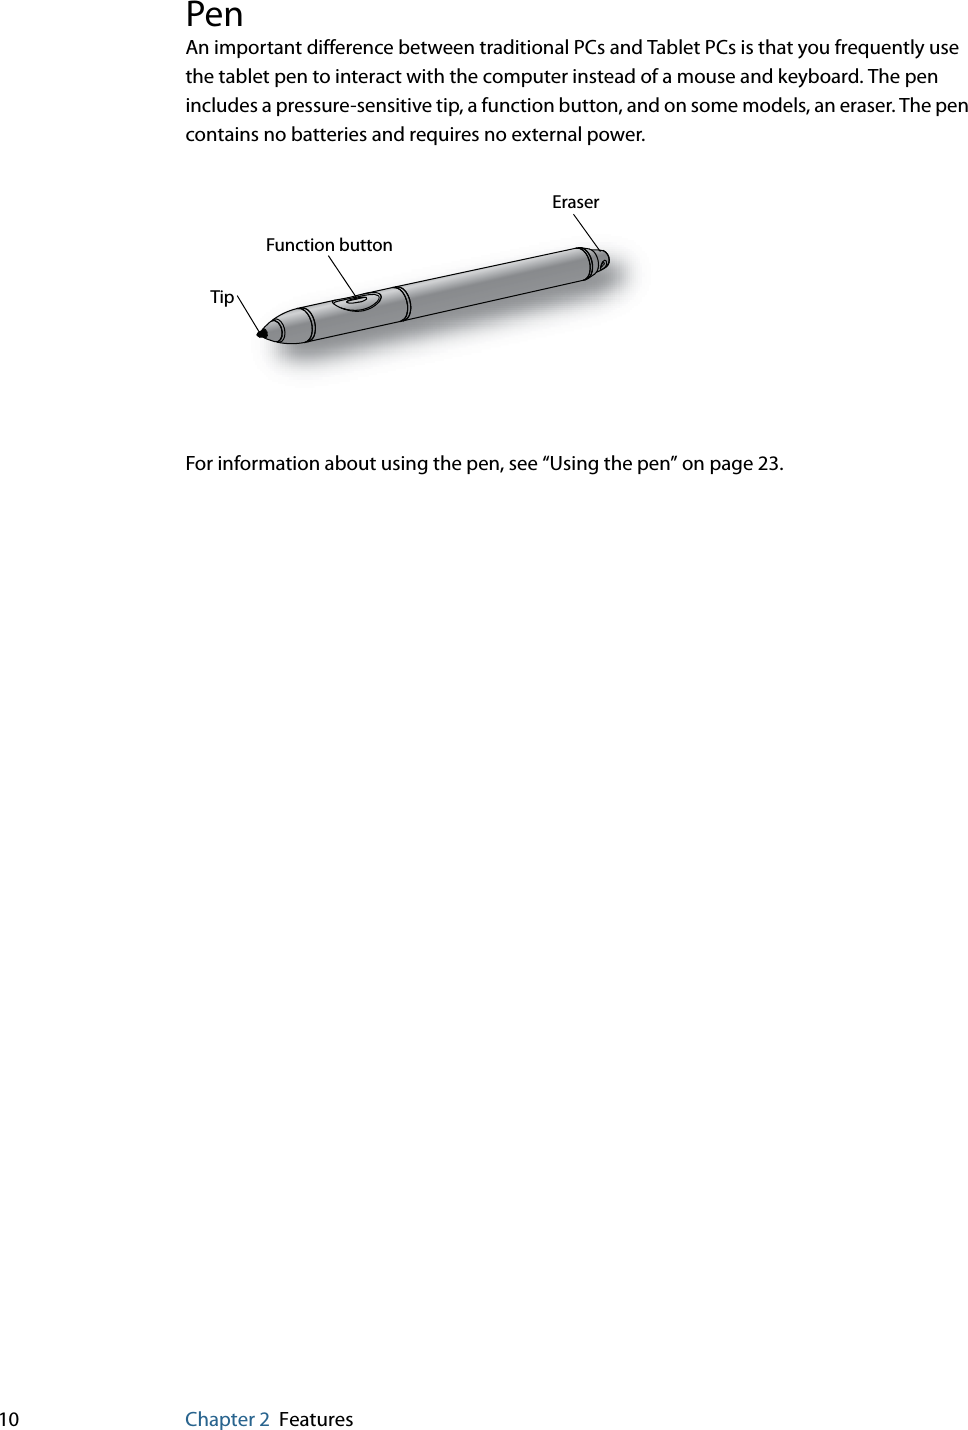
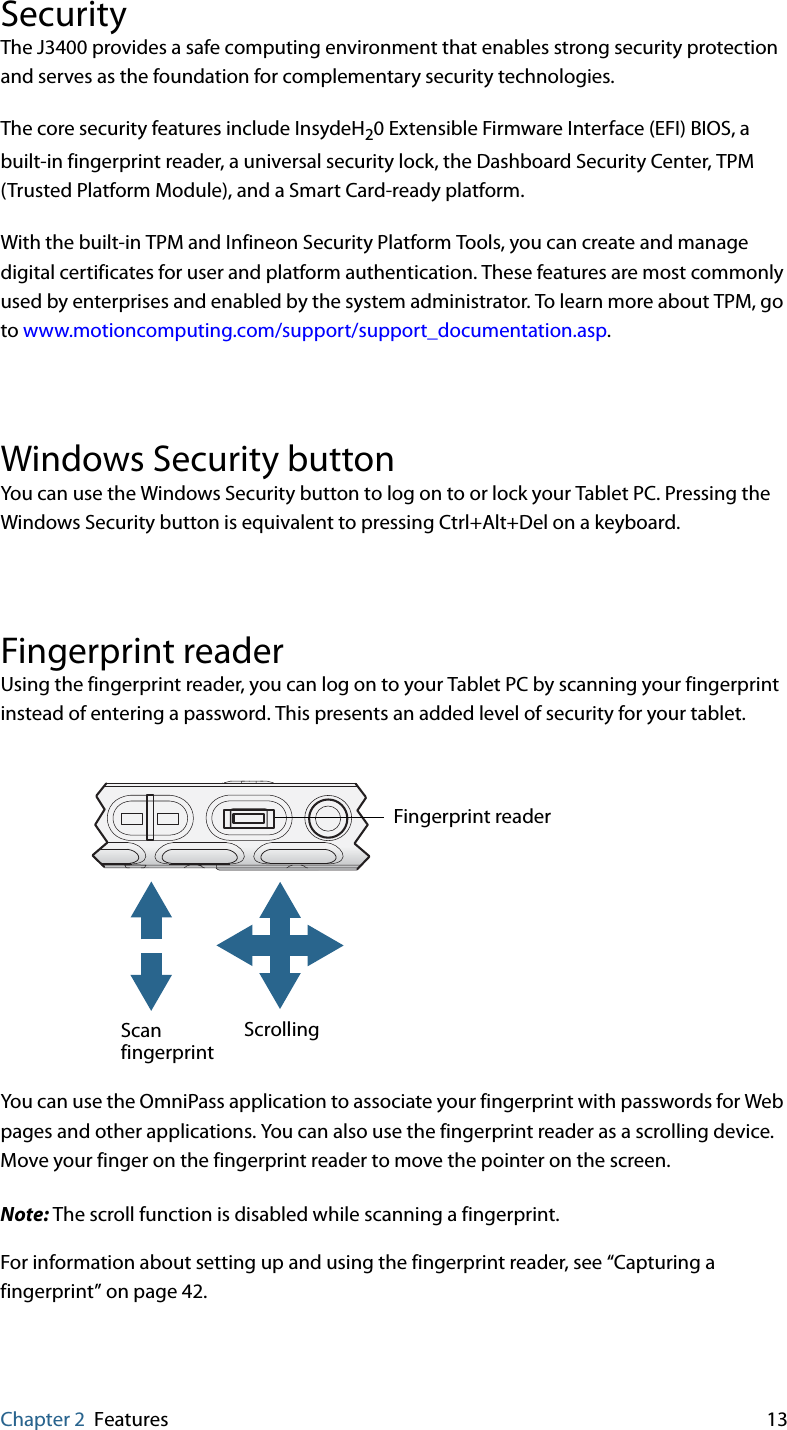
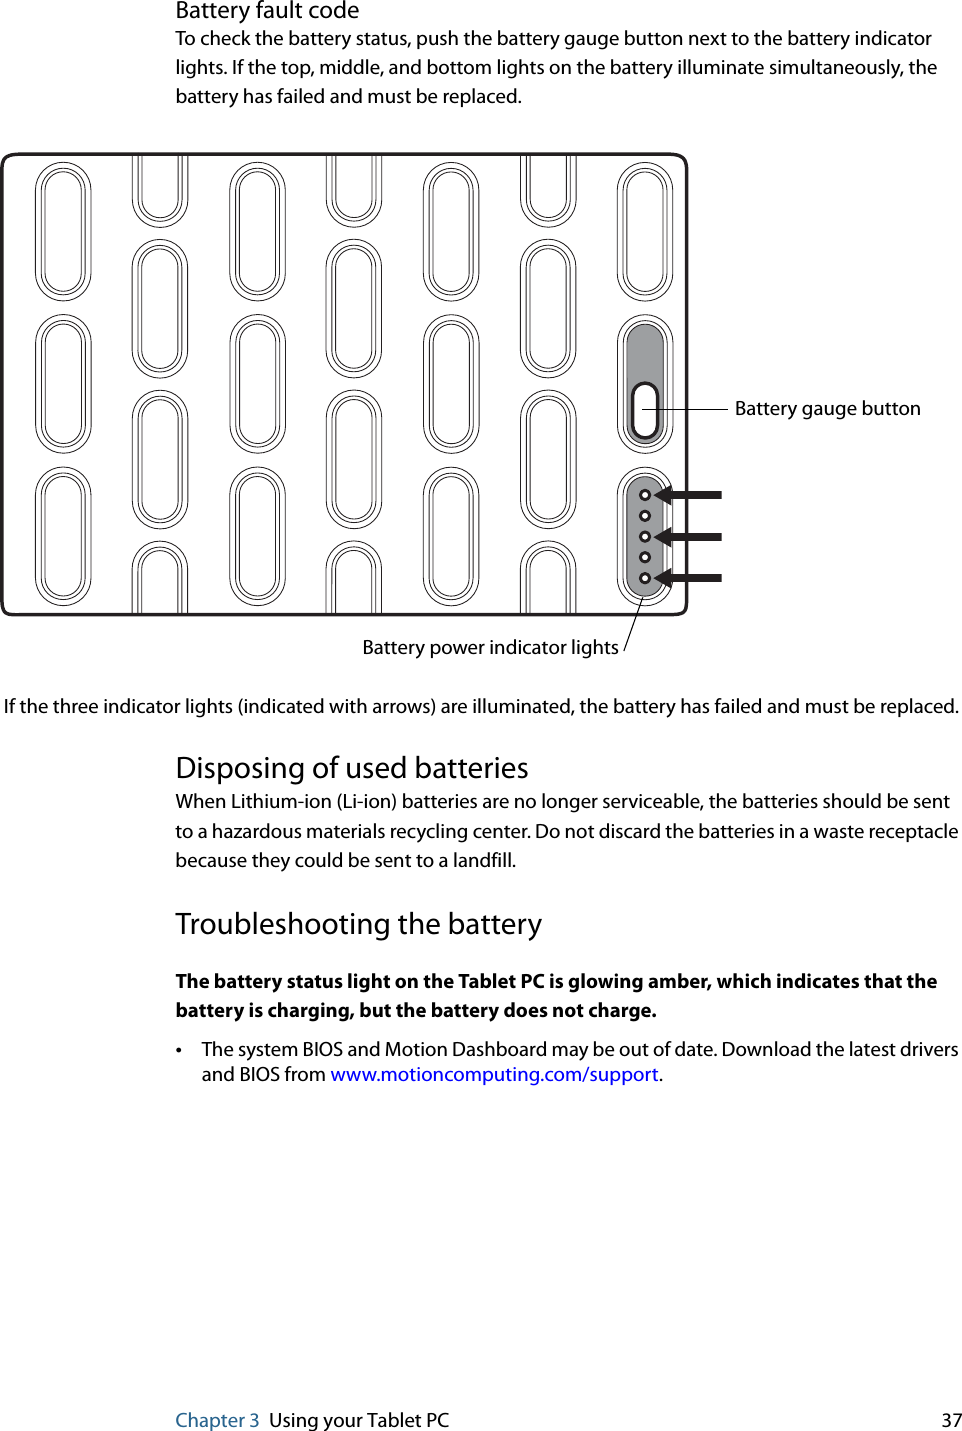
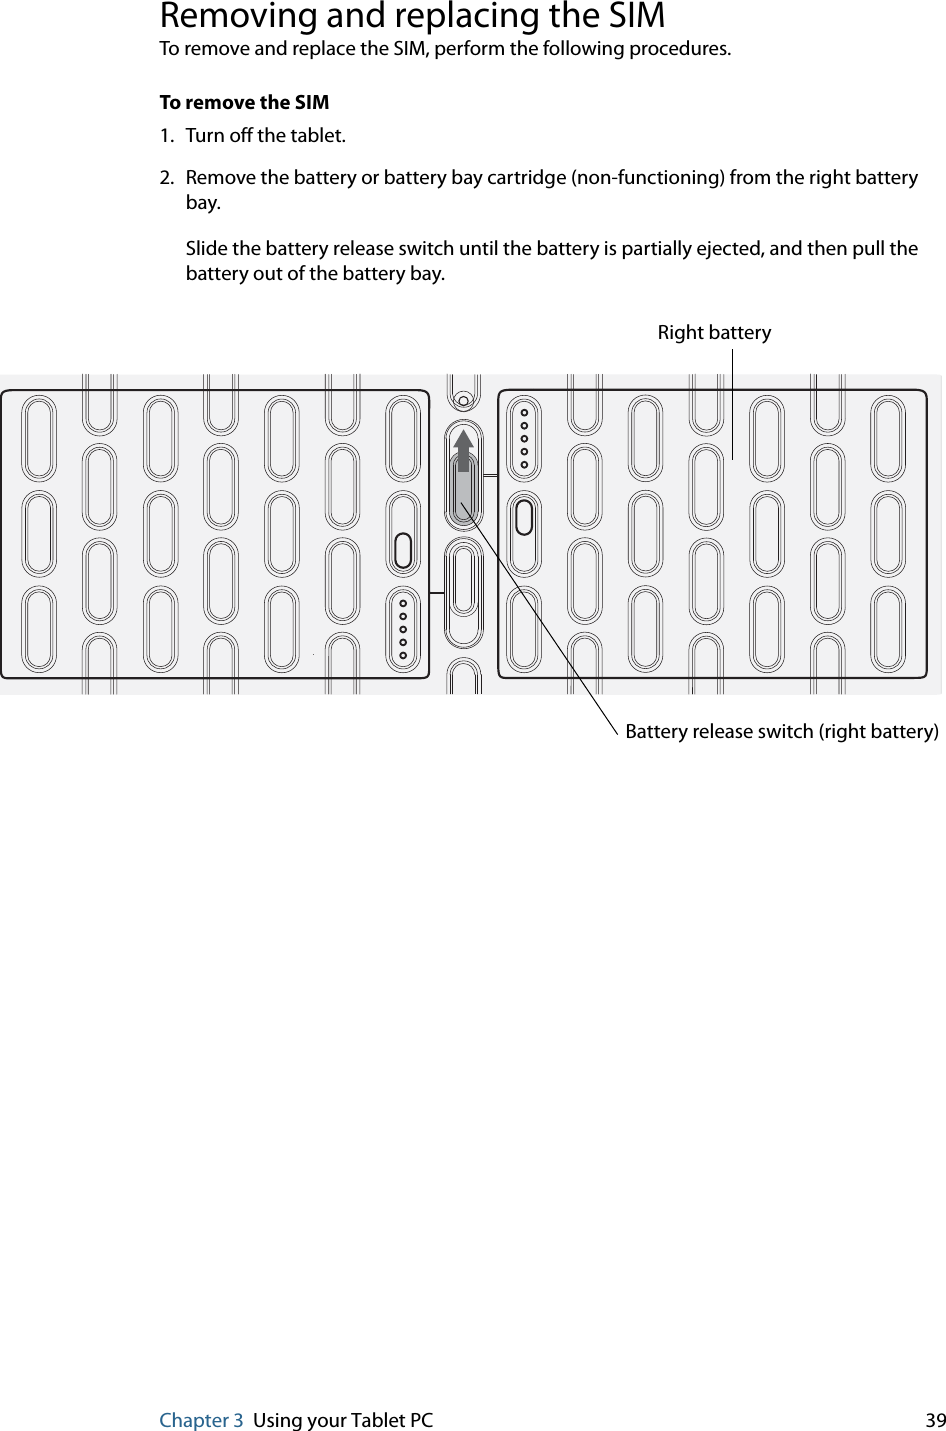
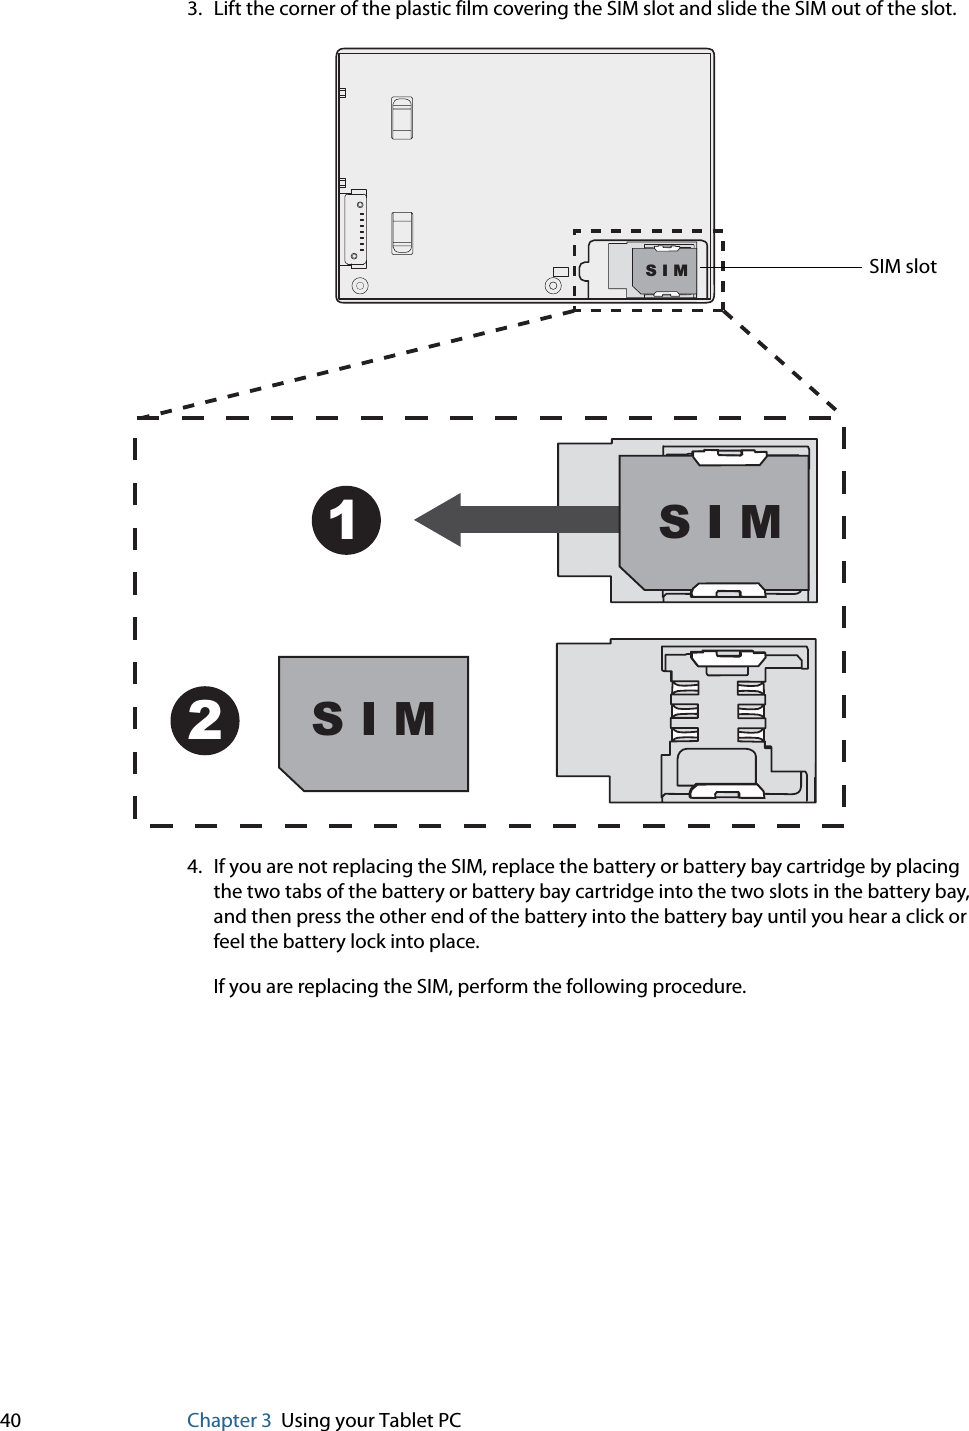
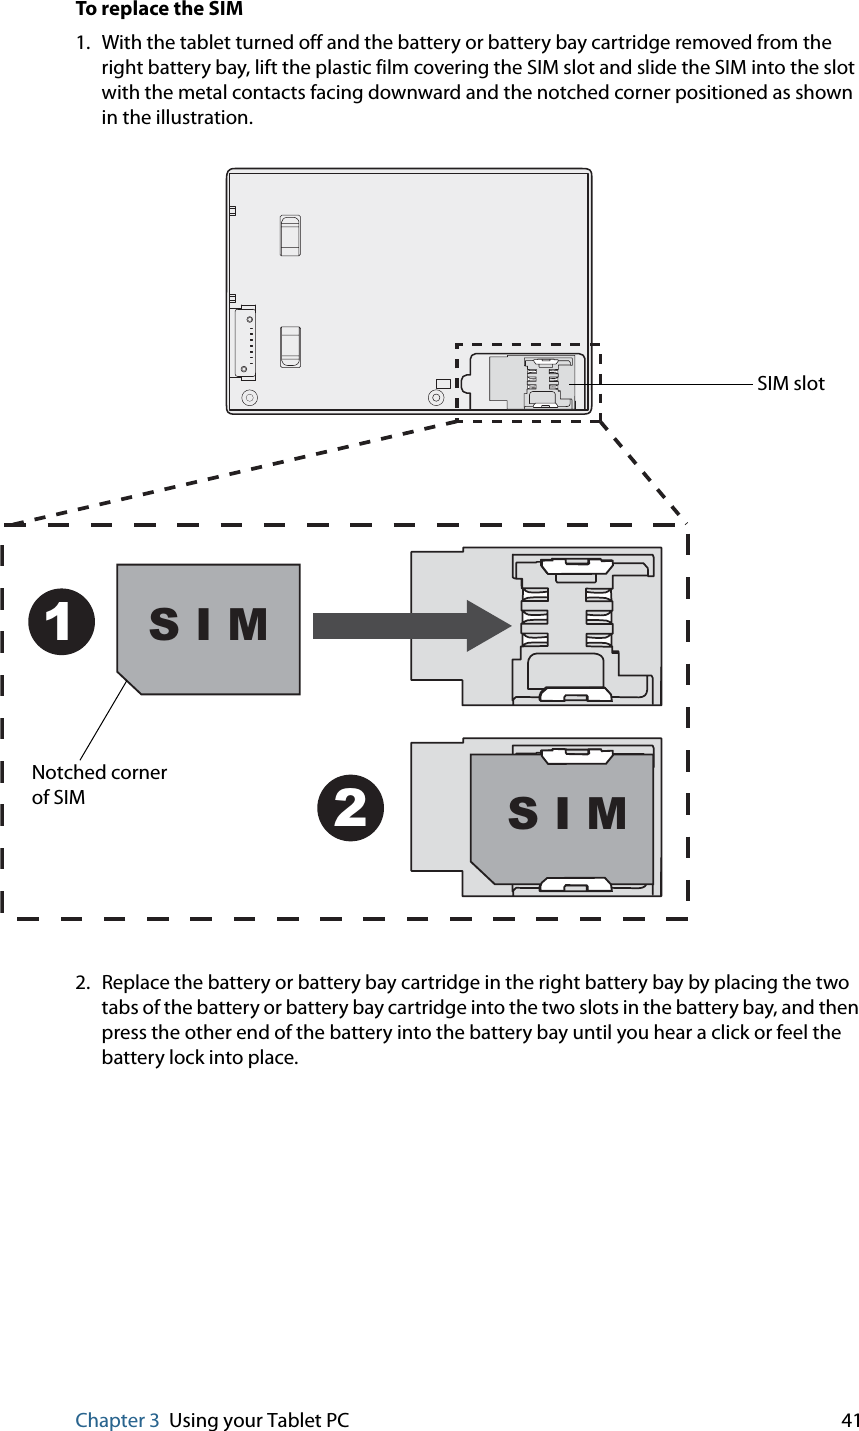
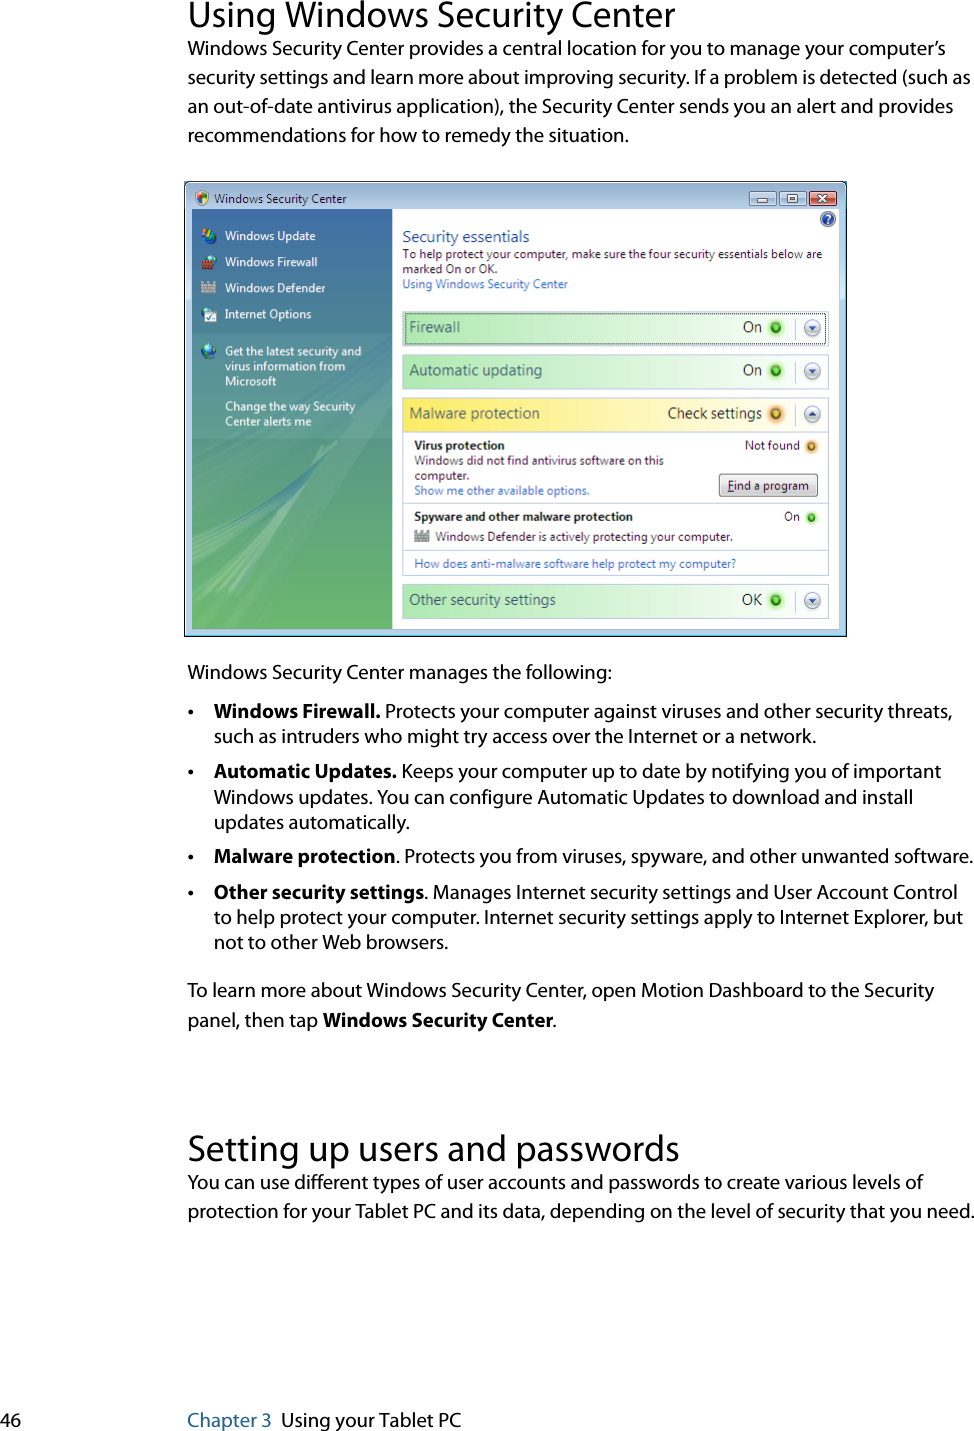
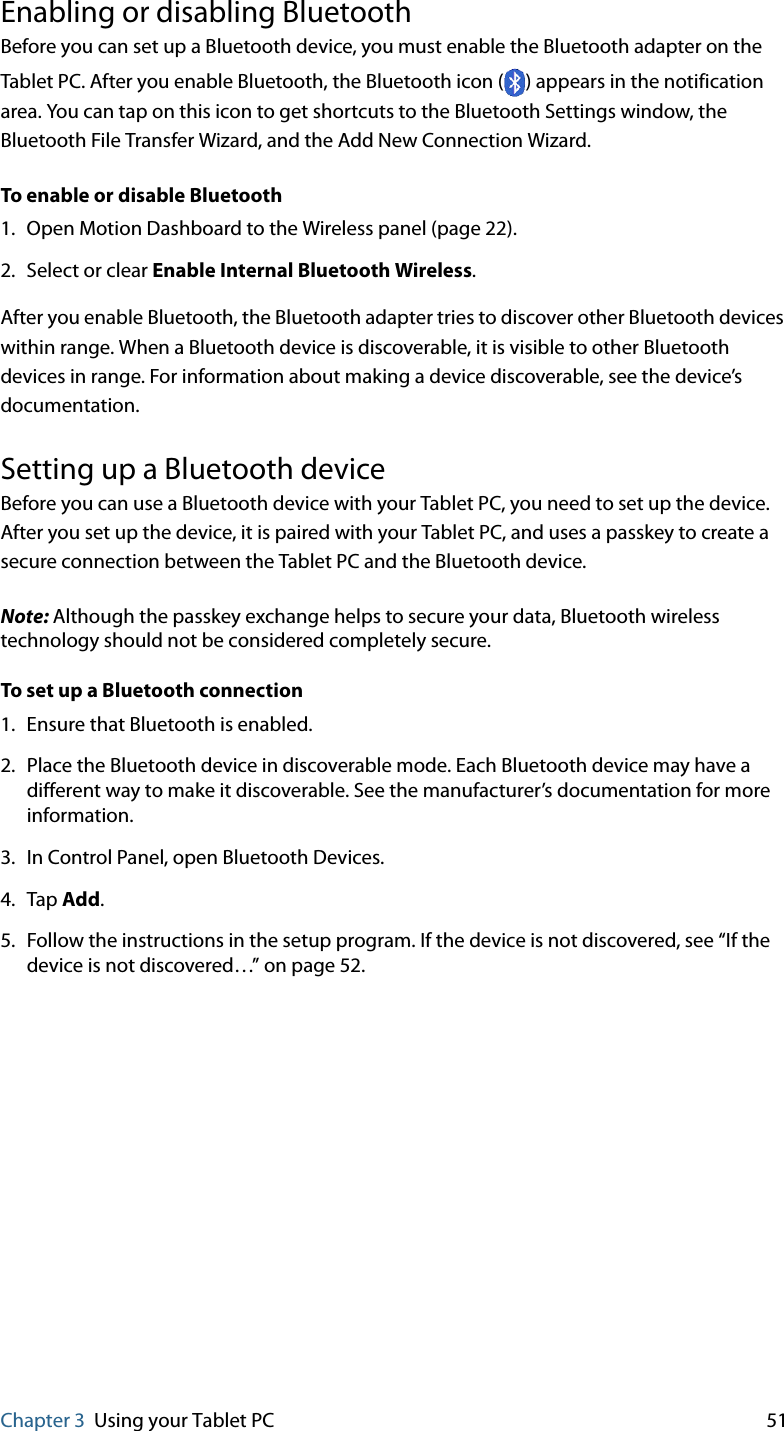
Xplore Technologies of America HWNVWUNDP-1 Tablet PC with Wireless Wide Area Network Module User Manual LE1700 User s Guide
Xplore Technologies Corp of America Tablet PC with Wireless Wide Area Network Module LE1700 User s Guide
Contents
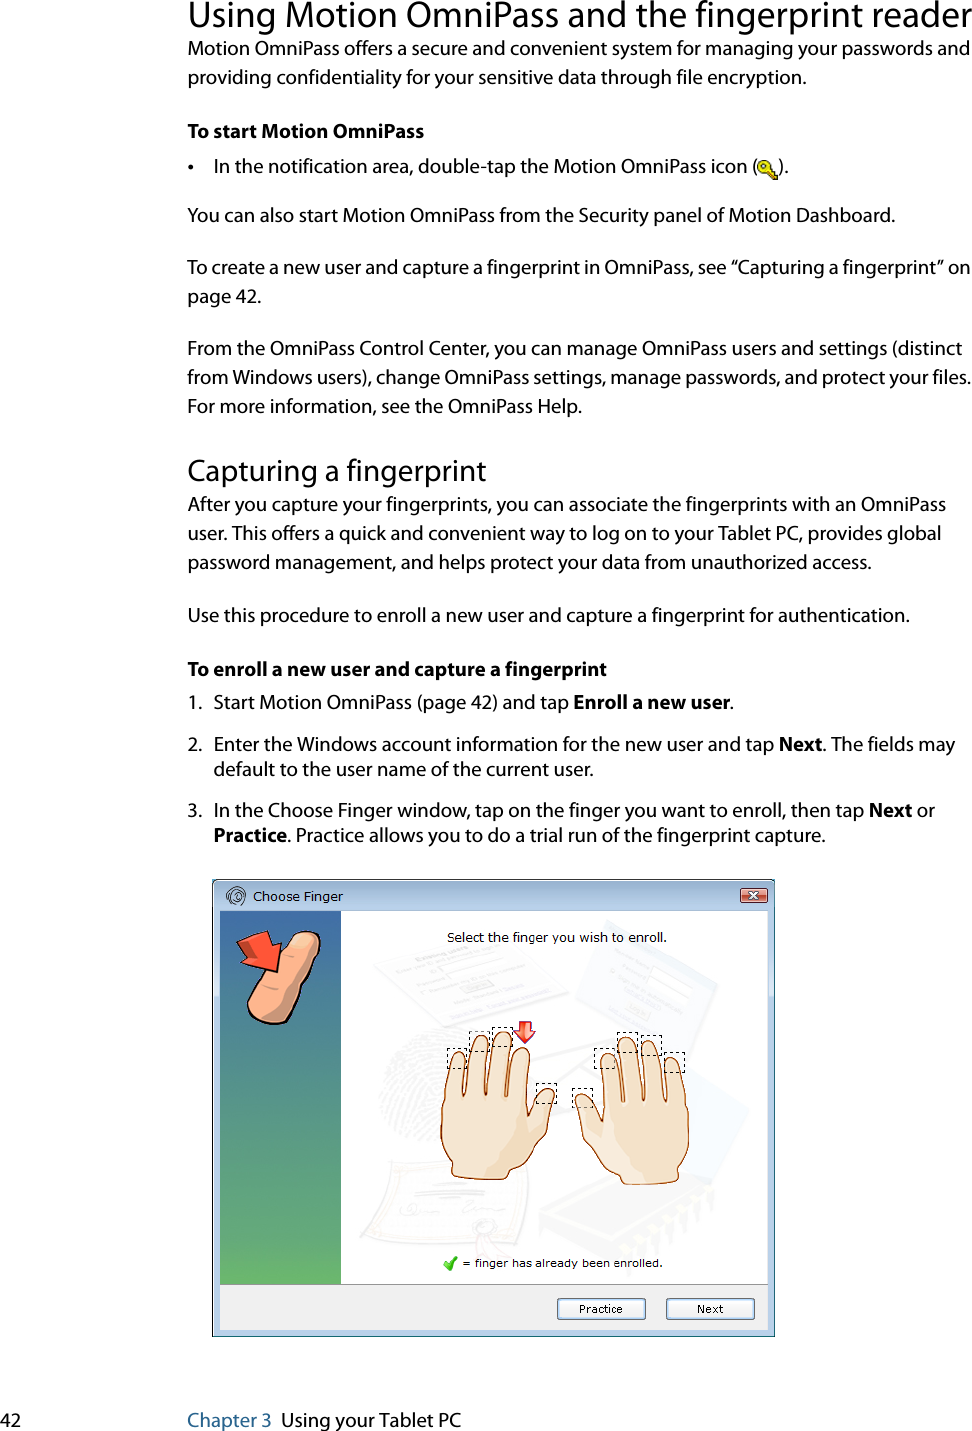
- 1. Users Guide
- 2. Regulatory Guide
Users Guide