Xsight Systems FODE6MWR FODetect System with Radar in 76-77 GHz Band User Manual Part III

Xsight Systems Inc. FODetect System with Radar in 76-77 GHz Band Part III

Contents

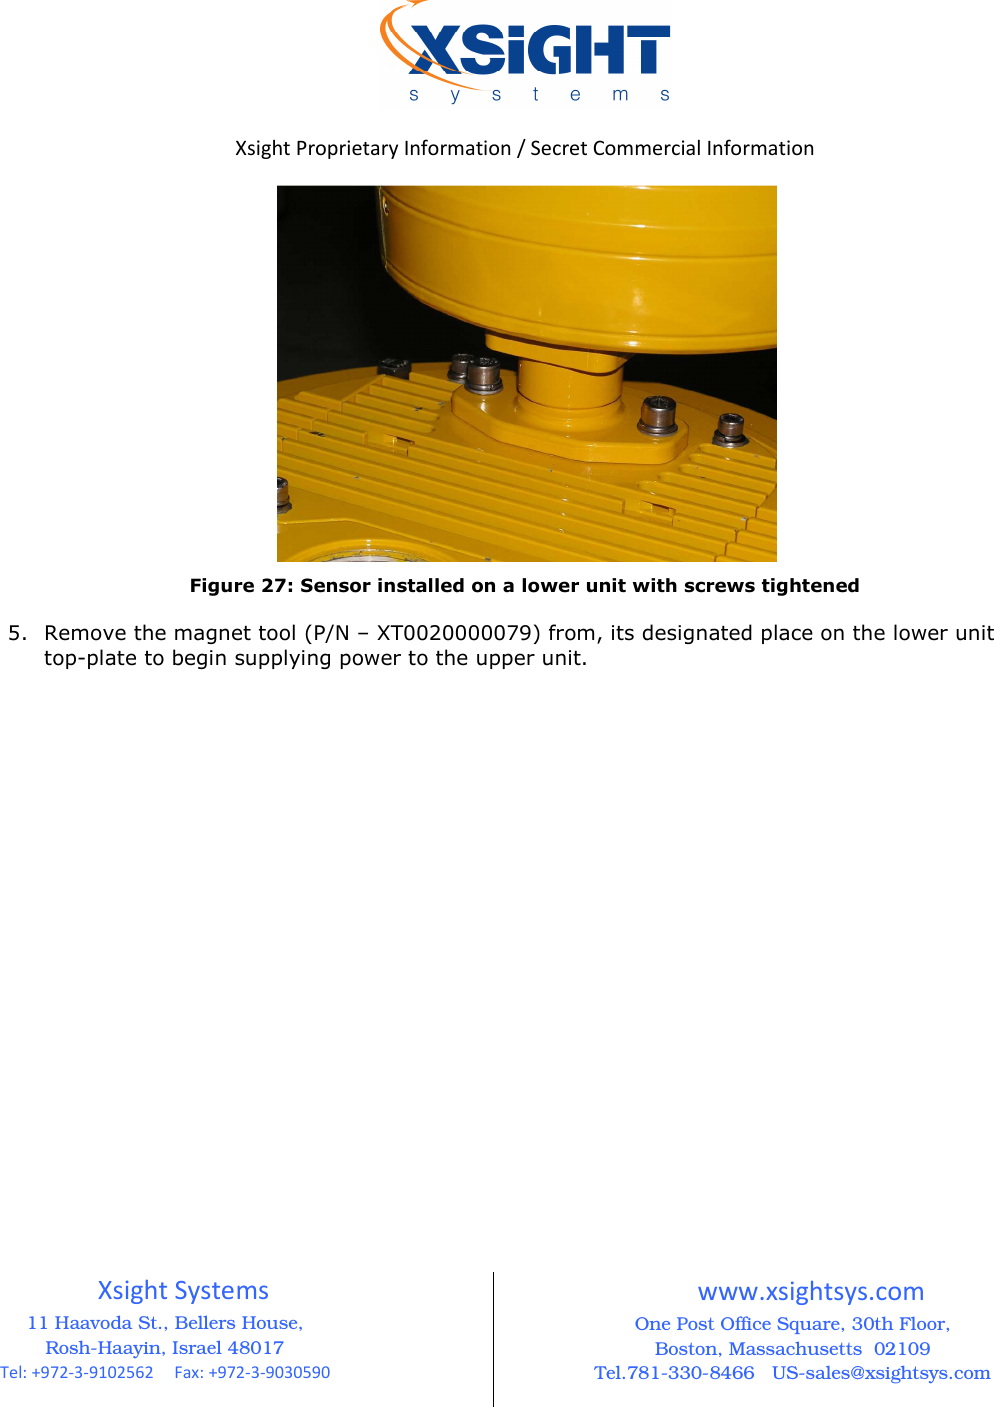
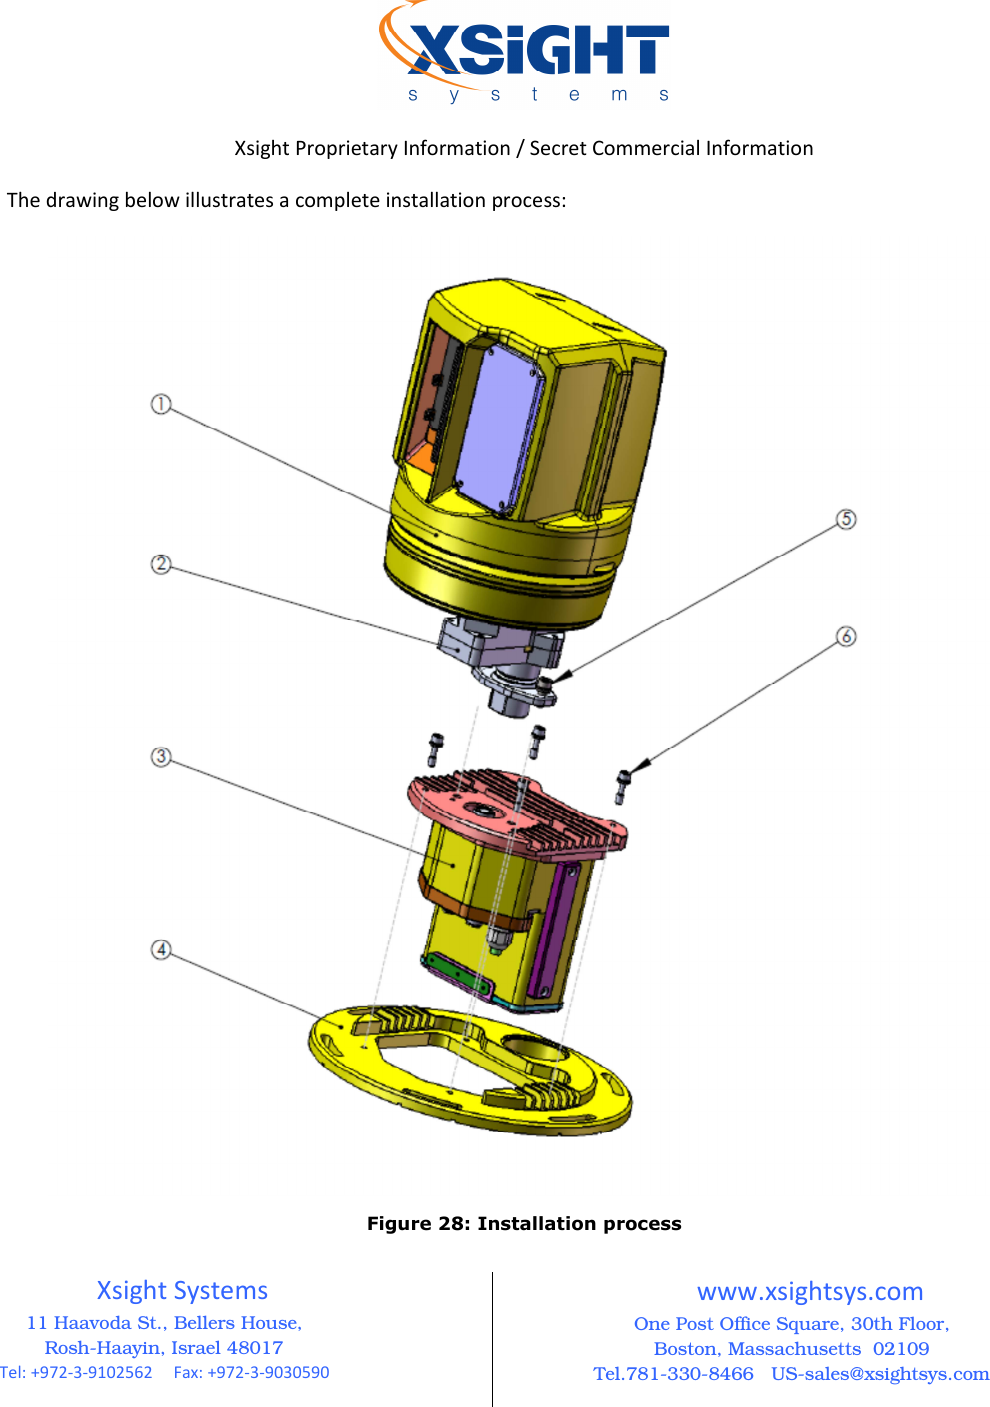
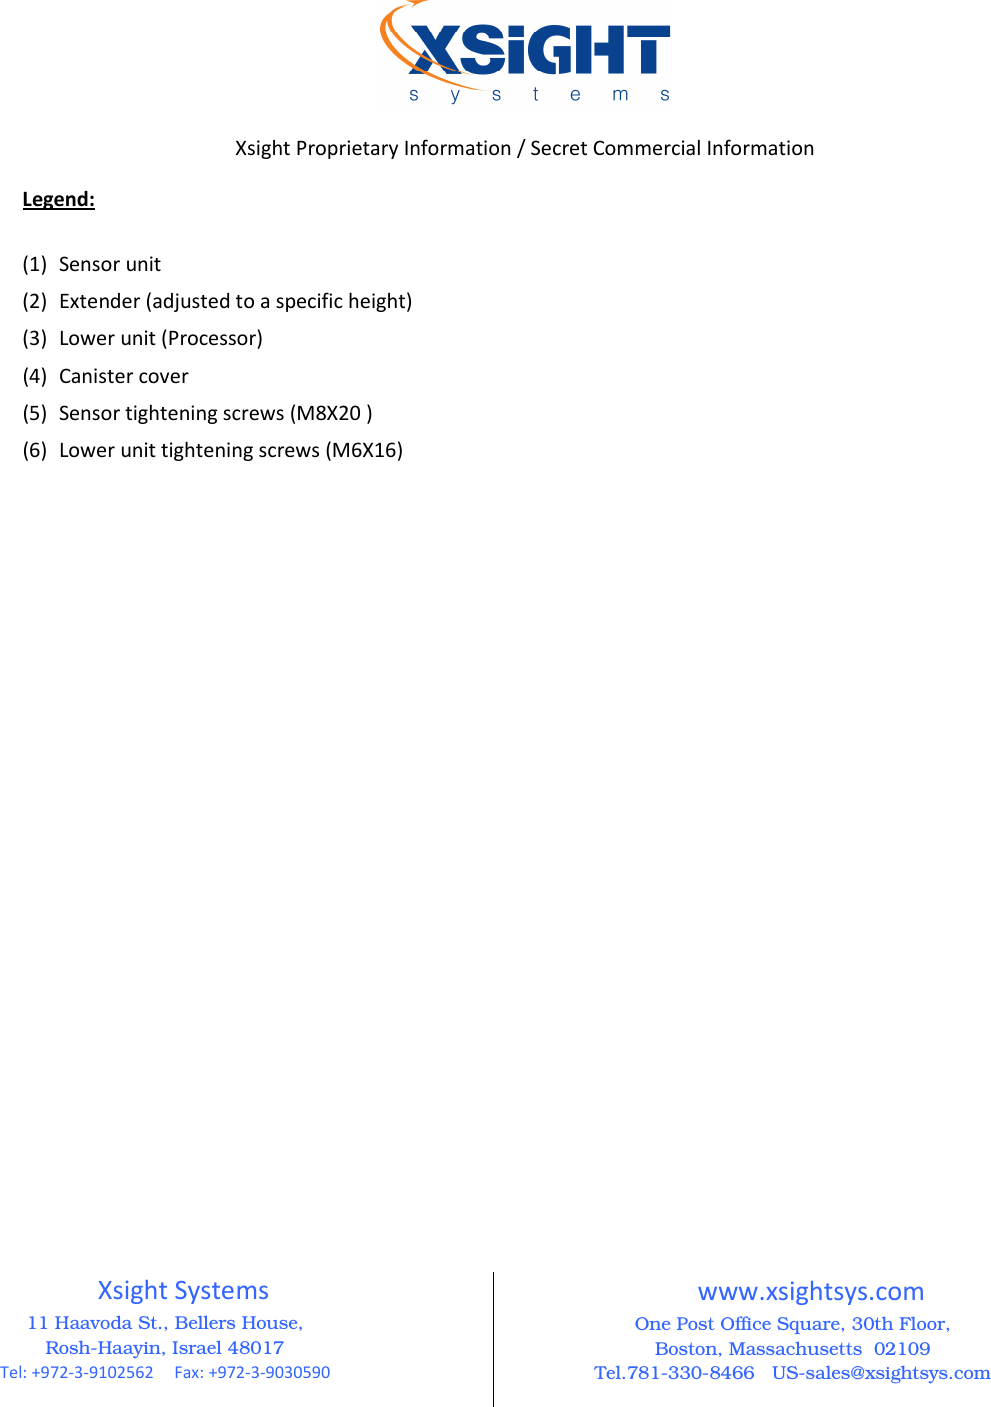
User Manual (Part III)

 Xsight Proprietary Information / Secret Commercial Information Xsight Systems 11 Haavoda St., Bellers House, Rosh-Haayin, Israel 48017 Tel: +972-3-9102562     Fax: +972-3-9030590 www.xsightsys.com One Post Office Square, 30th Floor, Boston, Massachusetts  02109 Tel.781-330-8466   US-sales@xsightsys.com  Chapter 9 Installing the Lower Unit Top-Plate (Canister Cover)    After infrastructure work is completed and tested, the canister cover should be mounted, to cover the canister until the other system components (lower & upper units) are supplied and ready to be installed. To mount the canister cover: 1. Remove the edge light from the present canister cover and disconnect the light power cable. 2. Remove the existing canister cover. Make sure that the canister top surface is clean before installing the new canister cover. 3. Place the canister cover (P/N XT2012000100 / 155) on top of the canister.   The bottom surface includes a sealing O-ring (P/N XT2040000015 / XT2040000075). Make sure that the O-ring is in its groove before positioning the plate.  4. Adjust the position of the cover (rotation) so the line between the sensor and the runway lamp is perpendicular to the runway, with the sensor facing the scanned area.  5. Tighten the six (6) screws (P/N MS-35307-363 / MS-35307-367) of the canister cover to the canister (See figure below).   The screws should be tightened with two (2) washers (flat+spring). Generally use torque 60NM.
 Xsight Proprietary Information / Secret Commercial Information Xsight Systems 11 Haavoda St., Bellers House, Rosh-Haayin, Israel 48017 Tel: +972-3-9102562     Fax: +972-3-9030590 www.xsightsys.com One Post Office Square, 30th Floor, Boston, Massachusetts  02109 Tel.781-330-8466   US-sales@xsightsys.com   Figure 20: 12'' Canister cover screw holes 6. Place the protective cover (Upper Cover, Dummy, P/N XT2012000164) on top of the lower unit hole and tighten its four (4) screws (P/N XT4050000121).   When the canister cover is installed before the lower units have been supplied, a protective cover is used to temporarily cover the lower unit hole. When the lower unit is eventually supplied and installed in the lower unit hole, the protective cover is removed.   The screws should be tightened with 2 washers (flat P/N XT4050000122 + spring P/N XT4050000123). Generally use torque 15Nm 7. After final installation, a supervisor should visually inspect the following: • All plates are aligned with the runway. • Upper Cover Dummy is in place. • No screws are left on or next to the edge light canister. • All screws are in place and tightened according to specifications.
 Xsight Proprietary Information / Secret Commercial Information Xsight Systems 11 Haavoda St., Bellers House, Rosh-Haayin, Israel 48017 Tel: +972-3-9102562     Fax: +972-3-9030590 www.xsightsys.com One Post Office Square, 30th Floor, Boston, Massachusetts  02109 Tel.781-330-8466   US-sales@xsightsys.com  Chapter 10 Installing the Lower Unit To install the lower unit: 1. Place the lower unit on the ground, next to the lower unit hole. 2. Unscrew the screws (P/N XT4050000121), which attach the protective cover to the lower unit hole, remove the cover (Upper Cover, Dummy, P/N XT2012000164), and then reach in the canister and locate the network and power supply cables. (if relevant).  3. Connect the power supply output cable to the lower unit input power connector. The unit supplies 12VDC power to the SDU system (up to 5.5A). Apply the yellow installation tape to connection points to achieve a weatherproof and airtight seal.  Make sure to completely connect the cable to the power connector to prevent the power supply from overheating and burning out.  4. Use a Compressed-Air Spray to clean and dry the network cable before connecting it to the lower unit. See the lower unit connector in the following image.
 Xsight Proprietary Information / Secret Commercial Information Xsight Systems 11 Haavoda St., Bellers House, Rosh-Haayin, Israel 48017 Tel: +972-3-9102562     Fax: +972-3-9030590 www.xsightsys.com One Post Office Square, 30th Floor, Boston, Massachusetts  02109 Tel.781-330-8466   US-sales@xsightsys.com   Figure 21: Lower unit’s connector panel   The lower unit connectors’ configuration can be copper or fiber optic depending on the existing infrastructure. 5. Place the lower unit in its hole. Make sure that the lower unit top plate O-ring is in place (at the bottom of the plate) before placement.  6. Tighten the four (4) screws (P/N XT4050000121) to the lower unit top plate (See figure below).
 Xsight Proprietary Information / Secret Commercial Information Xsight Systems 11 Haavoda St., Bellers House, Rosh-Haayin, Israel 48017 Tel: +972-3-9102562     Fax: +972-3-9030590 www.xsightsys.com One Post Office Square, 30th Floor, Boston, Massachusetts  02109 Tel.781-330-8466   US-sales@xsightsys.com   The screws should be tightened with two (2) washers (flat P/N XT4050000122 + spring P/N XT4050000123). Generally, use torque 15Nm.  Figure 22: Lower unit's four screws 7. After final installation, a supervisor should visually inspect the following: • All plates are aligned with the runway. • Upper Cover Dummy is in place. • No screws are left on or next to the edge light canister. • All screws are in place and tightened according to specifications.  When the upper unit is installed at a different time than the lower unit, the main connector should be covered with a protective cover (a dummy cover).
 Xsight Proprietary Information / Secret Commercial Information Xsight Systems 11 Haavoda St., Bellers House, Rosh-Haayin, Israel 48017 Tel: +972-3-9102562     Fax: +972-3-9030590 www.xsightsys.com One Post Office Square, 30th Floor, Boston, Massachusetts  02109 Tel.781-330-8466   US-sales@xsightsys.com  Chapter 11 Testing the SDU After installing an SDU lower unit and before the installation of the upper unit, the lower unit should be tested using an O-Level-Tester (OLT). An O-level Tester (OLT) is a portable unit that runs diagnostic checks on the following parts of an SDU:   Lower unit  Power supply  LAN connection In the event of SDU failure, maintenance technicians can use the OLT to test all system components. Upon installation, it is generally sufficient to run the lower unit tests.  For detailed instructions, see the OLT User manual.   11.1 Running the Lower Unit Test To run the lower unit test: 1. Connect the lower unit to the OLT using the provided cable.  2. Place the magnet tool (P/N – XT0020000079) in its designated place on the lower unit top-plate for less than ten seconds to reboot the unit’s software, so that it can communicate with the OLT. Then click Start on the OLT interface.
 Xsight Proprietary Information / Secret Commercial Information Xsight Systems 11 Haavoda St., Bellers House, Rosh-Haayin, Israel 48017 Tel: +972-3-9102562     Fax: +972-3-9030590 www.xsightsys.com One Post Office Square, 30th Floor, Boston, Massachusetts  02109 Tel.781-330-8466   US-sales@xsightsys.com                  Figure 23: Correct placement of magnet tool   Figure 24: Magnet tool  3. Follow the OLT instructions for the lower unit tests. See OLT Manual for further information. 4. If the SDU passes all the lower unit tests, continue with “Installing the Upper Unit.”
 Xsight Proprietary Information / Secret Commercial Information Xsight Systems 11 Haavoda St., Bellers House, Rosh-Haayin, Israel 48017 Tel: +972-3-9102562     Fax: +972-3-9030590 www.xsightsys.com One Post Office Square, 30th Floor, Boston, Massachusetts  02109 Tel.781-330-8466   US-sales@xsightsys.com   O-Level Tester Test Information 5. If the SDU failed the lower unit test, diagnose the specific cause of failure as following: a. Check whether the RDR LED light on the OLT unit is lit. b. If the RDR light is off, it is likely that there is a power supply problem. Remove the lower unit and run the power supply test. See “Removing the Lower Unit” and “Running the OLT Power Supply Test” for information. c. If the RDR light is on, and the OLT failed to communicate with the lower unit, it is likely that the lower unit requires replacing. Do the following: i. Remove the lower unit and replace it. See “Removing the Lower Unit” for information.  ii. Retest the lower unit using the OLT. iii. If the lower unit passes the OLT tests, reconnect the power supply, LAN cables, and lower unit. iv. Verify with the SOC that the the SDU has achieved proper communication with the server. If the SOC indicates that the SDU is working properly, the testing process is completed. d. If the lower unit communicated with the OLT but failed the OLT’s lower unit network test, check the network system. Remove the lower unit and run the OLT network test. See “Removing the Lower Unit” and “Running the OLT Network Test” for information.
 Xsight Proprietary Information / Secret Commercial Information Xsight Systems 11 Haavoda St., Bellers House, Rosh-Haayin, Israel 48017 Tel: +972-3-9102562     Fax: +972-3-9030590 www.xsightsys.com One Post Office Square, 30th Floor, Boston, Massachusetts  02109 Tel.781-330-8466   US-sales@xsightsys.com  e. If the lower unit communicated with the OLT but failed one of the tests other than the lower unit network test, it is likely the lower unit requires replacing. Do the following: i. Remove the lower unit and replace it. See “Removing the Lower Unit” for information.  ii. Retest the lower unit using the OLT. iii. If the lower unit passes the OLT tests, reconnect the power supply, LAN cables, and lower unit. iv. Verify with the SOC that the the SDU has achieved proper communication with the server. If the SOC indicates that the SDU is working properly, the testing process is completed. 11.2 Removing the Lower Unit To remove the lower unit: 1. Using an M6 wrench, unscrew the four (4) screws (P/N XT4050000121) which attach the lower unit to the lower unit top-plate (canister cover).  2. Disconnect the power supply and network cables from the lower unit and place the lower unit on the ground, next to the lower unit hole.  11.3 Running the OLT Power Supply Test  To run the OLT power supply test: 1. Connect the OLT power test cable to the power supply output cable.  2. Follow the OLT instructions for the power test. See OLT Manual for further information. 3. If the power test results indicate power supply failure, do the following: a. Replace the power supply.  b. Retest the power supply using the OLT. c. If the power supply passes the OLT tests, reconnect the power supply, LAN cables, and lower unit.  d. Verify with the SOC that the the SDU has achieved proper communication with the server. If the SOC indicates that the SDU is working properly, the testing process is completed. 11.4 Running the OLT Network Test  To run the OLT network test: 1. Locate the network cables inside the canister, and connect the Right LAN cable to the OLT network cable adapter.
 Xsight Proprietary Information / Secret Commercial Information Xsight Systems 11 Haavoda St., Bellers House, Rosh-Haayin, Israel 48017 Tel: +972-3-9102562     Fax: +972-3-9030590 www.xsightsys.com One Post Office Square, 30th Floor, Boston, Massachusetts  02109 Tel.781-330-8466   US-sales@xsightsys.com  2. Follow the OLT instructions. See OLT Manual for further information. 3. If the SDU passes the Right LAN test, connect the Left LAN cable to the OLT and test it. 4. If the network test results indicate problems with the network connection, contact a system administrator.
 Xsight Proprietary Information / Secret Commercial Information Xsight Systems 11 Haavoda St., Bellers House, Rosh-Haayin, Israel 48017 Tel: +972-3-9102562     Fax: +972-3-9030590 www.xsightsys.com One Post Office Square, 30th Floor, Boston, Massachusetts  02109 Tel.781-330-8466   US-sales@xsightsys.com  Chapter 12 Installing the Upper Unit  To install the upper unit: 1. Place the magnet tool (P/N – XT0020000079) in its designated place on the lower unit top-plate for at least 25 seconds to cut off  the voltage supplied to the upper unit (The 27-pin connector carries live voltage even if the upper unit is disconnected). Do not remove the magnet tool until after the upper unit is installed. Note:  The lower unit remains active even after the magnet tool cuts off voltage to the upper unit. 2. Wipe down the lower unit top plate, especially the area where the upper unit will be mounted. Then place the upper unit connector on top of the lower unit’s main connector, and slide the upper unit (P/N XT0020000061) in using the upper unit’s weight (no need to apply force).   Figure 25: Upper unit sliding into the lower unit connector housing 3. Tighten the two screws to the lower unit base-plate.   The screws should be tightened with two washers. Generally, use torque 38Nm.
 Xsight Proprietary Information / Secret Commercial Information Xsight Systems 11 Haavoda St., Bellers House, Rosh-Haayin, Israel 48017 Tel: +972-3-9102562     Fax: +972-3-9030590 www.xsightsys.com One Post Office Square, 30th Floor, Boston, Massachusetts  02109 Tel.781-330-8466   US-sales@xsightsys.com   Figure 26: Upper unit installation 4. After final installation, a supervisor should visually inspect the following: • All plates are aligned with the runway. • Upper Cover Dummy is in place. • No screws are left on or next to the edge light canister. • All screws are in place and tightened according to specifications.
 Xsight Proprietary Information / Secret Commercial Information Xsight Systems 11 Haavoda St., Bellers House, Rosh-Haayin, Israel 48017 Tel: +972-3-9102562     Fax: +972-3-9030590 www.xsightsys.com One Post Office Square, 30th Floor, Boston, Massachusetts  02109 Tel.781-330-8466   US-sales@xsightsys.com   Figure 27: Sensor installed on a lower unit with screws tightened 5. Remove the magnet tool (P/N – XT0020000079) from, its designated place on the lower unit top-plate to begin supplying power to the upper unit.
 Xsight Proprietary Information / Secret Commercial Information Xsight Systems 11 Haavoda St., Bellers House, Rosh-Haayin, Israel 48017 Tel: +972-3-9102562     Fax: +972-3-9030590 www.xsightsys.com One Post Office Square, 30th Floor, Boston, Massachusetts  02109 Tel.781-330-8466   US-sales@xsightsys.com  The drawing below illustrates a complete installation process:  Figure 28: Installation process
 Xsight Proprietary Information / Secret Commercial Information Xsight Systems 11 Haavoda St., Bellers House, Rosh-Haayin, Israel 48017 Tel: +972-3-9102562     Fax: +972-3-9030590 www.xsightsys.com One Post Office Square, 30th Floor, Boston, Massachusetts  02109 Tel.781-330-8466   US-sales@xsightsys.com  Legend:   (1) Sensor unit (2) Extender (adjusted to a specific height) (3) Lower unit (Processor) (4) Canister cover  (5) Sensor tightening screws (M8X20 ) (6) Lower unit tightening screws (M6X16)
 Xsight Proprietary Information / Secret Commercial Information Xsight Systems 11 Haavoda St., Bellers House, Rosh-Haayin, Israel 48017 Tel: +972-3-9102562     Fax: +972-3-9030590 www.xsightsys.com One Post Office Square, 30th Floor, Boston, Massachusetts  02109 Tel.781-330-8466   US-sales@xsightsys.com  Chapter 13 Computer Subsystem 13.1 Analysis and Control Center (ACC) FODetect®’s Analysis and Control Center (ACC) uses a Windows Server 2008 with Failover Clustering software that supports clusters of two, specially linked servers running Microsoft Windows Server, Enterprise Edition. This clustering technology keeps server-based applications highly available, regardless of individual component failures; when one server in a cluster fails or is taken offline, the other server in the cluster takes over the failed server's operations. Clients using server resources experience little or no interruption of their work as the resource functions move from one server to the other. Windows Server 2008 has built-in features that protect certain computer and network processes during failure and provide increased reliability by eliminating any SPOF (Single Point of Failure). These features include a RAID (Redundant Array of Independent Disks) disk array. A standard 19” heavy-duty computer can be used for the ACC Server. Commonly used SQL databases (e.g., the commercial MS SQL Server 2008, or the General Public License MySQL) are used to keep and maintain the database. The ACC serves as the system's main data fusion server, capturing and analyzing data and coordinating between all FODetect®’s subsystems. It controls SDU operation and receives all FOD information from the surface detection units (SDUs) in the field, including location and visual image. The ACC analyzes this information, sends alerts about suspected FOD to the operators, and then processes all operator commands to manually control the sensor. While the system automatically detects rain, operation under impaired conditions can be optimized by connecting the FODetect® system to the airport's weather system. This enables use of alternate algorithms to analyze radar and camera data when visibility is poor, avoiding false FOD alerts. Radar is also fed parameters according to the current weather conditions. It is also recommended to connect the FODetect® system to the airport’s A-SMGCS (Advanced Surface Movement Guidance and Control Systems), showing the position & identification of all aircraft & vehicles on the runway.  This serves two goals:
 Xsight Proprietary Information / Secret Commercial Information Xsight Systems 11 Haavoda St., Bellers House, Rosh-Haayin, Israel 48017 Tel: +972-3-9102562     Fax: +972-3-9030590 www.xsightsys.com One Post Office Square, 30th Floor, Boston, Massachusetts  02109 Tel.781-330-8466   US-sales@xsightsys.com   Enhancement of sensor FOD detection abilities, when sensors are blocked by an aircraft or the aircraft’s reflection interferes with visibility.  Enabling of positive identification of aircraft and vehicles responsible for a FOD.  The ACC and SOC are installed by Xsight. Software and Hardware Requirements Server  Desktop PC Operating System  Windows Server 2008 R2 64-bit. Processor  i5 or better Intel processor System Memory (RAM)  8 GB Video Card  Any   Figure 29: Standard ACC server 13.2 System Operator Console (SOC) The SOC uses HMI (Human-Machine Interface) technology that enables the operator to handle FOD events and query information. The FODetect® system can support multiple SOC stations that can be located in various
 Xsight Proprietary Information / Secret Commercial Information Xsight Systems 11 Haavoda St., Bellers House, Rosh-Haayin, Israel 48017 Tel: +972-3-9102562     Fax: +972-3-9030590 www.xsightsys.com One Post Office Square, 30th Floor, Boston, Massachusetts  02109 Tel.781-330-8466   US-sales@xsightsys.com  locations such as Operations tower and ATC tower. A desktop computer with a 22" or larger monitor, advanced graphic processor and a video card that runs windows XP SP3 or Win7 operating system can be used for an SOC. Software and Hardware Requirements Operating System  Windows® 7  64-bit  Processor  Pentium i3 or better System Memory (RAM)  4 GB of RAM, Hard disk 500GB  Video Card  1 GB of video card memory, resolution 1680X1050, 22"+ wide screen User Privileges  Administrator privileges required for installation
 Xsight Proprietary Information / Secret Commercial Information Xsight Systems 11 Haavoda St., Bellers House, Rosh-Haayin, Israel 48017 Tel: +972-3-9102562     Fax: +972-3-9030590 www.xsightsys.com One Post Office Square, 30th Floor, Boston, Massachusetts  02109 Tel.781-330-8466   US-sales@xsightsys.com  Chapter 14 Safety Instructions 14.1 Radar One of the hazards associated with maintaining radar equipment is exposure to RFR (Radio Frequency Radiation), a source of thermal energy. Excessive levels of exposure to RFR can result in adverse acute effects on people such as involuntary muscle contractions (electrostimulation), electrical shocks/burns (from touching metal objects in RFR fields), and excessive heating of tissue (thermal damage).  To avoid hazardous effects when the SDU is in operation, the radar should be visually inspected from a minimum distance of 50 cm, the defined radar hazard zone according to INCIRP (International Commission on Non-Ionizing Radiation Protection) guidelines. No safety measures are required outside this zone. If present within the radar hazard zone, observe the following precautions:    Do not inspect feed horns, open ends of waveguides or any opening emitting RFR energy visually unless you are sure that the equipment is definitely secured for that purpose.     Ensure that radar antenna that normally rotate are rotated continuously or that they are trained to a known safe bearing while they are radiating.  During installation or maintenance (due to SDU failure), the radar light is lit but it does not transmit any radar signals, so it poses no danger. The radar component transmits radar signals only during a scan cycle. 14.2 NIR Laser Beam and Pointer FODetect® uses a Class 1 line laser pointer. A class 1 laser is safe under all conditions of normal use.  14.3 NIR (Near-Infrared) Illuminator FODetect® uses a Class 4 illuminator that by definition, can burn the skin, or cause potentially devastating and permanent eye damage, when recommended safety measures are not followed.  To avoid hazardous effects, when the SDU is in operation, the illuminator should be visually inspected from a minimum distance of 24 cm, the Nominal Hazard Distance (NHD) for the NIR Illuminator. The NHD value measures the distance within which the level of the direct, reflected or scattered radiation during normal operation exceeds the level of laser radiation to which a person may be exposed without adverse biological changes in the eye or
 Xsight Proprietary Information / Secret Commercial Information Xsight Systems 11 Haavoda St., Bellers House, Rosh-Haayin, Israel 48017 Tel: +972-3-9102562     Fax: +972-3-9030590 www.xsightsys.com One Post Office Square, 30th Floor, Boston, Massachusetts  02109 Tel.781-330-8466   US-sales@xsightsys.com  skin (Maximum Permissible Exposure - MPE). Persons outside the NHZ boundary are exposed below the MPE level and thus no safety measures are required. (See: www.osha.gov/dts/osta/otm/otm_iii/otm_iii_6.html#4) If present within the NHZ boundary, observe the following precautions:  Never look directly into the lamp while illuminating.  Do not interpose your hand or any body part between the front of the lamp and the illumination beam when it is being projected. Before beginning any installation or maintenance procedure, the NIR Illuminator must first be turned off by powering off the system using the magnet tool.  14.4 Electrical Systems Installation of the SDU, its power supply and transformers, involves working close to extremely high voltages. Hence, the following safety instructions must be followed at all times:  All installation or maintenance activities may only be performed by authorized personnel who are certified by the AOT   CCR voltage must be turned off before the SDU canister cover is opened or removed. Do not proceed before verifying this with AFL personnel.  The CCR must be turned off before any installation or maintenance activity is performed that is related to the power supply and/or transformers. Do not proceed before verifying this with AFL personnel.
 Xsight Proprietary Information / Secret Commercial Information Xsight Systems 11 Haavoda St., Bellers House, Rosh-Haayin, Israel 48017 Tel: +972-3-9102562     Fax: +972-3-9030590 www.xsightsys.com One Post Office Square, 30th Floor, Boston, Massachusetts  02109 Tel.781-330-8466   US-sales@xsightsys.com  Appendix A - Power Supply Mechanical Drawing   Legend:  (1) Female input AC power cable (2) Output DC power cable (12VDC) (3) Male input AC power cable (4) Output voltage LED indicator (5) Input voltage LED indicator (6) Grounding (earth) screw
 Xsight Proprietary Information / Secret Commercial Information Xsight Systems 11 Haavoda St., Bellers House, Rosh-Haayin, Israel 48017 Tel: +972-3-9102562     Fax: +972-3-9030590 www.xsightsys.com One Post Office Square, 30th Floor, Boston, Massachusetts  02109 Tel.781-330-8466   US-sales@xsightsys.com   Appendix B – Lower Unit Mechanical Drawing    Legend:   (1) Input DC power connector (2) LAN connector  (fiber optic in the shown configuration) (3) Main connector (to sensor) (4) Cables grip clip
 Xsight Proprietary Information / Secret Commercial Information Xsight Systems 11 Haavoda St., Bellers House, Rosh-Haayin, Israel 48017 Tel: +972-3-9102562     Fax: +972-3-9030590 www.xsightsys.com One Post Office Square, 30th Floor, Boston, Massachusetts  02109 Tel.781-330-8466   US-sales@xsightsys.com

Navigation menu