Yaesu Musen FT-2800M Amateur Transceiver User Manual Introduction
Yaesu Musen Co., Ltd. Amateur Transceiver Introduction
UserManual.wiki
>
Yaesu Musen
>
FT 2800M User Manual
users manual
Navigation menu
Upload a User Manual
Namespaces
Wiki Guide
HTML
PDF
Info
Views
User Manual
Discussion / Help
Navigation

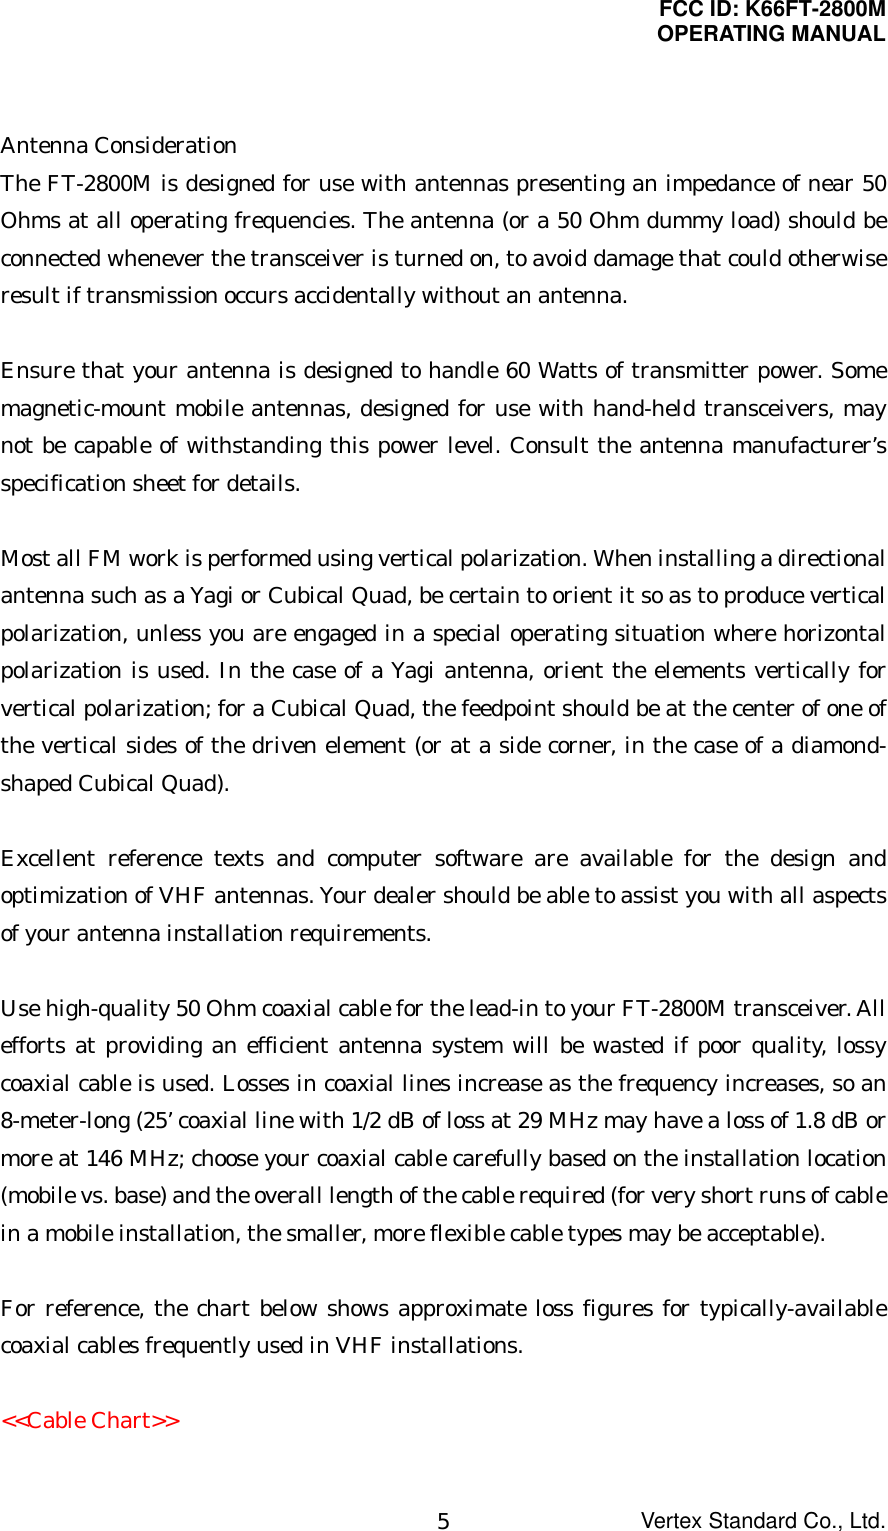
![FCC ID: K66FT-2800MOPERATING MANUALVertex Standard Co., Ltd.2SpecificationsGeneralFrequency Range: Tx 144 - 146 MHz or 144 - 148 MHzRx 144 - 146 MHz or 137 - 174 MHzChannel Step: 5/10/12.5/15/20/25/50/100 kHzStandard Repeater Shift ±600 kHzFrequency Stability: better than ±10 ppm[–4 °F to +140 °F (–20 °C to +60 °C)]Mode of Emission: F2/F3Antenna Impedance: 50-ohms, unbalancedSupply voltage: 13.8 V DC ±15%, negative groundCurrent Consumption (typical): Rx: less than 0.7 A, less than 0.3 A (squelched)Tx: 10 A (60 W)/6 A (25 W)/3 A (10 W)/2 A (5 W)Operating Temperature Range: ????Case Size (WxHxD): 6.3 x 2.0 x 7.3 inch (160 x 50 x 185 mm) (w/o knobs)Weight (Approx.): 4.0 lb (1.8 kg)TransmitterOutput Power: 60 W/25 W/10 W/5 WModulation Type: Variable ReactanceMaximum Deviation: ±5 kHz/±2.5 kHzSpurious Radiation: better than –60 dBMicrophone Impedance: 2-kohmReceiverCircuit Type: Double Conversion SuperheterodyneIfs: 21.7 MHz & 450 kHzSensitivity (for 12dB SINAD): better than 0.2 µVSelectivity (–6/–60dB): 12 kHz/28 kHzIF Rejection: better than 70 dBImage Rejection: better than 70 dBAdjacent Channel Selectivity better than 70 dBInter Modulation better than 95 dBMaximum AF Output: 3.5 W into 4-ohms @10 % THDSpecifications subject to change without notice or obligation.](https://usermanual.wiki/Yaesu-Musen/FT-2800M/User-Guide-283088-Page-2.png)
![FCC ID: K66FT-2800MOPERATING MANUALVertex Standard Co., Ltd.8Use the DC power cable supplied with your transceiver for making power connections tothe power supply. Connect the RED power cable lead to the POSITIVE (+) power supplyterminal, and connect the BLACK power cable lead to the NEGATIVE (–) power supplyterminal.Front Panel Controls & Switches1. VOL KnobThis control adjusts the audio volume level. Clockwise rotation increases thevolume level.2. SQL KnobThis control is used to silence background noise on the receiver. It should beadvanced clockwise just to the point where the noise is silenced (and the “BUSY”indicator on the display turns off), so as to provide the best sensitivity to weaksignals.3. Microphone JackConnect the supplied MH-48A6J Hand Microphone to this jack.4. [%] KeyThis key allows operating the Internet Connection feature.5. PWR KeyPress and hold this key for one second to toggle the transceiver’s power on and off.6. [MHz(SET)] KeyThis key allows tuning in 1-MHz steps (the MHz digits will blink on the display). Ifreceiving on a memory, pressing this key the first time activates the MemoryTuning mode, and pressing it again enables 1-MHz steps.Press and hold this key for one second to activate the “Set” (Menu) mode.7. [REV(DW)] KeyDuring split-frequency operation, such as through a repeater, this key reverses thetransmit and receive frequencies.Press and hold this key for one seconds to activate the Dual Watch feature,described in the Operation chapter (“PRI” will be displayed on the LCD, indicating“Priority Channel” monitoring).8. [LOW(A/N)] KeyPress this key momentarily to select the transmitter power output level.The available power levels are:](https://usermanual.wiki/Yaesu-Musen/FT-2800M/User-Guide-283088-Page-8.png)
![FCC ID: K66FT-2800MOPERATING MANUALVertex Standard Co., Ltd.9HIGH(60W) Æ MID(25W) Æ LOW2(10W) Æ LOW1(5W)While receiving on a memory, press and hold this key for one seconds to toggle thedisplay between indication of the frequency and the channel’s Alpha/Numeric label.9. [D/MR(MW)] KeyPress this key momentarily to switch the frequency control among the VFO,Memory System, and Home channel.Press and hold this key for one second to activate the Memory Storage mode.10. DIAL KnobThis 24-position detented rotary switch is used for tuning, memory selection andmost function settings. The microphone UP/DWN buttons duplicate the functions ofthis knob.11. DisplayThe main digits on the display may show operating frequency, memory name, orany of many parameters during setting.Microphone Switches1. PTT SwitchPress this switch to transmit, and release it to receive.2. KeypadThese 16 keys generate DTMF tones during transmission.In the receive mode, these 16 keys can be used for direct frequency entry and/ordirect numeric recall of the Memory channels.3. [P1]/[P2]/[P3]/[P4] Buttons[P1] button (SQL OFF)Pressing this button disable the noise and tone squelch system.[P2] button (S SRCH)Press this button to activate the Smart Search feature.[P3] button (T SRCH)Press this button to activate the Tone Search feature.[P4] buttonPress this button to recall the “Weather” broadcast channel bank.You can reprogram the [P1], [P2], [P3], and [P4] buttons for other functions, ifdesired. See page ?? for details.4. LAMP Switch](https://usermanual.wiki/Yaesu-Musen/FT-2800M/User-Guide-283088-Page-9.png)
![FCC ID: K66FT-2800MOPERATING MANUALVertex Standard Co., Ltd.10This switch illuminates the Microphone keypad.5. LOCK SwitchThis switch locks out the Microphone buttons (except for the keypad and PTTswitch).6. [UP]/[DWN] ButtonPress (or hold in) either of these buttons to tune (or scan up or down) the operatingfrequency or through the memory channels. In many ways, these buttons emulatethe function of the (rotary) DIAL knob.Rear Panel Connectors1. EXT SP JackThis 2-contact mini 3.5-mm mini phone jacks provide receiver audio output for anoptional external speaker. The audio impedance is 4-ohm, and the level variesaccording to the setting of the front panel’s VOL control. Inserting a plug into thisjack disable audio from the transceiver’s internal speaker. 2. 13.8V DC Cable Pigtail w/FuseThis is the power supply connection for the transceiver. Use the supplied DC cableto connect this pigtail to the car battery or other DC power supply capable of atleast 10 Amperes (continuous duty). Make certain that the red lead connects to thepositive side of the supply. The fuse is 15-A.3. ANT Coaxial SocketConnect a 144-MHz antenna to this type-M (SO-239) socket using 50-ohm coaxialcable and a type-M (pl-259) plug. Male sure the antenna is designed specifically foruse on the operating frequency.Basic OperationR. F. Says: Hi! I’m R. F. Radio, and I’ll be helping you along as you learn the manyfeatures of the FT-2800M. I know you’re anxious to get on the air, but I encourage you toread “Basic Operation” section of this manual as thoroughly as possible, so you’ll get themost out of this fantastic new transceiver. Now. . .let’s get operating!Turning the Transceiver On and Off1. To turn the transceiver on, press and hold in the PWR key for one second.When you turn on the FT-2800M, the current DC supply voltage is indicated on the](https://usermanual.wiki/Yaesu-Musen/FT-2800M/User-Guide-283088-Page-10.png)
![FCC ID: K66FT-2800MOPERATING MANUALVertex Standard Co., Ltd.11LCD for 2 seconds. After this interval, the display will switch its normal indicationof the operating frequency.2. To turn the transceiver off, again press and hold in the PWR key for one second.Adjusting the Audio Volume LevelRotate the VOL control to adjust the receiver volume. Clockwise rotation increases theaudio output level.Adjusting the Squelch SettingRotate the SQL control just to the point where the noise is silenced and the “BUSY”indicator on the display turns off. If the SQL control is set further clockwise, sensitivityto weak signals is reduced.A special “RF Squelch” feature is provided on this radio. This feature allows you to setthe squelch so that only signals exceeding a certain S-meter level will open the squelch.See page ?? for detailsFrequency Navigation1) Tuning DialRotating the DIAL knob allows tuning in the pre-programmed steps. Clockwise rotationof the DIAL knob causes the FT-2800M to be tuned toward a higher frequency, whilecounter-clockwise rotation will lower the operating frequency.Press the [MHz(SET)] key momentarily, then rotate the DIAL knob, to change thefrequency steps to 1 MHz per step. This feature is extremely useful for making rapidfrequency excursions over the wide tuning range of the FT-2800M.2) Direct Keypad Frequency EntryThe keypad of the MH-48A6J DTMF Microphone may be used for direct entry of theoperating frequency.To enter a frequency from the MH-48A6J keypad, just press the numbered digits in theproper sequence. There is no “decimal point” key on the MH-48A6J keypad. However,there is a short-cut for frequencies ending in zero - press the [#] key after the last non-zero digit.Examples: To enter 146.520 MHz, press [1] Æ [4] Æ [6] Æ [5] Æ [2] Æ [0]](https://usermanual.wiki/Yaesu-Musen/FT-2800M/User-Guide-283088-Page-11.png)
![FCC ID: K66FT-2800MOPERATING MANUALVertex Standard Co., Ltd.12To enter 146.000 MHz, press [1] Æ [4] Æ [6] Æ [#]3) ScanningFrom the VFO mode, press the microphone’s [UP]/[DWN] keys momentarily to initiatescanning toward a higher- or lower frequency, respectively. The FT-2800M will stopwhen it receives a signal strong enough to break through the squelch threshold. TheFT-2800M will then hold on that frequency according to the setting of the “Resume”mode (Menu #23 (SCAN); see page ??).If you wish to reverse the direction of the scan (i.e. toward a lower frequency, instead ofa higher frequency), just rotate the DIAL knob one click in the counter-clockwisedirection while the FT-2800M is scanning. The scanning direction will be reversed. Torevert to scanning toward a higher frequency once more, rotate the DIAL knob one clickclockwise.Press the [UP]/[DWN] keys again to cancel scanning.TransmissionTo transmit, simply close the PTT (Push To Talk) switch on the microphone when thefrequency is clear. Hold the microphone approximately 1” (25 mm) from your mouth,and speak into the microphone in a normal voice level. When your transmission iscomplete, release the PTT switch; the transceiver will revert .During transmission, the “TX” indicator will appear at the upper left corner on thedisplay.Changing the Transmitter Power LevelYou can select from among a total of four transmit power levels on your FT-2800M.To change the power level, press the [LOW(A/N)] key (or microphone’s [A] key) to selectone of four power settings. These power levels will be stored, in memory registers, at thetime of memory storage (see page ?? for details on Memory operation).During transmission, the Bar Graph will deflect in the display, according to the poweroutput selected.Advanced OperationWeather Broadcast ReceptionThe FT-2800M includes a unique feature which allows reception of weather broadcasts](https://usermanual.wiki/Yaesu-Musen/FT-2800M/User-Guide-283088-Page-12.png)
![FCC ID: K66FT-2800MOPERATING MANUALVertex Standard Co., Ltd.13in the 160-MHz frequency range. Ten standard Weather Broadcast channels are pre-loaded into a special memory bank.To listen to a Weather Broadcast Channel:1. Press the Microphone’s [P4] button to recall the Weather Broadcast channels.2. Turn the DIAL knob to select the desired Weather Broadcast channel.3. If you wish to check the other channels for activity by scanning, just press theMicrophone’s PTT switch.4. To exit to normal operation, press the [P4] button again. Operation will return tothe VFO or Memory channel you were operating on before you began WeatherBroadcast operation.R.F. Says: In the event of extreme weather disturbances, such as storms and hurricanes,the NOAA (National Oceanic and Atmospheric Administration) sends a weather alertaccompanied by a 1050 Hz tone and subsequent weather report on one of the NOAAweather channels. You may enable the this feature via Menu Item (32 W ALT), ifdesired. See page ?? for details.LOCK FeatureTo order to prevent accidental frequency change or inadvertent transmission, variousaspects of the FT-2800M’s keys and knob may be locked out. The possible lockoutcombinations are:KEY: Just the front panel keys are locked outDIAL: Just the front panel DIAL knob is locked outK+D: Both the keys and DIAL knob are locked outPTT: The PTT switch is locked (TX not possible)K+P: Both keys and PTT switch are locked outD+P: Both DIAL knob and PTT switch are locked outALL: All of the above are locked outOFF: The Lock feature is disabledTo lock out some or all of the keys:1. Press and hold the [MHz(SET)] key for one second, then rotate the DIAL knob toselect “14 LOCK.”2. Press the [MHz(SET)] key, then rotate the DIAL knob to select the display to “OFF.”3. Press and hold the [MHz(SET)] key for one second to save your new setting and exit](https://usermanual.wiki/Yaesu-Musen/FT-2800M/User-Guide-283088-Page-13.png)
![FCC ID: K66FT-2800MOPERATING MANUALVertex Standard Co., Ltd.14to normal operation.When activate the locking feature, the “KEY” icon will appear on the LCD.Keypad BeeperA key/button beeper provides useful audible feedback whenever a key/button is pressed.If you want to turn the beeper off (or back on again):1. Press and hold the [MHz(SET)] key for one second, then rotate the DIAL knob toselect “03 BEEP.”2. Press the [MHz(SET)] key, then rotate the DIAL knob to select the display to “OFF.”3. Press and hold the [MHz(SET)] key for one second to save your new setting and exitto normal operation.Channel Step SelectionTuning steps are factory present to default increments which are appropriate for thecountry to which this radio is exported. To change to another step size as following:1. Press and hold the [MHz(SET)] key for one second, then rotate the DIAL knob toselect “29 STEP”.2. Press the [MHz(SET)] key, then rotate the DIAL knob to select the desired step size(5/10/12.5/15/20/25/50/100 kHz).3. Press and hold the [MHz(SET)] key for one second to save your new setting and exitto normal operation.Display BrightnessThe FT-2800M display illumination has been specially engineered to provide highvisibility with minimal disruption of your “night vision” while you are driving. Thebrightness of the display is manually adjustable, using the following procedure:1. Press and hold the [MHz(SET)] key for one second, then rotate the DIAL knob toselect “07 DIMR”.2. Press the [MHz(SET)] key, then rotate the DIAL knob to select a comfortablebrightness level (1, 2, 3, and OFF).3. Press and hold the [MHz(SET)] key for one second to save your new setting and exitto normal operation.](https://usermanual.wiki/Yaesu-Musen/FT-2800M/User-Guide-283088-Page-14.png)
![FCC ID: K66FT-2800MOPERATING MANUALVertex Standard Co., Ltd.15RF SquelchA special RF Squelch feature is provided on this radio. This feature allows you to set thesquelch so that only signals exceeding a S-meter level will open the squelch. To set upthe RF squelch circuit for operation, use the following procedure:1. Press and hold the [MHz(SET)] key for one second, then rotate the DIAL knob toselect “20 RF SQL”.2. Press the [MHz(SET)] key, then rotate the DIAL knob to select the desired signalstrength level for the squelch threshold (1 - 10 or OFF).3. Press and hold the [MHz(SET)] key for 1/2 second to save your new setting and exitto normal operation.Note: The receiver’s squelch will open based on the highest level set by the two squelchsystem “Noise Squelch and RF Squelch). For example:1) If the Noise Squelch (SQL control) is set so that signals at a level of S-3 will openthe squelch, but the RF Squelch (Menu #20) is set to “S-9,” the squelch will onlyopen on signals which are S-9 or stronger on the S-meter.2) If the RF Squelch is set to “S-3,” but the Noise Squelch is set to a high level whichwill only pass signals which are Full Scale on the S-meter, the squelch will onlyopen on signals which are Full Scale on the S-meter. In this case, the Noise Squelchoverrides the action of the RF Squelch.Repeater OperationThe FT-2800M includes a host of convenience features which makes operation onamateur repeaters both efficient and enjoyable.Repeater SplitsThis transceiver offers three methods of setting up split-frequency operation onrepeaters:[1] Manual selection of preset repeater shifts;[2] Automatic Repeater Shift (ARS), providing automatic activation of repeatershifts during designated repeater frequency subbands; and[3] Independently stored transmit and receive frequencies (typically notcorresponding to established repeater frequency shifts).[1] Standard Repeater ShiftTo activate the standard shift manually, as following:](https://usermanual.wiki/Yaesu-Musen/FT-2800M/User-Guide-283088-Page-15.png)
![FCC ID: K66FT-2800MOPERATING MANUALVertex Standard Co., Ltd.161. Press and hold the [MHz(SET)] key for one second, then rotate the DIAL knob toselect “21 RPTR”.2. Press the [MHz(SET)] key, then rotate the DIAL knob to select the desired shiftdirection (–RPTR, +RPTR, or SIMP).3. Press and hold the [MHz(SET)] key for one second to save your new setting and exitto normal operation.With repeater shift activated, you can temporarily reverse the transmit and receivefrequencies by pressing the [REV(DW)] key (or microphone’s [B] key). Use this featureto display the transmit frequency without transmitting, and to check the strength ofsignals on a repeater uplink frequency (so as to determine whether or not a particularstation is within “Simplex” range, for example). The repeater offset is fixed to 600 kHz from the factory. You can change the offset byfollowing procedure, if needed:1. Press and hold the [MHz(SET)] key for one second, then rotate the knob to select“24 SHIFT”.2. Press the [MHz(MHz)] key, then rotate the DIAL knob to set the desired offset.Note that the resolution of the “standard” repeater shift is to the nearest 50 kHzmultiple.3. Press and hold the [MHz(SET)] key for one second to save your new setting and exitto normal operation.[2] Automatic Repeater ShiftThe ARS (Automatic Repeater Shift) feature in this transceiver allows easy andconvenient repeater operation by automatically activating the repeater shift functionwhenever you tune to a standard repeater sub band. The ARS function is preset at thefactory to conform to the standards for the country to which it is exported.The ARS function is enabled at the factory. To disable it:1. Press and hold the [MHz(SET)] key for one second, then rotate the DIAL knob toselect “02 ARS”.2. Press the [MHz(SET)] key, then rotate the DIAL knob to change the display to“OFF”.3. Press and hold the [MHz(SET)] key for one second to save your new setting and exitto normal operation.To enable the ARS function again, select to “ON” in step 2 above.](https://usermanual.wiki/Yaesu-Musen/FT-2800M/User-Guide-283088-Page-16.png)
![FCC ID: K66FT-2800MOPERATING MANUALVertex Standard Co., Ltd.17[3] Separate Transmit Frequency MemoriesAll memory channels can store independent receive and transmit frequencies, toaccommodate occasional non-standard offsets with greater frequency resolution than isavailable using the “standard” shift feature.1. First store the receive (repeater output) frequency. In the VFO mode, tune thetransceiver to the desired receive frequency. Now press and hold the [D/MR(MW)]key on the for one second.2. Within five seconds of pressing the [D/MR(MW)] key, use the DIAL knob ormicrophone’s [UP]/[DWN] buttons to select the desired memory for storage.3. Now press the [D/MR(MW)] key momentarily to store the receive frequency into theselected memory. 4. Next store the transmit (repeater input) frequency. Since you are still in the VFOmode, tune the transceiver to the desired transmit frequency. 5. Now press and hold the [D/MR(MW)] key for one second.6. Press and hold the PTT switch, and press the [D/MR(MW)] key momentarily whileholding in the PTT switch. This will not cause transmission, but rather it willinstruct the transceiver that you are programming a separate transmit frequencyinto memory.When you have finished the above procedure, press the [D/MR(MW)] key momentarily.The channel number and repeater downlink frequency will appears onto the display. Ifyou press the PTT switch, you will observe the display changing to indicate therepeater’s uplink frequency. Note also that the display shows “–+” in the upper left-handcorner; this indicates that an “odd” (non-standard) shift has been stored on this channel.CTCSS/DCS OperationCTCSS OperationMany repeater systems require that a very-low-frequency audio tone be superimposedon your FM carrier in order to activate the repeater. This helps prevent false activationof the repeater by radar or spurious signals from other transmitters. This tone system,called “CTCSS” (Continuous Tone Coded Squelch System), is included in your FT-2800M, and is very easy to activate.R. F. Says: CTCSS setup involves two actions: setting the Tone Mode and then setting ofthe Tone Frequency. These actions are set up by using the Set mode #28 (SQ TYP) and#27 (SQ TNF).](https://usermanual.wiki/Yaesu-Musen/FT-2800M/User-Guide-283088-Page-17.png)
![FCC ID: K66FT-2800MOPERATING MANUALVertex Standard Co., Ltd.181. Press and hold the [MHz(SET)] key for one second, then rotate the DIAL knob toselect “28 SQ TYP”.2. Press the [MHz(SET)] key, then rotate the DIAL knob so that “T ENC” appears onthe display; this activates the CTCSS Encoder, which allows repeater access.R. F. Says: You may notice an additional “DC ENC” and “DCS” appearing while yourotate the DIAL knob in this step. We’ll discuss the Digital Code Squelch systemshortly.3. Rotating the DIAL knob one more click clockwise in above step will cause “TSQ” toappear. When “TSQ” appears, this means that the Tone Squelch system is active,which mutes your FT-2800M’s receiver until it receives a call from another radiosending out a matching CTCSS tone. This can help keep your radio quiet until aspecific call is received, which may be helpful while operating in congested areas.4. When you have made your selection of the CTCSS tone mode, press the [MHz(SET)]key momentarily, then rotate the DIAL knob one click counter-clockwise to selectMenu #27 (SQ TNF). This Menu selection allows setting of the CTCSS tonefrequency to be used.5. Press the [MHz(SET)] key to enable adjustment of the CTCSS frequency.6. Rotate the DIAL knob until the display indicates the Tone Frequency you need to beusing.7. When you have made your selection, press and hold the Press the [MHz(SET)] keyfor one second to save the new setting and exit to normal operation.R. F. Says: Your repeater may or may not re-transmit a CTCSS tone - some systems justuse CTCSS to control access to the repeater, but don’t pass it along when transmitting.If the S-Meter deflects, but the FT-2800M is not passing audio, repeat steps “1” through“3” above, but rotate the DIAL knob so that “T ENC” appears - this will allow you tohear all traffic on the channel being received.DCS OperationAnother form of tone access control is Digital Code Squelch, or DCS. It is a newer, moreadvanced tone system which generally provides more immunity from false paging thandoes CTCSS. The DCS Encoder/Decoder is built into your FT-2800M, and operation isvery similar to that just described for CTCSS. Your repeater system may be configuredfor DCS; if not, it is frequently quite useful in Simplex operation if your friend(s) usetransceivers equipped with this advanced feature.R. F. Says: Just as in CTCSS operation, DCS requires that you set the Tone Mode toDCS and that you select a Tone Code.](https://usermanual.wiki/Yaesu-Musen/FT-2800M/User-Guide-283088-Page-18.png)
![FCC ID: K66FT-2800MOPERATING MANUALVertex Standard Co., Ltd.191. Press and hold the [MHz(SET)] key for one second, then rotate the DIAL knob toselect “28 SQ TYP”.2. Press the [MHz(SET)] key, then rotate the DIAL knob until “DCS” appears on thedisplay; this activates the DCS Encoder/Decoder.3. Now, press the [MHz(SET)] key momentarily, then rotate the DIAL knob to selectMenu #26 (SQ DCS).4. Press the [MHz(SET)] key momentarily to enable the adjustment of the DCS code.5. Rotate the DIAL knob to select the desired DCS Code (a three-digit number).6. When you have made your selection, press and hold the [MHz(SET)] key for onesecond to save the new setting and exit to normal operation.R. F. Says: Remember that the DCS is an Encode/Decode system, so your receiver willremain muted until a matching DCS code is received on an incoming transmission.Switch the DCS off when you’re just tuning around the band!Tone Search ScanningIn operating situations where you don’t know the CTCSS or DCS tone being used byanother station or stations, you can command the radio to listen to the incoming signaland scan in search of the tone being used. Two things must be remembered in thisregard: You must be sure that your repeater uses the same tone type (CTCSS vs. DCS). Some repeaters do not pass the CTCSS tone; you may have to listen to thestation(s) transmitting on the repeater uplink (input) frequency in order toallow Tone Search Scanning to work.To scan for the tone in use:1. Set the radio up for either CTCSS or DCS Decoder operation (see the previousdiscussion). In the case of CTCSS, “TSQ” will appear on the display; in the case ofDCS, “DCS” will appear on the display.2. Press and hold the [MHz(SET)] key for one second, then rotate the DIAL knob toselect Menu #27 (SQ TNF) when CTCSS is selected, or Menu #26 (SQ DCS) duringDCS operation.3. Press the Microphone’s [P3] key momentarily to start scanning for the incomingCTCSS or DCS tone/code.4. When the radio detects the correct tone or code, it will halt on that tone/code, andaudio will be allowed to pass.5. Press and hold the [MHz(SET)] key for one second to lock in that tone/code and exit](https://usermanual.wiki/Yaesu-Musen/FT-2800M/User-Guide-283088-Page-19.png)
![FCC ID: K66FT-2800MOPERATING MANUALVertex Standard Co., Ltd.20to normal operation.R. F. Says: If the Tone Scan feature does not detect a tone or code, it will continue toscan indefinitely. When this happens, it may be that the other station is not sending anytone. You can press the Microphone’s [P3] key to halt the scan at any time.Tone Scanning works either in the VFO or Memory modes.CTCSS/DCS Bell PagingDuring CTCSS Decode or DCS operation, you may set up the FT-2800M such that aringing “bell” sound alerts you to the fact that a call is coming in. Here is the procedurefor activating the CTCSS/DCS Bell:1. Set the transceiver up for CTCSS Decode (“Tone Squelch”) or DCS operation, asdescribed previously.2. Adjust the operating frequency to the desired channel.3. Press and hold the [MHz(SET)] key for one second, then rotate the DIAL knob toselect “04 BELL”.4. Rotate the DIAL konb to set the desired number of rings of the Bell. The availablechoices are 1, 3, 5, or 8 rings, REPEAT (continuous ringing), or OFF.5. Press and hold the [MHz(SET)] key for one second to save the new setting and exitto normal operation.When you are called by a station whose transceiver is sending a CTCSS tone or DCScode which matches that set into your Decoder, the Bell will ring in accordance to thisprogramming.DTMF Autodialer OperationNine DTMF Autodialer memories are available on this radio. These DTMF Autodialermemories can store up to 16 digits of a telephone number for repeater autopatch orother use.To load DTMF Autodialer memories, use following procedure:1. Press and hold the [MHz(SET)] key for one second, then rotate the DIAL knob toselect “10 DT MEM”.2. Press the [MHz(SET)] key, then rotate the DIAL knob to select the DTMFAutodialer memory channel number into which you wish store a telephone number(“DTMF-1” to “DTMF-9”).](https://usermanual.wiki/Yaesu-Musen/FT-2800M/User-Guide-283088-Page-20.png)
![FCC ID: K66FT-2800MOPERATING MANUALVertex Standard Co., Ltd.213. Press the [D/MR(MW)] key momentarily, then rotate the DIAL knob to select thefirst digit of the telephone number you wish to store.4. When you have selected the correct digit, press the [REV(DW)] key momentarily.Now, rotate the DIAL knob to select the second of 16 available numbers in thecurrent DTMF Autodialer memory resistor.5. Repeat this procedure for each digit in the telephone number. If you a mistake,press the microphone’s [DWN] key to move back to the first digit, then re-enter thecorrect number.6. When entry of all digits is complete, press the [MHz(SET)] key.7. If you wish to store another DTMF string, repeat steps 2 through 6 above.8. Press and hold the [MHz(SET)] key for one second to save the new setting and exitto normal operation.To transmit the memorized telephone number, use the following procedure:1. Press and hold the [MHz(SET)] key for one second, then rotate the DIAL knob toselect “08 DTMF”.2. Press the [MHz(SET)] key, then rotate the DIAL knob to set the DTMF Autodialermemory function to the “ON” position (the “Telephone” icon will appear).3. Press and hold the [MHz(SET)] key for one second to save the new setting and exitto normal operation.4. In the Autodialer function mode, first press the PTT switch, the press themicrophone’s numeric key ([1] through [9]) corresponding to the DTMF memorystring you wish to send. Once the string begins, you may release the PTT switch, asthe transmitter will be held “on the air” until the DTMF string is completed.To disable the Autodialer function mode, select “OFF” in step “2” above.The speed at which the DTMF digits are sent can be changed. Two speed levels areavailable: Low (10 digits per second) and High (20 digits per second: default). To togglebetween Low and High speed, use the following procedure:1. Press and hold the [MHz(SET)] key for one second, then rotate the DIAL knob toselect “11 DT SPD”.2. Press the [MHz(SET)] key, then rotate the DIAL knob to select the desired speed(“50”: High speed or “100”: Low speed).3. Press and hold the [MHz(SET)] key for one second to save the new setting and exitto normal operation.](https://usermanual.wiki/Yaesu-Musen/FT-2800M/User-Guide-283088-Page-21.png)
![FCC ID: K66FT-2800MOPERATING MANUALVertex Standard Co., Ltd.22You can also set a longer delay between the time your transmitter is keyed and the firstDTMF digit is send. To set a delay time, use the following procedure:1. Press and hold the [MHz(SET)] key for one second, then rotate the DIAL knob toselect “09 DT DLY”.2. Press the [MHz(SET)] key, then rotate the DIAL knob to select the desired speed(50/250/450/750/1000 ms).3. Press and hold the [MHz(SET)] key for one second to save the new setting and exitto normal operation.Memory OperationMemory StorageTo store a frequency into memory:1. In the VFO mode, select the desired frequency, repeater shift, CTCSS/DCS tone,and TX power level.2. Press and hold the [D/MR(MW)] key for one second. A memory number will appearblinking in the display.3. Within five seconds of pressing the [D/MR(MW)] key, use the DIAL knob to selectthe desired memory for storage.4. Press the [D/MR(MW)] key again, this time momentarily, to store the displayeddata into the selected memory channel slot. The memory label will disappear (sinceyou are still operating in the VFO mode).Storing Independent Transmit Frequencies (“Odd Splits”):1. Store the receiving frequency using the method already described.2. Turn to the desired transmit frequency, the press and hold [D/MR(MW)] key for onesecond.3. Within five seconds of pressing the [D/MR(MW)] key, use the DIAL knob to selectthe same memory channel number as used in step 1 above.4. Press and hold in the PTT switch, then press the [D/MR(MW)] key momentarilywhile holding the PTT switch to save the entry and exit to normal operation. Thiswill not cause transmission; instead, it signals the microprocessor that a separatetransmit frequency is being programmed into that memory register.R. F. Says: Whenever you recall a memory which contains independently-storedtransmit and receive frequencies, the “–+” indication will appear in the display.](https://usermanual.wiki/Yaesu-Musen/FT-2800M/User-Guide-283088-Page-22.png)
![FCC ID: K66FT-2800MOPERATING MANUALVertex Standard Co., Ltd.23Memory Recall1. Press the [D/MR(MW)] key, repeatedly if necessary, until “MR” icon and memorychannel number appears on the display; this indicates that the memory channel isrecalled (Memory Mode).2. When more than one memory has been stored, use the DIAL knob to select amemory for operation. Alternatively, microphone’s [UP] or [DWN] button may beused to stop or scan through the available memories. When using the microphone’sbuttons, press and release the button to move one step up or down; press and holdthe [UP] or [DWN] button for one second to begin memory scanning.Memory Recall from the Microphone’s keypad:While operating on the Memory Recall mode, the keypad of the MH-48A6J Microphonemay be used for direct recall of memory channels.To do this, press the Channel Number you wish to recall, then press the [½] key. Forexample, to recall Memory Channel “5,” press [5] Æ [½]. To recall Memory Channel“118,” press [1] Æ [1] Æ [8] Æ [½].Labeling MemoriesYou may wish to append an alpha-numeric “Tag” (label) to a memory or memories, to aidin recollection of the channel’s use (such as club name, etc.). This is easily accomplishedusing the Menu mode.1. Recall the memory channel on which you wish to append a label.2. Press and hold the [MHz(SET)] key for one second, then rotate the DIAL knob toselect “00 ALPH”.3. Press the [MHz(SET)] key. You will notice the first entry’s place blink. Within theA/N entry mode, rotate the DIAL knob to select characters, and pressing the[REV(DW)] key to move the character’s entry place to the right.4. Rotate the DIAL knob to select the desired number, letter, or symbol, then press the[D/MR] key to move the next character’s place.5. Do this as necessary to complete a name tag (up to six characters) for your memory,then press the [MHz(SET)] key momentarily to save the A/N name entry.6. Press and hold the [MHz(SET)] key for one second to exit to normal operation.While operating on the Memory Recall mode, press and hold the [LOW(A/N)] key for oneseconds to toggle the display between indication of the frequency and the channel’sAlpha/Numeric label.](https://usermanual.wiki/Yaesu-Musen/FT-2800M/User-Guide-283088-Page-23.png)
![FCC ID: K66FT-2800MOPERATING MANUALVertex Standard Co., Ltd.24Memory TuningOnce you have recalled a particular memory channel, you may easily tune off thatchannel, as though you were in the VFO mode.1. With the FT-2800M in the Memory Recall mode, select the desired memory channel.2. Press the [MHz(SET)] key momentarily. The “MR” indicator will be blinks; thisindicates that the Memory Tuning.3. Rotate the DIAL knob, as desired, to tune to anew frequency. The synthesizer stepsfor VFO operation will be the steps used during Memory Tuning.4. IF you wish to return to the original memory frequency, press the [D/MR(MW)] keymomentarily. The “MR” indicator will be stop the blinking.5. If you wish to store a new frequency set during Memory Tuning, just press and holdin the [D/MR(MW)] key for one second, per normal memory storage procedure.Deleting MemoriesWith 219 total memories available, there frequently are situations where you maydesire to delete certain memories temporarily (except the Memory Channel “1”). Theprocedure for deleting a channel is quite simple:1. Press and hold the [D/MR(MW)] key for one second, then rotate the DIAL knob toselect the memory channel on which you wish to be deleted.2. Press the [LOW(A/N)] key momentarily. The “CLEAR” will be appear on thedisplay.3. Press again the [LOW(A/N)] key momentarily. This will cause the display to shift toMemory Channel “00,” and the previously-selected memory will be deleted.Important Note: Once deleted, channel data cannot be recovered.Home Channel MemoryA Convenient one-touch “Home” channel memory is available to simplify return to yourmost-often-used frequency. This memory do not appear in the regular memory banks,simplify operation.To recall the Home channel, just press the [D/MR(MW)] key repeatedly, if necessary,until “HM” icon appears on the display; this indicates that the Home Channel isrecalled.The factory default frequency for the Home channel is 144.000 MHz. You can re-program the Home channel in a manner identical to that used for the regular memories:](https://usermanual.wiki/Yaesu-Musen/FT-2800M/User-Guide-283088-Page-24.png)
![FCC ID: K66FT-2800MOPERATING MANUALVertex Standard Co., Ltd.251. From the VFO mode, tune in the frequency you wish to store, and set all repeatershifts and other data just the way you do for “normal” memory channel storage.2. Press and hold the [D/MR] key for one second, then press the [REV(DW)] key tostore the displayed data into the Home channel. The memory label will disappear(since you are still operating in the VFO mode).You may also append an alpha-numeric “Tag” (label) to a Home channel, describedpreviously.Memory-Only ModeOnce memory channel programming has been completed, you may place the radio in a“Memory Only” mode, whereby VFO and Home Channel operation are impossible. Thismay be particularly useful during public-service events where a number of operatorsmay be using the radio for first time, and ultimate simplicity of channel selection isdesired.To place the radio into the Memory Only mode, turn it off. Now press and hold in the[MHz(SET)] and [D/MR(MW)] keys while turning the radio on. The VFO and HomeChannel will now be disabled.To return to normal operation, repeat the above power-on procedure.ScanningThe FT-2800M’s scanning capability provides the operator with many convenientmethods of rapid frequency navigation.Basic Scanner OperationBefore activating the scanner, make sure that the Squelch is set to silence thebackground noise when no signal is present.Scanning may be started or stopped using the microphone’s [UP] or [DWN] button. Thefollowing techniques are used for scanning: Press and hold either the [UP] or [DWN] button for one second in the VFO modewill causes upward or downward band scanning, respectively, to begin. Press and hold either the [UP] or [DWN] button for one second in the Memory modewill causes memory channel scanning toward a higher- or lower-numbered memorychannel, respectively. Scanning pauses when a signal opens the squelch, and the decimal point on the](https://usermanual.wiki/Yaesu-Musen/FT-2800M/User-Guide-283088-Page-25.png)
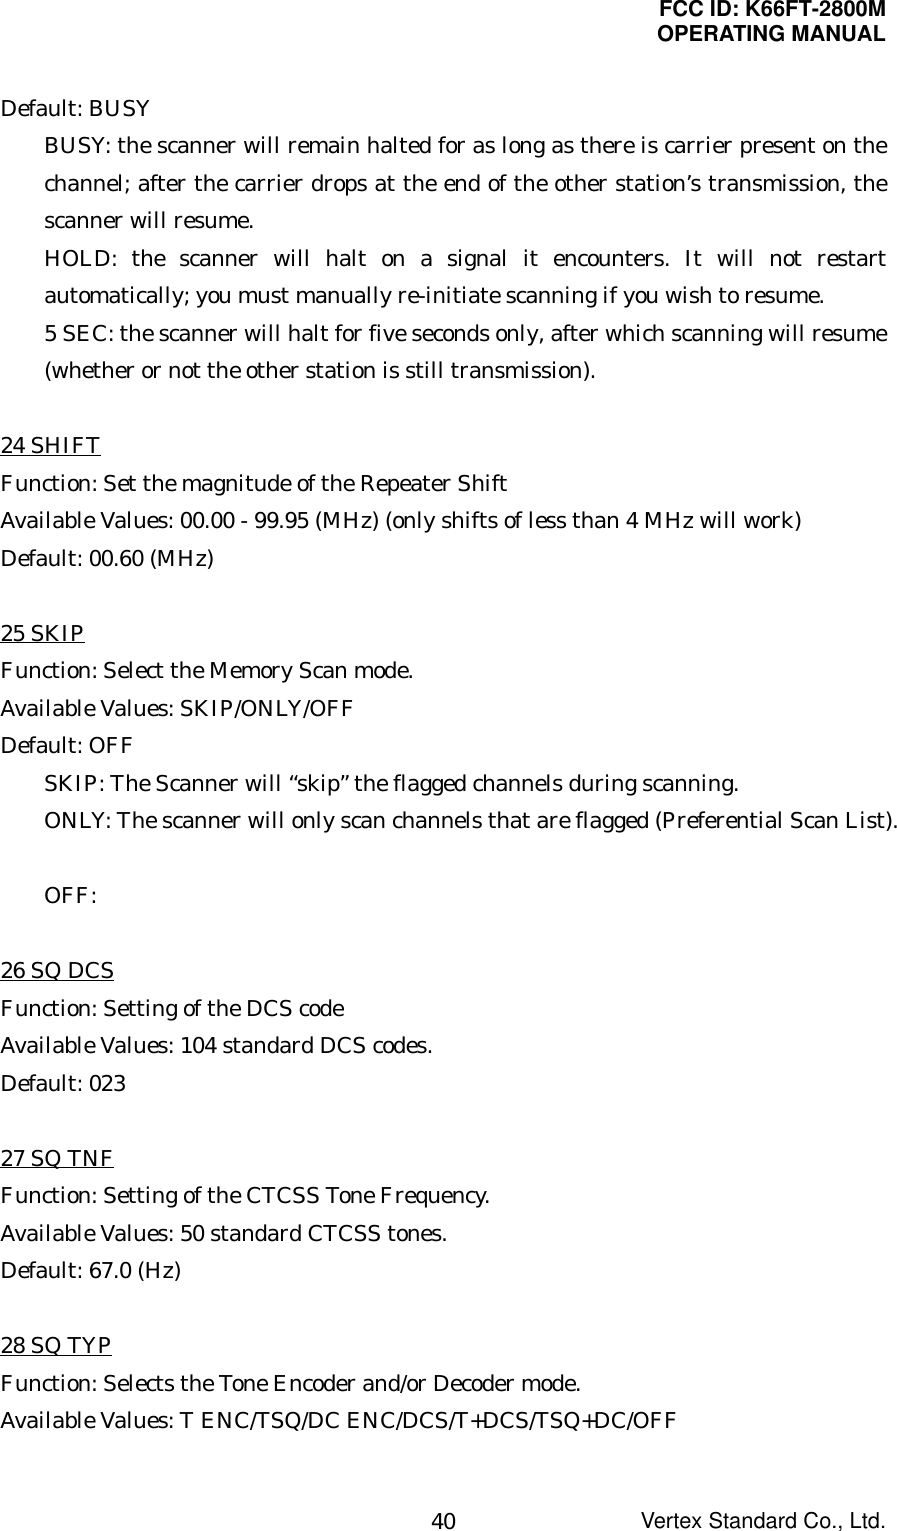
![FCC ID: K66FT-2800MOPERATING MANUALVertex Standard Co., Ltd.26display will blink. You can choose one of three scan-resume modes (described later). To holt the scan manually, the easiest way is to push the PTT switch on themicrophone momentarily (no transmission will occur while you are scanning). Thescan may also be halted manually by pressing the microphone’s [UP] or [DWN]button, or the [D/MR(MW)] key.Scan-Resume OptionsThree scan-resume modes are available on the radio: In the “BUSY” mode, the scanner will remain halted for as long as there is carrierpresent on the channel; after the carrier drops at the end of the other station’stransmission, the scanner will resume. In the “HOLD” mode, the scanner will halt on a signal it encounters. It will notrestart automatically; you must manually re-initiate scanning if you wish toresume. In the “5 SEC” mode, the scanner will halt for five seconds only, after whichscanning will resume (whether or not the other station is still transmission).To change the scan-resume mode, as following:1. Press and hold the [MHz(SET)] key for one second, then rotate the DIAL knob toselect “23 SCAN”.2. Press the [MHz(SET)] key, then rotate the DIAL knob to select the desired scan-resume mode (BUSY/HOLD/5 SEC).3. Press and hold the [MHz(SET)] key for one second to save the new setting and exitto normal operation.Memory Skip ScanningWhen you have some continuously-active channels in memories, you may wish to skipthem for scanning, but still have them available for manual selection.To mask a memory to be skipped during scanning, as following:1. Set the radio to memory mode by pressing the [D/MR(MW)] key repeatedly, ifnecessary.2. Rotate the DIAL knob to select the Memory Channel to be skipped during scanning.3. Press and hold the [MHz(SET)] key for one second, then rotate the DIAL knob toselect “25 SKIP”.](https://usermanual.wiki/Yaesu-Musen/FT-2800M/User-Guide-283088-Page-26.png)
![FCC ID: K66FT-2800MOPERATING MANUALVertex Standard Co., Ltd.274. Press the [MHz(SET)] key, then rotate the DIAL knob so as to select “SKIP”. Thecurrent Memory Channel will now be ignored during scanning. The “ONLY”selection is used for “Preferential Memory Scan,” described in the next column.5. Press and hold the [MHz(SET)] key for one second to save the new setting and exitto normal operation.A “SKIP” icon will appear when you recall the “skipped” memory channel manually.To re-institute a channel into the scanning loop, select “OFF” in step 4 above (the“Skipped” channel will, of course, still be accessible via manual channel selectionmethods using the DIAL knob in the Memory mode, whether or not it is locked out ofthe scanning loop).Preferential Memory ScanThe FT-2800M also allows you to set up a “Preferential Scan List” of channels whichyou can “flag” within the memory system. These channels are designated by a blinking“SKIP” icon when you have selected them, one by one, for the Preferential Scan List.When you initiate memory scanning, beginning on a channel with the Blinking “SKIP”icon appended, only those channels bearing the Blinking “SKIP” icon will be scanned. Ifyou initiate scanning on a channel which does not have the Blinking “SKIP” iconappended, you will scan all channels including those with the Blinking “SKIP” iconappended.Here is the procedure for setting up and using the Preferential Scan List:1. Set the radio to memory mode by pressing the [D/MR(MW)] key repeatedly, ifnecessary.2. Rotate the DIAL knob to select the Memory Channel which you wish to add to thePreferential Scan List.3. Press and hold the [MHz(SET)] key for one second, then rotate the DIAL knob toselect “25 SKIP”.4. Press the [MHz(SET)] key, then rotate the DIAL knob so as to select “ONLY.”5. Press and hold the [MHz(SET)] key for one second to save the new setting and exitto normal operation.To initiate Preferential Memory Scan:1. Set the radio to memory mode by pressing the [D/MR(MW)] key repeatedly, ifnecessary.2. Rotate the DIAL knob to select any memory channel which has a Blinking” “SKIP”](https://usermanual.wiki/Yaesu-Musen/FT-2800M/User-Guide-283088-Page-27.png)
![FCC ID: K66FT-2800MOPERATING MANUALVertex Standard Co., Ltd.28icon appended to the channel number.3. Press and hold either the microphone’s [UP] or [DWN] button for one second toinitiate Preferential Memory Scanning. Only the channels which have a Blinking“SKIP” icon appended to the channel number will be scanned.Programmable Band-Scan LimitsBesides band and memory scanning, this radio can be set to tune or scan only thefrequencies between user-defined lower and upper limits. For example, you may wish tolimit tuning/scanning to 144.5 - 148.0 MHz, to avoid encroachment on the SSB/CWsub-band between 144.0 and 144.5 MHzThese scanning limits are stores in special “Sub-Band Limit Memories” labeled L0/U0through L9/U9, with “L” and “U” designations representing the Lower and Upper limit,respectively.To utilize this feature, use the following steps:1. Store the lower edge of the desired scanning/tuning range in memory “L0”, and theupper edge in memory “U0” (or, alternatively, in memories “L1/U1” through“L9/U9”).2. With any of these memories recalled, press the [MHz(SET)] key momentarily toactivate the Programmable Band-Scan Limits. The “PMS” icon will be appeared.Tuning and scanning will now be limited within the just-programmed range.To cancel the Sub-Band Limits and return to normal memory operation, press the[D/MR(MW)] key momentarily.Priority Channel Scanning (Dual Watch)The FT-2800M’s scanning features include a two-channel scanning capability whichallows you to operate on a VFO, Memory channel or Home channel, while periodicallychecking a user-defined Memory Channel for activity. If a station is received on theMemory Channel which is strong enough to open the Squelch, the scanner will pause onthat station in accordance with the Scan-Resume mode set via Menu mode “23 SCAN.”See page xx.Here is the procedure for activating Priority Channel Dual Watch operation:1. Set the radio to memory mode by pressing the [D/MR(MW)] key repeatedly, ifnecessary.2. Press and hold in the [D/MR(MW)] key for one second (blink the Memory Channel](https://usermanual.wiki/Yaesu-Musen/FT-2800M/User-Guide-283088-Page-28.png)
![FCC ID: K66FT-2800MOPERATING MANUALVertex Standard Co., Ltd.29Number), then select the memory channel you wish to be the “Priority” channel.3. Press and hold in the [D/MR(MW)] key for one second. The “P” icon will appear tothe upper left of the “MR” icon, indicating it is the Priority channel.4. Now set the FT-2800M for operation on another memory channel, Home channel, oron a VFO frequency.5. Press and hold the [REV(DW)] key for one second. The display will remain on theVFO, memory channel selected, or Home channel, but every five seconds the FT-2800M will check the Priority Channel for activity.Priority Revert ModeDuring Priority channel operation (Dual Watch), a special feature is available whichwill allow you to move to the Priority Channel instantly, without waiting for activity toappear on the Priority Channel.When this feature is enabled, and priority monitoring is engaged, just press themicrophone’s PTT switch. Operation will instantly revert to the Priority Channel.To enable Priority Revert operation:1. Press and hold the [MHz(SET)] key for one second, then rotate the DIAL knob toselect “22 RVRT”.2. Press the [MHz(SET)] key, then rotate the DIAL knob to select “ON.”3. Press and hold the [MHz(SET)] key for one second to save the new setting and exitto normal operation.To disable Priority Revert operation, select “OFF” in step 2 above.Band Edge BeeperThe FT-2800M will automatically “beep” when a band edge is encountered duringscanning (either in standard VFO scanning or during PMS operation). You may enablethis feature (band edge beeper) when the frequency reaches the band edge whileselecting the VFO frequency by the DIALknob.The procedure for enabling the Band-Edge Beeper is:1. Press and hold the [MHz(SET)] key for one second, then rotate the DIAL knob toselect “12 EDG BP”.2. Press the [MHz(SET)] key, then rotate the DIAL knob to set this Menu to “ON.”3. Press and hold the [MHz(SET)] key for one second to save the new setting and exitto normal operation.](https://usermanual.wiki/Yaesu-Musen/FT-2800M/User-Guide-283088-Page-29.png)
![FCC ID: K66FT-2800MOPERATING MANUALVertex Standard Co., Ltd.30Smart Search OperationThe Smart Search feature allows you to load frequencies automatically according towhere activity is encountered by your radio. When Smart Search is engaged, thetransceiver will search above and below your current frequency, storing activefrequencies as it goes (without stopping on them even momentarily); these frequenciesare stored into a special Smart Search memory band, consisting of 31 memories (15above the current frequency, 15 below the current frequency, plus the current frequencyitself).Two basic operating modes for Smart Search are available:SINGLE: In this mode, the transceiver will sweep the current band once in eachdirection starting on the current frequency. All channels where activity is present willbe loaded into the Smart Search memories; whether or not all 31 memories are filled,the search will stop after one sweep in each direction.CONT: In this mode, the transceiver will make one pass in each direction as withOne-Shot searching; if all 31 channels are not filled after the first sweep, however, theradio will continue sweeping until they are all filled.Setting the Smart Search Mode1. Press and hold the [MHz(SET)] key for one second, then rotate the DIAL knob toselect “30 S SRCH”.2. Press the [MHz(SET)] key, then rotate the DIAL knob to select the desired SmartSearch mode (see above).3. Press and hold the [MHz(SET)] key for one second to save the new setting and exitto normal operation.Storing Smart Search Memories1. Set the radio to the VFO mode. Be sure that you have the Squelch adjustedproperly (so that band noise is quieted).2. Press the Microphone’s [P2] key to enter the Smart Search mode. The “S.S” iconwill be appears at the left bottom corner of the display.3. Press the Microphone’s [A] key to begin Smart Search scanning.4. As active channels are detected, you will observe the number of “loaded” channelsincreasing in the regular memory channel window.5. Depending on the mode you set for Smart Search operation (“SINGLE” or “CONT”),the Smart Search scan will eventually terminate, and the LCD will revert to Smart](https://usermanual.wiki/Yaesu-Musen/FT-2800M/User-Guide-283088-Page-30.png)
![FCC ID: K66FT-2800MOPERATING MANUALVertex Standard Co., Ltd.31Search Memory Channel “C.”6. To recall the Smart Search memories, rotate the DIAL knob to choose from amongthe Smart Search memories.7. To return to normal operation, press the [D/MR(MW)] key.R.F. Says: Smart Search is a great tool when visiting a city for the first time. You don’tneed to spend hours looking up repeater frequencies from a reference guidebook…justask your FT-2800M where the action is!Internet Connection FeatureThe FT-2800M can be used to access the repeater which provide the Vertex StandardWIRESTM (Wide-Coverage Internet Repeater Enhancement System).1. Press the [%] key to activate the Internet Connection feature. The “int” icon willappear in the memory channel field.2. Rotate the DIAL, while pressing and holding in the [%] key, to select the accessnumber corresponding to the WIRESTM repeater to which you wish to establish anInternet link (ask your repeater owner/operator if you don’t know the accessnumbers in the network).3. With the Internet Connection feature activated (as in step 1 above), the FT-2800Mwill generate a brief (0.2 second) DTMF tone according to your selection in step 2.This DTMF tone is sent at the beginning of every transmission to establish ormaintain the link to the remote WIRESTM repeater.4. To disable the Internet Connection feature, press the [%] key again.You may access other Internet Link Systems that use a DTMF string for access.1. Press and hold the [MHz(SET)] key for one second, then rotate the DIAL knob toselect “10 DT MEM”.2. Press the [MHz(SET)] key momentarily, then load the DTMF tones which you wishto use to establish an Internet link (ask your repeater owner/operator if you don’tknow the access numbers in the network) into the desired DTMF Memory channel.1). Rotate the DIAL knob to select the DTMF Autodialer memory channel number(“DTMF-1” through “DTMF-9”).2). Press the [D/MR(MW)] key momentarily.3). Rotate the DIAL knob to select the DTMF code, then press the [REV(DW)] keymomentarily to move the digit.](https://usermanual.wiki/Yaesu-Musen/FT-2800M/User-Guide-283088-Page-31.png)
![FCC ID: K66FT-2800MOPERATING MANUALVertex Standard Co., Ltd.324). Repeat step 3) above.5). Press the [MHz(SET)] key momentarily to save the new setting.3. Rotate the DIAL knob to select “13 INTNET.”4. Press the [MHz(SET)] key momentarily, then rotate the DIAL knob to set this Itemto “IRLP” (to enable the alternative Internet Link, and disable the WIRESTM accessoption).5. Press and hold the [MHz(SET)] key for one second to save the new setting and exitto normal operation.6. Press the [%] key momentarily to activate the Internet Link System. The “int” iconwill then appear in the memory channel field while the Internet Link Systemaccess feature is engaged.7. Rotate the DIAL knob, while pressing and holding in the [%] key, to select theDTMF access number (“DTMF-1” ~ “DTMF-9”) corresponding to the Internet linkrepeater to which you wish to establish an Internet link.8. With the Internet link feature activated (as in step 6 above), press the [%] key ormicrophone’s [P2] key to send out the DTMF tones according to your selection instep 7 (to establish the link to the Internet link repeater).9. To disable the Internet link feature, press the [%] key again.R. F. Says: To return to WIRESTM, recall Menu “13 INTNET” then set it to “WIRES.”Miscellaneous SettingTime-Out TimerThe “Time-Out Timer” (TOT) feature is designed to force the transceiver into the“receive” mode after a present time period of continuous transmission (the default is 6minutes). This feature prevents your transceiver from transmitting a “dead carrier” fora long period of time in the event that the microphone PTT switch is accidentally lockedin the “TX” condition.The Time-Out Timer’s “switch-to-receive” time may be adjusted, in one minuteincrements, for any period between 1 and 60 minutes.To change the default (6 minutes) time setting as follows:1. Press and hold the [MHz(SET)] key for one second, then rotate the DIAL knob toselect “31 TOT”.2. Press the [MHz(SET)] key, then rotate the DIAL knob to select the desired interval(between 1 and 60 minutes), or OFF.3. Press and hold the [MHz(SET)] key for one second to save the new setting and exit](https://usermanual.wiki/Yaesu-Musen/FT-2800M/User-Guide-283088-Page-32.png)
![FCC ID: K66FT-2800MOPERATING MANUALVertex Standard Co., Ltd.33to normal operation.Automatic Power-OffThe “Automatic Power-Off” (APO) feature will turn the radio completely off after auser-defined period of PTT or key/button inactivity. If you do not press any front panelkeys or buttons, rotate the DIAL knob or use the microphone’s keys and buttons, ortransmit, and so long as the transceiver is not scanning or engaged in prioritymonitoring, the radio will shut itself off after the specified time period. This feature isuseful in minimizing battery drain in a mobile installation if you forget to turn thetransceiver off when you leave your vehicle.To activate the APO feature as follows:1. Press and hold the [MHz(SET)] key for one second, then rotate the DIAL knob toselect “01 APO”.2. Press the [MHz(SET)] key, then rotate the DIAL knob to select the desired “switch-off” time (between 1 and 12 hours), or OFF.3. Press and hold the [MHz(SET)] key for one second to save the new setting and exitto normal operation.Programming the key assignmentDefault FT-2800M key functions have been assigned to Microphone’s [P1]/[P2]/[P3]/[P4]buttons at the factory. These may be changed by the user, if you wish to make anotherfunction.To programming the function:1. Press and hold the [MHz(SET)] key for one second, then rotate the DIAL knob toselect the Menu Item to be configured (“15 PRG P1,” “16 PRG P2,” “17 PRG P3,” or“18 PRG P4”).2. Press the [MHz(SET)] key, then rotate the DIAL knob to select the function youwish to assign to the button you selected in the previous step. The available choicesare:DC IN: Indicates the current DC supply voltageDIMR:WX CH:INTKEY:SKIP:SQLOFF: Opens the Squelch to allow un-muted receptionS SRCH:](https://usermanual.wiki/Yaesu-Musen/FT-2800M/User-Guide-283088-Page-33.png)
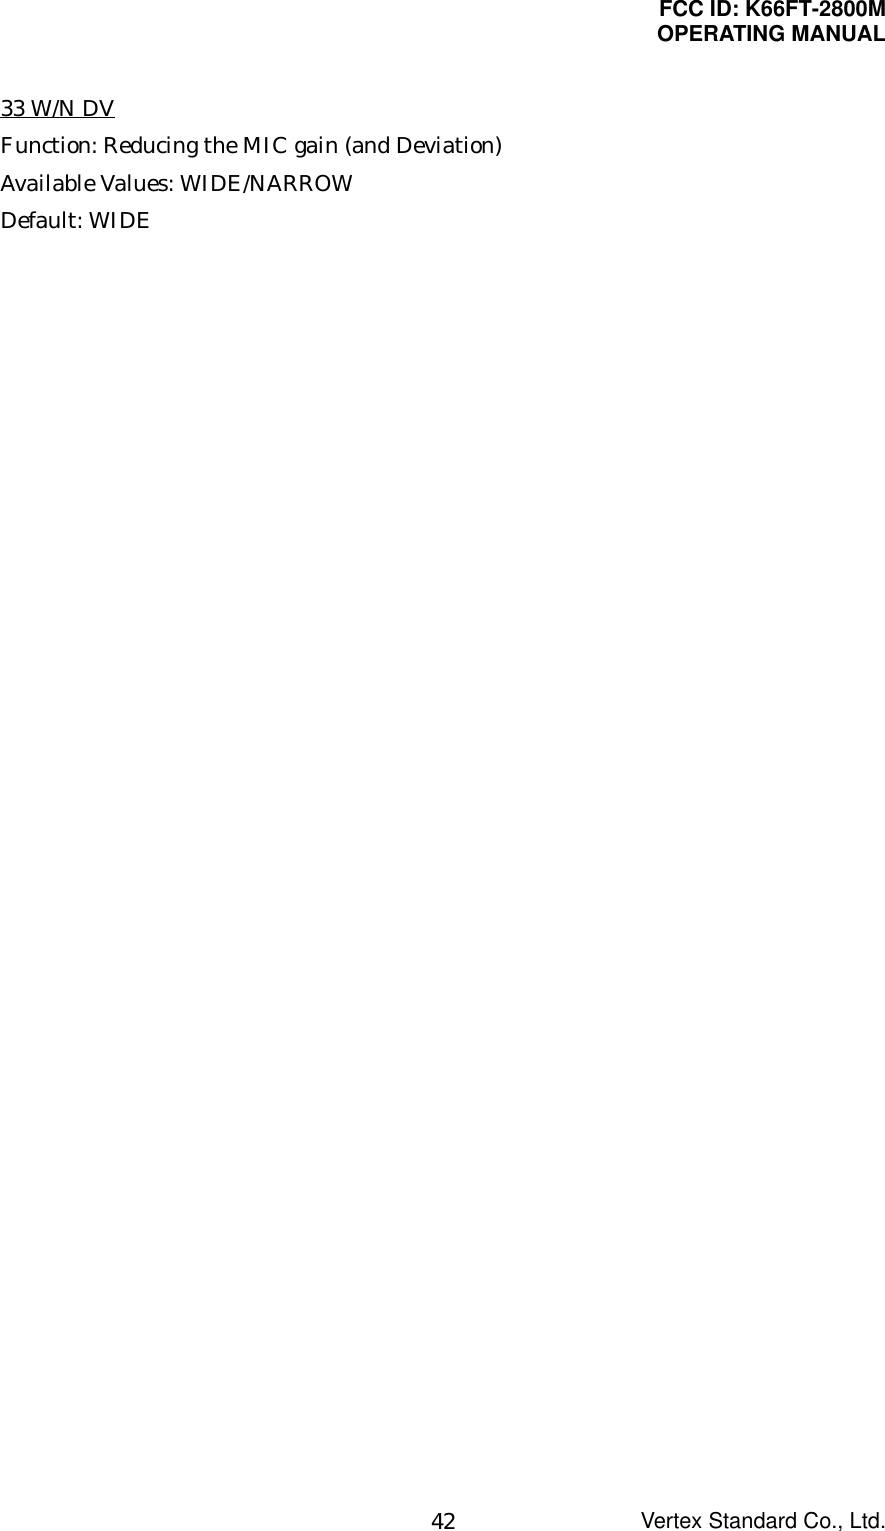
![FCC ID: K66FT-2800MOPERATING MANUALVertex Standard Co., Ltd.34TONE: Selects CTCSS frequencyT SRCH: T CALL: Activates 1750 Hz Tone BurstRPTR: Selects Repeater Shift direction3. Press the [MHz(SET)] key momentarily to save the new setting, then rotate theDIAL knob to select another programmable button to modify, if desired, and repeatabove steps.4. Press and hold the [MHz(SET)] key for one second to exit to normal operation.FM Bandwidth & MIC Gain ControlYou can reduce the microphone input level and receiver bandwidth when operating ontightly-clustered frequencies (channel spacing of 12.5 or 15 kHz). This will reduce thetransmitter and receiver deviation, thus minimizing interference to other users (andimproving reception, as well).To configure for the narrower bandwidth, use the following procedure:1. Press and hold the [MHz(SET)] key for one second, then rotate the DIAL knob toselect “33 W/N DV.”2. Press the [MHz(SET)] key, then rotate the DIAL knob to change the display to“NARROW.”3. Press and hold the [MHz(SET)] key for one second to save the new setting and exitto normal operation.Reset ProcedureIn some instances of erratic or unpredictable operation, the cause may be corruption ofdata in the microprocessor (due to static electricity, etc.). If this happens, resetting ofthe microprocessor may restore normal operation. Note that all memories will be erasedif you do a complete microprocessor reset, as described below.Microprocessor ResettingTo clear all memories and other settings to factory defaults:1. Turn the radio off.2. Press and hold in the [MHz(SET)], [REV(SET)], [LOW(A/N)] and [D/MR(MW)] keyswhile turning the radio on. The “MASRST” will be appears on the display.3. Press the [D/MR(MW)] key momentarily to reset all settings to their factorydefaults (press any other key to cancel the Reset procedure).](https://usermanual.wiki/Yaesu-Musen/FT-2800M/User-Guide-283088-Page-34.png)
![FCC ID: K66FT-2800MOPERATING MANUALVertex Standard Co., Ltd.35Set Mode ResettingTo reset the Set (Menu) mode settings to their factory defaults:1. Turn the radio off.2. Press and hold in the [REV(SET)], [LOW(A/N)] and [D/MR(MW)] keys whileturning the radio on. The “SETRST” will be appears on the display.3. Press the [D/MR(MW)] key momentarily to reset the Set (Menu) mode settings totheir factory defaults (press any other key to cancel the Reset procedure).CloningThe FT-2800M includes a convenient “Clone” feature, which allows the memory andconfiguration data from one transceiver to be transferred to another FT-2800M. Thiscan be particularly useful when configuring a number of transceivers for a publicservice operation. Here is the procedure for Cloning one radio’s data to another:1. Turn both radios off.2. Connect the user-constructed cloning cable between the MIC jacks of the two radios.3. Press and hold in the [MHz(SET)], [LOW(A/N)] and [D/MR(MW)] keys whileturning the radios on. Do this for both radios (the order of switch-on does notmatter). “TX RX” will appear on the displays of both radios when the Clone mode issuccessfully activated in this step.4. On the Destination radio, press the [D/MR(MW)] key (“????” will appear on theLCD).5. Press the [MHz(SET)] key on the Source radio; “????” will appear on the Sourceradio, and the data from this radio will be transferred to the other radio.6. If there is a problem during the cloning process, “ERROR” will be displayed. Checkyour cable connections and battery voltage, and try again.7. If the data transfer is successful, “????” will reappear on both displays. Turn bothradios off and disconnect the cloning cable. You can then turn the radios back on,and begin normal operation.Menu (“Set”) ModeThe FT-2800M Set (Menu) mode, already described in parts of many previous chapters,is easy to activate and set. It may be used for configuration of a wide variety of](https://usermanual.wiki/Yaesu-Musen/FT-2800M/User-Guide-283088-Page-35.png)
![FCC ID: K66FT-2800MOPERATING MANUALVertex Standard Co., Ltd.36transceiver parameters, some of which have not been detailed previously. Use thefollowing procedure to activate the Set (Menu) mode:1. Press and hold the [MHz(SET)] key for one second to enter the Set mode.2. Rotate the DIAL knob to select the Menu Item to be adjusted.3. Press the [MHz(SET)] key momentarily to enable adjustment of the selected Menuitem, then rotate the DIAL knob to perform the actual adjustment.4. After completing your selection and adjustment, press and hold in the [MHz(SET)]key for one second to exit the Set mode and exit to normal operation.Menu Selection Details00 ALPHFunction: Programming an Alpha/Numeric label for a memory. See page ?? for details.01 APOFunction: Enables/disables the Automatic Power Off feature.Available Values: 1H - 12 H, or OFFDefault: OFF02 ARSFunction: Activates/deactivates the Automatic Repeater Shift feature.Available Values: ON/OFFDefault: ON03 BEEPFunction: Enables/disables the key beeper.Available Values: ON/OFFDefault: ON04 BELLFunction: Selects the CTCSS/DCS Bell Ringer repetitions.Available Values: 1, 3, 5, 8, REPEAT, or OFFDefault: OFF05 CK SFTFunction: Shifting of CPU clock frequency.Available Values: ON/OFF](https://usermanual.wiki/Yaesu-Musen/FT-2800M/User-Guide-283088-Page-36.png)
![FCC ID: K66FT-2800MOPERATING MANUALVertex Standard Co., Ltd.3813 INTNETFunction: Select the Internet Connection mode.Available Values: WIRES/IRLPDefault: WIRES14 LOCKFunction: Select the Control Locking Lockout combination.Available Values: KEY/DIAL/K+D/PTT/K+P/D+P/ALL/OFFDefault: OFFKEY: Just the front panel keys are locked outDIAL: Just the front panel DIAL knob is locked outK+D: Both the keys and DIAL knob are locked outPTT: The PTT switch is locked (TX not possible)K+P: Both keys and PTT switch are locked outD+P: Both DIAL knob and PTT switch are locked outALL: All of the above are locked outOFF: The Lock feature is disabled15 PRG P1Function: Programming the function assigned to Microphone’s [P1] key. See page ?? fordetails.Available Values: SQLOFF/S SRCH/TONE/T SRCH/T CALL/RPTR/DC IN/DIMR/WXCH/INTKEY/SKIPDefault: SQLOFF16 PRG P2Function: Programming the function assigned to Microphone’s [P2] key. See page ?? fordetails.Available Values: SQLOFF/S SRCH/TONE/T SRCH/T CALL/RPTR/DC IN/DIMR/WXCH/INTKEY/SKIPDefault: S SRCH17 PRG P3Function: Programming the function assigned to Microphone’s [P3] key. See page ?? fordetails.Available Values: SQLOFF/S SRCH/TONE/T SRCH/T CALL/RPTR/DC IN/DIMR/WX](https://usermanual.wiki/Yaesu-Musen/FT-2800M/User-Guide-283088-Page-38.png)
![FCC ID: K66FT-2800MOPERATING MANUALVertex Standard Co., Ltd.39CH/INTKEY/SKIPDefault: T SRCH18 PRG P4Function: Programming the function assigned to Microphone’s [P4] key. See page ?? fordetails.Available Values: SQLOFF/S SRCH/TONE/T SRCH/T CALL/RPTR/DC IN/DIMR/WXCH/INTKEY/SKIPDefault: WX CH19 REV HMFunction: Select the Primary function of the [REV(DW)] key.Available Values: REV/HOMEDefault: REVREV: Pressing the [REV(DW)] key reverses the transmit and receive frequenciesduring repeater operation.HOME: Pressing the [REV(DW)] key instantly recalls a favorite “Home” channel.20 RF SQLFunction: Adjust the RF Squelch threshold level.Available Values: 1 - 10, or OFFDefault: OFF21 RPTRFunction: Sets the Repeater Shift direction.Available Values: –RPTR/+RPTR/SIMPDefault: SIMP22 RVRTFunction: Enables/disables the “Priority Channel Revert” feature.Available Values: ON/OFFDefault: OFF23 SCANFunction: Select the Scan Resume mode.Available Values: BUSY/HOLD/5 SEC](https://usermanual.wiki/Yaesu-Musen/FT-2800M/User-Guide-283088-Page-39.png)