Yamaha 07PSR_Installation Firmware Upgrade Installation For PSR S900/S700 EN 07PSR
User Manual: Yamaha Firmware upgrade - Installation for PSR-S900/S700 EN
Open the PDF directly: View PDF ![]() .
.
Page Count: 2
1
4
2
3
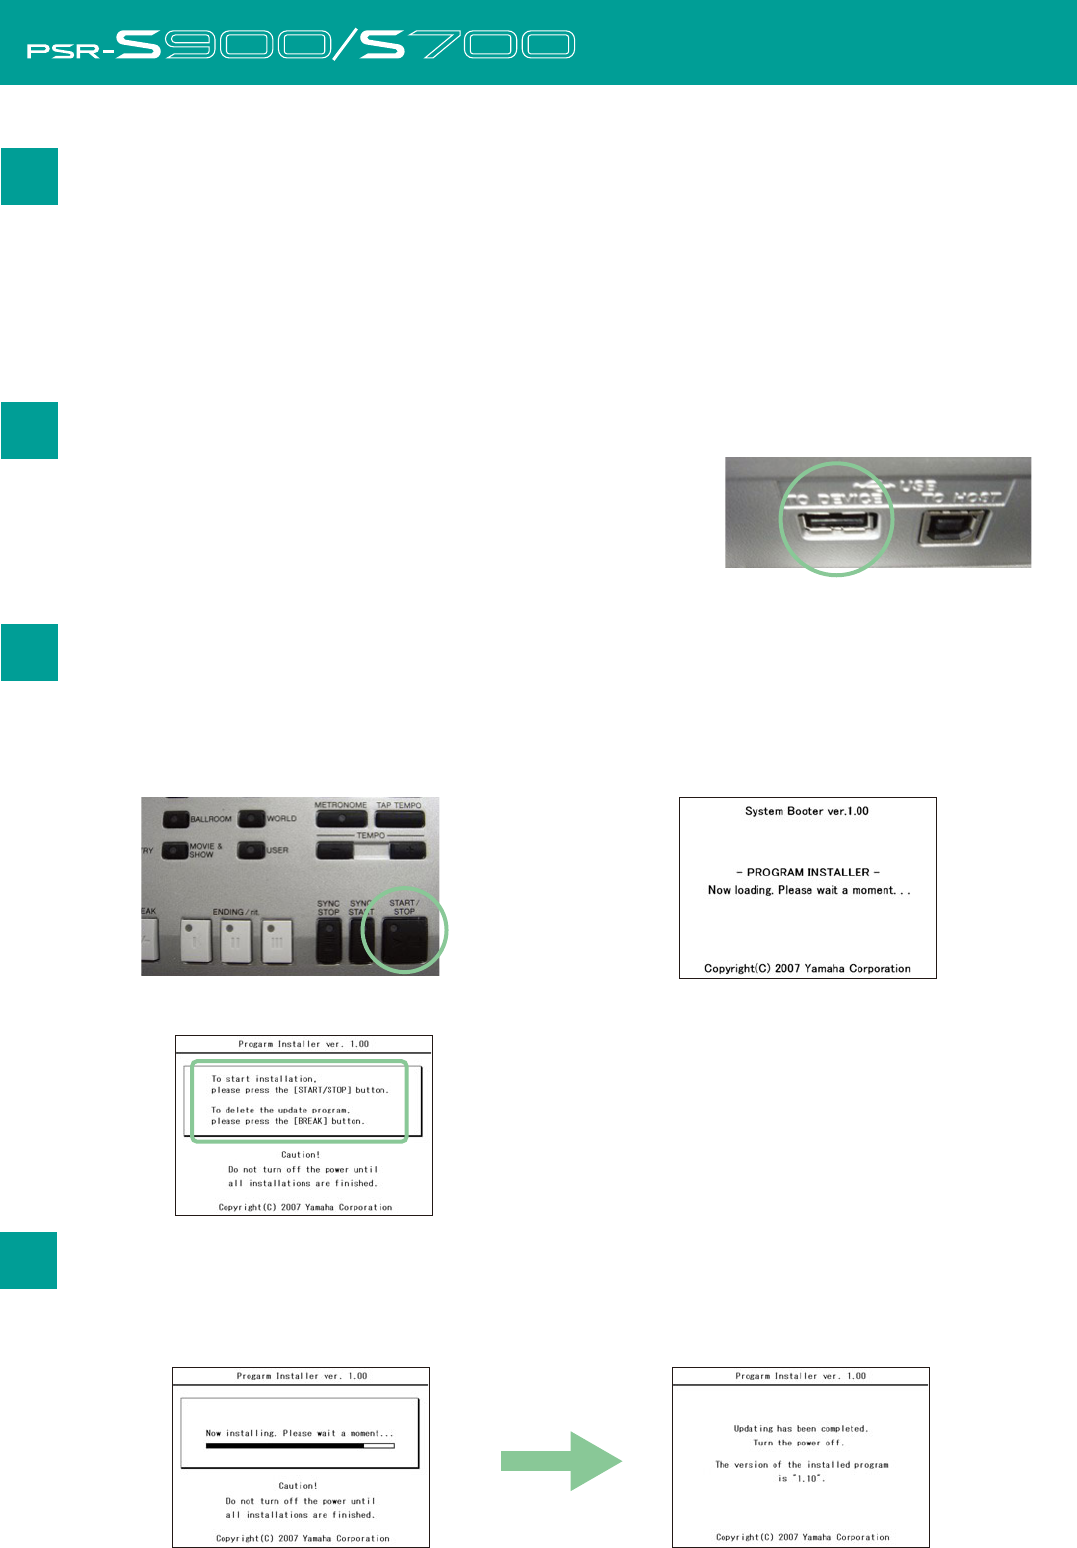
Press the [START/STOP] button to start installation.
Go on to step 4. (Executing the installation).
Press the [BREAK] button to delete the data the upgrade
data in the USB device.
Go on to step 5. (Deleting the upgrade data).
Installation Procedure
Connecting the USB device
Installing the upgrade program
Caution: Make sure that the USB device is connected properly to the
terminal. Do not try to force an incorrect connection; doing so
may damage the terminal.
Caution: Do not turn off the power or remove the USB media during this operation.
1) Download the Zip file.
2) Extract the six files included in the Zip file.
3) Insert the USB device into your computer.
4) Copy the extracted files into the root directory of the USB device.
Connect the USB device containing the appropriate upgrade data
to the USB TO DEVICE terminal on the instrument.
Simultaneously hold down the [START/STOP] button in the STYLE CONTROL section and turn on
the power.
Keep holding down the [START/STOP] button until the following display is shown.
After a few moments, the following display appears.
Press [START/STOP] button to start the
installation.
When the installation is completed, the
following display appears.
Turn off the power switch on the instrument.
Downloading the firmware
Executing the installation
5
Confirming the version number
Troubleshooting
The power supply was cut off or the USB device was removed during installation.
A complete reinstall is necessary. Perform the installation operation again from the beginning.
The installation cannot be executed and an error message appears in the display.
Check the following:
✓ Is the USB device inserted correctly?
✓ Is the USB connector free from dust and dirt?
✓ Is the USB memory or the firmware data itself damaged in some way?
Try installing it again by using another USB device.
Deleting the upgrade data
Press the [BREAK] button to call up the following display.
Press [START/STOP] button to start deleting
the upgrade data from the USB device.
When the deletion of the upgrade data is
completed, the following display appears.
The upgrade data has been deleted from the
USB device. Turn off the power switch of the
instrument and remove USB device.
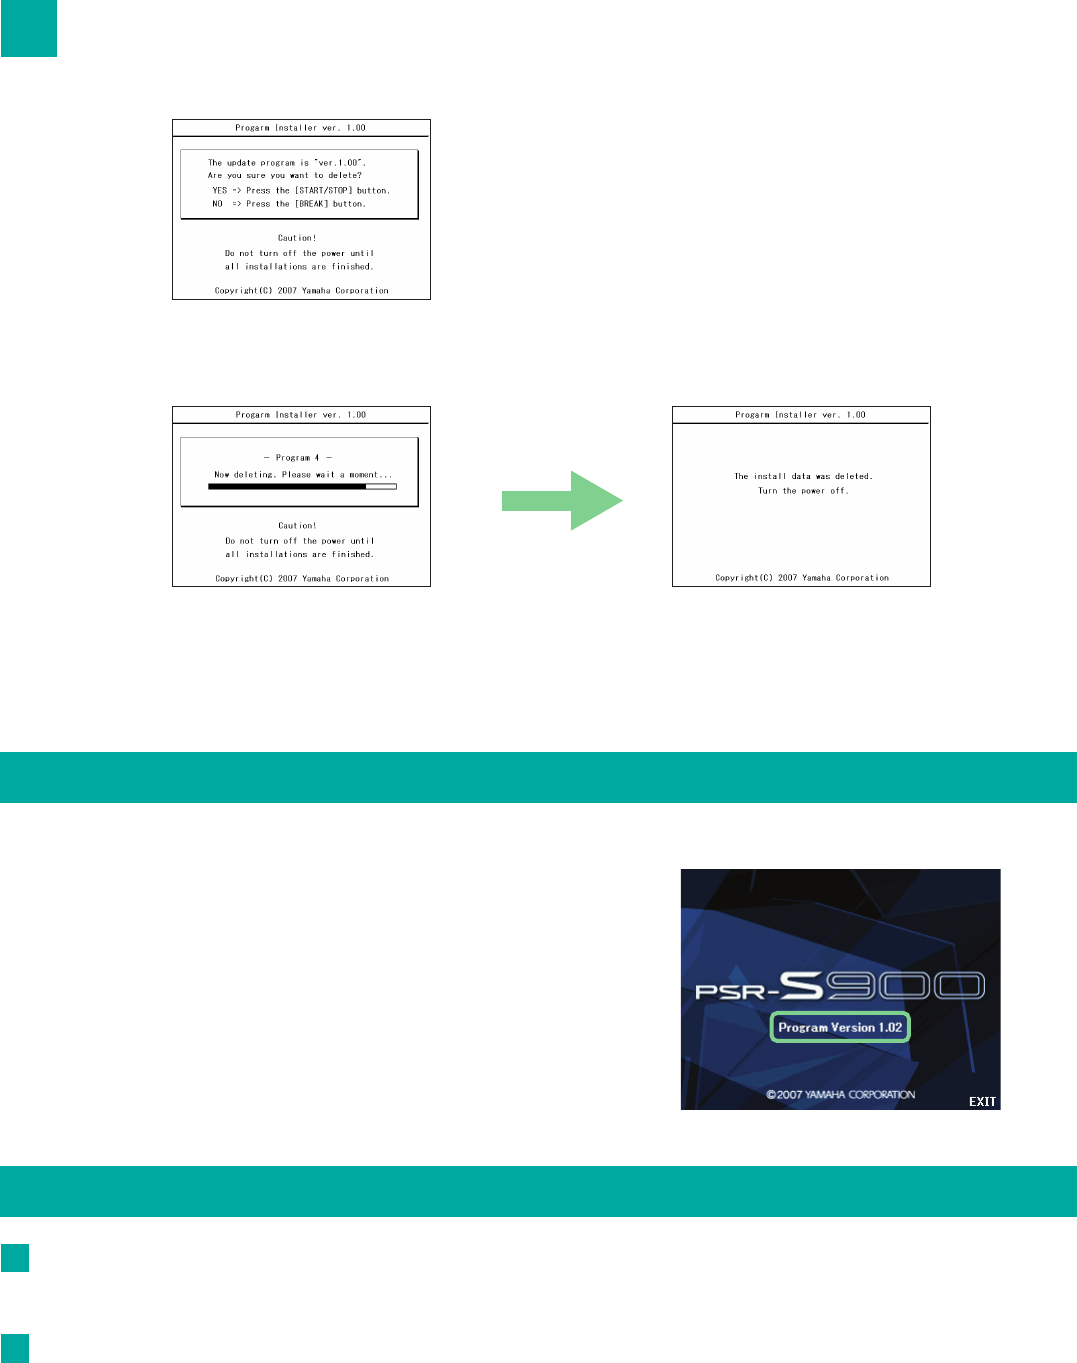
Turn on the power of the instrument normally and wait until the main display appears.
1) Press the [FUNCTION] button, then select [UTILITY] –>
[OWNER] tab.
2) Press the [7 ▲ ▼] / [8 ▲ ▼] (VERSION) buttons in the
display.
3) Check that the version number is correct for the
upgrade, and turn off the power of the instrument.
