Yamaha Psr 550 Owners Manual
Psr-550-Owners-Manual yamaha-psr-550-owners-manual-132268
PSR-550 Owner's Manual PSR550E
Yamaha Corporation PSR-550 Owner's Manual psr550e Yamaha Corporation - PSR-550 - Owner's Manual
PSR-550 to the manual 076632ac-e71c-47ec-922c-c4971e41cab3
Yamaha Corporation PSR-550 Owner's Manual psr550e Yamaha Corporation - PSR-550 - Owner's Manual
2014-12-13
: Yamaha Psr-550-Owners-Manual yamaha-psr-550-owners-manual-132268 pdf
Open the PDF directly: View PDF ![]() .
.
Page Count: 160 [warning: Documents this large are best viewed by clicking the View PDF Link!]
- Cover
- PRECAUTIONS
- Packing List
- How to use the manual
- Contents
- Important Features
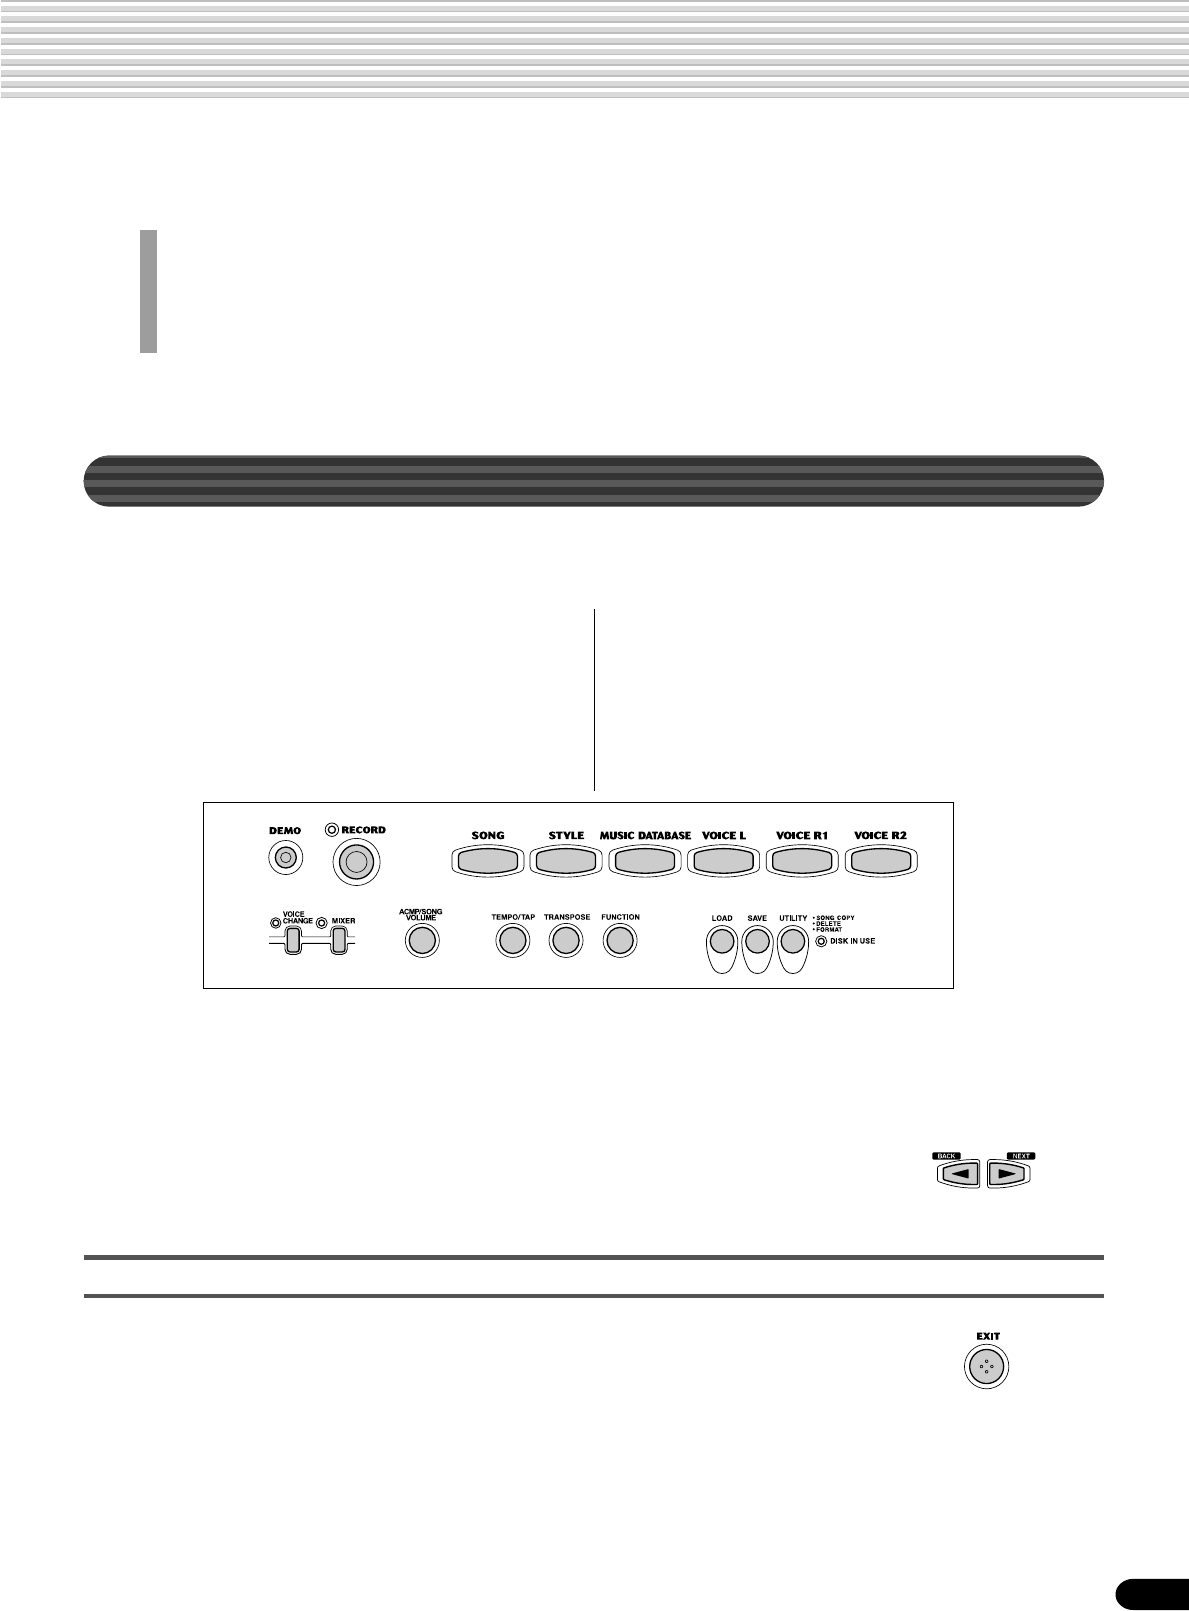
- Panel Controls and Terminals
- Setting Up
- Demo Song Playback
- Using the Music Database
- Panel Display Indications
- Basic Operation
- Function Tree
- Direct Access Chart
- Mode
- Playing Voices
- Auto Accompaniment
- The Multi Pads
- Digital Effects
- Registration Memory
- Disk Operations
- Disk Song Playback
- Part Settings
- Song Recording
- Multi Pad Recording
- Style Recording
- MIDI Functions
- Other Functions (Utility)
- Appendix
- Index

2
This product utilizes batteries or an external power supply
(adapter). DO NOT connect this product to any power sup-
ply or adapter other than one described in the manual, on
the name plate, or specifically recommended by Yamaha.
This product should be used only with the components
supplied or; a cart, rack, or stand that is recommended by
Yamaha. If a cart, etc., is used, please observe all safety
markings and instructions that accompany the accessory
product.
SPECIFICATIONS SUBJECT TO CHANGE:
The information contained in this manual is believed to be
correct at the time of printing. However, Yamaha reserves
the right to change or modify any of the specifications with-
out notice or obligation to update existing units.
This product, either alone or in combination with an ampli-
fier and headphones or speaker/s, may be capable of pro-
ducing sound levels that could cause permanent hearing
loss. DO NOT operate for long periods of time at a high
volume level or at a level that is uncomfortable. If you expe-
rience any hearing loss or ringing in the ears, you should
consult an audiologist.
IMPORTANT: The louder the sound, the shorter the time
period before damage occurs.
NOTICE:
Service charges incurred due to a lack of knowledge relat-
ing to how a function or effect works (when the unit is oper-
ating as designed) are not covered by the manufacturer’s
warranty, and are therefore the owners responsibility.
Please study this manual carefully and consult your dealer
before requesting service.
ENVIRONMENTAL ISSUES:
Yamaha strives to produce products that are both user safe
and environmentally friendly. We sincerely believe that our
products and the production methods used to produce
them, meet these goals. In keeping with both the letter and
the spirit of the law, we want you to be aware of the follow-
ing:
Battery Notice:
This product MAY contain a small non-rechargeable battery
which (if applicable) is soldered in place. The average life
span of this type of battery is approximately five years.
When replacement becomes necessary, contact a qualified
service representative to perform the replacement.
This product may also use “household” type batteries.
Some of these may be rechargeable. Make sure that the
battery being charged is a rechargeable type and that the
charger is intended for the battery being charged.
When installing batteries, do not mix batteries with new, or
with batteries of a different type. Batteries MUST be in-
stalled correctly. Mismatches or incorrect installation may
result in overheating and battery case rupture.
Warning:
Do not attempt to disassemble, or incinerate any battery.
Keep all batteries away from children. Dispose of used
batteries promptly and as regulated by the laws in your
area. Note: Check with any retailer of household type bat-
teries in your area for battery disposal information.
Disposal Notice:
Should this product become damaged beyond repair, or for
some reason its useful life is considered to be at an end,
please observe all local, state, and federal regulations that
relate to the disposal of products that contain lead, batter-
ies, plastics, etc. If your dealer is unable to assist you,
please contact Yamaha directly.
NAME PLATE LOCATION:
The name plate is located on the bottom of the product.
The model number, serial number, power requirements,
etc., are located on this plate. You should record the model
number, serial number, and the date of purchase in the
spaces provided below and retain this manual as a perma-
nent record of your purchase.
Model
Serial No.
Purchase Date
92-BP (bottom)
SPECIAL MESSAGE SECTION
PLEASE KEEP THIS MANUAL
3
1
• Do not use the instrument near other electrical products such as televisions,
radios, or speakers, since this might cause interference which can affect proper
operation of the other products.
• Do not place the instrument in an unstable position where it might accidentally
fall over.
• Before moving the instrument, remove all connected adaptor and other cables.
• When cleaning the instrument, use a soft, dry cloth. Do not use paint thinners,
solvents, cleaning fluids, or chemical-impregnated wiping cloths. Also, do not
place vinyl, plastic or rubber objects on the instrument, since this might discolor
the panel or keyboard.
• Do not rest your weight on, or place heavy objects on the instrument, and do
not use excessive force on the buttons, switches or connectors.
• Use only the stand specified for the instrument. When attaching the stand or
rack, use the provided screws only. Failure to do so could cause damage to the
internal components or result in the instrument falling over.
• Do not operate the instrument for a long period of time at a high or uncomfortable
volume level, since this can cause permanent hearing loss. If you experience
any hearing loss or ringing in the ears, consult a physician.
■DATA BACK-UP AND STORAGE
• Yamaha recommends that you regularly save data using a floppy disk in a safe,
cool, dry place. YAMAHA CANNOT BE HELD RESPONSIBLE FOR THE
ACCIDENTAL LOSS OF IMPORTANT MUSIC DATA! Regarding the data you
have created, as long as fresh batteries are inserted in (or an AC power adaptor
is connected to) the instrument, the data will be retained, even when the power
is turned off. It will also be retained long enough to exchange an old set of
batteries for a new set. If you have important data in the instrument which you
don’t want to lose, please take care to keep fresh batteries inserted in (or keep
an AC power adaptor connected to) the instrument, and to regularly save data.
Yamaha cannot be held responsible for damage caused by improper use or
modifications to the instrument, or data that is lost or destroyed.
Always turn the power off when the instrument is not in use.
Make sure to discard used batteries according to local regulations.
PRECAUTIONS
PLEASE READ CAREFULLY BEFORE PROCEEDING
* Please keep these precautions in a safe place for future reference.
• Do not open the instrument or attempt to disassemble the internal parts or
modify them in any way. The instrument contains no user-serviceable parts. If
it should appear to be malfunctioning, discontinue use immediately and have it
inspected by qualified Yamaha service personnel.
• Do not expose the instrument to rain, use it near water or in damp or wet
conditions, or place containers on it containing liquids which might spill into
any openings.
• If the AC adaptor cord or plug becomes frayed or damaged, or if there is a
sudden loss of sound during use of the instrument, or if any unusual smells or
smoke should appear to be caused by it, immediately turn off the power switch,
disconnect the adaptor plug from the outlet, and have the instrument inspected
by qualified Yamaha service personnel.
• Use the specified adaptor (PA-6 or an equivalent recommended by Yamaha)
only. Using the wrong adaptor can result in damage to the instrument or
overheating.
• Before cleaning the instrument, always remove the electric plug from the outlet.
Never insert or remove an electric plug with wet hands.
• Check the electric plug periodically and remove any dirt or dust which may
have accumulated on it.
CAUTION
Always follow the basic precautions listed below to avoid the possibility of physical injury to you or others, or damage to the
instrument or other property. These precautions include, but are not limited to, the following:
• Do not place the AC adaptor cord near heat sources such as heaters or radiators,
and do not excessively bend or otherwise damage the cord, place heavy objects
on it, or place it in a position where anyone could walk on, trip over, or roll
anything over it.
• When removing the electric plug from the instrument or an outlet, always hold
the plug itself and not the cord.
• Do not connect the instrument to an electrical outlet using a multiple-connector.
Doing so can result in lower sound quality, or possibly cause overheating in
the outlet.
• Unplug the AC power adaptor when not using the instrument, or during electrical
storms.
• Always make sure all batteries are inserted in conformity with the +/- polarity
markings. Failure to do so might result in overheating, fire, or battery fluid
leakage.
• Always replace all batteries at the same time. Do not use new batteries together
with old ones. Also, do not mix battery types, such as alkaline batteries with
manganese batteries, or batteries from different makers, or different types of
batteries from the same maker, since this can cause overheating, fire, or battery
fluid leakage.
• Do not dispose of batteries in fire.
• Do not attempt to recharge batteries that are not intended to be charged.
• When the batteries run out, or if the instrument is not to be used for a long time,
remove the batteries from the instrument to prevent possible leakage of the
battery fluid.
• Keep batteries away from children.
• If the batteries do leak, avoid contact with the leaked fluid. If the battery fluid
should come in contact with your eyes, mouth, or skin, wash immediately with
water and consult a doctor. Battery fluid is corrosive and may possibly cause
loss of sight or chemical burns.
• Before connecting the instrument to other electronic components, turn off the
power for all components. Before turning the power on or off for all components,
set all volume levels to minimum. Also, be sure to set the volumes of all
components at their minimum levels and gradually raise the volume controls
while playing the instrument to set the desired listening level.
• Do not expose the instrument to excessive dust or vibrations, or extreme cold
or heat (such as in direct sunlight, near a heater, or in a car during the day) to
prevent the possibility of panel disfiguration or damage to the internal
components.
(4)-7
WARNING
Always follow the basic precautions listed below to avoid the possibility of serious injury or even death from electrical shock,
short-circuiting, damages, fire or other hazards. These precautions include, but are not limited to, the following:
4
2
Congratulations!
You are the proud owner of a fine electronic keyboard. The Yamaha PSR-550
PortaTone combines the most advanced tone generation technology with state-of-the-
art digital electronics and features to give you stunning sound quality with maximum
musical enjoyment. A large graphic display and easy-to-use interface also greatly
enhance the operability of this advanced instrument. In order to make the most of your
PortaTone’s features and extensive performance potential, we urge you to read the
manual thoroughly while trying out the various features described. Keep the manual in
a safe place for later reference.
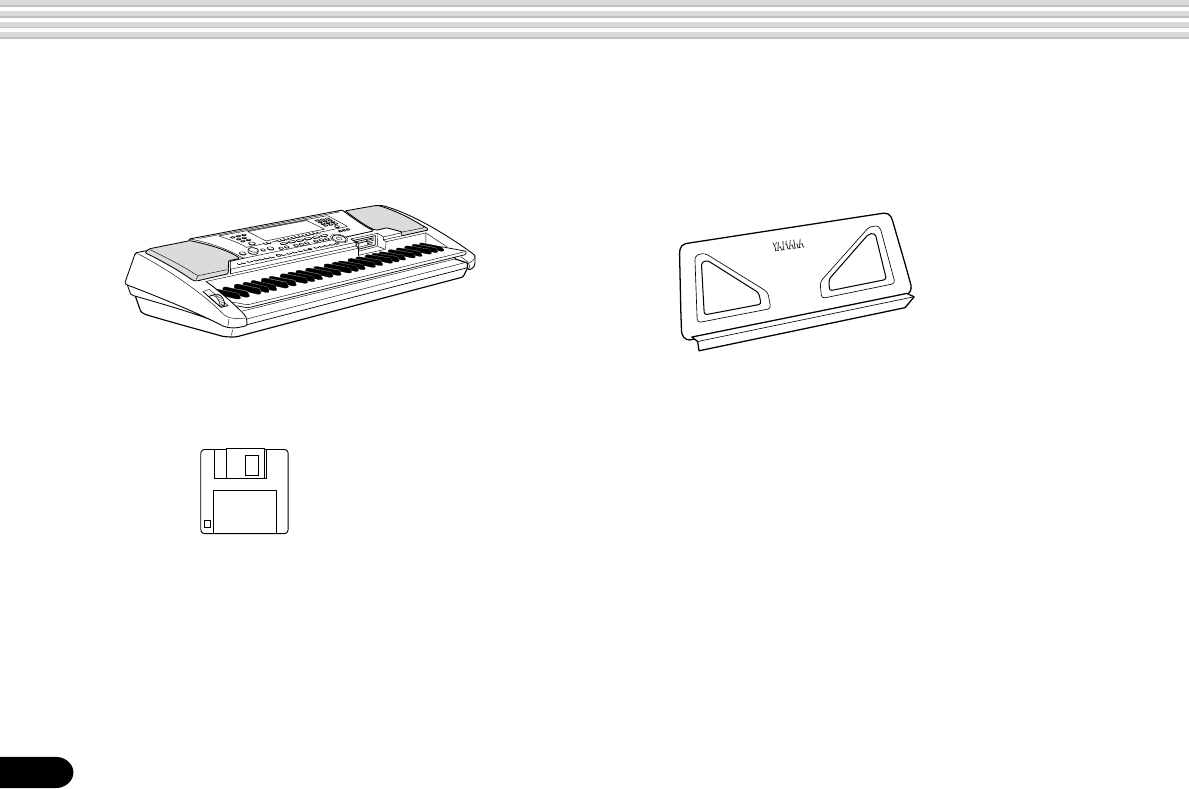
Packing List
Please check that these items have been packed with your PSR-550.
• PSR-550 • Music Stand (page 9)
• PSR-550 Data Disk • Owner’s Manual
(Refer to “Included Data Disk”
on page 59, and “MIDI and TO
HOST Terminals” on page
107.)
5
3
How to use the manual
Setting Up page 12
Before going on to any other part of the manual, we strongly suggest
you read this section first. It shows you how to get started playing and
using your new PSR-550.
Important Features page 8
Once you’ve set up the PSR-550, you should read through this section
— and explore the relevant page references — to familiarize yourself
with the enormous variety of features and functions of the PSR-550.
Basic Operation page 17
This section introduces you to the basic operating conventions of the
PSR-550, such as editing values and changing settings, and shows
you how to use the convenient Help and Direct Access functions.
Contents page 6
All topics, features, functions and operations are listed here in the
order they appear in the manual, for easy reference.
Panel Controls page 10
Use this section to find out about all of the buttons and controls of the
PSR-550.
Panel Display Indications page 16
This section explains the display indications of the PSR-550 and how
to read them for optimum operation.
Function Tree page 22
This lists all functions of the PSR-550 according to their hierarchical
structure, letting you easily see the relationship of the various func-
tions and quickly locate desired information.
Appendix page 123
This contains various important lists such as the Voice list, Preset
Style list, Effect list, MIDI data format and MIDI implementation chart.
Troubleshooting page 135
If the PSR-550 does not function as expected or you have some
problem with the sound or operation, consult this section before calling
your Yamaha dealer or service center. Most common problems and
their solutions are covered here in a very simple and easy-to-under-
stand way.
Index page 153
This section alphabetically lists virtually all topics, features, functions
and operations with their respective page numbers, letting you quickly
and easily find the information you need.
The illustrations and LCD screens as shown in this owner’s manual are for instructional pur-
poses only, and may be different from your instrument.

6
4
Contents
Packing List 4
How to use the manual 5
Important Features 8
Panel logos ................................................... 9
Music stand ................................................ 10
Panel Controls and Terminals 10
FOOTSWITCH jack .................................... 10
PHONES/OUTPUT jack ............................. 10
Top Panel Controls................................................. 11
Rear Panel Controls............................................... 11
Setting Up 12
Power supply connections ..................................... 12
Demo Song Playback 13
Using the Music Database 14
Panel Display Indications 16
Basic Operation 17
Calling up the Operation Displays.......................... 17
How to Read the Menu/Message Display and
“Easy Navigator”............................................... 18
Menu Selection ...................................................... 19
Changing (Editing) Values ..................................... 20
Naming .................................................................. 21
Direct Access ......................................................... 21
Function Tree 22
Direct Access Chart 24
Mode 25
Style Mode ............................................................. 25
Song Mode ............................................................ 25
Record Mode ......................................................... 25
Disk Mode .............................................................. 25
Playing Voices 26
Selecting a Voice ................................................... 26
Playing Two Voices (R1, R2) Simultaneously......... 27
Playing Different Voices with
the Left (L) and Right (R1, R2) Hands ............. 28
Functions of the Keyboard ..................................... 29
Transpose .............................................................. 30
Pitch Bend Wheel .................................................. 30
Sustain ................................................................... 30
Keyboard Percussion ............................................. 31
Auto Accompaniment 32
Using Auto Accompaniment (rhythm track only) .... 32
Using Auto Accompaniment (all tracks) ................. 33
Accompaniment Sections ...................................... 34
Tempo/Tap ............................................................. 36
Accompaniment Track Muting ................................ 37
Accompaniment Volume Control ............................ 37
Chord Fingerings ................................................... 38
Accompaniment Split Point .................................... 40
Synchro Stop ......................................................... 41
One Touch Setting ................................................. 42
The Multi Pads 43
Playing the Multi Pads ........................................... 43
Chord Match .......................................................... 43
Selecting a Multi Pad Bank .................................... 44
Turning Chord Match On/Off .................................. 44
Multi Pad Bank List ..................................... 45
Digital Effects 46
Reverb ................................................................... 46
Chorus ................................................................... 48
DSP ....................................................................... 49
System Effects and Insertion Effects ..................... 50
Harmony/Echo ....................................................... 50
Registration Memory 54
Registering the Panel Settings .............................. 55
Recalling the Registered Panel Settings ............... 55
Selecting a Registration Bank................................ 56
Naming the Registration Banks ............................. 56
Disk Operations 57
Using the Floppy Disk Drive (FDD) and
Floppy Disks ......................................... 58
Included Data Disk................................................. 59
Format ................................................................... 60
Save ....................................................................... 60
Load ....................................................................... 62
Song Copy ............................................................. 64
Delete .................................................................... 67

7
5
Contents
Disk Song Playback 68
Song Playback ....................................................... 68
Song Track Muting ................................................. 70
Song Volume Control ............................................. 70
Playing from a Specified Measure ......................... 71
Repeat Play (A-B Repeat) ..................................... 72
Song Transpose ..................................................... 73
Part Settings 74
Voice Change ........................................................ 75
Mixer ...................................................................... 76
Song Recording 78
Quick Recording .................................................... 80
Multi Track Recording ............................................ 82
Re-recording — Punch In/Out and Start Measure . 84
Quantize ................................................................ 86
Editing Setup Data ................................................. 88
Naming User Songs............................................... 90
Clearing User Song Data ....................................... 91
Multi Pad Recording 92
Multi Pad Recording............................................... 92
Chord Match .......................................................... 94
Naming User Pads ................................................. 94
Clearing User Pad Data ......................................... 95
Style Recording 96
Style Recording — Rhythm Track .......................... 98
Style Recording —
Bass/Phrase/Pad/Chord Tracks...................... 100
Quantize .............................................................. 102
Naming User Styles ............................................. 104
Clearing User Style Data ..................................... 104
MIDI Functions 106
What’s MIDI? ....................................................... 106
What You Can Do With MIDI ................................ 108
MIDI Data Compatibility ....................................... 109
Connecting to a Personal Computer .................... 110
MIDI Template ...................................................... 112
MIDI Transmit Setting ........................................... 114
MIDI Receive Setting ........................................... 115
Local Control........................................................ 116
Clock .................................................................... 116
Initial Data Send .................................................. 117
Other Functions (Utility) 118
Metronome........................................................... 118
Upper Octave ....................................................... 119
Master Tuning ...................................................... 119
Scale Tuning ........................................................ 119
Split Point ............................................................. 120
Touch Sensitivity .................................................. 120
Voice Set.............................................................. 120
Footswitch ............................................................ 121
Pitch Bend Range ................................................ 122
Assignable ........................................................... 122
Backlight .............................................................. 122
Appendix 123
Voice List ............................................................. 123
Panel Voice List ........................................ 123
XG Voice List ............................................ 125
Drum Kit List ........................................................ 128
Style List .............................................................. 130
Music Database List ............................................ 131
About the Digital Effects (Reverb/Chorus/DSP)... 132
Reverb Type List ....................................... 133
Chorus Type List ....................................... 133
DSP Type List ........................................... 133
Harmony/Echo Type List ...................................... 134
Troubleshooting ................................................... 135
Data Backup & Initialization ................................. 136
Alert Message List ............................................... 137
MIDI Data Format ................................................ 139
MIDI Implementation Chart .................................. 151
Index .................................................................... 153
Specifications....................................................... 156
8
6
Important Features
Since the PSR-550 has such a wealth of advanced features and functions, you may be at a loss as to how to
explore its capabilities and how to best use them for your music. You needn’t worry. The PSR-550 is very easy
to play and use, and each function — no matter how advanced — can be mastered easily.
That’s what this section is designed for. It will help you master the PSR-550. It introduces you to the important
features of the PSR-550 with short explanations and page references. Read through the features you’re
interested in, then turn to the relevant pages in the manual for instructions and other details.
Basic operations
• The PSR-550 is packed with
sophisticated feature and
functions, yet it’s also exceptionally
easy to use. Using the panel controls is quick,
easy and intuitive — thanks to the Easy navigator
feature, which indicates the buttons you should
press, and the special backlit LCD, which changes
color according to the selected mode. (→ Pages
16, 18)
• A convenient Direct Access function lets you
instantly call up the specific menu or display you
need. (→ Page 21)
Auto accompaniment (styles)
• The auto accompaniment feature puts a full backing band
at your fingertips, with a total of 112 styles (rhythm and
accompaniment patterns). (→ Page 32)
• The One Touch Setting feature lets you instantly call up
the appropriate voice, effect and other settings for the
selected accompaniment style — with the touch of a
single button. (→ Page 42)
• You can also create your original accompaniment styles
by recording them directly from the keyboard. (→ Page
96)
Music Database
• The PSR-550’s built-in Music Database gives you a
convenient way to automatically select the style, voice,
and effect settings that best suit a particular type of music.
If you don’t know which style or voice would be appropri-
ate, the Music Database can help you out. (→ Page 14)
Multi Pads
• By simply pressing one of the Multi Pads, you can play
short rhythmic or melodic phrases. (→ Page 43)
• You can also create your original Multi Pad phrases by
recording them directly from the keyboard. (→ Page 92)
Registration Memory
• The convenient Registration Memory feature lets you save
virtually all panel settings to one of 128 Registration
Memory settings, and then instantly recall all your custom
panel settings by pressing a single button. (→ Page 54)
Song Recording
• Use the powerful song recording features create your own
complete, fully orchestrated compositions and save them
floppy disk as a User song. Each User song lets you
record up to sixteen independent tracks. (→ Page 78)
* To quickly and easily mold your musical ideas into
complete songs, use the Quick Recording method. (→
Page 80)
* To build up a song part-by-part and track-by-track, use
the Multi Track Recording method. (→ Page 82)
* You can also “fine tune” the recorded song data with the
PSR-550’s comprehensive song editing functions. (→
Pages 84-91)
Listening to the PSR-550
• The PSR-550 features a wide
variety of songs in various
musical genres. (→ Page 15)
• In addition, 10 songs are provided in
the included disk. (→ Page 59)
• The powerful auto accompaniment function gives
you a total of 112 styles (rhythm and accompani-
ment patterns), providing professional sounding
backing parts for your performance.
(→ Page 112)
•
Special Multi Pads let you instantly and easily play short
rhythmic and melodic sequences for adding impact and
variety to your performance. (→ Page 43)
Playing the PSR-550
• The PSR-550 keyboard has 61
keys with full touch-response
capability that lets you play with
extraordinary expressiveness and dynamic control.
(→ Page 26)
• The PSR-550 lets you perform with a huge variety
of musical instrument voices. (→ Page 26)
There are two different types of voices: panel
voices (the original PSR-550voices) and XG
voices.
* The PSR-550 features 219 panel voices, 14 drum kits
and 480 XG voices
• With the R1, R2 and L voices, you can play two
different voices in a layer, and even play two
different voices with your right and left hands.
(→ Pages 27, 28)
9
7
Important Features
GM System Level 1
“GM System Level 1” is an addition to the MIDI standard
which guarantees that any data conforming to the standard will
play accurately on any GM-compatible tone generator or
synthesizer from any manufacturer.
XG
XG is a new Yamaha MIDI specification which significantly
expands and improves on the GM System Level 1 standard
with greater voice handling capacity, expressive control and
effect capability while retaining full compatibility with GM.
By using the PSR-550’s XG voices, it is possible to record
XG-compatible song files.
DOC
The DOC voice allocation format provides data playback
compatibility with a wide range of Yamaha instruments and
MIDI devices, including the Clavinova series.
Style File Format
The Style File Format — SFF — is Yamaha’s original style
file format which uses a unique conversion system to provide
high-quality automatic accompaniment based on a wide range
of chord types. The PSR-550 uses the SFF internally, reads
optional SFF style disks, and creates SFF styles using the
Style Recording feature.
Digital Effects
• A comprehensive set of professional-sounding digital
effects are built into the PSR-550, letting you enhance the
sound of your performance in a wide variety of ways.
These include Reverb, Chorus, DSP and Harmony/Echo.
(→ Page 46)
* Reverb recreates the rich spacial ambiance of various
performance environments, such as a concert hall or a
night club. (→ Page 46)
* Chorus enriches the voices by making them sound
warmer and thicker — as if several instruments were
playing together at the same time. (→ Page 48)
* The DSP effects let you process the sound in special,
unusual ways — such as applying distortion or tremolo
to a specific part. (→ Page 49)
* Harmony/Echo lets you enhance your right-hand
melodies with a variety of harmony and echo effects.
(→ Page 50)
Disk Drive
• The PSR-550 also features a built-in disk drive that lets
you save all your important original data (such as User
songs, User styles, User Multi Pads, Registration Memory,
etc.) to floppy disk for future recall. (→ Page 57)
MIDI
• MIDI (Musical Instrument Digital Interface) is a worldwide
standard interface that allows various electronic music
instruments, computers and other devices to communi-
cate with each other. The MIDI features let you
seamlessly integrate the PSR-550 into a variety of
systems and applications:
* Play other instruments from the PSR-550. (→ Page
108)
* Play the sounds of the PSR-550 (including the auto
accompaniment) from a connected keyboard. (→ Page
108)
* Connect the PSR-550 directly to a computer, for
advanced recording, editing and playing back of song
data. (→ Page 110)
* Use pre-programmed templates to instantly configure
the PSR-550 for your specific MIDI system/application.
(→ Page 112)
Panel logos
The logos printed on the PSR-550 panel indicate standards/
formats it supports and special features it includes.
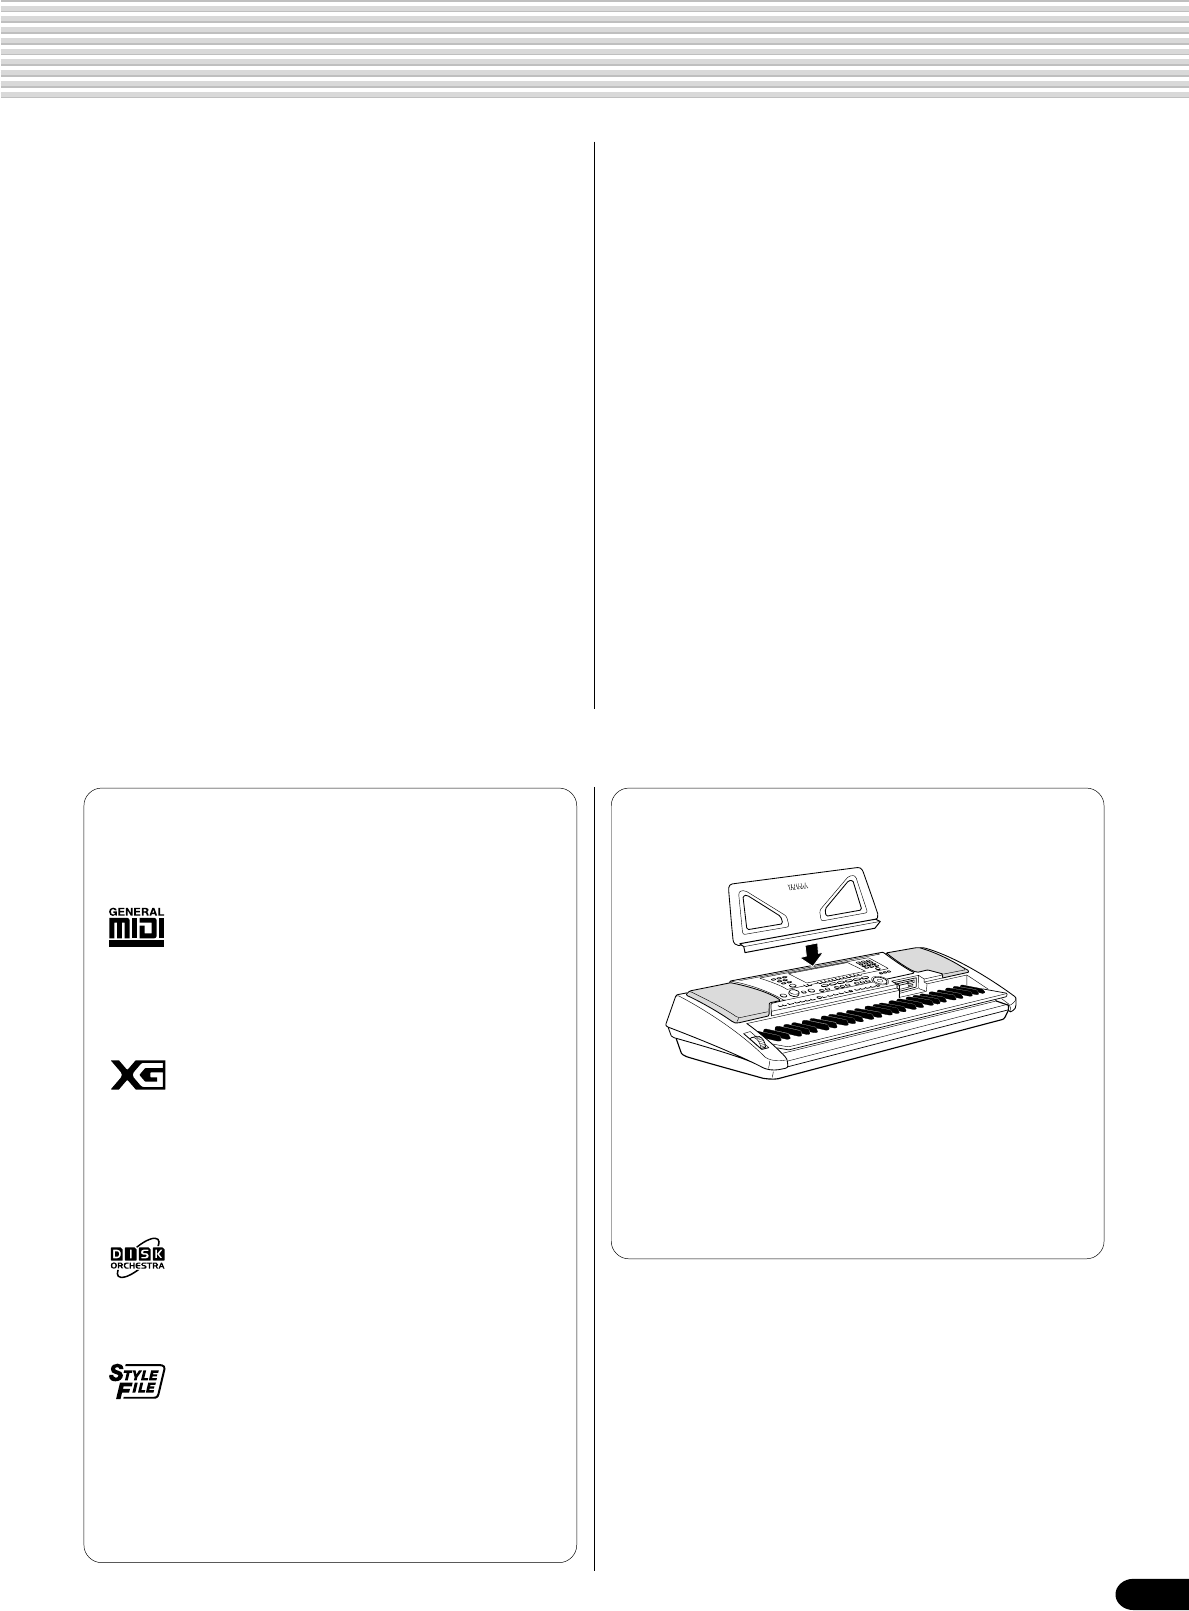
Music stand
The PSR-550 is supplied with a music stand that can be attached
to the instrument by inserting it into the slot at the rear of the
control panel.
10
8
Panel Controls and Terminals
C1
CLICK
36 T37 S39
F1
41
R
G1
43
L
D2
50
M
E2
52
H
42 44
A1
45
L
B1
47
M
C2
48
H51
F2
L53
G2
H5554 56
A2
57
L
D3
62
H
B2
59
M
L
C3
60
M
H
58 61
C
1
A3
69
C
2
63
R
1
B3
71
R
2
E3
64
F3
65
R66
G3
67
S68 70
C4
72
H73
L
D4
74 75
H
E4
76
L
F4
77
H78
L
G4
79
H80
L
A4
81 82
B4
83
H
C5
84
L85
S87
D5
86
L
E5
88
H
F5
89
L M 90
G5
O91 92
D1
38
E1
40 46 49
CHORD
dim
mM6
7
augsus4
119
513
1
REC
2
REC
3
REC
4
REC
5
REC
6
REC
7
REC
8
REC
9
REC
10
REC
11
REC
12
REC
13
REC
14
REC
15
REC
16
REC
TRANSPOSE REGIST-
RATION TEMPO MEASURE BEAT
BACK NEXT
KEYBOARDSTART/STOP
/YES
TRACK(1~16)
PAR T DIAL
0~9
MUSIC DATABASE
SONG
STYLE
VOICE LR12
EASY
NAVIGATOR
001 Grand Piano
DSP(FAST)
SUSTAIN HARMONY
TOUCH
qe
#3 #4 #5 #6 #7 #8 #9
!4
!3
!2
!5 !6 !7 !8 !9 @0
$0
yi
u
r
o!0
!1
t
w
@1 @2 @3 @4 @5 @6
@7
@8
#0
@9
#1 #2
$1 $2
$4
$3
$7 $8 $9 $6 $5 %0
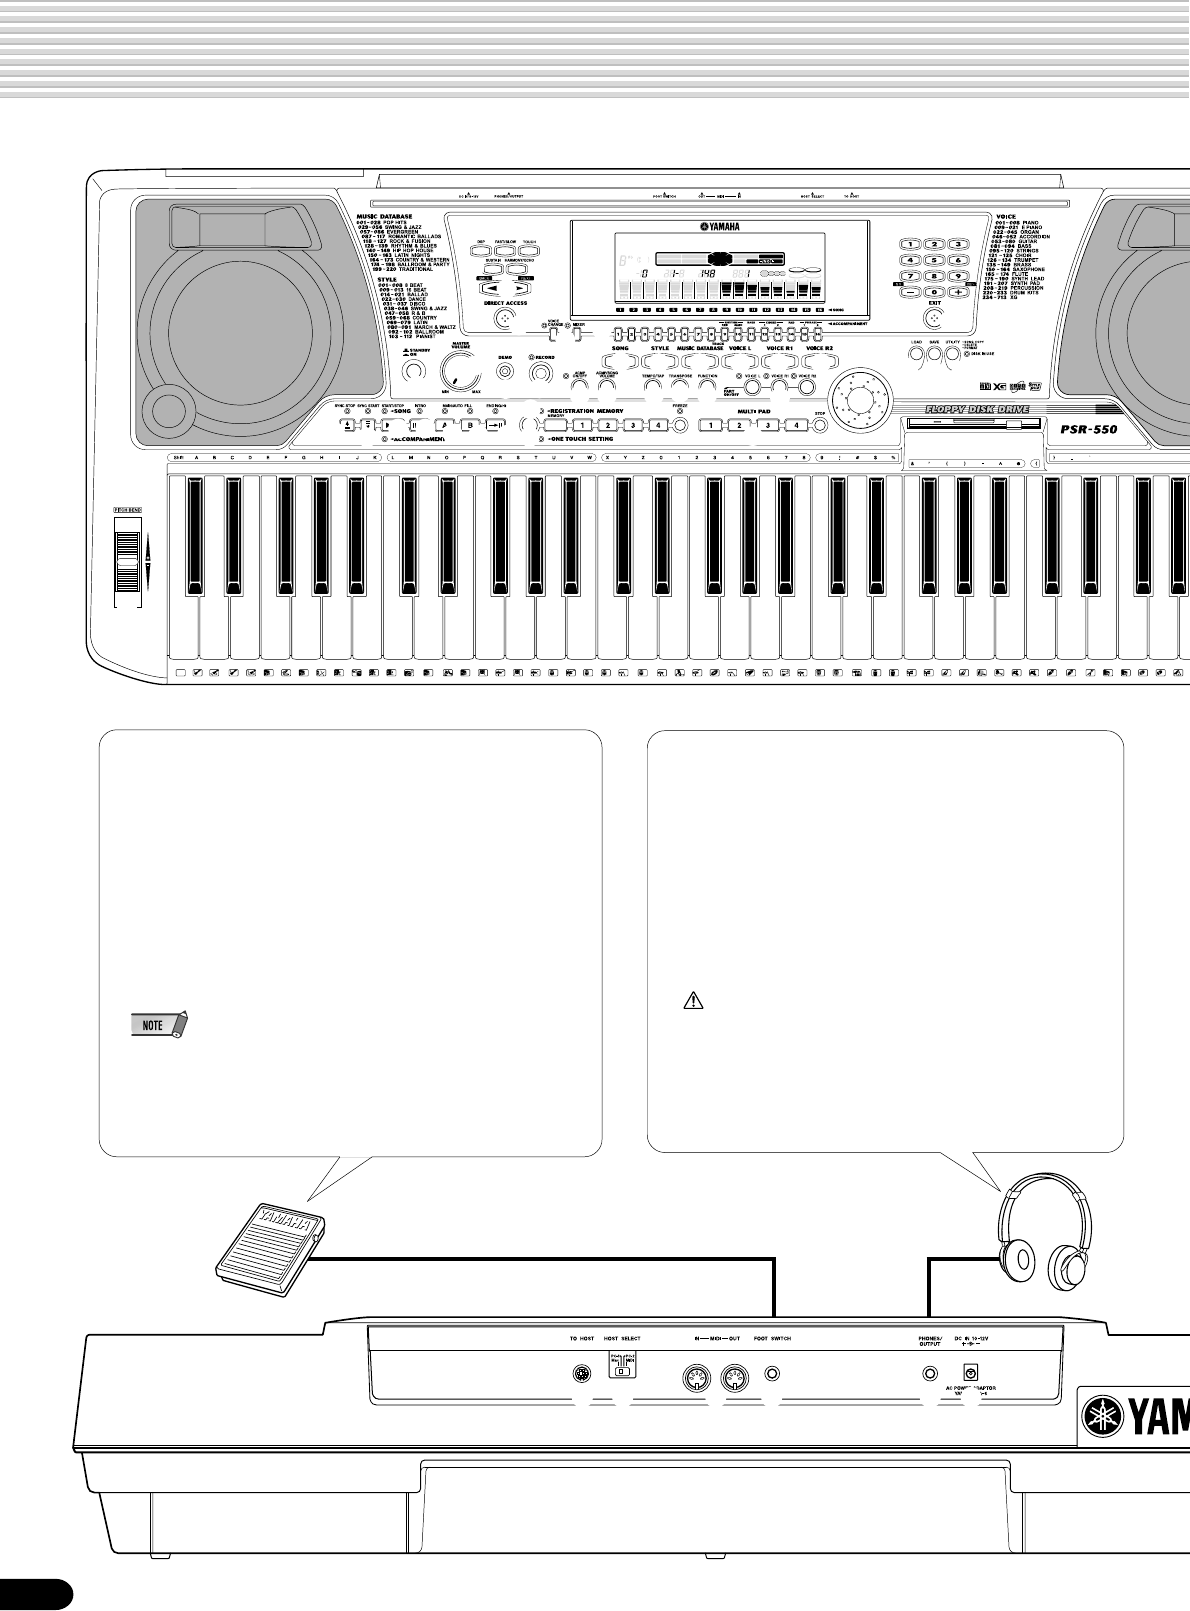
■ PHONES/OUTPUT jack
A standard pair of stereo headphones can be
plugged in here for private practice or late-night
playing. The internal stereo speaker system is
automatically shut off when a pair of head phones is
plugged into the PHONES/OUTPUT jack.
Do not listen with the headphones at high volume
for long periods of time. Doing so may cause
hearing loss.
CAUTION
•Connect the PSR-550 to external equipment only after
turning off power for all devices. To prevent damage to
the speakers, set the volume of the external devices at
the minimum setting before connecting them. Failure to
observe these cautions may result in electric shock or
equipment damage.
■ FOOTSWITCH jack
The sustain function lets you produce a natural
sustain as you play by pressing a footswitch. Plug
an optional Yamaha FC4 or FC5 footswitch into
this jack and use it to switch sustain on and off.
The footswitch connected to this jack can also be
set to replicate the functions of some panel buttons,
doing things like starting and stopping accompani-
ment (page 121).
•Be sure that you do not press the footswitch while turning the power
on. If you do, the ON/OFF status of the footswitch will be reversed.
•When the sustain or sostenuto pedal functions are being used
(page 121), some voices may sound continuously or have a long
decay after the notes have been released while the pedal is held.
11
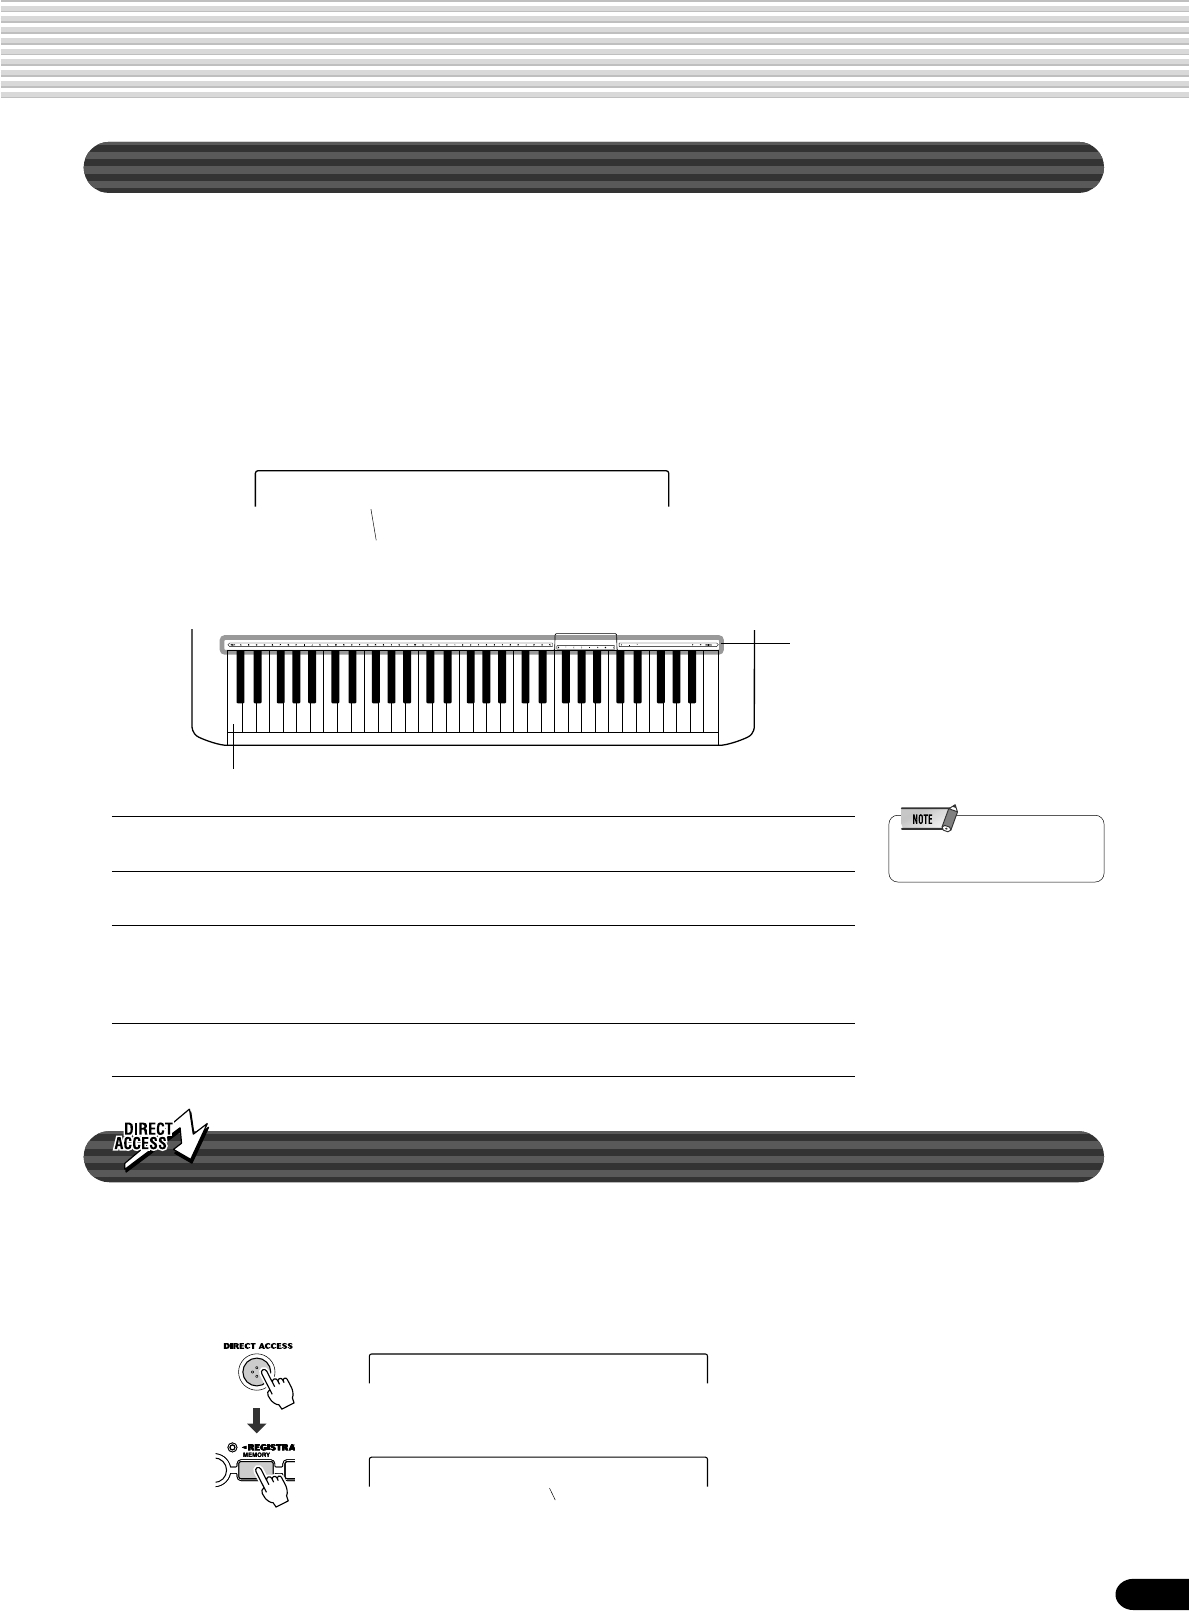
9
Top Panel Controls
qSTANDBY/ON switch .................................13
wMASTER VOLUME control ........................13
eDEMO button .......................................13, 17
rRECORD button.................17, 25, 78, 92, 96
tDIRECT ACCESS button .....................21, 24
yDSP button.................................................49
uFAST/SLOW button ...................................49
iTOUCH button .........................................120
oSUSTAIN button ......................................... 30
!0 HARMONY/ECHO button ..........................50
!1 BACK button, NEXT button ........................17
!2 LCD display ................................................ 16
!3 VOICE CHANGE button.......................17, 75
MIXER button.......................................17, 76
!4 TRACK 1 - 16 buttons .......................... 37, 70
!5 SONG button..................................17, 25, 68
!6 STYLE button.................................17, 25, 32
!7 MUSIC DATABASE button ...................14, 17
!8 VOICE L button ....................................17, 28
!9 VOICE R1 button ................................. 17, 26
@0 VOICE R2 button ................................. 17, 27
@1 ACMP ON/OFF button .........................25, 33
@2 ACMP/SONG VOLUME button ...... 17, 37, 70
@3 TEMPO/TAP button .............................. 17, 36
@4 TRANSPOSE button ............................ 17, 30
@5 FUNCTION button..............................17, 118
@6 PART ON/OFF
VOICE L button .....................................28
VOICE R1 button .................................. 26
VOICE R2 button .................................. 27
@7 Number buttons
[1]-[0], [-/NO], [+/YES] ........................... 20
@8 EXIT button ................................................17
@9 Data dial ..................................................... 20
#0 DISK LOAD button ............................... 17, 62
#1 DISK SAVE button ...............................17, 60
#2 DISK UTILITY button .....................17, 64, 67
#3 SYNC STOP button ................................... 41
#4 SYNC START button .................................. 33
#5 START/STOP button ............................32, 69
#6 INTRO button ............................................. 34
#7 MAIN/AUTO FILL A button ......................... 34
#8 MAIN/AUTO FILL B button ......................... 34
#9 ENDING/rit. button .....................................34
$0 REGISTRATION MEMORY buttons ........... 54
$1 ONE TOUCH SETTING buttons ................42
$2 MULTI PAD buttons .................................... 43
$3 Disk Drive...................................................58
$4 PITCH BEND wheel ................................... 30
Panel Controls and Terminals
Rear Panel Controls
$5 PHONES/OUTPUT jack.............................10
$6 FOOTSWITCH jack .................................... 10
$7 TO HOST connector ................................ 107
$8 HOST SELECT switch .............................110
$9 MIDI IN/OUT connectors..........................107
%0 DC IN 10-12V jack .....................................12
A5
93 94
B5
95
C6
96

12
10
Setting Up
This section contains information about setting up your PSR-550 and preparing to play.
Be sure to go through this section carefully before turning the power on.
CAUTION
•Never interrupt the power
supply (e.g. remove the
batteries or unplug the AC
adaptor) during any PSR-550
record operation! Doing so
can result in a loss of data.
Power supply connections
Although the PSR-550 will run either from an optional AC adaptor or batteries, Yamaha recommends use of the
more environmentally safe AC adaptor. Follow the instructions below according to the power source you intend
to use.
■ Using An Optional AC Power Adaptor
WARNING
•Use ONLY a Yamaha PA-6 AC
Power Adaptor (or other
adaptor specifically recom-
mended by Yamaha) to power
your instrument from the AC
mains. The use of other
adaptors may result in
irreparable damage to both
the adaptor and the PSR-550.
•Unplug the AC Power Adaptor
when not using the PSR-550,
or during electrical storms.
■ Using Batteries
For battery operation the PSR-550 requires six 1.5V “D” size, R20P (LR20) or
equivalent batteries. When the batteries need to be replaced, “Battery Low” may
appear on top of the display, the volume may be reduced, the sound may be
distorted, and other problems may occur. When this happens, turn the power off
and replace the batteries.
Replace the batteries as follows:
CAUTION
•When the batteries run down,
replace them with a complete
set of six new batteries.
NEVER mix old and new
batteries.
•Do not use different kinds of
batteries (e.g. alkaline and
manganese) at the same time.
•If the instrument is not to be
in use for a long time, remove
the batteries from it, in order
to prevent possible fluid
leakage from the battery.
•Plugging or unplugging the
AC power adaptor while the
batteries are installed will
reset the PSR-550 to the
defaults.
3
Plug the AC adaptor into an AC outlet.
When turning the power OFF, simply reverse
the procedure.
1
Open the battery compartment
cover located on the instrument’s
bottom panel.
2
Insert the six new batteries, being
careful to follow the polarity
markings on the inside of the
compartment.
3
Replace the compartment cover,
making sure that it locks firmly in
place.
1
Make sure that the STANDBY/ON switch
of the PSR-550 is set to STANDBY.
2
Connect the AC adaptor (PA-6 or other
adaptor specifically recommended by
Yamaha) to the power supply jack.
Important Notes on Battery Use
•Since the PSR-550 consumes a considerable amount of power,
Yamaha recommends the use of an AC power adaptor rather than
batteries. The batteries should be considered an auxiliary power
source for data backup.
•The floppy disk drive, in particular, uses a large amount of power, so
it is important to always use an AC power adaptor when performing
disk-intensive operations such as song recording/playback or data
load/save. If you attempt to use battery power for these operations
and the batteries do fail, you will lose not only the data you’re
recording or saving, but also other data in internal memory including
user styles, user pads, registration memory, etc.
•Taking the above precautions into consideration, always use an AC
power adaptor when using the PSR-550 for an important perfor-
mance or when creating important data.
13
11
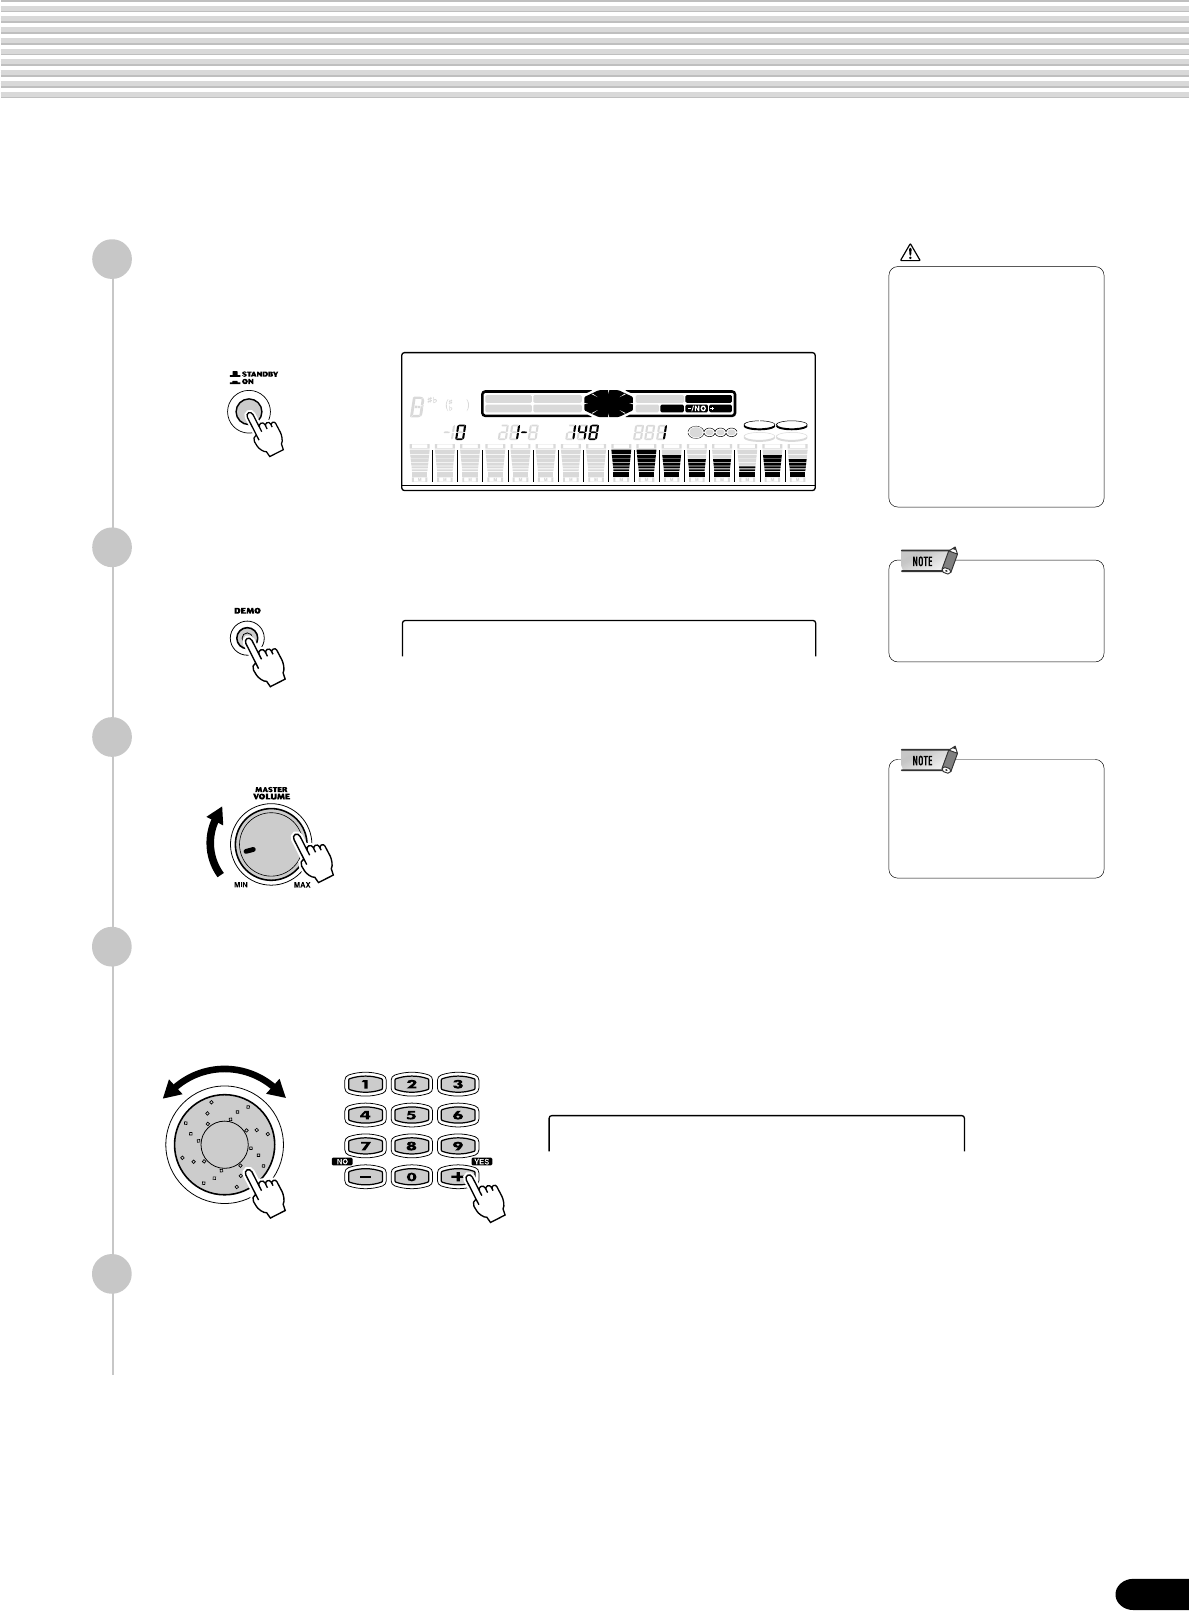
Demo Song Playback
Once you’ve set up your PSR-550, try listening to the pre-programmed demonstration songs. A total of 9
demo songs are provided. As the song plays back, the backlit LCD of the PSR-550 changes color.
CAUTION
•Even when the switch is in
the “STANDBY” position,
electricity is still flowing to
the instrument at the
minimum level. When you
are not using the PSR-550
for a long time, make sure
you unplug the AC power
adaptor from the wall AC
outlet, and/or remove the
batteries from the
instrument.
2
Press the [DEMO] button to start demo playback.
•If you play the PSR-550 with
the volume at its maximum
level when the batteries are
used, the life of the batteries
will be shorter.
3
Set a volume level with the [MASTER VOLUME] control.
4
Skip to the beginning of a different demo song.
Use the data dial, the [+/YES] button, the [-/NO] button or the number buttons
[1]-[0].
5
Press the [DEMO] button again to stop the demo song.
1
Turn the power ON by pressing the [STANDBY/ON] switch.
Press the [STANDBY/ON] switch again to turn the power OFF.
CHORD
dim
mM
6
7
augsus4
119
513
1
REC
2
REC
3
REC
4
REC
5
REC
6
REC
7
REC
8
REC
9
REC
10
REC
11
REC
12
REC
13
REC
14
REC
15
REC
16
REC
TRANSPOSE REGIST-
RATION TEMPO MEASURE BEAT
BACK NEXT
KEYBOARD
START/STOP
/YES
TRACK(1~16)
PART DIAL
0~9
SONG
STYLE
VOICE LR12
EASY
NAVIGATOR
001 Grand Piano
DSP(FAST)
SUSTAIN HARMONY
TOUCH
MUSIC DATABASE
1 Sweet Tenor
2 SweetTrumpet
•The LCD changes color
during Demo song playback
only if the Backlight mode is
set to “Auto” (page 122).
14
Using the Music Database
If you want to play in a certain genre of music but don’t know which style (page 32) and voice (page 26)
settings would be appropriate, simply select the desired genre from the Music Database. The PSR-550
automatically makes all appropriate panel settings to let you play in that music style!
2
Select a ‘‘Music Database.’’
Use the data dial, the [+/YES] button, the [-/NO] button or the number buttons
[1]-[0].
1
Press the [MUSIC DATABASE] button.
The MUSIC DATABASE menu appears in the display.
CHORD
dim
mM
6
7
augsus4
119
513
BEAT
BACK NEXT
KEYBOARDSTART/STOP
/YES
TRACK(1~16)
PART DIAL
0~9
M
U
S
IC DA
T
A
B
A
S
E
SONG
STYLE
VOICE LR12
EASY
NAVIGATOR
001 Alive Fever
CHORD
dim
mM6
7augsus4
119
513
BEAT
BACK NEXT
KEYBOARDSTART/STOP /YES
TRACK(1~16)
PART DIAL
0~9
M
U
S
IC DA
T
A
B
A
S
E
SONG
STYLE
VOICE LR12
EASY
NAVIGATOR
002 Alive Synth
•Press the [MUSIC
DATABASE] button to switch
into the Style mode, turn
AUTO ACCOMPANIMENT
on, and turn SYNCHRO-
NIZED START on. See page
25 for details.
•See pages 32 through 41 for
details about the Auto
Accompaniment.
The PSR-550 has 220 panel setups in the Music Database and they are divided
into eleven different categories. You can select different Music Database
categories in succession by using the Direct Access function.
To select the first Music Database of the next available category, first press the
[DIRECT ACCESS] button, then press the [MUSIC DATABASE] button.
See page 21 for details about the Direct Access function.
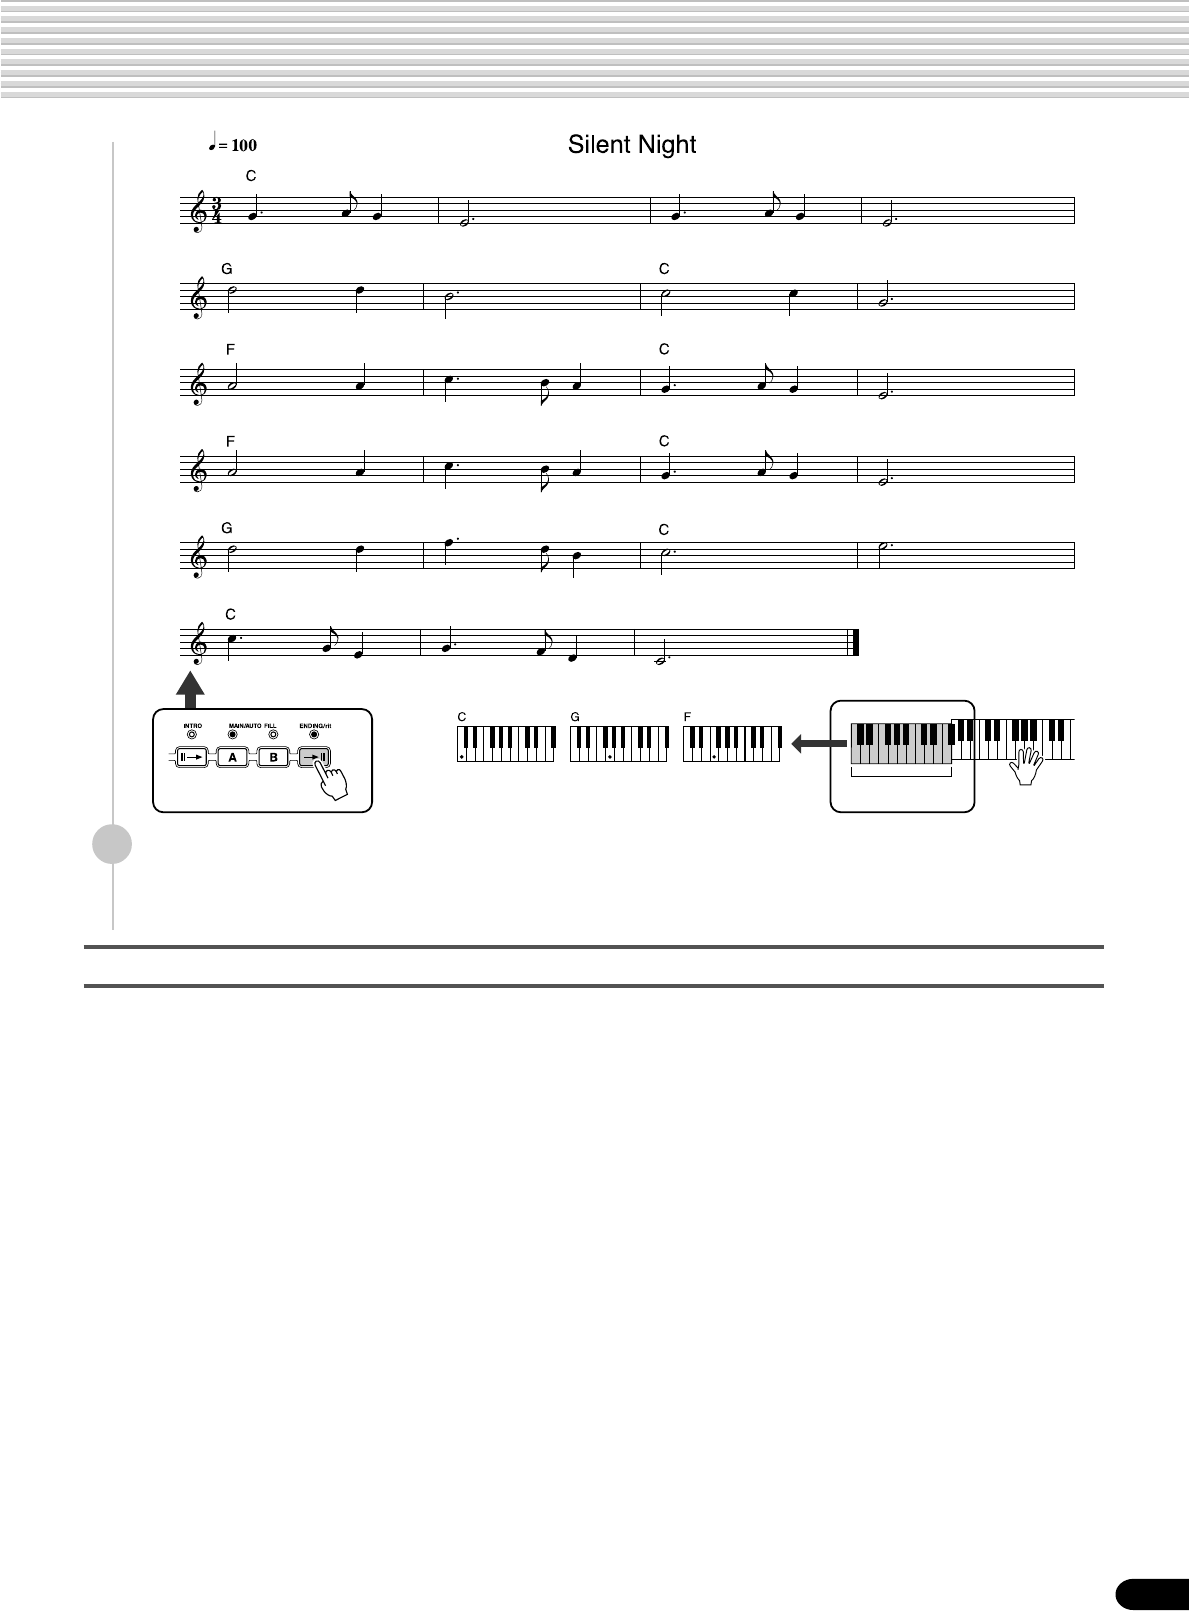
In this example, we’ll select #220 “Xmas Night” and play the song “Silent
Night.” (The sheet music is provided on the next page.)
3
Play the chords with your left hand and the melody lines with
your right hand along with the music.
As soon as you play a chord with your left hand, the auto accompaniment
starts.
For information on how to enter chords, see ‘‘Chord Fingerings’’ on page 38.
220 Xmas Night
Direct Access
029 Days of Sax
POP HITS
001 Alive Fever
002 Alive Synth
003 Croco Rock
028 YesterGuitar
SWING & JAZZ
029 Days of Sax
056 Wonderland
EVERGREEN
057 Black Forest
086 Wonder World
Music Database List
(page 131)
12
15
Using the Music Database
Data stored by the Music Database
Each of the Music Database settings has been specially programmed to match the selected style and each
features the best suited voice (or combination of voices), style, and other settings for that style. Pressing the
[MUSIC DATABASE] button and selecting a style lets you instantly reconfigure all relevant settings, conve-
niently allowing you to start playing in the desired genre with all the appropriate sounds — without having to
make each setting one by one. For each parameter, refer to the following pages.
■ VOICE PARAMETERS
• Part on/off (Voice R1/R2/L) ....................................................................... page 29
• Voice change setting (Voice R1/R2/L) ....................................................... page 75
• Mixer setting (Voice R1/R2/L) .................................................................... page 76
• DSP on/off, FIRST/SLOW on/off, DSP Type and Return Level ................. page 49
• HARMONY/ECHO on/off, type, volume, part ............................................ page 50
• Pitch Bend Range ................................................................................... page 122
• Upper Octave setting............................................................................... page 119
■ AUTO ACCOMPANIMENT PARAMETERS
• Auto accompaniment (ACMP) on/off ......................................................... page 33
• Synchro Start = ON* ................................................................................. page 33
• Style Number............................................................................................. page 32
• Main A/B section ....................................................................................... page 34
• Tempo ........................................................................................................ page 36
• Accompaniment Volume ............................................................................ page 37
• Track on/off ................................................................................................ page 37
• Voice Change setting................................................................................. page 75
• Mixer setting .............................................................................................. page 75
• Multi Pad Bank number ............................................................................. page 43
• Reverb setting ........................................................................................... page 46
• Chorus setting ........................................................................................... page 48
* Set only when the accompaniment is not playing.
4
When you reach the point in the music indicated by the arrow
above, press the [ENDING] button.
When the ending is finished, the auto accompaniment automatically stops.
Auto Accompaniment
section
13
16
14
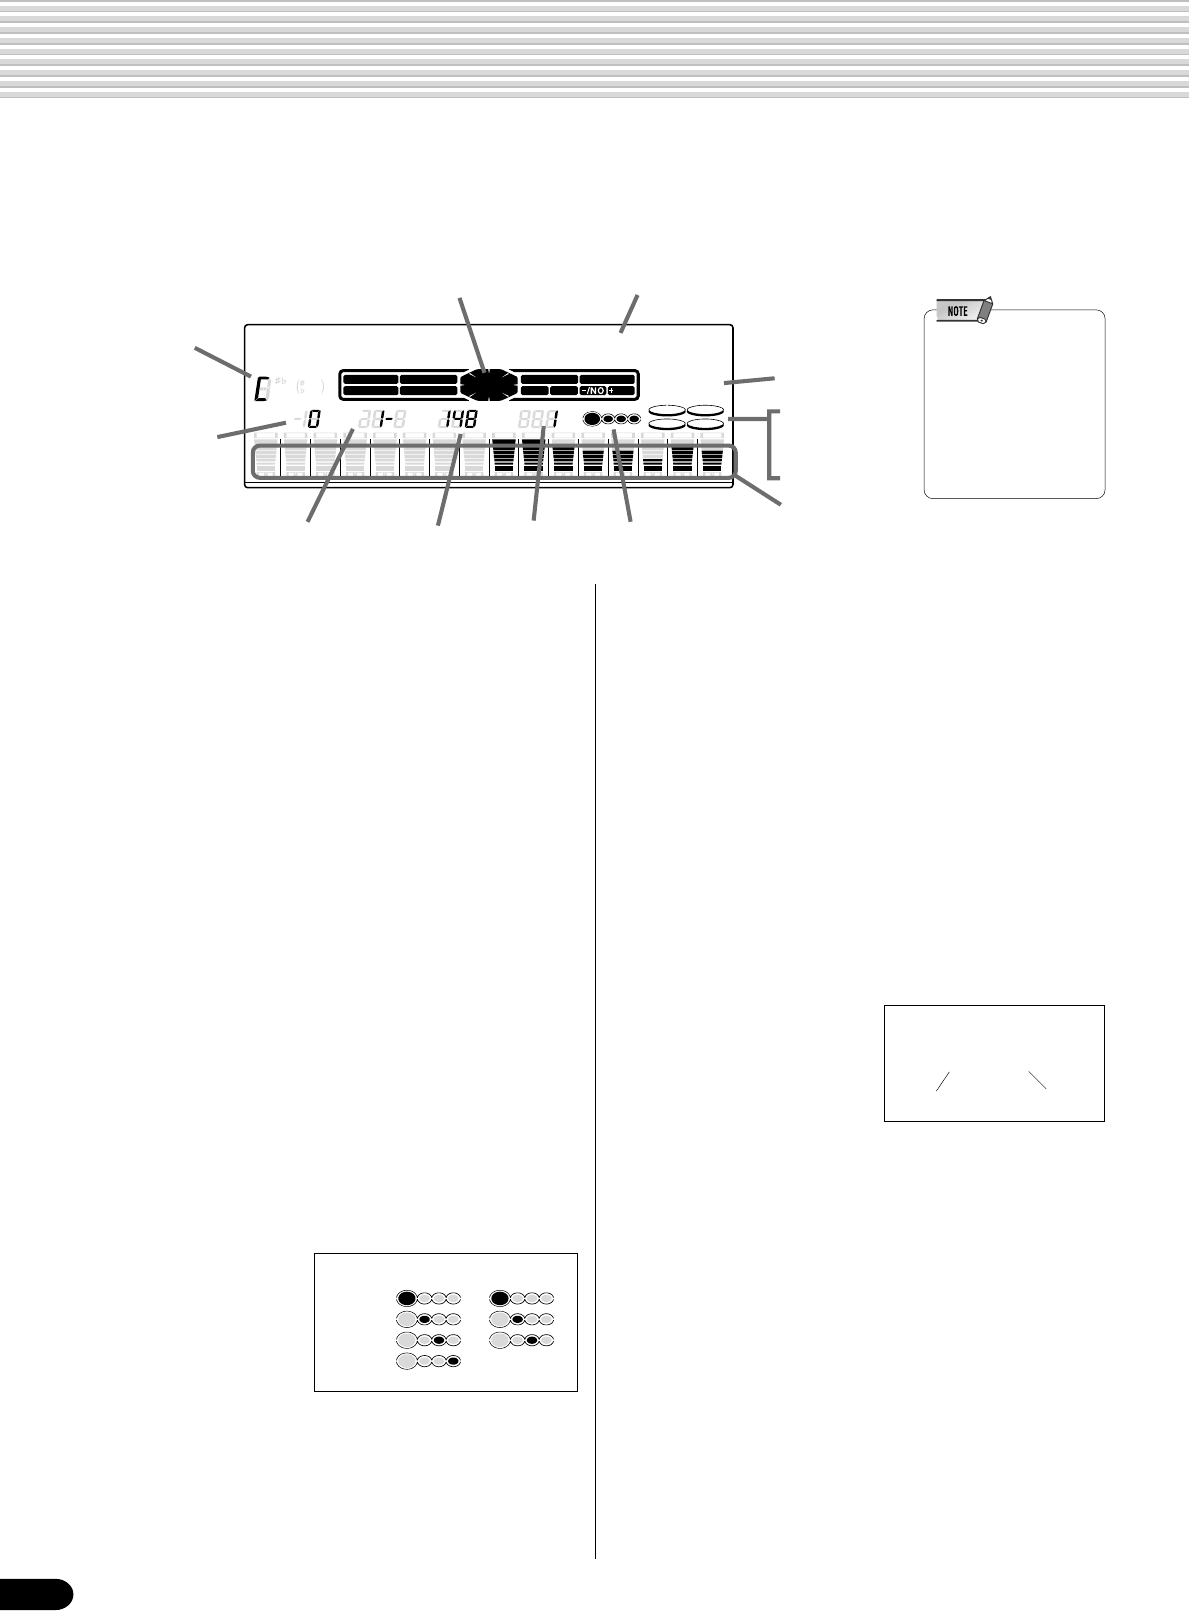
Panel Display Indications
The PSR-550 features a large multi-function display that shows all important settings for the instrument.
This backlit LCD also changes color depending on the selected mode, making operation even easier and
more intuitive. For details about the LCD’s Backlight mode, see page 122.
The section below briefly explains the various icons and indications in the display.
q Menu/message display
This shows the menu for each function of the PSR-550.
It also displays the relevant messages for the current
operation.
See the “Basic Operation” section (page 17) for details
on the menu/message display.
w Menu indication
This indicates the items shown in the menu display, and
the button to be pressed. Refer to “Basic Operation”
(page 17) for details.
e Easy Navigator
This indicates the buttons to be pressed. Refer to
“Basic Operation” (page 18) for details.
r Transpose
Shows the current transpose value (page 30).
t Registration bank-number
Shows the current selected registartion memory bank
and number (page 56).
y Tempo
Shows the current tempo of accompaniment/song
playback (page 36).
u Measure
Indicates the current
measure number during
song recording and
playback.
i Beat indicators
Flashes at the current tempo and indicates the current
beat during accompaniment and song playback.
o DSP (FAST)
“DSP” appears when the DSP effect is turned on (page
49).
“FAST” appears when the DSP FAST/SLOW effect is
turned on (page 49).
!0 TOUCH
Appears when the touch sensitivity is turned on (page
120).
!1 SUSTAIN
Appears when the sustain is turned on (page 30).
!2 HARMONY
Appears when the HARMONY effect is turned on
(page 50).
!3 Chord
Displays the current chord
name during AUTO ACCOM-
PANIMENT playback or
SONG recording/playback
(page 33).
!4 Song tracks / Accompaniment tracks
• In the Song mode (page 25) and the Demo Song
mode (page 15):
The icons of all tracks indicate the on/off status and
volume/velocity settimgs.
• In the Style mode (page 25):
The icons of tracks 9 - 16 indicate the on/off status
and volume/velocity settings for each of the eight
accompaniment tracks.
• In the Record mode (page 25):
The icons of all tracks indicate the on/off status and
volume/velocity settimgs. The “REC” marks
indicate the recording status.
Cm
Chord typeRoot
4/4 time 3/4 time
1st beat
2nd beat
3rd beat
4th beat
•If the power is left on
and the PSR-550
remains untouched for
three minutes or
longer, the LCD will
change color every
three seconds (when
Backlight mode is set
to “Auto”).
CHORD
dim
mM
6
7
augsus4
119
513
1
REC
2
REC
3
REC
4
REC
5
REC
6
REC
7
REC
8
REC
9
REC
10
REC
11
REC
12
REC
13
REC
14
REC
15
REC
16
REC
TRANSPOSE REGIST-
RATION TEMPO MEASURE BEAT
BACK NEXT
KEYBOARD
START/STOP /YES
TRACK(1~16)
PART DIAL
0~9
SONG
STYLE
VOICE LR12
EASY
NAVIGATOR
001 Grand Piano
DSP(FAST)
SUSTAIN HARMONY
TOUCH
M
USIC DATABASE
q Menu/message display
w Menu
indication
e Easy Navigator
o DSP (FAST)
!0 TOUCH
!1 SUSTAIN
!2 HARMONY
r Transpose
t Registration bank
and number
y Tempo u Measure i Beat indicators
!3 Chord
!4 Song tracks /
Accompaniment
tracks
17
15
Basic Operation
This section introduces you to the basic operations common to the various functions of the PSR-550.
In particular, you’ll learn how to use the menu/message display at the center of the front panel.
• Calling up the Operation Displays ..................................................................... page 17
• How to read the Menu/message display and the “Easy Navigator”................... page 18
• Menu Selection .................................................................................................. page 19
• Changing (Editing) Values ................................................................................. page 20
• Naming .............................................................................................................. page 21
• Direct Access..................................................................................................... page 21
Calling up the Operation Displays
Press the buttons listed below in order to call up the appropriate displays for the
various functions of the PSR-550.
Pressing one of these buttons instantly calls up the relevant display for the selected
function.
See the function tree chart for details (page 22).
If you’ve selected several different functions’ displays in succession, you can “retrace
your steps” and revisit each display by using the [BACK] and [NEXT] buttons at the
left side of the display. Of course you can also directly select the desired displays by
pressing the appropriate buttons (as listed above).
• DEMO button ...................................................... page 13
• RECORD button ............................. pages 25, 78, 92, 96
• SONG button ...................................................... page 25
• STYLE button.............................................. pages 25, 32
• MUSIC DATABASE button .................................. page 14
• VOICE L button ................................................... page 28
• VOICE R1 button ................................................ page 26
• VOICE R2 button ................................................ page 27
• VOICE CHANGE button...................................... page 75
• MIXER button...................................................... page 76
• ACMP/SONG VOL button ........................... pages 37, 70
• TEMPO/TAP button ............................................. page 36
• TRANSPOSE button ........................................... page 30
• FUNCTION button ............................................ page 118
• DISK LOAD button ............................................. page 62
• DISK SAVE button ............................................. page 60
• DISK UTILITY button ................................. pages 64, 67
How to leave the current display
As shown in the function tree chart (page 22), there is a wide varierty of functions on
the PSR-550, each with its own corresponding display. In order to leave the display of
each function press the [EXIT] button.
Since the PSR-550 has so many different displays, you may occasionally find yourself
confused as to which operation’s display is currently shown. If this happens, you can
return to “home base” by pressing the [EXIT] button several times. This returns the
PSR-550 to the default display — the same display that appears when the power is
turned on.
18
16
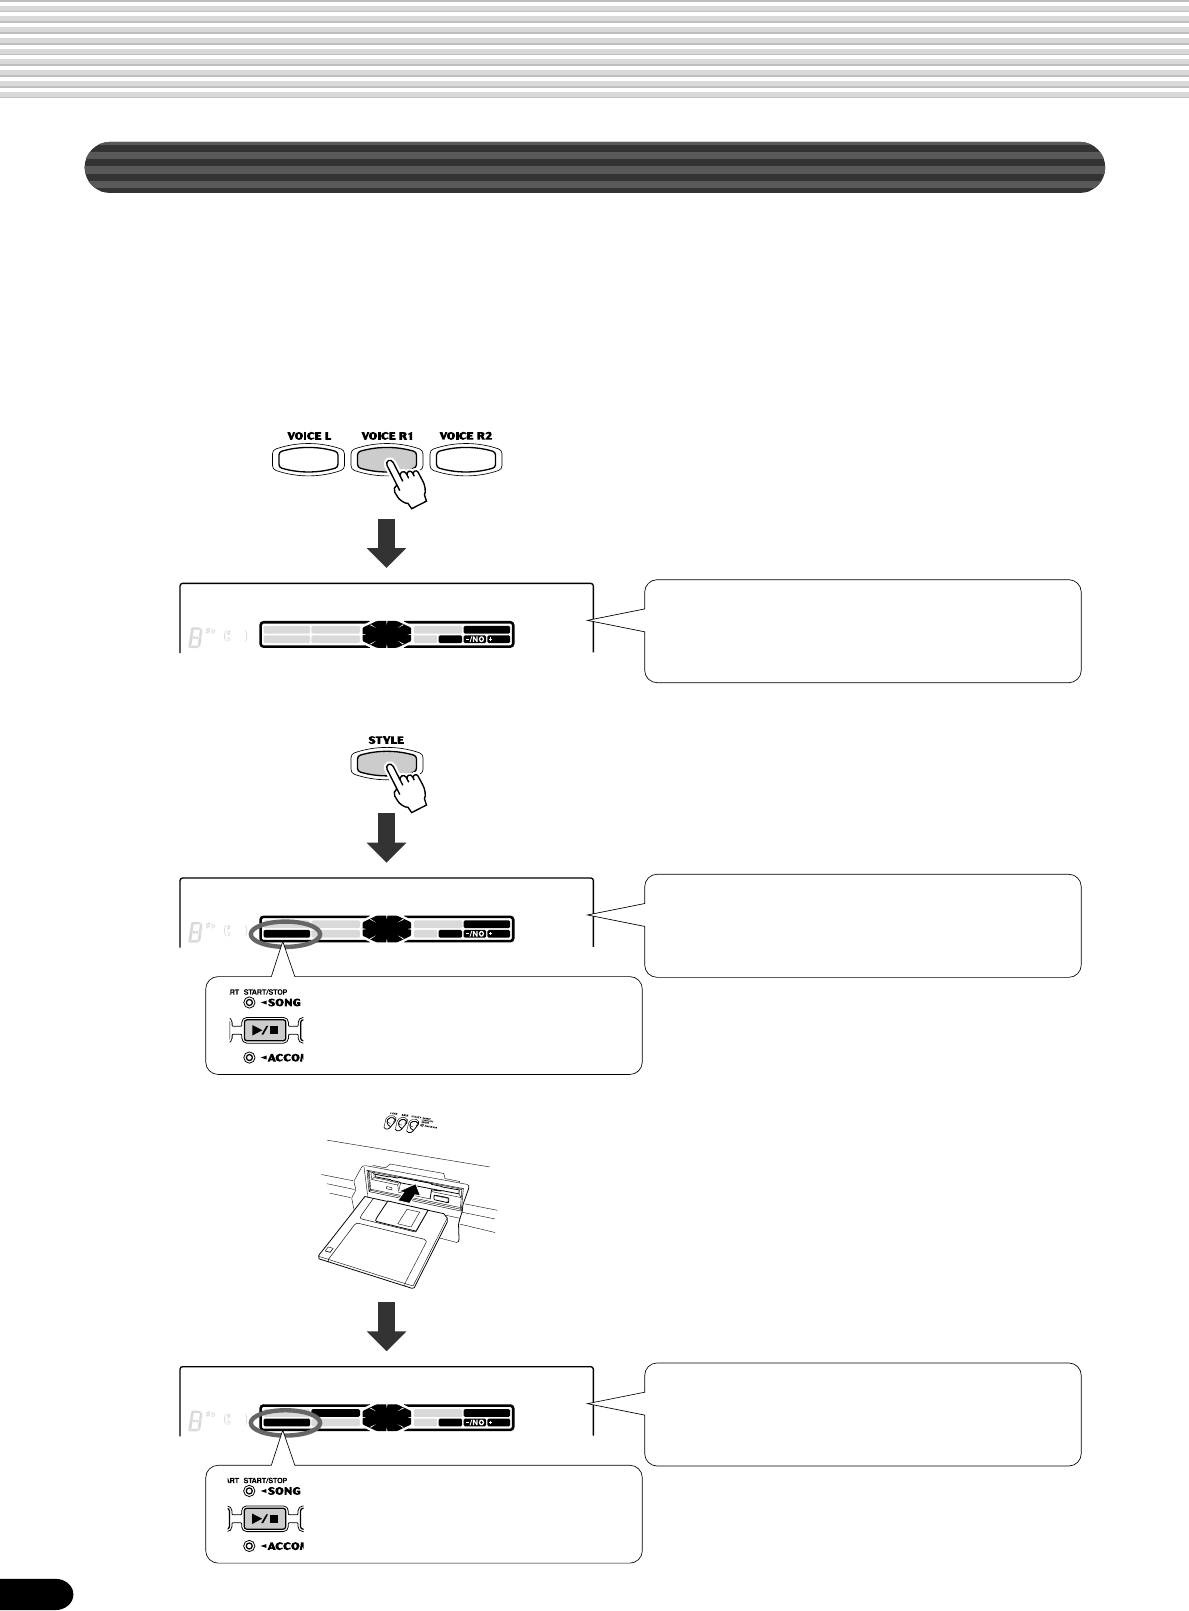
How to Read the Menu/Message Display and “Easy Navigator”
Depending on the selected function or operation, the PSR-550 shows a variety of
displays and indications. Included in these are “Easy Navigator” messages that guide
you through the various operations.
Let’s take a look at some examples:
● Voice
● Style
● Song
Basic Operation
CHORD
dim
mM
6
7
augsus4
119
513
BACK NEXT
KEYBOARD
START/STOP
/YES
TRACK(1~16)
PART DIAL
0~9
SONG
STYLE
VOICE LR12
EASY
NAVIGATOR
001 Grand Piano
MUSIC DATABASE
Press the [VOICE R1] button.
CHORD
dim
mM
6
7
augsus4
119
513
BACK NEXT
KEYBOARD
START/STOP
/YES
TRACK(1~16)
PART DIAL
0~9
SONG
STYLE
VOICE LR12
EASY
NAVIGATOR
001 8Beat 1
MUSIC DATABASE
Press the [STYLE] button.
This message means: “The current style (8Beat 1) is
shown at top. You can change this style by using the
data dial, the [+/YES] button, the [-/NO] button or the
number buttons [1]-[0].”
This message also means: “You can
start the accompaniment by pressing
the [START/STOP] button.”
CHORD
dim
mM
6
7
augsus4
119
513
BACK NEXT
KEYBOARD
START/STOP
/YES
TRACK(1~16)
PART DIAL
0~9
SONG
STYLE
VOICE LR12
EASY
NAVIGATOR
001 CLUB XG
_
MUSIC DATABASE
Insert the included data disk
into the disk drive.
This message means: “The current song (CLUB_XG)
is shown at top. You can change this song by using the
data dial, the [+/YES] button, the [-/NO] button or the
number buttons [1]-[0].”
This message also means: “You can
start the current song by pressing the
[START/STOP] button.”
This message means: “The current voice for voice R1
(Grand Piano) is shown at top. You can change this
voice by using the data dial, the [+/YES] button, the
[-/NO] button or the number buttons [1]-[0].”
19
17
● Disk
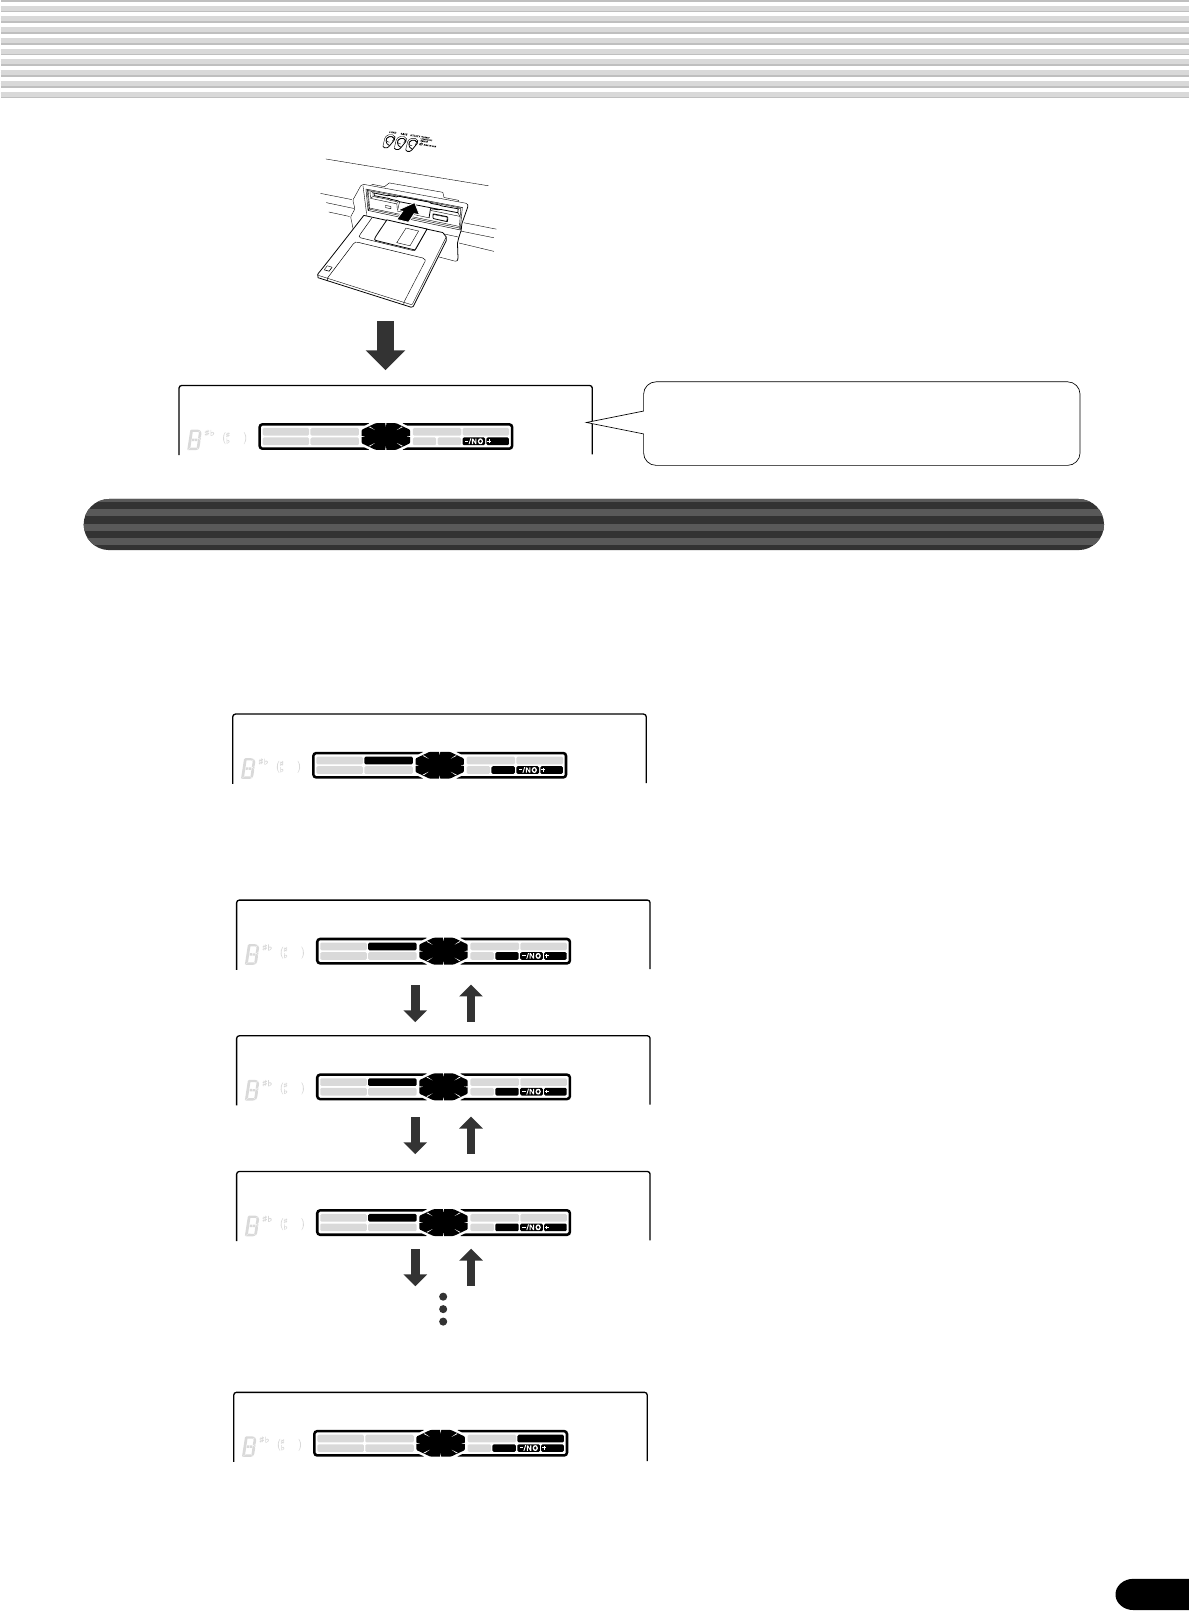
Menu Selection
For certain operations on the PSR-550 (such as selecting voices, demo songs and
styles), you’ll need to select different menus in the display.
For example, the display below (for selecting the function) appears when you press the
[FUNCTION] button.
In this case you can select the function by turning the data dial, or move the cursor by
pressing the [+/YES]/[-/NO] buttons.
The display below (for selecting voices) appears when you press the [VOICE R1]
button.
In this case you can also select the voice by using the data dial or the [+/YES]/[-/NO]
buttons as above; you can also input the voice number directly by using the number
buttons [1]-[0] (see the next page).
Basic Operation
CHORD
dim
mM
6
7
augsus4
119
513
BACK NEXT
KEYBOARD
START/STOP
/YES
TRACK(1~16)
PART DIAL
0~9
SONG
STYLE
VOICE LR12
EASY
NAVIGATOR
F1 Multi Pad
MUSIC DATABASE
CHORD
dim
mM
6
7
augsus4
119
513
BACK NEXT
KEYBOARD
START/STOP
/YES
TRACK(1~16)
PART DIAL
0~9
SONG
STYLE
VOICE LR12
EASY
NAVIGATOR
001 Grand Piano
MUSIC DATABASE
CHORD
dim
mM
6
7
augsus4
119
513
BACK NEXT
KEYBOARD
START/STOP
/YES
TRACK(1~16)
PART DIAL
0~9
SONG
STYLE
VOICE LR12
EASY
NAVIGATOR
F1 Multi Pad
CHORD
dim
mM
6
7
augsus4
119
513
BACK NEXT
KEYBOARD
START/STOP
/YES
TRACK(1~16)
PART DIAL
0~9
SONG
STYLE
VOICE LR12
EASY
NAVIGATOR
F2 Regist Memory
CHORD
dim
mM
6
7
augsus4
119
513
BACK NEXT
KEYBOARDSTART/STOP
/YES
TRACK(1~16)
PART DIAL
0~9
SONG
STYLE
VOICE LR12
EASY
NAVIGATOR
F3 DigitalEffect
MUSIC DATABASE
MUSIC DATABASE
MUSIC DATABASE
[+/YES] button [-/NO] button
CHORD
dim
mM6
7
augsus4
119
513 BACK NEXT
KEYBOARD
START/STOP /YES
TRACK(1~16)
PART DIAL
0~9
SONG
STYLE
VOICE LR12
EASY
NAVIGATOR
Format OK?
MUSIC DATABASE
This message means: “Press the [+/YES] button to
execute the Format operation.”
Insert an unformatted
disk into the disk drive.
[+/YES] button [-/NO] button
[+/YES] button [-/NO] button
20
18
Changing (Editing) Values
This section shows you how to set numeric values on the PSR-550, such as voice
number, song/style number and various parameters. Input the values by using the
number buttons [1]-[0] or the [+/YES]/[-/NO] buttons.
Numeric entry
•One- or two-digit numbers
can also be entered without
leading zeroes.
To select number “12”, for
example, simply press the [1]
button and then the [2]
button. The bars below the
number on the display will
flash for a few seconds, and
then disappear when the
selected number has been
recognized by the PSR-550.
• Entering three-digit numbers
The number buttons can be used to directly enter the number of the desired voice,
thereby immediately selecting that voice without having to step through a number of
other voices. To select number 106, for example, press the [1], [0] and [6] number
buttons in sequence.
Basic Operation
• Entering one- or two-digit numbers
One- or two-digit voice numbers can be entered with leading zeroes: e.g. “12” can be
entered as “012” by pressing the [0], [1] and [2] buttons in sequence.
Rotating the data dial
to the right (clockwise)
increases the value,
while rotating it to the
left (counter-clock-
wise) decreases it.
Number buttons [1]-[0]
described below.
Pressing the [+/YES] button increases the displayed
value by 1. Pressing the [-/NO] button decreases the
displayed value by 1. Pressing and holding either button
causes a continuous increase and decrease.
For items that have initial default values, pressing the [+/
YES] and the [-/NO] buttons together at the same time
will return the setting to the initial value.
The explanations here apply only to numbers that have a maximum of three digits,
such as those for voices and styles.
21
19
Naming
The allows you to create your own original data such as songs, styles and registration
memory settings. You can also freely name the data as desired.
The following data types can be named.
To enter an original name, use the keyboard.
Direct Access
By using the [DIRECT ACCESS] button, you can instantly call up the desired display.
For example, pressing the [DIRECT ACCESS] button and press the
[REGISTRARTION MEMORY] button automatically selects the display for input-
ting the Registration Memory bank name.
See page 24 for the Direct Access Chart.
• Disk files (User songs, etc) ............................... pages 61, 65, 66, 90
• User Styles ......................................................................... page 104
• User Pad banks .................................................................... page 94
• Registration Memory banks .................................................. page 56
The example display below appears when naming a song on a floppy disk (page 90).
Basic Operation
Entering a character Each key on the keyboard enters a different character, as
marked directly above the key.
Moving the cursor The A#5 and B5 keys move the cursor backward and
forward within the file name.
Entering a lower-case character The C1 key functions as a shift key that shifts between
lower- and upper-case characters: hold the Shift key
while pressing a character key to enter the lower-case
character.
Delete The Delete key (C6) deletes the character at the cursor
position.
Letters and charac-
ters are marked
above the corre-
sponding keys.
C1
–Nam=xxxxxxxx
Cursor
Direct Access
–RegName Regist01
•Lowercase letters cannot be
used for disk file names.
Cursor
22
20
Function Tree
Button Menu/message display Function See page
DEMO Sweet Tenor .................................... Demo song selection ........................................................................................ 13
VOICE R1 001 Grand Piano ............................ Voice R1 selection ............................................................................................ 26
VOICE R2 001 Grand Piano ............................ Voice R2 selection ............................................................................................ 27
VOICE L 001 Grand Piano ............................ Voice L selection .............................................................................................. 28
STYLE 001 8Beat 1 .................................... Accompaniment Style selection ........................................ 1 ................... 32
SONG 001 CLUB_XG................................ Song selection .................................................................................................. 68
SngMenu ........................................ Song menu selection........................................................................................ 69
PlayMode............................. Song play method selection .............................................. ...................... 69
Measure .............................. Song Measure from which to start playback .................................................... 71
AbRepeat ............................ Song repeat setting ........................................................... 2 ................... 72
S.Trans ................................ Song transpose setting ..................................................... 3 ................... 73
MUSIC DATABASE 001 Alive Fever ........................................................................................................................... 4 ................... 14
VOICE CHANGE R1=001 Grand Pno ........................ Voice selection of R1/R2/L/Style track/Song track ........................................... 75
MIXER Volume R1 ...................................... Volume adjustment of Voice R1/R2/L ................................ 5,6,7 ............. 76
Volume Ph1 .................................... Volume adjustment of the accompaniment track............... ...................... 76
Volume T01 .................................... Volume adjustment of the song track ................................ ...................... 76
Octave R1...................................... Octave setting of voice R1/R2/L ........................................ 8,9,10 ........... 77
Octave T01 .................................... Octave setting of song track ............................................................................. 77
Pan R1 .......................................... Pan setting of voice R1/R2/L ............................................................................ 77
Pan RhM ....................................... Pan setting of accompaniment track ................................................................ 77
Pan T01 ......................................... Pan setting of song track .................................................................................. 77
RevDepth R1 ................................. Reverb depth setting of voice R1/R2/L ............................. 27 ................. 77
RevDepth RhM .............................. Reverb depth setting of accompaniment track .................. 27 ................. 77
RevDepth T01 ............................... Reverb depth setting of song track .................................... 27 ................. 77
ChoDepth R1................................. Chorus depth setting of voice R1/R2/L ............................ 30 ................. 77
ChoDepth RhM.............................. Chorus depth setting of accompaniment track .................. 30 ................. 77
ChoDepth T01 ............................... Chorus depth setting of song track ................................... 30 ................. 77
DspDepth R1 ................................. DSP depth setting of voice R1/R2/L ................................. 33 ................. 77
DspDepth RhM .............................. DSP depth setting of accompaniment track ..................... 33 ................. 77
DspDepth T01 ............................... DSP depth setting of song track ....................................... 33 ................. 77
ACMP/SONG VOL Acmp Volume ................................. Accompaniment Volume setting ....................................................................... 37
Song Volume .................................. Song Volume setting ........................................................................................ 70
TRANSPOSE Transpose ....................................... Transpose setting ............................................................................................. 30
TEMPO/TAP Tempo ............................................. Tempo setting ................................................................................................... 36
DISK LOAD Ld ................................................... Loading data from a disk .................................................................................. 62
DISK SAVE Sv ................................................... Saving data to a disk ........................................................................................ 60
DISK UTILTY Menu
SongCopy ............................ Copying a song in a disk .................................................................................. 64
Delete .................................. Deleting a file in a disk ..................................................................................... 67
Format ................................. Formatting a disk ............................................................... 11 ................. 60
• The icon in the chart indicates that the relevant function or parameter can be called up via
the Direct Access function, and the numbers beside the icon correspond to the ones in the Direct
Access Chart on page 24. All functions indicated with this mark (other than Style selection,
Music Database selection, and Disk Format) can be user-assigned to the [+/YES] button, [-/NO]
button and the number buttons [1]-[0] — allowing you to instantly select the desired function/
parameter.
• When you call up the Mixer screens (other than Volume and Octave) via the Direct Access, the
previously edited part (page 74) will be displayed.
• Concerning 1 and 4, the screens that are called up actually are different from the ones
described at the left. See the Direct Access Chart on page 24.
23
21
Function Tree
Button Menu/message display Function See page
FUNCTION F1 Multi Pad
PBnk .................................. Multi pad bank selection .................................................... 12 ................. 44
CdMatch .............................. Chord match on/off setting ................................................ 13 ................. 43
F2 Regist Memory
RBnk .................................. Registration Memory bank selection ................................ 14 ................. 56
RegName ............................ Namimg Registration Memory bank ................................. 15 ................. 56
F3 DigitalEffect
Reverb
RevType .................... Reverb type selection ........................................................ 25 ................. 46
RevRetnLevel ........... Reverb return level setting ................................................ 26 ................. 47
Chorus
ChoType ................... Chorus type selction.......................................................... 28 ................. 48
ChoRetnLevel ........... Chorus return level setting ................................................ 29 ................. 48
Dsp
DspType .................... DSP type selection ............................................................ 16,31 ............ 49
DspRetnLevel ........... DSP return level setting..................................................... 32 ................. 49
Harmony
HTyp ......................... Harmony/Echo type selection ........................................... 17,34 ............ 50
Harmony Vol ............. Harmony /Echo volume setting ......................................... 24 ................. 52
HarmPart .................. Harmony part setting ......................................................... 35 ................. 53
F4 Midi
Template .............................. MIDI template vselection ................................................................................. 112
MidiTemplatLoad? .... Loading the selected MIDI template setting .................................................... 112
Transmit Ch ......................... MIDI transmit channel setting ............................................ ..................... 114
Recive Ch ............................ MIDI receive channel setting ............................................. ..................... 115
LocalContrl .......................... Local control on/off setting ................................................ ..................... 116
Clock .................................. External /Internal clock selection ...................................... ..................... 116
Init Send .............................. Initial data send ................................................................. ..................... 117
F5 Utility
Metronom ............................ Metronome on/off setting .................................................. 18 ................ 118
UpperOct ............................. Upper octave setting ......................................................... ..................... 119
Tuning .................................. Master tuning setting ......................................................... ..................... 119
SC.Tune ............................... Scale tuning setting ......................................................................................... 119
Template ................... Scale tuning template selection ...................................................................... 119
NoteEdit .................... Individual note tuning ........................................................ ..................... 119
Split .................................. Split point setting ............................................................... 19 ................ 120
Fingerng .............................. Fingering selection ............................................................ 20 ................. 38
TouchSns ............................. Touch sensitivity setting .................................................... 21 ................ 120
VoiceSet .............................. Voice set on/off setting ...................................................... 22 ................ 120
Pedal .................................. Selecting footswitch function ............................................. ..................... 121
PitchBnd .............................. Pitch bend range setting ................................................... ..................... 122
Assignbl ............................... Direct Access setting....................................................................................... 122
BackLigt ............................... LCD’s backlight color setting ............................................. 23 ................ 122
RECORD Song
QuickRec ............................. User Song Quick recording .............................................................................. 80
MultiRec .............................. User Song Multi track recording ....................................................................... 82
Punch In/Out............. Punch in/out setting.......................................................................................... 84
RecStart Mes ............ Measure from which to start playback.............................................................. 84
Edit
Quantize ................... Quantize ........................................................................................................... 86
Setup Dt.................... Setup data editing ............................................................................................ 88
Name ........................ Naming User Songs ......................................................................................... 90
Clear ......................... Clearing user song data ................................................................................... 91
Style
Record ................................. User Style recording ......................................................................................... 96
Edit
Quantize ................... Quantize .......................................................................................................... 102
Name ........................ Namimg User Styles ...................................................................................... 104
Clear ......................... Clearing user style data .................................................................................. 104
MultiPad
Record ................................. User Pad recording .......................................................................................... 92
Edit
ChdMatch ................. Chord match on/off setting ............................................................................... 94
Name ........................ Naming user pads ............................................................................................ 94
Clear ......................... Clearing user pad data ..................................................................................... 95

24
22
Various functions other than ones listed above can be accessed by assigning them to the [+/YES]
button, [-/NO] button and the number buttons [1]-[0].
The functions listed above are default settings.
See the Function Tree on pages 22 and 23 for the available functions.
See page 122 about how to assign the available functions.
Function Tree number/function Operation: + button listed below
1 Next style category selection [STYLE]
2 Song repeat setting [SONG]*
3 Song transpose setting [TRANSPOSE]*
4 Next Music database category selection [MUSIC DATABASE]
5 Volume adjustment of Voice R1 [VOICE R1]
6 Volume adjustment of Voice R2 [VOICE R2]
7 Volume adjustment of Voice L [VOICE L]
8 Octave setting of Voice R1 PART ON/OFF [VOICE R1]
9 Octave setting of Voice R2 PART ON/OFF [VOICE R2]
10 Octave setting of Voice L PART ON/OFF [VOICE L]
11 Formatting a disk [UTILITY]
12 Multi pad bank selection MULTI PAD [STOP]
13 Chord match on/off setting MULTI PAD [1]~[4]
14 Registration Memory bank selecton REGISTRATION MEMORY [1]~[4]
15 Naming Registration Memory bank REGISTRATION MEMORY [MEMORY]
16 DSP type selection [DSP] or [FAST/TAP]
17 Harmony/Echo type selection [HARMONY]
18 Metoronome on/off setting [TEMPO/TAP]
19 Split point settiong [SONG/ACMP VOLUME]
20 Fingering selection [ACMP ON/OFF]
21 Touch sensitivity setting [TOUCH]
22 Voice set on/off setting [FUNCTION]
23 LCD’s backlight color setting [DEMO]
24 Harmony/Echo volume setting Number button [0]
25 Reverb type selection Number button [1]
26 Reverb return level setting Number button [2]
27 Reverb depth setting Number button [3]
28 Chorus type selection Number button [4]
29 Chorus return level setting Number button [5]
30 Chorus depth setting Number button [6]
31 DSP type selection Number button [7]
32 DSP return level setting Number button [8]
33 DSP depth setting Number button [9]
34 Harmony/Echo type selection Number button [-/NO]
35 Harmony part setting Number button [+/YES]
Direct Access Chart
* Available only in the Song mode.
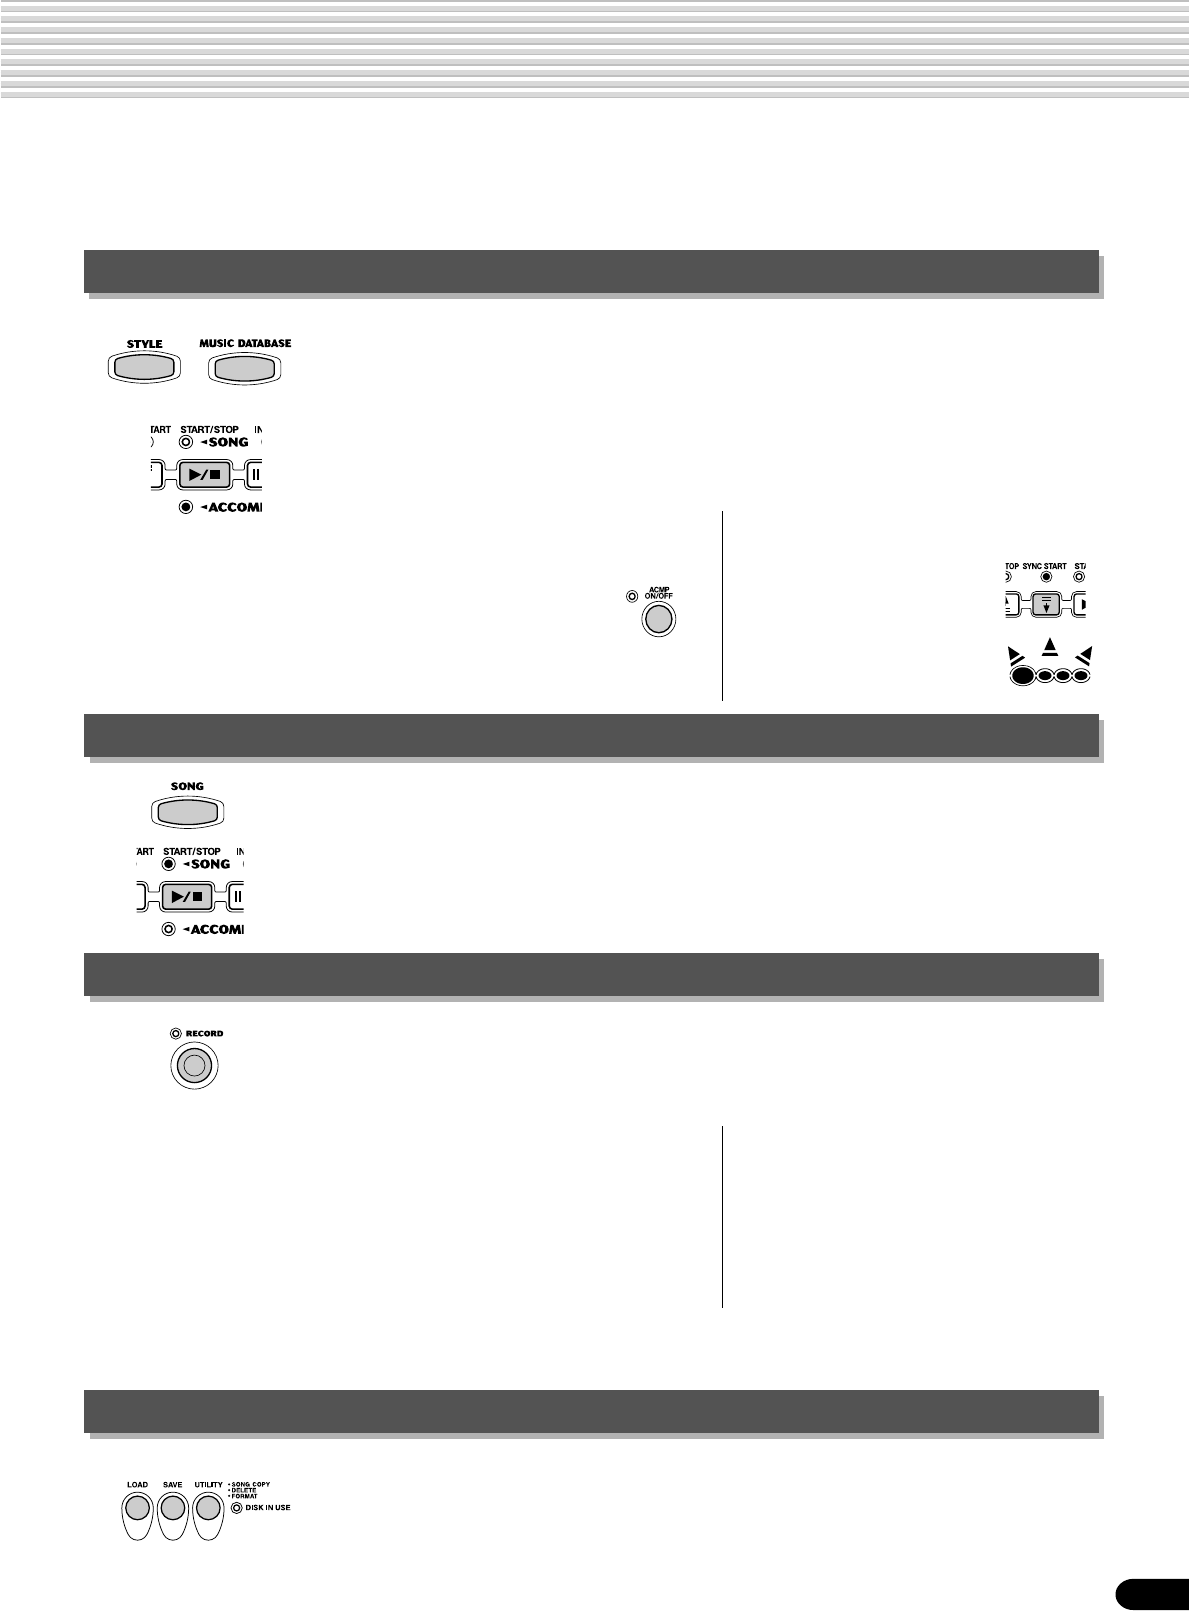
25
23
Mode
Depending on the panel operation used, the PSR-550 has several fundamentally different conditions (or
methods of operation). Each of these condition is called a mode. This section explains the main modes
of the instrument.
Style Mode page 32
Song Mode page 68
Select this mode by pressing the [STYLE] button or the [MUSIC DATABASE] button.
(This is the default mode when the power is turned on.)
The Style mode is used for playing the full keyboard normally, and when using the auto
accompaniment.
Styles are the rhythm/accompaniment pattterns which are played by the auto accompani-
ment feature.
In the Style mode, the backlight color is set to blue as the factory default.
Select this mode by pressing the [SONG] button or inserting the disk that contains song
data into the disk drive.
The Song mode is used for playing the full keyboard normally, and for playing back the
songs.
In the Song mode, the backlight color is set to purple as the factory default.
●Auto accompaniment (ACMP) on/off
..............................................page 33
The [ACMP ON/OFF] button
switches on and off.
When auto accompaniment
is on, the left side of the
keyboard is used for playing/
indicating chords.
●Synchronized Start standby
(SYNC START) on/off ................. page 33
The [SYNC START] button
switches on and off.
When Synchronized Start
standby is on, the auto
accompaniment starts as
soon as you play a key on
the keyboard.
Record Mode
Select this mode by pressing the [RECORD] button.
In the Record mode you can record your own original performances and songs, create
original styles and Multi Pad phrases.
In the Record mode, the backlight color is set to red as the factory default.
●Pad record mode ........................ page 92
• Rehearsal mode (Sync Start off)
• Record (Synchronized Start) standby
• Recording
When Record (Synchronized Start) standby is on, the recording starts as soon as you play
a key on the keyboard.
Disk Mode page 57
Select this mode by pressing the [LOAD] button, [SAVE] button or the [UTILITY]
button.
In the Disk mode you can save and load important data.
In the Disk mode, no panel operations can be executed (except for disk operations).
In the Disk mode, the backlight color is set to blue as the factory default.
●Song record mode .....................page 78
• Rehearsal mode (Sync Start off)
• Record (Synchronized Start) standby
• Recording
●Style record mode ...................... page 96
• Rehearsal mode (Sync Start off)
• Record (Synchronized Start) standby
• Recording
BEAT
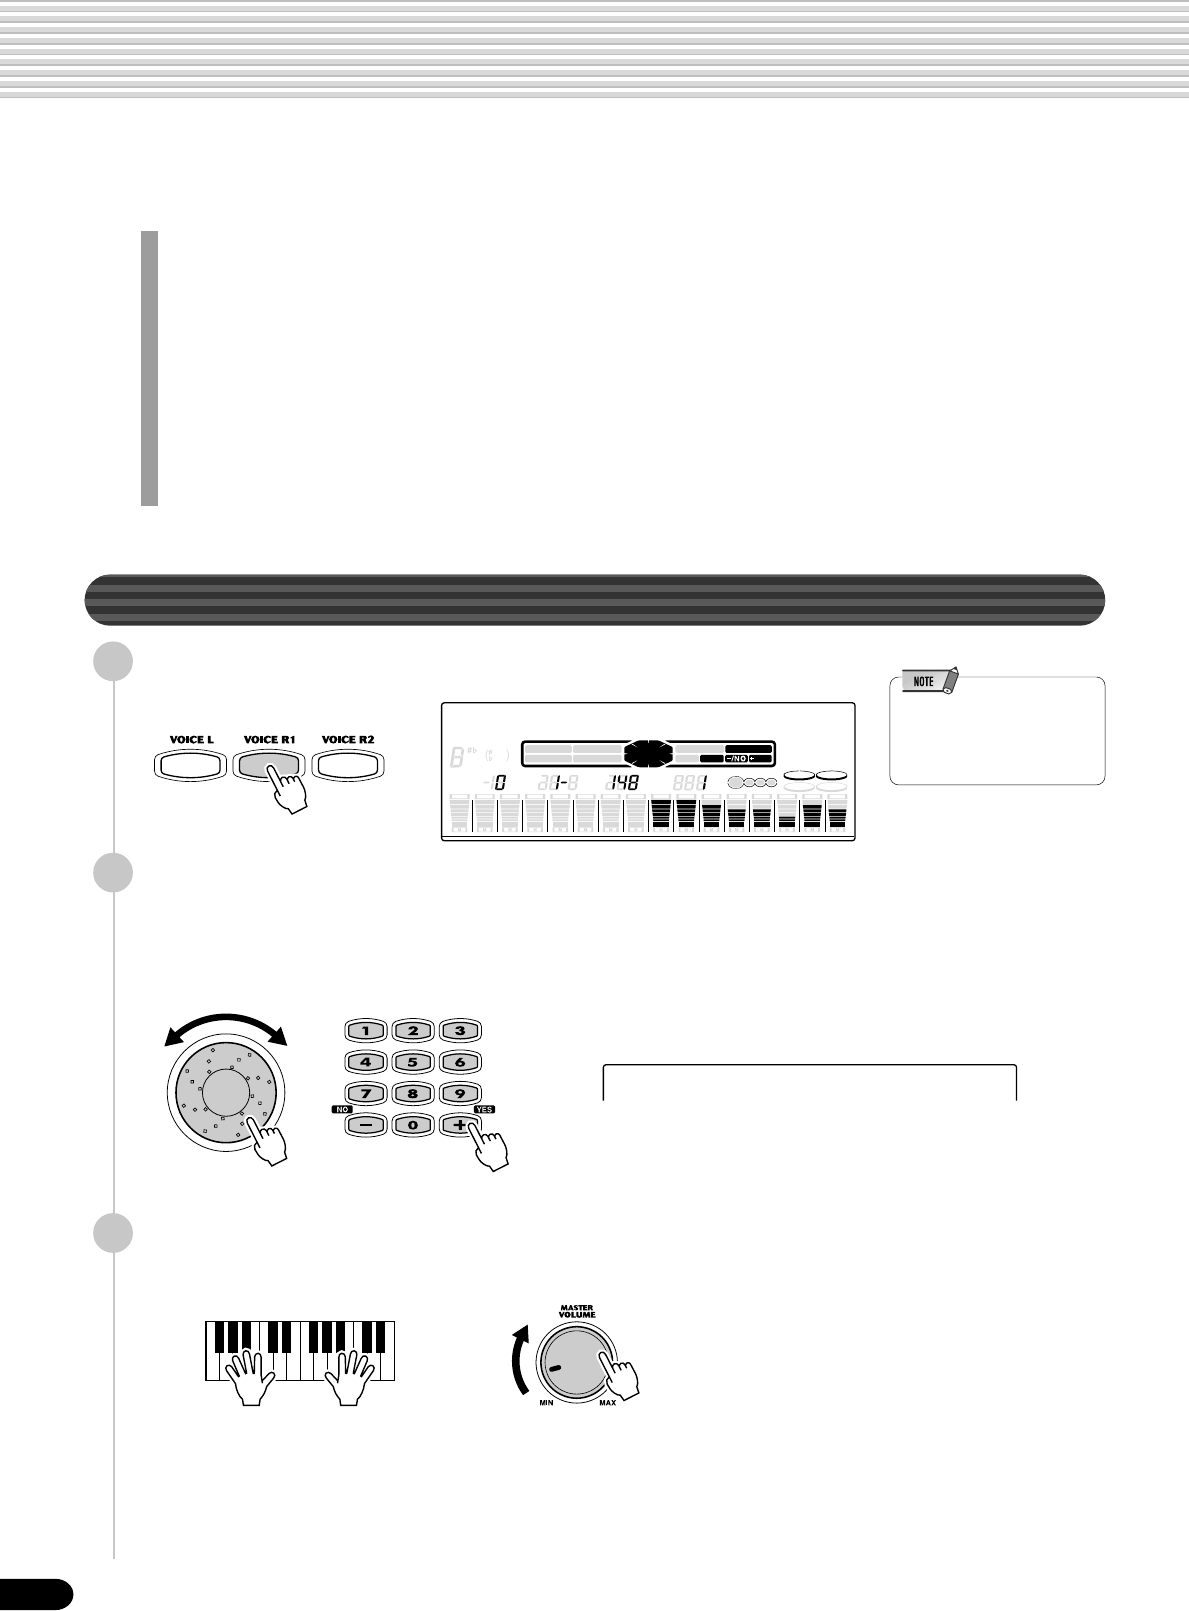
26
Playing Voices
The PSR-550 has a huge selection of various musical instrument voices which you can play. Try out the
different voices referring to the voice list at the end of this manual (page 123).
Select and play the voices of different musical instruments
• Selecting a Voice............................................................................................ page 26
• Keyboard Percussion ..................................................................................... page 31
Assign three different voices to the keyboard and play them
• Playing Two Voices (R1, R2) Simultaneously ................................................. page 27
• Playing Different Voices with the Left (L) and Right (R1, R2) Hands ............. page 28
• Functions of the Keyboard ............................................................................. page 29
Other voice-related functions
• Pitch Bend Wheel .......................................................................................... page 30
• Transpose....................................................................................................... page 30
• Sustain ........................................................................................................... page 30
• Touch Sensitivity .......................................................................................... page 120
Selecting a Voice
1
Press the [VOICE R1] button.
•The voice selected here is
called voice R1 (RIGHT 1).
See page 29 for more
information on voice R1.
2
Select a voice.
Use the data dial, the [+/YES] button, the [-/NO] button or the number buttons
[1]-[0].
Refer to the Voice List (page 123).
3
Play the keyboard and adjust the volume.
CHORD
dim
mM
6
7
augsus4
119
513
1
REC
2
REC
3
REC
4
REC
5
REC
6
REC
7
REC
8
REC
9
REC
10
REC
11
REC
12
REC
13
REC
14
REC
15
REC
16
REC
TRANSPOSE REGIST-
RATION TEMPO MEASURE BEAT
BACK NEXT
KEYBOARD
START/STOP
/YES
TRACK(1~16)
PART DIAL
0~9
SONG
STYLE
VOICE LR12
EASY
NAVIGATOR
001 Grand Piano
DSP(FAST)
SUSTAIN HARMONY
TOUCH
MUSIC DATABASE
002 Bright Piano
24
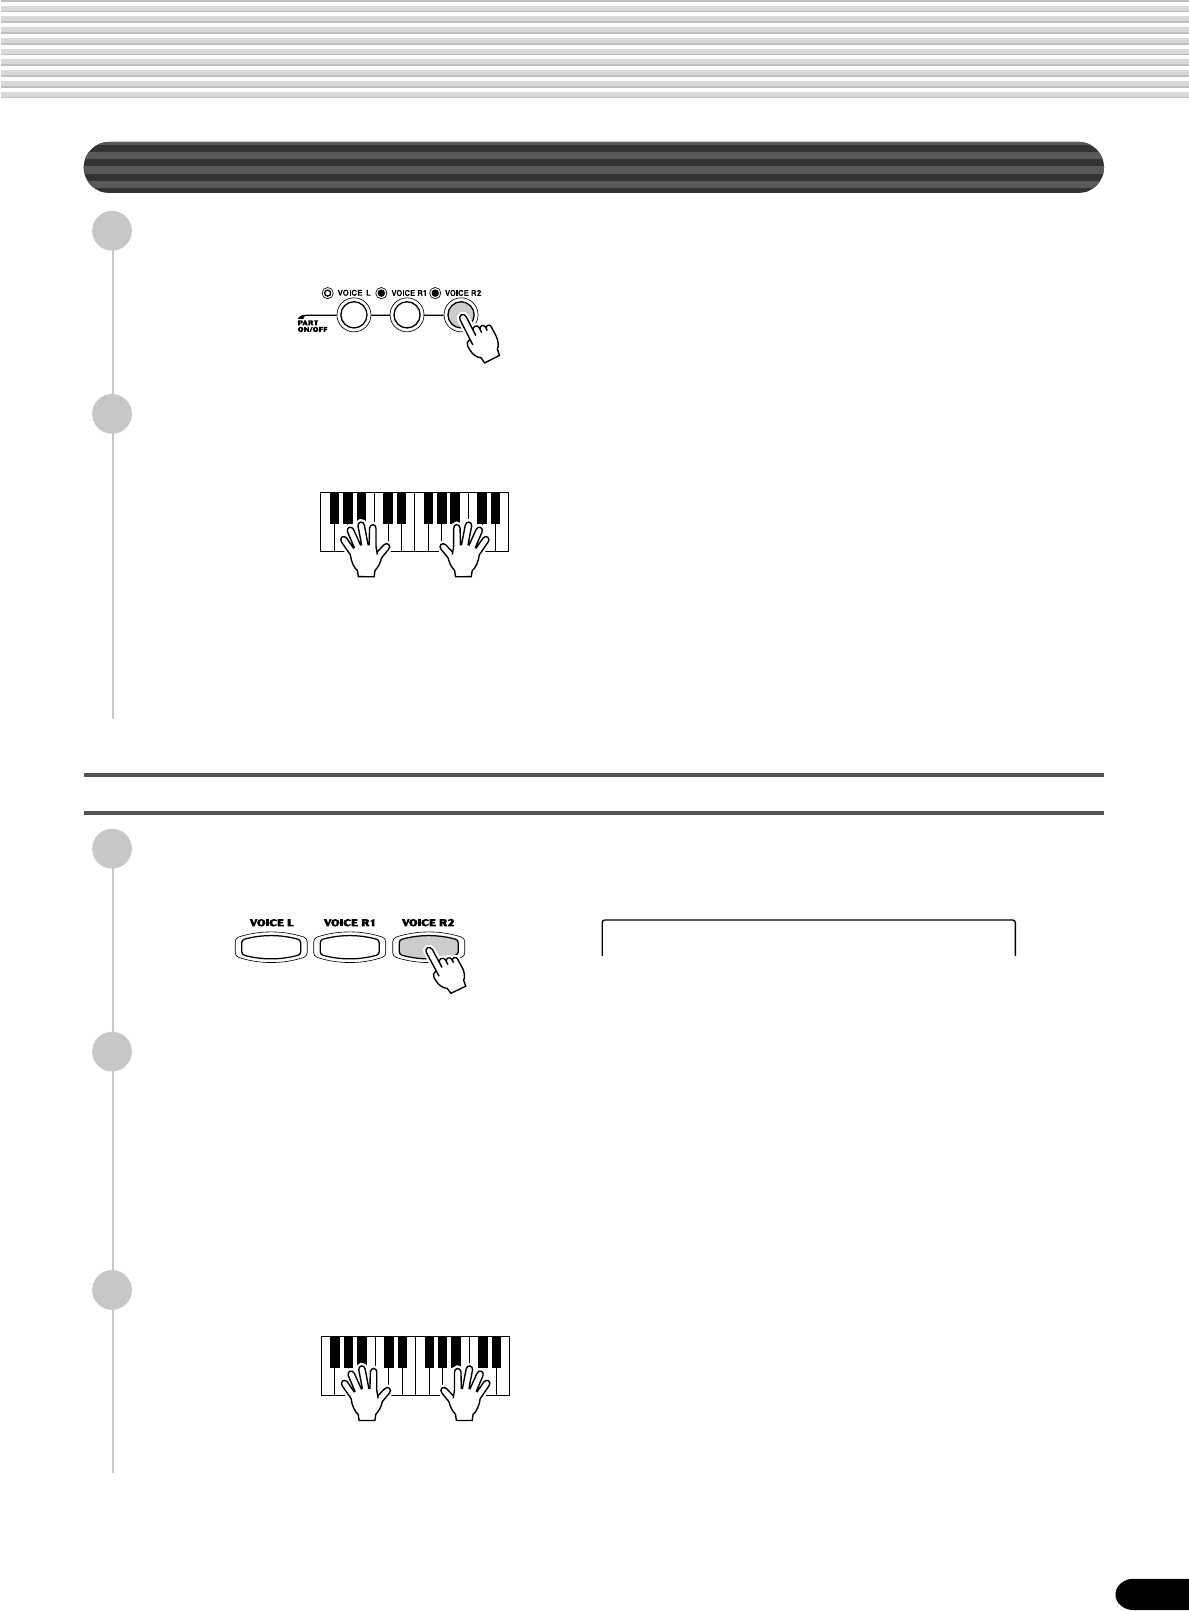
27
Playing Two Voices (R1, R2) Simultaneously
1
Press the [PART ON/OFF VOICE R2] button.
Selecting a voice for VOICE R2
2
Select a voice.
Use the data dial, the [+/YES] button, the [-/NO] button or the number buttons
[1]-[0].
Refer to the Voice List (page 123).
The voices available for selection here (VOICE R2) are the same as those
available for VOICE R1 (selected on page 26).
3
Play the voice.
2
Play the voices.
Two different voices are sounded simultaneously in a layer.
Voice R1 (RIGHT 1) is the first voice of the layer and is meant to be played
with the right hand. The second voice is called voice R2 (RIGHT 2) and is also
played with the right hand.
Playing Voices
1
Press the [VOICE R2] button.
098 Slow Strings
25
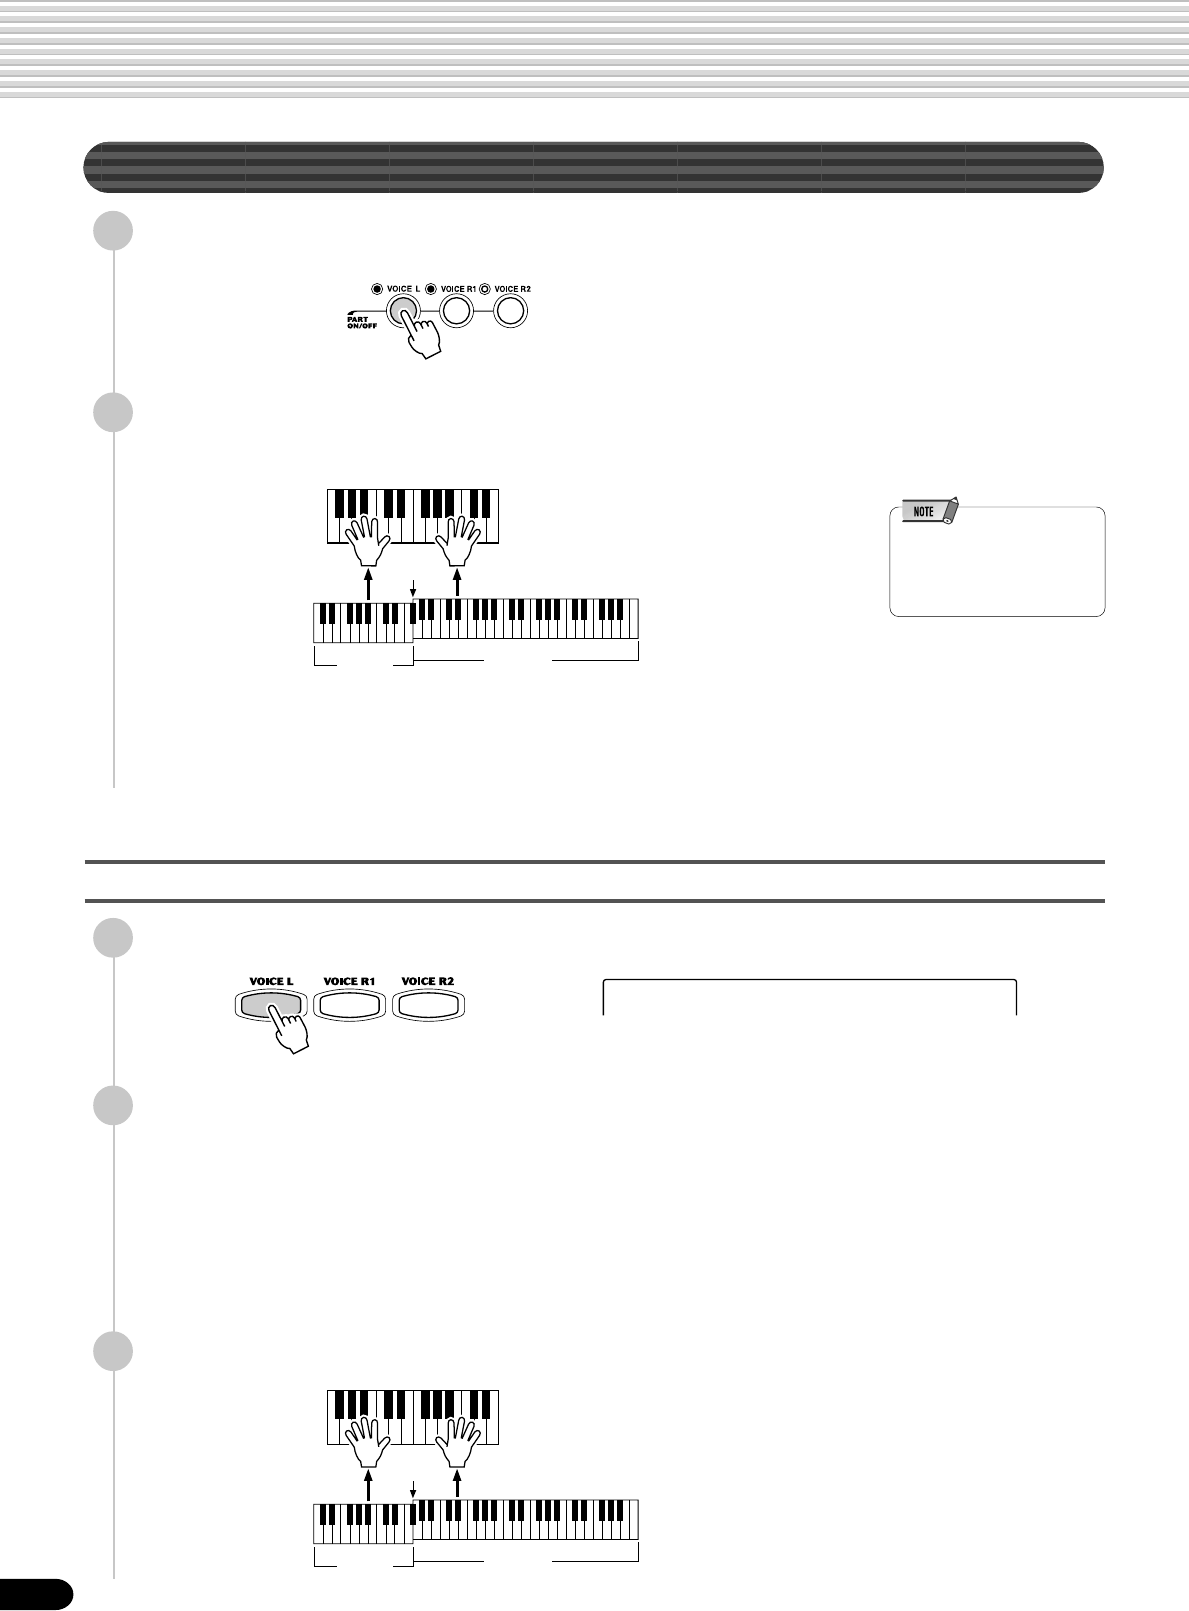
28
Playing Different Voices with the Left (L) and Right (R1, R2) Hands
1
Press the [PART ON/OFF VOICE L] button.
2
Play the voices.
The notes you play with your right and left hands sound two different voices.
•The point on the keyboard
that separates voice L and
voice R1 is called the “split
point” (page 29).
Voice R1 (RIGHT 1) is meant to be played with the right hand. Voice L
(LEFT) is played with the left hand.
Selecting a voice for VOICE L
2
Select a voice.
Use the data dial, the [+/YES] button, the [-/NO] button or the number buttons
[1]-[0].
Refer to the Voice List (page 123).
The voices available for selection here (VOICE L) are the same as those
available for VOICE R1 (selected on page 26).
3
Play the voices.
Playing Voices
1
Press the [VOICE L] button.
Split Point
Voice L Voice R1
095 String Ensbl
Split Point
Voice L Voice R1
26
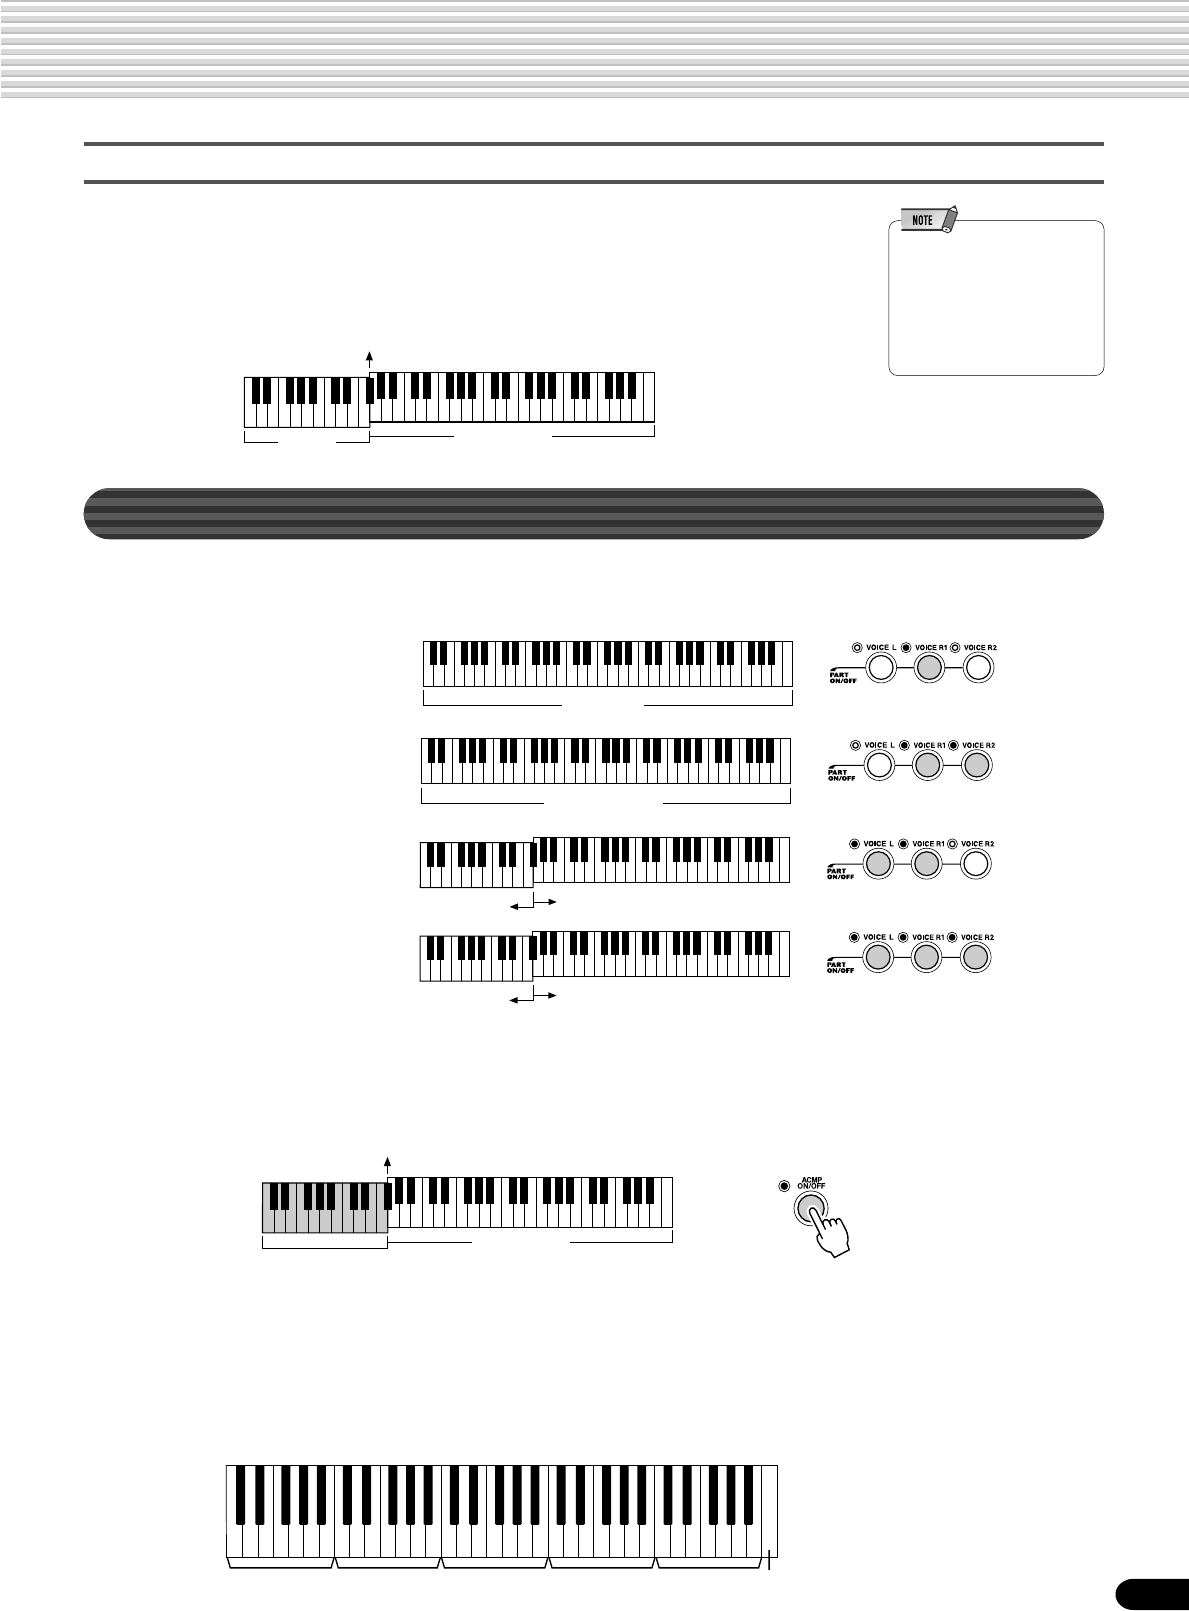
29
Split Point
Functions of the Keyboard
As explained above, the keyboard of the PSR-550 can sound three different voices. Here’s a short summary of the
various ways of playing voices.
● Playing a Single Voice
● Playing Two Voices
● Playing Separate Voices
with the Right and Left
Hands
In addition, the keyboard of the PSR-550 has other important functions besides playing voices (as shown below).
● Auto Accompaniment Section
When the auto accompaniment is set to on (page 33), the key range of voice L becomes the range for playing/
indicating chords.
● Naming
The keyboard can also be used to name song files on a floppy disk, User Styles,
User Pad banks and Registration Memory banks (page 21).
Playing Voices
The point on the keyboard that separates voice L and voice R1/R2 is called the “split
point”.
The split point is set to F#2 at the factory setting, however you can set this to any key
you wish. Refer to page 120 for instructions on setting the split point.
•Each key has a note name;
for example, the lowest
(farthest left) key on the
keyboard corresponds to C1,
and the highest (farthest
right) key to C6. (See below
for details.)
Each key has a note name; for example, the lowest (farthest left) key on the keyboard corresponds to C1, and the
highest (farthest right) key to C6.
Voice L
Split Point (F#2)
Voice R1/R2
Voice R1 + R2
Voice R1
Voice R1 + R2
Voice L
Voice R1
Voice L
C1
C1 - B1
D1 E1 F1 G1 A1 B1
C#1D#1F#1G#1A#1
C2 - B2 C3 - B3 C4 - B4 C5 - B5 C6
Auto accompaniment
section
Split Point
Voice R1/R2
27
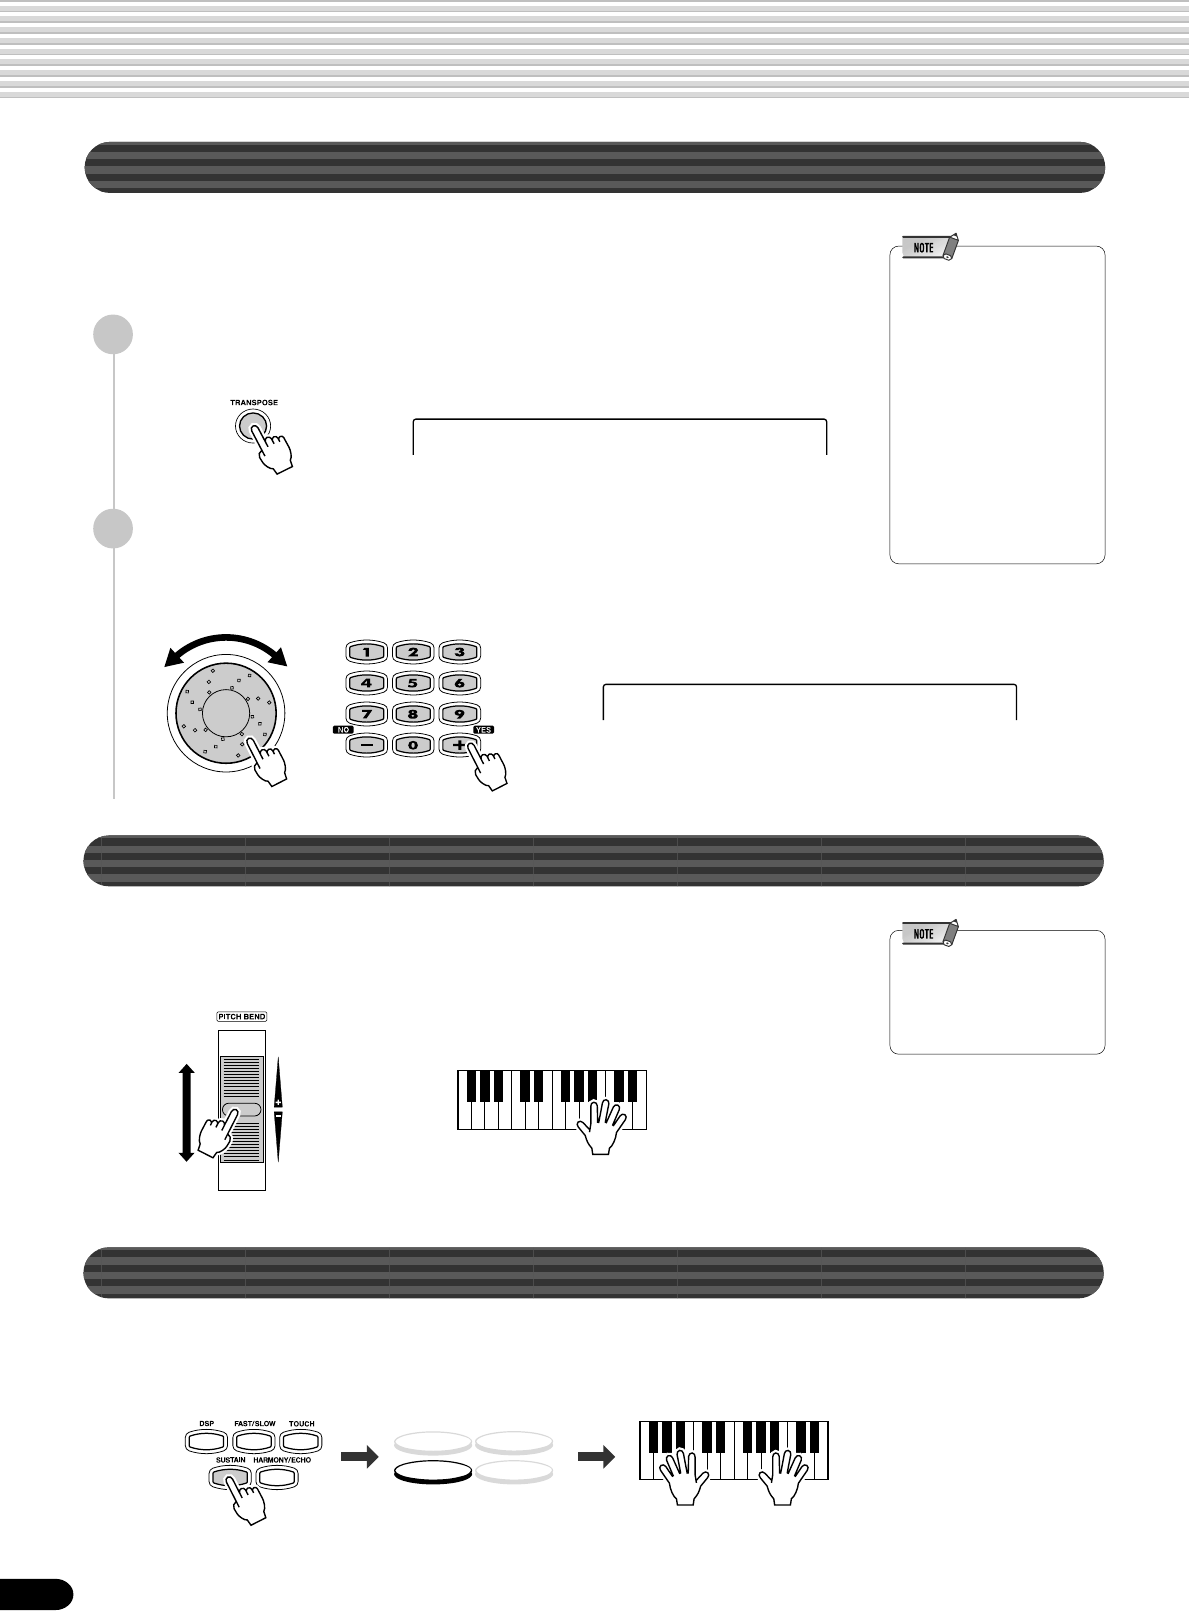
30
Transpose
This function allows the overall pitch of the PSR-550 to be transposed up or down by a
maximum of one octave in semitone increments. The transpose range is from -12 to
+12.
•The Transpose function
cannot be applied when a
drum kit is the selected voice
(page 31).
•Press the [+/YES] and [-/NO]
buttons simultaneously to
instantly reset the transpose
value to “0”.
•The new TRANSPOSE value
will take effect from the next
key played.
•Minus values can be entered
by using the number buttons
while holding the [-/NO]
button.
1
Press the [TRANSPOSE] button.
2
Set the transposition.
Use the data dial, the [+/YES] button, the [-/NO] button or the number buttons
[1]-[0].
Pitch Bend Wheel
Use the PSR-550 pitch bend wheel to bend notes up (roll the wheel away from you) or
down (roll the wheel toward you) while playing the keyboard. The pitch bend wheel is
self-centering and will automatically return to nornal pitch when released.
•The maximum pitch bend
range can be set via the
Pitch Bend Range function in
the Utility function group
(page 122).
Sustain
When the Sustain features is ON, all notes played on the keyboard have a longer
sustain. Press the [SUSTAIN] button to turn the SUSTAIN effect ON or OFF.
Playing Voices
Transpose = 0
Transpose = 4
DSP(FAST)
SUSTAIN HARMONY
TOUCH
28
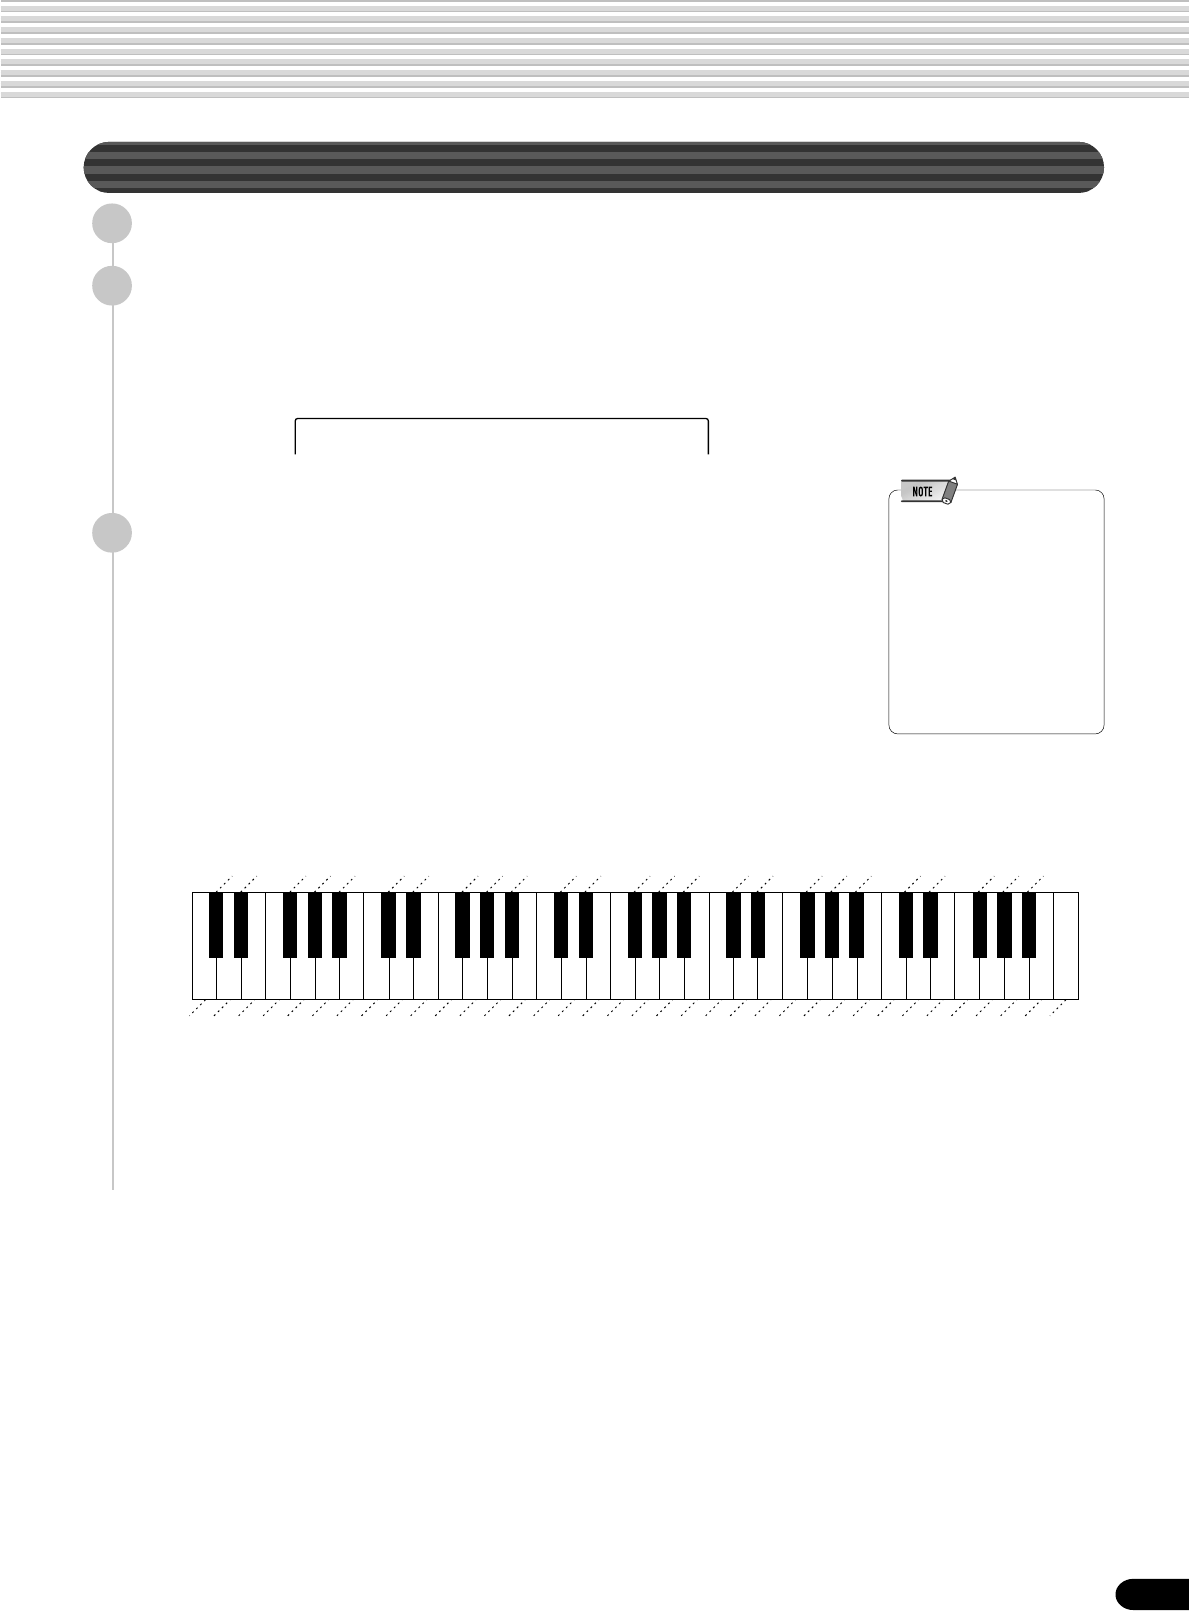
31
Keyboard Percussion
1
Press the [VOICE R1] button.
2
Select “StandardKit1”.
Use the data dial, the [+/YES] button, the [-/NO] button or the number buttons
[1]-[0].
3
Play the voice.
Refer to the illustration below and the drum kit list at the end of the manual
(page 128).
The drum and percussion instrument sounds for the standard kit (Std.Kit1) are
indicated by symbols printed below the keys.
•The Transpose function
cannot be applied when a
drum kit is the selected voice
(page 30).
•Each key has a note name;
for example, the lowest
(farthest left) key on the
keyboard corresponds to C1,
and the highest (farthest
right) key to C6. (See page
29 for details.)
Playing Voices
220 StandardKit1
[Standard Kit 1]
Seq Click H
Bell Tree
Jingle Bell
Triangle Open
Cuica Open
Wood Block L
Wood Block H
Guiro Long
Samba Whistle L
Samba Whistle H
Cabasa
Agogo H
Timbale H
Conga L
Conga H Mute
Bongo H
Ride Cymbal 2
Crash Cymbal 2
Splash Cymbal
Ride Cymbal Cup
Chinese Cymbal
High Tom
Mid Tom H
Mid Tom L
Low Tom
Floor Tom H
Floor Tom L
Snare Tight
Snare
Kick
Kick Tight
Kick Soft
Snare Soft
Snare Roll
Brush Tap Swirl
Brush Swirl
Brush Tap
Shaker
Triangle Mute
Cuica Mute
Claves
Guiro Short
Maracas
Agogo L
Timbale L
Conga H Open
Bongo L
Vibraslap
Cowbell
Tambourine
Ride Cymbal 1
Crash Cymbal 1
Hi-Hat Open
Hi-Hat Pedal
Hi-Hat Closed
Hand Clap
Side Stick
Open Rim Shot
Sticks
Castanet
Brush Slap
C1 C2 C3 C4 C5 C6
29
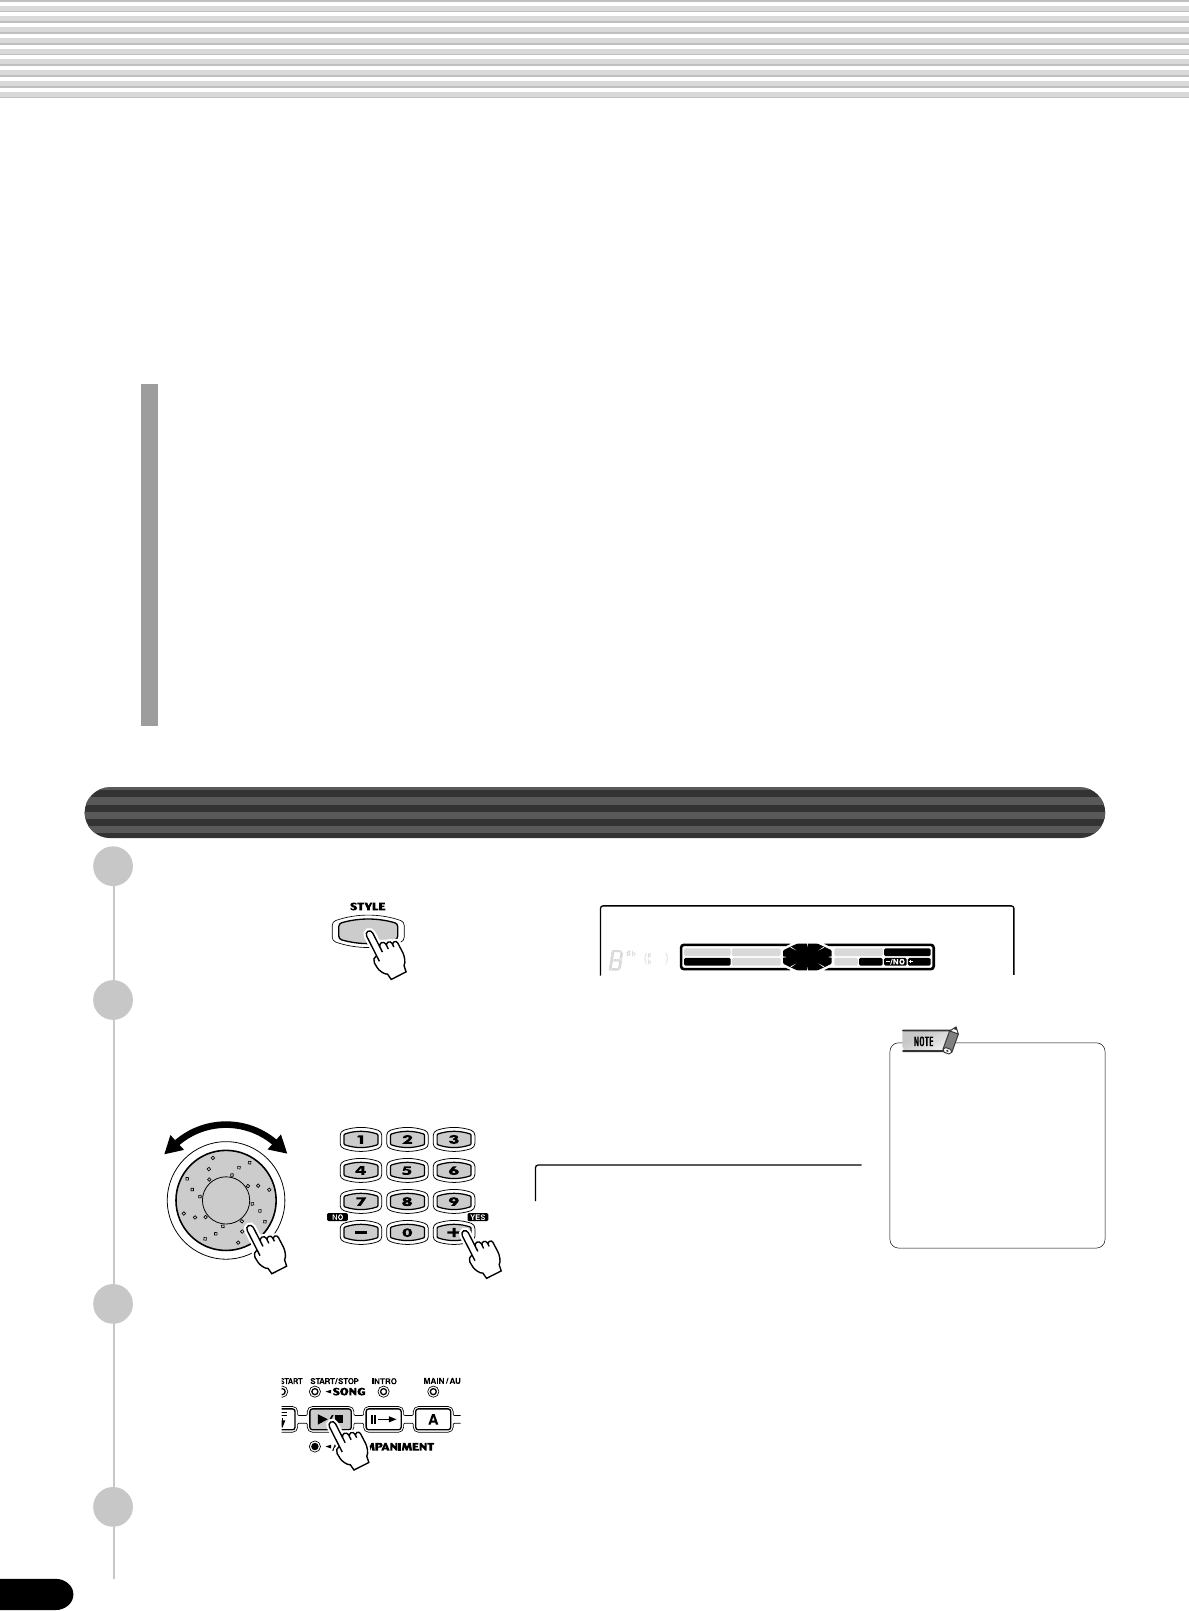
32
Auto Accompaniment
The auto accompaniment feature puts a full backing band at your fingertips. To use it, all you have to do
is play the chords with your left hand as you perform, and the selected accompaniment style matching
your music will automatically play along, instantly following the chords you play. With auto accompani-
ment, even a solo performer can enjoy playing with the backing of an entire band or orchestra.
The PSR-550 features a total of 112 styles or accompaniment patterns (style numbers 1 - 112) in a
variety of different musical genres. Try selecting some of the different styles (page 130) and play with the
auto accompaniment.
Two ways to playback the auto accompaniment
• Using Auto Accompaniment (rhythm track only) .......................................... page 32
• Using Auto Accompaniment (all tracks) ....................................................... page 33
Additional functions for getting the most out of the auto accompaniment
• Accompaniment Sections ............................................................................ page 34
• Tempo / Tap .................................................................................................. page 36
• Accompaniment Track Muting ...................................................................... page 37
• Accompaniment Volume Control .................................................................. page 37
Auto accompaniment functions related to your left hand chord playing
• Chord Fingerings ......................................................................................... page 38
• Accompaniment Split Point .......................................................................... page 40
• Synchro Stop ............................................................................................... page 41
Automatic one-touch selection of a variety of specially programmed panel
settings to match the auto accompaniment style
• One Touch Setting........................................................................................ page 42
Using Auto Accompaniment (rhythm track only)
1
Press the [STYLE] button.
2
Select a style.
Use the data dial, the [+/YES] button, the [-/NO] button or the number buttons
[1]-[0].
Refer to the Style List (page 130).
3
Press the [START/STOP] button to start the rhythm tracks of
the auto accompaniment, minus the bass and chord tracks.
4
Press the [START/STOP] button again to stop the accompani-
ment.
002 8 Beat 2
CHORD
dim
mM
6
7
augsus4
119
513
BACK NEXT
KEYBOARD
START/STOP
/YES
TRACK(1~16)
PART DIAL
0~9
SONG
STYLE
VOICE LR12
EASY
NAVIGATOR
001 8 Beat 1
MUSIC DATABASE
30
•You can select successive
Style categories by using the
Direct Access function. The
method is the same as for
selecting Music Database
categories. Refer to step #2
in “Using the Music
Database” on page 14. Also
refer to the Style categories
printed on the panel.
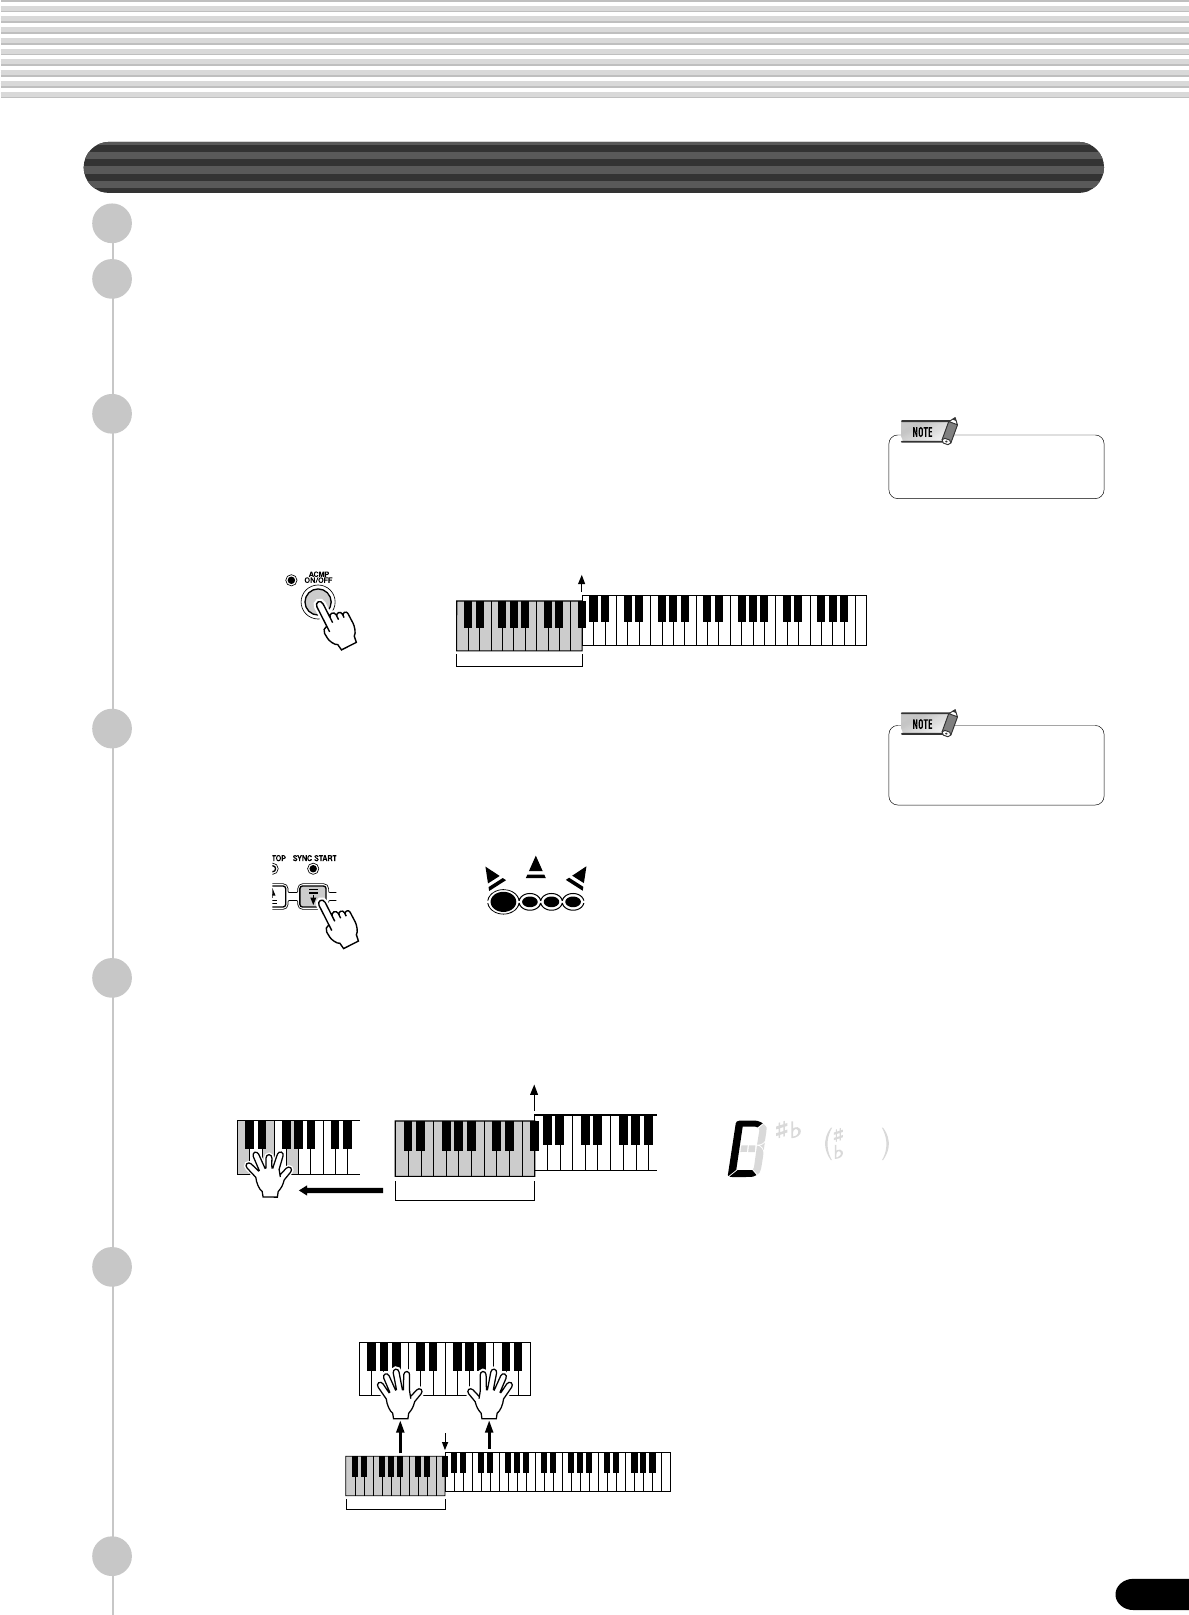
33
Using Auto Accompaniment (all tracks)
1
Press the [STYLE] button.
2
Select a style.
Use the data dial, the [+/YES] button, the [-/NO] button or the number buttons
[1]-[0].
Refer to the Style List (page 130).
3
Turn AUTO ACCOMPANIMENT on.
Press the [ACMP ON/OFF] so that its indicator lights.
The specified left-hand section of the keyboard becomes the “Auto Accompani-
ment” section, and chords played in this section are automatically detected and
used as a basis for fully automatic accompaniment with the selected style.
4
Turn SYNCHRONIZED START on.
Press the [SYNC START] button so that its indicator lights.
The beat lamp also flashes in time with the tempo. This condition is called
synchronized start standby. Refer to page 25 for details.
5
As soon as you play a chord with your left hand, the auto
accompaniment starts.
For this example, play a C major chord (as shown below).
6
Try playing other chords with your left hand.
For information on how to enter chords, see “Chord Fingerings” on page 38.
7
Press the [START/STOP] button again to stop the accompani-
ment.
Auto Accompaniment
•[ACMP] is the abbreviation of
[ACCOMPANIMENT] .
•[SYNC START] is the
abbreviation of [SYNCHRO-
NIZED START].
Auto Accompaniment
section
Split Point
BEAT
CHORD
dim
mM6
7augsus4
119
513
Split Point
Auto Accompaniment
section
Split Point
Auto Accompaniment
section
31
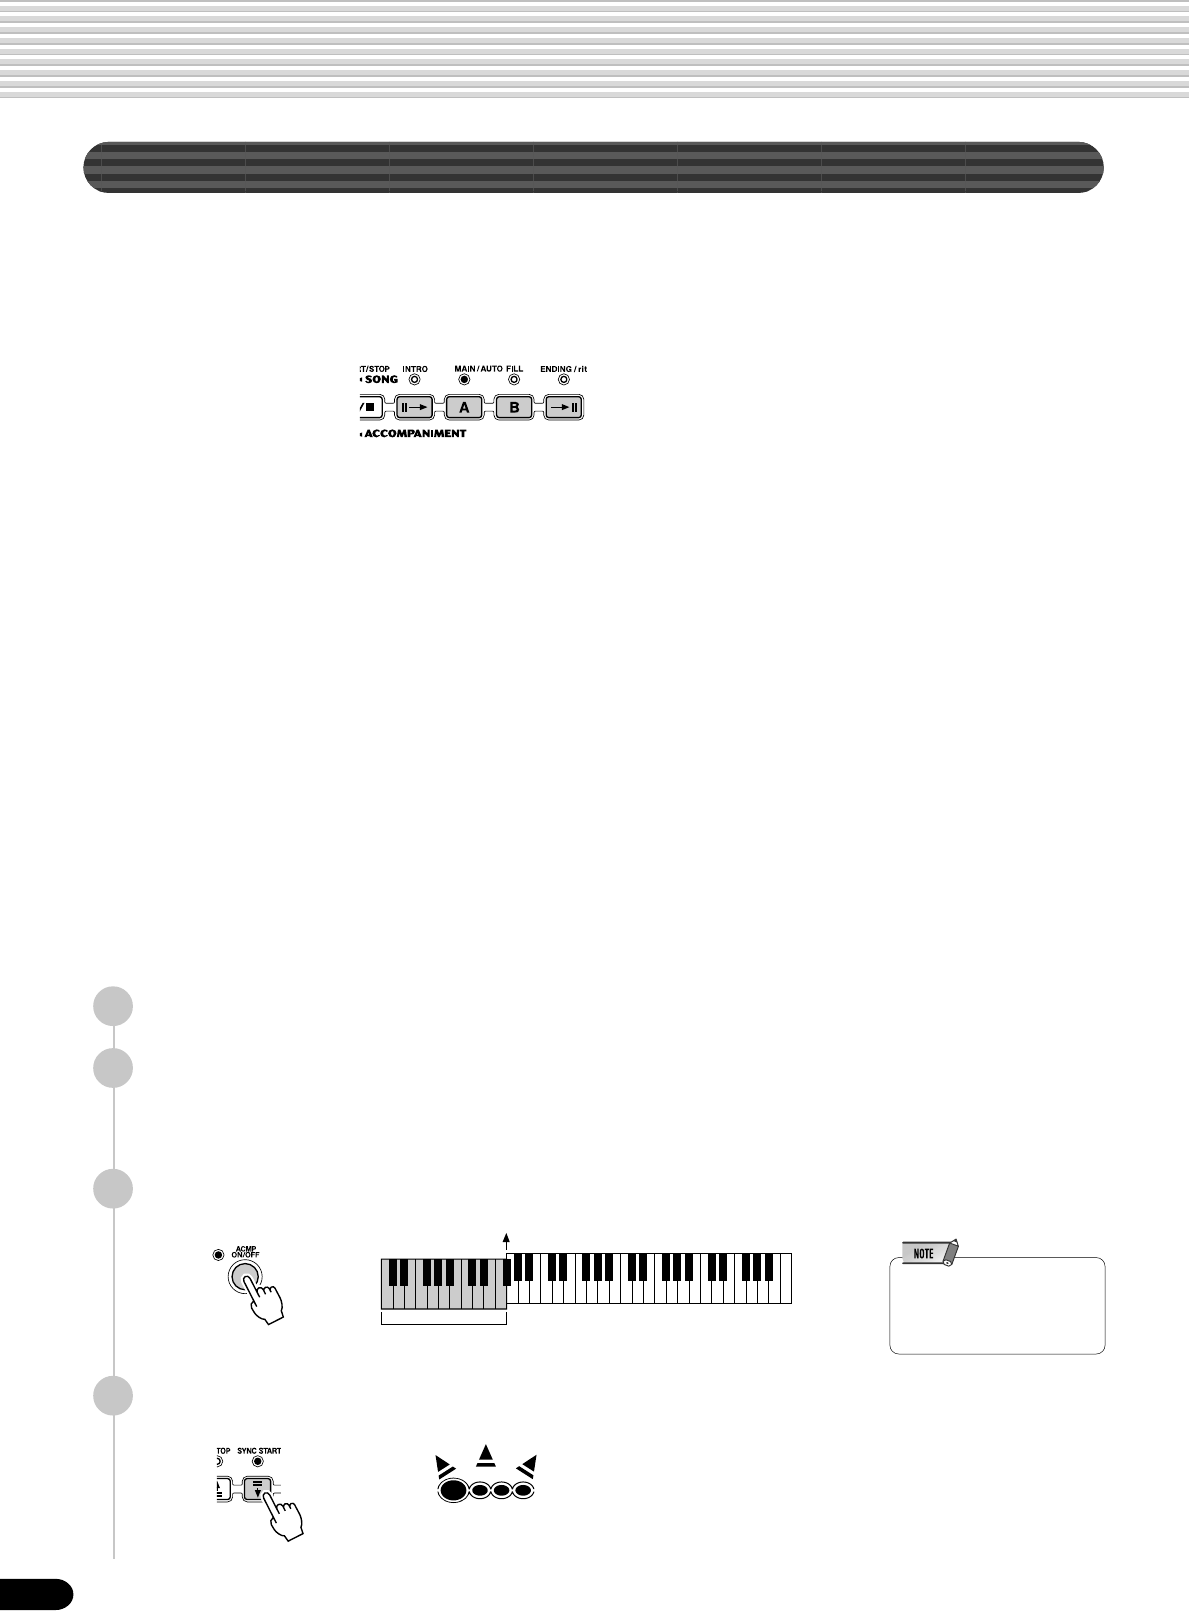
34
Auto Accompaniment
Accompaniment Sections
There are various types of Auto Accompaniment sections that allow you to vary the
arrangement of the accompaniment to match the song you are playing. They are: Intro,
Main A and B, Fill-in and Ending. By switching among them as you play, you can
easily produce the dynamic elements of a professional-sounding arrangement in your
performance.
1
Press the [STYLE] button.
2
Select a style (page 32).
Use the data dial, the [+/YES] button, the [-/NO] button or the number buttons
[1]-[0].
3
Turn AUTO ACCOMPANIMENT on (page 33).
4
Turn SYNCHRONIZED START on (page 33).
● INTRO Section
This is used for the beginning of the song. When the intro finishes playing, accompani-
ment shifts to the main section.
The length of the intro (in measures) differs depending on the selected style.
● MAIN Section
This is used for playing the main part of the song. It plays an accompaniment pattern of
several measures (2 - 4 measures), and repeats indefinitely until another section’s button
is pressed. There are two variations on the basic pattern, A - B, and the auto accompani-
ment changes harmonically based on the chords you play with your left hand.
● FILL-IN Section
The fill-in sections let you add dynamic variations and breaks in the rhythm of the
accompaniment, to make your performance sound even more professional. Simply press
one of the MAIN/AUTO FILL (A, B) buttons as you play, and the selected fill-in section
plays automatically (AUTO FILL), spicing up the auto accompaniment. When the fill-in is
finished, it leads smoothly into the selected main section (A, B).
● ENDING Section
This is used for the ending of the song. When the ending is finished, the auto accompani-
ment stops automatically. The length of the ending (in measures) differs depending on
the selected style.
•[ACMP] is the abbreviation of
[ACCOMPANIMENT] and
[SYNC START] is that of
[SYNCHRONIZED START].
Auto Accompaniment
section
Split Point
BEAT
32
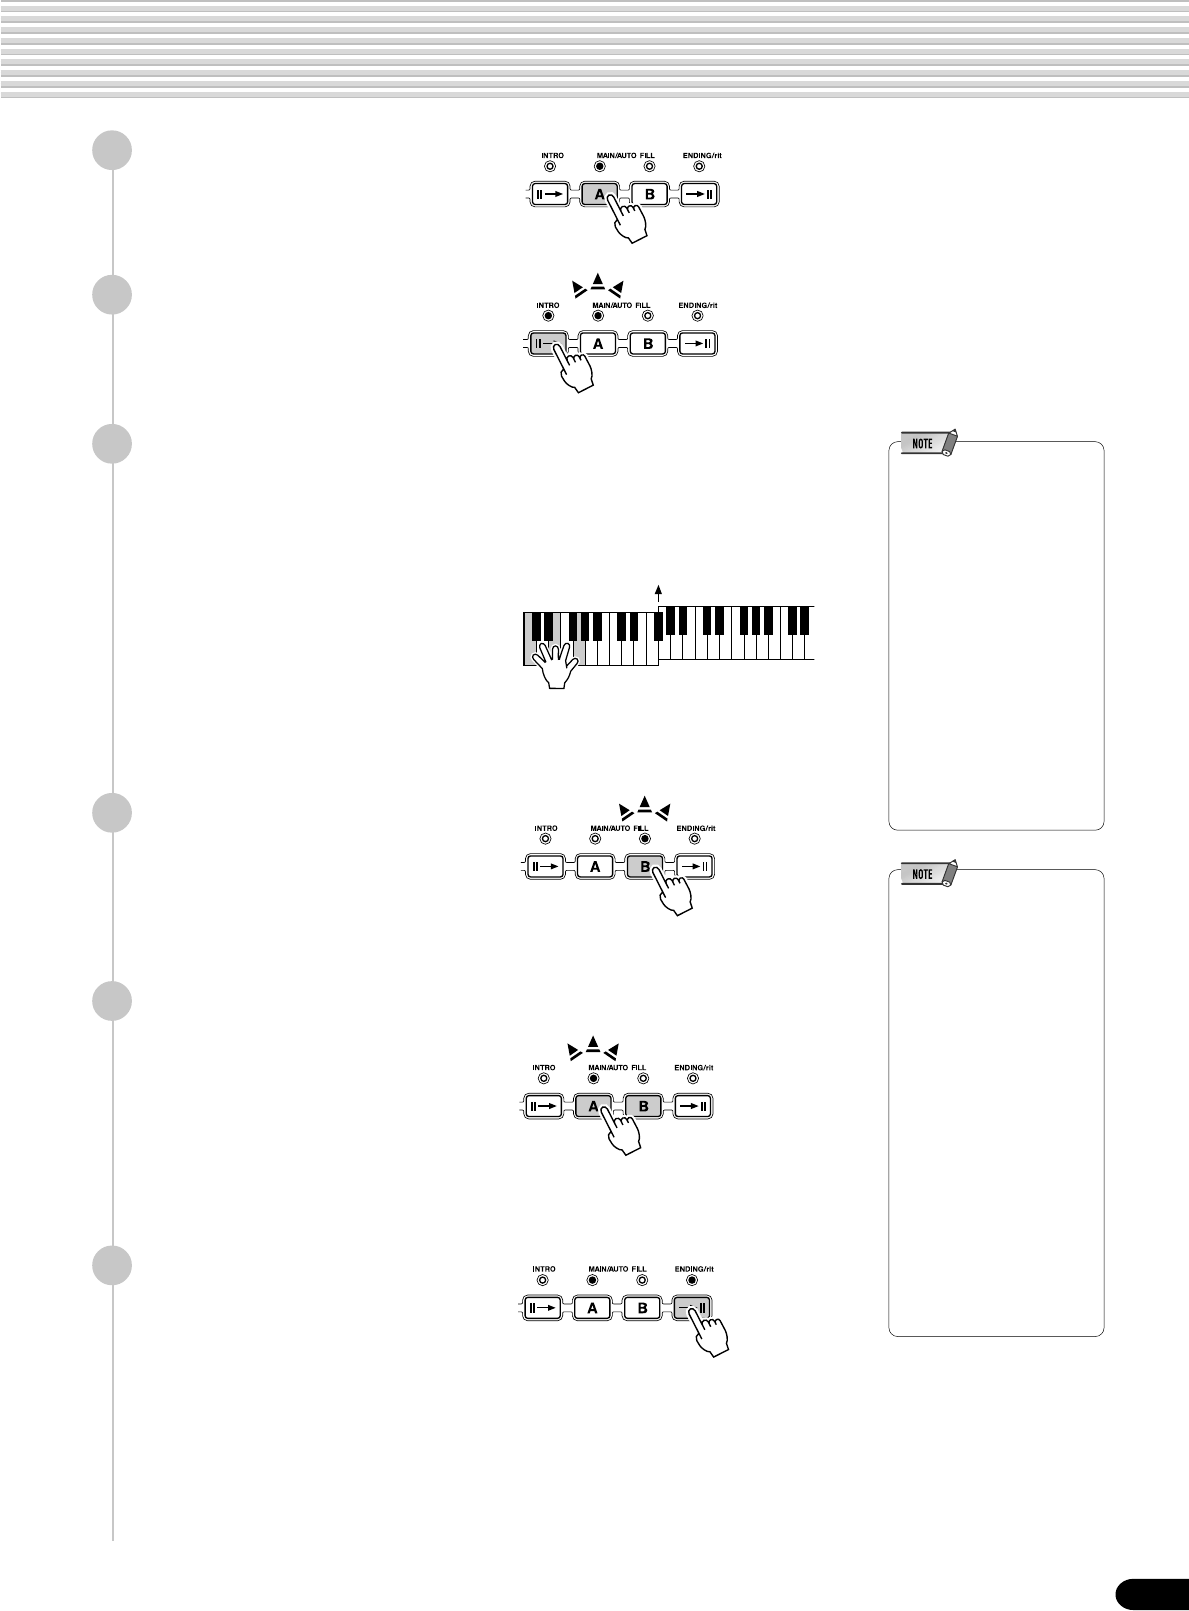
35
Auto Accompaniment
5
Press the [MAIN A] button.
6
Press the [INTRO] button.
7
As soon as you play a chord with your left hand, the auto
accompaniment starts.
For this example, play a C major chord (as shown below).
For information on how to enter chords, see “Chord Fingerings” on page 38.
When the playback of the intro is finished, it automatically leads into main A
section.
•The indicator of the
destination section (MAIN A
or B) will flash while the
corresponding fill-in is
playing. During this time you
can change the destination
section by pressing the
appropriate MAIN/AUTO
FILL [A] or [B] button.
•You can use the intro section
even in the middle of the
song by pressing the
[INTRO] button during the
song.
•If the MAIN/AUTO FILL A/B
button is pressed after the
final half beat (eighth note) of
the measure, fill-in will begin
from the next measure.
8
Press the [MAIN B] button.
A fill-in plays, automatically followed by the main B section.
9
Press the MAIN buttons as desired during your performance.
The main section corresponding to the pressed button plays following an
automatic fill-in.
10
Press the [ENDING] button.
This switches to the ending section. When the ending is finished, the auto
accompaniment automatically stops.
You can have the ending gradually slow down (ritardando) by pressing the
[ENDING] button again while the ending is playing back.
•If you press the INTRO
button while the ending is
playing, the intro section will
begin playing after the
ending is finished.
•If you press a MAIN/AUTO
FILL button while the ending
is playing, the fill-in
accompaniment will
immediately start playing,
continuing with the main
section.
•If you press the [SYNC
START] button while the
accompaniment is playing,
the accompaniment will stop
and the PSR-550 will enter
Synchronized Start standby
status.
•You can begin the
accompaniment by using the
ending instead of the intro
section.
Split Point
33
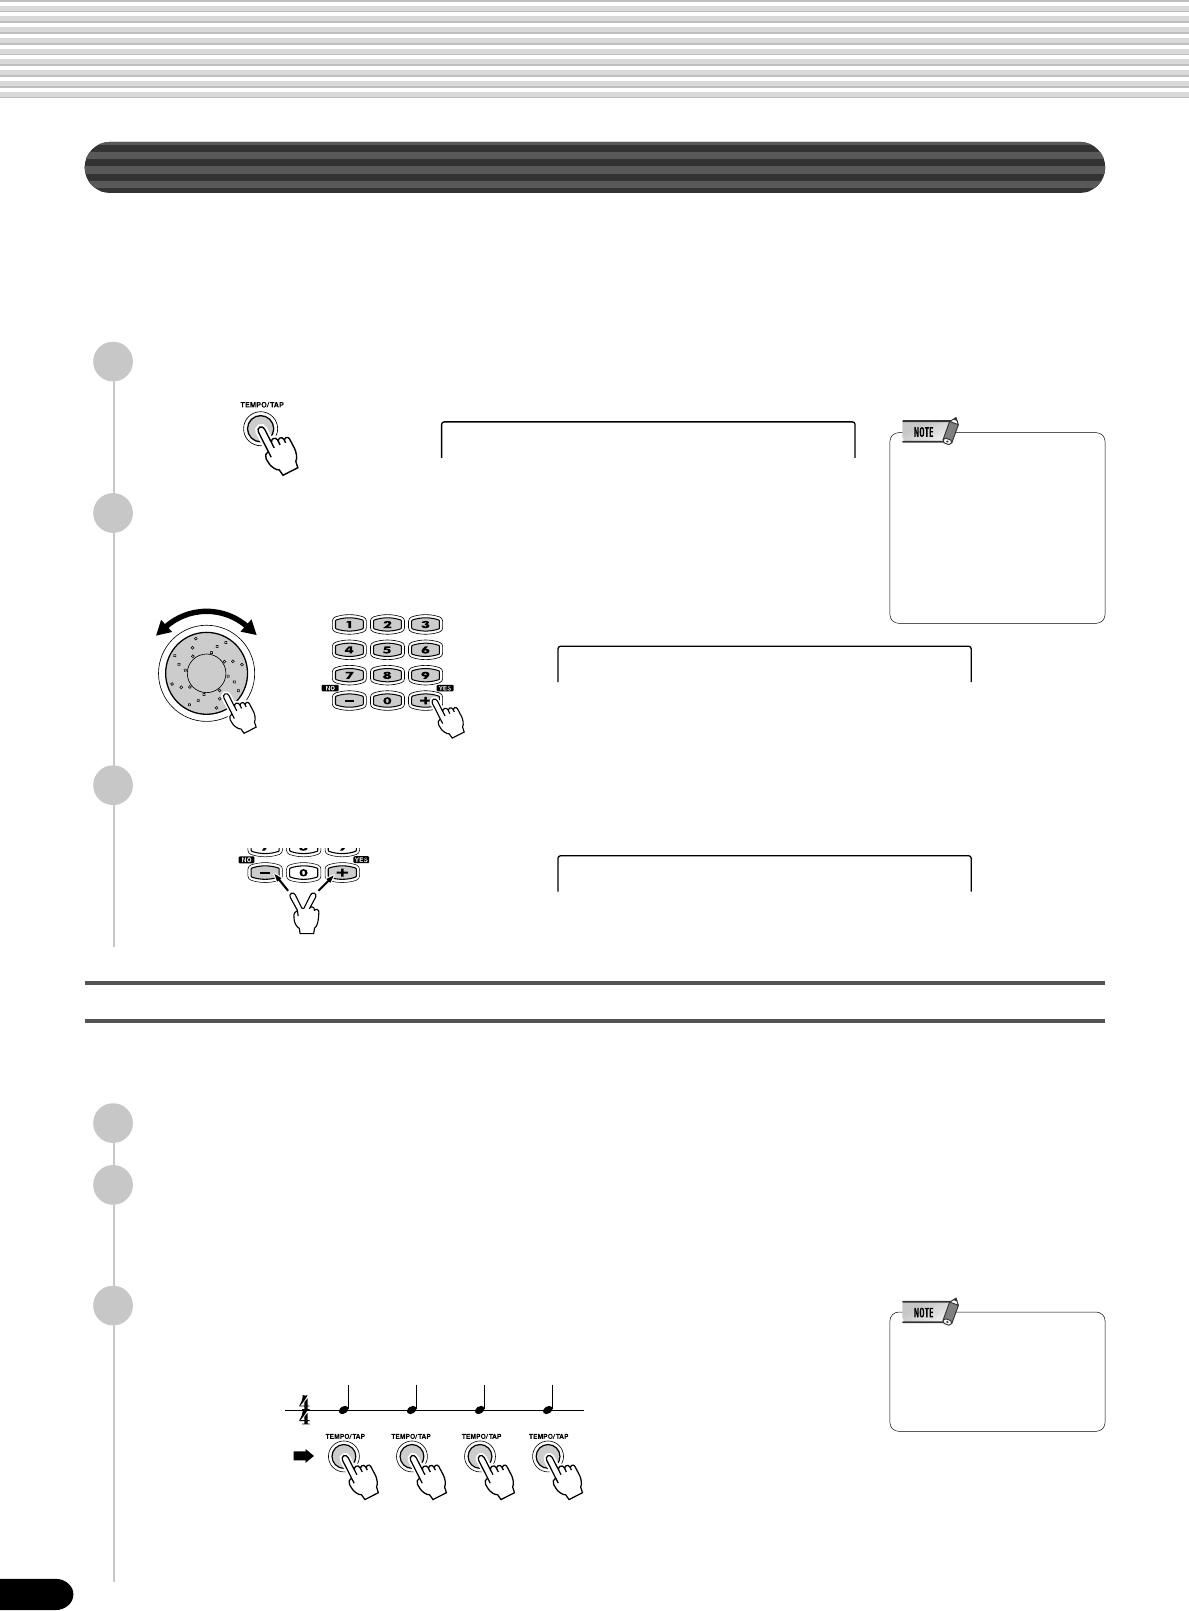
36
Auto Accompaniment
Tempo/Tap
Each style of the PSR-550 has been programmed with a default or standard tempo;
however, this can be changed by using the [TEMPO/TAP] button.
You can change the tempo to any value between 32 and 280 beats per minute.
The following steps can be used even during playback.
1
Press the [TEMPO/TAP] button.
2
Change the tempo.
Use the data dial, the [+/YES] button, the [-/NO] button or the number buttons
[1]-[0].
3
To restore the default tempo setting, press the [+/YES]/[-/NO]
buttons simultaneously.
Using the Tap function
The auto accompaniment starts automatically at the tempo you tapped the
button.
•The Tempo can also be
changed during playback by
tapping the TEMPO/TAP
button twice at the desired
tempo.
The auto accompaniment can be started at any tempo you desire by “tapping“ out the
tempo with the [TEMPO/TAP] button.
1
Press the [STYLE] button.
2
Select a style (page 32).
Use the data dial, the [+/YES] button, the [-/NO] button or the number buttons
[1]-[0].
3
Press the [TEMPO/TAP] button four times successively (in a
consistent rhythm).
•When you select a different
style while the accompani-
ment is not playing, the
“default” tempo for that style
is also selected. If the
accompaniment is playing,
the same tempo is
maintained even if you select
a different style.
Tempo =148
Tempo =124
Tempo =148
● When a 4-beat style is selected
Tap 4 times
34
* When a 3-beat style is selected,
tap 3 times.
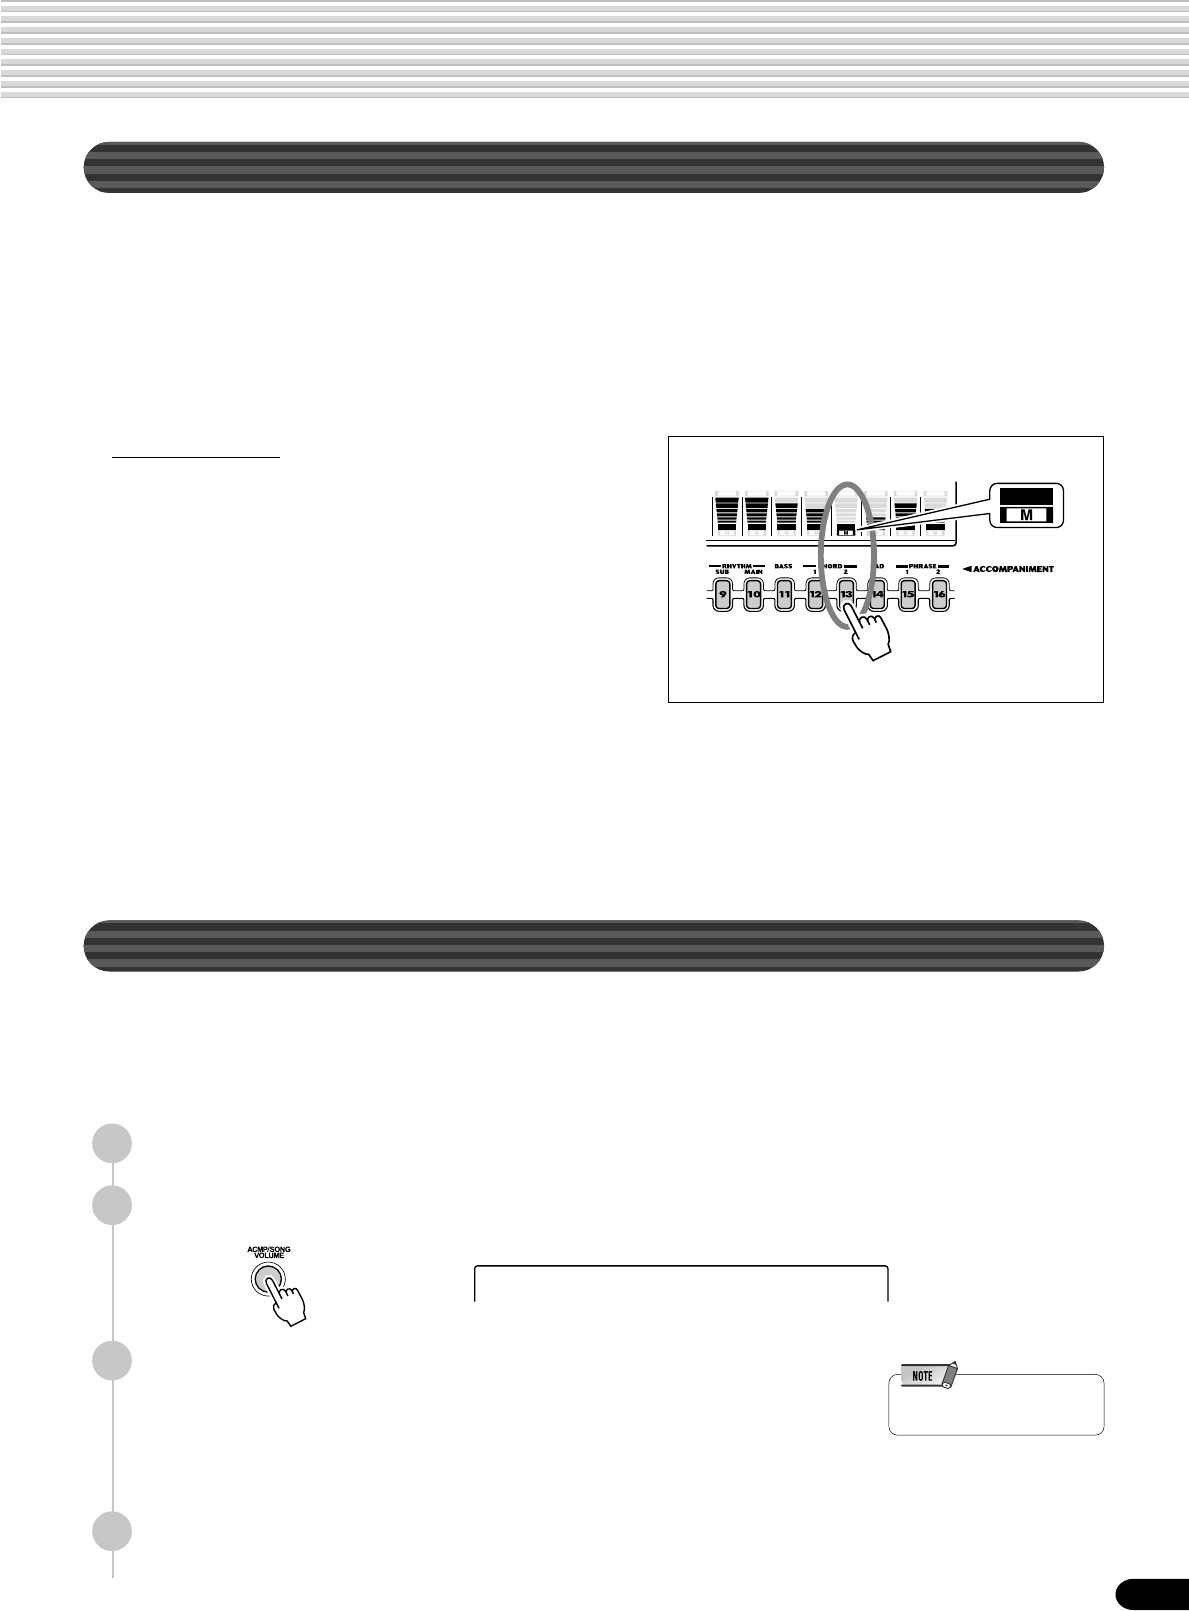
37
Auto Accompaniment
Accompaniment Track Muting
The PSR-550 has eight accompaniment tracks — RHYTHM SUB, RHYTHM MAIN, BASS, CHORD 1, CHORD
2, PAD, PHRASE 1 and PHRASE 2 — that you can control to modify the “orchestration” and therefore the overall
sound of the accompaniment. When a style is selected, the icons corresponding to the tracks which contain data for
any section of that style will light.
Individual accompaniment tracks can be turned OFF (muted) or ON by pressing the TRACK buttons (9 - 16)
corresponding to the target tracks. The [M] icon will appear when a track is muted. By turning the tracks OFF and
ON in different combinations, you can create various arrangements from a single accompaniment style.
Accompaniment Volume Control
This separate volume control for the auto accompaniment lets you set the optimum
level balance between the accompaniment and your right hand performance.
The accompaniment volume range is from “0” (no sound) to “127” (maximum vol-
ume).
1
Start the accompaniment (page 33).
2
Press the [ACMP/SONG VOLUME] button.
Track contents
● RHYTHM SUB, RHYTHM MAIN
These are the main rhythm tracks. The RHYTHM tracks produce
the drum and percussion sounds.
● BASS
The BASS track always plays a bass line, but the voice will
change to fit the selected style … acoustic bass, synth bass,
tuba, etc.
● CHORD 1, CHORD 2
These tracks provide the rhythmic chordal accompaniment
required by each style. You’ll find guitar, piano and other chordal
instruments here.
● PAD
This track plays long chords where necessary, using sustained instruments such as
strings, organ, choir.
● PHRASE 1, PHRASE 2
This is where the musical embellishments reside.
The PHRASE tracks are used for punchy brass stabs, arpeggiated chords and other
extras that make the accompaniment more interesting.
3
Adjust the Accompaniment Volume.
Use the data dial, the [+/YES] button, the [-/NO] button or the number buttons
[1]-[0].
Adjust the level as you play the keyboard with your right hand, listening to the
overall balance between the accompaniment and the keyboard-played voice.
•[ACMP] is the abbreviation of
[ACCOMPANIMENT] .
4
Stop the accompaniment (page 33).
9
REC
10
REC
11
REC
12
REC
13
REC
14
REC
15
REC
16
REC
13
Acmp Volume =100
35
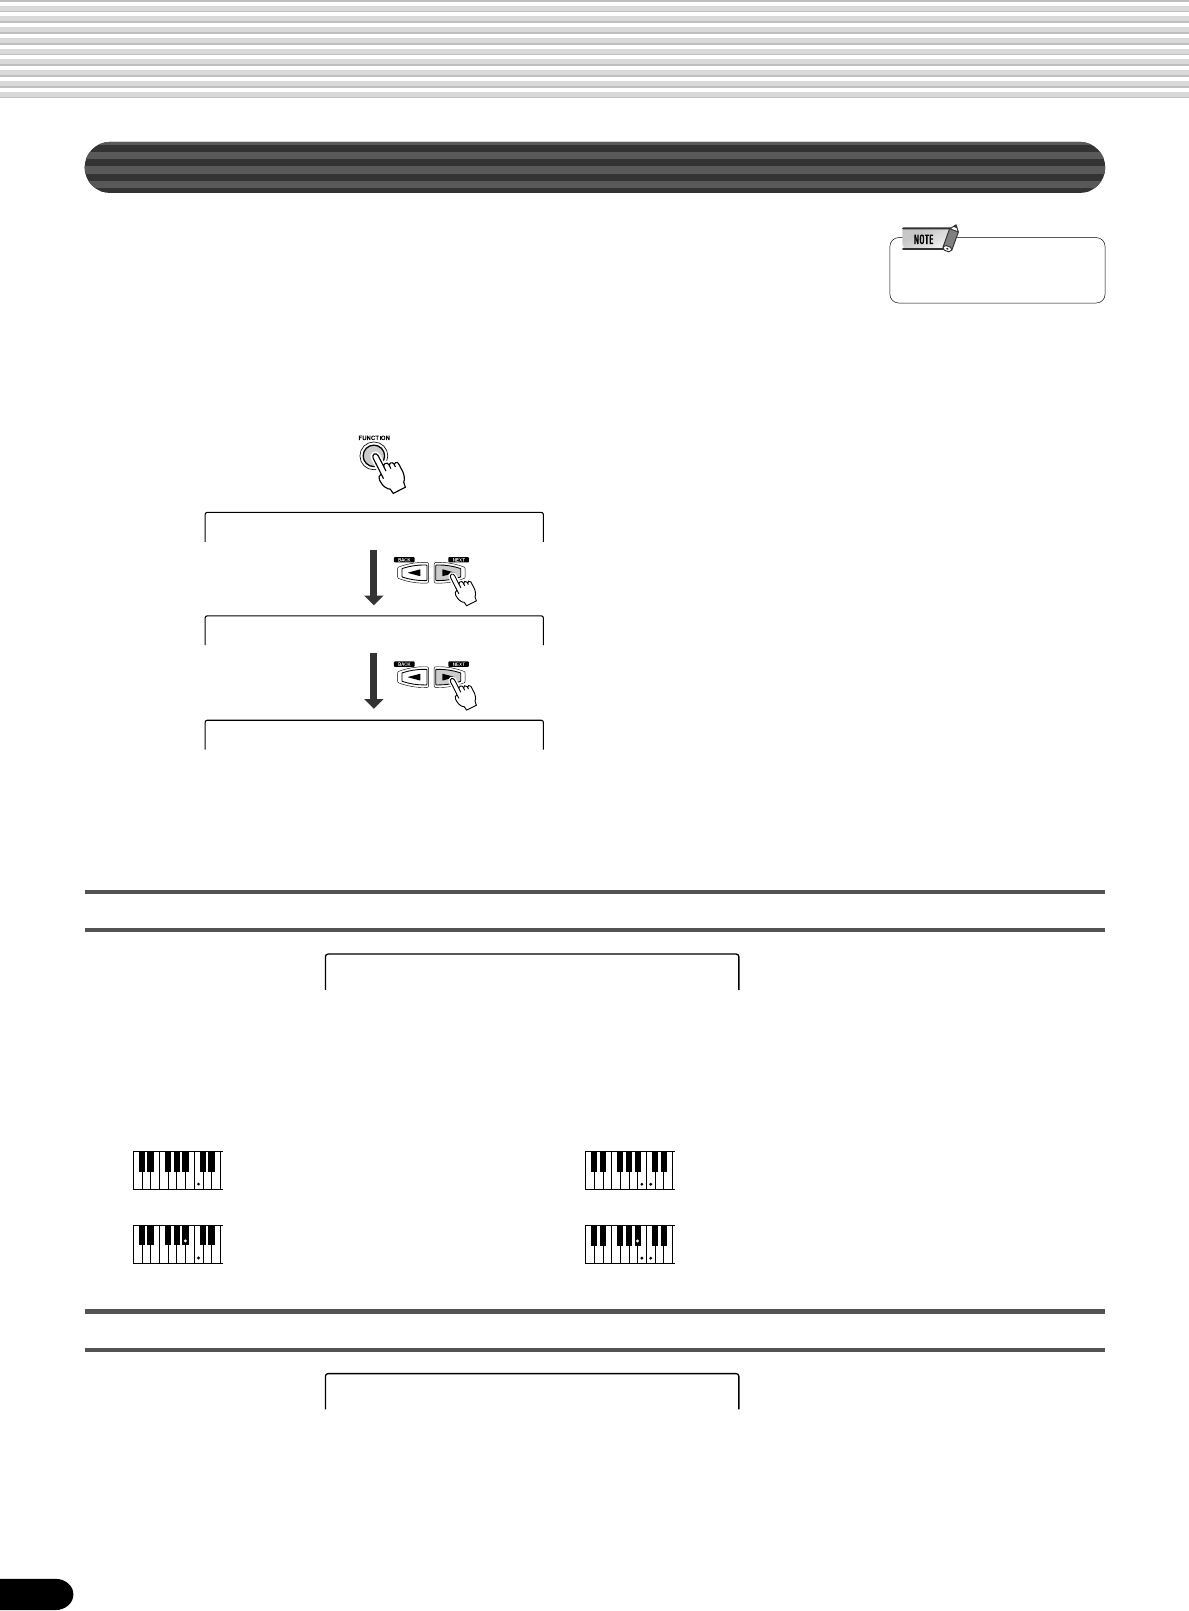
38
Auto Accompaniment
Chord Fingerings
The way in which chords are played or indicated with your left hand (in the auto
accompaniment section of the keyboard) is referred to as “fingering”. There are 5
types of fingerings as described below.
• Multi Finger ................................................................................................ page 40
• Single Finger .............................................................................................. page 38
• Fingered 1 .................................................................................................. page 38
• Fingered 2 .................................................................................................. page 40
• Full Keyboard ............................................................................................. page 40
•The default fingering mode is
“Multi Finger”.
The Single Finger mode
Single-finger accompaniment makes it simple to produce beautifully orchestrated
accompaniment using major, seventh, minor and minor-seventh chords by pressing a
minimum number of keys on the Auto accompaniment section of the keyboard. The
following abbreviated chord fingerings are used:
The Fingered 1 mode
The Fingered 1 mode lets you finger your own chords on the Auto accompaniment
section of the keyboard (i.e. all keys to the left of and including the split-point key —
normally F#2) while the PSR-550 supplies appropriately orchestrated rhythm, bass and
chord accompaniment in the selected style.
The Fingered 1 mode recognizes the following chords:
Fingering =Singl
Fingering =F1
Cm
C
Cm
7
C
7
•For a major chord, press the root key only.
•For a minor chord, simultaneously press the
root key and a black key to its left.
•For a seventh chord, simultaneously press the
root key and a white key to its left.
•For a minor-seventh chord, simultaneously
press the root key and both a white and black
key to its left.
36
1
Press the [FUNCTION] button.
2
Select ‘‘Utility’’ by using the data dial, the [+/YES]
button or the [-/NO] button.
3
Press the [NEXT] button.
4
Select ‘‘Fingerng’’ by using the data dial, the [+/
YES] button or the [-/NO] button.
5
Press the [NEXT] button.
6
Select the way in which chords are played or
indicated (Fingering) by using the data dial, the [+/
YES] button or the [-/NO] button.
F5 Utility
F5 Util:Fingerng
Fingering =Multi
The operations for each function corresponding to step #6 are covered in the following
explanations.
39
Auto Accompaniment
C
Cm
7
C
( )
CM
( )
7
C
(9)
C
( )
(9)
6
Caug Cm
6
Cm
7
( )
Cm
b5
7
CmM
b5
7
Cm
( )
(9)
7
Cm
(9)
CmM
7
( )
CmM
(9)
7
( )
Cdim Cdim
7
C
(9)
7
( )
C
(13)
7
( )
C
(b9)
7
( )
C
(b13)
7
Csus
4
C
1+2+5
C
b5
7
C
6
( )
( )
CM
7(9) 7
CM
(#11)
( )
7
CM
b5
C
(b5)
( )
C
(#11)
7
C
(#9)
7
( )
C aug
7
Cm
7(11)
( )
( )
CM aug
7
( )
C sus
4
7
( )
● Example for “C” chords
•Notes in parentheses can be
omitted.
•If you play any three
adjacent keys (including
black keys), the chord sound
will be cancelled and only
the rhythm instruments will
continue playing (CHORD
CANCEL function).
•Playing a single key or two
same root keys in the
adjacent octaves produces
accompaniment based only
on the root.
•A perfect fifth (1 + 5)
produces accompaniment
based only on the root and
fifth which can be used with
both major and minor
chords.
•The chord fingerings listed
are all in “root” position, but
other inversions can be used
— with the following
exceptions:
m7, m7
b
5, 6, m6, sus4,
aug, dim7, 7
b
5, 6(9),
m7(11), 1+2+5.
•Inversion of the 7sus4 chord
are not recognized if the 5th
is omitted.
•The AUTO ACCOMPANI-
MENT will sometimes not
change when related chords
are played in sequence (e.g.
some minor chords followed
by the minor seventh).
•Two-note fingerings will
produce a chord based on
the previously played chord.
Chord Name/[Abbreviation] Normal Voicing
Major [M] 1 - 3 - 5
Add ninth [(9)] 1 - 2 - 3 - 5
Sixth [6] 1 - (3) - 5 - 6
Sixth ninth [6(9)] 1 - 2 - 3 - (5) - 6
Major seventh [M7] 1 - 3 - (5) - 7 or
1 - (3) - 5 - 7
Major seventh ninth [M7(9)] 1 - 2 - 3 - (5) - 7
Major seventh add sharp eleventh [M7(#11)] 1 - (2) - 3 - #4 - 5 - 7 or
1 - 2 - 3 - #4 - (5) - 7
Flatted fifth [(b5)] 1 - 3 - b5
Major seventh flatted fifth [M7b5] 1 - 3 - b5 - 7
Suspended fourth [sus4] 1 - 4 - 5
Augmented [aug] 1 - 3 - #5
Major seventh augmented [M7aug] 1 - (3) - #5 - 7
Minor [m] 1 - b3 - 5
Minor add ninth [m(9)] 1 - 2 - b3 - 5
Minor sixth [m6] 1 - b3 - 5 - 6
Minor seventh [m7] 1 - b3 - (5) - b7
Minor seventh ninth [m7(9)] 1 - 2 - b3 - (5) - b7
Minor seventh add eleventh [m7(11)] 1 - (2) - b3 - 4 - 5 - (b7)
Minor major seventh [mM7] 1 - b3 - (5) - 7
Minor major seventh ninth [mM7(9)] 1 - 2 - b3 - (5) - 7
Minor seventh flatted fifth [m7b5] 1 - b3 - b5 - b7
Minor major seventh flatted fifth [mM7b5] 1 - b3 - b5 - 7
Diminished [dim] 1 - b3 - b5
Diminished seventh [dim7] 1 - b3 - b5 - 6
Seventh [7] 1 - 3 - (5) - b7 or
1 - (3) - 5 - b7
Seventh flatted ninth [7(b9)] 1 - b2 - 3 - (5) - b7
Seventh add flatted thirteenth [7(b13)] 1 - 3 - 5 - b6 - b7
Seventh ninth [7(9)] 1 - 2 - 3 - (5) - b7
Seventh add sharp eleventh [7(#11)] 1 - (2) - 3 - #4 - 5 - b7 or
1 - 2 - 3 - #4 - (5) - b7
Seventh add thirteenth [7(13)] 1 - 3 - (5) - 6 - b7
Seventh sharp ninth [7(#9)] 1 - #2 - 3 - (5) - b7
Seventh flatted fifth [7b5] 1 - 3 - b5 - b7
Seventh augmented [7aug] 1 - 3 - #5 - b7
Seventh suspended fourth [7sus4] 1 - 4 - (5) - b7
One plus two plus five [1+2+5] 1 - 2 - 5
Chord (C) Display
CC
C(9) C(9)
C6 C6
C6(9) C6(9)
CM7 CM7
CM7(9) CM7(9)
CM7(#11) CM7(#11)
C(b5) C(b5)
CM7b5 CM7b5
Csus4 Csus4
Caug Caug
CM7aug CM7aug
Cm Cm
Cm(9) Cm(9)
Cm6 Cm6
Cm7 Cm7
Cm7(9) Cm7(9)
Cm7(11) Cm7(11)
CmM7 CmM7
CmM7(9) CmM7(9)
Cm7b5 Cm7b5
CmM7b5 CmM7b5
Cdim Cdim
Cdim7 Cdim7
C7 C7
C7(b9) C7(b9)
C7(b13) C7(b13)
C7(9) C7(9)
C7(#11) C7(#11)
C7(13) C7(13)
C7(#9) C7(#9)
C7b5C7b5
C7aug C7aug
C7sus4 C7sus4
C1+2+5 C
37
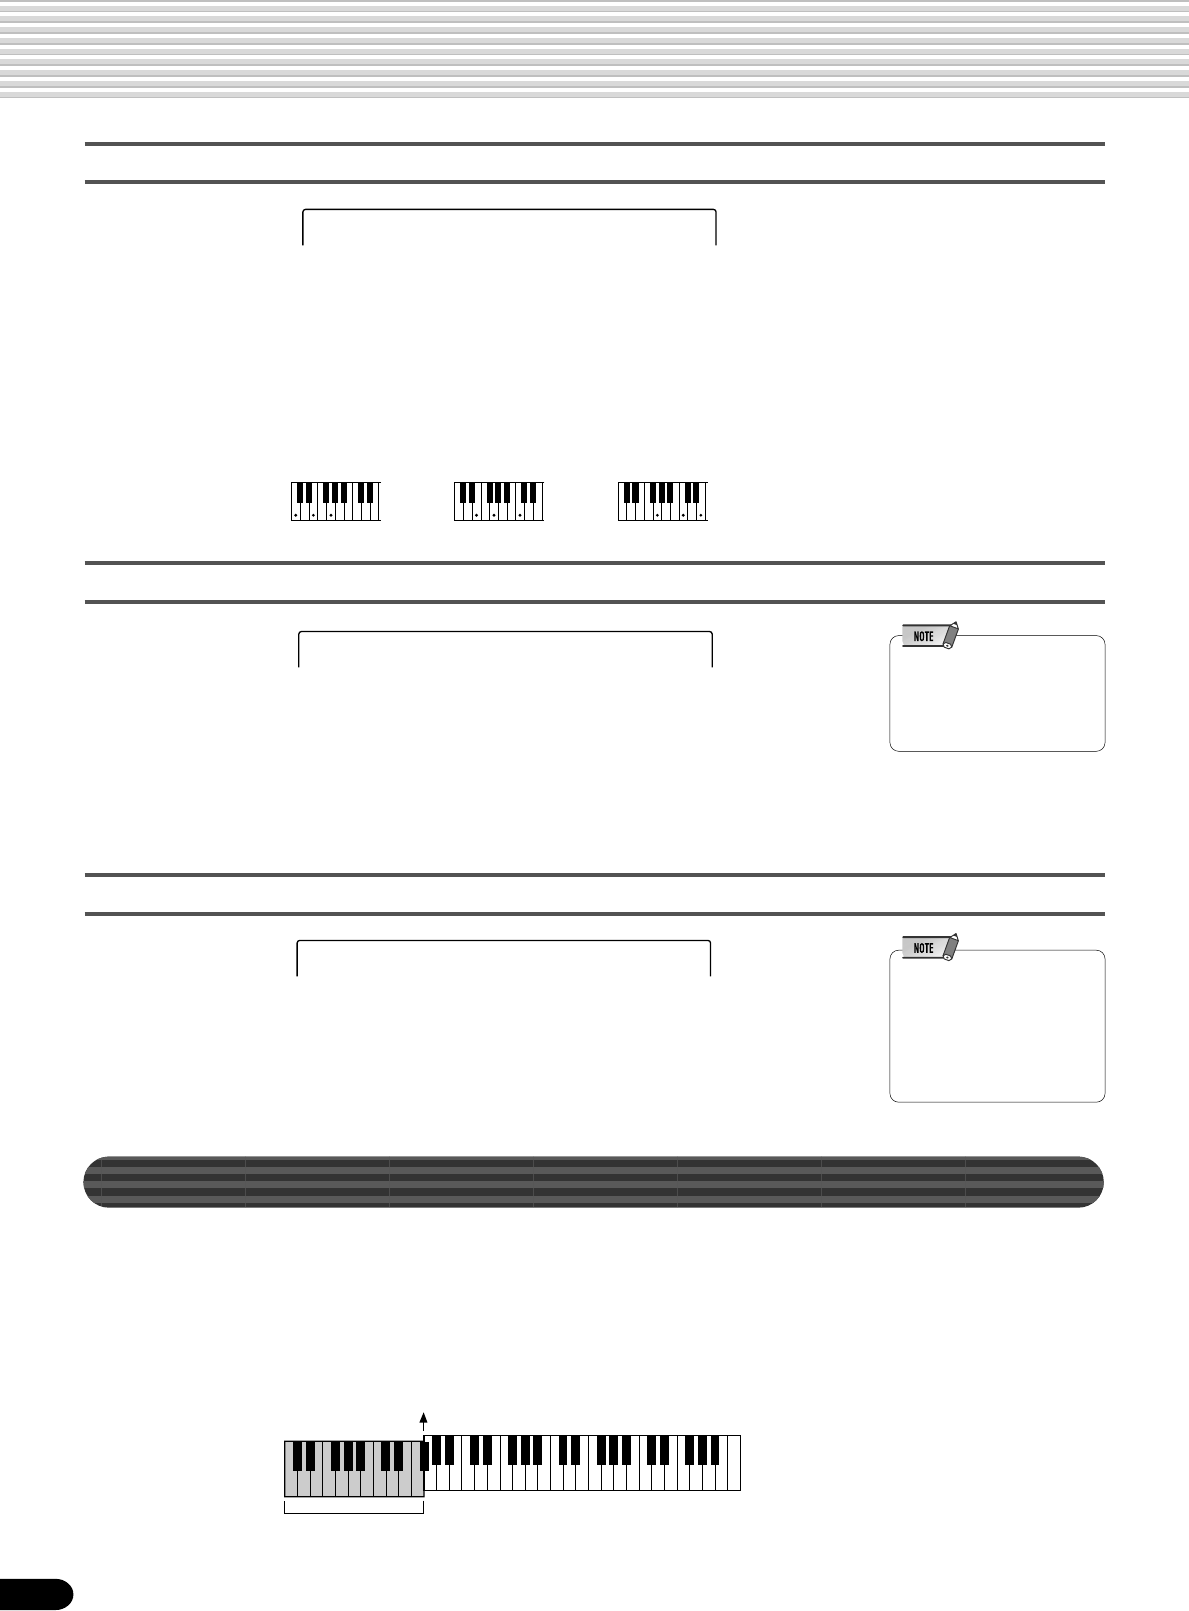
40
Auto Accompaniment
The Fingered 2 mode
Accompaniment Split Point
The point on the keyboard that separates the auto accompaniment section and the right-
hand section of the keyboard is called the “split point”.
The initial setting (factory setting) of the split point is “F#2”; however, this can be set
to any key you wish. Refer to page 118 for instructions on how to set the split point.
This is essentially the same as the Fingered 1 mode, described above, except that the
Fingered 2 mode additionally allows you to specify the lowest note of each chord —
simply, the lowest note played in the Auto accompaniment section of the keyboard is
used as the accompaniment bass note. This means you can specify “on-bass” chords in
which the main bass note for the chord is not the root of the chord. For a C major
chord, for example, you could use E (the third) or G (the fifth) as the bass note rather
than C.
When the Full Keyboard Mode is selected, the PSR-550 will automatically create
appropriate accompaniment while you play just about anything using both hands,
anywhere on the keyboard. You do not have to worry about specifying the accompani-
ment chords. The name of the detected chord will appear in the display.
•When the Full Keyboard
mode is selected, the split
point setting (see below) for
the auto accompaniment will
be ignored.
The Multi Finger mode
This is the default accompaniment mode. The Multi Finger mode automatically detects
Single Finger or Fingered 1 chord fingerings, so you can use either type of fingering
without having to switch fingering modes.
•If you want to play minor,
seventh or minor seventh
chords using the Single
Finger operation in the Multi
Finger Mode, always press
the closest white/black key(s)
to the root of the chord.
The Full Keyboard mode
Fingering =F2
C C on E C on G
Fingering =Full
Fingering =Multi
Auto Accompaniment
section
Split Point (F#2)
38
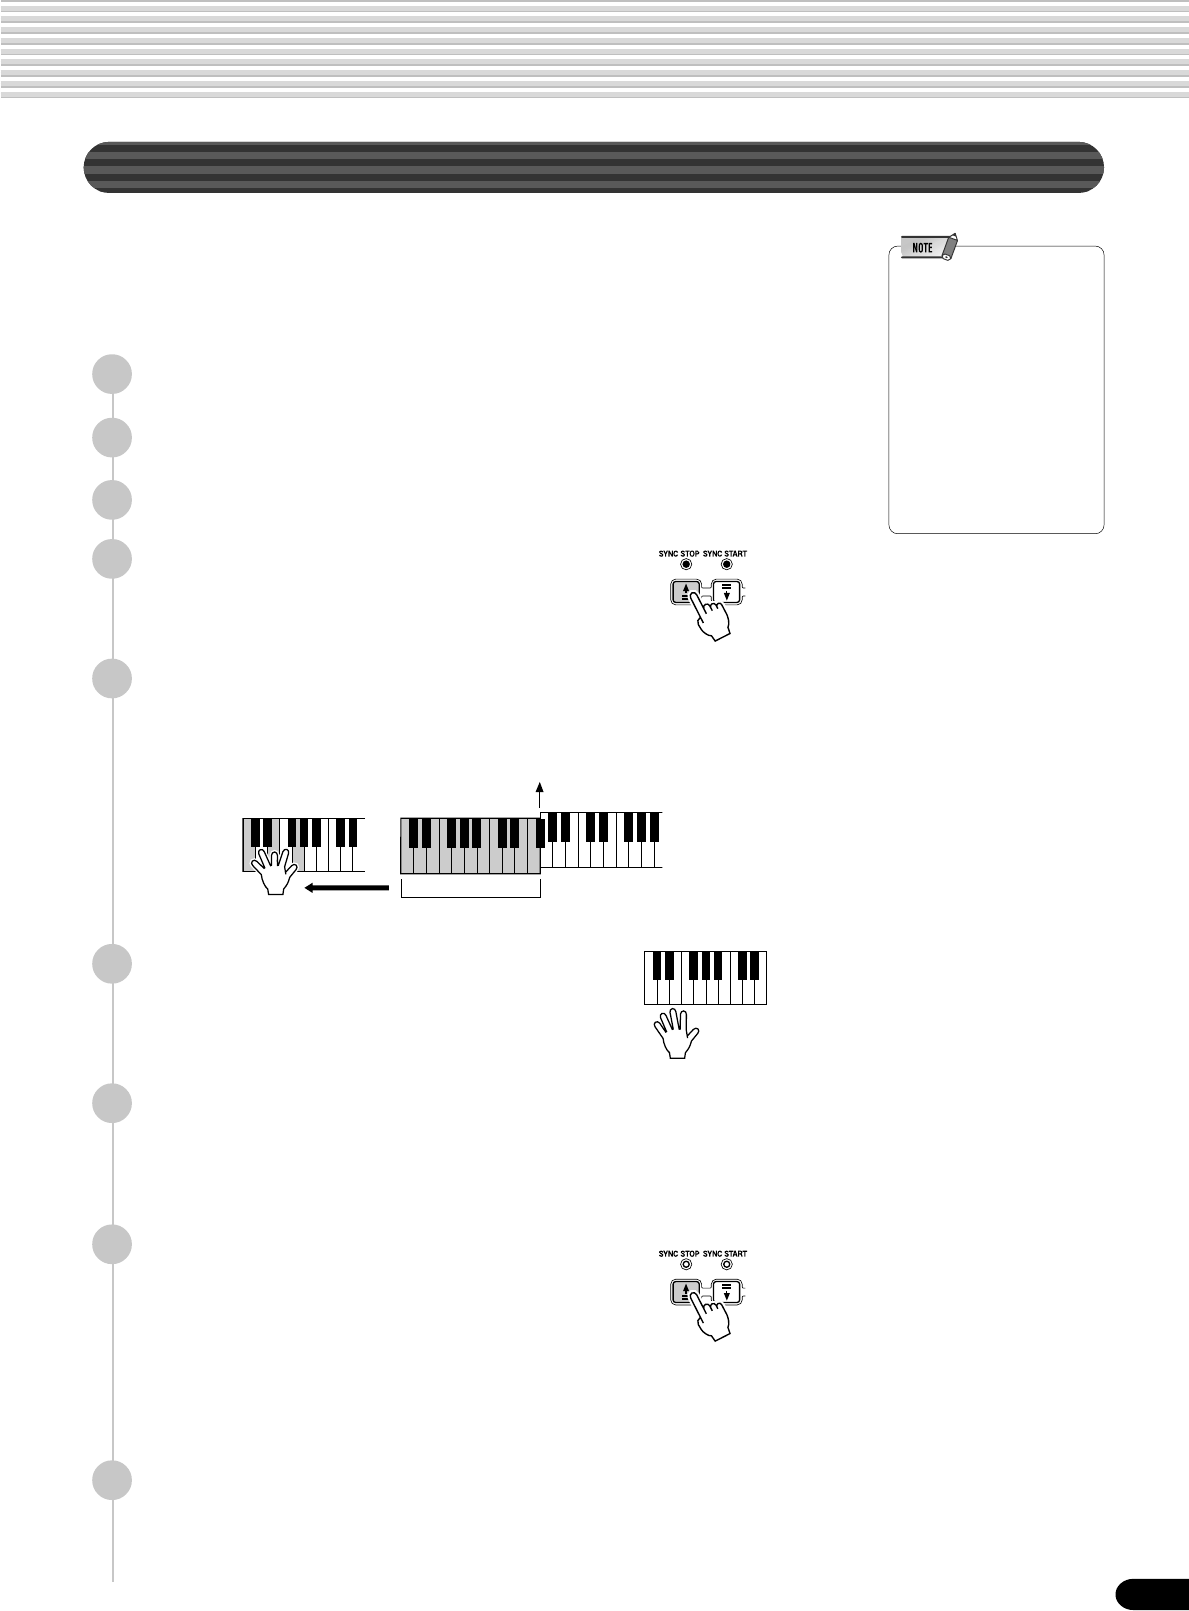
41
Auto Accompaniment
Synchro Stop
When the Synchro Stop function is engaged, accompaniment playback will stop
completely when all keys in the auto-accompaniment section of the keyboard are
released. Accompaniment playback will start again as soon as a chord is played. The
BEAT indicators in the display will flash while the accompaniment is stopped.
•Synchro Stop cannot be set
to on when the fingering
mode is set to Full Keyboard
or the auto accompaniment
on the panel is set to off.
Also, Synchro Stop
automatically turns off when
Full Keyboard is selected for
the fingering mode or when
the auto accompaniment on
the panel is turned off.
•[SYNC STOP] is the
abbreviation of [SYNCHRO
STOP].
1
Press the [STYLE] button.
2
Turn AUTO ACCOMPANIMENT on (page 33).
3
Turn SYNCHRONIZED START on (page 33).
4
Turn SYNCHRONIZED STOP on.
Press the [SYNC STOP] button.
5
As soon as you play a chord with your left hand, the auto
accompaniment starts.
For this example, play a C major chord (as shown below).
6
The auto accompaniment stops
when you release your left hand from
the keys.
7
Playing a chord with your left hand automatically restarts the
auto accompaniment.
To stop the auto accompaniment, simply release your left hand from the
keyboard.
8
Turn SYNCHRONIZED STOP off.
Press the [SYNC STOP] button.
When Synchronized Stop is off, the auto accompaniment does not stop when
you release your left hand from the keys.
9
Stop the accompaniment (page 33).
Split Point
Auto Accompaniment
section
39
42
Auto Accompaniment
One Touch Setting
One Touch Setting is a powerful and convenient function that lets you instantly
reconfigure virtually all auto-accompaniment-related panel settings with the touch of a
single button.
1
Press the round One Touch Setting button to call up the One
Touch Setting function.
•You can also try changing
the established One Touch
Setting data, making your
own original settings. To be
able to recall your original
settings anytime, save them
using the Registration
Memory function (page 54).
•When a User style (number
113-115) is selected, the
One Touch Setting cannot be
used.
2
Press one of the [ONE TOUCH SETTING] buttons [1]-[4].
Steps #3 - #4 of “Using Auto Accompaniment (all tracks)” (page 33) can be set
with just a single press of a [ONE TOUCH SETTING] button. In addition,
various panel settings (such as voices, effects, etc.) that match the selected style
can be instantly recalled with just a single button press (see below).
3
As soon as you play a chord with your left hand, the auto
accompaniment starts.
For this example, play a C major chord (as shown below).
4
Stop the accompaniment.
• Part on/off (VOICE R1, R2).............................................................................. page 29
• Voice Change setting (VOICE R1, R2) ............................................................ page 75
• Mixer setting (VOICE R1, R2) .......................................................................... page 76
• Auto accompaniment = ON.............................................................................. page 33
• Synchro Start = ON* ........................................................................................ page 33
• HARMONY/ECHO on/off, type, volume, part ................................................... page 50
• DSP on/off, type, return level and FAST/SLOW............................................... page 49
• Multi Pad bank number .................................................................................... page 44
• Upper Octave setting ....................................................................................... page 119
* Set only when the accompaniment is not playing.
One Touch Setting parameter list
Split Point
Auto Accompaniment
section
The PSR-550 features four different One Touch Settings for each of the 112 auto
accompaniment styles built into the instrument. Each has been specially programmed
to match the selected style; each has the best suited voice (or combination of voices),
digital effects and other settings for that style. Simply pressing one of the [ONE
TOUCH SETTING] buttons lets you instantly reconfigure all relevant settings,
conveniently allowing you to start playing in a desired style with all the appropriate
sounds — without having to make each setting one by one.
40
43
The Multi Pads
The PSR-550 Multi Pads can be used to play a number of short pre-recorded rhythmic and melodic
sequences that can be used to add impact and variety to your keyboard performances. You can also
record your own Multi Pad phrases as described in “Multi Pad Recording” on page 92.
Some pad phrases simply play back as programmed, while others are “chord match” types which, if the
Chord Match function is turned on, are automatically transposed to match chords played using the PSR-
550 auto accompaniment feature.
• Playing the Multi Pads .................................... page 43
• Chord Match ................................................... page 43
• Selecting a Multi Pad Bank ............................. page 44
• Turning the Chord Match On/Off ..................... page 44
Playing the Multi Pads
Press any of the Multi Pads.
The corresponding phrase (in this case, for Pad 1) starts playing back in its
entirety as soon as the pad is pressed. To stop playback in the middle of the
phrase, press the [STOP] button.
•Simply tap any of the Multi
Pads at any time to play back
the corresponding phrase at
the currently set tempo.
•You can even play two, three
or four Multi Pads at the
same time.
•Pressing the pad during its
playback will stop playing
and begin playing from the
top again.
Chord Match
1
Press the [STYLE] button.
2
Turn AUTO ACCOMPANIMENT on (page 33).
3
Play a chord with your left hand.
For this example, play an F major chord (as shown below).
4
Press any of the Multi Pads.
In this example, the phrase for Pad 1 will be transposed into F major before
playing back. Try playing other chords and pressing the pads.
•The chord match on/off
status depends on the
selected Multi Pad. Refer to
the Multi Pad Bank list (page
45).
Split Point
Auto Accompaniment
section
41
40 banks
44
Selecting a Multi Pad Bank
1
Press the [FUNCTION] button.
3
Press the [NEXT] button to display the MULTI PAD BANK
screen.
2
Select “Multi Pad.”
Use the data dial, the [+/YES] button or the [-/NO] button.
4
Select a Bank.
Use the data dial, the [+/YES] button, the [-/NO] button or the number buttons
[1]-[0].
Turning Chord Match On/Off
1
-
3
Use the same operation as in “Selecting a Multi Pad
Bank” above.
4
Press the [NEXT] button again.
•The chord match function
has no effect with pads that
contain percussion phrases.
• The chord match on/off
setting is restored to its
original status whenever a
preset Multi Pad Bank is
selected.
•When the chord match on/off
status of a user Multi Pad
Bank (see above) is
changed, the new status is
recorded with the Multi Pad
data.
5
Select the desired PAD.
Use the [NEXT]/[BACK] button.
6
Turn the CHORD MATCH function on or off.
Use the data dial, the [+/YES] button or the [-/NO] button.
The Multi Pads
F1 Multi Pad
PBnk=01 Fanfare
CdMatch Pad1=On
CdMatch Pad2=On
42
45
•There are two types of Multi
Pad data: some of the data
will be played back once and
stop when it reaches to the
end. Others will be played
back repeatedly until you
press the [STOP] button.
The Multi Pads
43
● Multi Pad Bank List
No. Bank name Chord Match Repeat
Pad1 Pad2 Pad3 Pad4 Pad1 Pad2 Pad3 Pad4
1 Fanfare O O O –– –––
2 Crystal O O O O ––––
3 Gothic_V O O O O ––––
4 TechSyn1 O O O O O O O O
5 TechSyn2 O O O O O O O O
6 TechSyn3 O O ––OOOO
7 TechSyn4 O O ––OOOO
8 PianoSeq O O O O ––––
9 OrcheHit O O O O ––––
10 Traffic –– ––– –––
11 Chirp –– ––– –––
12 HorrorSE –– ––– –––
13 Noises –– ––– –––
14 WaterSE –– ––– –––
15 AnalgKit –– ––– –––
16 TechKit –– ––– –––
17 RockKit –– ––– –––
18 TomFlam –– ––– –––
19 LatPerc1 –– ––– –––
20 LatPerc2 –– ––– –––
21 Timbales –– ––– –––
22 ArabKit1 –– ––– –––
23 ArabKit2 –– ––– –––
24 Brassy1 O O O O ––––
25 Brassy2 O O O O ––––
26 Swingy O O O O ––––
27 SynBrass O O O O ––––
28 GtrPlay1 O O O O O O O O
29 GtrPlay2 O O O O O O O O
30 GtrPlay3 O O O O O O O O
31 GtrPlay4 O O O O O O O O
32 PianoMan O O O O O O O –
33 SalsaPno O O O O O O O O
34 SambaShw –– ––OOOO
35 Accrdion O O O O ––––
36 Arpeggio O O O O ––––
37 Classic O O O O ––––
38 Twinkle O O O O ––––
39 Xmas1 O O O –– ––O
40 Xmas2 –OO–– –––
O : available
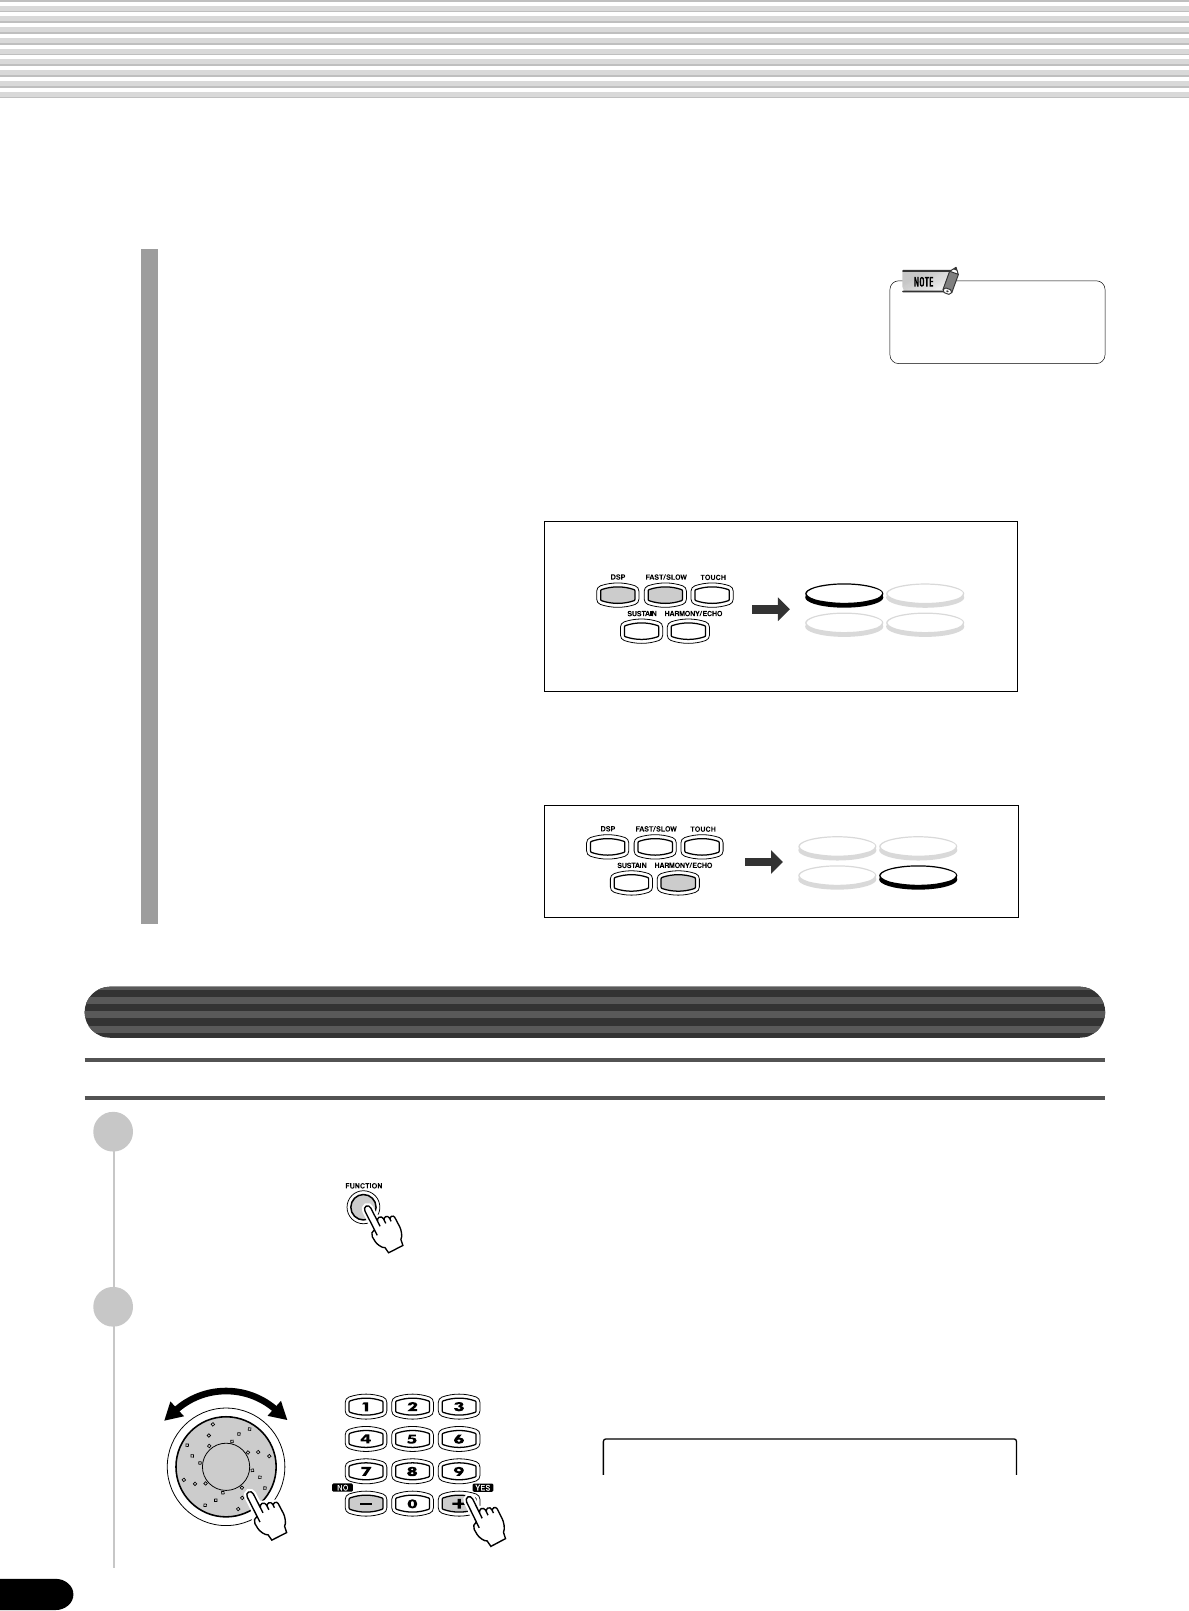
46
Digital Effects
With the digital effects built into the PSR-550 you can add ambiance and depth to your music in a variety
of ways—such as adding reverb that makes you sound like you are playing in a concert hall or adding
harmony notes for a full, rich sound.
● Reverb .......................................................................................................page 46
You can create a reverb effect that makes you sound like you are playing in
places like a concert hall, or live in a club.
Reverb is always set to on for the PSR-550. A total of 24 different reverb types
are available.
•For details about using
Digital Effects (Reverb,
Chorus, DSP) (page 132).
● Chorus.......................................................................................................page 48
You can add a chorus effect that makes your playing sound as though multiple
parts were being played together at the same time.
Chorus is always set to on for the PSR-550. A total of 16 different chorus types
are available.
● DSP ............................................................................................................ page 49
In addition to the Reverb and Chorus
types, the PSR-550 has special DSP
effects, that include additional effects
usually used for a specific part, such as
distortion and tremolo.
A total of 74 DSP types are available.
The PSR-550 features one DSP system,
which can be turned on or off by a panel
button (page 49). The [FAST/SLOW]
button can switch between variations of the DSP effect. For example, this lets
you change the rotating speed (fast/slow) of the rotary speaker effect.
● Harmony/Echo ..........................................................................................page 50
You can add a variety of harmony notes
to your playing in the right-hand section
(page 29), as well as adding tremolo or
other effects.
Reverb
Selecting a reverb type
2
Select “Digital Effect”.
Use the data dial, the [+/YES] button or the [-/NO] button.
1
Press the [FUNCTION] button.
DSP(FAST)
SUSTAIN HARMONY
TOUCH
DSP(FAST)
SUSTAIN HARMONY
TOUCH
F3 DigitalEffect
44
47
Adjust the depth of the reverb.
3
Press the [NEXT] button to display the Digital Effect screen.
4
Select “Reverb”.
Use the data dial, the [+/YES] button or the [-/NO] button.
5
Press the [NEXT] button.
6
Select a reverb type.
Use the data dial, the [+/YES] button or the [-/NO] button.
Refer to the Reverb Type List (page 133).
8
Press the [NEXT] button.
● Reverb Depth (send level) .................................................................................... page 74
Sets the reverb depth for the specified voice or track, and thus the amount of reverb effect
applied to that voice or track.
● Reverb Return Level .......................................................................................... see below
Sets the amount of reverb returned from the reverb effect stage, thus making it possible to
adjust the degree of reverb effect applied to the overall sound.
Digital Effects
The two parameters below affect the depth of the reverb.
D.Effect:Reverb
RevType=Hall1
9
Adjust the reverb return level.
Use the data dial, the [+/YES] button, the [-/NO] button or the number buttons
[1]-[0].
The range is from 0 to 127. The higher the value, the greater the return level.
RevRetnLevel= 64
RevRetnLevel= 81
•When you select a different
style, the appropriate reverb
type will be selected
accordingly.
7
Play the keyboard.
Try out some of the other reverb types as well.
45
48
Chorus
Selecting a Chorus Type
5
Press the [NEXT] button.
6
Select a chorus type.
Use the data dial, the [+/YES] button or the [-/NO] button.
Refer to the Chorus Type List (page 133).
Adjust the depth of the chorus.
● Chorus Depth (send level).................................................................................... page 74
Sets the chorus depth for the specified voice or track, and thus the amount of chorus
effect applied to that voice or track.
● Chorus Return Level .......................................................................................... see below
Sets the amount of chorus effect returned from the chorus effect stage, thus making it
possible to adjust the degree of chorus effect applied to the overall sound.
9
Adjust the chorus return level.
Use the data dial, the [+/YES] button, the [-/NO] button or the number buttons
[1]-[0].
The range is from 0 to 127. The higher the value, the greater the return level.
8
Press the [NEXT] button.
Digital Effects
1
-
3
Use the same operation as in “Reverb” (page 46).
4
Select “Chorus”.
Use the data dial, the [+/YES] button or the [-/NO] button.
The two parameters below affect the depth of the chorus effect.
ChoType=Chorus2
D.Effect:Chorus
ChoRetnLevel= 64
•When you select a different
style, the appropriate chorus
type will be selected
accordingly.
7
Play the keyboard.
Try out some of the other chorus types as well.
46
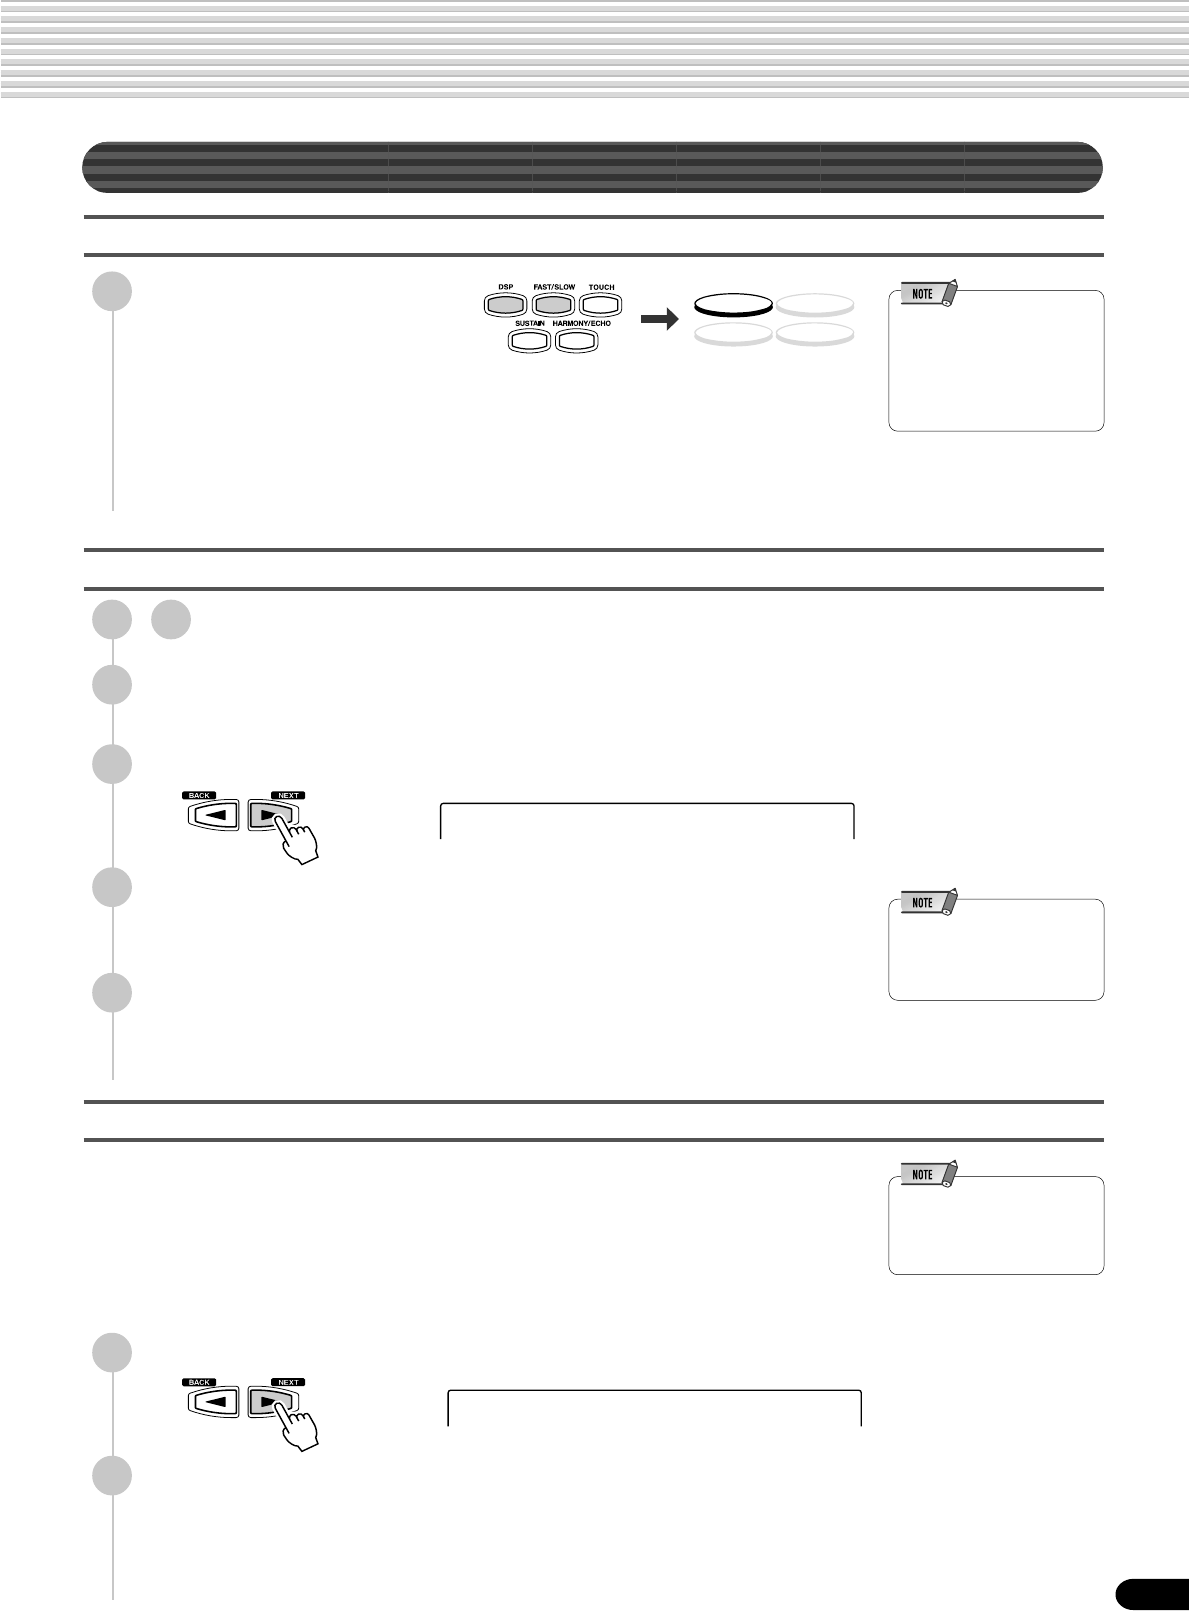
49
•When the selected DSP type
is an Insertion Effect (pages
49, 133), the DSP effect
applies only to the Voice R1.
DSP
Applying the DSP effect
The DSP icon will light up and the
DSP effect will be turned on.
The effect will be applied when
you play the R1, R2 and L voices from the keyboard.
In addition, when the [FAST/SLOW] button is pressed, the FAST icon lights up
indicating that the variation of the DSP effect is selected. When the DSP effect
type is Rotary Speaker or Tremolo, the speed of the modulation becomes fast.
•When the Voice Set function
is ON (page 120), the DSP
effect and FAST/SLOW
settings may change
according to the selected R1
panel voice.
Selecting a DSP Type
6
Select a DSP type.
Use the data dial, the [+/YES] button or the [-/NO] button.
Refer to the DSP Type List (page 133).
7
Play the keyboard.
Try out some of the other DSP types as well.
Adjust the depth of the DSP.
● DSP Depth (Send level)......................................................................................... page 74
Sets the DSP depth for the specified voice or track, and thus the amount of DSP effect
applied to that voice or track.
● DSP Return Level ............................................................................................... see below
Sets the amount of DSP effect returned from the DSP effect stage, thus making it
possible to adjust the degree of DSP effect applied to the overall sound.
•If DSP Insertion Effect is
selected (page 50), you
won’t be able to set the DSP
Return Level.
8
Press the [NEXT] button.
9
Adjust the DSP return level.
Use the data dial, the [+/YES] button, the [-/NO] button or the number buttons
[1]-[0].
The range is from 0 to 127. The higher the value, the greater the return level.
Digital Effects
Press the [DSP] button.
1
-
3
Use the same operation as in “Reverb” (page 46).
4
Select “Dsp”.
Use the data dial, the [+/YES] button or the [-/NO] button.
5
Press the [NEXT] button.
The two parameters below affect the depth of the DSP effect.
DSP(FAST)
SUSTAIN HARMONY
TOUCH
DspType=Stage2
DspRetnLevel= 64
47
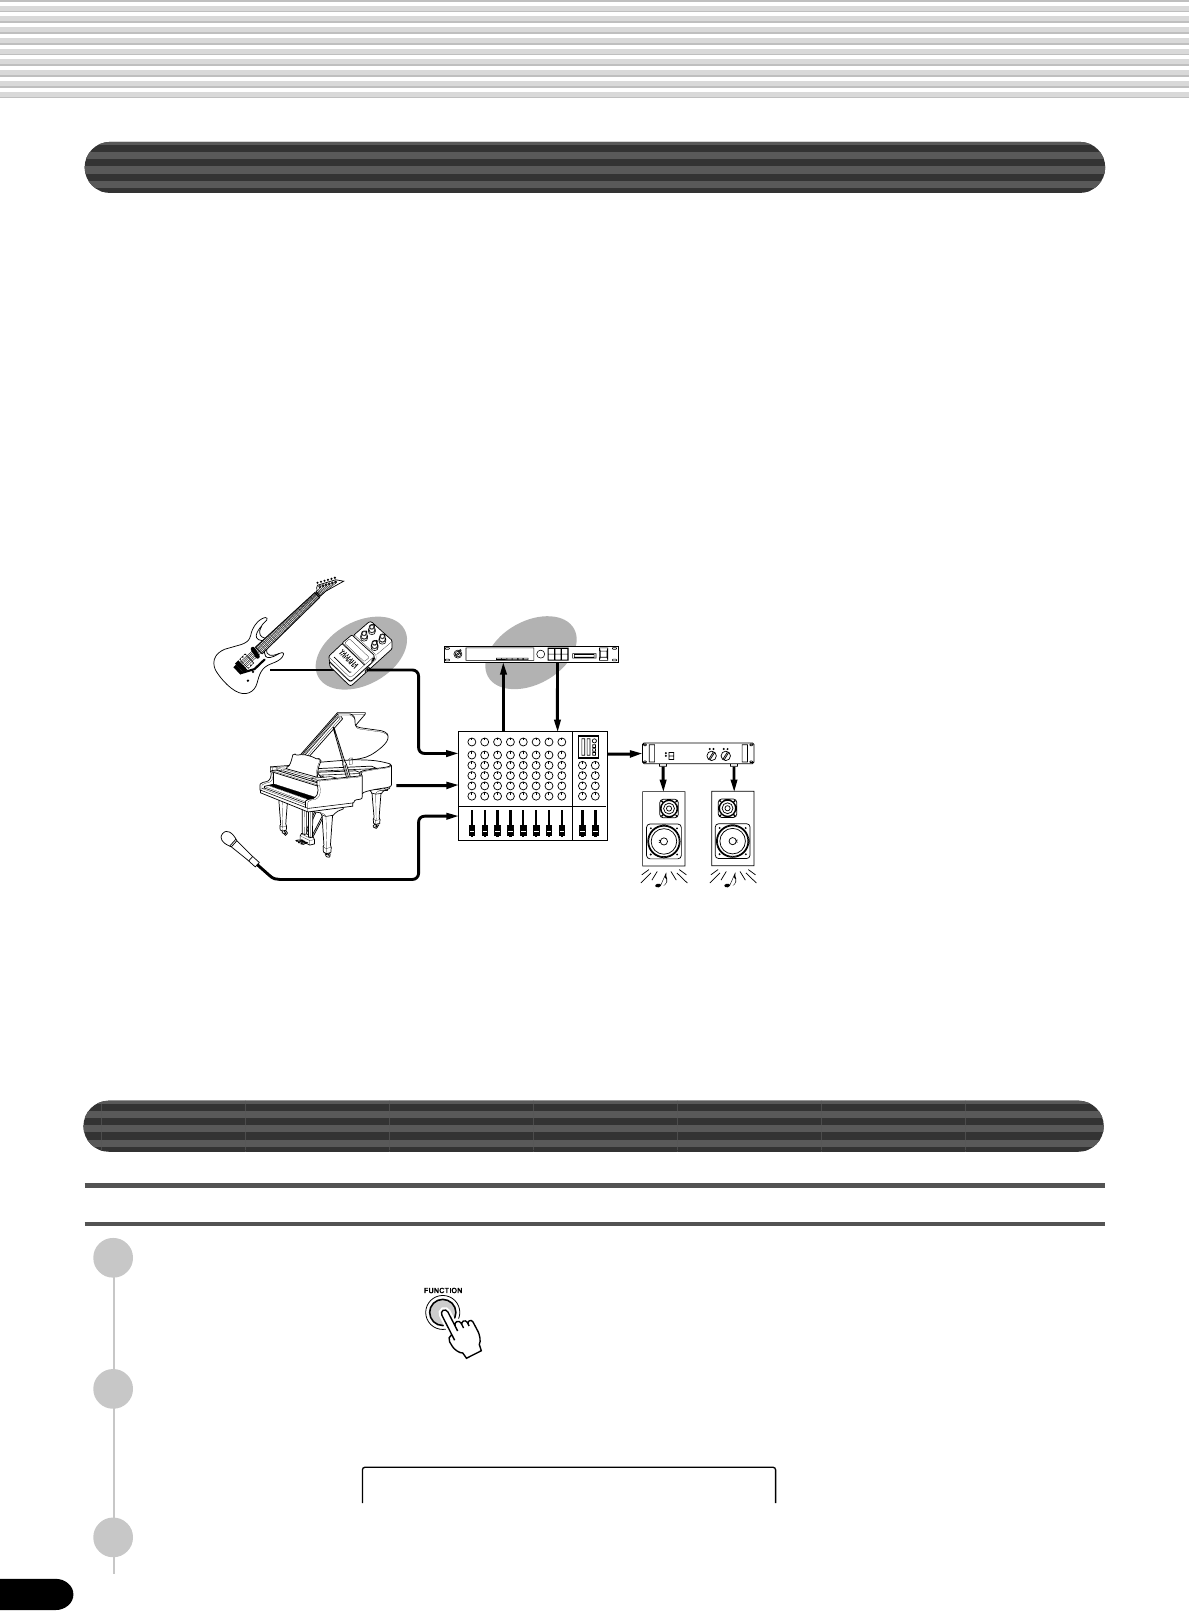
50
Digital Effects
F3 DigitalEffect
RETURNSEND
(Depth)
Insertion Effect
System Effect
Amplifier
Speaker
Mixer
System Effects and Insertion Effects
The reverb, chorus and DSP effects are divided into two different types or methods or
operation.
There are two types of digital effects: system effects and insertion effects.
Harmony/Echo
Selecting a Harmony/Echo type
2
Select “DigitalEffect”.
Use the data dial, the [+/YES] button or the [-/NO] button.
3
Press the [NEXT] button to display the Digital Effect screen.
● System Effects
Applies the effect to all of the parts input to the mixer. You can set the amount of effect
applied with the depth and return level parameters. Reverb and chorus are both system
effects.
● Insertion Effects
Applies the effect to only one designated part before inputting the signal to the mixer. You
can effectively use the digital effects by applying the desired effect to the specific part.
With the insertion effects, only the DSP depth can be set.
The illustration below with the various audio components (instruments, effect devices
and a mixer) represents the inner workings of the DSP effects of the PSR-550.
1
Press the [FUNCTION] button.
● Reverb ...... All types function as system effects.
● Chorus...... All types function as system effects.
● DSP .......... Depending on the selected type, this functions either as a system effect
or an insertion effect.
Refer to “About Digital Effects” (page 132) and the Type List.
48
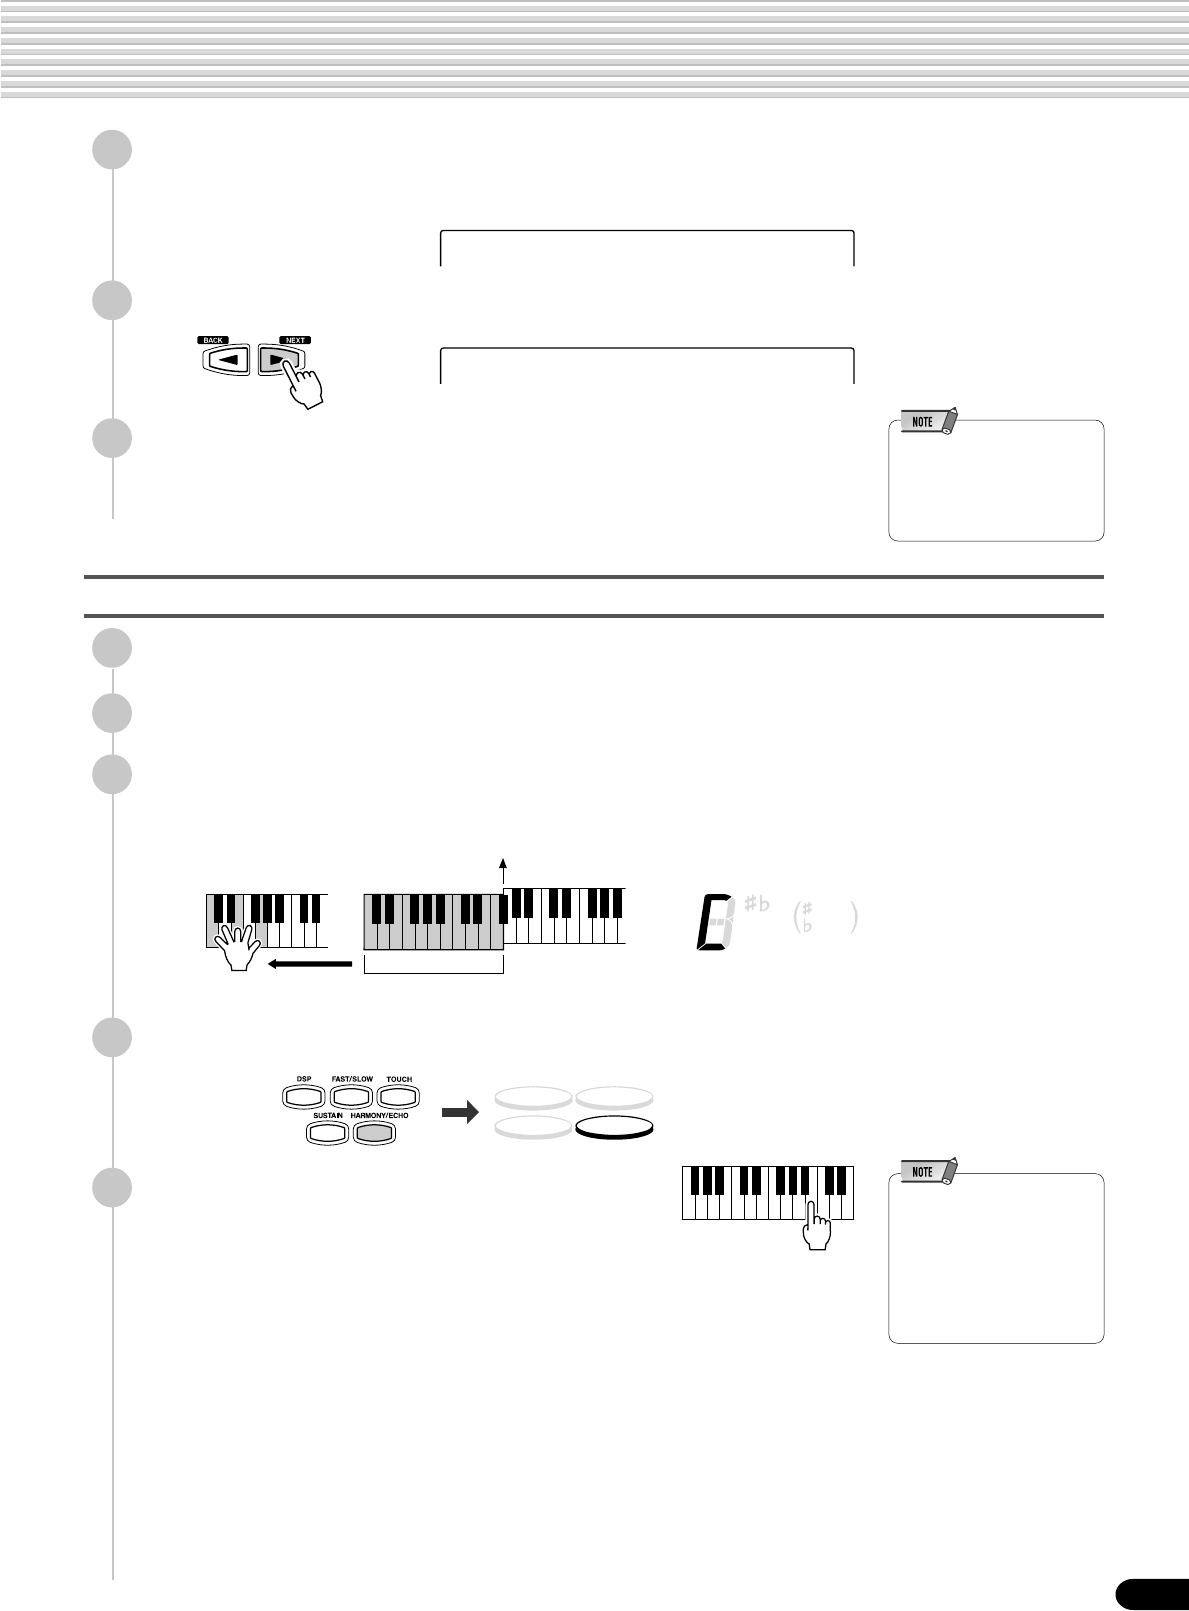
51
Digital Effects
4
Select “Harmony”.
Use the data dial, the [+/YES] button or the [-/NO] button.
5
Press the [NEXT] button.
6
Select a Harmony/Echo type.
Use the data dial, the [+/YES] button or the [-/NO] button.
Refer to the Harmony/Echo Type List (page 134).
•When the Voice Set function
is ON (page 120), the
Harmony/Echo type may
change according to the
selected R1 panel voice.
Applying the Harmony/Echo effect
4
Press the [HARMONY/ECHO] button.
5
Play some notes in the right-hand range of
the keyboard.
● When a Harmony type (Duet through Strum) is selected
This type automatically add one or more harmony notes to a single-note melody
played in the right hand.
● When an Echo type is selected
An echo effect is applied to the note played on the keyboard at the currently set
tempo.
Steps #1 - #3 above are unnecessary for this type.
● When a Tremolo type is selected
A tremolo effect is applied to the note played on the keyboard at the currently set
tempo.
Steps #1 - #3 above are unnecessary for this type.
● When a Trill type is selected
Two notes held on the keyboard are played alternately at the currently set tempo.
Steps #1 - #3 above are unnecessary for this type.
•Harmony/Echo cannot be
turned on when the Full
Keyboard (page 40) is
selected. Harmony/Echo will
be automatically turned off if
the Full Keyboard fingering
mode is selected while the
Harmony/Echo effect is on.
1
Press the [STYLE] button.
2
Turn AUTO ACCOMPANIMENT on (page 33).
3
Play a chord with your left hand.
For this example, play a C major chord.
HTyp=Duet
D.Effect:Harmony
CHORD
dim
mM6
7augsus4
119
513
Split Point
Auto Accompaniment
section
DSP(FAST)
SUSTAIN HARMONY
TOUCH
49

52
Digital Effects
Adjusting the Harmony/Echo volume
5
Press the [NEXT] button to display the Type Selection screen.
6
Press the [NEXT] button to display the Harmony/Echo Volume
screen.
•When the Voice Set function
is on (page 120), the
Harmony/Echo Volume may
change according to the
selected R1 panel voice.
•Changing the volume of the
harmony sound may not
produce audible effect for
some R1 voices (ex. organ
sounds) when you select
Harmony types “Duet”
through “Strum”.
7
Adjust the Harmony/Echo volume.
Use the data dial, the [+/YES] button, the [-/NO] button or the number buttons
[1]-[0].
The volume range is from 0 (no sound) to 127 (maximum volume).
The volume of the Harmony/Echo sound in relation to the keyboard sound can be
adjusted as follows:
1
-
4
Use the same operation as in “Selecting a Harmony/Echo
Type” (page 50).
Harmony Vol =120
D.Effect:Harmony
Harmony Vol =113
50
53
Digital Effects
•When the Voice Set function
is on (page 120), the
Harmony/Echo part setting
may change according to the
selected R1 panel voice.
Changing the Part for the Harmony/Echo effect
5
Press the [NEXT] button to display the Type Selection screen.
6
Press the [NEXT] button to display the Harmony Volume
screen.
7
Press the [NEXT] button to display the Harmony Part setting
screen.
8
Set the part.
Use the data dial, the [+/YES] button or the [-/NO] button.
● Auto .......... Harmony/Echo notes are automatically assigned to the R1 and R2
parts, in that order or priority.
● Right1 ....... Harmony/Echo is only applied to the Voice R1.
If Voice R1 is off, there will be no Harmony/Echo effect.
● Right2 ....... Harmony/Echo is only applied to the Voice R2.
If Voice R2 is off, there will be no Harmony/Echo effect.
This allows you to select the part which is used for the Harmony/Echo effect.
1
-
4
Use the same operation as in “Selecting a Harmony/Echo
Type” (page 50).
HarmoPart=Auto
D.Effect:Harmony
51
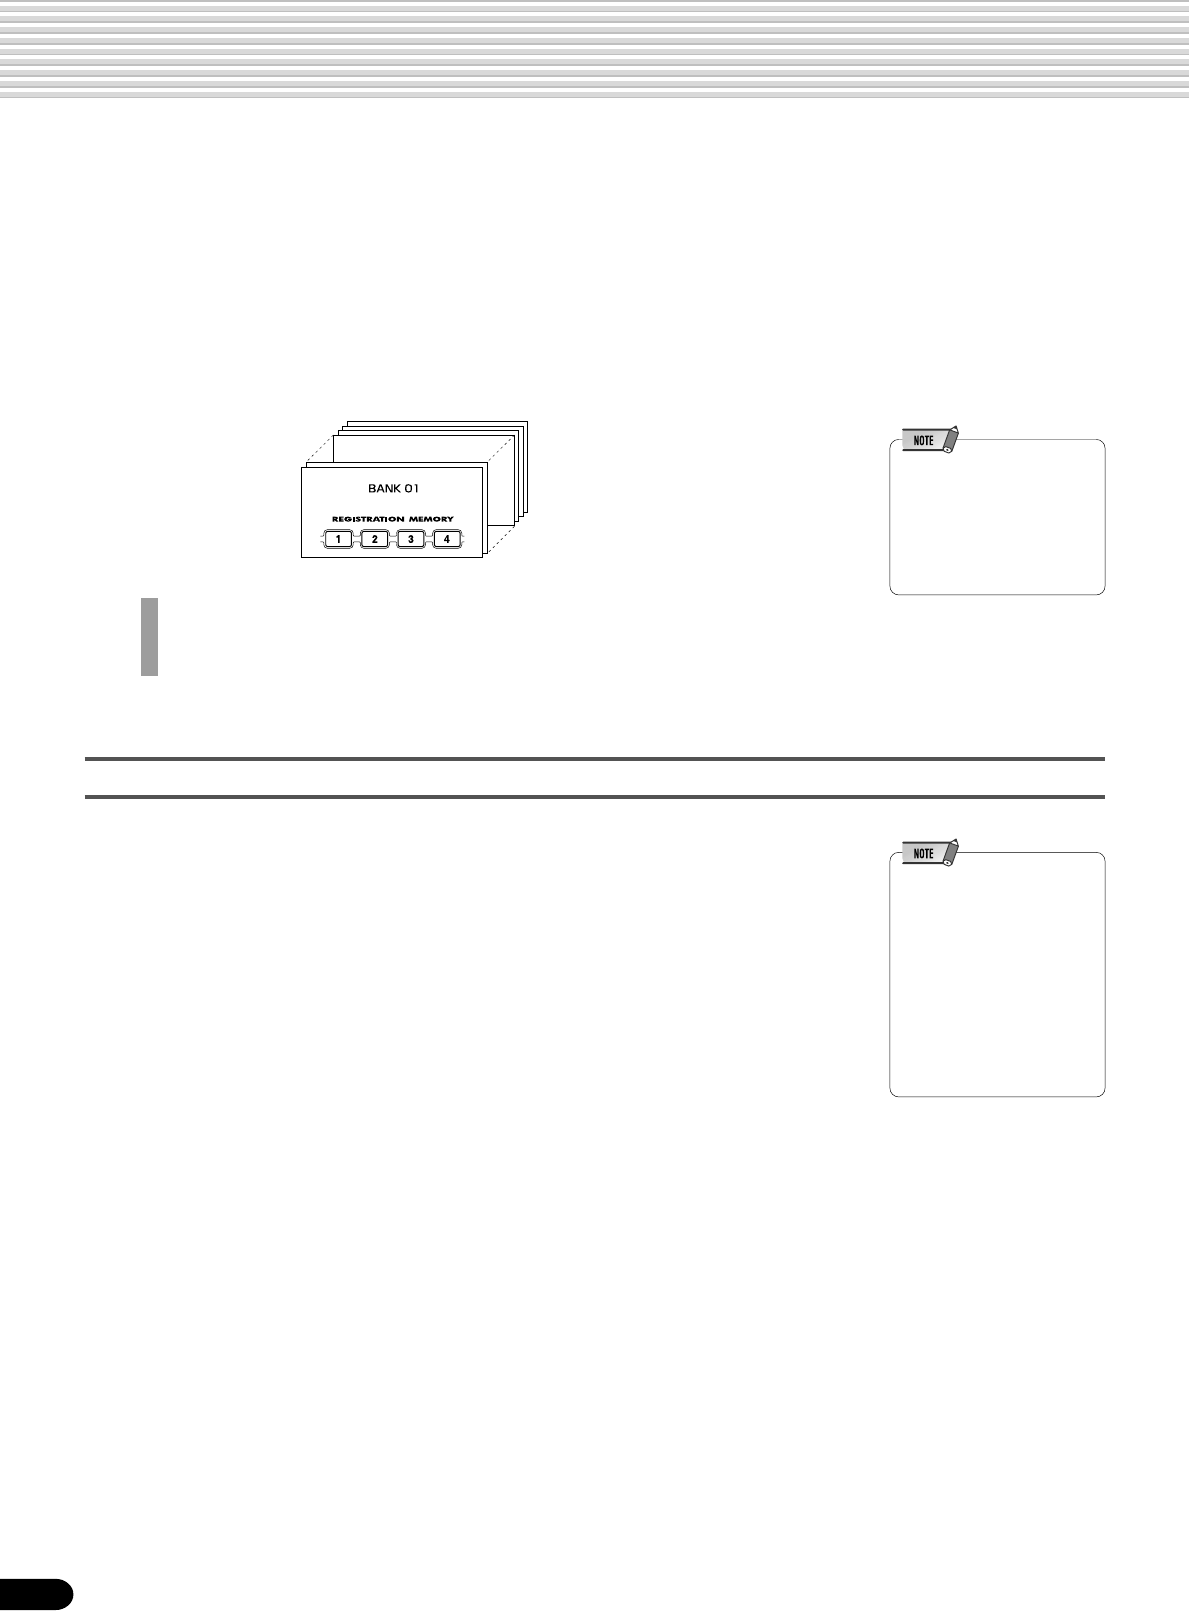
54
Registration Memory
Since the PSR-550 is such a sophisticated instrument with such a variety of controls and functions —
voice, style, auto accompaniment and effect settings, just to name a few — the Registration Memory
feature is one of the most convenient and powerful of the instrument. It allows you save virtually all panel
settings to a Registration Memory setting, and then instantly recall your custom panel settings by press-
ing a single button.
Registration Memory provides up to 128 complete control-panel setups (32 banks, 4 setups each) that
can be recalled instatly during your performance.
•The PSR-550’s initial
Registration Memory [1]–[4]
settings (when it shipped
from the factory) are the
same panel settings as when
the STANDBY switch is first
turned on.
• Registering the Panel Settings .................................................................... page 55
• Recalling the Registered Panel Settings ..................................................... page 55
• Selecting a Registration Bank ..................................................................... page 56
• Naming the Registration Banks ................................................................... page 56
32 banks
52
Data stored by the Registration Memory
■ VOICE PARAMETERS
• Part on/off (VOICE R1, R2, L) ..................................................................... page 29
• Voice Change setting (VOICE R1, R2, L) .................................................... page 75
• Mixer setting (VOICE R1, R2, L).................................................................. page 76
• Touch Sensitivity ........................................................................................ page 120
• DSP on/off, FAST/SLOW on/off, DSP Type and Return Level ..................... page 49
• HARMONY/ECHO on/off, type, volume, part .............................................. page 50
• TOUCH on/off ............................................................................................ page 120
• SUSTAIN on/off ........................................................................................... page 30
• Pitch Bend Range...................................................................................... page 122
• Scale Tuning .............................................................................................. page 119
• Footswitch function .................................................................................... page 121
• Transpose .................................................................................................... page 30
• Upper Octave setting ................................................................................. page 119
• Direct Access setting ................................................................................. page 122
• Backlight color setting................................................................................ page 122
■ ACCOMPANIMENT PARAMETERS
• Auto Accompaniment on/off ........................................................................ page 33
• Style number ............................................................................................... page 32
• Main A/B section.......................................................................................... page 34
• Tempo .......................................................................................................... page 36
• Fingering mode............................................................................................ page 38
• Split Point................................................................................................... page 120
• Accompaniment Volume .............................................................................. page 37
• Track on/off setting...................................................................................... page 37
• Voice Change setting ................................................................................... page 75
• Mixer setting ................................................................................................ page 75
• Multi Pad Bank number, Chord Match on/off ............................................... page 43
• Reverb setting.............................................................................................. page 46
• Chorus setting ............................................................................................. page 48
Registration Memory data can be saved to and loaded from floppy disk as needed (page 57).
•Material recorded data is
retained in memory even
when the STANDBY switch is
turned off if batteries are
installed or an AC adaptor is
connected (page 136). It is
nevertheless a good idea to
save important data to floppy
disk so that you can keep
them indefinitely and build up
your own data library (page
60).
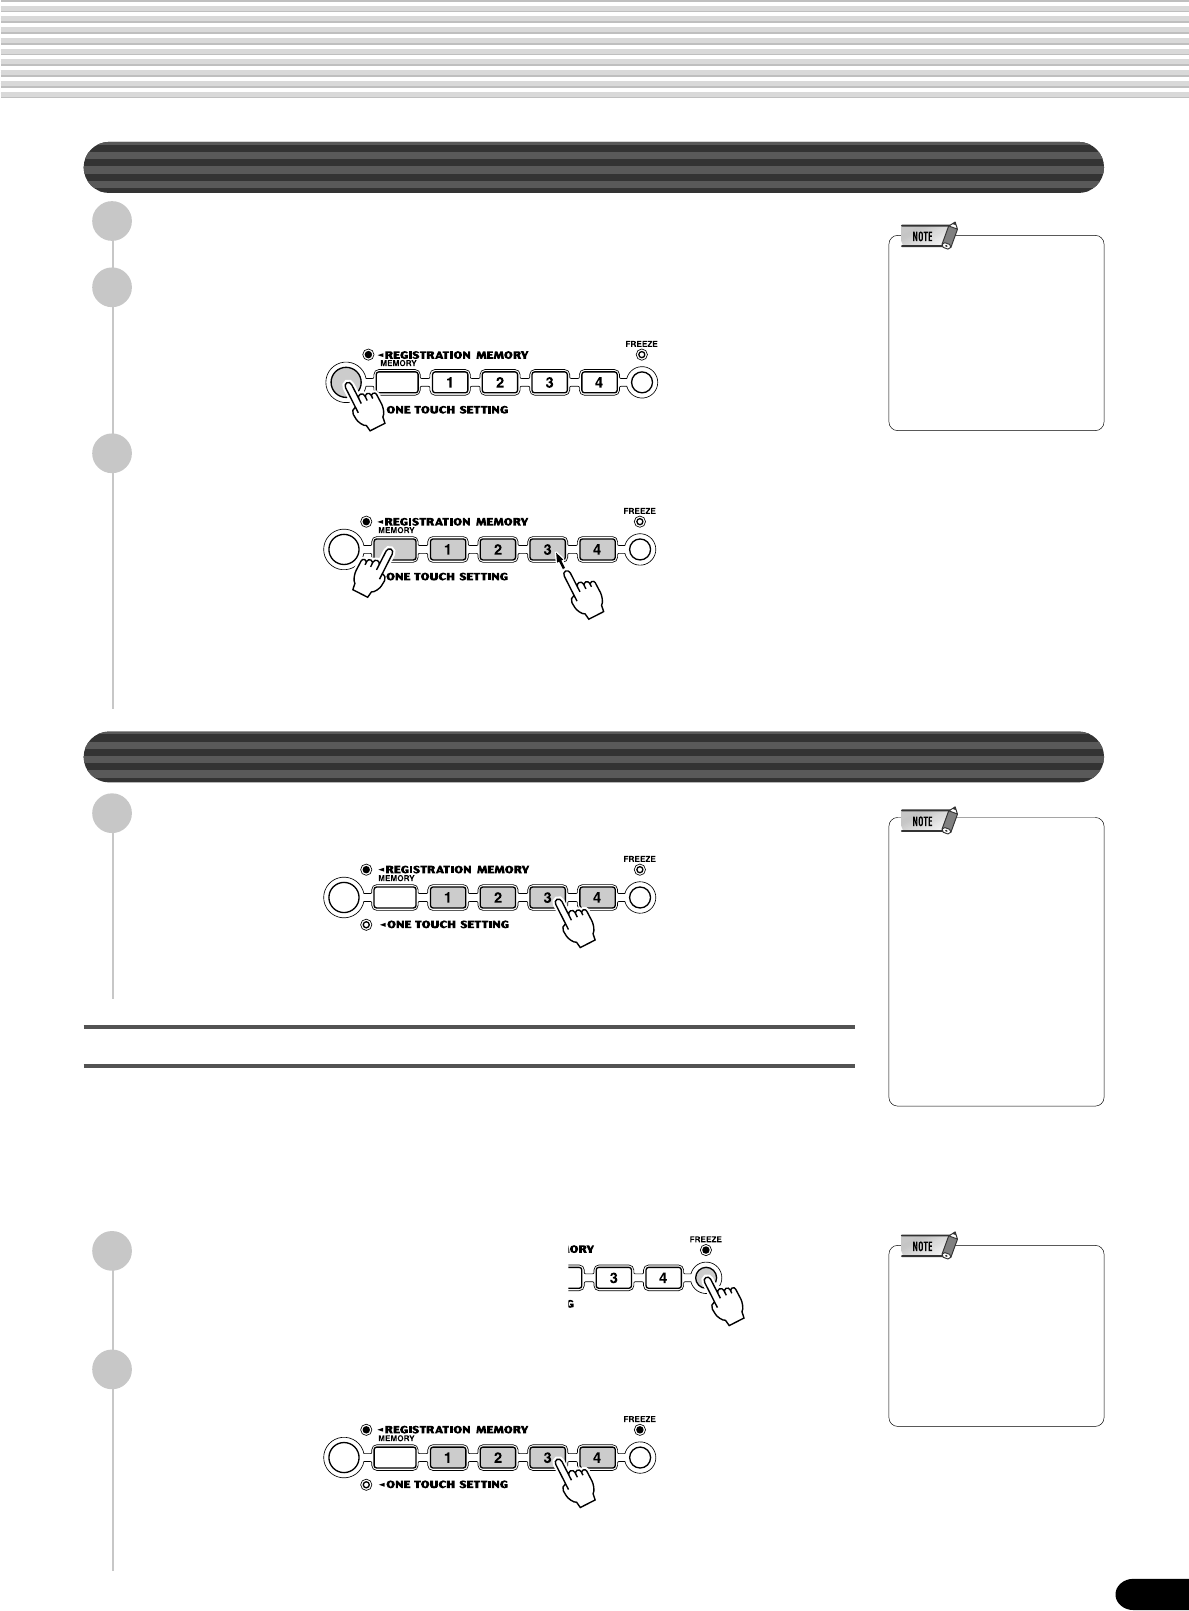
55
Registering the Panel Settings
1
Set up the panel controls as required.
2
Press the round Registration Memory button to call up the
Registration Memory function.
•Any data that was previously
recorded in the Registration
Memory location you
selected will be erased and
replaced by the new settings.
•The Registration Memory
contents will be retained
even after turning the power
off. See page 136 for details.
A “Regist Memorized” message briefly appears in the display, indicating that
the panel settings have been memorized.
In this example, the panel settings are memorized to button number 3.
Recalling the Registered Panel Settings
Press one of the REGISTRATION MEMORY buttons: [1]
through [4].
•Registration data cannot be
recalled when the One Touch
Setting function is on.
•Some parameters cannot be
recalled depending on the
selected mode. For example,
you cannot recall the Voice
R2/L voices in the Style
Record mode and Pad
Record mode even if you
press the Registration
Memory buttons, since only
the Voice R1 voice is used in
those modes.
In this example, the panel settings memorized to button number 3 are recalled.
•For details about Accompa-
niment parameters (page
54).
•The Freeze function will
automatically be turned on
when one of the following
modes, Song, Style Record
or Pad Record is engaged.
2
Press one of the REGISTRATION MEMORY buttons: [1]
through [4].
In this example, only the voice parameter settings memorized to button number
3 are recalled.
3
While holding the [MEMORY] button, press one of the REGIS-
TRATION MEMORY buttons: [1] through [4].
Registration Memory
When the FREEZE function is engaged, selecting a different Registration Memory
setup will not change any of the accompaniment (all other parameters will change as
programmed). This allows you to use the auto accompaniment and select different
Registration Memory setups, without suddenly disturbing the flow of the accompani-
ment.
1
Press the [FREEZE] button.
The [FREEZE] lamp lights.
The Accompaniment Freeze function
53
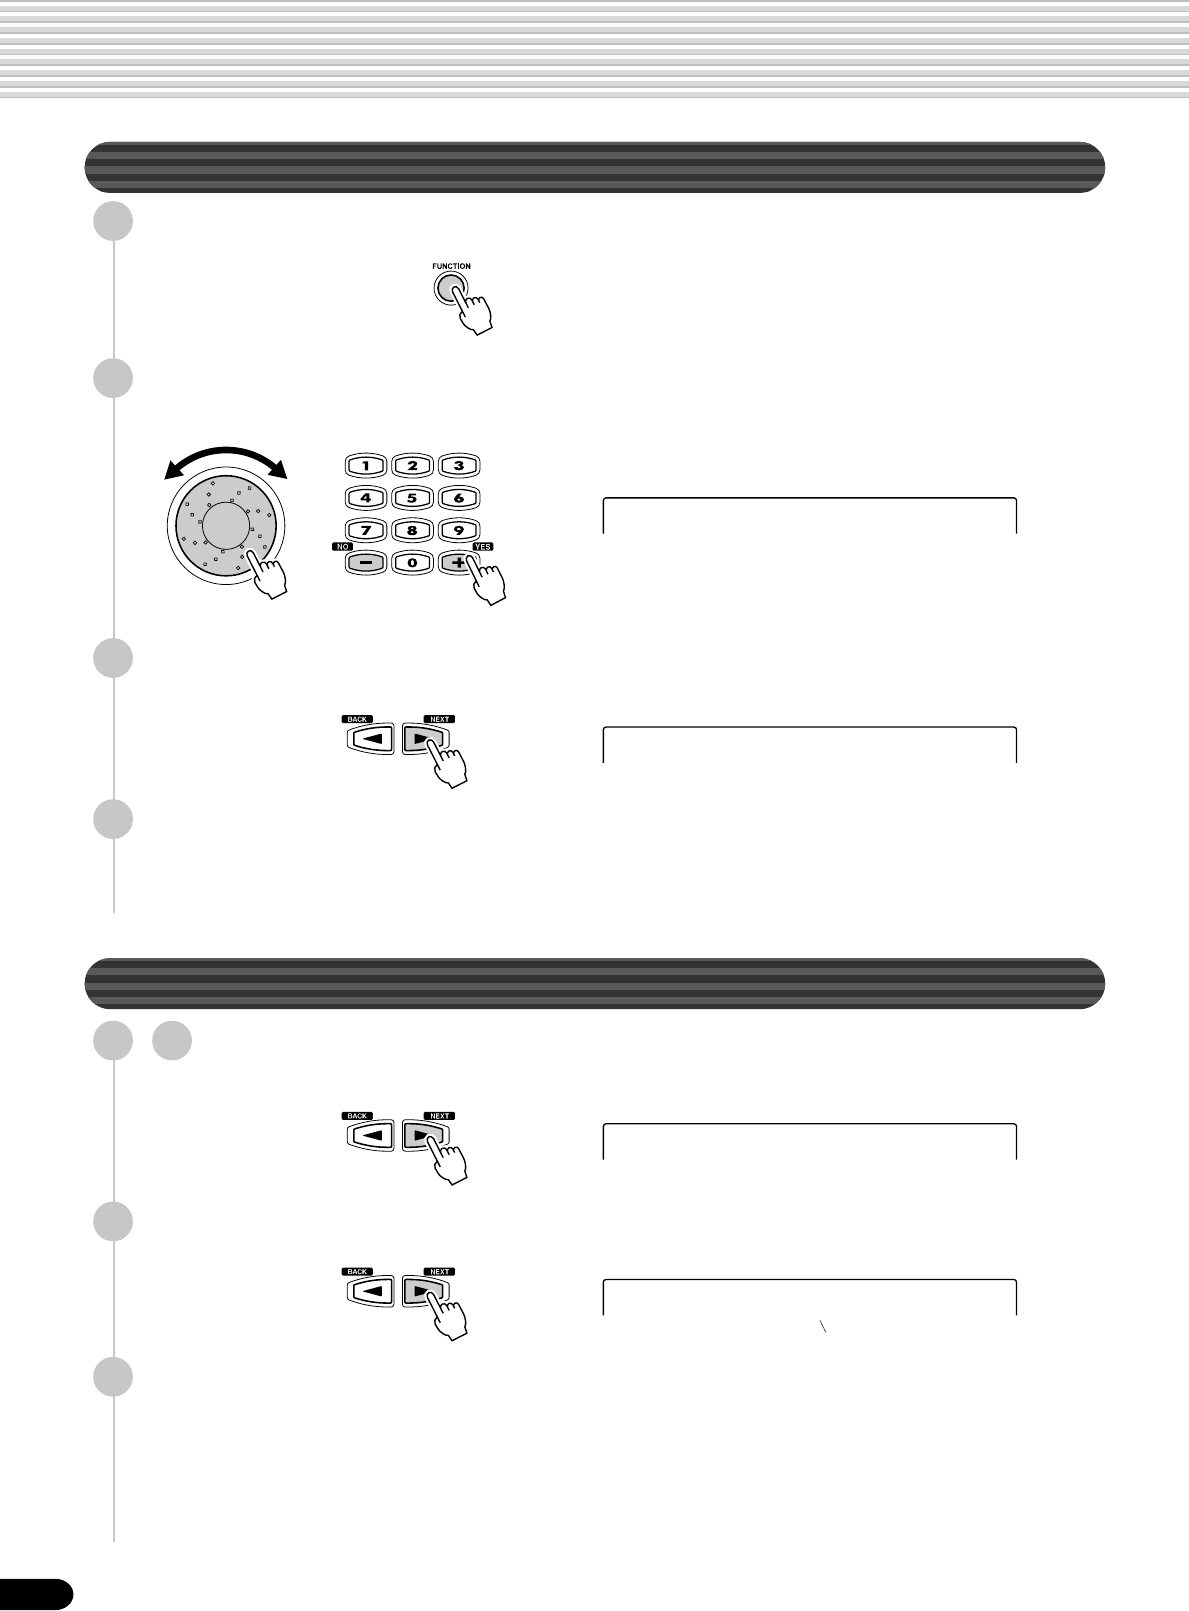
56
Registration Memory
Selecting a Registration Bank
1
Press the [FUNCTION] button.
3
Press the [NEXT] button to display the Registration Memory
Bank screen.
4
Select a bank.
Use the data dial, the [+/YES] button, the [-/NO] button or the number buttons
[1]-[0].
Naming the Registration Banks
1
-
3
Use the same operation as in “Selecting a Registration
Bank” (see above).
4
Press the [NEXT] button to display the Name screen.
5
Enter the desired name for the bank.
Use the keyboard to enter the name (page 21).
Up to eight letters or characters can be used.
F2 Regist Memory
RBnk=01 Regist01
RBnk=01 Regist01
2
Select “Regist Memory”.
Use the data dial, the [+/YES] button or the [-/NO] button.
54
–RegName=Regist01
Cursor
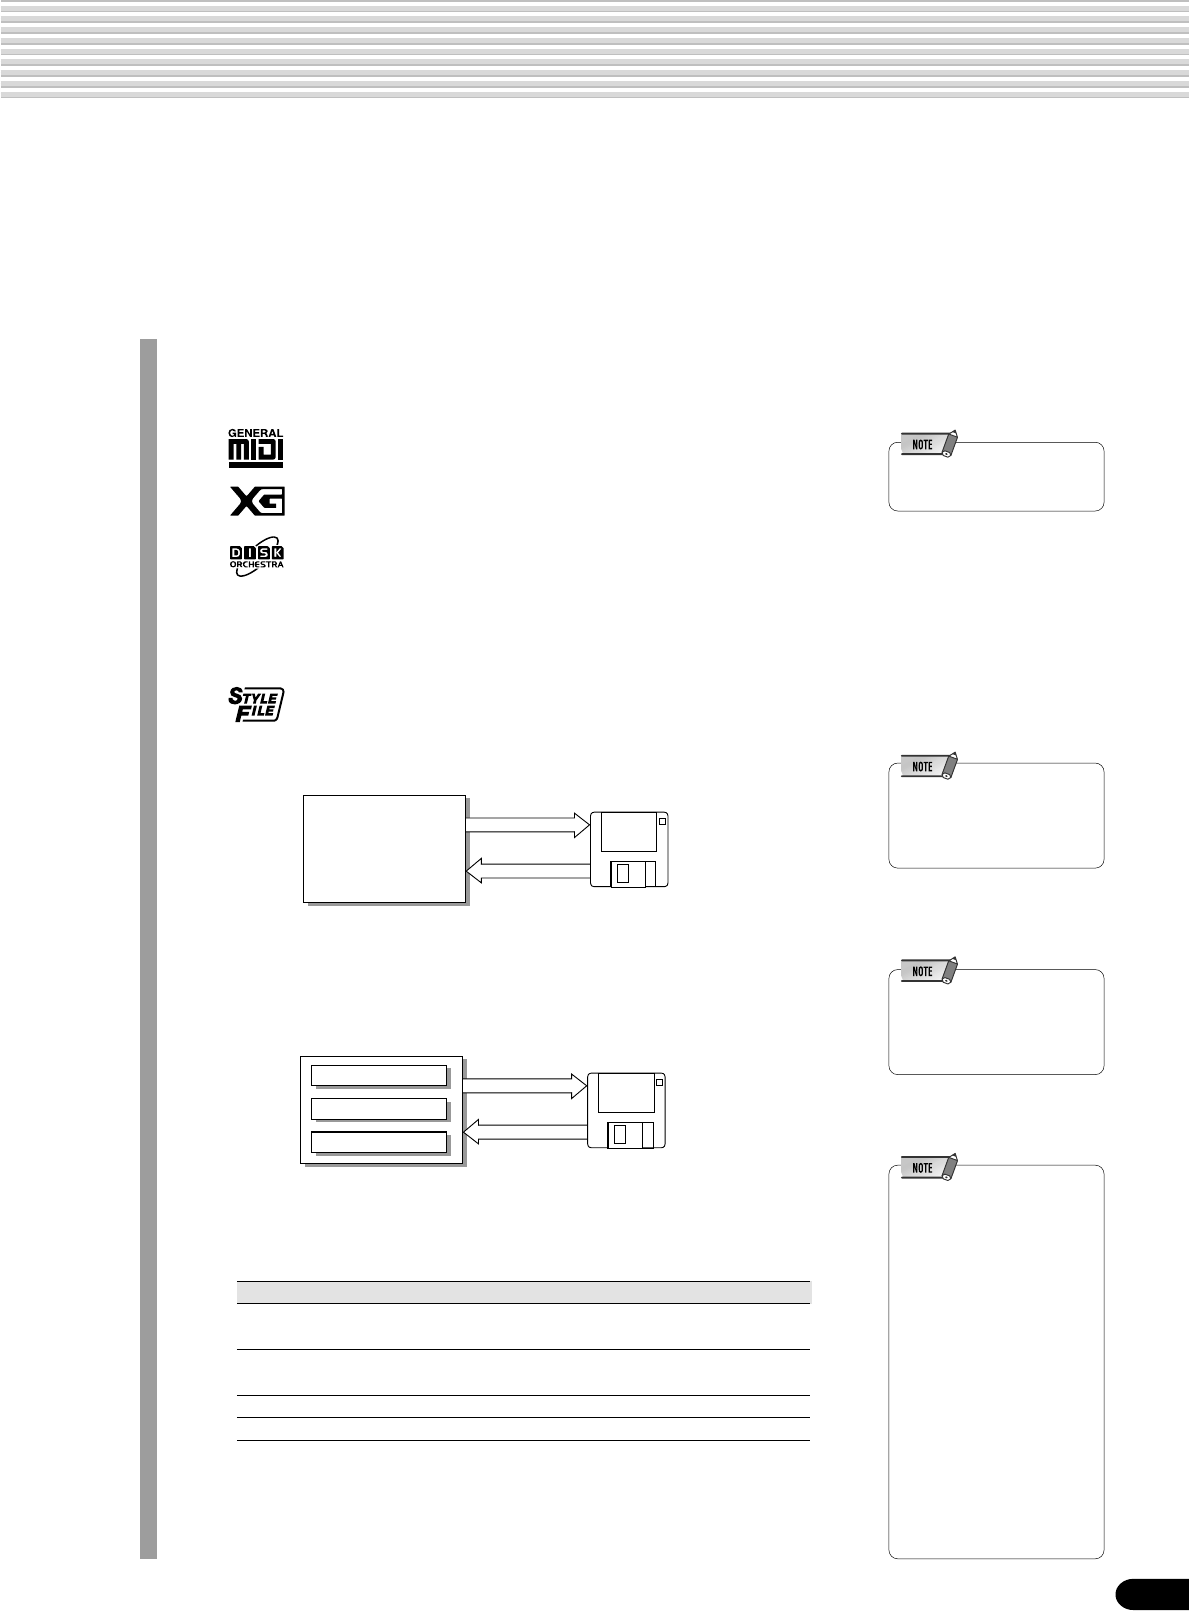
57
Disk Operations
Built into the PSR-550 is a disk drive. Simply insert a floppy disk and you’ve got access to a wide variety
of convenient functions, such as recording and playback of User songs (page 78), as well as saving and
loading of User styles (page 96), User pads (page 92) and Registration Memory data (page 54).
You can save any number of User styles, pads and registration data to floppy disks, create your own
song libraries or find many other ways to make playing and using the PSR-550 more efficient.
●The PSR-550 is capable of playing back songs contained on the included data
disk, as well as commercially available song data in the following formats,
indicated by the corresponding logos (page 9):
You can play back song files collected on these disks using the
voices defined in the GM standard.
You can play back songs using the XG format, an extension of the
GM standardthat allows for much higher sound quality.
You can play back song files collected on these disks using the
voices defined in Yamaha’s DOC format.
•Refer to page 9 for more
details on the logos.
●The PSR-550 is compatible with style data contained on the included data disk,
as well as commercially available disk styles in the following format, indicated by
the corresponding logo (page 9):
You can load and play with the style files collected on these disks.
●You can record your own performances to User songs and play them back (page
78).
•It may not be possible to
record the full 60 files to a
disk, depending on the
length of the recorded files.
●The PSR-550 features special User style, User pad and Registration Memory
functions. The data recorded with these functions can also be saved to disk
individually or in any combination. Likewise, data (files) saved to disks can be
loaded individually or in any combination to the PSR-550.
•The maximum number of
files may vary according to
the type and volume of the
saved files (page 61).
User data compatible with the PSR-550 is indicated in the chart below.
•When saving data, use a
floppy disk formatted on the
PSR-550.
•The three letters following
the file name (after the
period) are referred to as a
file “extension”. The
extension indicates the type
of file.
•Since the user songs are
directly recorded to the disk
as you play during recording
and read from the disk
during playback, the Save/
Load functions are not
available. The Copy and
Delete File operations
related to the user songs can
be executed.
●Other disk functions include:
• Format ............................................................... page 60
• Song Copy ......................................................... page 64
• Delete ................................................................ page 67
User Song
Record
Playback
(Direct save)
(Direct read) Maximum of 60 files
can be saved.
Floppy
Disk
Save
Load
Floppy
Disk
User Style
User Pad
Registration Memory
Save or load individually
or gathered together
Up to 32 All type files (page 61)
can be recorded on a 2HD disk.
Up to 13 All type files can be
recorded on a 2DD disk.
● Data that can be Saved or Loaded with the PSR-550
Data Type Extension Save Load
User song
(Standard MIDI format0) .MID ––
User style
(Style file format) .USR O O
User pad .USR O O
Registration Memory .USR O O
55
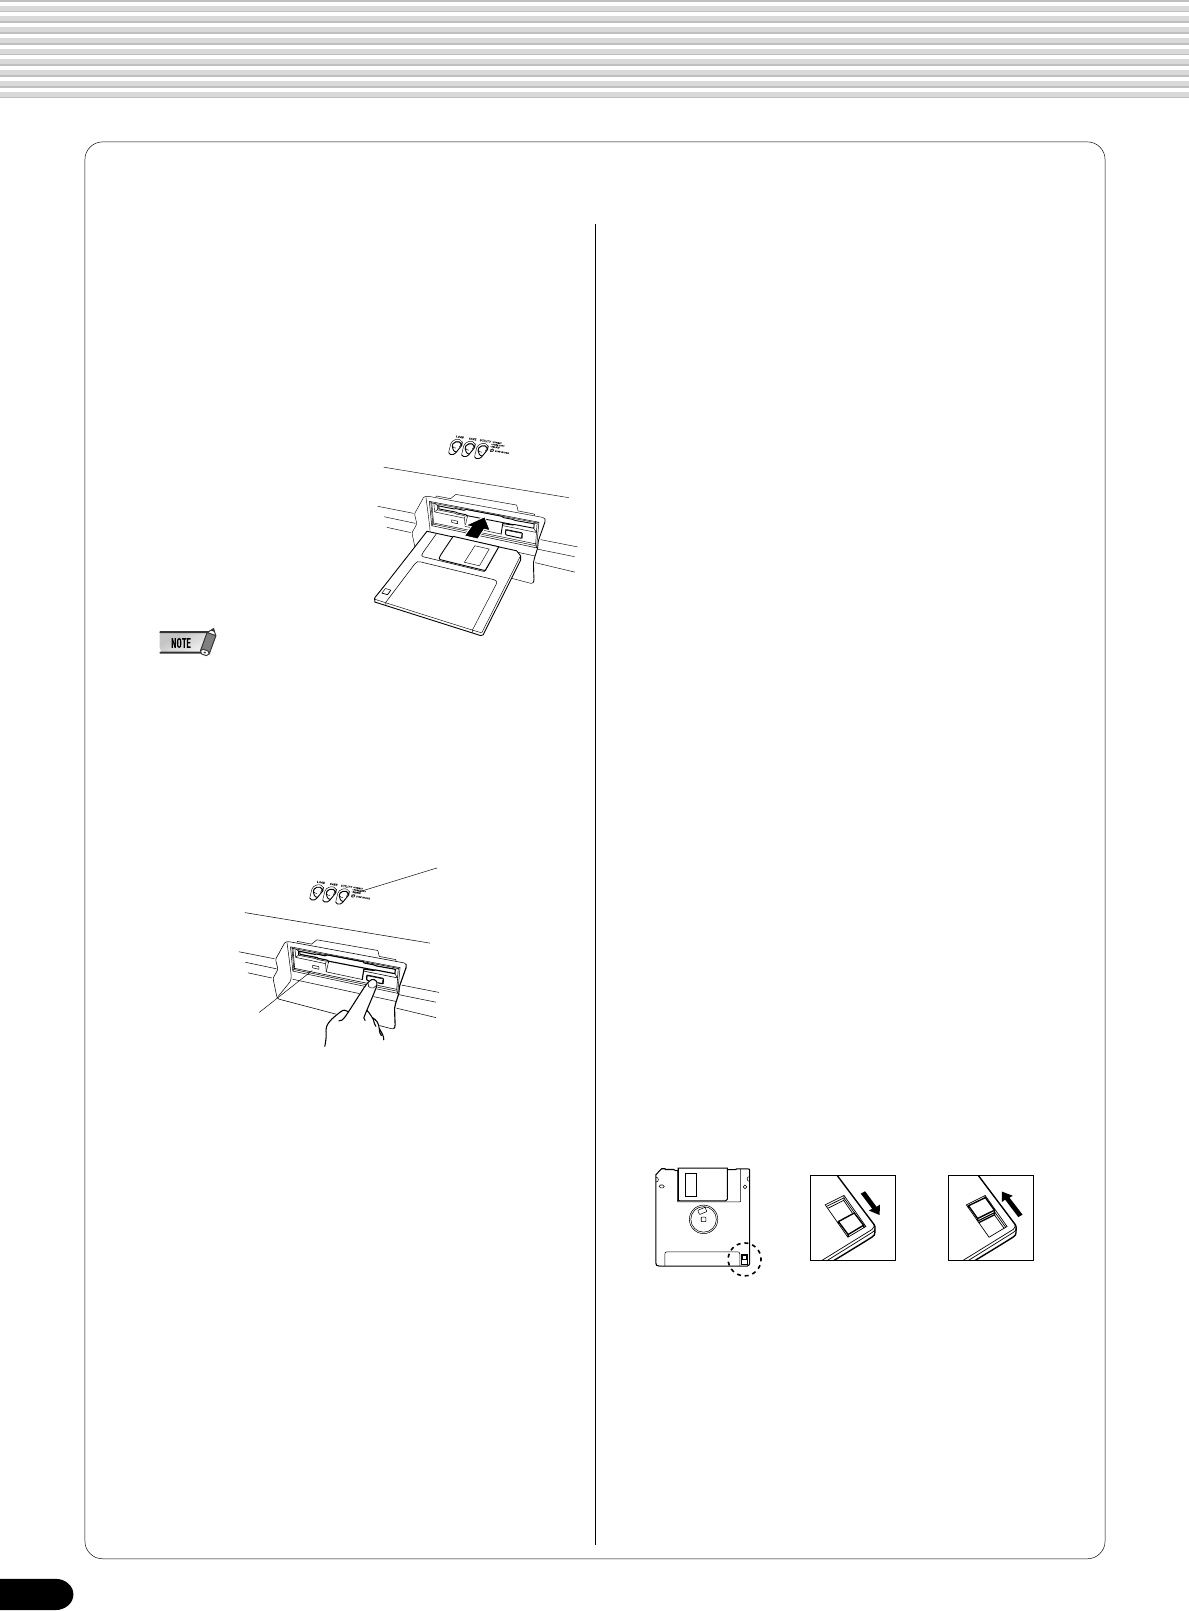
58
Disk Operations
Be sure to handle floppy disks and treat the disk drive with
care. Follow the important precautions below.
■ Compatible Disk Type
3.5" 2DD and 2HD type floppy disks can be used.
■ Inserting/Ejecting Floppy Disks
●To insert a floppy disk into the disk drive:
•Hold the disk so that the label of the disk is facing
upward and the sliding
shutter is facing forward,
towards the disk slot.
Carefully insert the disk
into the slot, slowly
pushing it all the way in
until it clicks into place
and the eject button pops
out.
■
Cleaning the Disk Drive Read/Write Head
●Clean the read/write head regularly. This instrument
employs a precision magnetic read/write head which,
after an extended period of use, will pick up a layer of
magnetic particles from the disks used that will
eventually cause read and write errors.
●To maintain the disk drive in optimum working order
Yamaha recommends that you use a commercially-
available dry-type head cleaning disk to clean the head
about once a month. Ask your Yamaha dealer about
the availability of proper head-cleaning disks.
●Never insert anything but floppy disks into the disk
drive. Other objects may cause damage to the disk
drive or floppy disks.
■ About the Floppy Disks
●To handle floppy disks with care:
•Do not place heavy objects on a disk or bend or
apply pressure to the disk in any way. Always keep
floppy disks in their protective cases when they are
not in use.
•Do not expose the disk to direct sunlight, extremely
high or low temperatures, or excessive humidity, dust
or liquids.
•Do not open the sliding shutter and touch the
exposed surface of the floppy disk inside.
•Do not expose the disk to magnetic fields, such as
those produced by televisions, speakers, motors,
etc., since magnetic fields can partially or completely
erase data on the disk, rendering it unreadable.
•Never use a floppy disk with a deformed shutter or
housing.
•Do not attach anything other than the provided
labels to a floppy disk. Also make sure that labels
are attached in the proper location.
●To protect your data (write-protect tab):
•To prevent accidental erasure of important data,
slide the disk’s write-protect tab to the “protect”
position (tab open).
Using the Floppy Disk Drive (FDD) and Floppy Disks
•When the PSR-550 is turned on, the LED below the floppy disk
slot will be lit indicating that the Disk Drive is ready to use.
●To eject a floppy disk:
•Before ejecting the disk, be sure to confirm that the
FDD is stopped (check if the DISK IN USE lamp is
off). Press the eject button slowly as far as it will go;
the disk will automatically pop out. When the disk is
fully ejected, carefully remove it by hand.
•If the eject button is pressed too quickly, or if it is not
pressed in as far as it will go, the disk may not eject
properly. The eject button may become stuck in a
half-pressed position with the disk extending from
the drive slot by only a few millimeters. If this
happens, do not attempt to pull out the partially
ejected disk, since using force in this situation can
damage the disk drive mechanism or the floppy disk.
To remove a partially ejected disk, try pressing the
eject button once again or push the disk back into
the slot and then repeat the eject procedure.
●Never attempt to remove the disk or turn the power off
during recording, reading and playing back. Doing so
can damage the disk and possibly the disk drive.
●Be sure to remove the floppy disk from the disk drive
before turning off the power. A floppy disk left in the
drive for extended periods can easily pick up dust and
dirt that can cause data read and write errors.
●Data backup
•For maximum data security Yamaha recommends
that you keep two copies of important data on
separate floppy disks. This gives you a backup if one
disk is lost or damaged.
Write protect tab
ON (locked or
write protected)
Write protect tab
OFF (unlocked or
write enabled)
DISK IN USE
This lamp lights
during disk read/
write operations,
such as when a
disk has been
inserted, during
recording,
playback,
formatting, etc.
This lamp is always on
when the power is on,
regardless of the disk
operation.
56
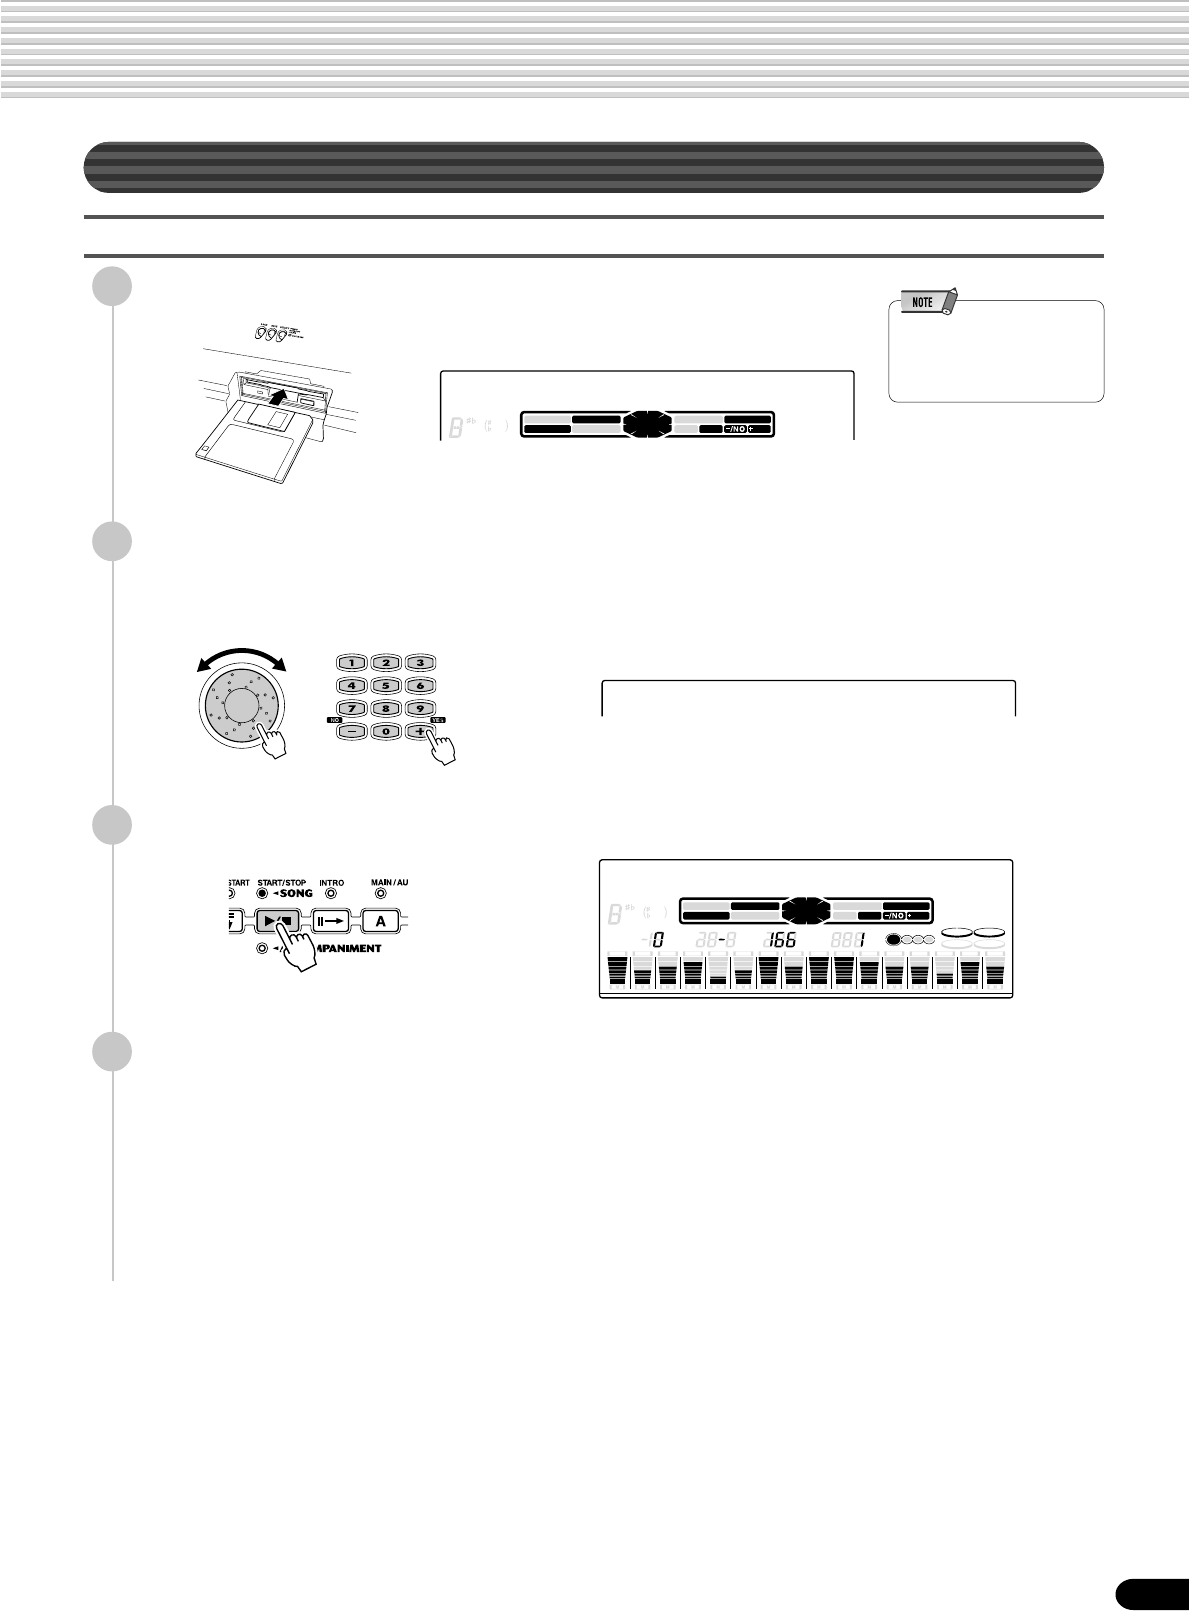
59
Disk Operations
Included Data Disk
Disk song playback
1
Insert the included data disk into the disk drive.
•If a disk has already been
inserted into the drive, press
the [SONG] button to call up
the Song display.
2
Select the desired song.
Use the data dial, the [+/YES] button, the [-/NO] button or the number buttons
[1]-[0].
3
Press the [START/STOP] button to start the song.
4
Press the [START/STOP] button again to stop the song.
For details, see “Song Playback” (page 68).
CHORD
dim
mM6
7
augsus4
119
513
BACK NEXT
KEYBOARD
START/STOP
/YES
TRACK(1~16)
PART DIAL
0~9
SONG
STYLE
VOICE LR12
EASY
NAVIGATOR
001 CLUB XG
_
MUSIC DATABASE
002 TECHNO
1
REC
2
REC
3
REC
4
REC
5
REC
6
REC
7
REC
8
REC
9
REC
10
REC
11
REC
12
REC
13
REC
14
REC
15
REC
16
REC
TRANSPOSE REGIST-
RATION TEMPO MEASURE BEAT
002 TECHNO
DSP(FAST)
SUSTAIN HARMONY
TOUCH
CHORD
dim
mM
6
7
augsus4
119
513
BACK NEXT
KEYBOARD
START/STOP
/YES
TRACK(1~16)
PART DIAL
0~9
SONG
STYLE
VOICE LR12
EASY
NAVIGATOR
MUSIC DATABASE
57
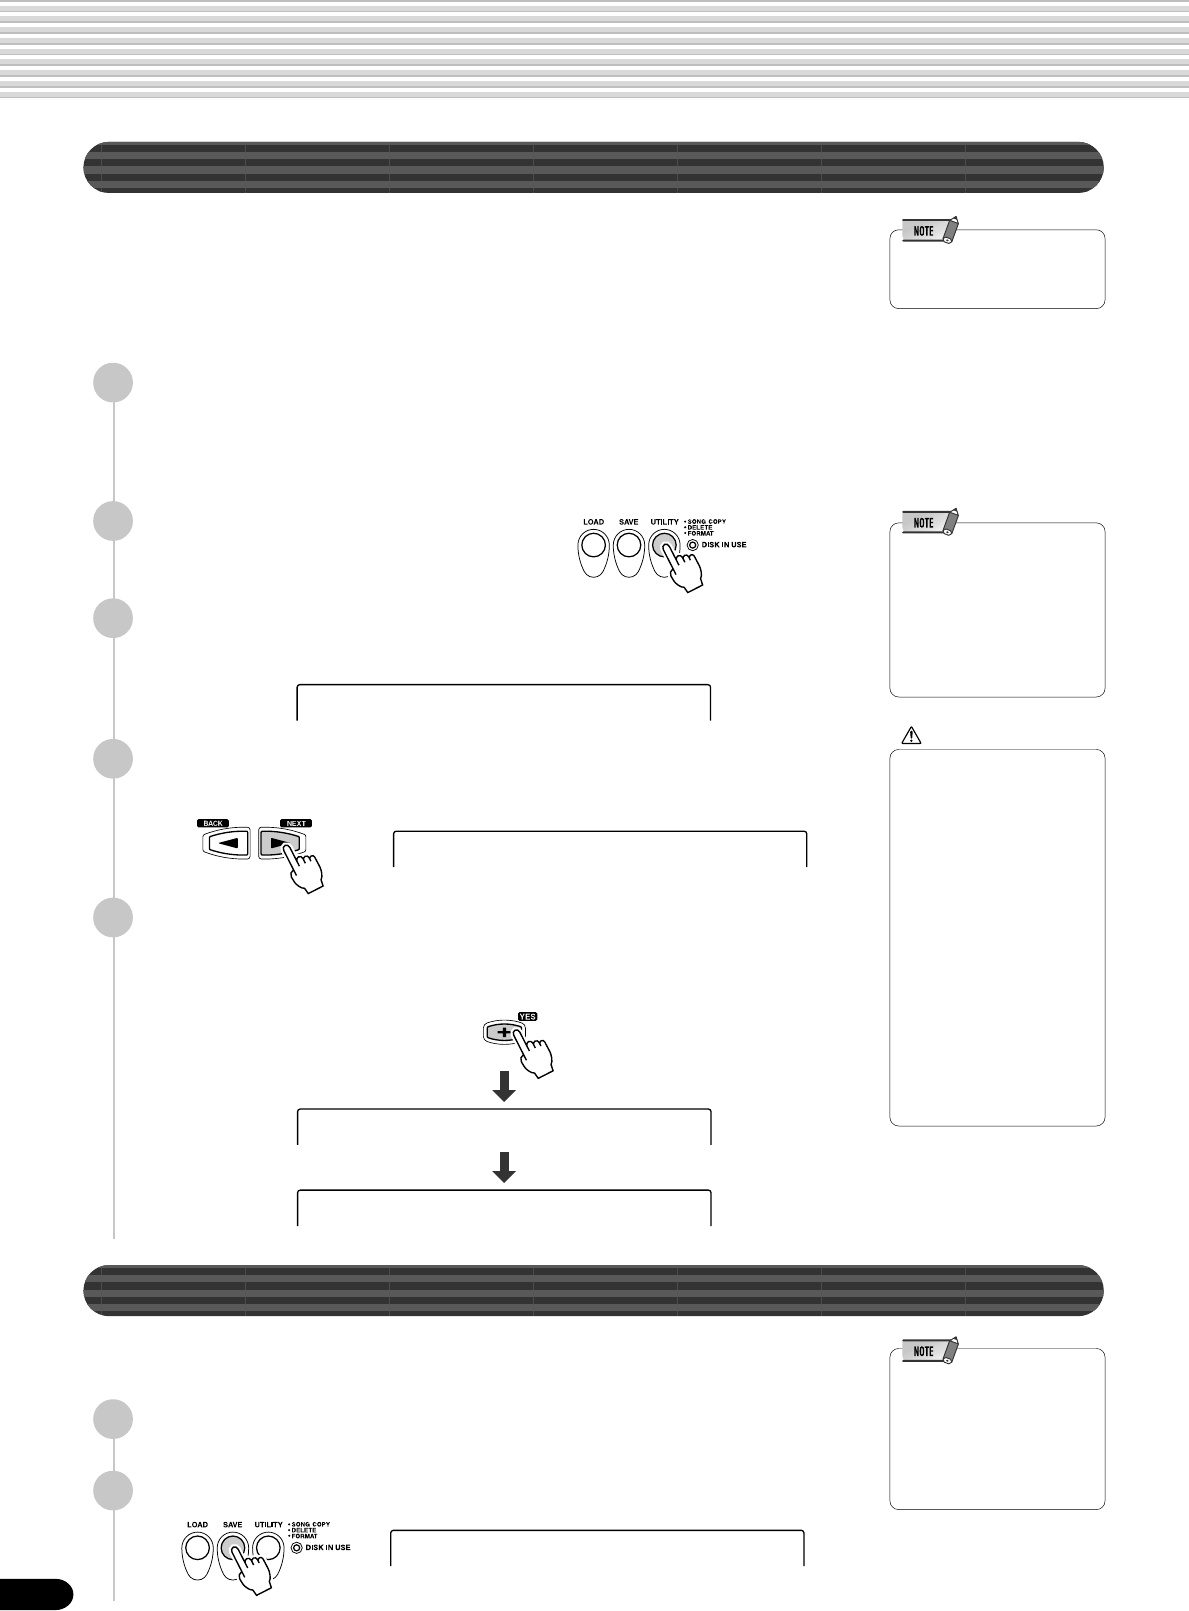
60
Disk Operations
Format
Setting up commercially available floppy disks for use with PSR-550 is called format-
ting.
This function is useful for quickly deleting unnecessary files from an already formatted
disk. Be careful when using this operation, since it automatically deletes all data on
the disk.
•After formatting, the capacity
of a 2HD disk is 1 MB and
that of a 2DD disk is 720 KB.
1
Insert the floppy disk into the disk drive.
When a (new) blank disk or an incompatible disk is inserted “Unformatted
Disk” will be displayed on the screen. In this case, press the [EXIT] button to
show “Format OK?” and then simply follow the procedure 5 below.
2
Press the [UTILITY] button.
•When the floppy disk’s write-
protect tab is set to ON
(page 58) or the disk is a
purposely “copy-protected”
disk, an alert message
appears indicating that the
Format function is not
possible.
3
Select “Format”.
Use the data dial, the [+/YES] button or the [-/NO] button.
CAUTION
•If data is already saved on
the disk, be careful not to
format it. If you format the
disk, all the previously
recorded data will be
deleted.
•While formatting is in
progress, never eject the
disk or turn off the power
to the PSR-550.
•If a disk that cannot be
read by the PSR-550 is
inserted into the disk
drive, it will be treated the
same as an unformatted
floppy disk. Take care not
to erase important data by
accidentally formatting a
disk.
4
Press the [NEXT] button to display the FORMAT operation
screen.
5
Execute the Format operation.
Press the [+/YES] button to execute the Format operation.
Press the [-/NO] button to abort the Format operation.
Save
You can save PSR-550 User styles, User pad (banks 37-40) and Registration Memory
data (banks 01-16) to floppy disks.
•When the floppy disk’s write-
protect tab is set to ON
(page 58) or the disk is a
purposely “copy-protected”
disk, an alert message
appears indicating that the
Save function is not possible.
1
Insert the floppy disk into the disk drive.
2
Press the [SAVE] button.
Utility:Format
Format OK?
Sv Type:All
The Format operation is completed...
Formatting 49%
Completed
58
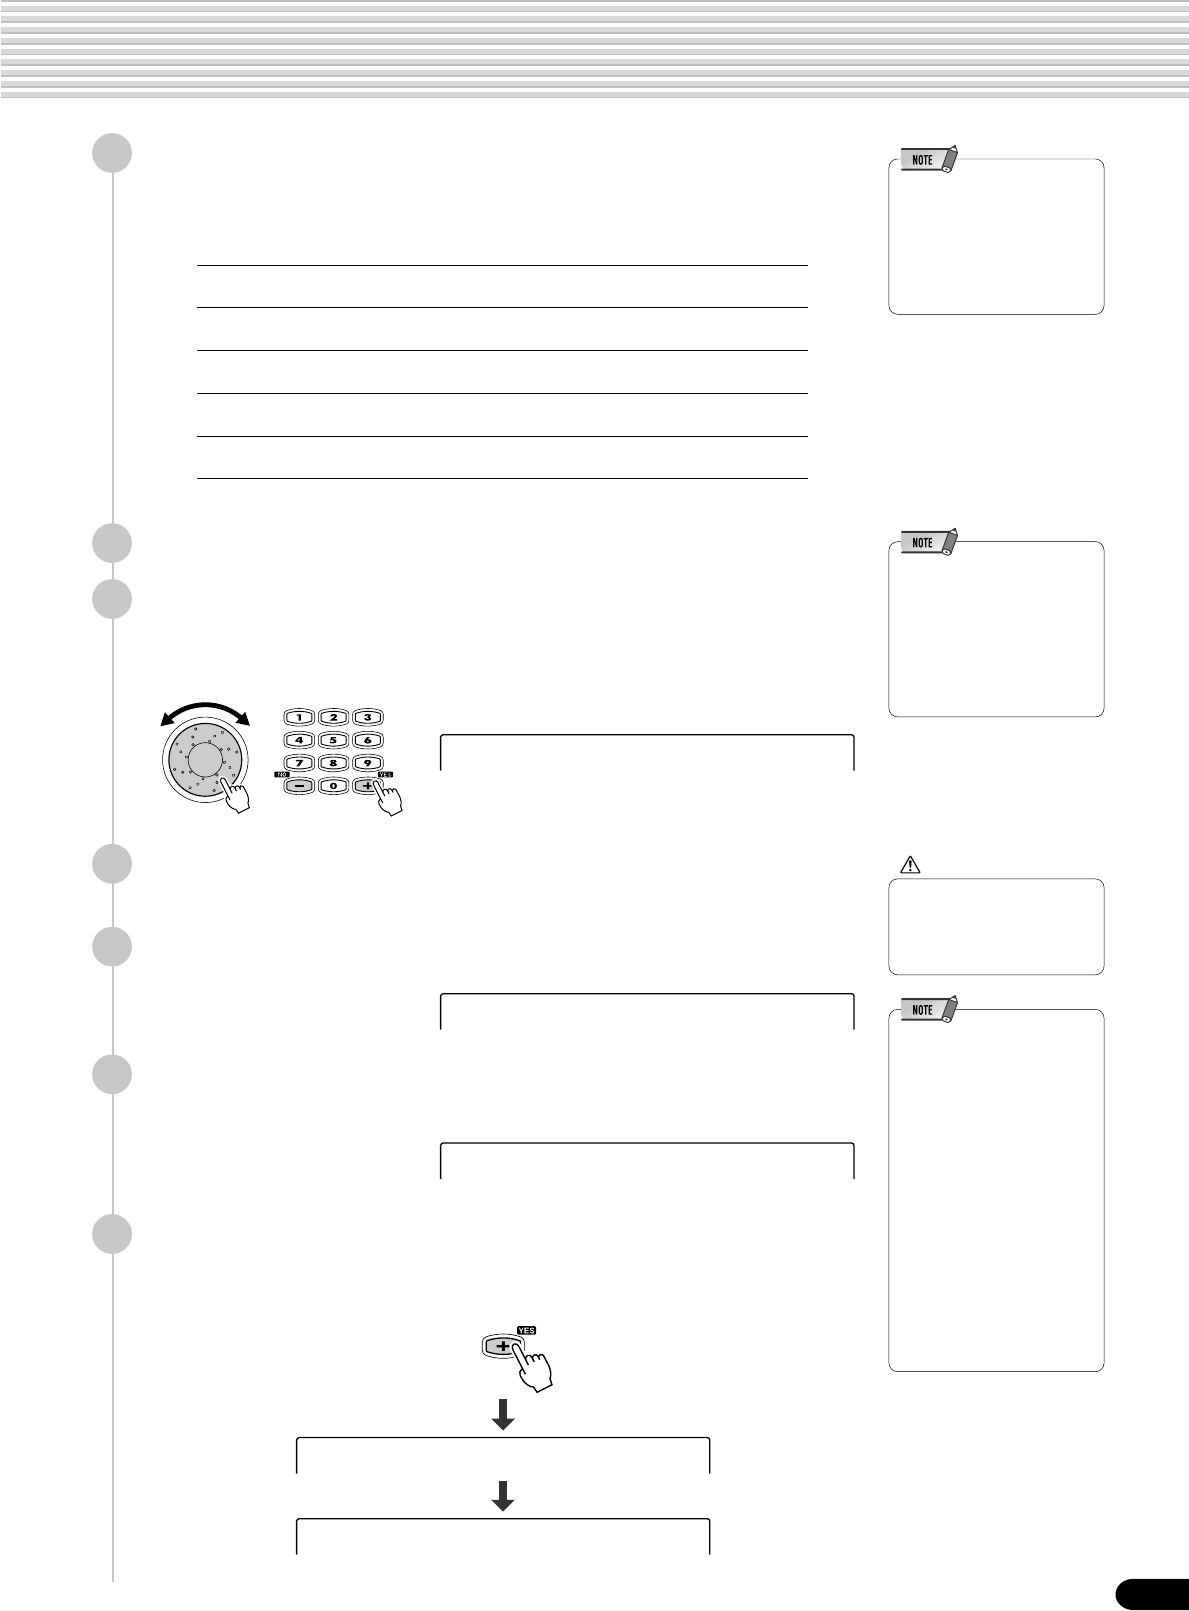
61
Disk Operations
3
Select the file type.
Use the data dial, the [+/YES] button or the [-/NO] button.
Refer to the file type list below:
•Although all User Style, User
Pad and Registration
Memory data can be saved
together into one single file,
the data can be recalled
individually when loaded
back into the PSR-550.
4
Press the [NEXT] button to display the FILE SELECT screen.
•If you’ve selected a file that
already contains data and
you rename the file with the
intent of overwriting the data,
renaming the file will simply
copy that data to the new file
name and leave the original
data and file name intact.
5
Select the destination file.
Use the data dial, the [+/YES] button or the [-/NO] button.
Select NEW when creating a new file.
6
Press the [NEXT] button to display the Name screen.
CAUTION
•While data is being saved,
never eject the floppy disk
or turn off power to the
PSR-550.
•If there isn’t enough space
on the disk, an alert
message appears and you
will not be able to save any
data. You can delete
unneeded files on the disk
(page 67), or replace the
disk with a new one and
repeat the Save operation.
•If a write error occurs during
a save operation, an alert
message appears. If the
error reoccurs after repeating
the Save operation, there
could be something wrong
with the disk. Insert a
different disk in the drive and
repeat the Save operation.
7
Enter the file name directly from the keyboard (page 21).
8
Press the [NEXT] button to display the Save operation
screen.
9
Execute the Save operation.
Press the [+/YES] button to execute the Save operation.
Press the [-/NO] button to abort the Save operation.
All Save all User Style (113-115), User Pad (bank 41-44), Registra-
tion Memory (bank 01-32) and all setup data into one single file.
Sty + Reg Save all User Style (113-115) and Registration Memory (bank 01-
32) data gathered together into one single file.
Style Save all User Style (113-115) data gathered together into one
single file.
Multi Pad Save all User Pad (bank 41-44) data gathered together into one
single file.
Regist Save all Registration Memory (bank 01-32) data gathered
together into one single file.
Sv =NEW
Sv Name=UF_00002
Save OK?
The Save operation is completed...
Executing 45%
Completed
59
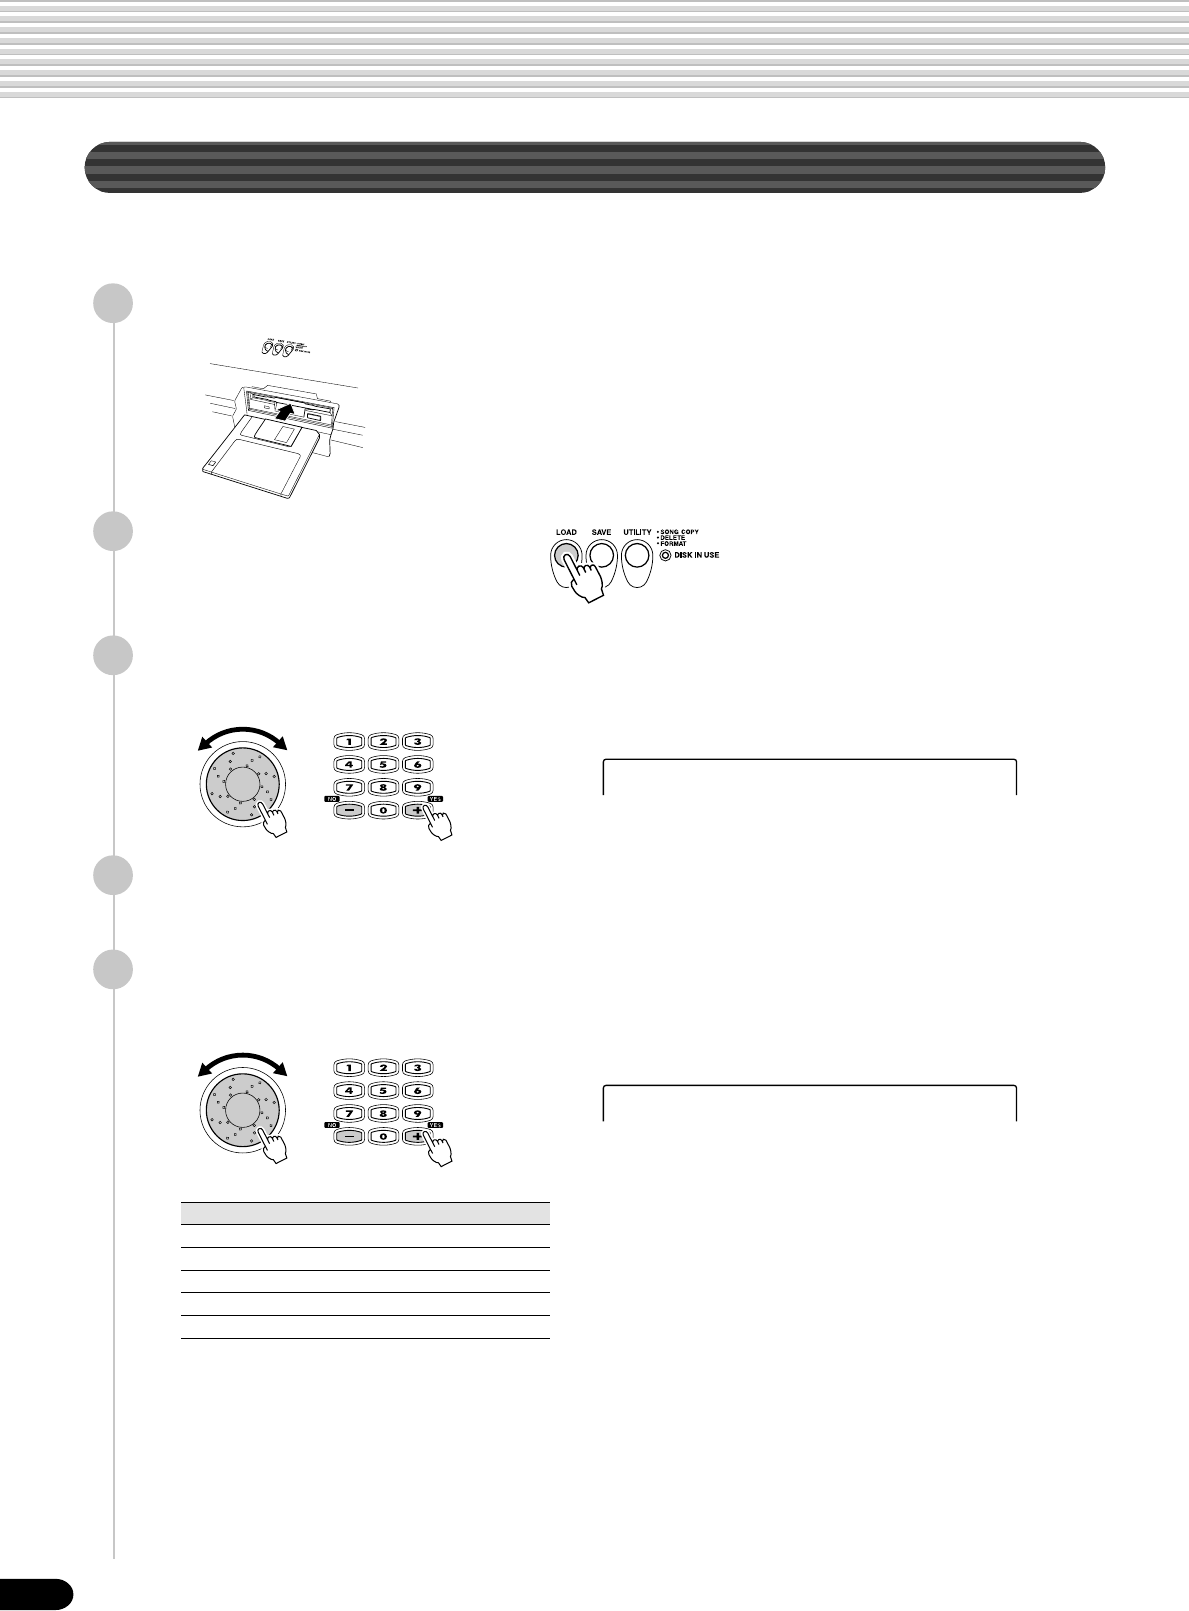
62
Disk Operations
Load
After saving User style (107-109), User pad (banks 37-40) and Registration Memory
(bank 01-32) data to a floppy disk, you can reload them into the PSR-550.
1
Insert the floppy disk into the disk drive.
2
Press the [LOAD] button.
3
Select the file to be loaded.
Use the data dial, the [+/YES] button or the [-/NO] button.
4
Press the [NEXT] button to display the Data Type Selection
screen.
5
Select the file type (data type) to be loaded.
Use the data dial, the [+/YES] button or the [-/NO] button.
Please follow the steps as indicated in the chart above, since the actual opera-
tion differs depending on the selected file type.
Ld =ABCD .USR
Ld Type:All
File types that can be loaded
All To Step 10
Sty + Reg To Step 10
Style To Step 6
Multi Pad To Step 6
Regist To Step 6
60
63
Disk Operations
6
Press the [NEXT] button.
7
Select the data to be loaded.
Use the data dial, the [+/YES] button or the [-/NO] button.
8
Press the [NEXT] button to display the destination selection
screen.
9
Select the destination.
Use the data dial, the [+/YES] button or the [-/NO] button.
10
Press the [NEXT] button to display the Load operation
screen.
11
Execute the Load operation.
Press the [+/YES] button to execute the Load operation.
Press the [-/NO] button to abort the Load operation.
CAUTION
•When data is loaded from
a floppy disk to the PSR-
550, the data already in the
memory of the instrument
will be replaced by the
data on the disk. Save
important data into a disk
file before doing the Load
operation.
•While data is loading,
never eject the floppy disk
or turn the power off.
•An alert message may
appear on the display, if a
problem occurs that prevents
the data from being loaded.
(For example, the capacity of
the PSR-550 [RAM] may be
exceeded, something may
be wrong with the floppy
disk, or the data from the
disk may be corrupted, etc.)
Src=User8BeatPop
Dst=UserStyle1
Load OK?
The Load Operation is completed...
Executing 45%
Completed
61
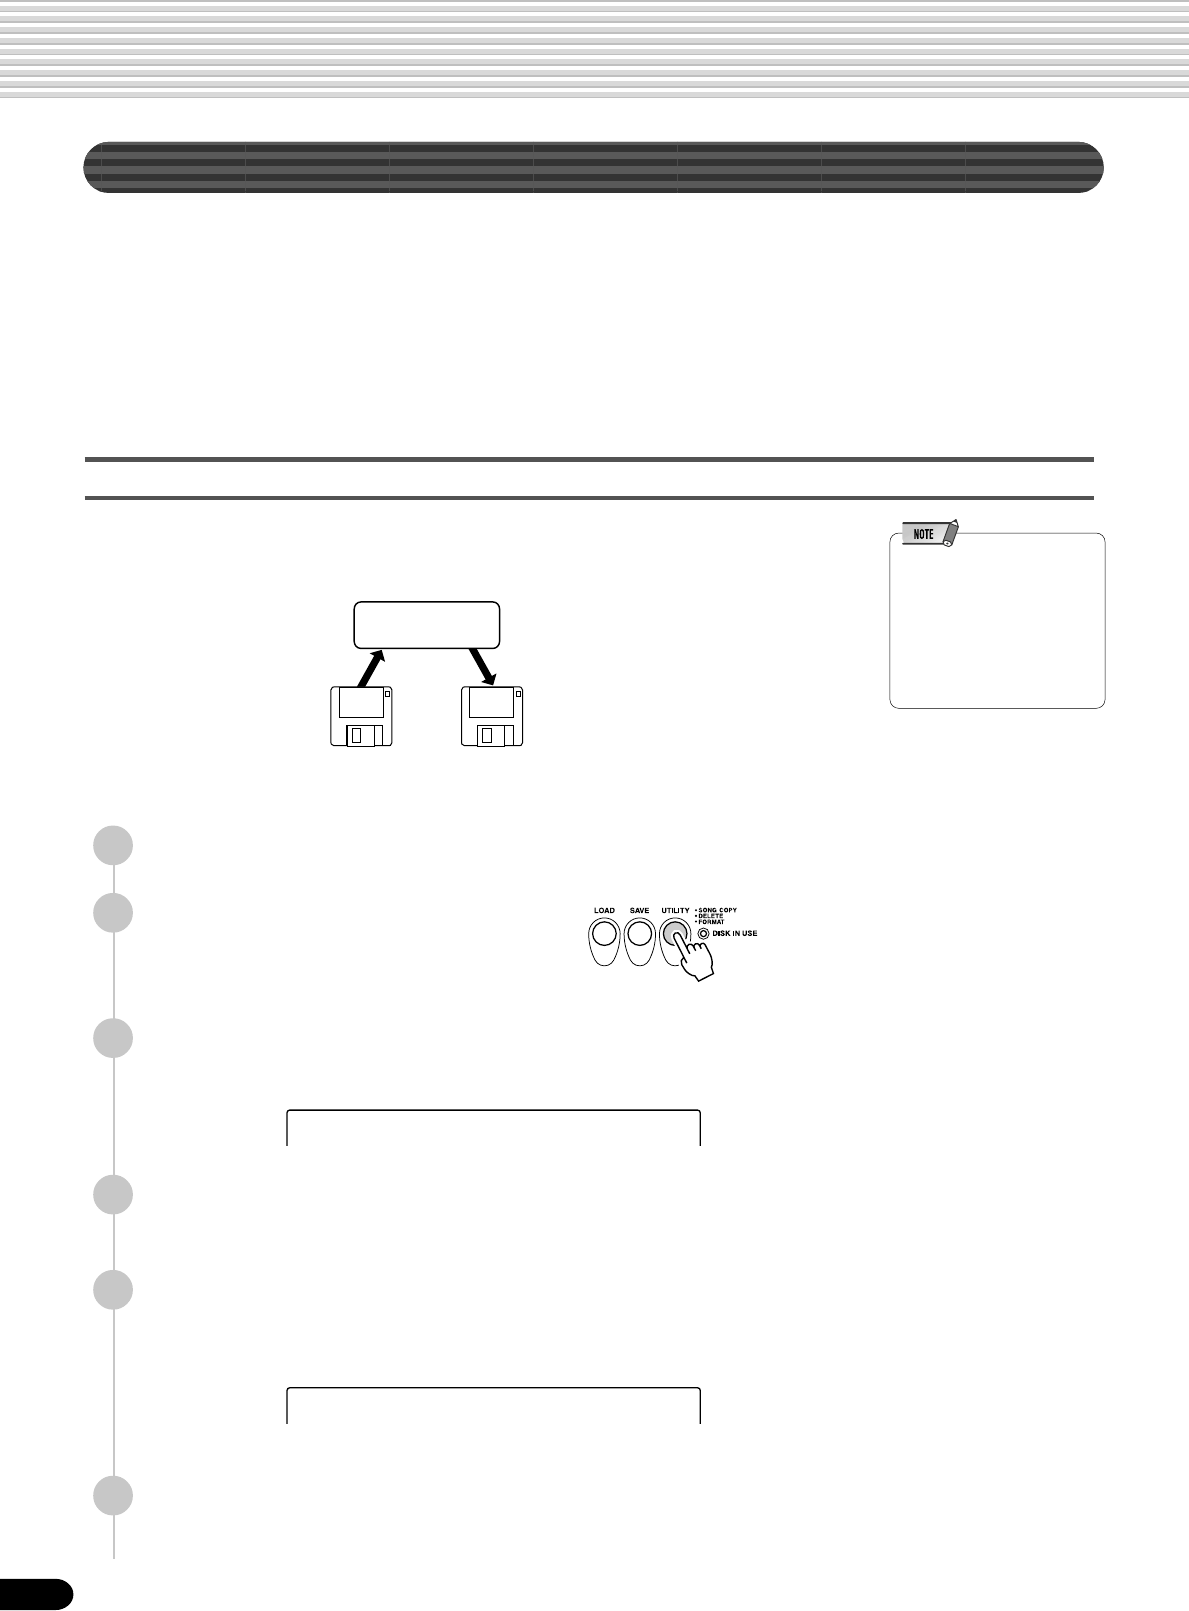
64
Disk Operations
Song Copy
This operation allows you to make backup copies of your important Song data. Prima-
rily, this will come in handy when you are recording and editing song data. For
example, if you are quantizing the track of a song (page 86) — which makes perma-
nent changes to the track — making a backup copy of the song allows you to restore
the original song data in case you’re not satisfied with the results of the quantization.
Having a dedicated backup disk for every song you work on is a good idea. In this
way, you can save a new copy of the song each time you make an important edit to it.
Copying song data from one floppy disk to another
Prepare a backup disk by formatting it. One file can be copied at a time. As shown in
the illustration below, first copy the desired file on the disk to internal memory, then
copy it to the destination disk.
If the quantity of data is large, it may be necessary for the data to be copied in parts.
•When the destination disk’s
write-protect tab is set to ON
(page 58) or the disk is a
purposely “copy-protected”
disk, an alert message
appears indicating that the
Song Copy function is not
possible.
1
Insert the disk to be copied (source disk) into the disk drive.
2
Press the [UTILITY] button.
3
Select “SongCopy”.
Use the data dial, the [+/YES] button or the [-/NO] button.
4
Press the [NEXT] button to display the Copy Type selection
screen.
5
Select “OtherFD”.
Use the data dial, the [+/YES] button or the [-/NO] button.
6
Press the [NEXT] button to display the Song selection
screen.
Utility:SongCopy
CopyType:OtherFD
PSR-550
Internal Memory
copycopy
Source Destination
62
65
Disk Operations
7
Select the source song file.
Use the data dial, the [+/YES] button or the [-/NO] button.
8
Press the [NEXT] button to display the Name screen.
9
Enter the destination song name directly from the keyboard
(page 21).
10
Press the [NEXT] button to display the Copy operation
screen.
11
Execute the Copy operation.
Press the [+/YES] button to execute the Copy operation.
Press the [-/NO] button to abort the Copy operation.
•If you insert a wrong disk,
different from the source or
destination disk, during the
Copy operation, an alert
message (page 137) will
appear on the display.
Src=Song_01
Copy OK?
Cursor
_–Dst=Song 01
Insert Target FD
Executing 20%
Executing 40%
Completed
Insert Source FD
While data is being copied, never
eject the floppy disk or turn the
power off.
If you want to cancel the Copy
function in this step, press the [EXIT]
button to cancel the operation.
While data is being copied, never
eject the floppy disk or turn the
power off.
If you want to cancel the Copy function in
this step, press the [EXIT] button to
cancel the operation.
The Copy operation
is completed...
Insert the
Source disk.
Copying the data from the
Source disk to Internal memory
Insert the
Destination disk.
Copying the data from Internal
memory to the Destination disk
CAUTION
CAUTION
If the quantity of
data is large, it
may be necessary
for the data to be
copied in parts.
63
66
Disk Operations
Copying data to another location on the same disk
1
-
4
Use the same operation as in “Copying data from one
floppy disk to another” (page 64).
5
Select “Same FD”.
Use the data dial, the [+/YES] button or the [-/NO] button.
6
Press the [NEXT] button to display the Song selection
screen.
7
Select the song source file.
Use the data dial, the [+/YES] button or the [-/NO] button.
8
Press the [NEXT] button to display the Name screen.
9
Enter the destination file name directly from the keyboard
(page 21).
10
Press the [NEXT] button to display the Copy operation
screen.
11
Execute the Copy operation.
Press the [+/YES] button to execute the Copy operation.
Press the [-/NO] button to abort the Copy operation.
CAUTION
•While data is being copied,
never eject the floppy disk
or turn the power off.
CopyType:Same FD
Src=Song_01
Copy OK?
The Copy Operation is completed...
Executing 49%
Completed
64
Cursor
_–Dst=Song 01
67
Disk Operations
Delete
You can delete individual files (User songs, User styles, User pads or Registra-
tion Memory) from the floppy disk.
1
Insert the floppy disk into the disk drive.
3
Select “Delete”.
Use the data dial, the [+/YES] button or the [-/NO] button.
4
Press the [NEXT] button to display the Delete screen.
5
Select the file to be deleted.
Use the data dial, the [+/YES] button or the [-/NO] button.
6
Press the [NEXT] button to display the Delete operation
screen.
7
Execute the Delete operation.
Press the [+/YES] button to execute the Delete operation.
Press the [-/NO] button to abort the Delete operation.
Utility:Delete
Del=ABCD .USR
Delete OK?
•When the floppy disk’s write-
protect tab is set to ON
(page 58) or the disk is a
purposely “copy-protected”
disk, an alert message
appears indicating that the
Delete function is not
possible.
2
Press the [UTILITY] button.
The Delete Operation is completed...
Executing 49%
Completed
CAUTION
•While the file is being
deleted, never eject the
floppy disk or turn the
power off.
65
68
Disk Song Playback
Song Playback
1
Insert the disk that contains song data into the disk drive.
PSR-550 will automatically switch into Song mode.
•If a disk has already been
inserted into the drive, press
the [SONG] button to call up
the Song display.
•Inserting a disk that does not
contain song data will not
automatically call up the
Song display.
2
Select the desired song.
Use the data dial, the [+/YES] button, the [-/NO] button or the number buttons
[1]-[0].
3
Press the [NEXT] button to display the Song Menu screen.
You can playback a huge variety of songs on the PSR-550, including the preset demo songs, the songs
on the included data disk, the User songs that you record to a floppy disk and songs on commercially
available XG/GM song collection disks. Except for the preset demo songs, a floppy disk must be inserted
in the disk drive to playback a song.
You can play back song files collected on these disks using the
voices defined in the GM standard.
You can play back songs using the XG format, an extension of the
GM standardthat allows for much higher sound quality.
You can play back song files collected on these disks using the
voices defined in Yamaha’s DOC format.
●The following disks are compatible for playback on the PSR-550 (including the
data disk). Refer to page 9 for more details on the logos.
●Disk songs can be played back in five different ways: ..................... page 69
• SINGLE
• SINGLE REPEAT
• ALL
• ALL REPEAT
• RANDOM
●Additional song playback functions:
• Song Track Muting ................................................................. page 70
• Tempo/Tap ............................................................................. page 36
• Song Volume Control............................................................. page 70
• Song Transpose .................................................................... page 73
• Playing from a Specified Measure......................................... page 71
• Repeat Play ........................................................................... page 72
•Make sure to read the
section “Using the Floppy
Disk Drive (FDD) and
Floppy Disks” on page 58.
•The tempo setting of some
commercially available disk
songs is fixed. These songs
are called “free-tempo
software”. When playing
back free-tempo song data
on the PSR-550, the Tempo
display shows “- - -” and the
beat display does not flash.
Also, the measure number in
the display does not match
the actual measure number
of playback, and only gives
you an indication of how
much of the song has played
back.
CHORD
dim
mM
6
7
augsus4
119
513
BACK NEXT
KEYBOARD
START/STOP
/YES
TRACK(1~16)
PART DIAL
0~9
SONG
STYLE
VOICE LR12
EASY
NAVIGATOR
001 CLUB XG
_
MUSIC DATABASE
002 TECHNO
66
69
Disk Song Playback
4
Select “PlayMode”.
Use the data dial, the [+/YES] button or the [-/NO] button.
5
Press the [NEXT] button to display the Song Play Mode
screen.
6
Select the desired Play mode.
Use the data dial, the [+/YES] button or the [-/NO] button.
● Single ................................... Play through the selected song, then stop.
● SglRepeat (Single Repeat) .. Play through the selected song repeatedly.
● All ......................................... Continue playback through all the songs on the floppy
disk.
● All Repeat ............................. Continue playback through all the songs on the floppy
disk repeatedly.
● Random ................................ Continue playback through all the songs at random.
7
Press the [START/STOP] button to start the song.
8
Press the [START/STOP] button again to stop the song.
SngMenu:PlayMode
PlayMd=Single
PlayMd=SglRepeat
1
REC
2
REC
3
REC
4
REC
5
REC
6
REC
7
REC
8
REC
9
REC
10
REC
11
REC
12
REC
13
REC
14
REC
15
REC
16
REC
TRANSPOSE REGIST-
RATION TEMPO MEASURE BEAT
002 TECHNO
DSP(FAST)
SUSTAIN HARMONY
TOUCH
CHORD
dim
mM
6
7
augsus4
119
513
BACK NEXT
KEYBOARD
START/STOP
/YES
TRACK(1~16)
PART DIAL
0~9
SONG
STYLE
VOICE LR12
EASY
NAVIGATOR
MUSIC DATABASE
67
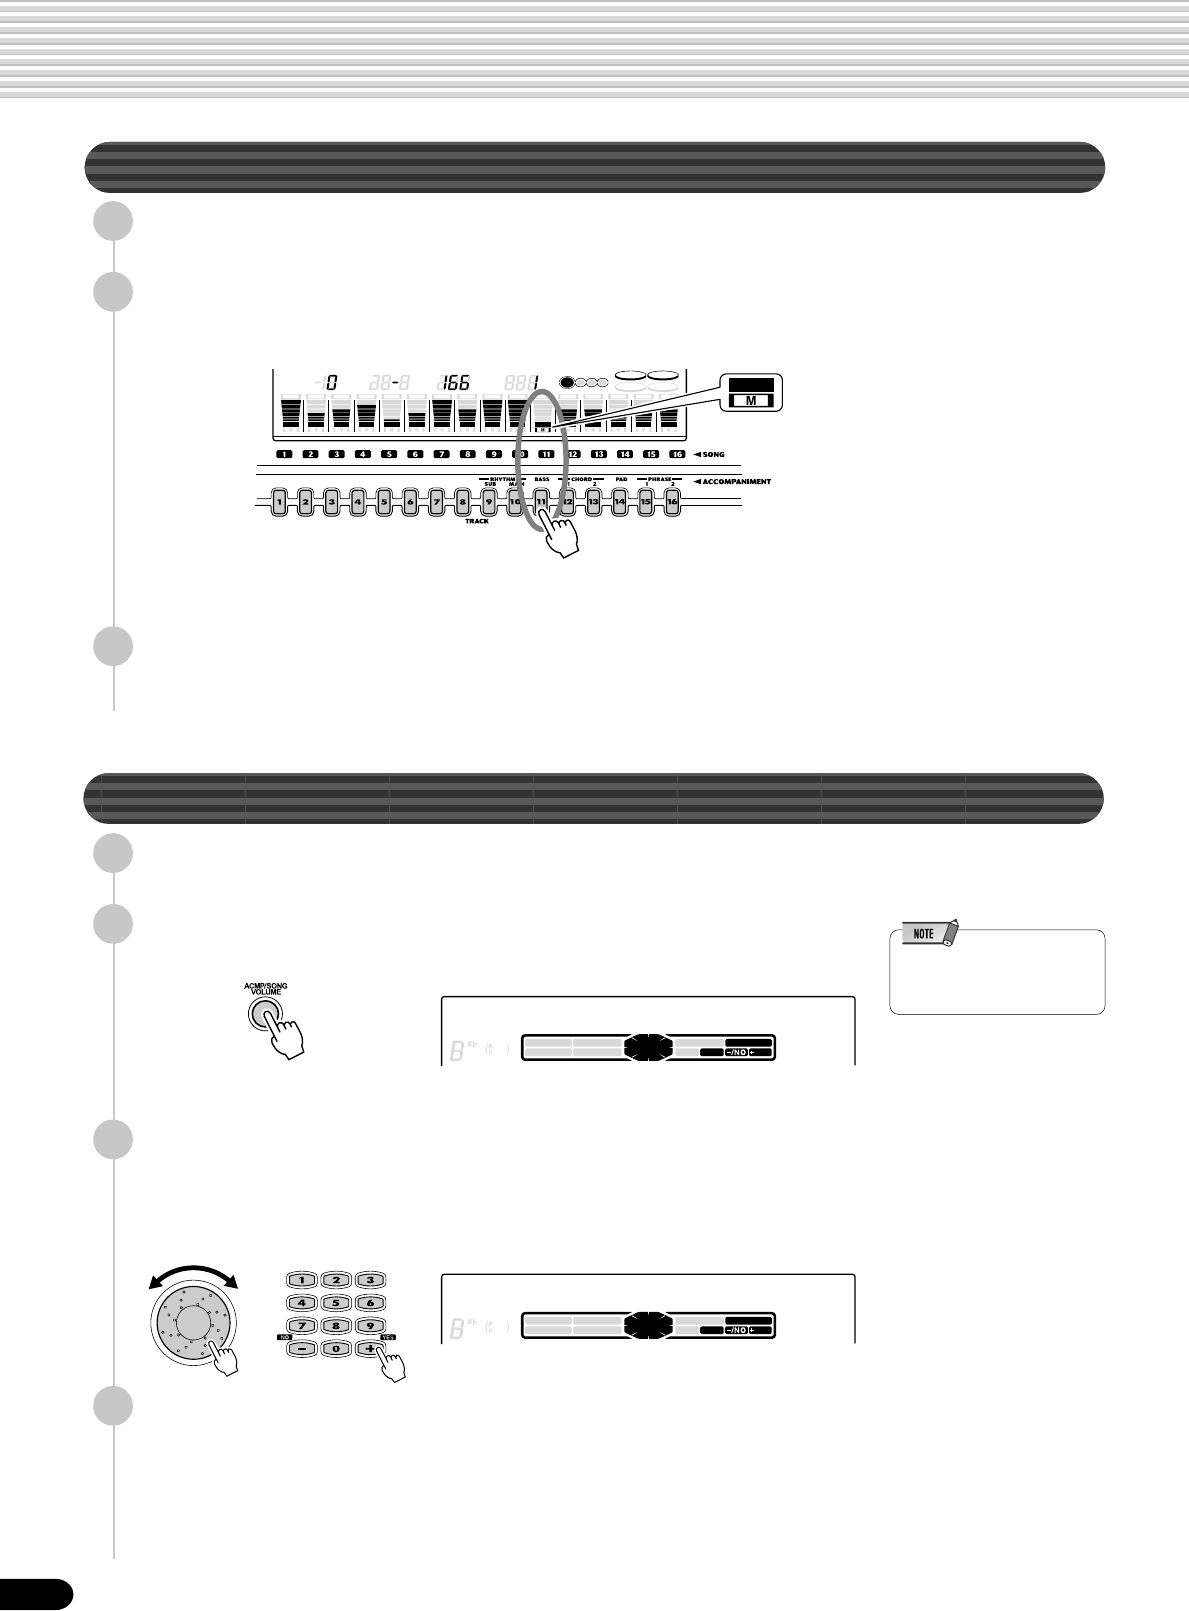
70
Disk Song Playback
Song Track Muting
1
Press the [START/STOP] button to start the song.
2
Press one of the TRACK buttons below the display.
The [M] icon will appear and the selected track will be muted.
Pressing the same track button again enables output of the playback sound.
3
Press the [START/STOP] button again to stop the song.
Song Volume Control
1
Press the [START/STOP] to start the song.
2
Press the [ACMP/SONG VOLUME] button.
3
Adjust the Song Volume.
Use the data dial, the [+/YES] button, the [-/NO] button or the number buttons
[1]-[0].
The range is from 0 to 127.
•The volume of the keyboard-
played voice(s) is not
affected by this operation.
4
Press the [START/STOP] button again to stop the song.
CHORD
dim
mM
6
7
augsus4
119
513
BACK NEXT
KEYBOARD
START/STOP
/YES
TRACK(1~16)
PART DIAL
0~9
SONG
STYLE
VOICE LR12
EASY
NAVIGATOR
Song Volume =120
MUSIC DATABASE
CHORD
dim
mM
6
7
augsus4
119
513
BACK NEXT
KEYBOARD
START/STOP
/YES
TRACK(1~16)
PART DIAL
0~9
SONG
STYLE
VOICE LR12
EASY
NAVIGATOR
Song Volume =108
MUSIC DATABASE
1
REC
2
REC
3
REC
4
REC
5
REC
6
REC
7
REC
8
REC
9
REC
10
REC
11
REC
12
REC
13
REC
14
REC
15
REC
16
REC
TRANSPOSE REGIST-
RATION TEMPO MEASURE BEAT
DSP(FAST)
SUSTAIN HARMONY
TOUCH
11
68

71
Disk Song Playback
Playing from a Specified Measure
1
Press the [SONG] button.
2
Press the [NEXT] button to display the Song Menu screen.
3
Select “Measure”.
Use the data dial, the [+/YES] button or the [-/NO] button.
4
Press the [NEXT] button to display the Song Start Measure
screen.
5
Specify the measure from which to begin playback.
Use the data dial, the [+/YES] button, the [-/NO] button or the number buttons
[1]-[0].
6
Press the [START/STOP] to start the song from the specified
measure.
7
Press the [START/STOP] button again to stop the song.
StartMeasure= 1
SngMenu:Measure
StartMeasure= 12
69
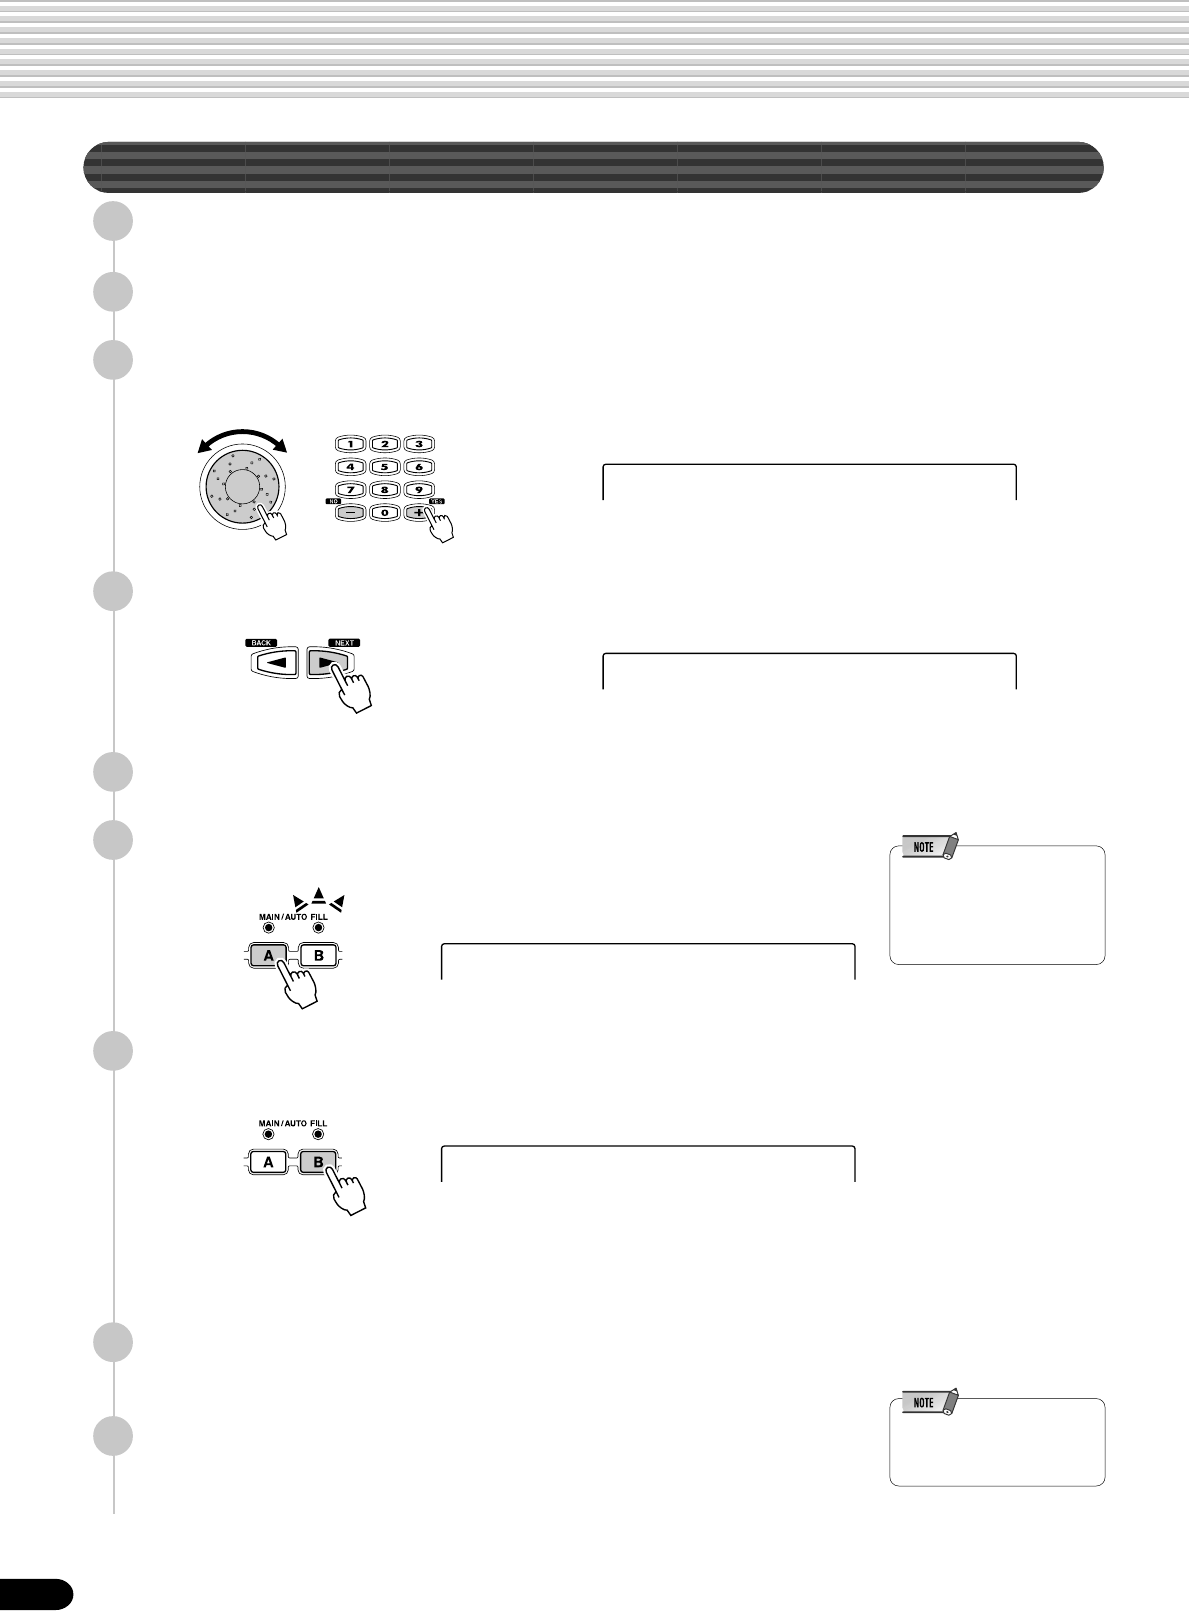
72
Disk Song Playback
Repeat Play (A-B Repeat)
1
Press the [SONG] button.
2
Press the [NEXT] button to display the Song Menu screen.
3
Select “AbRepeat”.
Use the data dial, the [+/YES] button or the [-/NO] button.
4
Press the [NEXT] to display the Repeat screen.
5
Press the [START/STOP] button to start the song.
6
Press the [MAIN A] button or the [+/YES] button at the start-
ing point (A) to be repeated.
7
Press the [MAIN B] button or the [+/YES] button at the ending
point (B) to be repeated.
•If only the “A” repeat point is
specified, repeat playback
will occur between the “A”
point and the end of the
song.
Repeat playback is now set, and the selected section automatically repeats
indefinitely (until disabled or stopped in the steps below).
8
To cancel the repeat function and continue song playback,
press the [MAIN A] button again, or press the [-/NO] button.
9
Press the [START/STOP] button to stop the song.
•Repeat playback will be
cancelled if a different song
is selected.
A-B Repeat =Off
SngMenu:AbRepeat
A-B Repeat =A-
A-B Repeat =A-B
70
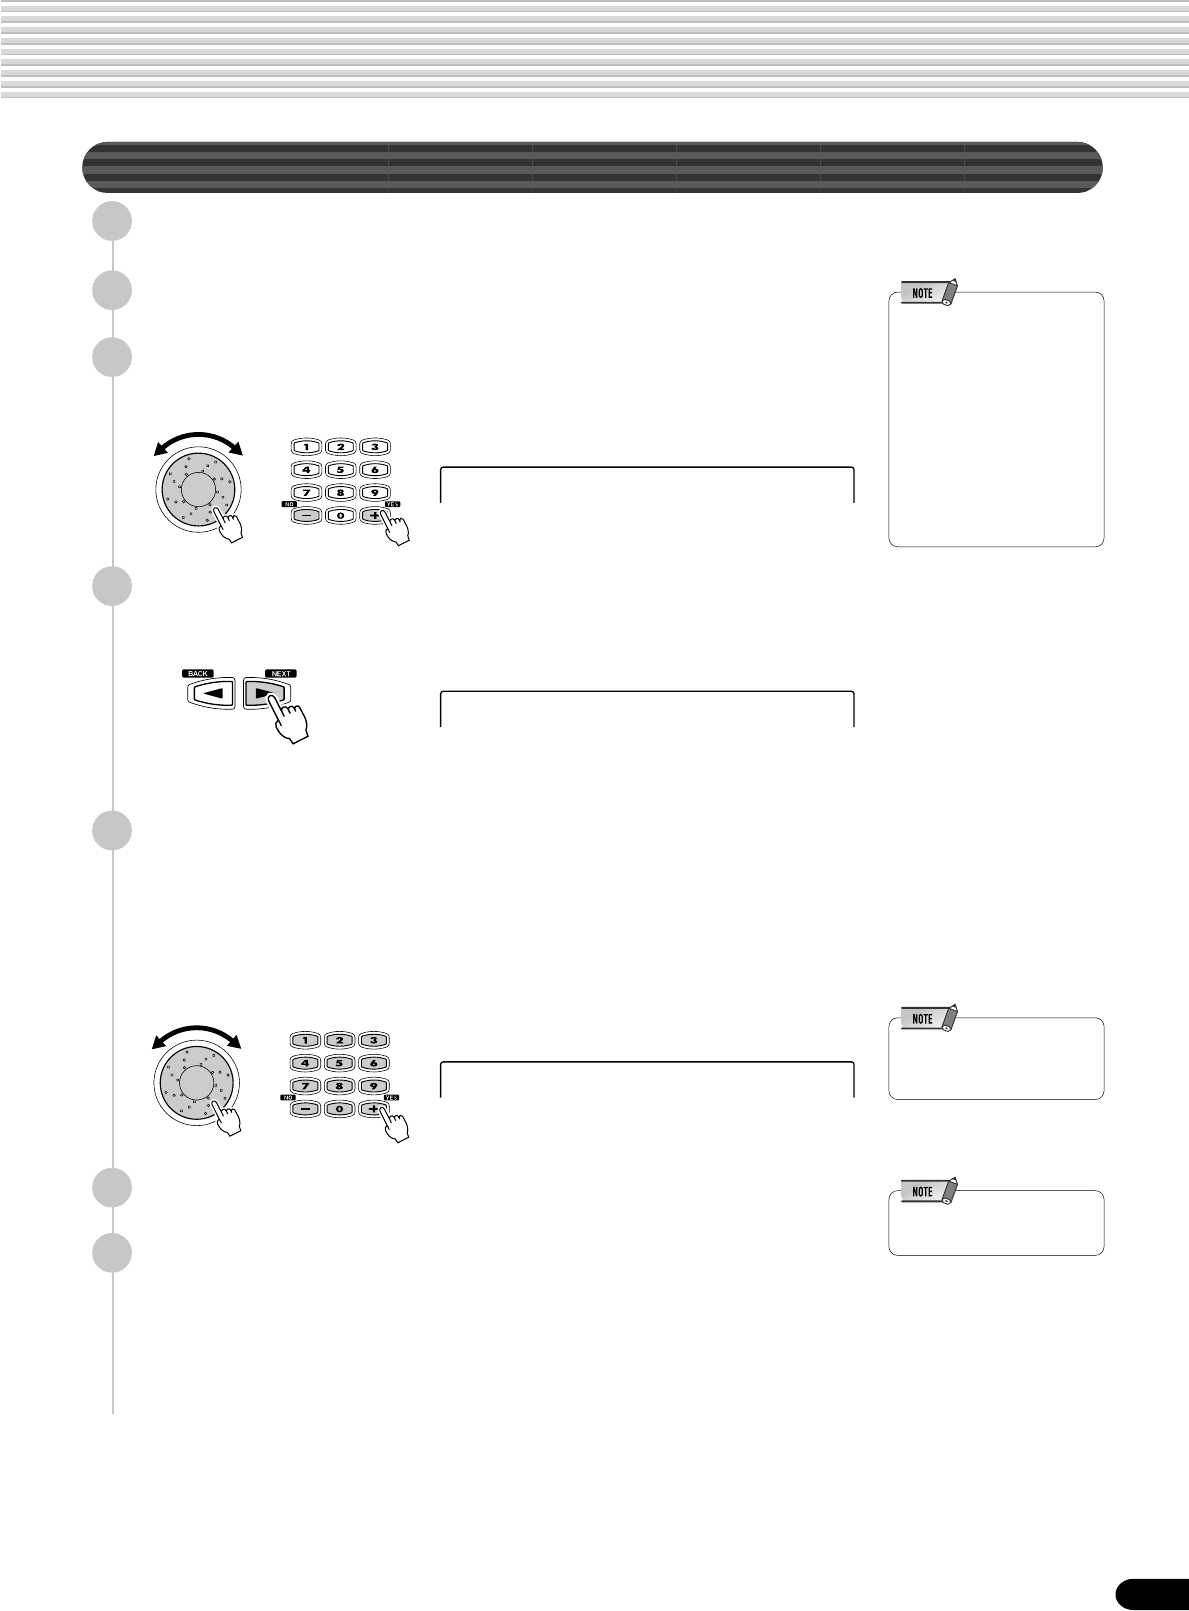
73
Disk Song Playback
Song Transpose
1
Press the [SONG] button.
2
Press the [NEXT] button to display the Song Menu screen.
•This operation does not
affect the pitch of the
keyboard-played voice(s)
•Changes made to the
transpose setting (on page
30) affect the entire sound of
the PSR-550, including the
song transpose setting.
•Enabling the record mode to
record a User song
automatically resets the song
transpose setting to “0”.
3
Select “S.Trans”.
Use the data dial, the [+/YES] button or the [-/NO] button.
4
Press the [NEXT] button to display the Song Transpose
screen.
5
Set the Transpose value.
Use the data dial, the [+/YES] button, the [-/NO] button or the number buttons
[1]-[0].
The transpose range is from -12 to +12. Each step corresponds to one semitone,
allowing a maximum upward or downward transposition of one octave. A
setting of “0” produces normal pitch.
•Minus values can be entered
by using the number buttons
while holding the [-] button.
6
Press the [START/STOP] to start the song.
7
Press the [START/STOP] button again to stop the song.
•Steps #1 through #5 can be
executed during playback.
SongTranspos= 0
SngMenu:S.Trans
SongTranspos= 4
71
74
72
Part Settings
In addition to the keyboard-played voices, the PSR-550 features many different instrumental “parts,”
included with the auto accompaniment, and song playback.
Use the following functions to change the settings for each part:
● Voice Change ........................................................................................................................ page 75
This lets you change the voice for each part.
● Mixer...................................................................................................................................... page 76
This lets you change the following settings for each part:
• Volume
Determines the volume of the specified voice or track.
• Octave
Shifts the pitch of the specified voice or track up or down by one or two octaves.
A setting of “0” produces normal pitch.
• Pan
Positions the sound of the specified voice or track from left to right in the stereo
sound field. “-7” is full left, “7” is full right, “0” is center, and all other settings are
corresponding positions in between.
• Reverb depth
Sets the reverb depth for the specified voice or track, and thus the amount of
reverb effect applied to that voice or track.
• Chorus depth
Sets the chorus depth for the specified voice or track, and thus the amount of
chorus effect applied to that voice or track.
• DSP depth
Sets the DSP depth for the specified voice or track, and thus the amount of DSP
effect applied to that voice or track.
The parameters which can be set for each part are shown in the chart below.
● Style mode
Part
Keyboard VOICE R1
VOICE R2
VOICE L
Auto Accompaniment RHYTHM SUB
RHYTHM MAIN
BASS
CHORD1
CHORD2
PAD
PHRASE1
PHRASE2
● Song mode
Part
Keyboard VOICE R1
VOICE R2
VOICE L
Song TRACK1
TRACK2
TRACK3
TRACK4
:
TRACK15
TRACK16
● Parameters
Parameter Voice Style Song Range Function
R1, R2, L
Voice number O O O Refer to the Voice Voice Change
List (page 123)
Volume O O O 0 – 127 Mixer
Octave O – O -2 – 2 Mixer
Pan O O O -64 – 63 Mixer
Reverb depth O O O 0 – 127 Mixer
Chorus depth O O O 0 – 127 Mixer
DSP depth O O O 0 – 127 Mixer
O : available
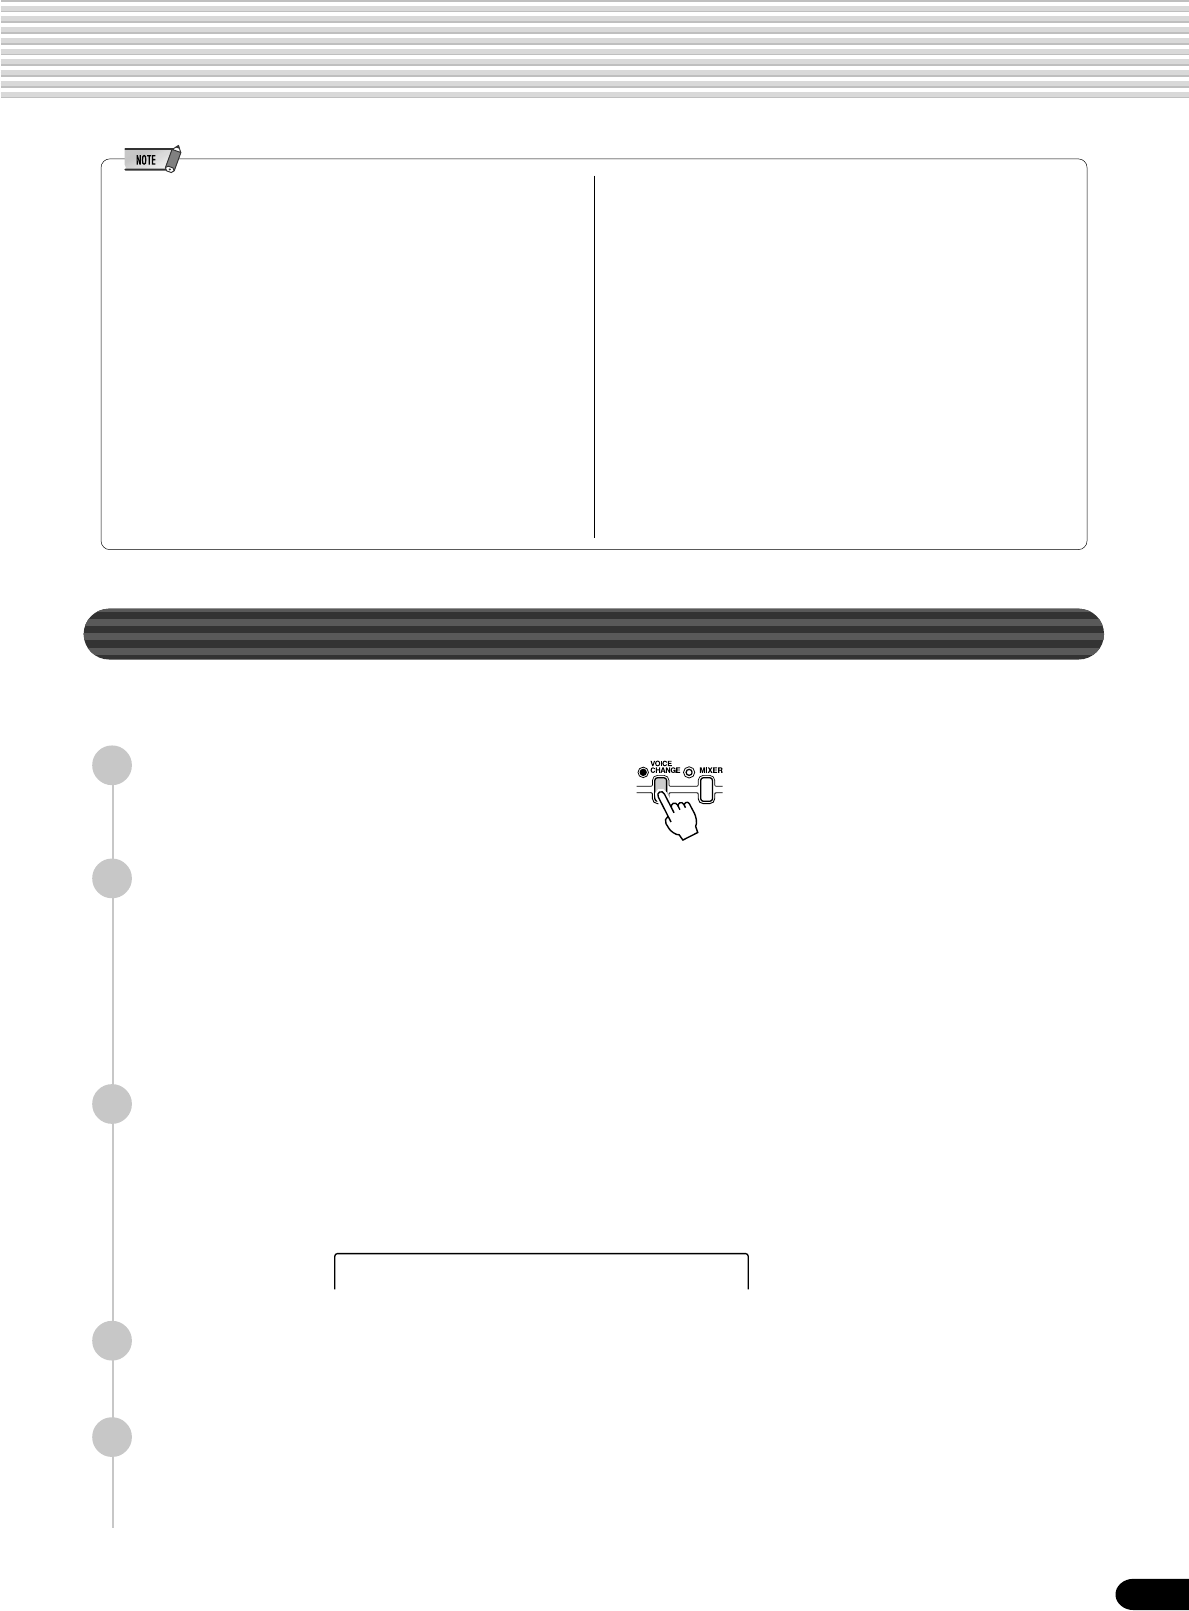
75
73
● Voice R1, R2, L
•When one of the DSP types belonging to the Insertion Effect (page
50) is selected, the effect will be exclusively applied to the Voice R1
and not to the Voice R2/L. Therefore the DSP depth for the Voice R2/
L cannot be changed. Also, the DSP depth for the Voice R1 cannot be
altered depending on the selected Insertion Effect type.
•Save any part settings you want to keep to the PSR-550 Registration
Memory (page 54). The voice part settings are temporary and will be
lost if the power is turned off, a different R1 panel voice is selected
while the Voice Set function (page 120) is on, or a Registration
Memory is recalled.
● Song
•Make sure to first select the appropriate song for which you wish to
set the part before calling up the relevant display.
•Any part settings made for the song will be lost if you turn off the
power, select another song, or select the Style mode (after finishing
the part settings). To prevent this, make sure to select the Recording
mode and save the song data to disk (page 78).
● Auto Accompaniment
•Only drum kit voices (page 31) can be selected for the RHYTHM
MAIN track.
•When using auto accompaniment part settings for the RHYTHM SUB
track, any of the voices can be selected but no chord changes will
occur when using Auto Accompaniment.
•Make sure to first select the appropriate style for which you wish to
set the part before calling up the relevant display.
•Auto accompaniment part settings can even be set while an
accompaniment is playing.
•Auto accompaniment part settings affects all sections of the selected
style.
•Save any part settings you want to keep to the PSR-550 Registration
Memory (page 54). The Auto accompaniment part setting are
temporary and will be lost if the power is turned off, a different style is
selected while the Voice Set function (page 120) is on, or a
Registration Memory is recalled.
Voice Change
In addition to being able to change the voices played from the keyboard (R1, R2, L),
you can also change the voices for each track of the auto accompaniment and songs.
1
Press the [VOICE CHANGE] button.
The [VOICE CHANGE] lamp lights.
2
Select the part for which you want to change voices.
Parts can be selected from the following buttons (depending on the selected
mode: Style or Song):
● Voice ................................. PART ON/OFF [VOICE R1], [VOICE R2], [VOICE L]
buttons
● Accompaniment track ....... [TRACK9]-[TRACK16] buttons (Style mode)
● Song track ......................... [TRACK1]-[TRACK16] button (Song mode)
3
Select a voice.
Use the data dial, the [+/YES] button, the [-/NO] button or the number buttons
[1]-[0].
Refer to the Voice List (page 123).
4
Repeat steps #2 and #3 as often as needed for other parts/
tracks.
5
Press the [EXIT] button to exit from the Voice Change screen.
Part Settings
RhM=220 StndKit1
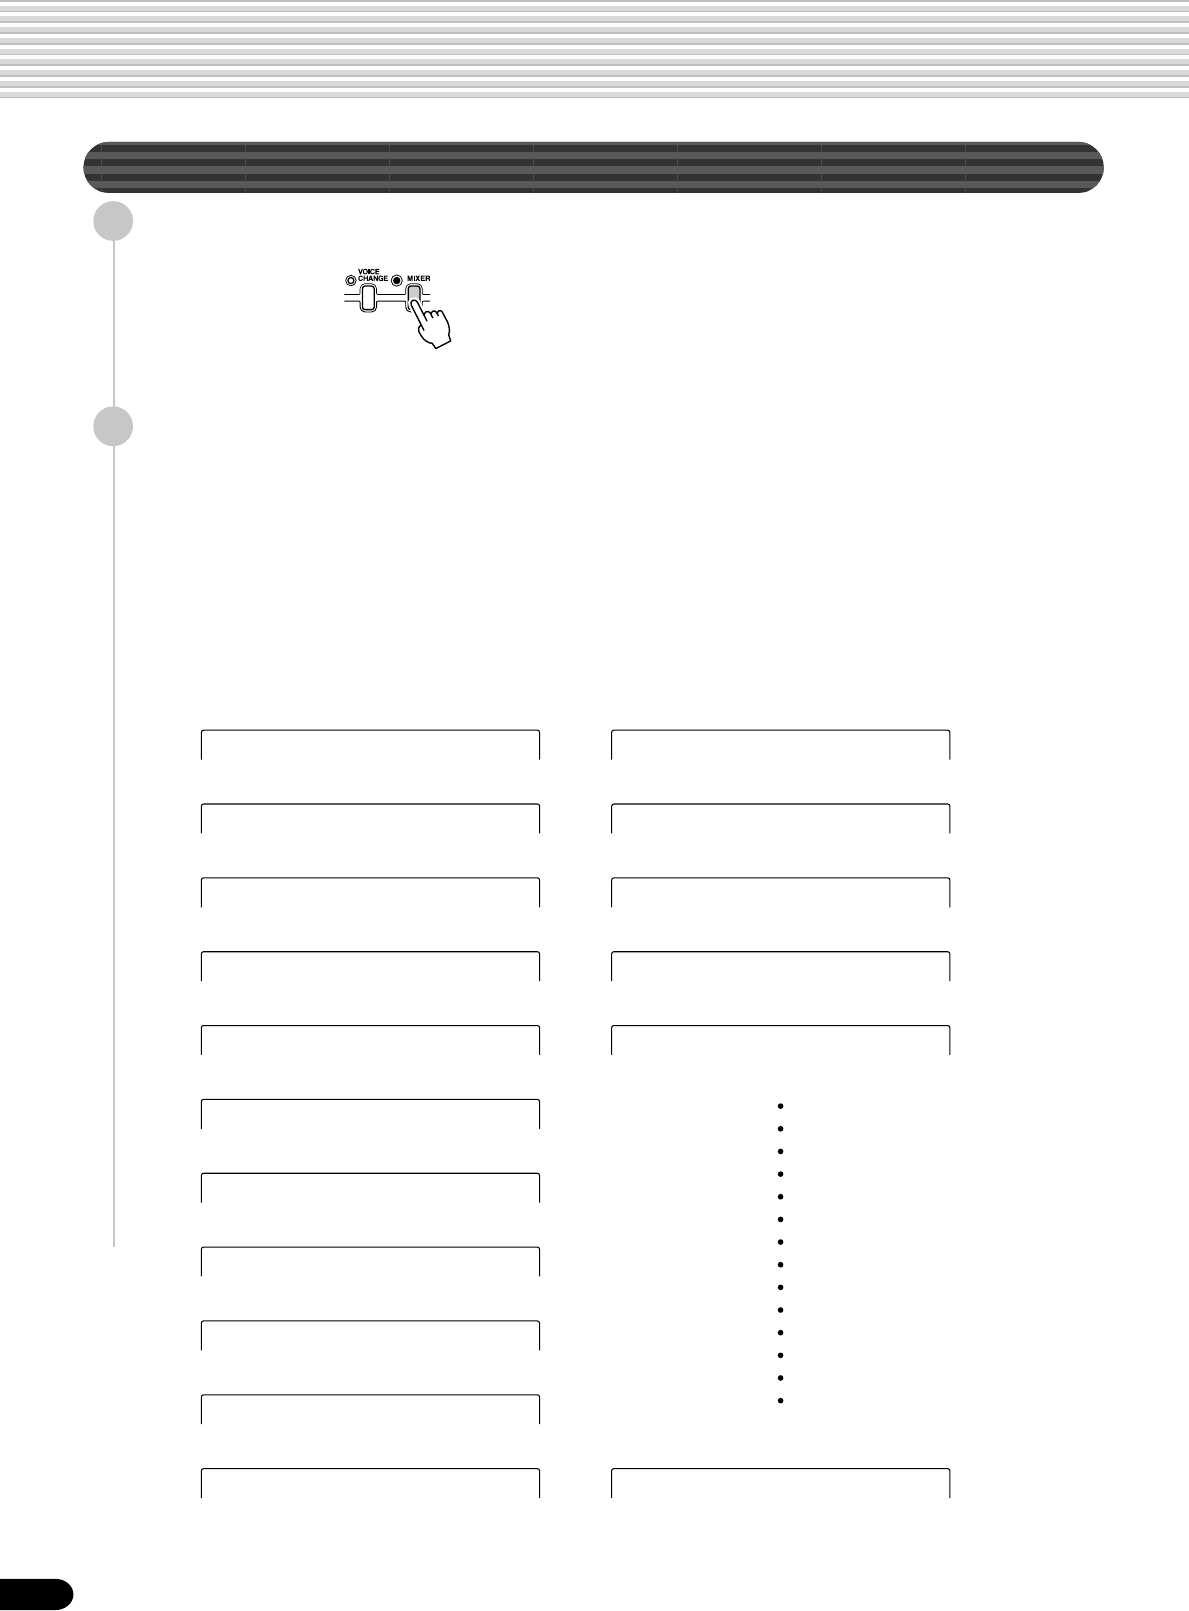
76
74
Mixer
1
Press the [MIXER] button so that its indicator lights.
2
Select the part for which you want to adjust the volume set-
ting or parameters.
Parts can be selected from the following buttons (depending on the selected
mode: Style or Song):
● Voice ................................. PART ON/OFF [VOICE R1], [VOICE R2], [VOICE L]
buttons
● Accompaniment track ....... [TRACK9] - [TRACK16] buttons (Style mode)
● Song track ......................... [TRACK1] - [TRACK16] button (Song mode)
Part Settings
● Style mode
Volume R1 =120
Volume R2 =120
Volume L =120
Volume RhS=120
Volume RhM=120
Volume Bas=120
Volume Cd1=120
Volume Cd2=120
Volume Pad=120
Volume Ph1=120
Volume Ph2=120
Volume R1 =120
Volume R2 =120
Volume L =120
Volume T01=120
Volume T02=120
Volume T16=120
● Song mode
PART ON/OFF [VOICE R1] Voice R1
PART ON/OFF [VOICE R2] Voice R2
PART ON/OFF [VOICE L] Voice L
[TRACK 9] Rhythm sub
PART ON/OFF [VOICE R1] Voice R1
PART ON/OFF [VOICE R2] Voice R2
PART ON/OFF [VOICE L] Voice L
[TRACK 10] Rhythm main
[TRACK 11] Bass
[TRACK 12] Chord 1
[TRACK 13] Chord 2
[TRACK 14] Pad
[TRACK 15] Phrase 1
[TRACK 16] Phrase 2
[TRACK 1] Song track 1
[TRACK 2] Song track 2
[TRACK 16] Song track 16
77
Volume R2 =108
Octave R2 = 2
Pan R2 = 40
RevDepth R2 =120
ChoDepth R2 =108
DspDepth R2 =112
[NEXT] button [BACK] button
75
3
Select the desired parameter by pressing the [NEXT]/[BACK]
button.
Part Settings
•The Octave parameter of
the style tracks cannot be
edited.
•Minus settings for the Octave
and Pan parameters can be
directly entered by pressing
the appropriate number
button while holding the
[-/NO] button.
4
Adjust the volume or parameters.
Use the data dial, the [+/YES] button or the [-/NO] button.
The order of Steps 2 and 3 here can be reversed; you can also select the part
after selecting the parameter. (In step #2 above, the Volume parameter is
shown as an example; however, any of the other parameters shown in step #3
can be selected.)
5
Repeat steps 2 to 4, as necessary.
6
Press the [EXIT] button to exit from the Mixer.
[NEXT] button [BACK] button
[NEXT] button [BACK] button
[NEXT] button [BACK] button
[NEXT] button [BACK] button
78
76
Song Recording
With the powerful and easy-to-use song recording features, you can record
your own keyboard performances to a floppy disk as a User song, and create
your own complete, fully orchestrated compositions.
Each User song lets you record up to sixteen independent tracks. These
include not only the voices for the keyboard performance (R1, R2, L), but also
the auto accompaniment parts.
The PSR-550 provides two different ways to record: Quick Recording and Multi Track Recording. In addition,
comprehensive editing functions let you “fine tune” the recorded song data.
● Quick Recording .................................................................................................................. page 80
With this method, you can quickly and easily record a song, without having to make
detailed settings.
● Multi Track Recording .......................................................................................................... page 82
With this method, you can record up to sixteen tracks independently, and even re-
record parts that have been previously recorded.
• Punch In/Out ...................................................................................................................... page 84
This function allows you to selectively re-record a portion of a song track (the
measures between the specified punch-in and punch-out points.
• Start Measure .................................................................................................................... page 84
This determines the measure at which recording starts. Set this when you
desire to start the recording in the middle of the song when re-recording. Keep
in mind that all previously recorded data from the starting measure is replaced.
● Editing ................................................................................................................................... page 86
The four editing features below allow you to edit already recorded song data.
• Quantize............................................................................................................................. page 86
This function aligns the timing of the recorded note data to a specified value.
• Editing Setup Data ............................................................................................................. page 88
This function allows you to change a variety of non-note settings.
• Naming User Songs ........................................................................................................... page 90
This function assigns a twelve-letter name to a recorded song.
• Clearing User Song Data ................................................................................................... page 91
This function lets you delete song data, either a specified part or the entire song.
After finishing your recording of a User song, you can play it back in the same way as one of the disk songs.
•User Songs are recorded on
floppy disks. They cannot be
recorded unless a floppy disk
is inserted into the disk drive.
■ Data that can be recorded to User songs
• Tempo ..................................................................................................... page 36
• Time signature ........................................................................................ page 16
• Accompaniment style number ................................................................ page 32
• Section changes and their timing ........................................................... page 34
• Chord changes and their timing ............................................................. page 33
• Accompaniment volume ......................................................................... page 37
• Note on/off (key press and release) ..................................................... page 107
• Velocity (strength of key press) ............................................................ page 107
• Pitch bend, pitch bend range ........................................................pages 30, 122
• Footswitch on/off .................................................................................. page 121
• Voice Change settings ............................................................................ page 75
• Mixer settings ......................................................................................... page 76
• Reverb type and settings........................................................................ page 46
• Chorus type and settings ....................................................................... page 48
• DSP (including FAST/SLOW) on/off and type ........................................ page 49
• Harmony/Echo on/off and type............................................................... page 50
• Scale tuning ......................................................................................... page 119
• Sustain on/off ......................................................................................... page 30
•Songs recorded by the PSR-
550 are saved as SMF
(format 0) files. See page
109 for information on the
SMF (format 0) format.
•Being able to record note on/
off and velocity means being
able to record forte or piano,
crescendo or diminuendo,
and other subtle elements of
expression from the
keyboard as you play them.
•Note ON (key press), note
OFF (key release), and
velocity (strength of key
press) are MIDI data events
(playing information) (page
107).
The maximum amount of song memory is 65,000 notes for 2DD disks and 130,000
notes for 2HD disks.
79
77
■ User Song Tracks
The tracks which can be recorded to the User songs are organized as shown in the
chart below.
The following notes and
cautions are important
points for you to keep in
mind as you record.
•Using the Metronome
function (page 118) can
make your recording
sessions much more
efficient.
•Using Registration Memory
(page 54) can make your
recording sessions much
more efficient, since various
settings (such as voices,
etc.) can be recalled by a
single button press.
When the record mode is
engaged, the Registration
Memory Freeze function will
be turned on (it cannot be
turned off while the record
mode is engaged).
•When the record mode is
engaged, the Synchro Stop
function will be turned off (it
cannot be turned on while
the record mode is
engaged).
•Whenever you record, any
previously recorded material
in the same track will be
erased.
•Song files on commercially
available disks which are not
write-protected can be
selected and recorded to
(edited) on the PSR-550. If
the song data is of a different
format from that of the PSR-
550 User songs, the display
prompts you to convert the
song data. By pressing the
[+/YES] button, you can
convert the song data to the
PSR-550 format (compatible
with the PSR-550). Once the
conversion operation is
finished, the PSR-550
returns to record standby,
allowing you to record.
•If the disk memory becomes
full while recording, an alert
message will appear on the
display and recording will
stop.
•Be careful to avoid turning
off the power or unplugging
the AC adaptor from the
outlet during recording, since
this will result in the loss of
recorded data.
The PSR-550 provides two different ways to record: Quick Recording and Multi Track
Recording.
● About Multi Track Recording
In Multi Track Recording, you determine the track assignments (as shown above)
before recording. Several tracks can be recorded simultaneously. In addition to
being able to record to empty tracks, you can also re-record tracks that already
contain recorded data.
● About Quick Recording
In Quick Recording, you can quickly record without having to worry about the
track assignments above. Quick Recording automatically makes track assign-
ments according to the simple rules below.
• When Record method is set to “Melody”
Your keyboard performances (VOICE R1, R2, L) are recorded to tracks
1 - 3.
• When Record method is set to “Acmp”
The auto accompaniment parts are recorded to tracks 9 - 16.
• When Record method is set to “Melody + Acmp”
Your keyboard performances (VOICE R1 and R2) are recorded to tracks
1 - 2, and the auto accompaniment parts are recorded to tracks 9 -16.
The Quick Recording method is different from the Multi Track Recording method;
however, for both of them, the recorded data is recorded on tracks 1–16.
If you wish to re-record a User song that was originally recorded by the Quick
Recording method, use Multi Track Recording.
Song Recording
Track Other Parts that can be set Default Part
1 VOICE R1, R2, L, Accompaniment Style track VOICE R1
2 VOICE R1, R2, L, Accompaniment Style track VOICE R2
3 VOICE R1, R2, L, Accompaniment Style track VOICE L
4 VOICE R1, R2, L, Accompaniment Style track VOICE R1
5 VOICE R1, R2, L, Accompaniment Style track VOICE R1
6 VOICE R1, R2, L, Accompaniment Style track VOICE R1
7 VOICE R1, R2, L, Accompaniment Style track VOICE R1
8 VOICE R1, R2, L, Accompaniment Style track VOICE R1
9 VOICE R1, R2, L, Accompaniment Style track
Accompaniment Style RHYTHM SUB
10 VOICE R1, R2, L, Accompaniment Style track
Accompaniment Style RHYTHM MAIN
11 VOICE R1, R2, L, Accompaniment Style track Accompaniment Style BASS
12 VOICE R1, R2, L, Accompaniment Style track Accompaniment Style CHORD1
13 VOICE R1, R2, L, Accompaniment Style track Accompaniment Style CHORD2
14 VOICE R1, R2, L, Accompaniment Style track Accompaniment Style PAD
15 VOICE R1, R2, L, Accompaniment Style track Accompaniment Style PHRASE1
16 VOICE R1, R2, L, Accompaniment Style track Accompaniment Style PHRASE2

80
001 New Song
RecMenu:Song
SongRec:QuickRec
Rec Tr =Melody
78
Quick Recording
1
Insert the floppy disk into the disk drive.
2
Press the [RECORD] button to engage the Record mode.
3
Select “Song”.
Use the data dial, the [+/YES] button or the [-/NO] button.
4
Press the [NEXT] button.
5
Press the [NEXT] button again to display the RecMode
screen.
6
Select “QuickRec”.
Use the data dial, the [+/YES] button or the [-/NO] button.
7
Press the [NEXT] button.
8
Select a Record method.
Use the data dial, the [+/YES] button or the [-/NO] button.
● Melody .................... This records your keyboard performance (Voices R1/R2/L)
without the auto accompaniment.
● Acmp ....................... This records only the auto accompaniment. When this is
selected, the auto accompaniment is automatically set to on.
● Mel + Acmp ............. This records your keyboard performance (Voices R1/R2)
along with the auto accompaniment. When this is selected,
auto accompaniment is automatically set to on.
Song Recording
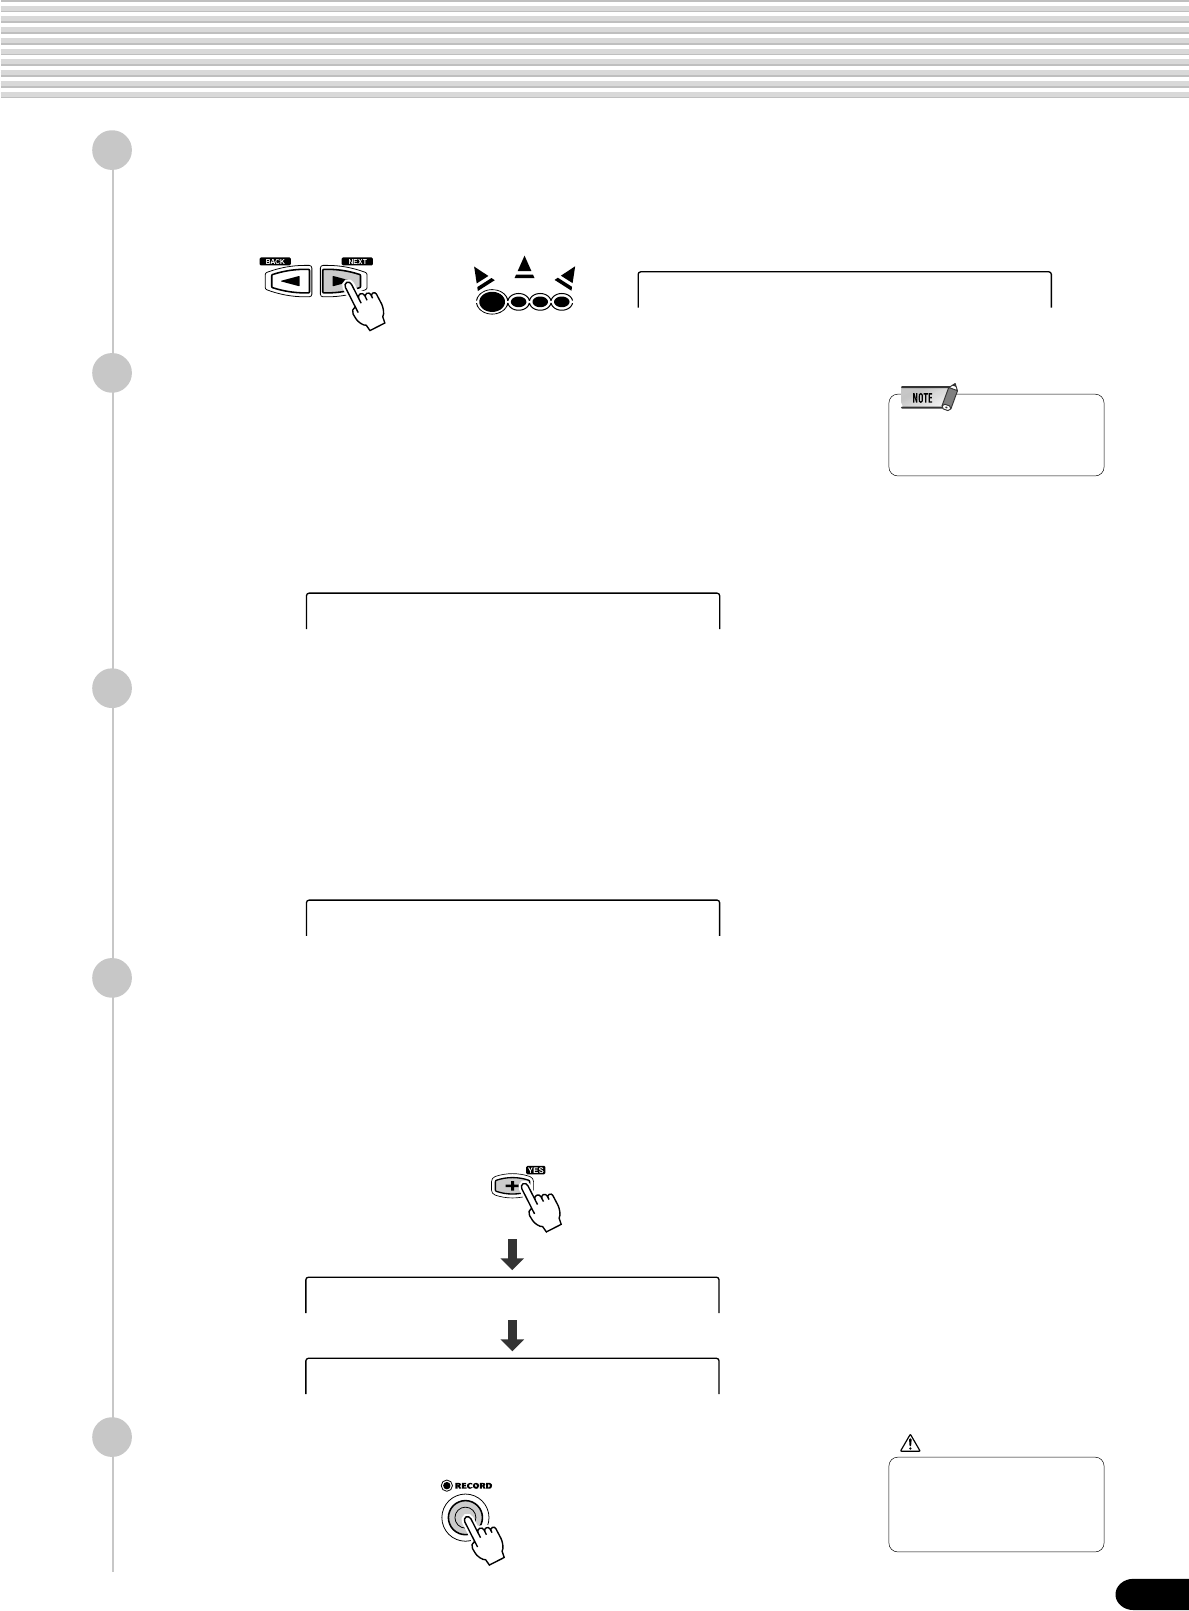
81
BEAT
Song Recording
Sv?:SONG 001.MID
–
79
9
Press the [NEXT] button to display the Record ready screen.
The beat indicator dots will flash at the currently set tempo, indicating that the
record ready (Synchro Start) mode is engaged.
10
Start recording.
• If you’ve selected [Melody] or [Mel + Acmp] in step #8 above, recording
starts as soon as you play a key.
• If you’ve selected [Acmp] in step #8 above, the auto accompaniment and
recording start simultaneously as soon as a chord is played in the auto
accompaniment section of the keyboard (the left side of the split point).
• Recording can also be started by pressing the [START/STOP] button.
•Auto accompaniment cannot
be turned on or off during
recording.
11
Stop recording.
• If you’ve selected [Melody] in step #8 above, press the [START/STOP]
button.
• If you’ve selected [Acmp] or [Mel + Acmp] in step #8 above, press the
[START/STOP] button or the [ENDING] button. If you press the [END-
ING] button while recording the auto accompaniment track, recording will
stop automatically after the ending section has finished.
12
Select whether to save the newly recorded data to disk or
not.
• To cancel the save operation (for example, when you wish to redo the record-
ing), press the [-/NO] button and re-record starting with step #8 above, after
the display returns to the Track selection screen.
• To save the data to disk, press the [+/YES] button.
13
Press the [RECORD] button to exit from the Record mode.
CAUTION
•While the file is being
saved, never eject the
floppy disk or turn the
power off.
Song Recording
Executing 72%
Rec Tr =Melody
The Save operation is completed...
Song Rec Ready

82
001 New Song
SongRec:MultiRec
RecPart T01 =R1
80
Multi Track Recording
1
-
3
Use the same operation as in “Quick Recording” (page
80).
4
Press the [NEXT] button to display the Song selection
screen.
5
Press the [NEXT] button again to display the RecMode
screen.
6
Select “MultiRec”.
Use the data dial, the [+/YES] button or the [-/NO] button.
7
Press the [NEXT] button three times to display the PART
setting screen.
8
Select the desired track and part for recording.
1) Select a track.
Press one of the [TRACK1]-[TRACK16] buttons.
2) Select a part.
Use the data dial, the
[+/YES] button or the
[-/NO] button.
3) Set the desired track to
“Rec”.
Press the [NEXT] button
and use the data dial, the
[+/YES] button or the
[-/NO] button .
• Make all necessary settings to each track by repeating steps 1) through 3)
above.
•For information on track
assignments (page 79).
•To record auto accompani-
ment data, set the [ACMP]
button to ON.
•The same part cannot be set
to more than one track for
recording.
Song Recording
[NEXT] button
CHORD
dim
mM
6
7
augsus4
119
513
BACK NEXT
KEYBOARD
START/STOP
/YES
TRACK(1~16)
PART DIAL
0~9
SONG
STYLE
VOICE LR12
EASY
NAVIGATOR
RecPart T16 =RhM
CHORD
dim
mM
6
7
augsus4
119
513
BACK NEXT
KEYBOARD
START/STOP
/YES
TRACK(1~16)
PART DIAL
0~9
SONG
STYLE
VOICE LR12
EASY
NAVIGATOR
Rec/Ply T16 =Rec
MUSIC DATABASE
MUSIC DATABASE
[BACK] button
•For information on the punch
in and start measure
functions (page 84).

83
BEAT
Rehearsal
Sv?:SONG 001.MID
–
81
9
Press the [NEXT] button to display the Rehearsal screen.
Voices and styles can be set from this display. After completing the desired
settings, press the [EXIT] button to return to this display.
10
Press the [NEXT] button to display the Record Ready screen.
The beat indicator dots will flash at the currently set tempo, indicating that the
record ready (Synchro Start) mode is engaged.
11
Start recording.
• Recording starts as soon as you play a key on the keyboard.
• If you enabled the auto accompaniment track for recording (in steps #8
above), recording starts as soon as you play a chord in the auto accompani-
ment section of the keyboard (the left side of the split point).
• Recording can also be started by pressing the [START/STOP] button.
•Auto accompaniment cannot
be turned on or off during
recording.
12
Stop recording.
• If you did not enable the auto accompaniment track for recording (in steps #8
above), press the [START/STOP] button.
• If you enabled the auto accompaniment track for recording (in steps #8
above), press the [START/STOP] button or the [ENDING] button. If you
press the [ENDING] button while recording the auto accompaniment track,
recording will stop automatically after the ending section has finished.
13
Save the recorded data to the disk.
• To cancel the save operation (for example, when you wish to redo the record-
ing), press the [-/NO] button and re-record starting with step #8 above, after
the display returns to the Track setting screen.
• To save the data to disk, press the [+/YES] button.
14
Press the [RECORD] button to exit from the Record mode.
CAUTION
•While the file is being
saved, never eject the
floppy disk or turn the
power off.
Song Recording
Executing 72%
Rec/Ply T16 =Ply
The Save operation is completed...
Song Rec Ready
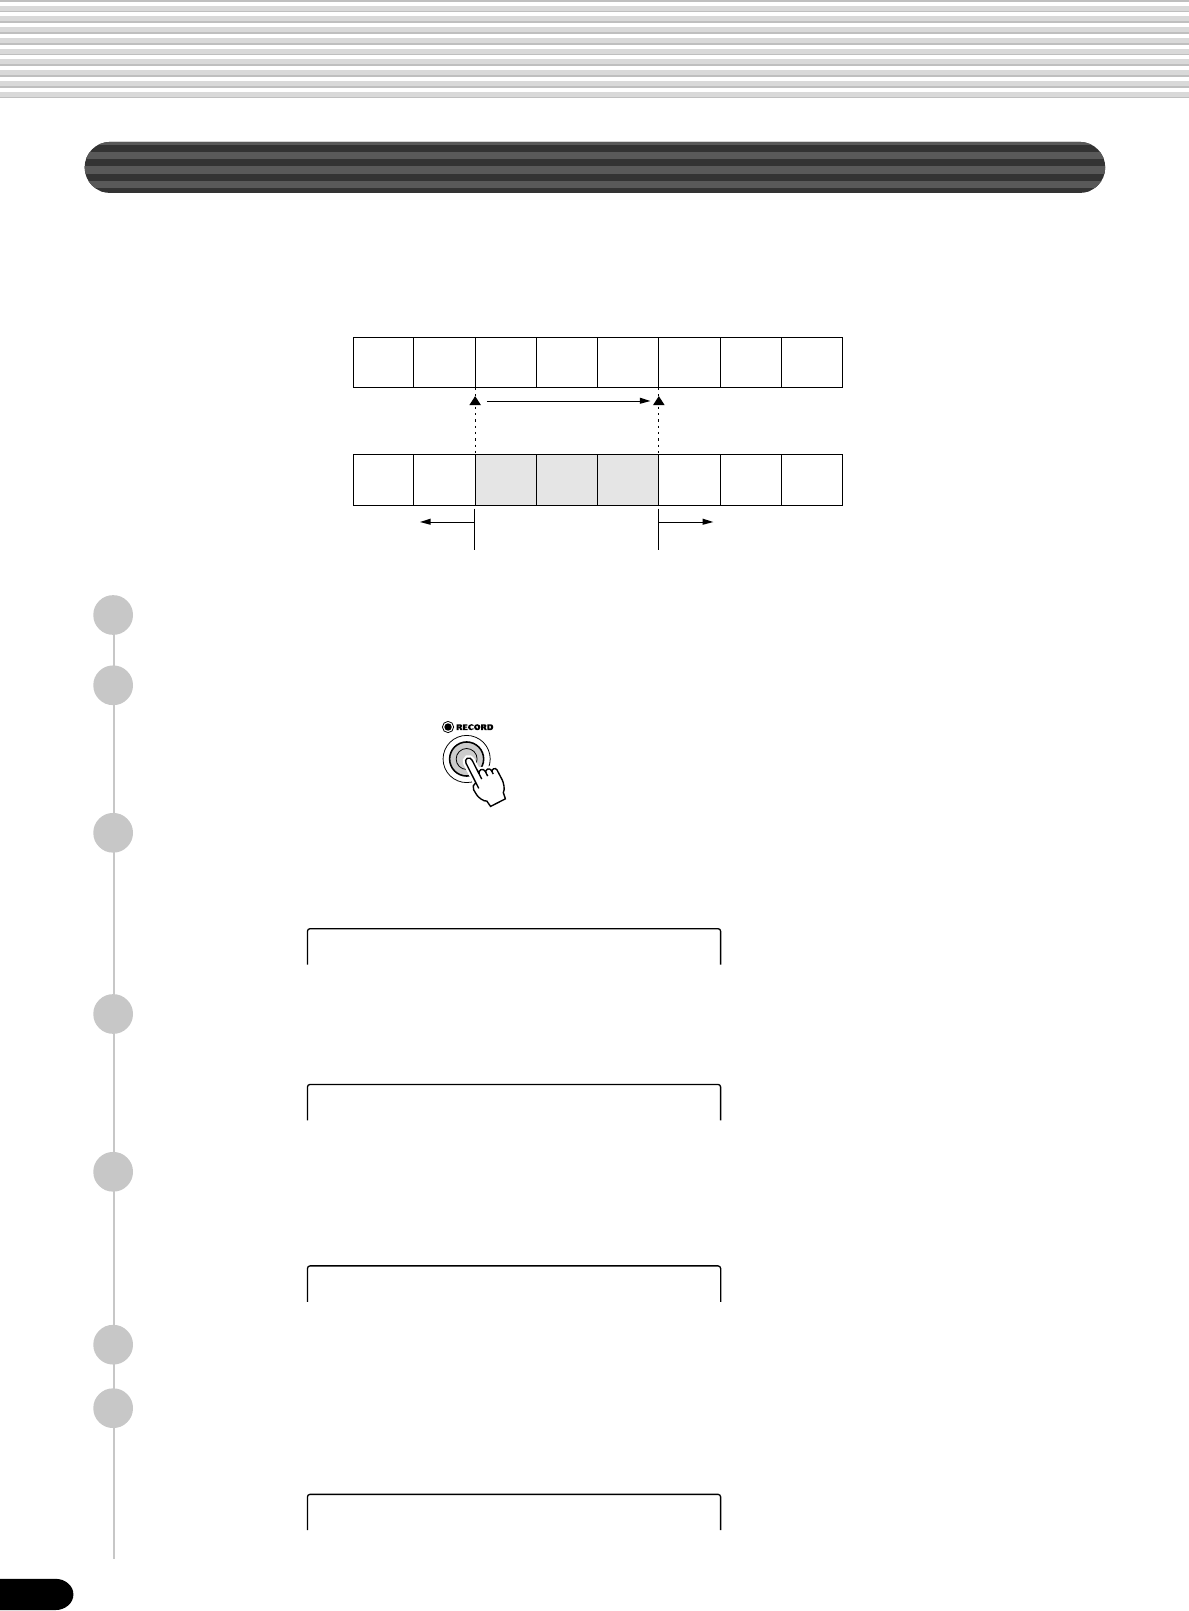
84
RecMenu:Song
002 SONG–001.MID
SongRec:MultiRec
12345678
12345678
Recording start
(Punch In) Recording stop
(Punch Out)
Previously
played data Newly played data Previously
played data
● Before re-recording
● After re-recording
82
Re-recording — Punch In/Out and Start Measure
This section shows you how to re-record a specific section of a already-recorded song.
In the eight-measure example below, the third measures through the fifth measure are
re-recorded.
1
Insert the floppy disk into the disk drive.
2
Press the [RECORD] button to engage the Record mode.
3
Select “Song”.
Use the data dial, the [+/YES] button or the [-/NO] button.
4
Press the [NEXT] button to display the Song selection
screen.
6
Press the [NEXT] button again to display the RecMode
screen.
7
Select “MultiRec”.
Use the data dial, the [+/YES] button or the [-/NO] button.
Song Recording
5
Select the Song you want to re-record.
Use the data dial, the [+/YES] button or the [-/NO] button.
001 New Song
85
Punch In/Out=On
Punch In = 3
Punch Out = 5
RecStart Mes= 2
83
8
Press the [NEXT] button to display the Punch In/Out screen.
9
Select “On”.
Use the data dial, the [+/YES] button or the [-/NO] button.
10
Press the [NEXT] button to display the Punch In measure
screen.
11
Set the punch-in measure.
Use the data dial, the [+/YES] button, the [-/NO] button or the number buttons
[1]-[0].
12
Press the [NEXT] button to display the Punch Out measure
screen.
13
Set the punch-out measure.
Use the data dial, the [+/YES] button, the [-/NO] button or the number buttons
[1]-[0].
14
Press the [NEXT] button to display the START MEASURE
screen.
15
Set the start measure (the measure at which playback starts).
Use the data dial, the [+/YES] button, the [-/NO] button or the number buttons
[1]-[0].
•The punch-out measure
number cannot be set lower
than the punch-in measure
number.
16
Press the [NEXT] button to display the PART screen.
17
Record using the same operation as described in “Multi Track
Recording” on page 82, starting with step #7.
•Punch In/Out recording
cannot be used with the auto
accompaniment tracks.
•During recording you can
use the TRACK buttons to
turn playback of previously-
recorded tracks on or off as
required.
Song Recording
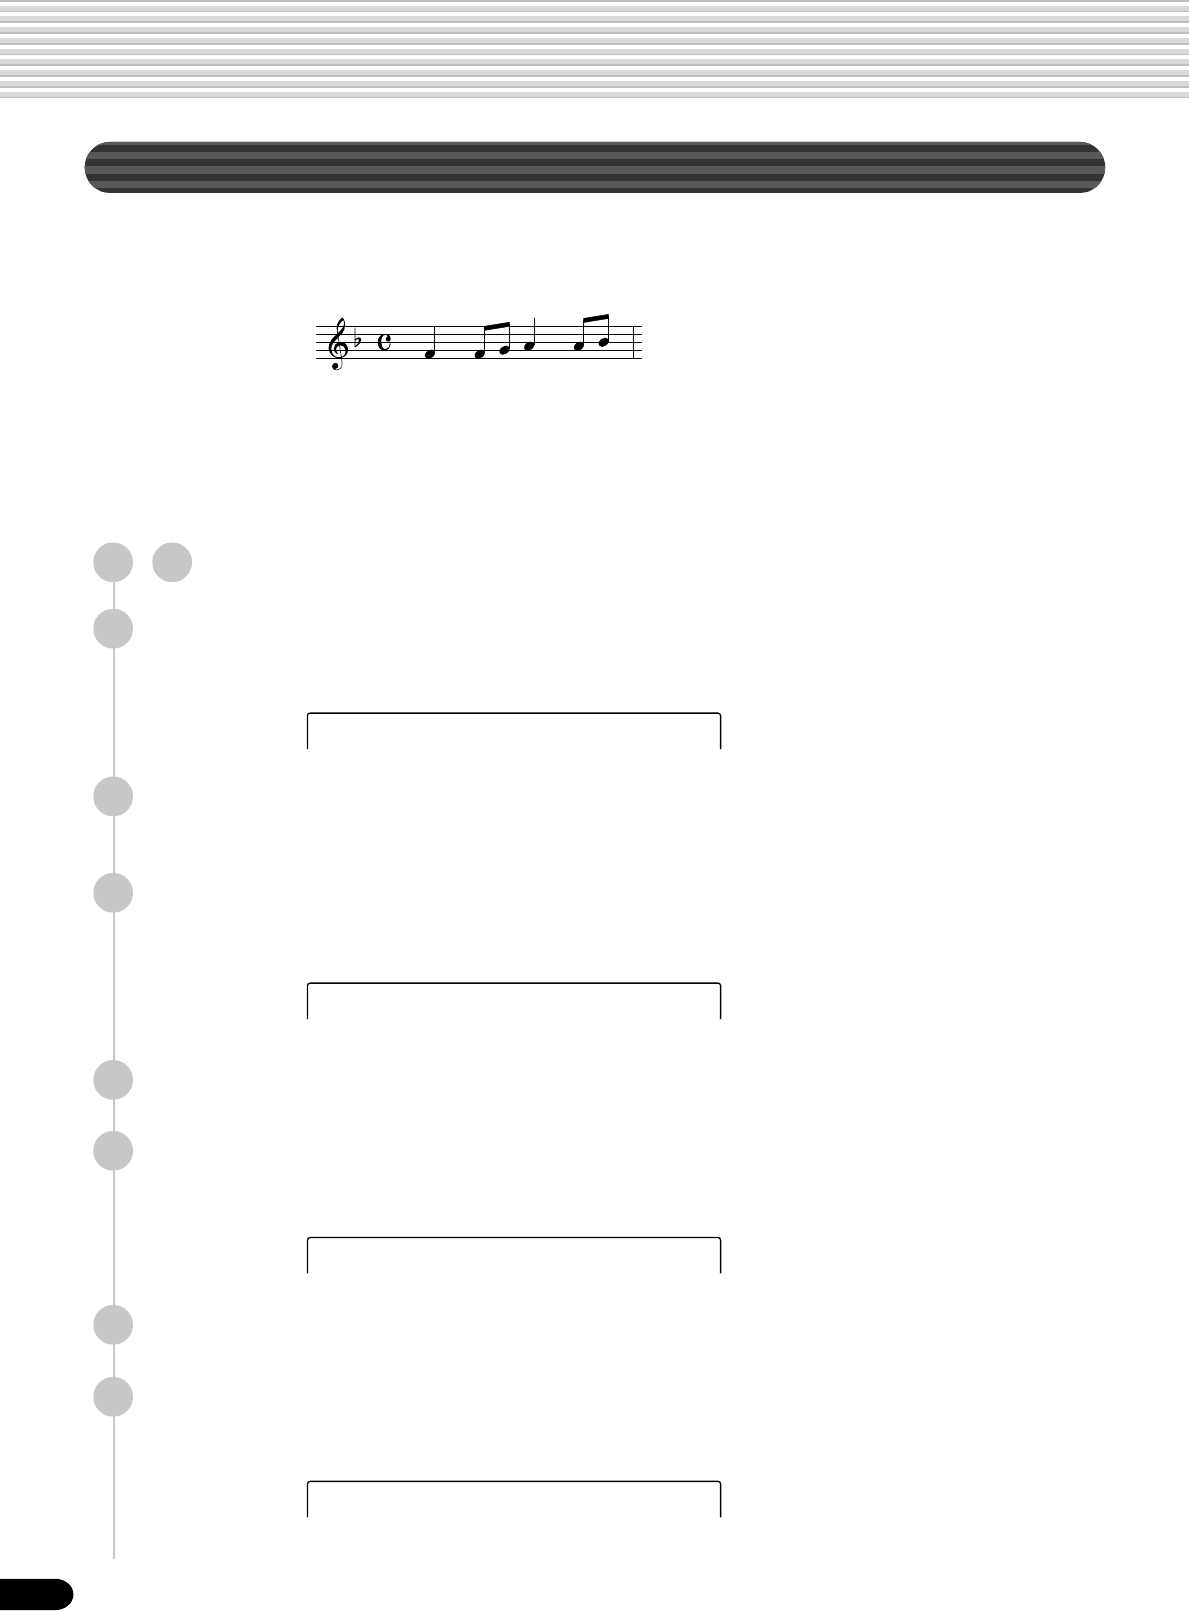
86
002 SONG–001.MID
SongRec:Edit
SngEdit:Quantize
QuantizTrack=T05
84
Quantize
Quantize lets you “clean up” or “tighten” the timing of a previously recorded track.
For example, the following musical passage has been written with exact quarter-note
and eighth-note values.
Even though you think you may have recorded the passage accurately, your actual
performance may be slightly ahead of or behind the beat (or both!). Quantize allows
you to align all the notes in a track so that the timing is absolutely accurate to the
specified note value.
1
-
4
Use the same operation as in “Re-recording” (page 84).
5
Select the Song file to be quantized.
Use the data dial, the [+/YES] button or the [-/NO] button.
6
Press the [NEXT] button again to display the RecMode
screen.
7
Select “Edit”.
Use the data dial, the [+/YES] button or the [-/NO] button.
8
Press the [NEXT] button to display the Edit Menu screen.
9
Select “Quantize”.
Use the data dial, the [+/YES] button or the [-/NO] button.
10
Press the [NEXT] button to display the Track selection screen.
11
Select the track to be quantized.
Use the data dial, the [+/YES] button or the [-/NO] button.
Song Recording
87
Quantize OK?
QuantizSize=1/4
85
12
Press the [NEXT] button.
13
Select the Quantize size (resolution).
Use the data dial, the [+/YES] button or the [-/NO] button.
Set the Quantize resolution to correspond to the smallest notes in the track you
are working with. For example, if the data was recorded with both quarter notes
and eighth notes, use 1/8 for the quantize resolution. If the quantize function is
applied in this case with the resolution set to 1/4, the eighth notes would be
moved on top of the quarter notes.
14
Press the [NEXT] button to display the Quantize operation
screen.
15
Press the [+/YES] button to execute the Quantize operation.
To abort the Quantize operation, press the [-/NO] button.
CAUTION
•While the Quantize
operation is being
executed, never eject the
floppy disk or turn the
power off.
16
Press the [RECORD] button to exit from the Record mode.
Song Recording
● Quantize size
Size Note
1/4 Quarter note
1/6 Quarter note triplet
1/8 Eighth note
1/12 Eighth note triplet
1/16 Sixteenth note
1/24 Sixteenth note triplet
1/32 Thirty-second note
One measure of 8th notes before quantization
After quantization
The Quantize operation is completed...
Executing 84%
Completed
•You cannot restore the
original data once you’ve
executed the Quantize
operation. If space exists on
the disk, save the original
song data (as a backup),
then use Quantize. If you
don’t like the results, you can
reload the backup song data.
88
002 UserSong1
SongRec:Edit
SngEdit:Setup Dt
86
Editing Setup Data
This function lets you make changes to various setup data (voice-related parameters)
for each track of a recorded song. The following parameters can be edited:
● Voice ................................. Assigns a voice number to the specified track.
● Volume .............................. Sets the volume of the specified track.
● Octave ............................... Shifts the pitch of the specified track up or down by
one or two octaves. A setting of “0” produces normal
pitch.
● Pan .................................... Positions the sound of the specified track from left to
right in the stereo sound field. A setting of “-7” is full
left, “7” is full right, “0” is center, and all other settings
are corresponding positions in between.
● Reverb depth..................... Sets the reverb depth for the specified track, and thus
the amount of reverb effect applied to that voice or
track.
● Chorus depth .................... Sets the chorus depth for the specified track, and thus
the amount of chorus effect applied to that voice or
track.
● DSP depth......................... Sets the DSP depth for the specified track, and thus
the amount of DSP effect applied to that voice or track.
•Only one of the Setup
parameters can be recorded
to each track, and any
parameter changes made in
the middle of the song will be
cancelled. However, in the
case of Volume data, any
Volume changes in the
middle of the song are
applied as an offset to the
initial Setup Data setting.
1
-
4
Use the same operation as in “Re-recording” (page 84).
5
Select the file (song) for which you wish to change the setup
data.
Use the data dial, the [+/YES] button or the [-/NO] button.
6
Press the [NEXT] button again to display the RecMode
screen.
7
Select “Edit”.
Use the data dial, the [+/YES] button or the [-/NO] button .
8
Press the [NEXT] button to display the Edit Menu screen.
9
Select “Setup Dt”.
Use the data dial, the [+/YES] button or the [-/NO] button.
10
Press the [NEXT] button to display the setup data screen.
Song Recording
89
87
11
Edit the setup data.
Press the [NEXT] and [BACK] buttons to switch among the displays (as
shown below).
• Select a track by pressing one of the [TRACK1]-[TRACK16] buttons.
• Use the data dial, the [+/YES] button, the [-/NO] button or the number
buttons [1]-[0] to change the desired values in each display.
12
Press the [NEXT] button to display the setup data saving
screen.
13
Save the changed data to the floppy disk.
• To cancel the save operation (if you wish to redo any edits), press the [-/NO]
button and continue editing.
• To save the data to disk, press the [+/YES] button.
14
Press the [RECORD] button to exit from the Record mode.
CAUTION
• While the file is being
saved, never eject the
floppy disk or turn the
power off.
Song Recording
The Save operation is completed...
Executing 84%
Completed
•Minus settings for the Octave
and Pan parameters can be
directly entered by pressing
the appropriate number
button while holding the
[-/NO] button.
T01=001 GrandPno
Volume T01=108
Octave T01= 1
Pan T01= 63
RevDepth T01= 49
ChoDepth T01= 89
DspDepth T01= 89
[BACK] button[NEXT] button
• Voice
• Volume
• Octave
• Pan
• Reverb depth
• Chorus depth
• DSP depth
[BACK] button[NEXT] button
[BACK] button[NEXT] button
[BACK] button[NEXT] button
[BACK] button[NEXT] button
[BACK] button[NEXT] button
Setup Data OK?
90
002 UserSong1
SongRec:Edit
SngEdit:Name
Nam=UserSong1_
88
cursor
Naming User Songs
1
-
4
Use the same operation as in “Re-recording” (page 84).
5
Select the file (song) for which you wish to change the name.
Use the data dial, the [+/YES] button or the [-/NO] button.
6
Press the [NEXT] button again to display the RecMode
screen.
7
Select “Edit”.
Use the data dial, the [+/YES] button or the [-/NO] button.
8
Press the [NEXT] button to display the Edit Menu screen.
9
Select “Name”.
Use the data dial, the [+/YES] button or the [-/NO] button.
10
Press the [NEXT] button to display the NAME screen.
11
Enter the desired name for the file (song).
Use the keyboard to enter the name (page 21).
Up to 12 letters or characters can be used. (The three-letter extension cannot be
changed.)
12
Press the [RECORD] button to exit from the Record mode.
Song Recording
91
SngEdit:Clear
Clear Track =T13
Clear Track OK?
89
Clearing User Song Data
1
-
4
Use the same operation as in “Re-recording” (page 84).
5
Select the song file to be cleared.
Use the data dial, the [+/YES] button or the [-/NO] button.
6
Press the [NEXT] button again to display the RecMode
screen.
7
Select “Edit”.
Use the data dial, the [+/YES] button or the [-/NO] button.
8
Press the [NEXT] button to display the Edit Menu screen.
9
Select “Clear”.
Use the data dial, the [+/YES] button or the [-/NO] button.
10
Press the [NEXT] button.
11
Select the track to be cleared.
Use the data dial, the [+/YES] button or the [-/NO] button.
To clear the data of an entire song, select “ALL”.
12
Press the [NEXT] button.
13
Press the [+/YES] button to execute the Clear operation.
To abort the Clear operation, press the [-/NO] button.
14
Press the [RECORD] button to exit from the Record mode.
CAUTION
•While the track is being
cleared, never eject the
floppy disk or turn the
power off.
Song Recording
The Clear operation is completed...
Executing 84%
Completed
92
90
• Material recorded data is
retained in memory even
when the STANDBY switch is
turned off if batteries are
installed or an AC adaptor is
connected (page 136). It is
nevertheless a good idea to
save important data to floppy
disk so that you can keep
them indefinitely and build up
your own data library (page
60).
Multi Pad Recording
Your keyboard performance (using voice R1) is recorded to the User pad. Chord
Match data (page 43) can also be recorded.
• Multi Pad Recording................................................................................ page 92
• Chord Match ........................................................................................... page 94
• Naming User Pads .................................................................................. page 94
• Clearing User Pad Data .......................................................................... page 95
In addition to the preset Multi Pad sets, the PSR-550 has 16 user-recordable sets that you can use to
store your own creations. These original User Multi Pads can be played and used in the same way as
the presets. User Multi Pad data can also be saved to and loaded from floppy disk.
■ Data that can be recorded to User pads
• Note on/off (key press and release)
• Velocity (strength of key press)
• Pitch bend, pitch bend range
• SUSTAIN button on/off
• Footswitch on/off (sustain, sostenuto, soft)
• Voice Change settings
• Mixer settings
Up to approximately 2,000 notes for all pads can be recorded to the PSR-550 Multi
Pads.
• User Pad data is recorded by
playing voice R1 from the
keyboard. Voice R2, voice L
and the auto accompaniment
cannot be used.
Multi Pad Recording
1
Press the [RECORD] button to engage the Record mode.
2
Select “MultiPad”.
Use the data dial, the [+/YES] button or the [-/NO] button.
3
Press the [NEXT] button.
4
Select a Multi Pad Bank to record.
Use the data dial, the [+/YES] button or the [-/NO] button.
RecMenu:MultiPad
PadBank=UserPad1
The following notes and
cautions are important
points for you to keep in
mind as you record your
Multi Pad data.
• Using the Metronome
function (page 118) can
make your recording
sessions much more
efficient.
• Using Registration Memory
(page 54) can make your
recording sessions much
more efficient, since various
settings (such as voices,
etc.) can be recalled by a
single button press.
When the record mode is
engaged, the Registration
Memory Freeze function will
be turned on (it cannot be
turned off while the record
mode is engaged).
• Whenever you record, any
previously recorded material
in the same track will be
erased.
• If the memory becomes full
while recording, an alert
message will appear on the
display and recording will
stop.
• Be careful to avoid turning
off the power or unplugging
the AC adaptor from the
outlet during recording, since
this will result in the loss of
recorded data.
93
91
5
Press the [NEXT] button to display the RecMode screen.
6
Select “Record”.
Use the data dial, the [+/YES] button or the [-/NO] button.
7
Press the [NEXT] button to display the pad number selection
screen.
8
Select a Pad number to record.
Use the data dial, the [+/YES] button, the [-/NO] button, or the MULTI PAD
buttons [1]-[4].
9
Press the [NEXT] button to display the Rehearsal screen.
Voices can be set from this display. After completing the desired settings, press
the [EXIT] button to return to this display.
10
Press the [NEXT] button to display the Record ready screen.
The beat indicator dots will flash at the currently set tempo, indicating that the
record ready (Synchro Start) mode is engaged.
11
Start recording.
• Recording starts as soon as you play a key on the keyboard.
• Recording can also be started by pressing the [START/STOP] button.
If you are recording a Chord match phrase, use only the CM7 scale tones (i.e. C,
D, E, G, A and B).
12
Press the [START/STOP] button to stop recording.
13
Press the [RECORD] button to exit from the Record mode.
Multi Pad Recording
M.Pad Recording
Rehearsal
Rec Pad =Pad1
M.Pad Rec:Record
BEAT
CSC CSC C = chord tone
C, S = scale tones
M.Pad Rec Ready
94
[BACK] button
CdMatch Pad1=Off
CdMatch Pad2=Off
[NEXT] button
92
Chord Match
1
-
5
Use the same operation as in “Multi Pad Recording”
(page 92).
6
Select “Edit”.
Use the data dial, the [+/YES] button or the [-/NO] button.
7
Press the [NEXT] button to display the Edit menu screen.
8
Select “ChdMatch”.
Use the data dial, the [+/YES] button or the [-/NO] button.
9
Press the [NEXT] button to display the Chord Match screen.
10
Turn the Chord Match function on or off.
• Use the data dial, the [+/YES] button or the [-/NO] button.
• To select the desired pad for setting, press the [NEXT] button.
11
Press the [RECORD] button to exit from the Record mode.
Naming User Pads
1
-
7
Use the same operation as in “Chord Match” above.
8
Select “Name”.
Use the data dial, the [+/YES] button or the [-/NO] button.
9
Press the [NEXT] button to display the Name screen.
Multi Pad Recording
M.Pad Rec:Edit
PadEdit:ChdMatch
PadEdit:Name
[BACK] button[NEXT] button
95
93
10
Enter the desired name for the bank.
Use the keyboard to enter the name (page 21).
Up to eight letters or characters can be used.
11
Press the [RECORD] button to exit from the Record mode.
Clearing User Pad Data
1
-
7
Use the same operation as in “Chord Match” (page 94).
8
Select “Clear”.
Use the data dial, the [+/YES] button or the [-/NO] button.
10
Select the Pad number to be cleared.
Use the data dial, the [+/YES] button or the [-/NO] button.
To clear the data from all four pads, select “All”.
11
Press the [NEXT] button.
12
Execute the Clear operation.
Press the [+/YES] button to execute the Clear operation.
To abort the Clear operation, press the [-/NO] button.
13
Press the [RECORD] button to exit from the Record mode.
Multi Pad Recording
–PadName=UserPad2
Clr Pad=Pad1
Clear Pad OK?
9
Press the [NEXT] button.
PadEdit:Clear
The Clear operation is completed...
Completed
Cursor
96
94
•Material recorded data is
retained in memory even
when the STANDBY switch is
turned off if batteries are
installed or an AC adaptor is
connected (page 136). It is
nevertheless a good idea to
save important data to floppy
disk so that you can keep
them indefinitely and build up
your own data library (page
60).
Style Recording
The PSR-550 lets you record up to three original User styles which can be
used for auto accompaniment in the same way as the preset styles. User Style
data can also be saved to and loaded from floppy disk (page 57).
You can create a User style by using the internal style data as a starting point.
Select a preset style that is closest to the type of style you want to create, and
record the auto accompaniment patterns to each section.
The PSR-550 provides two basic ways to record styles:
• Style Recording — Rhythm Track ...................................................................................... page 98
• Style Recording — Bass/Phrase/Pad/Chord Tracks ........................................................ page 100
The four editing features below allow you to edit already recorded style data.
• Quantize........................................................................................................................... page 102
This function aligns the timing of the recorded note data to a specified value.
• Naming User Styles ......................................................................................................... page 104
This function lets you name your original styles.
• Clearing User Style Data ................................................................................................. page 104
This function is for clearing (deleting) or part of the recorded style.
■ User Style Tracks
The tracks which can be recorded to the User styles are organized as shown in the
chart below.
Section Track
INTRO RHYTHM SUB CHORD1 PHRASE1 BASS
RHYTHM MAIN CHORD2 PHRASE2 PAD
MAIN A RHYTHM SUB CHORD1 PHRASE1 BASS
RHYTHM MAIN CHORD2 PHRASE2 PAD
MAIN B RHYTHM SUB CHORD1 PHRASE1 BASS
RHYTHM MAIN CHORD2 PHRASE2 PAD
FILL IN A RHYTHM SUB CHORD1 PHRASE1 BASS
RHYTHM MAIN CHORD2 PHRASE2 PAD
FILL IN B RHYTHM SUB CHORD1 PHRASE1 BASS
RHYTHM MAIN CHORD2 PHRASE2 PAD
ENDING RHYTHM SUB CHORD1 PHRASE1 BASS
RHYTHM MAIN CHORD2 PHRASE2 PAD
On the PSR-550, you can record up to a total of 48 tracks (6 sections x 8 tracks).
■ Data that can be recorded to User styles
• Note on/off (key press and release) .......................... page 107
• Velocity (strength of key press).................................. page 107
• Pitch bend, pitch bend range ..............................pages 30, 122
• Voice number (drum kit number)* ................................ page 26
• Mixer settings* ............................................................. page 76
• Tempo .......................................................................... page 36
• Reverb type and settings ............................................. page 46
• Chorus type and settings ............................................. page 48
Up to approximately 1,950 notes for a section (a total of about 7,150 notes) can be
recorded to the PSR-550 style tracks.
Only one event of the item marked with * can be recorded for each track of the
sections.
•User Style data is recorded
by playing voice R1 from the
keyboard. Voice R2, voice L
and the auto accompaniment
cannot be used.
97
95
■ About Recording User Styles
In recording a User song, the PSR-550 records your keyboard performance as MIDI
data. Recording of User styles, however, is done in a different way. Here are some
of the aspects in which style recording differs from song recording:
Style Recording
Loop Recording
Auto accompaniment repeats the accompaniment patterns of several measures
in a “loop,” and style recording is also done using loops. For example, if you start
recording with a two-measure main section, the two measures are repeatedly
recorded. Notes that you record will play back from the next repetition (loop),
letting you record while hearing previously recorded material.
Overdub Recording
This method records new material to a track already containing recorded data,
without deleting the original data. In style recording, the recorded data is not
deleted, except when using functions such as Clear (page 104) and Drum
Cancel (page 99).
For example, if you start recording with a two-measure main section, the two
measures are repeated many times. Notes that you record will play back from
the next repetition, letting you overdub new material to the loop while hearing
previously recorded material.
Using Preset Styles
The following notes and cautions are important points for you to keep in mind as you record your User styles.
•In the Record Ready mode, you can exchange or edit the voice
data in the recorded tracks using Mixer on page 76.
•If the memory becomes full while recording, an alert message
will appear on the display and recording will stop.
•Since recording is done in measure units, you should first select
a style that has the same number of measures as the section
you intend to record..
• If none of the preset styles is appropriate, select one that has the
same time signature and number of measures as the one you
want to create, then use the Clear function (page 104) to clear
all preset data before entering your own.
•Make sure to clear at least one of the three User styles before
recording a new User style. Recording a new User style cannot
be started when all three User styles have recorded data.
•Be careful to avoid turning off the power or unplugging the AC
adaptor from the outlet during recording, since this will result in
the loss of recorded data.
•Using Registration Memory (page 54) can make your recording
sessions much more efficient, since various settings (such as
voices, etc.) can be recalled by a single button press.
When the record mode is engaged, the Registration Memory
Freeze function will be turned on (it cannot be turned off while
the record mode is engaged).
•Using the Metronome function (page 118) can make your
recording sessions much more efficient.
Preset style data
Copy
Internal memory for
User style recording
As shown in the chart at left, when you select the
internal preset style that is the closest to the type
of style you wish to create, the preset style data
will be copied to a special memory location for
recording.
You create (record) your new, original style by
adding or deleting data from the memory location.
All tracks (with the exception of the rhythm track)
must be cleared before recording (page 104).
98
96
Style Recording — Rhythm Track
With this operation you can create your own original rhythm patterns by editing
existing rhythm track (percussion) data from a preset style.
1
Press the [RECORD] button to engage the Record mode.
2
Select “Style”.
Use the data dial, the [+/YES] button or the [-/NO] button.
3
Press the [NEXT] button.
4
Select a style to begin with.
Use the data dial, the [+/YES] button, the [-/NO] button or the number buttons
[1]-[0].
5
Press the [NEXT] button again to display the RecMode
screen.
6
Select “Record”.
Use the data dial, the [+/YES] button or the [-/NO] button.
7
Press the [NEXT] button to display the Section selection
screen.
8
Select the section to be recorded.
9
Press the [NEXT] button to display the Track selection screen.
•Multiple sections cannot be
recorded at the same time.
Style Recording
001 8Beat 1
RecMenu:Style
Style Rec:Record
Section =Main A
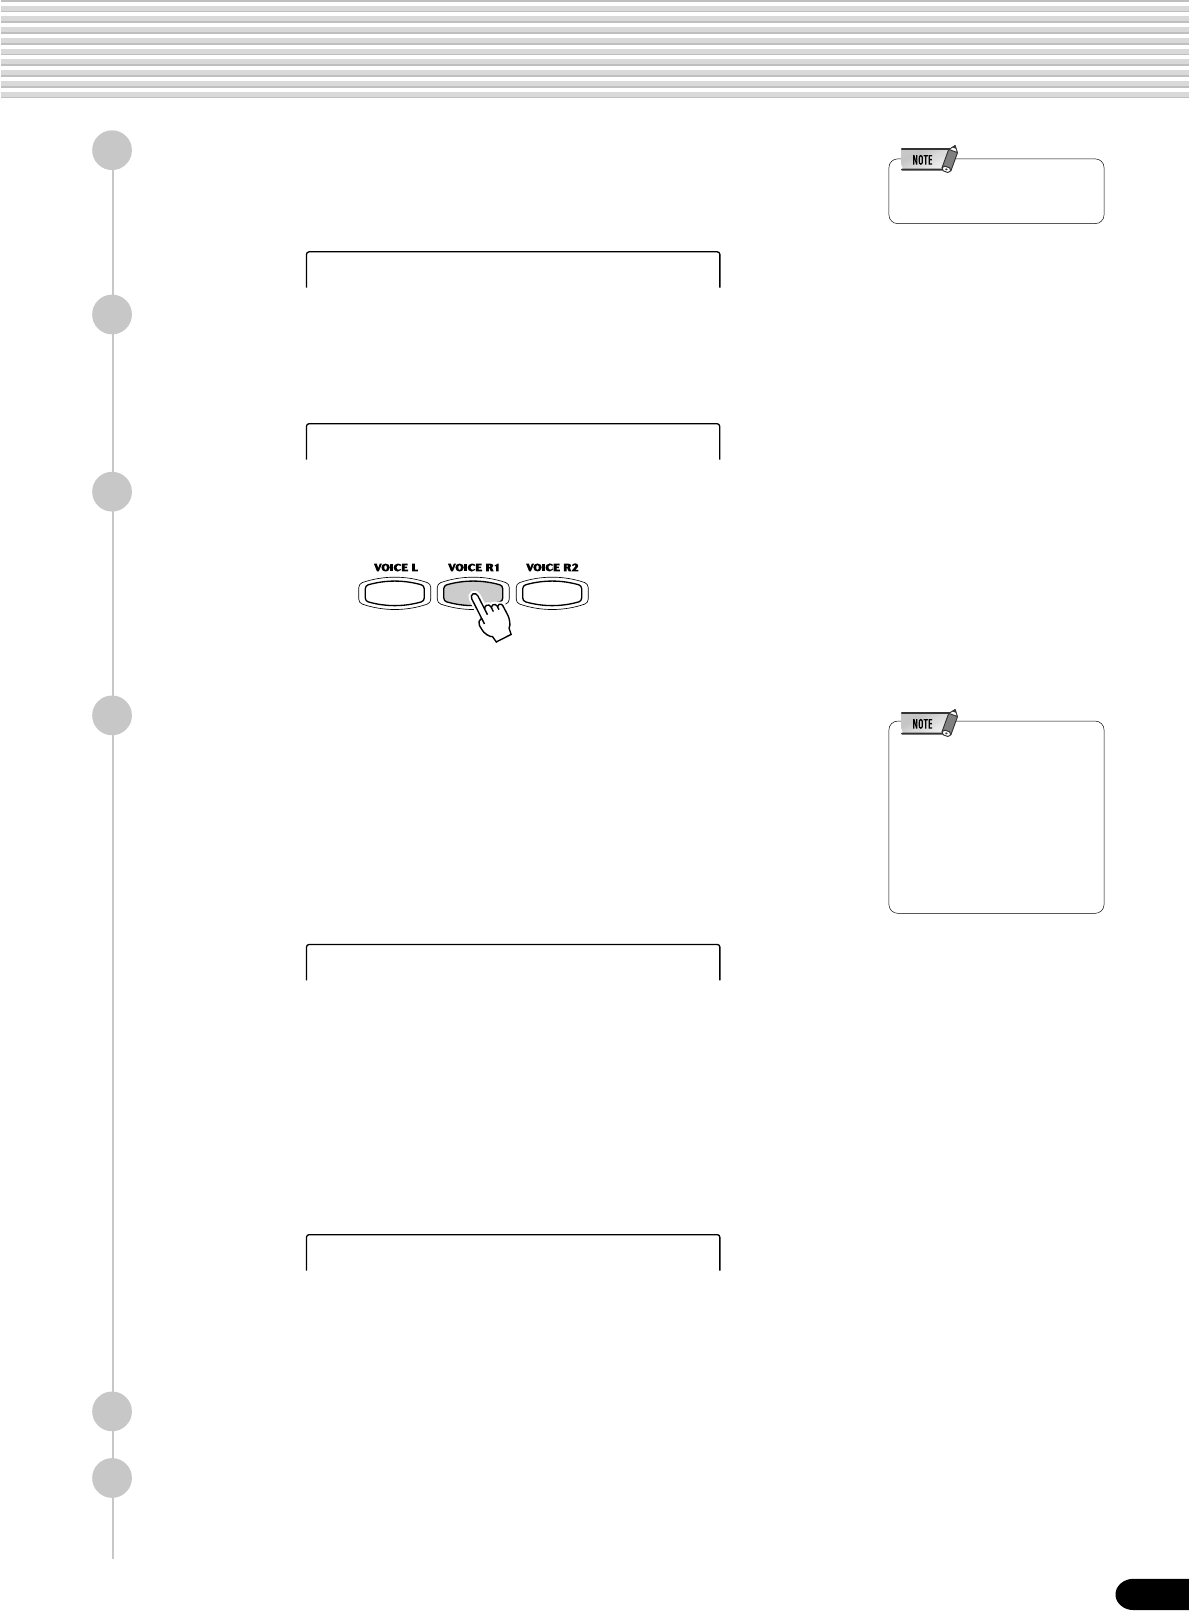
99
97
10
Select a Rhythm track to be recorded.
Select “RHYTHM MAIN” or “RHYTHM SUB” with the data dial, the
[+/YES] button or the [-/NO] button.
•Only one track can be
recorded at a time.
11
Press the [NEXT] button to display the Reharsal screen.
The beat indicator dots will flash at the currently set tempo, indicating that the
record ready (Synchro Start) mode is engaged.
Since the rhythm pattern plays back repeatedly, you can record by overdubbing
— listening to the pattern and playing the desired keys. Look at the icons
printed under the keys indicating the percussion sounds that are assigned to
each key.
•For recording the RHYTHM
tracks, the instrument
symbols printed on the front
edge of the panel show you
the instrument assignments
to each key. See “Keyboard
Percussion” on page 31 for
playing each drum/
percussion sound.
You can also delete certain percussion sounds in the following way:
1) Press the [NEXT] button.
2) Press the key on the keyboard corresponding to the instrument you want
to cancel.
3) To return to the original display, press the [BACK] button.
14
Press the [START/STOP] button to stop recording.
15
Press the [RECORD] button to exit from the Record mode.
You should save the recorded data before leaving the recording mode. (Refer
to page 100 for details.)
Style Recording
Record Track=RhM
Style Recording
Drum Cancel
To return to the original display, press the [EXIT] button (page 17).
13
Start recording.
You can start recording with one of the following ways:
• Press the [START/STOP] button. The following will start to play back: the
style selected in step #4, the section selected in step #8 and the rhythm track
selected in step #10.
• Press the [SYNC START] button to enable synchronized standby (page 25),
then play a key on the keyboard. Playback starts as described in the first
method above.
Rehearsal
12
Select one of the Drum Kits.
Select the desired kit by pressing the [VOICE R1] button (page 26).
100
98
Exiting from the Style Record mode
To leave the style recording mode, follow the instructions in the chart below.
Style Recording — Bass/Phrase/Pad/Chord Tracks
This section explains how to record all tracks (other than the rhythm), using the preset
styles.
Unlike recording the rhythm track, in this method you have to clear the track data of
the original style before recording.
1
-
9
Use the same operation as in “Style Recording —
Rhythm Track” (page 98).
10
Select a Track to be recorded.
Use the data dial, the [+/YES] button or the [-/NO] button.
Select from the following: “BASS,” “CHORD1,” “CHORD2,” “PAD,”
“PHRASE1,” and “PHRASE2”.
•Only one track can be
recorded at a time.
11
Press the [NEXT] button to display the Record Ready screen.
Style Recording
CAUTION
•Be aware that this process
automatically clears the
data in the track selected
in step #10.
Record Track=Bas
SaveToUserStyle?
Sv?:UserStyle1
Are You Sure?
Press the [-/NO] button to exit from the
Style Record mode without storing the
performance data to Internal Memory.
Select a style number
(destination).
Press the [+/YES] button to exit from the Style
Record mode after storing the performance data to
Internal Memory.
Press the [RECORD] button.
Press the [+/YES] button.
Press the [NEXT] button.
Song Rec Ready
•After exiting from the Style
Recording mode, the section
automatically switches to
Main B. If you record a
section other than Main B,
select the section again and
play the accompaniment.
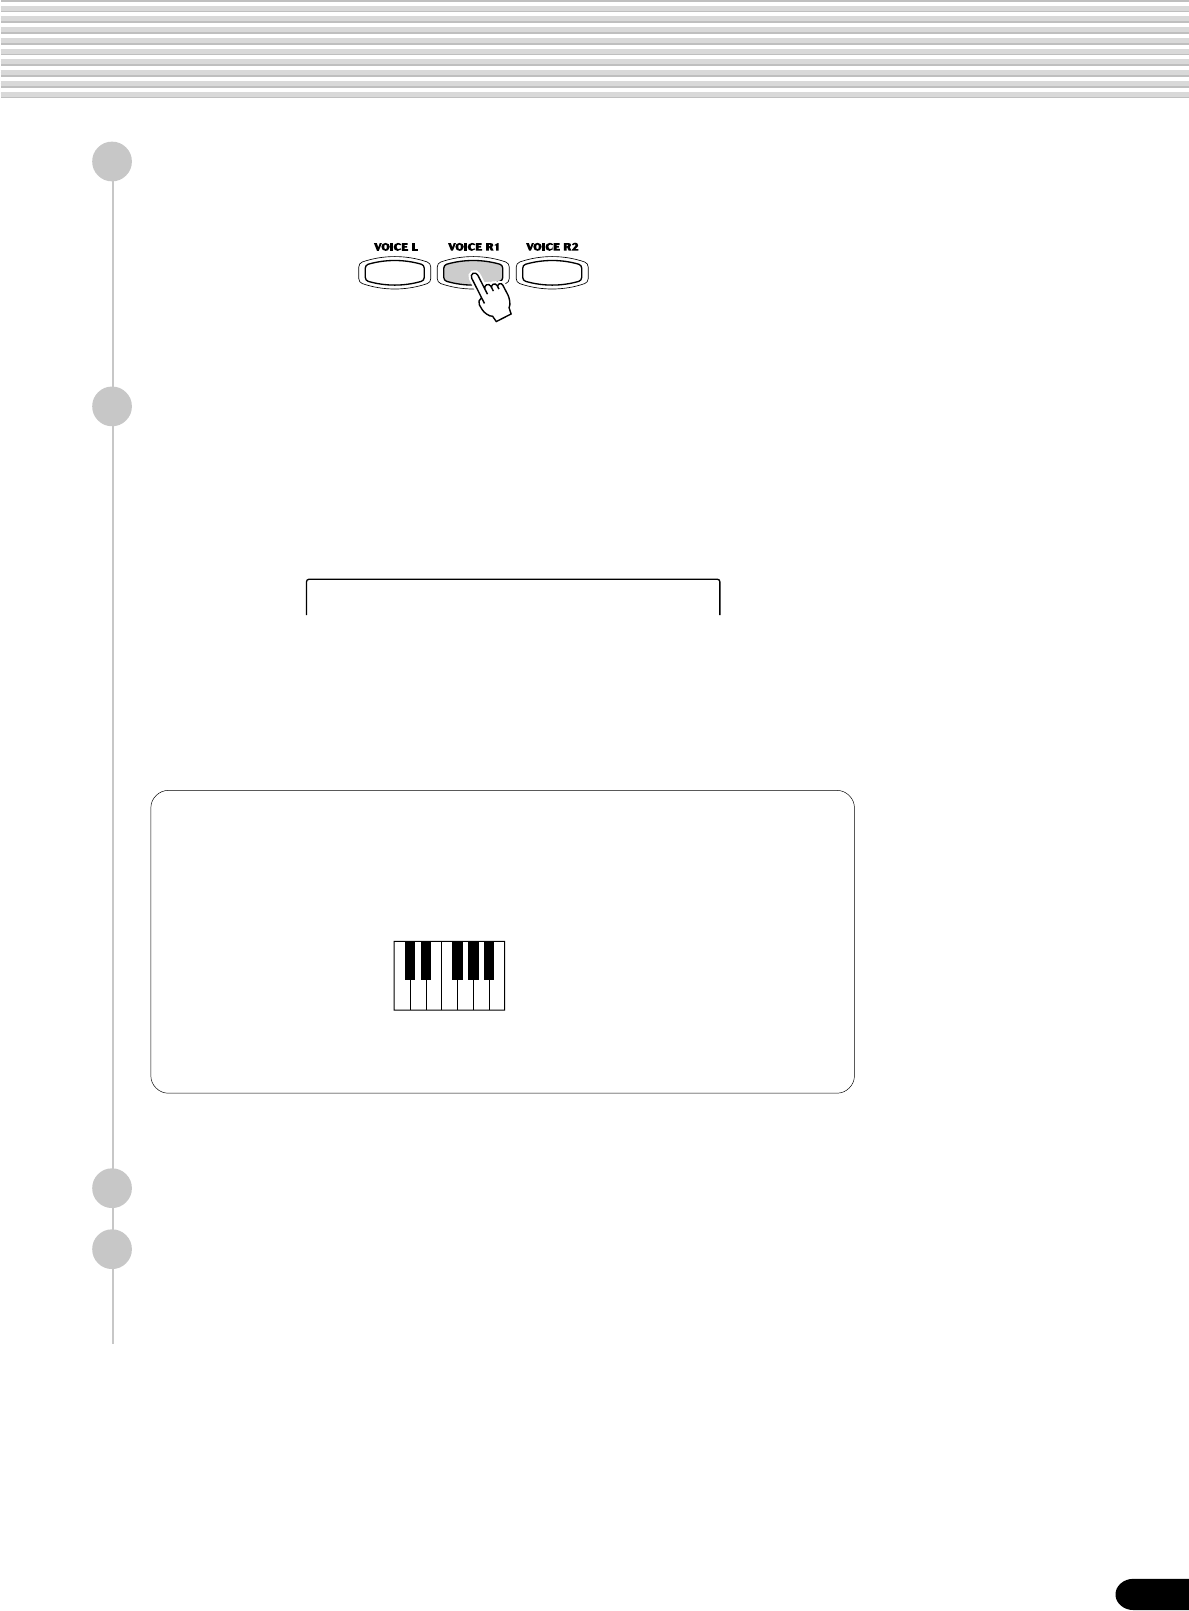
101
99
12
Select a voice for the track to be recorded.
Select the desired voice by pressing the [VOICE R1] button (page 26).
The recording repeats indefinitely (until stopped) in a loop.
Notes that you record will play back from the next repetition, letting you record
while hearing previously recorded material.
Observe the following rules when recording the MAIN and FILL sections:
•Use only the CM7 scale tones when recording the BASS and PHRASE tracks
(i.e. C, D, E, G, A and B).
•Use only the chord tones when recording the CHORD and PAD tracks (i.e. C,
E, G and B).
Any appropriate chord or chord progression can be used for the INTRO and
ENDING sections.
14
Press the [START/STOP] button to stop recording.
15
Press the [RECORD] button to exit from the Record mode.
For information on leaving the recording mode, see page 100.
Style Recording
Style Recording
CSC CSC
C = chord tone
C, S = scale tones
To return to the previous display, press the [EXIT] button.
13
Start recording.
You can start recording with one of the following ways:
• Press the [START/STOP] button.
• Press the [SYNC START] button to enable synchronized standby (page 25),
then play a key on the keyboard.

102
100
Quantize
Quantize lets you “clean up” or “tighten” the timing of a previously recorded track.
For example, the following musical passage has been written with exact quarter-note
and eighth-note values.
Even though you think you may have recorded the passage accurately, your actual
performance may be slightly ahead of or behind the beat (or both!). Quantize allows
you to align all the notes in a track so that the timing is absolutely accurate to the
specified note value.
1
-
5
Use the same operation as in “Style Recording —
Rhythm Track” (page 98).
6
Select “Edit”.
Use the data dial, the [+/YES] button or the [-/NO] button.
7
Press the [NEXT] button to display the Edit Menu screen.
8
Select “Quantize”.
Use the data dial, the [+/YES] button or the [-/NO] button.
9
Press the [NEXT] button to display the Section selection
screen.
10
Select the section to be quantized.
Use the data dial, the [+/YES] button or the [-/NO] button.
11
Press the [NEXT] button to display the Track selection
screen.
12
Select the track to be quantized.
Use the data dial, the [+/YES] button or the [-/NO] button.
Style Recording
Style Rec:Edit
StyEdit:Quantize
Section =Main A
QuantizTrack=Pad
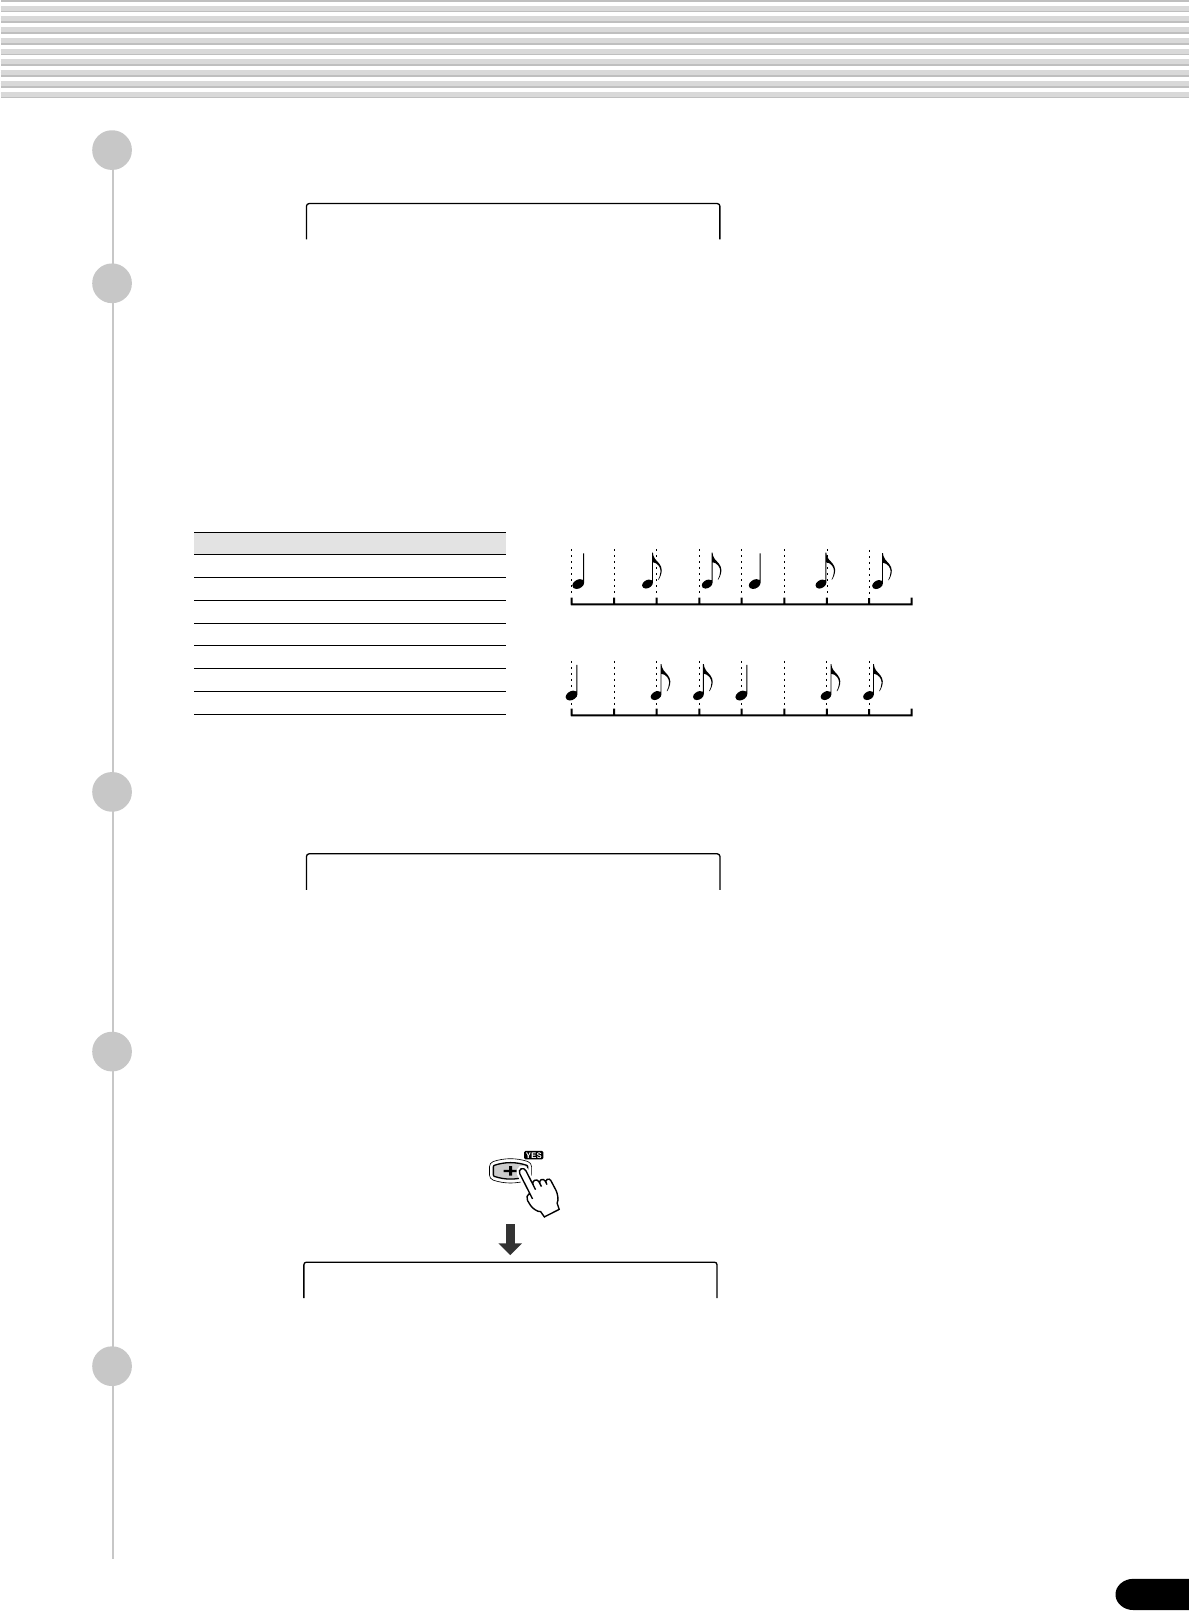
103
101
13
Press the [NEXT] button.
14
Select the Quantize size (resolution).
Use the data dial, the [-/NO] button or the [+/YES] button.
Set the Quantize resolution to correspond to the smallest notes in the track you
are working with. For example, if the data was recorded with quarter notes and
eighth notes, use 1/8 for the quantize resolution. If the quantize function is
applied in this case with the resolution set to 1/4, the eighth notes would be
moved on top of the quarter notes.
15
Press the [NEXT] button to display the QUANTIZE operation
screen.
• You can audition the quantized pattern in this step, allowing you to hear the
results of the operation before actually changing the data. To audition the
pattern, press the [START/STOP] button.
16
Press the [+/YES] button to execute the Quantize operation.
To abort the Quantize operation, press the [-/NO] button.
17
Press the [RECORD] button to exit from the Record mode.
For information on leaving the recording mode, see page 100.
Style Recording
QuantizSize =1/4
Quantize OK?
● Quantize size
Size Note
1/4 Quarter note
1/6 Quarter note triplet
1/8 Eighth note
1/12 Eighth note triplet
1/16 Sixteenth note
1/24 Sixteenth note triplet
1/32 Thirty-second note
One measure of 8th notes before quantization
After quantization
Completed
The Quantize operation is completed...
104
102
Naming User Styles
1
-
7
Use the same operation as in “Quantize” (page 102).
8
Select “Name”.
Use the data dial, the [+/YES] button or the [-/NO] button.
9
Press the [NEXT] button to display the Name screen.
10
Enter the desired name for the style.
Use the keyboard to enter the name (page 21).
Up to 12 letters or characters can be used.
11
Press the [RECORD] button to exit from the Record mode.
For information on leaving the recording mode, see page 100.
Clearing User Style Data
1
-
7
Use the same operation as in “Quantize” (page 102).
8
Select “Clear”.
Use the data dial, the [+/YES] button or the [-/NO] button.
9
Press the [NEXT] button to display the Section selection
screen.
10
Select a Section to be cleared.
Use the data dial, the [+/YES] button or the [-/NO] button.
When “All Sect” is selected as the section to be cleared, all style data (which
includes all sections and all tracks) will be deleted. In this case, go to step #13,
skipping over steps #11 and #12.
11
Press the [NEXT] button to display the Track selection screen.
12
Select a Track to be cleared.
Use the data dial, the [+/YES] button or the [-/NO] button.
Style Recording
StyEdit:Name
Nam=UserStyle1_
StyEdit:Clear
cursor
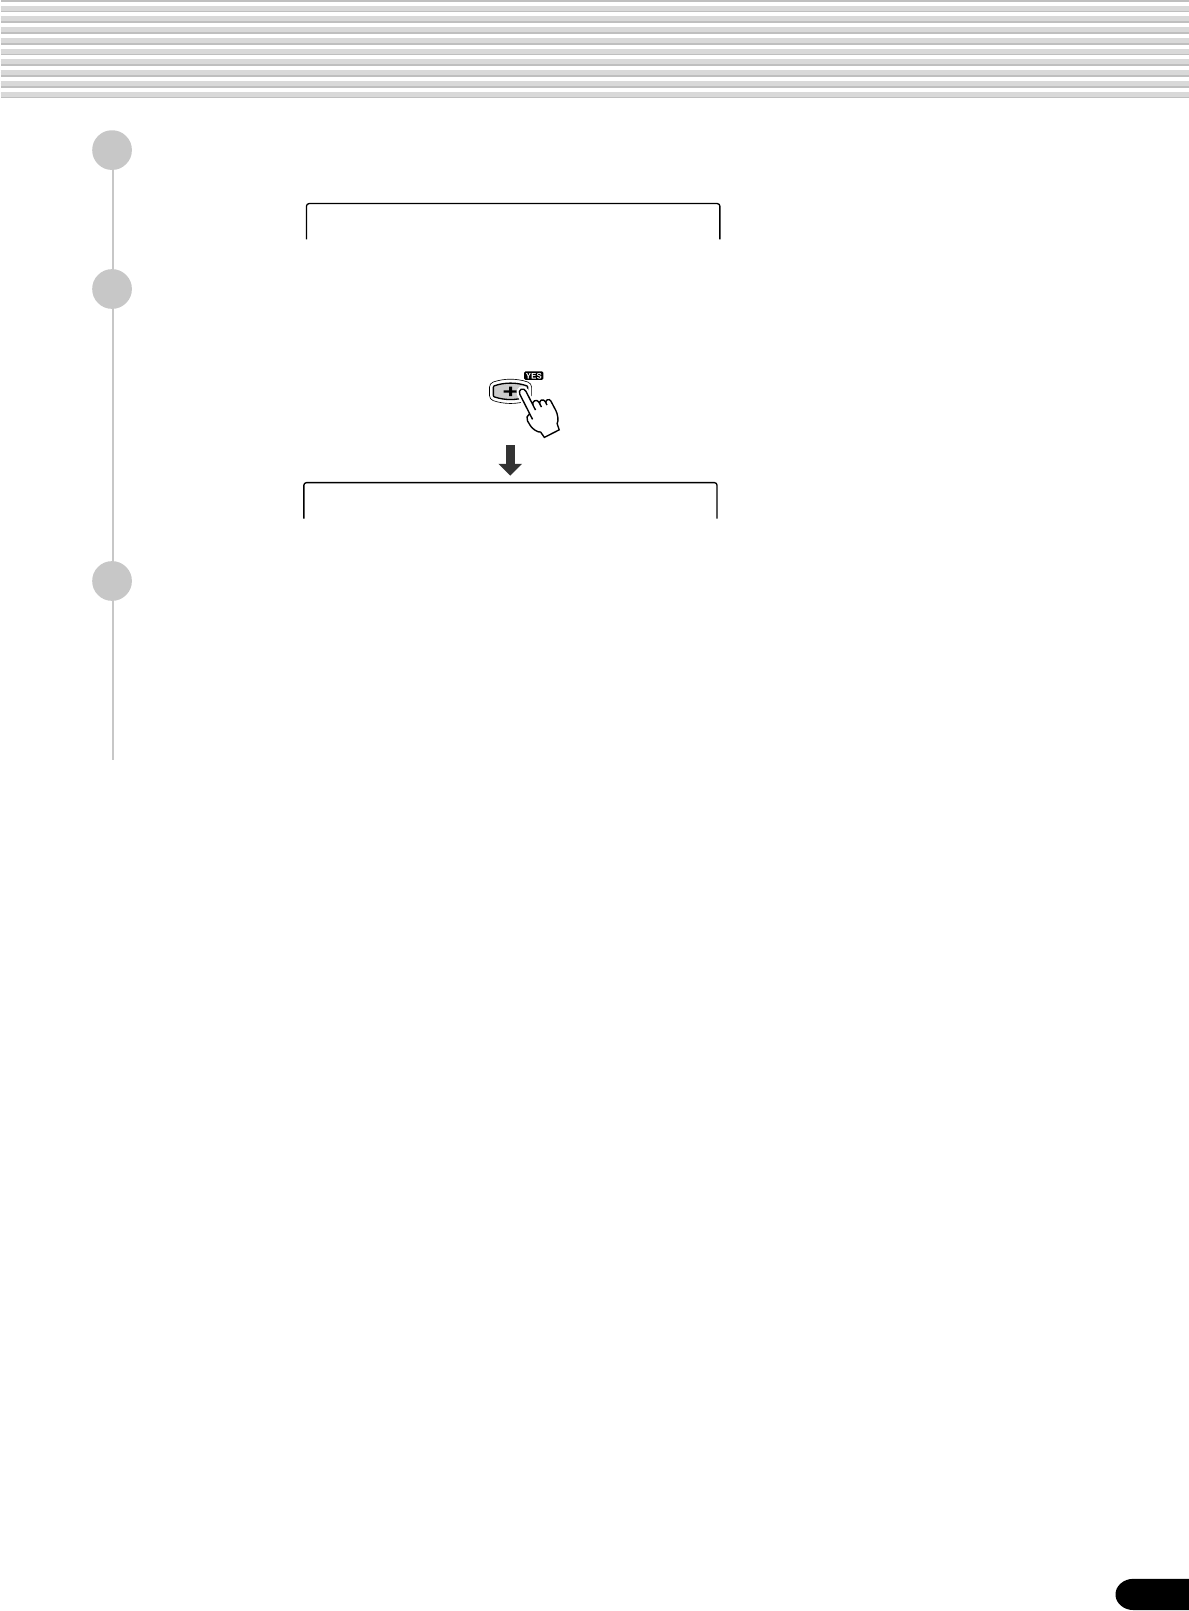
105
103
13
Press the [NEXT] button to display the Clear screen.
14
Press the [+/YES] button to execute the Clear operation.
To abort the Clear operation, press the [-/NO] button.
15
Press the [RECORD] button to exit from the Record mode.
If you’ve selected a certain section (other than “ALL sect”), see the explanation
on leaving the recording mode on page 100.
Style Recording
Clear OK?
Completed
The Clear operation is completed...
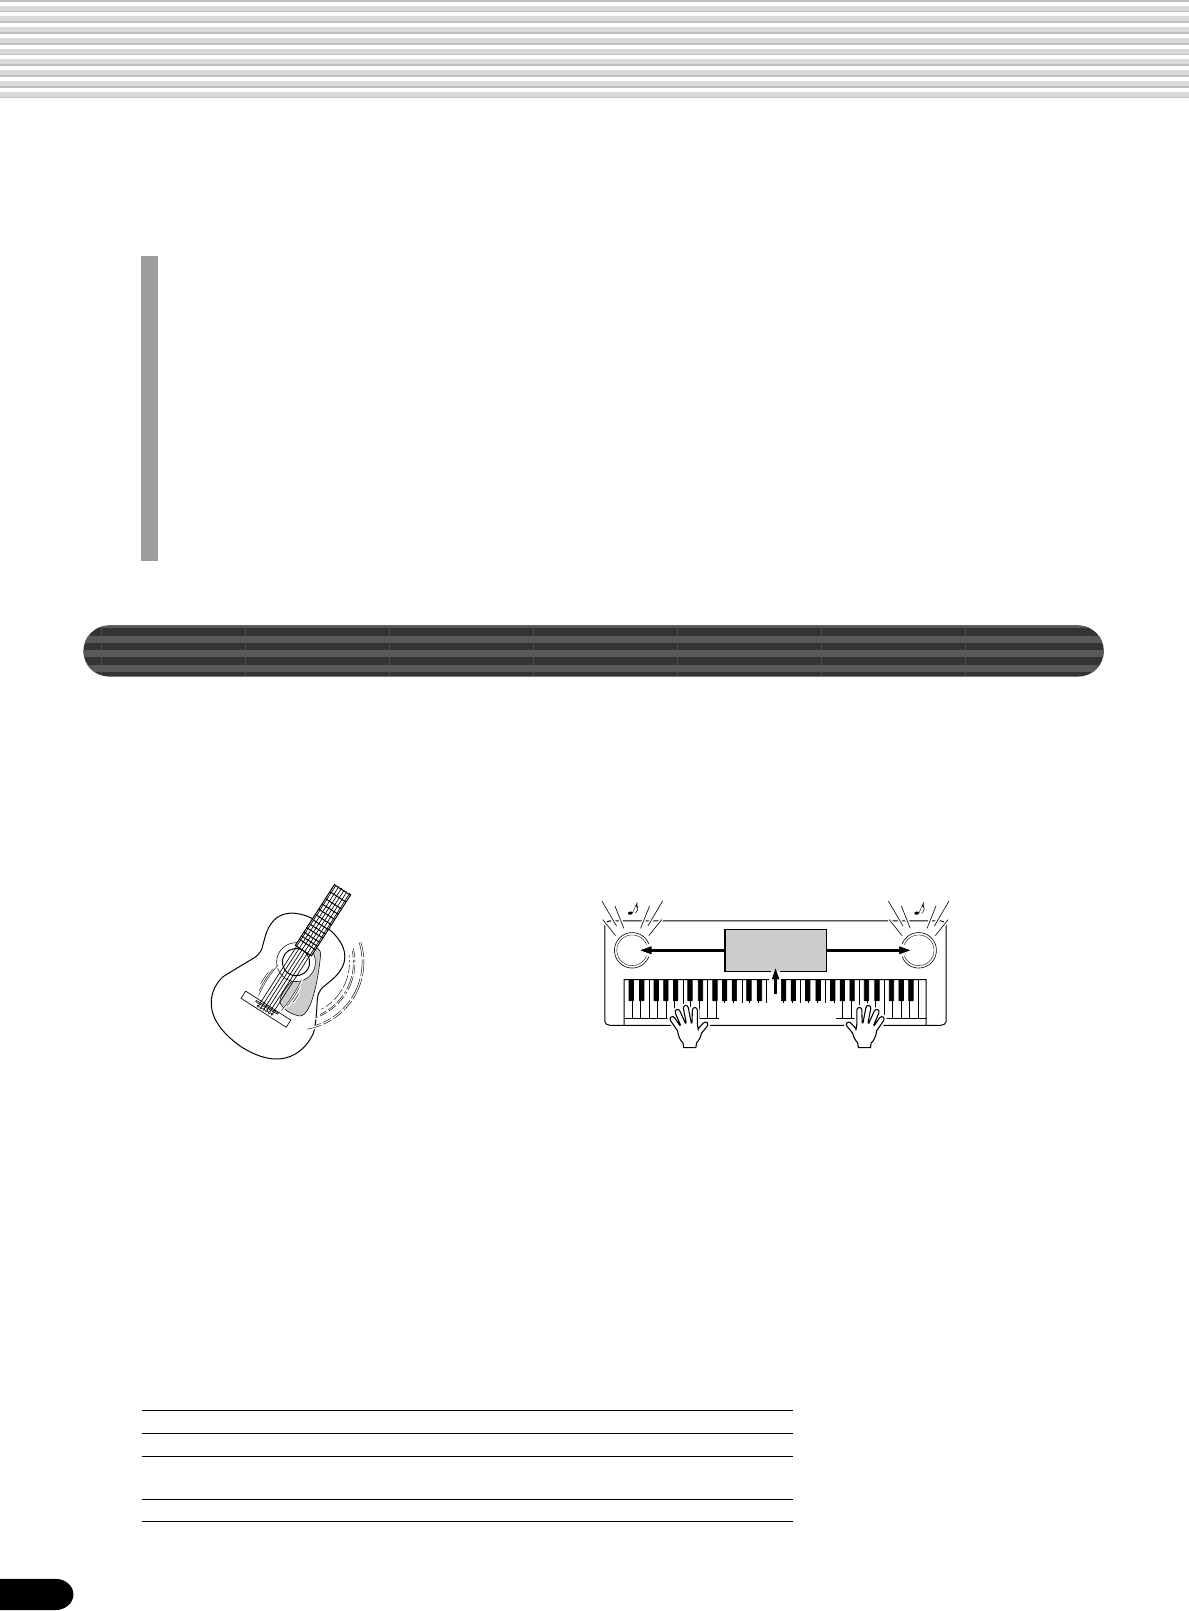
106
MIDI Functions
104
In the rear panel of your PSR-550, there are MIDI terminals (MIDI IN, MIDI OUT), a TO HOST terminal,
and a HOST SELECT switch. By using the MIDI functions you can expand your musical possibilities. This
section explains what MIDI is, and what it can do, as well as how you can use MIDI on your PSR-550.
● If you don’t know what MIDI is, make sure to read these sections:
• What’s MIDI?.............................................................................................. page 106
• What You Can Do With MIDI ...................................................................... page 108
• MIDI Data Compatibility ............................................................................. page 109
● If you want to use your PSR-550 with a computer, read this section:
• Connecting to a Personal Computer .......................................................... page 110
● The PSR-550 lets you make the following MIDI-related settings:
• MIDI Template ............................................................................................ page 112
• MIDI Transmit Setting ................................................................................. page 114
• MIDI Receive Setting ................................................................................. page 115
• Local Control .............................................................................................. page 116
• Clock .......................................................................................................... page 116
• Initial Data Send......................................................................................... page 117
What’s MIDI?
No doubt you have heard the terms “acoustic instrument” and “digital instrument.” In the world today, these are the
two main categories of instruments. Let’s consider an acoustic piano and a classical guitar as representative acous-
tic instruments. They are easy to understand. With the piano, you strike a key, and a hammer inside hits some
strings and plays a note. With the guitar, you directly pluck a string and the note sounds. But how does a digital
instrument go about playing a note?
As shown in the illustration above, in an electronic instrument the sampling note (previously recorded note) stored
in the tone generator section (electronic circuit) is played based on information received from the keyboard. So then
what is the information from the keyboard that becomes the basis for note production?
For example, let’s say you play a “C” quarter note using the grand piano sound on the PSR-550 keyboard. Unlike
an acoustic instrument that puts out a resonated note, the electronic instrument puts out information from the
keyboard such as “with what voice,” “with which key,” “about how strong,” “when was it pressed,” and “when was
it released.” Then each piece of information is changed into a number value and sent to the tone generator. Using
these numbers as a basis, the tone generator plays the stored sampling note.
● Example of Keyboard Information
Voice number (with what voice) 01 (grand piano)
Note number (with which key) 60 (C3)
Note on (when was it pressed) and Timing expressed numerically (quarter note)
note off (when was it released)
Velocity (about how strong) 120 (strong)
Sampling
Note Sampling
Note
Tone Generator
(Electric circuit)
Playing the keyboard
RL
● Acoustic guitar note production
Pluck a string and the body resonates
the sound.
● Digital instrument note production
Based on playing information from the keyboard, a
sampling note stored in the tone generator is played
through the speakers.
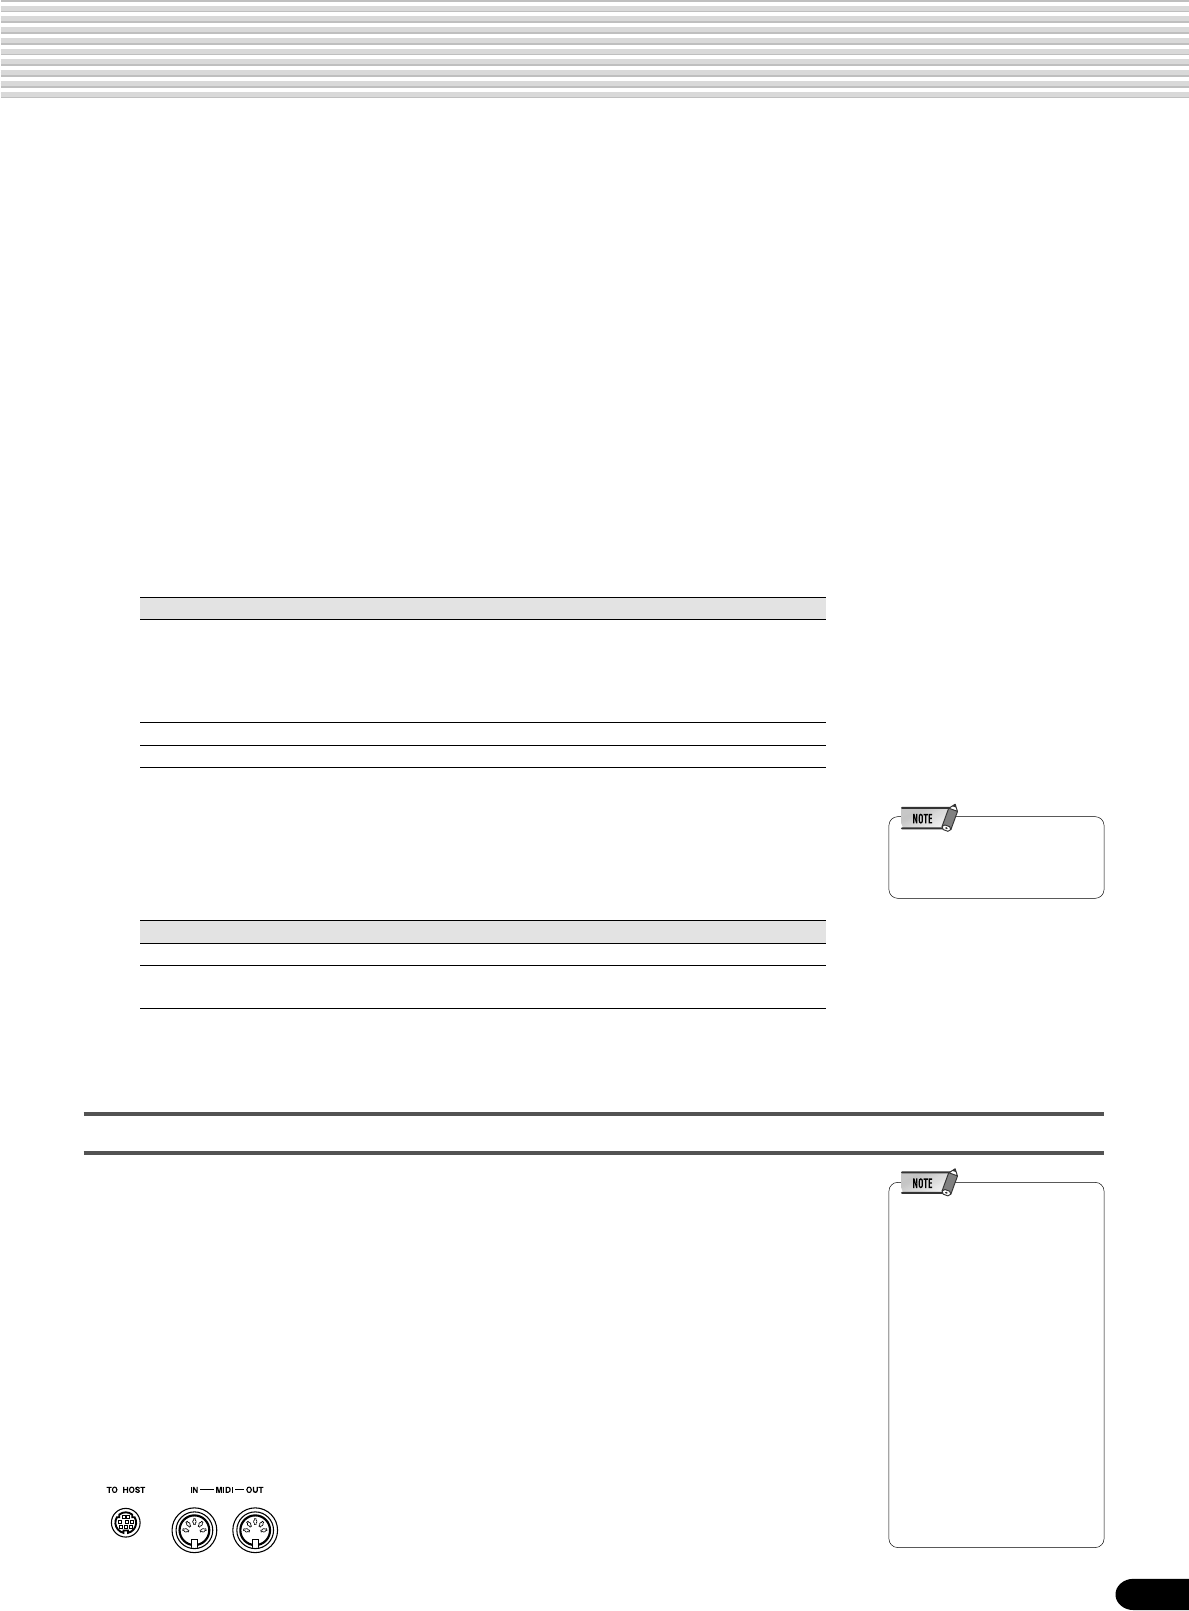
107
105
MIDI is an acronym that stands for Musical Instrument Digital Interface, which allows electronic musical instru-
ments to communicate with each other, by sending and receiving compatible Note, Control Change, Program
Change and various other types of MIDI data, or messages.
The PSR-550 can control a MIDI device by transmitting note related data and various types of controller data. The
PSR-550 can be controlled by the incoming MIDI messages which automatically determine tone generator mode,
select MIDI channels, voices and effects, change parameter values and of course play the voices
specified for the various parts.
MIDI messages can be divided into two groups: Channel messages and System messages. Below is an explanation
of the various types of MIDI messages which the PSR-550 can receive/transmit.
● Channel Messages
The PSR-550 is an electronic instrument that can handle 16 channels. This is
usually expressed as “it can play 16 instruments at the same time.” Channel mes-
sages transmit information such as Note ON/OFF, Program Change, for each of the
16 channels.
● System Messages
This is data that is used in common by the entire MIDI system. System messages
include messages like Exclusive Messages that transmit data unique to each instru-
ment manufacturer and Realtime Messages that control the MIDI device.
The messages transmitted/received by the PSR-550 are shown in the MIDI Data
Format and MIDI Implementation Chart on pages 139 and 151.
•The performance data of all
songs, styles and Multi Pads
is MIDI data.
Message Name PSR-550 Operation/Panel Setting
Note ON/OFF Messages which are generated when the keyboard is
played.
Each message includes a specific note number which corre-
sponds to the key which is pressed, plus a velocity value
based on how hard the key is stuck.
Program Change Voice setting (control change bank select MSB/LSB setting)
Control Change Mixer (volume, pan pot, etc.)
Message Name PSR-550 Operation/Panel Setting
Exclusive Message Reverb/chorus/DSP settings, etc.
Realtime Messages Clock setting
Start/stop operation
MIDI and TO HOST terminals
In order to exchange MIDI data between multiple devices, each device must be con-
nected by a cable.
There are two ways to connect: from the MIDI terminals of the PSR-550 to the MIDI
terminals of an external device using a MIDI cable, or from the TO HOST port of the
PSR-550 to the serial port of a personal computer using a special cable.
If you connect from the PSR-550 TO HOST terminal to a personal computer, the PSR-
550 will be used as a MIDI interface device, meaning that a specialized MIDI interface
device is not necessary.
In the rear panel of the PSR-550, there are two kinds of terminals, the MIDI terminals
and the TO HOST terminal.
● MIDI IN .........Receives MIDI data from another MIDI device.
● MIDI OUT .....Transmits the PSR-550’s keyboard information as
MIDI data to another MIDI device.
● TO HOST .....Transmits and receives MIDI data to and from a
personal computer.
•When using the TO HOST
terminal to connect to a
personal computer using
Windows, a Yamaha MIDI
driver must be installed in
the personal computer. The
included disk contains the
Yamaha MIDI driver.
•Special MIDI cables (sold
separately) must be used for
connecting to MIDI devices.
They can be bought at music
stores, etc.
•Never use MIDI cables
longer than about 15 meters.
Cables longer than this can
pick up noise which can
cause data errors.

108
106
The PSR-550 is an electronic musical instrument which is capable of transmitting and receiving over sixteen
channels. Imagine that there are sixteen separate pipes in the connected MIDI cable. When transmitting MIDI data
from the PSR-550 to an external device, MIDI data is sent through the assigned pipe (or MIDI channel) and
transmitted to the external device.
For example, several tracks can be transmitted simultaneously, including the auto accompaniment data (as shown
below).
What You Can Do With MIDI
●Use the PSR-550 as a multi tone generator (playing 16 channels at one time).
As you can see, it is essential to determine which data is to be sent over which MIDI channel when transmitting
MIDI data (page 114).
Receive mode for all channels set to “XG/GM.”
MIDI receive settings (page 115).
•When using a personal
computer, special software
(sequencer software) is
needed.
●Play music from another keyboard (no tone generator) using the PSR-550 XG tone
generator.
MIDI receive settings (page 115).
●Record performance data (1-16 channels) using the PSR-550 Auto Accompaniment
on a external sequencer (such as a personal computer). After recording, edit the data
with the sequencer, then play it again on the PSR-550 (playback).
MIDI transmit settings (page 114).
Initial Data send (page 117).
PSR-550
PSR-550
MIDI INMIDI OUT
MIDI OUTMIDI IN
PSR-550
Voice R1 Channel 1 Track 1
Voice L Channel 2 Track 2
Auto Accompaniment Bass Channel 3 Track 3
Auto Accompaniment Chord 1 Channel 4 Track 4
Auto Accompaniment Chord 2 Channel 5 Track 5
Auto Accompaniment Pad Channel 6 Track 6
Auto Accompaniment Phrase 1 Channel 7 Track 7
Auto Accompaniment Phrase 2 Channel 8 Track 8
Auto Accompaniment Rhythm Main Channel 9 Track 9
Auto Accompaniment Rhythm Sub Channel 10 Track 10
Voice R2 Channel 11 Track 11
MIDI cable External sequencerPSR-550 part
When recording performance data using the Auto
Accompaniment on an external sequencer
109
107
MIDI Data Compatibility
This section covers basic information on data compatibility: whether or not other MIDI devices can playback the
data recorded by PSR-550, and whether or not the PSR-550 can playback commercially available song data or song
data created for other instruments or on a computer.
Depending on the MIDI device or data characteristics, you may be able to play back the data without any problem,
or you may have to perform some special operations before the data can be played back. If you run into problems
playing back data, please refer to the information below.
Sequence format
The system which records song data is called “sequence format.”
Playback is only possible when the sequence format of the disk matches that of the MIDI device.
Voice allocation format
With MIDI, voices are assigned to specific numbers, called “program numbers.” The numbering standard (order of
voice allocation) is referred to as the “voice allocation format.”
Voices may not play back as expected unless the voice allocation format of the song data matches that of the
compatible MIDI device used for playback.
● SMF (Standard MIDI File)
This is the most common sequence format.
Standard MIDI Files are generally available as one of two types: Format 0 or Format 1. Many
MIDI devices are compatible with Format 0, and most commercially available software is
recorded as Format 0.
•The PSR-550 is compatible with both Format 0 and Format 1.
•Song data recorded on the PSR-550 is automatically recorded as SMF Format 0.
● ESEQ
This sequence format is compatible with many of Yamaha’s MIDI devices, including the
Clavinova series instruments. This is a common format used with various Yamaha software.
•The PSR-550 is compatible with ESEQ.
● Style File
The Style File Format — SFF — is Yamaha’s original style file format which uses a unique
conversion system to provide high-quality automatic accompaniment based on a wide range
of chord types.
•The PSR-550 uses the SFF internally, reads optional SFF style disks, and creates SFF
styles using the Style recording feature.
● GM System Level 1
This is one of the most common voice allocation formats.
Many MIDI devices are compatible with GM System Level 1, as is most commercially
available software.
•The PSR-550 is compatible with GM System Level 1.
● XG
XG is a major enhancement of the GM System Level 1 format, and was developed by
Yamaha specifically to provide more voices and variations, as well as greater expressive
control over voices and effects, and to ensure compatibility of data well into the future.
•The PSR-550 is compatible with XG.
● DOC
This voice allocation format is compaible with many of Yamaha’s MIDI devices, including the
Clavinova series instruments.
This is also a common format used with various Yamaha software.
•The PSR-550 is compatible with DOC.
•Even if the devices and data
used satisfy all the
conditions above, the data
may still not be completely
compatible, depending on
the specifications of the
devices and particular data
recording methods.
110
108
Connecting to a Personal Computer
Connect your PSR-550 to a computer and take advantage of the wide range of power-
ful and versatile software for creating and editing music. The PSR-550 can be con-
nected in two ways:
• Using the MIDI terminals
• Using the TO HOST terminal
●When using a MIDI interface with a Macintosh series computer, connect the RS-
422 terminal of the computer (modem or printer terminal) to the MIDI interface,
then connect the MIDI OUT terminal on the MIDI interface to the MIDI IN
terminal of the PSR-550, as shown in the diagram below. Set the HOST SE-
LECT switch on the PSR-550 to “MIDI.”
• When the HOST SELECT switch is set in the “MIDI” position, input and
output in the TO HOST switch is ignored.
• When using a Macintosh series computer, set the MIDI interface clock setting
in the application software to match the setting of the MIDI interface you are
using. For details, carefully read the owner’s manual for the software you are
using.
Connect using the PSR-550 MIDI terminals
Using a MIDI interface device installed in the personal computer, connect the MIDI
terminals of the personal computer and the PSR-550.
For the connection cable, use a special MIDI cable.
●When the computer has a MIDI interface installed, connect the MIDI OUT
terminal of the personal computer to the MIDI IN terminal of the PSR-550. Set
the HOST SELECT switch to “MIDI.”
MIDI INMIDI OUT
MIDI OUTMIDI IN
PSR-550
MIDI IN
RS-422
MIDI OUT
PSR-550
•If your computer features a
USB interface, we
recommend using the
Yamaha UX256.
111
MIDI Functions
109
Connect the serial port of the personal computer (RS-232C terminal or RS-422 termi-
nal) to the TO HOST terminal of the PSR-550.
For the connection cable, use the cable below (sold separately) that matches the
personal computer type.
Connect using the TO HOST terminal
● IBM-PC/AT Series
Connect the RS-232C terminal on the computer to the TO HOST terminal on the
PSR-550 using a serial cable (D-SUB 9P → MINI DIN 8P cross cable). Set the
PSR-550 HOST SELECT switch in the “PC-2” position.
When using a D-SUB 25P → MINI DIN 8P cross cable, connect using a D-SUB
9P plug adaptor on the computer side of the cable.
● Macintosh Series
Connect the RS-422 terminal (modem or printer terminal) on the computer to the
TO HOST terminal on the PSR-550 using a serial cable (system peripheral
cable, 8 bit). Set the PSR-550 HOST SELECT switch in the “Mac” position.
Set the MIDI interface clock in the sequencer software you are using to 1 MHz.
For details, carefully read the owner’s manual for the software you are using.
For details about the necessary MIDI settings for computer and sequence
software you are using, refer to the relevant owner’s manuals.
•Macintosh is a registered trademark of Apple Computer, Inc.
•IBM PC/AT is a trademark of International Business Machines Corp.
•Other company names and product names, etc. in this manual are registered trademarks or trademarks of those companies.
PSR-550
mini DIN 8-pin
D-SUB 9-pin
YAMAHA CCJ-PC2
PSR-550
mini DIN 8-pin
D-SUB 25-pin D-SUB 9-pin
YAMAHA CCJ-PC2
PSR-550
mini DIN 8-pin mini DIN 8-pin
YAMAHA CCJ-MAC
112
MIDI Functions
110
MIDI Template
The PSR-550 is capable of transmitting and receiving MIDI data over sixteen indepen-
dent channels. For proper MIDI operation, it is necessary to determine which data is
set to which channel.
The MIDI Template function allows you to instantly configure all appropriate transmit/
receive settings with a single button press.
2
Select “Midi.”
Use the data dial, the [+/YES] button or the [-/NO] button.
3
Press the [NEXT] button to display the MIDI screen.
4
Select “Template.”
Use the data dial, the [+/YES] button or the [-/NO] button.
5
Press the [NEXT] button to display the MIDI Template screen.
6
Select a MIDI Template.
Use the data dial, the [+/YES] button or the [-/NO] button.
For details, refer to the MIDI Template List (page 113).
1
Press the [FUNCTION] button.
F4 Midi
Midi:Template
Temp=Acmp Out
Temp=XG Module
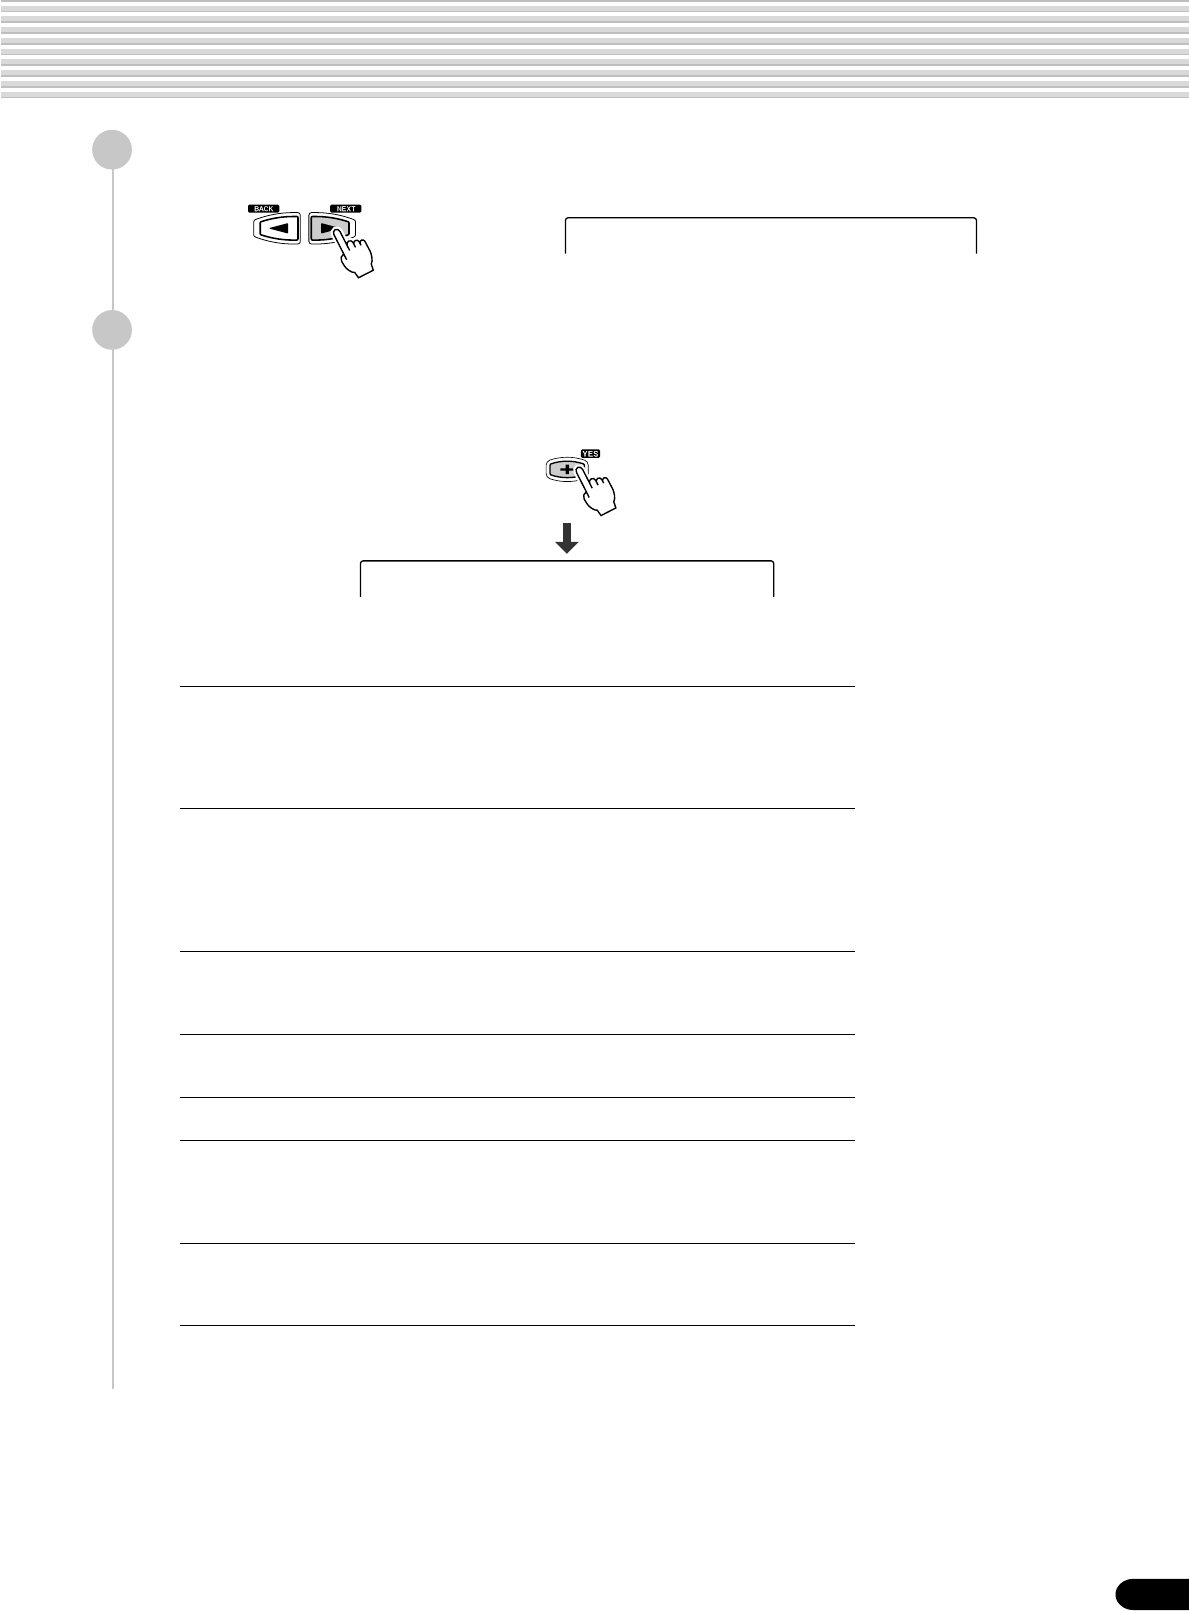
113
MIDI Functions
111
7
Press the [NEXT] button.
8
Load the selected MIDI Template.
Press the [+/YES] button to actually load the selected MIDI template settings.
To abort the operation, press the [-/NO] button.
MidiTemplatLoad?
● MIDI Template List
Keyboard Out The transmit channels are set as follows:
ch. 1: Right1, ch. 2: Right2, ch. 3: Left, chs. 4-16: Off
When outputting the performance data (note on/off messages).
Used to play the PSR-550 note on/off data with an external tone
generator and to record the PSR-550 note on/off data to an
external sequencer.
Acmp Out The transmit channels 9-16 are set with the Accompaniment
tracks.
chs. 1-8: Off, chs. 9-10: Rhythms, ch. 11: Bass,
chs. 12-13: Chords, ch. 14: Pad, chs. 15-16: Phrases
When outputting the style data. Used to play the PSR-550 auto
accompaniment data with an external tone generator and to record
the PSR-550 auto accompaniment data to an external sequencer.
Song Out All transmit channels are set with the Song tracks 1-16.
When outputting the song data. Used to play the PSR-550 song
data with an external tone generator and to record your entire
performance on the PSR-550 to an external sequencer.
Master Keyboard When using the PSR-550 as a master keyboard; in other words,
using it strictly as a controller for outputting MIDI data, without
using the internal sounds.
XG Module All receive channels are set to “XG/GM.”
When using the PSR-550 as a multi-timbral XG tone generator.
Accordion The receive channels are set as follows:
ch. 1: Remote, ch. 2: Chord, ch. 3: Bass, chs. 4-16: Off
When playing the PSR-550 by an external MIDI Accordion.
The connected MIDI accordion can play the PSR-550 and detect
chords and basses in the auto accompaniment section.
Midi Pedal All receive channels are set to “Root.”
When playing the PSR-550 using a connected (optional) MIDI
pedal. The connected MIDI pedal detects chords and basses in the
auto accompaniment section, allowing you to play on-bass chords.
Completed
114
MIDI Functions
112
MIDI Transmit Setting
The PSR-550 can simultaneously transmit data on all 16 MIDI channels. The Transmit
Channel and Transmit Track functions determine what PSR-550 data is transmitted via
which MIDI channels.
1
Press the [FUNCTION] button.
2
Select “Midi.”
Use the data dial, the [+/YES] button or the [-/NO] button.
3
Press the [NEXT] button to display the MIDI screen.
4
Select “Transmit Ch.”
Use the data dial, the [+/YES] button or the [-/NO] button.
5
Press the [NEXT] button to display the MIDI Transmit Ch
screen.
6
Set a MIDI Transmit Channel and Transmit Track.
● Press one of the [TRACK1]-[TRACK16] buttons to select a MIDI channel.
● Select a track with the data dial, the [+/YES] button or the [-/NO] button.
Off Nothing is transmitted.
R1 Right-hand keyboard playing* (VOICE R1)**
R2 Right-hand keyboard playing* (VOICE R2)**
L Left-hand keyboard playing* (VOICE L)**
Upper Right-hand keyboard playing*
(Outputs MIDI note data normally as explained on page 29.)
Lower Left-hand keyboard playing* with Auto Accompaniment ON
(Outputs MIDI note data normally as explained on page 29.)
RhM Auto Accompaniment RHYTHM MAIN track
RhS Auto Accompaniment RHYTHM SUB track
Bas Auto Accompaniment BASS track
Cd1 Auto Accompaniment CHORD1 track
Cd2 Auto Accompaniment CHORD2 track
Pad Auto Accompaniment PAD track
Ph1 Auto Accompaniment PHRASE1 track
Ph2 Auto Accompaniment PHRASE2 track
T01-16 Song track 1-16
•When a track is assigned to
more than one MIDI channel,
the data from that track is
transmitted via the lowest-
numbered channel.
•MIDI transmit track settings
will be retained even after
turning the power off. See
page 136 for details.
•The initial default channel/
track settings are:
• Ch. 1 = R1
• Ch. 2 = R2
• Ch. 3 = L
• Ch. 4 = Off
• Ch. 5 = Off
• Ch. 6 = Off
• Ch. 7 = Off
• Ch. 8 = Off
• Ch. 9 = RhS
• Ch. 10 = RhM
• Ch. 11 = Bas
• Ch. 12 = Cd1
• Ch. 13 = Cd2
• Ch. 14 = Pad
• Ch. 15 = Ph1
• Ch. 16 = Ph2
•To avoid MIDI loops which
can cause operational errors,
check the PSR-550 Local
Control setting (page 116),
and the MIDI THRU settings
of any external MIDI devices.
*“Right-hand keyboard playing” and “Left-hand keyboard playing” indicate the
performance played on the right side and left side of the keyboard from the split
point, respectively.
** Outputs MIDI note data according to the respective octave settings for the voices
R1, R2 and L.
Midi:Transmit Ch
Trans Ch16=R1
115
MIDI Functions
113
MIDI Receive Setting
The PSR-550 can simultaneously receive data on all 16 MIDI channels, allowing it to
function as a 16-channel multi-timbral tone generator. The Receive Channel and
Receive Mode functions determine how each channel will respond to received MIDI
data.
1
Press the [FUNCTION] button.
2
Select “Midi.”
Use the data dial, the [+/YES] button or the [-/NO] button.
3
Press the [NEXT] button to display the MIDI screen.
4
Select “Receive Ch.”
Use the data dial, the [+/YES] button or the [-/NO] button.
5
Press the [NEXT] button to display the MIDI Receive Ch
screen.
6
Set a MIDI Receive Channel and Receive mode.
● Press one of the [TRACK1]-[TRACK16] buttons to select a MIDI channel.
● Select a receive mode with the data dial, the [+/YES] button or the [-/NO]
button.
Off No MIDI data is received on channels set to “Off”.
XG/GM Received MIDI data is sent directly to the PSR-550 tone
generator. If all channels are set to “XG/GM”, the PSR-550
functions as a 16-channel multi-timbral tone generator.
Keybd Received MIDI data is handled in the same way as data
generated by the PSR-550’s own keyboard. In other words, a
remote keyboard could be used to control the PSR-740/640
AUTO ACCOMPANIMENT functions, etc.
Chord The note on/off messages received at the channel(s) set to
“Chord” are recognized as the fingerings in the accompaniment
section. The chords to be detected depend on the fingering
mode on the PSR-550. The chords will be detected regardless
of the accompaniment on/off and split point settings on the
PSR-550 panel.
Root The note on/off messages received at the channel(s) set to
“Root” are recognized as the bass notes in the accompaniment
section. The bass notes will be detected regardless of the
accompaniment on/off and split point settings on the PSR-550
panel.
•The initial default setting
(factory setting) for all
channels is “XG/GM.”
•MIDI receive mode settings
will be retained even after
turning the power off. See
page 136 for details.
Midi:Receive Ch
Reciv Ch01=XG/GM
116
MIDI Functions
114
Local Control
“Local Control” refers to the fact that, normally, the PSR-550 keyboard controls the
internal tone generator, allowing the internal voices to be played directly from the
keyboard. This situation is “Local Control on” since the internal tone generator is
controlled locally by its own keyboard. Local control can be turned off, however, so
that the keyboard does not play the internal voices, but the appropriate MIDI informa-
tion is still transmitted via the MIDI OUT connector when notes are played on the
keyboard. At the same time, the internal tone generator can respond to MIDI informa-
tion received on channels set to the “XG/GM” mode via the MIDI IN connector. This
means that while an external MIDI sequencer, for example, plays the PSR-550 internal
voices, an external tone generator can be played from the PSR-550 keyboard.
5
Press the [NEXT] button to display the Local Control screen.
6
Turn the Local Control on or off.
Use the data dial, the [+/YES] button or the [-NO] button.
Clock
Reception of an external MIDI clock signal can be enabled or disabled as required.
When disabled (“Int”), all of the time-based functions (Auto Accompaniment, SONG
recording and playback, etc.) are controlled by its own internal clock. When MIDI
clock reception is enabled (“Ext”), however, all timing is controlled by an external
MIDI clock signal received via the MIDI IN terminal (in this case the PSR-550
TEMPO setting has no effect). The default setting is “Int”.
1
Press the [FUNCTION] button.
2
Select “Midi.”
Use the data dial, the [+/YES] button or the [-/NO] button.
•The default Local Control
setting (factory setting) is
“On”.
1
Press the [FUNCTION] button.
2
Select “Midi”.
Use the data dial, the [+/YES] button or the [-/NO] button.
3
Press the [NEXT] button to display the MIDI screen.
4
Select “LocalContrl.”
Use the data dial, the [+/YES] button or the [-/NO] button.
Midi:LocalContrl
Midi Local =Off
117
MIDI Functions
115
3
Press the [NEXT] button to display the MIDI screen.
4
Select “Clock.”
Use the data dial, the [+/YES] button or the [-/NO] button.
Initial Data Send
Transmits all current panel settings to a second PSR-550 or a MIDI data storage
device.
If you want to have the song play back with the panel settings used for recording,
execute the Initial Data Send function before recording the performance on the PSR-
550 to an external sequencer.
1
Press the [FUNCTION] button.
2
Select “Midi.”
Use the data dial, the [+/YES] button or the [-/NO] button.
3
Press the [NEXT] button to display the MIDI screen.
4
Select “Init Send.”
Use the data dial, the [+/YES] button or the [-/NO] button.
•The default Clock setting
(factory setting) is “Int.”
•When the Clock setting is
“Ext,” auto accompaniment
playback cannot be started
via the panel [START/STOP]
button. Also, Multi Pad
playback cannot be initiated
by pressing the any of the
Multi Pads.
•When the Clock setting is
“Ext”, “EC” will appear on the
TEMPO display, and tempo
cannot be changed with the
panel button.
5
Press the [NEXT] button to display the Clock screen.
6
Set the Clock to “Int” or “Ext.”
Use the data dial, the [+/YES] button or the [-/NO] button.
5
Press the [NEXT] button to display the Init Send screen.
Midi:Clock
Midi Clock =Int
Midi:Init Send
Init Send OK?
Completed
6
Execute the Init Send
operation.
Press the [+/YES] button to
execute the Init Send opera-
tion.
To abort the operation, press
the [-/NO] button.
118
116
Other Functions (Utility)
This section of the manual covers some important functions of the PSR-550 that have not been ex-
plained in previous sections. These are all combined in the Utility menu of the “Function” section.
• Metronome ........................... “Metronom”............................................. page 118
• Upper Octave ....................... “UpperOct”............................................. page 119
• Master Tuning....................... “Tuning”.................................................. page 119
• Scale Tuning......................... “SC.Tune”................................................ page 119
• Split Point ............................. “Split”..................................................... page 120
• Fingering .............................. “Fingerng”............................................... page 38
• Touch Sensitivity .................. “TouchSns”............................................. page 120
• Voice Set .............................. “VoiceSet”............................................. page 120
• Footswitch ............................ “Pedal”..................................................... page 121
• Pitch Bend Range ................ “PitchBnd”............................................. page 122
• Assignable ........................... “Assignbl”............................................. page 122
• Backlight .............................. “BackLigt”............................................. page 122
Metronome
When this is set to “ON,” the metronome sounds at the set tempo for the following
conditions.
• Accompaniment playback
• Song playback
• Synchronized start standby
• Record standby
• Recording
• Turn Metronome ON or OFF with the data dial, the [+/YES] button or the
[-/NO] button.
1
Press the [FUNCTION] button.
2
Select “Utility.”
Use the data dial, the [+/YES] button or
the [-/NO] button.
3
Press the [NEXT] button.
4
Select a function.
Use the data dial, the [+/YES] button or the [-/NO] button.
Refer to the list above for available Utility menu items.
5
Press the [NEXT] button.
6
Set the value.
Use the data dial, the [+/YES] button or
the [-/NO] button.
Each of the above functions can be set as described below.
The operations for each function corresponding to step #6 are covered in the following explanations.
Metronome =On
F5 Utility
F5 Util:Metronom
Metronome =Off
•The Metronome cannot be
turned on when free-tempo
song data is selected in the
Song mode.
The tempo setting of some
commercially available songs
is fixed. These songs are
called “free-tempo” software.
When playing back free-
tempo song data on the
PSR-550, the Tempo display
shows “- - -” and the beat
display does not flash. Also,
the measure number in the
display does not match the
actual measure number of
playback, and only gives you
an indication of how much of
the song has played back.
119
117
Upper Octave
This determines the Octave setting for the right-hand range of the keyboard, letting you
have independent ranges for the right and left hands. The range is from -1 to 1.
• Use the data dial, the [+/YES] button or the [-/NO] button to set the Octave.
Master Tuning
The Master Tuning function sets the overall pitch of the PSR-550.
The range is from 414.6 Hz to 466.8 Hz.
• Set the value with the data dial, the [+/YES] button or the [-/NO] button.
Scale Tuning
Scale tuning allows each individual note of the octave to be tuned over range from -64
to +63 cents in 1-cent increments (1 cent = 1/100th of a semitone). This makes it
possible to produce subtle tuning variations, or tune the instrument to totally different
scales (e.g. classic or Arabic scales).
The PSR-550 also provides nine different scale settings (shown below) that let you
instantly reconfigure the tuning of the instrument for playing in special scales. You can
tune the instrument in two ways: select the desired scale setting template, or tune each
key individually using Note Edit.
•The scale tuning settings are
common to each octave on
the keyboard.
•Minus values can be entered
by using the number buttons
while holding the [-/NO]
button.
Other Functions (Utility)
Upper Octave = 1
Tuning =414.6
•The normal tuning of
±
0
cents can be recalled by
setting ‘‘Equal’’.
Use the same operation as in steps 1-5 on page 118 and:
• Selecting the template • Individual note tuning
Template C C#DEbEFF#GAbABbB
Bayat-G 0 0 0 0 -50 0 0 0 0 -50 0 0
Bayat-A 0 0 0 0 0 0 -50 0 0 0 0 -50
Bayat-E 0 -50 0 0 0 0 -50 0 0 0 0 0
Bayat-C 0 0 -50 0 0 0 0 0 0 -50 0 0
Rast-G 0 0 0 0 0 0 -50 0 0 0 0 -50
Rast-A 0 -50 0 0 0 0 0 0 -50 0 0 0
Rast-E 0 0 0 -50 0 0 0 0 -50 0 0 0
Rast-C 0 0 0 0 -50 0 0 0 0 0 0 -50
Equal 0 0 0 0 0 0 0 0 0 0 0 0
ScTuneEdt C#= 63
Completed
SC.Tune:NoteEdit
Template=Bayat-G
SC.Tune:Template
[NEXT] button
Use the data dial, the
[+/YES] button or the [-/
NO] button to select the
template. For details,
refer to the table above.
[NEXT] button
Data dial
[+/YES] button
[-/NO] button
Use the [NEXT] button to select the
desired key, then tune each key by
using the data dial, the [+/YES] button,
or the [-/NO] button.
[NEXT] button
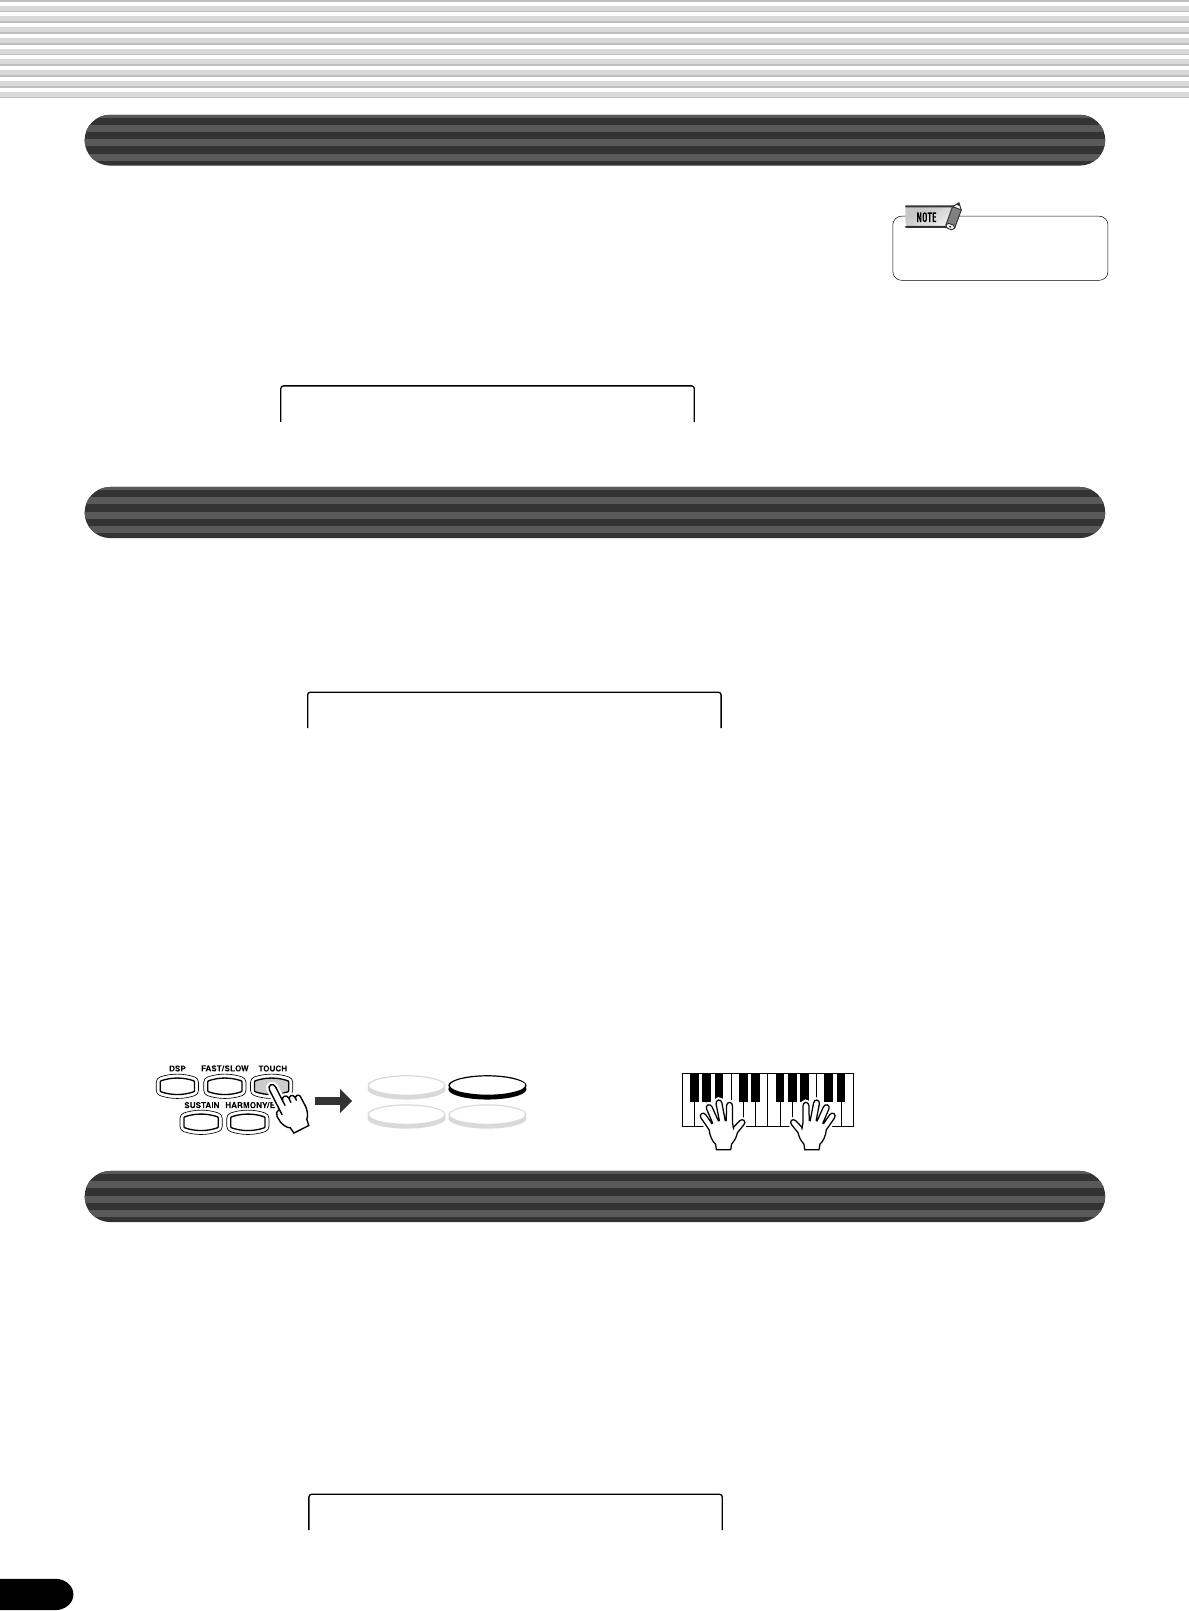
120
118
Touch Sensitivity
The keyboard of the PSR-550 is equipped with a touch response feature that lets you
dynamically and expressively control the level of the voices with your playing strength
— just as on an acoustic instrument. The Touch Sensitivity parameter gives you
detailed control over the touch response feature by letting you set the degree of touch
response.
Voice Set
The Voice Set feature brings out the best in each individual voice by automatically
setting a range of important voice-related parameters whenever an R1 panel voice is
selected. The parameters that may be set by the Voice Set feature are listed below. This
function lets you turn Voice Set on or off, as required.
● Voice Set Parameter List
•Voice R1 (Volume, octave, pan, reverb depth, chorus depth, DSP depth)
•Voice R2 (Voice number, volume, octave, pan, reverb depth, chorus depth, DSP
depth)
•Harmony Type, Volume, Part setting
•DSP on/off, type, return level and FAST/SLOW
• Set the value with the data dial, the [+/YES] button, the [-/NO] button or the
number buttons [1]-[0].
The range is from 0 to 127. The greater the value, the more sensitive the keyboard is to
your playing strength, and the more dynamic range that can be brought out of the
voices.
A setting of “0” results in a fixed touch response, or no level change no matter how
hard or how soft you play the keys. (This setting is good for instrument sounds such as
organ or harpsichord, which normally do not have touch response.) You can also
achieve the same effect by turning touch response off with the [TOUCH] button on the
panel (the indicator turns off).
• Turn Voice Set On or Off by using the data dial, the [+/YES] button or the
[-/NO] button.
Other Functions (Utility)
Voice Set =On
Touch Sense =127
DSP(FAST)
SUSTAIN HARMONY
TOUCH
Split Point
The point on the keyboard that separates the auto accompaniment section and the right-
hand section of the keyboard is called the “split point.”
• When the auto accompaniment is on, keys played to the left of the split point are
used for controlling the auto accompaniment (page 33).
• When the auto accompaniment is off, keys played to the left of the split point are
used for playing voice L (page 28).
• Set the value with the data dial, the [+/YES] button or the [-/NO] button.
•The default setting (factory
setting) is “F
#
2.”
Split Point =C3
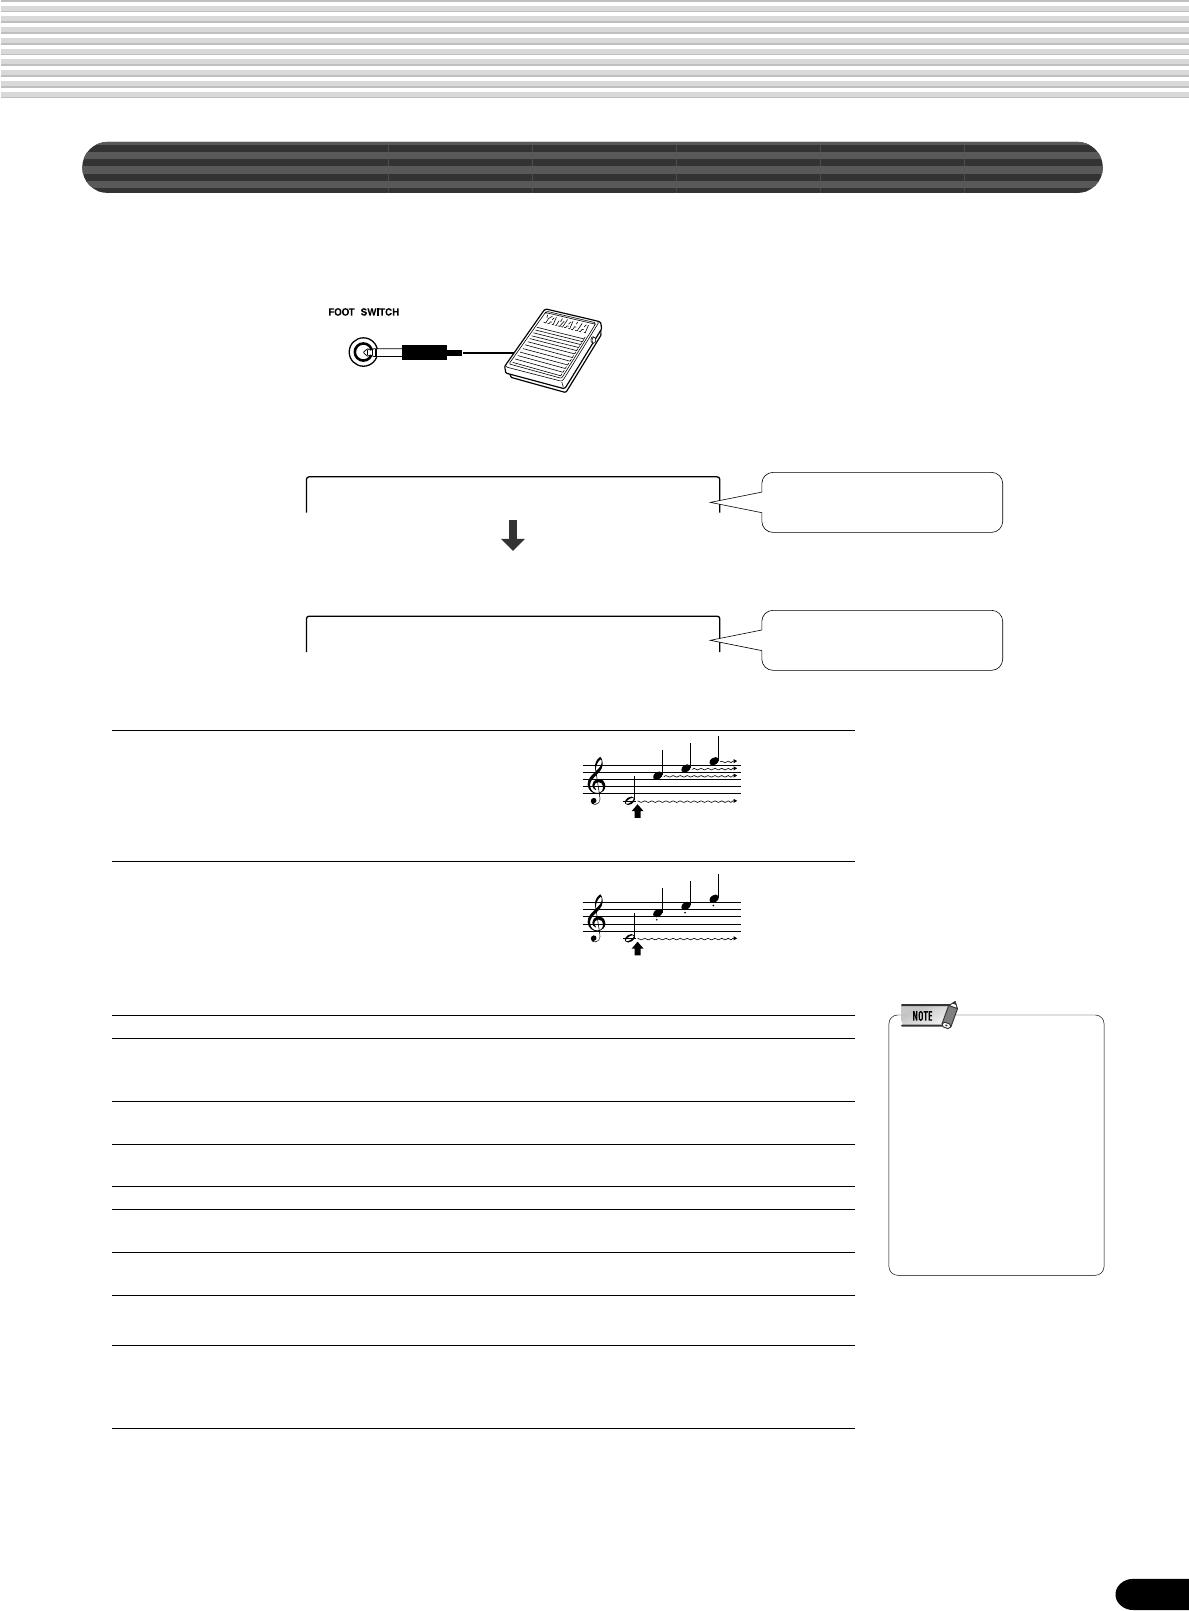
121
119
Footswitch
Various functions can be assigned to the footswitch connected to the FOOTSWITCH
jack. The polarity of the footswitch can also be changed.
• Select the Functions to be controlled by the footswitch.
• Set the polarity of the footswitch NORMAL or REVERSE.
● Functions controlled by the footswitch
Sustain When you press the footswitch,
sustain is applied to the keyboard
notes.
Sostenuto When you press the footswitch,
the sostenuto effect is applied to
the keyboard notes.
Soft When you press the footswitch, the soft effect is applied to the keyboard notes.
Regist + Pressing the footswitch advances through the Registration Memory numbers. For
example, if you step on the footswitch with bank 1-3 recalled, 1-4 will be recalled,
then next 2-1 will be recalled.
Start/Stop Pressing the footswitch has the same effect as pressing the START/STOP button
on the panel.
Synchro Stop Pressing the footswitch has the same effect as pressing the SYNC STOP button
on the panel.
Bass Hold The bass root note will be held as long as you press the footswitch.
Break When you press the footswitch, accompaniment will stop. Releasing the switch
with the foot will cause it to play again from the next measure.
Tap Tempo Pressing the footswitch has the same effect as pressing the TAP TEMPO button
on the panel.
● Polarity
This parameter lets you configure the footswitch response of the PSR-550 to
match that of the particular footswitch you are using. If the footswitch works in
the opposite way (i.e., pressing the footswitch has no effect, but releasing it
does), try changing this setting. The default setting is “Norm.”
Other Functions (Utility)
For “Sostenuto,” if you press and hold the footswitch here,
only the first note will be sustained (the note that you
played and held when pressing the footswitch).
For “Sustain,” if you press and hold the footswitch here, all
the notes shown will be sustained.
Pedl=Sustain
Use the data dial, the [+/YES]
button or the [-/NO] button.
Polarity =Norm
Use the data dial, the [+/YES]
button or the [-/NO] button.
Press the [NEXT] button.
•When the footswitch
changes the Registration
Memory number (Regist +),
the footswitch function set in
the selected Registration
Memory is overridden or
ignored. For example, even
if footswitch is set to control
Sustain in the selected
Registration Memory, if set to
“Regist +” here, the
footswitch will NOT control
Sustain.
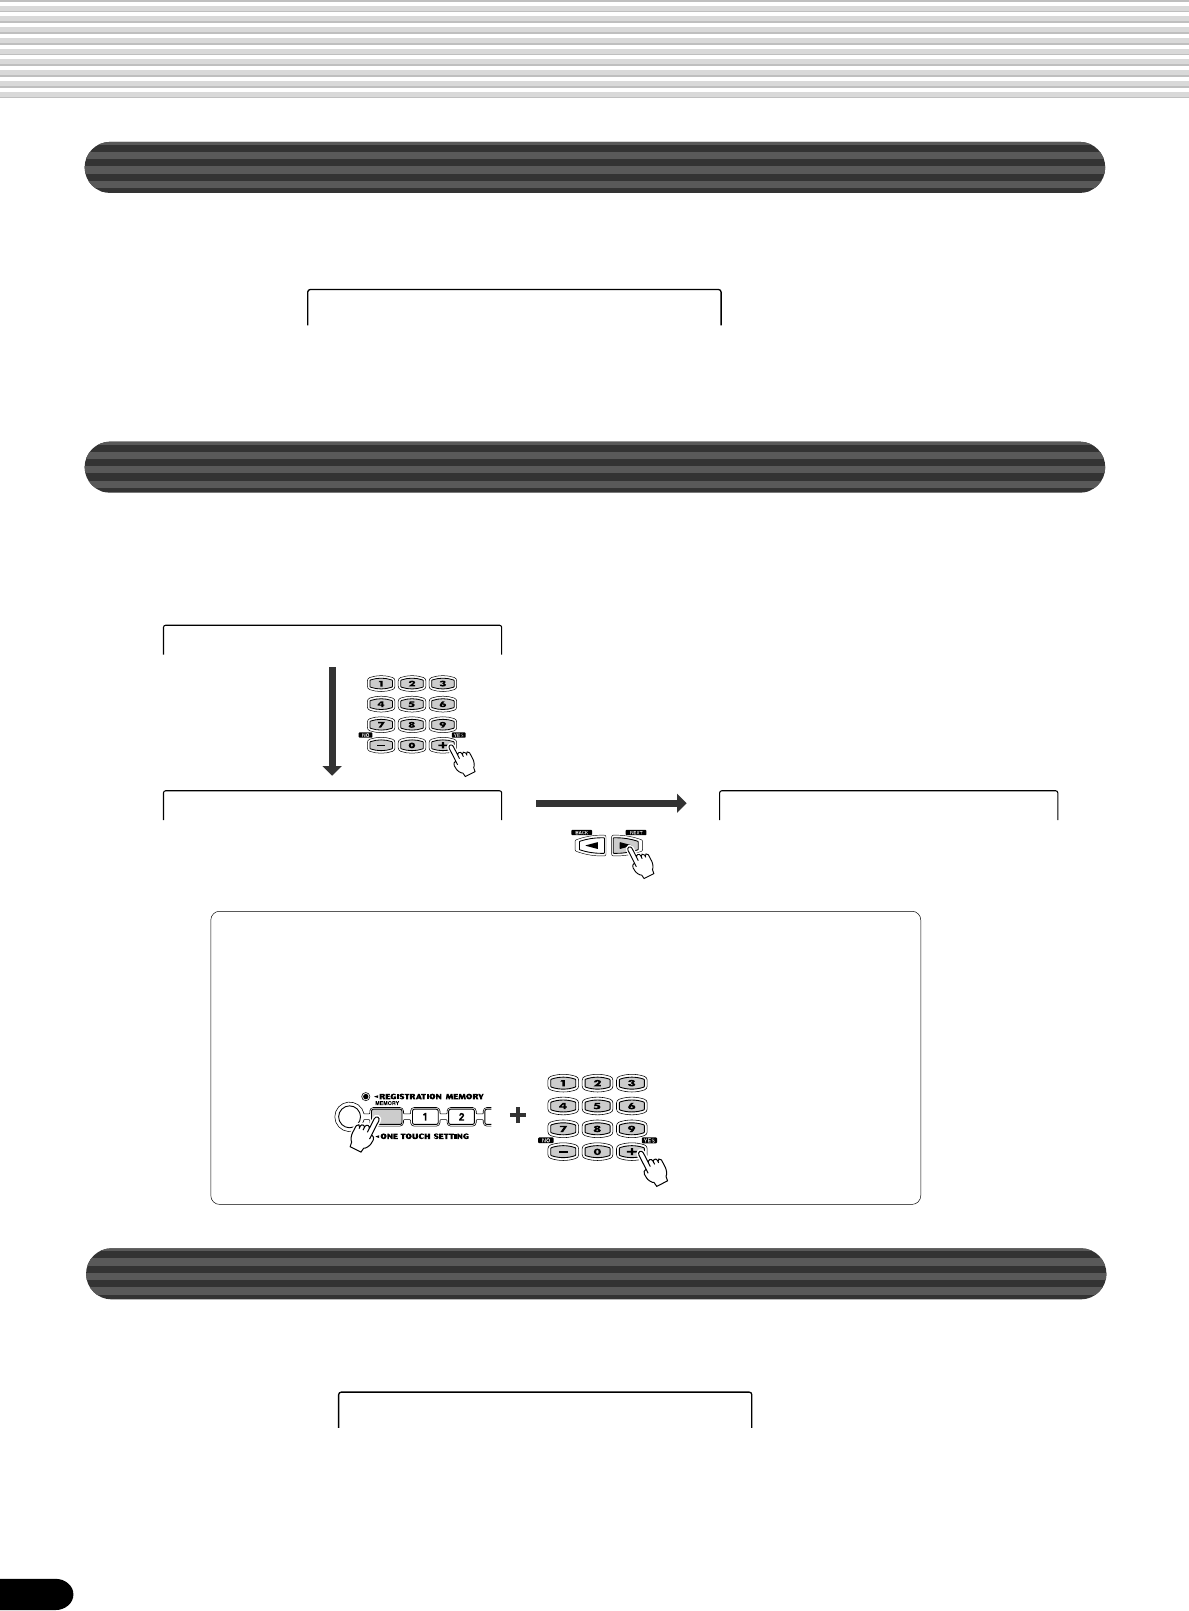
122
120
Pitch Bend Range
This determines the maximum pitch bend range for the PITCH BEND wheel.
The range is from “0” to “12”. Each increment corresponds to one semitone.
• Set the Pitch Bend Range with the data dial, the [+/YES] button, the [-/NO]
button or the number buttons [1]-[0].
Other Functions (Utility)
PitchBndRange= 4
Assignable
Functions to be called up via the Direct Access can be assigned to the [+/YES] button,
[-/NO] button and the number buttons [1]-[0]. See the function tree chart for details
(page 22-23).
● Another way to set the Direct Access:
1
Select the function or parameter you wish to assign.
See the function tree chart for details (page 22-23).
In this example,
‘‘Clock = Int’’ is
assigned to the [+]
button.
Backlight
You can set the Backlight color of the display.
Use the data dial, the [+/YES] button or the [-/NO] button to set the Backlight color.
• Auto ...................................... The color changes according to the mode of the PSR-550. In the Style mode, the
backlight color is set to blue. In the Song mode, the backlight color is set to purple. In
the Record mode, the backlight color is set to red.
• Blue, Red, Purple ................. The backlight color is not changed regardless of the mode.
• Off ......................................... The backlight color is turned off.
BackLight=Auto
Press one of the
number buttons to
be assigned.
Select the function/parameter you wish to
assign by using the data dial, the [+/YES]
button, or the [-/NO] button.
AssignButton =1
AssignButton =+ Ass=HarmPart
2
While holding the [MEMORY] button, press one of the number buttons.
123
131
PSR-550 Voices
The PSR-550 actually includes two voice sets: the “panel” voices and percussion kits, and the XG voices. The panel
voices include 219 “pitched” voices and 14 drum kits, while the XG voice set includes 480 voices.
The panel voices are specially recorded and programmed voices exclusive to the PSR-550 and other PortaTone
instruments. The XG voices conform to Yamaha’s XG format; they also conform to the GM (General MIDI) standard. This
allows you to accurately play back any GM- or XG-compatible song data directly on the PSR-550 itself, without having to
change voices or make special settings. It also allows you to record songs for other GM- or XG-compatible instruments,
and have them play back on those instruments as intended.
Appendix Voice List
•The Voice List includes
MIDI program change
numbers for each voice.
Use these program change
numbers when playing the
PSR-550 via MIDI from an
external device.
•When the sustain or
sostenuto pedal functions
are being used (page 121),
some voices may sound
continuously or have a long
decay after the notes have
been released while the
pedal is held.
● Maximum Polyphony
The PSR-550 has 32-note maximum polyphony. Auto Accompaniment uses a number of the available notes, so when
Auto Accompaniment is used the total number of notes that can be played on the keyboard is correspondingly reduced.
The same applies to the Voice R2, Voice L, Multi Pad, and Song functions. When the maximum polyphony is exceeded,
notes are played using last-note priority.
● Voices Panel Voices Drum Kits XG Voices
(Panel Voices)
PSR-550 001-219 220-233 234-713
Bank Select MIDI
Number
Voice Program Voice Name
of Notes
Number MSB LSB Change
Used
Number
Panel Voice List
Bank Select MIDI
Number
Voice Program Voice Name
of Notes
Number MSB LSB Change
Used
Number
Piano
1 0 112 1 Grand Piano 2
2 0 112 2 Bright Piano 2
3 0 112 4 Honky Tonk 2
4 0 114 3 Rock Piano 2
5 0 112 3 Midi Grand 2
6 0 113 3 CP 80 2
7 0 112 7 Harpsichord 1
8 0 113 7 Grand Harpsi 2
E.Piano
9 0 114 5 Galaxy EP 2
10 0 115 5 Polaris EP 2
11 0 118 5 Suitcase EP 2
12 0 117 6 Super DX EP 2
13 0 112 6 DX Modern EP 2
14 0 112 5 Funk EP 1
15 0 115 6 Modern EP 2
16 0 113 6 Hyper Tines 2
17 0 116 6 New Tines 2
18 0 114 6 Venus EP 2
19 0 113 5 Tremolo EP 2
20 0 112 8 Clavi 1
21 0 113 8 Wah Clavi 1
Organ
22 0 112 17 Jazz Organ1 2
23 0 113 17 Jazz Organ2 2
24 0 120 17 GlassJazzOrg 2
25 0 112 18 Click Organ 2
26 0 113 18 Dance Organ 2
27 0 115 17 DrawbarOrgan 2
28 0 115 18 Mellow Draw 2
29 0 116 17 Bright Draw 2
30 0 112 19 Rock Organ 1 2
31 0 113 19 Rock Organ 2 2
32 0 114 19 Purple Organ 2
33 0 116 18 60’s Organ 2
34 0 117 18 Blues Organ 2
35 0 117 17 16+1 Organ 2
36 0 118 17 16+2 Organ 2
37 0 119 17 16+4 Organ 2
38 0 118 18 Elec.Organ 2
39 0 114 17 TheaterOrg1 2
40 0 114 18 TheaterOrg2 2
41 0 112 20 Pipe Organ 2
42 0 113 20 ChapelOrgan1 2
43 0 114 20 ChapelOrgan2 2
44 0 115 20 ChapelOrgan3 2
45 0 112 21 Reed Organ 1
Accordion
46 0 113 22 Trad.Accrd 2
47 0 112 22 MusetteAccrd 2
48 0 112 24 Tango Accrd 1
49 0 113 24 Bandoneon 2
50 0 114 22 Soft Accrd 2
51 0 115 22 Accordion 1
52 0 112 23 Harmonica 1
Guitar
53 0 113 25 Spanish Gtr 1
54 0 112 25 Classic Gtr 2
55 0 112 26 Folk Guitar 1
56 0 116 26 FolkGw/pick1 2
57 0 117 26 FolkGw/pick2 2
58 0 118 26 FolkGw/pick3 2
59 0 113 26 12Str Guitar 2
60 0 114 25 Smooth Nylon 2
61 0 115 26 Campfire 2
62 0 112 27 Jazz Guitar 2
63 0 113 27 Octave Gtr 2
64 0 114 27 Hawaiian Gtr 2
65 0 123 28 VintageOpen 1
66 0 124 28 VintageChors 2
67 0 118 28 Solid Guitar 2
68 0 116 28 Bright Clean 1
69 0 112 28 Clean Guitar 2
70 0 119 28 Elec12StrGtr 2
71 0 113 28 Tremolo Gtr 2
72 0 114 29 Cool! E.Gtr 1
73 0 115 29 VintageMute 1
74 0 113 29 Funk Guitar 1
75 0 112 29 Muted Guitar 1
76 0 113 30 Feedback Gtr 2
77 0 112 30 Overdriven 2
78 0 112 31 Distortion 2
79 0 115 28 Pedal Steel 2
80 0 114 26 Mandolin 2
Bass
81 0 112 34 Finger Bass 1
82 0 112 33 AcousticBass 2
124
132
Voice List
Bank Select MIDI
Number
Voice Program Voice Name
of Notes
Number MSB LSB Change
Used
Number
Bank Select MIDI
Number
Voice Program Voice Name
of Notes
Number MSB LSB Change
Used
Number
83 0 114 33 Bass&Cymbal 2
84 0 112 35 Pick Bass 1
85 0 112 36 FretlessBass 2
86 0 113 36 Jaco Bass 2
87 0 112 37 Slap Bass 1
88 0 112 38 Funk Bass 1
89 0 113 37 Fusion Bass 1
90 0 112 39 Synth Bass 1
91 0 112 40 Analog Bass 2
92 0 113 40 Dance Bass 2
93 0 113 39 Hi-Q Bass 2
94 0 114 39 Rave Bass 2
Strings
95 0 112 49 String Ensbl 2
96 0 113 49 Orch.Strings 2
97 0 114 49 SymphonicStr 2
98 0 113 50 Slow Strings 2
99 0 114 50 Str.Quartet 2
100 0 115 49 Concerto Str 2
101 0 115 50 Marcato Strs 2
102 0 112 50 Chamber Strs 2
103 0 112 45 Tremolo Strs 2
104 0 112 46 Pizz.Strings 2
105 0 112 51 Syn Strings 2
106 0 112 52 Analog Strs 2
107 0 113 51 Tech Strings 2
108 0 112 56 OrchestraHit 2
109 0 112 41 Solo Violin 2
110 0 113 41 Soft Violin 1
111 0 112 111 Fiddle 1
112 0 112 42 Viola 2
113 0 112 43 Cello 1
114 0 112 44 Contrabass 1
115 0 112 47 Harp 2
116 0 113 47 Hackbrett 2
117 0 112 107 Shamisen 1
118 0 112 108 Koto 1
119 0 112 105 Sitar 2
120 0 112 106 Banjo 1
Choir
121 0 112 53 Choir 2
122 0 112 55 Air Choir 2
123 0 113 54 Gothic Vox 2
124 0 113 53 Vocal Ensbl 2
125 0 112 54 Vox Humana 2
Trumpet
126 0 115 57 SweetTrumpet 1
127 0 112 57 Solo Trumpet 1
128 0 114 57 Soft Trumpet 1
129 0 113 57 Flugel Horn 1
130 0 112 60 MutedTrumpet 1
131 0 112 58 Trombone 1
132 0 114 58 Mel.Trombone 2
133 0 112 61 French Horn 1
134 0 112 59 Tuba 2
Brass
135 0 113 62 BigBandBrass 2
136 0 112 62 BrassSection 2
137 0 116 62 Mellow Brass 2
138 0 117 62 Small Brass 2
139 0 118 62 Pop Brass 2
140 0 119 62 Mellow Horns 2
141 0 113 60 Ballroom Brs 2
142 0 114 62 Full Horns 2
143 0 115 62 High Brass 2
144 0 120 62 Bright Brass 2
145 0 113 58 Trb.Section 2
146 0 112 63 Synth Brass 2
147 0 112 64 Analog Brass 2
148 0 113 63 Jump Brass 2
149 0 114 63 Techno Brass 2
Saxophone
150 0 117 67 Sweet Tenor 2
151 0 114 67 BreathyTenor 2
152 0 113 66 Breathy Alto 2
153 0 112 65 Soprano Sax 2
154 0 112 66 Alto Sax 1
155 0 112 67 Tenor Sax 1
156 0 112 68 Baritone Sax 1
157 0 116 67 Sax Section 2
158 0 115 67 Sax Combo 2
159 0 112 72 Clarinet 2
160 0 113 72 Mel.Clarinet 2
161 0 113 67 Woodwind Ens 2
162 0 112 69 Oboe 1
163 0 112 70 English Horn 1
164 0 112 71 Bassoon 1
Flute
165 0 114 74 Sweet Flute 1
166 0 112 74 Flute 2
167 0 113 74 Pan Flute 2
168 0 112 73 Piccolo 1
169 0 112 76 Ethnic Flute 2
170 0 112 78 Shakuhachi 1
171 0 112 79 Whistle 1
172 0 112 75 Recorder 1
173 0 112 80 Ocarina 1
174 0 112 110 Bagpipe 2
Synth Lead
175 0 116 82 Fire Wire 2
176 0 112 81 Square Lead 2
177 0 112 82 SawtoothLead 2
178 0 113 82 Big Lead 2
179 0 112 99 Stardust 2
180 0 114 82 Blaster 2
181 0 115 82 Analogon 2
182 0 113 99 Sun Bell 2
183 0 112 84 Aero Lead 2
184 0 114 81 Mini Lead 2
185 0 115 81 Vinylead 1
186 0 117 82 Warp 2
187 0 116 81 Hi Bias 2
188 0 118 81 Tiny Lead 2
189 0 118 82 Sub Aqua 2
190 0 119 82 Fargo 2
Synth Pad
191 0 113 95 Insomnia 2
192 0 115 89 Golden Age 2
193 0 113 100 Cyber Pad 2
194 0 112 96 Wave 2001 2
195 0 112 95 Equinox 2
196 0 114 89 Stargate 2
197 0 112 93 DX Pad 2
198 0 112 89 Fantasia 2
199 0 112 92 Xenon Pad 2
200 0 112 90 Area 51 2
201 0 112 100 AtmospherPad 2
202 0 113 90 Dark Moon 2
125
133
Bank Select MIDI
Number
Voice Program Voice Name
of Notes
Number MSB LSB Change
Used
Number
Bank Select MIDI
Number
Voice Program Voice Name
of Notes
Number MSB LSB Change
Used
Number
203 0 115 95 Ionosphere 2
204 0 113 89 Symbiont 2
205 0 114 95 Solaris 2
206 0 117 89 Millenium 2
207 0 113 96 Transform 2
Percussion
208 0 113 12 Jazz Vibes 2
209 0 112 12 Vibraphone 2
210 0 112 13 Marimba 2
211 0 112 14 Xylophone 1
212 0 112 115 Steel Drums 1
213 0 112 9 Celesta 2
214 0 112 10 Glockenspiel 1
215 0 112 11 Music Box 2
216 0 112 15 Tubular Bell 2
217 0 112 109 Kalimba 1
218 0 112 48 Timpani 1
219 0 112 16 Dulcimer 2
Drum Kits
220 127 0 1 StandardKit1 -
221 127 0 2 StandardKit2 -
222 127 0 9 Room Kit -
223 127 0 17 Rock Kit -
224 127 0 25 Electro Kit -
225 127 0 26 Analog Kit -
226 127 0 28 Dance Kit -
227 127 0 33 Jazz Kit -
228 127 0 41 Brush Kit -
229 127 0 49 Symphony Kit -
230 127 0 81 Style Kit -
231 126 0 36 ArabicKit -
232 126 0 1 SFX Kit 1 -
233 126 0 2 SFX Kit 2 -
Voice List
XG Voice List
Bank Select
MIDI
Number
Voice Program
Voice Name
of Notes
Number
MSB LSB Change
Used
Number
234 0 0 1 Grand Piano 1
235 0 1 1 GrndPianoKSP 1
236 0 18 1 MellowGrPno 1
237 0 40 1 PianoStrings 2
238 0 41 1 Dream 2
239 0 0 2 Bright Piano 1
240 0 1 2 BritePnoKSP 1
241 0 0 3 ElecGrandPno 2
242 0 1 3 ElecGrPnoKSP 2
243 0 32 3 Detuned CP80 2
244 0 40 3 Layered CP 1 2
245 0 41 3 Layered CP 2 2
246 0 0 4 Honkytonk 2
247 0 1 4 HonkytonkKSP 2
248 0 0 5 El.Piano 1 2
249 0 1 5 El.Piano1KSP 1
250 0 18 5 Mellow EP 1 2
251 0 32 5 Chorus EP 1 2
252 0 40 5 HardEl.Piano 2
253 0 45 5 VXfade El.P1 2
254 0 64 5 60sEl.Piano1 1
255 0 0 6 El.Piano 2 2
256 0 1 6 El.Piano2KSP 1
257 0 32 6 Chorus EP 2 2
258 0 33 6 DX EP Hard 2
259 0 34 6 DX Legend 2
260 0 40 6 DX Phase EP 2
261 0 41 6 DX+AnalogEP 2
262 0 42 6 DX Koto EP 2
263 0 45 6 VXfade El.P1 2
264 0 0 7 Harpsichord 1
265 0 1 7 Harpsi.KSP 1
266 0 25 7 Harpsichord2 2
267 0 35 7 Harpsichord3 2
268 0 0 8 Clavi. 1
269 0 1 8 Clavi.KSP 1
270 0 27 8 Clavi.Wah 2
271 0 64 8 Pulse Clavi. 1
272 0 65 8 PierceClavi. 2
273 0 0 9 Celesta 1
274 0 0 10 Glockenspiel 1
275 0 0 11 Music Box 2
276 0 64 11 Orgel 2
277 0 0 12 Vibraphone 1
278 0 1 12 Vibes KSP 1
279 0 45 12 Hard Vibes 2
280 0 0 13 Marimba 1
281 0 1 13 Marimba KSP 1
282 0 64 13 Sine Marimba 2
283 0 97 13 Balimba 2
284 0 98 13 Log Drums 2
285 0 0 14 Xylophone 1
286 0 0 15 TubularBells 1
287 0 96 15 Church Bells 2
288 0 97 15 Carillon 2
289 0 0 16 Dulcimer 1
290 0 35 16 Dulcimer 2 2
291 0 96 16 Cimbalom 2
292 0 97 16 Santur 2
293 0 0 17 DrawbarOrgan 1
294 0 32 17 DetDrawOrgan 2
295 0 33 17 60sDrawOrg1 2
296 0 34 17 60sDrawOrg2 2
297 0 35 17 70sDrawOrg1 2
298 0 36 17 DrawbarOrg2 2
299 0 37 17 60sDrawOrg3 2
300 0 38 17 Even Bar Org 2
301 0 40 17 16+2’2/3 Org 2
302 0 64 17 Organ Bass 1
303 0 65 17 70sDrawOrg2 2
304 0 66 17 Cheezy Organ 2
305 0 67 17 DrawbarOrg3 2
306 0 0 18 Perc.Organ 1
307 0 24 18 70sPercOrg1 2
308 0 32 18 DetPercOrgan 2
309 0 33 18 Light Organ 2
310 0 37 18 Perc.Organ2 2
311 0 0 19 Rock Organ 1
312 0 64 19 Rotary Organ 2
313 0 65 19 Slow Rotary 2
314 0 66 19 Fast Rotary 2
315 0 0 20 Church Organ 2
316 0 32 20 ChurchOrgan3 2
317 0 35 20 ChurchOrgan2 2
318 0 40 20 Notre Dame 2
319 0 64 20 Organ Flute 2
320 0 65 20 Trem.OrganFl 2
321 0 0 21 Reed Organ 1
322 0 40 21 Puff Organ 2
323 0 0 22 Accordion 1
324 0 32 22 Accord It 2
325 0 0 23 Harmonica 1
326 0 32 23 Harmonica 2 2
327 0 0 24 Tango Accord 1
328 0 64 24 TangoAccord2 2
329 0 0 25 Nylon Guitar 1
330 0 16 25 NylonGuitar2 1
331 0 25 25 NylonGuitar3 2
332 0 43 25 VelGtrHarmo 1
333 0 96 25 Ukulele 1
334 0 0 26 Steel Guitar 1
335 0 16 26 SteelGuitar2 1
336 0 35 26 12Str Guitar 2
337 0 40 26 Nylon&Steel 2
338 0 41 26 Steel&Body 2
339 0 96 26 Mandolin 2
340 0 0 27 Jazz Guitar 1
341 0 18 27 MellowGuitar 1
342 0 32 27 Jazz Amp 2
343 0 0 28 Clean Guitar 1
344 0 32 28 ChorusGuitar 2
345 0 0 29 Muted Guitar 1
346 0 40 29 FunkGuitar1 2
347 0 41 29 MuteSteelGtr 2
Bank Select
MIDI
Number
Voice Program
Voice Name
of Notes
Number
MSB LSB Change
Used
Number
Bank Select
MIDI
Number
Voice Program
Voice Name
of Notes
Number
MSB LSB Change
Used
Number
126
134
Voice List
Bank Select
MIDI
Number
Voice Program
Voice Name
of Notes
Number
MSB LSB Change
Used
Number
Bank Select
MIDI
Number
Voice Program
Voice Name
of Notes
Number
MSB LSB Change
Used
Number
Bank Select
MIDI
Number
Voice Program
Voice Name
of Notes
Number
MSB LSB Change
Used
Number
348 0 43 29 FunkGuitar2 1
349 0 45 29 Jazz Man 2
350 0 0 30 Overdriven 1
351 0 43 30 Guitar Pinch 1
352 0 0 31 Distortion 1
353 0 40 31 FeedbackGtr 2
354 0 41 31 FeedbackGtr2 2
355 0 0 32 GtrHarmonics 1
356 0 65 32 GtrFeedback 1
357 0 66 32 GtrHarmonic2 1
358 0 0 33 AcousticBass 1
359 0 40 33 Jazz Rhythm 2
360 0 45 33 VXUprghtBass 2
361 0 0 34 Finger Bass 1
362 0 18 34 Finger Dark 2
363 0 27 34 Flange Bass 2
364 0 40 34 Bass&DistEG 2
365 0 43 34 Finger Slap 1
366 0 45 34 FingerBass2 2
367 0 65 34 Mod.Bass 2
368 0 0 35 Pick Bass 1
369 0 28 35 MutePickBass 1
370 0 0 36 FretlessBass 1
371 0 32 36 Fretless 2 2
372 0 33 36 Fretless 3 2
373 0 34 36 Fretless 4 2
374 0 96 36 Syn.Fretless 2
375 0 97 36 SmthFretless 2
376 0 0 37 Slap Bass 1 1
377 0 27 37 ResonantSlap 1
378 0 32 37 Punch Thumb 2
379 0 0 38 Slap Bass 2 1
380 0 43 38 Velo.Sw.Slap 1
381 0 0 39 Synth Bass 1 1
382 0 18 39 SynBass1Dark 1
383 0 20 39 FastResoBass 1
384 0 24 39 Acid Bass 1
385 0 35 39 Clavi Bass 2
386 0 40 39 Techno Bass 2
387 0 64 39 Orbiter 2
388 0 65 39 Square Bass 1
389 0 66 39 Rubber Bass 2
390 0 96 39 Hammer 2
391 0 0 40 Synth Bass 2 2
392 0 6 40 MellowSyBass 1
393 0 12 40 SequenceBass 2
394 0 18 40 ClickSynBass 2
395 0 19 40 SynBass2Dark 1
396 0 32 40 SmoothSyBass 2
397 0 40 40 ModulrSyBass 2
398 0 41 40 DX Bass 2
399 0 64 40 X Wire Bass 2
400 0 0 41 Violin 1
401 0 8 41 SlwAtkViolin 1
402 0 0 42 Viola 1
403 0 0 43 Cello 1
404 0 0 44 Contrabass 1
405 0 0 45 Trem.Strings 1
406 0 8 45 SlwAtTremStr 1
407 0 40 45 SuspenseStr 2
408 0 0 46 PizzicatoStr 1
409 0 0 47 Orch.Harp 1
410 0 40 47 Yang Chin 2
411 0 0 48 Timpani 1
412 0 0 49 Strings 1 1
413 0 3 49 StereoStrngs 2
414 0 8 49 SlwAtkStrngs 1
415 0 24 49 Arco Strings 2
416 0 35 49 60’s Strings 2
417 0 40 49 Orchestra 2
418 0 41 49 Orchestra 2 2
419 0 42 49 TremOrchstra 2
420 0 45 49 Velo.Strings 2
421 0 0 50 Strings 2 1
422 0 3 50 S.SlowStrngs 2
423 0 8 50 LegatoStrngs 2
424 0 40 50 Warm Strings 2
425 0 41 50 Kingdom 2
426 0 64 50 70’s Strings 1
427 0 65 50 Strings 3 1
428 0 0 51 SynStrings1 2
429 0 27 51 Reso Strings 2
430 0 64 51 SynStrings4 2
431 0 65 51 SynStrings5 2
432 0 0 52 SynStrings2 2
433 0 0 53 Choir Aahs 1
434 0 3 53 Stereo Choir 2
435 0 16 53 Choir Aahs 2 2
436 0 32 53 Mellow Choir 2
437 0 40 53 ChoirStrings 2
438 0 0 54 Voice Oohs 1
439 0 0 55 Synth Voice 1
440 0 40 55 SynthVoice2 2
441 0 41 55 Choral 2
442 0 64 55 Analog Voice 1
443 0 0 56 OrchestraHit 2
444 0 35 56 OrchestrHit2 2
445 0 64 56 Impact 2
446 0 0 57 Trumpet 1
447 0 16 57 Trumpet 2 1
448 0 17 57 BriteTrumpet 2
449 0 32 57 Warm Trumpet 2
450 0 0 58 Trombone 1
451 0 18 58 Trombone 2 2
452 0 0 59 Tuba 1
453 0 16 59 Tuba 2 1
454 0 0 60 MutedTrumpet 1
455 0 0 61 French Horn 1
456 0 6 61 Fr.Horn Solo 1
457 0 32 61 FrenchHorn2 2
458 0 37 61 HornOrchestr 2
459 0 0 62 BrassSection 1
460 0 35 62 Tp&TbSection 2
461 0 40 62 BrassSect2 2
462 0 41 62 High Brass 2
463 0 42 62 Mellow Brass 2
464 0 0 63 SynthBrass1 2
465 0 12 63 Quack Brass 2
466 0 20 63 ResoSynBrass 2
467 0 24 63 Poly Brass 2
468 0 27 63 SynthBrass3 2
469 0 32 63 Jump Brass 2
470 0 45 63 AnaVelBrass1 2
471 0 64 63 AnalogBrass1 2
472 0 0 64 SynthBrass2 1
473 0 18 64 Soft Brass 2
474 0 40 64 SynthBrass4 2
475 0 41 64 Choir Brass 2
476 0 45 64 AnaVelBrass2 2
477 0 64 64 AnalogBrass2 2
478 0 0 65 Soprano Sax 1
479 0 0 66 Alto Sax 1
480 0 40 66 Sax Section 2
481 0 43 66 HyperAltoSax 1
482 0 0 67 Tenor Sax 1
483 0 40 67 BreathyTenor 2
484 0 41 67 SoftTenorSax 2
485 0 64 67 Tenor Sax2 1
486 0 0 68 Baritone Sax 1
487 0 0 69 Oboe 1
488 0 0 70 English Horn 1
489 0 0 71 Bassoon 1
490 0 0 72 Clarinet 1
491 0 0 73 Piccolo 1
492 0 0 74 Flute 1
493 0 0 75 Recorder 1
494 0 0 76 Pan Flute 1
495 0 0 77 Blown Bottle 2
496 0 0 78 Shakuhachi 1
497 0 0 79 Whistle 1
498 0 0 80 Ocarina 1
499 0 0 81 Square Lead 2
500 0 6 81 SquareLead2 1
501 0 8 81 LM Square 2
502 0 18 81 Hollow 1
503 0 19 81 Shroud 2
504 0 64 81 Mellow 2
505 0 65 81 Solo Sine 2
506 0 66 81 Sine Lead 1
507 0 0 82 SawtoothLead 2
508 0 6 82 SawtoothLd2 1
509 0 8 82 Thick Saw 2
510 0 18 82 Dynamic Saw 1
511 0 19 82 Digital Saw 2
512 0 20 82 Big Lead 2
513 0 24 82 Heavy Synth 2
514 0 25 82 Waspy Synth 2
515 0 40 82 Pulse Saw 2
516 0 41 82 Dr. Lead 2
517 0 45 82 VelocityLead 2
518 0 96 82 Seq.Analog 2
519 0 0 83 CalliopeLead 2
520 0 65 83 Pure Pad 2
521 0 0 84 Chiff Lead 2
522 0 64 84 Rubby 2
523 0 0 85 Charang Lead 2
524 0 64 85 DistortedLd 2
525 0 65 85 Wire Lead 2
526 0 0 86 Voice Lead 2
527 0 24 86 Synth Aahs 2
528 0 64 86 Vox Lead 2
529 0 0 87 Fifths Lead 2
530 0 35 87 Big Five 2
531 0 0 88 Bass & Lead 2
532 0 16 88 Big & Low 2
533 0 64 88 Fat & Perky 2
534 0 65 88 Soft Whirl 2
535 0 0 89 New Age Pad 2
536 0 64 89 Fantasy 2
537 0 0 90 Warm Pad 2
538 0 16 90 Thick Pad 2
539 0 17 90 Soft Pad 2

127
135
Bank Select
MIDI
Number
Voice Program
Voice Name
of Notes
Number
MSB LSB Change
Used
Number
Bank Select
MIDI
Number
Voice Program
Voice Name
of Notes
Number
MSB LSB Change
Used
Number
Bank Select
MIDI
Number
Voice Program
Voice Name
of Notes
Number
MSB LSB Change
Used
Number
540 0 18 90 Sine Pad 2
541 0 64 90 Horn Pad 2
542 0 65 90 RotaryStrngs 2
543 0 0 91 PolySynthPad 2
544 0 64 91 Poly Pad 80 2
545 0 65 91 Click Pad 2
546 0 66 91 Analog Pad 2
547 0 67 91 Square Pad 2
548 0 0 92 Choir Pad 2
549 0 64 92 Heaven 2
550 0 66 92 Itopia 2
551 0 67 92 CC Pad 2
552 0 0 93 Bowed Pad 2
553 0 64 93 Glacier 2
554 0 65 93 Glass Pad 2
555 0 0 94 Metallic Pad 2
556 0 64 94 Tine Pad 2
557 0 65 94 Pan Pad 2
558 0 0 95 Halo Pad 2
559 0 0 96 Sweep Pad 2
560 0 20 96 Shwimmer 2
561 0 27 96 Converge 2
562 0 64 96 Polar Pad 2
563 0 66 96 Celestial 2
564 0 0 97 Rain 2
565 0 45 97 Clavi Pad 2
566 0 64 97 Harmo Rain 2
567 0 65 97 African Wind 2
568 0 66 97 Carib 2
569 0 0 98 Sound Track 2
570 0 27 98 Prologue 2
571 0 64 98 Ancestral 2
572 0 0 99 Crystal 2
573 0 12 99 SynthDr.Comp 2
574 0 14 99 Popcorn 2
575 0 18 99 Tiny Bells 2
576 0 35 99 RoundGlocken 2
577 0 40 99 GlockenChime 2
578 0 41 99 Clear Bells 2
579 0 42 99 Chorus Bells 2
580 0 64 99 Synth Mallet 1
581 0 65 99 Soft Crystal 2
582 0 66 99 Loud Glocken 2
583 0 67 99 ChristmasBel 2
584 0 68 99 Vibe Bells 2
585 0 69 99 DigitalBells 2
586 0 70 99 Air Bells 2
587 0 71 99 Bell Harp 2
588 0 72 99 Gamelimba 2
589 0 0 100 Atmosphere 2
590 0 18 100 Warm Atmos. 2
591 0 19 100 HollwRelease 2
592 0 40 100 NylonElPiano 2
593 0 64 100 Nylon Harp 2
594 0 65 100 Harp Vox 2
595 0 66 100 Atmos.Pad 2
596 0 67 100 Planet 2
597 0 0 101 Brightness 2
598 0 64 101 FantasyBells 2
599 0 96 101 Smokey 2
600 0 0 102 Goblins 2
601 0 64 102 GoblinsSynth 2
602 0 65 102 Creeper 2
603 0 66 102 Ring Pad 2
604 0 67 102 Ritual 2
605 0 68 102 To Heaven 2
606 0 70 102 Night 2
607 0 71 102 Glisten 2
608 0 96 102 Bell Choir 2
609 0 0 103 Echoes 2
610 0 8 103 Echoes2 2
611 0 14 103 Echo Pan 2
612 0 64 103 Echo Bells 2
613 0 65 103 Big Pan 2
614 0 66 103 Synth Piano 2
615 0 67 103 Creation 2
616 0 68 103 Star Dust 2
617 0 69 103 Reso&Panning 2
618 0 0 104 Sci-Fi 2
619 0 64 104 Starz 2
620 0 0 105 Sitar 1
621 0 32 105 DetunedSitar 2
622 0 35 105 Sitar 2 2
623 0 96 105 Tambra 2
624 0 97 105 Tamboura 2
625 0 0 106 Banjo 1
626 0 28 106 Muted Banjo 1
627 0 96 106 Rabab 2
628 0 97 106 Gopichant 2
629 0 98 106 Oud 2
630 0 0 107 Shamisen 1
631 0 0 108 Koto 1
632 0 96 108 Taisho-kin 2
633 0 97 108 Kanoon 2
634 0 0 109 Kalimba 1
635 0 0 110 Bagpipe 2
636 0 0 111 Fiddle 1
637 0 0 112 Shanai 1
638 0 64 112 Shanai2 1
639 0 96 112 Pungi 1
640 0 97 112 Hichiriki 2
641 0 0 113 Tinkle Bell 2
642 0 96 113 Bonang 2
643 0 97 113 Altair 2
644 0 98 113 GamelanGongs 2
645 0 99 113 StereoGamlan 2
646 0 100 113 Rama Cymbal 2
647 0 101 113 Asian Bells 2
648 0 0 114 Agogo 1
649 0 0 115 Steel Drums 1
650 0 97 115 Glass Perc. 2
651 0 98 115 Thai Bells 2
652 0 0 116 Woodblock 1
653 0 96 116 Castanets 1
654 0 0 117 Taiko Drum 1
655 0 96 117 Gran Cassa 1
656 0 0 118 Melodic Tom 1
657 0 64 118 MelodicTom2 1
658 0 65 118 Real Tom 2
659 0 66 118 Rock Tom 2
660 0 0 119 Synth Drum 1
661 0 64 119 Analog Tom 1
662 0 65 119 ElectroPerc. 2
663 0 0 120 Rev.Cymbal 1
664 0 0 121 GtrFretNoise 1
665 0 0 122 Breath Noise 1
666 0 0 123 Seashore 2
667 0 0 124 Bird Tweet 2
668 0 0 125 TelephonRing 1
669 0 0 126 Helicopter 1
670 0 0 127 Applause 1
671 0 0 128 Gunshot 1
672 64 0 1 CuttingNoise 1
673 64 0 2 CuttingNoiz2 2
674 64 0 4 String Slap 1
675 64 0 17 Fl.Key Click 1
676 64 0 33 Shower 1
677 64 0 34 Thunder 1
678 64 0 35 Wind 1
679 64 0 36 Stream 2
680 64 0 37 Bubble 2
681 64 0 38 Feed 2
682 64 0 49 Dog 1
683 64 0 50 Horse 1
684 64 0 51 Bird Tweet 2 1
685 64 0 55 Ghost 2
686 64 0 56 Maou 2
687 64 0 65 Phone Call 1
688 64 0 66 Door Squeak 1
689 64 0 67 Door Slam 1
690 64 0 68 Scratch Cut 1
691 64 0 69 ScratchSplit 1
692 64 0 70 Wind Chime 1
693 64 0 71 TelphonRing2 1
694 64 0 81 CarEngineIgn 1
695 64 0 82 CarTiresSqel 1
696 64 0 83 Car Passing 1
697 64 0 84 Car Crash 1
698 64 0 85 Siren 2
699 64 0 86 Train 1
700 64 0 87 Jet Plane 2
701 64 0 88 Starship 2
702 64 0 89 Burst 2
703 64 0 90 RollrCoaster 2
704 64 0 91 Submarine 1
705 64 0 97 Laugh 1
706 64 0 98 Scream 1
707 64 0 99 Punch 1
708 64 0 100 Heartbeat 1
709 64 0 101 FootSteps 1
710 64 0 113 Machine Gun 1
711 64 0 114 Laser Gun 2
712 64 0 115 Explosion 2
713 64 0 116 Firework 2
Voice List
128
136
Bank MSB
Bank LSB
Prgram Number
Note # Note
13 C#-1
14 D-1
15 D#-1
16 E-1
17 F-1
18 F#-1
19 G-1
20 G#-1
21 A-1
22 A#-1
23 B-1
24 C0
25 C#0
26 D0
27 D#0
28 E0
29 F0
30 F#0
31 G0
32 G#0
33 A0
34 A#0
35 B0
36 C1
37 C#1
38 D1
39 D#1
40 E1
41 F1
42 F#1
43 G1
44 G#1
45 A1
46 A#1
47 B1
48 C2
49 C#2
50 D2
51 D#2
52 E2
53 F2
54 F#2
55 G2
56 G#2
57 A2
58 A#2
59 B2
60 C3
61 C#3
62 D3
63 D#3
64 E3
65 F3
66 F#3
67 G3
68 G#3
69 A3
70 A#3
71 B3
72 C4
73 C#4
74 D4
75 D#4
76 E4
77 F4
78 F#4
79 G4
80 G#4
81 A4
82 A#4
83 B4
84 C5
85 C#5
86 D5
87 D#5
88 E5
89 F5
90 F#5
91 G5
E1
F1 F#1
G1 G#1
A1 A#1
B1
C1
D#1
D1 C#1
E2
F2 F#2
G2 G#2
A2 A#2
B2
C2
D#2
D2 C#2
E3
F3 F#3
G3 G#3
A3 A#3
B3
C3
D#3
D3 C#3
E4
F4 F#4
G4 G#4
A4 A#4
B4
C4
D#4
D4 C#4
E5
F5 F#5
G5 G#5
A5 A#5
B5
C5
D#5
D5 C#5
C6
•“<——” indicates that the drum kit is the same as “Standard Kit1”.
•Each percussion voice uses one note, whereas one marked ( ) = uses two notes.
•The note numbers and note names printed on the keyboard are one octave higher than the MIDI note numbers and note names shown in the
list. For example, the note number and note name, #36 and C1, on the keyboard correspond to the MIDI note number and note name, #24 and
C0, shown in the list.
Drum Kit List
127 127 127 127 127 127 127
000000 0
129172526 28
Standard Kit 1 Standard Kit 2 Room Kit Rock Kit Electro Kit Analog Kit Dance Kit
Surdo Mute <—— <—— <—— <—— <—— <——
Surdo Open <—— <—— <—— <—— <—— <——
Hi Q <—— <—— <—— <—— <—— <——
Whip Slap <—— <—— <—— <—— <—— <——
Scratch H <—— <—— <—— <—— <—— <——
Scratch L <—— <—— <—— <—— <—— <——
Finger Snap <—— <—— <—— <—— <—— <——
Click Noise <—— <—— <—— <—— <—— <——
Metronome Click <—— <—— <—— <—— <—— <——
Metronome Bell <—— <—— <—— <—— <—— <——
Seq Click L <—— <—— <—— <—— <—— <——
Seq Click H <—— <—— <—— <—— <—— <——
Brush Tap <—— <—— <—— <—— <—— <——
Brush Swirl <—— <—— <—— <—— <—— <——
Brush Slap <—— <—— <—— <—— <—— <——
Brush Tap Swirl <—— <—— <—— Reverse Cymbal Reverse Cymbal Reverse Cymbal
Snare Roll <—— <—— <—— <—— <—— <——
Castanet <—— <—— <—— Hi Q 2 Hi Q 2 Hi Q 2
Snare Soft Snare Soft 2 <—— Snare Noisy
Snare Snappy Electro
Snare Noisy 4 Snare Techno
Sticks <—— <—— <—— <—— <—— <——
Kick Soft <—— <—— <—— Kick 3 Kick 3 Kick Techno Q
Open Rim Shot
Open Rim Shot H Short
<—— <—— <—— <—— Rim Gate
Kick Tight <—— <—— Kick 2 Kick Gate Kick Analog Short Kick Techno L
Kick Kick Short <—— Kick Gate Kick Gate Heavy Kick Analog Kick Techno 2
Side Stick Side Stick Light <—— <—— <——
Side Stick Analog
Side Stick Analog
Snare Snare Short Snare Snappy Snare Rock Snare Noisy 2 Snare Analog Snare Clap
Hand Clap <—— <—— <—— <—— <—— <——
Snare Tight Snare Tight H
Snare Tight Snappy Snare Rock Tight
Snare Noisy 3 Snare Analog 2 Snare Dry
Floor Tom L <—— Tom Room 1 Tom Rock 1 Tom Electro 1 Tom Analog 1 Tom Analog 1
Hi-Hat Closed <—— <—— <—— <——
Hi-Hat Closed Analog
Hi-Hat Closed 3
Floor Tom H <—— Tom Room 2 Tom Rock 2 Tom Electro 2 Tom Analog 2 Tom Analog 2
Hi-Hat Pedal <—— <—— <—— <——
Hi-Hat Closed Analog 2
Hi-Hat Closed Analog 3
Low Tom <—— Tom Room 3 Tom Rock 3 Tom Electro 3 Tom Analog 3 Tom Analog 3
Hi-Hat Open <—— <—— <—— <——
Hi-Hat Open Analog
Hi-Hat Open 3
Mid Tom L <—— Tom Room 4 Tom Rock 4 Tom Electro 4 Tom Analog 4 Tom Analog 4
Mid Tom H <—— Tom Room 5 Tom Rock 5 Tom Electro 5 Tom Analog 5 Tom Analog 5
Crash Cymbal 1 <—— <—— <—— <—— Crash Analog Crash Analog
High Tom <—— Tom Room 6 Tom Rock 6 Tom Electro 6 Tom Analog 6 Tom Analog 6
Ride Cymbal 1 <—— <—— <—— <—— <—— <——
Chinese Cymbal <—— <—— <—— <—— <—— <——
Ride Cymbal Cup <—— <—— <—— <—— <—— <——
Tambourine <—— <—— <—— <—— <—— <——
Splash Cymbal <—— <—— <—— <—— <—— <——
Cowbell <—— <—— <—— <—— Cowbell Analog Cowbell Analog
Crash Cymbal 2 <—— <—— <—— <—— <—— <——
Vibraslap <—— <—— <—— <—— <—— <——
Ride Cymbal 2 <—— <—— <—— <—— <—— <——
Bongo H <—— <—— <—— <—— <—— <——
Bongo L <—— <—— <—— <—— <—— <——
Conga H Mute <—— <—— <—— <—— Conga Analog H Conga Analog H
Conga H Open <—— <—— <—— <—— Conga Analog M Conga Analog M
Conga L <—— <—— <—— <—— Conga Analog L Conga Analog L
Timbale H <—— <—— <—— <—— <—— <——
Timbale L <—— <—— <—— <—— <—— <——
Agogo H <—— <—— <—— <—— <—— <——
Agogo L <—— <—— <—— <—— <—— <——
Cabasa <—— <—— <—— <—— <—— <——
Maracas <—— <—— <—— <—— Maracas 2 Maracas 2
Samba Whistle H <—— <—— <—— <—— <—— <——
Samba Whistle L <—— <—— <—— <—— <—— <——
Guiro Short <—— <—— <—— <—— <—— <——
Guiro Long <—— <—— <—— <—— <—— <——
Claves <—— <—— <—— <—— Claves 2 Claves 2
Wood Block H <—— <—— <—— <—— <—— <——
Wood Block L <—— <—— <—— <—— <—— <——
Cuica Mute <—— <—— <—— Scratch H 2 Scratch H 2 Scratch H 2
Cuica Open <—— <—— <—— Scratch L 2 Scratch L 2 Scratch L 2
Triangle Mute <—— <—— <—— <—— <—— <——
Triangle Open <—— <—— <—— <—— <—— <——
Shaker <—— <—— <—— <—— <—— <——
Jingle Bells <—— <—— <—— <—— <—— <——
Bell Tree <—— <—— <—— <—— <—— <——
129
137
Bank MSB
Bank LSB
Prgram Number
Note # Note
13 C#-1
14 D-1
15 D#-1
16 E-1
17 F-1
18 F#-1
19 G-1
20 G#-1
21 A-1
22 A#-1
23 B-1
24 C0
25 C#0
26 D0
27 D#0
28 E0
29 F0
30 F#0
31 G0
32 G#0
33 A0
34 A#0
35 B0
36 C1
37 C#1
38 D1
39 D#1
40 E1
41 F1
42 F#1
43 G1
44 G#1
45 A1
46 A#1
47 B1
48 C2
49 C#2
50 D2
51 D#2
52 E2
53 F2
54 F#2
55 G2
56 G#2
57 A2
58 A#2
59 B2
60 C3
61 C#3
62 D3
63 D#3
64 E3
65 F3
66 F#3
67 G3
68 G#3
69 A3
70 A#3
71 B3
72 C4
73 C#4
74 D4
75 D#4
76 E4
77 F4
78 F#4
79 G4
80 G#4
81 A4
82 A#4
83 B4
84 C5
85 C#5
86 D5
87 D#5
88 E5
89 F5
90 F#5
91 G5
E1
F1 F#1
G1 G#1
A1 A#1
B1
C1
D#1
D1 C#1
E2
F2 F#2
G2 G#2
A2 A#2
B2
C2
D#2
D2 C#2
E3
F3 F#3
G3 G#3
A3 A#3
B3
C3
D#3
D3 C#3
E4
F4 F#4
G4 G#4
A4 A#4
B4
C4
D#4
D4 C#4
E5
F5 F#5
G5 G#5
A5 A#5
B5
C5
D#5
D5 C#5
C6
127 127 127 127 126 126 126
000 0 000
33 41 49 81 36 1 2
Jazz Kit Brush Kit Symphony Kit Style Kit Arabic Kit SFX Kit 1 SFX Kit 2
<—— <—— <—— <——
<—— <—— <—— <——
<—— <—— <—— <——
<—— <—— <—— <——
<—— <—— <—— <——
<—— <—— <—— <——
<—— <—— <—— <——
<—— <—— <—— <——
<—— <—— <—— <——
<—— <—— <—— <——
<—— <—— <—— <——
<—— <—— <—— <—— Nakarazan Dom
<—— <—— <—— Brush Tap Style Cabasa
<—— <—— <—— Brush Swirl Style
Nakarazan Edge
<—— <—— <—— Brush Slap Style Hager Dom
<—— <—— <—— Brush Tap Swirl Style Hager Edge
<—— <—— <—— <—— Bongo H
<—— <—— <—— <—— Bongo L
Snare Jazz H Brush Slap 2 <—— Snare Soft Style Conga H Mute
<—— <—— <—— <—— Conga H Open
<—— <—— Kick Soft 2 Kick Soft Style Conga L
<——
Open Rim Shot Light
<——
Open Rim Shot Style
Zagrouda H
<—— <—— Gran Cassa Kick Tight Style Zagrouda L
Kick Jazz Kick Jazz Gran Cassa Mute Kick Style Kick Soft Cutting Noise Phone Call
Side Stick Light Side Stick Light <—— Side Stick Style Side Stick
Cutting Noise 2
Door Squeak
Snare Jazz L Brush Slap 3 Band Snare Snare Style Snare Soft Door Slam
<—— <—— <—— <——
Arabic Hand Clap
String Slap Scratch Cut
Snare Jazz M Brush Tap 2 Band Snare 2 Snare Tight Style Snare Scratch H 3
<—— Tom Brush 1 <—— Floor Tom L Style Floor Tom L Wind Chime
<—— <—— <——
Hi-Hat Closed Style
Hi-Hat Closed
Telephone Ring 2
<—— Tom Brush 2 <—— Floor Tom H Style Floor Tom H
<—— <—— <—— Hi-Hat Pedal Style Hi-Hat Pedal
<—— Tom Brush 3 <—— Low Tom Style Low Tom
<—— <—— <—— Hi-Hat Open Style Hi-Hat Open
<—— Tom Brush 4 <—— Mid Tom L Style Mid Tom L
<—— Tom Brush 5 <—— Mid Tom H Style Mid Tom H
<—— <—— Hand Cymbal
Crash Cymbal 1 Style
Crash Cymbal 1
<—— Tom Brush 6 <—— High Tom Style High Tom
<—— <——
Hand Cymbal Short
Ride Cymbal 1 Style Ride Cymbal 1
<—— <—— <——
Chinese Cymbal Style
Crash Cymbal 2
Flute Key Click
Car Engine Ignition
<—— <—— <——
Ride Cymbal Cup Style
Duhulla Dom
Car Tires Squeal
<—— <—— <—— <—— Tambourine Car Passing
<—— <—— <——
Splash Cymbal Style
Duhulla Tak Car Crash
<—— <—— <—— <—— Cowbell Siren
<—— <—— Hand Cymbal 2
Crash Cymbal 2 Style
Duhulla Sak Train
<—— <—— <—— <—— Claves Jet Plane
<—— <——
Hand Cymbal 2 Short
Ride Cymbal 2 Style
Doff Dom Starship
<—— <—— <—— <—— Katem Dom Burst
<—— <—— <—— <—— Katem Tak Roller Coaster
<—— <—— <—— <—— Katem Sak Submarine
<—— <—— <—— <—— Katem Tak
<—— <—— <—— <—— Doff Tak
<—— <—— <—— <—— Tabla Dom
<—— <—— <—— <—— Tabla Tak1
<—— <—— <—— <—— Tabla Tik
<—— <—— <—— <—— Tabla Tak2 Shower Laugh
<—— <—— <—— <—— Tabla Sak Thunder Scream
<—— <—— <—— <——
Tabla Roll of Edge
Wind Punch
<—— <—— <—— <—— Tabla Flam Stream Heart Beat
<—— <—— <—— <—— Sagat 1 Bubble Foot Steps
<—— <—— <—— <—— Tabel Dom Feed
<—— <—— <—— <—— Sagat 3
<—— <—— <—— <—— Tabel Tak
<—— <—— <—— <—— Sagat 2
<—— <—— <—— <—— Rik Dom
<—— <—— <—— <—— Rik Tak 2
<—— <—— <—— <—— Rik Finger 1
<—— <—— <—— <—— Rik Tak 1
<—— <—— <—— <—— Rik Finger 2
<—— <—— <—— <——
Rik Brass Tremolo
<—— <—— <—— <—— Rik Sak
<—— <—— <—— <—— Rik Tik Dog Machine Gun
Horse Laser Gun
Bird Tweet 2 Explosion
Firework
Ghost
Maou
Drum Kit List
130
138
Style List
Style Style Name
Number Style Style Name
Number Country
59 Country Rock
60 Country 2/4
61 Country 8 Beat
62 Country Pop
63 Country Swing
64 Country Shuffle
65 Country Ballad
66 Country Waltz
67 Bluegrass
68 Hoedown
Latin
69 Latin Pop
70 Samba City
71 Bossa Nova
72 Guitar Bossa
73 Mambo
74 Salsa
75 Beguine
76 Gypsy Rumba
77 Pop Rumba
78 Happy Reggae
79 Disco Latin
March & Waltz
80 US March
81 German March
82 6/8 March
83 Polka Oberkrainer
84 Waltz Oberkrainer
85 Polka Pop
86 Tarantella
87 Reel
88 Musette
89 Jazz Waltz
90 Christmas 3/4
91 Slow Waltz
Ballroom
92 Vienna Waltz
93 English Waltz
94 Slowfox
95 Quickstep
96 Foxtrot
97 Tango
98 Samba
99 Rumba
100 Cha Cha Cha
101 Pasodoble
102 Jive
Pianist
103 P_Swing
104 P_Stride
105 P_Boogie
106 P_Ballad
107 P_Pianoman
108 P_March
109 P_6/8 March
110 P_Ragtime
111 P_Jazz Waltz
112 P_Waltz
8 Beat
1 8 Beat 1
2 8 Beat 2
3 8 Beat 3
4 8 Beat Adria
5 8 Beat Party
6 8 Beat Rock
7 Root Rock
8 Hard Rock
16 Beat
9 16 Beat Pop
10 Guitar Pop
11 Kool Shuffle
12 Pop Shuffle
13 Jazz Rock
Ballad
14 16 Beat Ballad
15 Slow & Easy
16 Love Song
17 Organ Ballad
18 Analog Ballad
19 6/8 Slow Rock
20 Modern 6/8
21 Acoustic Ballad
Dance
22 House
23 Eurobeat
24 Euro House
25 Trance
26 Clubdance
27 Techno
28 Hip Hop
29 Trip Hop
30 Groundbeat
Disco
31 Saturday Night
32 70’s Disco
33 Disco Chocolate
34 Disco Hands
35 Disco Funk
36 Disco Fox
37 Disco Party
Swing & Jazz
38 Big Band 1
39 Big Band 2
40 Big Band 3
41 Swing
42 Swingfox
43 Shuffle
44 Acoustic Jazz
45 Jazz Ballad
46 Dixieland
R & B
47 Soul Shuffle
48 Cat Groove
49 Gospel Brothers
50 Gospel Sisters
51 Boogie Woogie
52 Croco Twist
53 Rock & Roll
54 60’s Rock & Roll
55 Soul
56 Rock Shuffle
57 Motown Soul
58 6/8 Blues
131
139
MDB Song Name
Number MDB Song Name
Number
Music Database List
POP HITS
1 Alive Fever
2 Alive Synth
3 Croco Rock
4 D.Survival
5 EasySunday1
6 EasySunday2
7 GoingMyWay 1
8 GoingMyWay 2
9 Hurry Luv
10 I’m Torn
11 Imagination
12 Just Called
13 Just the way
14 Love is Deep
15 Music Thanks
16 Nikita Trp.
17 Paradise Day
18 Proud Guitar
19 Sailing Sax
20 SeptemberPop
21 Sultan Swing
22 Sweet Lord
23 TitanicHeart
24 WatchGirls1
25 WatchGirls2
26 WaterlooShfl
27 Whiter Shade
28 YesterGuitar
SWING & JAZZ
29 Days of Sax
30 Honey Taste
31 Lost Heart
32 MistyGeorgia
33 Moon Jazz
34 Moonlight 1
35 Moonlight 2
36 New York 1
37 New York 2
38 New York 3
39 PantherSwing
40 Patrol Brass
41 Patrol Sax
42 PetiteClari.
43 Ragtime Band
44 RedRoseSwing
45 Saints March
46 Satin Woodw.
47 Sax The Mood
48 Shear Jazz
49 Show Bizz
50 Splanky Trb.
51 Sunny Side
52 Two Foot 5
53 WaltzingBlue
54 What is new?
55 WildCatDixie
56 Wonderland
EVERGREEN
57 Black Forest
58 California
59 Ciao Capri
60 Close on You
61 D’Amour Str.
62 Do you wish?
63 Dolanes Song
64 El Condor
65 Entertainer
66 EpicSymphony
67 In the Night
68 In the Rain
69 Love Stories
70 Lucky Sax
71 MillionStars
72 My Prince
73 O Sole Mio
74 PalomaGuitar
MDB Song Name
Number
75 Puppet Brass
76 Raindrops
77 Red Moulin
78 Romantic Gtr
79 SchiwagoMood
80 Shadow Gtr.
81 Small Planet
82 Snow White
83 Spanish Eyes
84 Tie a Ribbon
85 Time goes by
86 Wonder World
ROMANTIC BALLADS
87 Adeline B.
88 ArgentinaCry
89 BlueAcordion
90 Body Beauty
91 Cat Memory
92 CavatinaSolo
93 Deep Ballad
94 Elvis Ballad
95 Fly Away
96 GoodFeelings
97 GreenSleeves
98 Gtr.Concerto
99 Guitar Date
100 Hard to Say1
101 Hard to Say2
102 Lonely Piper
103 Moon Tenor
104 MusicboxDnce
105 NorwegianFlt
106 RainbowAbove
107 Red Lady
108 Release me
109 SavingMyLove
110 SierraMusett
111 Silent Sound
112 Silvery Moon
113 Smokey Eyes
114 StrangeShore
115 Sweet Orch
116 Unplugged
117 Whisper Sax
ROCK & FUSION
118 Dave again
119 Funky Pieces
120 Jump Rock
121 Oye Como Cha
122 RiverRedRock
123 SatisfiedGtr
124 Sheriff Shot
125 Smokey Water
126 Twist again
127 Venus Pop
RHYTHM & BLUES
128 Amazing
129 Baby Baby
130 BoogieManiac
131 Clock Rock
132 Gator Boogie
133 Happy Day!
134 Johnny Good
135 Melon Cat
136 Mercy Bros.
137 Rising Sun
138 Supergroove1
139 Supergroove2
HIP HOP HOUSE
140 Boy Group
141 Funky City
142 Funky Disco
143 Grounded
144 Miami Trance
145 Nine PM
146 Only TwoOfUs
147 Rap Talk
148 Soft Kill
149 Techno Dolls
LATIN NIGHTS
150 Bamba Brass
151 Bamba Flute
152 Be Happy!
153 Day & Night
154 Ipanema 1
155 Ipanema 2
156 Latin Lola
157 MarinaMusett
158 Mucho Tromb.
159 Smooth Latin
160 Sun of Life
161 Sunshine
162 Tico Organ
163 TromboneWave
COUNTRY & WESTERN
164 AlabamaBanjo
165 Blowing Wind
166 Bonanza
167 Green Grass
168 JambalayaFlt
169 LondonStreet
170 Lucille Str.
171 Think Twice
172 Top World
173 WestVirginia
BALLROOM & PARTY
174 Aloha Hawaii
175 BabylonDisco
176 Barbados!
177 Brazil Brass
178 Charming 3/4
179 Cherry Brass
180 Cherry Organ
181 ChickenSynth
182 Cumparsita
183 Danube Waves
184 FiestaMexico
185 HandsUpParty
186 Modern Talk
187 Next Alice
188 Paloma Flute
189 Pub Piano
190 Sandman Fox
191 Sunday Never
192 Tea Time Cha
193 ThemeOfLove
194 Tijuana 1
195 Tijuana 2
196 Tulip’sWaltz
197 Why MCA?
198 “YesSir,Quick”
TRADITIONAL
199 Alpen Trio
200 Balalaikas
201 Ceilidh Band
202 Ciel deParis
203 Clarinet Fun
204 Comrades
205 Happy Polka
206 Herzilein
207 Jingle Bells
208 KufsteinSong
209 La Danza
210 MexiHatDance
211 Mickey Flute
212 Navy Anchors
213 Rolla Barrel
214 Snow Waltz
215 Star March 1
216 Star March 2
217 The Hornpipe
218 Washington
219 Wood Cutters
220 Xmas Night
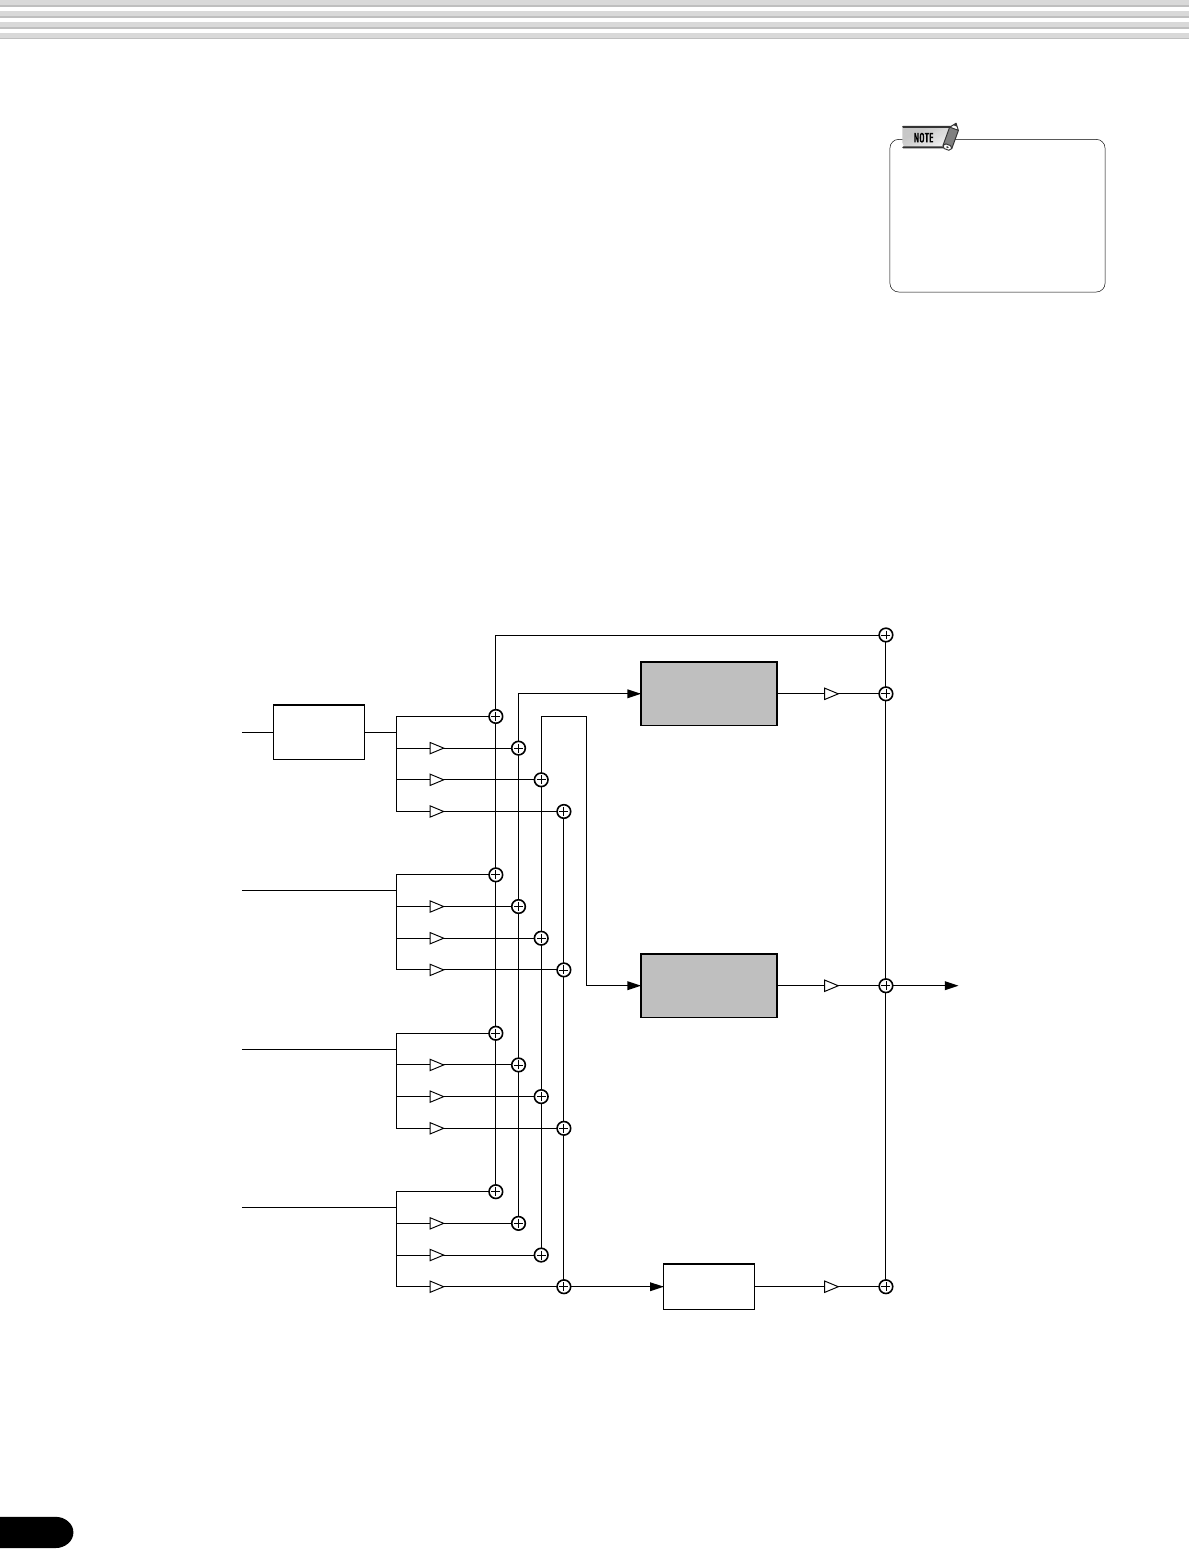
132
140
● Reverb (System effect)
Reverb effect type/depth can be set by panel operation.
When you select a different style, the appropriate reverb type will be selected accord-
ingly.
● Chorus (System effect)
Chorus effect type/depth can be set by panel operation.
When you select a different style, the appropriate chorus type will be selected accord-
ingly.
● DSP (System/Insertion effect)
DSP effect on/off status, type and depth can be set by panel operation.
DSP effect will function as either System or Insertion effect. Whether DSP
effect is System or Insertion depends on the selected type. DSP effect
configuration will differ between System and Insertion effects as follows:
About the Digital Effects (Reverb/Chorus/DSP)
•Although not all the effect
settings cannot be made by
operating the PSR-550 panel
manually, some of them may
be accessible through MIDI.
Refer to the MIDI data format
for details.
OUT
Rev Send
VOICE R1
Dry
Cho Send
DSP Send
When DSP type is selected
as a System effect
When DSP type is selected
as an Insertion effect
Rev Send
VOICE R2
Dry
Cho Send
DSP Send
Rev Send
VOICE L
Dry
Cho Send
DSP Send
Rev Send
STYLE
Dry
Cho Send
DSP Send
CHORUS
REVERB
DRY LINE
DSP
Chorus
Return
DSP
Return
Reverb
Return
DSP
effect

133
141
● Reverb Type List
Reverb Type System/Insertion Description
Hall1-5 System Concert hall reverb.
Room1-7 System Small room reverb.
Stage1-4 System Reverb for solo instruments.
Plate1-3 System Simulated steel plate reverb.
White Room System A unique short reverb with a bit of initial delay.
Tunnel System Simulation of a tunnel space expanding to left and right.
Canyon System A hypothetical acoustic space which extends without limit.
Basement System A bit of initial delay followed by reverb with a unique resonance.
No Effect — No effect.
● Chorus Type List
Chorus Type System/Insertion Description
Chorus1-8 System Conventional chorus program with rich, warm chorusing.
Celeste1, 2 System A 3-phase LFO adds modulation and spaciousness to the sound.
Flanger1-5 System Pronounced three-phase modulation with slight metallic sound.
No Effect — No effect.
● DSP Type List
DSPType System/Insertion Description
Hall1-5 System Concert hall reverb.
Room1-7 System Small room reverb.
Stage1-4 System Reverb for solo instruments.
Plate1-3 System Simulated steel plate reverb.
Delay Left - Center - System Three independent delays, for the left, right and center stereo positions.
Right1, 2
Delay Left - Right System Initial delay for each stereo channel, and two separate feedback delays.
Echo System Stereo delay, with independent feedback level settings for each channel.
Cross Delay System Complex effect that sends the delayed repeats “bouncing” between the left and right channels.
ER1, 2 System This effect isolates only the early reflection components of the reverb.
Gate Reverb System Gated reverb effect, in which the reverberation is quickly cut off for special effects.
Reverse Gate System Similar to Gate Reverb, but with a reverse increase in reverb.
Karaoke1-3 System A delay with feedback of the same types as used for karaoke reverb.
Chorus1-8 System Conventional chorus program with rich, warm chorusing.
Celeste1, 2 System A 3-phase LFO adds modulation and spaciousness to the sound.
Flanger1-5 System Pronounced three-phase modulation with slight metallic sound.
Symphonic1, 2 System A multi-phase version of Celeste.
Rotary Speaker 1-6 Insertion Rotary speaker simulation.
Tremolo1-3 Insertion Rich Tremolo effect with both volume and pitch modulation.
Guitar Tremolo Insertion Simulated electric guitar tremolo.
Auto Pan1, 2 Insertion Several panning effects that automatically shift the sound position (left, right, front, back).
Phaser 1, 2 System Pronounced, metallic modulation with periodic phase change.
Distortion Hard Insertion Hard-edge distortion.
Distortion Soft Insertion Soft, warm distortion.
Distortion Heavy Insertion Heavy distortion.
Overdrive Insertion Adds mild distortion to the sound.
Amp Simulator Insertion A simulation of a guitar amp.
EQ Disco Insertion Equalizer effect that boosts both high and low frequencies, as is typical in most disco music.
EQ Telephone Insertion Equalizer effect that cuts both high and low frequencies, to simulate the sound heard through a
telephone receiver.
3Band EQ (MONO) Insertion A mono EQ with adjustable LOW, MID, and HIGH equalizing.
2Band EQ (STEREO) Insertion A stereo EQ with adjustable LOW and HIGH. Ideal for drum Parts.
Auto Wah1, 2 Insertion Cyclically modulates the center frequency of a wah filter.
No Effect — No effect.
Through — Bypass without applying an effect.
About the Digital Effects (Reverb/Chorus/DSP)
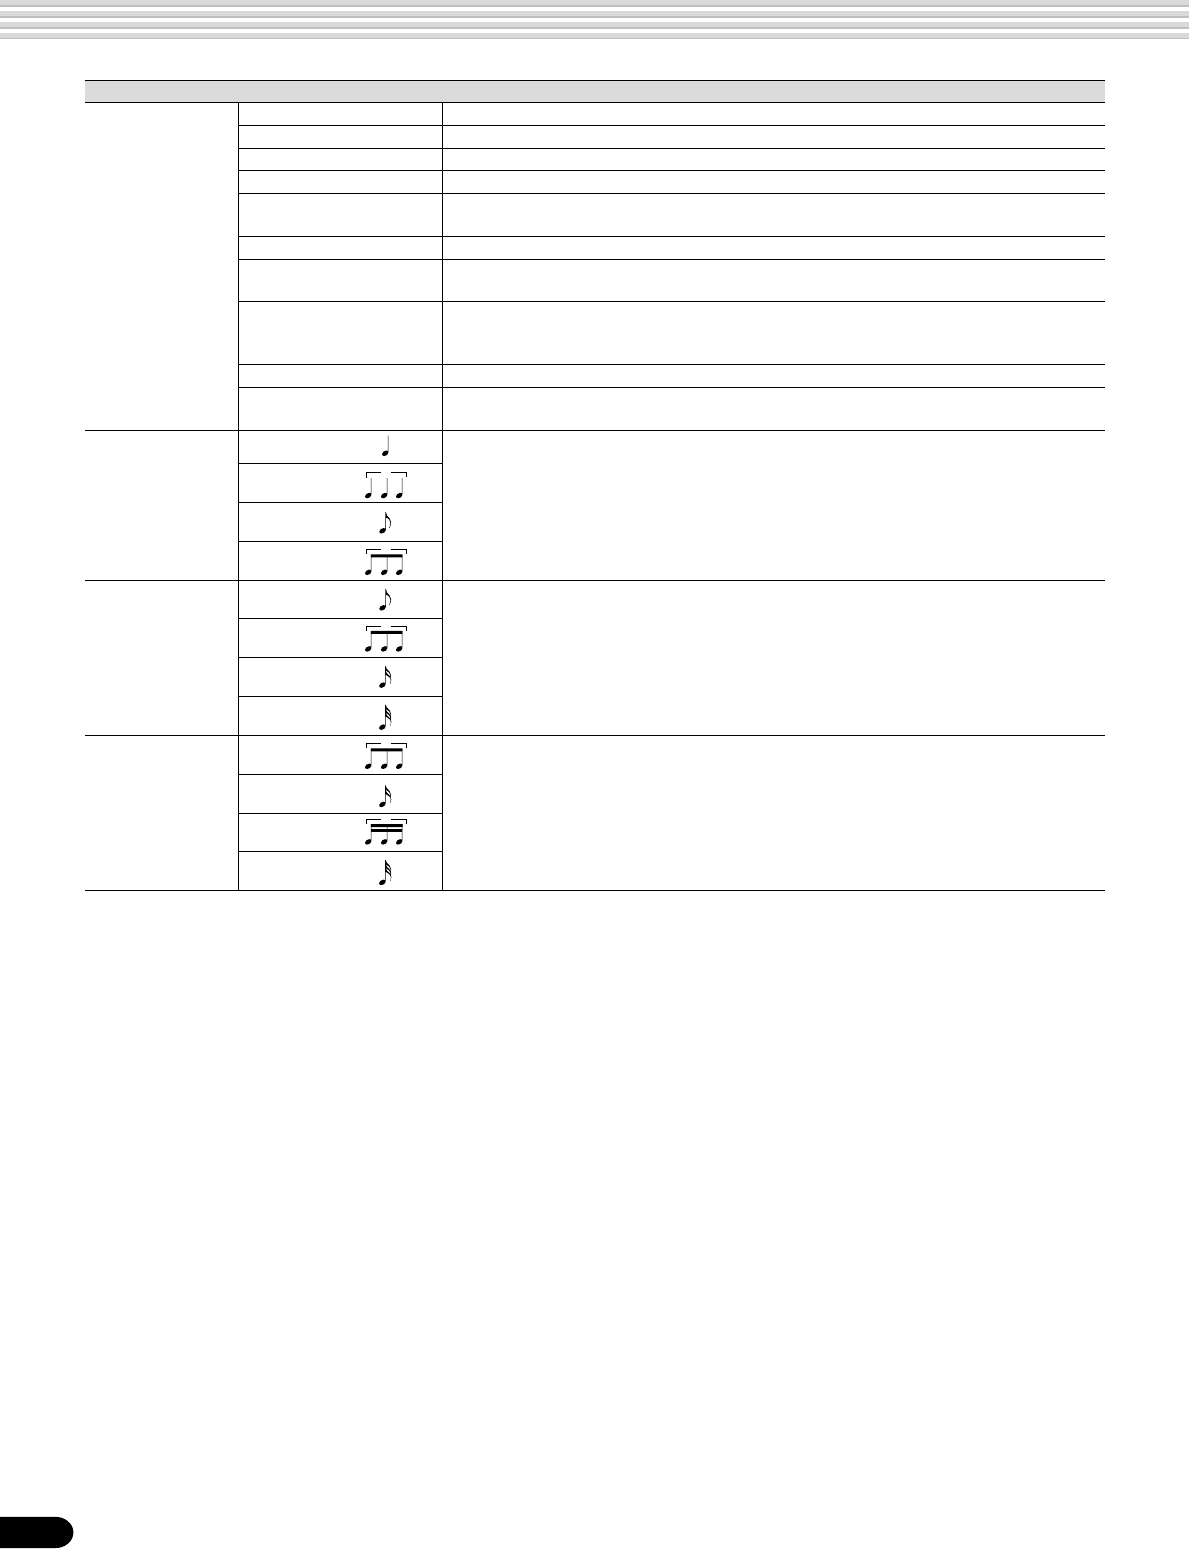
134
142
Harmony/Echo Type List
Category Type Description
Harmony Duet An extra note is added to the note played on the keyboard to produce duet type harmony.
1+5 A parallel voice is produced a fifth above the note played on the keyboard.
Country One note is added above the note played on the keyboard for a country-style harmony feel.
Trio Two notes are added below the note played on the keyboard for three-part harmony.
Block Three or four notes are added to the note played on the keyboard to produce four or five-
note chords.
4Way Close1 Three harmony notes are generated to produce a four-note chord.
4Way Close2 Similar to the preceding type, but depending on the chords played this type will sometimes
produce a more colorful sound.
4Way Open Four-note chords with open voice (large intervals between the notes). The result is a very
“open” sound. Since the harmony notes can be as much as two octaves below the note
played on the keyboard, avoid playing in the lower registers.
Octave One note is added an octave below the note played on the keyboard.
Strum The notes and assignments are the same as in the Block type, but the notes are
arpeggiated.
Echo Echo 1/4 An echo effect is applied to the note played on the keyboard at the currently set tempo.
Echo 1/6
3
Echo 1/8
Echo 1/12
3
Tremolo Tremolo 1/8 A tremolo effect is applied to the note played on the keyboard at the currently set tempo.
Tremolo 1/12
3
Tremolo 1/16
Tremolo 1/32
Trill Trill 1/12
3
Two notes played on the keyboard are played alternately at the currently set tempo.
Trill 1/16
Trill 1/24
3
Trill 1/32
135
143
Troubleshooting
POSSIBLE CAUSE/SOLUTION
This is normal and is no cause for alarm.
Using a mobile phone in close proximity to the PortaTone may produce interference.
To prevent this, turn off the mobile phone or use it further away from the PortaTone.
The batteries probably need to be replaced. Either replace all six batteries, or use
an AC power adaptor.
•The R1/R2/L voice volume (Mixer) settings could be set too low. Make sure the
voice volumes are set at appropriate levels (page 76).
•The Local Control function could be turned off. Make sure Local Control is turned
on (page 116).
•Check whether the naming function of Registration Memory or song recording
(page 21) is called up in the display or not. If the naming function is active, the
PSR-550 does not produce any sound, even when the keys are played.
You are probably exceeding the maximum polyphony of the PSR-550. The PSR-550
can play up to 32 notes at the same time — including voice R2, voice L, auto
accompaniment, song, and multi pad notes. Notes exceeding this limit will not
sound.
Make sure that Disk mode is engaged.
In the Disk mode, no panel operations can be executed (except for disk operations),
and playing the keyboard does not produce any sound.
Exit from the display by pressing the [EXIT] button.
The MIDI Clock may be set to “Ext”. Make sure it is set to “Int” (page 116).
You may be trying to start accompaniment by playing a key in the right-hand range
of the keyboard. To start the accompaniment with Synchro Start, make sure to play
a key in the left-hand (accompaniment) range of the keyboard.
Check whether the Song mode (page 25) is selected or not. When the Song mode
is active, none of the auto accompaniment functions can be used.
Make sure that the scale tuning value for those notes is set to “0.” If not, select the
template “Equal” to recall the normal tuning of ±0 cents (page 119).
Check whether the fingering mode is set to “Full” or not. If the Full fingering mode is
selected, chords are recognized over the entire range of the keyboard, irrespective
of the split point setting.
•Harmony cannot be turned on when the Full Keyboard fingering mode is selected
or if a percussion kit voice is selected. Select an appropriate fingering mode or
voice.
•Harmony cannot be turned on when a drum kit is selected for the voice R1.
The MIDI terminals can only be used when the HOST SELECT switch is set to
“MIDI.” All other settings (“Mac,” “PC-1,” and “PC-2”) are for direct transmission/
reception with a computer.
PROBLEM
•The speakers produce a “pop” sound whenever
the power is turned ON or OFF.
•When using a mobile phone, noise is produced.
•The volume is reduced or the sound is distorted.
•The sound quality has gotten progressively
worse.
•The registration memory doesn’t work properly.
•Recorded song data will not play back properly.
•The display goes blank and all panel controls are
reset.
•No sound results when the keyboard is played.
•Not all simultaneously-played notes sound.
•Auto Accompaniment seems to “skip” when the
keyboard is played.
•Nothing happens or nothing seems to function,
even when pressing a panel button. For example,
pressing the DEMO button does not start the
Demo song, or playing the keyboard does not
produce any sound.
•The accompaniment or song does not play back
even when pressing the [START/STOP] button.
•The Multi Pads do not play back, even when one
of the MULTI PAD buttons is pressed.
•The auto accompaniment does not start, even
when the Synchro Start is in the standby
condition and a key is pressed.
•The following buttons related to the auto
accompaniment do not function.
•[SYNC START] button
•[SYNC STOP] button
•[ACMP ON/OFF] button
•REGISTRATION MEMORY [FREEZE] button
•Certain notes sound at the wrong pitch.
•Auto accompaniment chords are recognized
regardless of the split point or where chords are
played on the keyboard.
•The Harmony function does not operate.
•MIDI data is not transmitted or received, even
when MIDI cables are connected properly.
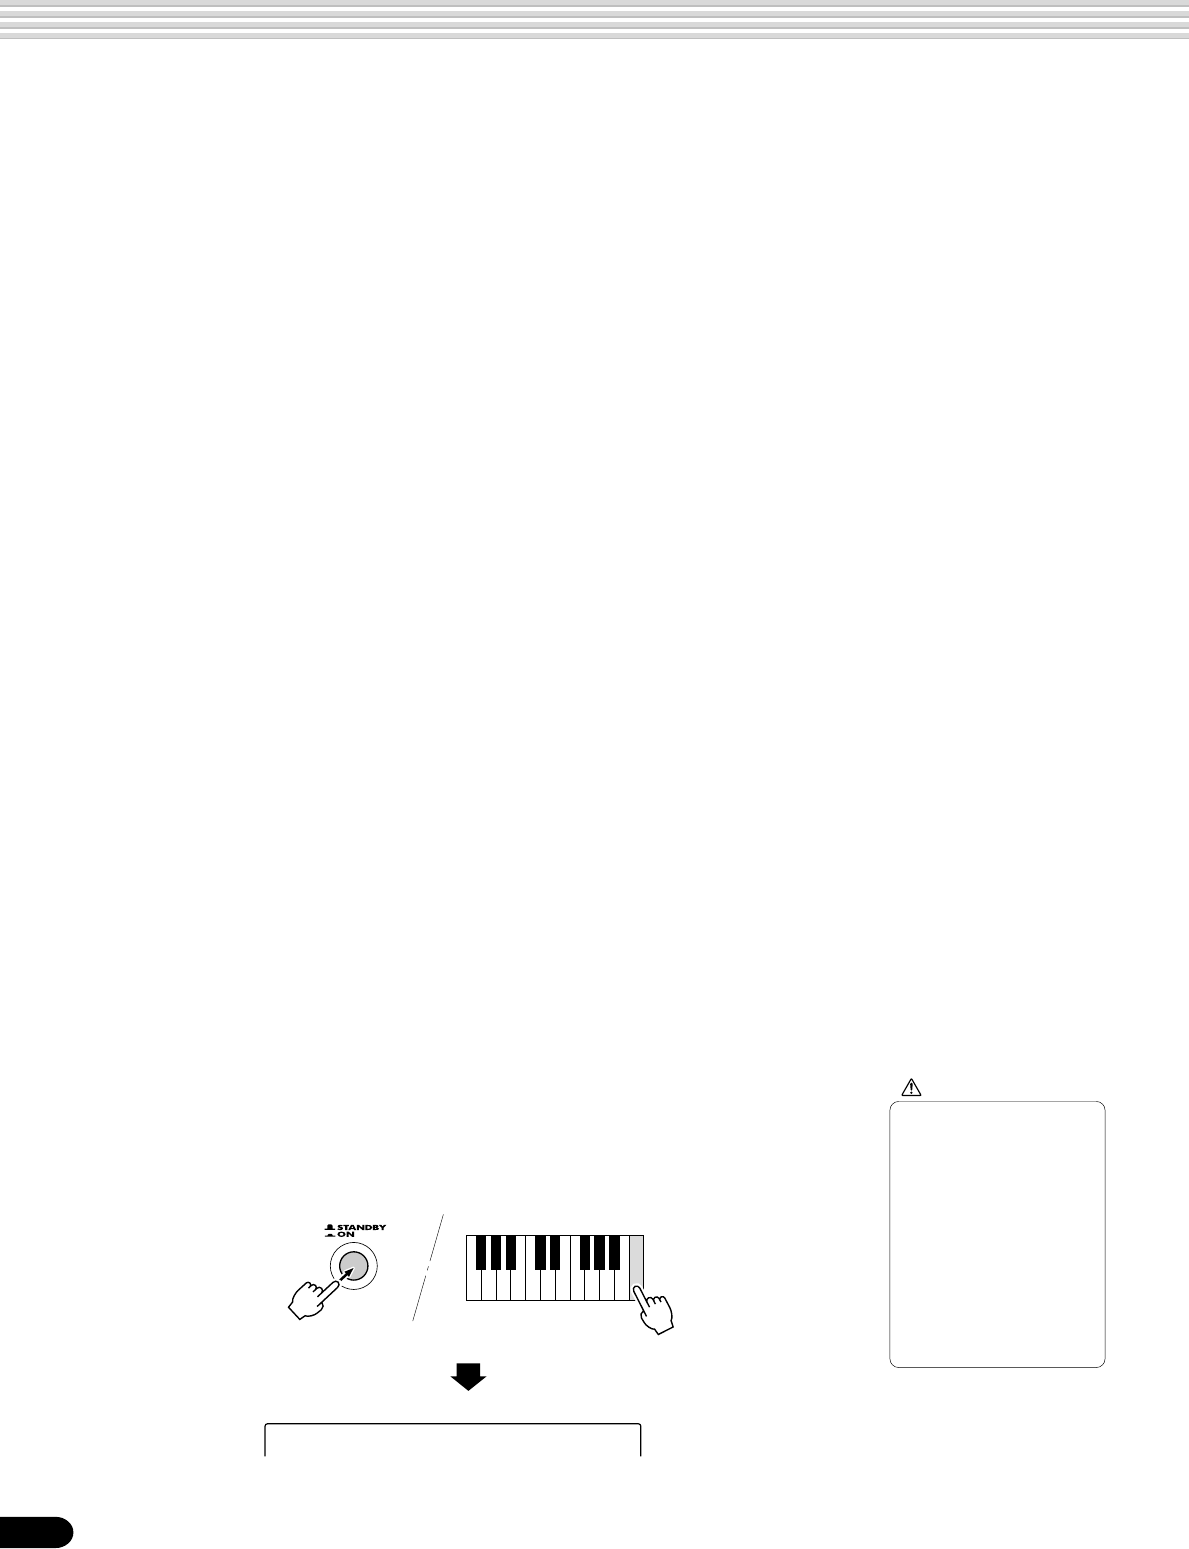
136
144
Data Backup & Initialization
■ Data Backup
Except for the data listed below, all PSR-550 panel settings are reset to their initial
settings whenever the power is turned on. The data listed below are backed up - i.e.
retained in memory - as long as an AC adaptor is connected or a set of batteries is
installed.
■ Data Initialization
All data can be initialized and restored to the factory preset condition by turning on the
power while holding the highest (rightmost) white key on the keyboard. “Now Initial-
izing” will appear briefly on the display.
• User Style data ............................................................ page 96
• User Pad data .............................................................. page 92
• Registration Memory data............................................ page 54
• Registration Memory Bank Number............................. page 56
• Registration Memory/One Touch Setting status........... page 55
• Freeze on/off ................................................................ page 55
• MIDI Transmit settings ............................................... page 114
• MIDI Receive settings ................................................ page 115
• Voice Set on/off .......................................................... page 120
• Voice L (Voice Change, Mixer) ..................................... page 74
• Fingering mode ............................................................ page 38
• Split Point ................................................................... page 120
• Sustain on/off ............................................................... page 30
• Upper Octave setting ................................................. page 119
• Pitch Bend Range ...................................................... page 122
• Scale Tuning .............................................................. page 119
• Transpose .................................................................... page 30
• Footswitch Function, Polarity ..................................... page 121
• Touch on/off, Sensitivity ............................................. page 120
• Multi Pad setting .......................................................... page 43
• Master Tuning ............................................................ page 119
• Metronome on/off....................................................... page 118
CAUTION
• All registration and User
Style/Pad memory data,
plus the other settings
listed above, will be erased
and/or changed when the
data initialization
procedure is carried out.
• Carrying out the data
initialization procedure will
usually restore normal
operation if the PSR-550
freezes or begins to act
erratically for any reason.
Even though these settings are retained in memory, you should save them — and all
your important data — to floppy disk for permanent, safe storage. To save all of the
data types listed above to floppy disk, use the Save operation (page 60) and select
“All” as the file type.
All data listed above will be lost if the power is interrupted — in other words, if the
power is turned off, the AC adaptor is disconnected and the batteries are removed.
When this happens, the next time you turn on the PSR-550, a “Clear Backup” message
appears in the display, the Data Initialization operation (below) is automatically
executed, and the PSR-550 is set to the Style mode (page 25).
Now Initializing

137
145
Alert Message List
No File
Unformatted Disk
Disk Error
Write-protected
File Protected
No Disk
Disk Removed
Disk Full
Wrong Disk
Same Name
Maximum 60 Songs
Memory Full
The file is a purposely “copy-protected” disk.
The Copy function is not possible.
The disk contains no file to be loaded, copied, or be deleted.
Insert the disk that contains files to be loaded, copied, or deleted.
An unformatted disk is inserted.
An error occurred during execution of a disk operation.
Try changing the disk.
This message also may appear when executing the Load operation if the
internal memory becomes full.
The floppy disk’s write-protect tab is set to ON.
Remove the disk, set write-protect to off, reinsert the disk and attempt the
operation again.
There is no floppy disk inserted into the disk drive.
Insert a disk.
An error occured because the disk was removed during a disk operation.
Never remove a disk during a disk operation since this could damage both
the disk and the drive.
The disk’s memory capacity is full and no additional data can be recorded.
Delete one or more unneeded songs (using Delete), and attempt the
operation again.
When using the Copy operation, the inserted disk is different from the
source or destination disk.
Remove the disk and reinsert the proper Disk.
More than one file has the same name on the disk.
Change the name.
Maximum of 60 songs can be recorded.
Delete one or more unneeded songs (using Delete), and attempt the song
recording again.
If the internal memory becomes full during Style/Pad recording, this
message will appear on the display and recording will stop.
Insert Song Disk
This message appears when you press the [SONG] button without a disk
in the disk drive.
138
146
Clear Backup
Now Initializing
Cannot Operate
Cannot Set MIDI
CannotTurnHar.On
CannotTurnDSP On
Alert Message List
This message appears when you attempt to edit, quantize or clear the
track which contains no data in the Record mode.
This message indicates that recording a new User style cannot be started
when all three User styles have recorded data. Make sure to clear at least
one of the three User styles before recording a new User style.
This message appears when you attempt to edit, or quantize the track
(other than RHYTHM) which contains preset data in the Style Record
mode.
This function cannot be used during Song/Style/Pad recording.
The MIDI function cannot be set during recording, playback, and disk
operations.
Harmony cannot be turned on during Style/Pad recording.
DSP cannot be turned on during Style/Pad recording.
This message appears to indicate you cannot enter the function when you
select a Multi Pad function in the Multi Pad Recording mode.
•This message may appear when the PSR-550 is turned on, and indi-
cates that user data temporarily stored in the internal memory has been
lost (page 136). When this happens, the Data Initialization operation
(page 136) is automatically executed, and the PSR-550 is set to the
Style mode (page 25).
•If this message appears even when the AC adaptor is connected or the
battery power is adequate, the backup data (page 136) is faulty. Use the
Data Initialization function (page 136).
CannotEnterFunc.
All data can be initialized and restore to the factory preset condition by
turning the STANDBY switch ON while holding the highest (rightmost)
white key on the keyboard.
When the batteries run down this message appears every few seconds.
Exchange all the batteries with the new ones according to the instructions
on page 12.
Battery Low
Data Not Found
User Style Full
Preset Data
This message appears when executing the Quantize or Recording opera-
tions (in the Style Recording mode) when the internal memory is full.
Memory Over
139
Many MIDI messages listed in the MIDI Data Format are expressed in decimal numbers,
binary numbers and hexadecimal numbers.
Hexadecimal numbers may include the letter “H” as a suffix. Also, “n” can freely be defined
as any whole number.
To enter data/values, refer to the table below.
Decimal Hexadecimal Binary
0 00 0000 0000
1 01 0000 0001
2 02 0000 0010
3 03 0000 0011
4 04 0000 0100
5 05 0000 0101
6 06 0000 0110
7 07 0000 0111
8 08 0000 1000
9 09 0000 1001
10 0A 0000 1010
11 0B 0000 1011
12 0C 0000 1100
13 0D 0000 1101
14 0E 0000 1110
15 0F 0000 1111
16 10 0001 0000
17 11 0001 0001
18 12 0001 0010
19 13 0001 0011
20 14 0001 0100
21 15 0001 0101
22 16 0001 0110
23 17 0001 0111
24 18 0001 1000
25 19 0001 1001
26 1A 0001 1010
27 1B 0001 1011
28 1C 0001 1100
29 1D 0001 1101
30 1E 0001 1110
31 1F 0001 1111
32 20 0010 0000
33 21 0010 0001
34 22 0010 0010
35 23 0010 0011
36 24 0010 0100
37 25 0010 0101
38 26 0010 0110
39 27 0010 0111
40 28 0010 1000
41 29 0010 1001
42 2A 0010 1010
43 2B 0010 1011
44 2C 0010 1100
45 2D 0010 1101
46 2E 0010 1110
47 2F 0010 1111
48 30 0011 0000
49 31 0011 0001
50 32 0011 0010
51 33 0011 0011
52 34 0011 0100
53 35 0011 0101
54 36 0011 0110
55 37 0011 0111
56 38 0011 1000
57 39 0011 1001
58 3A 0011 1010
59 3B 0011 1011
60 3C 0011 1100
61 3D 0011 1101
62 3E 0011 1110
63 3F 0011 1111
Decimal Hexadecimal Binary
64 40 0100 0000
65 41 0100 0001
66 42 0100 0010
67 43 0100 0011
68 44 0100 0100
69 45 0100 0101
70 46 0100 0110
71 47 0100 0111
72 48 0100 1000
73 49 0100 1001
74 4A 0100 1010
75 4B 0100 1011
76 4C 0100 1100
77 4D 0100 1101
78 4E 0100 1110
79 4F 0100 1111
80 50 0101 0000
81 51 0101 0001
82 52 0101 0010
83 53 0101 0011
84 54 0101 0100
85 55 0101 0101
86 56 0101 0110
87 57 0101 0111
88 58 0101 1000
89 59 0101 1001
90 5A 0101 1010
91 5B 0101 1011
92 5C 0101 1100
93 5D 0101 1101
94 5E 0101 1110
95 5F 0101 1111
96 60 0110 0000
97 61 0110 0001
98 62 0110 0010
99 63 0110 0011
100 64 0110 0100
101 65 0110 0101
102 66 0110 0110
103 67 0110 0111
104 68 0110 1000
105 69 0110 1001
106 6A 0110 1010
107 6B 0110 1011
108 6C 0110 1100
109 6D 0110 1101
110 6E 0110 1110
111 6F 0110 1111
112 70 0111 0000
113 71 0111 0001
114 72 0111 0010
115 73 0111 0011
116 74 0111 0100
117 75 0111 0101
118 76 0111 0110
119 77 0111 0111
120 78 0111 1000
121 79 0111 1001
122 7A 0111 1010
123 7B 0111 1011
124 7C 0111 1100
125 7D 0111 1101
126 7E 0111 1110
127 7F 0111 1111
•Except the table above, for example 144-159(decimal)/9nH/1001 0000-1001
1111(binary) displays the Note On Message for each channel (1-16).
176-191/BnH/1011 0000-1011 1111 displays the Control Change Message for each
channel (1-16).
192-207/CnH/1100 0000-1100 1111 displays the Program Change Message for
each channel (1-16).
240/FOH/1111 0000 denotes the start of a System Exclusive Message.
247/F7H/1111 0111 denotes the end of a System Exclusive Message.
•aaH (hexidecimal)/0aaaaaaa (binary) denotes the data address. The address
contains High, Mid, and Low.
•bbH/0bbbbbbb denotes the byte count.
•ccH/0ccccccc denotes the check sum.
•ddH/0ddddddd denotes the data/value.
(1) TRANSMIT FLOW
MIDI ← NOTE ON/OFF 9nH
OUT CONTROL CHANGE BnH
BANK SELECT MSB BnH,00H
BANK SELECT LSB BnH,20H
DATA ENTRY MSB BnH,06H
DATA ENTRY LSB BnH,26H
MAIN VOLUME BnH,07H
PANPOT BnH,0AH
SUSTAIN BnH,40H
SOSTENUTE BnH,42H
SOFT PEDAL BnH,43H
RELEASE TIME BnH,48H
REVERB SEND LEVEL BnH,5BH
CHORUS SEND LEVEL BnH,5DH
VARIATION SEND LEVEL BnH,5EH
RPN LSB BnH,64H
RPN MSB BnH,65H
PITCH BEND SENS. BnH,65H,00H,64H,00H,06H,mmH
PROGRAM CHANGE CnH
PITCH BEND EnH
SYSTEM EXCLUSIVE MESSAGE
<YAMAHA MIDI FORMAT>
<UNIVERSAL>
UNIVERSAL NON-REALTIME F0H 7EH.....F7H
<XG STANDARD>
XG PARAMETER CHANGE F0H 43H 1nH 4CH aaH aaH aaH ddH
.....ddH F7H
XG BULK DUMP F0H 43H 0nH 4CH bbH bbH aaH aaH
aaH ddH.....ddH ccH F7H
SPECIAL OPERATORS
SYSTEM REALTIME MESSAGE
MIDI CLOCK F8H
START FAH
STOP FCH
ACTIVE SENSING FEH
(2) RECEIVE FLOW
MIDI → NOTE OFF 8nH
IN NOTE ON/OFF 9nH
CONTROL CHANGE
BANK SELECT MSB BnH,00H
BANK SELECT LSB BnH,20H
MODULATION BnH,01H
PORTAMENTO TIME BnH,05H
DATA ENTRY MSB BnH,06H
DATA ENTRY LSB BnH,26H
MAIN VOLUME BnH,07H
PANPOT BnH,0AH
EXPRESSION BnH,0BH
SUSTAIN BnH,40H
PORTAMENTO BnH,41H
SOSTENUTO BnH,42H
SOFT PEDAL BnH,43H
HARMONIC CONTENT BnH,47H
RELEASE TIME BnH,48H
ATTACK TIME BnH,49H
BRIGHTNESS BnH,4AH
PORTAMENTO CONTROL BnH,54H
REVERB SEND LEVEL BnH,5BH
CHORUS SEND LEVEL BnH,5DH
VARIATION SEND LEVEL BnH,5EH
DATA INCREMENT BnH,60H
DATA DECREMENT BnH,61H
NRPN LSB BnH,62H
NRPN MSB BnH,63H
VIBRATO RATE BnH,63H,01H,62H,08H,06H,mmH
VIBRATO DEPTH BnH,63H,01H,62H,09H,06H,mmH
VIBRATO DELAY BnH,63H,01H,62H,0AH,06H,mmH
FILTER CUTOFF FREQ. BnH,63H,01H,62H,20H,06H,mmH
FILTER RESONANCE BnH,63H,01H,62H,21H,06H,mmH
AEG ATTACK TIME BnH,63H,01H,62H,63H,06H,mmH
AEG DECAY TIME BnH,63H,01H,62H,64H,06H,mmH
AEG RELEASE BnH,63H,01H,62H,66H,06H,mmH
DRUM INST
CUTOFF FREQ. BnH,63H,14H,62H,rrH,06H,mmH
FILTER RESONANCE BnH,63H,15H,62H,rrH,06H,mmH
AEG ATTACK RATE BnH,63H,16H,62H,rrH,06H,mmH
AEG DECAY RATE BnH,63H,17H,62H,rrH,06H,mmH
PITCH COARSE BnH,63H,18H,62H,rrH,06H,mmH
MIDI Data Format
147
140
PITCH FINE BnH,63H,19H,62H,rrH,06H,mmH
LEVEL BnH,63H,1AH,62H,rrH,06H,mmH
PANPOT BnH,63H,1CH,62H,rrH,06H,mmH
REVERB SEND BnH,63H,1DH,62H,rrH,06H,mmH
CHORUS SEND BnH,63H,1EH,62H,rrH,06H,mmH
VARIATION SEND BnH,63H,1FH,62H,rrH,06H,mmH
RPN LSB BnH,64H
RPN MSB BnH,65H
PITCH BEND SENS. BnH,65H,00H,64H,00H,06H,mmH
FINE TUNING BnH,65H,00H,64H,01H,06H,mmH,
26H,llH
COARSE TUNING BnH,65H,00H,64H,02H,06H,mmH
NULL BnH,65H,7FH,64H,7FH
ALL SOUND OFF BnH,78H,00H
RESET ALL CONTROLLERS BnH,79H,00H
ALL NOTES OFF BnH,7BH,00H
OMNI OFF BnH,7CH,00H
OMNI ON BnH,7DH,00H
MONO BnH,7EH
POLY BnH,7FH
PROGRAM CHANGE CnH
CHANNEL AFTER TOUCH DnH
PITCH BEND CHANGE EnH
SYSTEM EXCLUSIVE MESSAGE
<YAMAHA MIDI FORMAT>
<UNIVERSAL>
UNIVERSAL REALTIME F0H 7FH.....F7H
UNIVERSAL NON-REALTIME F0H 7EH.....F7H
<XG STANDARD>
XG PARAMETER CHANGE F0H 43H 1nH 4CH aaH aaH aaH ddH
.....ddH F7H
XG BULK DUMP F0H 43H 0nH 4CH bbH bbH aaH aaH
aaH ddH.....ddH ccH F7H
PARAMETER REQUEST F0H 43H 3nH 4CH aaH aaH aaH F7H
DUMP REQUEST F0H 43H 2nH 4CH aaH aaH aaH F7H
SPECIAL OPERATORS
Others
SYSTEM REALTIME MESSAGE
MIDI CLOCK F8H
START FAH
STOP FCH
ACTIVE SENSING FEH
(3-1-4) CHANNEL AFTER TOUCH (Receive only)
STATUS 1101nnnn(DnH) n = 0 - 15 VOICE CHANNEL NUMBER
VALUE 0vvvvvvv v = 0 - 127 AFTER TOUCH VALUE
(3-1-5) PITCH BEND CHANGE
STATUS 1110nnnn(EnH) n = 0 - 15 VOICE CHANNEL NUMBER
LSB 0vvvvvvv PITCH BEND CHANGE LSB
MSB 0vvvvvvv PITCH BEND CHANGE MSB
(3-1-6) CONTROL CHANGE
STATUS 1011nnnn(BnH) n = 0 - 15 VOICE CHANNEL NUMBER
CONTROL NUMBER 0ccccccc
CONTROL VALUE 0vvvvvvv
* Transmit CONTROL NUMBER.
c = 0 BANK SELECT MSB ; v = 0:XG NORMAL,
64:SFX NORMAL,
126:XG SFX KIT,
127:XG DRUM
c = 32 BANK SELECT LSB ; v = 0 - 127
c = 6 DATA ENTRY MSB ; v = 0 - 127
c = 38 DATA ENTRY LSB ; v = 0 - 127
c = 7 MAIN VOLUME ; v = 0 - 127
c = 10 PANPOT ; v = 0 - 127
c = 64 SUSTAIN ; v = 0-63:OFF , 64-127:ON
c = 66 SOSTENUTO ; v = 0-63:OFF , 64-127:ON
c = 67 SOFT PEDAL ; v = 0-63:OFF , 64-127:ON
c = 72 RELEASE TIME ; v = 0:-64-64:0-127:+63
c = 91 REVERB SEND LEVEL ; v = 0 - 127
c = 93 CHORUS SEND LEVEL ; v = 0 - 127
c = 94 VARIATION SEND LEVEL ; v = 0 - 127
(When only Connection = 1[System])
c = 100 RPN LSB Refer to “(3-3)REGISTERED
PARAMETER NUMBER”
c = 101 RPN MSB Refer to “(3-3)REGISTERED
PARAMETER NUMBER”
* Receive CONTROL NUMBER.
c = 0 BANK SELECT MSB ; v =0:XG NORMAL,
64:SFX NORMAL,
126:XG SFX KIT,
127:XG DRUM
c = 32 BANK SELECT LSB ; v = 0 - 127
c = 1 MODULATION ; v = 0 - 127
c = 5 PORTAMENTO TIME ; v = 0 - 127 *2
c = 6 DATA ENTRY MSB ; v = 0 - 127 *1
c = 38 DATA ENTRY LSB ; v = 0 - 127 *1
c = 7 MAIN VOLUME ; v = 0 - 127
c = 10 PANPOT ; v = 0 - 127
c = 11 EXPRESSION ; v = 0 - 127
c = 64 SUSTAIN ; v = 0-63:OFF , 64-127:ON *2
c = 65 PORTAMENTO ; v = 0-63:OFF , 64-127:ON *2
c = 66 SOSTENUTO ; v = 0-63:OFF , 64-127:ON *2
c = 67 SOFT PEDAL ; v = 0-63:OFF , 64-127:ON *2
c = 71 HARMONIC CONTENT ; v = 0:-64 - 64:0 - 127:+63
c = 72 RELEASE TIME ; v = 0:-64 - 64:0 - 127:+63 *2
c = 73 ATTACK TIME ; v = 0:-64 - 64:0 - 127:+63
c = 74 BRIGHTNESS ; v = 0:-64 - 64:0 - 127:+63
c = 84 PORTAMENT CONTROL ; v = 0 - 127 *2
c = 91 REVERB SEND LEVEL ; v = 0 - 127
c = 93 CHORUS SEND LEVEL ; v = 0 - 127
c = 94 VARIATION SEND LEVEL ; v = 0 - 127
(When only Connection=1[System])
c = 96 DATA INCREMENT ; v = 0 - 127 *1
c = 97 DATA DECREMENT ; v = 0 - 127 *1
c = 98 NRPN LSB Refer to “(3-4)NON-REGISTERED
PARAMETER NUMBER”
c = 99 NRPN MSB Refer to “(3-4)NON-REGISTERED
PARAMETER NUMBER”
c = 100 RPN LSB Refer to “(3-3)REGISTERED
PARAMETER NUMBER”
c = 101 RPN MSB Refer to “(3-3)REGISTERED
PARAMETER NUMBER”
*1 Only when setting the appointed parameter with RPN.
*2 Does not effect Rhythm Voice.
• Until a PROGRAM CHANGE message is received, the BANK SELECT operation
will be suspended.
When a Voice, including VOICE BANK, is changed, set the BANK SELECT and
Program Change Message, and transmit in the following order, BANK SELECT
MSB, LSB, PROGRAM CHANGE.
• MODULATION controls the Vibrato Depth.
• PORTAMENTO TIME controls the Pitch Change Speed when the Portamento Switch
= ON. 0 being the shortest time, and 127 being the longest.
• PANPOT changes the value for the melody voice and rhythm voice in relation to the
preset value.
• Portamento time is fixed to 0 when the PORTAMENTO CONTROL is used.
• HARMONIC CONTENT applies adjustment to the resonance value that is set by the
voice.
(3) TRANSMIT/RECEIVE DATA
(3-1) CHANNEL VOICE MESSAGES
(3-1-1) NOTE OFF (Receive only)
STATUS 1000nnnn(8nH) n = 0 - 15 VOICE CHANNEL NUMBER
NOTE NUMBER 0kkkkkkk k = 0 (C-2) - 127 (G8)
VELOCITY 0vvvvvvv v: ignored
(3-1-2) NOTE ON/OFF
STATUS 1001nnnn(9nH) n = 0 - 15 VOICE CHANNEL NUMBER
NOTE NUMBER 0kkkkkkk k = 0 (C-2) - 127 (G8)
VELOCITY 0vvvvvvv (v≠0) NOTE ON
00000000 (v=0) NOTE OFF
(3-1-3) PROGRAM CHANGE
STATUS 1100nnnn(CnH) n = 0 - 15 VOICE CHANNEL NUMBER
PROGRAM NUMBER 0ppppppp p = 0 - 127
* PROGRAM NUMBER: XG DRUM VOICE number correspondence
P = 0 Standard Kit
P = 1 Standard2 Kit
P = 8 Room Kit
P = 16 Rock Kit
P = 24 Elctrnic Kit
P = 25 Analog Kit
P = 27 Dance Kit
P = 32 Jazz Kit
P = 40 Brush Kit
P = 48 Symphonic Kit
* PROGRAM NUMBER: XG SFX KIT number correspondence
P = 0 SFX1 Kit
P = 1 SFX2 Kit
When DRUM VOICE is selected and program change data for a different DRUM
VOICE is received, the currently selected DRUM VOICE will be replaced with the new
DRUM VOICE.
MIDI Data Format
148

141
This parameter specifies relative change with the value of 64 producing 0 adjustment.
As values get higher the sound becomes increasingly eccentric.
Note that for some voices the effective parameter range is narrower than the legal
parameter range.
• RELEASE TIME applies adjustment to the envelope release time set by the voice.
This parameter specifies relative change with the value of 64 producing 0 adjustment.
• ATTACK TIME applies adjustment to the envelope attack time set by the voice.
This parameter specifies relative change with the value of 64 producing 0 adjustment.
• BRIGHTNESS applies adjustment to the cut-off frequency set by the voice.
This parameter specifies relative change with the value of 64 producing 0 adjustment.
Lower voices produce a softer sound.
For some voices the effective parameter range is narrower than the legal parameter
range.
(3-2) CHANNEL MODE MESSAGES
STATUS 1011nnnn(BnH) n = 0 - 15 VOICE CHANNEL NUMBER
CONTROL NUMBER 0ccccccc c = CONTROL NUMBER
CONTROL VALUE 0vvvvvvv v = DATA VALUE
(3-2-1) ALL SOUND OFF (Receive only)
(CONTROL NUMBER = 78H , DATA VALUE = 0)
Switches off all sound from the channel.
Does not reset Note On and Hold On conditions established by Channel Messages.
(3-2-2) RESET ALL CONTROLLERS (Receive only)
(CONTROL NUMBER = 79H , DATA VALUE = 0)
Resets controllers as follows.
PITCH BEND CHANGE 0 (Center)
AFTER TOUCH 0 (min.)
MODULATION 0 (min.)
EXPRESSION 127 (max.)
SUSTAIN 0 (off)
SOSTENUTO 0 (off)
SOFT PEDAL 0 (off)
NRPN Sets number to null. (Internal data remains unchanged)
RPN Sets number to null. (Internal data remains unchanged)
PORTAMENT CONTROL Resets portamento source note number
PORTAMENTO 0 (off)
(3-2-3) ALL NOTES OFF (Receive only)
(CONTROL NUMBER = 7BH , DATA VALUE = 0)
Switches off all of the channel’s “on” notes.
However, any notes being held by SUSTAIN or SOSTENUTO continue to sound until
SUSTAIN/SOSTENUTO goes off.
(3-2-4) OMNI OFF (Receive only)
(CONTROL NUMBER = 7CH , DATA VALUE = 0)
Same processing as for All Notes Off.
(3-2-5) OMNI ON (Receive only)(CONTROL NUMBER = 7DH , DATA VALUE = 0)
Same processing as for All Notes Off. Omni On is not executed.
(3-2-6) MONO (Receive only) (CONTROL NUMBER = 7EH , DATA VALUE = 0)
Same processing as for All Notes Off.
If the 3rd byte is in a range of 0-16 the corresponding channel will be changed to Mode
4 (m=1).
(3-2-7) POLY (Receive only) (CONTROL NUMBER = 7FH , DATA VALUE = 0)
Same processing as for All Sounds Off and the corresponding channel will be changed
to Mode 3.
(3-3) REGISTERED PARAMETER NUMBER (RPN)
STATUS 1011nnnn(BnH) n = 0 - 15 VOICE CHANNEL NUMBER
RPN LSB 01100100(64H)
RPN LSB NUMBER 0ppppppp p = RPN LSB(refer to the list below)
RPN MSB 01100101(65H)
RPN MSB 0qqqqqqq q = RPN MSB(refer to the list below)
DATA ENTRY MSB 00000110(06H)
DATA VALUE 0mmmmmmm m = Data Value
DATA ENTRY LSB 00100110(26H)
DATA VALUE 0lllllll l = Data Value
First appoints the parameter for RPN MSB/LSB, then sets the parameter value for data
entry MSB/LSB.
RPN D.ENTRY
MSB LSB MSB LSB PARAMETER NAME DATA RANGE
00H 00H mmH — PITCH BEND SENSITIVITY 00H - 18H(0 - 24 semitones)
01H 00H mmH llH FINE TUNE {mmH,llH} =
{00H,00H}-{40H,00H}-{7FH,7FH}
(-8192*100/8192) - 0 - (+8192*100/8192)
02H 00H mmH — COARSE TUNE
28H - 40H - 58H (-24 - 0 - +24 semitones)
7FH 7FH — — NULL Clears the current RPN number setting.
Does not change the internal parameter settings.
(3-4) NON-REGISTERED PARAMETER NUMBER (NRPN) (Receive only)
STATUS 1011nnnn(BnH) n = 0 - 15 VOICE CHANNEL NUMBER
NRPN LSB 01100010(62H)
NRPN LSB NUMBER 0ppppppp p = NRPN LSB(refer to the list below)
NRPN MSB 01100011(63H)
NRPN MSB NUMBER 0qqqqqqq q = NRPN MSB(refer to the list below)
DATA ENTRY MSB 00000110(06H)
DATA VALUE 0mmmmmmm m = Data Value
First appoints the parameter for NRPN MSB/LSB, then sets the parameter value for
data entry MSB/LSB.
NRPN D.ENTRY
MSB LSB MSB LSB PARAMETER NAME DATA RANGE
01H 08H mmH — VIBRATO RATE 00H - 40H - 7FH (-64 - 0 - +63)
01H 09H mmH — VIBRATO DEPTH 00H - 40H - 7FH (-64 - 0 - +63)
01H 0AH mmH — VIBRATO DELAY 00H - 40H - 7FH (-64 - 0 - +63)
01H 20H mmH — FILTER CUTOFF FREQUENCY 00H - 40H - 7FH (-64 - 0 - +63)
01H 21H mmH — FILTER RESONANCE 00H - 40H - 7FH (-64 - 0 - +63)
01H 63H mmH — EG ATTACK TIME 00H - 40H - 7FH (-64 - 0 - +63)
01H 64H mmH — EG DECAY TIME 00H - 40H - 7FH (-64 - 0 - +63)
01H 66H mmH — EG RELEASE 00H - 40H - 7FH (-64 - 0 - +63)
14H rrH mmH — DRUM FILTER CUTOFF FREQ. 00H - 40H - 7FH (-64 - 0 - +63)
15H rrH mmH — DRUM FILTER RESONANCE 00H - 40H - 7FH (-64 - 0 - +63)
16H rrH mmH — DRUM AEG ATTACK RATE 00H - 40H - 7FH (-64 - 0 - +63)
17H rrH mmH — DRUM AEG DECAY RATE 00H - 40H - 7FH (-64 - 0 - +63)
18H rrH mmH — DRUM PITCH COARSE 00H - 40H - 7FH (-64 - 0 - +63)
19H rrH mmH — DRUM PITCH FINE 00H - 40H - 7FH (-64 - 0 - +63)
1AH rrH mmH — DRUM LEVEL 00H - 7FH (0 - max.)
1CH rrH mmH — DRUM PANPOT 00H, 01H - 40H - 7FH
(random,left - center - right)
1DH rrH mmH — DRUM REVERB SEND LEVEL 00H - 7FH (0 - max.)
1EH rrH mmH — DRUM CHORUS SEND LEVEL 00H - 7FH (0 - max.)
1FH rrH mmH — DRUM VARIATION SEND LEVEL 00H - 7FH (0 - max.)
The MSG14H-1FH (for drums) message is accepted as long as the channel is set with a
drum voice.
rrH : drum instrument note number
(3-5) SYSTEM REALTIME MESSAGES
(3-5-1) MIDI CLOCK
STATUS 11111000 (F8H)
Transmission: 96 clocks per measure are transmitted.
Reception: If the instrument’s clock is set to external, after FAH is received from the
external device the instrument’s clock will sync with the 96 beats per measure received
from the external device.
Decides whether the internal clock, or Timing Clocks received via the MIDI IN will be
used.
(3-5-2) START
STATUS 11111010 (FAH)
Transmission: Transmitted when instrument’s Rhythm or Song playback is started.
Reception: Depending upon the condition, Rhythm, Song Playback, or Song Rec will
start.
(3-5-3) STOP
STATUS 11111100 (FCH)
Transmission: Transmitted when instrument’s Rhythm or Song playback is stopped.
Reception: Depending upon the condition, Rhythm, Song Playback, or Song Rec will
stop.
(3-5-4) ACTIVE SENSING
STATUS 11111110 (FEH)
Transmission: Transmitted approximately once every 200msec.
Reception: Depending upon the condition, Rhythm, Song Playback, or Song Rec will
stop.
(3-6) SYSTEM EXCLUSIVE MESSAGE
(3-6-1) YAMAHA MIDI FORMAT
(3-6-1-1) SECTION CONTROL
binary hexadecimal
11110000 F0 Exclusive status
01000011 43 YAMAHA ID
01111110 7E Style
00000000 00
0sssssss SS Switch No.
00H : INTRO A
01H - 07H : INTRO B
08H : MAIN A
09H - 0FH : MAIN B
10H : FILL IN A
11H - 1FH : FILL IN B
20H : ENDING A
21H - 27H : ENDING B
0ddddddd DD Switch On/Off: 00H(Off),7FH(On)
11110111 F7 End of Exclusive
When an ON code is received, the appointed section will be changed.
MIDI Data Format
149

142
(3-6-1-2) TEMPO CONTROL
binary hexadecimal
11110000 F0 Exclusive status
01000011 43 YAMAHA ID
01111110 7E Style
00000000 01
0ttttttt TT Tempo4
0ttttttt TT Tempo3
0ttttttt TT Tempo2
0ttttttt TT Tempo1
11110111 F7 End of Exclusive
The internal clock will be set to the received Tempo value.
Tempo Meta Event is a large data block (24-bit), it is divided into 4 groups with 7-bits
going into each of the Tempos 1-4 (4 receives the remaining 3 bits).
(3-6-2) UNIVERSAL SYSTEM EXCLUSIVE
(3-6-2-1) UNIVERSAL REALTIME MESSAGE
(3-6-2-1-1) MIDI MASTER VOLUME (Receive only)
binary hexadecimal
11110000 F0 Exclusive status
01111111 7F Universal Realtime
01111111 7F ID of target Device
00000100 04 Sub-ID #1=Device Control Message
00000001 01 Sub-ID #2=Master Volume
0sssssss SS Volume LSB
0ttttttt TT Volume MSB
11110111 F7 End of Exclusive
or
11110000 F0 Exclusive status
01111111 7F Universal Realtime
0xxxnnnn XN When N is received N=0-F, whichever is received.
When N is transmitted N always=0.
X = don’t care
00000100 04 Sub-ID #1=Device Control Message
00000001 01 Sub-ID #2=Master Volume
0sssssss SS Volume LSB
0ttttttt TT Volume MSB
11110111 F7 End of Exclusive
The volume for all channels will be changed simultaneously.
The TT value is used as the MIDI Master Volume value. (the ss value is ignored.)
(3-6-2-2) UNIVERSAL NON REALTIME MESSAGE
(3-6-2-2-1) GENERAL MIDI SYSTEM ON
binary hexadecimal
11110000 F0 Exclusive status
01111110 7E Universal Non-Realtime
01111111 7F ID of target Device
00001001 09 Sub-ID #1=General MIDI Message
00000001 01 Sub-ID #2=General MIDI On
11110111 F7 End of Exclusive
or
11110000 F0 Exclusive status
01111110 7E Universal Non-Realtime
0xxxnnnn XN When N is received N=0-F, whichever is received.
When N is transmitted N always=0.
X = don’t care
00001001 09 Sub-ID #1=General MIDI Message
00000001 01 Sub-ID #2=General MIDI On
11110111 F7 End of Exclusive
Depending upon the received ON message, the System Mode will be changed to XG.
Except MIDI Master Tuning, all control data be reset to default values.
This message requires approximately 50ms to execute, so sufficient time should be
allowed before the next message is sent.
The bank select message for the channel 10 and the NRPN message are not received in
the GM mode.
(3-6-3) XG STANDARD
(3-6-3-1) XG PARAMETER CHANGE
(3-6-3-1-1) XG SYSTEM ON
binary hexadecimal
11110000 F0 Exclusive status
01000011 43 YAMAHA ID
0001nnnn 1N Device Number
01001100 4C Model ID
00000000 00 Address High
00000000 00 Address Mid
01111110 7E Address Low
00000000 00 Data
11110111 F7 End of Exclusive
Depending upon the received ON message, the SYSTEM MODE will be changed to
XG.Controllers will be reset, all values of Multi Part and Effect, and All System values
denoted by “XG” data within All System will be reset to default values in the table.
This message requires approximately 50ms to execute, so sufficient time should be
allowed before the next message is sent.
(3-6-3-1-2) XG PARMETER CHANGE
binary hexadecimal
11110000 F0 Exclusive status
01000011 43 YAMAHA ID
0001nnnn 1N Device Number
01001100 4C Model ID
0aaaaaaa AA Address High
0aaaaaaa AA Address Mid
0aaaaaaa AA Address Low
0ddddddd DD Data
| |
11110111 F7 End of Exclusive
For parameters with data size of 2 or 4, transmit the appropriate number of data bytes.
For more information on Address and Parameters, refer to < Table 1-2 > - < Table 1-5 >.
The data types listed below are transmitted and received.
System Data
Multi Effect1 Data
Multi Part Data
Drums Setup Data
(3-6-3-2) XG BULK DUMP
binary hexadecimal
01110000 F0 Exclusive status
01000011 43 YAMAHA ID
0000nnnn 0N Device Number
01001100 4C Model ID
0bbbbbbb BB ByteCount MSB
0bbbbbbb BB ByteCount LSB
0aaaaaaa AA Address High
0aaaaaaa AA Address Mid
0aaaaaaa AA Address Low
0ddddddd DD Data
| |
0ccccccc CC Check sum
11110111 F7 End of Exclusive
For more information on Address and Byte Count, refer to < Table 1-2 > - < Table 1-5 >.
The Check Sum value is set such that the sum of Byte Count, Address, Data, and Check
Sum has value zero in its seven least significant bits.
If the top of the block is appointed to the Address the XG Bulk Dump, Bulk Request
will be received.
The Block is a unit that consists of the data, arranged in the list, as the Total Size.
The data types listed below are transmitted and received.(These are transmitted only
after a Bulk Dump request is received.)
System Data
System Information (Transmit ONLY)
Multi Effect1 Data
Multi Part Data
Drums Setup Data
(3-6-3-3) XG PARAMETER REQUEST (Receive only)
binary hexadecimal
11110000 F0 Exclusive status
01000011 43 YAMAHA ID
0011nnnn 3n Device Number
01001100 4C Model ID
0aaaaaaa AA Address High
0aaaaaaa AA Address Mid
0aaaaaaa AA Address Low
11110111 F7 End of Exclusive
For more information on Address and Byte Count refer to < Table 1-2 > - < Table1-5 >.
The data types listed below are received.
System Data
Multi Effect1 Data
Multi Part Data
Drums Setup Data
(3-6-3-4) XG DUMP REQUEST (Receive only)
binary hexadecimal
11110000 F0 Exclusive status
01000011 43 YAMAHA ID
0010nnnn 2n Device Number
01001100 4C Model ID
00aaaaaaa AA Address High
00aaaaaaa AA Address Mid
00aaaaaaa AA Address Low
11110111 F7 End of Exclusive
For more information on Address and Byte Count refer to < Table 1-2 > - < Table1-5 >.
The data types listed below are received.
System Data
System Information
Multi Effect1 Data
Multi Part Data
Drums Setup Data
MIDI Data Format
150

143
(3-6-4) CLAVINOVA MIDI COMPLIANCE
(3-6-4-1) DOC MULTI TIMBRE ON / OFF (Receive only)
binary hexadecimal
11110000 F0 Exclusive status
01000011 43 YAMAHA ID
01110011 73 Clavinova ID
00000001 01 Clavinova commmon ID
0001000n 1N
N: 3(DOC Multi Timbre Off),4(DOC Multi Timbre On)
11110111 F7 End of Exclusive
(3-6-4-2) MIDI FA CANCEL(Receive only)
binary hexadecimal
11110000 F0 Exclusive status
01000011 43 YAMAHA ID
01110011 73 Clavinova ID
00000001 01 Clavinova common ID
01100001 61 MIDI FA Cancel
11110111 F7 End of Exclusive
If this message is received, even if FAH is received the accompaniment/song will not
start.
(3-6-5) SPECIAL OPERATORS
(3-6-5-1) VOLUME ,EXPRESSION AND PAN REALTIME CONTROL OFF
binary hexadecimal
11110000 F0 Exclusive status
01000011 43 YAMAHA ID
01110011 73 Clavinova ID
00000001 01 Clavinova common ID
00010001 11 Sub ID
0000nnnn 0N N = MIDI Channel
01000101 45 Volume and Expression Realtime Control Off
0vvvvvvv VV Value VV: Off=7FH, on=OOH
11110111 F7 End of Exclusive
When “On” is received, subsequent volume, expression, and PAN
changes are only valid after the reception of the next key on.
Normal operation resumes when “Off” is received.
(3-6-6) Others
(3-6-6-1) MIDI MASTER TUNING(Receive only)
binary hexadecimal
11110000 F0 Exclusive status
01000011 43 YAMAHA ID
0001nnnn 1N When N is received N=0-F, whichever is received.
When N is transmitted N always=0.
00100111 27 Model ID
00110000 30 Sub ID
00000000 00
00000000 00
0mmmmmmm MM Master Tune MSB
0lllllll LL Master Tune LSB
0ccccccc CC don’t care
11110111 F7 End of Exclusive
Changes tuning of all channels.
MM, LL values are used to define the MIDI Master Tuning value.
T = M-128
T : Tuning value (-99cent - +99cent)
M : A single byte value (28-228) consists of bytes 0-3 of MM = MSB,
bytes 0-3 of LL = LSB.
In this setting, GM System ON, XG System ON will not be reset.
< Table 1-1> Parmeter Basic Address
Parameter Change
Address
(H) (M) (L) Description
SYSTEM 00 00 00 System
00 00 7D Drum Setup Reset
00 00 7E XG System On
00 00 7F All Parameter Reset
INFORMATION 01 00 00 System Information
EFFECT 1 02 01 00 Effect1(Reverb,Chorus,Variation)
MULTI PART 08 00 00 Multi Part 1
:
08 0F 00 Multi Part 16
DRUM 30 0D 00 Drum Setup 1 → Address Parameter
31 0D 00 Drum Setup 2 : :
3n 0D 0 note number 13
3n 0E 0 note number 14
: :
3n 5B 0 note number 91
< Table 1-2 > MIDI Parameter Change table (SYSTEM)
Address Size Data Prameter Name Description Default Value
(H) (H) (H) (H)
00 00 00 4 0000 Master Tune -102.4..+102.3[cent] 00 04 00 00
01 ..07FF 1st bit3-0 → bit15-12 (400)
02 2nd bit3-0 → bit11-8
03 3rd bit3-0 → bit7-4
4th bit3-0 → bit3-0
04 1 00..7F Master Volume 0..127 7F
05 1 Not Used
06 1 28..58 Transpose -24..+24[semitones] 40
7D 0n Drum Setup Reset 0n=Drum Setup Number
7E 00 XG System On 00=XG Sytem on
7F 00 All Parameter Reset 00=on (receive only)
TOTAL SIZE 7
< Table 1-3 > MIDI Parameter table (System information)
Address Size Data Prameter Name Description
(H) (H) (H)
01 00 00 E 20..7F Model Name 32..127(ASCII)
:
0D
0E 1 00
0F 1 00
TOTAL SIZE 10
(Transmitted by Dump Request. Not received. Bulk Dump Only)
MIDI Data Format
151

144
< Table 1-4 > MIDI Parameter Change table (EFFECT)
Address Size Data Prameter Name Description Default Value
(H) (H) (H) (H)
02 01 00 2 00..7F Reverb Type MSB Refer to the Ef. Type List 01(=HALL1)
00..7F Reverb Type LSB 00 : basic type 00
02 1 00..7F Reverb Parameter 1 Refer to the Ef. Parameter List Depend on Reverb type
03 1 00..7F Reverb Parameter 2 Refer to the Ef. Parameter List Depend on Reverb type
04 1 00..7F Reverb Parameter 3 Refer to the Ef. Parameter List Depend on Reverb type
05 1 00..7F Reverb Parameter 4 Refer to the Ef. Parameter List Depend on Reverb type
06 1 00..7F Reverb Parameter 5 Refer to the Ef. Parameter List Depend on Reverb type
07 1 00..7F Reverb Parameter 6 Refer to the Ef. Parameter List Depend on Reverb type
08 1 00..7F Reverb Parameter 7 Refer to the Ef. Parameter List Depend on Reverb type
09 1 00..7F Reverb Parameter 8 Refer to the Ef. Parameter List Depend on Reverb type
0A 1 00..7F Reverb Parameter 9 Refer to the Ef. Parameter List Depend on Reverb type
0B 1 00..7F Reverb Parameter 10 Refer to the Ef. Parameter List Depend on Reverb type
0C 1 00..7F Reverb Return -∞..0..+6dB(0..64..127) 40
0D 1 01..7F Reverb Pan L63..C..R63(1..64..127) 40
TOTAL SIZE 0E
02 01 10 1 00..7F Reverb Parameter 11 Refer to the Ef. Parameter List Depend on Reverb type
11 1 00..7F Reverb Parameter 12 Refer to the Ef. Parameter List Depend on Reverb type
12 1 00..7F Reverb Parameter 13 Refer to the Ef. Parameter List Depend on Reverb type
13 1 00..7F Reverb Parameter 14 Refer to the Ef. Parameter List Depend on Reverb type
14 1 00..7F Reverb Parameter 15 Refer to the Ef. Parameter List Depend on Reverb type
15 1 00..7F Reverb Parameter 16 Refer to the Ef. Parameter List Depend on Reverb type
TOTAL SIZE 6
02 01 20 2 00..7F Chorus Type MSB Refer to the Ef. Type List 41(=Chorus1)
00..7F Chorus Type LSB 00 : basic type 00
22 1 00..7F Chorus Parameter 1 Refer to the Ef. Parameter List Depend on Chorus Type
23 1 00..7F Chorus Parameter 2 Refer to the Ef. Parameter List Depend on Chorus Type
24 1 00..7F Chorus Parameter 3 Refer to the Ef. Parameter List Depend on Chorus Type
25 1 00..7F Chorus Parameter 4 Refer to the Ef. Parameter List Depend on Chorus Type
26 1 00..7F Chorus Parameter 5 Refer to the Ef. Parameter List Depend on Chorus Type
27 1 00..7F Chorus Parameter 6 Refer to the Ef. Parameter List Depend on Chorus Type
28 1 00..7F Chorus Parameter 7 Refer to the Ef. Parameter List Depend on Chorus Type
29 1 00..7F Chorus Parameter 8 Refer to the Ef. Parameter List Depend on Chorus Type
2A 1 00..7F Chorus Parameter 9 Refer to the Ef. Parameter List Depend on Chorus Type
2B 1 00..7F Chorus Parameter 10 Refer to the Ef. Parameter List Depend on Chorus Type
2C 1 00..7F Chorus Return -∞..0..+6dB(0..64..127) 40
2D 1 01..7F Chorus Pan L63..C..R63(1..64..127) 40
2E 1 00..7F Send Chorus To Reverb -∞..0..+6dB(0..64..127) 00
TOTAL SIZE 0F
02 01 30 1 00..7F Chorus Parameter 11 Refer to the Ef. Parameter List Depend on Chorus Type
31 1 00..7F Chorus Parameter 12 Refer to the Ef. Parameter List Depend on Chorus Type
32 1 00..7F Chorus Parameter 13 Refer to the Ef. Parameter List Depend on Chorus Type
33 1 00..7F Chorus Parameter 14 Refer to the Ef. Parameter List Depend on Chorus Type
34 1 00..7F Chorus Parameter 15 Refer to the Ef. Parameter List Depend on Chorus Type
35 1 00..7F Chorus Parameter 16 Refer to the Ef. Parameter List Depend on Chorus Type
TOTAL SIZE 6
02 01 40 2 00..7F Variation Type MSB Refer to the Ef. Type List 05(=DELAY L,C,R)
00..7F Variation Type LSB 00 : basic type 00
42 2 00..7F Vari. Param. 1 MSB Refer to the Ef. Parameter List Depend on Vari. Type
00..7F Vari. Param. 1 LSB Refer to the Ef. Parameter List Depend on Vari. Type
44 2 00..7F Vari. Param. 2 MSB Refer to the Ef. Parameter List Depend on Vari. Type
00..7F Vari. Param. 2 LSB Refer to the Ef. Parameter List Depend on Vari. Type
46 2 00..7F Vari. Param. 3 MSB Refer to the Ef. Parameter List Depend on Vari. Type
00..7F Vari. Param. 3 LSB Refer to the Ef. Parameter List Depend on Vari. Type
48 2 00..7F Vari. Param. 4 MSB Refer to the Ef. Parameter List Depend on Vari. Type
00..7F Vari. Param. 4 LSB Refer to the Ef. Parameter List Depend on Vari. Type
4A 2 00..7F Vari. Param. 5 MSB Refer to the Ef. Parameter List Depend on Vari. Type
00..7F Vari. Param. 5 LSB Refer to the Ef. Parameter List Depend on Vari. Type
4C 2 00..7F Vari. Param. 6 MSB Refer to the Ef. Parameter List Depend on Vari. Type
00..7F Vari. Param. 6 LSB Refer to the Ef. Parameter List Depend on Vari. Type
4E 2 00..7F Vari. Param. 7 MSB Refer to the Ef. Parameter List Depend on Vari. Type
00..7F Vari. Param. 7 LSB Refer to the Ef. Parameter List Depend on Vari. Type
50 2 00..7F Vari. Param. 8 MSB Refer to the Ef. Parameter List Depend on Vari. Type
00..7F Vari. Param. 8 LSB Refer to the Ef. Parameter List Depend on Vari. Type
52 2 00..7F Vari. Param. 9 MSB Refer to the Ef. Parameter List Depend on Vari. Type
00..7F Vari. Param. 9 LSB Refer to the Ef. Parameter List Depend on Vari. Type
54 2 00..7F Vari. Param. 10 MSB Refer to the Ef. Parameter List Depend on Vari. Type
00..7F Vari. Param. 10 LSB Refer to the Ef. Parameter List Depend on Vari. Type
56 1 00..7F Variation Return -∞..0..+6dB(0..64..127) 40
57 1 01..7F Variation Pan L63..C..R63(1..64..127) 40
58 1 00..7F Send Vari. To Reverb -∞..0..+6dB(0..96..127) 00
59 1 00..7F Send Vari. To Chorus -∞..0..+6dB(0..96..127) 00
5A 1 00..01 Variation Connection 0:insertion,1:system 00
5B 1 00..7F Variation Part
part1..16(0..15),off(16..63,65..127),AD1(64)
7F
5C 1 00..7F MW Vari. Ctrl Depth -63..+63 40
5D 1 00..7F PB Vari. Ctrl Depth -63..+63 40
5E 1 00..7F CAT Vari. Ctrl Depth -63..+63 40
5F 1 Not Used
60 1 Not Used
TOTAL SIZE 21
02 01 70 1 00..7F Variation Parameter 11 option Parameter Depend on Variation Type
71 1 00..7F Variation Parameter 12 option Parameter Depend on Variation Type
72 1 00..7F Variation Parameter 13 option Parameter Depend on Variation Type
73 1 00..7F Variation Parameter 14 option Parameter Depend on Variation Type
74 1 00..7F Variation Parameter 15 option Parameter Depend on Variation Type
75 1 00..7F Variation Parameter 16 option Parameter Depend on Variation Type
TOTAL SIZE 6
MIDI Data Format
152

145
< Table 1-5 > MIDI Parameter Change table (MULTI PART)
Address Size Data Prameter Name Description Default Value
(H) (H) (H) (H)
08 nn 00 1 00..20 Element Reserve 0..32 0(Part10),2(Others)
nn 01 1 00..7F Bank Select MSB 0..127 7F(Part10),00(Others)
nn 02 1 00..7F Bank Select LSB 0..127 00
nn 03 1 00..7F Program Number 1..128 00
nn 04 1 00..0F, Rcv Channel 0..15;1..16,127;off Part No.
7F
nn 05 1 00..01 Mono/Poly Mode 0:mono,1:poly 01
nn 06 1 00..03 Same Note Number 0:single 01
Key On Assign 1:multi
2:inst (for DRUM)
nn 07 1 00..02 Part Mode 0:normal 00 (other than Part10)
1:drum (ROM) 01 (Part10)
2-3:drum (RAM)
nn 08 1 28..58 Note Shift -24..+24[semitones] 40
nn 09 2 00..FF Detune -12.8..+12.7[Hz] 08 00
nn 0A 1st bit3..0 → bit7..4 -80
2nd bit3..0 → bit3..0
nn 0B 1 00..7F Volume 0..127 64
nn 0C 1 00..7F Velocity Sense Depth 0..127 40
nn 0D 1 00..7F Velocity Sense Offset 0..127 40
nn 0E 1 00..7F Pan 0:random 40
L63..C..R63(1..64..127)
nn 0F 1 00..7F Note Limit Low C-2..G8 00
nn 10 1 00..7F Note Limit High C-2..G8 7F
nn 11 1 00..7F Dry Level 0..127 7F
nn 12 1 00..7F Chorus Send 0..127 00
nn 13 1 00..7F Reverb Send 0..127 28
nn 14 1 00..7F Variation Send 0..127 00
nn 15 1 00..7F Vibrato Rate -64..+63 40
nn 16 1 00..7F Vibrato Depth -64..+63 40
nn 17 1 00..7F Vibrato Delay -64..+63 40
nn 18 1 00..7F Filter Cutoff Freq. -64..+63 40
nn 19 1 00..7F Filter Resonance -64..+63 40
nn 1A 1 00..7F EG Attack Time -64..+63 40
nn 1B 1 00..7F EG Decay Time -64..+63 40
nn 1C 1 00..7F EG Release Time -64..+63 40
nn 1D 1 28..58 MW Pitch Control -24..+24[semitones] 40
nn 1E 1 00..7F MW Filter Control -9600..+9450[cent] 40
nn 1F 1 00..7F MW Amp. Control -100..+100[%] 40
nn 20 1 00..7F MW LFO PMod Depth 0..127 0A
nn 21 1 00..7F MW LFO FMod Depth 0..127 00
nn 22 1 00..7F MW LFO AMod Depth 0..127 00
nn 23 1 28..58 Bend Pitch Control -24..+24[semitones] 42
nn 24 1 00..7F Bend Filter Control -9600..+9450[cent] 40
nn 25 1 00..7F Bend Amp. Control -100..+100[%] 40
nn 26 1 00..7F Bend LFO PMod Depth 0..127 00
nn 27 1 00..7F Bend LFO FMod Depth 0..127 00
nn 28 1 00..7F Bend LFO AMod Depth 0..127 00
TOTAL SIZE 29
nn 30 Not Used
: :
nn 40 Not Used
nn 41 1 00..7F Scale Tuning C -64..+63[cent] 40
nn 42 1 00..7F Scale Tuning C# -64..+63[cent] 40
nn 43 1 00..7F Scale Tuning D -64..+63[cent] 40
nn 44 1 00..7F Scale Tuning D# -64..+63[cent] 40
nn 45 1 00..7F Scale Tuning E -64..+63[cent] 40
nn 46 1 00..7F Scale Tuning F -64..+63[cent] 40
nn 47 1 00..7F Scale Tuning F# -64..+63[cent] 40
nn 48 1 00..7F Scale Tuning G -64..+63[cent] 40
nn 49 1 00..7F Scale Tuning G# -64..+63[cent] 40
nn 4A 1 00..7F Scale Tuning A -64..+63[cent] 40
nn 4B 1 00..7F Scale Tuning A# -64..+63[cent] 40
nn 4C 1 00..7F Scale Tuning B -64..+63[cent] 40
nn 4D 1 28..58 CAT Pitch Control -24..+24[semitones] 40
nn 4E 1 00..7F CAT Filter Control -9600..+9450[cent] 40
nn 4F 1 00..7F CAT Amplitude Control -100..+100[%] 40
nn 50 1 00..7F CAT LFO PMod Depth 0..127 00
nn 51 1 00..7F CAT LFO FMod Depth 0..127 00
nn 52 1 00..7F CAT LFO AMod Depth 0..127 00
nn 53 Not Used
: :
66 Not Used
nn 67 1 00..01 Portamento Switch off/on 00
nn 68 1 00..7F Portamento Time 0..127 00
nn 69 Not Used
: :
6E Not Used
TOTAL SIZE 3F
nn = PartNumber
If there is a Drum Voice assigned to the Part, the following parameters are ineffective.
• Bank Select LSB
• Pitch EG
• Portamento
• Soft Pedal
• Mono/Poly
• Scale Tuning
MIDI Data Format
153
146
XG ESSENTIAL EFFECT
Same as LSB=0
XG OPTION EFFECT
Expanded type for PSR-550
* If the received value does not contain an effect type in the TYPE LSB, the LSB will be directed to TYPE 0.
* Panel Effects are based on the “[Number] Effect Name”.
< Table 1-6 > MIDI Parameter Change table (DRUM SETUP)
Address Size Data Prameter Name Description Default Value
(H) (H) (H) (H) (H)
3n rr 00 1 00..7F Pitch Coarse -64..+63 40
3n rr 01 1 00..7F Pitch Fine -64..+63[cent] 40
3n rr 02 1 00..7F Level 0..127 Depend on the Note
3n rr 03 1 00..7F Alternate Group 0:off,1..127 Depend on the Note
3n rr 04 1 00..7F Pan 0:random Depend on the Note
L63..C..R63(1..64..127)
3n rr 05 1 00..7F Reverb Send Level 0..127 Depend on the Note
3n rr 06 1 00..7F Chorus Send Level 0..127 Depend on the Note
3n rr 07 1 00..7F Variation Send Level 0..127 7F
3n rr 08 1 00..01 Key Assign 0:single,1:multi 00
3n rr 09 1 00..01 Rcv Note Off off/on Depend on the Note
3n rr 0A 1 00..01 Rcv Note On off/on 01
3n rr 0B 1 00..7F Filter Cutoff Freq. -64..63 40
3n rr 0C 1 00..7F Filter Resonance -64..63 40
3n rr 0D 1 00..7F EG Attack Rate -64..63 40
3n rr 0E 1 00..7F EG Decay1 Rate -64..63 40
3n rr 0F 1 00..7F EG Decay2 Rate -64..63 40
TOTAL SIZE 10
n:Drum Setup Number(0 - 1)
rr:note number(0DH - 5BH)
If XG SYSTEM ON and/or GM On message is received, all Drum Setup Parameter will be reset to default values.
According to the Drum Setup Reset message, individual Drum Setup Parameters can be reset to default values.
< Table 1-7 > Effect Type List
REVERB TYPE
TYPE MSB TYPE LSB
DEC HEX 00 01 02 03...07 08 09...15 16 17 18 19 20
000 00 NO EFFECT
001 01 [1]HALL1 [5]HALL2 [2]HALL2 [3]HALL3 [4]HALL4
002 02 [10]ROOM1 [11]ROOM2 [12]ROOM3 [6]ROOM1 [7]ROOM2 [8]ROOM3 [9]ROOM4
003 03 [15]STAGE1 [16]STAGE2 [13]STAGE1 [14]STAGE2
004 04 [19]PLATE [17]PLATE1 [18]PLATE2
005 05 NO EFFECT
:::
015 0F NO EFFECT
016 10 [20]WHITE ROOM
017 11 [21]TUNNEL
018 12 [22]CANYON
019 13 [23]BASEMENT
020 14 NO EFFECT
:::
127 7F NO EFFECT
CHORUS TYPE
TYPE MSB TYPE LSB
DEC HEX 00 01 02 03...07 08 09...15 16 17 18 19 20
000 00 NO EFFECT
001 01 NO EFFECT
:::
064 40 NO EFFECT
065 41 [6]CHORUS1 [7]CHORUS2 [5]CHORUS5 [8]CHORUS4
066 42 [9]CELESTE1 [4]CHORUS4 [10]CELESTE3 [2]CHORUS2 [3]CHORUS3 [1]CHORUS1
067 43 [15]FLANGER 1 [14]FLANGER 4 [11]FLANGER1 [12]FLANGER2 [13]FLANGER3
068 44 NO EFFECT
:::
127 7F NO EFFECT
VARIATION TYPE(0-63)
TYPE MSB TYPE LSB
DEC HEX 00 01 02 03...07 08 09...15 16 17 18 19 20
000 00 NO EFFECT
001 01 [1]HALL1 [5]HALL2 [2]HALL2 [3]HALL3 [4]HALL4
002 02 [10]ROOM1 [11]ROOM2 [12]ROOM3 [6]ROOM1 [7]ROOM2 [8]ROOM3 [9]ROOM4
003 03 [15]STAGE1 [16]STAGE2 [13]STAGE1 [14]STAGE2
004 04 [19]PLATE [17]PLATE1 [18]PLATE2
005 05 [21]DELAY L,C,R [20]Delay LCR
006 06 [22]DELAY L,R
007 07 [23]ECHO
008 08 [24]CROSS DELAY
009 09 [25]ER1 [26]ER2
010 0A [27]GATE REVERB
011 0B [28]REVERS GATE
012 0C NO EFFECT or THRU*
:::
019 13 NO EFFECT or THRU*
020 14 [29]KARAOKE 1
[30]KARAOKE 2 [31]KARAOKE 3
021 15 NO EFFECT or THRU*
:::
063 3F NO EFFECT or THRU*
* No effect when Effect Connection = System.
Through when Effect Connection = Insertion.
VARIATION TYPE (64-127)
TYPE MSB TYPE LSB
DEC HEX 00 01 02 03...07 08 09...15 16 17 18 19 20
064 40 THRU
065 41 [37]CHORUS1 [38]CHORUS2 [36]CHORUS5 [39]CHORUS4
066 42 [40]CELESTE1 [35]CHORUS4 [41]CELESTE3 [33]CHORUS2 [34]CHORUS3 [32]CHORUS1 [53]Rotary Sp5
067 43 [46]FLANGER 1 [45]FLANGER 4 [42]FLANGER1 [43]FLANGER2 [44]FLANGER3
068 44 [48]SYMPHONIC [47]Symphonic
069 45 [54]ROTARY SP. [49]Rotary Sp1
070 46 [57]TREMOLO [55]Tremolo1 [52]Rotary Sp4
071 47 [60]AUTO PAN [36]AutoPan [50]Rotary Sp2 [51]Rotary Sp3 [56]Tremolo2 [58]Gtr Tremolo
072 48 [61]PHASER [62]PHASER 2
073 49 [65]DISTORTION
074 4A [66]OVER DRIVE
075 4B [67]AMP SIM. [63]DIST.HARD [64]DIST.SOFT
076 4C [70]3BAND EQ [68]EQ DISCO [69]EQ TEL
077 4D [71]2BAND EQ
078 4E [73]AUTO WAH [72]Auto Wah
079 4F THRU
::
127 7F THRU
MIDI Data Format
154

147
< Table 1-8 > Effect Parameter List
HALL1,HALL2, ROOM1,ROOM2,ROOM3, STAGE1,STAGE2, PLATE (reverb, variation block)
No. Parameter Display Value See Table Control
1 Reverb Time 0.3-30.0s 0-69 table#4
2 Diffusion 0-10 0-10
3 Initial Delay 0.1mS-99.3mS 0-63 table#5
4 HPF Cutoff Thru-8.0kHz 0-52 table#3
5 LPF Cutoff 1.0k-Thru 34-60 table#3
6
7
8
9
10 Dry/Wet D63>W - D=W - D<W63 1-127 ●
11 Rev Delay 0.1mS-99.3mS 0-63 table#5
12 Density 0-4 0-3
13 Er/Rev Balance E63>R - E=R - E<R63 1-127
14
15 Feedback Level -63-+63 1-127
16
WHITE ROOM, TUNNEL, CANYON, BASEMENT (reverb, variation block)
No. Parameter Display Value See Table Control
1 Reverb Time 0.3-30.0s 0-69 table#4
2 Diffusion 0-10 0-10
3 Initial Delay 0.1mS-99.3mS 0-63 table#5
4 HPF Cutoff Thru-8.0kHz 0-52 table#3
5 LPF Cutoff 1.0k-Thru 34-60 table#3
6 Width 0.5-10.2m 0-37 table#8
7 Heigt 0.5-20.2m 0-73 table#8
8 Depth 0.5-30.2m 0-104 table#8
9 Wall Vary 0-30 0-30
10 Dry/Wet D63>W - D=W - D<W63 1-127 ●
11 Rev Delay 0.1mS-99.3mS 0-63 table#5
12 Density 0-4 0-3
13 Er/Rev Balance E63>R - E=R - E<R63 1-127
14
15 Feedback Level -63-+63 1-127
16
DELAY L,C,R (variation block)
No. Parameter Display Value See Table Control
1 Lch Delay 0.1-715.0ms 1-7150
2 Rch Delay 0.1-715.0ms 1-7150
3 Cch Delay 0.1-715.0ms 1-7150
4 Feedback Delay 0.1-715.0ms 1-7150
5 Feedback Level -63-+63 1-127
6 Cch Level 0-127 0-127
7 High Damp 0.1-1.0 1-10
8
9
10 Dry/Wet D63>W - D=W - D<W63 1-127 ●
11
12
13 EQ Low Frequency 50Hz-2.0kHz 8-40 table#3
14 EQ Low Gain -12-+12dB 52-76
15 EQ High Frequency 500Hz-16.0kHz 28-58 table#3
16 EQ High Gain -12-+12dB 52-76
DELAY L,R (variation block)
No. Parameter Display Value See Table Control
1 Lch Delay 0.1-715.0ms 1-7150
2 Rch Delay 0.1-715.0ms 1-7150
3 Feedback Delay 1 0.1-715.0ms 1-7150
4 Feedback Delay 2 0.1-715.0ms 1-7150
5 Feedback Level -63-+63 1-127
6 High Damp 0.1-1.0 1-10
7
8
9
10 Dry/Wet D63>W - D=W - D<W63 1-127 ●
11
12
13 EQ Low Frequency 50Hz-2.0kHz 8-40 table#3
14 EQ Low Gain -12-+12dB 52-76
15 EQ High Frequency 500Hz-16.0kHz 28-58 table#3
16 EQ High Gain -12-+12dB 52-76
ECHO (variation block)
No. Parameter Display Value See Table Control
1 Lch Delay1 0.1-355.0ms 1-3550
2 Lch Feedback Level -63-+63 1-127
3 Rch Delay1 0.1-355.0ms 1-3550
4 Rch Feedback Level -63-+63 1-127
5 High Damp 0.1-1.0 1-10
6 Lch Delay2 0.1-355.0ms 1-3550
7 Rch Delay2 0.1-355.0ms 1-3550
8 Delay2 Level 0-127 0-127
9
10 Dry/Wet D63>W - D=W - D<W63 1-127 ●
11
12
13 EQ Low Frequency 50Hz-2.0kHz 8-40 table#3
14 EQ Low Gain -12-+12dB 52-76
15 EQ High Frequency 500Hz-16.0kHz 28-58 table#3
16 EQ High Gain -12-+12dB 52-76
CROSS DELAY (variation block)
No. Parameter Display Value See Table Control
1 L->R Delay 0.1-355.0ms 1-3550
2 R->L Delay 0.1-355.0ms 1-3550
3 Feedback Level -63-+63 1-127
4 Input Select L,R,L&R 0-2
5 High Damp 0.1-1.0 1-10
6
7
8
9
10 Dry/Wet D63>W - D=W - D<W63 1-127 ●
11
12
13 EQ Low Frequency 50Hz-2.0kHz 8-40 table#3
14 EQ Low Gain -12-+12dB 52-76
15 EQ High Frequency 500Hz-16.0kHz 28-58 table#3
16 EQ High Gain -12-+12dB 52-76
EARLY REF1,EARLY REF2(variation block)
No. Parameter Display Value See Table Control
1 Type S-H, L-H, Rdm, Rvs, Plt, Spr 0-5
2 Room Size 0.1-7.0 0-44 table#6
3 Diffusion 0-10 0-10
4 Initial Delay 0.1mS-99.3mS 0-63 table#5
5 Feedback Level -63-+63 1-127
6 HPF Cutoff Thru-8.0kHz 0-52 table#3
7 LPF Cutoff 1.0k-Thru 34-60 table#3
8
9
10 Dry/Wet D63>W - D=W - D<W63 1-127 ●
11 Liveness 0-10 0-10
12 Density 0-3 0-3
13 High Damp 0.1-1.0 1-10
14
15
16
GATE REVERB, REVERSE GATE (variation block)
No. Parameter Display Value See Table Control
1 Type TypeA,TypeB 0-1
2 Room Size 0.1-20.0 0-127 table#6
3 Diffusion 0-10 0-10
4 Initial Delay 0.1mS-200.0mS 0-127 table#5
5 Feedback Level -63-+63 1-127
6 HPF Cutoff Thru-8.0kHz 0-52 table#3
7 LPF Cutoff 1.0k-Thru 34-60 table#3
8
9
10 Dry/Wet D63>W - D=W - D<W63 1-127 ●
11 Liveness 0-10 0-10
12 Density 0-3 0-3
13 High Damp 0.1-1.0 1-10
14
15
16
KARAOKE1,2,3 (variation block)
No. Parameter Display Value See Table Control
1 Delay Time 0.1mS-400.0mS 0-127 table#7
2 Feedback Level -63-+63 1-127
3 HPF Cutoff Thru-8.0kHz 0-52 table#3
4 LPF Cutoff 1.0k-Thru 34-60 table#3
5
6
7
8
9
10 Dry/Wet D63>W - D=W - D<W63 1-127 ●
11
12
13
14
15
16
CHORUS1,2,3,4, CELESTE1,2,3,4 (chorus, variation block)
No. Parameter Display Value See Table Control
1 LFO Frequency 0.00Hz-39.7Hz 0-127 table#1
2 LFO Depth 0-127 0-127
3 Feedback Level -63-+63 1-127
4 Delay Offset 0.0mS-50mS 0-127 table#2
5
6 EQ Low Frequency 50Hz-2.0kHz 8-40 table#3
7 EQ Low Gain -12-+12dB 52-76
8 EQ High Frequency 500Hz-16.0kHz 28-58 table#3
9 EQ High Gain -12-+12dB 52-76
10 Dry/Wet D63>W - D=W - D<W63 1-127 ●
11
12
13
14
15 Input Mode mono/stereo 0-1
16
MIDI Data Format
155
148
PHASER 1 (chorus, variation block)
No. Parameter Display Value See Table Control
1 LFO Frequency 0.00Hz-39.7Hz 0-127 table#1
2 LFO Depth 0-127 0-127
3 Phase Shift Offset 0-127 0-127
4 Feedback Level -63-+63 1-127
5
6 EQ Low Frequency 50Hz-2.0kHz 8-40 table#3
7 EQ Low Gain -12-+12dB 52-76
8 EQ High Frequency 500Hz-16.0kHz 28-58 table#3
9 EQ High Gain -12-+12dB 52-76
10 Dry/Wet D63>W - D=W - D<W63 1-127 ●
11 Stage 4,5,6 (chorus block) 4-6
6-10 (variation block) 6-10
12
13
14
15
16
PHASER 2 (variation block)
No. Parameter Display Value See Table Control
1 LFO Frequency 0.00Hz-39.7Hz 0-127 table#1
2 LFO Depth 0-127 0-127
3 Phase Shift Offset 0-127 0-127
4 Feedback Level -63-+63 1-127
5
6 EQ Low Frequency 50Hz-2.0kHz 8-40 table#3
7 EQ Low Gain -12-+12dB 52-76
8 EQ High Frequency 500Hz-16.0kHz 28-58 table#3
9 EQ High Gain -12-+12dB 52-76
10 Dry/Wet D63>W - D=W - D<W63 1-127 ●
11 Stage 3,4,5 3-5
12
13 LFO Phase Difference -180deg-+180deg (resolution=3deg.) 4-124
14
15
16
DISTORTION, OVERDRIVE (variation block)
No. Parameter Display Value See Table Control
1 Drive 0-127 0-127 ●
2 EQ Low Frequency 50Hz-2.0kHz 8-40 table#3
3 EQ Low Gain -12-+12dB 52-76
4 LPF Cutoff 1.0k-Thru 34-60 table#3
5 Output Level 0-127 0-127
6
7 EQ Mid Frequency 500Hz-10.0kHz 28-54 table#3
8 EQ Mid Gain -12-+12dB 52-76
9 EQ Mid Width 1.0-12.0 10-120
10 Dry/Wet D63>W - D=W - D<W63 1-127
11 Edge (Clip Curve) 0-127 0-127 mild-sharp
12
13
14
15
16
AMP SIMULATOR (variation block)
No. Parameter Display Value See Table Control
1 Drive 0-127 0-127 ●
2 AMP Type Off,Stack,Combo,Tube 0-3
3 LPF Cutoff 1.0k-Thru 34-60 table#3
4 Output Level 0-127 0-127
5
6
7
8
9
10 Dry/Wet D63>W - D=W - D<W63 1-127
11 Edge(Clip Curve) 0-127 0-127 mild-sharp
12
13
14
15
16
3BAND EQ(MONO) (variation block)
No. Parameter Display Value See Table Control
1 EQ Low Gain -12-+12dB 52-76
2 EQ Mid Frequency 500Hz-10.0kHz 28-54 table#3
3 EQ Mid Gain -12-+12dB 52-76
4 EQ Mid Width 1.0-12.0 10-120
5 EQ High Gain -12-+12dB 52-76
6 EQ Low Frequency 50Hz-2.0kHz 8-40 table#3
7 EQ High Frequency 500Hz-16.0kHz 28-58 table#3
8
9
10
11
12
13
14
15 Input Mode mono/stereo 0-1
16
FLANGER1,2,3 (chorus, variation block)
No. Parameter Display Value See Table Control
1 LFO Frequency 0.00Hz-39.7Hz 0-127 table#1
2 LFO Depth 0-127 0-127
3 Feedback Level -63-+63 1-127
4 Delay Offset 0.0mS-50mS 0-127 table#2
5
6 EQ Low Frequency 50Hz-2.0kHz 8-40 table#3
7 EQ Low Gain -12-+12dB 52-76
8 EQ High Frequency 500Hz-16.0kHz 28-58 table#3
9 EQ High Gain -12-+12dB 52-76
10 Dry/Wet D63>W - D=W - D<W63 1-127 ●
11
12
13
14 LFO Phase Difference -180-+180deg (resolution=3deg.) 4-124
15
16
SYMPHONIC (chorus, variation block)
No. Parameter Display Value See Table Control
1 LFO Frequency 0.00Hz-39.7Hz 0-127 table#1
2 LFO Depth 0-127 0-127
3 Delay Offset 0.0mS-50mS 0-127 table#2
4
5
6 EQ Low Frequency 50Hz-2.0kHz 8-40 table#3
7 EQ Low Gain -12-+12dB 52-76
8 EQ High Frequency 500Hz-16.0kHz 28-58 table#3
9 EQ High Gain -12-+12dB 52-76
10 Dry/Wet D63>W - D=W - D<W63 1-127 ●
11
12
13
14
15
16
ROTARY SPEAKER (variation block)
No. Parameter Display Value See Table Control
1 LFO Frequency 0.00Hz-39.7Hz 0-127 table#1 ●
2 LFO Depth 0-127 0-127
3
4
5
6 EQ Low Frequency 50Hz-2.0kHz 8-40 table#3
7 EQ Low Gain -12-+12dB 52-76
8 EQ High Frequency 500Hz-16.0kHz 28-58 table#3
9 EQ High Gain -12-+12dB 52-76
10 Dry/Wet D63>W - D=W - D<W63 1-127
11
12
13
14
15
16
TREMOLO (variation block)
No. Parameter Display Value See Table Control
1 LFO Frequency 0.00Hz-39.7Hz 0-127 table#1 ●
2 AM Depth 0-127 0-127
3 PM Depth 0-127 0-127
4
5
6 EQ Low Frequency 50Hz-2.0kHz 8-40 table#3
7 EQ Low Gain -12-+12dB 52-76
8 EQ High Frequency 500Hz-16.0kHz 28-58 table#3
9 EQ High Gain -12-+12dB 52-76
10
11
12
13
14 LFO Phase Difference -180-+180deg (resolution=3deg.) 4-124
15 Input Mode mono/stereo 0-1
16
AUTO PAN (variation block)
No. Parameter Display Value See Table Control
1 LFO Frequency 0.00Hz-39.7Hz 0-127 table#1 ●
2 L/R Depth 0-127 0-127
3 F/R Depth 0-127 0-127
4 PAN Direction L<->R,L->R,L<-R,Lturn,Rturn,L/R 0-5
5
6 EQ Low Frequency 50Hz-2.0kHz 8-40 table#3
7 EQ Low Gain -12-+12dB 52-76
8 EQ High Frequency 500Hz-16.0kHz 28-58 table#3
9 EQ High Gain -12-+12dB 52-76
10
11
12
13
14
15
16
MIDI Data Format
156
149
MIDI Data Format
2BAND EQ(STEREO) (variation block)
No. Parameter Display Value See Table Control
1 EQ Low Frequency 50Hz-2.0kHz 8-40 table#3
2 EQ Low Gain -12-+12dB 52-76
3 EQ High Frequency 500Hz-16.0kHz 28-58 table#3
4 EQ High Gain -12-+12dB 52-76
5
6
7
8
9
10
11
12
13
14
15
16
AUTO WAH (variation block)
No. Parameter Display Value See Table Control
1 LFO Frequency 0.00Hz-39.7Hz 0-127 table#1
2 LFO Depth 0-127 0-127
3 Cutoff Frequency Offset 0-127 0-127 ●
4 Resonance 1.0-12.0 10-120
5
6 EQ Low Frequency 50Hz-2.0kHz 8-40 table#3
7 EQ Low Gain -12-+12dB 52-76
8 EQ High Frequency 500Hz-16.0kHz 28-58 table#3
9 EQ High Gain -12-+12dB 52-76
10 Dry/Wet D63>W - D=W - D<W63 1-127
11
12
13
14
15
16
NO EFFECT (reverb, chorus, variation block), THRU (variation block)
No. Parameter Display Value See Table Control
1
2
3
4
5
6
7
8
9
10
11
12
13
14
15
16
157

150
< Table 1-9 > Effect Data Value Assign Table
MIDI Data Format
Table#1
LFO Frequency
Data Value Data Value Data Value Data Value
0 0.00 32 1.35 64 2.69 96 8.41
1 0.04 33 1.39 65 2.78 97 8.75
2 0.08 34 1.43 66 2.86 98 9.08
3 0.13 35 1.47 67 2.94 99 9.42
4 0.17 36 1.51 68 3.03 100 9.76
5 0.21 37 1.56 69 3.11 101 10.1
6 0.25 38 1.60 70 3.20 102 10.8
7 0.29 39 1.64 71 3.28 103 11.4
8 0.34 40 1.68 72 3.37 104 12.1
9 0.38 41 1.72 73 3.45 105 12.8
10 0.42 42 1.77 74 3.53 106 13.5
11 0.46 43 1.81 75 3.62 107 14.1
12 0.51 44 1.85 76 3.70 108 14.8
13 0.55 45 1.89 77 3.87 109 15.5
14 0.59 46 1.94 78 4.04 110 16.2
15 0.63 47 1.98 79 4.21 111 16.8
16 0.67 48 2.02 80 4.37 112 17.5
17 0.72 49 2.06 81 4.54 113 18.2
18 0.76 50 2.10 82 4.71 114 19.5
19 0.80 51 2.15 83 4.88 115 20.9
20 0.84 52 2.19 84 5.05 116 22.2
21 0.88 53 2.23 85 5.22 117 23.6
22 0.93 54 2.27 86 5.38 118 24.9
23 0.97 55 2.31 87 5.55 119 26.2
24 1.01 56 2.36 88 5.72 120 27.6
25 1.05 57 2.40 89 6.06 121 28.9
26 1.09 58 2.44 90 6.39 122 30.3
27 1.14 59 2.48 91 6.73 123 31.6
28 1.18 60 2.52 92 7.07 124 33.0
29 1.22 61 2.57 93 7.40 125 34.3
30 1.26 62 2.61 94 7.74 126 37.0
31 1.30 63 2.65 95 8.08 127 39.7
Table#2
Modulation Delay Offset
Data Value Data Value Data Value Data Value
0 0.0 32 3.2 64 6.4 96 9.6
1 0.1 33 3.3 65 6.5 97 9.7
2 0.2 34 3.4 66 6.6 98 9.8
3 0.3 35 3.5 67 6.7 99 9.9
4 0.4 36 3.6 68 6.8 100 10.0
5 0.5 37 3.7 69 6.9 101 11.1
6 0.6 38 3.8 70 7.0 102 12.2
7 0.7 39 3.9 71 7.1 103 13.3
8 0.8 40 4.0 72 7.2 104 14.4
9 0.9 41 4.1 73 7.3 105 15.5
10 1.0 42 4.2 74 7.4 106 17.1
11 1.1 43 4.3 75 7.5 107 18.6
12 1.2 44 4.4 76 7.6 108 20.2
13 1.3 45 4.5 77 7.7 109 21.8
14 1.4 46 4.6 78 7.8 110 23.3
15 1.5 47 4.7 79 7.9 111 24.9
16 1.6 48 4.8 80 8.0 112 26.5
17 1.7 49 4.9 81 8.1 113 28.0
18 1.8 50 5.0 82 8.2 114 29.6
19 1.9 51 5.1 83 8.3 115 31.2
20 2.0 52 5.2 84 8.4 116 32.8
21 2.1 53 5.3 85 8.5 117 34.3
22 2.2 54 5.4 86 8.6 118 35.9
23 2.3 55 5.5 87 8.7 119 37.5
24 2.4 56 5.6 88 8.8 120 39.0
25 2.5 57 5.7 89 8.9 121 40.6
26 2.6 58 5.8 90 9.0 122 42.2
27 2.7 59 5.9 91 9.1 123 43.7
28 2.8 60 6.0 92 9.2 124 45.3
29 2.9 61 6.1 93 9.3 125 46.9
30 3.0 62 6.2 94 9.4 126 48.4
31 3.1 63 6.3 95 9.5 127 50.0
Table#3
EQ Frequency
Data Value Data Value
0 THRU(0) 32 800
1 22 33 900
2 25 34 1.0k
3 28 35 1.1k
4 32 36 1.2k
5 36 37 1.4k
6 40 38 1.6k
7 45 39 1.8k
8 50 40 2.0k
9 56 41 2.2k
10 63 42 2.5k
11 70 43 2.8k
12 80 44 3.2k
13 90 45 3.6k
14 100 46 4.0k
15 110 47 4.5k
16 125 48 5.0k
17 140 49 5.6k
18 160 50 6.3k
19 180 51 7.0k
20 200 52 8.0k
21 225 53 9.0k
22 250 54 10.0k
23 280 55 11.0k
24 315 56 12.0k
25 355 57 14.0k
26 400 58 16.0k
27 450 59 18.0k
28 500 60 THRU(20.0k)
29 560
30 630
31 700
Table#4
Reverb time
Data Value Data Value Data Value
0 0.3 32 3.5 64 17.0
1 0.4 33 3.6 65 18.0
2 0.5 34 3.7 66 19.0
3 0.6 35 3.8 67 20.0
4 0.7 36 3.9 68 25.0
5 0.8 37 4.0 69 30.0
6 0.9 38 4.1
7 1.0 39 4.2
8 1.1 40 4.3
9 1.2 41 4.4
10 1.3 42 4.5
11 1.4 43 4.6
12 1.5 44 4.7
13 1.6 45 4.8
14 1.7 46 4.9
15 1.8 47 5.0
16 1.9 48 5.5
17 2.0 49 6.0
18 2.1 50 6.5
19 2.2 51 7.0
20 2.3 52 7.5
21 2.4 53 8.0
22 2.5 54 8.5
23 2.6 55 9.0
24 2.7 56 9.5
25 2.8 57 10.0
26 2.9 58 11.0
27 3.0 59 12.0
28 3.1 60 13.0
29 3.2 61 14.0
30 3.3 62 15.0
31 3.4 63 16.0
Table#5
Delay Time(200.0ms)
Data Value Data Value Data Value Data Value
0 0.1 32 50.5 64 100.8 96 151.2
1 1.7 33 52.0 65 102.4 97 152.8
2 3.2 34 53.6 66 104.0 98 154.4
3 4.8 35 55.2 67 105.6 99 155.9
4 6.4 36 56.8 68 107.1 100 157.5
5 8.0 37 58.3 69 108.7 101 159.1
6 9.5 38 59.9 70 110.3 102 160.6
7 11.1 39 61.5 71 111.9 103 162.2
8 12.7 40 63.1 72 113.4 104 163.8
9 14.3 41 64.6 73 115.0 105 165.4
10 15.8 42 66.2 74 116.6 106 166.9
11 17.4 43 67.8 75 118.2 107 168.5
12 19.0 44 69.4 76 119.7 108 170.1
13 20.6 45 70.9 77 121.3 109 171.7
14 22.1 46 72.5 78 122.9 110 173.2
15 23.7 47 74.1 79 124.4 111 174.8
16 25.3 48 75.7 80 126.0 112 176.4
17 26.9 49 77.2 81 127.6 113 178.0
18 28.4 50 78.8 82 129.2 114 179.5
19 30.0 51 80.4 83 130.7 115 181.1
20 31.6 52 81.9 84 132.3 116 182.7
21 33.2 53 83.5 85 133.9 117 184.3
22 34.7 54 85.1 86 135.5 118 185.8
23 36.3 55 86.7 87 137.0 119 187.4
24 37.9 56 88.2 88 138.6 120 189.0
25 39.5 57 89.8 89 140.2 121 190.6
26 41.0 58 91.4 90 141.8 122 192.1
27 42.6 59 93.0 91 143.3 123 193.7
28 44.2 60 94.5 92 144.9 124 195.3
29 45.7 61 96.1 93 146.5 125 196.9
30 47.3 62 97.7 94 148.1 126 198.4
31 48.9 63 99.3 95 149.6 127 200.0
Table#6
Room Size
Data Value Data Value Data Value Data Value
0 0.1 32 5.1 64 10.1 96 15.1
1 0.3 33 5.3 65 10.3 97 15.3
2 0.4 34 5.4 66 10.4 98 15.5
3 0.6 35 5.6 67 10.6 99 15.6
4 0.7 36 5.7 68 10.8 100 15.8
5 0.9 37 5.9 69 10.9 101 15.9
6 1.0 38 6.1 70 11.1 102 16.1
7 1.2 39 6.2 71 11.2 103 16.2
8 1.4 40 6.4 72 11.4 104 16.4
9 1.5 41 6.5 73 11.5 105 16.6
10 1.7 42 6.7 74 11.7 106 16.7
11 1.8 43 6.8 75 11.9 107 16.9
12 2.0 44 7.0 76 12.0 108 17.0
13 2.1 45 7.2 77 12.2 109 17.2
14 2.3 46 7.3 78 12.3 110 17.3
15 2.5 47 7.5 79 12.5 111 17.5
16 2.6 48 7.6 80 12.6 112 17.6
17 2.8 49 7.8 81 12.8 113 17.8
18 2.9 50 7.9 82 12.9 114 18.0
19 3.1 51 8.1 83 13.1 115 18.1
20 3.2 52 8.2 84 13.3 116 18.3
21 3.4 53 8.4 85 13.4 117 18.4
22 3.5 54 8.6 86 13.6 118 18.6
23 3.7 55 8.7 87 13.7 119 18.7
24 3.9 56 8.9 88 13.9 120 18.9
25 4.0 57 9.0 89 14.0 121 19.1
26 4.2 58 9.2 90 14.2 122 19.2
27 4.3 59 9.3 91 14.4 123 19.4
28 4.5 60 9.5 92 14.5 124 19.5
29 4.6 61 9.7 93 14.7 125 19.7
30 4.8 62 9.8 94 14.8 126 19.8
31 5.0 63 10.0 95 15.0 127 20.0
Table#7
Delay Time(400.0ms)
Data Value Data Value Data Value Data Value
0 0.1 32 100.9 64 201.6 96 302.4
1 3.2 33 104.0 65 204.8 97 305.5
2 6.4 34 107.2 66 207.9 98 308.7
3 9.5 35 110.3 67 211.1 99 311.8
4 12.7 36 113.5 68 214.2 100 315.0
5 15.8 37 116.6 69 217.4 101 318.1
6 19.0 38 119.8 70 220.5 102 321.3
7 22.1 39 122.9 71 223.7 103 324.4
8 25.3 40 126.1 72 226.8 104 327.6
9 28.4 41 129.2 73 230.0 105 330.7
10 31.6 42 132.4 74 233.1 106 333.9
11 34.7 43 135.5 75 236.3 107 337.0
12 37.9 44 138.6 76 239.4 108 340.2
13 41.0 45 141.8 77 242.6 109 343.3
14 44.2 46 144.9 78 245.7 110 346.5
15 47.3 47 148.1 79 248.9 111 349.6
16 50.5 48 151.2 80 252.0 112 352.8
17 53.6 49 154.4 81 255.2 113 355.9
18 56.8 50 157.5 82 258.3 114 359.1
19 59.9 51 160.7 83 261.5 115 362.2
20 63.1 52 163.8 84 264.6 116 365.4
21 66.2 53 167.0 85 267.7 117 368.5
22 69.4 54 170.1 86 270.9 118 371.7
23 72.5 55 173.3 87 274.0 119 374.8
24 75.7 56 176.4 88 277.2 120 378.0
25 78.8 57 179.6 89 280.3 121 381.1
26 82.0 58 182.7 90 283.5 122 384.3
27 85.1 59 185.9 91 286.6 123 387.4
28 88.3 60 189.0 92 289.8 124 390.6
29 91.4 61 192.2 93 292.9 125 393.7
30 94.6 62 195.3 94 296.1 126 396.9
31 97.7 63 198.5 95 299.2 127 400.0
Table#8
Reverb Width;Depth;Height
Data Value Data Value Data Value Data Value
0 0.5 32 8.8 64 17.6 96 27.5
1 0.8 33 9.1 65 17.9 97 27.8
2 1.0 34 9.4 66 18.2 98 28.1
3 1.3 35 9.6 67 18.5 99 28.5
4 1.5 36 9.9 68 18.8 100 28.8
5 1.8 37 10.2 69 19.1 101 29.2
6 2.0 38 10.4 70 19.4 102 29.5
7 2.3 39 10.7 71 19.7 103 29.9
8 2.6 40 11.0 72 20.0 104 30.2
9 2.8 41 11.2 73 20.2
10 3.1 42 11.5 74 20.5
11 3.3 43 11.8 75 20.8
12 3.6 44 12.1 76 21.1
13 3.9 45 12.3 77 21.4
14 4.1 46 12.6 78 21.7
15 4.4 47 12.9 79 22.0
16 4.6 48 13.1 80 22.4
17 4.9 49 13.4 81 22.7
18 5.2 50 13.7 82 23.0
19 5.4 51 14.0 83 23.3
20 5.7 52 14.2 84 23.6
21 5.9 53 14.5 85 23.9
22 6.2 54 14.8 86 24.2
23 6.5 55 15.1 87 24.5
24 6.7 56 15.4 88 24.9
25 7.0 57 15.6 89 25.2
26 7.2 58 15.9 90 25.5
27 7.5 59 16.2 91 25.8
28 7.8 60 16.5 92 26.1
29 8.0 61 16.8 93 26.5
30 8.3 62 17.1 94 26.8
31 8.6 63 17.3 95 27.1
158
151
MIDI Implementation Chart
[Portable Keyboard] Date : 30-NOV-2000
Model : PSR-550 MIDI Implementation Chart Version : 1.0
Function... Transmitted Recognized Remarks
Basic Default 1 - 16 *1 1 - 16 *2
Channel Changed 1 - 16 *1 1 - 16 *2
Default 3 3
Mode Messages x x
Altered ************** x
Note 0 - 127 0 - 127
Number : True voice ************** 0 - 127
Velocity Note ON o 9nH,v=1-127 o 9nH,v=1-127
Note OFF x 9nH,v=0 x
After Key’sx x
Touch Ch’sx o
Pitch Bend o o
0,32 o o Bank Select
1,5,11 x o
7,10 o o
6,38 o o Data Entry
Control 64,66-67 o o
65 x o Portamento
Change 72 o o Sound Controller
71,73-74 x o Sound Controller
84 x o Portament Cntrl
91,93-94 o o Effect SendLevel
96-97 x o Data Inc,Dec
98-99 x o NRPN LSB,MSB
100-101 o o RPN LSB,MSB
Prog o 0 - 127 o 0 - 127
Change : True # **************
System Exclusive o o
: Song Pos. x x
Common : Song Sel. x x
: Tune x x
System : Clock o o
Real Time : Commands o o
: All Sound Off x o
Aux :
Reset All Cntrls
xo
: Local ON/OFF x x
Mes- : All Notes OFF x o (123-127)
sages : Active Senseo o
: Reset x x
Mode 1 : OMNI ON, POLY Mode 2 : OMNI ON, MONO o : Yes
Mode 3 : OMNI OFF, POLY Mode 4 : OMNI OFF, MONO x : No
159

152
MIDI Implementation Chart
*1 The tracks for each channel can be selected on the panel.
See page 114 for more information.
*2 Incoming MIDI messages control the PSR-550 as 16 channel
multi timbral tone generator when initially shipped (factory set).
The MIDI messages don’t affect the panel controls including the
Panel Voice selection since they are directly sent to the tone
generator of the PSR-550.
However, the following MIDI messages affects the panel controls
such as Panel Voice, Style, Multi Pad and Song settings:
•MIDI MASTER TUNE, MASTER TUNE (XG System Param-
eter).
•TRANSPOSE (XG System Parameter).
•System Exclusive Messages related to the REVERB, CHO-
RUS and DSP EFFECT settings.
Also, the MIDI messages affect the panel settings when one of
the folowing MIDI reception modes is selected.
These modes can be selected on the panel (see page 115).
Keyboard : The Note On/Off messages received at the desig-
nated Keyboard (receive) channel are processed the
same as the notes normally played on the keyboard.
In this mode, only the following channel messages
will be recognized:
• Note On/Off
• Control Changes
Bank Select (R1 voice only)
Modulation
Volume(R1 voice only)
Data entry
Pan (R1 voice only)
Expression
Sustain
Sostenuto
Soft Pedal
Harmonic Content
Release time
Brightness
Reverb send level (R1 voice only)
Chorus send level (R1 voice only)
Variation send level (R1 voice only)
RPN(Pich bend sensitivity)
All Notes Off
• Program Change (R1 voice only)
• Pitch Bend
Root : The note on/off messages received at the channel(s)
set to “Root” are recognized as the bass notes in the
accompaniment section.
The bass notes will be detected regardless of the
accompaniment on/off the PSR-550.
However, the following MIDI messages affects and
split point settings on the PSR-550 panel.
Chord : The note on/off messages received at the channel(s)
set to “Chord” are recognized as the fingerings in the
accompaniment section.
The chords to be detected depend on the fingering
mode on the PSR-550.
The chords will be detected regardless of the ac-
companiment on/off and split point settings on the
PSR-550 panel.
Off : The MIDI channel messages will not be received at
the designated channel.
160

153
Index
A
AC adaptor......................................................................12
Accompaniment..............................................................32
Accompaniment style .....................................................32
Accompaniment track.....................................................37
Accompaniment volume.................................................37
ACMP .............................................................................33
Assignable ....................................................................122
Auto Accompaniment .....................................................32
Auto Accompaniment on/off ....................................25, 33
Auto Accompaniment section...................................33, 34
Auto Fill..........................................................................34
B
BACK .............................................................................17
Backlight.......................................................................122
Backup ..........................................................................136
Bank..........................................................................44, 56
BASS ........................................................................37, 96
Bass Hold......................................................................121
Batteries ..........................................................................12
Beat indicator..................................................................16
Break.............................................................................121
C
Chord ..................................................................16, 33, 38
Chord Fingerings ............................................................38
Chord Match .............................................................43, 94
CHORD1 ..................................................................37, 96
CHORD2 ..................................................................37, 96
Chorus.............................................................................48
Clear .................................................................91, 95, 104
Clock............................................................................. 116
Control Change.............................................................107
Copy ...............................................................................64
D
Data dial..........................................................................20
DC IN 10-12V jack.........................................................12
Default ............................................................................20
Delete........................................................................21, 67
Demo song ......................................................................13
Digital effect ...........................................................46, 132
Direct Access ............................................................21, 24
DISK IN USE .................................................................58
Disk drive .......................................................................58
Disk mode.......................................................................25
Display............................................................................16
DOC....................................................................9, 68, 109
Drum Cancel...................................................................99
Drum Kit.........................................................................31
Drum Kit List ...............................................................128
DSP .................................................................................49
E
Easy Navigator .........................................................16, 18
Echo ........................................................................51, 134
Edit .......................................................86, 88, 91, 94, 102
Ending.............................................................................34
ESEQ ............................................................................109
EXIT ...............................................................................17
External......................................................................... 116
F
FAST...................................................................16, 46, 49
Fingered1 ..................................................................38, 39
Fingered2 ..................................................................38, 40
Fingering...................................................................17, 38
Floppy disk .....................................................................58
Footswitch ..............................................................10, 121
Format.............................................................................60
Freeze .............................................................................55
Full Keyboard ...........................................................38, 40
Function ..........................................................17, 106, 118
Function tree ...................................................................22
G
GM (General MIDI) ...........................................9, 68, 109
H
Harmony ...................................................................16, 50
Harmony Volume ............................................................52
Harmony/Echo Type List..............................................134
Headphone ......................................................................10
HOST SELECT .................................................... 110, 111
I
Included Data Disk .........................................................59
Initial send .................................................................... 117
Initialization..................................................................136
Insertion effect ........................................................50, 132
Internal..........................................................................116
Intro ................................................................................34
K
Keyboard ........................................................................29
Keyboard Percussion ......................................................31
L
Left .................................................................................29
Load ................................................................................62
Local Control ................................................................ 116
Loop recording ...............................................................97
Lower............................................................................112
161

154
Index
M
Main ................................................................................34
Master Tuning ............................................................... 119
Master Volume ................................................................15
Maximum Polyphony ...................................................123
Measure ..............................................................16, 71, 84
Menu .........................................................................16, 17
Metronome ...................................................................118
MIDI .............................................................................106
MIDI Data Format ........................................................139
MIDI Implementation Chart .........................................151
MIDI terminals .............................................................107
Mixer ..................................................................17, 74, 76
Mode ...............................................................................25
Multi Finger ..............................................................38, 40
Multi Pad ..................................................................43, 92
Multi Track Recording .......................................78, 79, 82
Music Database ..............................................................14
Music Database List .....................................................131
Music stand.......................................................................9
N
Name...............................................21, 56, 65, 90, 94, 104
NEXT .............................................................................17
Note on/off....................................................................106
Number buttons ..............................................................20
O
Octave .........................................................74, 77, 88, 119
One Touch Setting ..........................................................42
Overddub ........................................................................97
P
Packing List ......................................................................4
Pan ......................................................................74, 77, 88
Panel voice....................................................................123
PART ON/OFF ...................................................27, 28, 29
Pitch Bend ......................................................................30
Pitch Bend Range .........................................................122
Polarity .........................................................................121
Program Change ...........................................................107
Punch In/Out...................................................................84
Q
Quantize..................................................................86, 102
Quick Recording.................................................78, 79, 80
R
Receive .........................................................................115
Record...........................................................17, 78, 92, 96
Record mode ...................................................................25
Regist +.........................................................................121
Regist -..........................................................................121
Registration Memory ......................................................54
Rehearsal mode ..............................................................25
Repeat .................................................................45, 69, 72
Return Level .......................................................47, 48, 49
Reverb.............................................................................46
RHYTHM MAIN .....................................................37, 96
RHYTHM SUB ........................................................37, 96
Right ...............................................................................29
Ritardando ......................................................................35
Root ..............................................................................115
S
Save ................................................................................60
Scale Tuning .................................................................119
Section ............................................................................34
Send Level ..........................................................47, 48, 49
Setting up ........................................................................12
Shift ................................................................................21
Single Finger ..................................................................38
SLOW .................................................................16, 46, 49
Soft ...............................................................................121
Song Copy ......................................................................64
Song Menu......................................................................72
Song mode ......................................................................25
Song Play mode ..............................................................69
Song volume ...................................................................70
Sostenuto ......................................................................121
Specification .................................................................156
Split Point .........................................................29, 40, 120
Standard MIDI ..............................................................109
STANDBY switch ..........................................................15
Start Measure ..................................................................71
START/STOP .............................25, 32, 69, 81, 83, 93, 99
Style ..........................................................................32, 96
Style File.............................................................9, 57, 109
Style List.......................................................................130
Style mode ......................................................................25
Sustain ....................................................................16, 121
SYNC START ..........................................................25, 33
SYNC STOP...................................................................41
Synchro Start ............................................................25, 33
Synchro Stop ..........................................................41, 121
Synchronized Start standby ............................................25
System effect ..........................................................50, 132
162

155
Index
T
Tap ..........................................................................36, 121
Tempo .............................................................................36
Time signature ................................................................80
TO HOST .....................................................................107
TOUCH ..................................................................16, 120
Touch Sensitivity ..........................................................120
Track ...................................................................37, 70, 82
Transmit ........................................................................ 114
Transpose ............................................................16, 30, 73
Tremolo ..................................................................51, 134
Trill .........................................................................51, 134
Troubleshooting ............................................................135
U
Upper ............................................................................112
Upper Octave ................................................................ 119
User Pad..........................................................................92
User Song .......................................................................78
User Style .......................................................................96
Utility....................................................17, 60, 64, 67, 118
V
Velocity .........................................................................106
Voice ...............................................................................26
Voice Change ......................................................17, 74, 75
Voice L ......................................................................28, 29
Voice List ......................................................................123
Voice R1 .............................................................26, 27, 29
Voice R2 ...................................................................27, 29
Voice Set .......................................................................120
Volume ..............................................26, 37, 70, 74, 88, 89
W
Write-protect tab .............................................................58
X
XG ......................................................................9, 68, 109
XG/GM ......................................................................... 115
163

156
Specifications
Keyboards
•61 standard-size keys (C1 — C6) with
touch response.
Display
•Large multi-function LCD display
Setup
•STANDBY/ON
•Master Volume : MIN — MAX
Demo
•9 Songs
Realtime Controls
•Pitch Bend wheel
Control & Number Buttons
•SONG
•STYLE
•MUSIC DATABASE
•VOICE L
•VOICE R1
•VOICE R2
•VOICE CHANGE
•MIXER
•NEXT/BACK
•DIRECT ACCESS
•EXIT
•Data dial, [1] — [0], [+/YES], [-/NO]
Overall Controls
•Tempo : 32 — 280
•Transpose
Voice
•219 Panel Voices +14 Drum Kits + 480
XG Voices
•Polyphony : 32
•Voice Set
•R1/R2/L Voices
•Part on/off (R1/R2/L)
•Voice Change : Voice number
•Mixer : Volume, Octave, Pan, Reverb
Depth, Chorus Depth, DSP Depth
Auto Accompaniment
•112 Styles
•Accompaniment Track : RHYTHM SUB/
MAIN, BASS, CHORD 1/2, PAD,
PHRASE1/2
•Accompaniment Track Settings : ON/OFF
•Accompaniment Control : ACMP ON/OFF,
SYNC START, SYNC STOP, START/
STOP, INTRO, MAIN A/B (AUTO FILL),
ENDING/rit
•Beat Indicator
•Accompaniment Volume
•Voice Change : Voice number
•Mixer : Volume, Pan, Reverb depth,
Chorus depth, DSP depth
•One Touch Setting
•Fingering Mode : Multi Finger/Single
Finger/Fingered 1/Fingered 2/Full
Keyboard
Music Database
•220
Multi Pads
•40 Multi Pad Banks
•4 Pads + STOP
•Chord Match
•Naming
Digital Effects
•Reverb : 24 types
•Chorus : 16 types
•DSP (system/insertion) : 74 types
•Harmony/Echo : 22 types
Registration Memory
•32 Registration Banks : 1 — 4
•Naming
•Accompaniment Freeze
Disk Operations
•Song playback/recording
•Load
(Style/Multi Pad/Registration Memory)
•Save
(Style/Multi Pad/Registration Memory)
•Utility : Format, Song Copy, Delete File
Song
•Song Volume
•Song Track Settings : ON/OFF
•Repeat Play
•Song Transpose
Song Recording
•Quick Record, Multi Record
•Recording Tracks: 1 — 16
•Punch In/Punch Out
•Quantize
•Naming
•Clear
•Setup Data : Volume, Octave, Pan,
Reverb depth, Chorus depth, DSP depth
Multi Pad Recording
•User Pad Bank : 4 (41 — 44)
•Naming
•Clear
•Chord Match
Style Recording
•User Styles : 3 (113 — 115)
•Recording Tracks : 6 Sections x 8 tracks
•Drum Cancel
•Quantize
•Naming
•Clear
MIDI
•Transmit settings
•Receive settings
•Local Control
•Clock
•Initial Data Send
•MIDI template
Other functions
•Metronome
•Upper Octave
•Master Tuning
•Scale Tuning
•Split Point
•Touch Sensitivity
•Voice Set
•Footswitch function
•Pitch Bend Range
Auxiliary Jacks
•DC IN 10-12V, PHONES/OUTPUT,
SUSTAIN, MIDI IN/OUT, TO HOST
Amplifiers
•6W + 6W (when using PA-6 power
adaptor)
•4.5W + 4.5W (when using batteries)
Speakers
•12 cm (4-3/4") x 2, 3 cm (1-3/16") x 2
Power Consumption
•22W (when using PA-6 power adaptor)
Power Supply
•Adaptor : Yamaha PA-6 AC power adaptor
Rated Voltage DC 10-12V
Rated Current 2A
•Batteries : Six “D” size, R20P (LR20) or
equivalent batteries
Dimensions (W x D x H)
•952 x 387 x 169 (mm)
(37-1/2" x 15-1/4" x 6-5/8")
Weight
•8.7 Kg (19.2 lbs.) excluding batteries
Supplied Accessories
•Data Disk
•Music Stand
•Owner’s Manual
Optional Accessories
•Headphones : HPE-150
•AC Power Adaptor : PA-6
•Foot Switch : FC4, FC5
•Keyboard Stand : L-6, L-7
* Specifications and descriptions in this owner’s
manual are for information purposes only. Yamaha
Corp. reserves the right to change or modify
products or specifications at any time without prior
notice. Since specifications, equipment or options
may not be the same in every locale, please check
with your Yamaha dealer.
164

Entsorgung leerer Batterien (nur innerhalb Deutschlands)
Leisten Sie einen Beitrag zum Umweltschutz. Verbrauchte Batterien
oder Akkumulatoren dürfen nicht in den Hausmüll. Sie können bei
einer Sammelstelle für Altbatterien bzw. Sondermüll abgegeben
werden. Informieren Sie sich bei Ihrer Kommune.
(battery)
FCC INFORMATION (U.S.A.)
1. IMPORTANT NOTICE: DO NOT MODIFY THIS UNIT!
This product, when installed as indicated in the instructions con-
tained in this manual, meets FCC requirements. Modifications not
expressly approved by Yamaha may void your authority, granted
by the FCC, to use the product.
2. IMPORTANT: When connecting this product to accessories and/
or another product use only high quality shielded cables. Cable/s
supplied with this product MUST be used. Follow all installation
instructions. Failure to follow instructions could void your FCC
authorization to use this product in the USA.
3. NOTE: This product has been tested and found to comply with
the requirements listed in FCC Regulations, Part 15 for Class “B”
digital devices. Compliance with these requirements provides a
reasonable level of assurance that your use of this product in a
residential environment will not result in harmful interference with
other electronic devices. This equipment generates/uses radio
frequencies and, if not installed and used according to the instruc-
tions found in the users manual, may cause interference harmful
to the operation of other electronic devices. Compliance with FCC
regulations does not guarantee that interference will not occur in
all installations. If this product is found to be the source of inter-
ference, which can be determined by turning the unit “OFF” and
“ON”, please try to eliminate the problem by using one of the
following measures:
Relocate either this product or the device that is being affected by
the interference.
Utilize power outlets that are on different branch (circuit breaker
or fuse) circuits or install AC line filter/s.
In the case of radio or TV interference, relocate/reorient the an-
tenna. If the antenna lead-in is 300 ohm ribbon lead, change the
lead-in to co-axial type cable.
If these corrective measures do not produce satisfactory results,
please contact the local retailer authorized to distribute this type
of product. If you can not locate the appropriate retailer, please
contact Yamaha Corporation of America, Electronic Service Divi-
sion, 6600 Orangethorpe Ave, Buena Park, CA90620
The above statements apply ONLY to those products distributed
by Yamaha Corporation of America or its subsidiaries.
* This applies only to products distributed by YAMAHA CORPORATION OF AMERICA. (class B)
OBSERVERA!
Apparaten kopplas inte ur växelströmskällan (nätet) sá länge som
den ar ansluten till vägguttaget, även om själva apparaten har
stängts av.
ADVARSEL: Netspæendingen til dette apparat er IKKE afbrudt,
sálæenge netledningen siddr i en stikkontakt, som er t endt — ogsá
selvom der or slukket pá apparatets afbryder.
VAROITUS: Laitteen toisiopiiriin kytketty käyttökytkin ei irroita
koko laitetta verkosta.
(standby)
165

166
Limited Warranty
90 DAYS LABOR 1 YEAR PARTS
Yamaha Corporation of America, hereafter referred to as Yamaha, warrants to the original consumer of a product included in the categories listed below,
that the product will be free of defects in materials and/or workmanship for the periods indicated. This warranty is applicable to all models included in
the following series of products:
PSR SERIES OF PORTATONE ELECTRONIC KEYBOARDS
If during the first 90 days that immediately follows the purchase date, your new Yamaha product covered by this warranty is found to have a defect in
material and/or workmanship, Yamaha and/or its authorized representative will repair such defect without charge for parts or labor.
If parts should be required after this 90 day period but within the one year period that immediately follows the purchase date, Yamaha will, subject to
the terms of this warranty, supply these parts without charge. However, charges for labor, and/or any miscellaneous expenses incurred are the consumers
responsibility. Yamaha reserves the right to utilize reconditioned parts in repairing these products and/or to use reconditioned units as warranty
replacements.
THIS WARRANTY IS THE ONLY EXPRESS WARRANTY WHICH YAMAHA MAKES IN CONNECTION WITH THESE PRODUCTS.
ANY IMPLIED WARRANTY APPLICABLE TO THE PRODUCT, INCLUDING THE WARRANTY OF MERCHANT ABILITY IS
LIMITED TO THE DURATION OF THE EXPRESS WARRANTY. YAMAHA EXCLUDES AND SHALL NOT BE LIABLE IN ANY
EVENT FOR INCIDENTAL OR CONSEQUENTIAL DAMAGES.
Some states do not allow limitations that relate to implied warranties and/or the exclusion of incidental or consequential damages. Therefore, these
limitations and exclusions may not apply to you.
This warranty gives you specific legal rights. You may also have other rights which vary from state to state.
CONSUMERS RESPONSIBILITIES
If warranty service should be required, it is necessary that the consumer assume certain responsibilities:
1. Contact the Customer Service Department of the retailer selling the product, or any retail outlet authorized by Yamaha to sell the product for assistance.
You may also contact Yamaha directly at the address provided below.
2. Deliver the unit to be serviced under warranty to: the retailer selling the product, an authorized service center, or to Yamaha with an explanation of
the problem. Please be prepared to provide proof purchase date (sales receipt, credit card copy, etc.) when requesting service and/or parts under
warranty.
3. Shipping and/or insurance costs are the consumers responsibility.* Units shipped for service should be packed securely.
*Repaired units will be returned PREPAID if warranty service is required within the first 90 days.
IMPORTANT: Do NOT ship anything to ANY location without prior authorization. A Return Authorization (RA) will be issued that has a
tracking number assigned that will expedite the servicing of your unit and provide a tracking system if needed.
4. Your owners manual contains important safety and operating instructions. It is your responsibility to be aware of the contents of this manual and to
follow all safety precautions.
EXCLUSIONS
This warranty does not apply to units whose trade name, trademark, and/or ID numbers have been altered, defaced, exchanged removed, or to failures
and/or damages that may occur as a result of:
1. Neglect, abuse, abnormal strain, modification or exposure to extremes in temperature or humidity.
2. Improper repair or maintenance by any person who is not a service representative of a retail outlet authorized by Yamaha to sell the product, an
authorized service center, or an authorized service representative of Yamaha.
3. This warranty is applicable only to units sold by retailers authorized by Yamaha to sell these products in the U.S.A., the District of Columbia, and
Puerto Rico. This warranty is not applicable in other possessions or territories of the U.S.A. or in any other country.
Please record the model and serial number of the product you have purchased in the spaces provided below.
Model___________________________ Serial #________________________________ Sales Slip #________________________________
Purchased from____________________________________________________________ Date______________________________________
(Retailer)
YAMAHA CORPORATION OF AMERICA
Electronic Service Division
6600 Orangethorpe Avenue
Buena Park, CA 90620
KEEP THIS DOCUMENT FOR YOUR RECORDS. DO NOT MAIL!
HEAD OFFICE
Yamaha Corporation, Pro Audio & Digital Musical Instrument Division
Nakazawa-cho 10-1, Hamamatsu, Japan 430-8650
Tel: 053-460-3273
[PK] 20
For details of products, please contact your nearest Yamaha or the
authorized distributor listed below.
Pour plus de détails sur les produits, veuillez-vous adresser à Yamaha ou
au distributeur le plus proche de vous figurant dans la liste suivante.
Die Einzelheiten zu Produkten sind bei Ihrer unten aufgeführten
Niederlassung und bei Yamaha Vertragshändlern in den jeweiligen
Bestimmungsländern erhältlich.
Para detalles sobre productos, contacte su tienda Yamaha más cercana
o el distribuidor autorizado que se lista debajo.
CANADA
Yamaha Canada Music Ltd.
135 Milner Avenue, Scarborough, Ontario,
M1S 3R1, Canada
Tel: 416-298-1311
U.S.A.
Yamaha Corporation of America
6600 Orangethorpe Ave., Buena Park, Calif. 90620,
U.S.A.
Tel: 714-522-9011
MEXICO
Yamaha de Mexico S.A. De C.V.,
Departamento de ventas
Javier Rojo Gomez No.1149, Col. Gpe Del
Moral, Deleg. Iztapalapa, 09300 Mexico, D.F.
Tel: 686-00-33
BRAZIL
Yamaha Musical do Brasil LTDA.
Av. Rebouças 2636, São Paulo, Brasil
Tel: 011-853-1377
ARGENTINA
Yamaha Music Argentina S.A.
Viamonte 1145 Piso2-B 1053,
Buenos Aires, Argentina
Tel: 1-4371-7021
PANAMA AND OTHER LATIN
AMERICAN COUNTRIES/
CARIBBEAN COUNTRIES
Yamaha de Panama S.A.
Torre Banco General, Piso 7, Urbanización Marbella,
Calle 47 y Aquilino de la Guardia,
Ciudad de Panamá, Panamá
Tel: 507-269-5311
THE UNITED KINGDOM
Yamaha-Kemble Music (U.K.) Ltd.
Sherbourne Drive, Tilbrook, Milton Keynes,
MK7 8BL, England
Tel: 01908-366700
IRELAND
Danfay Ltd.
61D, Sallynoggin Road, Dun Laoghaire, Co. Dublin
Tel: 01-2859177
GERMANY/SWITZERLAND
Yamaha Europa GmbH.
Siemensstraße 22-34, 25462 Rellingen,
F.R. of Germany
Tel: 04101-3030
AUSTRIA
Yamaha Music Austria
Schleiergasse 20, A-1100 Wien Austria
Tel: 01-60203900
THE NETHERLANDS
Yamaha Music Nederland
Kanaalweg 18G, 3526KL, Utrecht, The Netherlands
Tel: 030-2828411
BELGIUM
Yamaha Music Belgium
Keiberg Imperiastraat 8, 1930 Zaventem, Belgium
Tel: 02-7258220
FRANCE
Yamaha Musique France,
Division Claviers
BP 70-77312 Marne-la-Vallée Cedex 2, France
Tel: 01-64-61-4000
ITALY
Yamaha Musica Italia S.P.A.,
Home Keyboard Division
Viale Italia 88, 20020 Lainate (Milano), Italy
Tel: 02-935-771
SPAIN/PORTUGAL
Yamaha-Hazen Electronica Musical, S.A.
Ctra. de la Coruna km. 17, 200, 28230
Las Rozas (Madrid) Spain
Tel: 91-201-0700
GREECE
Philippe Nakas S.A.
Navarinou Street 13, P.Code 10680, Athens, Greece
Tel: 01-364-7111
SWEDEN
Yamaha Scandinavia AB
J. A. Wettergrens Gata 1
Box 30053
S-400 43 Göteborg, Sweden
Tel: 031 89 34 00
DENMARK
YS Copenhagen Liaison Office
Generatorvej 8B
DK-2730 Herlev, Denmark
Tel: 44 92 49 00
FINLAND
F-Musiikki Oy
Kluuvikatu 6, P.O. Box 260,
SF-00101 Helsinki, Finland
Tel: 09 618511
NORWAY
Norsk filial av Yamaha Scandinavia AB
Grini Næringspark 1
N-1345 Østerås, Norway
Tel: 67 16 77 70
ICELAND
Skifan HF
Skeifan 17 P.O. Box 8120
IS-128 Reykjavik, Iceland
Tel: 525 5000
OTHER EUROPEAN COUNTRIES
Yamaha Europa GmbH.
Siemensstraße 22-34, 25462 Rellingen,
F.R. of Germany
Tel: 04101-3030
Yamaha Corporation,
Asia-Pacific Music Marketing Group
Nakazawa-cho 10-1, Hamamatsu, Japan 430-8650
Tel: 053-460-2312
TURKEY/CYPRUS
Yamaha Europa GmbH.
Siemensstraße 22-34, 25462 Rellingen,
F.R. of Germany
Tel: 04101-3030
OTHER COUNTRIES
Yamaha Music Gulf FZE
LB21-128 Jebel Ali Freezone
P.O.Box 17328, Dubai, U.A.E.
Tel: 971-4-881-5868
HONG KONG
Tom Lee Music Co., Ltd.
11/F., Silvercord Tower 1, 30 Canton Road,
Tsimshatsui, Kowloon, Hong Kong
Tel: 2737-7688
INDONESIA
PT. Yamaha Music Indonesia (Distributor)
PT. Nusantik
Gedung Yamaha Music Center, Jalan Jend. Gatot
Subroto Kav. 4, Jakarta 12930, Indonesia
Tel: 21-520-2577
KOREA
Cosmos Corporation
1461-9, Seocho Dong, Seocho Gu, Seoul, Korea
Tel: 02-3486-0011
MALAYSIA
Yamaha Music Malaysia, Sdn., Bhd.
Lot 8, Jalan Perbandaran, 47301 Kelana Jaya,
Petaling Jaya, Selangor, Malaysia
Tel: 3-703-0900
PHILIPPINES
Yupangco Music Corporation
339 Gil J. Puyat Avenue, P.O. Box 885 MCPO,
Makati, Metro Manila, Philippines
Tel: 819-7551
SINGAPORE
Yamaha Music Asia Pte., Ltd.
11 Ubi Road #06-00, Meiban Industrial Building,
Singapore
Tel: 65-747-4374
TAIWAN
Yamaha KHS Music Co., Ltd.
10F, 150, Tun-Hwa Northroad,
Taipei, Taiwan, R.O.C.
Tel: 02-2713-8999
THAILAND
Siam Music Yamaha Co., Ltd.
121/60-61 RS Tower 17th Floor,
Ratchadaphisek RD., Dindaeng,
Bangkok 10320, Thailand
Tel: 02-641-2951
THE PEOPLE’S REPUBLIC OF CHINA
AND OTHER ASIAN COUNTRIES
Yamaha Corporation,
Asia-Pacific Music Marketing Group
Nakazawa-cho 10-1, Hamamatsu, Japan 430-8650
Tel: 053-460-2317
AUSTRALIA
Yamaha Music Australia Pty. Ltd.
Level 1, 99 Queensbridge Street, Southbank, Victoria
3006, Australia
Tel: 3-9693-5111
NEW ZEALAND
Music Houses of N.Z. Ltd.
146/148 Captain Springs Road, Te Papapa,
Auckland, New Zealand
Tel: 9-634-0099
COUNTRIES AND TRUST
TERRITORIES IN PACIFIC OCEAN
Yamaha Corporation,
Asia-Pacific Music Marketing Group
Nakazawa-cho 10-1, Hamamatsu, Japan 430-8650
Tel: 053-460-2312
NORTH AMERICA
CENTRAL & SOUTH AMERICA
EUROPE
AFRICA
MIDDLE EAST
ASIA
OCEANIA
M.D.G., Pro Audio & Digital Musical Instrument Division, Yamaha Corporation
© 2001 Yamaha Corporation
??????? 1??PO????-01A0 Printed in China
Yamaha PK CLUB (Portable Keyboard Home Page, English only)
http://www.yamaha.co.jp/english/product/pk
Yamaha Manual Library (English versions only)
http://www2.yamaha.co.jp/manual/english/
