Yi Technology DCM116 Xiaoyi Mirror-less Camera User Manual 1
Shanghai Xiaoyi Technology Co., Ltd. Xiaoyi Mirror-less Camera 1
UserManual.wiki
>
Yi Technology
>
DCM116 User Manual
Users Manual
Navigation menu
Upload a User Manual
Namespaces
Wiki Guide
HTML
PDF
Info
Views
User Manual
Discussion / Help
Navigation
![3029Date 2016 2 620152017135715 : 3514 33:16 35 :1.Power on Menu displayBasic settingsA上下滑动屏幕调整所需选项。< >Simplified Chinese < ON > < ON >< ON >< sRGB >< +2 >RGB4.Power on/ Power offTurn On/Off dial clock-wise.2.Power offTurn On/Off dial counter-clockwise.5.Set date and time[Basic settings] [ Date and time]- Swipe right on the LCD screen - Find [Basic settings] - Select [Basic settings] - Select [Date and time] sub-menuDate and timelanguageShutter soundSystem operation soundDate and timeTimeMonth DayBasic settingsAuto power off: ONColor spaceBrightness adjustmentRestore default settingsYou can adjust color space, screen brightness, or restore to default settings by configuring settings under [Basic settings] menu.Tap " Back " button on the upper-left hand corner of the LCD screen or half push the shutter to go back to Live View screen. You can also press Q button to return to Live View screen.](https://usermanual.wiki/Yi-Technology/DCM116/User-Guide-3123461-Page-6.png)
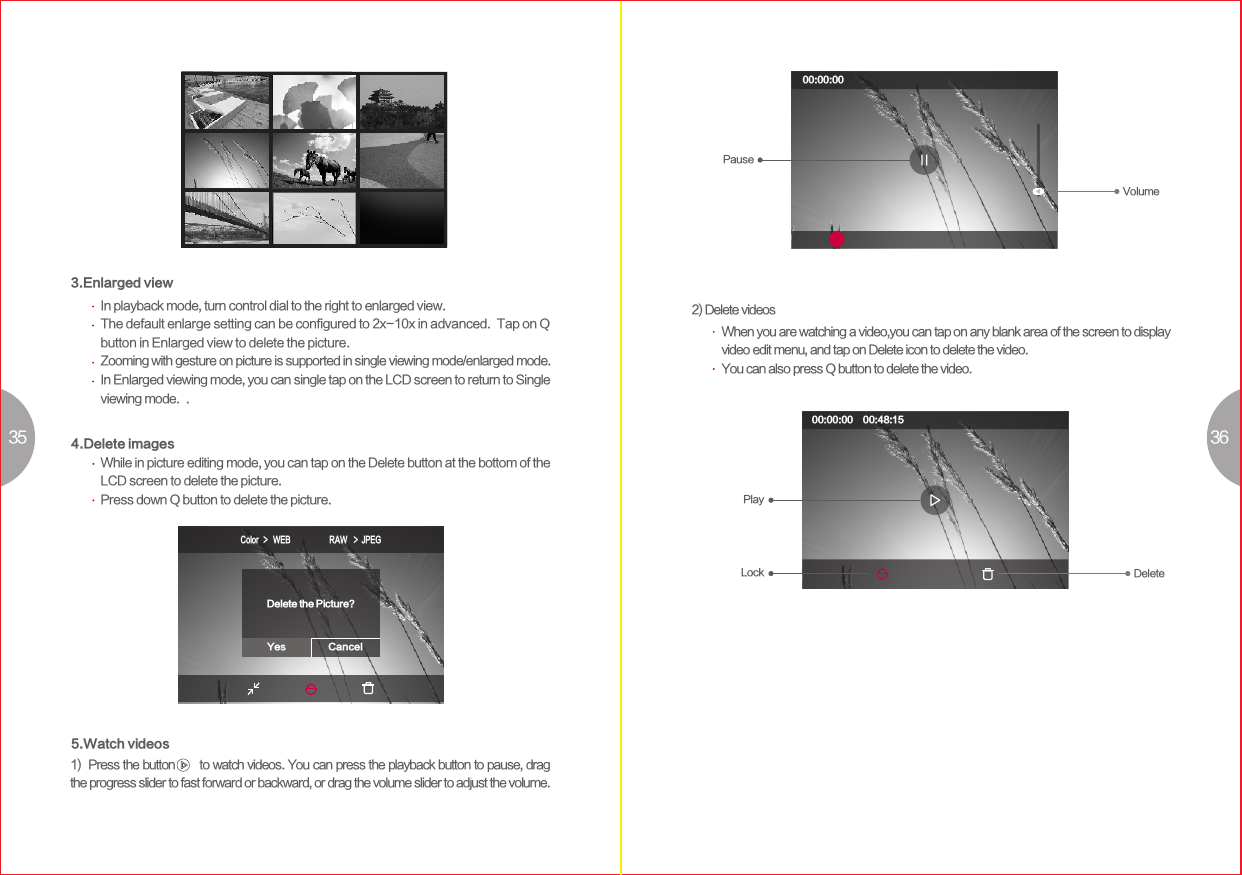
![32311) Choose a shooing mode.2) Set up the camera and decide on the composition.3) Adjust the focus and make sure the subject is clear: S C E N ESCENE S6. Select shooting modeProgram modePASMAperture-priority modeShutter-priority modeManual modePanorama modeAutomatic modeSuper master guideVideo modeAutomatic modeA fully automated mode in which the camera automatically configures the best setting for the current scene. All you need to do is to push the shutter button.Aperture-priority modeYou choose the aperture to control the depth of field, and let the camera automatically adjust to the appropriate shutter speed. Shutter-priority modeYou choose the shutter speed in order to have different moving effects or to make sure the clarity of the image. Manual mode You set the aperture, shutter speed, ISO and other shooting parameters in order to have the free exposure control. Panorama mode You can shoot image with wide angle using this mode.You can record videos. VideoSuper master guideBy downloading templates from the app, you will be able to create high-quality images just as you are having a master by your sideThis is a shooting mode where the camera automatically sets the optimal aperture and shutter speed to get the best result. You can choose a scene that goes well with current shooting environment to get the optimal shooting results. Program mode7. Shoot pictures/record videos1.Shooting still picturesYou can put focus on the subject by touching the subject on the LCD screen. Tap Q button in Live View screen allows you to change focus modes. Touch on the LCD screen allows you to change subject to focus. Press the shutter button halfway, and a green frame ( AF target) will be displayed in the focus location.ISO 2500 WB BKT AF-C MAWB 20M 1999 FSEV2.84000+1.0Remaining shotsWhite balanceISOMetering modesApertureShutterExposure compensationFocus modesExposure modesPowerFile size Wireless connection statusAperture: Rotate the control dial set the aperture in mode A.Shutter: Rotate the control dial to select shutter speed in mode S. Exposure compensation: Press the exposure compensation button, then rotate the control dial to set the compensation value. 4) Press the shutter button all the way down to take a picture. When the LCD screen on the back is turned on, you can directly tap on the subject in Live View screen to focus and shoot. After shooting, the image will be displayed on the LCD screen (display time is depending on the time you set in [Auto Playback])](https://usermanual.wiki/Yi-Technology/DCM116/User-Guide-3123461-Page-7.png)
![33 342015/12/15 15:48 200/1200 | P5110001Shooting mode: AMetering mode: SpotAperture value: F5.6Shutter speed: 30Exposure compensation: ±0.0ISO: 100Focus mode: A-AFLens focal length: 35mmWhite balance: AutoColor space: sRGBQuality setting: 5184×3888Color WEB RAW JPEG2.Information display/index display2.Record videos2) press the button again to stop recording.00:00:00 AF-C AWB 1080P 00:00Recording time displayWhite balanceDelay recordingBracket recordingImage quality settingsVideo settingsFile formatFlash settingsAEBKT16MRAWA4:34KVideo settings1.View/edit still picturesThe lastest picture/video will be displayed.1) During the display of Live View screen, tap on the video button on mode dial to record video. To ensure recording results match your expectations, you can set the parameters in [Video Setting] in advanced. Basic settingsAspect ratiosMemory card settingsRecording status indicationRecording time displayVideo modeElectronic image stabilizationWireless connection statusPowerVideo specification Remaining time to record8. View pictures/videos1) Press the button to view/edit pictures/videos. Slide the screen left or right to swith in between picture and video.Tap the picture to show photo editing menu, tap again to exit single viewing mode. Color to B&WLockingResizingRAW format to JPG formatDeletingTurn control dial to the left to switch between detailed info and index display.](https://usermanual.wiki/Yi-Technology/DCM116/User-Guide-3123461-Page-8.png)