Yi Technology YVR1717 YI Halo Camera User Manual
Shanghai Xiaoyi Technology Co., Ltd. YI Halo Camera Users Manual
UserManual.wiki
>
Yi Technology
>
YVR1717 User Manual
Users Manual
Navigation menu
Upload a User Manual
Namespaces
Wiki Guide
HTML
PDF
Info
Views
User Manual
Discussion / Help
Navigation
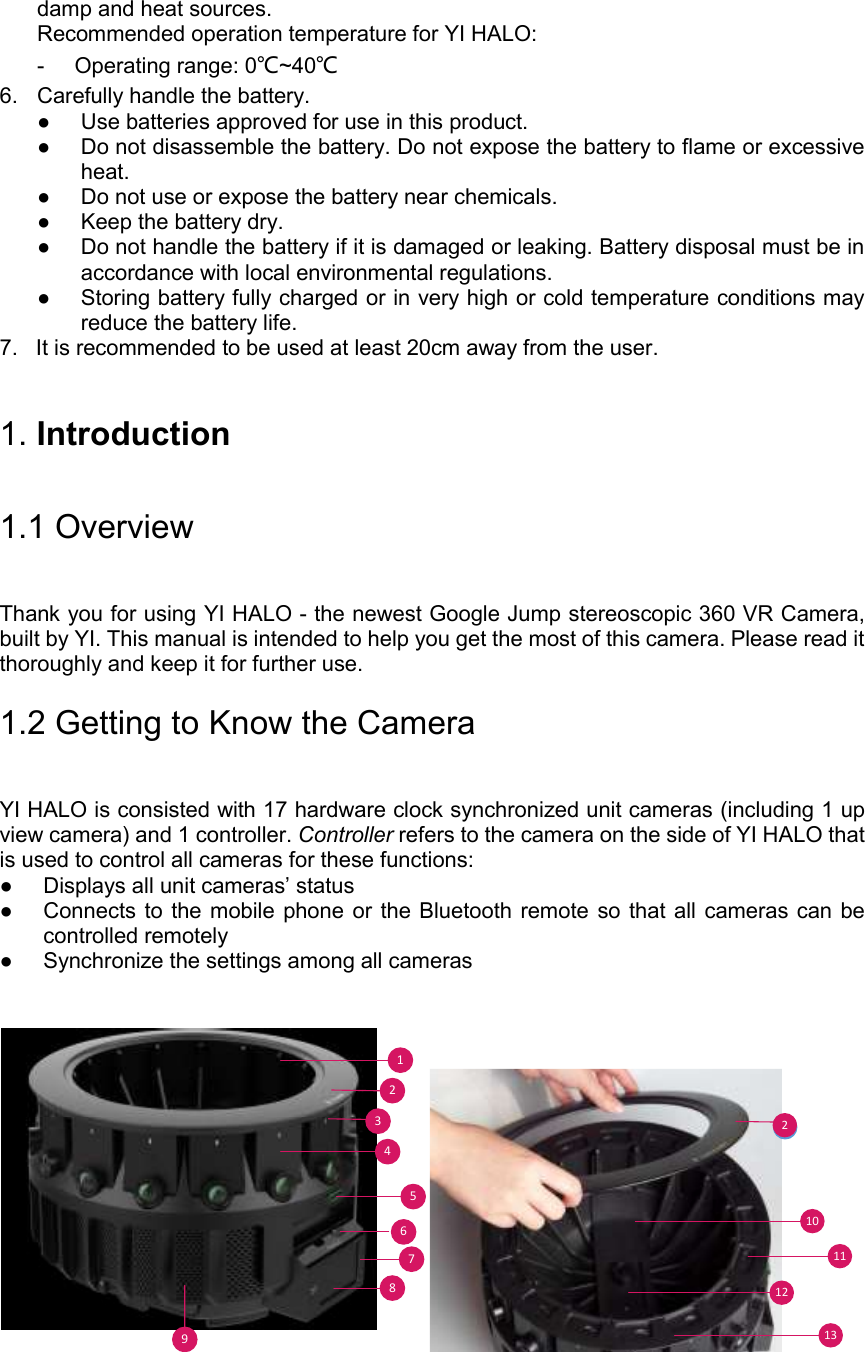


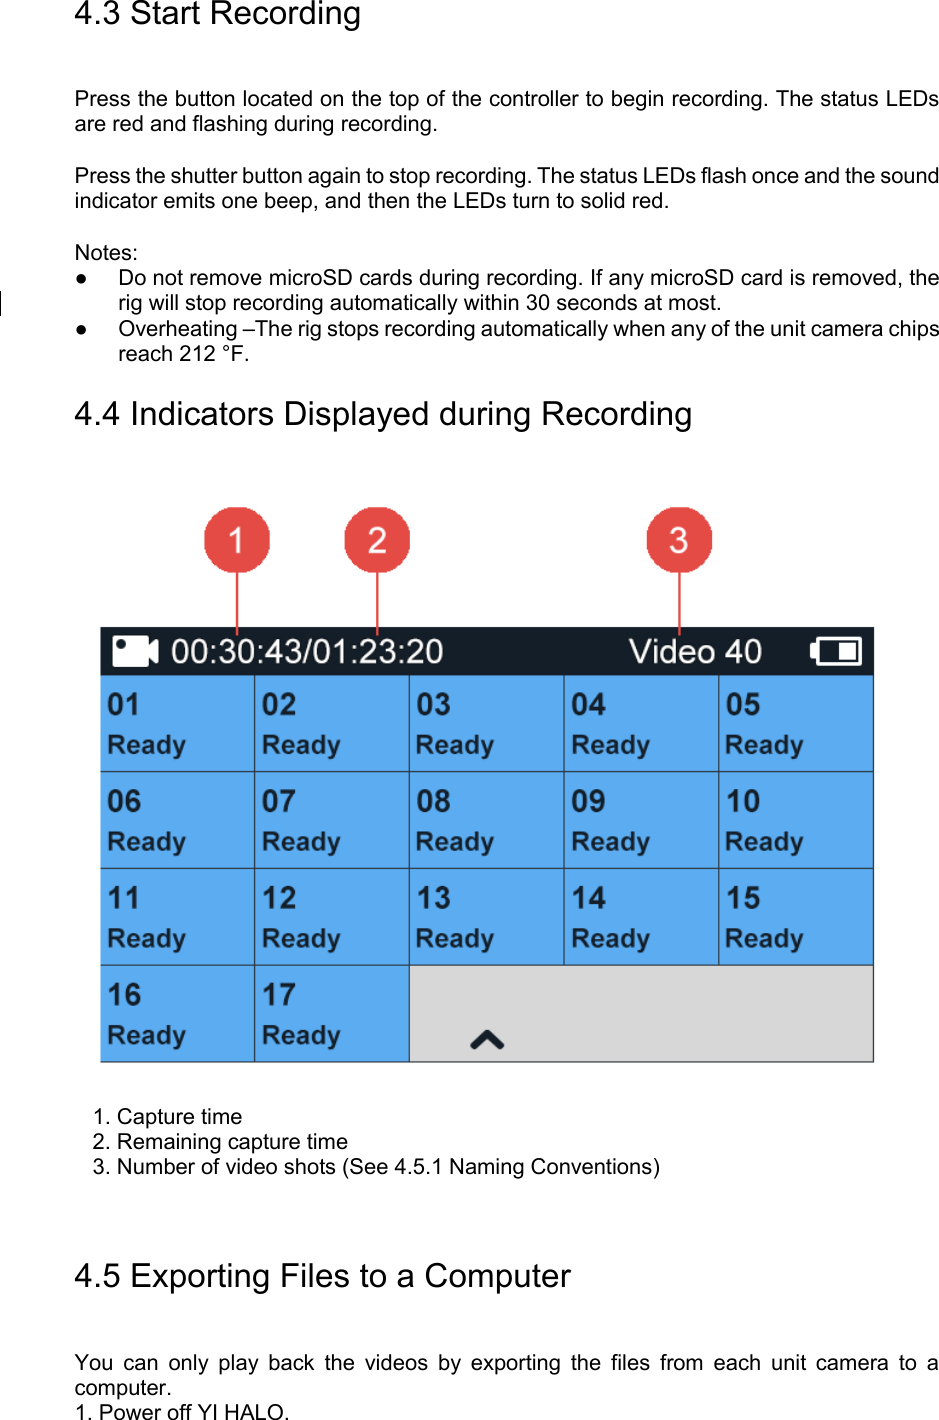
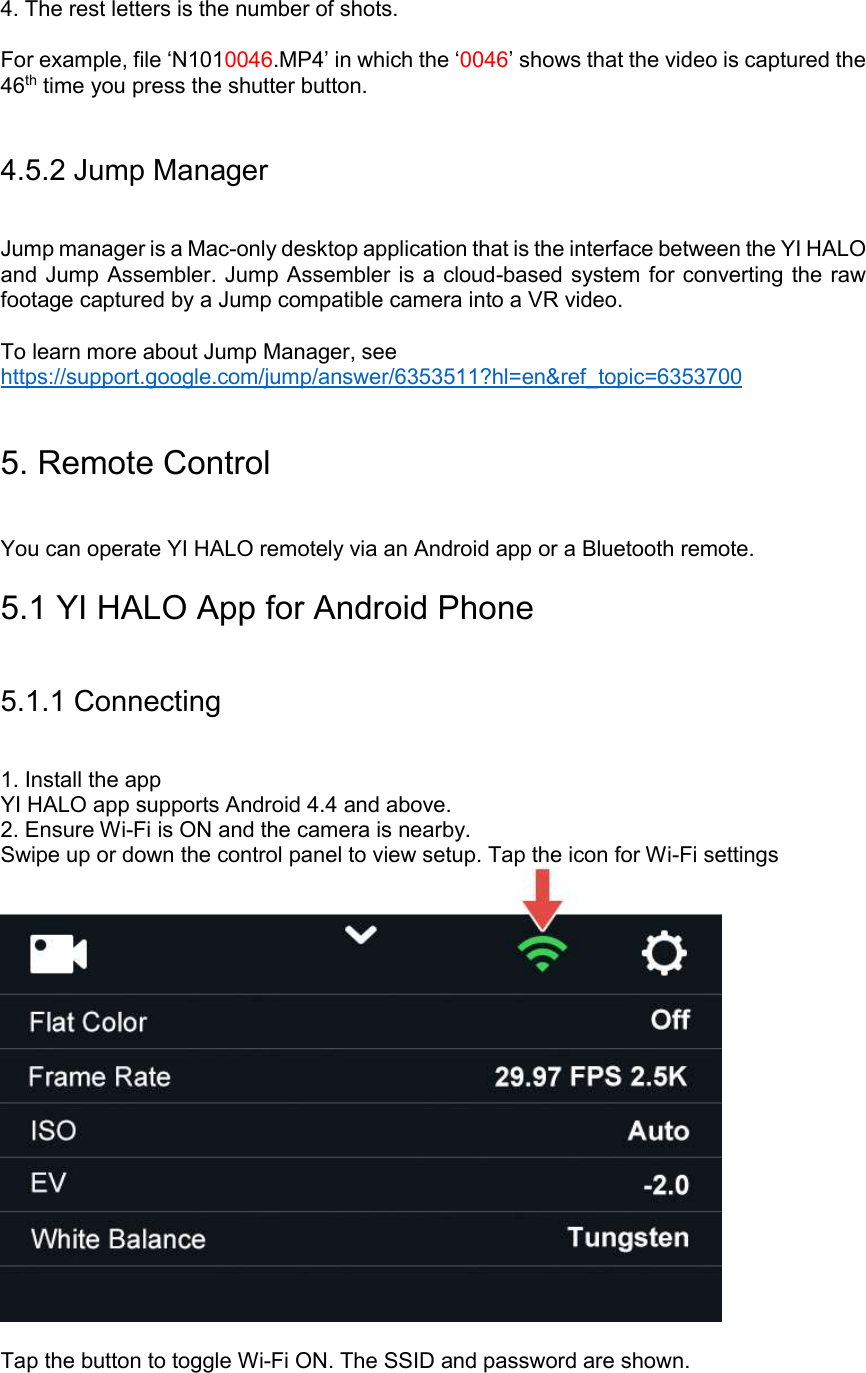
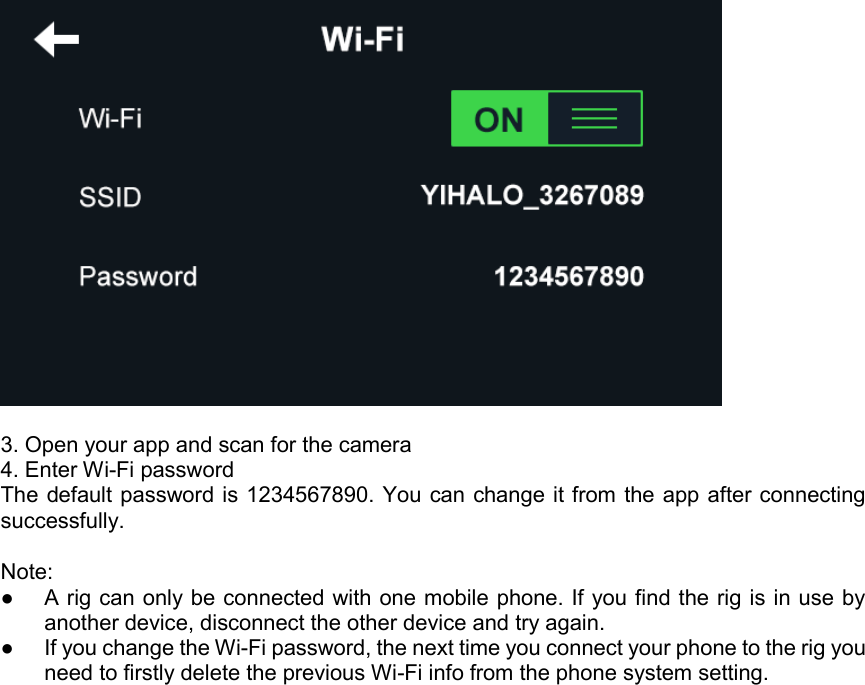
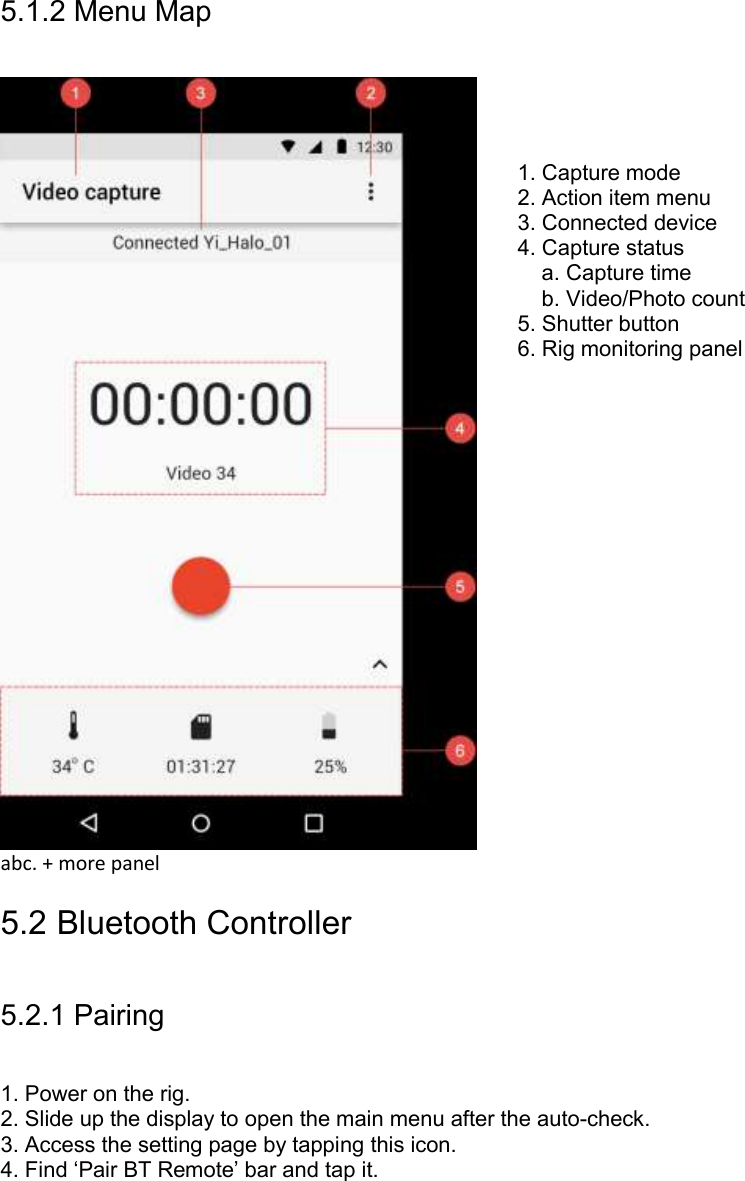
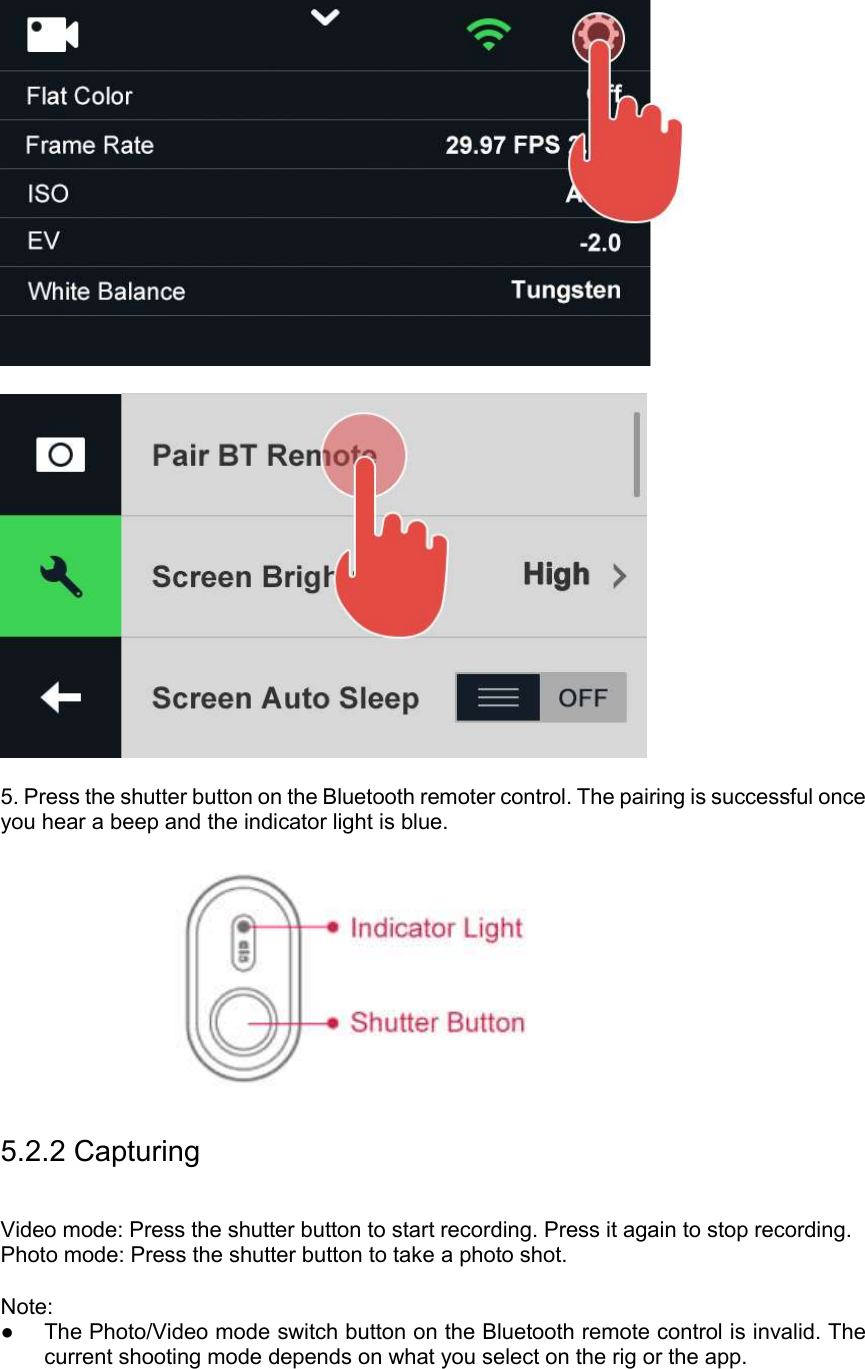
![2. Remove the microSD cards from unit cameras. 3. Complete these steps for each microSD card. ● Insert the card to a card reader. ● Connect the card reader to your computer. ● Transfer the files to your computer. ● Delete the files from your card if needed. Note: ● Before deleting the files, make sure to back them up. ● It is recommended to power off YI HALO first before inserting/removing the microSD cards. Hot inserting/removing the microSD cards may cause recognition issue or unintended consequences to the microSD cards. 4.5.1 Naming Conventions YI HALO uses the following file naming convention when recording video. [Video Type][Camera ID][Part Number][Shot Number].mp4 N 1 0 1 0 0 4 6.mp4Video TypeCamera IDPart NumberShot Number 1. The first letter of videos indicates what the file type is. - N: Video - T: Time Lapse Video 2. The second letter of videos is the camera ID. - The letter 1~9 represents camera #1 ~ camera #9. The letter A~G represents camera #10~ camera #16. The letter H represents the up camera. For example, file ‘N1010046.MP4’ in which the second letter 1 indicates that the video is captured by camera #1. File ‘NA010046.MP4’ indicates that the video is captured by camera #10. 3. The third and fourth letter of files is the number of parts. - If a video is no more than 8 minutes, the third and fourth letter in the name should be ‘00’. If a video is more than 8 minutes, it will be divided into a part every 8 minutes. For example, file ‘N1000046.MP4’ in which the ‘00’ shows that the video is less than 8 minutes. File ‘N1020046.MP4’ shows that it is the third part of the video.](https://usermanual.wiki/Yi-Technology/YVR1717/User-Guide-3383153-Page-38.png)