Yifang Digital Technology XN303I Mobile Digital Pen User Manual XN205BT manual
Shenzhen Yifang Digital Technology Co., Ltd. Mobile Digital Pen XN205BT manual
user manual

1
TABLE OF CONTENT
PRODUCT OVERVIEW ......................................................................................... 2
KEY FEATURES.................................................................................................. 3
PACKAGE CONTENT ........................................................................................... 3
CHAPTER 1 HOW TO USE THE DIGITAL PEN........................................................... 3
Installing/Replacing an Ink Refill into the Pen........................................................ 3
Installing/Replacing Pen Batteries........................................................................ 4
Write Correctly.................................................................................................. 5
CHAPTER 2 BASE UNIT ...................................................................................... 6
General Overview .............................................................................................. 6
Getting To Know Your Memory Unit...................................................................... 6
CHAPTER 3 USE YOUR PEN TABLET IN MOBILE MODE ............................................. 8
Mounting your Base Unit to Paper........................................................................ 8
Take handwritten notes...................................................................................... 9
CHAPTER 4 USING THE BLUETOOTH ....................................................................10
CHAPTER 5 USE YOUR POCKET PEN TABLET IN CONNECTED MODE.........................10
Install the Software Suite ..................................................................................10
Run the Software..............................................................................................12
Connect Memory Unit to Computer .....................................................................13
Uploading Notes to your PC................................................................................13
Viewing Notes ..................................................................................................16
Using your Pen in Mouse Mode ...........................................................................16
The Note Manager ............................................................................................17
Creating Notes .................................................................................................20
Manage Notes ..................................................................................................23
Setting Your Preferences ...................................................................................28
Setting a Reminder...........................................................................................30
Exporting to JPEG.............................................................................................31
Exporting to a Data format file ...........................................................................32
Importing a Data format file...............................................................................32
Pasting Notes into Other Applications ..................................................................32
Creating Sticky Notes........................................................................................33
Creating Paper holder Notes...............................................................................35
The Note Editor ................................................................................................36
2
Sending Notes..................................................................................................40
Receiving notes over the local network................................................................42
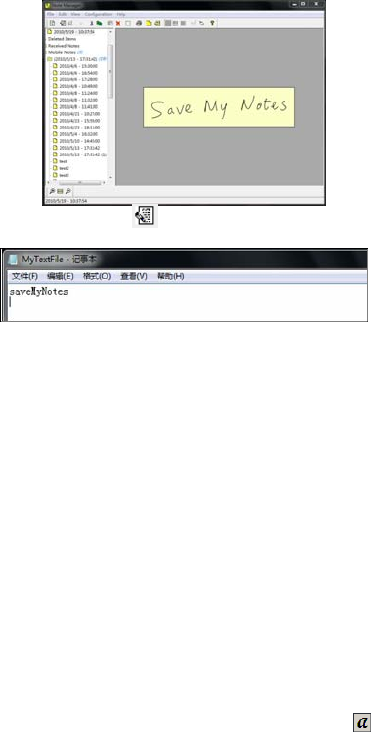
Convert Note to Text.........................................................................................43
Using the “Note to Text” menu (only available in Windows Vista or 7) .....................43
Using the Vision Objects MyScript® Notes (Optional)............................................43
Application Tray Icon ........................................................................................45
CHAPTER 5 USE PEN TABLET IN WINDOWS VISTA ..........................................45
Getting started.................................................................................................46
Windows Journal...............................................................................................46
Tablet PC Input Panel........................................................................................47
Sticky Notes.....................................................................................................48
Windows Snipping Tool......................................................................................49
Pen-and-Ink functionality in Vista- Office 2007.....................................................49
CHAPTER 6 USING IN MAC OS ............................................................................52
CHAPTER 8 USING THE PHOTO SKETCHER ..........................................................56
CHAPTER 8 TAKING CARE OF YOUR POCKET PEN TABLET......................................56
Cleaning your Pocket pen tablet .........................................................................56
CHAPTER 9 TROUBLESHOOTING ........................................................................56
CHAPTER 10 TECHNICAL SPECIFICATIONS ...........................................................58
Product Overview
Thanks for purchasing this useful and powerful product!
The Pocket Pen Tablet can capture any handwritten notes or drawings on a plain
paper and store them in its internal flash memory. Captured notes can be uploaded to
computer via its USB interface. It really helps when you are away from computer and
needs to capture any instant thoughts or important points.
The Pocket pen tablet consists of a digital pen and a small receiving unit, which
combines Ultrasound and Infrared technologies with sophisticated algorithms to
enable an accurate tracking and positioning system that tracks the movement of the
tip of the pen on any surface and converts the movement into a vector image of the
user’s handwriting. The digital pen transmits handwritings to the receiver unit for
storage.
The following chapters will describe both hardware and software features of the
device in details. Read the Quick User Guide before operation. For detail information
3
about the device, please read the included User Manual on the CD provided with the
package, so that you are aware of some useful functions that you may not know.
Key Features
• Capture natural handwritings and drawings while being away from computer.
• Save captured handwritten notes into built-in flash memory.
• Upload captured handwritten notes to computer via USB connection.
• Act as a digital ink pen with hovering and mouse functionality to directly write
into Windows Vista and Office 2007.
• No installation is required to activate digital ink in Vista and Office 2007.
• No need for special paper.
• Standard off-the-shelf ink refill and batteries.
Package Content
• Digital Pen
• Base unit
• USB cable
• Pen battery
Chapter 1 How to use the Digital Pen
Your Pen is a unique device that captures notes handwritten on plain paper, and
transmits them to the base unit
The Pen Uses patented technology combining Ultrasound and Infrared technologies
with sophisticated algorithms to enable an accurate tracking and positioning system
that tracks the movement of the tip of the pen on any surface and converts the
movement into a vector image of the user’s handwriting.
Installing/Replacing an Ink Refill into the Pen
The top of the pen cap also functions as an ink refill extractor.
NOTE: Make sure you use a refill that is similar to the original (standard refill (67.0mm
long X 2.35mm diameter).
To replace the ink refill:
1. Detach the cap from the digital pen.
• ink refill
• Quick Start Guide
• Warranty Card
• Note Manager CD
4
2. Insert the ink refill into the cross of
the extractor with pressure so that
the extractor holds the refill firmly.
Hold the pen firmly, and apply
pressure with the extractor against
it.
3. Pull the used Refill out.
To insert a new refill
1. Slide the new refill into the tip of the
pen.
2. Gently press the new refill until it
is lodged securely in place.
Installing/Replacing Pen Batteries
(1) Remove the battery compartment cover.
(2) Install two SR41 batteries, with the positive poles facing up.
(3) Supplied batteries are good for initial use only Replace battery
compartment cover.
Notice:
• Please use the enclosed GP SR41 batteries with the positive polarity facing
up.
• Batteries may be safely disposed of in normal household waste.
Contact your local government for disposal or recycling practices in your area
• Caution: Risk of explosion if battery is replaced by an incorrect type
Please use silver oxide button cells battery type only.
• When your Pen battery runs low, the following message appears on your
screen:
5
This warning is continuously displayed on each new note and the application tray icon
in the system tray changes to reflect the current status until the batteries are replaced.
Tray icon indiocation, for Pen low
battery, in Note Mode
Tray icon indiocation, for Pen low battery,
in Mouse Mode.
Note: Lifetime of the batteries may vary and cannot be guaranteed.
Write Correctly
When you pick up the pen, find a position that is
comfortable for you. Be careful to hold the pen in a way
that does not block the signals sent from the tip of the pen
to the memory unit receivers.
When you are writing with the digital pen, make sure its
inclination to the paper surface is between 45°and 90°.
Hold the pen firmly and write normally.
WARNING:
Do not attempt to open the Digital Pen.
This may cause the pen to malfunction.
For better writing quality
Do not block the base
unit with your hand.
Do not place your
hand between the
pen and receiver.
Do not hold the pen
like a paintbrush.
6
Chapter 2 Base Unit
General Overview
The Pocket pen tablet is a unique device that captures notes handwritten on plain
paper, Stores the notes to memory and uploads them to a PC.
The device consists of a Digital Pen and a small receiving unit.
The Pocket pen tablet uses a patented technology combining Ultrasound and Infrared
technologies with sophisticated algorithms to enable an accurate tracking and
positioning system that tracks the movement of the tip of the pen on any surface and
converts the movement into a vector image of the user’s handwriting.
The Mobile Pocket pen tablet can capture and store up to 50 A4 pages.
At home or in the office, the user can connect the Mobile Pocket pen tablet to the PC
using the USB cable, then upload and manage the saved notes.
Getting To Know Your Memory Unit
Buttons & Ports
The memory unit consists of an LCD for status indications. The memory unit also
consists of a single button (Top button) allowing you to turn the unit ON and OFF, as
well as creating a new file.
A. USB port – connect to computer through the USB cable
B. Neckstrap Holder
C. LCD display
D. Top button – Press and hold for about 5 seconds to turn on the unit.
Press shortly to create a new note.
E. Bluetooth ON/OFF – Turn on or off the bluetooth.
F. Reset hole – When the unit does not respond, stab into this hole to
reset it and then press and hold the Top button to restart the unit.
G. Paper Clip – clip the unit to paper
7
Turn on/off the Unit
Press and hold the Top button to turn on or off the unit before you use the base unit in
mobile mode.
NOTE: The unit will power off automatically after 60 minutes of idle time (no working).
Charge the Battery
Your Pocket pen tablet includes a rechargeable internal battery. Each time you
connect your unit to your PC USB port, the batteries are being charged. Full charge
time takes about 3.5 hours.
Reset the Base Unit
If the base unit is frozen, you can use a pin to press the Reset button to reset it and
then press and hold the Top button (ON/OFF button) to restart the unit.
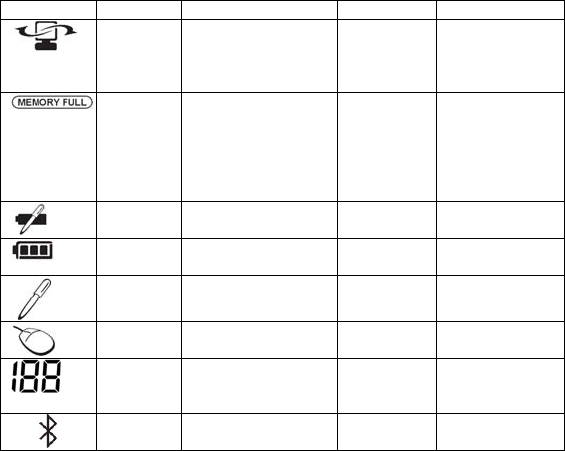
Memory Unit LCD
Use the LCD to view status indications.
Name On when Off When Blinks When
Mobile
Pocket pen
tablet is
Connected
Unit is connected to PC Unit is NOT
connected to
PC
Data is uploaded to
PC
Memory
FULL
Mobile Pocket pen tablet
Unit Memory is 90% full.
It is highly recommended
to upload your files to
your PC and delete them
from memory!
Less than 90%
capacity used
Never
Pen Low
Battery
Low Pen battery Pen Battery
good
Low Pen battery
Base unit
Low battery
Full Unit is Off Charging
Note Mode Pen down/Pen move Mouse Mode Pen down/Pen
move
Mouse
Mode
Pen down/Pen move Pen Mode Pen down/Pen
move
Number of
saved notes
in memory
Always Unit is Off Memory full Or
Error
Bluetooth The bluetooth is on The bluetooth
is off
Never
8
Power Save mode
In order to save power from the rechargeable battery, while in mobile mode, if there is
no activity (Meaning: No Pen usage nor key press on base unit), your base unit will
automatically shut down in 60 minutes. Your note will be automatically saved.
To exit power save mode, simply press ON/OFF button on the unit to turn it on. (Note:
This will start a new note file).
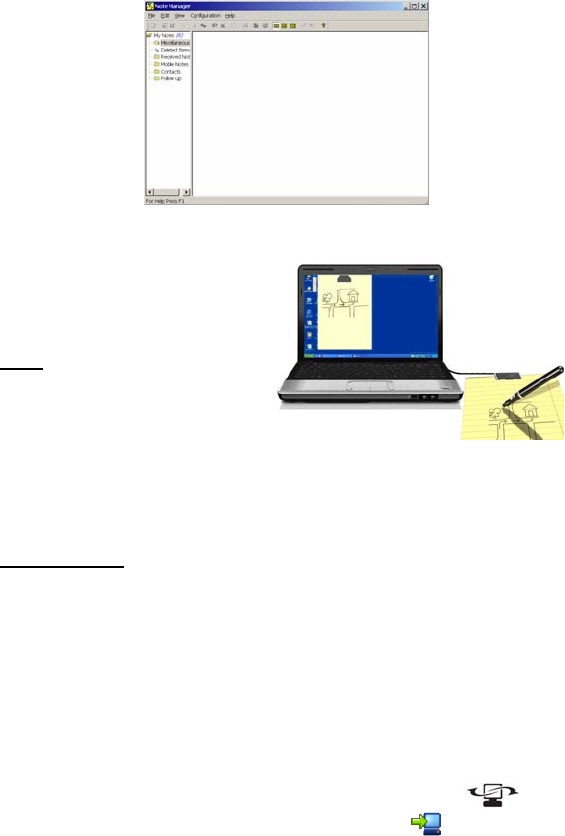
Chapter 3 Use your Pen Tablet in Mobile Mode
In the mobile mode, you can use your Pocket Pen Tablet to take and store your
important notes or drawings at any time and where.
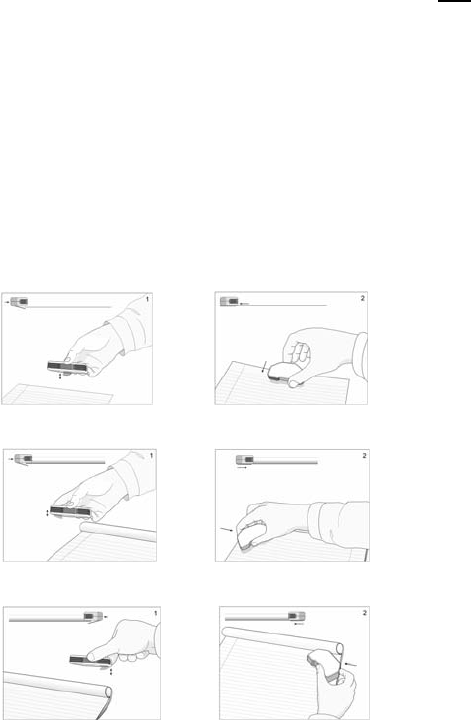
Mounting your Base Unit to Paper
Your base unit can be mounted in 3 positions on top of the paper depending on
various deivce model.
The following images illustrate the way you can mount your base unit, according to
the recommended positioning.
A. Mounting your base unit at the top center of the paper is recommended
for a single paper usage:
B. Mounting your base unit at the top left corner of a paper block is
recommended for right hand Users.
C. Mounting your base unit at the top right corner of a paper block is
recommended for left hand Users.
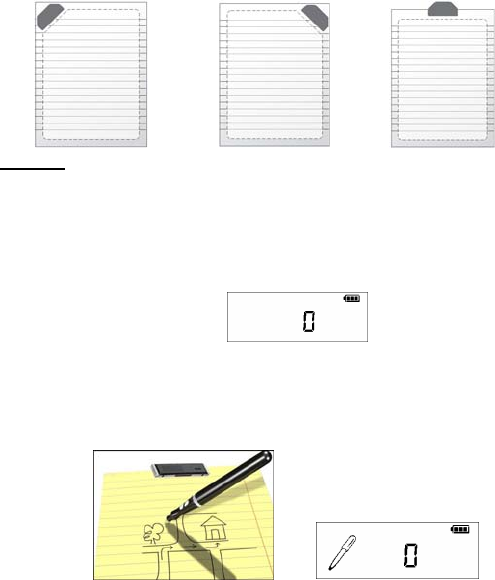
9
Base Unit Coverage area:
The following images illustrate the coverage area of your base unit.
Note: a. The paper is an A4 size paper; b. The striped line illustrates the covered area
in each of the positions.
Base unit located at the
left corner.
Base unit located at
the right corner.
Base unit located at
the top center.
Warning:
DO NOT move or overturn the base unit when you are using the base unit. Fix it up
onto the edge of the paper with the face up. Moving or overturning it may result in
mixed strokes or other fatal errors.
Take handwritten notes
(1) Press and hold the ON/OFF button to power on the unit.
(2) Hold the base unit and gently press the paper clipper.
(3) Slide the base unit into the paper’s upper edge and make sure the base unit is
in the center.
(4) Pick up the digital pen and start writing. (NOTE: Be careful to hold the pen in a
way that does not block signals sent from the tip of the pen to the receiver unit.)
(5) Once you’ve completed one page, shortly press the ON/OFF button to save
current page and start a new page. On the base unit screen, you can see the
page number added by one.
(6) All notes are stored in the base unit. You can upload them to a PC for viewing,
editing, or email.
10
Chapter 4 Using the Bluetooth
The device has bluetooth which enables you to connect the base unit wirelessly to
any mobile device with bluetooth, for example, mobile phone based on Windows /
Android operating system.
1. Install the Note Manager application on your mobile device (mobile phone).
2. Press the Bluetooth button on the unit to turn on the bluetooth.
3. Turn on the bluetooth on your mobile device (mobile phone) and pair with the
base unit.
4. Once the base unit and mobile phone is paired and connected sucessfully, you
can start using the Pen Tablet just as you do on a PC.
Chapter 5 Use your Pocket Pen Tablet in
Connected Mode
Connect your Pocket Pen Tablet to the computer with the USB cable, the device
works in the connected mode. Once connected, you can view, edit, send or print your
notes. Also, you can take notes and make drawings just as you do in mobile mode.
The digital pen can also acts as a mouse with features like hovering, left and right
click. Additionally, there are some special features to be used only with the connected
mode. Those features will be described in details in the followed chapters.
Before you connect the device to a PC, first make sure to install the Pocket pen tablet
manager application included in the CD and run it.
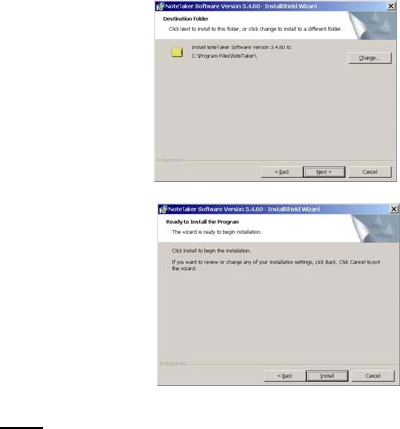
Install the Software Suite
Your product is packaged with a CD that includes its companion desktop software –
Note Manager. With the software, you can upload notes to computer, view or edit the
notes.
System Requirements:
o Microsoft ® Windows 2000 (SP4) or Microsoft ® Windows XP (SP2) or
Microsoft ® Vista or Windows 7.
o Minimum 50MB available hard disk space
o Minimum 128MB RAM
o 32 bit color quality
o Screen resolution of 1024x768 pixels
o Available USB port.
(1) Insert the installation CD into your CD ROM drive. The setup program should
start automatically. If not, run the program by selecting ‘Run’ from the Windows
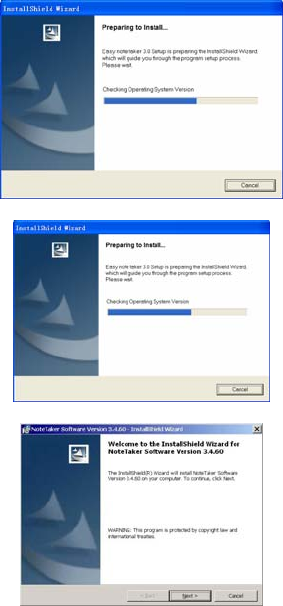
11
‘Start’ menu and type in D:\setup.exe. If your CD drive uses a different letter,
type that letter instead of D.
(2) Follow the instructions on the screen.
12
(3) Click “Finish” once the installation is finished.
Note: After the installation process, when running the application for the 1st time, a
new folder named “Ink Notes” is created in your “My Documents” directory. All your
notes will be saved into this directory. In the event that no “My Documents”
directory is found, the installation process will create a new “My Documents” folder
on your C hard drive. The ‘Ink Notes’ folder will then be created under this
directory. If you uninstall, upgrade or reinstall the software in a different location,
the note files will remain in this directory, and will not be overwritten.
Run the Software
Select “Programs”Æ “Pocket pen tablet” from the Windows “Start” menu to run the
Note Manager.
13
Connect Memory Unit to Computer
Use the Mobile Pocket pen tablet’s
mini USB connector to plug in the
USB cable (included in the package),
which connects the unit with the PC
when uploading notes.
Note: Only use the USB cable
supplied with your Mobile Pocket
pen tablet package.
The USB cable (included in the
package) plugs into the Memory Unit
Connector and is used for the following:
• Uploading notes from the memory unit to the PC
• Working in Connected Mode
• Firmware updates
Important Notice: Do not connect more than one set of this device at the same time.
That may cause interference with each other.
Uploading Notes to your PC
Connect Memory Unit to Computer
When in Connected Mode, you can upload all your notes from the memory unit to
your PC using the Pocket pen tablet software application.
Before doing so, first make sure that:
• Your Note Manager software application is running
• Your memory unit is connected to your PC’s USB port using the memory unit
USB cable.
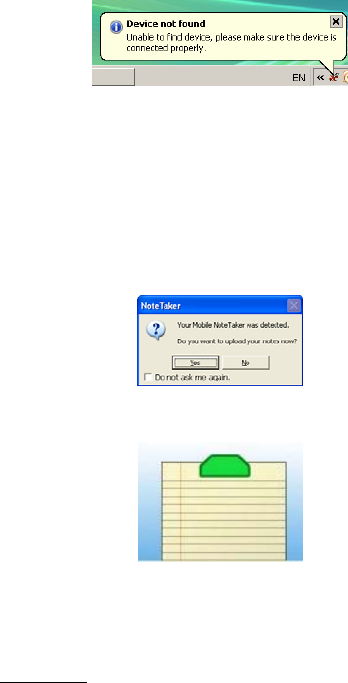
The “CONNECTED” icon will be displayed on your memory unit LCD:
Application Tray Icon will change while uploading your notes:
14
Port Auto-Detection
Once you launch the application, the Pocket pen tablet software automatically detects
your hardware.
The application automatically searches all ports in order to detect the hardware. If it is
unable to locate the connection, the Hardware Detection dialog box appears.
USB Hot-Insertion
USB Hot Insertion refers to connecting the USB cable while the application is running.
The application will auto-detect your hardware if the USB cable is disconnected while
the system is running and then re-connected. The application will also auto-detect the
hardware if you first run the software and then connect the USB cable.
When you plug your Mobile Pocket pen tablet unit (If the application is running), you
will be asked if you want to upload your notes from the Mobile unit memory to your
Note Manager.
Setting your base unit orientation preferences
Your base unit can be placed the top center of an A4 paper.
Pen Mode and Mouse Mode
The device supports a Note mode and a Mouse Mode. In the Note mode, you can
write and draw pictures with the pen. In the Mouse mode, the pen acts as a mouse
with click and hovering function.
Selecting default mode can be done in 2 ways:
a. At the first time you start your Pocket pen tablet application, OR
b. Using the Pocket pen tablet “Configuration” menu (‘Set Digital Pen Mode’)
15
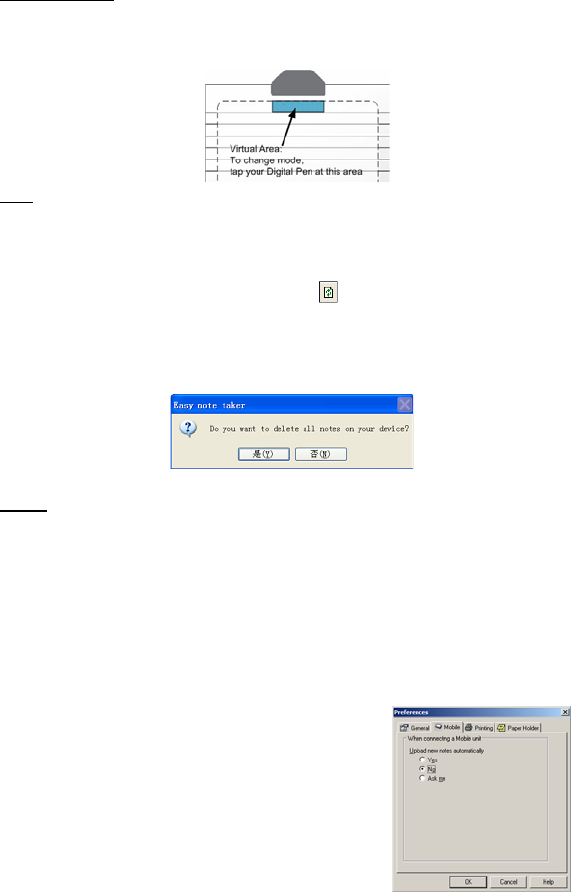
Changing modes during operation can be done in 2 ways:
a. Press the base unit top button (‘Mode’ button) , OR
b. Right click the ‘Pocket pen tablet’ tray icon, and change mode, OR
c. Clicking on the virtual area using your pen.
Note: On each mode change, a Balloon will popup indicating the current mode and
the corresponding LED will lit.
Uploading Notes
(1) Start the Note Manager.
(2) In the “File” menu, select “Upload”, or click in the upper toolbar. All the
notes in your memory unit are uploaded to your PC.
(3) At the end of the process, a message appears asking if you want to delete all
notes on the memory unit. Select ‘Yes’ to erase all notes on your memory unit.
Select ‘NO’ to retain the notes.
(4) Uploaded notes will be saved in the Mobile Notes folder named by date.
NOTE: When you select “NO”, the next time you upload those notes that are already
uploaded to the PC Will not be uploaded.
However, if you delete notes from the PC application and then upload again from the
memory unit, the notes will be uploaded again.
You can select one of three options to be performed automatically when your Mobile
Pocket pen tablet base unit is connected. The following can be selected in the
‘Configuration -->Preferences’ menu within the Note Manager.
Upload new notes automatically options:
YES – Your Mobile Notes will be automatically uploaded
each time you connect it to your PC
NO – Your Mobile Notes will not be uploaded. In this
option, you will manually need to perform this action by
16
selecting “File” --> “Upload” menu within the Note Manager
ASK ME – Each time you connect the Mobile Pocket pen tablet base unit, you will be
prompt if you want to upload your notes.
Viewing Notes
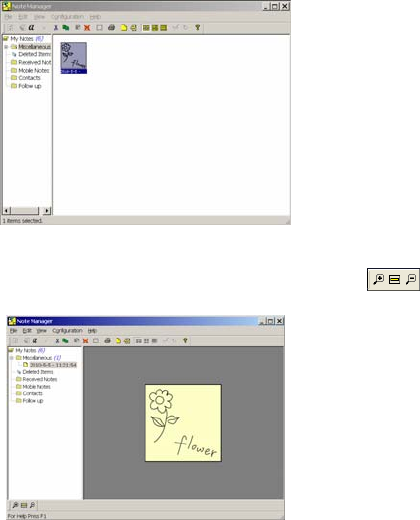
You can view your note on the computer screen.
(1) Run the Note Manager.
(2) Click the “Mobile Notes” folder in the left pane, you should see all note
thumbnails.
(3) Double click a note thumbnail to view it in full screen. You can click the
button to zoom in or out the view.
Using your Pen in Mouse Mode
In Mouse mode, your Digital pen behaves as a mouse, having the following
functionality:
• To move your mouse cursor you can hover with the pen.
To start Hovering you can press the side button or tip the pen on the paper.
The pen will now hover even with no press for about 30 seconds.
17
• To Click an object, point your mouse cursor on that object. Now tip the pen
on the paper or click the side button.
• To Double-Click an object, point your mouse cursor on that object. Now tip
the pen twice on the paper or click the side button twice.
• To Right-Click an object, point your mouse cursor on that object. Now press
the tip of the pen a bit longer on the paper. A special ‘Right Click’ cursor will
appear. Lift the pen from the paper, and the context menu (Right Click menu)
appears.
Avoid interference while using regular mouse:
When the pen is not in use it powers off automatically after
60 minutes.
It is recommend that while not in use, the pen is placed as
shown, to avoid interface with a regular mouse operation.
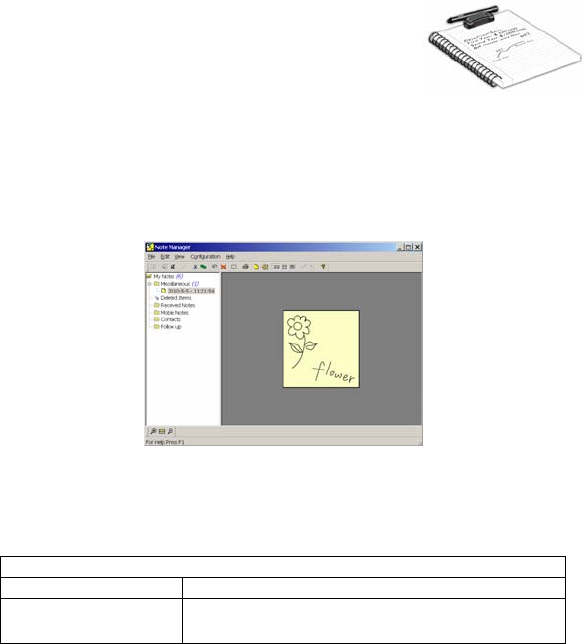
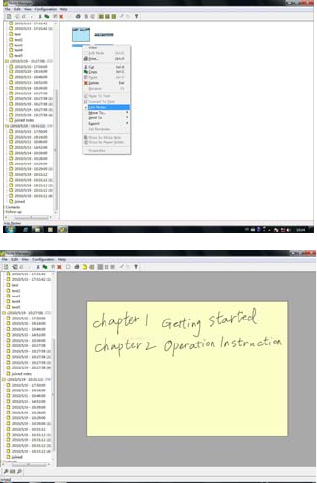
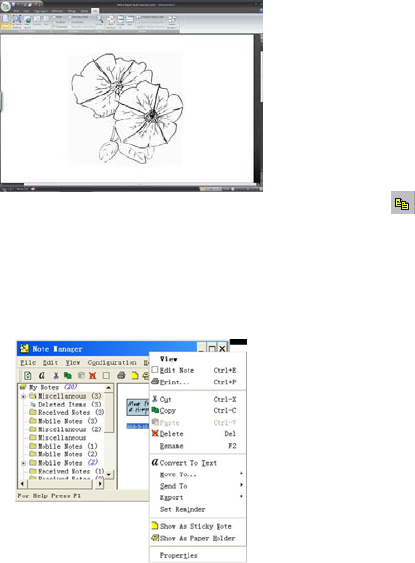
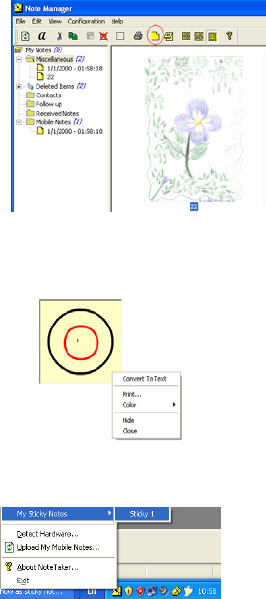
The Note Manager
The Note Manager can be used for storing, viewing, searching, copying and exporting
notes.
It is set up in Windows Explorer format, which allows you to browse through your files
in the left pane and view them in the right pane.
Note Manager Menus
Use these menus to select options and preferences and to perform all software
functions relating to storage and transfer of your notes.
The following table contains a list of all menus and menu commands in the system
together with a short description of their function.
File Menu
Upload Upload notes from the mobile unit to the PC
Note To Text Convert handwritten note to texts (only available in
Windows Vista or 7 OS).
18
Convert To Text Convert your note to Text using MyScript® Notes.
(Only available if the recognition software is installed.)
Join Notes Join several notes together.
Move to Allows you to move the selected note to another folder
Send To Sends any note by email (Jpeg or Data file) or local
network
Import Import data file (.pegvf format)
Export Exports the selected note/s to a JPEG file or a data file
format
Set Reminder Enables you to set an exact date and time that a selected
note will be displayed as a reminder
Show as Sticky Note Make this Note a Sticky Note
Show As Paper Holder Make this Note as Paper holder
Properties View Note Properties
New Folder Create a new folder
Empty Deleted Items Performs a final irreversible deletion of all deleted notes
Print Prints the selected note/notes
Print Preview Displays the selected note as it will look when printed
Print Setup Allows you to select print options
Backup/Restore Backup/Restore your Notes Database
Exit Exits the Note Manager interface
Edit Menu
Edit Note Allows you to edit a selected note
Cut Cuts the selected note and saves it to the clipboard
Copy Copies the selected note and saves it to the clipboard
Paste Pastes whatever was last copied or cut to the clipboard
Delete Deletes the selected note/notes
Rename Allows you to rename the selected note
Find Note Lets you search through saved notes based on defined
criteria
Find Next Locates the next note that matches the search criteria
Select All Selects all notes
View Menu
Sort Sort Notes by Date or Name
Small Thumbnails Displays small thumbnails in the Note Manager view
Medium Thumbnails Displays medium sized thumbnails in the Note Manager
view
Large Thumbnails Displays large thumbnails in the Note Manager view
Zoom In Enlarges the thumbnail view by 50% (available only when
viewing an individual note thumbnail)
19
Zoom to Fit Returns the thumbnail view size to the original size
(available only when viewing an individual note thumbnail)
Zoom Out Reduces the thumbnail view by 50% (available only when
viewing an individual note thumbnail)
Configuration Menu
Detect Hardware Allows you to detect your unit
Preferences Allows you to select your personal preference for
elements such as; note color, auto-save, windows options
and printing options
Pen Styles Lets you select the default ink color and stroke width of
the pen
Set Device Orientation Set your device position on paper (Top center, Left or
Right corners).
Set digital note mode Select default Pen mode (Mouse/Note)
Mouse Properties Mouse resolution
Help Menu
Read User Manual Opens the pocket pen tablet User Manual
About NoteTaker Displays pocket pen tablet version information
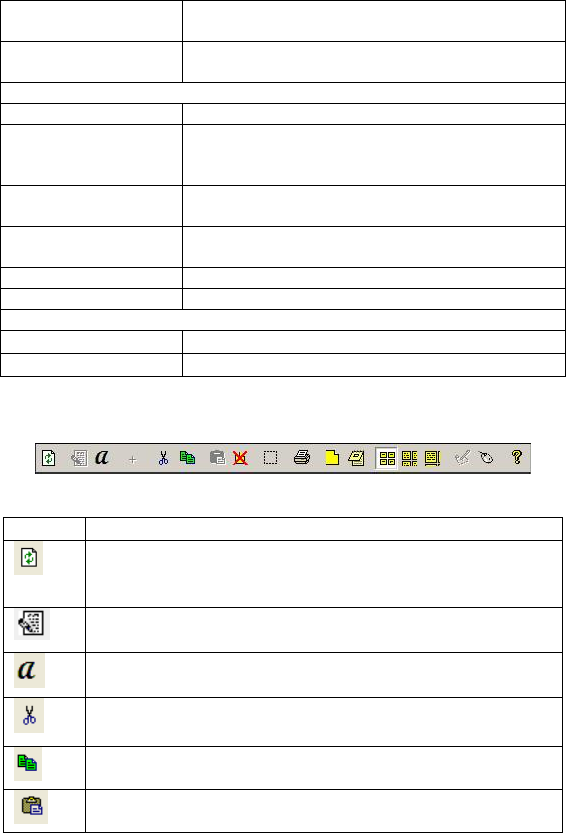
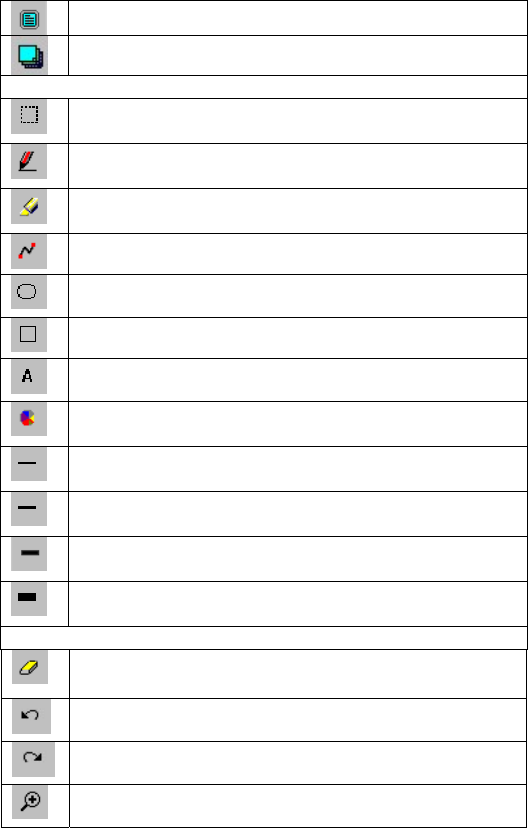
Note Manager Toolbox
The Note Manager Toolbox contains buttons that give you access to the most
commonly used menu commands.
The following table contains a list of each button in the toolbox together with a
description of its function.
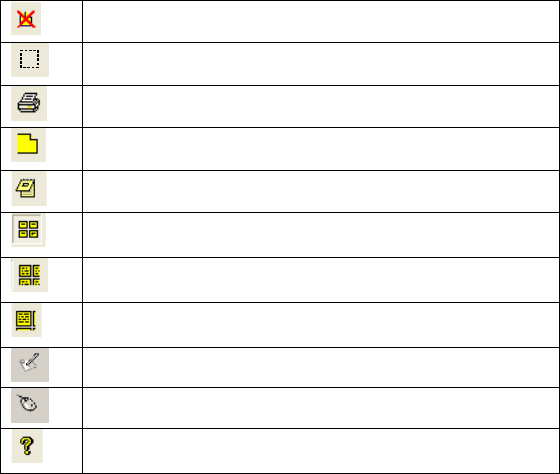
Button Description
UPLOAD – When in Connected Mode, you can upload all your notes
from the mobile unit to your PC using the Pocket pen tablet software
application
Note To Text - Convert handwritten note to texts. (only
available in Windows Vista or 7)
Convert your note to text using MyScript® Notes. (Only available if
the recognition software is installed.)
CUT – Cuts the selected note and saves it to the clipboard
COPY – Copies the selected note and saves it to the clipboard
PASTE – Pastes whatever was last copied or cut to the clipboard
20
DELETE – Deletes the selected note/notes
EDIT NOTE – Allows you to edit a selected note
PRINT -- Prints the selected note/notes
SHOW AS STICKY NOTE – Make your Note as Sticky Note
SHOW AS PAPER HOLDER – Make your Note as a paper holder
SMALL THUMB – Displays small thumbnails in the Note Manager
view
MEDIUM THUMB - Displays medium sized of thumbnails in the Note
Manager view
LARGE THUMB - Displays large thumbnails in the Note Manager
view
NOTE MODE
MOUSE MODE – TURNS YOUR PEN INTO A MOUSE
ABOUT – Provides you with your Pocket pen tablet version
information
Creating Notes
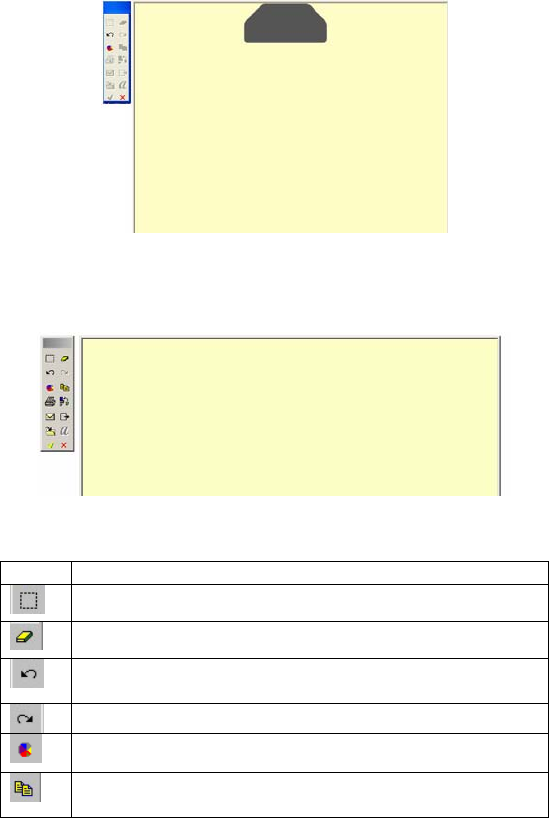
The moment you begin to write or sketch with your digital pen, a Note Window
appears on your screen that reflects everything that you write on the paper attached
to the base unit. The Note Window toolbar allows you to perform various basic
functions such as saving, editing, sending and copying your notes while writing, or
once you have finished writing.
21
NOTE: While writing, make sure not to block the line of sight between the pen and the
base unit with your hand. When the line of sight is blocked, the Pocket pen tablet will
not function properly.
The Notes Toolbar
The following table contains all buttons available in the Notes toolbar together with a
description of their functions.
Button Description
EDIT – Opens the Note Editor for editing the note
CLEAR – Clears the entire on-screen note.
UNDO – Clears the previous stroke made by the digital Pen in
reverse chronological order.
REDO – Replaces previously undone strokes in chronological order.
PEN STYLES- Changes the Ink color and width.
COPY – Copies the note to the clipboard for pasting into other
applications.
22
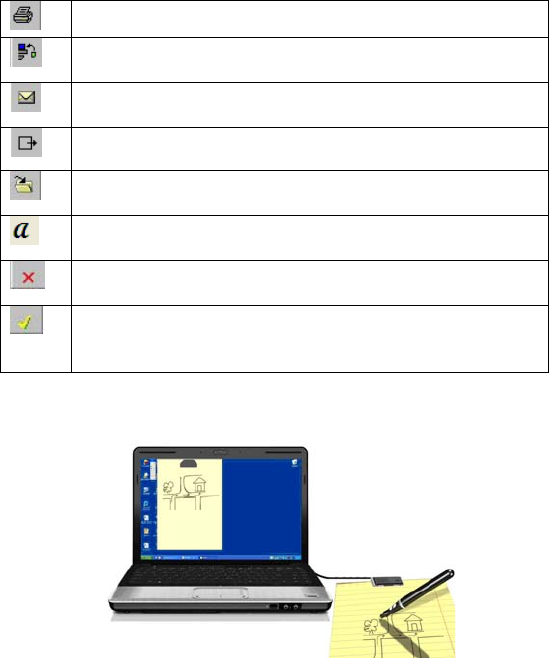
PRINT – Prints the current note.
SEND BY NETWORK – Sends the current note by local network to
selected recipients.
SEND BY EMAIL - Sends the current note by email to selected
recipients as a JPEG attachment.
EXPORT TO JPEG- Exports the selected note to a JPEG file.
SAVE TO FOLDER – Saves the note to a specified folder and
closes the note window.
Convert your note to Text using MyScript® Notes.
(Only available if the recognition software is installed.)
CLOSE WITHOUT SAVING – Closes the current note without
saving.
SAVE AND CLOSE – Closes the current note and saves it into the
Notes Manager under the default Miscellaneous folder (the note is
named according to the creation date).
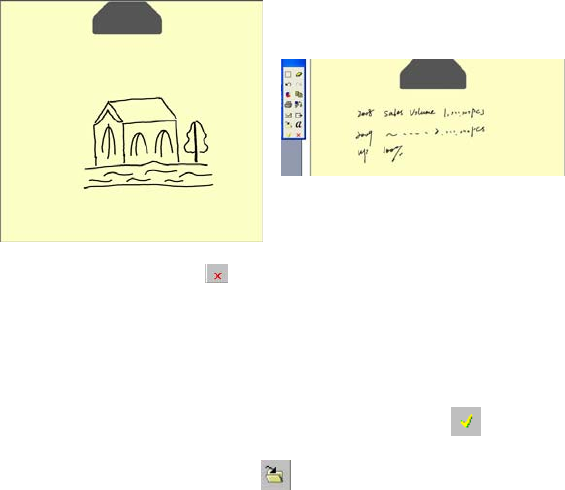
Writing notes or Make Drawings
With the device connected, pick up the pen to write or draw.
23
During writing or drawing, you can use the toolbar to edit, cancel, erase, copy or send
the notes. When finished, click to exit from the Note Window.
Saving Notes
Notes can be saved at any time during the note creation process. They are
automatically saved to the default and named according to the date they were created.
Notes can be renamed at any time once they have been saved.
To save a note,
(1) In the Note Window Toolbar, click the Save and Close icon to save the
note to the default Miscellaneous folder.
(2) Click the Save the Folder icon to save the note to any folder you select.
NOTE: It is also possible to configure an 'Auto-Save' feature. That will automatically
save your note periodically while you are working.
Manage Notes
The Note Manager in installed with predefined folders, Miscellaneous, Deleted Items,
Contacts, Follow Up, Received Notes and Mobile Notes.
You can use these folders for storing your notes and can create additional custom
folders, as needed.
Miscellaneous: User-defined Folder
Deleted Items: Store deleted notes
Received Notes: Store received notes by e-mail.
Mobile Notes: Store uploaded notes from the base unit.
Imported Notes: Store imported notes from computer.
Follow up: Store to-be-continued notes
Contacts: Store contact information.

24
Creating a new folder
To create a new folder:
Creating a new folder can be done in few ways:
You can use ‘File’ menu to run the ‘New Folder‘ option
(1) Choose the folder you want to create a sub folder for or choose the ‘My Notes’
root folder
(2) Use ‘File’ menu to run the ‘New Folder ‘option.
(3) Fill the new folder name.
You can right click any folder in the Folders Tree
(1) Choose the folder you want to create a sub folder for or choose
the ‘My Notes’ root folder.
(2) Right click this folder.
(3) Choose ‘New Folder’ from the drop down menu.
(4) A new folder will be created.
(5) To rename this folder please see ‘Renaming a folder’
Renaming a folder
All folders can be renamed except for the predefined Miscellaneous, Deleted Items,
Received Notes and Mobile Notes.
To rename an existing folder:
(1) Right-click the folder you want to rename (Or press F2 key, when the folder is
selected).
(2) In the short-cut menu, select Rename. The folder name is now highlighted.
(3) Type the new folder name.
Deleting a folder
All folders can be deleted except for the predefined
Miscellaneous, Deleted Items, Received Notes and Mobile Notes
To delete a folder,
(1) Right-click the folder you want to delete (Or press the delete button, when the
folder is selected).
(2) In the shortcut menu that appears, select Delete.
(3) Select ‘Yes’ to confirm that you would like to delete the folder, or ‘No’ to cancel
the operation.
25
Renaming Notes
Each time you create and save a new note, it is automatically given a name that
corresponds to the exact date and time the note was created. You can rename notes
at any time to give them names that are more meaningful to you.
To rename a note:
(1) Right-click the note you want to rename (Or click F2 key, when the note is
selected).
(2) In the shortcut menu that appears, select Rename. The note name is highlighted.
(3) Type the new note name.
Join Notes
You can join more than one note together.
(1) Select more than one note together by dragging the mouse.
(2) Right click the selected notes and then select “Join Note” from the menu.
(3) Enter the new name for the joined note and press Confirm. The selected notes
are joined into one note with the new name.
(joint note)
26
Moving Notes
You can move a note from the folder it is currently in to any other folder.
To move a note to another folder:
(1) In the Note Manager, select the note file name or thumbnail.
(2) From the File menu, select Move to,
–or–
right-click the note name or thumbnail and in the shortcut menu, select Move to
(3) Select the folder name to which you would like to move the note
NOTE: You can also use ‘Drag and Drop’ to move a note.
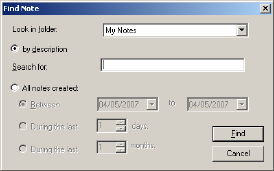
Finding Notes
It is possible to search through your saved notes to locate any particular note.
In order to perform a search:
(1) In the Notes Manager Edit menu, select Find Note.
(2) Select the folder or folders where you would like to search.
(3) If you would like to search by description or note name, select by description and
then in the search for field, type in the name or description of the note you are
looking for.
(4) To search by creation date parameters, select All notes created and then specify
the date range according to which you would like to search.
(5) Click Find.
Printing Notes
A note can be printed from any of the 3 Note interfaces – The Note Window, The Note
Editor or the Note Manager. Notes can be printed from a saved file in the Note
Manager, or while they are open in the Notes Window or Notes Editor.
To print a note from a file,
(1) In the Note Manager, click the note name or thumbnail.
(2) In the File menu, select Print Preview to first see how the note will
look when printed.
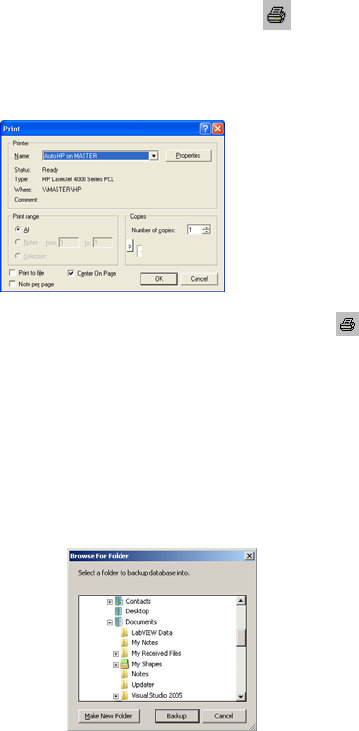
27
Note: You can preview multiple notes simultaneously. Select the first note, then on
the keyboard press the <CTRL> key and select the other notes.
(1) In the File menu, select Print or click the Print button .
(2) Select your desired print setting and properties (this can also be done through
Print Setup from the File menu. Some default print preferences can also be set
through the Configuration menu preferences).
(3) Click OK.
To print an open note,
(1) In the Notes Editor File menu, select Print or click the Print button
–or–
in the Note Window toolbar, simply click the Print button.
(2) Repeat steps 4 and 5 in the previous procedure.
Backup and Restore Notes Database
You can use the Note Manager to backup your entire database, and restore it when
needed.
To backup your database:
(1) Select ‘File -->Backup/Restore --> Backup Database’ from the Note Manager
menu, the following dialog will appear.
(2) Choose the destination path to backup all your notes database
(You can create a new folder by pressing ‘Make New Folder’ button)
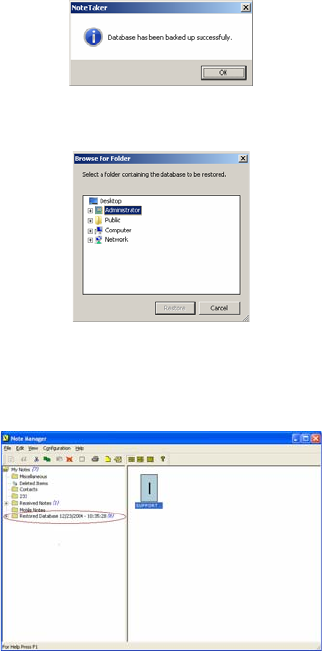
28
(3) Click the ‘Backup’ button, Upon a successful backup, the following message
appears:
To restore your database:
(1) Select ‘File -->Backup/Restore --> Restore Database’ from the Note Manager
menu, the following dialog will appear.
(2) Choose the location of your database backup]
(3) Click the ‘Restore’ button.
(4) Upon a successful restore, your database will be restores to a new folder in the
Note Manager. This new folder will be named ‘Restored database’ and will also
be according to the restoring date and time.
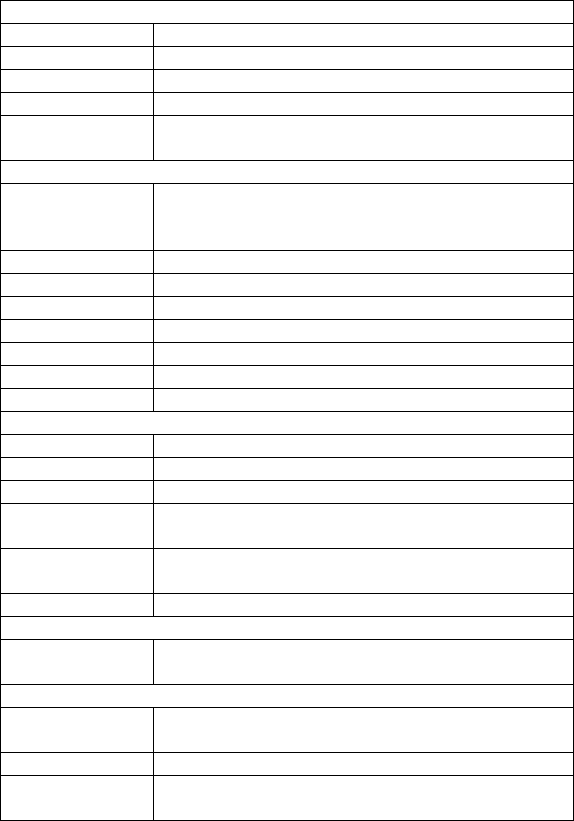
Setting Your Preferences
Set your default preferences such as note color, auto-save options, print preferences,
etc. in the Preferences dialog box.
The dialog box is divided into three tabs, each controlling a different aspect of the
system: General, Printing, and Ink.
To access Preferences:
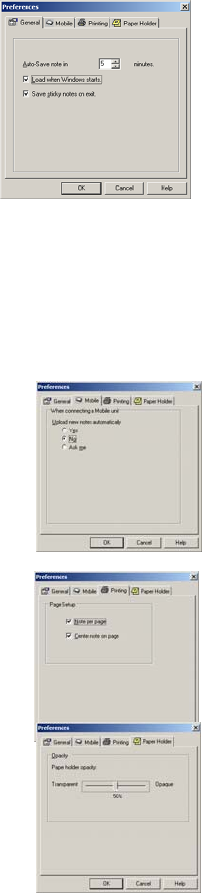
29
(1) In the Notes Manager Configuration menu,
select Preferences.
(2) Set your General Preferences as follows:
• In the Auto-Save note in box, select the time
interval (in minutes) after which the system
automatically saves your note. This also
activates an auto-recovery feature that
recovers any unsaved information in case of
system crash or power failure. The only lost
inputs are changes made since the last auto-
save.
• Select the Load When Windows Starts checkbox to automatically load the
Pocket pen tablet each time you turn on your computer, so that a new note will
pop up whenever you begin to using the Pen
• Select the Save Sticky Notes on Exit checkbox to automatically save all the
new sticky notes you created. The saved sticky notes will then instantly appear
the next time you either turn on your computer or restart the application
Set your Mobile Preferences as follows:
• Select the Upload new notes automatically proper
option.
Set your Print Preferences as follows:
• Select the Note Per Page checkbox to specify that
when you print notes, only one note is printed per
page
• Select the Center Note On Page checkbox to
specify that notes always be centered on the page
when printed
Set your Paper Holder Preferences as follows:

30
• Under Paper Holder opacity, drag the slider to set the desired level of
transparency
Selecting Pen Style
You can change Ink color and width of on-screen pen strokes at any time
(The default pen color is black and the default width is 1)
To select the pen style:
In the Notes Manager Configuration menu, select Pen Styles
–or–
Right-click the new note and in the shortcut menu
that appears, select Pen Styles
(1) Click the arrow to the right of the current pen
color to open the Pen Color list and select the color you want.
(2) Use the arrows to the right of the current pen color width to select a pen stroke
width between 1-10 (you can also type the desired width directly in the box)
(3) Click Default in order to restore the default settings at any time
(4) Click Cancel to return to the Note Manager or to the note without changing the
current pen style settings
NOTE:
You can also change the color and width of any pen stroke in the Note Editor by
selecting an individual pen stroke or group of strokes and then in the Tools Menu
selecting Color or Line Width.
Setting a Reminder
You can use notes stored on your PC to be reminders by setting an exact date and
time for a selected note to automatically pop up on your screen.
To set a Reminder:
(1) In the Note Manager, select the note or note thumbnail In the File menu, select
Set Reminder –or– Right-click the note and , in the shortcut menu, select Set
Reminder.
(2) Select the Enable Reminder checkbox
(3) In the Remind On list, click the arrow to the right of the list and select a date from
the drop down calendar that appear
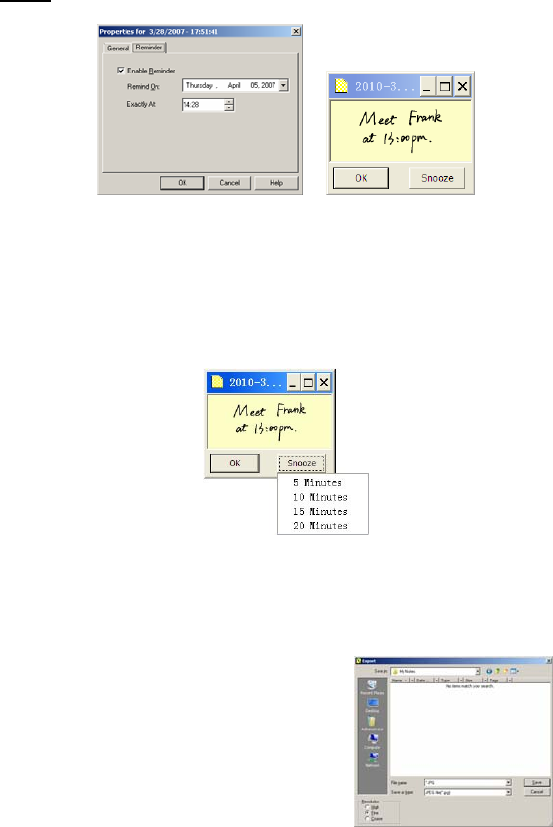
31
(4) If you would like to specify an exact time for the reminder, select the Exactly At
checkbox and use the arrows to change the default time or type in the desired
time.
NOTE: If you do not select an exact time, the reminder will appear when you turn on
your computer on the specified day.
Setting a Reminder to Snooze
When a reminder appears, you can set it to snooze so that it disappears and then
pops up again within 5, 10, 15 or 20 minutes (depending on your preference).
To set a reminder to snooze
(1) Click Snooze.
(2) In the drop-down list, select the number of minutes you want to “snooze” until
you’re reminded again.
Exporting to JPEG
You can export any note to JPEG file format, turning the note into a graphic image.
This is useful for example when you want to insert notes into documents created in
other applications such as MS Word or PowerPoint.
To export a note to jpeg format:
(1) In the Note Manager, select the note you
want to export.
(2) Right-click the note name,
–or–
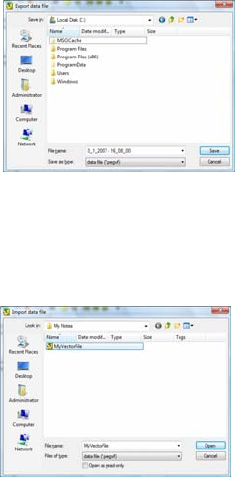
32
in the File menu, select Export to JPEG. The Export dialog box appears.
(3) In Save in, select the destination file path
(4) In the Save as type list, select JPEG.
(5) Under Resolution, select the resolution quality
(6) Click Save
NOTE: You can export multiple notes simultaneously. On the keyboard, hold down
the <CTRL> key and then in the Note Manager, select the notes you want to export.
Exporting to a Data format file
You can export any note to a vector format file,
so that another Pocket pen tablet user can
import this file into the Note Manager database
To export a note to a data file (.pegvf file):
(1) In the Note Manager, select the note you
want to export.
(2) Right-click the note name,
–or–
in the File menu, select ‘Export as a data file’. The Export dialog box appears.
(3) In Save in, select the destination file path.
(4) Click Save.
Importing a Data format file
You can import any .pegvf Data format file into
the Note Manager database
To import a data format file:
(1) In the File menu, select ‘Import a data file’.
The Import dialog box appears.
(2) Select the file you would like to import.
(3) Click Open
Pasting Notes into Other Applications
You can paste any saved note into another application.
(The note is automatically converted into a JPEG image).
To paste a note into another application:
(1) In the Note Manager, select the note or thumbnail.
(2) In the Edit menu, select Copy or Cut (cutting will delete the note from its current
location),
33
–or–
right-click the note name or thumbnail and, in the shortcut menu, select Copy or
Cut.
(3) Open the application into which you would like to paste the note.
(4) In the open application, locate and select the Paste option.
Note: You can also copy a note that you are currently sketching by clicking on the
button in the Note Toolbar
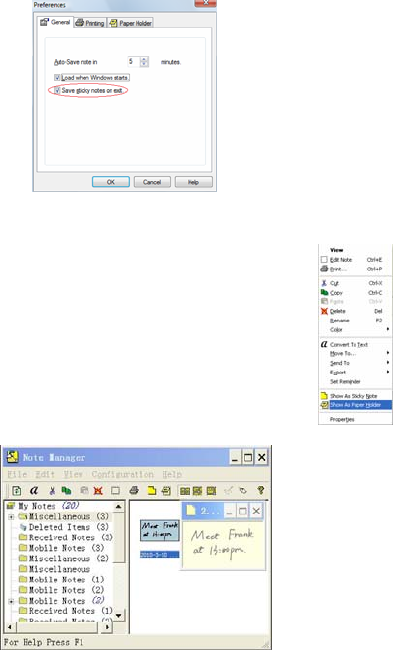
Creating Sticky Notes
You can create sticky notes by doing one of the following:
(1) Dragging notes from the Note Manager to your desktop.
(2) Select a note in the Note Manager, right click it and select ‘Show as Sticky Note’
(3) Select a note in the Note Manager, click the ‘Show as Sticky Note’ toolbar button
34
NOTES:
To view additional sticky note options,
(1) Right click on the sticky note.
(2) Select ‘HIDE’ to hide a sticky note into the application tray icon
(3) You can restore any hidden sticky note by right clicking the application tray icon,
and selecting ‘My Sticky Notes’. Then select the note you would like to restore.
(4) A Sticky Note can automatically pop up after the application has been closed
and re-opened, or after system reset. In the Note Manager, use the
Configuration menu
35
Creating Paper holder Notes
Paper holder notes can help you in many ways.
One common way is if you need to read your note and rewrite it in a
text editor.
A paper holder note will always be on top, and its transparency can
be adjusted
You can create paper holder note by doing one of the following:
• Select a note in the Note Manager, right click it and select
‘Show as Paper Holder’.
• Select a note in the Note Manager, click the ‘Show as Paper
Holder’ toolbar button.
NOTES:
You can hide and show paper holder notes the same way you hide and show sticky
note.
To view additional options, right click on the sticky note

36
You can set the transparency to a Paper Holder.
In the Note Manager, use the Configuration menu
The Note Editor
Notes can be edited at any time, whether you are still writing one, or you want to edit
a note you have already saved in the Note Manager. The Note Editor contains menus
and a toolbar that give you access to a wide selection of editing functions
Note Editor Menus
The following table lists all menu commands available in the Note Editor, together with
a description.
37
Note menu
Print Prints the selected note
Print preview Displays the selected note as it will look when printed
Print setup Allows you to select print options
Exit & Save/Send Saves the edited note and closes the editing
EXIT Without
Save/Send
Closes the editing application without saving any changes
Edit Menu
Undo Clears the last stroke made by the digital Pen. Clicking
Undo again will clear the stroke made before that, and so
forth.
Redo Replaces previously undone strokes in chronological order
Cut Cuts the selected note and saves it to the clipboard
Copy Copies the selected note and saves it to the clipboard
Paste Pastes whatever was last saved to the clipboard
Delete Deletes the selected note
Clear Note Clears the entire on-screen note
Select All Selects all the pen strokes in the note
View menu
Zoom In Increases the note view
Zoom to fit Restores the note view to the original size
Zoom Out Reduces the note view
Toolbars Allows you to select which editing toolbars you want to view
(Standard, Tools, Manager)
Status bar Allows you to view or hide the status bar at the bottom of
the Notes Editor
Full screen Opens the Notes Editor into full screen view
Configuration menu
Pen/Highlight
Properties
Lets you select the color and width of the Editor Pen and
Highlighter
Tools menu
Selector Allows you to select any area by clicking and dragging with
your mouse
Pen Allows you to freestyle draw with your mouse
Highlight Allows you to highlight any area by freestyle drawing with
your mouse
38
Line Allows you to insert a line of any length
Circle Allows you to insert a circle image of any size
Rectangle Allows you to insert a rectangle of any size
Text Allows you to insert type written text
Color Allows you to pre-select or change the color of pen strokes
or to highlight strokes or text
Line Width 1 Allows you to pre-select or change the thickness of any
stroke to width 1
Line Width 2 Allows you to pre-select or change the thickness of any
stroke to width 2
Line Width 4 Allows you to pre-select or change the thickness of any
stroke to width 4
Line Width 8 Allows you to pre-select or change the thickness of any
stroke to width 8
Help menu
Read User Manual Review the user manual
Check for Software
Updates
To get software update programs
About NoteTaker Displays software version information
Note Editor Toolbars
The Note Editor Toolbars provide you with quick access to the more common menu
commands.
The following table lists all toolbar buttons, together with a description of their
functions.
Standard Toolbar
PRINT -- Prints the selected note
CUT – Cuts the selected note and saves it to the clipboard
COPY – Copies the selected note and saves it to the clipboard
PASTE – Pastes whatever was last saved to the clipboard
ABOUT POCKET PEN TABLET – Provides you with your Pocket
pen tablet version information
39
FULL SCREEN – Brings the Notes Editor into full screen view
NOTE COLOR – Changes the current note color.
Tools toolbar
SELECT – Allows you to select any area by clicking and dragging
with your mouse
PEN – Allows you to freestyle draw using your mouse
HIGHLIGHT – Allows you to highlight any area by freestyle
drawing using your mouse
LINE – Allows you to insert a line of any length
CIRCLE – Allows you to insert a circle image of any size
RECTANGLE – Allows you to insert a rectangle of any size
TEXT – Allows you to insert type written text
COLOR – Allows you to pre-select or change the color of pen
strokes or to highlight strokes or text
LINE WIDTH 1 – Allows you to pre-select or change the thickness
of any stroke to width 1
LINE WIDTH 2 – Allows you to pre-select or change the thickness
of any stroke to width 2
LINE WIDTH 4 – Allows you to pre-select or change the thickness
of any stroke to width 4
LINE WIDTH 8 – Allows you to pre-select or change the thickness
of any stroke to width 8
Manager toolbar
CLEAR PAGE – Clears the entire on-screen note
UNDO- Clears the previous action
REDO- Replaces previously undone action
ZOOM IN – Enlarges the note view
40
ZOOM TO FIT - Returns the note view to the original size
ZOOM OUT – Reduces the note view
ROTATE RIGHT – Rotates the entire note image 90° to the right
ROTATE LEFT – Rotates the entire note image 90° to the left
Editing Notes
Once a note is open in the Note Editor, you can only edit elements of the note (pen
strokes, etc.) after they have been selected. Once you have selected the area you
want to edit, you can delete it, change the color and/or width of the pen strokes, etc.
You can also add figures and drawings into the note using the various drawing
features (insert circle, line, highlight, text, etc). These new elements can also be
edited after you insert them.
To start editing a note,
(1) While working on a note, or in the Note Manager select the note and click the
Edit Note button ,
–Or–
right-click the note and, in the shortcut menu, click Edit Note.
-Or-
(2) Double click a note in the note view mode.
(3) The Note Editor window opens displaying the selected note.
(4) Use the Select Area button in the Tools Toolbar or the Select option from
the Tools Menu to select a particular stroke or group of strokes,
–or–
in the Edit menu, click Select All to select the entire note.
(5) Use the edit toolbar to edit the strokes.
NOTE: While editing, you can still use your pen to continue sketching on the note.
Sending Notes
You can send any note by email or over the local network. An emailed note appears
as a JPEG attachment to the recipient. In order to send a note by local network, the
recipient must have the Pocket pen tablet software installed and running on his/her
PC. Notes can be sent by email or network from both the Note window and the Note
Manager.
41
Sending notes by email
The Pocket pen tablet uses your default email client to send notes as email.
To send a note immediately after you have completed it:
(1) Click the Send Note by Email button
(2) A new email form opens with the note in the form of a JPEG attachment
(3) Type in the desired recipient’s email address and any desired text in the subject
and body of the email
(4) Send the email
To send a saved note:
Any saved note can be send as a JPEG or vector format file
o In the Note Manager, click the note name or thumbnail.
o In the File menu, select Send TO --> Email,
–or–
right-click the note name or thumbnail and, in the shortcut menu that appears,
select Send TO--> E-Mail .
o A new email form opens with the note attached as a JPEG file.
o Type the desired recipient’s email address and any desired text in the subject
and body of the email
o Send the email
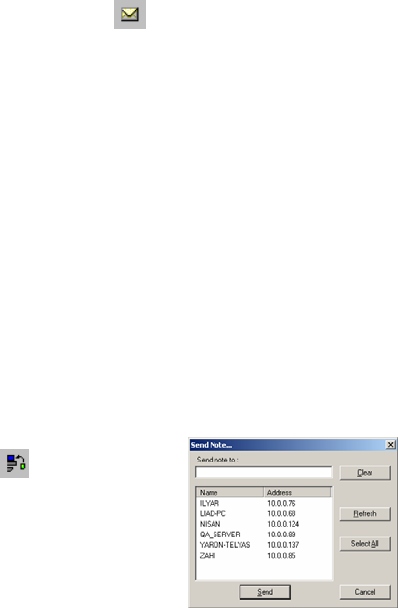
Sending notes over the local network
To send a note immediately after you have completed it,
(1) In the Note Window, click the Send Note to
Network PC button .
(2) In the Send Note dialog box, a list of all
network users that have the Pocket pen
tablet application installed and running
automatically appears. Select the Name/IP
address of the person(s) to whom you would
like to send the note
–or–
click Select All to send the note to everyone on the list.
(3) Click Send.
To send a saved note:
o In the Note Manager, click the note name or thumbnail.
42
o In the File menu, select Send To--> Network PC,
–or–
right-click the note name or thumbnail and, in the shortcut menu that appears,
select Send To --> Network PC.
o In the Send Note dialog box, a list of all network users that have the Pocket
pen tablet application installed and running automatically appears. Select the
Name/IP address of the person(s) to whom you would like to send the note
–or–
click Select All to send the note to everyone on the list.
o Click Send
NOTE: You can select multiple recipients when sending a note via local network By
selecting a name in the list, then pressing <CTRL> On the keyboard and selecting
another name or names.
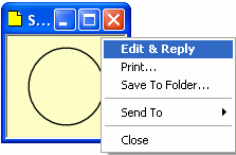
Receiving notes over the local network
Users on a local area network (LAN) such as may exist in an office environment can
receive notes over the LAN.
When you receive a note, it automatically appears on your PC screen and a sound is
heard.
• Right click the received note to have the following options:
o Replying to the sender (this includes an editing function so the user
can add text and sketches)
o Printing the note
o Saving the note
o Setting a reminder
o Sending the note to other users on the network
o Close the Note
Notes received by LAN will be saved under ‘Received Notes’ in the Note Manager.
43
Convert Note to Text
You can convert your handwritten notes to texts in the following two methods.
Using the “Note to Text” menu (only available in Windows Vista or 7)
(1) Open the Note Manager, select the note that you want to convert.
(2) Click the “Note to Text” icon from the top tool bar. The note is then
converted to text. Save the converted note as you want.
Using the Vision Objects MyScript® Notes (Optional)
MyScript® Notes is a well known character recognition engine. It can covert the
notes in your Pen-Tablet to texts. You can purchase the software from its vendor if
you want.
(1) Installing MyScript® Notes. Follow the installation instructions in the software
manual.
(2) Operating MyScript® Notes. To use the MyScript® Notes recognition engine,
please make sure you have installed Pen-Tablet Software Suite. Then, you can
select a note, Notes, or a Sticky Note, and export them to the MyScript®
Notes recognition engine.
Exportable objects from NoteTaker to MyScript® Notes:
• A New Note
• A single Note from “NoteTaker Manager”
• Multi pages Note from “NoteTaker Manager”
• Sticky Note from “NoteTaker Manager”
(3) Exporting objects. Use the following methods for each type of object in order to
export it to MyScript® .
a. For a New Note, Click the “Convert to Text” toolbar button .
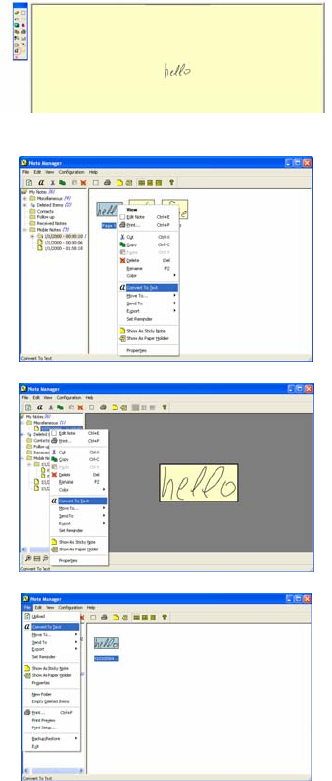
44
b. For A single/multi page Note from “NoteTaker Manager”, right click the Note
in the thumbnails area.
c. Right click the Note in the tree area.
d. Select a note and select “File --> Convert to Text” menu.
e. For sticky Note from ‘NoteTaker Manager’, right click the “Sticky Note” and
select “Convert to Text” menu.
45
(4) Your Note will be exported to MyScript® Notes application. MyScript® Notes
will be opened with your Note in the “Conversion” area. Please refer to the
MyScript® Notes user guide for more instructions on how to use the
MyScript® Notes application.
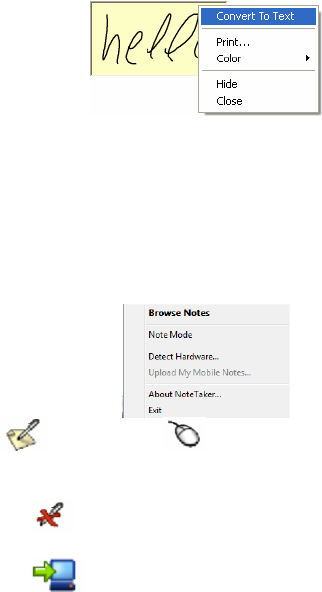
Application Tray Icon
Right clicking the application tray icon gives you the ability to perform the following
actions:
Browse Notes – Open the Note Manger
Note Mode Or Mouse mode – Toggle between the 2 options of your
Digital Pen. Tray icon changes accordingly
Detect Hardware - Detect your hardware. If your hardware is not detected, the tray
icon changes to
Upload My Mobile Notes - Upload your Notes from the Pocket pen tablet. the tray
icon changes to
About Pocket pen tablet - See application details (About Dialog)
Exit - Exit the application
Chapter 5 Use Pen Tablet in Windows Vista
The rich inking features & utilities in Window Vista enable users to take handwritten
notes, convert handwriting to text, annotate documents, add electronic signatures and
send handwritten emails.
With integrated Pen-Tablet support, digital ink technologies and handwriting
recognition technologies your Pen-tablet turns into a Table PC compatible device
that’s practical, comfortable, intuitive and easy to use while you are on the go and it
46
also works well when you are at your desk..
This chapter provides basic instructions how to utilize inking and handwriting utilities
in Windows Vista and Office 2007’s applications. For more features and possibilities
please refer to Microsoft’s User manual and Help.
* Pen-Ink capabilities are NOT available in Windows Vista Basic.
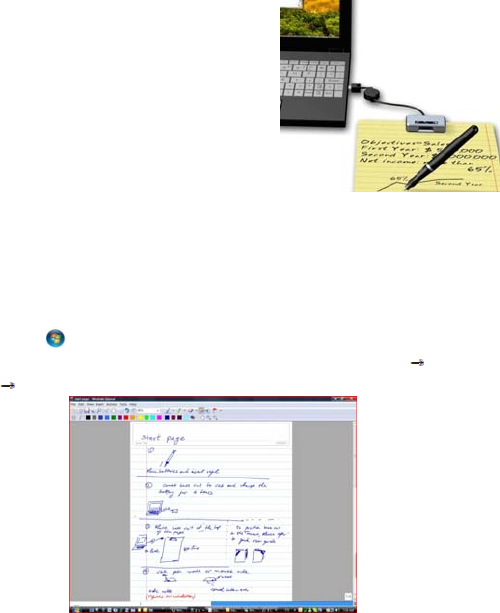
Getting started
To start inking in windows Vista, just plug-in your Pen-Tablet to any available USB
port, place the receiver unit at the top of the page in the middle. You are ready to go.
No further installation is required to use all Windows Vista and Office 2007
applications.
Pen-Tablet can serve you as handwriting
instrument as well as pointing device - a mouse.
Note: Make sure your Pen-Tablet is in Mouse
mode.
Windows Journal
Windows Journal looks like a sheet of paper but it is far more flexible than a typical
pad of paper. You can change pens, pen colors, highlighters and erasers, move items
around on the page, make space for additional items, send the notes as email,
convert handwriting to text and enjoy many more features. All of that is done by just
using Pen-Tablet for handwriting and mouse functionalities.
To start Windows Journal:
Click Start button , type Windows Journal in the search box, and then tap
Windows Journal in the list of results. Alternatively, you can click Start All
Programs Windows Journal.
47
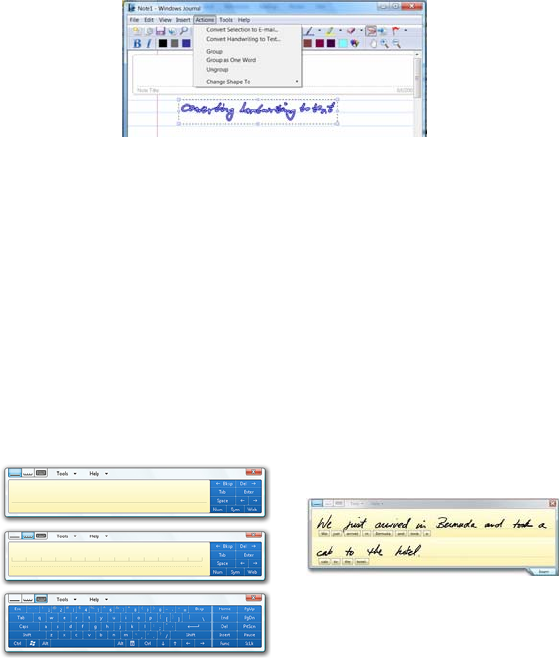
Conversion to text and conversion to email:
Use the Lasso to mark the conversion area. Tap Actions and choose Convert
Selection to E-mail or Convert Selection to text (if a character recognition application
is installed.)
Tablet PC Input Panel
In Windows Vista, the Tablet PC Input Panel is the standard interface for converting
handwriting to text in a Windows-based program. It's the method by which Pen-Tablet
users enter text into applications that do not include a custom handwriting interface.
Using Input Panel, users can insert text into website forms, word processing and e-
mail applications, web browsers, and more.
The Three Input Areas of Input Panel:
The input Panel includes three input areas for entering text: the writing pad, the
character pad, and the on-screen keyboard. The writing pad and the character pad
convert handwriting into typed text. The on-screen keyboard works just like a standard
keyboard except that the user enters text by tapping keys with a Pen-Tablet.
The following illustrations show the writing pad, the character pad, and the on-screen
keyboard.
To improve personal handwriting recognition, go to Tools and tap Personalize
Handwriting Recognition.
48
There are three ways to open Input Panel:
1. Tap the Input Panel icon, which appears
when you place the pointer in a text entry
area, such as the Address bar in a web
browser or a text box in a dialog box.
2. Tap the Input Panel tab, which appears
by default on the left edge of the screen.
When you open Input Panel this way, it
floats on top of any open windows.
3. Tap the Tablet PC Input Panel icon on
the Windows taskbar. The Input Panel
icon does not appear on the taskbar by
default. To make it appear, right-click the
taskbar, tap Toolbars, and then tap
Tablet PC Input Panel.
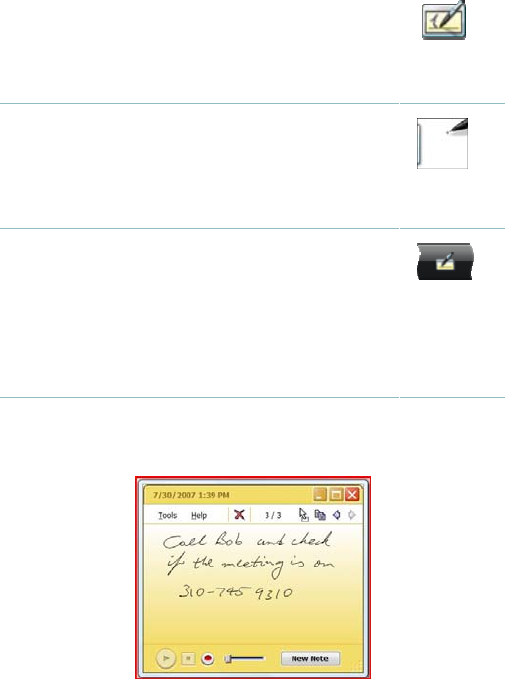
Sticky Notes
Write down ideas and thoughts in a quick and easy way using desktop notes
(“stickies”).
Keep your information, quick notes, addresses, phone numbers, web links and more
in one place where you can easily find it? Windows Vista can offer you different
electronic notes software and freeware solutions that allows you to quickly write
something down any time you need - during a meeting, lecture, searching information
on the Internet, etc.
49
To make sticky notes open automatically at startup go to Tools, tap Options and then
tap Open at Startup.
Open Sticky Notes by tapping the Start button, typing Sticky Notes in the
search box, and then tapping Sticky Notes in the list of results.
Alternatively: Start All Programs Sticky Notes
To keep sticky notes always visible on the desktop Tap the Tools menu, points to
Options and then type Always on Top.
Note: Your notes are automatically saved when you close Sticky Notes
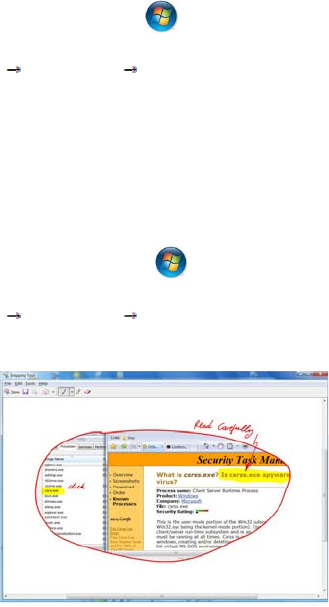
Windows Snipping Tool
The program is a screen-capture tool that allows taking screenshots (called snips) of
windows, rectangular areas, or a free-form area. Snips can then be annotated, saved
(as an image file or HTML page), or e-mailed.
Open Snipping Tool by tapping the Start button, typing Snipping Tool or just
Snipping in the search box, and then tapping Snipping Tool in the list of results.
Alternatively: Start All Programs Snipping Tool
The first time you use the Snipping Tool, you will be provided an option to add it to
your quick launch bar.
Pen-and-Ink functionality in Vista- Office 2007
Microsoft Office 2007 and a Tablet-Pen offer new capabilities that allow you to work
more naturally and efficiently. Within Office 2007, numerous applications support
digital mark-up with Tablet-Pen and provide easy access to digital inking tools for
intuitive collaboration in:
• Word
• Excel
• Outlook
50
• PowerPoint
• OneNote
Writing with a pen is a particularly efficient and natural way to comment on an existing
document and to capture rough thoughts that are emerging in real time.
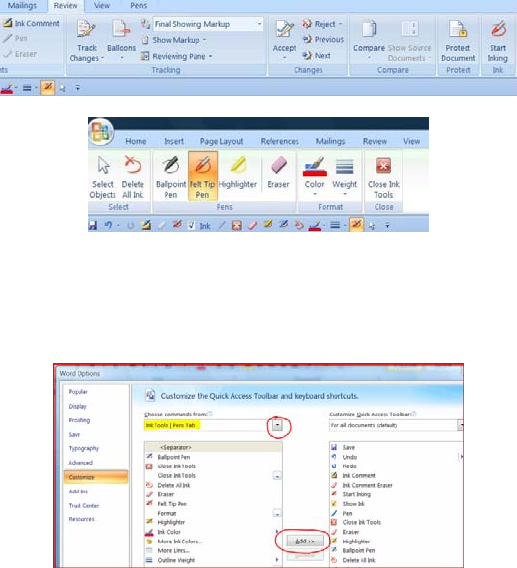
Word, PowerPoint and Excel have a Review tab with a Start Inking button that
provides an Ink Tools menu. This menu includes tools such as: felt tip pen,
ballpoint pen, highlighter, and eraser, as well as options to select the Ink Color.
Ink Tools
Quick Access Toolbar
The Ink Tools allow you to markup and edit documents in a natural way. In Word,
easily mark-up copy and make noticeable edits.
To create Quick Toolbar, please follow the instructions below:
1. Place the cursor on the bar next to View and right click the mouse. Tap
Customize Quick Access toolbar.
2. Choose Ink Tools Pens Tab by taping the arrow at Choose command
from (see yellow highlight)
3. Add ink and pen icons at your will by using Add button
51
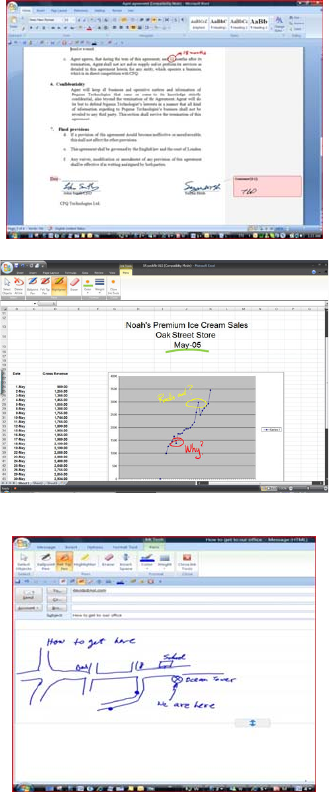
Selected examples for using digital ink in Office 2007 Applications
Signatures, Ink Comments and annotation in Word 2007
Inking Excel 2007
Drawing in Outlook 2007
52
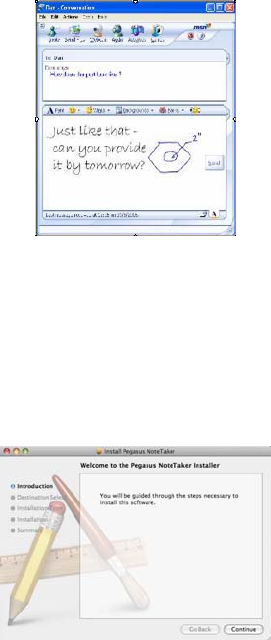
Drawing in on-line messenger
For more information about the various available options of using Pen-Tablet, inking
and handwriting, please refer to Microsoft manuals and Help service.
Chapter 6 Using in Mac OS
Installing the Note Manager for Mac software
The following procedure guides you through installation of the Note Manager for
Mac.
1. Click on the NoteTaker installer icon (NoteTaker. pkg). The NoteTaker Installer
opens (a standard Mac installer):
Figure 1: NoteTaker Installer
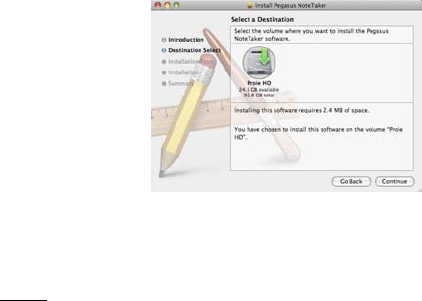
2. Click Continue. The Installer advances to the Destination Selection step. In this
step, you are asked to choose the location (usually your Mac hard drive) where
you want to install the Note Manager software. When you select (click on) your
preferred hard drive, the Installer confirms your selection:
53
Figure 2 Installer showing the Destination Select stage
3. Click Continue. The Installer advances to the Installation Type stage. In this stage,
you confirm that you want to perform a standard installation of the Note Manager
software on the hard drive you selected.
Notes: Performing a standard installation will install the software directly into your
Applications folder on your Mac’s hard drive.
If you want to change the location to which the software will be installed, clicking
Change Install Location will return you to the previous step, Choose Destination
Location.
4. Click Install. The Password dialog opens.
5. Enter your user password and click OK. The Note Manager software is installed on
the drive you selected and the Install Succeeded message is displayed on the
Installer.
6. Click Close to close the Installer and complete the installation.
Using the NoteTaker Preferences Tool
About the Preferences Tool
When you use your Digital Pen to write text, everything you write is saved as a series
of TIFF (Tagged Image File Format) images in the base memory unit. Before you can
work with your text on your Mac, you first need to transfer the TIFF images from the
Pen-Tablet to your Mac’s hard drive. When you connect the Pen-Tablet to a USB port
on your Mac, your text is automatically transferred directly from the Pen-Tablet to your
Mac.
Before you can start transferring your text from the Pen-Tablet, you first need to set
preferences on your Mac. By setting preferences, you decide:
z where on your Mac’s hard drive you want to save the TIFF images;
z whether you want to erase the TIFF images from the Pen-Tablet after you have
imported them to your Mac.
54
You set these preferences using the NoteTaker Preference Tool.
Setting Preferences with the NoteTaker Preference Tool
The following procedure describes how to set preferences using the NoteTaker
Preference Tool:
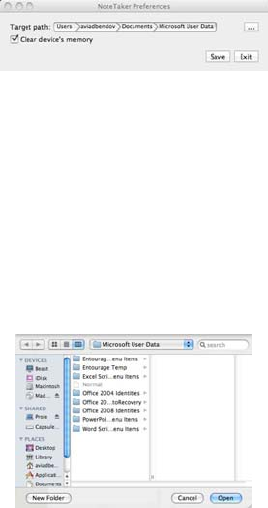
1. Click on the NoteTaker Preferences icon. The NoteTaker Preferences dialog
opens:
Figure 3: NoteTaker Preferences dialog
The NoteTaker Preferences dialog consists of the following elements:
• The Target Path – displays the path to the location on your Mac’s hard drive where
TIFF images from the Pen-Tablet will be saved.
• The Clear Device Memory checkbox – if this checkbox is checked, the Pen-
Tablet’s memory will be cleared (erased) after you upload TIFF images to your Mac. If
the checkbox is unchecked, the TIFF images will remain saved on the Pen-Tablet
after you have uploaded them to your Mac.
2. The first preference you need to set is the location on your Mac where TIFF
images will be saved when you transfer them from the Pen-Tablet. The Target
Path displays the default location to which the TIFF images will be saved. To
choose a different path, click the ellipsis button (“…”) to open the Finder window:
Figure 4: NoteTaker Preferences Finder window
3. Choose where on your Mac you want to save TIFF images by clicking on the
relevant location in the left hand column, and then click Open. The Finder window
closes and the new Target Path is displayed in the NoteTaker Preferences dialog.
4. If you want to clear the Pen-Tablet ’ s memory each time you upload TIFF images
from it, check the Clear Device Memory checkbox. To leave the TIFF images on
the Pen-Tablet after they are uploaded, leave the checkbox unchecked.
5. To save your preferences and close the NoteTaker Preferences dialog, click Save.
55
When you next connect the Pen-Tablet to your Mac, your images will be uploaded
according to the preferences you have set.
6. To close the NoteTaker Preferences dialog without saving any changes, click Exit.
Pen-Tablet operation with Mac
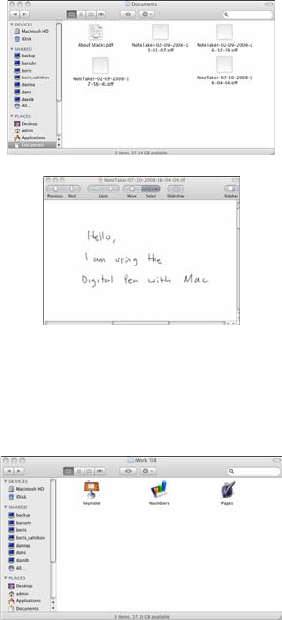
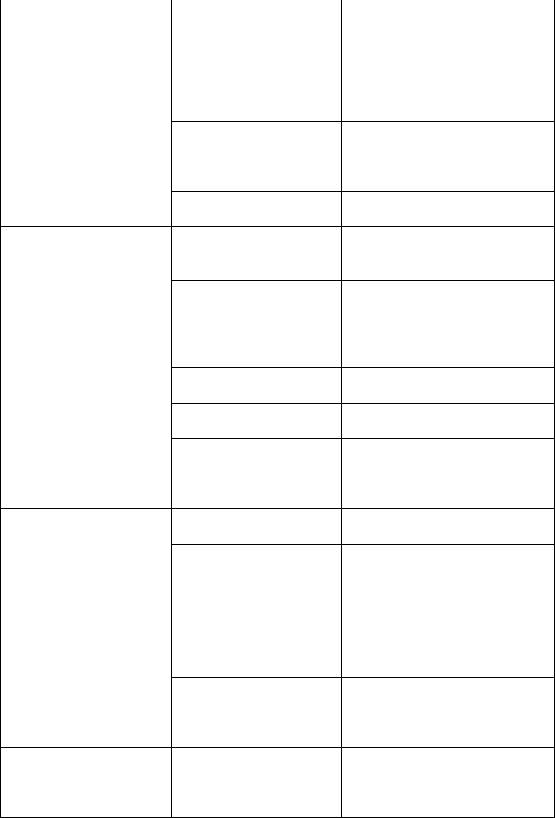
1. Use the Pen-Tablet to capture and save your notes while you are away from
your Mac, in meetings or lectures.
2. Connect the Pen-Tablet to your Mac, to upload the saved notes. The notes are
saved in TIFF format. Double click on the desired TIFF file, in order to view the
note.
3. While being connected to the Mac via the USB port, the Pen-Tablet can be used
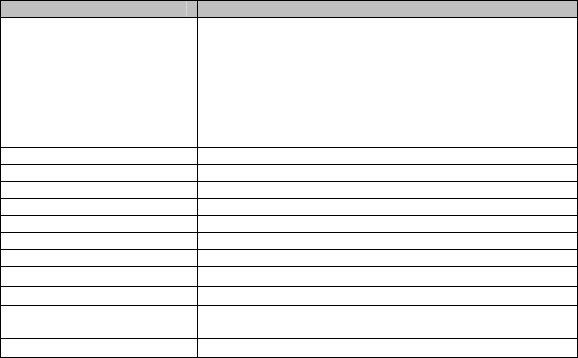
as a Mouse and as a Tablet input device for Mac ink applications. Use the digital
pen in applications such as iWork’08. You can write handwritten test, on-line,
and the Mac will convert it into text. The feature is available iWork Pages (word
processor), iWork Keynote (presentations) and iWork Numbers (spreadsheets).

56
The Digital Pen can be also used for drawings inside applications such as Adobe
Illustrator, Photoshop, etc.
Chapter 8 Using the Photo Sketcher
The provided CD contains another userful application - Photo Sketcher. You can use
it to add annoations on top of any picture. For details about the application, see the
Photo Sketcher Software User Guide in the CD.
Chapter 8 Taking Care of Your Pocket pen tablet
Storing your Pocket pen tablet
• Keep your Pocket pen tablet away from liquids and direct sunlight at
all times.
• Always store your unit in protected packaging or in the original box.
• Severe shock can cause degradation in performance. Take
precautions not to drop the memory Unit or Pen onto hard surfaces.
Cleaning your Pocket pen tablet
• Clean your Pocket pen tablet using a soft cloth.
• Special care must be taken not to insert sharp pointed objects into the
ultrasonic transmitting and receiving units.
Chapter 9 Troubleshooting
Problem Possible Cause Solution
The LCD displays
nothing when I power
on the base unit
Battery of the base
unit is too low
Connect the base unit to a
computer or use the charger
to charge the battery
The charger/USB
cable is not
connected properly
Reconnect the charger or
USB cable
The battery icon does
not blink during
charging The charger/USB
cable is damaged Replace the charger or USB
cable with a new one
The Note Manager
does not run
Run the Note Manager
application provided with the
package
The pen stroke is
invisible on the screen
The hardware (pen or
base unit) is not
installed correctly Re-install the hardware
57
The pen is in Mouse
mode
1. Press the ON/OFF button
on the base unit to switch to
Pen mode(refer to the user
manual).
2. Set the pen as Pen mode
in Note Manager (refer to
the user manual).
The distance between
the pen and the base
unit is beyond the
area of A4 paper
Make sure the distance
between the pen and the
base unit is within the area
of A4 paper.
The digital pen's
battery is too low Replace the pen's battery
There is barrier
between the pen and
the base unit. Remove the barrier
Your handhold is so
close to the pen tip
that the transmitting at
the pen tip is blocked
by your finger.
Refer to the user manual for
instruction of correct
handhold
The battery of the pen
is too low Replace the battery
Your writing is too
gentle. Impose more strength on
your writing.
The pen stroke is
messy or
discontinuous.
The writing surface is
not smooth or the
paper is not spread
well.
Make the writing surface is
smooth
The pen's battery is
too low Replace the battery
The pen is not in
Mouse mode
1.Press the ON/OFF button
on the base unit to switch to
the Mouse mode.(refer to
the user manual)
2.Set the pen as Mouse
mode in Note Manager(refer
to the user manual)
The mouse is dead
The distance between
the pen and the base
unit is beyond the
area of A4 paper.
Make sure the distance
between the pen and the
base unit is within the area
of A4 paper.
The orientation of the
pen strokes does not
match the actual
writing or drawing.
Setting your base unit
orientation as the
same to your actual
placement.
See "Setting your base unit
orientation preferences"
section in the user manual.
58
Chapter 10 Technical Specifications
Item Description
System Requirement
1. Minimum 50MB available hard disk space
2. Minimum 128MB RAM
3. 32 bit color quality
4. Screen resolution of 1024x768 pixels
5. Available USB port
6. Microsoft ® Windows 2000 (SP4), Microsoft ®
Windows XP (SP2), Microsoft ® Vista, Windows 7 or
later version.
Work Mode Note and Mouse
LCD Screen 132X32 lattice
Battery Type Rechargeable lithium-ion battery
Battery Life About 6 hours
Charge Time About 3.5 hours
Coverage area A4
Capacity 100 A4 pages
Storage Temp* -20℃ ~ + 65℃
Ambient Temp* 5℃ ~ + 55℃
Operation Relative
Humidity* 20% ~ 90%(40℃)
Storage Relative Humidity* 20% ~ 93%(40℃)
This device complies with Part 15 of the FCC Rules. Operation is subject to the
following two conditions: (1) this device may not cause harmful interference, and (2)
this device must accept any interference received, including interference that may
cause undesired operation.
changes or modifications not expressly approved by the party responsible for
compliance could void the user's authority to operate the equipment.
NOTE: This equipment has been tested and found to comply with the limits for a
Class B digital device, pursuant to Part 15 of the FCC Rules. These limits are
designed to provide reasonable protection against harmful interference in a
residential installation. This equipment generates, uses and can radiate radio
frequency energy and, if not installed and used in accordance with the
instructions, may cause harmful interference to radio communications. However,
there is no guarantee that interference will not occur in a particular installation.
If this equipment does cause harmful interference to radio or television reception,
which can be determined by turning the equipment off and on, the user is
encouraged to try to correct the interference by one or more of the following
measures:
-- Reorient or relocate the receiving antenna.
-- Increase the separation between the equipment and receiver.
-- Connect the equipment into an outlet on a circuit different
from that to which the receiver is connected.
-- Consult the dealer or an experienced radio/TV technician for help.
FCC RF warning statement:
The device has been evaluated to meet general RF exposure requirement.
The device can be used in portable exposure condition without restriction.