Yulong Computer Telecommunication Scientific YLVODAFONE888N GSM/WCDMA mobile phone User Manual
Yulong Computer Telecommunication Scientific (Shenzhen) Co. LTD GSM/WCDMA mobile phone
UserManual.wiki
>
Yulong Computer Telecommunication Scientific
>
YLVODAFONE888N User Manual
User Manual
Navigation menu
Upload a User Manual
Namespaces
Wiki Guide
HTML
PDF
Info
Views
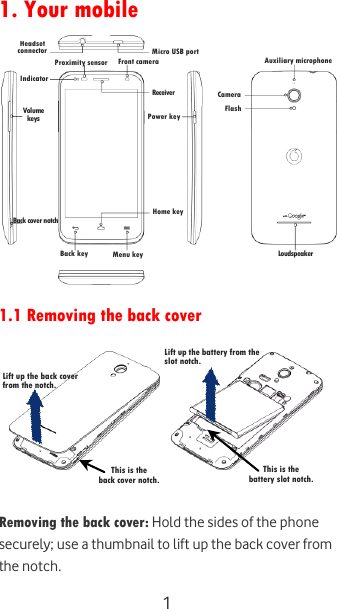
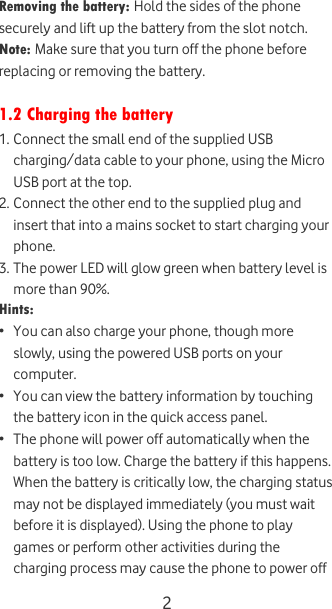
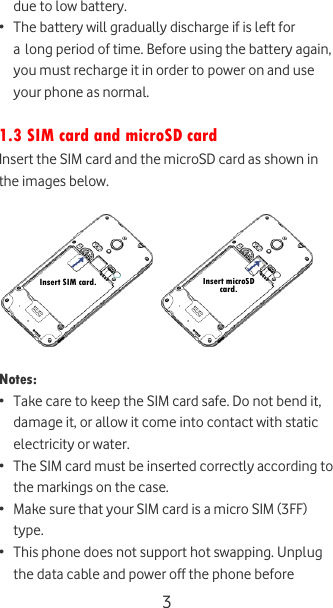
User Manual
Discussion / Help
Navigation