Yusan SPABT30 BLUETOOTH Wireless Speaker User Manual SP ABT30 EN 03 indd
Yusan Industries Ltd. BLUETOOTH Wireless Speaker SP ABT30 EN 03 indd
Yusan >
User manual
– 1 – – 2 –
INSTRUCTIONS
LVT2566-002A
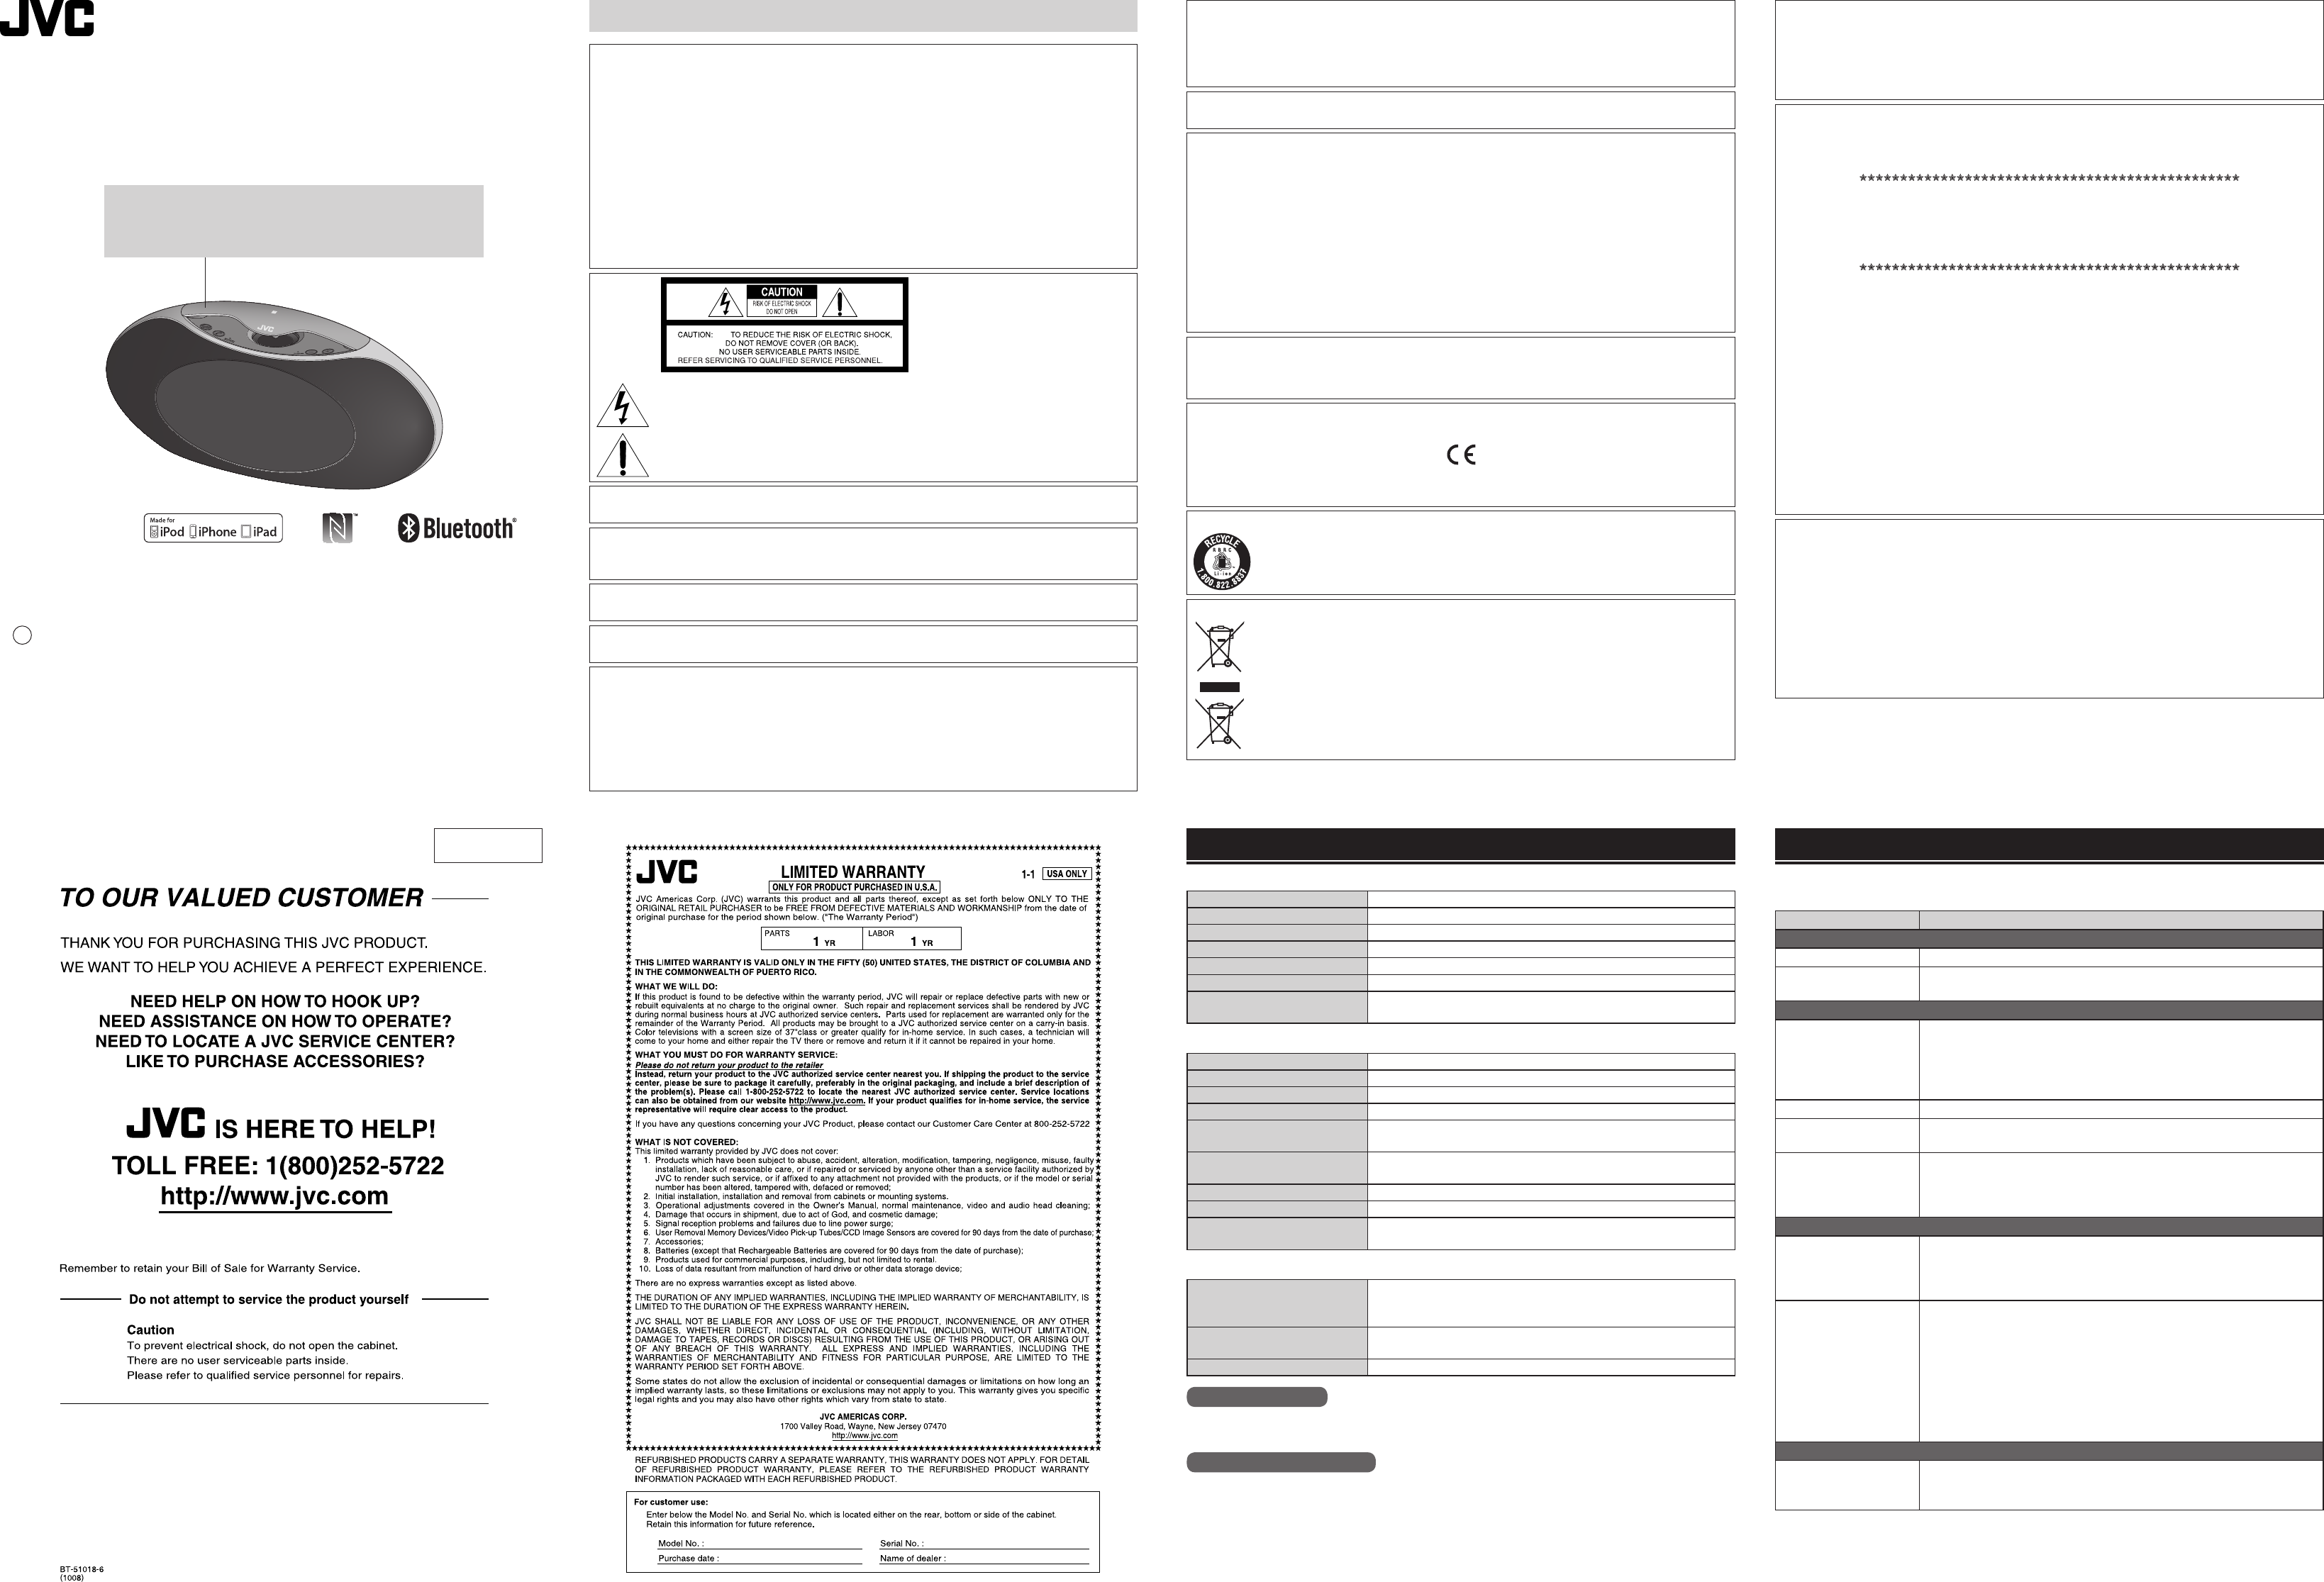
BLUETOOTH WIRELESS SPEAKER
SP-ABT30
© 2014 JVC KENWOOD Corporation
Caution:
The top part of the System is con gured as a re ection plate for the
360-degree speaker. Do not lift or carry the System by this re ection
plate. Otherwise the plate may be damaged.
Thank you for purchasing this product.
Before use, please read this “INSTRUCTIONS” and the information materials included to
ensure proper use of this product.
●BLUETOOTH
Standard BLUETOOTH Ver. 3.0 Class 2
Max. communication distance Approx. 10 m (33 ft)*1
Supported BLUETOOTH pro les HSP/HFP/A2DP/AVRCP/SPP
Supported codecs SBC
Supported content protection SCMS-T
Multi pairing Supported (up to 8 devices can be registered)
Multipoint operation Supported (simultaneous connection of one music playback device
and one communication device possible)
*1 Communication distance is an approximate value.
●Power supply/General
Power supply Supplied AC adaptor or internal rechargeable lithium battery
Battery life Approx. 10 hrs*2
Charging method From supplied AC adaptor
Charging time Approx. 3 hrs
AC adaptor Input : AC 100 V–240 V, 50 Hz/60 Hz, 1.2 A
Output : DC 13 V, 2.3 A
Power consumption
(when using AC adaptor)
0.5 W or less (xx W (typ.) in normal standby mode, xx W (typ.) in
BLUETOOTH standby mode)
Usage temperature range 5°C (41°F) to 35°C (95°F)
Dimensions (W x H x D) 300 mm (11-13/16”) x 143 mm (5-11/16”) x 80 mm (3-3/16”)
Mass Approx. 1.1 kg (Approx. 2.5 lbs) (including internal rechargeable
battery, excluding AC adaptor)
*2 Depends on usage conditions.
●Audio
Speakers • L/R speakers: 50 mm (2”) x 2
• 360-degree speaker: 40 mm (1-5/8”) x 1
• Passive radiator x 1
Max. output power • L/R speakers: 10 W + 10 W (THD 10%)
• 360-degree speaker: 10 W (THD 10%) + R ch. : 10 W
Input terminal (AUDIO IN) 3.5 mm dia. stereo mini jack
About BLUETOOTH
BLUETOOTH is a standard for wireless communication between digital devices.
BLUETOOTH comprises various protocols for di erent applications. These are called pro les.
About BLUETOOTH profiles
• A2DP (Advanced Audio Distribution Pro le)
• AVRCP (Audio/Video Remote Control Pro le)
• HSP (Headset Pro le)
• HFP (Hands-Free Pro le)
• SPP (Serial Port Pro le)
Speci cations
Latest product and Q&A information can be found on our web site (http://www3.jvckenwood.com/).
Check this list for a possible solution before calling customer service.
Problem Action
Power problem
Power does not come on Connect the supplied AC adaptor and charge the battery.
The System does not
charge
Make sure that the supplied AC adaptor is connected correctly.
Connection problem
Cannot connect via NFC • If you are using a case for your smartphone, remove the smartphone
from the case.
• Bring the N Mark on the BLUETOOTH device into contact with the N Mark
on the System.
• Verify that the NFC function of your smartphone is enabled.
Pairing fails Verify that the System is in pairing standby mode.
Cannot connect • Check whether the System is connected to another device.
• Cancel pairing at the BLUETOOTH device and then reconnect.
After connecting the
BLUETOOTH device to
the System, operation
does not start right away
Depending on the BLUETOOTH device, there may be a delay until
operation becomes possible, or sound may be interrupted, even after the
LED indicator has lit up in blue.
Audio problem
No sound is heard • Verify that connection has been established properly.
• Check whether your device supports the A2DP pro le. Refer to the
documentation for your device.
• Adjust the volume setting of the System and the BLUETOOTH device.
Sound cuts out or is
distorted, noise is heard
• If there are obstacles such as furniture, walls or people between the
System and the BLUETOOTH device, the sound may be interrupted, or
operation response may be sluggish.
• Increase the distance between the System and appliances or devices
using the 2.4 GHz frequency band (microwave ovens, wireless LAN,
cordless telephones etc.).
• Charge the battery.
• Lower the volume setting of the System. Lower the volume setting of the
System or the BLUETOOTH device.
Other problem
Cannot use the hands-
free call function
• Verify that connection has been established properly.
• Check whether your device supports the HFP pro le. Refer to the
documentation for your device.
If the above steps do not solve the problem, use a pointed object such as the tip of a pen to press the
[RESET] button on the bottom of the System.
Troubleshooting
Warnings, Cautions and Others
CAUTION
Battery shall not be exposed to excessive heat such as sunshine, fire or the like.
CAUTION
Danger of explosion if battery is incorrectly replaced. Replace only with the same or equivalent type.
CAUTION
The MAINS plug or an appliance coupler is used as the disconnect device, the disconnect device shall remain
readily operable.
The lightning flash with arrowhead symbol, within an equilateral triangle is intended to alert the
user to the presence of uninsulated “dangerous voltage” within the product’s enclosure that may be
of sufficient magnitude to constitute a risk of electric shock to persons.
The exclamation point within an equilateral triangle is intended to alert the user to the presence of
important operating and maintenance (servicing) instructions in the literature accompanying the
appliance.
This equipment complies with FCC/IC radiation exposure limits set forth for an uncontrolled environment and
meets the FCC radio frequency (RF) Exposure Guidelines in Supplement C to OET65 and RSS-102 of the IC radio
frequency (RF) Exposure rules. This equipment has very low levels of RF energy that it deemed to comply without
maximum permissive exposure evaluation (MPE). But it is desirable that it should be installed and operated
keeping the radiator at least 20cm or more away from person’s body (excluding extremities: hands, wrists, feet
and ankles).
For U.S.A.
This transmitter must not be co-located or operated in conjunction with any other antenna or transmitter.
Dear Customer,
This apparatus is in conformance with the valid European directives and standards regarding electromagnetic
compatibility and electrical safety.
European representative of JVC KENWOOD Corporation is:
JVC Technical Services Europe GmbH
Konrad-Adenauer-Allee 1-11, 61118 Bad Vilbel, Germany
SAFETY INSTRUCTIONS
“SOME DOS AND DON'TS ON THE SAFE USE OF EQUIPMENT”
This equipment has been designed and manufactured to meet international safety standards but, like any electrical
equipment, care must be taken if you are to obtain the best results and safety is to be assured.
Do read the operating instructions before you attempt to use the equipment.
Do ensure that all electrical connections (including the mains plug, extension leads and interconnections between
pieces of equipment) are properly made and in accordance with the manufacturer's instructions. Switch off and
withdraw the mains plug when making or changing connections.
Do consult your dealer if you are ever in doubt about the installation, operation or safety of your equipment.
Do be careful with glass panels or doors on equipment.
DON'T continue to operate the equipment if you are in any doubt about it working normally, or if it is damaged in any
way — switch off, withdraw the mains plug and consult your dealer.
DON'T remove any fixed cover as this may expose dangerous voltages.
DON'T leave equipment switched on when it is unattended unless it is specifically stated that it is designed for
unattended operation or has a standby mode.
Switch off using the switch on the equipment and make sure that your family know how to do this.
Special arrangements may need to be made for infirm or handicapped people.
DON'T use equipment such as personal stereos or radios so that you are distracted from the requirements of traffic
safety. It is illegal to watch television whilst driving.
DON'T listen to headphones at high volume as such use can permanently damage your hearing.
DON'T obstruct the ventilation of the equipment, for example with curtains or soft furnishings.
Overheating will cause damage and shorten the life of the equipment.
DON'T use makeshift stands and NEVER fix legs with wood screws — to ensure complete safety always fit the
manufacturer's approved stand or legs with the fixings provided according to the instructions.
DON'T allow electrical equipment to be exposed to rain or moisture.
ABOVE ALL
— NEVER let anyone, especially children, push anything into holes, slots or any other opening in the case.
— this could result in a fatal electrical shock
— NEVER guess or take chances with electrical equipment of any kind — it is better to be safe than sorry!
E43486–340B
• The Bluetooth® word mark and logos are registered trademarks owned by Bluetooth SIG, Inc. and
any use of such marks by JVC KENWOOD Corporation is under license.
• “Made for iPod,”“Made for iPhone,” and“Made for iPad” mean that an electronic accessory has been
designed to connect speci cally to iPod, iPhone, or iPad, respectively, and has been certi ed by
the developer to meet Apple performance standards. Apple is not responsible for the operation of
this device or its compliance with safety and regulatory standards. Please note that the use of this
accessory with iPod, iPhone, or iPad may a ect wireless performance.iPod, iPhone, and iPad are
trademarks of Apple Inc., registered in the U.S. and other countries.
• Android is a trademark and/or registered trademark of Google Inc..
• The N Mark is a trademark or registered trademark of NFC Forum, Inc. in the United States and in
other countries.
• Speci cations and appearance of this unit are subject to change for further improvements without
prior notice.
• Rating label and other information are placed on the exterior of the bottom.
WARNING:
TO PREVENT FIRE OR SHOCK HAZARDS, DO NOT EXPOSE THIS APPARATUS TO RAIN OR MOISTURE.
Important Safety Instructions
1. Read these instructions.
2. Keep these instructions.
3. Heed all warnings.
4. Follow all instructions.
5. Do not use this apparatus near water.
6. Clean only with dry cloth.
7. Do not install near any heat sources such as radiators, heat registers, stoves, or other apparatus (including
amplifiers) that produce heat.
8. Protect the power cord from being walked on or pinched particularly at plugs, convenience receptacles, and
the point where they exit from the apparatus.
9. Only use attachments/accessories specified by the manufacturer.
10. Unplug this apparatus during lightning storms or when unused for long periods of time.
11. Refer all servicing to qualified service personnel. Servicing is required when the apparatus has been
damaged in any way, such as power-supply cord or plug is damaged, liquid has been spilled or objects have
fallen into the apparatus, the apparatus has been exposed to rain or moisture, does not operate normally, or
has been dropped.
USA ONLY
A copy of the Declaration of Conformity with regard to the R&TTE Directive 1999/5/EC can be
downloaded from the following Web sites (http://www.jvc.co.jp/ecdoc/).
Hereby, JVC declares that this System SP-ABT30 is in compliance with the essential requirements and
other relevant provision of Directive 1999/5/EC.
CAUTION
• Do not block the ventilation openings or holes.
(If the ventilation openings or holes are blocked by a newspaper or cloth, etc., the heat may not be able to get
out.)
• Do not place any naked flame sources, such as lighted candles, on the apparatus.
• When discarding batteries, environmental problems must be considered and local rules or laws governing the
disposal of these batteries must be followed strictly.
• Do not expose this apparatus to rain, moisture, dripping or splashing and that no objects filled with liquids,
such as vases, shall be placed on the apparatus.
For Canada
This device complies with Industry Canada license-exempt RSS standard(s). Operation is subject to the following
two conditions: (1) this device may not cause interference, and (2) this device must accept any interference,
including interference that may cause undesired operation of the device.
ATTENTION:
The product you have purchased is powered by a rechargeable battery that is recyclable. Please call
1-800-8-BATTERY for information on how to recycle this battery.
(USA and Canada only)
For U.S.A.
Caution: Changes or modifications not expressly approved by party responsible for compliance could void the
user’s authority to operate the equipment.
Note: This equipment has been tested and found to comply with the limits for a Class B digital device, pursuant
to Part 15 of the FCC Rules. These limits are designed to provide reasonable protection against harmful
interference in a residential installation. This equipment generates, uses and can radiate radio frequency energy
and, if not installed and used in accordance with the instructions, may cause harmful interference to radio
communications. However, there is no guarantee that interference will not occur in a particular installation. If
this equipment does cause harmful interference to radio or television reception, which can be determined by
turning the equipment off and on, the user is encouraged to try to correct the interference by one or more of the
following measures:
– Reorient or relocate the receiving antenna.
– Increase the separation between the equipment and receiver.
– Connect the equipment into an outlet on a circuit different from that to which the receiver is connected.
– Consult the dealer or an experienced radio/TV technician for help.
[European Union only]
Information on Disposal of Old Electrical and Electronic Equipment and Batteries
(applicable for countries that have adopted separate waste collection systems)
Products and batteries with the symbol (crossed-out wheeled bin) cannot be disposed as
household waste.
Old electrical and electronic equipment and batteries should be recycled at a facility capable of
handling these items and their waste byproducts.
Contact your local authority for details in locating a recycle facility nearest to you.
Proper recycling and waste disposal will help conserve resources whilst preventing detrimental
effects on our health and the environment.
Notice: The sign “Pb” below the symbol for batteries indicates that this battery contains lead.
BC mark means complies with Energy E ciency Law.
BC
SP-ABT30_EN_03.indd 1SP-ABT30_EN_03.indd 1 2014/02/26 13:24:272014/02/26 13:24:27
– 3 – – 4 –
The dedicated remote control app "JVC Audio Control BR2" installed on a BLUETOOTH enabled Android
device or iPhone can be used to control the System from a distance.
The Android app can be downloaded from Google Play. The iPhone app can be downloaded from the
App Store.
Before using the Android app, perform pairing between the device and the System.
Before using the iPhone app, enable BLUETOOTH connection between the device and the System.
If the system is currently connected via BLUETOOTH to other devices, disconnect all devices except the
one on which the remote control app is used.
• UI design and functions of the app may be changed without notice.
• No assurance is given that the app will work on a particular device.
The remote control app provides the following functions.
• Power on/o
• Volume control
• Sound mode
• Audio source
• Mute
• DIMMER
To allow the System to be turned on from the remote control app, the System must be in BLUETOOTH
standby mode. For information on the BLUETOOTH standby mode, see [System standby modes].
Example Requirements for remote control app
[Android app]
• Android OS 2.3.3 or later
• Device with SPP support
[iPhone app]
• iOS 5.1 or later
• iPhone 3GS or later
• iPod touch 3G or later
• iPad
■ Charging the System
The System can be powered either with the supplied AC adaptor or the internal rechargeable lithium
battery. Before using the System for the rst time, be sure to connect the supplied AC adaptor and
charge the battery.
■ Connecting the supplied AC adaptor
1 Insert the DC plug of the supplied AC adaptor into the DC IN jack on the bottom of the System.
2 Plug the AC adaptor into a wall outlet.
The CHARGE LED lights up in orange, and charging starts. When charging is complete, the
indicator goes out. The charging time is approx. 3 hours.
Choose one of the following three connection methods, depending on the BLUETOOTH device that you
are using. For details on the connection steps, please refer to the documentation of your device.
Connecting to a BLUETOOTH device with NFC support
1 Enable the NFC function of the BLUETOOTH device.
2 Turn the System on.
There is no need to turn the system on in BLUETOOTH standby mode.
Go to step 3.
3 Bring the BLUETOOTH device into contact with the N Mark on the System.
Bring the N Mark on the BLUETOOTH device into contact with the N Mark on the System. Then
follow the instructions that appear on the screen of the BLUETOOTH device to complete the
connection.
4 Verify that the STANDBY/SOURCE LED on the System is lit in blue.
The connection is established.
Connecting to a BLUETOOTH device without NFC support for the rst time
The BLUETOOTH device must be paired with the System the rst time that it is connected. If a cable
with mini stereo plug is connected to the AUDIO IN jack, disconnect the cable.
1 Turn the System on.
2 Hold down the [ (Power)] button for 3 seconds or more.
The System goes into pairing standby mode and the STANDBY/SOURCE LED ashes rapidly in
blue. (The pairing standby mode will cancel itself automatically after 5 minutes.)
3 Turn on the BLUETOOTH device and enable pairing.
Example
Android device
Tap "Settings", then "Wireless & Networks"
If "Bluetooth" is set to "O ", change the setting to "On"
Tap "Bluetooth Settings", then "Scan Devices" (or a similarly named item)
iPhone Perform one of the following procedures.
Tap "Settings", then "Bluetooth"
or
Tap "Settings", "General", then "Bluetooth"
If "Bluetooth" is set to "O ", change the setting to "On"
4 Select "SP-ABT30" from the list of devices.
A connection between the System and the BLUETOOTH device will be established.
• During the pairing process, the other device may require input of a PIN code. In such a case,
enter "0000" as the PIN code for the System.
5 Verify that the STANDBY/SOURCE LED on the System is lit in blue.
Pairing is now complete.
Connecting to a BLUETOOTH device for which pairing has been performed
1 Turn the System on.
2 Turn the BLUETOOTH device on and enable connection.
Example
Android device
Tap "Settings", then "Wireless & Networks"
If "Bluetooth" is set to "O ", change the setting to "On"
Tap "Bluetooth Settings", then "Scan Devices" (or a similarly named item)
iPhone Perform one of the following procedures.
Tap "Settings", then "Bluetooth"
or
Tap "Settings", "General", then "Bluetooth"
If "Bluetooth" is set to "O ", change the setting to "On"
3 Select "SP-ABT30" from the list of devices.
A connection between the System and the BLUETOOTH device will be established.
Multi pairing
Pairing information for up to 8 BLUETOOTH devices can be registered in the system. When pairing is
performed for a 9th device, the oldest pairing information stored in the System will be overwritten.
Automatic connection
The System automatically attempts to reconnect to the BLUETOOTH device used the previous time.
Disconnecting a connected BLUETOOTH device
To disconnect a connected BLUETOOTH device, perform one of the following steps.
• Hold down the [ (Power)] button of the System for 3 seconds or more.
• Bring the N Mark on the BLUETOOTH device into contact with the N Mark on the System (with NFC
enabled BLUETOOTH device).
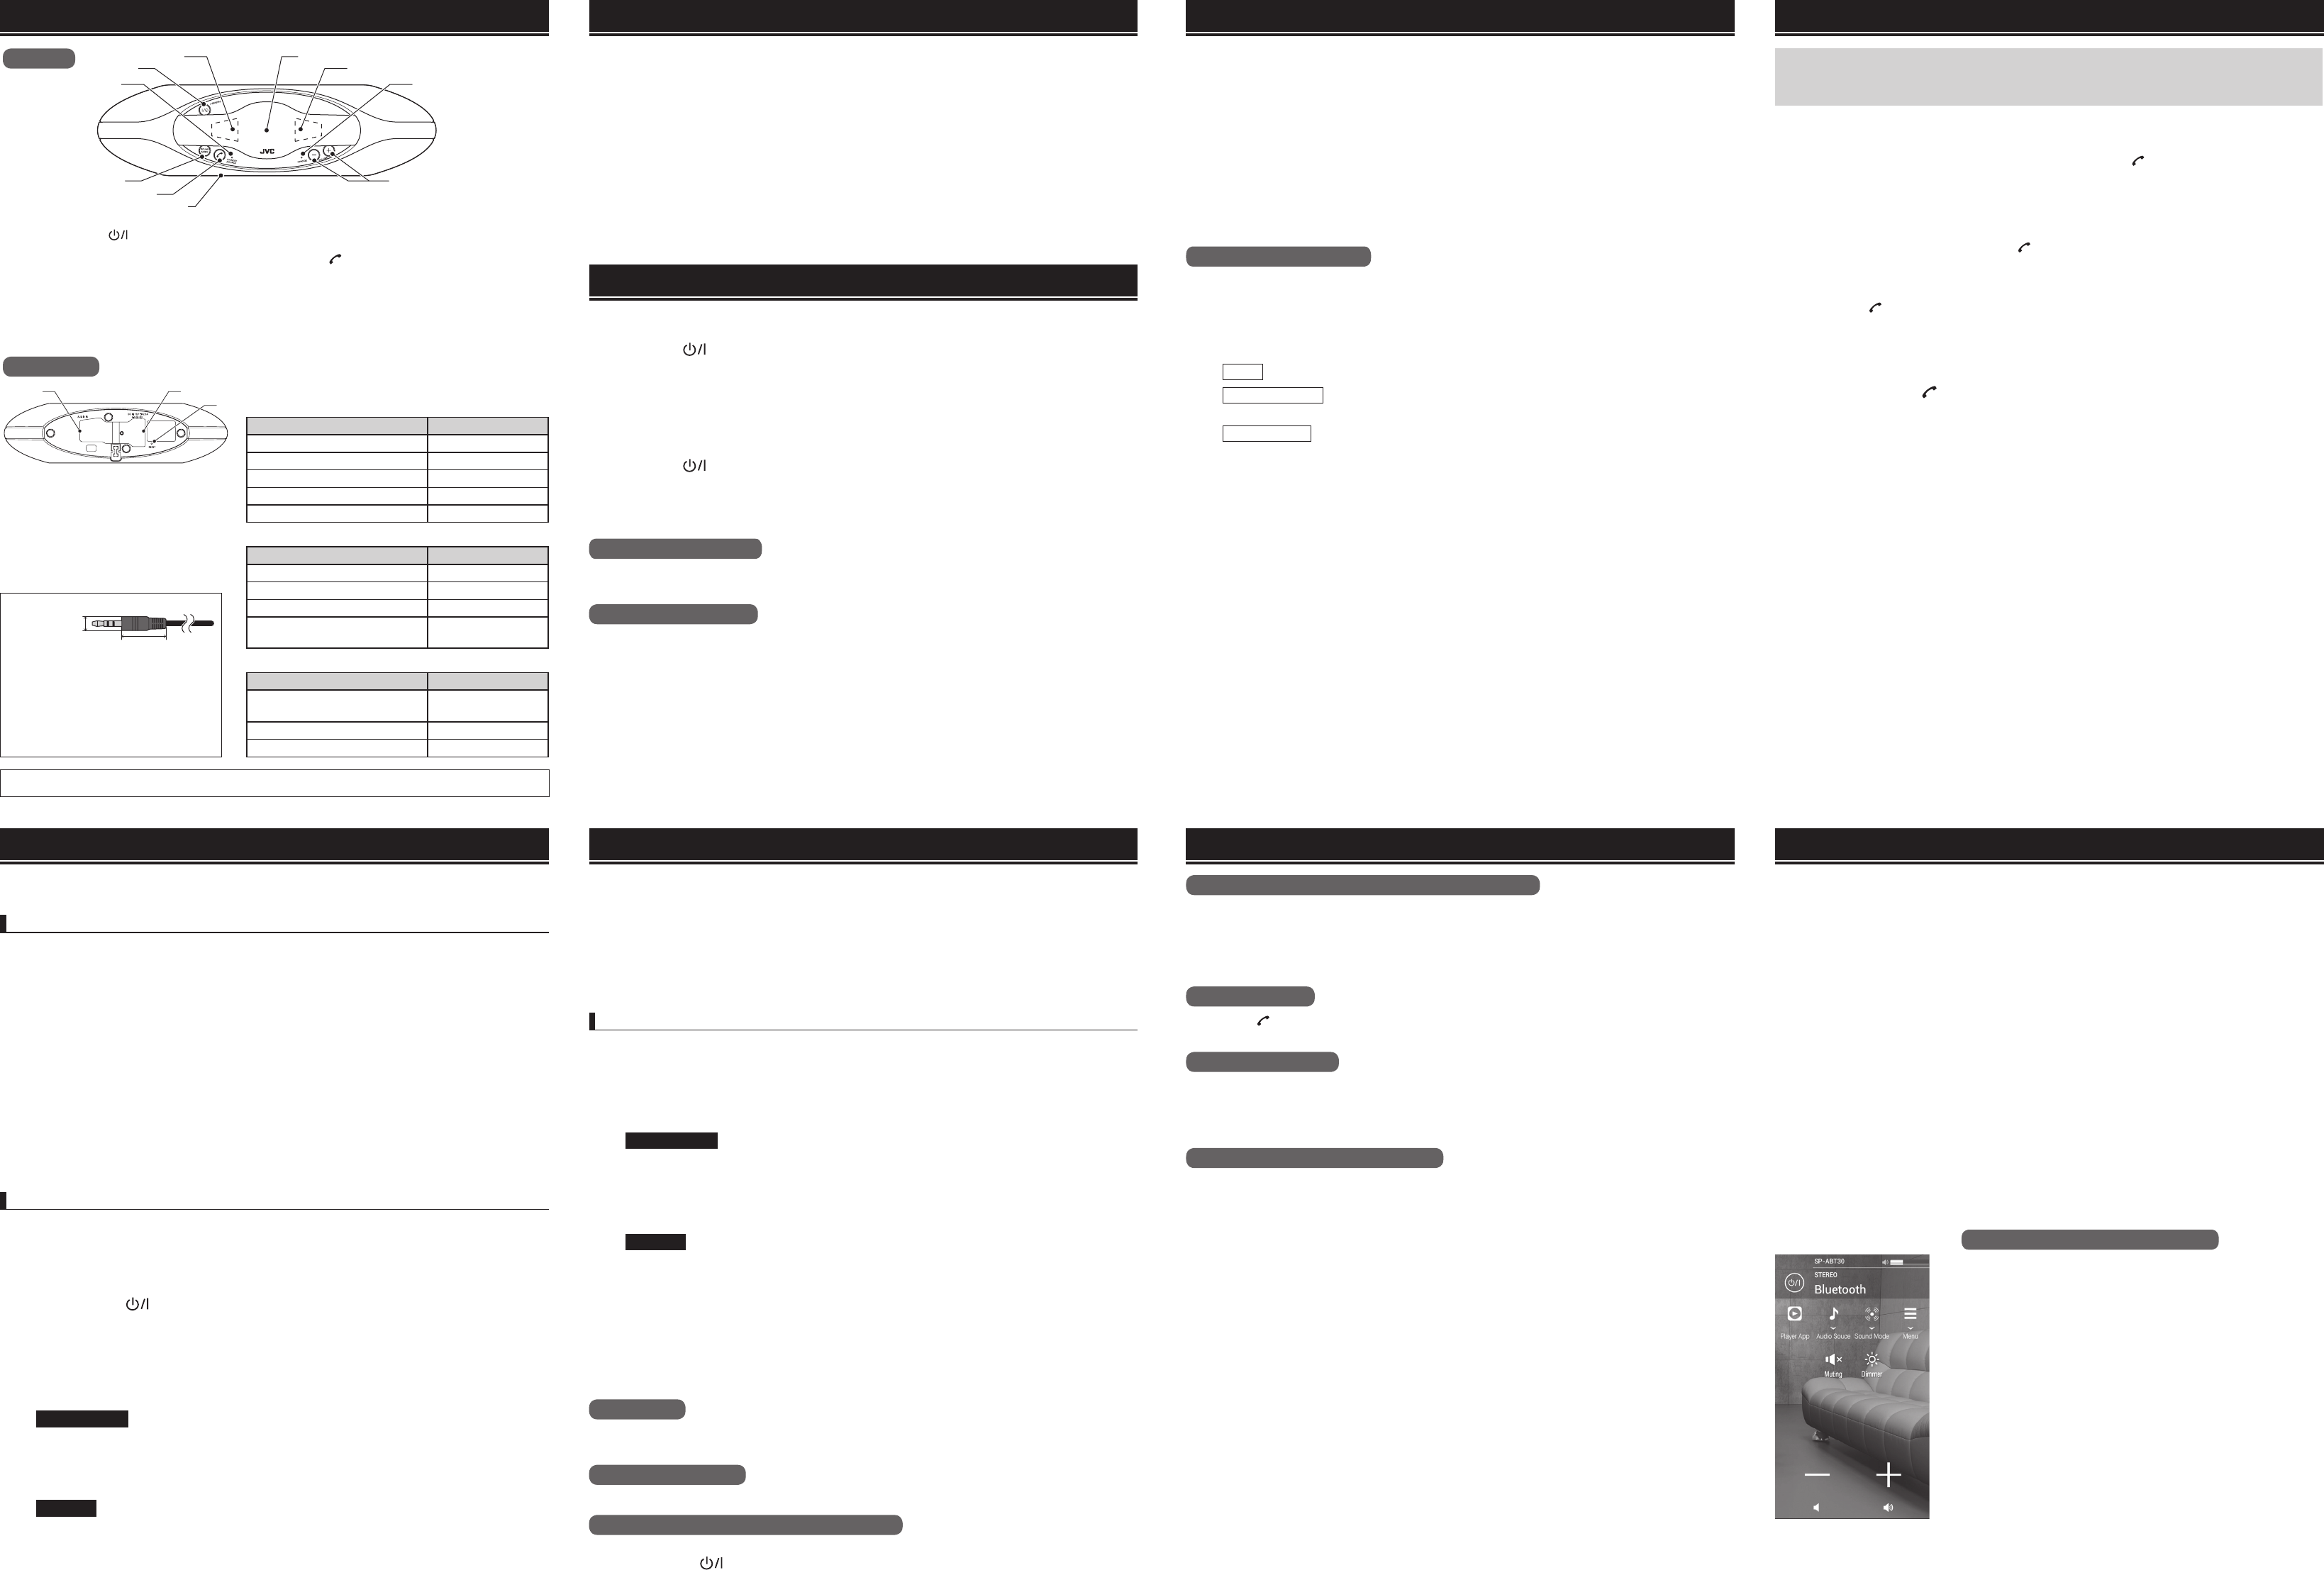
3
1
2
2
8
9
7
5
44
6
1 (Power) button
2 Illumination LED
3 N Mark
4 CHARGE LED
5 VOLUME +/- buttons
6 STANDBY/SOURCE LED
7 Microphone (inside grille)
8 (Hands-free) button
9 SOUND MODE button
Supplied accessory : AC adaptor (For North America : JD1018-000A/For UK : JD1020-000A)
Part names Preparation
■ Turning on the power
Press the [ (Power)] button.
The illumination LEDs light up, and the System turns on.
When a cable with mini stereo plug is inserted into the AUDIO IN jack, the AUDIO IN source is
activated.
■ Turning o the System
Press the [ (Power)] button.
The illumination LEDs go out, and the System turns o .In BLUETOOTH standby mode, the
STANDBY/SOURCE LED keeps ashing.In normal standby mode, the STANDBY/SOURCE LED is lit
in red. (If the AC adaptor is not connected, the LED will turn o .)
Auto Power Save (A.P.S.)
If no BLUETOOTH device is connected or there is no signal from the AUDIO IN jack for about 15 minutes,
the System automatically turns itself o .
System standby modes
The System has two types of standby modes. In BLUETOOTH standby mode, connection of a BLUETOOTH
device is possible also while power to the System is not turned on. In normal standby mode, which
consumes less power, the System must be turned on to allow connection of a BLUETOOTH device.
■ Toggling the standby mode
While the System is on, hold down the [SOUND MODE] button and the [VOLUME +] button
simultaneously for 3 seconds or more.
The factory default setting is normal standby mode. Immediately after standby mode is toggled,
the System turns itself o .
Basic operations
Listening to audio from BLUETOOTH devices Using the System as a speakerphone
• To use the System as a speakerphone, you must rst connect to a BLUETOOTH device supporting
hands-free operation.
• If connection to the device fails, see "Connecting to a paired device".
■ Accepting a call
When you hear the ring tone from the System, press the [ (Hands-free)] button
If a call is accepted while music is playing, playback will automatically be paused.
• You can use the [VOLUME] buttons to adjust the talk volume.
• Depending on the type of smartphone or other device, the ring tone heard when a call comes
in may be the ring tone of the System, regardless of the ring tone setting on the smartphone.
• To refuse the call, press and hold the [ (Hands-free)] button.
■ Terminating a call
Press the [ (Hands-free)] button while a call is in progress.
If music was playing before the call was received, playback will resume automatically.
■ Switching the call
Press and hold the [ (Hands-free)] button while a call is in progress.
You can switch the call between the System and the smartphone.
Connecting to a device without BLUETOOTH support
The AUDIO IN jack on the bottom of the System allows connection of an audio player without
BLUETOOTH support.
When a cable with mini stereo plug is inserted into the AUDIO IN jack, the System switches to the
AUDIO IN source.
When the cable is disconnected from the AUDIO IN jack, the BLUETOOTH source is activated again.
Dimmer function
Pressing the [ (Hands-free)] button and the [VOLUME -] button together cycles the brightness of the
illumination LEDs as follows: Bright ➞ Dim ➞ O .
Multipoint operation
• The System supports multipoint operation.
• While playing music with a BLUETOOTH compatible device without call support (using the A2DP/
AVRCP protocol), it is possible to also use the System for hands-free communication, together with
another BLUETOOTH device with call support (using the HSP/HFP protocol).
Precautions for multipoint operation
• First perform pairing between the System and both the music playback device and the call device.
• Proceed as follows to connect the System to the music playback device and the call device.
1 Turn the BLUETOOTH compatible music playback device on and connect to the System.
The music playback device and the System connect via the A2DP/AVRCP protocol, and music
playback is possible.
2 Turn the BLUETOOTH compatible call device on and connect to the System.
The call device and the System connect via the HSP/HFP protocol, and hands-free call operation
is possible.
• When a call is received and while using the System as a hands-free speakerphone, music playback
will be paused.
* If the call device is connected rst, it sometimes may connect to the System via the A2DP/AVRCP
protocol. In this case, turn the call device o and repeat the above procedure from step 1.protocol.
In this case, turn the call device o and repeat the above procedure from step 1.
Other operations Using the remote control appConnecting a BLUETOOTH device to the System
Connecting a BLUETOOTH device to the System (continued)
Top view
0 AUDIO IN jack
- DC IN jack
= RESET button
0-
-
=
Bottom view LED indicators of the System
[STANDBY/SOURCE LED]
While power is on
Operation LED indication
BLUETOOTH device connection standby Flashes in blue
Pairing standby Flashes rapidly in blue
BLUETOOTH device connection standby Lit in blue
Signal present at AUDIO IN Lit in purple
No signal present at AUDIO IN Flashing in purple
While power is o
Operation LED indication
Normal standby (AC adaptor not connected) Unlit
Normal standby (AC adaptor connected) Lit in red
BLUETOOTH standby (no device connected) Flashes slowly in blue
BLUETOOTH standby (device connected) Flashes alternately in blue
and red
[CHARGE LED]
Operation LED indication
Remaining battery charge low
(Connect AC adaptor to charge battery) Flashing in orange
Charging Lit in orange
Fully charged Unlit
Max.
11 mm (7/16”)
Max.
25 mm (1”)
Depending on their shape, some stereo
mini plugs may not t the AUDIO IN
jack. Use a cable with a mini plug (such
as the recommended CN-MM100-B/W).
1 Turn power to the System on and connect to the BLUETOOTH device.
If connection to the device fails, see [Connecting to a BLUETOOTH device for which pairing has
been performed].
2 Play audio on the BLUETOOTH device.
The sound is reproduced by the System.
3 Adjust the volume with the [VOLUME] buttons.
• Pressing the [VOLUME +] button increases the volume and pressing the [VOLUME -] button
reduces the volume.
• You can also use the volume control on your BLUETOOTH device to adjust the level.
Selecting the sound mode
Select the desired sound mode, according to the type of source material.
Press the [SOUND MODE] button repeatedly.
The sound mode cycles through the following settings: Stereo ➞ Enhanced Stereo ➞ 360°
Surround.
Stereo : Conventional stereo playback
Enhanced Stereo : Surround type sound with simulated speaker position located further away,
providing greater depth
360° Surround : Full 360 degree surround type sound
SP-ABT30_EN_03.indd 2SP-ABT30_EN_03.indd 2 2014/02/26 13:24:272014/02/26 13:24:27
This device complies with Part 15 of the FCC rules. Operation is subject to
the following two conditions: 1) this device may not cause harmful
interference, and 2) this device must accept any interference received,
including interference that may cause undesired operation.
Le présent appareil est conforme aux CNR d'Industrie Canada applicables
aux appareils radio exempts de licence. L'exploitation est autorisée aux
deux conditions suivantes : (1) l'appareil ne doit pas produire de
brouillage, et (2) l'utilisateur de l'appareil doit accepter tout brouillage
radioélectrique subi, même si le brouillage est susceptible d'en
compromettre le fonctionnement.