Z Com 0825M IEEE 802.11b Wireless Module User Manual
Z Com Inc IEEE 802.11b Wireless Module Users Manual
UserManual.wiki
>
Z Com
>
0825M User Manual
Users Manual
Navigation menu
Upload a User Manual
Namespaces
Wiki Guide
HTML
PDF
Info
Views
User Manual
Discussion / Help
Navigation


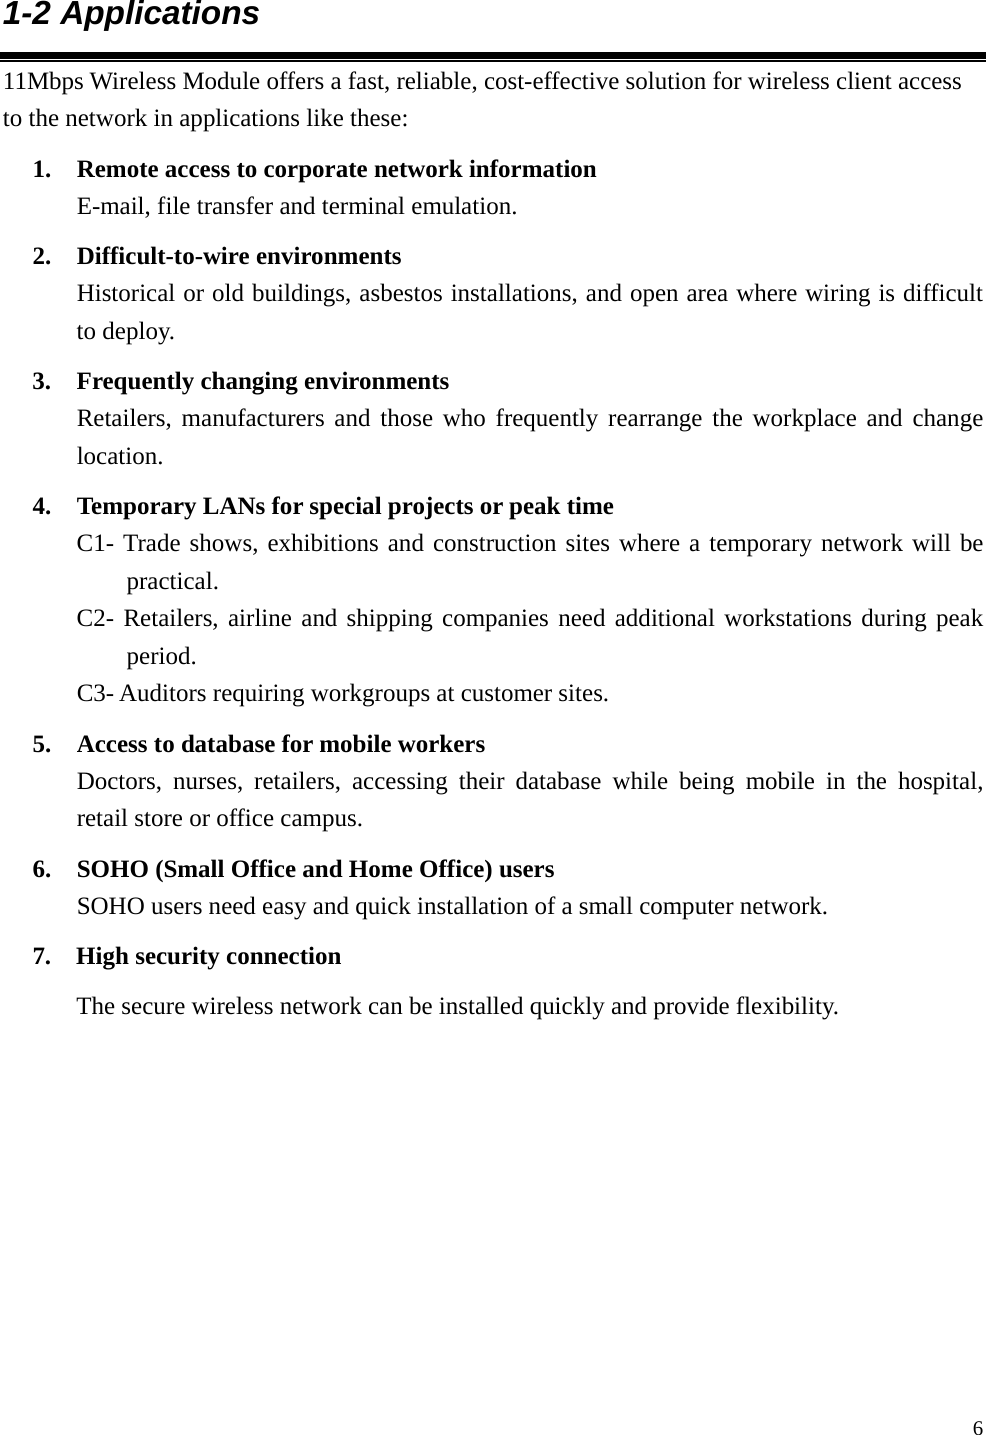


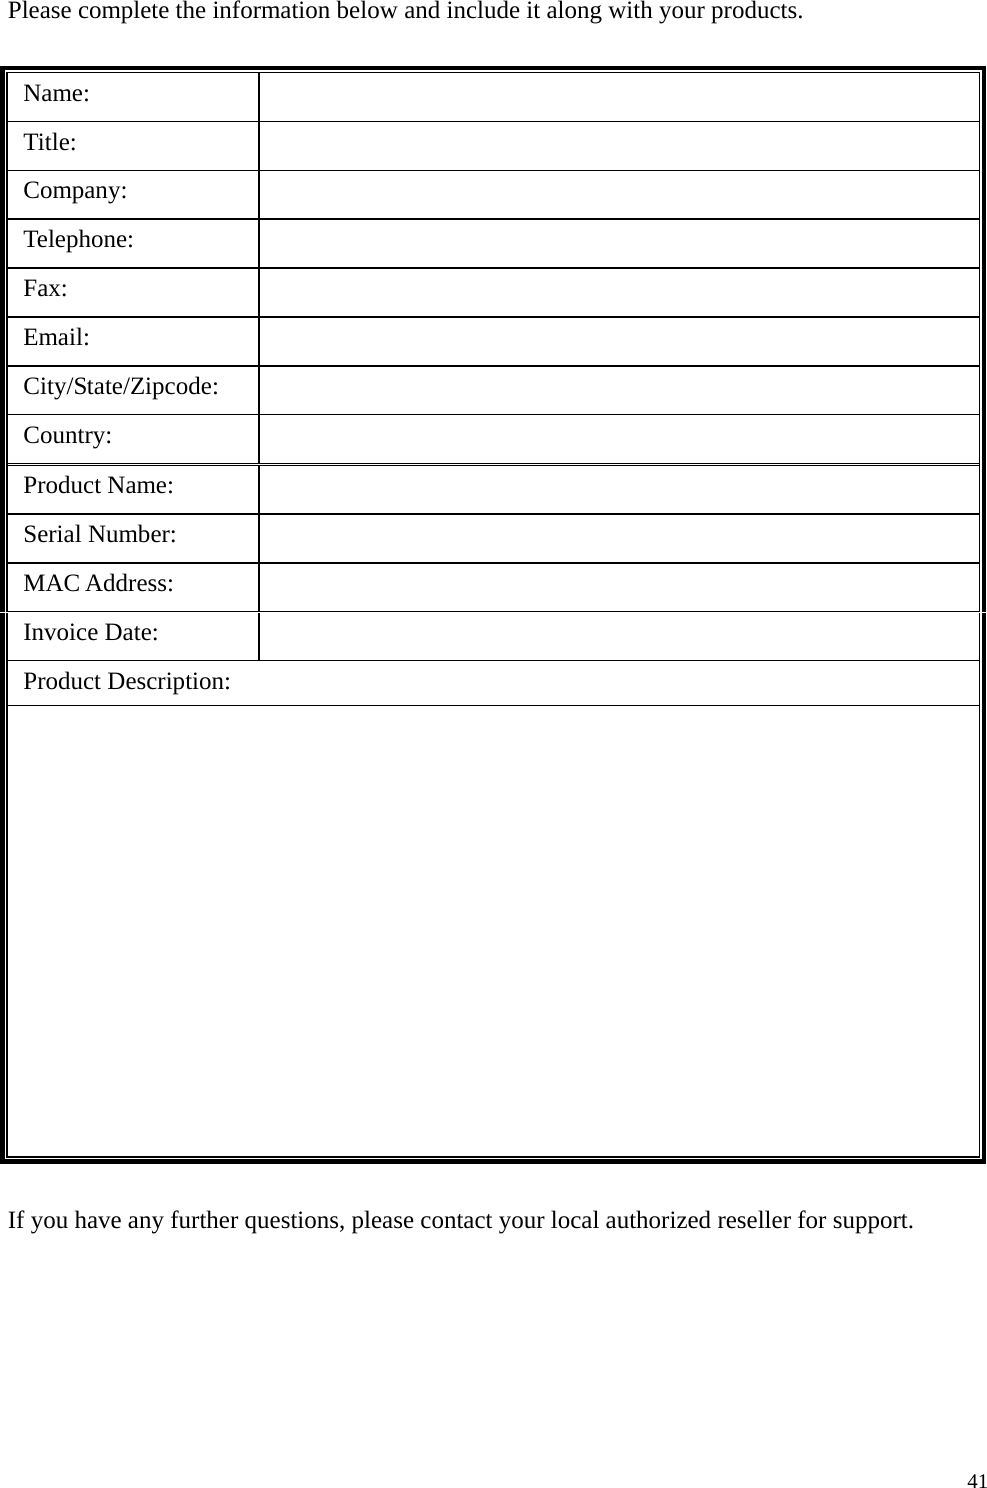
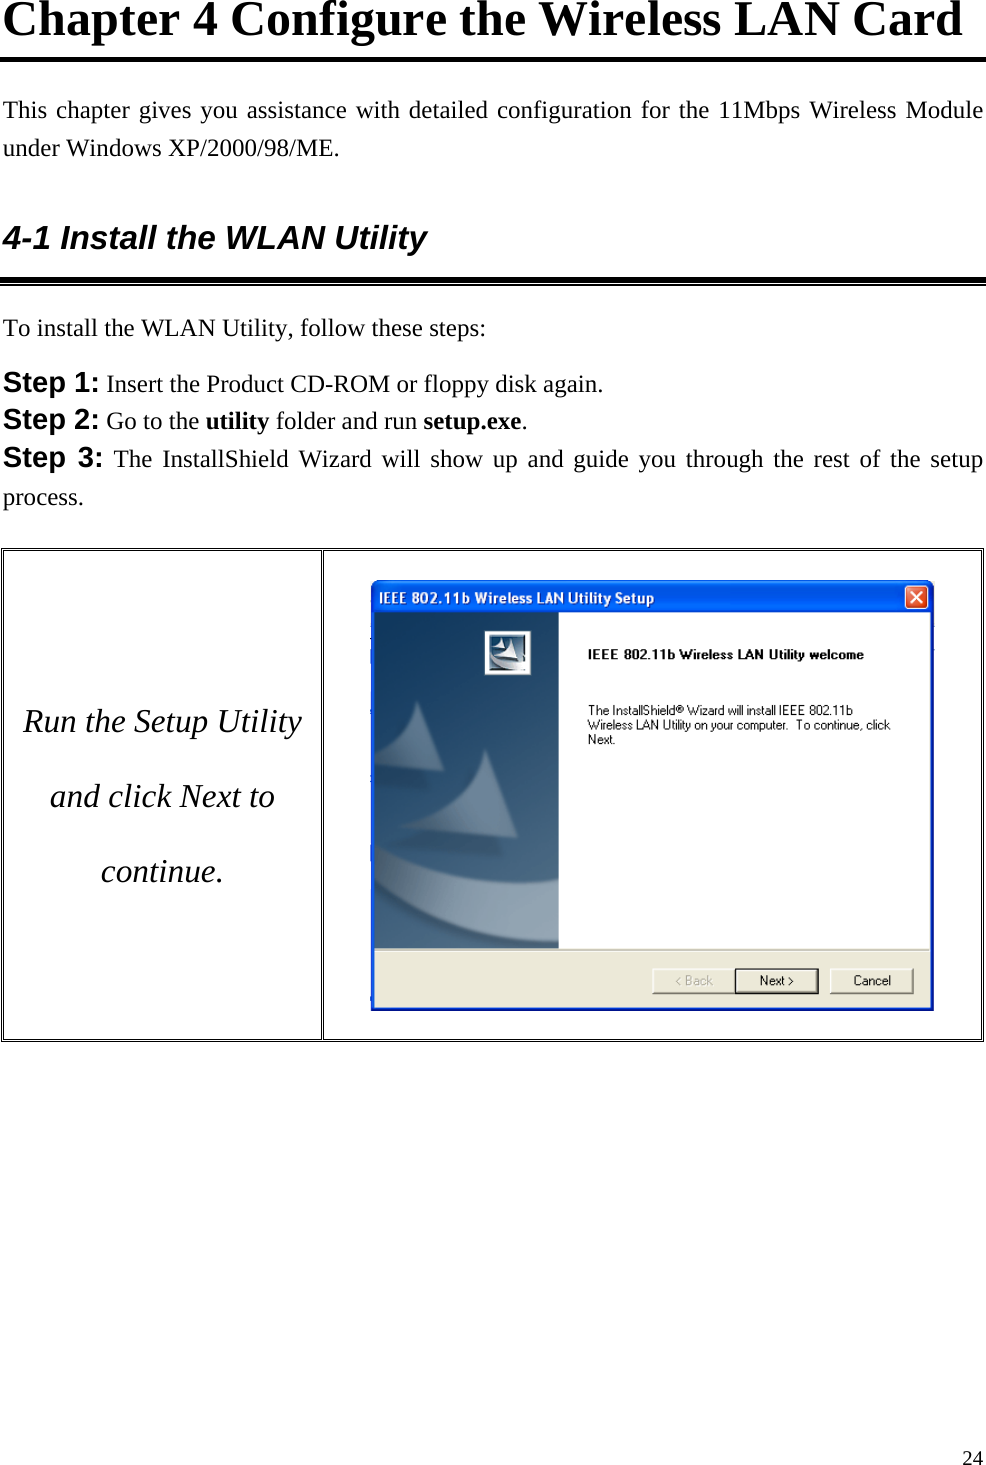
![22Step 5: Once the [Please insert the disk labeled ‘Windows 98 Second Edition CD-ROM/ME CD-ROM”, and then click OK] window appears, enter the path corresponding to the appropriate drives and click OK. Usually these files can be found at C:\Windows or C:\Windows\system. Step 6: Click Finish to complete the software installation. Step 7: Restart the computer.](https://usermanual.wiki/Z-Com/0825M/User-Guide-655084-Page-22.png)


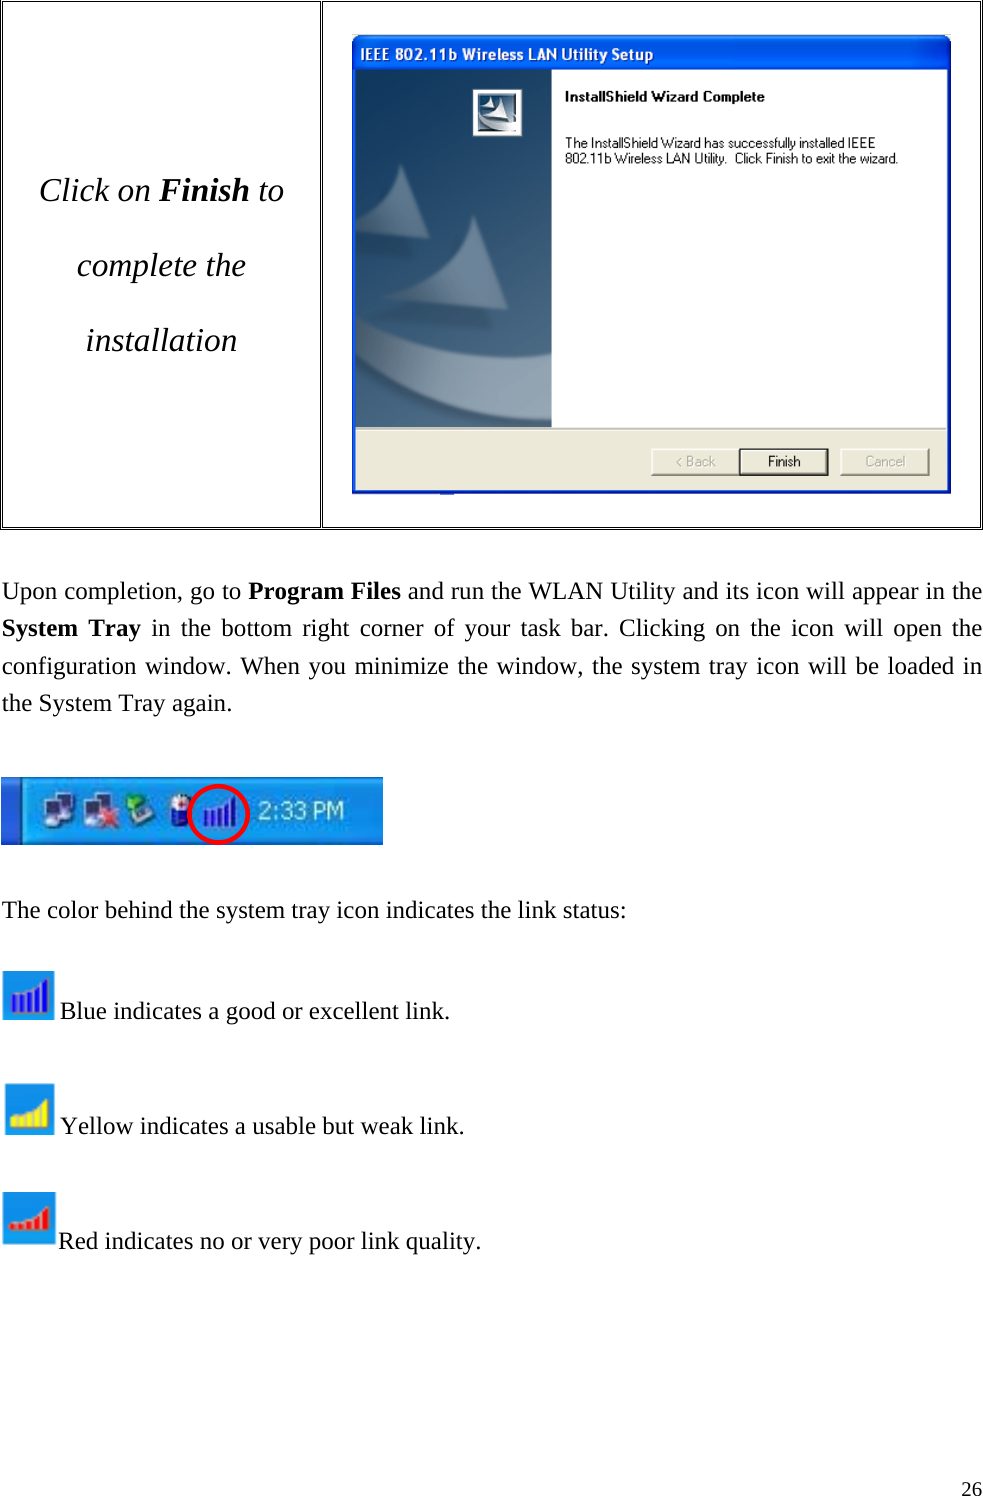


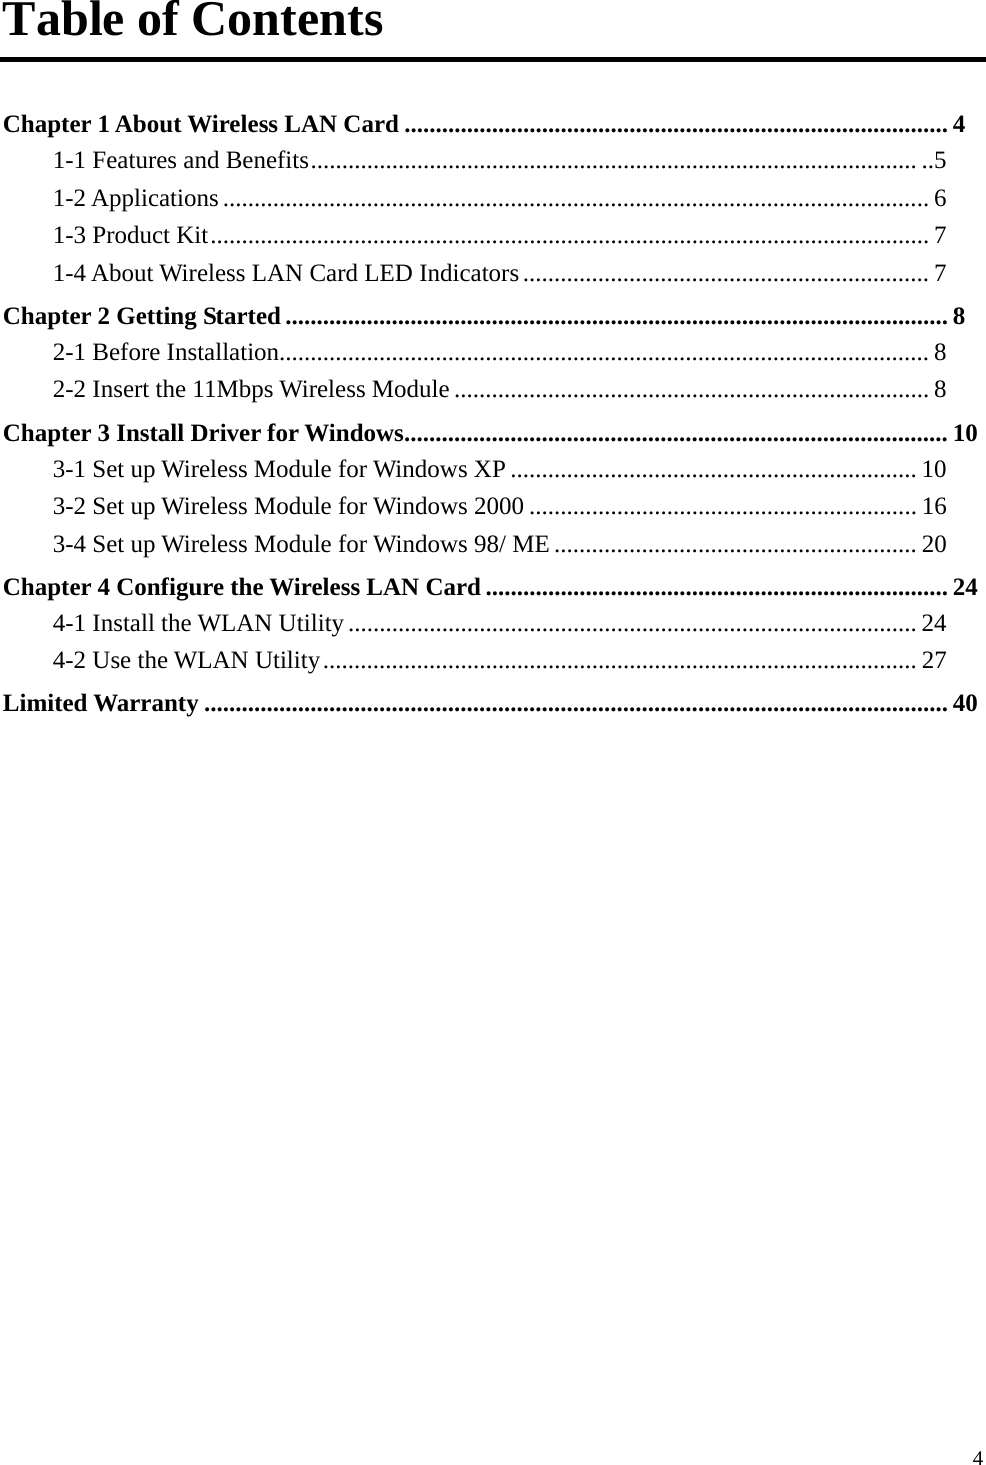
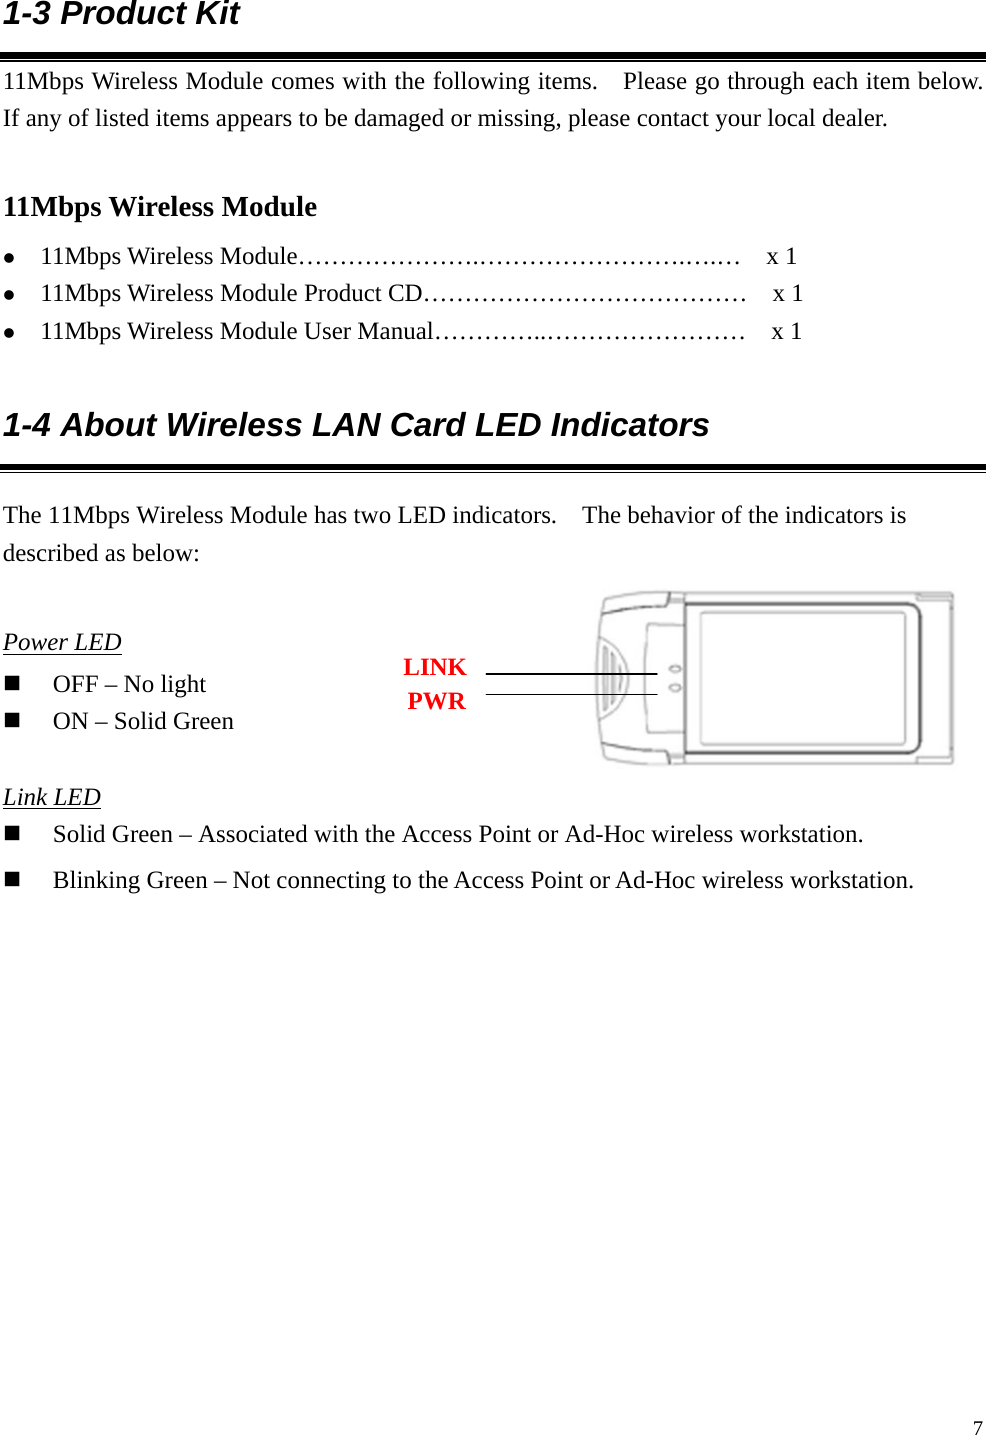
![30For Authentication Mode: Open: Requires NO authentication, since it allows any device to join a network without performing any security check. Shared: Requires that the station and the access point use the same WEP key to authenticate. This basically means that WEP must be enabled and configured on both the access point and the client with a same key, showed as below: WPA-PSK: Allows you to gain access to a secured wireless network that the station and the access point use the same pre-shared key to authenticate. You must type a mixture of numbers and letters in the Pre-shared key [WPA] section of this menu. You may input either 8-63 ASCII characters or 64 HEX characters. Pre-shared key is usually used for SOHO authentication.](https://usermanual.wiki/Z-Com/0825M/User-Guide-655084-Page-30.png)
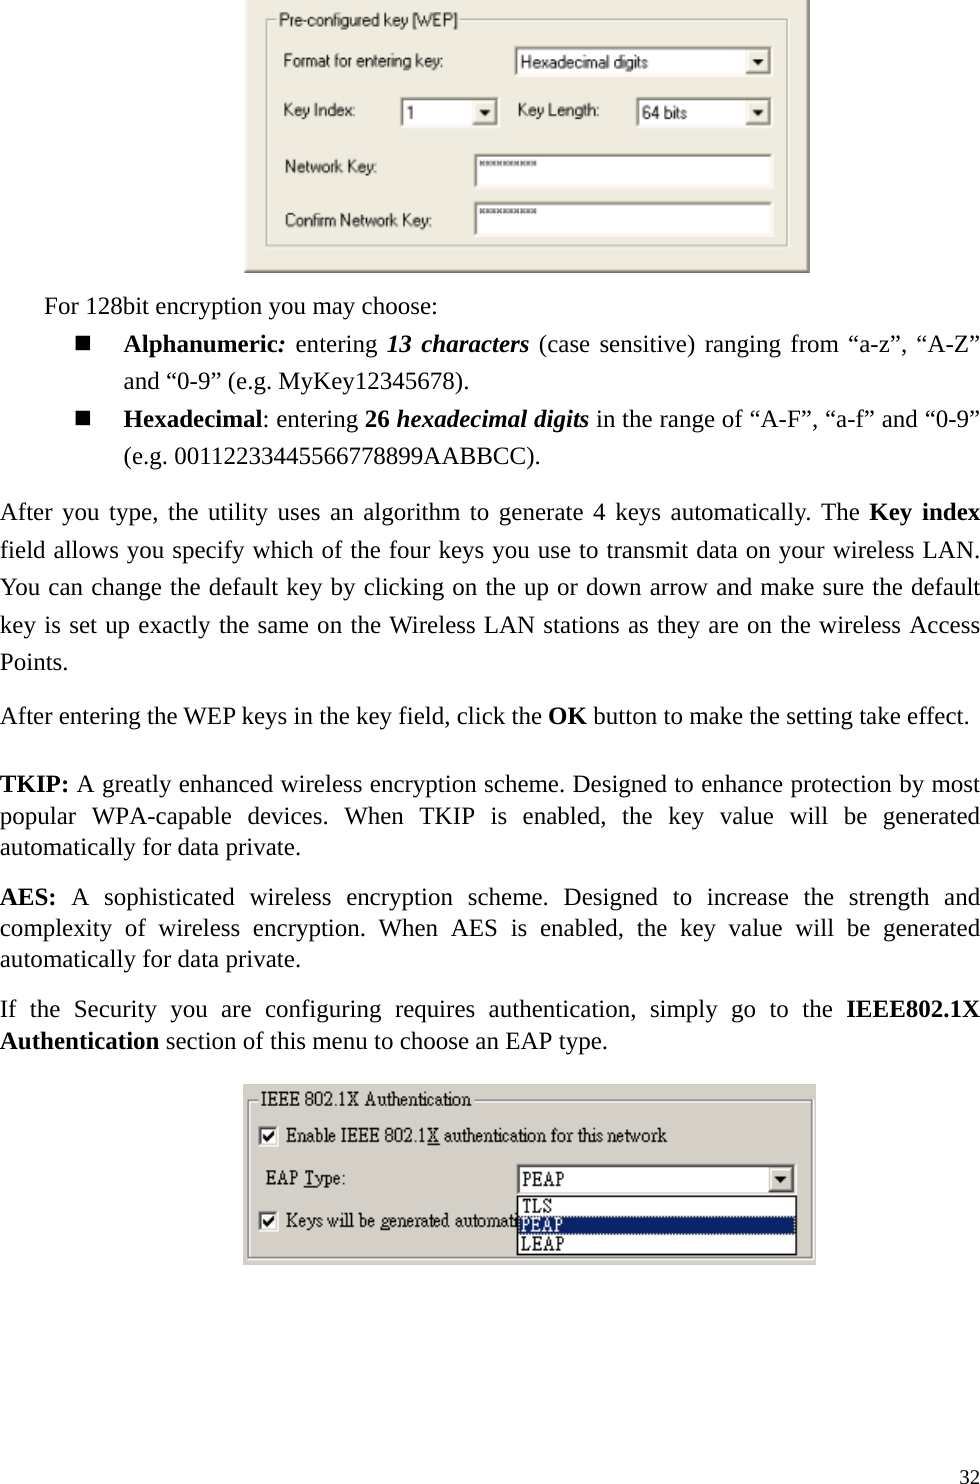
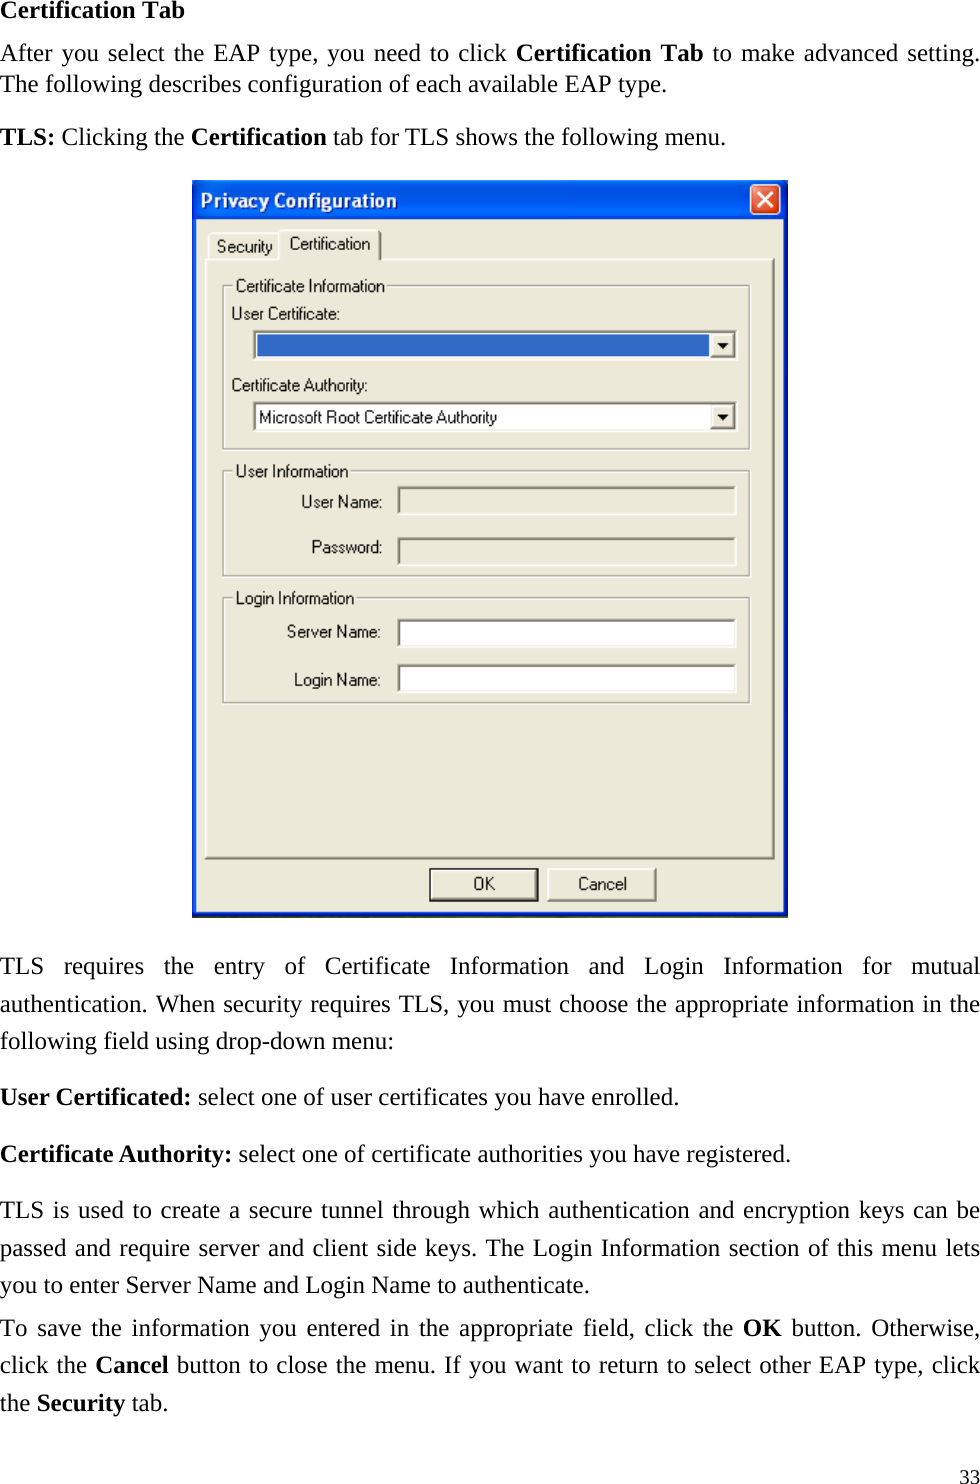
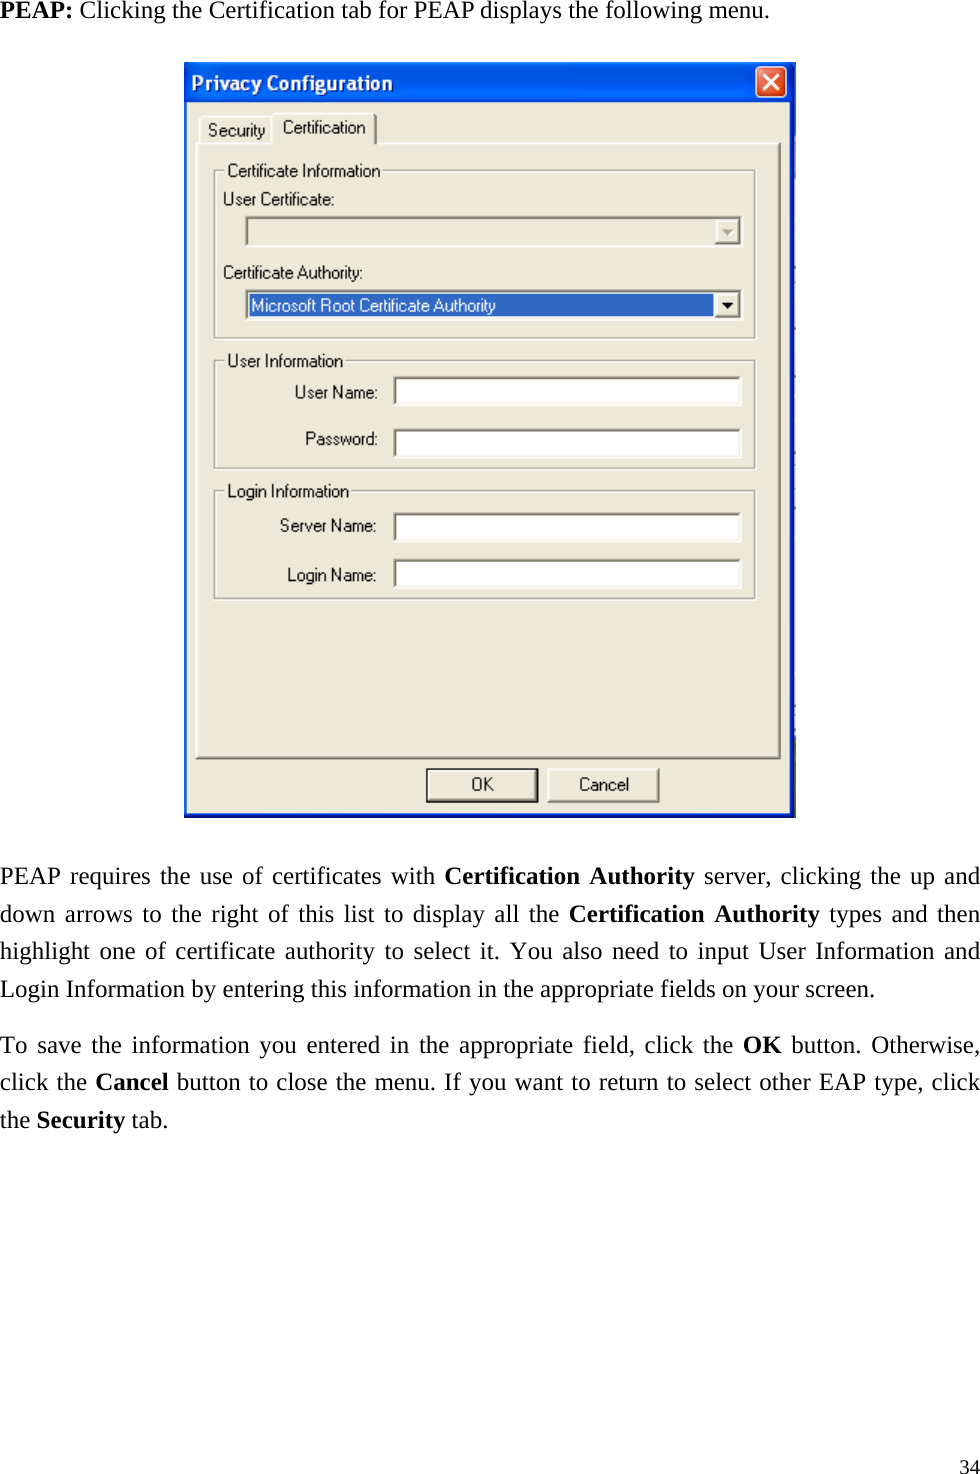
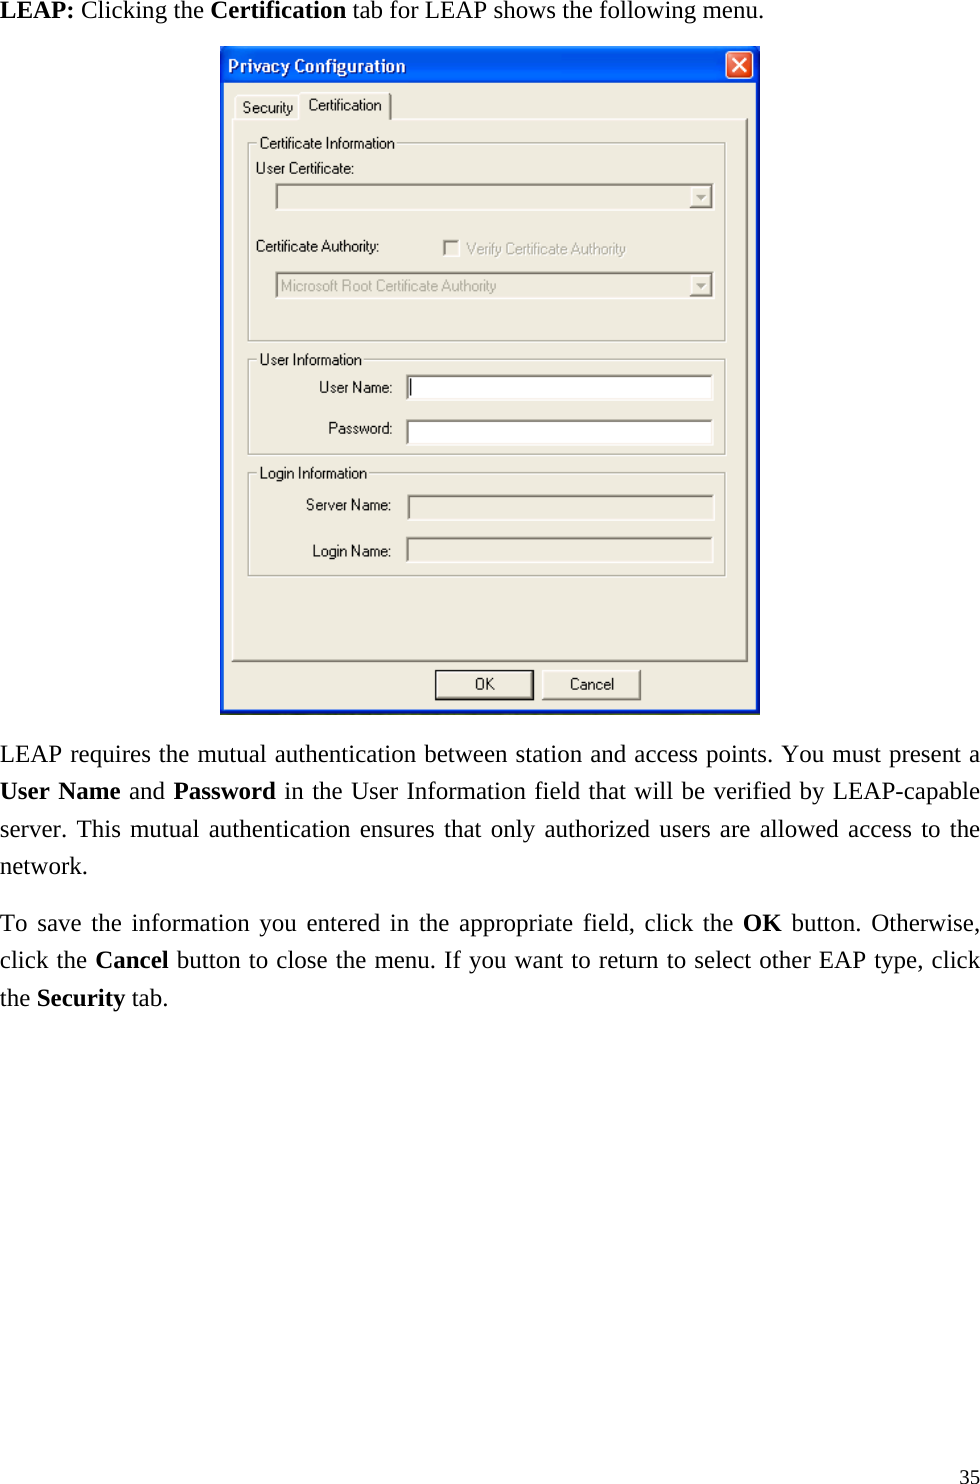
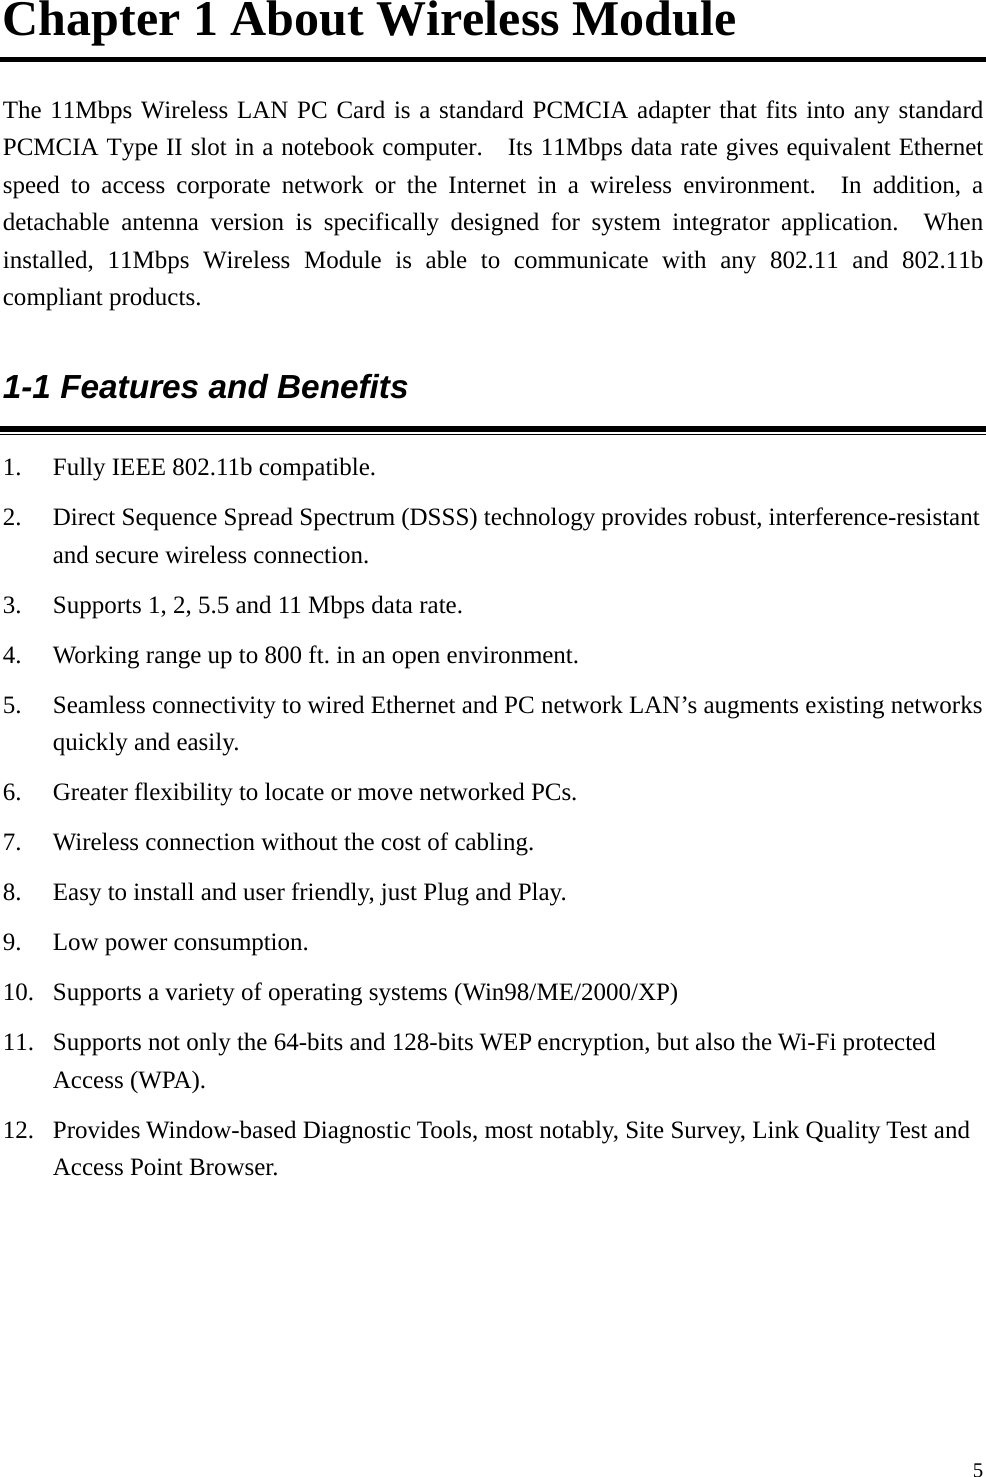
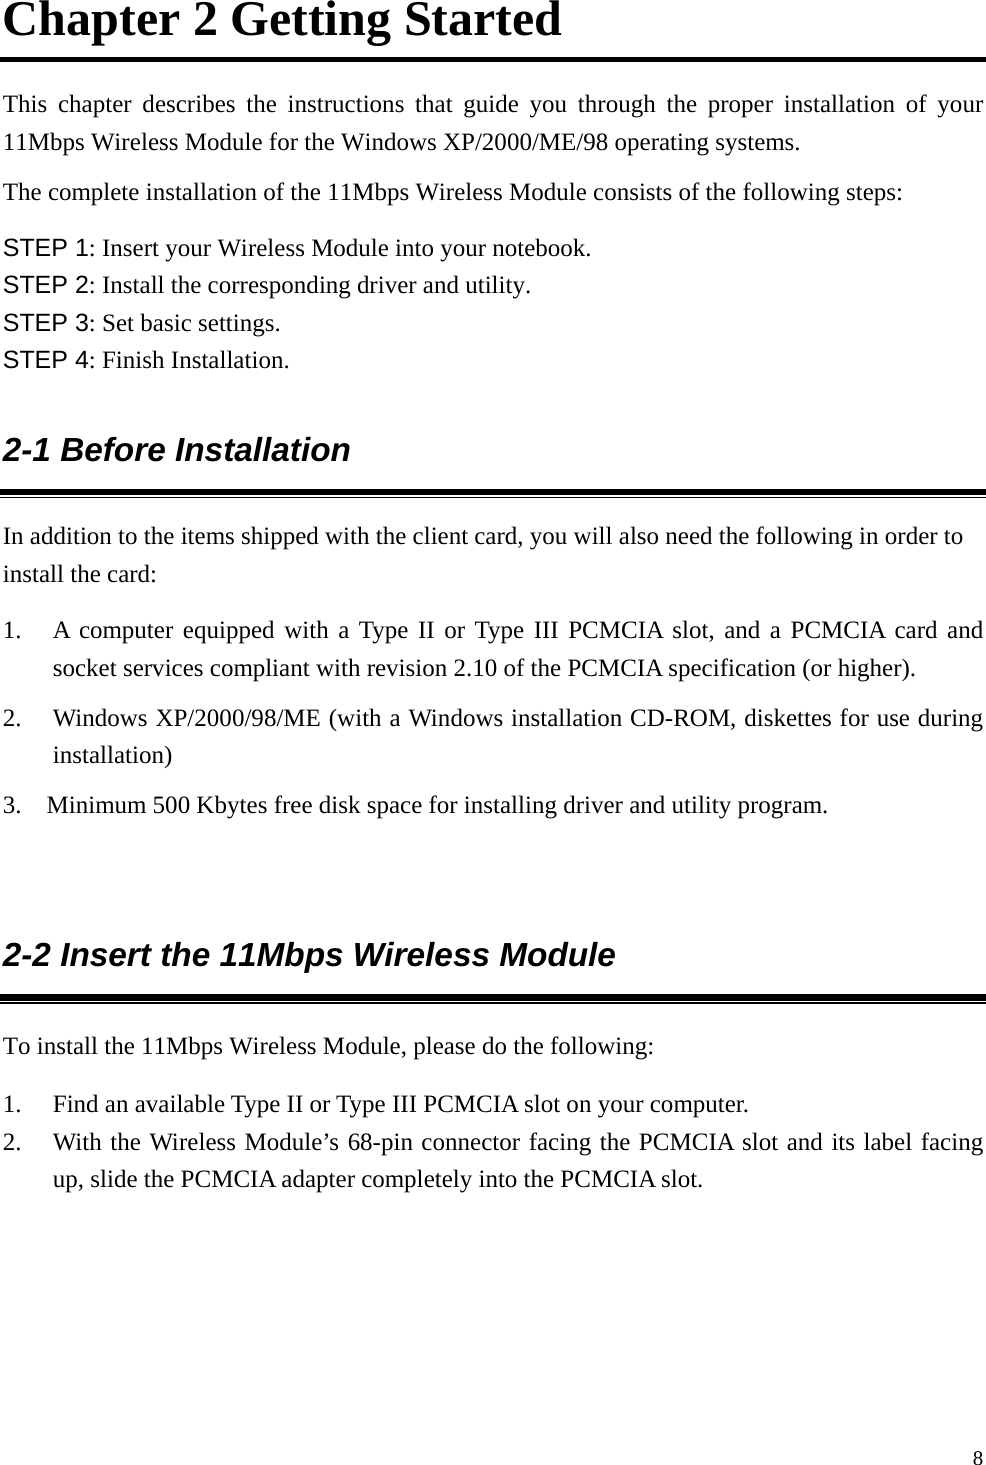
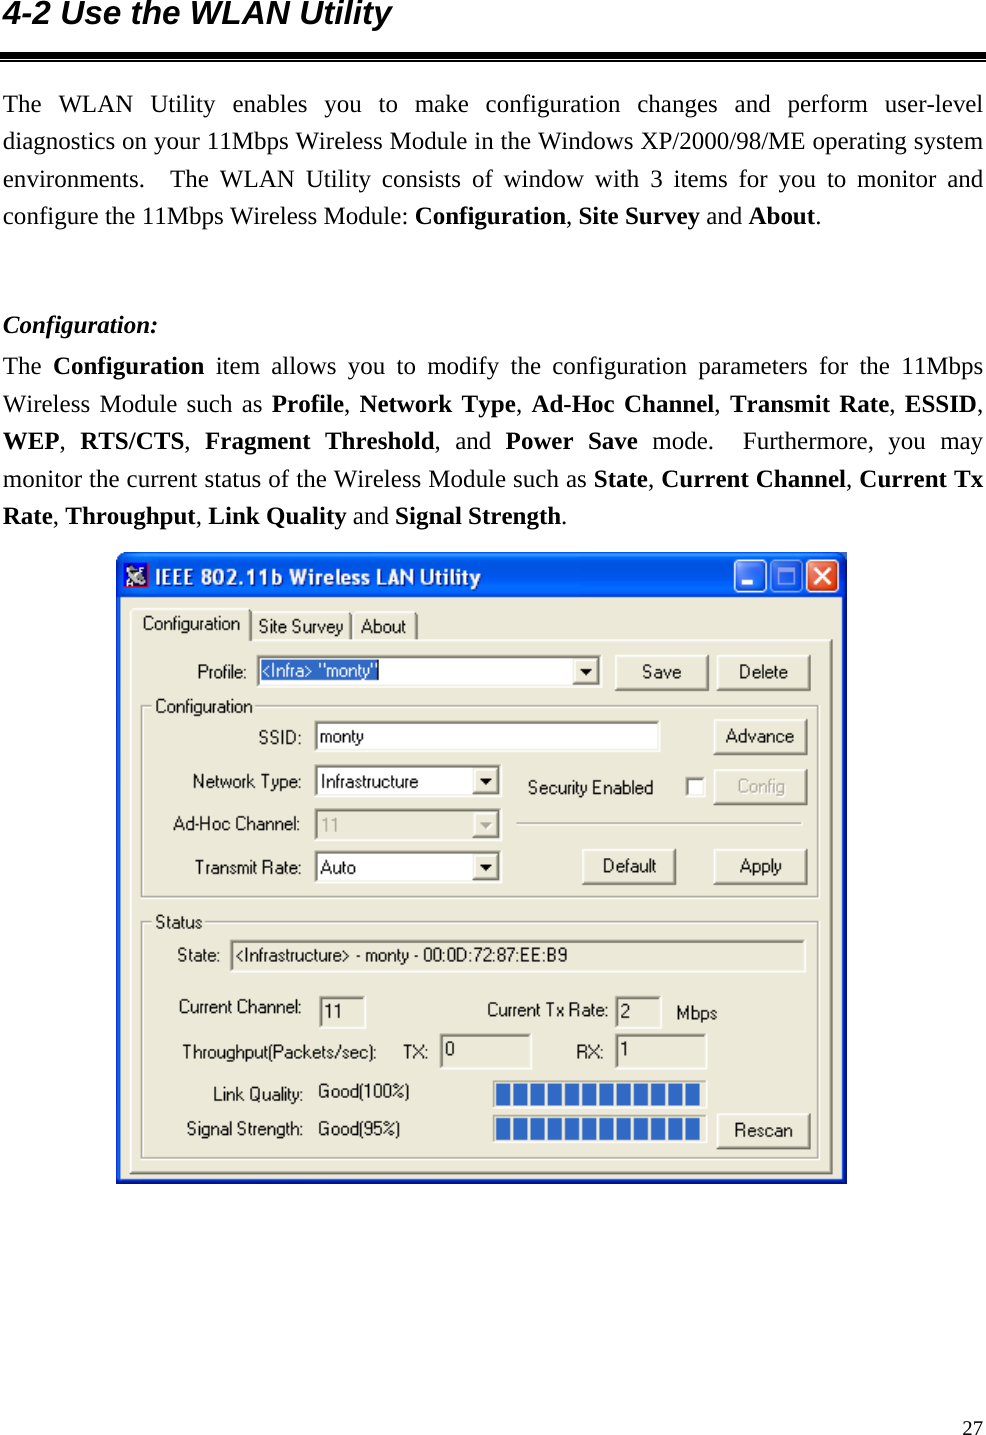
![31WPA: Allows you to gain access to a more secured wireless network that requires mutual authentication between client and access point with a Radius authentication server. This product supports various EAP types (TLS and PEAP), which require different credential authentication. In order to access the wireless network, you must select EAP type your service provider supplied in the section of IEEE802.11X Authentication. WPA consists of methods to strengthen data encryption (Wired Equivalent Privacy [WEP], Temporal key integrity Protocol [TKIP], Advanced Encryption Standard [AES]) and to provide user authentication (strong EAP type such as TLS, PEAP, LEAP). Once you choose your Authentication Mode, you then need to select the Encryption Mode. For Encryption Mode WEP: Specify the encryption keys. There are two methods to set the WEP keys, as described below: Key will be generated automatically for data private To create encryption keys automatically, click the Key will be generated automatically for data private check box. Note: This function is used in IEEE802.1X Authentication mode. Keys are dynamically generated and distributed by the authentication server. Actually, you can obtain keys by asking your service provider for further configuration and information to gain access to the wireless network. Pre-configured key [WEP] You can also create encryption keys manually by pulling down the Key Length menu and select either 64bit or 128bit encryption method in the Pre-configured key section of this menu. For 64bit encryption you may choose: Alphanumeric: entering 5 characters (case sensitive) ranging from “a-z”, “A-Z” and “0-9” (e.g. MyKey). Hexadecimal: entering 10 hexadecimal digits in the range of “A-F”, “a-f” and “0-9” (e.g. 11AA22BB33, showed as below).](https://usermanual.wiki/Z-Com/0825M/User-Guide-655084-Page-31.png)