Z Com XI330HP 11Mbps High Speed Wireless LAN PC Card User Manual C XI 325 v 4 0 7 generic 1
Z Com Inc 11Mbps High Speed Wireless LAN PC Card C XI 325 v 4 0 7 generic 1
Z Com >
Contents
- 1. user manual part 1
- 2. user manual part 2
user manual part 2
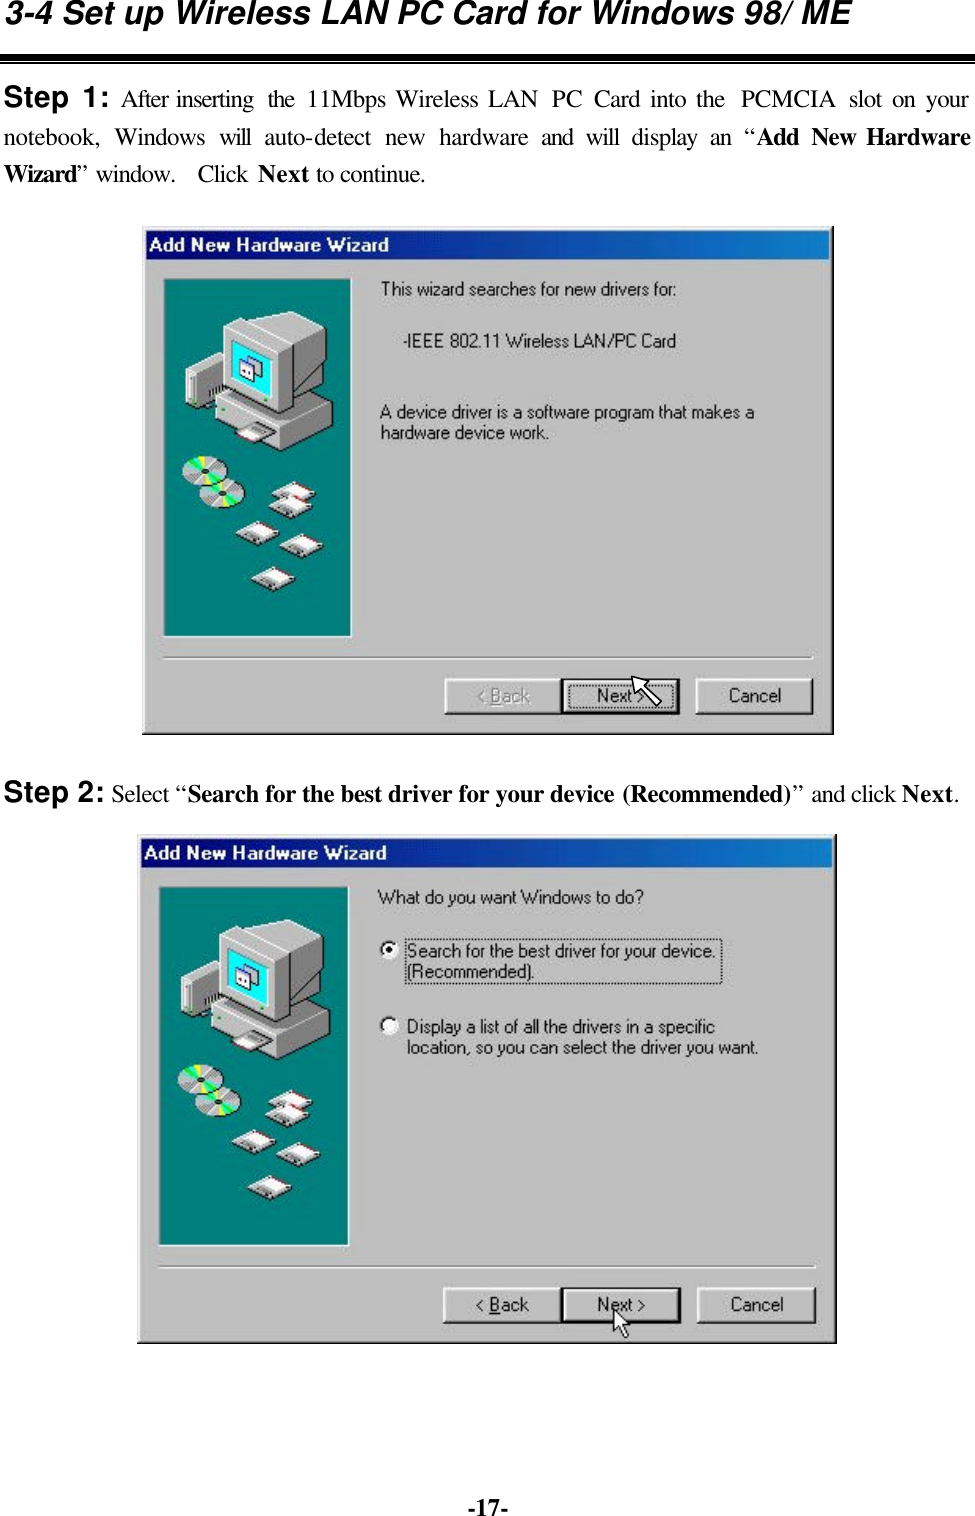
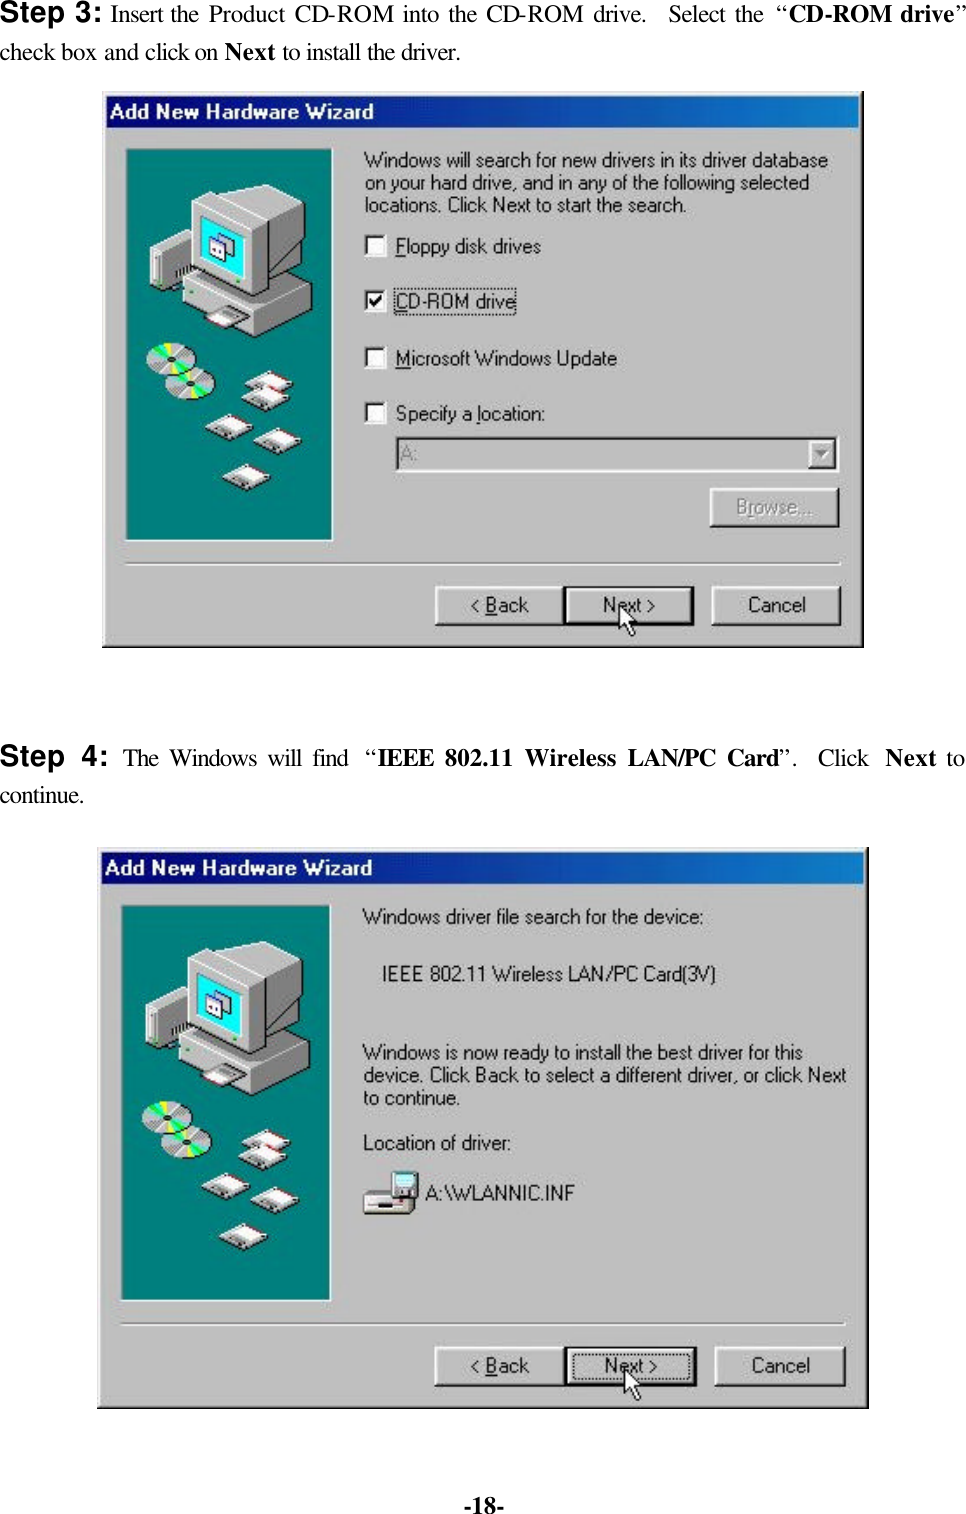
![-19- Step 5: Once the [Please insert the disk labeled ‘Windows 98 Second Edition CD-ROM/ME CD-ROM”, and then click OK] window appears, inset enter the path corresponding to the appropriate drives and click OK. Usually these files can be found at C:Windows or C:Windows\system. Step 6: Click Finish to complete the software installation. Step 7: Restart the computer.](https://usermanual.wiki/Z-Com/XI330HP.user-manual-part-2/User-Guide-369311-Page-3.png)