Z Com XN990V02 IEEE 802.11n Wireless LAN PCI Card User Manual 20070725 XN 990 QIG
Z Com Inc IEEE 802.11n Wireless LAN PCI Card 20070725 XN 990 QIG
UserManual.wiki
>
Z Com
>
XN990V02 User Manual
User Manual
Navigation menu
Upload a User Manual
Namespaces
Wiki Guide
HTML
PDF
Info
Views
User Manual
Discussion / Help
Navigation


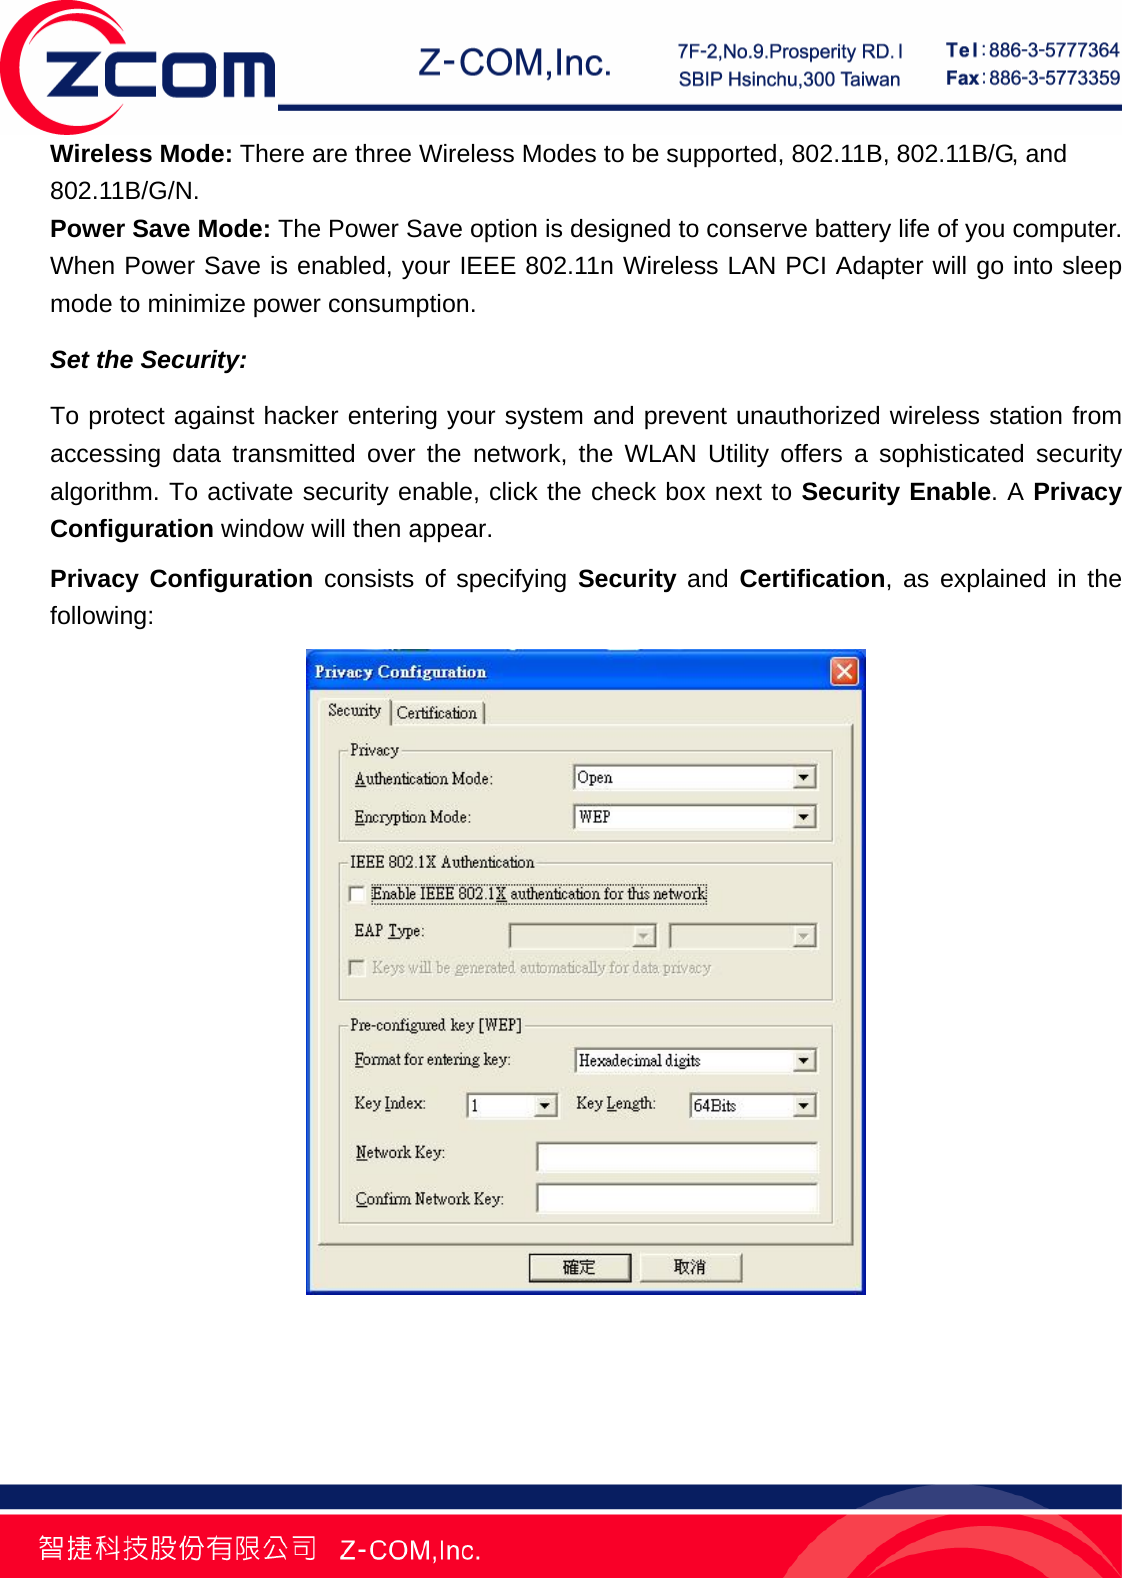
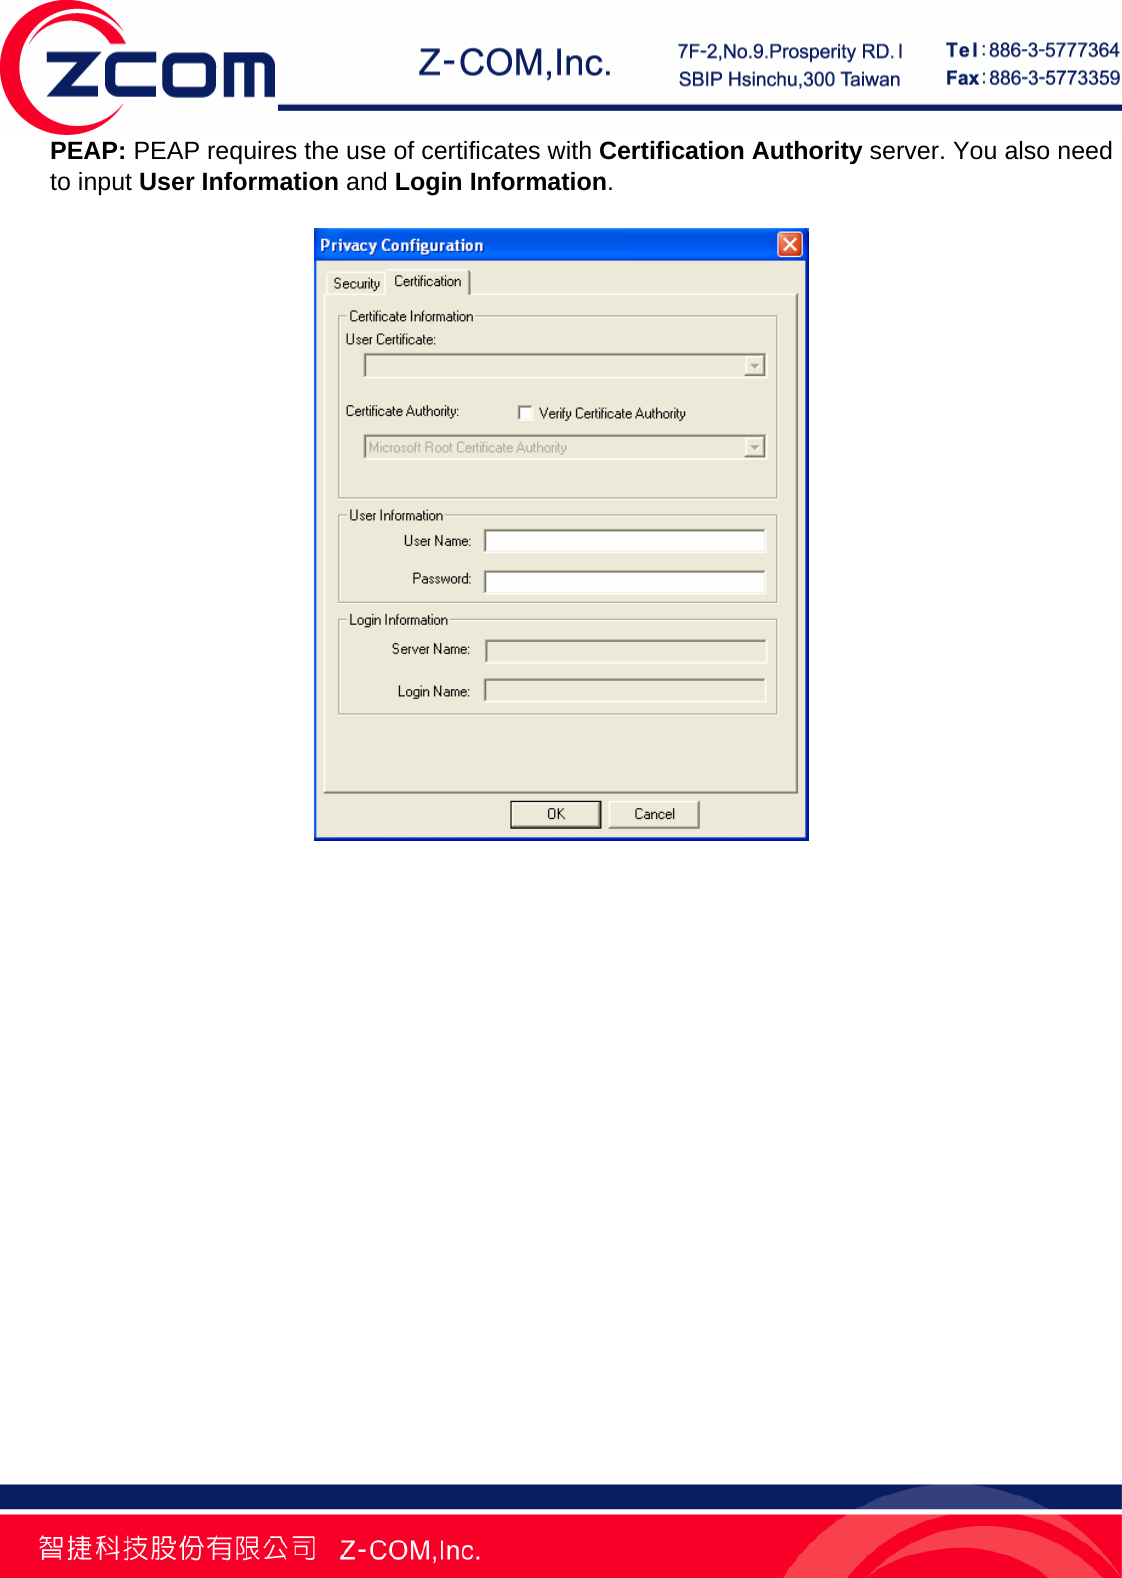
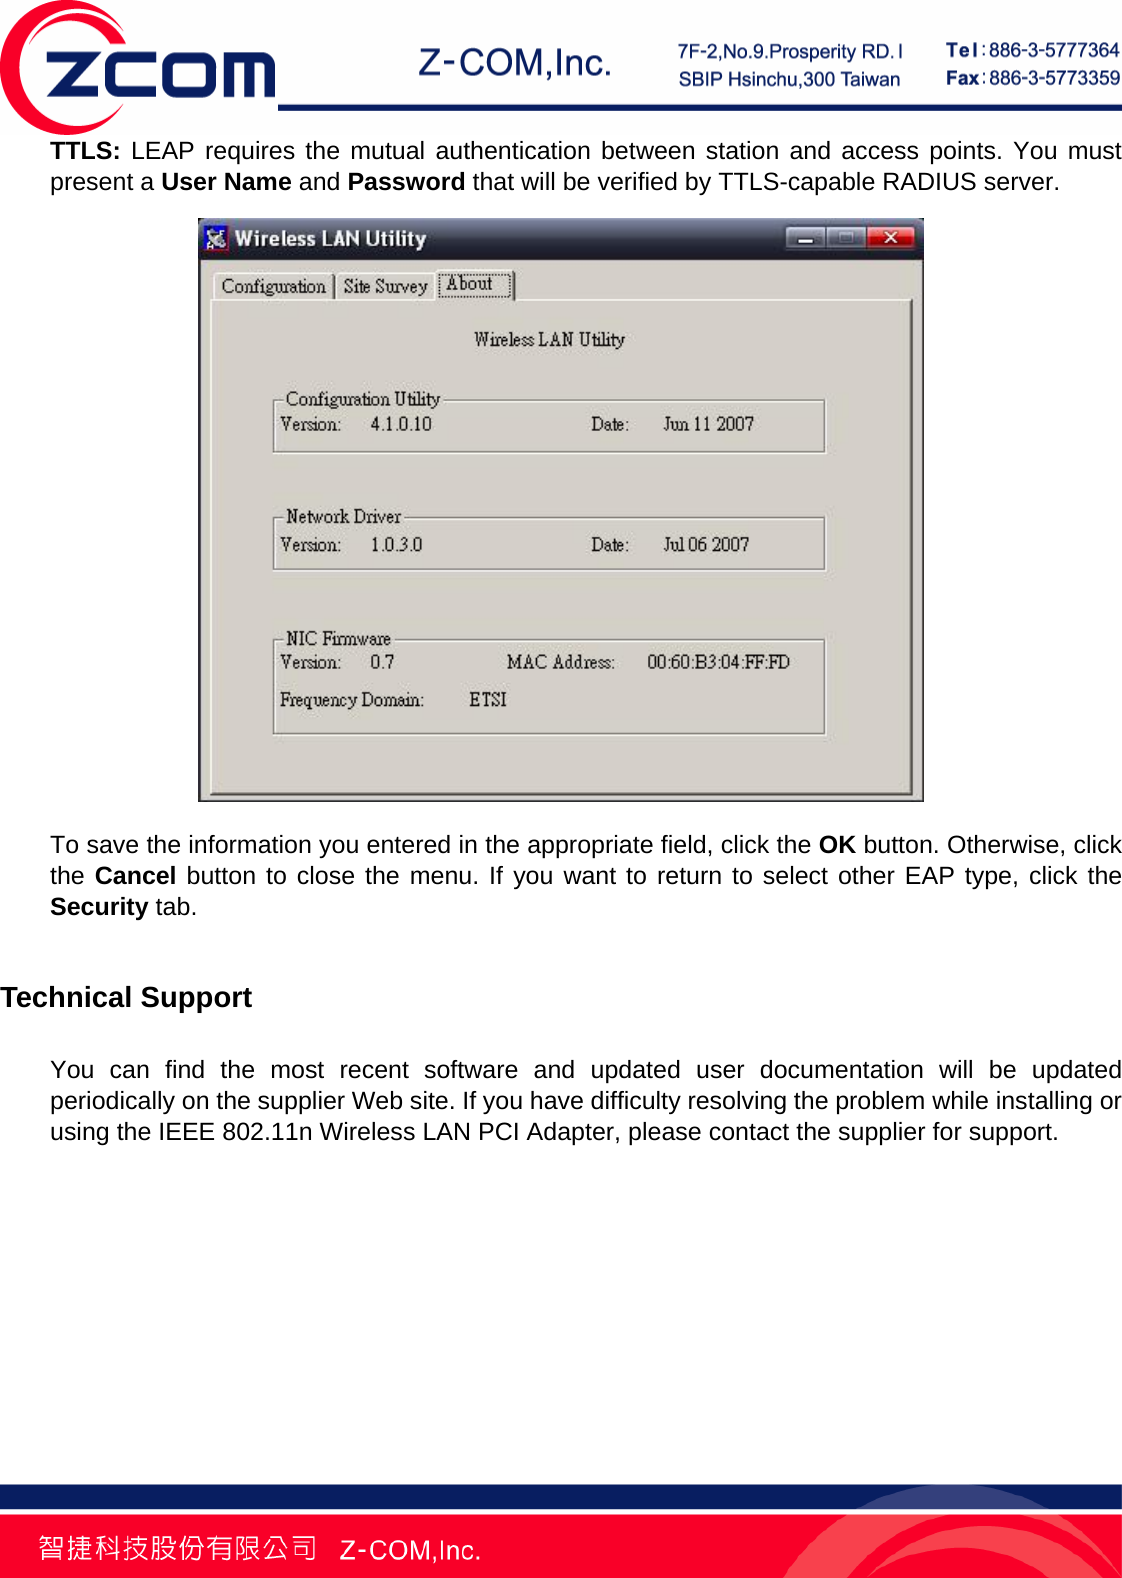
![Security Tab: Set the Authentication Mode: Open: If you require NO authentication, select “Open” since it allows any device to join a network without performing any security check. Shared: If you select “Shared” mode, make sure that WEP must be enabled and configured on both the access point and the client with a same key. WPA (2)-PSK: Allows you to gain access to a secured wireless network that the station and the access point use the same pre-shared key to authenticate. You must type an alphanumeric password phrases between 8 and 63 characters in the Pre-shared key section of this menu. WPA (2): Allows you to gain access to a more secured wireless network that requires mutual authentication between client and access point with a Radius authentication server. In order to access the wireless network, you must select EAP type your service provider supplied in the section of IEEE802.11X Authentication. Once you choose your Authentication Mode, you then need to select the Encryption Mode. Set the Encryption Mode: WEP: There are two methods to set the WEP keys, as described below: Key will be generated automatically for data private To create encryption keys automatically, click the Key will be generated automatically for data private check box. Pre-configured key [WEP] You can also create encryption keys manually by pulling down the Key Length menu and select either 64bit or 128bit encryption method After entering the WEP keys in the key field, click the OK button to make the setting take effect. TKIP: When TKIP is enabled, the key value will be generated automatically for data private. AES: When AES is enabled, the key value will be generated automatically for data private.](https://usermanual.wiki/Z-Com/XN990V02/User-Guide-853755-Page-14.png)