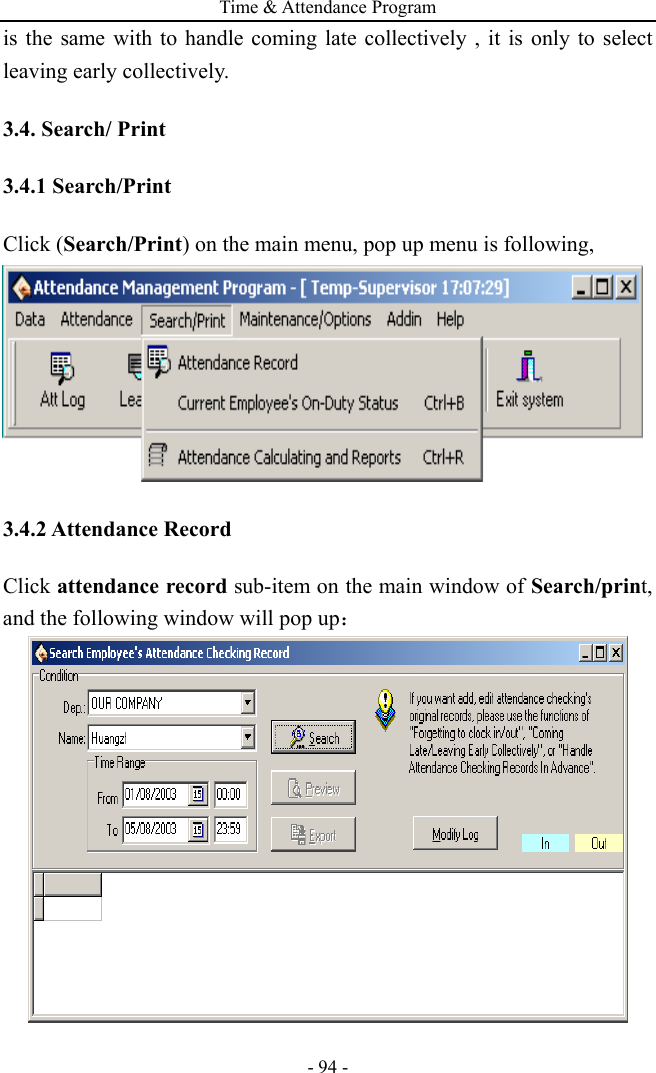
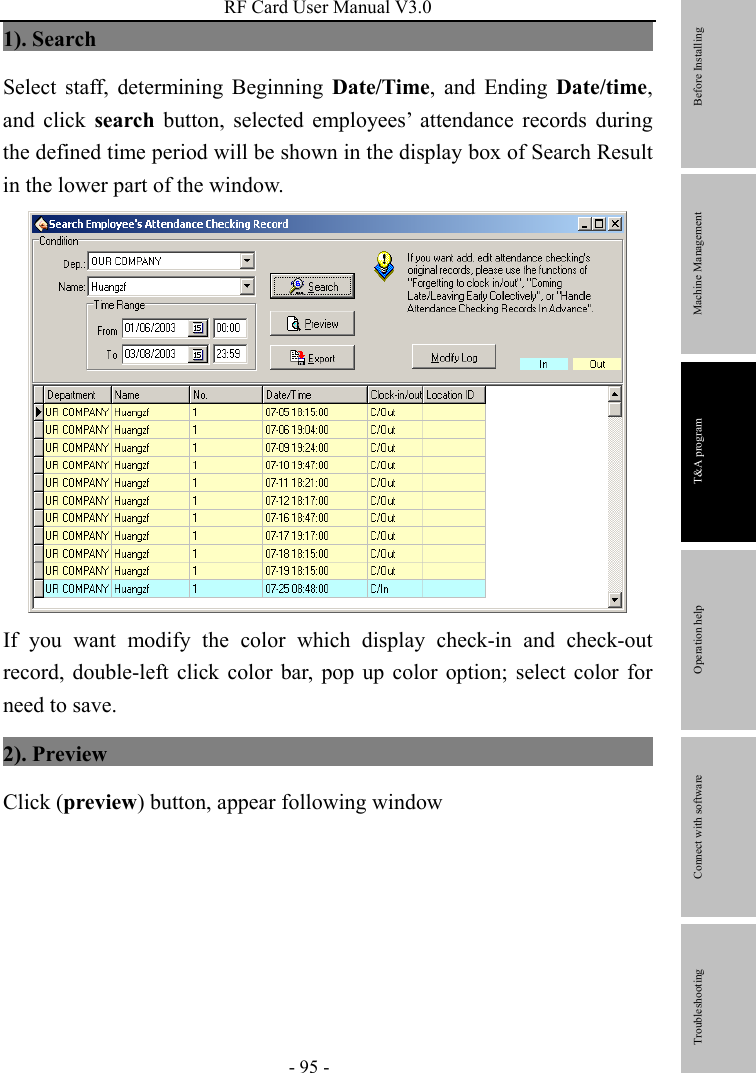
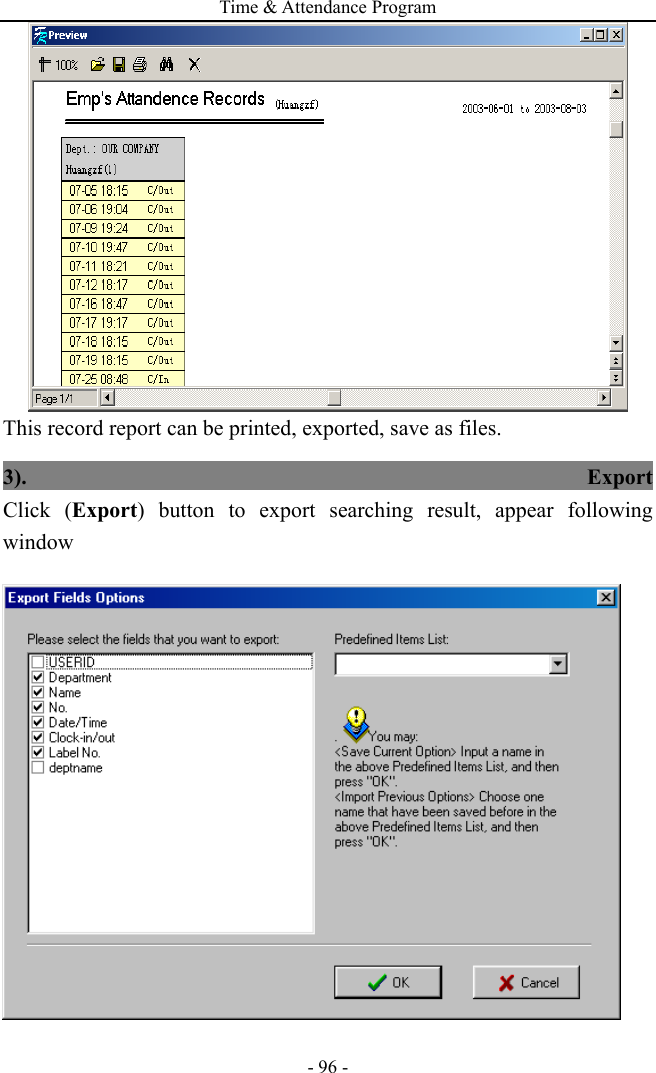
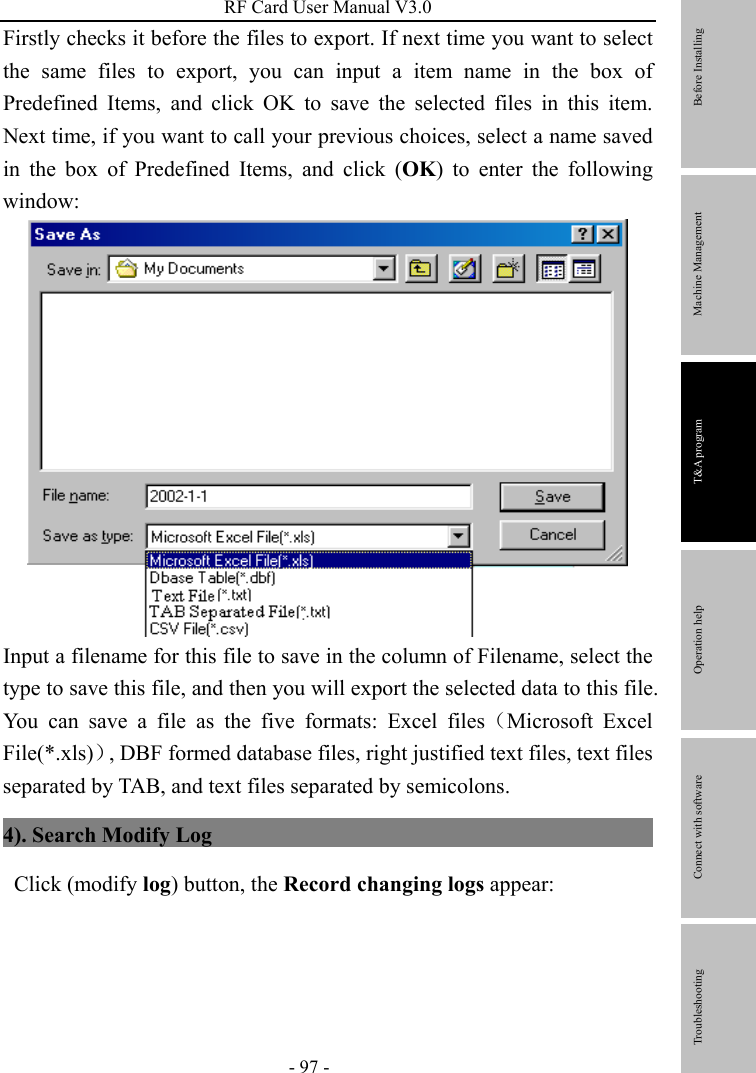
ZKSOFTWARE U600P RFID T&A; system User Manual User mannual
ZKSOFTWARE INC. RFID T&A; system User mannual
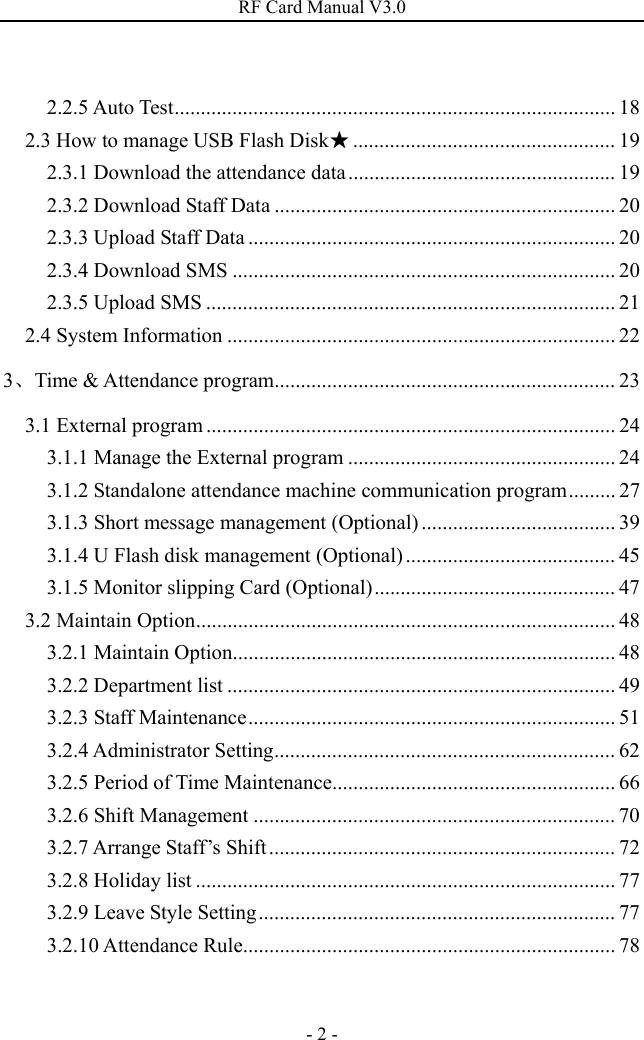
UserManual.wiki
>
ZKSOFTWARE
>
U600P User Manual
Users Manual
Navigation menu
Upload a User Manual
Namespaces
Wiki Guide
HTML
PDF
Info
Views
User Manual
Discussion / Help
Navigation
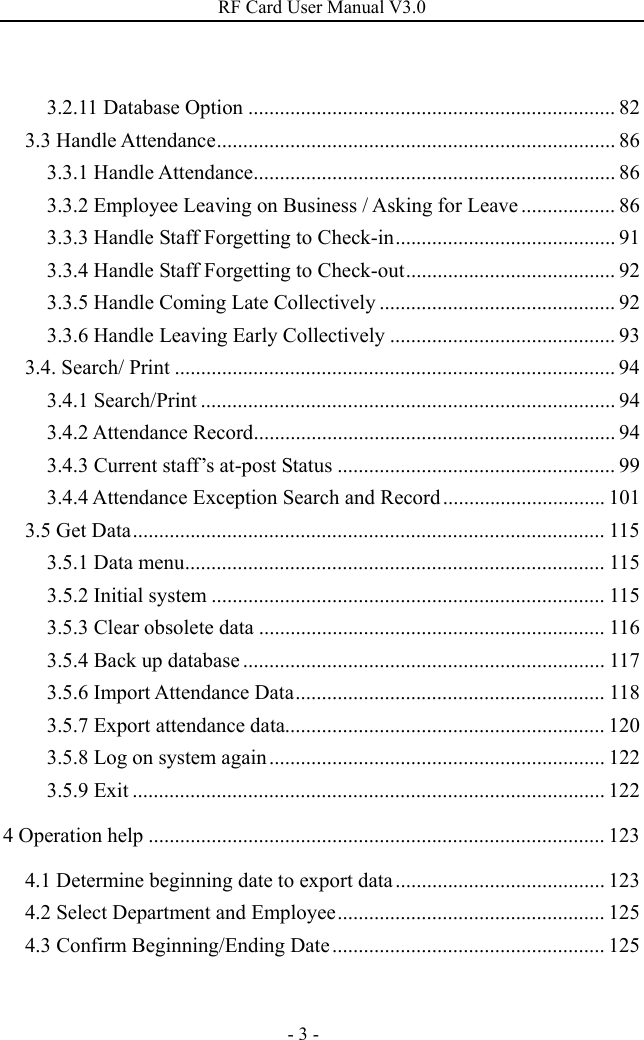

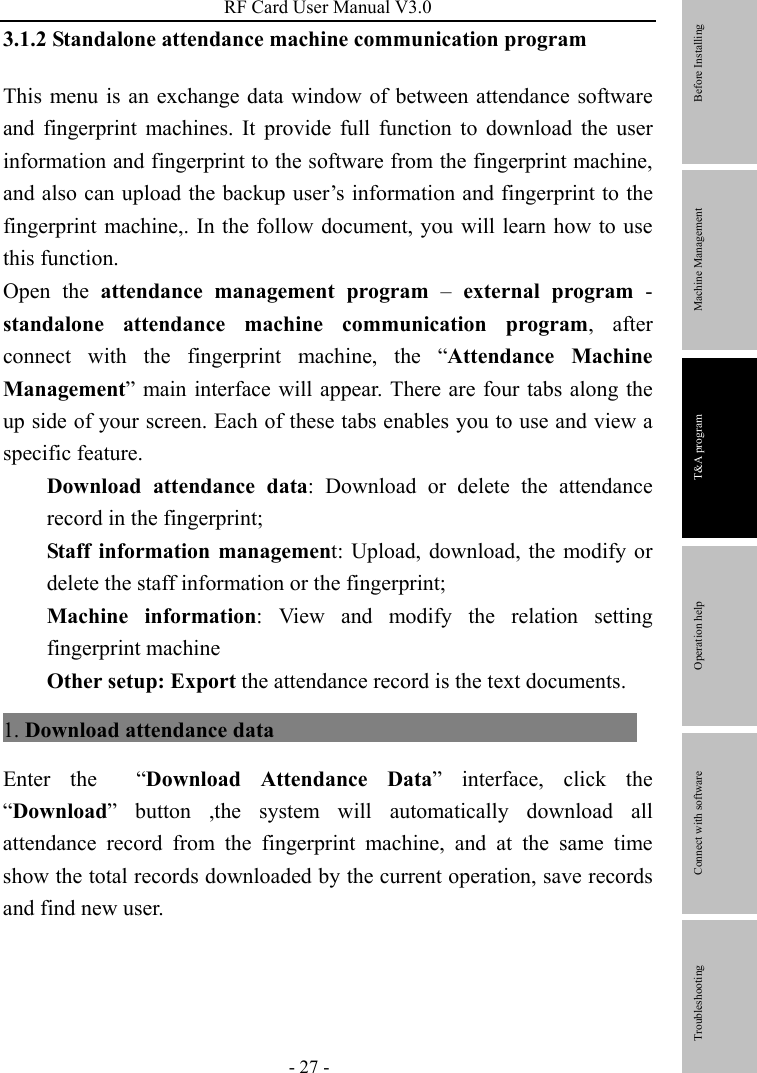
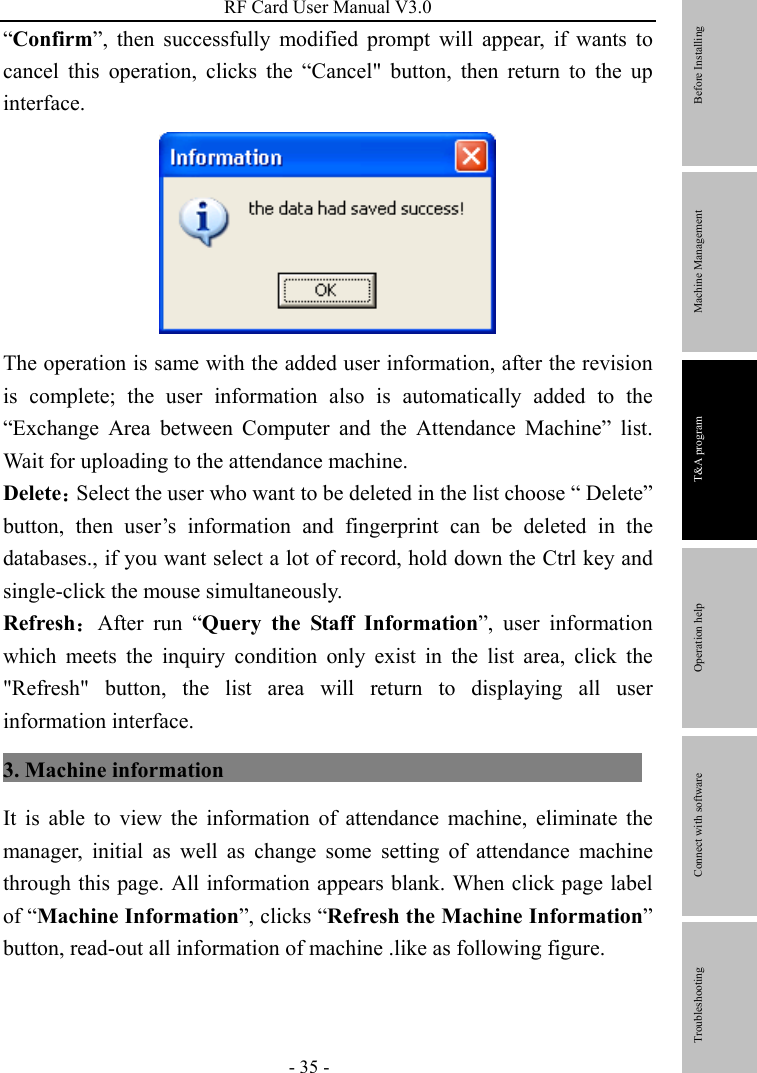
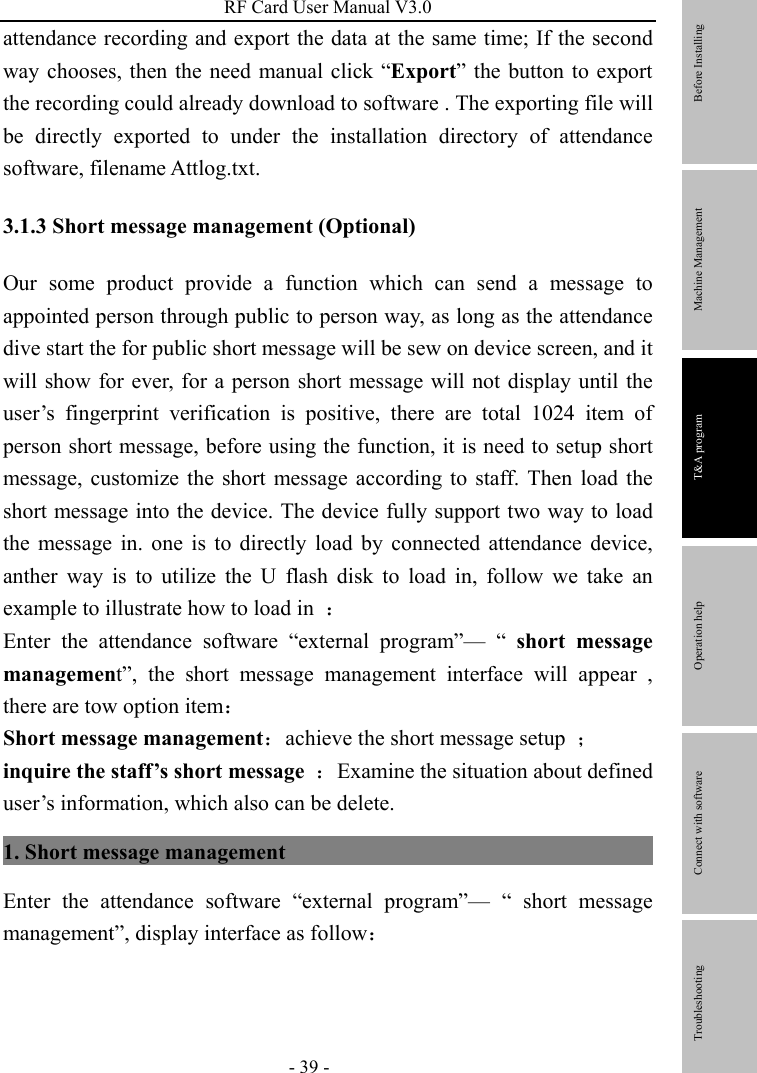
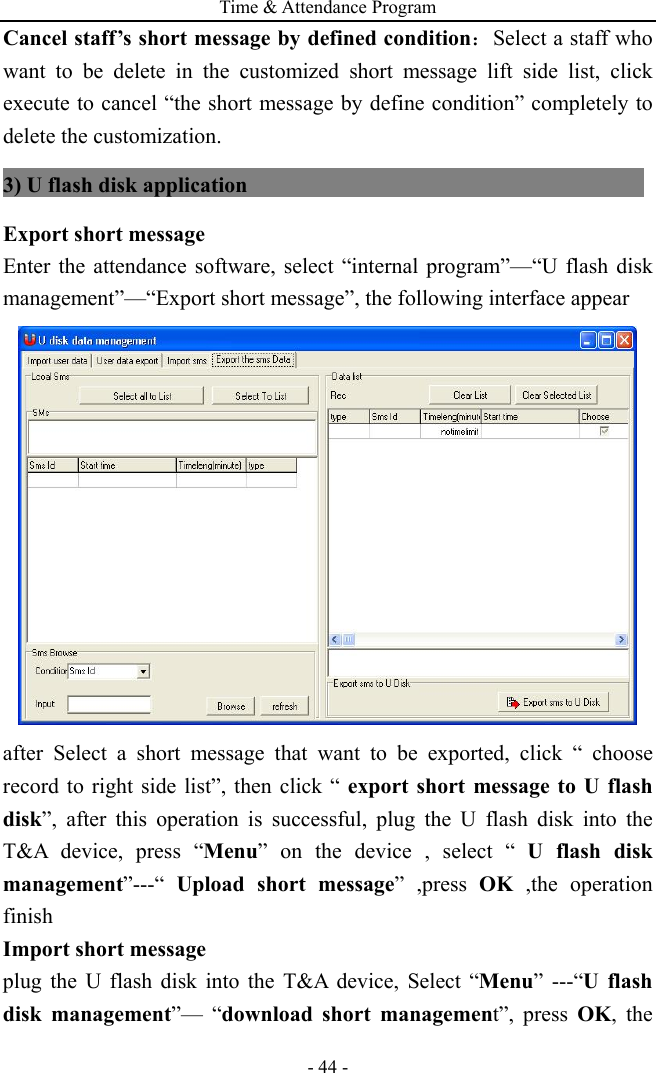
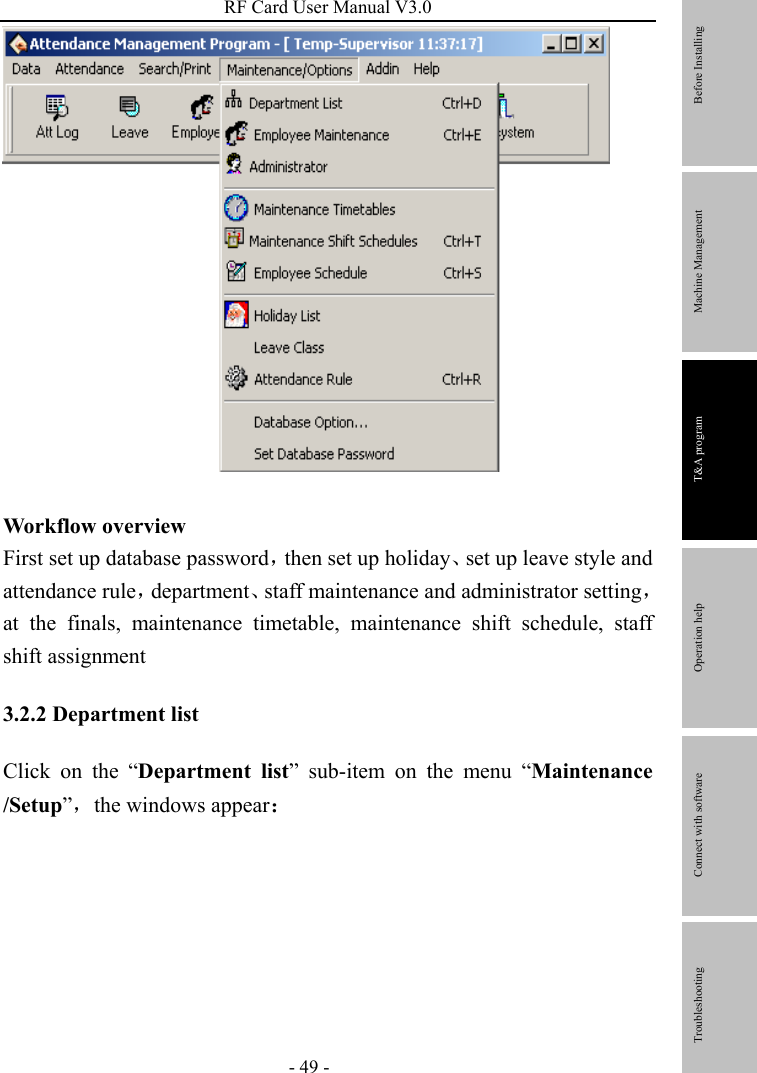
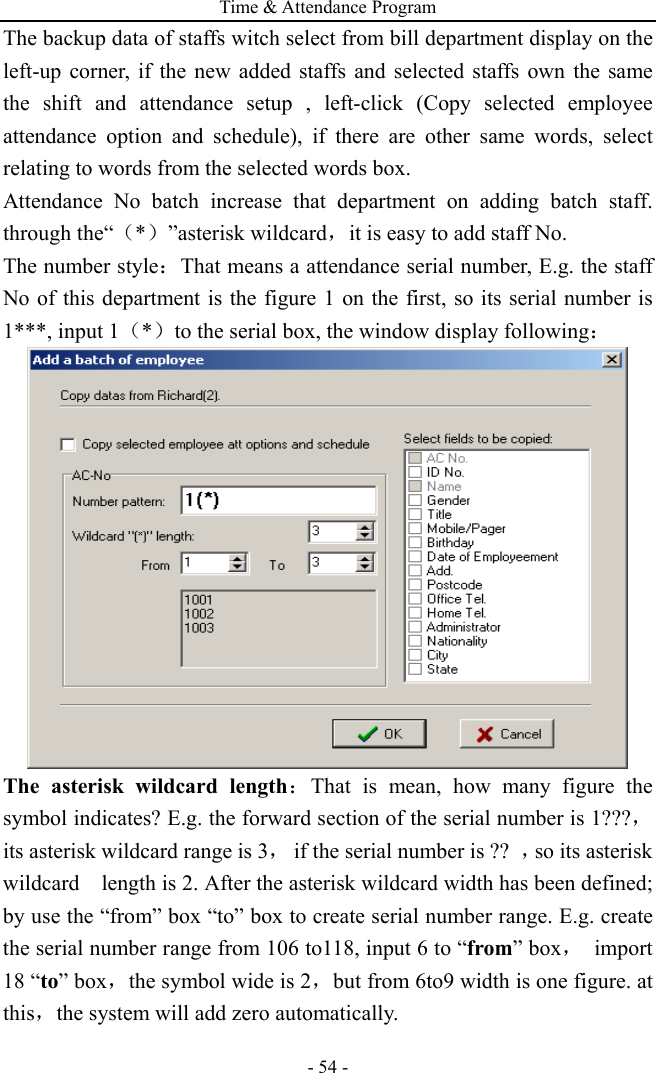
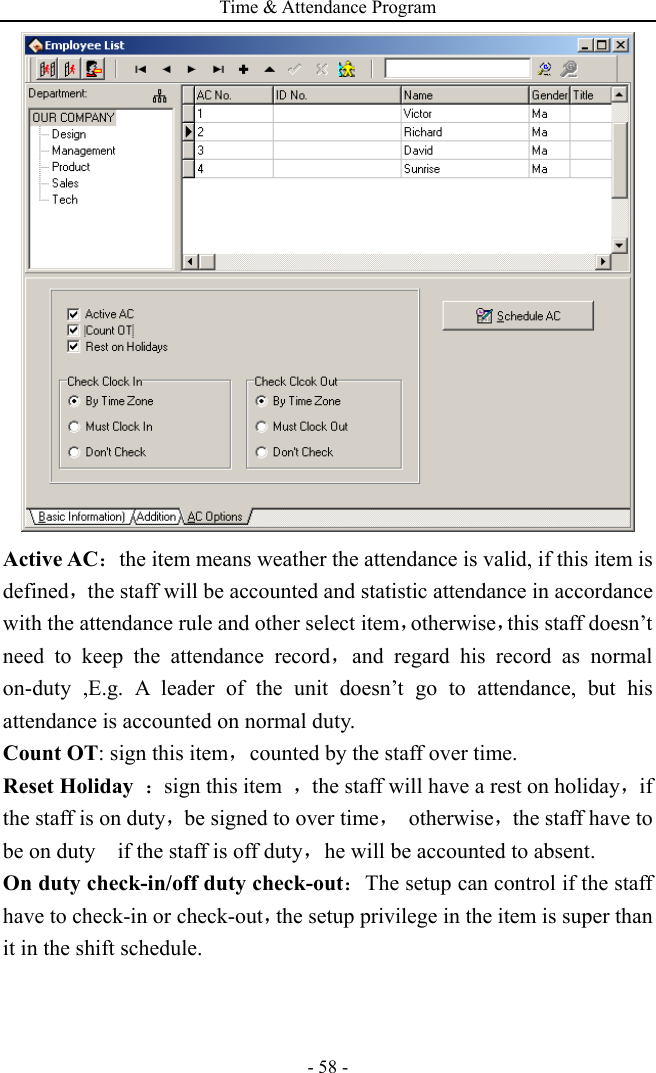
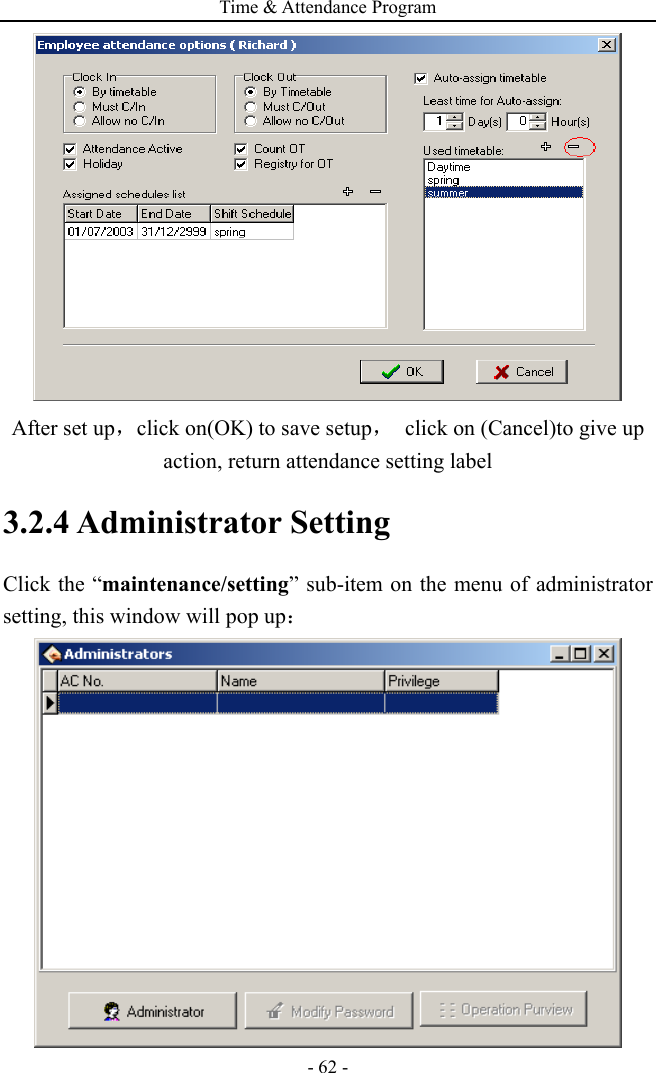
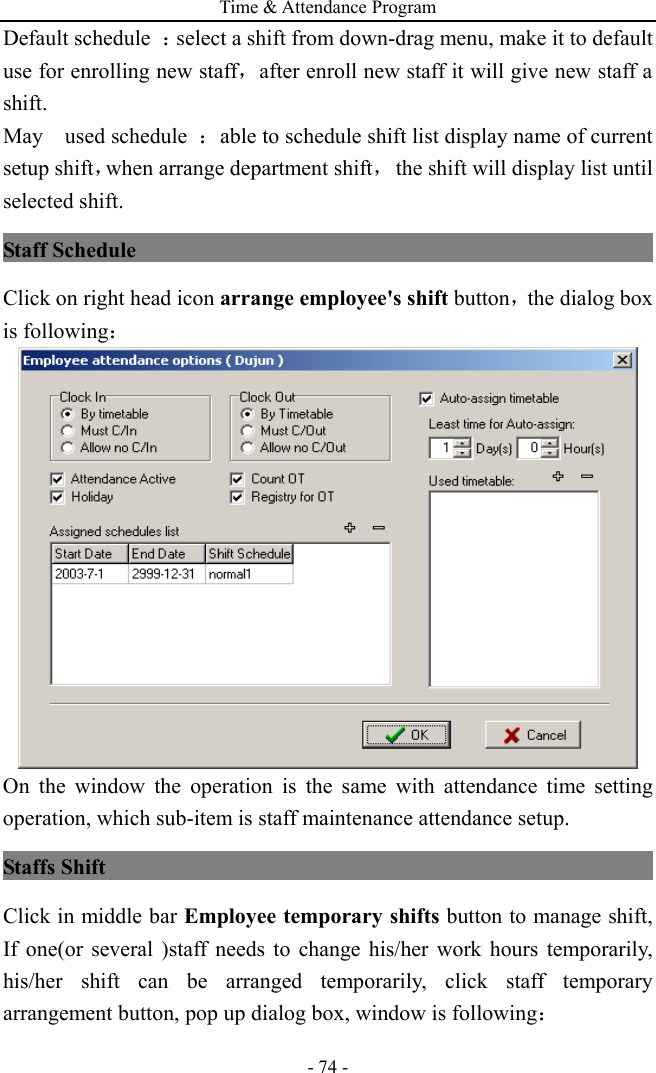
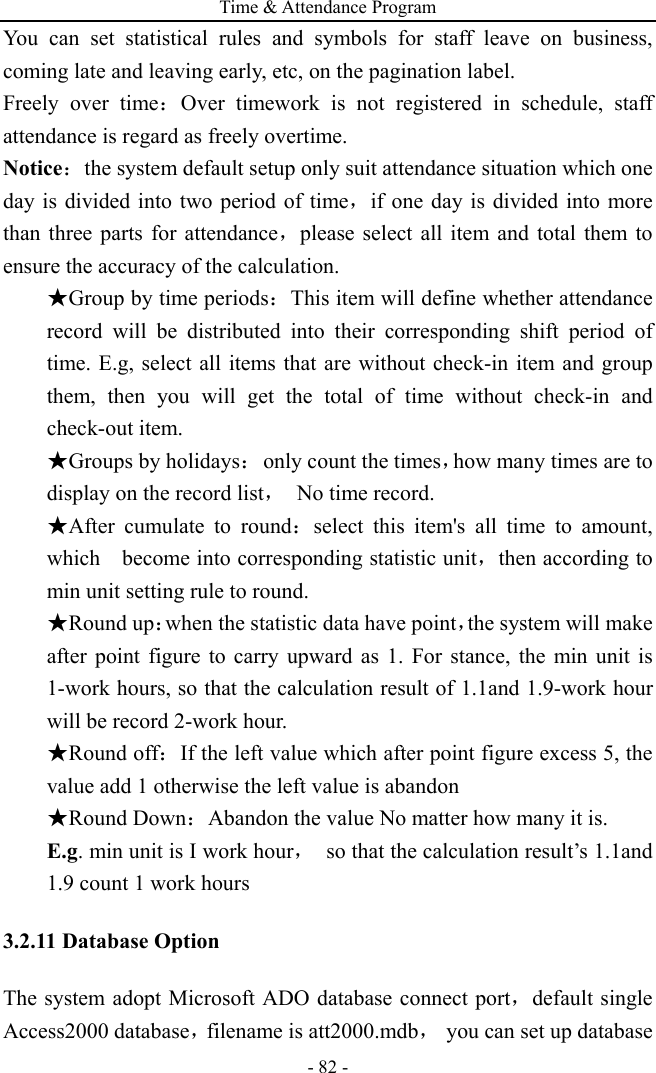
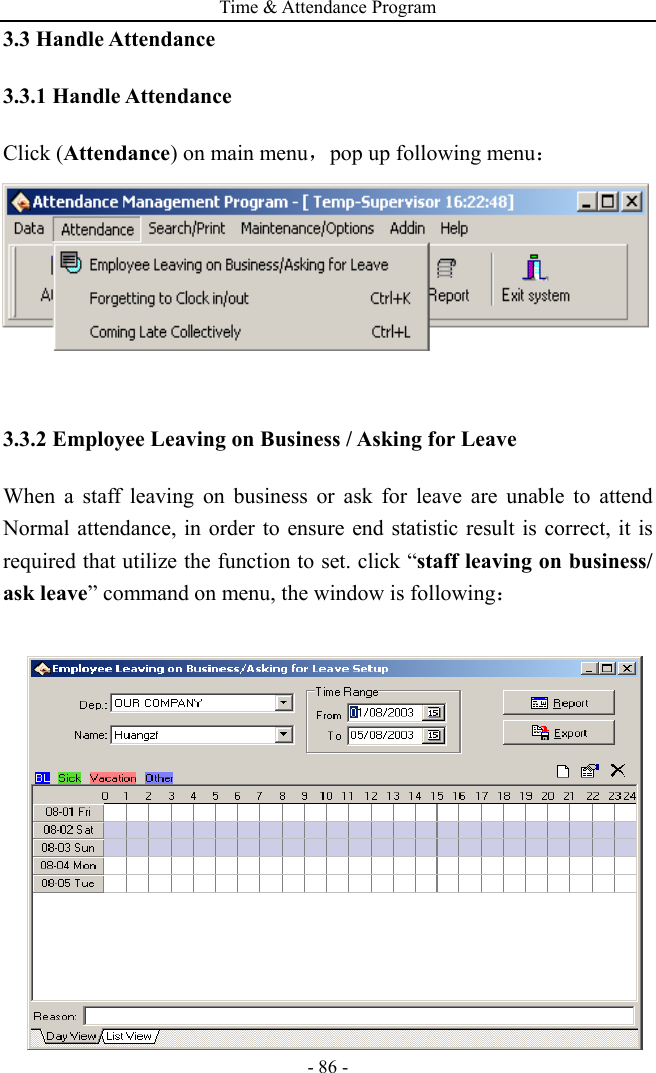
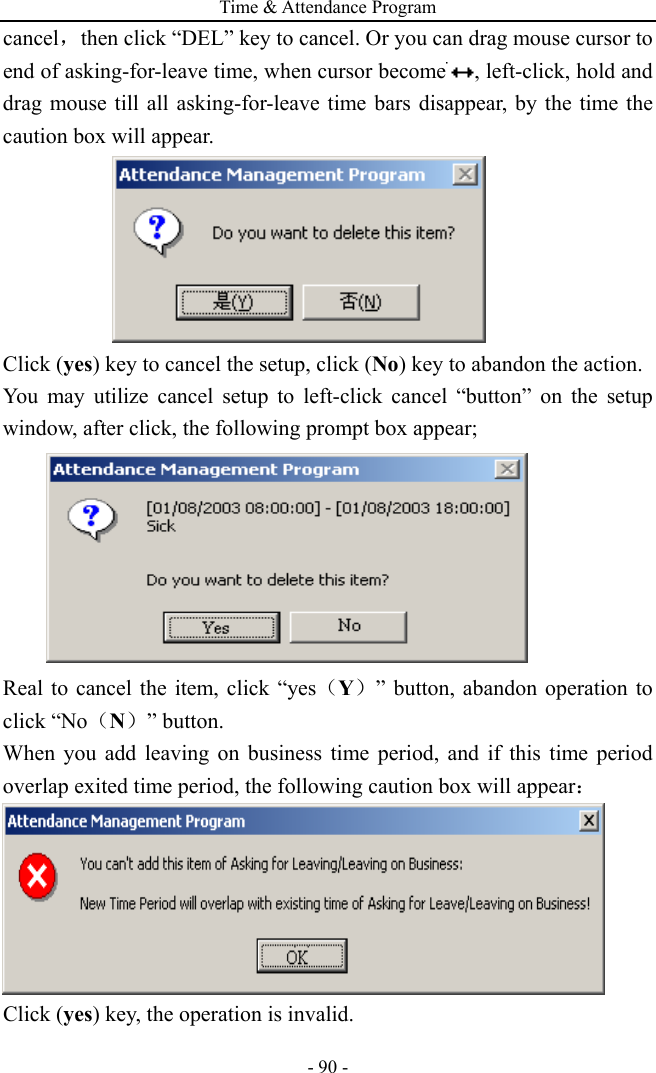
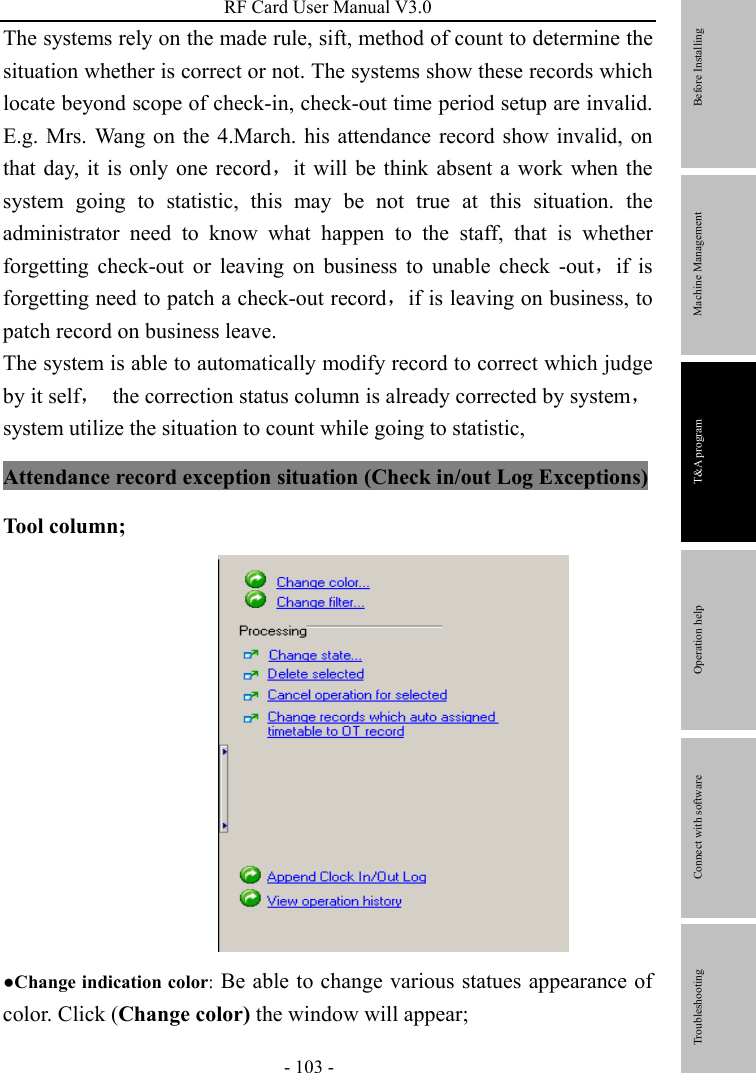
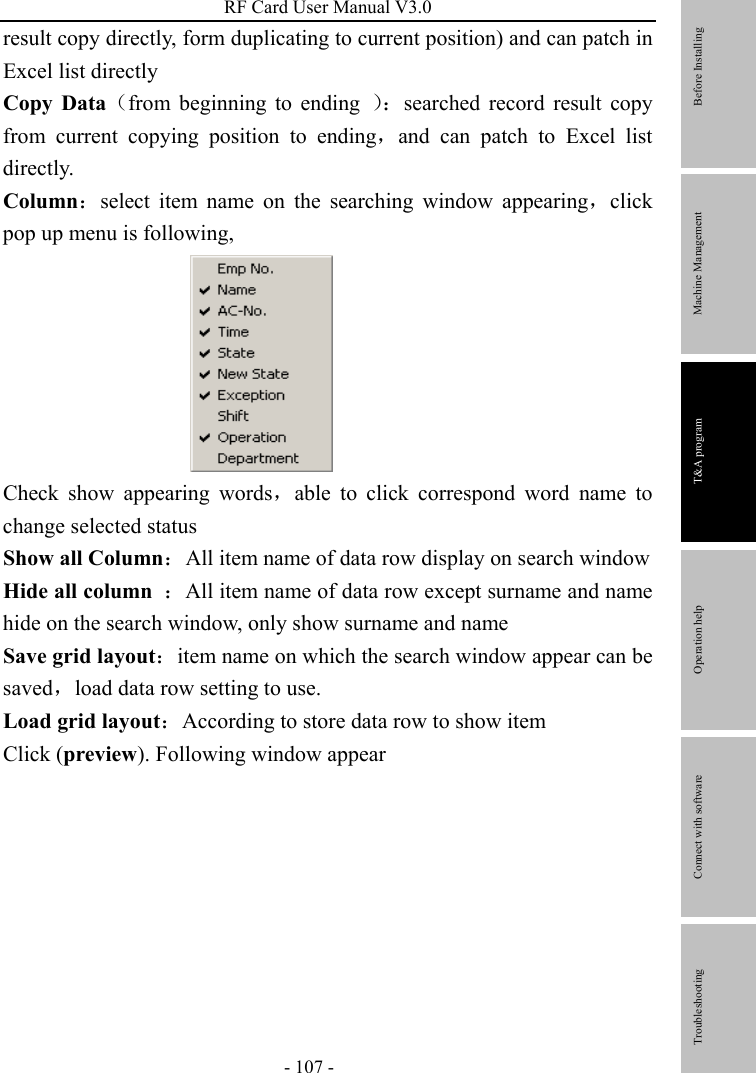
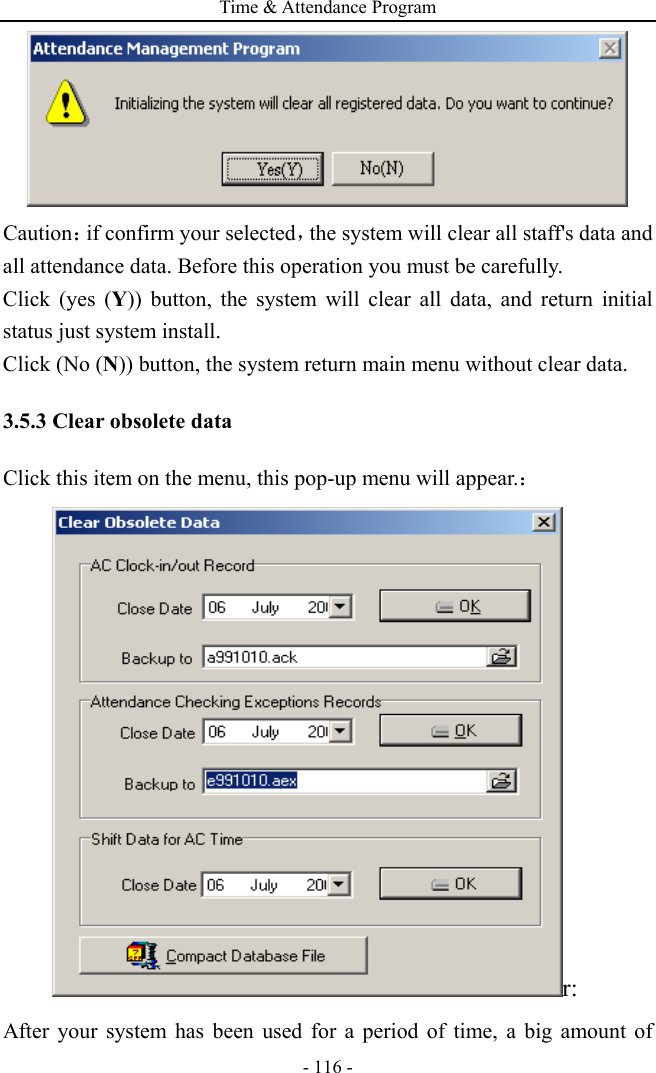
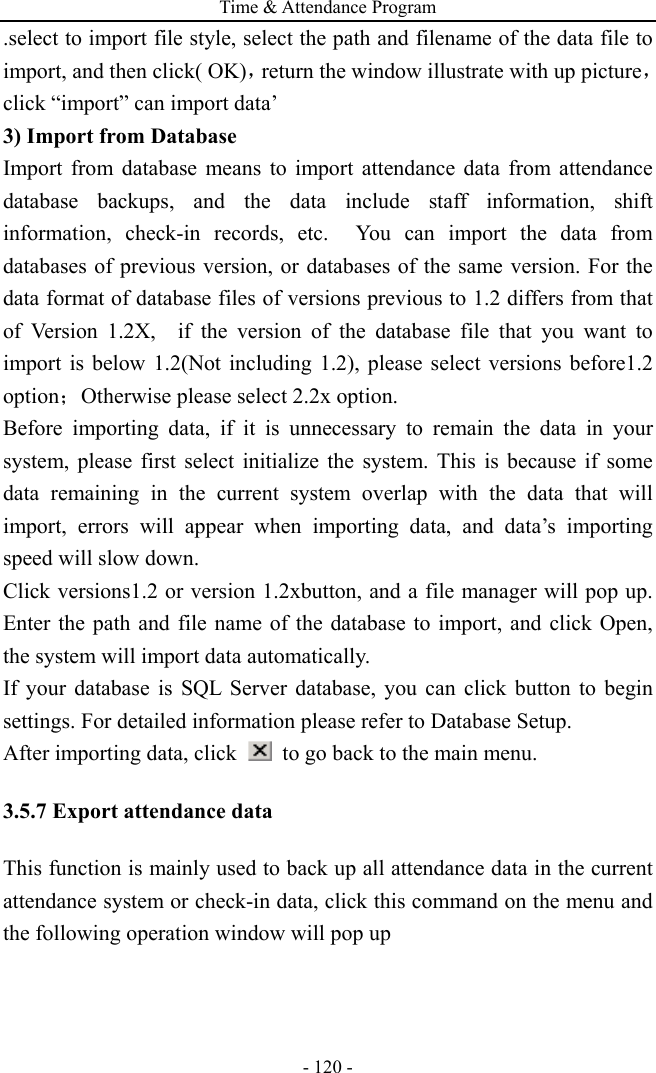
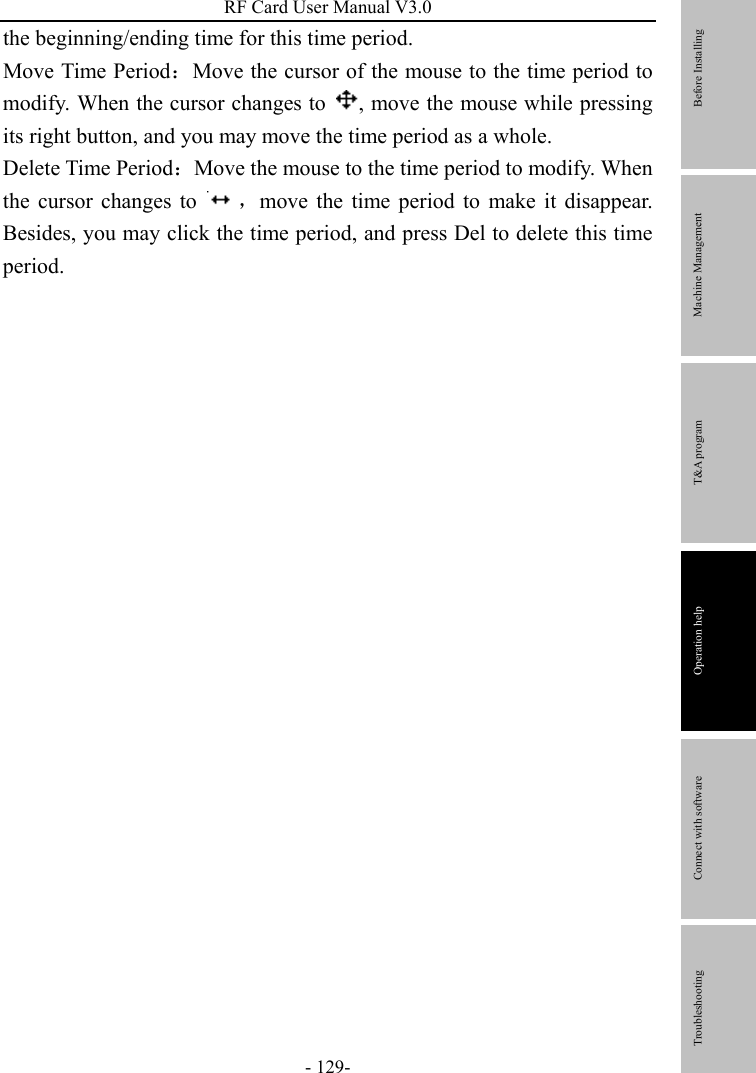
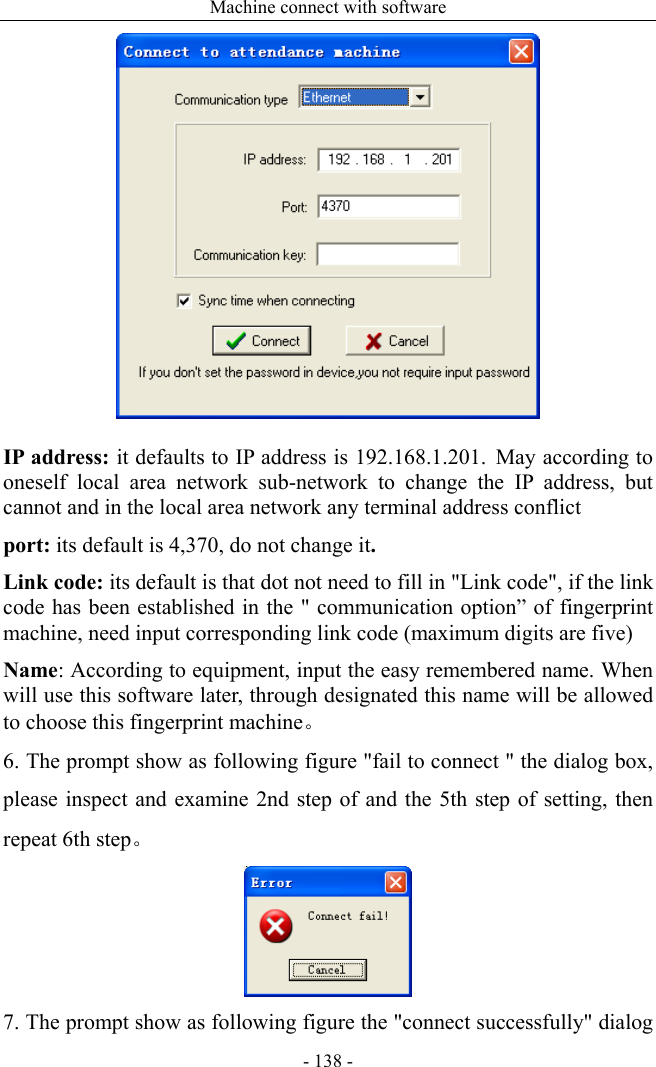
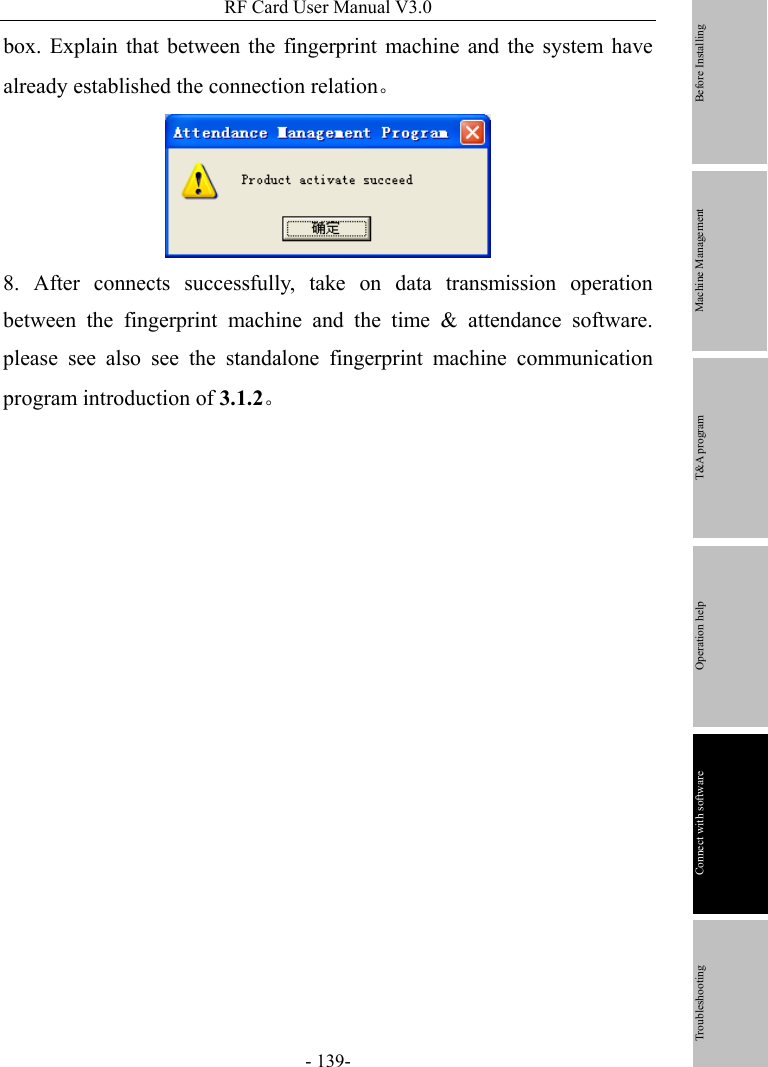
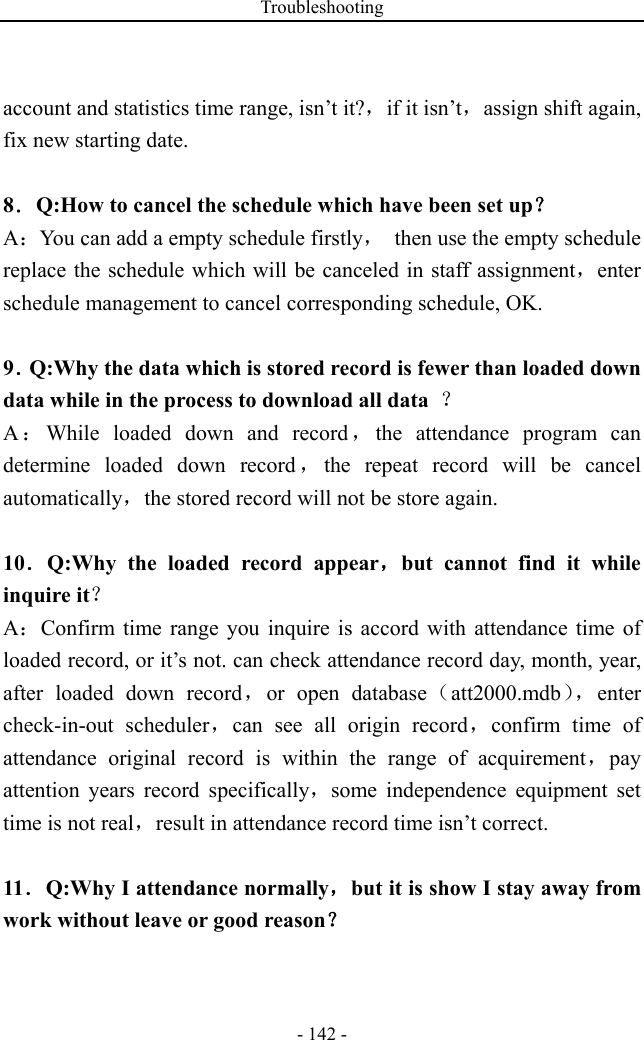
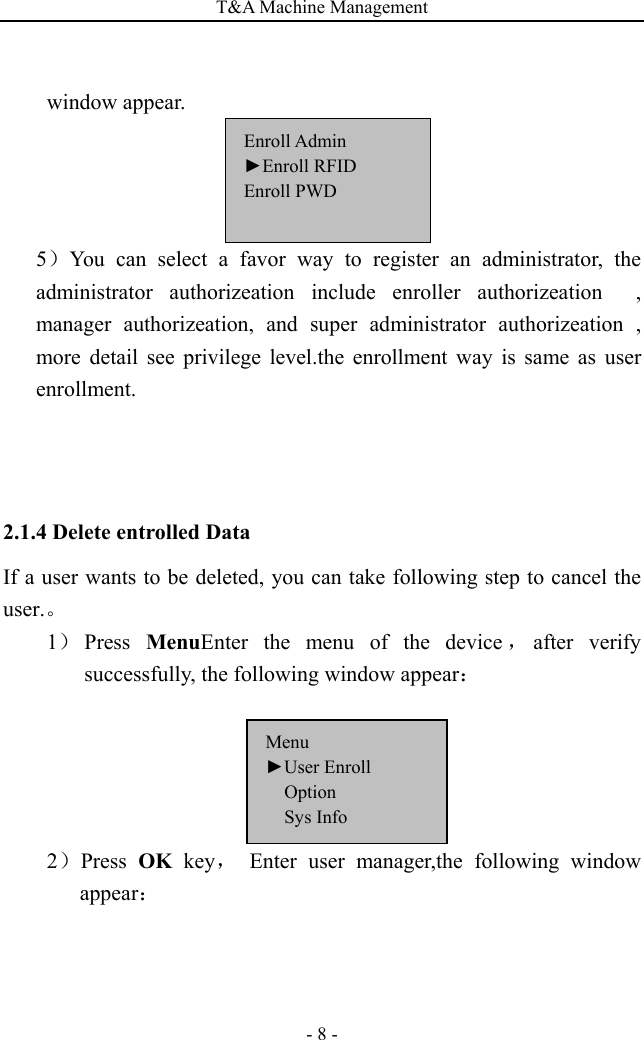
![T&A Machine Management - 2 - 2、T& A Machine Management 2.1 Enrollment and Verifying Procedure 2.1.1 User Enrollment If there is on enroller in the machine, everyone is allowed to enroll user, if a manager already has registered in the machine, not until pass manager verification you don’t enroll new user. There are two way to enroll user by the RF card and Password. Start to enroll user, if the manager has been registered in the machine, must verify the manager status firstly, --- and press Menu, if the machine prompt the manager has been confirmed, then show the Card or input password to verify. Note: if there is no manager, it is no necessary to do this. 1) Enroll ID 1)Press the MENU button to enter the User enroll,Access Reg RFID, press [OK], the following appears: 2)Press [OK], the following appears: RFID New Enroll? ESC OK New enroll Enroll No: 00010 ESC OK](https://usermanual.wiki/ZKSOFTWARE/U600P/User-Guide-979732-Page-8.png)
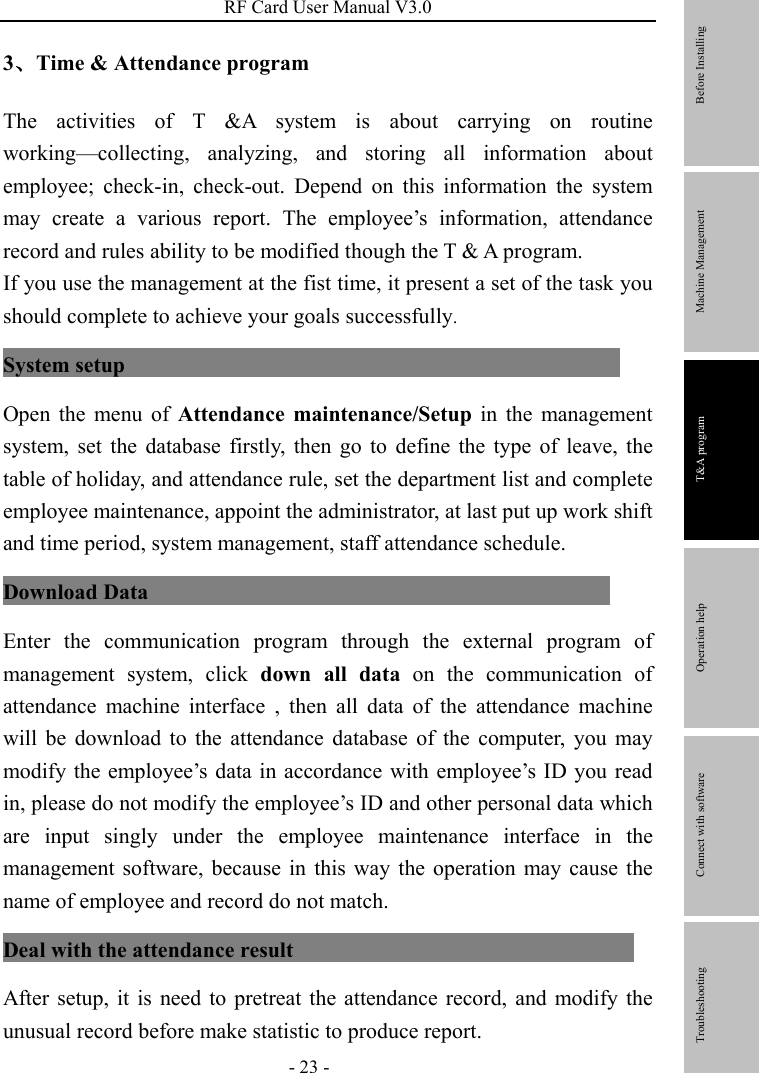
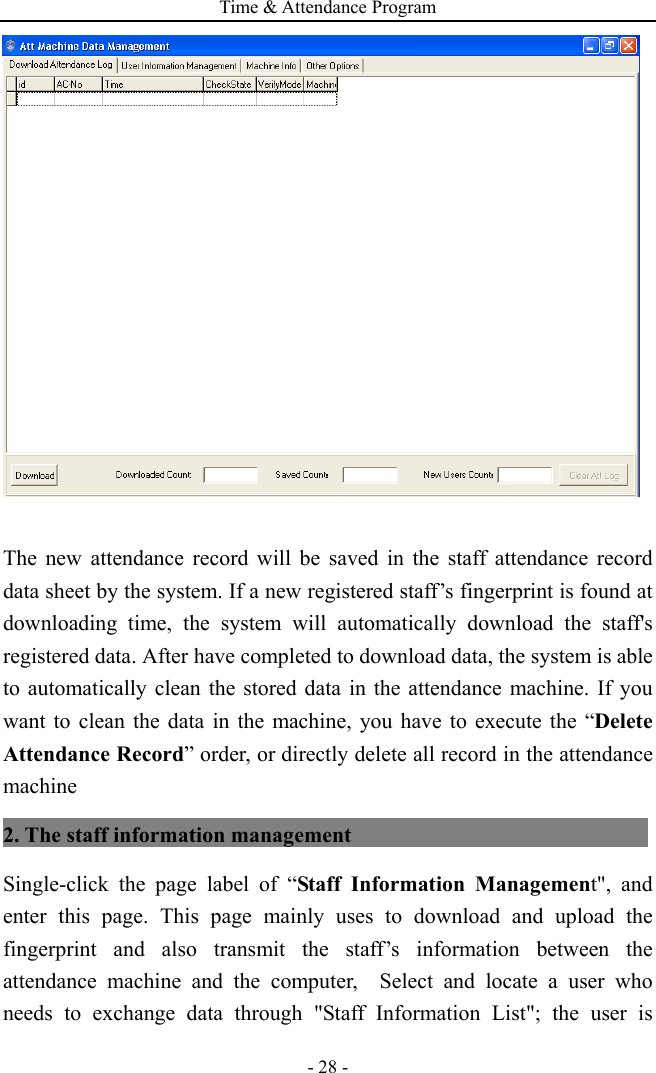
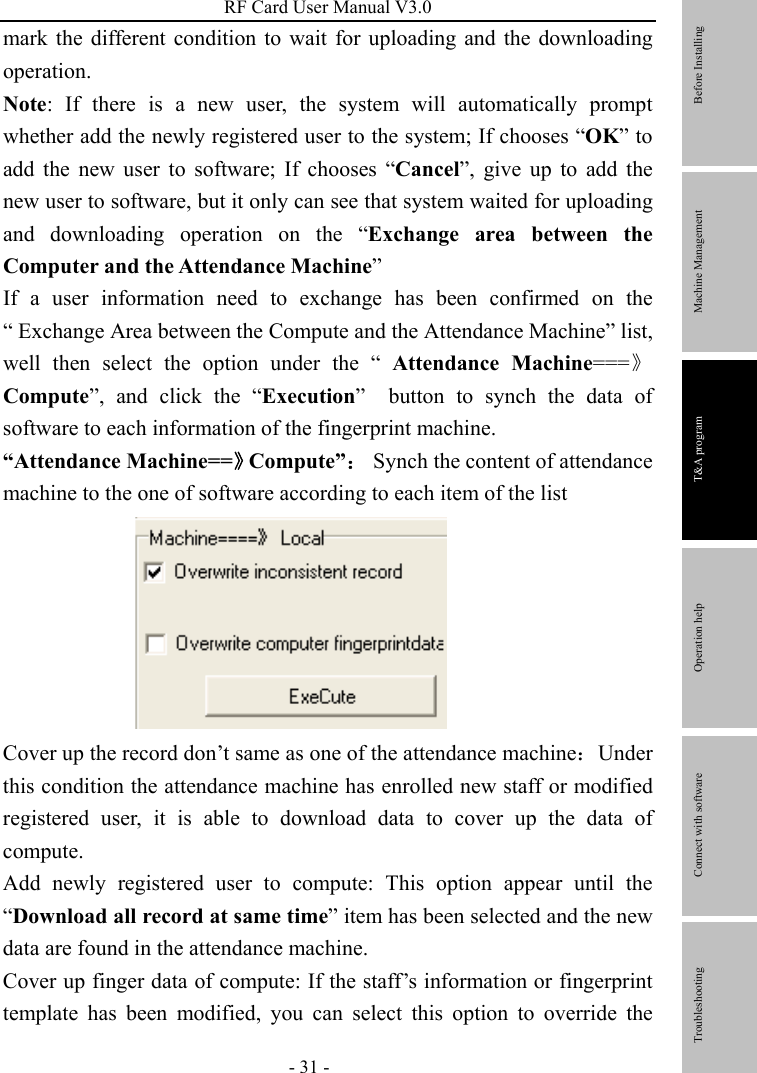
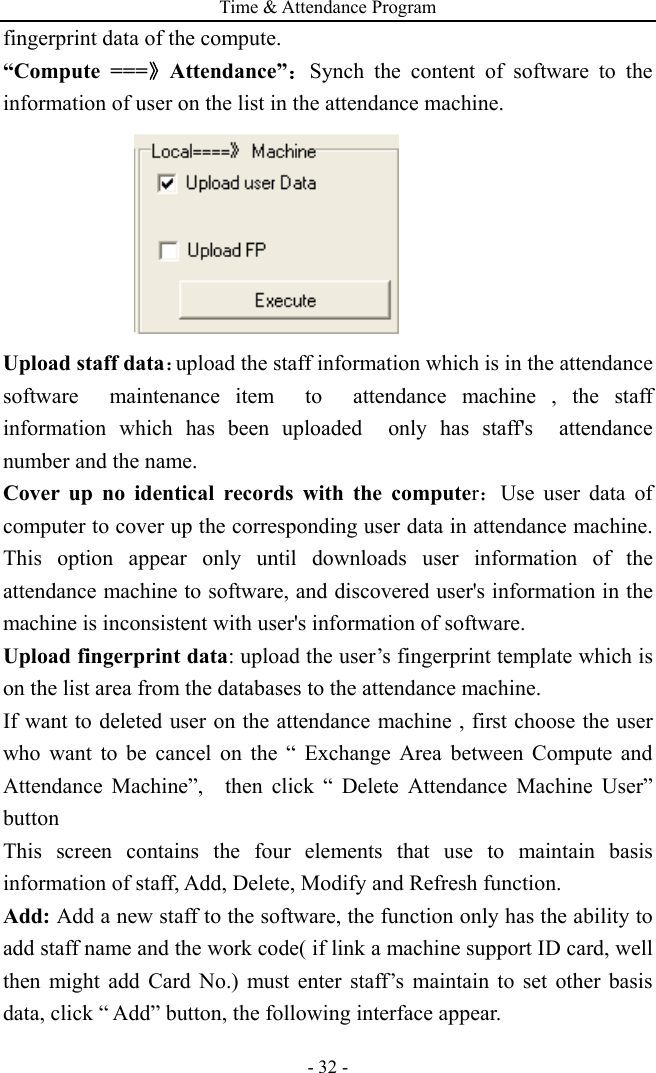
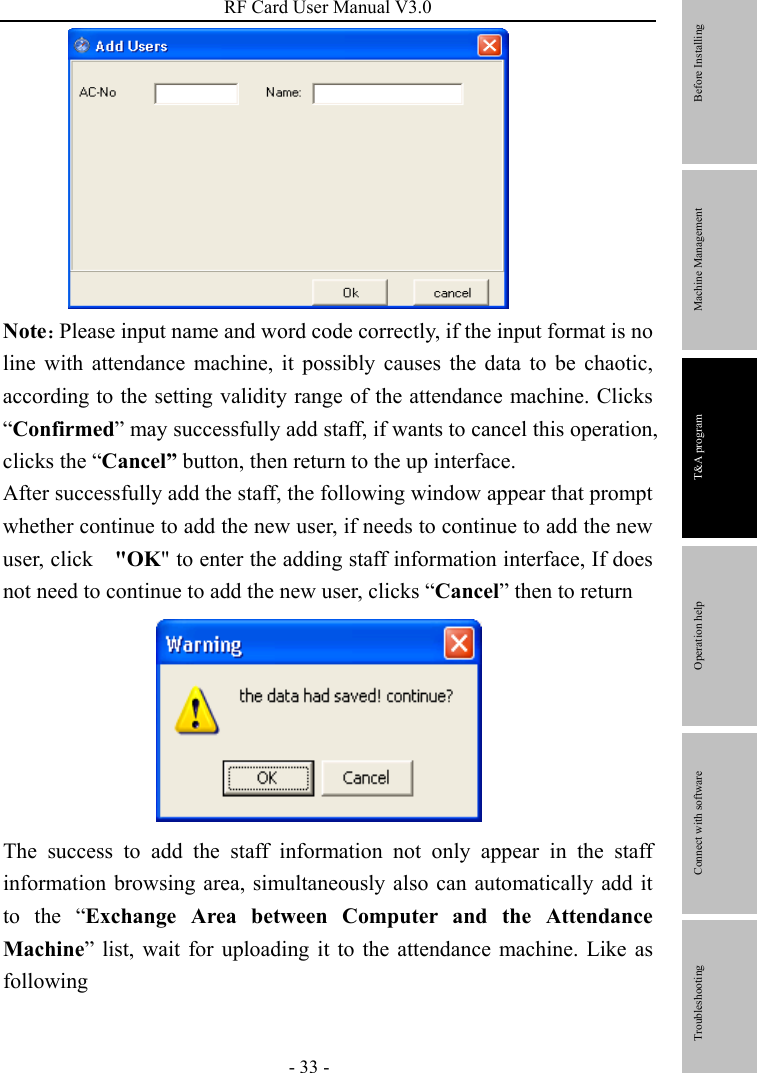
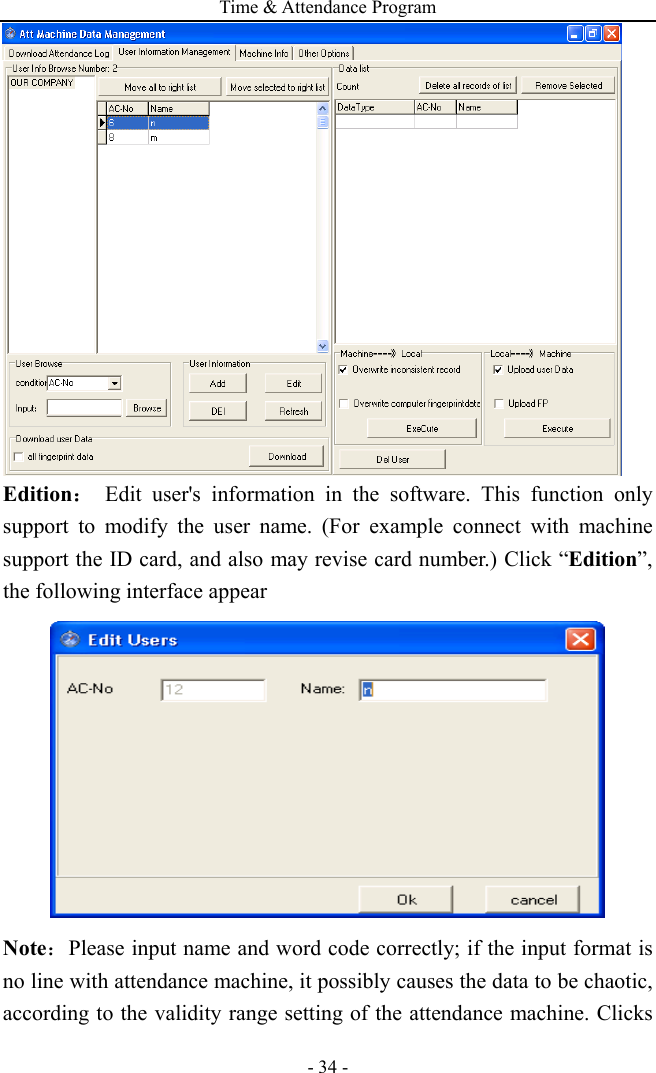
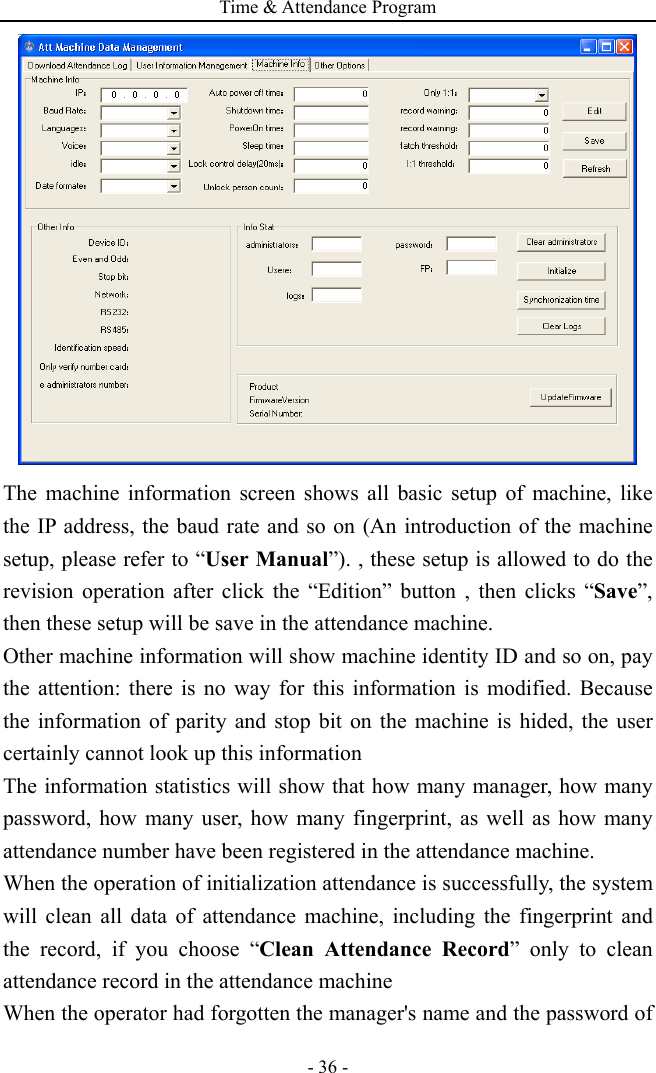
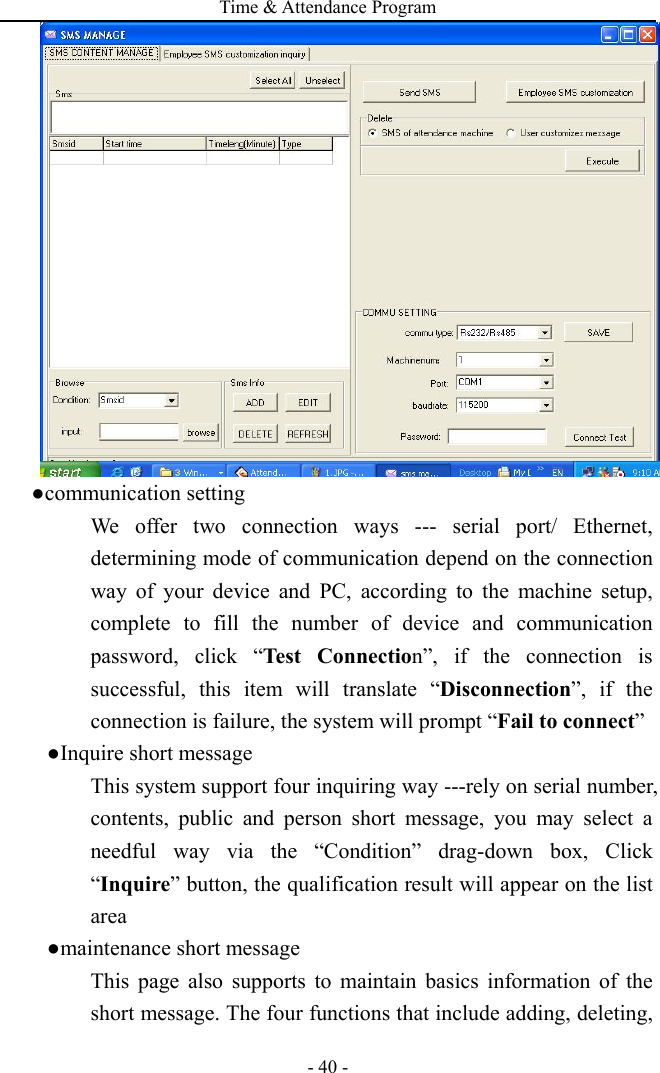
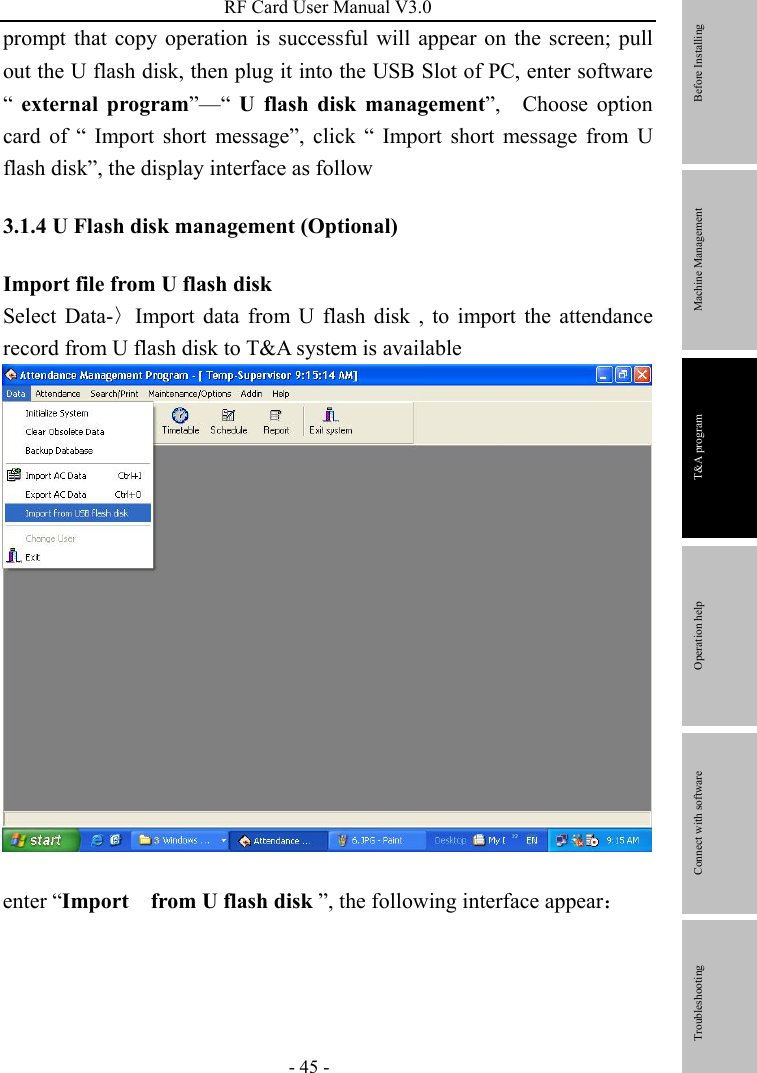
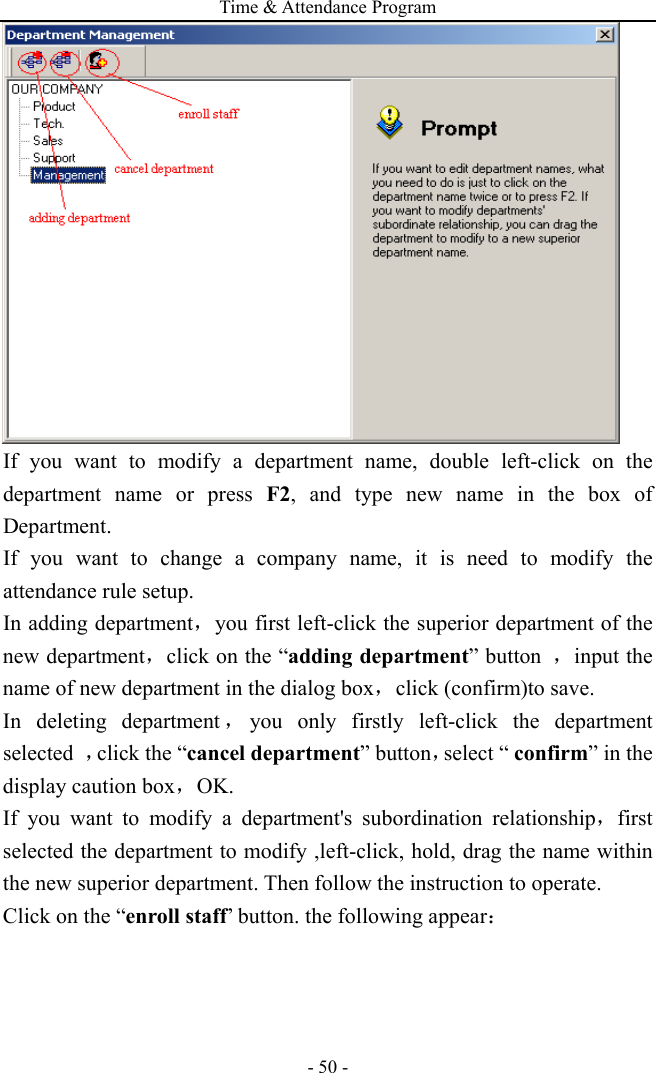
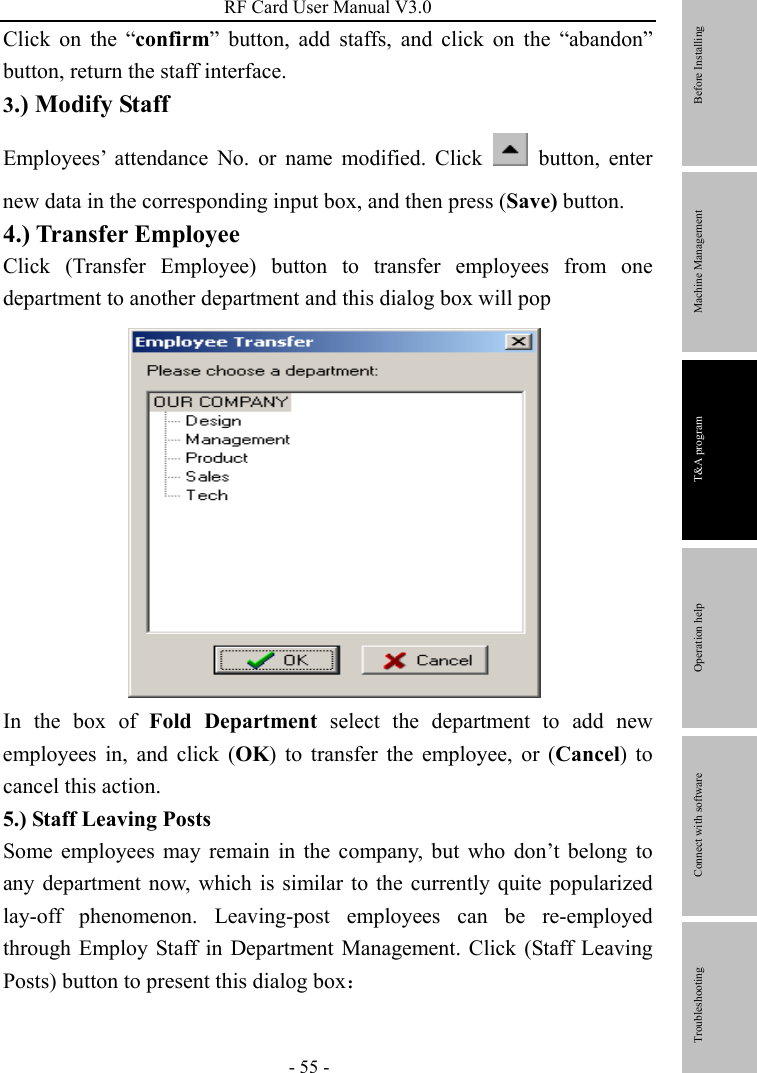
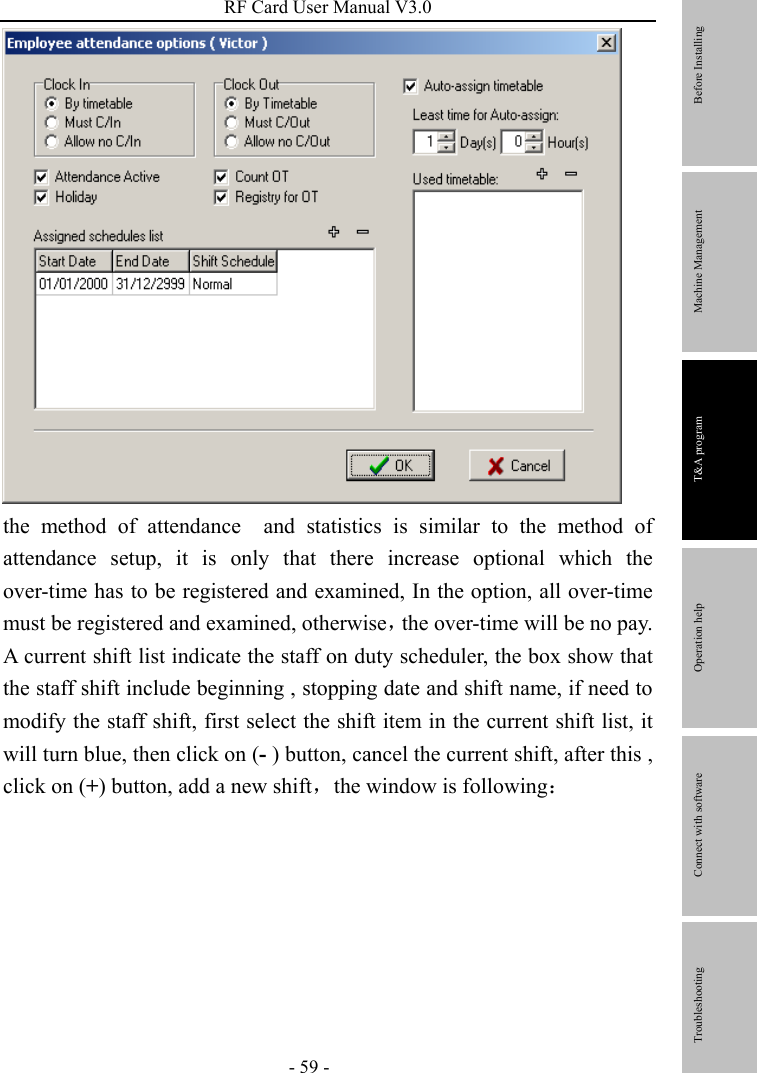
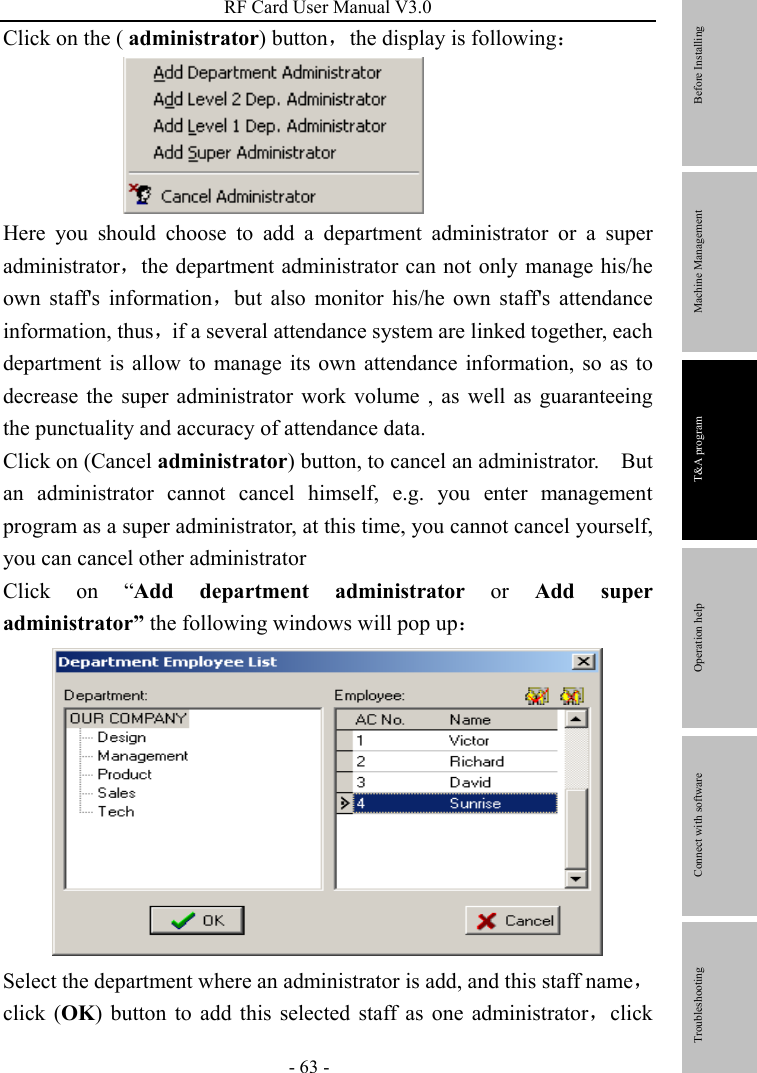
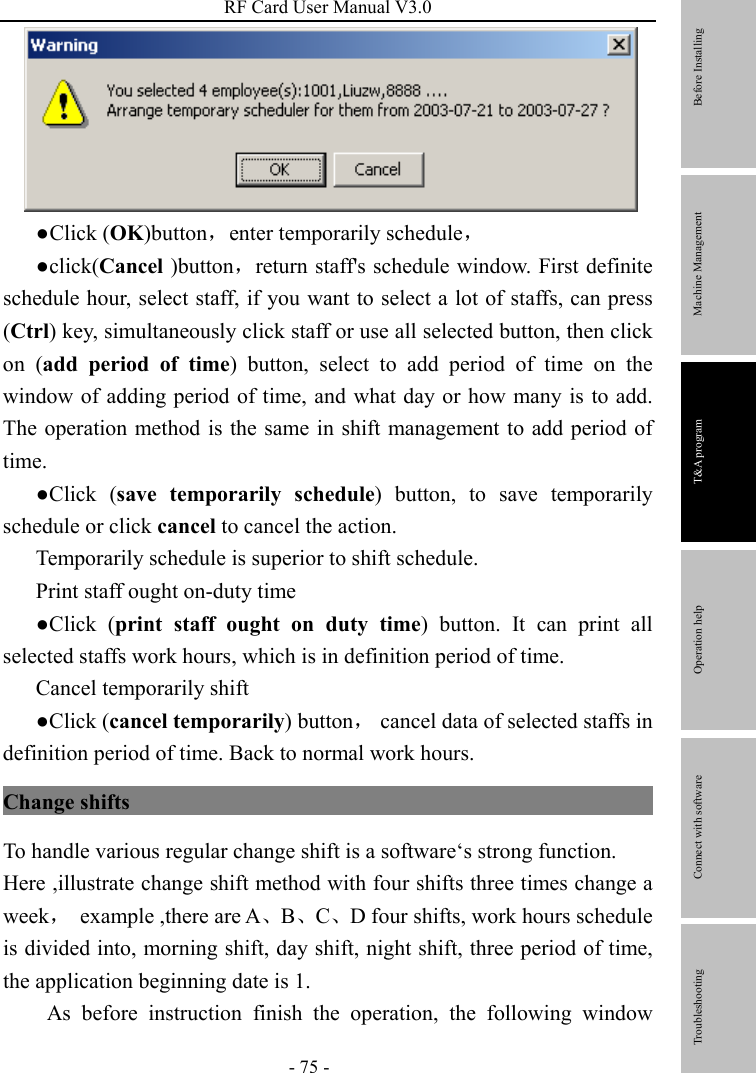
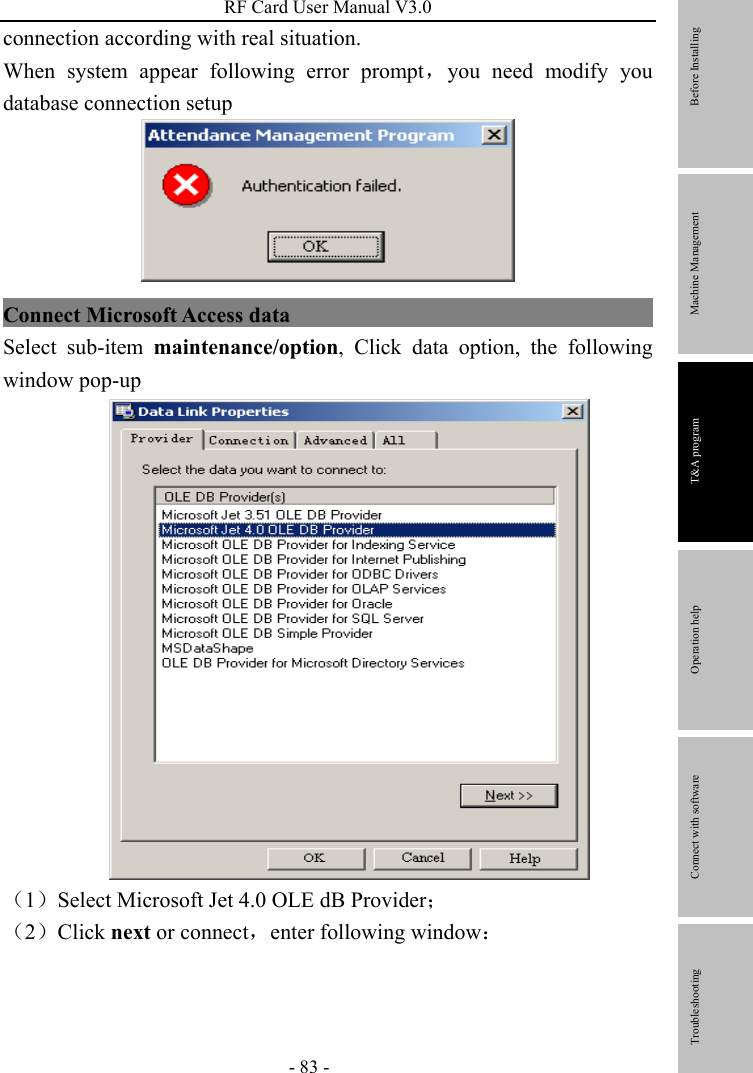
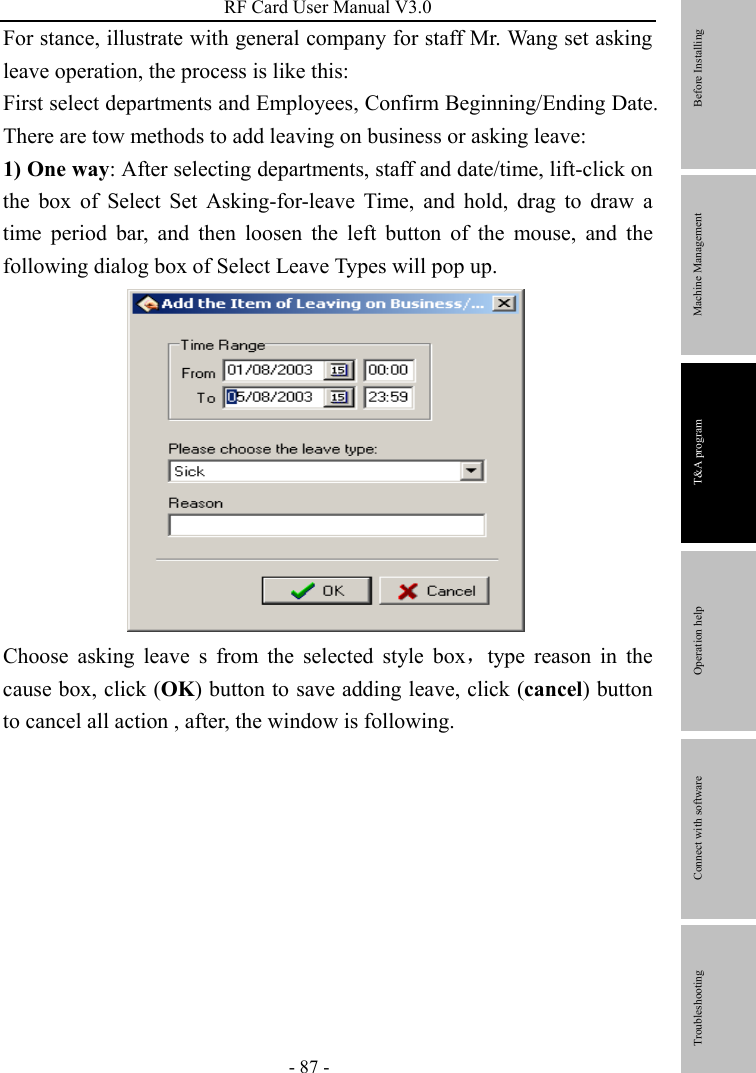
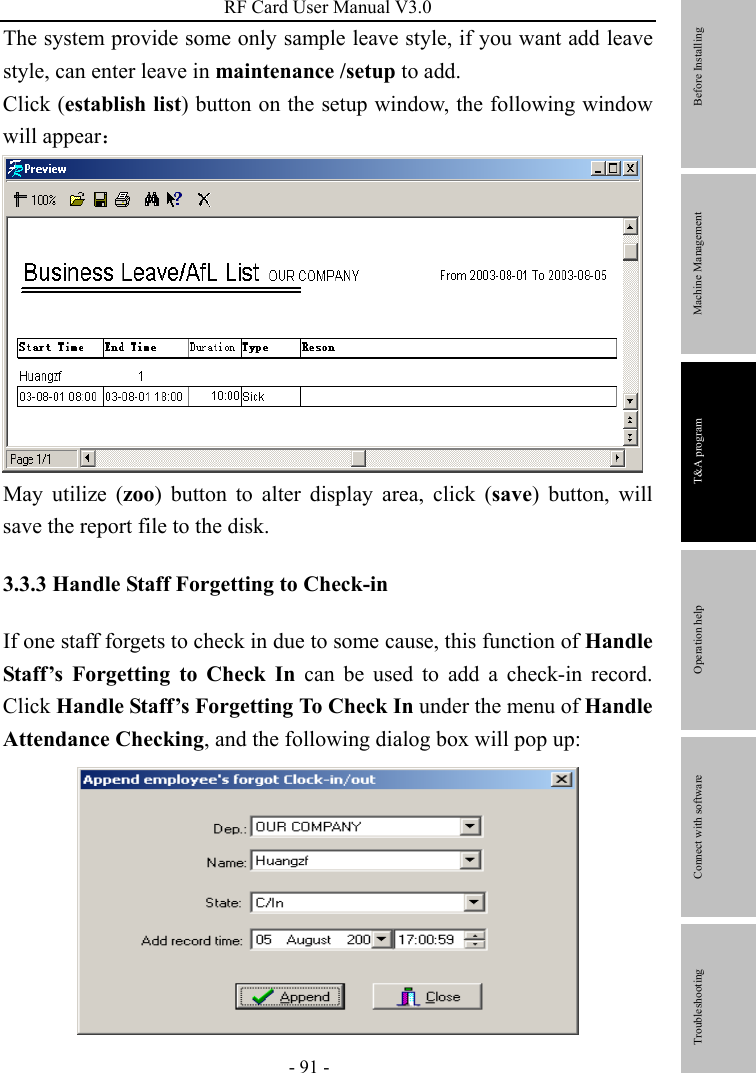
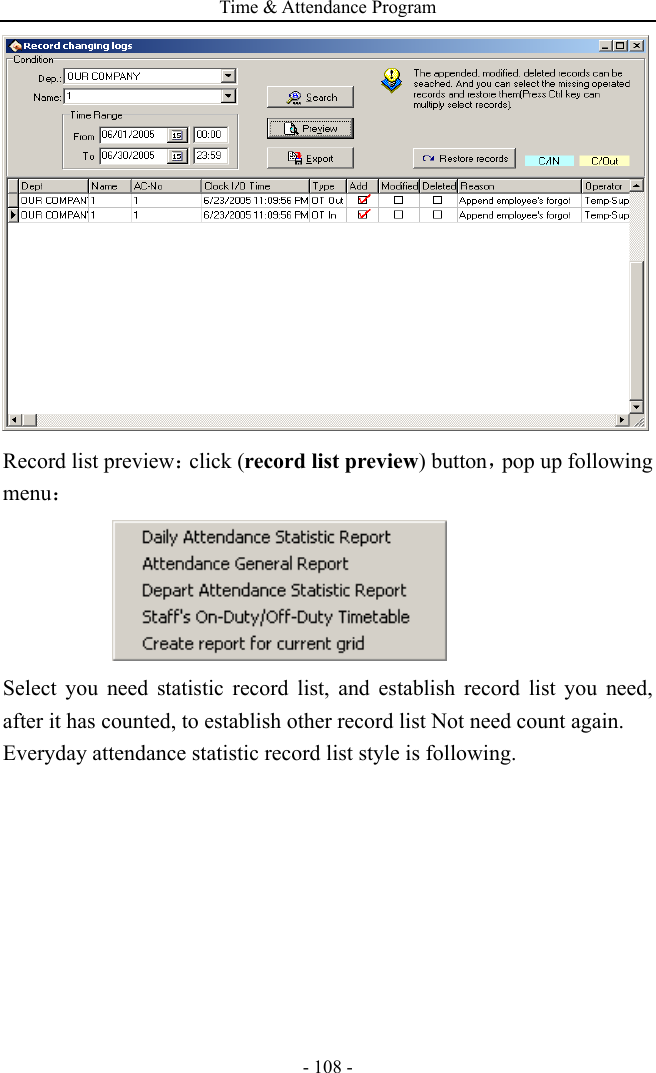
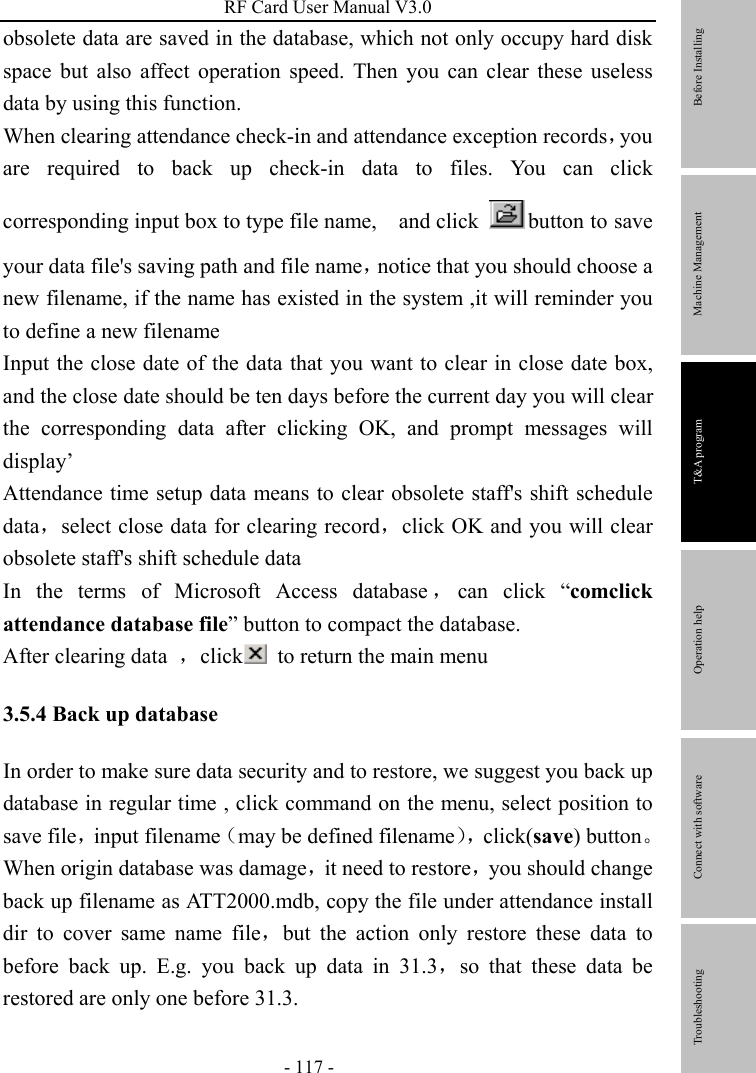
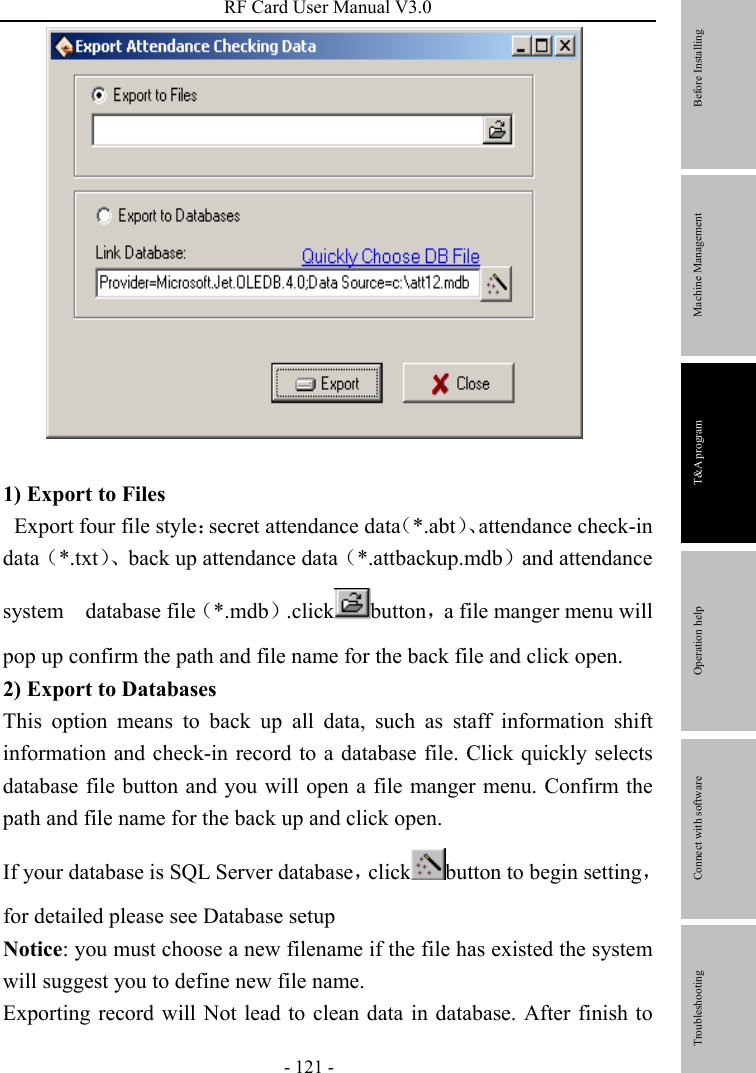
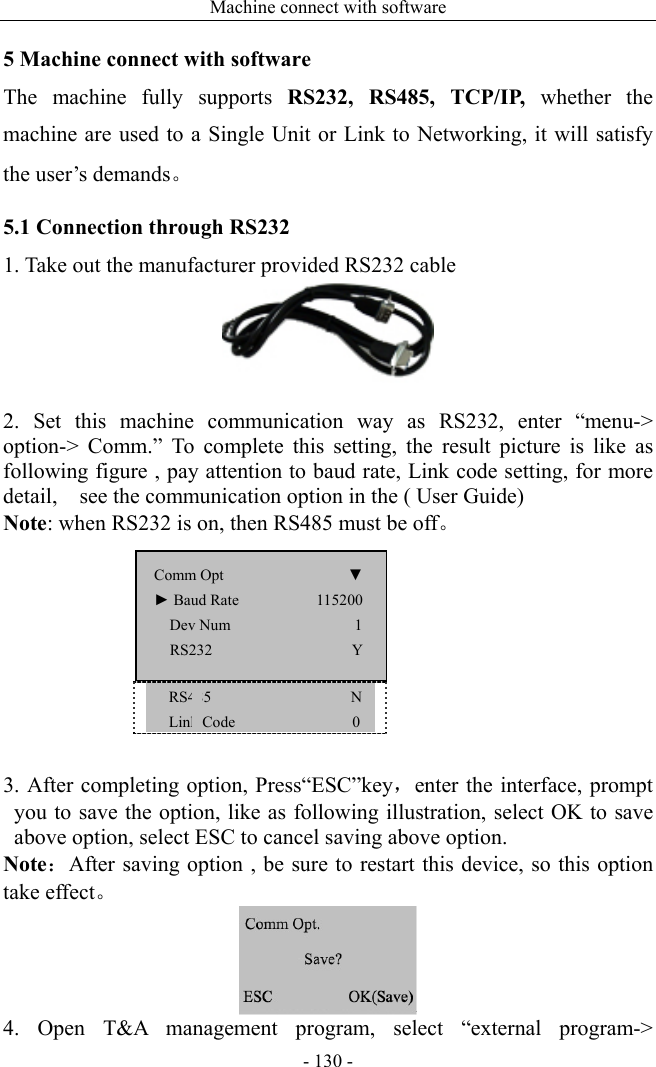
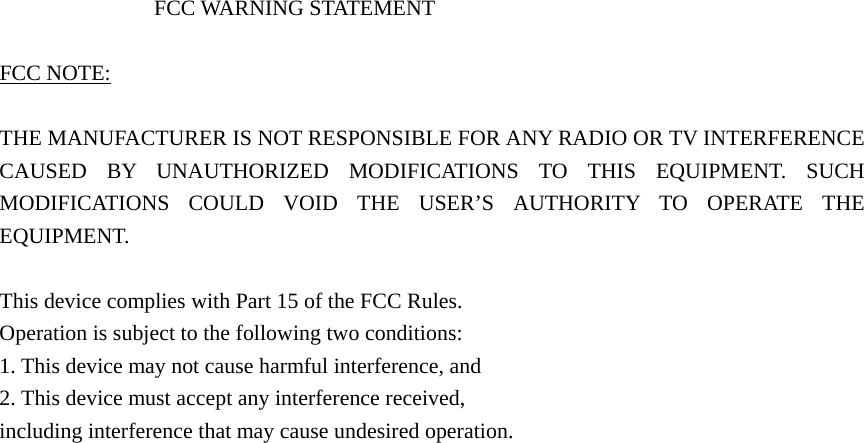
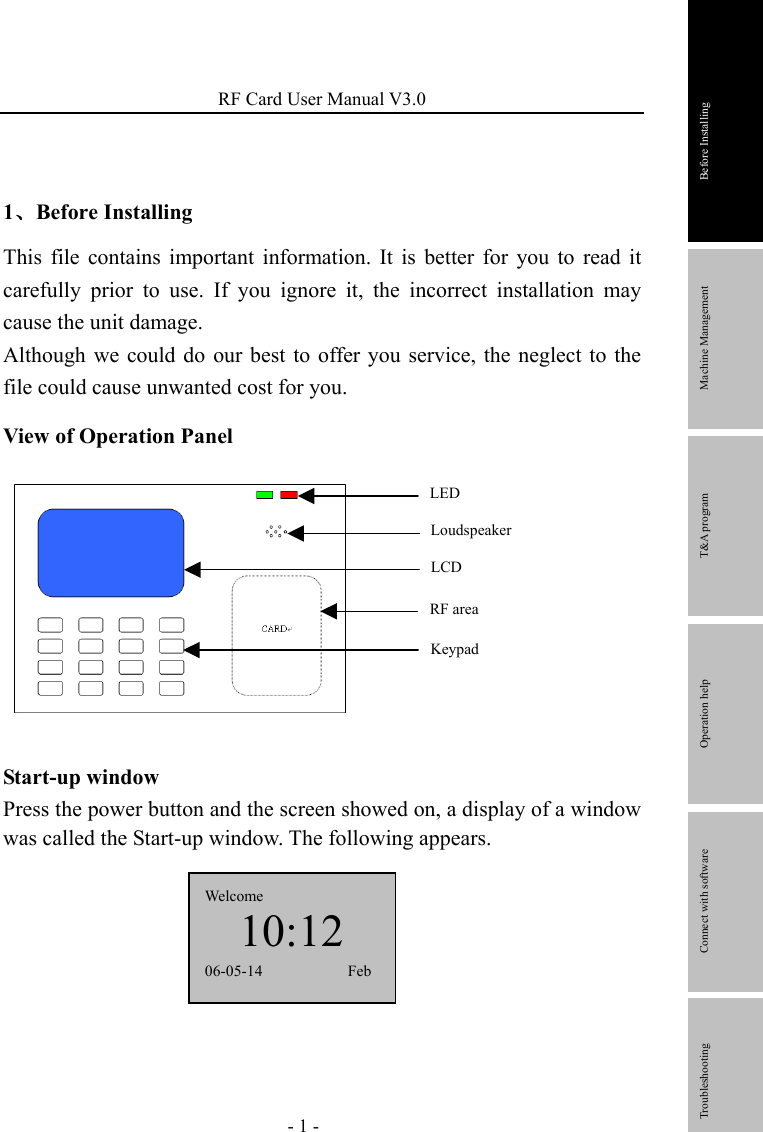
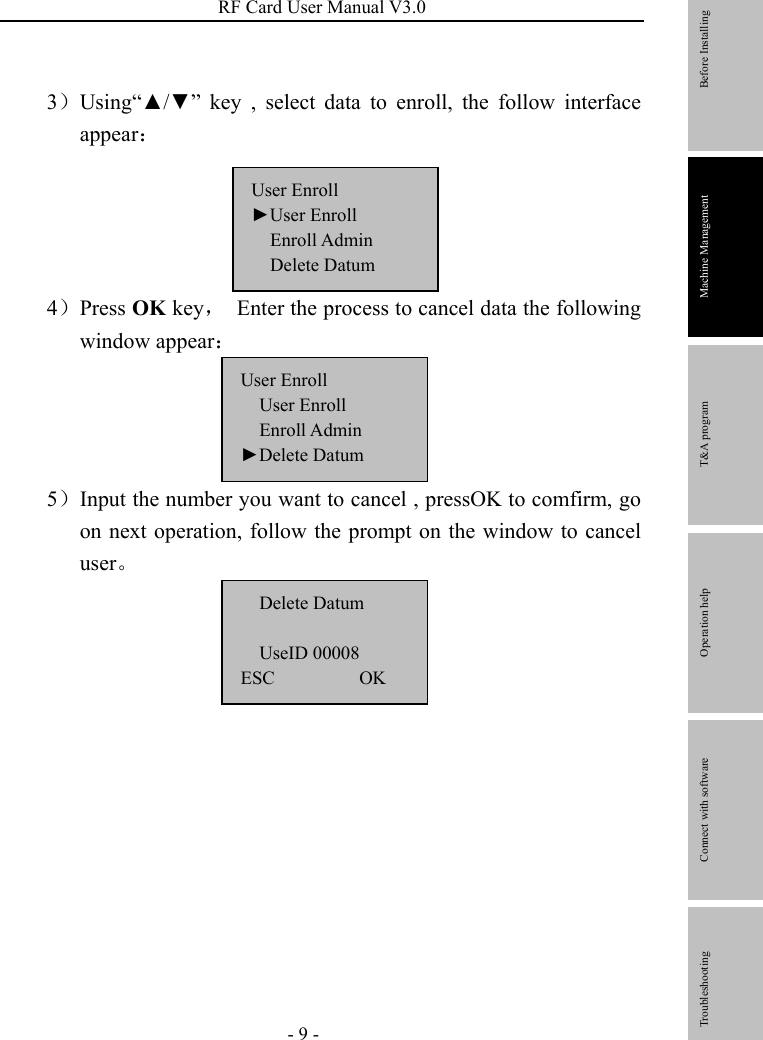
![RF Card User Manual V3.0 - 3 - 3)Input the enroll number (the range is 1 to 65534), press [OK], the following appears: 4) Slip the card near the area of induction follow the prompt, read out Card ID, the follow appear: 5) press “OK” key to complete Enrollment ,go on next operation.the following appear. 6)Press ‘ESC’ key to cancel the new enrollment, press OK to save enrolled data, so that complete registering ID card flow New Enroll RFID:16650449 Enroll No: 00010 ESC OK New enroll Please show the card Enroll No:00010 ESC OK New enroll 000010-C ESC OK Note :00010-C The least letter C means ID card Before Installing Machine Management T&A program Operation help Connect with software Troubleshooting](https://usermanual.wiki/ZKSOFTWARE/U600P/User-Guide-979732-Page-9.png)
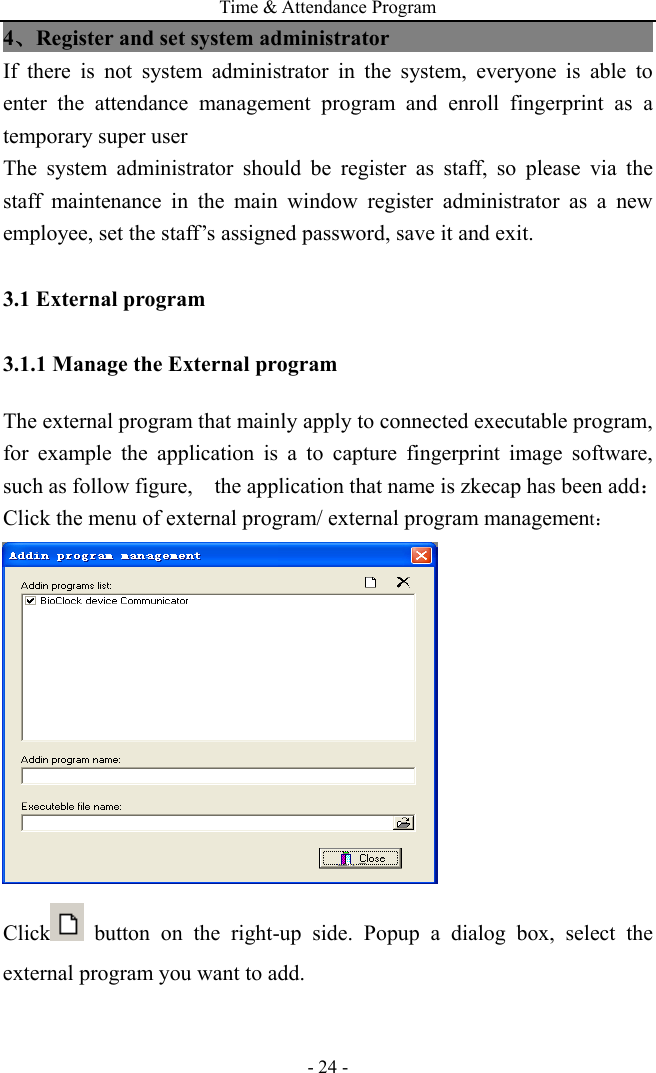
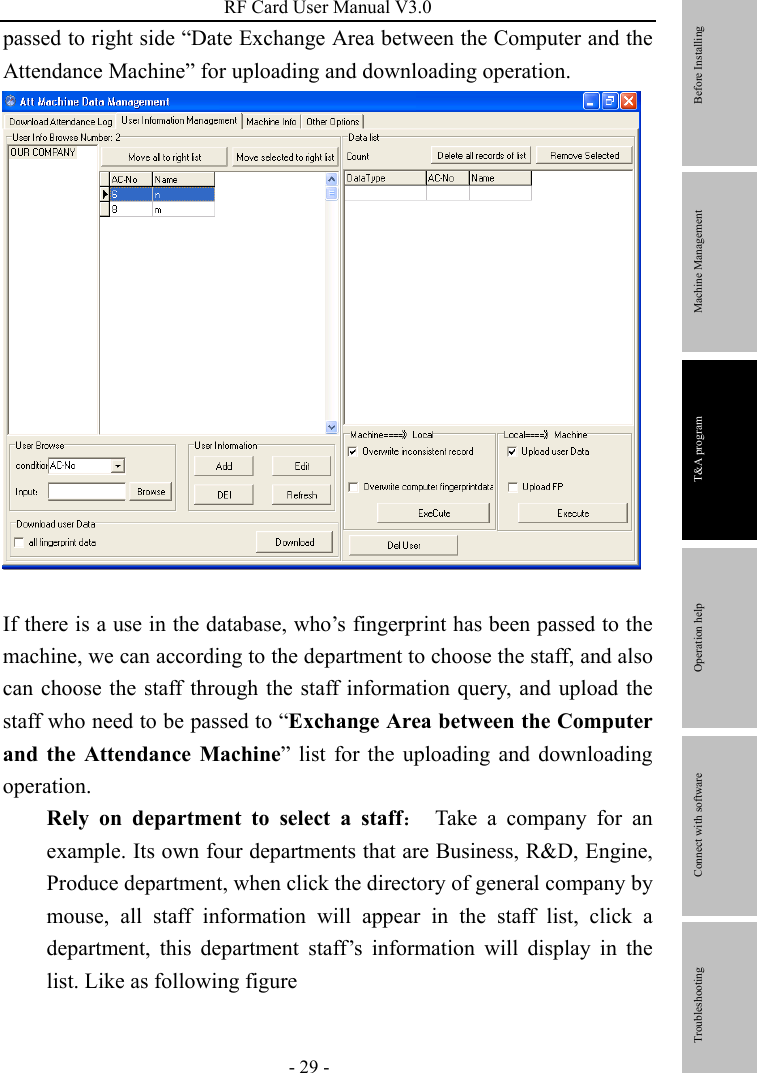
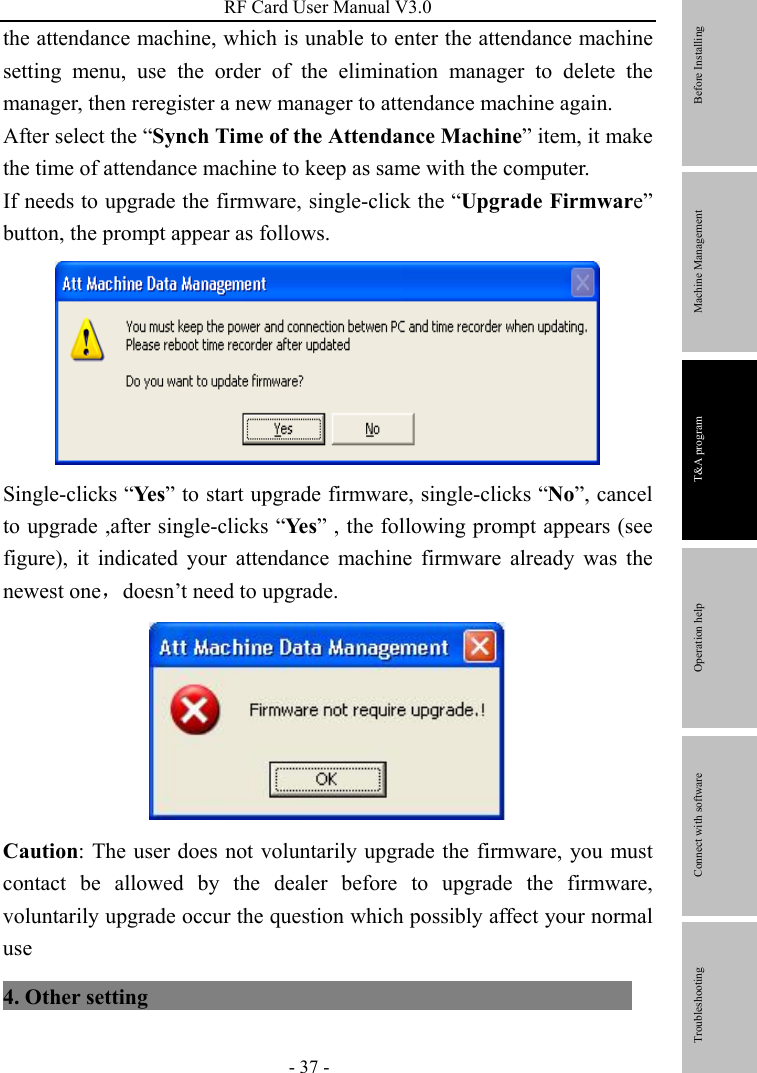
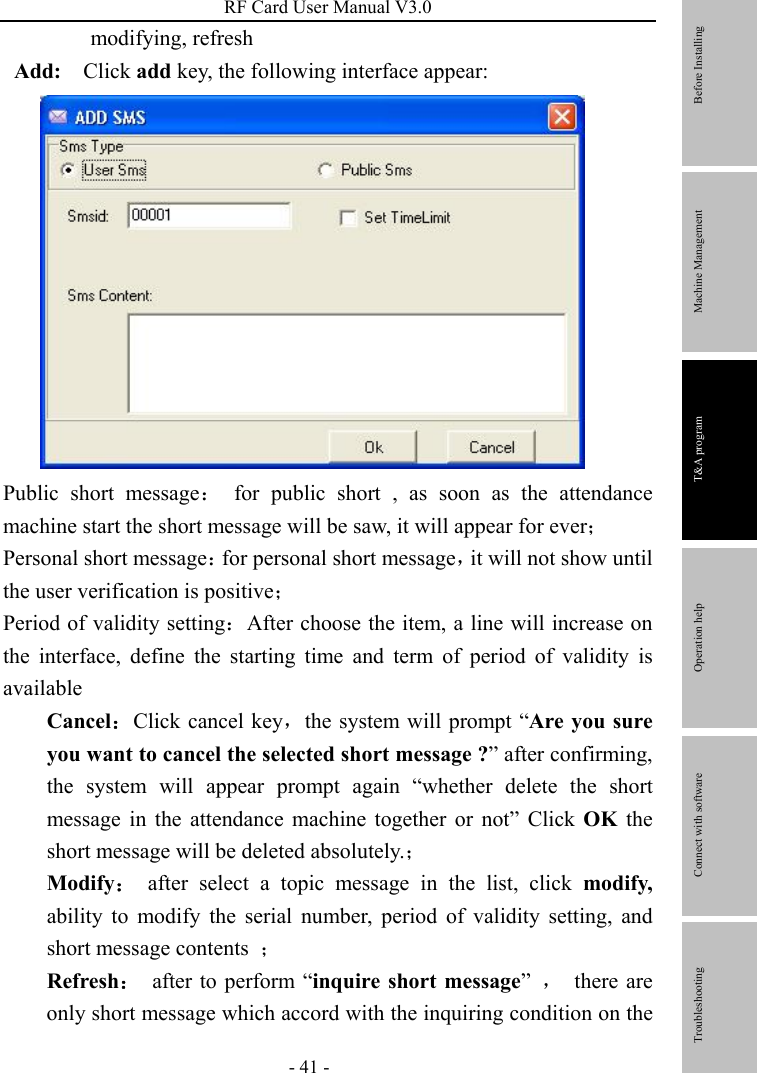
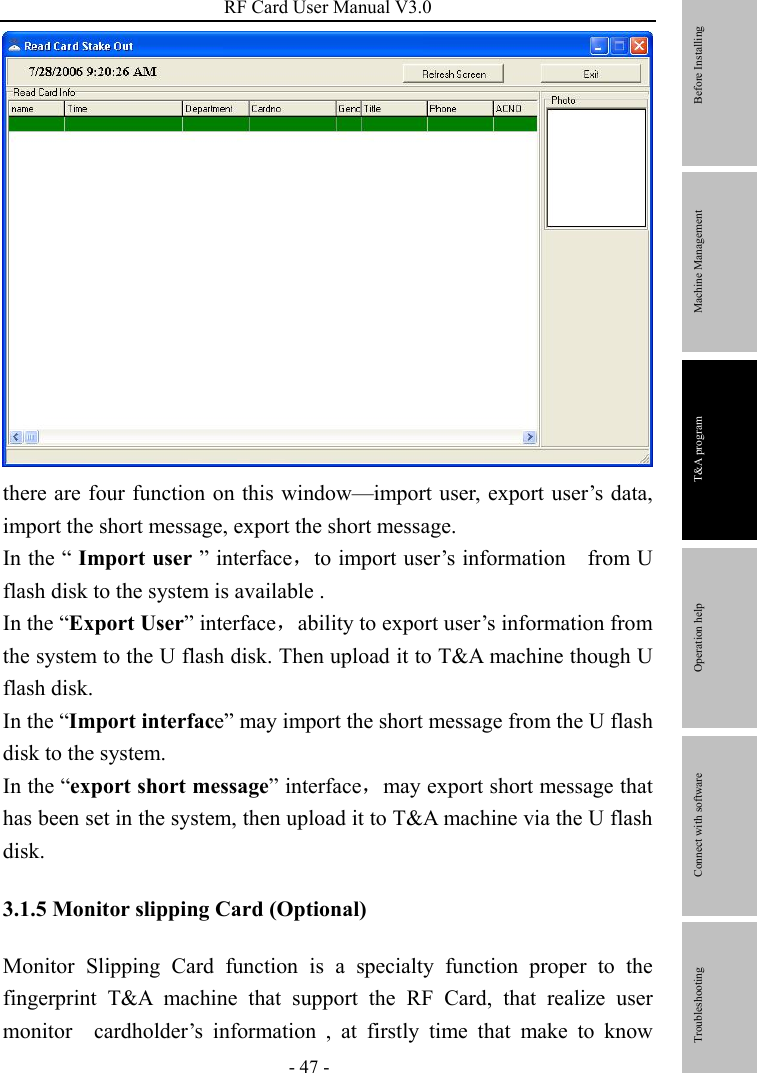
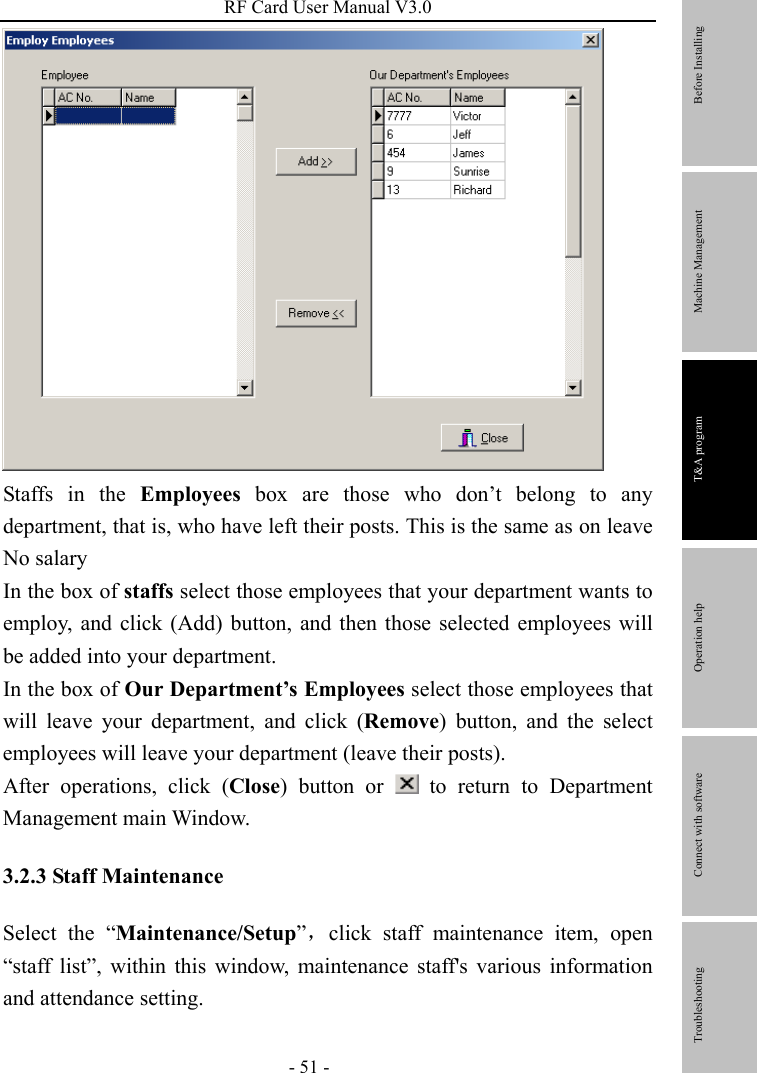
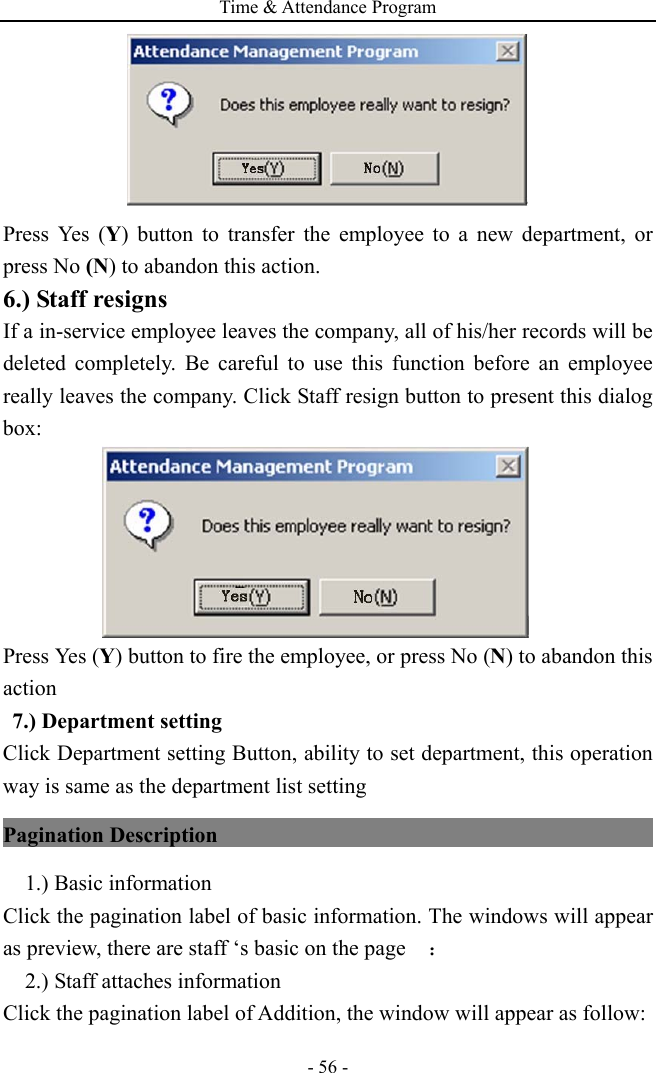
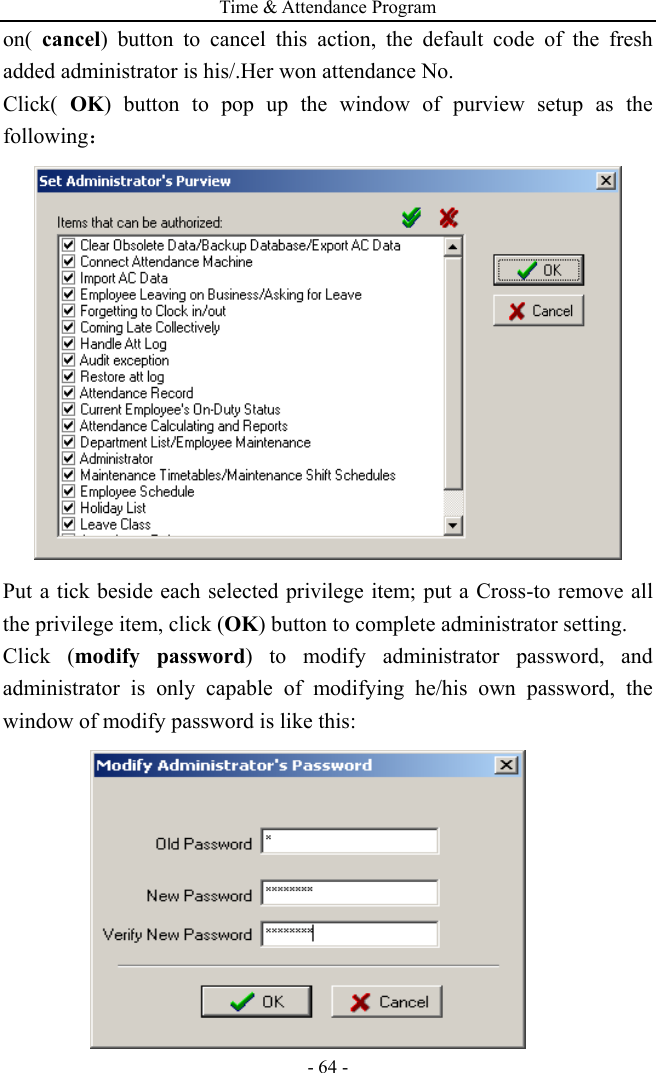
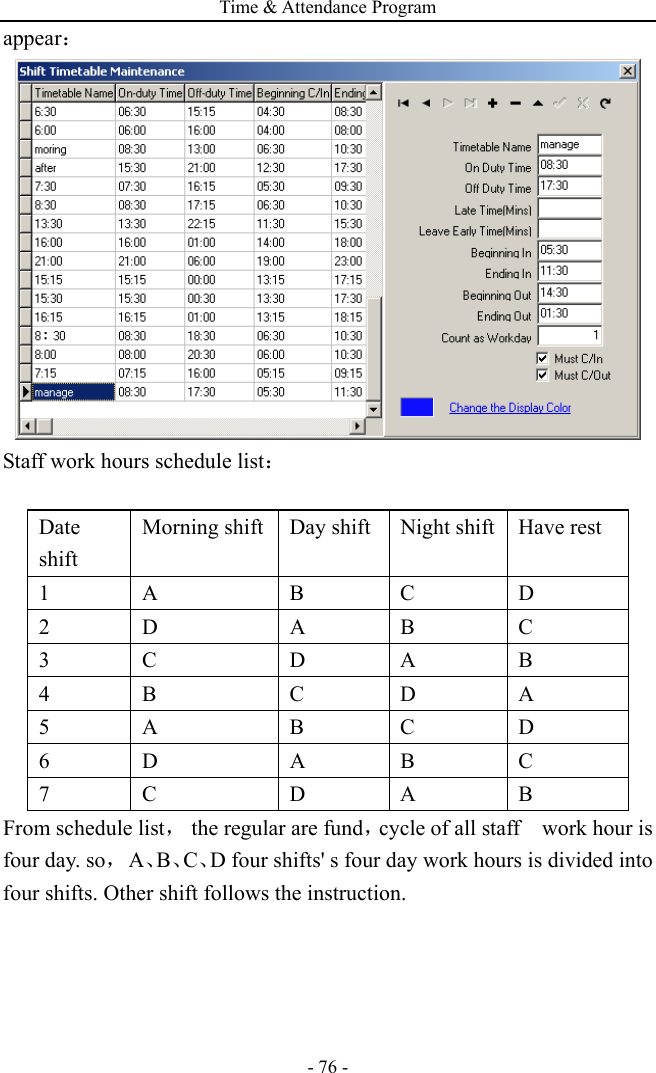
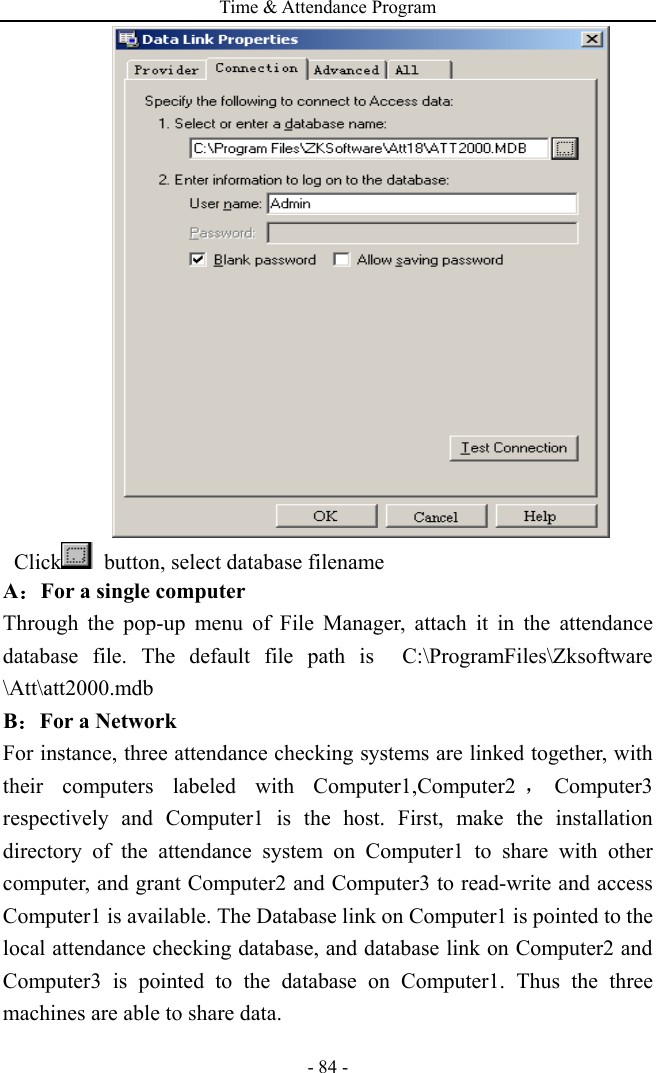
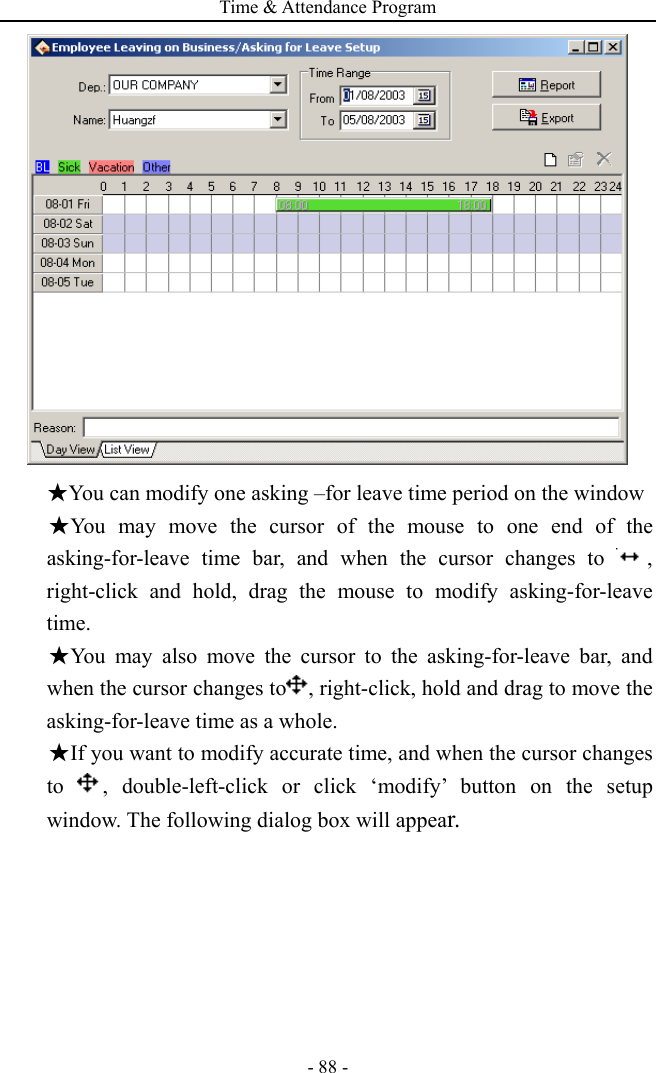
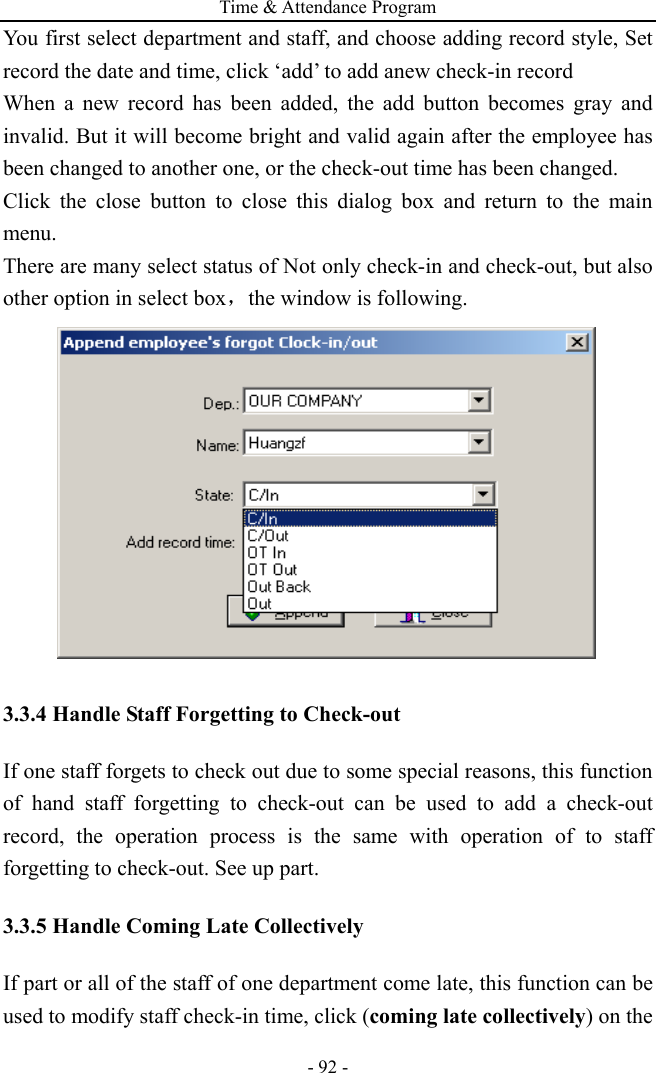
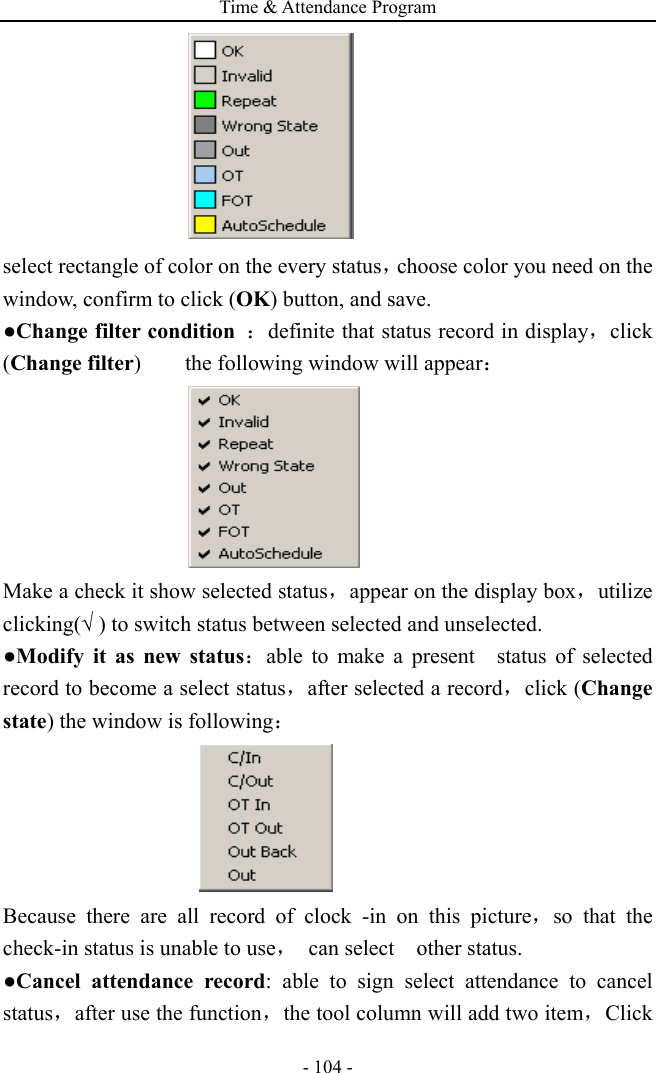
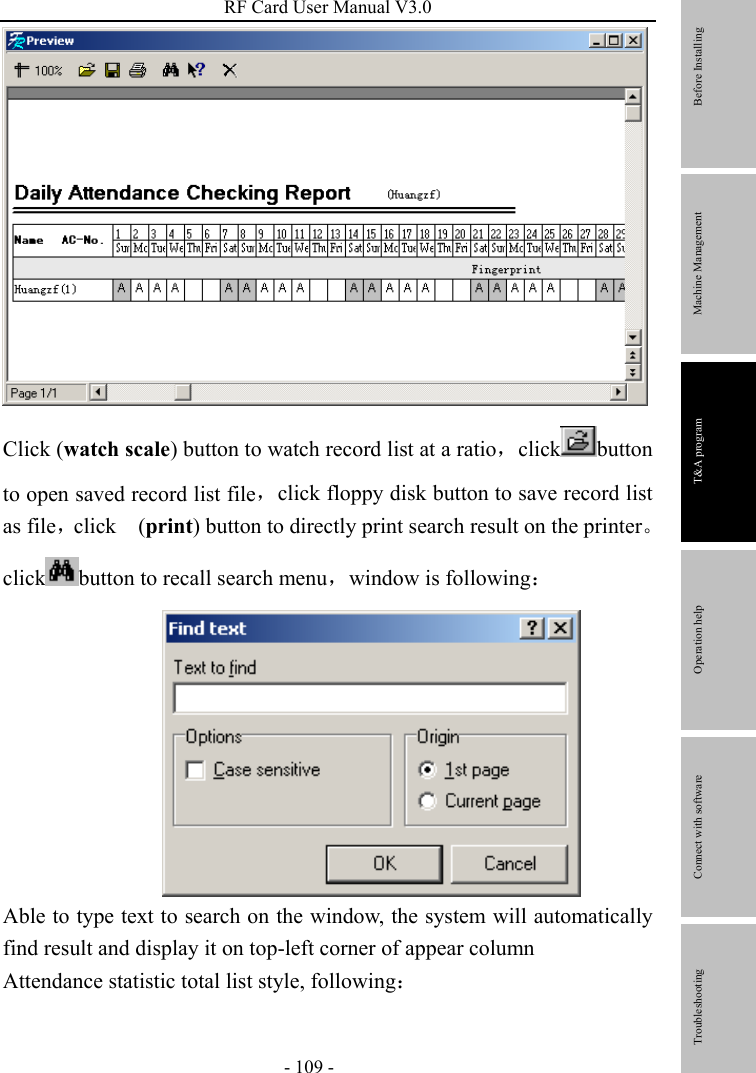
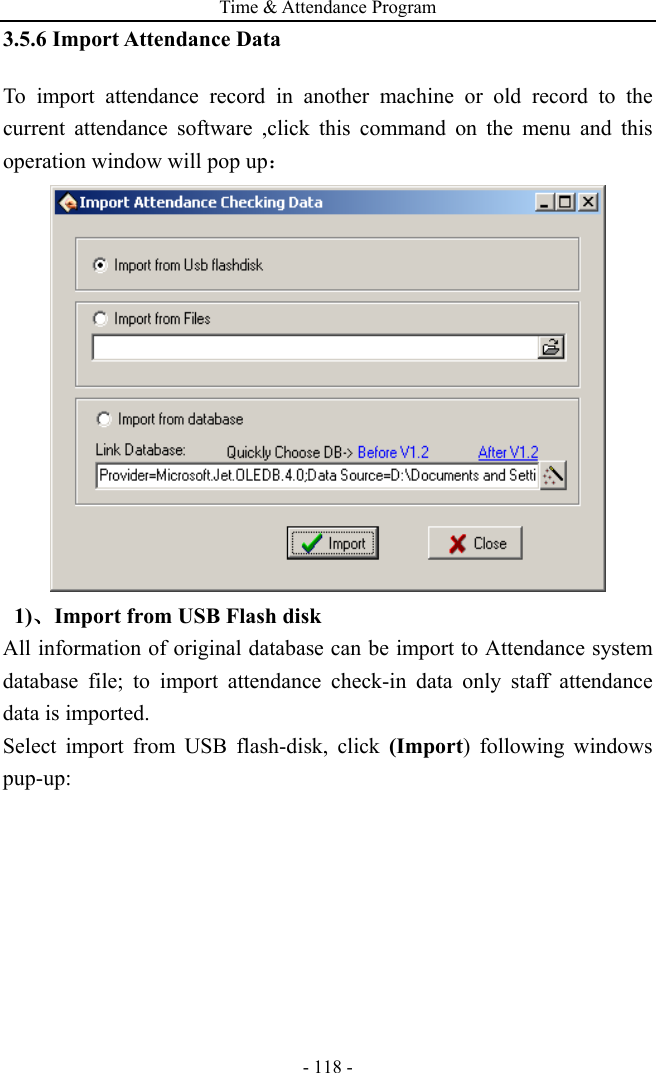
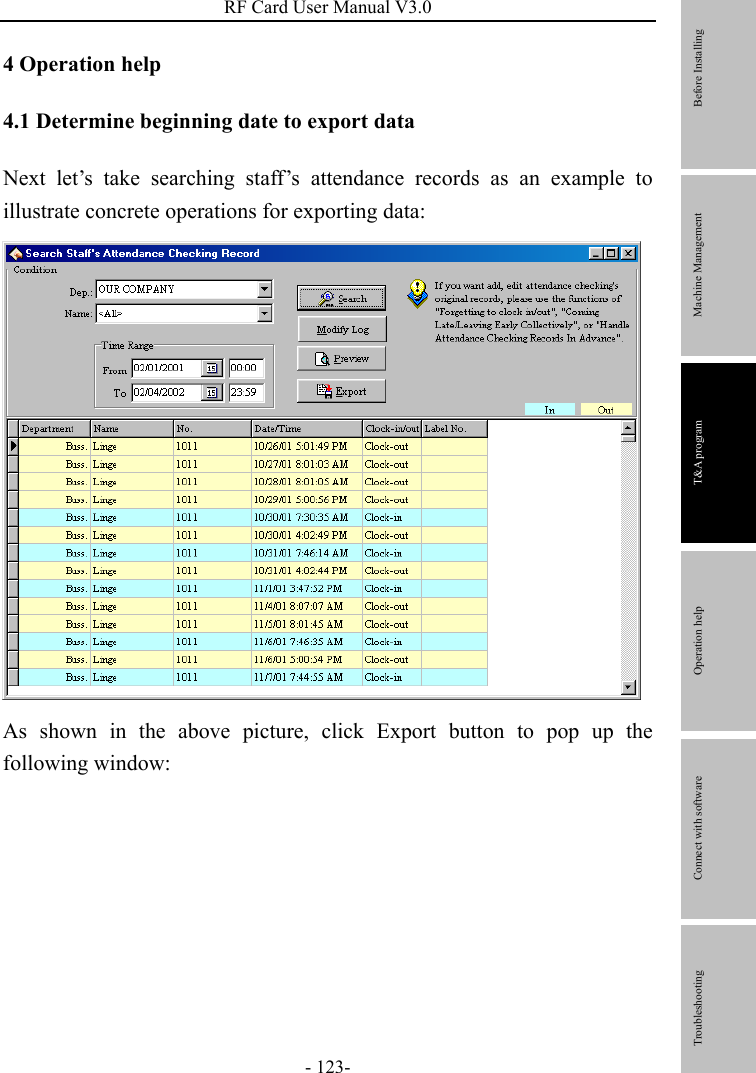
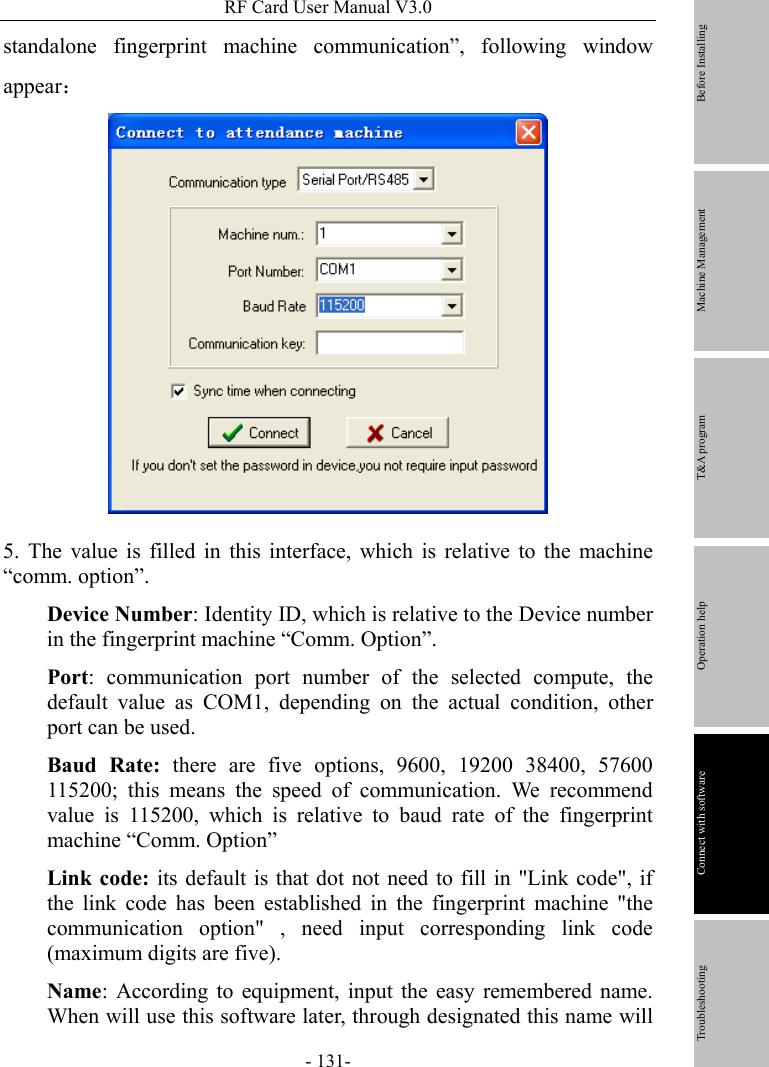
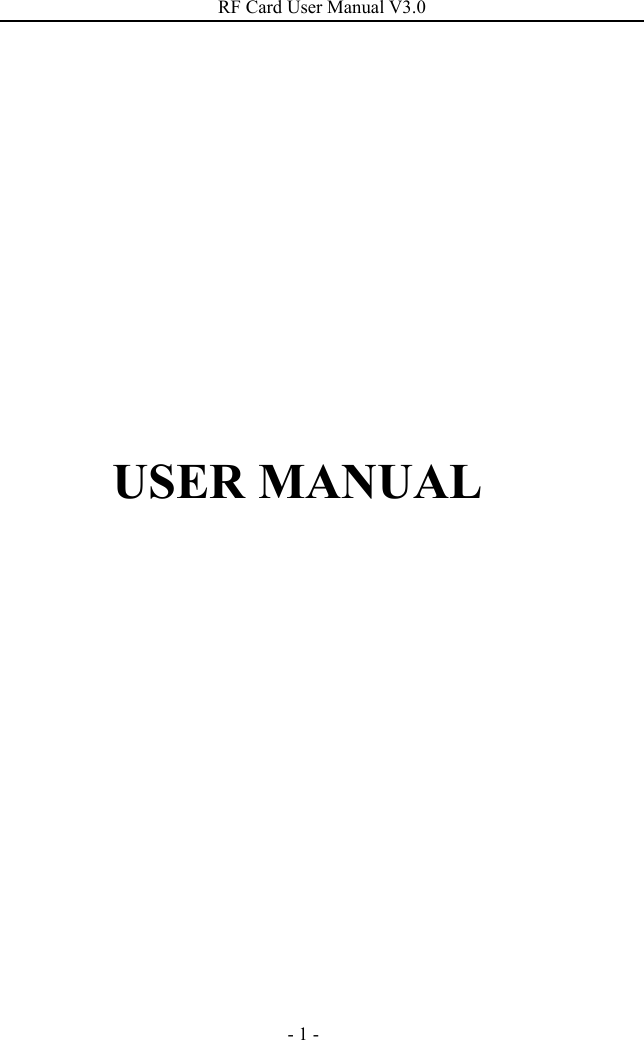
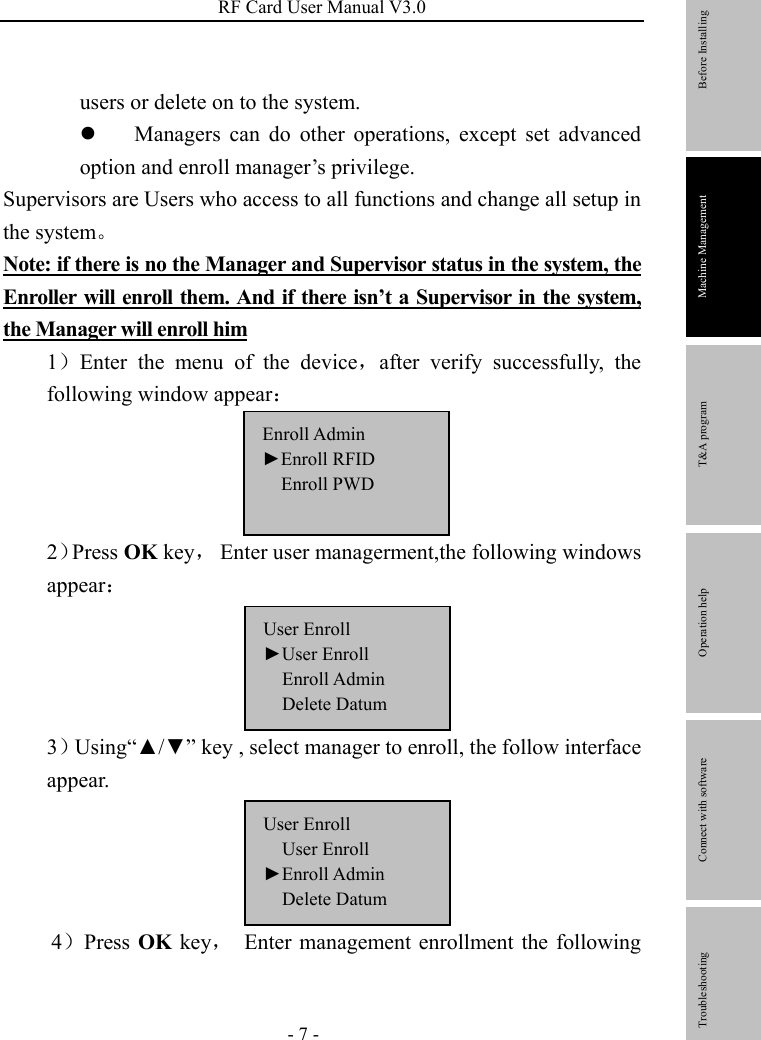
![T&A Machine Management - 4 - 2) Password Enrollment 1)Press the MENU button to enter the User enroll,Access the password enrollment, press [OK], the following appears: 2)Press [OK], the following appears: 3)Input the enroll number (the range is 1 to 65534), press [OK], the following appears: 4)Input your password, the following appears: 5)Input the password again, press [OK], the following appears: New Enroll Enroll No 00006 ESC OK New Enroll Input Pwd ***** ESC OK New Enrollment Input Pwd ***** Pwd Affirm ***** Note:00006-P The last letter P means password. New Enroll 00006-P ESC OK[Save]](https://usermanual.wiki/ZKSOFTWARE/U600P/User-Guide-979732-Page-10.png)
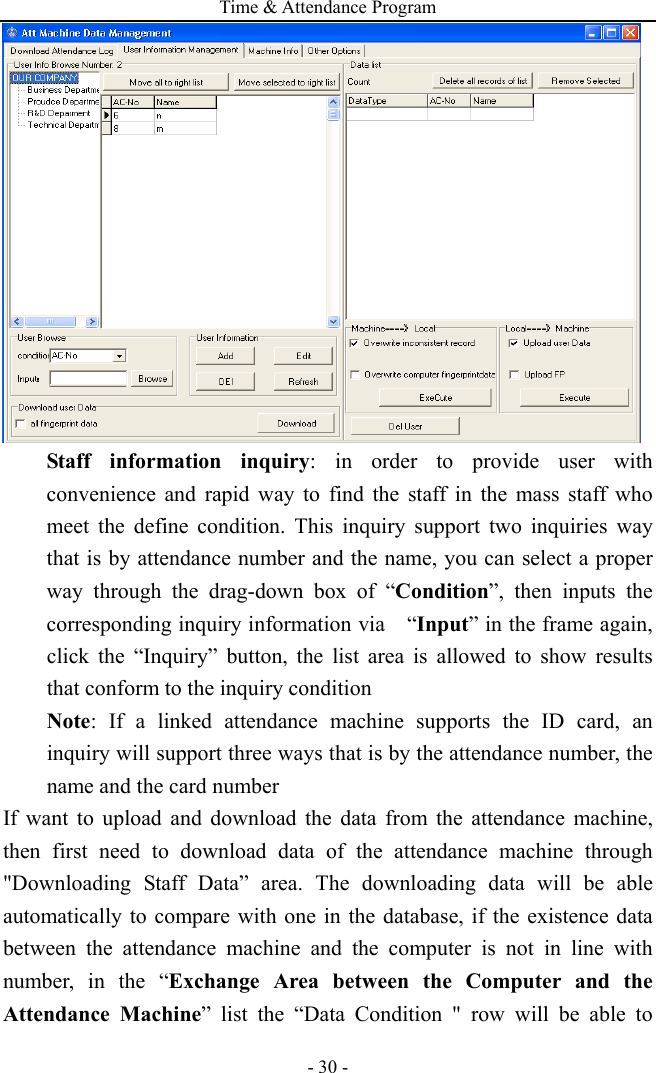
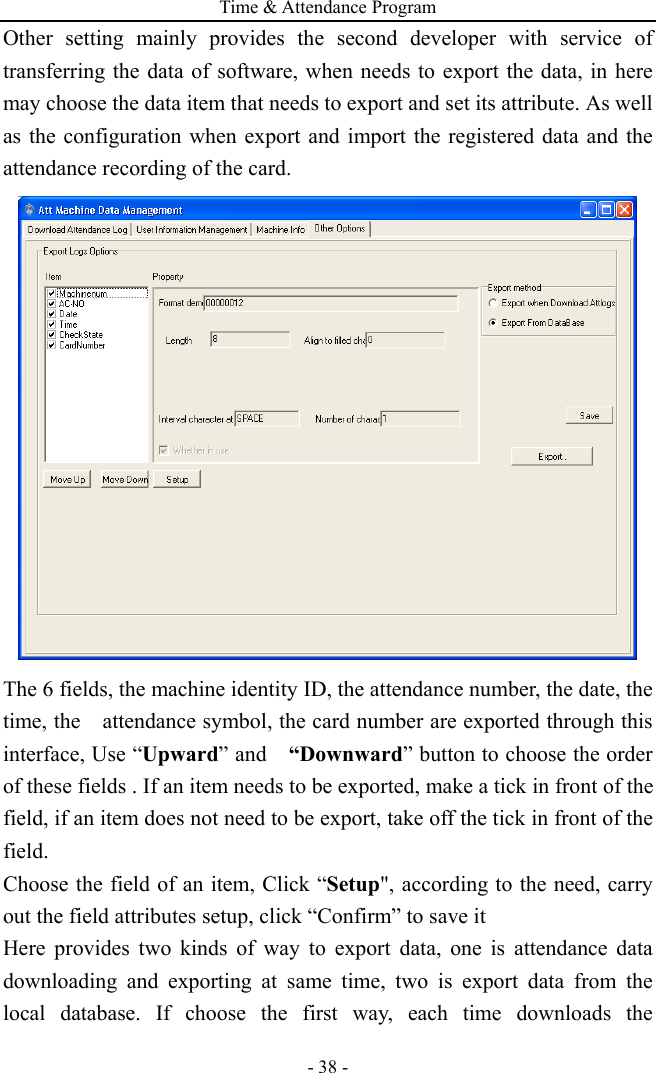
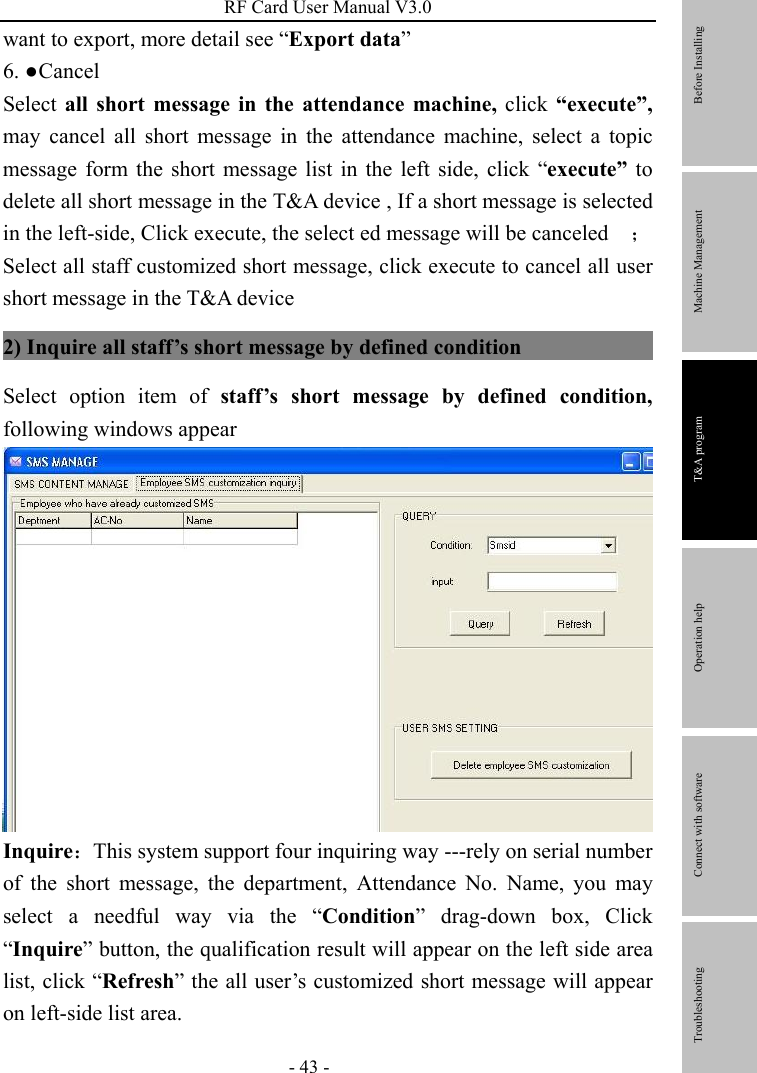
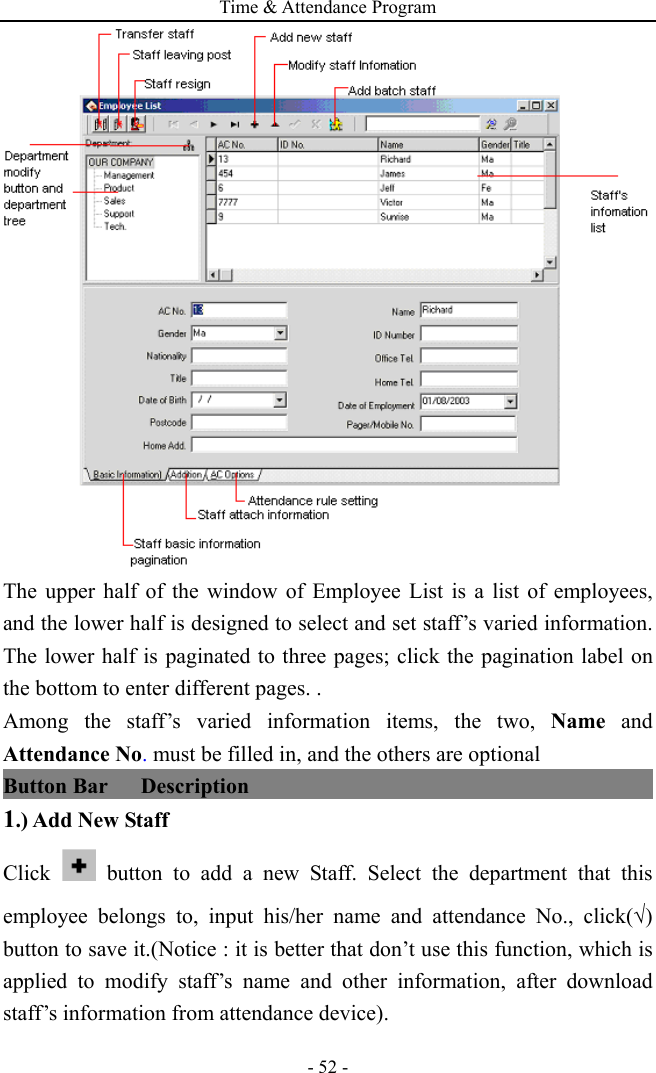
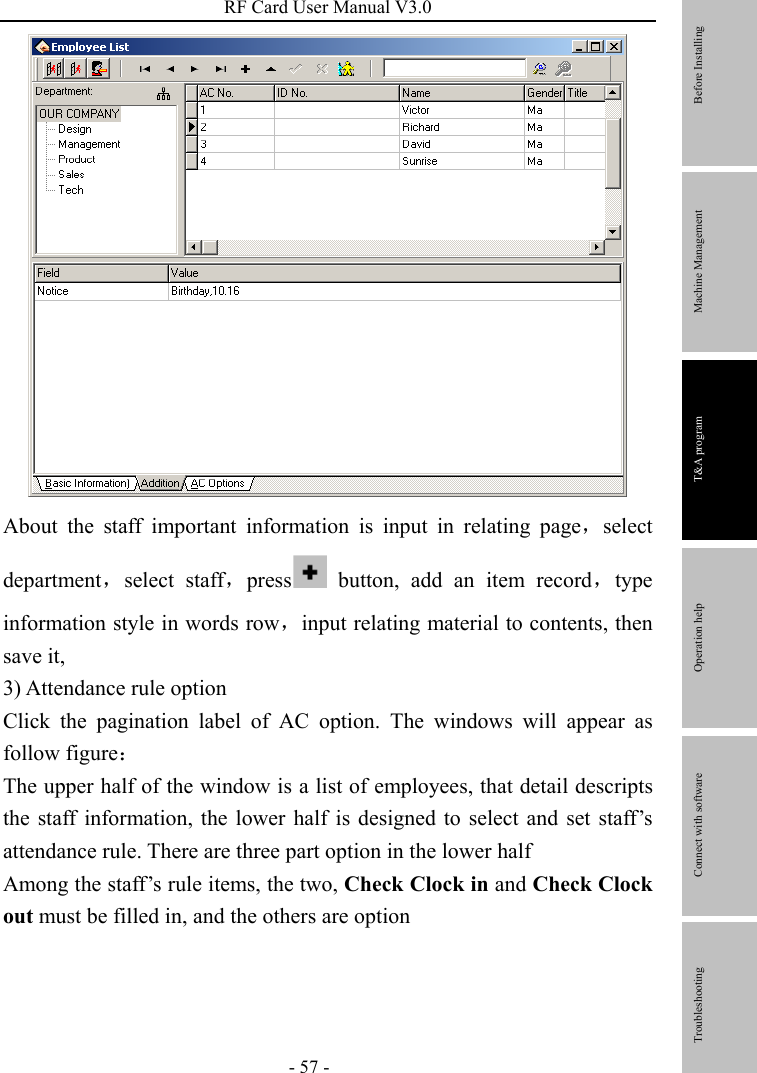
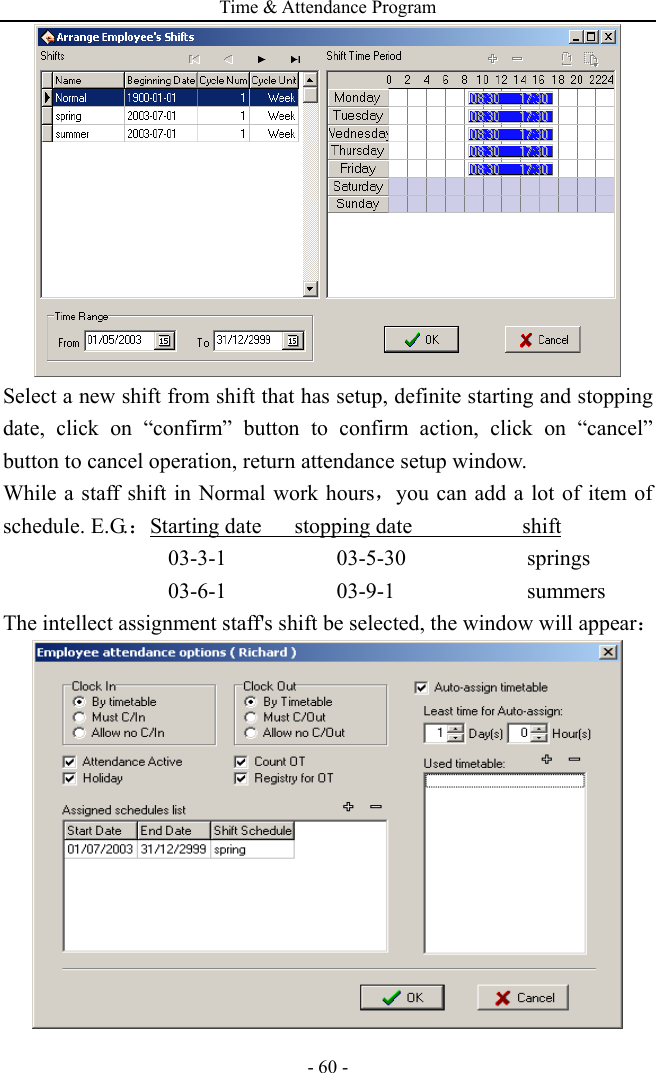
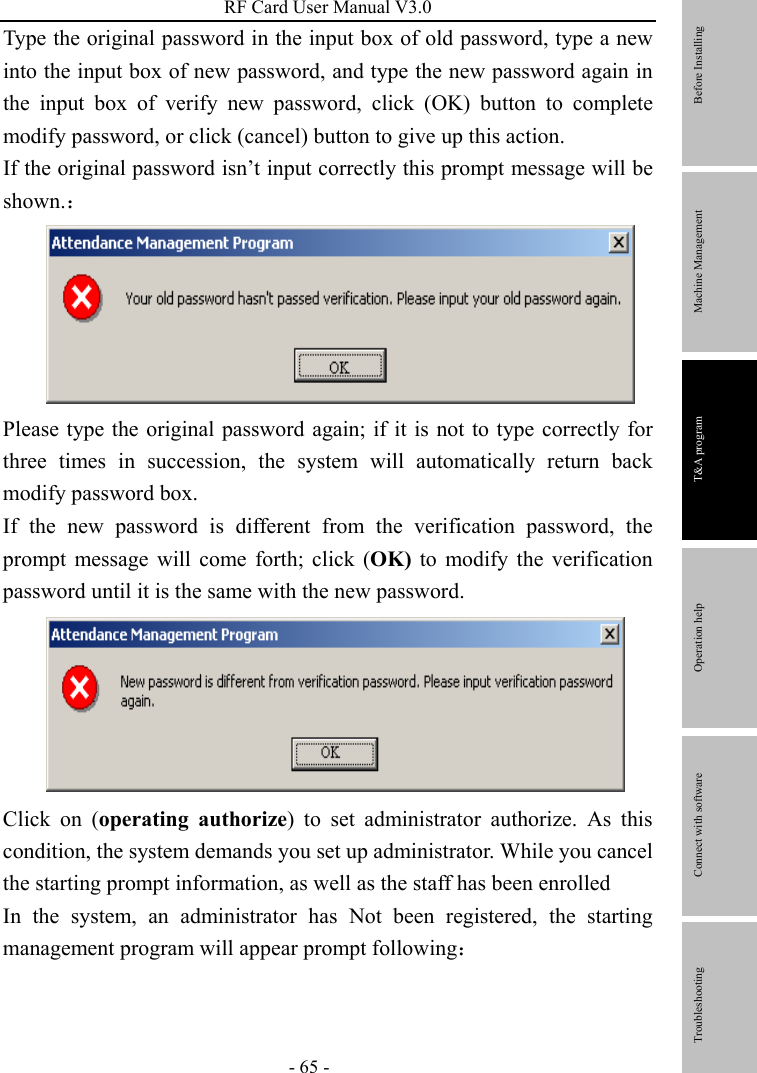
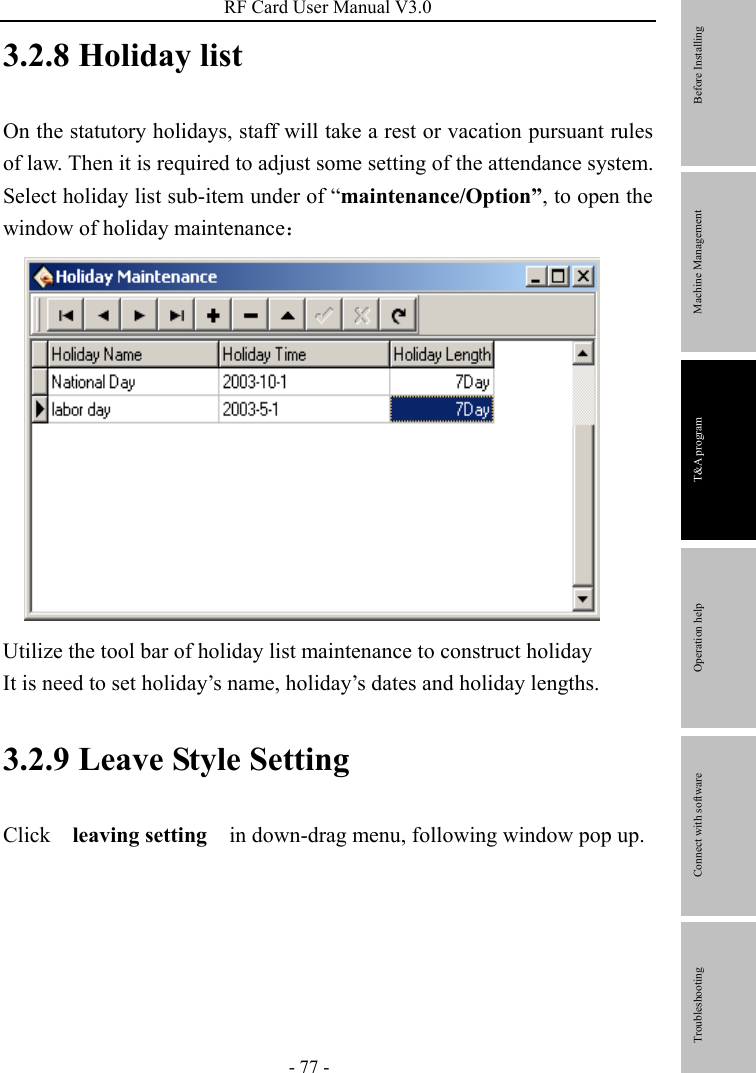
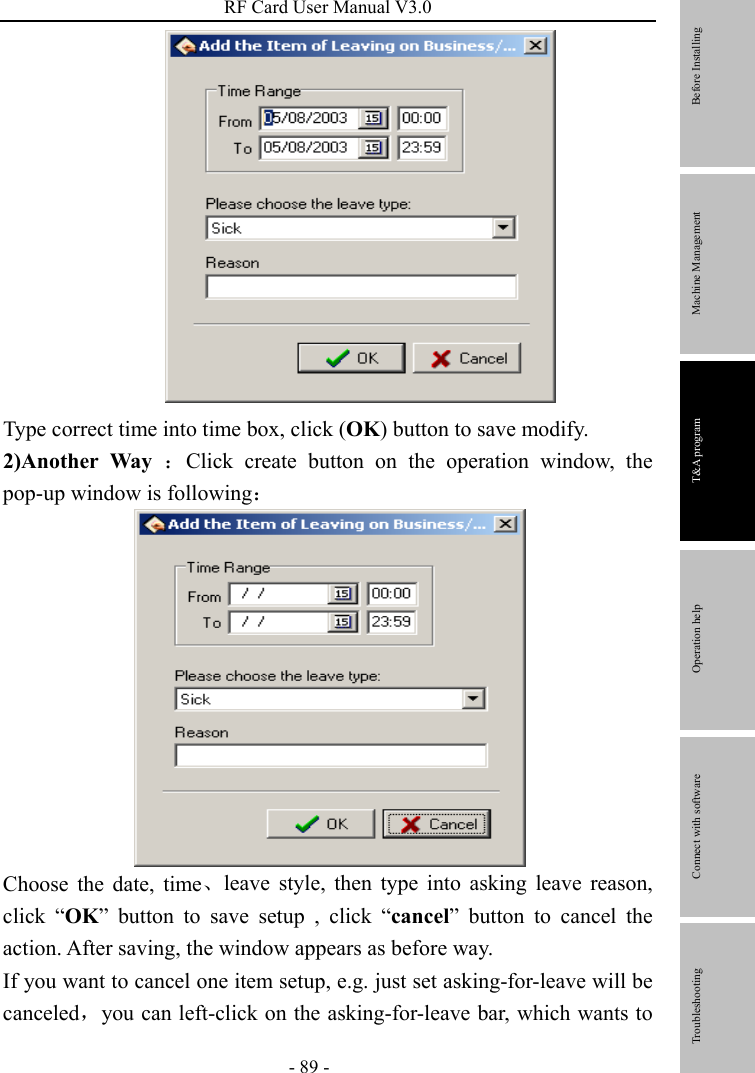
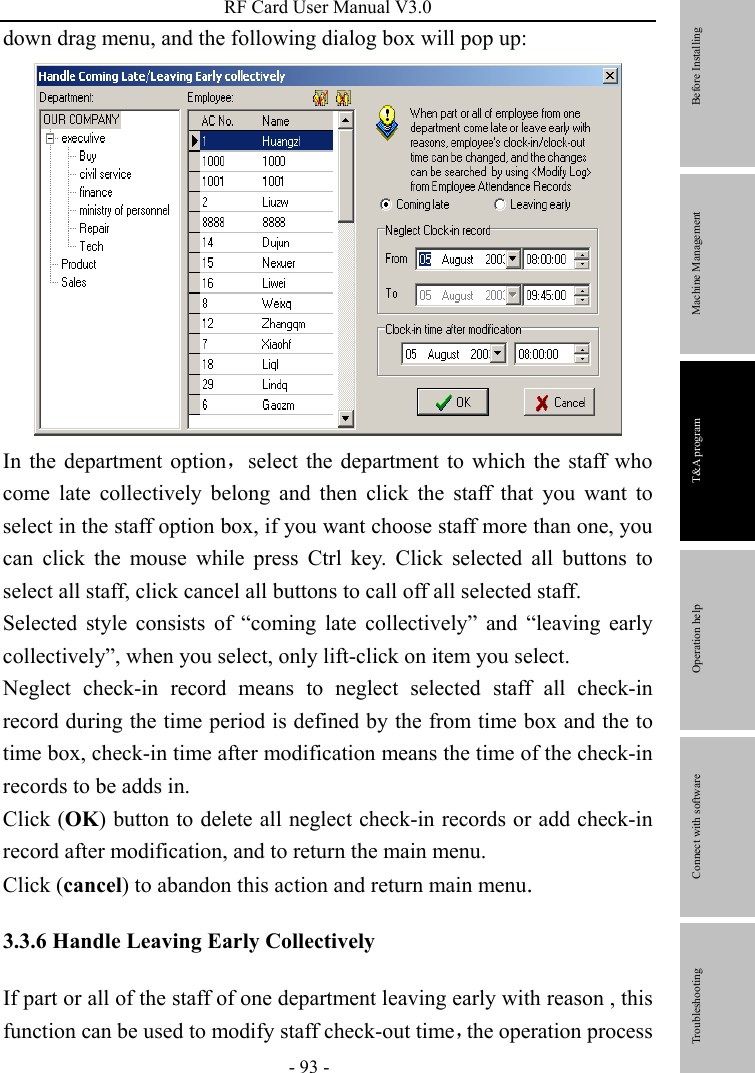
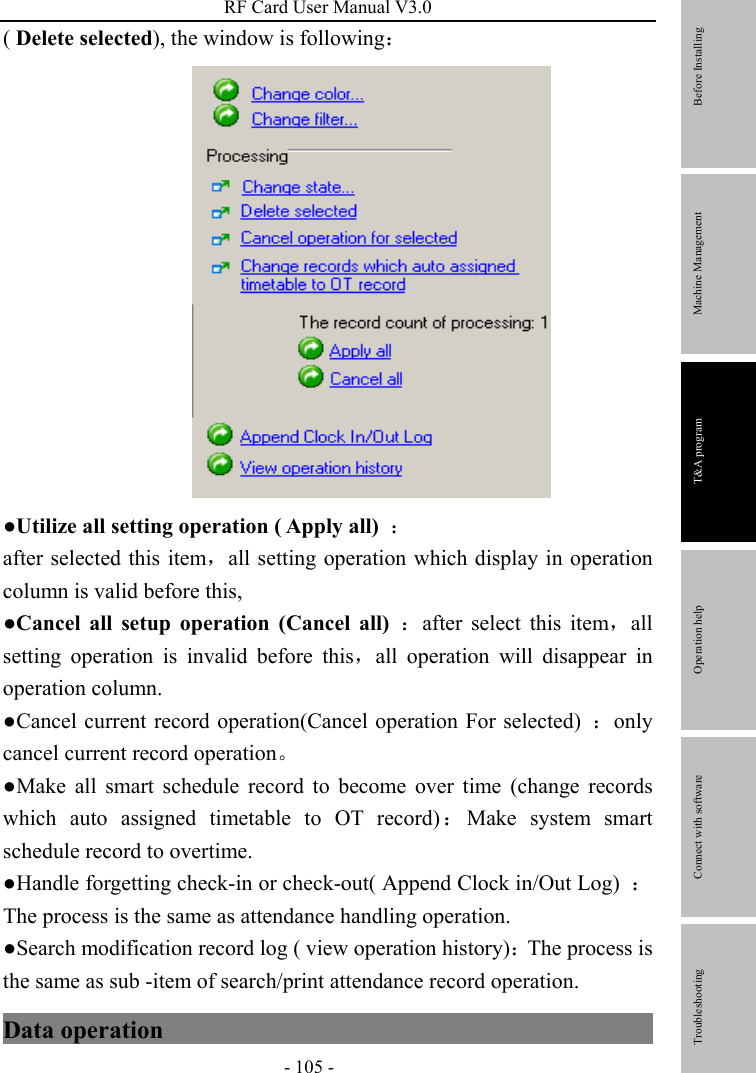
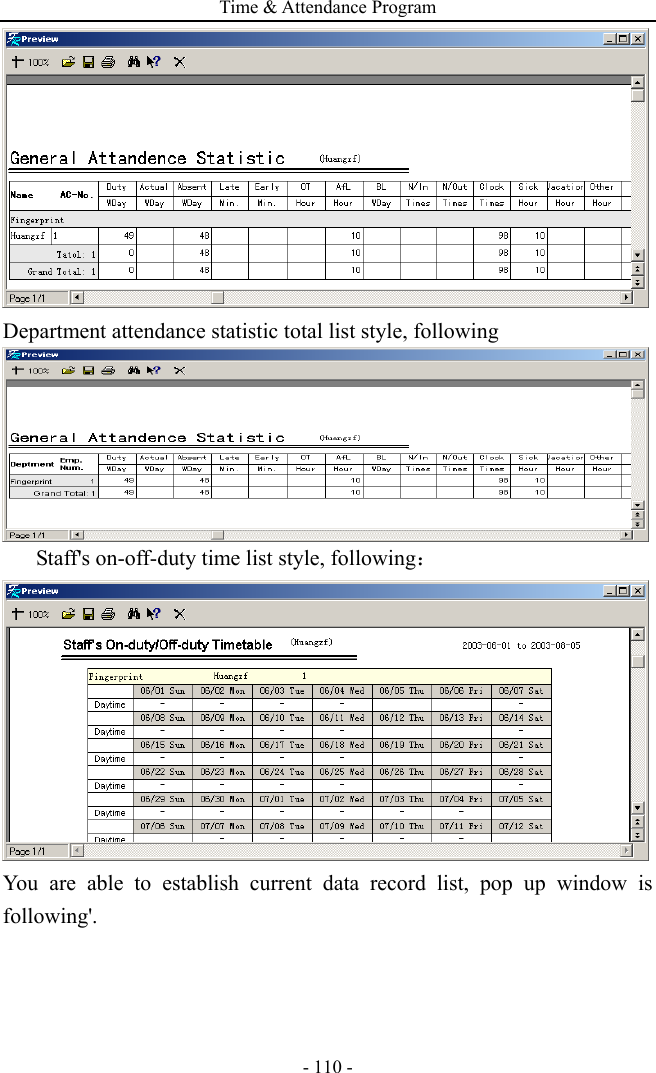
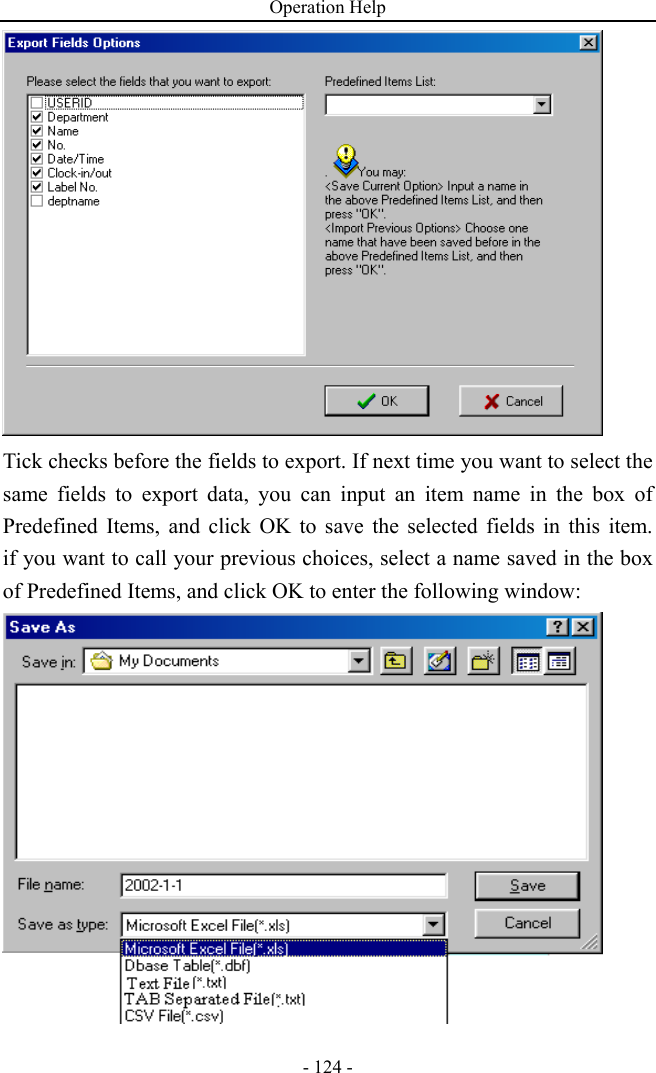
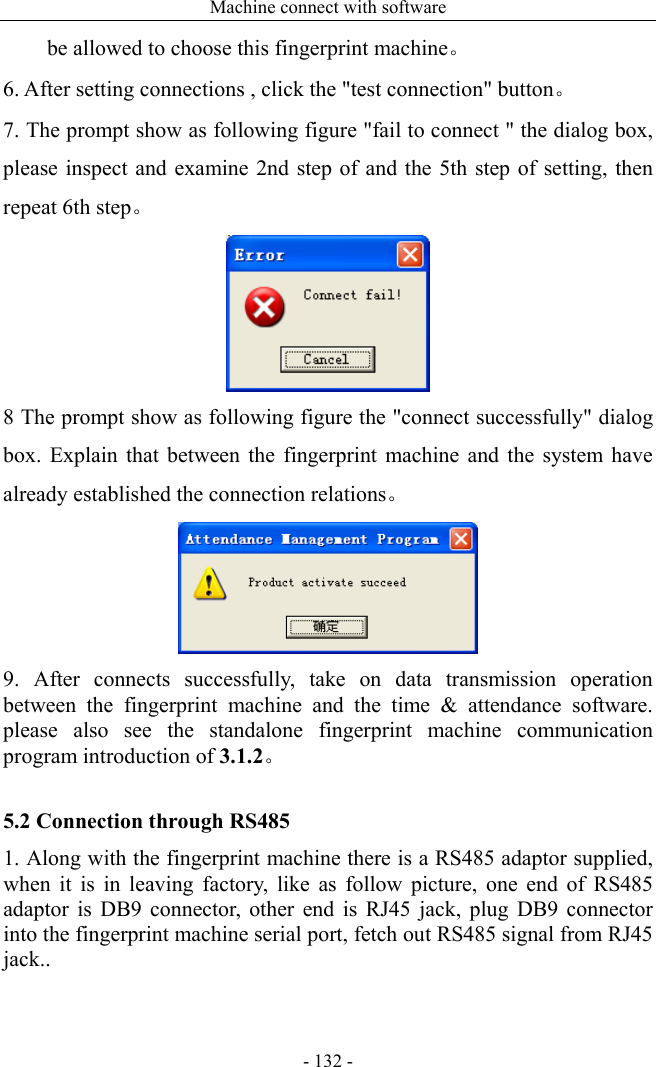
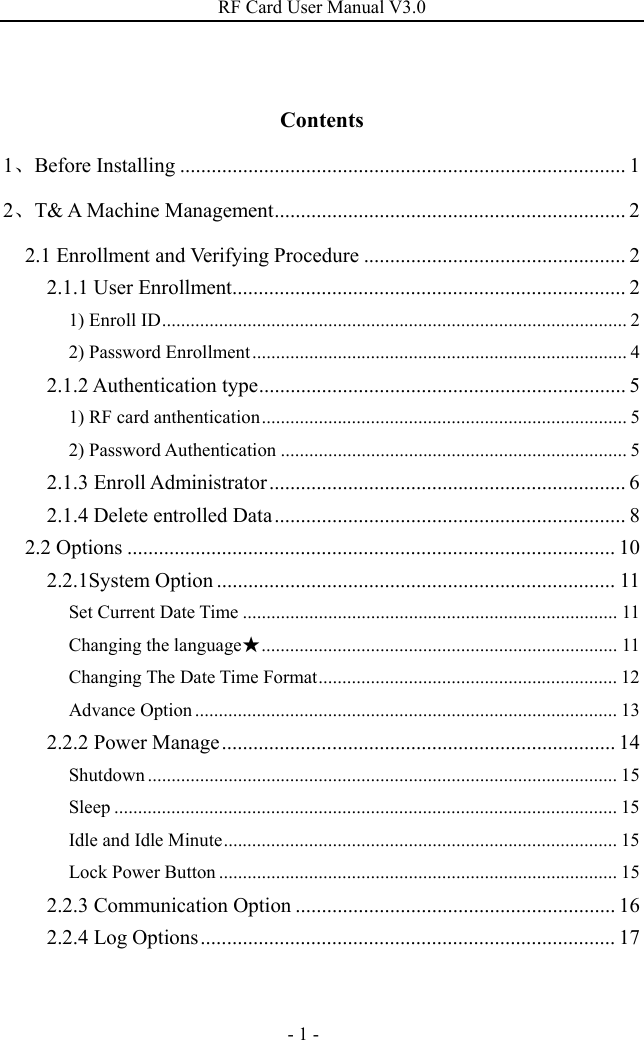
![RF Card User Manual V3.0 - 5 - 6)Press [OK], the previous message continues to be displayed while the template is created. 2.1.2 Authentication type 1) RF card anthentication The RF card of a user is used to identify the user. You can register the RF card number to the system in advance to provide against loss or theft of the RF card。 2) Password Authentication A password of 1--5 digits long is used to validate access authentication. You can use this method in such a special case as when the cards are damaged To start the enrollment process, enter your ID number, the following appears: 1:1 Verify Enroll No 00008 ESC OK[Pwd] Before Installing Machine Management T&A program Operation help Connect with software Troubleshooting](https://usermanual.wiki/ZKSOFTWARE/U600P/User-Guide-979732-Page-11.png)
![T&A Machine Management - 6 - Press [OK], the following appears: Input correct password, press [OK], the following appears: If the password cannot be verified, the following appears: 2.1.3 Enroll Administrator Privileges are permission that is give to use. These define the ability of user to perform specified administrative and other task, including the ability to view, edit, add, or renew specified information categories. Privilege levels are named set of permission that can be modified as required, User’s four privilege levels are assigned by the device, that are user, enroller, administrator, Super administrator. The Idenification systems have four Privilege or status levels: Users are people whose identity must be verified, such to gain access to a facility or to have their attendance recorded. Enrollers are Users who are authorized to enroll new Pwd Affirm Enroll No:00008 Input Pwd:***** Pwd Affirm Enroll No 00008 Verified!](https://usermanual.wiki/ZKSOFTWARE/U600P/User-Guide-979732-Page-12.png)
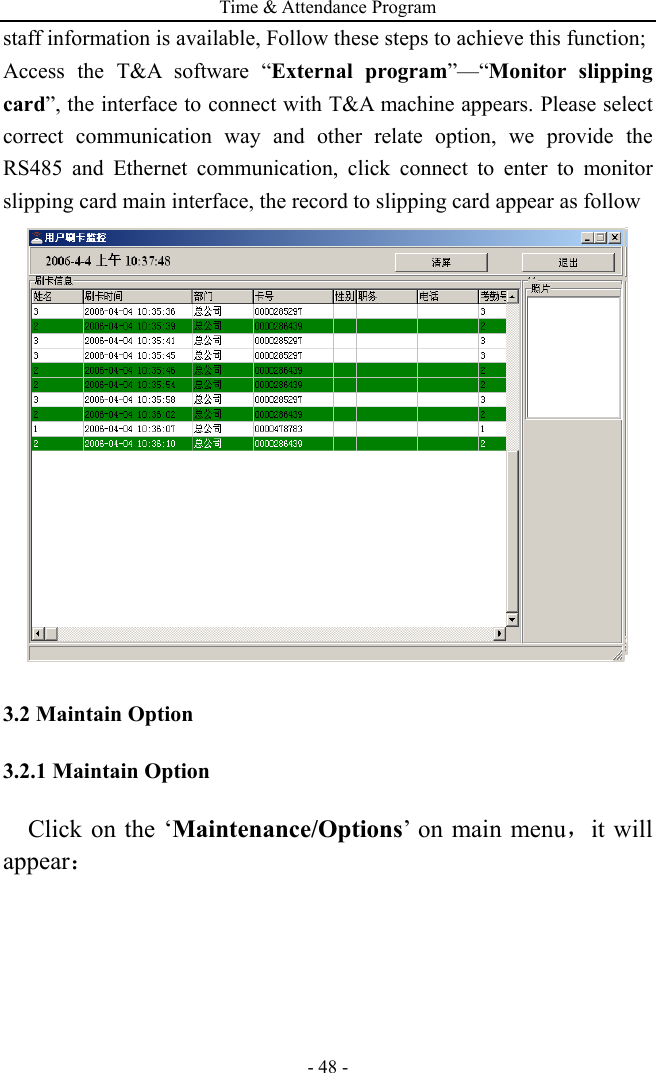
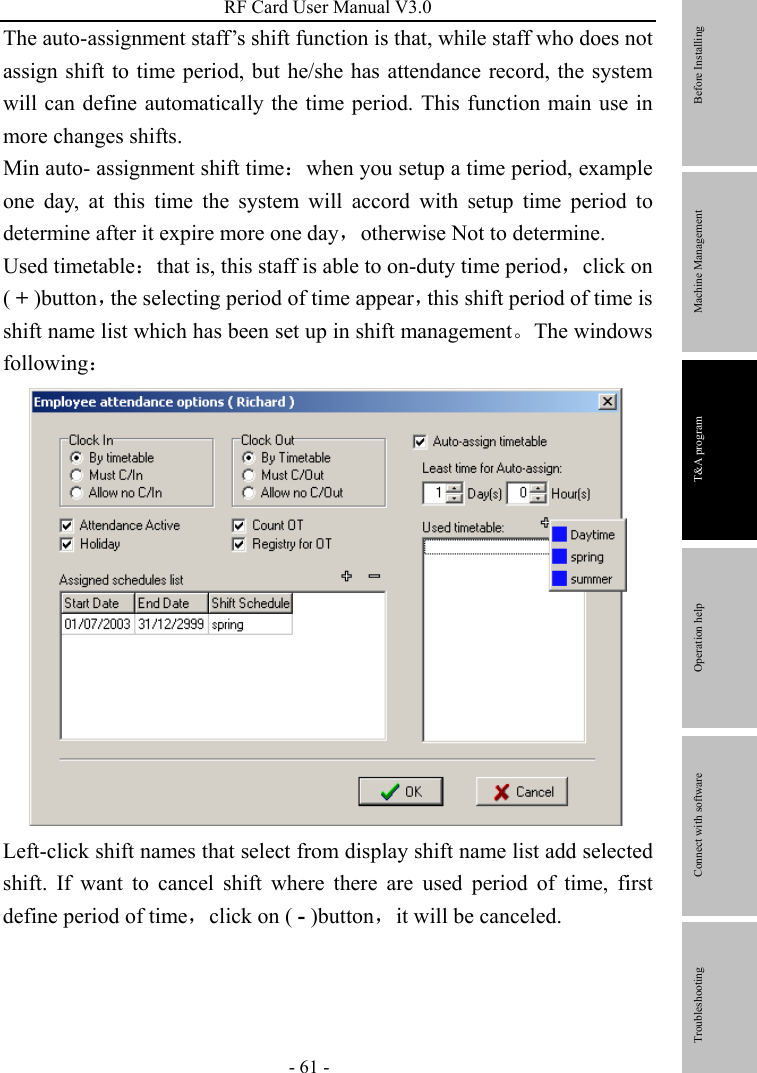
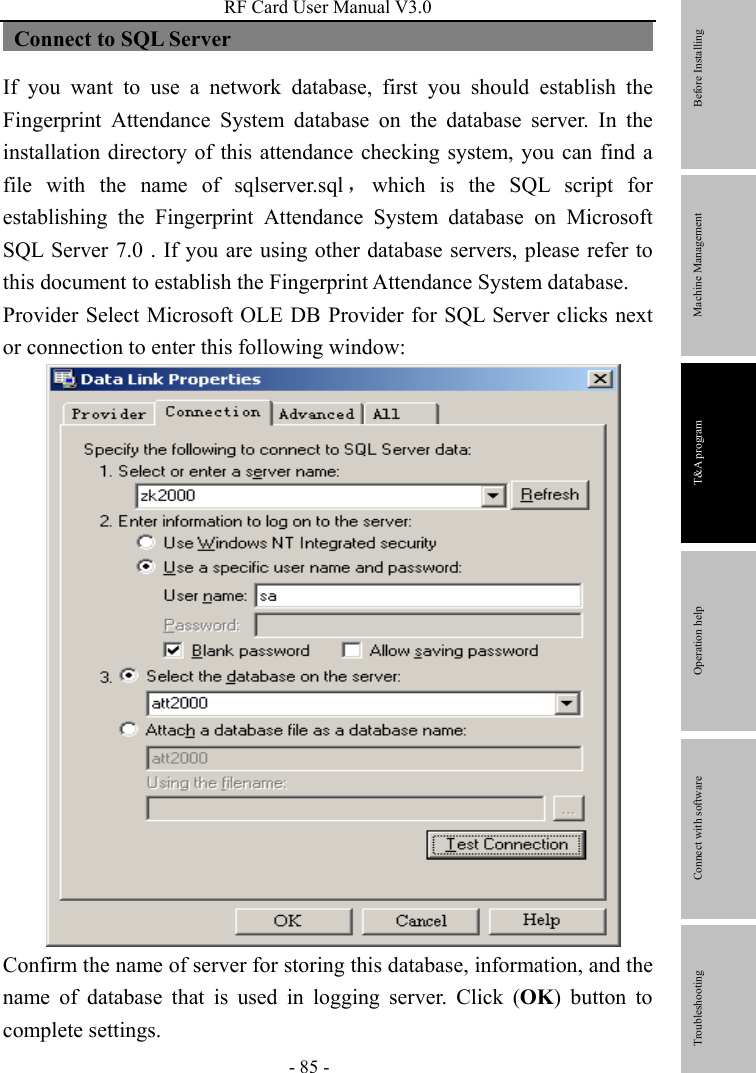
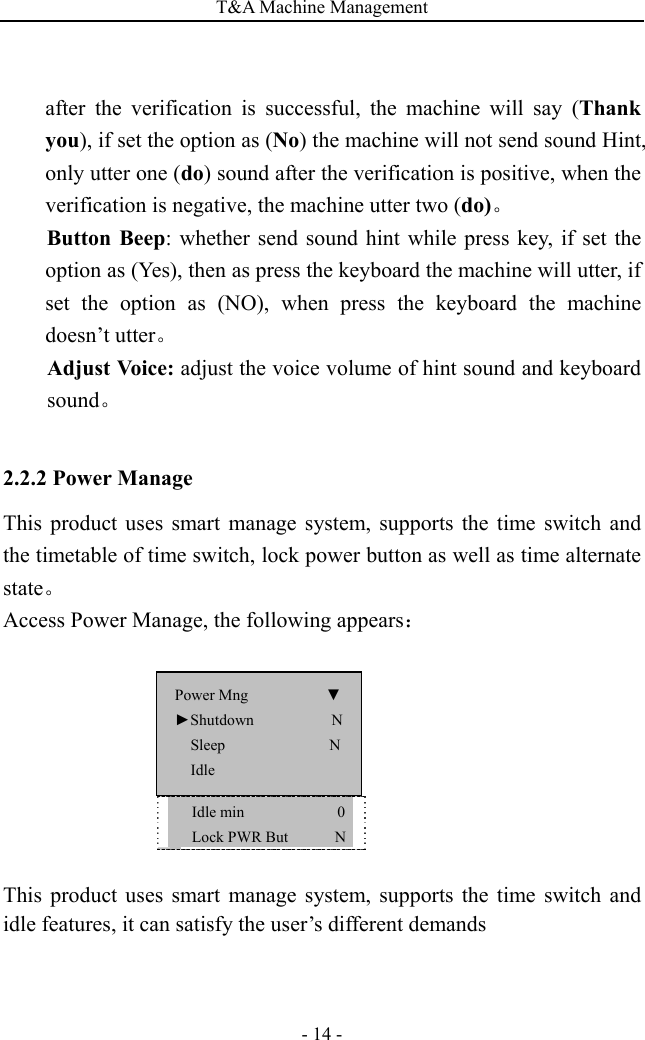
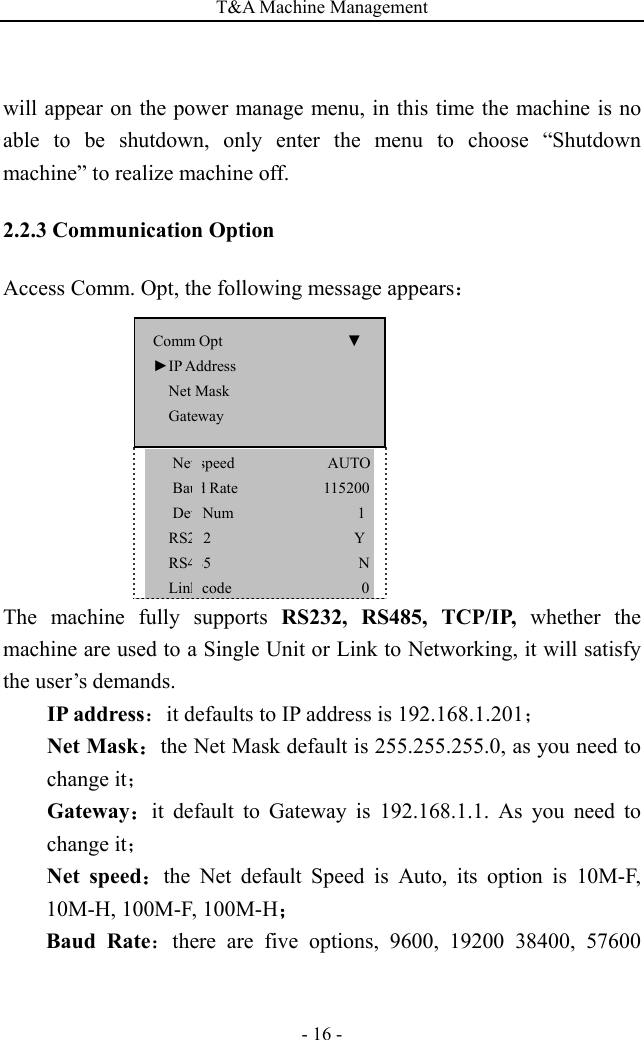
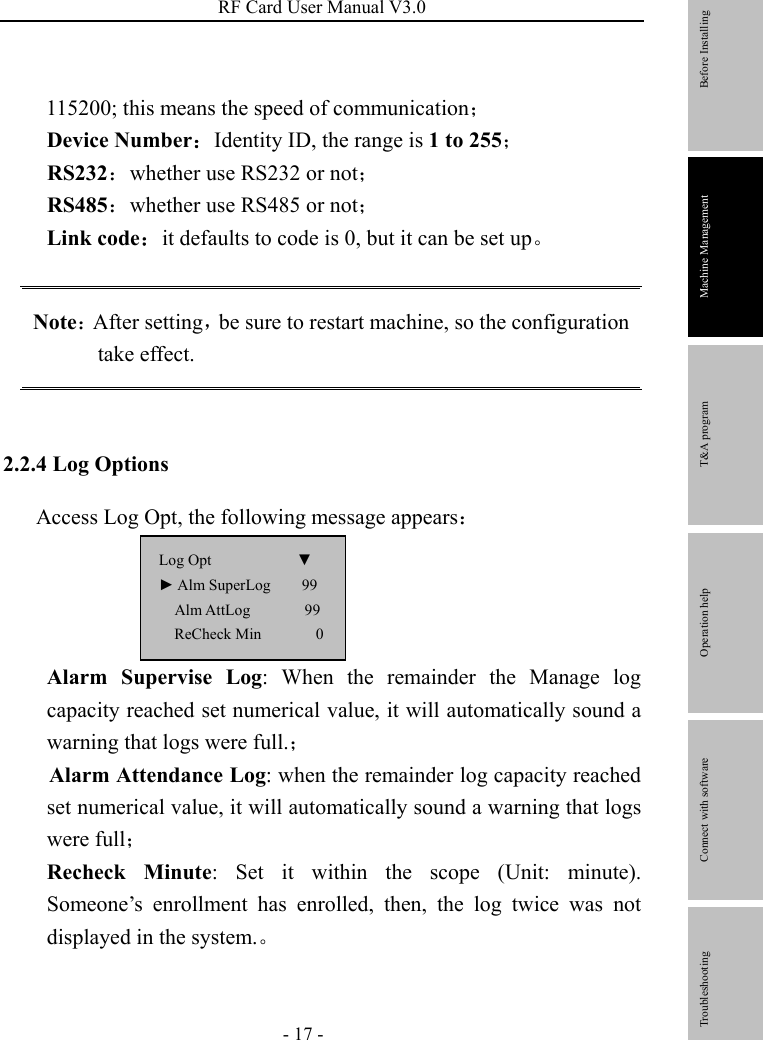
![T&A Machine Management - 10 - 2.2 Options Press the [Menu], and then verify your identity. The following appears: Access Options, press [OK], the following appears: Log Opts Auto Test This following topic include: System Option,Power Manage, Communication Option, Log Option and Auto test. Menu User Manage ► Options Sys Info Options ▼ ► System Opt Power Mng Comm Opt](https://usermanual.wiki/ZKSOFTWARE/U600P/User-Guide-979732-Page-16.png)
![RF Card User Manual V3.0 - 11 - 2.2.1System Option Access System Opt, the following appears: Adv Option Set Current Date Time Access Date Time, the following appears: To change the date, press∨ and key, then input the correct date and time, press [OK]. Changing the language★ Select the language you want and press OK, the default language is English; the screen will show in English. System Opt ▼ ► Date Time Language★ Fmt YYYY-MM-DD 24H 2006-6-13 9:34:29 ESC OK(save) Before Installing Machine Management T&A program Operation help Connect with software Troubleshooting](https://usermanual.wiki/ZKSOFTWARE/U600P/User-Guide-979732-Page-17.png)
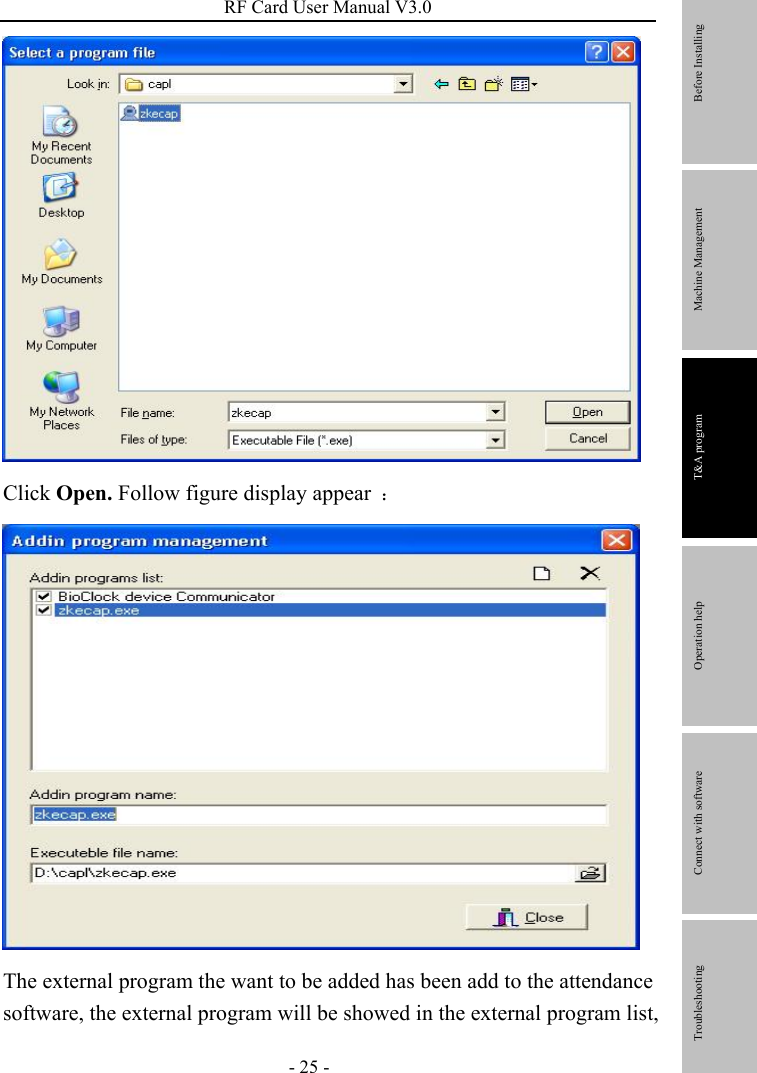
![T&A Machine Management - 12 - Press the up down key to change the type of language, the device fully supports multinational languages, on the screen there may be display as English besides the language you favor and order. Choose the language you want, and press OK then press ESC to exit system option, the system may prompt you to save the setup, press to confirm and change the system language setup. Be sure to restart you computer .so the sstting take effect。 Note:This machine does not provide this option that follows that standard approved for use with this machine, if you need this function; please contact our market supporter or saleman. Changing The Date Time Format Access Fmt YY-MM-DD, press ∨and∧ key, then input the correct date and time format, press [OK],There are ten formats: YY-MM-DD、YY/MM/DD、 YY.MM.DD、MM-DD-YY、MM/DD/YY、MM.DD.YY、DD-MM-YY、DD/MM/YY、DD.MM.YY、YYYYMMDD。For change the Date Time display format in the initial interface. E.g.:YY/MM/DD format (left) become to the YY-MM-DD format(right) System Opt ▼ Data Time ► Language Eng Adv Option](https://usermanual.wiki/ZKSOFTWARE/U600P/User-Guide-979732-Page-18.png)
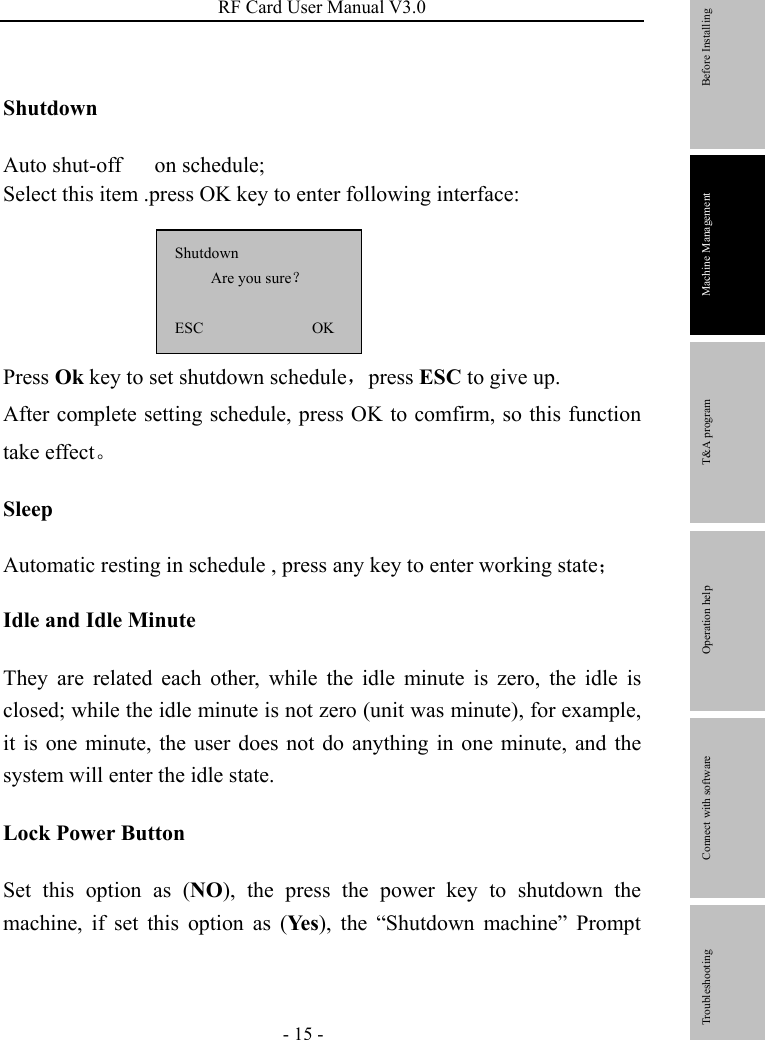
![RF Card User Manual V3.0 - 13 - Advance Option Access Advanced Option, press [OK], the following appears: Clr admin pri Voice Y Button Beep N AdjVol %34 Press “▲/▼”to scroll up or down the screen to select the option. Restore Default: restore all setup information to default of leave factory。 Clear all Data: delete all enrolling user information and logs。 Delete Logs: delete all logs of flash disk。 Clear Admin’ Privilege: change the Administer privilege into ordinary users’ option。 Sound: whether use to phonic hint or not. If set the option as (Ye s ), the machine will send a hint sound for every operation example, Welcome 10:12 05-14-06 Feb Welcome 10:12 05/14/06 Feb Adv Option ▼ ► Restore Deflt Del Logs Clear all Data Before Installing Machine Management T&A program Operation help Connect with software Troubleshooting](https://usermanual.wiki/ZKSOFTWARE/U600P/User-Guide-979732-Page-19.png)

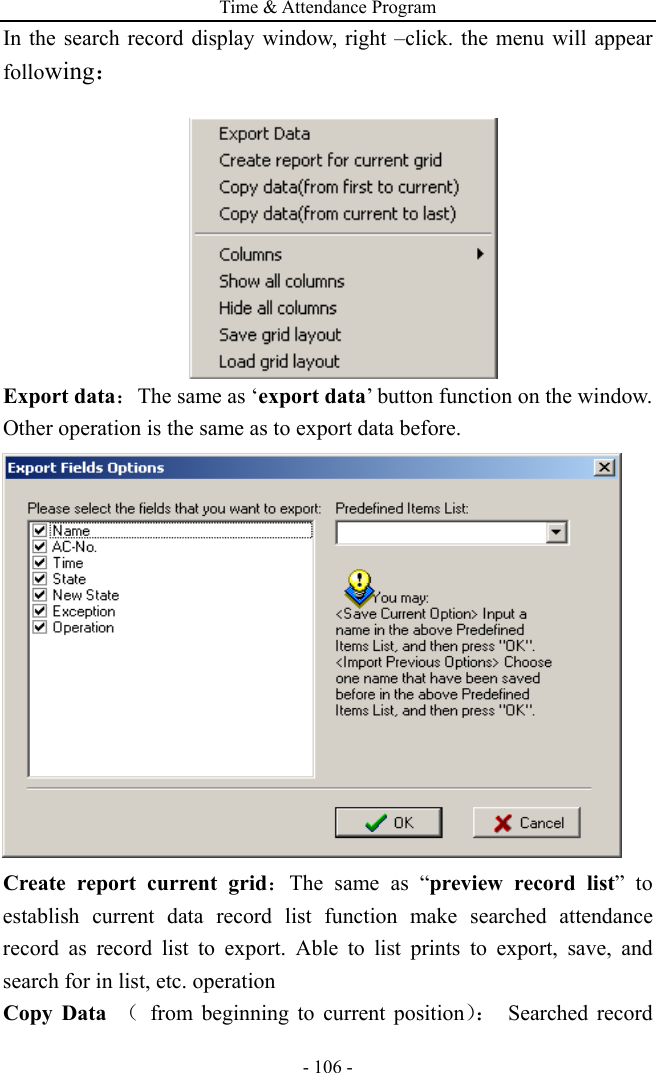
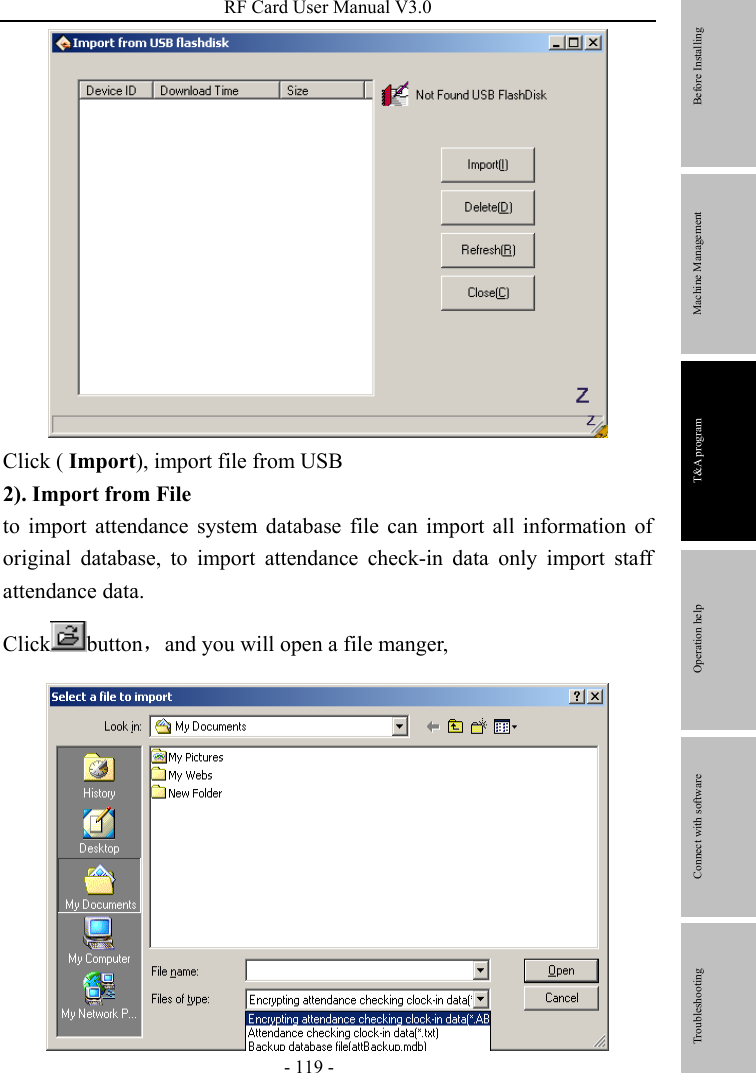
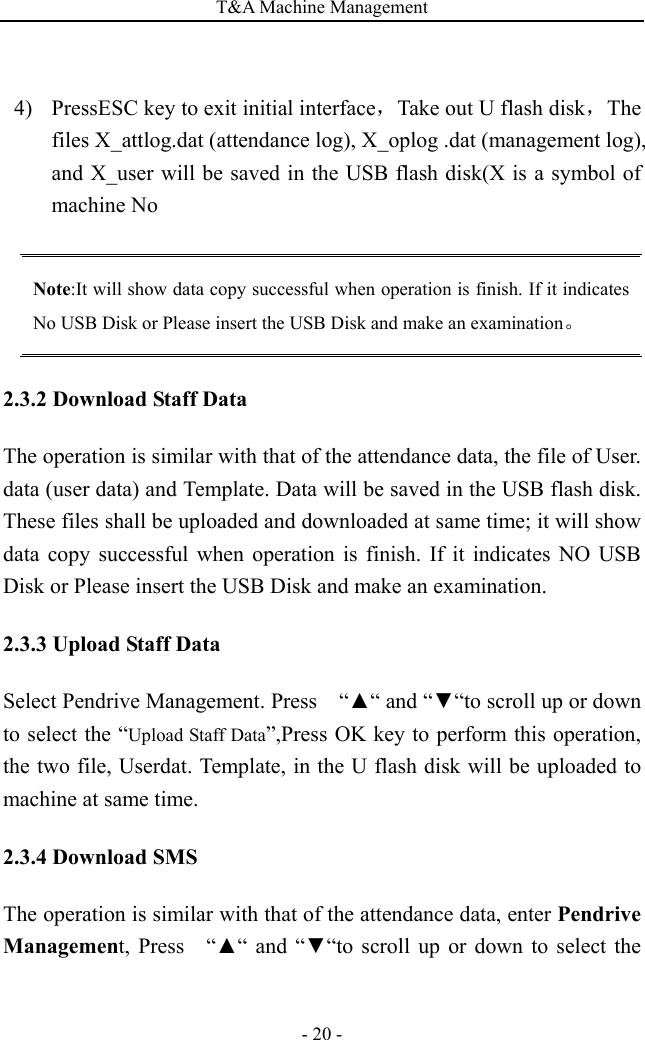
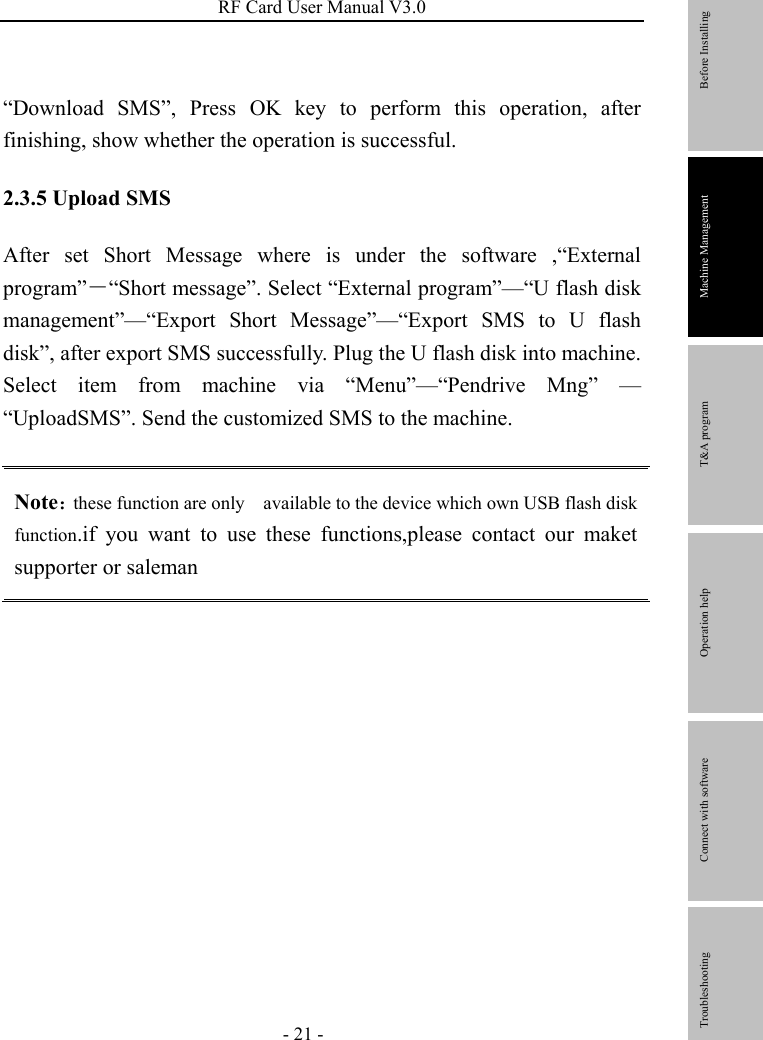
![RF Card User Manual V3.0 - 19 - 2.3 How to manage USB Flash Disk★ Choose USB flash disk management in the menu, press[OK], the following appears: Download SMS Upload SMS The USB flash disk can be used to download the attendance data, and download and upload employee data、SMS. 2.3.1 Download the attendance data 1) Plug the USB flash in the USB solt。 2) Press the Menu button to enter the “USB flash disk management” menu , Press “▲“ and “▼“to scroll up or down the screen to select the “Download Attlog”: 3)Press “ok” to go on downloading data, after operation finish,this interface show as follow.: Pen Drive Mng ▼ ► Download Attlog Download User Upload User PenDrive Mng ▼ ►Download Attlog Download User UpLoad User Copy data successfully! Before Installing Machine Management T&A program Operation help Connect with software Troubleshooting](https://usermanual.wiki/ZKSOFTWARE/U600P/User-Guide-979732-Page-25.png)
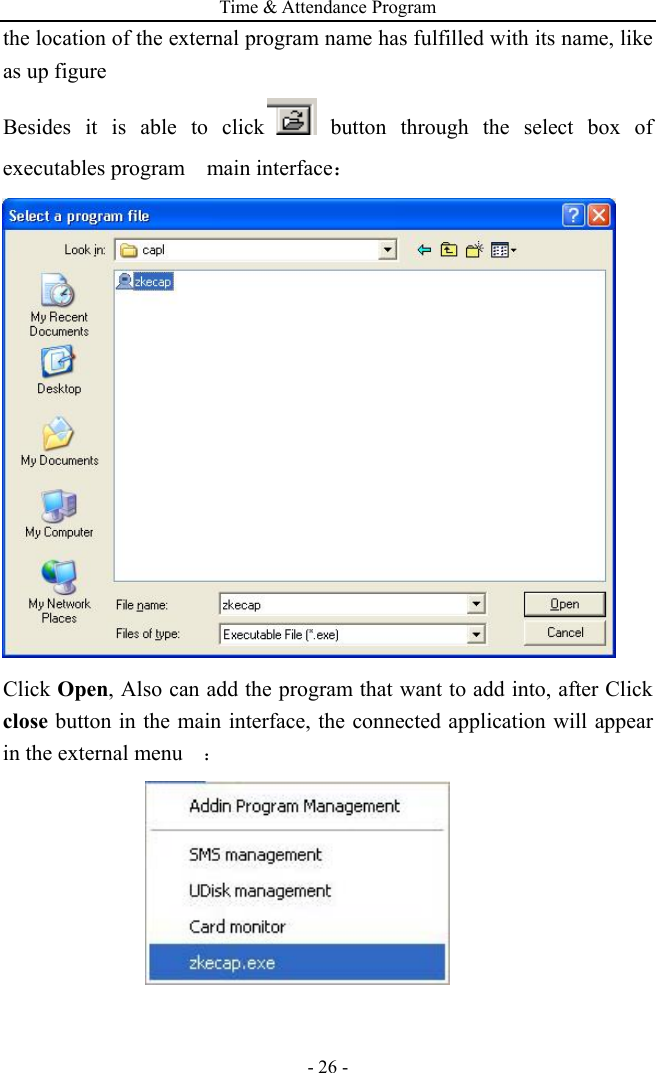
![T&A Machine Management - 22 - 2.4 System Information Through system Information you can view machine all information,Access [Menu] to Sys Info, press [OK], the following appears: Pwd User 30 Super Logs 263 Free Space Inf Dev Info The follow table illustrates what LCD showing item means: User Cnt: The total amount of use has been enrolled. Att log : The record of attendance which have been stored in the system Pwd User: The total amount of user who use password to achieve authentication Free space info: the remainder log capacity, how long reach set numerical value Dev Info: About this device information Sys Info ▼ ► User Cnt 206 RFID Cnt 8046 Att Log 2](https://usermanual.wiki/ZKSOFTWARE/U600P/User-Guide-979732-Page-28.png)