ZTE 995N WCDMA/LTE Dual-Mode Digital Mobile Phone User Manual ZTE T81
ZTE Corporation WCDMA/LTE Dual-Mode Digital Mobile Phone ZTE T81
UserManual.wiki
>
ZTE
>
995N User Manual
User manual
Navigation menu
Upload a User Manual
Namespaces
Wiki Guide
HTML
PDF
Info
Views
User Manual
Discussion / Help
Navigation


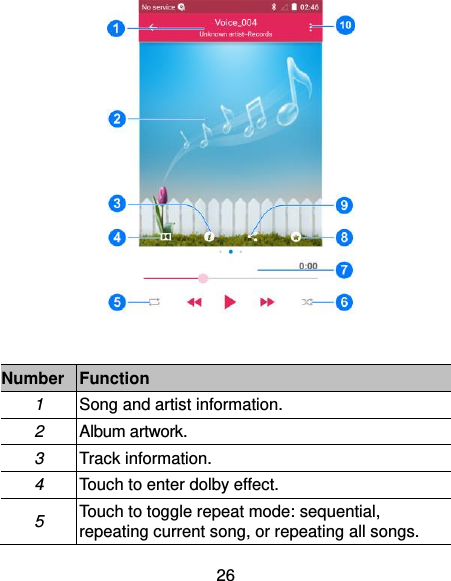
![27 6 Touch to play the current playlist in shuffle mode, where tracks are played in random order. 7 Playback control. Skip songs or pause and resume playback. Drag the slider to jump to any part of the song 8 Add the song to the Favorites. 9 Share the song. 10 Get more options. Connecting to PC You can connect your phone to a computer with a USB cable and transfer music, pictures, and other files in either direction. Your device stores these files in internal storage or on a removable microSDHC card. 1. Touch and hold the status bar across the top of the screen and flick down. 2. Touch (Connected as [current connection mode]). 3. Choose one of the following options: Charge only: Charge your phone via USB. USB mass storage: Transfer files between your computer and your Android device. Install driver: Install the driver needed for connecting your phone to your PC.](https://usermanual.wiki/ZTE/995N/User-Guide-2606500-Page-27.png)