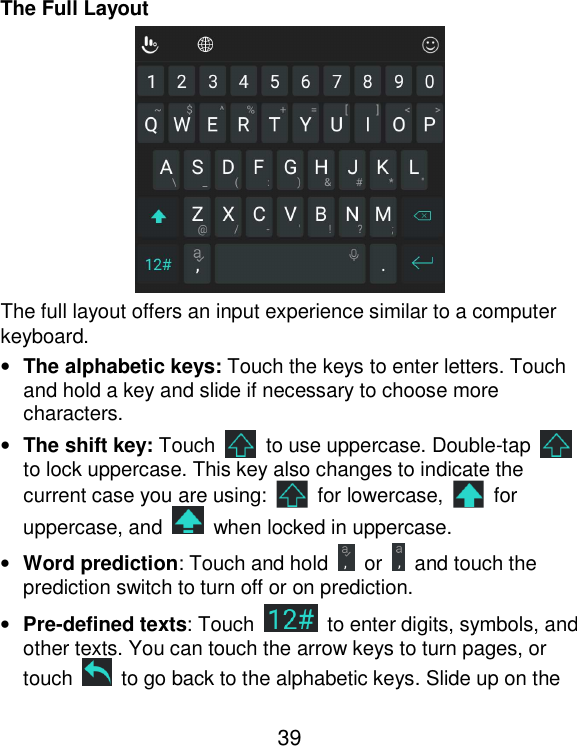
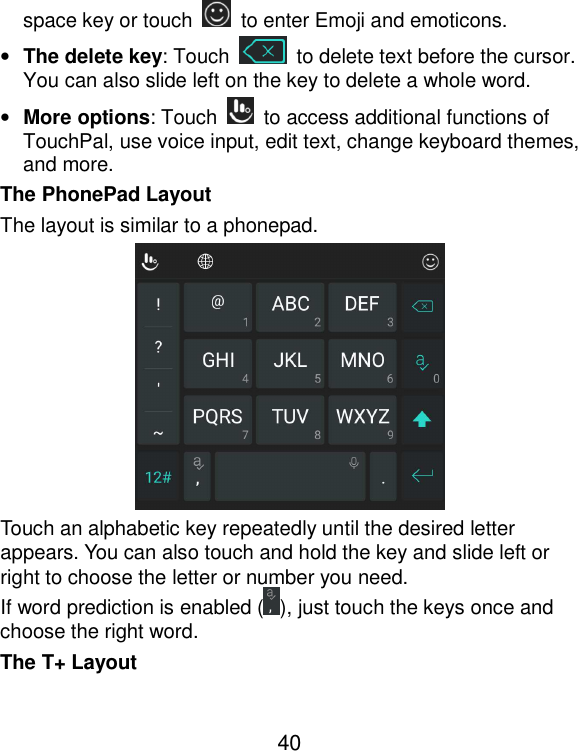
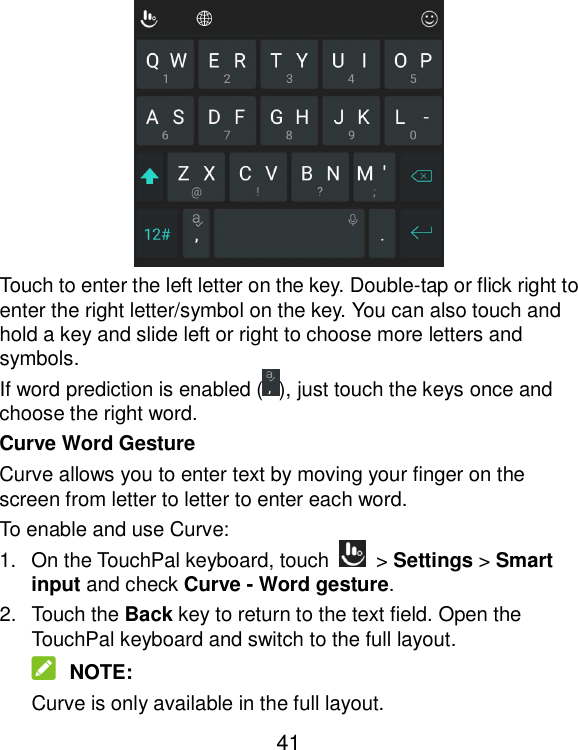
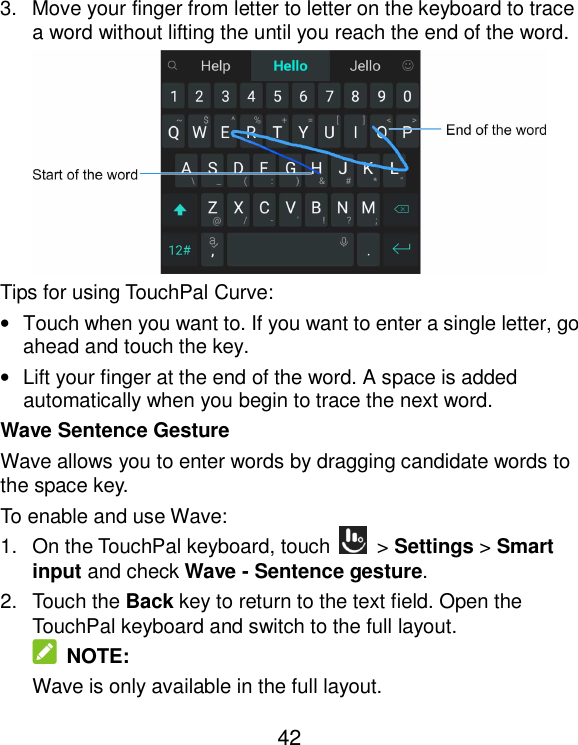
ZTE K88 Mobile Broadband Internet Device User Manual K88 V1 0
ZTE Corporation Mobile Broadband Internet Device K88 V1 0
UserManual.wiki
>
ZTE
>
K88 User Manual
Users Manual
Navigation menu
Upload a User Manual
Namespaces
Wiki Guide
HTML
PDF
Info
Views
User Manual
Discussion / Help
Navigation

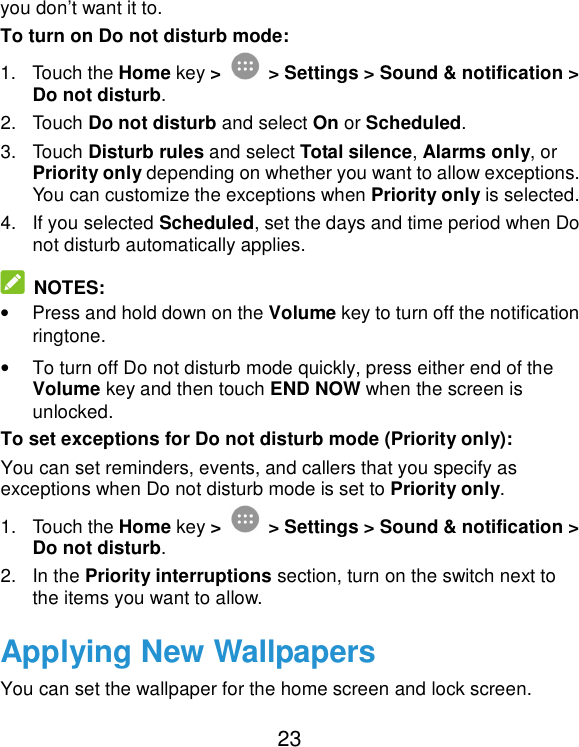
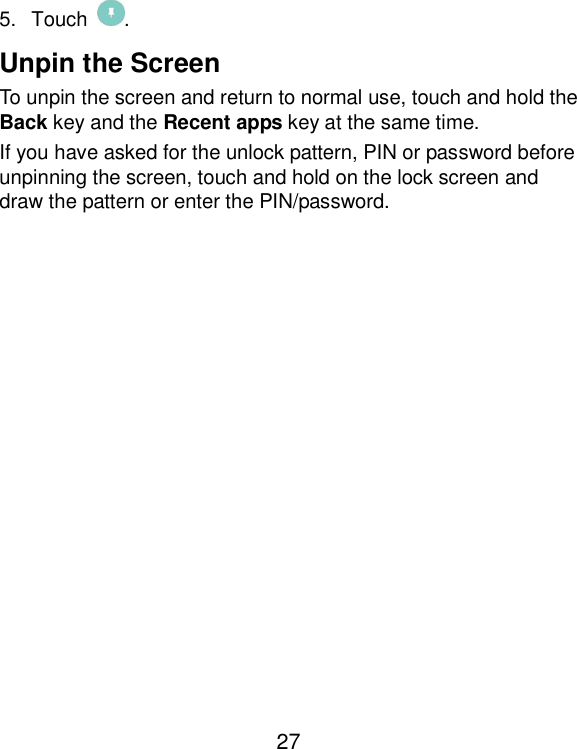
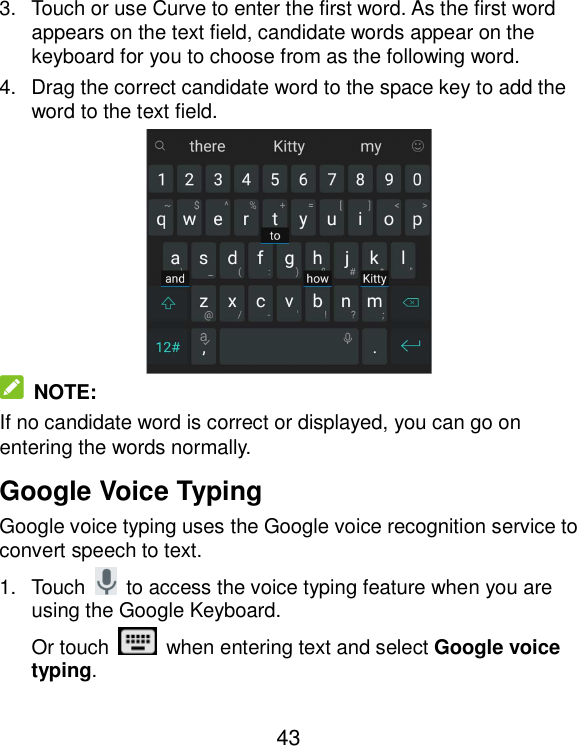
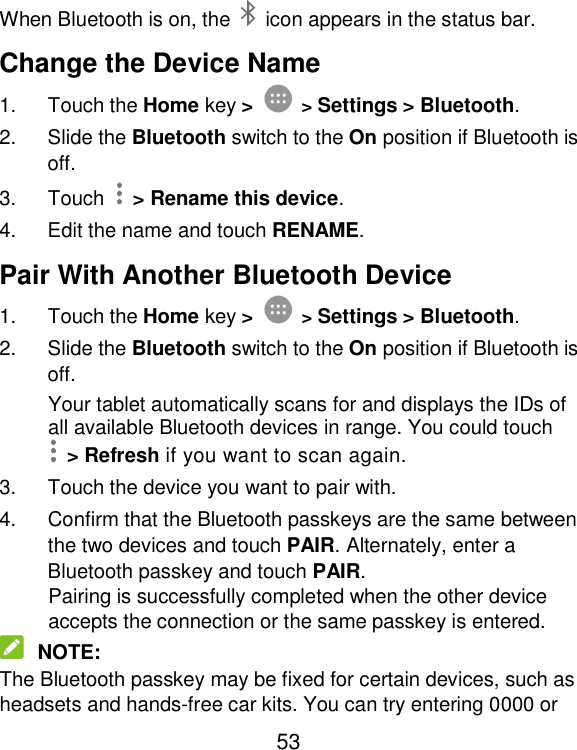
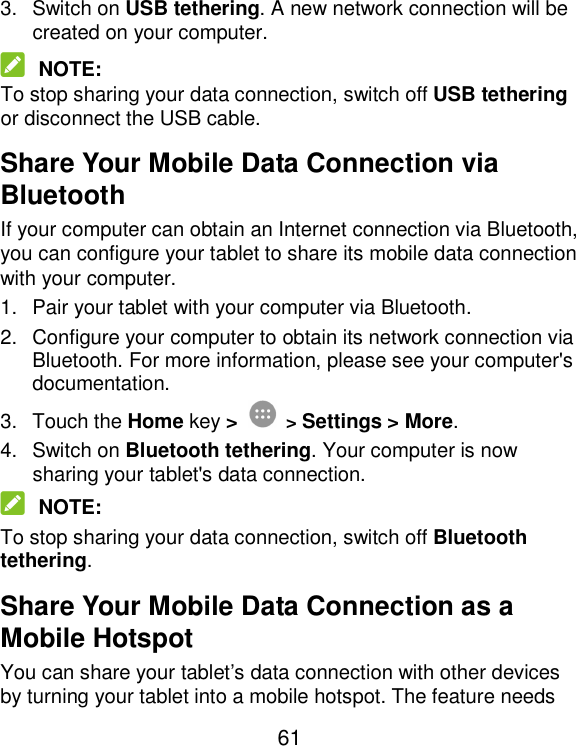
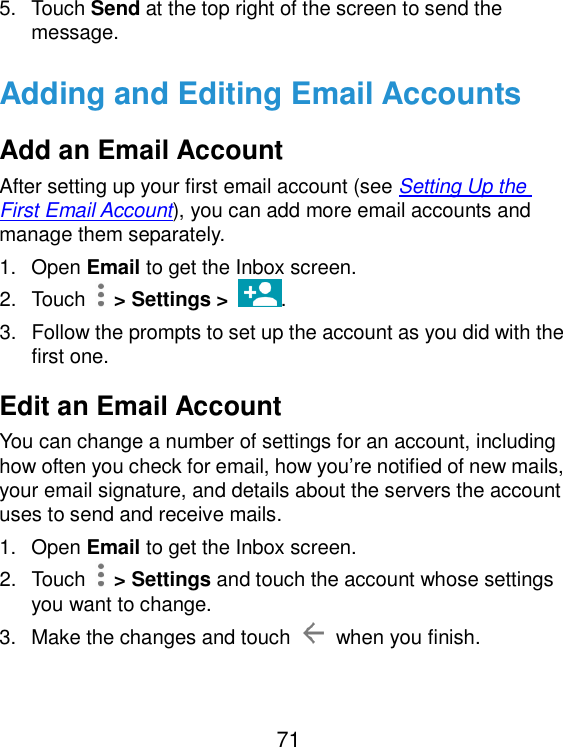
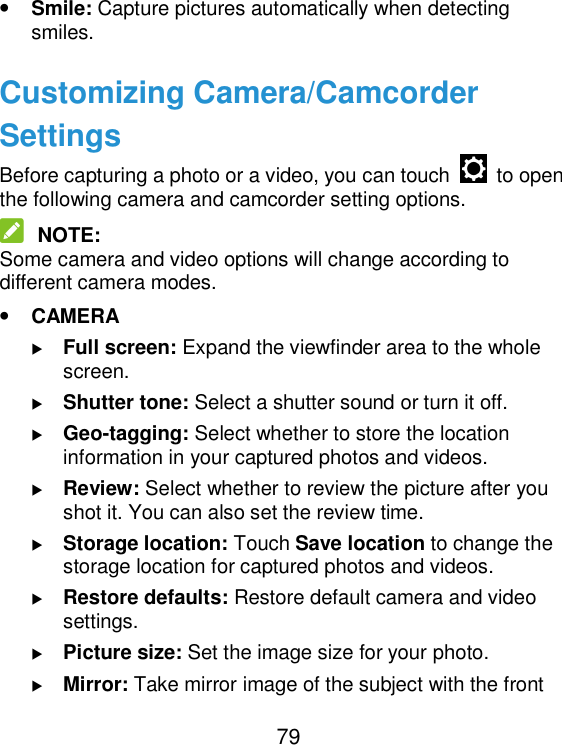
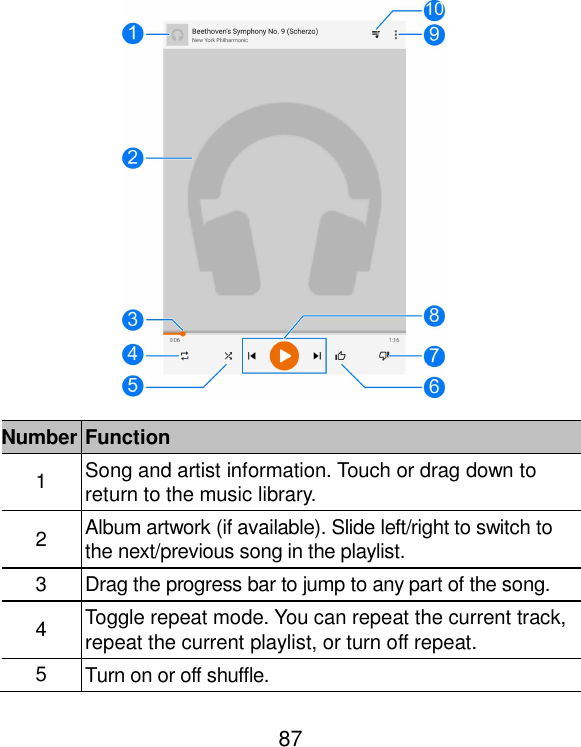
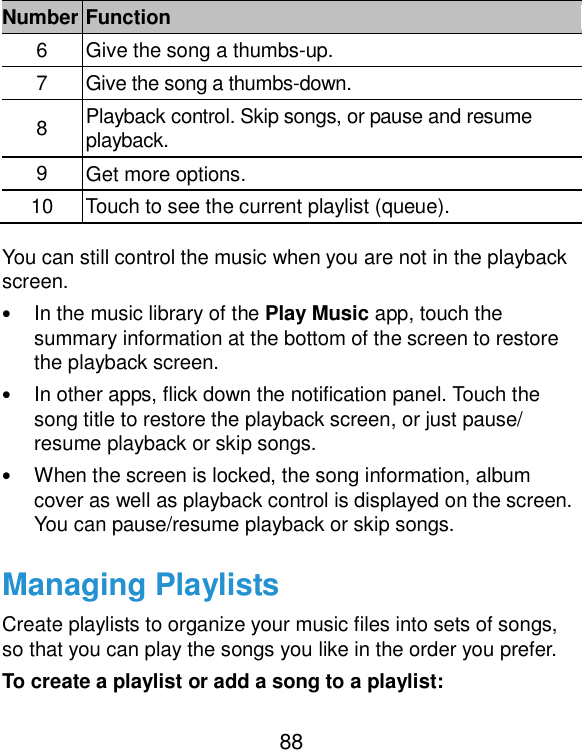
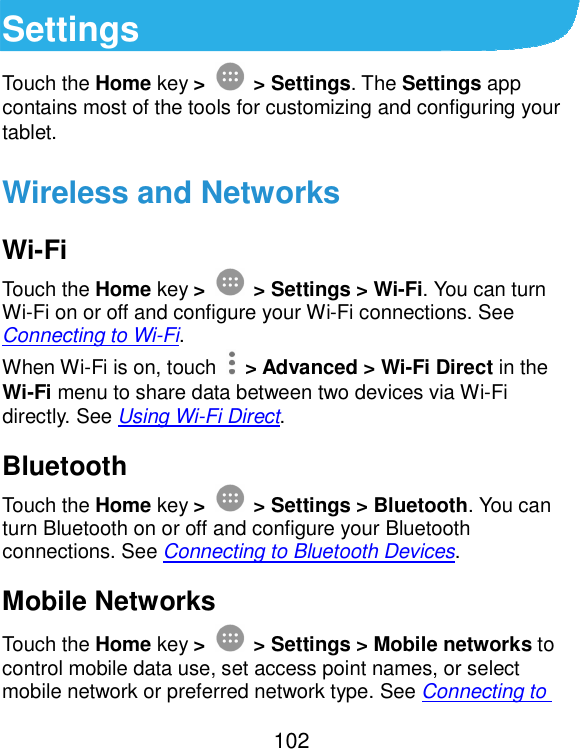
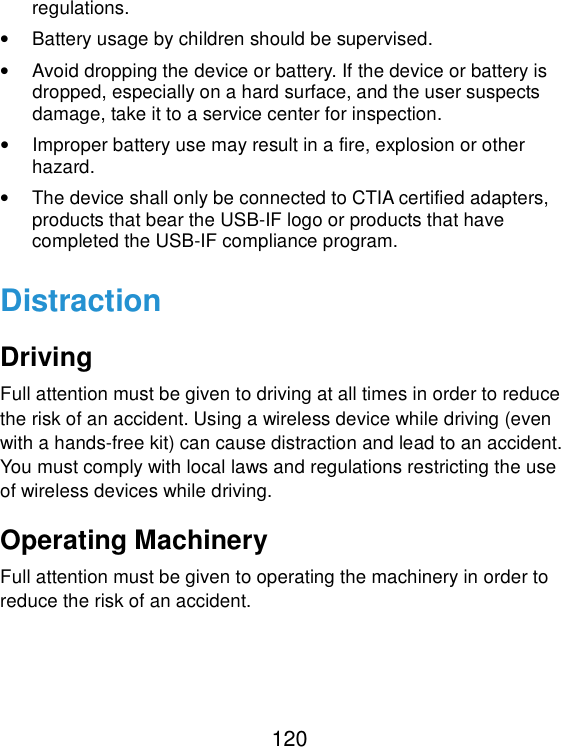
![22 2. Touch Default notification ringtone. 3. Select the ringtone you want to use. NOTE: If you have additional audio files saved in the internal storage or the microSDHC card, touch the MUSIC or RECORDINGS tab at the top of the ringtone list to choose one as the ringtone. 4. Touch OK. Turning On/Off System Sounds 1. Touch the Home key > > Settings > Sound & notification > Other sounds. 2. Touch Dial pad tones, Screen locking sounds, Charging sounds, or Touch sounds. Adjusting Volume 1. Touch the Home key > > Settings > Sound & notification. 2. Drag the sliders below Media volume, Alarm volume and Notification volume to adjust the volume for each type of audio. NOTE: You can adjust the media volume when a media application is in use by pressing the Volume key. If no media application is active, press the Volume key to adjust notification volume. Using Do Not Disturb Mode You can limit interruptions with Do not disturb mode. This mode silences your device so that it doesn’t make sounds or vibrate when Comment [A1]: No phone function, delete?](https://usermanual.wiki/ZTE/K88/User-Guide-3005051-Page-22.png)