ZTE MF279 WCDMA/LTE CPE User Manual
ZTE Corporation WCDMA/LTE CPE
UserManual.wiki
>
ZTE
>
MF279 User Manual
User manual
Navigation menu
Upload a User Manual
Namespaces
Wiki Guide
HTML
PDF
Info
Views
User Manual
Discussion / Help
Navigation

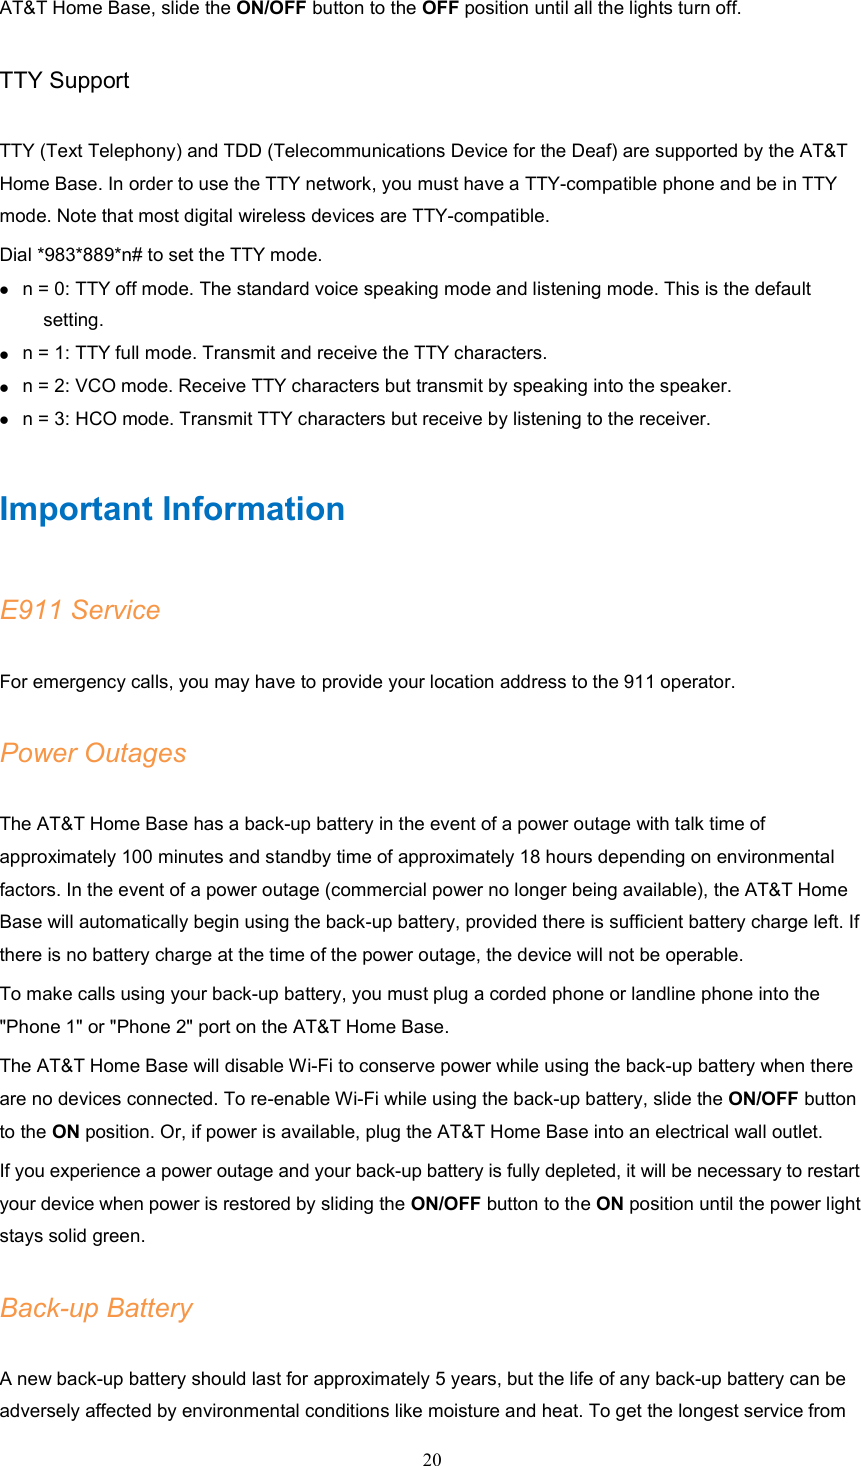
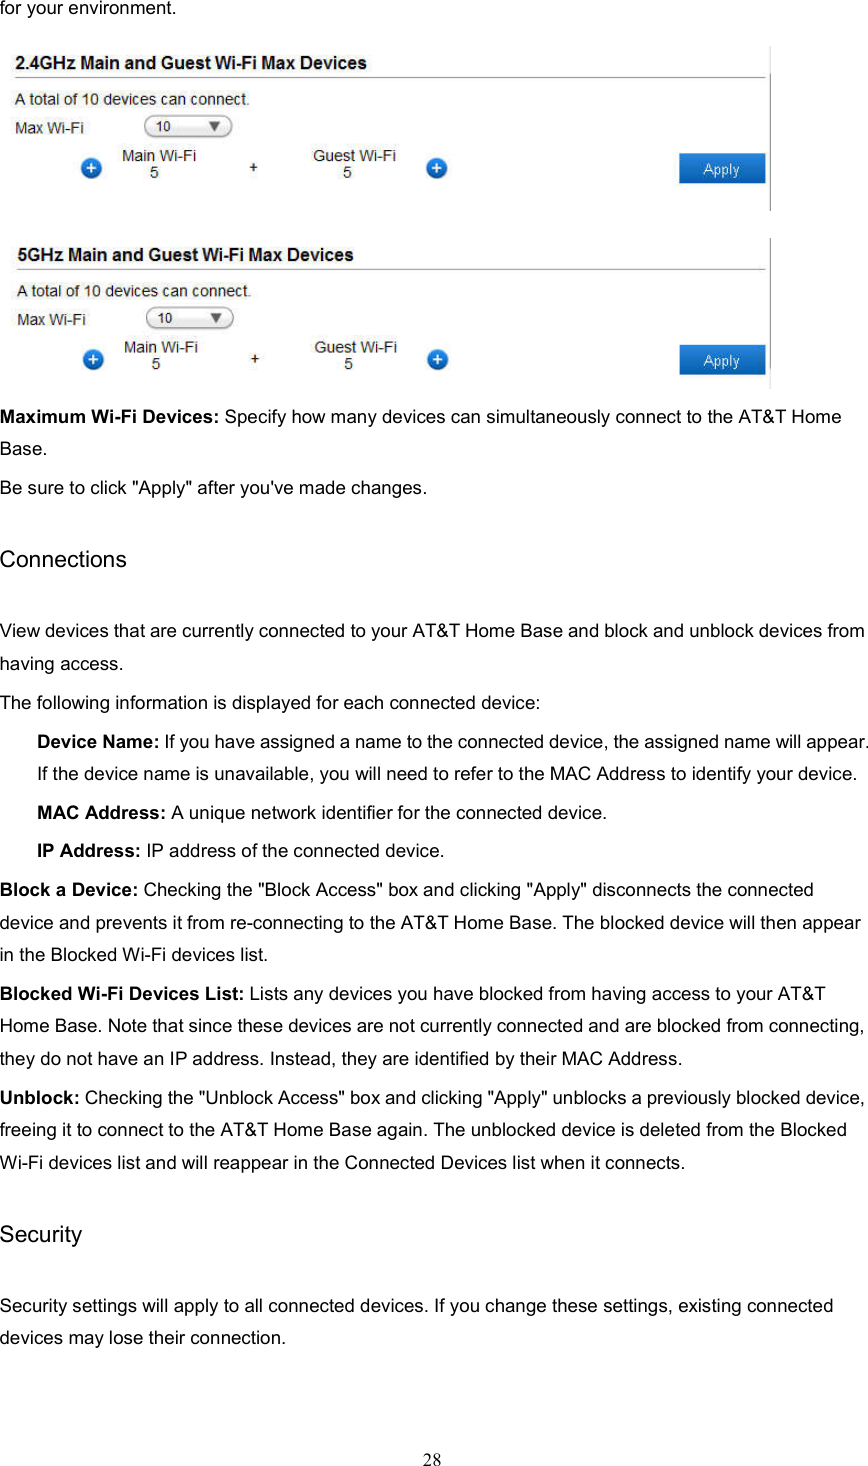
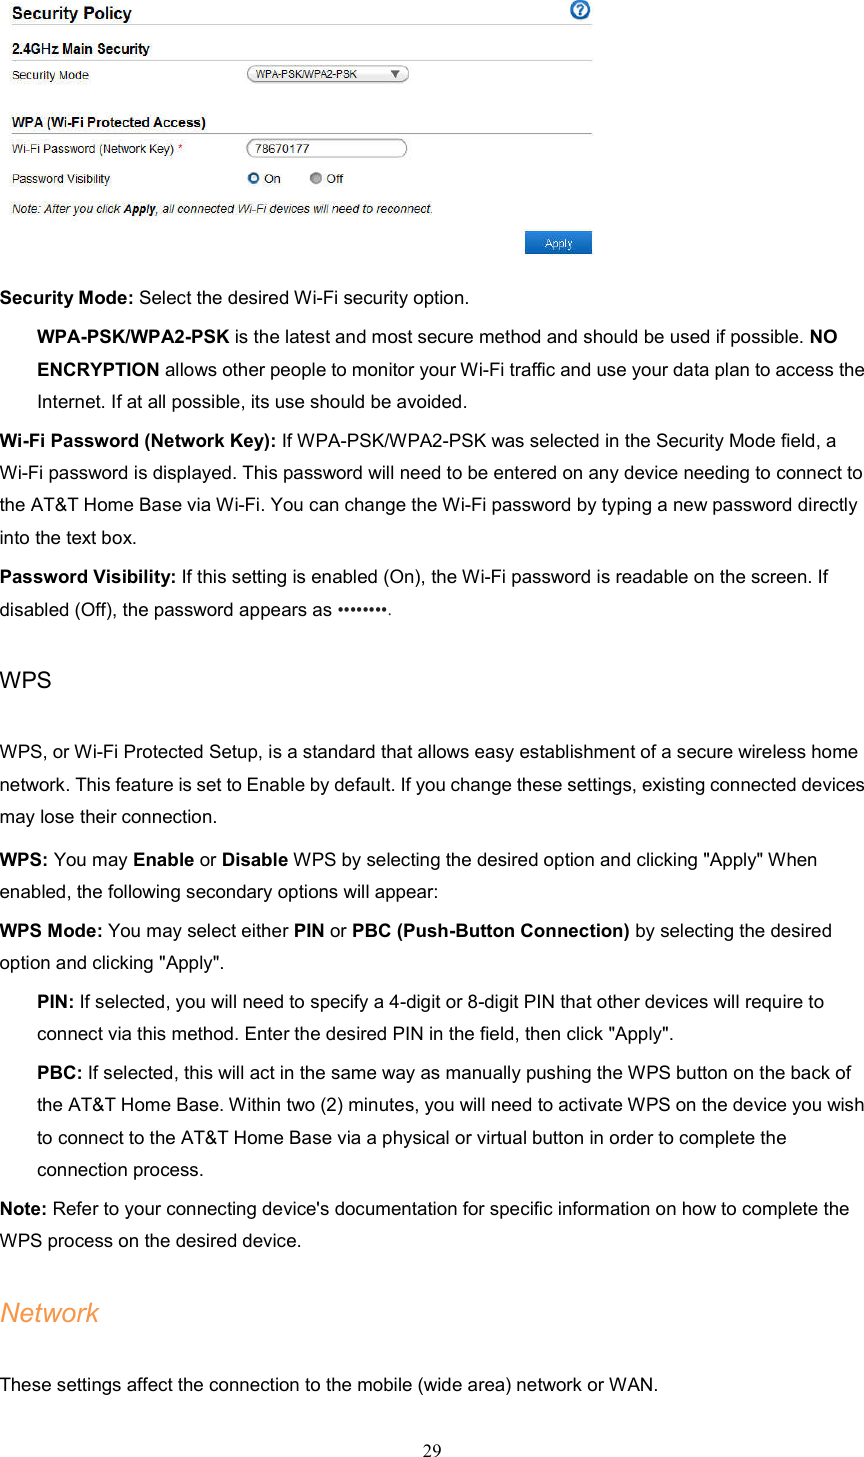
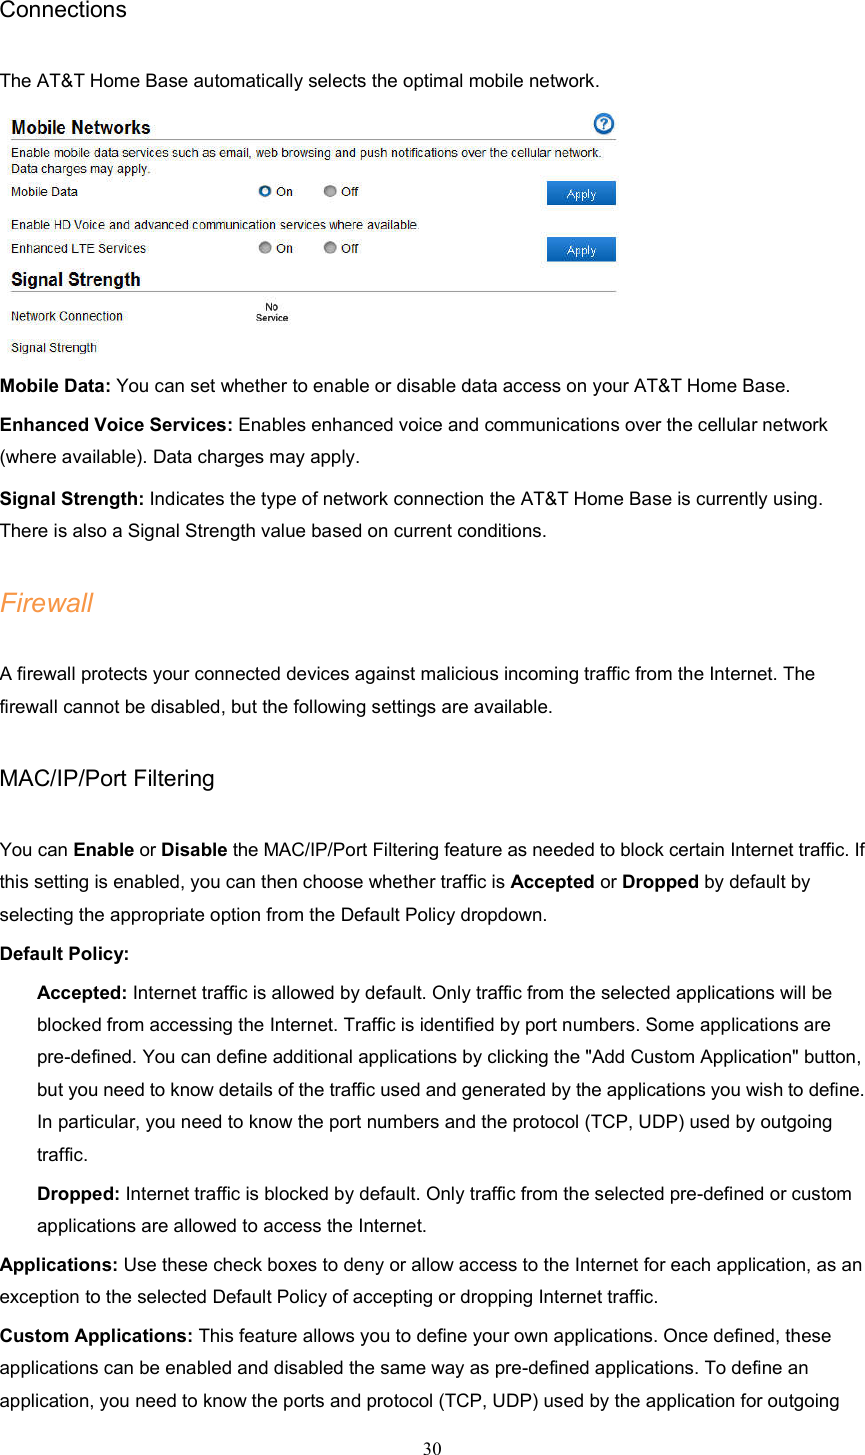
![15 Parental Control -- Select a connected device to add to Limited Device List, you can also set the days and times to limit data access. Settings -- customize your device's Wi-Fi and security settings (See Device Configuration on page 28). Run Device Diagnostics-- Diagnosis the device basic status: network, Wi-Fi and firewall. About Your Device -- get details regarding current device status and information. AT&T Software Update -- view software updates that are delivered automatically over the AT&T cellular network. Using Your Device Calling Making Calls Using a phone connected to your AT&T Home Base, place and receive calls as you normally would. The AT&T Home Base supports both cordless and corded phone dialing methods. Note: Make sure to dial the 10-digit phone number, including area code. Three-Way Calling While on an existing call, press the Flash (or Phone/Talk) key on your phone to put the first party on hold. When you hear a dial tone, dial the second party's number (wait up to four [4] seconds). When the second party answers, press the Flash (or Phone/Talk) key again to complete the three-way connection. If the second party does not answer, press the Flash (or Phone/Talk) key to end the connection and return to the first party. Note: If your phone does not have a Flash (or Phone/Talk) key, use the off-hook mechanism supported by your phone instead. Call Waiting You will hear two tones if someone calls while you are already on a call. To hold the current call and accept the waiting call, press the Flash (or Phone/Talk) key. You can press the Flash (or Phone/Talk) key anytime to switch back and forth between calls. To clear the current call and accept the waiting call, enter "1" and press the Flash (or Phone/Talk) key. To reject (User Busy) the waiting call, enter "0" and press the Flash (or Phone/Talk) key. Notes:](https://usermanual.wiki/ZTE/MF279/User-Guide-3568667-Page-15.png)