ZTE NX521J LTE Digital Mobile Phone Handset User Manual
ZTE Corporation LTE Digital Mobile Phone Handset
ZTE >
user manual
Android Mobile Phone
User Manual
The manual is applicable for the NX521J.

Content
About the User Manual ............................................................................................ 1
Copyrights ......................................................................................................... 1
Trademarks ....................................................................................................... 2
Statement of Third-party Applications .............................................................. 3
Basic Operations ...................................................................................................... 3
Definition of Keys .............................................................................................. 3
Icons on the Status Bar ..................................................................................... 5
Screen Control .................................................................................................. 6
Home Screen .................................................................................................... 6
Lock & Unlock the Screen................................................................................. 9
Calls ........................................................................................................................ 11
Make a call ...................................................................................................... 11
Call Settings .................................................................................................... 13
Answer a call ................................................................................................... 13
Reject a call ..................................................................................................... 14

End a call ........................................................................................................ 14
Options during a call ....................................................................................... 15
Call Log ........................................................................................................... 16
Voicemail ......................................................................................................... 16
Contacts ................................................................................................................. 17
Create new contact ......................................................................................... 17
Search contacts .............................................................................................. 17
Add to Favorites .............................................................................................. 18
Contacts group ................................................................................................ 18
Delete a contact .............................................................................................. 19
Edit a contact .................................................................................................. 19
Scan business card ......................................................................................... 20
Share a contact ............................................................................................... 20
Import & export contacts ................................................................................. 20
Messaging .............................................................................................................. 21
Send messages .............................................................................................. 21
Receive messages .......................................................................................... 22

Delete messages ............................................................................................ 22
Message settings ............................................................................................ 23
Email ....................................................................................................................... 23
Set up Email account ...................................................................................... 23
Check Emails .................................................................................................. 23
Send an Email ................................................................................................. 24
Network Applications .............................................................................................. 25
Data connection .............................................................................................. 25
Wi-Fi ................................................................................................................ 26
Tethering & portable hotspot .......................................................................... 27
Browser ........................................................................................................... 28
Bluetooth connection ...................................................................................... 29
GPS ........................................................................................................................ 32
Connect to your PC ................................................................................................ 33
MTP media device .......................................................................................... 33
PTP camera device ......................................................................................... 33
Settings ................................................................................................................... 34

Wireless & Networks ....................................................................................... 34
Personal .......................................................................................................... 35
System ............................................................................................................ 38
Multimedia .............................................................................................................. 39
Camera............................................................................................................ 39
Video recorder................................................................................................. 45
Music player .................................................................................................... 46
Video player .................................................................................................... 48
Gallery ............................................................................................................. 49
Tools ....................................................................................................................... 50
Flashlight ......................................................................................................... 50
Sound recorder ............................................................................................... 51
Calculator ........................................................................................................ 52
FM Radio ......................................................................................................... 52
NotePad .......................................................................................................... 53
Calendar .......................................................................................................... 53
Features ................................................................................................................. 55

Profile .............................................................................................................. 55
Screen division ................................................................................................ 57
Custom bottom key ......................................................................................... 59
Touch gestures ............................................................................................... 59
Smart sensing ................................................................................................. 60
Other ....................................................................................................................... 62
My Files ........................................................................................................... 62
Backup ............................................................................................................ 62
Screen projection ............................................................................................ 63
Input Method .......................................................................................................... 63
Using your phone safely ......................................................................................... 63
Battery care and safety .......................................................................................... 67
Charger care and safety ......................................................................................... 68
Care and maintenance ........................................................................................... 69
Health and safety ................................................................................................... 70
FCC Regulations: ............................................................................................ 70
Declaration of RoHS compliance ........................................................................... 74

1
About the User Manual
Copyrights
Copyright © 2015 by Nubia Technology Co., Ltd.
All the copyrights of the user manual herein belong to Nubia Technology Co., Ltd.
Without the written permission of copyright owner, no part of this publication may
be excerpted, reproduced, translated by any person or entity in any form or by any
means.
Nubia Technology Co., Ltd. reserves the right to modify technical parameters and
specifications in this manual, and promptly correct the contents in the manual that
are inconsistent with the latest documents. All modifications shall be compiled in a
new version of user manual without prior notice.
Nubia Technology Co., Ltd. keeps the right to make the final explanation to this
manual.

2
And don’t worry if the pictures we use to demonstrate your phone’s functions look a
little different from what you see on its screen. It’s the functions they show that
matter.
If the contents described in the user manual are consistent with the actual product
due to upgrade, please subject to the information subsequently released by the
company.
Android is a trademark of Google, Inc.
Trademarks
For DTS patents, see http://patents.dts.com. Manufactured under
license from DTS Licensing Limited.
DTS, the Symbol and DTS + the Symbol together are registered trademarks of DT
S, Inc., and DTS Sound is a trademark of DTS, Inc. © DTS, Inc. All Rights
Reserved.
All other trademarks remain the property of their respective owners.

3
Statement of Third-party Applications
During the installation process of some third-party applications, the issues of
repeated restart or abnormal use of software might be caused by incompatibility of
the third-party applications, rather than the phone itself.
The installation of a third-party ROM or non-official operating system might bring
security risk and security threats. Nubia Technology Co., Ltd. shall not be liable for
the security threats brought by upgrade of the operating system.
Basic Operations
Definition of Keys
Power/Reboot/Lock key
Press & hold: turn on the phone; open the Phone options menu.
Press & hold more than 10 seconds: reboot the phone.
Press: turn off and lock the screen, or wake up the screen.

4
Home key
Press the key to return to the home screen from any other interface.
Press & hold the key to open the list of most recently used applications.
Menu key
Press the key to open the tools menu of current interface.
After Free Screenshot is enabled, press & hold the key to enter the Free
Screenshot mode.
Back key
Press the key to return to the previous menu.
Volume key
Press the key to adjust the volume. Press & hold the upper key to adjust to
maximum volume, and press & hold the lower key to adjust to Vibration.
5
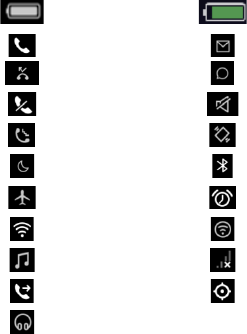
Icons on the Status Bar
Icon
Description Icon Description
Battery full
In charging
In a call
New E-mail
Missed calls
Unread messages
Mute on call
Silence mode enabled
Vibrate on call
Vibration mode enabled
Sleep mode enabled
Bluetooth On
Flight mode enabled
Alarm On
Connected to Wi-Fi
Wi-Fi hotspots enabled
Music player On
SIM/UIM card unavailable
Call forwarding enabled
GPS enabled
Headset inserted
6
Screen Control
You can control your phone through a series of operations on the screen.
- Touch: select an item or option on the screen, or open an application.
- Slide: swipe left/right or up/down on the screen to move through what’s on the
screen.
- Press & hold: press your finger down and leave it there for a few seconds to open
a menu specific to what you're doing.
- Drag: drag some items on the screen to accomplish certain operations.
- Pinch or stretch: in some applications (e.g., Gallery, Browser), pinch two fingers
together on the screen or stretch them apart to zoom out or in.
- Rotate: in most screens, rotate your phone sideways to switch the screen from
portrait mode to landscape mode.
Home Screen
The home screen appears as the phone is in idle mode. On the home screen, you
can check the status of your phone and get access to applications.
7
Extend home screen
The home screen can be extended to exceed the width of the screen to provide
more space for newly added applications, shortcuts, widgets, etc.
Slide left/right on the home screen to move to the left or right side of the home
screen.
Touch the small dot at the lower part of the screen to directly move to the relevant
screen. Press & hold the small dot area and drag to quickly navigate.
Quick Launch Toolbar
There are icons at the bottom of the screen. You can move the applications or
shortcuts that you need access most frequently into the quick launch toolbar.
1. Press & hold an icon at the toolbar and drag it to the area outside the toolbar.
2. Press & hold another icon on the screen you want to move, and then drag it to
an empty area inside the toolbar.
Show/hide notification bar
As a new notification icon appears in the notification bar, you can pull down the
notification bar to view the list of notifications, and touch a notification to perform
8
detailed operation.
Swipe up from any place on the screen to hide the notification bar.
Move icons on home screen
To move an icon on the home screen, press & hold the icon you want to move,
drag it to your desired position on the screen and release it. Drag the icon to the
navigation bar to quickly switch to other screen.
Press & hold the icon you want to move and release it, the icon shall jump to the
bottom of the screen; slide left or right to the target screen, and touch the icon at
the bottom of the screen to jump to the target screen.
Delete icons on home screen
To uninstall an application or remove a widget, press & hold the Application or
Widget icon and drag it to the Remove/Uninstall icon at the top of the screen.
Note:
The preinstalled system applications cannot be removed.
Add or move screen on home screen
Press and hold an empty area on the home screen to add more screens. Slide
from left to right to view the newly added screen.

9
Touch the icon to continue adding more screens; Press and hold the
icon until it has changed to , touch the icon to remove the newly
added screen. Touch the icon to set the current screen as Home screen.
Change desktop wallpaper
On the home screen, press ‘Menu key’> ‘Wallpapers’ to choose a wallpaper.
Use shortcuts panel
On the home screen or in the process of using an application, pull down the
notification bar to open the shortcuts panel. Touch the shortcuts icons to perform
relevant settings.
Create a folder and add items into the folder
1. On the home screen, press & hold an icon and drag it to another icon on the
screen to create a folder containing these two icons.
2. Press & hold other icons and drag them to the folder to add items into the folder.
Lock & Unlock the Screen
Lock the screen
As the phone is powered on, press the ‘Power’ key to lock the screen. The phone
10
shall automatically lock the screen after it’s not used for a while.
Lockscreen photo
As the screen is locked, press the ‘Power’ key to light up the screen.
Show Music widget
As the screen is locked, press the ‘Power’ key to light up the screen, and double
touch the'Home' key to display music widget.
Unlock the screen
1. Press the ‘Power’ key to light up the screen.
2. Swipe up from the bottom of the screen to the icon ‘Unlock’ to unlock the screen;
slide left to the icon ‘Phone’ to enter the dialing interface, and slide right to the
icon ‘Camera’ to directly enter the camera interface.
Change screen lock method
1. On the home screen, press ‘Menu’ key> ‘Settings’> ‘Security & location ’ >
‘Screen lock’.
2. Choose the screen lock method.
11
Calls
Make a call
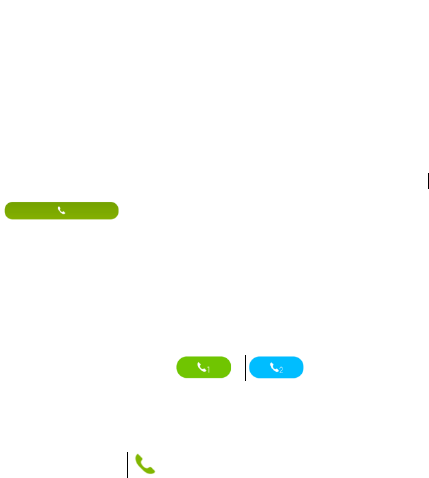
Directly make a call
On the home screen, touch the icon ‘Phone’ to display the dialing keypad. Touch
the numeric buttons to input telephone numbers and touch the button
to make a call.
You can touch the first letter of a contact’s name on the dialing keypad to quickly
search the contact. For example, if you want to call John , input
5(JKL)-6(MNO)-4(GHI)-6(MNO).
If you have inserted two SIM cards, touch the numeric buttons to enter a phone
number and touch the icon or to make a call.
Make a call from contacts
On the home screen, touch the icon ‘Contacts’, select the contact you want to call
and touch the button to make a call.

12
Make a call from call logs
On the home screen, touch the icon ‘Phone’, select one call log and touch it to
make a call.
Make an international call
On the home screen, touch the icon ‘Phone’ to display the dialing keypad, press &
hold ‘0’ key until “+” appears on the screen, and then dial the country/region code,
city code & phone number.
Make a call from messaging
1. On the home screen, touch the icon ‘Messaging’ to open the messaging
interface.
2. Touch one message to open it.
3. Touch the icon to view the details of the message sender and touch the
button to make a call.

13
Speed dial
On the dialing keypad, press & hold 2-9 key to quickly call the corresponding
contact.
Please perform settings according to the prompt on the screen.
Call Settings
1. On the home screen, touch the icon ‘Phone’ to display the dialing keypad.
2. Select ‘More’ > ‘Call settings’ to set the options during a call. In ‘More settings’
menu, you can set Fixed Dialing Numbers, Call Forwarding and Call Waiting.
Answer a call
The mobile phone shall ring or vibrate (depends on the current mode and settings)
upon an incoming call.
- If the screen is unlocked, touch the icon ‘Answer’ to answer the call on the
incoming call interface.
- If the screen is locked, drag the icon and swipe down to answer the call on
the incoming call interface.

14
- If you’ve activated ‘Motion Answer’, you can put the phone near your ears to
directly answer the call.
Reject a call
Screen unlocked
On the incoming call interface, touch the icon ‘Decline’ to reject the call.
If you want to politely reject the call, you can touch the icon ‘Send SMS’ to
send a text message.
Screen locked
On the incoming call interface, drag the icon and swipe down to reject the
call.
If you want to send a text message while rejecting a call, swipe up from the bottom
of the screen to select a text message or edit a message.
End a call
During a call, touch the icon ‘End’ to end a call.

15
Options during a call
Adjust the volume
During a call, press the volume key to adjust the volume.
Dialpad
During a call, touch the icon ‘Dialpad’ to display the dialing keypad for easy
operations.
Speaker
During a call, touch the icon ‘Speaker’ to enter the hands-free mode and touch the
icon again to resume.
Mute
Touch the icon ‘Mute’ to turn off the microphone and let the other party unable to
hear your voice; touch the icon again to resume.
Add call
During a call, select ‘More’ > ‘Add call’ to make a conference call. The function
requires the support from the network operator.

16
Record
During a call, select ‘More’ > ‘Record’.
Call Log
1. On the home screen, touch the icon ‘Phone’.
2. The call log is displayed on the screen. If you want to clear call logs, select
‘More’ > ‘Clear call log’.
Voicemail
Note:
Prior to access to voicemail server, you must save voicemail server number.
Please contact your network operator to get the number.
Set voicemail
1. On the home screen, touch the icon ‘Phone’ to display the dialing keypad.
2. Select ‘More’ > ‘Call settings’ >‘More settings’ > ‘Voicemail’ > ‘Setup’.
3. Touch ‘Voicemail number’ to set.
Listen to voicemail

17
On the home screen, touch the icon ‘Phone’ to display the dialing keypad and
press & hold ‘1’ key to listen to voicemail.
Contacts
Create new contact
1. On the home screen, touch the ‘Contacts’ icon and select ‘New contact’.
2. Enter the information for the new contact.
3. Select the storage location under ‘SAVE TO’.
4. Touch ‘Done’ to save.
Search contacts
After you enter ‘Contacts’, all contacts will be arranged in alphabetical order.
1. Swipe up/down to scroll the list of contacts. You can also quickly scroll the
list by dragging your fingers along the right index.
2. Touch ‘Find contacts’ at the top of the screen, and input a contact’s name
to quickly find the contact.

18
3. Touch a contact’s name to view the details of the contact.
4. On the interface of contact’s details, you can touch to make a call
and touch to send a message.
Add to Favorites
1. Enter ‘Contacts’ and select the contact you want to add to favorites.
2. Touch the icon ‘Star’.
3. On the contacts interface, all favorite contacts are displayed at the top of the
screen.
Note:
You can only add the contacts in the phone to Favorites
Contacts group
1. Enter ‘Contacts’ and touch the icon ‘Group’.
2. Touch the icon ‘Create group’.
3. Input a group’s name.

19
4. Touch ‘Default Ring’ to set the ringtone for the group, and input a contact’s name
or touch to select from the list of contacts.
5. Touch ‘Done’.
6. Enter one group and touch ‘Text’ or ‘Email’ at the bottom of the screen to
send a text message or E-mail to all group members.
Note:
You can only add the contacts in the phone to Group.
Delete a contact
1. Enter ‘Contacts’ and select the contact you want to delete.
2. Select ‘More’ > ‘Delete’.
To delete multiple contacts, select ‘More’ > ‘Delete contact’ on the interface of
contacts’ list, select the contacts you want to delete and touch ‘OK’.
Edit a contact
1. Enter ‘Contacts’ and select the contact you want to edit.
2. Touch the icon ‘Edit’ at the bottom of the screen.

20
Scan business card
1. Enter ‘Contacts’ and touch the icon ‘Scan’.
2. Center the business card in the view finder, touch the shutter button and
the icon icon to display the information from the business card on the
screen.
3. Touch ‘Done’.
Share a contact
You can share a contact with others.
1. Enter ‘Contacts’ and select the contact you want to share with others.
2. Touch the icon ‘Share’.
Import & export contacts
You can move the contacts from the SIM card/SD card to the phone or from the
phone to the SIM card/SD card.

21
1. Enter ‘Contacts’ and touch the icon ‘More’.
2. Touch ‘Advanced’, and select from ‘IMPORT/EXPORT CONTACTS’.
Messaging
Send messages
1. On the home screen, touch the icon ‘Messaging’ to enter the messaging
interface, and touch the icon ‘Create’ .
2. Type your desired telephone number into the field “To”.
- Manually input a telephone number. For multiple numbers, please separate them
with a carriage return.
- You can also touch the icon to select your desired telephone number from
Contacts.
3. Type the message text into the field ‘Type message’. Touch the icon to
insert an Emoticon, Picture, Video or Phrase.
4. If you have inserted two SIM cards, a SIM card icon will appear beside the

22
content field. Touch the icon to select Send messages from SIM card 1 or SIM card
2.
5. Touch to send the message.
Receive messages
There is a notification in the notification bar upon the receipt of a new message.
You can pull down the notification bar and touch a message to view it.
Delete messages
On the messaging interface, press & hold one message thread, then select the
message threads you want to delete, and touch the icon ‘Delete’ at the bottom of
the screen.
If you want to delete one single message, press & hold one message, and touch
the icon ‘Delete’ at the bottom of the screen.

23
Message settings
On the messaging interface, select ‘More’ > ‘Settings’ to perform settings related to
messages.
Email
Set up Email account
1. On the home screen, touch ‘Email’.
2. Select one mail provider.
3. Input your Email address & password and touch ‘Next’.
4. Perform the operations according to the prompt on the screen.
Check Emails
1. If you have set your Email account, touch ‘Email’ to enter the inbox of this
account.
2. If you want to check Emails of more accounts, select ‘Settings’ > ‘Add account’.

24
3. Touch the account’s name at the top of the screen to select the account you
want to check; touch ‘Combined view’ to check the inbox of all Email accounts
you’ve set.
4. Scroll the screen and check the Emails.
Send an Email
1. On the Email interface, touch the icon ‘Compose’.
2. Type the recipient’s address into the field ‘To’ or touch the icon to
select one recipient from the list of contacts.
3. If you need to send by Cc or Bcc, select ‘More’ > “Add Cc/Bcc”.
4. Touch ‘Subject’ to input the Email subject.
5. Touch ‘Compose email’ to input the text.
6. If you want to attach a file, touch the icon ‘Add attachments’.
7. Touch ‘Send’ to send the Email, and select ‘More’ > ‘Save as draft’ to save
the Email as draft.

25
Network Applications
Data connection
Your phone can connect to the Internet.
Pull down the notification bar to show the Shortcuts panel, and touch ‘Data’ to
enable or disable data connection.
If you have inserted only one SIM card, you can press the ‘Menu’ key> ‘Settings’ >
‘More’ > ‘Mobile networks’ on the home screen to perform detailed settings for data
connection.
If you have inserted two SIM cards, you can press the ‘Menu’ key> ‘Settings’ >
‘Dual card settings’ on the home screen and touch ‘Internet settings’ to select a
SIM card used for Internet access.
Note:
You may need to pay for some data service. For details, please consult your
network service provider.
26
If you don’t use mobile network, please promptly disable data connection to avoid
unnecessary charges.
Wi-Fi
Your phone can connect to the Internet through a wireless access point or Wi-Fi
hotspot.
Turn on Wi-Fi
1. On the home screen, press ‘Menu’ key> ‘Settings’.
2. Touch ‘Wi-Fi’ and drag the scrollbar beside ‘Wi-Fi’ to the right side.
3. Your phone shall automatically search available wireless access points.
4. Select one access point from the list.
- If you’ve selected one open network, your phone will automatically connect to the
network.
- If you’ve selected one secured network, your phone will connect to the network
after you enter the correct password.
Manually add Wi-Fi
1. On the home screen, press ‘Menu’ key> ‘Settings’ > ‘Wi-Fi’.
27
2. Touch the icon ‘Add network’, enter the network SSID and select the security
type.
3. Touch ‘Show advanced options’ to perform further settings.
4. Touch ‘Save’.
Tethering & portable hotspot
Tethering Wi-Fi hotspot
1. On the home screen, press ‘Menu’ key > ‘Settings’ > ‘More’.
2. Drag the scrollbar beside ‘Portable Wi-Fi hotspot’ to the right side to turn it on.
3. Touch ‘Set up Wi-Fi hotspot’ to set ‘Network SSID’, ‘Security’ and ‘Password’.
4. Find your phone’s network SSID on other devices and connect.
USB tethering
After connecting your phone to the PC through a USB cable, you can use your
phone as Modem to share the phone’s mobile network.
If your operating system is Window 7 or Mac OS X, you can establish network
connection in the following method. If you use other operating systems, you need
manually establish a network connection.
28
1. Connect your phone to the PC through a USB cable,
2. On the home screen, press ‘Menu’ key > ‘Settings’ > ‘More’.
3. Drag the scrollbar beside ‘USB tethering’ to the right side to turn it on and share
mobile networks through USB tethering.
4. After tethered, you can access to the Internet on your computer through the
phone’s network.
Bluetooth tethering
1. On the home screen, press ‘Menu’ key > ‘Settings’ > ‘More’.
2. Drag the scrollbar beside ‘Bluetooth tethering’ to the right side to turn it on and
share mobile networks through Bluetooth tethering.
3. Make sure you have turned on Bluetooth and set Visible to all nearby Bluetooth
devices. Scan on other devices and pair with your phone.
Browser
Open browser
1. On the home screen, touch the icon ‘Browser’.
2. Touch the input field at the top of the screen and input a website address.
29
3. Touch ‘Go’.
Browser options
When browsing a web page, you can slide to view other parts of the web page.
- Pinch your fingers together on the screen or stretch them apart to zoom in or out.
- Double touch the screen to return to the original size. The function might not be
available on some pages.
- Select ‘More’ > ‘Save to bookmarks’ to add the current web page to bookmark.
- Select ‘Bookmarks’ to open the saved bookmarks.
- Select ‘More’ > ‘Share’ to send the website to others or share with others.
Browser settings
On the browser interface, select ‘More’ > ‘Settings’, and perform settings according
to the prompt on your phone.
Bluetooth connection
With Bluetooth function, you can exchange data with other nearby Bluetooth
devices.
Since the Bluetooth devices communicate through radio wave, the interference
30
might exist due to some obstacles or other electronic devices.
Turn on Bluetooth
1. On the home screen, press ‘Menu’ key > ‘Settings’ > ‘Bluetooth’.
2. Drag the scrollbar beside ‘Bluetooth’ to the right side to turn on Bluetooth.
Search for devices and pair
1. On the home screen, press ‘Menu’ key > ‘Settings’ > ‘Bluetooth’ > ‘Search for
devices’.
2. Select one device.
3. Touch ‘Pair’ to pair with two devices. Or input the Bluetooth password and then
touch ‘OK’.
After the pairing request is accepted by other device or the same password is
entered, pairing is completed.
4. After pairing, these two devices can communicate within short distance.
Send data via Bluetooth
You can send music, sound recordings, videos, calendar events, contacts, etc. via
Bluetooth. The operation process depends on what you send. Below is an example
of sending a photo via the Bluetooth.
31
1. On the home screen, touch ‘Gallery’.
2. Open the photo you want to send.
3. Select ‘Share’ > ‘Bluetooth’.
4. If there is a prompt ‘Turn on Bluetooth now?’ on the screen, touch ‘OK’.
5. Select one paired device or touch ‘Scan for devices’ to select one device from
the scanning list to pair and send the file.
Receive data via Bluetooth
1. Turn on Bluetooth and turn on ‘Visible to all nearby Bluetooth devices’.
2. Open the notification bar, touch the Bluetooth share notification and touch
‘Accept’ to receive the file.
3. After the file is received, the phone shall display the notification. If you want to
view the file immediately, open the notification bar and touch the relevant
notification.

32
GPS
The mobile phone has GPS receiver, so you can start GPS service and use other
GPS functions.
Please try to use GPS function on sunny days. The GPS performance can be
affected by factors such as ceiling, roof or weather. If you want to get the best
performance, please try to move to the area where you can get 360°panoramic
view of the entire sky. The skyscrapers and walls might affect the GPS
performance.
Start GPS
You can receive the information of your location and search maps only after GPS
service is enabled.
1. On the home screen, press ‘Menu’ key > ‘Settings’ > ‘Security & Location’ >
‘Location service’.

33
2. Move the icon next to 'Location service' to right, and the touch "Mode" to select
the location mode.
Connect to your PC
MTP media device
You can use your computer to access the media files saved in your phone after
connecting your phone to your computer.
1. Connect your phone to your computer using a USB cable.
2. Pull down from the top of the screen to open the notification bar and touch
‘ Connectd as an installer’ > ‘Media device(MTP)’.
PTP camera device
You can use your computer to access the image files saved in your phone after
connecting your phone to your computer.
1. Connect your phone to your computer using a USB cable.

34
2. Pull down from the top of the screen to open the notification bar and touch
‘ Connectd as an installer’> ‘camera(PTP)’
Settings
Wireless & Networks
Airplane mode
After the Airplane mode is activated, your phone will close all wireless
connections.
1. On the home screen, press ‘Menu’ key > ‘Settings’ > ‘More’.
2. Touch ‘Airplane mode’ to turn it on.
Tip:
You can pull down the notification bar to show the Shortcuts panel, and touch
‘Airplane’ to turn on/off the airplane mode.
Data usage
On the home screen, press ‘Menu’ key > ‘Settings’ > ‘More’ > ‘Data usage’ to
check data usage.
35
Mobile networks (Single SIM card)
1. On the home screen, press ‘Menu’ key > ‘Settings’ > ‘More’.
2. Select ‘Mobile networks’ and then set ‘Data enabled’, ‘Data roaming’, ‘Access
Point Names’ and ‘Network operators’.
Dual card settings
If you have inserted two SIM cards, your phone will automatically switch to Dual
card mode.
You can perform settings for dual cards.
1. On the home screen, press the ‘Menu’ key> ‘Settings’ > ‘Dual card settings’.
2. Select the SIM card you want to use, data network and the default card for
outgoing calls.
Personal
Display
On the home screen, press ‘Menu’ key > ‘Settings’ > ‘Display’. You can change all
kinds of display settings of your phone.
Wallpaper: Select one from Gallery, Live Wallpapers or Wallpapers.
36
Screen timeout: adjust the delay before the screen automatically turns off.
Auto-rotate screen: rotate the phone to change the display orientation after you
turn it on.
Automatic brightness: After you turn on Automatic brightness, your phone will
adjust the screen brightness automatically according to the environment. If
Automatic brightness is disabled, you can drag the scrollbar to adjust the screen
brightness manually.
Screen display preferences: set your preferred screen display effect.
Breath light: after you turn it on, the breath light shall light up as your phone is
being charged, upon low battery or if there is a missed call, unread message, or
application message.
Font size: set the font size in Phone, Messaging, Contacts and Settings.
Screen projection: turn on/off screen projection.
Sound
On the home screen, press ‘Menu’ key > ‘Settings’ > ‘Sound’. You can change all
kinds of sound settings of your phone.
Volumes: set the volume for media, ringtone & notifications, system and alarms.
37
Silent mode: turn on/off silent mode.
Phone ringtone: set the default incoming call ringtone.
DTS: enhance sound effect when playing video, music, audio, and provide
complete entertainment experience.
Dial pad touch tones: play sound when touching dial pad.
Touch sounds: play sound when touching the screen.
Screen lock sound: play sound when locking the screen.
Vibrate on touch : vibrate when touching the buttons.
Power on sound: play sound when powering on your phone
Security & Location
Screen lock: select Slide, Pattern, PIN & Password to lock the screen.
Make passwords visible: after you select ‘Make passwords visible’, you can see
the password you are entering.
Set up SIM/RUIM card lock: after you select ‘Lock SIM card’, you need input a PIN
as you turn on the phone.
Location service: turn on/off GPS.
Device administrators: view or deactivate device administrators.
38
Installment manager: allow installation of apps from unknown sources.
Install from storage : install the encrypted certificate from storage.
Clear credentials: remove all certificates.
Accounts
On the home screen, press ‘Menu’ key > ‘Settings’ > ‘Accounts’, touch ‘Add
account’ to add accounts requiring SYNC.
System
Language & input
Set the menu language, default input method, etc.
Date & time
Set the date & time displayed on the phone.
Battery
Check the battery status.
Apps
View the applications downloaded.
About phone

39
Check the phone’s status, battery usage and legal information.
More
Backup & reset: reset the phone to factory settings and erase all data.
Accessibility: accessibility is specially customized for people with disabilities.
Changing settings can make the phone more accessible to people with disabilities.
Multimedia
Camera
You can take photos with your phone. You can set the photo taken with your phone
as wallpaper, or send to others via MMS, Email.
Tips:
Please respect others’ rights and abide by local regulations and customs when
taking photos.
Back Camera
40
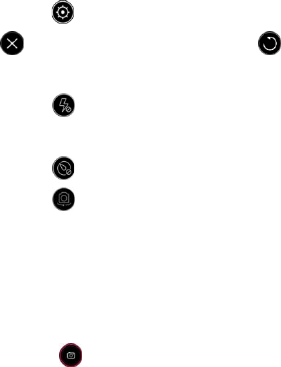
1. Touch ‘Camera’ on the home screen to enter the back camera by default.
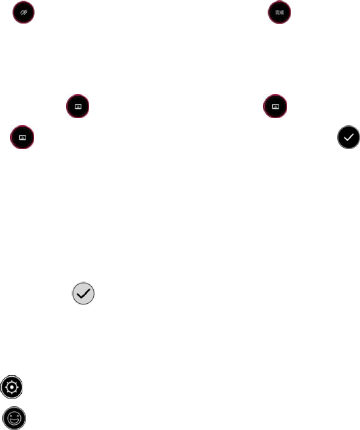
- Touch the icon to enter ‘Settings’. You can turn on/off HDR, DOF, etc, Touch
the icon to exit ‘Settings’ and touch the icon to restore to default
settings.
- Touch the icon to toggle among Flashlight ON/Flashlight OFF/Auto
Flashlight.
- Touch the icon to toggle among 5S delay/10S delay/20S delay/Delay OFF.
- Touch the icon to switch between Front camera and Back camera.
- Pinch your fingers together on the screen or stretch them apart to zoom in or out.
- Touch the position on the screen you want to focus and move the focus frame to
this position. You can respectively drag the square focus frame and the round
metering frame on the screen.
2. Touch the icon to shoot photos. The photos will be automatically saved.
3. Touch the Thumbnails icon at the lower left corner of the screen to view the
photos.
Parameter settings

41
In Camera mode, touch the icon to set Exposure Compensation, Shutter
Speed, White Balance, ISO, Focus, etc.; touch the icon to restore to default
settings.
Camera Family
In Camera mode, slide your fingers on the screen from left to right to open
‘Camera Family’, and slide from right to left to close it.
On the interface of ‘Camera Family’, touch the icon ‘neoShare’ at the upper right
corner to quickly enter neoShare.
Light Painting/p>
Light painting allows you to shoot the track that light sources are moving through
long-time exposure.
Please use a tripod while shooting photos in a dark environment. Use the light
sources such as flashlight to draw a pattern in the air.
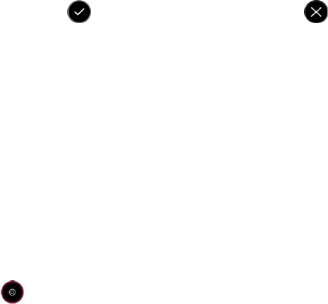
1. In ‘Camera Family’, touch the icon ‘Light Painting’.
2. Touch the icon to shoot a photo, check what displays on the screen and
touch the icon again when you are satisfied with the photo.
Special Effects

42
1. In ‘Camera Family’, touch the icon ‘Light Painting’.
2. There are multiple special effects on the screen for you to select. Touch the
icons at the lower part of the screen to select your desired special effect.
3. Touch the icon to shoot photos.
Electronic Aperture
Electronic Aperture is a kind of aperture priority shooting mode. You can adjust the
size of the aperture, and the camera will automatically adjust the shutter speed.
It is suitable for you to shoot a static landscape, night view, still object or slowly
moving object.
Please use a tripod while shooting photos.
1. In ‘Camera Family’, touch the icon ‘Electronic Aperture’.
2. Please touch ‘Bulb’ to adjust the electronic aperture and aperture
compensation.
3. Touch the icon to shoot photos.
Panorama
1. In ‘Camera Family’, touch the icon ‘Panorama’.
2. Touch the icon to slowly move your phone horizontally or vertically and
43
shoot photos, touch the icon again to end, and touch the icon to exit
Panorama.
Slow Shutter
Slow Shutter is a kind of slow shutter shooting mode, which allows you to adjust
the exposure time.
It is suitable for you to shoot scenes with insufficient light, animated objects such
as human beings, vehicles, rain/snow, misty waves or colorful light track.
1. In ‘Camera Family’, touch the icon ‘Slow Shutter’.
2. Adjust the shutter speed.
3. Touch the icon to shoot photos.
Star Track
Star Track allows you to shoot the track that stars are running around through
long-time exposure.
Try to select a bright and starry night and use a tripod while taking photos in a dark
environment.
1. In ‘Camera Family’, touch the icon ‘Star Track’.
2. Adjust the shutter speed.
44
3. Touch the icon to shoot photos, and touch the icon to finish.。
Video Maker
1. In ‘Camera Family’, touch the icon ‘Video Maker’.
2. Press and hold the icon to shoot, release the icon to pause, press
and hold the icon again to continue shooting, and touch the icon to
end.
3. Touch the photos to select those that appear in the video clip. You can set
Original sound/Silence, or select some music for the video clip. You can also set
the playing order and playing speed.
4. After that, touch the icon .
Front Camera
1. In Front camera, you can touch the following icons to perform relevant settings:
-Touch the icon to set the Picture size and Snapshot mirror.
- Touch the icon to turn on ‘Face Detection’ and touch the icon again to turn it
off. After you turn on ‘Face Detection’, the camera will display the focus frame and
automatically shoot when your smiling face is captured on the camera viewfinder
interface.
45
- Touch the icon to turn on ‘Beautify Skin’ and touch the icon again to turn it
off.
- Touch the icon to toggle among 5S delay/10S delay/20S delay/Delay OFF.
2. Touch the icon to shoot photos.
Video recorder
You can record video clips with your phone.
Tips:
Please respect others’ rights and abide by local regulations and customs when
recording video clips.
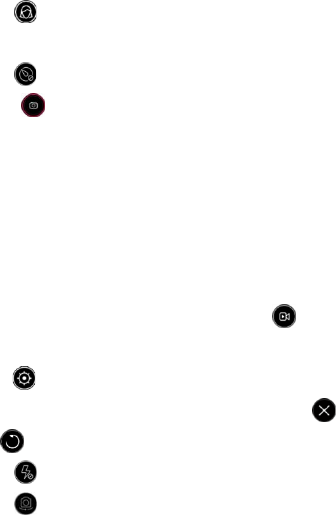
1.On the home screen, touch ‘Camera’ and touch the icon .
2. Aim your lens at an object and adjust accordingly.
- Touch the icon to set Video quality,Video high frame rate, Focus lock when
video recording and Zoom when video recording. Touch the icon to exit and
touch the icon to restore to default settings.
- Touch the icon to turn on/off Flashlight.
- Touch the icon to switch between front camera and back camera.

46
- You can respectively drag the focus frame and metering frame.
3. Touch the icon to start recording, touch the icon to pause recording,
touch the icon to continue recording and touch the icon to end. Touch
the icon to take a photo during the process of video recording.
4. After video recording, touch the Thumbnails icon at the lower left corner of the
screen to view the video clips you have just recorded.
Music player
With Music player, you can listen to the music saved in your phone.
Play local music
Before playing music, please firstly copy music files into your phone.
On the home screen, touch ‘Music player’ to open the music player.
1. If you enter the music player for the first time, select ‘All Music ’ > ‘Scan music ’
to automatically search all music files saved in the phone.
2. Touch a music file to start playing and touch to stop playing.
3. During the process of playing music, you can press the volume key to adjust the

47
volume.
4. Touch the playing song’s thumbnail to enter one single music player interface.
- Touch to add the current song to Favorites.
- Touch to return to the music playlist.
- Touch to switch among Random play, Repeat current song and Repeat all
songs.
- Touch to select Share, Delete, Set as ring, or Tone improver.
Add playlist
You can create some playlists to manage your music files.
1. On the local music interface, select ‘Playlists’ > ‘Add playlist’
2. Input a playlist name and touch ‘Complete’.
3. Touch ‘Add Music’, select one music file and touch ‘Add’.
Play/download online music
1. Turn on Data connection or connect to Wi-Fi.
2. Touch ‘Online’ on the music player interface.
3. Select a music file to play.

48
4. Touch the playing song’s thumbnail to enter one single music player
interface and touch to select ‘Download’.
Video player
With Video player, you can watch the videos saved in your phone.
1. On the home screen, touch ‘Video’ to open the list of videos.
2. Select one video and touch it to play.
During the process of playing videos, you can touch the screen to stop playing the
video and touch the screen again to continue to play it.
- Touch the button ‘PIP’ to enable Picture-in-Picture function. A small suspending
image appears after you touch the icon.
- Touch ‘Lock’/ ‘Unlock’ to Lock/unlock the screen.
- Select ‘More’ > ‘Snapshot’ to capture the current screen.
- Select ‘More’ > ‘Share’ to share the video with your friends.
You can perform the following operations with your fingers:
- Slide your fingers on the screen to the left/right to fast forward/rewind. The time
progress appears at the top of the screen.
49
- Pinch your fingers together on the screen or stretch them apart to adjust the
display ratio of the screen.
- Swipe up/down to adjust the volume.
Gallery
On the home screen, touch ‘Gallery’ to view all photos and videos in your phone.
You can use video player to play the videos.
View photos
1. Touch the album you want to open, and select the photo you want to browse.
2. Double touch the photo to enlarge and double touch it again to resume.
3. If you want to edit your selected photo, touch the photo and select ‘Edit’.
4. Pinch your fingers together on the screen to zoom out, and swipe up or down to
delete photos.
Make GIF
1. Select one album from ‘Gallery’ > ‘My Album’.
2. Select ‘More’ > ‘Make Gif’.
3. Touch the photo you want and touch ‘Make GIF’.

50
Slideshow
1. Select one album from ‘Gallery’ > ‘My Album’.
2. Touch ‘Slideshow’.
Tools
Flashlight
On the home screen, touch ‘Tools’ > ‘Flashlight’ to use your phone as a flashlight.
Turn on flashlight
On the Flashlight interface, drag the button and swipe up to turn on the
flashlight.
Turn off flashlight
On the Flashlight interface, drag the button and swipe down to turn off the
flashlight; or pull down the notification bar and touch the button ‘Close’
beside flashlight to turn it off.

51
Enter SOS mode
No matter whether you turn on the flashlight or not, touch the button ‘SOS’ to enter
SOS mode; at this moment the flashlight shall flash to send out a distress signal.
Sound recorder
On the home screen, touch ‘Tools’ > ‘Sound Recorder’ to turn on the sound
recorder.
Record audio files
1. Move the microphone on your phone close to your mouth and touch to
start recording.
2. Touch to pause, touch to continue and touch to stop recording.
3. Your phone shall automatically save your recordings. Touch the name of your
recording to play it.
Set as ringtone
Press & hold a recording file to display a pop-up menu and touch ‘Set as ringtone’.

52
Cut audio files
Press & hold a recording file to display a pop-up menu, touch ‘Cut’ and then drag
the scrollbars at two ends. The contents between two scrollbars are reserved.
Calculator
On the home screen, touch ‘Tools’ > ‘Calculator’ to perform simple calculations.
After you turn on Auto-rotate, the phone shall switch to the landscape mode and
switch from Simple Calculator to Advanced Calculator.
FM Radio
1. Insert the earphone into your phone. On the home screen, touch ‘Tools’ > ‘FM
Radio’ to enter the FM radio.
2. Touch to turn on the radio.
- Slide your fingers on the channel scale in the center of the screen to adjust the
frequency.
- Touch and ‘Scan’, your phone shall search channels. Touch one channel to
listen to it.

53
- Touch to add the current channel to My Favorites.
- Touch to turn off the radio.
- Touch to automatically search the previous channel and touch
automatically search the next channel.
- Press the volume keys to adjust the volume.
- Select > ‘Enable Speaker’ to listen to the radio through the speaker.
NotePad
1. On the home screen, touch ‘NotePad’.
2. Touch the button ‘Add Note’.
3. Input what you want to write down and touch ‘Done’.
4. On the NotePad interface, select one single record to view the details.
Calendar
On the home screen, touch ‘Calendar’ to enter. Touch the date at the top of the
screen to select Day, Week or Month to view the calendar, and touch ‘Agenda’ to
view all events.
54
Tip:
When viewing calendar by Day or Week, press & hold one existed event and drag
it to other time to quickly change the date of event. You can slide your fingers on
the screen to the left/right to change time.
Create new event
1. On the calendar interface, touch the button ‘New event’.
2. Input detailed information of a new event and touch ‘Save’.
Edit event
1. On the calendar interface, touch the date at the top of the screen and touch
‘Agenda’.
2. Select the event you want to edit, and touch the button ‘Edit’.
Display and SYNC calendar
1. On the calendar interface, select ‘More’ > ‘Calendars to display’.
2. Drag the scrollbar to select the calendars you want to display.
3. Touch ‘Calendars to sync’ to synchronize the calendars under other accounts.

55
Features
Profile
On the home screen, touch ‘Profile’ to enter.
Pocket
Avoid mistouch in pocket: After this function is enabled, the phone can prevent
some inadvertent operations when put inside the pocket. In Pocket mode, the
screen will light up upon an incoming call or in other cases, but operations won’t be
allowed on the lighted screen.
Take the phone out of the pocket to exit from Pocket mode.
Ringtone volume highest and vibration: After this function is enabled, your phone
will automatically adjust to the maximum vibration or ringtone when put inside the
pocket.
One-handed
After the ‘One-handed’ mode is enabled, tilt your phone left or right to enter the
one-handed mode.
56
Double touch the area outside the small screen to lock the one-handed mode, and
touch it again to exit.
As the one-handed mode is not locked, press & hold the round icon at the top of
small screen to drag the small screen to your desired location.
Touch ‘One-handed’ to set ‘Display size’ and ‘Blacklist settings’.
Powersave
After the Powersave mode is enabled, your phone shall consume less power.
You can touch ‘Powersave’ to perform detailed settings.
Sleep
1. Drag the scrollbar to enable/disable the Sleep mode.
2. After the Sleep mode is enabled, your phone shall not ring or vibrate, and it shall
automatically disable notifications, breath light and dim the screen. There is a
prompt only upon an incoming call or message from the list of allowed contacts.
- Touch ‘Timer switch’ to set the time of enabling/disabling the sleep mode.
- Touch ‘Allowable contacts’ to edit the list of contacts.
- If you turn on ‘Auxiliary Sleep’, your phone will play some Sleep music within the
set period once entering the sleep mode. Touch ‘Auxiliary Sleep’ to select the
57
Sleep music and set the time length of playing music.
- If you turn on ‘Disable network connection’, your phone will turn off WLAN, mobile
networks, GPS, Bluetooth, Wi-Fi hotspots once entering the sleep mode.
- If you turn on ‘Repeated incoming calls not barred’, the phone shall right or
vibrate when receiving the same incoming call for the third time or later in 5
minutes.
- After the phone enters the sleep mode and the screen turns off, pick up your
phone to display the sleep clock, press the ‘Home’ key or ‘Back’ key to enter the
lockscreen, and press the ‘Power’ key to turn off the screen.
Desktop mode
Select 'Easy mode' or regular 'Standard desktop'.
'Easy mode' displays large text and icons on the desktop.
Screen division
1. On the home screen, press ‘Menu’ key > ‘Settings’ > ‘Feature’ > ‘Screen
division’.
2. After you turn on ‘Split-screen mode’, the screen will be split into two areas.

58
You can handle different tasks on two different areas.
3. After you turn on ‘Split-screen mode’, swipe up from the bottom of the screen to
activate the split screen.
4. The split-screen control bar is located at the center of the screen. Drag the
round dot in the middle of control bar and swipe up or down to adjust the size of
two split screens.
5. Touch the button in the middle of split-screen control bar to display the buttons
on the screen
Description of buttons:
Full-screen button: become full screen and exit from Split-screen mode.
Split-screen mode switch button: switch between self-adaptable or
length-width ratio
Volume set button: control whether or not to play sound on the current
split-screen.
Screen exchange button: touch it to exchange the contents displayed on two
split screens
6. Press the Home key to exit Screen division.
59
Custom bottom key
You can define the functions of three keys at the bottom of the phone.
On the home screen, press ‘Menu’ key > ‘Settings’ > ‘Feature’ > ‘Custom bottom
key’, and select what you prefer according to the prompt on the screen.
Touch gestures
You can perform fast operations on the screen via gestures.
On the home screen, press ‘Menu’ key > ‘Settings’ > ‘Feature’ > ‘Touch gestures’
to perform detailed settings.
Double click to light up
After this function is enabled, you can double click the screen with one single finger
to light up the screen as the screen turns off.
Palm Screen Lock
After this function is enabled, you can cover the screen with your palm to turn off
and lock the screen as the screen lights up.
Free screenshot
After this function is enabled, you can press & hold ‘Menu’ key to enter the free
60
screenshot mode. Draw an enclosed pattern to take your desired screenshot.
Tri finger screenshot
After this function is enabled, you can swipe up with three fingers to take a
screenshot.
Tri finger switch app
After this function is enabled, you can slide three fingers to the left or right to switch
between the opened applications.
View notifications
After this function is enabled, you can swipe down with one single finger from any
place of the desktop to view notifications.
Smart sensing
With smart sensing function, you can control your phone, such as flip, shake, etc.
On the home screen, press ‘Menu’ key > ‘Settings’ > ‘Feature’ > ‘Smart sensing’ to
perform detailed settings.
Motion sensing dial
When viewing the detailed information of call logs, messages or contacts, put the
61
phone close to your ears to dial the contact.
Motion sensing answer
Upon an incoming call, put the phone close to your ears to answer the incoming
call.
Flip to mute/pause
Flip the phone to mute the ringer, pause the media player or snooze the alarm.
Shake to change songs
When playing music, shake the phone to the left to play the previous song, and
shake the phone to the right to play the next song.
Shake to clear
On the notification bar, shake the phone to clear notifications; on the multi-task
interface, shake the phone to clear memory and most recently used applications.
Shake to update
Shake the phone to update the list when scanning Bluetooth or WLAN.

62
Other
My Files
With My Files, you can manage the files in your phone (including pictures, music,
videos, documents, zips, APKs and folders)
Backup
On the home screen, touch ‘Backup’.
Touch ‘One key backup’ to backup the contacts, SMS to phone or external OTG
storage.
Touch the icon to set ‘Backup content’ and ‘Backup device choise’.
- Restore: restore the previous backup information.
- Scheduled Backup: backup your designated contents periodically after enabling
‘Scheduled Backup’.
- Operator History: check the history of backup operations.
- Space Info: check the space of local memory and Cloud device.

63
Screen projection
With Screen projection, you can project your phone’s screen onto your smart TV.
Input Method
The phone has preinstalled Android input method.
Using your phone safely
On the road
Using a phone while driving is illegal in many countries. Please follow local
laws and drive safely at all times.
Near sensitive electronics
Don’t use your phone near sensitive electronic equipment – particularly
medical devices such as pacemakers – as it could cause them to malfunction.
It can also interfere with the operation of fire detectors and other
automatic-control equipment.
For more information about how your phone affects pacemakers or other

64
electronic equipment, please contact the manufacturer or your local distributor.
Your phone may cause interference when used near TVs, radios or automated
office equipment.
While flying
Your phone can cause interference with aircraft equipment. So it’s essential
you follow airline regulations. And if airline personnel ask you to switch off
your phone, or disable its wireless functions, please do as they say.
In hospital
Your phone may interfere with the normal operation of medical equipment.
Follow all hospital regulations and turn it off when you’re asked to by posted
warnings or medical staff.
At a petrol station
Don’t use your phone at petrol stations. In fact, it’s always best to switch off
whenever you’re near fuels, chemicals or explosives.
Around water
Keep your phone away from water (or any other liquid). It’s not a waterproof
model.
Making repairs
Never take your phone apart. Please leave that to the professionals.
Unauthorised repairs could break the terms of your warranty.

65
Broken antenna
Don’t use your phone if the antenna is damaged, as it could cause injury.
Please do not touch or cover the antenna area (the upper part on the back of
your phone) during the conversation to avoid affecting talk quality and
consuming more battery power, which might reduce the talk time and standby
time.
Around children
Keep your phone out of children’s reach. It should never be used as a toy and it
might not be good for their health.
Original accessories
Only use the original accessories supplied with your phone or those approved
by the manufacturer. Using unapproved accessories may affect performance,
make the warranty void, break national regulations on the use of phones, or
even cause injury.
Near explosives
Turn off your phone in or near areas where explosive materials are used.
Always obey local laws and turn off your phone when requested.

66
Emergency calls
To make an emergency call your phone must be turned on and in an area
where there’s network coverage. Dial the national emergency number and
touch ‘send’. Explain exactly where you are and don’t hang up until help has
arrived.
Working temperature
The working temperature for the phone is between 0℃ and 40℃. Please don’t
use the phone outside the range. Using the phone under too high or too low
temperature might cause problems.
Eyesight
Please do not use your phone in dim light for a long time to avoid damage on
your eyesight.
For some people, exposure to flashing lights (such as TV) might trigger
seizures or dizziness. If you have a history of seizures or epilepsy, consult a
doctor before playing video games or enabling a flashlight feature on your
phone.
Safety information

67
In order to protect your personal information and prevent disclosure of
sensitive information, please set a phone password and change it from time to
time, make sure to back up important data, back up the data on your phone
before disposal and reset your phone.
Please do not download unknown applications and browse suspected websites
in order to protect your phone against malicious applications and viruses.
At very high volume, prolonged listening to a phone can damage your
hearing.
Battery care and safety
Keep the battery in a cool, ventilated place and out of direct sunlight.
Although the battery is rechargeable, it’ll eventually start to lose its ability to
recharge. If you find that the battery won’t recharge, it’s time to replace it.
Please don’t throw old batteries into your household rubbish. You’ll find there are
special bins for batteries at refuse collection points. And some high street
electrical stores provide a battery recycling service too.
Never throw the battery into a fire – it’s highly inflammable and could explode,
hurting you or somebody else.
When you put the battery into your phone, there’s no need to use force. Exerting
too much pressure could make it leak, overheat, explode or burst into flame.

68
Never take the battery apart. This may result in leakage, overheating, explosion
or fire.
If the battery becomes hot, changes colour or shape at any time (when in use,
charging or even while in storage) please stop using it immediately and replace.
Keep the battery dry. Damp or wet conditions can cause it to overheat or
corrode.
Don’t leave the battery in direct sunlight or anywhere really hot, like in a car on a
summer’s day. That could make it leak or overheat, while lowering its
performance and shortening its life.
Don’t charge the battery continuously for 24 hours. Overcharging is not good for
it.
Note:
Please avoid contact with the materials inside a damaged or leaking
battery. If they get on your skin, wash with lots of water and seek medical
assistance if required.
Charger care and safety
Only plug into voltages between 100VAC and 240VAC. Using a voltage outside
that range can damage the phone/charger – and cause the battery to leak or
catch fire.
69
Never short-circuit the charger – this may cause electrocution, overheating or
damage.
Don’t charge the phone in direct sunlight or in an area where it’s damp, dusty, or
on a vibrating surface. And charging your phone near – or on – a TV or radio
could interfere with transmission.
Don’t use the charger if the power cable is damaged. It may cause a fire or give
someone an electric shock.
Keep water well away from the charger. If the charger does get splashed by
water, or any other kind of liquid, immediately unplug it to avoid overheating,
fire or electrocution.
Don’t take the charger apart. It could cause injury, give you an electric shock or
catch fire.
Never touch any charger, electric cable or socket with wet hands.
Don’t place heavy objects on the electric cable.
If the cable is damaged, don’t try to mend it yourself – it could cause a fire or
electrocute you.
Always unplug the charger before you clean it.
When unplugging the charger, hold the plug itself, rather than pulling on the
cable. A damaged cable can cause electrocution or fire.
Care and maintenance
Your phone is a delicate device. The following advice will help you to keep it
looking good and performing well…
70
Use a soft dry cloth to clean your phone, battery and charger. Don’t use liquids
such as alcohol, dilution agents or benzene.
From time-to-time, clean the socket where the charger cable connects to the
phone. Dust tends to gather there. This will ensure a really good connection.
Don’t use needles, pen points or other sharp objects on the keypad or screen.
Don’t use your phone with wet hands – it could injure you and damage the
phone.
Don’t use your phone in dusty or dirty environment.
Keep your phone away from extremes of heat – like radiators or ovens. It may
explode if it gets too hot.
If your phone gets wet and the colour of the label on it changes, the warranty
will be void, even if the warranty period hasn’t expired.
If there’s anything wrong with the phone, battery, charger, or any accessory,
please send them to your nearest service centre for inspection.
Health and safety
FCC Regulations:
This mobile phone complies with part 15 of the FCC Rules. Operation is subject to
the following two conditions: (1) This device may not cause harmful interference,
71
and (2) this device must accept any interference received, including interference
that may cause undesired operation.
This mobile phone has been tested and found to comply with the limits for a Class
B digital device, pursuant to Part 15 of the FCC Rules. These limits are designed to
provide reasonable protection against harmful interference in a residential
installation. This equipment generates, uses and can radiated radio frequency
energy and, if not installed and used in accordance with the instructions, may
cause harmful interference to radio communications. However, there is no
guarantee that interference will not occur in a particular installation If this
equipment does cause harmful interference to radio or television reception, which
can be determined by turning the equipment off and on, the user is encouraged to
try to correct the interference by one or more of the following measures:
-Reorient or relocate the receiving antenna.
-Increase the separation between the equipment and receiver.
-Connect the equipment into an outlet on a circuit different from that to which the
receiver is connected.
-Consult the dealer or an experienced radio/TV technician for help.
72
FCC Note:
Caution: Changes or modifications not expressly approved by the party
responsible for compliance could void the user‘s authority to operate the
equipment.
RF exposure information (SAR)
This phone is designed and manufactured not to exceed the emission limits for
exposure to radio frequency (RF) energy set by the Federal Communications
Commission of the United States.
During SAR testing, this device was set to transmit at its highest certified power
level in all tested frequency bands, and placed in positions that simulate RF
exposure in usage against the head with no separation, and near the body with the
separation of 10 mm. Although the SAR is determined at the highest certified
power level, the actual SAR level of the device while operating can be well below
the maximum value. This is because the phone is designed to operate at multiple
power levels so as to use only the power required to reach the network. In general,
the closer you are to a wireless base station antenna, the lower the power output.
73
The exposure standard for wireless devices employing a unit of measurement is
known as the Specific Absorption Rate, or SAR.
The SAR limit set by the FCC is 1.6W/kg.
This device is complied with SAR for general population /uncontrolled exposure
limits in ANSI/IEEE C95.1-1992 and had been tested in accordance with the
measurement methods and procedures specified in IEEE1528. This device has
been tested and meets the FCC RF exposure guidelines when tested with the
device directly contacted to the body.
The FCC has granted an Equipment Authorization for this model phone with all
reported SAR levels evaluated as in compliance with the FCC RF exposure
guidelines. SAR information on this model phone is on file with the FCC and can
be found under the Display Grant section of www.fcc.gov/oet/ea/fccid after
searching on FCC ID: SRQ-NX521J.
For this device, the highest reported SAR value for usage against the head is
0.370 W/kg, for usage near the body is 1.205 W/kg. Simultaneous SAR is
1.395W/kg.
74
While there may be differences between the SAR levels of various phones and at
various positions, they all meet the government requirements.
SAR compliance for body-worn operation is based on a separation distance of 10
mm between the unit and the human body. Carry this device at least 10 mm away
from your body to ensure RF exposure level compliant or lower to the reported
level. To support body-worn operation, choose the belt clips or holsters, which do
not contain metallic components, to maintain a separation of 10 mm between this
device and your body.
RF exposure compliance with any body-worn accessory, which contains metal,
was not tested and certified, and use such body-worn accessory should be
avoided.
Declaration of RoHS compliance
We’re determined to reduce the impact we have on the environment and take
responsibility for the earth we live on. So this document allows us to formally
declare that the nubia Z9mini, manufactured by Nubia Technology Co., Ltd. fully
75
complies with the European Parliament’s RoHS (Restriction of Hazardous
Substances) Directive 2002/95/EC, with respect to all the following substances:
(1) Lead (Pb)
(2) Mercury (Hg)
(3) Cadmium (Cd)
(4) Hexavalent Chromium (Cr (VI))
(5) Polybrominated biphenyl (PBB)
(6) Polybrominated diphenyl ether (PBDE)
Our compliance is witnessed by written declaration from our suppliers. This
confirms that any potential trace contamination levels of the substances listed
above are below the maximum level set by EU 2002/95/EC, or are exempt due to
their application.
The nubia Z9mini manufactured by Nubia Technology Co., Ltd. meets all the
requirements of EU 2002/95/EC.

76
Disposal of your old phone
1. When the wheelie bin symbol is attached to a product, it means
the product is covered by the European Directive 2002/96/CE.
2. All electrical and electronic products should be disposed of
separately from normal household waste via designated collection
points provided by government or local authorities.
3. The correct disposal of electrical and electronic products will
help protect the environment and human health.