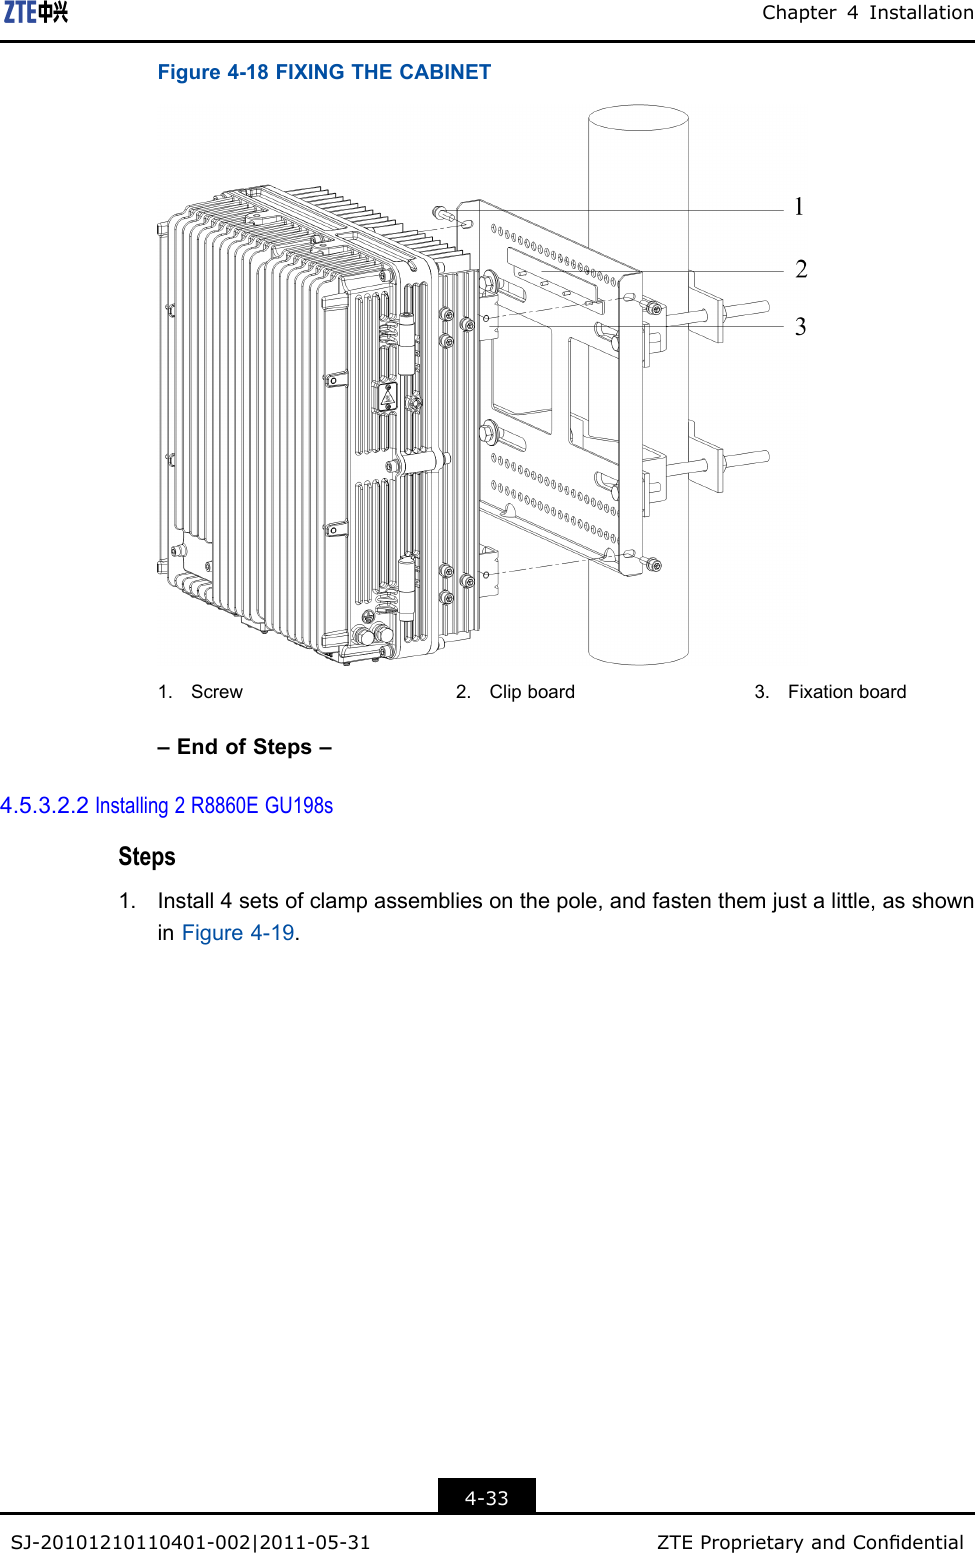
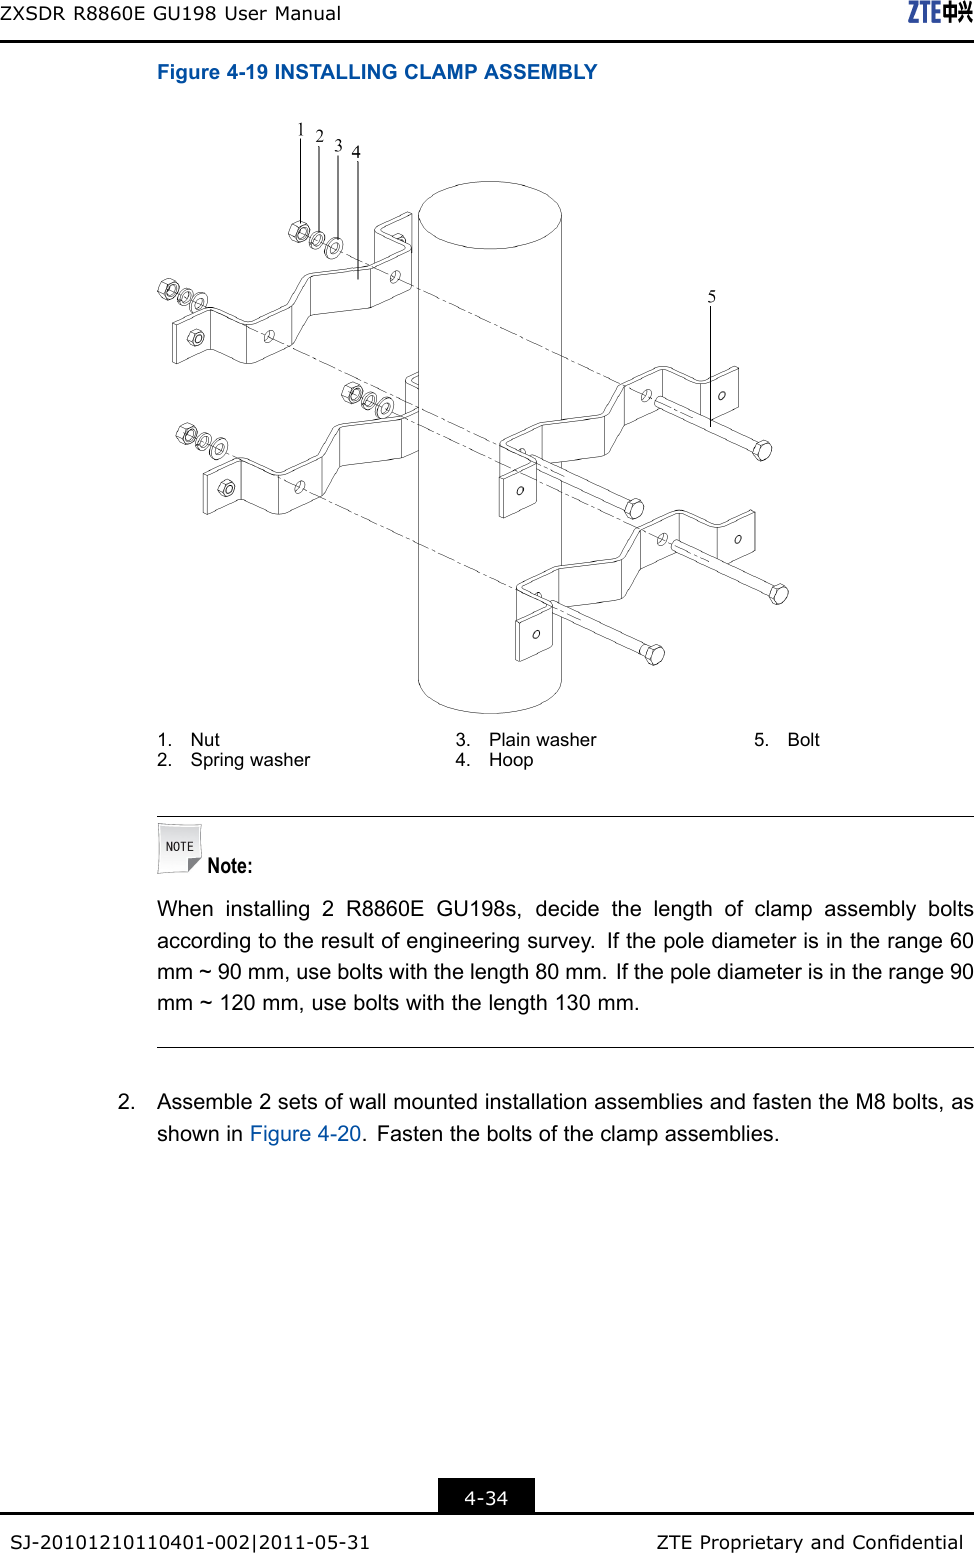
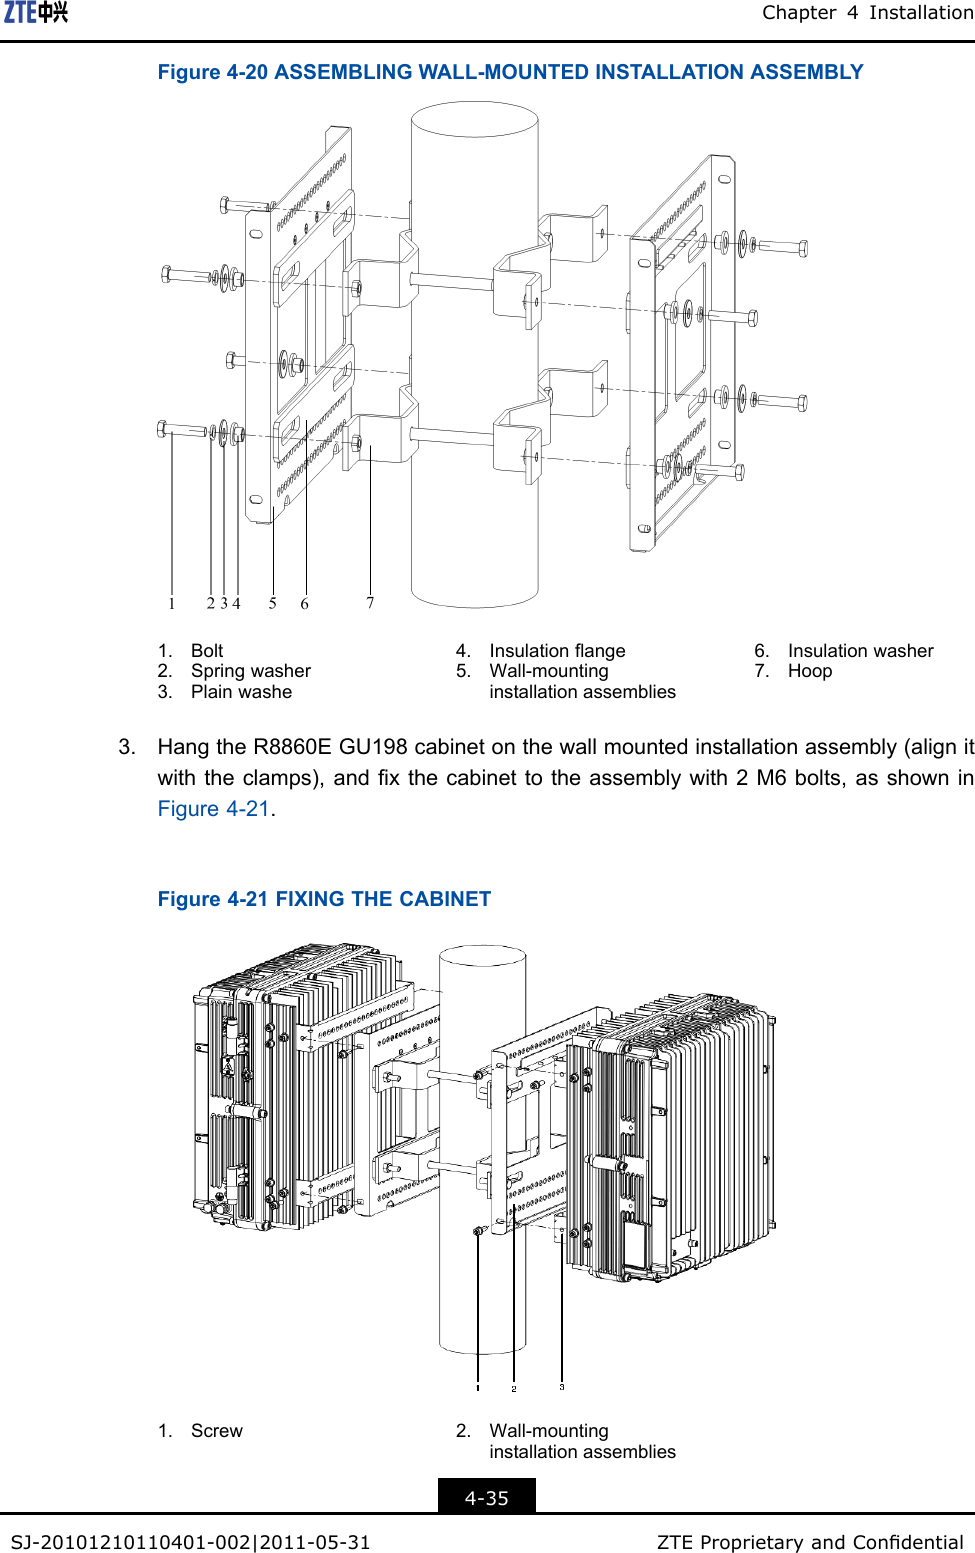
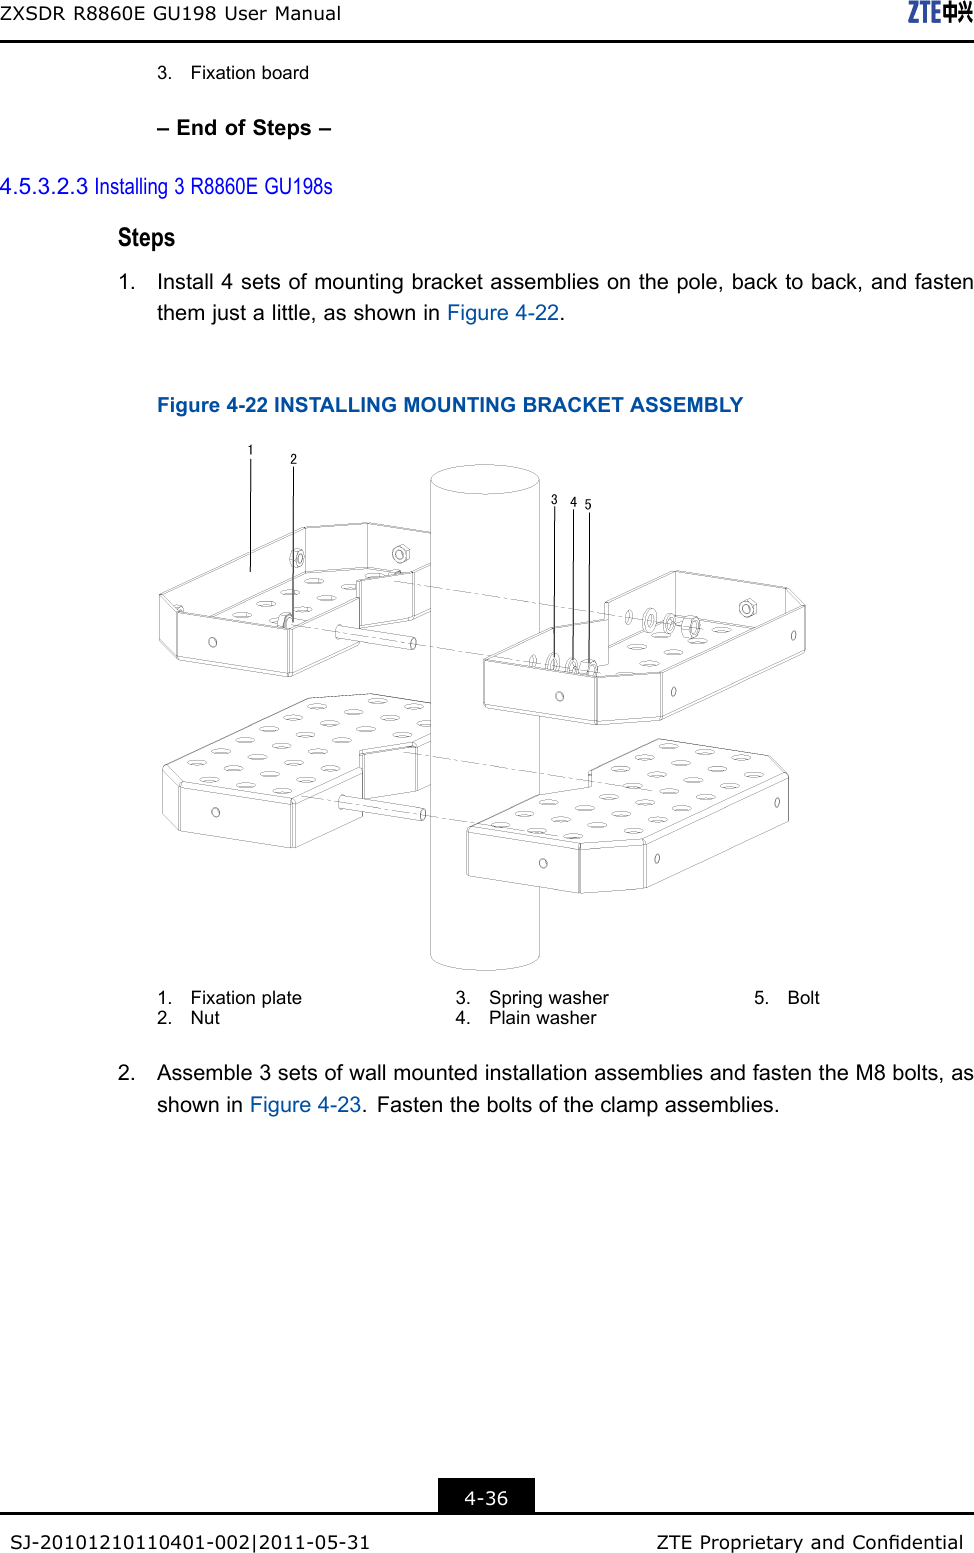
ZTE R8860EGU198B Outdoor GSM/UMTS Dual Mode Remote Radio Unit User Manual II
ZTE Corporation Outdoor GSM/UMTS Dual Mode Remote Radio Unit II
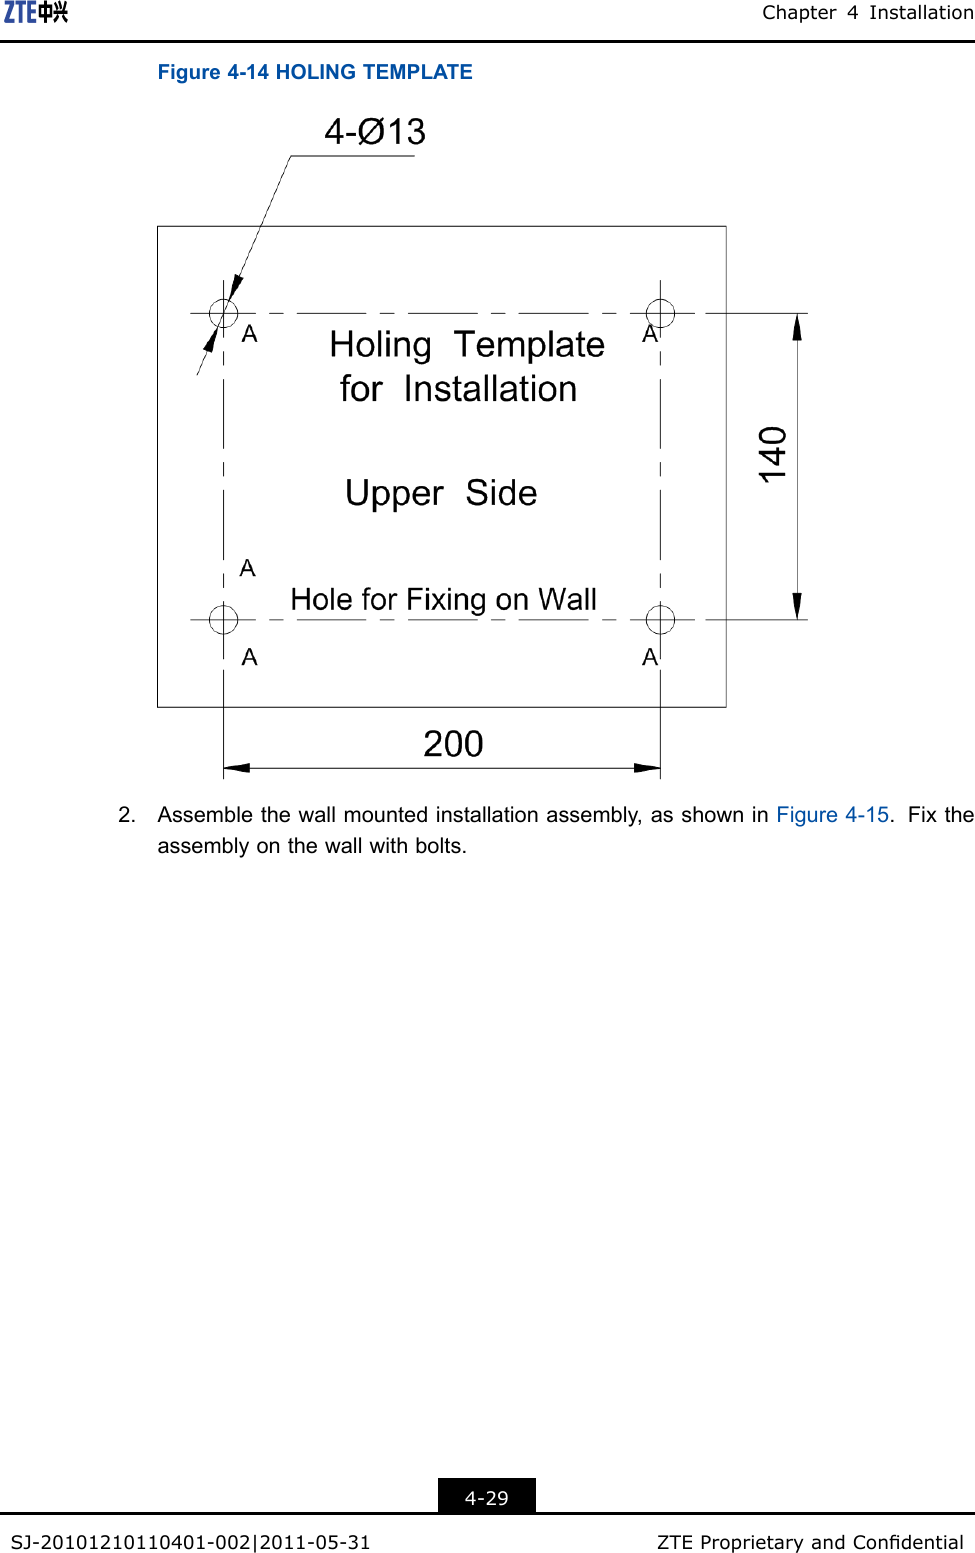
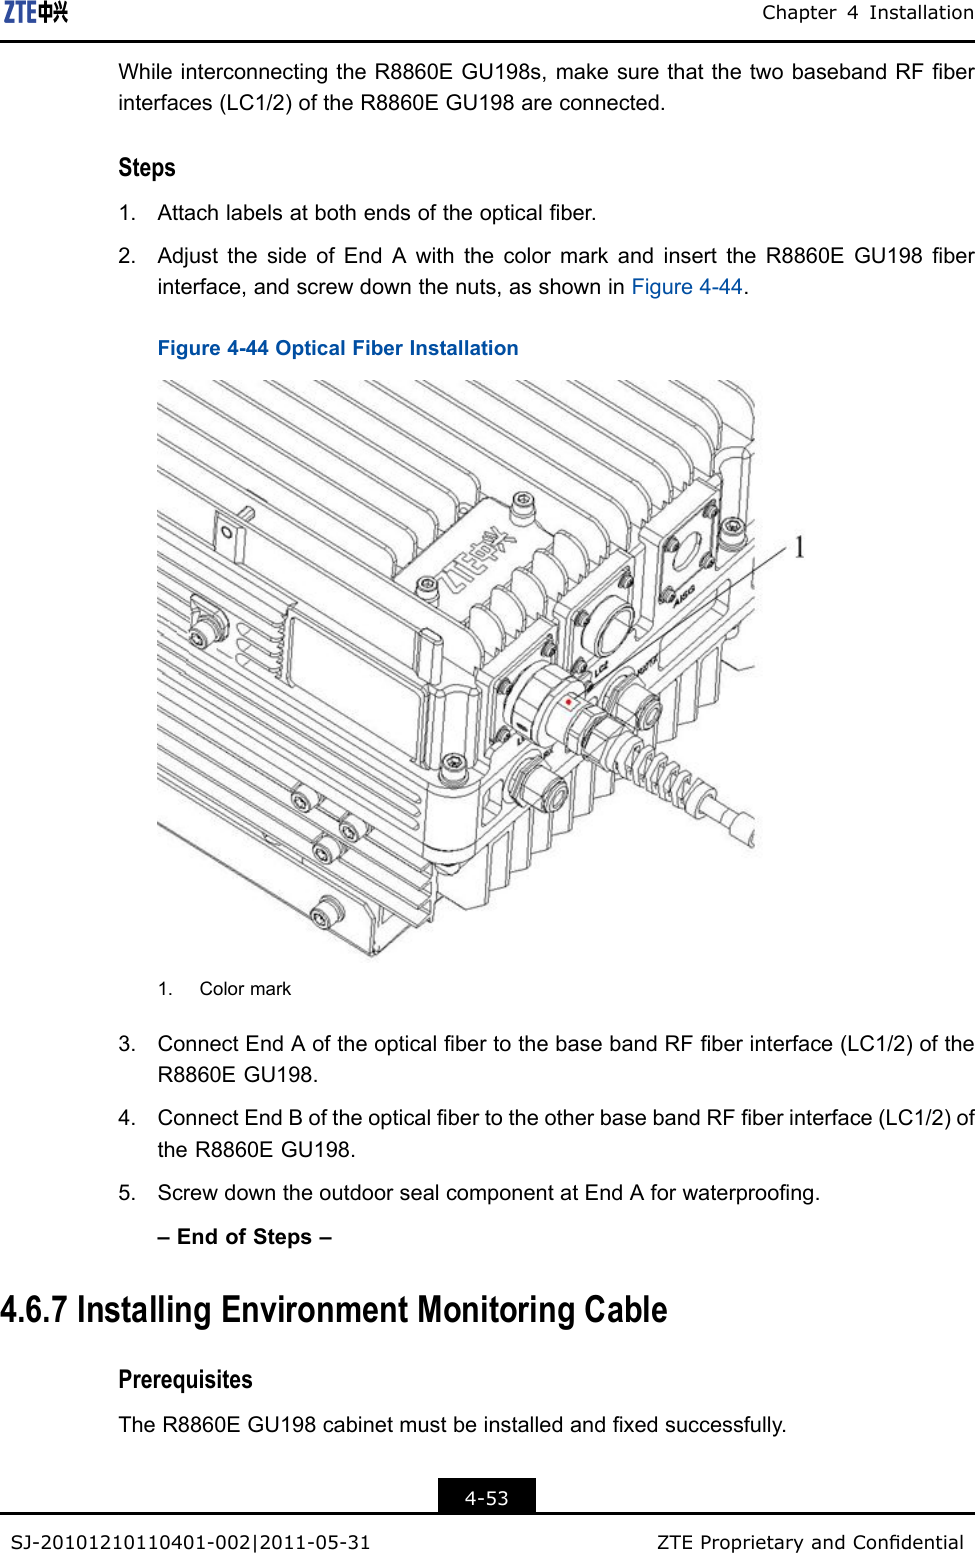
UserManual.wiki
>
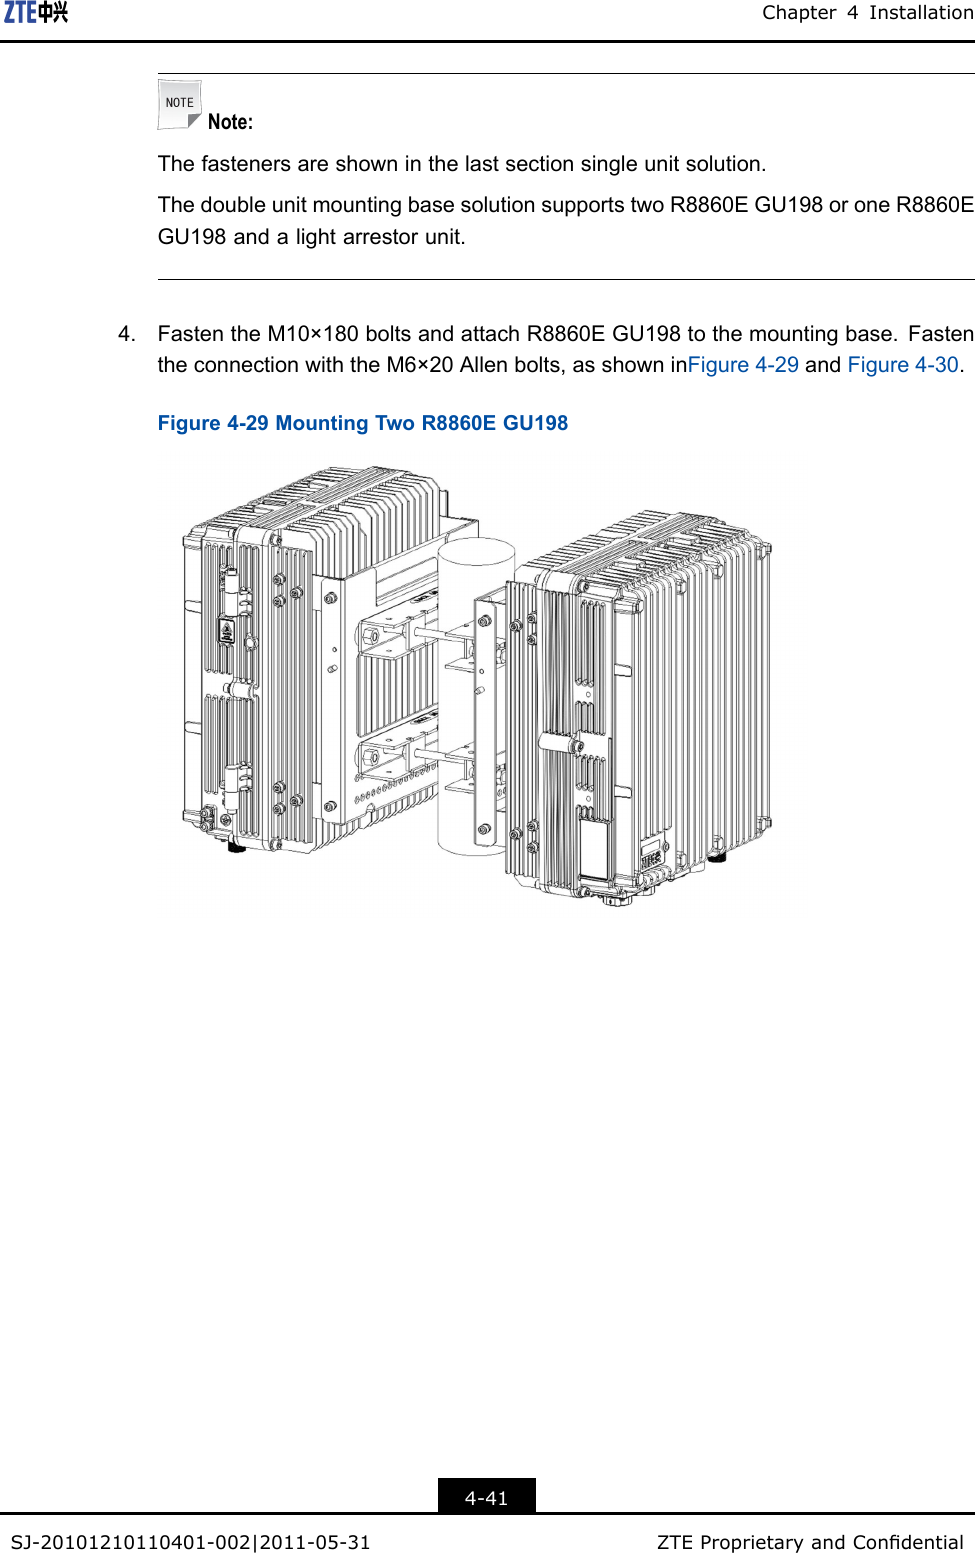
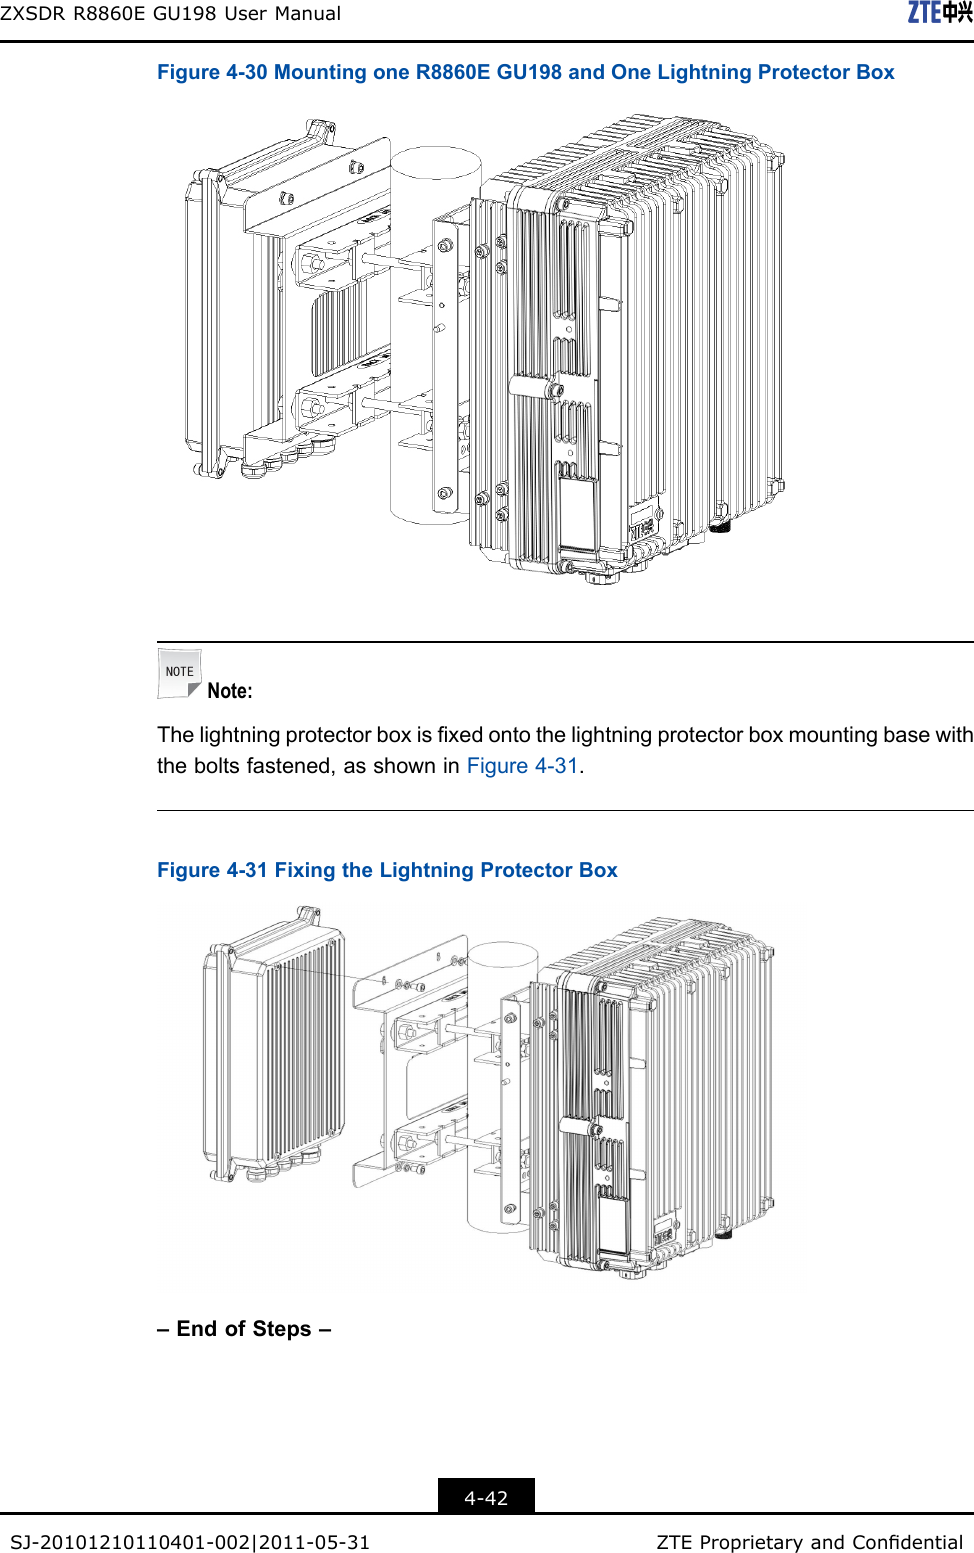
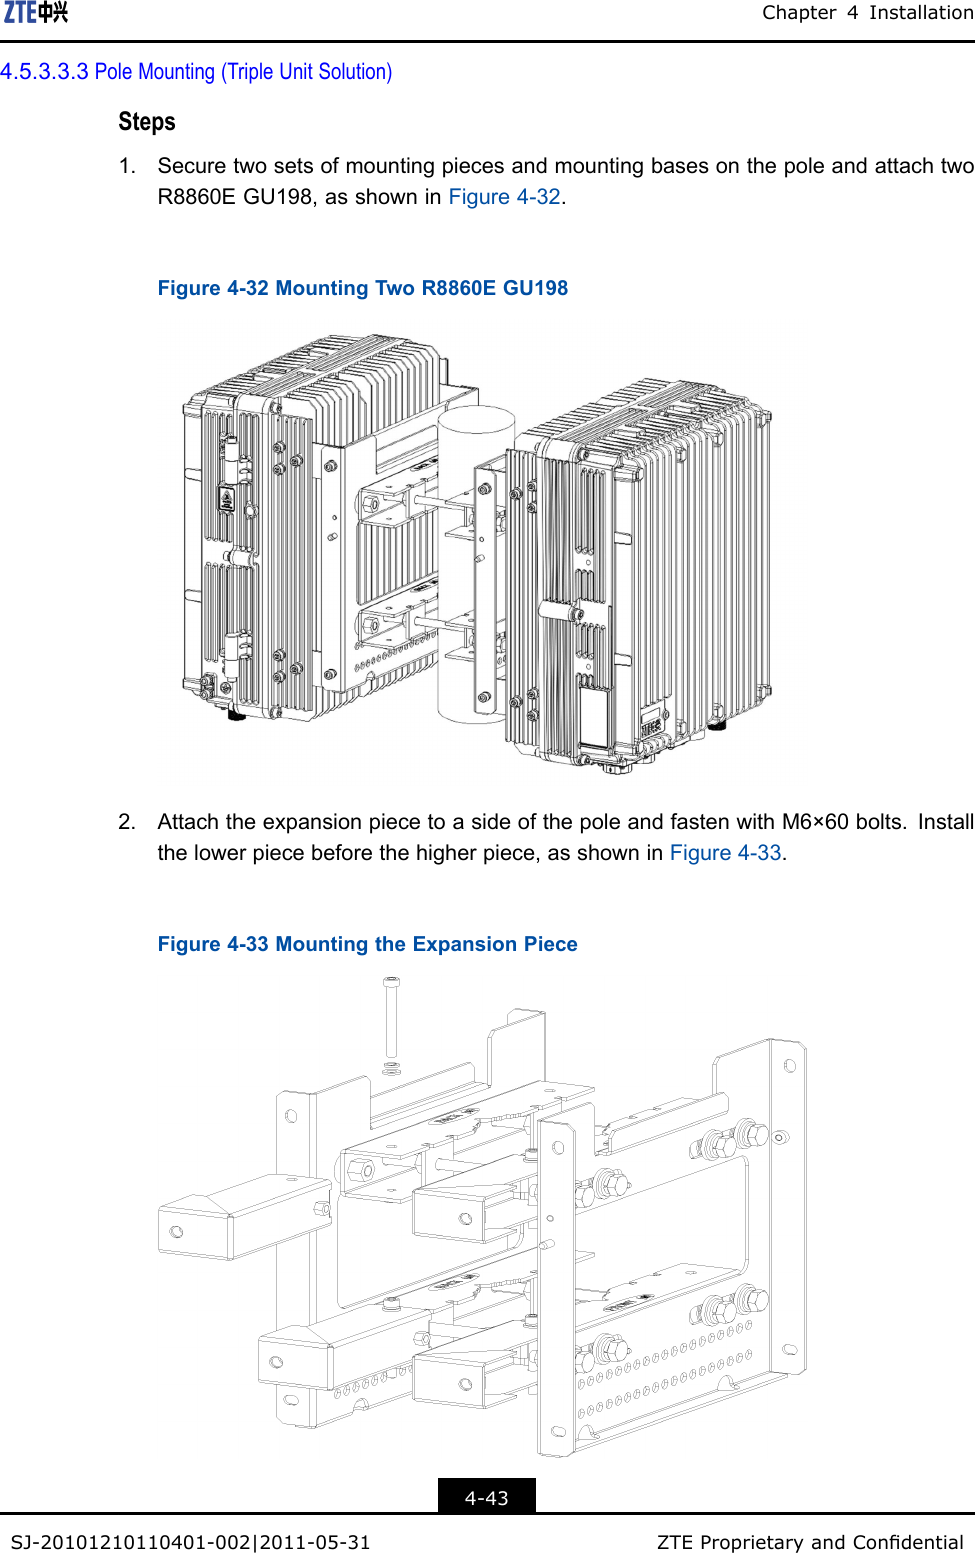
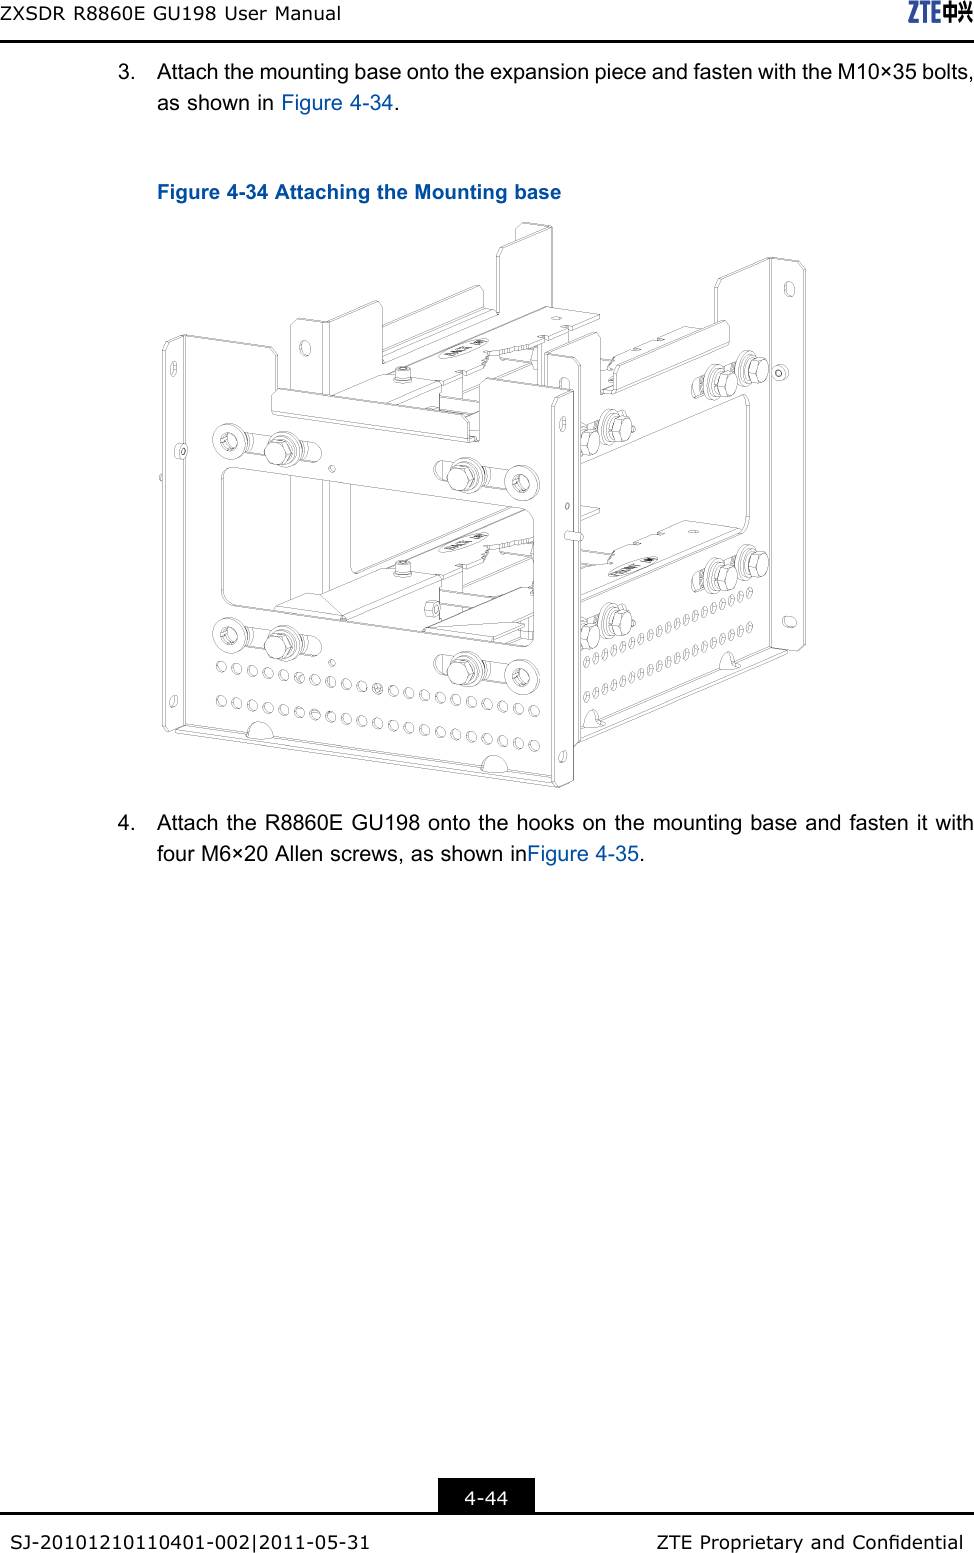
ZTE
>
R8860EGU198B User Manual
>
User Manual II
Contents
1.
User Manual
2.
User Manual II
User Manual II
Navigation menu
Upload a User Manual
Namespaces
Wiki Guide
HTML
PDF
Info
Views
User Manual
Discussion / Help
Navigation