ZTE V55 ZTE OPTIK User Manual
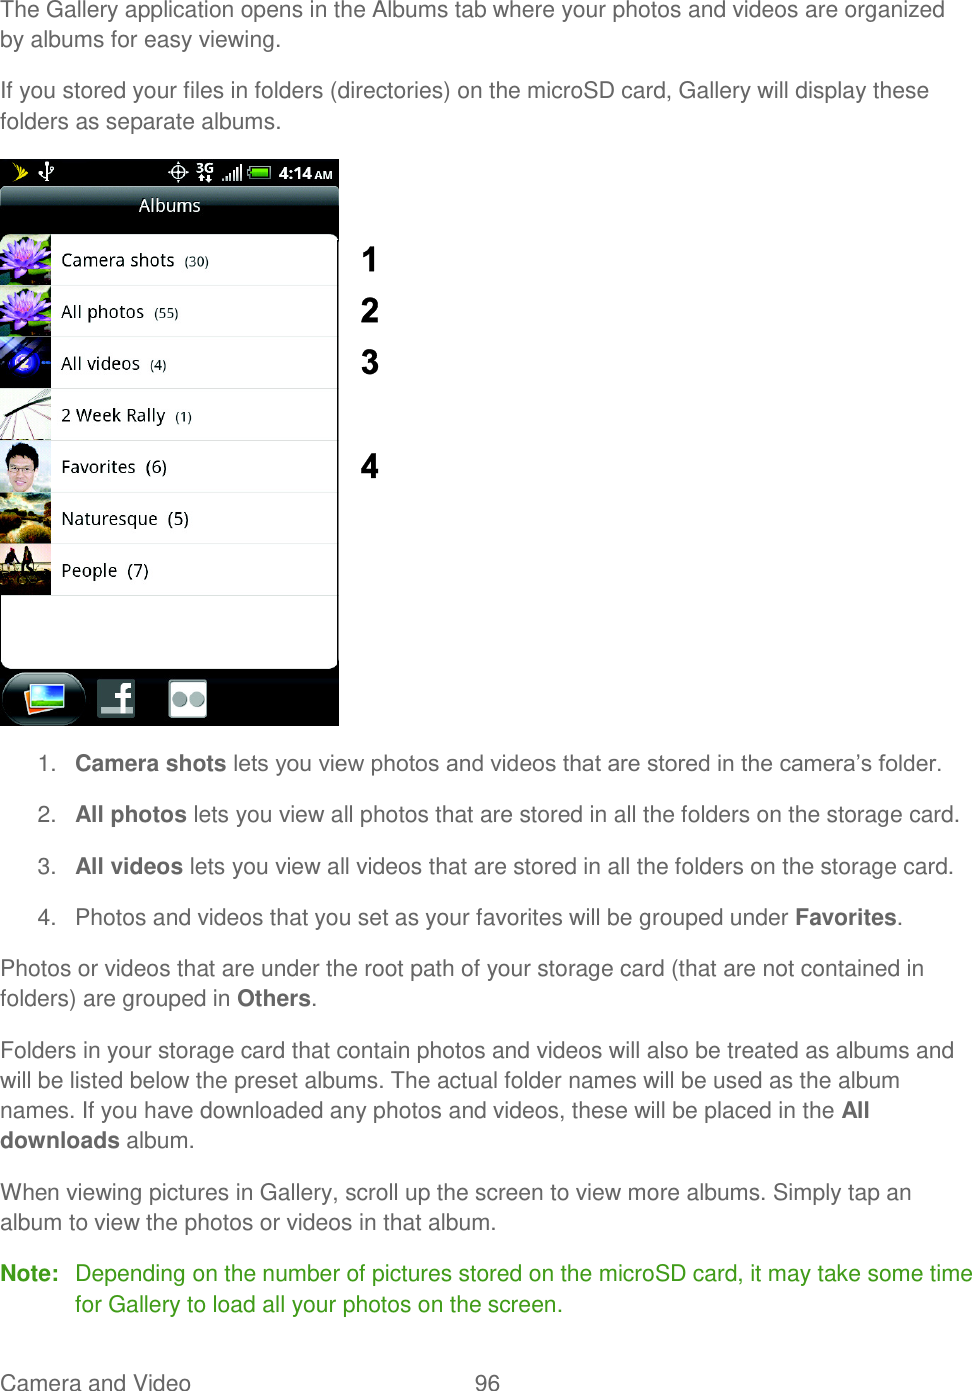
ZTE Corporation ZTE OPTIK Users Manual
UserManual.wiki
>
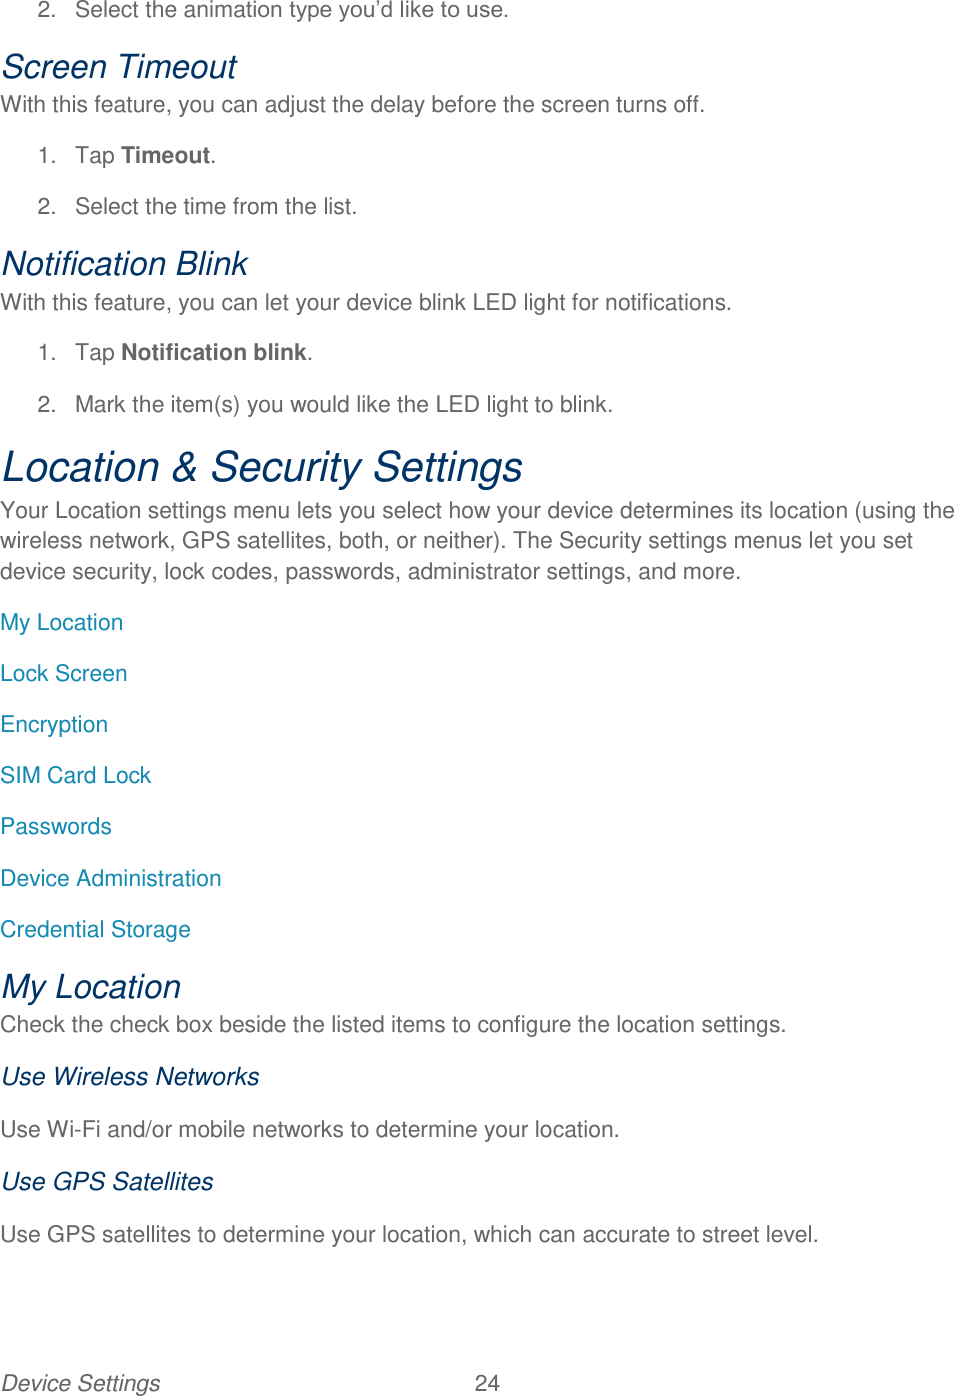
ZTE
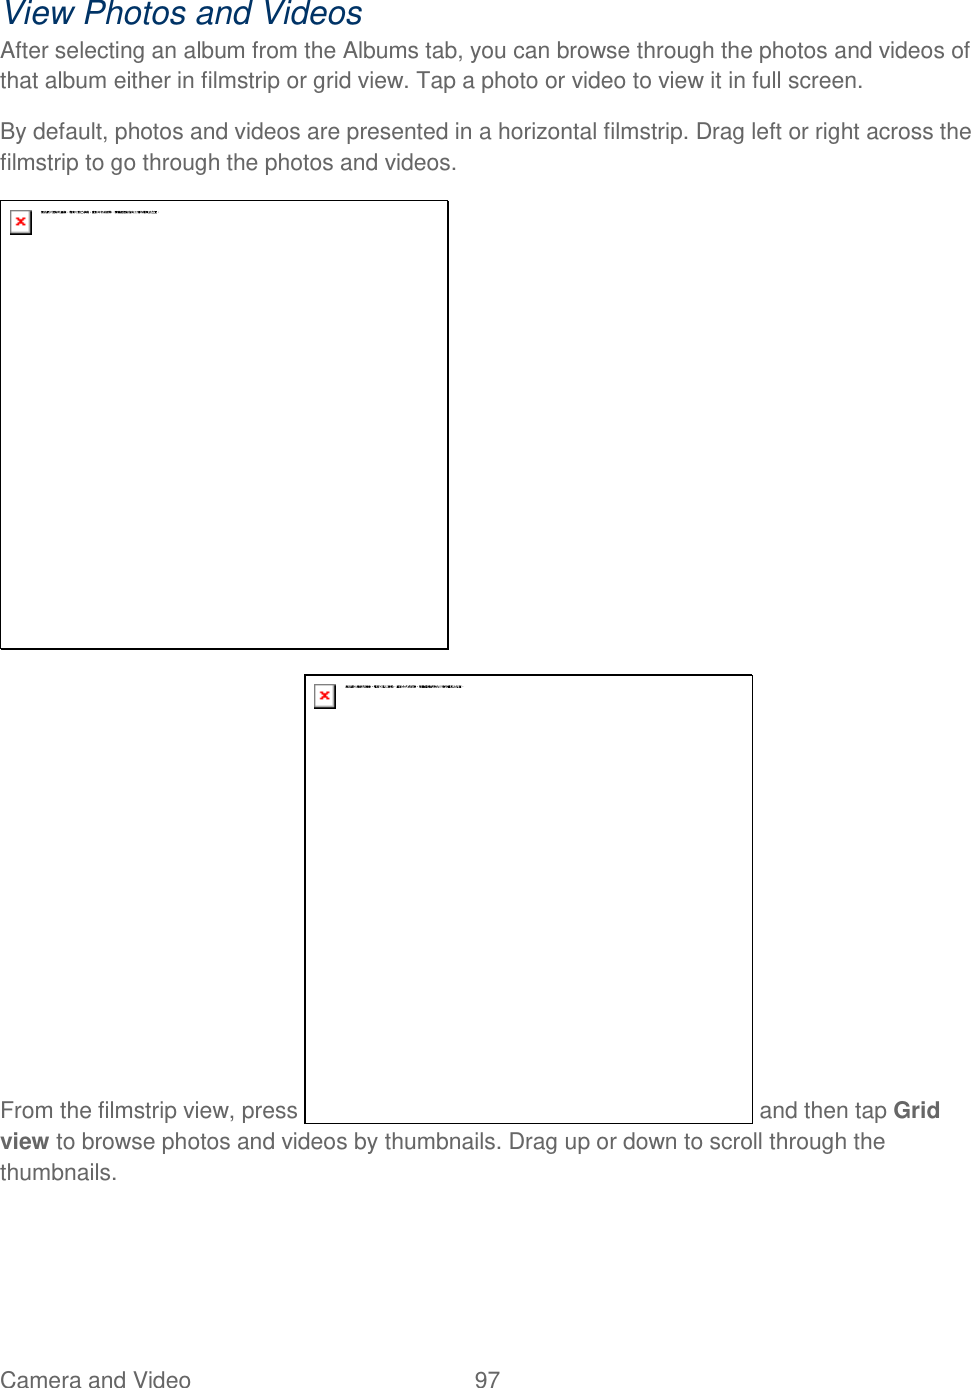
>
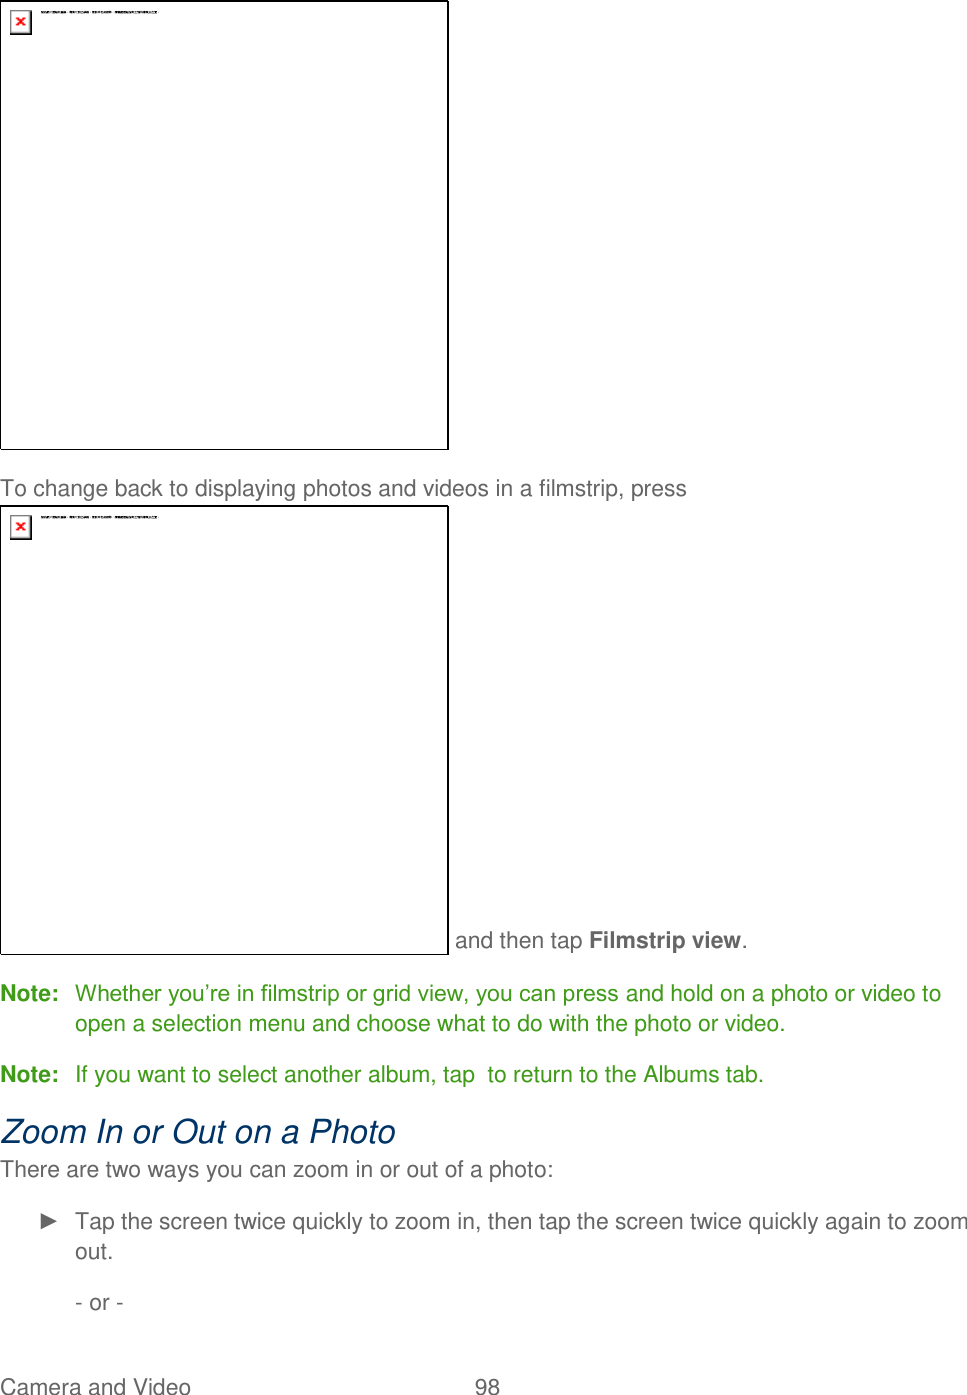
V55 User Manual
>
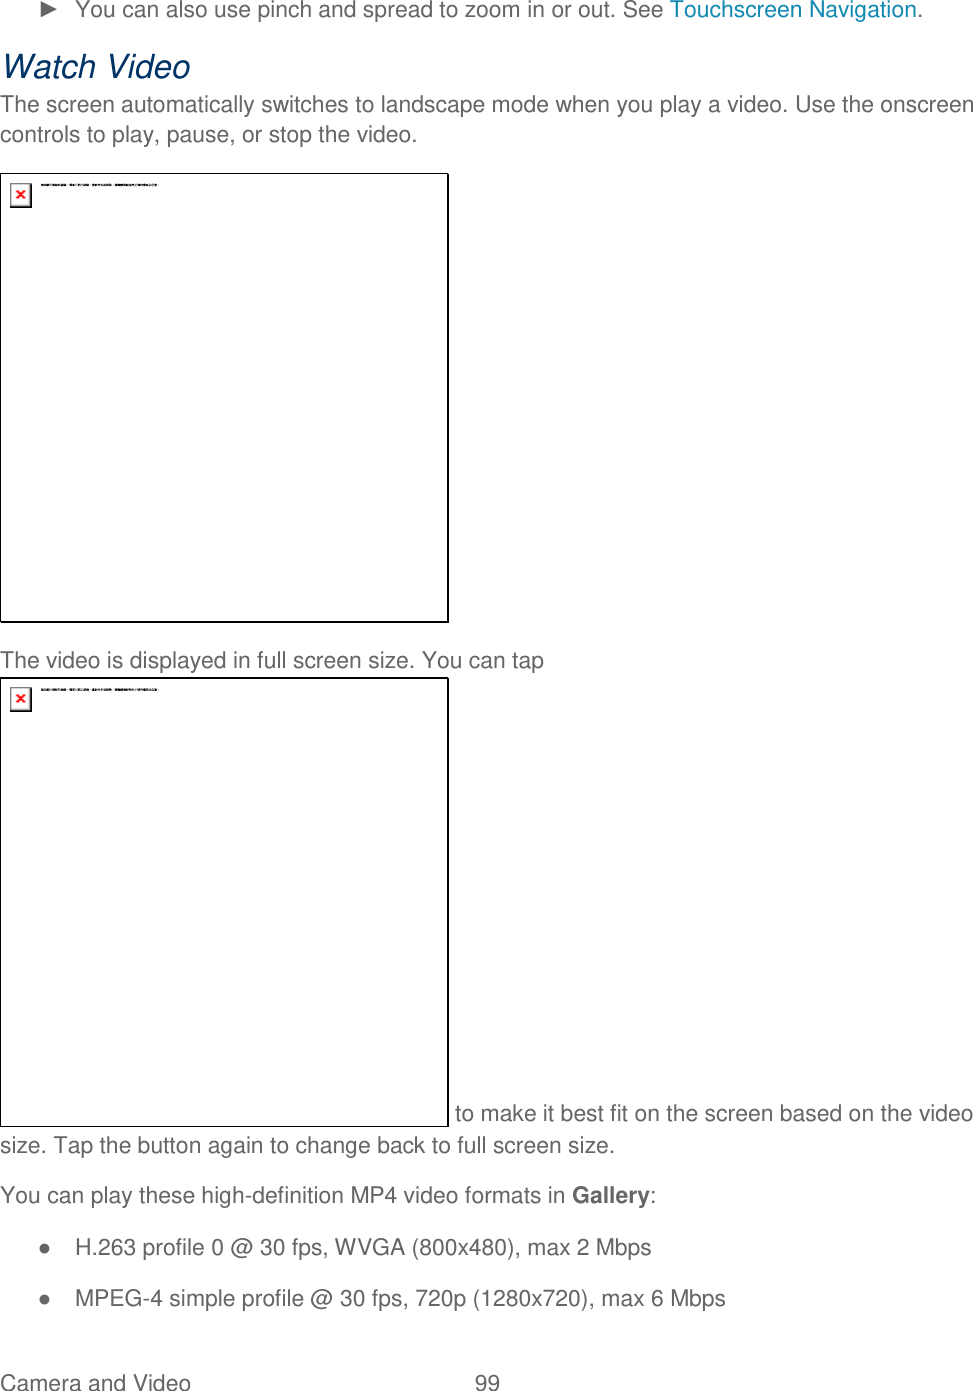
Users Manual
Contents
1.
Users Manual
2.
USERS MANUAL
3.
users manual
Users Manual
Navigation menu
Upload a User Manual
Namespaces
Wiki Guide
HTML
PDF
Info
Views
User Manual
Discussion / Help
Navigation


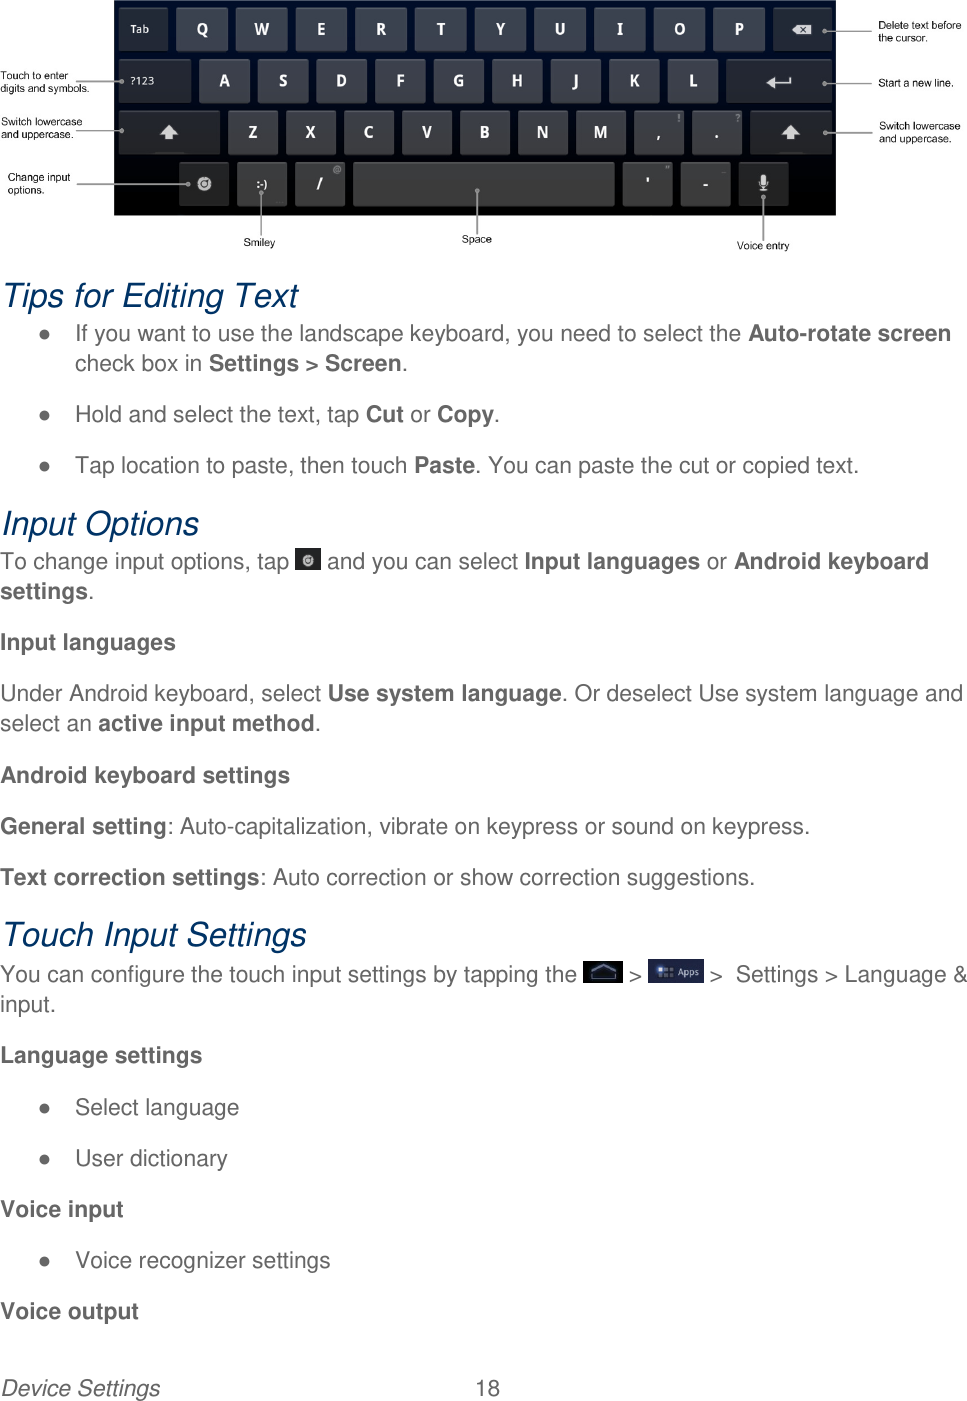
![Device Settings 17 sync active alarm set battery (charging) battery (full charge) Notification Icons Icon Description New email New Gmail [icon] Event Music playing USB connection [icon] Alarm [icon] Alert Enter Text You can type on your device using the virtual Android keyboard. Touchscreen Keyboards Tips for Editing Text Input Options Touch Input Settings Touchscreen Keyboards Touch any text field to open the touchscreen keyboard. To close the keyboard, please touch the icon at the lower left corner of the screen. Android Keyboard is a keyboard layout similar to a desktop computer keyboard. You can choose to use the landscape or portrait orientation of the on-screen keyboard, by turning the Tablet sideways.](https://usermanual.wiki/ZTE/V55.Users-Manual/User-Guide-1553779-Page-27.png)


![Web and Data 60 i. Tap Play to play the playlist. ii. Tap Delete to delete the playlist. Add songs to your playlist 1. Open the folder where the song you want to add to a playlist is. 2. Tap and select Add to playlist. 3. Select a playlist from the list. Sprint Music Plus [intro text]](https://usermanual.wiki/ZTE/V55.Users-Manual/User-Guide-1553779-Page-70.png)


![Web and Data 79 Connect to Sprint Mobile Hotspot 1. Enable Wi-Fi (wireless) functionality on your target device (laptop, media device, etc.). 2. Scan for Wi-Fi networks from the device and select your device hotspot from the network list. The default name for your device hotspot is [DEVICE]XXX. You can change the name by tapping Sprint Hotpot Settings > Router name from the Sprint Hotspot screen. 3. Select this device and follow your onscreen instructions to enter the passkey (provided on the Sprint Hotspot page). 4. Launch your Web browser to confirm you have an Internet connection.](https://usermanual.wiki/ZTE/V55.Users-Manual/User-Guide-1553779-Page-89.png)
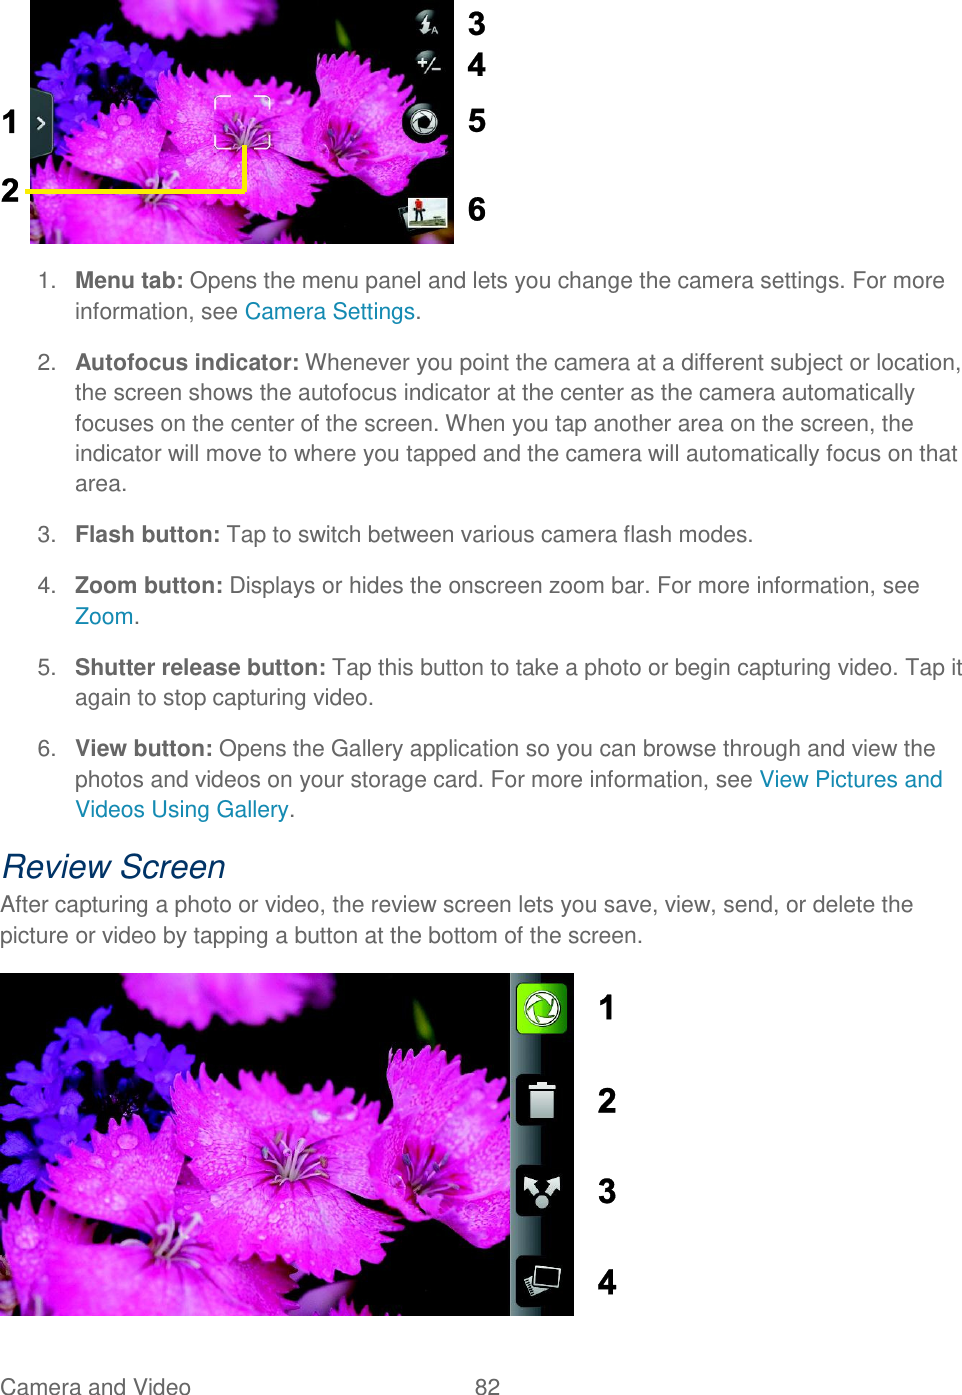
![Camera and Video 81 Open the Camera ► To open the camera in photo mode and take photos, press and touch > Camera. [include hard-button or programmable button option for launching camera, if applicable] Viewfinder Screen You’ll find the following controls on the Viewfinder screen:](https://usermanual.wiki/ZTE/V55.Users-Manual/User-Guide-1553779-Page-91.png)


![Tools and Calendar 130 Calendar event. In the Calendar’s Day view, Agenda view, or Week view, press and hold the event, and then touch Share vCalendar > Bluetooth. Music track. With the track displayed on the Now playing screen, press , and then touch Share > Bluetooth. Voice recording. On the main Voice Recorder screen, touch the Share button , and then touch Bluetooth. 4. If you are prompted to turn on Bluetooth, touch Yes. 5. Touch the name of the receiving device. 6. If prompted, accept the connection on the receiving device, and enter the same passcode on both your device and the other device, or confirm the auto-generated passcode. 7. On the receiving device, accept the file. The location where the information is saved depends on the type of information and the receiving device: ● If you send a calendar event or contact, it is normally added directly to the corresponding application on the receiving device. For example, if you send a calendar event to a compatible phone, the event is shown in that phone’s calendar application. ● If you send another file type to a Windows computer, it is normally saved in the Bluetooth Exchange folder within your personal document folders. On Windows XP, the path may be: C:\Documents and Settings\[your username]\ My Documents\Bluetooth Exchange. On Windows Vista, the path may be: C:\Users\[your username]\Documents.](https://usermanual.wiki/ZTE/V55.Users-Manual/User-Guide-1553779-Page-140.png)