ZTE VDF1230PLUS Tri-band GSM 850 / DCS 1800 / PCS 1900 Mobile Phone with Bluetooth User Manual
ZTE Corporation Tri-band GSM 850 / DCS 1800 / PCS 1900 Mobile Phone with Bluetooth
UserManual.wiki
>
ZTE
>
VDF1230PLUS User Manual
User Manual
Navigation menu
Upload a User Manual
Namespaces
Wiki Guide
HTML
PDF
Info
Views
User Manual
Discussion / Help
Navigation

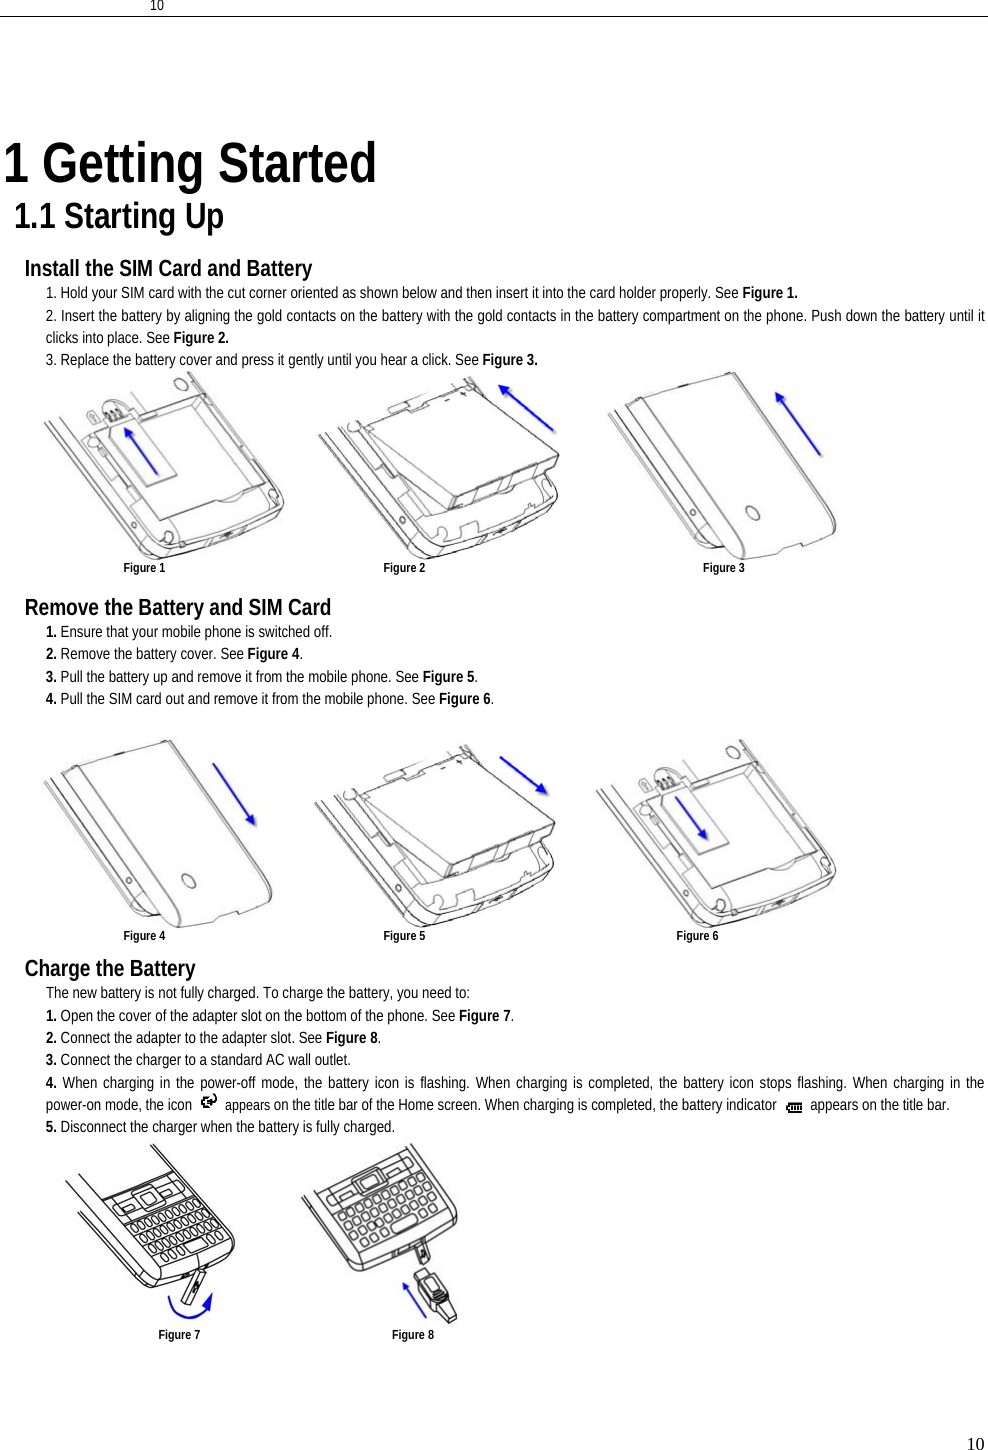
![55• Do not attempt to disassemble your phone or its accessories, only authorized personnel must do so. • Do not expose your phone or its accessories to extreme temperatures, minimum - [5] and maximum + [50] degree Celsius. • Please check local regulations for disposal of electronic products. • Do not carry your phone in your back pocket as it could break when you sit down. Small children Do not leave your phone and its accessories within the reach of small children or allow them to play with it. They could hurt themselves or others, or could accidentally damage the phone. Your phone contains small parts with sharp edges that may cause an injury or which could become detached and create a choking hazard. Demagnetization To avoid the risk of demagnetization, do not allow electronic devices or magnetic close to your phone for a long time. Electrostatic discharge (ESD) Do not touch the SIM card’s metal connectors. Antenna Do not touch the antenna unnecessarily. Normal use position When placing or receiving a phone call, hold your phone to your ear, with the bottom towards you mouth or as you would a fixed line phone Air Bags Do not place a phone in the area over an air bag or in the air bag deployment area. Store the phone safely before driving your vehicle. Seizures/ Blackouts This phone is capable of producing bright flashing lights. Repetitive Motion Injuries • To minimize the risk of RSI, when texting or playing games with your phone: • Do not grip the phone too tightly. • Press the buttons lightly. • Make use of the special features in the handset which minimize the number of the buttons which have to be pressed, such as message templates and predictive text. • Take lots of breaks to stretch and relax. Emergency Calls This phone, like any wireless phone, operates using radio signals, which cannot guarantee connection in all conditions. Therefore, you must never rely solely on any wireless phone for emergency communications. Loud Noise This phone is capable of producing loud noise which may damage your hearing. Bright Light The phone is capable of producing flash or light or use as a torch, do not use it too close to the eyes.](https://usermanual.wiki/ZTE/VDF1230PLUS/User-Guide-1046920-Page-5.png)

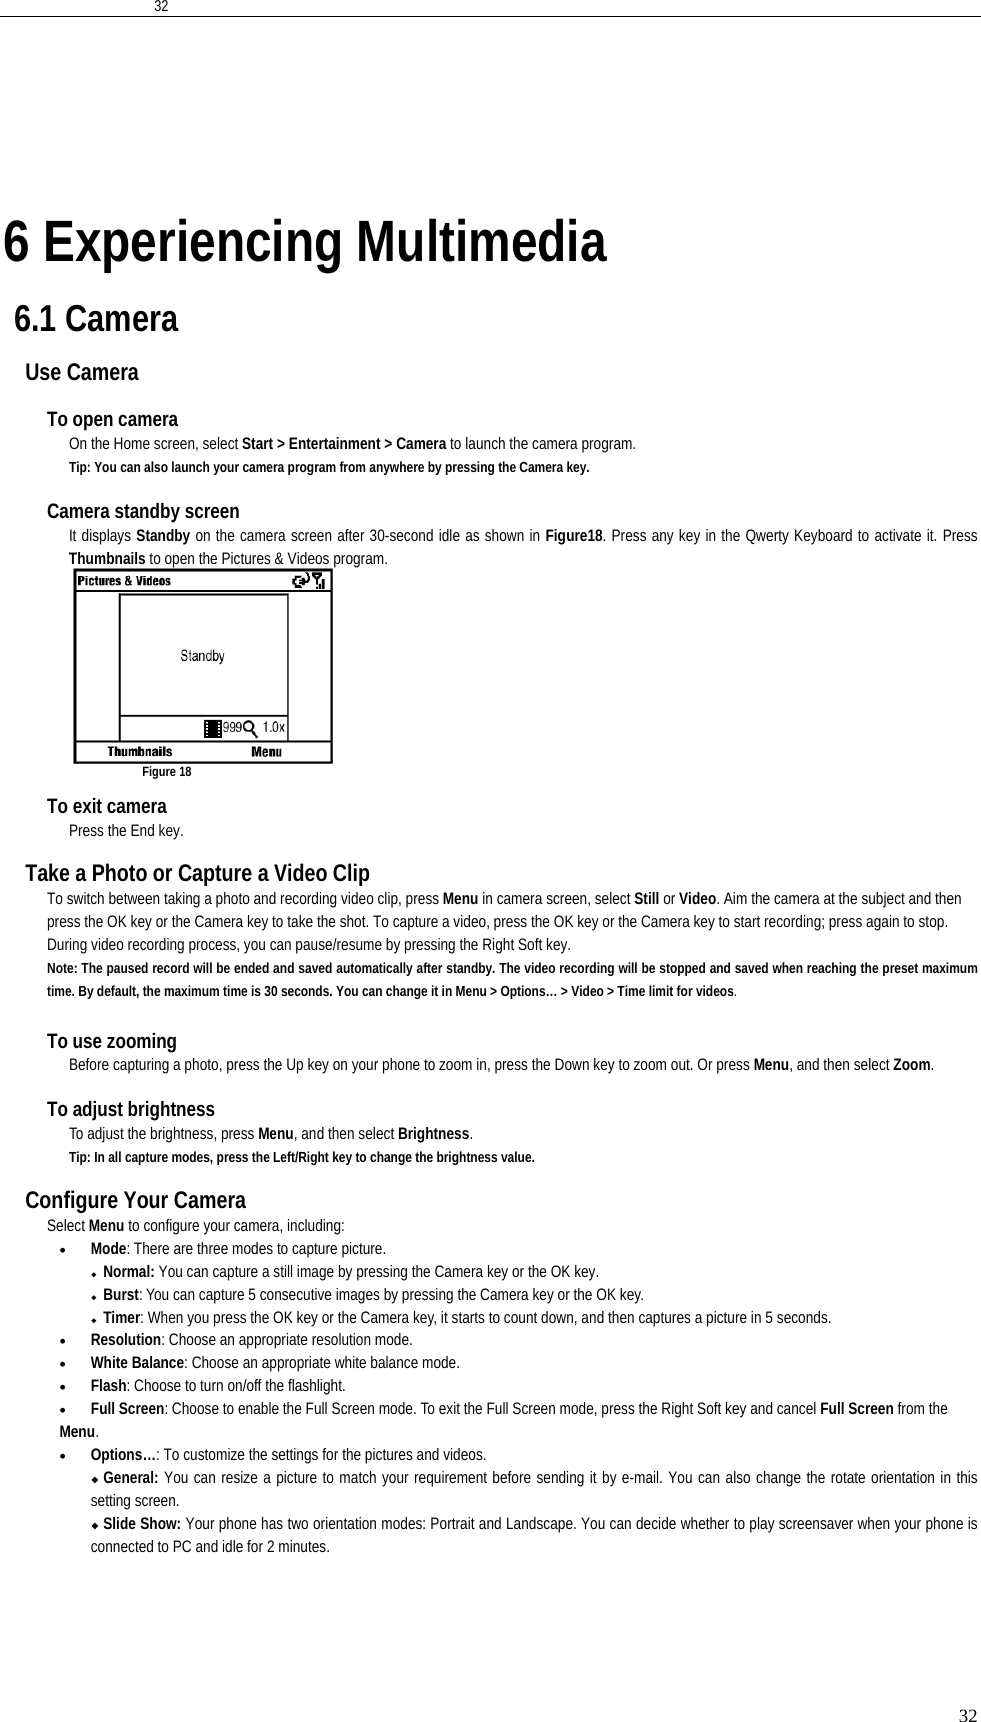


![4444To change the zoom ratio Select View > Zoom and then select the zoom ratio to use. To switch to another worksheet If your Excel file has multiple worksheets, you can go to a different worksheet by selecting View > Sheet and then select the worksheet you want to view. Edit and Send Worksheets In order to edit Excel worksheets, you need to switch to Edit mode. When the worksheets are opened, to switch to Edit mode, select Menu > Edit. To edit the cell text 1. Select the cell whose text you want to edit and then press the OK key or select Menu > Edit > Cell Text. 2. Type in the text and select Done. To delete the cell content Select the cell whose content you want to delete, and select Menu > Edit > Clear Cell. Tip: You can select multiple cells by selecting Menu > Select, and choosing what to select in the worksheet. To change the cell range of a defined name If your worksheet contains defined names created in Microsoft Excel on the PC, you can change the cell range of the defined name. 1. Select Menu > Edit > Define Name. 2. In Range Name, select the name whose cell range you want to change. 3. In Refers to, type in the new cell range. 4. Press Done. To delete cells Select the cell you want to delete and select Menu > Edit > Delete Cells. Tip: You can select multiple cells to delete by selecting Menu > Select and then choosing what to select in the worksheet. To copy and paste cell contents 1. Select the cell(s) you want to copy and then select Menu > Edit > Copy. 2. Select the cell(s) where you want to copy the cell contents to and select Menu > Edit > Paste. To insert a row or column Select the cell where you want to insert a row or column and then select Menu > Insert > Row or Column. If you insert a row, the row will be inserted above the selected cell; if you insert a column, the column will be inserted at the left of the selected cell. Tip: You can also shift the contents of a row or column. To shift, select the cell you want to shift and select Menu > Insert > Shift Right or Shift Down. To go to a cell Select Menu > Tools > Go To and then enter the Cell reference or name. Select OK. Tip: You can sort and find text in the worksheet by selecting Menu > Tools > Sort or Find. To undo and redo an action Select Menu > Undo [Action] or Redo [Action]. To save the worksheet 1. Select Menu > File > Save As…. 2. Type in the Name you want to use for the edited worksheet and select the Location where you want to save the worksheet. 3. Press Save. To send the document through e-mail 1. Select Menu > File > Send. 2. In the Messaging screen, select the e-mail account you want to use to send the worksheet. 3. In the e-mail, the file is automatically appended as an attachment. 4. Enter the recipient name and press Send. 8.5 Microsoft® Office PowerPoint® Mobile Microsoft® Office PowerPoint® Mobile enables you to view your PowerPoint presentations.](https://usermanual.wiki/ZTE/VDF1230PLUS/User-Guide-1046920-Page-44.png)