ZTE Z936L CDMA/LTE Dual-Mode Digital Mobile Phone User Manual ZTE T22
ZTE Corporation CDMA/LTE Dual-Mode Digital Mobile Phone ZTE T22
UserManual.wiki
>
ZTE
>
Z936L User Manual
User manual
Navigation menu
Upload a User Manual
Namespaces
Wiki Guide
HTML
PDF
Info
Views
User Manual
Discussion / Help
Navigation


![56 for it to search for new devices and touch one of them. Receive Data via Bluetooth 1. Turn Bluetooth on before trying to receive data via Bluetooth. NOTE: If the phone has not been paired with the sending device, you may need to touch Bluetooth > [your phone’s name] in Settings to keep the phone detectable through Bluetooth. 2. Flick down the status bar and touch . 3. Touch Accept to start receiving the data. Depending on your storage setting and whether a microSDHC card is installed, received files are stored automatically in a dedicated folder (Bluetooth, for instance) in the phone storage or microSDHC. You can access them with the File Manager app. Connecting to Your Computer via USB You can connect your phone to a computer with a USB cable and transfer music, pictures, and other files in both directions. Your phone stores these files in the phone storage or on a removable microSDHC card. For more information, see Storage. Connect Your Phone to a Computer via USB 1. Connect your phone to the PC with a USB cable. 2. Open the notification panel and touch . 3. Choose one of the following options:](https://usermanual.wiki/ZTE/Z936L/User-Guide-2520476-Page-56.png)
![61 Phone Calls You can place calls from the Phone app, the Contacts app, or other apps or widgets that display contact information. Wherever you see a phone number, you can usually touch it to dial. Placing and Ending Calls Place a Call by Dialing 1. Touch the Home Key > . 2. Touch and enter the phone number or the contact name with the dialpad. The phone will display matching information from your contact list. To make an international call, touch and hold the 0 key to enter the plus (+) symbol. Next, enter the country code, followed by the city/area code and then the phone number. 3. Touch the matching contact to call the contact or touch to call the number. NOTE: You can also touch the search box at the top of the Phone app screen and enter the phone number or contact name you want to call. Touch the matching contact or Call [number] to place the call. NOTE: To redial the last call you made, just touch the Home Key > > > and touch again.](https://usermanual.wiki/ZTE/Z936L/User-Guide-2520476-Page-61.png)
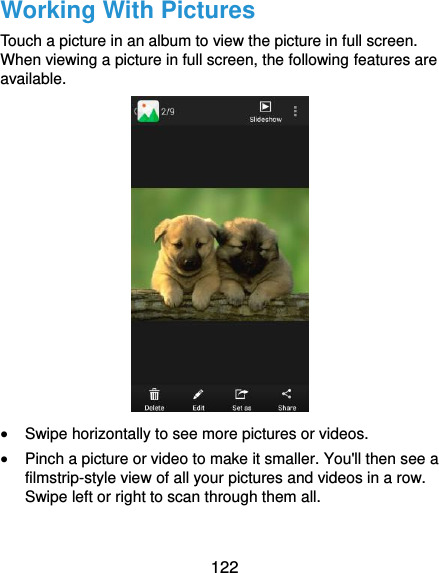
![64 Touch Call [number] to make a call. Touch > Edit number before call to edit the number in the dialer before calling it. Touch to send a message. If the number belongs to a contact you have, touch to view contact details. Touch > Remove from call log to delete the call log entry. Calling Your Contacts 1. Touch the Home Key > . Your favorite contacts and frequently called contacts are displayed. 2. Touch a contact to place the call, or touch All Contacts to view all your contacts with phone numbers and select one to make the call. Checking Voicemail If you have set the phone to divert calls to voicemail, callers can leave voicemail messages when they cannot reach you. Here’s how to check the messages they left. 1. Touch the Home Key > > . 2. Touch and hold on the dialpad. If prompted, enter your voicemail password. 3. Follow the voice prompts to listen to and manage your voicemail messages.](https://usermanual.wiki/ZTE/Z936L/User-Guide-2520476-Page-64.png)