ZTE Z962BL WCDMA/LTE Multi-Mode Digital Mobile Phone User Manual ZTE T81
ZTE Corporation WCDMA/LTE Multi-Mode Digital Mobile Phone ZTE T81
UserManual.wiki
>
ZTE
>
Z962BL User Manual
User manual
Navigation menu
Upload a User Manual
Namespaces
Wiki Guide
HTML
PDF
Info
Views
User Manual
Discussion / Help
Navigation


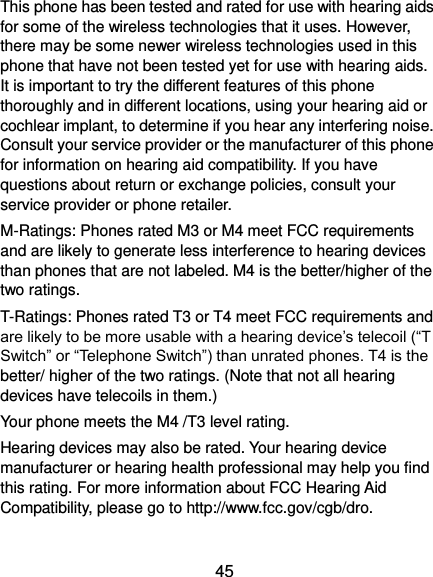
![19 Calling and Voicemail Making a Call 1. Touch the Home key > . 2. Touch and enter the phone number or the contact name with the dialpad. The phone will display matching information from your contact list. 3. Touch the matching contact to call the contact or touch to call the number. NOTE: You can also touch the search box at the top of the Phone app screen and enter the phone number or contact name you want to call. Touch the matching contact or Call [number] to place the call.](https://usermanual.wiki/ZTE/Z962BL/User-Guide-2844862-Page-19.png)