ZTE ZTEA39 GSM DUAL-BAND DIGITAL MOBILE PHONE User Manual A39 V1 0
ZTE Corporation GSM DUAL-BAND DIGITAL MOBILE PHONE A39 V1 0
UserManual.wiki
>
ZTE
>
ZTEA39 User Manual
USERS MANUAL
Navigation menu
Upload a User Manual
Namespaces
Wiki Guide
HTML
PDF
Info
Views
User Manual
Discussion / Help
Navigation


![24 Enter PIN ——if SIM card password has been set. Press Left soft key[ Unlock], Enter lock Code——if handset lock code has been set. 2.5.4 Unlocking the SIM Card and Mobile Phone By setting PIN (personal identification number) code of SIM card and handset lock code, you can protect your SIM card and phone from illegal use. Method to unlock the SIM card: Enter PIN code and end by pressing Left soft key [OK]. If you enter an incorrect PIN code three times in a row, your SIM card will be locked by the network and the phone will ask for PUK code. Note: Your network service provider will set a standard PIN code (4-8 digits) for your SIM card; please change it with your private password as soon as possible. Method to unlock the phone: Enter handset lock code and end by pressing Left soft key [OK]. Note: If you forget your handset lock code, please connect with your distributor or](https://usermanual.wiki/ZTE/ZTEA39/User-Guide-744791-Page-32.png)
![33 of the following options, you can set to divert which service to the preset number: All Services: Divert incoming calls, voice calls and short messages. Voice Calls: Only divert voice calls. Data: Only divert data. Fax: Only divert faxes. Messages: Only divert short messages. All Except Messages: Diverts all services except short messages. Cancel All Enter the divert interface, use Scroll keys to select Cancel All to cancel all diverts services. 4.2.3 Firewall 4.2.3.1 Incoming Calls Bar Friend List: Press Select to access. If you have not added anything, the screen displays “List empty”. Press Add to add the phone number, and then press Left soft key [OK] to save.](https://usermanual.wiki/ZTE/ZTEA39/User-Guide-744791-Page-41.png)
![34 If you have added something, you can directly enter the friend list. Press Options to select such options: Add, Edit, Delete. If you have set “Bar Blacklist”, all the phone numbers in the black list or the phone numbers started with the numbers of the black list can not be connected. Black List: Press Select to access. If you have not added anything, the screen displays “List empty”. Press Add to add the phone number, and then press Left soft key [OK] to save. If you have added something, you can directly enter the black list. Press Options to select such options: Add, Edit, Delete. If you have set “Friend Only”, only the phone numbers in the friend list or the phone numbers started with the numbers of the friend list can be connected. Current Settings: Press Select to access and the following options are displayed: Bar All, Bar Blacklist, Friend Only and Cancel All. Note: The phone numbers in the blacklist should be the fixed telephone number added with area code, or the call can not be banned.](https://usermanual.wiki/ZTE/ZTEA39/User-Guide-744791-Page-42.png)
![35 4.2.3.2 Outgoing Calls Bar Before entering the function, you need to enter phone password first. The default phone password is 1234. Current Settings: Bar All: Bar all outgoing calls except emergency calls. Bar List: Bar all numbers in the barred list and all the numbers beginning with any number in the barred list. Cancel All: Cancel the restriction on outgoing calls. Barred List: Directly enter the list, press Options to select Add/Edit/Delete. If you have not added anything, the screen displays “List empty”. Press Add, and then press Left soft key [OK] to save. 4.2.4 Call Settings Anykey Answer: If “On” is selected, you can answer the call by pressing any key except End key, and Right Soft key.](https://usermanual.wiki/ZTE/ZTEA39/User-Guide-744791-Page-43.png)
![39 Pictures: Press left soft key to enter the picture list. The pictures are downloaded from a browser or from the attachment of MMS. Ringtones: Press left soft key to enter the audio list. The audio files can be downloaded from a browser or received from attachment of a message. Press Up/Down key to select a record and then press Left soft key [Option] to enter the following submenu: Play: Play the selected music. Set ringtone: Set the selected music as the ring tone of the incoming call. Info: View the attribution of the selected record.](https://usermanual.wiki/ZTE/ZTEA39/User-Guide-744791-Page-47.png)
![51 4.6.2 MMS If your SIM card supports, you can send and receive multimedia messages freely. New Message Press MMS-〉New Message, and then press left soft key [options] to enter the following submenu: Edit Text: Select to edit text message, hold *key to access the preset idiom. Press left soft key [OK] to confirm the input and then press left soft key [Options] to enter the following submenu: ♦ Done: (This submenu appears when the mms has been edited), Press done to enter address option. Send later: Save the created Multimedia message to the drafts until the next time you send the message manually. Subject: Write a title, 20 characters are permitted. To: One or more phone numbers or email addresses where you want to send the message, 40 characters are permitted for each recipient’s address. CC: Phone numbers or email addresses where you want to send a carbon](https://usermanual.wiki/ZTE/ZTEA39/User-Guide-744791-Page-59.png)
![56 pressing Up/Down key, and then press Dial key to dial the number. In the names list interface, press Options to access the menu interface. The menu options are as follows: Search Edit Delete IP Dial Detail Add New Name Settings Batch Operation In the names list interface, press OK key to check the selected record. And then press left soft key [Options] to access the following submenu interface: Send Message: Access the creating message interface. Edit: Edit the record. Delete: Select whether to delete the record.](https://usermanual.wiki/ZTE/ZTEA39/User-Guide-744791-Page-64.png)
![60 Enter the name of the number you want to add and then press Left soft key[OK] Select the group. 4.7.7 Sending Message In the names list interface, press Options and select Send Message, you can access the interface of editing messages directly. The following operation is the same as creating messages. 4.7.8 settings Ringing Tone: You can set different alert rings for different groups. Save Nos. to: You can select Handset memory/Choice/SIM card to save numbers. Used Space: You can view the number of saved records and maximum number of records in SIM card and phone memory. Speed Dial List: List the speed dial number. 4.7.9 Batch Operation This function provides you to batch copy, move or delete all the numbers saved in the](https://usermanual.wiki/ZTE/ZTEA39/User-Guide-744791-Page-68.png)
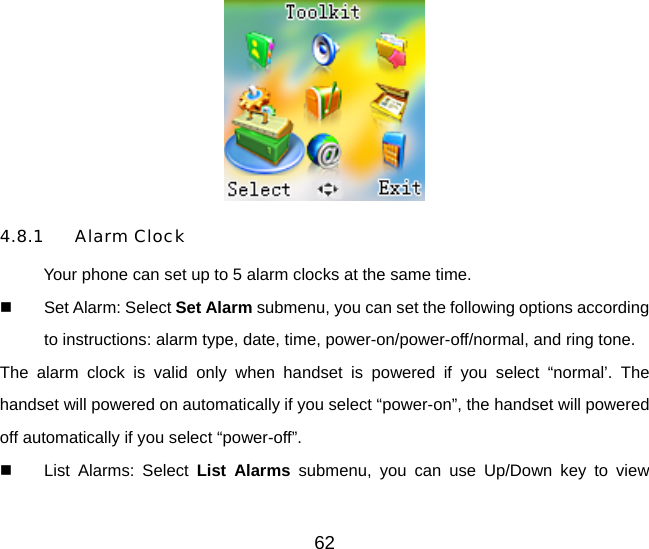
![63 alarm clocks settings. Press Options to enter setting screen, select Edit to view/edit the alarm clock settings, or select Delete to delete it, or select Enable/Disable to enable/disable it. Define Rest Day: Select Define Rest Day to set or change days off in a week. Workday alarm will not ring at defined restday. Press Up/Down key to select and then press Ok key to set or cancel restday. Clear All: Select Clear All to clear all settings of all the alarm clocks. 4.8.2 Calendar Use Scroll key to select and press View to quick view. The date can be set from January 1, 1901 to December 31, 2059. 4.8.3 Calculator Press 0~9 Number keys to enter numbers, press # key to enter decimal point. Press Up/Down/Left/Right key to switch among +, –, ×, ÷. Press Right soft key to clear last digit and results. Press End key to exit the calculator. Press Left soft key [Equal] to get results.](https://usermanual.wiki/ZTE/ZTEA39/User-Guide-744791-Page-71.png)
![64 Note: This calculator has limited accuracy and rounding errors may occur especially in long division. 4.8.4 Stopwatch You can measure time and take split times or lap times, for example, in different sports. Press OK key to start timing. Press OK key to stop the timing during the operation and view the duration of time. Press Left soft key or OK key to reset. 4.8.5 World Clock The world Clock function provides time information on major cities worldwide. You can view the time of desired city by using Left/Right/Up/Down key on the navigation screen of World Time. Press Left soft key [Save] to save the selected city time as a native display. Press End key to quit.](https://usermanual.wiki/ZTE/ZTEA39/User-Guide-744791-Page-72.png)