ZTE ZTEN800 CDMA 1X-EVDO DIGITAL MOBILE PHONE User Manual
ZTE Corporation CDMA 1X-EVDO DIGITAL MOBILE PHONE
UserManual.wiki
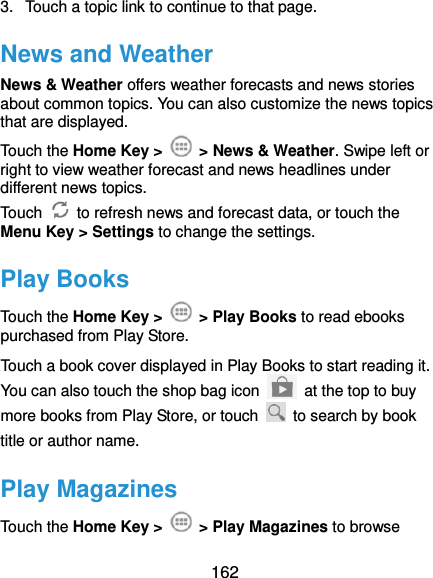
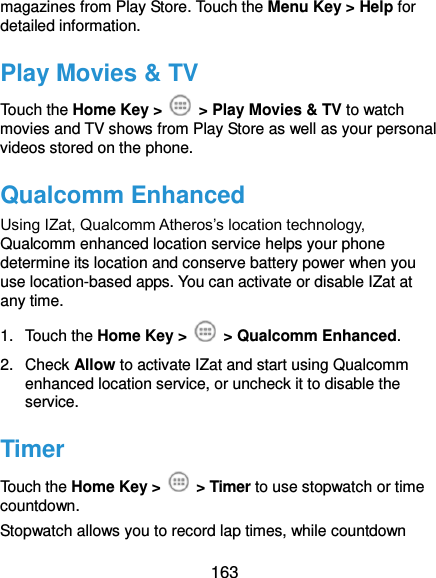
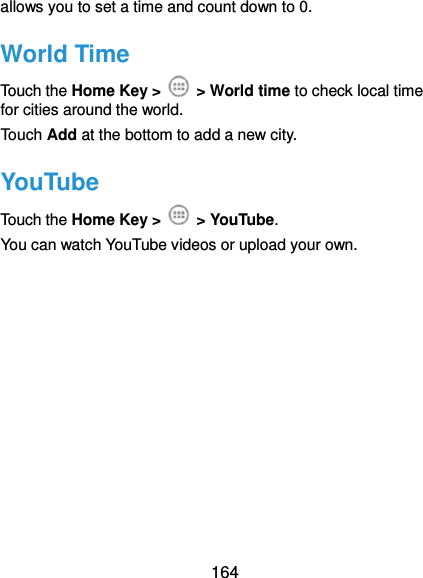
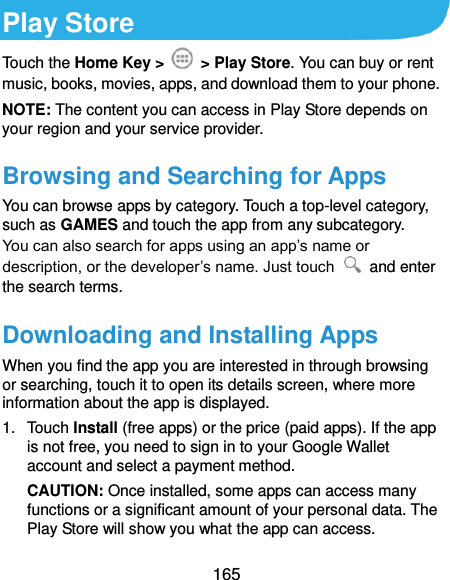
>
ZTE
>
ZTEN800 User Manual
User Manual
Navigation menu
Upload a User Manual
Namespaces
Wiki Guide
HTML
PDF
Info
Views
User Manual
Discussion / Help
Navigation
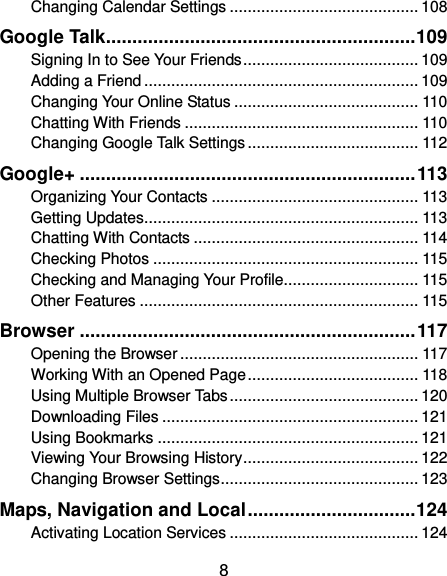

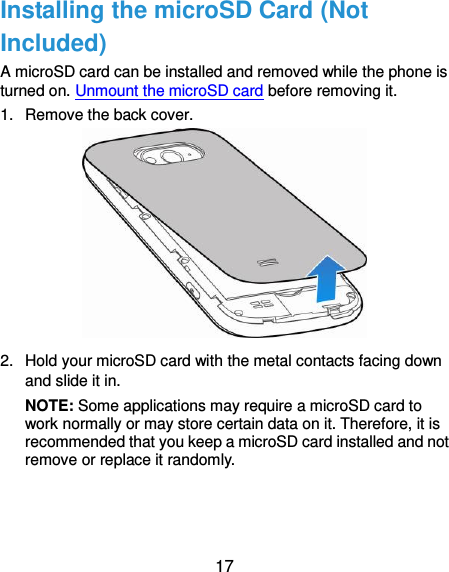

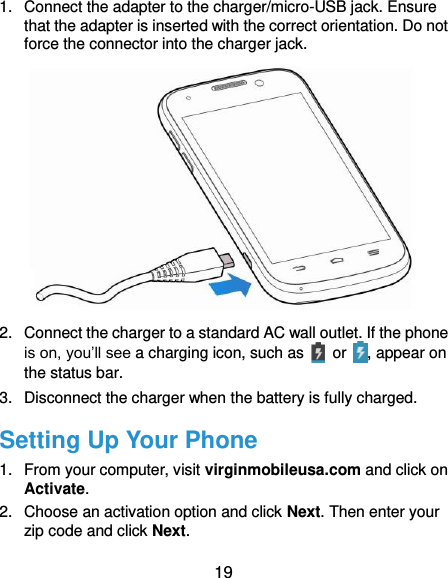


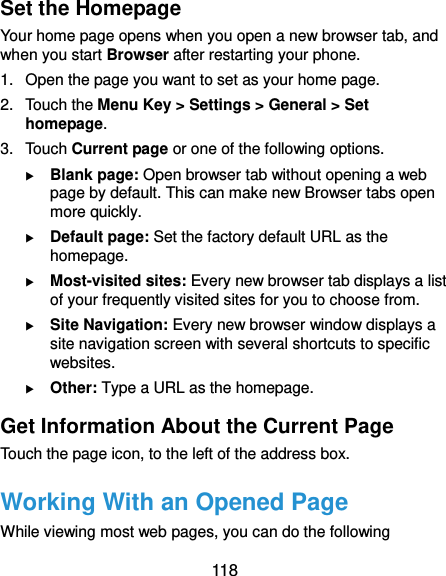
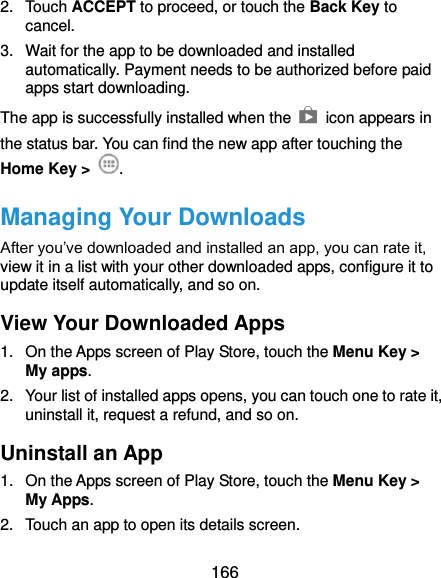
![59 Send Data via Bluetooth 1. Open the appropriate application and select the file or item you want to share. 2. Select the option for sharing via Bluetooth. The method may vary by application and data type. 3. Touch a Bluetooth device the phone has paired with or wait for it to search for new devices and touch one of them. Receive Data via Bluetooth 1. Turn Bluetooth on before trying to receive data via Bluetooth. NOTE: If the phone has not been paired with the sending device, you may need to touch Bluetooth > [your phone’s name] in Settings to keep the phone detectable through Bluetooth. 2. Flick down the status bar and touch . 3. Touch Accept to start receiving the data. Received files are stored automatically in a dedicated folder (Bluetooth, for instance). You can access them with the File Manager app. Connecting to Your Computer via USB You can connect your phone to a computer with a USB cable and transfer music, pictures, and other files in both directions. Your phone stores these files in internal storage or on a removable microSD card.](https://usermanual.wiki/ZTE/ZTEN800/User-Guide-2012643-Page-59.png)