ZTE ZTEN9810 CDMA/LTE Multi-Mode Digital Mobile Phone User Manual
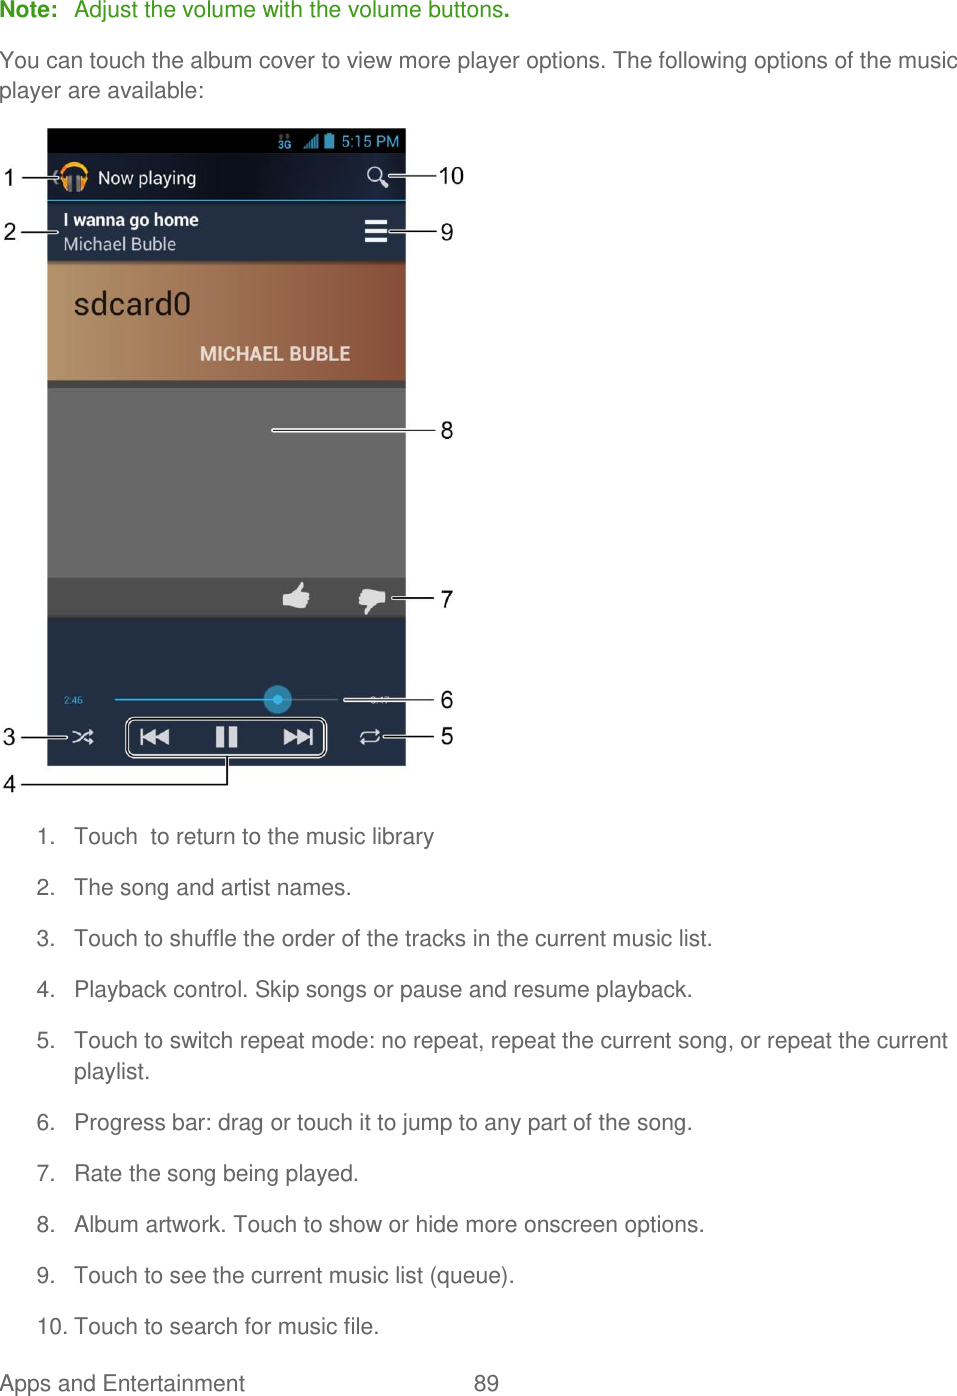
ZTE Corporation CDMA/LTE Multi-Mode Digital Mobile Phone
UserManual.wiki
>
ZTE
>
ZTEN9810 User Manual
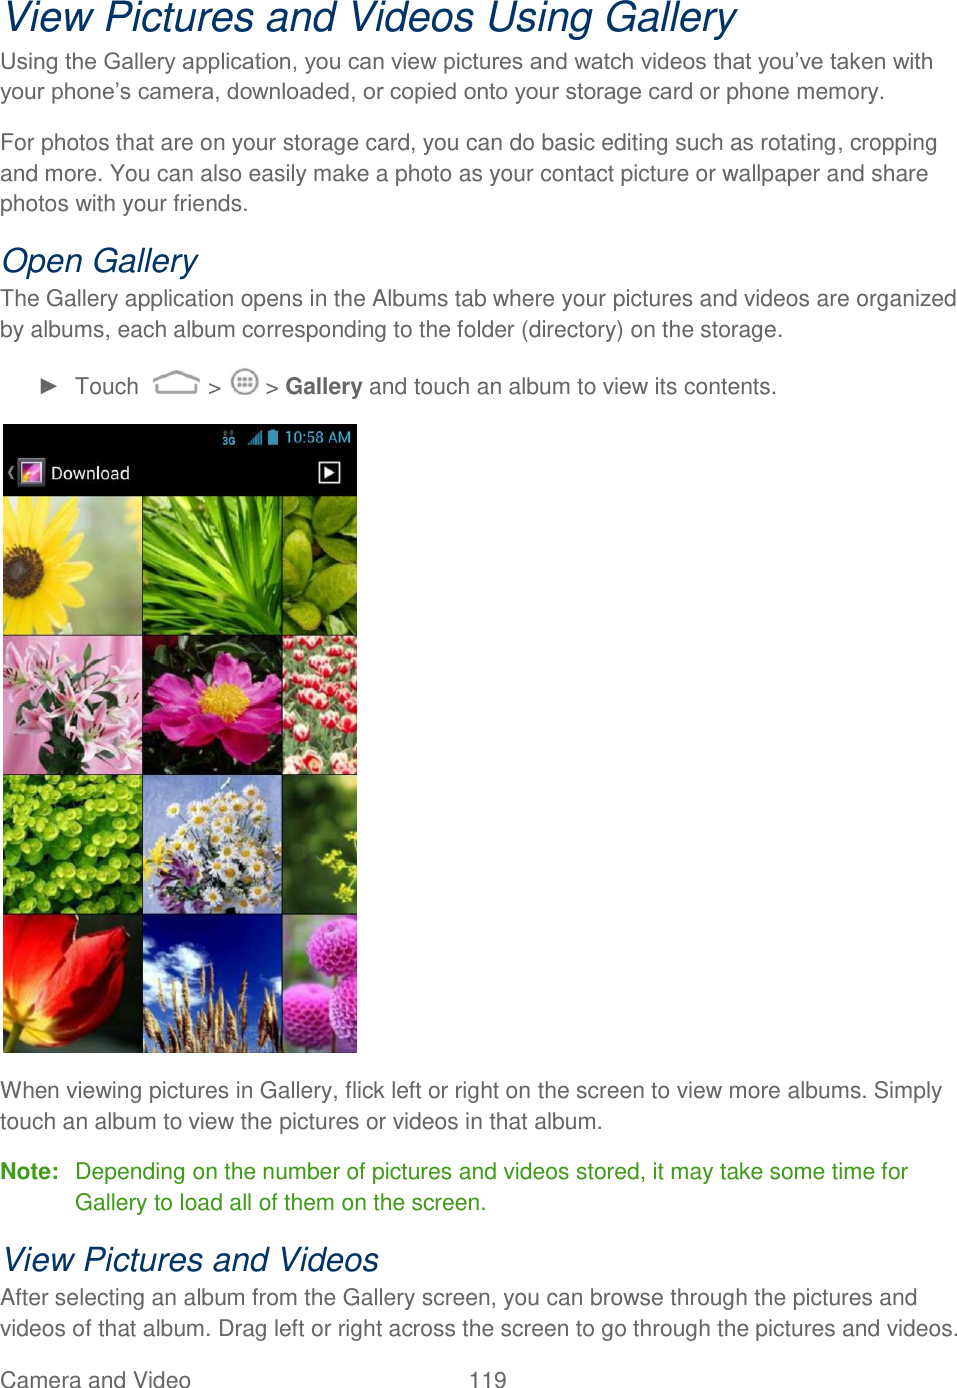
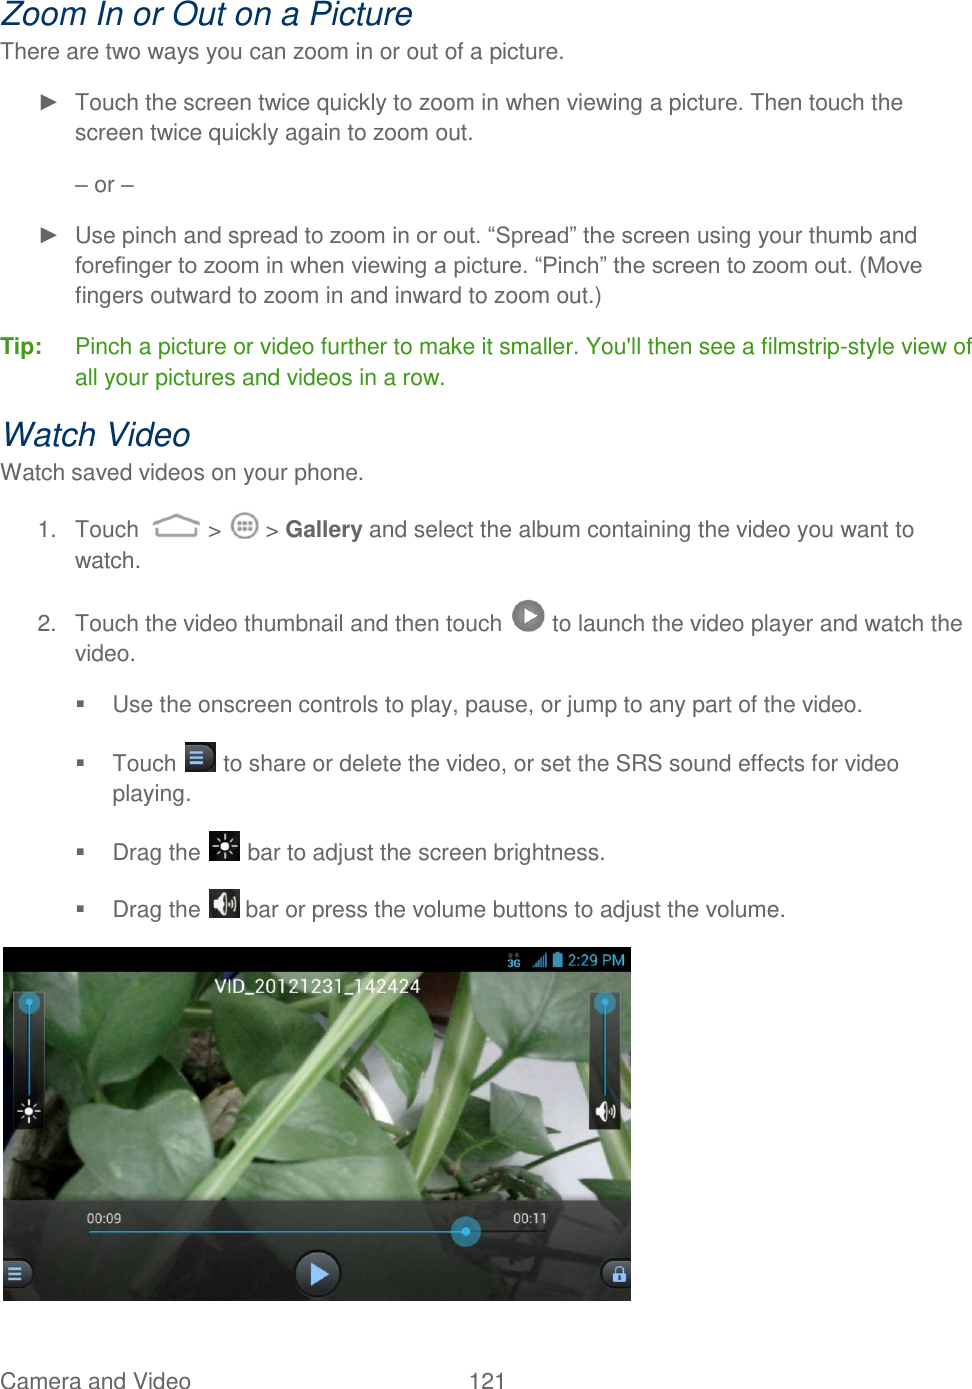
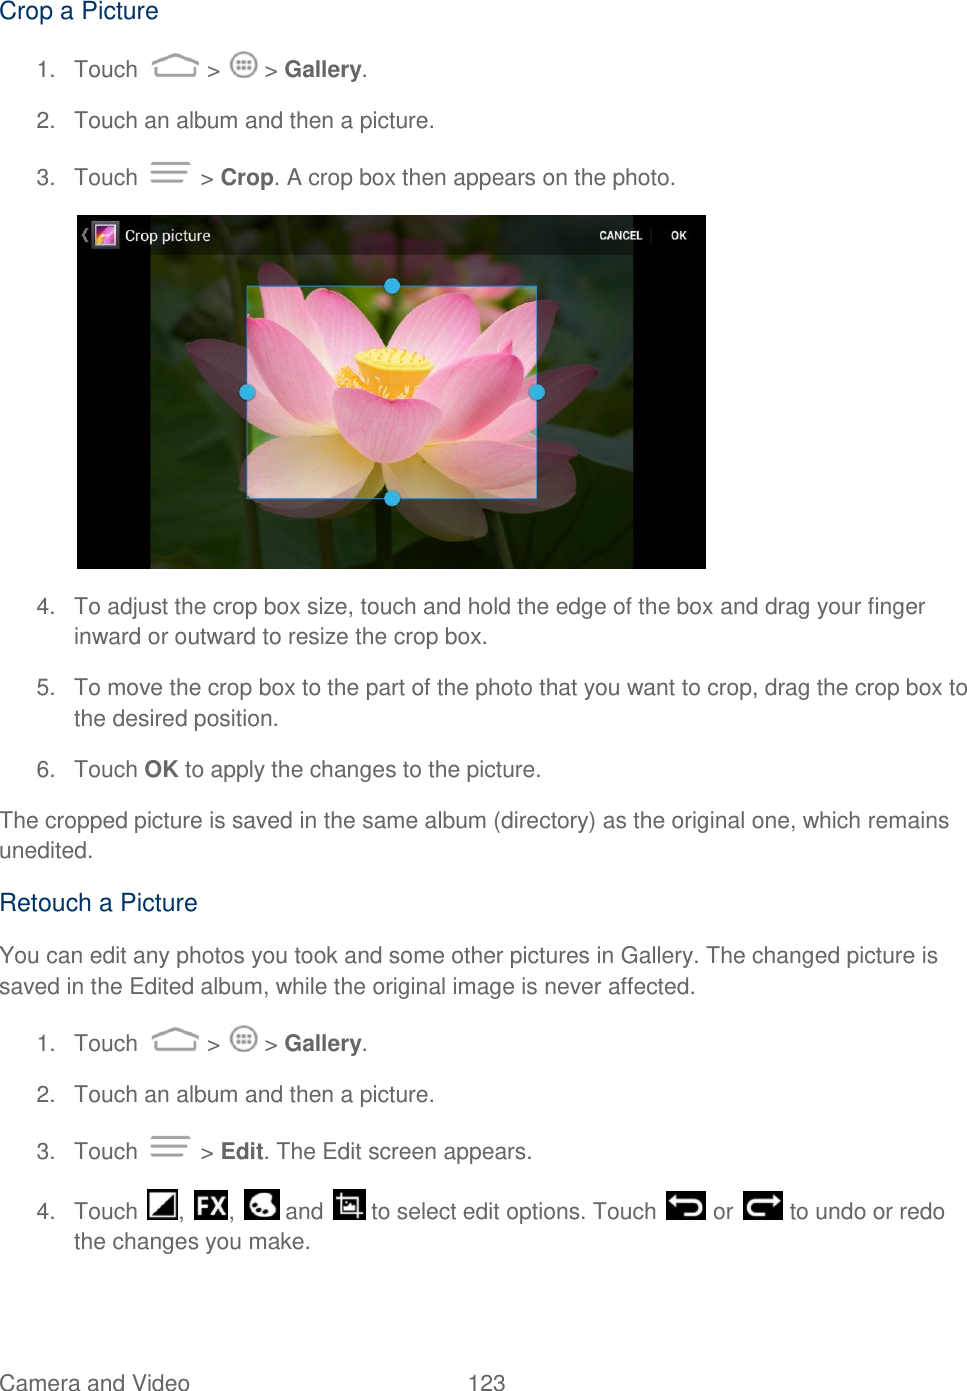
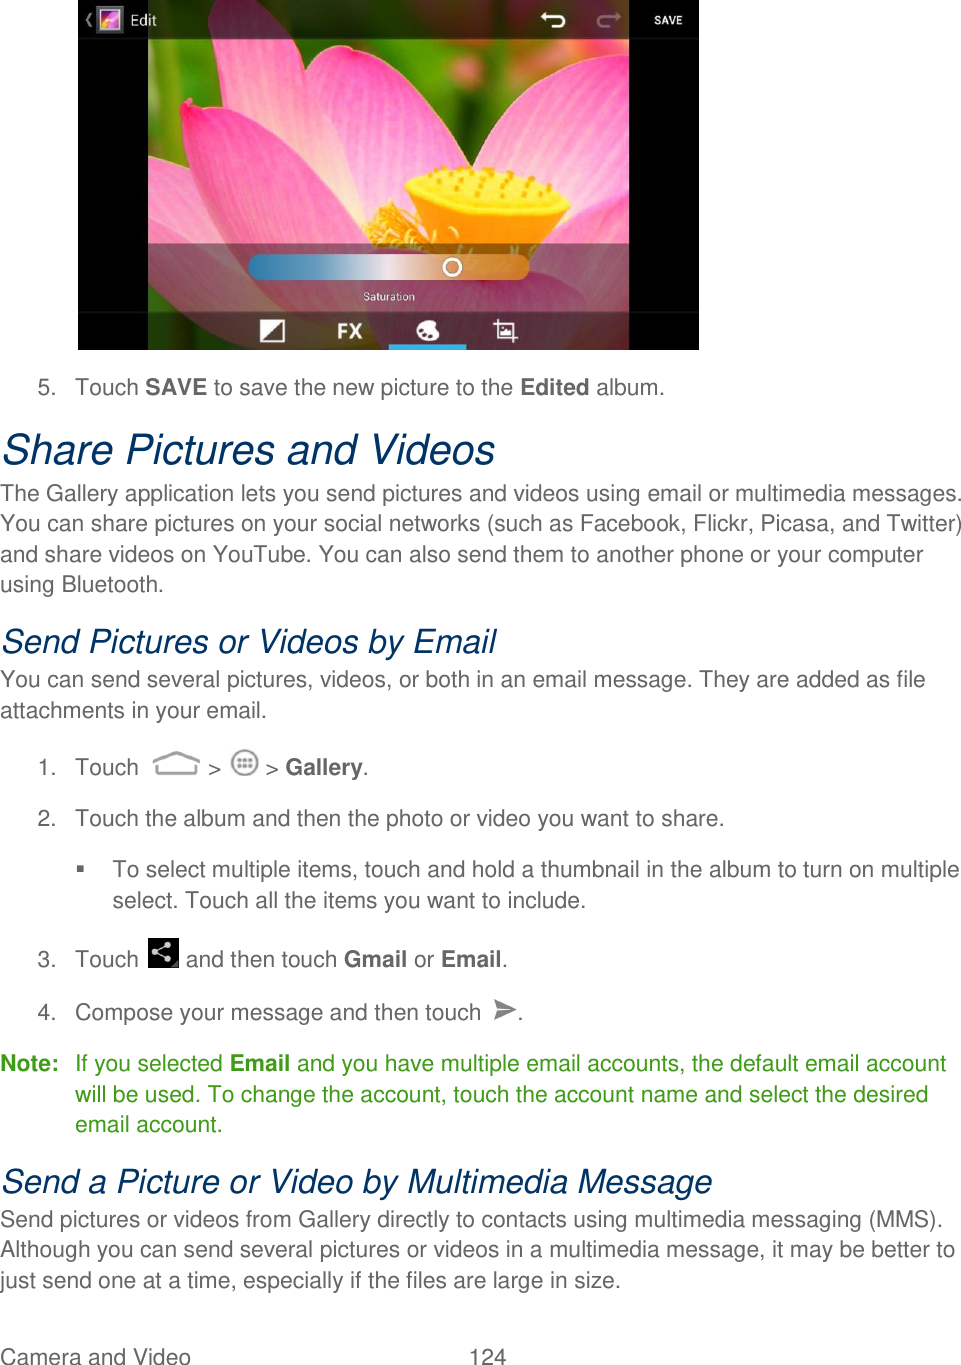
User Manual
Navigation menu
Upload a User Manual
Namespaces
Wiki Guide
HTML
PDF
Info
Views
User Manual
Discussion / Help
Navigation
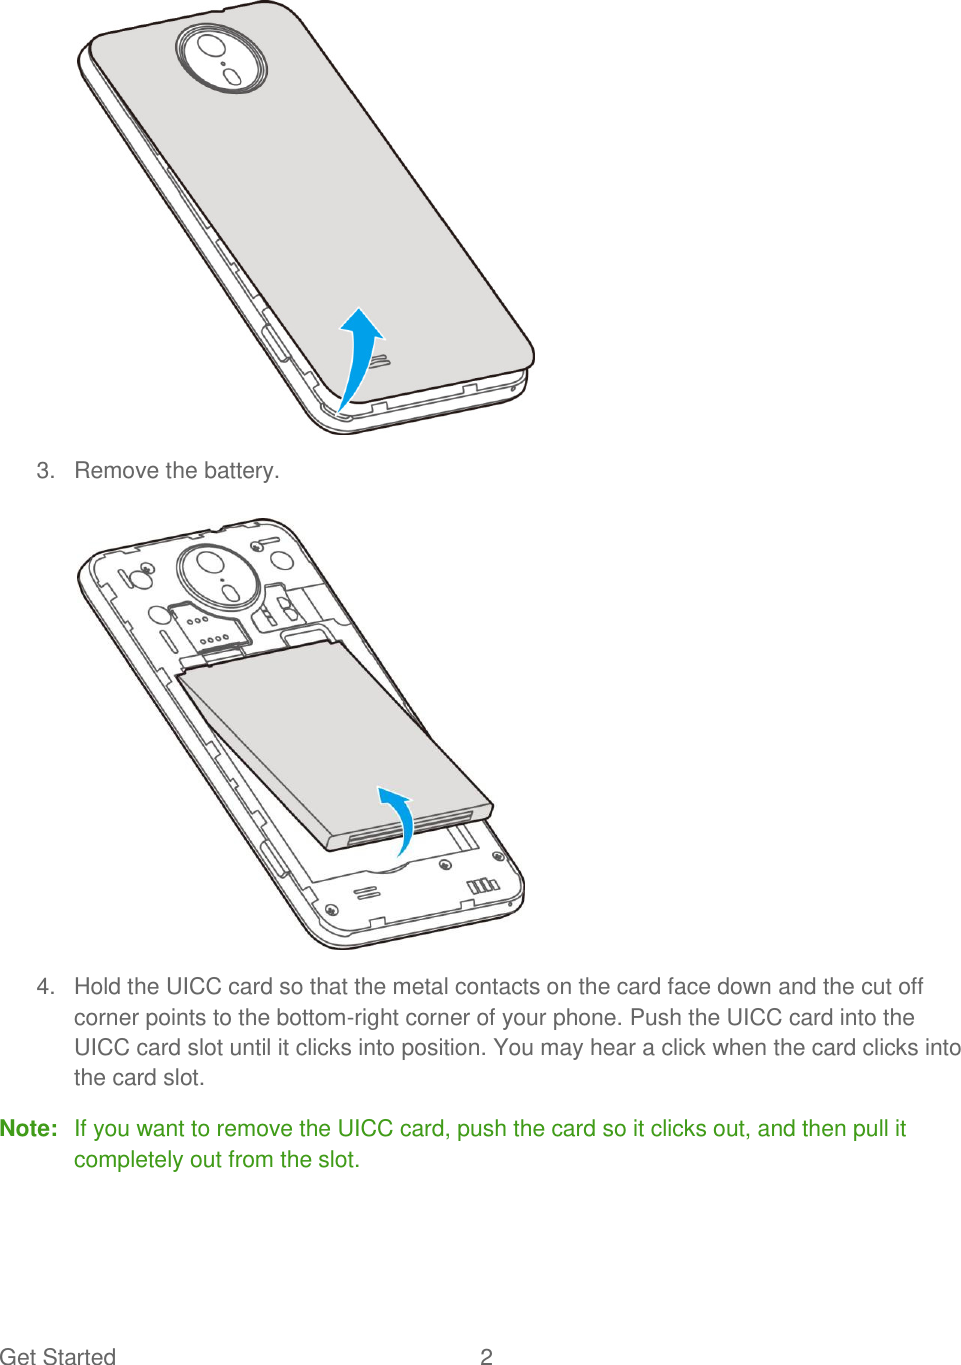
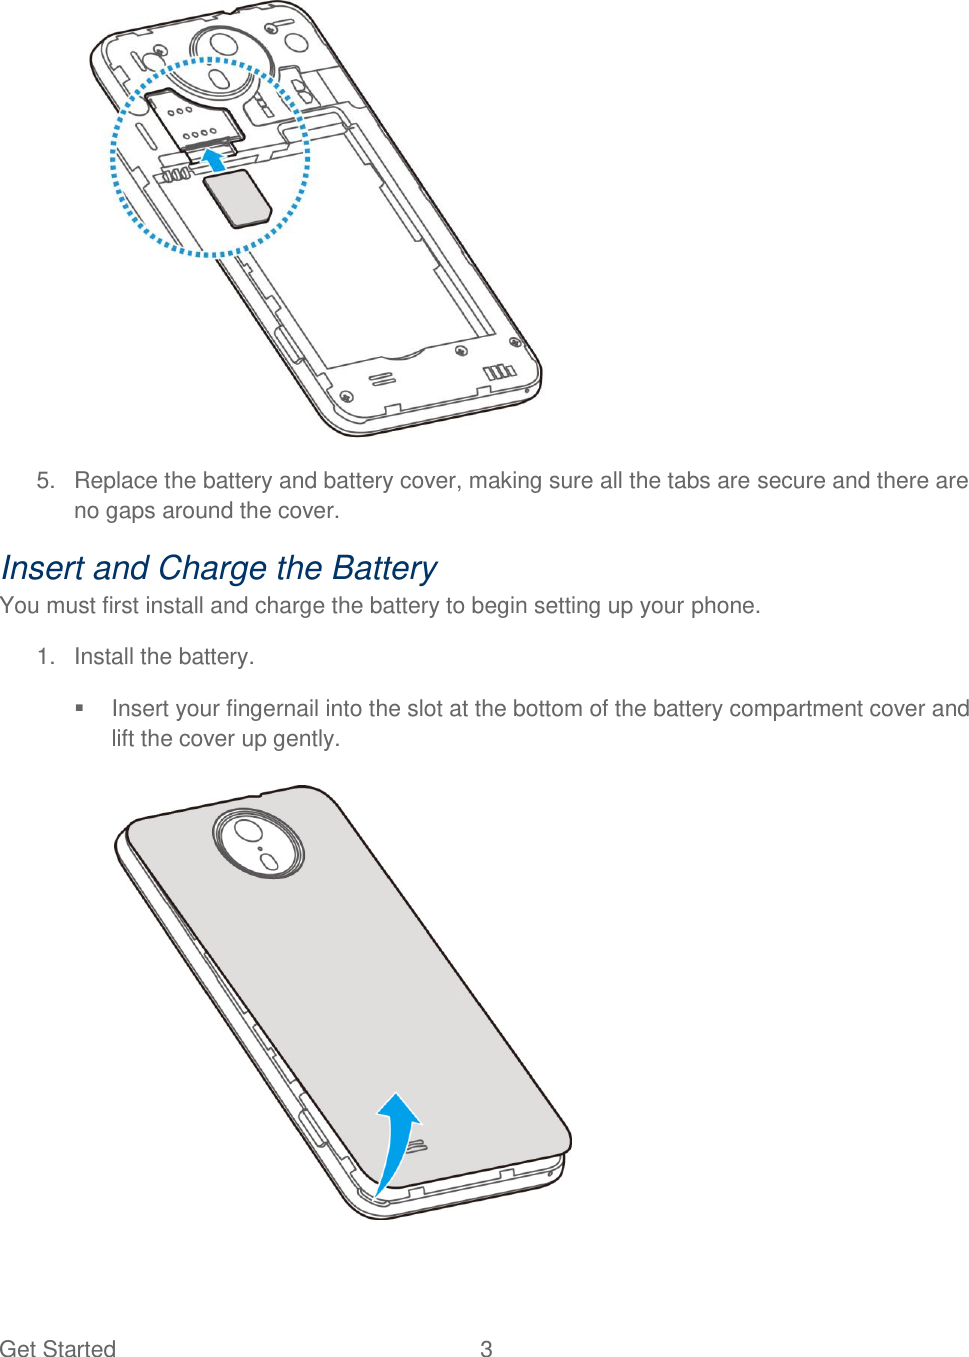
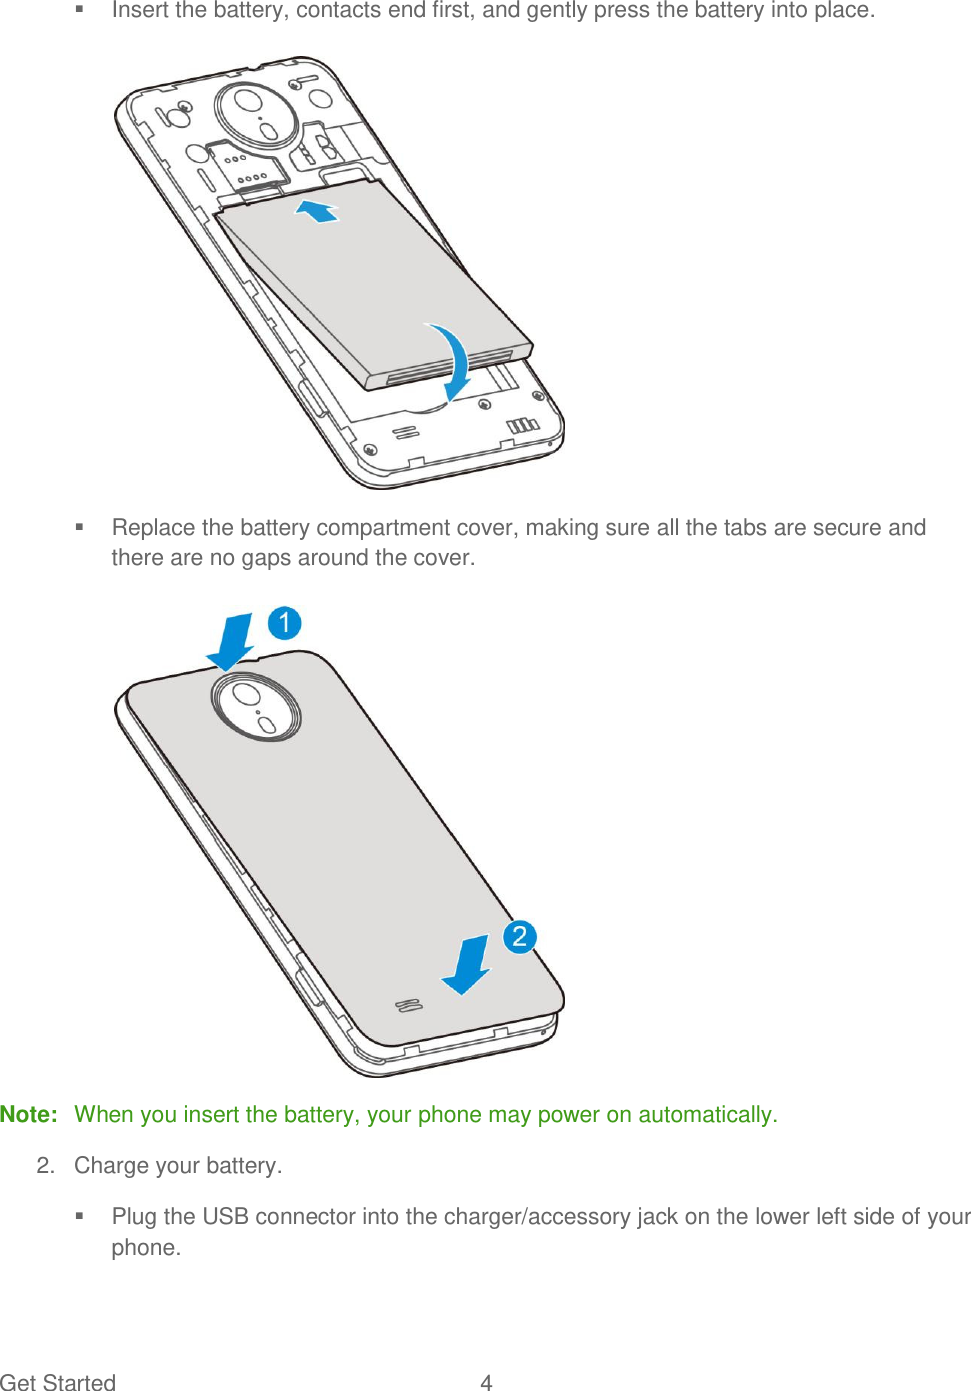
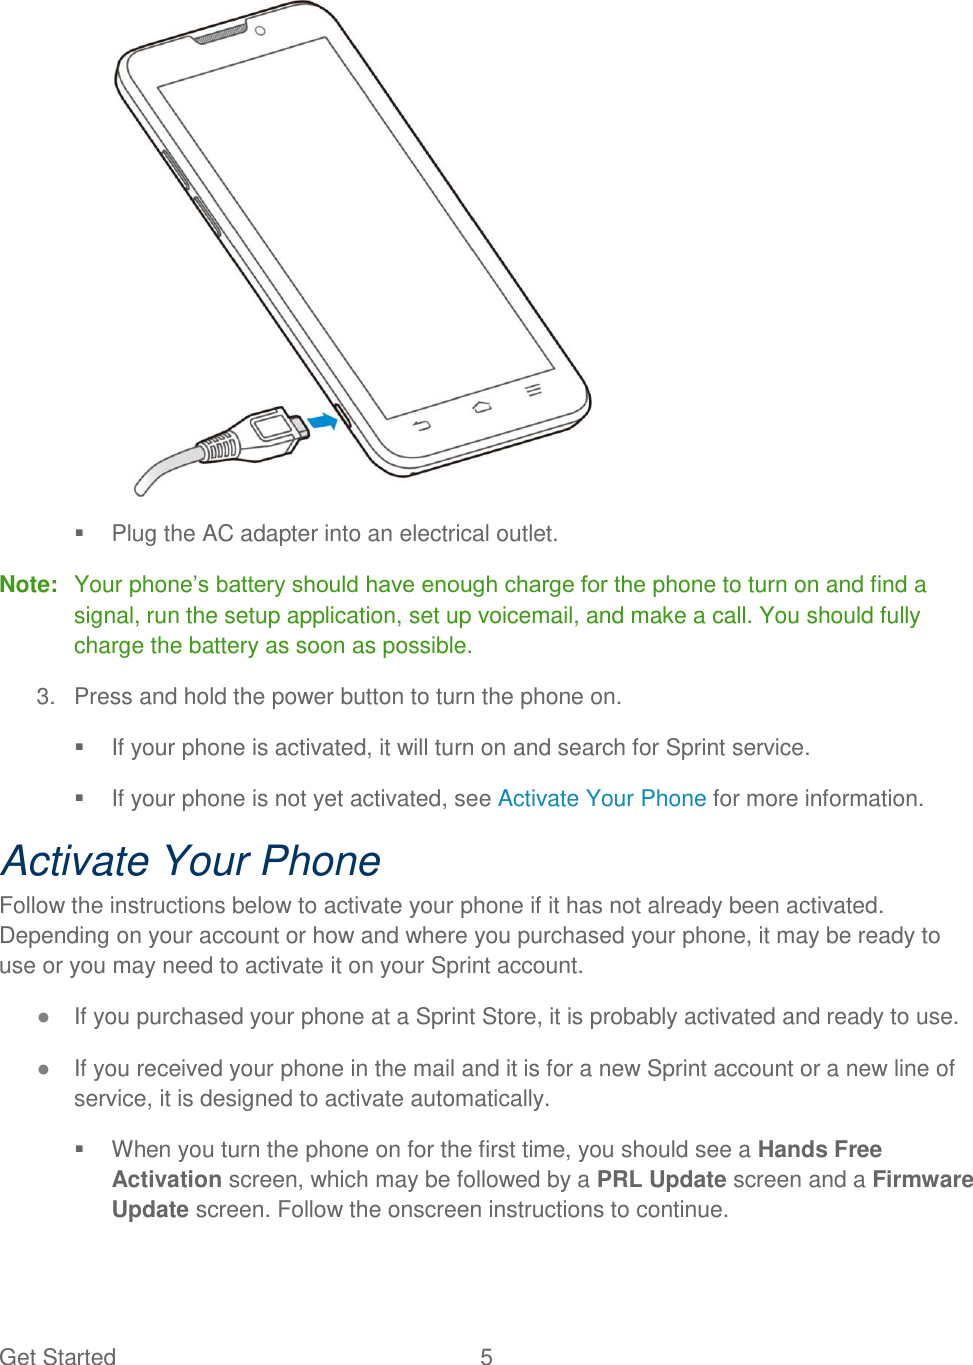
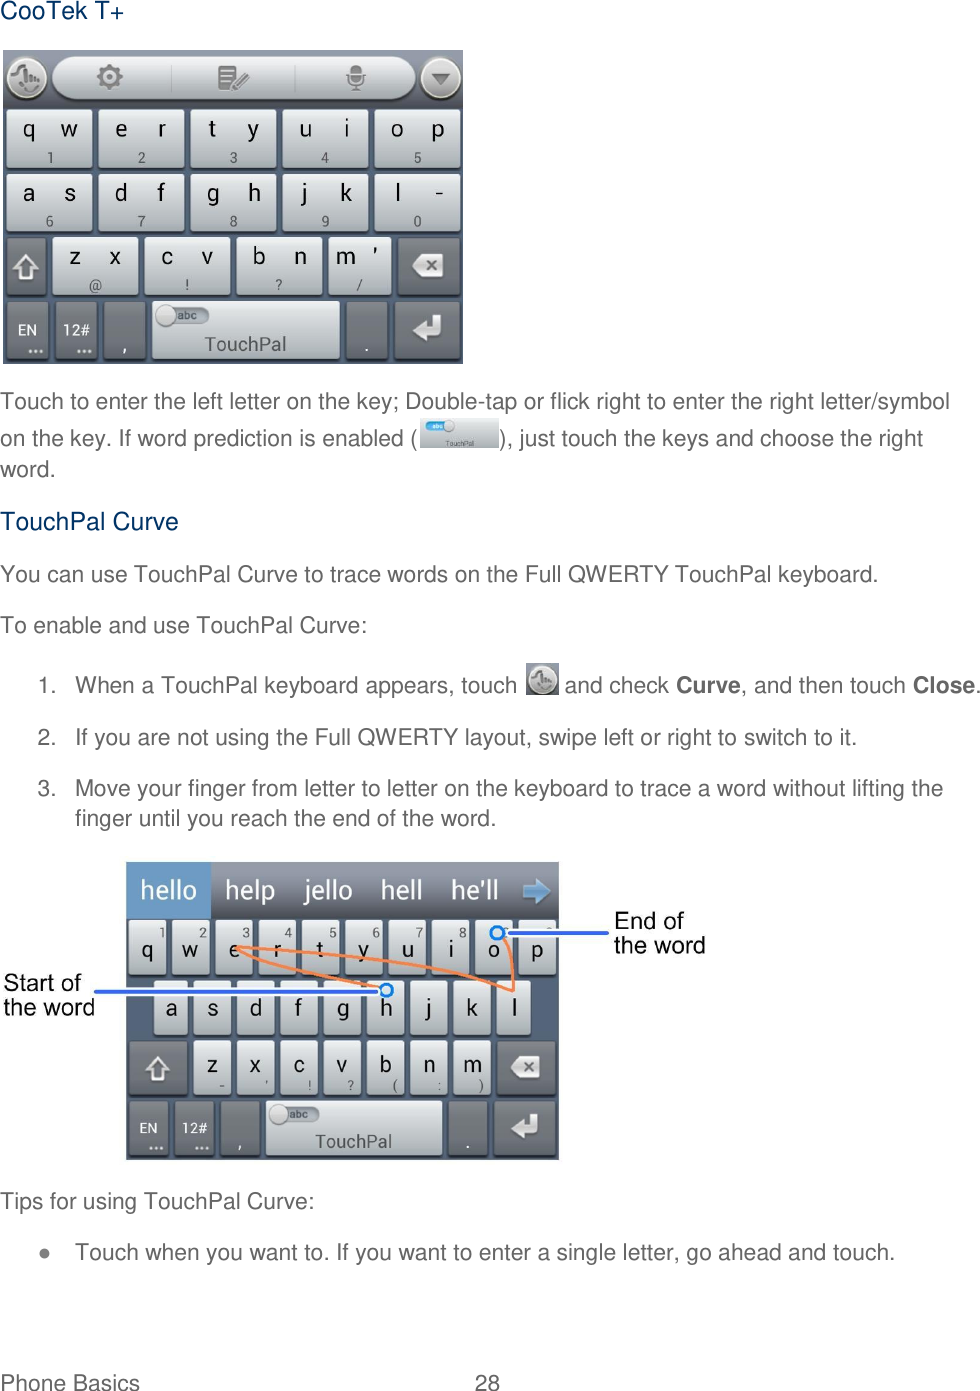
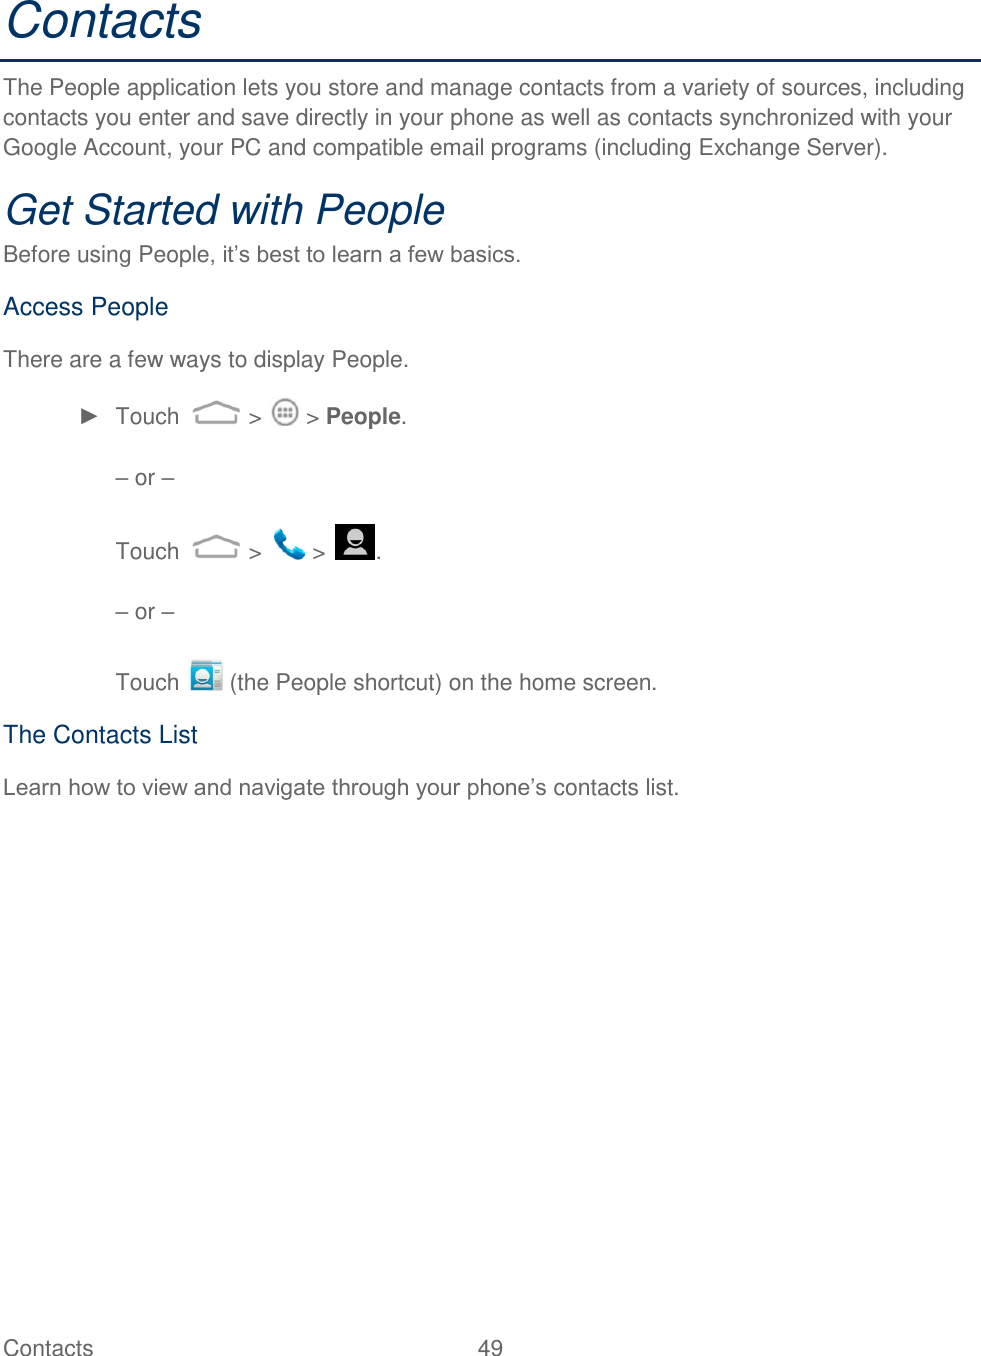
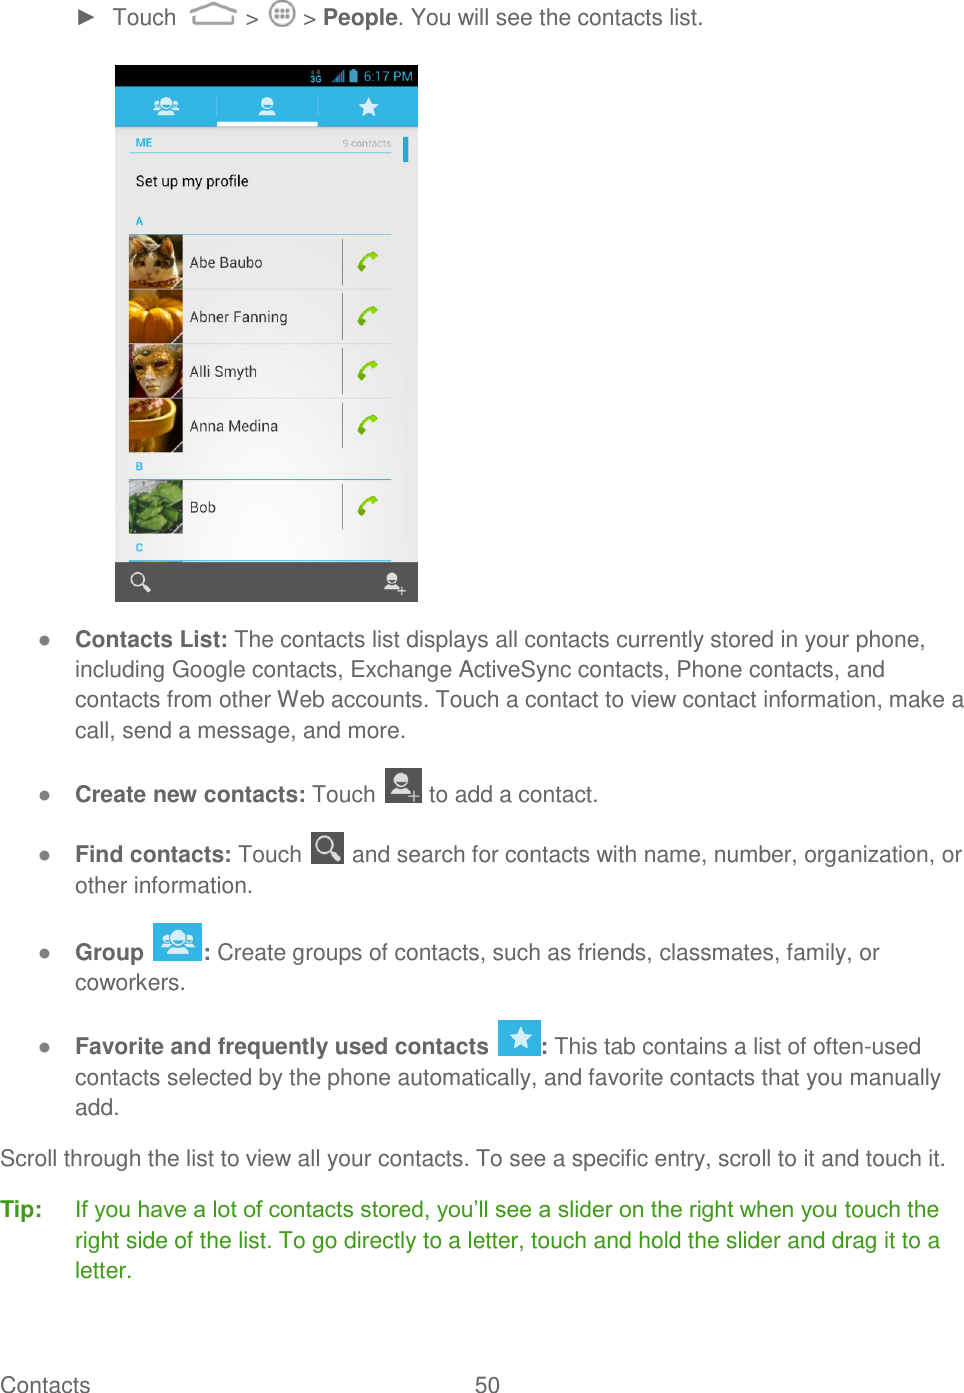
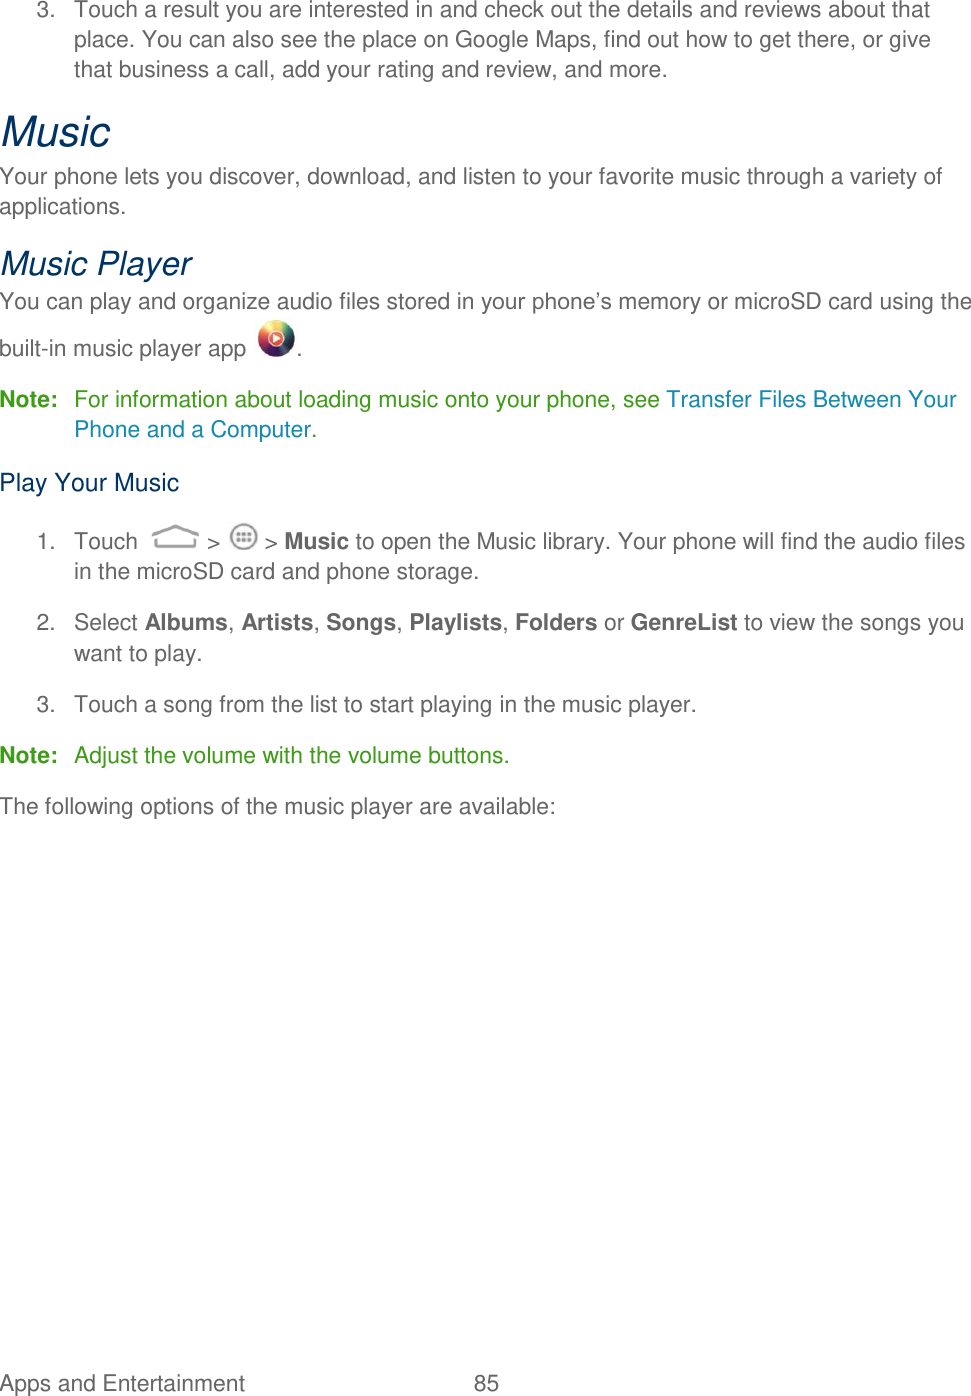
![ZTE Quantum User Guide ©2013 Sprint. Sprint and the logo are trademarks of Sprint. Other marks are trademarks of their respective owners. [Sprint UG template version 12c]](https://usermanual.wiki/ZTE/ZTEN9810/User-Guide-1985495-Page-1.png)
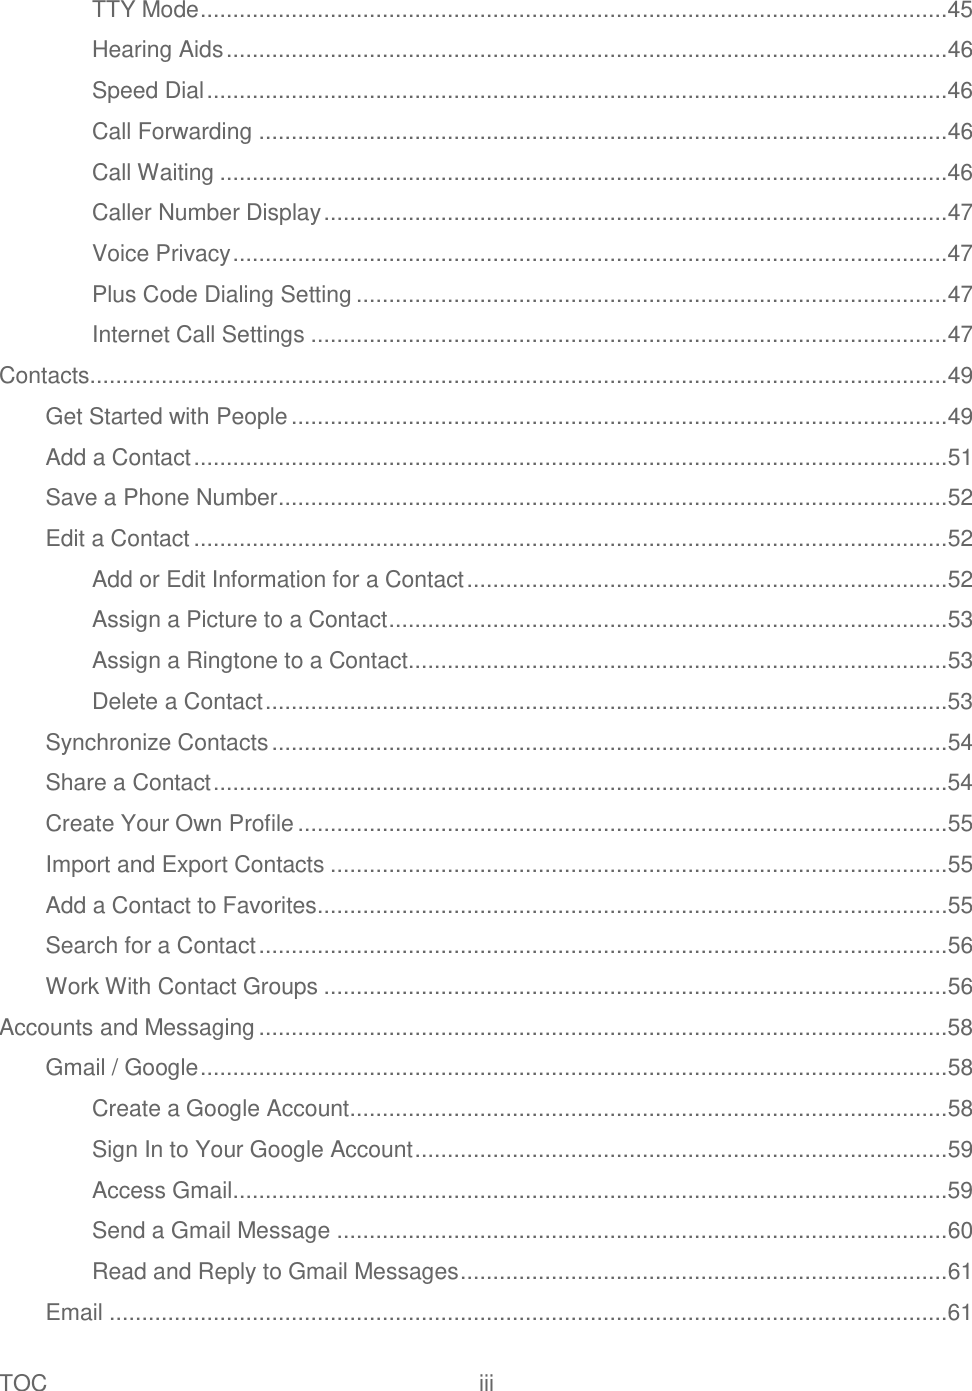


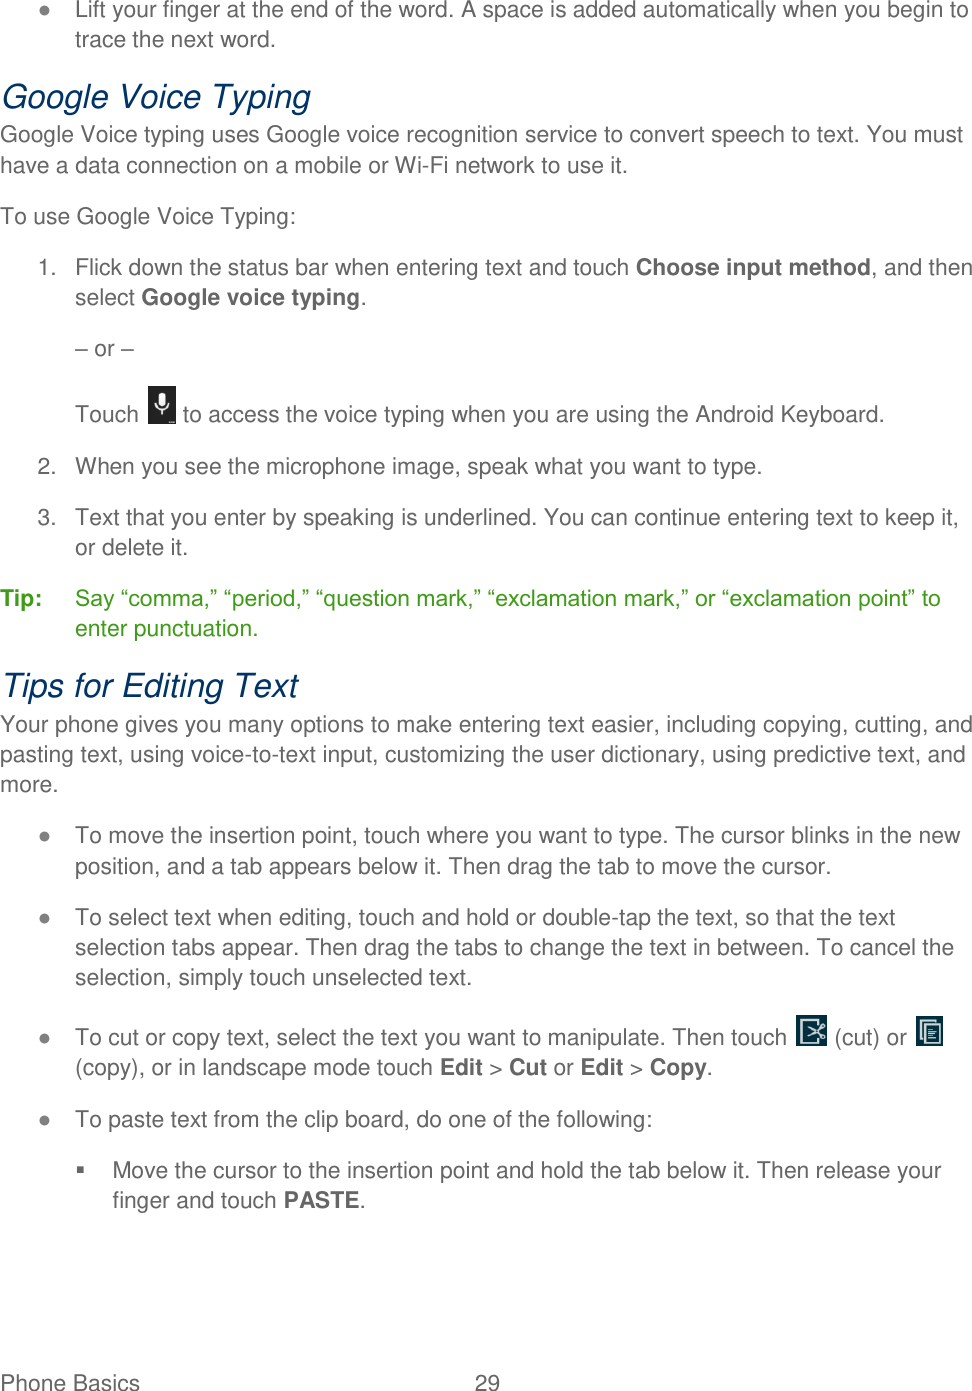

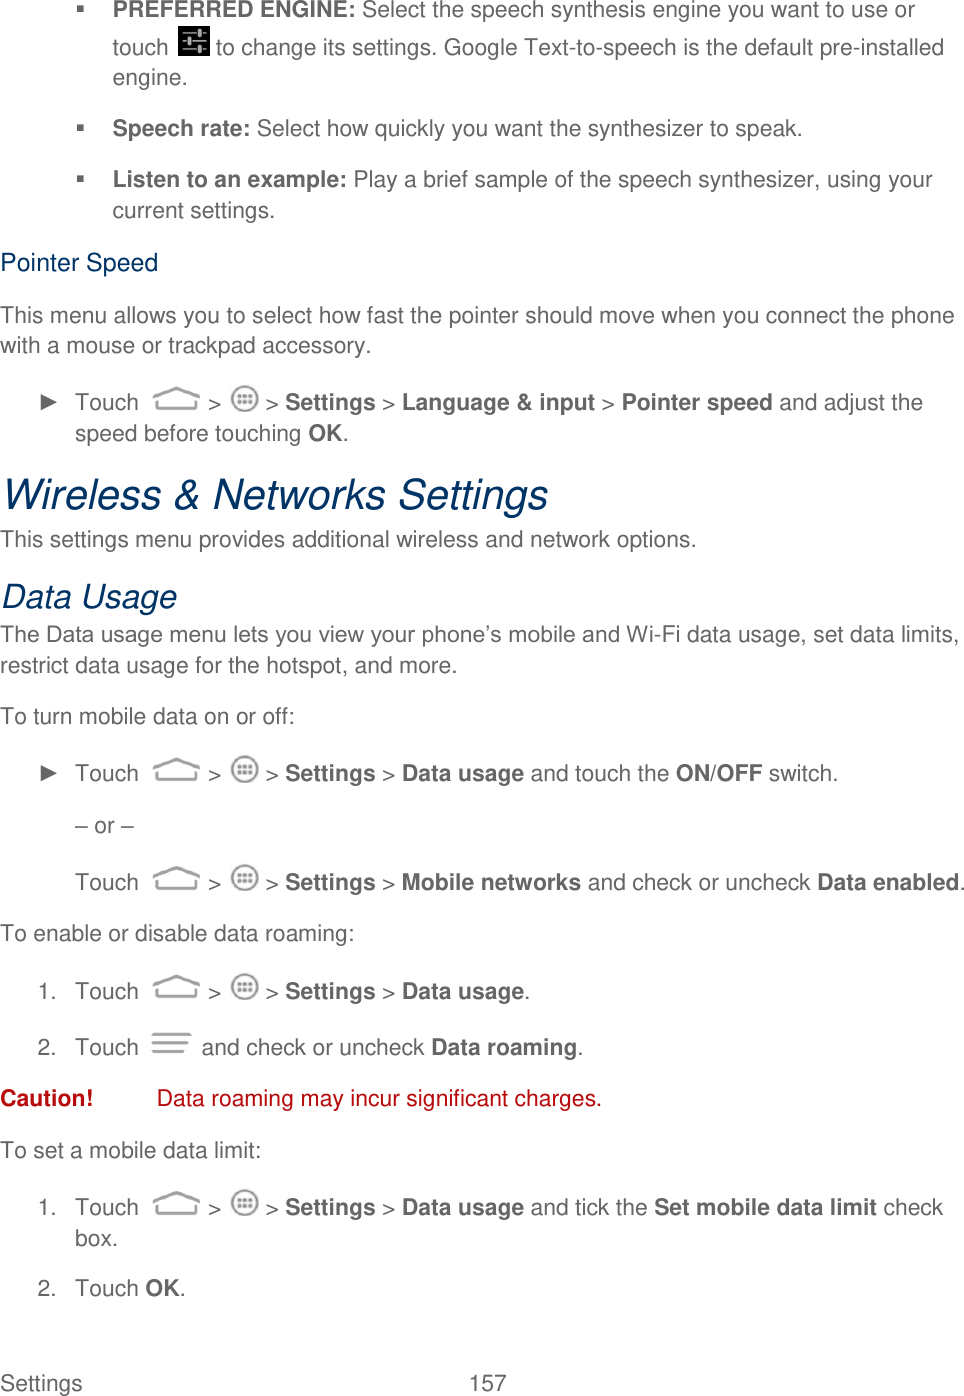
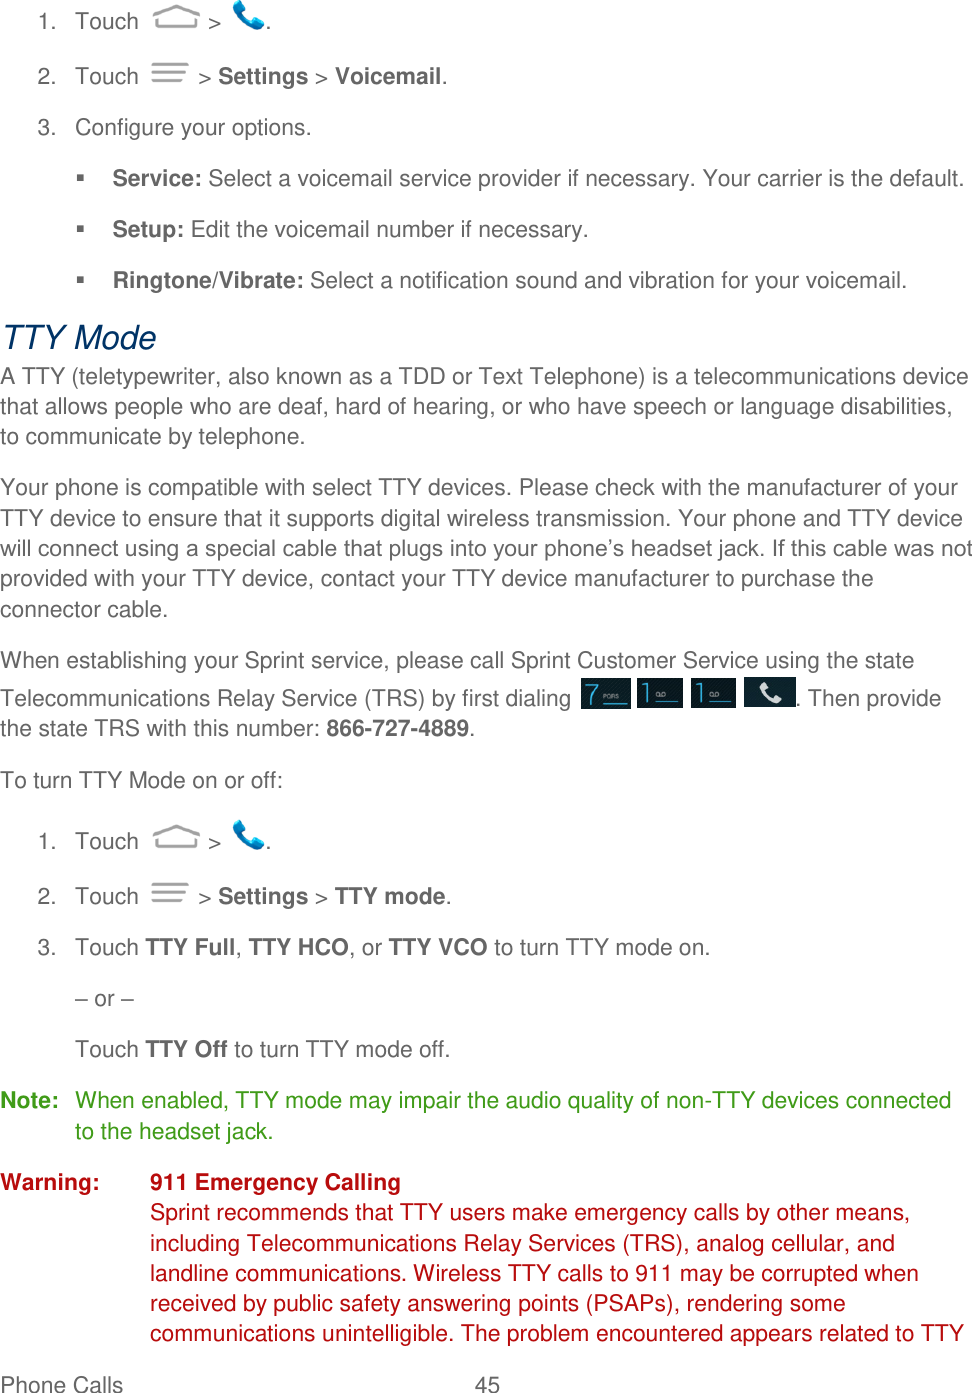
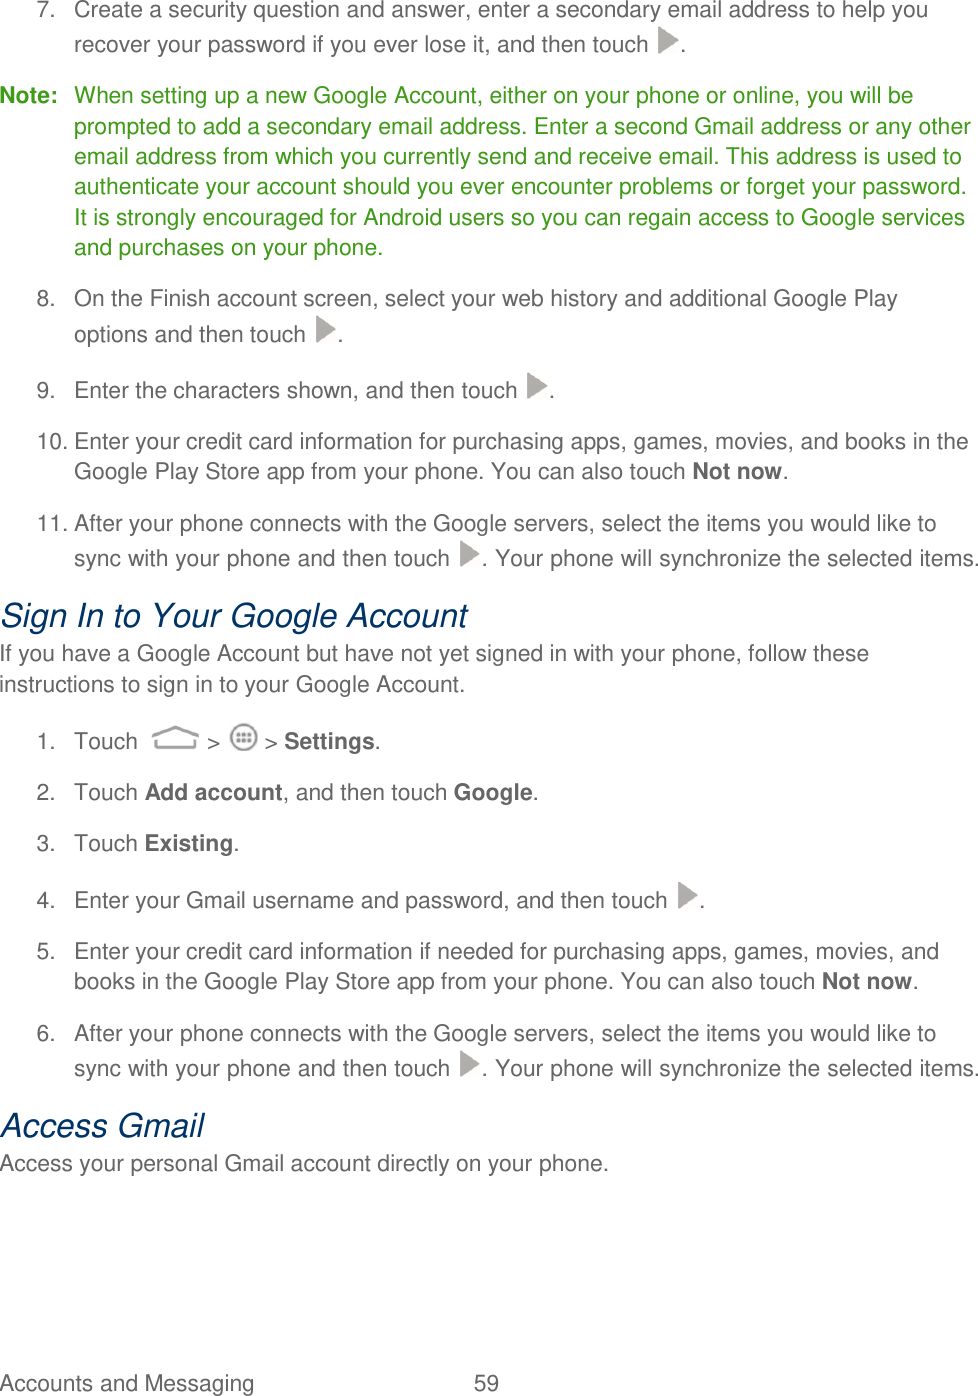
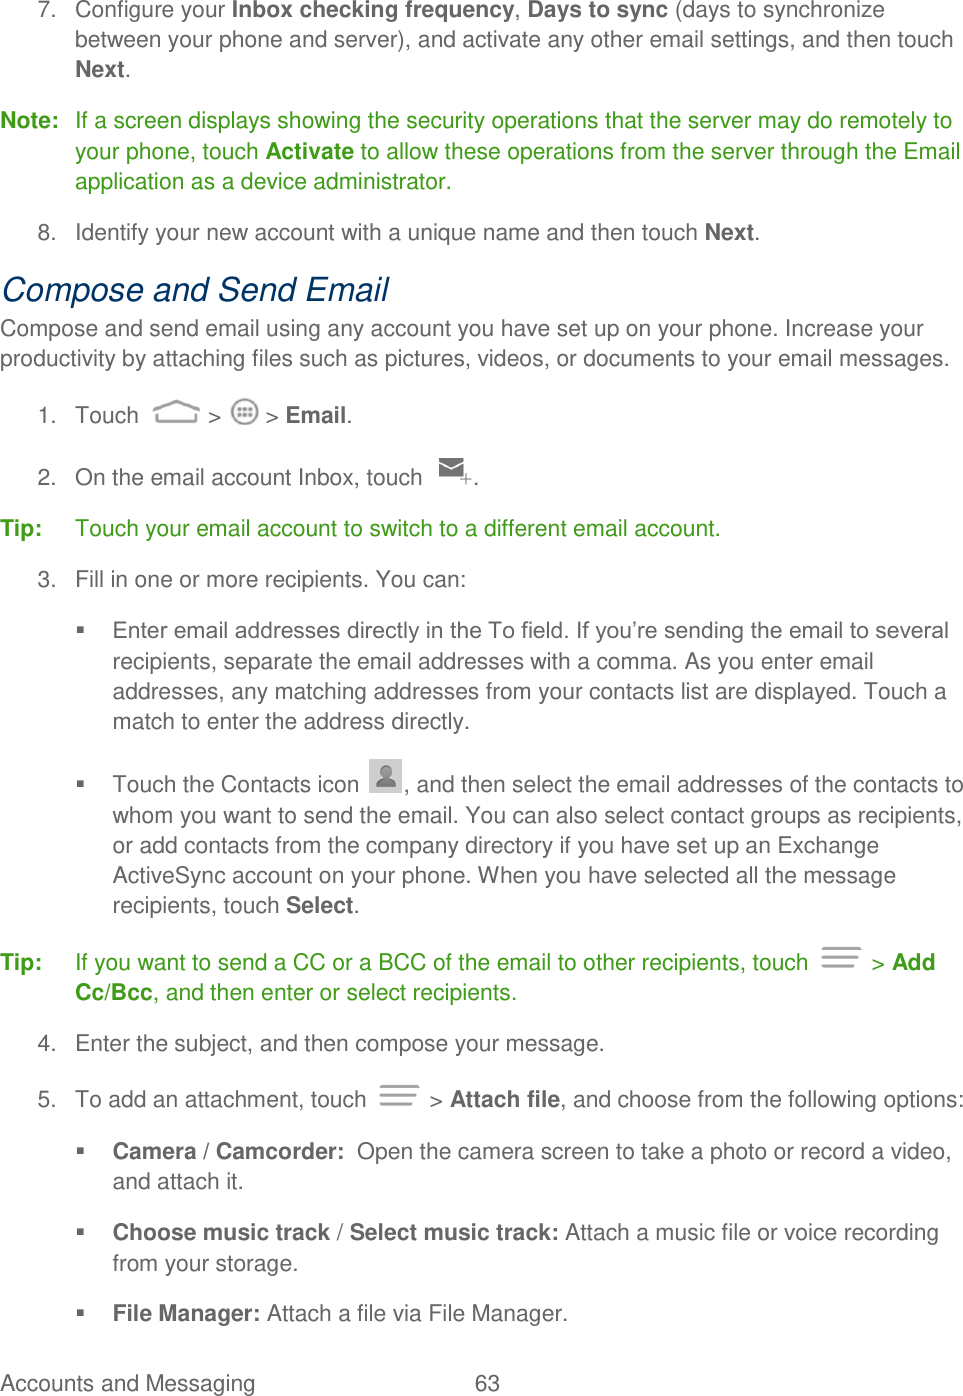
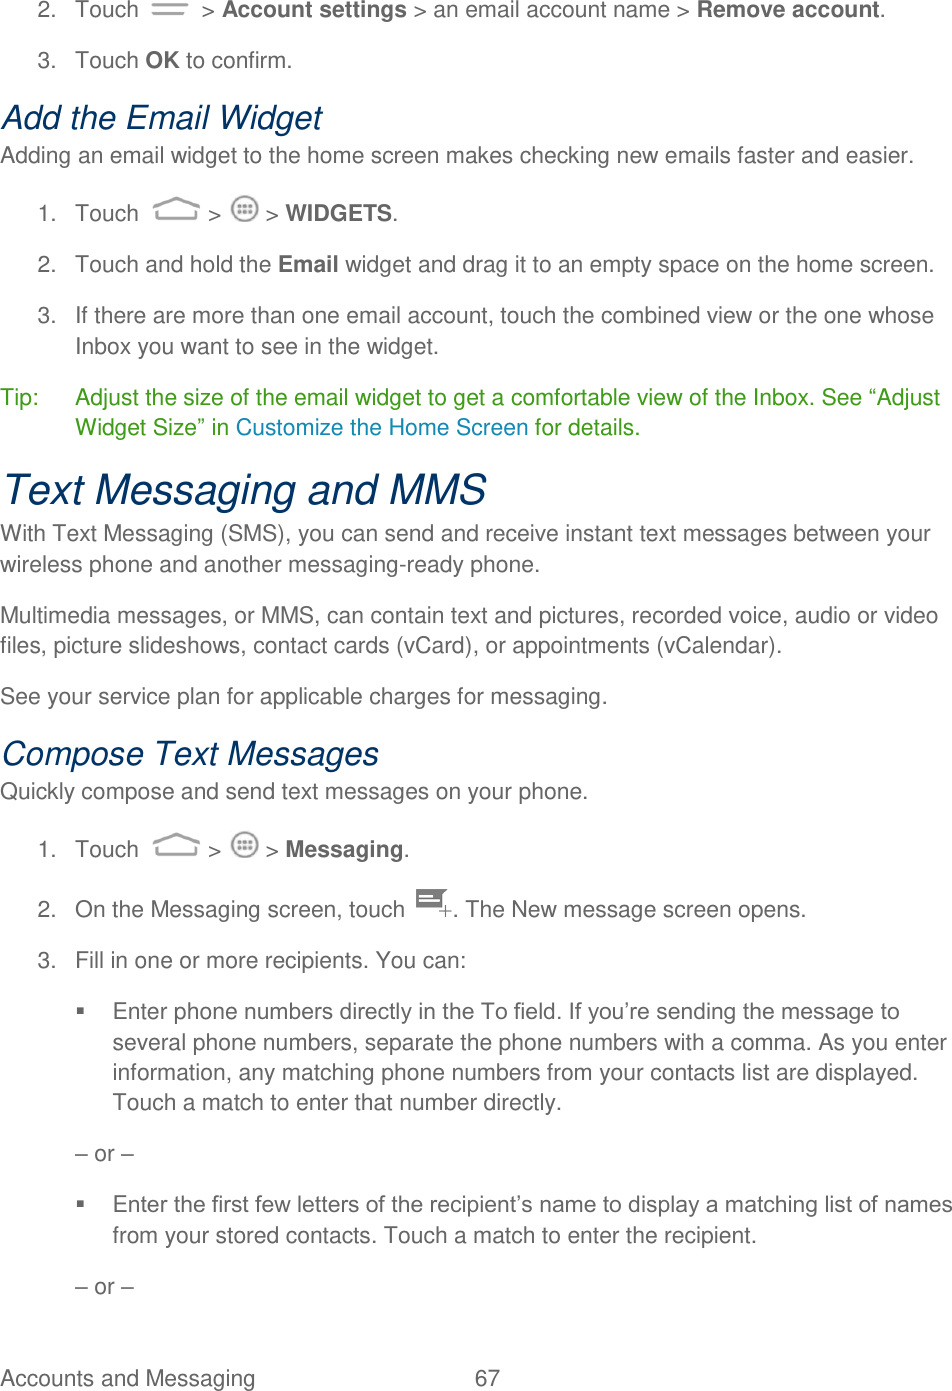
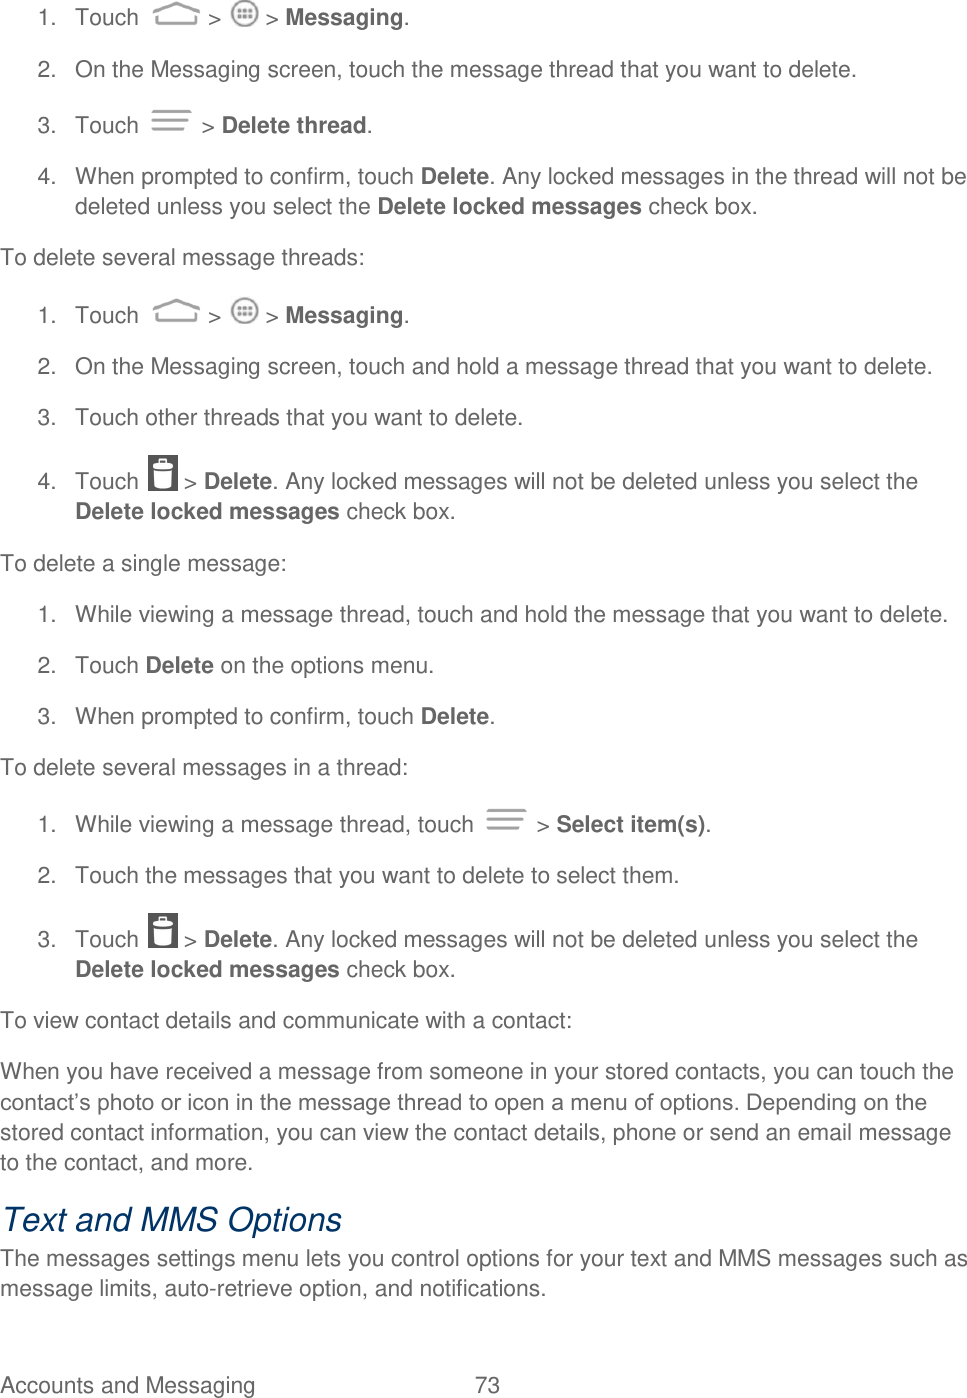
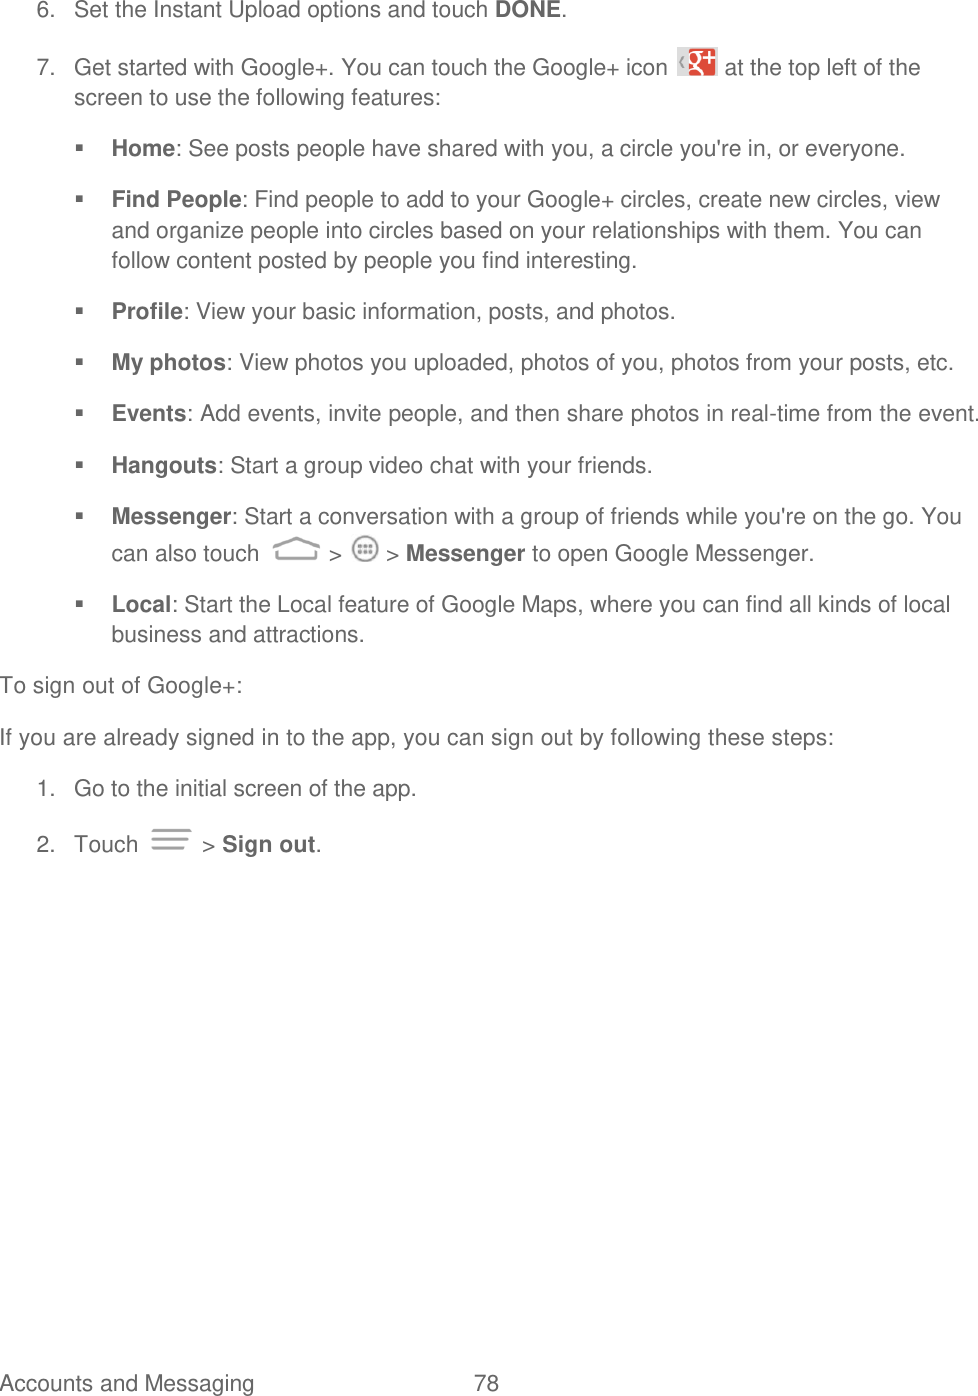
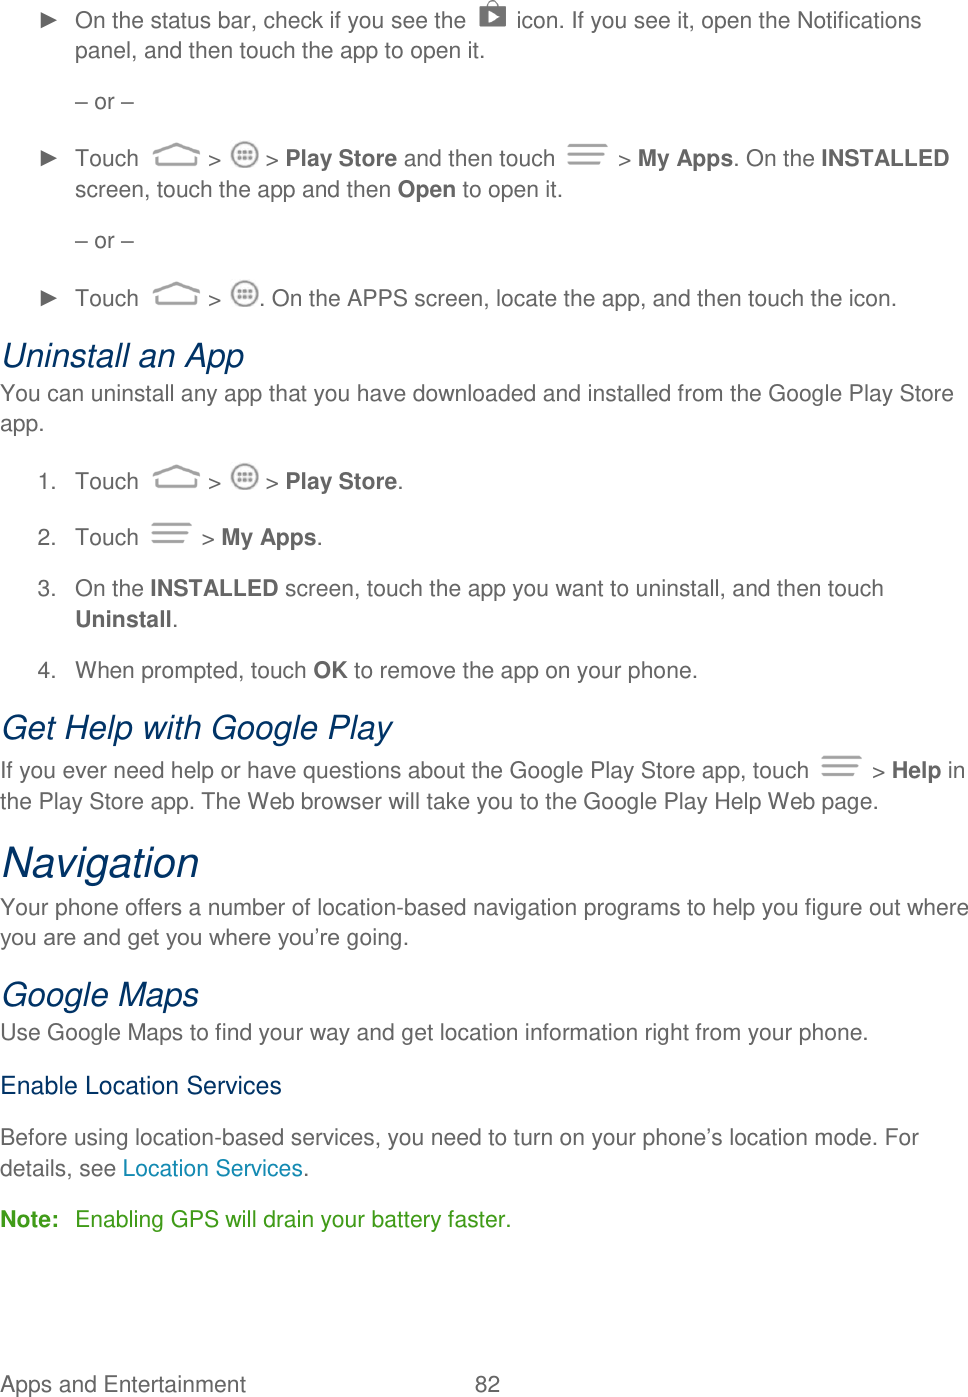
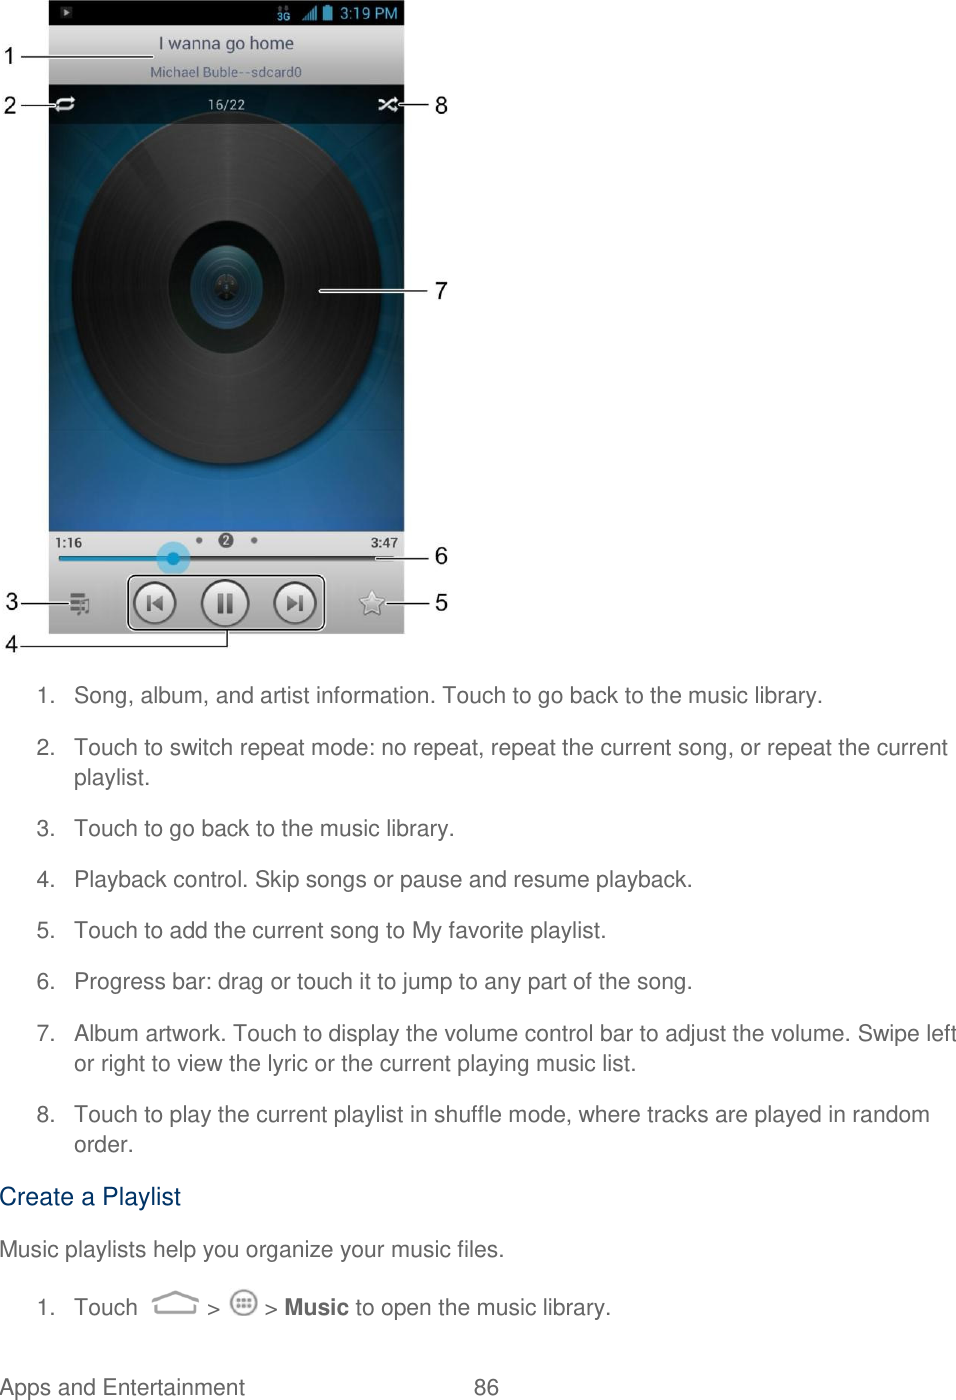
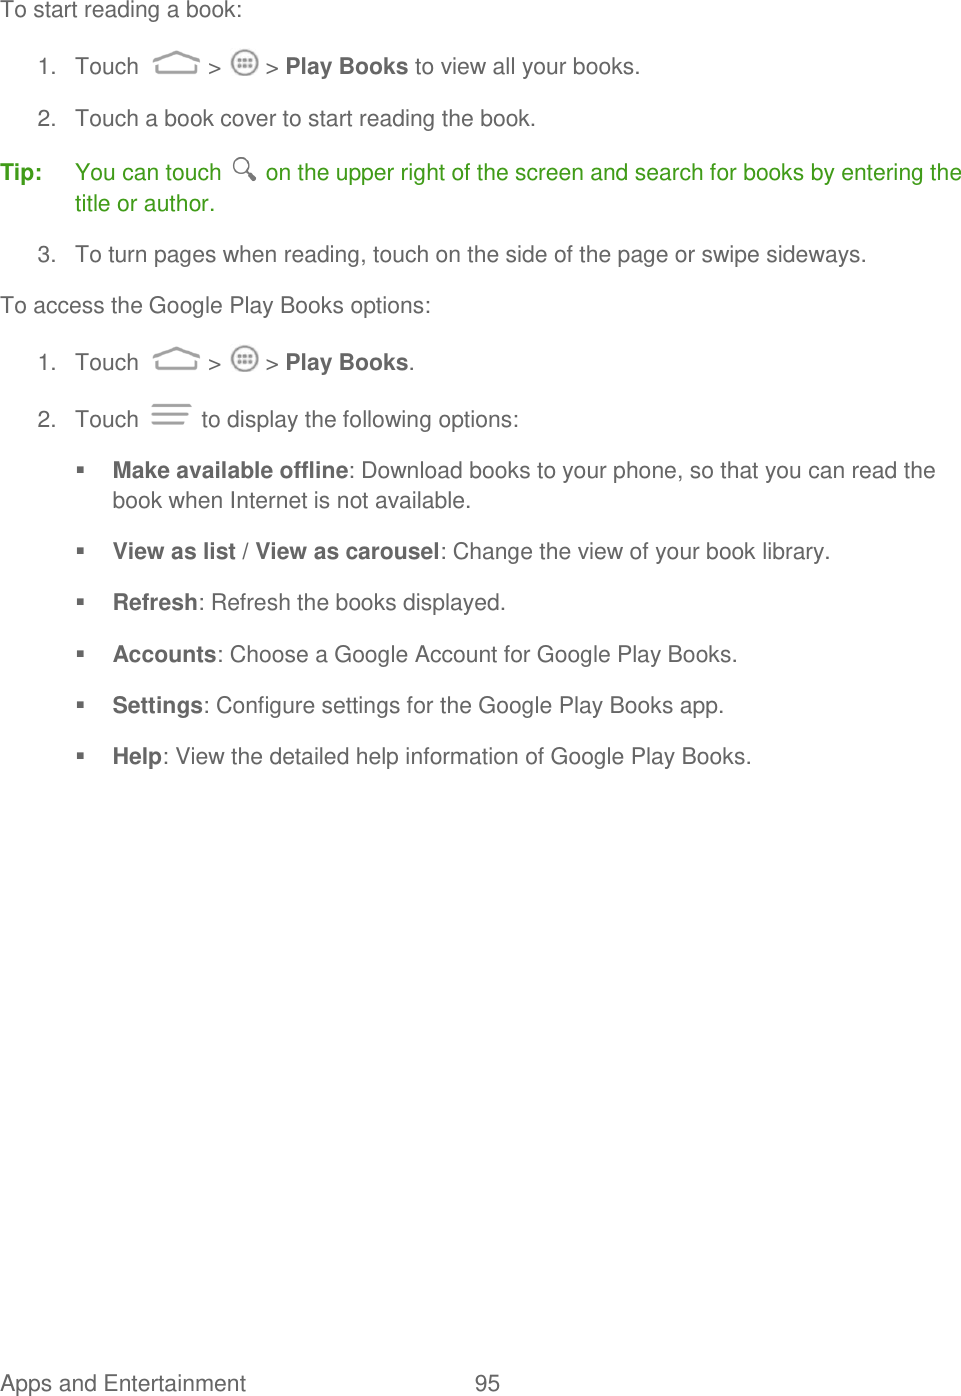
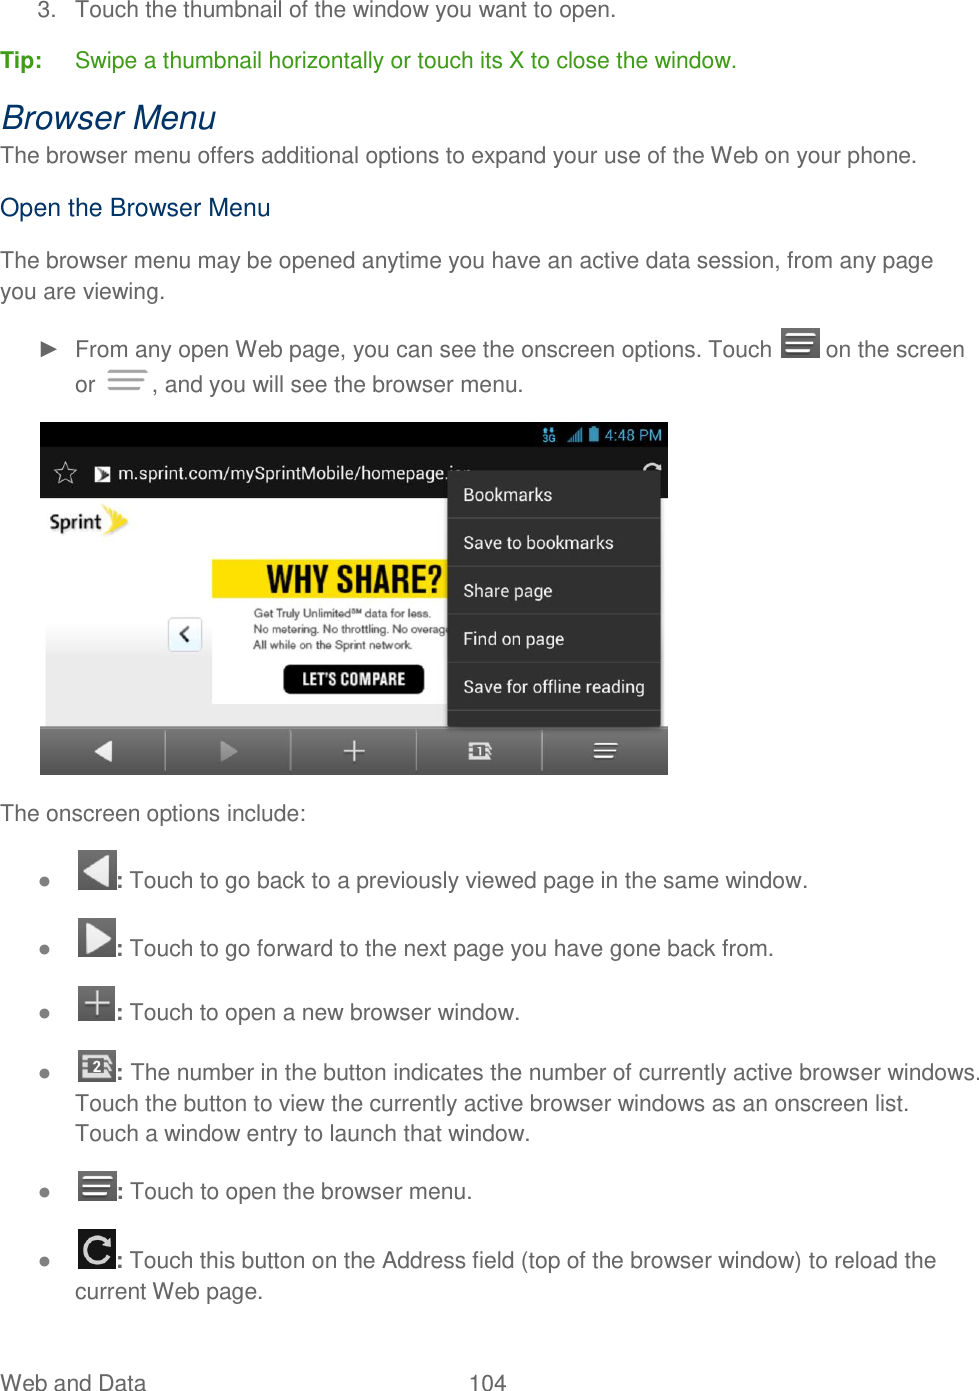
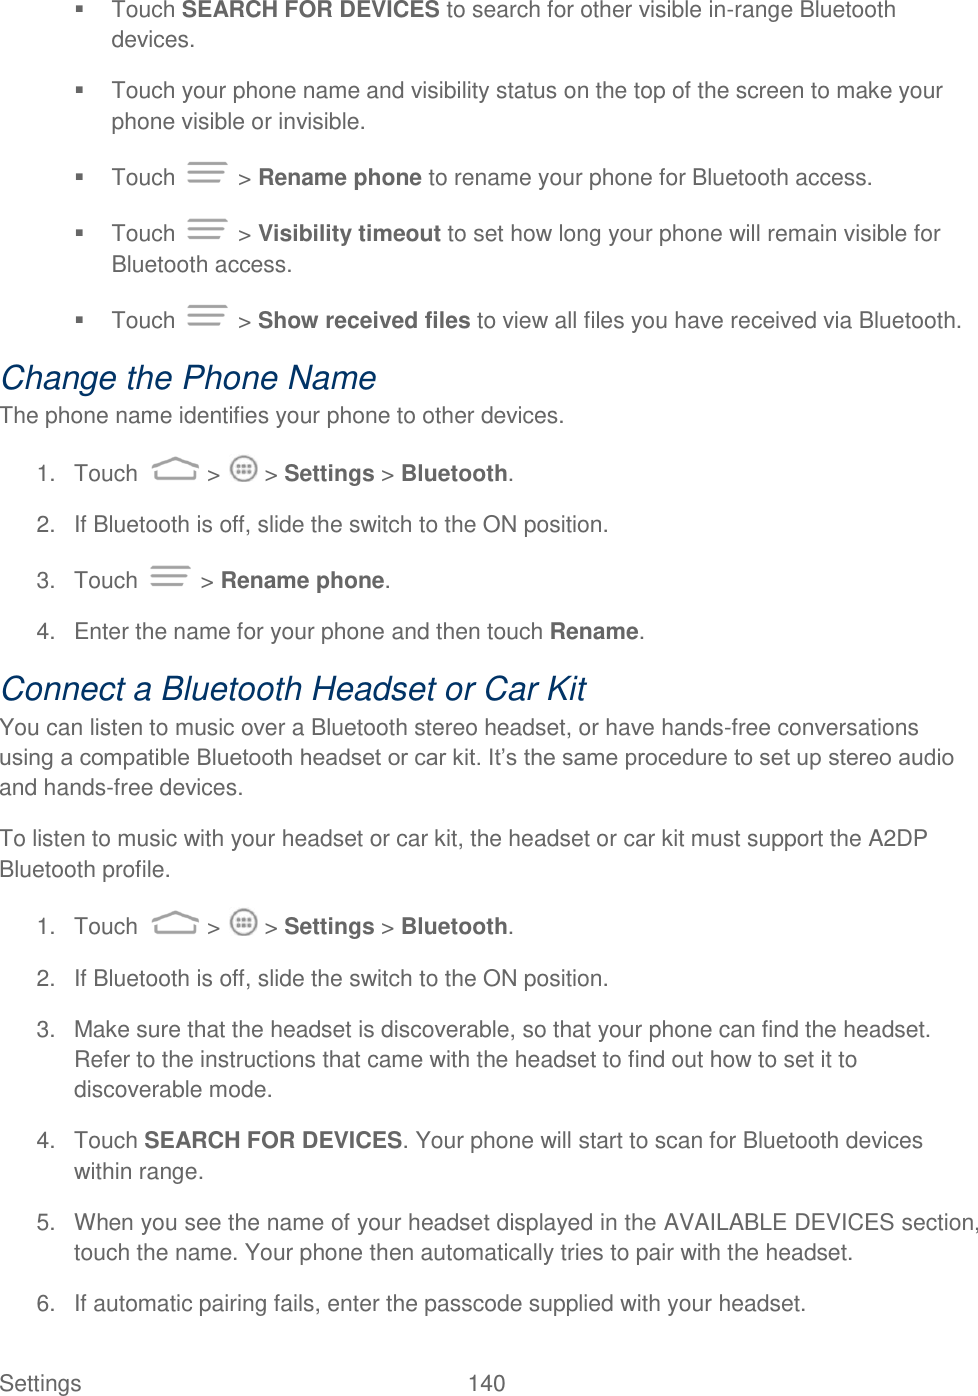
![Phone Calls 32 3. Touch to call the number. 4. To end the call, touch . Call from Call Logs The Call logs list lets you quickly place calls to recent incoming, outgoing, or missed numbers. 1. Touch > to display the phone app. 2. Touch to display the call logs. 3. Touch the phone icon next to a number or contact to place a call. For additional options, touch the name or number. Call from Contacts You can place phone calls directly from entries in your Contacts list. 1. Touch > to display the phone app. 2. Touch to display the Contacts list. 3. Touch a contact or number you want to call to place a call. For additional information on Contacts, see People. Call Using a Speed Dial Number Speed dial numbers let you dial numbers by touching and holding a single number on the dialpad. See Set Up Speed Dialing for information on assigning speed dial numbers. 1. Touch > to display the phone app. 2. Touch and hold the 2~ 9 key on the dialpad to call the corresponding speed dial number. The number key 1 is reserved to speed dial your voicemail. Call a Number in a Text Message or Email Message While viewing a text message or email message, you can place a call to a number that is in the body of the message. 1. Touch > , > > Email or > > Gmail. If necessary, select an email or Gmail account. 2. Touch the conversation and then the message with the phone number. For emails, touch the number directly and select Phone: [number].](https://usermanual.wiki/ZTE/ZTEN9810/User-Guide-1985495-Page-42.png)

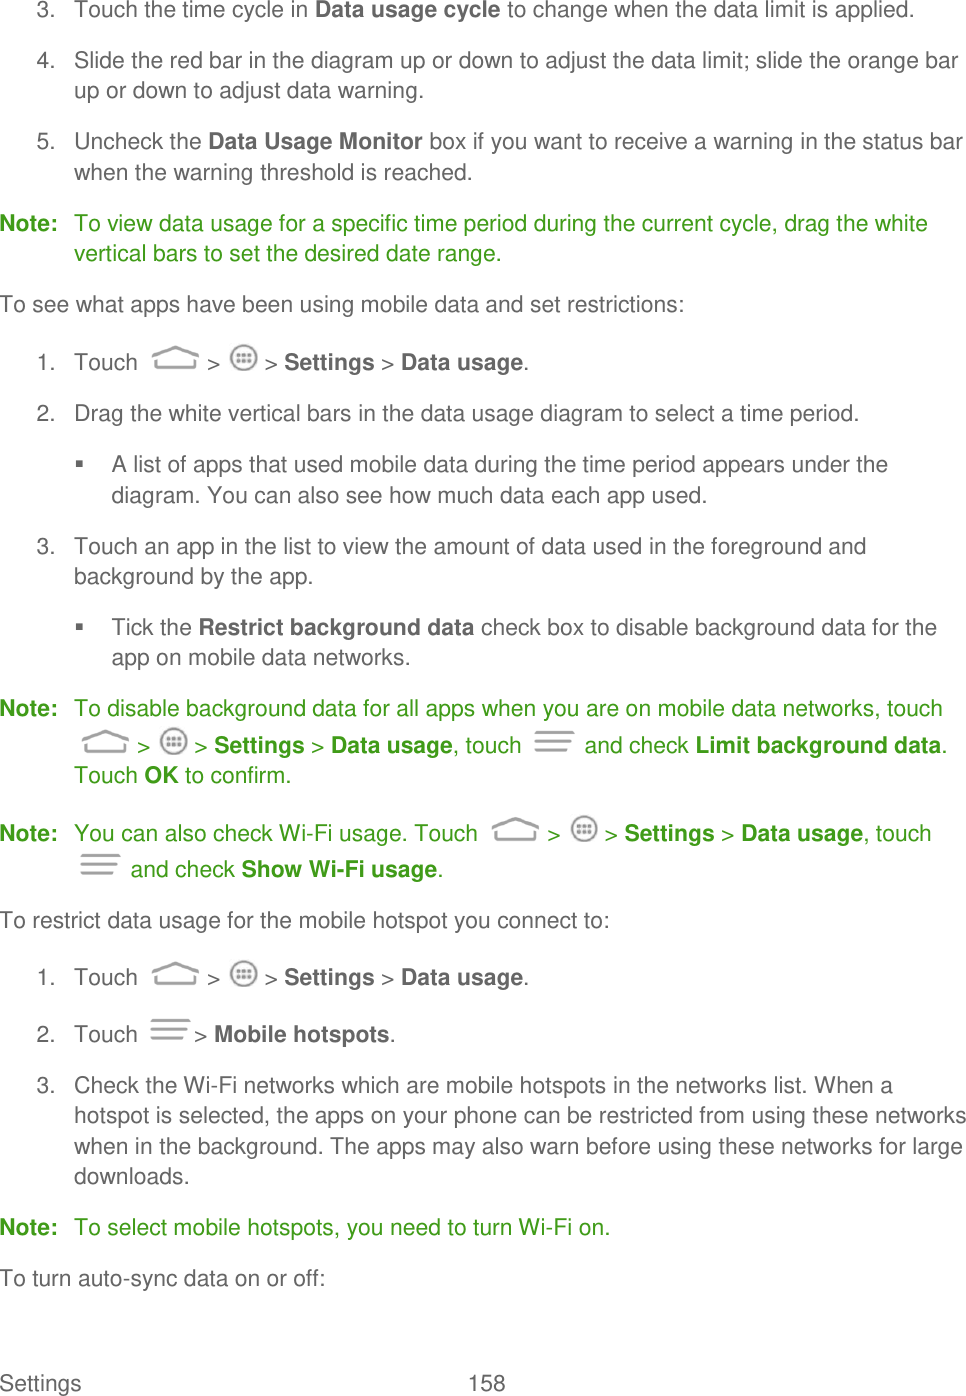
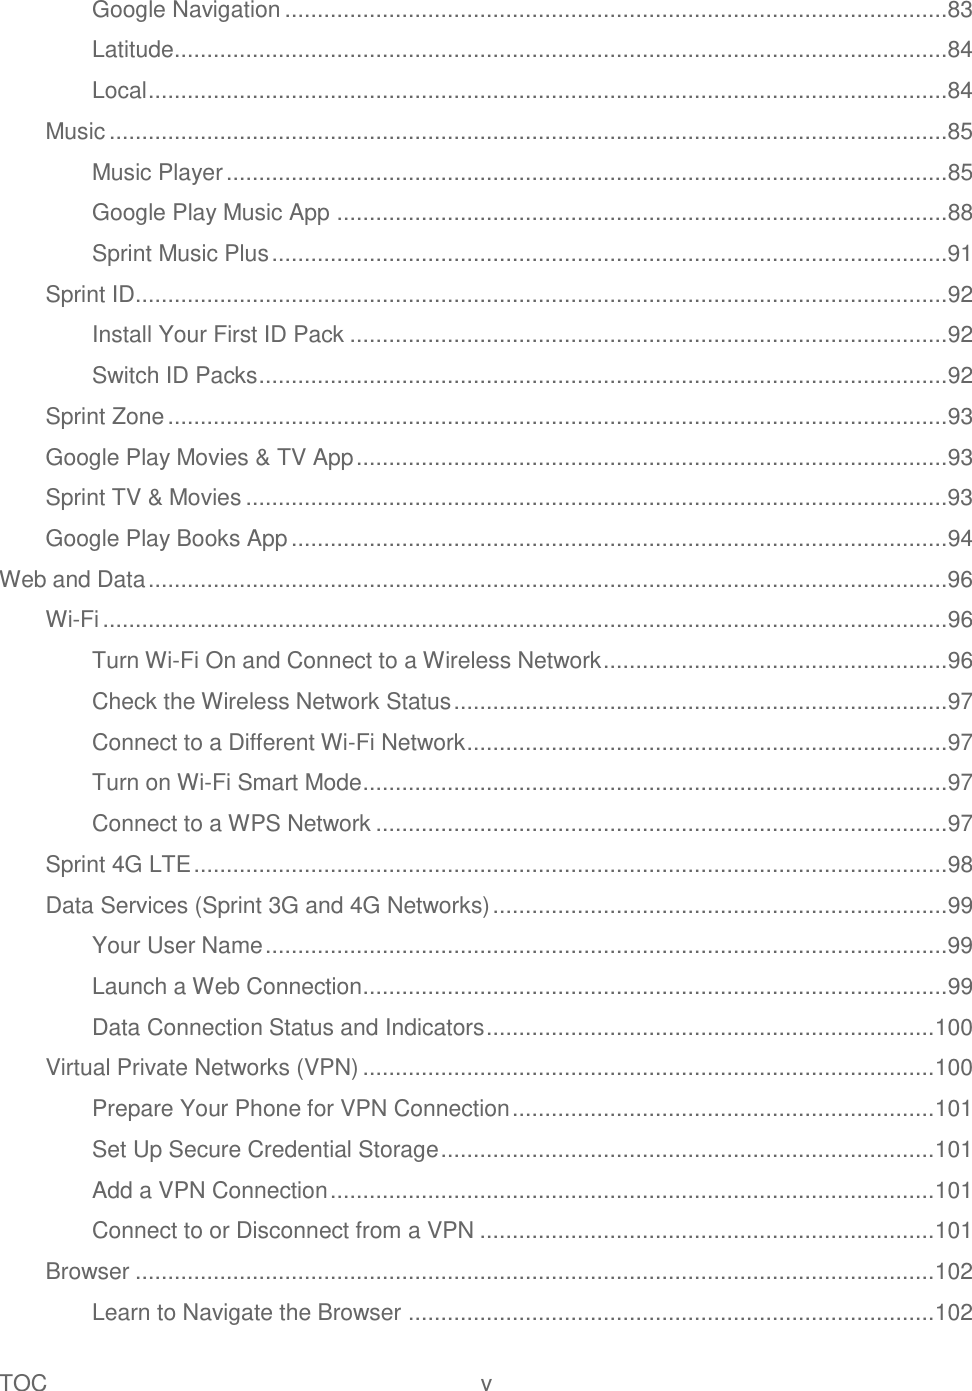
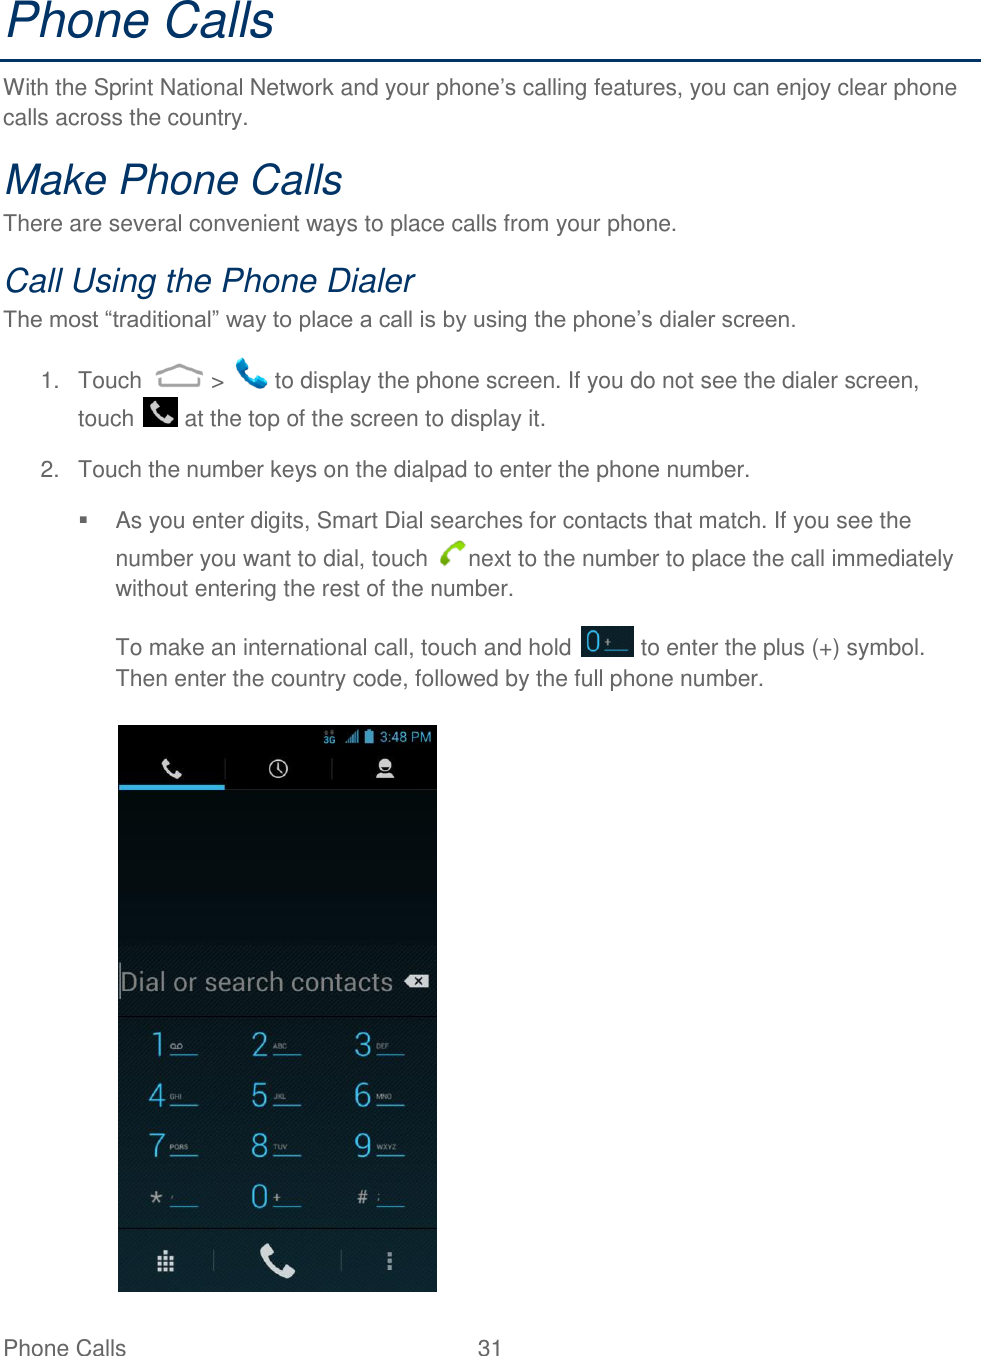
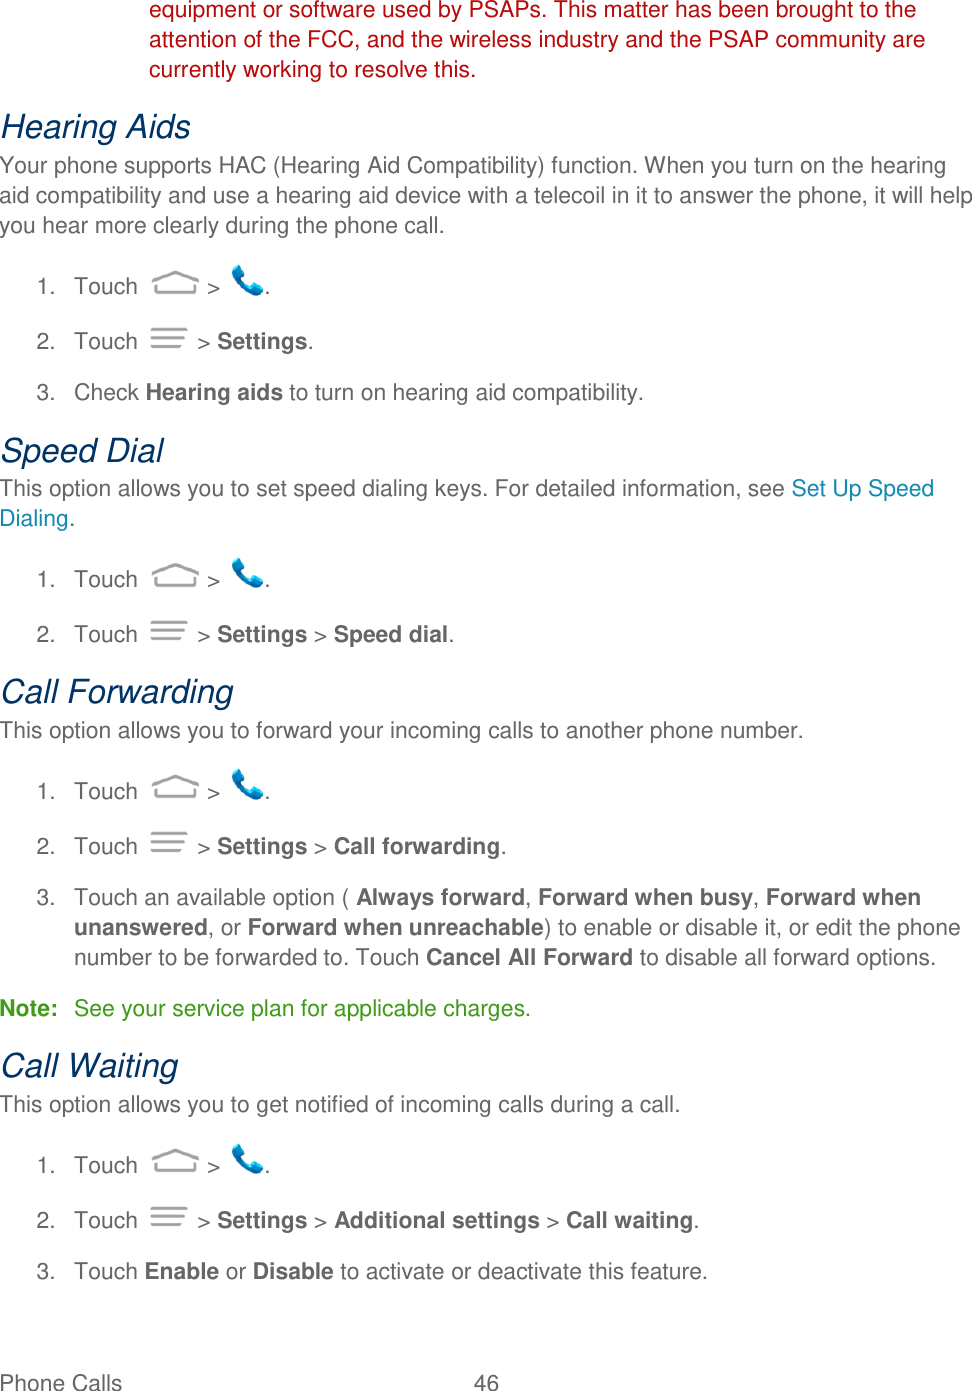
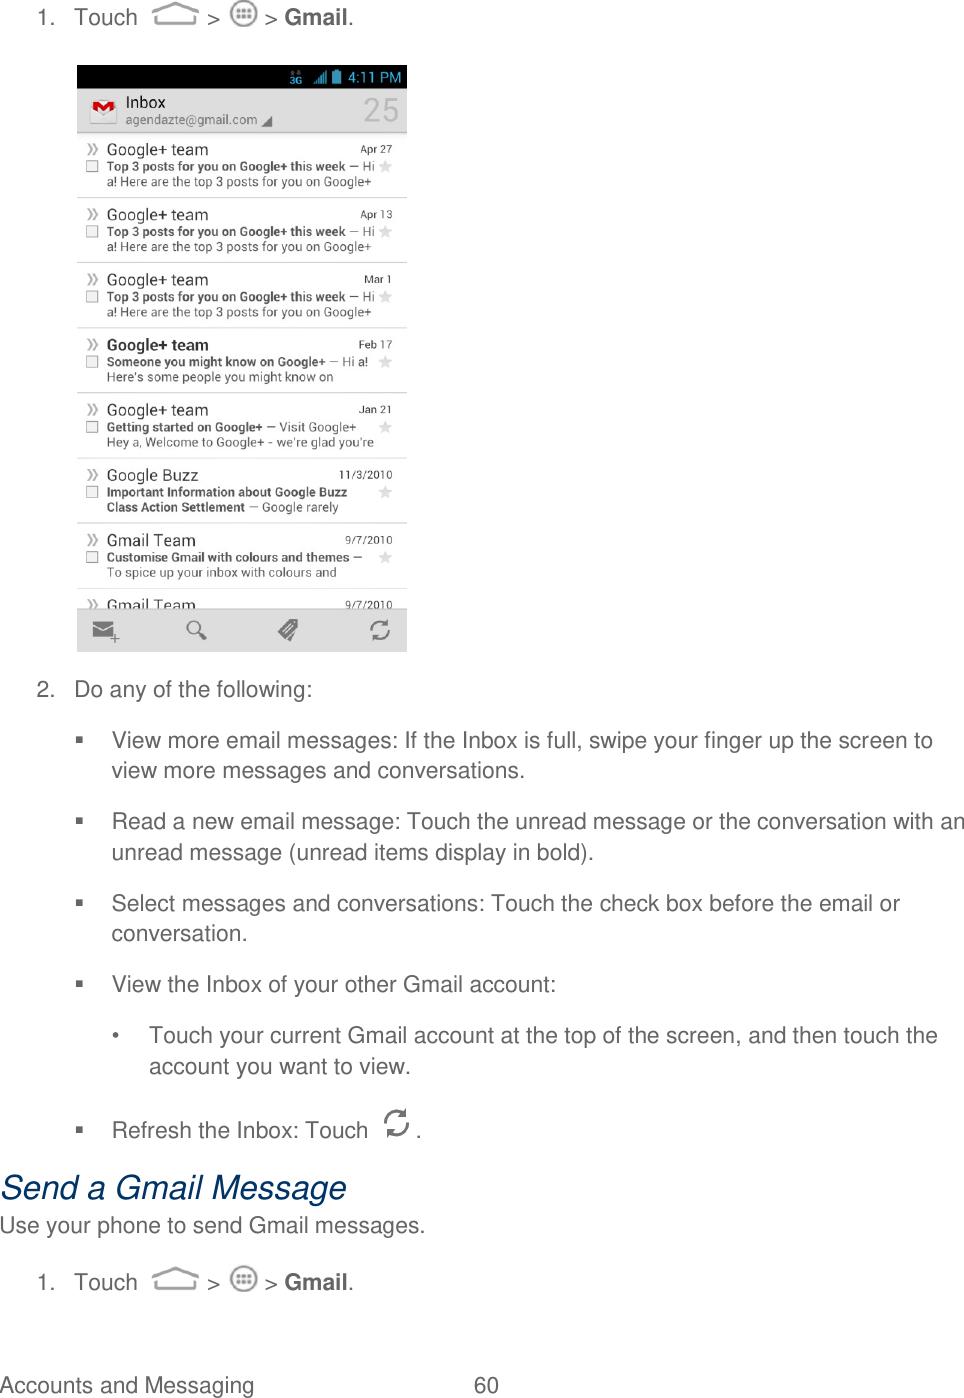
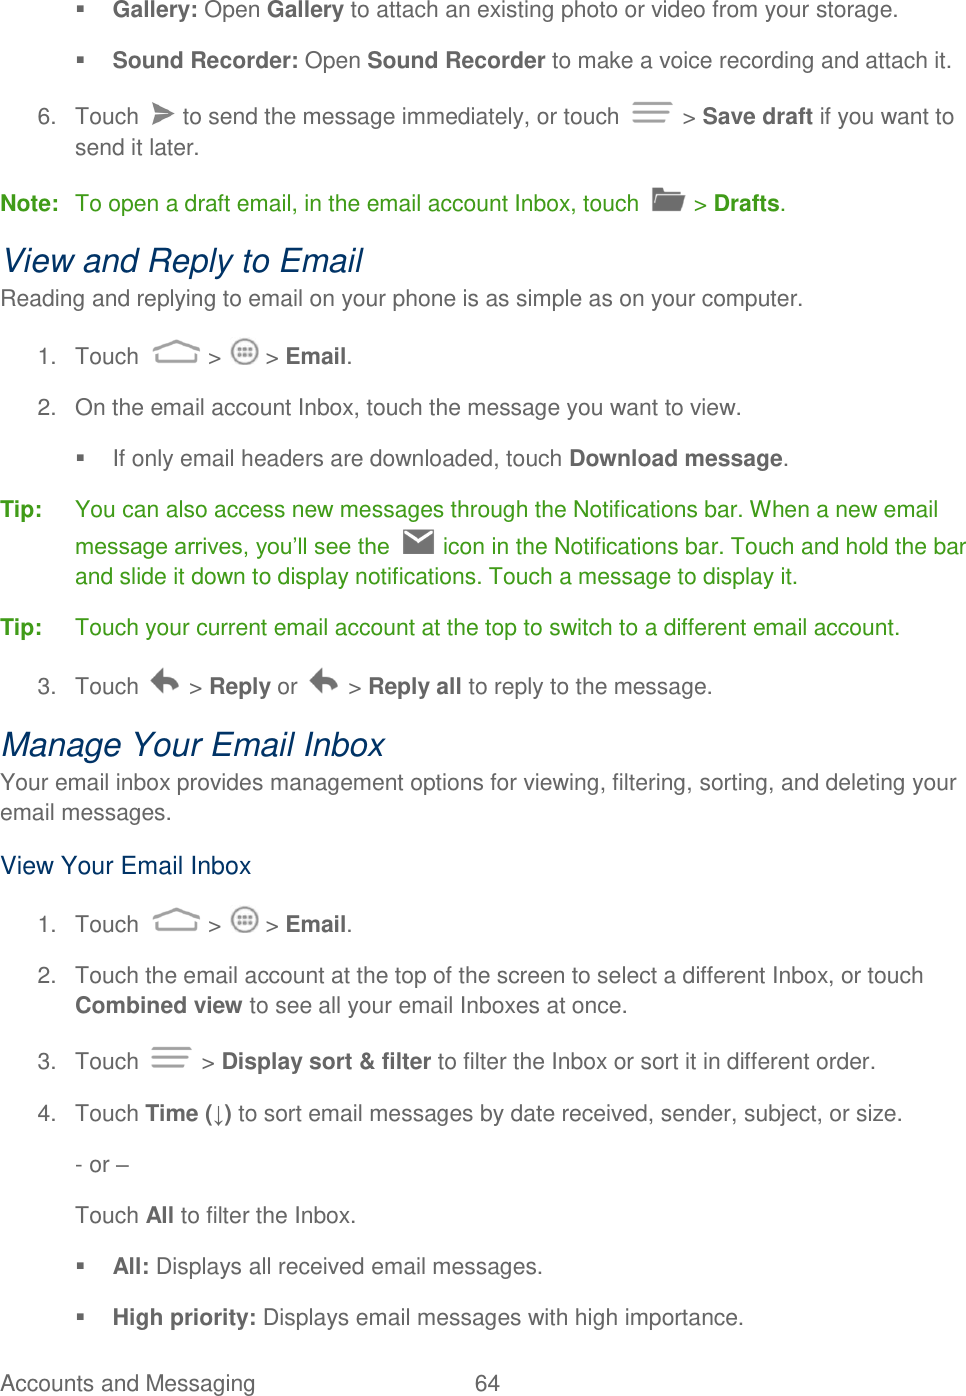
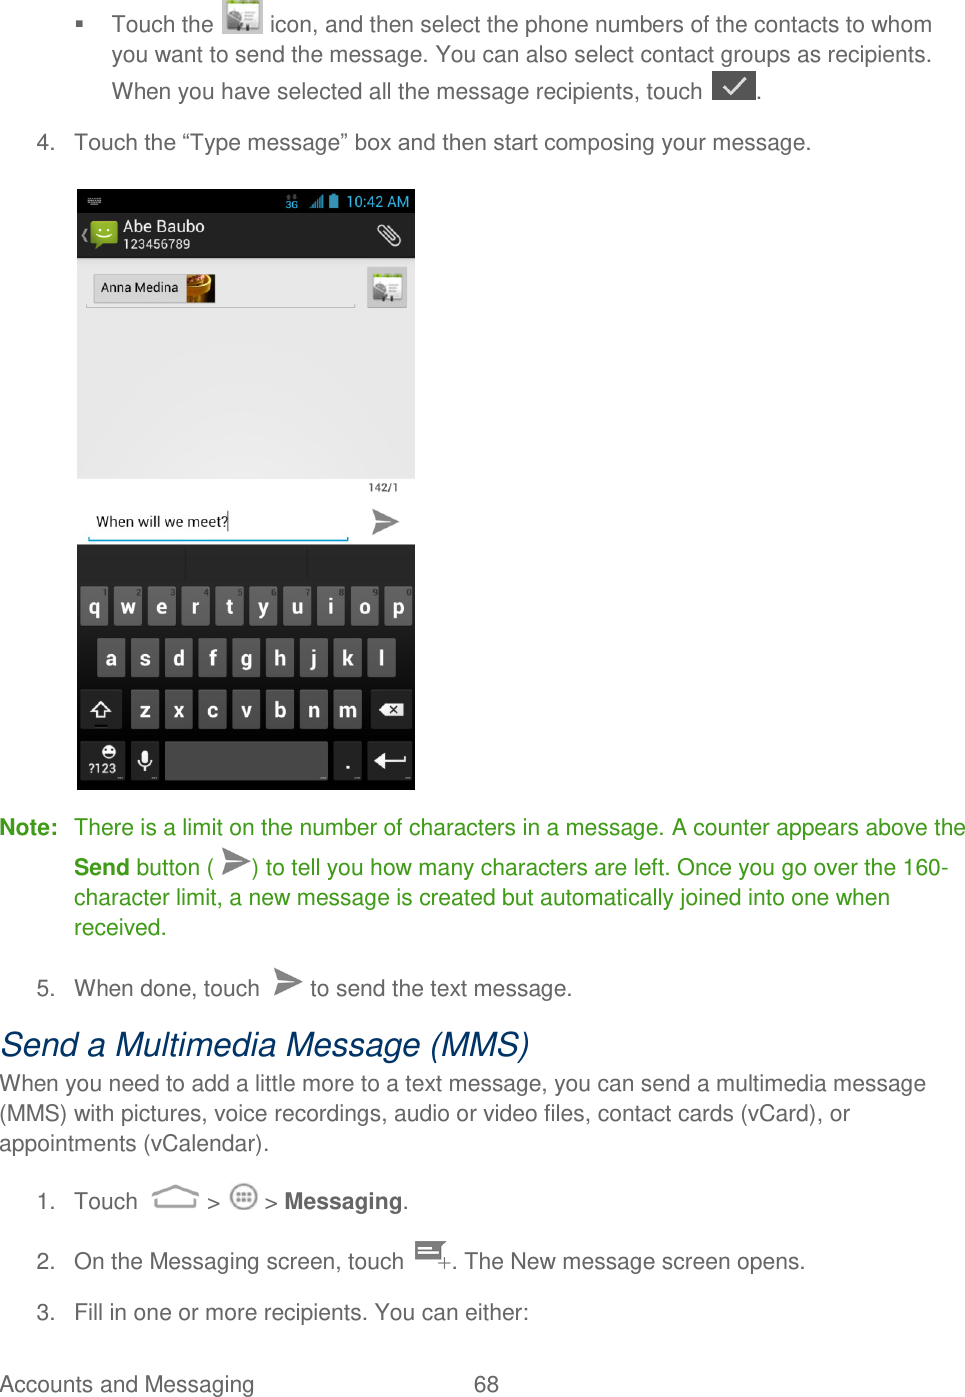
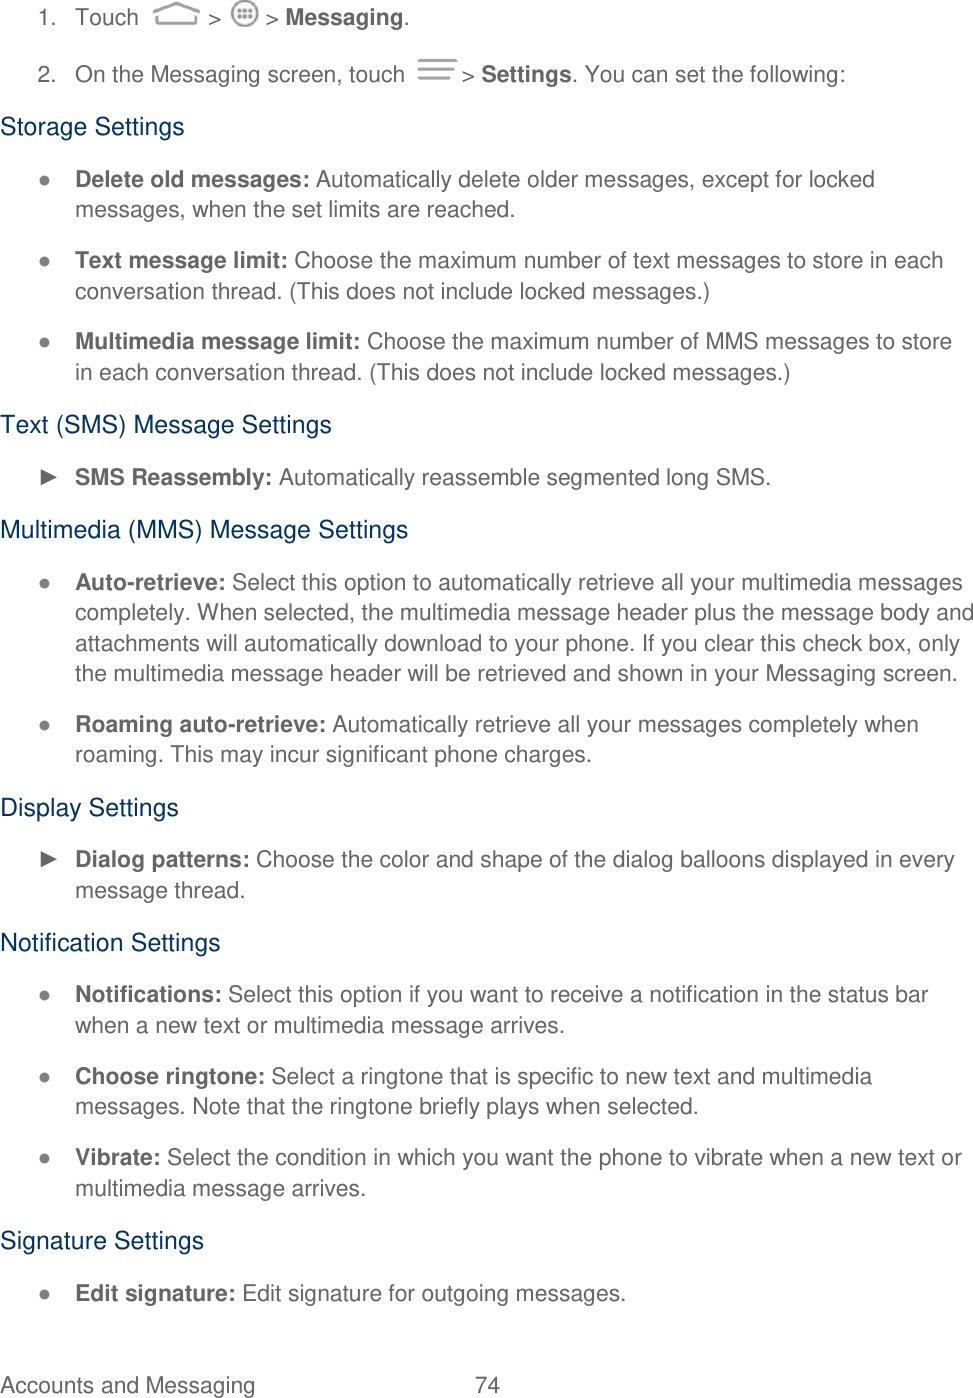
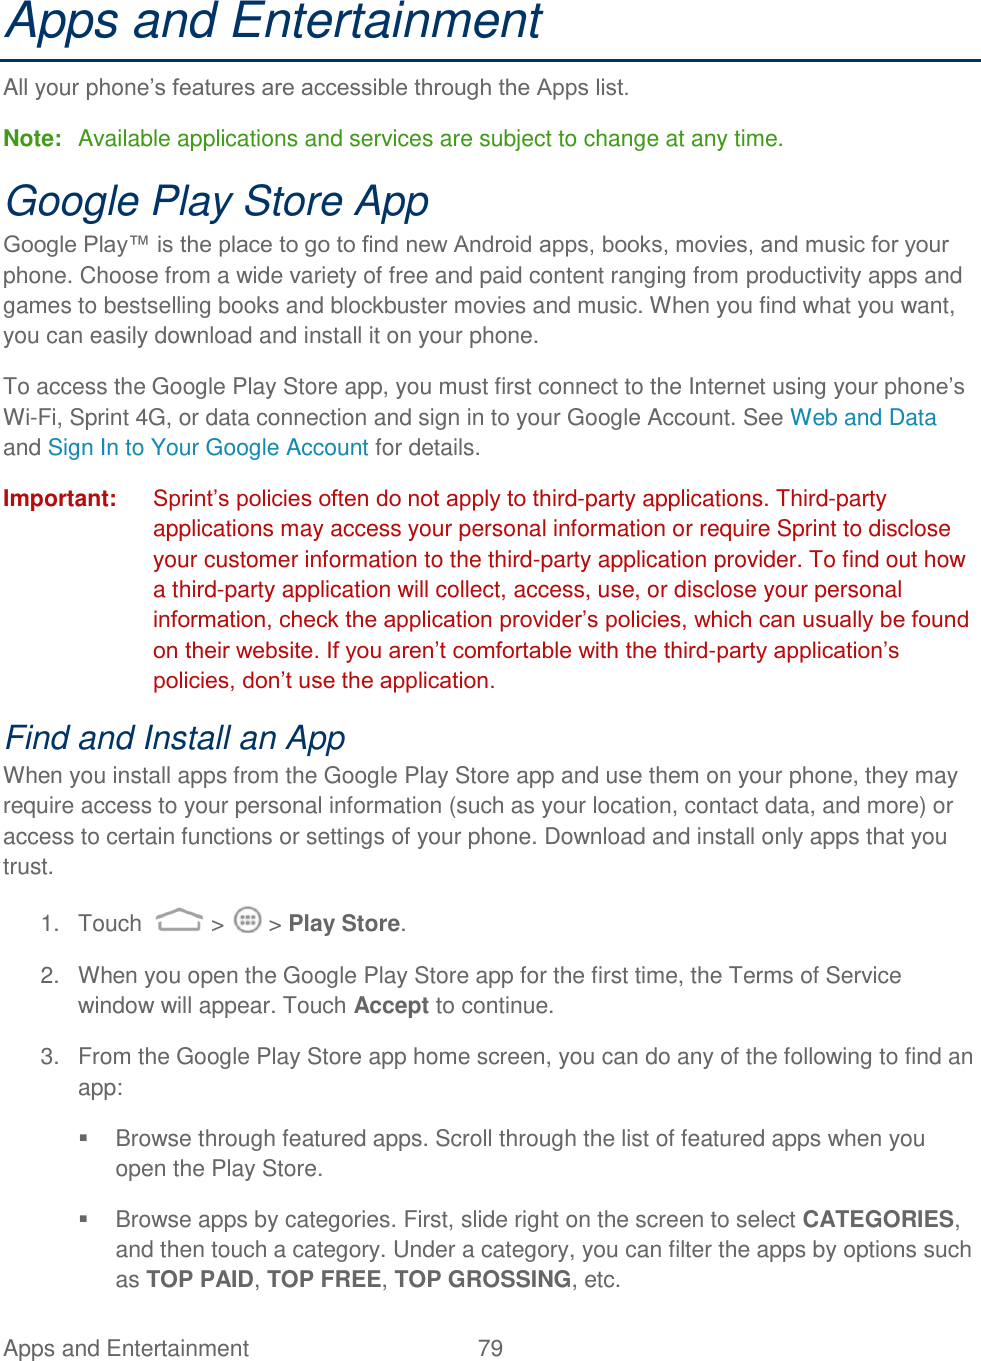
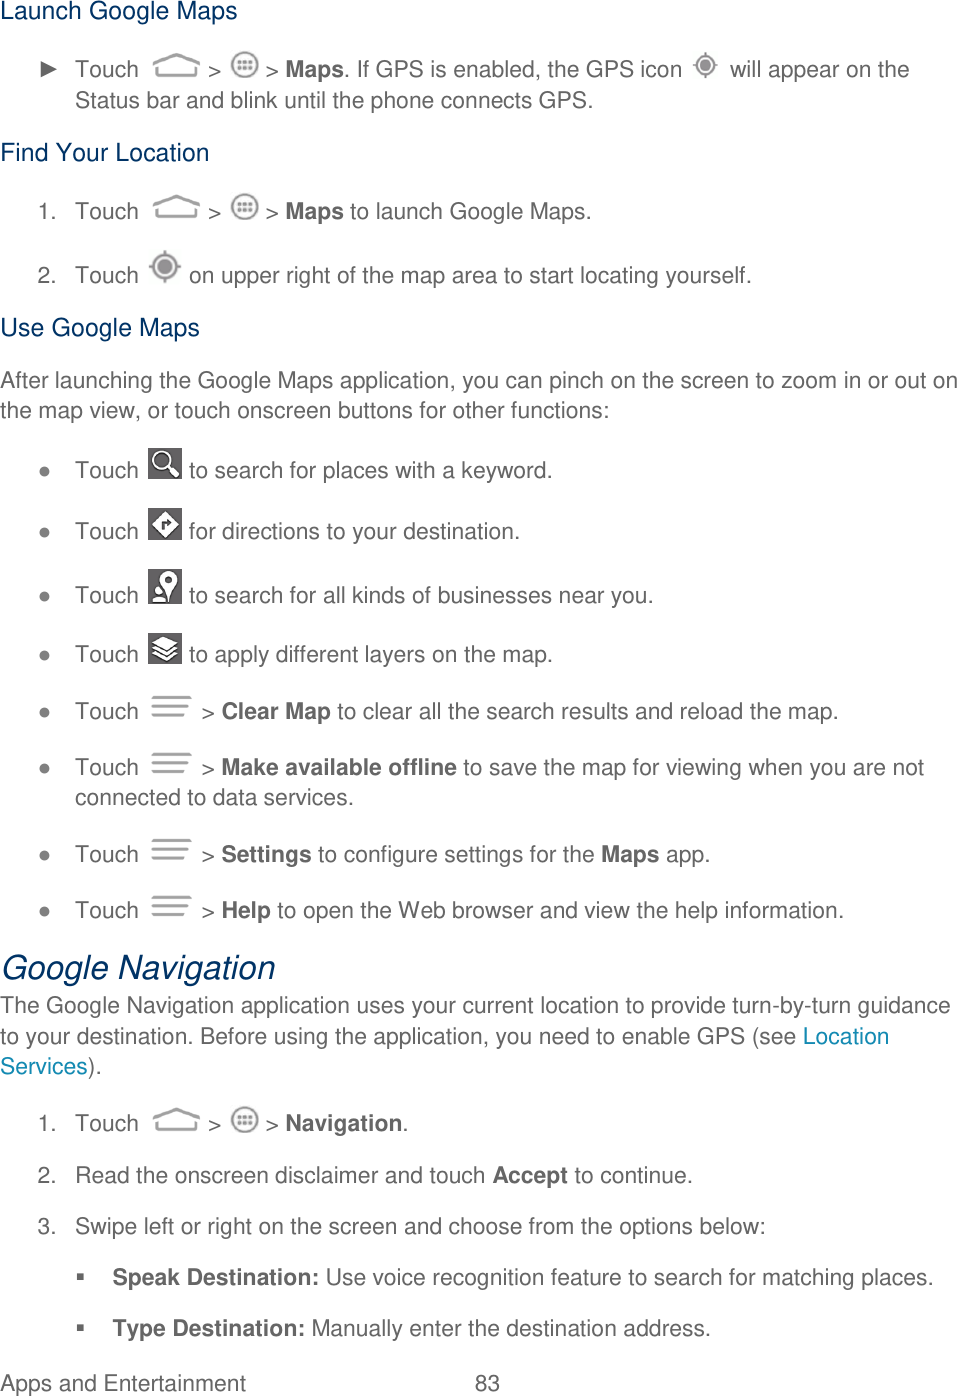
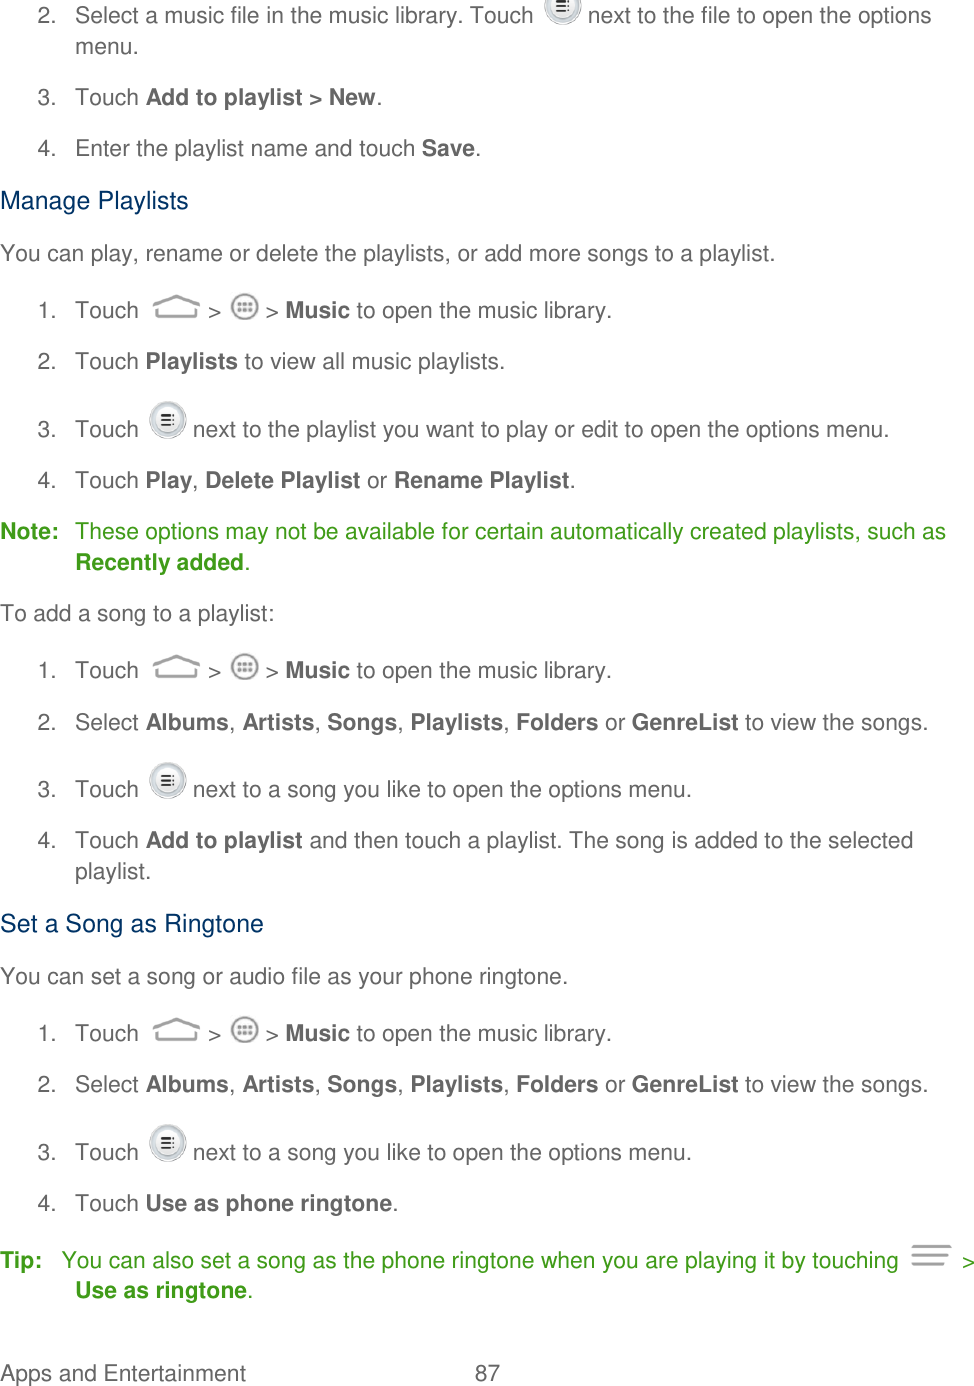
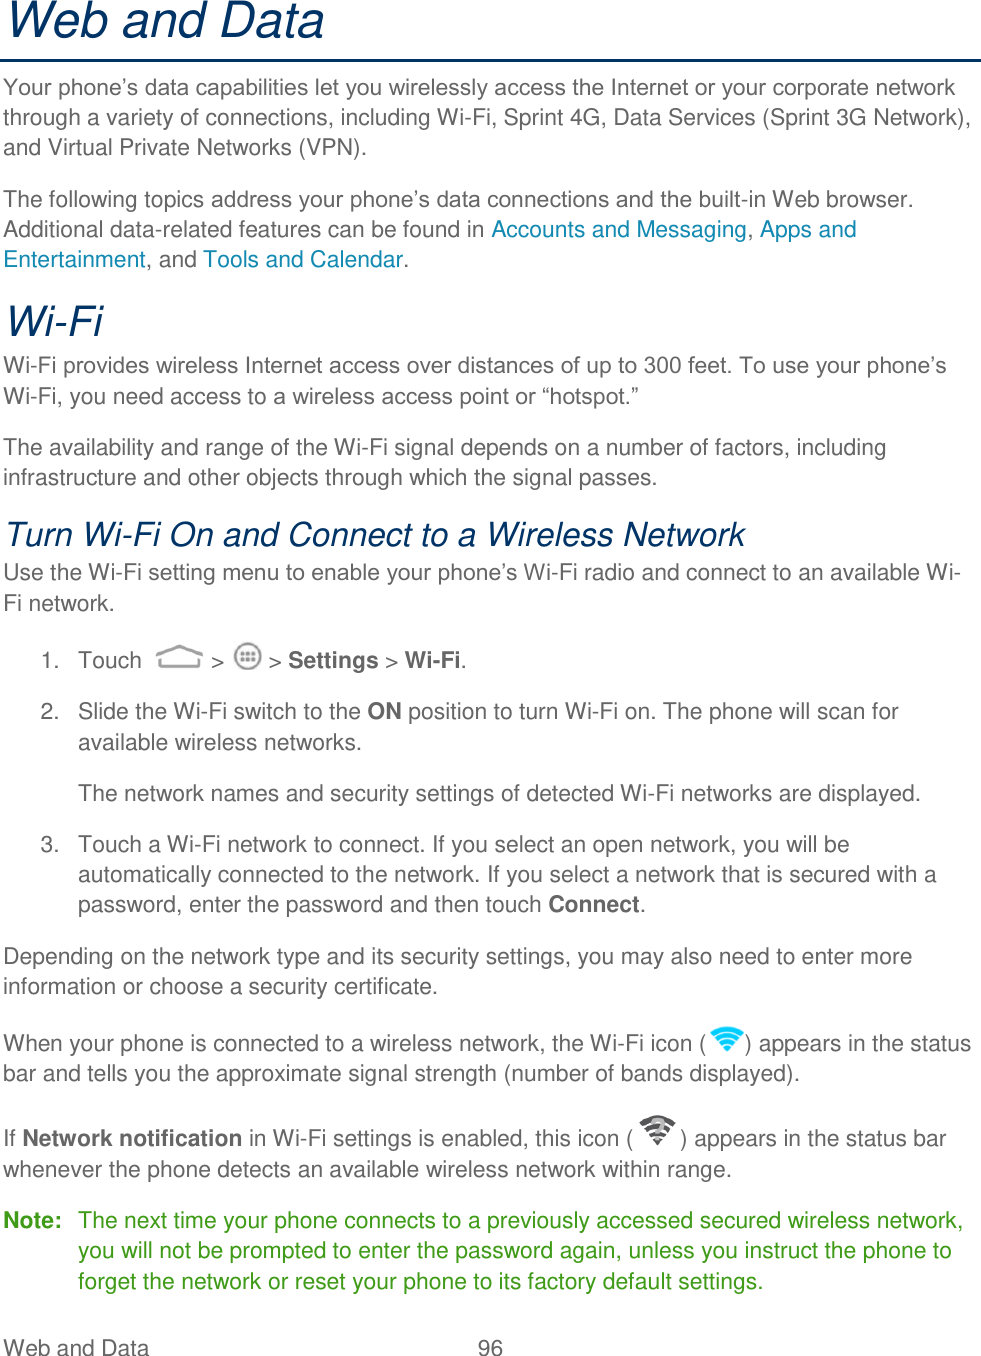
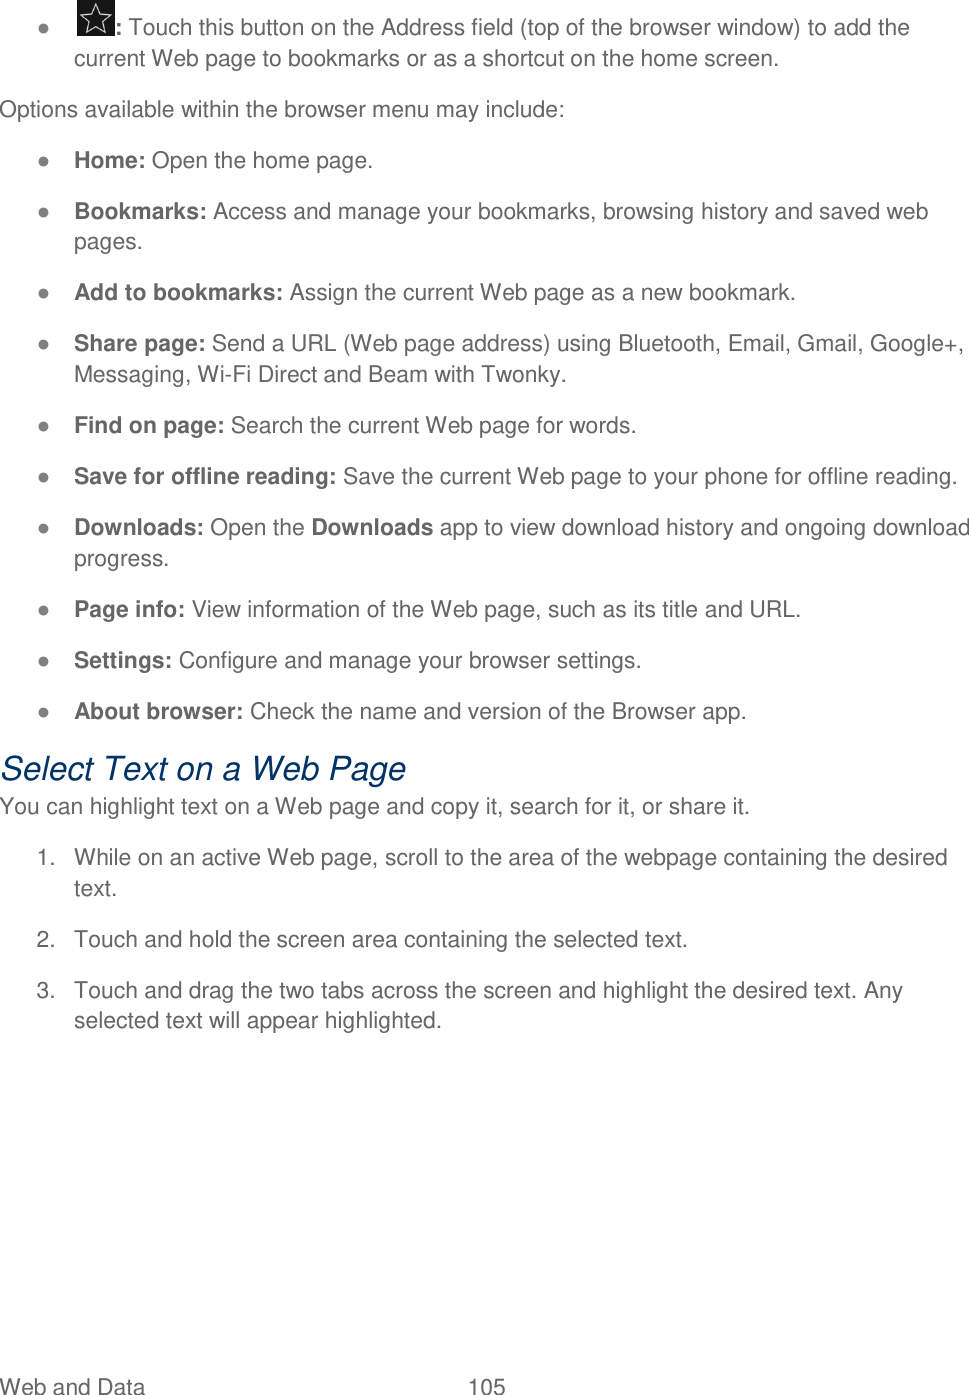
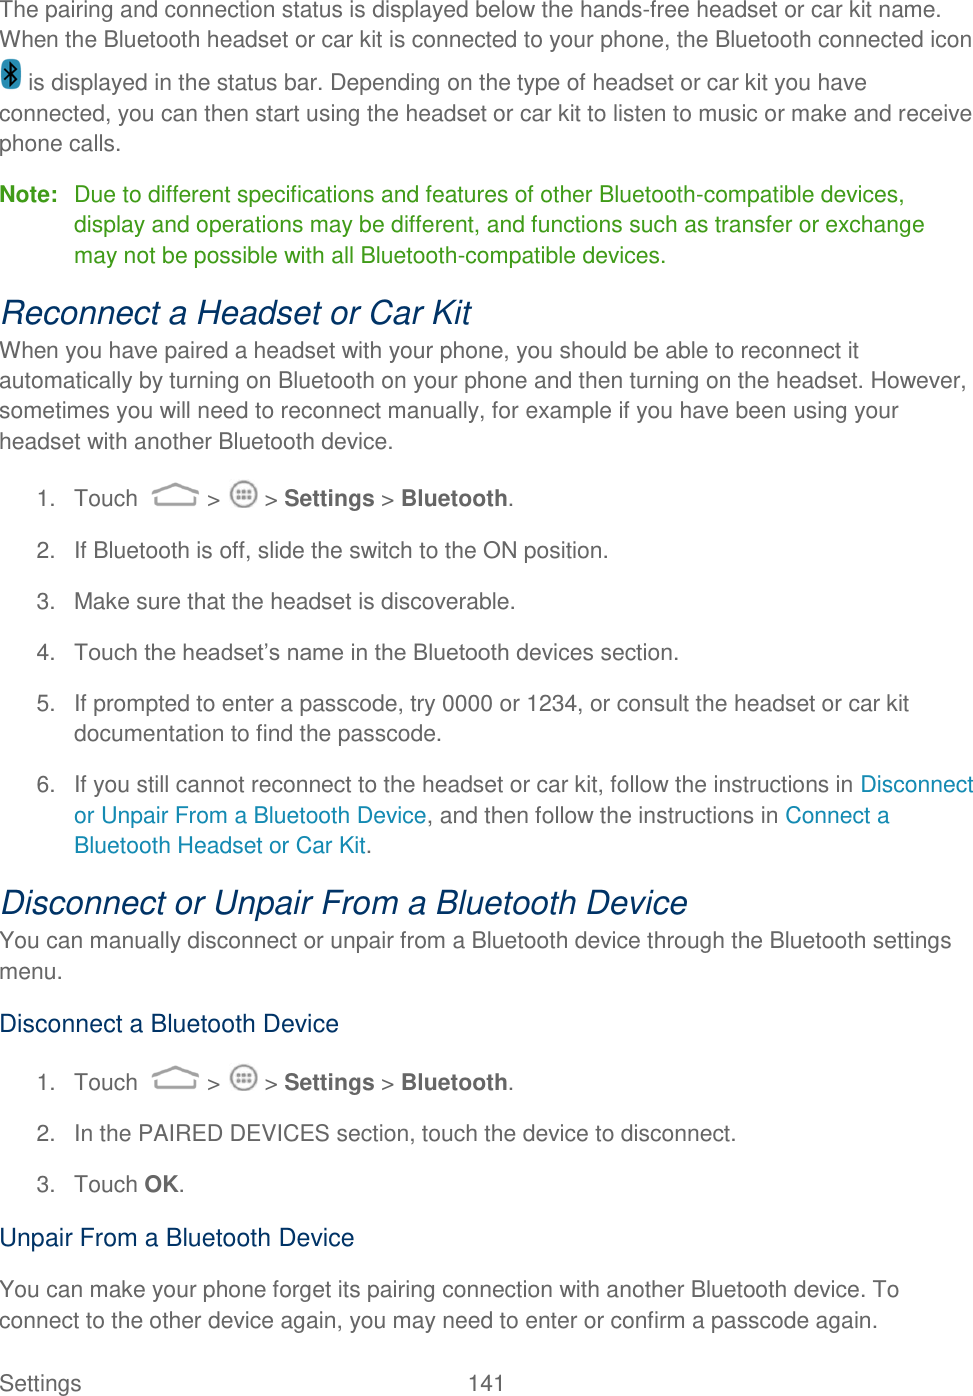
![Phone Calls 44 3. Touch a listing to display the options in a new screen. The options may differ according to the type of the number. Touch to view the contact. Touch to add the number to an existing contact or a new contact. Touch Call [number] to place a call. Touch to send a message to the number. Clear Call Logs Use the menu option to clear your call log. 1. Touch > to display the phone app. 2. Touch to display the call logs. 3. You can delete one listing or all call logs. Touch a listing and then touch > Remove from call log to delete it. To delete all call logs, touch > Clear call log and touch OK in the Call Log screen. Call Settings Your phone‟s Call Settings menu lets you configure your voicemail options and a number of other settings for the phone application. Quick Responses This menu allows you to edit the text response that you can quickly send to the caller when you reject a call. See “Reject a Call and Send a Text Message” in Receive Phone Calls. 1. Touch > . 2. Touch > Settings > Quick responses. 3. Touch the preset response. 4. In the window that opens, edit the message text, and touch OK. Voicemail Settings If you need to adjust your voicemail provider or access settings, use the Voicemail settings menu.](https://usermanual.wiki/ZTE/ZTEN9810/User-Guide-1985495-Page-54.png)
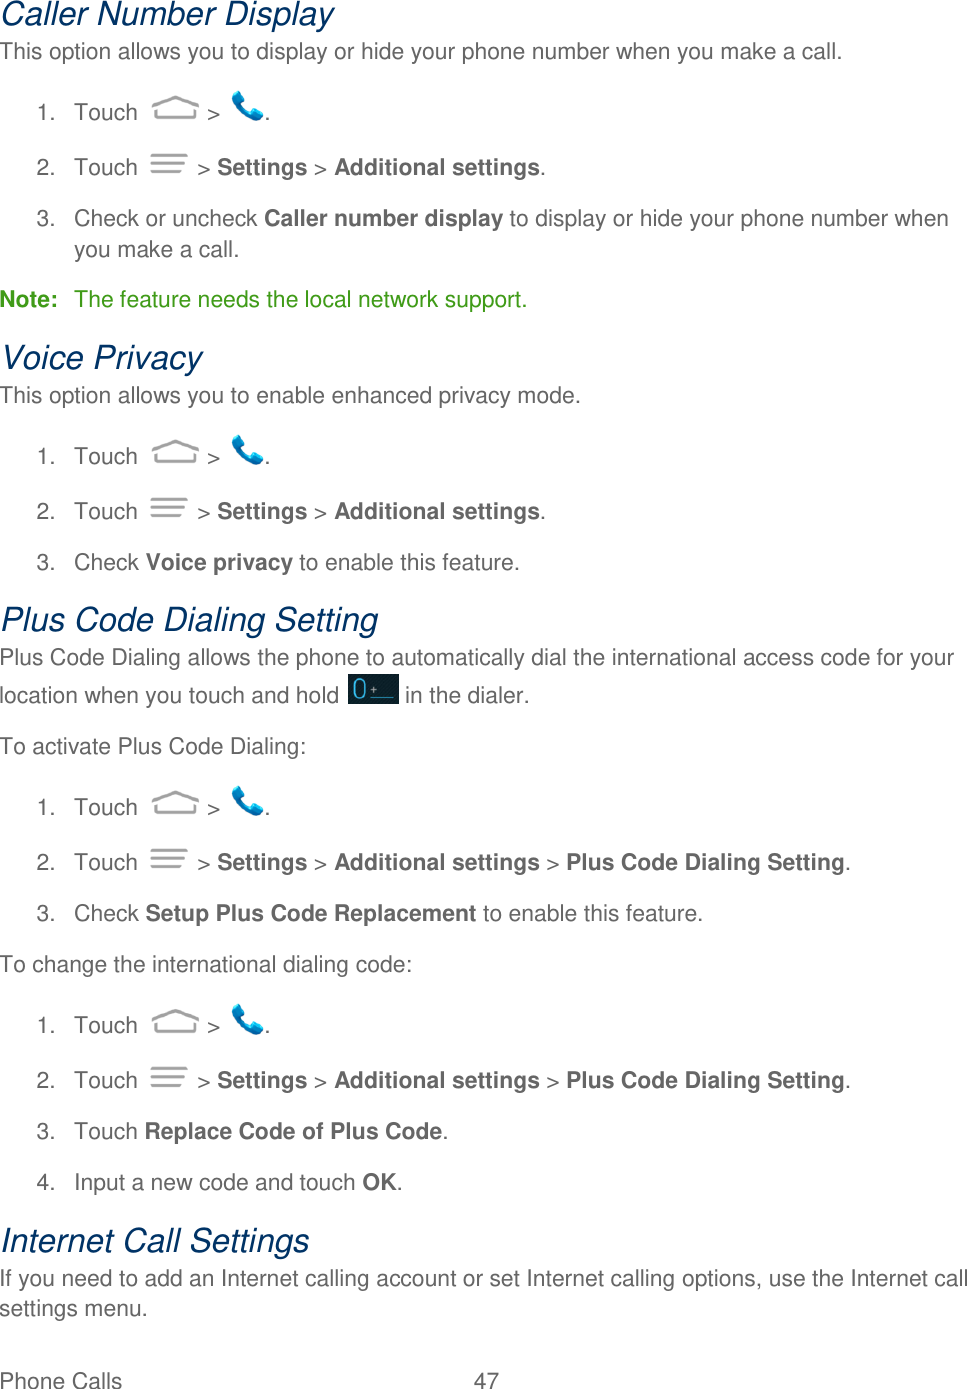


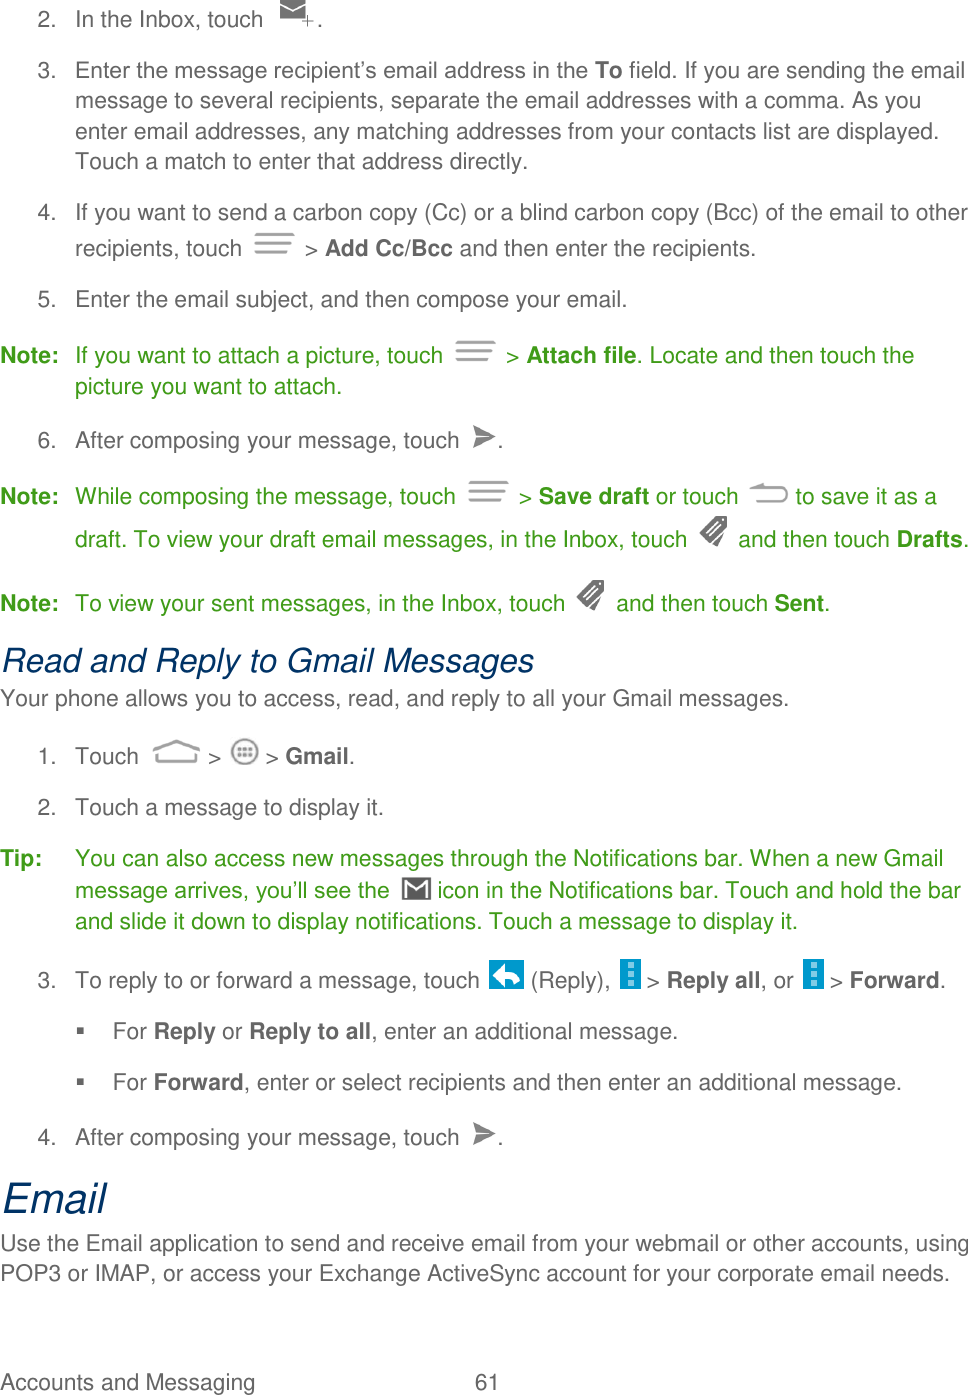
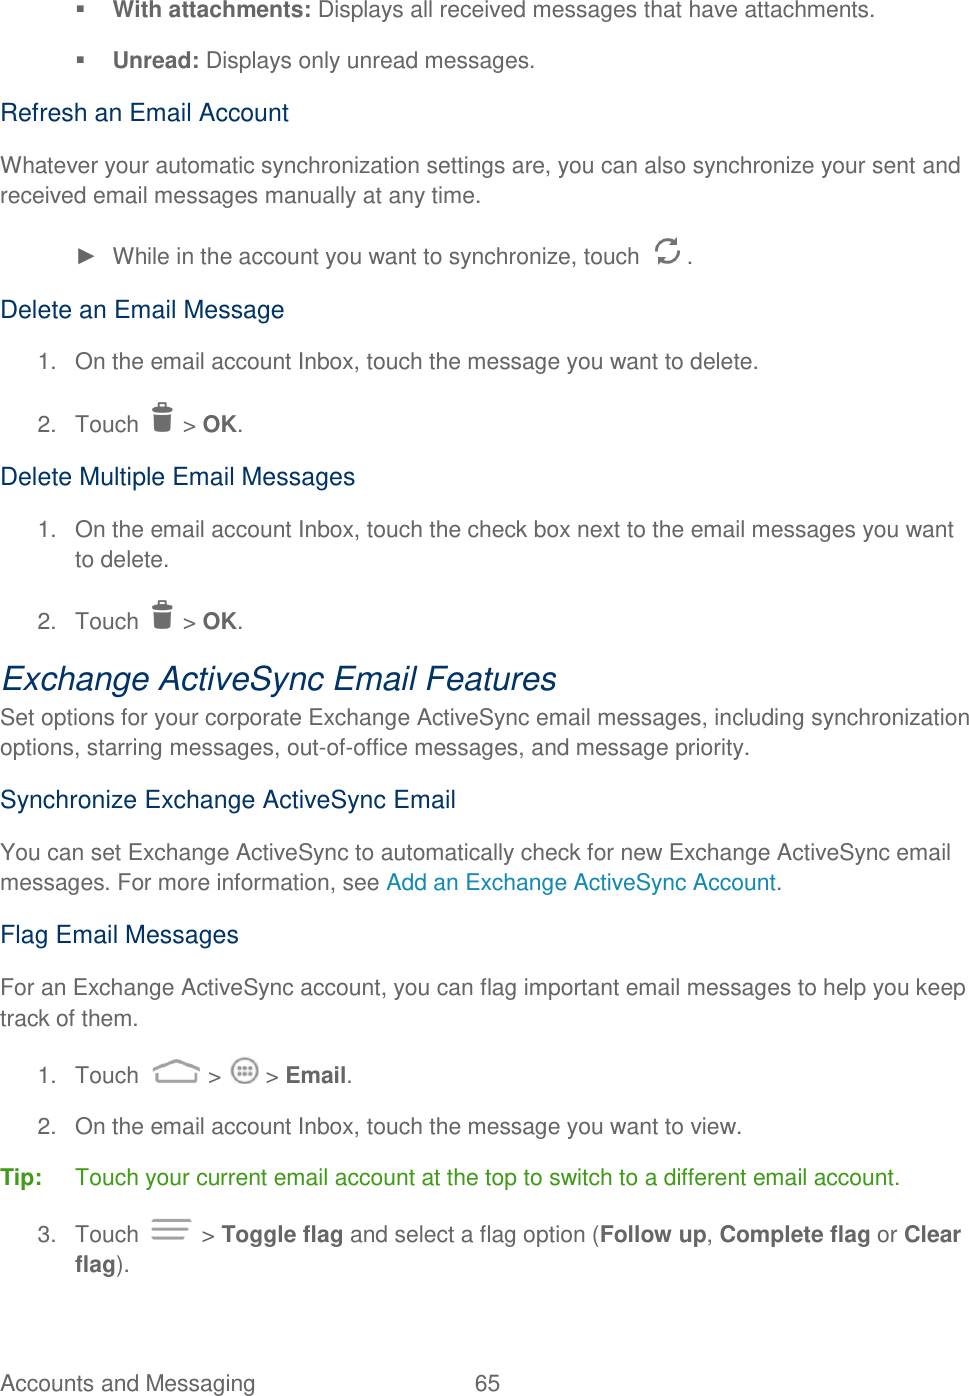

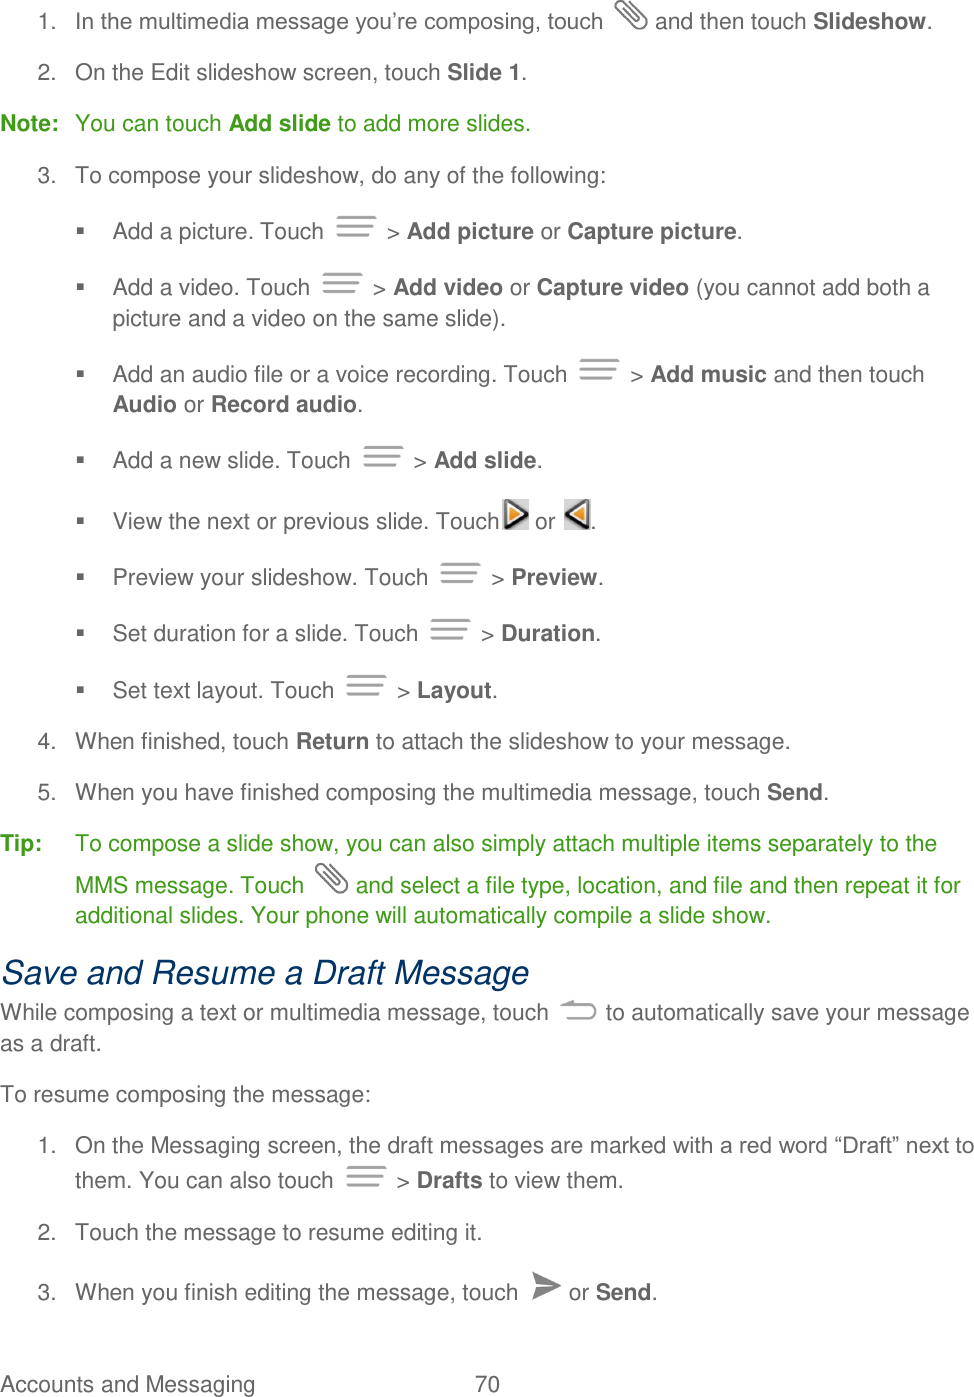

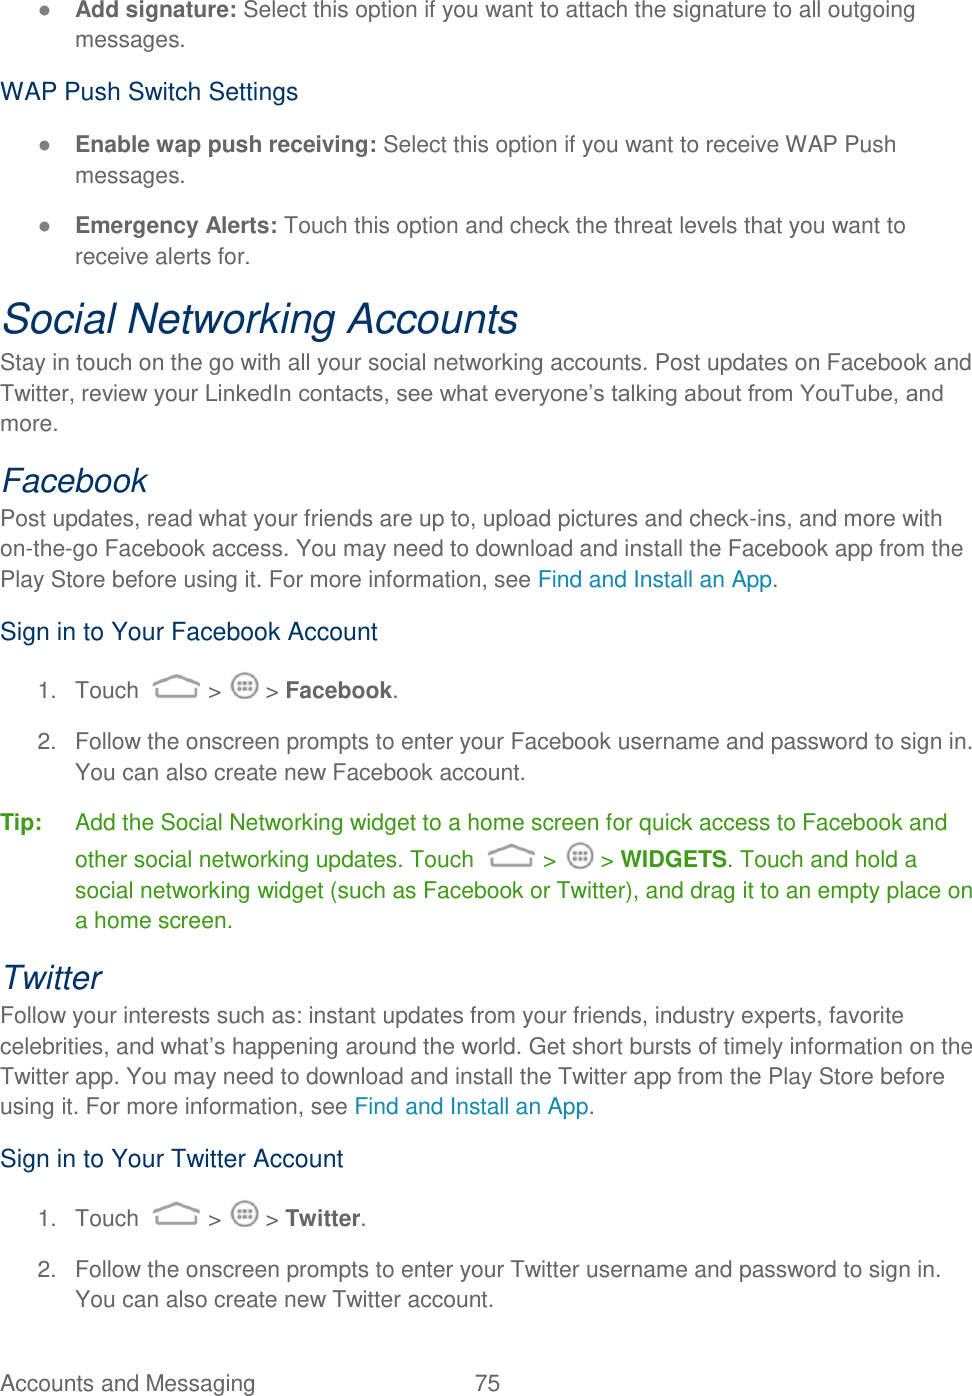

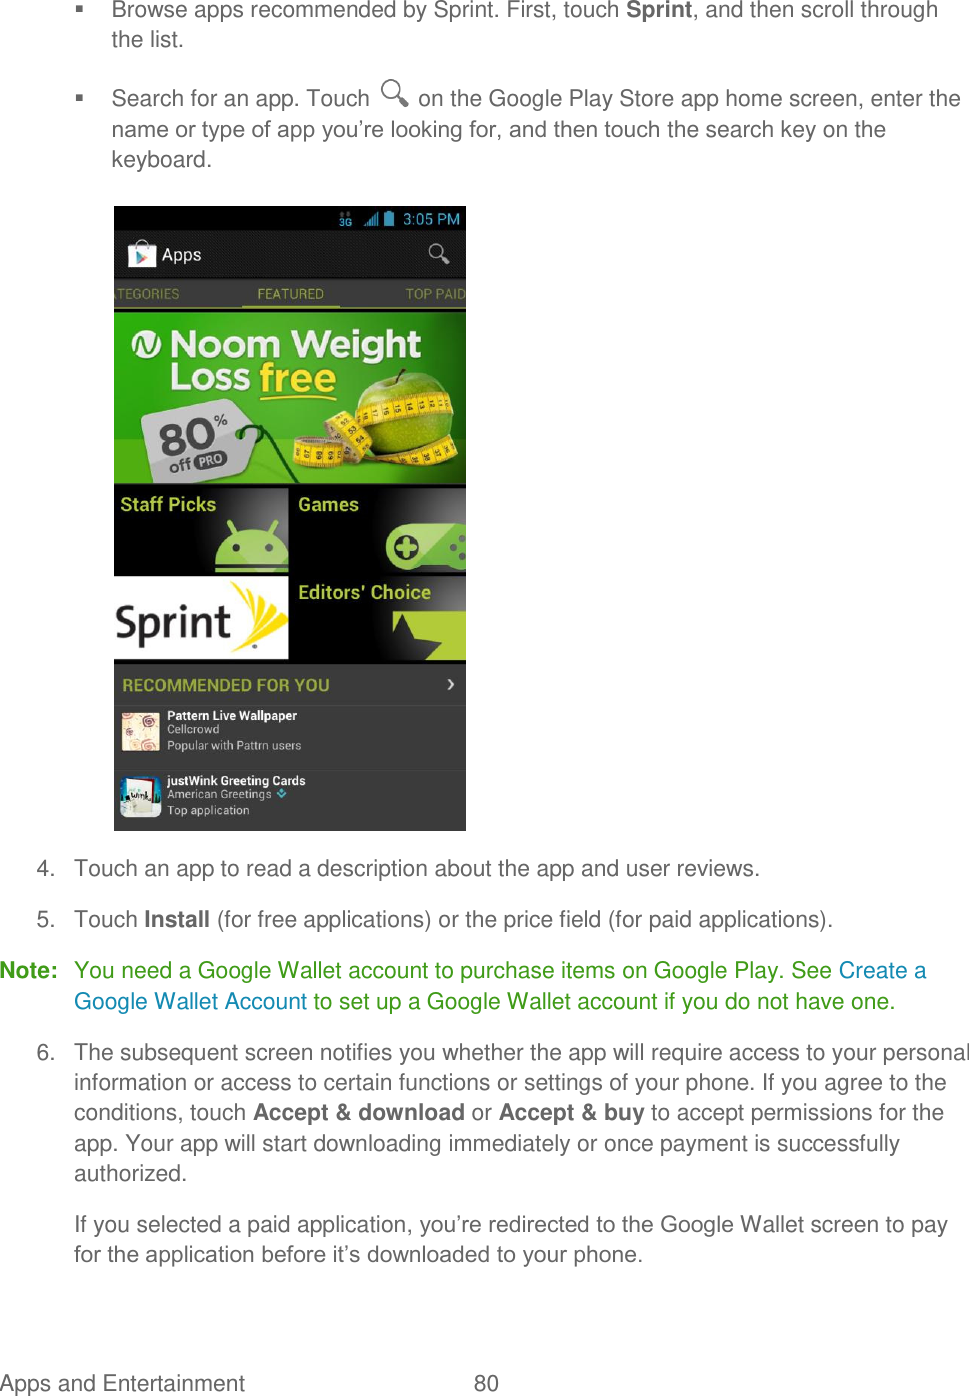
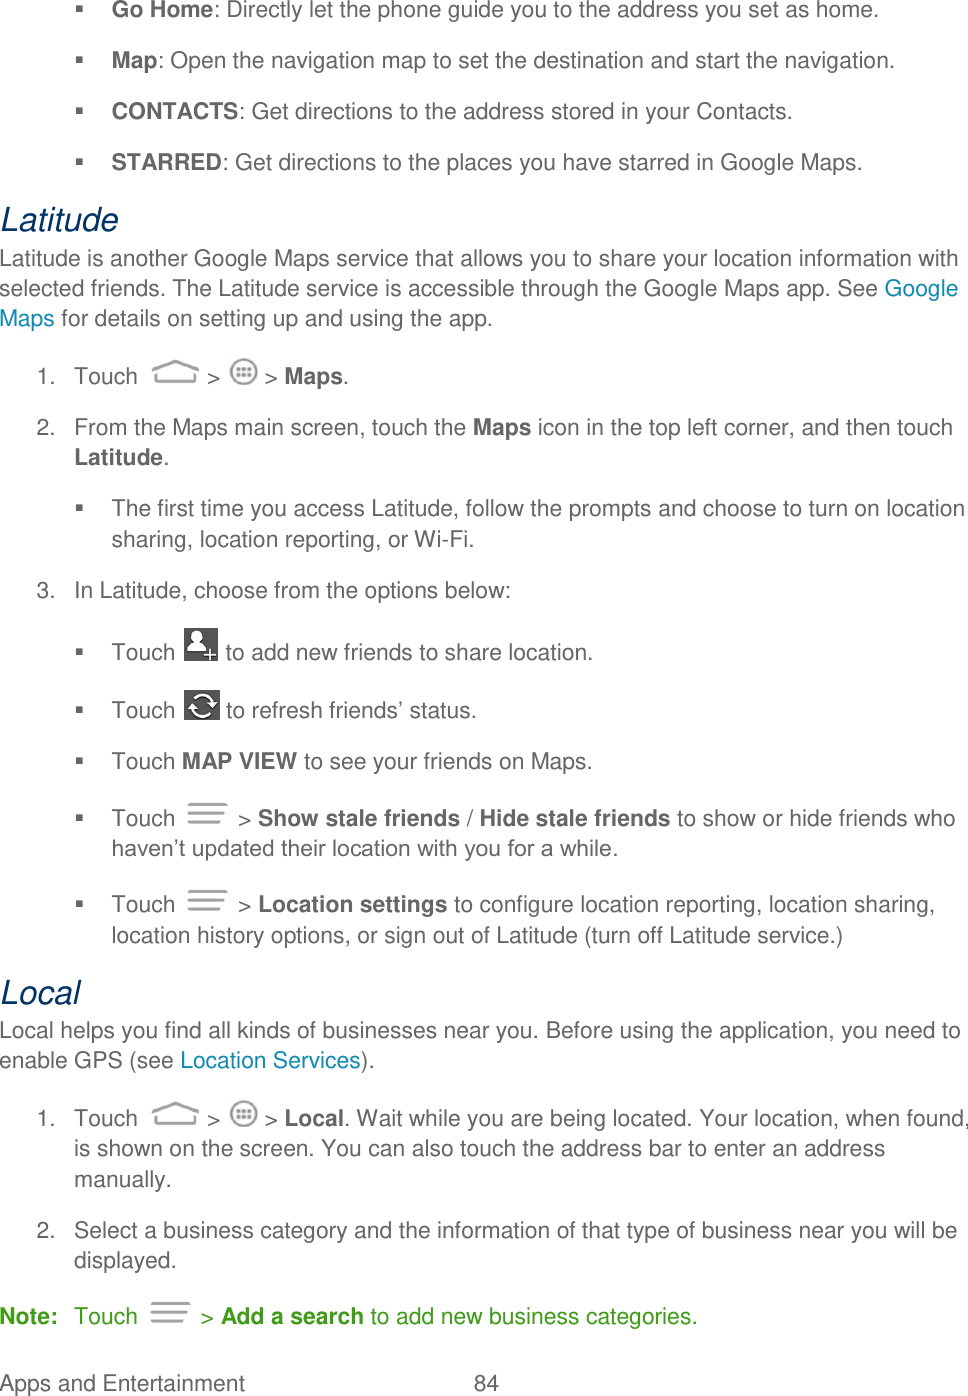
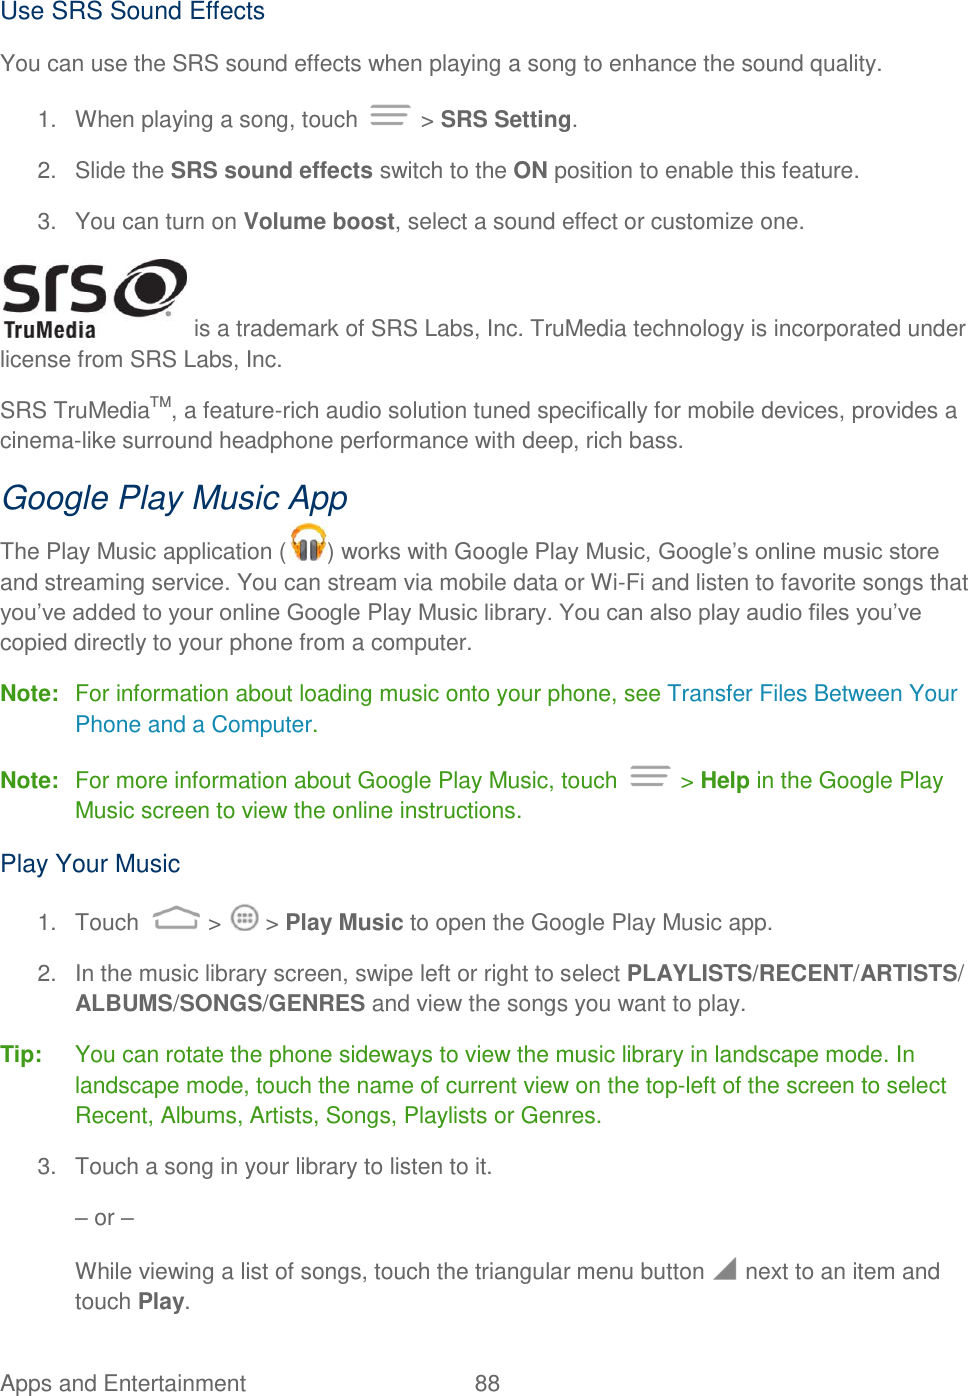

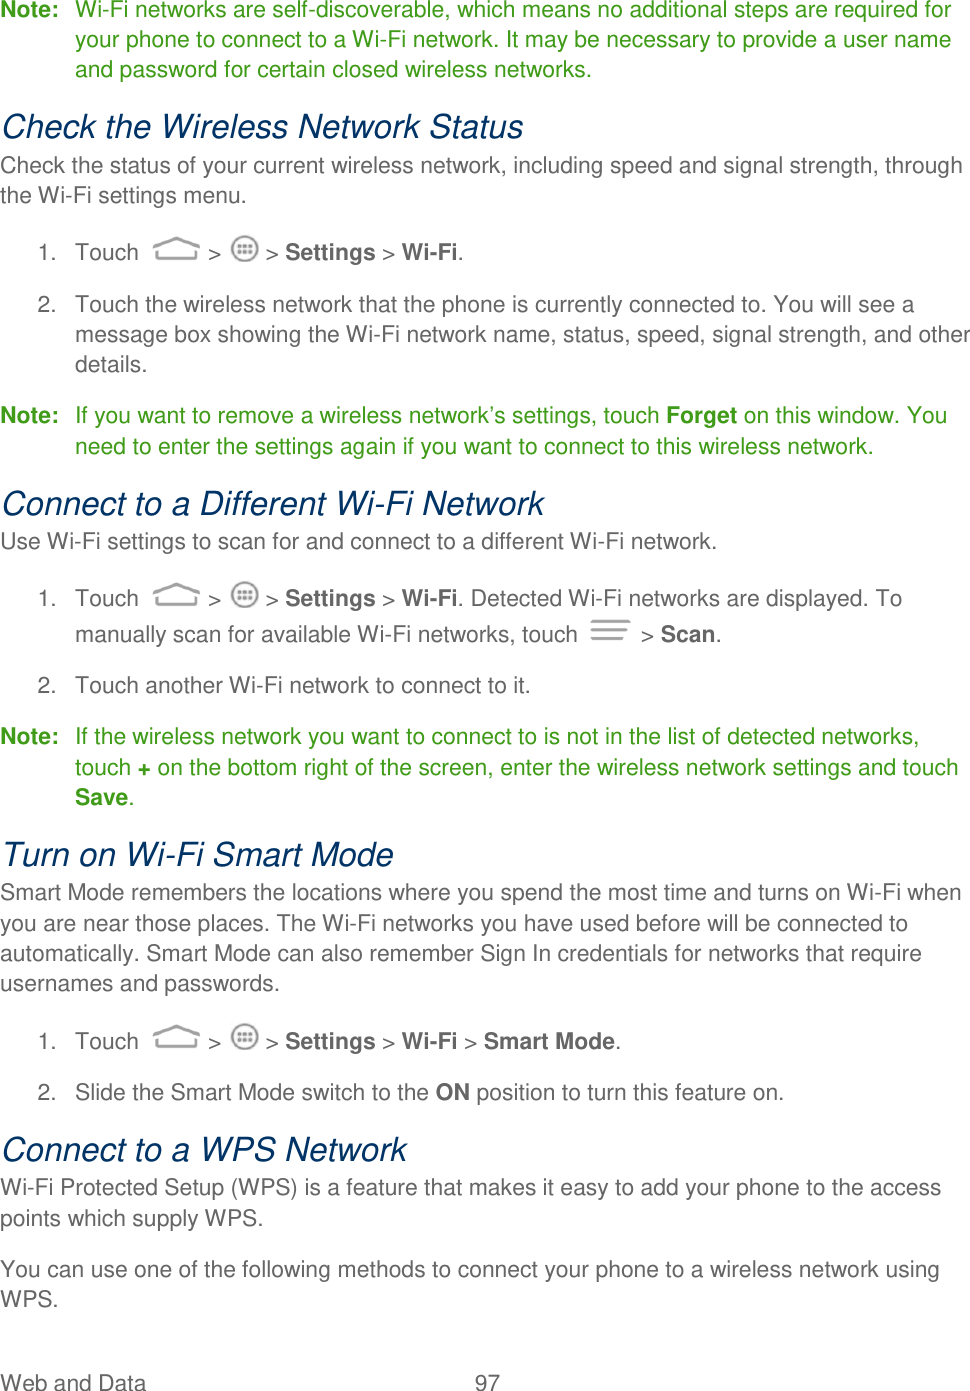

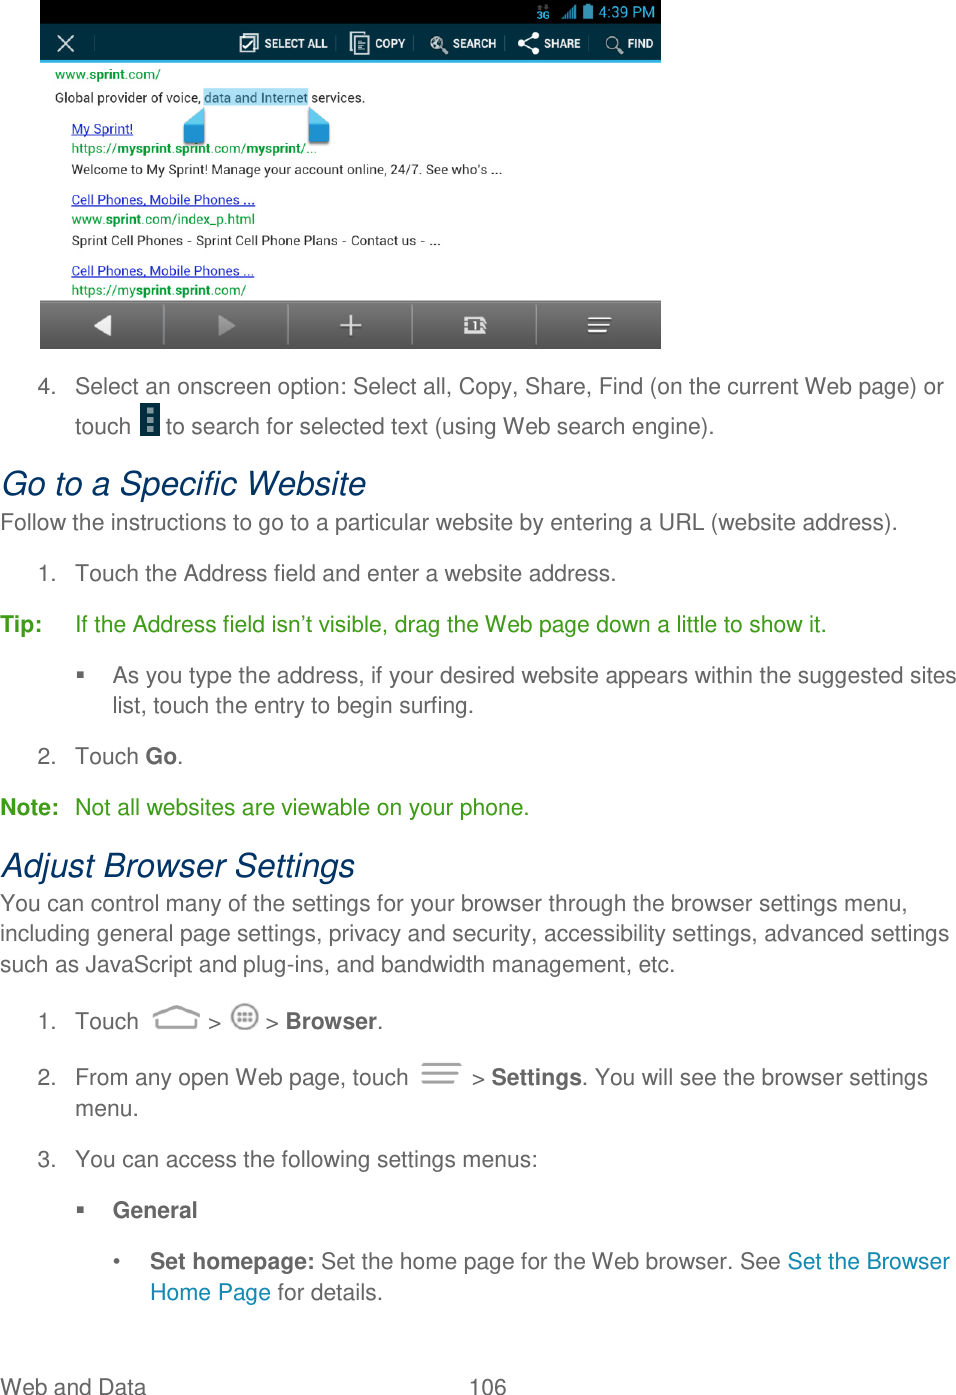


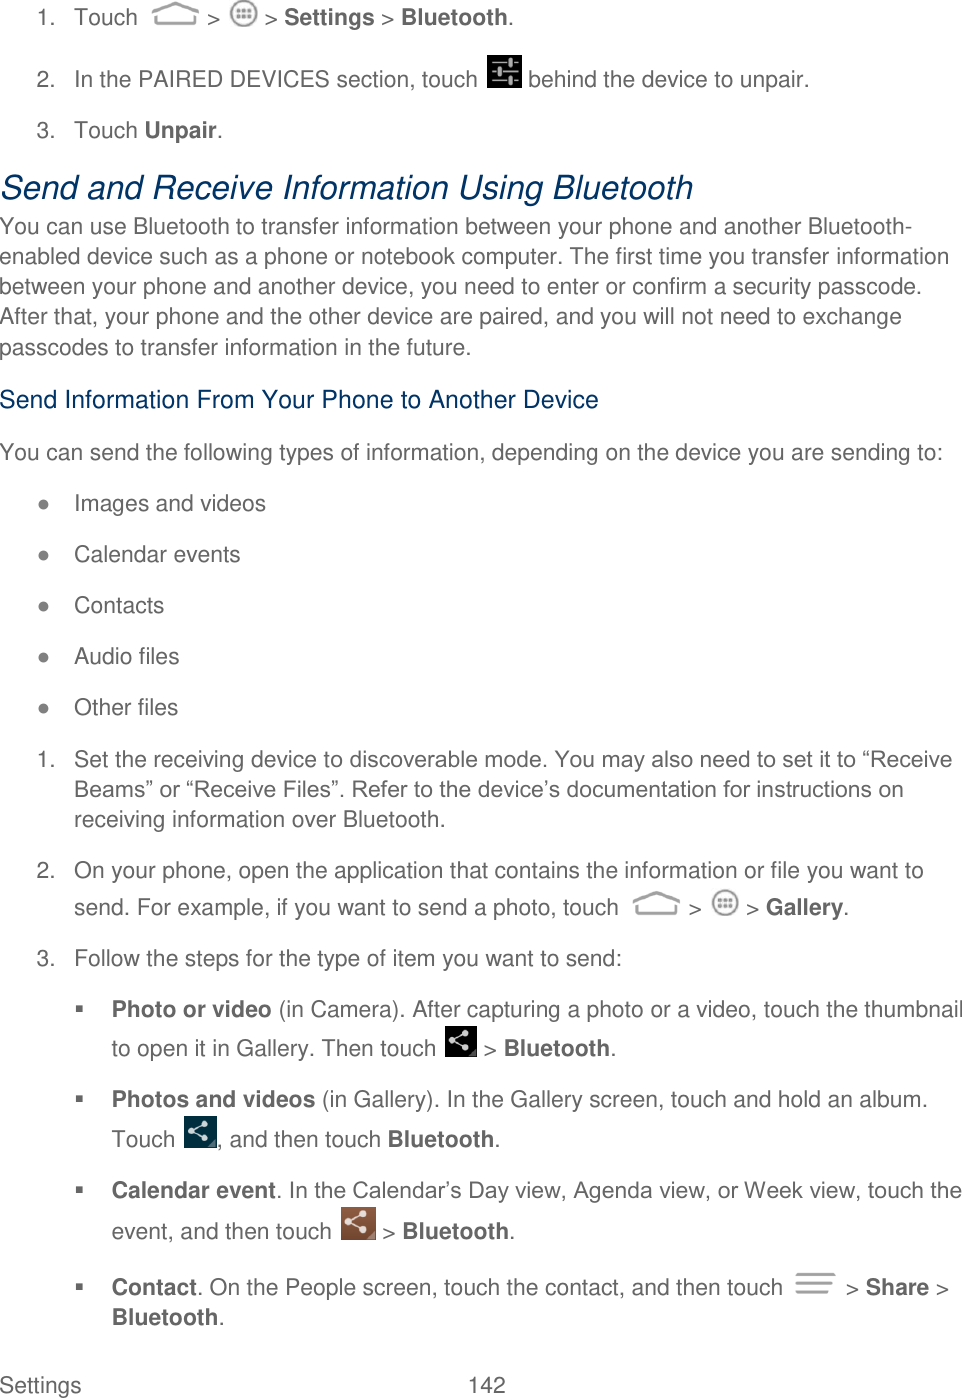
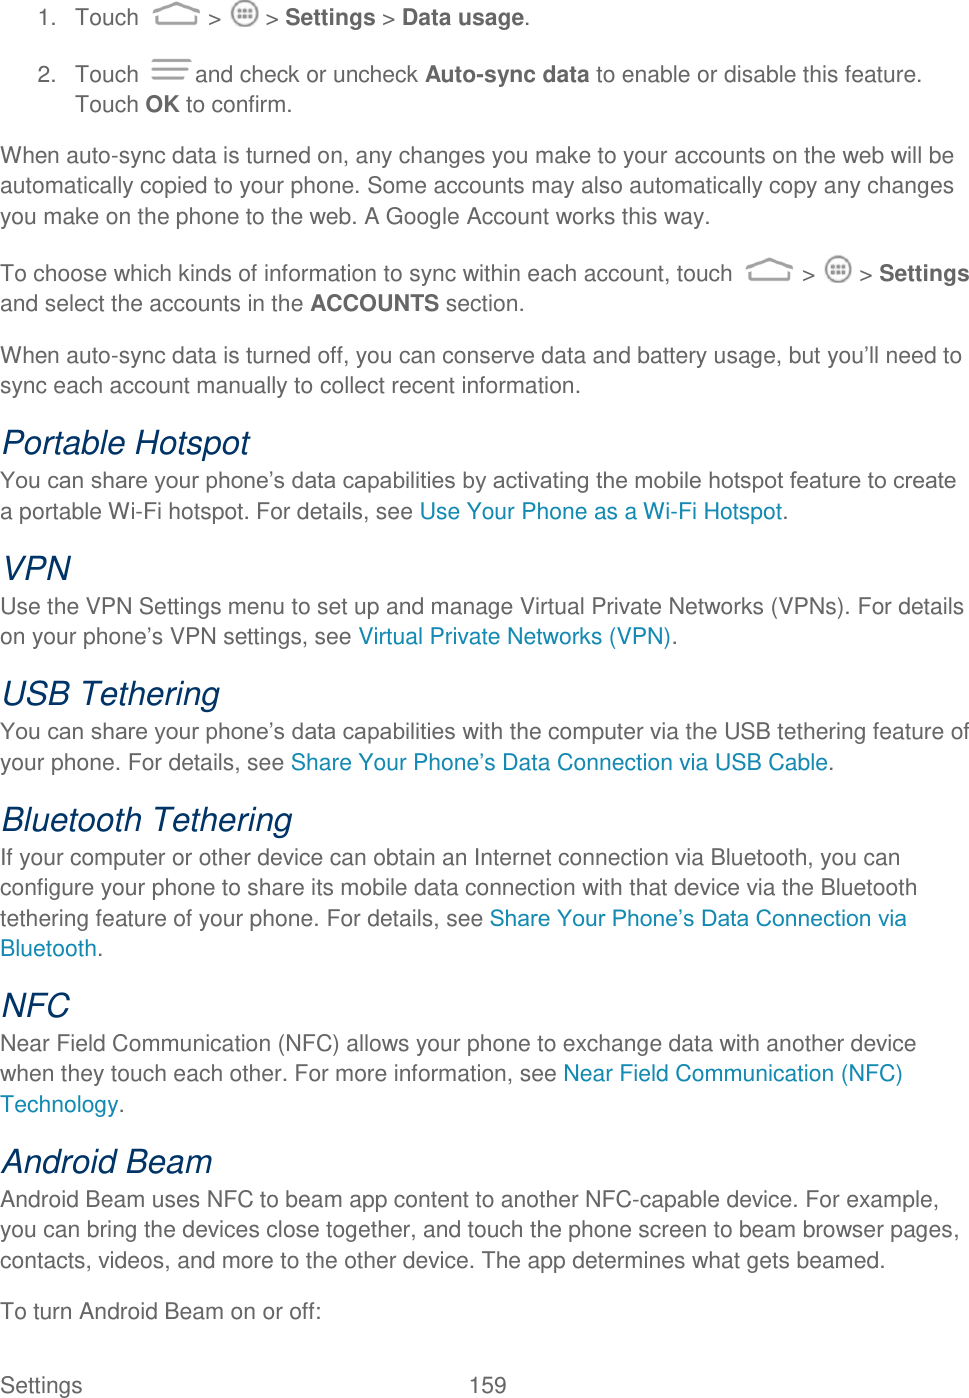
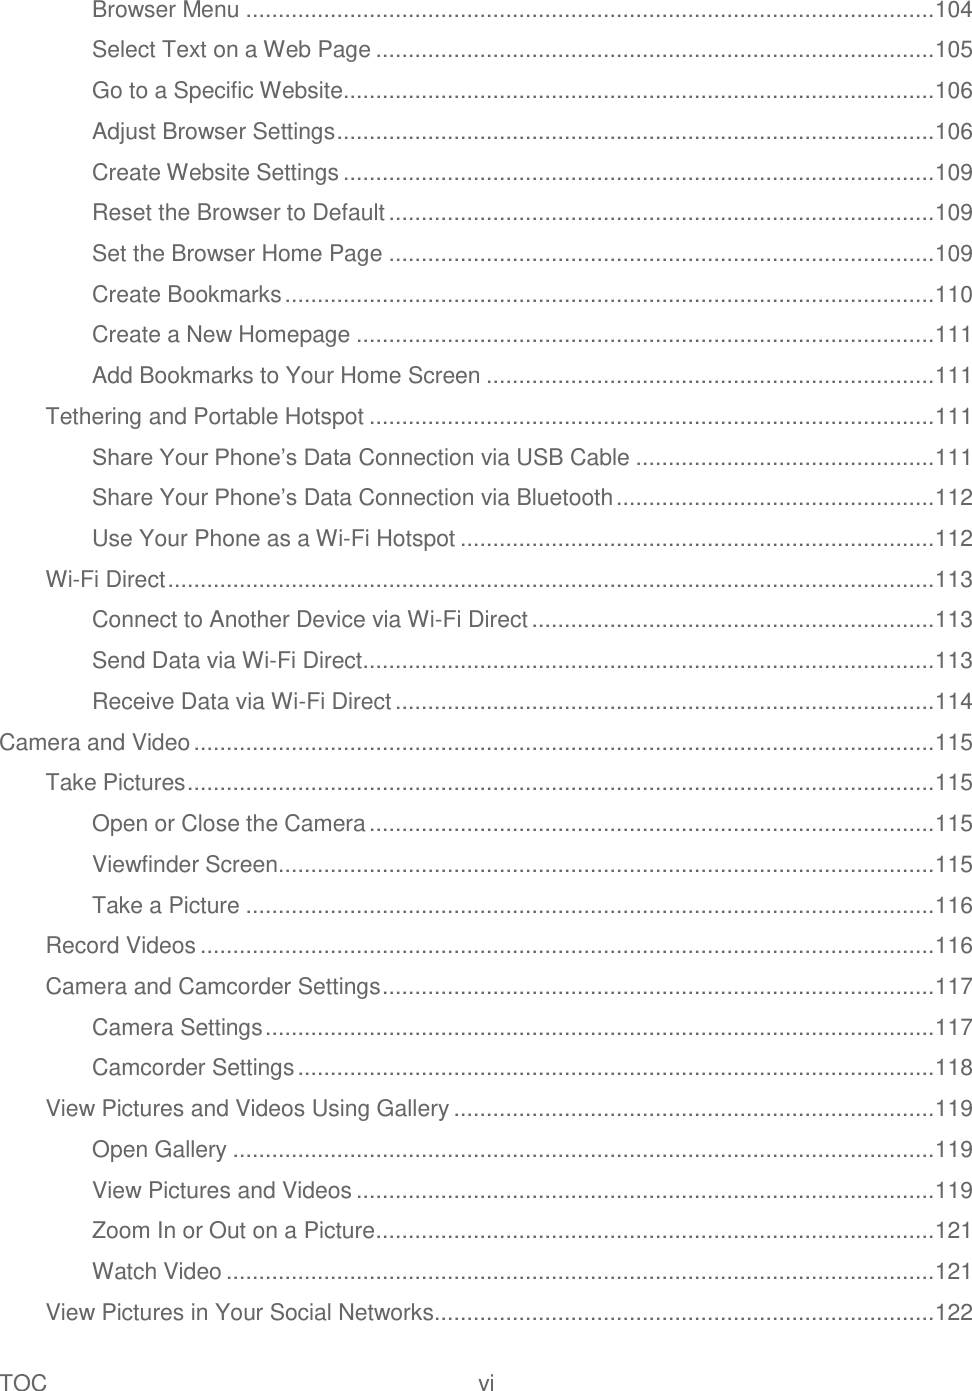
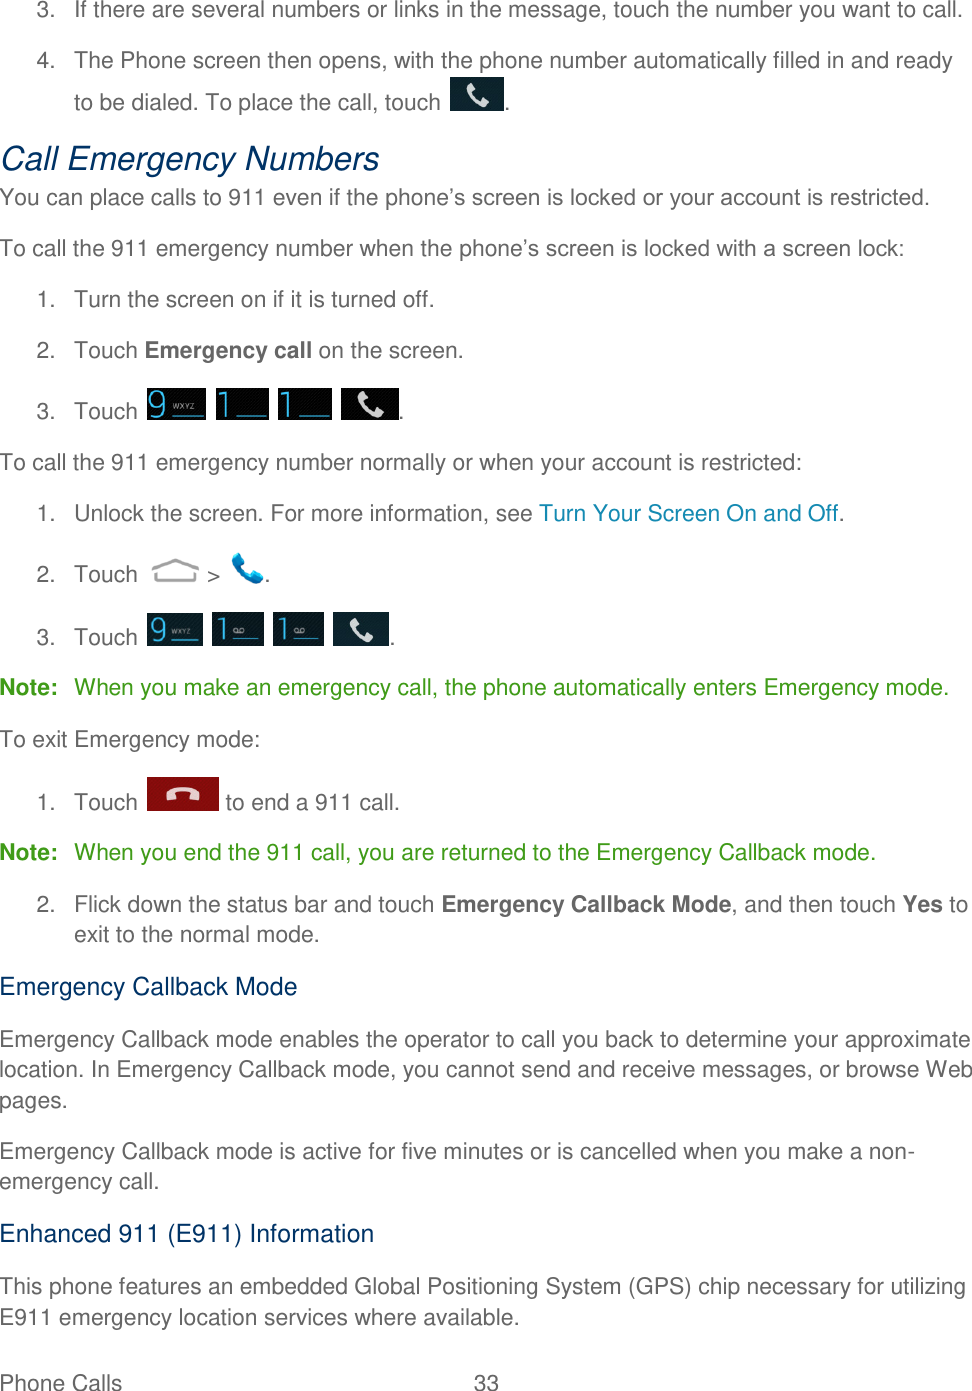
![Settings 143 Music track (in Music). With the track displayed on the music playing screen, touch > Share > Bluetooth. Voice recording. On the main Sound Recorder screen, touch to view all recordings. Touch and hold an item and touch > Bluetooth. Other files. Open File Manager, find a file you need to send, touch and hold the file and then touch > Bluetooth. 4. If you are prompted to turn on Bluetooth, touch Turn on. 5. Touch the name of the receiving device. 6. If prompted, accept the connection on the receiving device. Enter the same passcode on both your phone and the other device, or confirm the auto-generated passcode. 7. On the receiving device, accept the file. The location where the information is saved depends on the type of information and the receiving device: ● If you send a calendar event or contact, it is normally added directly to the corresponding application on the receiving device. For example, if you send a calendar event to a compatible phone, the event is shown in that phone‟s calendar application. ● If you send another file type to a Windows computer, it is normally saved in the Bluetooth Exchange folder within your personal document folders. On Windows XP, the path may be: C:\Documents and Settings\[your username]\My Documents\Bluetooth Exchange. On Windows Vista, the path may be: C:\Users\[your username]\Documents. ● If you send a file to another device, the saved location may depend on the file type. For example, if you send an image file to another wireless phone, it may be saved in a folder named “Images.” Receive Information From Another Device Your phone is capable of receiving a wide variety of file types with Bluetooth, including photos, music tracks, and documents such as PDFs. 1. Touch > > Settings > Bluetooth. 2. If Bluetooth is off, slide the switch to the ON position. 3. If your phone and the sending devices have not been paired, make sure your phone is discoverable to all nearby Bluetooth devices.](https://usermanual.wiki/ZTE/ZTEN9810/User-Guide-1985495-Page-153.png)