Zebra Technologies MD-BTC2TY Modular Bluetooth Radio User Manual CERTIFICATE OF COMPLIANCE
Zebra Technologies Corporation Modular Bluetooth Radio CERTIFICATE OF COMPLIANCE
UserManual.wiki
>
Zebra Technologies
>
MD BTC2TY User Manual
Users Manual
Navigation menu
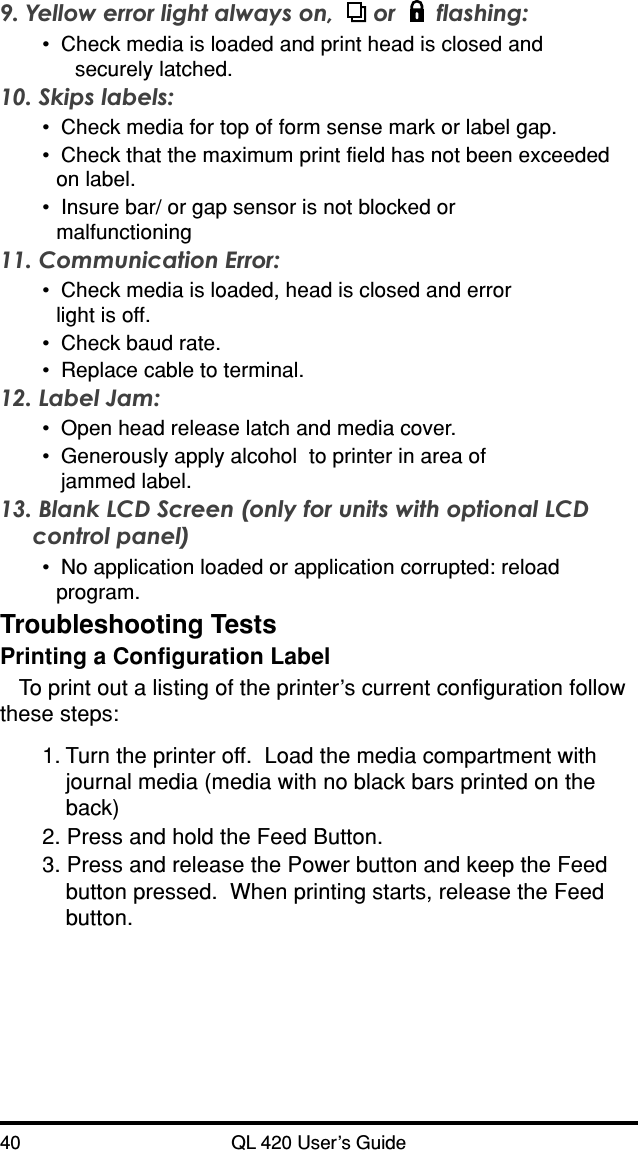
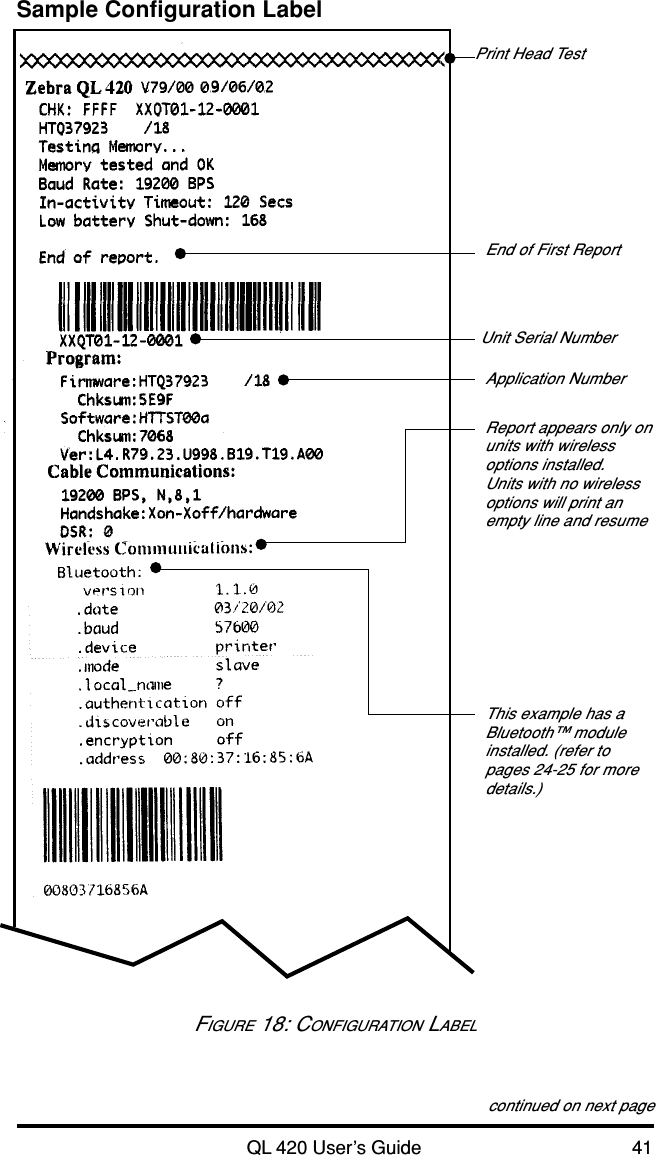
Upload a User Manual
Namespaces
Wiki Guide
HTML
PDF
Info
Views
User Manual
Discussion / Help
Navigation
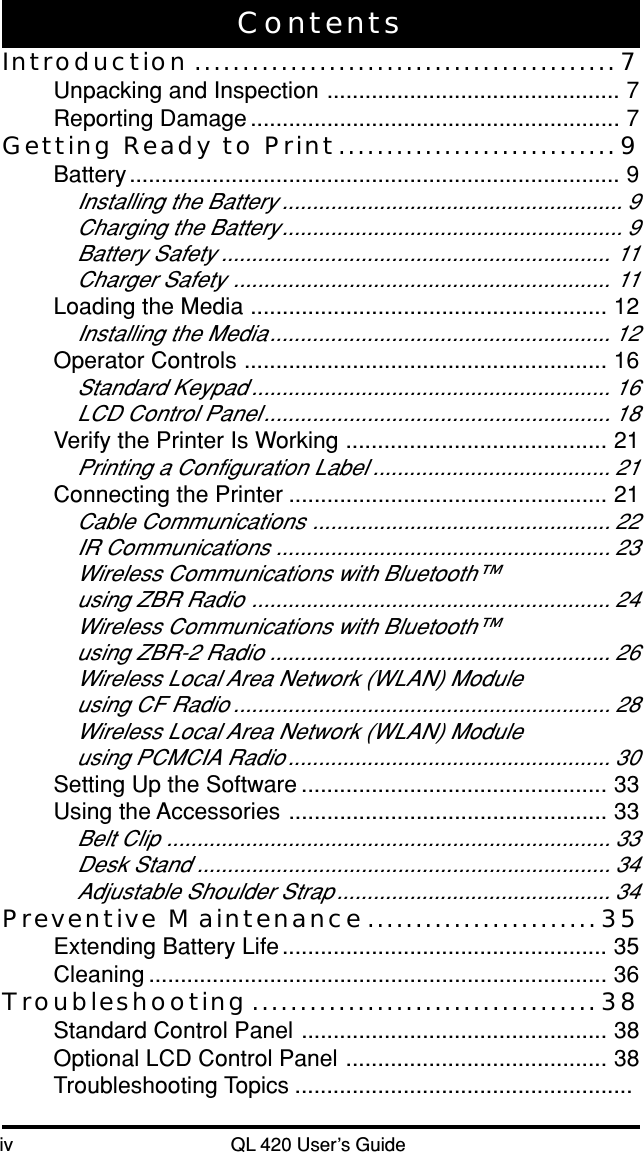


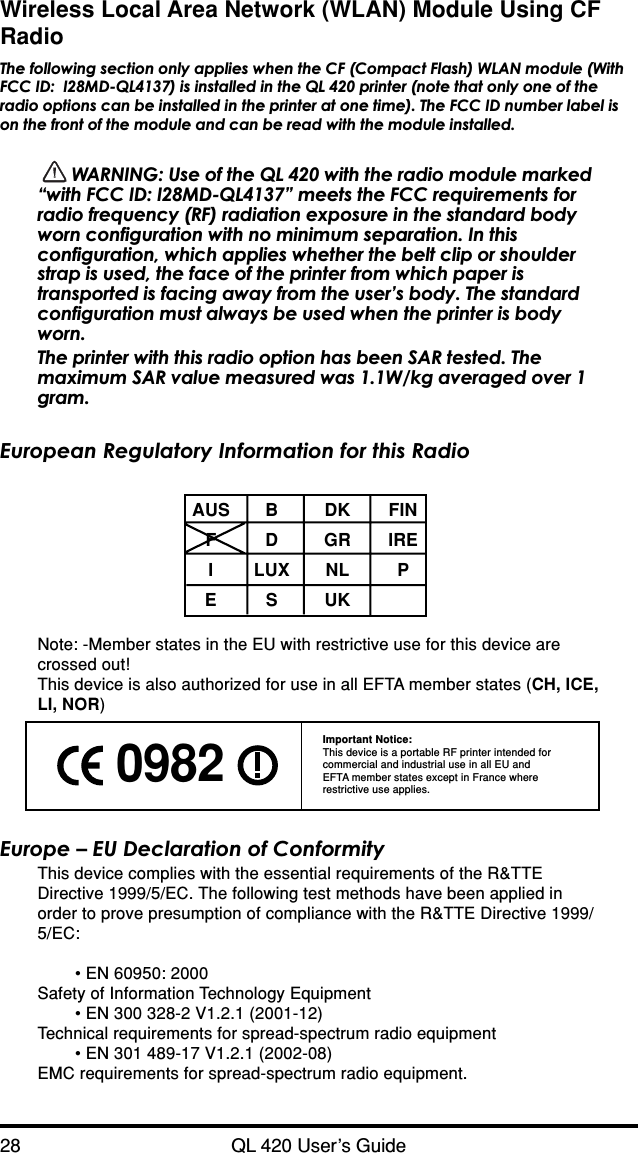
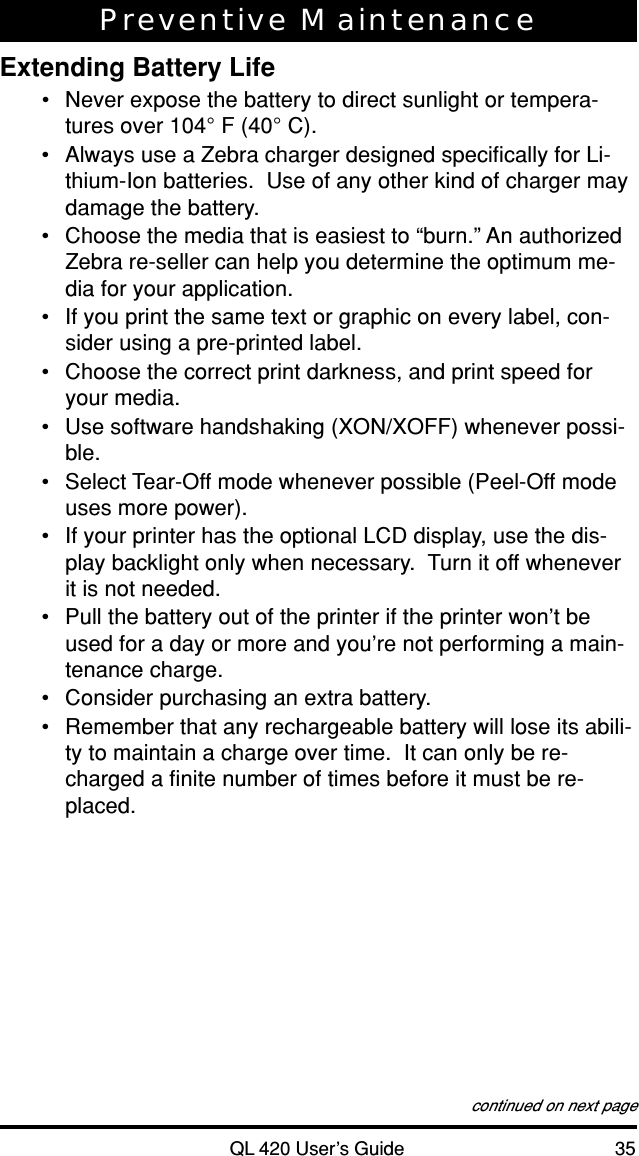
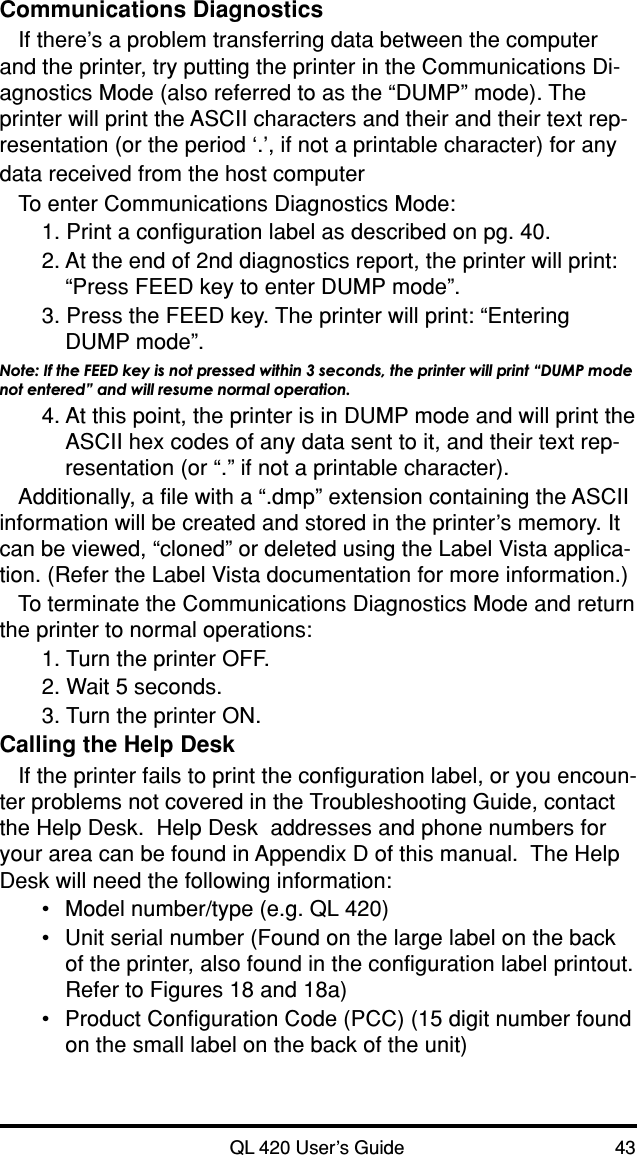
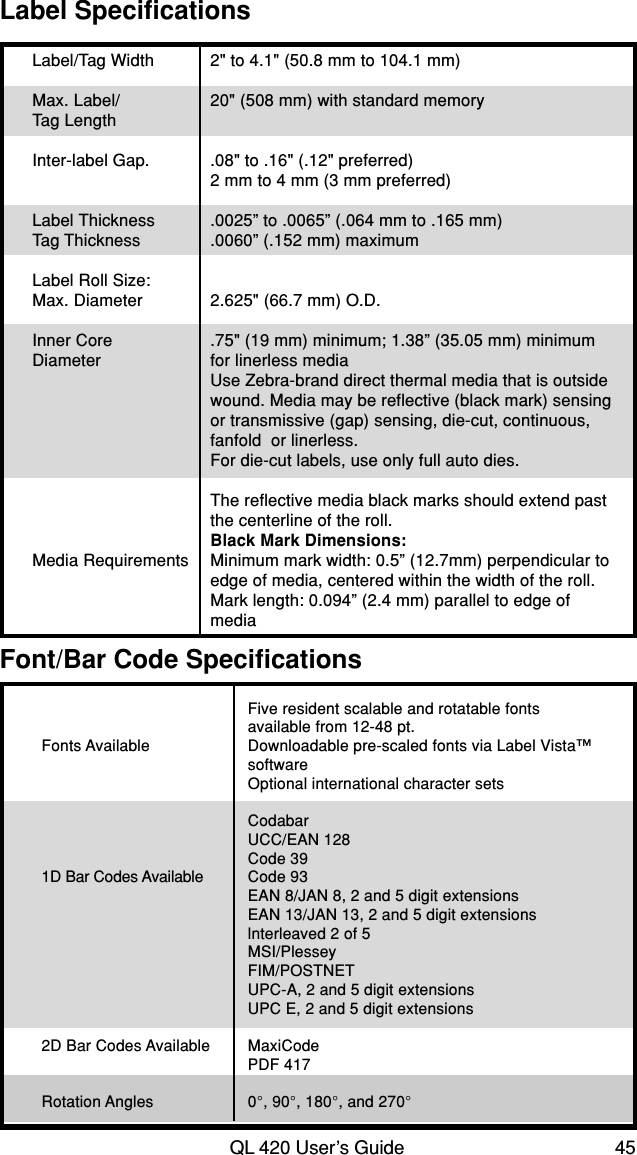
![46 QL 420 User’s GuidePhysical/Environmental/Electrical SpecificationsWeightw/ battery, 2.0 lbs. (.9 kg. )excluding media& wireless optons.TemperatureOperating 5° to 122° F (-15° to 50° C)Storage -13° to 158° F (-25° to 70° C) RangeRelative HumidityOperation 10% to 80% (non-condensing)Storage 10% to 90% (non-condensing)Electrical Battery: 7.4V (nominal) Lithium-IonChargers: External single battery charger Model LI72,120-230 VAC depending on model selected.External 4-bay charger Model UCLI72-4, 120 VACFIGURE 19 OVERALL DIMENSIONS3.0”[76.2 mm] 3.5”[89 mm]7.8”[198.0 mm]6.1”[154.9mm]8.2 “[208 mm]](https://usermanual.wiki/Zebra-Technologies/MD-BTC2TY/User-Guide-330266-Page-47.png)