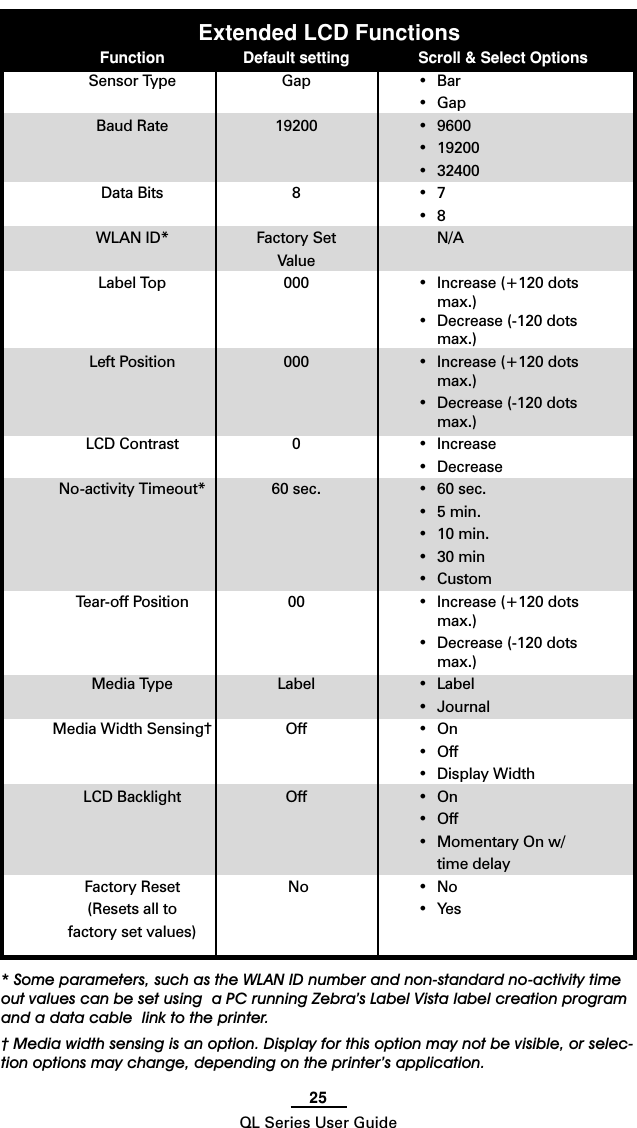
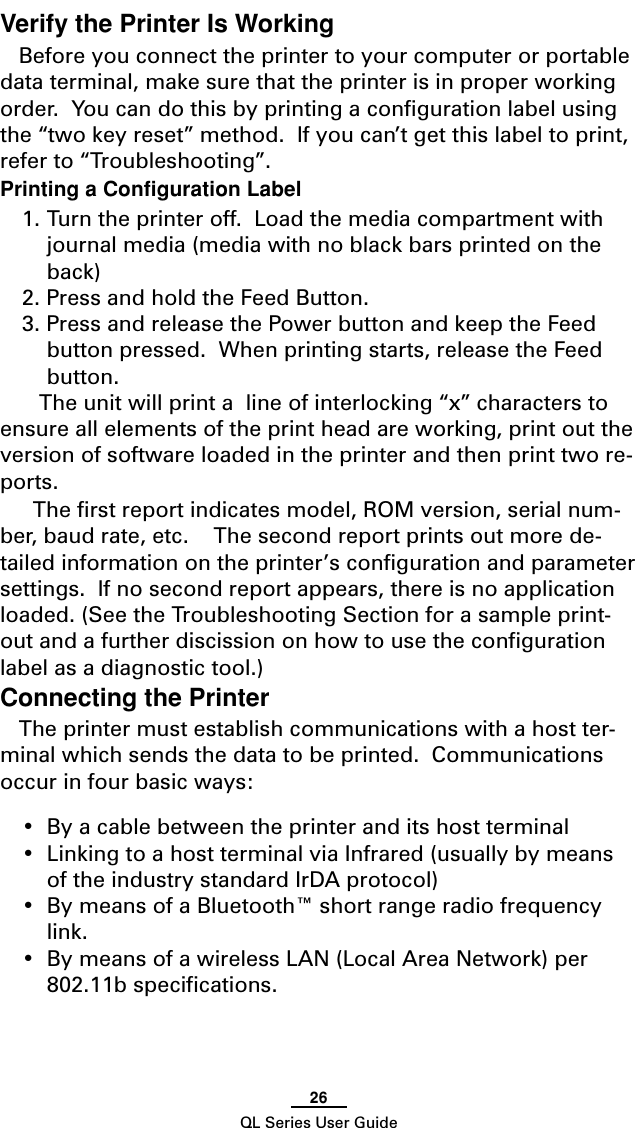
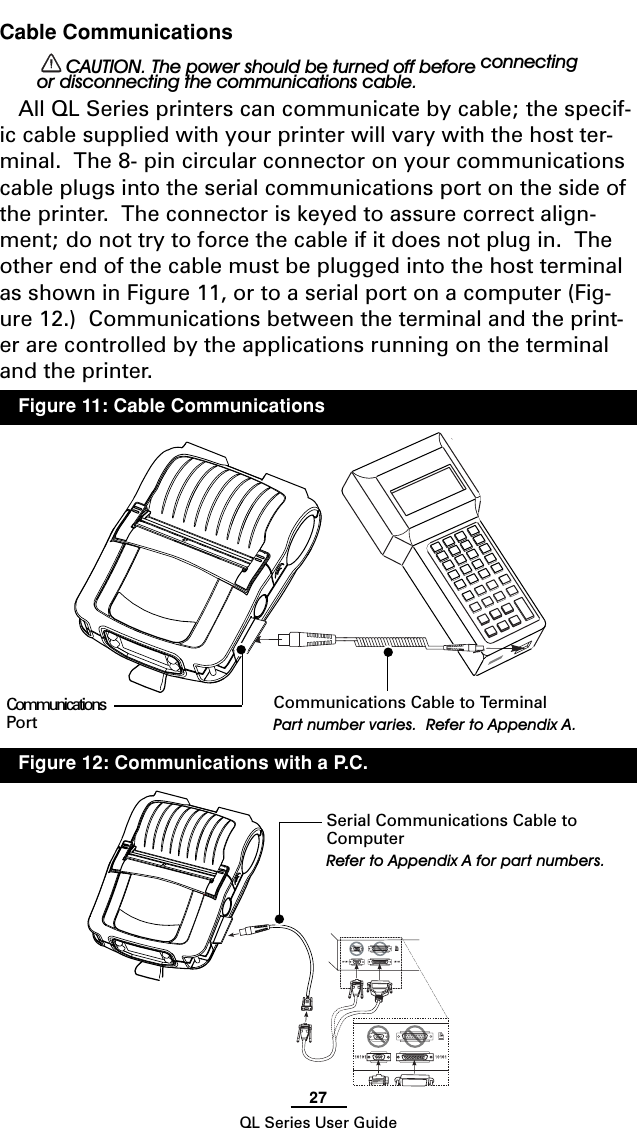
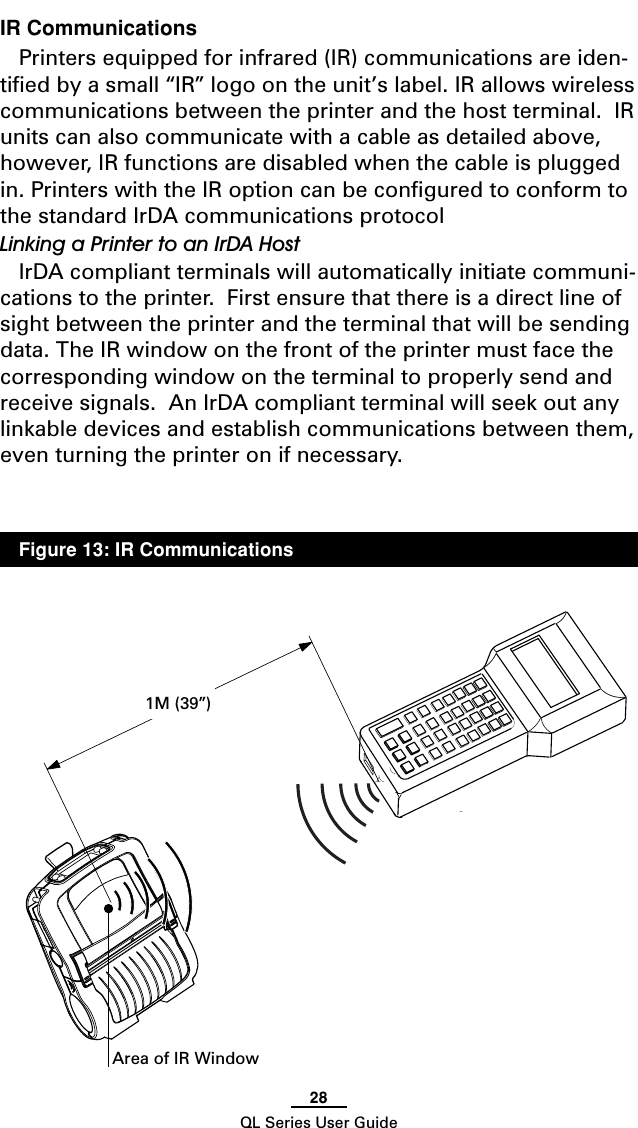
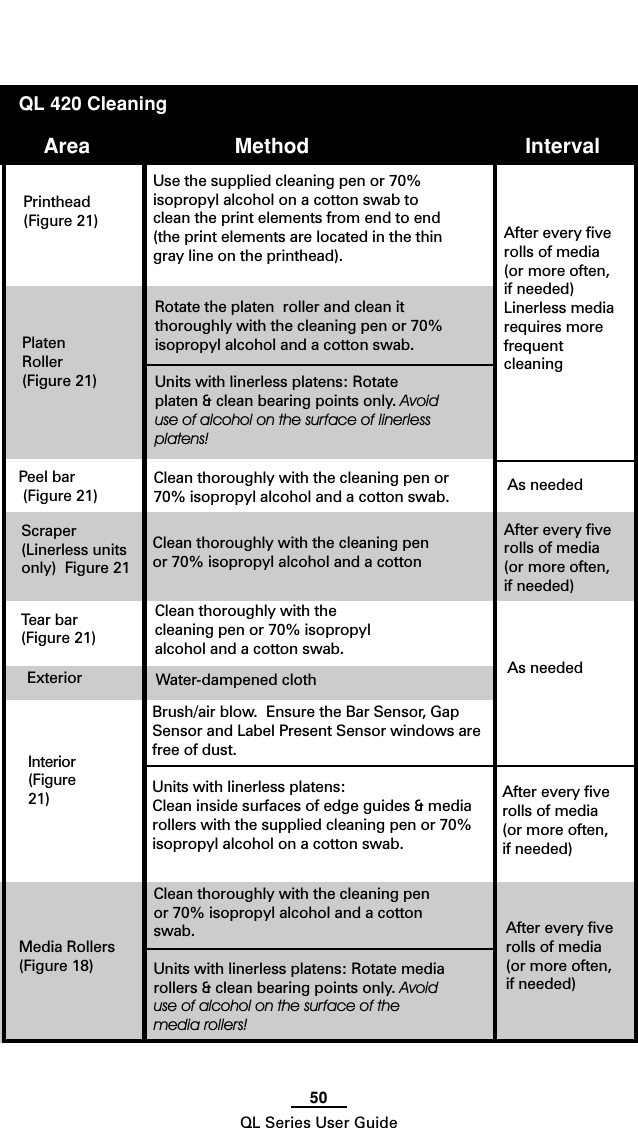
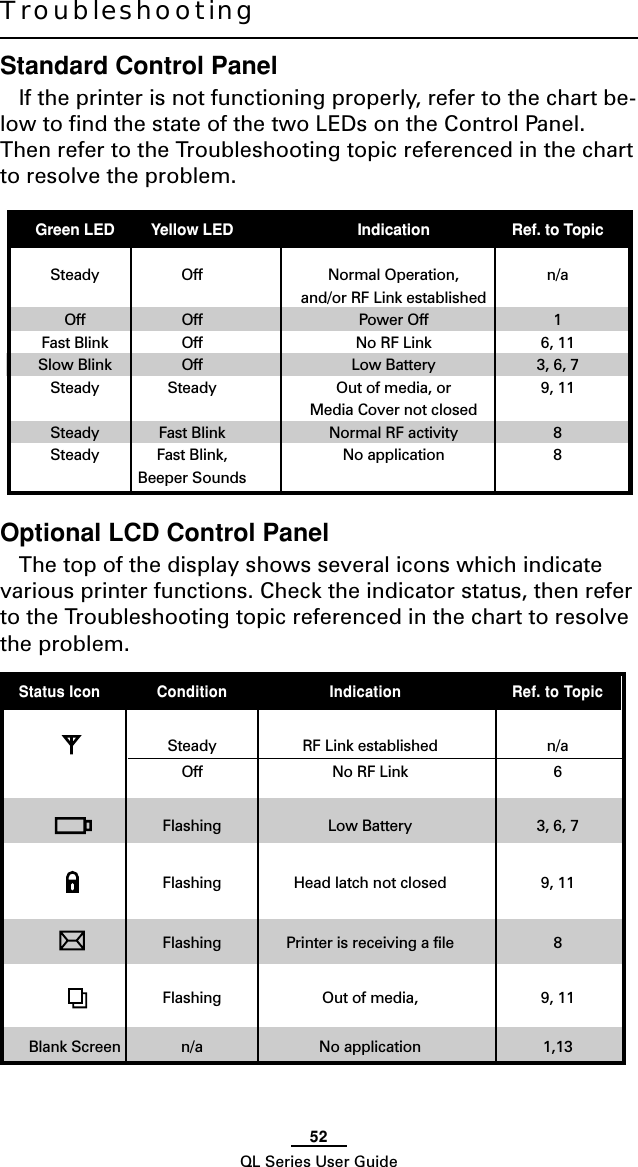
Zebra Technologies MD-BTC2TY2 ZBR3 Modular Bluetooth Radio User Manual CERTIFICATION APPLICATION REPORT
Zebra Technologies Corporation ZBR3 Modular Bluetooth Radio CERTIFICATION APPLICATION REPORT
UserManual.wiki
>
Zebra Technologies
>
MD BTC2TY2 User Manual
Users Manual Revised
Navigation menu
Upload a User Manual
Namespaces
Wiki Guide
HTML
PDF
Info
Views
User Manual
Discussion / Help
Navigation


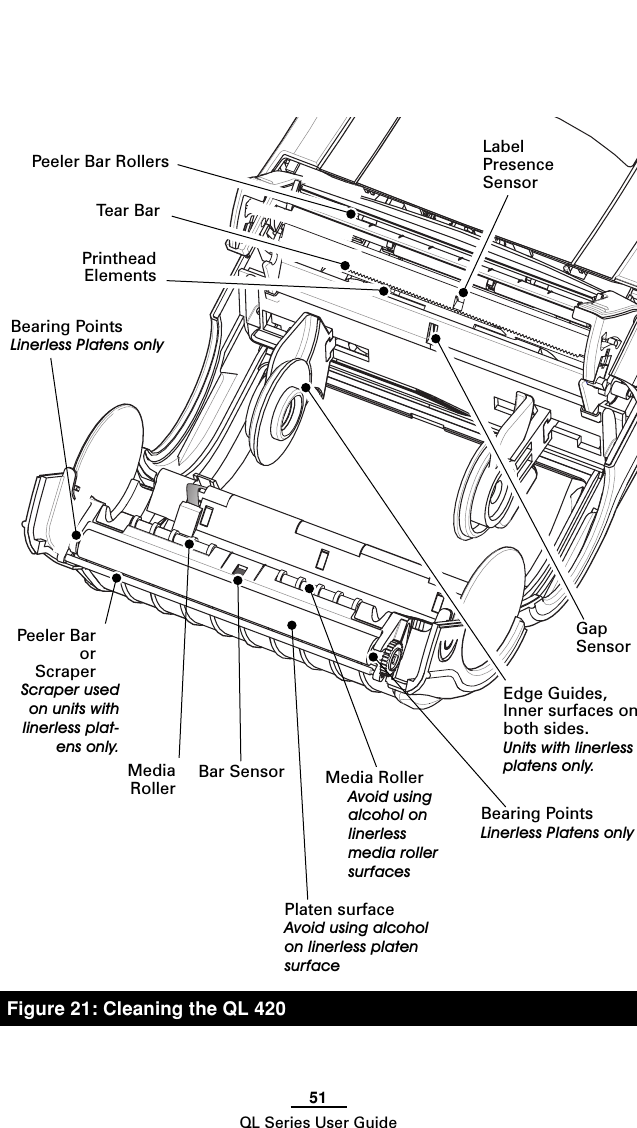
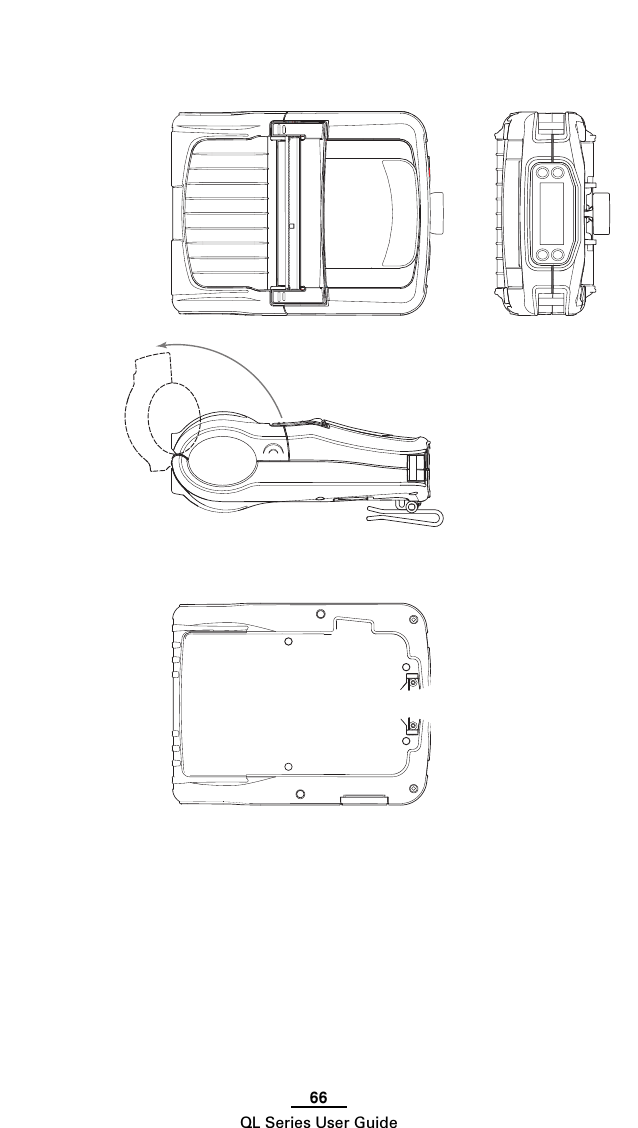
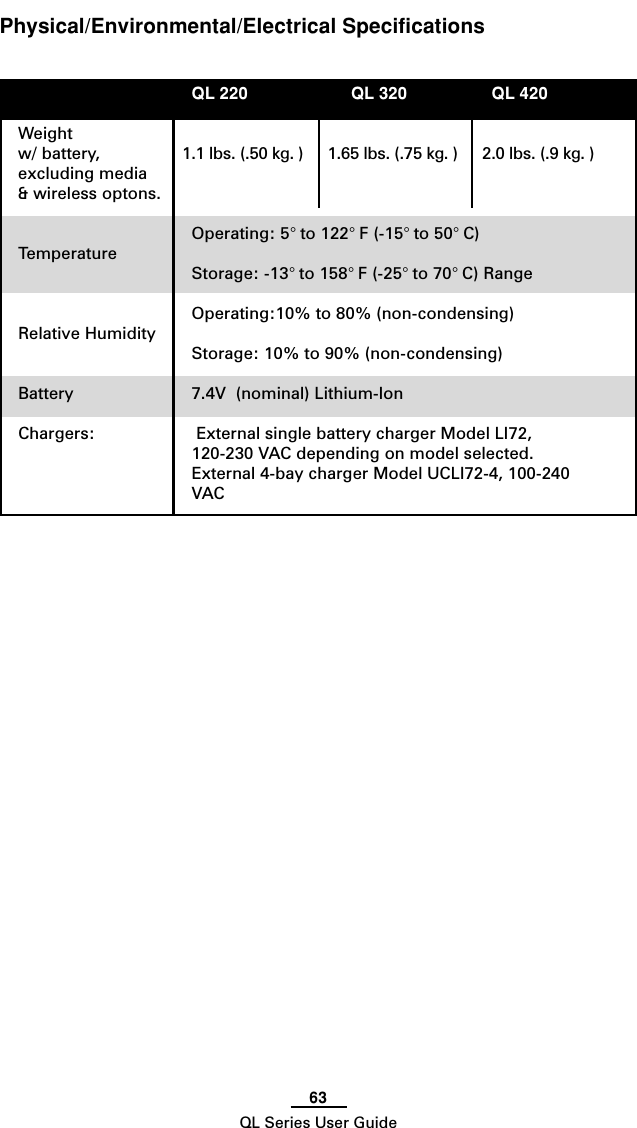
![60QL Series User GuideLabel SpecificationsQL220 QL320 QL420Label/Tag Width .63" to 2.12" 1.5" to 3.1" 2" to 4.1" (16 to 53.8 mm) (38.1to 78.4 mm) (50.8 to 104.1 mm)Max. Label/ 20" (508 mm) 16" (406.4 mm) 20" (508 mm)Tag Length(w/std. memory)Inter-label Gap. 08" to .16" (.12" preferred)(2 mm to 4 mm [3 mm preferred])Label Thickness .0025” to .0065” (.064 mm to .165 mm)Tag Thickness .0060” (.152 mm) maximumMax. Label Roll dia. 2.625" (66.7 mm) O.D.Label Inner Core .75" (19 mm) minimum dia;1.38” (35.05 mm) minimum dia for linerless media(QL420 accepts .75 linerless.)Black Mark The reflective media black marks shouldDimensions extend past the centerline of the roll.Media Minimum mark width: 0.5” (12.7mm)Requirements perpendicular to edge of media, centered withinthe width of the roll.Mark length: 0.094” (2.4 mm) parallel to edge of mediaUse Zebra brand direct thermal media that is outside wound. Media may be reflective(black mark) sensing, or transmissive (gap) sensing, die-cut, continuous, or linerless.QL 420 will accept fanfold media if used with an external media supply.For die-cut labels, use only full auto dies.](https://usermanual.wiki/Zebra-Technologies/MD-BTC2TY2/User-Guide-495904-Page-63.png)
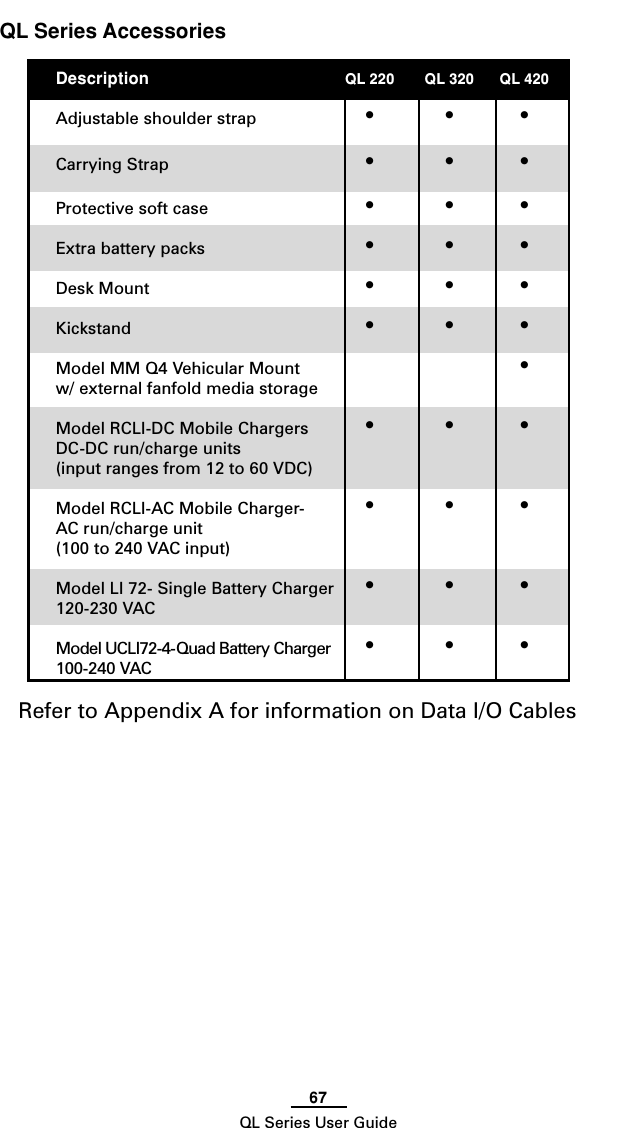
![65QL Series User GuideFigure 25: QL 320 Overall Dimensions3.18”[80.7 mm]3.9”[100.2 mm]8.16”[207.4 mm]4.67”[118.7 mm]8.27”[210 mm]](https://usermanual.wiki/Zebra-Technologies/MD-BTC2TY2/User-Guide-495904-Page-68.png)