Zebra Technologies MD-RW4137 802.11b WLAN Radio w/Compact Flash Form Factor User Manual UMAN RW4 001
Zebra Technologies Corporation 802.11b WLAN Radio w/Compact Flash Form Factor UMAN RW4 001
UserManual.wiki
>
Zebra Technologies
>
MD-RW4137 User Manual
>
Users Manual
Contents
1.
Users Manual
2.
User Manual
Users Manual
Navigation menu
Upload a User Manual
Namespaces
Wiki Guide
HTML
PDF
Info
Views
User Manual
Discussion / Help
Navigation
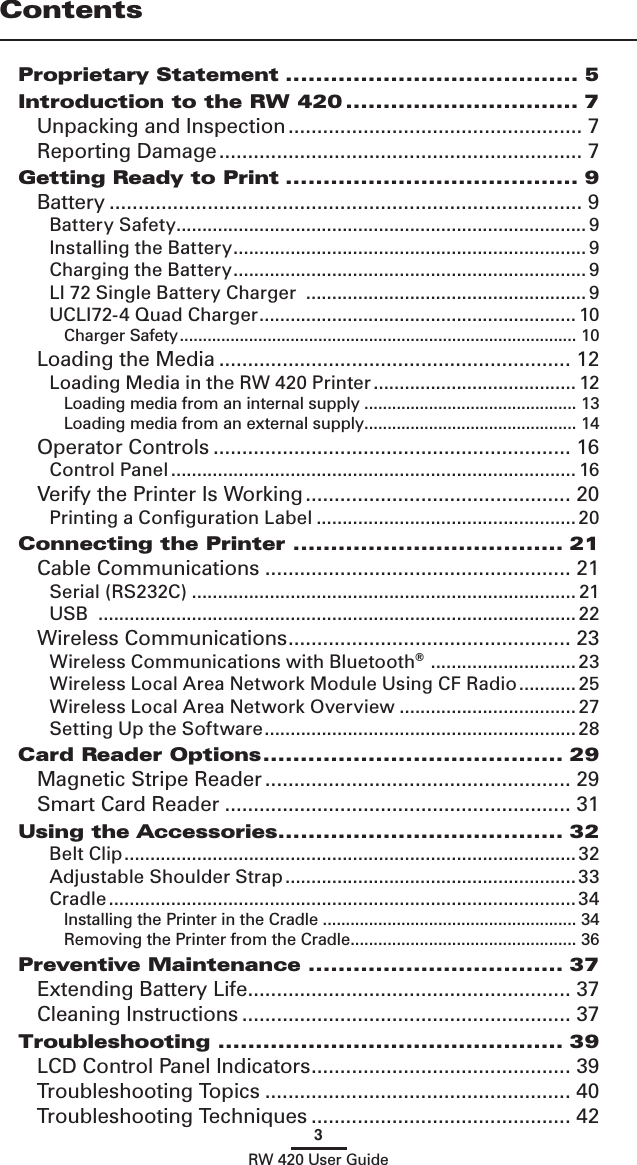


![50RW 420 User GuideMedia SpecificationsMedia Width 2.0 in. to 4.1 in. (50.8 to 104.1 mm) Max. continuous receipt 143 in. (3620 mm)(w/std. memory)Inter-label Gap. 0.08 in. to 0.16 in. (0.12 in. preferred) (2 mm to 4 mm [3 mm preferred])Label Thickness .0025” to .0065” (.064 mm to .165 mm)Max. Label Roll dia. 2.25 in. (57 mm) O.D.Label Inner Core .75 in. (19 mm) minimum dia; 1.38 in. (35 mm) optional settingBlack Mark The reflective media black marks should Dimensions extend past the centerline of the roll. Media Minimum mark width: 0.5” (12.7mm) Requirements perpendicular to edge of media, centered within the width of the roll. Mark length: 0.094” (2.4 mm) parallel to edge of media Use Zebra brand direct thermal media that is outside wound. Media may be reflective (black mark) sensing, or transmissive (gap) sensing, die-cut, or continuous. RW 420 configured with the External Media option will accept fanfold media used with an external media supply.For die-cut labels, use only full auto dies.](https://usermanual.wiki/Zebra-Technologies/MD-RW4137.Users-Manual/User-Guide-497151-Page-50.png)
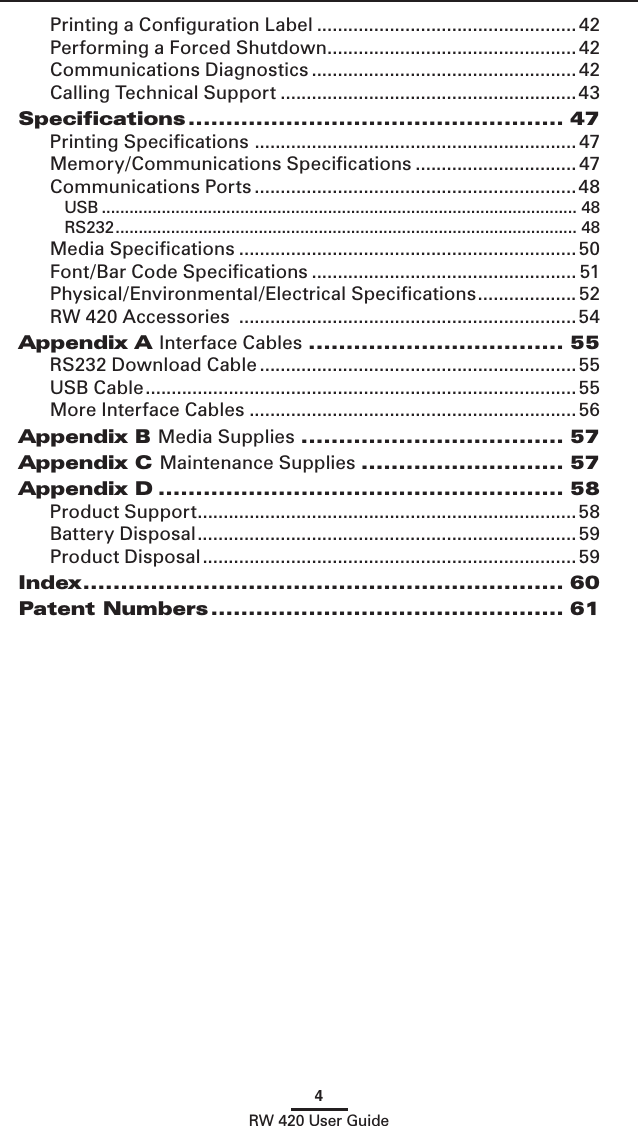
![53RW 420 User Guide Figure 25: RW 420 Overall Dimensions1.8” [46 mm].25” [6 mm]6.9” [175 mm]7.4” [188 mm]3.7” [94 mm] max. 13.1” [76 mm] max. 16.3” [160 mm]Notes: 1. Dimensions shown are for units with the MSR/Smart Card option installed. Subtract .08” [2 mm] from these dimen-sions for units without this option.](https://usermanual.wiki/Zebra-Technologies/MD-RW4137.Users-Manual/User-Guide-497151-Page-53.png)