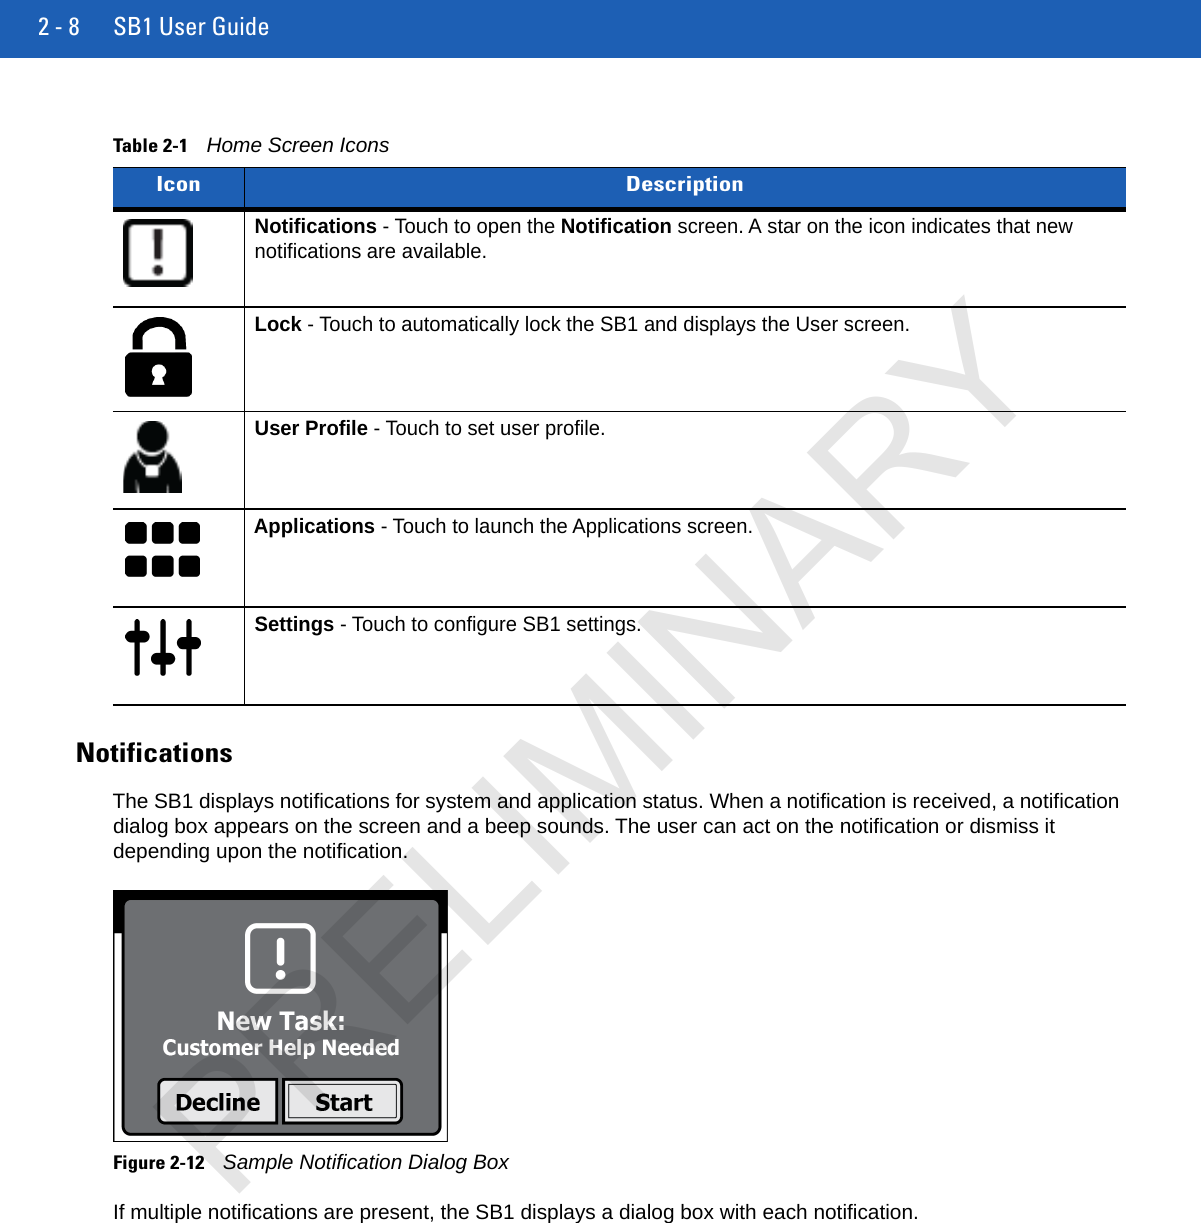
Zebra Technologies SB1 SMART BADGE User Manual SB1 User Guide P N 72E 164711 01 Rev 082312
Zebra Technologies Corporation SMART BADGE SB1 User Guide P N 72E 164711 01 Rev 082312
UserManual.wiki
>
Zebra Technologies
>
SB1 User Manual
>
USERS MANUAL 1
Contents
1.
USERS MANUAL 1
2.
USERS MANUAL 2
USERS MANUAL 1
Navigation menu
Upload a User Manual
Namespaces
Wiki Guide
HTML
PDF
Info
Views
User Manual
Discussion / Help
Navigation


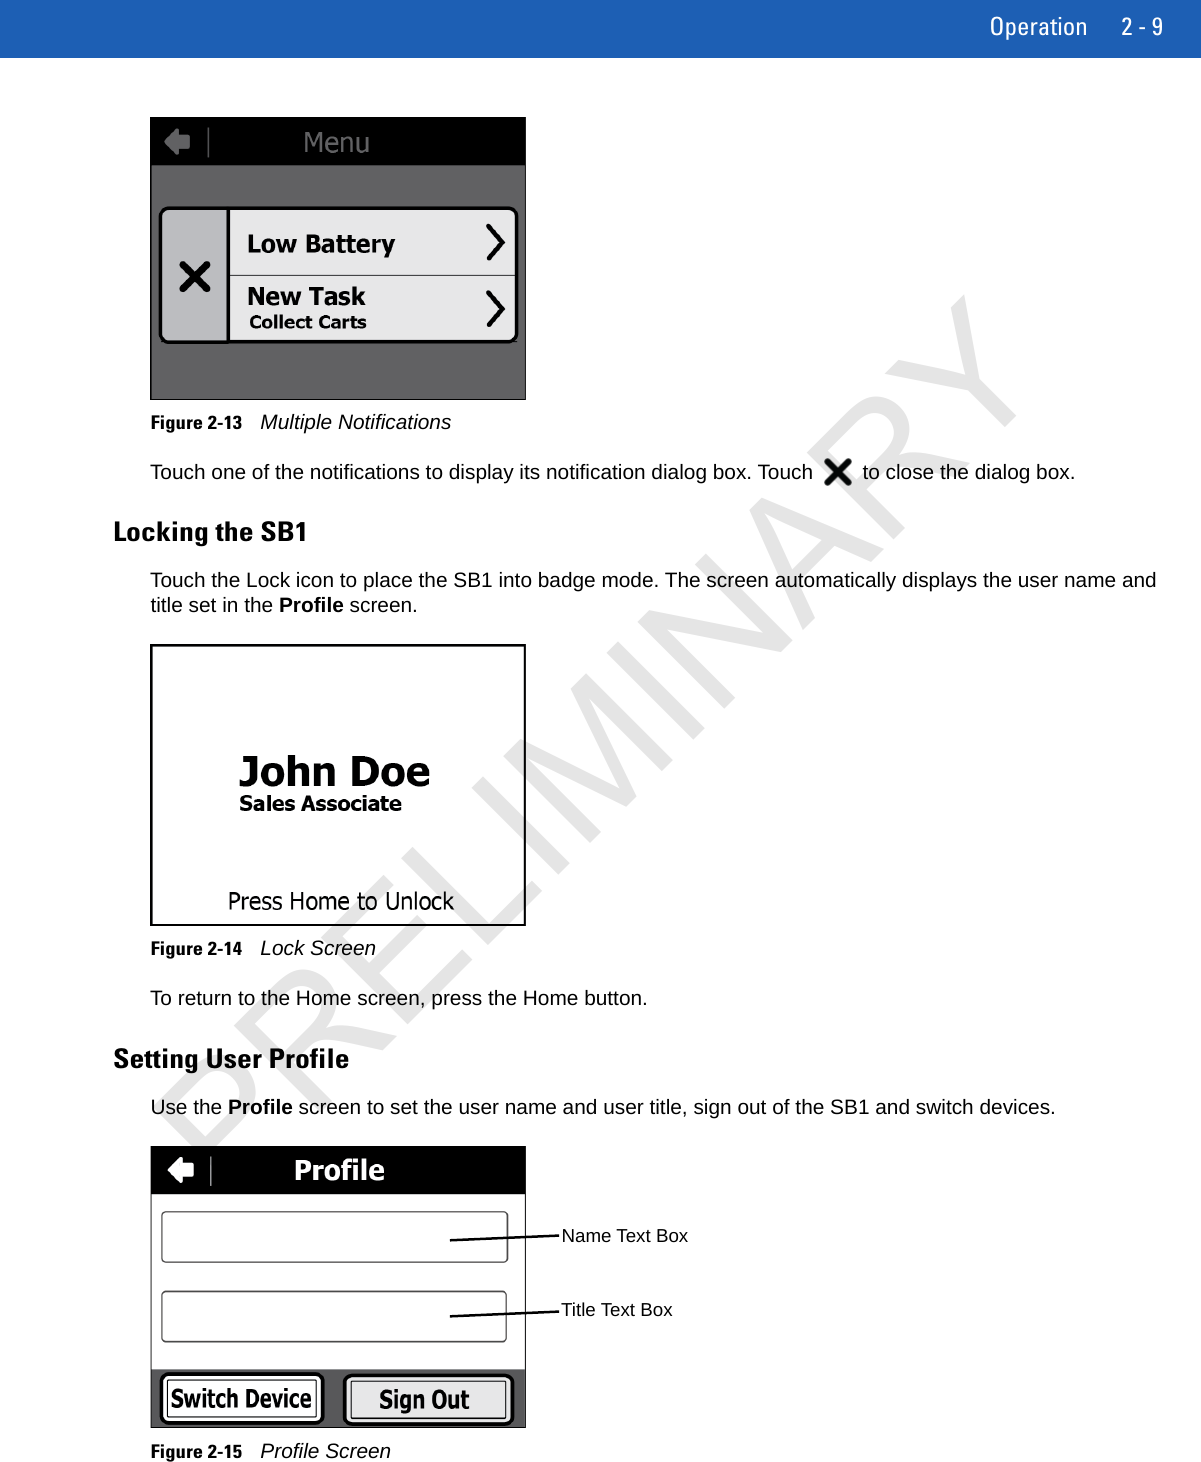
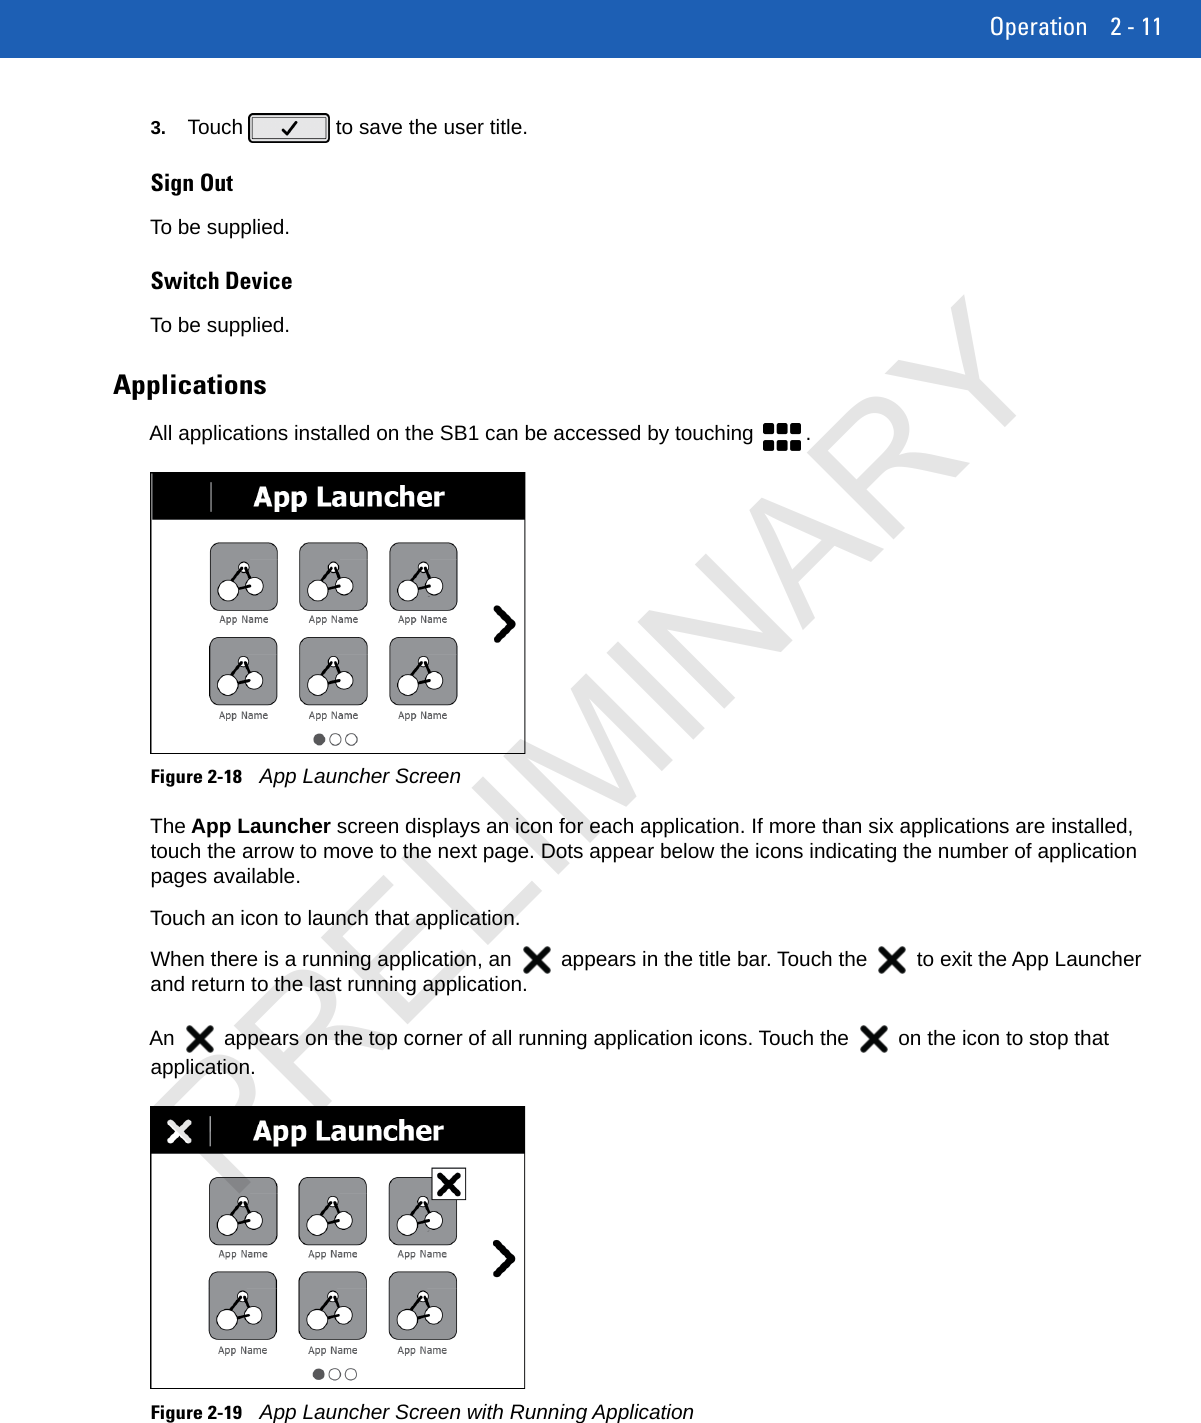
![2 - 10 SB1 User GuideEnter Name and TitleTo enter user name:1. In the Profile screen, touch the top text box. The Enter Name screen appears.Figure 2-16Enter Name Screen2. Press the keypad keys to enter the user name.•Use to create capital letter.•Touch to display the numeric keypad.•Touch to display special character keypad.•To create the letter c, quickly touch three times.•Use [Delete] to delete the last character in the text box.3. Touch to save the name.To enter user title:1. In the Profile screen, touch the lower text box. The Enter Title screen appears.Figure 2-17Enter Title Screen2. Press keypad keys to enter the user title.•Use to create capital letter.•Touch to display the numeric keypad.•Touch to display special character keypad.•To create the letter c, quickly touch three times.•Use [Delete] to delete the last character in the text box.PRELIMINARY](https://usermanual.wiki/Zebra-Technologies/SB1.USERS-MANUAL-1/User-Guide-1792608-Page-30.png)
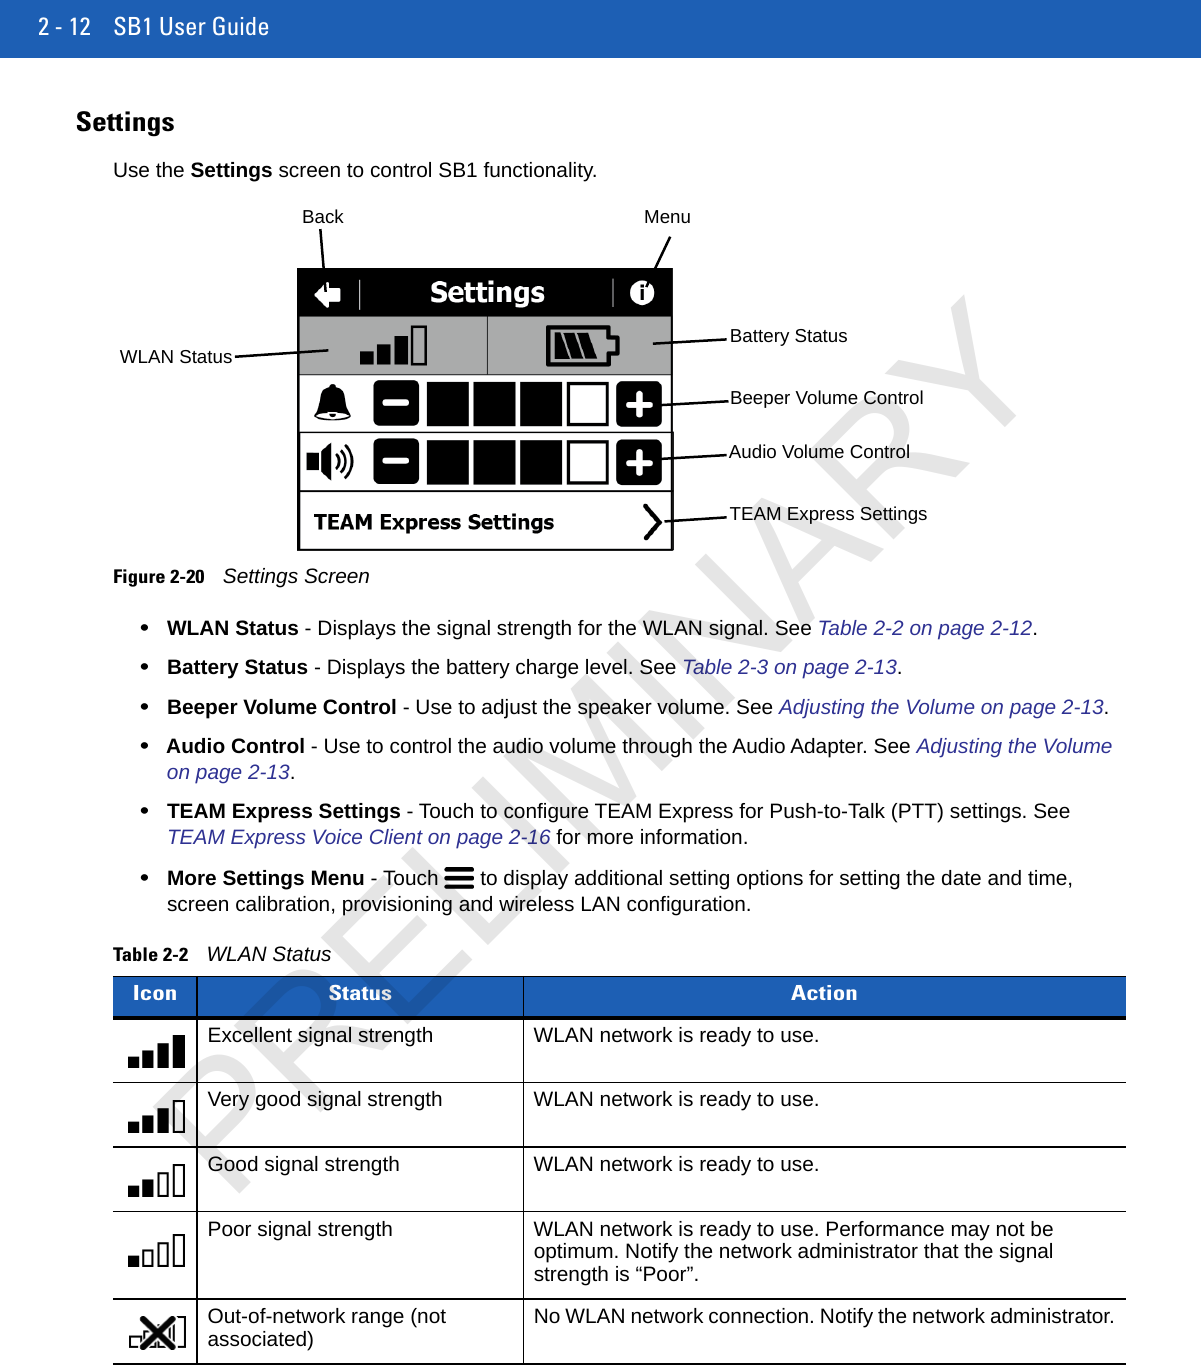
![Table 2-3Battery Status Icon Description0% - [does this actually appear?]25%50%75%100%Operation 2 - 13Adjusting the VolumeTo adjust the beeper volume and the audio volume on the SB1, touch to increase volume or to decrease volume.TEAM Express SettingsUse the TEAM Express Setting to enable TEAM Express for PTT and select a channel. For information on using TEAM Express see TEAM Express Voice Client on page 2-16.Screen CalibrationIf when touching the screen misalignment is observed, the user can re-calibrate the screen.1. On the Settings screen, touch .2. Touch Calibrate Screen.3. Carefully press and briefly hold finger tip on the center of the target. Repeat the procedure as the target moves and stops at different locations on the screen. This enters the new calibration settings. Figure 2-21Calibration Screen4. Once all of the new calibration settings are input, tap the screen to save the new calibration settings.PRELIMINARY](https://usermanual.wiki/Zebra-Technologies/SB1.USERS-MANUAL-1/User-Guide-1792608-Page-33.png)