Zenithink Technologies E98 MID User Manual 8 E98 3G
Shenzhen Zenithink Technologies Co., Ltd. MID 8 E98 3G
Users Manual
Android 2.2
User Manual
Directory----------------------------------------------------1
1.Use statement-------------------------------------------1
2.Appearance Description--------------------------------2
2.1 Overall structure----------------------------------2
2.2 Buttons and faucets----------------------------------3-6
3. The description of menu interface-------------------6
3.1 Desktop description-----------------------------------6
3.2 Status Bar Description -------------------------------7
4.Basic set of equipment ---------------------------------8
4.1 Wireless Control --------------------------------------8-9
4.2 Sound and display--------------------------------9-10
4.3 Security and location-----------------------------10
4.4 Date and time-------------------------------------11
4.5 Locate and text------------------------------------12
4.6 Battery Charging----------------------------------12
5. Software installation and management-------------12
5.1 Browser-------------------------------------------12-13
5.2 E-mail----------------------------------------------13
5.3 Google Map --------------------------------------13-14
5.4 Alarm clock ---------------------------------------14-15
5.5 The procedure of using HDMI-------------------15
5.6 The procedure of connecting the tablet PC
with computer---------------------------------------------------15
6. O / I File Manager -----------------------------------16
7.FAQ--------------------------------------------------------17
7.1 Can not open the media player---------------------17
7.2 Screen flashing----------------------------------------17
7.3 Headphones can not hear sound-------------------17
7.4 Can not copy the file---------------------------------17
1
1. Use statement
Statement: The company are committed to quality innovation and
continual improvement of software. If the final version of products
has any differences from the description of the user guide, please
subject to the final product .Thank you.
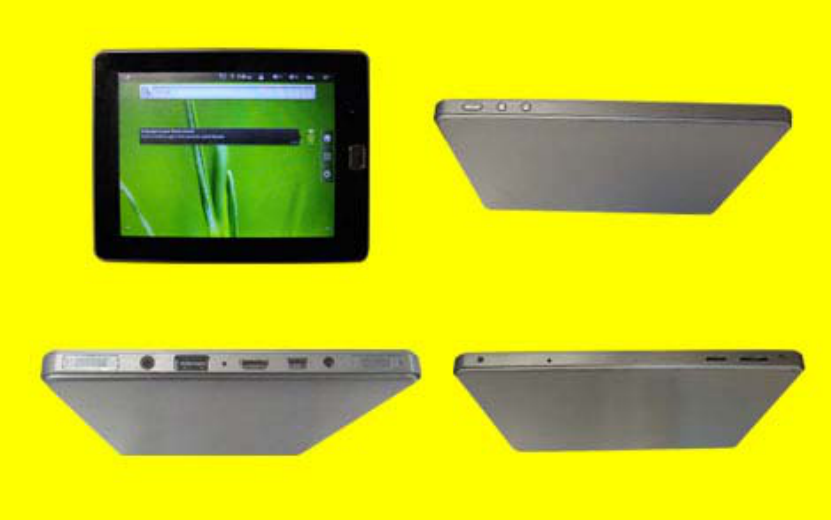
2. Appearance Description
2.1 Overall structure
2

2.2 Buttons and faucets
3
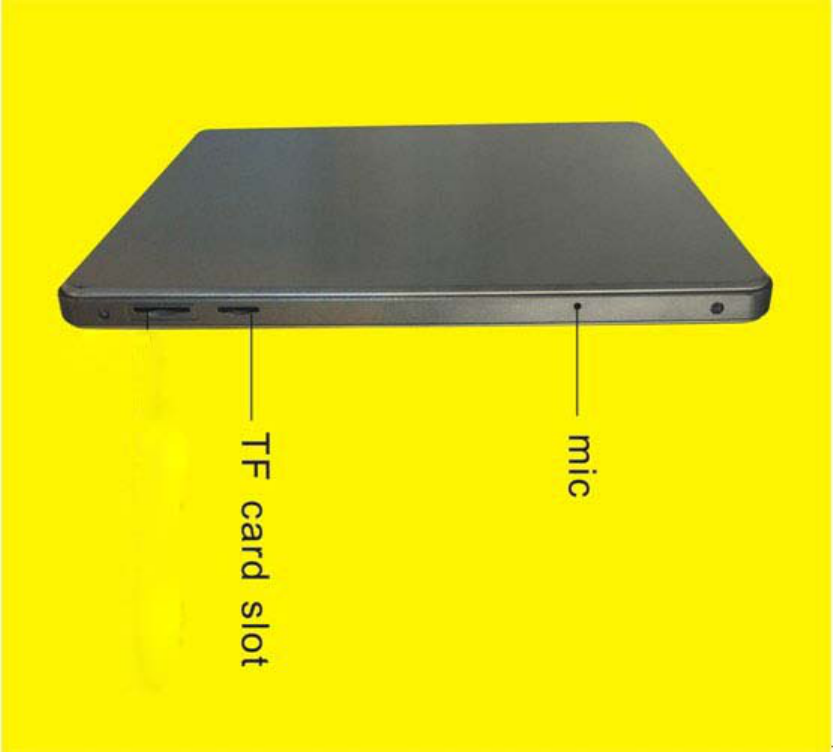
4
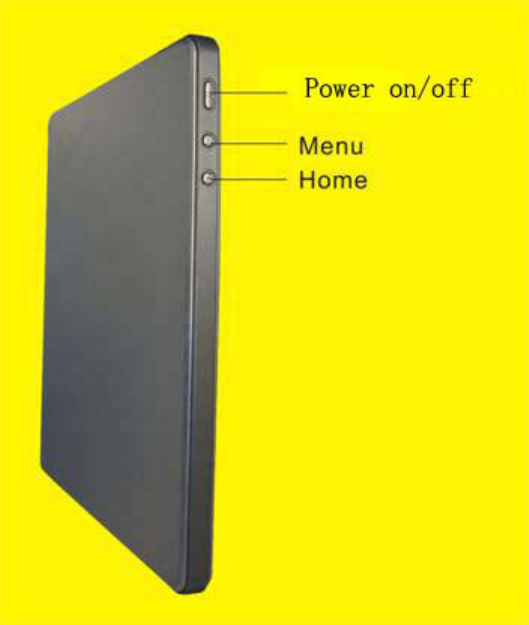
5
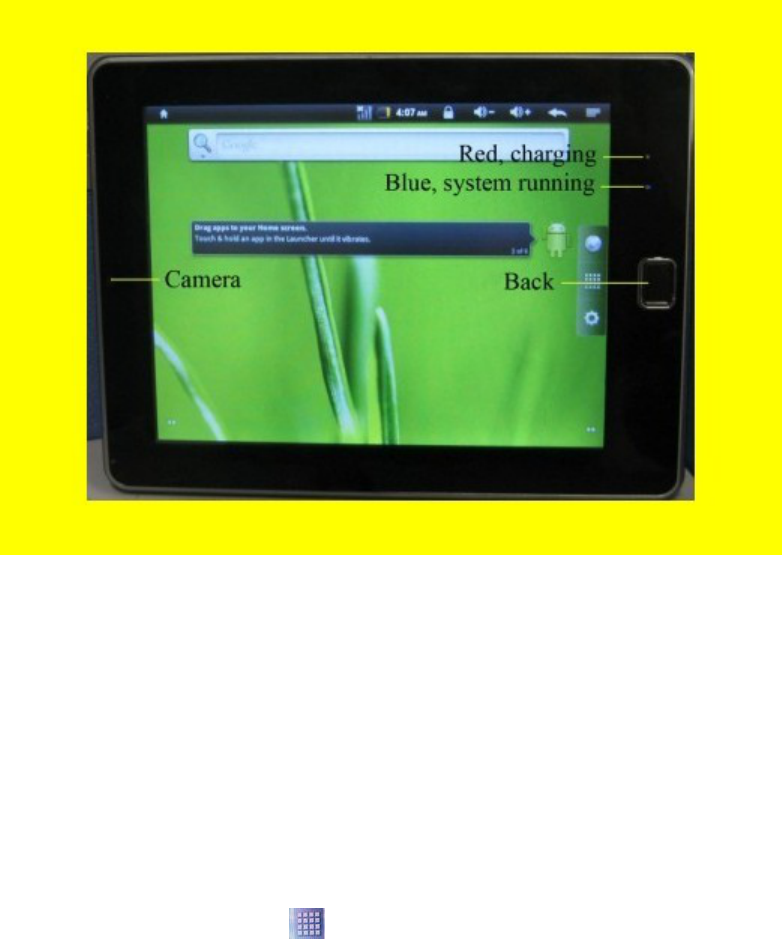
Note: if system halted, please insert one
slender material into the reset key ,then system will shutdown
insert an external charger, then charging lamp will turn on;
When charging is completed, charging lamp will turn off.
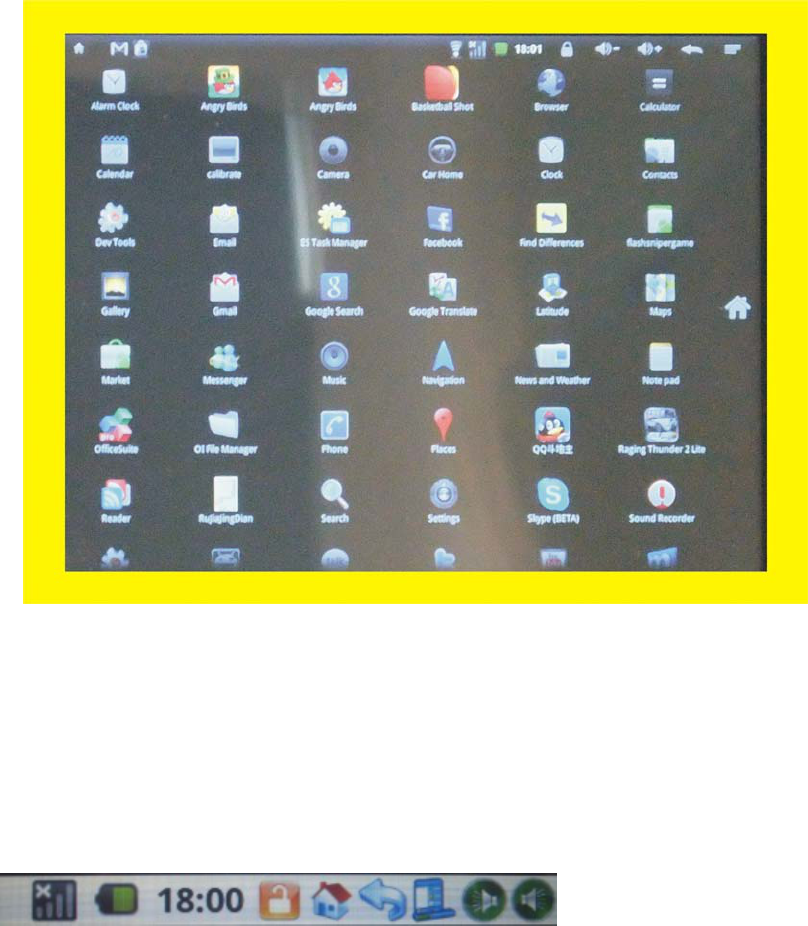
3.The description of menu interface
3.1 Desktop description
With Pressing the icon" ", you can
enter menu and choose the options you need,
such as email settings and so on
6
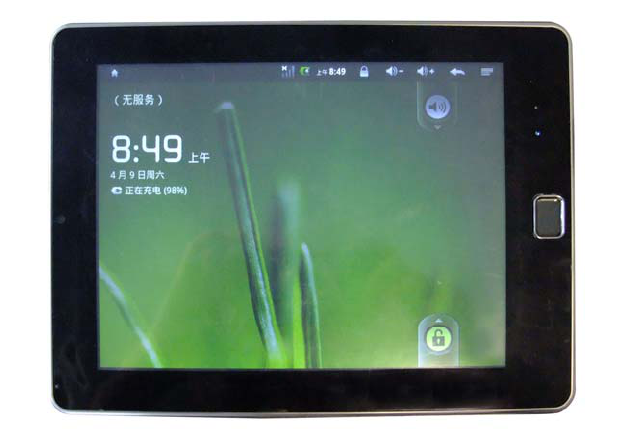
3.2 Status Bar Description
The status bar is located on the top screen
On the top screen, it shows the followings from left to right: residual
battery, current time, lock, home key, return key, menu key,
current time, two volume adjustment keys, return key, home key.
7
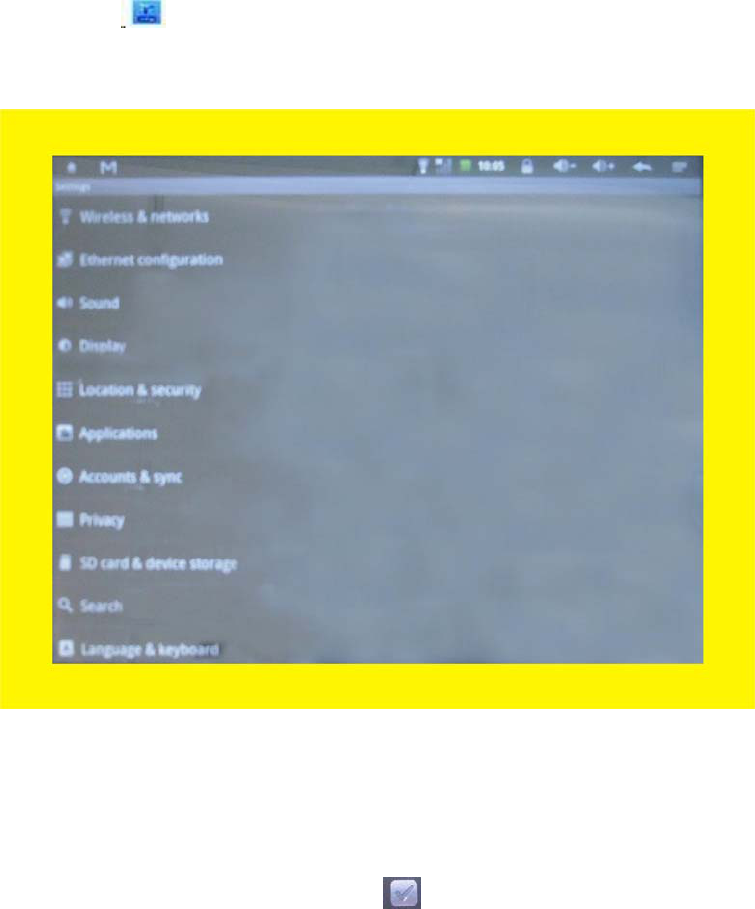
4. Basic settings of e-pad devices
4.1 Wireless Control
press the set-up" " in the menu page to enter set-up interface
WI-FI settings: set up and manage the notice of access point to the
wireless
.When the icon showed on the right is “ " with gray color, which
means WIFI is in the state of close
8
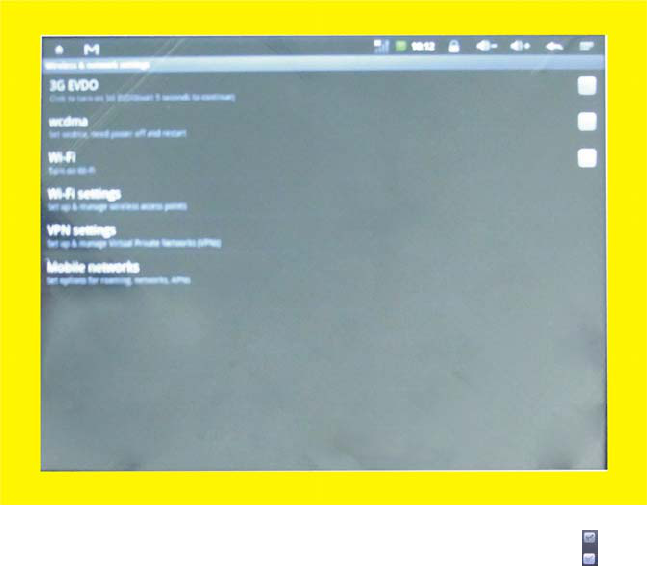
click network notification .When the right icon shows“ “,it means
device is scanning the network that is available. The device will
search automatically
and add the nearby wi-fi network which can be
connected. click wireless network port and then
you can connect network.
4.2 Sound and display
silent mode: All sound will become silent except for media and alarm
The Volume of media: Adjust the volume of media by
dragging the move point to right or left
Direction: It will change the direction automatically
when you rotate the MID
9
Cartoon: It will show cartoon when you open or close a window
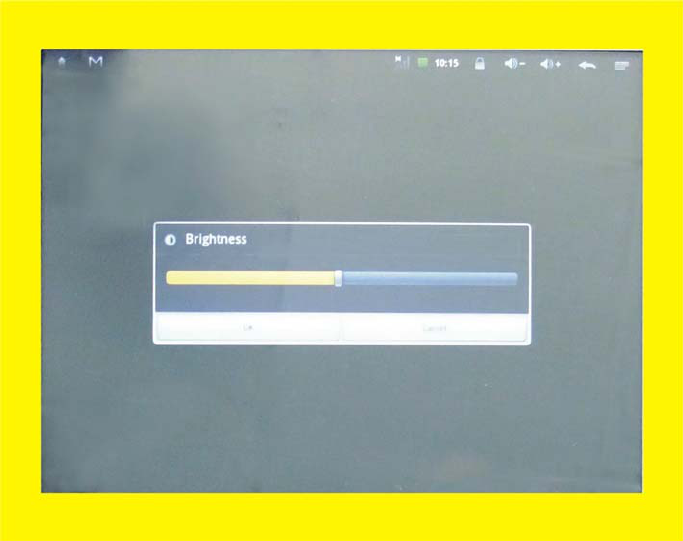
Brightness: Adjust the brightness of screen by dragging the point to
the right or left.
Idle screen: There are six kinds of time intervals for your choose
for idle screen: 15 seconds,30 seconds,1 minutes,2 minutes,10
minutes and 30 minutes.
4.3 Security and location
safety and location: set up my location and password selections,
Using of wireless network: you can check the location of application
by using wireless network
Visible password: it will show your password when you typing them
10
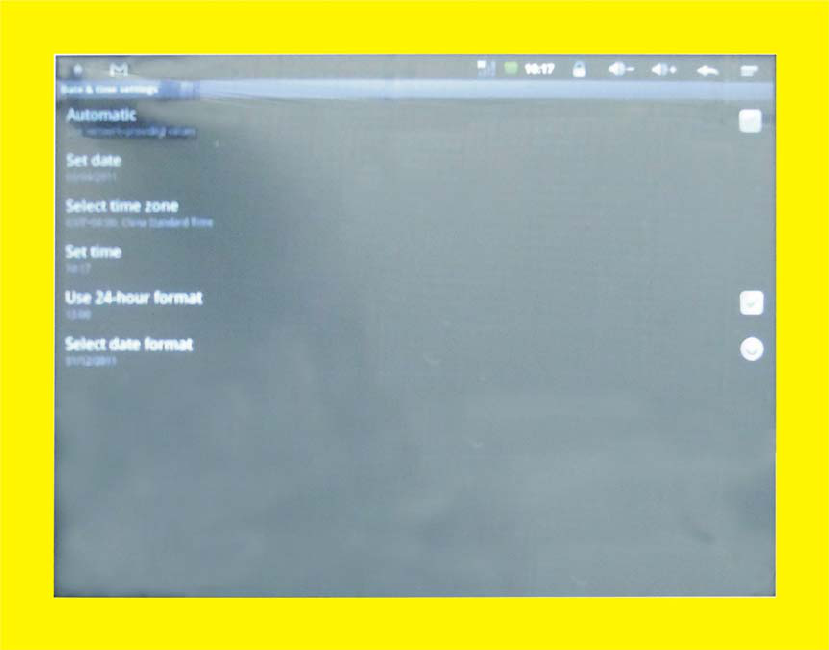
4.4 Date and time
Date and time: set up date, time, time zone and format
Set up date and time: enter the interface of date setting to set up
the date and time
Select time zone: enter the interface of time zone to set up the time
zone
Set up time format: set up the display format of time
Choose date format: Choose different display format of date
11
4.5 Locate and text
set up the locate (languages and areas),text entry and automatic

error correction
Select area: There are 54 kinds of languages for choice
4.6 Battery Charging
There is a built-in battery, when the electric quantity is low, the
system will recommend you to charge
Way of charging: connect one end of the adaptor to power socket,
connect the other end to the power port of the device.
1, When the indicator light of battery charging turns on, it means
device is charging.
When the indicator light turns to green. It means battery is fully
charged.
2, During the charging period, user can still use the Pc.
Note: In the boot of state, .it takes long time for charging.
5. Software installation and management
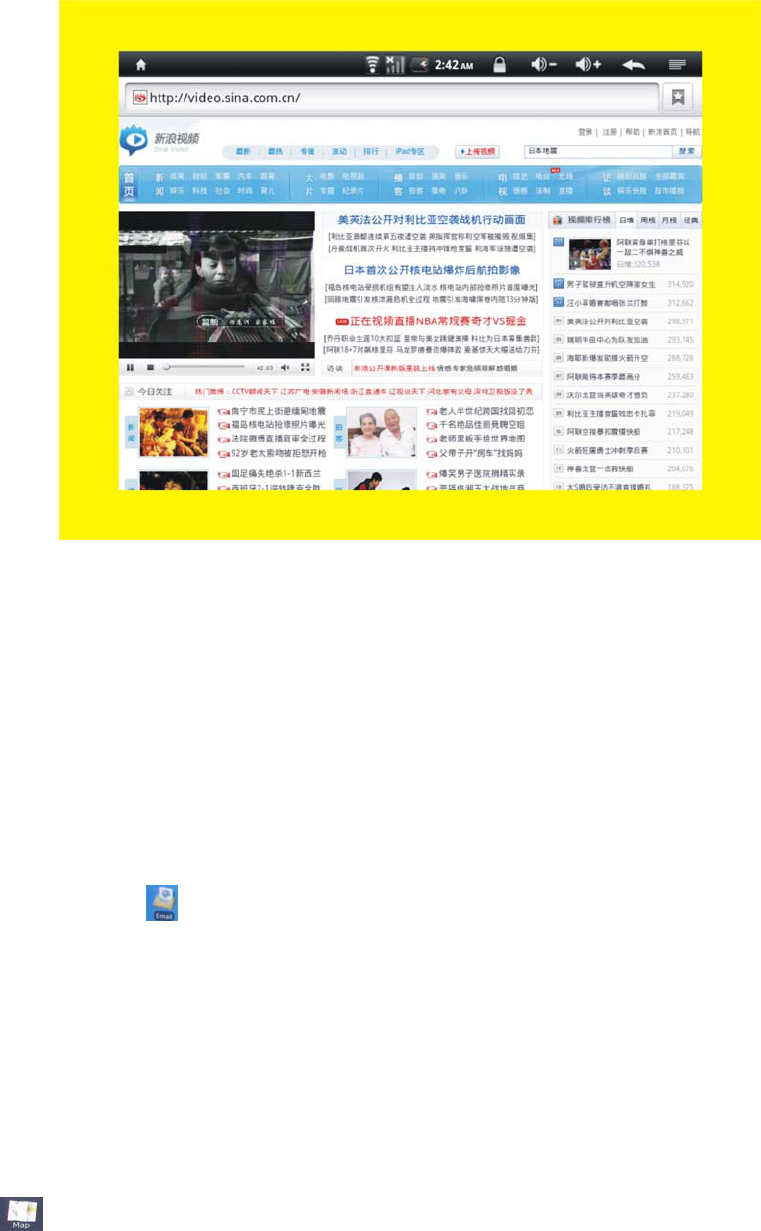
5.1Browser
Click" ” and open the following web page.
Start: enter website by inputting web address
12
5.2 E-mail
Click E-mail icon” ” and enter the e-mail,
You can proceed as follows:
1、 Set an e-mail account
2、 Open a new e-mail
3、 Send and receive e-mails
Note: Shortcut menu will popup when clicking the menu button..
5.3 Google map
Click” ” and enter Google Map
13

--Click the zoom icons on the touch screen to zoom in and zoom out
images
--Drag touch screen, move the image up-and-down and
right-and-left
Click Menu :
--search: search maps by entering address
--Line : search drive circuit by entering starting and finishing
address
--Map mode: three modes for choice, map mode、satellite mode
and traffic mode.
--My position: Find out my current location by setting up "My
Location"
--more: more information about Google Map
5.4 Alarm clock
Click " " and enter the alarm clock settings
14
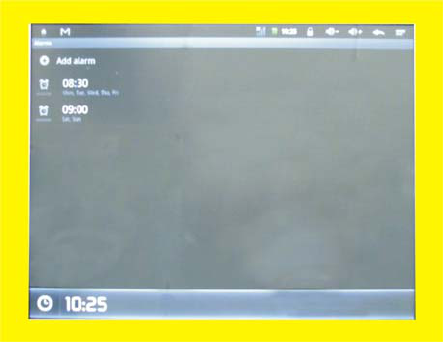
Set up time : Enter the interface of time settings to set up time.
Set up hour format: set up displaying format of time
Select the format of date: choose different format to show date.
5.5 The procedure of using HDMI
---through the cabel to connect the tablet PC with TV
---when the HDMI icon appear on the status bar, pull down the
status bar
---HDMI switch
---HDMI 480P or
HDMI 720P or
HDMI 1080P
Then you can see the computer screen on TV screen.
5.6 The procedure of connecting the tablet PC with computer
---through the cabel to connect the tablet PC with computer
---when the USB icon appear on the status bar, pull down the
status bar
---USB connected
---turn on the USB storage
Then you can see the file of tablet PC in your computer.
15

6.O/I File Manager
Click " " and enter O/I File manager, you can browse the files in
the e-pad and T-Flash memory card.
Short click the menu key or click the mean software on the screen
to bring up the operator interface.
Operation: bring up the operation interface
--Cut: Cut a file or folder
--Copy: Copy a file or folder
--Delete: Delete a file or folder
--Rename: Rename a file or folder
16
7. FAQ
7.1 Can not open the media player
--Check battery
-Connect the power adapter and then check
again
--If it still cannot be opened, please
contact our sales person
7.2 Screen is flashing after starting up
--short of power, please charge
7.3 Headphones can not hear sound
--please check whether the volume has
been set to 0
--please check whether the music file
has been damaged. Try playing another
music to determine. If the file has been
damaged, it could lead to serious noise or skips.
7.4 Can not copy the file
--Confirm whether the computer and
the player is properly connected
--Confirm whether the storage space is full
17
FCC WARNING
This device complies with Part 15 of the FCC Rules. Operation is
subject to the following two conditions:
(1) this device may not cause harmful interference, and
(2) this device must accept any interference received, including interference that may cause
undesired operation.
NOTE 1: This equipment has been tested and found to comply with the limits for a Class B digital
device, pursuant to part 15 of the FCC Rules. These limits are designed to provide reasonable
protection against harmful interference in a residential installation. This equipment generates, uses
and can radiate radio frequency energy and, if not installed and used in accordance with the
instructions, may cause harmful interference to radio communications. However, there is no
guarantee that interference will not occur in a particular installation. If this equipment does cause
harmful interference to radio or television reception, which can be determined by turning the
equipment off and on, the user is encouraged to try to correct the interference by one or more of
the following measures:
- Reorient or relocate the receiving antenna.
- Increase the separation between the equipment and receiver.
-Connect the equipment into an outlet on a circuit different from that to which the receiver is
connected.
-Consult the dealer or an experienced radio/TV technician for help.
NOTE 2: Any changes or modifications not expressly approved by the manufacturer could void
the user’s authority to operate the equipment.
NOTE 3: The manufacturer is not responsible for any radio or TV interference caused by
unauthorized modifications to this equipment. Such modifications could void the user’s authority
to operate the equipment.