Zero One Technology Co WU04001 WIRELESS PRINT SERVER User Manual 615WU English Manual V0
Zero One Technology Co Ltd WIRELESS PRINT SERVER 615WU English Manual V0
UserManual.wiki
>
Zero One Technology Co
>
WU04001 User Manual
>
USERS MANUAL 1
Contents
1.
USERS MANUAL 1
2.
USERS MANUAL 2
USERS MANUAL 1
Navigation menu
Upload a User Manual
Namespaces
Wiki Guide
HTML
PDF
Info
Views
User Manual
Discussion / Help
Navigation

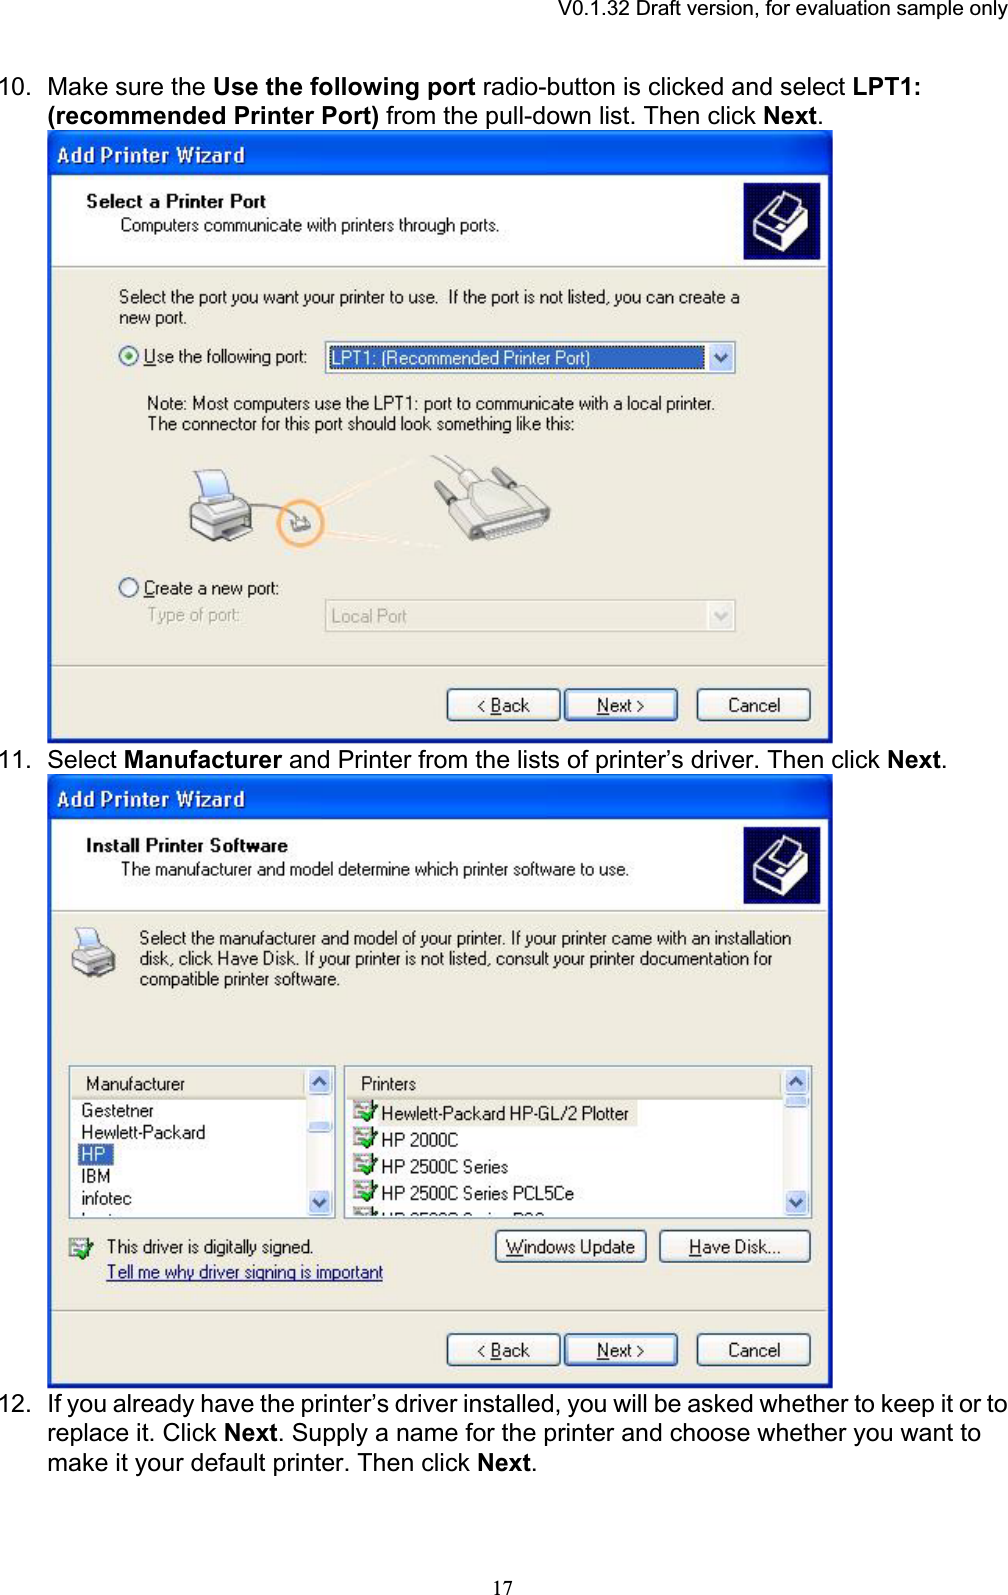
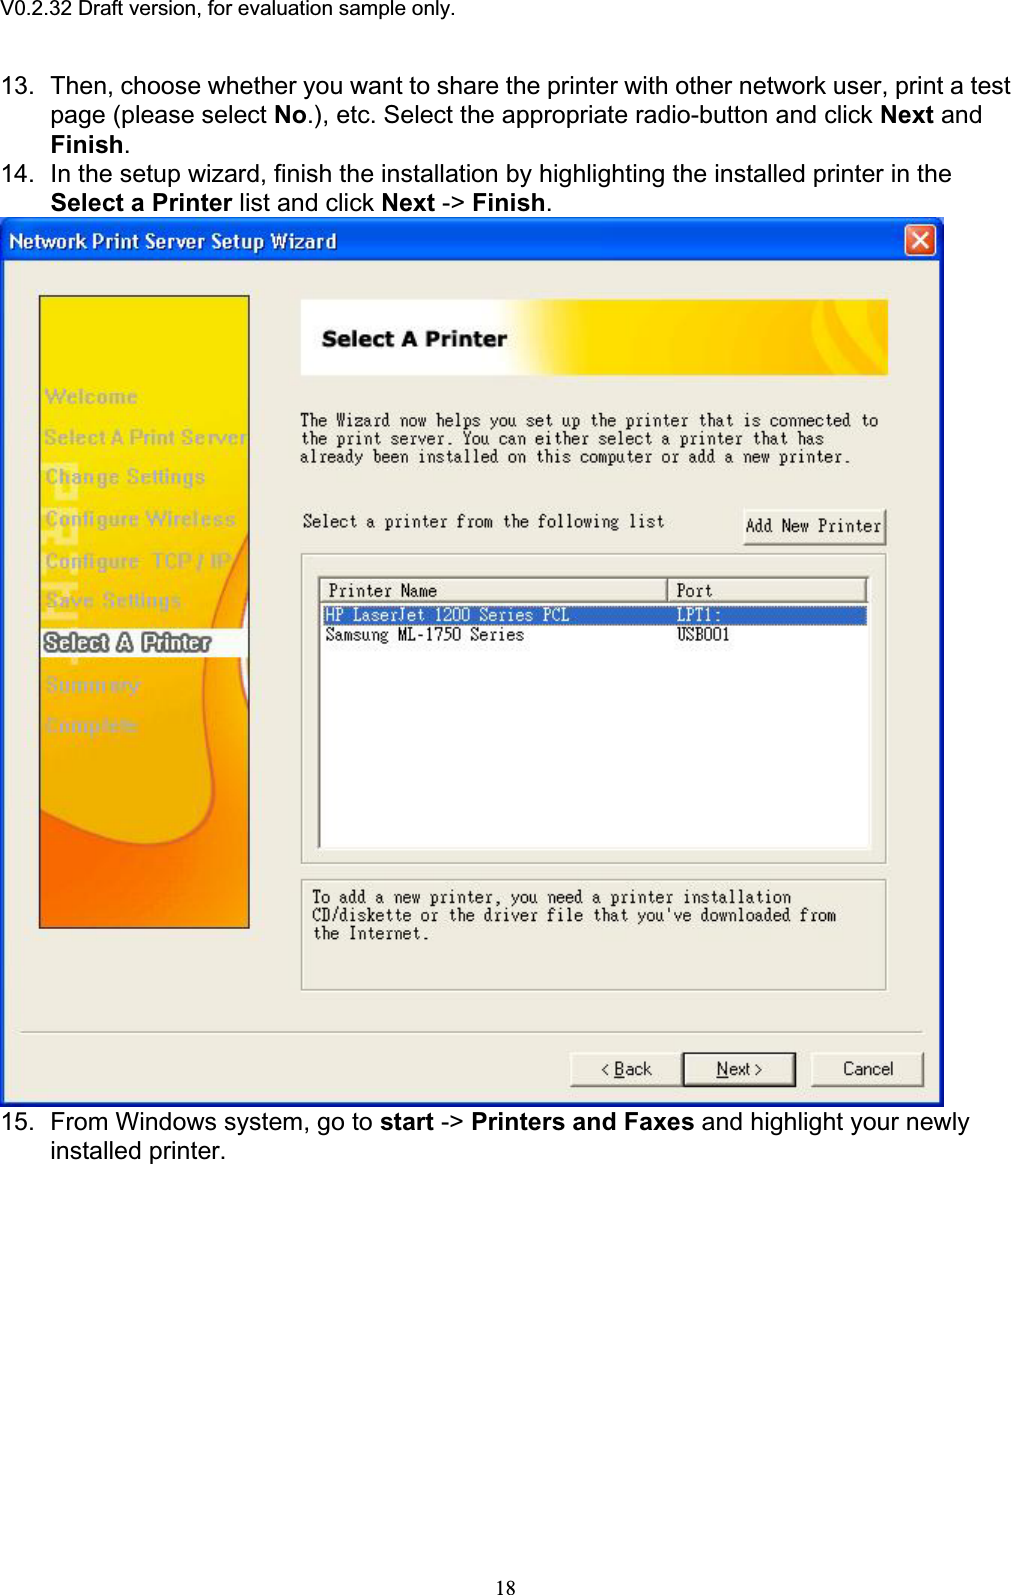
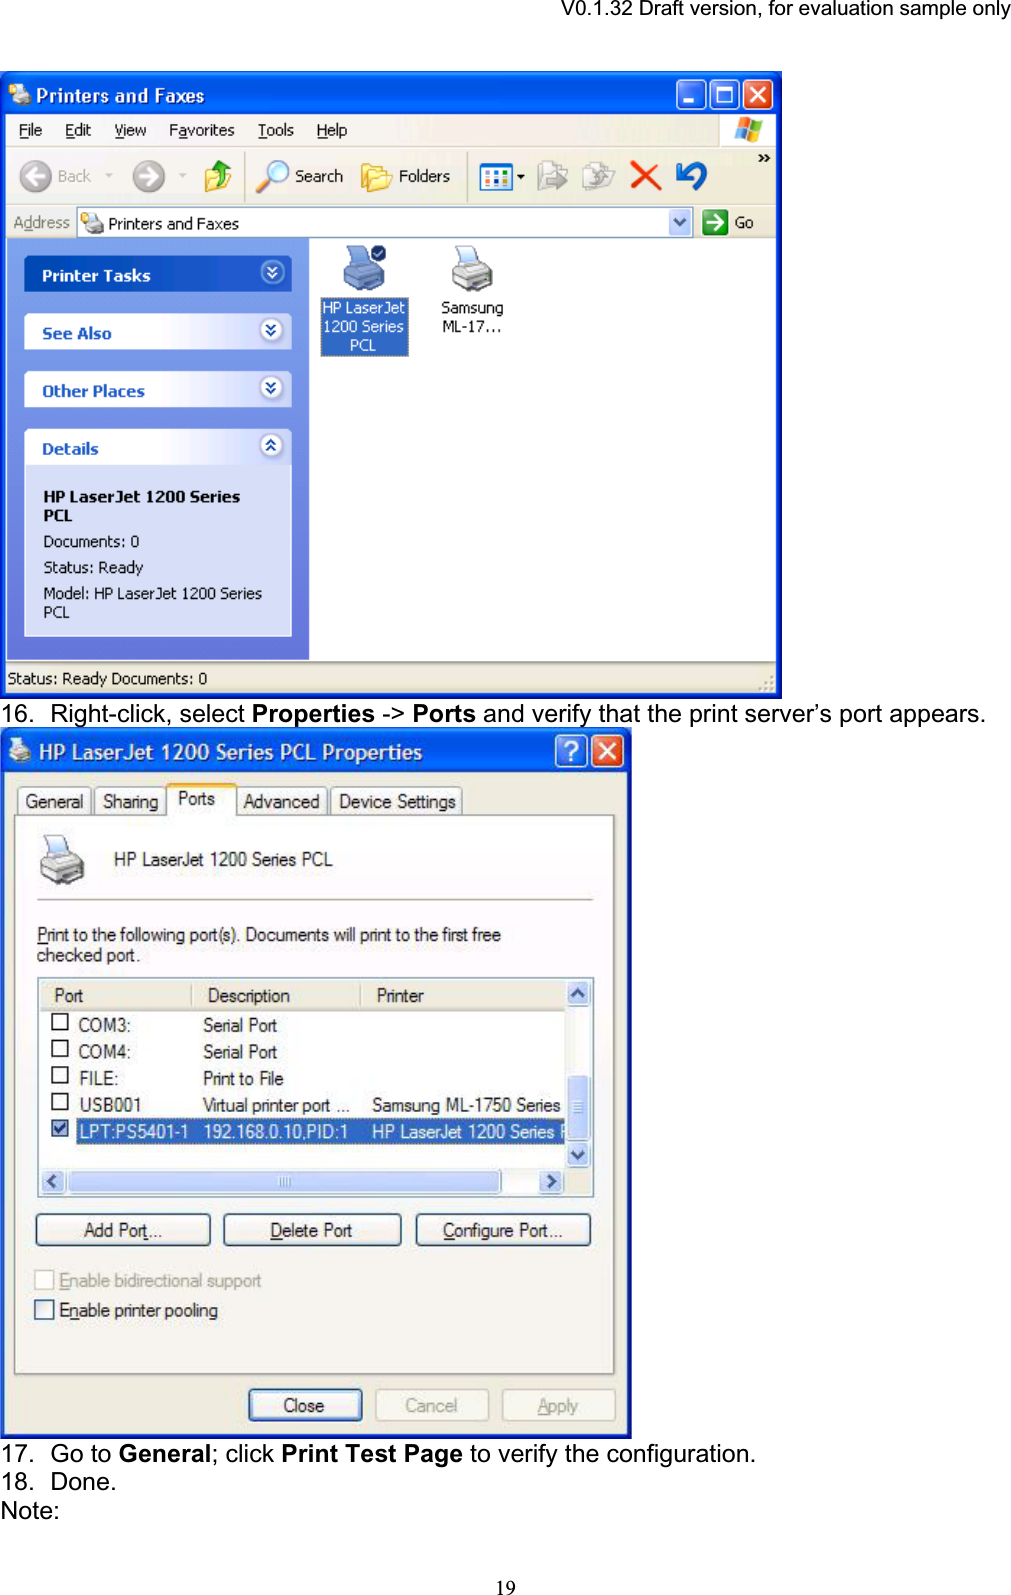
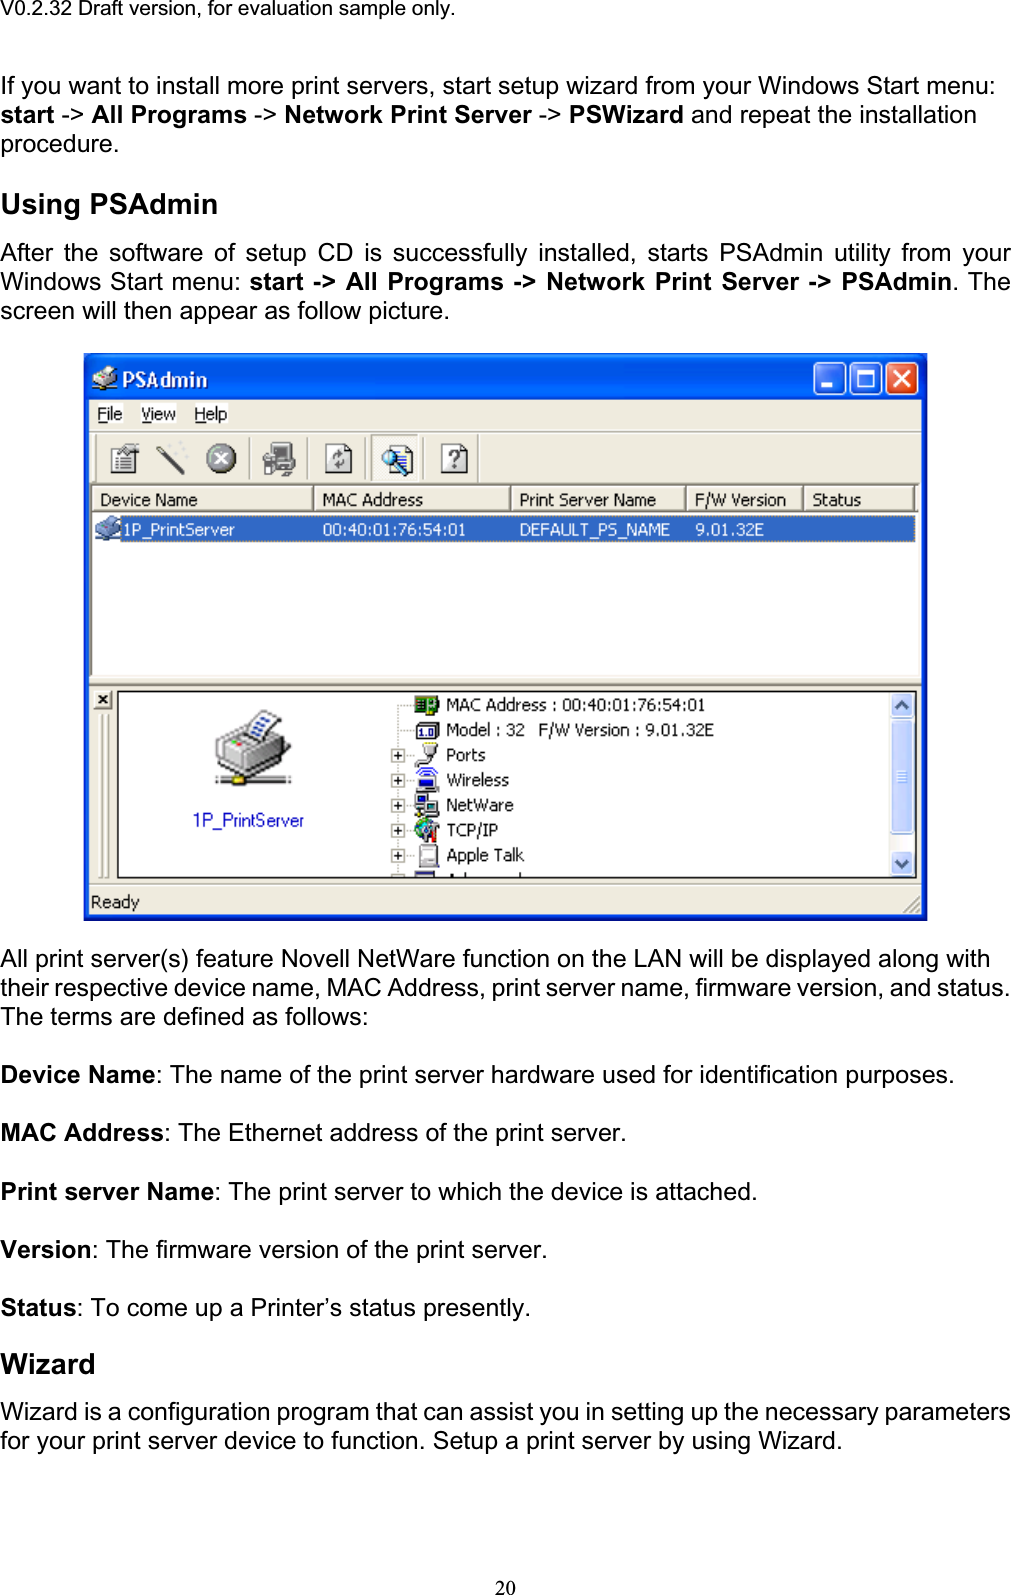
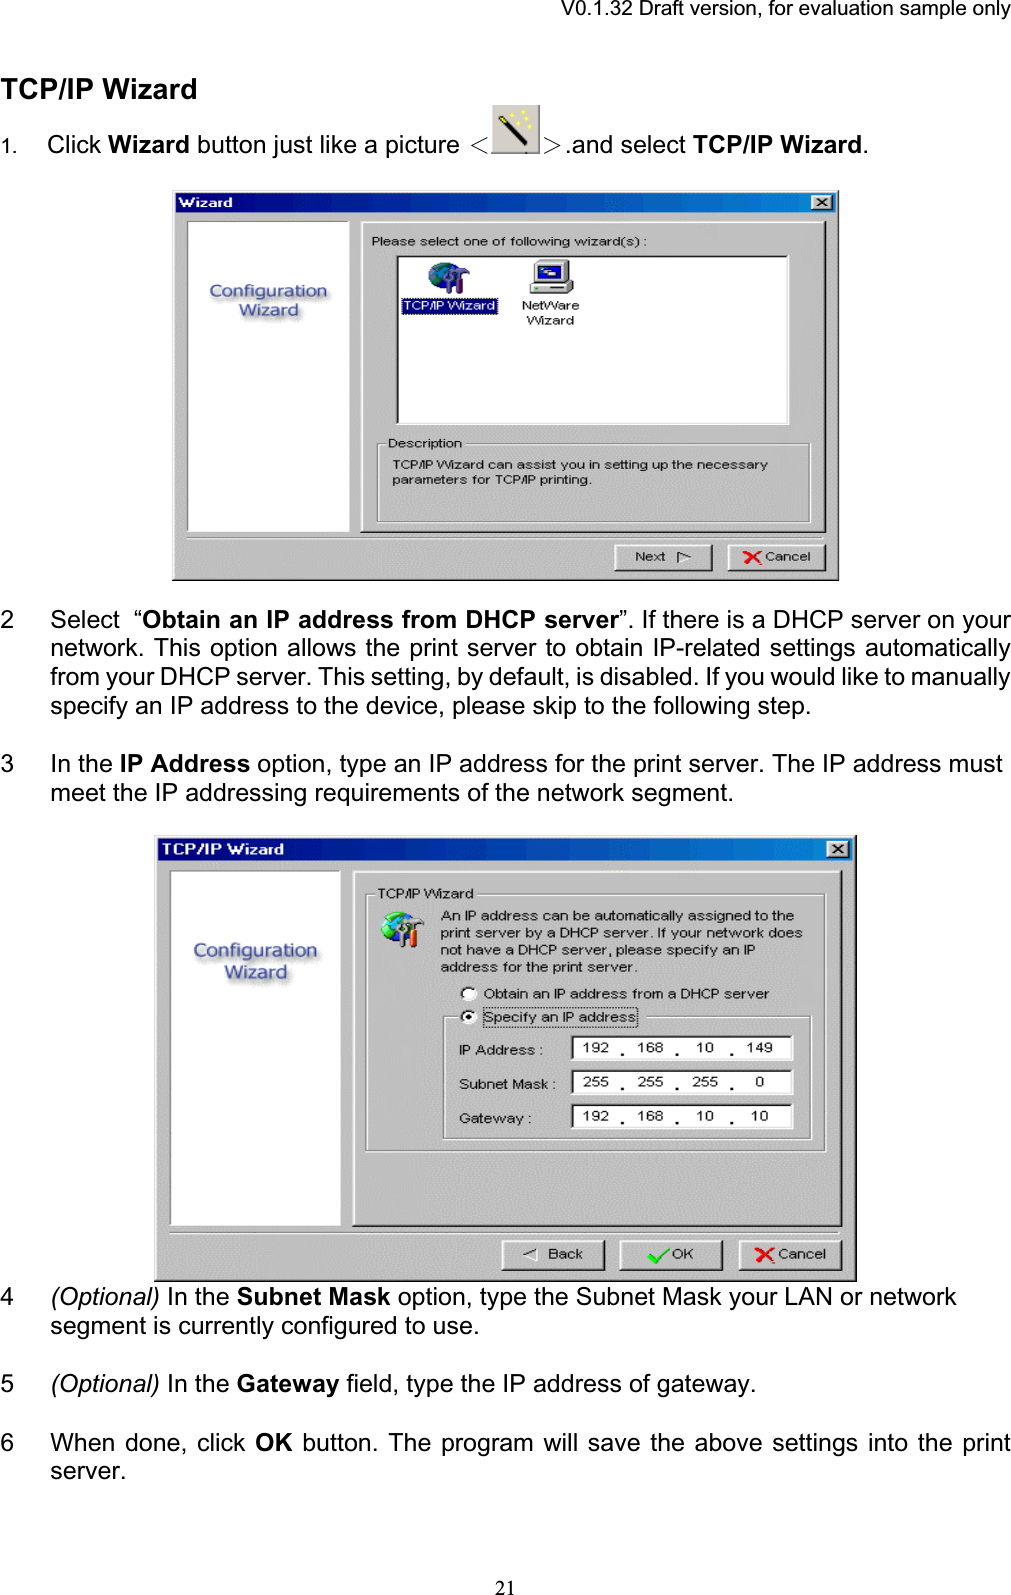
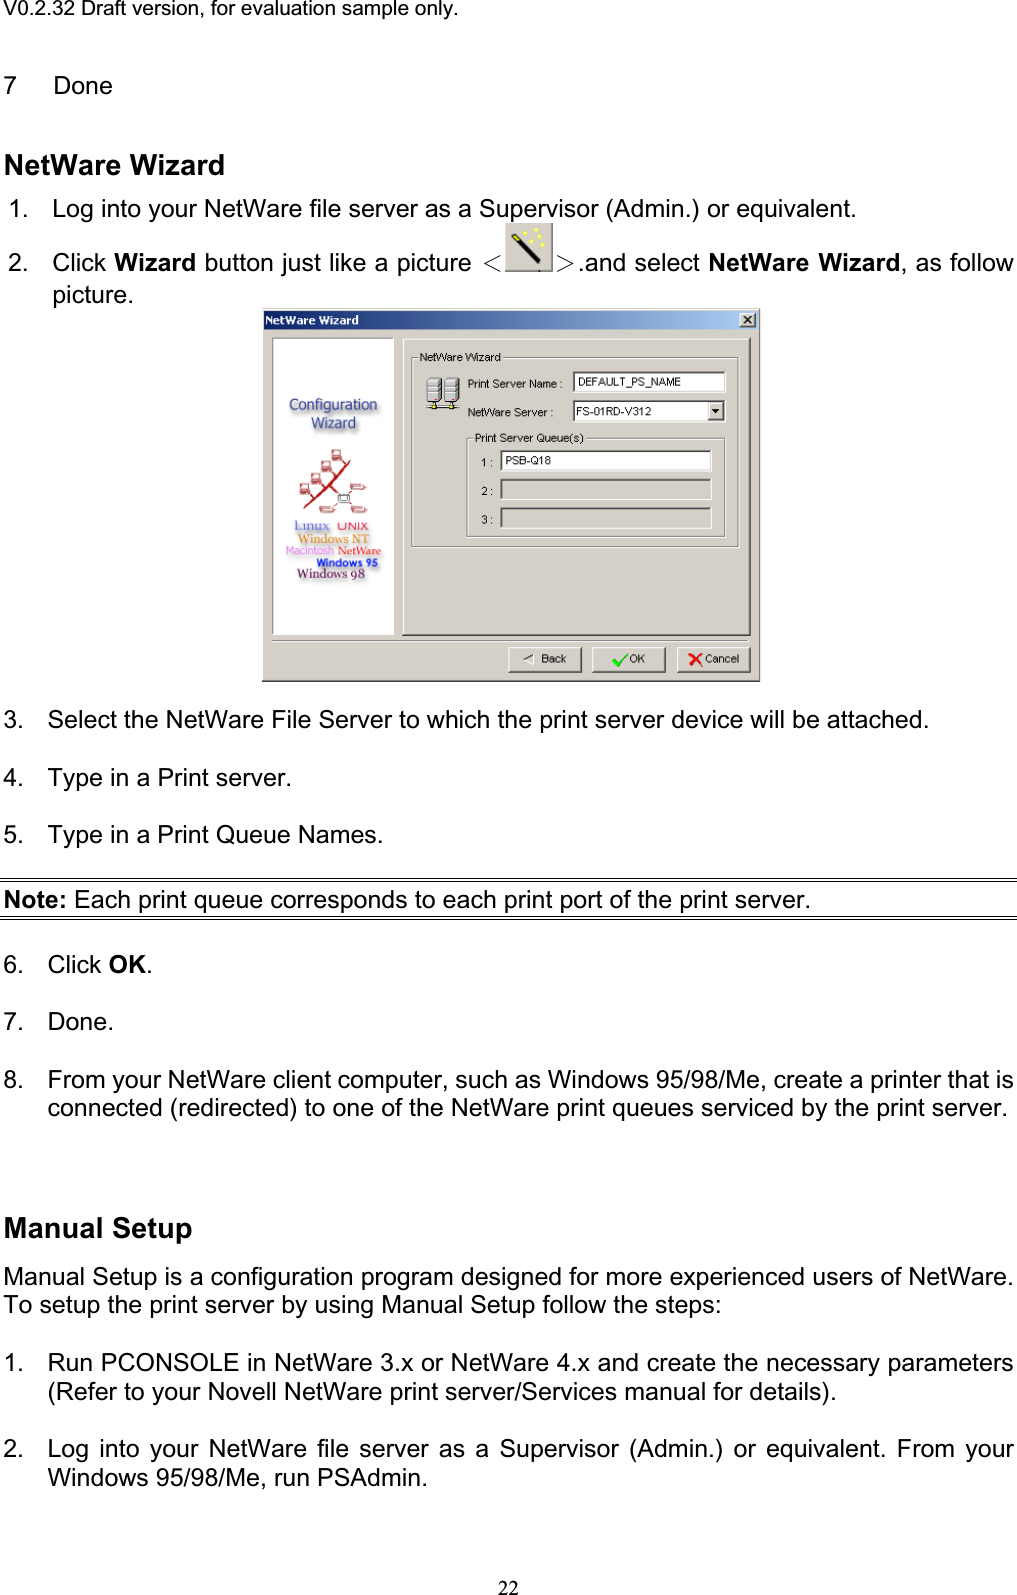
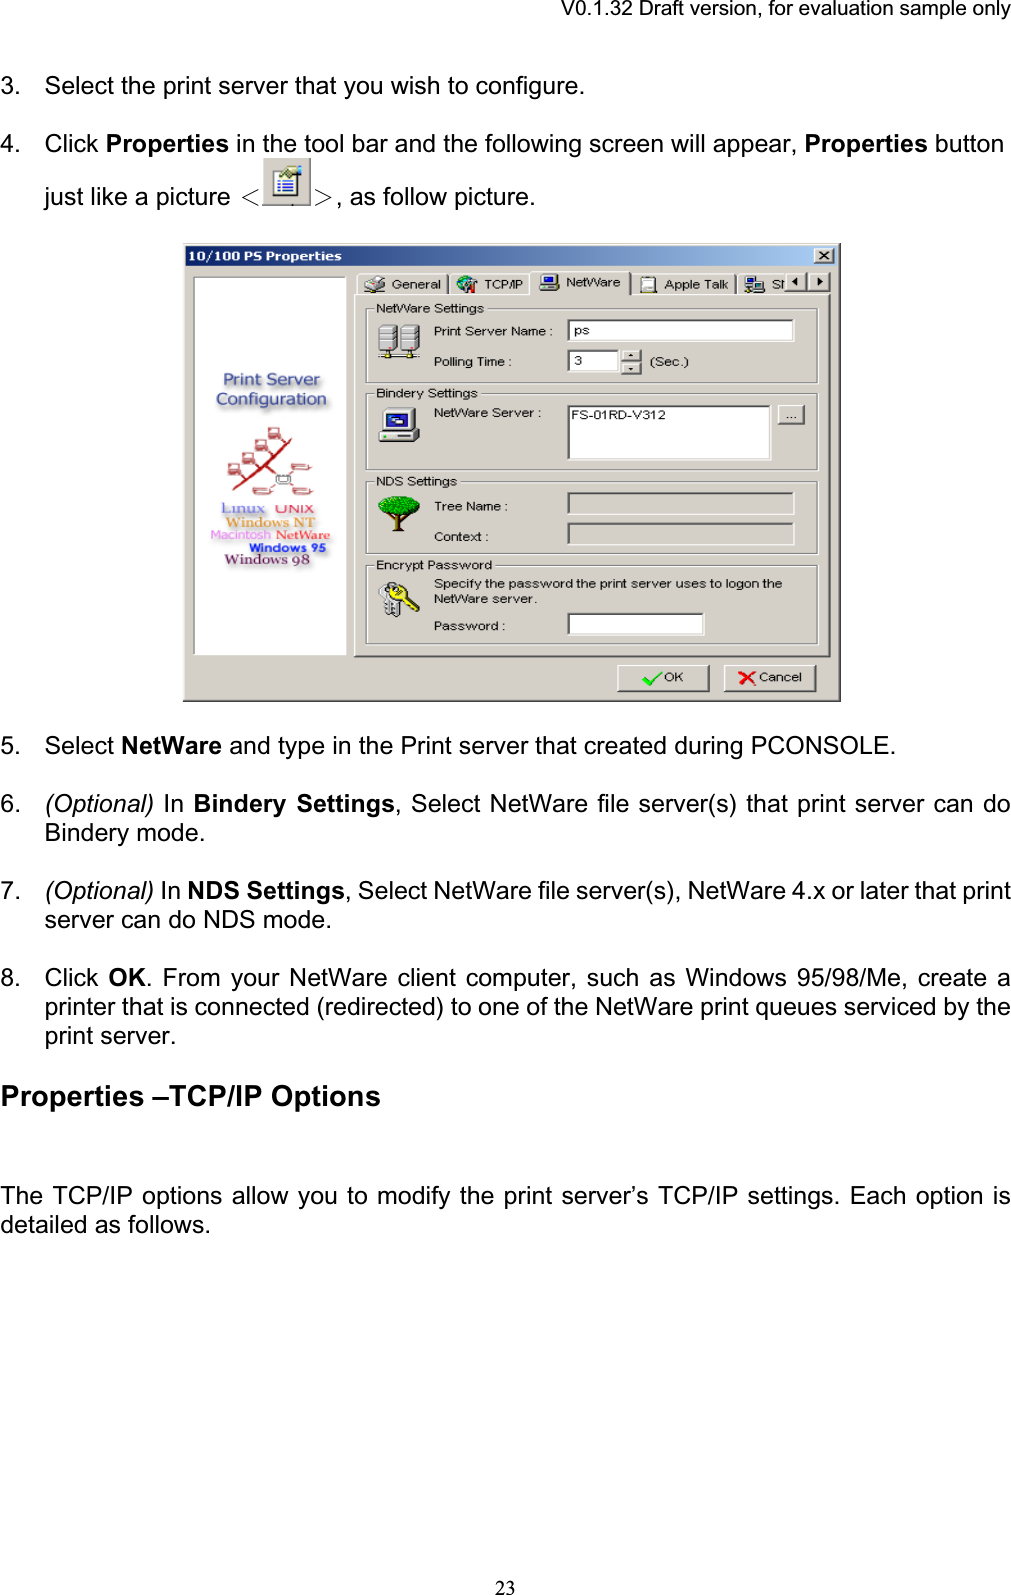


![V0.2.32 Draft version, for evaluation sample only.Note: Configure the print speed in the Advanced label, must match the printer’s speed which connect to the print server. Undependable configuration will cause printer to abnormal printing. Multiple Print Queues Configuration To configure the print server to service multiple print queues, please follow the instructions listed below: 1. Log into your NetWare file server as a Supervisor (Admin.) or equivalent. 2. Run the PSAdmin from your Windows. 3. Select the print server and to be configured. 4. Click the Wizard icon in the tool bar. 5. Type in a Print server and a Print Queue Name (For more detailed information about Wizard, please refer to the “Wizard” section in this chapter). 6. Run the NetWare’s PCONSOLE and create additional print queues. 7. Select the Print server name you specify in Step 5. 8. Select the “Print server Configuration” option and select the ”Queue Serviced byPrinter” option (For NetWare 4.x’s PCONSOLE, please select “Printers” option and select “Printer 0” instead).9. Select the “Printer 0” and press the [Insert] key to add the print queues you create in Step 6 into the list (For NetWare 4.x’s PCONSOLE, please select “Print queues assigned” option instead).10. Reset the print server by clicking the “Reset” icon from the PSAdmin. Done. Note: Please refer to NetWare’s Print server/Services manuals for detailed PCONSOLE commands.Uninstalling the PSAdmin on Windows PCTo help users easily remove all installed software components of the PSAdmin from their Windows PC, and the PSAdmin software comes with un-installation wizard program that can automatically remove the software components from their Windows PC systems in minutes. Please follow the directions listed below to proceed with the un-installation procedure. After the PSAdmin is removed, the print server is no longer accessible via the PSAdmin. You have to re-install the PSAdmin on your system in order to access the print server again. Procedure:1. Click Start, point to Settings, and select Control Panel.2. Double click the Add/Remove Programs icon. 26](https://usermanual.wiki/Zero-One-Technology-Co/WU04001.USERS-MANUAL-1/User-Guide-529458-Page-26.png)