Zhejiang Dahua Vision Technology SD22 2 INCH PTZ DOME CAMERA User Manual F4X5 Indoor Series Network Camera User s Manual
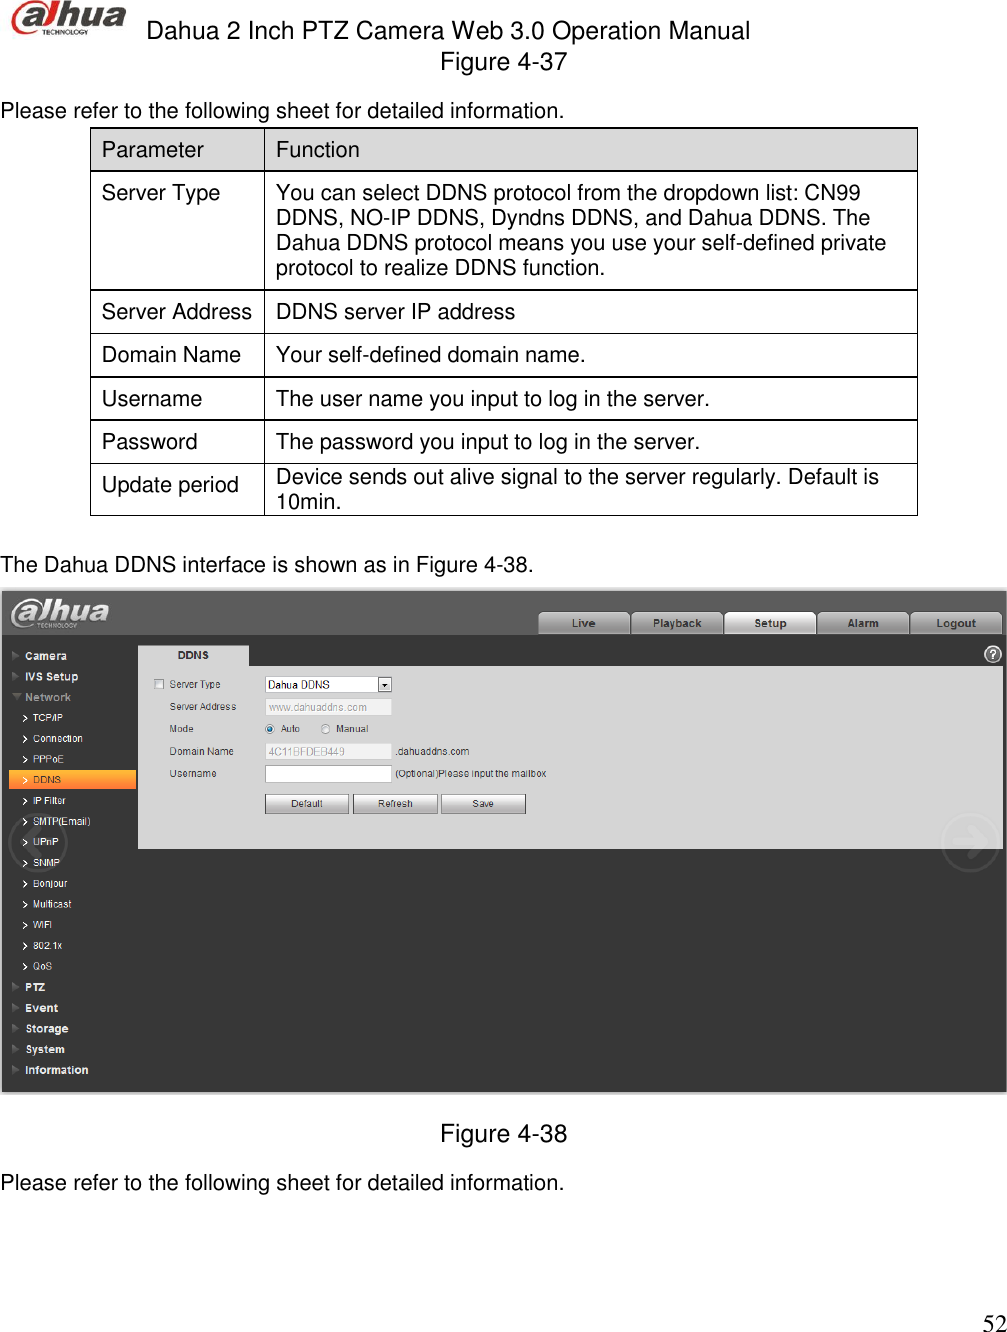
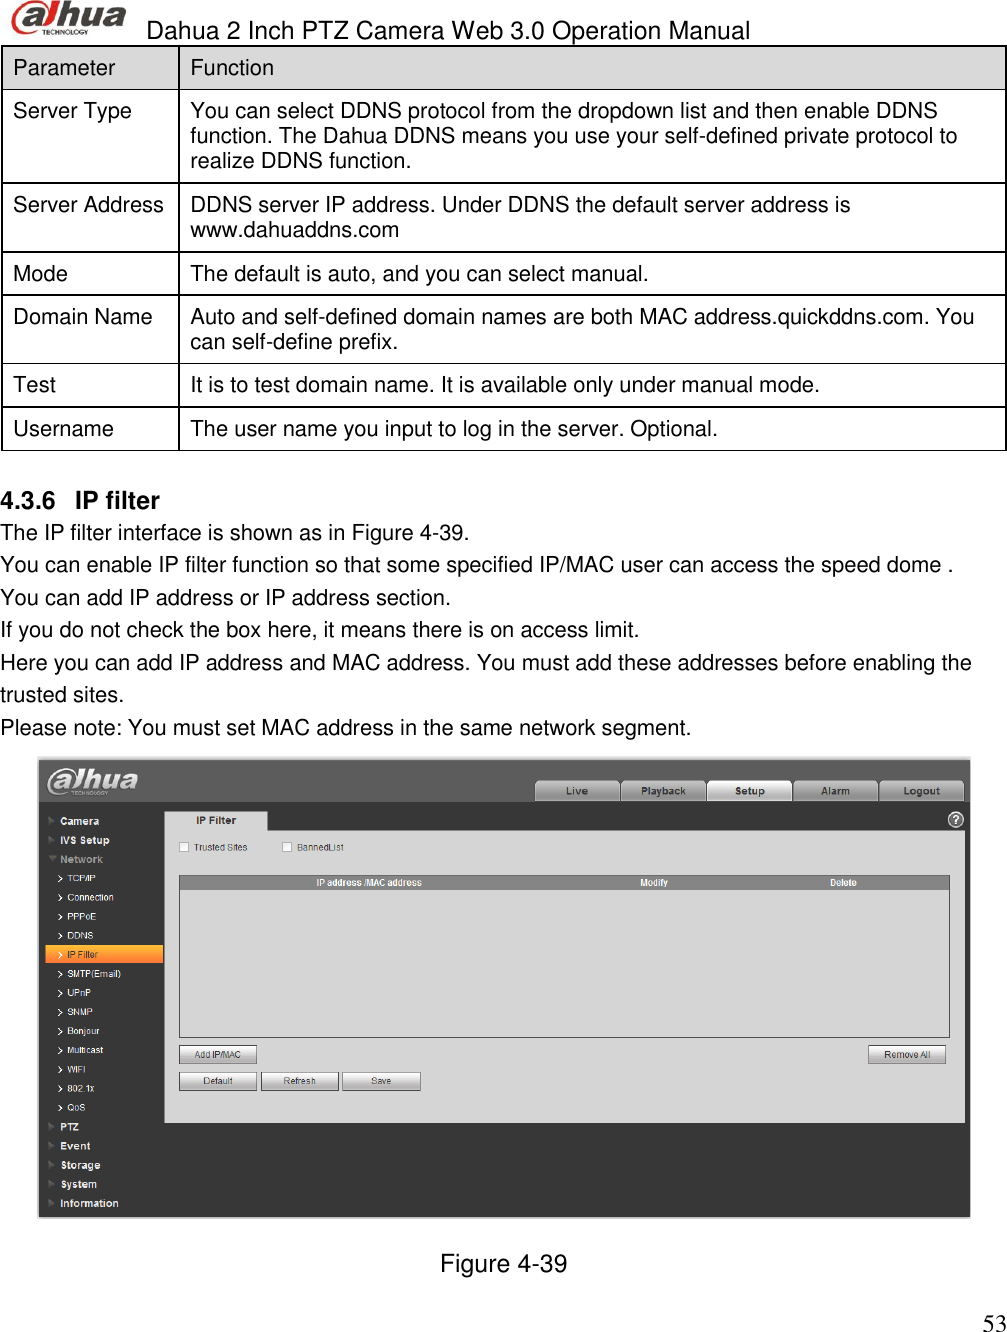
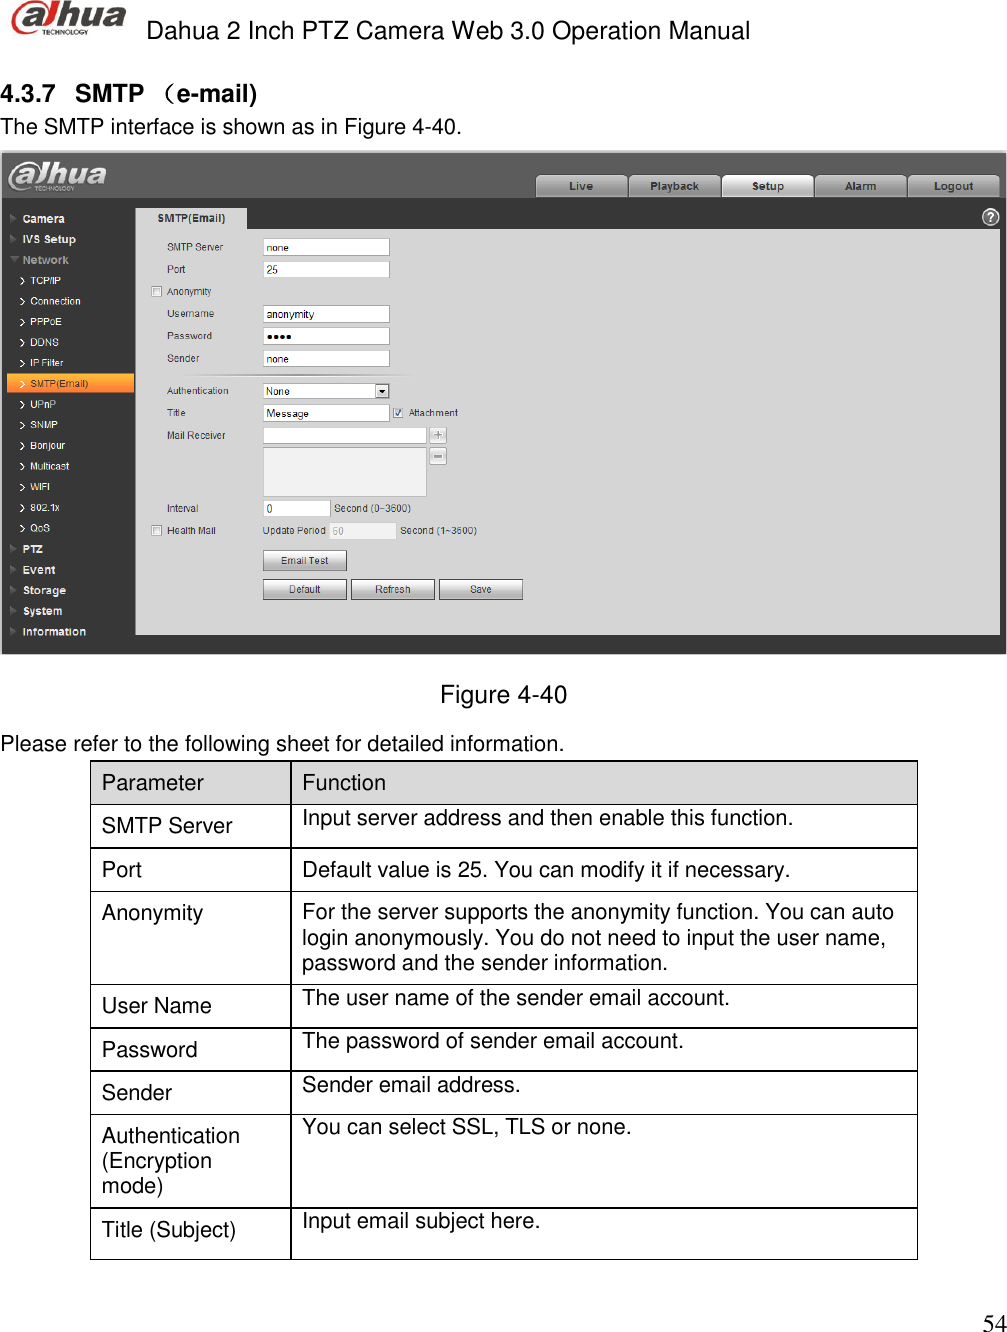
Zhejiang Dahua Vision Technology Co., Ltd 2 INCH PTZ DOME CAMERA F4X5 Indoor Series Network Camera User s Manual
Contents
- 1. Installation Manual
- 2. Operation Manual
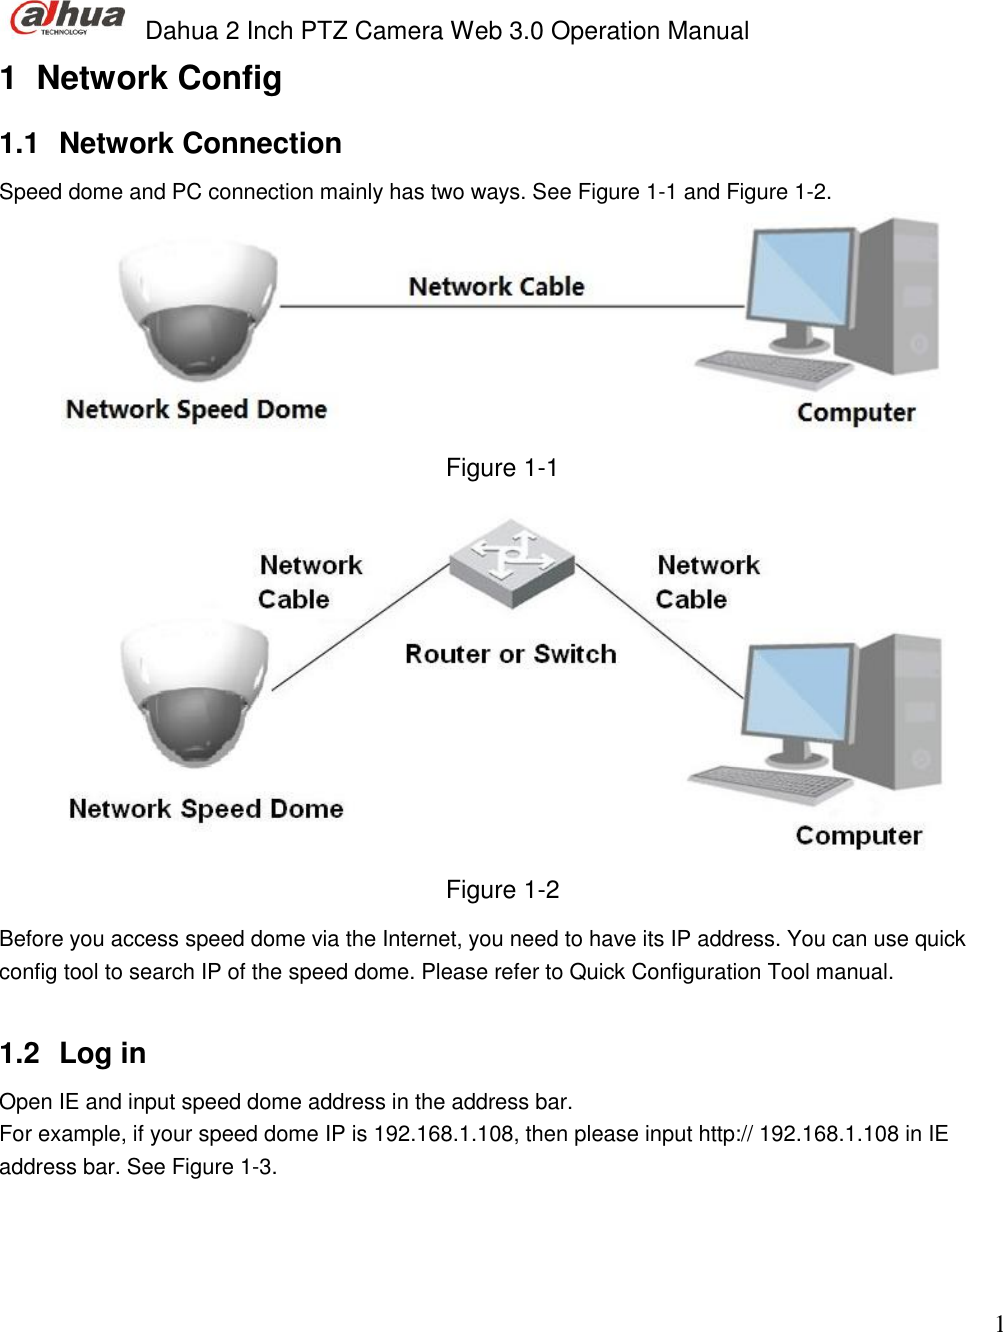
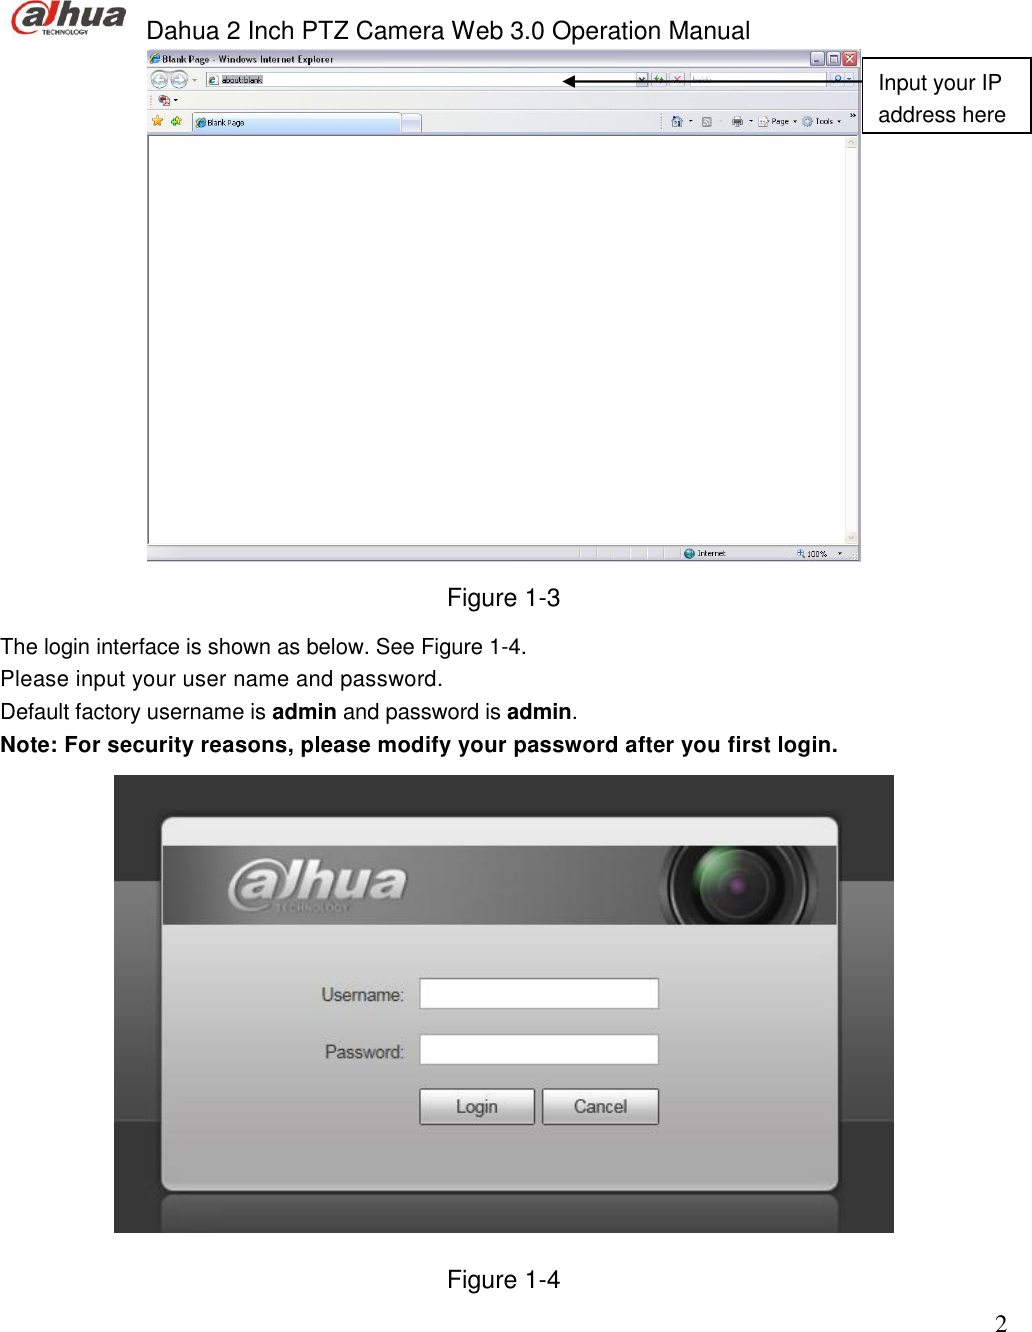
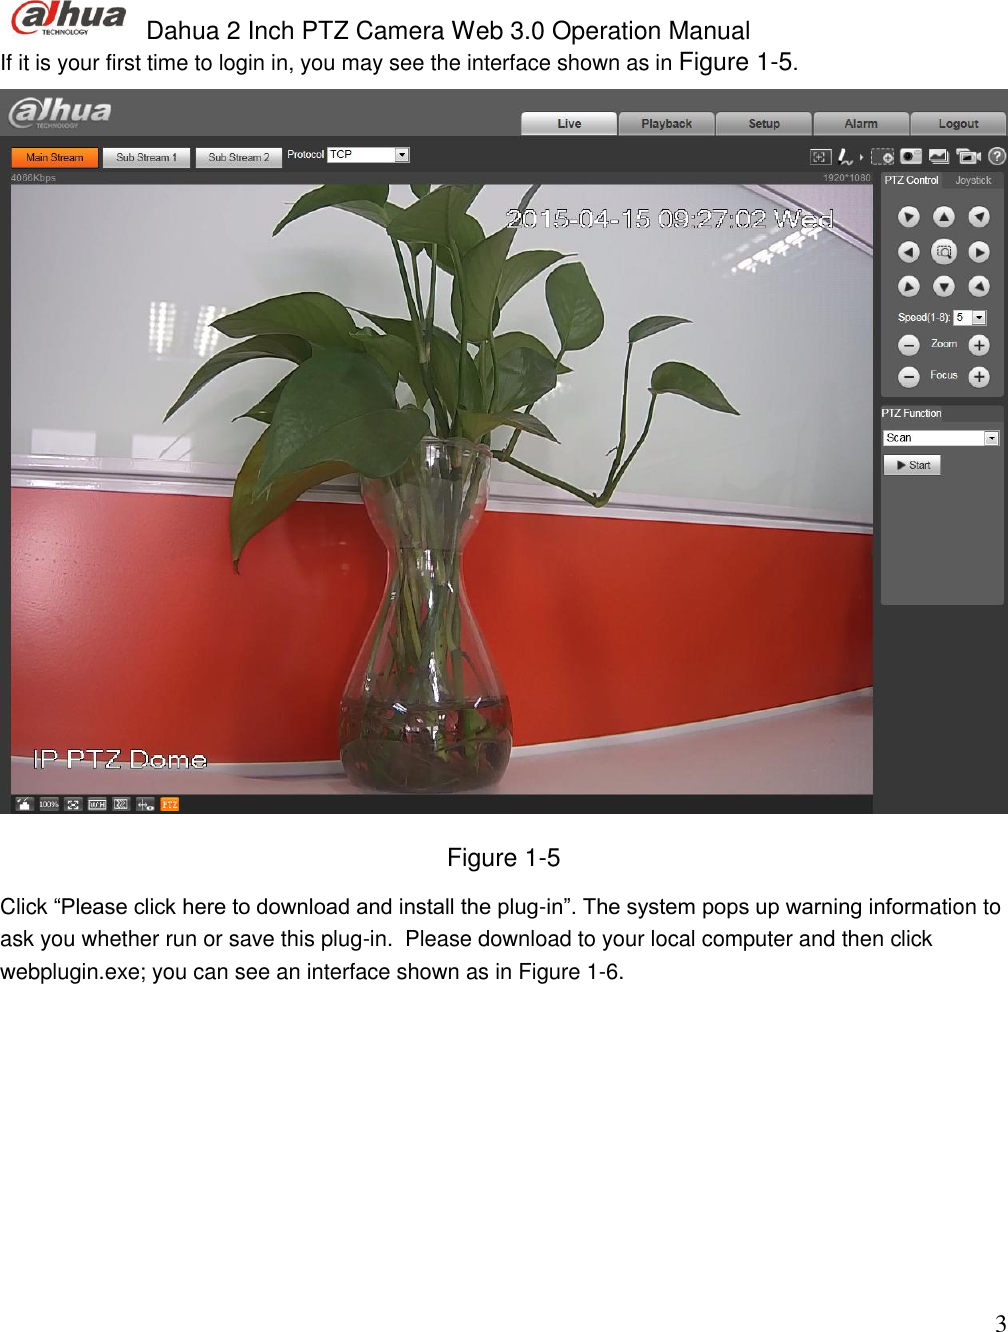
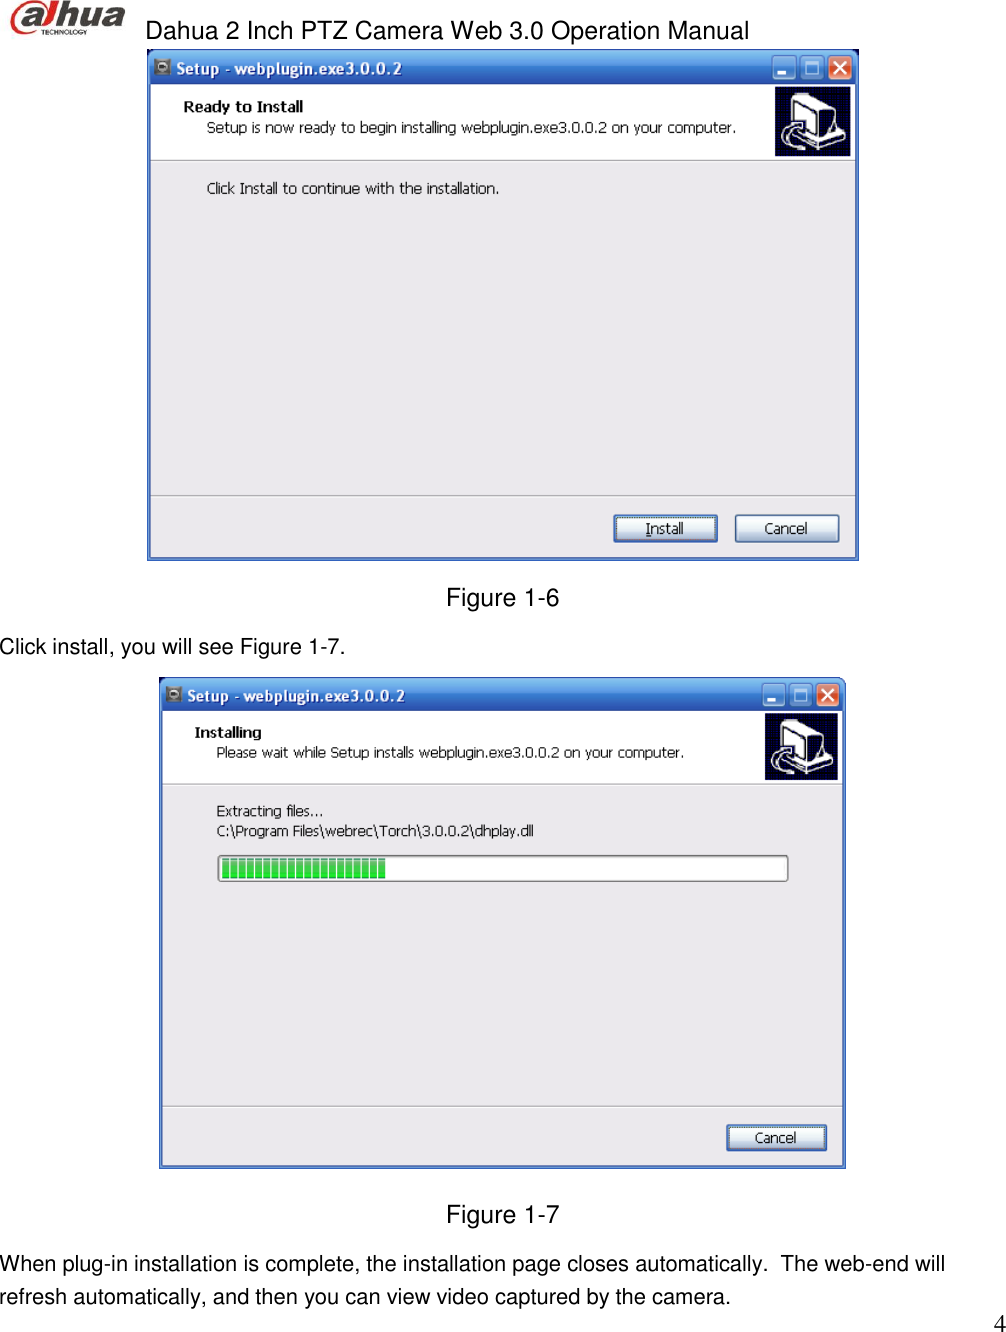
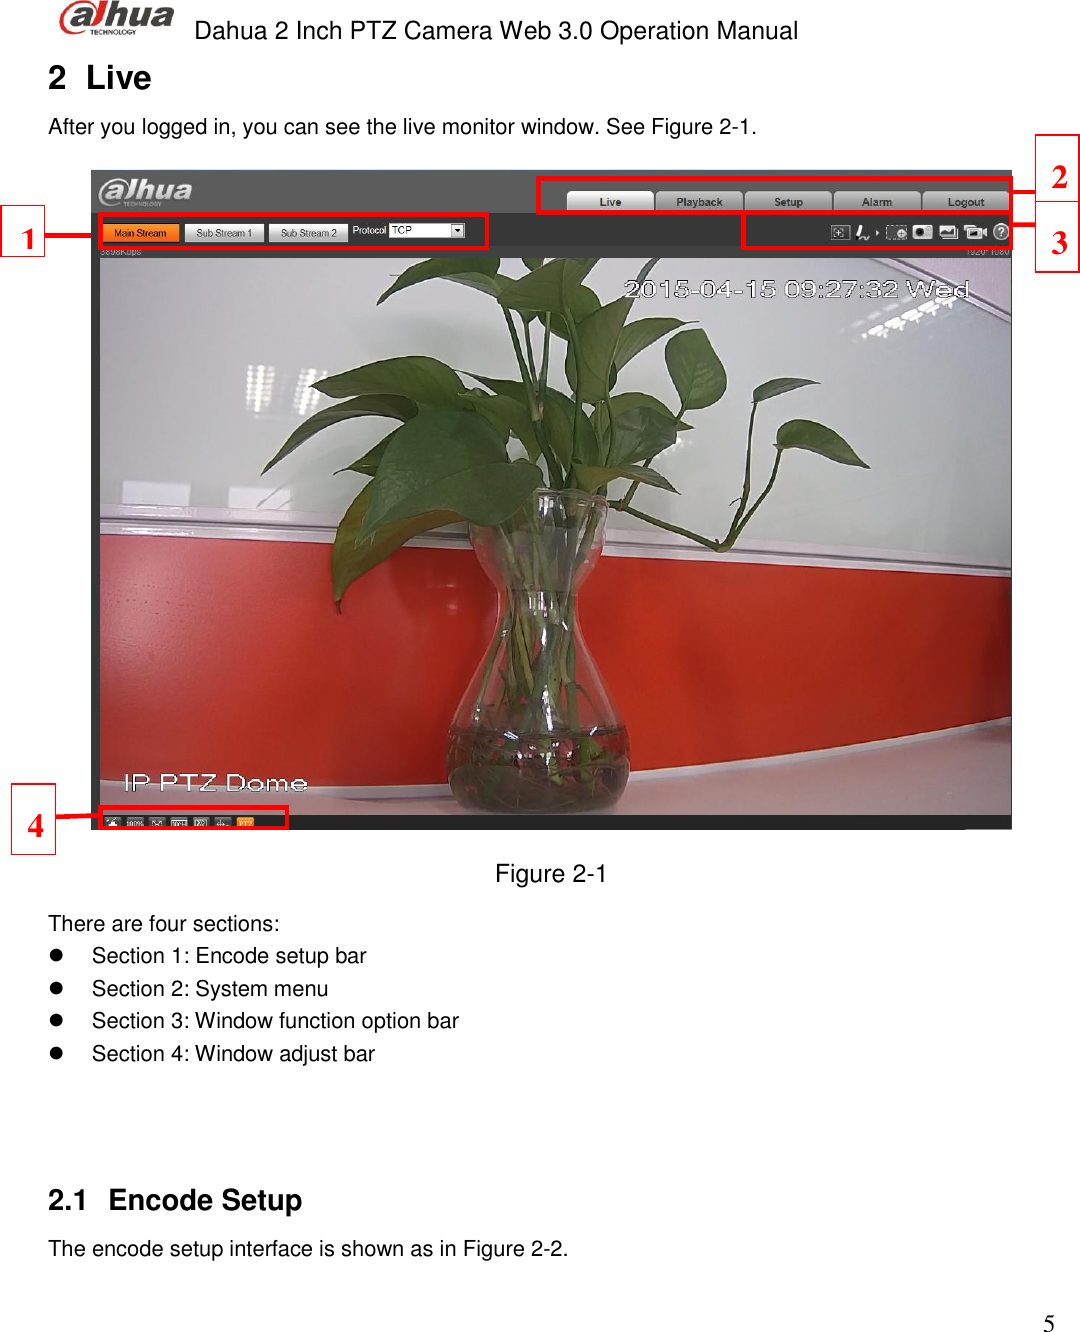
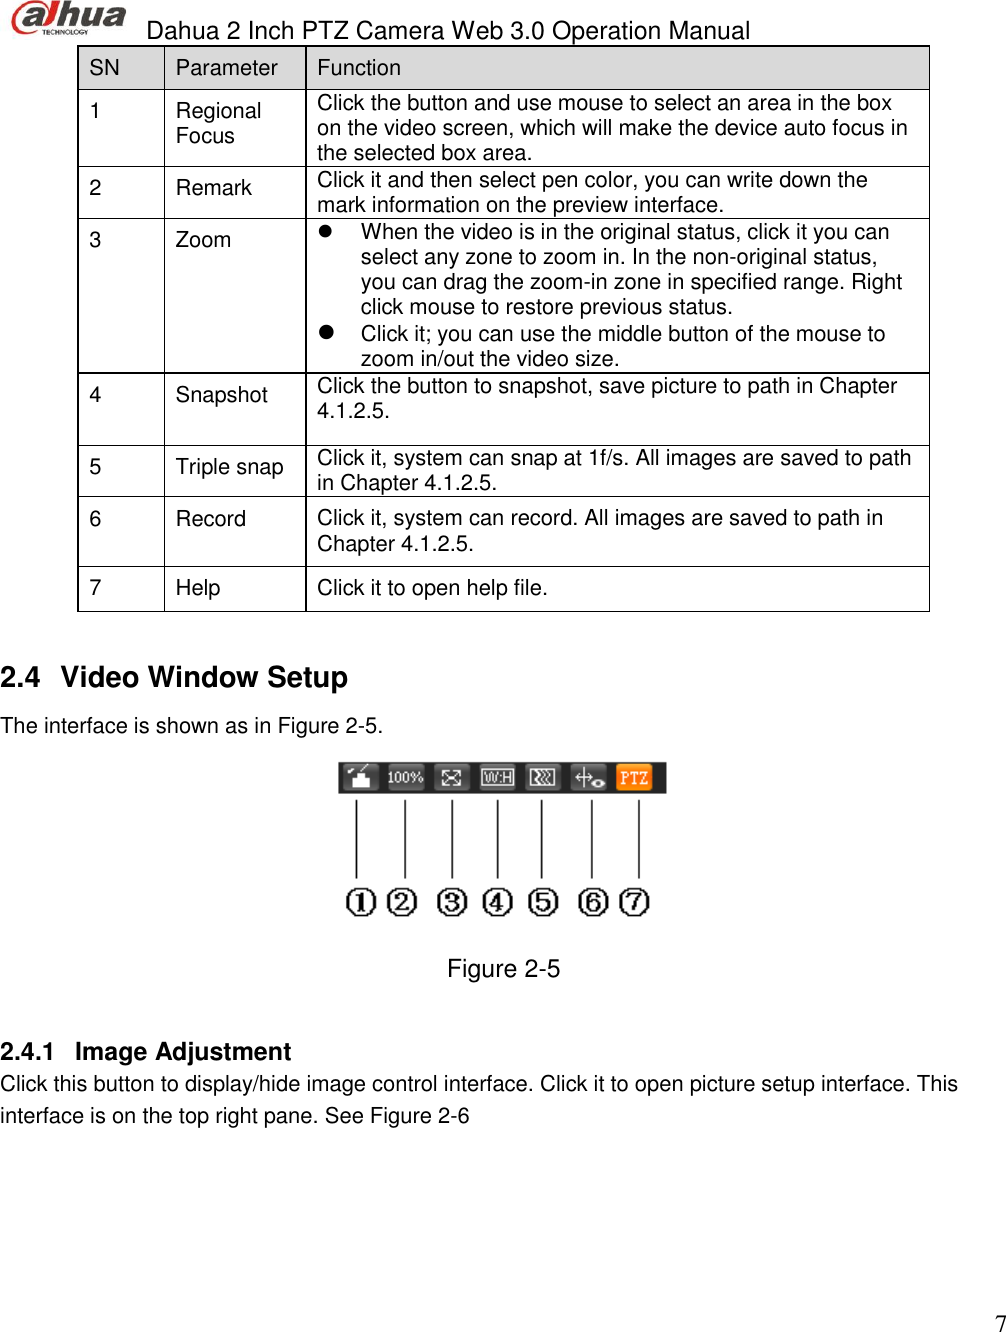
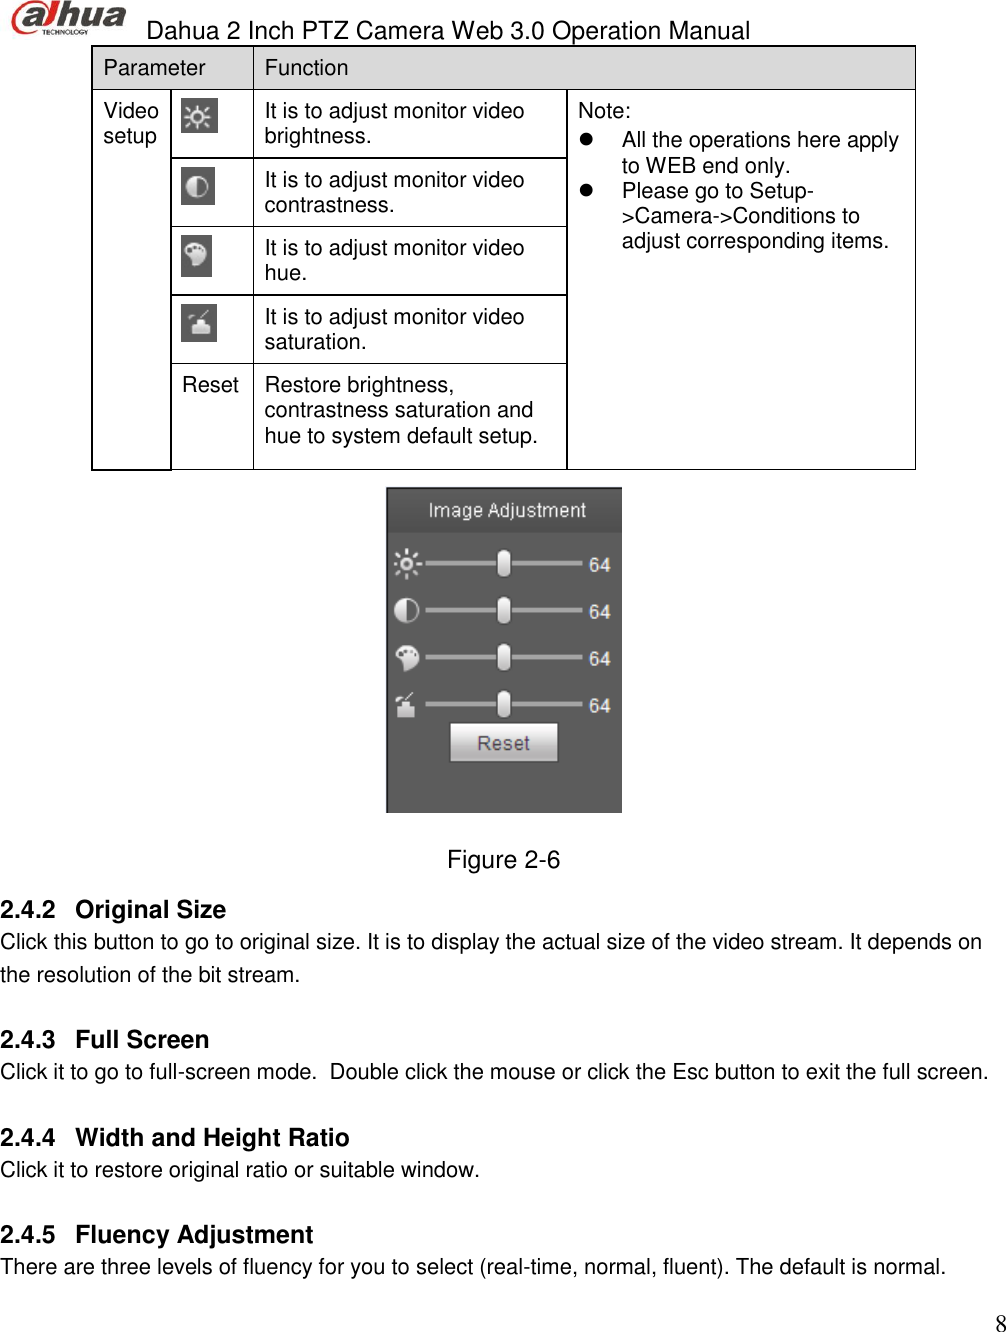
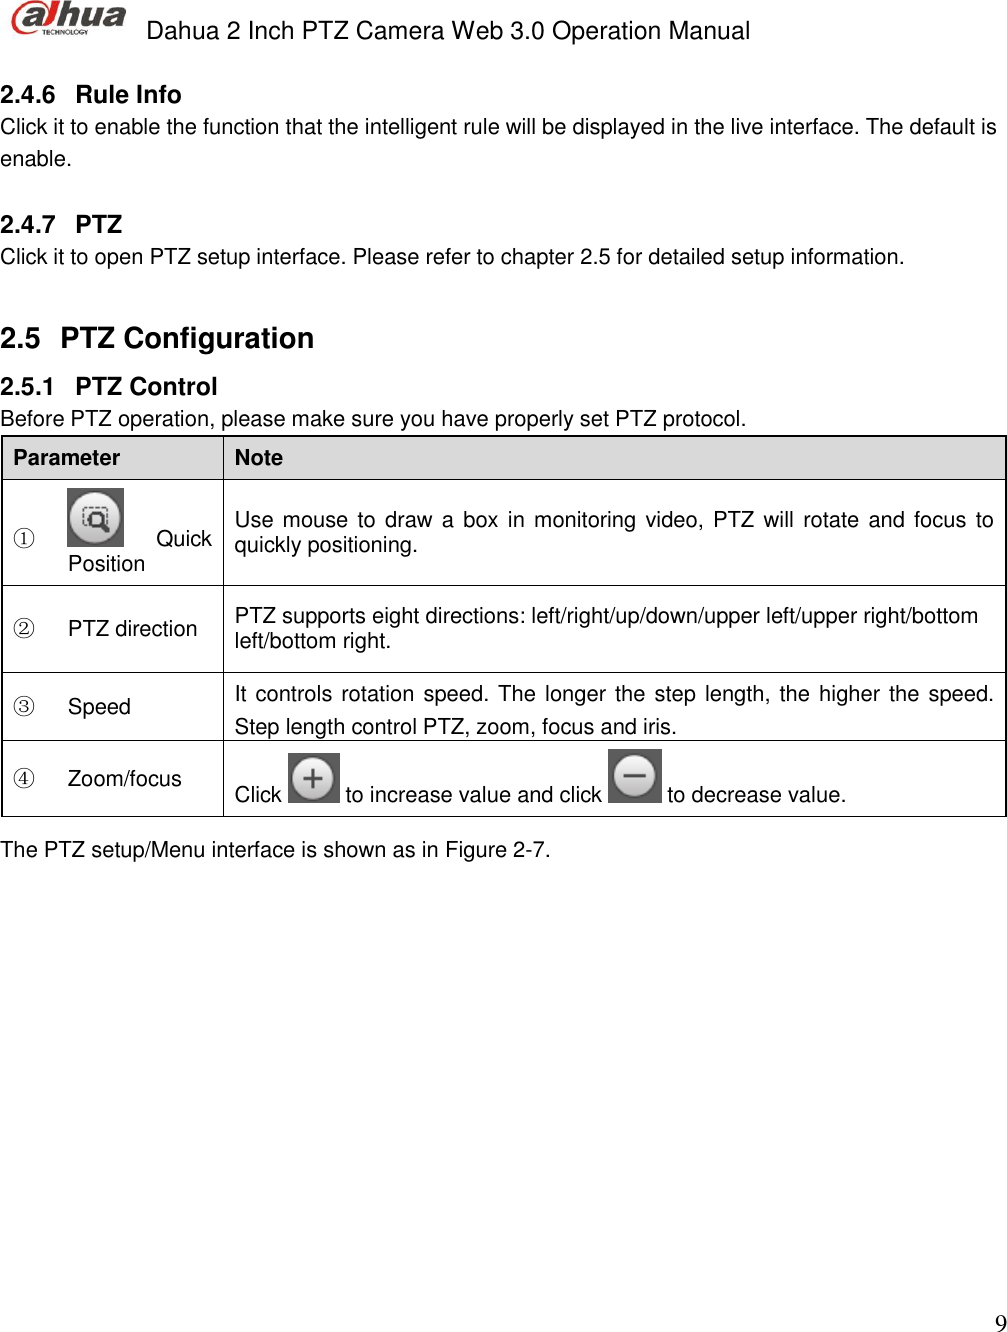
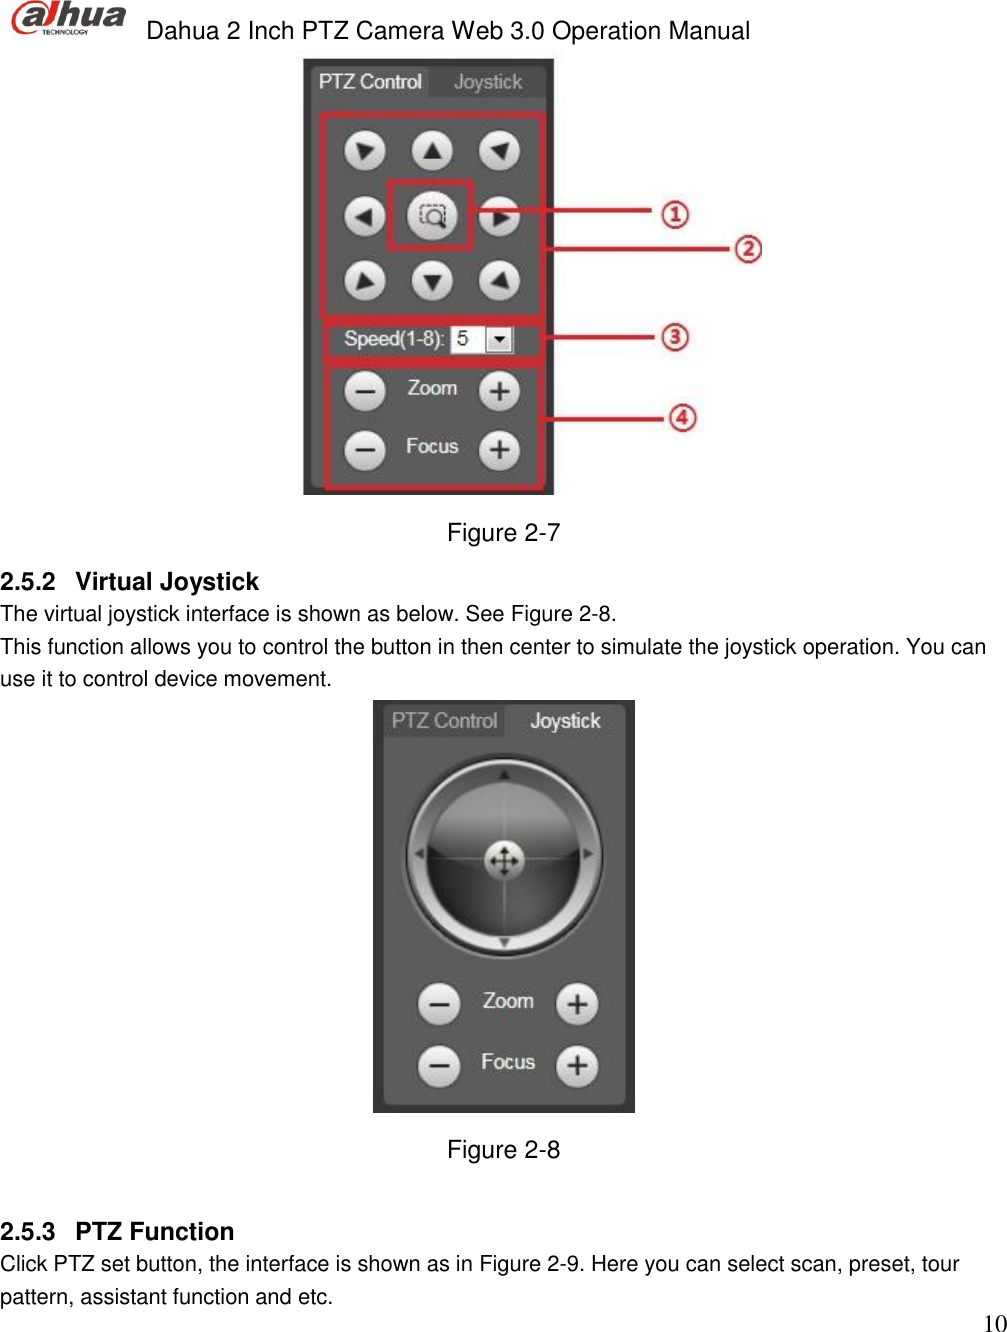
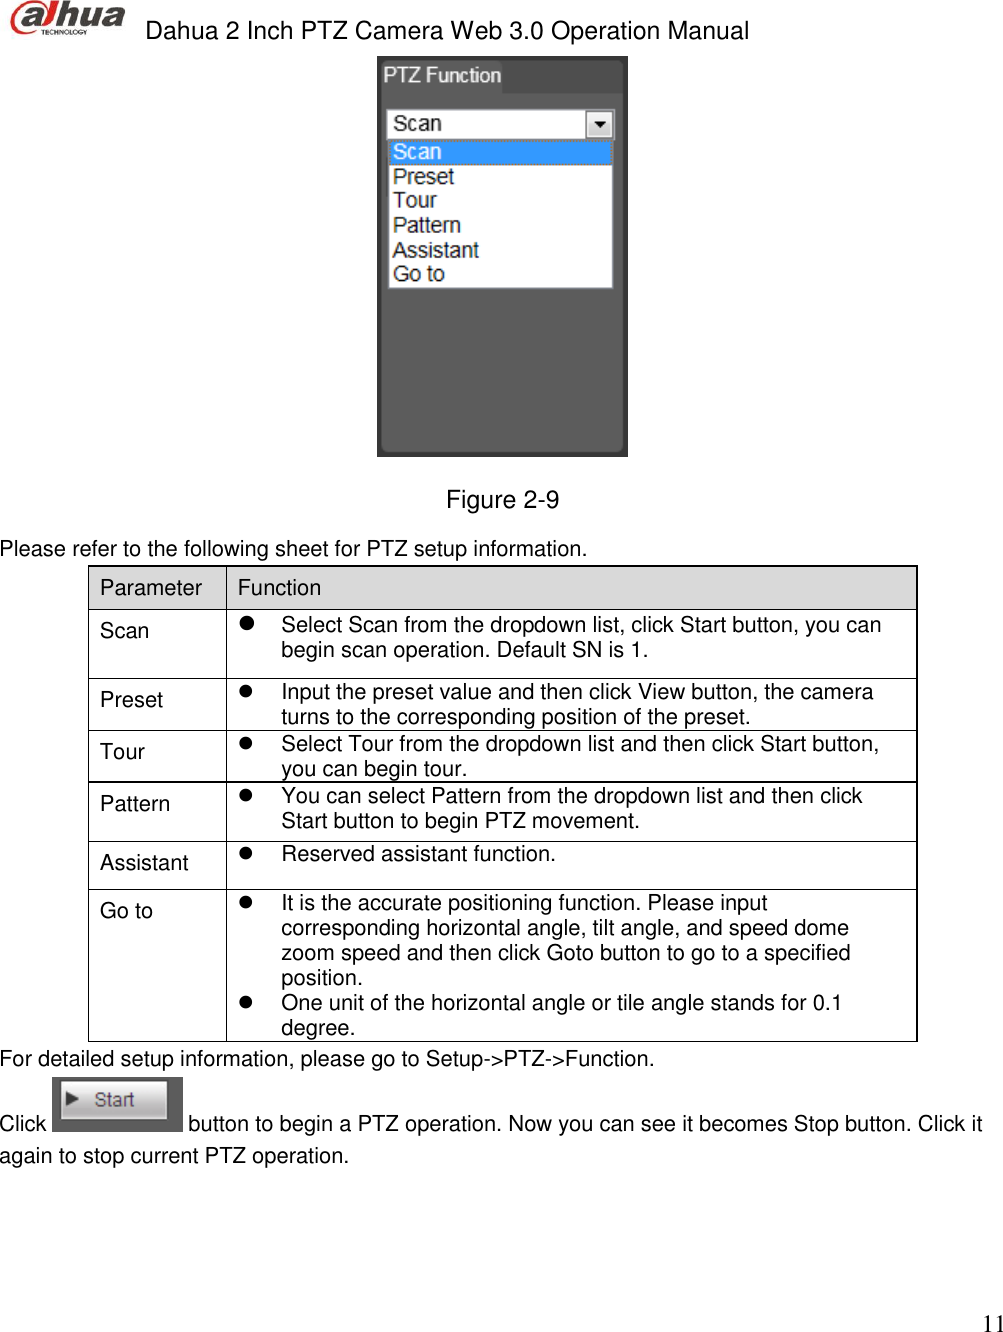
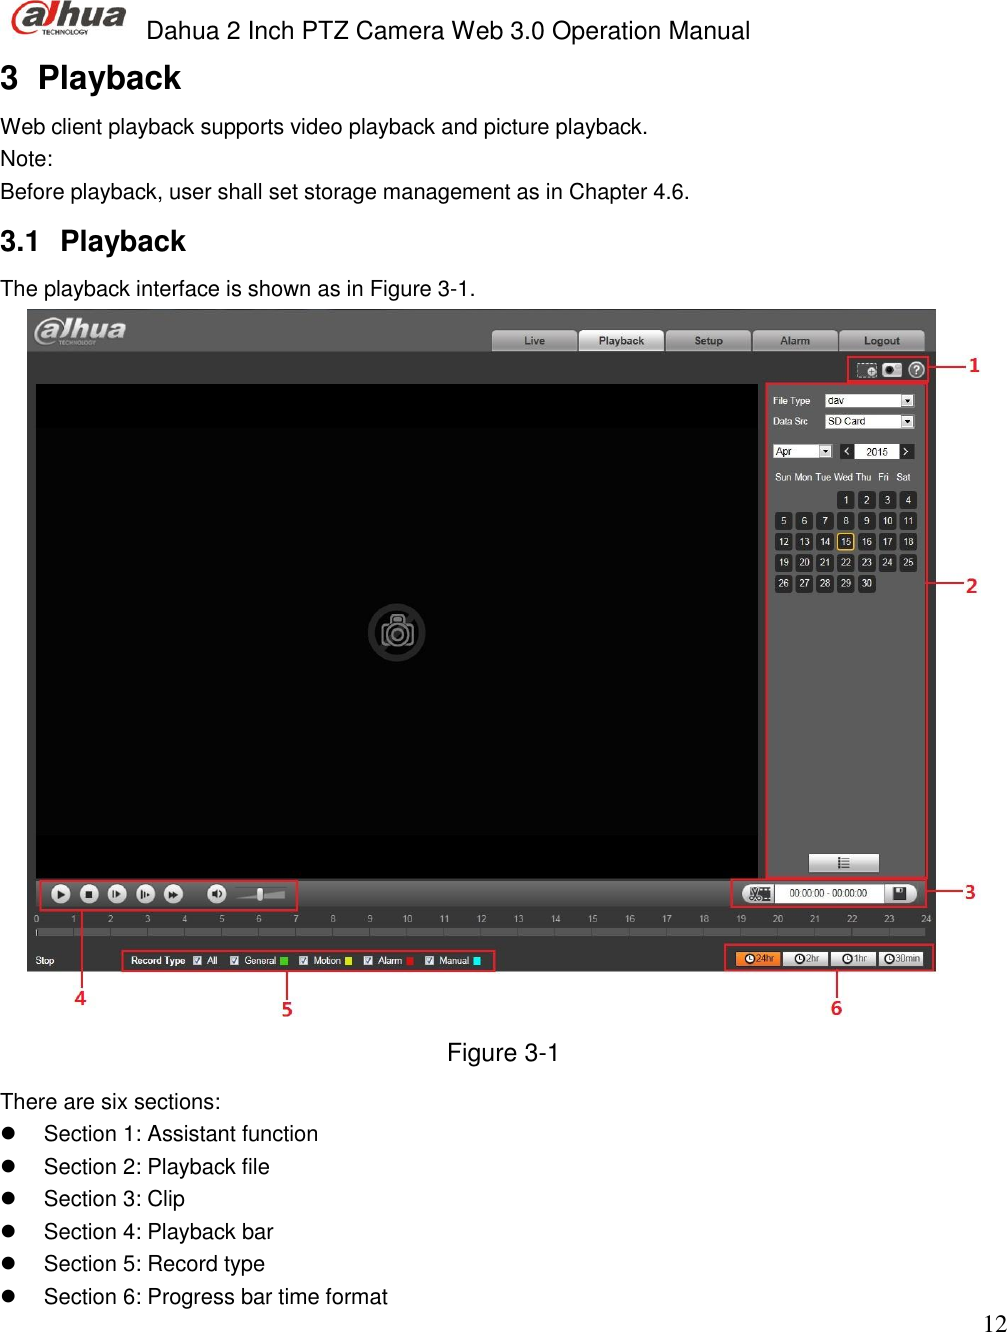
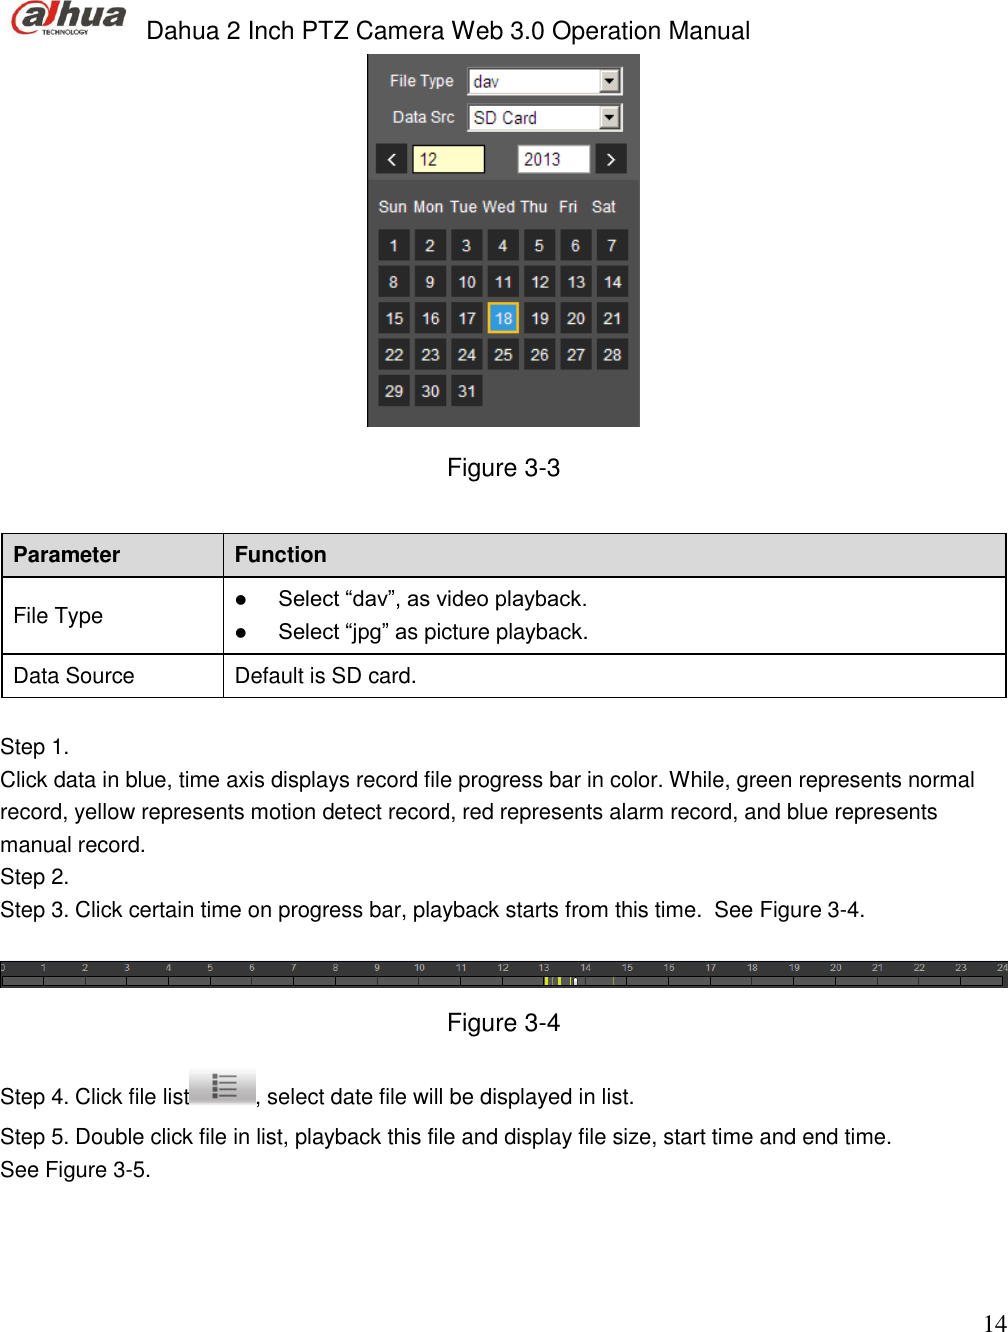
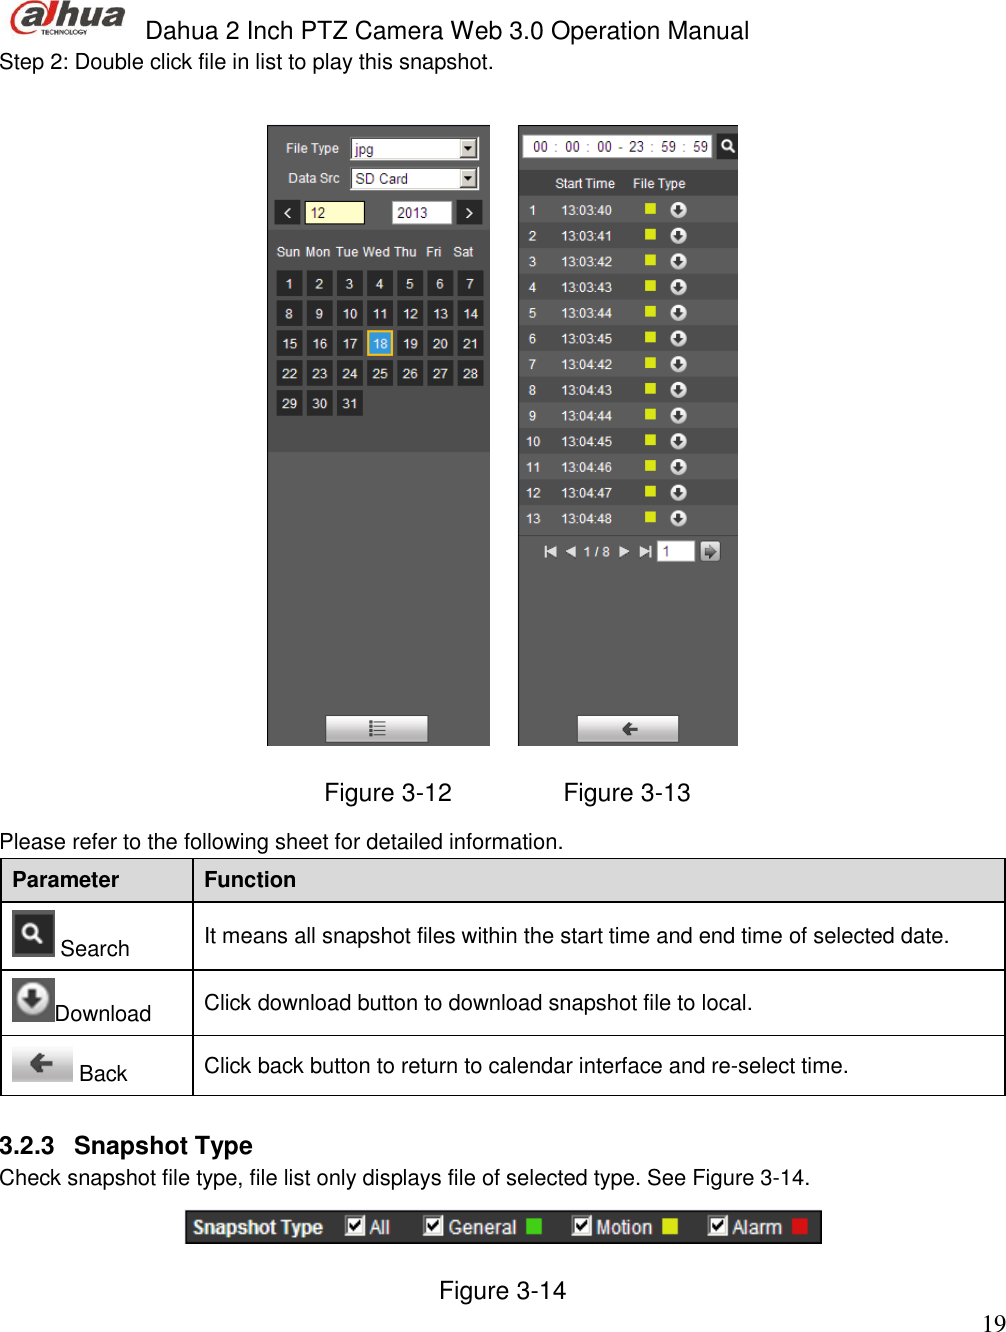
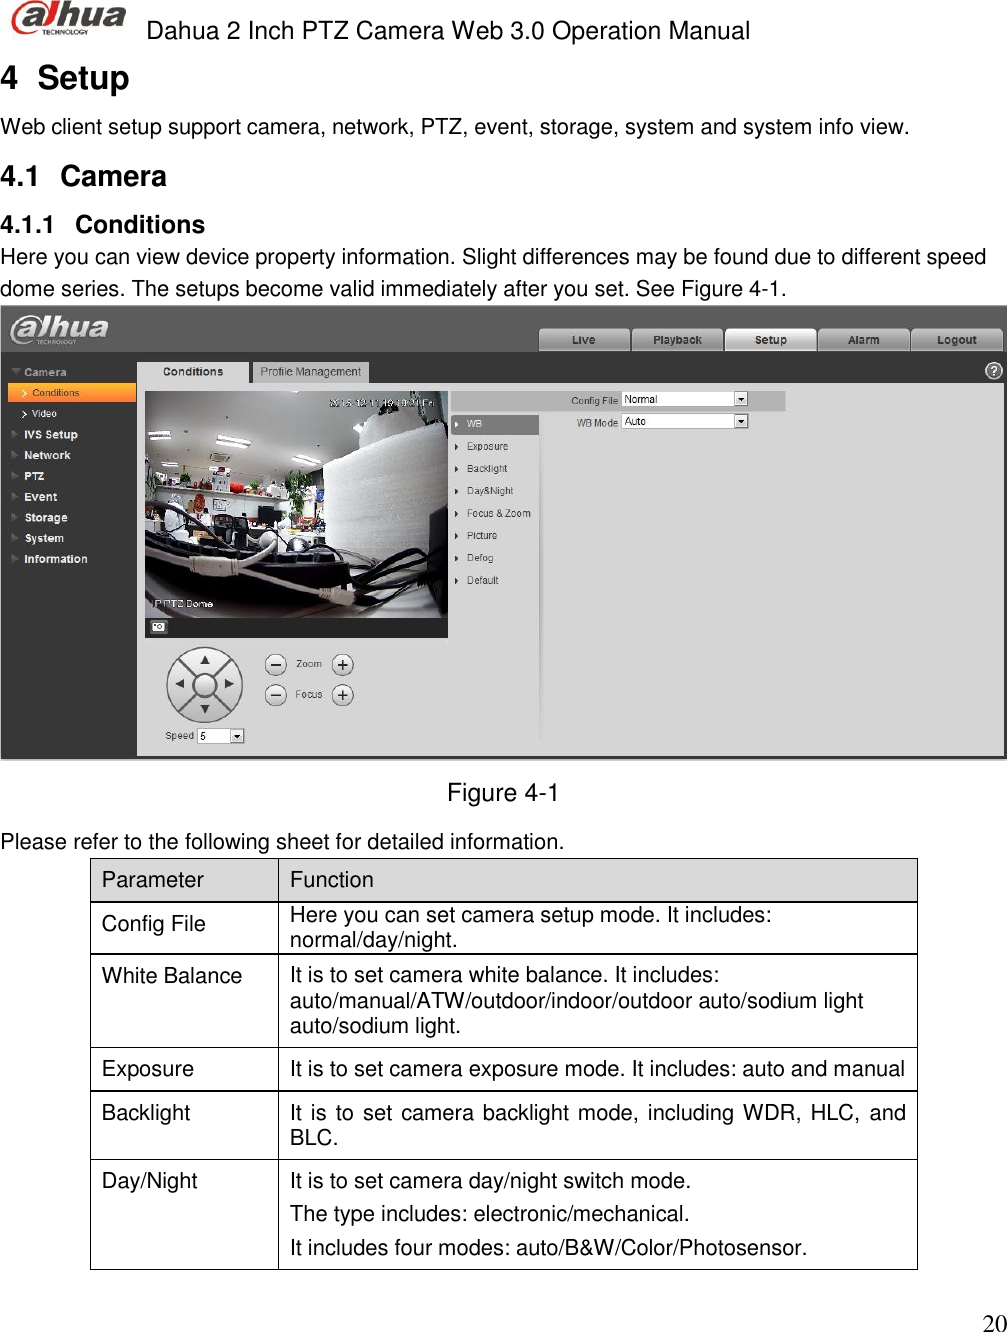
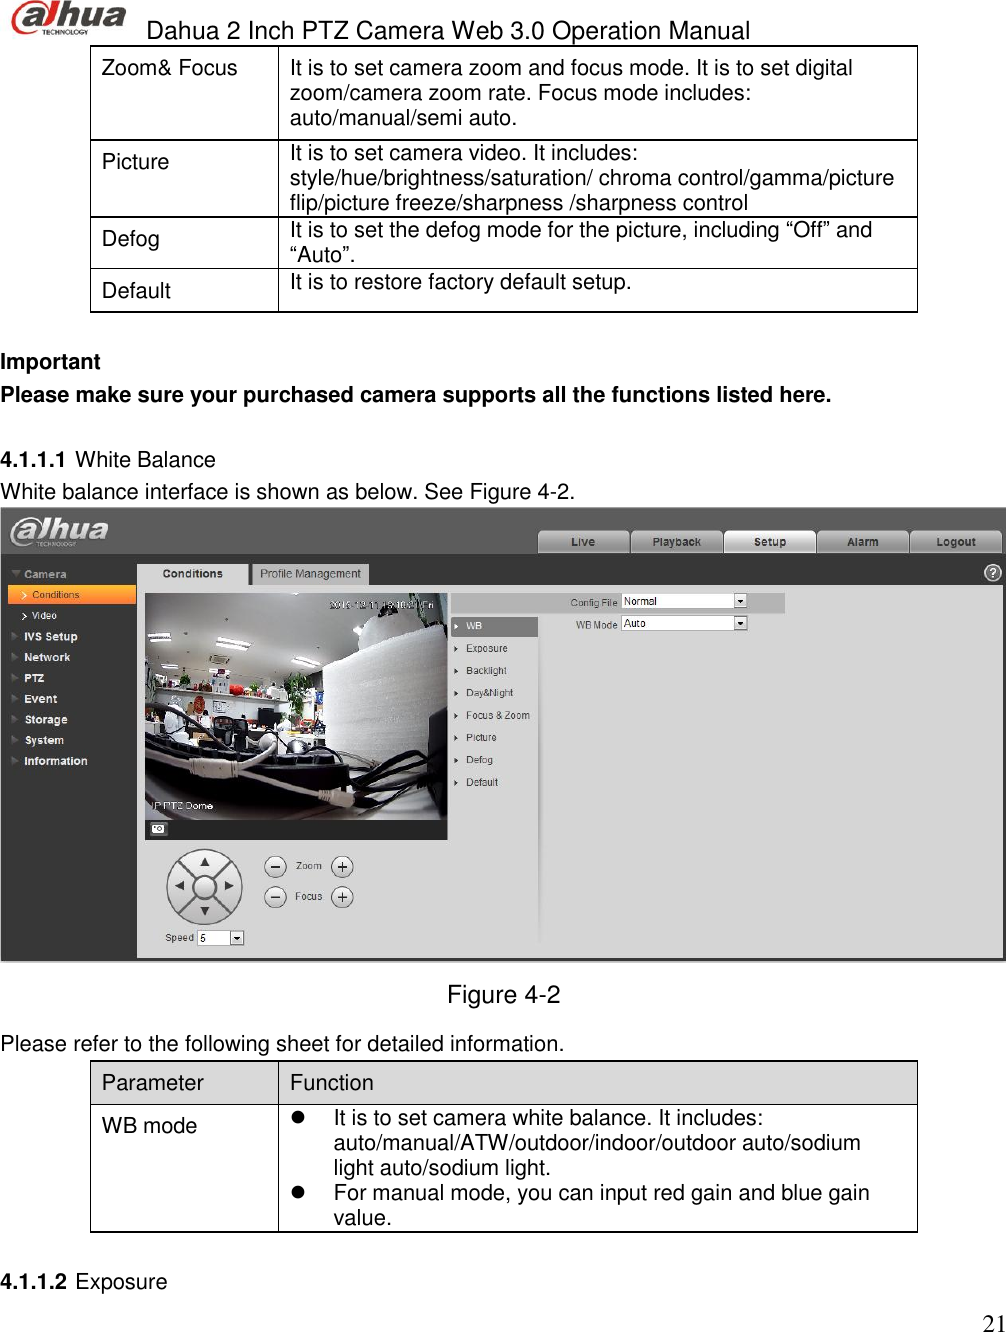
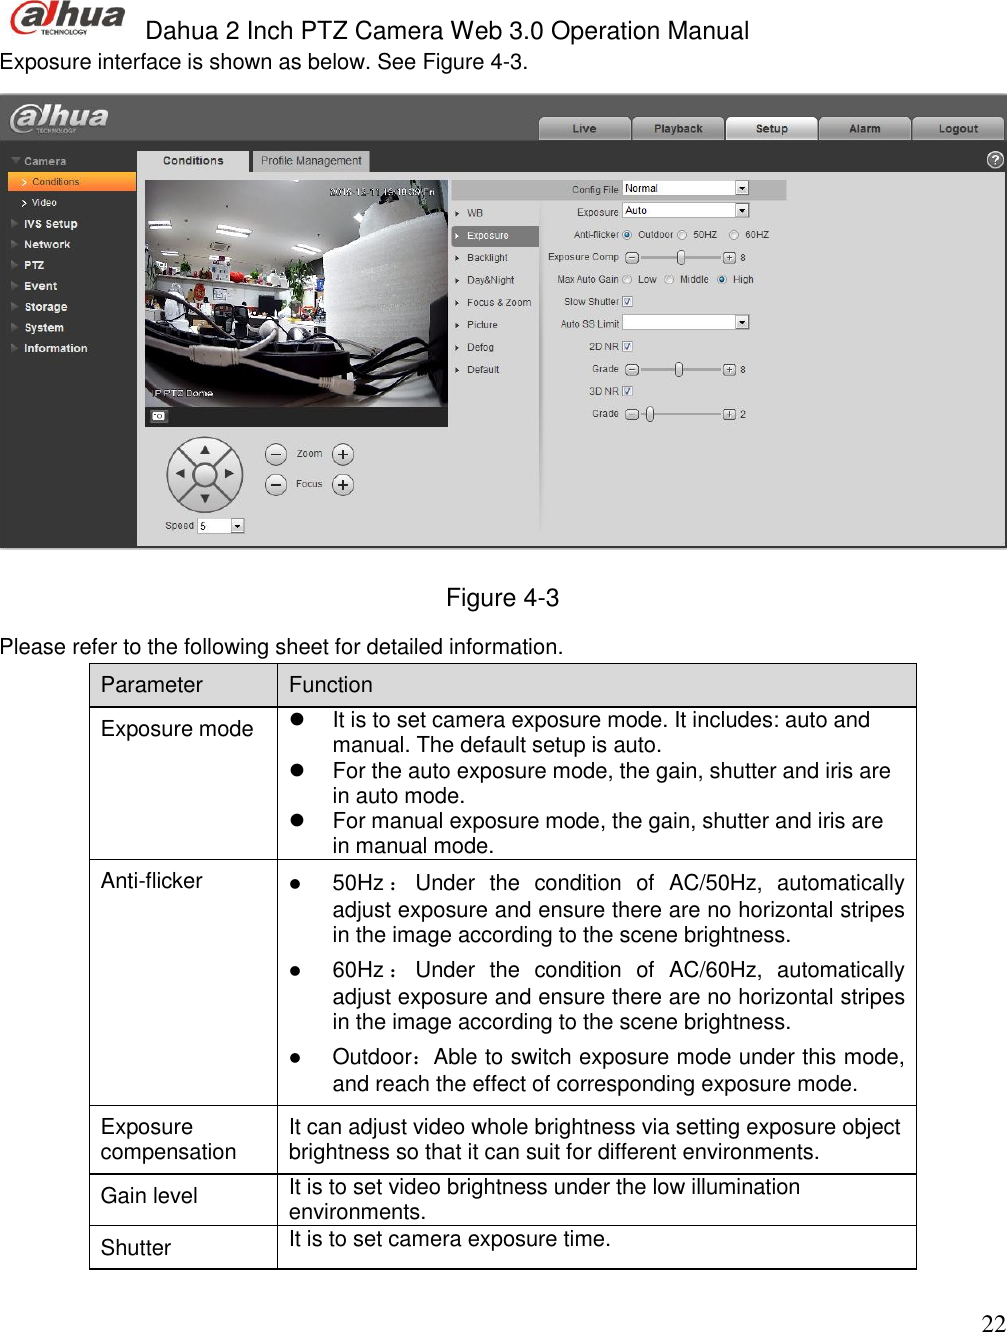
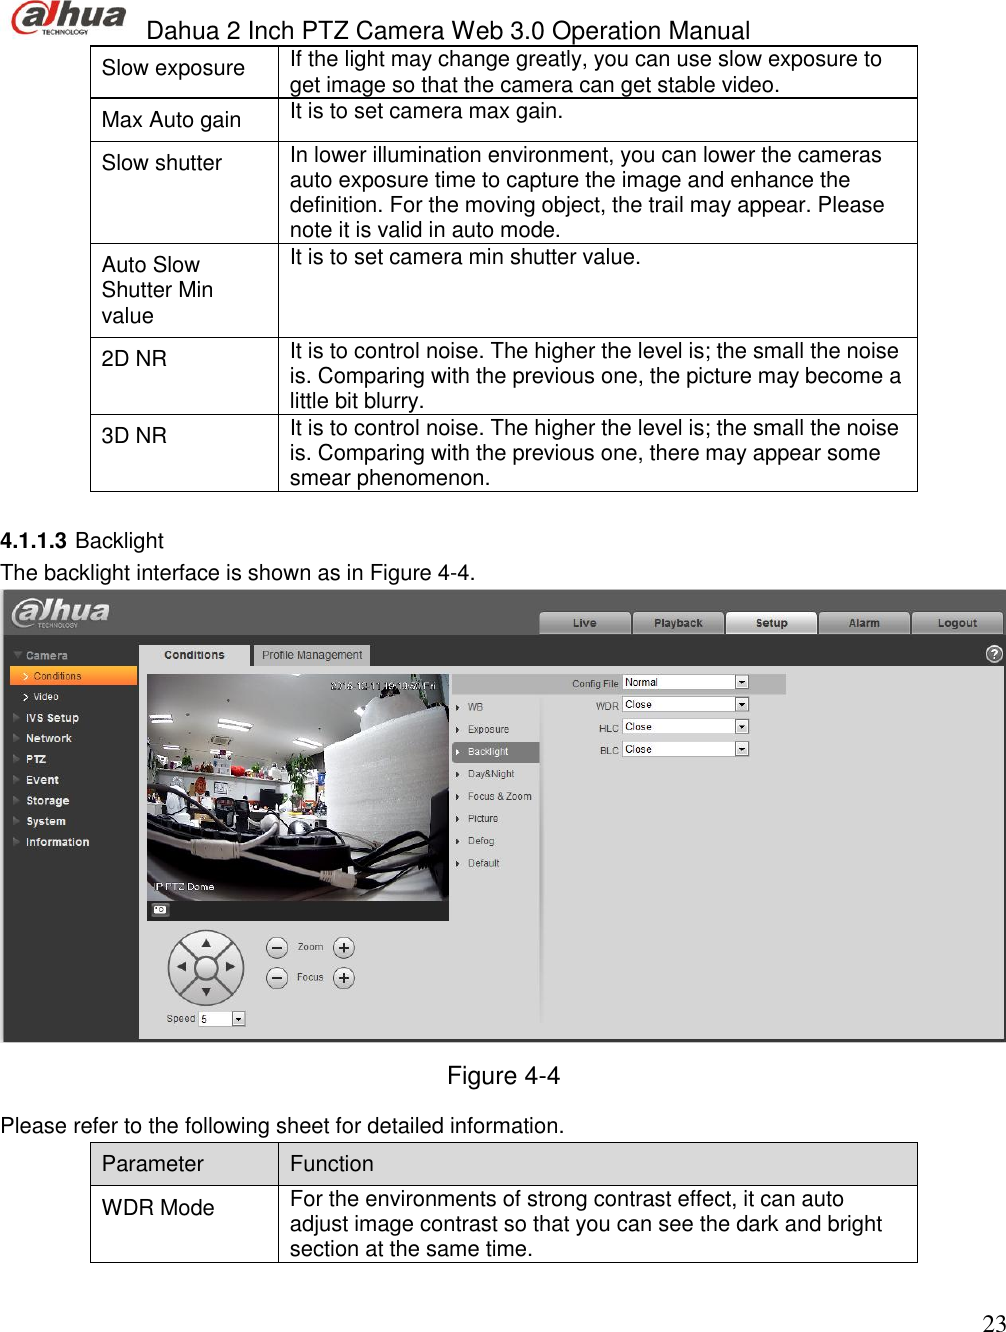
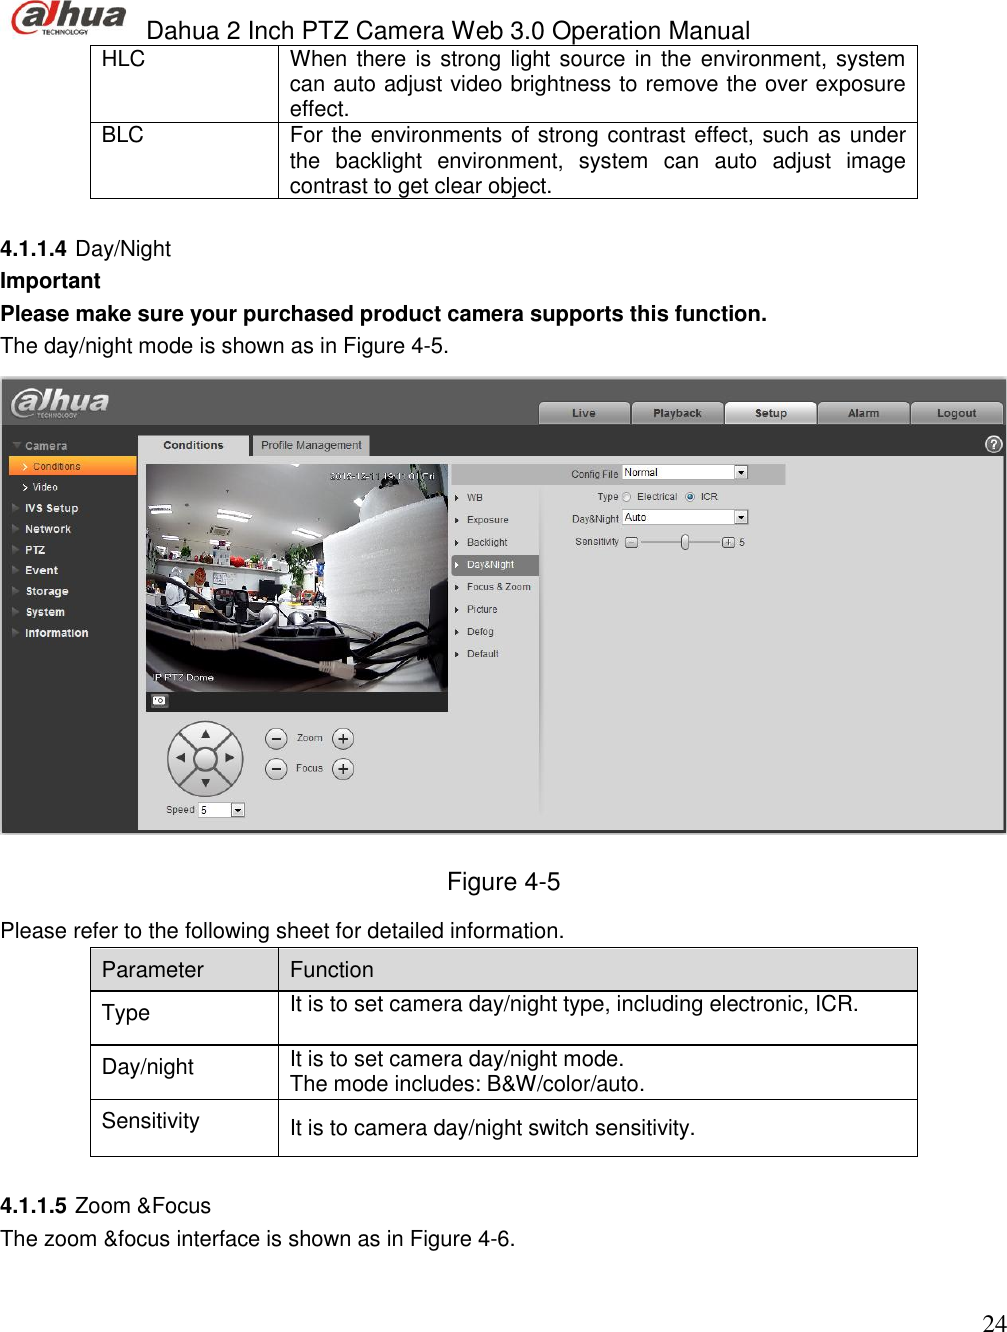
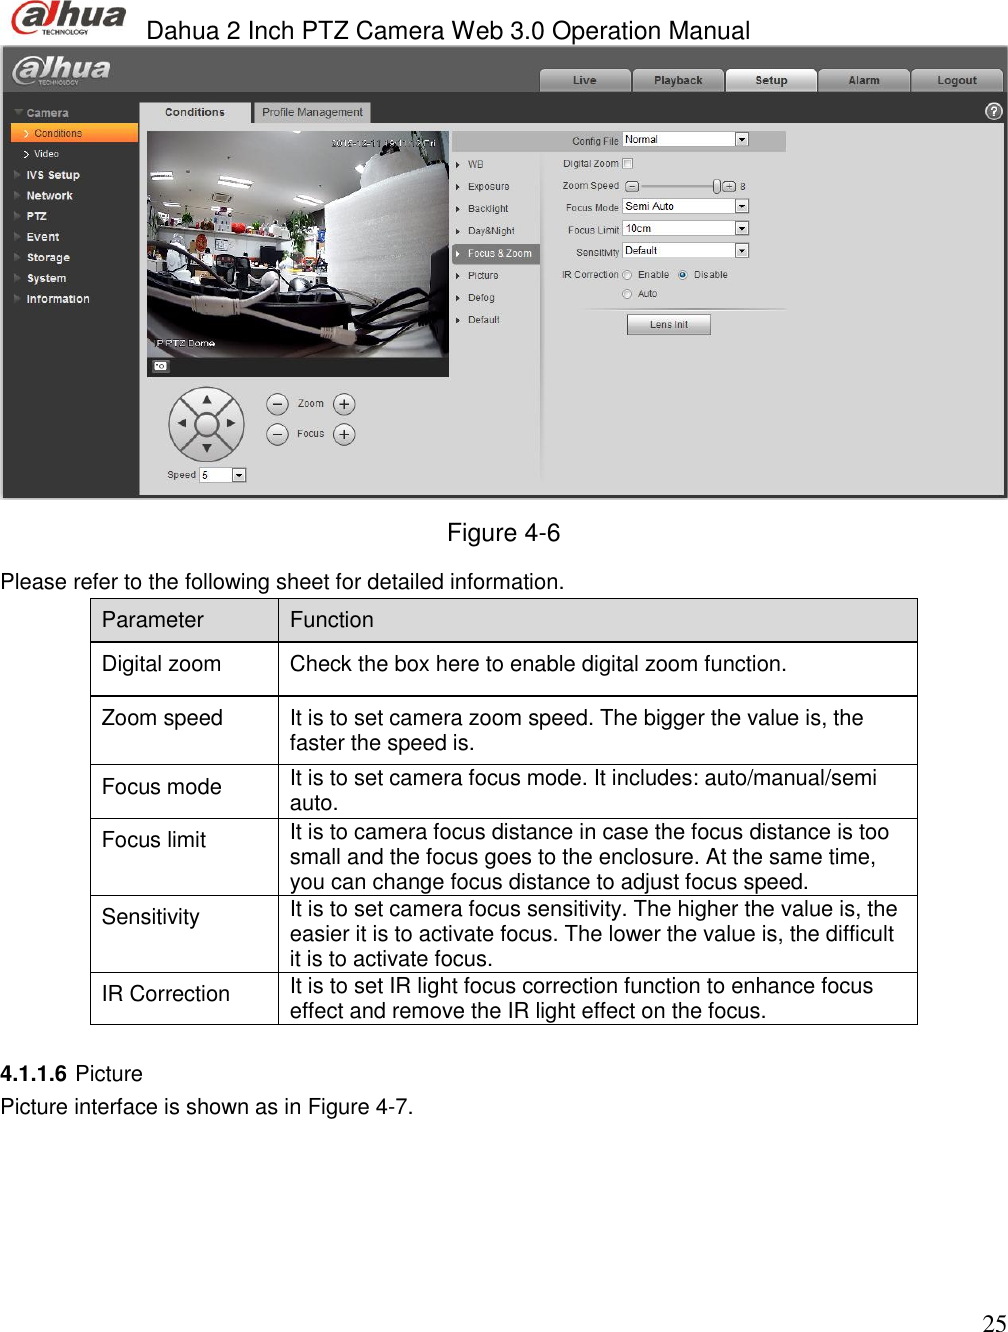
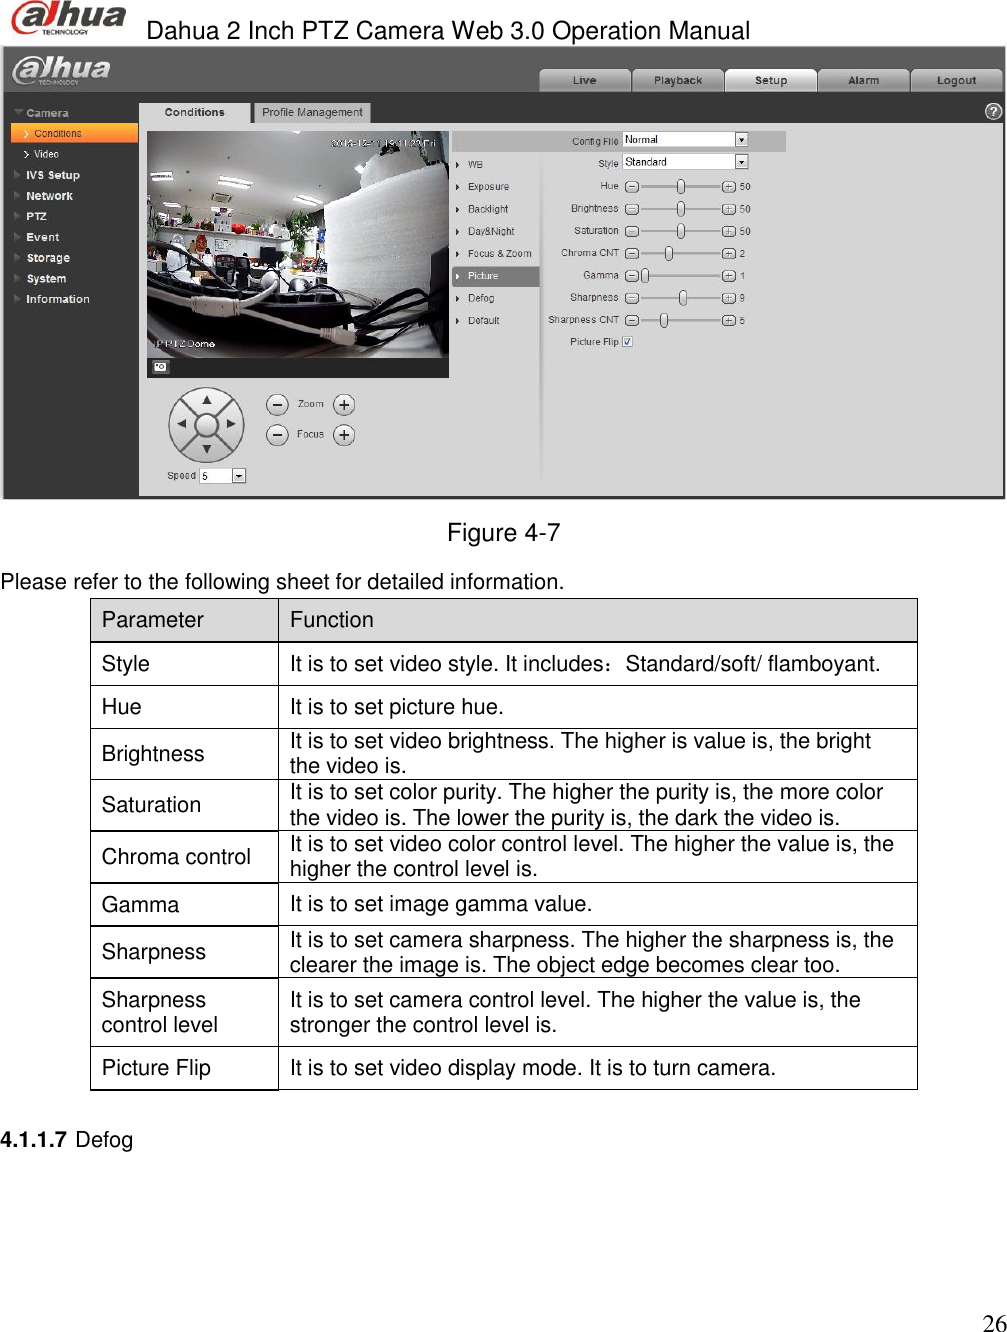
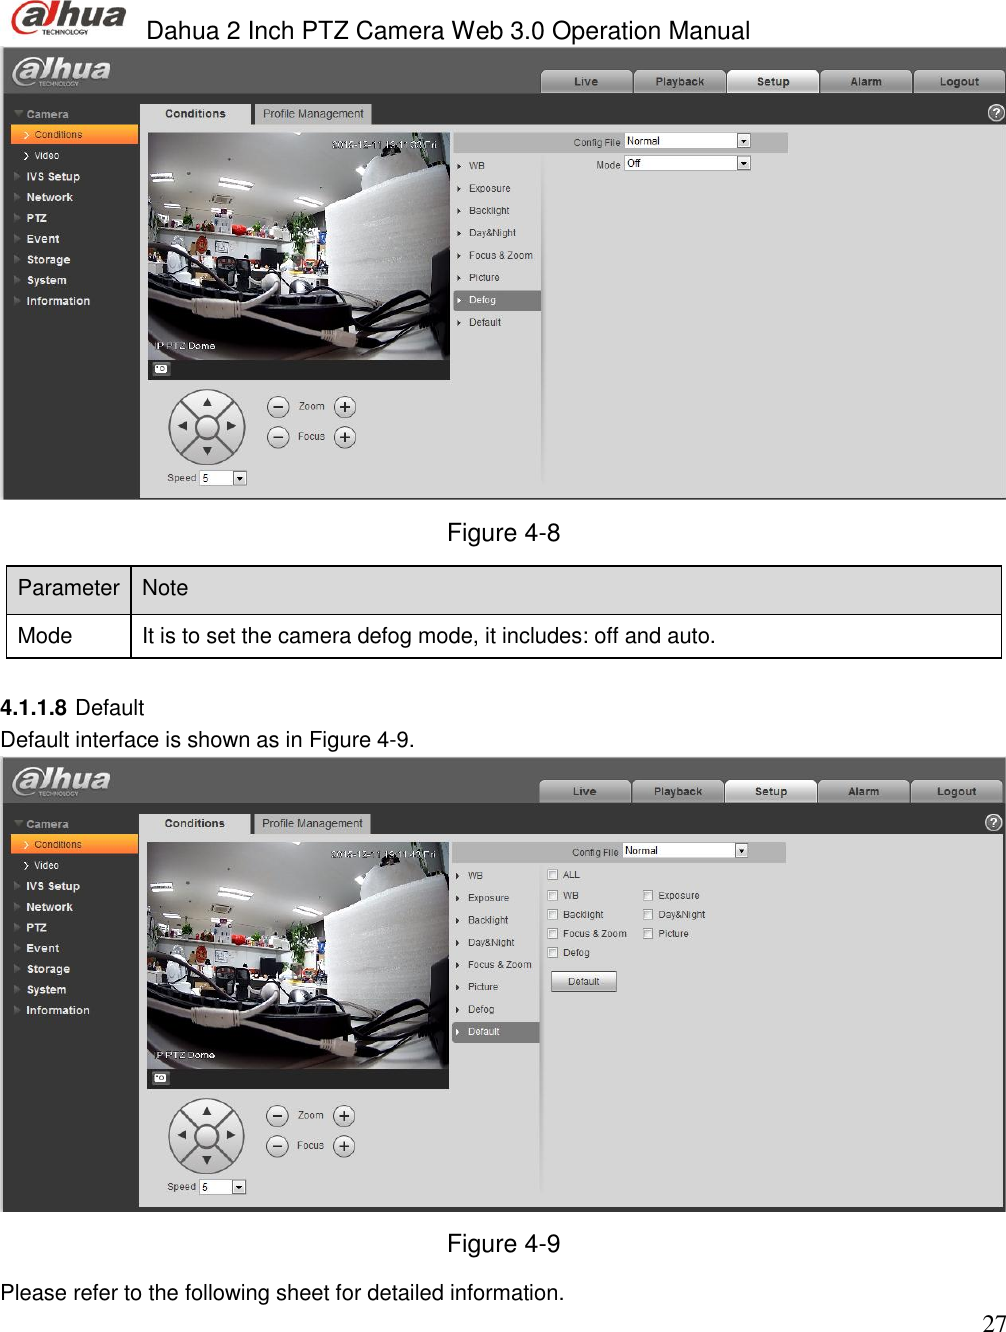
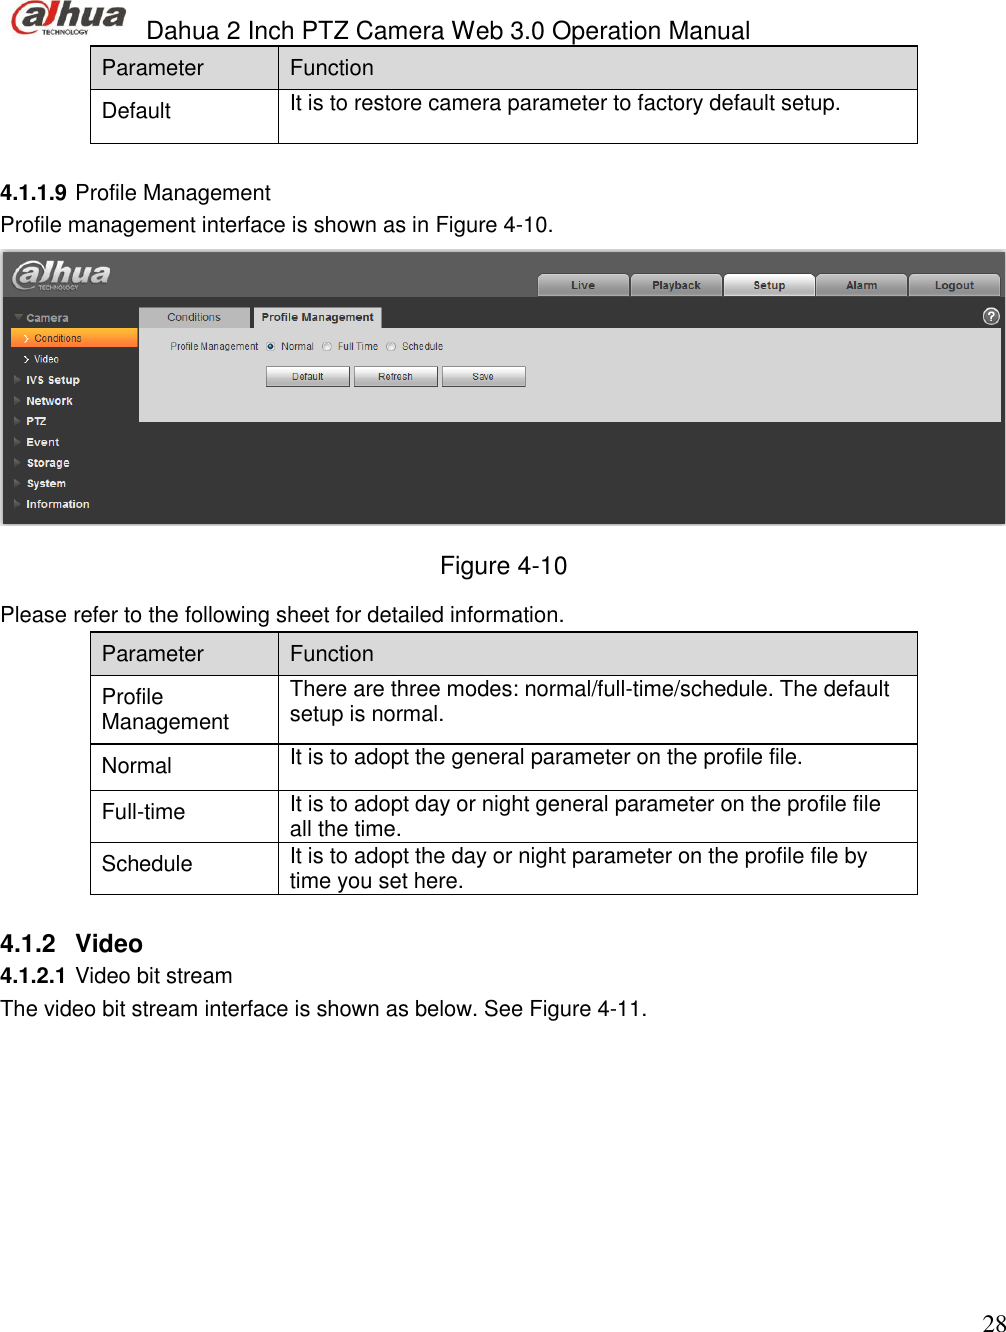
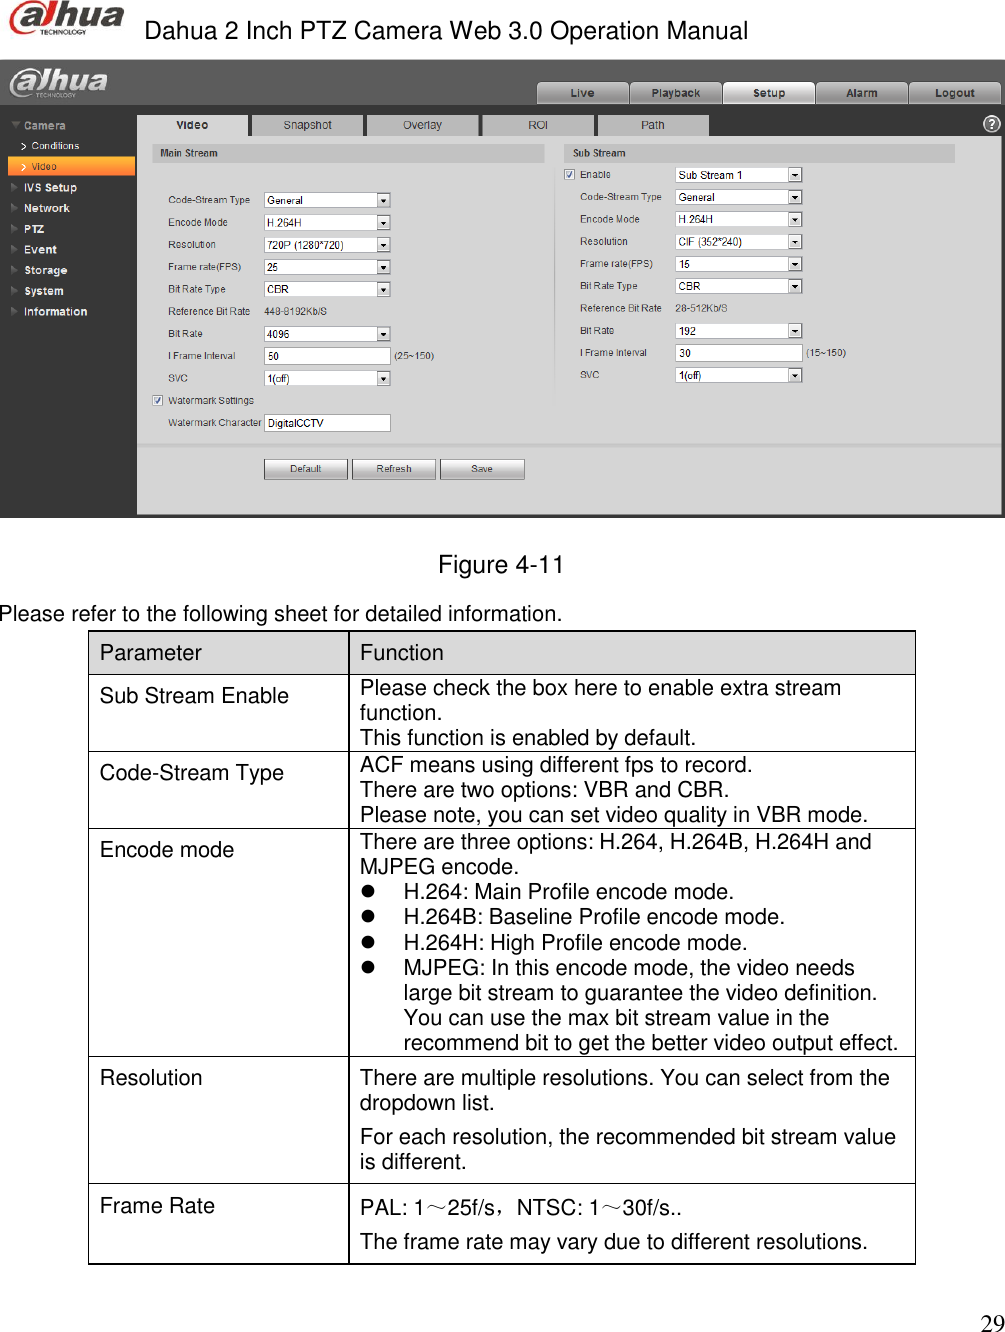
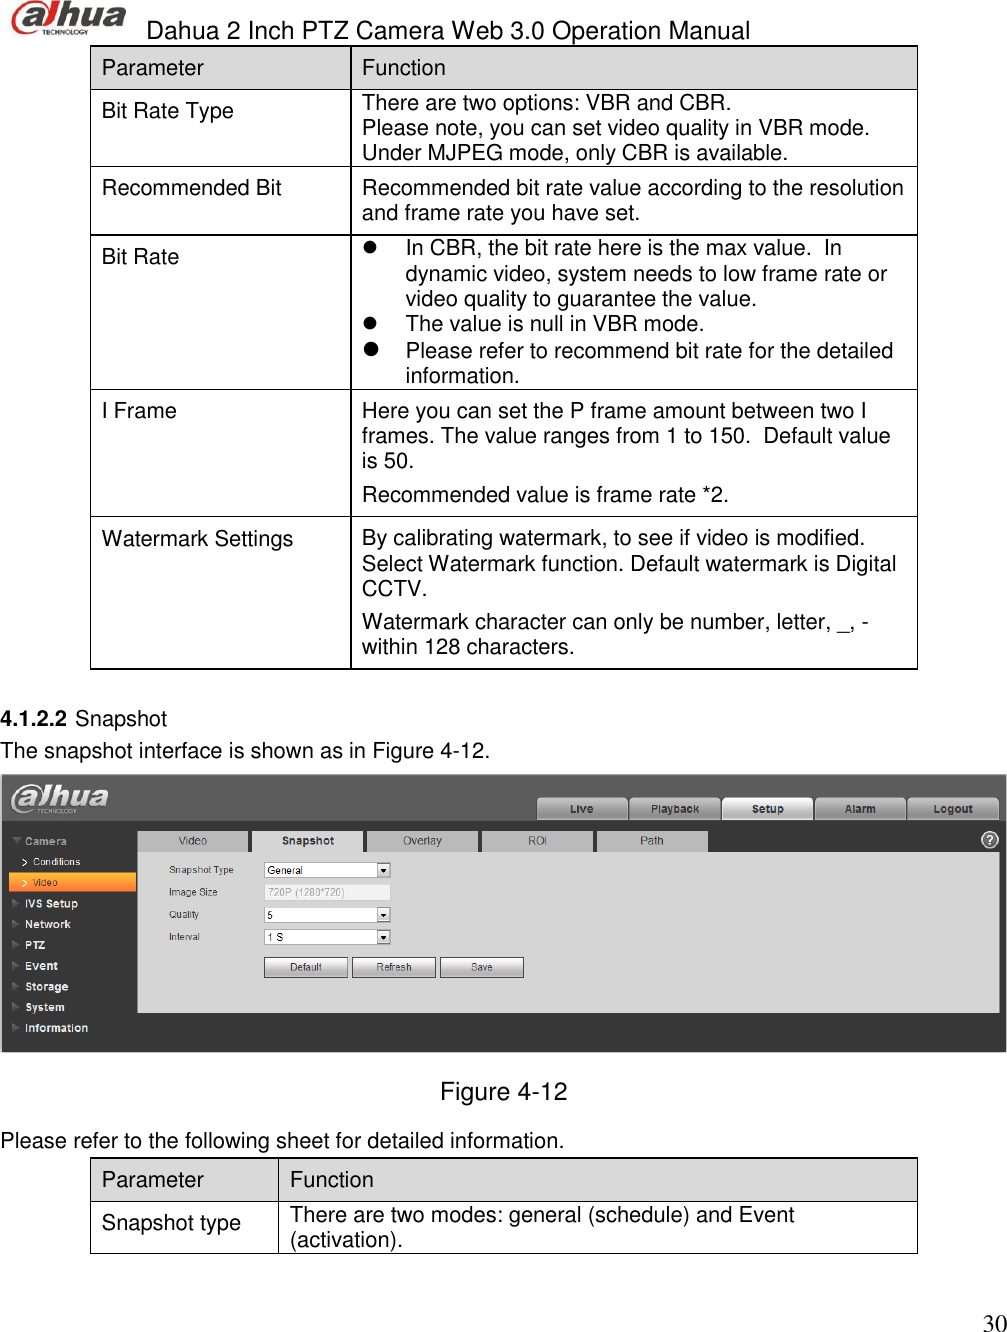
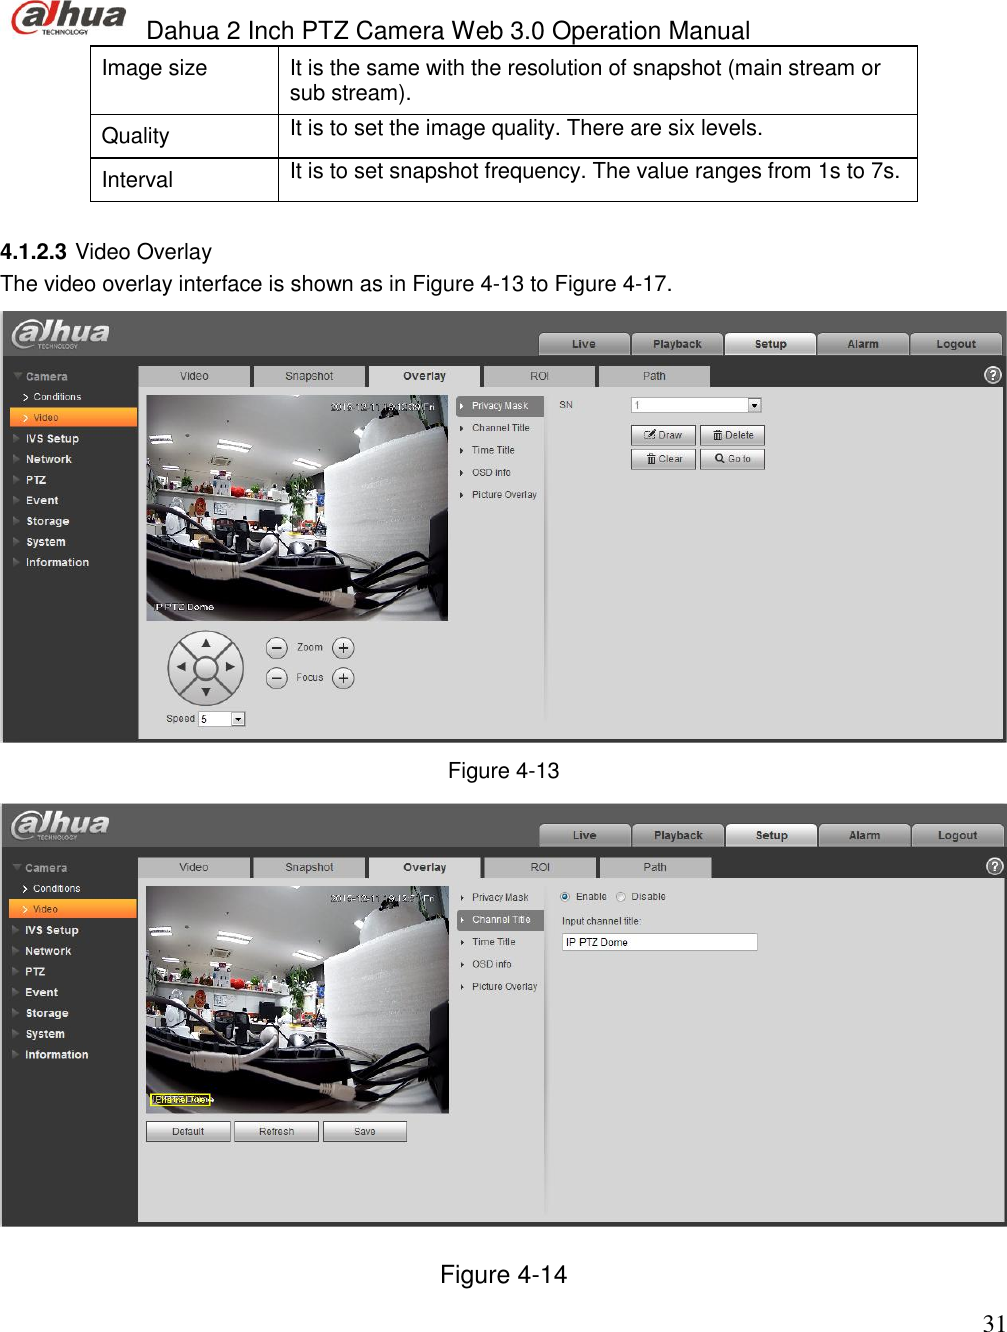
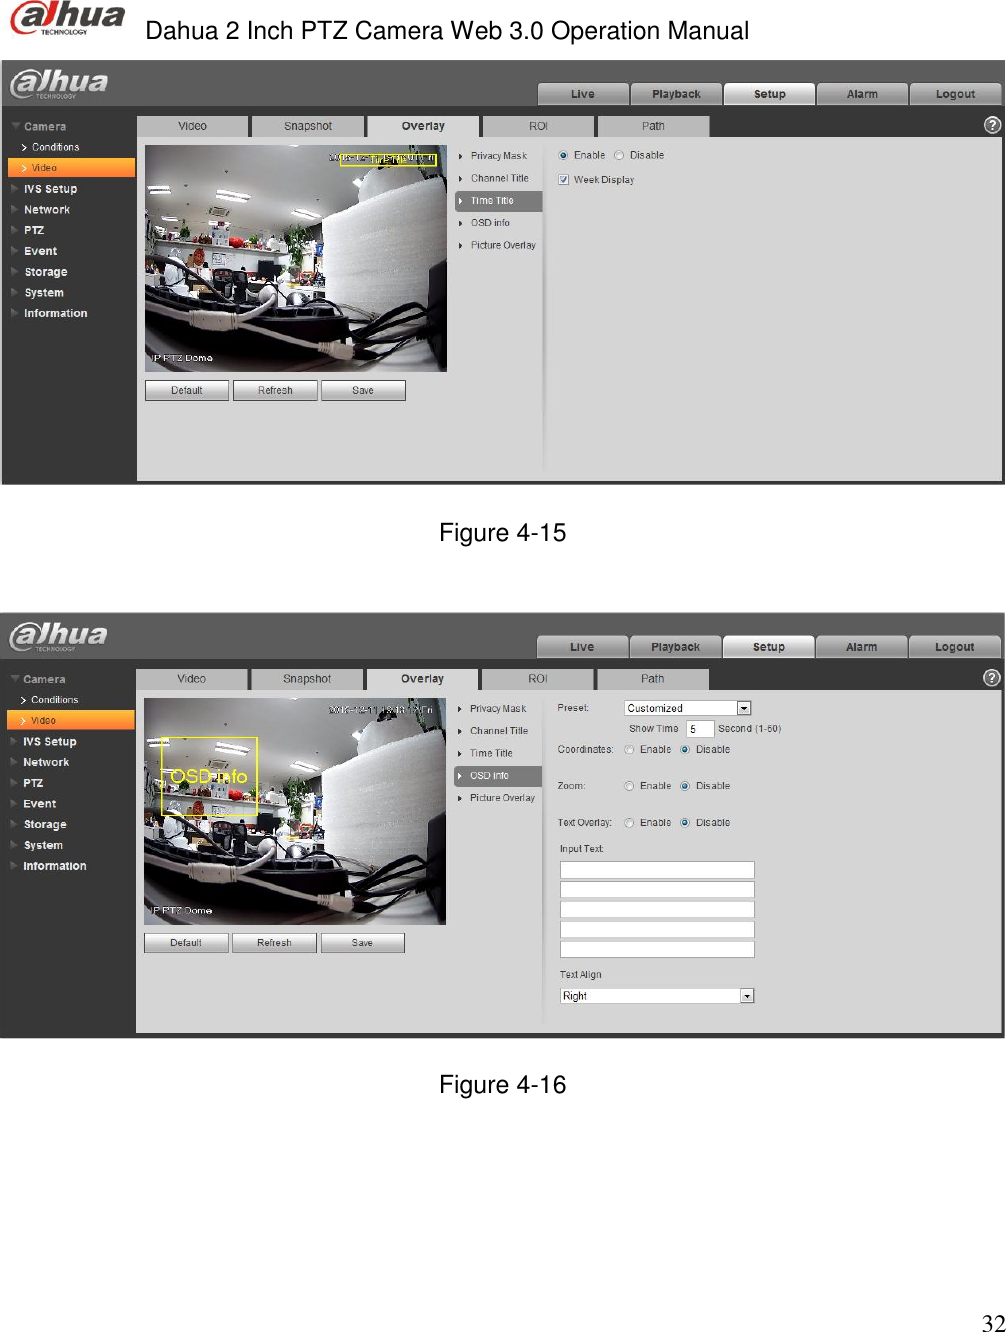
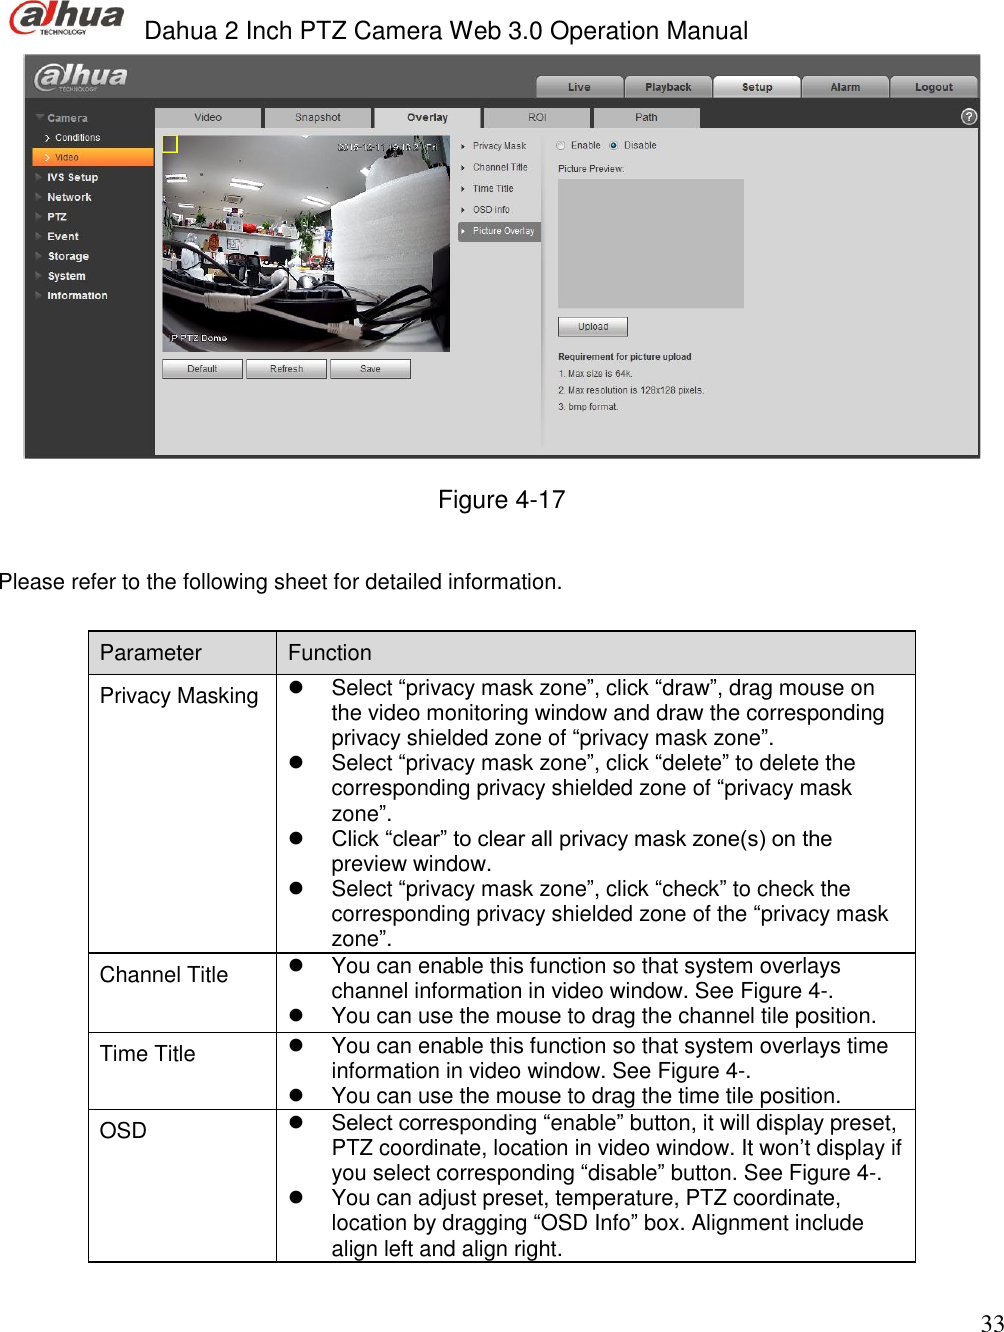
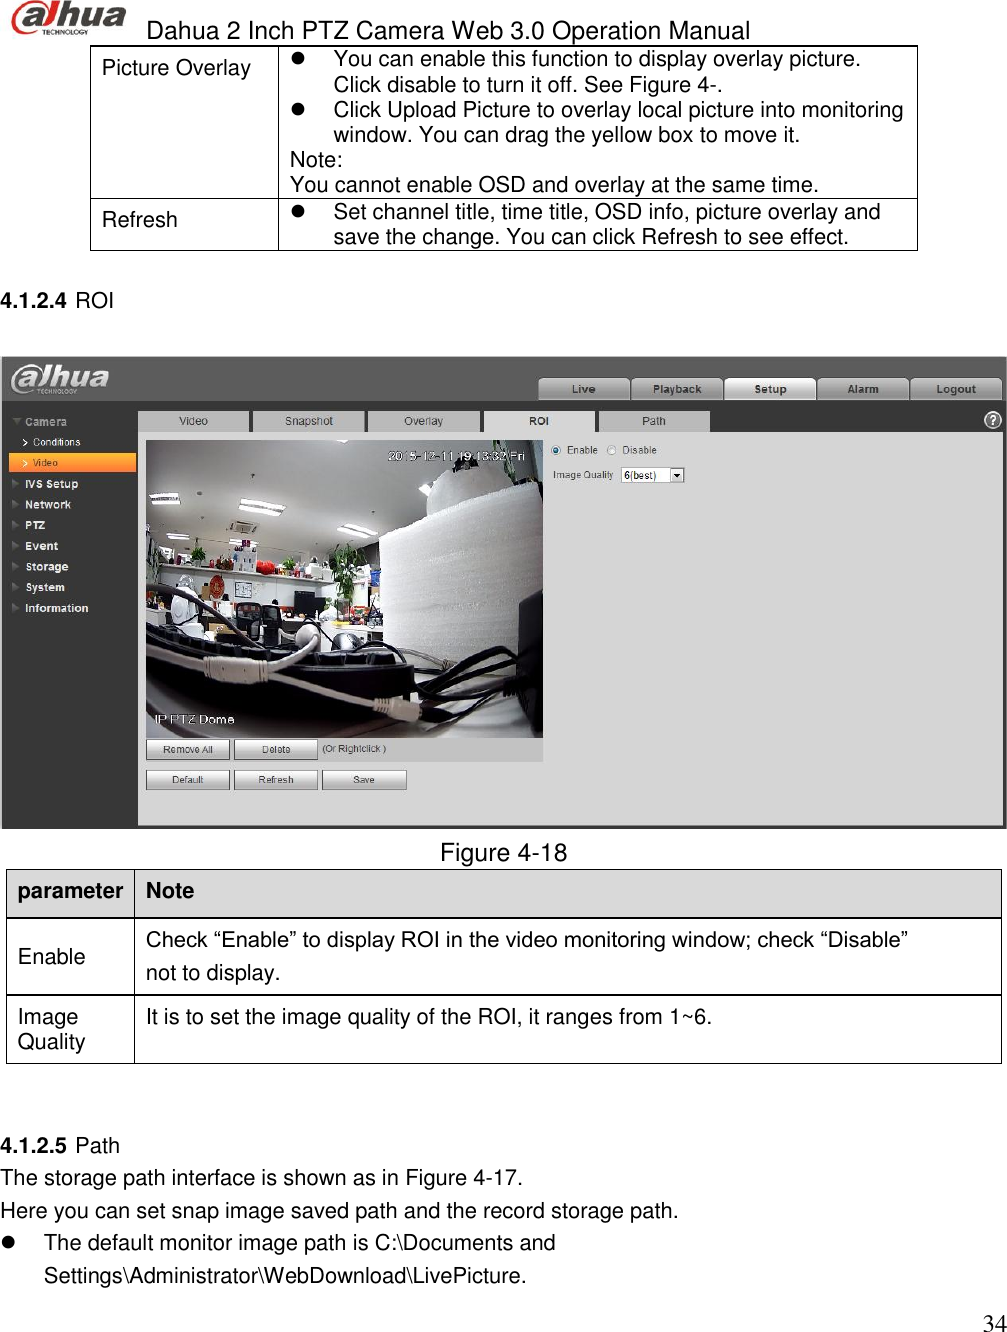
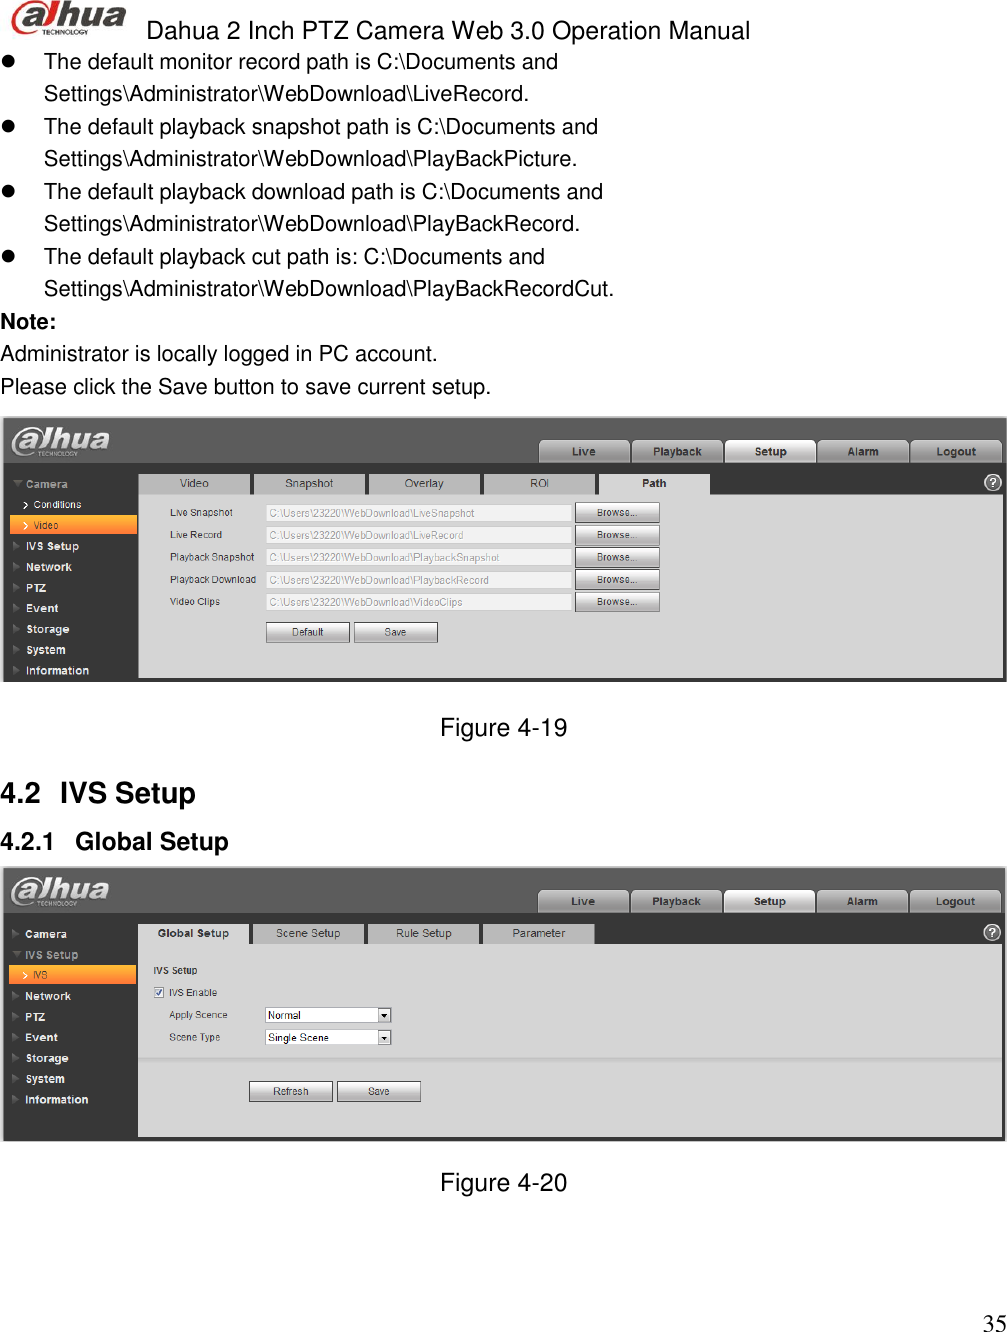
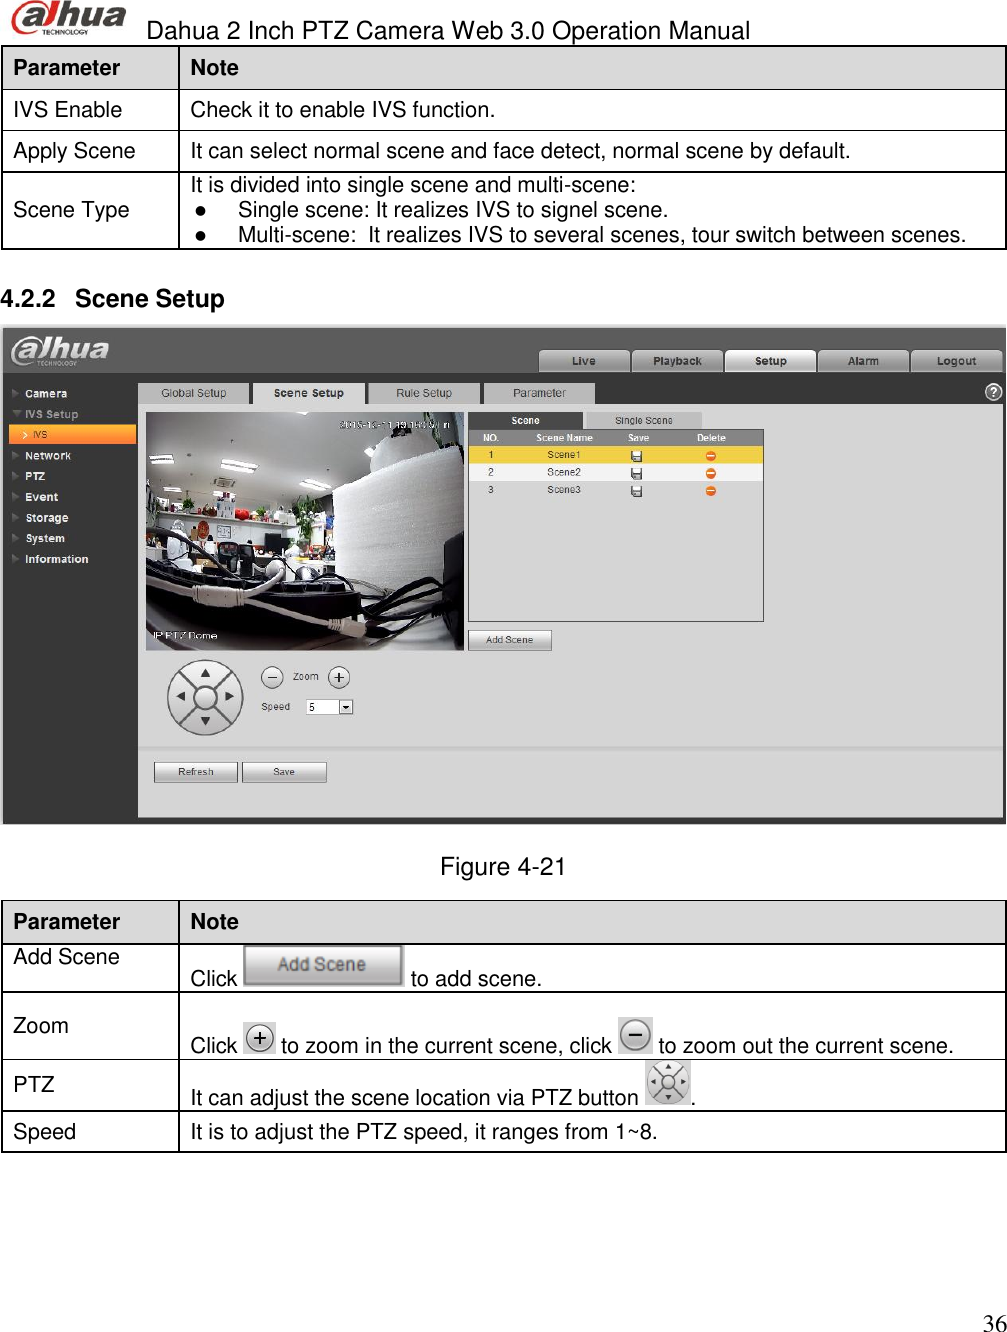
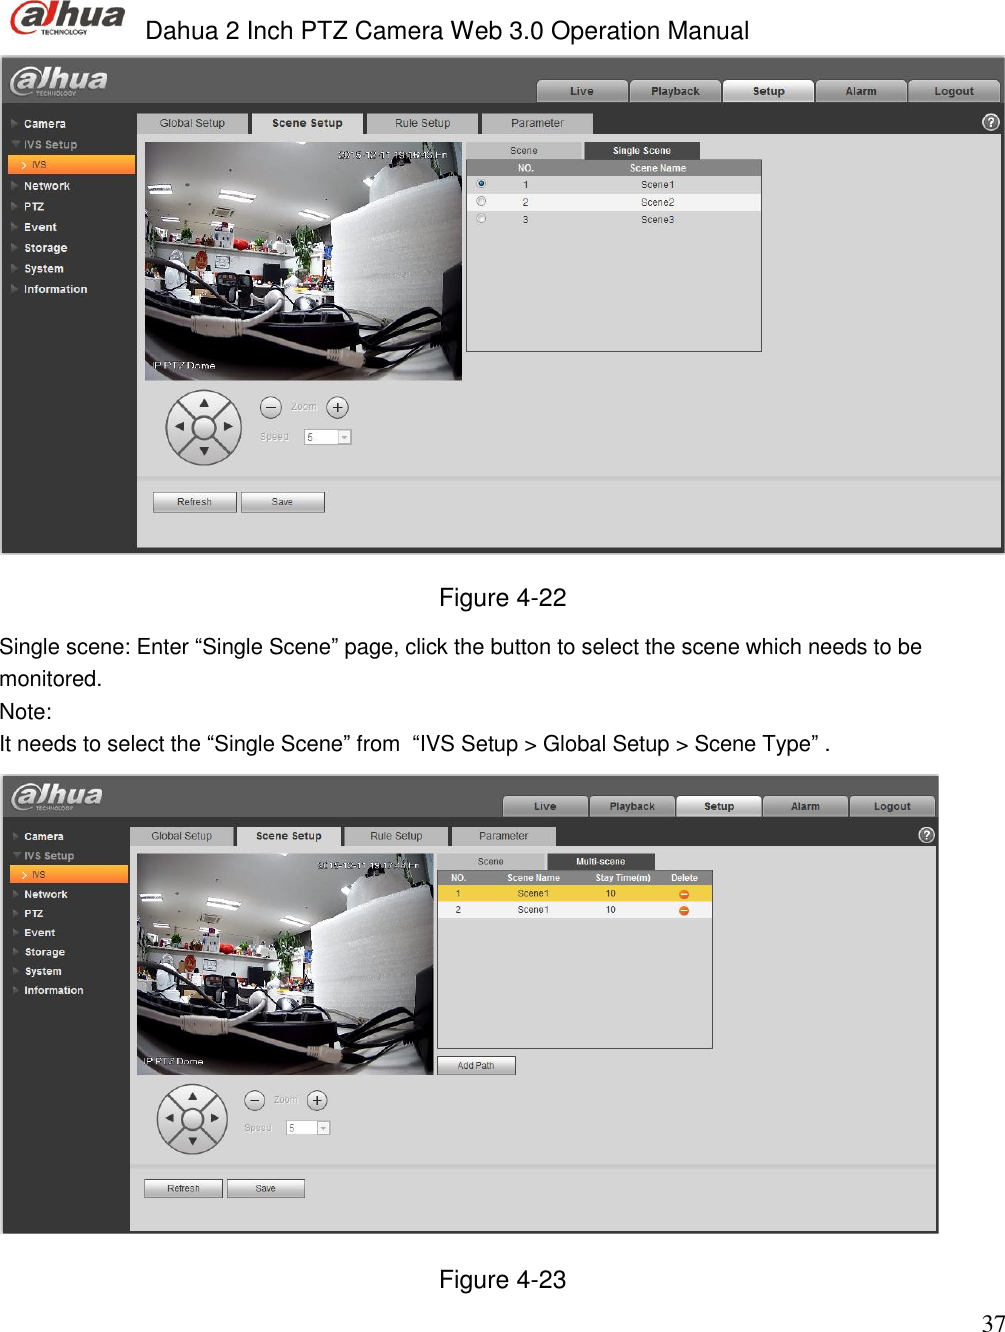
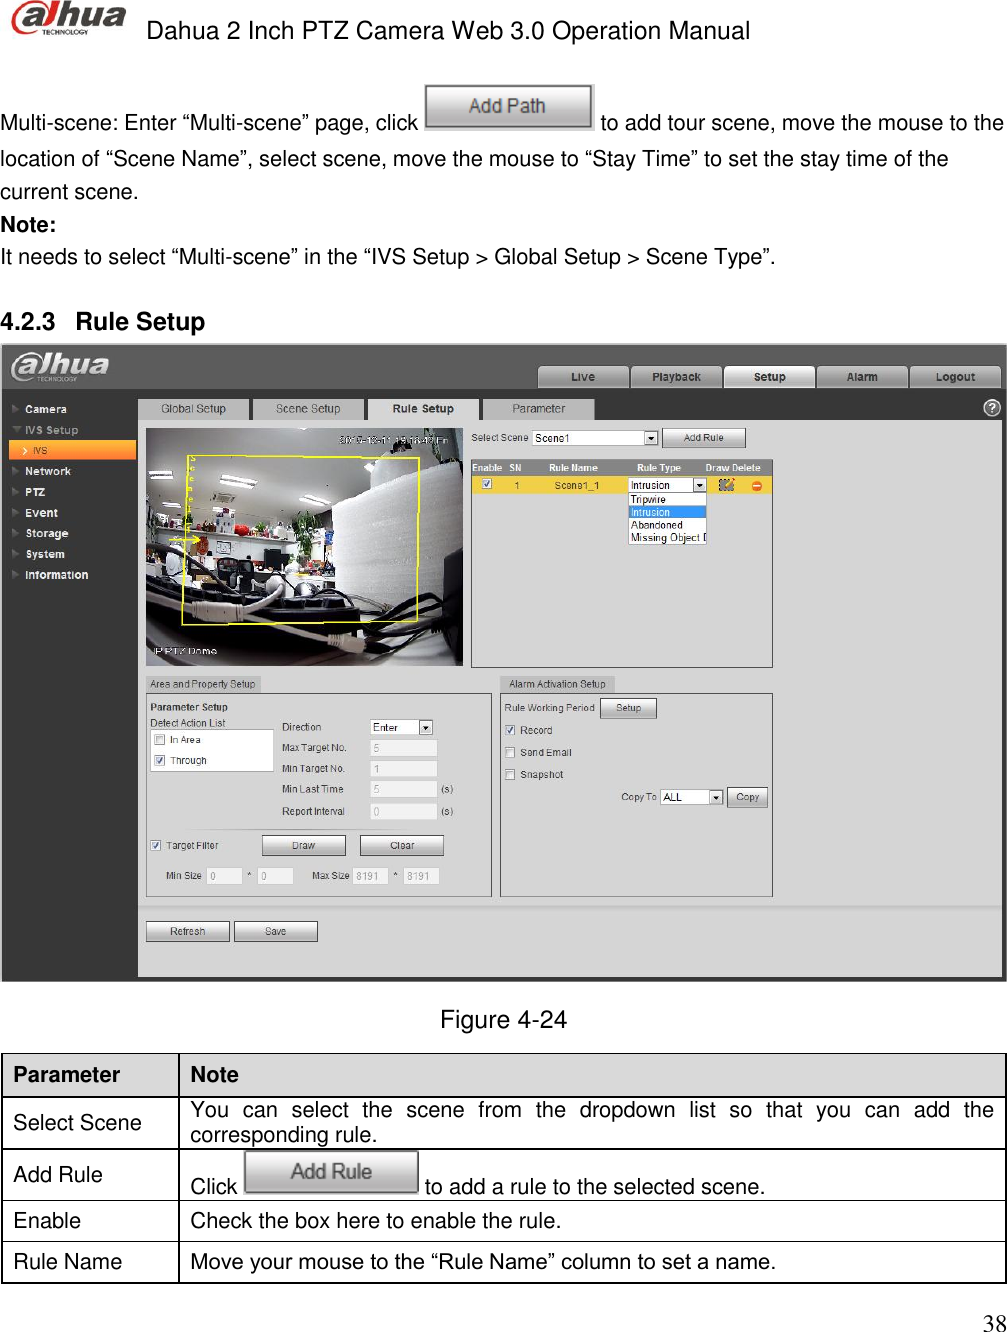
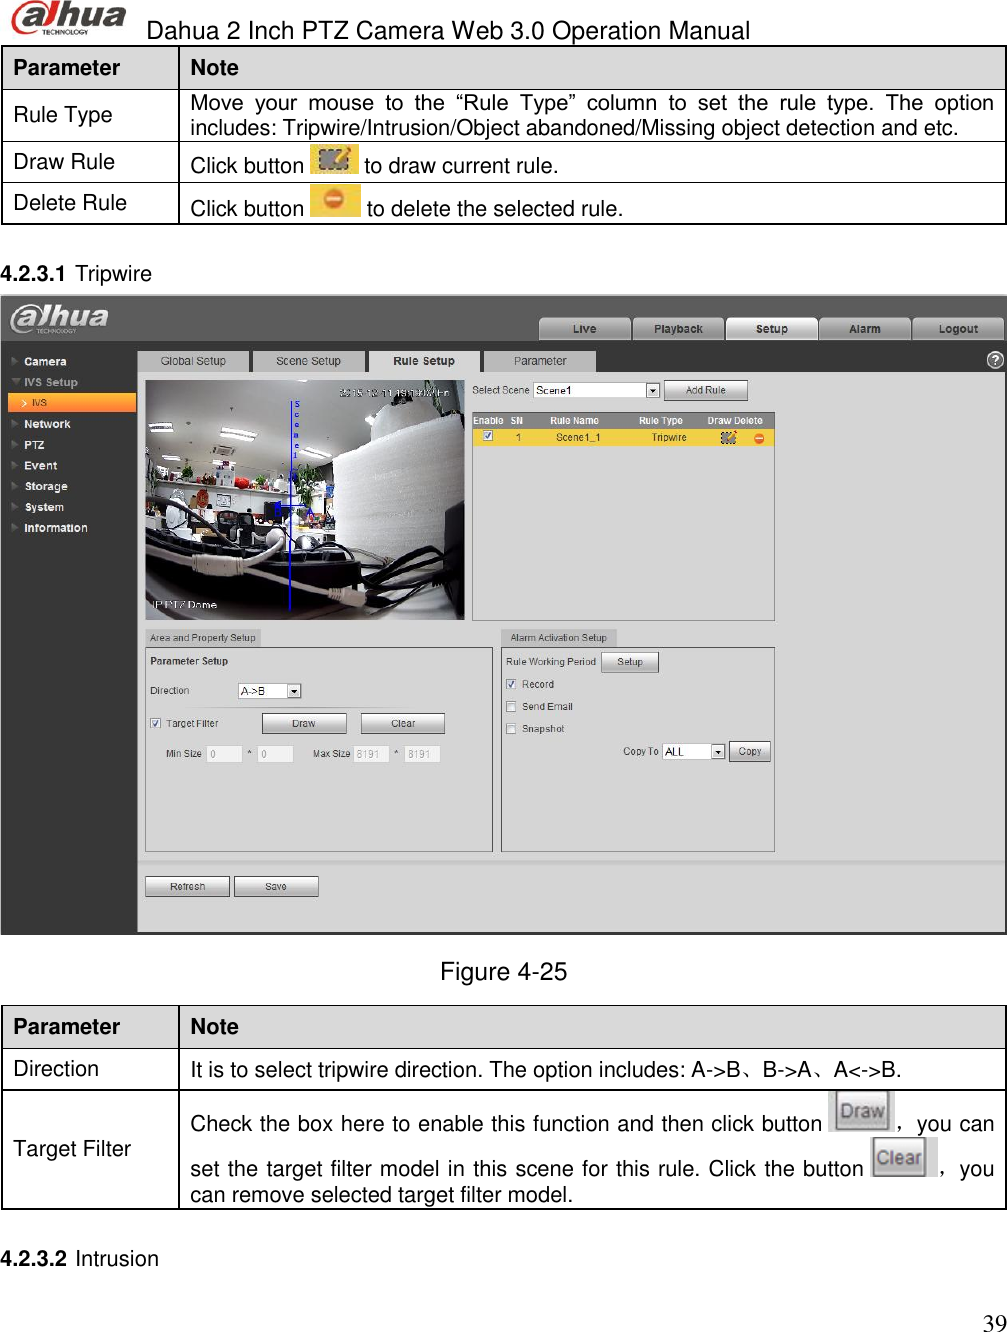
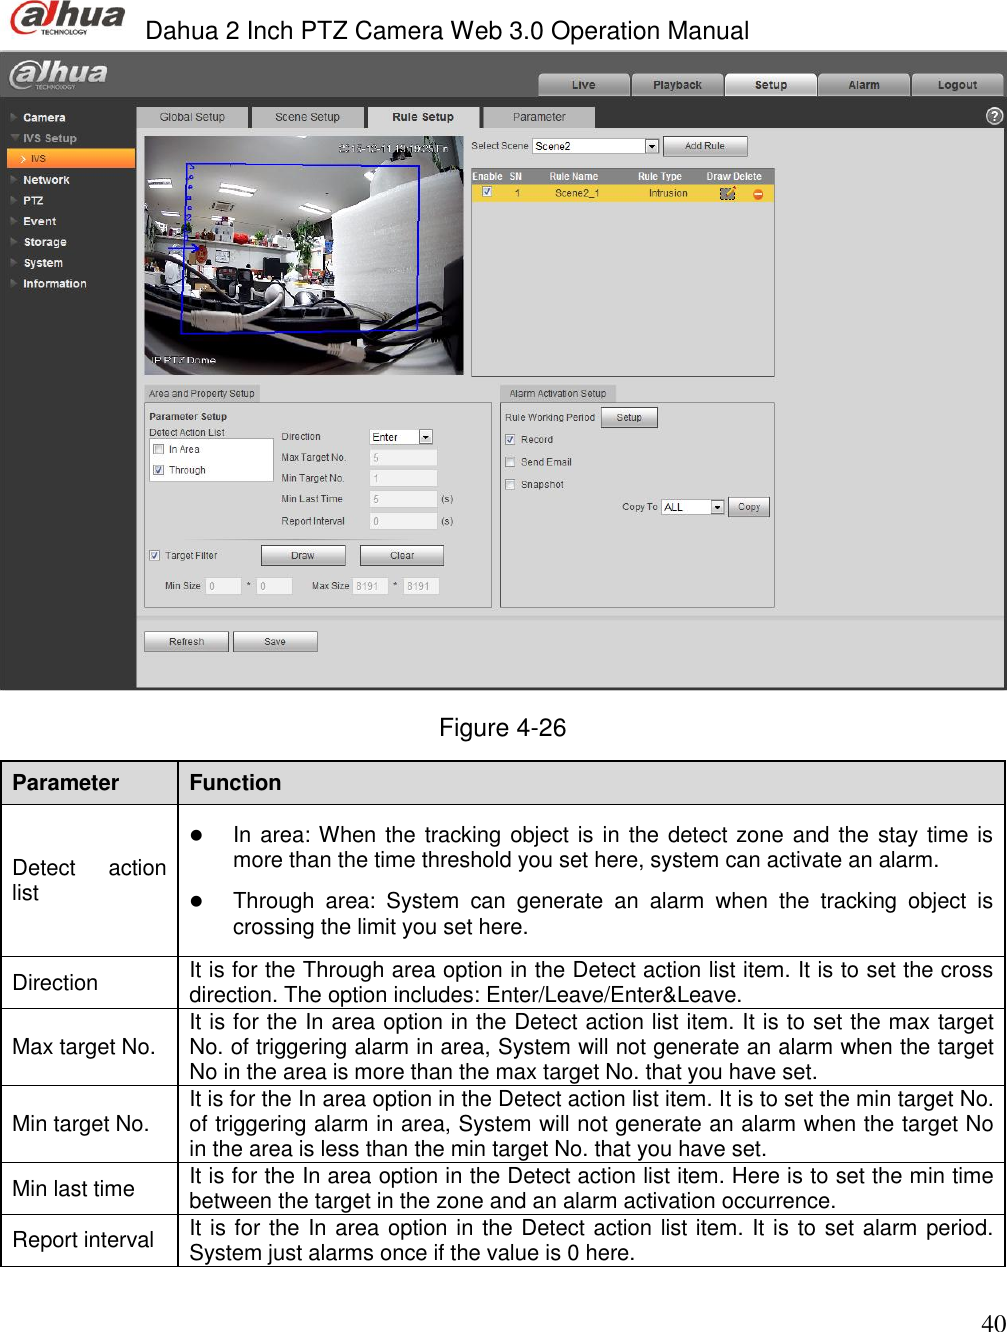
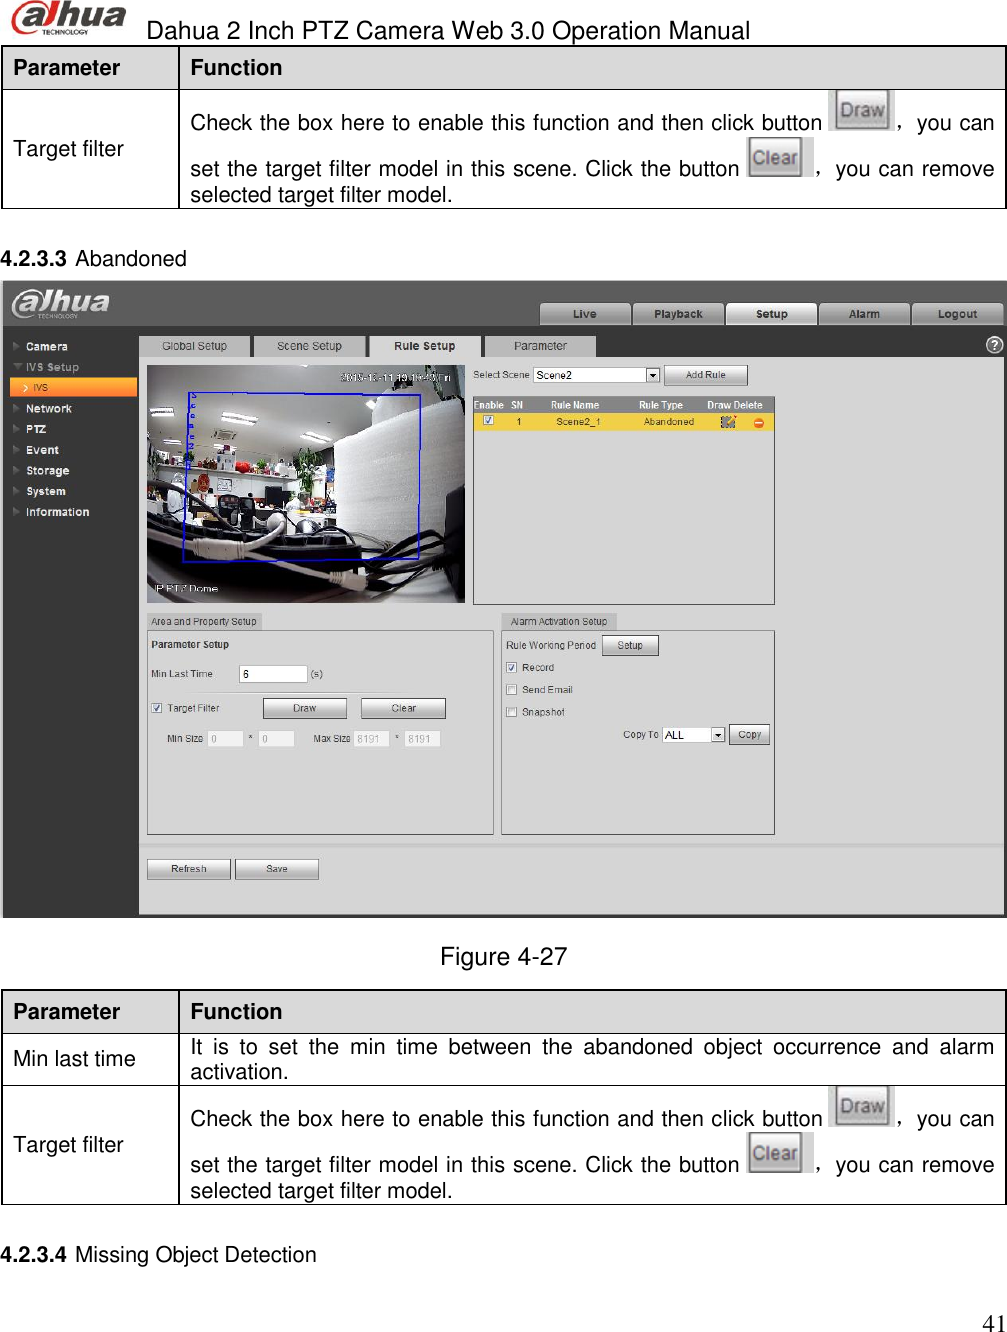
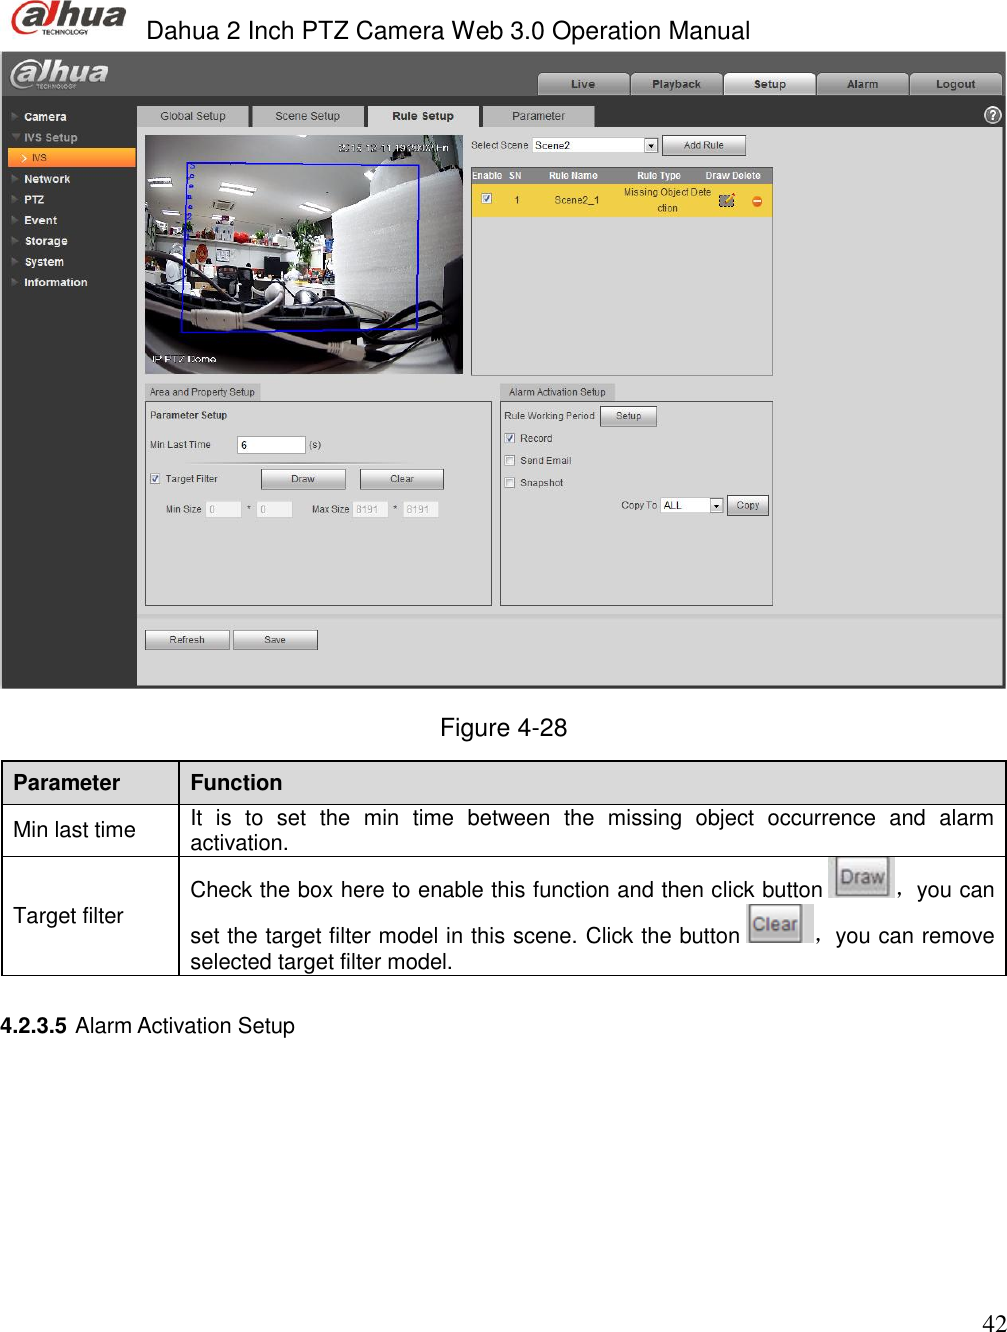
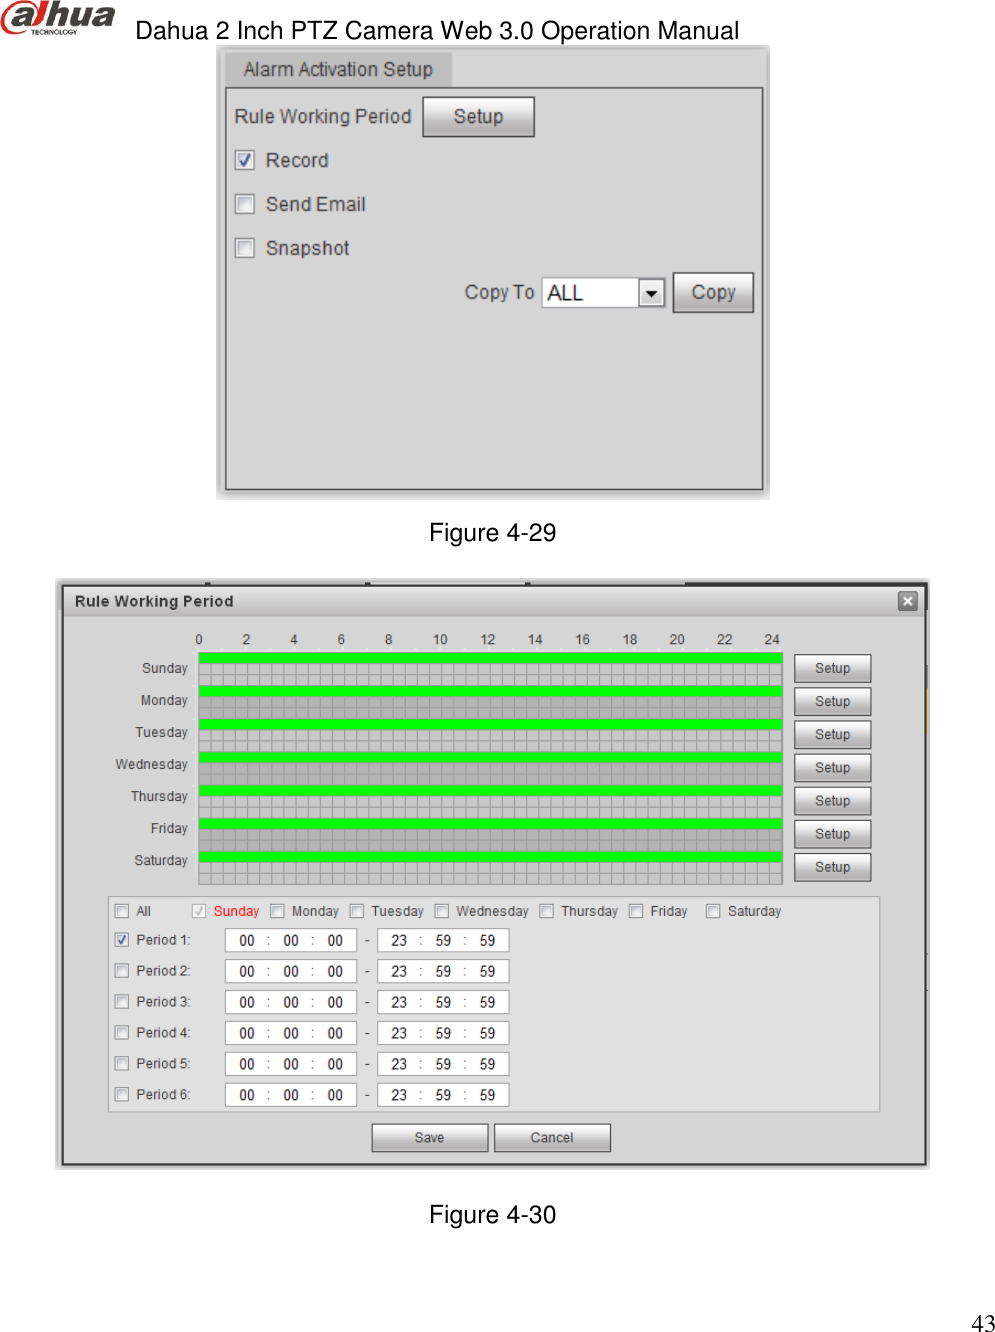
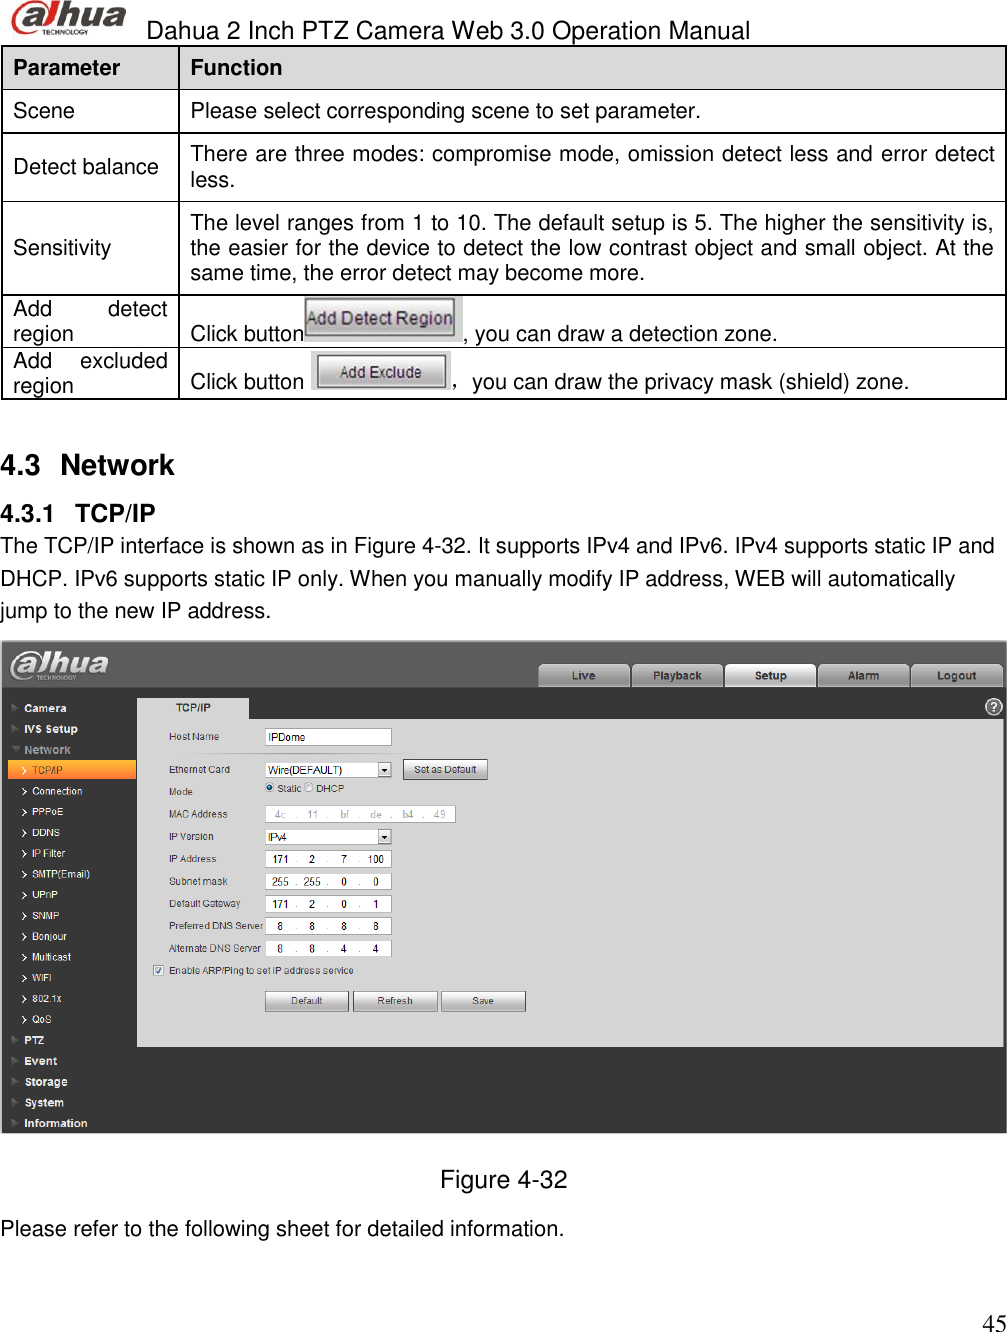
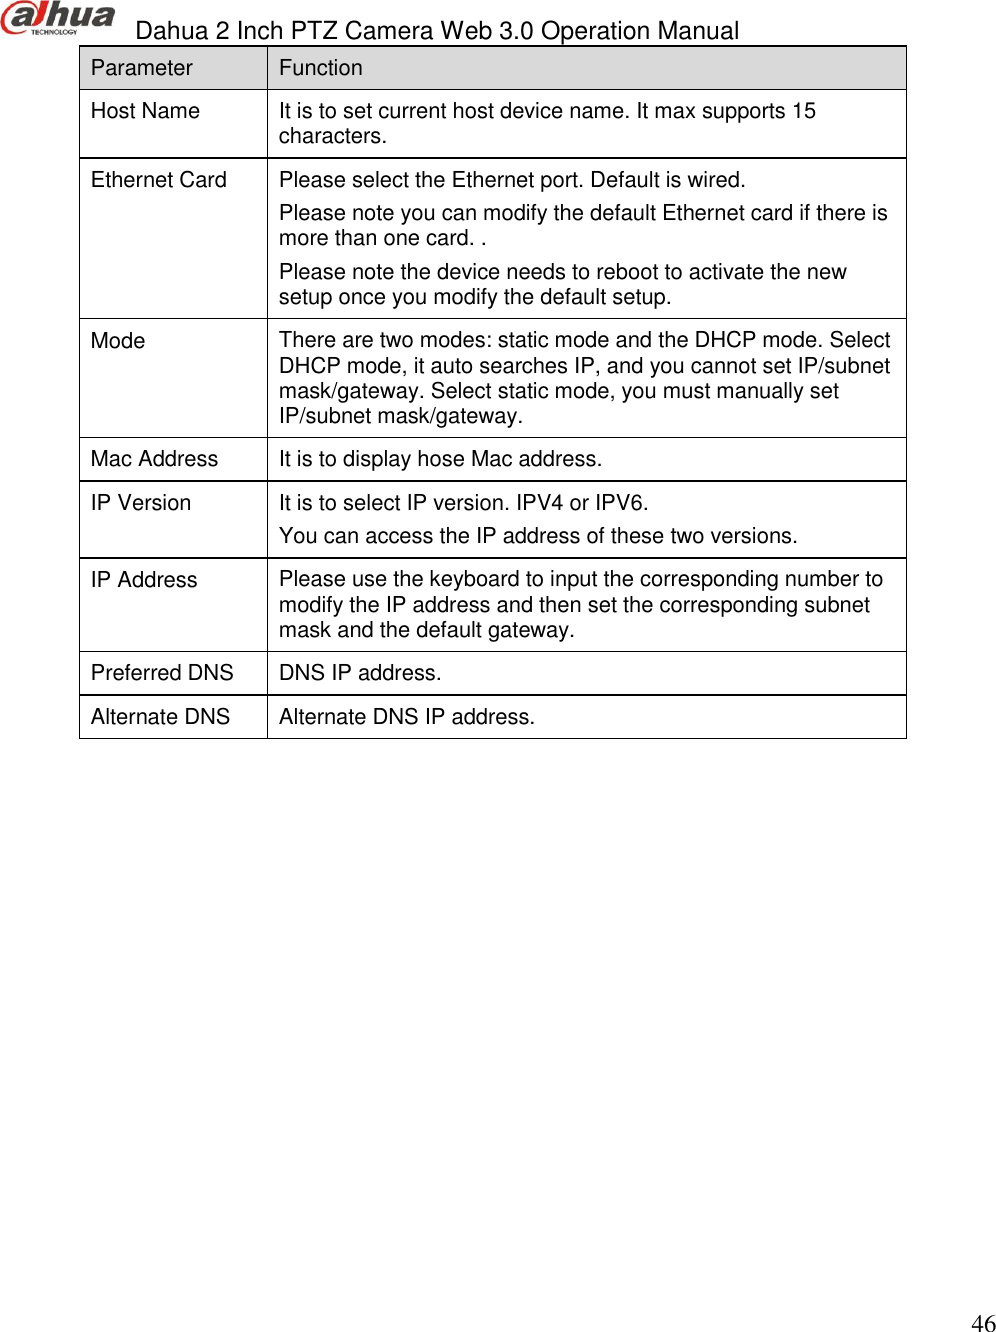
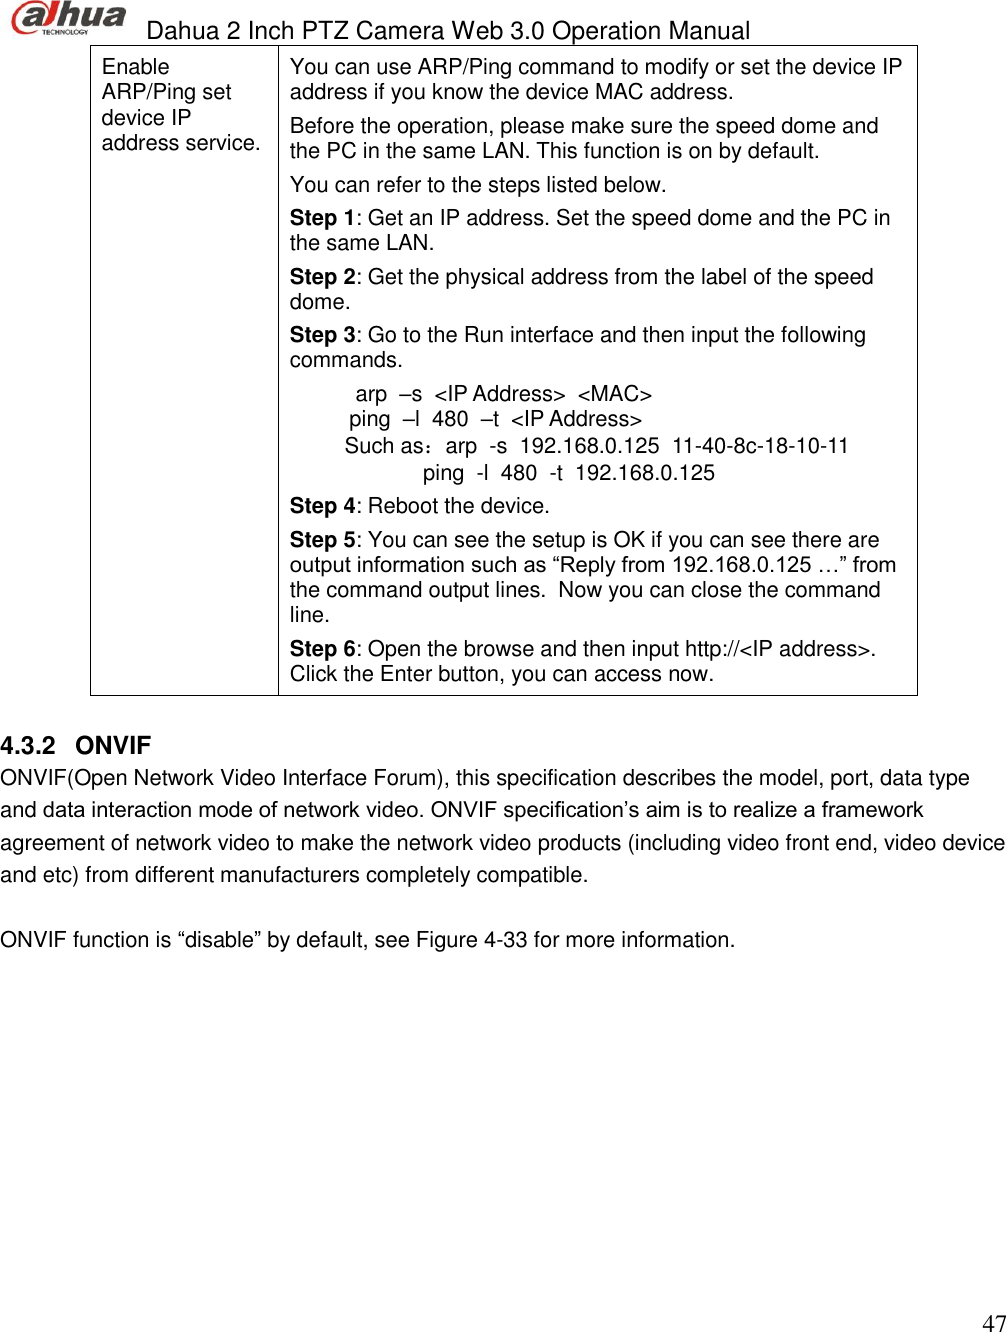
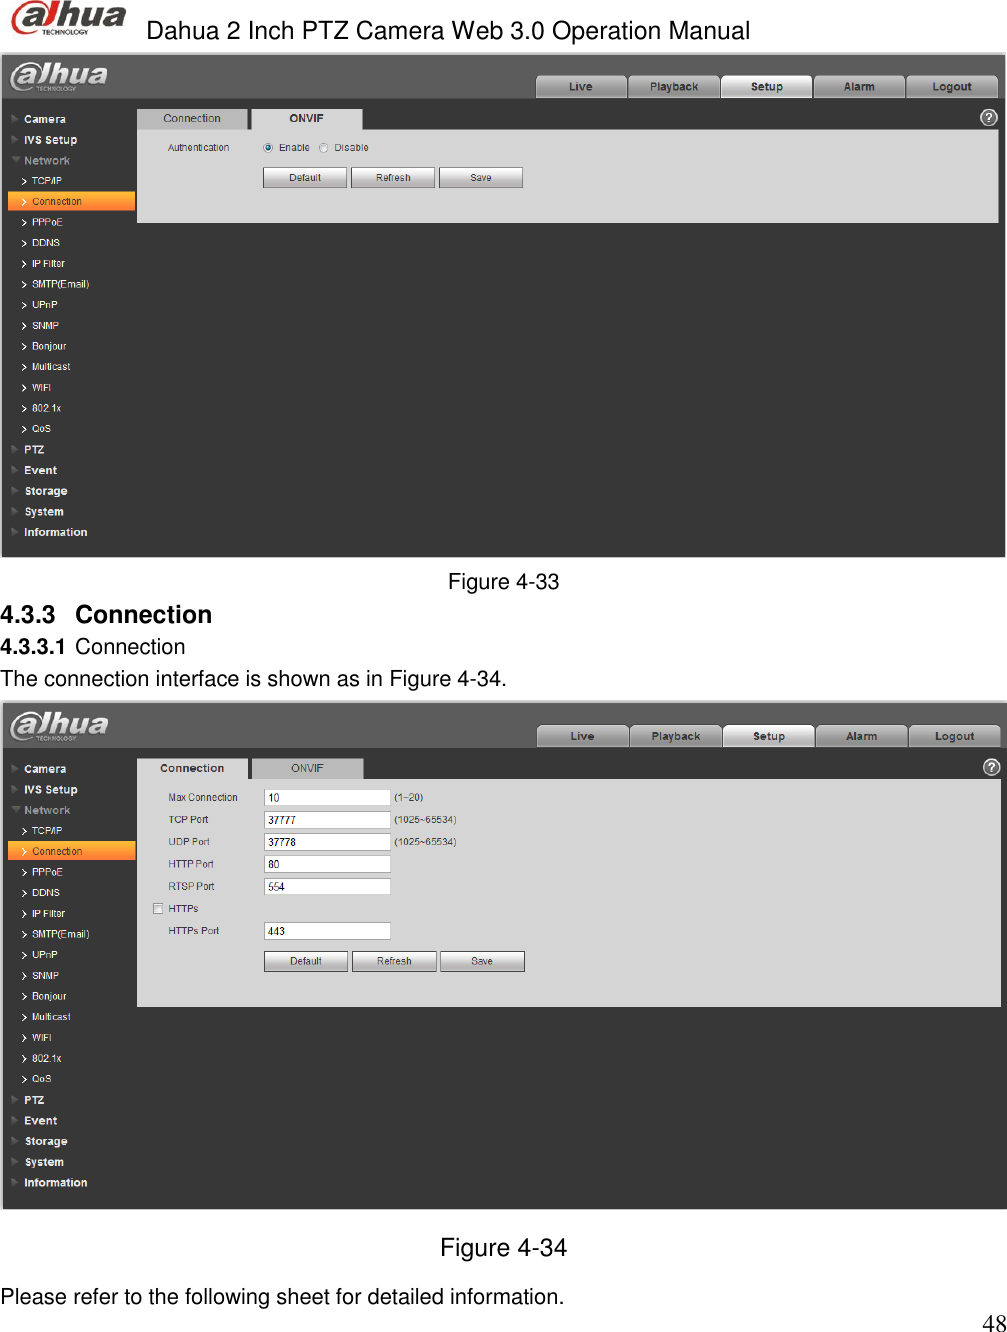
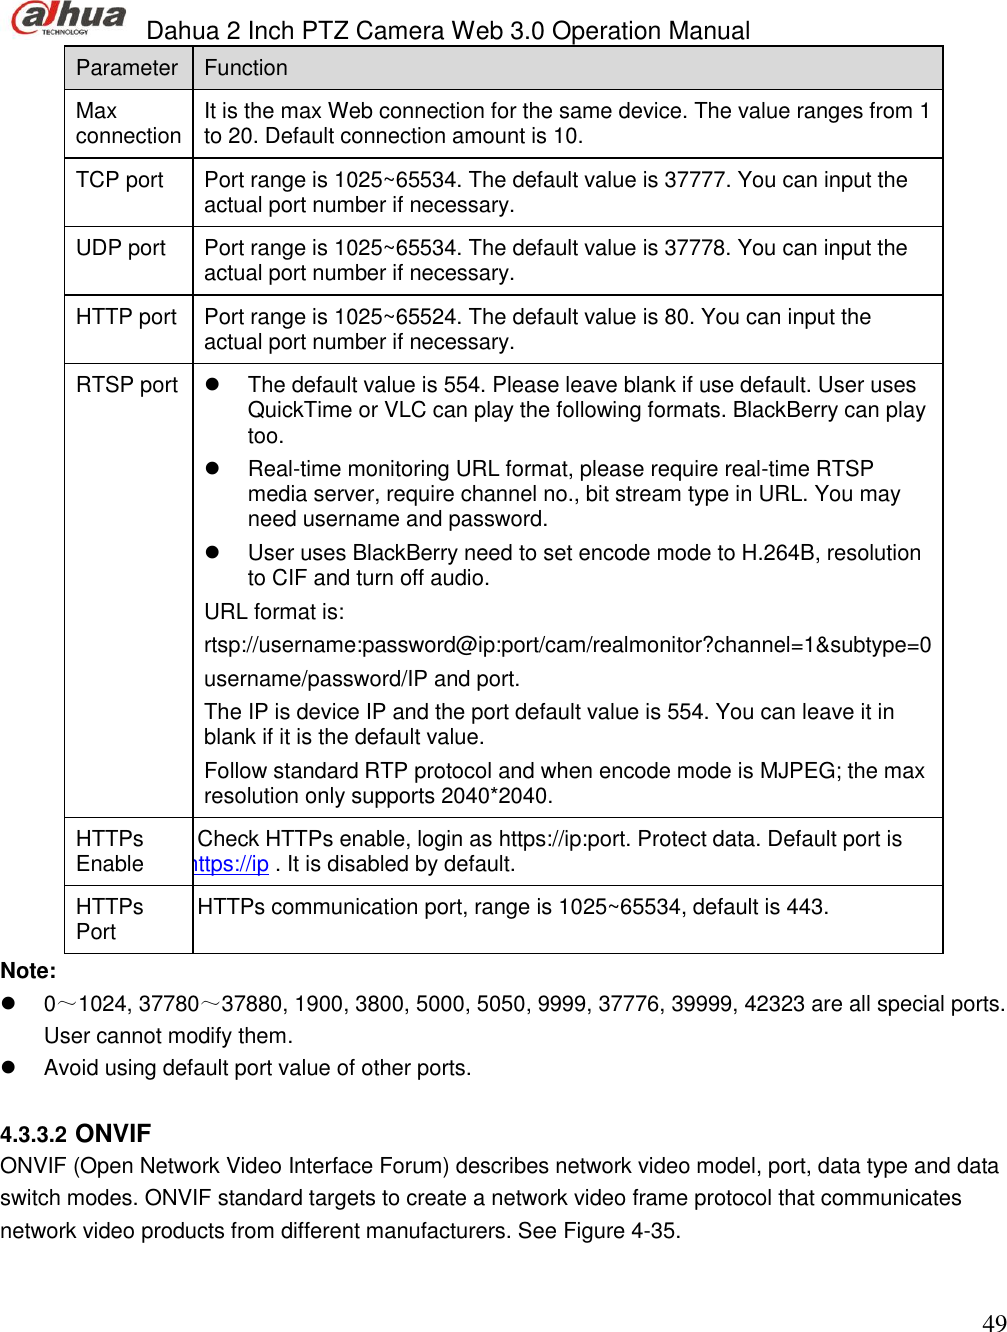
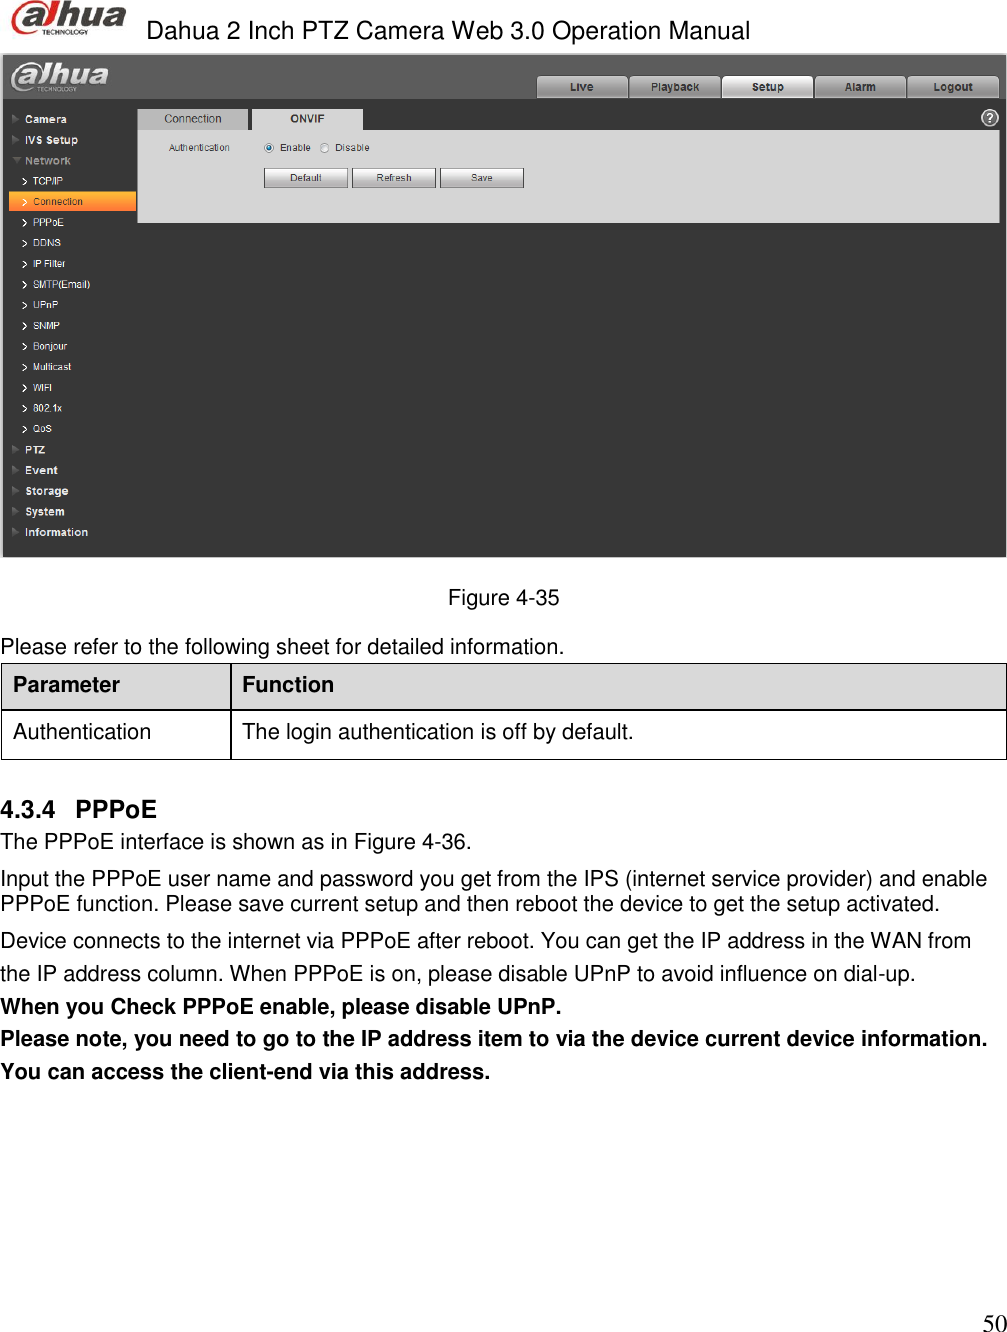
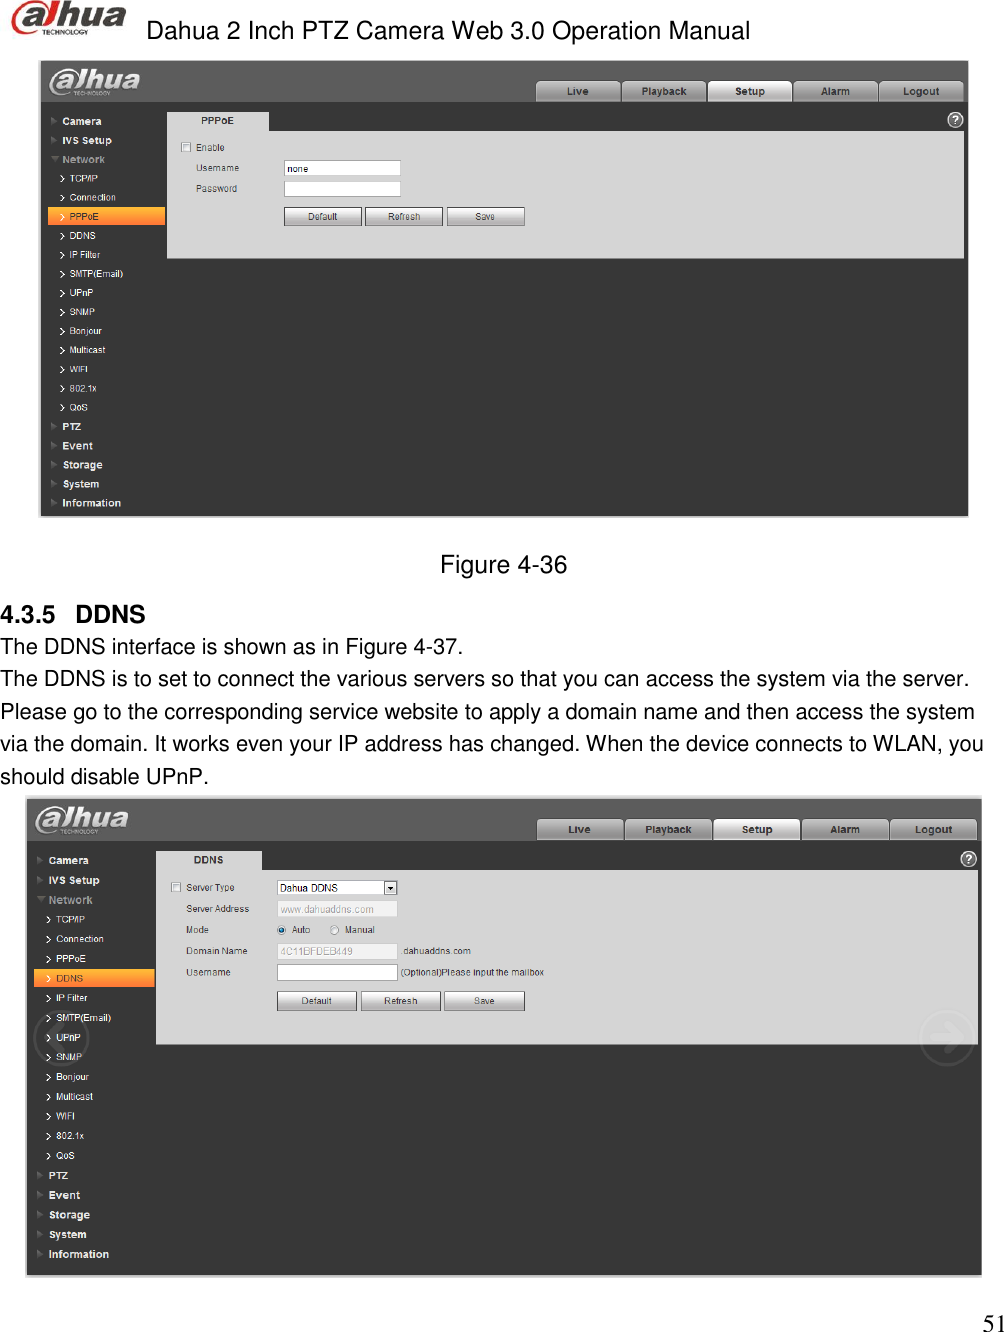
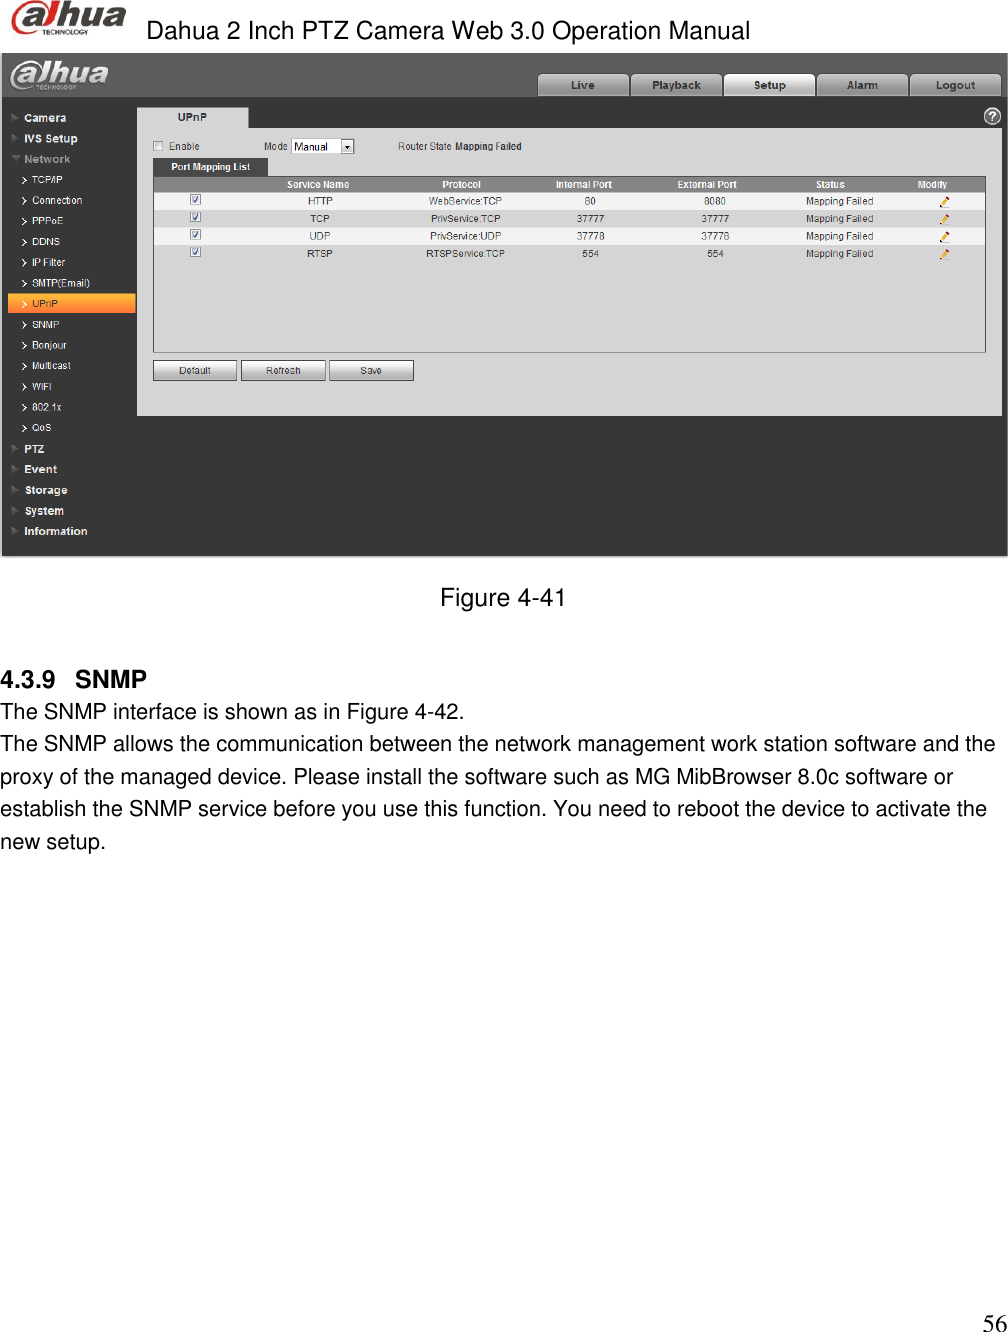
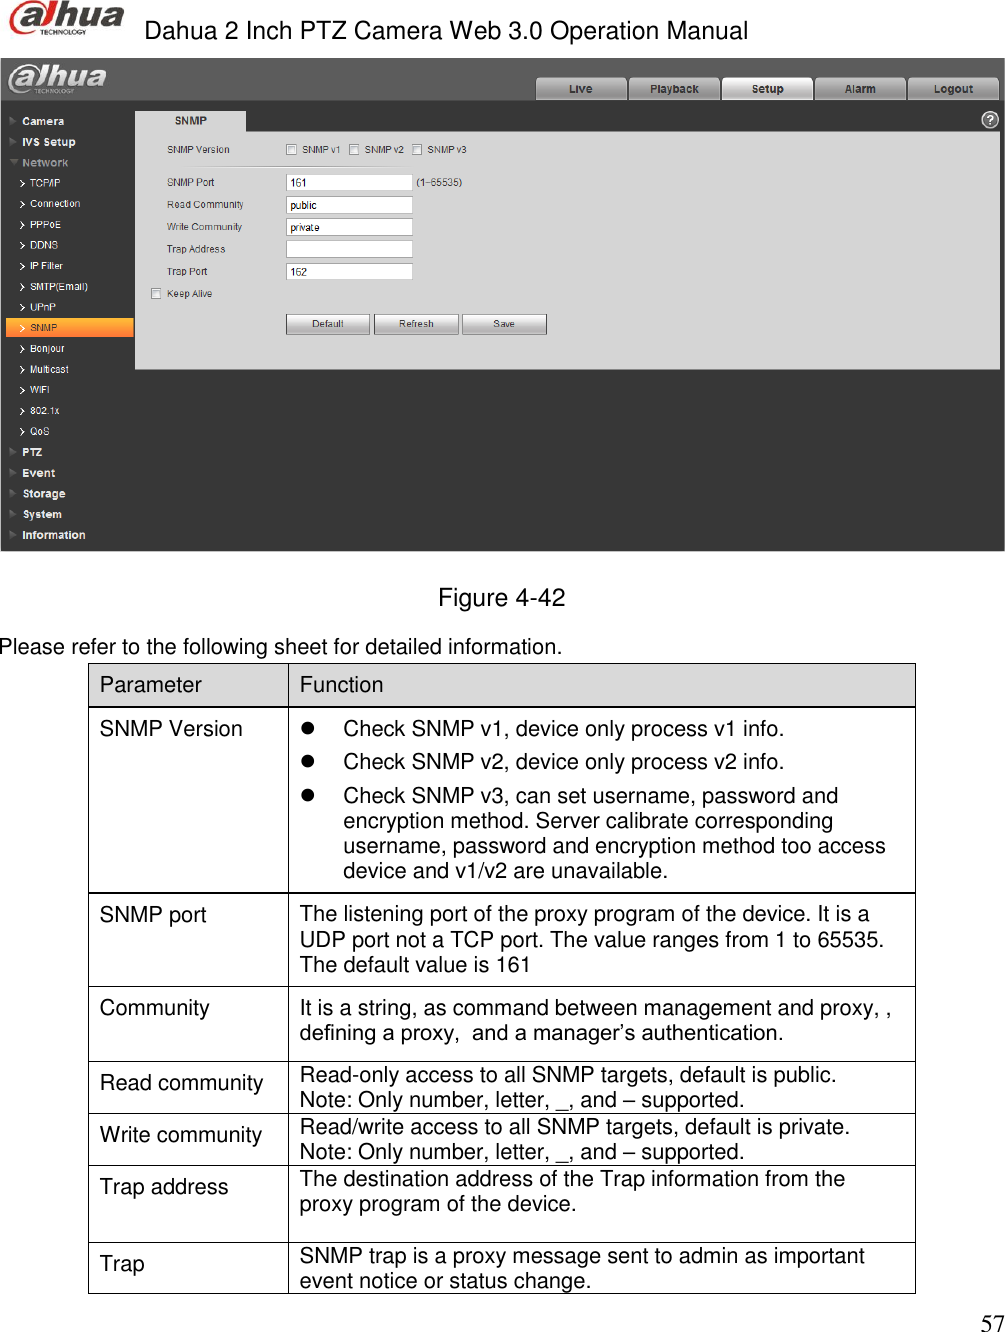
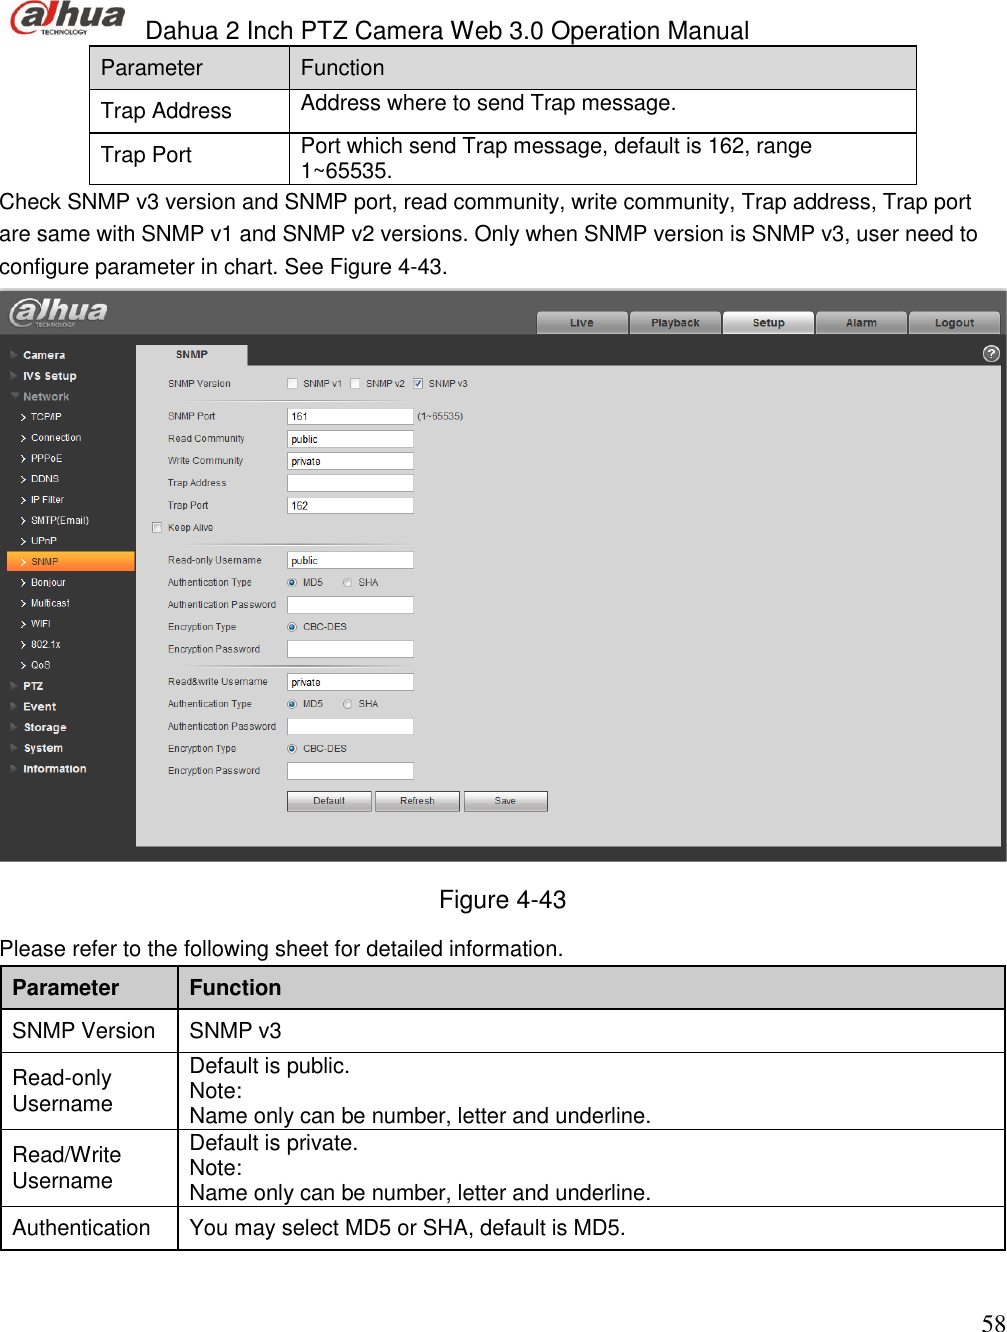
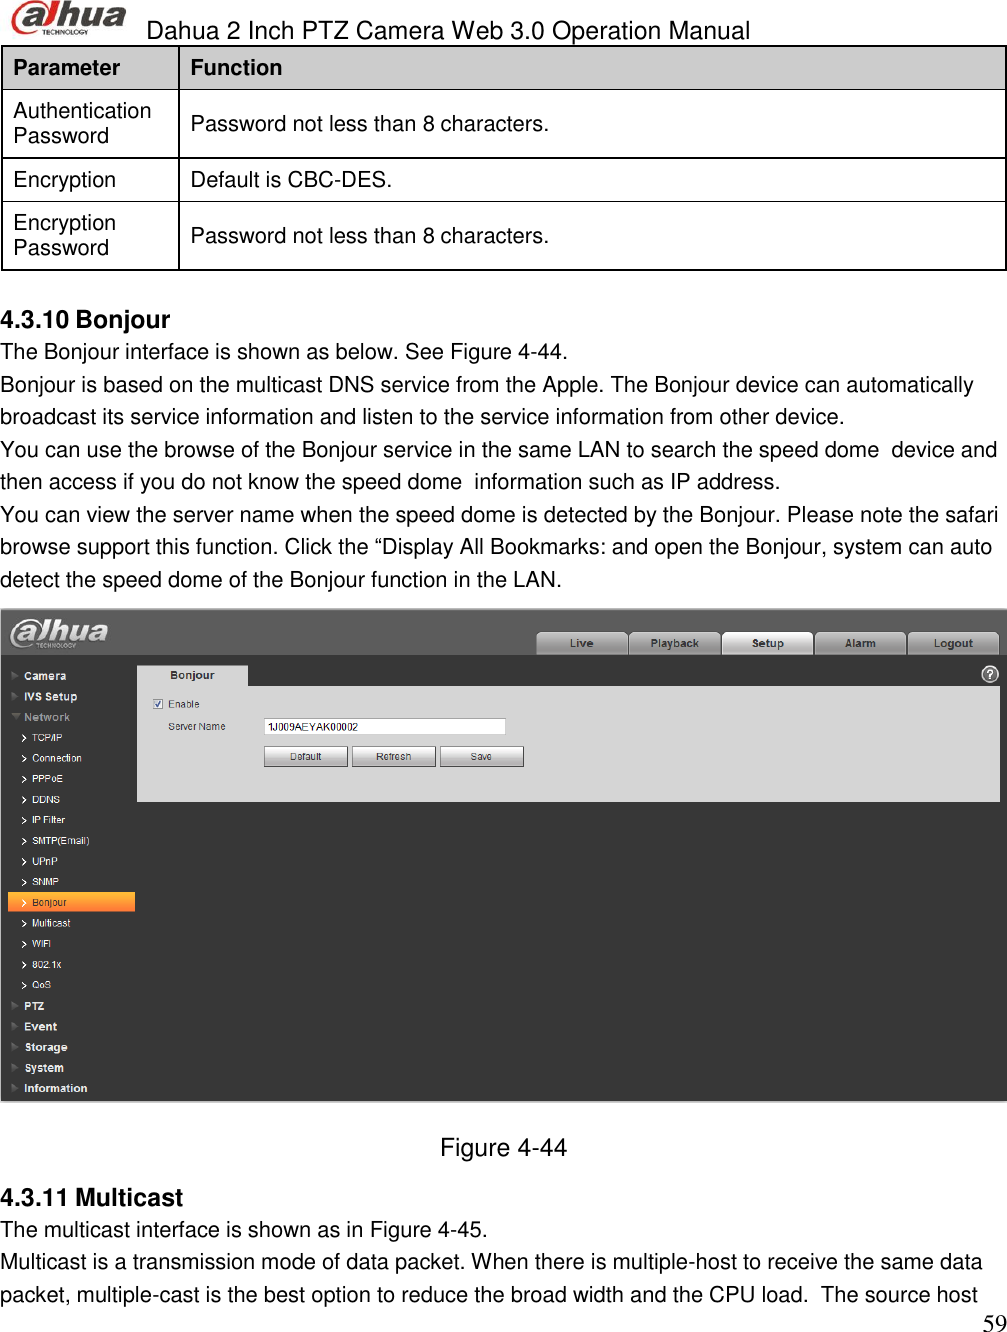
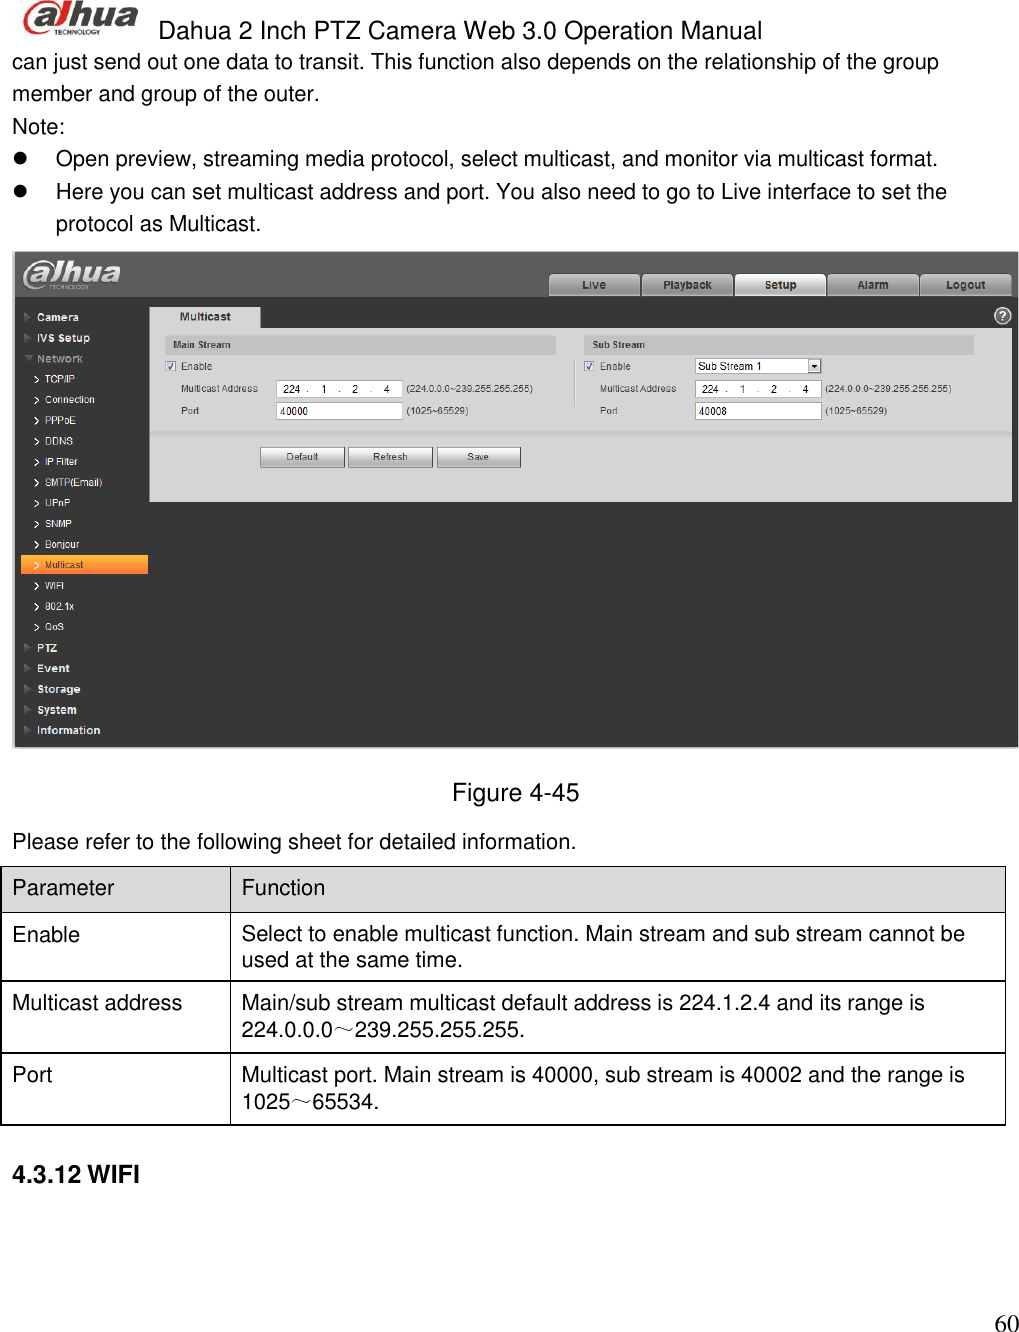
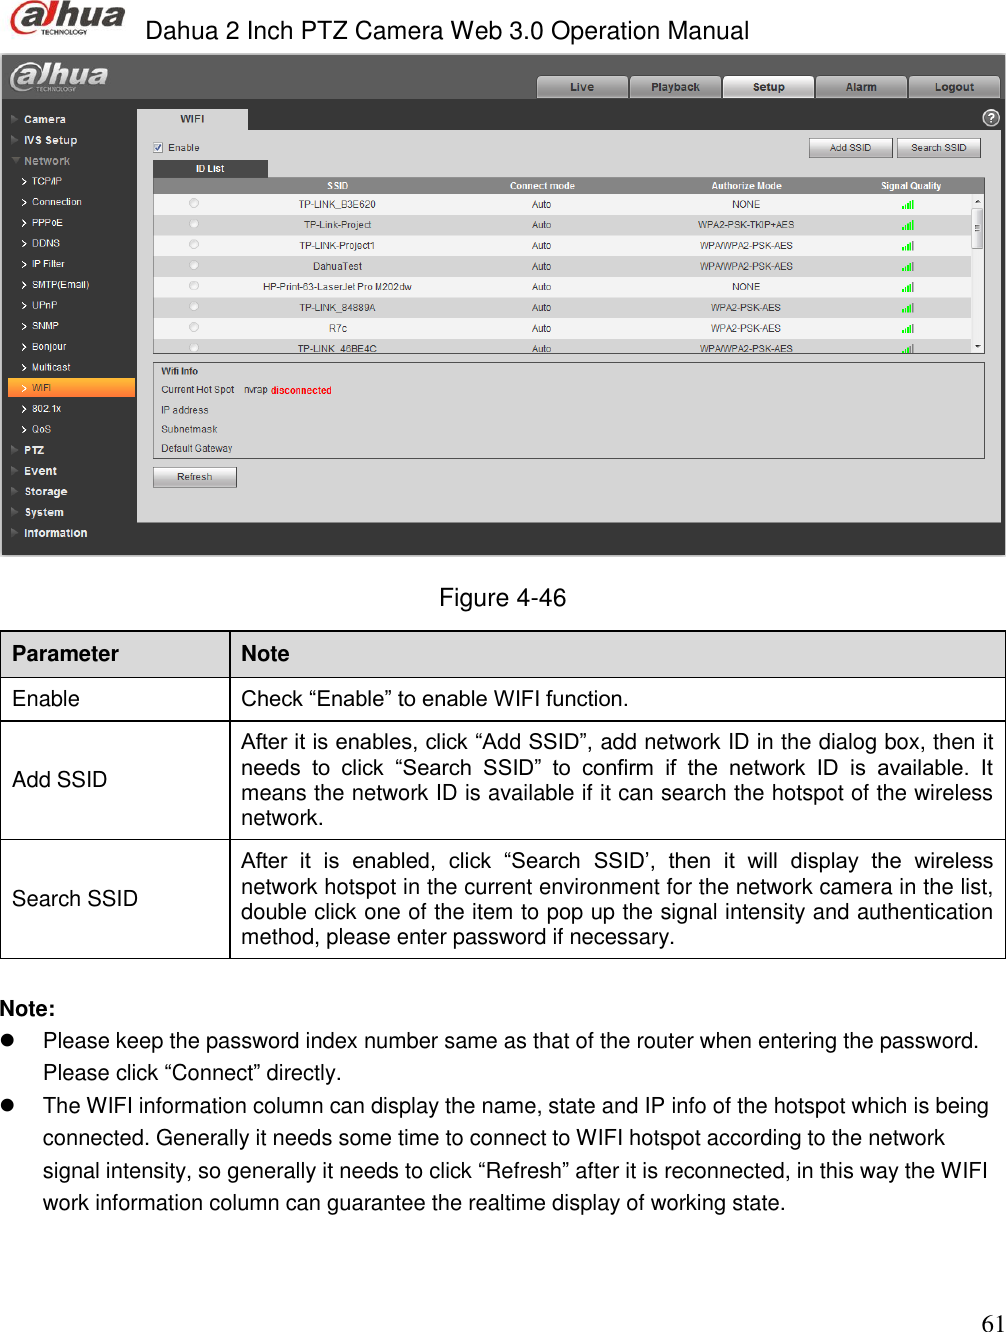
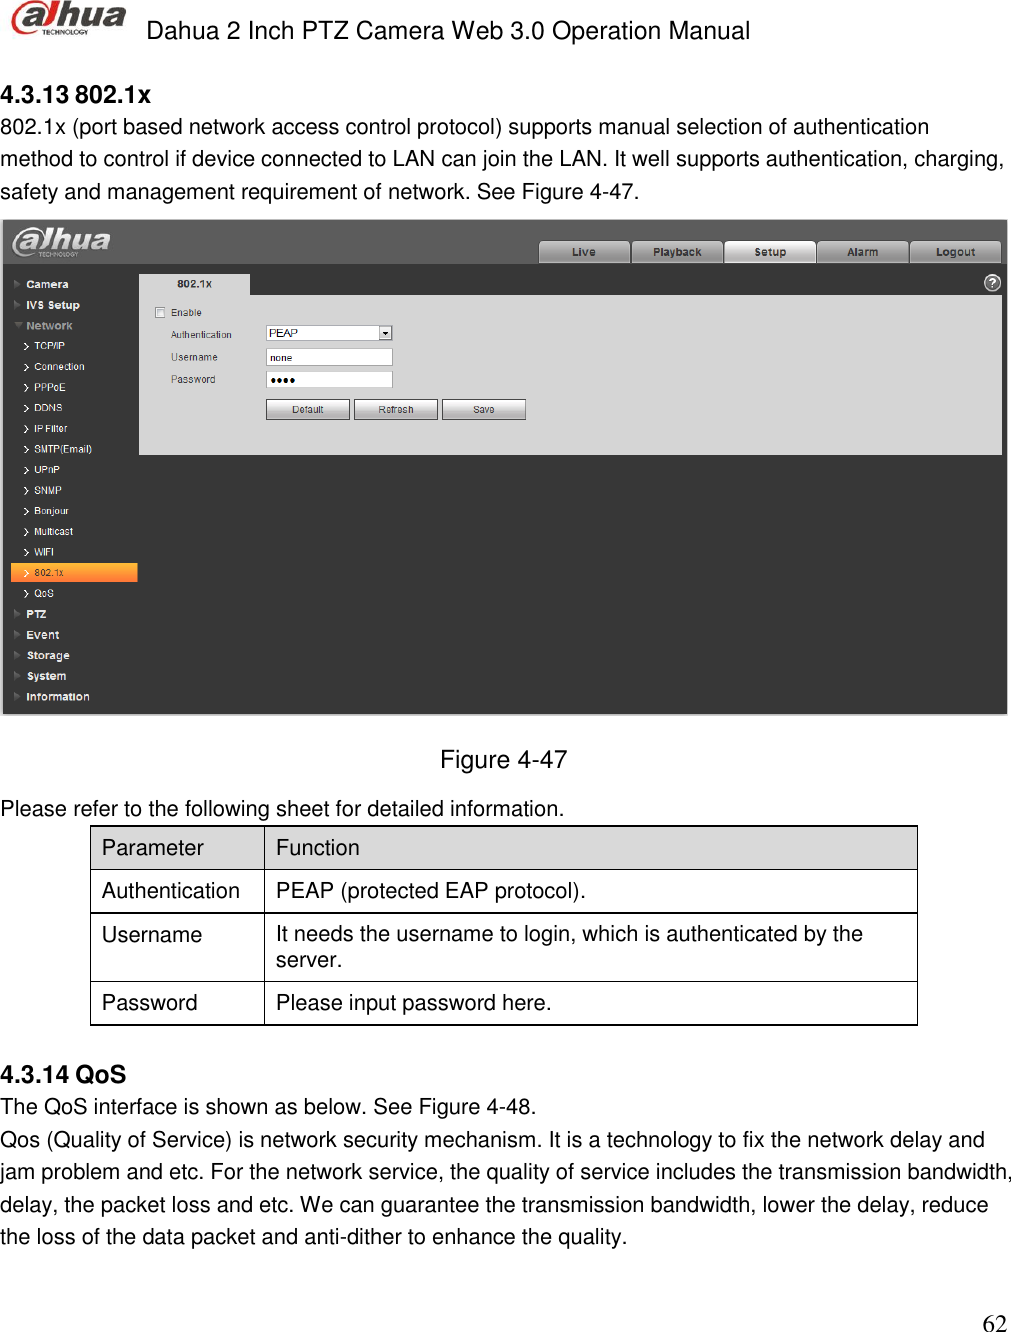
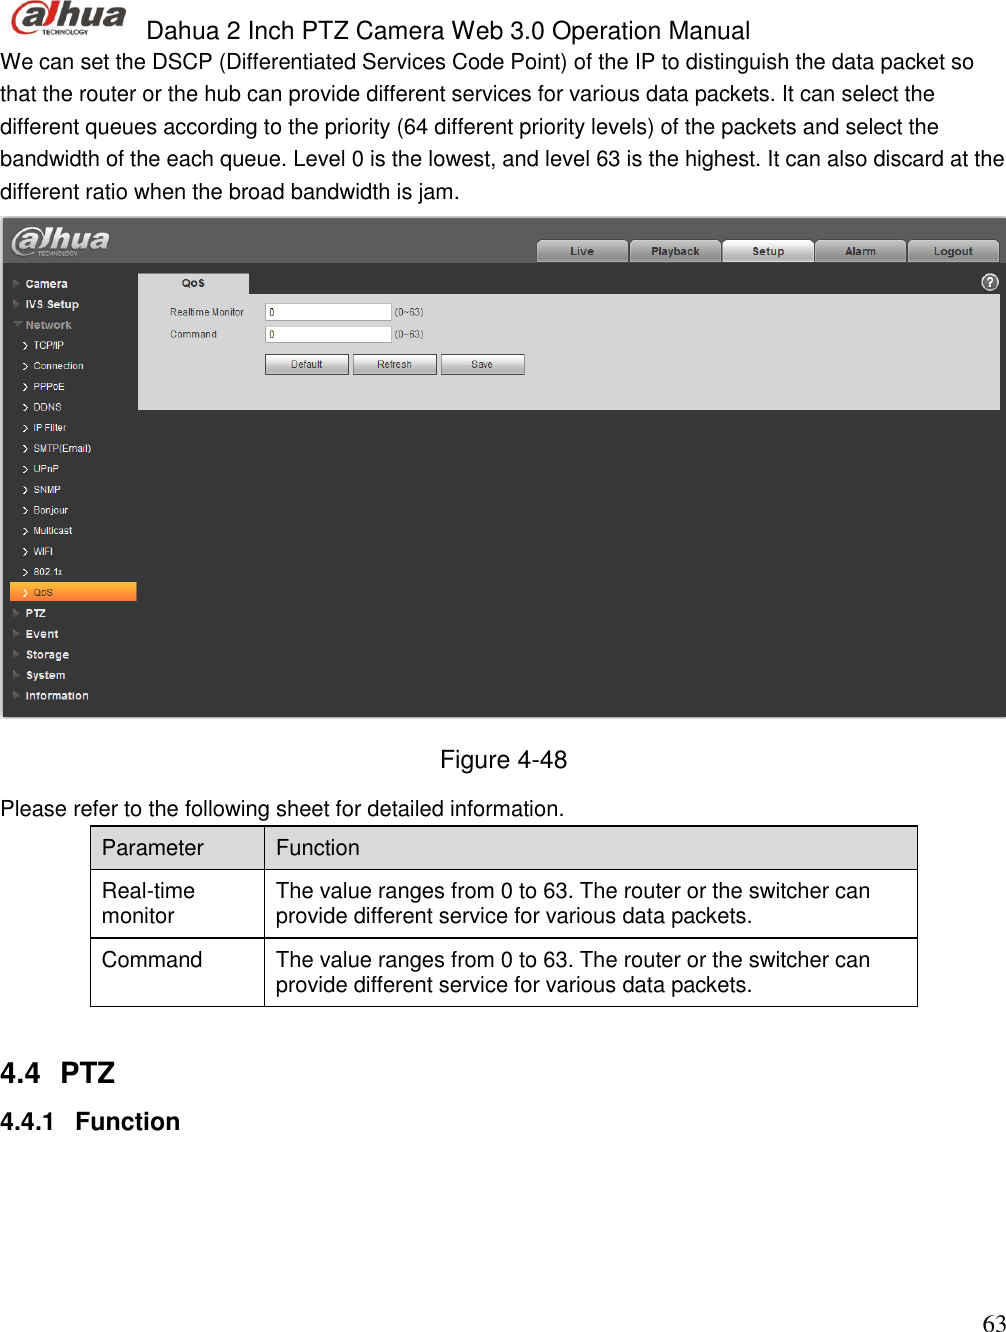
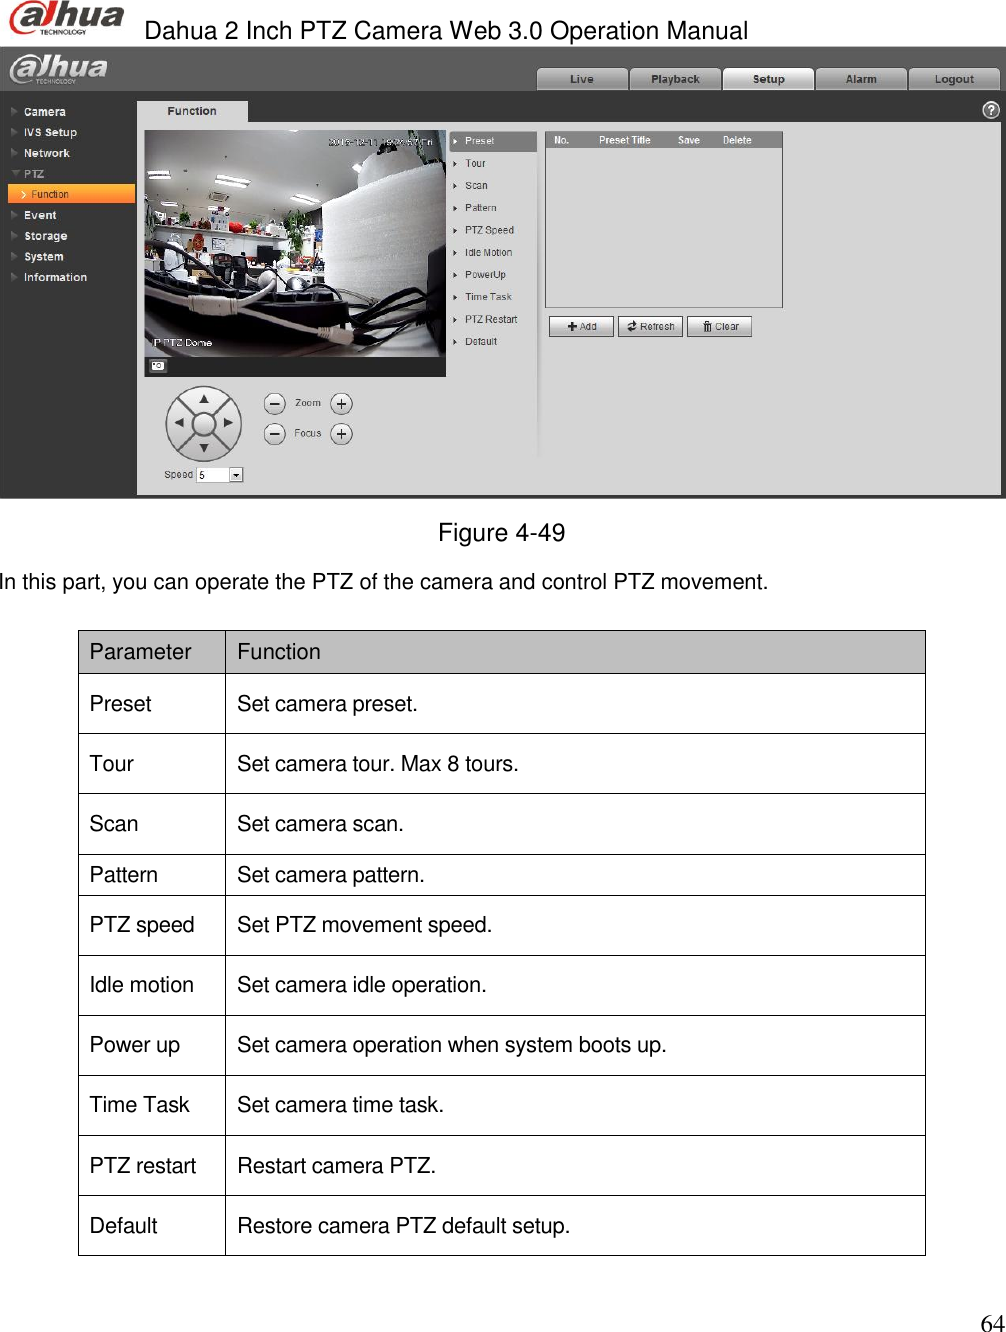
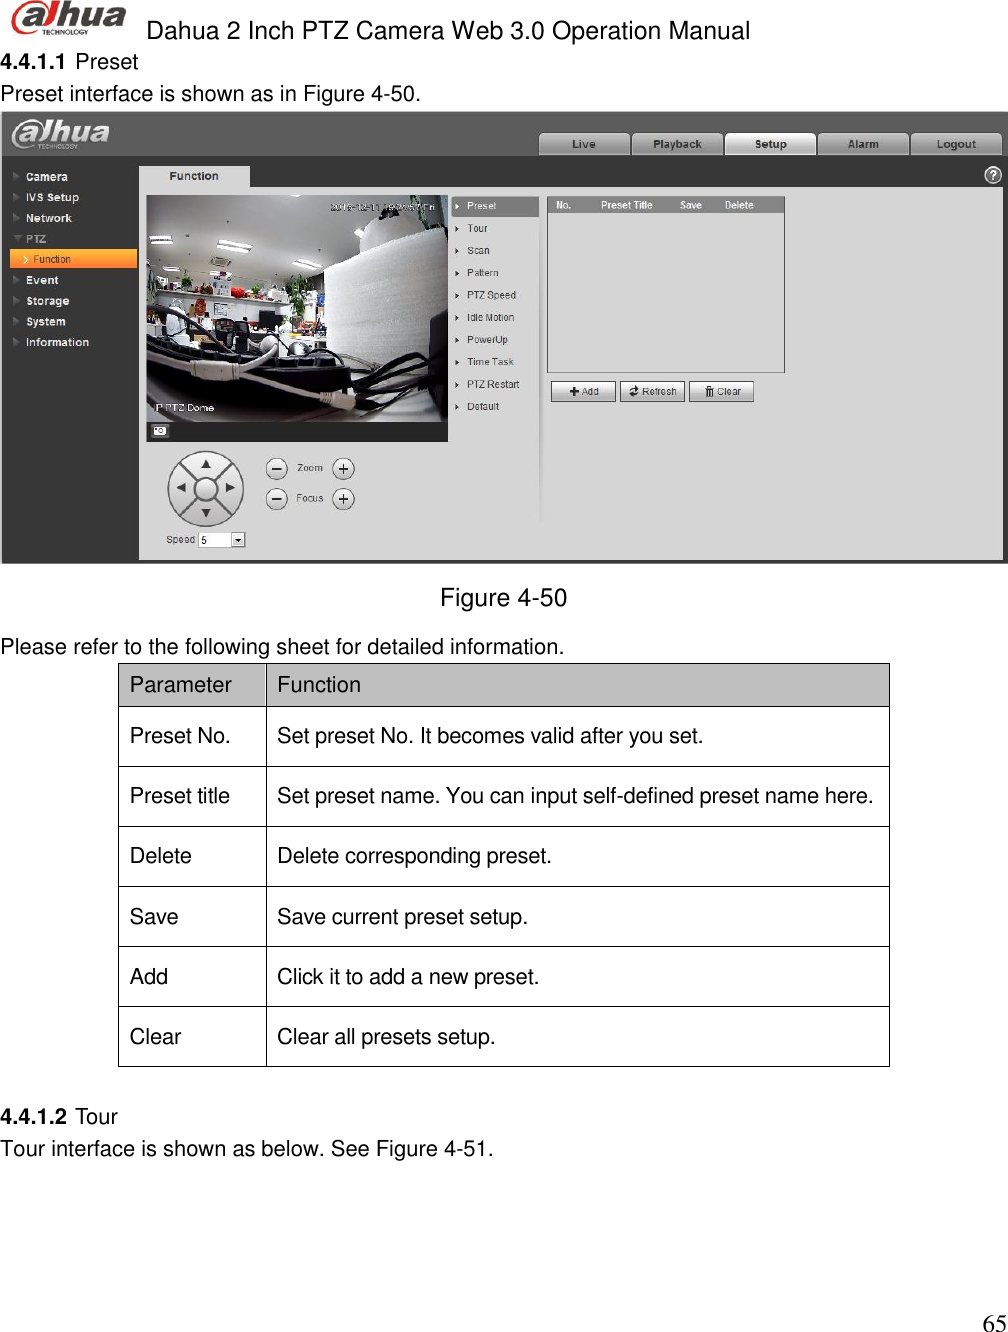
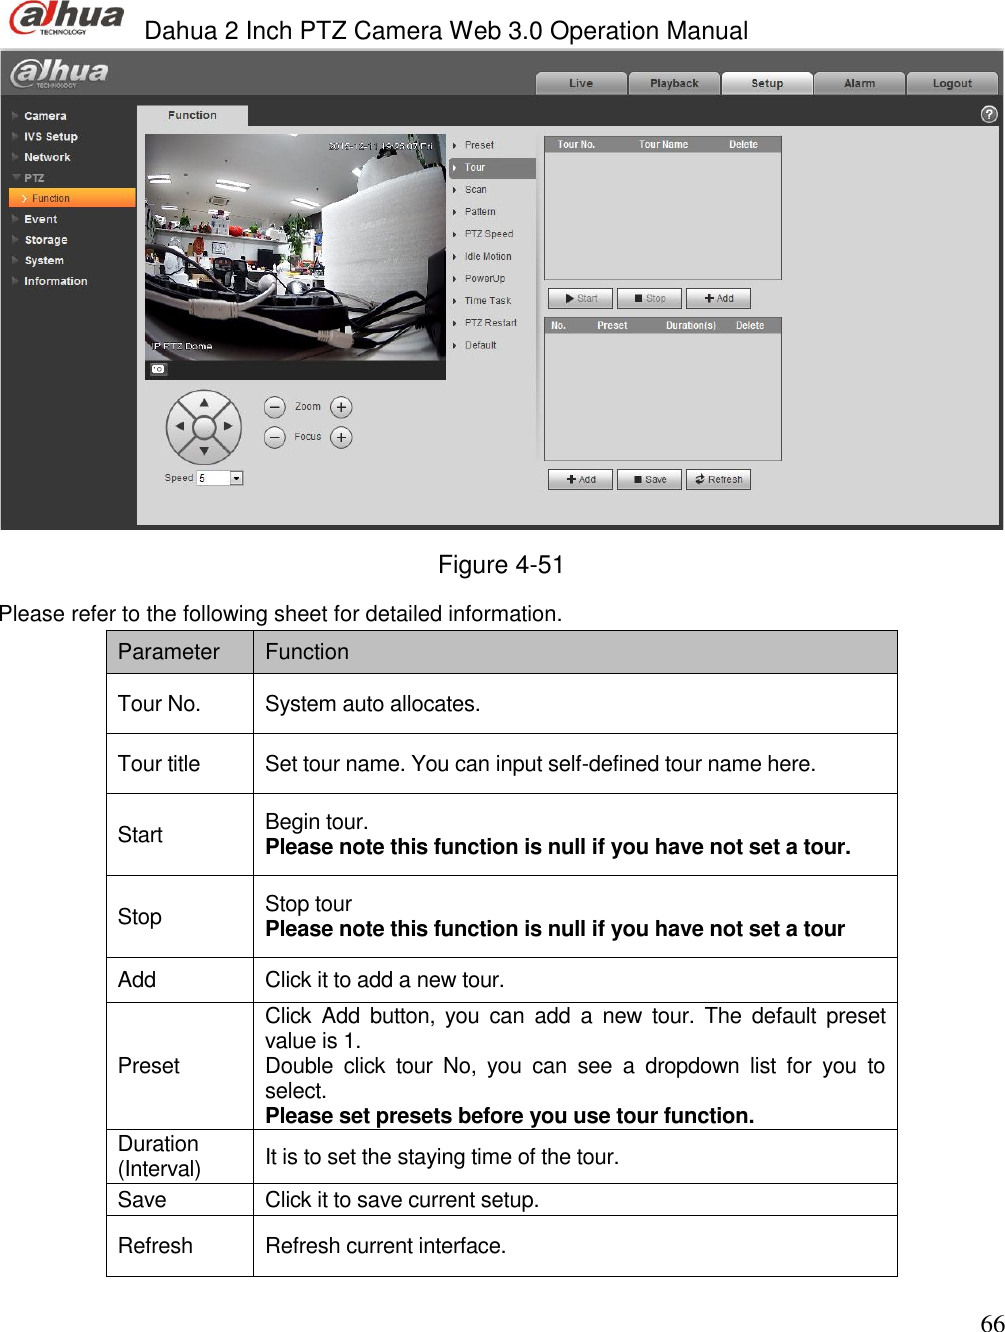
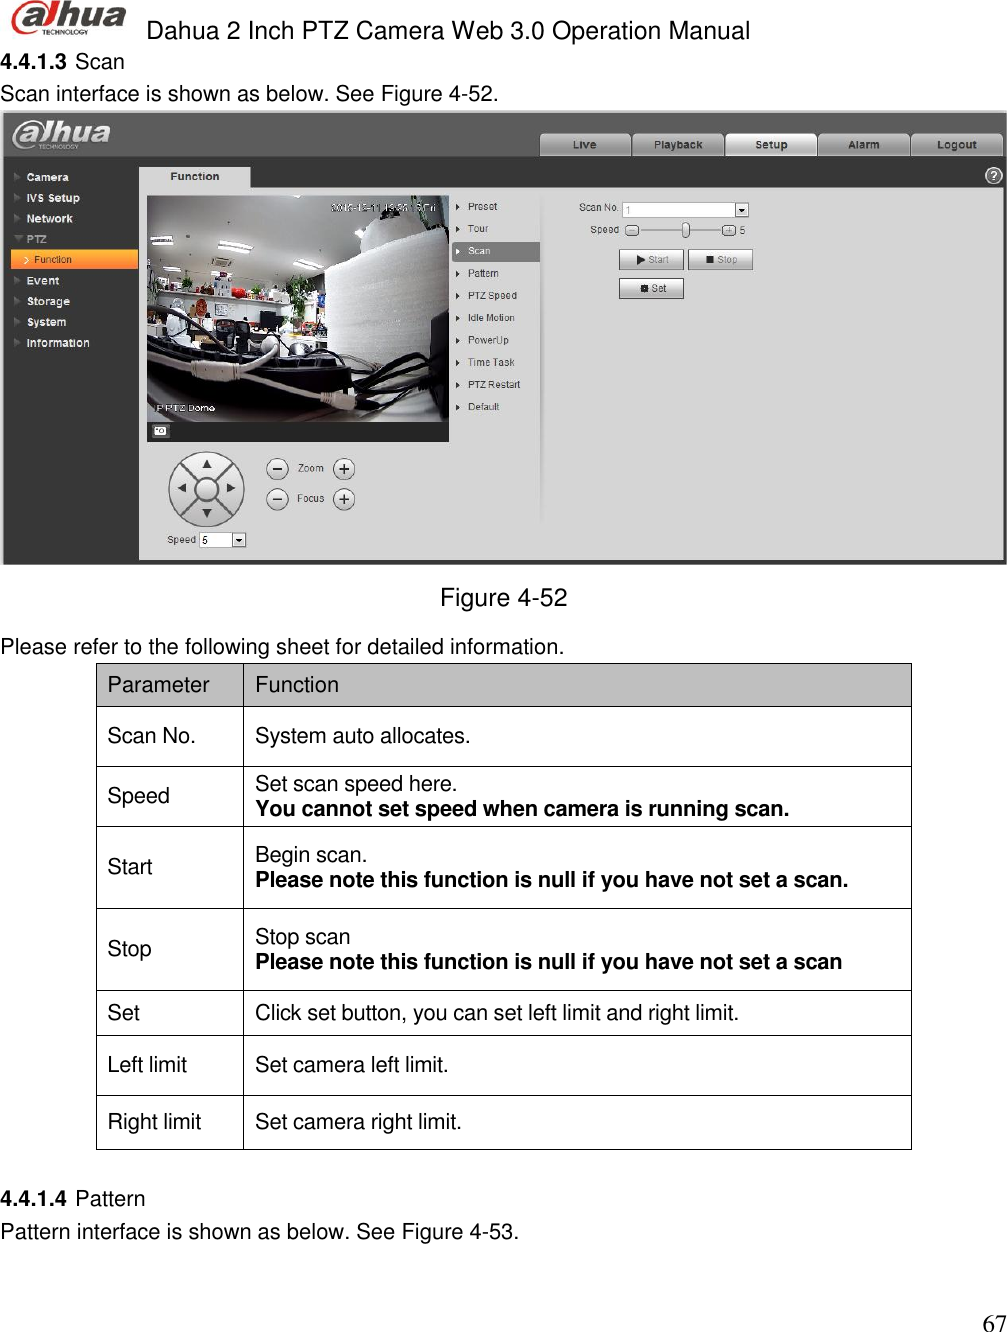
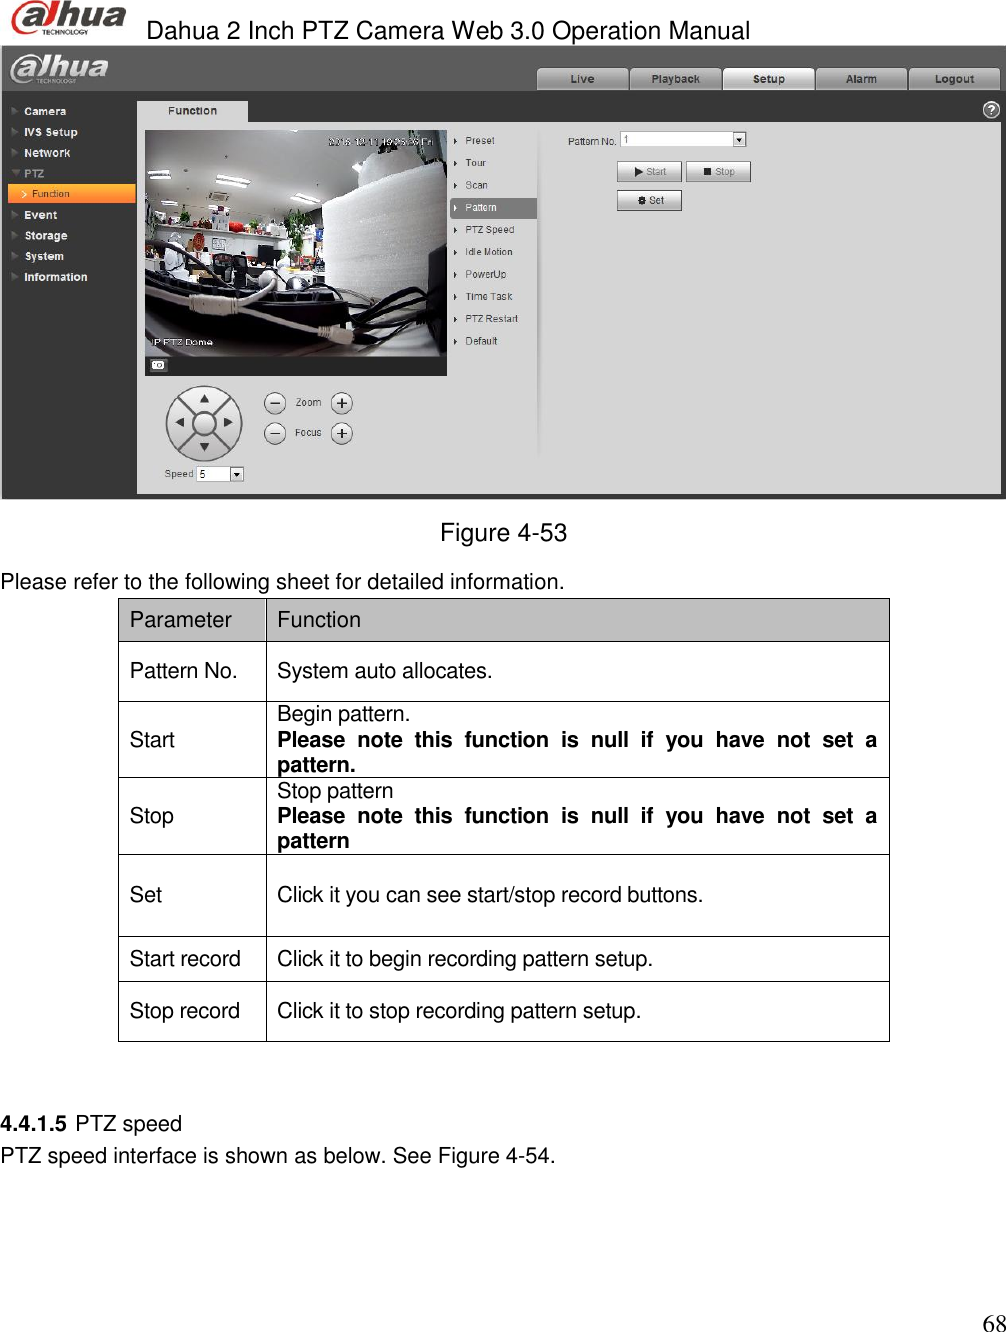
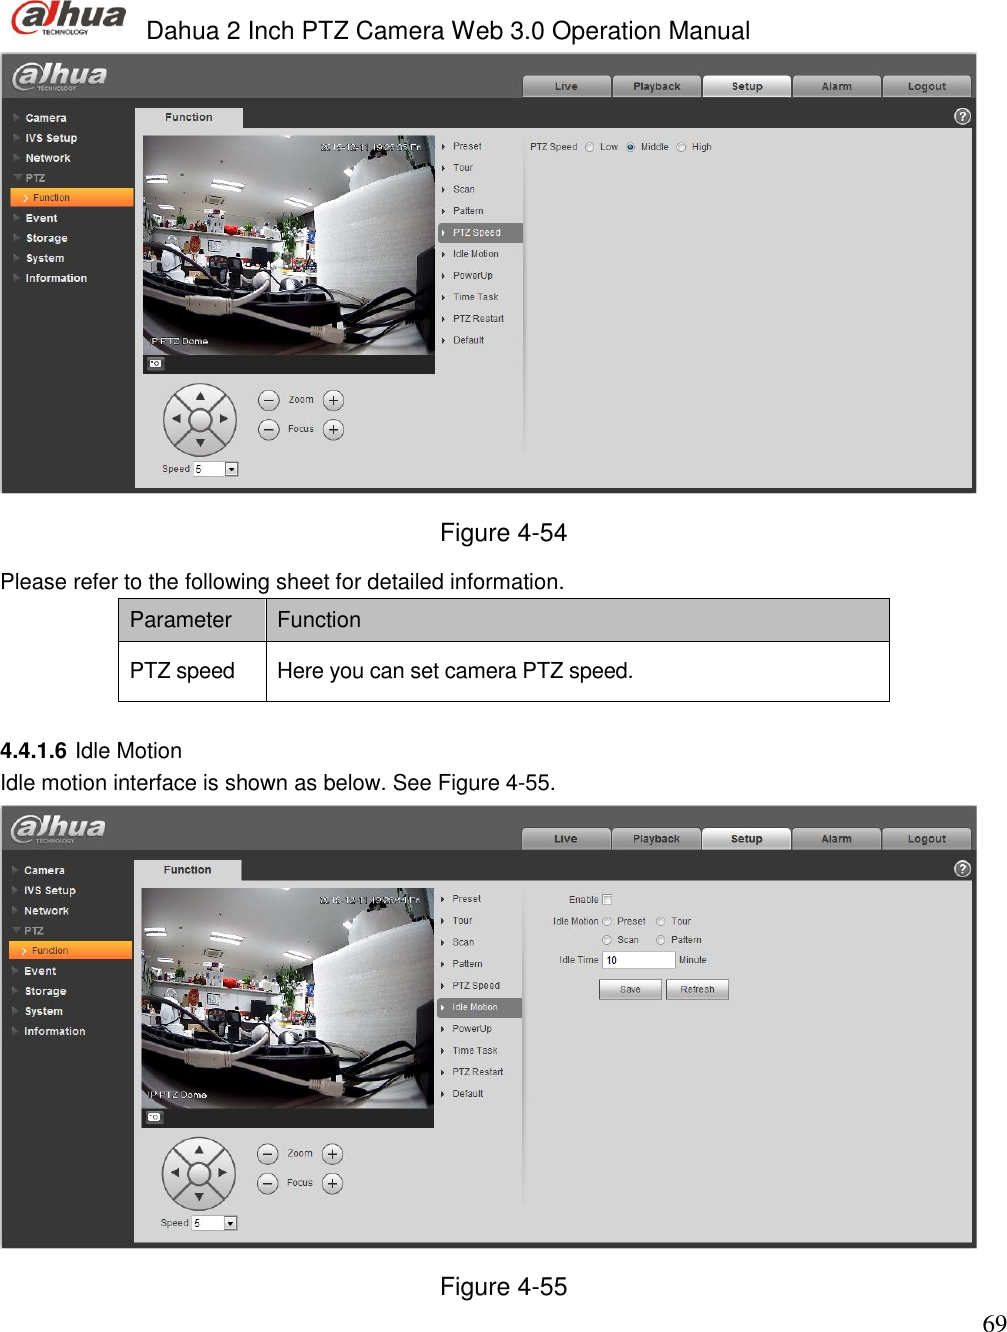
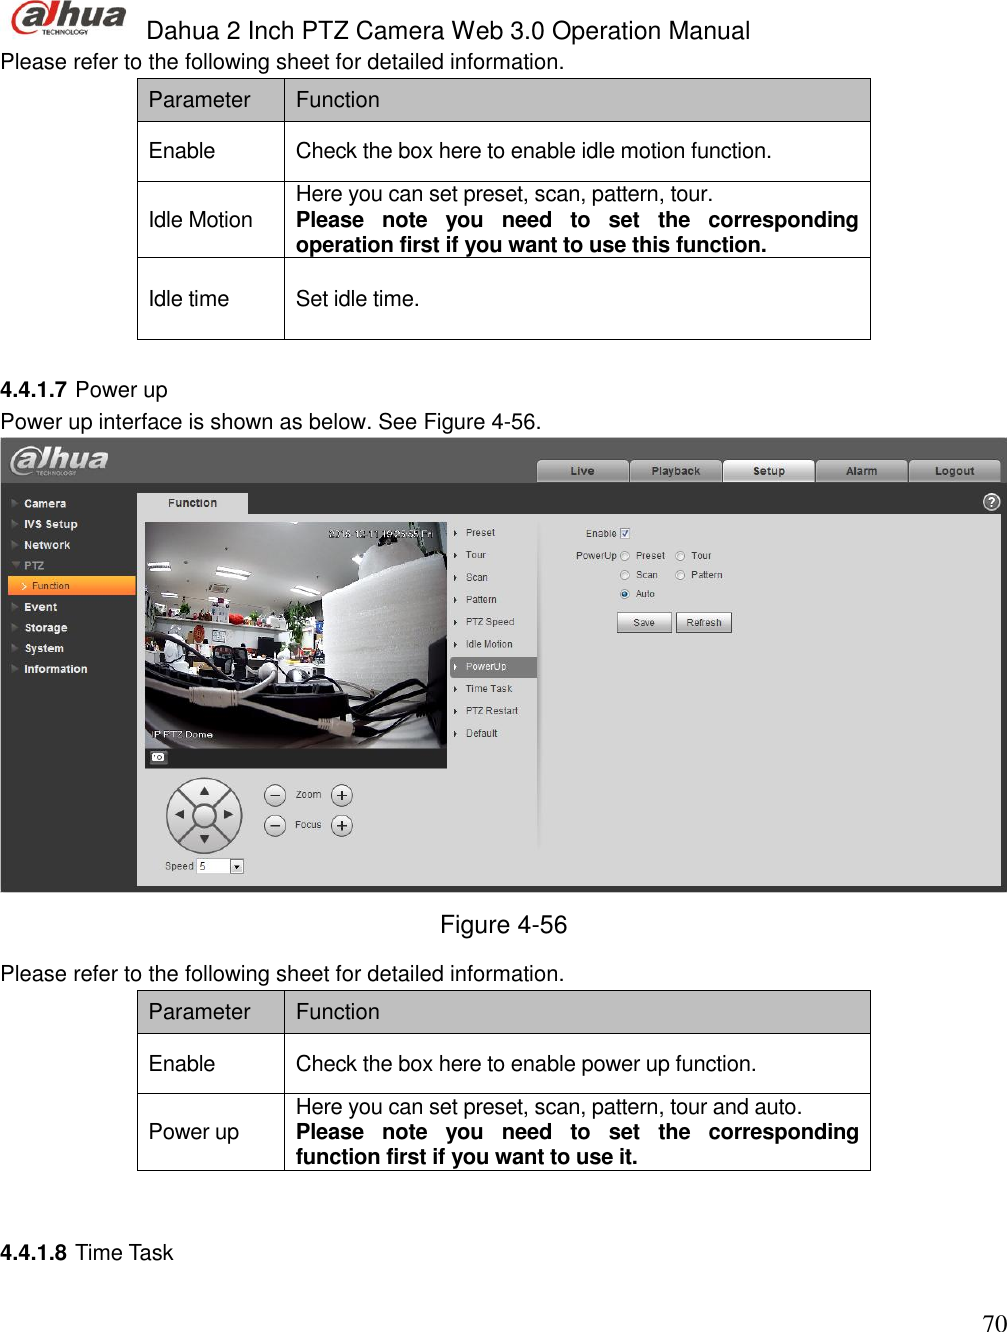
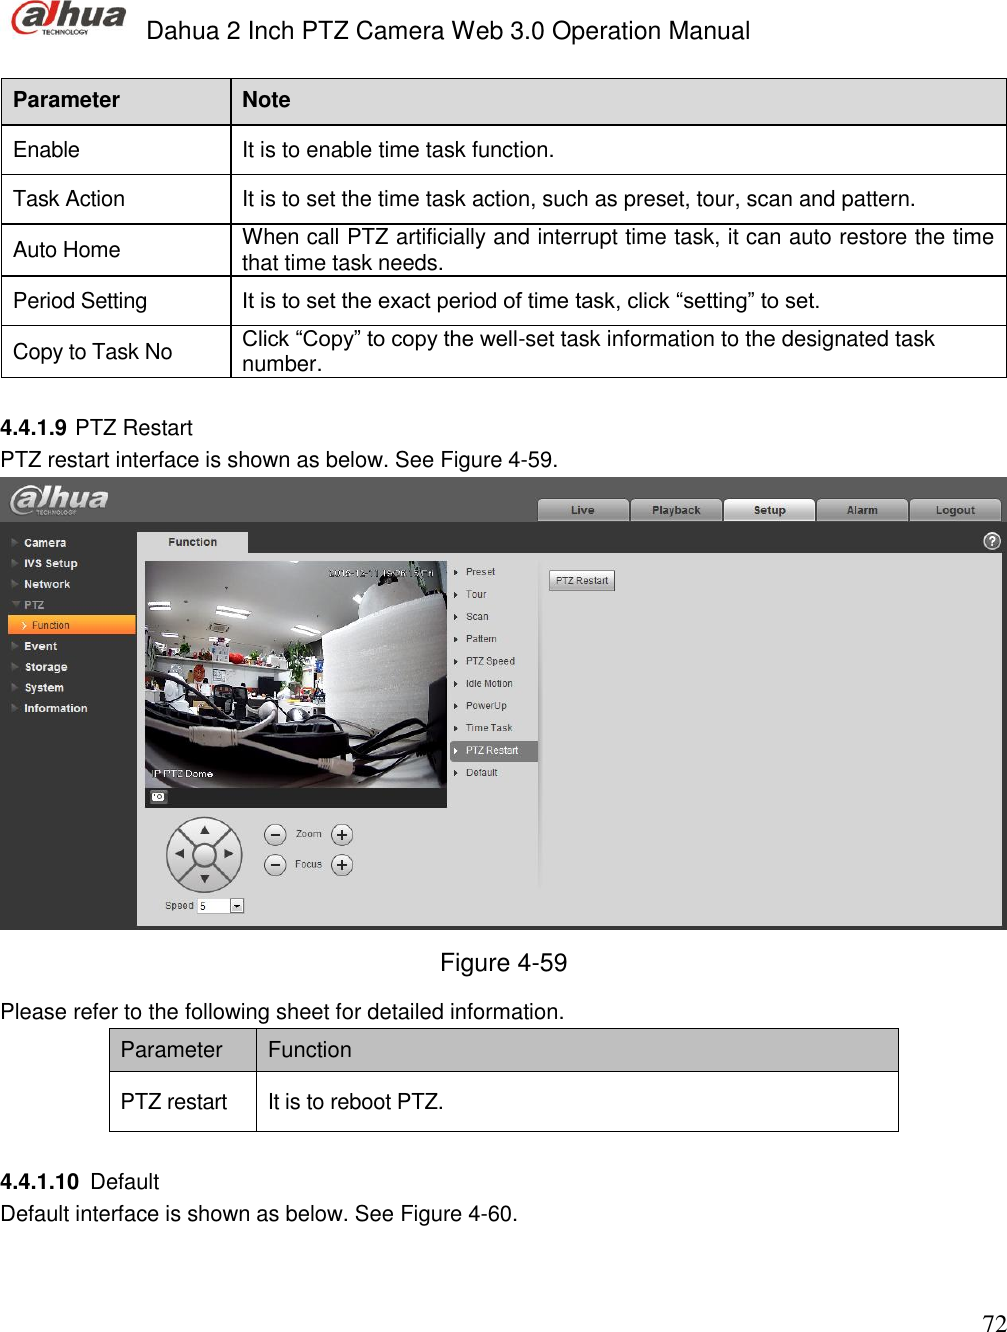
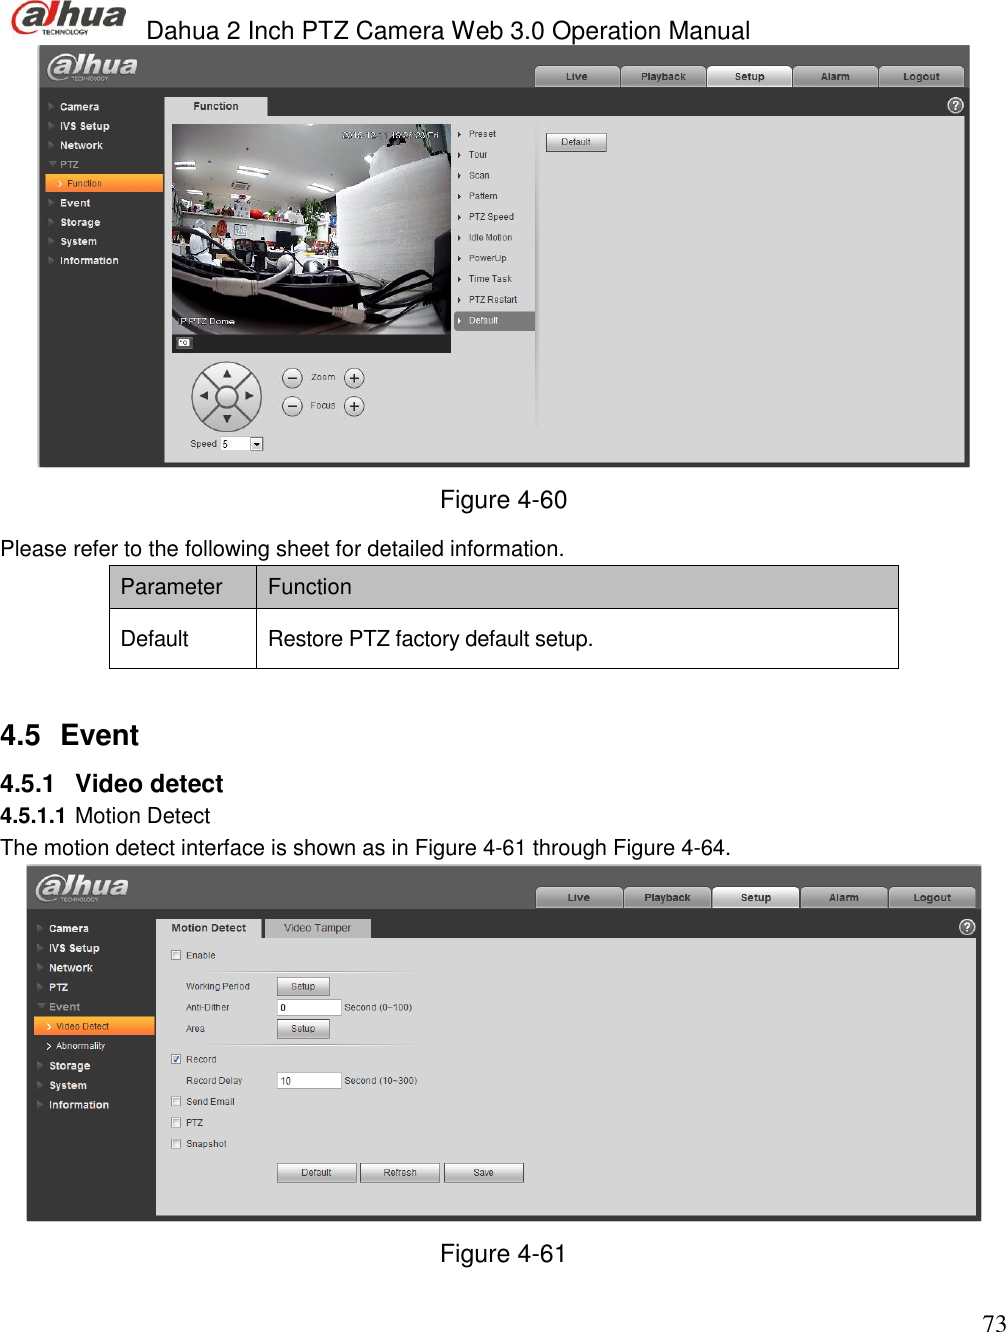
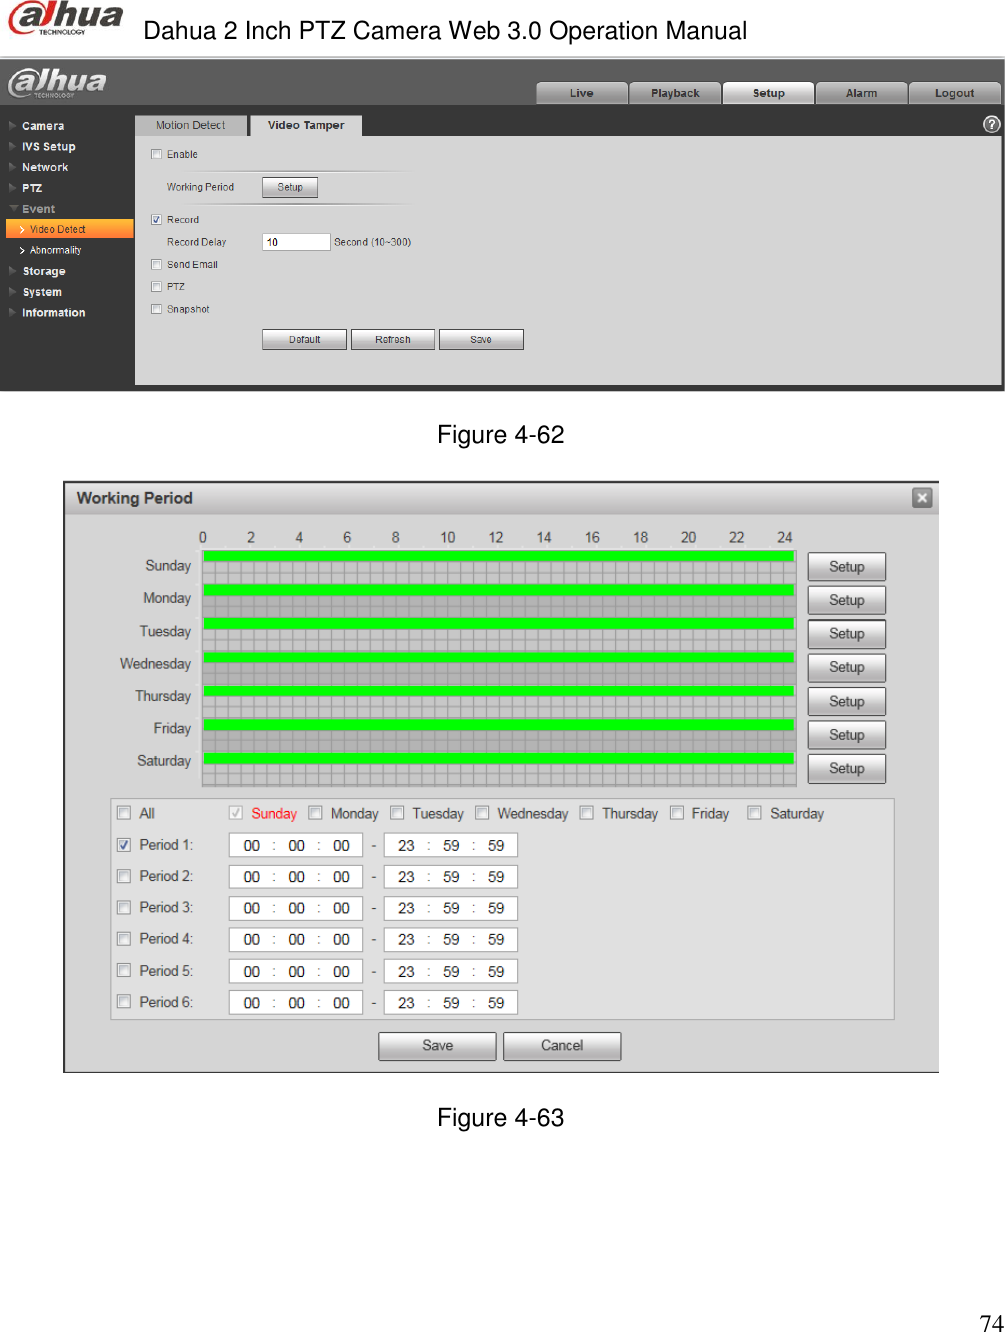
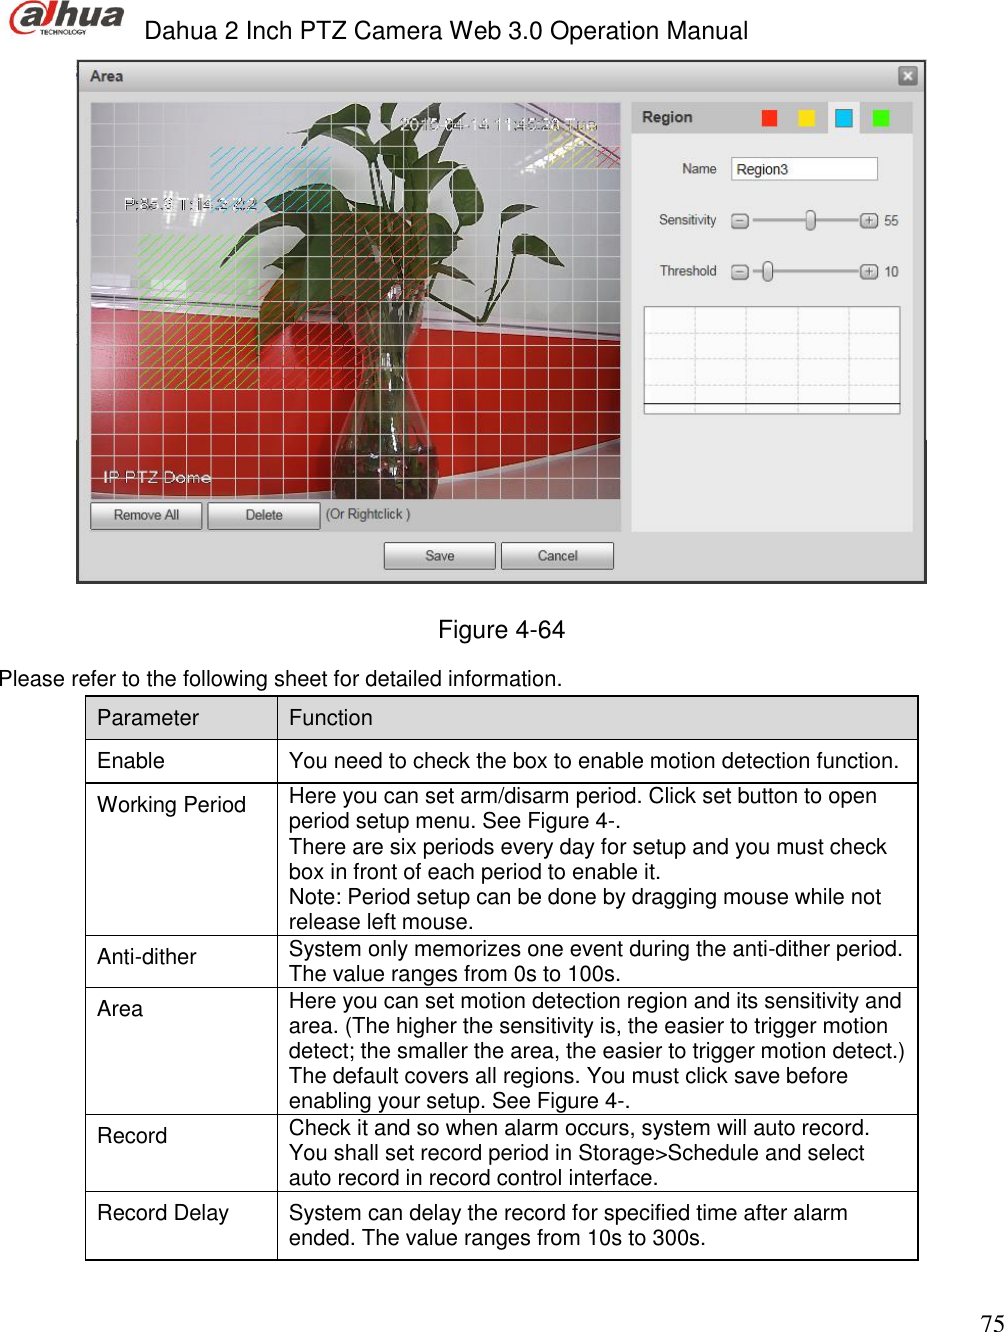
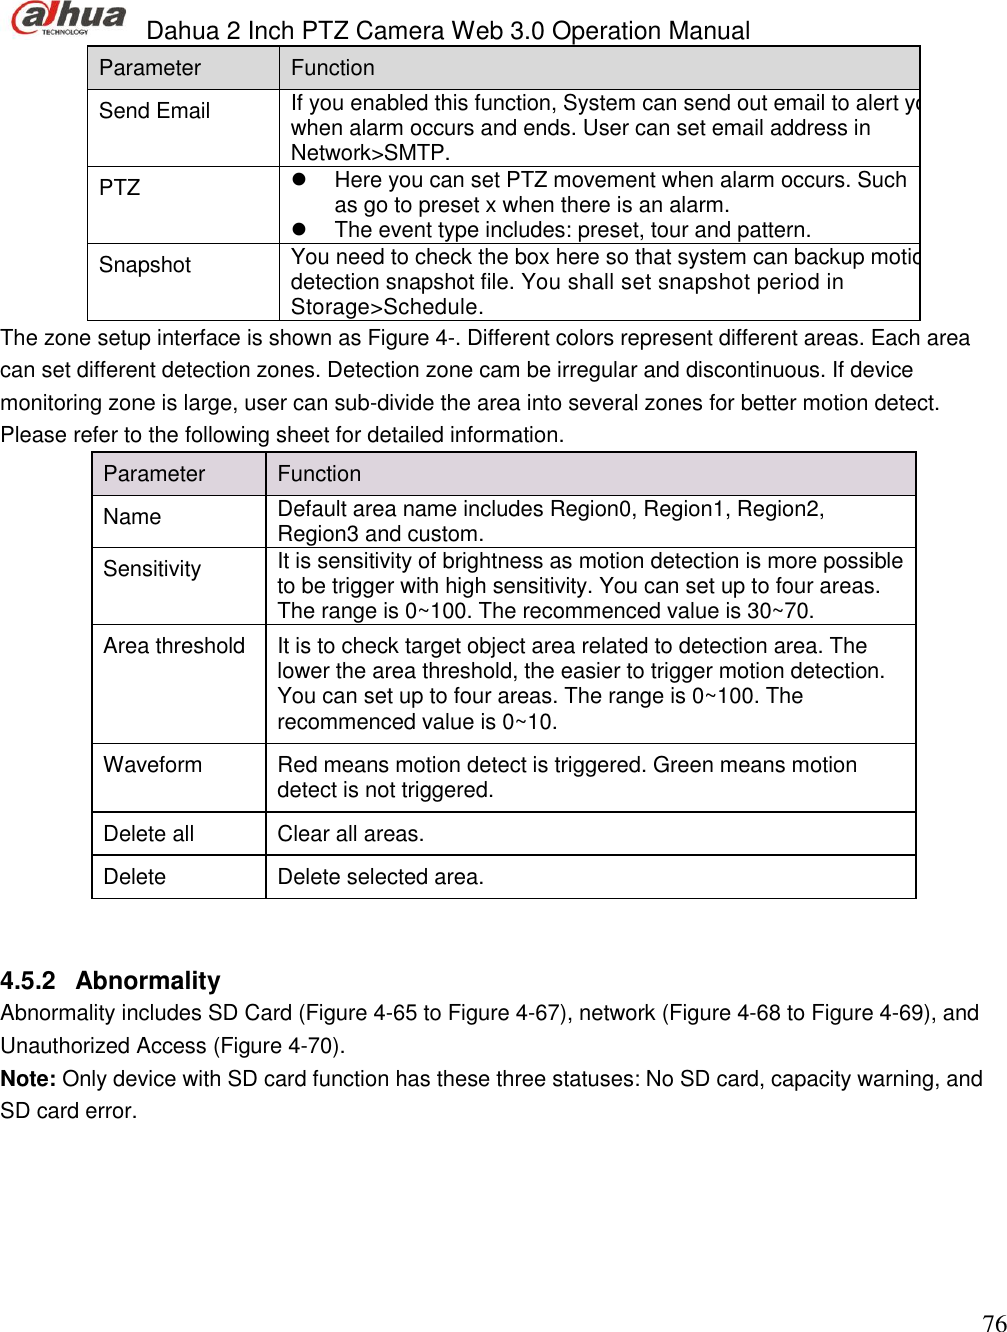
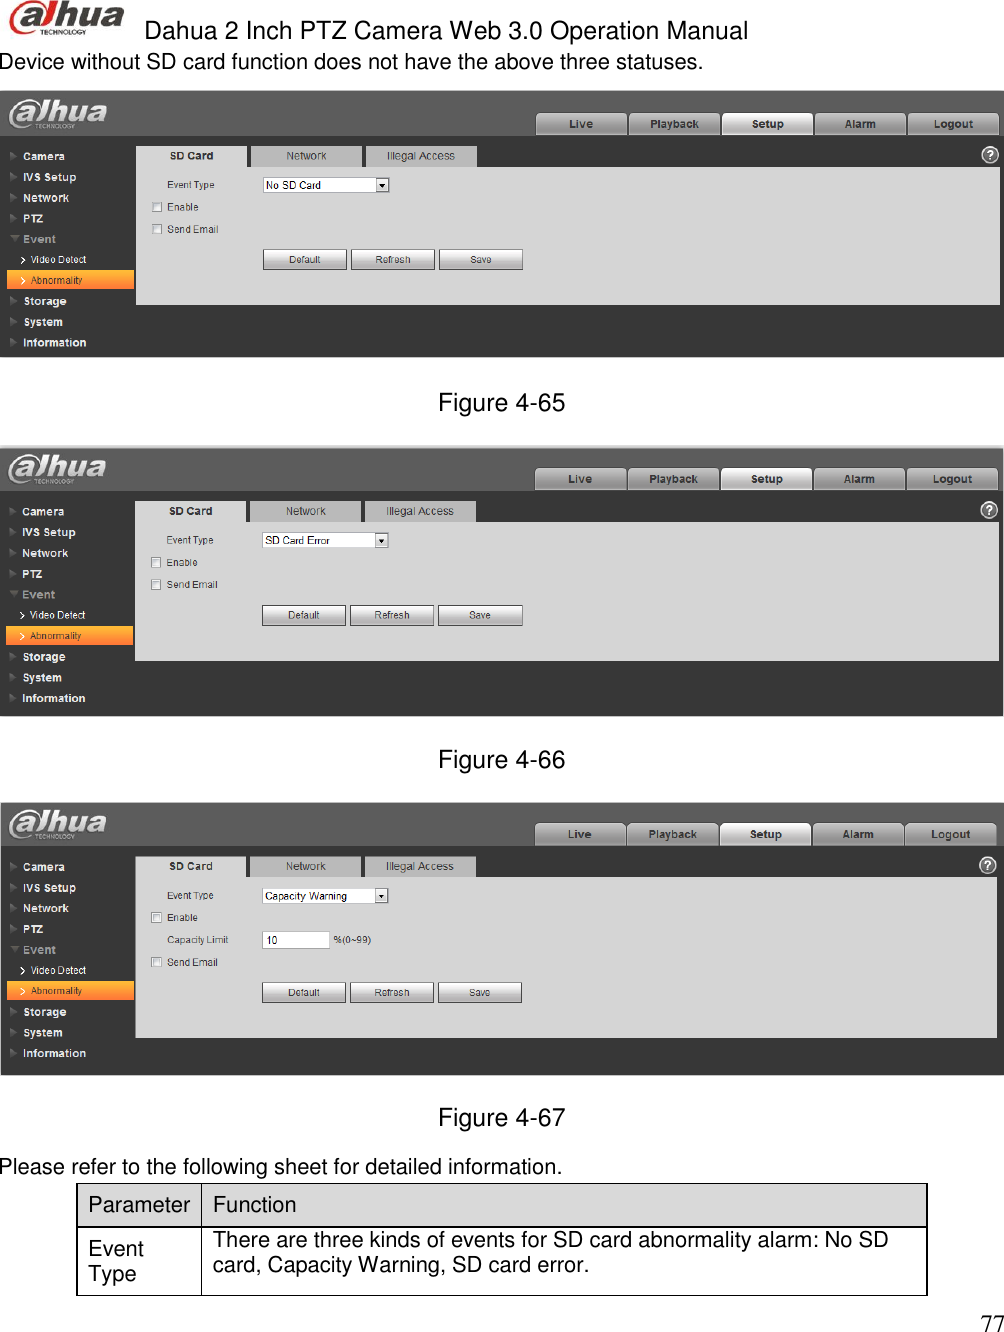
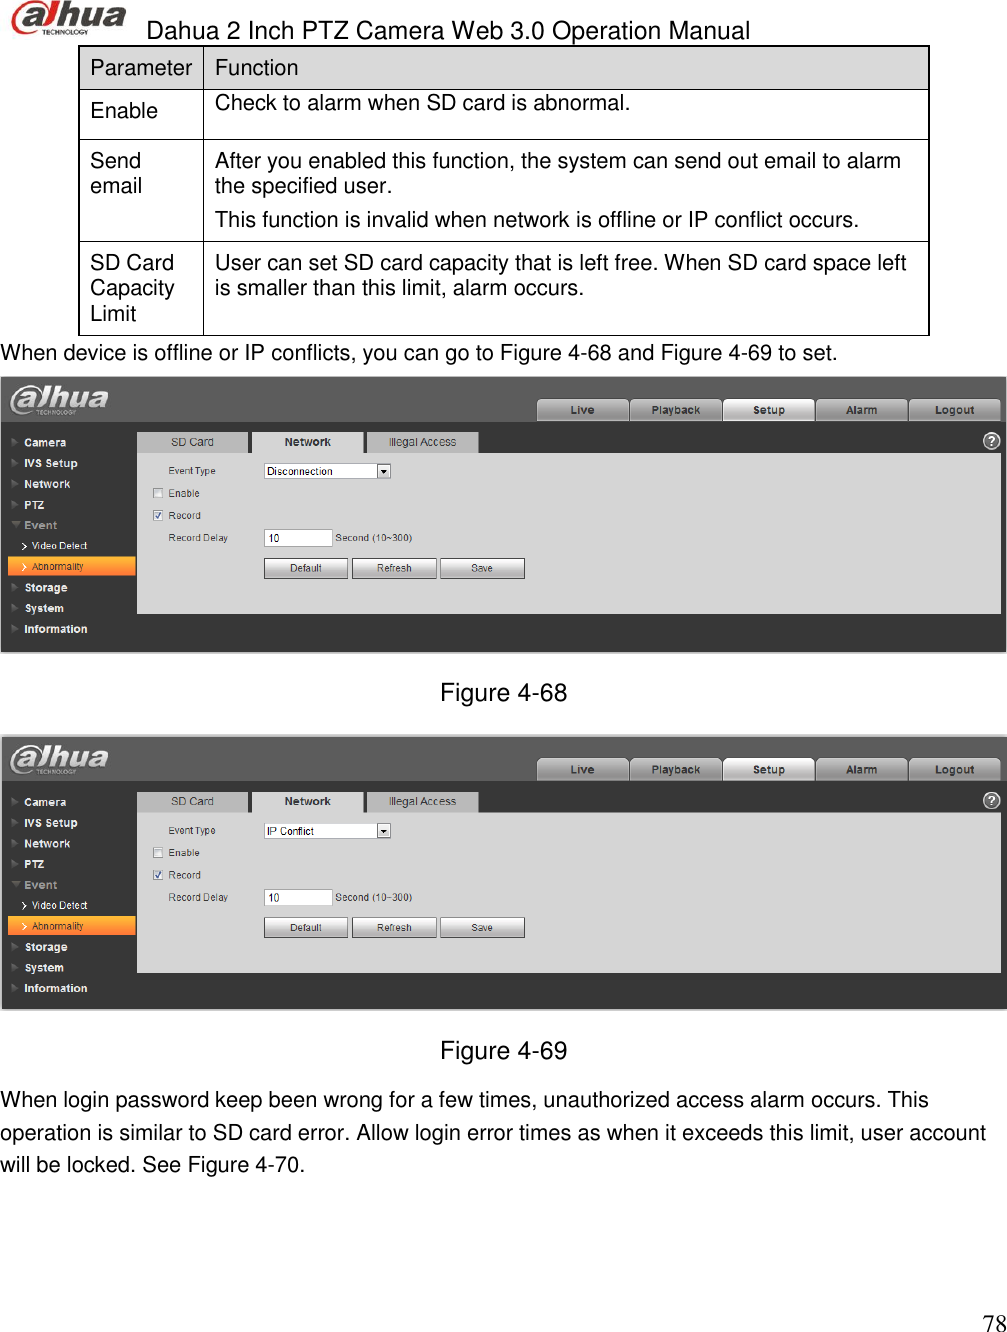
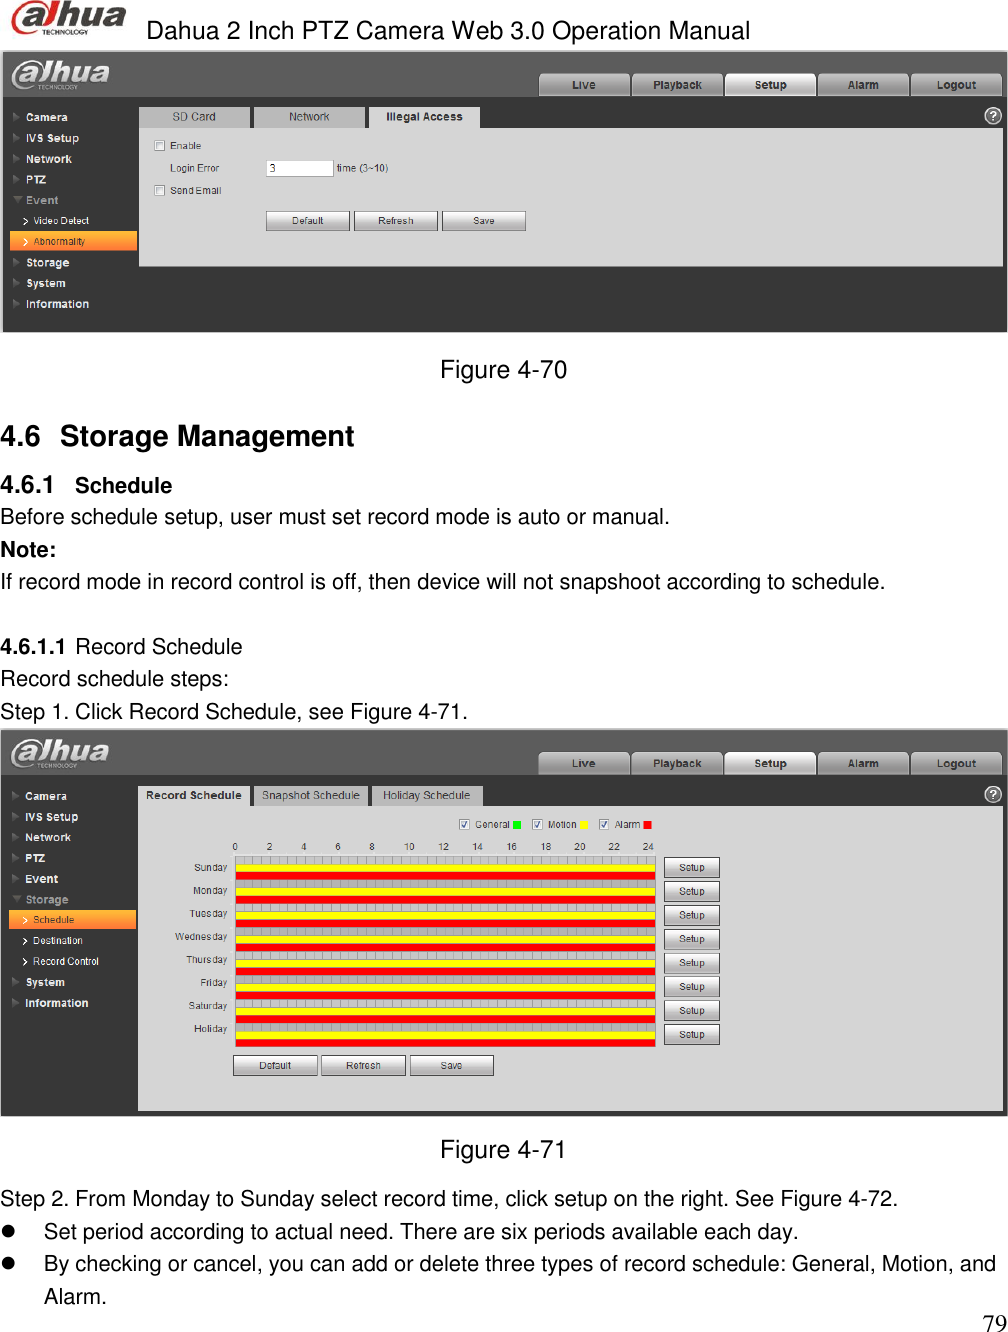
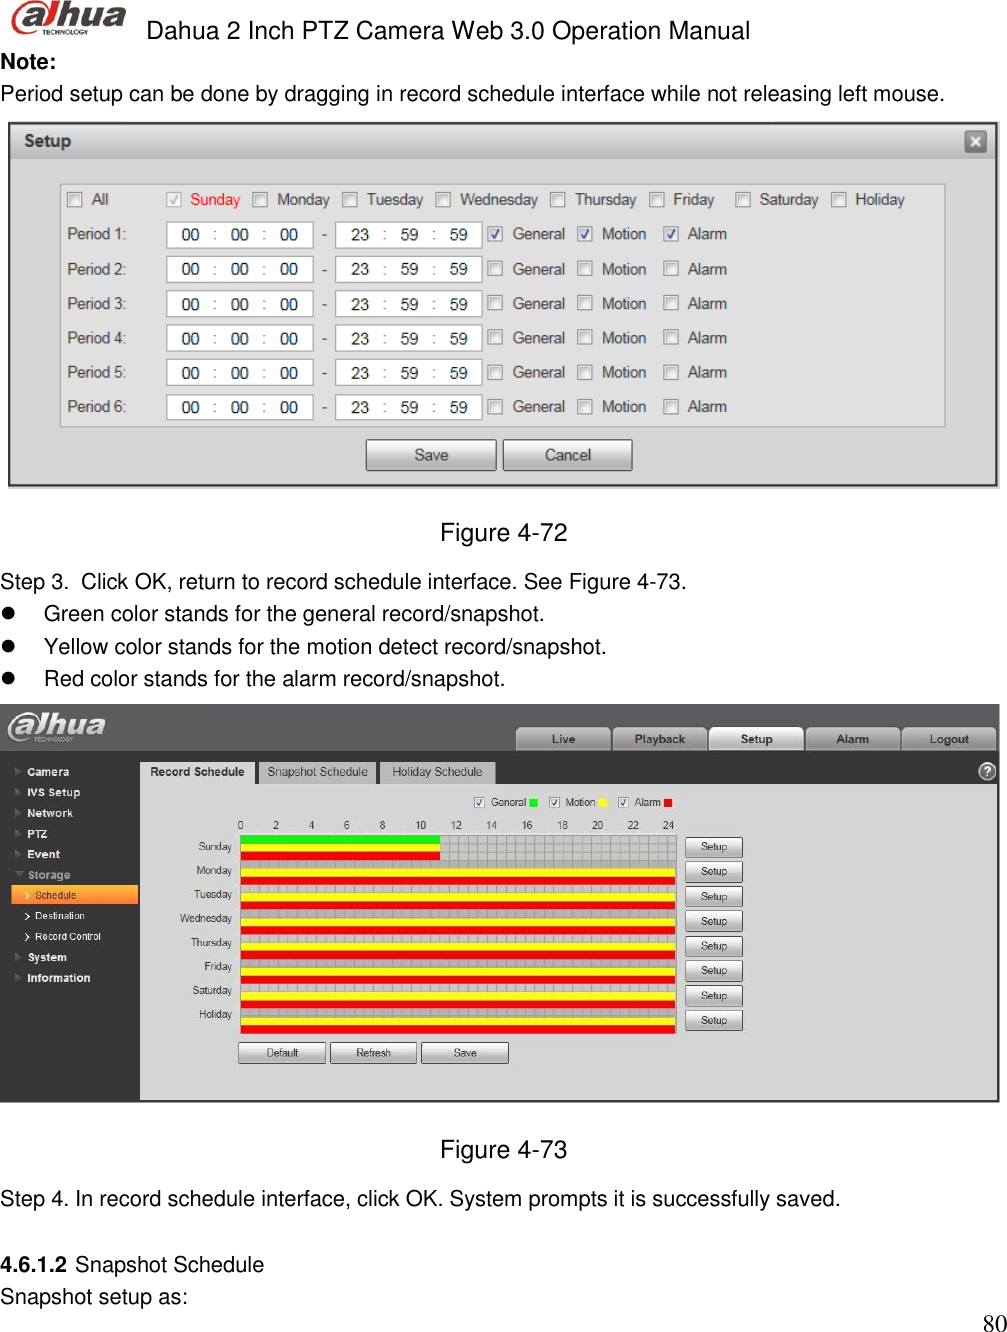
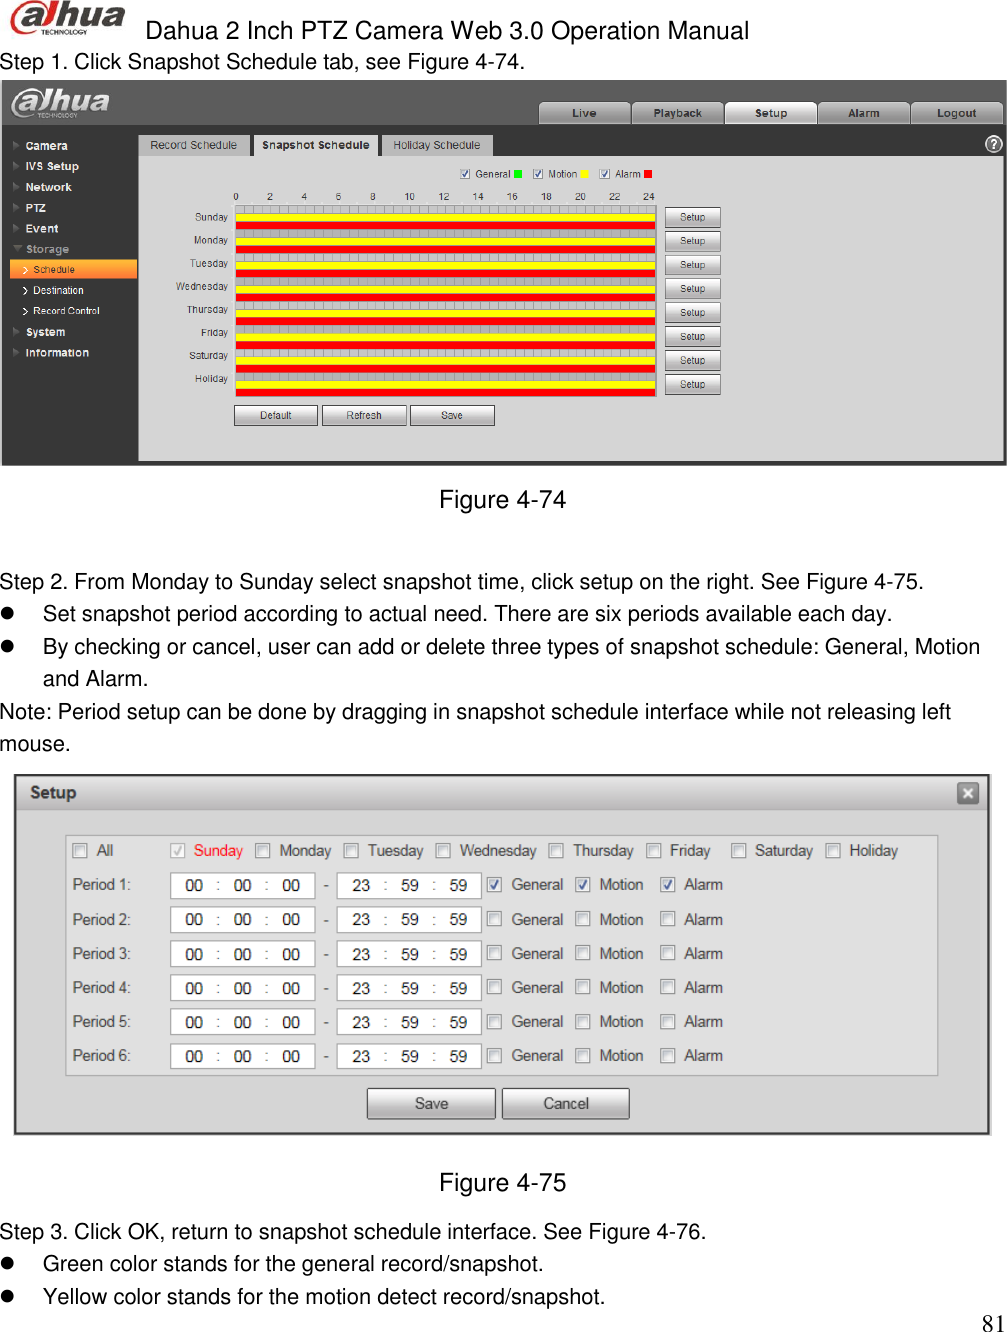
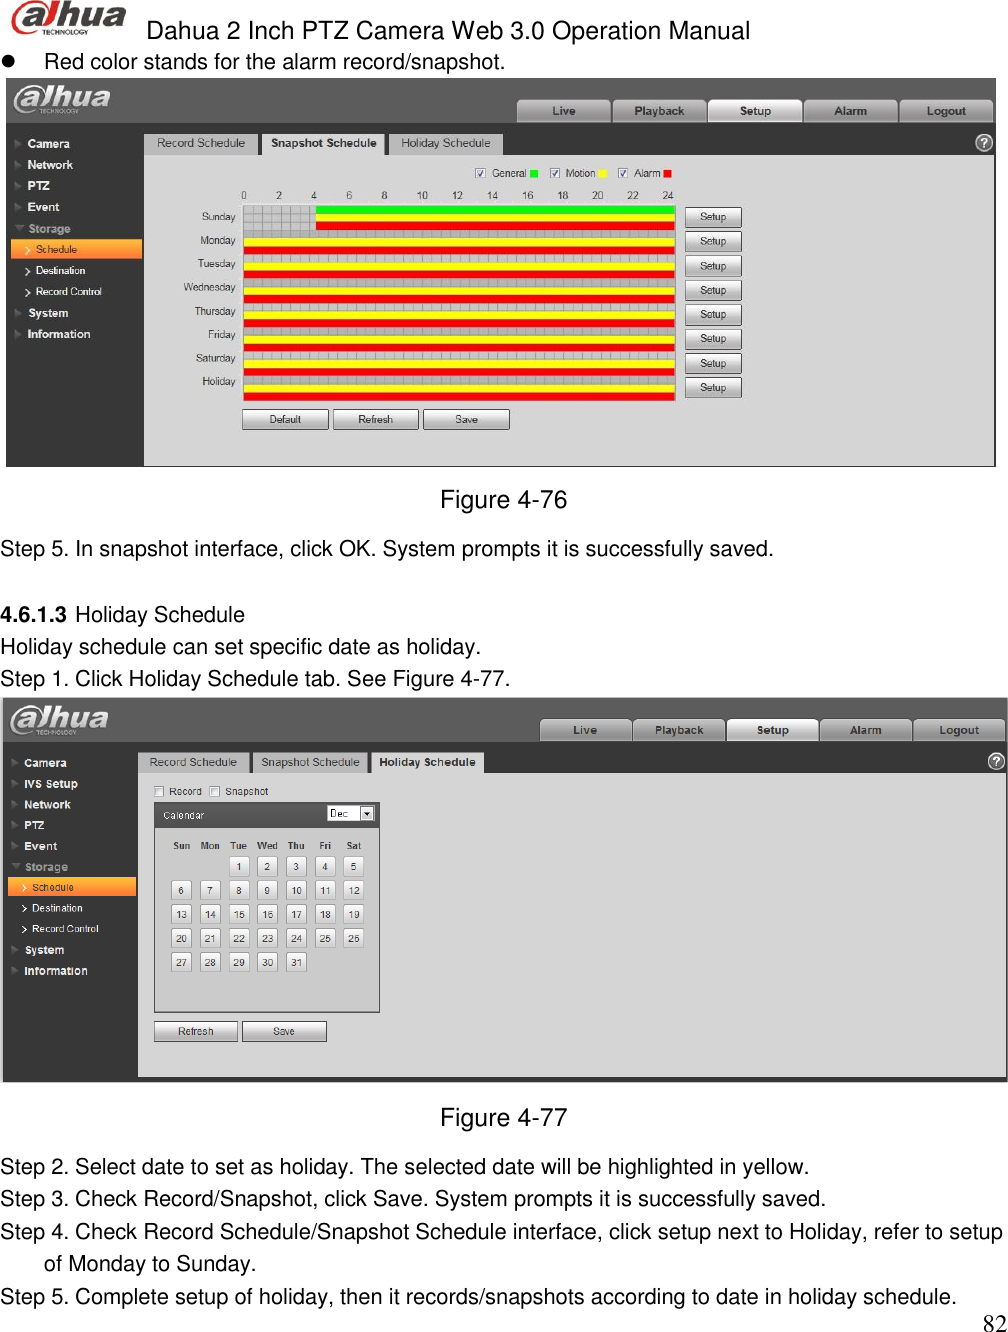
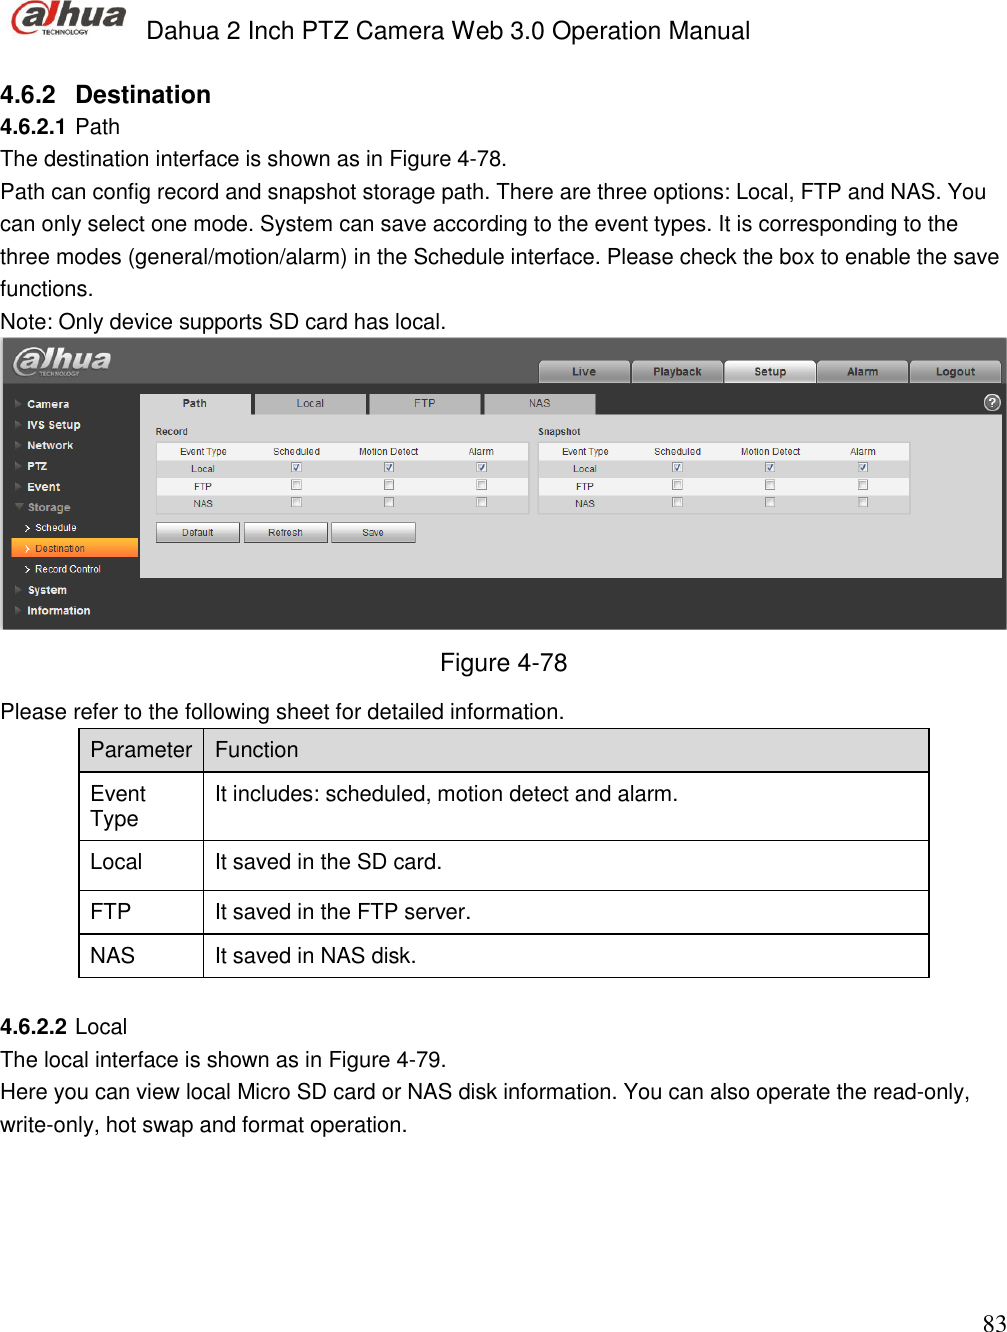
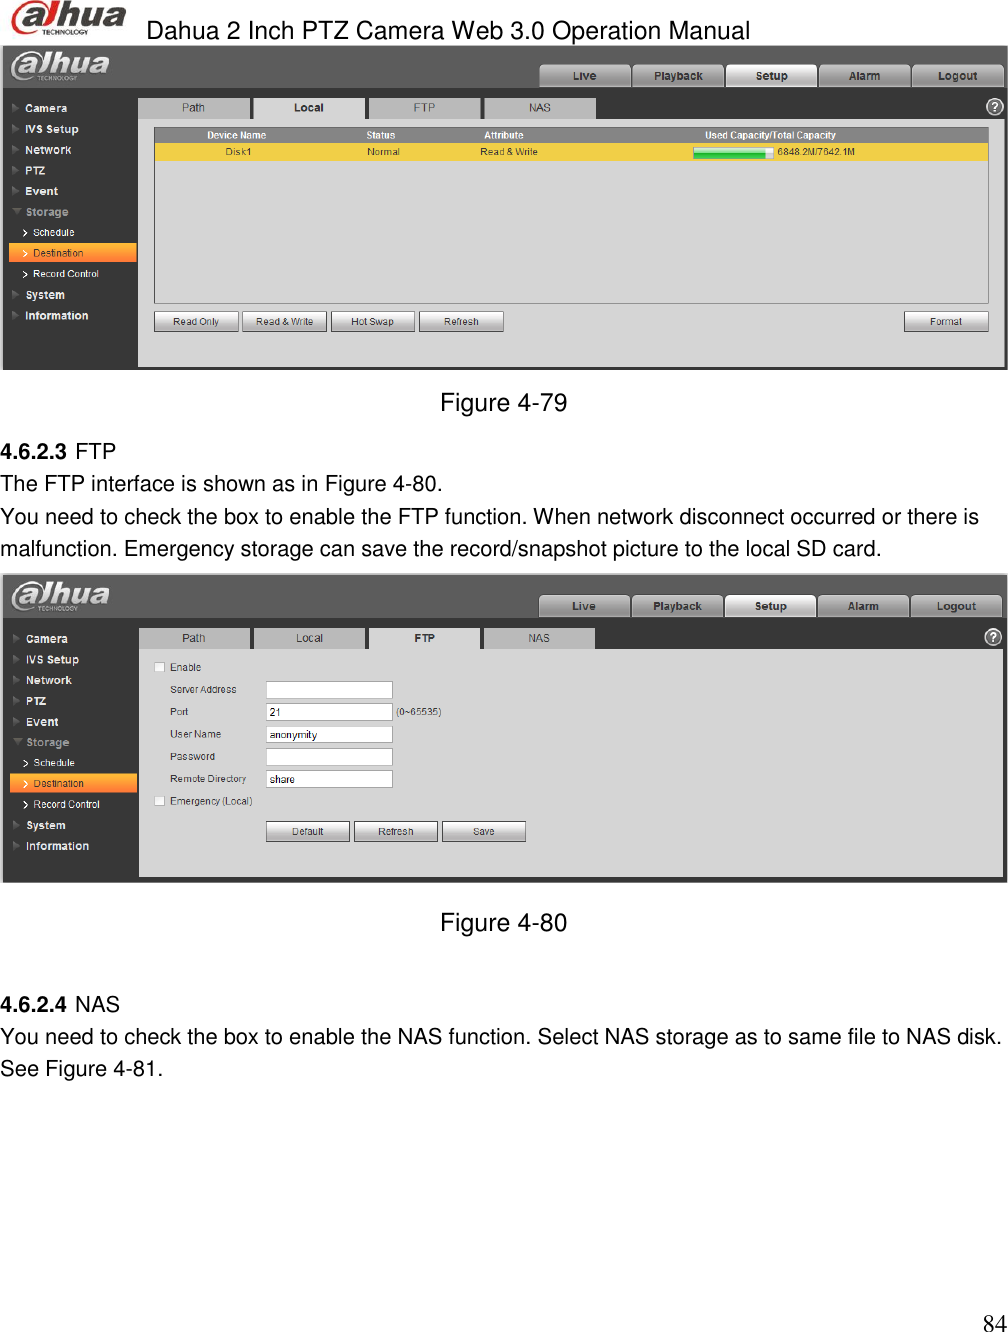
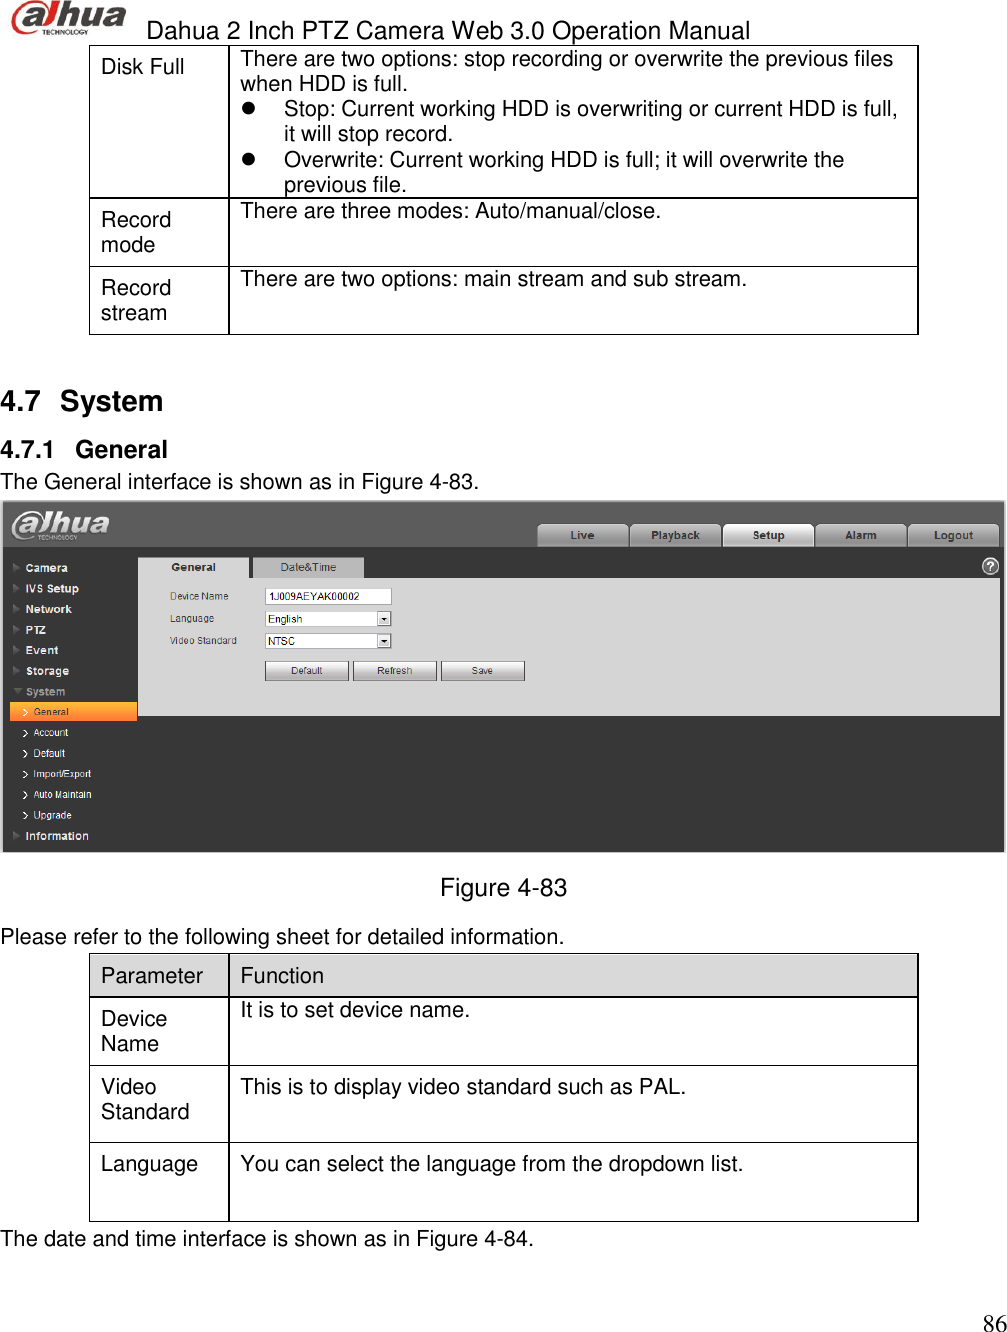
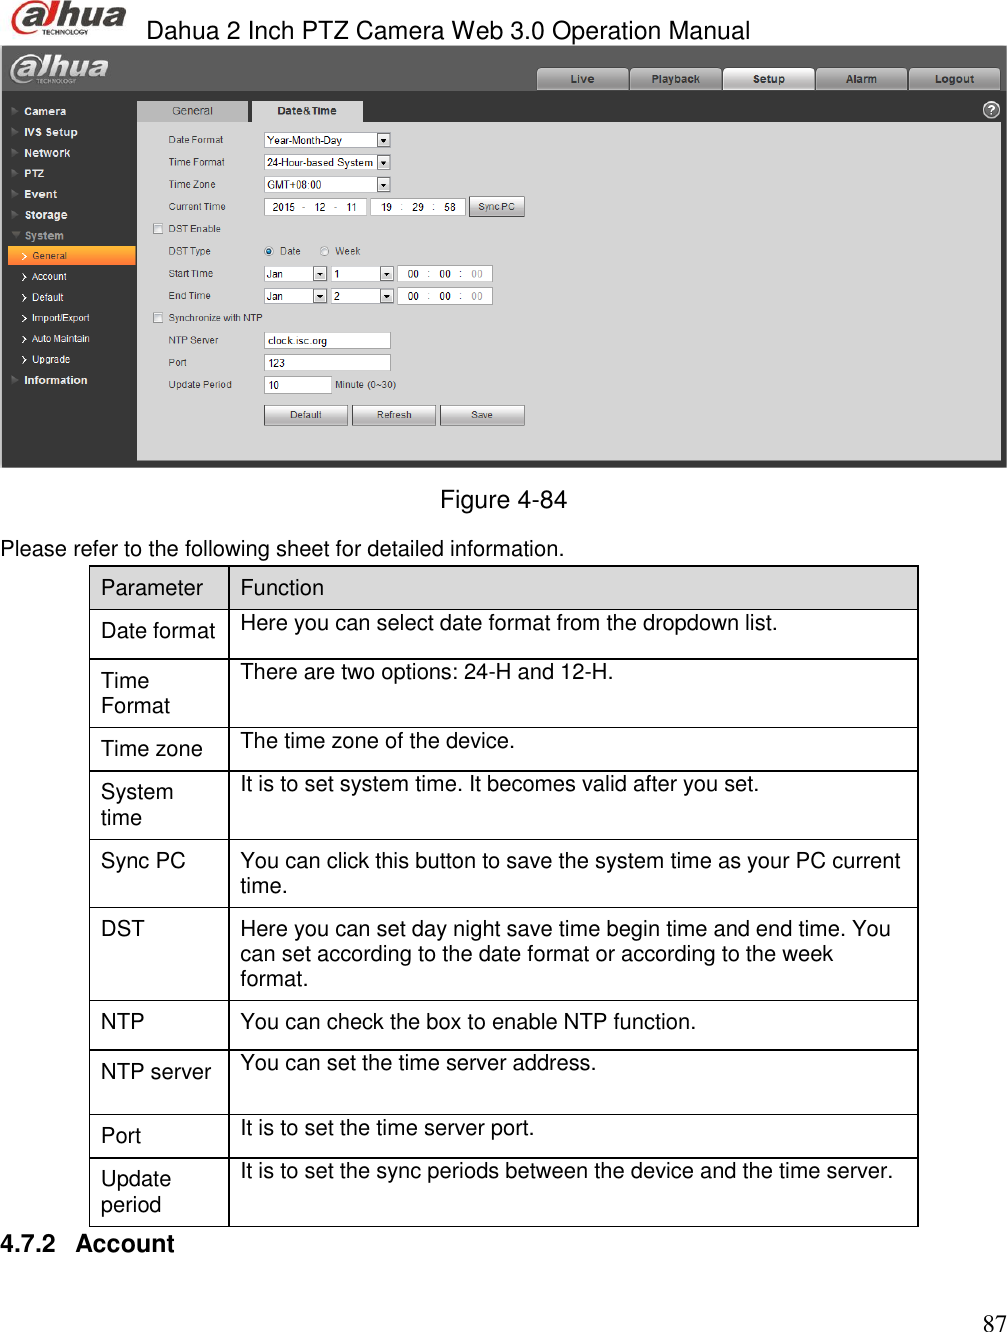
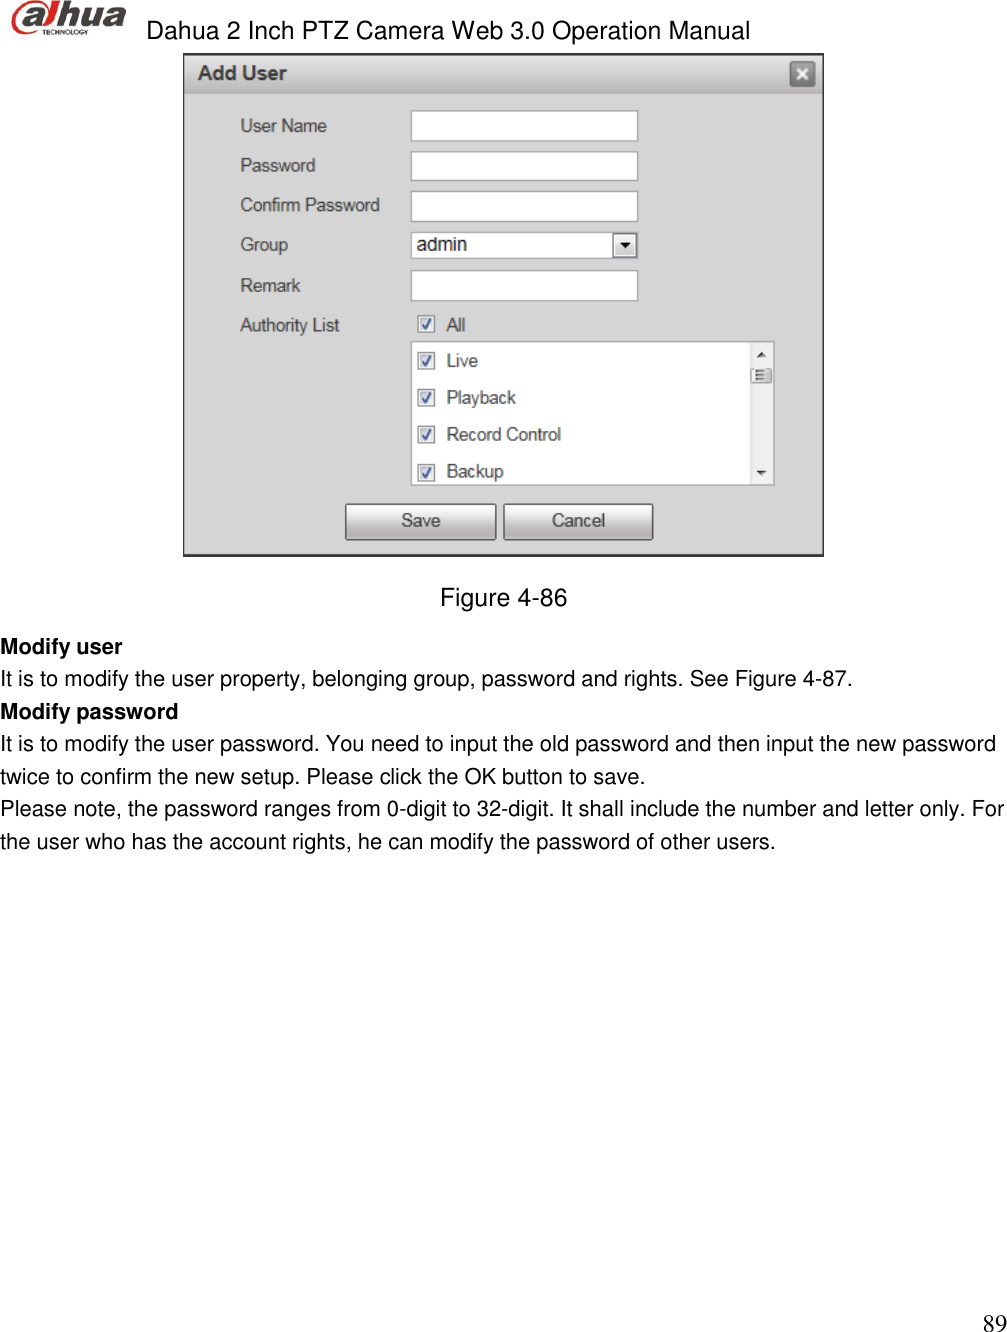
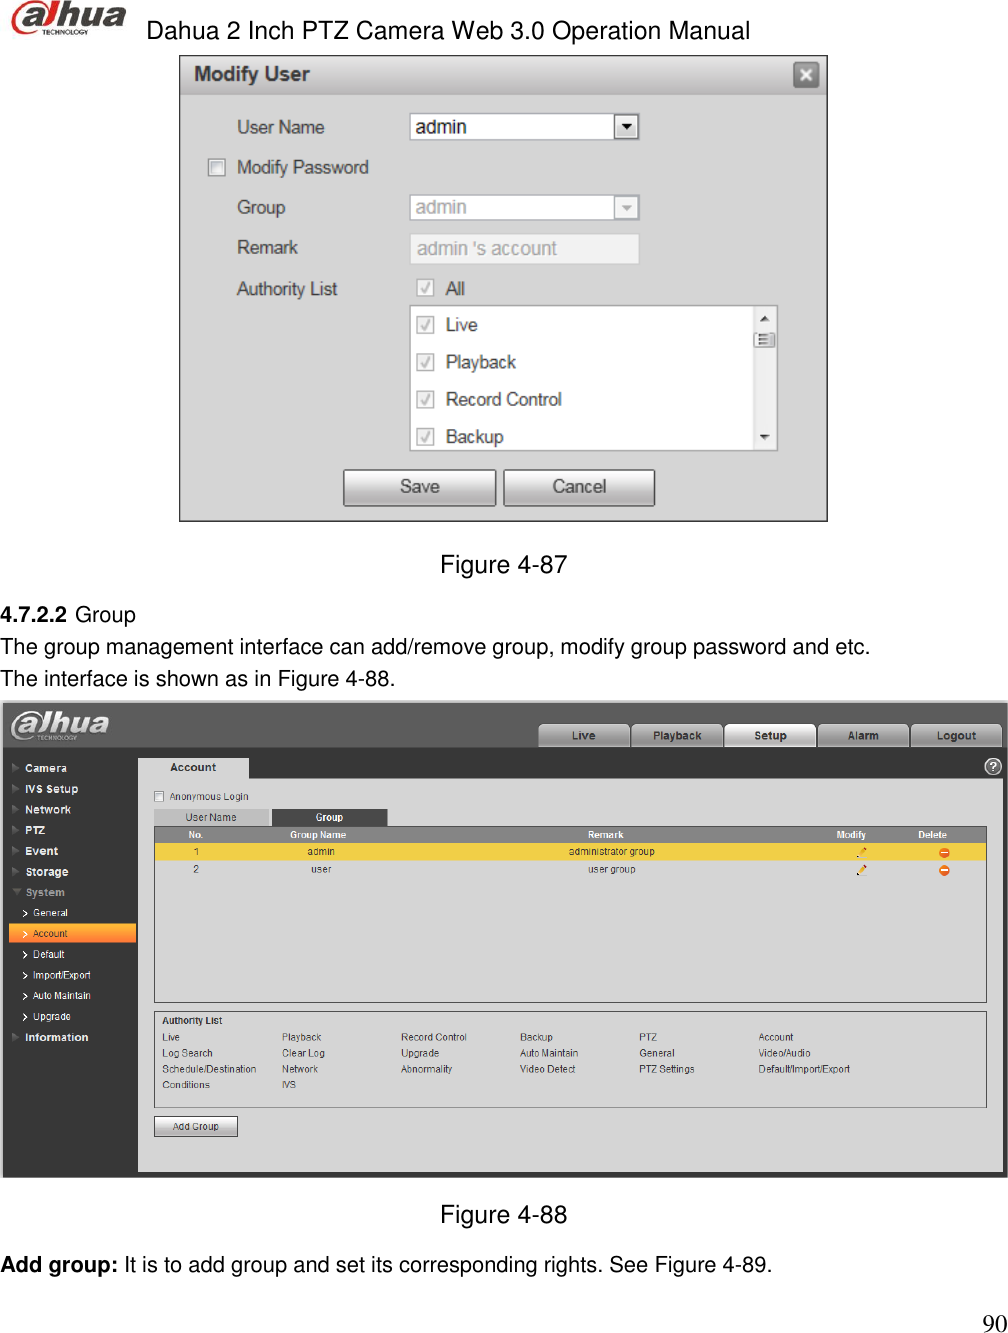
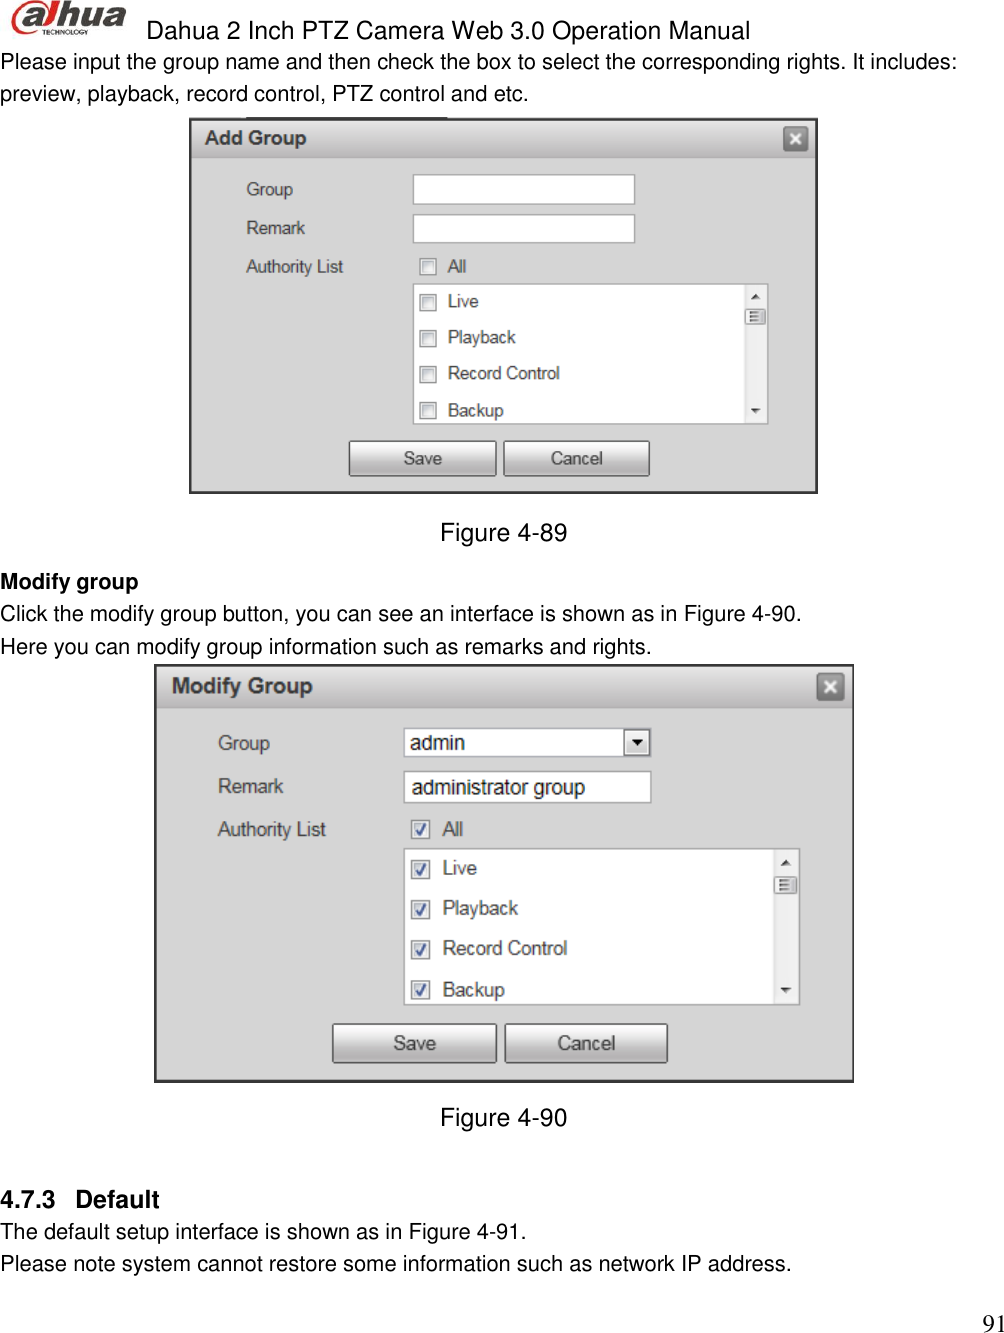
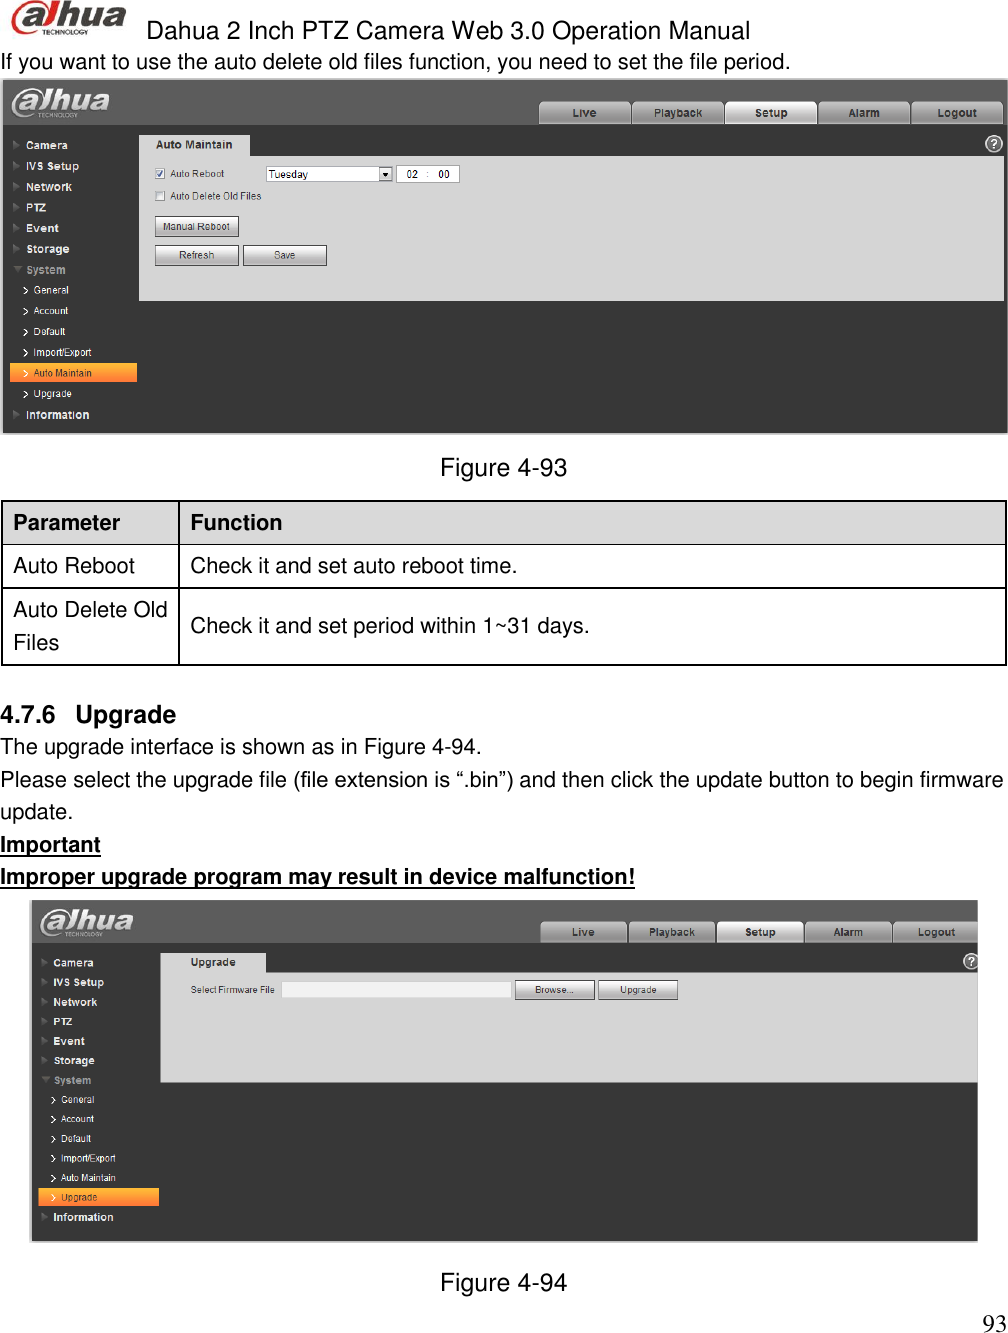
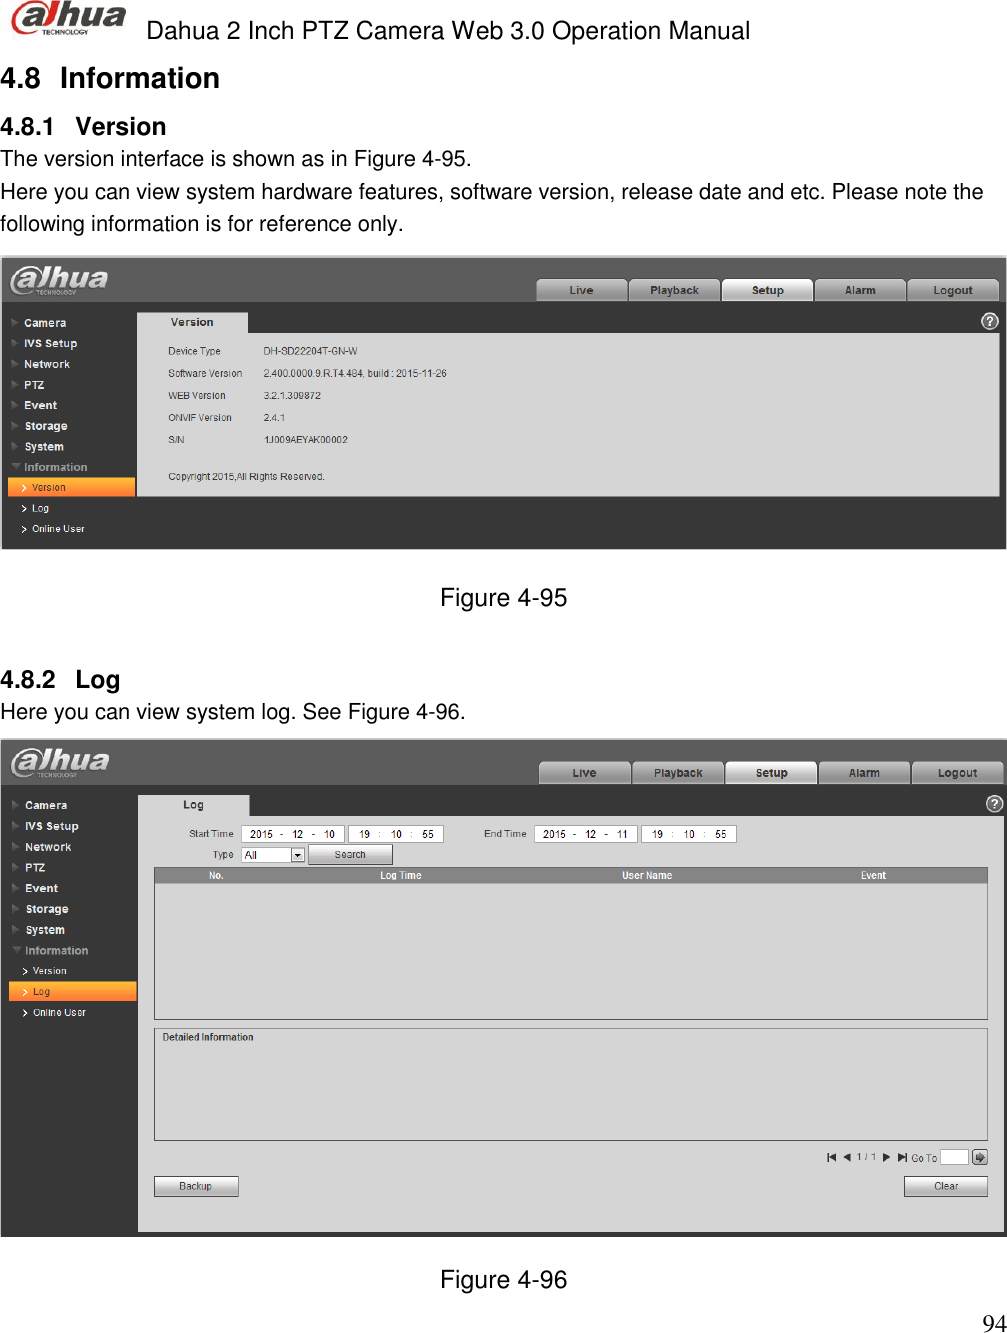
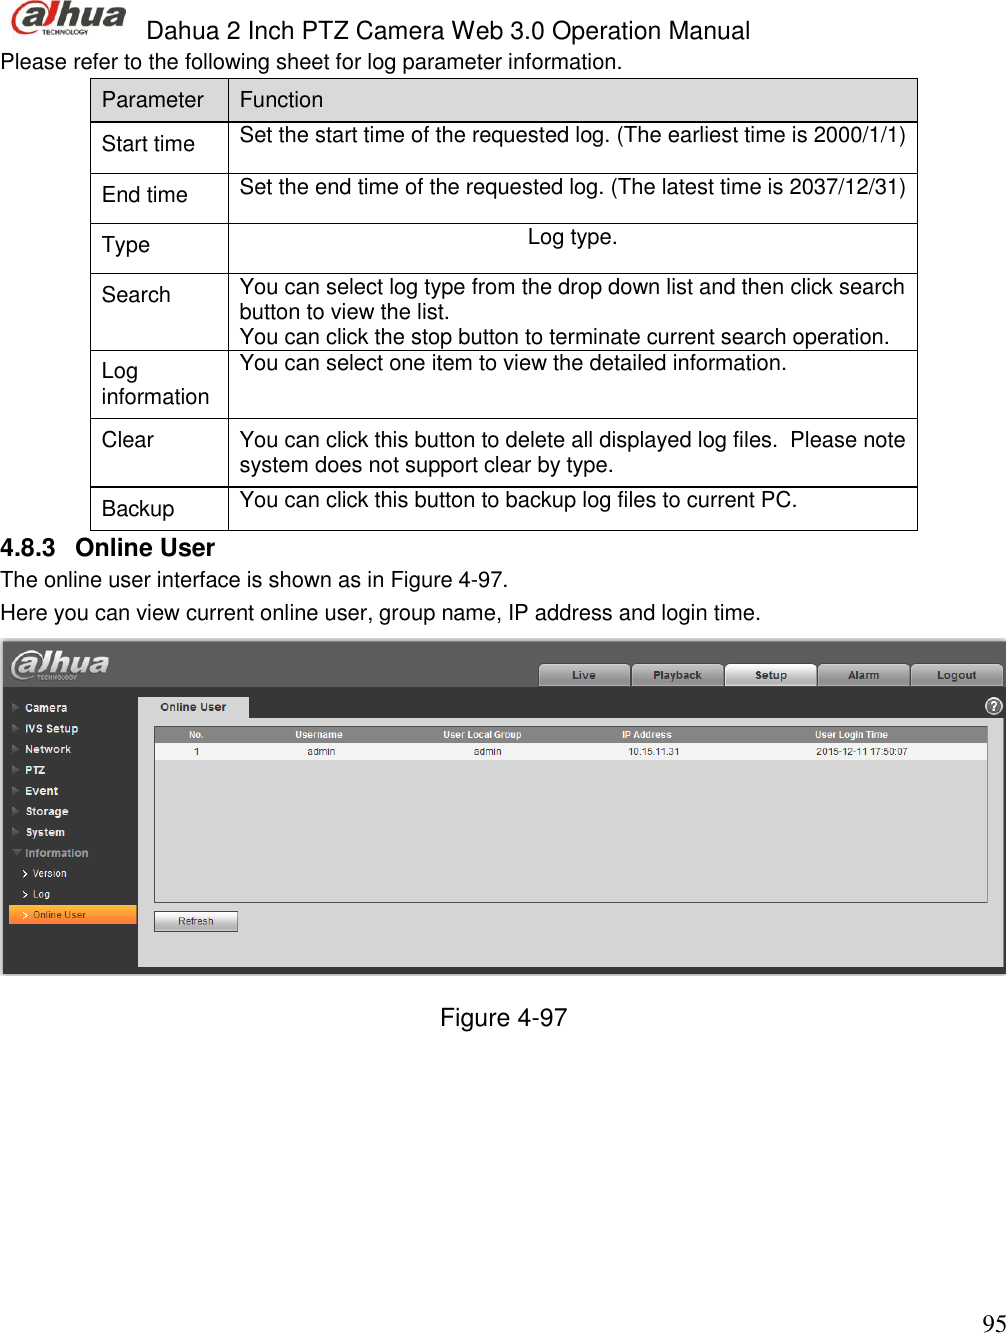
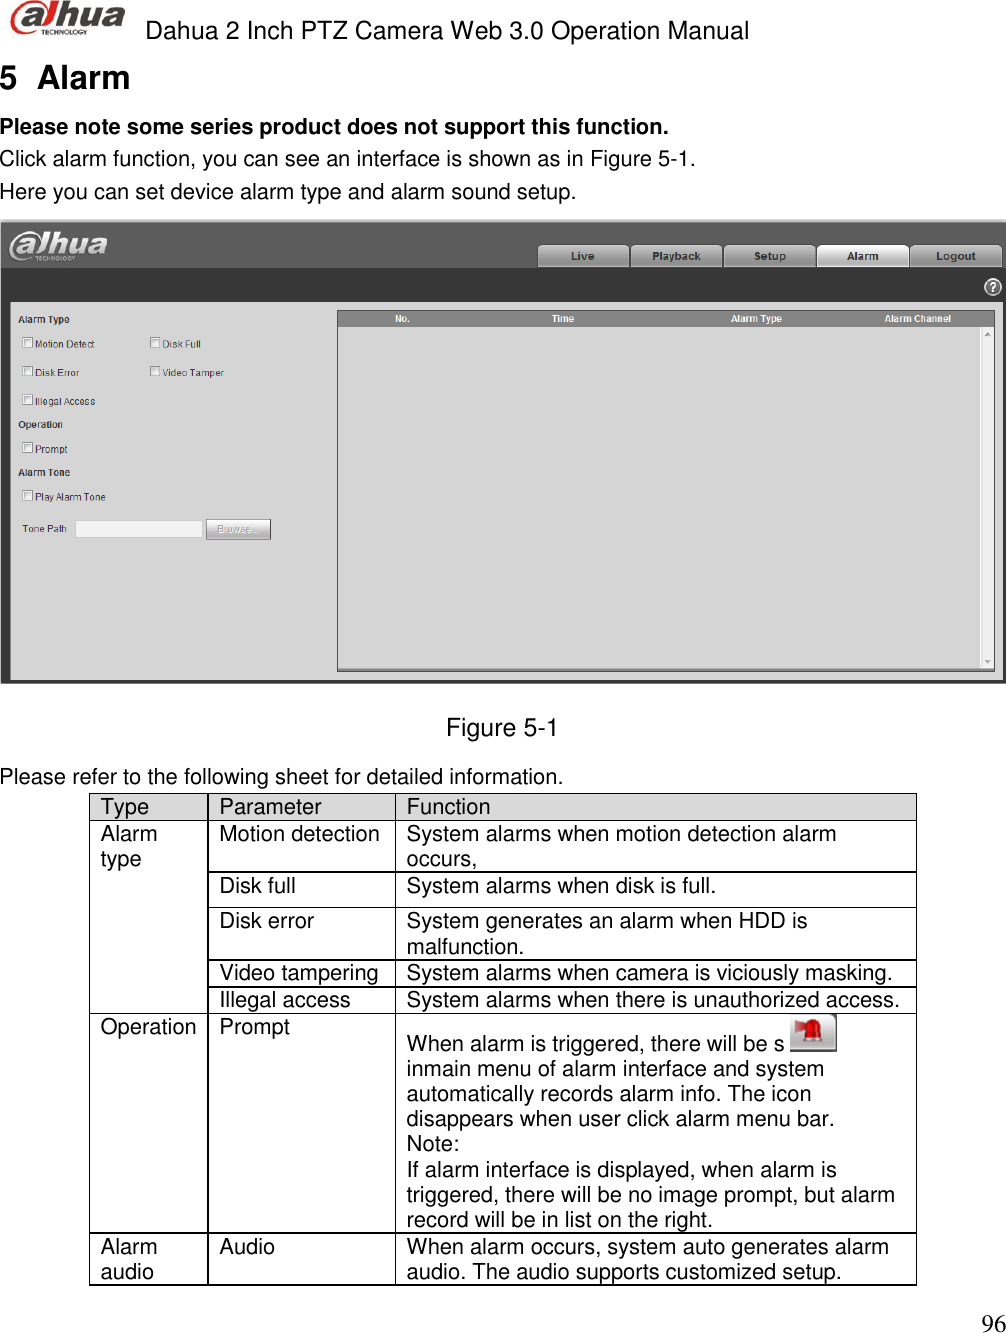
Operation Manual