Zippy Technology BT668 Bluetooth Trackball Keyboard User Manual BT668
Zippy Technology Corp. Bluetooth Trackball Keyboard BT668
BT668 User manual
Safety
Introduction
Before getting started, read these instructions and save
them for future reference.
Do not drop or hit your keyboard.
Do not use your keyboard in a location that is subject
to strong vibrations because vibration may damage
your keyboard.
Do not disassemble or modify the product in any way.
Disassembly or modification may void your warranty
and could damage your keyboard leading to a fire or
electric shock.
Do not use or store your keyboard in damp locations.
Liquid entering the product may cause damage or lead
to fires or electric shock.
Do not insert metal objects, such as coins or paper
clips, into your keyboard.
Your keyboard is for general device use. Do not use
your keyboard with a device that requires exceptional
reliability, especially if a breakdown or malfunction of
might jeopardize life or health, such as aerospace
equipment, atomic power control system, traffic-related
equipment, transportation equipment, industrial robotics,
Congratulations on your purchase of a high-quality product.
Your BT-668 wireless keyboard represents the state of the
art in wireless keyboard design and is designed for reliable
and trouble-free performance.
1
Bluetooth Trackball Keyboar
d
Model:BT668
23
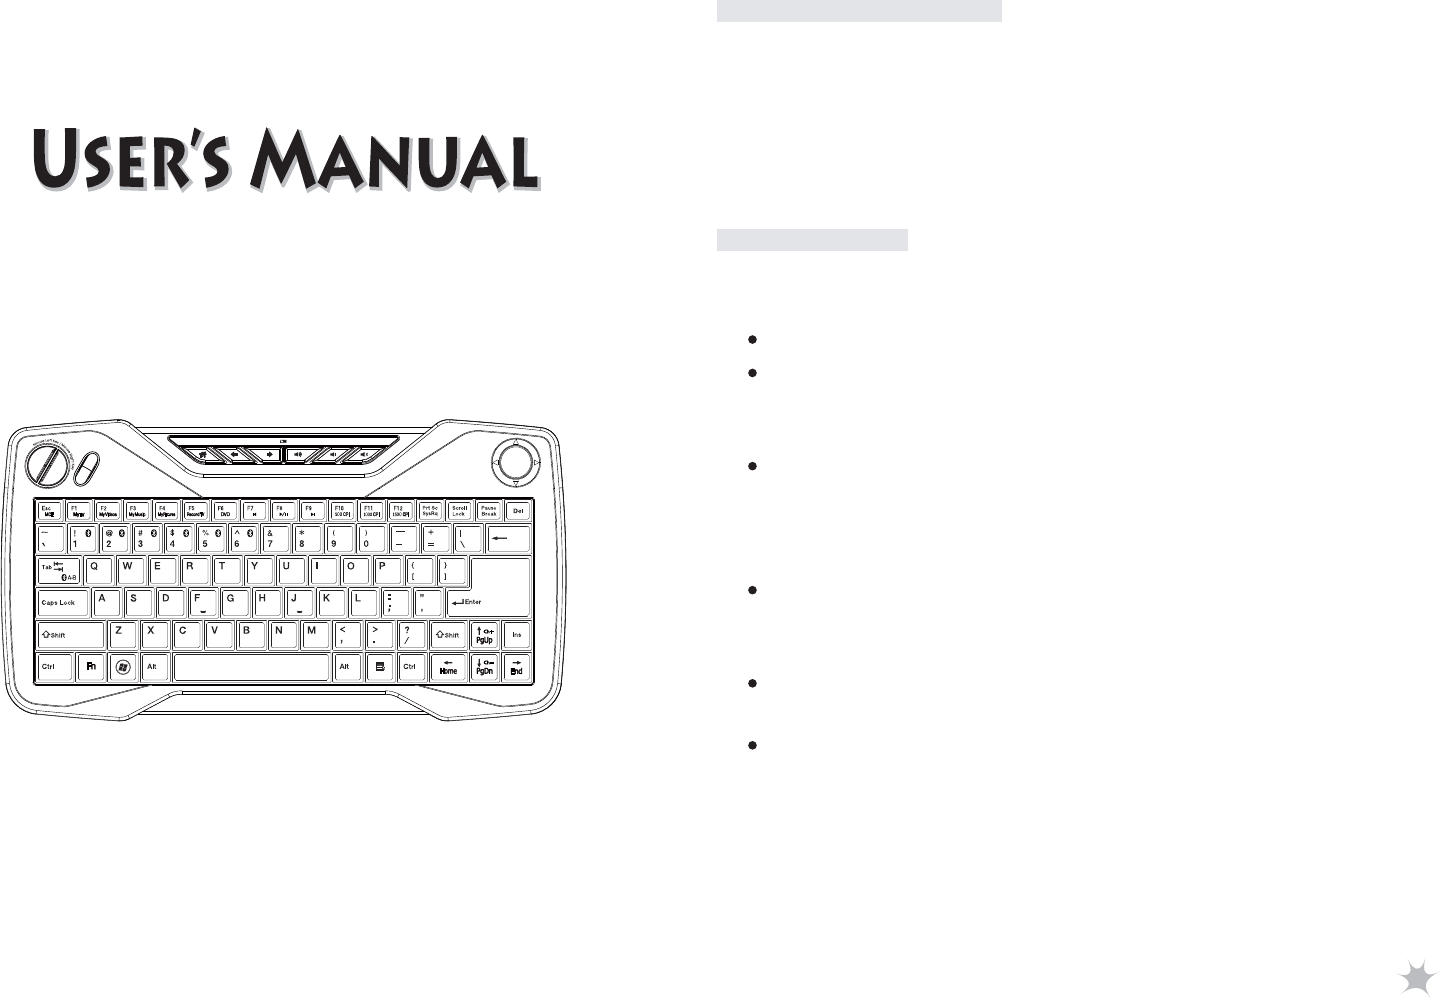
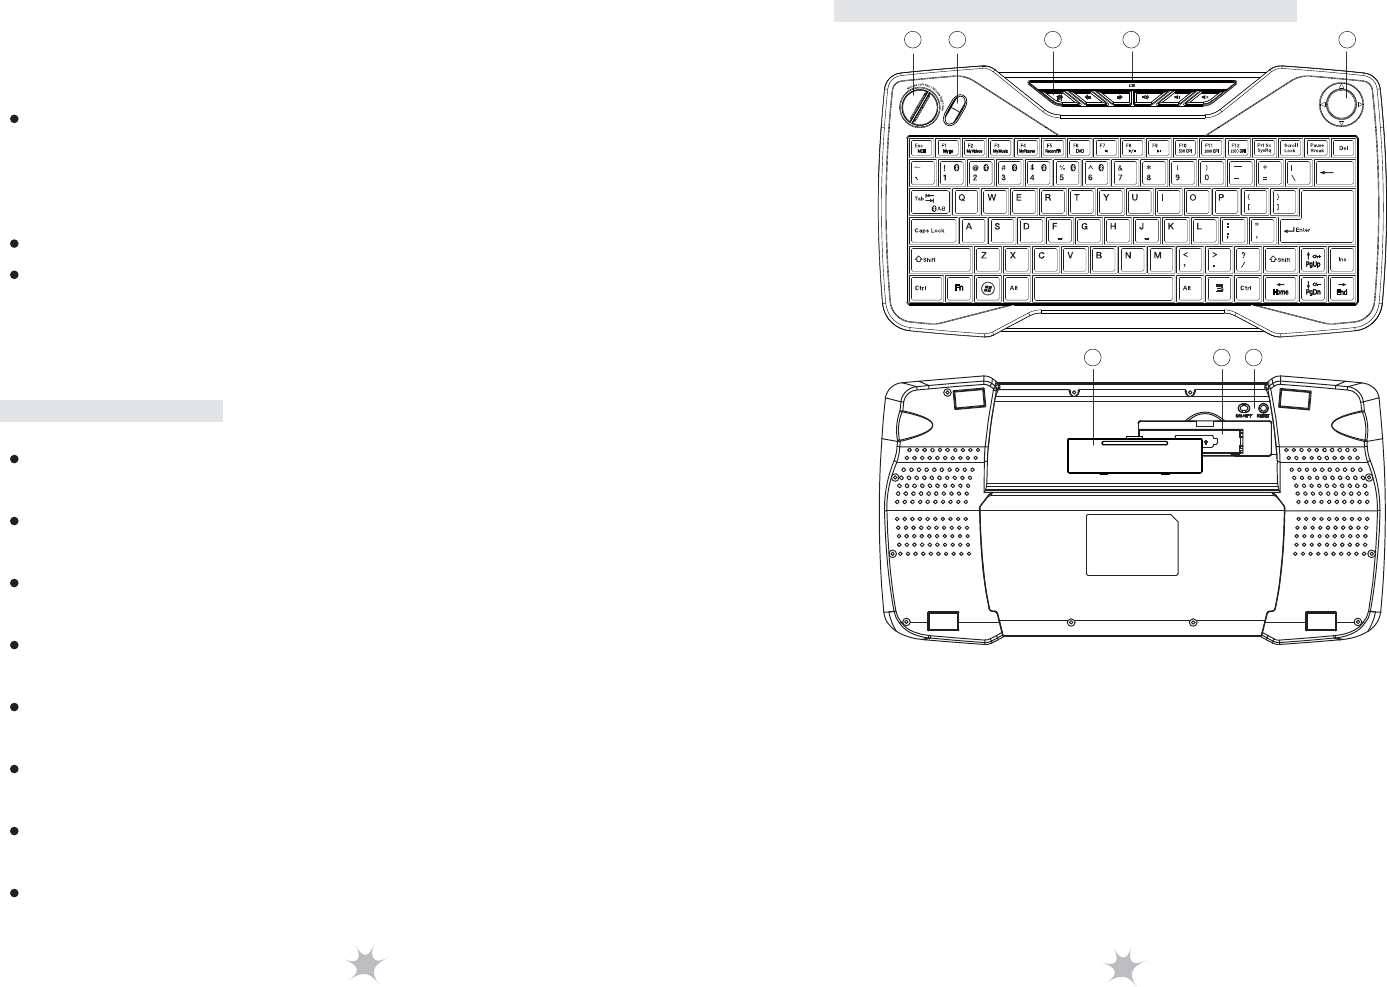
Keyboard Components
1. Mouse Keys
2. Scroll Wheel
3. Hotkeys
4. LED Indicator
5. Trackball
6. Battery Cover
7. Battery Slot
8. Power Switch & Pairing Button
531 42
876
Features
combustion equipment, safety devices, and life-support
systems.
Batteries may explode or leak if they are improperly
recharged, inserted disposed of in fire, or mixed with
used batteries or different battery types. There is a risk
of explosion if a battery is replaced incorrectly.
Dispose of used batteries according to local regulations.
Keep the battery compartment cover and the batteries
out of the reach of small children.
Patented Bluetooth multi-link function that memorizes up
to six Bluetooth devices.
Fast and easily switch between desktop PC and
Bluetooth devices.
Special hotkeys and function keys for MCE, web browse
and trackball resolution selection.
Bluetooth 3.0 technology and auto sleep mode extend
battery life.
Embedded a LED indicator informs pairing and battery
low status.
Patented Scissor-Key Structure provides 10 million
service times, positive response and super quiet.
Built-in optical trackball mouse, scroll wheel and mouse
buttons function.
Optical trackball resolution: 500, 1000, 1500 CPI.
4 5
Operating System Support
Specifications
Package Contents
Bluetooth Keyboard
AA Alkaline Batteries x2
User’s Manual
Windows XP
Windows Vista (32-bit / 64-bit)
Windows 7 (32-bit / 64-bit)
Mac OS X v10.0.4 or later
iOS 4.0 or later
Dimension: 333.0(L) x 178.0(W) x 29.0(H) mm
Weight: 480 ± 20g (w/o battery)
Radio Frequency: 2.4 Ghz
Operating Distance: 10 Meters
Key Number: 82 Keys (US)
Battery: 2 x AA Alkaline Batteries
Battery Life: 2 Months (base on average usage)
Keyboard
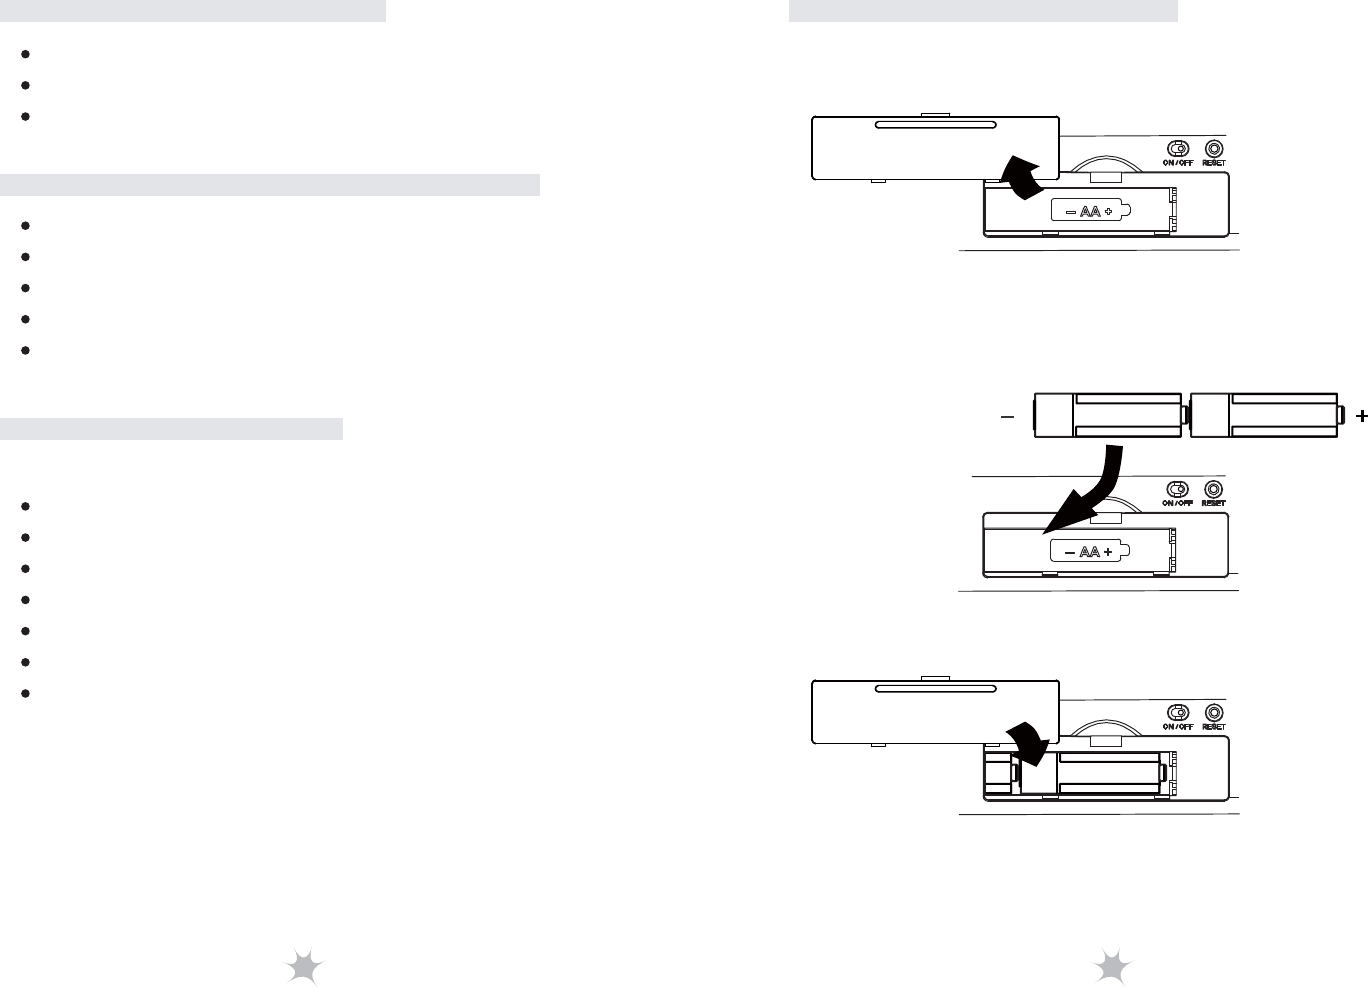
Installing Batteries
2. Insert two AAA alkaline batteries and make
sure the batteries are installed properly.
1. Open the battery cover.
3. Close the battery cover.
7
Installation Proccedure
6
* Indicator LED on the top of keyboard will blink during
paring stage.
4. Launch the Bluetooth program (ex, Microsoft Windows
control panel) in the 1st. device.
5. Add (search) for new devices. You should be able to find
a new device “Bluetooth Keyboard”.
6. During the connection process, it will provide a PIN CODE
for paring. Enter the pass CODE from the keyboard.
7. Wait for adding a new HID device into the system.
Installing Bluetooth keyboard in second to sixth device or
Bluetooth host
Switching to the desired device
Installing Bluetooth keyboard in first device or Bluetooth
host
1. Turn on your 1st. device or Bluetooth host and make sure
that your Bluetooth device is set to search mode.
2. Switch Bluetooth keyboard power to ON position.
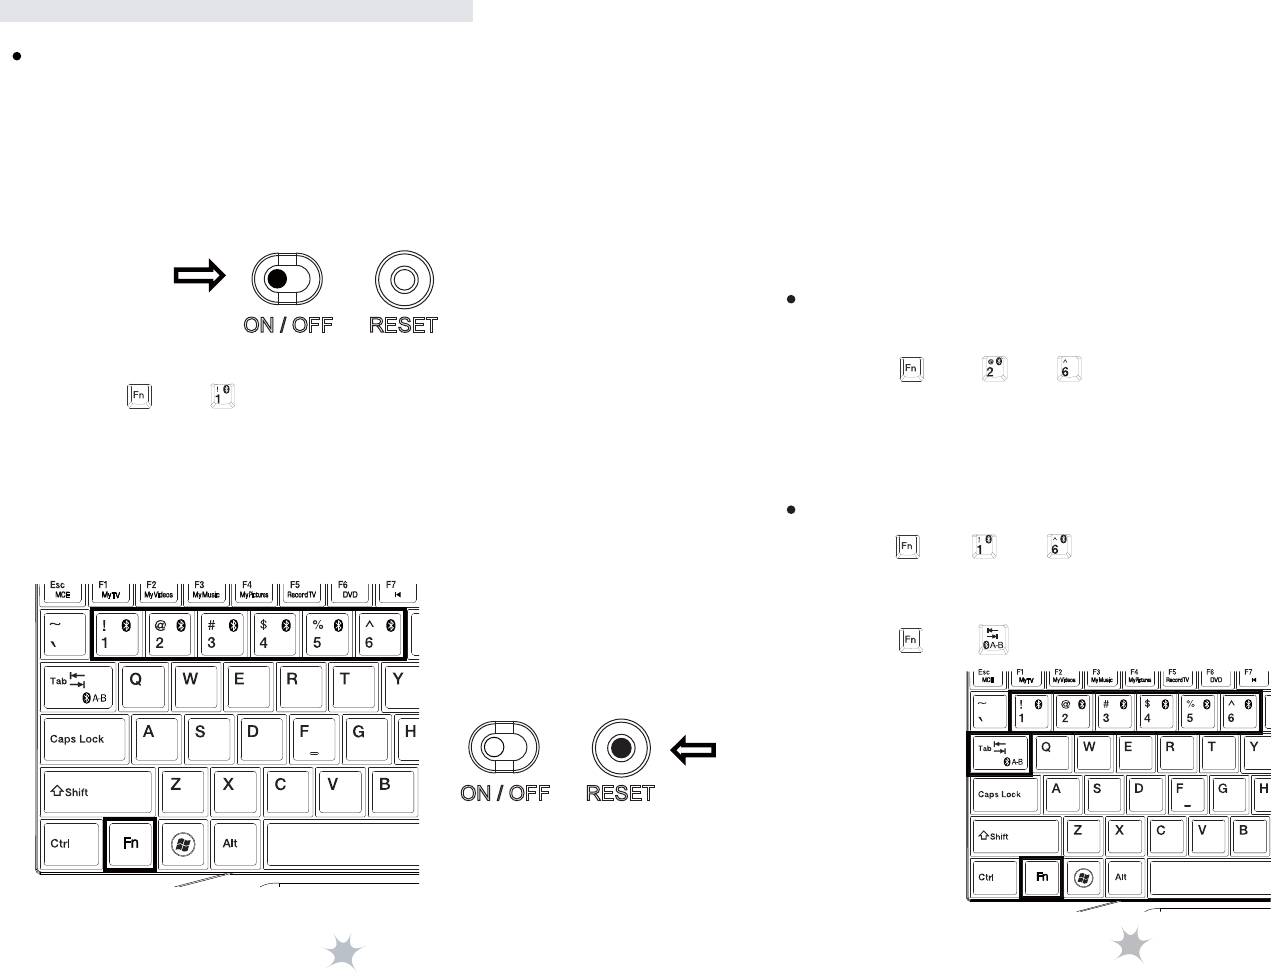
1. Press “ ” + “ ” ~ “ ”, you can use Bluetooth keyboard
in the paired device.
or
2. Press “ ” + “ ” to return to the previous device.
3. Press “ ” + “ ” on the Bluetooth keybord, and then,
click the RESET button to activate Bluetooth discovering
and set the FIRST device as ID 1.
1. Press “ ” + “ ”~ “ ” on the Bluetooth keybord, and
then, click the RESET button to activate Bluetooth
discovering and set the devices as ID 2 ~ ID 6.
2. The rest steps are the same as you installed it in 1st. device.
89
Battery Low
Make sure that you have paired your keyboard with
Low-battery is indicated by illumination on the top case of
keyboard. Please replace the batteries when the indicator
lights up.
We recommend using alkaline batteries for the keyboard.
You may need to reset the connection after replacing new
batteries for the keyboard.
Do not mix old and new batteries, or mix different types
of batteries. This can cause rupture or leakage, resulting
in presonal injury or property damage.
your device. For more information, see “Installation
Procedure” on page 6.
Make sure that your operating system is compatible
with your keyboard. For more information, see
“Operating System Support” on page 4.
Make sure that the anode(+) and cathode(–) symbols
on the batteries match the anode(+) and cathode(–)
symbols in the battery compartment.
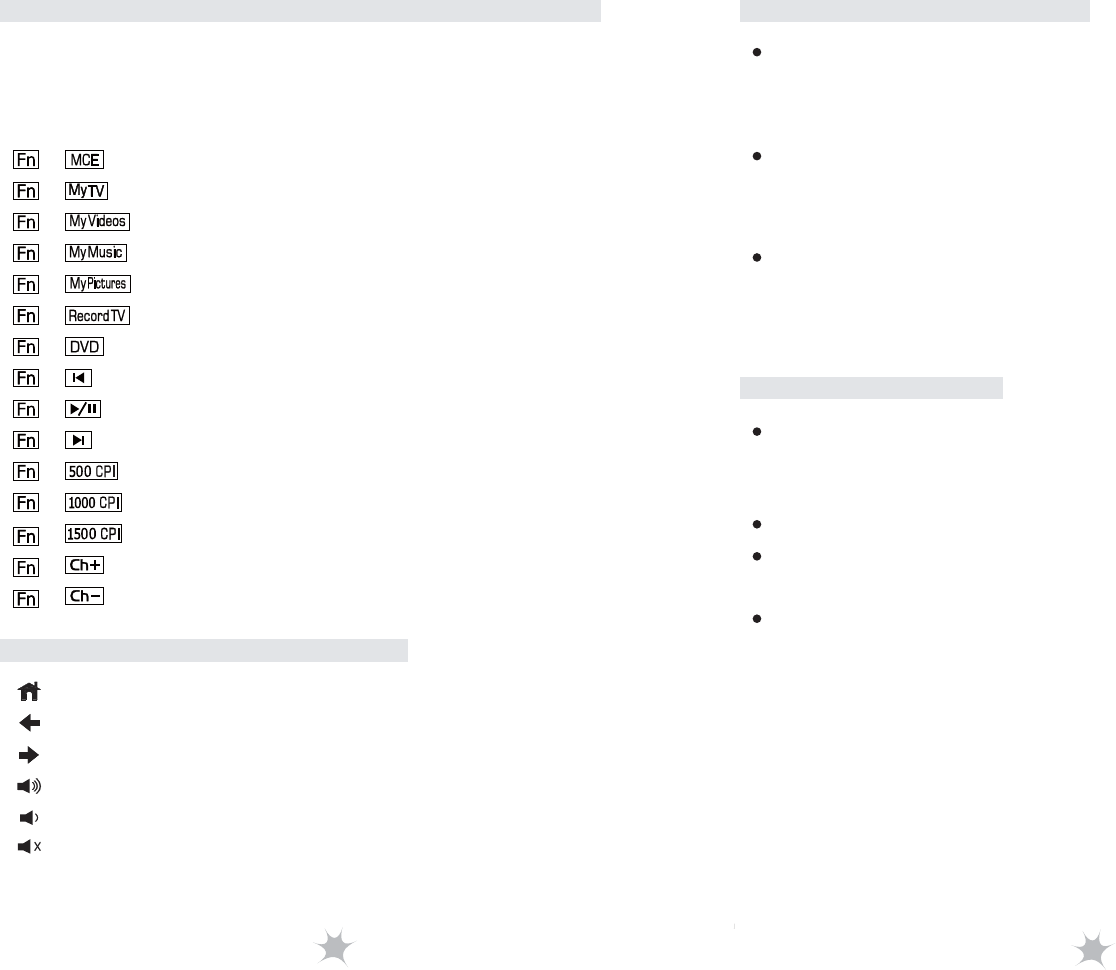
There are some function keys in this keyboard. To use
these function keys, please hold “Fn” and then press
the function key (the keys with blue letters).
Madia Center Function Keys
Shortcut Key Function
Troubleshooting
: Launch Windows Media Center
: Launch My TV
: Launch My Videos
: Launch My Music
: Launch My Pictures
: Record TV
: Play DVD in Windows Media Center
: Last Track
: Play/ Pause
: Next Track
: Change Trackball Resolution to 500 CPI
: Change Trackball Resolution to 1000 CPI
: Change Trackball Resolution to 1500 CPI
: Channel Up
: Channel Down
: Default Homepage
: Previous Page
: Next Page
: Volume Up
: Volume Down
: Mute
+
++
+
++
+
++
+
++
+
++
+
++
++
+
++

10
This equipment has been tested and found to comply with the
limits for a Class B digital device, pursuant to part 15 of the
FCC rules. These limits are designed to provide reasonable
protection against harmful interference in a residential
installation. This equipment generates, uses and can radiate
radio frequency energy and, if not installed and used in
accordance with the instructions, may cause harmful
interference to radio communications. However, there is no
guarantee that interference will not occur in a particular
installation. If this equipment does cause harmful interference
to radio or television reception, which can be determined by
turning the equipment off and on, the user is encouraged to
try to correct the interference by one or more of the following
measures:
-Reorient or relocate the receiving antenna.
-Increase the separation between the equipment and receiver.
-Connect the equipment into an outlet on a circuit different
from that to which the receiver is connected.
-Consult the dealer or an experienced radio/TV technician for
help.
You are cautioned that changes or modifications not expressly
approved by the party responsible for compliance could void
your authority to operate the equipment.
This device complies with Part 15 of the FCC Rules. Operation
is subject to the following two conditions:
(1) this device may not cause harmful interference and
(2) this device must accept any interference received,
including interference that may cause undesired operation