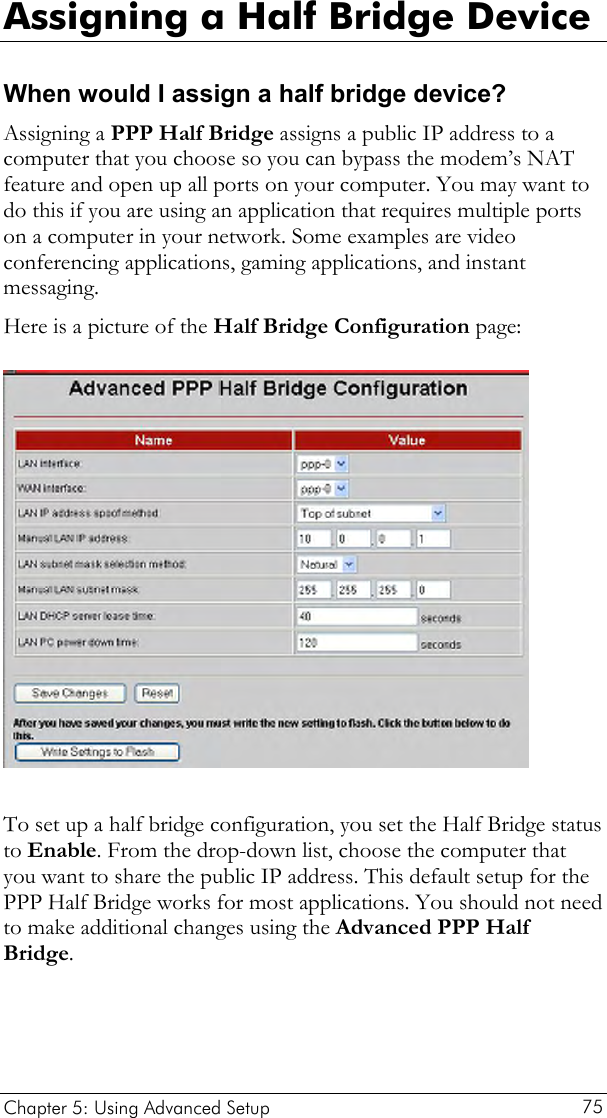
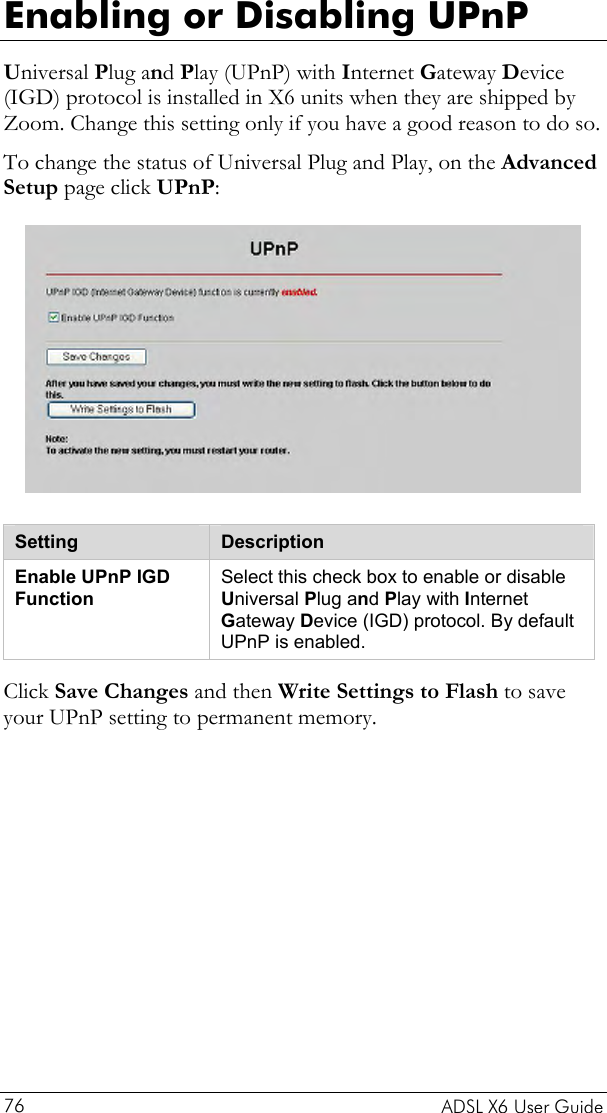
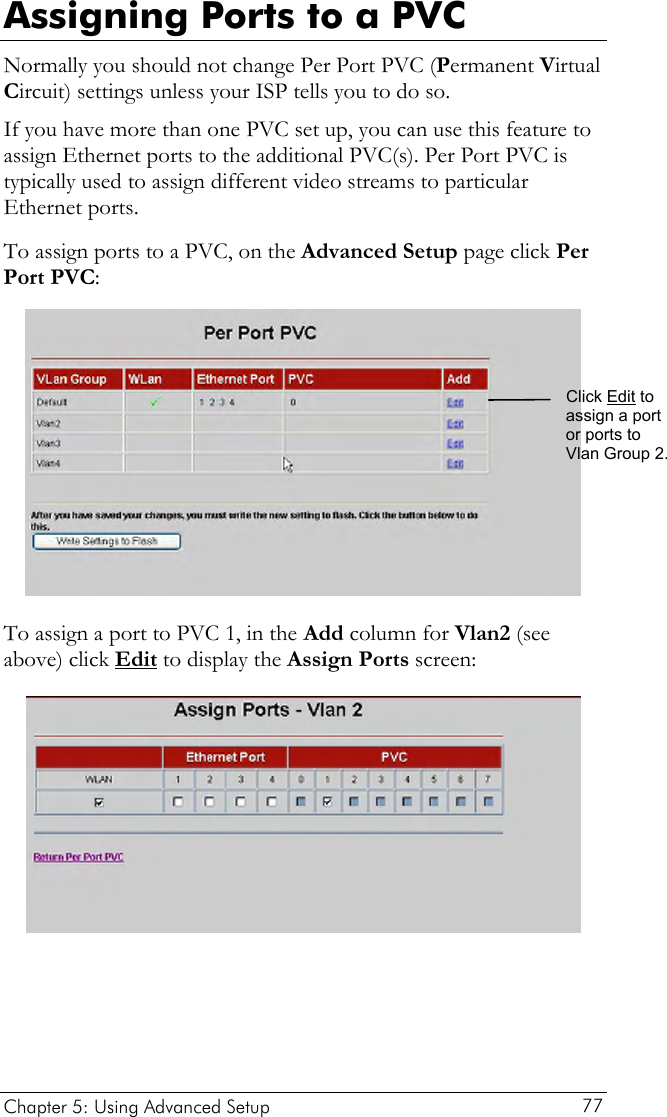
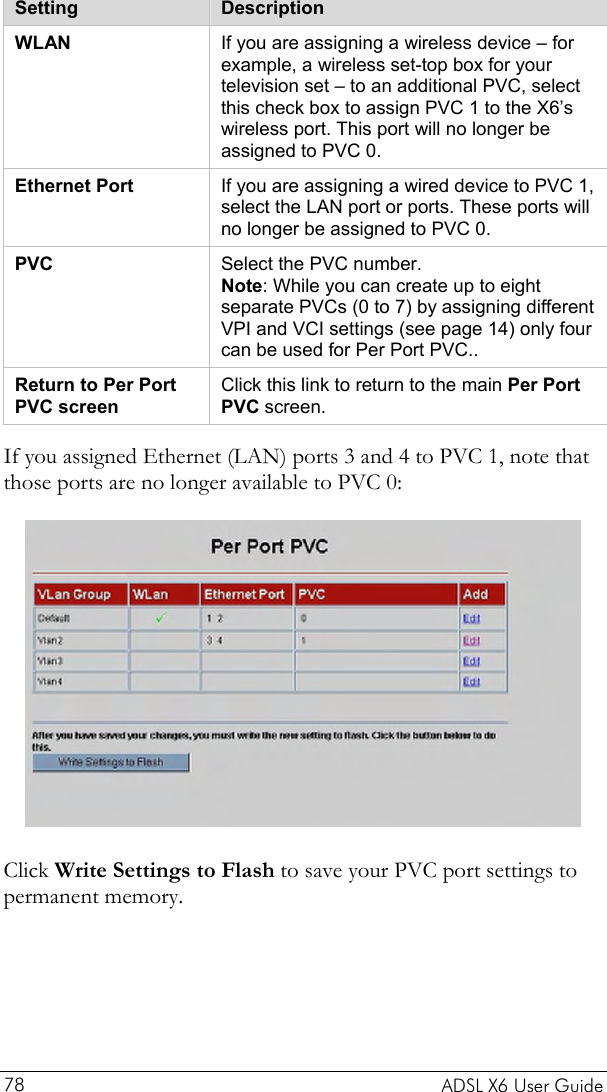
Zoom Telephonics 1058WL X6 Wireless ADSL/2/2+Modem/Router User Manual Overview
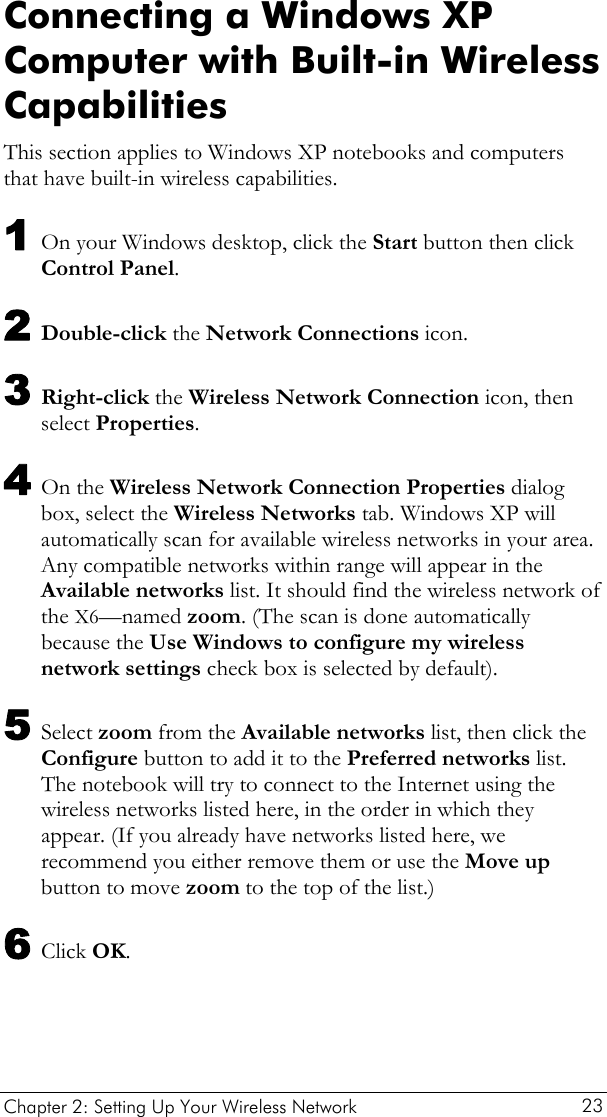
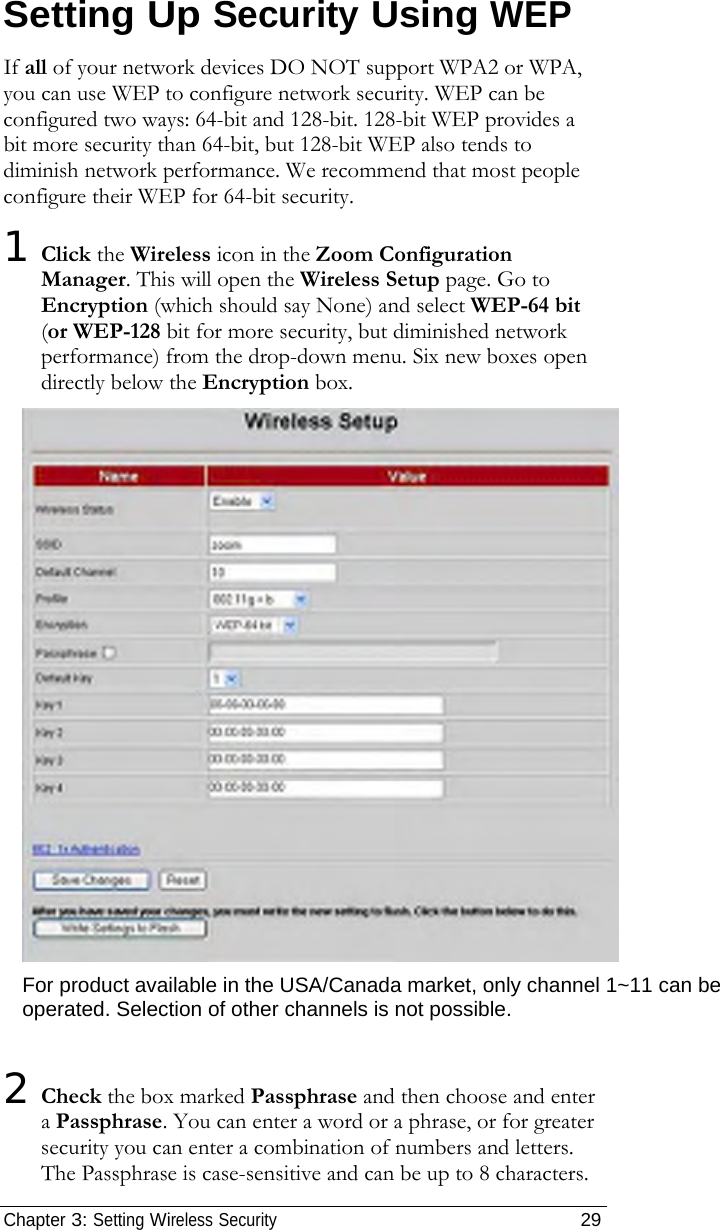
Zoom Telephonics Inc X6 Wireless ADSL/2/2+Modem/Router Overview
UserManual.wiki
>
Zoom Telephonics
>
1058WL User Manual
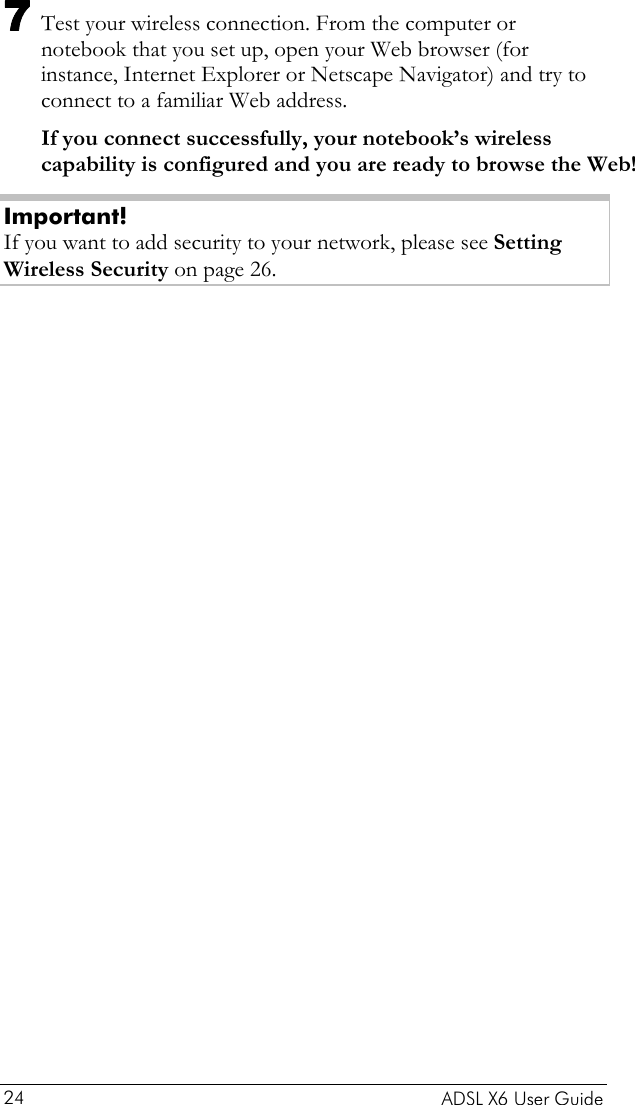
Users Manaul
Navigation menu
Upload a User Manual
Namespaces
Wiki Guide
HTML
PDF
Info
Views
User Manual
Discussion / Help
Navigation


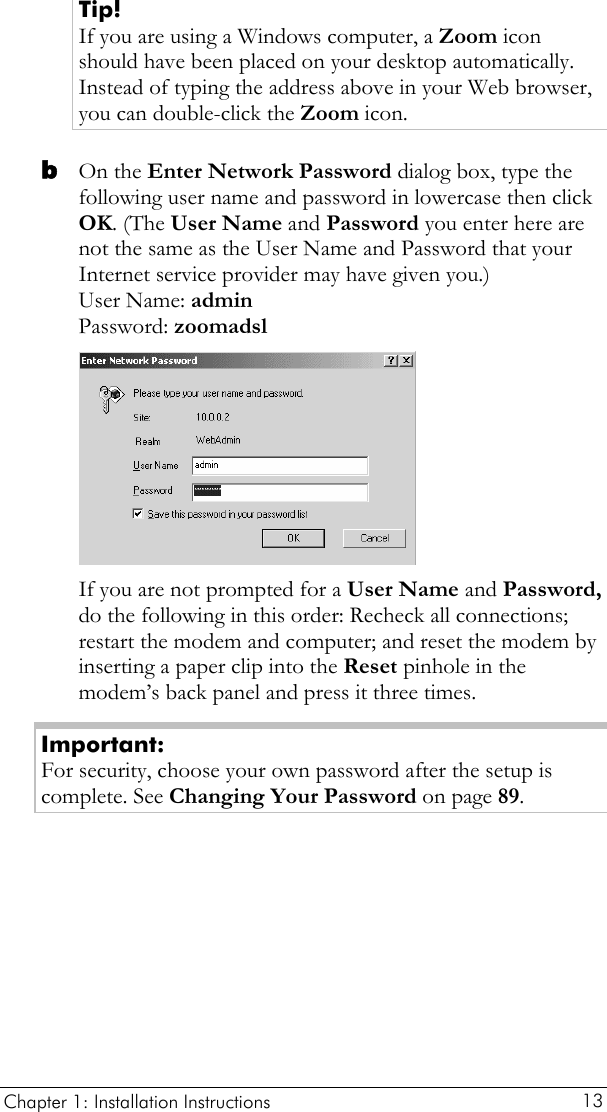
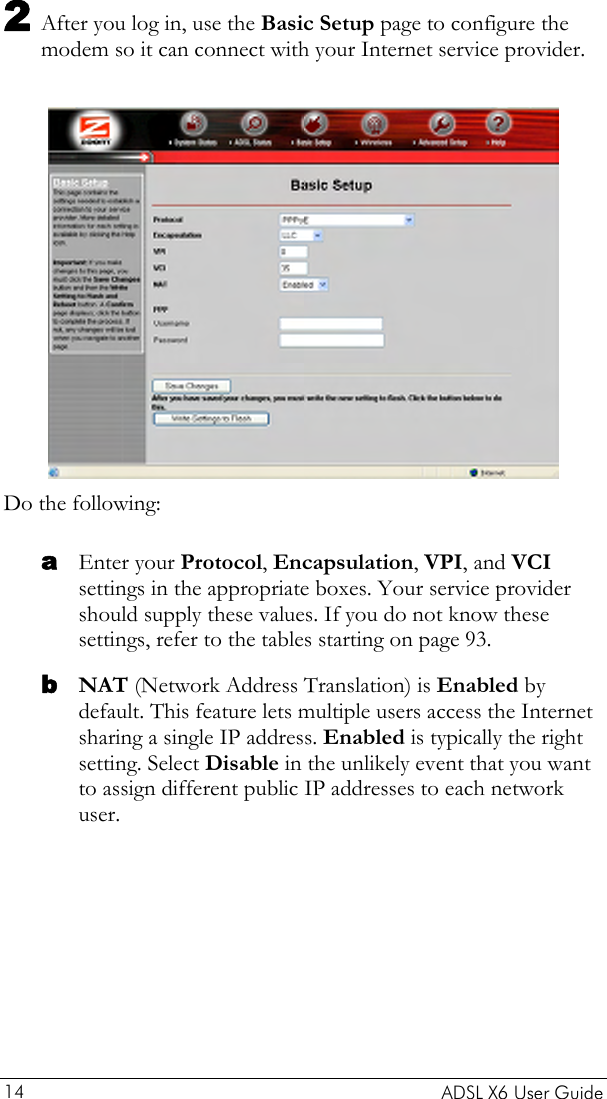
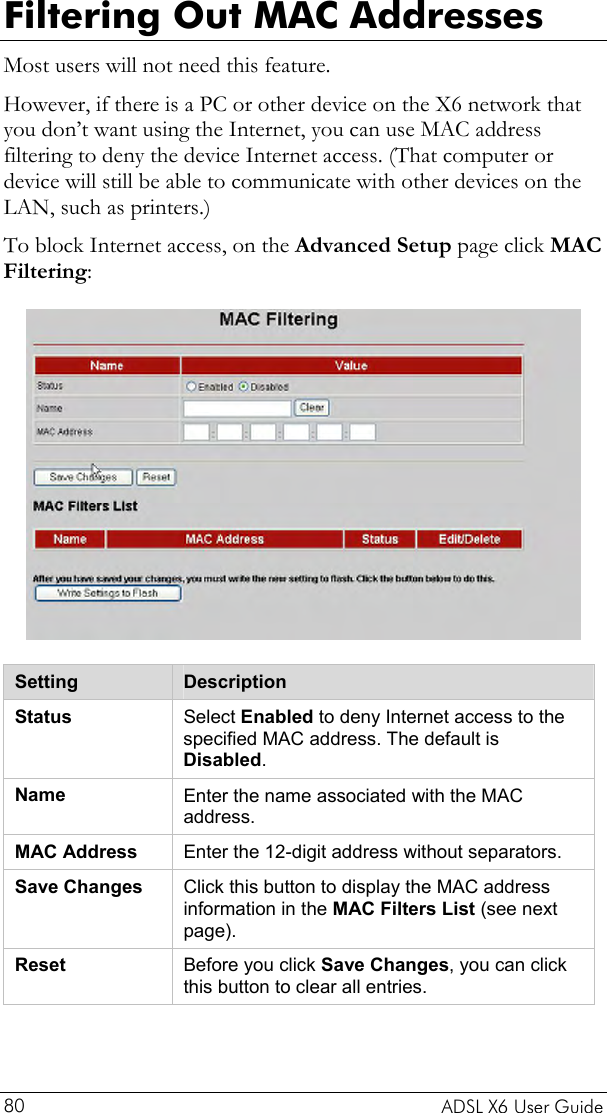
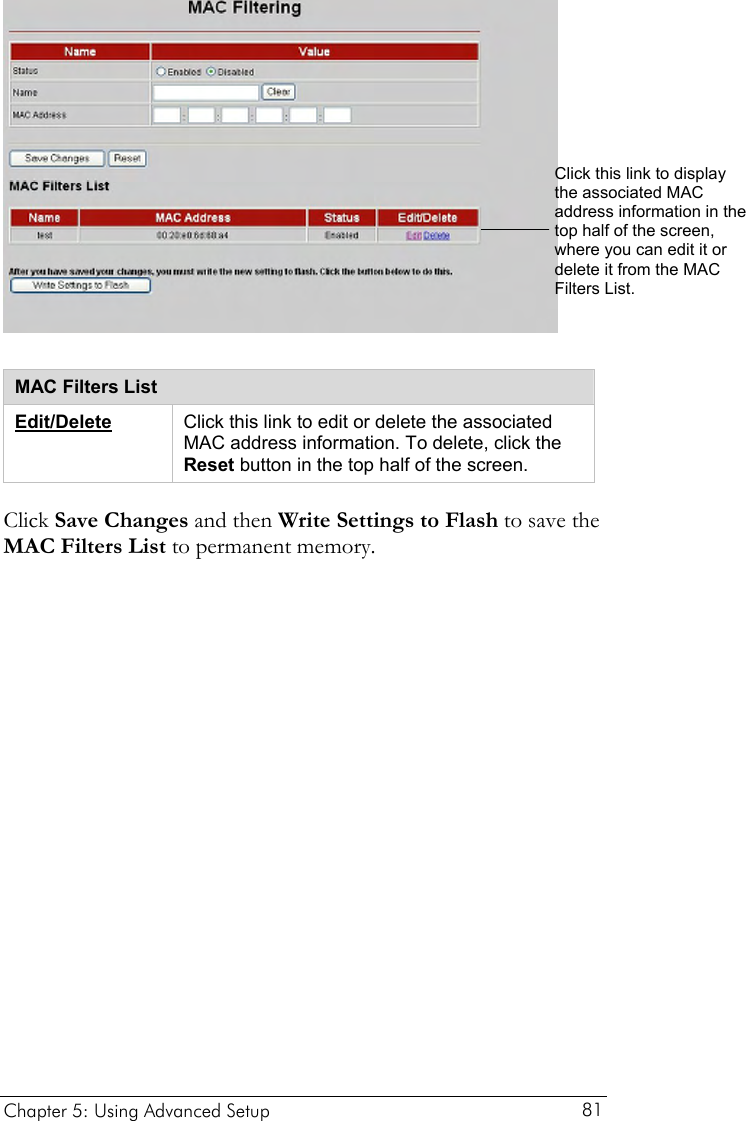
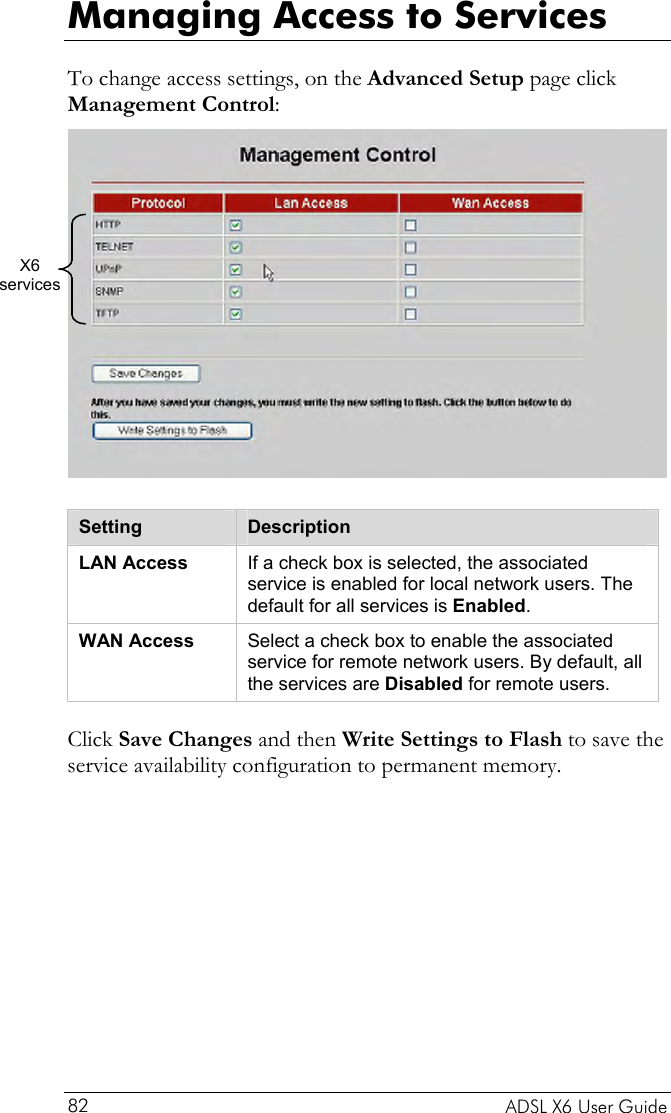
![Chapter 1: Installation Instructions 15 c Depending on the Protocol setting you selected the bottom half of the page will change so that you can enter additional information. If you selected PPPoA or PPPoE, enter your ADSL Username and Password in the appropriate boxes. Your Internet service provider should have given this information to you. (Your Username is typically your email address or the characters preceding the @ sign in your email address. This is NOT the same Username and Password that you used earlier to open the Zoom Configuration Manager.) If you selected 1483 Bridged or 1483 Routed, you have the option of using either dynamic or static IP addressing. Depending on your situation, select the appropriate option button: − [MOST USERS] Ensure that Obtain an IP address Automatically is selected if you are using Dynamic Host Configuration Protocol (also known as DHCP or dynamic IP addressing). This option is selected by default because most Internet service providers use DHCP. − Select Use the following IP Address only if you are using a static IP address. (You should know if you are using static IP addressing. There is typically an extra charge for a static IP address and you usually have to make special arrangements with your Internet service provider to get one.) Then enter the IP Address, Subnet Mask, Default Gateway, and DNS that you plan to use. Click the Save Changes button, then click the Write Settings to Flash button.](https://usermanual.wiki/Zoom-Telephonics/1058WL/User-Guide-806666-Page-15.png)


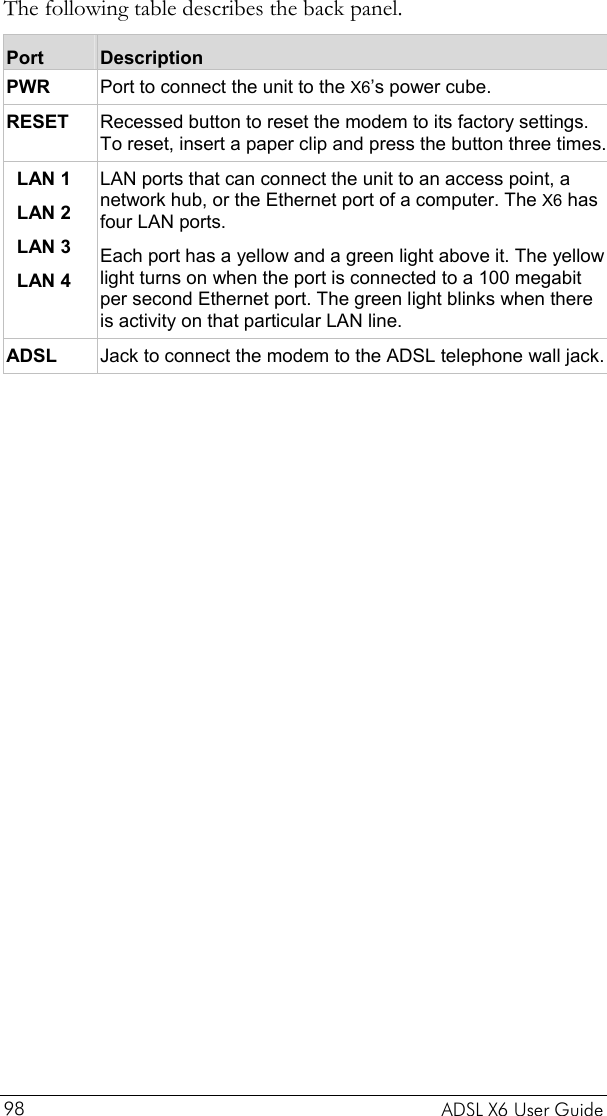
![Changing HTTP and Telnet Ports This feature lets you change the default X6 ports for Internet and Telnet traffic. If, for example, you are running another Internet server on the network and that server is using Port 80, you need to assign a different port to the X6 to avoid a conflict. To assign Internet (HTTP) or Telnet ports, on the Advanced Setup page click Port Settings: Setting Description HTTP Port Enter a port number between 61000 and 62000. (The default is 80.) Telnet Port Enter a port number between 61000 and 62000. (The default is 23.) Click Save Changes and then Write Settings to Flash to save the new port settings to permanent memory. Reboot your PC to make the settings active. When the new port settings are saved, network users who want to access the X6 via the Internet must add a colon [ : ] plus the new port number after the X6’s IP address. For example, in their browser’s address bar, users would enter 10.0.0.2:61101, where 61101 is the new Internet port. To access the X6 via Telnet, users would type telnet[space]10.0.0.2[space]61102, where 61102 is the new port. Chapter 5: Using Advanced Setup 79](https://usermanual.wiki/Zoom-Telephonics/1058WL/User-Guide-806666-Page-79.png)