ZyXEL Communications AMG1202T10B Wireless N-lite ADSL2+ 4-port Gateway User Manual AMG1202 T10B User Guide Part1 REV1
ZyXEL Communications Corporation Wireless N-lite ADSL2+ 4-port Gateway AMG1202 T10B User Guide Part1 REV1
Contents
- 1. AMG1202_T10B_User Guide_Part1_REV1
- 2. AMG1202_T10B_User Guide_Part2_REV1
AMG1202_T10B_User Guide_Part1_REV1


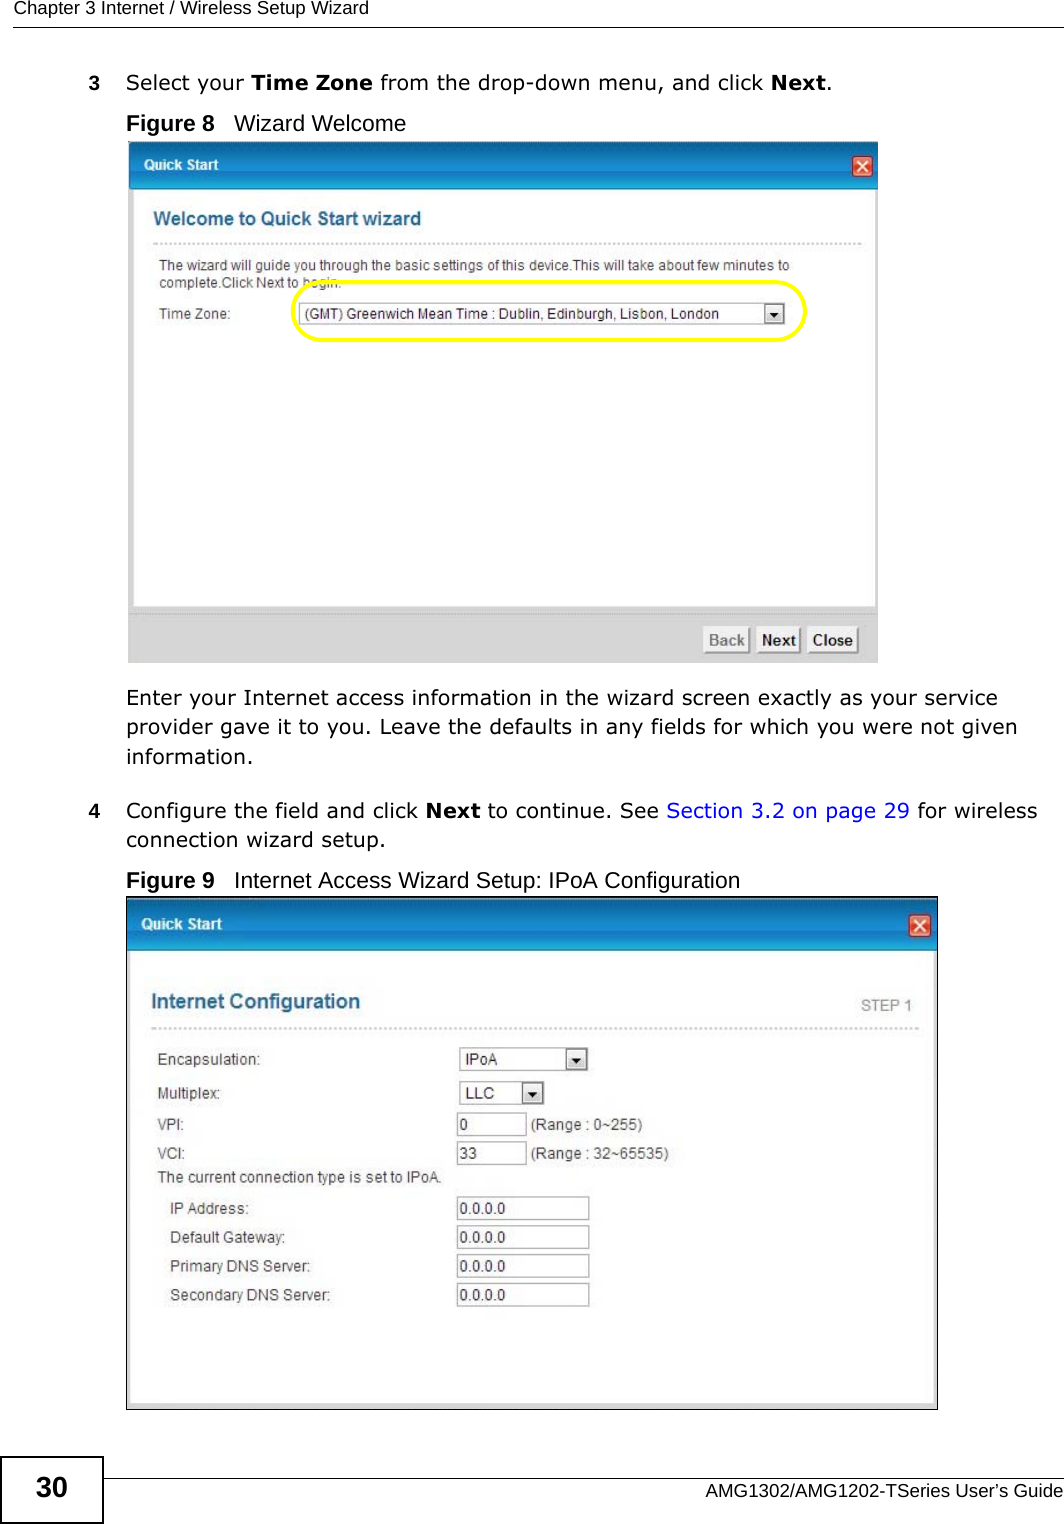
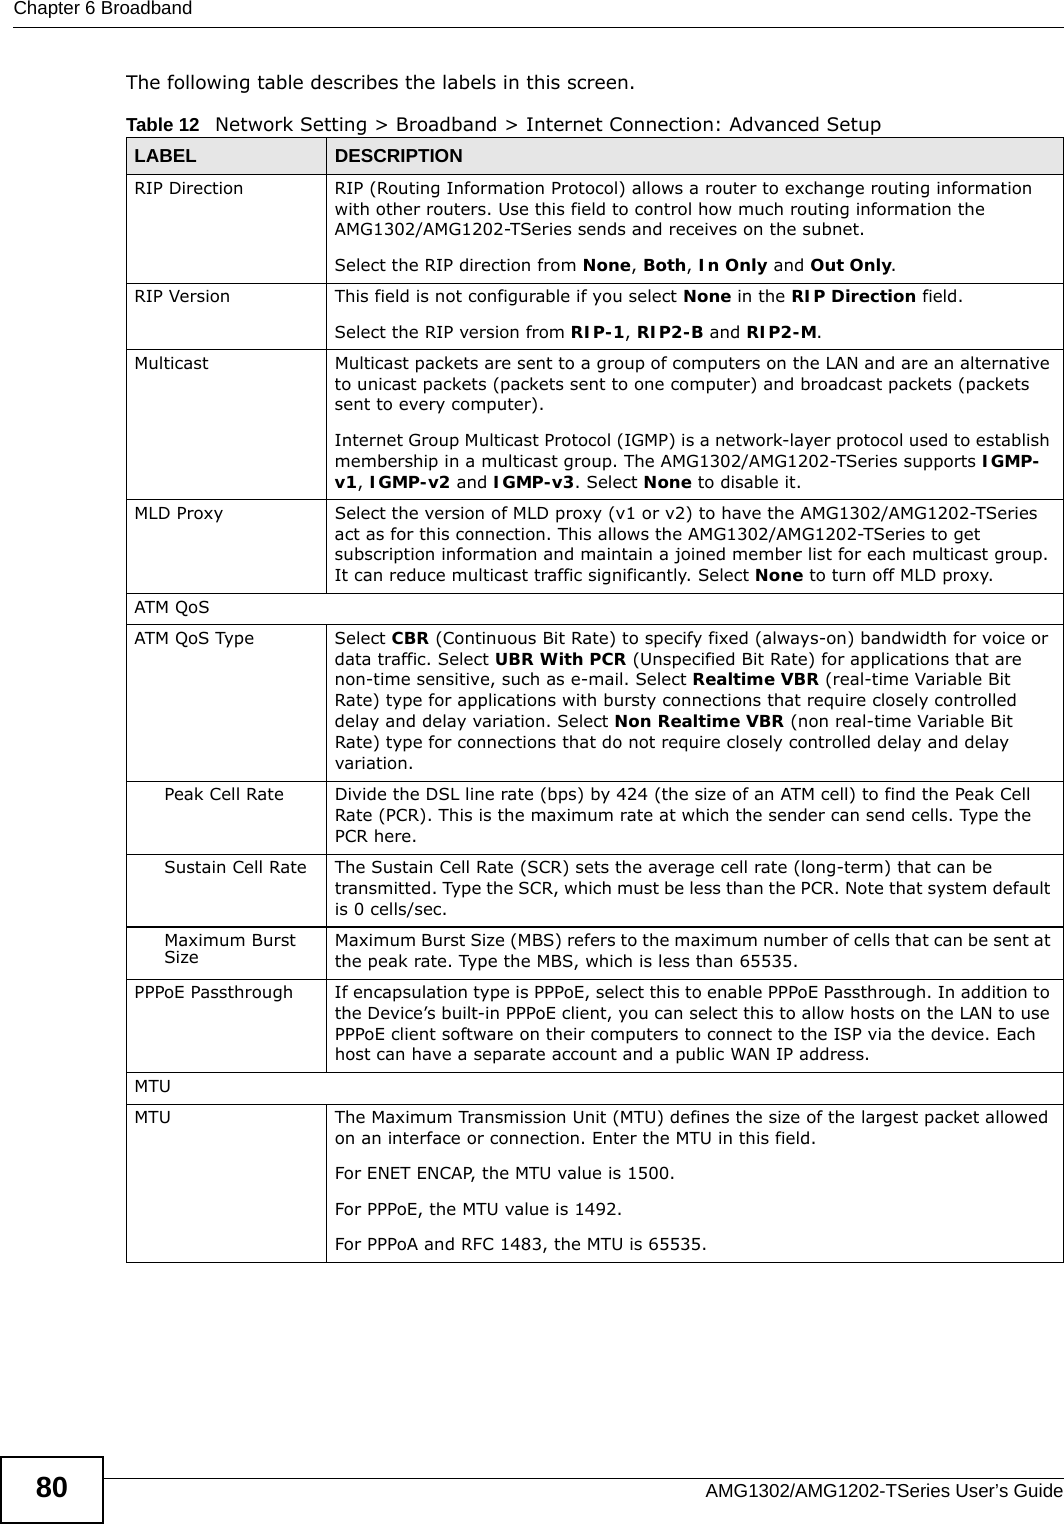
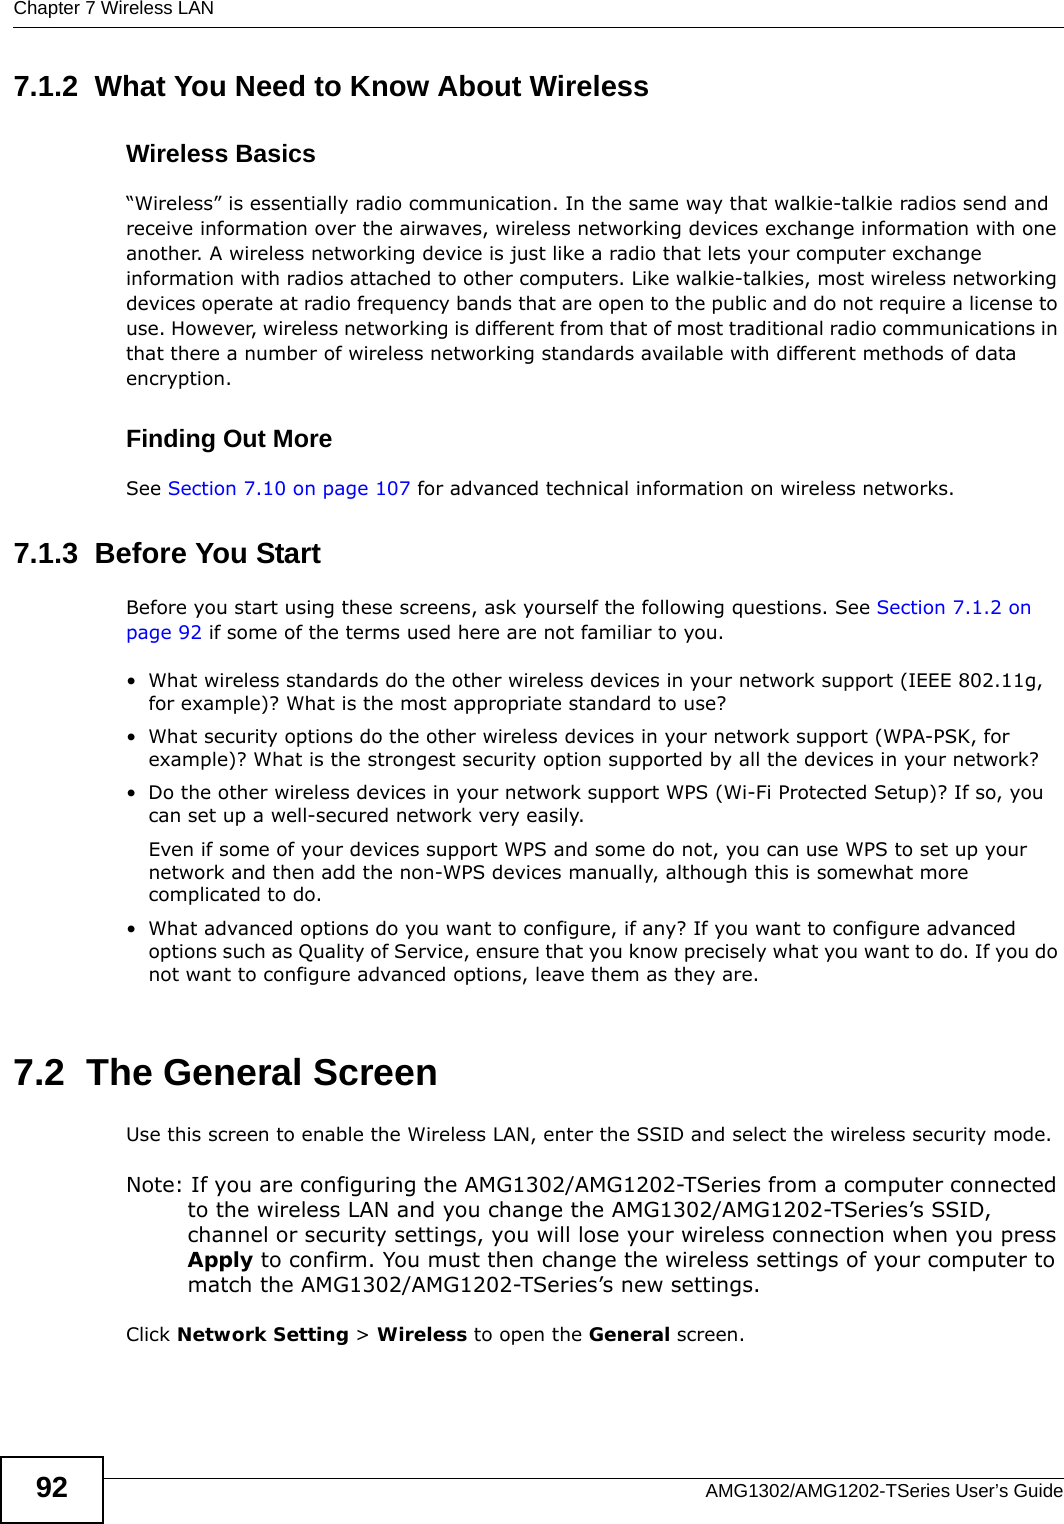
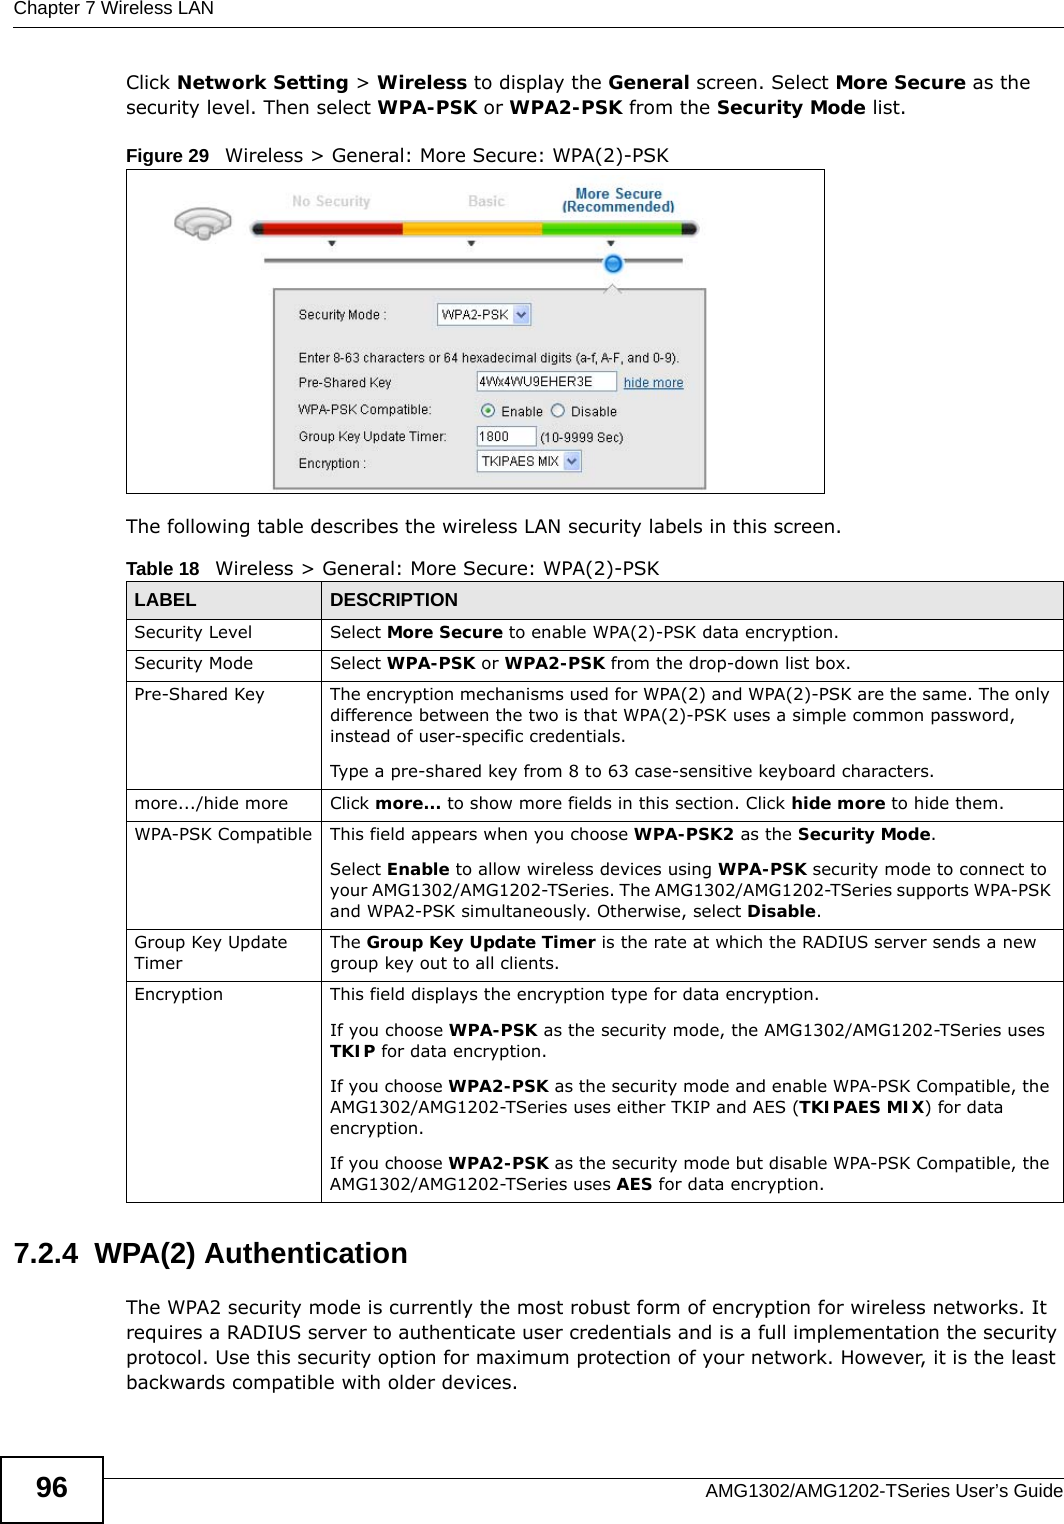
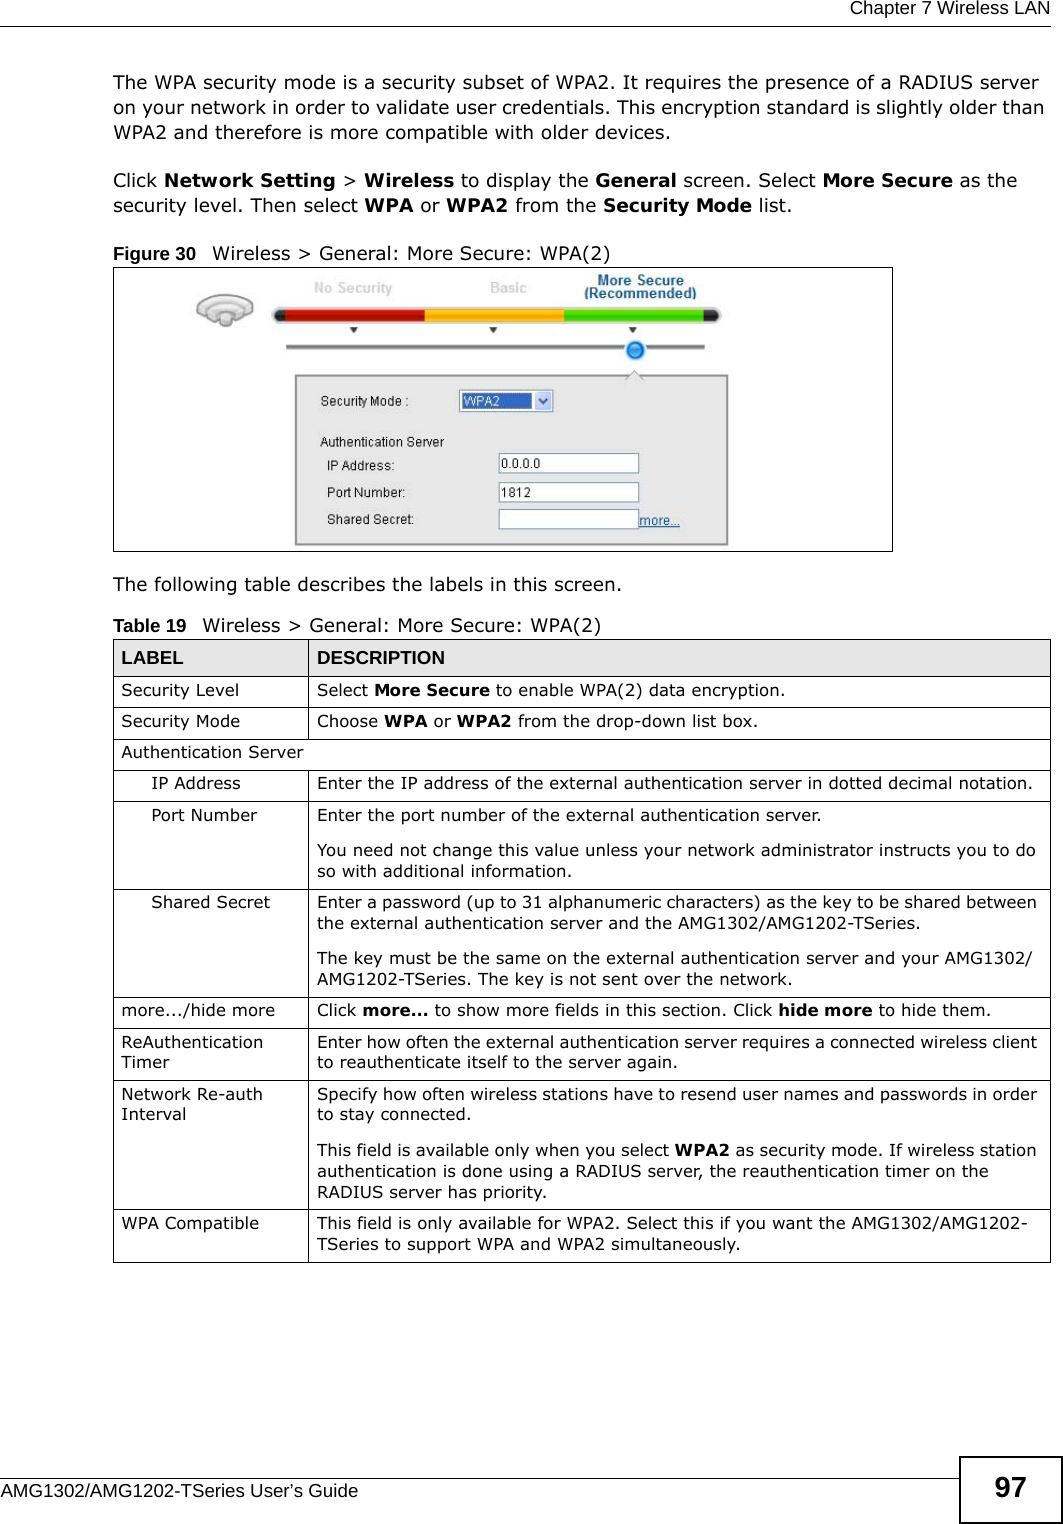
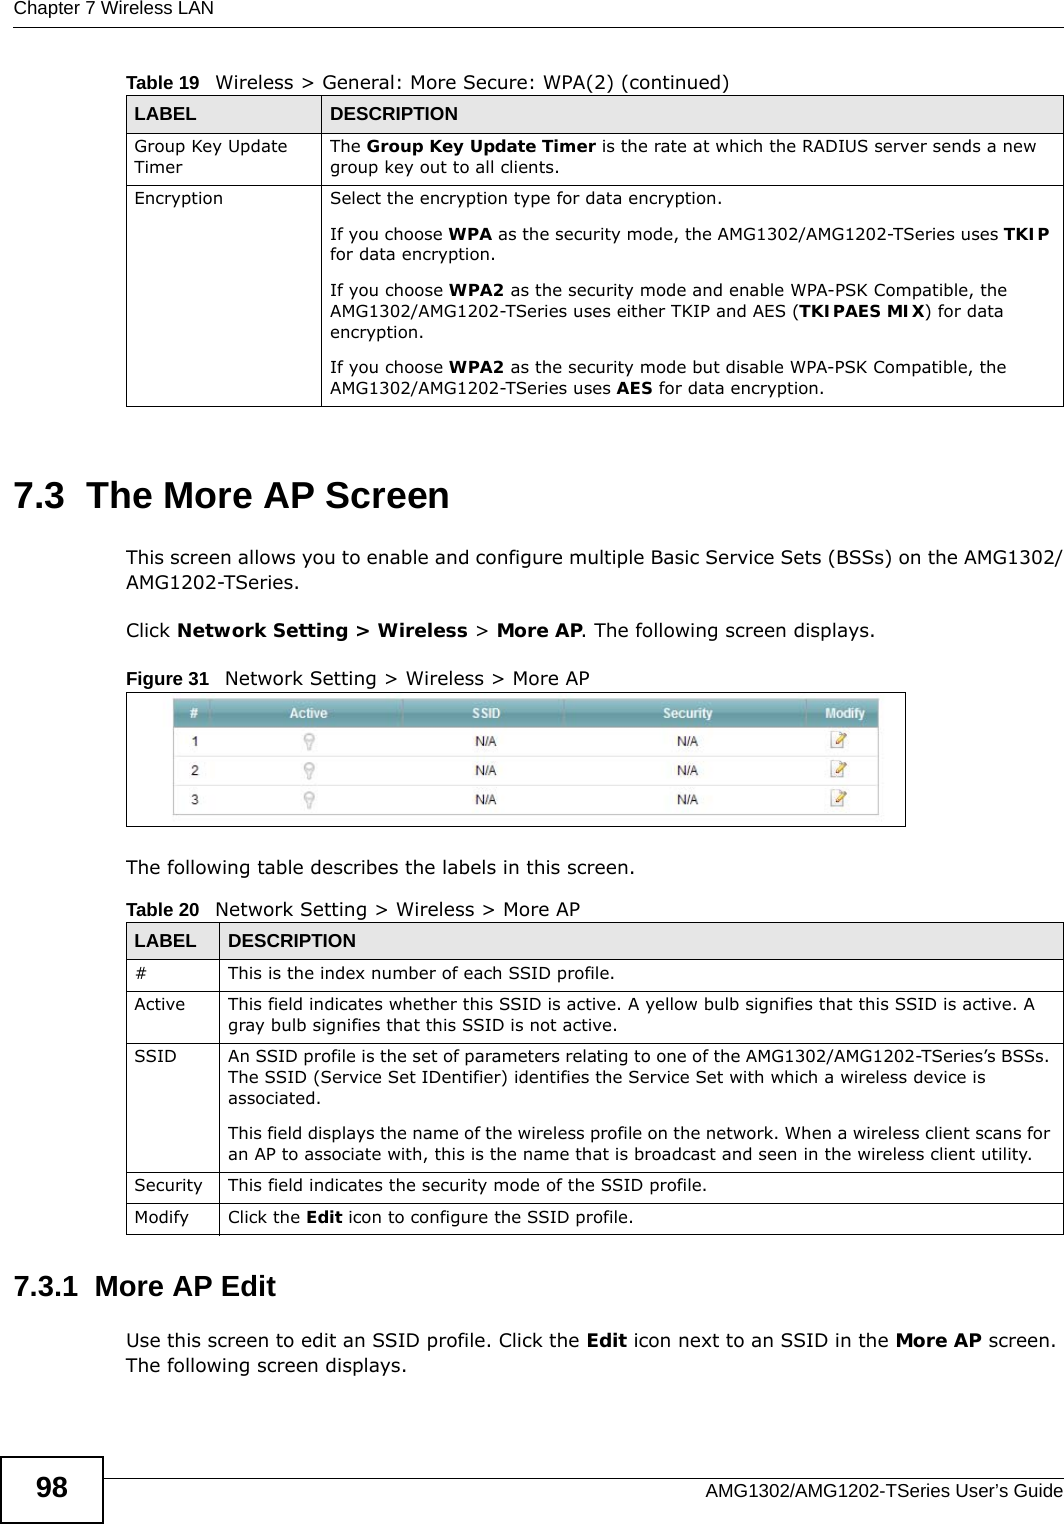
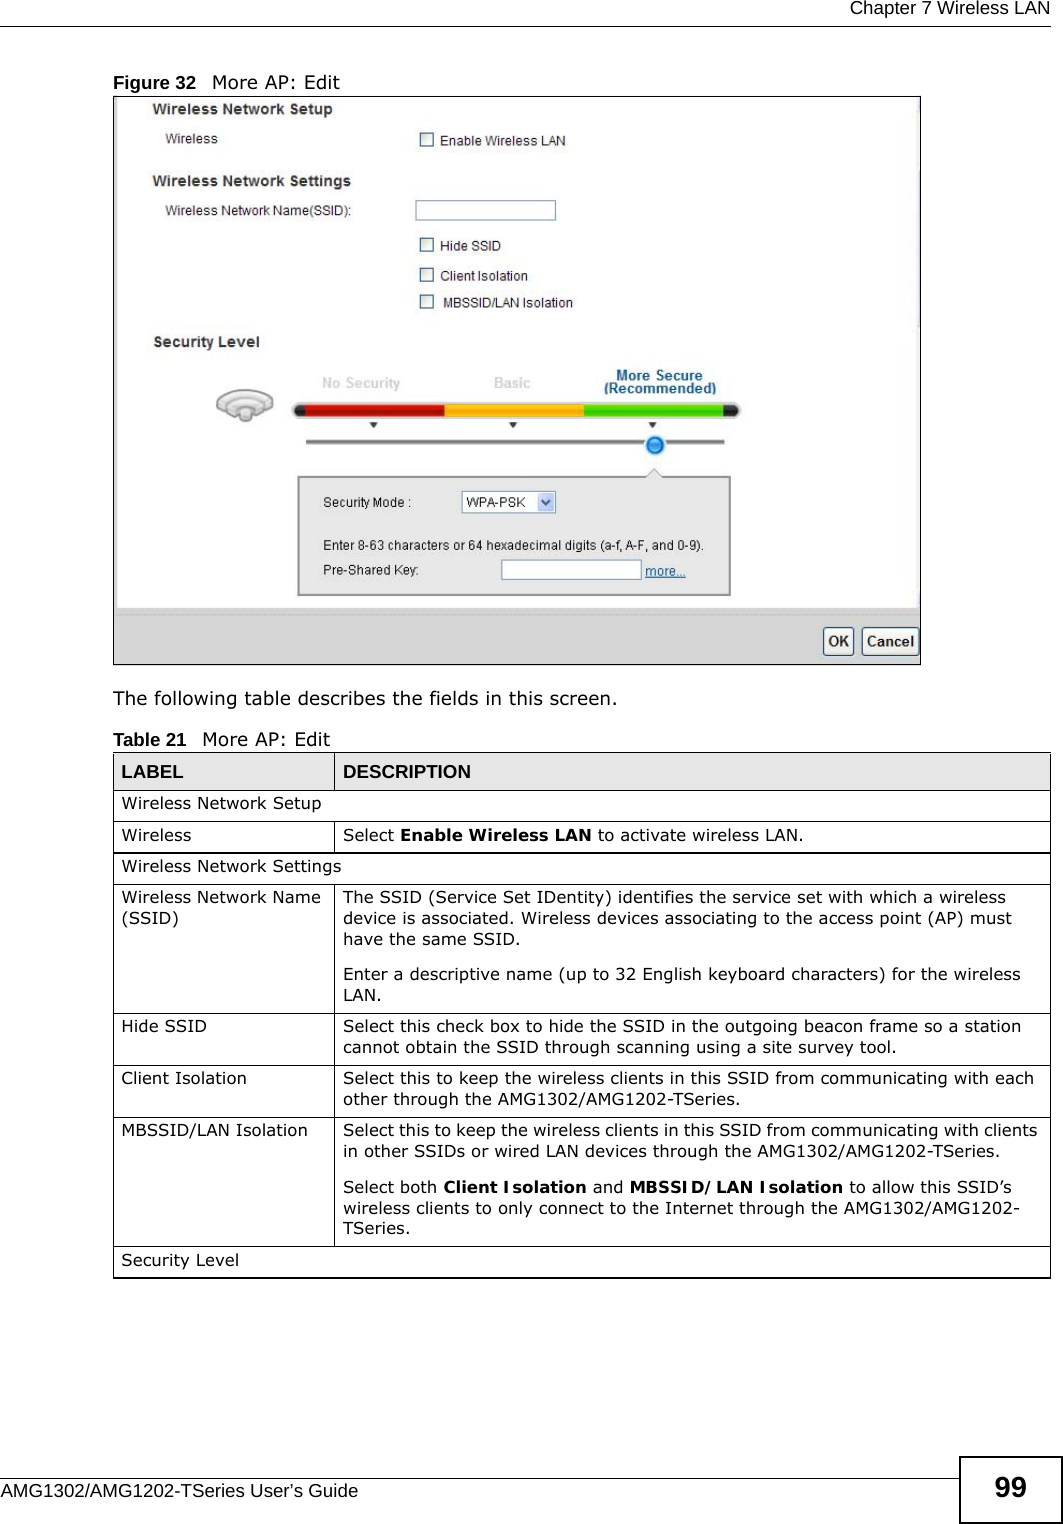
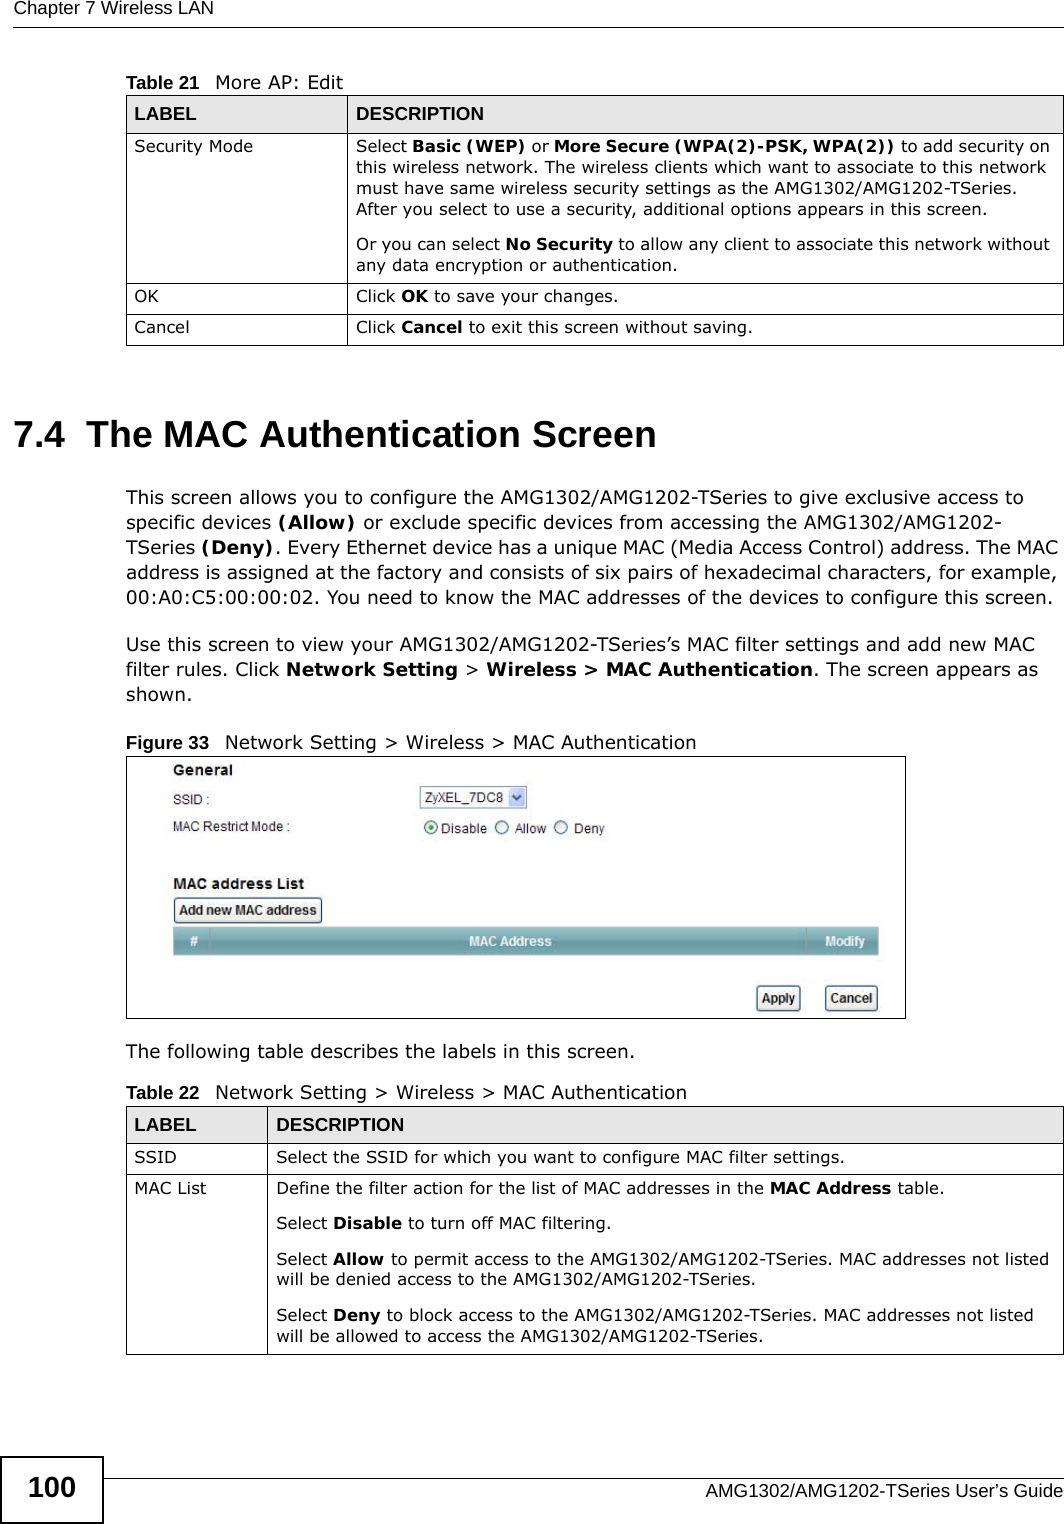
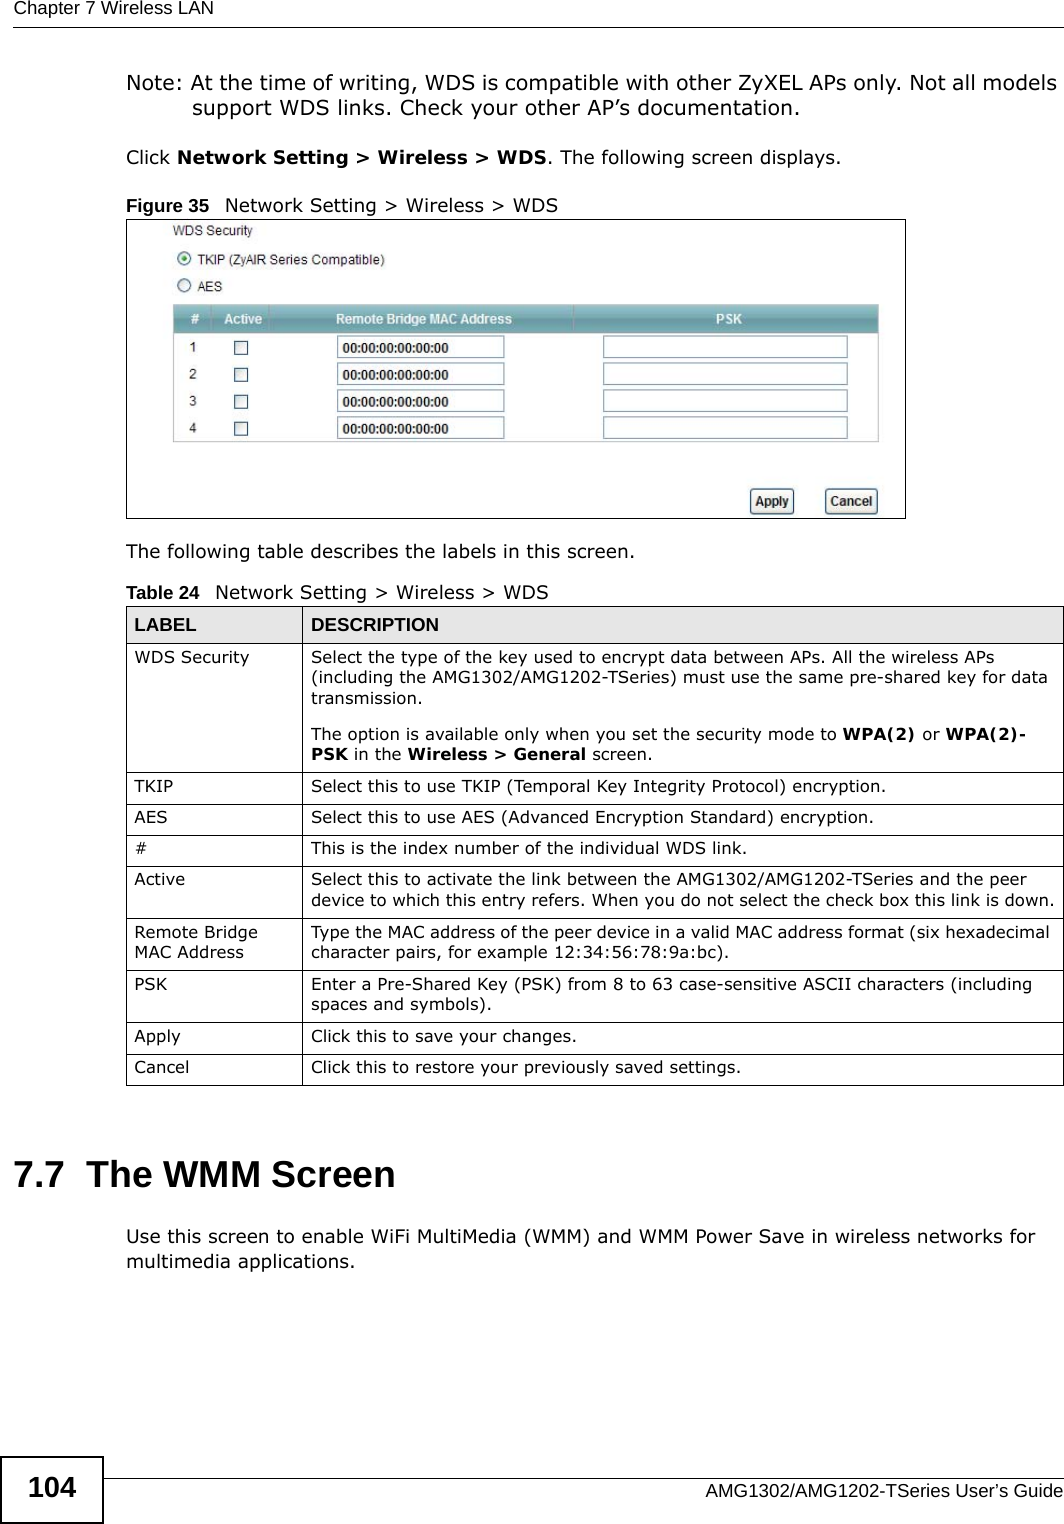
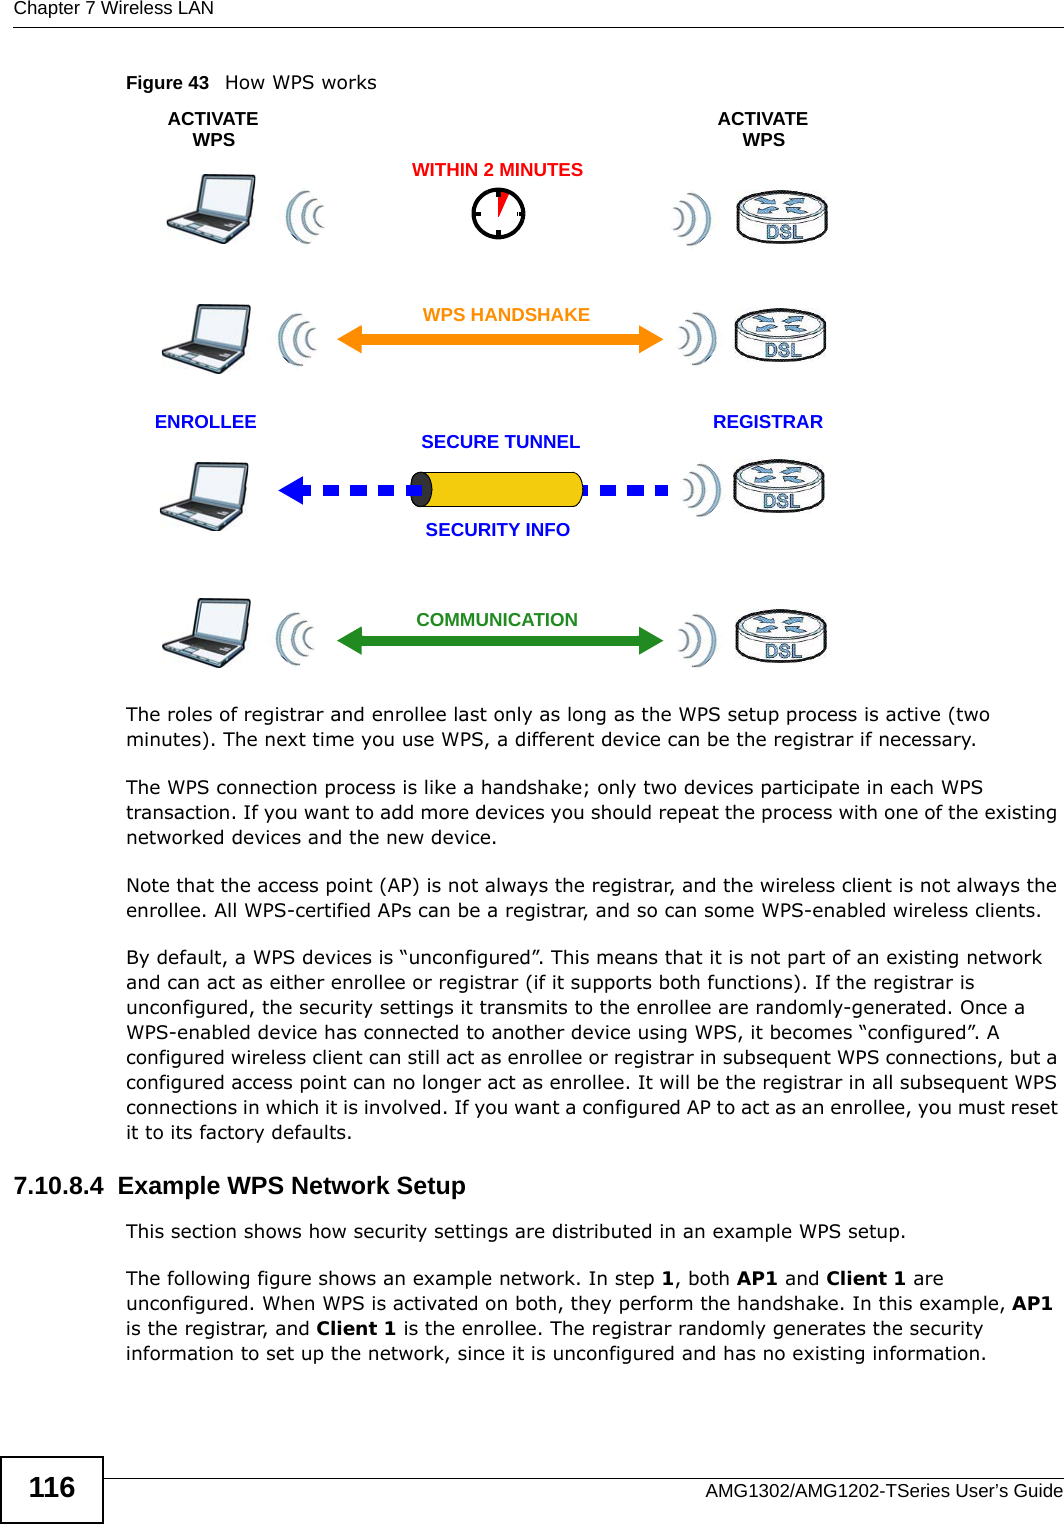
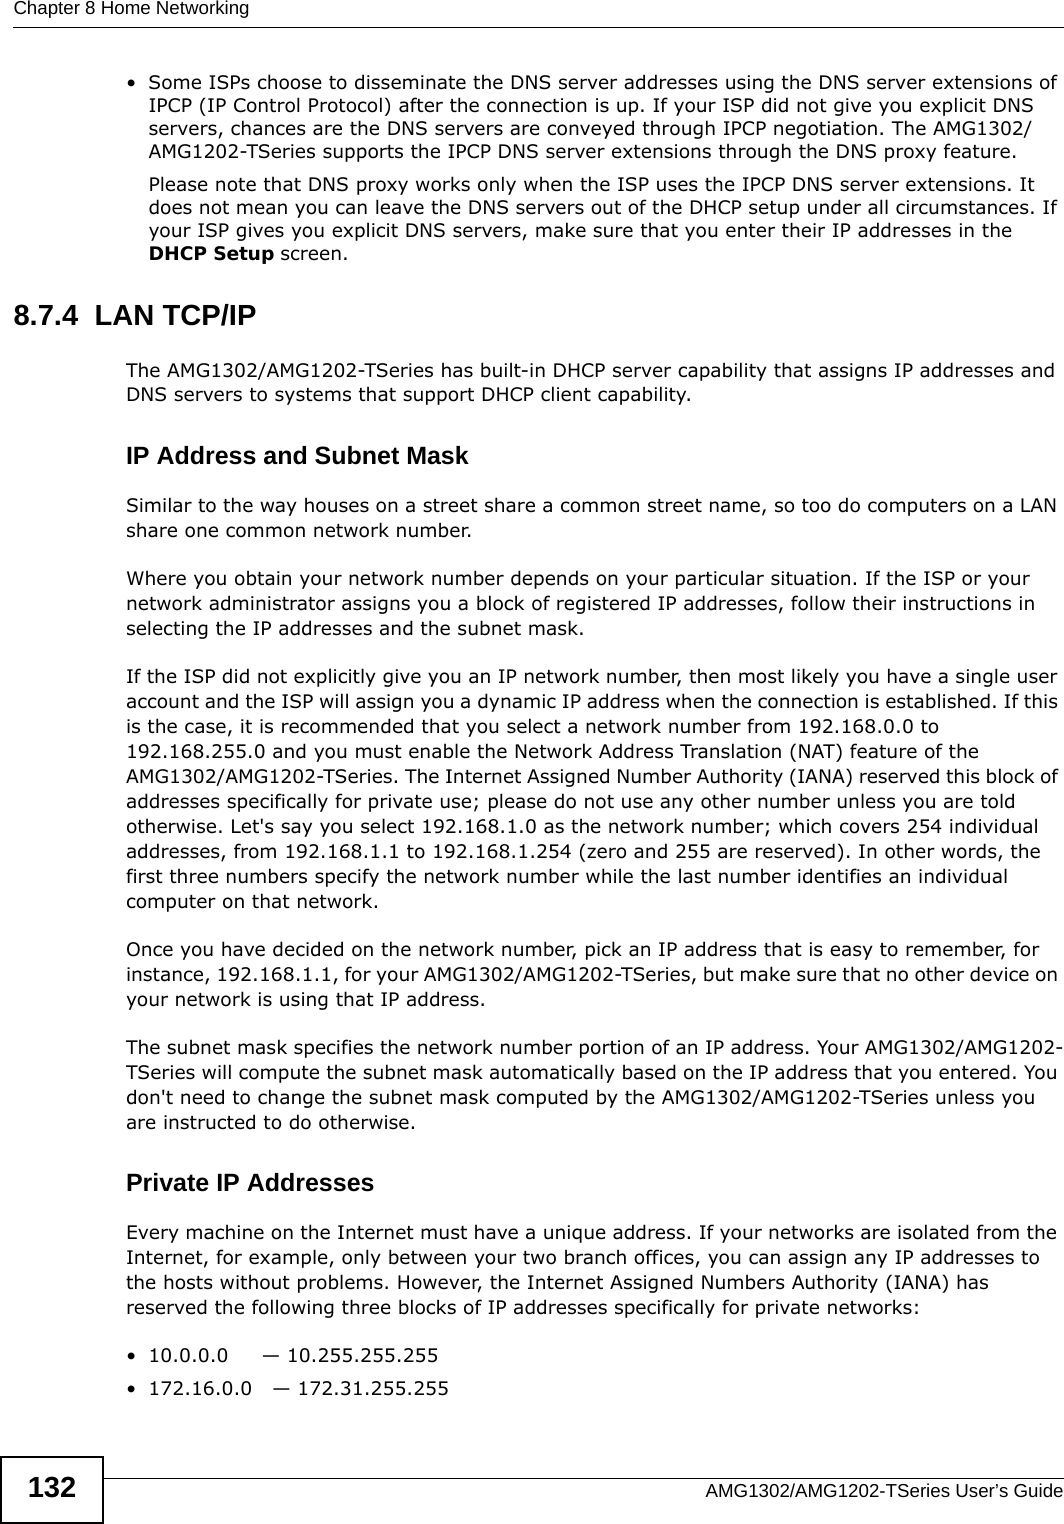
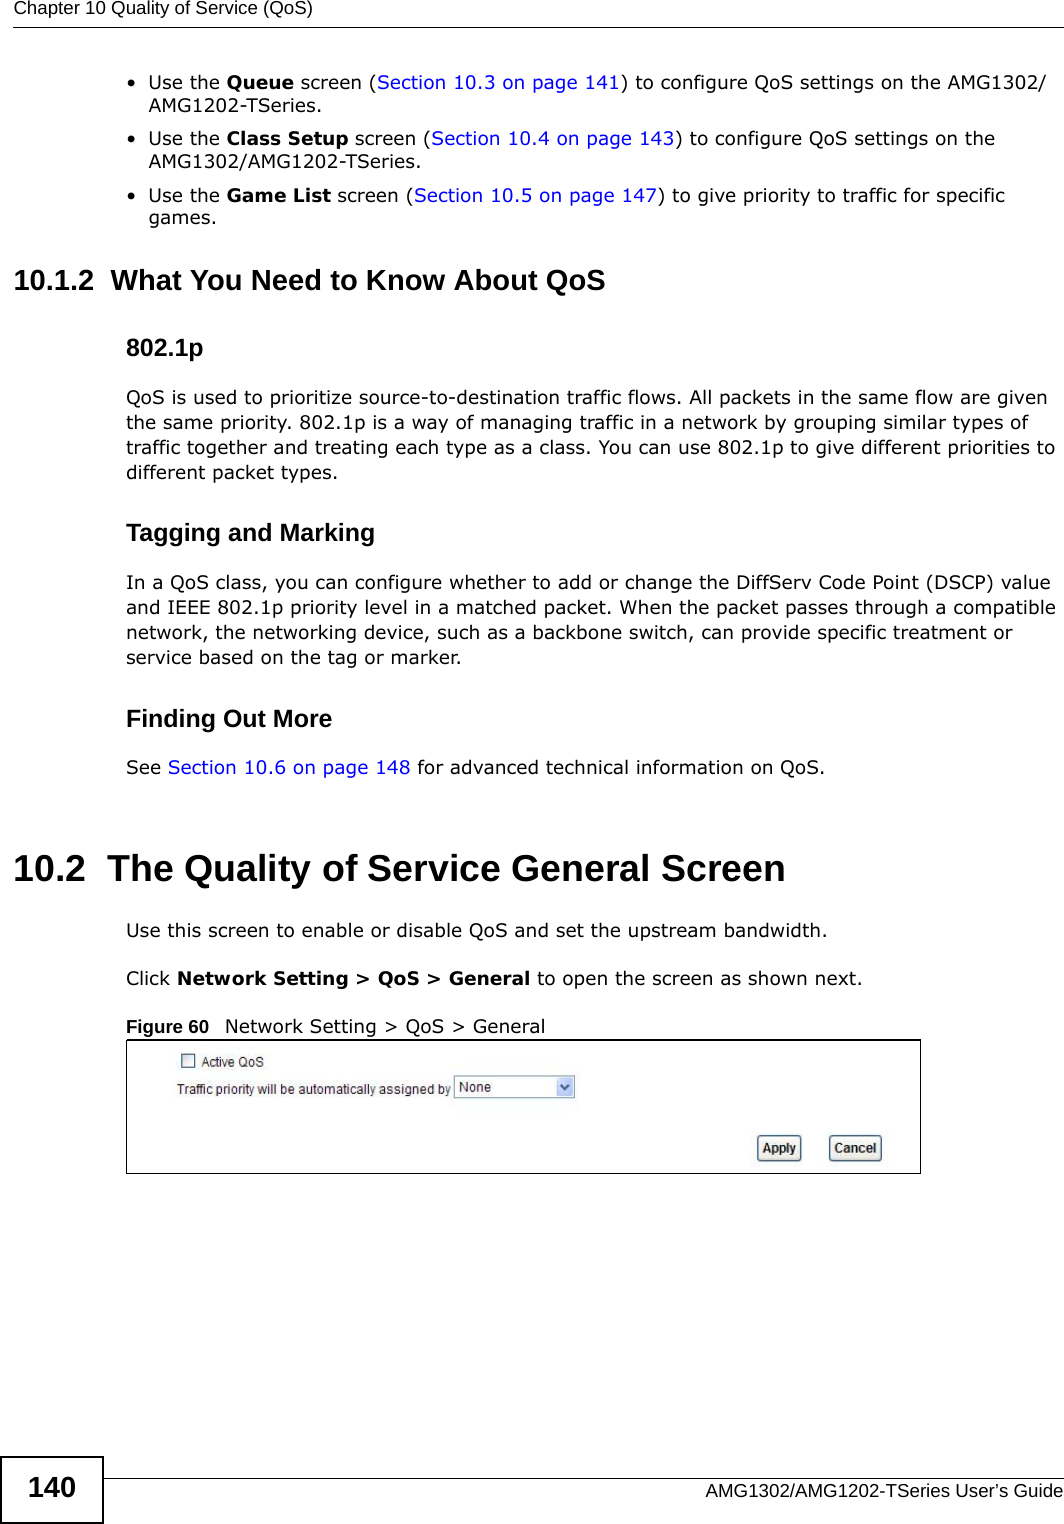
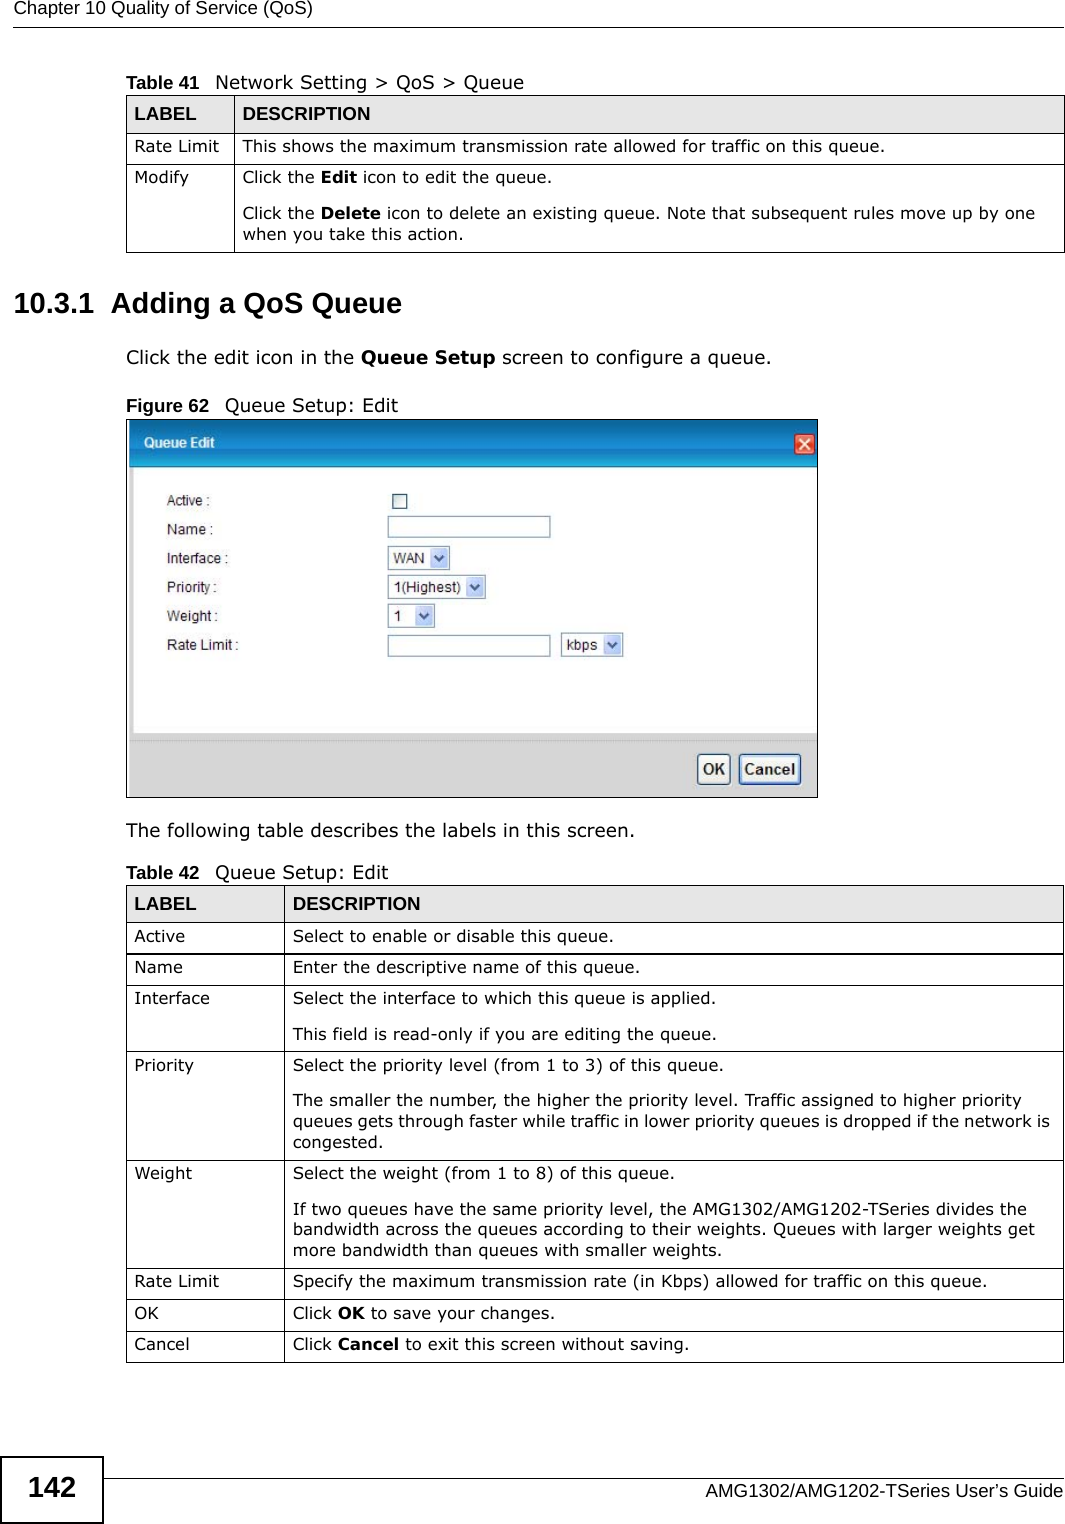
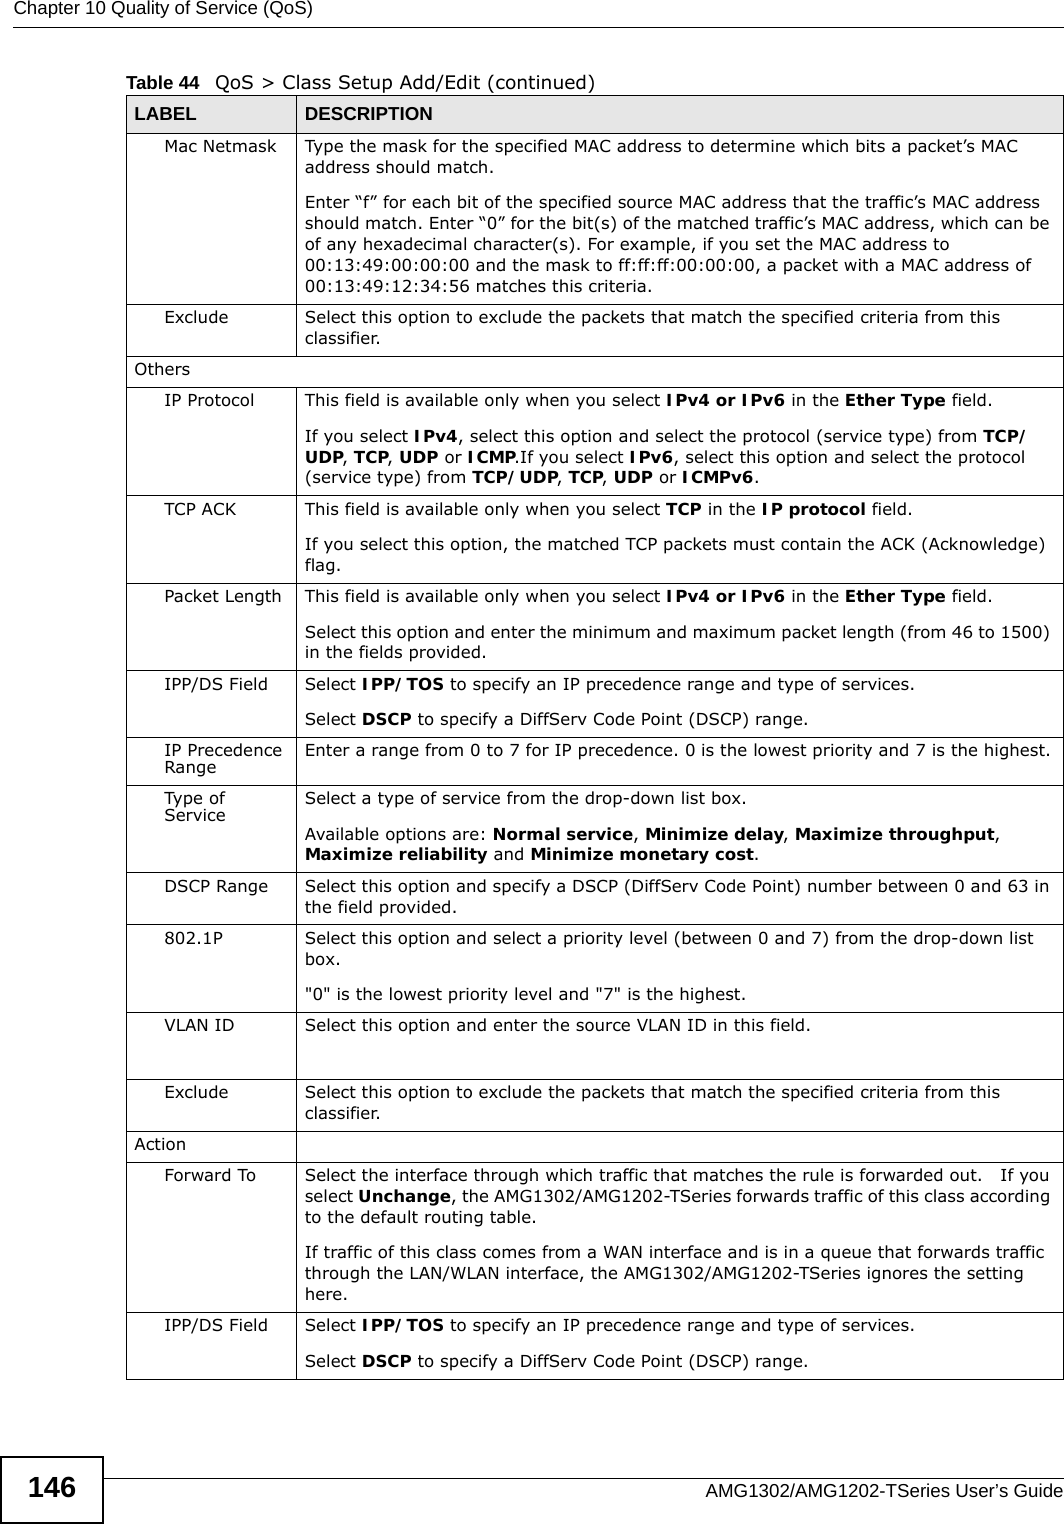
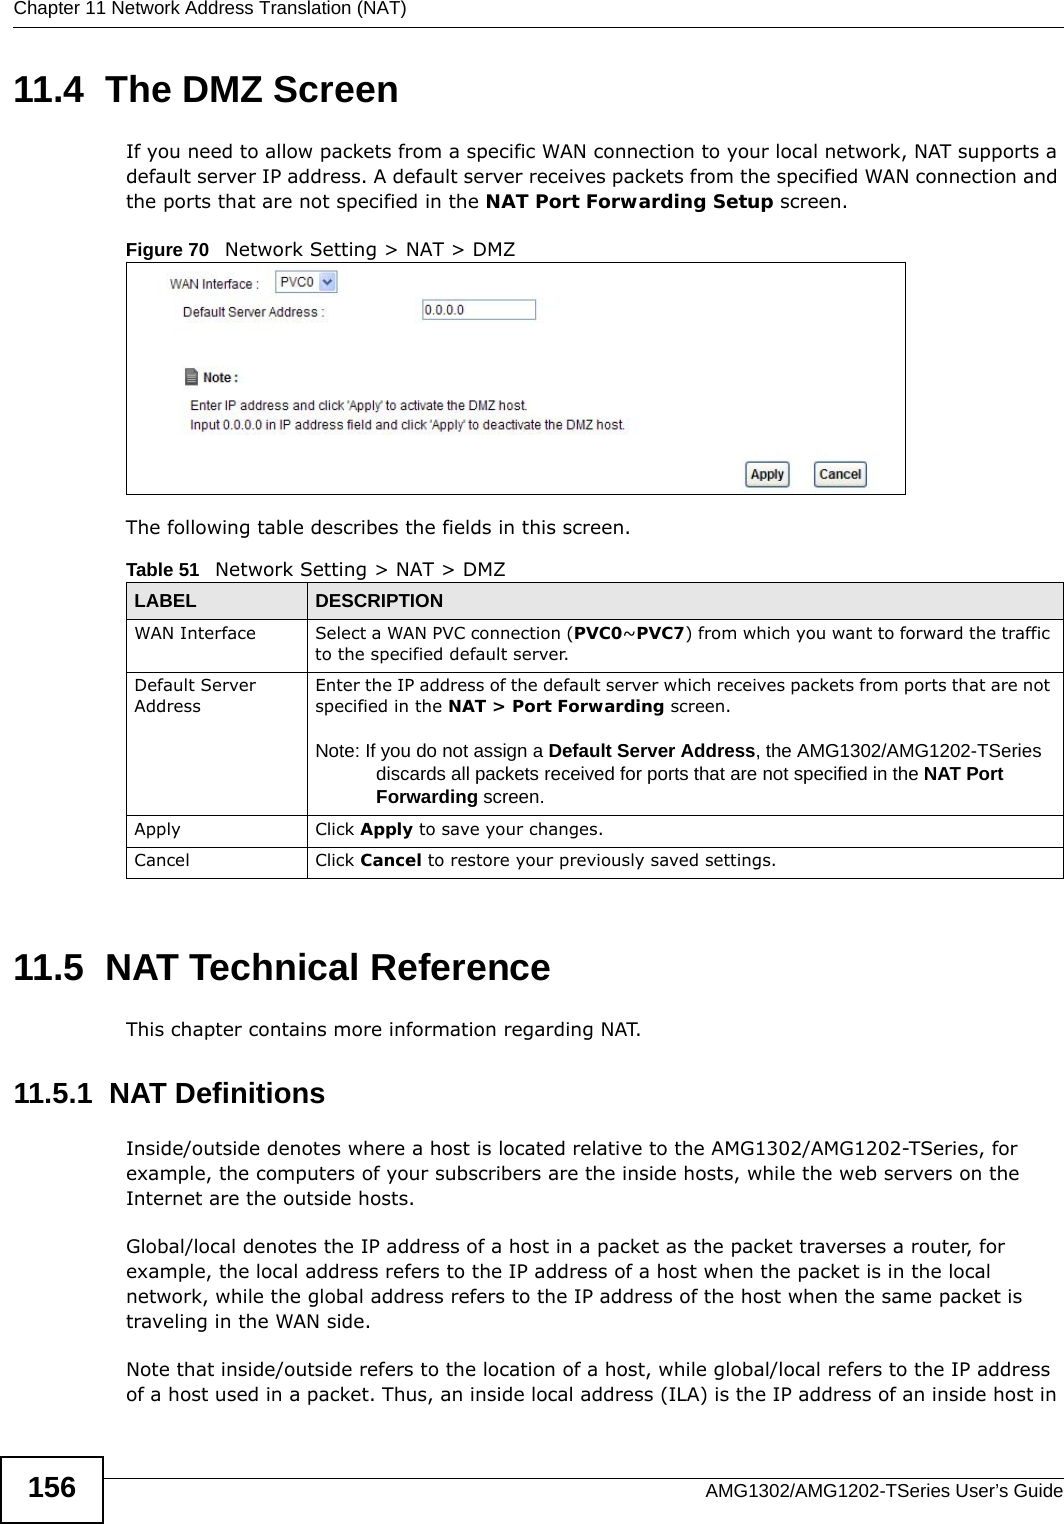
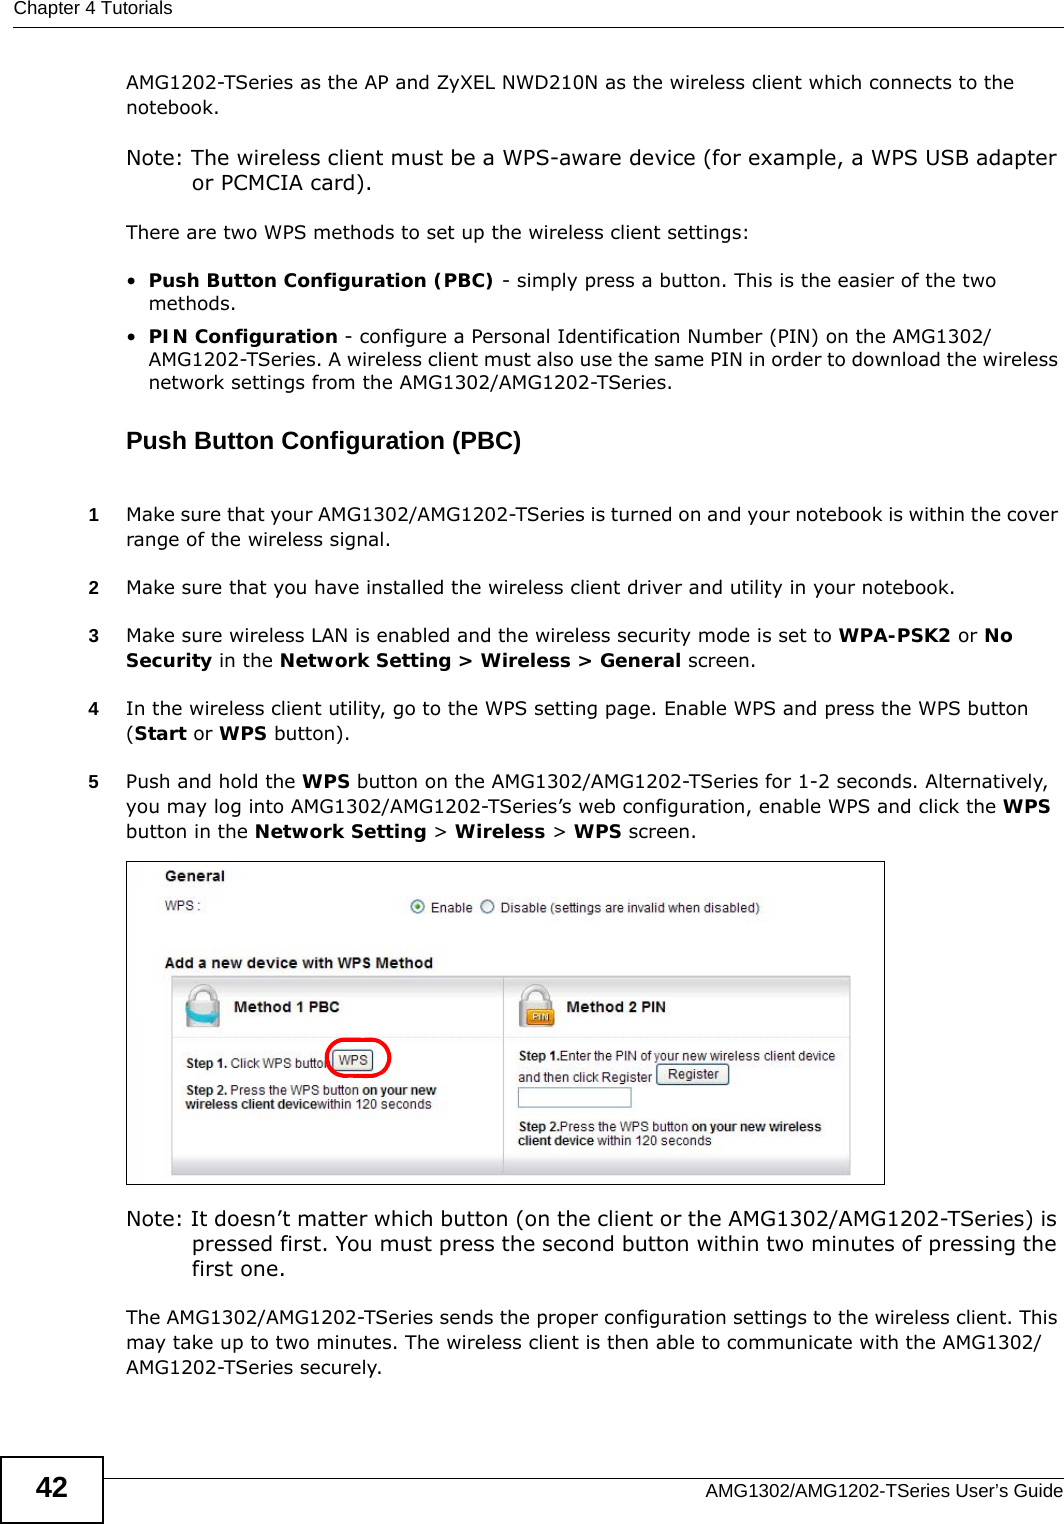
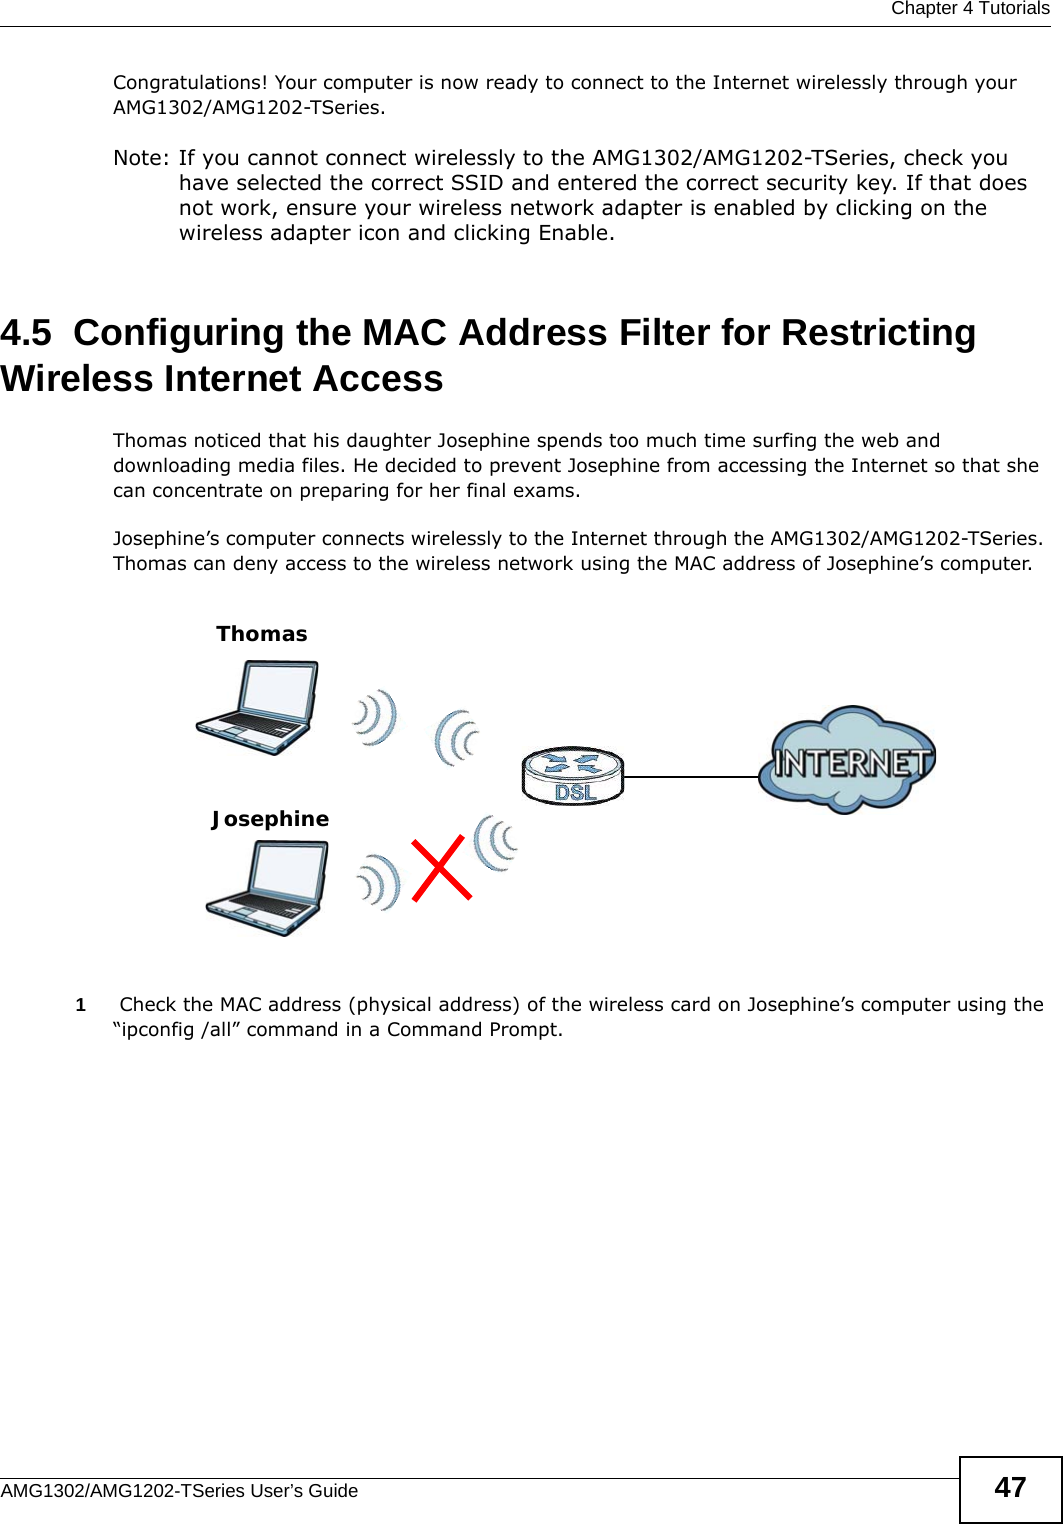
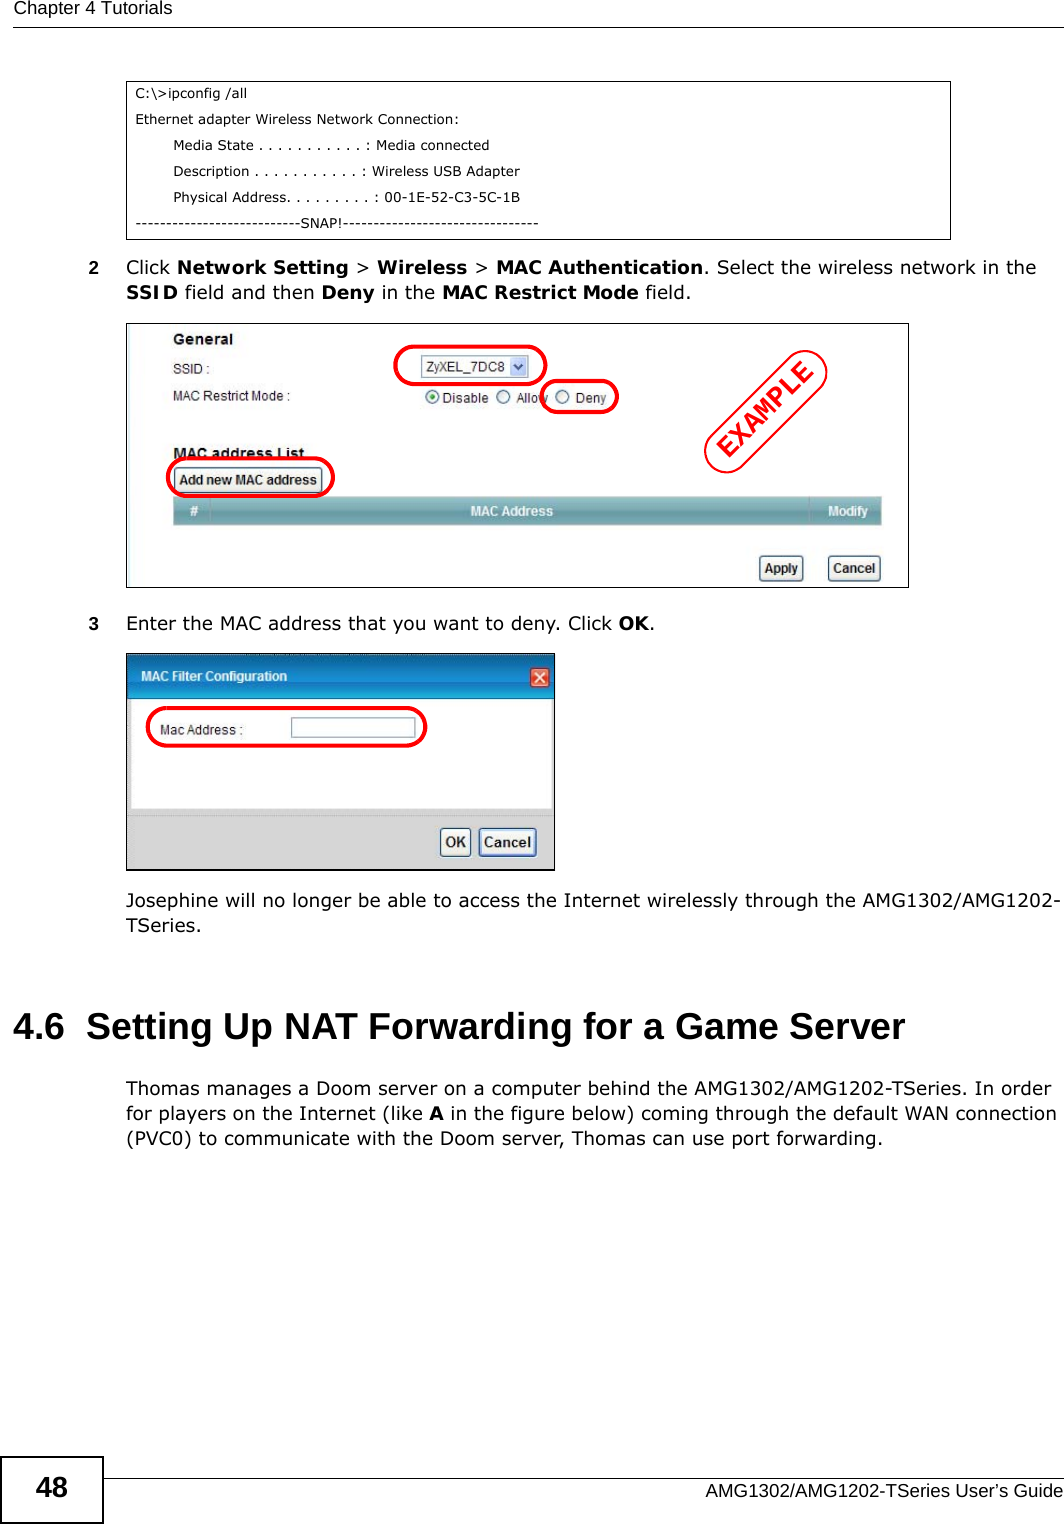
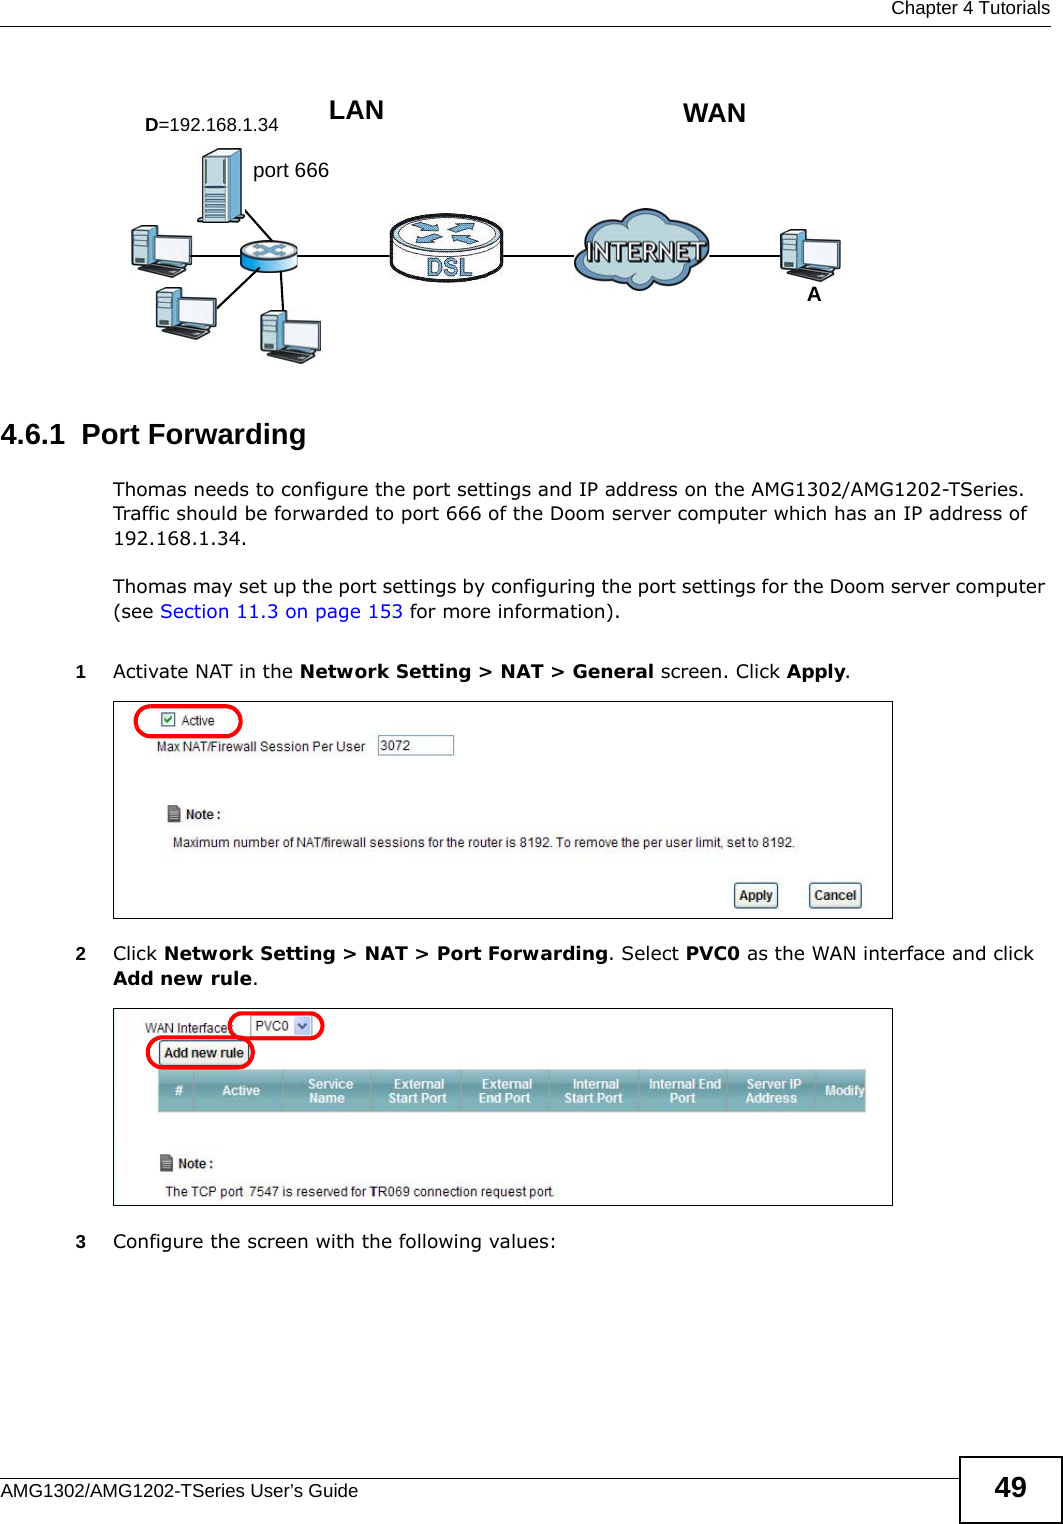
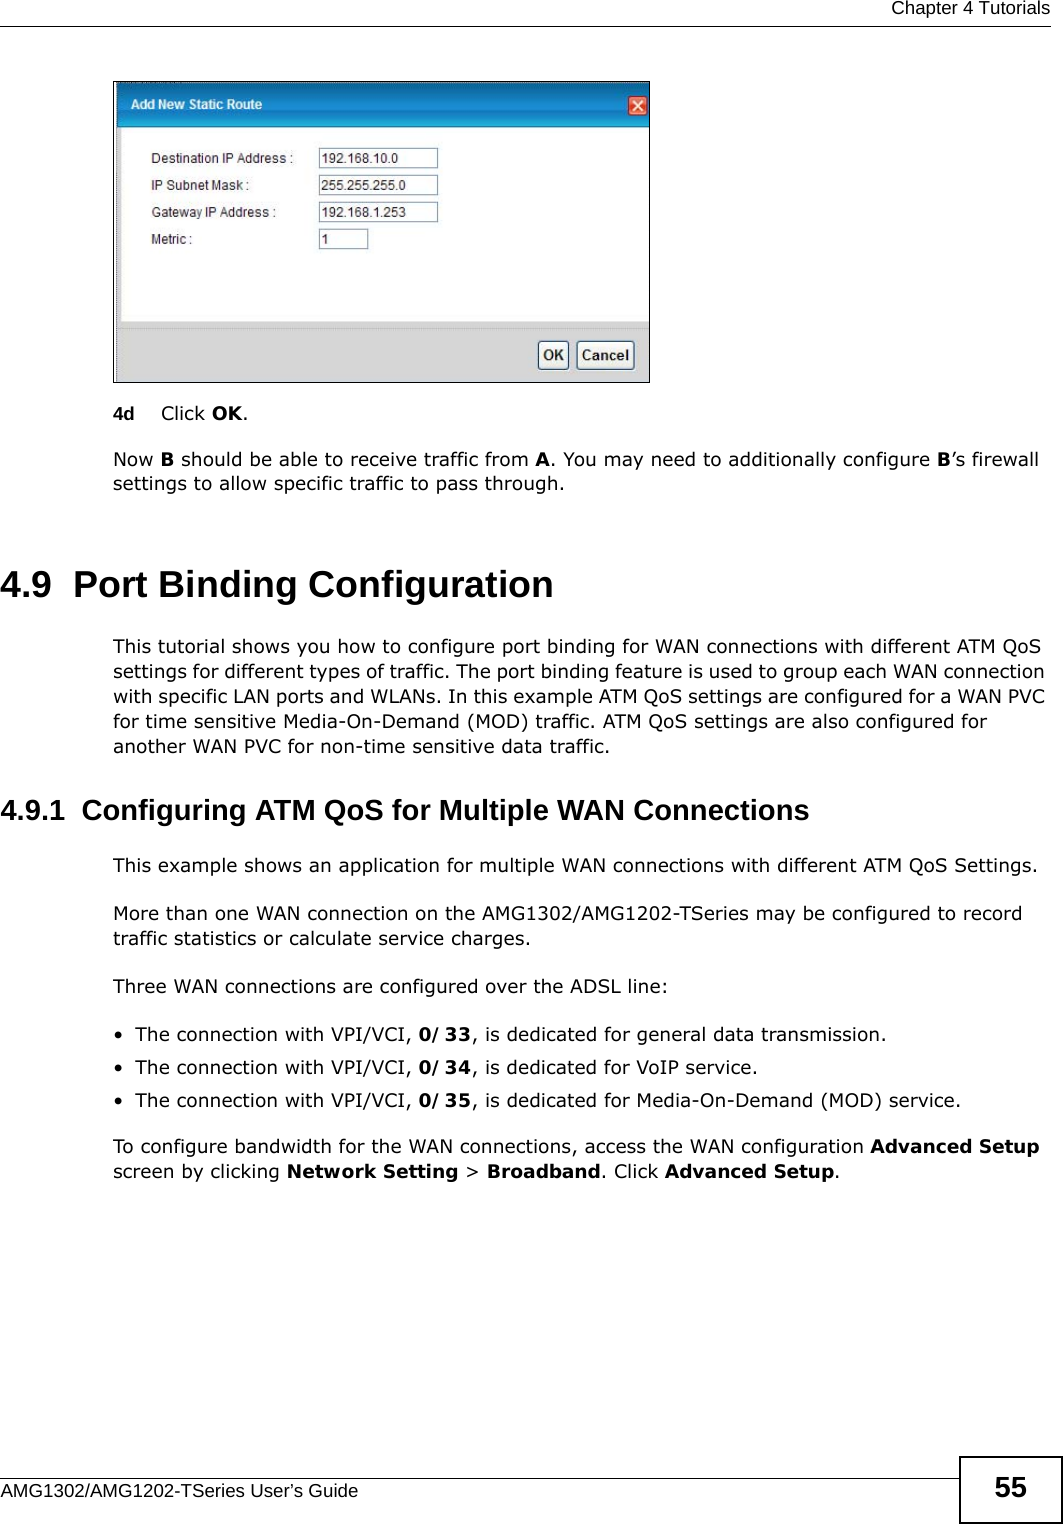
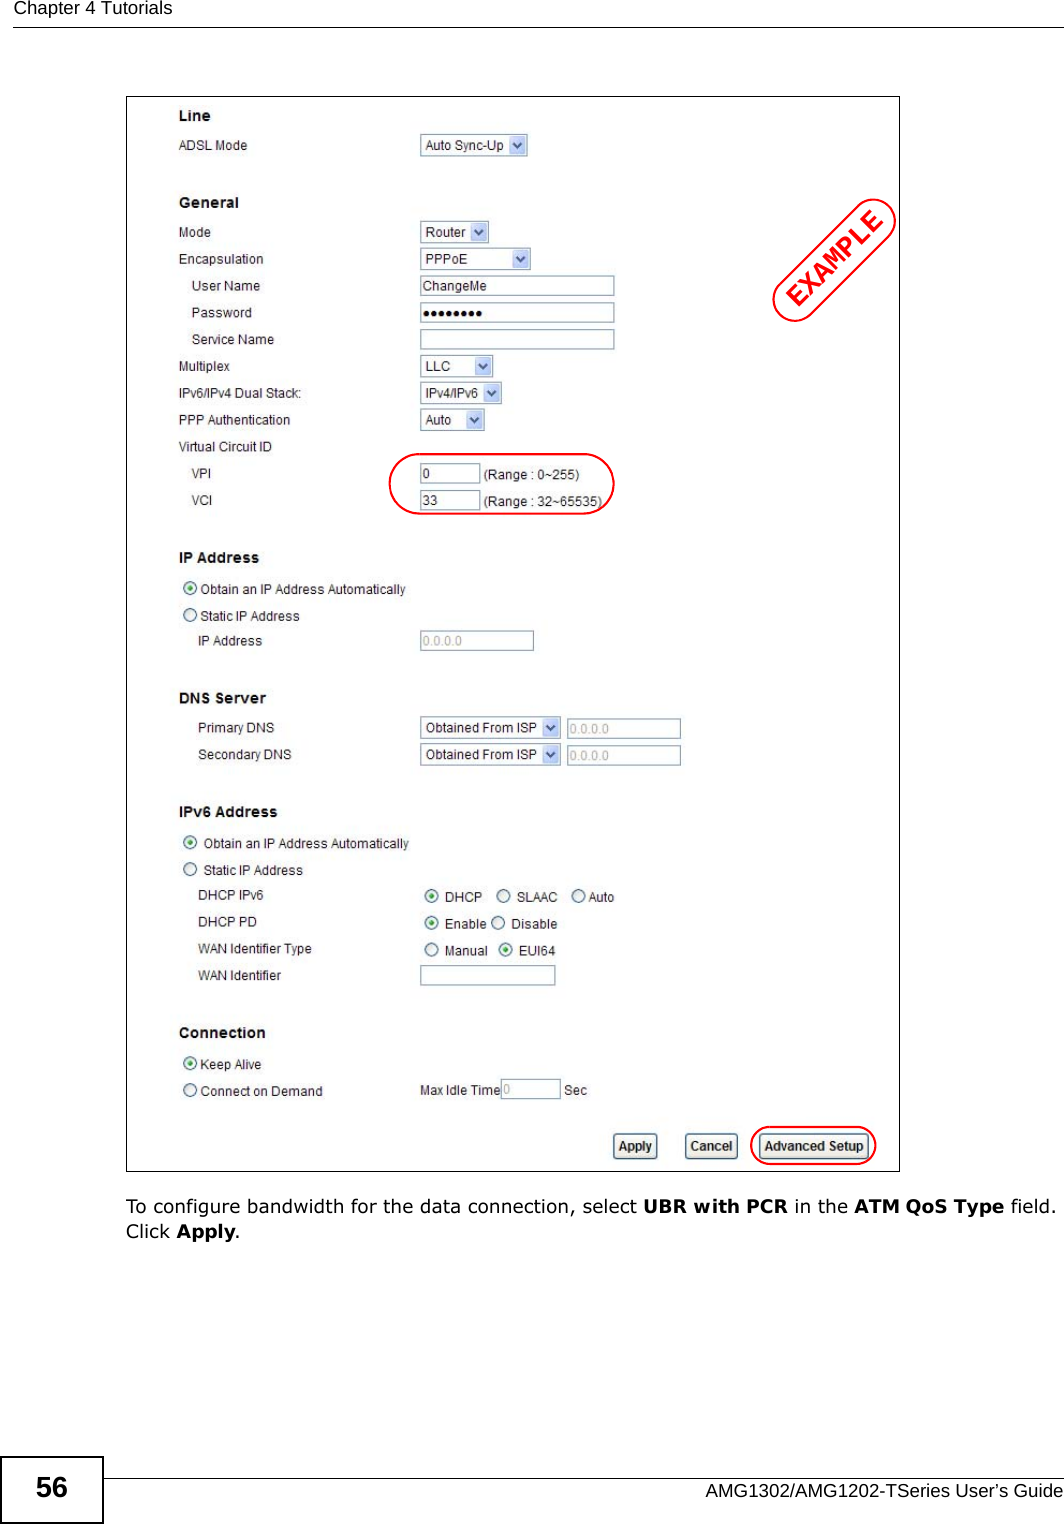
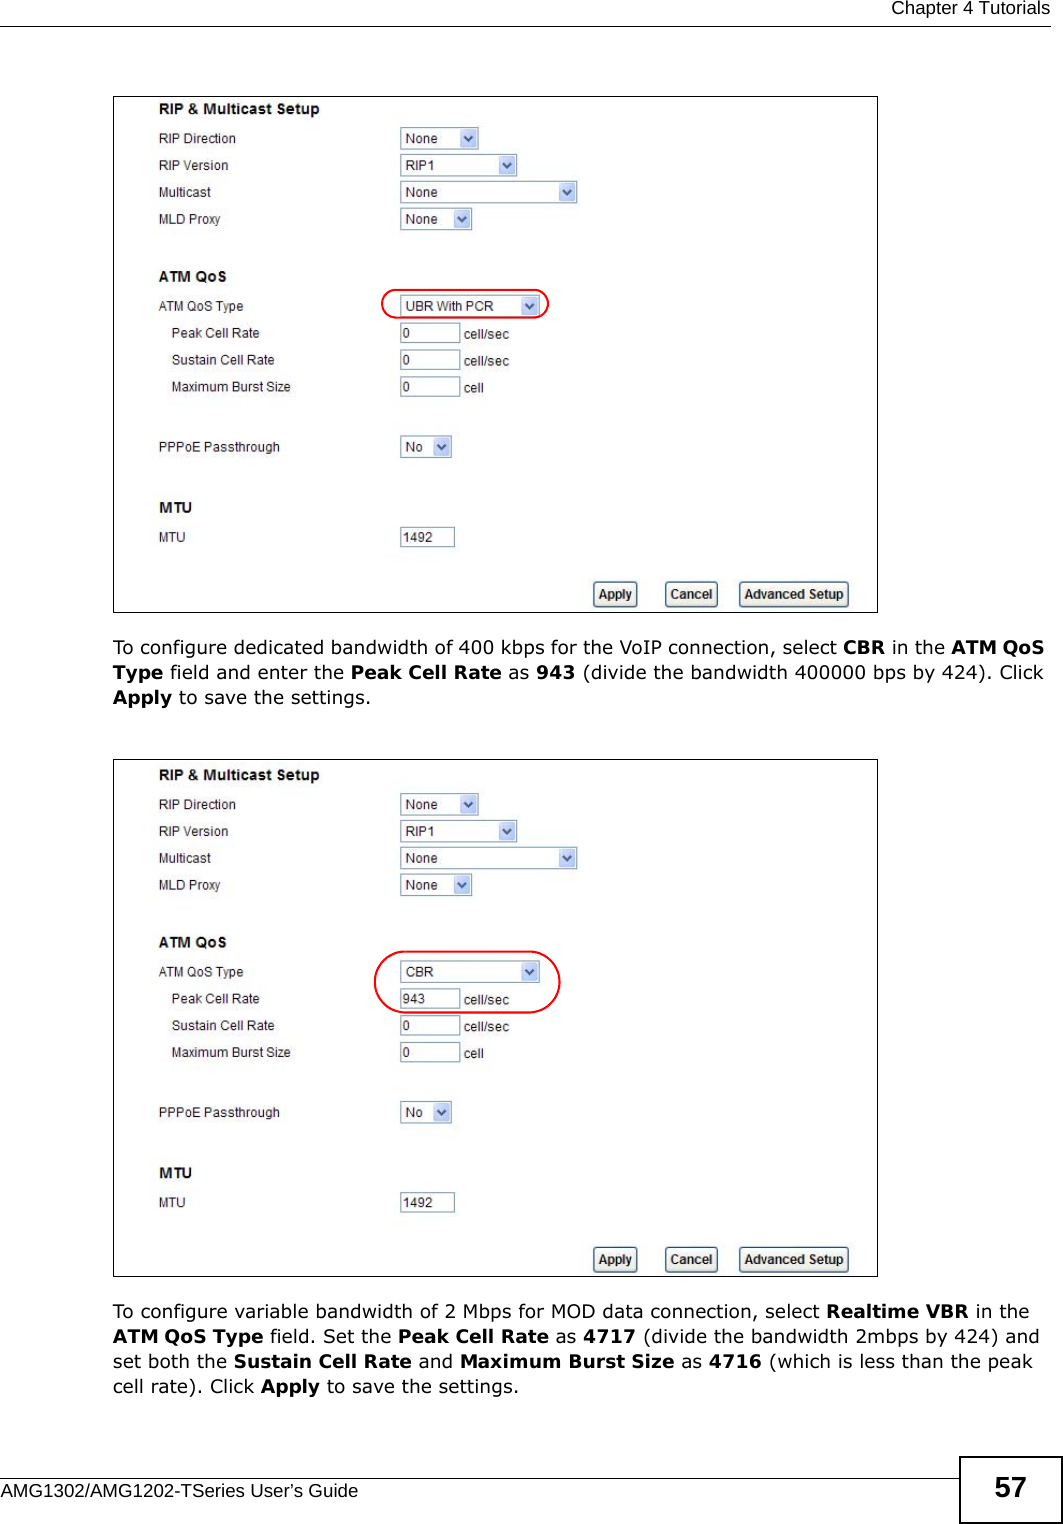
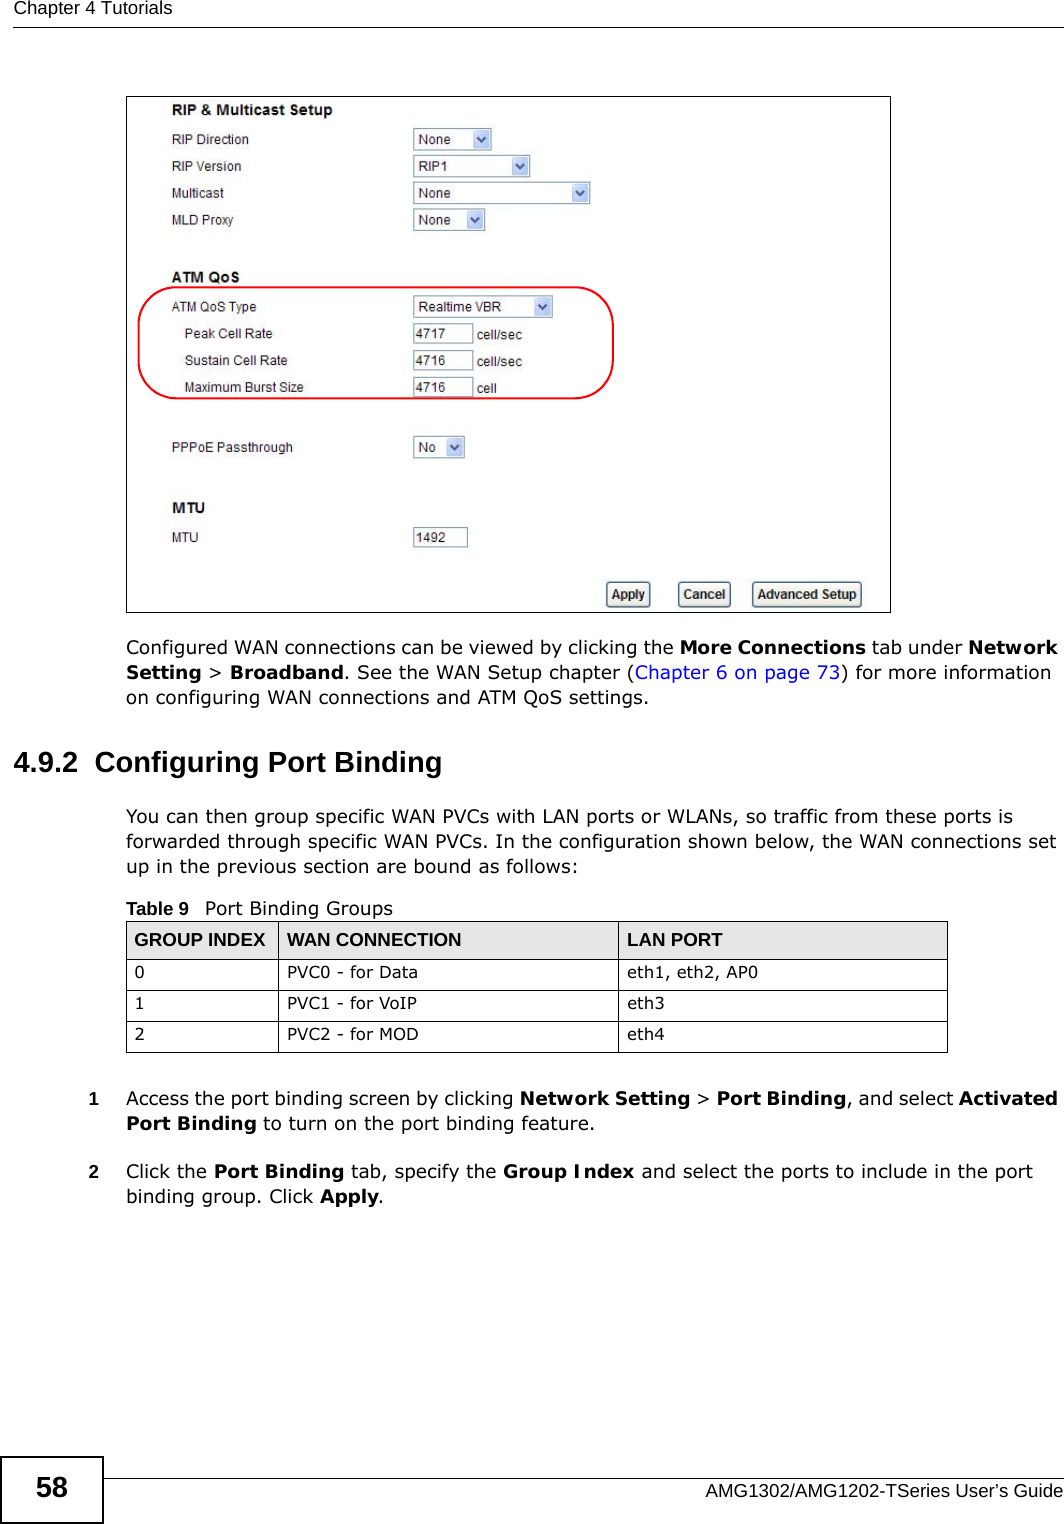
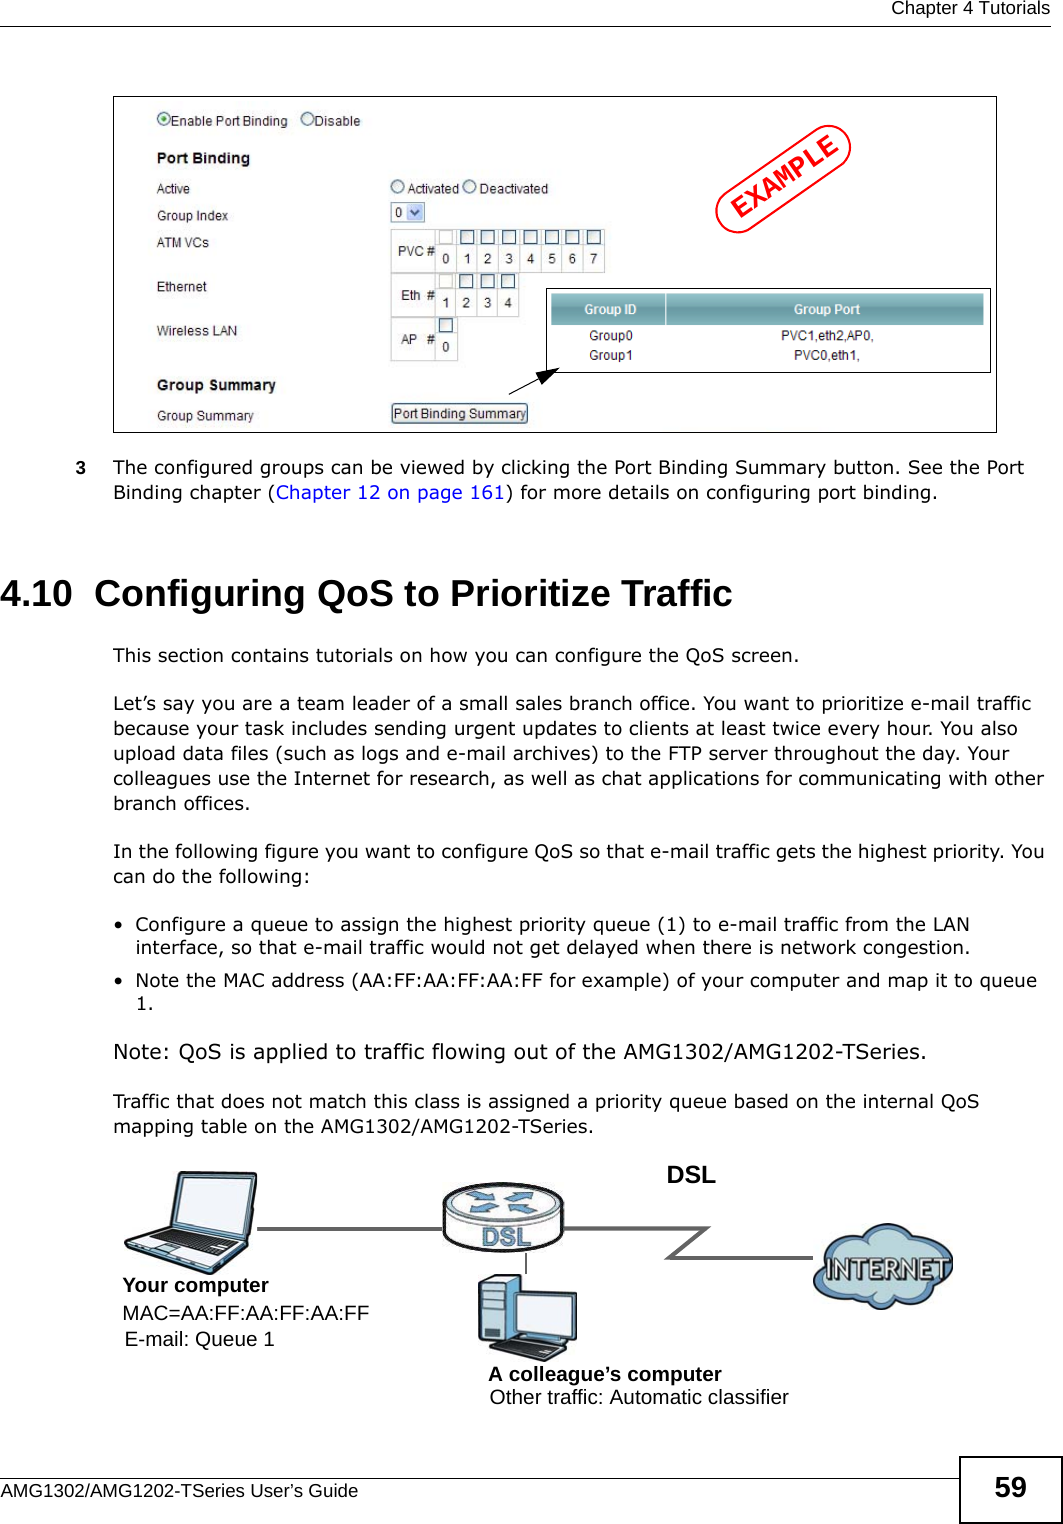
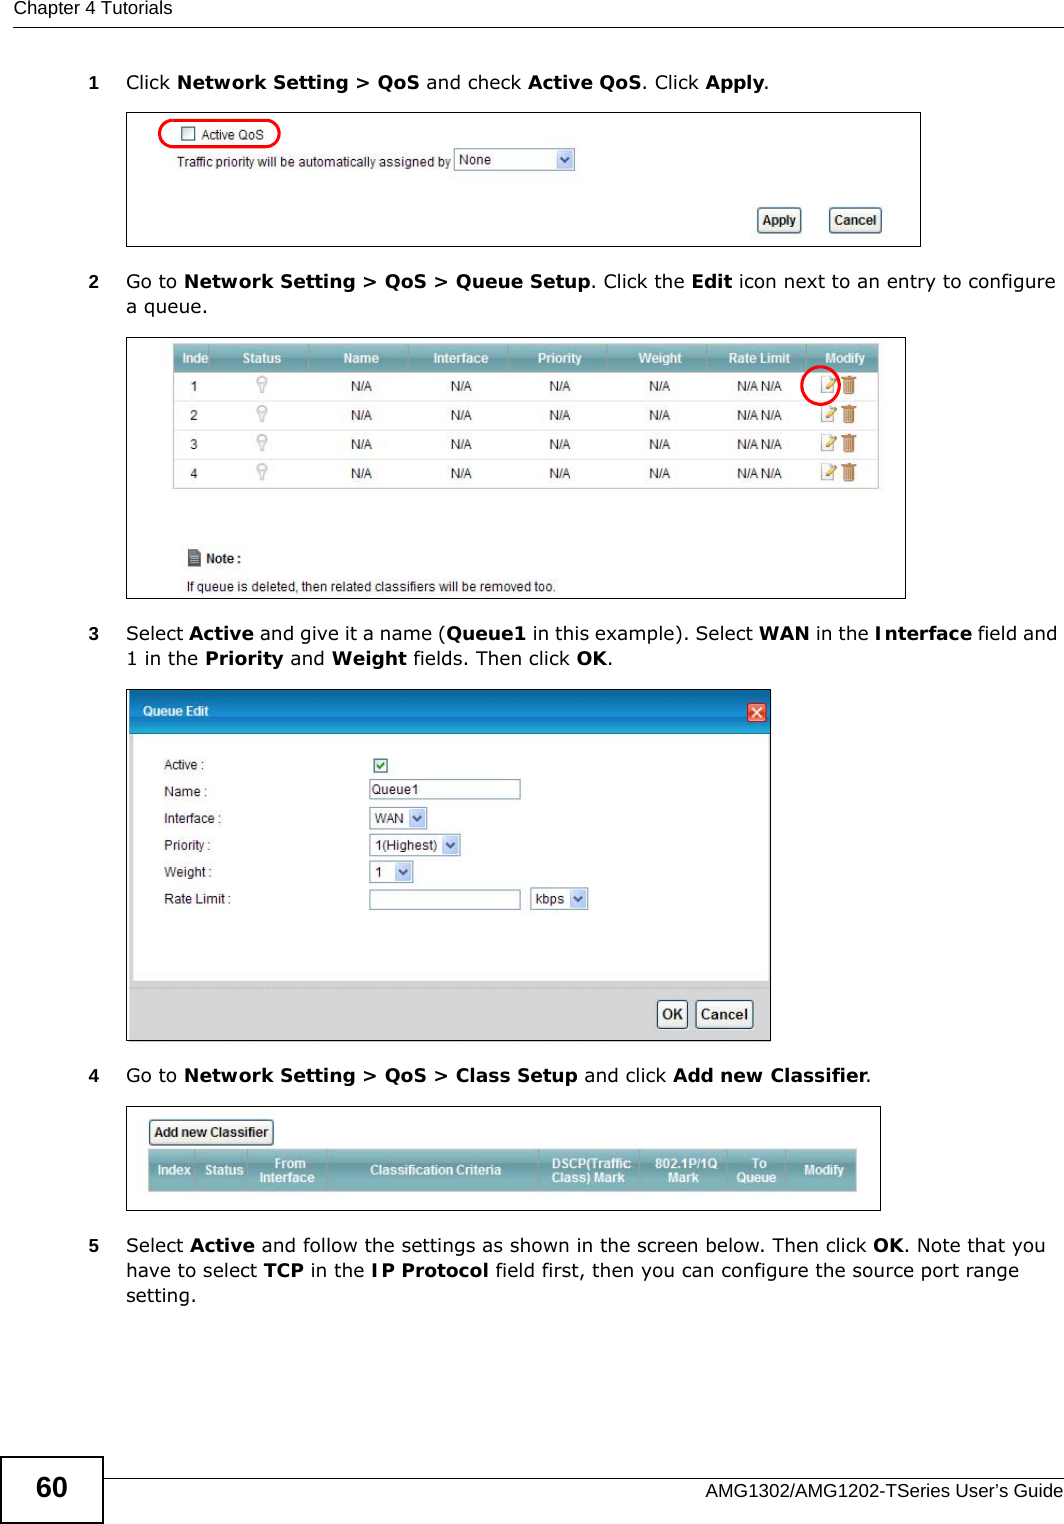
![Chapter 3 Internet / Wireless Setup WizardAMG1302/AMG1202-TSeries User’s Guide 35• If the Internet connection fails, check to see if your account is activated. After you configure the Internet access information, use the following screen to set up your wireless LAN. 5Check the Wireless Service box to enable wireless connection on the ZyXEL device. 6Configure your wireless settings in this screen. Click Next.Figure 13 Wireless SetupThe following table describes the labels in this screen.Table 7 Wireless SetupLABEL DESCRIPTIONWireless ServiceClick this to enable or disable wireless service on the ZyXEL device.Wireless Network Name(SSID)Enter a descriptive name (up to 32 printable 7-bit ASCII characters) for the wireless LAN. If you change this field on the AMG1302/AMG1202-TSeries, make sure all wireless stations use the same SSID in order to access the network. Channel SelectionThe range of radio frequencies used by IEEE 802.11b/g wireless devices is called a channel. Select a channel ID that is not already in use by a neighboring device.Security Displays the security setting. To mofidy, see Section 7.2 on page 92.Pre-Shared KeyEnter a set of characters (8 to 63 characters or 64 hexadecimal digits [a-f, A-F, and 0-9]) for the shared security key.Back Click this to return to the previous screen without saving.Next Click this to continue to the next wizard screen.Exit Click this to close the wizard screen without saving.](https://usermanual.wiki/ZyXEL-Communications/AMG1202T10B.AMG1202-T10B-User-Guide-Part1-REV1/User-Guide-1970013-Page-35.png)

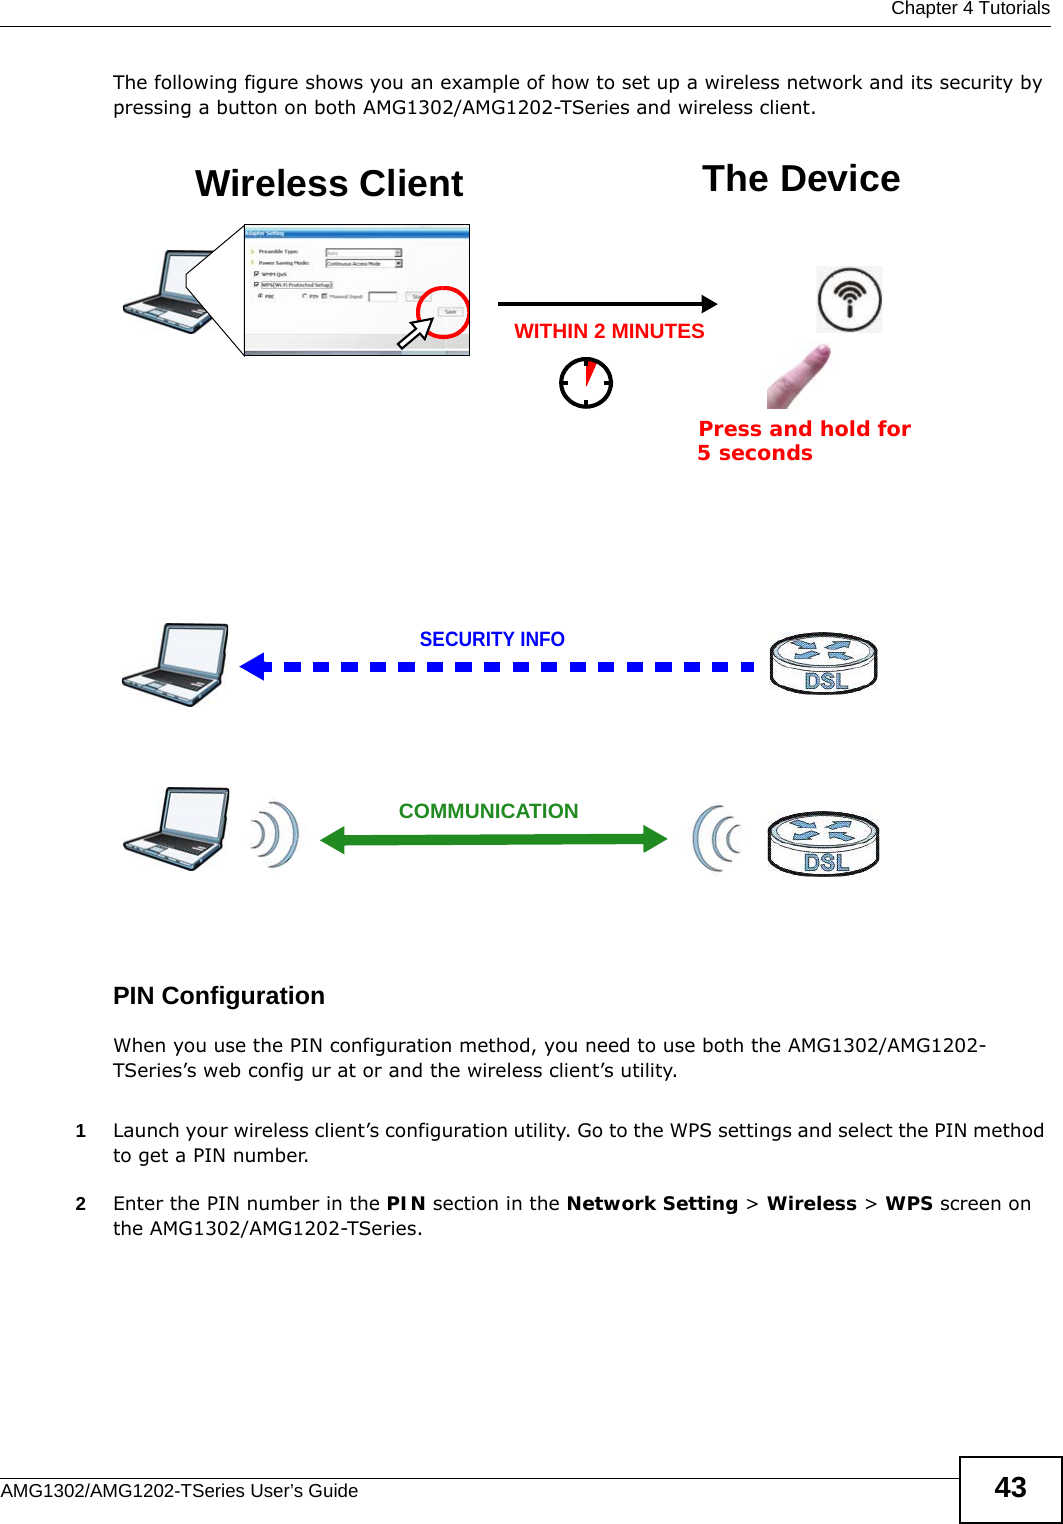

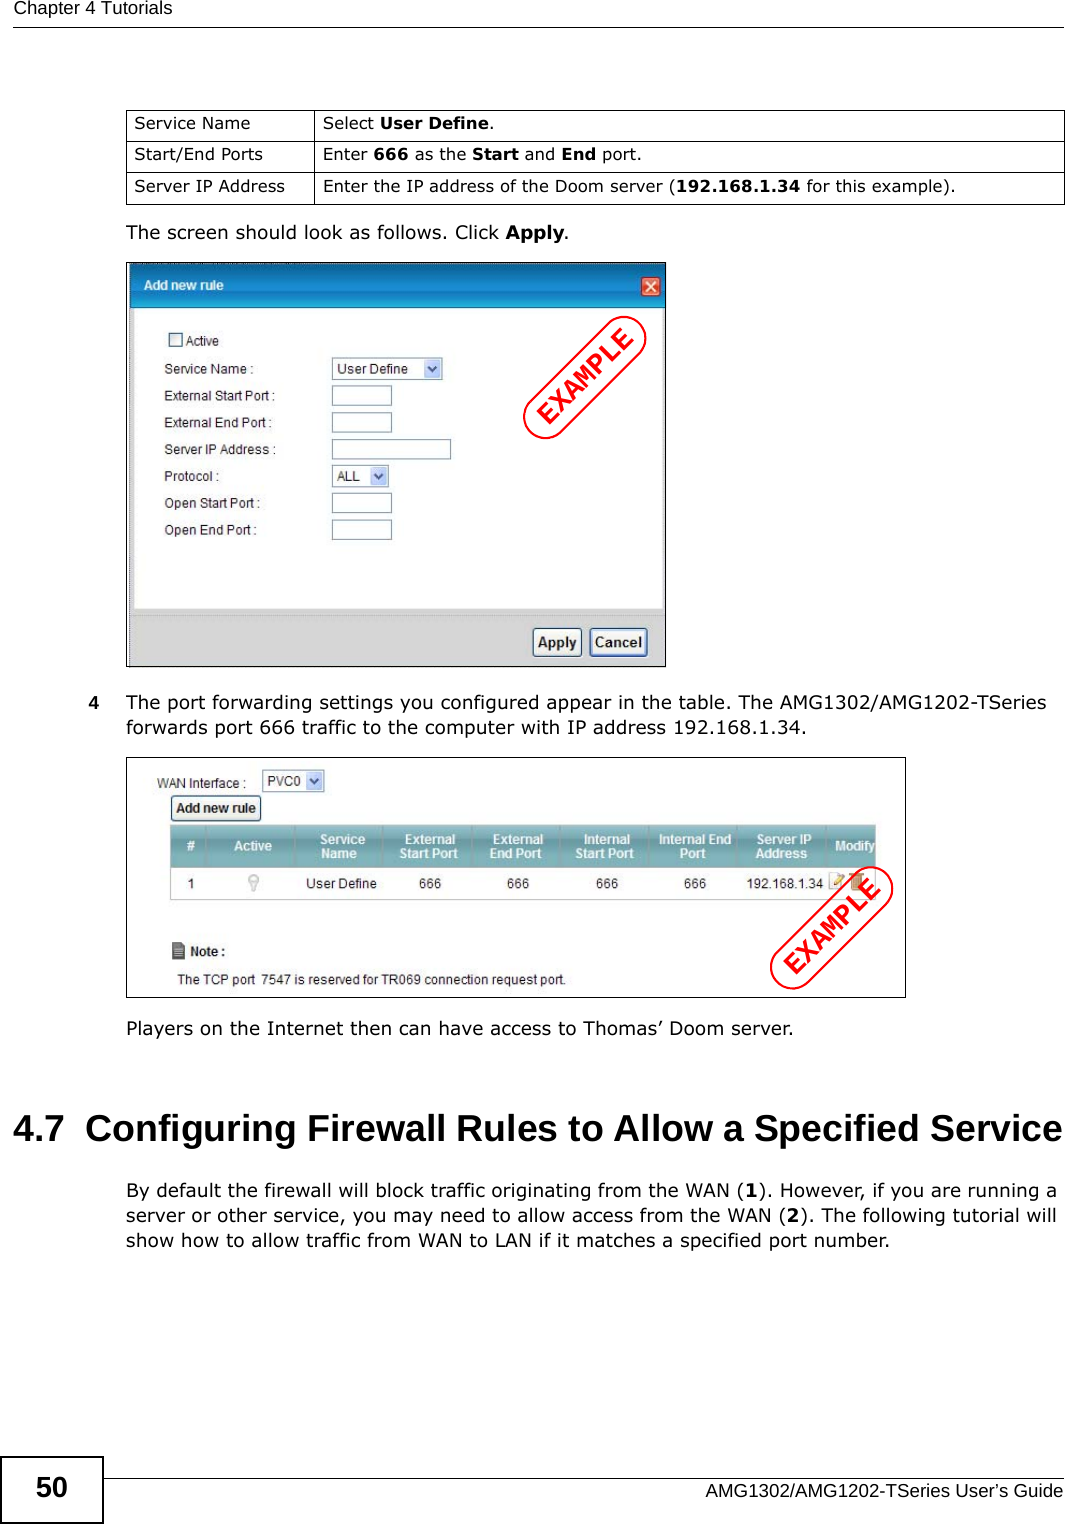
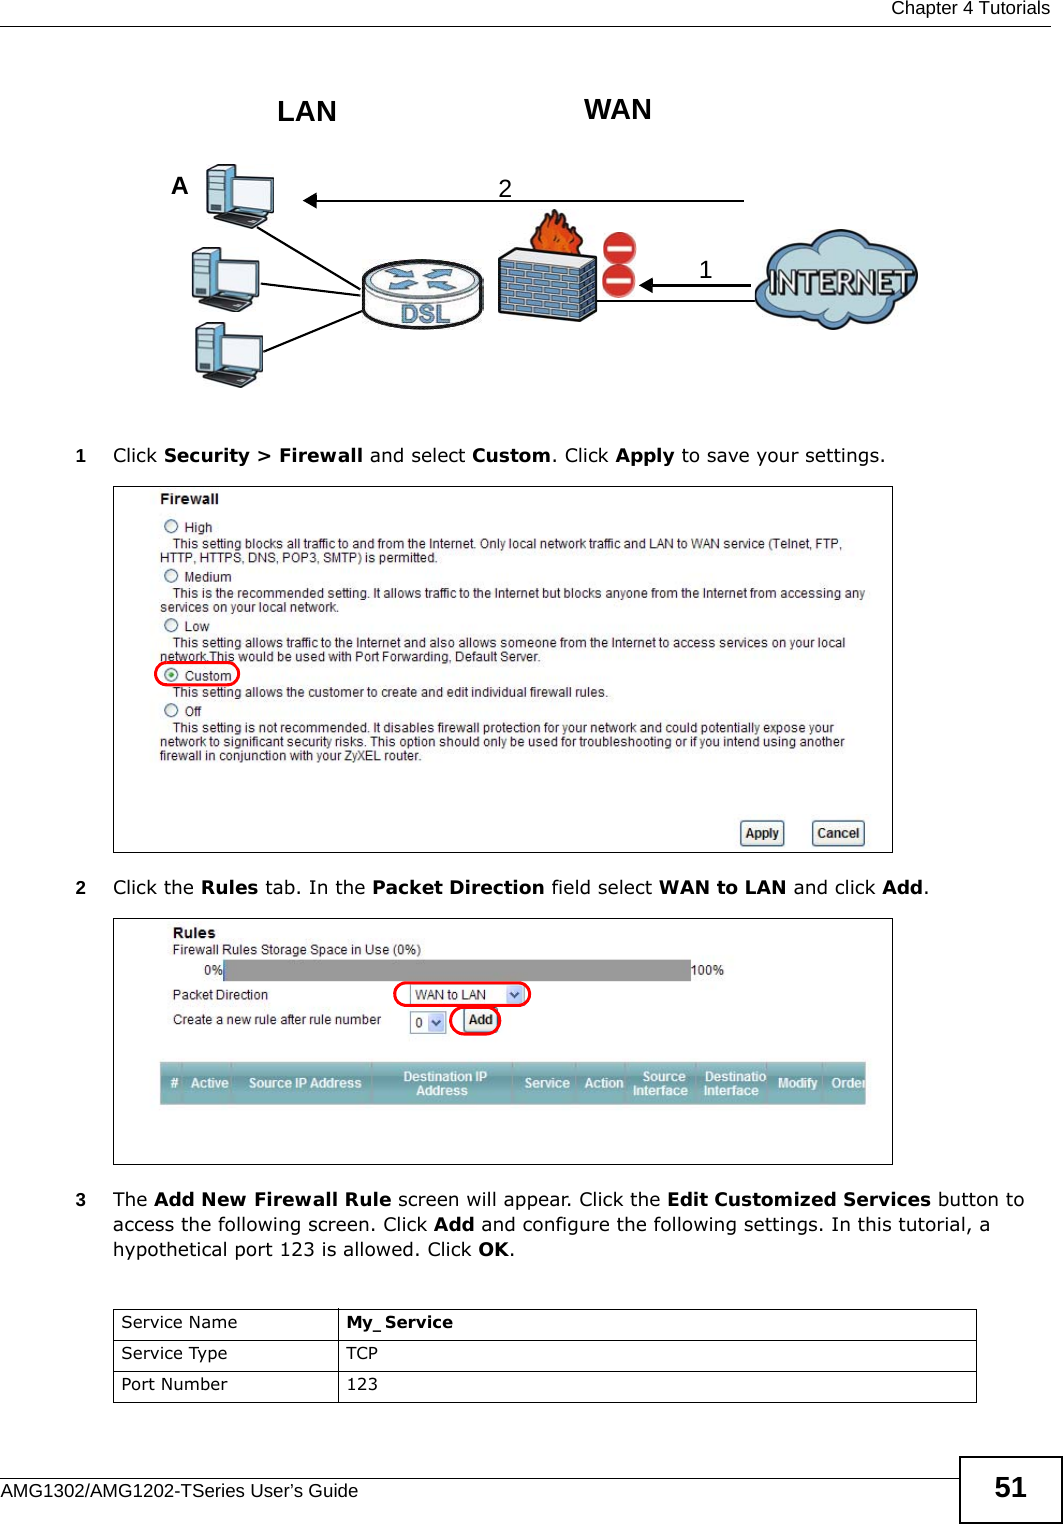
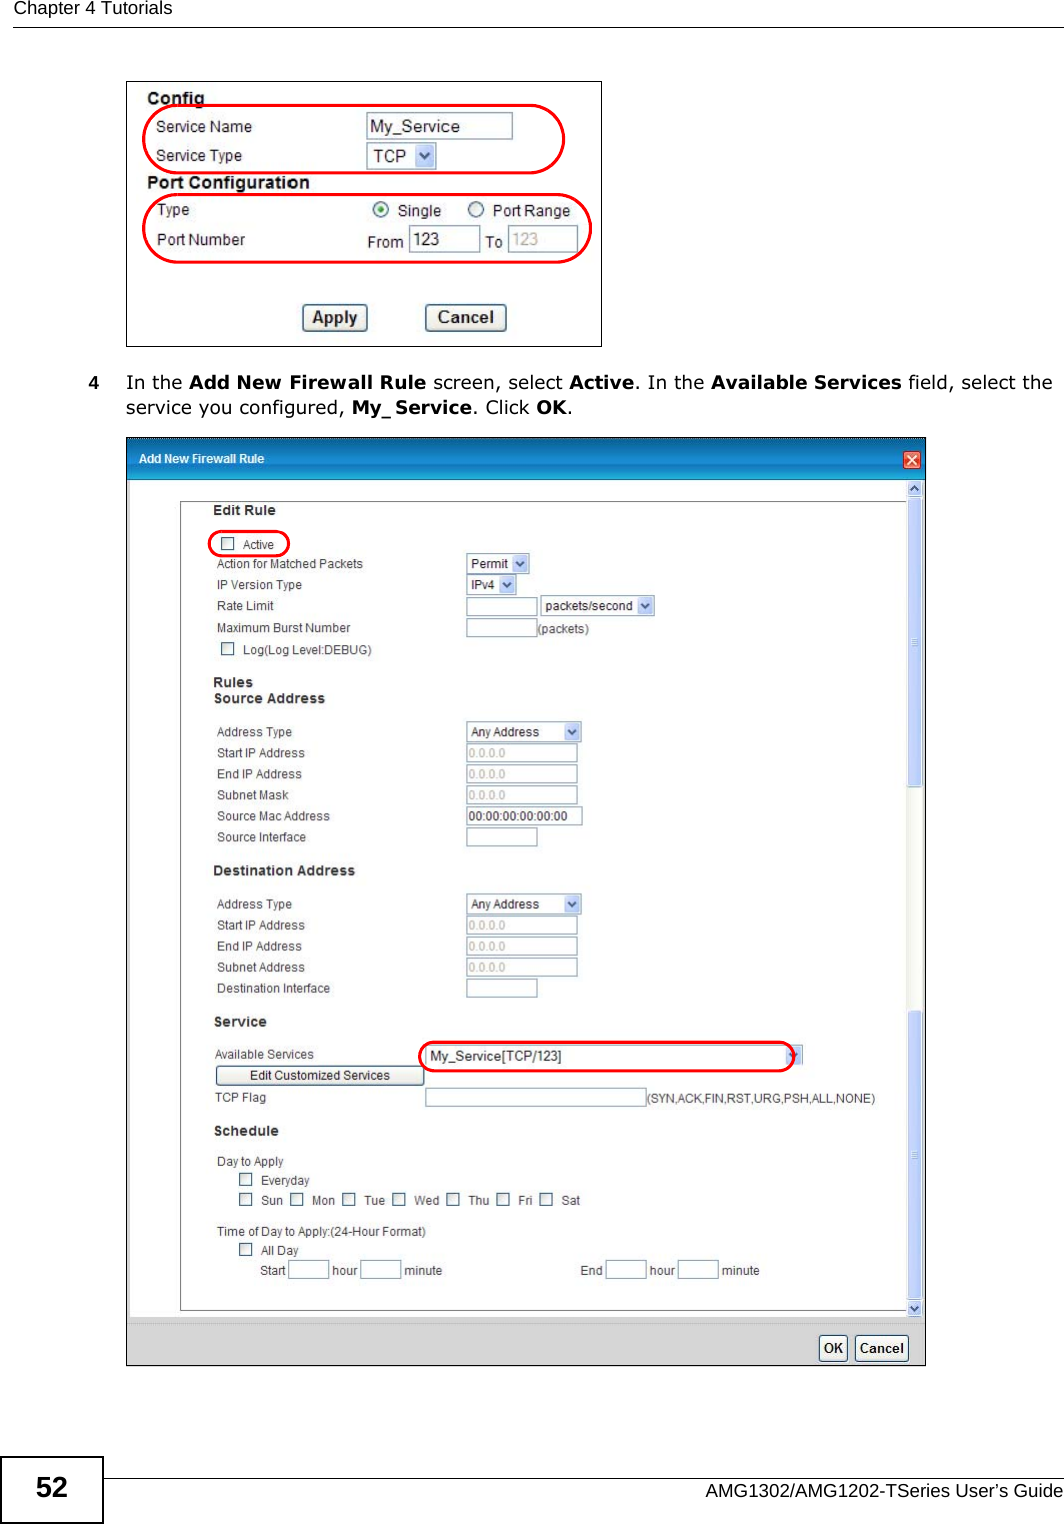
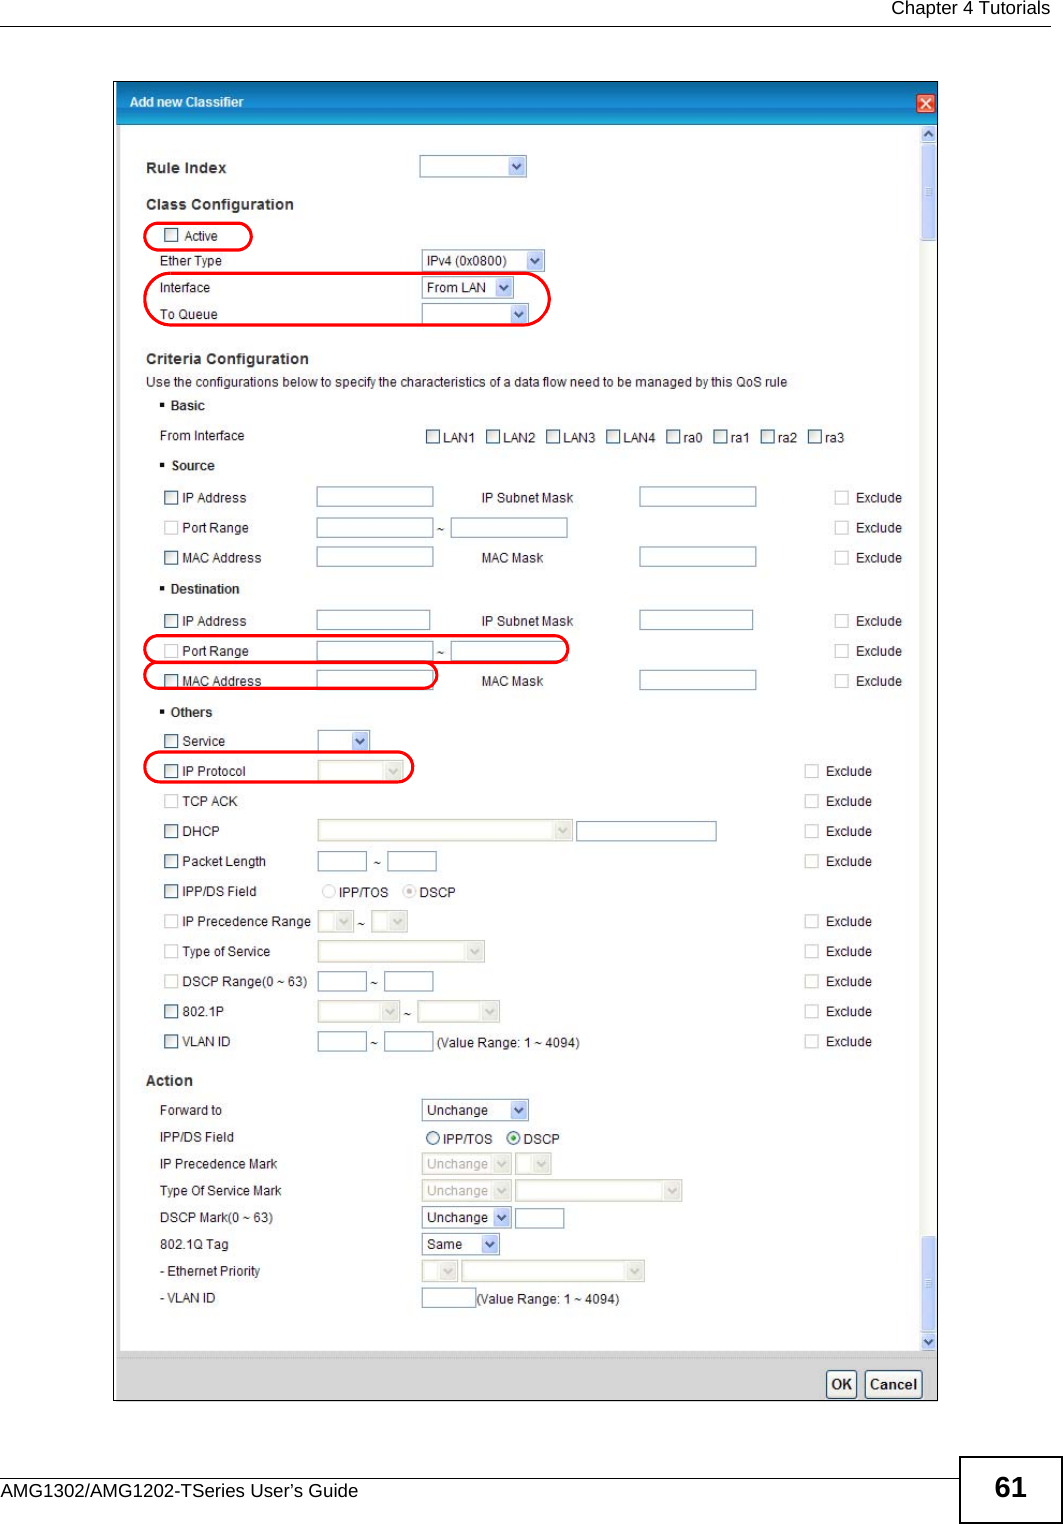
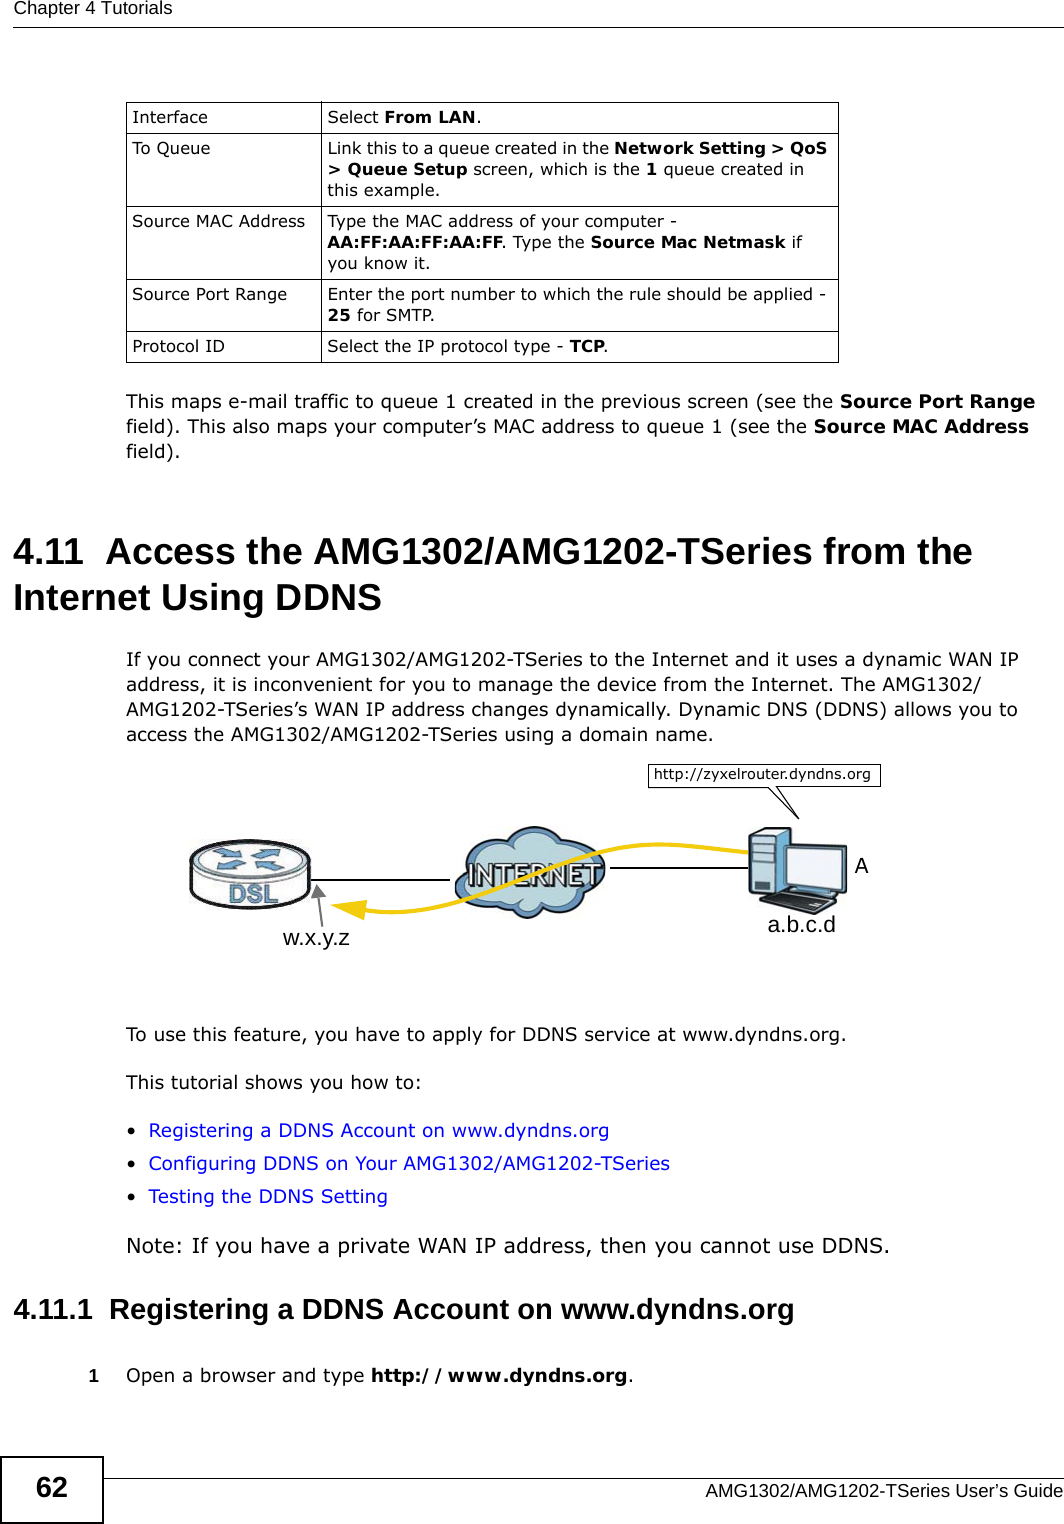
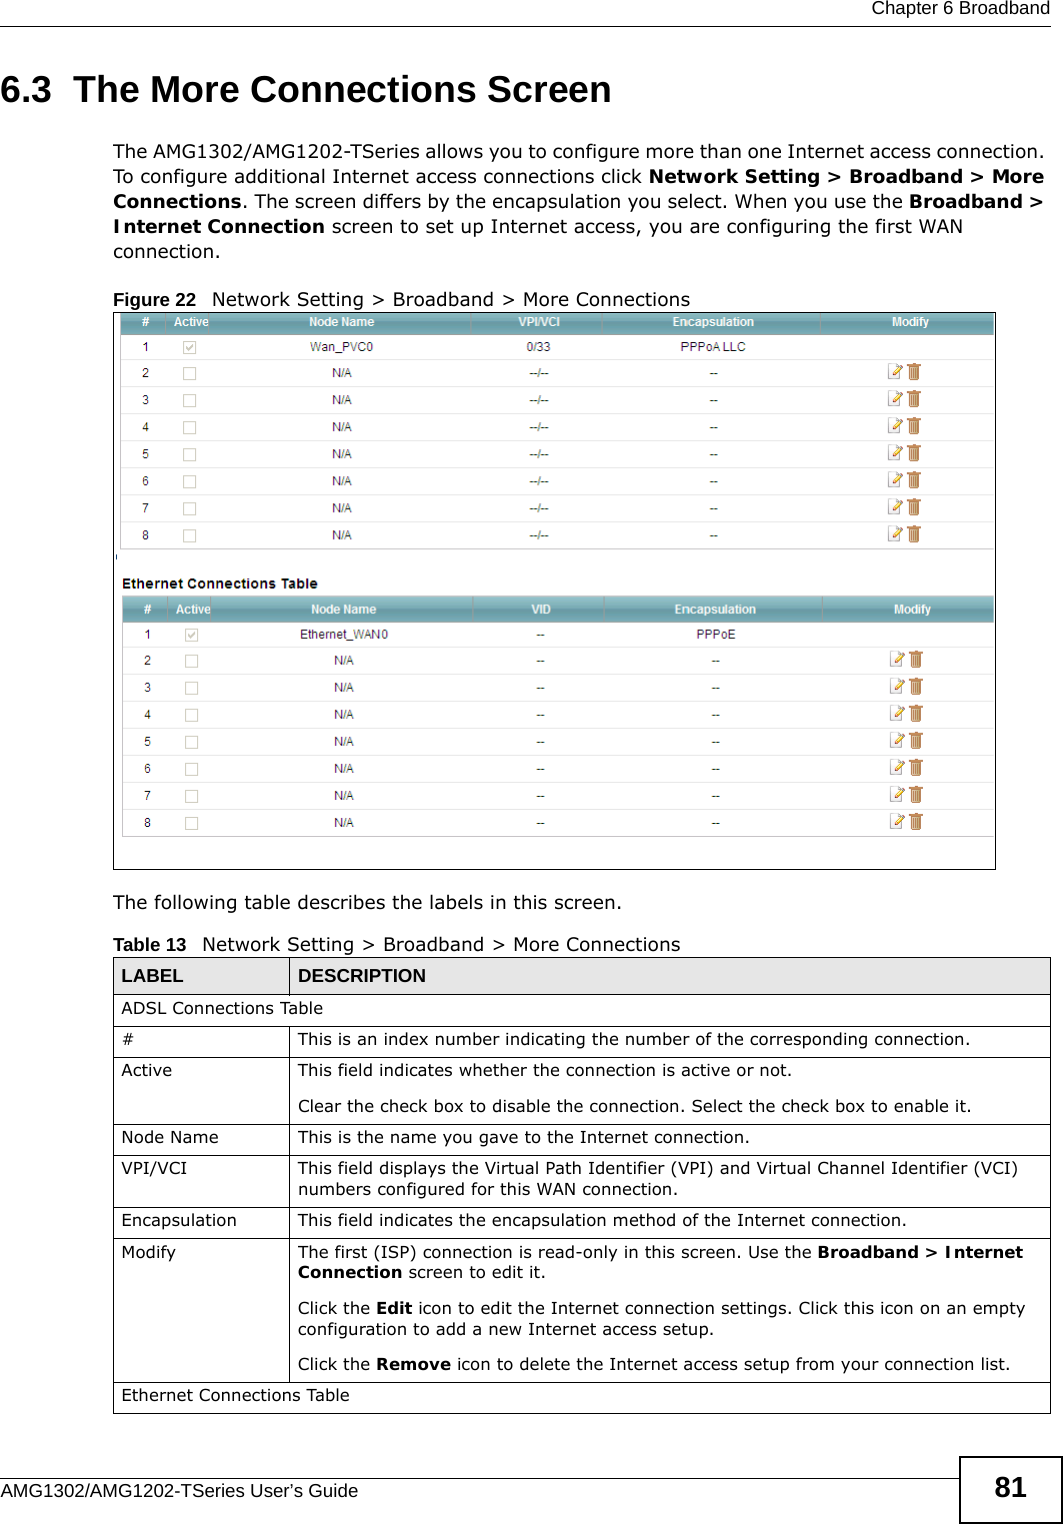
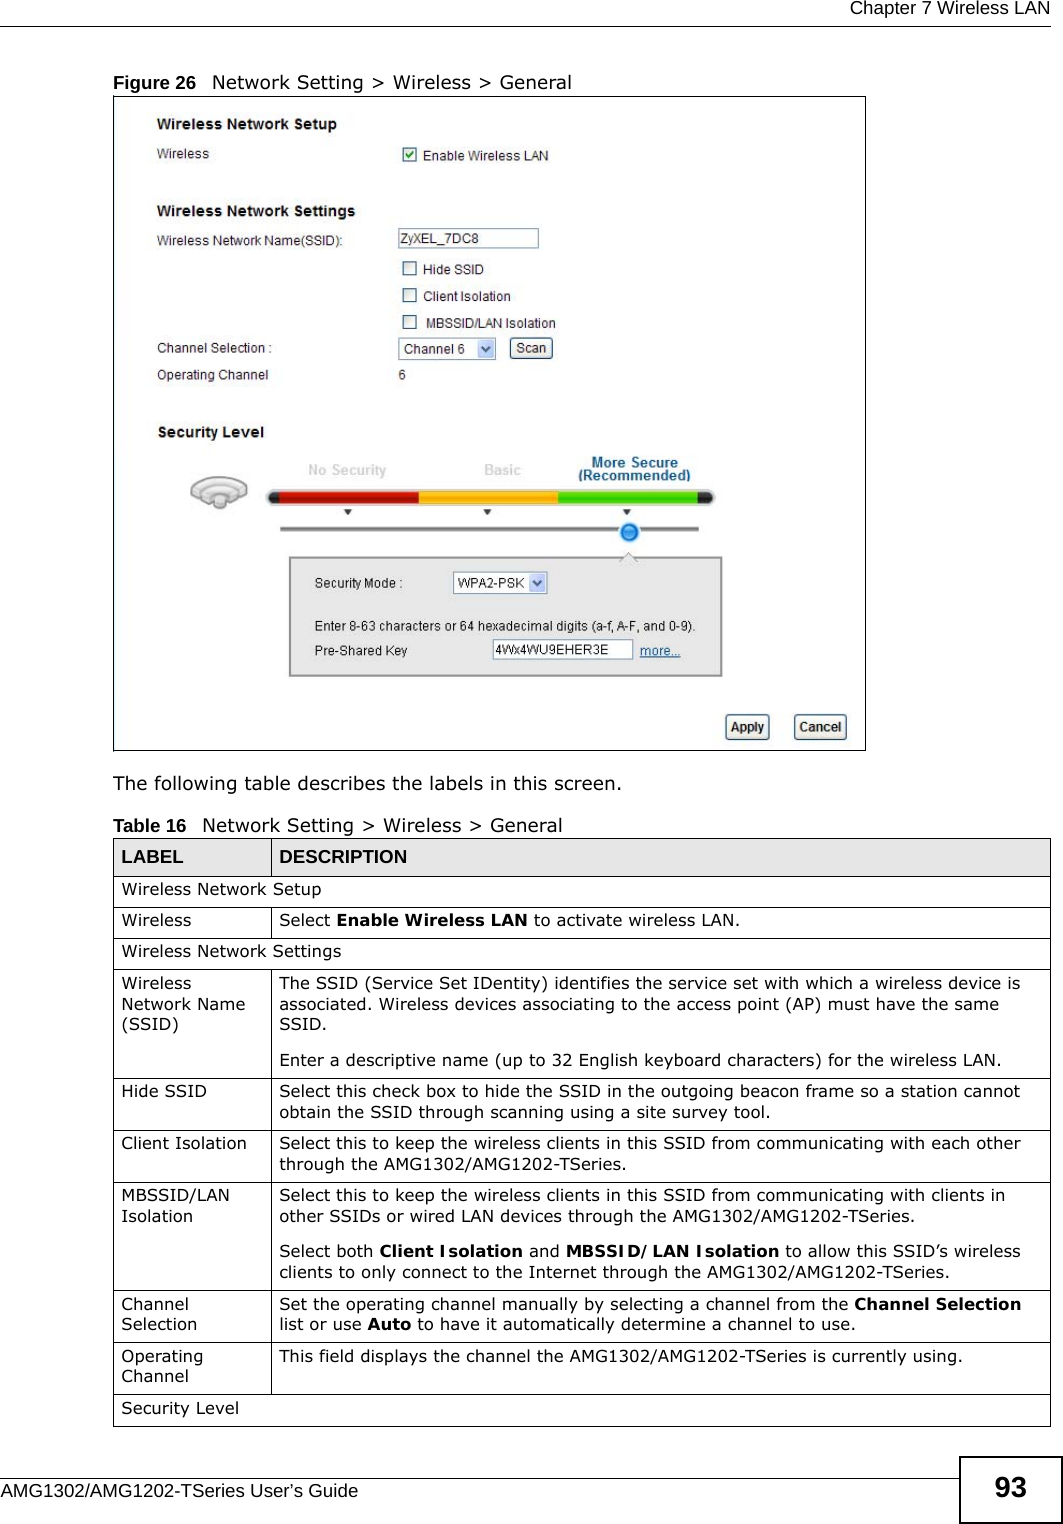
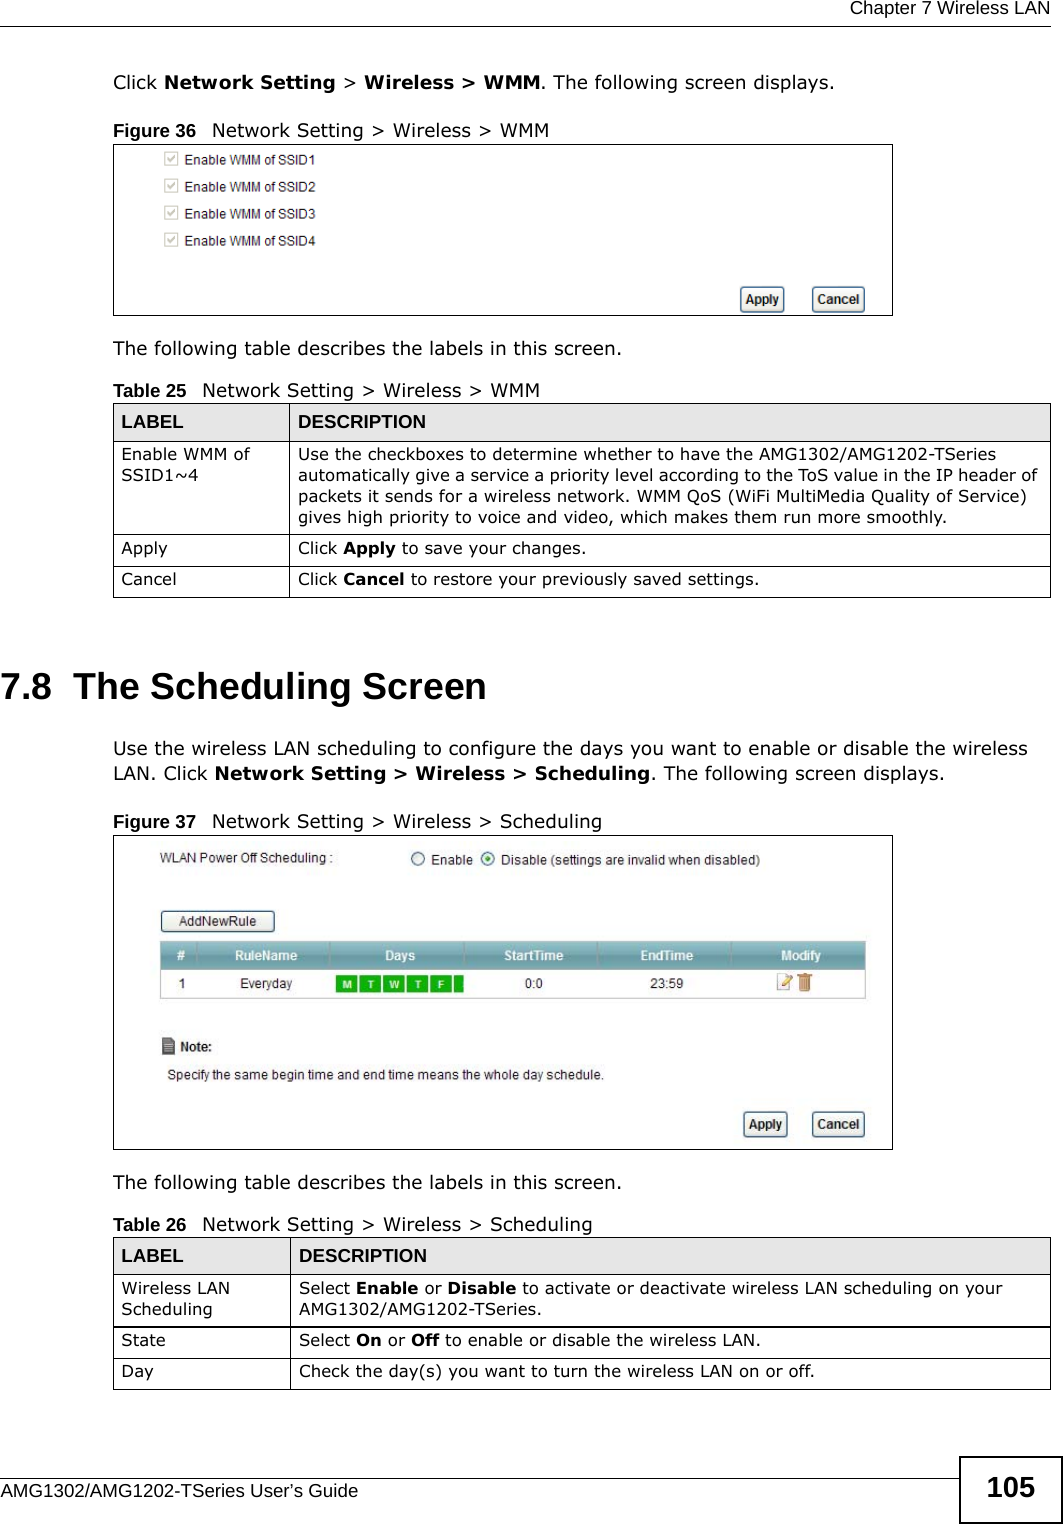
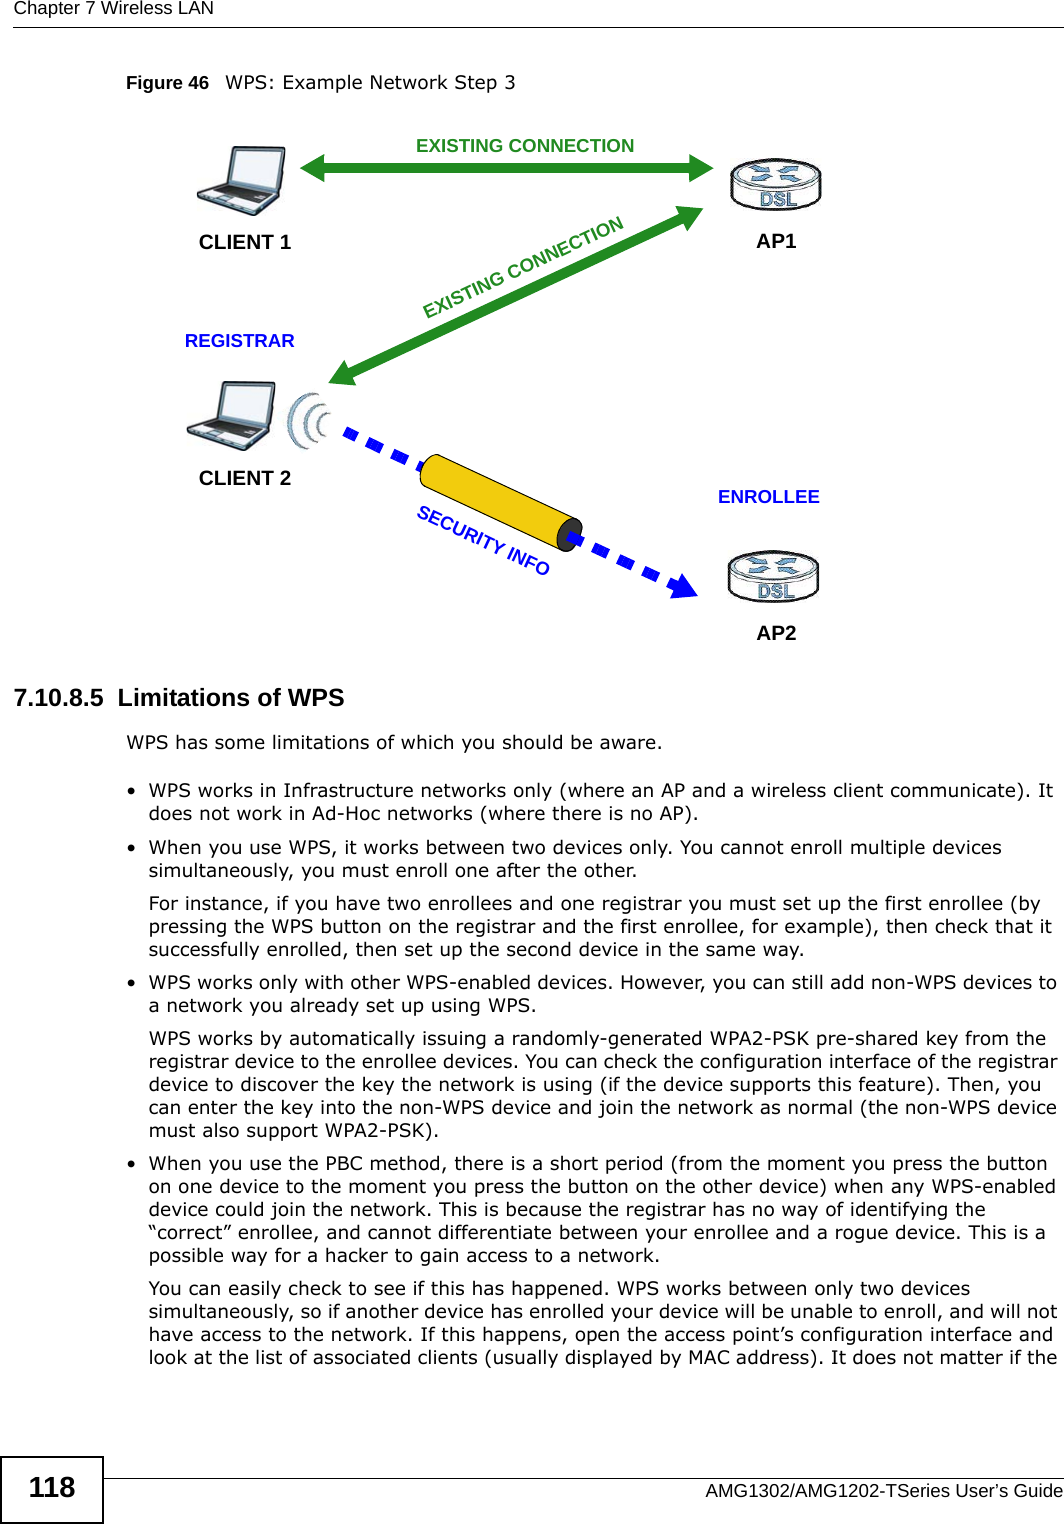
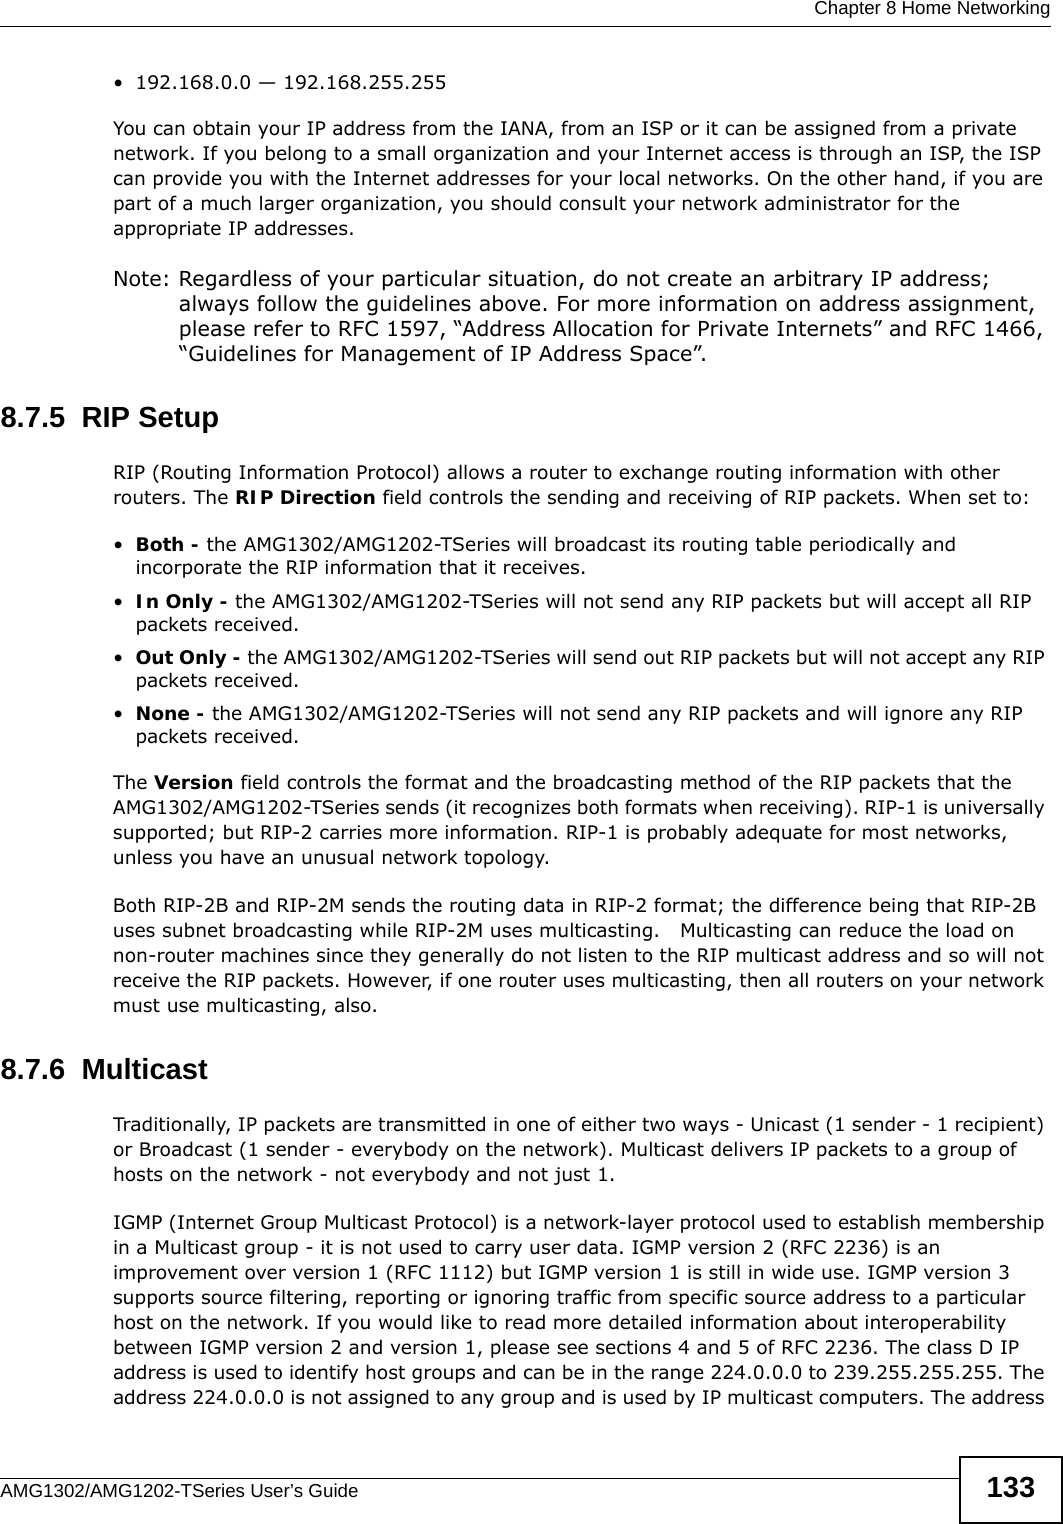
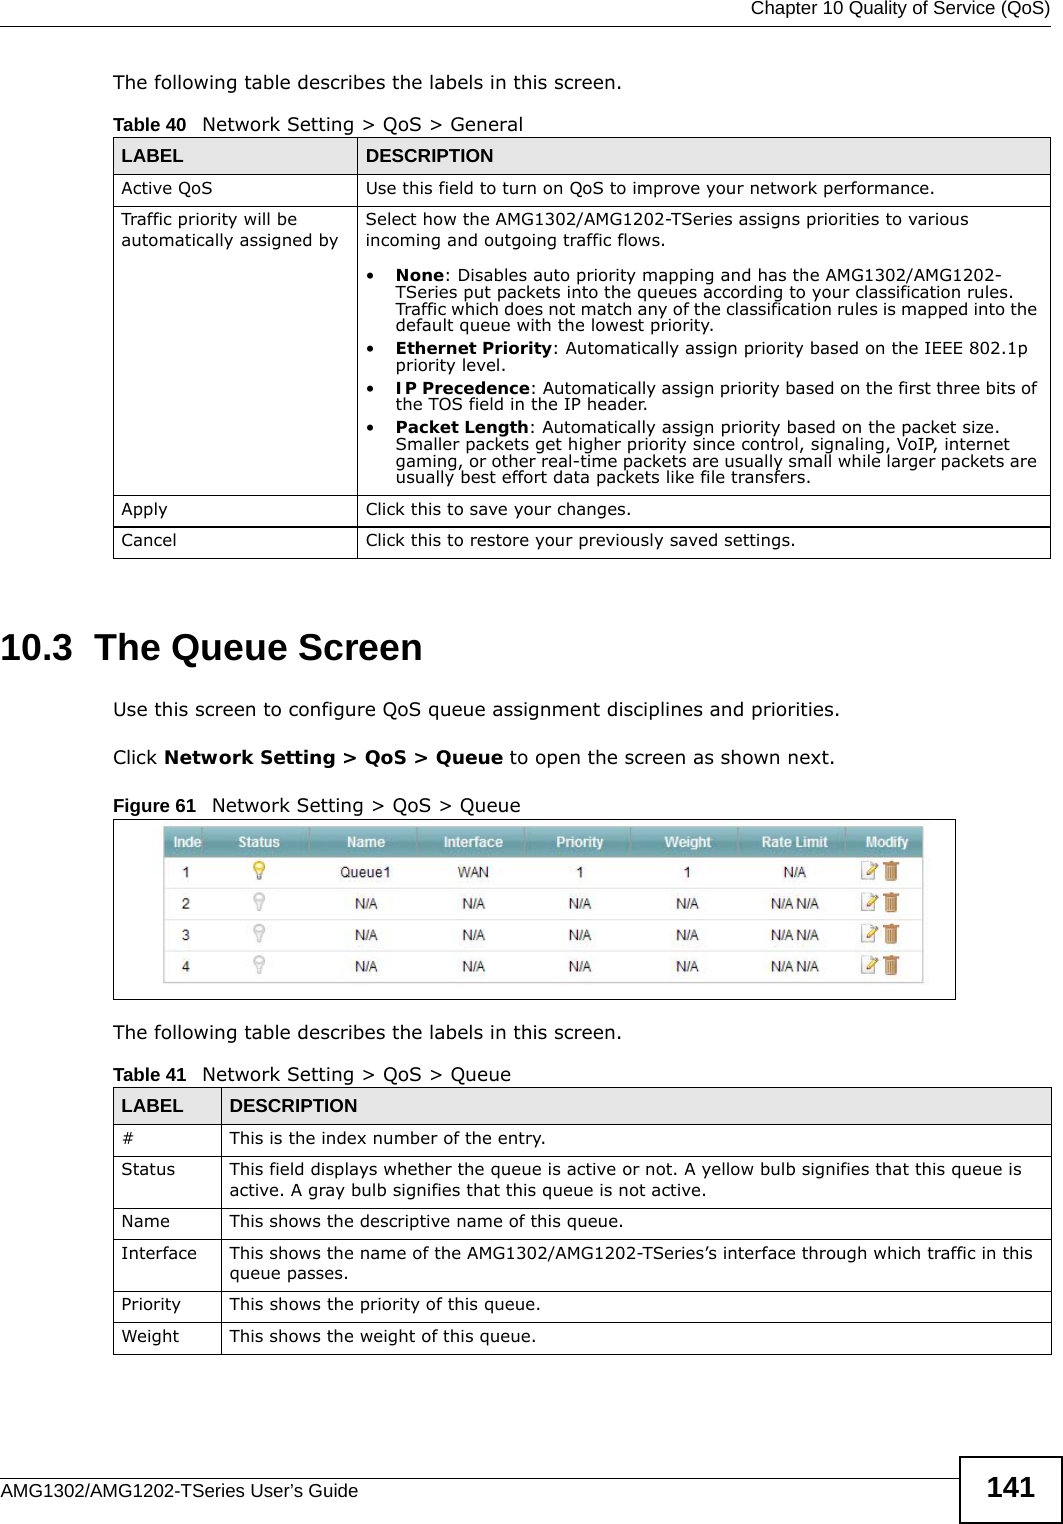
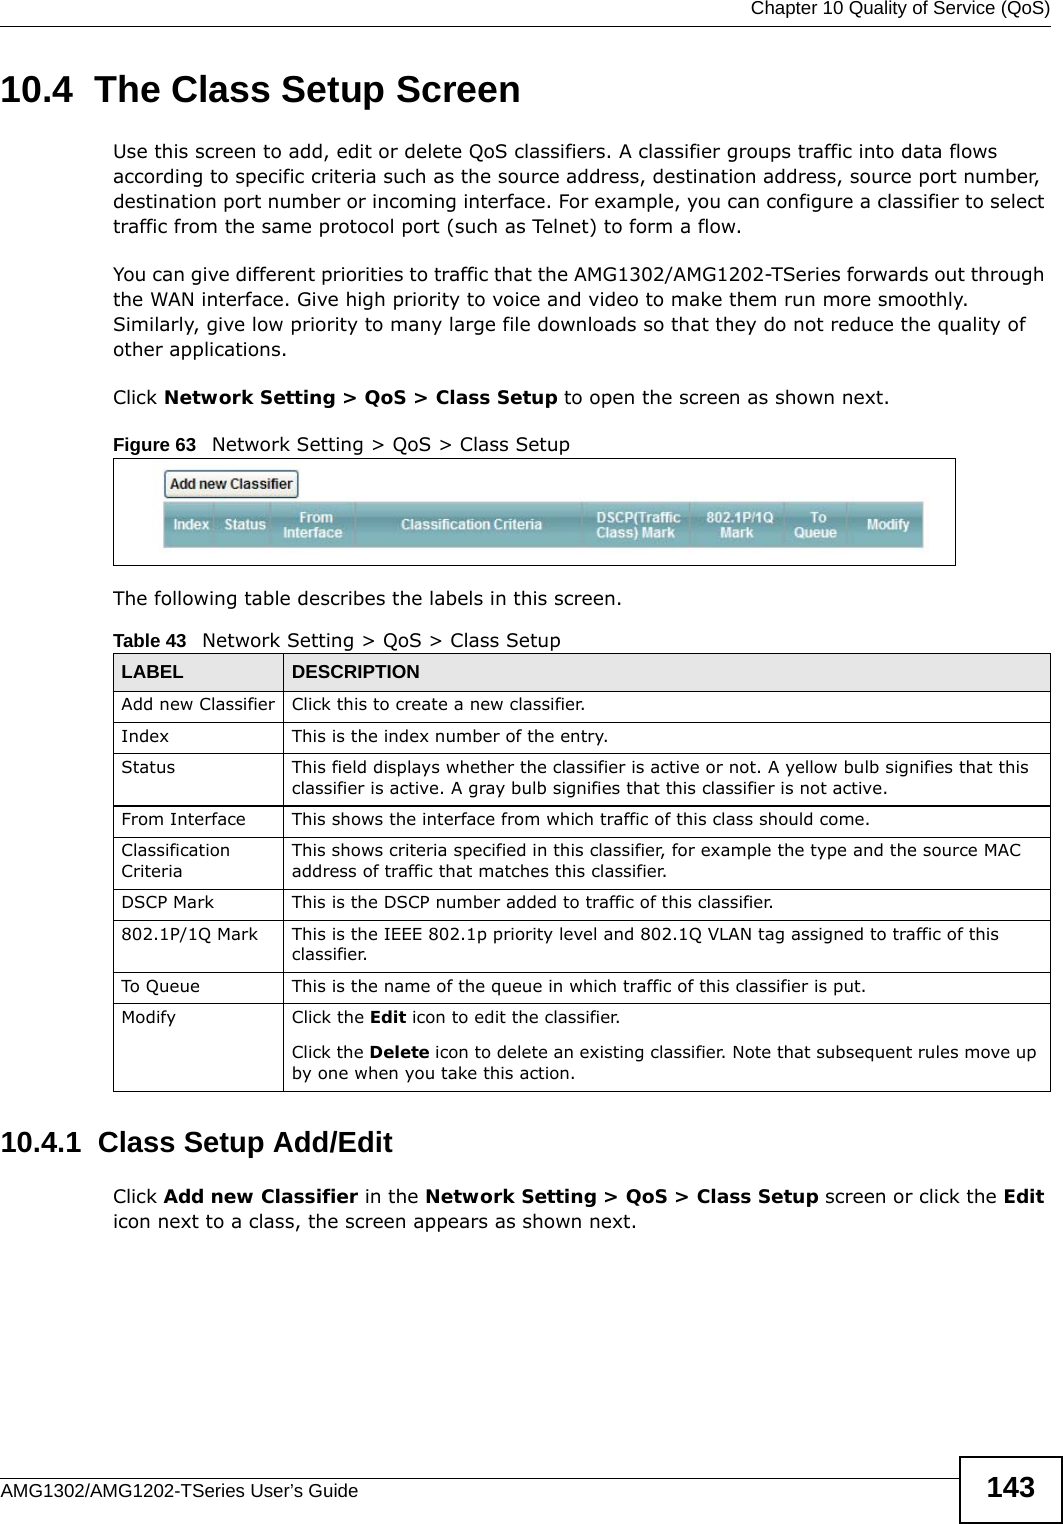
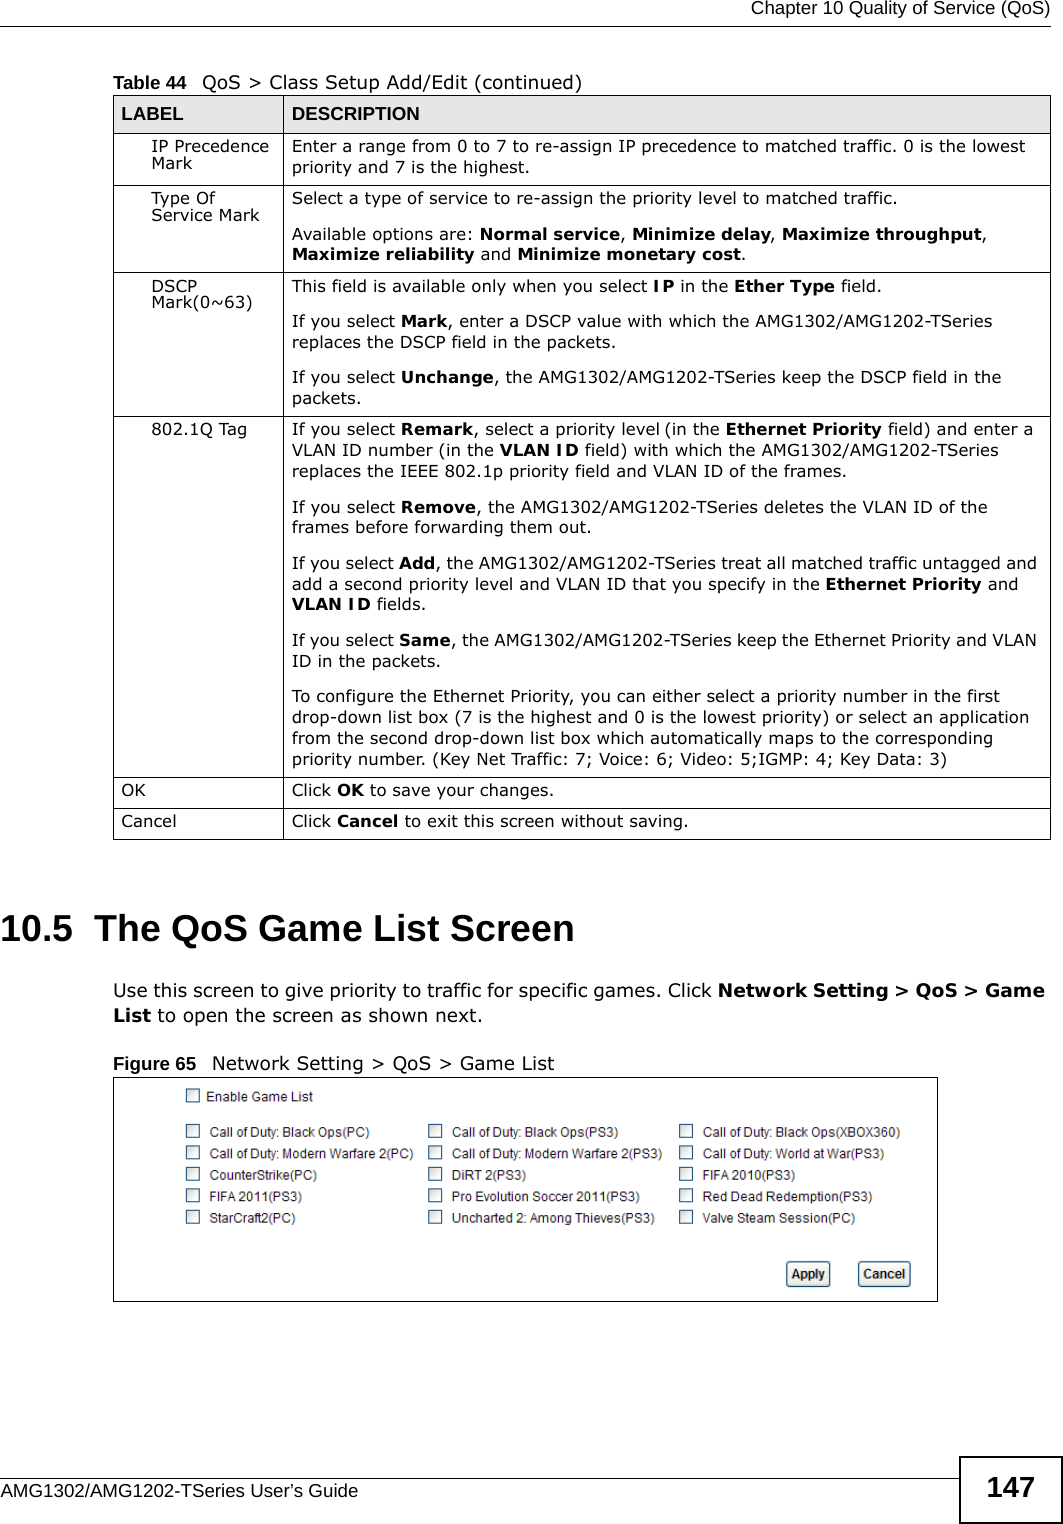
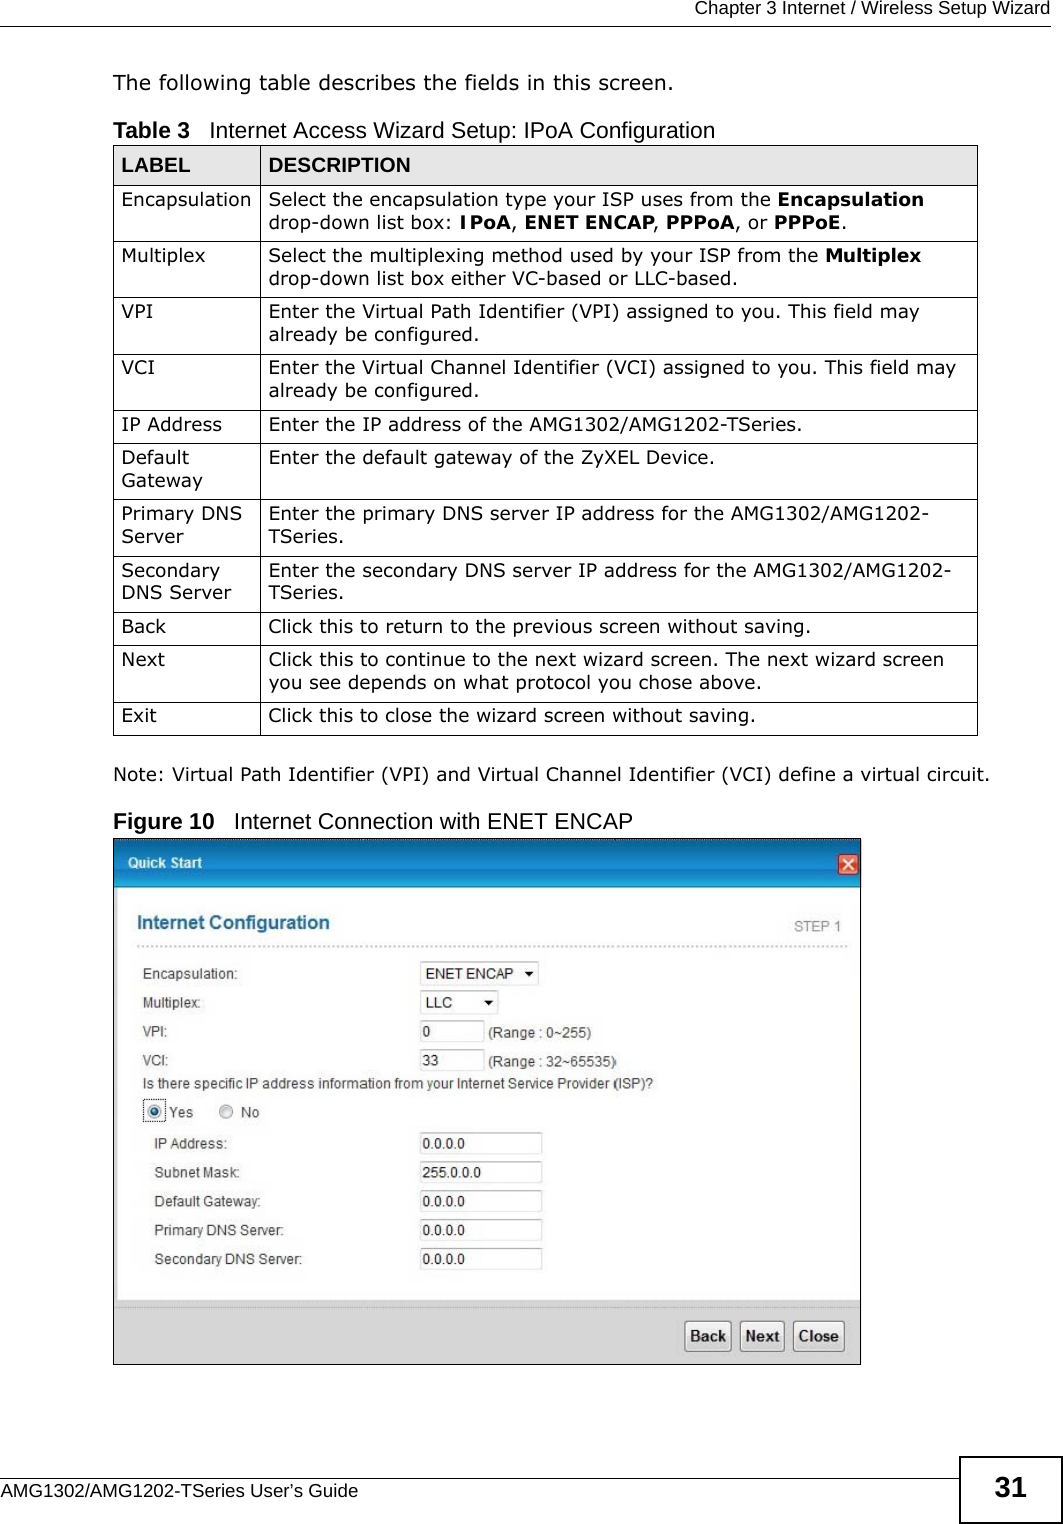
![Chapter 4 TutorialsAMG1302/AMG1202-TSeries User’s Guide 632Apply for a user account. This tutorial uses UserName1 and 12345 as the username and password.3Log into www.dyndns.org using your account.4Add a new DDNS host name. This tutorial uses the following settings as an example.•Hostname: zyxelrouter.dyndns.org•Service Type: Host with IP address• IP Address: Enter the WAN IP address that your AMG1302/AMG1202-TSeries is currently using. You can find the IP address on the AMG1302/AMG1202-TSeries’s Web Configurator Status page.Then you will need to configure the same account and host name on the AMG1302/AMG1202-TSeries later.4.11.2 Configuring DDNS on Your AMG1302/AMG1202-TSeriesConfigure the following settings in the Network Setting > Dynamic DNS screen.•Select Active Dynamic DNS.•Select www.dyndns.org in the Service Provider field.•Type zyxelrouter.dyndns.org in the Host Name field.• Enter the user name (UserName1) and password (12345).Click Apply.4.11.3 Testing the DDNS SettingNow you should be able to access the AMG1302/AMG1202-TSeries from the Internet. To test this:1Open a web browser on the computer (using the IP address a.b.c.d) that is connected to the Internet.2Type http://zyxelrouter.dyndns.org and press [Enter].3The AMG1302/AMG1202-TSeries’s login page should appear. You can then log into the AMG1302/AMG1202-TSeries and manage it.](https://usermanual.wiki/ZyXEL-Communications/AMG1202T10B.AMG1202-T10B-User-Guide-Part1-REV1/User-Guide-1970013-Page-63.png)