ZyXEL Communications FSG1100HN Wireless Active Fiber Router User Manual V 1
ZyXEL Communications Corporation Wireless Active Fiber Router V 1
User manual V.1
FSG1100HN
Wireless Active Fiber Router
Multiservice Home Gateway
with 802.11n Wireless
Firmware V1.00
Edition 3/6/2010
IP Address:
User Login:
http://192.168.1.1
User Name: admin
Password: 1234
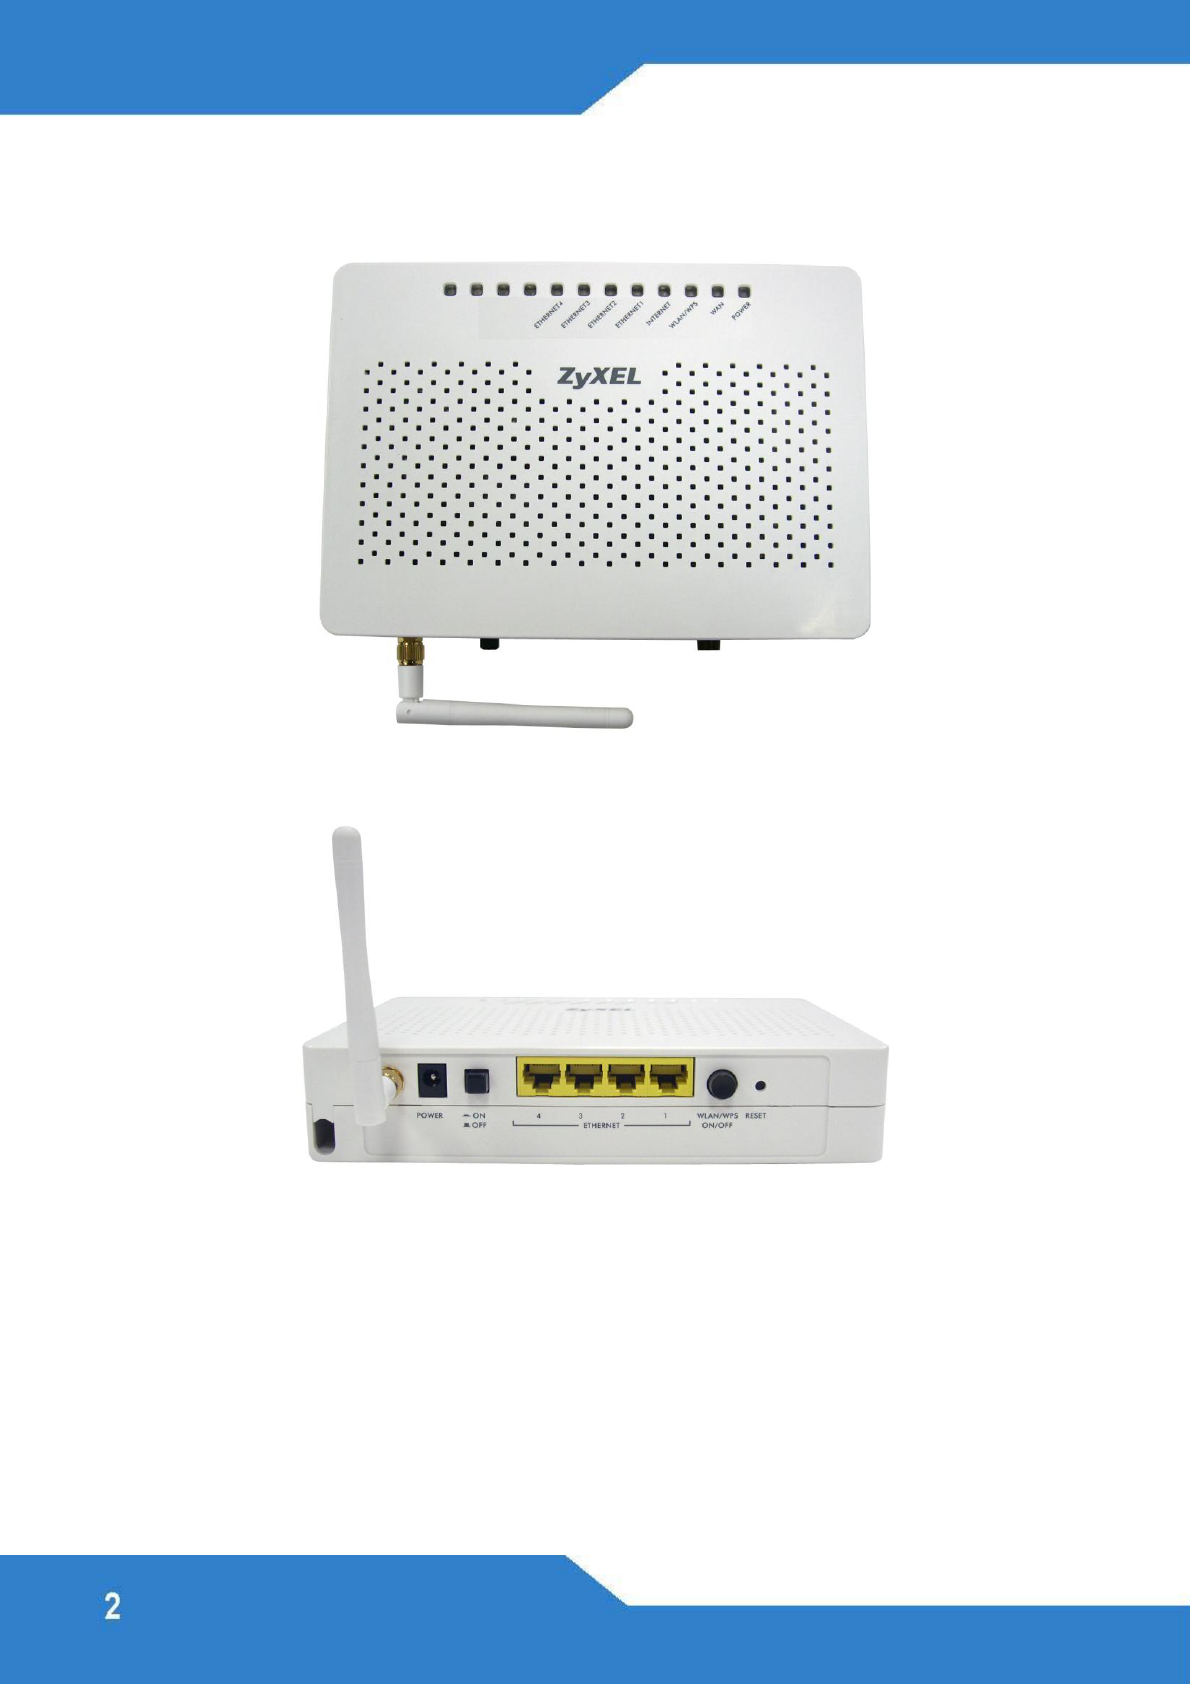
LED and Rear Panel
Overview
The FSG1100HN is a wireless router that lets you set up
both wired and wireless networks. Its built-in firewall is
enabled by default to protect your network.
The Quick Start Guide show you how to:
Mount the FSG1100HN on the Wall
Set Up a Wired Network with Internet Access
Set Up a Wireless Network with WPS
Wall-Mounting Instructions
Here have two ways to install FSG1100HN on a wall
a.) Wall-mounting Fixing
b.) Wall-mounting Hangging.
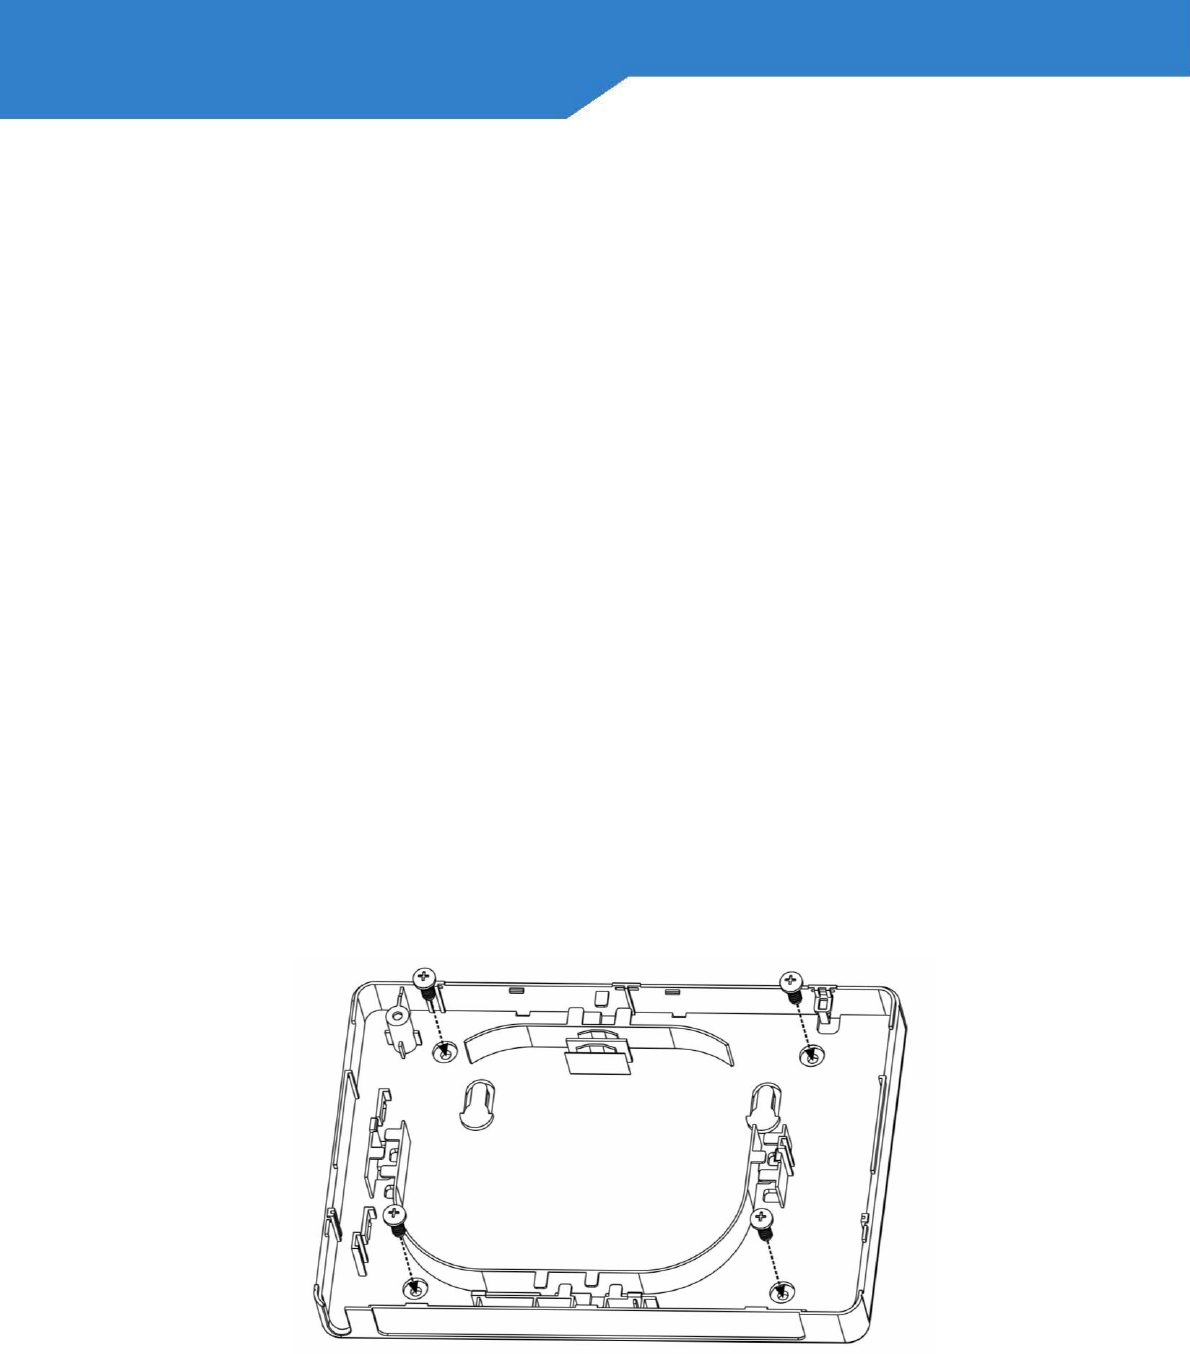
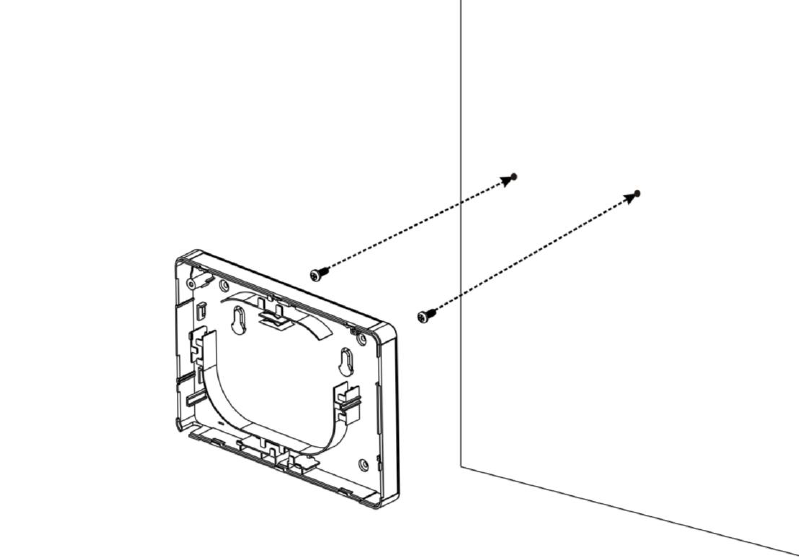
Do the following to “fix“ your FSG1100HN on a wall
1. Locate a high position on a wall that is free of
obstructions. Use a sturdy wall.
2. Drill four holes for the screws. Make sure the distance
between the centers of the holes matched
FSG1100HN.
3. Screw the screws with lower Case on the wall, as:
4. Coiling the Fiber Cables within the FSG1100HN, as:
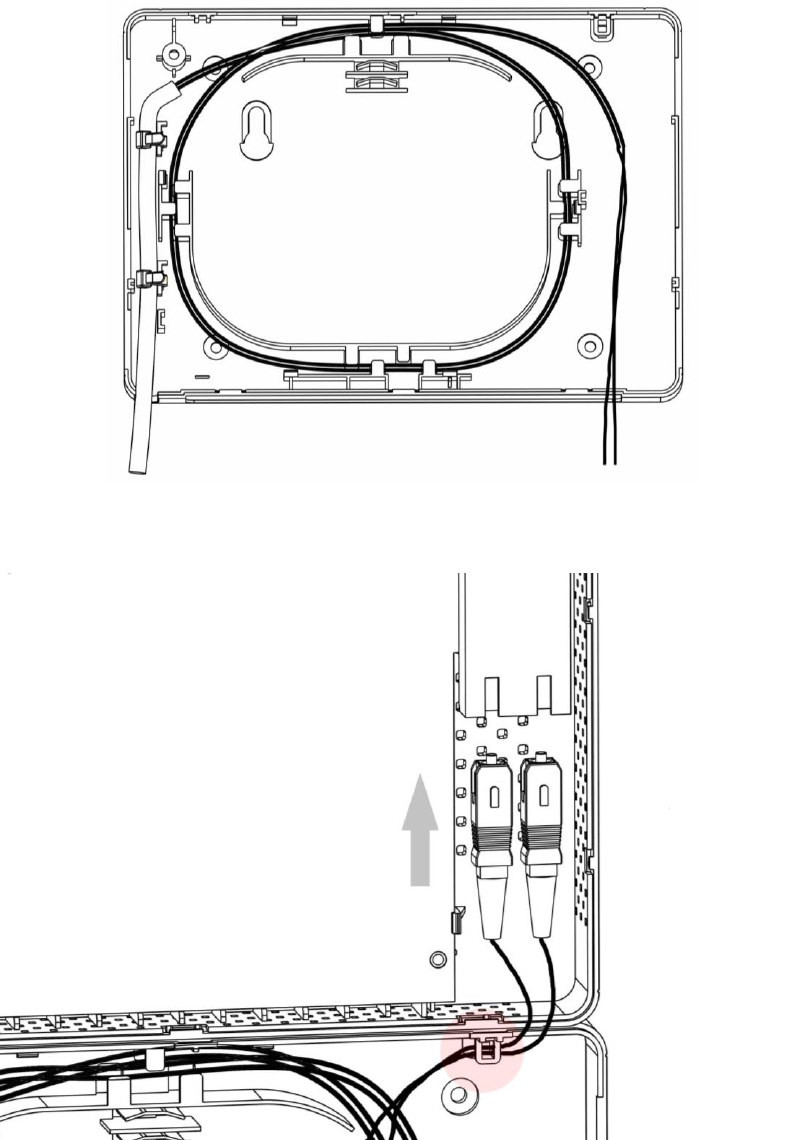
5. Plug-in Fiber on module. Make sure the Fiber Cable
has coiled the hole as figure showing:
6. Put the Mylar on the Fiber tray to prevent fiber coil
derailment
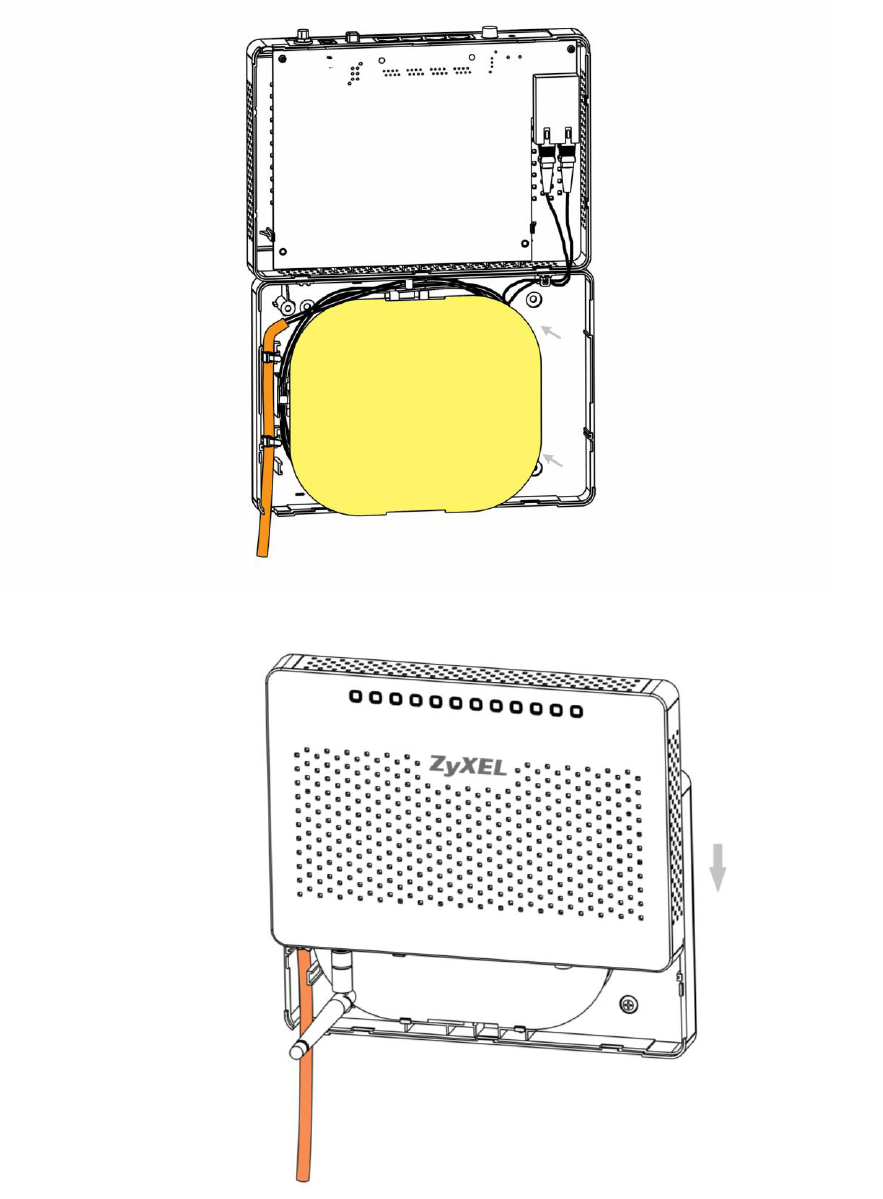
7. Slide the Upper Case in:
8. For Hagging, don’t screw the screws all the way into
the wall. Leave a small gap of about 0.5cm between
the heads of the screws and the wall. Make sure the
screws are snugly fastened to the wall. They need to
hold the weight of the FSG1100HN with connection
cables.
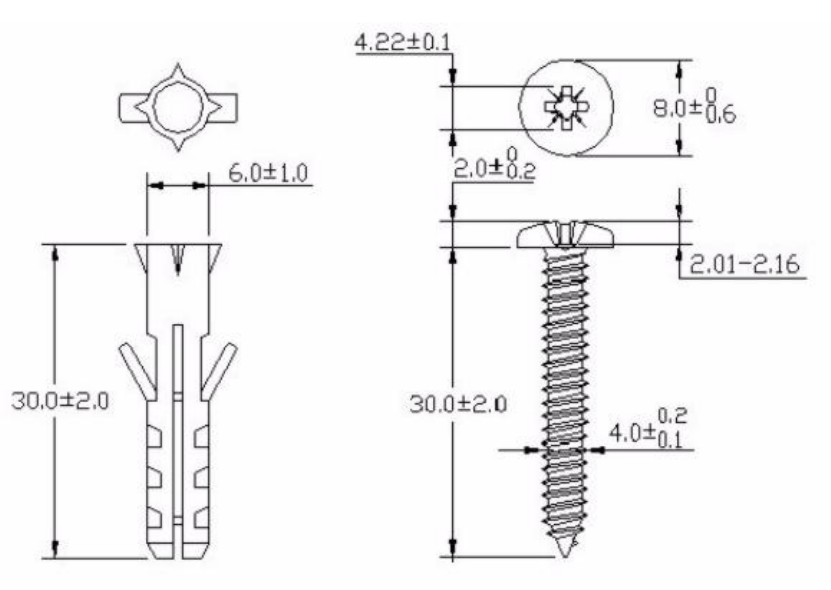
The following are dimensions of an M4 tap screw and
masonry plug used for wall mounting. All measurements
are in millimeters (mm).
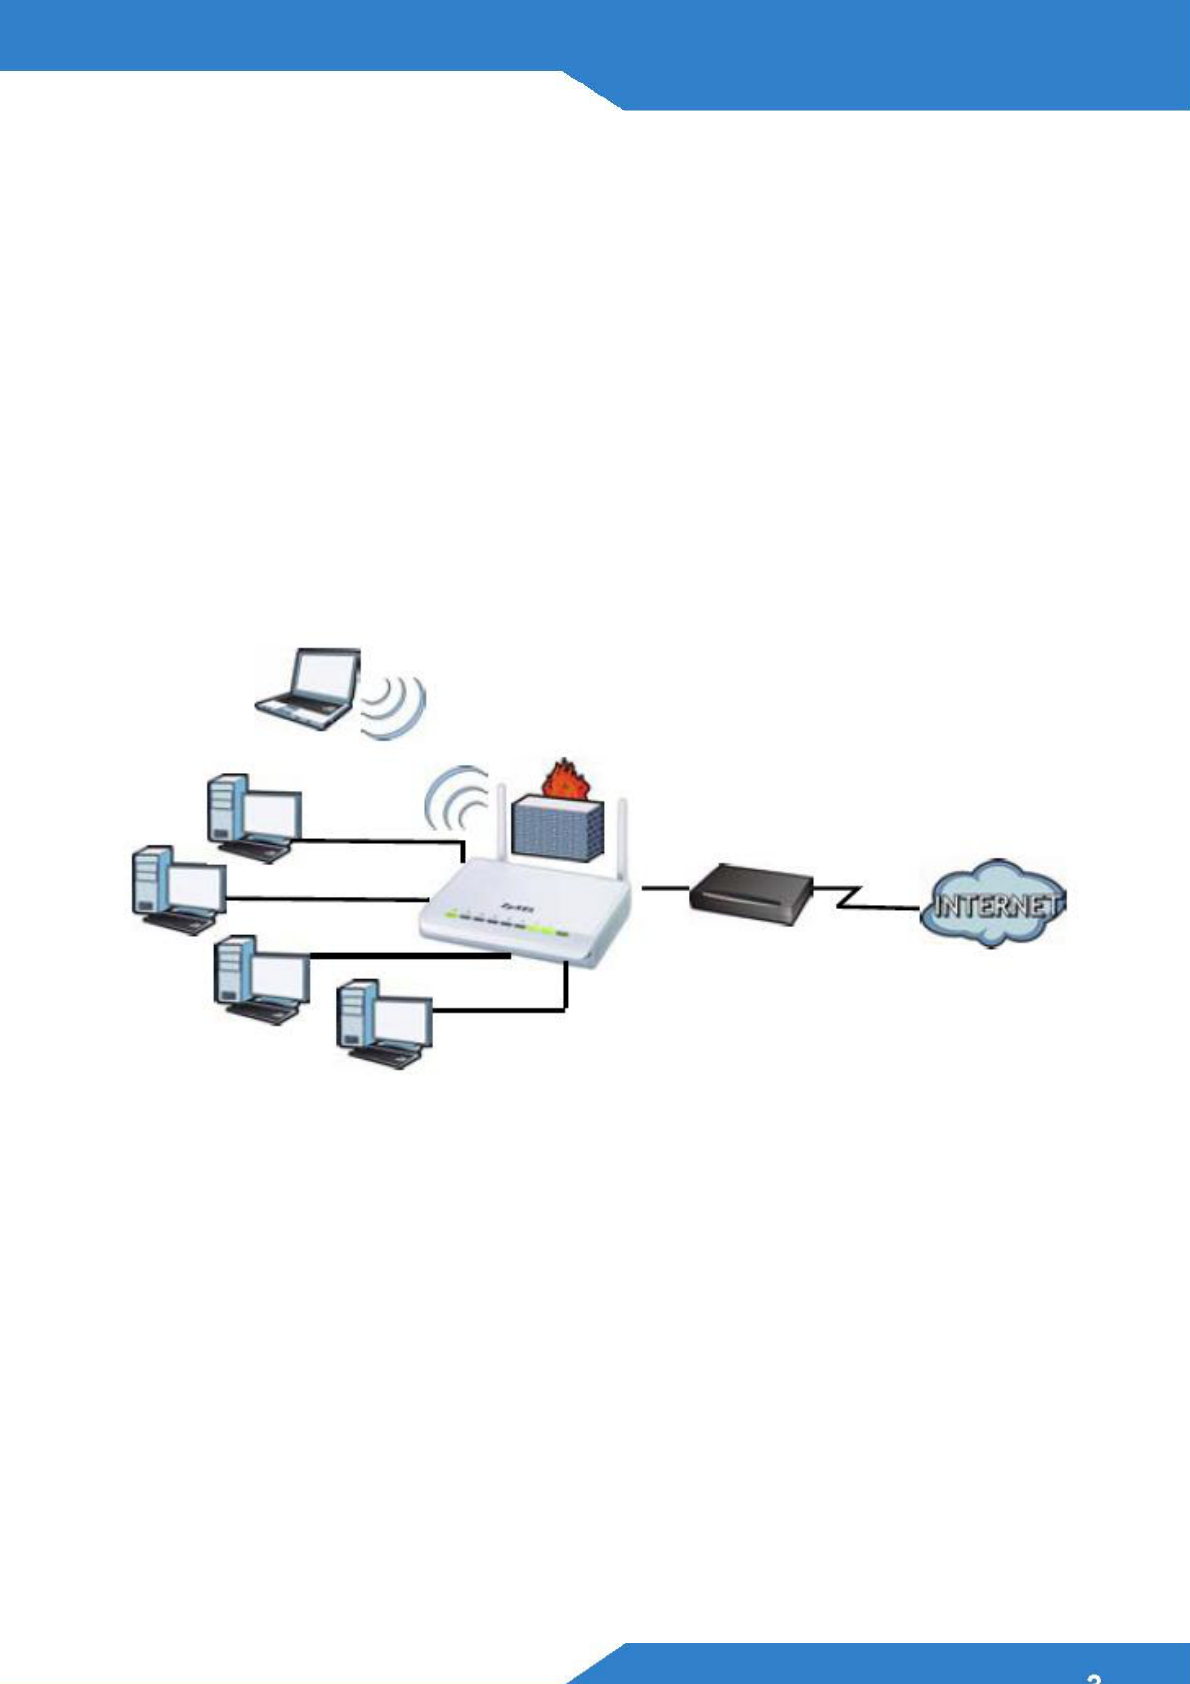
Set Up A Wired Network
with Internet Access
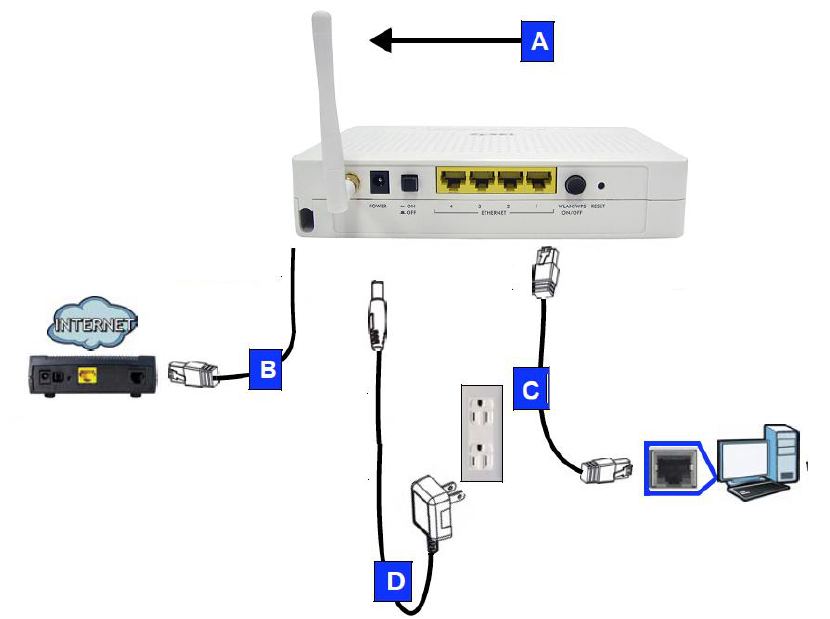
1. Make the following hardware connections to your
FSG1100HN:
Connect the antennas (A) to the antenna sockets,
ensuring they are screwed in firmly and angled
upwards.
Connect the WAN port (B) on your FSG1100HN to the
Ethernet port on the device with which you are

accessing the Internet (for example, a modem) using
the cable that came with your modem.
Connect the Ethernet port on your computer to a LAN
port (C) on the FSG1100HN using an Ethernet cable.
Use the power adapter (D) from the package to
connect the POWER socket to an appropriate power
source.
2. Check your Internet connection. Open a web browser
on your computer and enter www.zyxel.com in the
address bar.
If you cannot access the Internet, restart your
FSG1100HN.
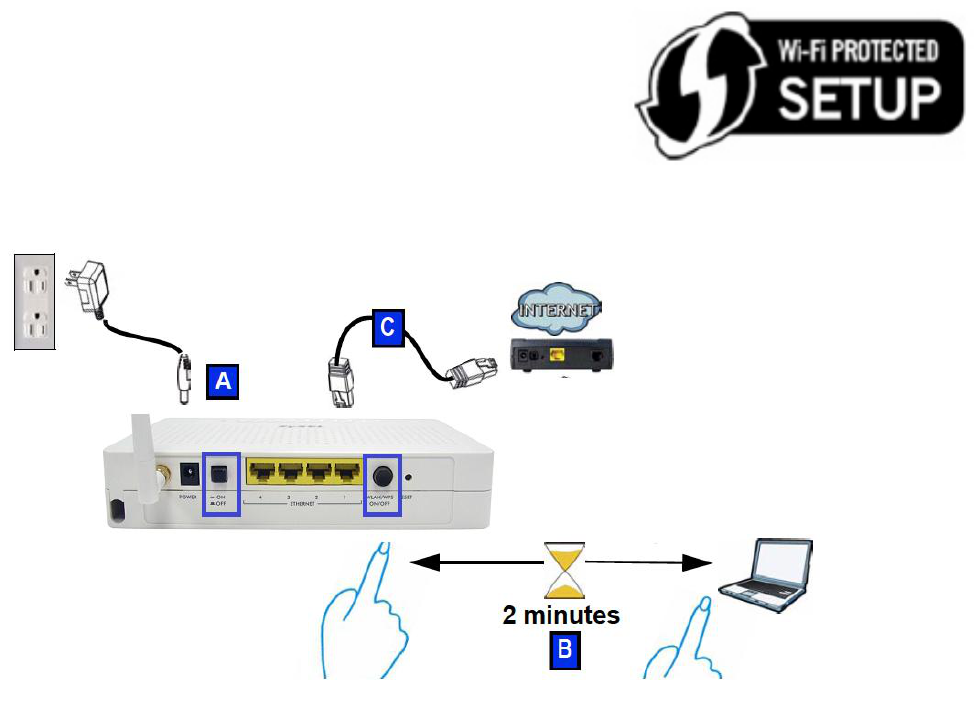
Set Up Wireless Network with
WPS
Use Wi-Fi Protected Setup (WPS) to let wireless devices,
such as notebooks and computers, securely access the
FSG1100HN wirelessly.
Check if your wireless device has the
WPS logo and follow these steps to
set up your wireless network using
WPS.
1. Make sure your FSG1100HN is turned on (A). Place
your wireless device within range of the FSG1100HN.

2. Enable wireless on the FSG1100HN by Wireless
holding the button longer 1 sec (B).
3. Press the WPS button on the FSG1100HN and your
notebook (B). It doesn’t matter which button is
pressed first. You must press the second button
within two minutes of pressing the first one.
The WPS LED on the FSG1100HN blinks with
Orange during the WPS process, then shines stadily
when the WPS process is finished.
If your WPS connection is successful, you should
now be able to access the FSG1100HN.
4. Connect the WAN port (C) on your FSG1100HN to
your broadband modem. You are now ready to
connect to the Internet wirelessly through your
FSG1100HN.
If your wired Internet connection is fine but your
wireless connection is not, repeat step 3. If WPS
is not working or your wireless device does not
support WPS, go to the next section.

NOTE: This equipment has been tested and found to comply with the limits for a Class B digital device, pursuant to Part 15 of the FCC Rules.
These limits are designed to provide reasonable protection against harmful interference in a residential installation. This equipment generates,
uses and can radiate radio frequency energy and, if not installed and used in accordance with the instructions, may cause harmful interference to
radio communications. The internal wireless module shall not be operated in channel 12 and 13.
However, there is no guarantee that interference will not occur in a particular installation. If this equipment does cause harmful interference to
radio or television reception, which can be determined by turning the equipment off and on, the user is encouraged to try to correct the
interference by one or more of the following measures:
Reorient or relocate the receiving antenna.
Increase the separation between the equipment and receiver.
Connect the equipment into an outlet on a circuit different from that to which the receiver is needed.
Consult the dealer or an experienced radio/TV technician for help.
CAUTION:
1. To comply with FCC RF exposure compliance requirements, a separation distance of at least 20 cm must be maintained between the
antenna of this device and all persons.
2. This Transmitter must not be co-located or operating in conjunction with any other antenna or transmitter
Warning: Changes or modifications to this unit not expressly approved by the party responsible for compliance could void the
user authority to operate the equipment.