ZyXEL Communications G620 802.11g Wireless MiniPCI Card User Manual SpeedStream Wireless
ZyXEL Communications Corporation 802.11g Wireless MiniPCI Card SpeedStream Wireless
UserManual.wiki
>
ZyXEL Communications
>
G620 User Manual
Manual
Navigation menu
Upload a User Manual
Namespaces
Wiki Guide
HTML
PDF
Info
Views
User Manual
Discussion / Help
Navigation
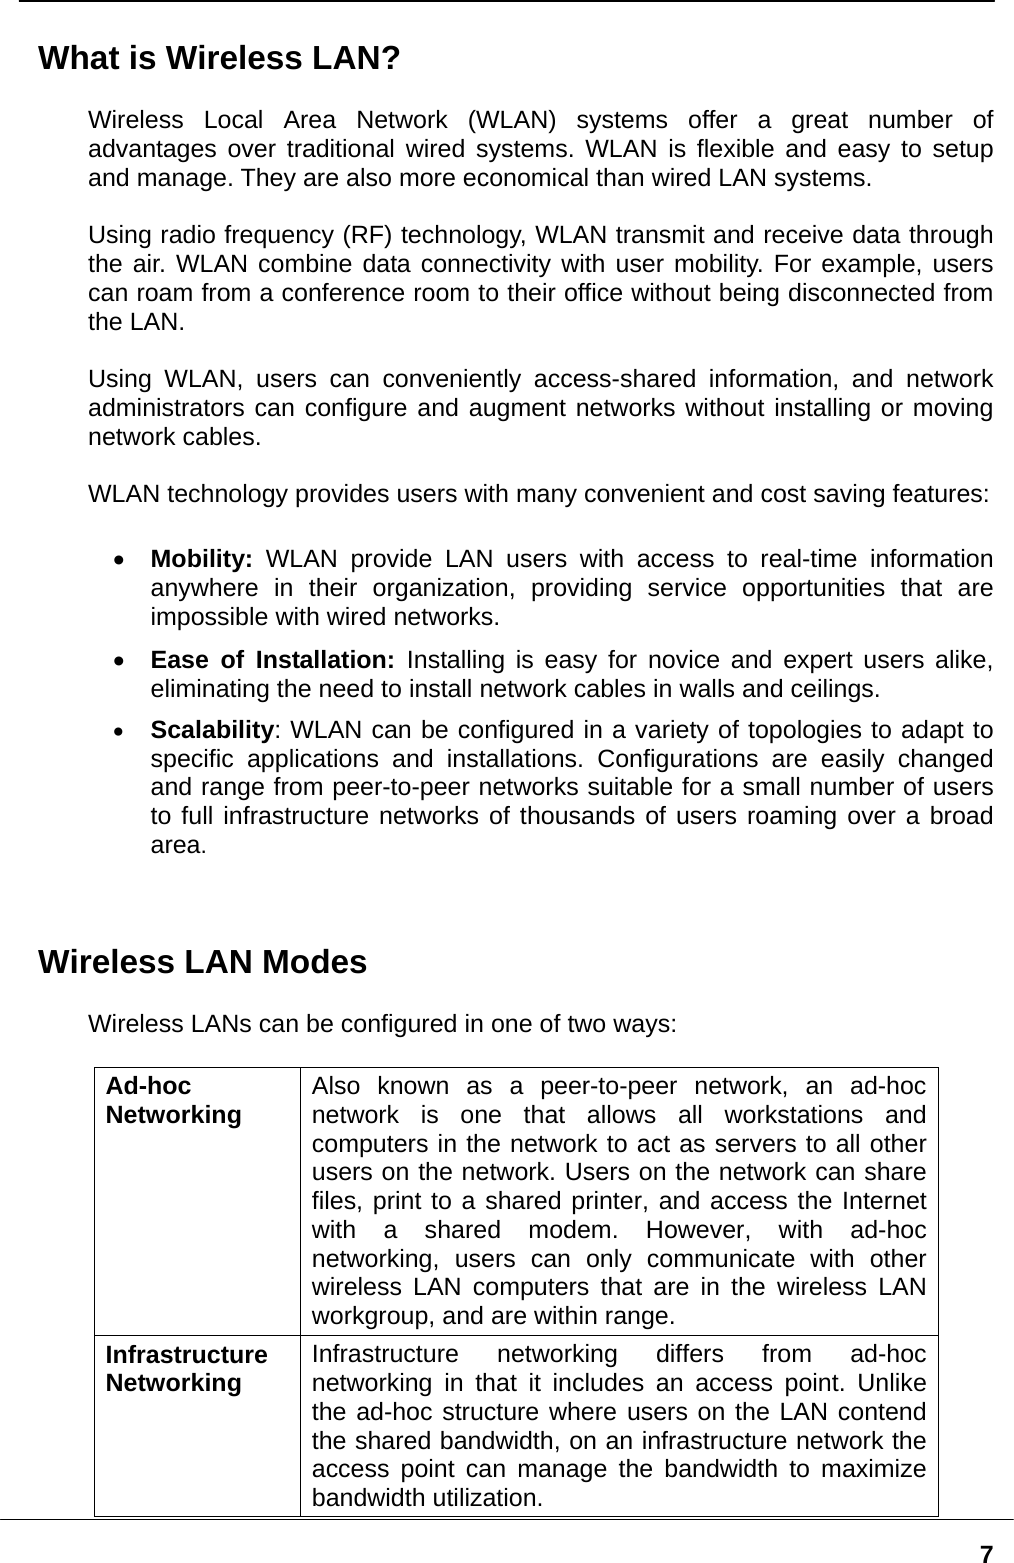
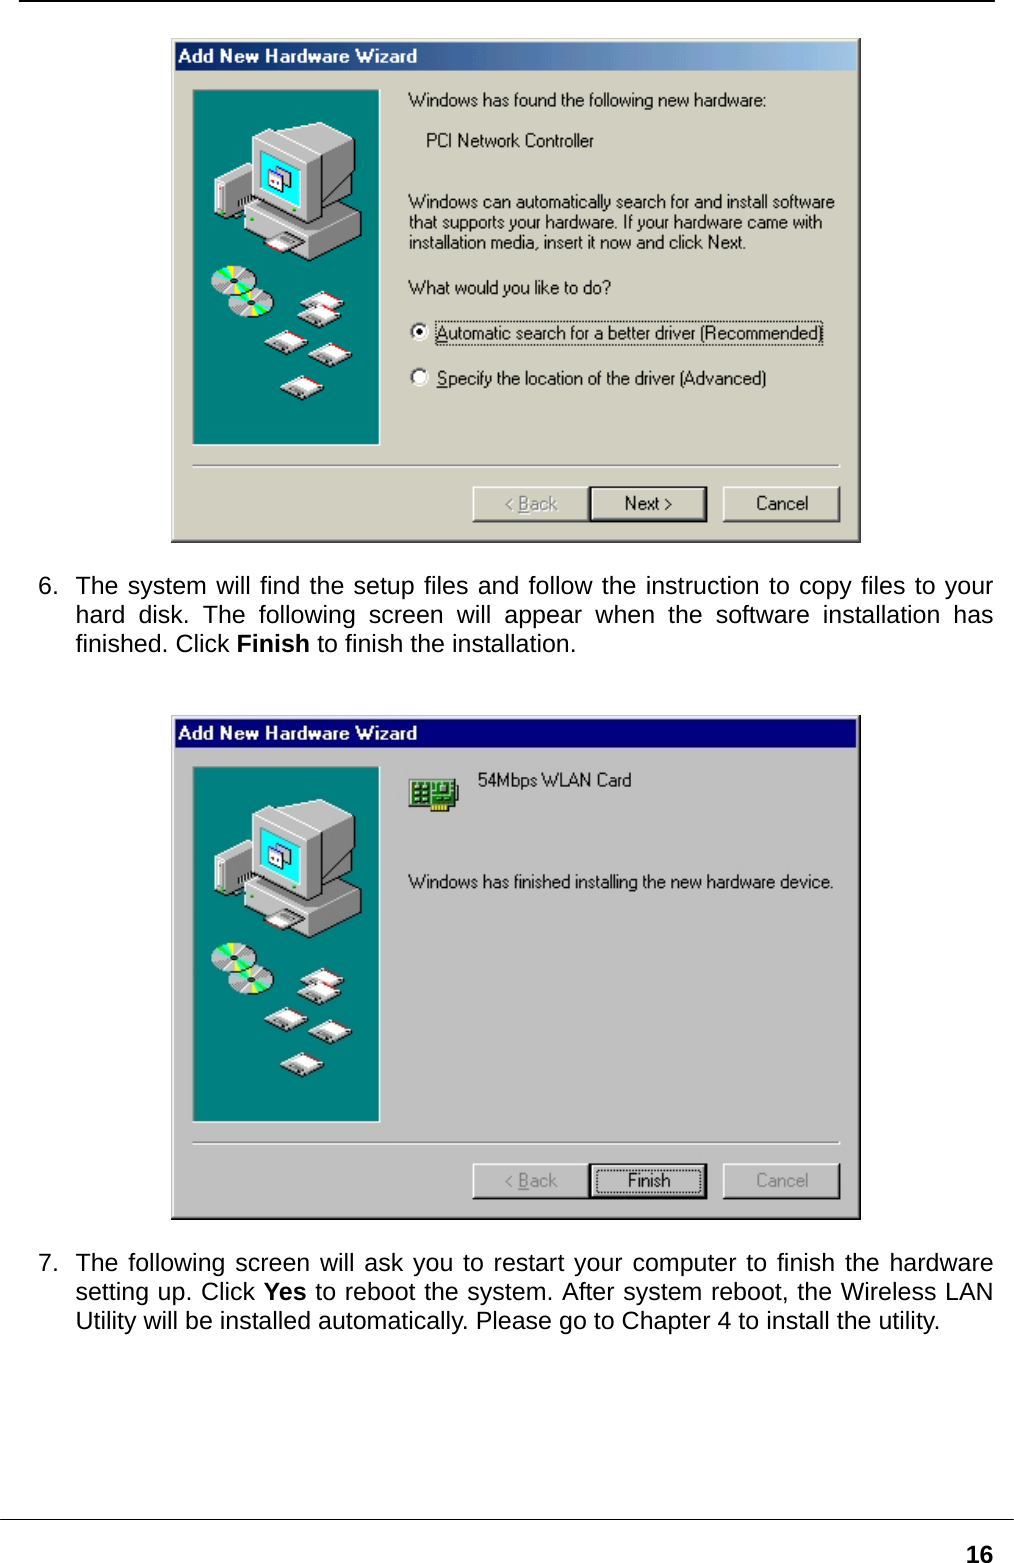
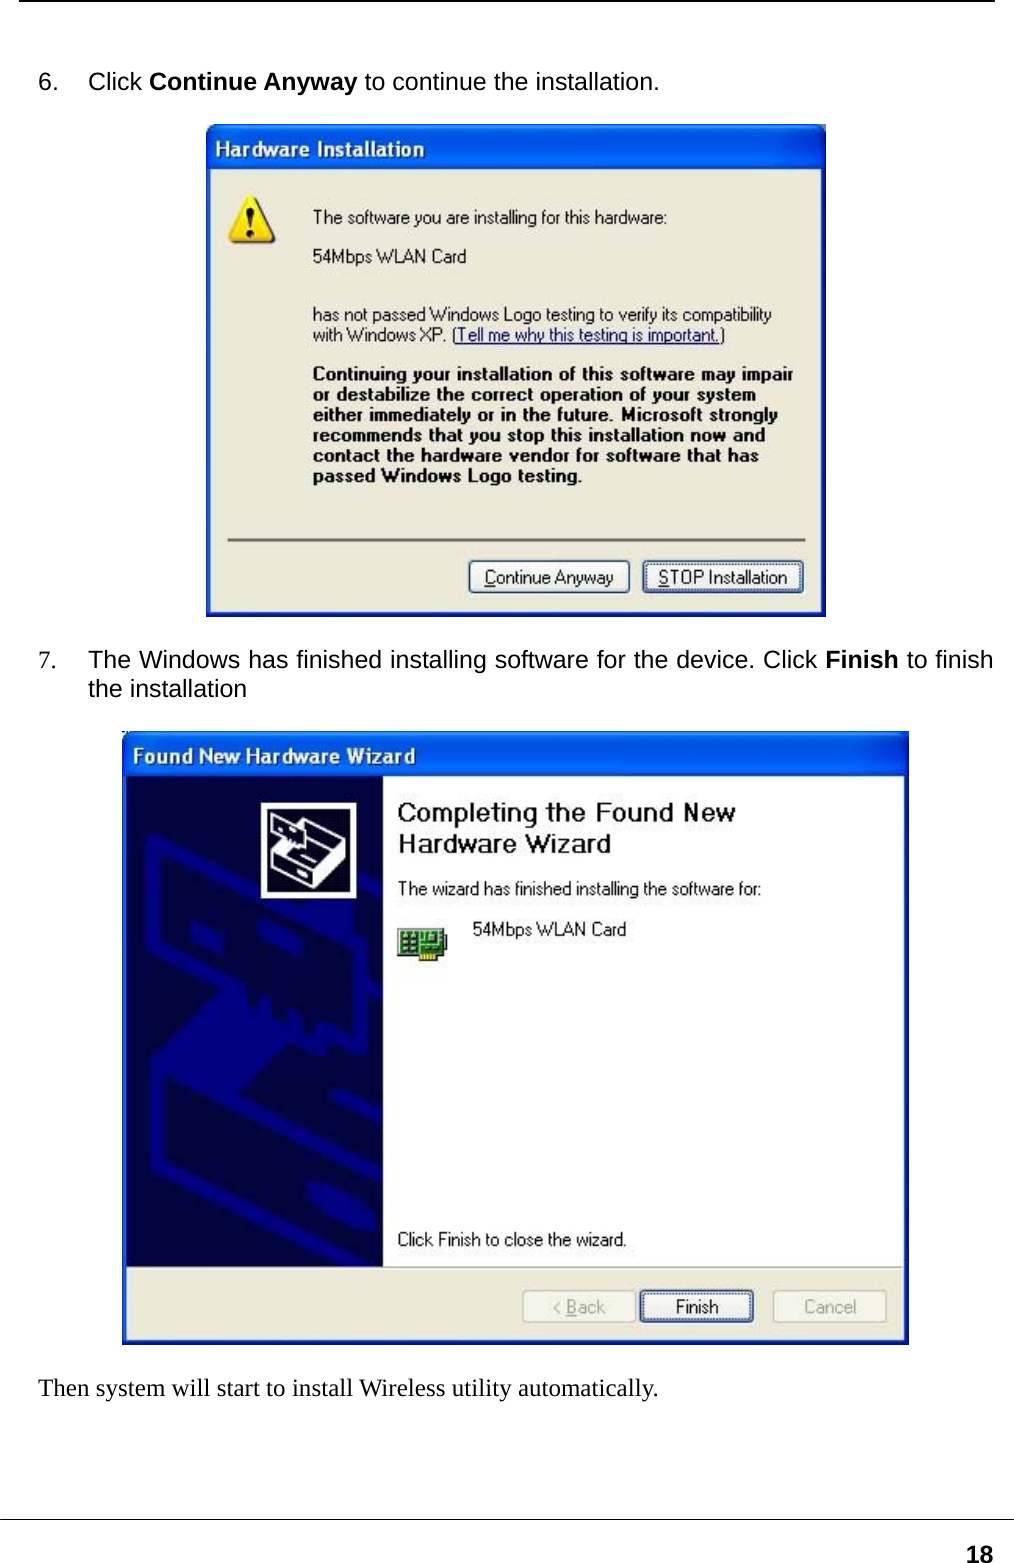
![17 Note! In most cases, Windows will automatically copy all of the files needed for networking. If Windows asks you for the files and prompts you to input the path to the files. Follow the instructions on your screen, and then click OK to continue. Driver installation for Windows XP Follow the steps below to install the MiniPCI Wireless LAN Card drivers for Windows XP. 1. Insert the driver CD to your CD-ROM and turn off notebook. 2. Release the screws and open the miniPCI slot cover (It should located on the back of your notebook) carefully. 3. Insert the MiniPCI Wireless LAN Card to miniPCI slot of notebook securely. (Refer to Chapter 2 – Hardware installation.) 4. Turn on your notebook. 5. After Windows XP detects the miniPCI Wireless LAN Card, the Found New Hardware Wizard window appears. Select Install the software automatically [Recommended] and insert the driver CD-ROM into CD-ROM drive and click Next to continue.](https://usermanual.wiki/ZyXEL-Communications/G620/User-Guide-594165-Page-17.png)