ZyXEL Communications MAX206M1R WiMax MIMO CPE User Manual Quick Start Guide
ZyXEL Communications Corporation WiMax MIMO CPE Quick Start Guide
UserManual.wiki
>
ZyXEL Communications
>
MAX206M1R User Manual
>
User Manual 1
Contents
1.
User Manual 1
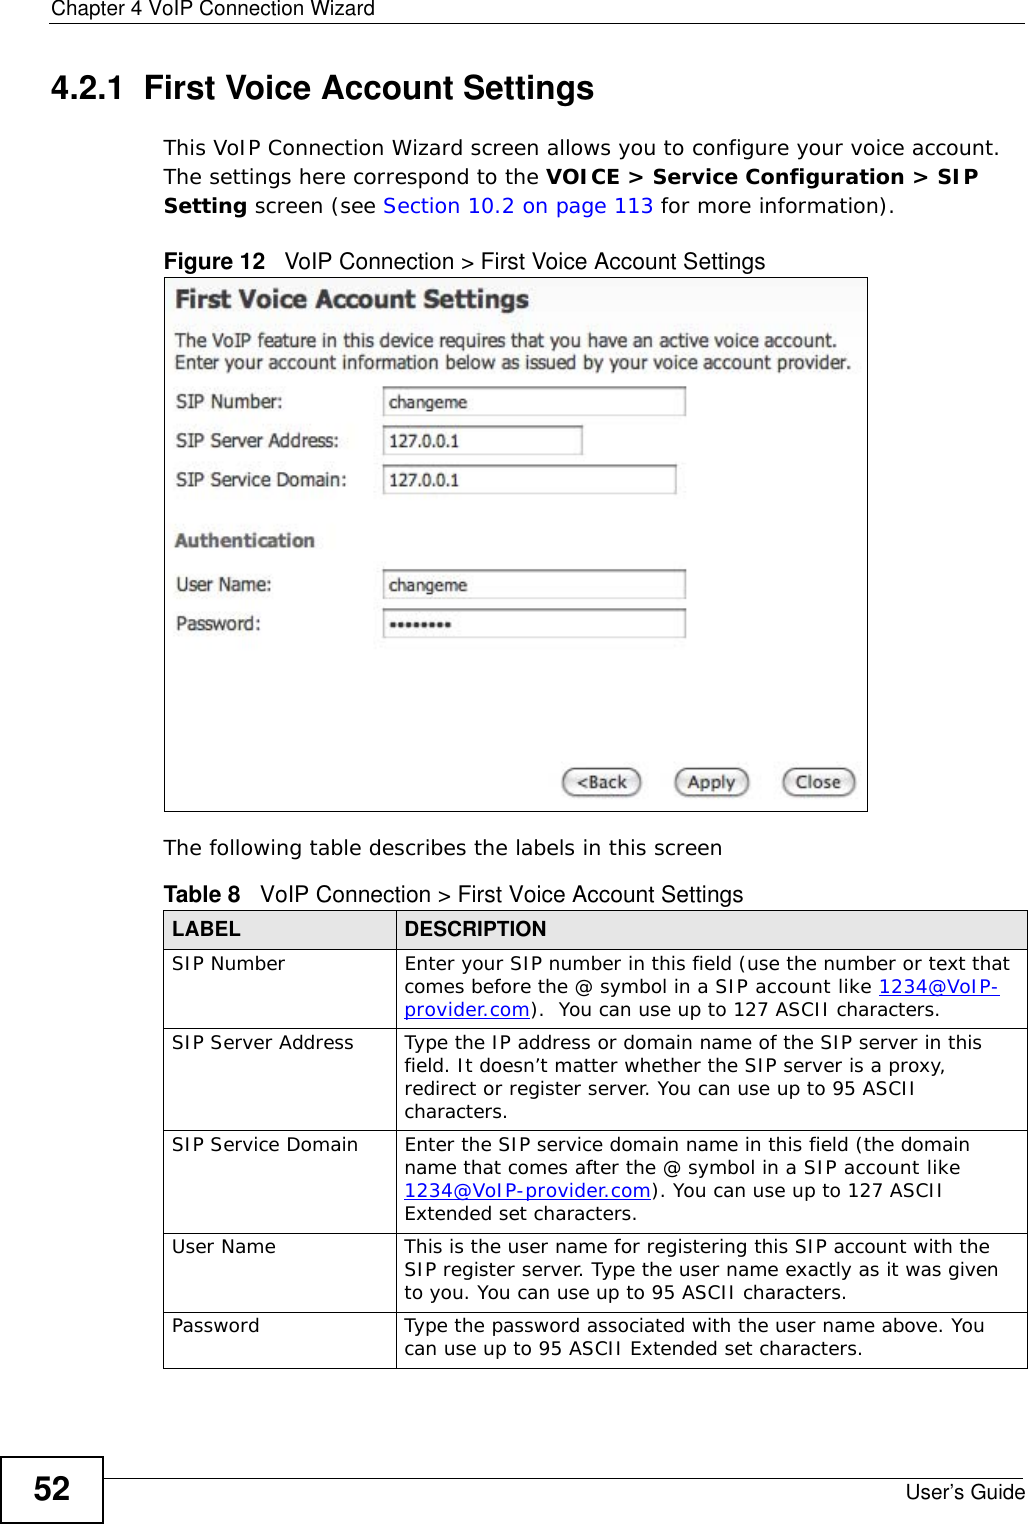
2.
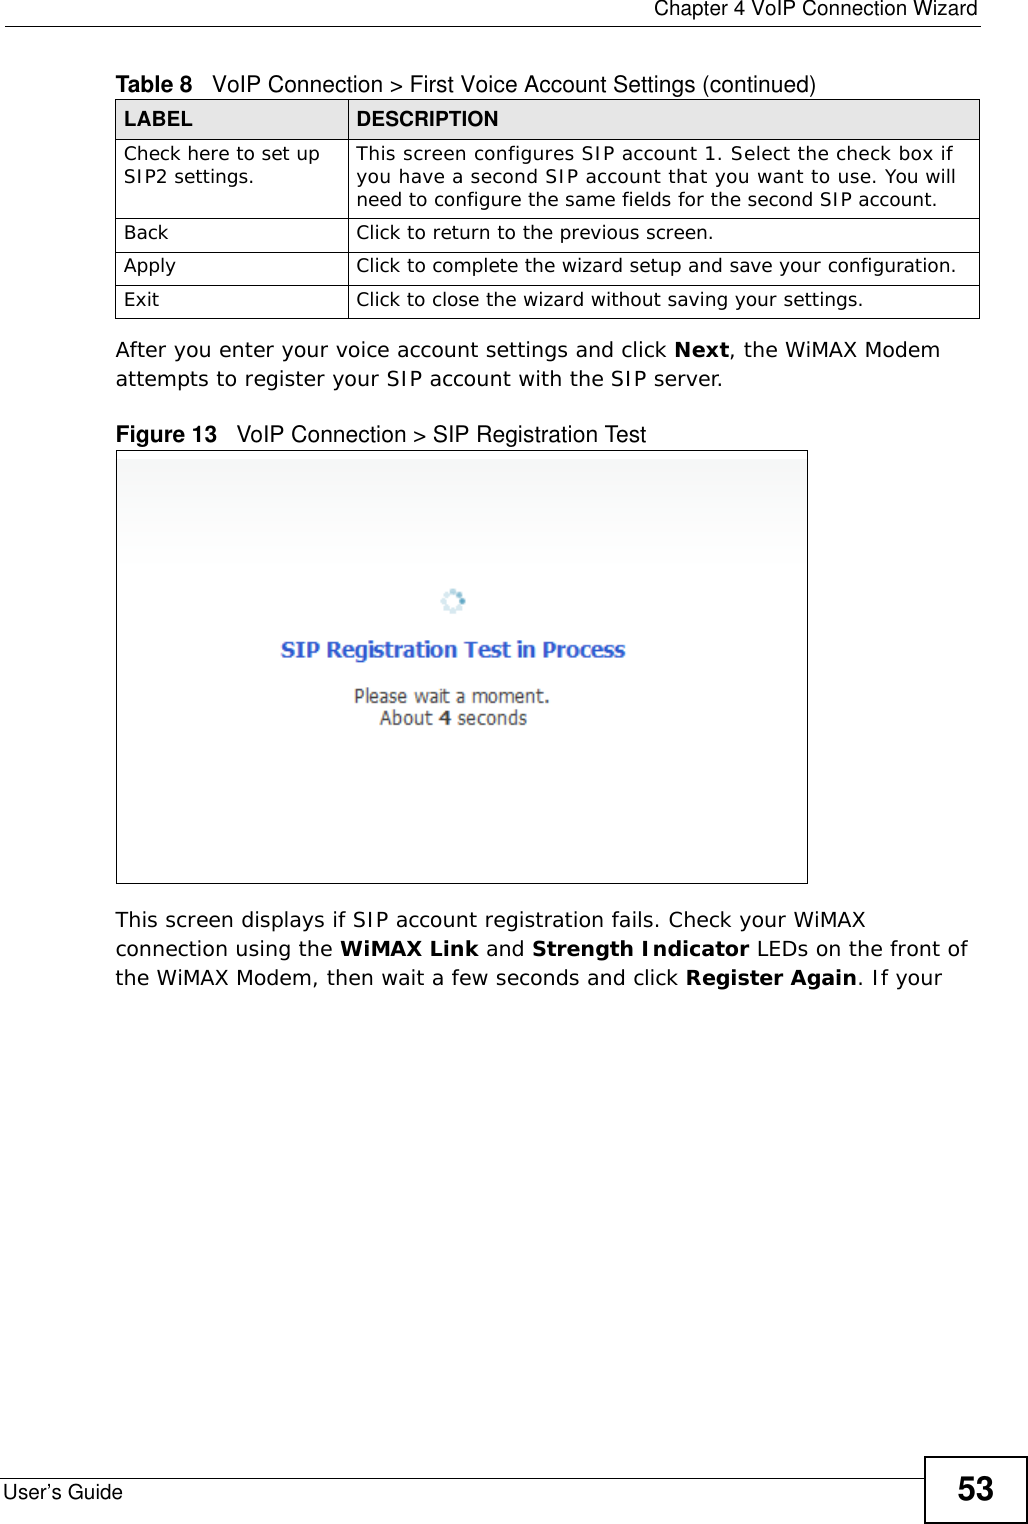
User Manual 2
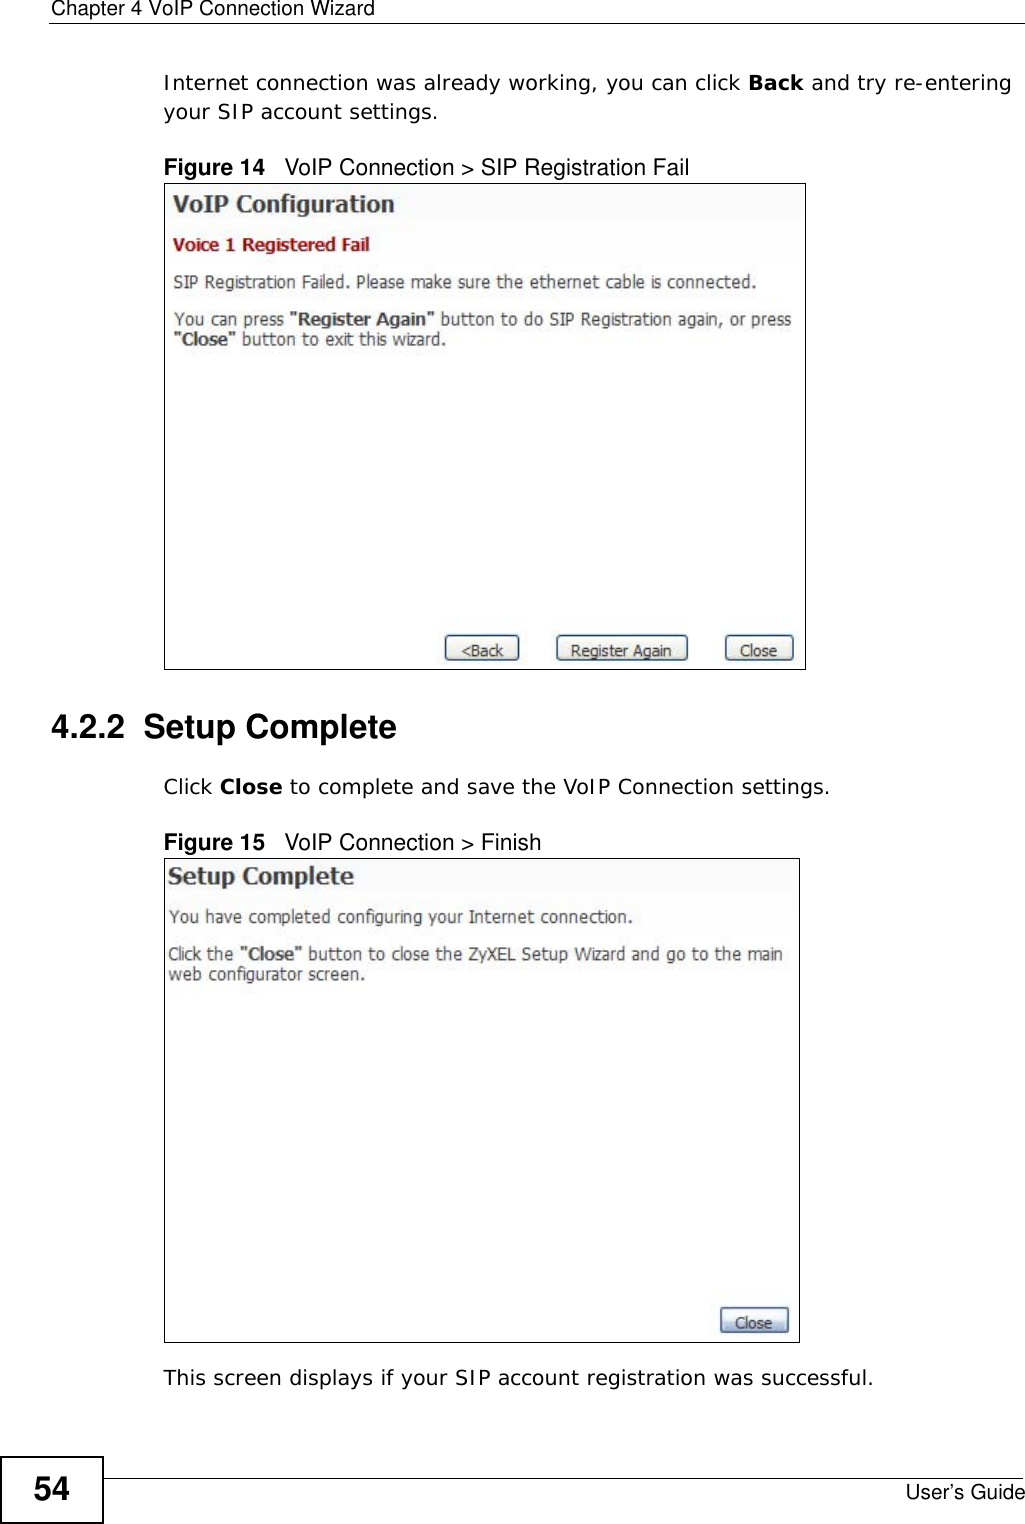
User Manual 1
Navigation menu
Upload a User Manual
Namespaces
Wiki Guide
HTML
PDF
Info
Views
User Manual
Discussion / Help
Navigation
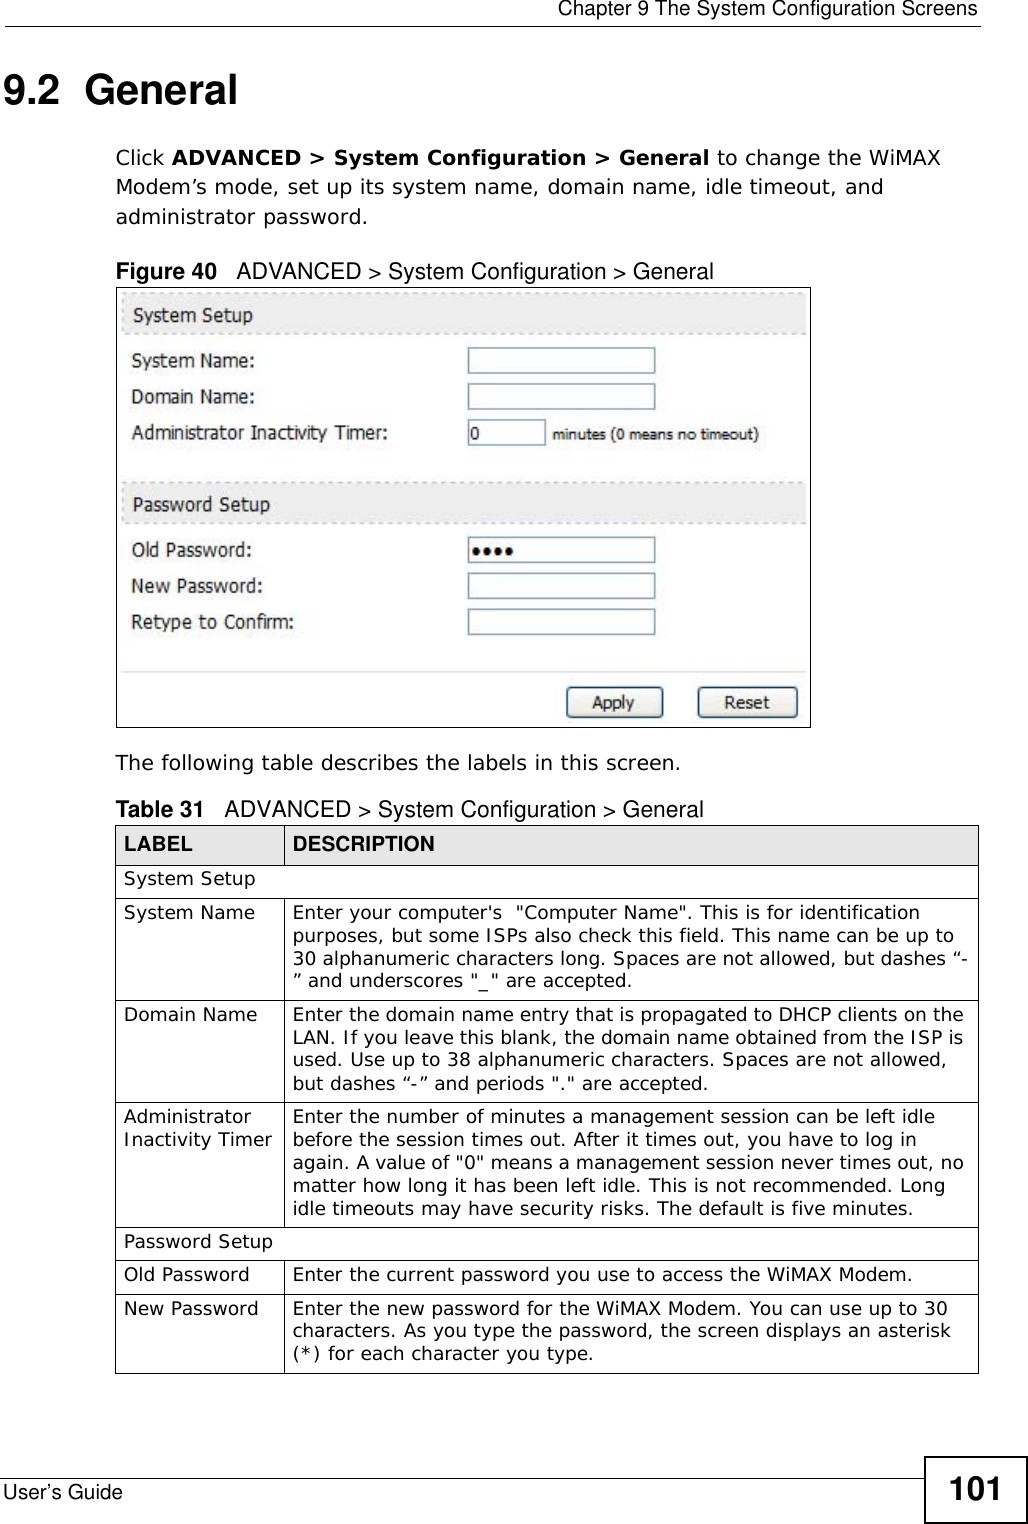
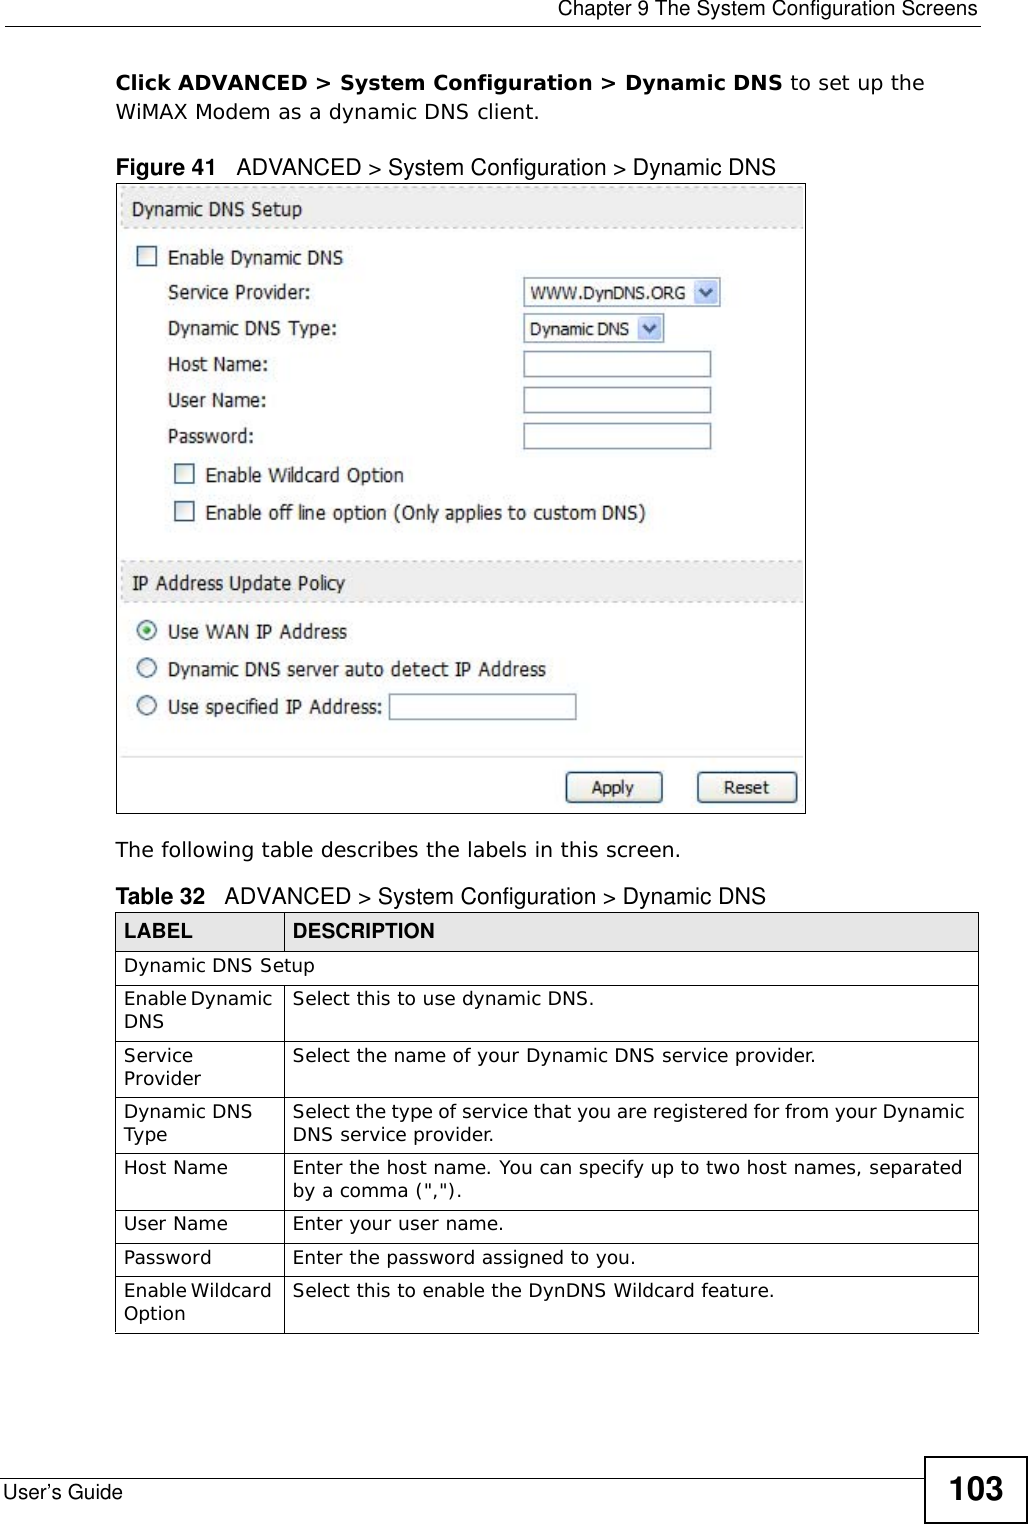
![Document ConventionsUser’s Guide 5Document ConventionsWarnings and NotesThese are how warnings and notes are shown in this User’s Guide. Warnings tell you about things that could harm you or your WiMAX Modem.Note: Notes tell you other important information (for example, other things you may need to configure or helpful tips) or recommendations.Syntax Conventions• The product(s) described in this book may be referred to as the “WiMAX Modem”, the “device”, the “system” or the “product” in this User’s Guide.• Product labels, screen names, field labels and field choices are all in bold font.• A key stroke is denoted by square brackets and uppercase text, for example, [ENTER] means the “enter” or “return” key on your keyboard.• “Enter” means for you to type one or more characters and then press the [ENTER] key. “Select” or “choose” means for you to use one of the predefined choices.• A right angle bracket ( > ) within a screen name denotes a mouse click. For example, TOOLS > Logs > Log Settings means you first click Tools in the navigation panel, then the Logs sub menu and finally the Log Settings tab to get to that screen.• Units of measurement may denote the “metric” value or the “scientific” value. For example, “k” for kilo may denote “1000” or “1024”, “M” for mega may denote “1000000” or “1048576” and so on.• “e.g.,” is a shorthand for “for instance”, and “i.e.,” means “that is” or “in other words”.](https://usermanual.wiki/ZyXEL-Communications/MAX206M1R.User-Manual-1/User-Guide-1141280-Page-5.png)


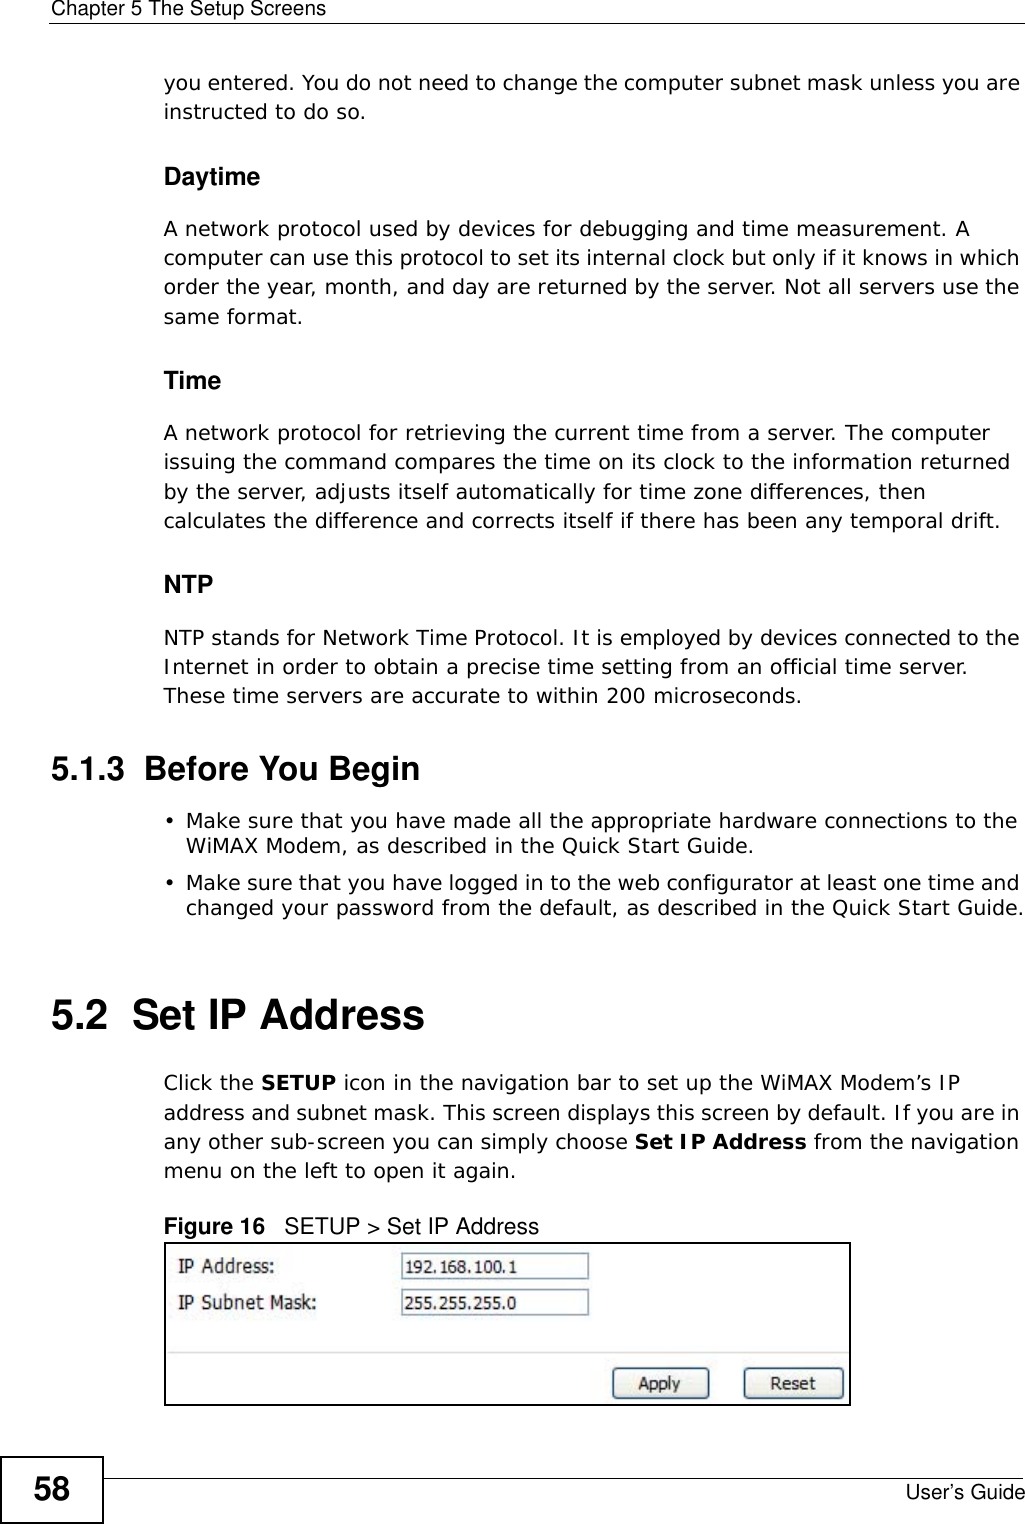

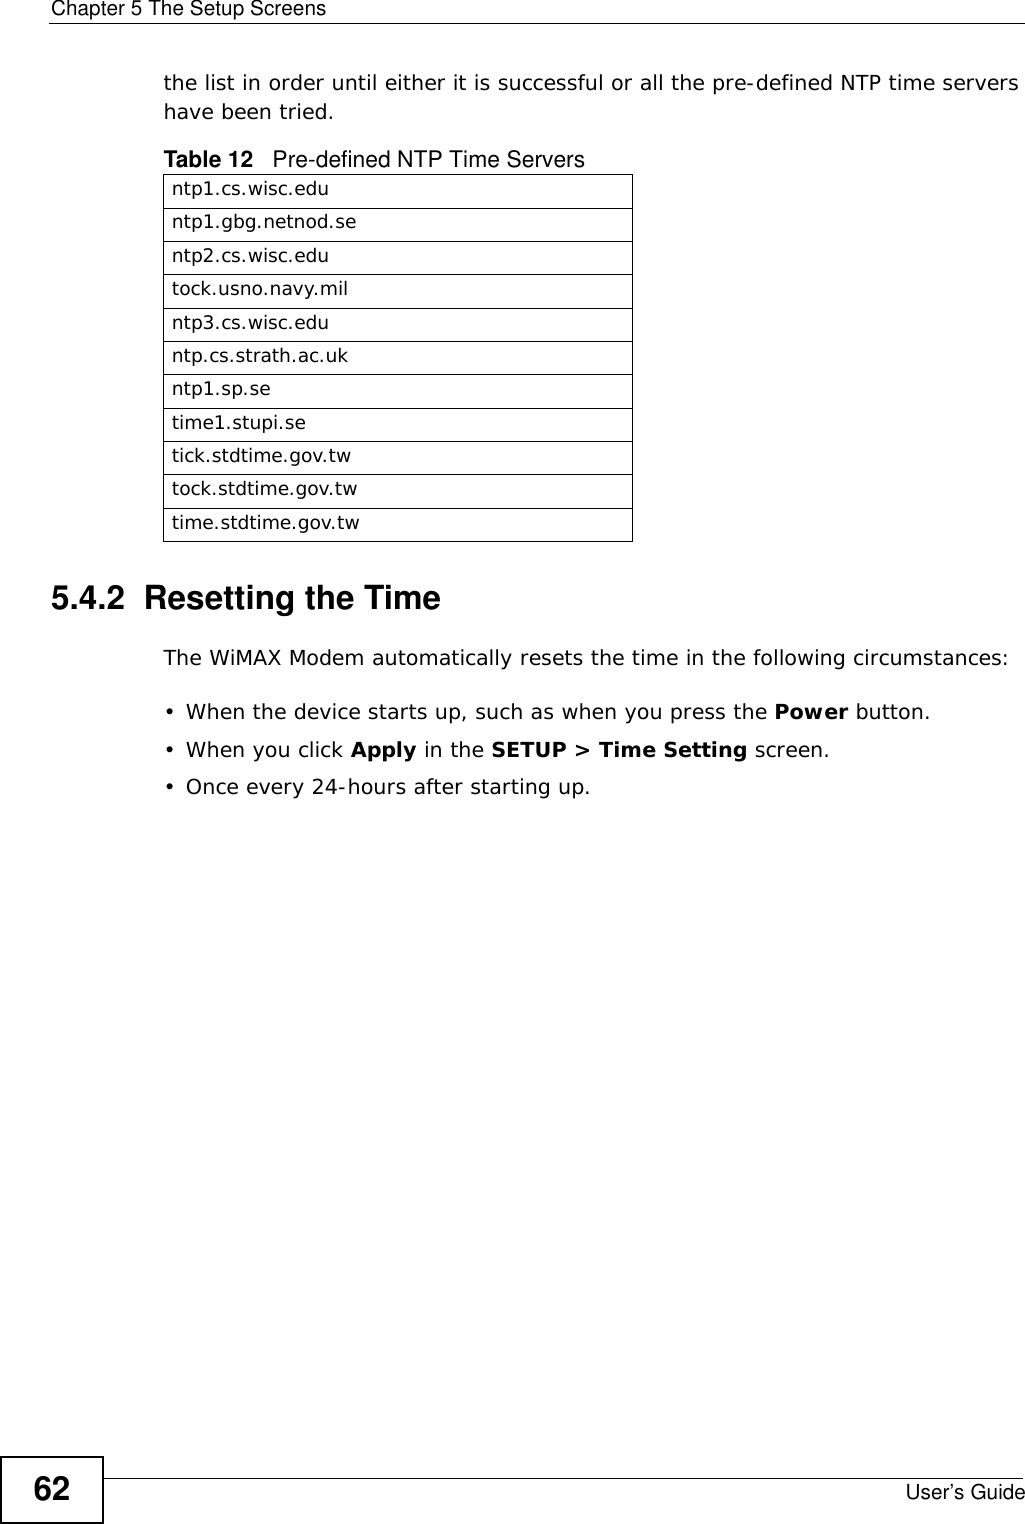

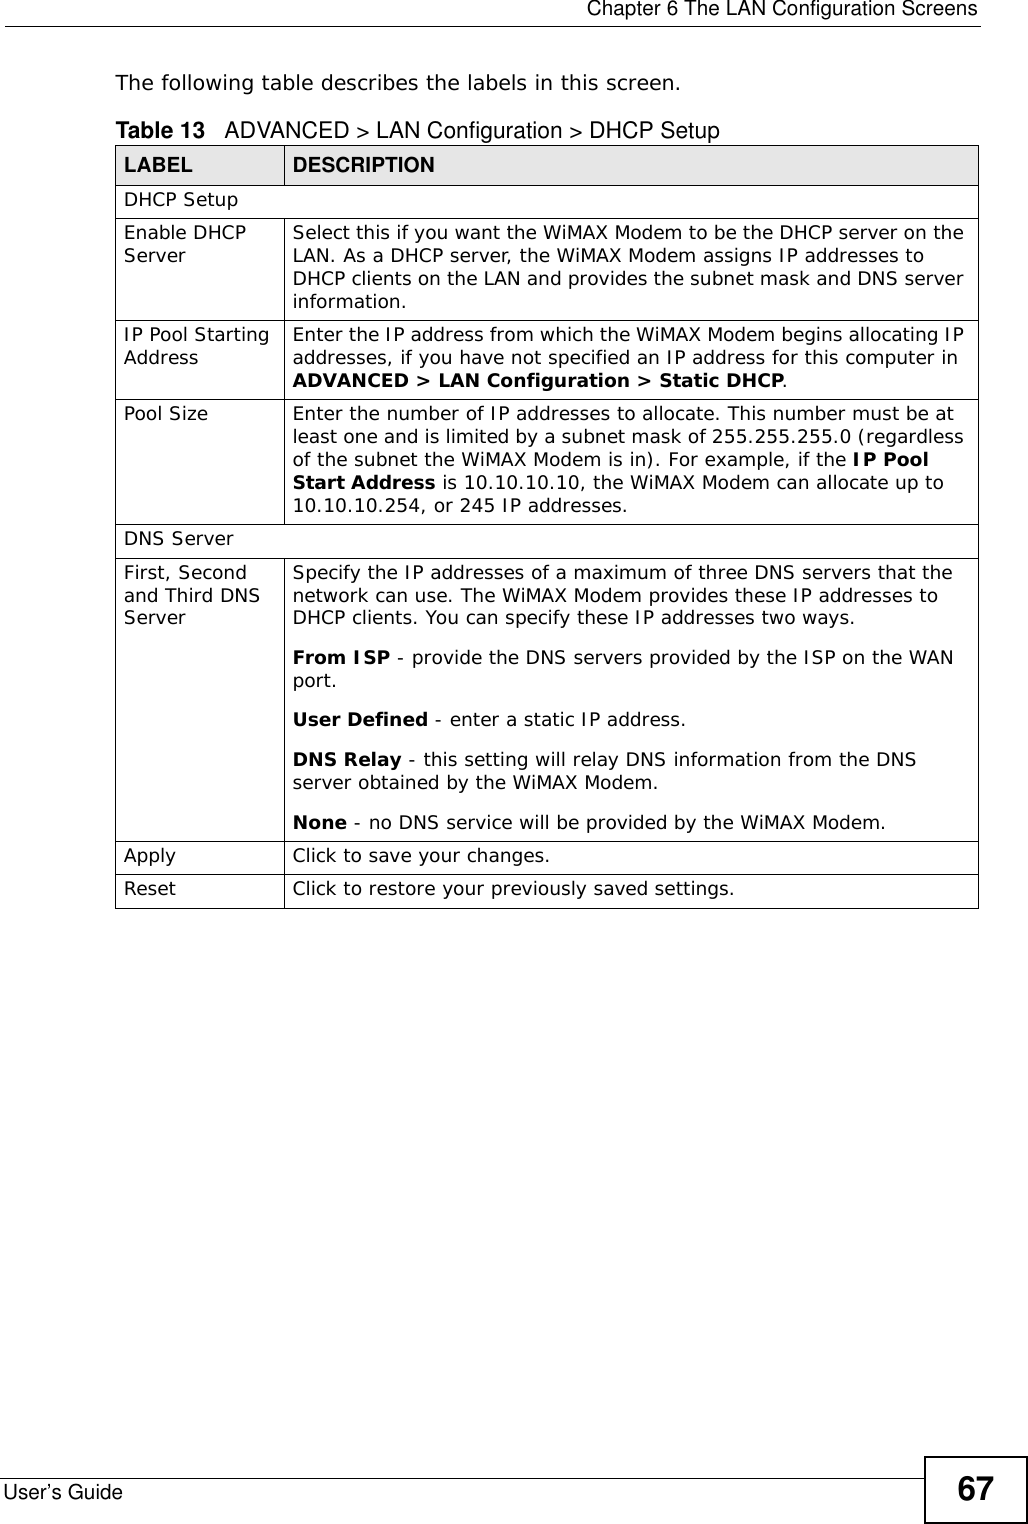


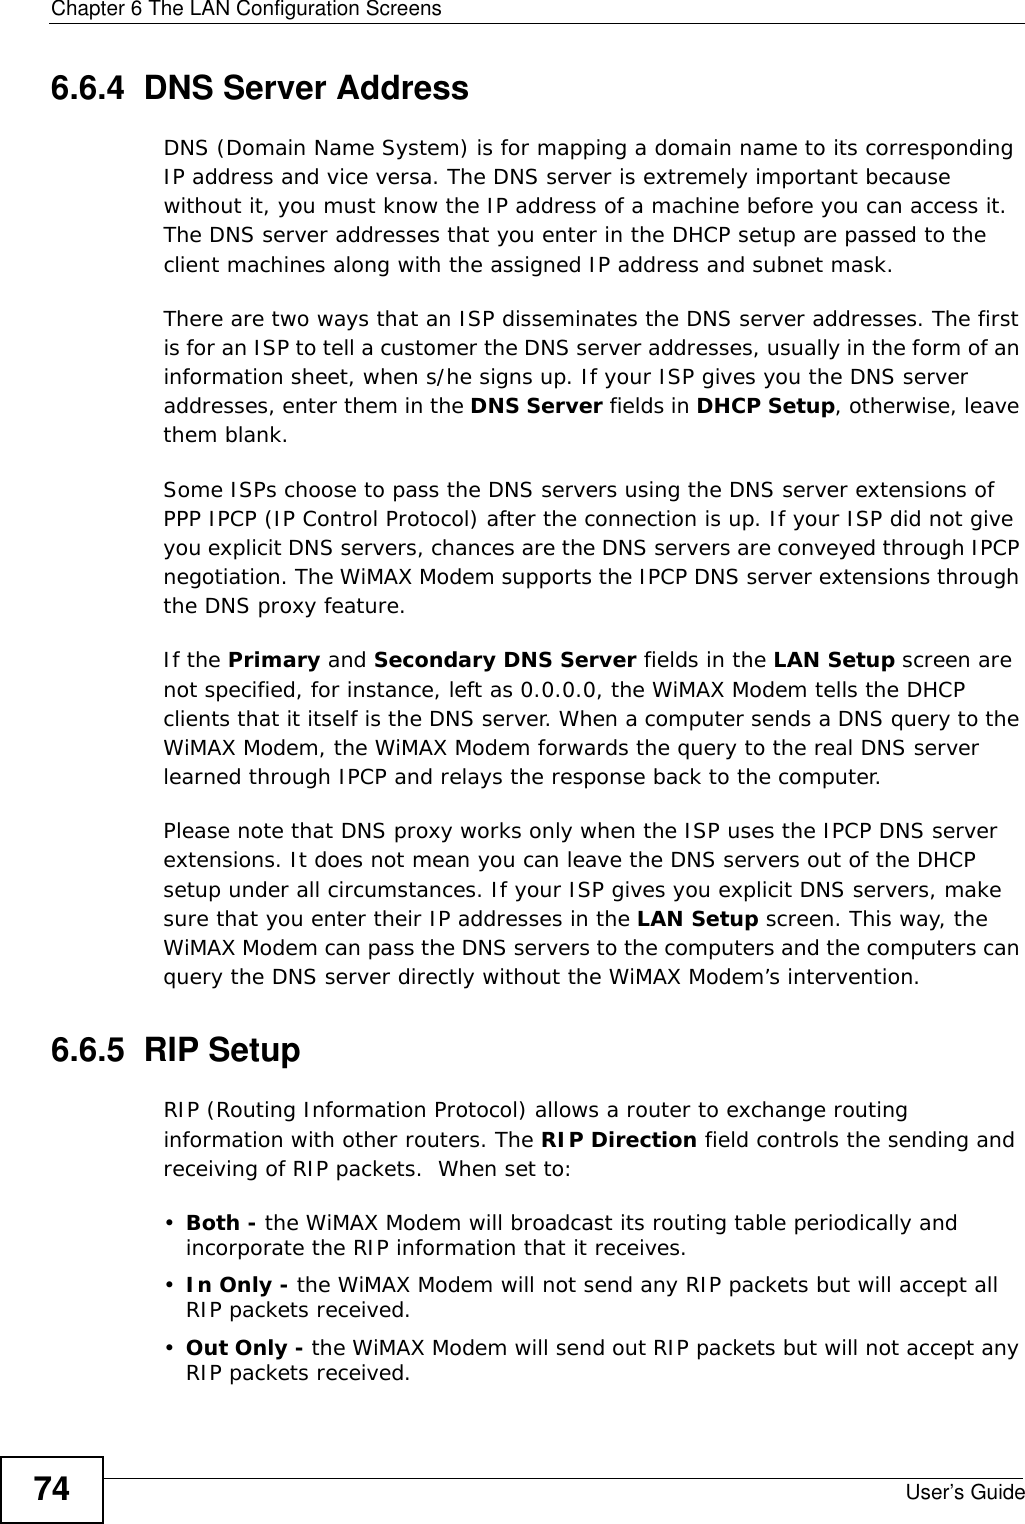


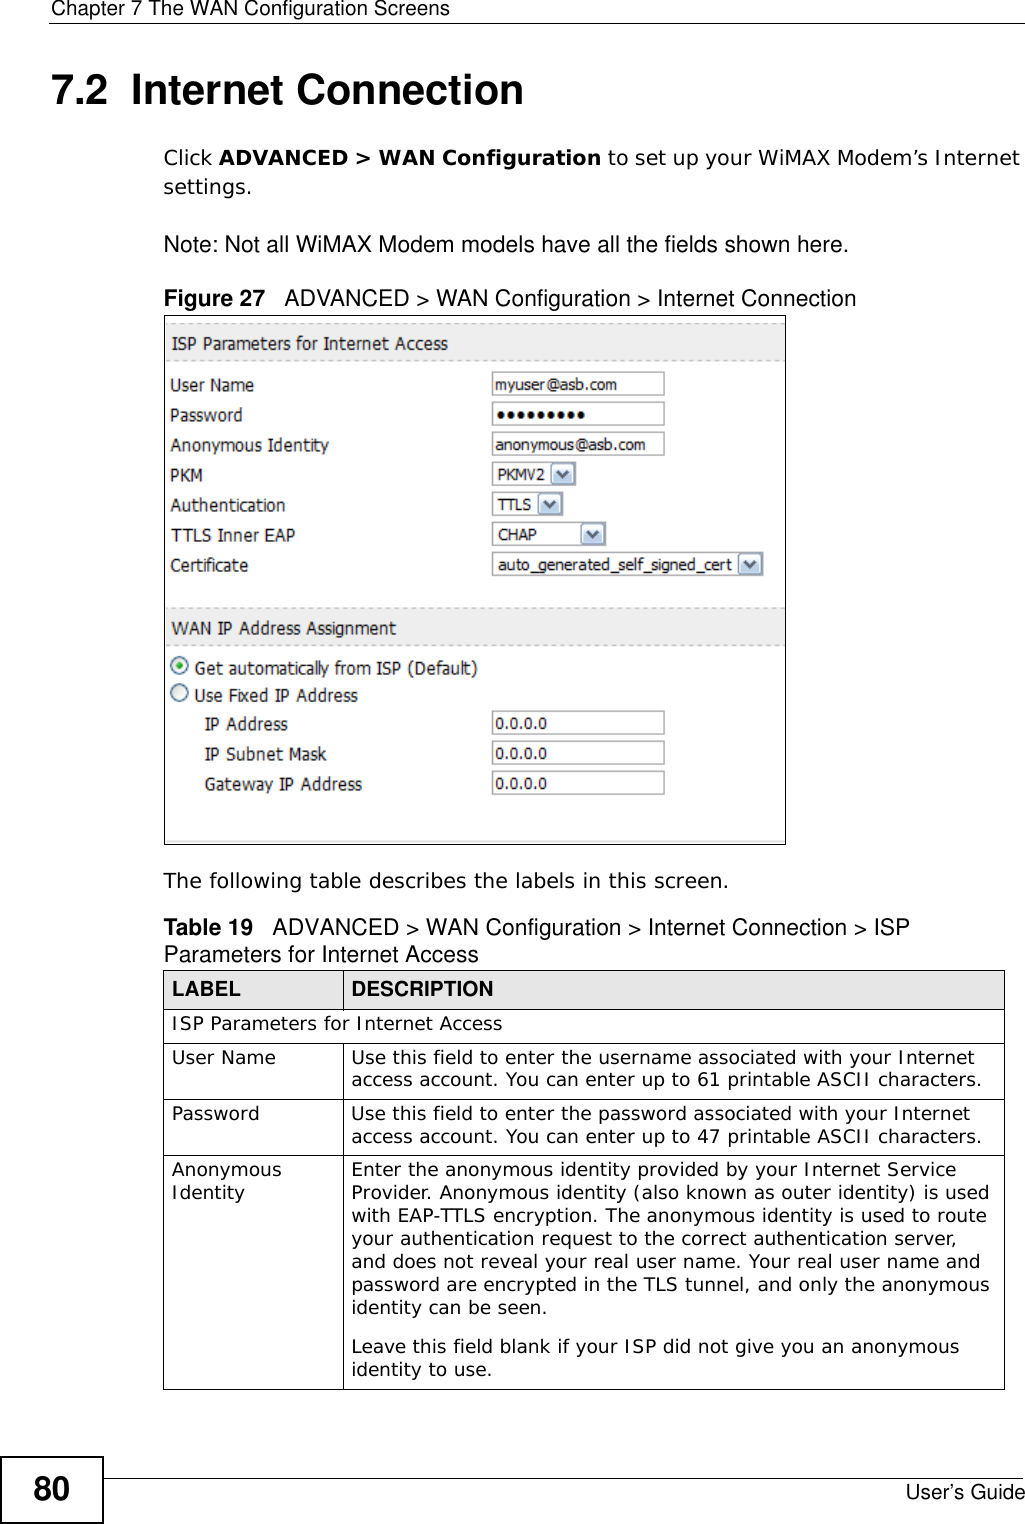
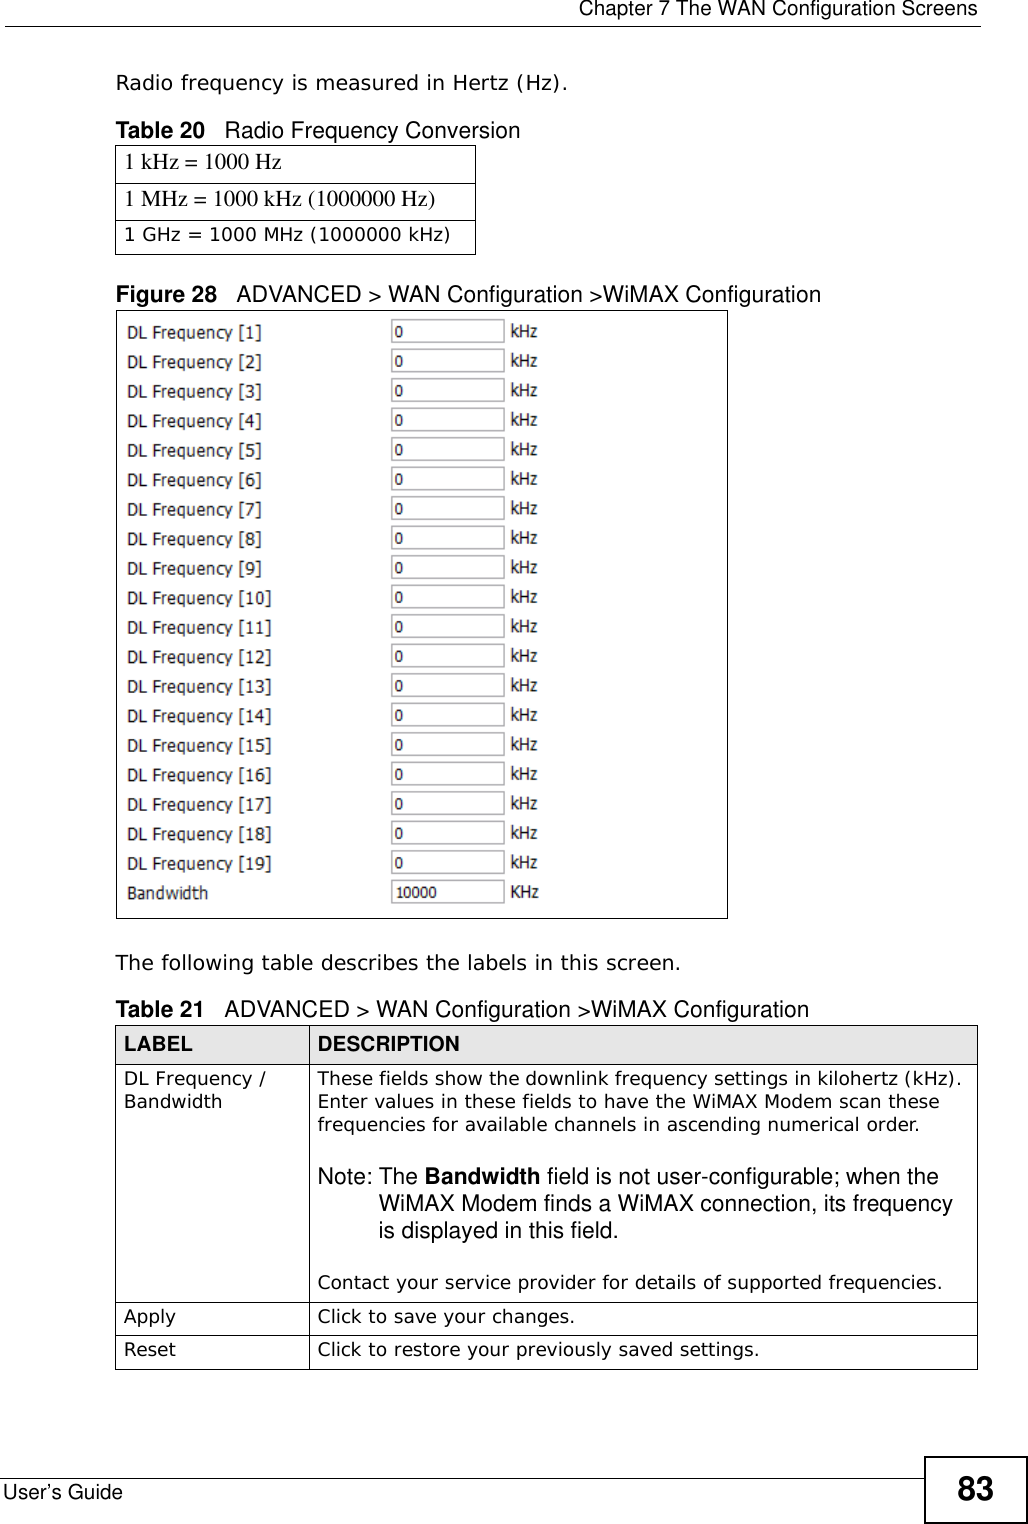
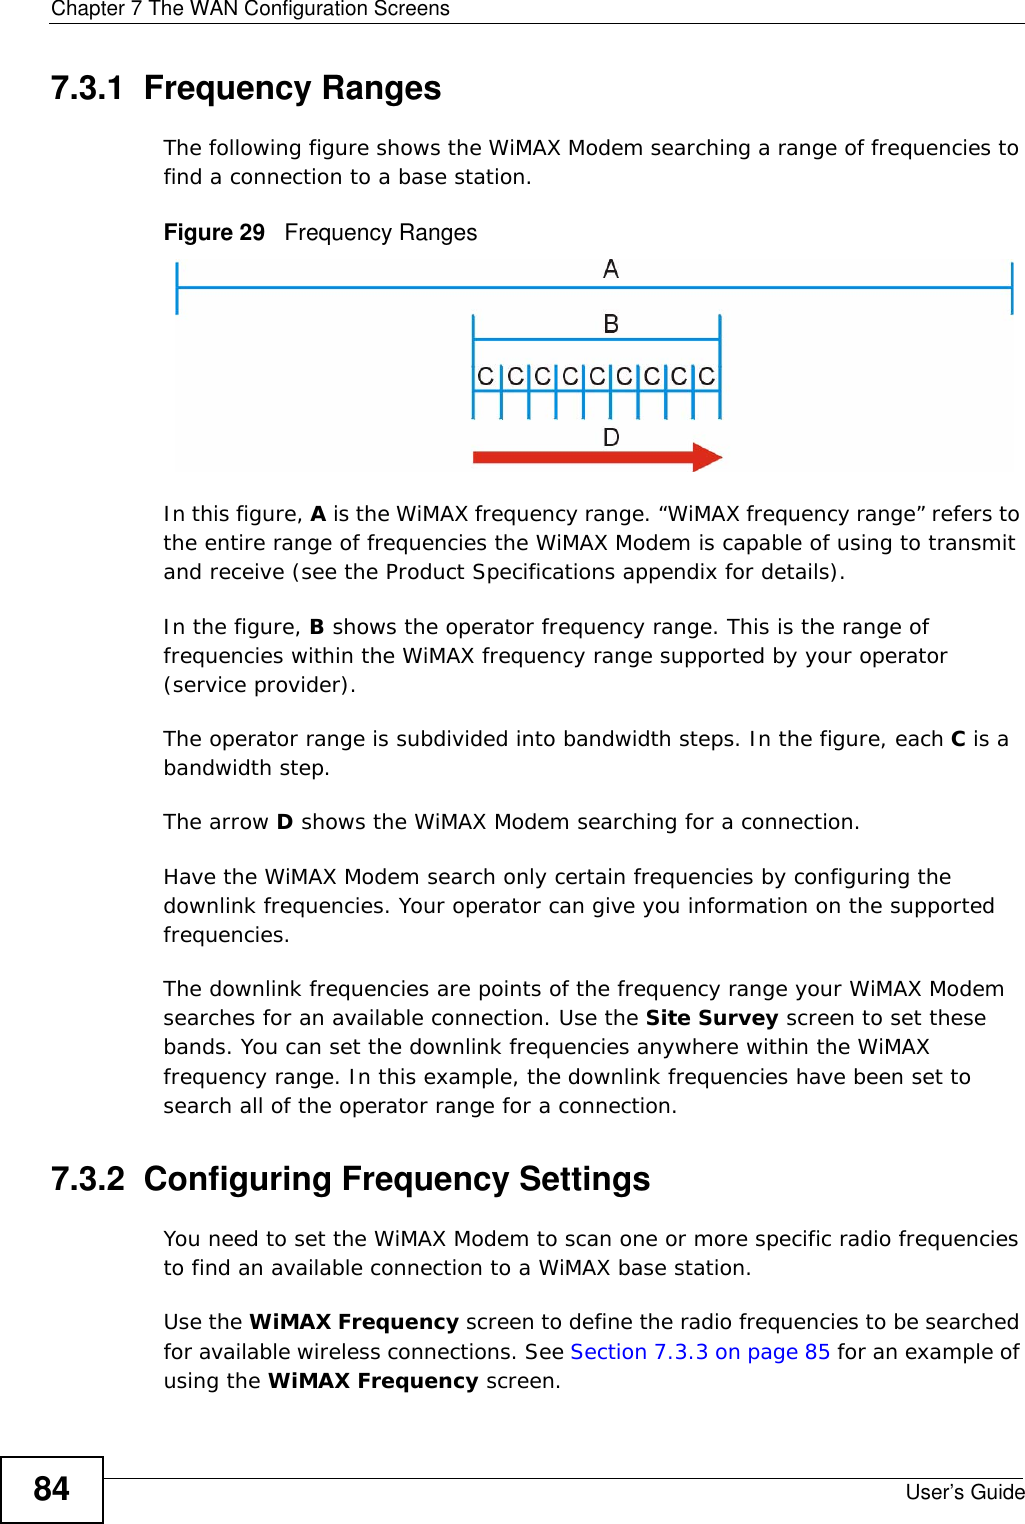
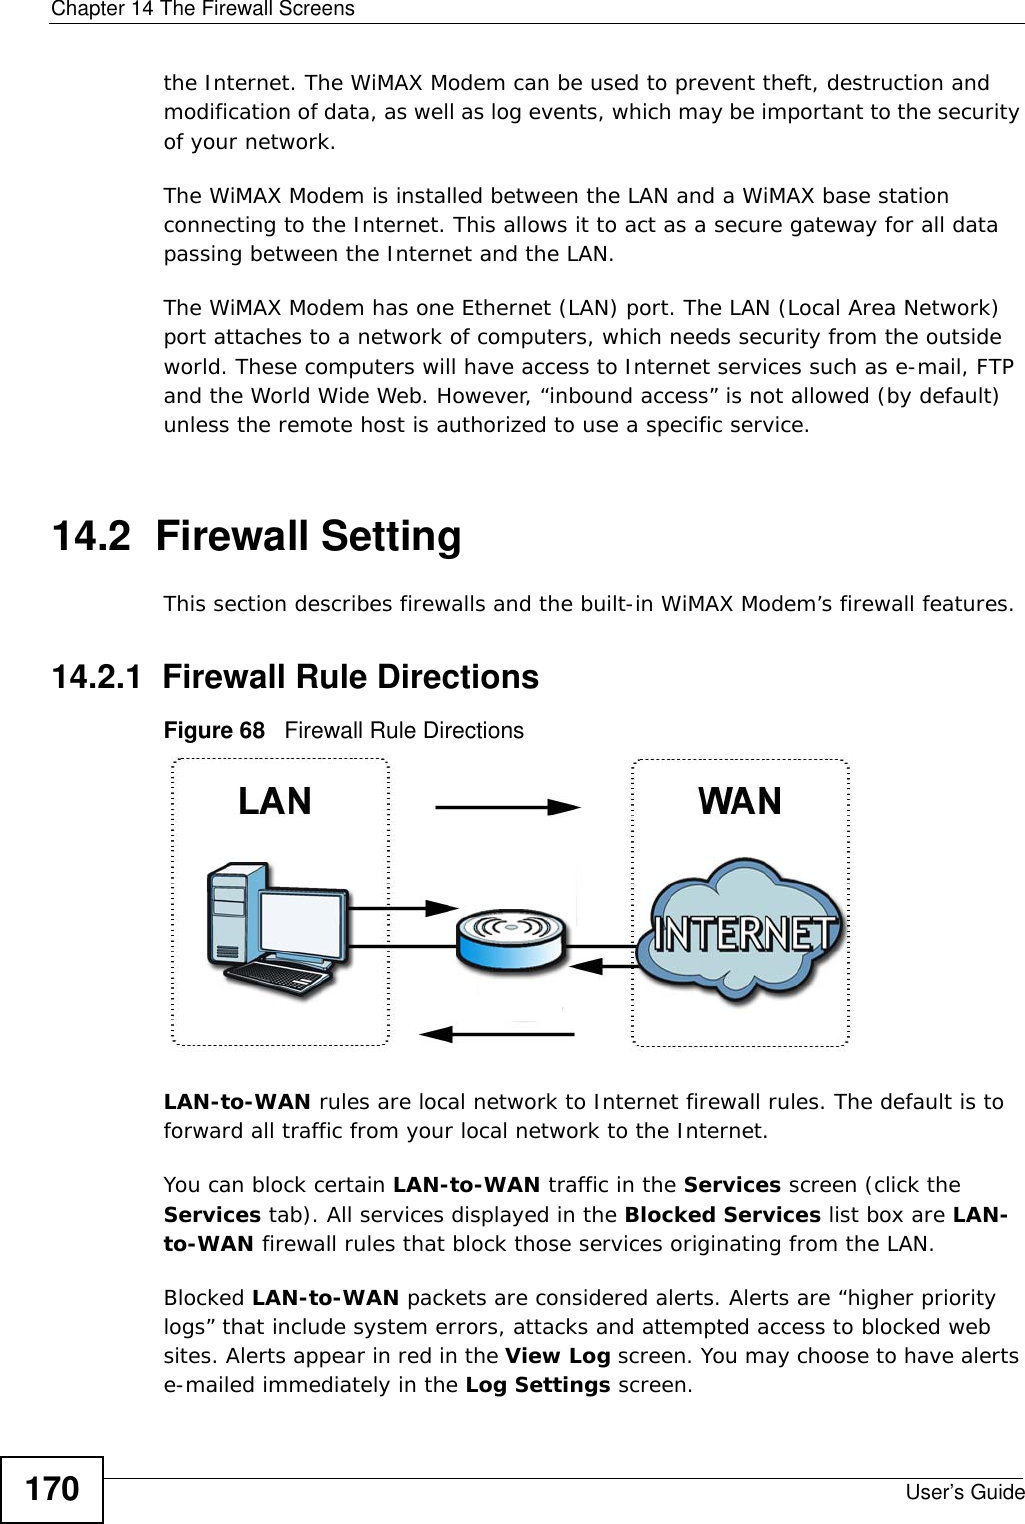
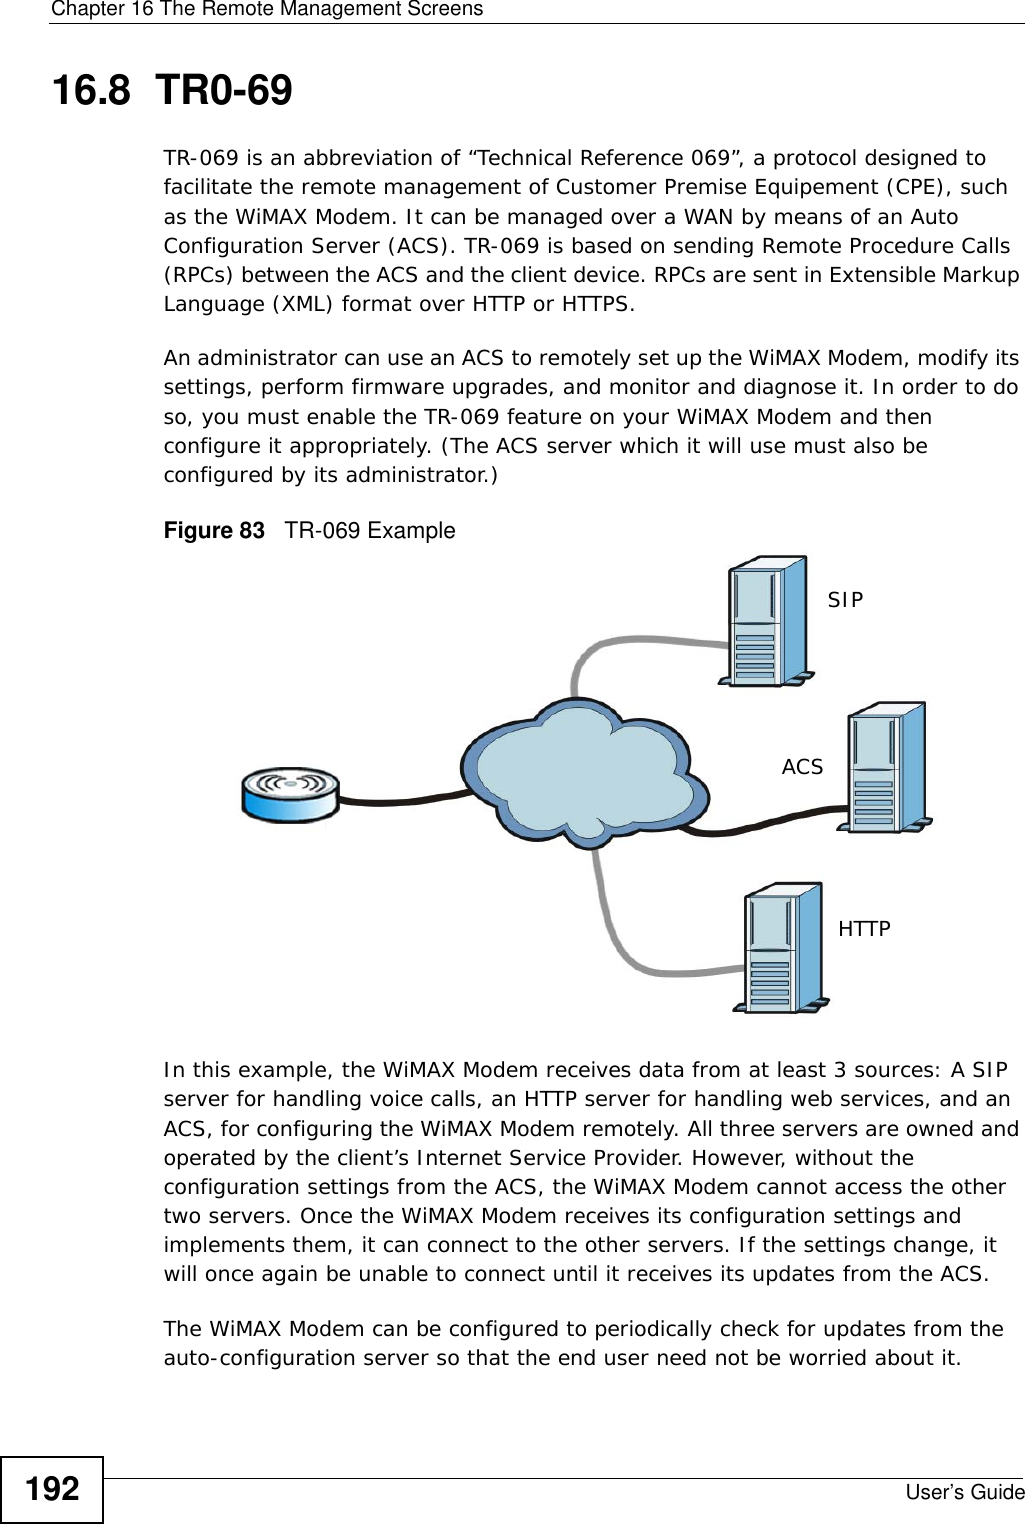
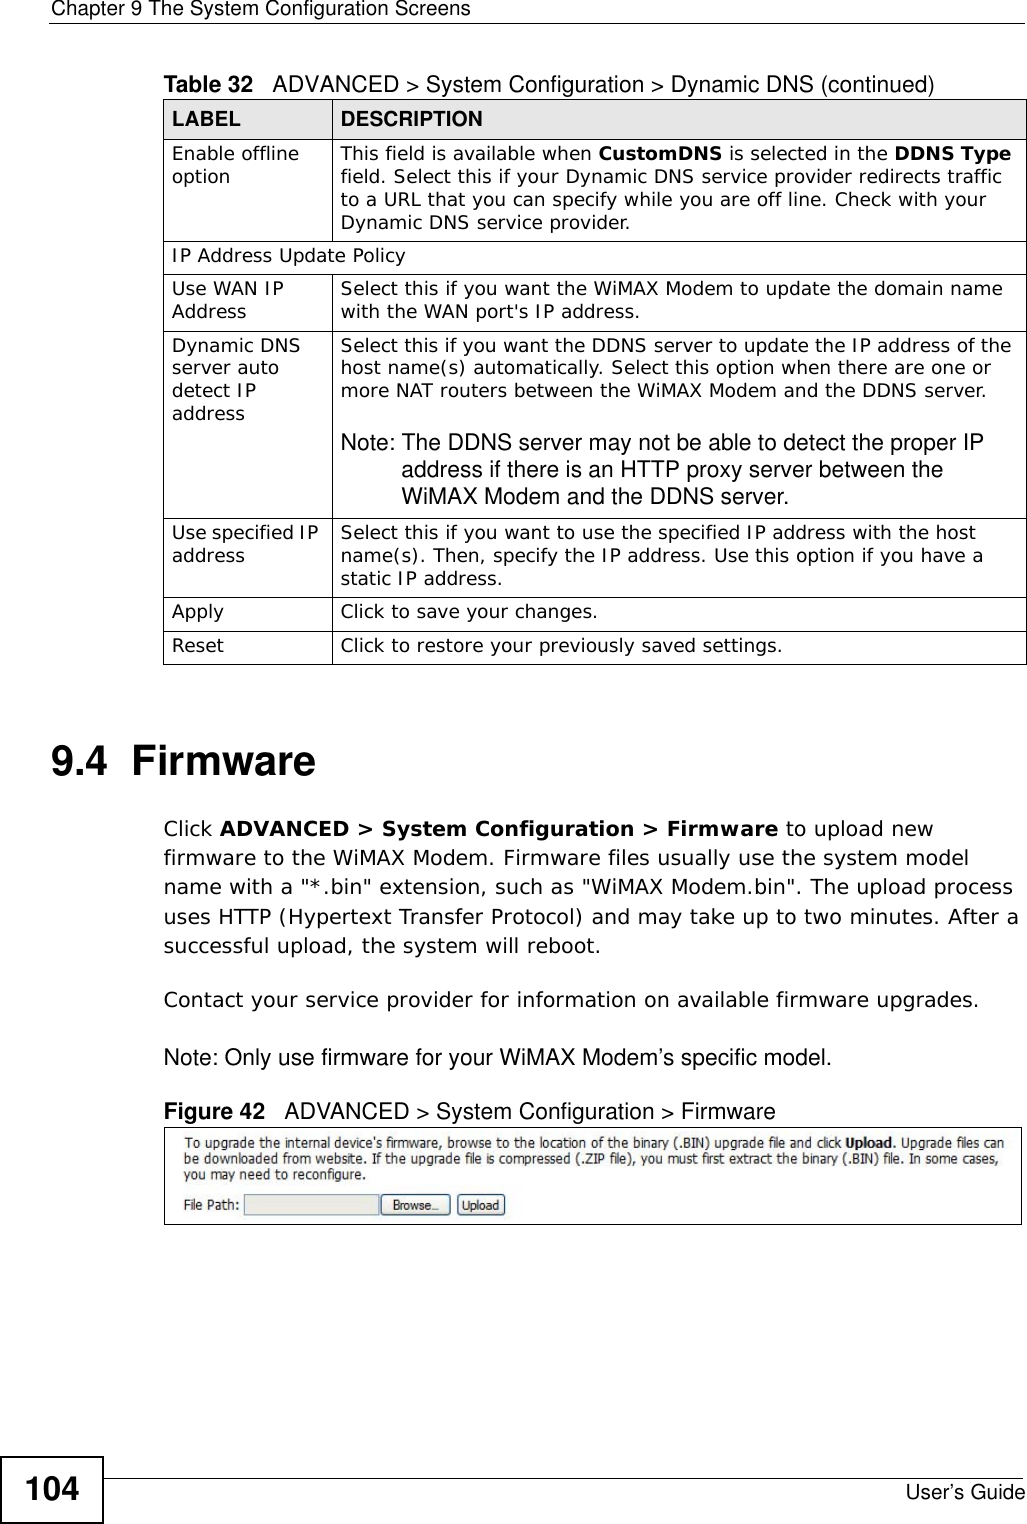
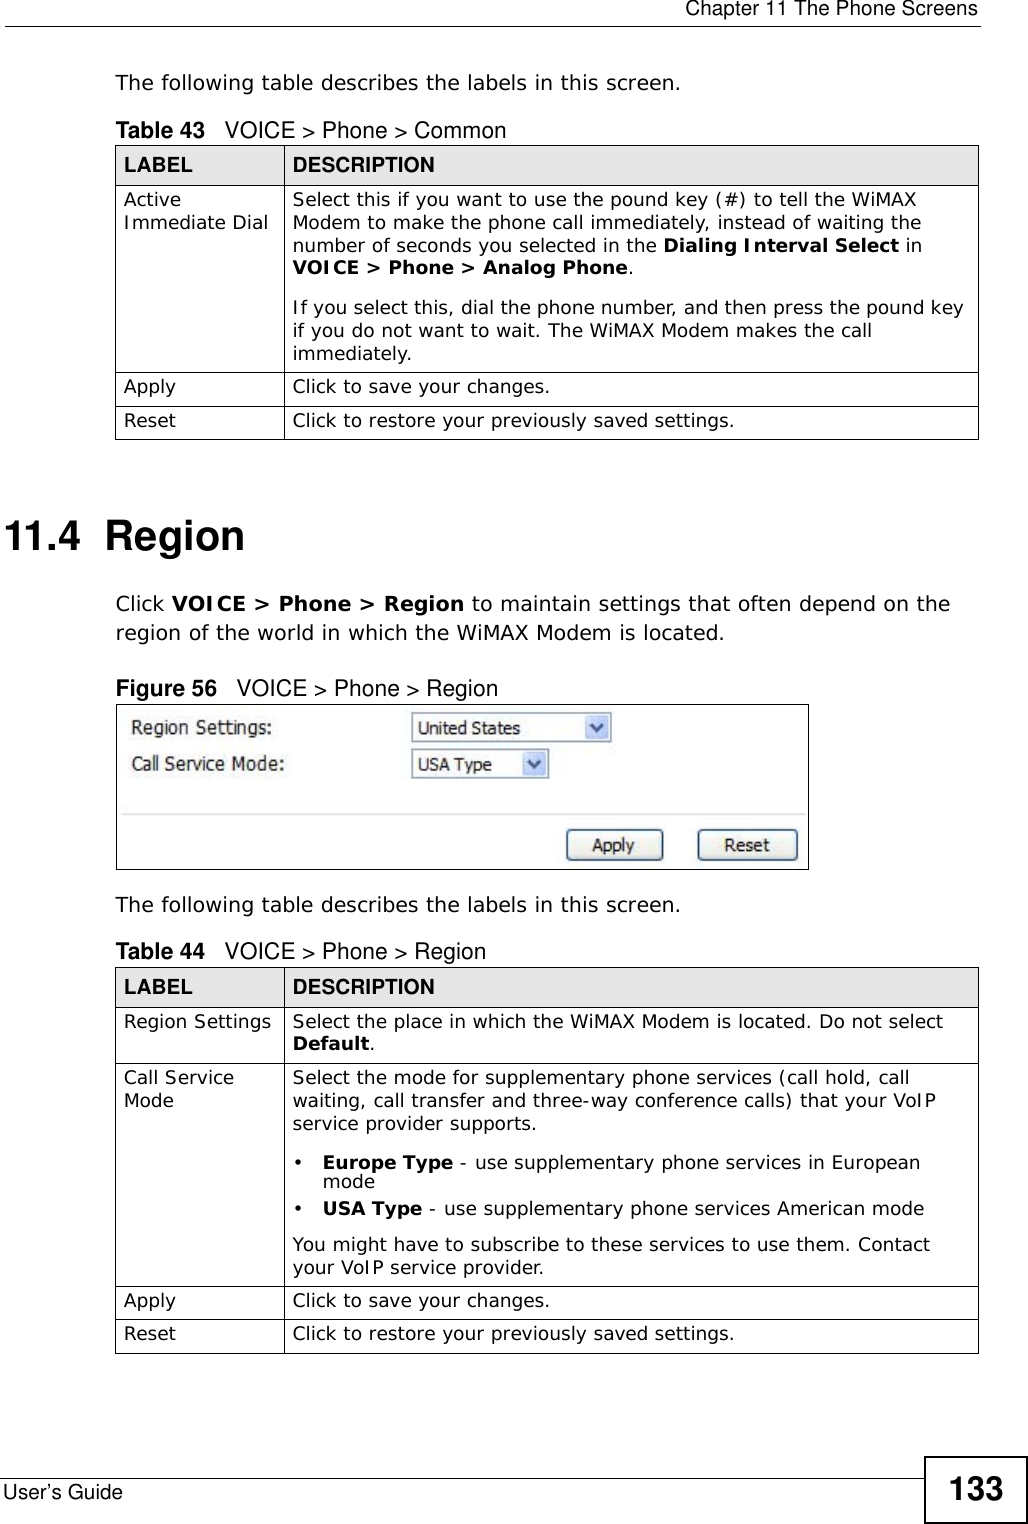
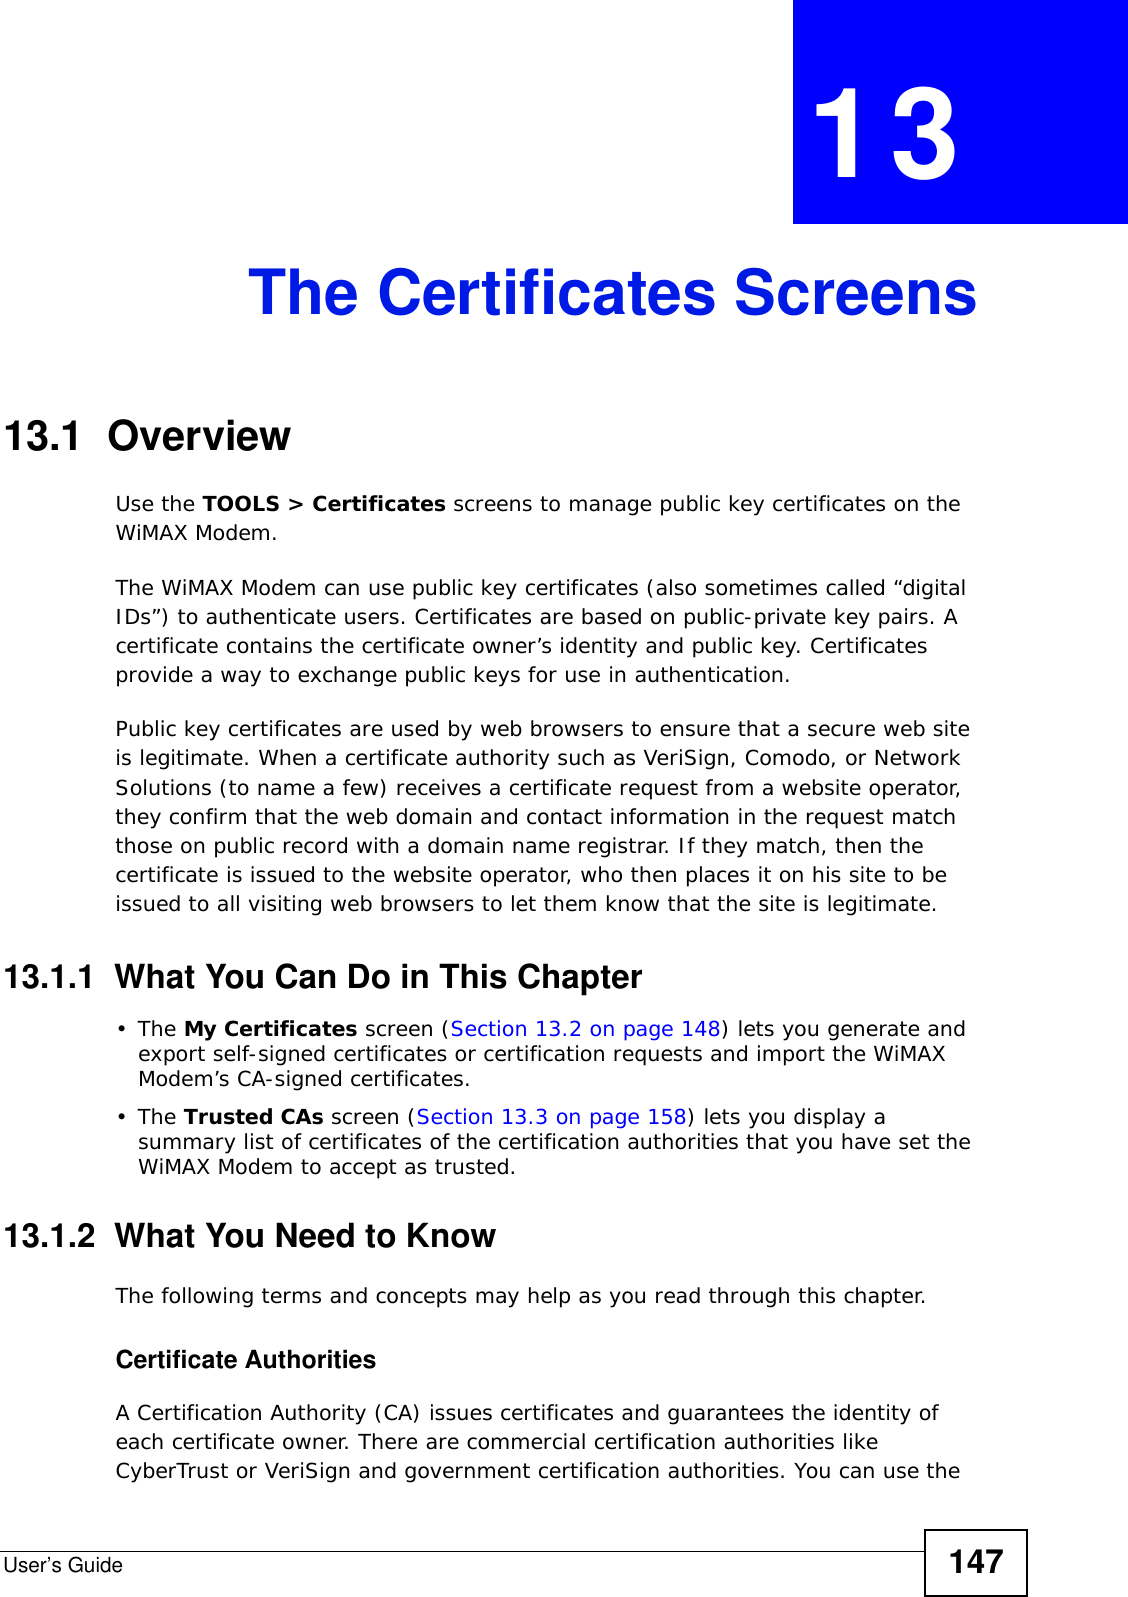
![Chapter 7 The WAN Configuration ScreensUser’s Guide 85Note: It may take several minutes for the WiMAX Modem to find a connection.• The WiMAX Modem searches the DL Frequency settings in ascending numerical order, from [1] to [9].Note: The Bandwidth field is not user-configurable; when the WiMAX Modem finds a WiMAX connection, its frequency is displayed in this field.• If you enter a 0 in a DL Frequency field, the WiMAX Modem immediately moves on to the next DL Frequency field.• When the WiMAX Modem connects to a base station, the values in this screen are automatically set to the base station’s frequency. The next time the WiMAX Modem searches for a connection, it searches only this frequency. If you want the WiMAX Modem to search other frequencies, enter them in the DL Frequency fields.The following table describes some examples of DL Frequency settings.7.3.3 Using the WiMAX Frequency ScreenIn this example, your Internet service provider has given you a list of supported frequencies: 2.51, 2.525, 2.6, and 2.625. 1In the DL Frequency [1] field, enter 2510000 (2510000 kilohertz (kHz) is equal to 2.51 gigahertz).2In the DL Frequency [2] field, enter 2525000.3In the DL Frequency [3] field, enter 2600000.Table 22 DL Frequency Example SettingsEXAMPLE 1 EXAMPLE 2Bandwidth: 2500000 2500000DL Frequency [1]: 2550000 2550000DL Frequency [2] 0 2600000DL Frequency [3]: 00DL Frequency [4]: 00The WiMAX Modem searches at 2500000 kHz, and then searches at 2550000 kHz if it has not found a connection.The WiMAX Modem searches at 2500000 kHz and then at 2550000 kHz if it has not found an available connection. If it still does not find an available connection, it searches at 2600000 kHz.](https://usermanual.wiki/ZyXEL-Communications/MAX206M1R.User-Manual-1/User-Guide-1141280-Page-85.png)
![Chapter 7 The WAN Configuration ScreensUser’s Guide864In the DL Frequency [4] field, enter 2625000.Leave the rest of the DL Frequency fields at zero. The screen appears as follows.Figure 30 Completing the WiMAX Frequency Screen5Click Apply. The WiMAX Modem stores your settings. When the WiMAX Modem searches for available frequencies, it scans all frequencies from DL Frequency [1] to DL Frequency [4]. When it finds an available connection, the fields in this screen will be automatically set to use that frequency.7.4 Antenna SelectionClick ADVANCED > WAN Configuration > Antenna Selection to switch between the WiMAX Modem’s internal antenna and the (optinoal) external antennas, if they are installed.Note: This screen only pertains to the MAX-216M1R plus. Other devices in this series do not support external antennas.Figure 31 ADVANCED > WAN Configuration > Antenna SelectionThe following table describes the labels in this screen.Table 23 ADVANCED > WAN Configuration > AdvancedLABEL DESCRIPTIONSelect the Antenna Switch ModeUse Internal Antenna Select this to use the device’s internal antenna.Use External Antenna Select this to use the device’s external antenna. If you select this option but do not have external antennas attached, you may experience poor reception.External antennas are optional and not required.](https://usermanual.wiki/ZyXEL-Communications/MAX206M1R.User-Manual-1/User-Guide-1141280-Page-86.png)


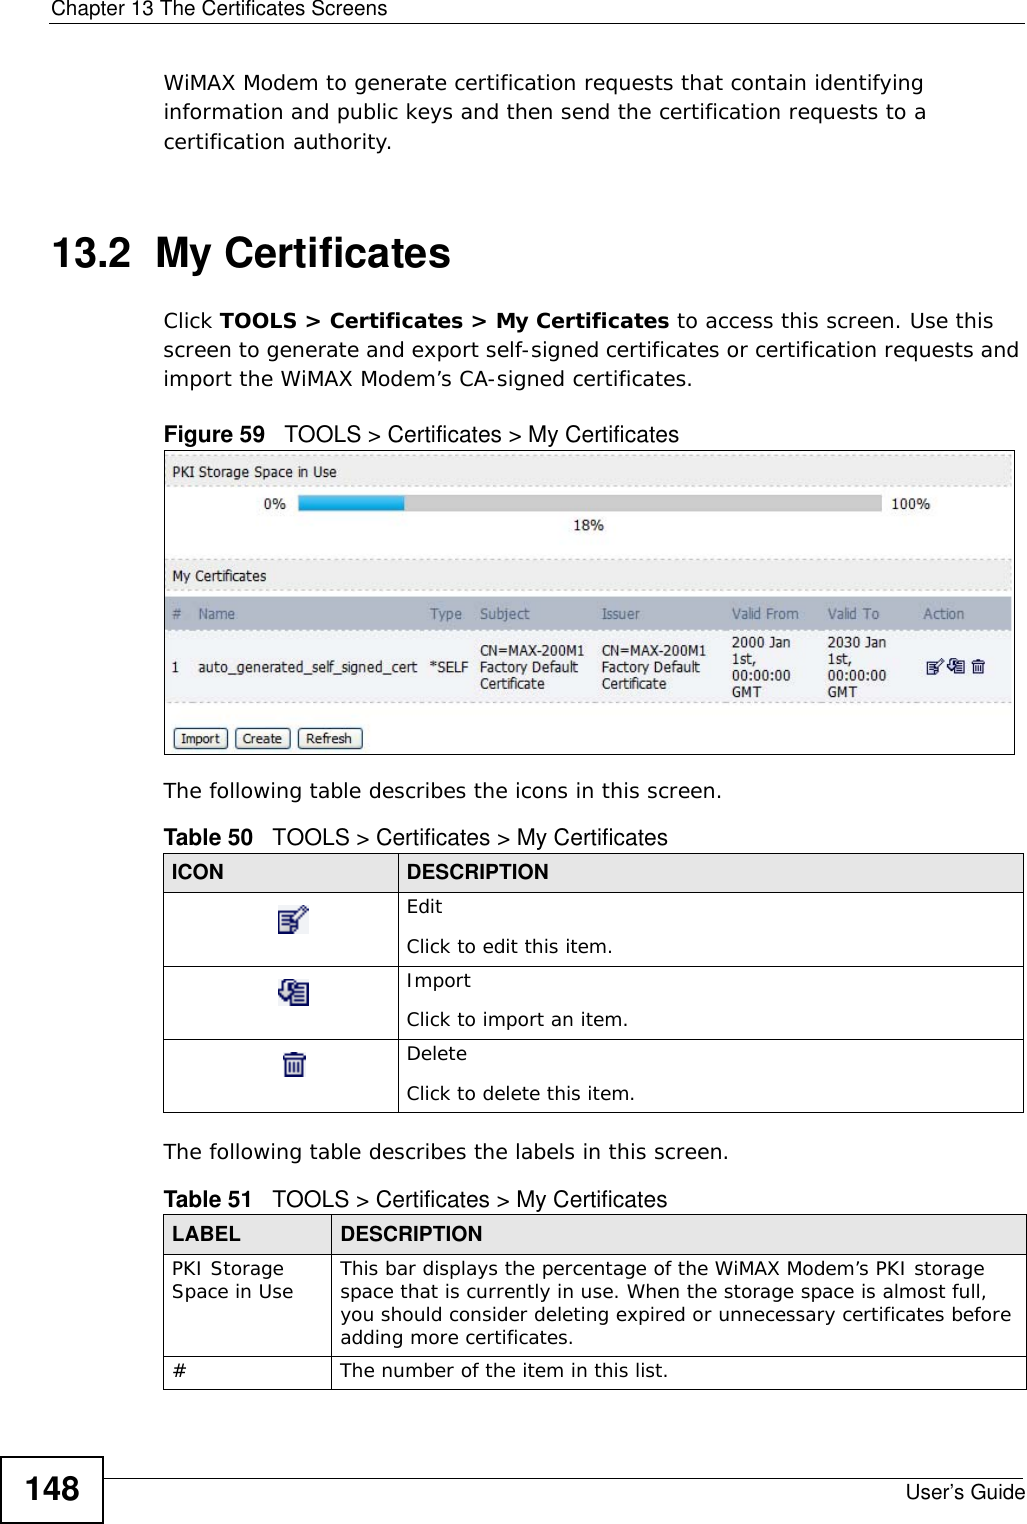
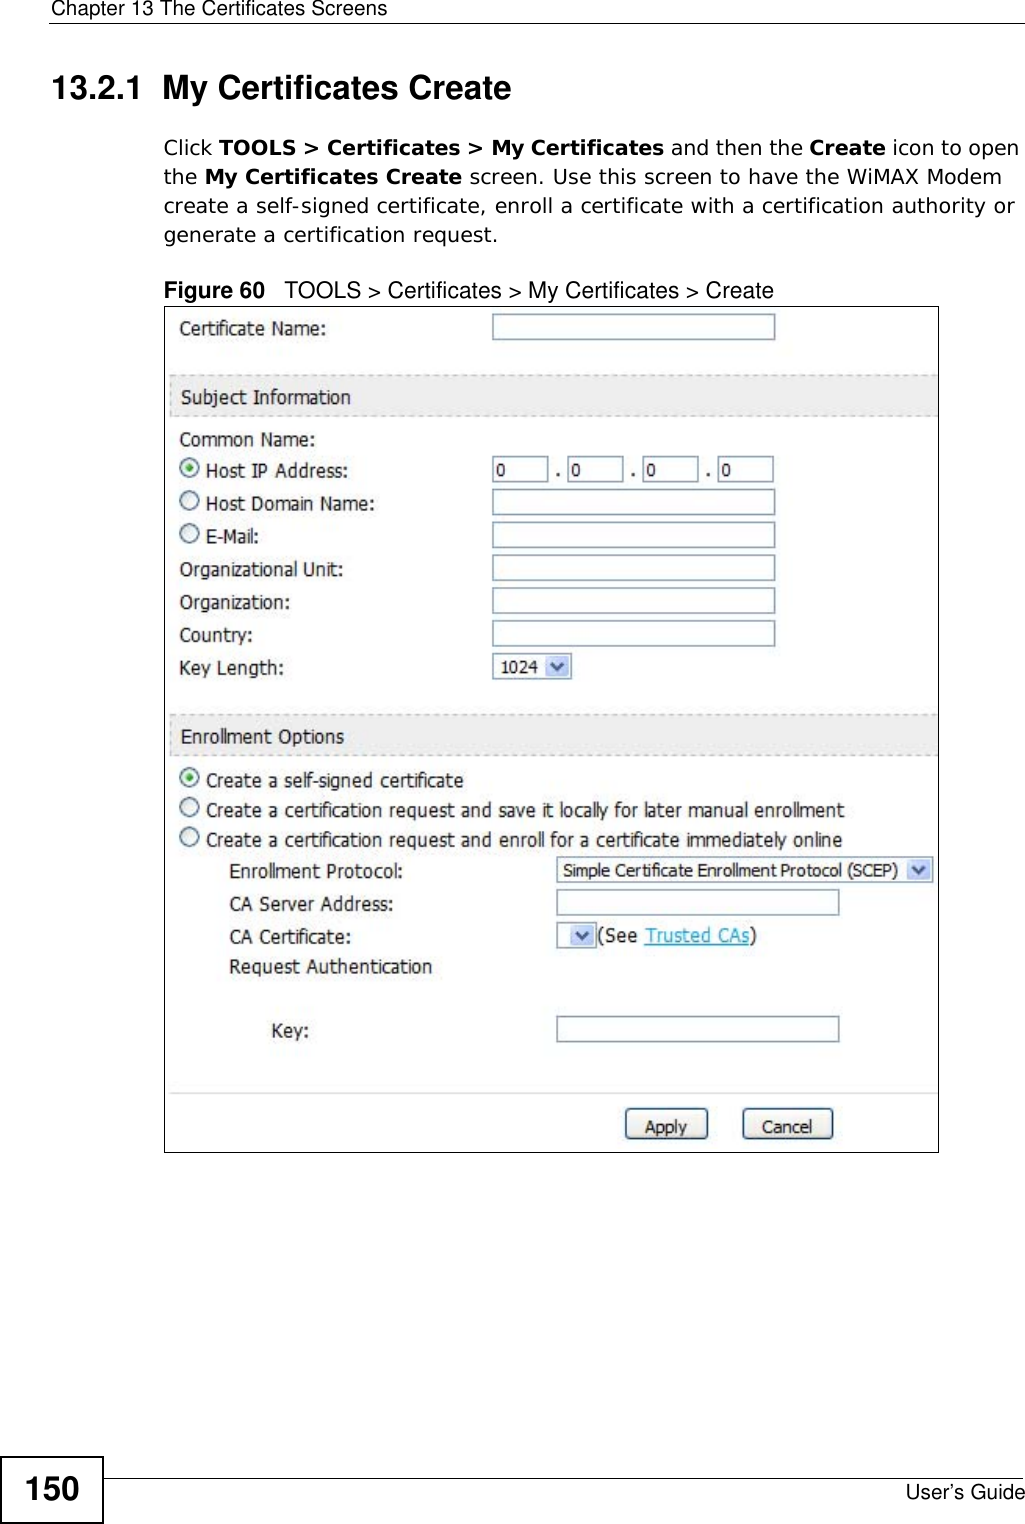
![Chapter 13 The Certificates ScreensUser’s Guide 151The following table describes the labels in this screen. Table 52 TOOLS > Certificates > My Certificates > CreateLABEL DESCRIPTIONCertificate Name Type a name to identify this certificate. You can use up to 31 alphanumeric and ;‘~!@#$%^&()_+[]{}’,.=- characters.Subject Information Use these fields to record information that identifies the owner of the certificate. You do not have to fill in every field, although the Common Name is mandatory. The certification authority may add fields (such as a serial number) to the subject information when it issues a certificate. It is recommended that each certificate have unique subject information.Common Name Select a radio button to identify the certificate’s owner by IP address, domain name or e-mail address. Type the IP address (in dotted decimal notation), domain name or e-mail address in the field provided. The domain name or e-mail address is for identification purposes only and can be any string.A domain name can be up to 255 characters. You can use alphanumeric characters, the hyphen and periods.An e-mail address can be up to 63 characters. You can use alphanumeric characters, the hyphen, the @ symbol, periods and the underscore.Organizational Unit Identify the organizational unit or department to which the certificate owner belongs. You can use up to 63 characters. You can use alphanumeric characters, the hyphen and the underscore.Organization Identify the company or group to which the certificate owner belongs. You can use up to 63 characters. You can use alphanumeric characters, the hyphen and the underscore.Country Identify the state in which the certificate owner is located. You can use up to 31 characters. You can use alphanumeric characters, the hyphen and the underscore.Key Length Select a number from the drop-down list box to determine how many bits the key should use (512 to 2048). The longer the key, the more secure it is. A longer key also uses more PKI storage space.Enrollment Options These radio buttons deal with how and when the certificate is to be generated.Create a self-signed certificate Select Create a self-signed certificate to have the WiMAX Modem generate the certificate and act as the Certification Authority (CA) itself. This way you do not need to apply to a certification authority for certificates.Create a certification request and save it locally for later manual enrollmentSelect Create a certification request and save it locally for later manual enrollment to have the WiMAX Modem generate and store a request for a certificate. Use the My Certificate Details screen to view the certification request and copy it to send to the certification authority.Copy the certification request from the My Certificate Details screen and then send it to the certification authority.](https://usermanual.wiki/ZyXEL-Communications/MAX206M1R.User-Manual-1/User-Guide-1141280-Page-151.png)

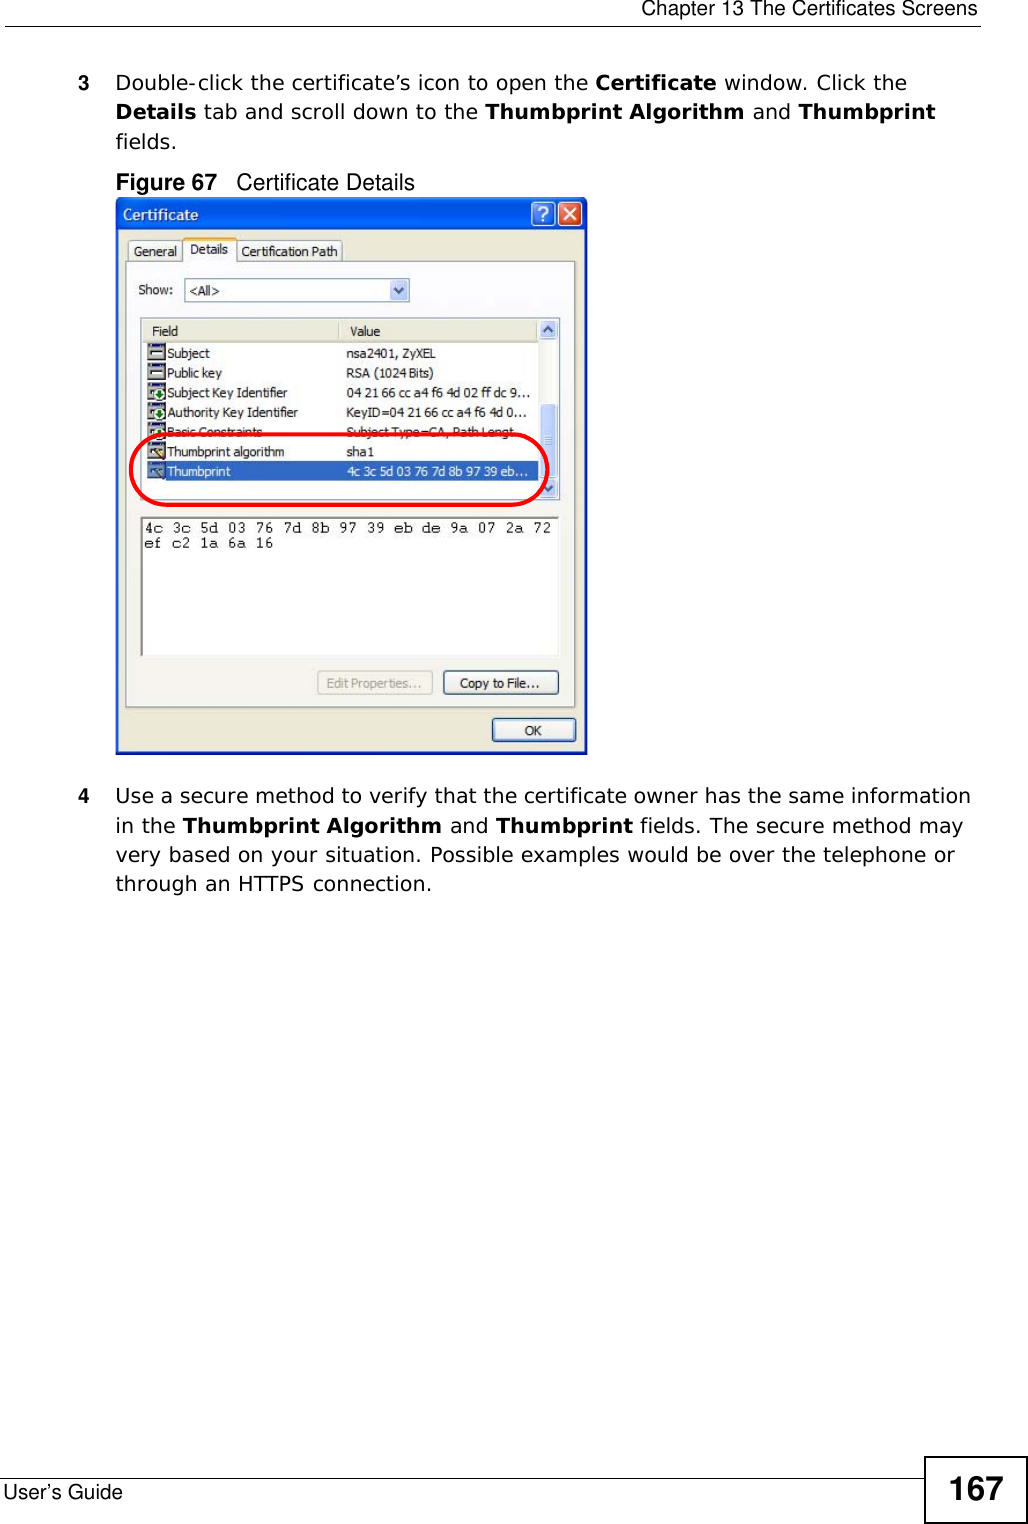
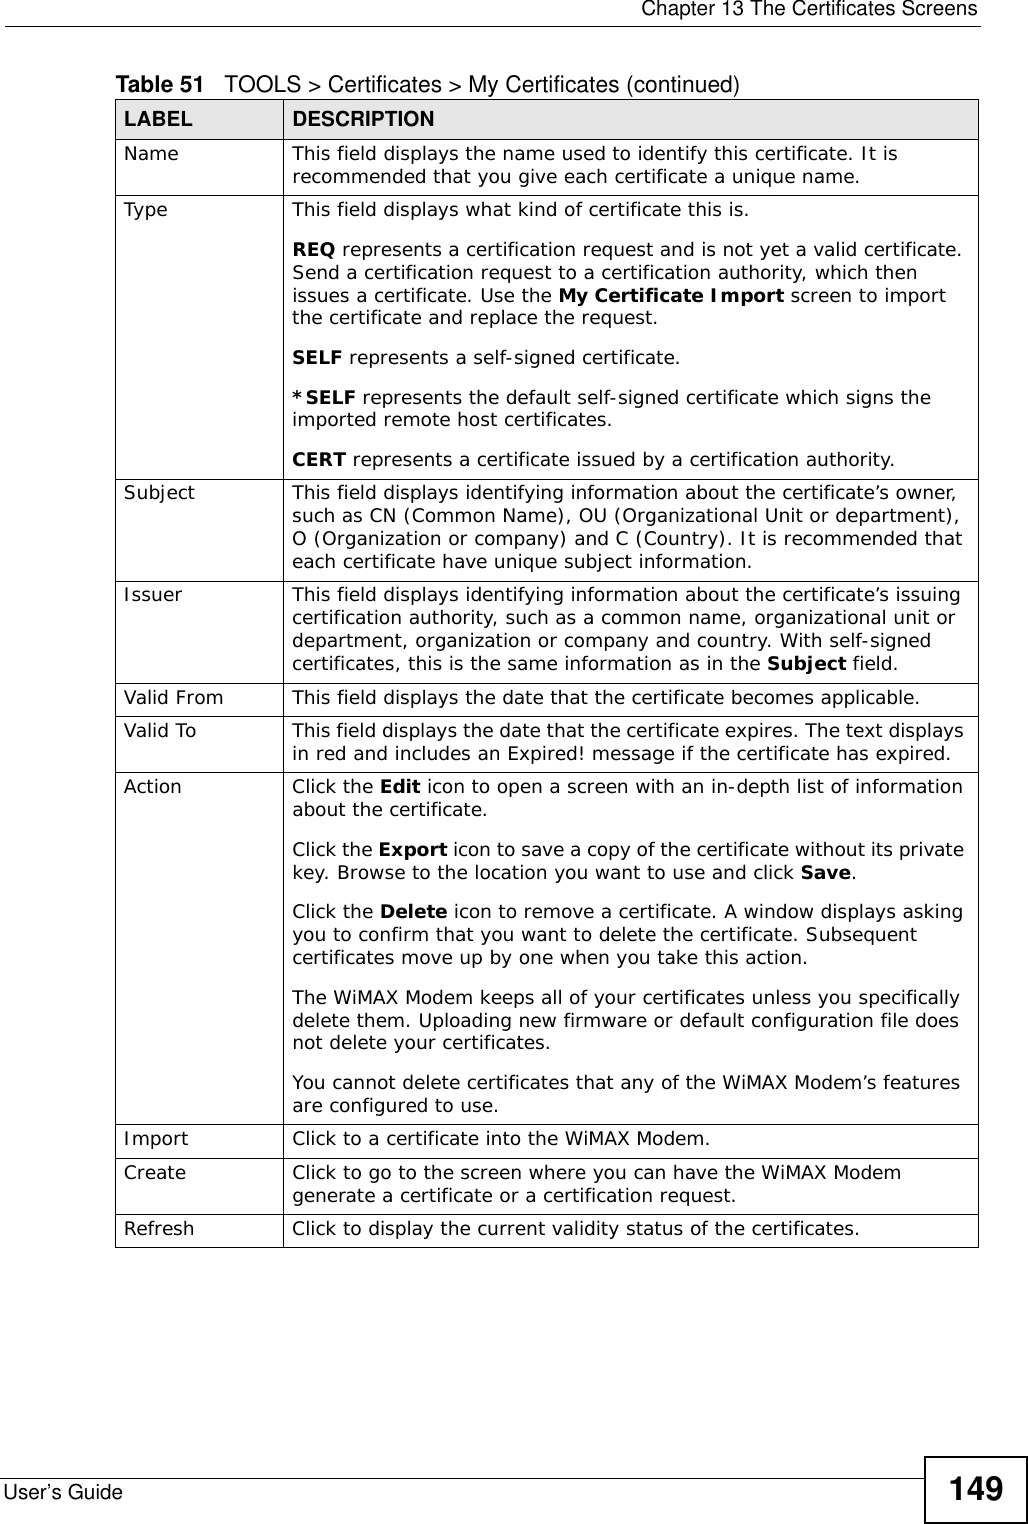
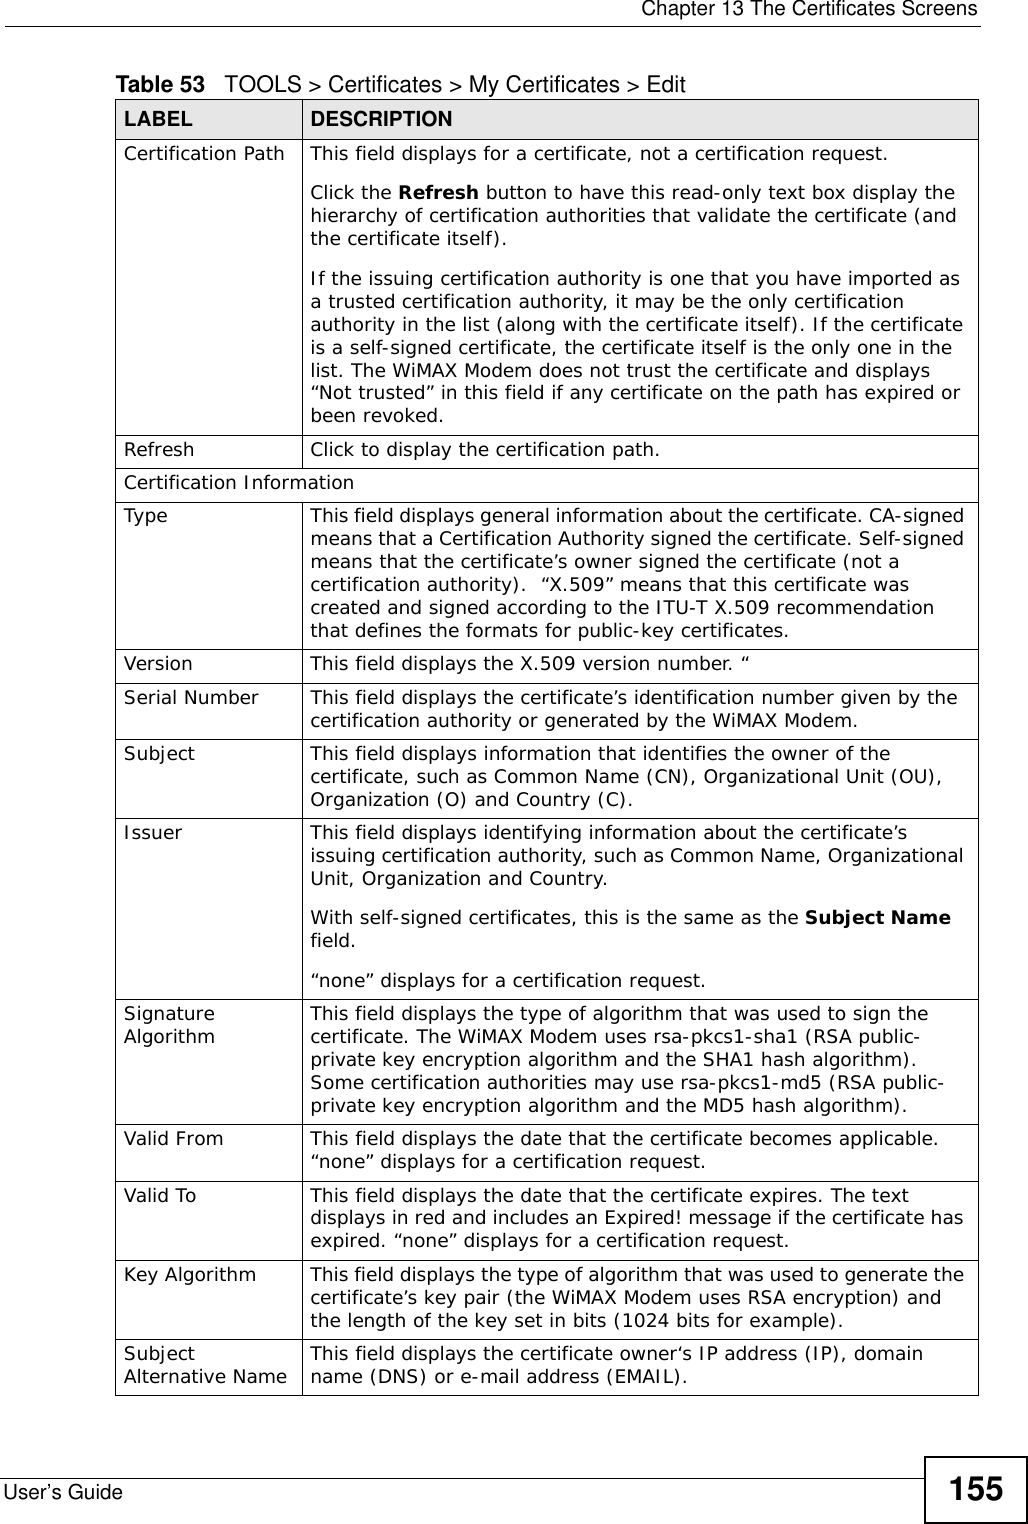
![Chapter 13 The Certificates ScreensUser’s Guide15413.2.2 My Certificate EditClick TOOLS > Certificates > My Certificates then the Edit icon to access this screen. Use this screen to view in-depth certificate information and change the certificate’s name. Figure 61 TOOLS > Certificates > My Certificates > Edit The following table describes the labels in this screen. Table 53 TOOLS > Certificates > My Certificates > EditLABEL DESCRIPTIONName This field displays the identifying name of this certificate. You can use up to 31 alphanumeric and ;‘~!@#$%^&()_+[]{}’,.=- characters.Property Select Default self-signed certificate which signs the imported remote host certificates to use this certificate to sign the remote host certificates you upload in the TOOLS > Certificates > Trusted CAs screen.](https://usermanual.wiki/ZyXEL-Communications/MAX206M1R.User-Manual-1/User-Guide-1141280-Page-154.png)

![Chapter 13 The Certificates ScreensUser’s Guide16013.3.1 Trusted CA Edit Click TOOLS > Certificates > Trusted CAs and then click the Edit icon to open the Trusted CAs screen. Use this screen to view in-depth certificate information and change the certificate’s name.Figure 64 TOOLS > Certificates > Trusted CAs > Edit The following table describes the labels in this screen. Table 57 TOOLS > Certificates > Trusted CAs > EditLABEL DESCRIPTIONName This field displays the identifying name of this certificate. You can use up to 31 alphanumeric and ;‘~!@#$%^&()_+[]{}’,.=- characters.Property Select Default self-signed certificate which signs the imported remote host certificates to use this certificate to sign the remote host certificates you upload in the TOOLS > Certificates > Trusted CAs screen.](https://usermanual.wiki/ZyXEL-Communications/MAX206M1R.User-Manual-1/User-Guide-1141280-Page-160.png)