ZyXEL Communications NBG420N Wireless N Router User Manual NBG334W User Guide
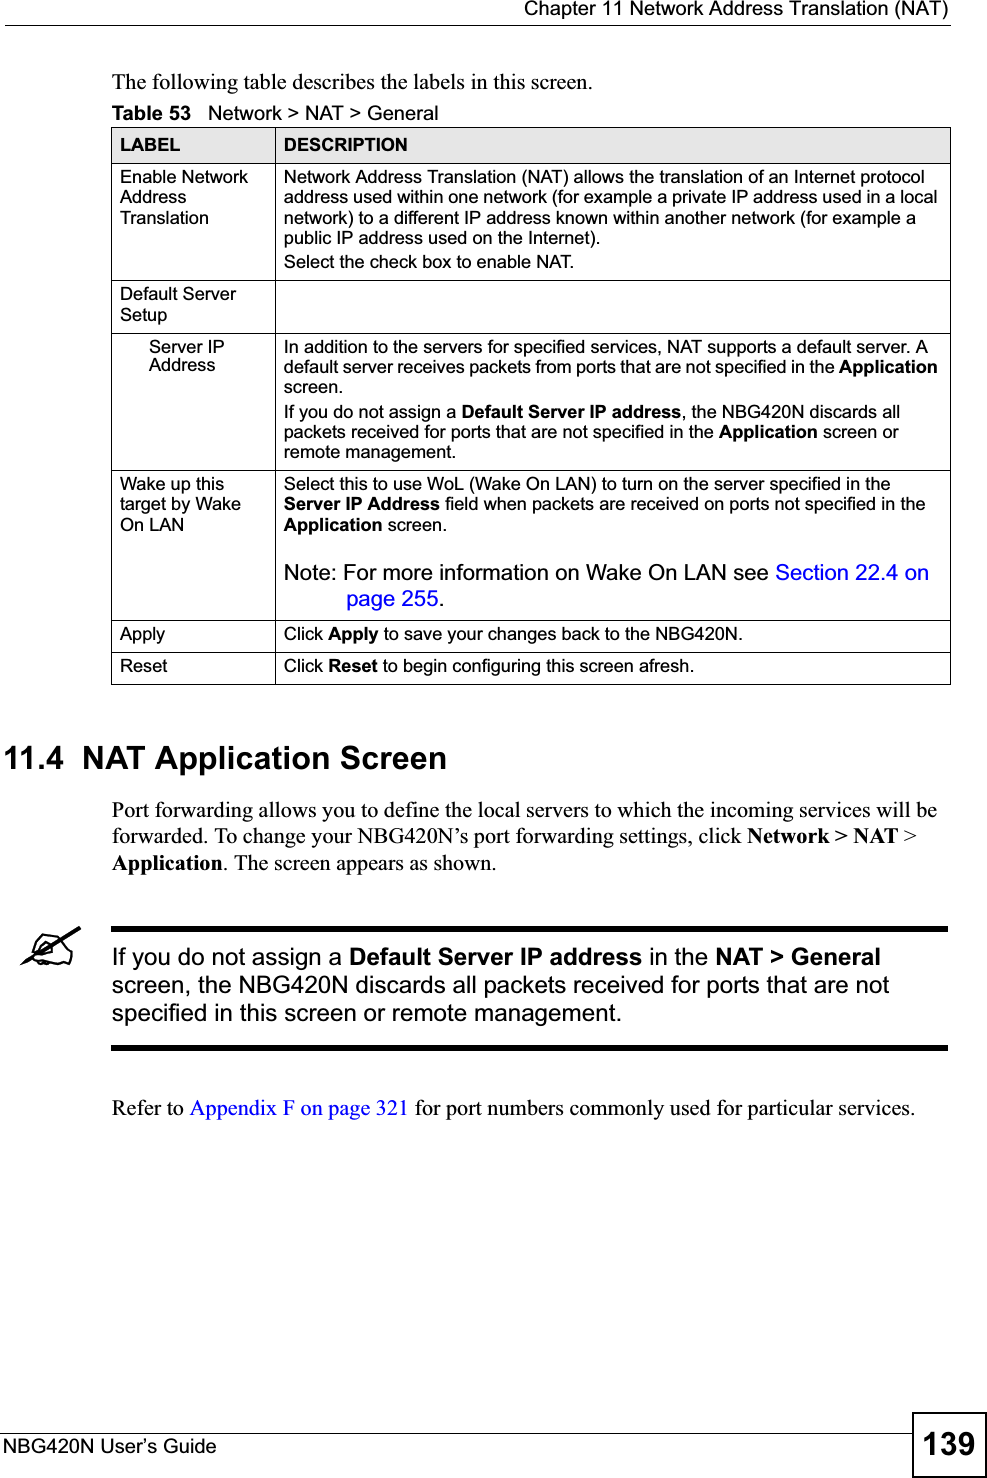
ZyXEL Communications Corporation Wireless N Router NBG334W User Guide
Contents
- 1. User manual part1
- 2. User manual part2
- 3. User manual part3
- 4. User manual part4
User manual part2
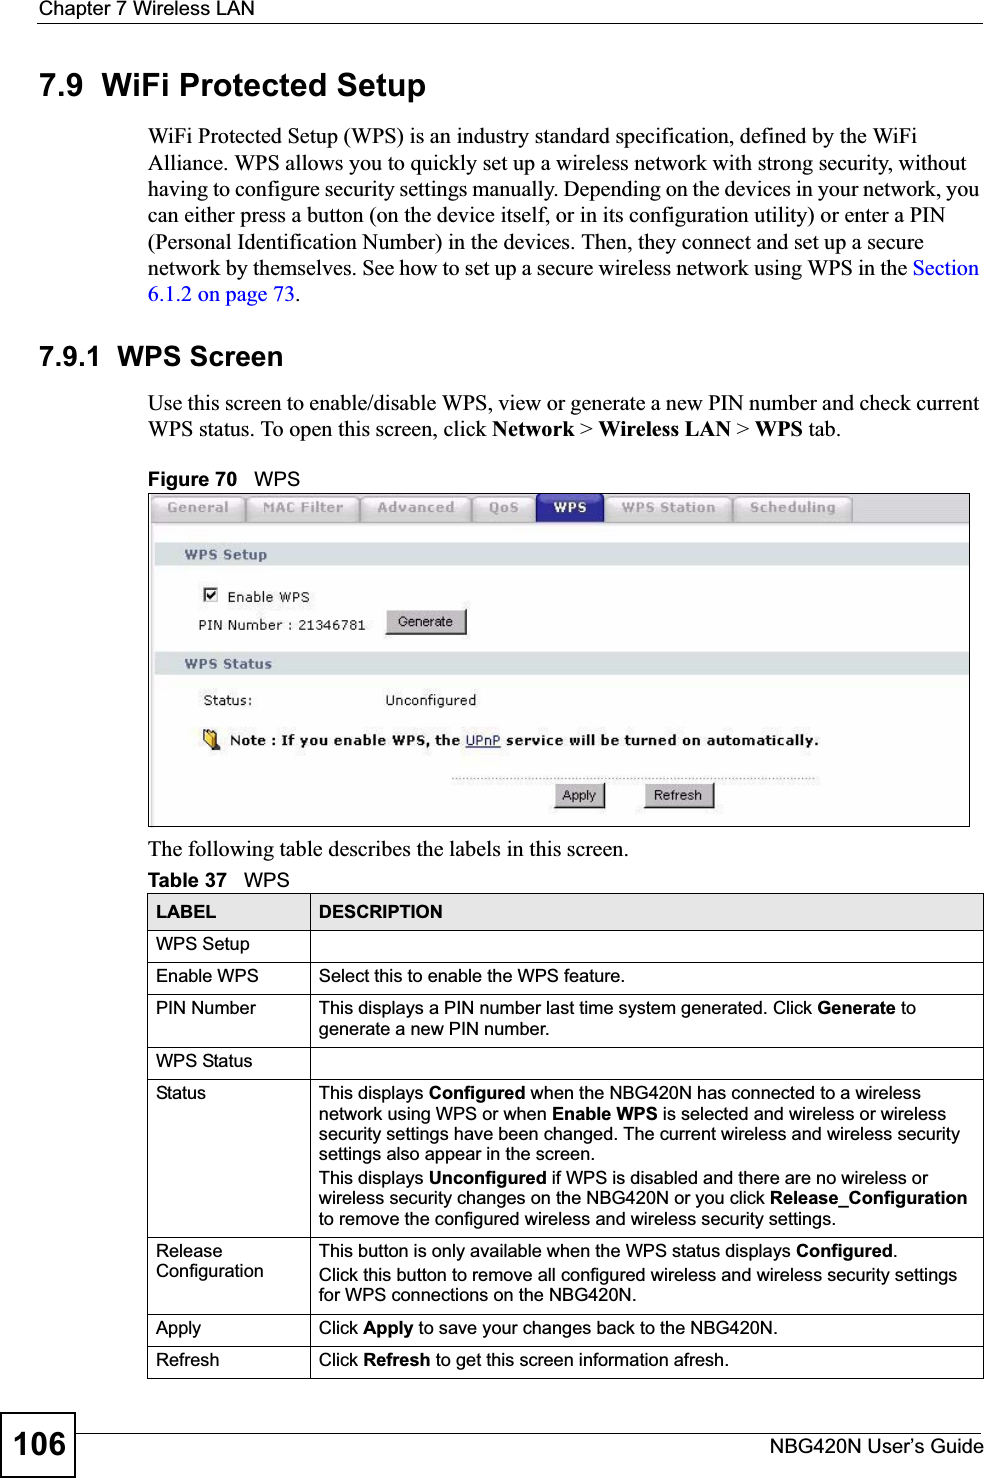

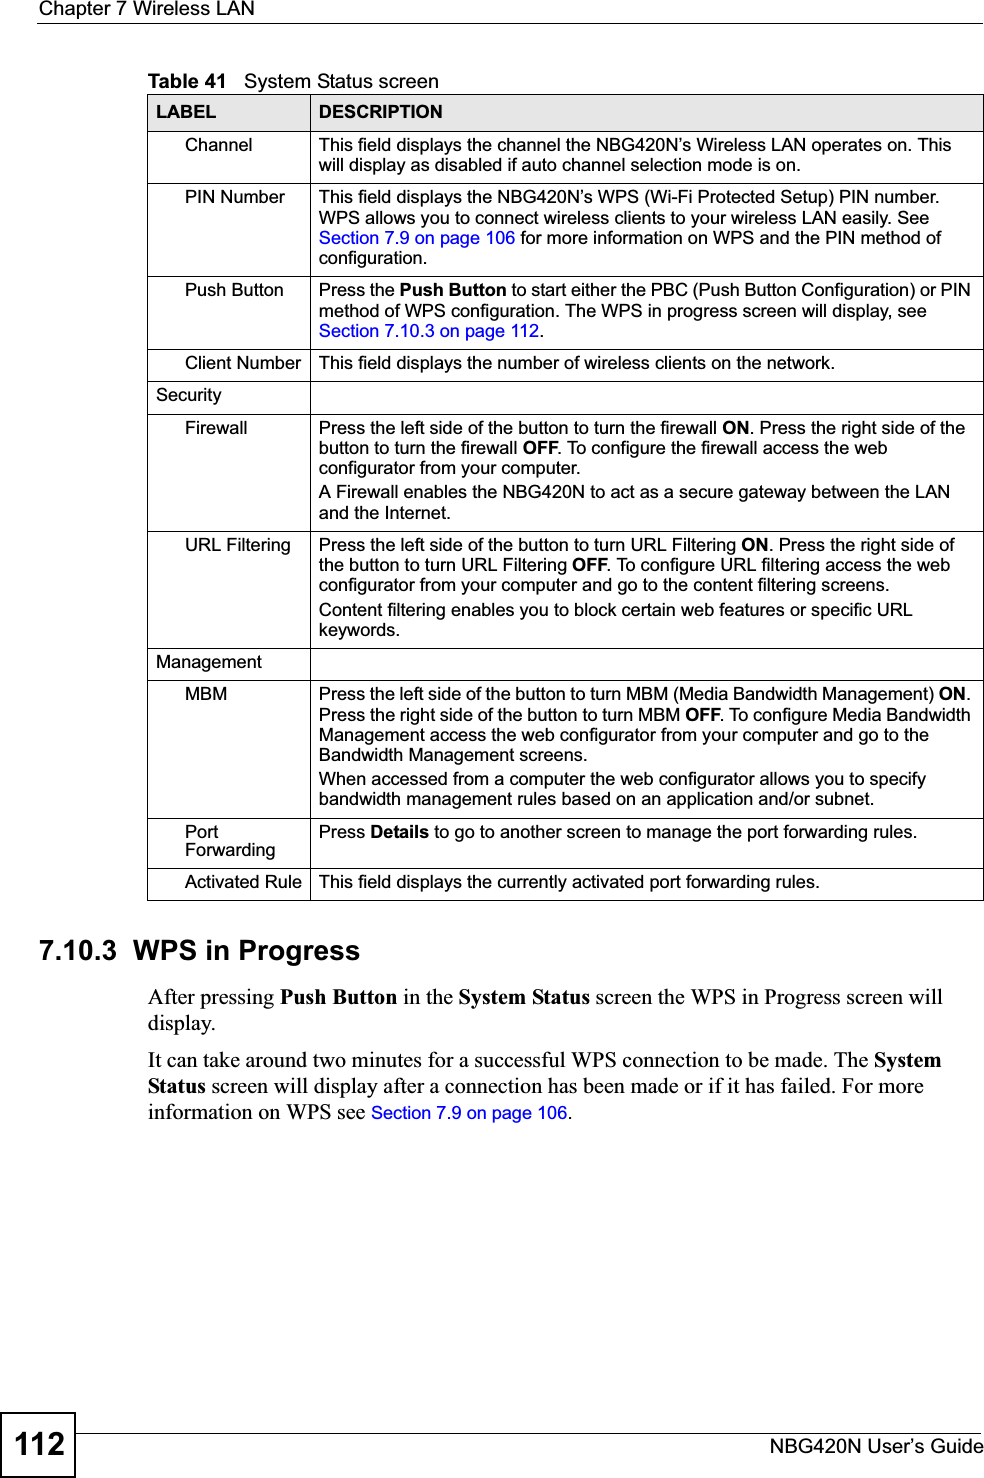

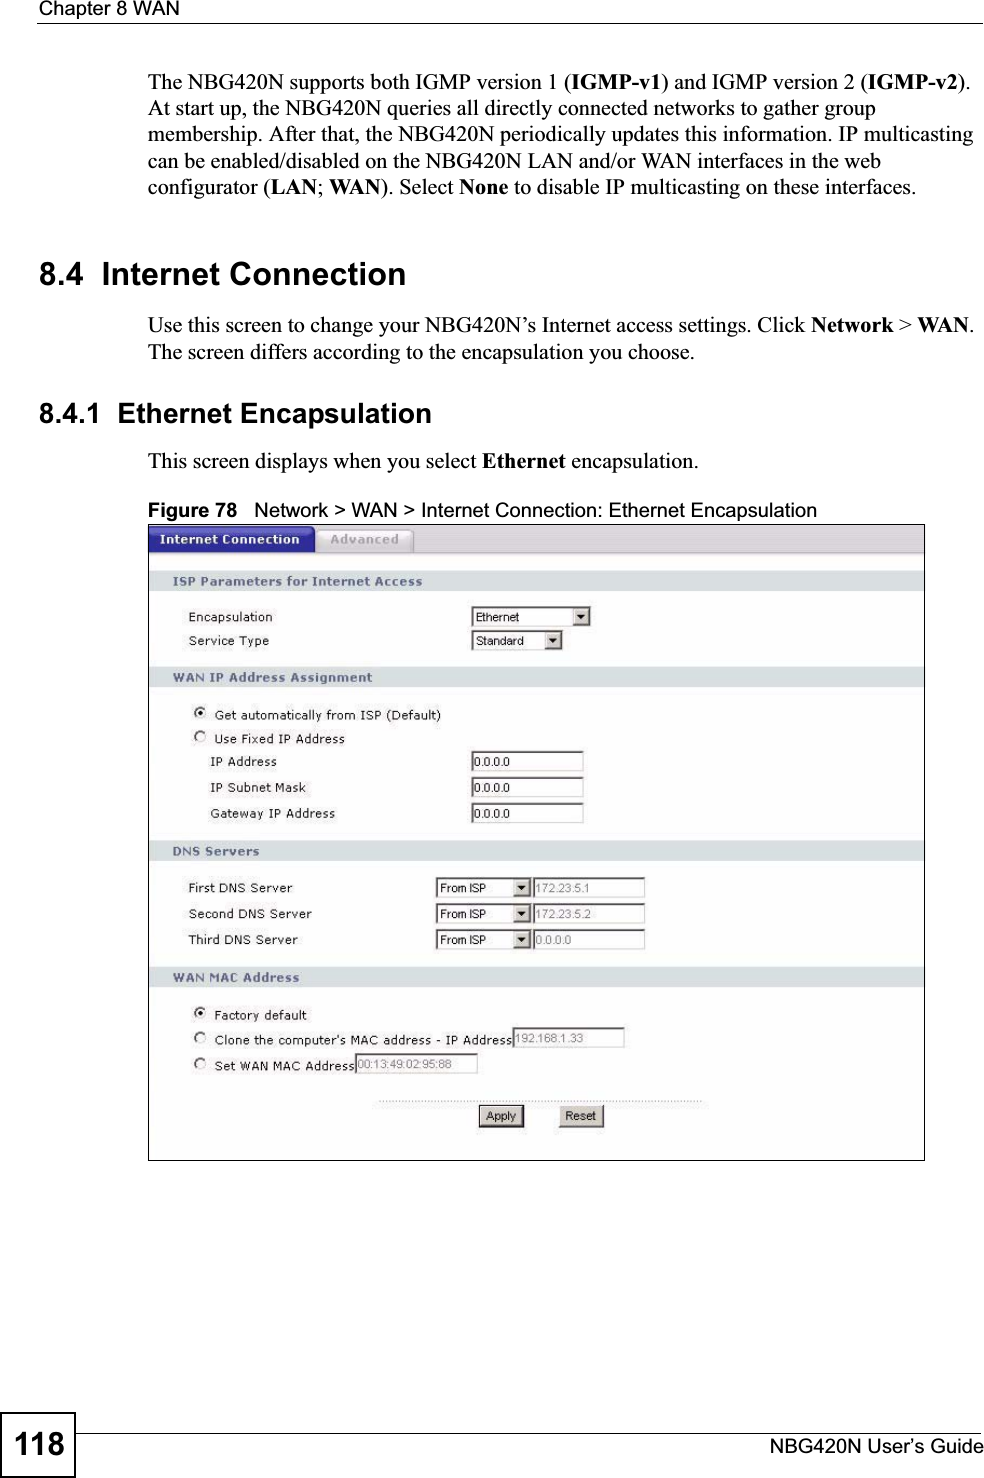
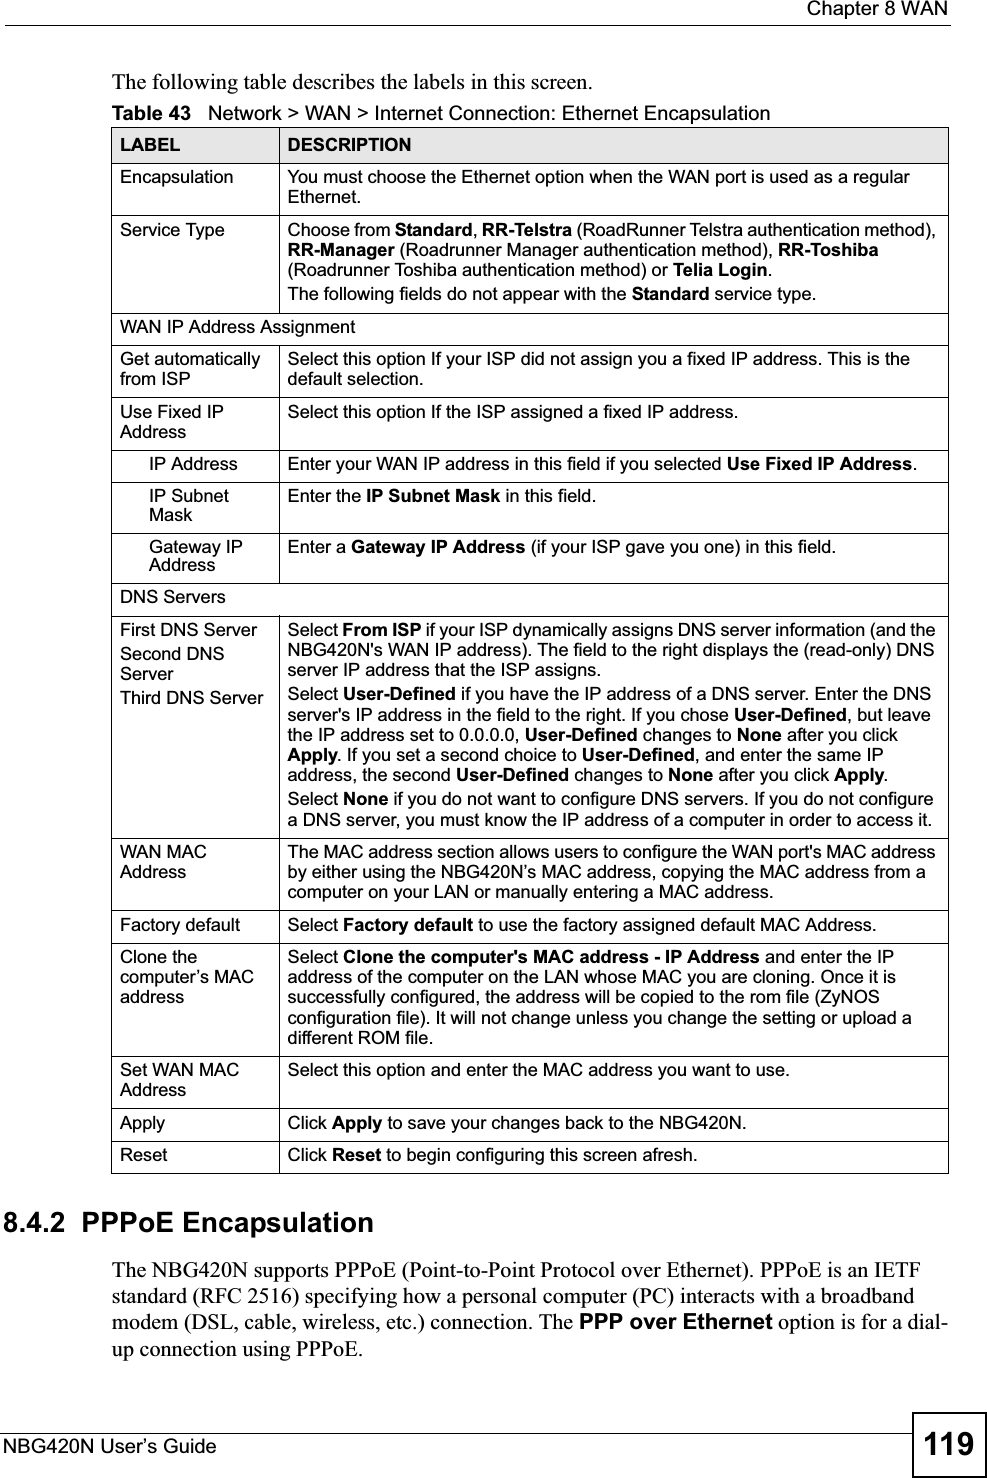

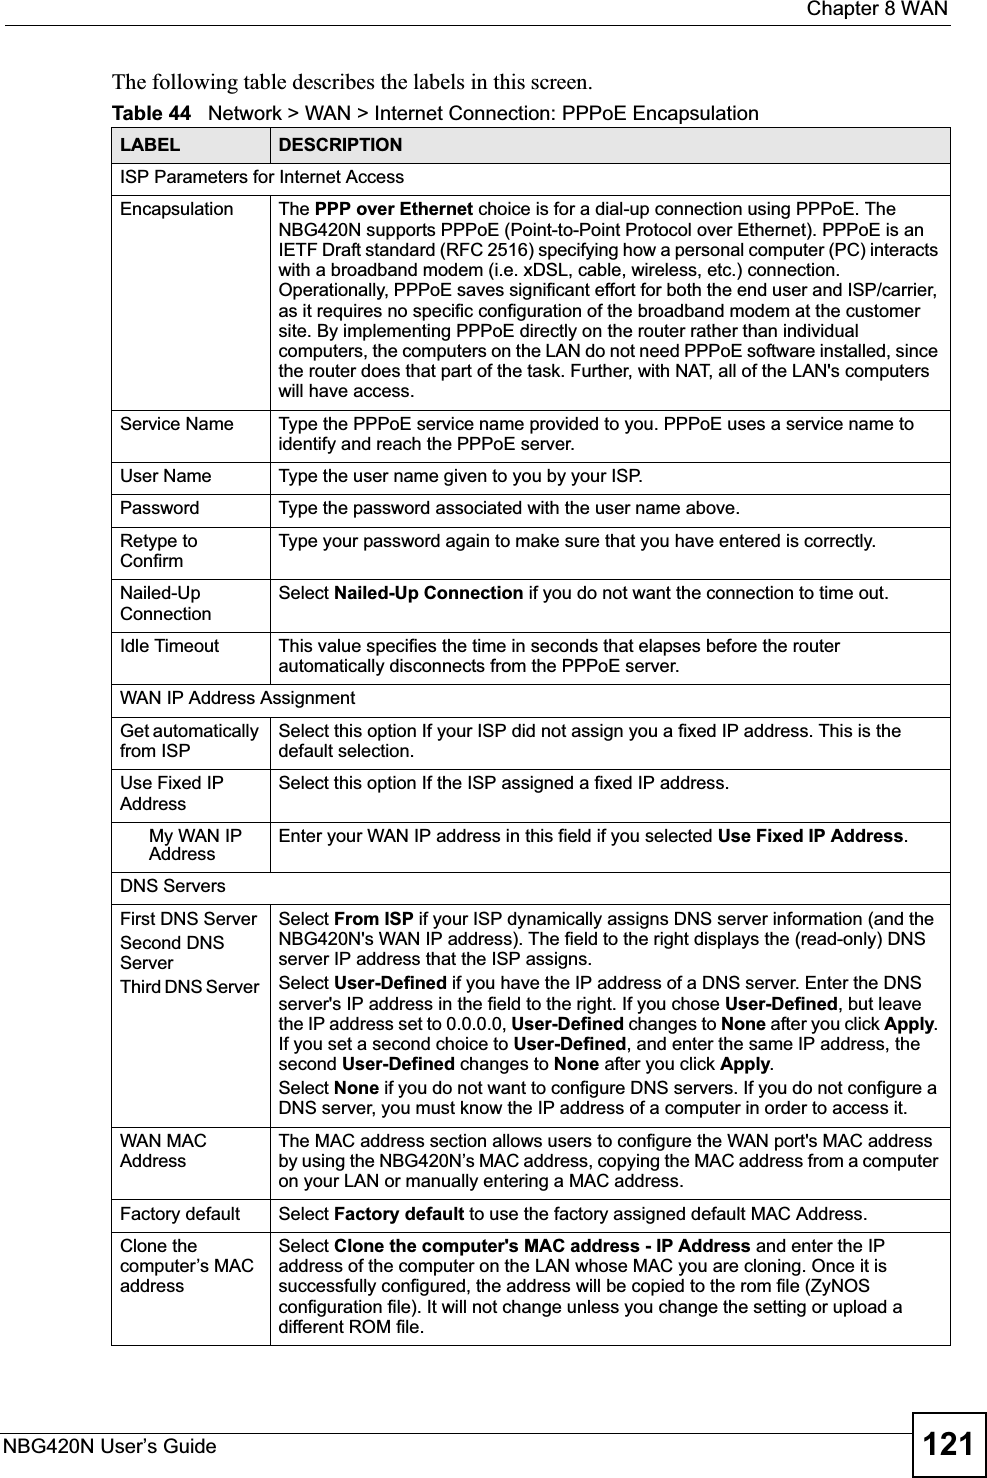


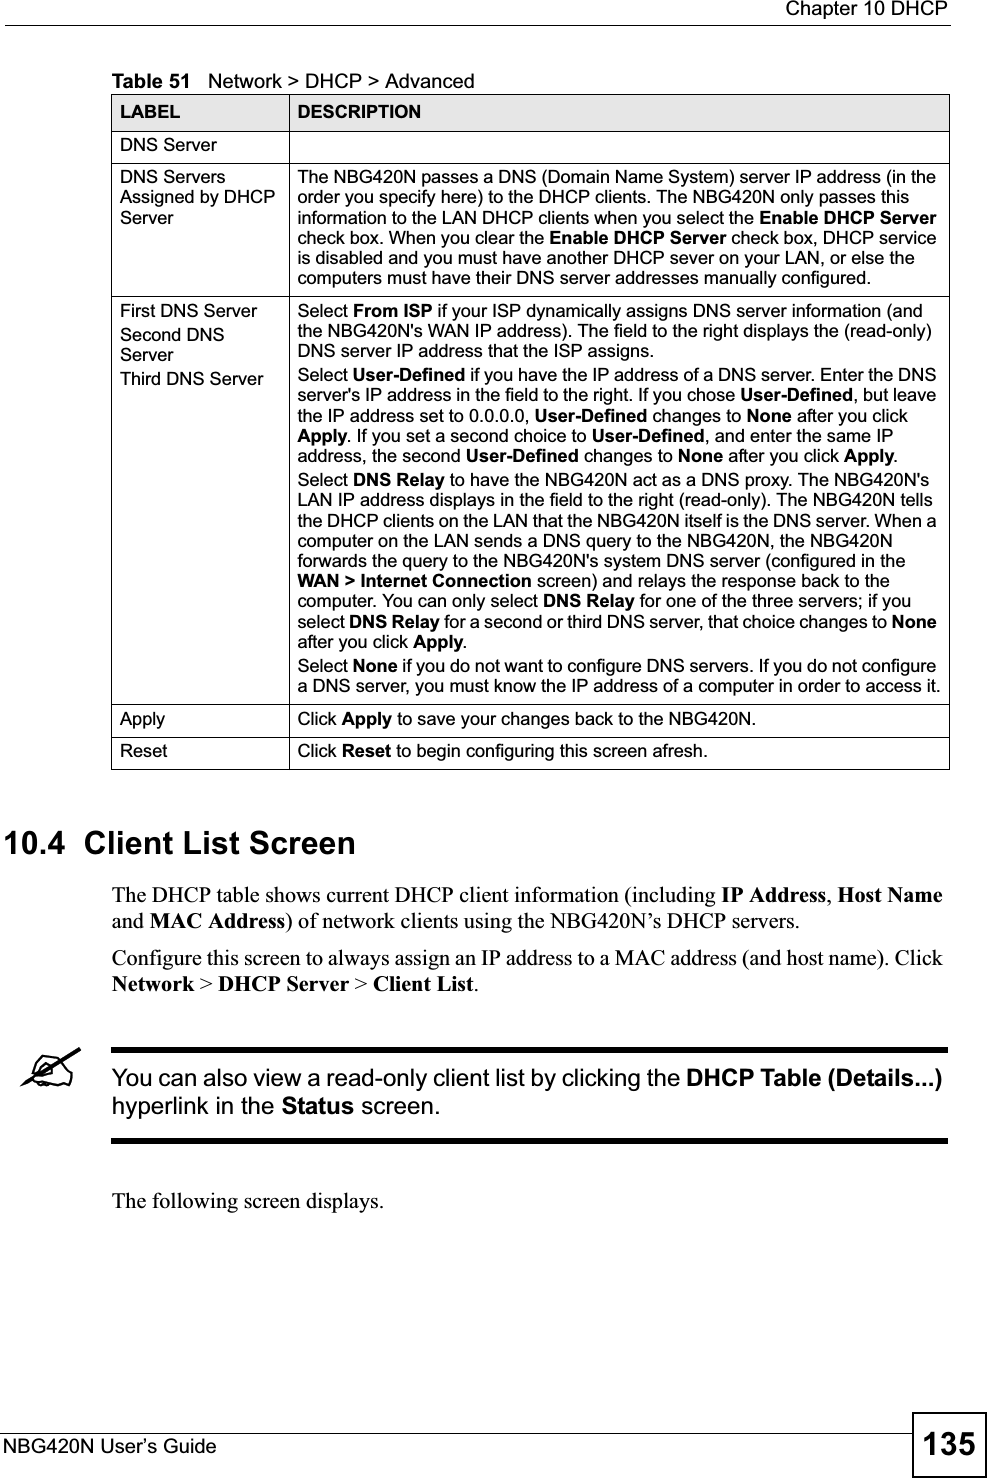
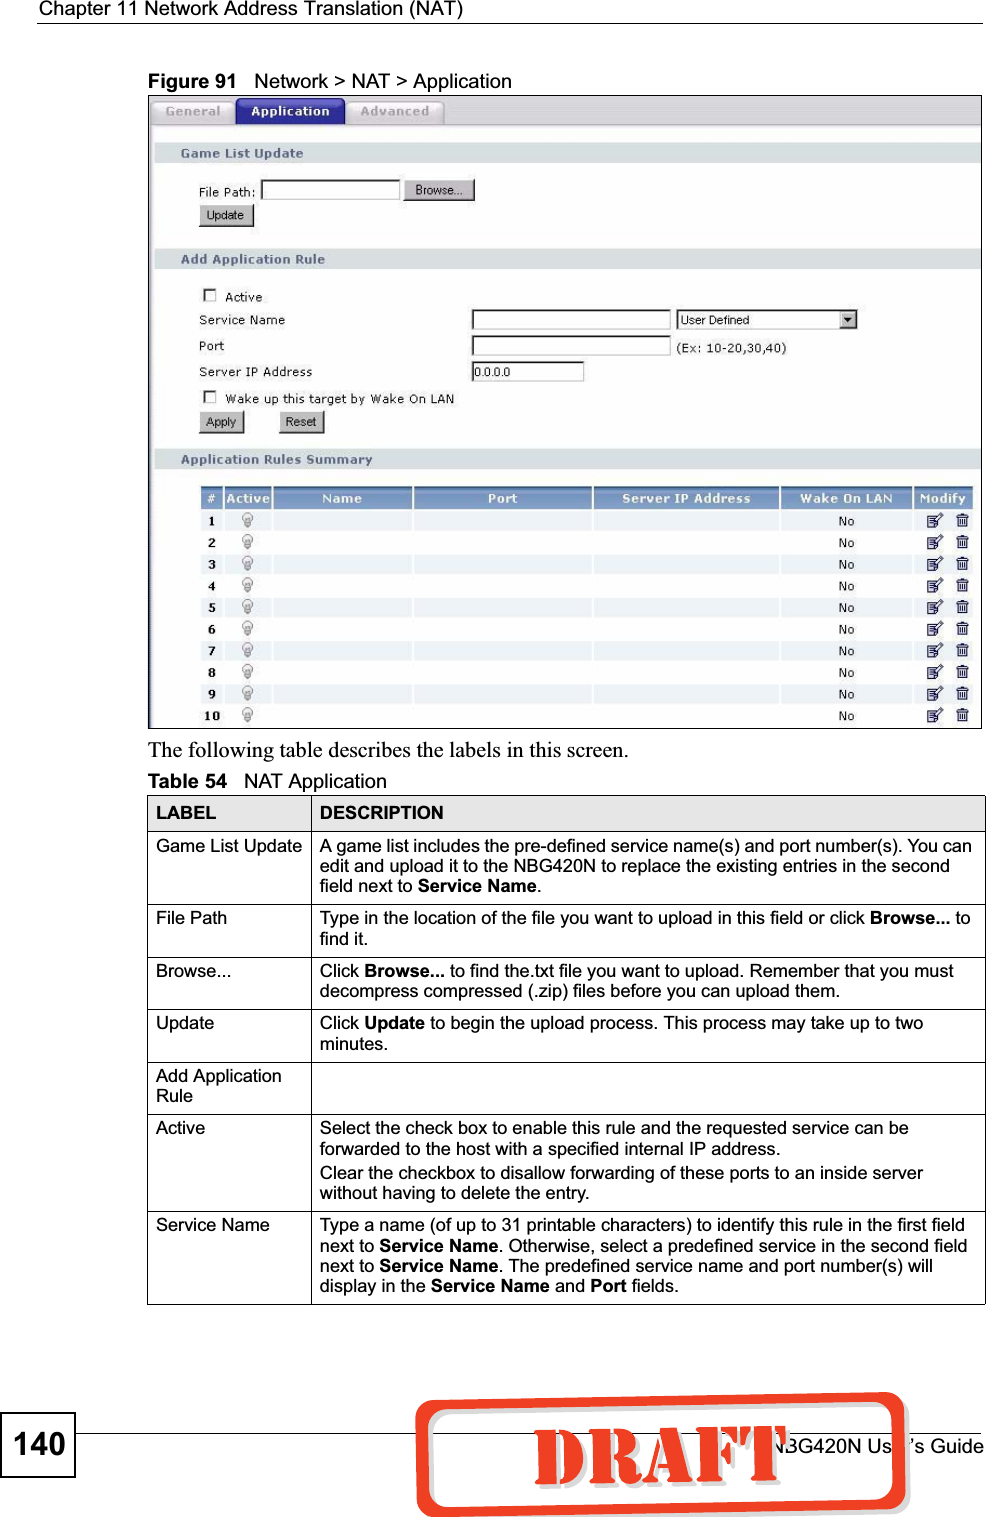
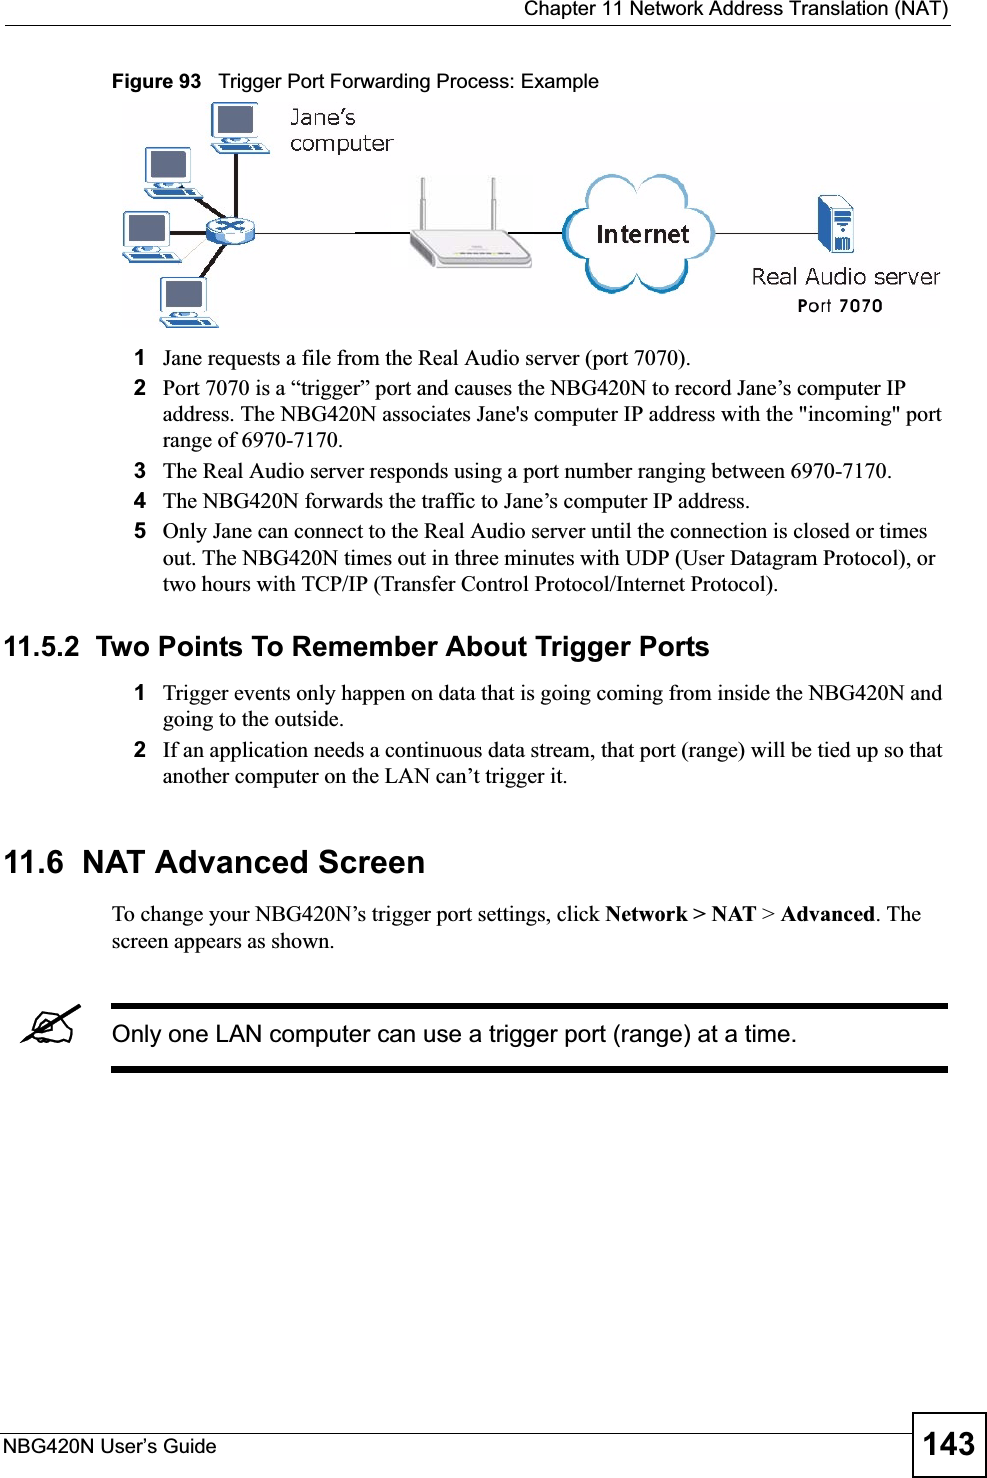
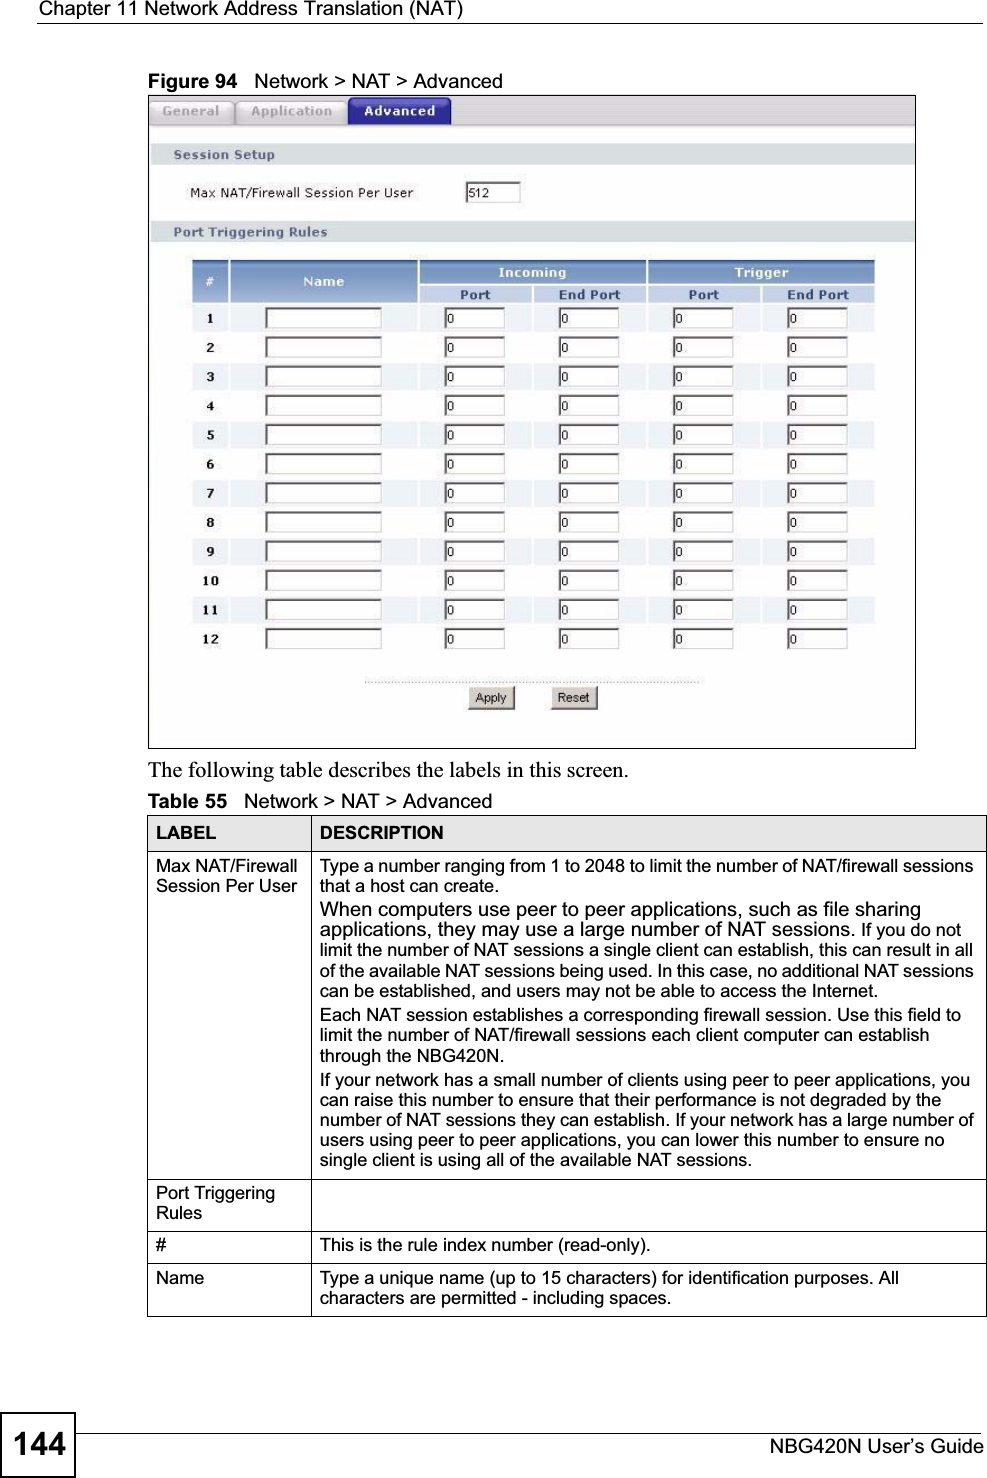

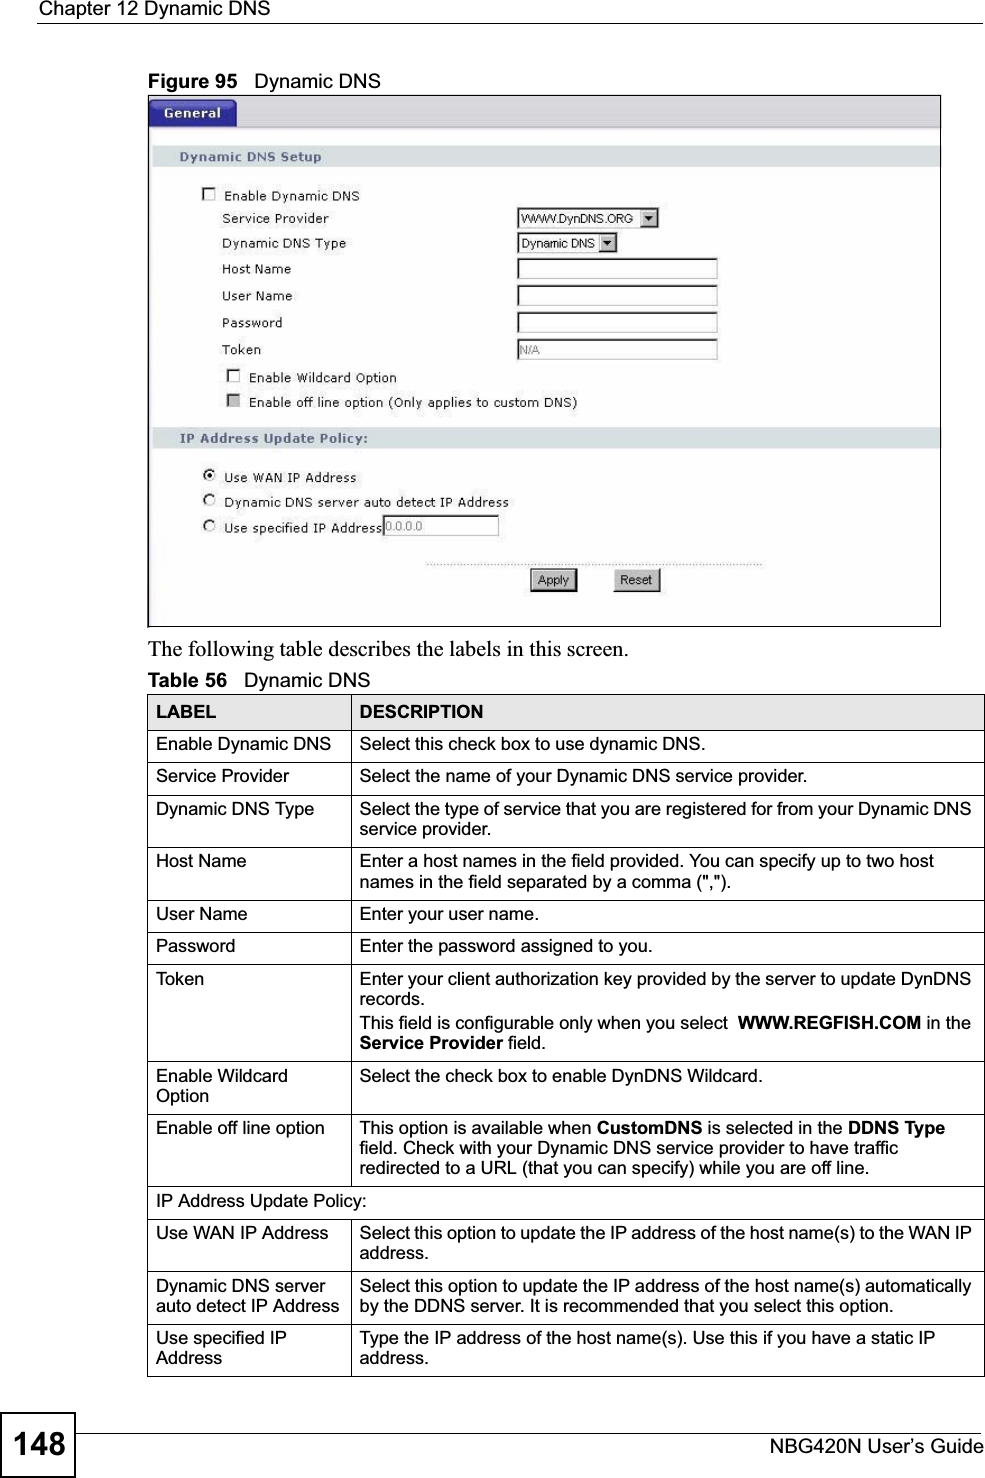


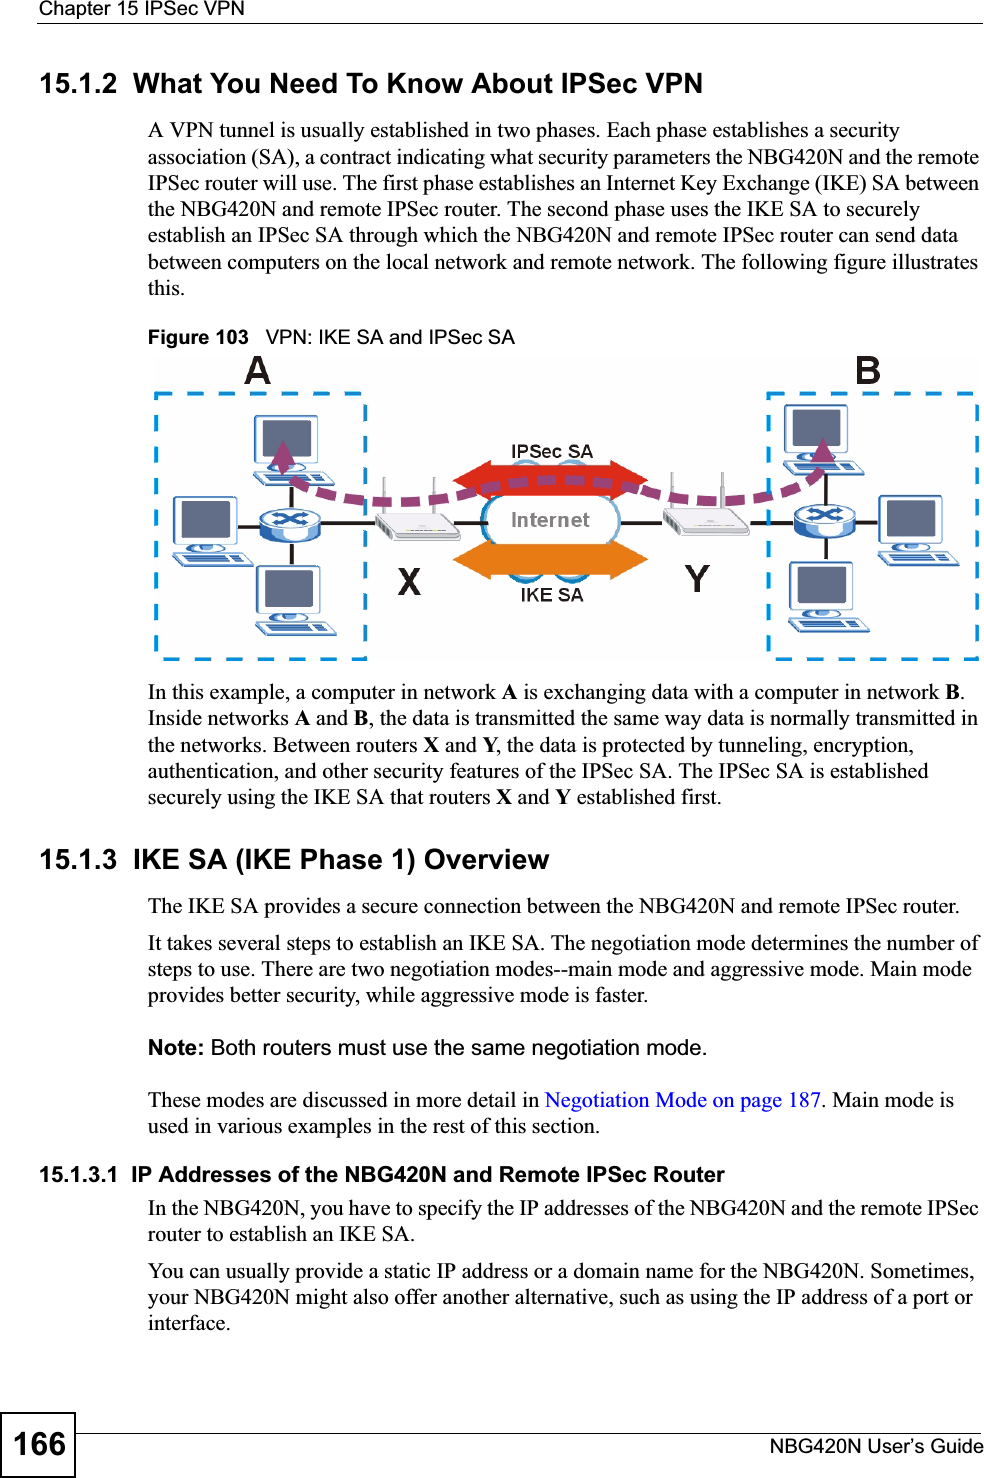
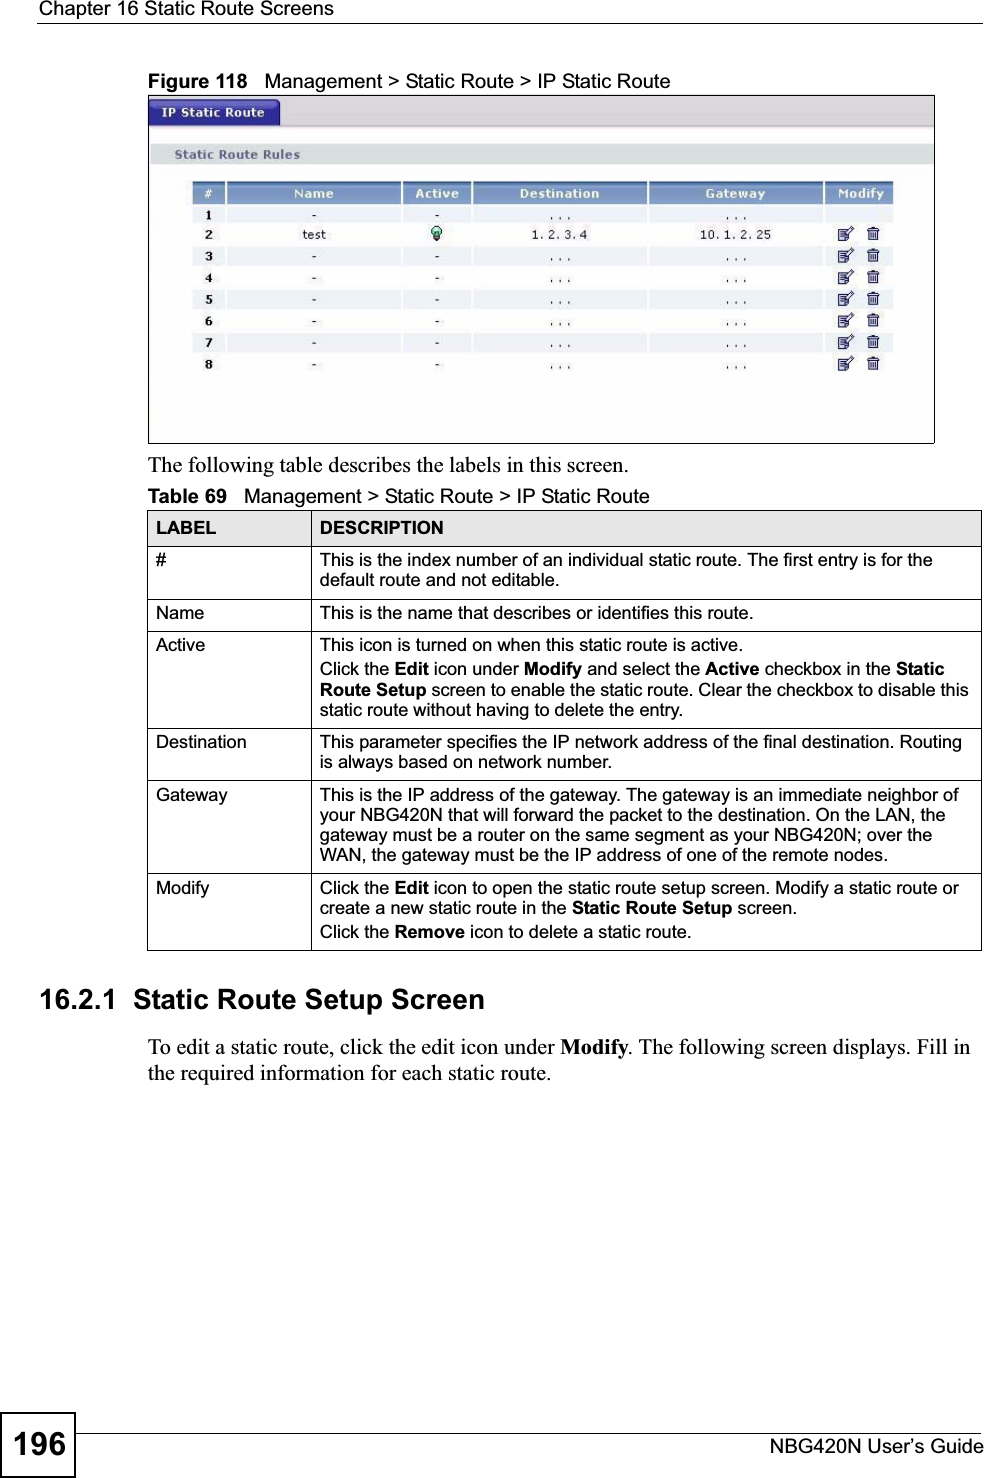
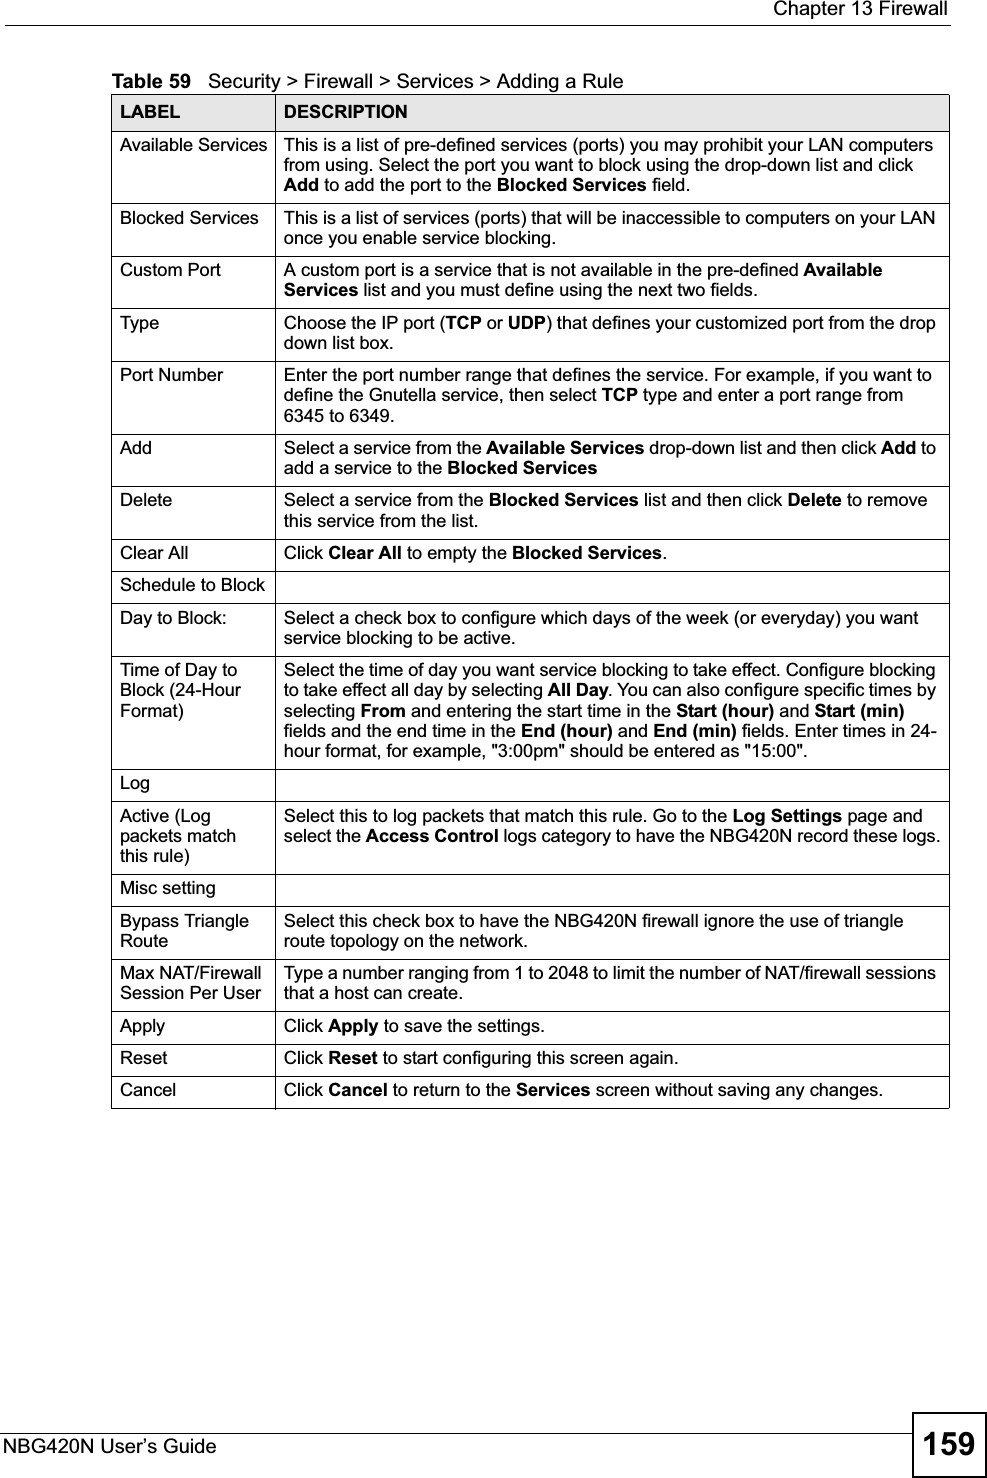
![Chapter 13 FirewallNBG420N User’s Guide 15713.4.1 The Add Firewall Rule ScreenIf you click Add or the Modify icon on an existing rule, the Add Firewall Rule screen is displayed. Use this screen to add a firewall rule or to modify an existing one.Do not respond to requests for unauthorized servicesSelect this option to prevent hackers from finding the NBG420N by probing for unused ports. If you select this option, the NBG420N will not respond to port request(s) for unused ports, thus leaving the unused ports and the NBG420N unseen. By default this option is not selected and the NBG420N will reply with an ICMP Port Unreachable packet for a port probe on its unused UDP ports, and a TCP Reset packet for a port probe on its unused TCP ports. Note that the probing packets must first traverse the NBG420N's firewall mechanism before reaching this anti-probing mechanism. Therefore if the firewall mechanism blocks a probing packet, the NBG420N reacts based on the firewall policy, which by default, is to send a TCP reset packet for a blocked TCP packet. You can use the command "sys firewall tcprst rst [on|off]" to change this policy. When the firewall mechanism blocks a UDP packet, it drops the packet without sending a response packet.Firewall Rule# This is your firewall rule number. The ordering of your rules is important as rules are applied in turn. Use the Move button to rearrange the order of the rules.Active This icon is green when the rule is turned on. The icon is grey when the rule is turned off. Service Name This field displays the services and port numbers to which this firewall rule applies.IP This field displays the IP address(es) the rule applies to.Schedule This field displays the days the firewall rule is active.Log This field shows you whether a log will be created when packets match the rule (Match) or not (No).Modify Click the Edit icon to modify an existing rule setting in the fields under the Add Firewall Rule screen.Click the Remove icon to delete a rule. Note that subsequent firewall rules move up by one when you take this action.Add Click the Add button to display the screen where you can configure a new firewall rule. Modify the number in the textbox to add the rule before a specific rule number.Move The Move button moves a rule to a different position. In the first text box enter the number of the rule you wish to move. In the second text box enter the number of the rule you wish to move the first rule to and click the Move button.Misc settingBypass Triangle RouteSelect this check box to have the NBG420N firewall ignore the use of triangle route topology on the network. Max NAT/Firewall Session Per UserType a number ranging from 1 to 2048 to limit the number of NAT/firewall sessions that a host can create.Apply Click Apply to save the settings. Reset Click Reset to start configuring this screen again. Table 58 Security > Firewall > ServicesLABEL DESCRIPTION](https://usermanual.wiki/ZyXEL-Communications/NBG420N.User-manual-part2/User-Guide-928778-Page-57.png)

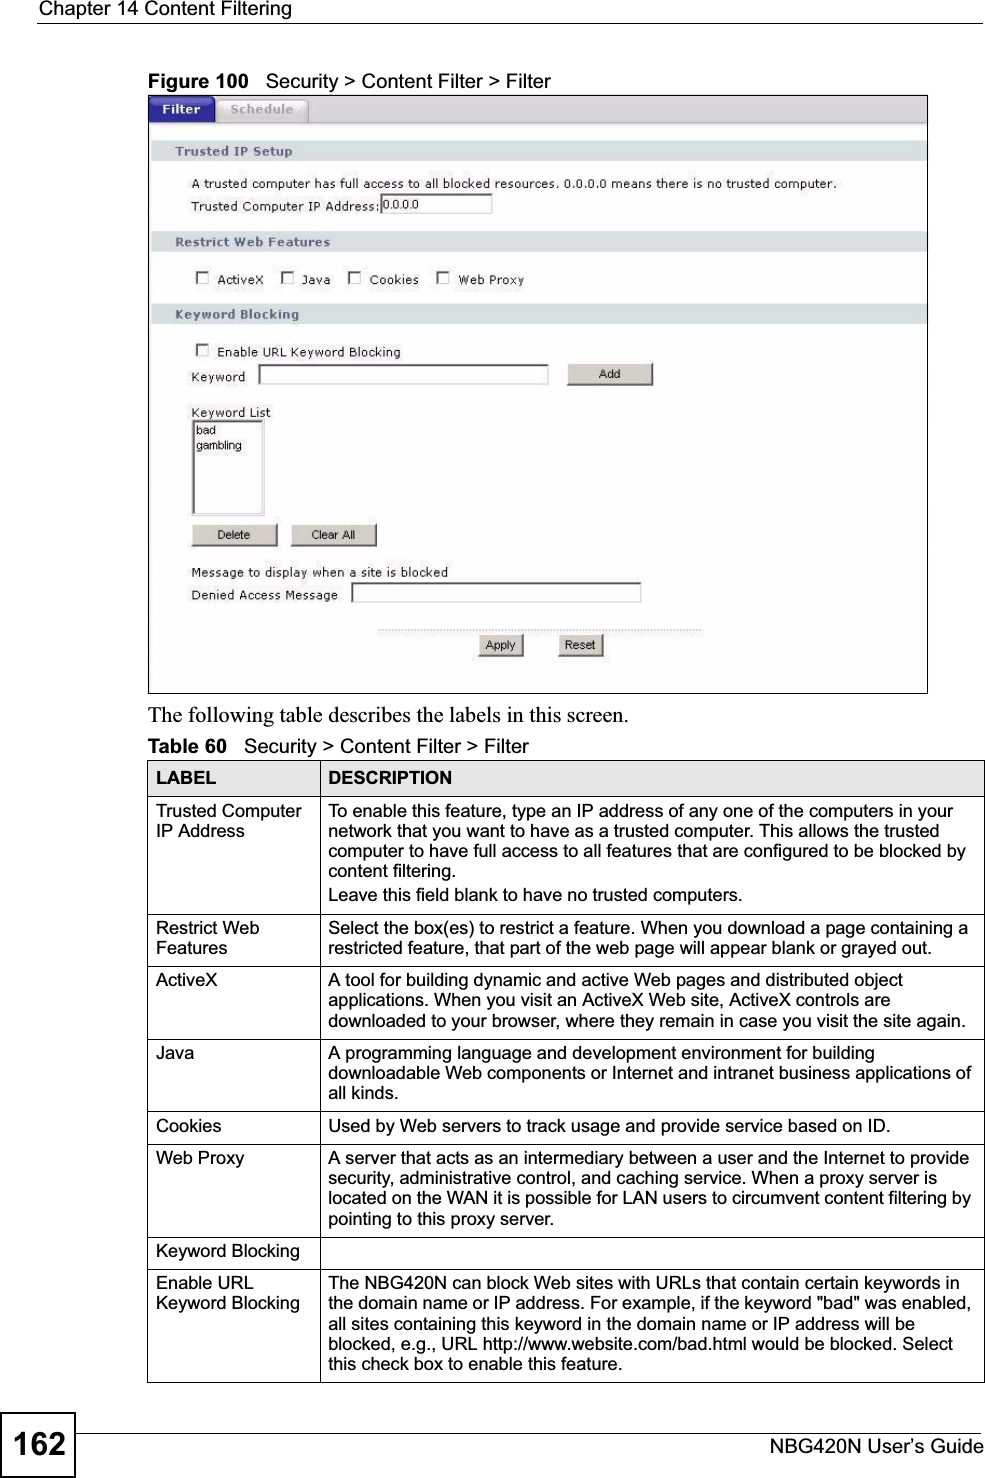
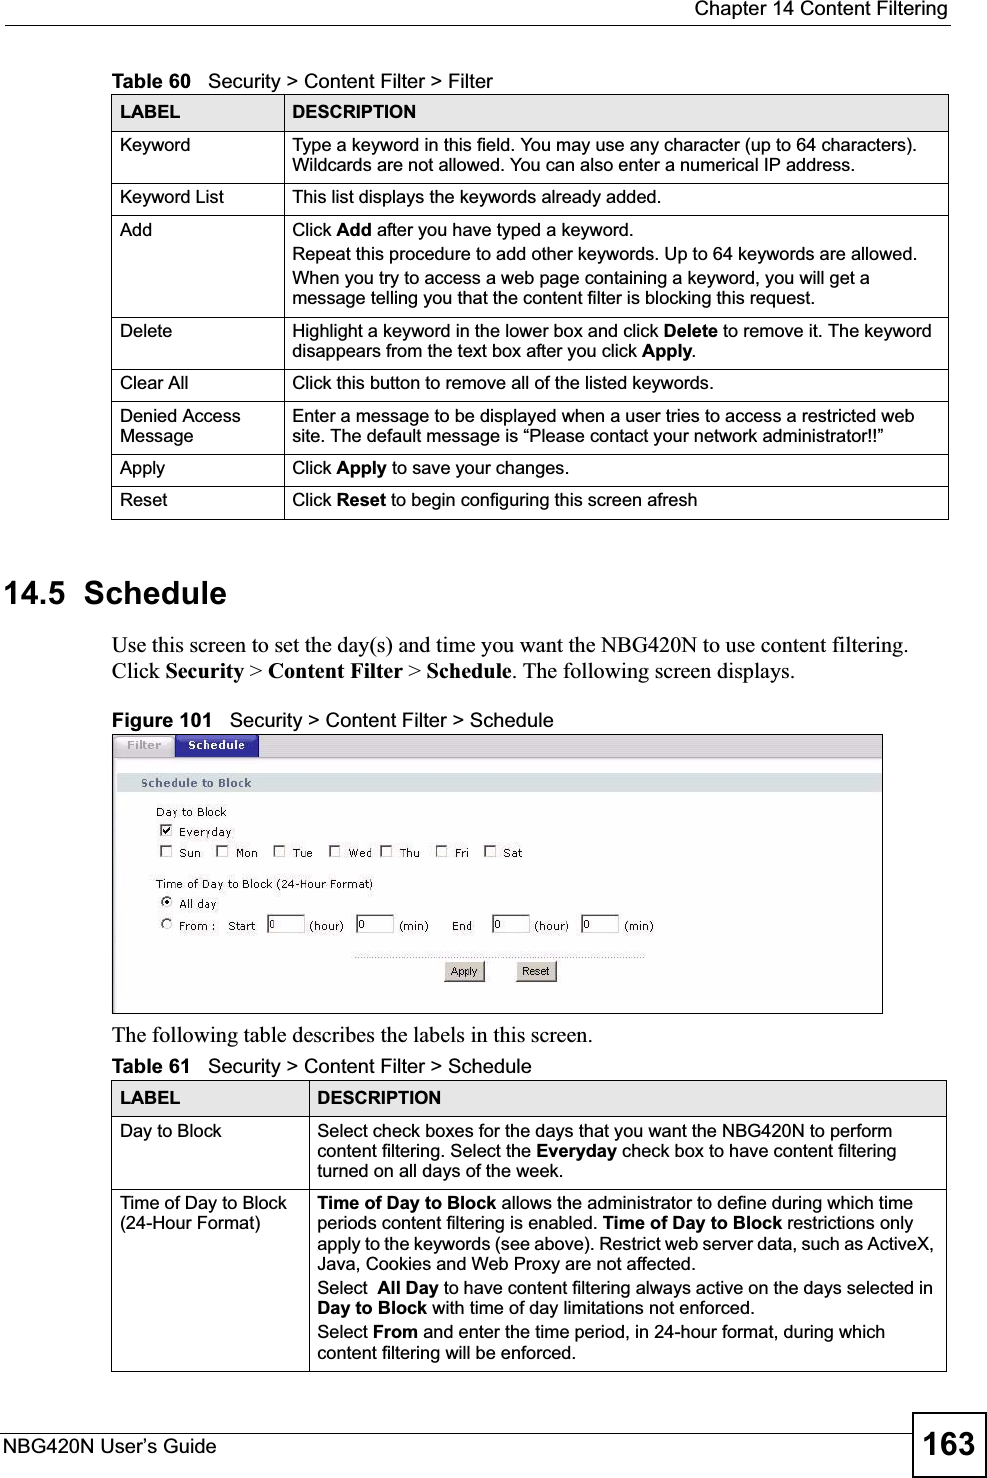
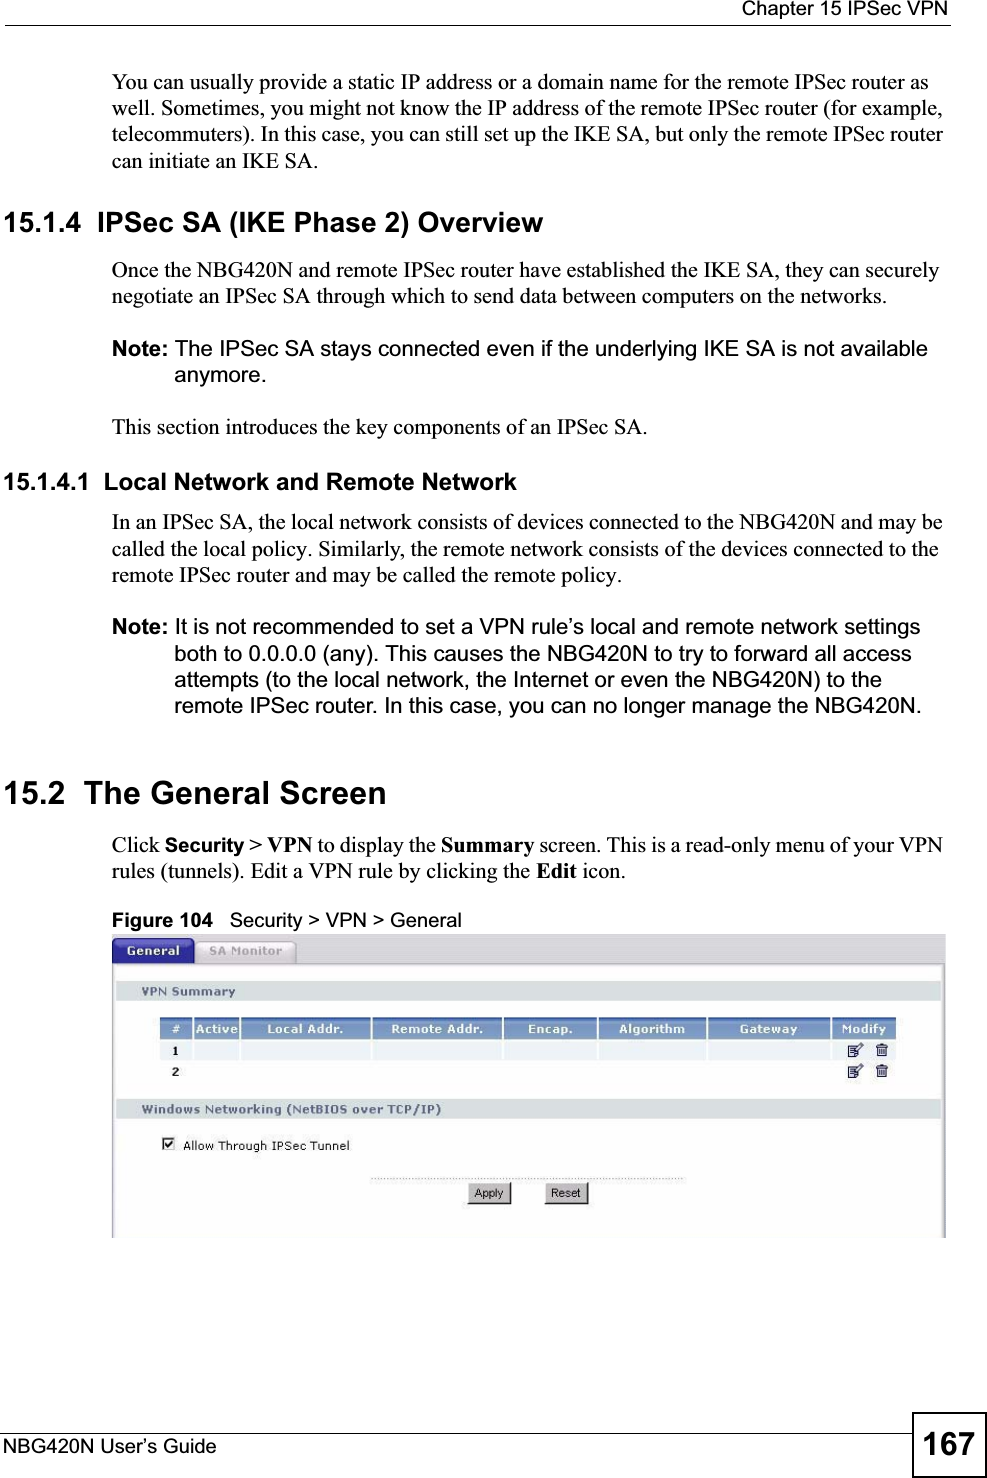
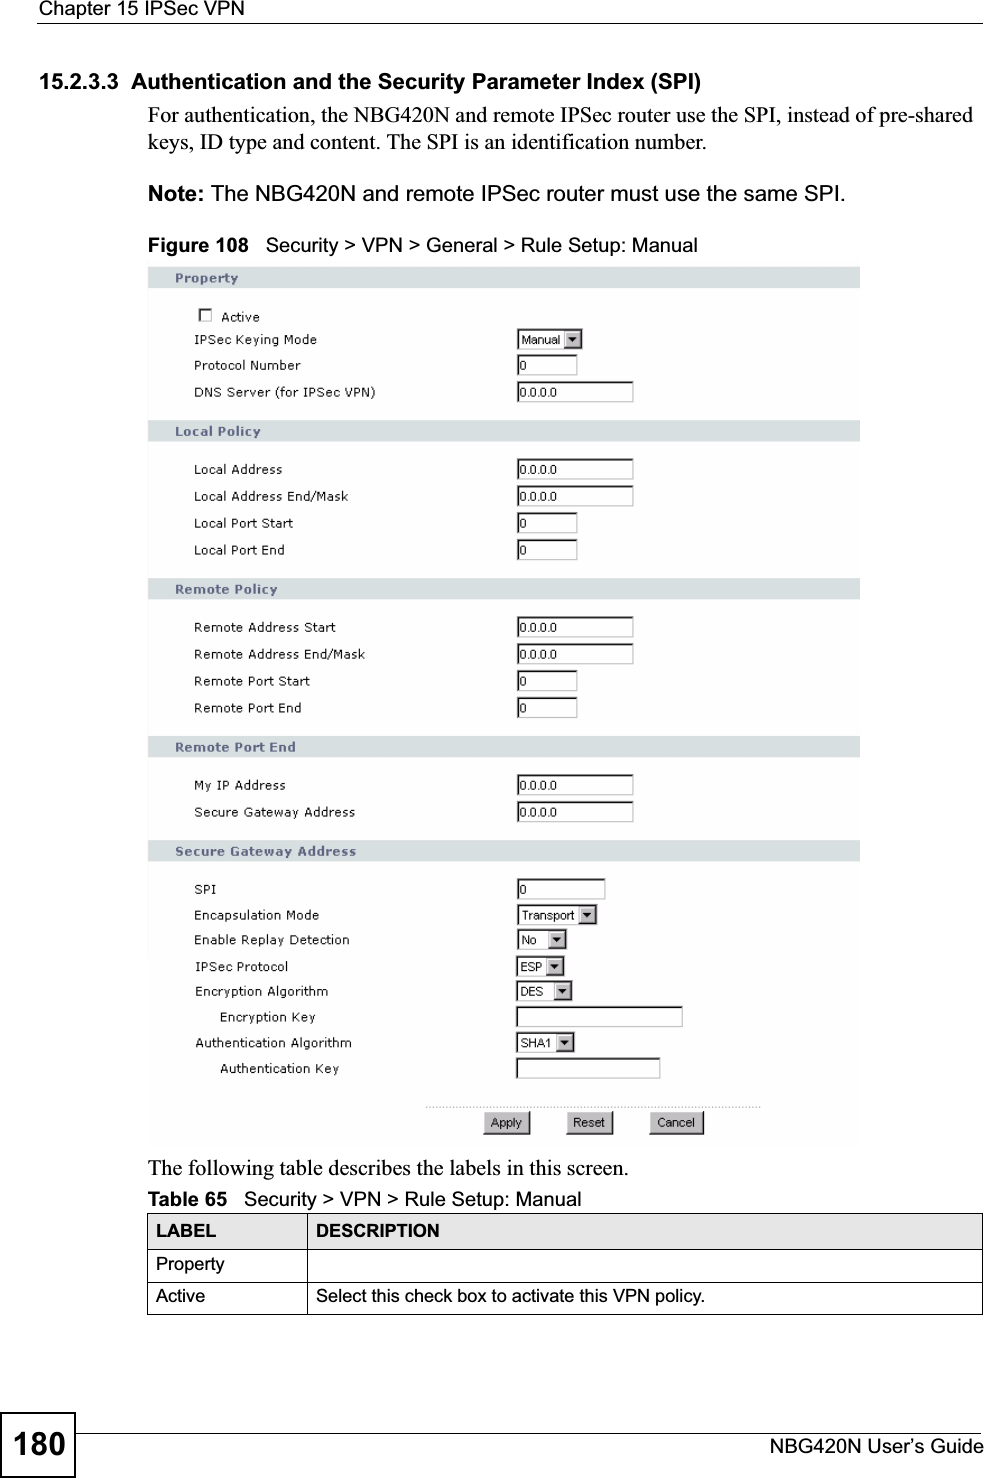
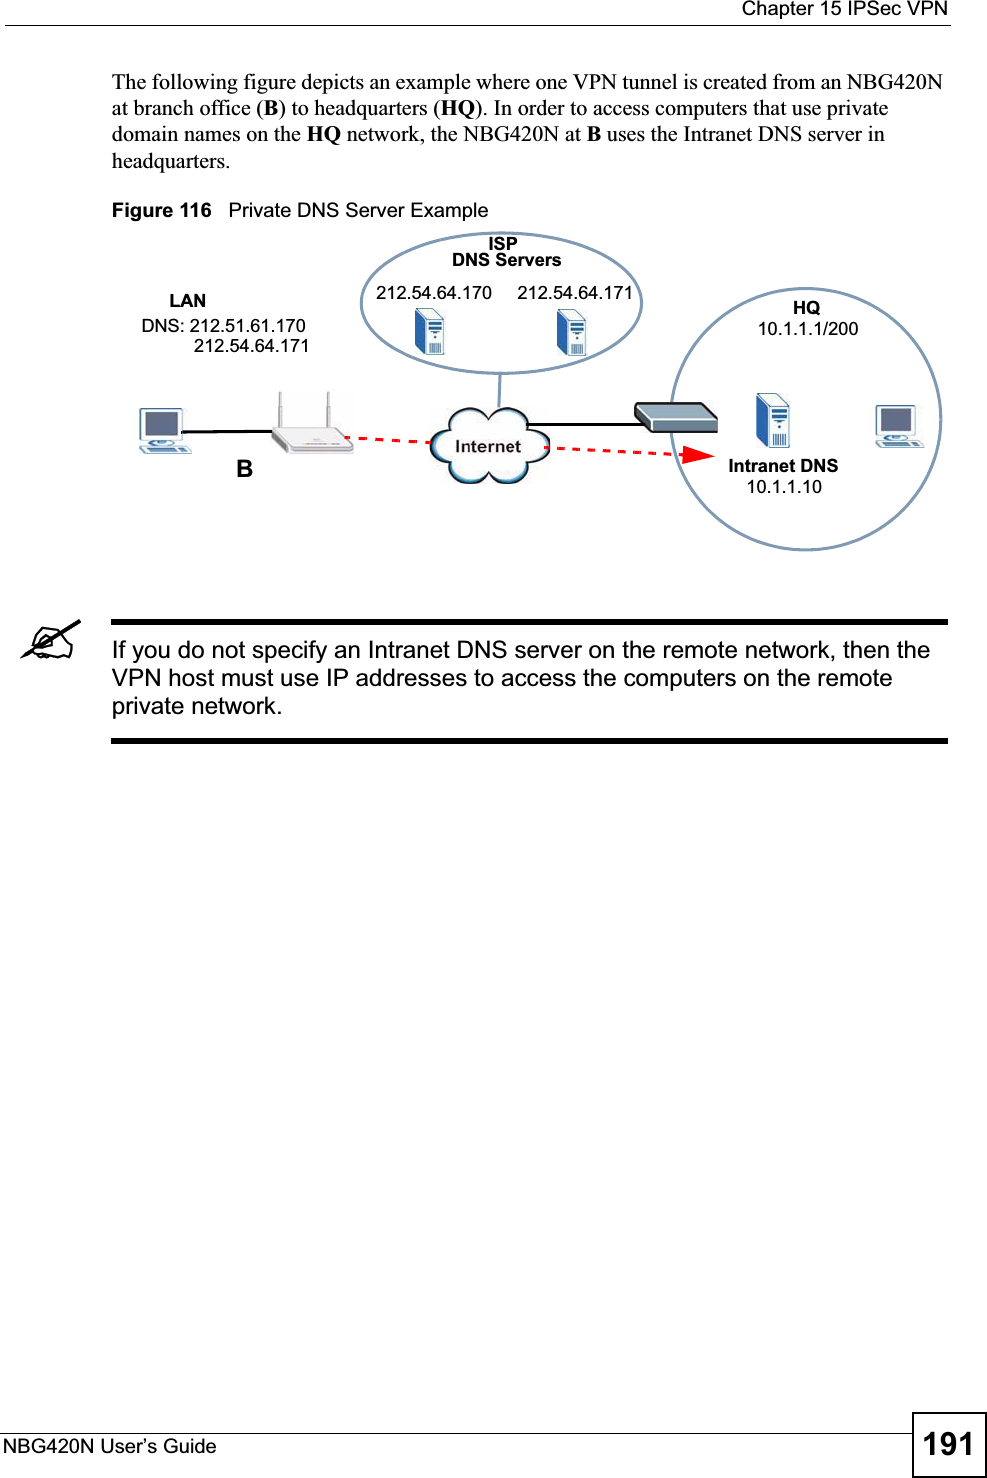
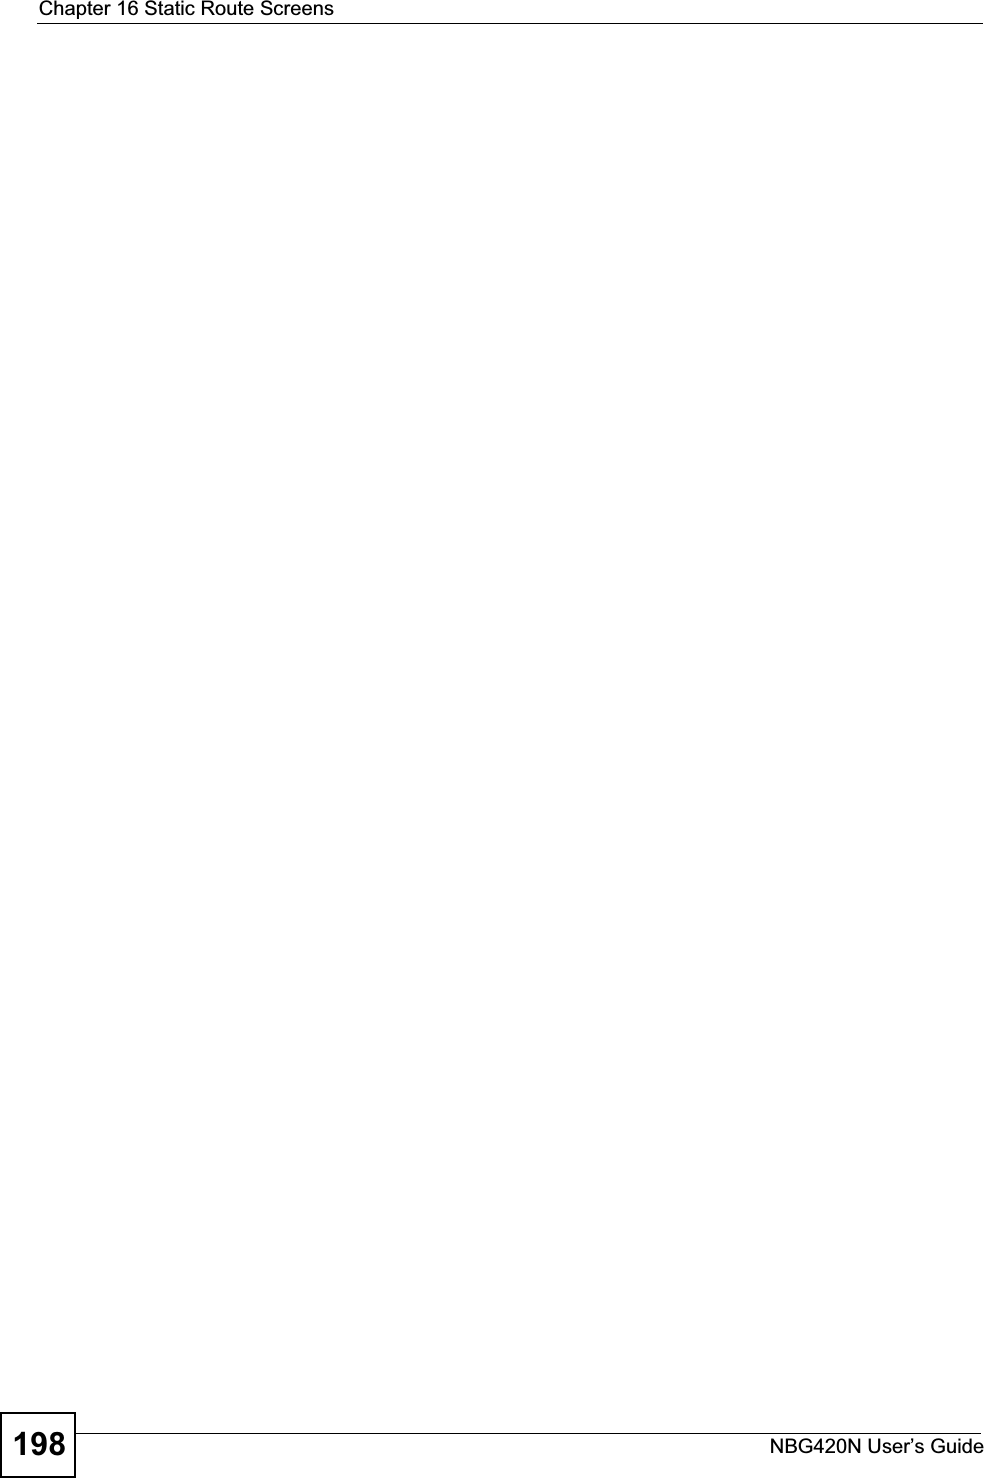
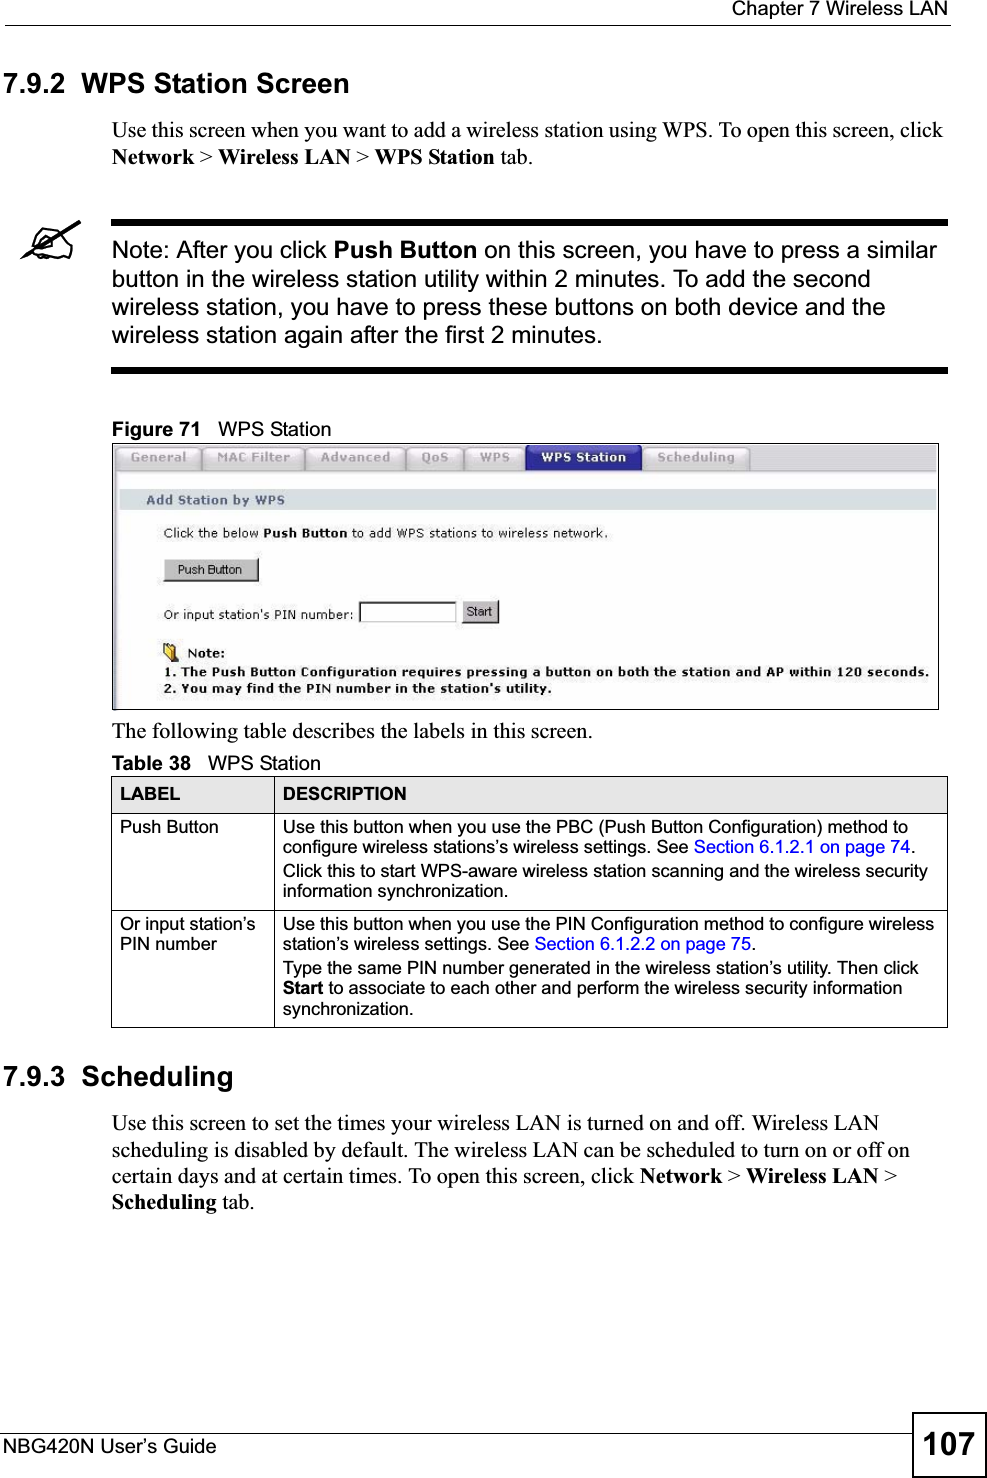
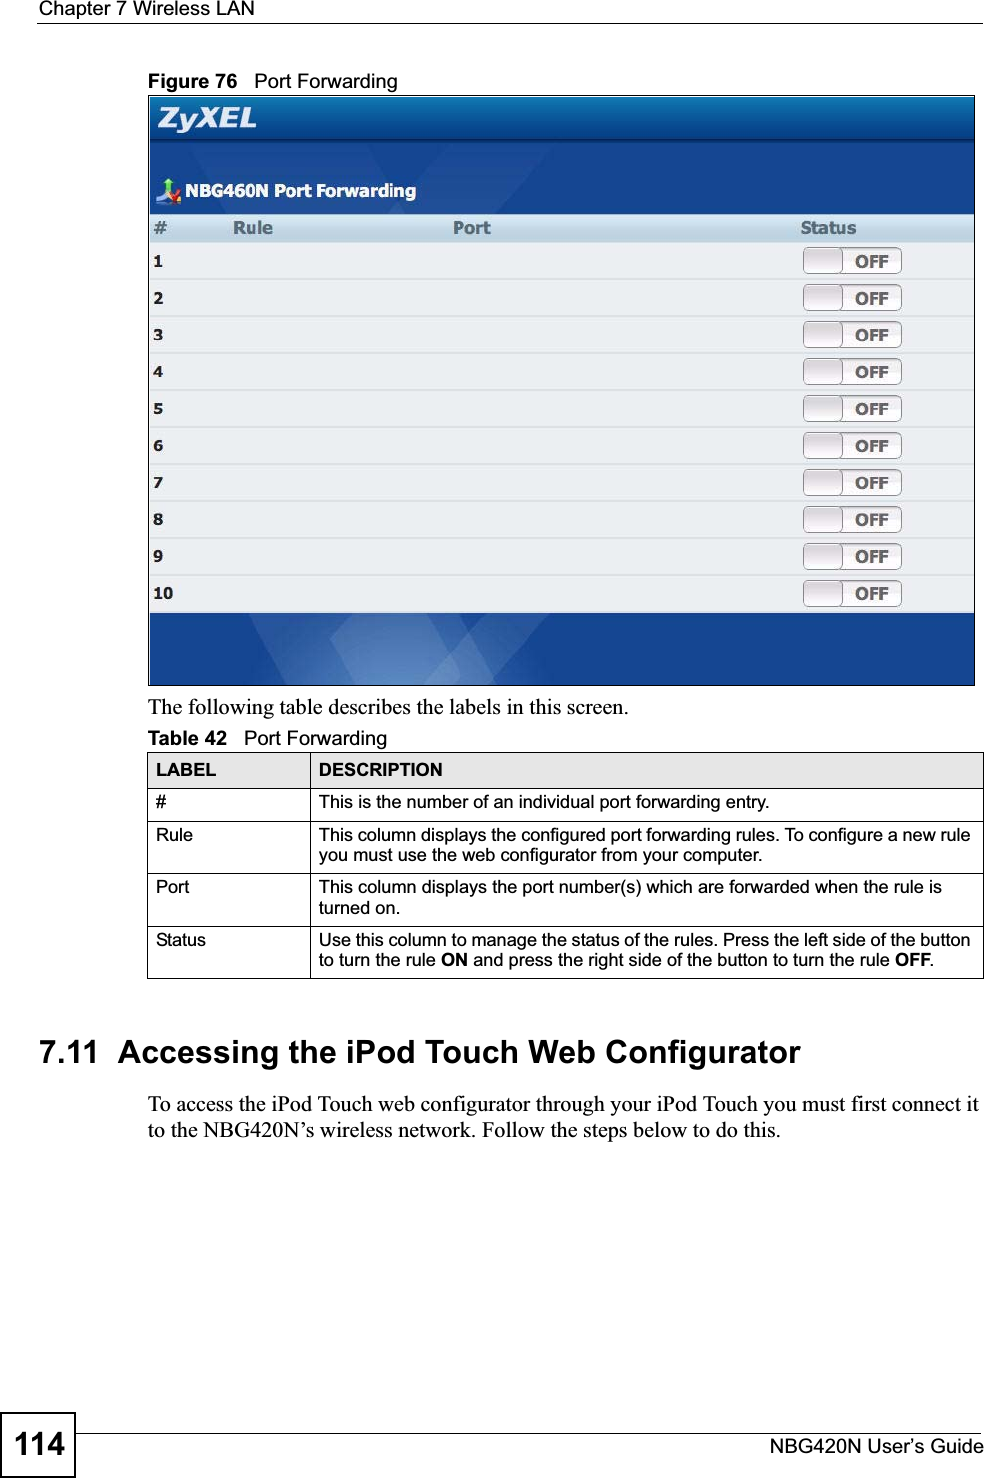
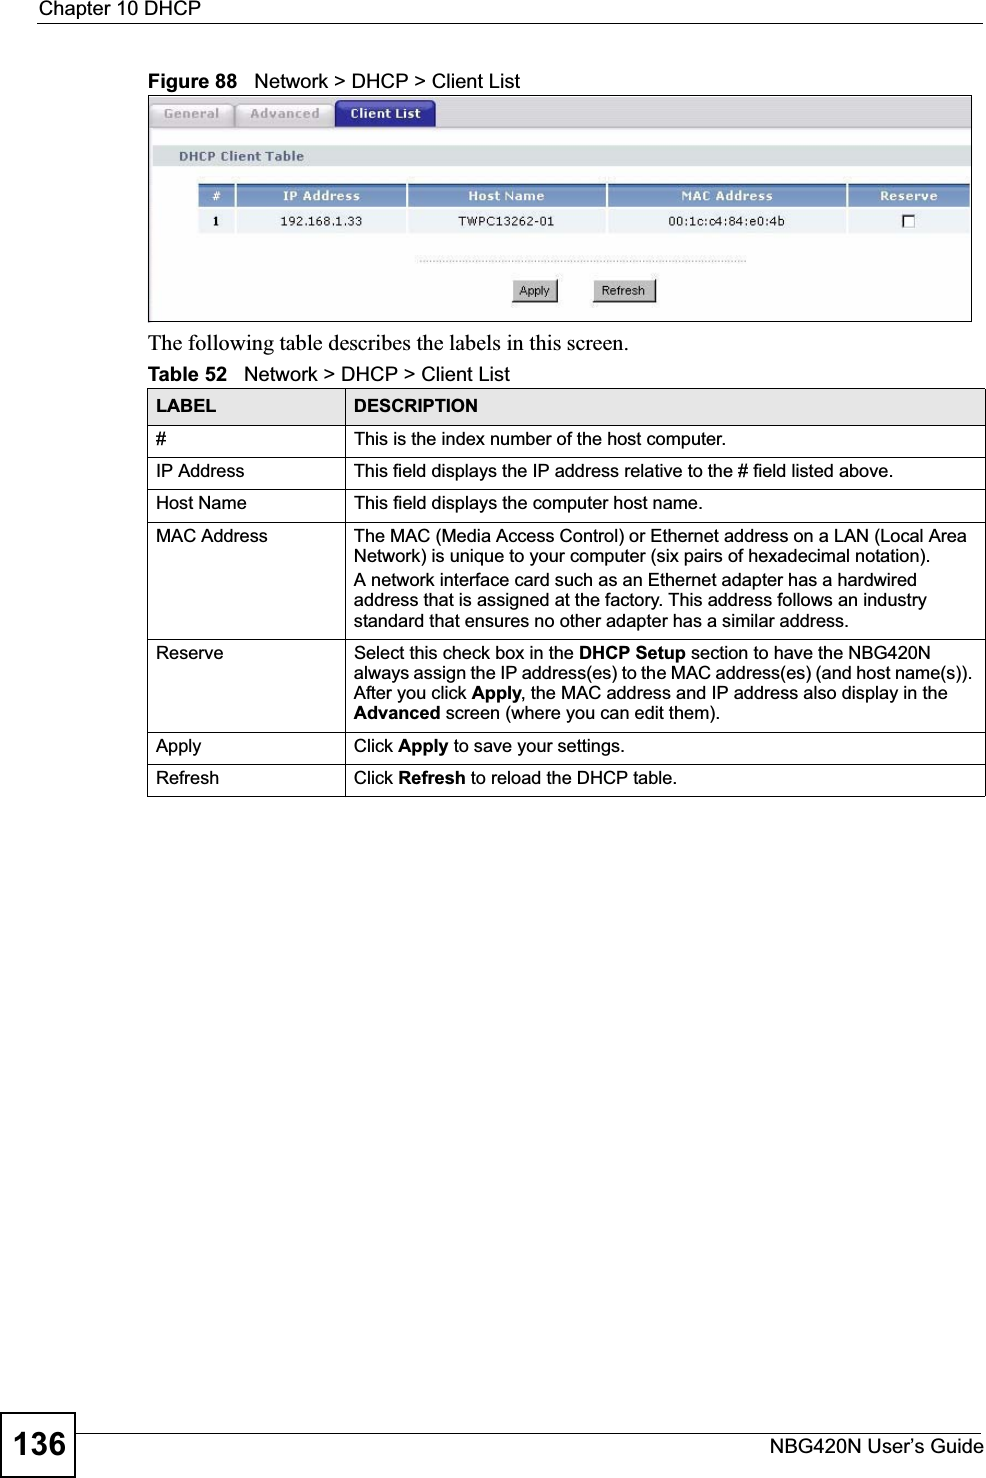
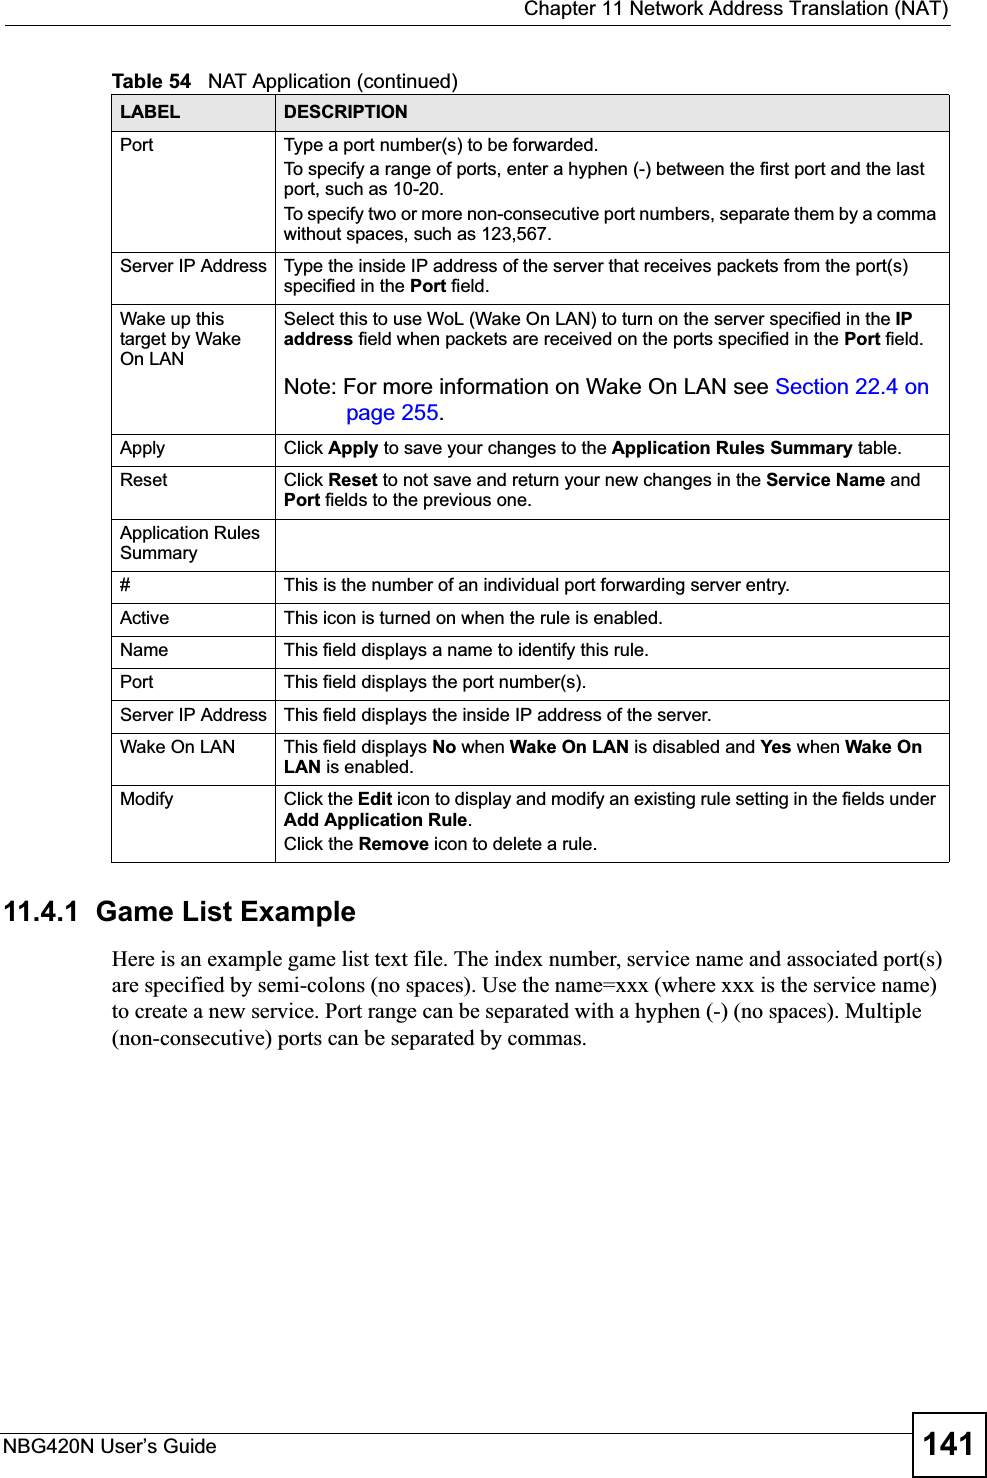
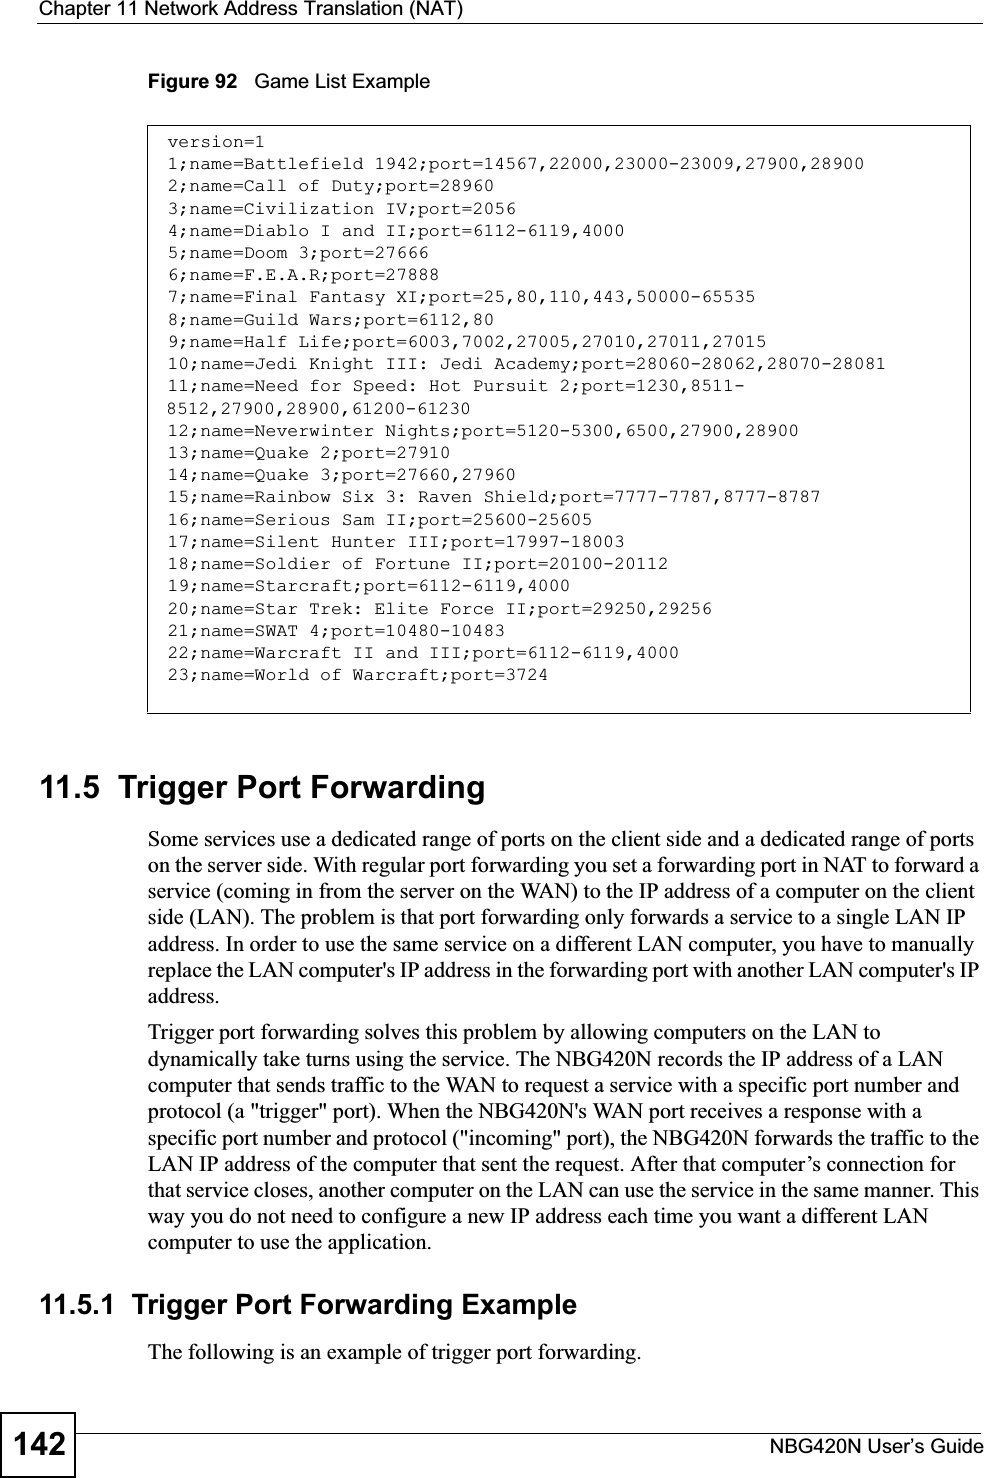
![Chapter 14 Content FilteringNBG420N User’s Guide16414.6 Customizing Keyword Blocking URL CheckingYou can use commands to set how much of a website’s URL the content filter is to check for keyword blocking. See the appendices for information on how to access and use the command interpreter.14.6.1 Domain Name or IP Address URL CheckingBy default, the NBG420N checks the URL’s domain name or IP address when performing keyword blocking.This means that the NBG420N checks the characters that come before the first slash in the URL.For example, with the URL www.zyxel.com.tw/news/pressroom.php, content filtering only searches for keywords within www.zyxel.com.tw.14.6.2 Full Path URL CheckingFull path URL checking has the NBG420N check the characters that come before the last slash in the URL.For example, with the URL www.zyxel.com.tw/news/pressroom.php, full path URL checking searches for keywords within www.zyxel.com.tw/news/.Use the ip urlfilter customize actionFlags 6 [disable | enable]command to extend (or not extend) the keyword blocking search to include the URL's full path.14.6.3 File Name URL CheckingFilename URL checking has the NBG420N check all of the characters in the URL.For example, filename URL checking searches for keywords within the URL www.zyxel.com.tw/news/pressroom.php.Use the ip urlfilter customize actionFlags 8 [disable | enable] command to extend (or not extend) the keyword blocking search to include the URL's complete filename.Apply Click Apply to save your customized settings and exit this screen.Reset Click Reset to begin configuring this screen afreshTable 61 Security > Content Filter > ScheduleLABEL DESCRIPTION](https://usermanual.wiki/ZyXEL-Communications/NBG420N.User-manual-part2/User-Guide-928778-Page-64.png)