ZyXEL Communications NWD211AN Dual band Wireless N USB Adapter User Manual SMG 700 User s Guide V1 00 Nov 2004
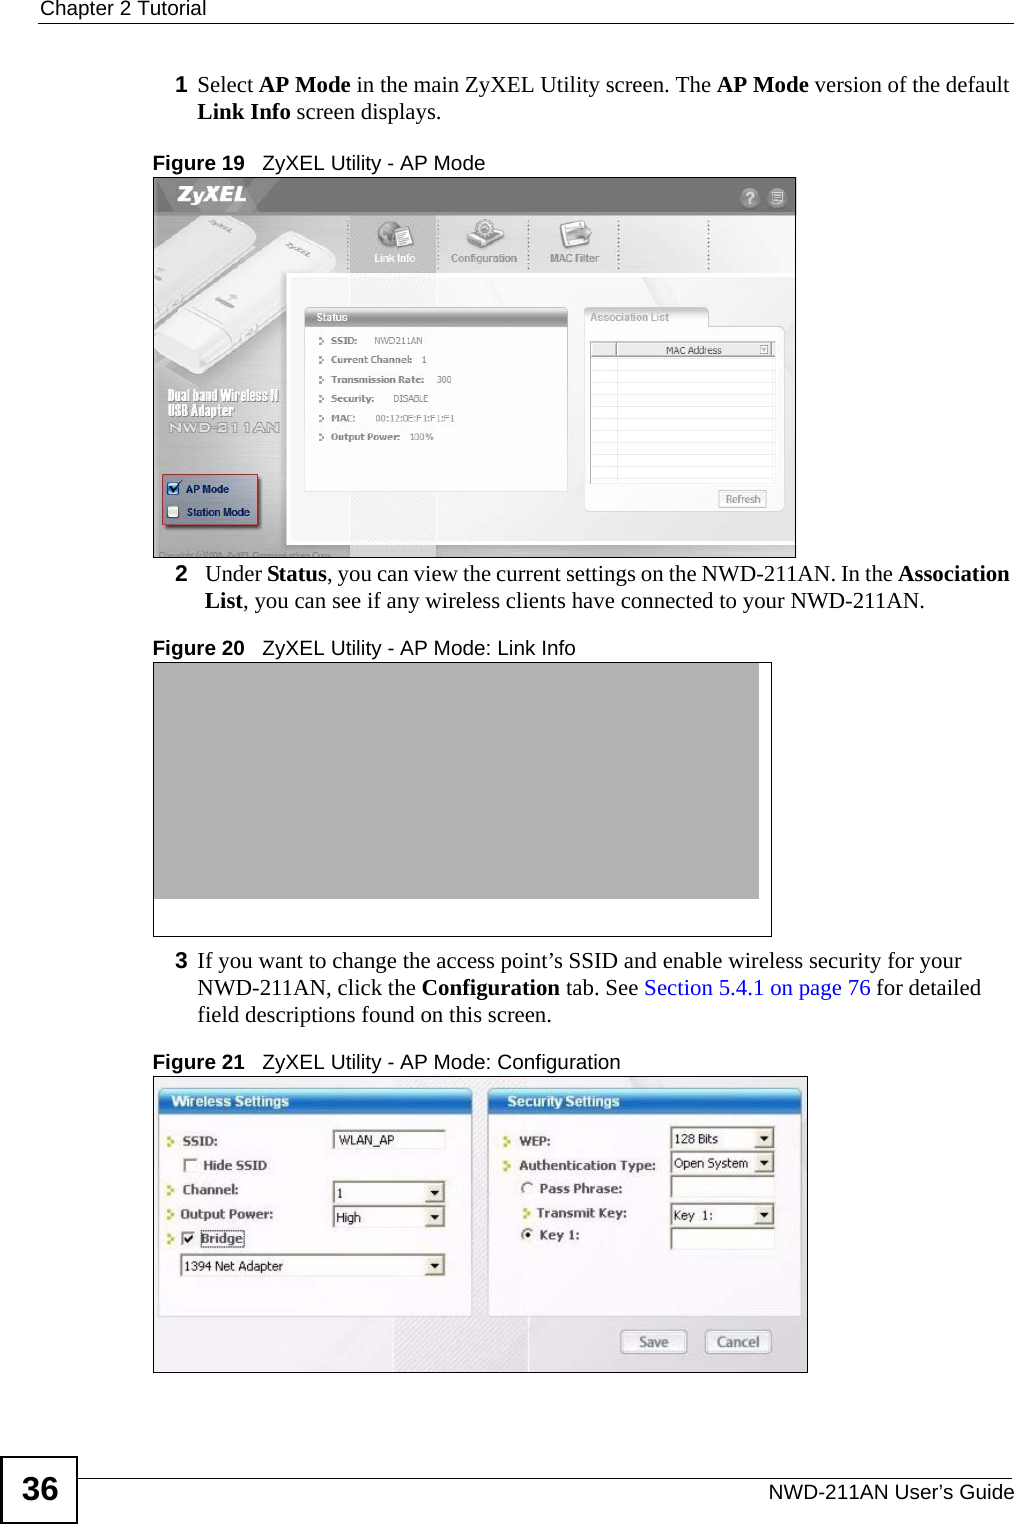
ZyXEL Communications Corporation Dual band Wireless N USB Adapter SMG 700 User s Guide V1 00 Nov 2004
UserManual.wiki
>
ZyXEL Communications
>
NWD211AN User Manual
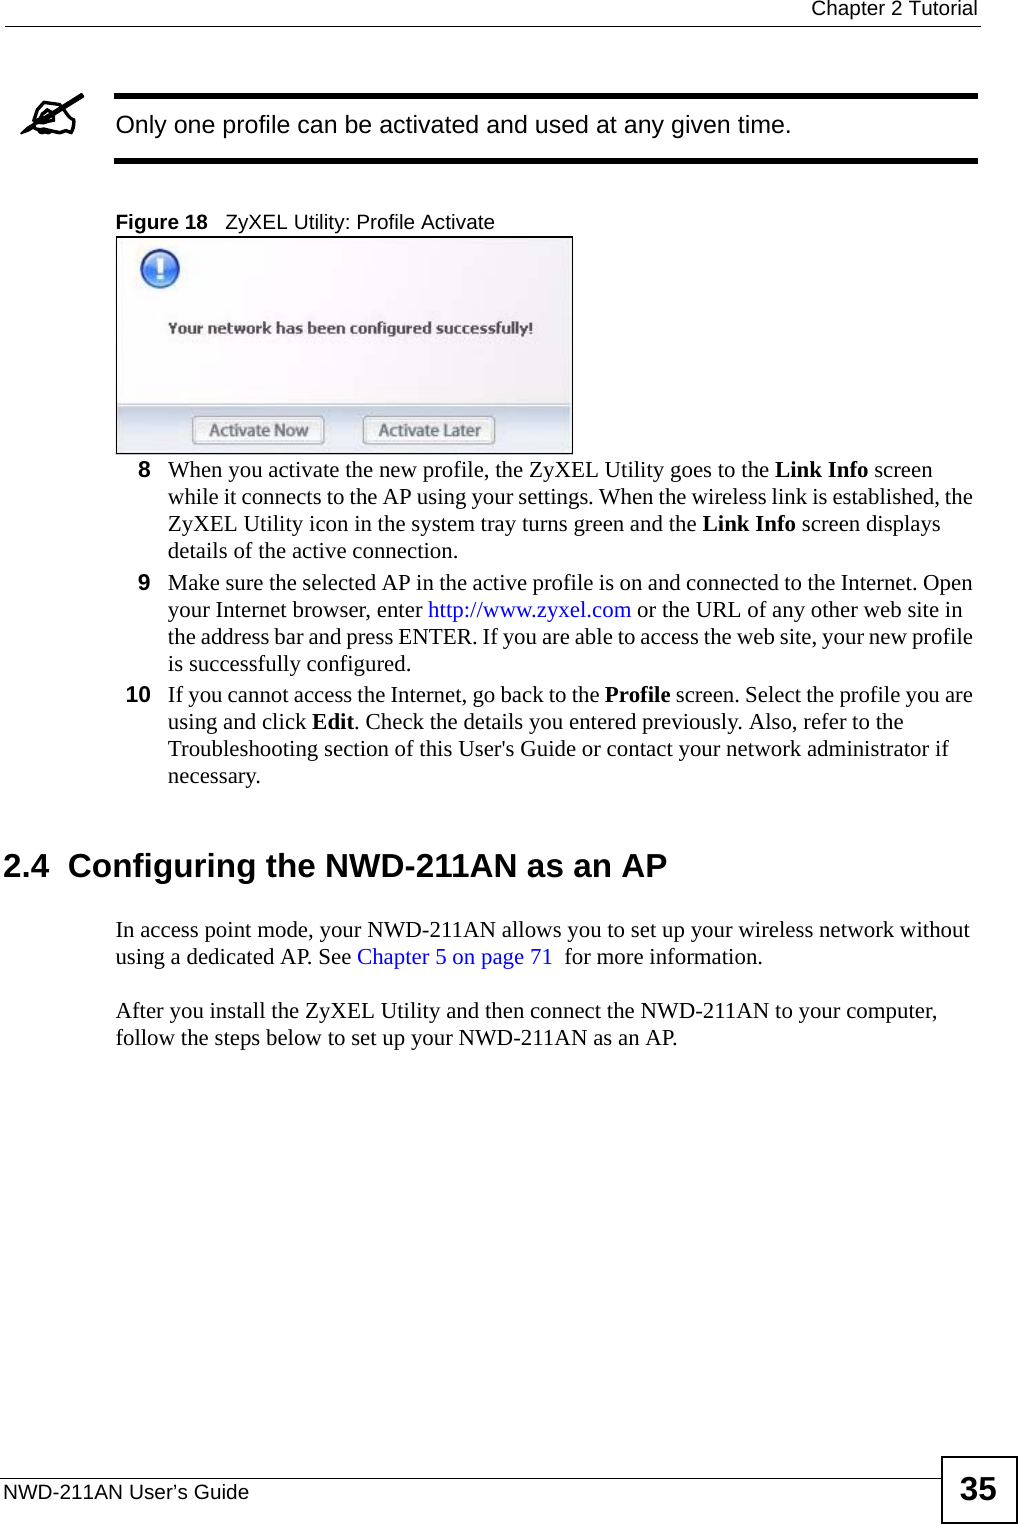
Manual
Navigation menu
Upload a User Manual
Namespaces
Wiki Guide
HTML
PDF
Info
Views
User Manual
Discussion / Help
Navigation
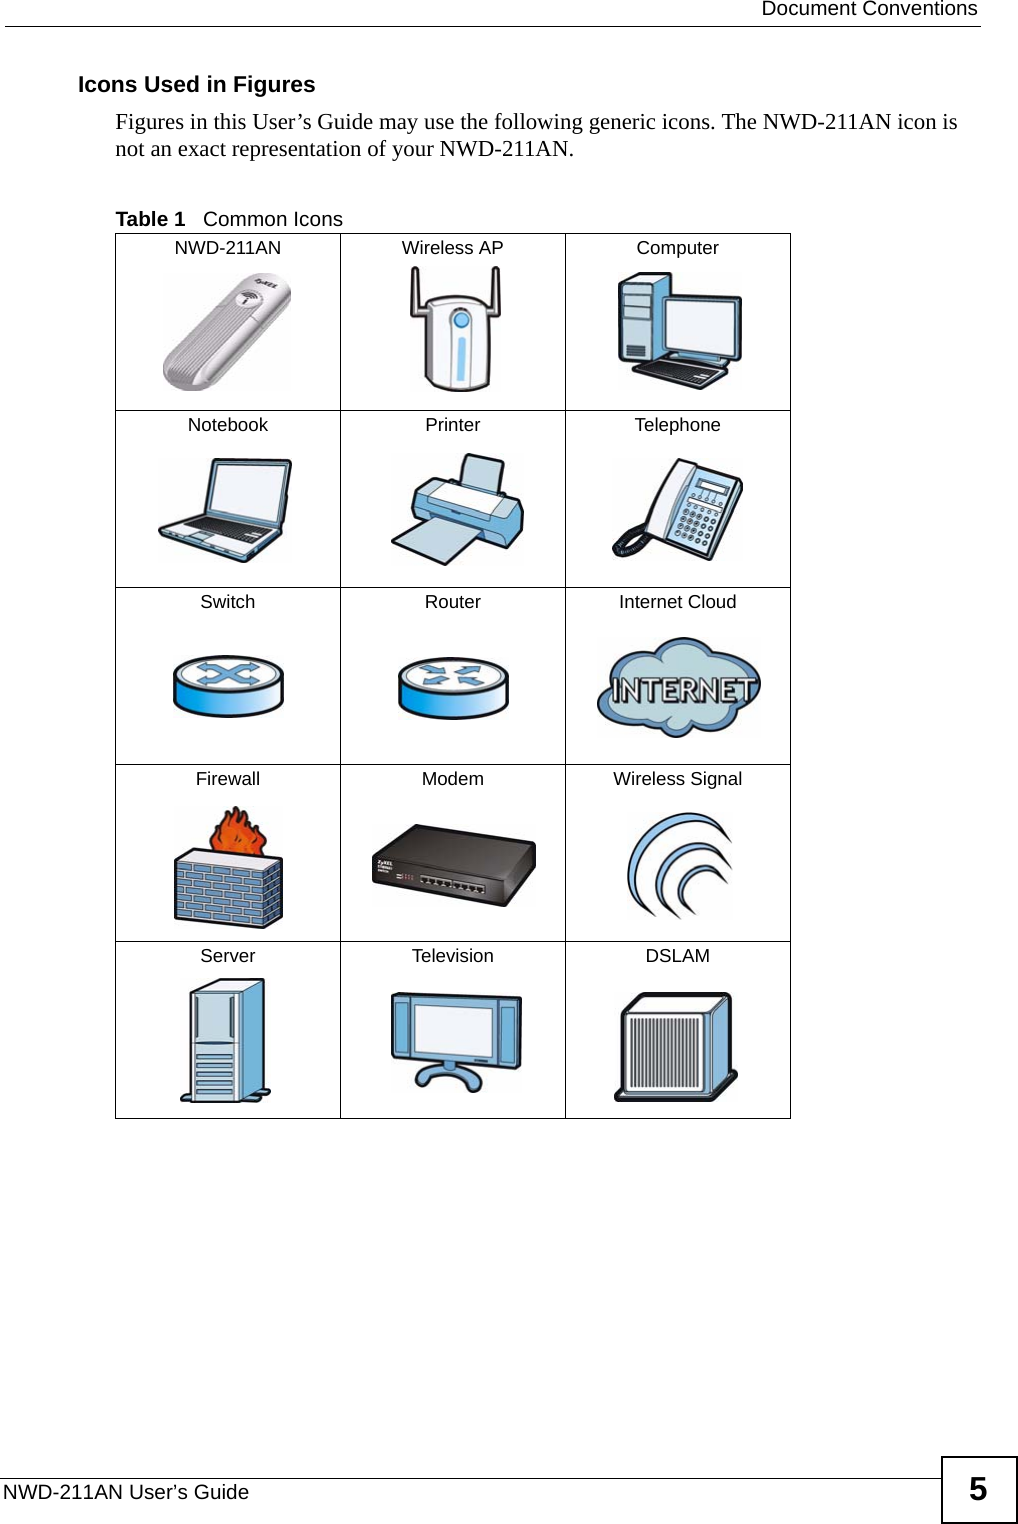
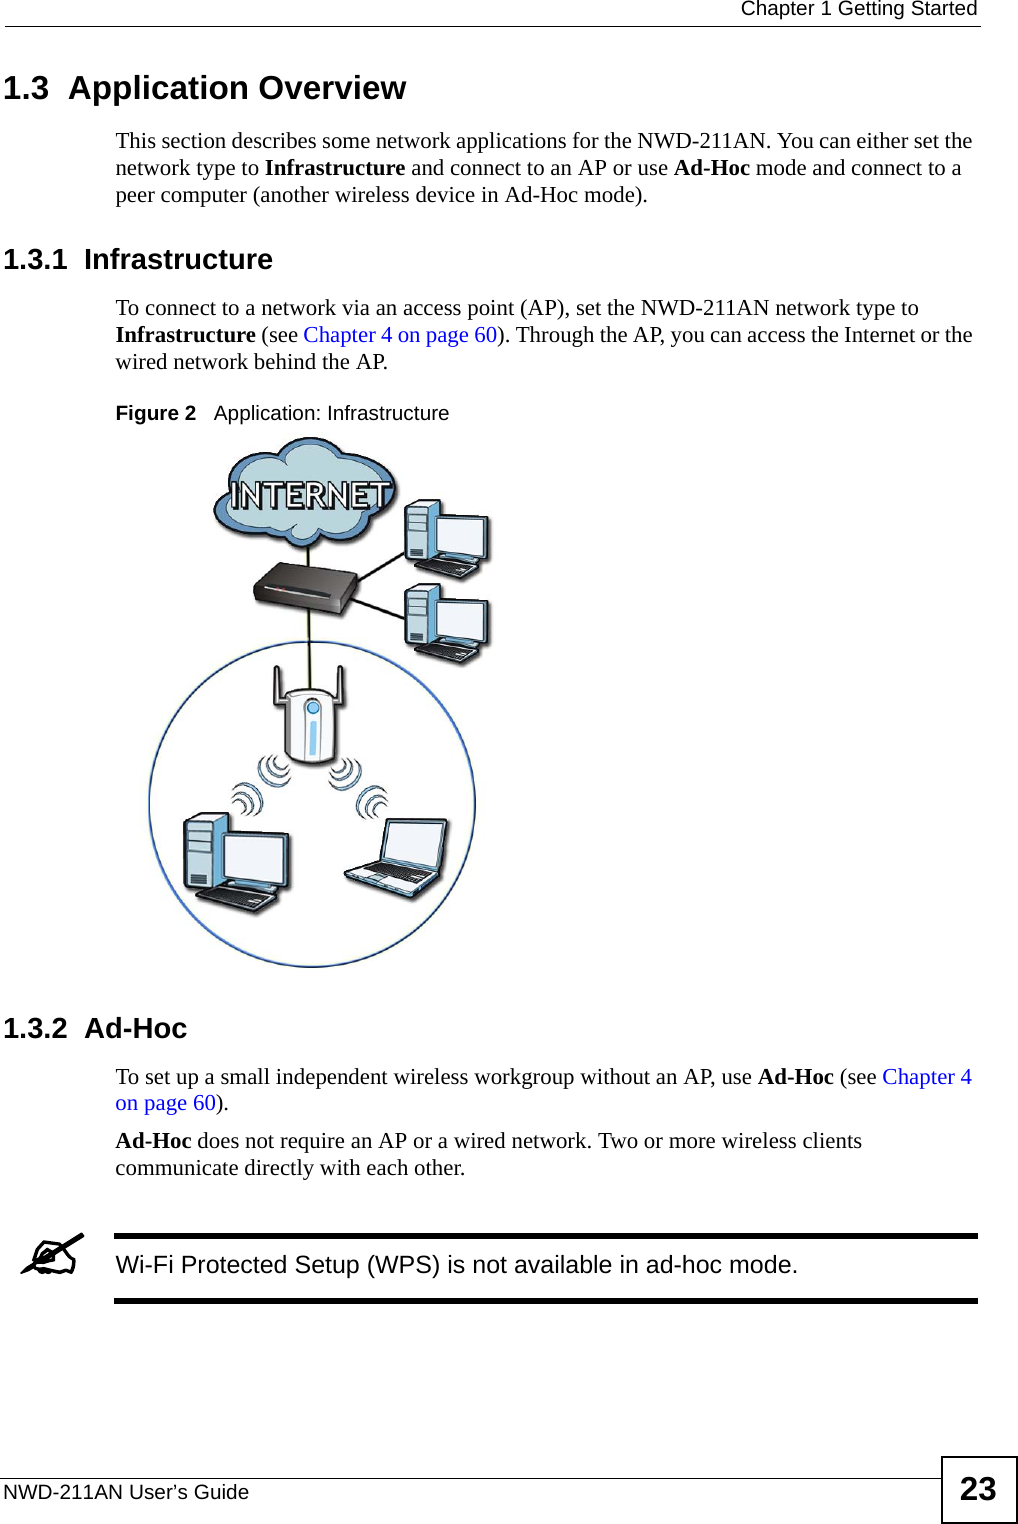
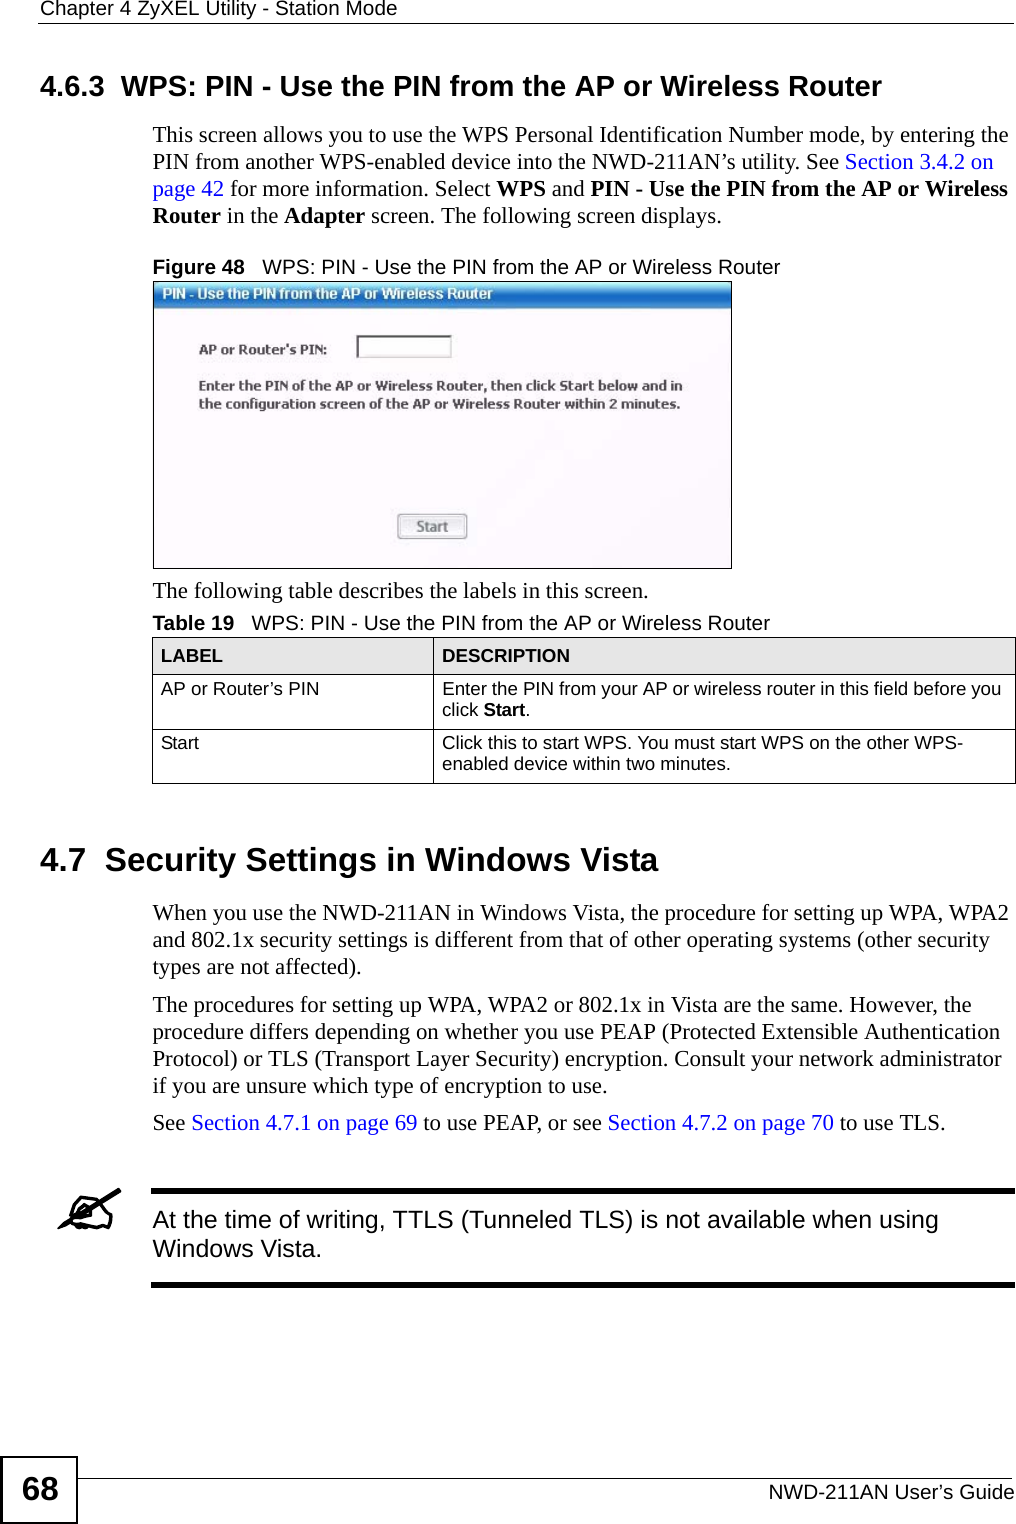
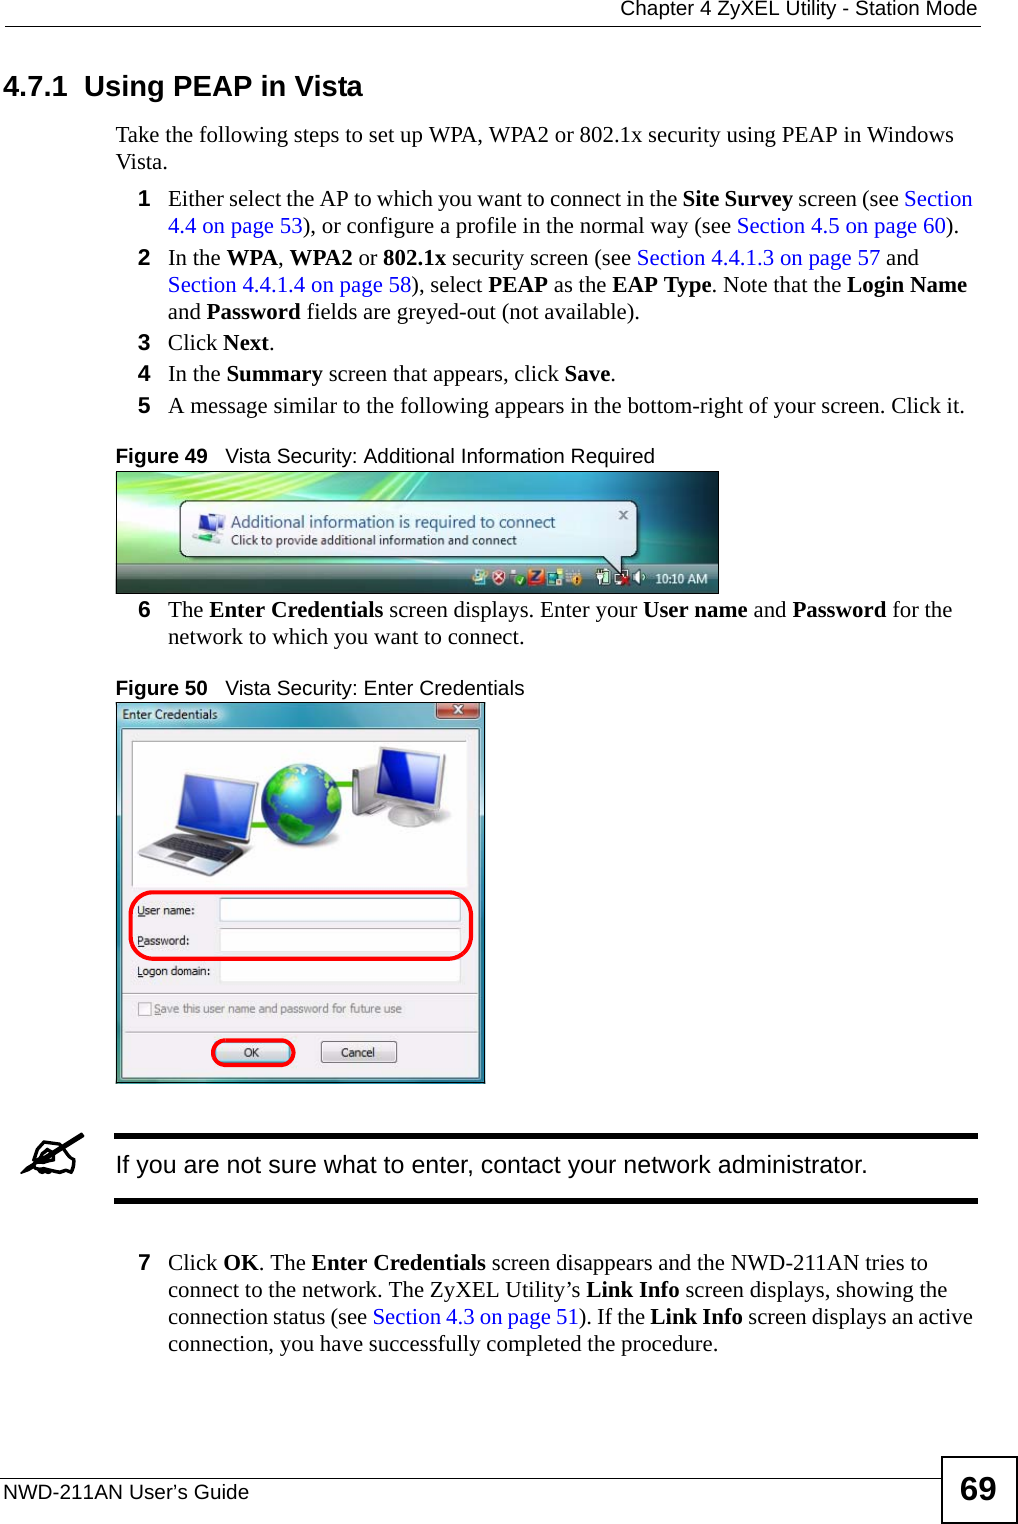
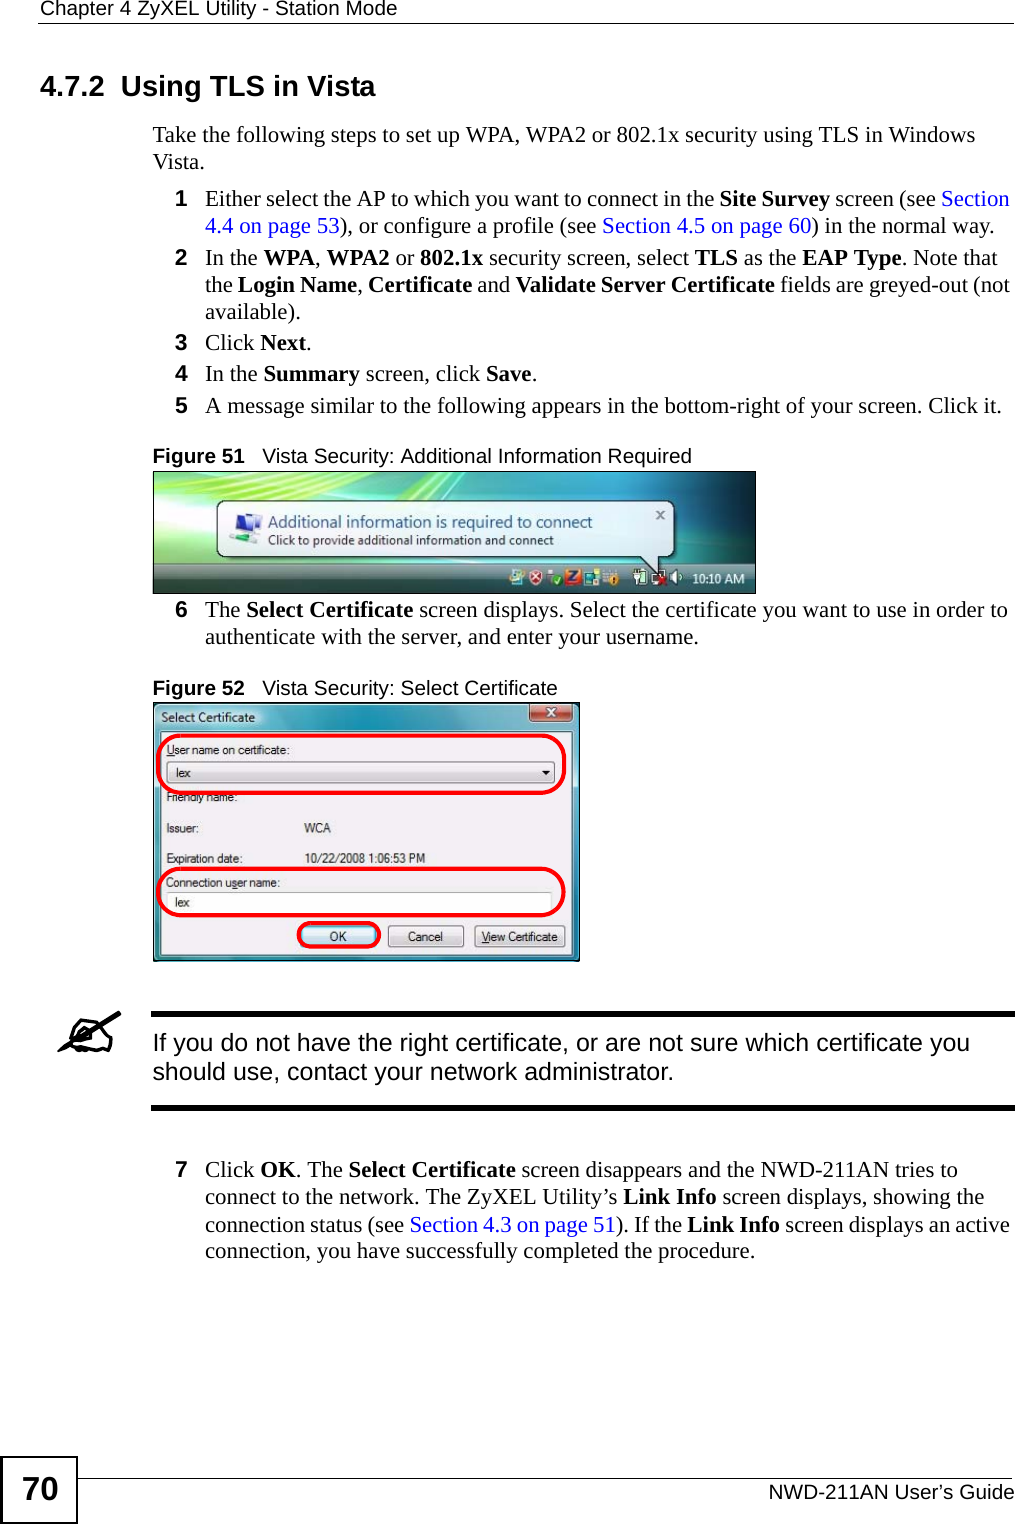
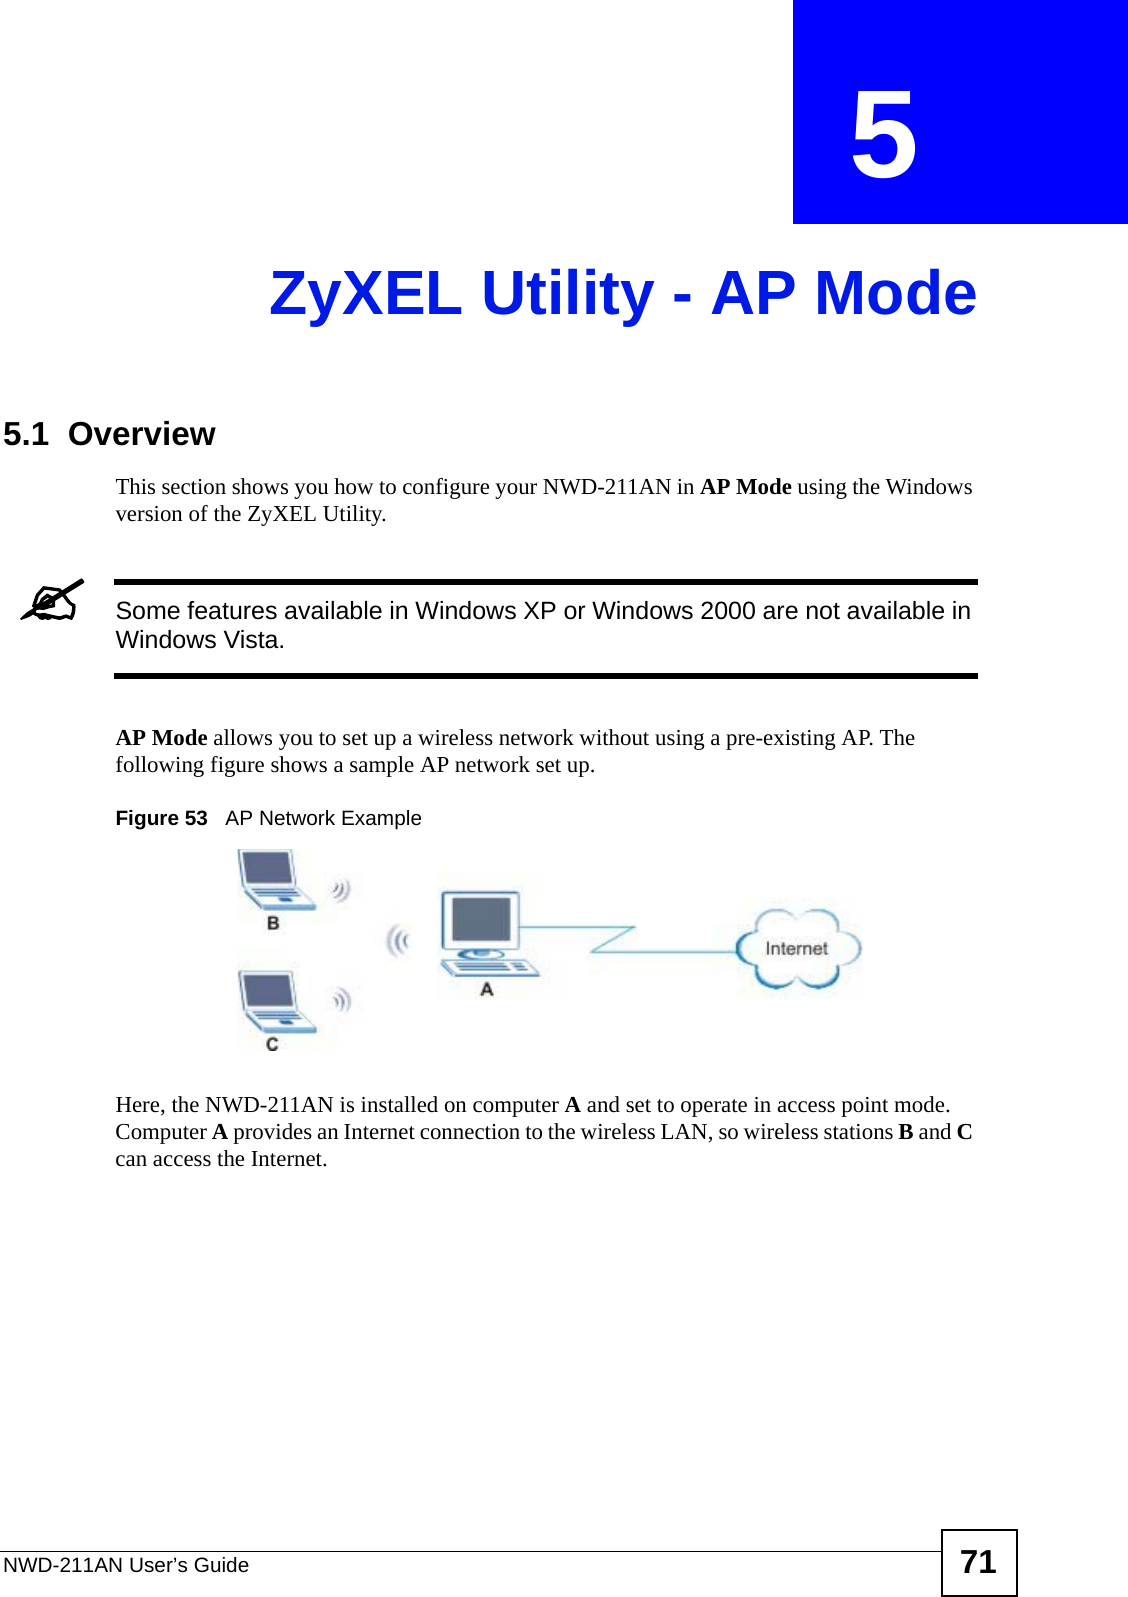
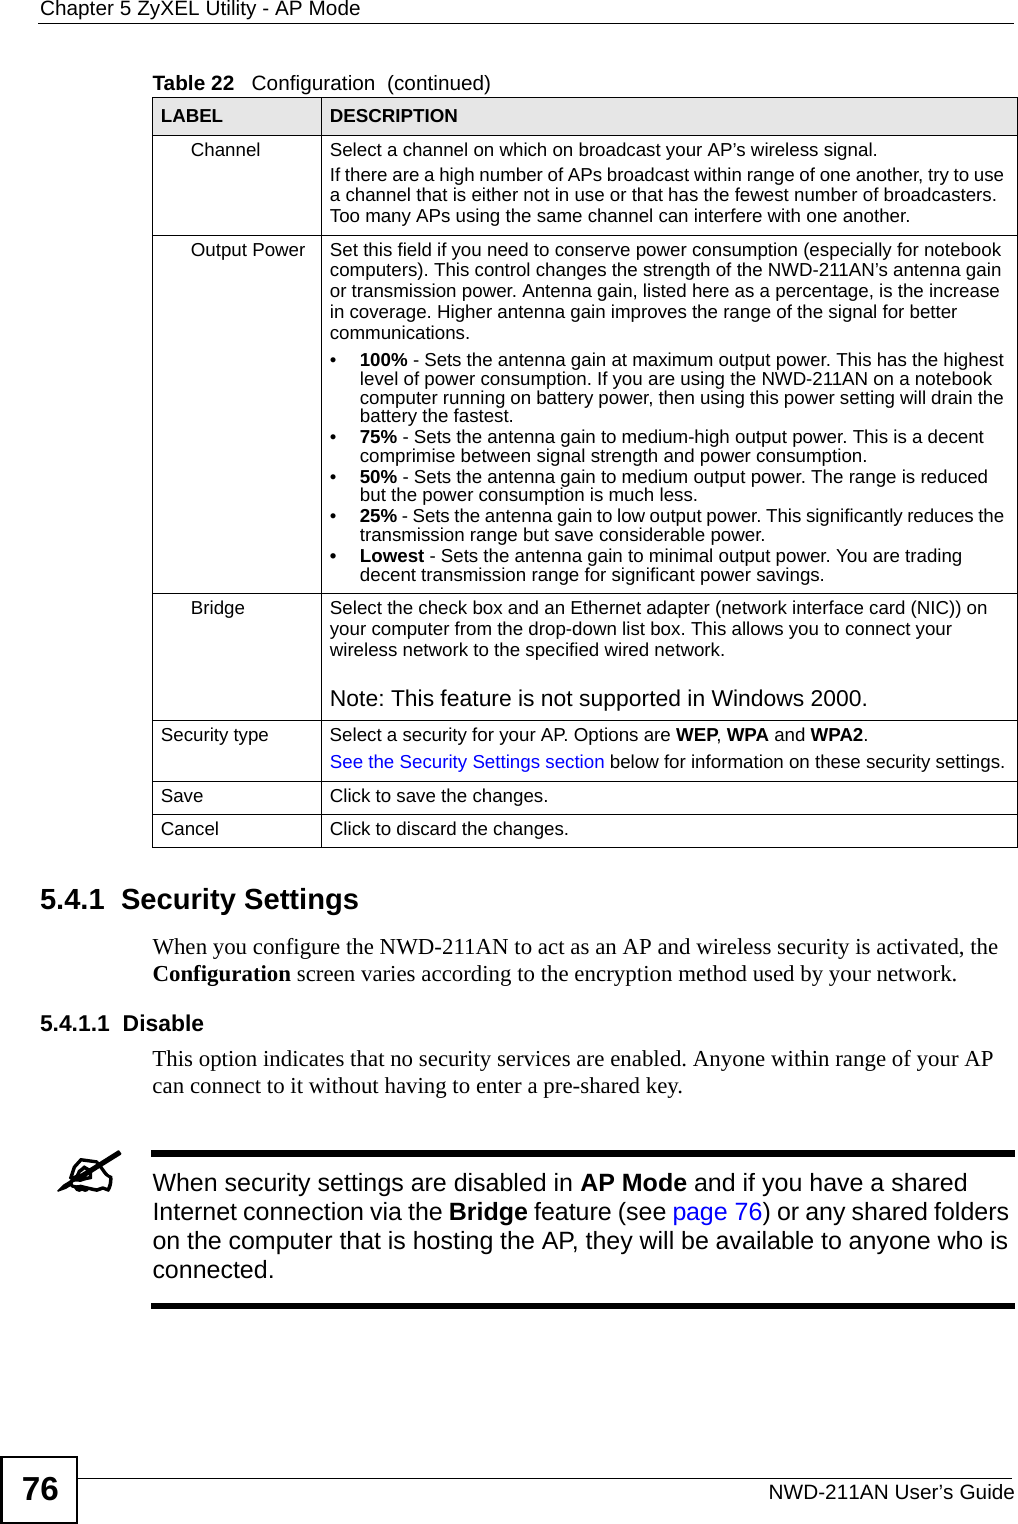
![Document ConventionsNWD-211AN User’s Guide4Document ConventionsWarnings and NotesThese are how warnings and notes are shown in this User’s Guide. 1Warnings tell you about things that could harm you or your NWD-211AN."Notes tell you other important information (for example, other things you may need to configure or helpful tips) or recommendations.Syntax Conventions• The NWD-211AN Dual-Band Wireless N USB Adapter may be referred to as the “NWD-211AN”, the “device”, the “system” or the “product” in this User’s Guide.• Product labels, screen names, field labels and field choices are all in bold font.• A key stroke is denoted by square brackets and uppercase text, for example, [ENTER] means the “enter” or “return” key on your keyboard.• “Enter” means for you to type one or more characters and then press the [ENTER] key. “Select” or “choose” means for you to use one of the predefined choices.• A right angle bracket ( > ) within a screen name denotes a mouse click. For example, Maintenance > Log > Log Setting means you first click Maintenance in the navigation panel, then the Log sub menu and finally the Log Setting tab to get to that screen.• Units of measurement may denote the “metric” value or the “scientific” value. For example, “k” for kilo may denote “1000” or “1024”, “M” for mega may denote “1000000” or “1048576” and so on.• “e.g.,” is a shorthand for “for instance”, and “i.e.,” means “that is” or “in other words”.](https://usermanual.wiki/ZyXEL-Communications/NWD211AN/User-Guide-1075413-Page-4.png)


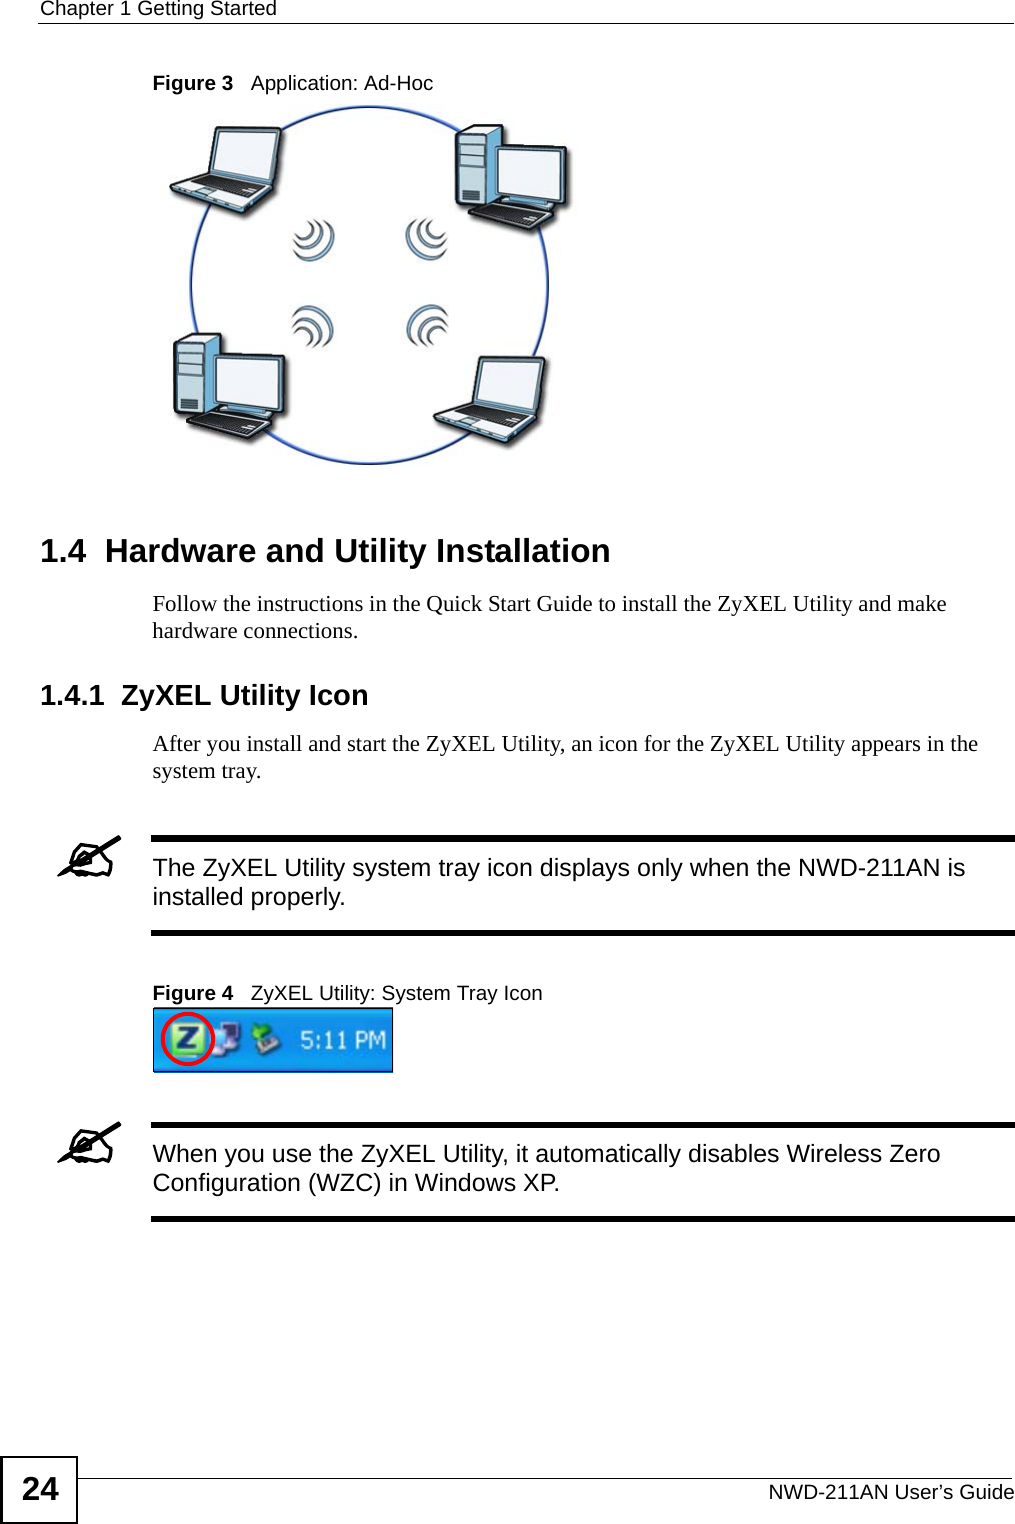


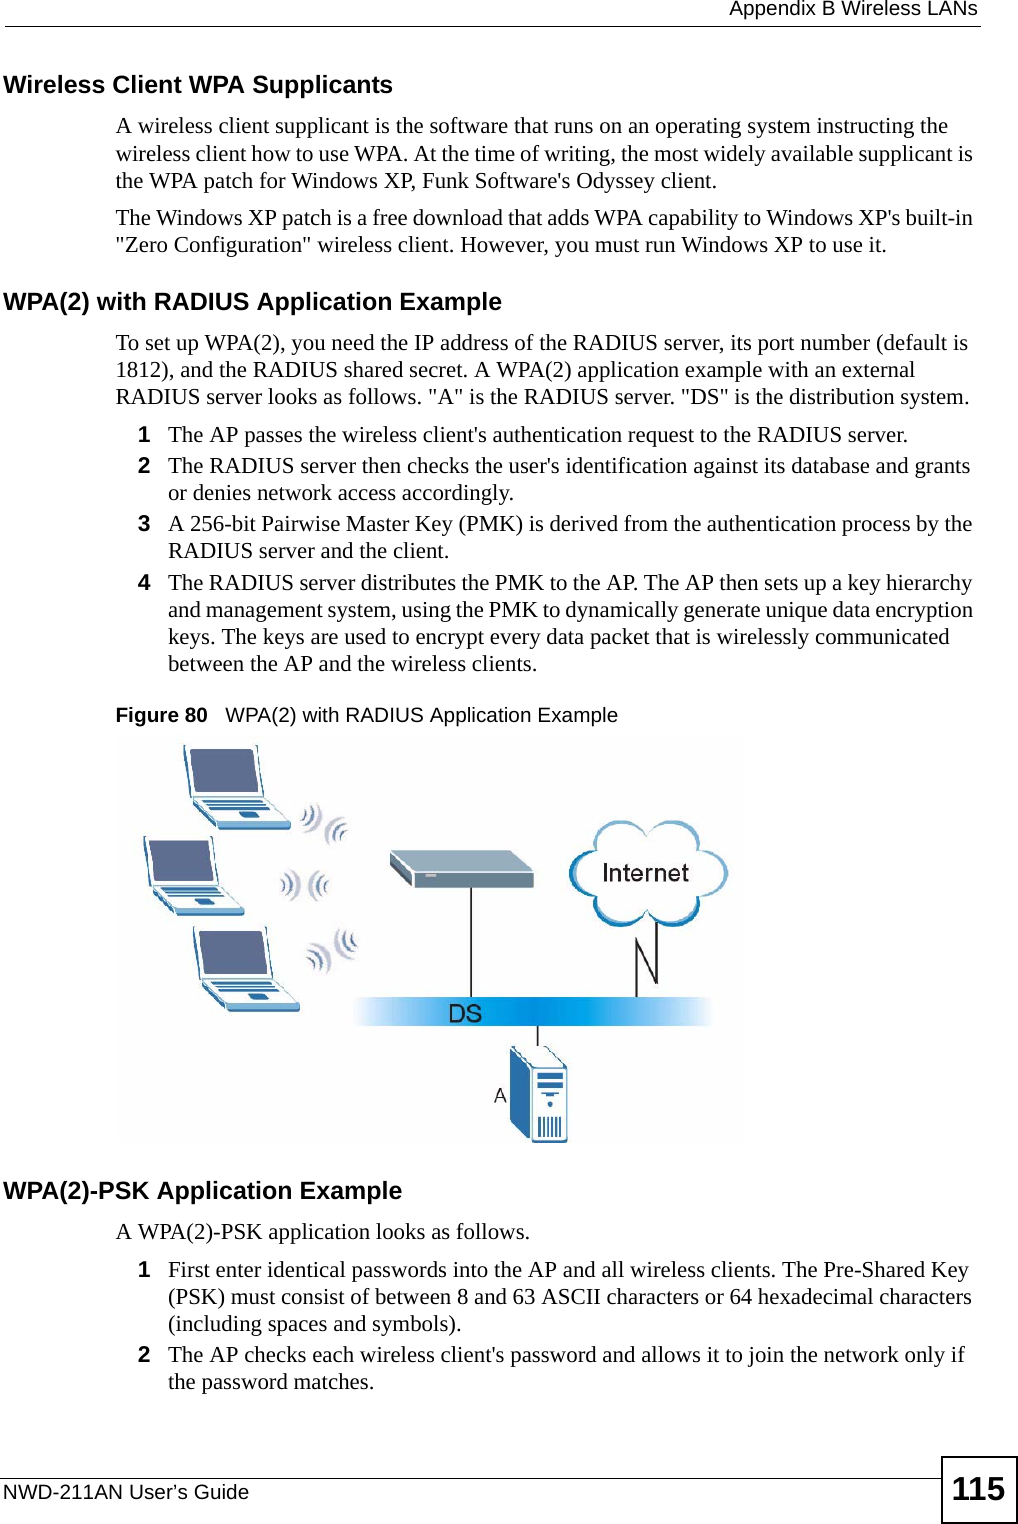
![Appendix A Setting Up Your Computer’s IP AddressNWD-211AN User’s Guide1005The Internet Protocol TCP/IP Properties window opens.Figure 68 Windows XP: Internet Protocol (TCP/IP) Properties6Select Obtain an IP address automatically if your network administrator or ISP assigns your IP address dynamically.Select Use the following IP Address and fill in the IP address, Subnet mask, and Default gateway fields if you have a static IP address that was assigned to you by your network administrator or ISP. You may also have to enter a Preferred DNS server and an Alternate DNS server, if that information was provided.7Click OK to close the Internet Protocol (TCP/IP) Properties window.8Click OK to close the Local Area Connection Properties window.Verifying Settings1Click Start > All Programs > Accessories > Command Prompt.2In the Command Prompt window, type "ipconfig" and then press [ENTER]. You can also go to Start > Control Panel > Network Connections, right-click a network connection, click Status and then click the Support tab to view your IP address and connection information.](https://usermanual.wiki/ZyXEL-Communications/NWD211AN/User-Guide-1075413-Page-100.png)
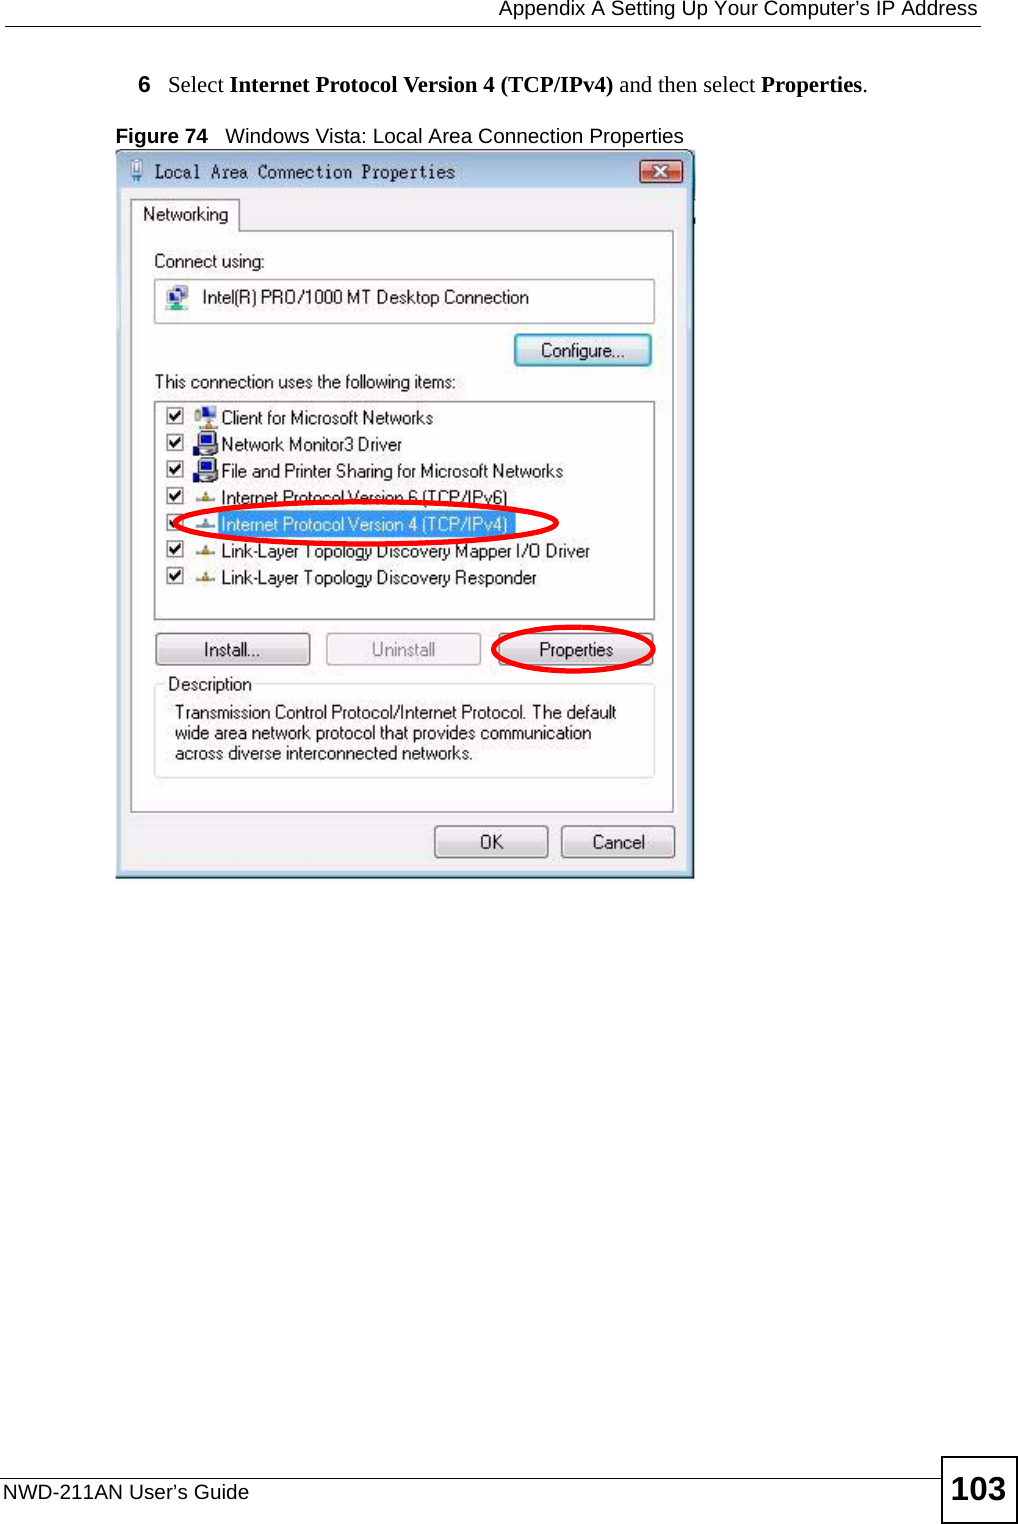
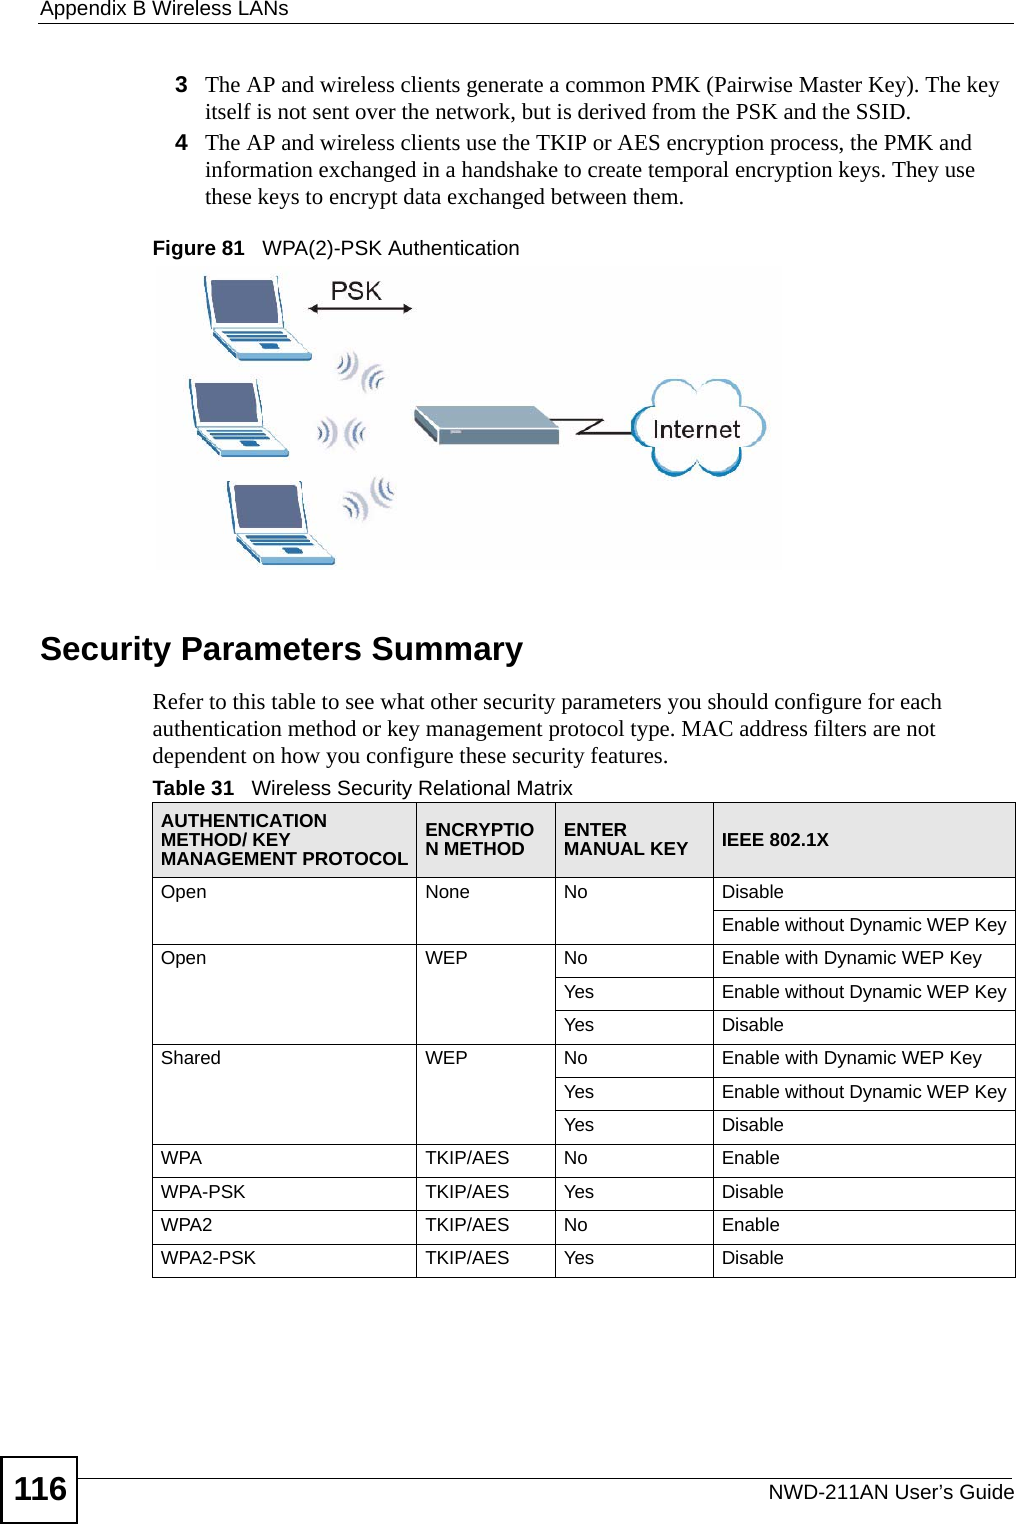
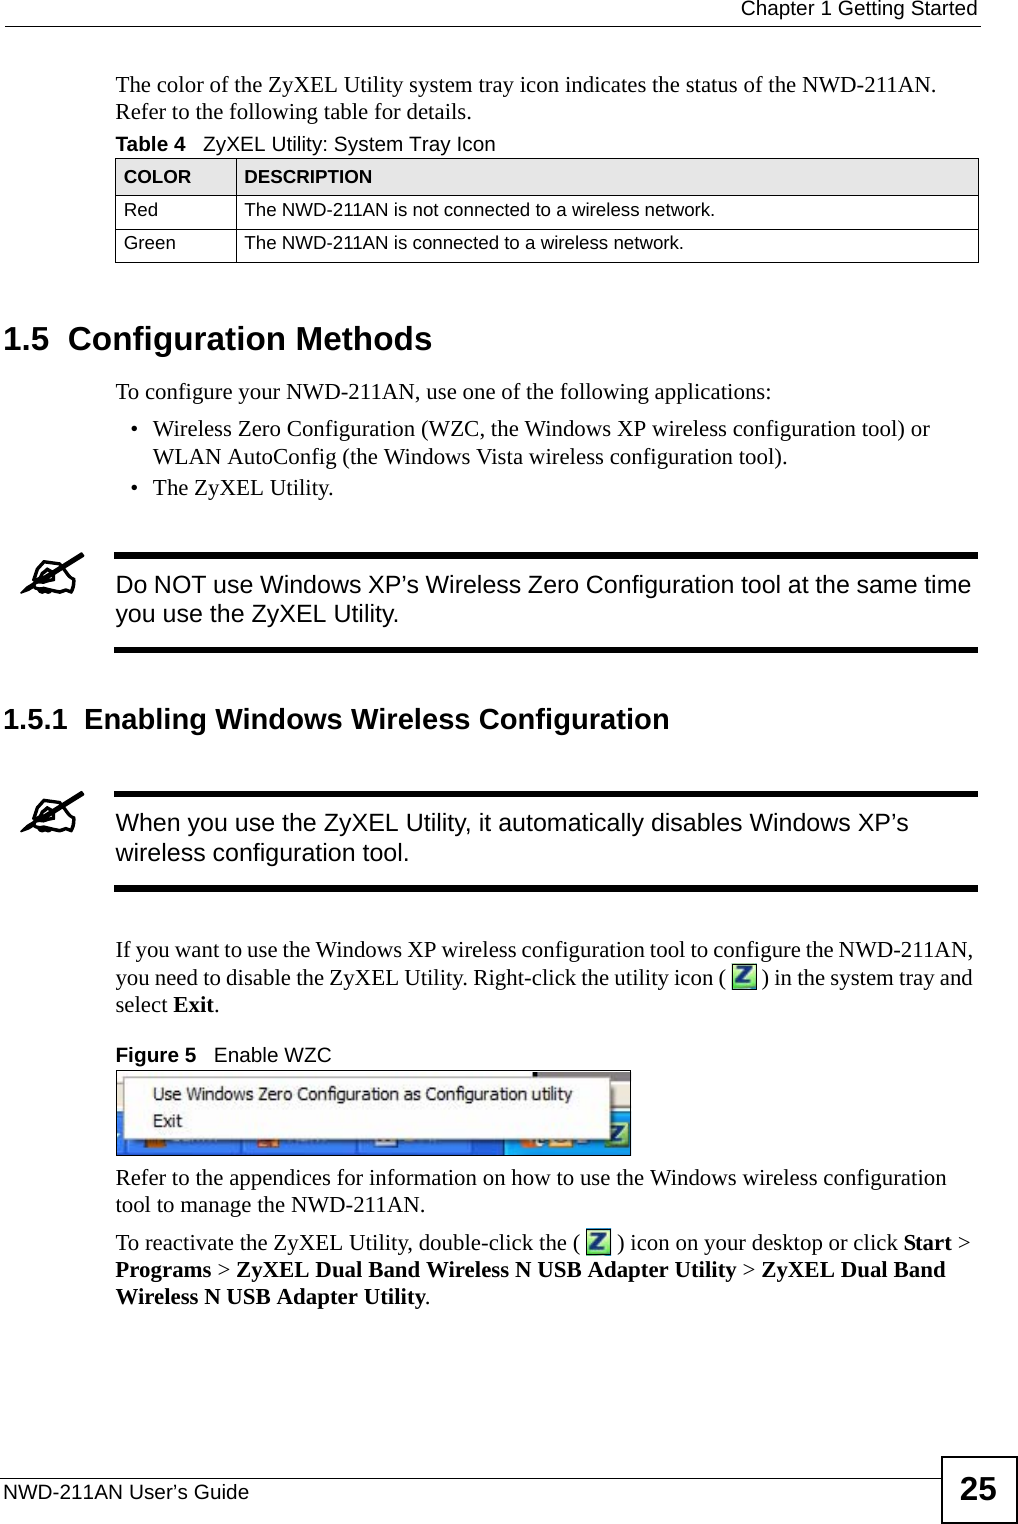
![Appendix A Setting Up Your Computer’s IP AddressNWD-211AN User’s Guide1047The Internet Protocol Version 4 (TCP/IPv4) Properties window opens.Figure 75 Windows Vista: Internet Protocol Version 4 (TCP/IPv4) Properties8Select Obtain an IP address automatically if your network administrator or ISP assigns your IP address dynamically.Select Use the following IP Address and fill in the IP address, Subnet mask, and Default gateway fields if you have a static IP address that was assigned to you by your network administrator or ISP. You may also have to enter a Preferred DNS server and an Alternate DNS server, if that information was provided.Click Advanced.9Click OK to close the Internet Protocol (TCP/IP) Properties window.10 Click OK to close the Local Area Connection Properties window.Verifying Settings1Click Start > All Programs > Accessories > Command Prompt.2In the Command Prompt window, type "ipconfig" and then press [ENTER]. You can also go to Start > Control Panel > Network Connections, right-click a network connection, click Status and then click the Support tab to view your IP address and connection information.](https://usermanual.wiki/ZyXEL-Communications/NWD211AN/User-Guide-1075413-Page-104.png)