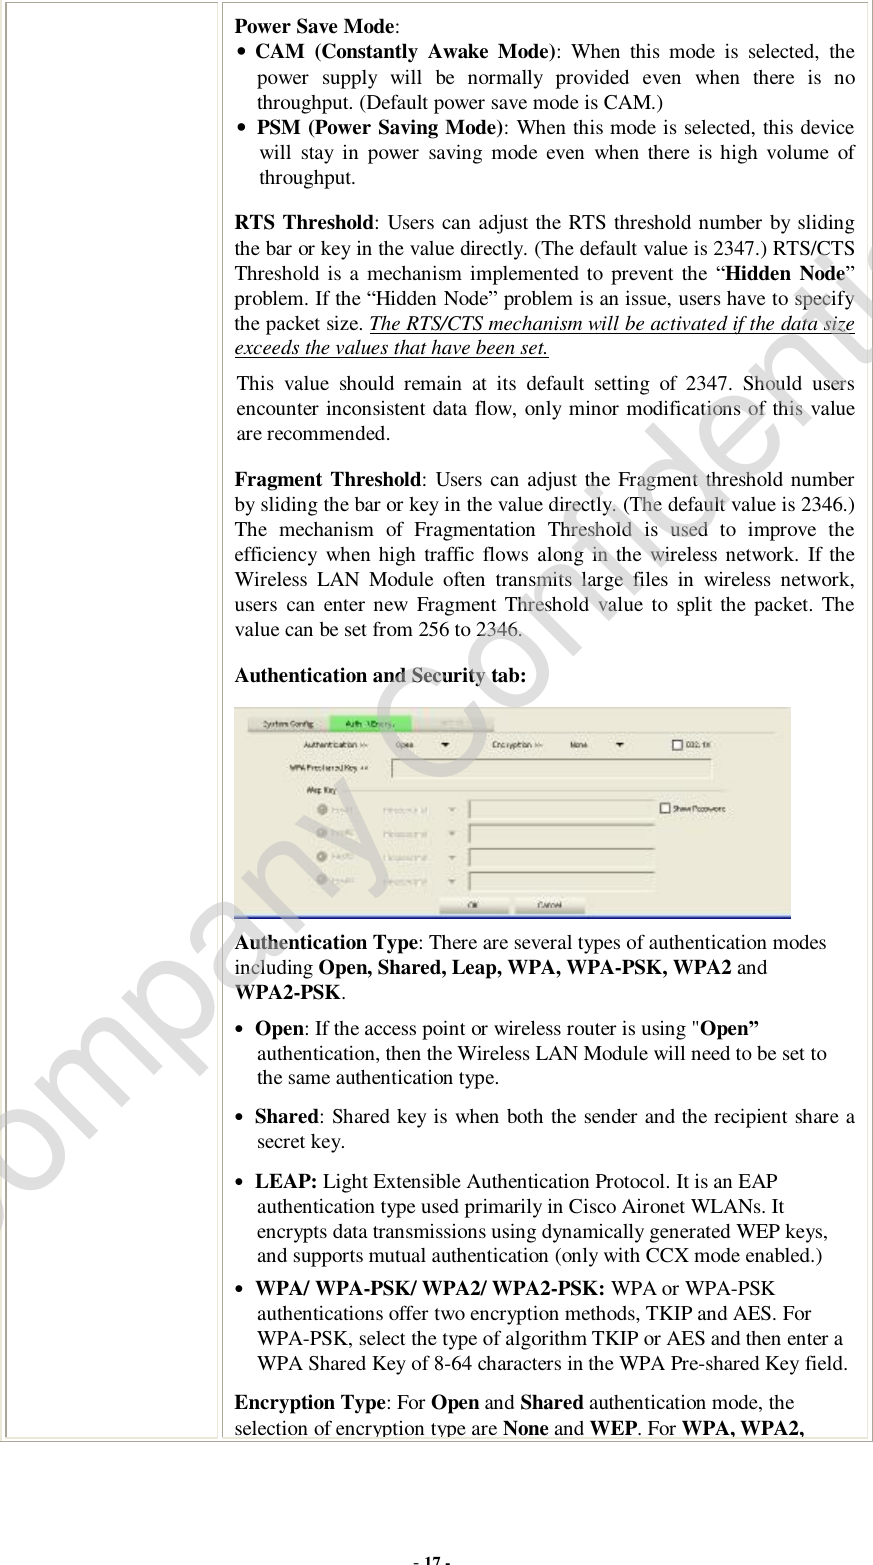
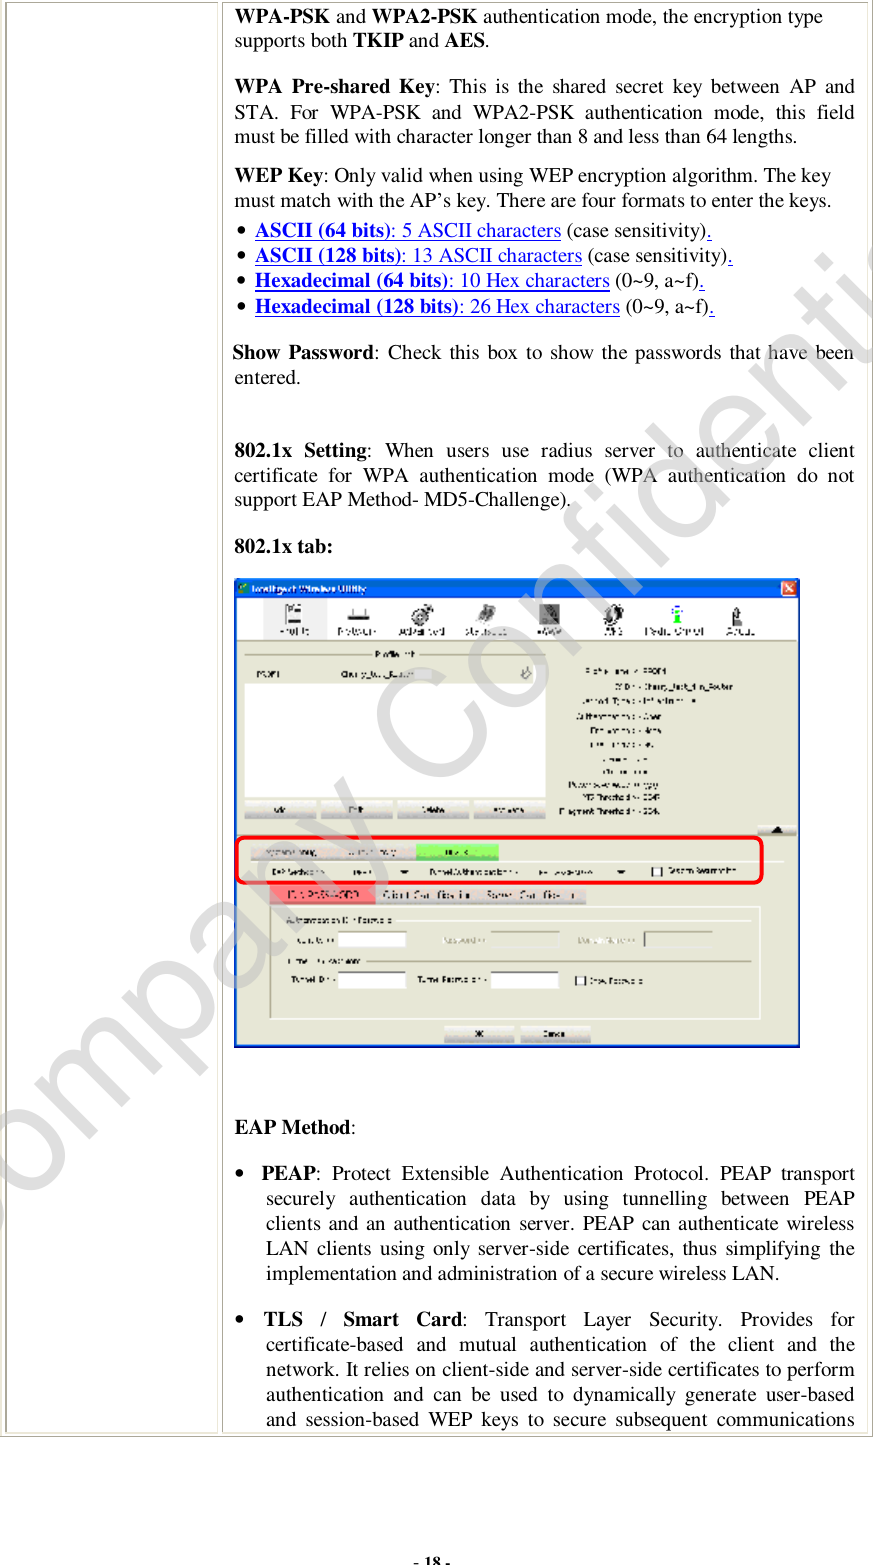
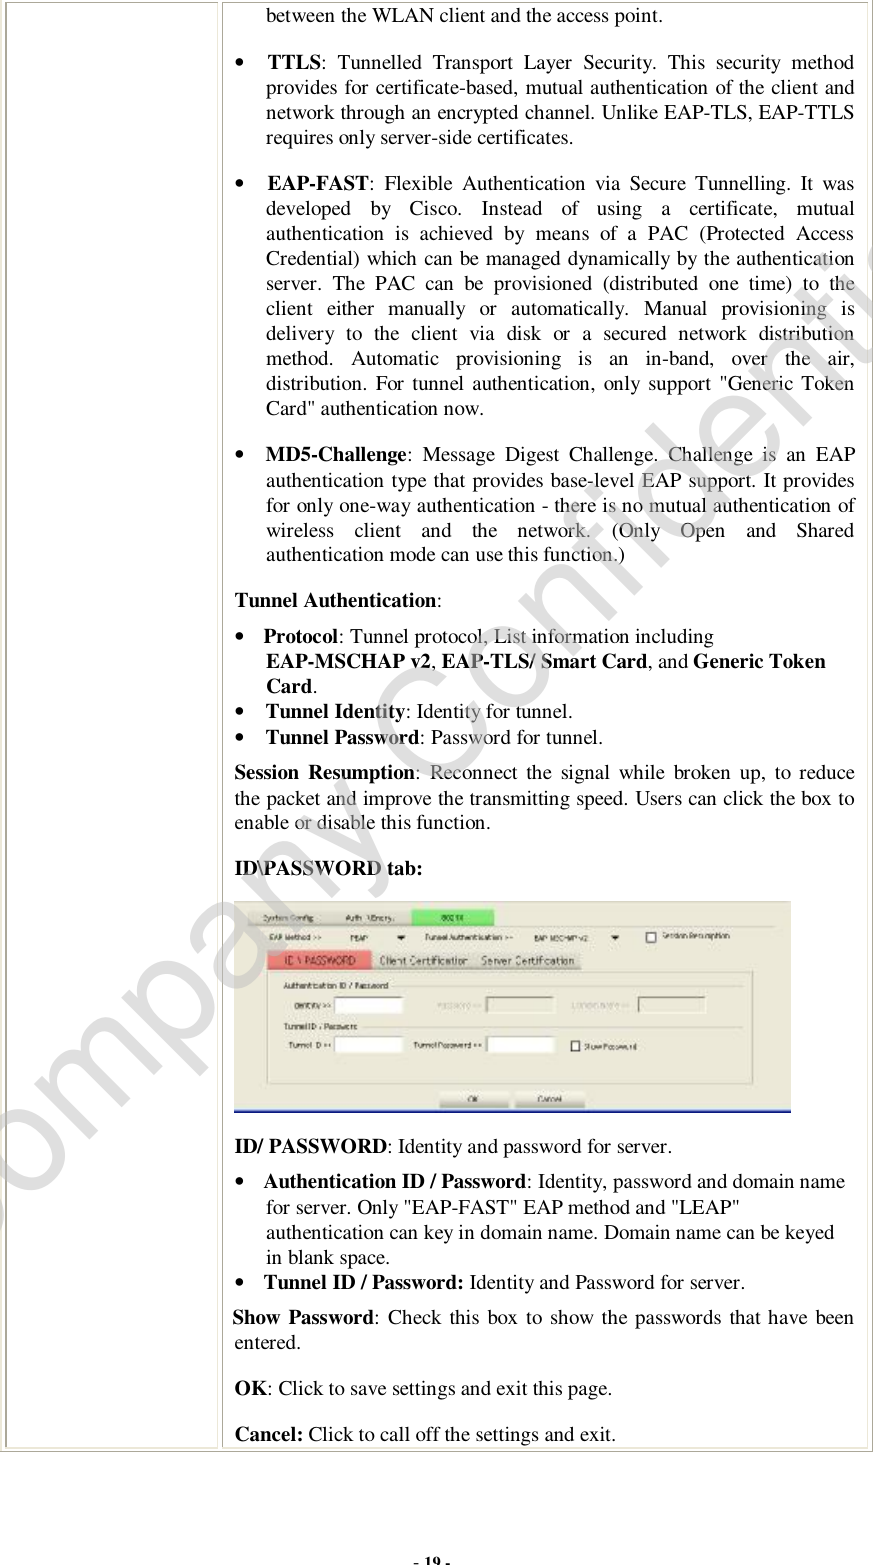
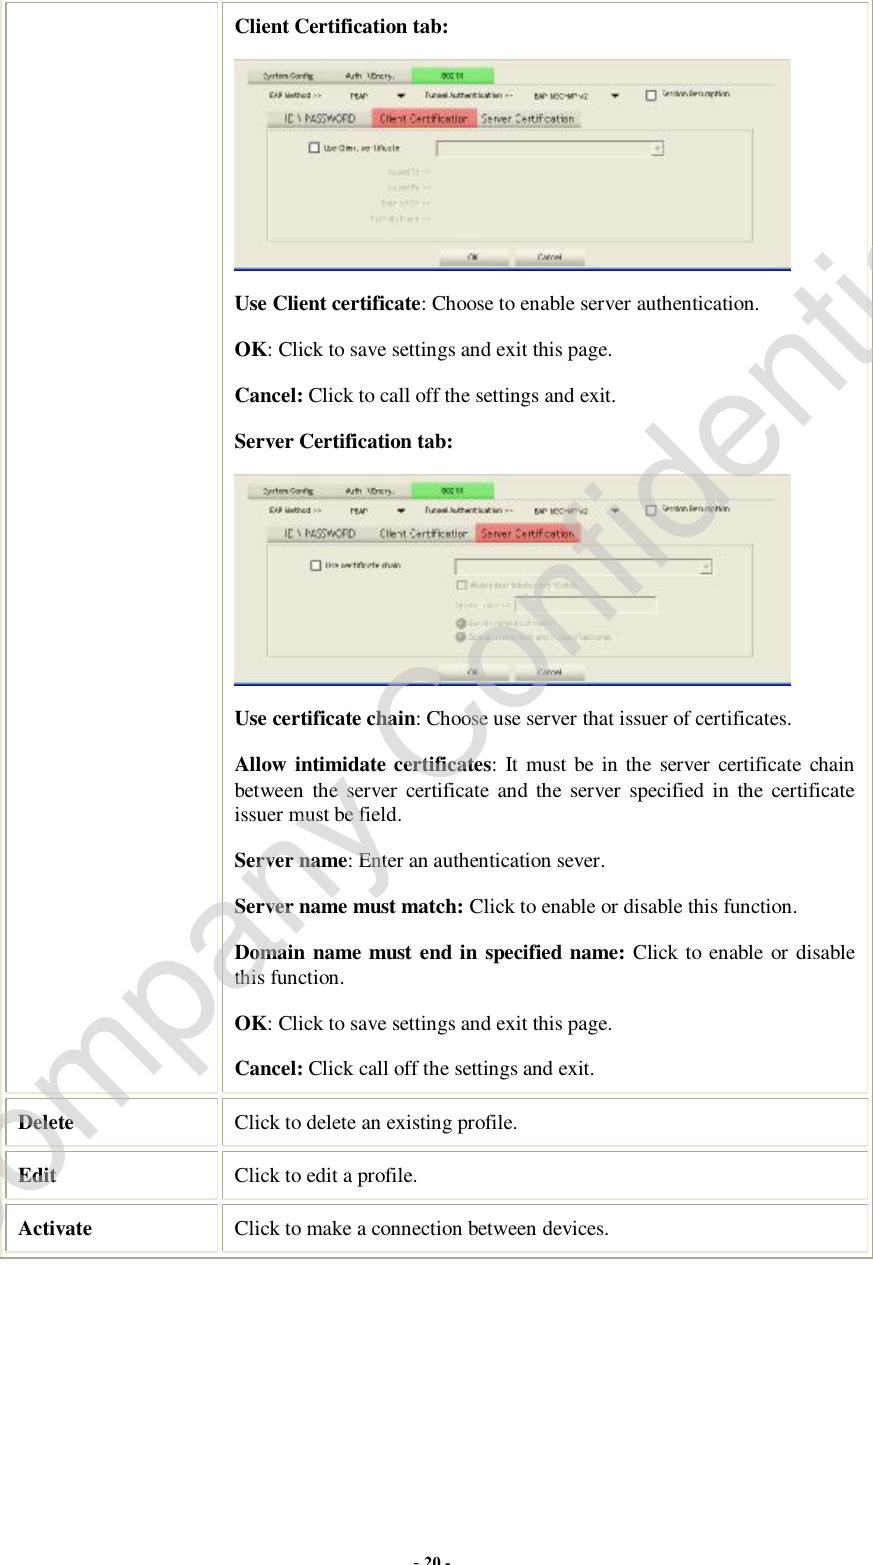
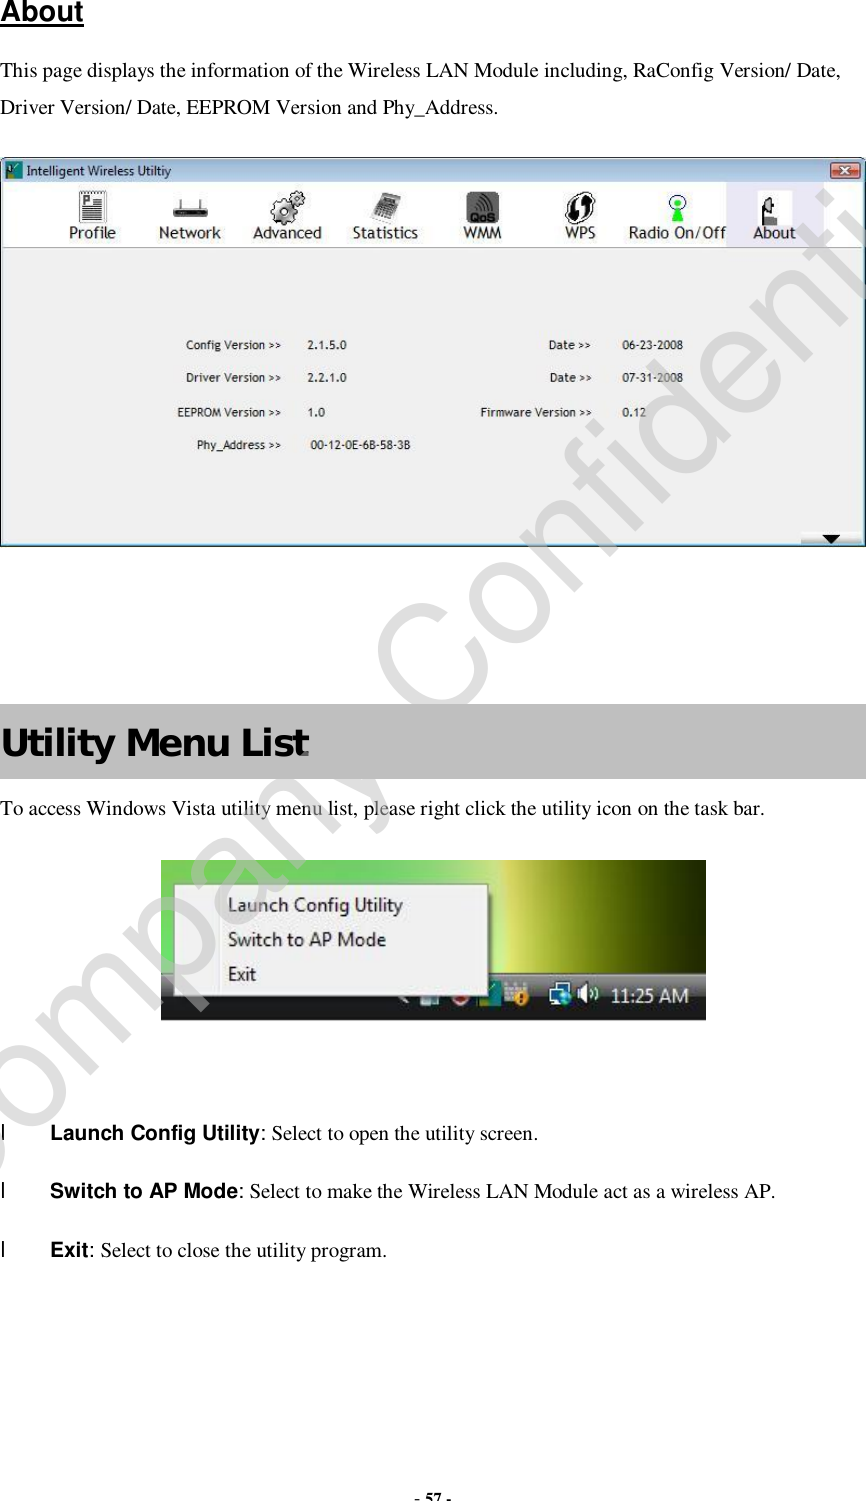
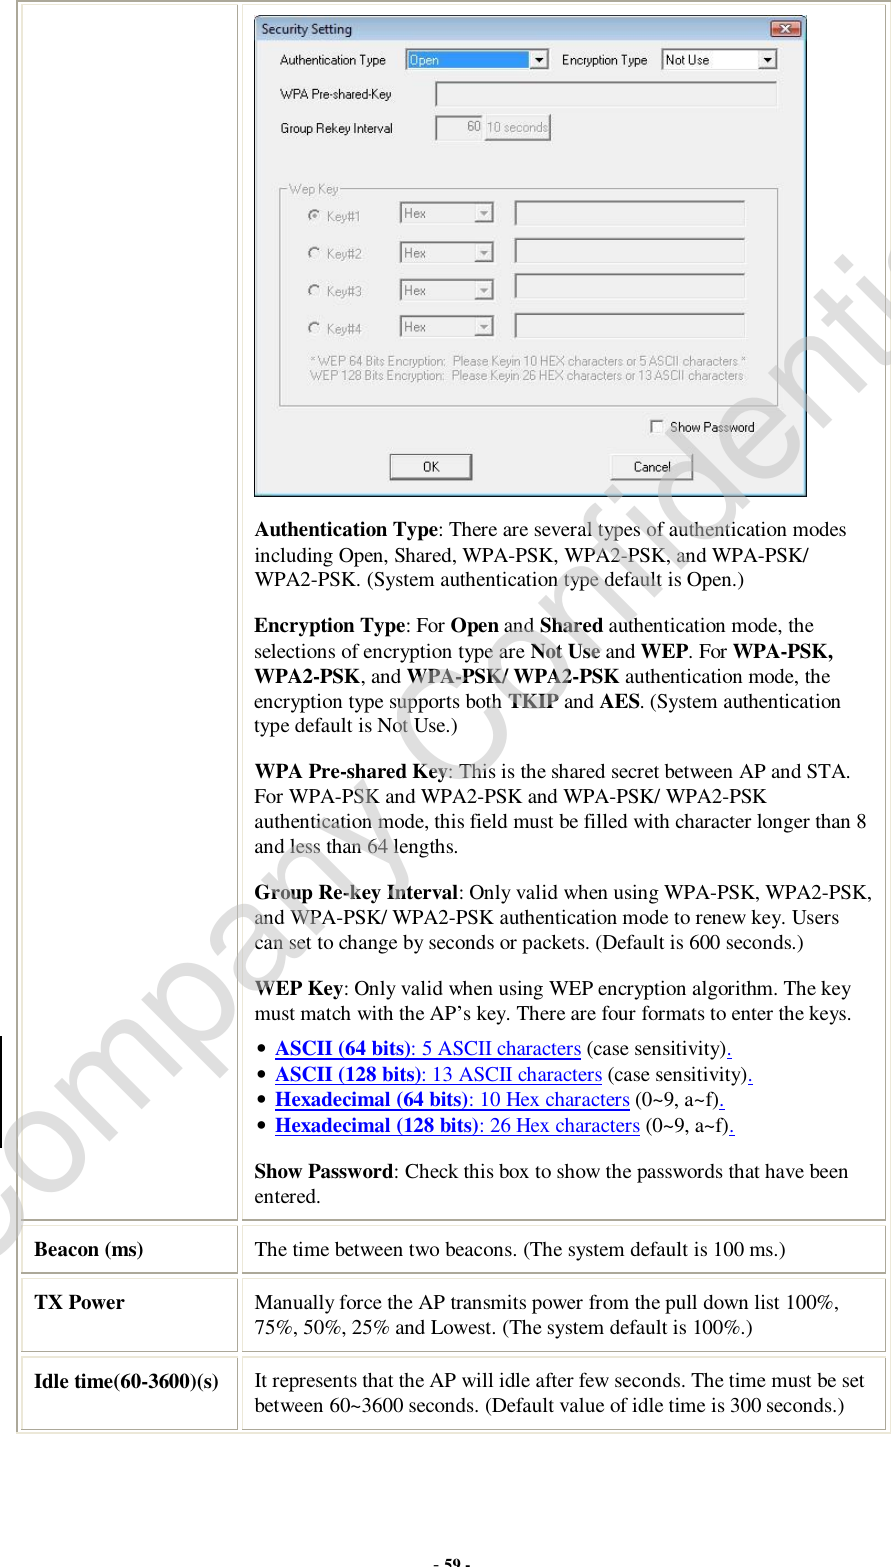
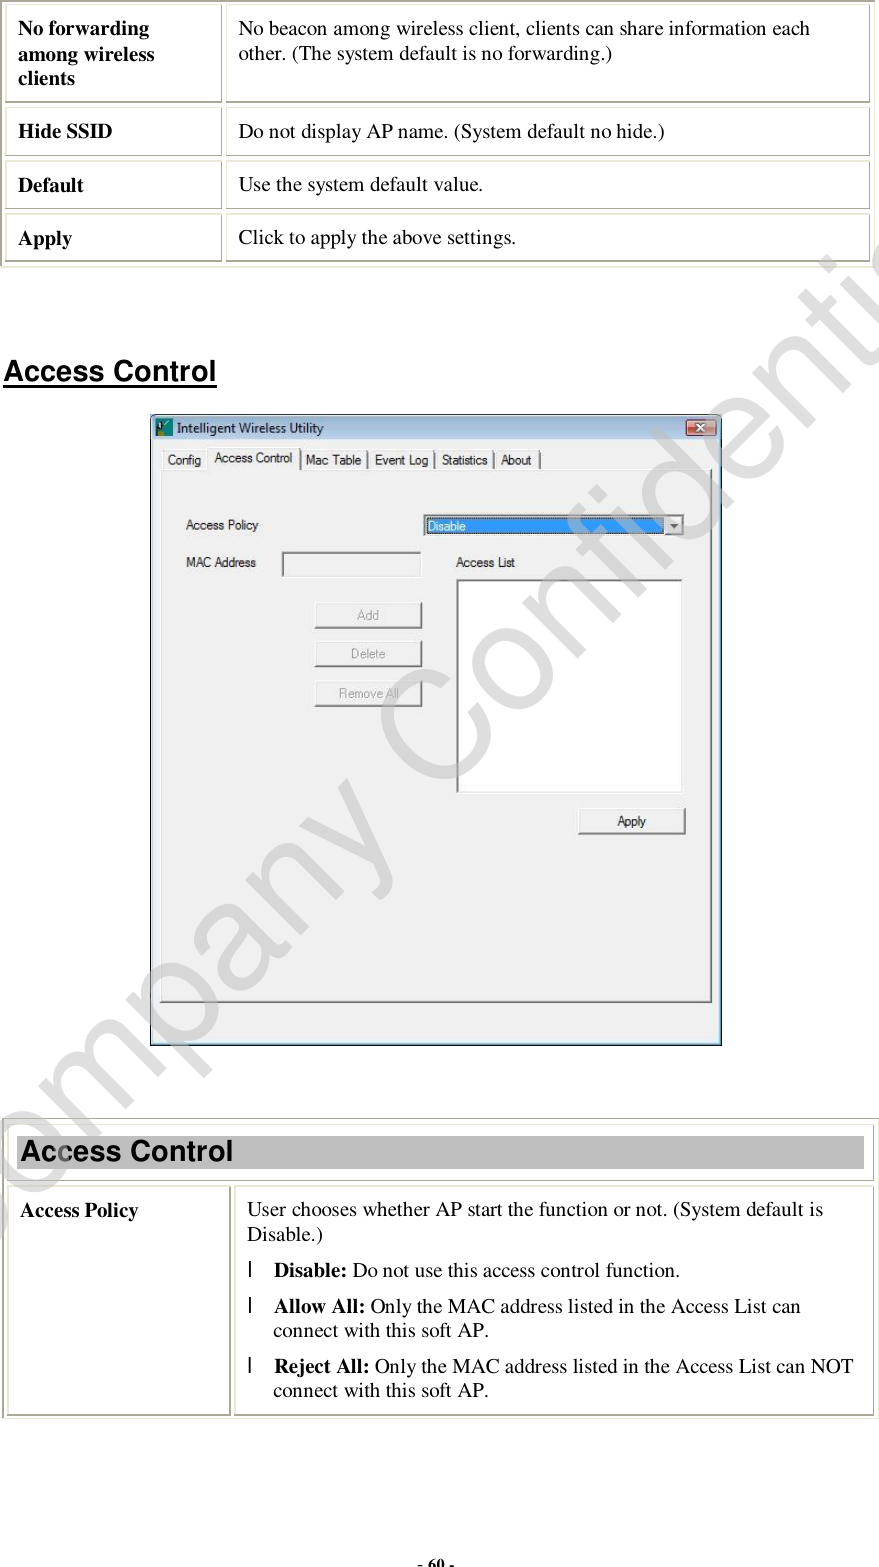
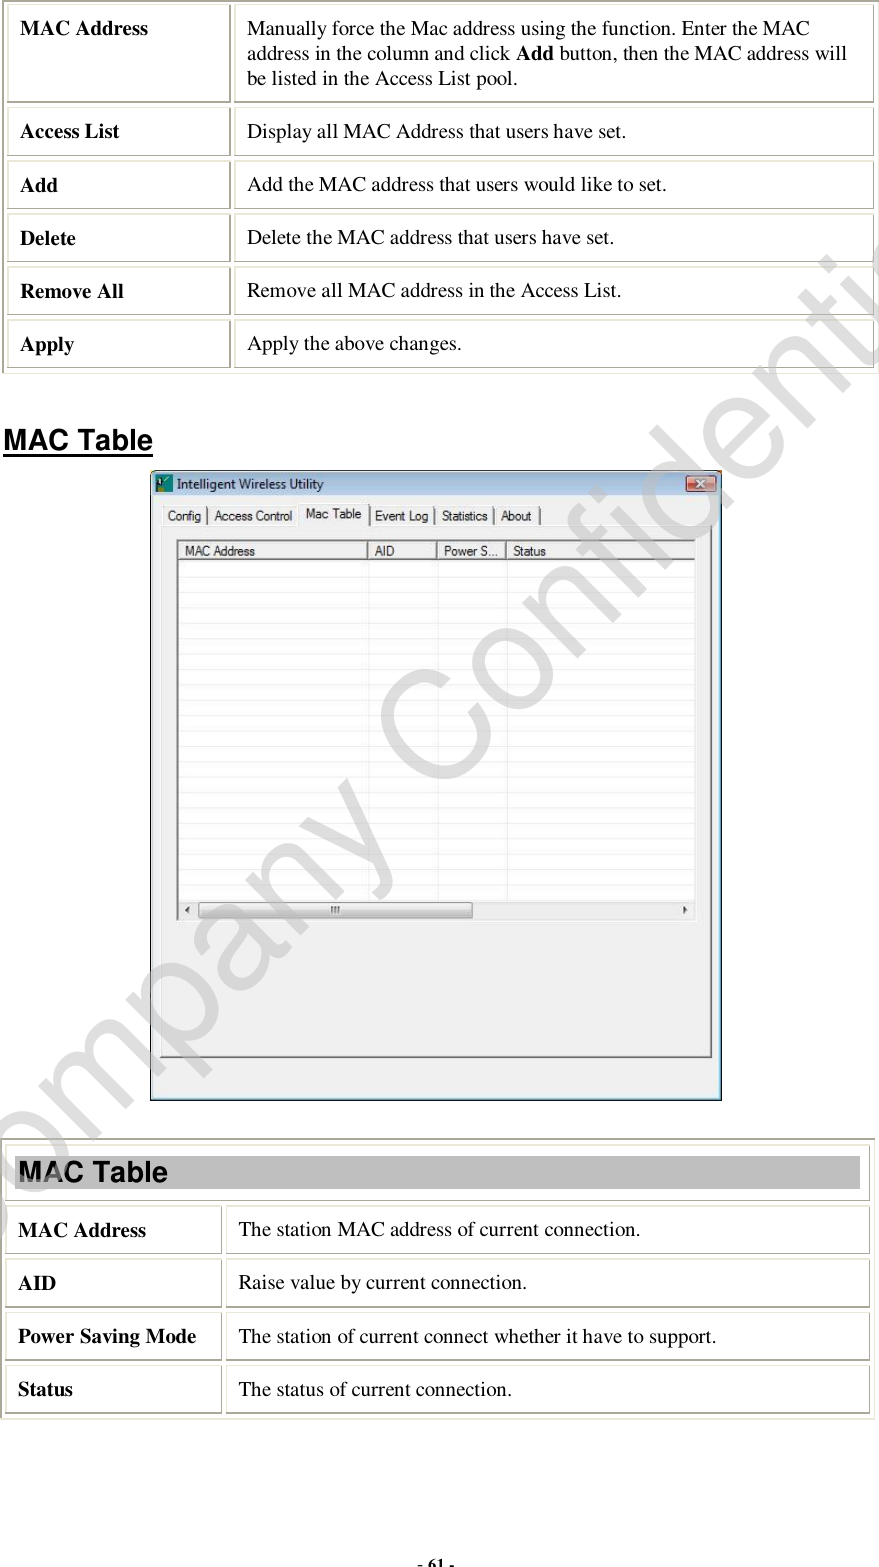
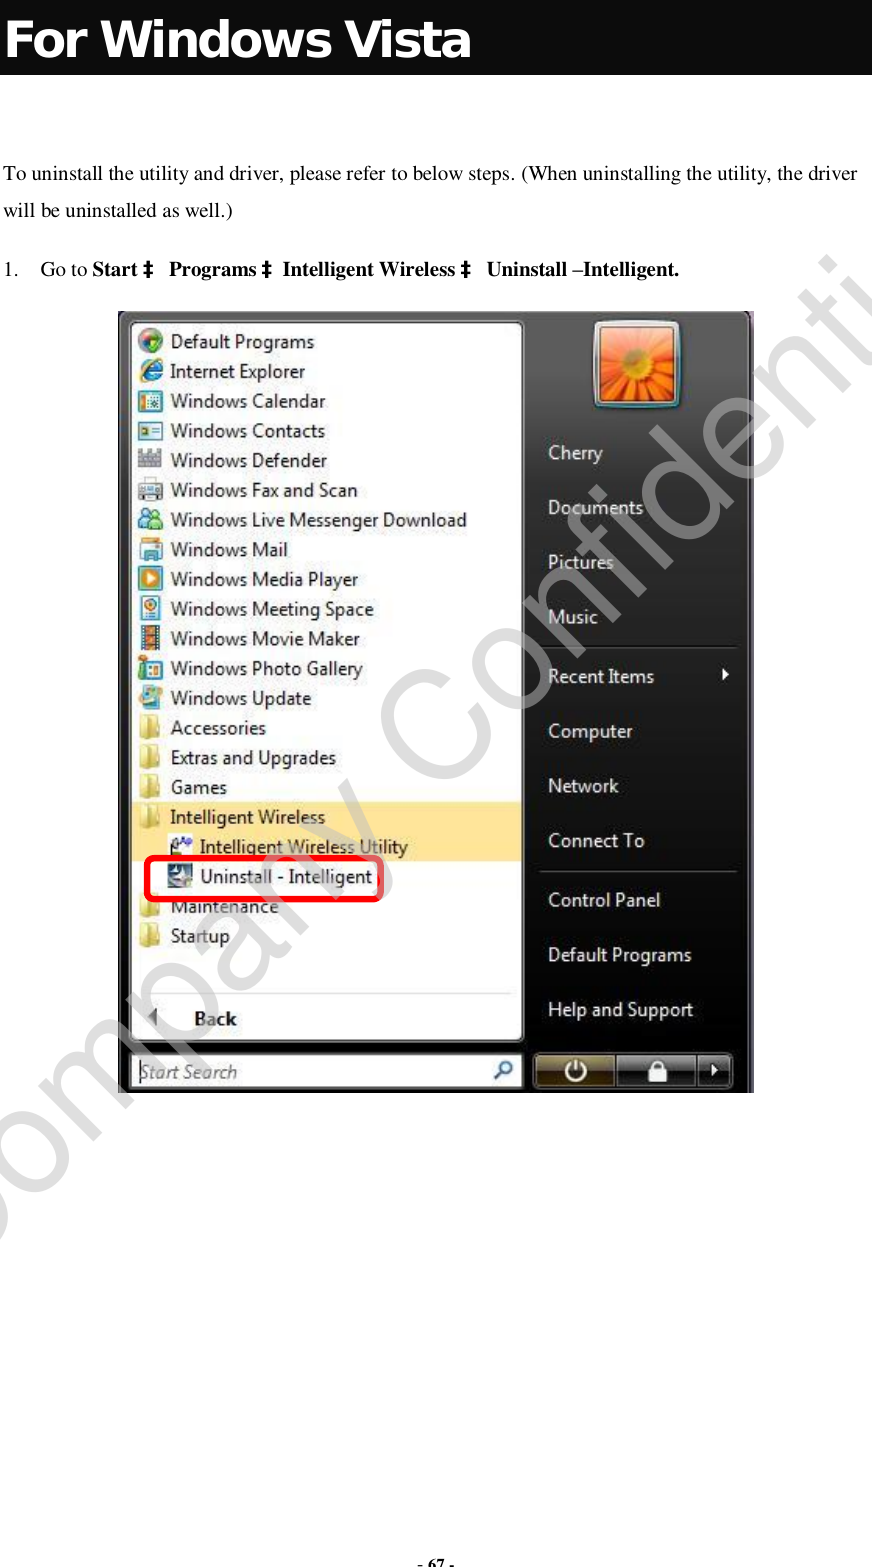
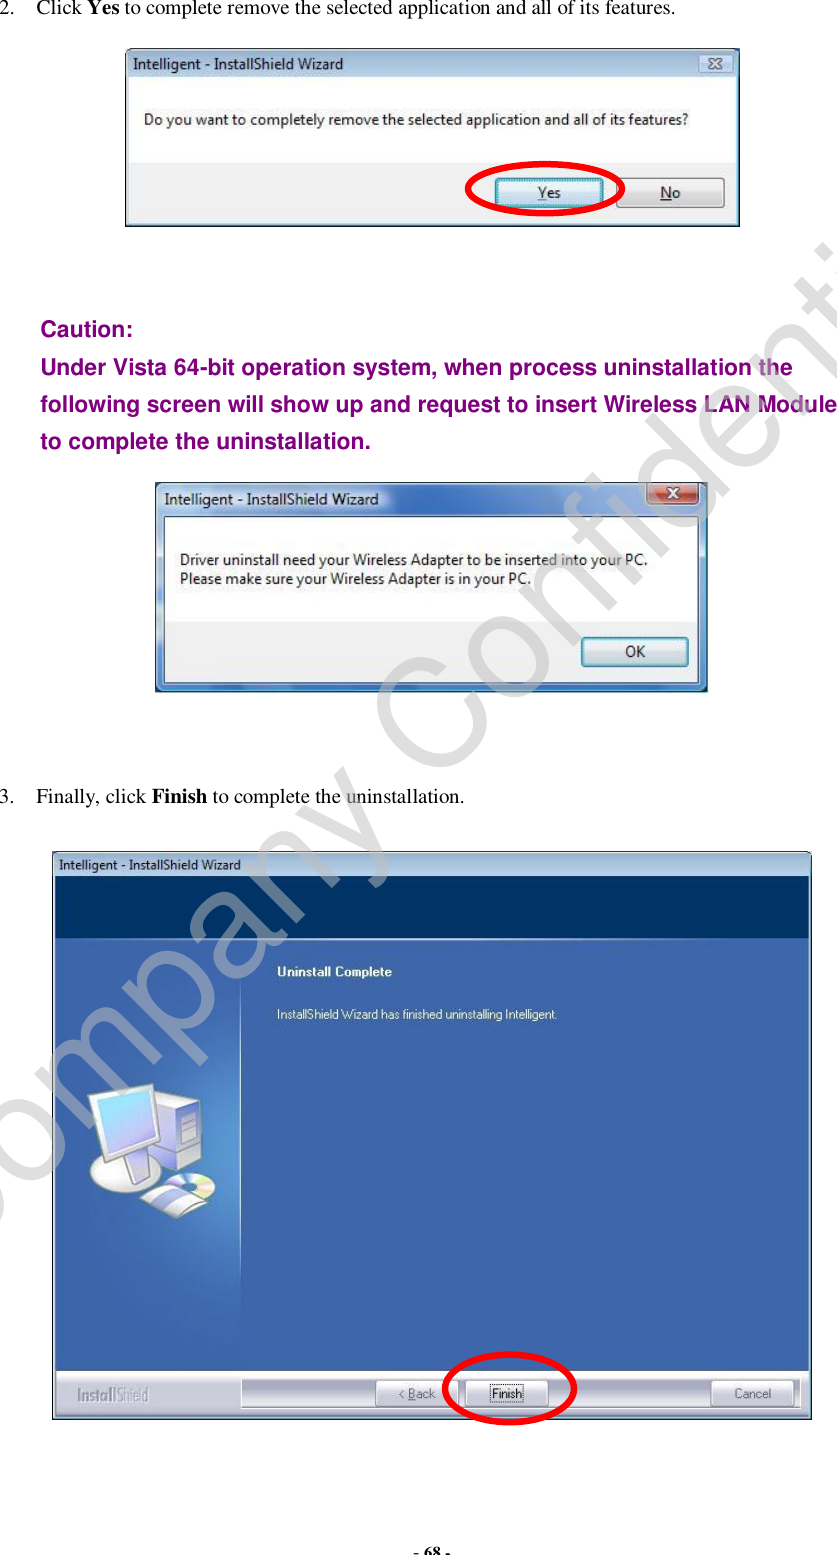
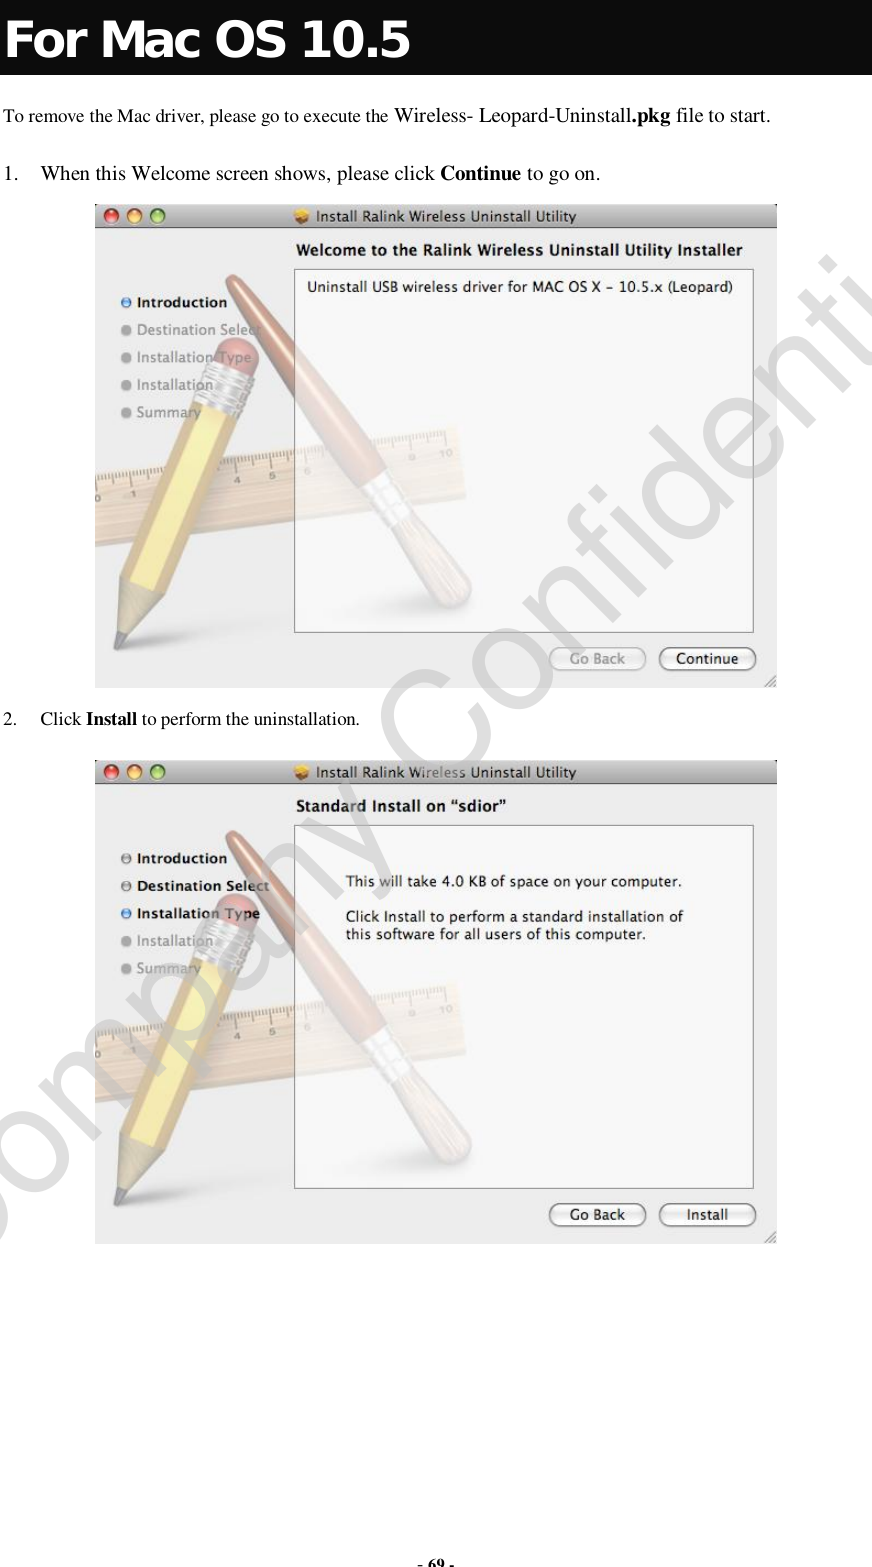
ZyXEL Communications WM5204Z Wireless LAN USB 2.0 Adapter User Manual WM5204Z V2 User s Manual
ZyXEL Communications Corporation Wireless LAN USB 2.0 Adapter WM5204Z V2 User s Manual
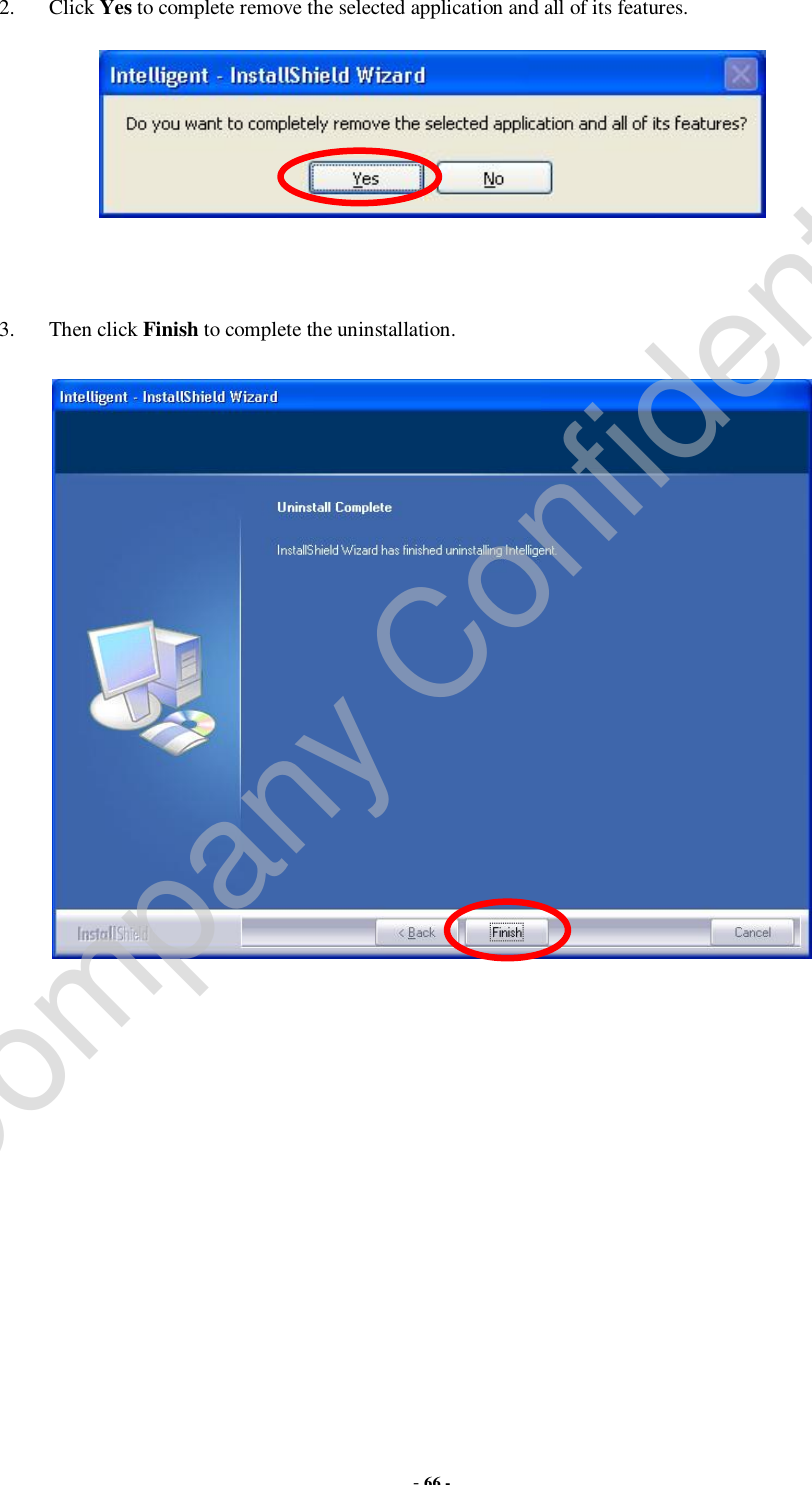
UserManual.wiki
>
ZyXEL Communications
>
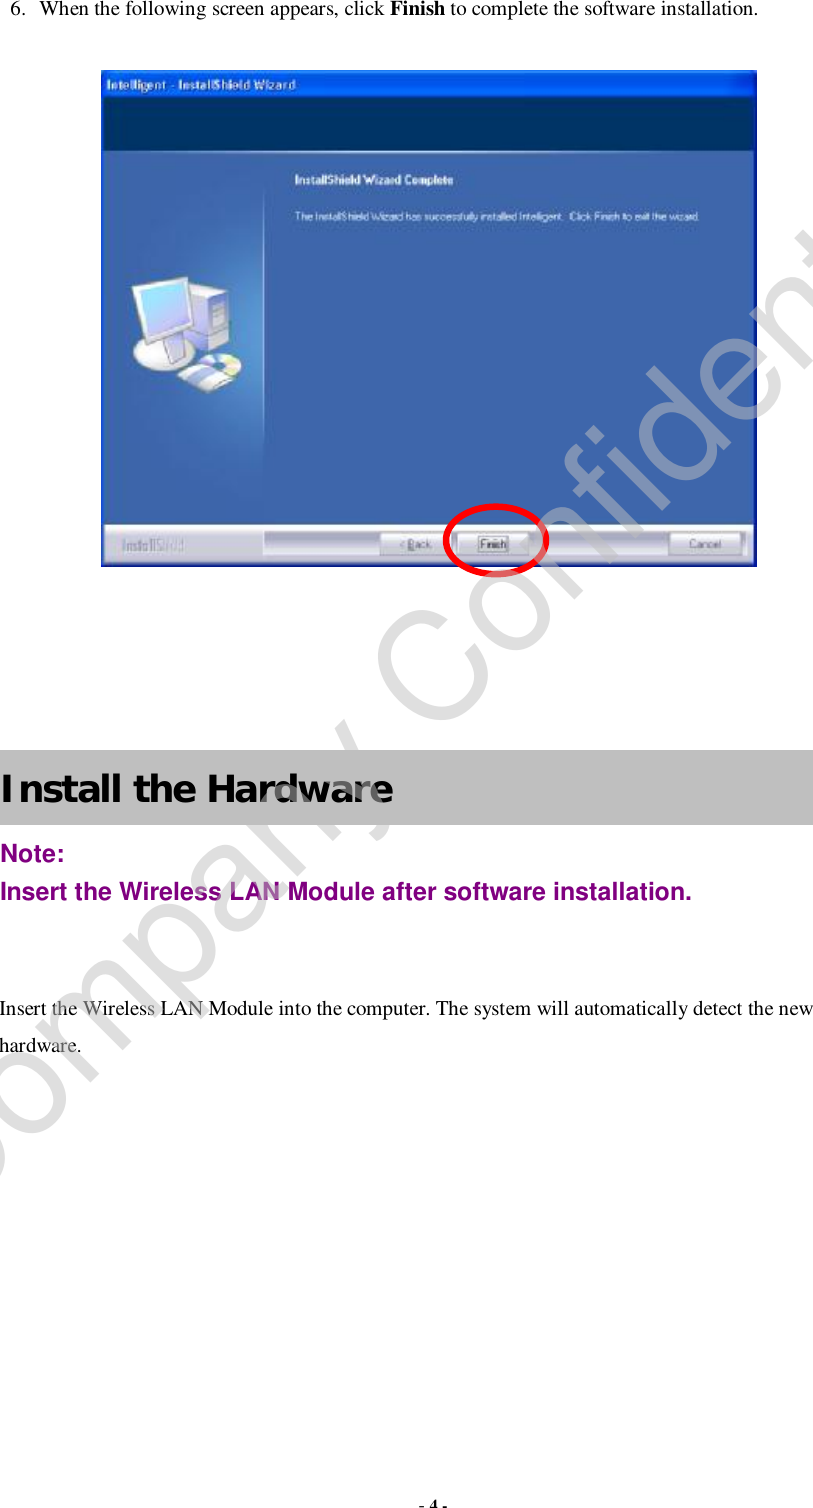
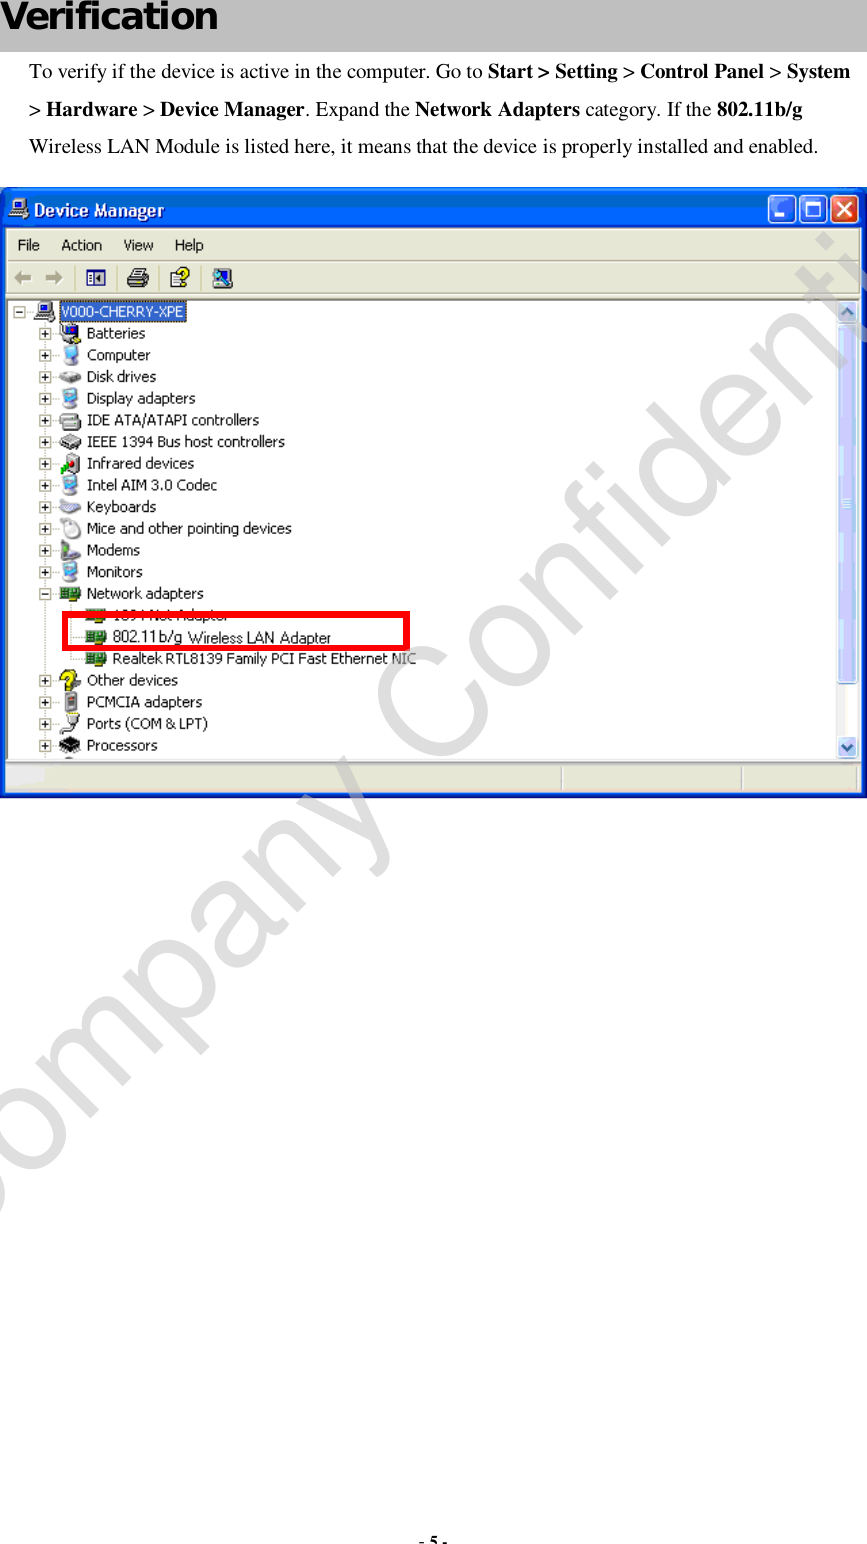
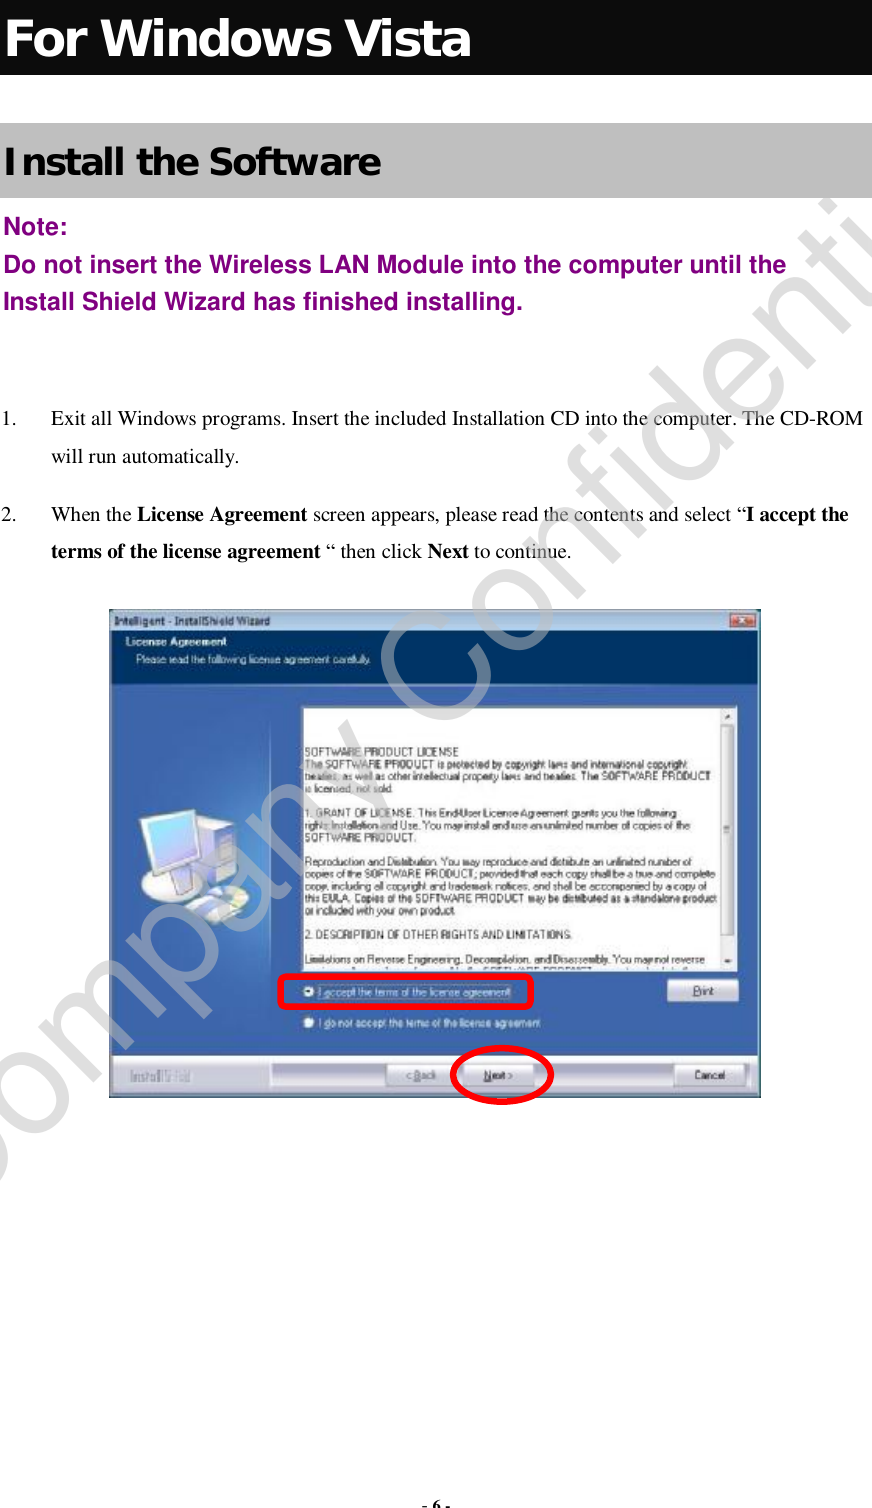
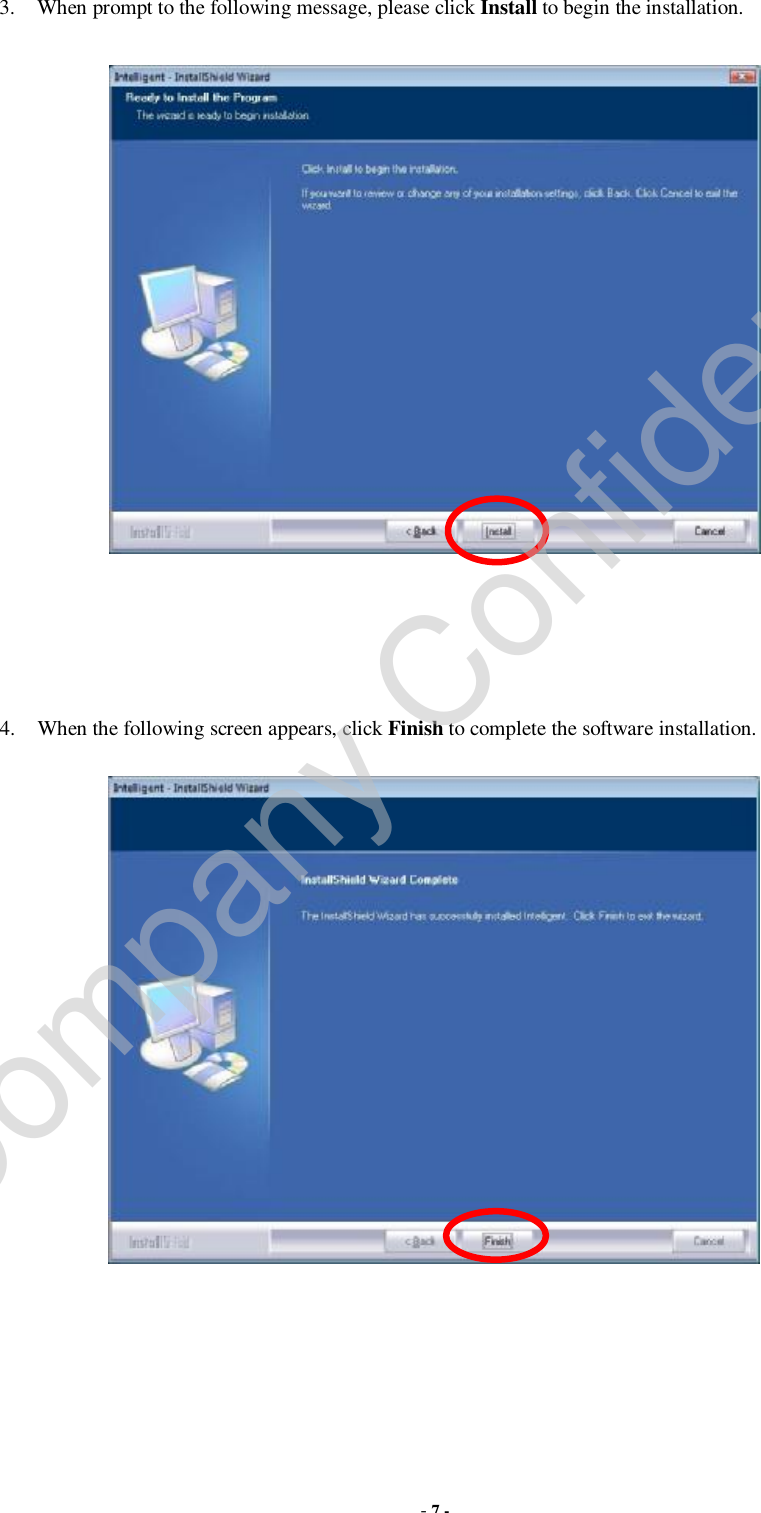
WM5204Z User Manual
Manual
Navigation menu
Upload a User Manual
Namespaces
Wiki Guide
HTML
PDF
Info
Views
User Manual
Discussion / Help
Navigation

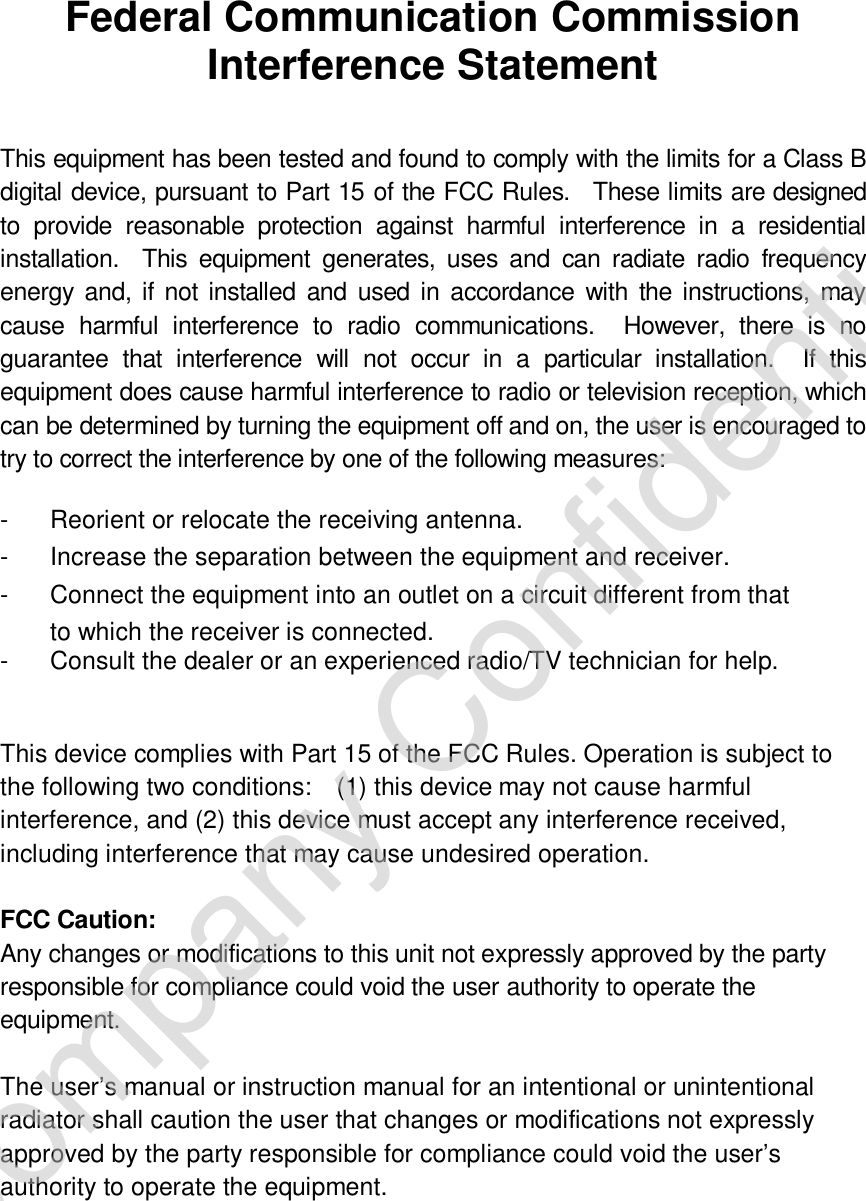

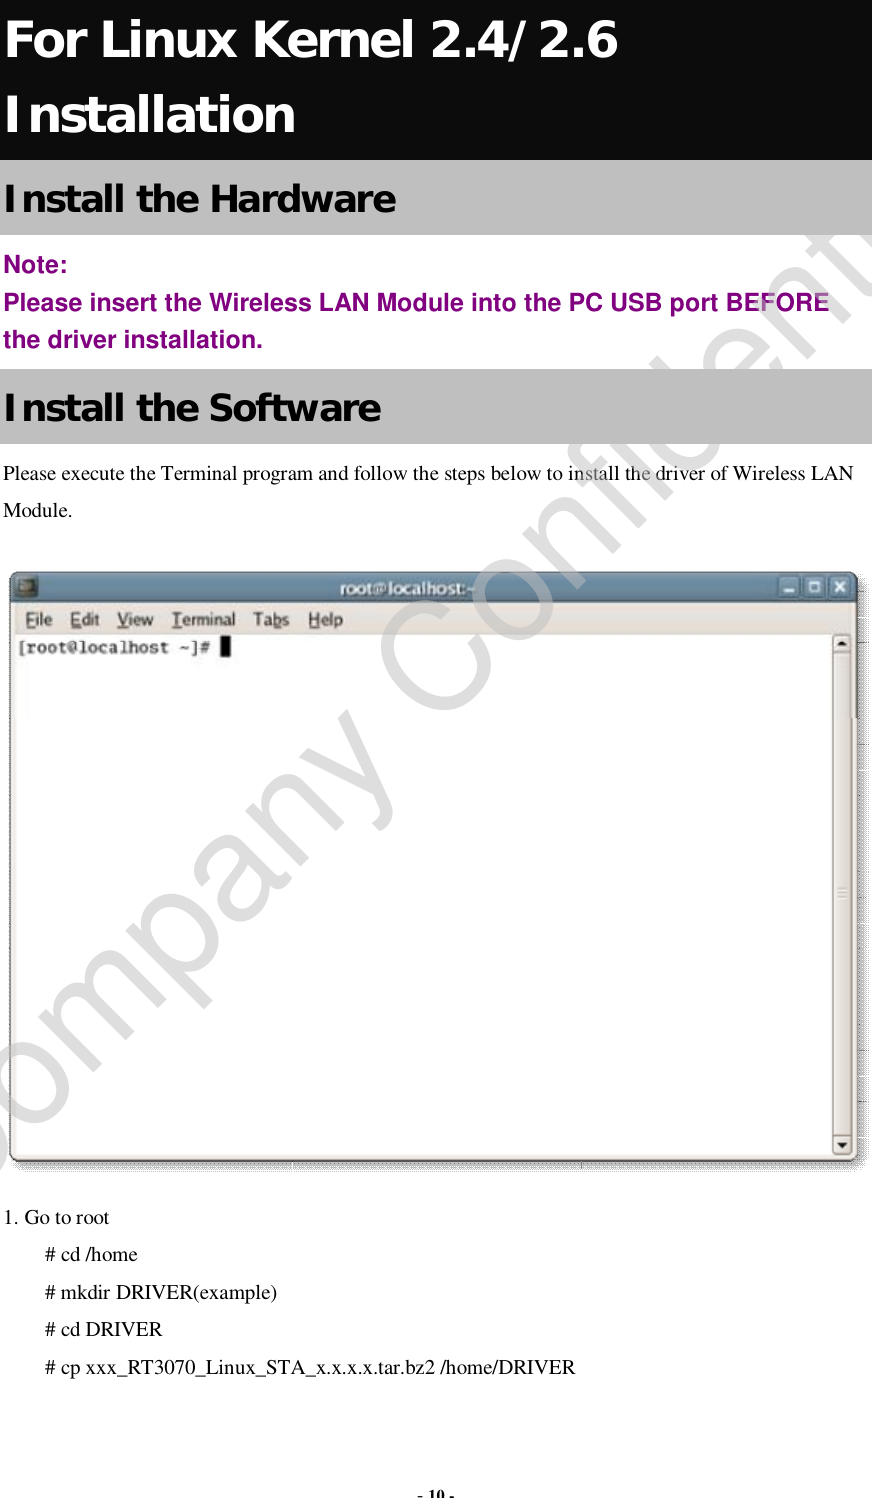
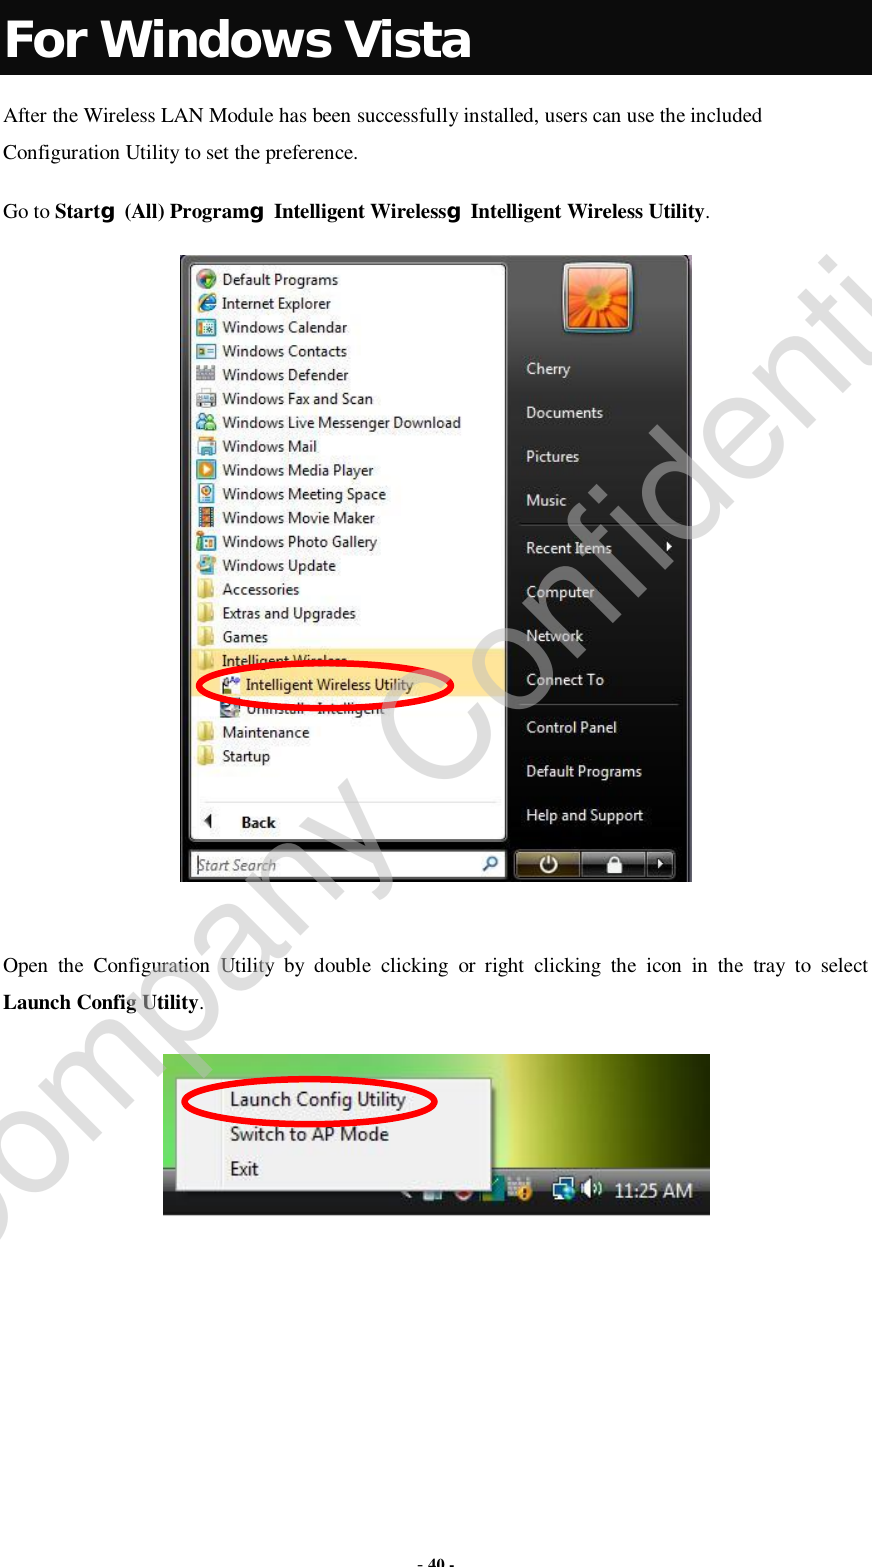
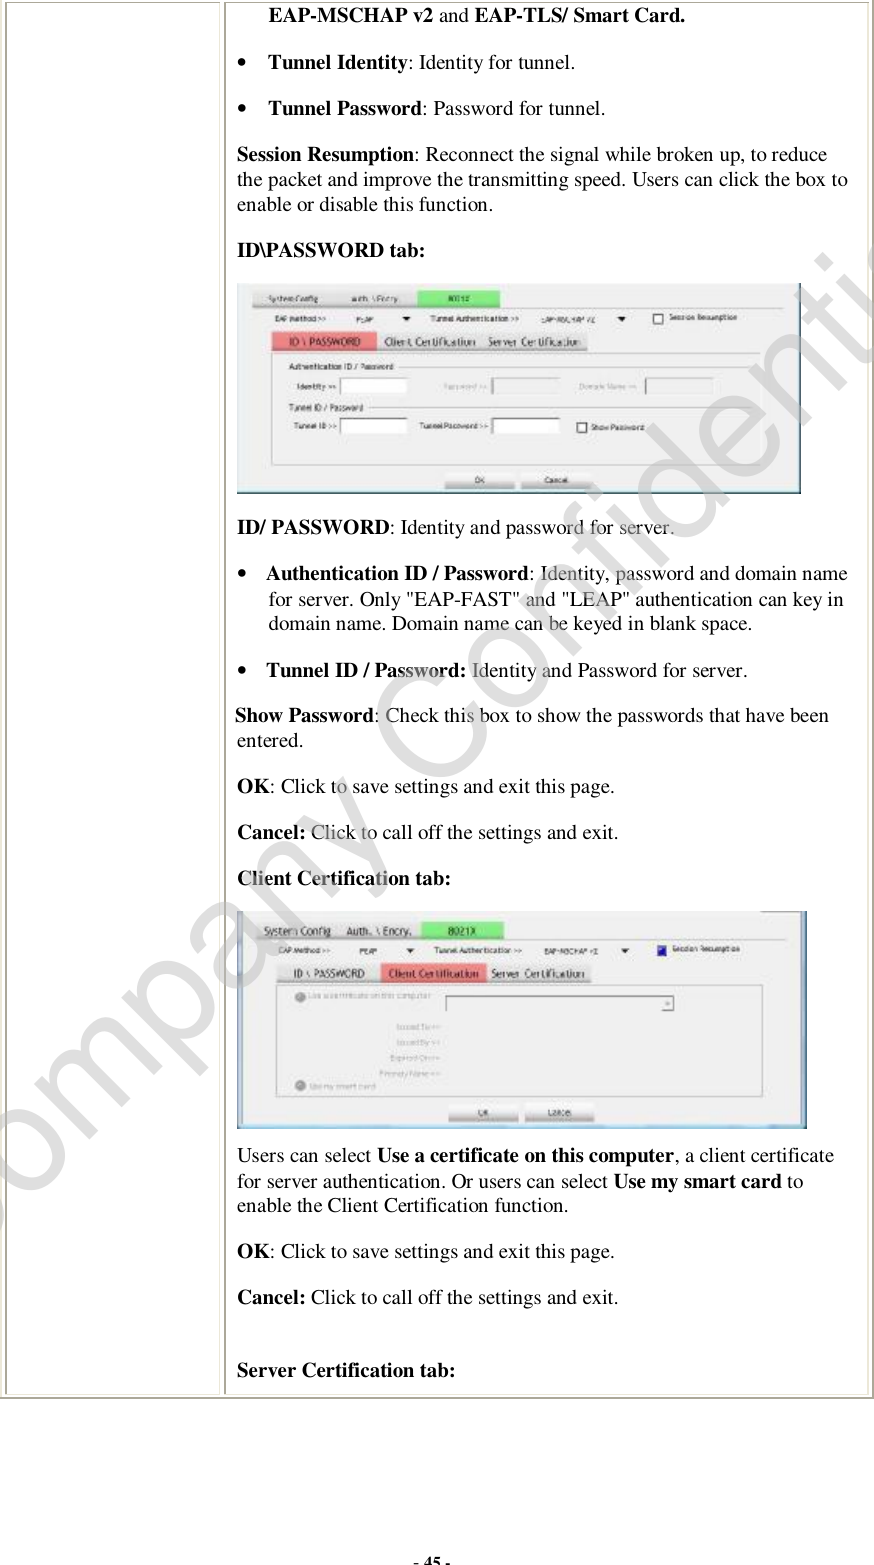
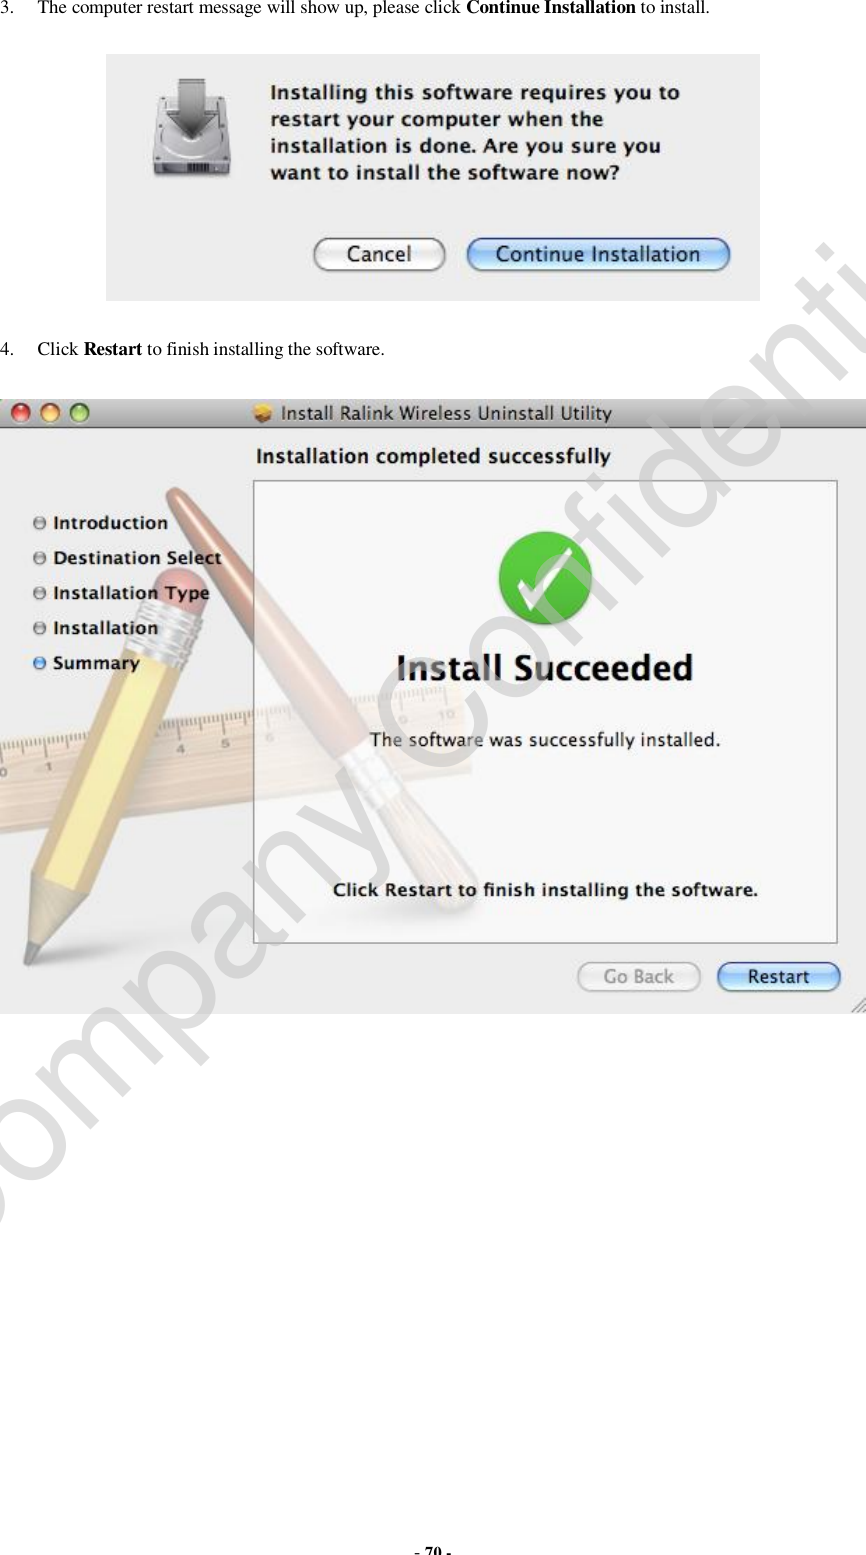
![- 11 - 2. # tar -jxvf xxx_RT3070_Linux_STA_x.x.x.x.tar.bz2 go to "./xxx_RT3070_Linux_STA_x.x.x.x" directory. 3. # make clean 4. # make PS: If there is ERROR Message after compile, then user may need to recheck the Makefile or .c and .h 5. # cd /etc/Wireless/ 6. # mkdir RT2870STA 7. go to "./home/DRIVER/xxx_RT3070_Linux_STA_x.x.x.x" directory 8. # cp RT2870STA.dat /etc/Wireless/RT2870STA/RT2870STA.dat 9. go to "./home/DRIVER/xxx_RT3070_Linux_STA_x.x.x.x/os/linux/" directory. Load driver [kernel 2.4] # /sbin/insmod rt3070sta.o # /sbin/ifconfig ra0 inet YOUR_IP up [kernel 2.6] # /sbin/insmod rt3070sta.ko # /sbin/ifconfig ra0 inet YOUR_IP up Unload driver # /sbin/ifconfig ra0 down # /sbin/rmmod rt3070sta 10. Scan AP # iwlist ra0 scanning 11. Connect to AP # iwpriv ra0 set SSID="AP's SSID" 12. Check status # iwconfig ra0 or # ifconfig ra0 Note: 1. Supporting Kernel: Linux kernel 2.4 and 2.6 series. Tested in Redhat 7.3 or later. 2. Clear DHCP on ra0 # killall dhclient 3. Get DHCP from AP # dhclient ra0 Company Confidential](https://usermanual.wiki/ZyXEL-Communications/WM5204Z/User-Guide-1130115-Page-17.png)