Abbyy PDF Transformer+ User's Guide PDFT4 UG English
User Manual: abbyy PDF Transformer+ - User's Guide Free User Guide for ABBYY PDF Transformer Software, Manual
Open the PDF directly: View PDF ![]() .
.
Page Count: 74
- Introducing ABBYY PDF Transformer+
- About ABBYY PDF Transformer+
- What's New in ABBYY PDF Transformer+
- Using the program
- Viewing PDF documents and finding information
- Document review and approval
- Copying content from PDF documents
- Editing PDF documents
- Creating PDF documents
- Converting PDF documents
- Reducing the size of PDF files
- Removing information from PDF documents
- Protecting PDF documents
- Filling out digital forms
- Annotations and comments
- Adding comments
- Marking up text
- Adding text to a PDF document
- Working with comments
- Creating PDF documents
- Converting PDF documents
- Converting a PDF document
- Conversion settings
- Improving conversion results
- Recognition languages
- Working with complex script languages
- Editing PDF documents
- Saving and printing
- Integrating ABBYY PDF Transformer+ with other applications
- Frequently asked questions
- Appendix
- Activating and registering ABBYY PDF Transformer+
- Technical support
ABBYY
®
PDF Transformer+
User’s Guide
© 2013 ABBYY Production LLC. All rights reserved.
ABBYY
PDF Transformer+
User’s Guide
2
Information in this document is subject to change without notice and does not bear any commitment on the part of
ABBYY.
The software described in this document is supplied under a license agreement. The software may only be used or
copied in strict accordance with the terms of the agreement. It is a breach of the "On legal protection of software and
databases" law of the Russian Federation and of international law to copy the software onto any medium unless
specifically allowed in the license agreement or nondisclosure agreements.
No part of this document may be reproduced or transmitted in any from or by any means, electronic or other, for any
purpose, without the express written permission of ABBYY.
© 2013 ABBYY Production LLC. All rights reserved.
ABBYY, the ABBYY logo, ADRT are either registered trademarks or trademarks of ABBYY Software Ltd.
© 1987-2012 Adobe Systems Incorporated. All rights reserved. Adobe PDF Library licensed from Adobe Systems
Incorporated.
Adobe, Acrobat, the Adobe logo, the Acrobat logo and the Adobe PDF logo, Adobe PDF Library are either registered
trademarks or trademarks of Adobe Systems Incorporated in the United States and/or other countries.
© 2001 ParaType, Inc.
PDF-XChange Standard © 2001-2013 by Tracker Software Products (Canada) Ltd.
JasPer License Version 2.0:
© 2001-2006 Michael David Adams
© 1999-2000 Image Power, Inc.
© 1999-2000 The University of British Columbia
© 1991-2013 Unicode, Inc. All rights reserved
© 2012 Microsoft Corporation. All rights reserved
Microsoft, Outlook, Excel, PowerPoint, Visio, Windows Vista, Windows are either registered trademarks or trademarks of
Microsoft Corporation in the United States and/or other countries.
Portions of this software are copyright © 2013 University of New South Wales All rights reserved.
Kakadu Software © 2013 University of New South Wales. All rights reserved.
EPUB, is a registered trademark of the IDPF (International Digital Publishing Forum).
This product includes software developed by the OpenSSL Project for use in the OpenSSL Toolkit.
(http://www.openssl.org/). This product includes cryptographic software written by Eric Young (eay@cryptsoft.com).
(c) 1998-2011 The OpenSSL Project. All rights reserved.
(c) 1995-1998 Eric Young (eay@cryptsoft.com) All rights reserved.
This product includes software written by Tim Hudson (tjh@cryptsoft.com).
All other trademarks are the sole property of their respective owners.
ABBYY
PDF Transformer+
User’s Guide
3
Contents
Introducing ABBYY PDF Transformer+ ..................................................................................................... 6
About ABBYY PDF Transformer+ ................................................................................................................. 6
What's New in ABBYY PDF Transformer+ ................................................................................................ 7
Using the program ............................................................................................................................................. 8
Viewing PDF documents and finding information ............................................................................................ 8
Document review and approval ............................................................................................................................. 8
Copying content from PDF documents ................................................................................................................ 9
Editing PDF documents ............................................................................................................................................ 9
Creating PDF documents ......................................................................................................................................... 9
Converting PDF documents .................................................................................................................................. 10
Reducing the size of PDF files ............................................................................................................................. 10
Removing information from PDF documents ................................................................................................... 10
Protecting PDF documents .................................................................................................................................... 10
Filling out digital forms .......................................................................................................................................... 11
Annotations and comments .................................................................................................................................. 11
Adding comments .................................................................................................................................................... 11
Marking up text ........................................................................................................................................................ 11
Adding text to a PDF document .......................................................................................................................... 13
Working with comments ........................................................................................................................................ 13
Creating PDF documents ................................................................................................................................17
Scanning to PDF....................................................................................................................................................... 17
Scanning tips ............................................................................................................................................................ 18
Creating a PDF document from a file ................................................................................................................ 18
Creating a PDF document from multiple files ................................................................................................. 19
Using the PDF–XChange Printer to create PDF documents ......................................................................... 20
Converting PDF documents ...........................................................................................................................22
Converting a PDF document ................................................................................................................................. 22
Conversion settings ................................................................................................................................................. 22
ABBYY
PDF Transformer+
User’s Guide
4
Improving conversion results ............................................................................................................................... 27
Recognition languages ........................................................................................................................................... 27
Working with complex script languages .................................................................................................31
Language support .................................................................................................................................................... 31
Recommended fonts ............................................................................................................................................... 31
Editing PDF documents ...................................................................................................................................33
Editing text and pictures ....................................................................................................................................... 33
Copying content from PDF documents .............................................................................................................. 34
Recognizing text ...................................................................................................................................................... 35
Background recognition ......................................................................................................................................... 35
Adding stamps .......................................................................................................................................................... 36
Bates numbering ...................................................................................................................................................... 38
Managing PDF document pages .......................................................................................................................... 40
Attached files ............................................................................................................................................................ 41
Keyword search ........................................................................................................................................................ 42
Protecting PDF documents .................................................................................................................................... 42
Redacting data in PDF documents ...................................................................................................................... 43
Digital signatures ..................................................................................................................................................... 45
Saving and printing ..........................................................................................................................................47
Reducing the size of PDF documents ................................................................................................................ 47
Saving PDF documents .......................................................................................................................................... 47
Sending a PDF document in an e–mail message............................................................................................ 47
Printing PDF documents ........................................................................................................................................ 48
Integrating ABBYY PDF Transformer+ with other applications ....................................................49
Microsoft Word, Excel, PowerPoint, and Visio integration ........................................................................... 49
Microsoft Outlook integration .............................................................................................................................. 50
Windows Explorer integration .............................................................................................................................. 51
Frequently asked questions ..........................................................................................................................53
Types of PDF documents ....................................................................................................................................... 53
ABBYY
PDF Transformer+
User’s Guide
5
Supported document formats .............................................................................................................................. 54
Changing the interface language ........................................................................................................................ 55
Current date and time on stamps and in Bates numbers ............................................................................ 55
Appendix ...............................................................................................................................................................60
Glossary ...................................................................................................................................................................... 60
Keyboard shortcuts ................................................................................................................................................. 62
Using ABBYY PDF Transformer+ Help ............................................................................................................... 66
Customer Experience Improvement Program .................................................................................................. 69
Activating and registering ABBYY PDF Transformer+ .......................................................................70
Activating ABBYY PDF Transformer+ ................................................................................................................. 70
Registering ABBYY PDF Transformer+............................................................................................................... 71
Privacy Policy ............................................................................................................................................................ 72
Buying ABBYY products ......................................................................................................................................... 72
About ABBYY ............................................................................................................................................................. 72
Technical support ..............................................................................................................................................74
ABBYY
PDF Transformer+
User’s Guide
6
Introducing ABBYY PDF Transformer+
This chapter provides an overview of ABBYY PDF Transformer+ and its features.
Contents:
What is ABBYY PDF Transformer+
What's new in ABBYY PDF Transformer+
About ABBYY PDF Transformer+
ABBYY PDF Transformer+ is an easy–to–use, versatile tool that lets you create, edit, comment on,
and convert PDF files to other editable formats such as DOCX and XLSX.
ABBYY PDF Transformer+ can convert paper documents to searchable PDF files, merge files of
various formats into a single PDF document, add or remove pages from a document and change
their order, or edit text and copy pictures and text from PDF files to other applications, all without
the need to convert PDF documents to an editable format. It also has a number of features for
commenting, discussing documents, and creating document archives.
ABBYY PDF Transformer+ features
Simplicity and ease of use
Simple, intuitive interface makes it easy to start working and master the main functions.
All the functionality you need for work with PDF files can be accessed from the main window.
Copy and edit content and search for key words in PDF documents of any type, including scanned
documents.
Opening, creating, and converting PDF documents is quick and easy thanks to integration with
Microsoft Office and Windows Explorer.
Accurate recognition
ABBYY's OCR (Optical Character Recognition) technology provides accurate results when searching
for keywords, copying text, and converting PDF documents to editable formats.
The layout and formatting of PDF documents, including hyperlinks, e–mail addresses, headers,
footers, illustration captions, page numbers and footnotes, are retained after conversion thanks to
ABBYY ADRT® (Adaptive Document Recognition Technology).
ABBYY
PDF Transformer+
User’s Guide
7
What's New in ABBYY PDF Transformer+
This page introduces new features and improvements of ABBYY PDF Transformer+.
Unified interface
ABBYY PDF Transformer+ is built around the concept a unified interface: all of the primary
functions can be accessed from a single window, making work with PDF documents simple and
efficient. It is also an ideal choice for viewing PDF documents of any leng th thanks to additional
navigation tools.
New PDF document editing features
ABBYY PDF Transformer+ offers easy–to–use tools for editing PDF documents. You can correct
typing errors, copy text and pictures, post comments and much more without converting PD F
documents to editable formats or searching for the files they were created from.
Versatile search tool
ABBYY PDF Transformer+ is capable of searching for keywords in PDF documents of any type. This
search includes not only the document's visible text, bu t also hidden information such as
comments, bookmarks and metadata. You can easily find, select or delete words from the
document.
Expanded PDF document creation features
Additional scanning options let you improve image quality, decrease the size of scanned files and
automatically convert scans into searchable PDF documents.
Create PDF documents from image files of popular formats: JPEG, JPEG2000, BMP, JBIG2, PNG, GIF,
TIFF.
New conversion formats
Ebooks
ABBYY PDF Transformer+ can convert PDF documents to two popular ebook formats: EPUB and
FB2. You can read these ebooks on your iPad, tablet, or other mobile device.
OpenOffice.org Writer Support
ABBYY PDF Transformer+ lets you convert PDF files to the OpenOffice.org Writer (ODT) without
losing the layout and formatting of the original document, making ODT documents easy to work
with and archive.
Digital signatures
ABBYY PDF Transformer+ lets you sign documents with a digital signature. Digital signatures, just
like regular signatures on paper documents, are used to confirm the identity of the person that
signed a digital document. They can also be used to prevent your PDF documents from being
accessed and edited without authorization, adding another layer of protection.
ABBYY
PDF Transformer+
User’s Guide
8
Using the program
This section tells you how you can use ABBYY PDF Transformer+ for some common tasks.
Section contents:
Viewing PDF documents and finding information
Reviewing, discussing, and approving PDF documents
Copying content from PDF documents
Editing PDF documents
Combining multiple files into one PDF document
Converting PDF documents
Reducing the size of PDF documents
Removing content from PDF documents
Protecting your PDF documents
Filling out forms inside PDF documents
Viewing PDF documents and finding information
ABBYY PDF Transformer+ lets you view PDF documents, find information inside them, and highlight
or comment on important text fragments.
With ABBYY PDF Transformer+, you can:
Find and highlight information
Search both in the body text and in the hidden data such as comments, bookmarks, and metadata.
For your convenience, search results are displayed in a separate search pane, with the matching
words highlighted in the body text of the document, so that you can easily remove all occurrences of
a particular word or phrase.
Add comments and annotations
Collaborate on PDF documents and discuss them with other users by adding comments and making
notes inside documents. Reply to comments and assign statuses to them to make your discussions
more organized.
Document review and approval
ABBYY PDF Transformer+ lets you review PDF documents.
With ABBYY PDF Transformer+, you can:
Add comments and annotations
Collaborate on PDF documents and discuss them with other users by adding comments and making
notes inside documents. Reply to comments and assign statuses to them to make your discussions
more organized.
Highlight text fragments
While reading documents, highlight important text fragments and add editorial notes.
Add stamps to your documents
Stamp PDF files in the same manner as you stamp paper documents.
ABBYY
PDF Transformer+
User’s Guide
9
Sign digital documents and validate signatures
Add digital signatures to documents and validate existing signatures. Digital signatures cannot be
forged and the recipient of your document can be absolutely certain of your authorship.
Copying content from PDF documents
Use keyword search to find and copy content inside PDF documents.
With ABBYY PDF Transformer+, you can:
Copy text, pictures and tables
ABBYY PDF Transformer+ lets you copy text, pictures and tables and paste them to other
applications. You do not need to convert or optically recognize PDFs obtained with a scanner to be
able to copy content from such files.
Find information by keywords
Search both in the body text and in the hidden data such as comments, bookmarks, and metadata.
For your convenience, search results are displayed in a separate search pane, with the matching
words highlighted in the body text of the document, so that you can easily remove all occurrences of
a particular word or phrase.
Editing PDF documents
You can edit PDF documents without converting them to editable text formats.
With ABBYY PDF Transformer+, you can:
Edit text inside PDFs
Add or remove text within one line in regular PDF documents. Use the Eraser tool to remove text or
pictures from any type of PDF file.
Add text to PDFs
Add text fragments to PDF files of any type, even to PDFs which were obtained with a scanner.
Organize pages in a PDF document
Reorder pages, delete pages from or add new pages to your documents. You can also create blank
PDF pages.
Creating PDF documents
ABBYY PDF Transformer+ lets you create PDF files from paper documents, Microsoft Word
documents, image files, and from many other popular formats.
With ABBYY PDF Transformer+, you can:
Create searchable PDFs from paper documents
Select scanning settings for optimal files size and image quality and create searchable PDF files.
Additional options include automatic image processing, MRC compression, and multi–page scanning.
Create PDFs from files
Create PDF documents from files in many popular formats. Use the PDF–XChange 5.0 for ABBYY
virtual printer to create PDF files in any application that allows you to select a printer.
Create PDFs from multiple files
Combine multiple files into one PDF document or create a separate PDF file for each of the files in a
list. You can combine both editable files in any of the supported formats and image or PDF files.
Organize pages in a PDF document
Reorder pages, delete pages from or add new pages to your documents. You can also create blank
PDF pages.
ABBYY
PDF Transformer+
User’s Guide
10
Add Bates numbers to your PDFs
Add a unique number to each page to each document to make finding archived documents easier.
Add a text layer to image–only PDFs
Scan paper documents and add a text layer to them to make them searchable. You will also be able
to copy and mark up text in such documents.
Converting PDF documents
ABBYY PDF Transformer+ lets you easily convert PDF documents into editable formats.
With ABBYY PDF Transformer+, you can:
Convert PDF documents into editable formats
Convert PDF files to Microsoft Office documents, Open Office documents, PowerPoint presentations,
plain text files, CSV files with tabular data, FB2 e–book files, and EPUB e–book files.
Select conversion settings
ABBYY PDF Transformer+ offers a wide range of conversion settings to achieve optimal results.
Reducing the size of PDF files
With ABBYY PDF Transformer+, you can:
Reduce the size of a PDF file
PDF files that contain page images or illustrations can be very large. You can compress a document
before you save it, decreasing its file size.
Compress pictures in a PDF file
Use Mixed Raster Content (MRC) compression to get smaller files without a loss in quality. This type
of compression is available when you scan documents or create PDF documents from image files.
Removing information from PDF documents
Before making a PDF document public, you may wish to remove unnecessary or sensitive
information. With ABBYY PDF Transformer+, you can:
Find and remove confidential information
Search both in the body text and in the hidden data such as comments, bookmarks, and metadata.
For your convenience, search results are displayed in a separate search pane, with the matching
words highlighted in the body text of the document, so that you can easily remove all occurrences of
a particular word or phrase.
Remove pictures and text
ABBYY PDF Transformer+ has a special editing mode that lets you delete text and images from PDF
documents that do not contain page images. Use the Eraser tool to remove text or pictures from
any type of PDF file.
Protecting PDF documents
There are many ways to protect your PDF documents. With ABBYY PDF Transformer+, you can:
Protect PDFs with passwords
Protect your PDF document with a password to prevent unauthorized opening, printing, or editing.
Sign digital documents and validate signatures
Add digital signatures to documents and validate existing signatures. Digital signatures cannot be
forged and the recipient of your document can be absolutely certain of your authorship.
ABBYY
PDF Transformer+
User’s Guide
11
Find and remove confidential information
Search both in the body text and in the hidden data such as comments, bookmarks, and metadata.
For your convenience, search results are displayed in a separate search pane, with the matching
words highlighted in the body text of the document, so that you can easily remove all occurrences of
a particular word or phrase.
Filling out digital forms
ABBYY PDF Transformer+ lets you fill out PDF forms.
Use the Text Box tool to fill out static forms in PDF documents of any type. You can also fill out
interactive forms (note, however, that they will appear as static forms).
Annotations and comments
ABBYY PDF Transformer+ lets you review PDF documents and add comments, highlight important
fragments, and make editorial notes as you read.
Section contents:
Adding comments
Marking up a text
Adding text to a PDF document
Working with comments
Adding comments
ABBYY PDF Transformer+ lets you add comments anywhere on a PDF page, making group work
with PDF documents more efficient.
1. On the toolbar, click .
2. Click where you want the comment to appear on the page and type the text of the comment.
To change the color of comment markup:
–click a comment and select the desired color from the shortcut menu or
.
See
Working with comments
for detailed instructions on how to open a comment, reply to a
comment, or delete a comment.
Marking up text
ABBYY PDF Transformer+ allows you to indicate what changes should be made to the original
document from which the PDF file was created. Any editing marks that you add will not alter the
ABBYY
PDF Transformer+
User’s Guide
12
text itself but merely indicate what changes must be made and where. For example, you can mark
text fragments to be modified, inserted, or removed.
If there is no text layer in the document, the markup tools will not be available to you. To be
able to mark up the document, you will need to add a text layer to it. For deta ils, see
Adding a
text layer
.
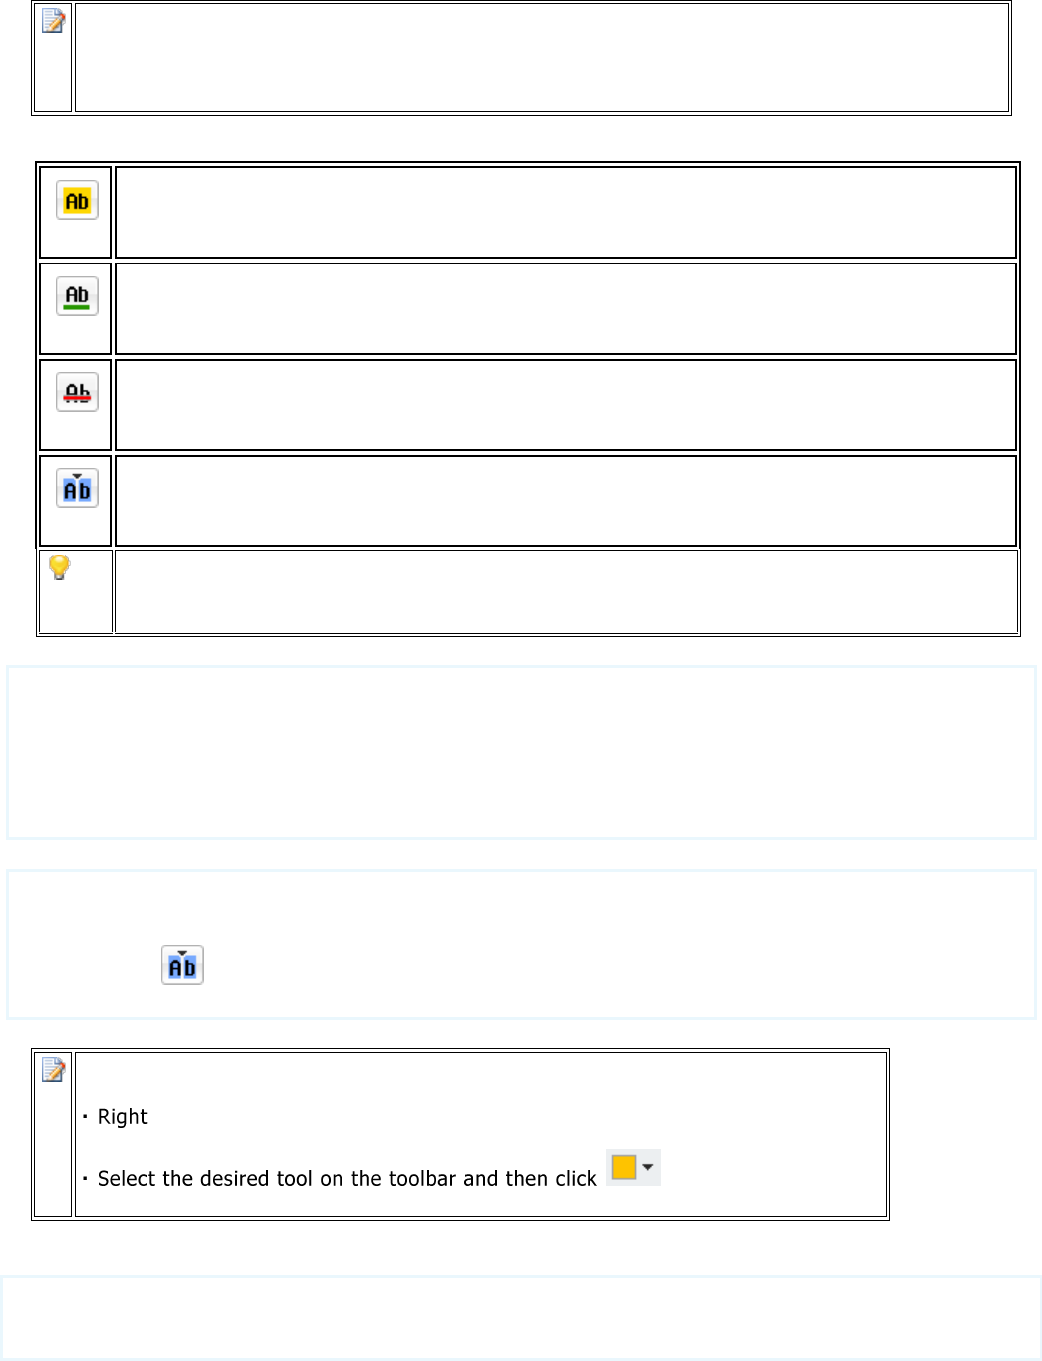
ABBYY PDF Transformer+ offers the following markup tools:
Highlight
Underline
Strikethrough
Add Note to Insert Text
You can add a comment to any type of annotation by double –clicking the annotation. See
Working with comments
for details.
To highlight, underline, or cross out a text fragment:
Select the appropriate tool on the toolbar and then select the desired text fragment, or
Select the desired text fragment and then select the appropriate tool on the toolbar.
To indicate an insertion point:
Click on the toolbar and then click where new text should be inserted.
To change the color of an annotation:
–click the annotation and select the desired color from the shortcut menu or
.
With ABBYY PDF Transformer+, you can quickly mark up text fragments using keyword search:
1. Open the Search pane.
ABBYY
PDF Transformer+
User’s Guide
13
2. Type the text you want to mark up in the search box.
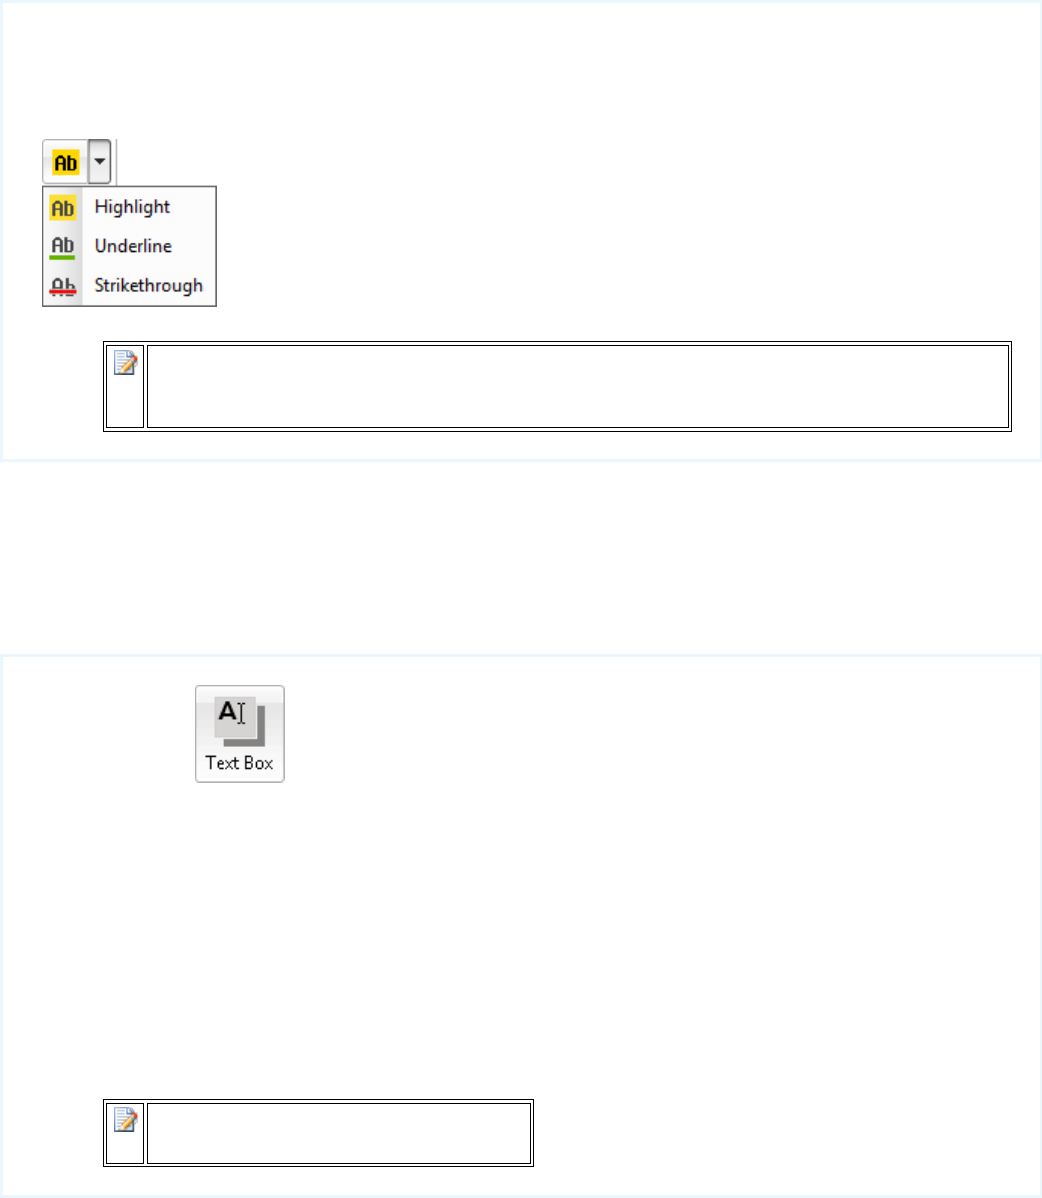
3. In the search results, select the words you want to mark up and then select the desired tool from
the drop–down list:
The color of the annotation in the Search pane is the same as the color selected on the
toolbar.
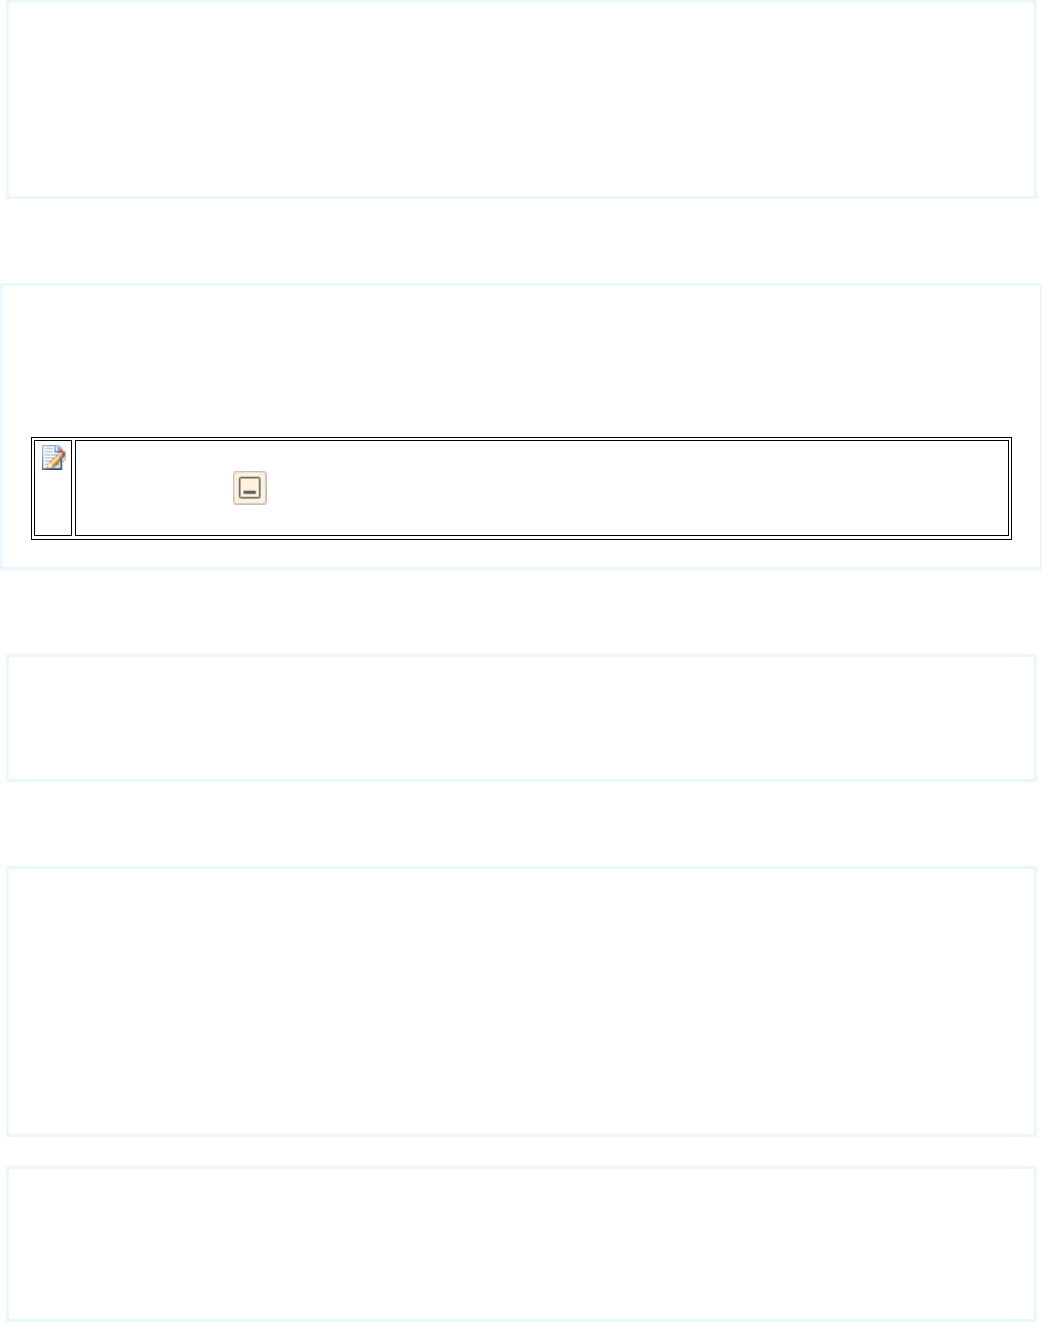
Adding text to a PDF document
ABBYY PDF Transformer+ lets you add a block of text to any PDF file without converting it to
another editable format.
1. Click the button on the main toolbar.
A toolbar with text editing tools will appear beneath the main toolbar.
2. Click where you want to add text. You can drag the mouse pointer without releasing the mouse
button to change the size of the text block.
3. Type the text. You can choose a font, font size, and color.
4. Change the size of the text block if necessary.
5. To draw a border around the text block, select the color and thickness of the border.
6. You can also select a background color. The Detect background color option will use the
background color from the document.
The default background is transparent.
You can use ABBYY PDF Transformer+ to fill out PDF forms. To do this, simply type text over the
form using the Text Box tool.
Working with comments
With ABBYY PDF Transformer+, you can see comments made by other reviewers, even if they were
created in applications other than ABBYY PDF Transformer+, and reply to t hese comments. You can
ABBYY
PDF Transformer+
User’s Guide
14
also change the status of a comment to inform a reviewer that you have accepted or rejected their
suggestion.
Adding a comment to an annotation
Double–click the annotation to which you want to add a comment, or
Right–click the annotation and select the Add Comment command from the shortcut menu.
If the Comments pane is hidden, a comment box will appear. If the Comments pane is visible,
the comment box associated with the annotation will be highlighted.
Opening a comment
Select the annotation that contains the comment you want to see.
If the Comments pane is hidden, a comment box will appear. If the Comments pane is visible,
the comment box associated with the annotation will be highlighted.
If you want a comment to be permanently displayed, double–click its annotation. To hide a
comment, click in the top right corner of the comment box.
Replying to a comment
1. Select the annotation that contains the comment to which you want to reply.
2. Click Reply in the comment box or press CTRL + Enter and type your reply.
Deleting an annotation or its associated comment or reply
To delete an annotation:
Select the annotation you want to delete and press Delete. Alternatively, right–click the annotation
and select Delete from the shortcut menu.
The comment associated with the annotation will also be deleted.
On the Comments pane, select the annotation you want to delete and press Delete. Alternatively,
right–click the annotation on the Comments pane and select Delete from the shortcut menu.
The comment associated with the annotation will also be deleted.
To delete a comment:
Right–click inside the comment box and select Delete from the shortcut menu.
All replies associated with the comments will also be deleted.
ABBYY
PDF Transformer+
User’s Guide
15
To delete all comments and annotations:
From the Edit menu, select the Delete Comments and Markup… command.
To delete a reply:
Right–click the reply and select Delete Reply from the shortcut menu.
In the same manner, you can delete a reply on the Comments pane.
Flagging a comment or changing its status
You can assign statuses to comments you have read or flag those comments which you want to
revisit later.
To flag a comment:
On the comments pane, select the check box in the bottom right corner of the comment box that
you want to flag. Alternatively, right–click inside the comment box and select the Flag command
from the shortcut menu.
To change the status of a comment:
Right–click the annotation or comment whose status you want to change, select Status from the
shortcut menu, and then select the desired status, or
Click the author's name in the comment box and select the desired status.
The status of a comment is displayed together with the name of the reviewer who assigned the
status. Any changes made to the status of a comment are logged in the History section of the
Properties… dialog box of the annotation or comment.
Comment/annotation properties
In the Properties dialog box of an annotation or comment, you can change the author or the
subject and see how the status of the annotation or comment changed over time. If you change the
name of the author and want this name to be used for any new annotations and comments that y ou
add, click the Set Default button.
To open the Properties of an annotation or comment:
Right–click the annotation or comment and select the Properties… command from the shortcut
menu.

ABBYY
PDF Transformer+
User’s Guide
16
Comments pane
The Comments pane displays all annotations added to the document, with or without comments.
It also displays stamps and redactions, if any.
To open the Comments pane:
Right–click an annotation, stamp or comment and select the Show Comments Pane command
from the shortcut menu, or
From the View menu, select the Comments command, or
On the main toolbar, click the button.
You can use keyword search to find a comment, a reply to a comment, or an author.
You can sort the comments by:
1. Type
2. Author
3. Page
4. Date
5. Flag Status
6. Comment Status
To sort the comments:
On the Comments pane, click and then select the desired sorting option from the shortcut
menu.
You can filter the comments by type, author, flag status, or comment status.
To filter the comments:
On the Comments pane, click and select the Show All Comments command, the Hide
All Comments command, or a filtering option from the shortcut menu.
ABBYY
PDF Transformer+
User’s Guide
17
Creating PDF documents
ABBYY PDF Transformer+ lets you create PDF documents from paper documents and from Microsoft
Word, Microsoft Excel, Microsoft PowerPoint, HTML, RTF, Microsoft Visio, TXT, and image files.
This section provides detailed instructions on how to create a PDF document and gives advice on
selecting the right settings.
Section contents:
Scanning to PDF
Scanning tips
Creating a PDF document from one file
Creating a PDF document from multiple files
Image processing options
Using the PDF–XChange Printer to create PDF documents
Scanning to PDF
ABBYY PDF Transformer+ lets you scan a paper document and save the result in PDF format. You
can also add a text layer to your document while scanning.
To create a new PDF document:
1. Open the File menu and click Create from Scanner…
You can create a PDF document in a new PDF Transformer+ window. Click the Create
button to open the new window and then click the Scan button.
2. Specify the appropriate scanning settings:
Resolution, color mode, and brightness
Image processing options
Make file compatible with PDF/A — Select this option if you need a PDF document of
high visual quality for archiving purposes
Multi–page scanning settings:
a. Use automatic document feeder (ADF)
b. Duplex scanning (if supported by your scanner)
c. Pause for (specify a pause in seconds)
3. Click Scan.
The scanned document will be opened in a new ABBYY PDF Transformer+ window.
ABBYY
PDF Transformer+
User’s Guide
18
Scanning tips
You can set the scanning settings in the ABBYY PDF Transformer+ scanning dialog box.
Make sure that your scanner is connected properly and switched on.
Consult your scanner documentation to ensure it is set up correctly. Be sure to install the software
provided with your scanner. Some scanner models must be switched on before you power up the
computer.
Place your documents face down on the scanner, making sure they are properly adjusted. Skewed
images may be converted incorrectly.
Printed documents are best scanned in grayscale at 300 dpi.
Conversion quality depends on the quality of the original document and scanning parameters. Poor
image quality may have an adverse effect on the quality of conversion. Be sure to select the
scanning parameters appropriate for your document.
See also:
Image processing options
If the font on the original image is too small...
If you see the "Adjust image resolution" warning message...
If you see the "Adjust brightness" warning message...
Creating a PDF document from a file
You can use ABBYY PDF Transformer+ to create PDF documents from Microsoft Word, Microsoft
Excel, Microsoft PowerPoint, HTML, RTF, Microsoft Visio, and TXT documents and from image files.
1. Open the File menu and click Create from File…
You can create a PDF document in a new PDF Transformer+ window. Click the Create
button to open the new window and then click the Create from file button.
2. Select the file from which you want to create a PDF document.
You can select several files. If you do so, the Create PDF dialog box will open. To learn
more about creating PDF documents from several files, please refer to
Creating a PDF
document from multiple files
.
3. Click the Settings… button and check if you need to change any settings.
Compression influences the size and quality of the resulting PDF document. You should
choose a compression level based on how you plan to use the document. Select High
resolution if you want to preserve the quality of the images in the document. Low
resolution (150 dpi or less) is useful for decreasing the size of files which you plan to e–
mail or publish on the Internet.
Make file compatible with PDF/A should be selected if you want to create a PDF
document without any visual quality loss, or if you want to store the resulting document in
an archive.
If you are creating a PDF document from images or image–only PDFs, make sure you select
the necessary image processing options.
ABBYY
PDF Transformer+
User’s Guide
19
4. Click Open.
A PDF document will be created from the selected file and opened in ABBYY PDF Transformer+.
Creating a PDF document from multiple files
ABBYY PDF Transformer+ lets you create a PDF document from multiple files. You can merge files
of various supported formats as well as images and image –only PDF documents. You can also
create a separate PDF document from each file in the list.
1. Open the File menu and click Create from Multiple Files…
You can create a PDF document in a new PDF Transformer+ window. Click the Create
button to open the new window and then click the Create from multiple files button.
2. Select the file from which you want to create a PDF document and click Open.
3. The Create PDF dialog box will open. In this dialog box, you can:
Add more files.
To do this, click the Select File… button.
Remove files.
Select the file you want to remove and click the Remove button.
Change the order of the files using the and buttons.
The files will be added to the resulting document in the same order you see in the list. Each
file will begin on a new page.
4. Click the Settings… button and check if you need to change any settings.
Compression influences the size and quality of the resulting PDF document. You should
choose a compression level based on how you plan to use the document. Select High
resolution if you want to preserve the quality of the images in the document. Low
resolution (150 dpi or less) is useful for decreasing the size of files which you plan to e–
mail or publish on the Internet.
Make file compatible with PDF/A should be selected if you want to create a PDF
document without any visual quality loss, or if you want to store the resulting document in
an archive.
If you are creating a PDF document from images or image–only PDFs, make sure you select
the necessary image processing options.
5. Select either the Create one PDF document from all files or the Create a separate PDF
document for each file option and specify the folder to which you wish to save the resulting
document(s).
6. Click Create PDF.
If you create one document, it will be opened in ABBYY PDF Transformer+. If you create several
documents, the folder containing these documents will be opened.
ABBYY
PDF Transformer+
User’s Guide
20
Image processing options
ABBYY PDF Transformer+ offers multiple image processing options, which may improve the quality
of source images for accurate optical character recognition.
Be sure to select the appropriate image processing options when scanning paper documents or
creating PDFs from image files.
Recognize text — Selecting this option will place a text layer under the image, producing a
searchable PDF document that looks exactly like the original. You will be able to copy and mark up
text in the PDF document.
Correct distorted text lines, document skew, and other defects — Selecting this option will
cause the program to run a number of image enhancement routines on your images.
Depending on the type of an input image, ABBYY PDF Transformer+ will select the appropriate
image enhancement mechanism, such as skew correction, correction of trapezium distortions, or
adjustment of image resolution.
Image enhancement may take some time.
Correct page orientation — Selecting this option will cause the program to detect the orientation
of the page on the scanner.
For best recognition results, a page should have the standard orientation, i.e. with horizontal lines
and letters pointing upwards.
Split facing pages — Selecting this option will cause the problem to split any two pages of a book
or magazine spread into two separate images.
When you scan a book, a scanned image will typically contain two opposite pages. For best
recognition results, the program will split the image into two, creating a separate PDF page for each
book page.
This feature will not work on Chinese and Japanese texts.
Use mixed raster content (MRC) compression — Selecting this option will apply the MRC
compression algorithm, which greatly reduces file size and preserves the visual quality the image.
Make sure that the right text recognition languages are selected.
See also:
Scanning to PDF
Creating PDF Documents from Files
Creating PDF Documents from Multiple Files
Using the PDF–XChange Printer to create PDF documents
You can create PDF documents from any applications that allow you to select a printer. Simply
select the virtual PDF–XChange 5.0 for ABBYY, which is installed on your computer when you select
the standard installation option.
To create a PDF document with PDF–XChange 5.0 for ABBYY:
1. Open a document from which you want to create a PDF.
ABBYY
PDF Transformer+
User’s Guide
21
2. Open the printing options dialog box (e.g. select File>Print…).
The appearance of the dialog box and the commands that invoke it will vary from
application to application.
3. In the list of available printers, select the virtual PDF–XChange 5.0 for ABBYY.
4. Adjust the PDF creation settings if required (click Settings… to open to open the settings dialog
box).
5. Click OK to start creating a PDF document.
6. In the dialog box that opens, you can change the name of the file and its location. You can also
choose to add the PDF document that is being created to an existing PDF document by selecting
Add Files to PDF.
Should you have any questions on which printing options to select, press F1 in the printing
options dialog box. This will open the PDF–XChange 5.0 for ABBYY Help file. You can also find
this Help file on the ABBYY PDF Transformer+ installation disk.
ABBYY
PDF Transformer+
User’s Guide
22
Converting PDF documents
ABBYY PDF Transformer+ can convert entire PDF documents or individual pages into editable text in
multiple formats.
This section provides detailed instructions on how to convert a PDF document, gives advice on
selecting the appropriate conversion settings, and shows how you can improve conversion results.
Section contents:
Converting a PDF document
Conversion settings
Improving conversion results
Converting a PDF document
ABBYY PDF Transformer+ lets you convert any type of PDF document into editable text. The
appearance and properties of resulting documents will depend on the conversion settings that you
select.
1. Specify the languages of your PDF document. See
Recognition languages
for details.
By default, the program will attempt to select the appropriate language from the list of your most
commonly used languages.
We do not recommend that you specify more than three languages at a time, as this
may adversely affect the accuracy of text recognition.
2. On the toolbar, click the Convert To button and then select the desired output format.
Alternatively, on the File menu, click Convert To and then select the desired output format.
To specify conversion settings for an output format, click Conversion Settings,
configure the settings, and click OK.
3. The converted document will be opened in the appropriate application.
See also:
Conversion settings
Improving conversion results
Conversion settings
ABBYY PDF Transformer+ offers multiple conversion settings for the supported output formats. The
selected conversion settings affect the appearance of the resulting document.
Click a format name to read about the conversion settings available for the format:
PDF
DOCX/ODT/RTF
ABBYY
PDF Transformer+
User’s Guide
23
XLSX
HTML
PPTX
TXT
CSV
FB2/EPUB
PDF conversion settings
To adjust the conversion settings for the PDF format, select File>Convert To and then click the
PDF tab in the Conversion Settings dialog box. Alternatively, click Convert To>Conversion
Settings… on the toolbar.
The following settings are available:
Saving formats
PDF
PDF/A
Page image settings
The Page image settings drop–down list allows you to control the size and quality of the output
file:
Best quality (JPEG quality: 70)
Select this item to preserve the quality of the page image.
Balanced (JPEG quality: 45)
Select this item to reduce the size of the output PDF file without too much loss in quality.
Compact (JPEG quality: 30)
Select this item to greatly reduce the size of the output PDF file.
DOCX, ODT, and RTF conversion settings
To adjust the conversion settings for the DOCX, ODT, and RTF formats, select File>Convert To
and then click the DOCX/ODT/RTF tab in the Conversion Settings dialog box. Alternatively,
click Convert To>Conversion Settings… on the toolbar.
The following settings are available:
Retain layout
Select the appropriate setting depending on how you plan to use the output document.
a. Exact copy
Preserves the formatting of the original document. This setting is recommended for documents with
complex layouts, such as promotion booklets. Note, however, that it limits your ability to change the
text and formatting in the output document.
b. Editable copy
The formatting of the output document may differ slightly from the original but you will be able to
edit the text in the output document.
c. Formatted text
Retains the paragraphs but does not retain the exact positions of the objects and line spacing. The
resulting text will be left–aligned (right–to–left texts will be right–aligned.
ABBYY
PDF Transformer+
User’s Guide
24
Vertical texts will become horizontal.
Text settings
Keep headers and footers
Retains the running titles (also called headers and footers) in the output document.
Keep line numbers
Retains the original line numbering (if any). The line numbers will be saved in a separate field that
remains unchanged when you edit the text.
This feature is only available if Exact copy or Editable copy is selected.
Keep text and background colors
Retains the original background and letter colors.
Picture settings
If your text contains very many pictures, the resulting file may be fairly large. The quality of the
pictures and the size of the resulting file can be tweaked using the options in the Picture settings
drop–down list.
If you do not wish to retain any pictures, clear the Keep pictures option.
XLSX conversion settings
To adjust the conversion settings for the XLSX format, select File>Convert To and then click the
XLSX tab in the Conversion Settings dialog box. Alternatively, click Convert To>Conversion
Settings… on the toolbar.
The following settings are available:
Text settings
Ignore text outside tables
Saves only the tables and ignores the rest.
Convert numeric values to numbers
Converts numbers into the "Numbers" format in the XLSX document. Microsoft Excel can perform
arithmetic operations on such cells.
Keep headers and footers
Retains the running titles (also called headers and footers) in the output document.
PPTX conversion settings
To adjust the conversion settings for the PPTX format, select File>Convert To and then click the
PPTX tab in the Conversion Settings dialog box. Alternatively, click Convert To>Conversion
Settings… on the toolbar.
The following settings are available:
Text settings
Keep line breaks
Retains the original line arrangement. Otherwise, all converted text will be written in one line.
Wrap text
Fits the converted text into a text box on a slide.
ABBYY
PDF Transformer+
User’s Guide
25
Keep headers and footers
Retains the running titles (also called headers and footers) in the output document.
Picture settings
If your text contains very many pictures, the resulting file may be fairly large. The quality of the
pictures and the size of the resulting file can be tweaked using the options in the Picture settings
drop–down list.
If you do not wish to retain any pictures, clear the Keep pictures option.
HTML conversion settings
To adjust the conversion settings for the HTML format, select File>Convert To and then click the
HTML tab in the Conversion Settings dialog box. Alternatively, click Convert To>Conversion
Settings… on the toolbar.
The following settings are available:
Retain layout
Select the appropriate setting depending on how you plan to use the output document.
Flexible layout
Preserves the formatting of the original. The output HTML document can be easily edited.
Formatted text
Retains the paragraphs but does not retain the exact positions of the objects and line spacing. The
resulting text will be left–aligned (right–to–left texts will be right–aligned.
Vertical texts will become horizontal.
Use CSS
Select this option to save the file in HTML 4 format. This preserves the original layout by adding a
cascaded style sheet to the HTML document.
Text settings
Keep headers and footers
Retains the running titles (also called headers and footers) in the output document.
Keep line breaks
Retains the original line arrangement. Otherwise, all converted text will be written in one line.
Keep text and background colors
Retains the original background and letter colors.
Picture settings
If your text contains very many pictures, the resulting file may be fairly large. The quality of the
pictures and the size of the resulting file can be tweaked using the options in the Picture settings
drop–down list.
If you do not wish to retain any pictures, clear the Keep pictures option.
ABBYY
PDF Transformer+
User’s Guide
26
Encoding
If you want ABBYY PDF Transformer+ to select the appropriate encoding automatically, choose
Autoselect from the drop–down list. Alternatively, you can specify encoding manually by selecting
the appropriate item from the list.
CSV conversion settings
To adjust the conversion settings for the CSV format, select File>Convert To and then click the
CSV tab in the Conversion Settings dialog box. Alternatively, click Convert To>Conversion
Settings… on the toolbar.
The following settings are available:
Text settings
Ignore text outside tables
Saves only the tables and ignores the rest.
Insert page break character (#12) as page separator
Saves the original page arrangement.
Field separator
Specifies the character that will be used to separate the data columns in the output CSV document.
Encoding
If you want ABBYY PDF Transformer+ to select the appropriate encoding a utomatically, choose
Autoselect from the drop–down list. Alternatively, you can specify encoding manually by selecting
the appropriate item from the list.
TXT conversion settings
To adjust the conversion settings for the TXT format, select File>Convert To and then click the
TXT tab in the Conversion Settings dialog box. Alternatively, click Convert To>Conversion
Settings… on the toolbar.
The following settings are available:
Text settings
Keep headers and footers
Retains the running titles (also called headers and footers) in the output document.
Encoding
If you want ABBYY PDF Transformer+ to select the appropriate encoding automatically, choose
Autoselect from the drop–down list. Alternatively, you can specify encoding manually by selecting
the appropriate item from the list.
FB2 and EPUB conversion settings
To adjust the conversion settings for the FB2 and EPUB formats, select File>Convert To and then
click the FB2/EPUB tab in the Conversion Settings dialog box. Alternatively, click Convert
To>Conversion Settings… on the toolbar.
The following settings are available:
Retain layout
Select the appropriate setting depending on how you plan to use the output document.
ABBYY
PDF Transformer+
User’s Guide
27
Formatted text
Retains the paragraphs but does not retain the exact positions of the objects and line spacing. The
resulting text will be left–aligned (right–to–left texts will be right–aligned.
Vertical texts will become horizontal.
Plain text
Does not retain the formatting.
Save fonts and font sizes
Saves the appearance and sizes of the fonts used in the original document.
Use first page as cover
Places the first page of the original document on the cover of the e –book.
Embed fonts
Embeds the fonts into the e–book.
Picture settings
If your text contains very many pictures, the resulting file may be fairly large. The quality of the
pictures and the size of the resulting file can be tweaked using the options in the Picture settings
drop–down list.
If you do not wish to retain any pictures, clear the Keep pictures option.
Improving conversion results
This section provides advice on selecting the right conversion settings and provides some tips on
how to get the most out of ABBYY PDF Transformer+
Recognition languages
Rotating an image
If the font on the original image is too small...
If you see the "Adjust resolution" warning message...
If you see the "Adjust brightness" warning message...
Working with Complex Script Languages
Recognition languages
The correct languages must be selected, otherwise the text layer of your document will differ from
the text in the document image, causing the search and copy functions to work incorrectly.
1. Open the Edit menu and click Preferences…
2. In the dialog box that opens, select one of the options from the Recognition languages drop–
down list:
Autoselect
A language will be selected automatically. To edit the list of languages:

ABBYY
PDF Transformer+
User’s Guide
28
a. Click the Language Editor… button.
b. Make sure the Automatically select document languages from the following
list option is enabled.
c. Click the Specify... button.
d. Select the desired languages in the dialog box that opens.
A language or a combination of languages
Select one of the available options. Languages in the list include English, French, German,
and your recently used languages.
More languages…
Select this option if you want to use other recognition languages.
In the Language Editor dialog box that opens, select the Specify languages manually option
and specify one or more languages.
3. Click Save.
To specify a recognition language, click the Convert To button on the toolbar and then select
the desired language from the drop–down list.
Rotating pages
For best recognition results, a page should have the standard orientation, i.e. with horizontal lines
and top–to–bottom reading order.
1. Open the image of the page you want to rotate.
2. From the Edit>Rotate Page menu, select one of the following:
Rotate Right
to rotate the image 90 degrees to the right
Rotate Left
to rotate the image 90 degrees to the left
Automatically Rotate All Pages
to make the program automatically detect the orientation of the page and correct it if
necessary
You can also rotate an image by clicking one of the two buttons ( ) at the top of
the Pages pane.
If the font on the original image is too small...
For optimal text recognition results, scan documents printed in very small fonts at higher
resolutions.
ABBYY
PDF Transformer+
User’s Guide
29
1. Click the button on the toolbar or open the File menu and click Create from
Scanner…
2. Specify a resolution value and scan the image.
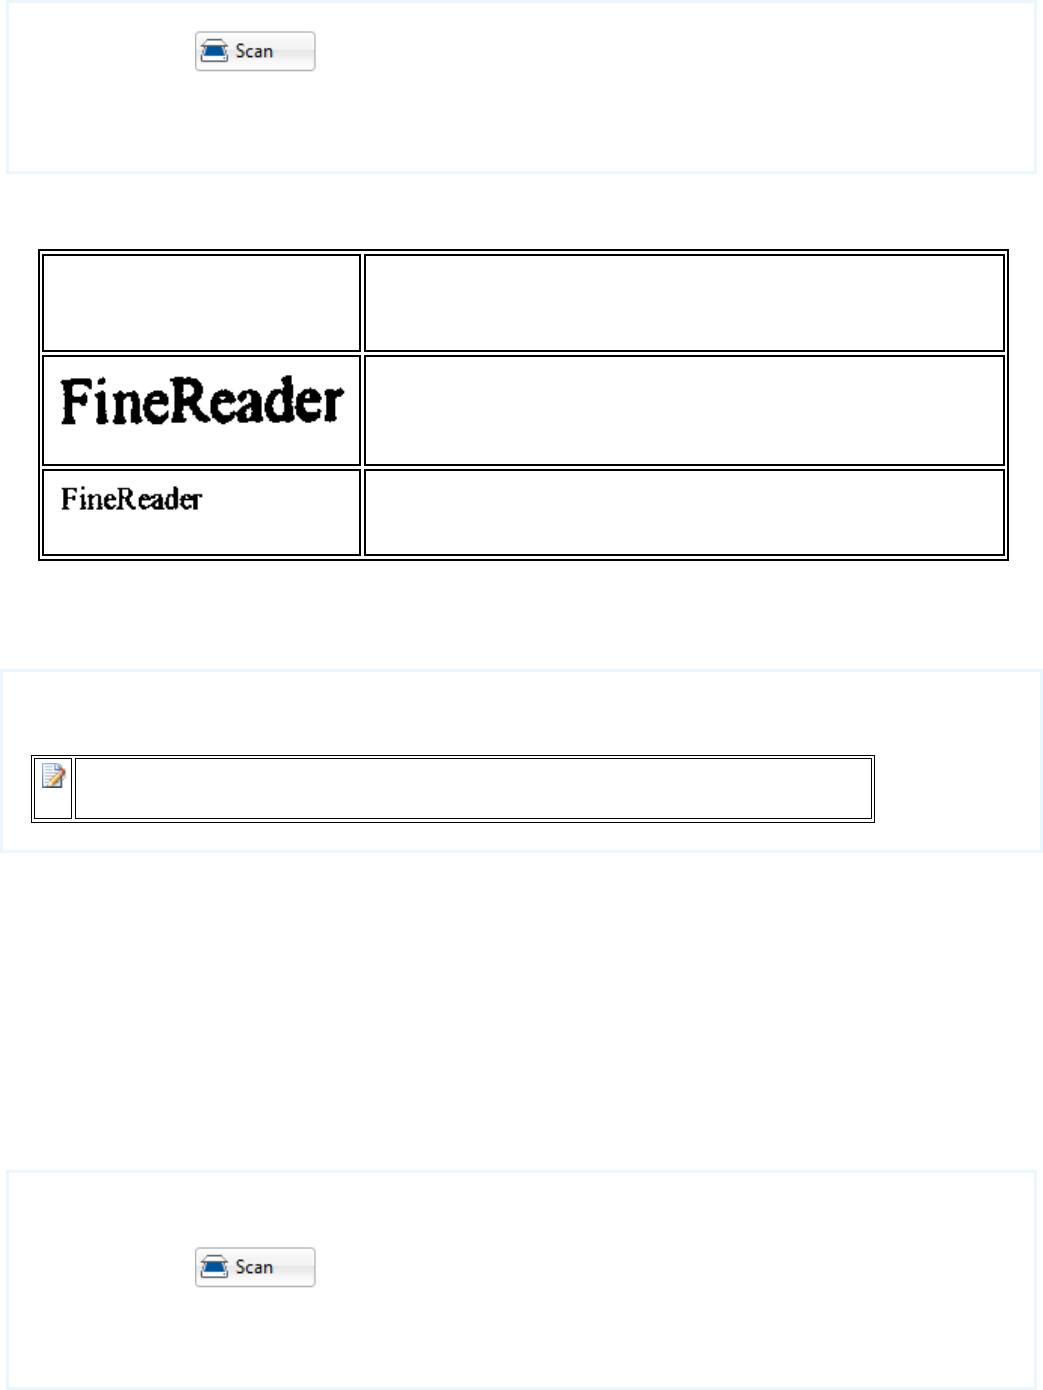
You may wish to compare the images of the same document obtained at different resolutions.
Image
Recommended resolution
300 dpi for regular texts (printed in fonts of size 10pt or larger)
400–600 dpi for texts printed in smaller fonts (9pt or smaller)
If you see the "Adjust image resolution" warning message...
Lower scanning resolutions may adversely affect the quality of text recognition.
We recommend scanning documents at 300 dpi.
For best recognition results, vertical and horizontal resolutions must be the same.
Setting the resolution too high (over 600 dpi) increases the recognition time. Increasing the
resolution does not yield substantially improved recognition results. Setting an extremely low
resolution (less than 150 dpi) adversely affects OCR quality.
You may need to adjust the resolution of your images if:
the resolution of your image is less than 250 dpi or higher than 600 dpi
the resolution of your image is non–standard; for example, faxes may have a resolution of 204 x 96
dpi.
To adjust the resolution:
1. Click the button on the toolbar or open the File menu and click Create from
Scanner….
2. Specify a resolution value and scan the image.
ABBYY
PDF Transformer+
User’s Guide
30
If you see the "Adjust brightness" warning message
ABBYY PDF Transformer+ will display a warning message during scanning if the brightness setting
is incorrect. You may also need to adjust the brightness setting when scanning in black–and–white
mode.
You can adjust the brightness setting in the scanning dialog box. The 50% setting works well in
most cases.
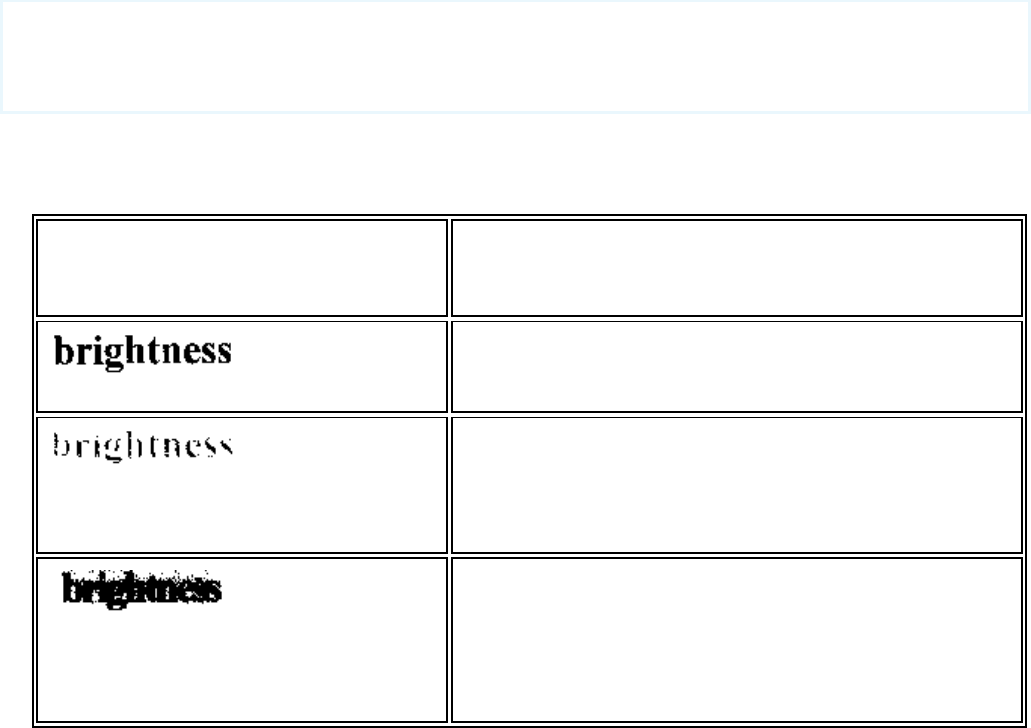
If the resulting image contains too many "sketchy" or "thick" letters, troubleshoot using the table
below.
Image
Recommendations
This image is suitable for text recognition.
Characters are very thin and sketchy
Lower the brightness to make the image darker
Scan in grayscale; brightness will be tuned
automatically
Characters are very thick and stuck
together
Increase the brightness to make the image lighter
Scan in grayscale; brightness will be tuned
automatically
ABBYY
PDF Transformer+
User’s Guide
31
Working with complex script languages
ABBYY PDF Transformer+ lets you create and convert documents in Hebrew, Yiddish, Japanese,
Chinese, Thai, Korean, and Arabic. However, there are some things you will have to do before you
can work with documents that contain text in these languages:
Install language support files
Install additional system fonts
Language support
You may have to install language support for Hebrew, Yiddish, Japanese, Chinese, Thai, Korean,
and Arabic languages before you can convert documents that use these languages.
Microsoft Windows Vista and later Microsoft operating systems support these la nguages by
default.
Follow the instructions below to install language support for these languages in Microsoft Windows
XP:
1. Open the Start menu and click Control Panel.
2. Double–click the Regional and Language Options control panel item.
3. Select the following options on the Languages tab:
Install files for complex script and right–to–left languages (including Thai)
for Hebrew, Yiddish, Arabic, and Thai language support
Install files for East Asian languages
for Japanese, Chinese, and Korean language support
4. Click OK.
Recommended fonts
The table below lists recommended fonts.
Language
Recommended font
Arabic
Arial™ Unicode™ MS*
Hebrew
Arial™ Unicode™ MS*
Yiddish
Arial™ Unicode™ MS*

ABBYY
PDF Transformer+
User’s Guide
32
Thai
Arial™ Unicode™ MS*
Aharoni
David
Levenim mt
Miriam
Narkisim
Rod
Simplified Chinese,
Traditional Chinese,
Korean, Korean (Hangul),
Japanese
Arial™ Unicode™ MS*
SimSun fonts
such as SimSun (Founder Extended), SimSun–18030, NSimSun.
Simhei
YouYuan
PMingLiU
MingLiU
Ming(for–ISO10646)
STSong
* This font is installed with Microsoft Windows XP and Microsoft Office 2000 or later.
ABBYY
PDF Transformer+
User’s Guide
33
Editing PDF documents
ABBYY PDF Transformer+ lets you search PDF documents, edit them, and copy content without the
need to convert PDFs to an editable format.
Contents
Editing text and images
Copying content from PDF documents
Recognizing text
Background recognition
Image enhancement
Adding stamps
Bates numbering
Managing PDF document pages
Embedded files
Keyword search
Editing text and pictures
You can use ABBYY PDF Transformer+ to edit text and pictures in any type of PDF document.
Editing text
Text in PDF documents that do not contain a page image can be edited one line at a time. You can
correct typing errors, delete text, and type new text.
1. Click the button on the toolbar.
The editing mode will be enabled and editable text and pictures will be highlighted.
2. Make the desired changes to the text.
You can use the Text Box tool to edit text in both searchable and image –only PDF documents.
1. Click the button.
2. Click inside the document and type the text you want to add.
ABBYY
PDF Transformer+
User’s Guide
34
You can select the background color and type text over existing text in the document.
You can find more information about the Text Box tool in
Adding text to a PDF
document
.
Inserting and editing pictures
ABBYY PDF Transformer+ lets you insert pictures into any PDF document.
1. Click the button on the toolbar.
2. In the dialog box that opens, select a picture and click Open.
3. The picture will be inserted in the center of the page.
You can resize, move, and delete pictures. When you move a picture, it may overlap with other
objects on the page. To bring the picture to the foreground, right–click it and select Bring Image
to Front.
To delete a picture in a regular PDF document, enable the Edit Mode, right–click a picture, and click
Delete in the shortcut menu.
To delete a picture in a searchable or image–only PDF document, click the button on the
toolbar and select the area you want to delete.
See the
Types of PDF documents
article for more information about different types of PDF
documents.
Copying content from PDF documents
ABBYY PDF Transformer+ lets you copy text, pictures, and tables from PDF documents to other
applications. Content can be copied from all types of PDF documents, including scans and image
files, without the need to recognize and save them in an editable format first. Selected data will be
copied to your computer's Clipboard and can then be pasted to any application that supports
pasting from the Clipboard.
Complete the following steps to copy text or a table.
1. Select the text or table that you want to copy.
2. Right–click the selected text or table and either select Copy Text or Copy Table from the shortcut
menu or click the appropriate icon in the pop–up menu above the selected area.
3. Paste the text or table.
ABBYY
PDF Transformer+
User’s Guide
35
If the copied text or table differs significantly from the original, add a text layer to the
document page from which you copied it, then copy the text or table again.
Complete the following steps to copy an image of a part of a document.
1. Select the document area you wish to copy.
2. Right–click the selected area and either select Copy Image from the shortcut menu or click the
appropriate icon in the pop–up menu above the selected area.
If the selected area contains text, an image of the text will be copied.
3. Paste the image.
Recognizing text
ABBYY PDF Transformer+ lets you add a text layer to image –only PDF documents. A document
created this way is practically indistinguishable from the original, but the text it contains can be
marked up, copied, and searched. You can also replace the text layer in searchable PDF documents.
1. Specify the languages of your PDF document See
Recognition languages
for details.
2. On the toolbar, click the Convert To button and then select Searchable PDF Document from the
drop–down list.
3. The output document will contain a searchable text layer as a result.
You can also add a text layer when scanning a paper document, opening a PDF file, or adding
pages to an existing PDF document. To do this, select the Recognize text option in the Scan
Pages and Create PDF Document dialog box or the PDF Creation Settings dialog box and
specify the languages of the document.
If ABBYY PDF Transformer+ fails to recognize the PDF document, try saving it as an image –only
PDF document by clicking Convert To on the toolbar and selecting Image–Only PDF
Document from the drop–down list.
Background recognition
ABBYY PDF Transformer+ lets you search and copy text and pictures from PDF documents without a
text layer, such as scanned documents and documents created from image files. This is possible
thanks to a recognition process that runs in the background.
ABBYY
PDF Transformer+
User’s Guide
36
Background recognition is enabled by default and starts automatically when you open a PDF
document without a text layer.
The background recognition process cannot run on computers with a single –core processor.
The background recognition process does not change a PDF document's type, so if you save an
image–only document and open it in another application, you will no longer be able to search it and
copy its content.
To make a PDF document searchable you need to add a text layer to it. See
Recognizing text
for more information.
If the search or copy functions don't work properly, check if the document's languages are specified
correctly. See Recognition languages for more information.
You can disable the background recognition process at any time by clearing the Enable
copying and full–text searches in raster documents without a text layer check box in
the Preferences… dialog box.
Image enhancement
ABBYY PDF Transformer+ can enhance the quality of PDF documents created from image files.
Depending on the type of input images, the program will automatically choose and apply the
necessary corrections to remove such defects as skew, uneven text lines or wrong resolution.
ABBYY PDF Transformer+ can also correct page orientation and make characters look smoother with
ABBYY PreciseScan technology.
When a PDF document with a digital signature is enhanced, the signature becomes a bitmap
image.
You can specify enhancement options in the Image Enhancement dialog box (File>Enhance
Image…).
Correct page orientation
Select this option to automatically correct page orientation. In order for a page to be recognized, it
must have the correct orientation: text lines must be horizontal and text must read from top to
bottom.
Apply ABBYY PreciseScan to smooth characters on image
Selecting this option enables ABBYY PreciseScan, an image processing technology that smoothes
characters on a document so that they do not become pixilated when you zoom in.
Applying ABBYY PreciseScan may increase the size of the resulting file. To reduce the
size of the file, select Reduce File Size… from the File menu.
Adding stamps
ABBYY PDF Transformer+ lets you stamp PDF files in the same manner as you stamp paper
documents. You can select a stamp from the list of available stamps or create your own, adding any
text you need, together with the data and time of stamping.
ABBYY
PDF Transformer+
User’s Guide
37
To stamp a page:
1. Click the arrow next to the tool and select a stamp or select the
tool to stamp the document with the most recently used stamp.
If the stamp you want to use is not available in the menu, select More….
2. Stamp the page.
3. Move the stamp to the desired location if necessary.
You can add comments to stamps and change their statuses in the same manner as you add
comments to annotations. For details, see
Working with comments
.
Creating a stamp...
1. Click the arrow next to the tool and select Create Text Stamp…
2. In the Stamp dialog box, enter a name for the stamp you are about to create.
3. Under Stamp text, type in the text you want to appear on the stamp.
4. From the Add Date/Time list, select the date and/or time of stamping.
The parameters you specify will be added to the Stamp text field after the mouse
cursor. You can change the order of the parameters in this field, add explanatory text,
and set up the data and time formats. For more about setting up date and time, see
Current date and time on stamps and in Bates numbers.
5. Under Font and border, select a font and color for the stamp.
6. Select the Add border option if you want the text to be enclosed in a frame.
7. Click Save to save your settings.
You can create a stamp from an existing one. Click the arrow next to the
tool and select Manage Stamps. In the dialog box that opens, select a stamp and click
Copy….
Editing stamps
1. Click the arrow next to the tool and select Manage Stamps…
2. In the dialog box that opens, select a stamp and click Edit….
3. Specify the desired settings and click Save.
ABBYY
PDF Transformer+
User’s Guide
38
Removing a stamp...
To remove a stamp from your document, do one of the following:
Select the stamp in the document and press DEL
Right–click the stamp in the document and select Delete from the shortcut menu
To remove a stamp from the list:
1. Click the arrow next to the tool and select Manage Stamps
2. In the dialog box that opens, select the stamp you want to remove and click Delete.
Bates numbering
ABBYY PDF Transformer+ lets you add Bates numbers to PDF documents. Bates numbers facilitate
document search and retrieval and are useful for electronic archiving.
To add Bates numbering:
1. On the toolbar, click .
2. From the menu that opens, select one of the available numbering styles.
You will be prompted to save the document under a new name, because once added, Bates
numbering cannot be removed.
Creating a Bates numbering style...
1. On the toolbar, click and then select Create….
2. In the Bates Numbering dialog box, enter a name for the numbering style you are about to
create.
3. Select one of the eight possible positions on the page.
4. Under Bates number text, type in the text you want to appear in the Bates numbers.
5. Select the desired settings:
a. From the Add Date/Time list, select the date and/or time of numbering.
b. Click the Add Page Number button.
This will add the number of the current page to each Bates number.
c. Click the Add Unique Number button.
Bates numbering will start from the number you specify. If multiple documents are
processed, they will all be numbered through starting from this number. Depending on your
ABBYY
PDF Transformer+
User’s Guide
39
settings, this number will increment either with each new page or with each new document.
By default, numbering starts from 1 and increments with each page. To change the default
settings, click More…
The parameters you specify will be added to the Bates number text field after the
mouse cursor. You can change the order of the parameters in this field, add explanatory
text, and set up the data and time formats. For more about setting up date and time,
see
Current date and time on stamps and in Bates numbers
.
6. Under Font and border, select a font and color for Bates numbers.
7. Select the Add border option if you want the text to be enclosed in a frame.
8. Click Save to save your settings.
You can create a Bates numbering style from an existing one. Click and
select Manage Bates Numbers In the dialog box that opens, select a numbering style and
click Copy….
Changing Bates numbering parameters...
1. On the toolbar, click and select Manage Bates Numbers…
2. In the dialog box that opens, select a numbering style and click Edit….
3. Specify the desired settings and click Save.
Removing a Bates numbering style from the list...
1. On the toolbar, click and select Manage Bates Numbers…
2. In the dialog box that opens, select the numbering style you want to remove and click Delete.
ABBYY
PDF Transformer+
User’s Guide
40
Managing PDF document pages
ABBYY PDF Transformer+ lets you delete or add pages to a PDF document, change their order, and
insert blank pages.
Adding pages from scans...
1. Click the button on the toolbar.
2. Specify scanning settings in the dialog box that opens:
Resolution, scanning mode, and brightness
Image processing options
Multi–page document scanning options:
a. Use automatic document feeder (ADF)
b. Duplex scanning (if supported by your scanner)
c. Pause for (pause scanning for several seconds after each page is scanned)
3. Use the Add pages drop–down list to specify where you want to add scanned pages.
4. Click the Scan button.
Scanned pages will be inserted into the PDF document.
Adding pages from a file...
1. Click the button on the toolbar.
2. In the dialog that opens, select the file that you want to add to the PDF document.
You can select several files. If you do so, the Create PDF dialog box with options will
open. You can change the order of files or add more files in this dialog box.
3. Use the Add pages drop–down list to specify where you want to add the selected files.
4. Click the Settings… and, if necessary, configure the following settings:
Compression influences the size and quality of the resulting PDF document. You should
choose a compression level based on how you plan to use the document. Select None (for
high–quality printouts) if you want to preserve the quality of the images in the
document. High (for e–mail and sharing) is useful for decreasing the size of files which
you plan to e–mail or publish on the Internet.
If you are adding pages from images or image–only PDFs, make sure you select the
necessary image processing options.
5. Click the Open button.
The selected files will be converted into PDF documents and inserted into the document curre ntly
opened in ABBYY PDF Transformer+.

ABBYY
PDF Transformer+
User’s Guide
41
Inserting blank pages...
1. Select a page in the Pages pane. You will be able to insert blank pages before or after this page.
2. Right–click the page and select Insert Blank Page from the shortcut menu, then click Before
Current Page or After Current Page.
Changing the order of pages...
Select one or more pages in the Pages pane and drag them to the desired place in the document.
Rotating pages...
Select one or more pages in the Pages pane, right–click them and select Rotate Right or Rotate
Left from the shortcut menu.
Deleting pages...
Select one or more pages in the Pages pane, right–click them and select Delete from the shortcut
menu.
Creating a PDF document from selected pages...
On the Pages pane, select the desired pages, right–click them and then select Create PDF from
Selected Pages… from the shortcut menu.
The created document will open in a new window.
Attached files
Files of any format can be attached to a PDF file. These files are stored together with the PD F
document. If the PDF document is moved, the files are moved to the same location.
Attached files can be linked to a specific place within a document. If an attached file is linked to a
document, the icon will appear on the corresponding page.
To view attached files:
Click the button on the pane to the left, or open the View menu and click Attachments.
You can open, save, rename or delete attached files.
ABBYY
PDF Transformer+
User’s Guide
42
On the ATTACHMENTS pane:
Select a file
Click the tool that corresponds to the action you want to perform ( ).
Keyword search
ABBYY PDF Transformer+ can find and highlight information in PDF files. Comments, metadata, and
bookmarks will be searched along with text in the document itself. Search results will be highlighted
in the document, and you can apply various effects to these results.
1. Click the button on the pane to the left or open the View menu and click Search.
The Search pane will open in the left–hand part of the screen.
2. Type the word or phrase you want to find in the search box.
Words or phrases that match your query will be highlighted in the document.
3. You can change search parameters by clicking on the magnifying glass in the search box and
selecting any of the following options:
Whole Words Only will find only words that are an exact match of the words you typed in
the search box.
Match Case will find only words that match the capitalization in your query.
You can highlight, underline or cross out any of the found words. Simply select the words you want
to highlight, underline or cross out in the search results and then select the desired tool from the
drop–down list:
The color of the annotation in the Search pane is the same as the color selected on the
toolbar.
ABBYY PDF Transformer+ also lets you search for and remove words and phrases using the
Redaction Mode tool. See the
Redacting data in PDF documents
article for details.
Protecting PDF documents
When you create a PDF document, you can set passwords that protect it from unauthorized access,
editing, and printing. Furthermore, you can remove confidential information as well as any words
and phrases you find using the search function. ABBYY PDF Transformer+ also lets you sign your
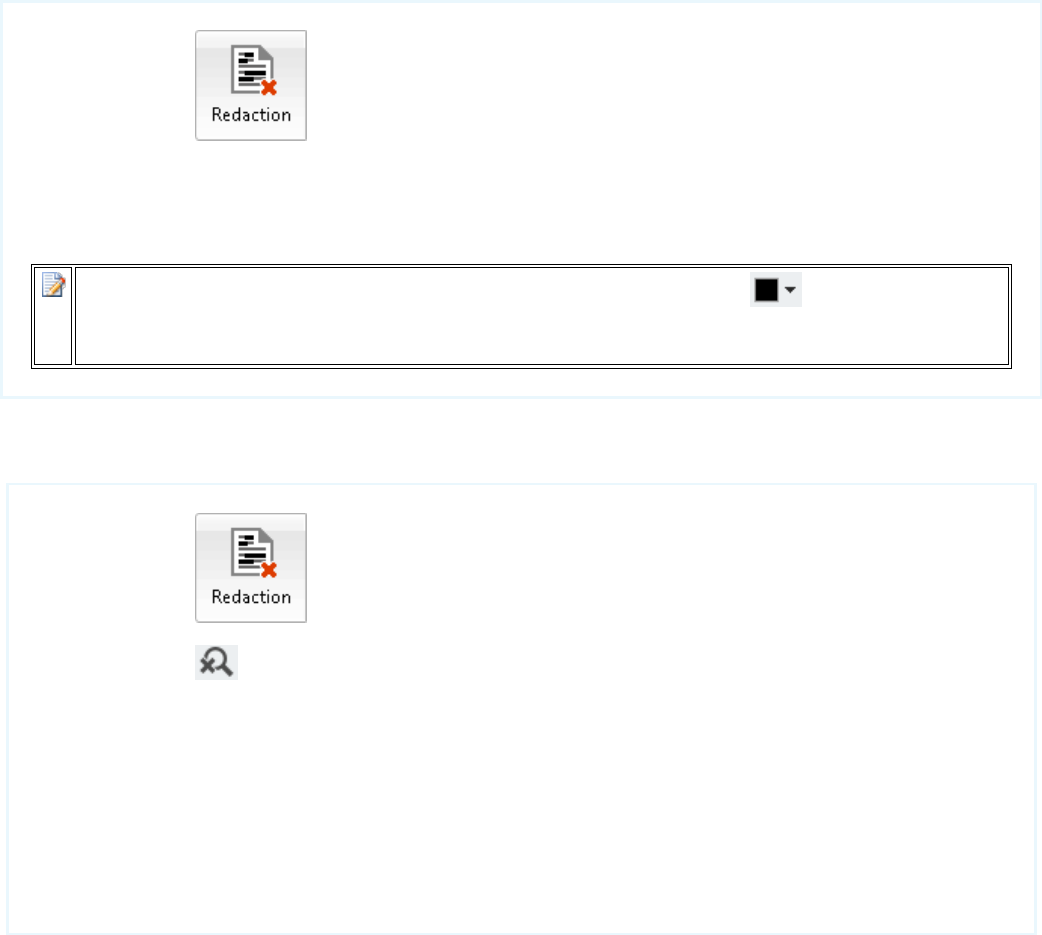
ABBYY
PDF Transformer+
User’s Guide
43
documents with a digital certificate. This certificate can be either self–signed or issued by a
certificate authority.
Contents:
Redacting data in PDF documents
Passwords and permissions
Digital signatures
Redacting data in PDF documents
You can use ABBYY PDF Transformer+ to redact confidential information in PDF documents before
publishing them. Both text and images can be redacted.
1. Click the button on the main toolbar.
2. Select the text and/or images you want to remove.
The selected areas will be covered by black rectangles and any text inside these areas will be
removed from the text layer.
To change the color that is used to obliterate redacted text, click the button on the
toolbar.
ABBYY PDF Transformer+ also lets you redact text found using the search function.
1. Click the button on the main toolbar.
2. Click the button in the pane to the left.
The Search and Redact panel will open in the left part of the window.
3. Type the text you want to redact in the text entry box.
4. Search results will be displayed. Select the results you want to redact.
5. Click the Apply Redactions button.
The selected text will be covered by black rectangles in the document and replaced with asterisks in
hidden objects (i.e. comments, bookmarks, and metadata).
You can also delete hidden data and make it impossible to copy text from the document.
ABBYY
PDF Transformer+
User’s Guide
44
1. Click the arrow next to the button and select Remove Hidden Data….
2. In the dialog box that opens, select the types of data that you want to delete and click OK.
Passwords and permissions
When you create a PDF document, you can specify a password to protect the document from
unauthorized access, editing, and printing. A PDF document can be protected with a document
open password and/or a permissions password.
If a PDF document is protected from unauthorized access, it can only be opened after providing a
password that was specified by the document's author. If the document is protected from
unauthorized editing and printing, these actions will only be possible after providing a permissions
password specified by the author. The permissions password can also be used to open a protected
PDF document.
Follow the instructions below to protect a document with a password.
1. Click the button on the main toolbar or select Password Security… from
the Tools menu. The Security Settings dialog box will open.
2. If you want to protect your document from unauthorized access, select the Restrict access with a
Document Open password option.
3. Type the document open password and confirm it.
If you clear the Hide characters option, the password will not be obscured as you type
it and you will not have to confirm it.
4. If you want to protect your document from unauthorized printing and editing, select the Restrict
printing and editing with a Permissions password option.
5. Type the permissions password and confirm it.
If you clear the Hide characters option, the password will not be obscured as you type
it and you will not have to confirm it.
6.
The document open password and the permissions password must be different.
7. Select a printing restriction from the Printing drop–down list.
8. Select an editing restriction from the Editing drop–down list.
9. Select an encryption level and components to encrypt.
10. Click Save.
ABBYY
PDF Transformer+
User’s Guide
45
You will be prompted to confirm the passwords again. You can save the changes in the open
document or create a new document.
Digital signatures
ABBYY PDF Transformer+ allows you to sign documents digitally and to validate any digital
signature in a document. A digital signature, just like a hand –written signature on a paper
document, is used to establish the identity of the person that signed the document. Additionally,
digital signatures can be used to make sure that signed documents have not been altered.
To sign a document:
1. Click the button on the toolbar.
2. The Add Signature dialog box will open. Select the certificate you want to use to sign the
document from the Sign as drop–down list. To view a certificate's properties, select it and click the
Show Certificate… button.
If the certificate you want to use is not in the lis t, you will have to install it. To install a
certificate, right–click it in Windows Explorer, click Install Certificate in the shortcut
menu and then follow the instructions in the Certificate Import Wizard.
3. Select your reason for signing the document from the Reason drop–down list or type a new reason.
4. You can also specify where the document was signed in the Location field and provide your contact
details in the Contact field (this step is optional).
5. Click the Sign button.
6. Select the area where you want to place the signature or simply click the desired location.
A signature can only be placed on a document once and contains information about the document's
version at the moment of its signing. If any changes are made to the document after it has been
signed, the signature becomes invalid. This means that the recipient of a signed document can be
sure that the document has not been altered.
To view the properties of a signature in a document:
Right–click the signature and click Show Signature Properties… in the shortcut menu, or
Double–click the signature in the SIGNATURES pane.
When you open a PDF document, ABBYY PDF Transformer+ automatically validates the digital
signatures in the document, if any. Validation results will be displayed in the SIGNATURES pane,
which also contains detailed information about the signatures used in the document.
To delete a signature:

ABBYY
PDF Transformer+
User’s Guide
46
Right–click the signature and click Remove Signature in the shortcut menu.
You can only delete a signature from a document if you have the corresponding digital
certificate.
ABBYY
PDF Transformer+
User’s Guide
47
Saving and printing
ABBYY PDF Transformer+ lets you save, print, and send PDF documents as e –mail messages.
Contents:
Saving PDF documents
Reducing the size of PDF documents
Sending a PDF document in an e–mail message
Printing PDF documents
Reducing the size of PDF documents
PDF documents that contain page images or a lot of pictures can be very large. ABBYY PDF
Transformer+ allows you to reduce the size of such documents.
1. From the File menu, select the Reduce File Size… command.
2. In the dialog box that opens, select the languages of your document and click OK.
The compressed document will open in a new window.
Saving PDF documents
ABBYY PDF Transformer+ offers various PDF saving options.
To save a PDF document, open the File menu and click Save or click the button on the
main toolbar.
To save a PDF document in the PDF/A format or change the document's file name or the folder to
which it is saved, open the File menu and click Save As…
To save a PDF document without a text layer (such PDF documents cannot be searched and their
content cannot be selected, copied or edited) click Convert To on the toolbar and select Image–
Only PDF Document from the drop–down list.
Sending a PDF document in an e–mail message
ABBYY PDF Transformer+ lets you send PDF documents in e –mail messages.
1. Click the button on the main toolbar or select E–mail… from the File menu.
2. Specify the document's name in the dialog box that opens.
3. Choose which pages you want to send.

ABBYY
PDF Transformer+
User’s Guide
48
4. Click Create E–mail Message.
An e–mail message will be created and the PDF document will be attached to this message. Now all
you have to do is type in the recepient's address and send the message.
Printing PDF documents
You can use ABBYY PDF Transformer+ to print PDF documents. Before printing, please make sure
your computer is connected to a local or network printer and that the drivers for this printer are
installed.
1. Click the button in the main toolbar or open the File menu and click Print….
2. Select one of the printers in the dialog box that opens.
3. Specify which pages you want to print.
4. Specify the number of copies.
5. Click Print.
ABBYY
PDF Transformer+
User’s Guide
49
Integrating ABBYY PDF Transformer+ with other
applications
When integrated with Microsoft Office applications and Windows Explorer, ABBYY PDF Transformer+
allows you to open, create or convert PDF documents with a mouse click.
Section contents:
Microsoft Word, Excel, PowerPoint, and Visio integration
Microsoft Outlook integration
Windows Explorer integration
Microsoft Word, Excel, PowerPoint, and Visio integration
When you install ABBYY PDF Transformer+, an ABBYY PDF Transformer+ toolbar is added to
Microsoft Word, Microsoft Excel, Microsoft PowerPoint, and Microsoft Visio. By clicking this tab, you
can create PDF documents directly from within these Microsoft Office applications.
ABBYY PDF Transformer+ integrates with Microsoft Office 2007 and later.
1. Start a Microsoft Office application.
For instructions on creating and converting PDF documents from Microsoft Outlook,
please refer to
Integration with Microsoft Outlook
.
2. Create or open a document that you want to save in PDF.
3. On the ABBYY PDF Transformer+ toolbar, click
Create PDF to create and save a PDF document
Create and E–mail PDF to create a PDF document and send it as an e–mail attachment
Create PDF from Multiple Files to create a PDF document from several files in any of the
supported formats
The created PDF document will be saved and opened in ABBYY PDF Transformer+ or attached to an
e–mail message.
I can't see the ABBYY PDF Transformer+ toolbar in a Microsoft Office application...
Right–click the toolbar at the top of the Microsoft Office application and select ABBYY PDF
Transformer+ from the shortcut menu.
If there is no ABBYY PDF Transformer+ item in the shortcut menu, this means that you chose
not to integrate ABBYY PDF Transformer+ with Microsoft Office when you installed the program.
ABBYY
PDF Transformer+
User’s Guide
50
To integrate ABBYY PDF Transformer+ with Microsoft Office:
1. Click Start>Settings>Control Panel and select Programs and Features.
In Microsoft Windows XP, select Add or Remove Programs.
2. In the list of installed programs, select ABBYY PDF Transformer+ and click Change.
3. In the Custom Installation dialog box, select the desired components and follow the instructions
of the setup program.
Microsoft Outlook integration
When you install ABBYY PDF Transformer+, a ABBYY PDF Transformer+ toolbar is added to
Microsoft Outlook. By clicking this tab, you can create and edit PDF documents directly from within
your mailbox.
In Microsoft Outlook 2007, the ABBYY PDF Transformer+ toolbar is displayed only in mail
messages opened in a separate window.
To create a PDF document while working with Microsoft Outlook:
1. Start Microsoft Outlook.
2. Select a message whose text or attachments you want to use for a PDF document.
If you want to create a PDF document only from some of the attached files, select the
desired files.
3. Click Create PDF from Attachments to create one or several PDF documents from the
attachments. Click Create PDF from Body Text, to create a PDF document from the text of the
message.
4. In the saving dialog box, select a folder where to save your PDF document.
The created PDF document will be saved in the folder of your choice and opened in a new ABBYY
PDF Transformer+ window.
To convert a PDF document while working with Microsoft Outlook:
1. Start Microsoft Outlook.
2. Select a message whose PDF attachments you want to convert.
If you want to convert only some of the attached PDF files, select the desired files.
3. From the Text recognition languages list, select the languages of the PDF documents.
ABBYY
PDF Transformer+
User’s Guide
51
4. Adjust the conversion settings if required (click Conversion Settings to open the settings dialog
box).
5. On the toolbar, click Convert PDF and select an output format.
The created document will be saved in the format of your choice and opened in its native
application.
If a converted document looks very much different from the original, make sure the right
conversion settings were selected or try selecting text, picture, and table areas manually. For
details, see
Improving conversion results
.
I can't see the ABBYY PDF Transformer+ toolbar in Microsoft Outlook...
Right–click the toolbar at the top of the Microsoft Outlook and select ABBYY PDF Transformer+
from the shortcut menu.
If there is no ABBYY PDF Transformer+ item in the shortcut menu, this means that you chose
not to integrate ABBYY PDF Transformer+ with Microsoft Office when you installed the program.
To integrate ABBYY PDF Transformer+ with Microsoft Office:
1. Click Start>Settings>Control Panel and select Programs and Features.
In Microsoft Windows XP, select Add or Remove Programs.
2. In the list of installed programs, select ABBYY PDF Transformer+ and click Change.
3. In the Custom Installation dialog box, select the desired components and follow the instructions
of the setup program.
Windows Explorer integration
When you install ABBYY PDF Transformer+, it is integrated with Windows Explorer. As a result,
ABBYY PDF Transformer+ commands are added to the shortcut menus that appear when you right –
click files in any of the supported formats. By selecting these command s, you can create and edit
PDF documents directly from Windows Explorer.
To create PDFs from or convert PDFs to Microsoft Word, Microsoft Excel, Microsoft PowerPoint
or Microsoft Visio documents, you must have Microsoft Office installed on your computer.
To create a PDF document without leaving Windows Explorer:
1. In Windows Explorer, select one or more files.
ABBYY
PDF Transformer+
User’s Guide
52
2. Right–click the selected file(s) and from the short–cut menu, select one of the following:
Create PDF… to create and save a PDF document
Create and E–mail PDF… to create a PDF and attach it to an e–mail message
Create PDF from Multiple Files… to combine multiple files in various formats into one
PDF document or to create a separate PDF document for each of the files
For details, see
Creating a PDF document from multiple files
.
The actual commands available to you will depend on the number of selected files and
their formats.
When creating PDFs from Microsoft Word, Microsoft Excel, and Microsoft PowerPoint documents
their structure, bookmarks, and hyperlinks are all preserved.
To convert a PDF document without leaving Windows Explorer:
1. In Windows Explorer, select one or more files.
2. Right–click the selected file(s) and from the short–cut menu, select Convert To, and then select an
output format.
I can't see any ABBYY PDF Transformer+ commands in the shortcut menu...
If there are no ABBYY PDF Transformer+ commands in the shortcut menu, this means that you
chose not to integrate ABBYY PDF Transformer+ with Windows Explorer when you installed the
program.
To integrate ABBYY PDF Transformer+ with Windows Explorer:
1. Click Start>Settings>Control Panel and select Programs and Features.
In Microsoft Windows XP, select Add or Remove Programs.
2. In the list of installed programs, select ABBYY PDF Transformer+ and click Change.
3. In the Custom Installation dialog box, select the desired components and follow the instructions
of the setup program.
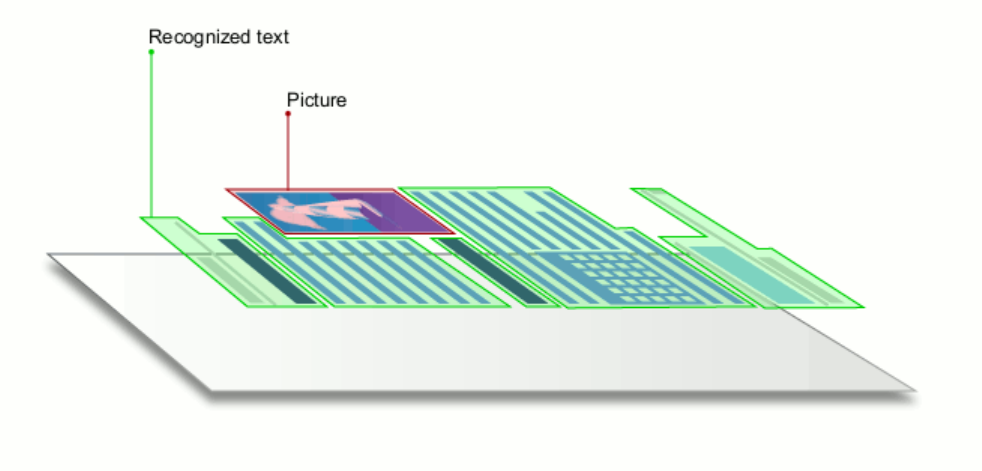
ABBYY
PDF Transformer+
User’s Guide
53
Frequently asked questions
This section contains answers to the most frequently asked questions.
Section contents:
Types of PDF documents
Supported OCR languages
Supported document formats
Current date and time on stamps and in Bates numbers
Types of PDF documents
There are three different types of PDF documents. Documents that only contain the images of
pages are not searchable, and the text they contain cannot be edited. Documents that also contain
a text layer are searchable, and text contained in these documents can be copied.
Regular PDF documents
Regular PDF documents are created when you convert documents in editable formats into the PDF
format. They contain a text layer and illustrations. The size of such PDF files is comparatively smal l,
they are searchable, and their text can be selected, deleted, or modified just like text in other
editable formats, such as Microsoft Word.
Searchable PDF documents
Searchable PDF documents consist of the images of pages with a text layer placed under neath.
Such PDF files are almost indistinguishable from the original documents and are fully searchable.
Text in searchable PDF documents can be selected, copied, or marked up, but not modified.
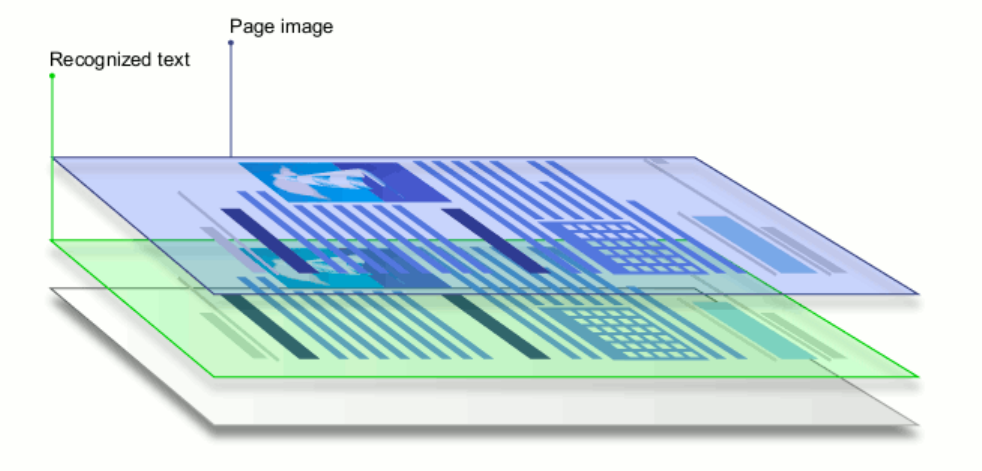
ABBYY
PDF Transformer+
User’s Guide
54
Image–only PDF documents
Image–only PDF documents are created from scans of hardcopy documents. They only contain the
images of pages, without a text layer. Image –only PDF files are not searchable, and the text they
contain usually cannot be modified or marked up. However, with ABBYY PDF Transformer+, you can
copy text from such documents, or add a text layer to turn them into searchable PDF documents.
Supported document formats
PDF creation
ABBYY PDF Transformer+ can create PDF documents from the following file formats:
Microsoft Word 97–2003 Document (*.doc)
Microsoft Word Document (*.docx)
Rich Text Format (*.rtf)
HTML Document (*.html)
Microsoft PowerPoint 97–2003 Presentation (*.ppt)
Microsoft PowerPoint Presentation (*.pptx)
Text Files (*.txt)
Microsoft Excel 97–2003 Workbook (*.xls)
Microsoft Excel Workbook (*.xlsx)
Microsoft Visio 2003–2010 Drawing (*.vsd)
Microsoft Visio Drawing (*.vsdx)
Image files (*.jpeg, *.jpeg 2000, *.bmp, *.jbi2g, *.gif, *.tiff, *.png, *.pdf)
ABBYY
PDF Transformer+
User’s Guide
55
You can use the built–in PDF–XChange 5.0 for ABBYY digital printer to create PDF documents
from files with other formats.
PDF conversion
ABBYY PDF Transformer+ can convert PDF files to the following formats:
Microsoft Word Document (*.docx)
OpenDocument Text (*.odt)
Rich Text Format (*.rtf)
Microsoft Excel Workbook (*.xlsx)
Microsoft PowerPoint Presentation (*.pptx)
HTML Document (*.html)
FB2 Document (*.fb2)
EPUB Document (*.epub)
Microsoft Office Excel Comma–Separated Values File (*.csv)
Text Files (*.txt)
Searchable PDF (*.pdf, *.pdf/a)
In order to work with Microsoft Word, Microsoft Excel, Microsoft PowerPoint, or Microsoft Visio
documents, you will need to have the corresponding components of Microsoft Office installed
on your computer.
Changing the interface language
The interface language is selected when ABBYY PDF Transformer+ is installed. This language will be
used for all the messages, dialog boxes, buttons, and menu items. To change the interface
language, follow the instructions below:
1. Open the Preferences dialog box (Tools>Preferences…).
2. Select the desired language from the Interface language drop–down menu.
3. Click the Save button.
4. Restart ABBYY PDF Transformer+.
Current date and time on stamps and in Bates numbers
You can create stamps and Bates numbers that display the current date. Use the following tags in
the stamp manager or bates number manager.
Tag
Example
ABBYY
PDF Transformer+
User’s Guide
56
<d/>
Date in short format
07.02.2013
<date/>
Date in long format
7 February 2013
<t12/>
Time in 12–hour format
9:22 PM
<t24/>
Time in 24–hour format
21:22
<time/>
Time in HH:MM:SS format
21:22:51
By default, the regional settings of your computer will determine the date and time formats. You
can specify a different format. For example, <d=RUS/>, <date=USA/>, or <time=ENG/>. The
result will be immediately displayed in the preview pane.
Click here to see some examples
<d=USA/>
2/7/2013
<d=ENG/>
07/02/2013
<d=RUS/>
07.02.2013
<d=DEU/>
07.02.2013
<d=FRA/>
07/02/2013
<d=ITA/>
07/02/2013
<d=ESP/>
07/02/2013
<d=NLD/>
3–2–2013
<d=PO/>
2013–02–07
<d=HUN/>
2013.02.07
<d=CZ/>
7.2.2013
<d=SL/>
7. 2. 2013
Your operating system may not support some of the regions specified in the tags
above. Of course, you can specify any other region supported by your operating
system.
You can specify date and time formats using the <date/> and <time/> tags.
Click here to see some examples
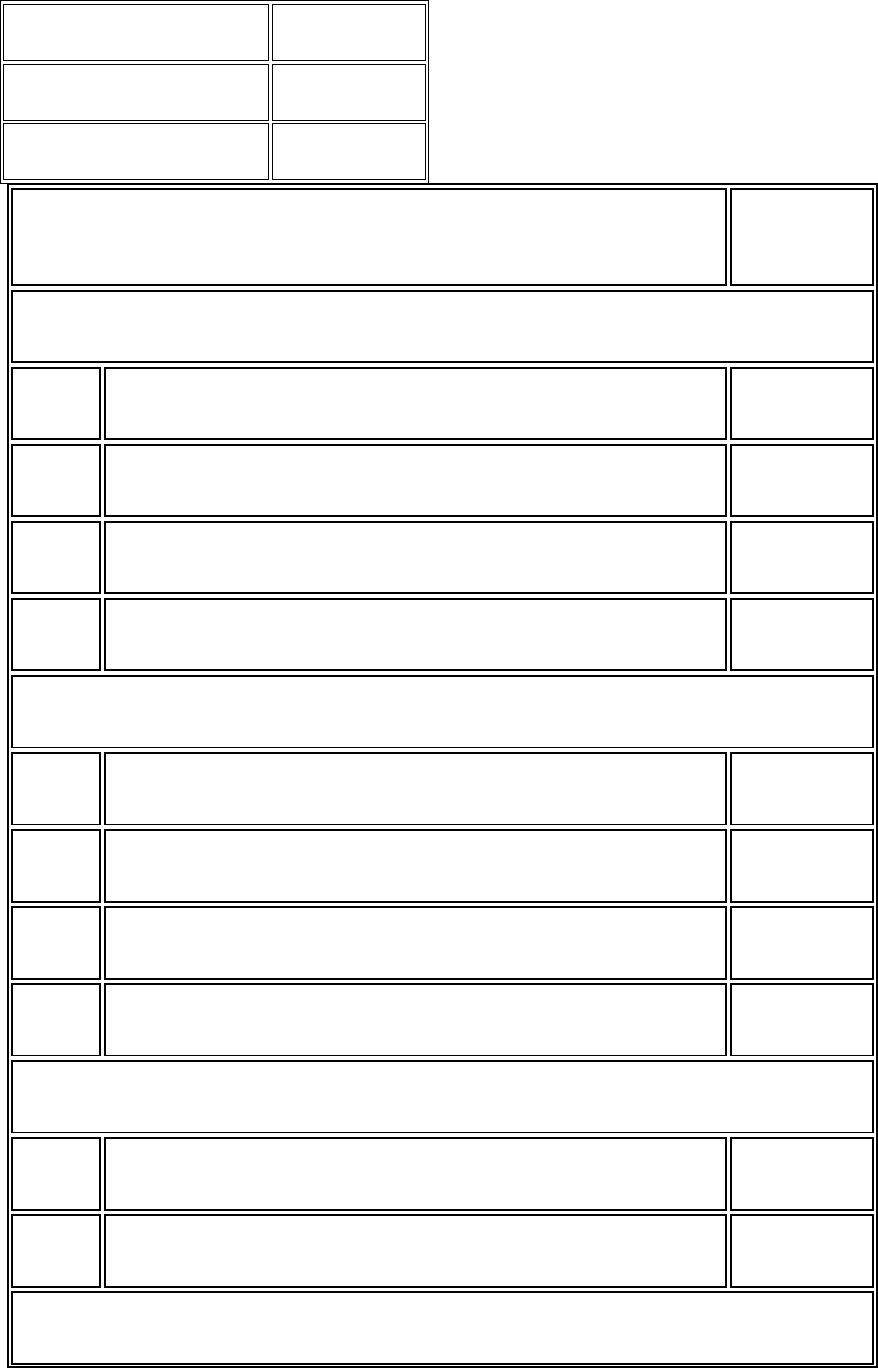
ABBYY
PDF Transformer+
User’s Guide
57
<date=USA %A/>
Friday
<date=DEU %B, %Y/>
February, 2013
<time %Hh %Mm/>
09h 22m
<date/> parameters
Example
Year
%y
The year as a number from 01 to 99 (with leading zeros)
01
%#y
The year as a number from 1 to 99 (no leading zeros)
1
%Y
The year as a number from 0001 to 9999 (with leading zeros)
2013
%#Y
The year as a number from 1 to 9999 (no leading zeros)
2013
Month
%b
Abbreviated names of the months
Feb
%B
Full names of the months
February
%m
The month as a number from 01 to 12 (with leading zeros)
02
%#m
The month as a number from 1 to 12 (no leading zeros)
2
Day of month
%d
The day as a number from 01 to 31 (with leading zeros)
07
%#d
The day as a number from 1 to 31 (no leading zeros)
7
Day of week
ABBYY
PDF Transformer+
User’s Guide
58
%a
Abbreviated names of the days
Tu
%A
Full names of the months
Tuesday
<time/> parameters
Example
Hours
%H
Hours in 24–hour format (from 00 to 23, with leading zeros)
07
%#H
Hours in 24–hour format (from 0 to 23, no leading zeros)
7
%I
Hours in 12–hour format (from 01 to 12, with leading zeros)
05
%#I
Hours in 12–hour format (from 1 to 12, no leading zeros)
5
%p
A.M./P.M. indication for 12–hour format*
AM
Minutes and seconds
%M
Minutes as a number from 00 to 59 (with leading zeros)
04
%#M
Minutes as a number from 0 to 59 (no leading zeros)
4
%S
Seconds as a number from 00 to 59 (with leading zeros)
04
%#S
Seconds as a number from 0 to 59 (no leading zeros)
4
Additional parameter
%%
Percentage symbol
Changing your regional settings
1. Select Start>Control Panel>Clock, Language and Region and click Region and Language.

ABBYY
PDF Transformer+
User’s Guide
59
2. On the Formats tab, select a standard to be used for date and time, or click Additional
settings... to create your own date and time formats.
In Microsoft Windows XP, click the Regional Options tab.
______________________
* Available only for the USA, ENG, HUN, and CZ regions.
ABBYY
PDF Transformer+
User’s Guide
60
Appendix
Contents
Glossary
Keyboard shortcuts
Using ABBYY PDF Transformer+ Help
Customer Experience Improvement Program
Glossary
A
Activation is the process of obtaining a special code from ABBYY which allows the user to use a
copy of the software in full mode on a specific computer.
Active area is a selected area on an image that can be deleted, moved or modified. To make an
area active, click it. The frame enclosing an active area is bold and has small squares on its
corners.
Activation code is a code that is issued by ABBYY to each user of ABBYY PDF Transformer+
during the activation procedure. An activation code is used to activate ABBYY PDF Transformer+ on
the computer that was used to generate the Product ID.
ADRT® (Adaptive Document Recognition Technology) is a technology that improves the quality of
conversion of multi–page documents. It is capable of recognizing such structural elements as
headings, headers and footers, footnotes, page numbering, and signatures.
Area is a section on an image enclosed by a frame. Before performing OCR, ABB YY PDF
Transformer+ detects text, picture, table, and barcode areas in order to determine which sections
of the image should be recognized and in what order.
Automatic Document Feeder (ADF) is a device that automatically feeds documents to a scanner.
A scanner with an ADF can scan multiple pages without manual intervention. ABBYY PDF
Transformer+ supports multi–page documents.
B
Background picture area is an image area that contains a picture with text printed over it.
Brightness is a scanning parameter that indicates the contrast between the black and white areas
on an image. Setting the correct brightness value increases recognition quality.
C
Character encoding is used to pair characters with character codes.
D
Document open password is a password which prevents users from opening a PDF document
unless they type the password specified by the author.
DPI (dots per inch) is a measure of image resolution.
Driver is a software program that controls a computer peripheral (e.g., a scanner, a monitor, etc).
ABBYY
PDF Transformer+
User’s Guide
61
F
Font effects alter the appearance of a font (i.e. bold, italic, underlined, strikethrough, subscript,
superscript, small caps).
H
Headers and Footers are images or text in the top or bottom margin of a page. Headers are
located at the top of the page and footers are located at the bottom.
K
Keyboard shortcuts are keys or combinations of keys that trigger a specific action when pressed.
Using hotkeys can significantly increase your productivity.
O
OCR (Optical Character Recognition) is the process of converting text from an image into machine –
encoded text. OCR software can "read" text on a scanned page, separate it from pictures and other
design elements, find tables and analyze their contents, and then compile all of the resulting data
into an editable document that mirrors the original's appearance.
P
Page analysis is the process of identifying areas on an image. Page analysis can be carried out
automatically by clicking the Convert button or manually, before starting conversion.
Page layout is the arrangement of text, tables, pictures, paragraphs, and columns on a page. The
fonts, font sizes, font colors, text background, and text orientation are also part of the page layout.
PDF (Portable Document Format) is a versatile document format. A PDF file looks the same no
matter what computer it is displayed on thanks to the detailed descriptions of text, fonts and
graphics it contains.
PDF security settings are restrictions that prevent a PDF document from being opened, edited,
copied or printed. These settings include document open passwords, permissions passwords, and
encryption levels.
Permissions password is a password which prevents other users from printing and editing a PDF
document unless they type the password specified by the author. If some security settings are
selected for the document, other users will not be able to change these settings until they type the
password.
Picture area is an area that contains a picture. This type of area may enclose an actual picture or
any other object that you want to be displayed as a picture (e.g. a section of text).
Product ID is a parameter that is automatically generated based on a computer's hardware
configuration when ABBYY PDF Transformer+ is activated on that computer.
R
Recognition area is an image area that ABBYY PDF Transformer+ should analyze automatically.
Regular PDF document is a PDF document that contains a text layer and illustrations. This type
of PDF document is usually created by converting an editable document file to PDF. Regular PDF
files are relatively small and fully searchable. Text in these documents can be selected, edited and
deleted, just like text in other editable formats, such as Mi crosoft Word documents.

ABBYY
PDF Transformer+
User’s Guide
62
Resolution is a scanning parameter that indicates how many dots can be placed in a line of a
specific length. A resolution of 300 dpi should be used for fonts of 10 pt and larger, 400 to 600 dpi
is preferable for smaller font sizes (9 pt and less).
S
Serial number is a unique number you receive when you purchase ABBYY PDF Transformer+. It is
used during activation.
Shortcut menu is the menu that appears when you right–click something, such as an area or
another part of a document.
Support ID is a unique identifier of a serial number that contains information about the license
and the computer on which it is used. A support ID provides additional protection and is checked by
the technical support service before providing technical su pport.
T
Table area is an image area that contains data in table form. When the application reads this type
of area, it draws vertical and horizontal separators inside the area to form a table. This area is then
rendered as a table in the output text.
Text area is an image area that contains text. Note that text areas should only contain single –
column text.
U
Unicode is an international text encoding standard developed by the Unicode Consortium (Unicode,
Inc.). The Unicode standard provides an easily extendible 16–bit system for encoding symbols from
almost all contemporary languages. It specifies how symbols should be encoded and determines
which algorithms and character properties should be used during the encoding process.
Keyboard shortcuts
ABBYY Transformer+ offers the following keyboard shortcuts for the most commonly used
commands.
The File Menu
The Edit Menu
The View Menu
The Tools Menu
The Help Menu
The File Menu
Command
Shortcut
Open…
Ctrl+O

ABBYY
PDF Transformer+
User’s Guide
63
Create from File…
Ctrl+N
Create from Scanner…
Ctrl+K
Save
Ctrl+S
Save As…
Ctrl+Shift+S
Close
Ctrl+W
Print…
Ctrl+P
Exit
Ctrl+Q
The Edit Menu
Command
Shortcut
Undo
Ctrl+Z
Redo
Ctrl+Y
Cut
Ctrl+X
Copy
Ctrl+C
Paste
Ctrl+V
Delete
Del
Select All
Ctrl+A
Find
Ctrl+F
Find Next
F3
ABBYY
PDF Transformer+
User’s Guide
64
Add from File…
Ctrl+Shift+N
Add from Scanner…
Ctrl+Shift+K
The View Menu
Command
Shortcut
Pages
F5
Bookmarks
F6
Search
Ctrl+F
Attachments
F7
Signatures
F8
Comments
F9
Zoom In
Ctrl++
Zoom Out
Ctrl+–
Best Fit
Ctrl+1
Fit to Width
Ctrl+2
Actual Size
Ctrl+0
First Page
Home
Last Page
End
Previous Page
Ctrl+Up Arrow

ABBYY
PDF Transformer+
User’s Guide
65
Next Page
Ctrl+Down Arrow
Previous View
Alt+Left Arrow
Next View
Alt+Right Arrow
Continuous Scroll
F11
Single Page
F11
The Tools Menu
Command
Shortcut
Comment
Ctrl+T
Highlight
Ctrl+H
Underline
Ctrl+U
Strikethrough
Ctrl+D
Add Note to Insert Text
Ctrl+J
Search and Mark Up
Ctrl+F
Edit Text and Images
Shift+F2
Redaction
Ctrl+Shift+H
The Help Menu
Command
Shortcut
ABBYY
PDF Transformer+
User’s Guide
66
ABBYY PDF Transformer+ Help
F1
Using ABBYY PDF Transformer+ Help
Keyboard shortcuts for the Help window
Using the Contents, Index, Search pane
Using the topic pane
Keyboard shortcuts for browsing search results
Changing the appearance of a Help topic
Keyboard shortcuts for the Help window
To
Press
Display the Help window
F1
Switch between the Help topic
and the Contents, Index,
Search pane
F6
Display the Options menu to
access the commands on the
Help toolbar
ALT+O
Hide or show the pane with the
Contents, Index, and Search
tabs
ALT+O, and then press T
Display one of the previously
viewed topics
ALT+O, and then press B to go back or F to go forward
Return to the specified home
page
ALT+O, and then press H
Stop the Help window from
opening a Help topic (useful if
you want to stop a Web page
from downloading)
ALT+O, and then press S
Open the Internet Options
ALT+O, and then press I

ABBYY
PDF Transformer+
User’s Guide
67
dialog box for Microsoft Internet
Explorer, where you can change
accessibility settings
Refresh the topic (when viewing
a Web page)
ALT+O, and then press R
Print all topics in the current
book or the selected topic only
ALT+O, and then press P
Close the Help window
ALT+F4
Using the Contents, Index, and Search pane
Press F6 to switch from the Help topic to the Contents, Search, Index pane.
To
Press
Switch to the next tab
CTRL+TAB
Switch to the Contents tab
ALT+C
Switch to the Search tab
ALT+S
Switch to the Index tab
ALT+N
Open a selected book or Help topic
ENTER
Select the next book or Help topic
DOWN ARROW
Select the previous book or Help topic
UP ARROW
Display a shortcut menu
SHIFT+F10
Using the topic pane
Press F6 to switch from the Contents, Index, Search pane to the open Help topic.
ABBYY
PDF Transformer+
User’s Guide
68
To
Press
Go to the next Help topic
ALT+RIGHT ARROW
Go to the previous Help topic
ALT+LEFT ARROW
Select the next hidden text or hyperlink
TAB
Select the previous hidden text or hyperlink
SHIFT+TAB
Perform the action for the selected hidden text, or
hyperlink
ENTER
Scroll toward the beginning or end of a Help topic
UP ARROW or DOWN ARROW
Scroll toward the beginning or end of a Help topic in
large increments
PAGE UP or PAGE DOWN
Go to the beginning or end of a Help topic
HOME or END
Print the current Help topic
CTRL+P
Select the entire Help topic
CTRL+A
Copy the selected items to the Clipboard
CTRL+C
Display a shortcut menu
SHIFT+F10
Keyboard shortcuts for browsing search results
To select a topic, use the UP ARROW or DOWN ARROW keys, and then press ENTER to open the
topic in the Help window.
Changing the appearance of a Help topic
1. On the Help menu, click Help.
2. In the Help window, click Options, and then click Internet Options.
3. On the General tab, click Accessibility, and then select the Ignore colors specified on Web
pages check box.
4. Click OK.
ABBYY
PDF Transformer+
User’s Guide
69
5. In the Internet Options dialog box, do one or both of the following:
To change the color of the background or text in Help, click the General tab, click Colors,
and then select the options you want.
To change the font in Help, on the General tab, click Fonts, and then select the options
you want.
If you change the font and background color of the Help topics in the Help window, this change
will also affect the font and background color when you view a Web page in Microsoft Internet
Explorer.
Customer Experience Improvement Program
At ABBYY, we are constantly seeking to improve the effectiveness and usability of our products. In
order to accomplish this, we need to know how users interact with out products and which
functions they use.
Since contacting every user directly and asking for feedback isn't possible, the Custo mer Experience
Improvement Program was created. This program is completely anonymous and participation is
strictly voluntary. If you choose to participate, information about your system and the settings you
use in your ABBYY product (build number, part number, license type, name of your operating
system and your region) will be sent from your computer to ABBYY from time to time, without any
effort on your part. No personal data will ever be sent to ABBYY during this process.
An internet connection is required to send this information.
To participate in the Customer Experience Improvement Program:
Select the Participate in the Customer Experience Improvement Program option in the
Preferences… dialog box (Tools>Preferences…).
You can opt out of the Customer Experience Improvement Program at any time by clearing the
Participate in the Customer Experience Improvement Program option in the
Preferences… dialog box.
You can find more information about the Customer Experience Improvement Program on our
website at http://www.abbyy.com.
ABBYY
PDF Transformer+
User’s Guide
70
Activating and registering ABBYY PDF Transformer+
Software piracy hurts software manufacturers and end users alike – using an illegal product is never
safe. Legal software ensures that a third party cannot introduce detrimental code changes. ABBYY
makes every effort to protect its intellectual property rights and the security of its customers.
ABBYY software products include special protection technology which prevents unauthorized use by
those who have not entered into a license agreement with ABBYY.
To be able to run ABBYY PDF Transformer+ in full mode, you need to activate it.
Registration is optional and registered users enjoy certai n benefits.
Section contents:
Activating ABBYY PDF Transformer+
Registering ABBYY PDF Transformer+
Privacy Policy
Activating ABBYY PDF Transformer+
After you install ABBYY PDF Transformer+, you will have to activate it, otherwise it will run in trial
mode. If you are not prompted to activate ABBYY PDF Transformer+ after installation, your copy
does not require activation.
When the trial period ends, you will still be able to use ABBYY PDF Transformer+ to view and
comment PDF files.
The built–in Activation Wizard will help you activate the program by sending the data required to
activate your copy to ABBYY. In return, you will receive an Activation Code which you will have to
enter in order to complete the activation process. The Activation Wizard has a simple interface
and the activation process will only take a few minutes.
Complete the following steps in order to activate ABBYY PDF Transformer+:
1. Open the Help menu and click Activate…
2. Follow the instructions in the Activation Wizard.
If you choose to activate by e–mail or phone, you will have to enter the Activation Code you
receive from ABBYY or the path to to the Activation File in the Activation Wizard.
Once activation is complete, you can begin using ABBYY PDF Transformer+ on the computer on
which it was activated.
There are several ways to activate your product:
Activation via the internet
The activation process is automatic and only takes several seconds. An internet connection is
required for this activation method.
Activation by e–mail
You will be prompted to send an automatically generated message containing activation information
to ABBYY.
ABBYY
PDF Transformer+
User’s Guide
71
Please do not change the subject and the contents of the message to insure a quick
reply from the e–mail robot.
Activation on the website
The Activation Wizard will display an internet address, a serial number, and the Product ID (you
can copy them). Go to the specified internet address and type the serial number and the Product
ID in the corresponding fields on the web page. You will be prompted to download a file. Save this
file to your hard disk and specify the path to this file in the activation wizard.
The Product ID is a unique parameter generated by the Activation Wizard based on your
computer's configuration during the activation process. This parameter does not contain any
personal information or any information about your user settings and the software and data on your
computer. In addition to the Product ID, your serial number, the name of your product, its ve rsion
number and interface language will be transferred to ABBYY's server. This information is collected in
order to select the language and contents of the message displayed at the end of the activation
process and will not be used for any other purpose.
Activation by phone
Select your country in the Activation Wizard. You will be prompted to contact the nearest office of
ABBYY or one of ABBYY's partners by phone. Please tell the technical support engineer the serial
number and Product ID displayed in the Activation Wizard.
Receiving an Activation Code by phone may take a considerable amount of time.
You can uninstall and re–install ABBYY PDF Transformer+ on the same computer an unlimited
amount of times without repeating the activation process. However, if significant changes were
made to your computer's configuration, your hard disk was formatted or your operation system was
re–installed, you will have to receive a new activation code and activate ABBYY PDF Transformer+
again.
Registering ABBYY PDF Transformer+
ABBYY invites you to become a registered user of ABBYY PDF Transformer+. Registration is optional
and registered users enjoy certain benefits.
To register your copy of ABBYY PDF Transformer+, use one of the following four methods:
Fill out the registration form when activating the program
If you do not register the program during activation, you can always do it later.
From the Help menu, select Register… and fill out the registration form
Register on the ABBYY website
Contact the nearest ABBYY office
Registered users enjoy the following benefits:
1. Free technical support
2. E–mail notifications about new ABBYY releases
ABBYY
PDF Transformer+
User’s Guide
72
Privacy Policy
You agree to transfer your personal data to ABBYY during registration of your copy of the ABBYY
PDF Transformer+ software product. You also agree that ABBYY may collect, process, and use the
data received from you in accordance with terms of the License Agreement and applicable law. Any
personal information provided by you will be used only within the ABBYY group of companies and
will not be disclosed to any third party unless ABBYY is required to so under applicable law or by
the License Agreement.
ABBYY may send you e–mail messages containing product news, pricing information, special offers,
and other company and product information only if you agree to receive such information from
ABBYY by selecting the corresponding option in the product registration dialog box. You can delete
your e–mail address from the mailing list at any time by contacting ABBYY.
Buying ABBYY products
You can purchase ABBYY products in the ABBYY online store or from one of ABBYY's partners listed
at http://www.abbyy.com.
For detailed information about ABBYY products, please
visit our website http://www.abbyy.com
contact the nearest ABBYY office
send us an e–mail to sales@abbyy.ru
You can get more fonts for various languages at www.paratype.com/shop/.
About ABBYY
ABBYY is a Russian company founded in Moscow in 1989. It is a leading software developer and
service provider in the areas of linguistics, optical character recognition and data capture.
ABBYY is headquartered in Moscow and has established a presence on 5 continents: our 13
international offices are located in Austria, the UK, Germany, Cyprus, Russia, USA, Thailand,
Ukraine and Japan.
According to our internal data, over 30 million people in 150 countries use ABBYY products to
automate labor–intensive tasks, increase productivity and turn data into useful knowledge. ABBYY
products have received awards from top trade magazines and review labs from all over the world,
over 240 of which were awarded for the ease of use and accessibility of ABBYY products and the
innovativeness and high quality of ABBYY technologies.
Leading players of the enterprise content management and data captur e markets, including
Microtek, Hewlett–Packard, Samsung Electronics, BancTec, EMC2/Documentum, NewSoft and
Notable Solutions use ABBYY's technologies in their products. The FineReader line of ABBYY's
optical character recognition products is pre–installed on scanners and multifunction printers
(MFPs) from major manufacturers such as Xerox, Epson, Canon, Toshiba, Panasonic
Communications, Fujitsu and Konica Minolta.
Key Products
ABBYY FineReader is an optical character recognition (OCR) system that lets u sers increase their
productivity when working with documents and PDF files. It is capable of converting various types
ABBYY
PDF Transformer+
User’s Guide
73
of documents (such as hardcopy documents, PDF files and document images from digital cameras)
into editable and searchable formats.
ABBYY Lingvo is a dictionary program that brings licensed dictionaries, encyclopedias and
professional translation services to PCs, smartphones and tablets. It lets users translate words and
phrases and look them up in various online resources, including Wikipe dia. ABBYY Lingvo includes
recorded pronunciations of words by native speakers, phrase books, and Lingvo Tutor, an
application that helps users memorize new words.
ABBYY Mobile Products are recognition and translation applications for mobile devices. These
apps will help you extract useful information from printed text, access a wide range of dictionaries
licensed from publishers from all over the world, and even offer a novel approach to managing your
contacts.
ABBYY Recognition Server is an automated, server–based document capture solution for
enterprises. It converts documents from fax machines, scanners and multifunction printers to
popular document formats (such as PDF, HML and Microsoft Word documents) and creates digital
archives. ABBYY Recognition Server is highly scalable, easy to use and administrate.
ABBYY FlexiCapture is a data and document capture solution for enterprises. ABBYY FlexiCapture
automates data capture processes, taking data from hardcopy documents and storing it in an
enterprise's database.
ABBYY FineReader Engine is a powerful software development kit that lets developers
incorporate advanced recognition and document conversion technology into their products. ABBYY
FineReader Engine is capable of optical character recognition (OCR), intelligent character
recognition (ICR), optical mark recognition (OMR), reading barcodes, creating document images
and converting PDF files. It can recognize printed text (OCR) in 198 languages and hand –printed
text (ICR) in 113 languages.
ABBYY
PDF Transformer+
User’s Guide
74
Technical support
Should you have any questions regarding the use of ABBYY PDF Transformer+, please consult all
the documentation you have (the User's Guide and Help) before contacting the ABBYY technical
support service. You may also wish to browse the technical s upport section on the ABBYY website
at www.abbyy.com/support — you may find the answer to your question there.
Our technical support service engineers will need the following information to answer your question
competently:
Your full name
The name of your company or organization (if applicable)
Your telephone number (or fax or e–mail)
The serial number of your copy of ABBYY PDF Transformer+ or support ID. The support ID is the
unique identifier of the serial number, which contains information about your license and computer.
To view your support ID, select Help>About…>License Info
The build number of your copy (as displayed in Help>About…)
A general description of your problem and the full text of the error message (if there was one)
The type of your computer and processor
The version of your Windows operating system
Any other information that you think is important
You can gather some of the above information automatically:
1. Select Help>About….
2. Click System Info… to open a dialog box with some of the above information.
Only registered users are eligible for free technical support. You can register your copy of the
application on the ABBYY website or by selecting Help>Register….
Should you have any questions about using ABBYY PDF Transformer+, contact any of the
ABBYY representative offices.
