Adobe Acrobat Connect User Guide
User Manual: adobe Acrobat Connect - User Guide Free User Guide for Adobe Acrobat Reader Software, Manual
Open the PDF directly: View PDF ![]() .
.
Page Count: 35
- Contents
- Chapter 1: Before you begin
- Chapter 2: Meeting setup
- Chapter 3: Hosting a meeting
- Chapter 4: Screen sharing
- Chapter 5: Attending a meeting
- Index
- A
- B
- C
- D
- E
- G
- H
- I
- K
- L
- M
- N
- P
- Q
- R
- S
- T
- U
- V
- W

Chapter 1:

Copyright
Copyright 2001 - 06 Adobe Macromedia Software LLC and its licensors. All rights reserved.
Protected by U.S. Patent 7,039,643; Patents Pending in the U.S. and other countries.
If this guide is distributed with software that includes an end user agreement, this guide, as well as the software described in it, is furnished under license and may be used or
copied only in accordance with the terms of such license. Except as permitted by any such license, no part of this guide may be reproduced, stored in a retrieval system, or trans-
mitted, in any form or by any means, electronic, mechanical, recording, or otherwise, without the prior written permission of Adobe Systems Incorporated.Pleasenotethatthe
content in this guide is protected under copyright law even if it is not distributed with software that includes an end user license agreement.
Thecontentofthisguideisfurnishedforinformationaluseonly,issubjecttochangewithoutnotice,andshouldnotbeconstruedasacommitmentbyAdobe Systems Incorpo-
rated. Adobe Systems Incorporated assumes no responsibility or liability for any errors or inaccuracies that may appear in the informational content contained in this guide.
Adobe, the Adobe logo, Acrobat, Adobe Connect, Flash Player, PDF, and Reader are either registered trademarks or trademarks of Adobe Systems Incorporated in the United
States and/or other countries.
Mac OS and Macintosh are trademarks of Apple Computer, Inc., registered in the United States and other countries. Microsoft and Windows are either registered trademarks or
trademarks of Microsoft Corporation in the United States and/or other countries. All other trademarks are the property of their respective owners.
Updated Information/Additional Third Party Code Information available at http://www.adobe.com/go/thirdparty.
<AdobeIP#0000239>
Portions include software under the following terms:
Portions Copyright © 1995-2002 Metrowerks Corporation. All rights reserved.
Portions Copyright © 1994 Hewlett-Packard Company
Permission to use, copy, modify, distribute and sell this software and its documentation for any purpose is hereby granted without fee, provided that theabovecopyrightnotice
appears in all copies and that both that copyright notice and this permission notice appear in supporting documentation. Hewlett-Packard Company makes no representations
about the suitability of this software for any purpose. It is provided “as is” without express or implied warranty.
Portions Copyright © 1996, 1997 Silicon Graphics Computer Systems, Inc.
Permission to use, copy, modify, distribute and sell this software and its documentation for any purpose is hereby granted without fee, provided that theabovecopyrightnotice
appear in all copies and that both that copyright notice and this permission notice appear in supporting documentation. Silicon Graphics makes no representations about the
suitability of this software for any purpose. It is provided “as is” without express or implied warranty.
Portions utilize Microsoft Windows Media Technologies. Copyright © 1999-2002 Microsoft Corporation. All rights reserved.
This product includes software developed by the Apache Software Foundation (http://www.apache.org/).
Redistribution and use in source and binary forms, with or without modifications, are permitted provided that the following conditions are met:
1Redistributions of source code must retain the above copyright notice, this list of conditions and the following disclaimer.
2Redistributions in binary form must reproduce the above copyright notice, this list of conditions and the following disclaimer
in the documentation and/or other materials provided with the distribution.
3The end-user documentation included with the redistribution, if any, must include the following acknowledgement: “This
product includes software developed by the Apache Software Foundation (http://www.apache.org/).” Alternately, this acknowl-
edgement may appear in the software itself, if and wherever such third-party acknowledgements normally appear.
4The names “The Jakarta Project”, “Tomcat”, and “Apache Software Foundation” must not be used to endorse or promote products
derived from this software without prior written permission. For written permission, please contact apache@apache.org.
5Productsderivedfromthissoftwaremaynotbecalled“Apache”normay“Apache”appearintheirnameswithoutpriorwritten
permission of the Apache Group.
THIS SOFTWARE IS PROVIDED “AS IS” AND ANY EXPRESSED OR IMPLIED WARRANTIES, INCLUDING BUT NOT LIMITED TO, THE IMPLIED WARRANTIES OF
MERCHANTABILITY AND FITNESS FOR A PARTICULAR PURPOSE ARE DISCLAIMED. IN NO EVENT SHALL THE APACHE SOFTWARE FOUNDATION OR ITS
CONTRIBUTORS BE LIABLE FOR ANY DIRECT, INDIRECT, INCIDENTAL, SPECIAL, EXEMPLARY, OR CONSEQUENTIAL DAMAGES (INCLUDING BUT NOT
LIMITED TO, PROCUREMENT OF SUBSTITUTE GOODS OR SERVICES; LOSS OF USE, DATA, OR PROFITS; OR BUSINESS INTERRUPTION) HOWEVER CAUSED
AND ON ANY THEORY OF LIABILITY, WHETHER IN CONTRACT, STRICT LIABILITY, OR TORT (INCLUDING NEGLIGENCE OR OTHERWISE) ARISING IN ANY
WAY OUT OF THE USE OF THIS SOFTWARE, EVEN IF ADVISED OF THE POSSIBILITY OF SUCH DAMAGE.
Sorenson Spark ™ video compression and decompression technology licensed from Sorenson Media, Inc.
Real Duplex ™ Acoustic Echo Cancellation is Copyright © 1995-2004 SPIRIT
Adobe Systems Incorporated, 345 Park Avenue, San Jose, California 95110, USA.
Notice to U.S. Government End Users: The Software and Documentation are “Commercial Items,” as that term is defined at 48 C.F.R. §2.101, consisting of “Commercial
Computer Software” and “Commercial Computer Software Documentation,” as such terms are used in 48 C.F.R. §12.212 or 48 C.F.R. §227.7202, as applicable. Consistent with
48 C.F.R. §12.212 or 48 C.F.R. §§227.7202-1 through 227.7202-4, as applicable, the Commercial Computer Software and Commercial Computer Software Documentation are
being licensed to U.S. Government end users (a) only as Commercial Items and (b) with only those rights as are granted to all other end users pursuant to the terms and conditions
herein. Unpublished-rights reserved under the copyright laws of the United States. Adobe agrees to comply with all applicable equal opportunity laws including, if appropriate,
the provisions of Executive Order 11246, as amended, Section 402 of the Vietnam Era Veterans Readjustment Assistance Act of 1974 (38 USC 4212), and Section 503 of the
Rehabilitation Act of 1973, as amended, and the regulations at 41 CFR Parts 60-1 through 60-60, 60-250, and 60-741. The affirmative action clause and regulations contained in
the preceding sentence shall be incorporated by reference.

iii
Contents
Chapter 1: Before you begin
Resources . . . . . . . . . . . . . . . . . . . . . . . . . . . . . . . . . . . . . . . . . . . . . . . . . . . . . . . . . . . . . . . . . . . . . . . . . . . . . . . . 1
Using Adobe Help . . . . . . . . . . . . . . . . . . . . . . . . . . . . . . . . . . . . . . . . . . . . . . . . . . . . . . . . . . . . . . . . . . . . . . . . 2
Chapter 2: Meeting setup
Acrobat Connect basics . . . . . . . . . . . . . . . . . . . . . . . . . . . . . . . . . . . . . . . . . . . . . . . . . . . . . . . . . . . . . . . . . . . 4
Meeting room and pods . . . . . . . . . . . . . . . . . . . . . . . . . . . . . . . . . . . . . . . . . . . . . . . . . . . . . . . . . . . . . . . . . . 6
Your account . . . . . . . . . . . . . . . . . . . . . . . . . . . . . . . . . . . . . . . . . . . . . . . . . . . . . . . . . . . . . . . . . . . . . . . . . . . . 11
Chapter 3: Hosting a meeting
Starting a meeting . . . . . . . . . . . . . . . . . . . . . . . . . . . . . . . . . . . . . . . . . . . . . . . . . . . . . . . . . . . . . . . . . . . . . . . 12
Managing attendees . . . . . . . . . . . . . . . . . . . . . . . . . . . . . . . . . . . . . . . . . . . . . . . . . . . . . . . . . . . . . . . . . . . . . 14
Taking notes . . . . . . . . . . . . . . . . . . . . . . . . . . . . . . . . . . . . . . . . . . . . . . . . . . . . . . . . . . . . . . . . . . . . . . . . . . . . . 16
Chatting with attendees . . . . . . . . . . . . . . . . . . . . . . . . . . . . . . . . . . . . . . . . . . . . . . . . . . . . . . . . . . . . . . . . . 17
Video conferencing . . . . . . . . . . . . . . . . . . . . . . . . . . . . . . . . . . . . . . . . . . . . . . . . . . . . . . . . . . . . . . . . . . . . . . 18
Ending a meeting . . . . . . . . . . . . . . . . . . . . . . . . . . . . . . . . . . . . . . . . . . . . . . . . . . . . . . . . . . . . . . . . . . . . . . . . 19
Getting meeting data . . . . . . . . . . . . . . . . . . . . . . . . . . . . . . . . . . . . . . . . . . . . . . . . . . . . . . . . . . . . . . . . . . . . 20
Chapter 4: Screen sharing
Sharing your screen . . . . . . . . . . . . . . . . . . . . . . . . . . . . . . . . . . . . . . . . . . . . . . . . . . . . . . . . . . . . . . . . . . . . . . 21
Annotating a shared screen . . . . . . . . . . . . . . . . . . . . . . . . . . . . . . . . . . . . . . . . . . . . . . . . . . . . . . . . . . . . . . 24
Chapter 5: Attending a meeting
Joining or exiting a meeting . . . . . . . . . . . . . . . . . . . . . . . . . . . . . . . . . . . . . . . . . . . . . . . . . . . . . . . . . . . . . . 26
Using text chat, notes, and video . . . . . . . . . . . . . . . . . . . . . . . . . . . . . . . . . . . . . . . . . . . . . . . . . . . . . . . . . 27
Attendee status and roles . . . . . . . . . . . . . . . . . . . . . . . . . . . . . . . . . . . . . . . . . . . . . . . . . . . . . . . . . . . . . . . . 28
Index . . . . . . . . . . . . . . . . . . . . . . . . . . . . . . . . . . . . . . . . . . . . . . . . . . . . . . . . . . . . . . . . . . . . . . . . . . . . . . . . . . . 31

1
Chapter 1: Before you begin
Begin here to get information about Help documentation for Adobe®Acrobat®Connect™.Youcanalsofindoutabout
the tools Adobe offers to help you get started, find system requirements for your software, and get an overview of
resources available at Adobe.com.
Resources
Help components
Help The documentation is available in Help, browser-based content you access through the Help menu of your
Adobe product. For information about Help and its accessibility features, see “Using Adobe Help” on page 2.
PDF version of Help To view all the Help topics in a single PDF document, visit
www.adobe.com/go/connect_pdf_en.
Acrobat Connect resources
More information is available from the following sources:
Quick Start AdobeoffersQuickStartdemosforAcrobatConnect.Theseshortdemosshowyouvisuallyhowtodo
common tasks. To view Quick Start demos, select Help > Quick Start in the meeting room
Getting Started Movie ThismoviewalksyouthroughthekeyfeaturesofAcrobatConnect,showingyouhowtostart
an online meeting and collaborate with colleagues in your meeting room. In the meeting room, select Help > Getting
Started Movie.
Resource Center The Resource Center is updated regularly with tutorials, simulations, and best-practices infor-
mation for Acrobat Connect. Select Help > Resource Center in the meeting room.
Support Center The Acrobat Connect Support Center contains current support information, including technical
notes, helpful presentations, and support program details. Select Help > Acrobat Connect Support Center in the
meeting room, or visit www.adobe.com/go/acrobatconnect_support.
Acrobat Connect Professional Adobe Acrobat Connect Professional is a customizable enterprise-wide web confer-
encing solution that lets users conduct online meetings, events, and seminars for groups of all sizes. Acrobat Connect
Professional enables a rich multimedia experience, and includes event recording capabilities, multiple layout
templates, and document sharing libraries. To find out more, select Help > Learn About Acrobat Connect Profes-
sional.
Troubleshooting To view troubleshooting tips for Acrobat Connect and access diagnostic tools such as the
Connection Speed Test, select Help > Troubleshooting in the meeting room.
System requirements
The most complete listing of system requirements for Adobe Acrobat Connect can be found at
www.adobe.com/go/acrobat_connect_sysreqs_en.

ADOBE ACROBAT CONNECT
User Guide
2
Adobe.com
These resources are available on the Adobe website:
Adobe Design Center Offers articles, tips, and tutorials in various formats, including video, Adobe PDF, and HTML.
The content is authored by industry experts, designers, and Adobe publishing partners, and new content is added
monthly. You’ll also find Adobe Studio Exchange, where users download and share thousands of free actions,
plug-ins, and other content. Adobe Design Center is available in English, French, German, and Japanese.
Communities Features forums, blogs, and other avenues for users to share technologies, tools, and information; ask
questions; and find out how others are getting the most out of their software. User-to-user forums are available in
English, French, German, and Japanese; blogs are posted in a wide range of languages.
Using Adobe Help
Browse Help topics
1In the navigation pane, do one of the following:
•To browse by topic, click Contents.
•To browse alphabetically, click Index, and then click a letter.
2Expand items in the navigation pane until you reach the desired topic.
3Click items in the navigation pane to view content in the reading pane.
Search Help topics
1In the navigation pane, click Search.
2Type one or more words in the text box, and click the Search button.
Topics matching the search terms appear in the navigation pane, listed in order of relevance.
Search tips
These tips can help you improve your search results in Help:
•If you search using a phrase, such as “screen sharing,” put quotation marks around the phrase. The search returns
only those topics containing all words in the phrase.
•Make sure that search terms are spelled correctly.
•If a search term doesn’t yield results, try using a synonym, such as “web” instead of “Internet.”
Navigate Help
❖Navigate Help by doing any of the following:
•Expand items in the navigation pane until you reach the desired topic. To view a topic, click its title, either in the
navigation pane or the reading pane.
•Click the navigation links that appear above the topic title in the reading pane.
•Click Previous or Next in the reading pane.
•Click Back or Forward on the toolbar.

ADOBE ACROBAT CONNECT
User Guide
3
You can also navigate Help using accessible keyboard shortcuts. For details, see “Adobe Help and accessibility” on
page 3.
Adobe Help and accessibility
Adobe Help is designed so that it is accessible to people with disabilities—such as mobility impairments, blindness,
and low vision. Adobe Help supports standard accessibility features and alternative keyboard shortcuts for toolbar
controls and navigation.
Supported accessibility features
Adobe Help supports the following standard accessibility features:
•Standard HTML tags define content structure.
•Style sheets control formatting (no embedded fonts).
•Each frame has a title to indicate its purpose.
•Graphics without captions include alternate text.
•If link text doesn’t match the title of the destination, the title is referenced in the Title attribute of the Anchor tag.
For example, the Previous and Next links include the titles of the previous and next topics.
•Content supports high-contrast mode.
•Text size can be changed with standard context menu commands or standard menu commands for Mac OS.
Keyboard shortcuts for toolbar controls
Each control in the toolbar for Adobe Help has a keyboard equivalent in Windows:
Back Alt-left arrow
Forward Alt-right arrow
Print Ctrl-p
Keyboard shortcuts for navigation
To navigate Adobe Help, use the following keyboard combinations in Windows:
•To move between the navigation pane and the reading pane, press Control-Tab and Shift-Control-Tab.
•To move through links within a pane, press Tab or Shift-tab.
•To activate a selected link, press Enter.

4
Chapter 2: Meeting setup
Welcome to Adobe® Acrobat® Connect™, a personal web communication tool that enables you to have real-time,
online meetings whenever you want. It integrates the ability to share and annotate your screen, have a phone
conference, and broadcast live video from your web camera for efficient and productive online meetings.
Acrobat Connect basics
About Acrobat Connect
Adobe Acrobat Connect provides you with a personal online meeting room in which up to 15 people (including the
host) can collaborate via the web in real time. In your meeting room, you and other attendees can share your
computer screens, use text chat, broadcast live video, and review meeting notes.
When you create an Acrobat Connect account, you are provided with a single URL to go to for all your meetings. As
the owner of the meeting room, you can enter it at any time by typing your meeting URL into the address field of a
web browser or by clicking the Start Meeting button in Adobe Acrobat 8, Adobe Reader 8, or another application.
Share your meeting URL with others so that they can attend meetings in your room. For example, you can send the
URL in an e-mail invitation or instant message, or have it printed on your business cards.
Attendees join a meeting by clicking on the meeting URL link or by typing the URL into the address field of a web
browser. Attendees cannot enter the room unless the host is present and has accepted their request to enter. As an
attendee, your capabilities and permissions in a meeting depend on your role, which is assigned by the host. All
attendees can view a shared computer screen, view meeting notes, and chat with other attendees. You can share your
own screen and contribute meeting notes only if the host makes you a presenter.
To take part in a meeting you must have a browser, a copy of the Adobe Flash Player plug-in (version 8 and above),
and an Internet connection. When you share your screen for the first time, you will also be prompted to download
the Adobe Acrobat Connect Add-in.
Three steps to your first meeting
You can start your first online meeting in three basic steps:
1. Create an account.
To start a meeting, you need your own Acrobat Connect account. You can create an account by visiting Adobe.com
or by clicking the Start Meeting button found in software applications such as Adobe Acrobat 8, Adobe Reader 8,
and some Microsoft Office programs.
2. Invite attendees.
ThereisnoneedtoscheduleameetinginadvancewithAcrobatConnect.Youcaninvitesomeonetoameetingon
the spot, or at a specific time, by simply communicating your meeting URL. For example, you can paste the URL in
an instant message or send it in an e-mail invitation. When you are logged in to your meeting room and an attendee
uses the URL to access it, you are notified immediately and must either accept or deny the request to enter your room.
(Attendees cannot access the room unless you are there.)
ADOBE ACROBAT CONNECT
User Guide
5
3. Share your screen.
Now that you and other attendees are in the same room, you can use screen sharing to collaborate and communicate.
Click Share My Screen in the center of the Share pod to get started. From there, you can choose to share your whole
desktop, or only specific windows or applications.
See also
“Log in from any web browser” on page 13
“Invite attendees” on page 13
“Sharing your screen” on page 21
Meeting roles and permissions
Your capabilities for screen sharing and carrying out other activities in a meeting room are determined by your role.
There are three roles for meeting room attendees: host, presenter, and participant.
Host The host is the owner of the meeting room. The host can resize and rearrange the pods in a meeting room,
invite attendees, grant and deny access to the room, and share and annotate their screen. The host can broadcast live
videoandcontroluseoftheCamerapod,changesettingsintheChatpod,andaddcontenttotheNotepod.Thehost
can also assign a participant the role of presenter and clear status indicators in the Attendee List pod.
Presenter Presenters can share and annotate their screens, take notes, broadcast live video, and use text chat. To
facilitate screen sharing or other types of collaboration, presenters can also maximize and restore the viewing area
of each pod. However, presenters cannot move or resize the pods.
Participant Participants can view the shared screen of a host or presenter, broadcast live video, use text chat, and
view the meeting notes. A participant cannot share their screen or contribute meeting notes unless the host makes
them a presenter.
Phone and video conferencing
To make it easy for attendees to participate in the meeting via telephone, the host can display conference call infor-
mation (such as a telephone number and participant code) to attendees as they join the meeting. Phone conference
information can also be viewed at any time during the meeting.
If you have access to a teleconferencing system, you can enter and display those numbers for meeting attendees. Or,
you can choose to display Acrobat Connect phone conferencing information. An Acrobat Connect phone confer-
encing number and host ID is included with your account, along with a participant ID that attendees can use to
phone in to your online meeting. (Regular long-distance rates apply.)
Any attendee whose computer is connected to a web camera can broadcast live video during the meeting. Video
feeds appear in the Camera pod, and are automatically resized as more cameras are shared or stopped. (However,
only the meeting host can resize the Camera pod itself.) Attendees can share, pause, or stop their own cameras
whenever they like; the host and presenters can also stop any of the cameras at any time during the meeting.

ADOBE ACROBAT CONNECT
User Guide
6
See also
“Specify phone conference information” on page 13
“Sharing your web camera” on page 28
Bandwidth and performance
Many network factors affect the performance of the Acrobat Connect application for attendees, including the
bandwidth setting for the meeting room, the connection speed setting for each individual attendee, and the type of
activities being performed in the meeting. For example, higher bandwidth is required to broadcast live video than to
send chat messages.
Optimize room bandwidth The meeting host can specify the bandwidth setting at which the meeting is broadcast.
Options are Modem, DSL/Cable, and LAN. You should match the room bandwidth to the connection speed available
to attendees. For example, only use LAN if all your attendees have access to LAN. If attendees are on a variety of
connection speeds, it is best to choose the slowest speed that attendees are using.
Attendee connection speed Each attendee can choose My Connection Speed from the Meeting menu and select
Modem, DSL/Cable, or LAN. Choose the connection speed that matches your Internet connection type. If you
experience delays in viewing a shared screen or receiving a video broadcast, reduce your connection speed setting.
To test your connection speed, select Help > Troubleshooting in the meeting room. The Connection Speed Test will
start automatically.
The following general guidelines are recommended for room bandwidth settings. Actual speeds may vary according
to each network environment:
•Modem: One presenter can generate around 26 Kbits/second of data. Attendees need around 29 Kbits/second for
a good connection. Having more than one presenter with the Modem setting is not recommended. Screen sharing
with the Modem setting is not recommended.
•DSL/Cable: One presenter can generate around 125 Kbits/second of data. Attendees need around
128 Kbits/second for a good connection. If screen sharing is used, attendees should have 200 Kbits/second.
•LAN: One presenter can generate around 250 Kbits/second of data. Attendees need around 255 Kbits/second. If
screen sharing is used, attendees should have 400 Kbits/second.
See also
“Monitor connection status” on page 15
“Optimize room bandwidth” on page 16
“Choose your connection speed” on page 29
Meeting room and pods
Meeting room overview
Your Acrobat Connect account provides you with one personal meeting room that you can log in to any time you
want to collaborate with someone online. The meeting room becomes available to others only if you (the owner, or
host) are logged in to the meeting room and accept their request to enter.
ADOBE ACROBAT CONNECT
User Guide
7
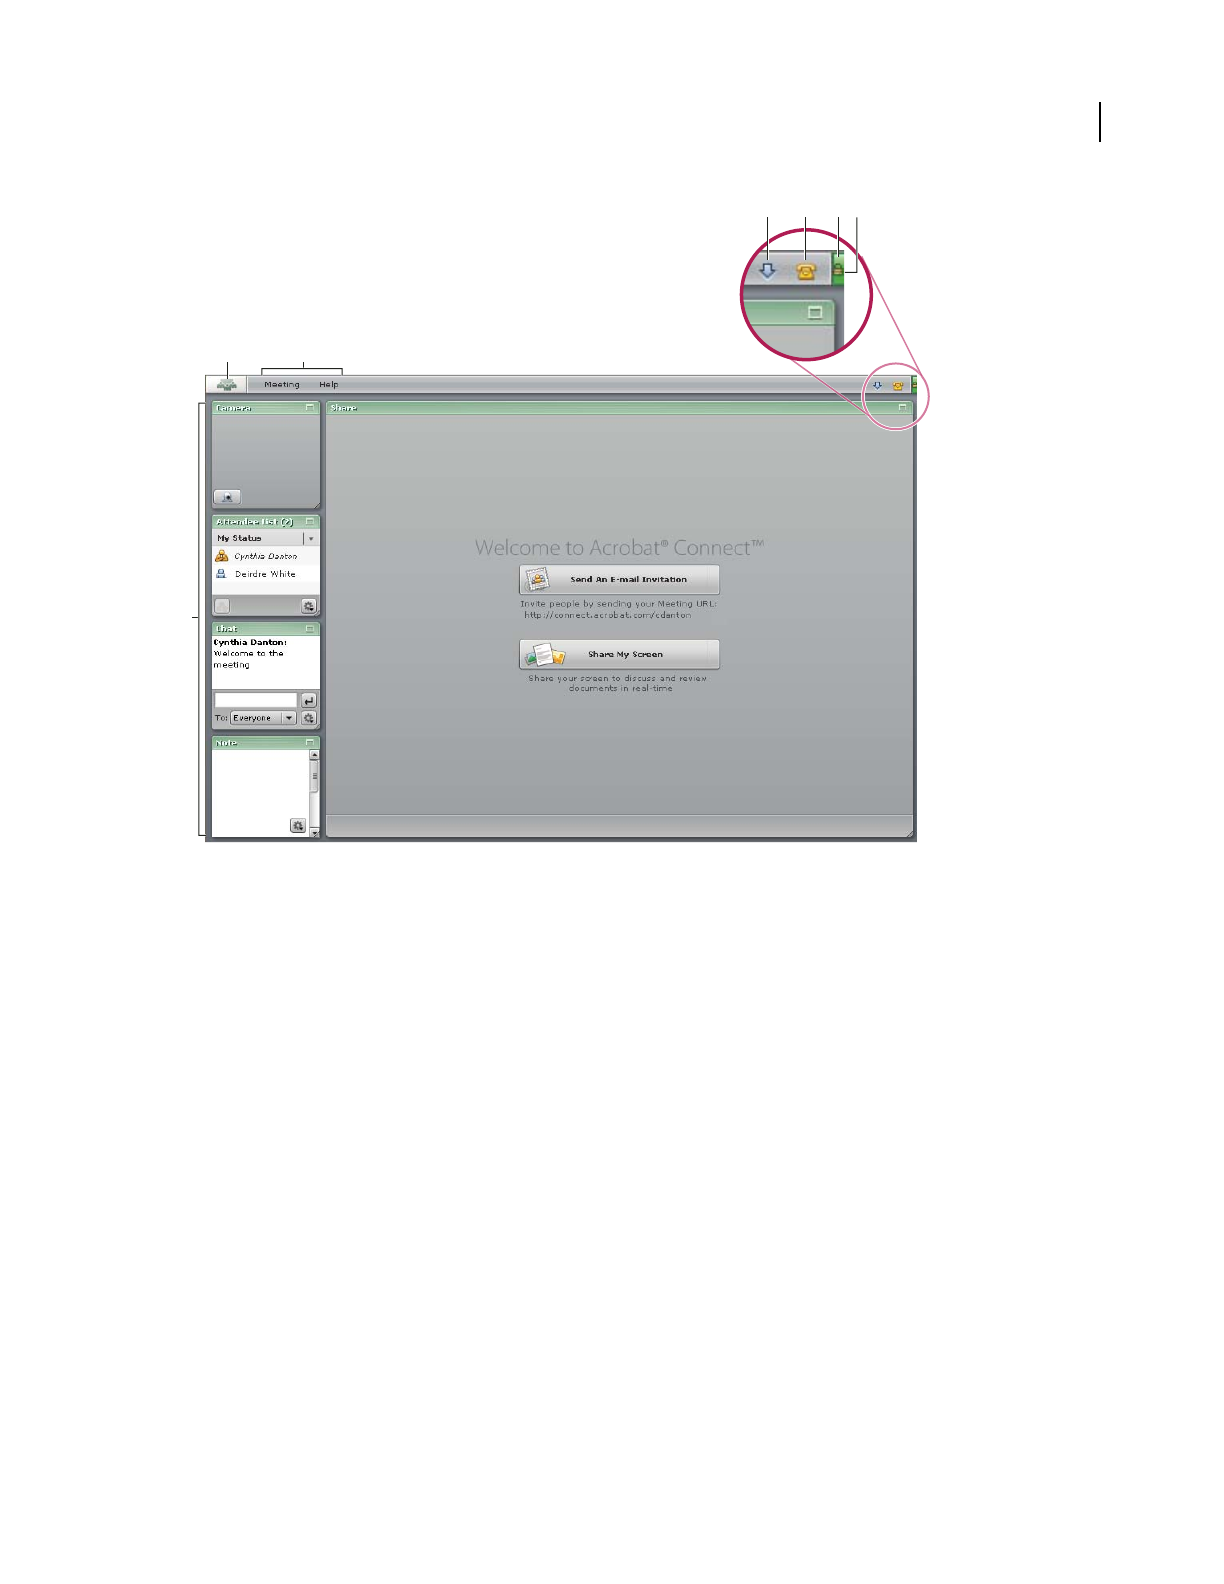
Host’s meeting room
A. ClicktovisittheAcrobatConnectwebsite B. Menus C. When visible, click to install the Adobe Acrobat Connect Add-in D. When visible,
clicktoviewphoneconferencenumbers E. Meeting connection status indicator F. Alocksymbolindicatesthatthemeetingisconnectedover
a secure socket G. Pods
The Acrobat Connect meeting room contains five display panels, called pods, each with its own function:
Share pod Displays shared content from the presenter’s computer (including windows, applications, or the entire
desktop).
Camera pod Allows hosts, presenters, and participants to broadcast live video to all attendees.
Attendee List pod Displays the name, role, and status of each attendee. Allows the host to change an attendee’s role
and monitor connection status.
Chat pod Allows attendees to send chat messages to other attendees.
Note pod Displays text information from hosts or presenters to all attendees.
As the host, you can customize the size and arrangement of the pods in the room for each meeting. After you end
the meeting, the pods will revert to their default sizes and arrangement.
Note: Pods cannot be deleted.
A B
G
C D E F
ADOBE ACROBAT CONNECT
User Guide
8
Share pod
As a host or presenter, you can use the Share pod to share selected windows, selected applications, or your entire
desktop. The shared regions of your screen appear in attendees’ Share pods, and attendees can follow the progress of
your pointer as you move it across your screen. You can also pause the region you are sharing and annotate it, using
one of several annotation tools.
While inactive, the host’s Share pod displays the Send An E-mail Invitation and Share My Screen buttons, and also
displays the meeting URL.
While a screen is being shared, additional tools appear along the bottom of the Share pod:
•
Attendees can use the zoom tool to view the shared content at actual size or scale it to fit the size of their Share pods.
•AhostorpresentercanclickabuttontorequestcontrolofthesharedscreenorclickPodOptionstochangedisplay
settings.
•The person currently screen sharing can click a button to stop sharing, click Pod Options to change display
settings, and click the Adobe Acrobat Connect icon in the taskbar (Windows) or icon bar (Mac OS) to access
commands such as Pause And Annotate, Choose Window To Share, and Stop Control.
The first time you share your screen, you are prompted to install the Adobe Acrobat Connect Add-in. The add-in is
a version of Flash Player with additional features that allow hosts and presenters to share their screens.
See also
“About screen sharing” on page 21
“Annotate or draw on a shared screen” on page 24
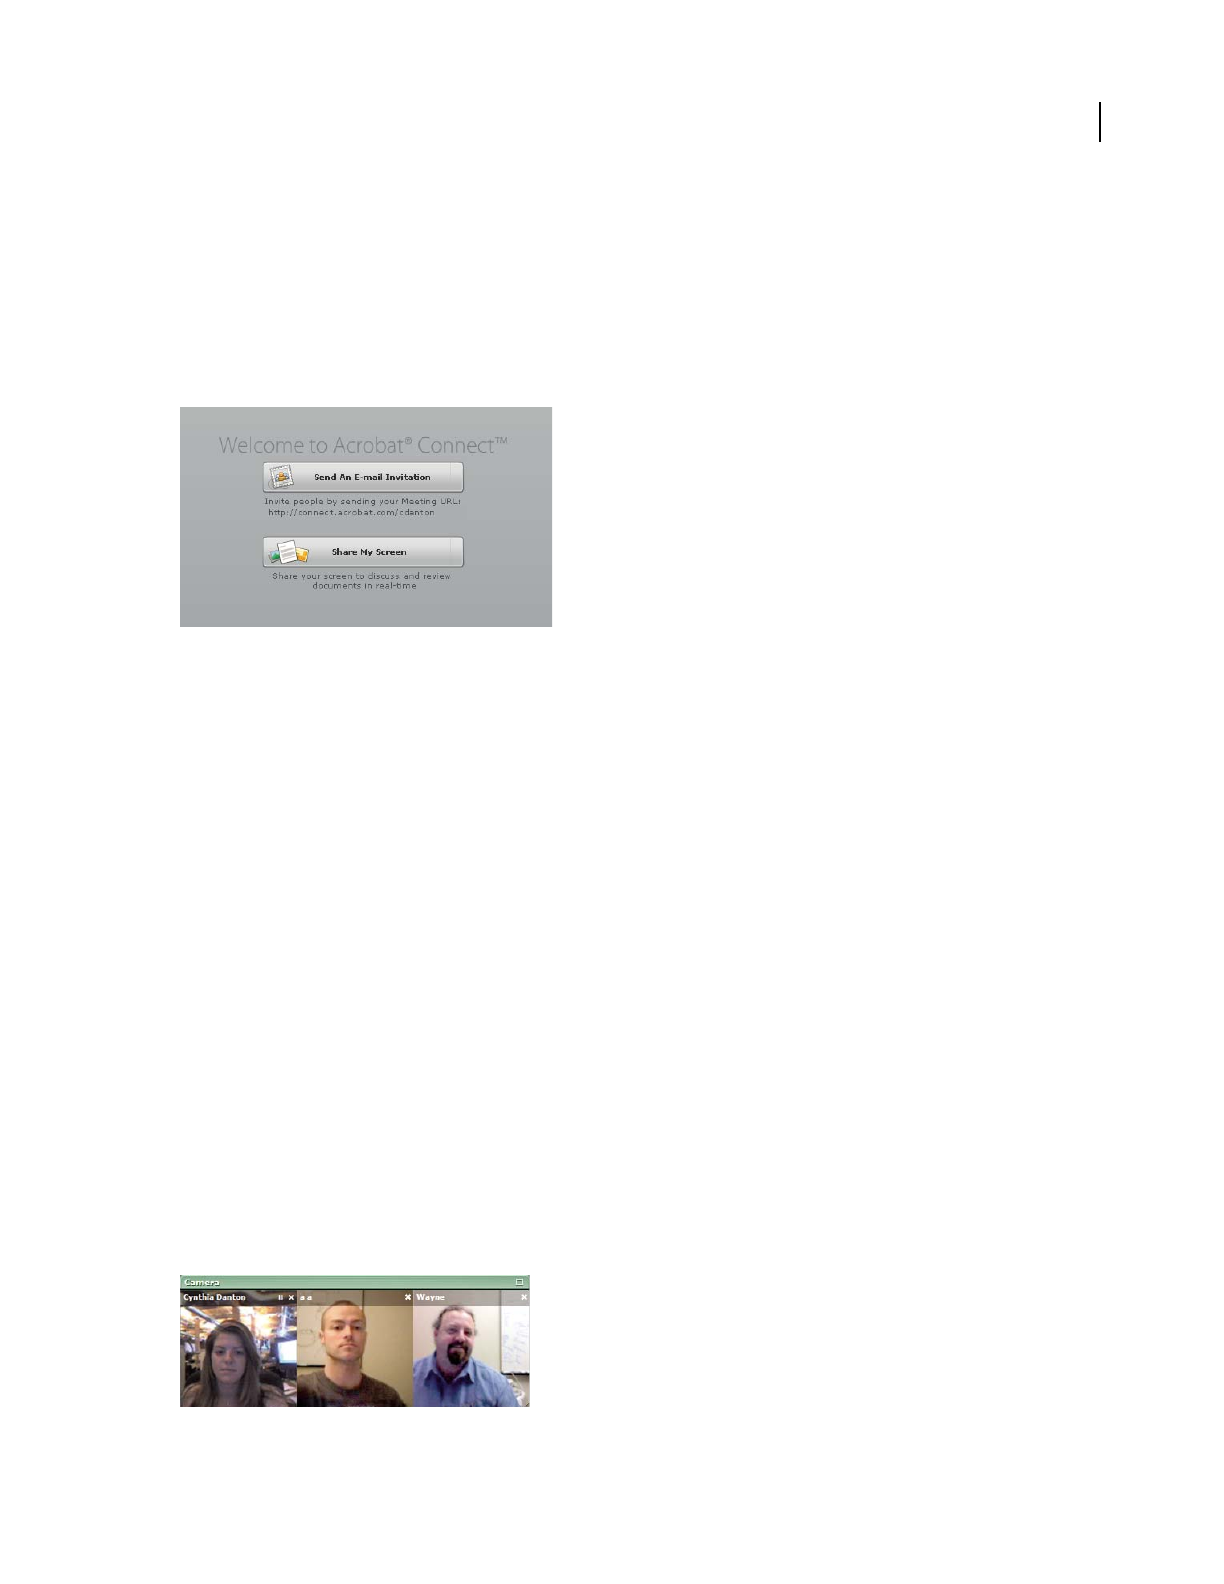
Camera pod
The Camera pod enables meeting attendees to broadcast live video from their web cameras. Attendees can share,
pause, or stop their cameras at any time during the meeting. If needed, the host or a presenter can also stop the
camera of any attendee.
ThesizeandarrangementoftheindividualvideofeedsdisplayedintheCamerapodchangeautomaticallyasmore
attendees share or stop sharing their web cameras. Only the host can change the size of the Camera pod itself.
ADOBE ACROBAT CONNECT
User Guide
9
Note: Broadcasting live video works better with high-speed broadband connections. Viewers with a slower connection
could experience irregular or choppy display.
Attendee List pod
FromtheAttendeeListpod,youcanquicklyseewhoisloggedintoameetingandvieweveryone’snameandoneor
more icons that denote role, meeting status, and connection status. The host is listed first, followed by presenters and
then participants. Within a role group, attendee names are alphabetized.
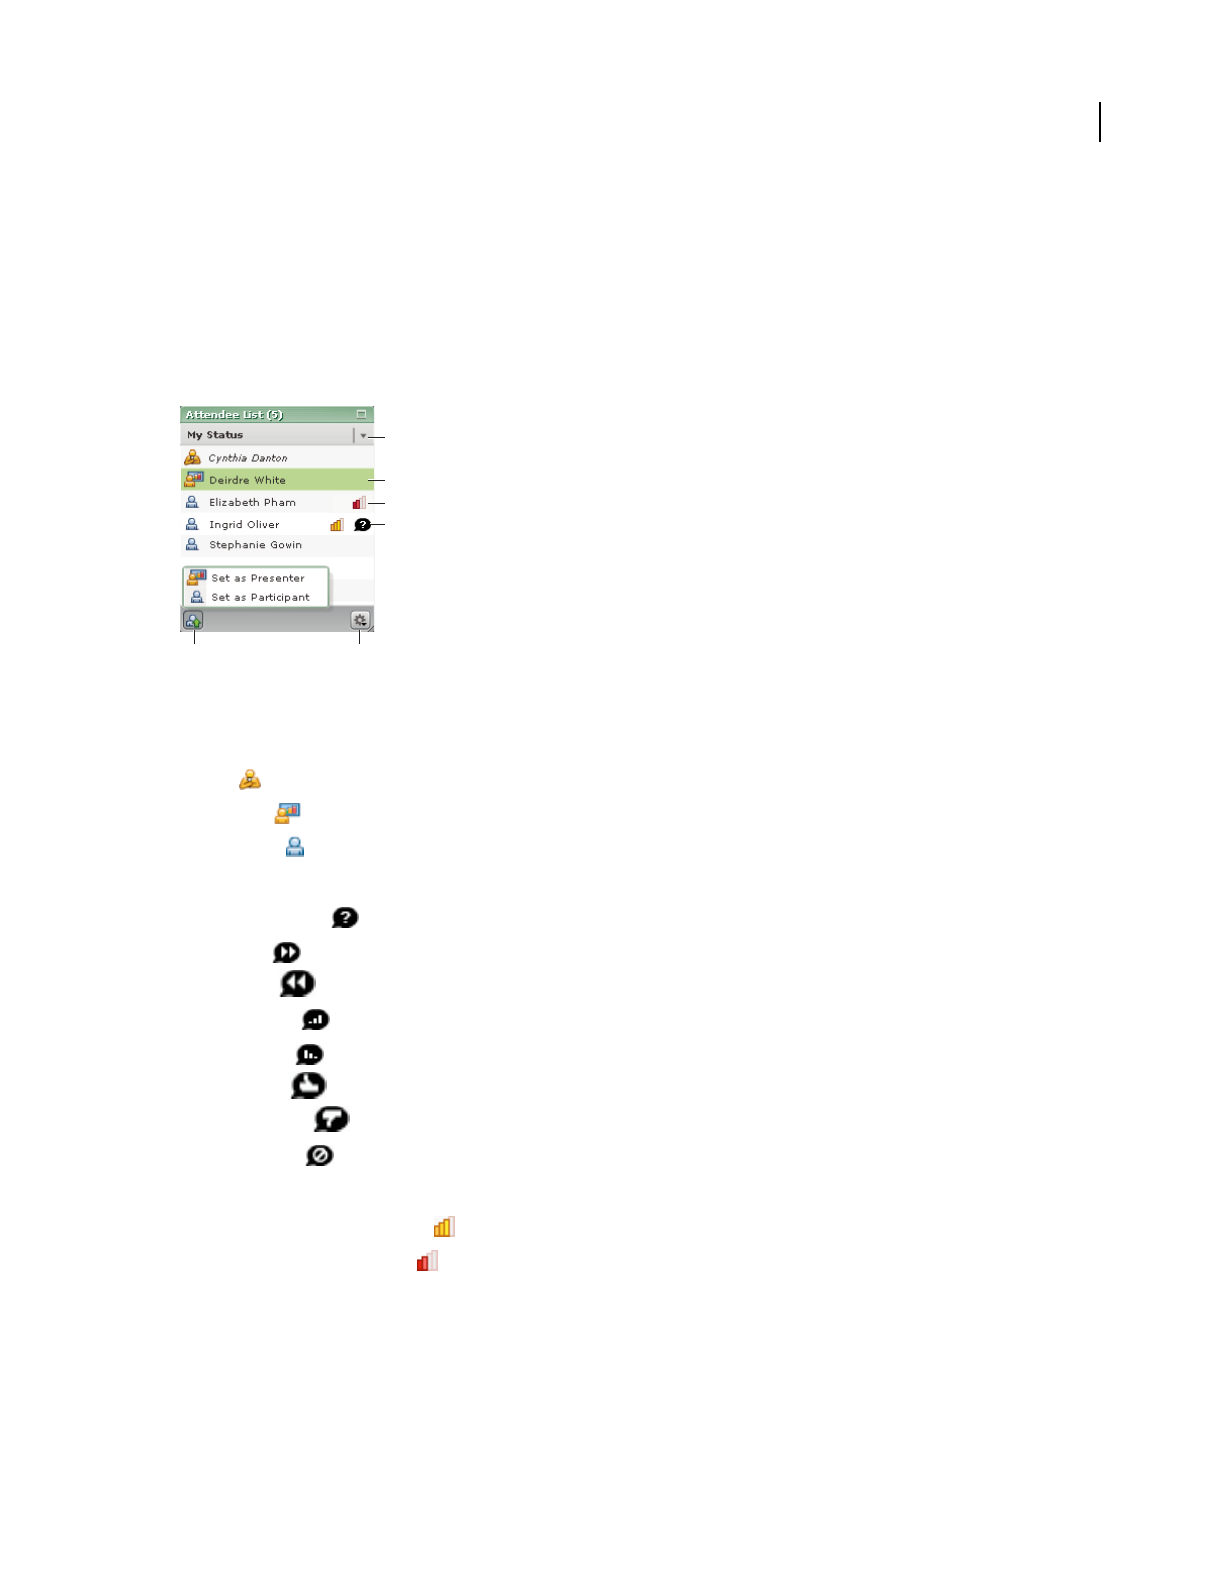
Attendee List pod
A. Set attendee status B. Selected attendee C. Connection status icon D. Attendee status icon E. Set attendee role F. Pod Options
Attendee role icons appear to the left of attendee names:
•Host
•Presenter
•Participant
Attendee status icons, when selected, appear on the right side of the pod:
•I have a question
•Go faster
•Go slower
•Speak louder
•Speak softer
•Thumbs up
•Thumbs down
•Stepped away
Connection status icons, when displayed, appear to the right of attendee names (host view only):
•Moderate connection problem
•Serious connection problem
A
B
C
D
E F

ADOBE ACROBAT CONNECT
User Guide
10
See also
“View or change an attendee’s role” on page 14
“Display or clear your status” on page 28
“Monitor connection status” on page 15
Chat pod
You can use the Chat pod to send a text message to another attendee, to all presenters in the meeting (which includes
the host), or to all attendees.
Chat pod
A. Type your message B. Select a message recipient C. Pod Options (host and presenters only) D. Send the message E. Text messages appear
here
When you receive a text message, your Chat pod shows the sender’s name and the message. If the message was sent
to everyone, the sender’s name is followed by the message. If the message was sent only to you, the sender’s name is
followed by “(privately)” and the text is colored red. If the message was sent only to the presenters, the sender’s name
is followed by “(presenters)” and the text is colored green.
While you are logged in to a meeting room, all the messages you send and receive remain in your Chat pod. When
the host ends a meeting, the Chat pod is cleared. To preserve the chat history, a host or presenter can send out the
contents of the Chat pod in an e-mail message. Any attendee can copy and paste the contents of the Chat pod into
another application.
Note pod
As a host or presenter, you can use the Note pod to show information to all meeting attendees.
Unlike a text message in the Chat pod, text in the Note pod is created only by hosts or presenters. It remains visible
in the Note pod throughout the meeting or until the host or a presenter edits the note. The host and presenters can
also choose text size and alignment options.
A
E
D
BC

ADOBE ACROBAT CONNECT
User Guide
11
When the host ends a meeting, the Note pod is cleared. To preserve the meeting notes, the host and presenters can
sendoutthecontentsoftheNotepodinane-mailmessage.AnyattendeecancopyandpastethecontentsoftheNote
pod into another application.
Your account
View account information
The My Information page displays your user name, your meeting URL and Adobe ID (which you use to log in to
your meeting room), and your current plan.
1In your meeting room, select Meeting > My Account.
2To display the My Information page, click My Information on the left.
Change your password
1In your meeting room, select Meeting > My Account.
2Click My Information on the left, and then click Change Password.
Finding your meeting URL
When you set up your Acrobat Connect account, Adobe sends you an e-mail message that includes your meeting
URL along with other information about your account.
If you are already logged in to your meeting room and the Share pod is not in use, you will see your meeting URL
under the Send An E-mail Invitation button. Or, you can select Meeting > My Account and then click My Infor-
mation.

12
Chapter 3: Hosting a meeting
As the owner of an Adobe Acrobat Connect meeting room, you control the meeting. You can start an online meeting
whenever you want, and you can determine who enters the room and what capabilities attendees will have when they
join the meeting. You can also specify phone conference details and choose an optimal room bandwidth for each
meeting.
Starting a meeting
About starting a meeting
As a host, starting a meeting is as simple as logging in to your meeting room and then inviting others to do the same.
You can send your meeting URL to attendees in an instant message or e-mail invitation, and frequent guests can
bookmarktheURLforfutureuse.Meetingscanbespontaneous,oryoumayhaveprearrangedgroupswhologinto
your meeting room at the same time every week.
Beforeyouinviteattendeestojoinyouintheroom,youmaywanttoresizeorrearrangethemeetingroompods.You
can also set phone conference options in advance, so that attendees are shown the phone number to call as they join
the meeting.
After one or more attendees have joined you in the meeting, you may want to share your screen, broadcast from your
web camera, send text messages, or optimize the bandwidth for the room.
See also
“Meeting room overview” on page 6
“Sharing your screen” on page 21
Log in using the Start Meeting button
You can use the Start Meeting button to access your meeting room login screen or to set up a new Acrobat Connect
account. The Start Meeting button is included in software applications such as Adobe Acrobat 8, Adobe Reader 8,
and some Microsoft Office programs.
1Click the Start Meeting button in the toolbar.
2In the Welcome To Start Meeting dialog box, click Log In.
Note: In Acrobat or Reader, your meeting preferences determine how much login information you need to enter, or if this
dialog box even appears, before your meeting room opens. To change your Acrobat or Reader meeting preferences, select
Edit > Preferences (Windows), Acrobat > Preferences (Mac OS), or Reader > Preferences (Mac OS), and then select
Meeting on the left.
3In the Start Meeting Log In dialog box, type your meeting URL, login, and password (as needed), and then click
Log In.
You can find your login information in the welcome message that was e-mailed to you after you created your
account.

ADOBE ACROBAT CONNECT
User Guide
13
Log in from any web browser
You can access your meeting room login screen by opening a web browser.
1Type your meeting URL in the address bar of a web browser.
The first time you visit your meeting room, bookmark it for quick access the next time you want to start a meeting.
2Select Enter With Your Login And Password.
3Type your Acrobat Connect login and password, and then click Enter Room.
Specify phone conference information
By default, the Acrobat Connect phone conferencing number for your account is displayed to attendees as they join
the meeting. You can change this information before the meeting begins. If you change phone conference infor-
mation while a meeting is in progress, it is displayed to attendees again.
1Select Meeting > Set Phone Conference Options.
2In the Phone Conference Options dialog box, click the triangle button and then select one of the following:
Acrobat Connect phone conferencing An Acrobat Connect phone conferencing number is included with your
account. Choose this option to display the Acrobat Connect phone conferencing number and participant ID to
meeting attendees. As the host, you will also see a host ID, which is specific to your account. (When using Acrobat
Connect phone conferencing, regular long-distance rates apply.)
Other Choose Other to provide customized phone conferencing information to attendees. You can enter a
conference telephone number, participant code, and moderator code, depending on your provider’s phone confer-
encing features.
None Choose None if you do not wish to display any phone conferencing information to attendees.
See also
“Phone and video conferencing” on page 5
“View phone conference information” on page 27
Invite attendees
The simplest way to invite attendees to your meeting room is to paste your meeting URL into an e-mail or instant
message and send it to attendees. From within the meeting room, you can automatically generate an e-mail message
that includes your meeting URL.
❖Do one of the following:
•In the Share pod, click Send An E-mail Invitation.
•In the menu bar, select Meeting > Invite Participants, and then click Compose E-mail.
•In the Attendee List pod, click Pod Options , select Invite Participants, and then click Compose E-mail.
ADOBE ACROBAT CONNECT
User Guide
14
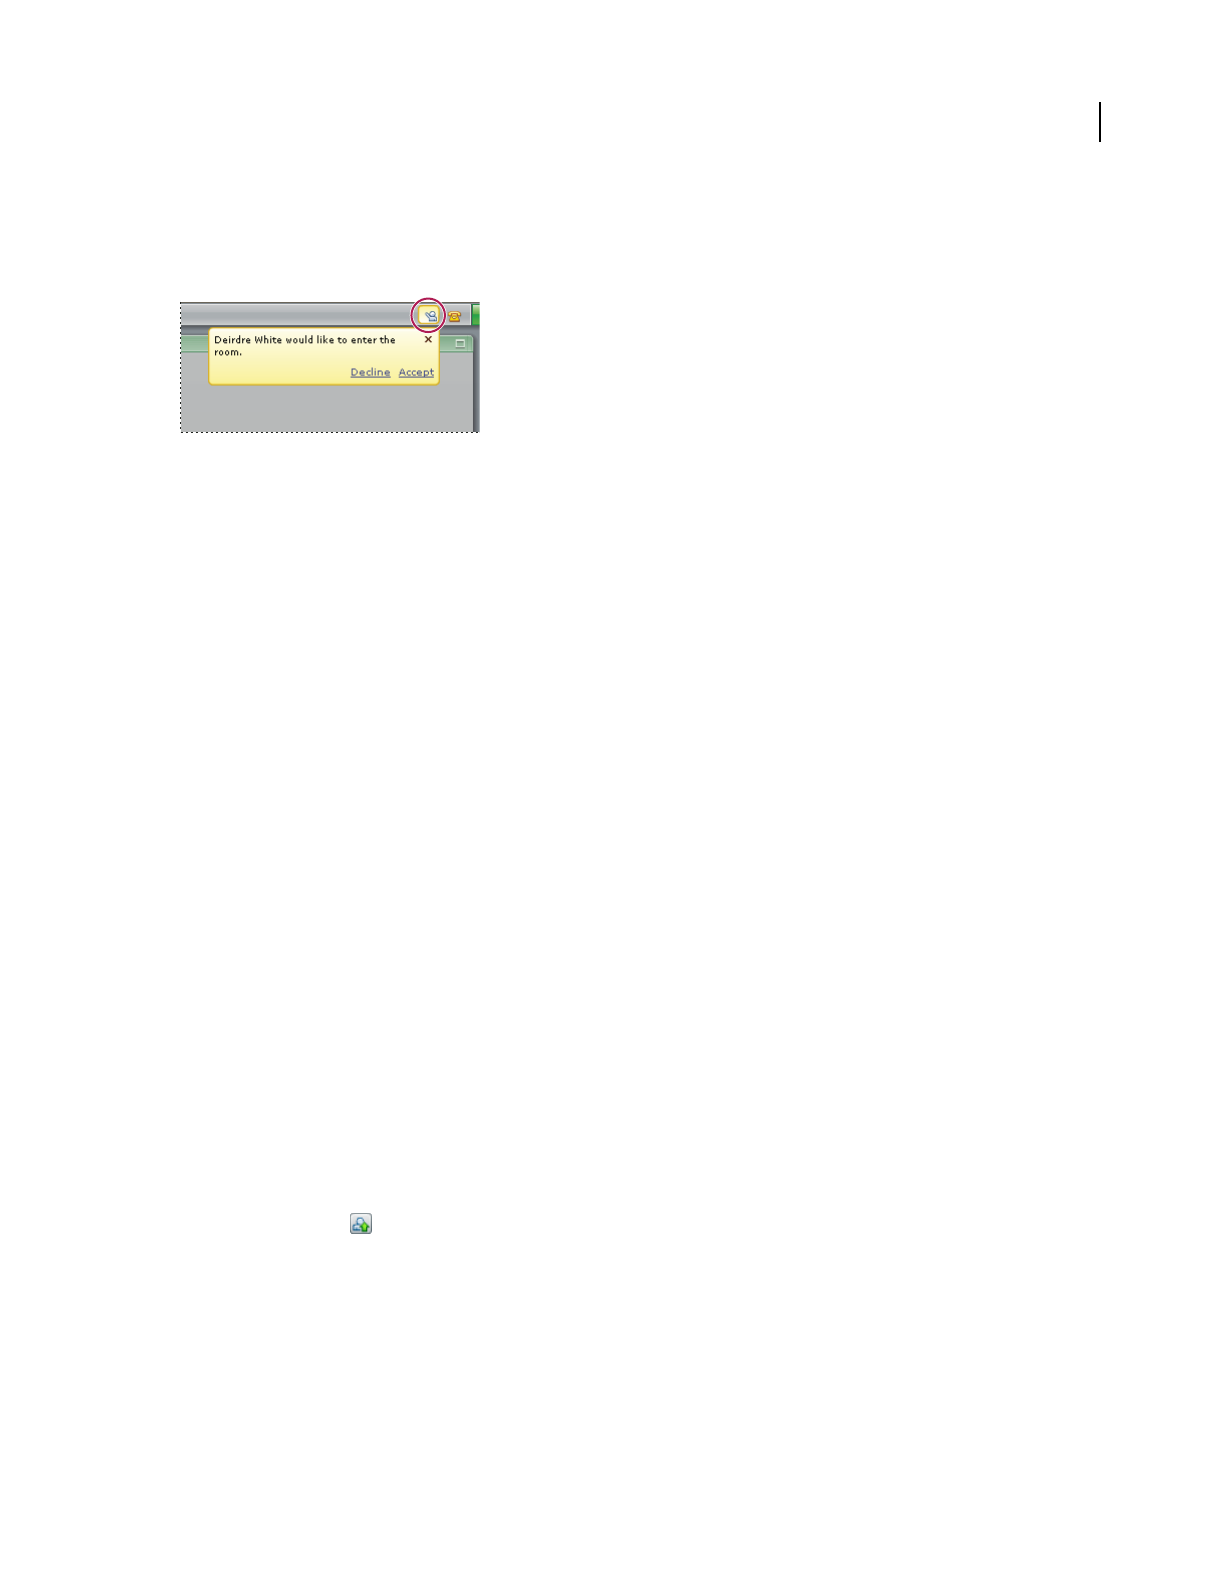
Accept or decline a request to join the meeting
When you are logged in to your meeting room and someone attempts to enter, a notification window appears in the
upper-right corner of the meeting window.
A pop-up notification also appears in the lower-right corner of your screen, which you will see even if the meeting
room is hidden by other windows.
1To allow an incoming attendee to enter your meeting room, click Accept in the notification window.
The meeting room is immediately displayed to the attendee, including the current state of all pods.
2To deny access to an incoming attendee, click Decline in the notification window.
The attendee sees the following message: “Your request to enter has been declined.”
Managing attendees
View or change an attendee’s role
As the meeting host, you can change an attendee’s role from participant to presenter. Becoming a presenter enables
an attendee to share his or her screen and contribute meeting notes. You can also change an attendee from presenter
to participant.
See also
“Meeting roles and permissions” on page 5
“Attendee List pod” on page 9
View information about attendees
❖In the Attendee List pod, move the pointer over each name to view the attendee’s name, meeting role, and
connection status (if any).
Change a participant’s role
1In the Attendee List pod, select a name.
2Click Set User Role in the lower-left corner of the Attendee List pod.
3From the pop-up menu, select Set As Presenter or Set As Participant.
The attendee’s role icon changes and the Attendee list is re-sorted according to role.
Note: As the meeting host, you cannot change your own role.

ADOBE ACROBAT CONNECT
User Guide
15
Make all participants presenters
If you want everyone in your meeting to be presenters, you can automatically set their role to presenter as they join
the meeting.
1Select Meeting > Auto-Promote Participants To Presenters.
2In the notification window, click Yes to confirm your choice.
A presenter icon appears in the upper-right corner of the menu bar to remind you that all attendees will now
come into your meeting as presenters.
Note: This setting will remain in effect, for each new meeting, until you change it. Select Meeting > Auto-Promote Partic-
ipants To Presenters again to remove the check mark and turn this setting off.
Clear attendee status
If an attendee has chosen a status (such as “I have a question” or “Thumbs up”), a status icon is shown by the
attendee’s name in the Attendee List pod. Attendees can change or clear their status at any time during a meeting.
The host can also clear an attendee’s status at any time—for example, after a question has been answered.
1In the Attendee List pod:
•To clear status for one attendee, select the attendee’s name.
•To clear status for all attendees, click Pod Options and then choose Select All.
2Click Pod Options and then choose Clear User Status.
See also
“Display or clear your status” on page 28
“Attendee List pod” on page 9
Monitor connection status
As the host, you monitor the connection status of attendees so that you can optimize bandwidth for the room. You
can turn connection status indicators on or off during a meeting. (Connection status icons are only visible to the
host.)
When Show Connection Status is selected, a group of bars (similar to the bars indicating signal strength on a mobile
phone) may appear next to an attendee’s name in the Attendee List pod. When the attendee’s connection falls below
the current meeting room bandwidth, a yellow or red icon appears. When bandwidth performance meets require-
ments, no icon appears.
See also
“Bandwidth and performance” on page 6
“Choose your connection speed” on page 29
Show connection status icons
1Click Pod Options in the lower-right corner of the Attendee List pod.
2Click Show Connection Status in the pop-up menu, so that a check mark appears.

ADOBE ACROBAT CONNECT
User Guide
16
Hide connection status icons
1Click Pod Options in the lower-right corner of the Attendee List pod.
2Click Show Connection Status in the pop-up menu to remove the check mark.
Interpret and resolve connection status issues
The yellow icon may appear for any of the following reasons:
•The attendee’s connection speed is set to DSL/Cable and the room bandwidth is set to LAN.
•The attendee’s connection speed is set to Modem and the room bandwidth is set to DSL/Cable.
•The attendee’s connection has a latency (data return time) of more than .5 second.
•The attendee’s connection is dropping 5% to 20% of the packets for this user.
The red icon may appear for any of these reasons:
•The attendee’s connection speed is set to Modem and the room bandwidth is set to LAN.
•The attendee’s connection has a latency (data return time) of more than 4 seconds.
•The attendee’s connection is dropping more than 20% of the packets for this user.
For details about connection problems, move your pointer over the attendee’s name to display a tool tip.
•If there is a discrepancy between the attendee’s connection speed and the room bandwidth, the tool tip indicates
the attendee’s connection speed—for example, “Connection: Modem.” The host should optimize room bandwidth
so that it matches the slowest speed attendees are using.
•If the attendee is experiencing latency, the tool tip reads, “Latency: High” or “Latency: Medium.” The attendee may
need to choose a lower connection speed.
•If the attendee’s connection is dropping packets, the tool tip reads, “Drops: 5%-20%” or “Drops: > 20%.“ The
attendee may need to choose a lower connection speed.
Optimize room bandwidth
The meeting host can specify the bandwidth setting at which the meeting is broadcast. As the host, you should match
the room bandwidth to the connection speed available to attendees. If attendees are on a variety of connection
speeds, it is best to choose the slowest speed that attendees are using.
❖
In your meeting room, select Meeting > Optimize Room Bandwidth, and then choose Modem, DSL/Cable, or LAN.
Taking notes
Add text to the Note pod
If you are a host or presenter, you can type information such as meeting notes in the Note pod. Participants can view,
but not change, the contents of this pod.
❖Click in the Note pod to make an insertion point appear, and then begin typing.

ADOBE ACROBAT CONNECT
User Guide
17
See also
“Note pod” on page 10
“Save or e-mail chat history or notes” on page 20
Change Note pod settings
A host or presenter can use the Pod Options button in the lower-right corner of the Note pod to change the size or
alignment of the text. The change will affect all contents of the Note pod, for all attendees.
•To change text size, click Pod Options , select Text Size, and then choose a size.
•To change alignment, click Pod Options and then select Align Left, Align Center, or Align Right.
Chatting with attendees
Send text messages to attendees
YoucanusetheChatpodtosendamessagetojustoneattendee,toallpresenters,ortoallattendees.Besuretoselect
the message recipient before sending the message.
1At the bottom of the Chat pod, click the triangle button and select a recipient:
•Select Everyone to send a message to all attendees.
•Select Presenters to send a message only to attendees with presenter status.
•Select the name of an attendee to send a private message to just one person.
2Click in the small box above the recipient and type your message.
3To send the message, do one of the following:
•Click Send Message .
•Press Enter (Windows) or Return (Mac OS).
The message appears in the top portion of each recipient’s Chat pod.
See also
“Chat pod” on page 10
“Save or e-mail chat history or notes” on page 20
Change text size in the Chat pod
A host or presenter can change the text size in the Chat pod. The change will affect the display of all messages in the
Chat pod, for all attendees.
1Click Pod Options in the lower-right corner of the Chat pod.
2Select Text Size and then choose a size.

ADOBE ACROBAT CONNECT
User Guide
18
Clear messages from the Chat pod
When an empty Chat pod is required in a meeting, a host or presenter can clear all messages for all attendees.
1Click Pod Options in the lower-right corner of the Chat pod.
2Select Clear Chat.
See also
“Save or e-mail chat history or notes” on page 20
Disable chat notifications
If a participant sends you a message when the meeting room is not visible, or while you are sharing your screen, a
notification appears in the lower-right corner of the screen to let you know you have a new message. You can see the
sender’s name and the first few words of the message in the notification window. (The notification disappears after
a few seconds, or you can close it.)
By default, Chat notifications are enabled. As the host or presenter, you can disable these notifications if you don’t
want them to appear to other attendees while you are sharing your desktop.
1Click Pod Options in the lower-right corner of the Chat pod.
2Select Disable Chat Notifications.
A check mark appears, indicating that chat notifications are disabled.
Disable private chat
As a host or presenter, you can prevent participants from chatting privately. When you disable private chat, partici-
pants can send text messages to all presenters or to everyone, but not to individual attendees. However, a host or
presenter can still send private messages to anyone.
1Click Pod Options in the lower-right corner of the Chat pod.
2Click Enable Private Chat For Participants to deselect it.
The check mark is removed, indicating that private chat is disabled.
Video conferencing
Sharing your web camera
If you have a web camera attached to your computer, you can broadcast live video to all meeting attendees.
See also
“Camera pod” on page 8
Share your camera
When you share your camera, your live video feed appears in the Camera pod. The video feeds are automatically
arranged and resized as other attendees share or stop their cameras.
1Click Share My Camera in the Camera pod.

ADOBE ACROBAT CONNECT
User Guide
19
2If the Flash Player displays a prompt requesting access to your camera, click Allow.
Stop your camera
Stopping your camera removes your video feed from the Camera pod.
❖Click the stop button in the upper-right corner of your video feed.
Pause your camera
When you pause your camera, a still image remains visible in the Camera pod.
1Point to the title bar immediately above your video feed.
2Click the pause button that appears to the left of the stop button.
Stop an attendee’s camera
As a host or presenter, you can stop another attendee’s camera at any time. (However, you cannot pause or restart
another attendee’s camera.)
❖Click the stop button in the upper-right corner of the video feed that you want to close.
Ending a meeting
About ending or exiting a meeting
As a host, you can end a meeting by selecting Meeting > End Meeting. This gives you an opportunity to customize
a closing message for the attendees and direct them to another URL for further information.
If the host ends a meeting by selecting Meeting > Exit Acrobat Connect or by simply closing the meeting room
window, the meeting stays open for other attendees, who can continue to collaborate for 10 minutes. After 10
minutes, they are notified that the meeting room will close in 1 minute.
End a meeting
1Select Meeting > End Meeting.
2In the End Meeting dialog box:
•To customize a closing message to the meeting attendees, replace the text in the box under Show This Message To
Everyone.
•To open a new website for attendees after the meeting room closes, select Open This URL For Participants and
type the URL.
3To save these settings for future meetings, click Save Message.
You are returned to the meeting room. Select Meeting > End Meeting again.
4To end the meeting, click OK.
The meeting room closes for all attendees, and the closing message appears. As the host, you can reopen this meeting
by clicking the Start Meeting button that appears on your closing screen.
Timing out of a meeting
As a host, if you are alone in your meeting room for longer than 20 minutes, you will see a warning message, and
must click the I’m Still Here button in order to keep the meeting room open.

ADOBE ACROBAT CONNECT
User Guide
20
IfyoudonotclicktheI’mStillHerebuttonwithinthespecified time period, your meetingwillbedisconnectedand
a notification window will appear. You may be able to restart the meeting so that you can either invite new attendees
or save the chat history and notes.
A single meeting can last no longer than three hours. After three hours of continuous use, the meeting room will
close and all attendees will see a basic closing message. If you would like to continue to share information after this
point, you can restart the meeting and invite attendees to join again.
Save or e-mail chat history or notes
To preserve the meeting notes or chat history, any attendee can copy the contents of the Chat or Note pod and paste
the text into another application. As a host or presenter, you can also send the contents of the Chat or Note pod to
an e-mail recipient.
❖Click Pod Options , and then select E-mail Notes or E-mail Chat History.
Note: These commands are available only if the Adobe Acrobat Connect Add-in is installed. (You are prompted to install
the add-in the first time you share your screen.)
Getting meeting data
View meeting room activity
The Meeting Room Activity page provides a list of all meetings you have held in your room, including the number
of attendees and session length for each meeting.
1In your meeting room, select Meeting > Meeting Information.
2Click Meeting Room Activity on the left.
3To reorder the list of meetings, do one of the following:
•Click Session to sort the list by date.
•Click People to sort the list by number of attendees.
•Click Minutes to sort the list by meeting length.
4To view the attendees for each meeting, click the triangle next to the session date.
View attendee data
The Meeting Room Attendees page lists everyone who has ever visited your meeting room, including the total
number of minutes and specific dates and times they visited your room.
1In your meeting room, select Meeting > Meeting Information.
2Click Meeting Attendees on the left.
3To reorder the list of attendees, do one of the following:
•Click People to sort the list by attendee name.
•Click Minutes to sort the list by number of minutes.
4Toseealistofthedatesandtimesduringwhichsomeonevisitedyourmeetingroom,clickthetrianglenexttothe
attendee name.

21
Chapter 4: Screen sharing
Screen sharing is a great way to review documents, provide software training, and collaborate on other types of
projects—and always be sure that people are on the same page. When others can view your screen, you can work
together without worrying about version control or platform compatibility, or even having the same programs
installed.
Sharing your screen
About screen sharing
Screen sharing allows you to collaborate with your colleagues on a variety of documents, regardless of differences in
operating system or installed software. For example, you can display the contents of a document, demonstrate an
action within an application, or share a presentation that is running on your computer. While screen sharing, you
can also pause the currently shared item and then annotate or draw on it using one of several annotation tools.
When you share your computer screen, actions you take in the shared region are visible to all attendees in the
meeting. Viewers can follow the progress of your pointer as you move it across your screen.
There are three ways you can share your screen:
Desktop When you share your entire desktop, attendees see everything that happens on your computer screen,
including e-mail pop-ups, alerts, and all visible windows and applications. This option is best when your demon-
stration involves several applications and windows, or when the areas you want to share are layered on top of each
other. You can pause a shared desktop and annotate everything that is currently visible.
Application If you choose this option, you can select from a list of applications currently running on your computer.
Only the applications you select will be visible to attendees (along with any windows associated with the applica-
tions). Use this option if you want to demonstrate functionality or share documents that can be opened in one or
more applications.
Window Ifyouchoosethisoption,youcanselectfromalistofwindowscurrentlyopenonyourcomputer.Onlythe
windows you select will be visible to attendees. Use this option if you want to share or annotate only the information
that appears in one or more windows.
Note: If you share control of your screen while sharing the entire desktop, the person controlling your screen also has
access to your entire computer system. Sharing only an application or window is a more secure way to share information,
as it limits what attendees can see or access.
ADOBE ACROBAT CONNECT
User Guide
22
When you are sharing windows or applications, the regions that you share must be visible on your desktop in order
to be visible in the Share pod to other attendees. If you are sharing a window or application, and a window you are
not sharing covers it, the overlapped area will appear as a blue cross-hatched pattern in the Share pod.
See also
“Share pod” on page 8
“Annotating a shared screen” on page 24
Share your computer screen
You can share your screen if you are the host or a presenter.
See also
“Annotate or draw on a shared screen” on page 24
Start screen sharing
1In a meeting room, do one of the following:
•Click Share My Screen in the middle of the Share pod.
•Select Meeting > Share My Computer Screen.
If you do not have a supported version of the Adobe Acrobat Connect Add-in, a dialog box asks whether you want
to install it. The add-in supports screen sharing. Click Allow to download the add-in.
2In the Start Screen Sharing dialog box, do one of the following:
•Select Desktop to share your entire desktop. If you have more than one monitor connected to your computer, a
desktop appears for each monitor. Choose the desktop that you want to share.
•Select Windows to share one or more windows that are open on your computer. Choose the windows that you
want to share.
•Select Applications to share one or more applications that are running on your computer. Choose the applications
that you want to share.

ADOBE ACROBAT CONNECT
User Guide
23
3Click the Share button.
Stop screen sharing
❖Do one of the following:
•In the taskbar (Windows) or icon bar (Mac OS), click the Adobe Acrobat Connect icon and select Stop Screen
Sharing.
•At the top of a shared window or application, click the red Stop Sharing button.
•At the bottom of the Share pod, click Stop Sharing.
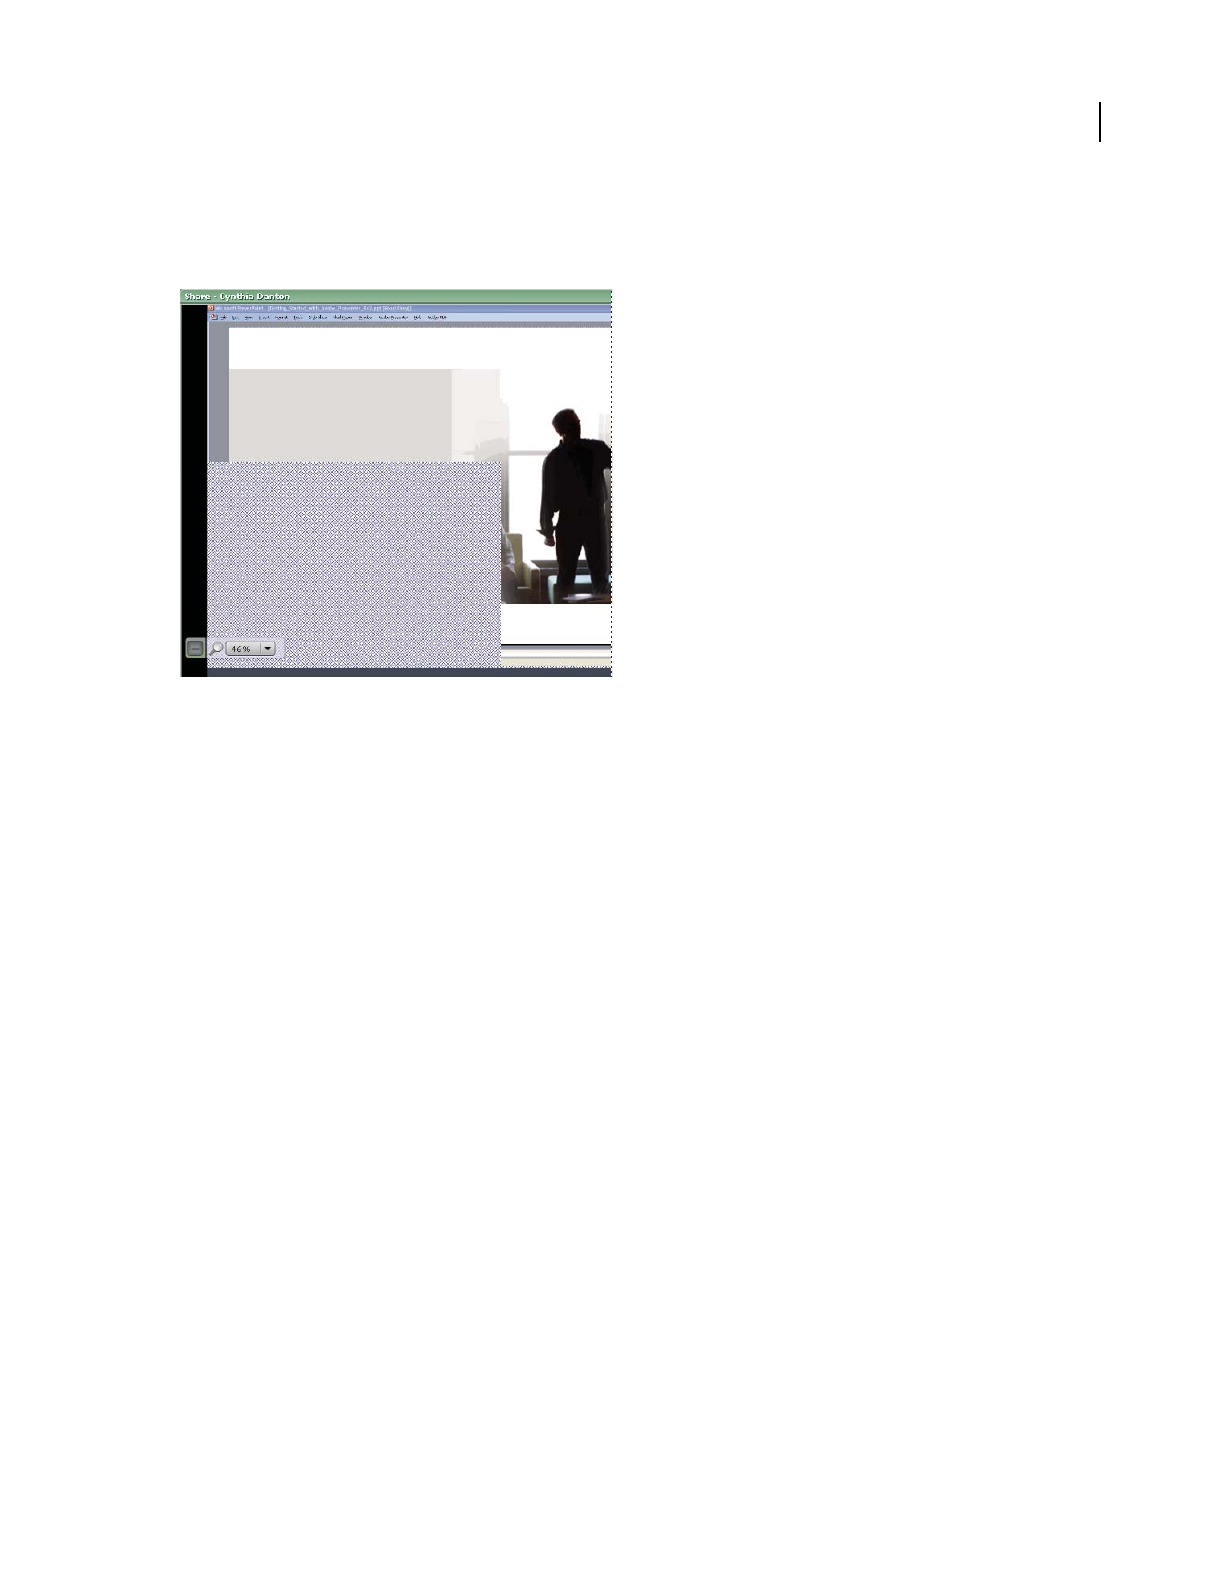
Previewing the shared screen
When sharing an application, window, or desktop, you can preview the shared region in your meeting room. (You
can also see a still preview of the shared region when you pause and annotate a shared screen.)
❖In the meeting room, do one of the following:
•Click Pod Options in the lower-right corner of the Share pod, and select Preview In Pod While Screen Sharing.
•Click Show Participant View in the lower-left corner of the Share pod.
Note: If you preview in the Share pod while sharing your desktop, the application broadcasts and plays itself back
repeatedly, producing a recursive window-in-window effect. If you preview in the Share pod while sharing a window or
application, arrange visible windows to avoid covering the shared region.
Maximize and restore the Share pod
A host or presenter can maximize the Share pod to the full size of the meeting room for all attendees. This will cover,
but not close, the other pods in the room.
1To enlarge a pod so that it fills the entire meeting room window, click Maximize in the upper-right corner of
the pod.
2To return the pod to its original size, click Restore Pod .
Request and release control of a shared screen
While screen sharing, you can pass control of the shared desktop, window, or application to the host or to another
presenter. The host or presenter must request control, and you see a request message in the lower-right corner of the
meeting room window that you can accept or decline. The owner of the shared screen can take back control at any time.
Request control of a shared screen
❖Click the Request Control button in the lower-left corner of your Share pod.
If the request is accepted, a message informs you that you have been granted control of the screen. The Request
Control button becomes a Release Control button. You can now take control of the shared screen.
Release control of a shared screen
❖Click the Release Control button in the lower-left corner of the Share pod to return control of the shared screen
to the original presenter.
ADOBE ACROBAT CONNECT
User Guide
24
Take back control of a shared screen
If you are the owner of a shared screen that another attendee is controlling, you can take back control of it at any time.
•If you are sharing your entire desktop, click the Acrobat Connect Add-in icon in the system tray (Windows) or
icon bar (Macintosh), and select Stop Control.
•Click Pod Options in the lower-right corner of the Share pod and select Stop Control.
Annotating a shared screen
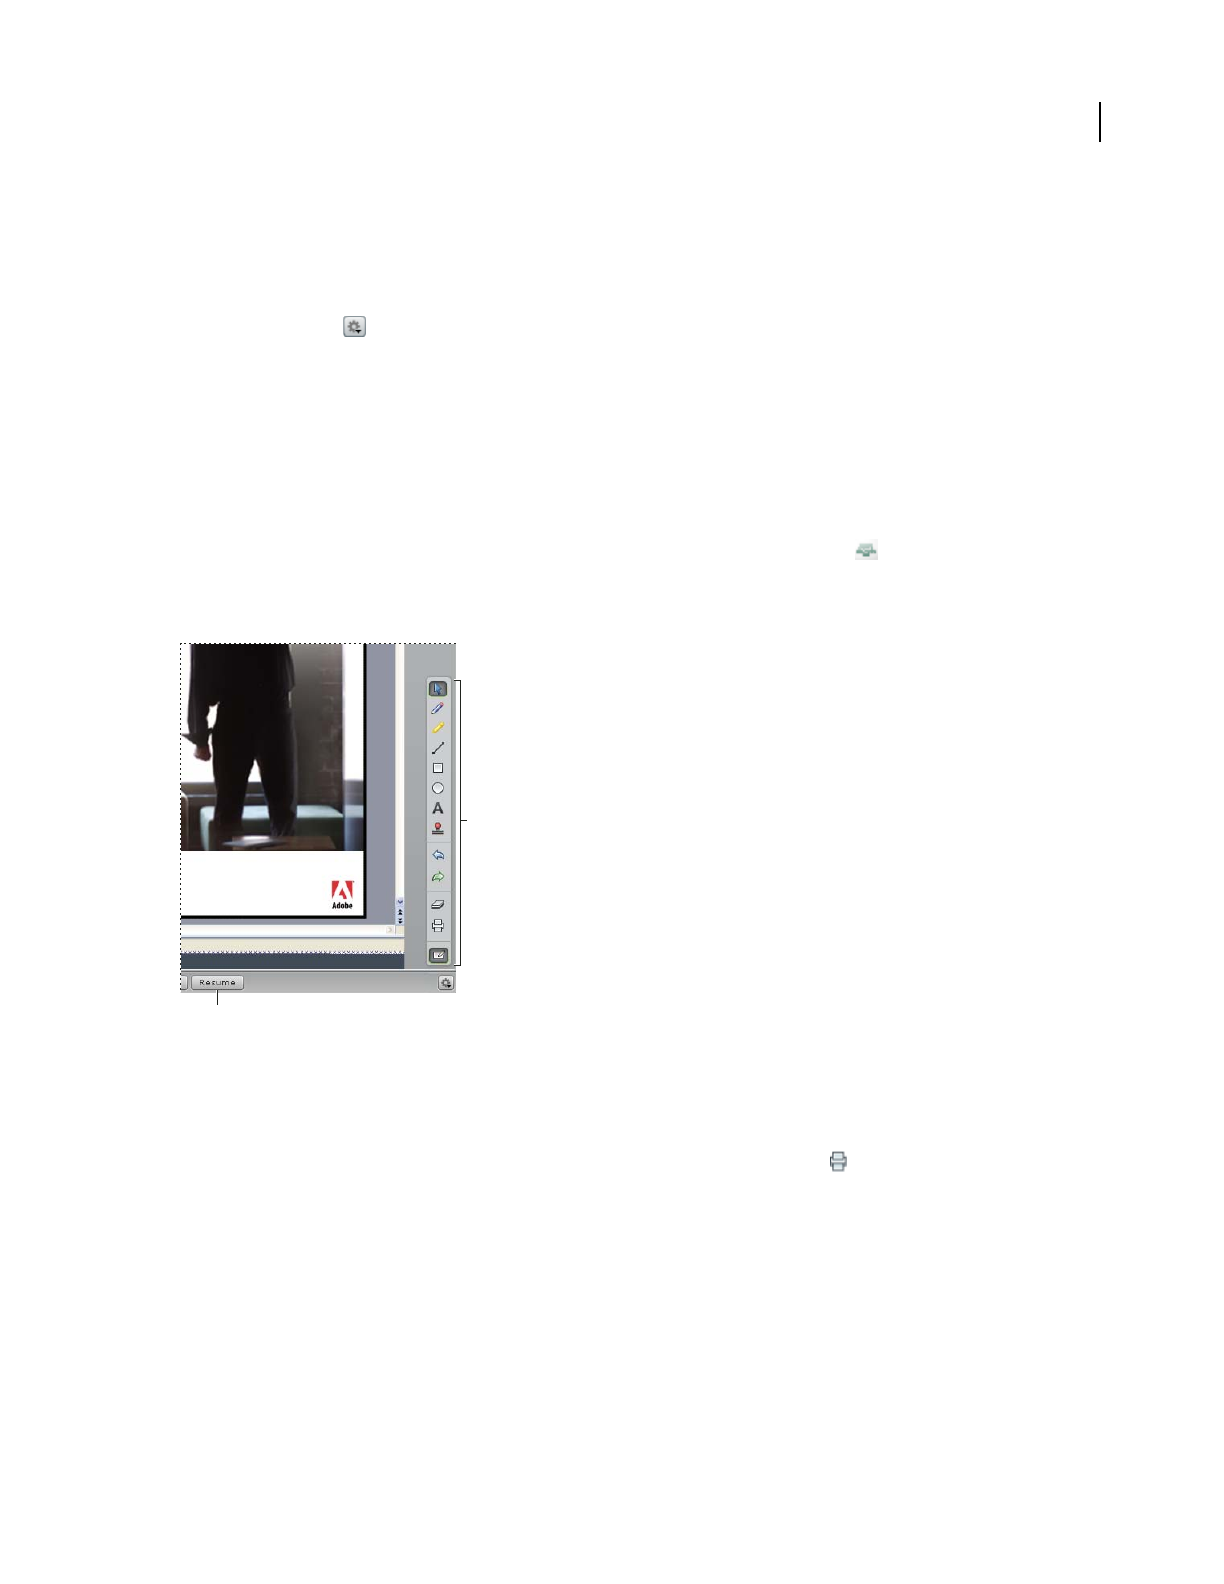
Annotate or draw on a shared screen
While sharing your screen, you can pause the shared region so that you can annotate or draw on it.
1In the taskbar (Windows) or icon bar (Mac OS), click the Adobe Acrobat Connect icon and select Pause And
Annotate.
The shared screen is displayed in the Share pod, along with a set of annotation tools.
Shared screen paused for annotation
A. Annotation tools B. Resume button
2Use the annotation tools to mark up the shared screen. For example, you can add arrows, shapes, stamps, and text
comments.
3To print a copy of the shared region along with the annotations, click the Print tool .
4When you finish annotating the shared screen, click the Resume button.
The annotations and annotation tools are removed, and your screen continues to be shared as it was before you
started annotating.
A
B

ADOBE ACROBAT CONNECT
User Guide
25
Annotation tools
The host and presenters can use the following tools to annotate the window, application, or desktop they are
currently sharing:
Selection tool Selects an annotation already drawn in the Share pod. Click an annotation to select it, or drag to
create a selection rectangle that selects all the annotations within the rectangle. The selection rectangle has eight
control points for resizing the selected annotation. Shift-drag a corner control point to maintain the aspect ratio
when you resize. Select and drag an annotation to move it. To add an annotation to the selection, Shift-click it.
Pencil tool Drawsafreehandshapeorline.Youcancustomizestrokecolorandstrokeweightbyusingthecolor
picker and stroke weight pop-up menu at the lower-right corner of the Share pod.
Marker tool Highlights a portion of the shared screen. You can customize stroke color and stroke weight by using
the color picker and stroke weight pop-up menu at the lower-right corner of the Share pod.
Line tool Draws a line between two points. You can customize stroke color and stroke weight by using the color
picker and line width pop-up menu at the lower-right corner of the Share pod. To create arrows, use the arrow
buttons at the lower-right corner of the Share pod. Hold down the Shift key while drawing to make the line snap
every 45 degrees.
Rectangle tool Creates square and rectangle shapes. You can customize stroke color, fill color, and stroke weight
by using the color picker and the stroke weight pop-up menu. You can use No Fill as a setting for stroke color and
fillcolor;however,youcannotuseNoFillforbothstrokecolorandfillcolor.Dragtoexpandtheshape.Tomakethe
rectangle a square, hold down the Shift key while drawing.
Ellipse tool Creates circle and ellipse shapes. You can customize stroke color, fill color, stroke weight, and trans-
parency by using the pop-up menus at the lower-right of the Share pod. Drag to expand the shape. To make the
ellipse a circle, hold down the Shift key while drawing.
Text tool Creates a text box. Drag to create a text area where you can type. Press Enter or Return to create
multiple lines. You can customize fill color, font face, and font size by using pop-up menus at the lower-right of the
Share pod.
Stamper tool Creates a check mark, arrow, star, or cross (X) on the screen. A check mark is the default stamp.
Youcanchangethestampimageandcustomizeimagecolorandshapesizebyusingthepop-upmenusatthelower-
right corner of the Share pod.
Undo Rescinds the previous action. You can undo the following actions: drawing a shape, moving a shape,
resizing a shape, clearing the annotations, and changing a shape’s property. There is no limit to the number of times
you can perform this operation in the pod.
Redo Performs a previously undone action.
Clear Erases all annotations in the Share pod.
Print Creates a printed copy of the shared screen, including annotations.

26
Chapter 5: Attending a meeting
Joining an online meeting can be as simple as visiting a website and making a phone call at the same time. If you are
attending the meeting as a participant, your role is to watch and listen and provide feedback as needed—either by
using text chat or the phone. If the host makes you a presenter, you can share your screen and contribute meeting
notes.
Joining or exiting a meeting
Entering a meeting room
To enter a meeting room as an attendee, all you need is the host’s meeting URL. The host may send this URL in an
e-mail invitation or instant message, or you may have bookmarked it from a previous meeting. From the login
screen, you can enter the meeting as a guest by typing the name you want displayed to other meeting attendees. Or
if you have your own Acrobat Connect account, you can enter by typing your login name and password. The host
receives your request to enter the room and can accept or decline it.
Note: If the host has not yet entered the meeting room, you are asked to wait. After the host has started the meeting and
accepted your request, your browser displays the meeting room.
See also
“Meeting room overview” on page 6
Join a meeting
1Do one of the following:
•If you received an invitation via e-mail or instant message, click the meeting URL in the message.
•Type the meeting URL into a web browser.
2 In the meeting login screen:
•If Enter As A Guest is selected, type your name.
•If you have an Acrobat Connect account, select Enter With Your Login And Password, and then type your login
information.
3Click Enter Room.
If the host is logged in to the meeting and accepts your request to enter, the meeting room window will open on your
screen.
See also
“Meeting room overview” on page 6

ADOBE ACROBAT CONNECT
User Guide
27
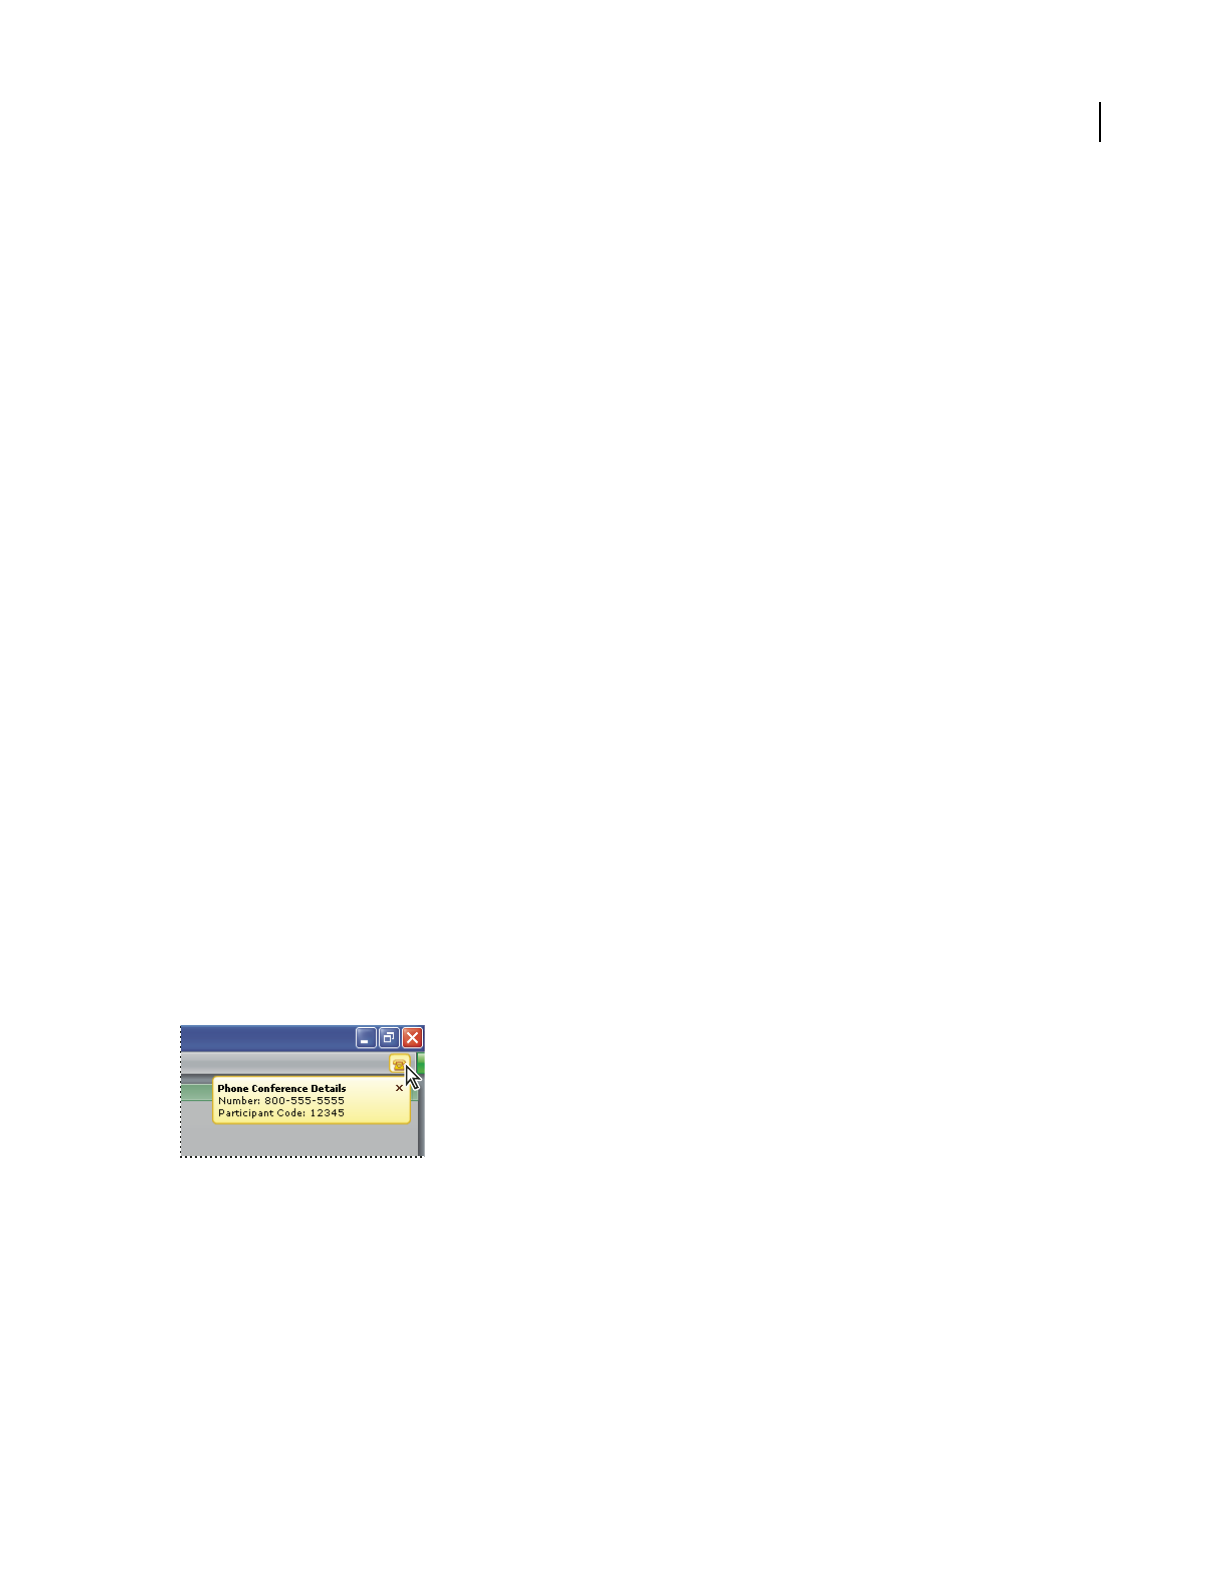
View phone conference information
If the host has specified phone conferencing information for the meeting, you will see those numbers in the center
of the screen when you enter the room. Phone conference numbers are also displayed in a yellow box in the upper-
right corner of the screen, which you can close if needed.
❖To display the phone conferencing numbers for your meeting, click the yellow phone in the upper-right
corner of the screen.
Exit a meeting
As a participant or presenter, you can leave the meeting at any time by doing one of the following:
•Close the browser window.
•Select Meeting > Exit Acrobat Connect. (This command is available if you have installed the Acrobat Connect
Add-in.)
Your name is removed from the Attendee list, you will no longer see what the host or presenter is sharing, and you
will no longer have access to the meeting notes or chat history.
See also
“Save or e-mail chat history or notes” on page 20
Using text chat, notes, and video
Chat with other attendees
You can send a public text message to all attendees or all presenters. You may also be able to send a private text
message to a single attendee. Be sure to select the message recipient before sending the message.
1At the bottom of the Chat pod, click the triangle button and select a recipient:
•Select Everyone to send a message to all attendees.
•Select Presenters to send a message only to attendees with presenter status (this includes the host).
•Select the name of an attendee to send a private message to just one person.
Note: If individual attendees are not listed in this menu, private chat has been disabled for your meeting; you can only
send text messages to Presenters or Everyone.
2Click in the small box above the recipient and type your message.
3To send the message, do one of the following:
•Click Send Message .
•Press Enter (Windows) or Return (Mac OS).
The message appears in the top portion of each recipient’s Chat pod.
See also
“Chat pod” on page 10

ADOBE ACROBAT CONNECT
User Guide
28
Viewing meeting notes
Meeting notes or additional information may appear in the Note pod. If needed, use the scroll tab on the right side
of the pod to view all of the notes.
As a participant, you will not be able to type in this pod. However, if you are a presenter, you are able to edit the
contents of the Note pod and change text size and alignment settings.
See also
“Note pod” on page 10
“Change Note pod settings” on page 17
“Save or e-mail chat history or notes” on page 20
Sharing your web camera
If you have a web camera attached to your computer, you can broadcast live video to all meeting attendees.
See also
“Camera pod” on page 8
Share your camera
When you share your camera, your live video feed appears in the Camera pod. The video feeds are automatically
arranged and resized as other attendees share or stop their cameras.
1In the Camera pod, click Share My Camera .
2If the Flash Player displays a prompt requesting access to your camera, click Allow.
Stop your camera
Stopping your camera removes your video feed from the Camera pod.
❖Click the stop button in the upper-right corner of your video feed.
Pause your camera
When you pause your camera, a still image remains visible in the Camera pod.
1Point to the title bar immediately above your video feed.
2Click the pause button that appears to the left of the stop button.
Attendee status and roles
Display or clear your status
You can communicate requests or issues to presenters or other attendees by displaying a status icon next to your
name. You can choose an icon to indicate any of the following:
•I have a question
•Go faster

ADOBE ACROBAT CONNECT
User Guide
29
•Go slower
•Speak louder
•Speak softer
•Thumbs up
•Thumbs down
•Stepped away
When you select a status, the icon appears to the right of your name. You can clear your status at any time during a
meeting. The meeting host can also clear your status—for example, after a question has been answered.
1Click My Status in the Attendee List pod.
2Select the status that you want to show, or click Clear My Status.
See also
“Attendee List pod” on page 9
Choose your connection speed
To ensure that data from the meeting will be delivered at a speed appropriate for your system, choose a connection
speed according to on the type of Internet connection you have. For example, if you connect to the Internet over DSL,
choose DSL/Cable for your meeting connection speed.
❖Select Meeting > My Connection Speed and then choose Modem, DSL/Cable, or LAN.
To test your connection speed, select Help > Troubleshooting in the meeting room. The Connection Speed Test will
start automatically.
See also
“Bandwidth and performance” on page 6
Presenting at a meeting
When you join a meeting, your default role is participant. As a participant, you can view information shared by a
presenter, view video and meeting notes, and chat with other attendees.
If you are a presenter in a meeting, you can share your screen, type in the Note pod, change pod settings, and
maximize and restore various pods in order to facilitate your presentation. Only the meeting host can promote a
participanttothepresenterrole.Thehostcanchangetheroleofanindividualparticipant,ormaychoosetohaveall
attendees enter the meeting as presenters instead of participants.
Note: As a presenter, you will be prompted to download and install the Adobe Acrobat Connect Add-in the first time you
share your screen.
See also
“Meeting roles and permissions” on page 5
“Meeting room overview” on page 6

ADOBE ACROBAT CONNECT
User Guide
30
“Sharing your screen” on page 21
“Taking notes” on page 16
Hosting a meeting
If you want to host meetings and invite attendees using your own meeting URL, you can get your own Acrobat
Connect account. Create an account by visiting Adobe.com or by clicking the Start Meeting button found in software
applications such as Adobe Acrobat 8, Adobe Reader 8, and some Microsoft Office programs.
See also
“Meeting roles and permissions” on page 5
“Three steps to your first meeting” on page 4

31
Index
A
accessibility features in Help 3
account
changing password 11
information, viewing 11
meeting URL 11
registering for 30
Acrobat Connect phone
conferencing 13
Acrobat Connect Professional 1
Adobe Acrobat 8
meeting preferences 12
Start Meeting button 12
Adobe Acrobat Connect Add-in
installing 22
Adobe Design Center 2
Adobe Help
accessibility 3
browsing 2
keyboard shortcuts for 3
navigating 2
PDF version of 1
searching 2
Adobe Reader 8
meeting preferences 12
Start Meeting button 12
annotation tools
Ellipse tool 25
Line tool 25
Marker tool 25
Pencil tool 25
Rectangle tool 25
Selection tool 25
Stamper tool 25
Text tool 25
Undo tool 25
Attendee List pod
about 9
icons in 9
attendee roles
about 5
changing 14
host role 5
icons for 9
participant role 5
presenter role 5
attendee status
about 15
clearing 15, 28
displaying 28
icons for 9
attendees
connection speed 6, 16, 29
information about 14
inviting to meeting 13
lists of 20
permissions 5
request to join meeting 14
status indicators 15
time in meeting room 20
B
bandwidth
and meeting performance 6
optimizing for meeting 16
C
Camera pod
about 8
video feed arrangement 8
Chat pod
about 10
clearing 10, 18
colors of messages 10
notifications 18
private chat 18
save chat history 20
sending messages 17, 27
text size 17
Communities website 2
connection speed 6
choosing 29
dropped packets 16
DSL/Cable setting 6
LAN setting 6
latency 16
modem setting 6
testing 6
connection status
icons for 9
monitoring 15
resolving issues 16
connection status icons
meanings 16
showing and hiding 15
tool tips for 16
control of shared screen 23
D
dropped packets 16
E
Ellipse tool 25
e-mail
chat history 20
meeting invitation 13
notes 20
G
Getting Started movie 1
Go Faster status 28
Go Slower status 29
H
Help system. See Adobe Help
host role
about 5
getting an account 30
I
I Have A Question status 28
icons
attendee role 9
attendee status 9
connection status 9
K
keyboard shortcuts for Help 3
L
latency 16
Line tool 25

INDEX 32
M
Marker tool 25
meeting roles
host 5
icons for 9
participant 5
presenter 5
meeting room
about 6
attendee activity in 20
entering 26
leaving 27
logging in to 13
pods 7
meeting URL, finding 11
meetings
about 4
attendee lists for 20
bandwidth 16
connection speed 6
ending 19
joining 26
leaving 27
list of 20
roles and permissions 5
starting 4, 13
time limits 20
messages
clearing from Chat pod 10
sending text 17
N
Note pod
about 10
adding content 16
clearing 10
saving contents 20
text alignment 17
text size 17
notifications
incoming attendee 14
phone conferencing 13, 27
text message 18
P
participant role
about 5
changing to presenter 14, 15
password 11
Pause And Annotate command 24
Pencil tool 25
phone conference information
about 5
specifying for attendees 13
viewing 27
pods
about 7
Attendee List pod 9
Camera pod 8
Chat pod 10, 17
Note pod 10
Share pod 8
presenter role
about 5, 29
assigning to all attendees 15
changing to participant 14
Q
Quick Start demos 1
R
Rectangle tool 25
Resource Center 1
S
screen sharing
about 21
annotations 25
Application option 21
blue cross-hatched pattern 22
control of shared screen 23
Desktop option 21
Pause And Annotate command 24
previewing 23
Window option 21
window-in-window effect 23
Selection tool 25
Share pod
about 8
blue cross-hatched pattern 22
maximize and restore 23
window-in-window effect 23
sharing. See screen sharing
Speak Softer status 29
Stamper tool 25
Start Meeting button 12
Stepped Away status 29
Support Center 1
system requirements 1
T
text messages
clearing from Chat pod 10, 18
private chat 18
saving 20
sending 17, 27
Text tool 25
Thumbs Down status 29
Thumbs Up status 29
Troubleshooting 1
U
Undo tool 25
user forums 2
V
video conferencing
about 5
broadcasting live video 18
W
web camera
broadcasting from 18
pausing 19
stopping 19
