Adobe FrameMaker XML Author (2015 Update 1) Getting Started Guide Frame Maker 2015 Fm XA Qsg En
User Manual: adobe FrameMaker XML Author - 2015 - Getting Started Free User Guide for Adobe FrameMaker Software, Manual
Open the PDF directly: View PDF ![]() .
.
Page Count: 38
- Introduction
- Leverage support for Arabic, Hebrew, and Farsi
- Work smarter, accomplish more
- Experience best-in-class XML authoring
- Additional resources
- Legal notices
title_pg.fm
Getting Started With
Adobe FrameMaker XML Author
(2015 update 1)

i
Table of Contents
Introduction . . . . . . . . . . . . . . . . . . . . . . . . . . . . . . . . . . . . . . . . . . . . . . . . . . . . . . . . . . . . . . . . . . 1
How to get Adobe FrameMaker XML Author (2015 release) ............................................................................ 2
Leverage support for Arabic, Hebrew, and Farsi . . . . . . . . . . . . . . . . . . . . . . . . . . . . . . .3
Bidirectional language support .............................................................................................................................................. 3
Bidirectional content flipping ..................................................................................................................................................6
Work smarter, accomplish more . . . . . . . . . . . . . . . . . . . . . . . . . . . . . . . . . . . . . . . . . . . . . .9
Conditional table columns ........................................................................................................................................................9
Enhanced visual conditional indicators ..........................................................................................................................10
Packager ............................................................................................................................................................................................... 12
Table Enhancements .................................................................................................................................................................. 13
Improved usability in tables .......................................................................................................................................... 13
Automatic insertion of table continuation variables .................................................................................... 15
More out-of-the-box table styles ................................................................................................................................16
Enhanced pod support ................................................................................................................................................................17
Highlighting and Positioning of Pod ........................................................................................................................18
Enhanced user interface ...........................................................................................................................................................19
Improved FrameMaker XML Author and Adobe Experience Manager connector .........................20
Integration with DITA Exchange CMS ............................................................................................................................ 20
Experience best-in-class XML authoring . . . . . . . . . . . . . . . . . . . . . . . . . . . . . . . . . . . . . . 21
Simplified XML ................................................................................................................................................................................. 21
Simplified XML authoring ............................................................................................................................................... 21
Enhanced Quick Element Toolbar ............................................................................................................................22
DITA 1.3 support ..............................................................................................................................................................................25
Enhanced Structure View ........................................................................................................................................................ 26
Improved support for inline MathML equations .....................................................................................................27
DITAVAL support in DITA-OT publishing .....................................................................................................................30
Comprehensive DITA 1.2 support ....................................................................................................................................... 30

ii
DITA maps preview, including nested maps ............................................................................................................. 30
Additional resources . . . . . . . . . . . . . . . . . . . . . . . . . . . . . . . . . . . . . . . . . . . . . . . . . . . . . . . . .33
Product page .................................................................................................................................................................................... 33
User guides and Help hub pages ....................................................................................................................................... 33
Legal notices . . . . . . . . . . . . . . . . . . . . . . . . . . . . . . . . . . . . . . . . . . . . . . . . . . . . . . . . . . . . . . . .35
Introduction
Introduction
Adobe FrameMaker XML Author (2015 release) is now a complete solution for bidirectional
technical content. Personalize content with new dynamic content filters. Author XML content
faster with a simplified environment, enhanced Quick Element toolbar, and DITA 1.3 support.
Do more with tables.
This guide presents you an overview of the new features and workflows in FrameMaker XML
Author (2015 release). A large number of narrated videos make it easy for you to become famil-
iar with the changes in the UI and help you get started with this release.
Besides this Getting Started Guide, you will find the FrameMaker XML Author User Guide and
many other resources at adobe.com. A collection of key FrameMaker XML Author resources is
presented in the Additional resources section of this guide.
Introduction
How to get Adobe FrameMaker XML Author (2015 release) 2
How to get Adobe
FrameMaker XML Author
(2015 release)
To try FrameMaker XML Author before buying, download a
fully functional, 30-day complimentary trial version.
You can buy Adobe FrameMaker XML Author (2015 release)
through the online Adobe Store or by calling 800-585-0774.
Learn about other ways to buy FrameMaker XML Author (2015
release), including buying through authorized resellers or
purchasing with education or government discounts.
See the following table for FrameMaker XML Author pricing.
Note: Prices listed are the Adobe direct store prices. Reseller prices may vary. Prices do not include
tax or shipping and handling.
For more information, call us at +1-877-687-1520 or visit the FrameMaker XML Author website.
Product
One year plan (price per month)
USD EUR AUD YEN
Adobe
FrameMaker
XML Author
(2015) release
$19.99 €19.99 $19.99 ¥2600
Leverage support for Arabic, Hebrew, and Farsi
Leverage support for Arabic,
Hebrew, and Farsi
Bidirectional language support
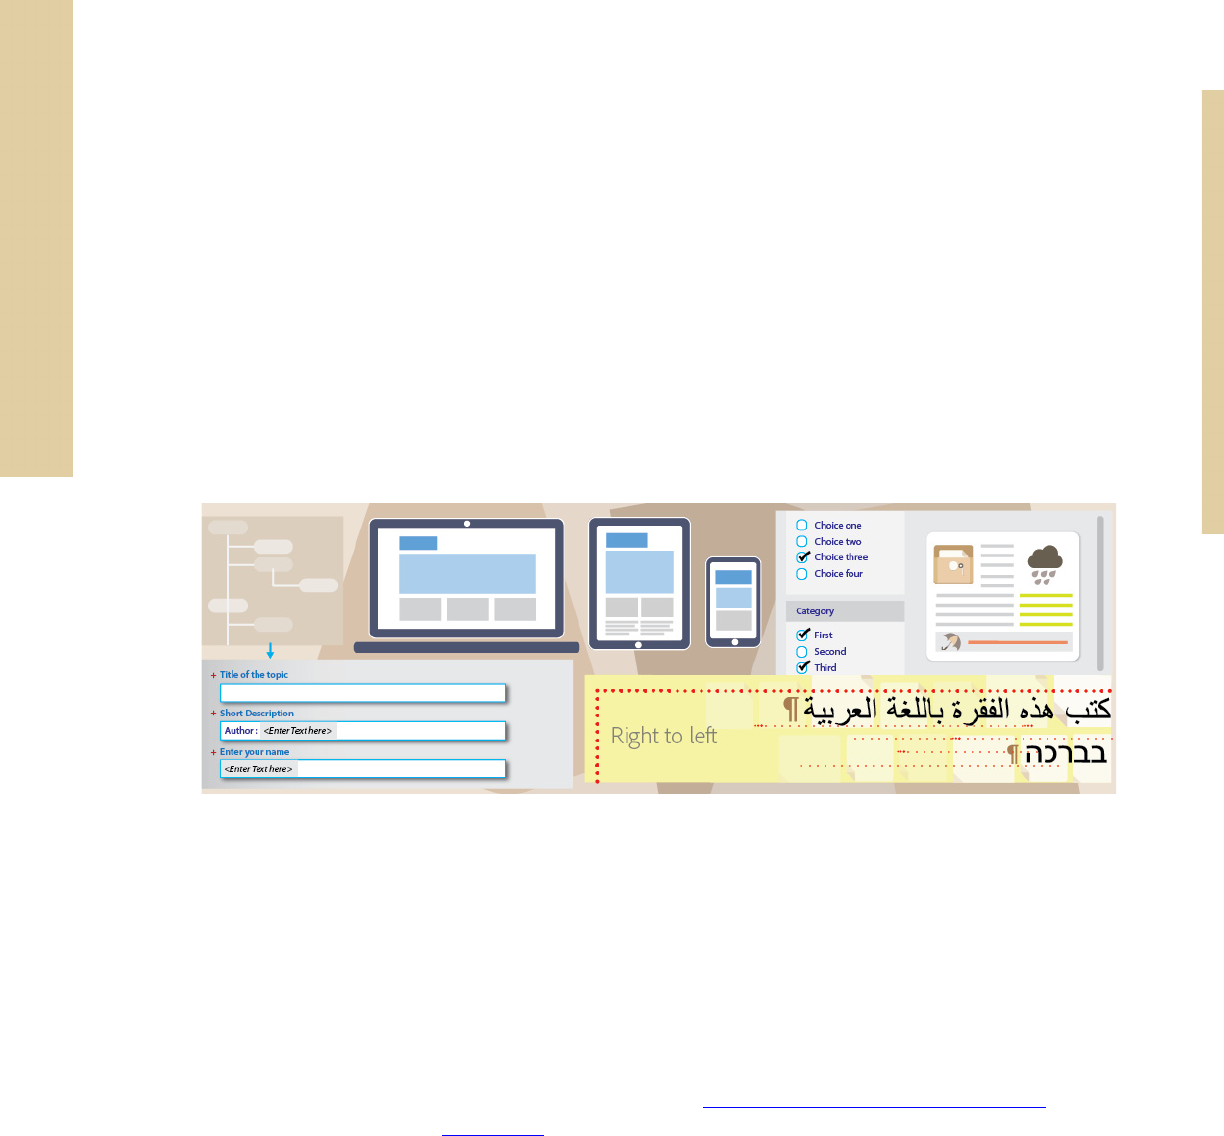
Now create bidirectional content in FrameMaker XML Author. This
means that you can not only create content in right-to-left (RTL)
languages - Arabic, Hebrew, and Farsi but a mix of both LTR and
RTL languages.
Author a
single doc-
ument that
includes con-
tent in left-to-right languages such as
English or German and right-to-left lan-
guages - Arabic, Hebrew, or Farsi. The
DITA map in your document can also be
configured to publish in right-to-left
fashion.
All of this works out-of-the-box for
FrameMaker XML Author documents.
• Support for bidirectional content
and not just RTL
• Languages supported - Arabic,
Hebrew, and Farsi
• CJK content mixed with RTL at
document level
Leverage support for Arabic, Hebrew, and Farsi
Bidirectional language support 4
You can also author bidirectional content in DITA topics by simply applying the Direction attri-
bute (dir) of any supporting element. Or define this attribute in the EDD to provide bidirec-
tional authoring support in your custom structured applications.
The inheritance model in FrameMaker XML Author has been redesigned to support the Direc-
tion attribute. For example, if a topic’s Direction attribute has been set to RTL, and the Direction
attribute of a paragraph element within the topic has been set to inherit, then the direction of
the paragraph element will also be set to RTL.
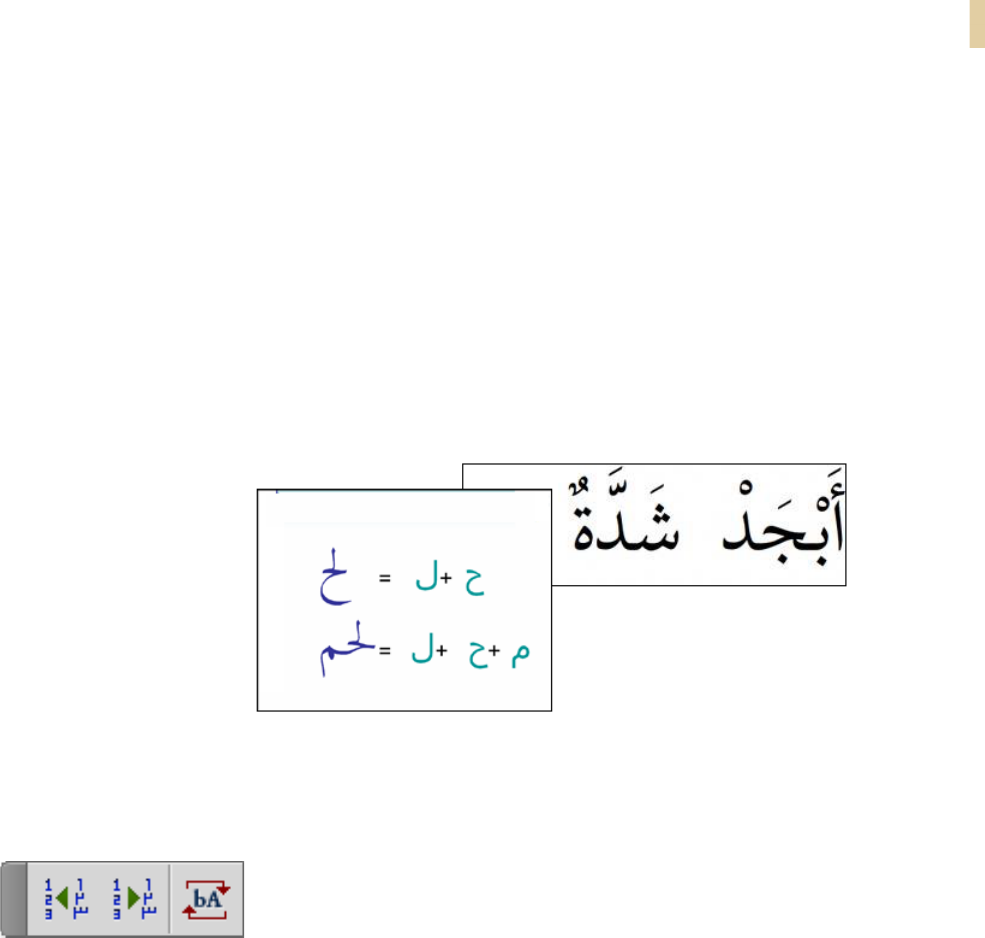
For Arabic language, FrameMaker XML Author supports diacritics and standard ligature charac-
ters as shown in the following figure:
A new Direction toolbar had also been added to help you quickly convert digits from English to
Arabic or from Arabic to English and directional markers for neutral symbols, such as slash or
parentheses.
It’s easy to mix Chinese, Japanese, and Korean (CJK) content with LTR or RTL content. This sup-
port is available at the document level, but in different paragraphs. This means that within a
document, you can have Chinese content in one paragraph and the next paragraph can have
Arabic content.
Note: The following video has been created using Adobe FrameMaker hence the interface might
differ in FrameMaker XML Author.

Leverage support for Arabic, Hebrew, and Farsi
Bidirectional language support
5
To se t the dir ec tion of a DITA t opic
1. Create a new DITA topic or use an existing DITA topic.
2. From the Element menu, choose Edit Attributes.
3. In Attributes Editor, set the dir attribute to change the direction of the topic.
Leverage support for Arabic, Hebrew, and Farsi
Bidirectional content flipping 6
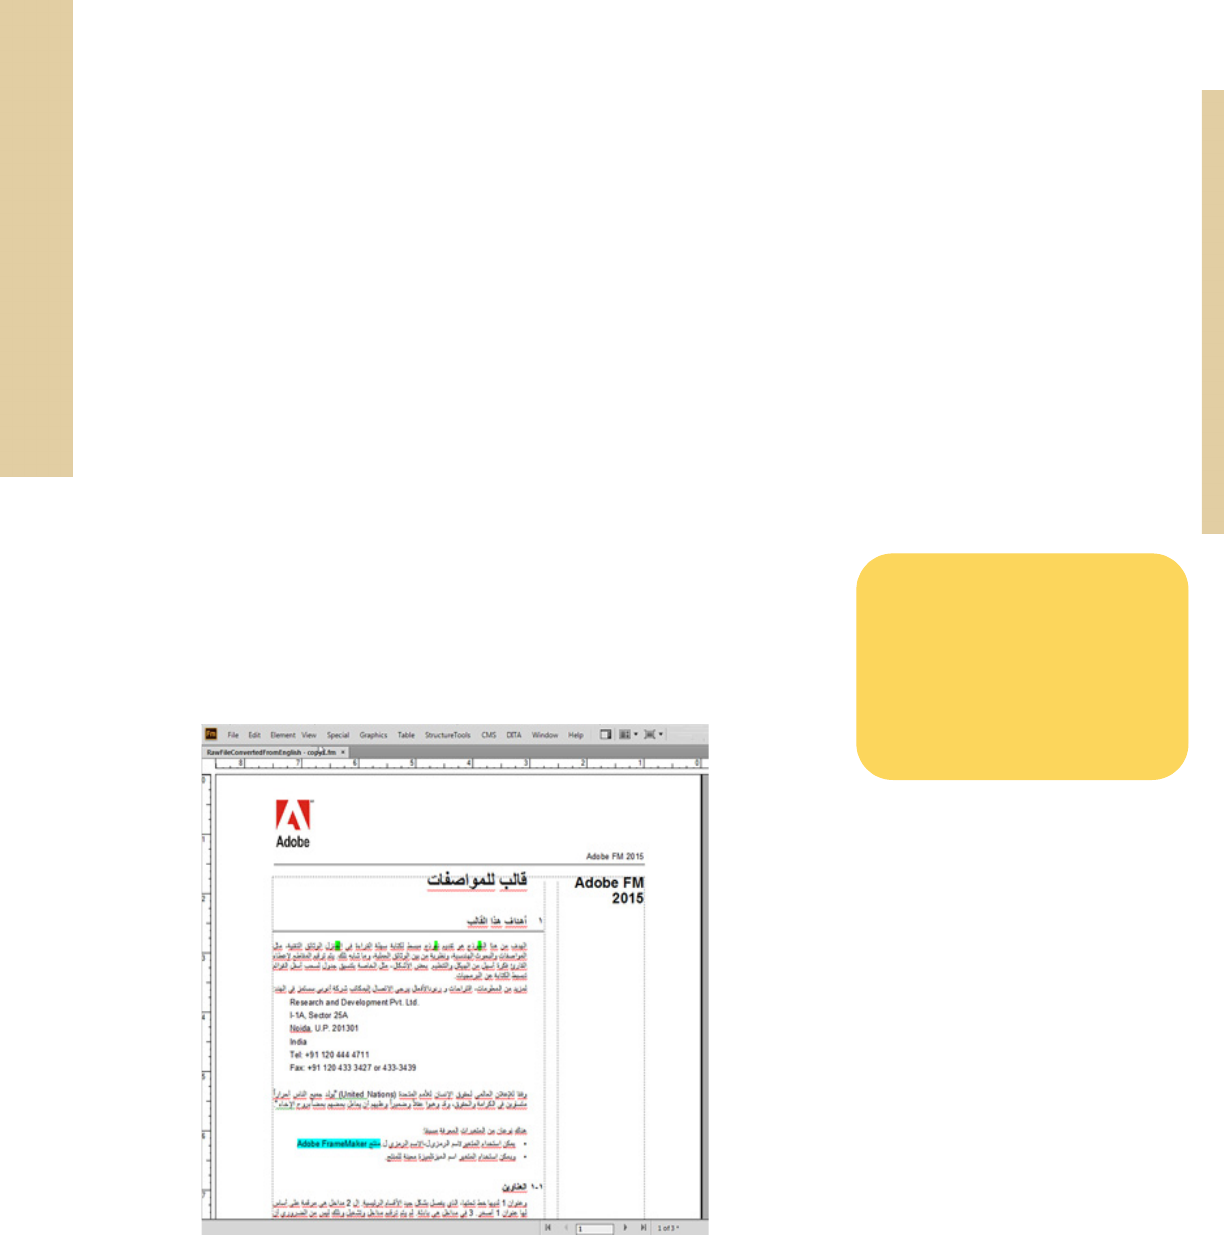
Bidirectional content flipping
Reduce translation and DTP work with the new Direction property.
Author a document in an LTR language such as English and send it for translation to Arabic,
Hebrew, or Farsi without worrying about the direction of the translated content. Then simply
flip the direction of the translated document and your document is ready to be published.
This works just as well for bidirectional documents. In this case, simply flip individual DITA ele-
ments.
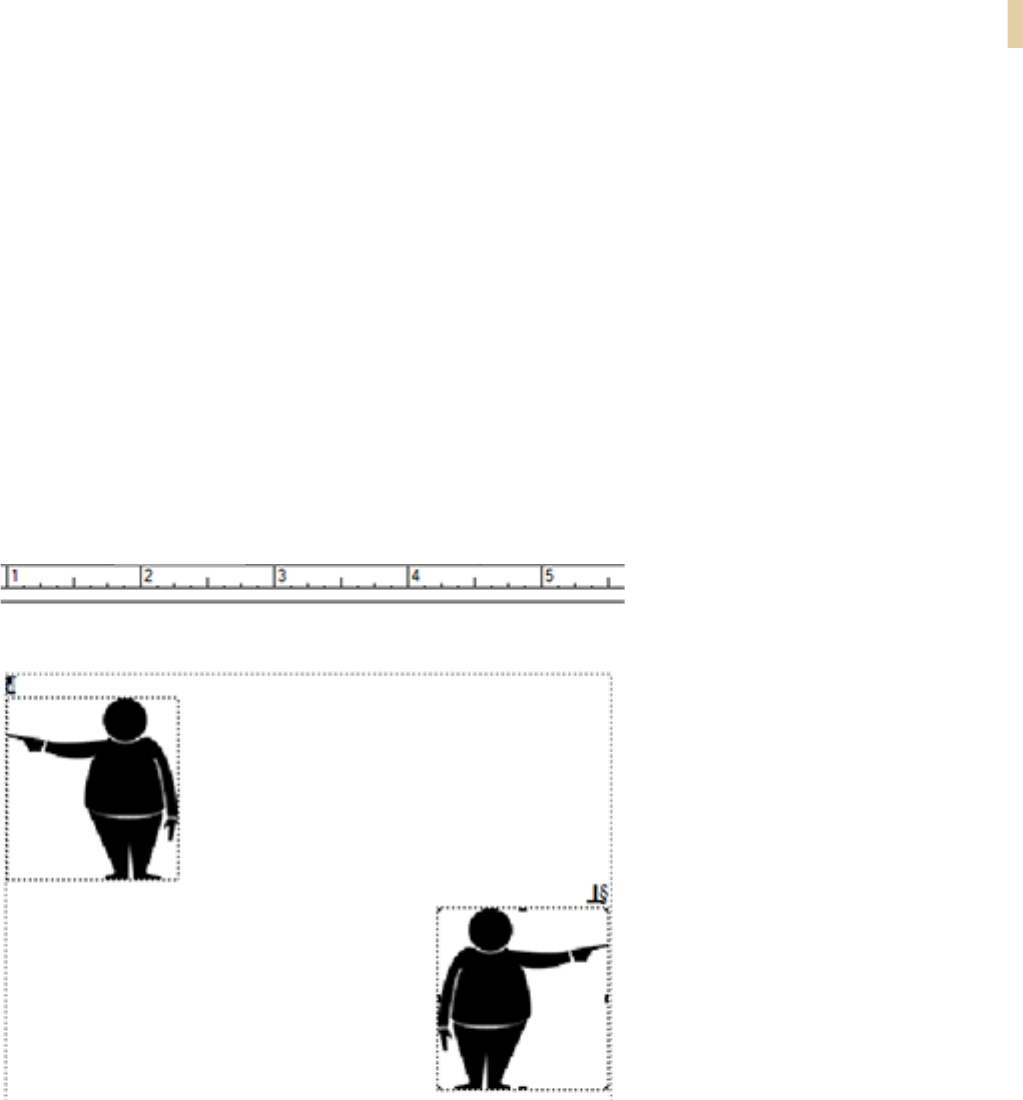
For images or illustrations, you have a choice of either flipping the image from left to right, or
creating a mirror image. This is extremely helpful when you want to convert a flowchart from
English to Arabic.
Note: The following video has been created using Adobe FrameMaker hence the interface might
differ in FrameMaker XML Author.

Leverage support for Arabic, Hebrew, and Farsi
Bidirectional content flipping
7
To f lip a tex t el ement
1. Click the text element in Structure View.
2. From the Element menu, choose Edit Attributes.
3. In Attributes Editor, set the dir attribute to change the direction of the element.

Leverage support for Arabic, Hebrew, and Farsi
Bidirectional content flipping 8

Work smarter, accomplish more
Work smarter, accomplish more
Conditional table columns
Present only the required information to your users by hiding the columns in a table that are
not relevant for a particular type of audience.
Apply conditions in columns that will show or hide depending on your intended audience. For
example, you can conditionalize columns by predefined conditions, such as audience, platform,
product, or others.
Note: The following video has been created using Adobe FrameMaker hence the interface might
differ in FrameMaker XML Author.

Work smarter, accomplish more
Enhanced visual conditional indicators 10
Enhanced visual conditional indicators
FrameMaker XML Author has significantly improved the display of condi-
tional indicators to make it easier to identify portions of content that are
tagged for one or more versions of published output. Now you can easily
identify which conditions have been applied to various types of content,
such as images, tables, graphics, and anchored frames.
Use conditional tag formatting rules to easily identify one or more conditions
applied on the content at a glance. This feature helps in reducing errors in your final output as
the visual conditional indicators ensure that the intended conditional tag is applied to the con-
tent.
Note: The following video has been created using Adobe FrameMaker hence the interface might
differ in FrameMaker XML Author.
• Know what conditions have
been applied to tables and
graphic objects
• Content remains readable even
when multiple tags are applied

Work smarter, accomplish more
Enhanced visual conditional indicators
11

Work smarter, accomplish more
Packager 12
Packager
Never miss out a file in your documents, books, or DITA maps when you share them with your
colleagues, subject matter experts, and translators. Create a self-contained package that
includes all dependent files, such as referenced files and images, and configuration files.
Note: The following video has been created using Adobe FrameMaker hence the interface might
differ in FrameMaker XML Author.
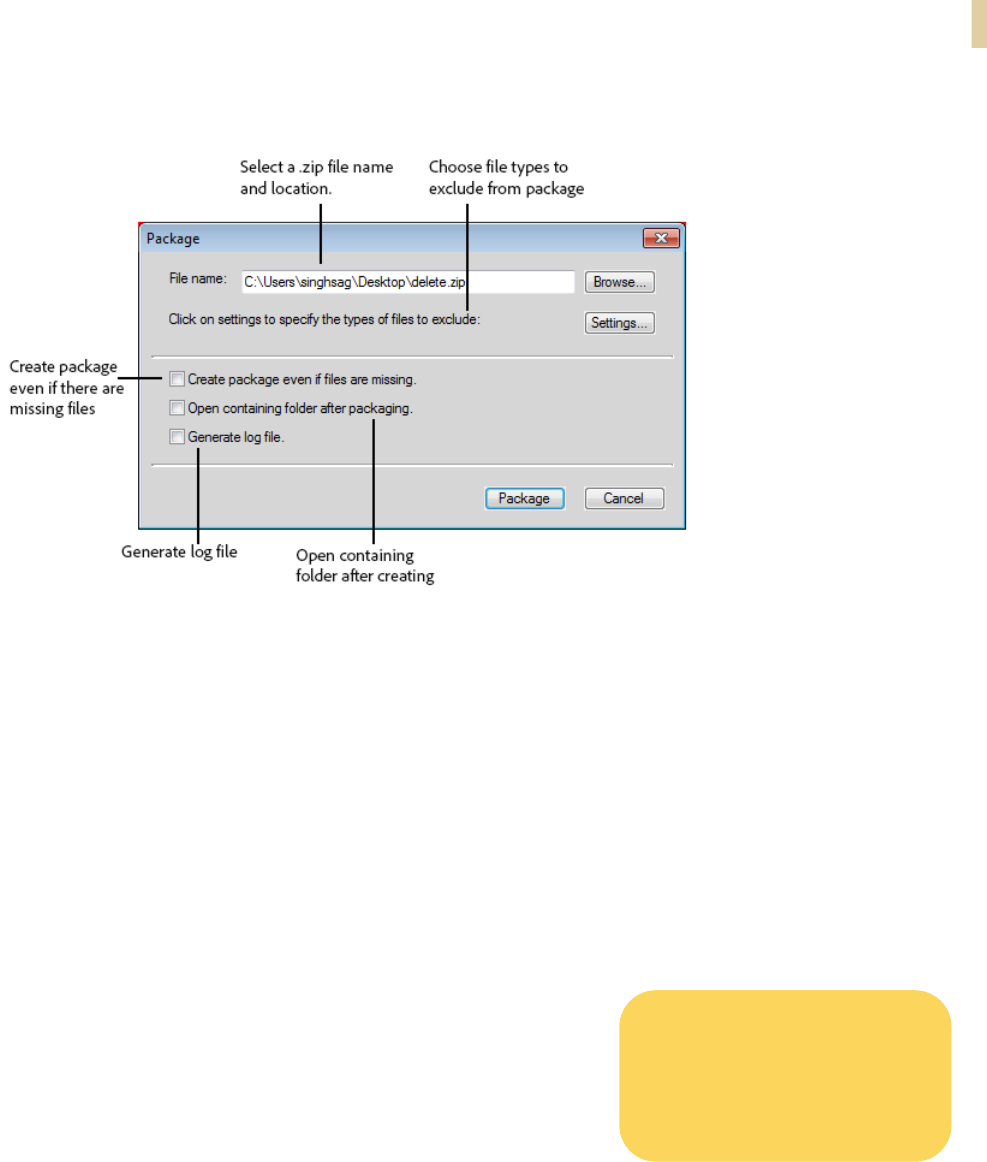
Create a package
1. Select the book or DITA map.
2. From the File menu, choose Package.
3. In the Package dialog:
Work smarter, accomplish more
Table Enhancements
13
4. Click Package.
FrameMaker XML Author processes the book file and creates a package in the form of a zip file.
Now you can share the zip file with others or create backup.
Table Enhancements
Improved usability in tables
Working with tables has never been so easy. Save authoring time by
using the new and improved user experience when working with
tables. Navigate the table cells using the arrow keys, or add a row
by pressing TAB in the last cell of the last column.
If you want to move or reorganize information within a table, sim-
ply drag rows or columns and drop them onto the rows or col-
umns that you want to replace them with. Or use the Shift key to
simply moves the rows or columns when you drag-and-drop them.Also, you can easily resize
table columns and rotate table text or graphic through context or main menu in Simplified and
Author View.
• Navigate using the arrow keys
• Press tab to insert rows
• Rotate table text or graphic
using main or context menu

Work smarter, accomplish more
Table Enhancements 14
Note: The following video has been created using Adobe FrameMaker hence the interface might
differ in FrameMaker XML Author.
Work smarter, accomplish more
Table Enhancements
15
Automatic insertion of table continuation variables
Improve the readability of large, multi-page tables with table continuation and table sheet vari-
ables that you can insert to a new or old table. With a few clicks, you can insert these variables
into all the existing tables in a document or all the tables of a selected format.
Note: The following video has been created using Adobe FrameMaker hence the interface might
differ in FrameMaker XML Author.
Create a table with variables
1. Place the insertion point where you need to insert the table.
2. From the Table menu, choose Insert Table.
3. In the Table Variables section of the Insert Table dialog:
Apply table continuation variables to the inserted table
Apply table sheet variables to the inserted table.
4. Click Insert.

Work smarter, accomplish more
Table Enhancements 16
Apply table variables to existing tables
1. From the Table menu, choose Insert Table Variables.
2. In the Table Variables dialog box:
Apply table continuation variables to the inserted table
Apply table sheet variables to the inserted table.
3. And choose to apply the table variable changes to:
All the tables in the document.
Or all the table of a particular format.
More out-of-the-box table styles
You no longer have to restrict yourself to a limited set of table
styles. FrameMaker XML Author now gives you a wide range of
out-of-the-box table styles that you can use to improve the visual
appeal of your documents. With the improved table shading, now
apply solid colors to table cells and make the information in your table more readable.
Note: The following video has been created using Adobe FrameMaker hence the interface might
differ in FrameMaker XML Author.
• Apply solid fills in table shading
• New out-of-the-box table styles

Work smarter, accomplish more
Enhanced pod support
17
Insert a table and apply table styles
1. From the Table menu, choose Insert Table.
2. In the Table Format drop-down list, choose from the updated list of table formats and click
Insert.
Enhanced pod support
Note: The following video has been created using Adobe FrameMaker hence the interface might
differ in FrameMaker XML Author.
Work smarter, accomplish more
Enhanced pod support 18
Highlighting and Positioning of Pod
Did you find it difficult to locate the pod you just added to your workspace? Well, FrameMaker
XML Author now makes it easier for you to work with and find the pod that you were looking
for. As soon as you open a pod, FrameMaker XML Author adds the highlighted blue boundary
to the pod for quick identification.
Notice, the blue highlight boundary indicating the newly opened pod.

Work smarter, accomplish more
Enhanced user interface
19
You can also configure the preferences (Preferences > Interface > Hide Pods on Close), so that
you don’t have to search for modaless dialog in the workspace, because they open in the same
location they were when you last closed FrameMaker XML Author. Also, FrameMaker XML
Author remembers the locations of the modal dialogs that you open. This way the dialogs will
appear in the same location the next time you open the dialog or even the next time you open
FrameMaker XML Author.
Enhanced user interface
Make the workspace your own, optimized for the work you do, and configured to exactly what
you want. The latest user interface enhancements make working in the FrameMaker XML
Author environment easier and more efficient.
Now resize these dialogs to work on them the way you want to:
•DITA Conref dialog
•DITA Cross-Reference dialog
• DITA Link dialog
•Show / Hide Conditional Text dialog
• Cross-Reference dialog
Note: The following video has been created using Adobe FrameMaker hence the interface might
differ in FrameMaker XML Author.

Work smarter, accomplish more
Improved FrameMaker XML Author and Adobe Experience Manager connector 20
Improved FrameMaker XML Author and Adobe
Experience Manager connector
Enjoy significant improvement in performance while carrying out frequently used operations,
such as check-in and check-out, thanks to an enhanced connector between FrameMaker XML
Author and Adobe Experience Manager CMS.
Integration with DITA Exchange CMS
Leverage the new built-in connector to the DITA Exchange CMS to manage your DITA content
easily. Use the Repository view to check-out files, manage dependencies, version management
and perform search. Use the advanced metadata-based filter, which is dynamically fetched
from the CMS, to quickly browse and find relevant topics, DITA maps or graphics in a large vol-
ume of content.

Experience best-in-class XML authoring
Experience best-in-class XML
authoring
Simplified XML
Simplified XML authoring
Now the subject matter experts and casual authors can create valid XML doc-
uments without worrying about the underlying XML complexities. The sim-
plified XML authoring environment allows you to work faster with an
intuitive user interface, which gives a form-like easy-to-fill authoring experi-
ence. The main menu options and the Quick Element Toolbar have been
customized to provide only those options that you would need to work
faster. Use the Quick Element Toolbar to insert objects quickly, such as a
paragraph, section, image, and so on.
Note: The following video has been created using Adobe FrameMaker hence the interface might
differ in FrameMaker XML Author.
• Easy to fill form-like authoring
environment
• No need to know the underlying
XML structure
• Out-of-the-box forms for DITA
1.3 and 1.2

Experience best-in-class XML authoring
Simplified XML 22
Enhanced Quick Element Toolbar
Make it easy for authors to focus on content, not on validation.
Insert content even more easily with the enhanced,
always-enabled Quick Element Toolbar. The toolbar automatically
identifies the next valid location if the inserted object is invalid at
the current location.
You can quickly insert a table, figure, footnote, or any other structured content by using the
Quick Element Toolbar while maintaining a valid structural context.
Note: The following video has been created using Adobe FrameMaker hence the interface might
differ in FrameMaker XML Author.
• Configurable QET
• Always insert objects at valid
location
• Out-of-the-box QET for DITA 1.3
and 1.2
Experience best-in-class XML authoring
Simplified XML
23
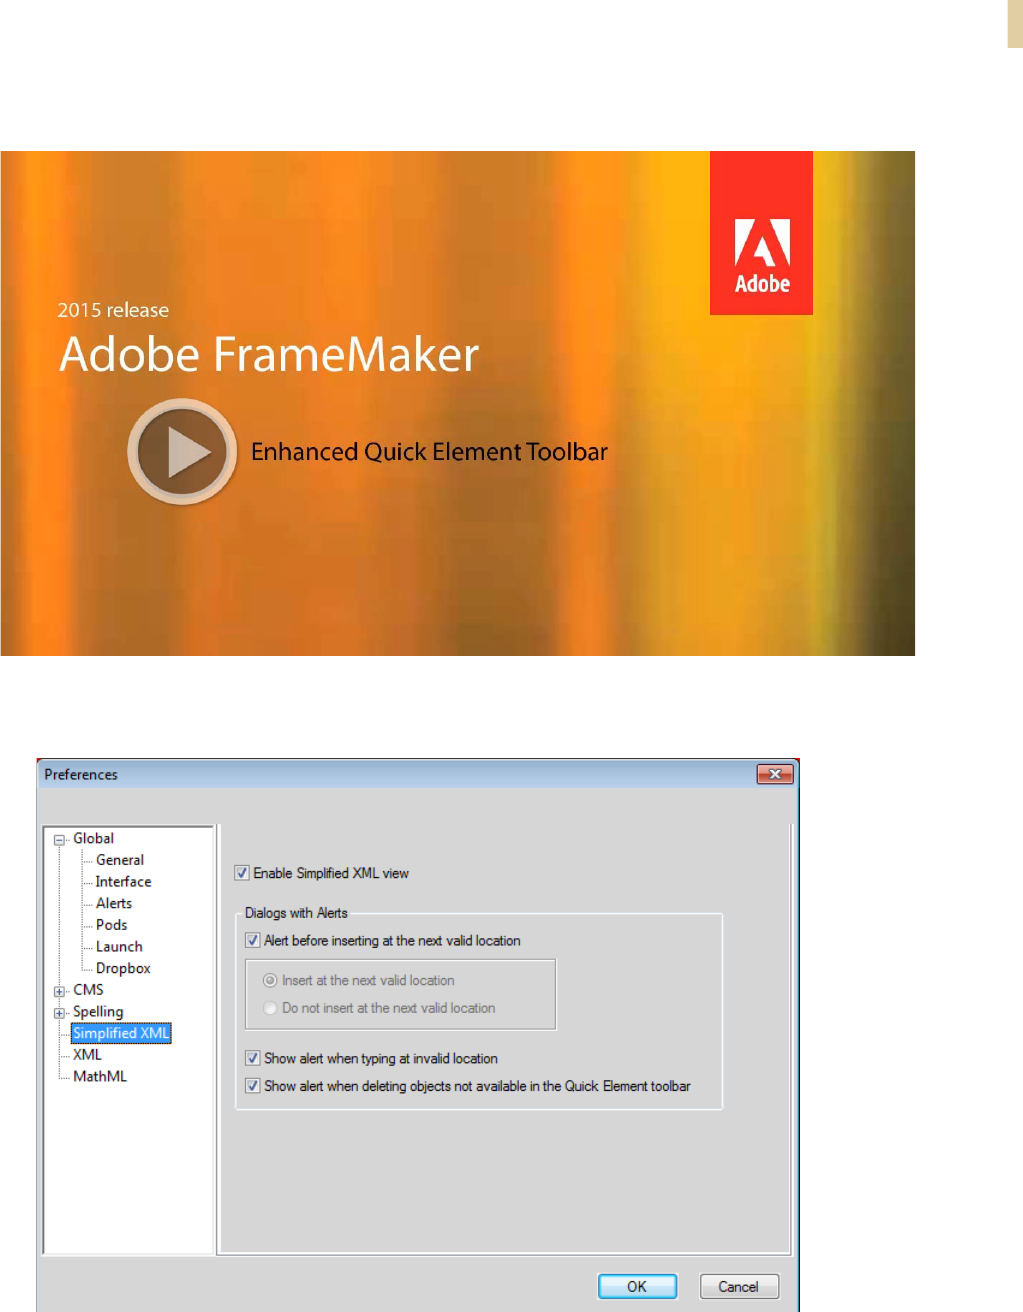
Enable the Simplified XML view
1. Open the Preferences dialog box.

Experience best-in-class XML authoring
Simplified XML 24
2. Choose Simplified XML and select the Enable Simplified XML view option.
3. Restart FrameMaker XML Author.
Author in the Simplified XML view
1. Create a new DITA topic.
2. Click the Author View button in the application bar to switch to the Simplified XML author-
ing environment.
3. Enter information in the form fields.
Experience best-in-class XML authoring
DITA 1.3 support
25
DITA 1.3 support
With FrameMaker XML Author’s upgrade to DITA 1.3 support, you can now
author more custom topic types defined by the latest DITA specifications.
FrameMaker XML Author now supports the following new topic types:
•troubleshooting
•learningObjectMap
•learningGroupMap
Also, you can now insert MathML equations in DITA 1.3 document types. Quick Element Tool-
bar in Simplified XML view for DITA 1.3 documents has also been enhanced to include the
MathML container button that allows insertion of MathML equations.
Quick Element Toolbar is also included in the WYSIWYG view for DITA 1.3 document types
(topic, task, concept, reference, and troubleshooting).
Note: The following video has been created using Adobe FrameMaker hence the interface might
differ in FrameMaker XML Author.
• Support for new DITA 1.3 topic
types
• Insert MathML equations in
DITA 1.3 documents
• QET is available for DITA 1.3 doc-
uments in WYSIWYG view

Experience best-in-class XML authoring
Enhanced Structure View 26
Configure FrameMaker XML Author to use DITA 1.3
1. From the DITA menu, choose DITA Options.
2. In the DITA Versions drop-down of the DITA Options dialog box, choose DITA 1.3.
3. You are required to restart FrameMaker XML Author to effect the changes.
Enhanced Structure View
Working with FrameMaker XML Author’s Structure View is even simpler and more convenient.
Now select an element in the Document view and easily find it in
the Structure View. Get a clear visual indicator when you drop ele-
ments at invalid locations in the tree. Simple right-click options are
now available for you to expand and collapse sibling elements and
attributes.
When scrolling through your document using the mouse or the
scroll bars, FrameMaker XML Author also scrolls through the ele-
ments in the Structure View. So, the Document View and the Structure View will always be dis-
play in sync.
Note: The following video has been created using Adobe FrameMaker hence the interface might
differ in FrameMaker XML Author.
• Highlight current node in Struc-
ture view
• Enhanced drag-and-drop
• Expand or collapse child and
sibling elements and attributes
Experience best-in-class XML authoring
Improved support for inline MathML equations
27
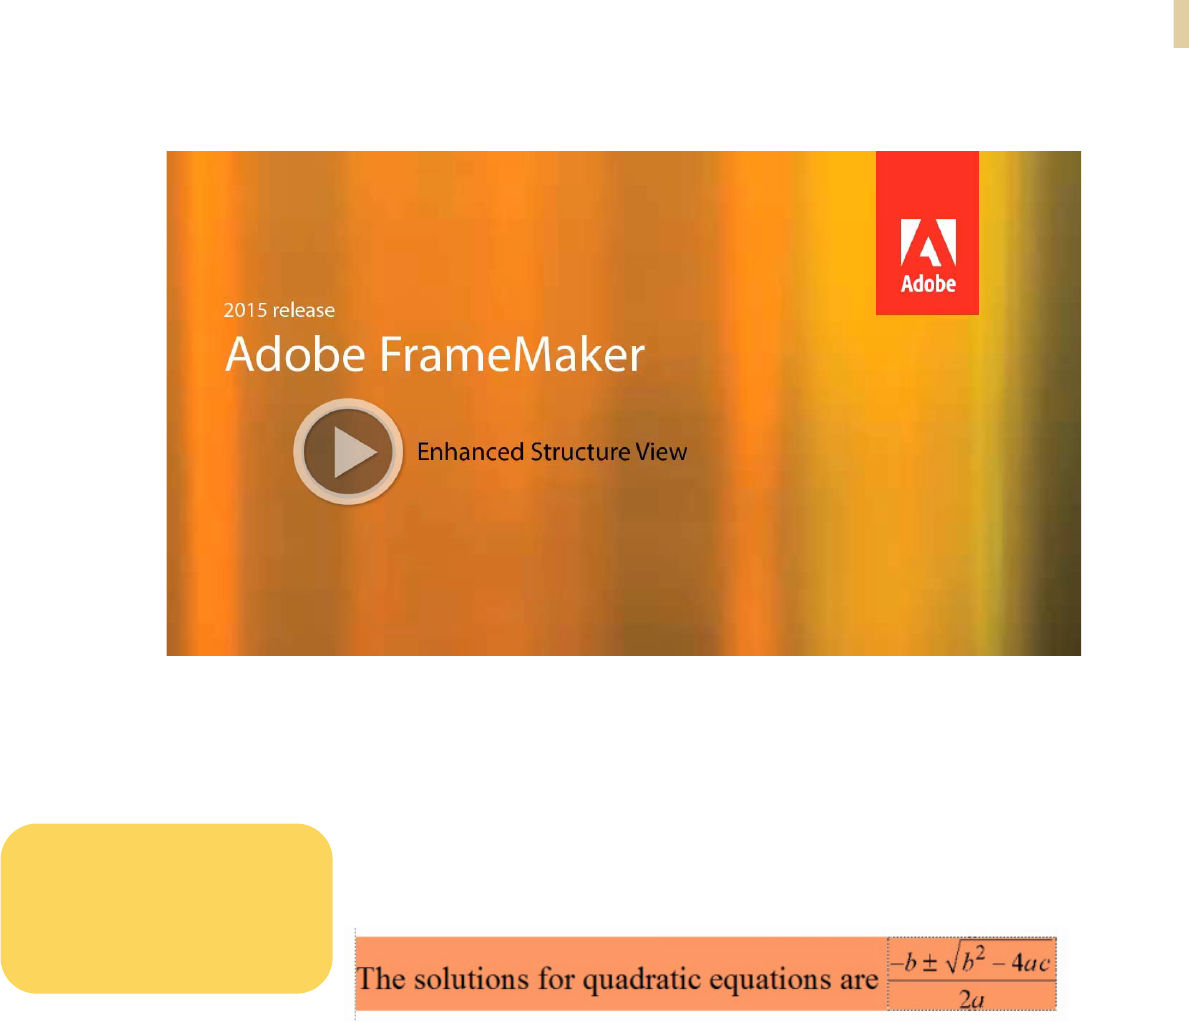
Improved support for inline MathML equations
Leverage FrameMaker XML Author’s native integration with MathFlow Structure and Style edi-
tors from Design Science to create inline equations. The equations now
merge with the surrounding paragraph by inheriting paragraph properties
such as font and background color.
Never export your MathML equations as raster in the published output again. Instead, export
them as high quality vector graphics. Also, allow your readers to search for the equations in the
PDF output.
Note: The following video has been created using Adobe FrameMaker hence the interface might
differ in FrameMaker XML Author.
• Create inline MathML equations
• Apply surrounding paragraph’s
settings
• Export equations as vector files

Experience best-in-class XML authoring
Improved support for inline MathML equations 28
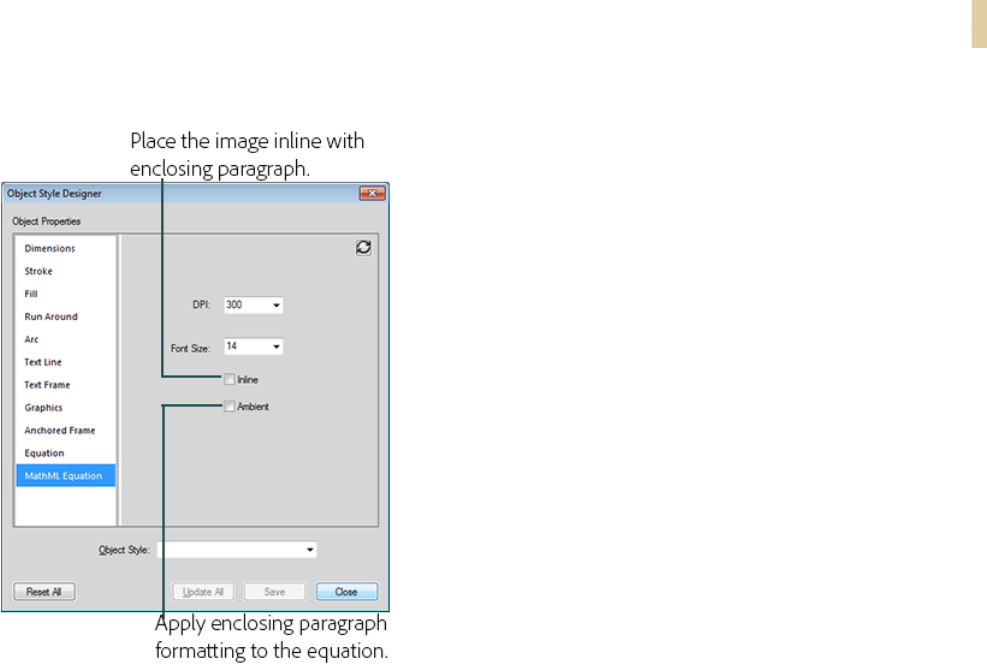
Create inline MathML equations.
1. Insert a MathML equation in your document.
2. Select the MathML equation.
3. From the Graphic menu, choose Object Properties.
4. In the MathML Equation Properties dialog box:
Experience best-in-class XML authoring
Improved support for inline MathML equations
29
You can also apply these settings globally to all MathML equations created subsequently.
1. Open the Preferences dialog (Edit > Preferences).
2. In the MathFlow settings section of the MathML tab, change the equation settings.
Note: These settings take effect immediately. So you do not need to restart FrameMaker XML
Author.

Experience best-in-class XML authoring
DITAVAL support in DITA-OT publishing 30
DITAVAL support in DITA-OT publishing
Leverage out-of-the-box support for DITA-OT 2.1 to seamlessly publish content in various for-
mats, including PDF, HTML, Microsoft HTML Help (.CHM), and Java Help. Also, conditionalize
your DITA topics and then use DITAVAL files to filer the final DITA-OT output in any of these for-
mats.
To apply a DITAVAL file when generating DITA-OT output
1. From the DITA menu, choose Generate DITA-OT Output.
2. In the Generate DITA-OT Output dialog box, select the output type.
3. In the DitaVal file field, enter the location of the DitaVal file.
Or browse and select the file.
4. Click Build.
Comprehensive DITA 1.2 support
Create customized information models by automatically generating DITA 1.2 elements, such as
titles, TOC, indexes, page rounding, and numbering. Publish DITA maps has been simplified.
Quick Element Toolbar has been introduced for DITA 1.2 reference type documents in WYSI-
WYG View and Simplified XML/Author View.
That’s not all, you can align images in your DITA 1.2 topics by simply setting the align attri-
bute value in the Attributes editor. Or set the align property in the EDD to default all images to
a preset alignment. Also, easily resize the images in the topics by setting the height, width,
scale, and Scalefit attributes in the Attributes editor.
DITA maps preview, including nested maps
Preview of all the direct and nested references in a DITA map in a single document view. And
then simply double-click to open any of these references in a separate document.
Experience best-in-class XML authoring
DITA maps preview, including nested maps
31
To pr evie w DITA maps
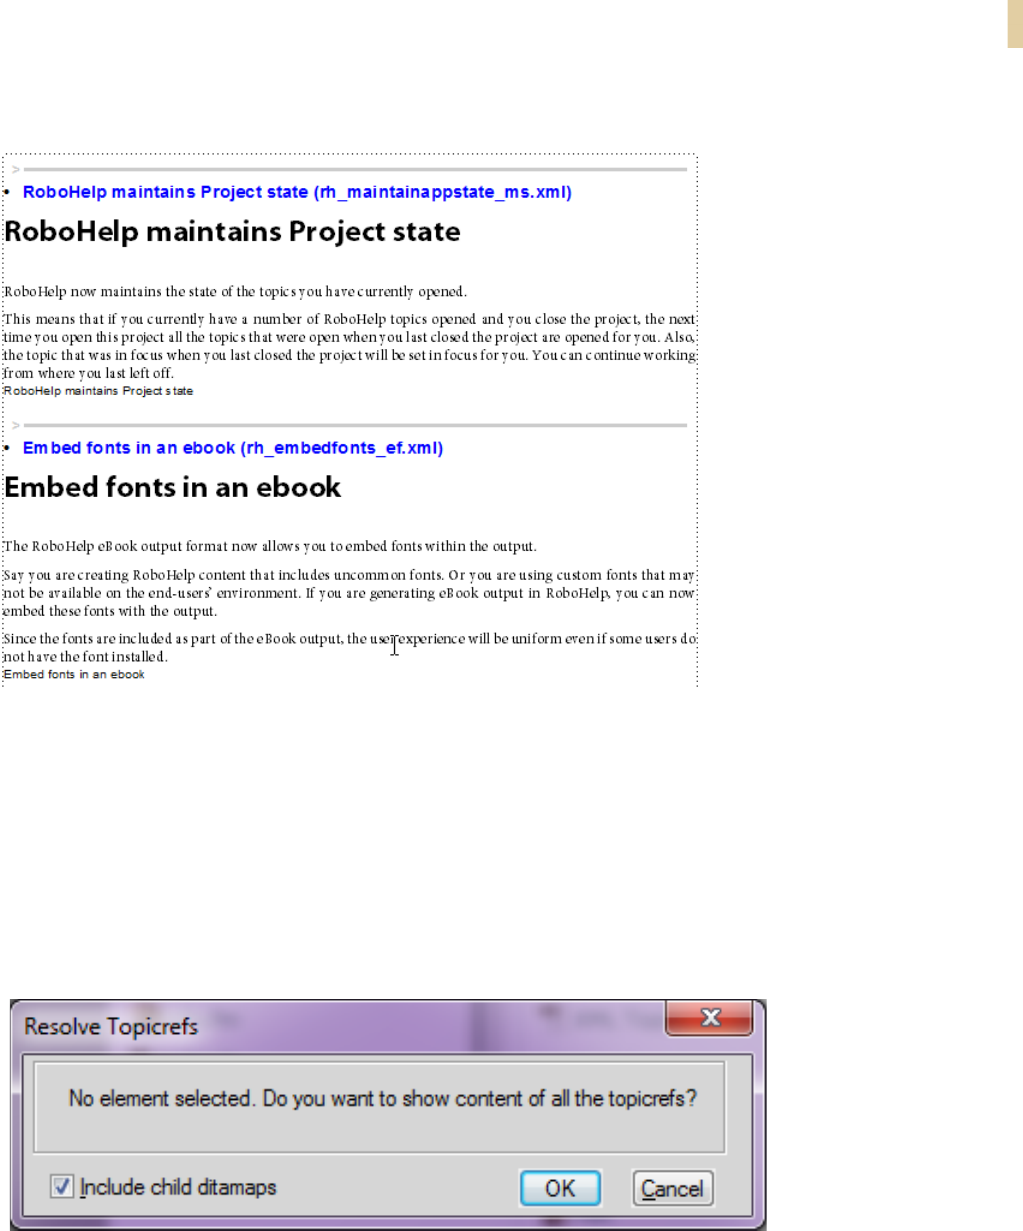
1. To preview the content, choose DITA > Resolve Topicref (s) > Show Content.
2. To hide the preview, choose DITA > Resolve Topicref (s) > Hide Content.
If a DITA map includes references to child maps, the Show and Hide options in the DITA map
will show or hide the topics referenced in the child maps.
To show or hide child maps, ensure that the Include child ditamap option is checked in the
Resolve Topicrefs dialog:

Experience best-in-class XML authoring
DITA maps preview, including nested maps 32

Additional resources
Additional resources
More information on the full Adobe Technical Communication Suite and the tools it provides
can be found online.
Product page
•Adobe FrameMaker XML Author homepage
•Adobe Technical Communications homepage
•Adobe FrameMaker homepage
•Adobe FrameMaker Publishing Server homepage
•Adobe RoboHelp homepage
User guides and Help hub pages
•Adobe FrameMaker XML Author (2015 release) User Guide
•Adobe FrameMaker XML Author Help Hub
•Adobe FrameMaker (2015 release) User Guide
•Adobe FrameMaker Help Hub
•Adobe RoboHelp (2015 release) User Guide
•Adobe RoboHelp Help Hub
•Adobe FrameMaker Publishing Server (2015 release) User Guide
•Adobe FrameMaker Publishing Server Help Hub

Additional resources
User guides and Help hub pages 34