Adobe Acrobat 3D Version 8 Getting Started 8.0 QG
User Manual: adobe Acrobat 3D - 8.0 - Getting Started Free User Guide for Adobe Acrobat Reader Software, Manual
Open the PDF directly: View PDF ![]() .
.
Page Count: 34

ug.book Page i Thursday, April 5, 2007 1:21 PM
GETTING STARTED
ug.book Page ii Thursday, April 5, 2007 1:21 PM
© 2007 Adobe Systems Incorporated. All rights reserved.
Adobe® Acrobat® 3D Version 8 for Windows®
If this guide is distributed with software that includes an end user agreement, this guide, as well as the software described in it, is furnished under license
and may be used or copied only in accordance with the terms of such license. Except as permitted by any such license, no part of this guide may be
reproduced, stored in a retrieval system, or transmitted, in any form or by any means, electronic, mechanical, recording, or otherwise, without the prior
written permission of Adobe Systems Incorporated. Please note that the content in this guide is protected under copyright law even if it is not distributed
with software that includes an end user license agreement.
The content of this guide is furnished for informational use only, is subject to change without notice, and should not be construed as a commitment by
Adobe Systems Incorporated. Adobe Systems Incorporated assumes no responsibility or liability for any errors or inaccuracies that may appear in the
informational content contained in this guide.
Please remember that existing artwork or images that you may want to include in your project may be protected under copyright law. The unauthorized
incorporation of such material into your new work could be a violation of the rights of the copyright owner. Please be sure to obtain any permission
required from the copyright owner.
Any references to company names in sample templates or images are for demonstration purposes only and are not intended to refer to any actual organi-
zation.
Adobe, the Adobe logo, Acrobat, Acrobat Capture, Acrobat Connect, Breeze, Creative Suite, Distiller, Flash, FrameMaker, FreeHand, GoLive, Illustrator,
InCopy, InDesign, LiveCycle, Photoshop, PostScript, PostScript 3, Reader, and Version Cue are either registered trademarks or trademarks of Adobe
Systems Incorporated in the United States and/or other countries.
Apple, Mac and Macintosh are trademarks of Apple Inc., registered in the United States and other countries. Microsoft, MS-DOS, OpenType, Vista, and
Windows are either registered trademarks or trademarks of Microsoft Corporation in the United States and/or other countries. UNIX is a registered
trademark op The Open Group in the US and other countries. Helvetica and Times are trademarks of Heidelberger Druckmaschinen AG exclusively
licensed through Linotype Library GmbH, and may be registered in certain jurisdictions. All other trademarks are the property of their respective
owners.
The Spelling portion of this product is based on Proximity Linguistic Technology. © Copyright 1989, 2004 All Rights Reserved Proximity Technology
A Division of Franklin Electronic Publishers, Inc. Burlington, New Jersey USA. © Copyright 1990 Merriam-Webster Inc. © Copyright 1990 All Rights
Reserved Proximity Technology A Division of Franklin Electronic Publishers, Inc. Burlington, New Jersey USA. © Copyright 2003, 2004 Franklin
Electronic Publishers, Inc. © Copyright 2003, 2004 All Rights Reserved Proximity Technology A Division of Franklin Electronic Publishers, Inc.
Burlington, New Jersey USA. © Copyright 1991 Dr. Lluis de Yzaguirre I Maura. © Copyright 1991 All Rights Reserved Proximity Technology A
Division of Franklin Electronic Publishers, Inc. Burlington, New Jersey USA. © Copyright 1990 Munksgaard International Publishers Ltd. © Copyright
1990 All Rights Reserved Proximity Technology A Division of Franklin Electronic Publishers, Inc. Burlington, New Jersey USA. © Copyright 1990,
1995 Van Dale Lexicografie bv © Copyright 1990, 1996 All Rights Reserved Proximity Technology A Division of Franklin Electronic Publishers, Inc.
Burlington, New Jersey USA. © Copyright 1990, 2004 IDE a.s. © Copyright 1990, 2004 All Rights Reserved Proximity Technology A Division of
Franklin Electronic Publishers, Inc. Burlington, New Jersey USA. © Copyright 1992 Hachette / Franklin Electronic Publishers, Inc. © Copyright 2004
All Rights Reserved Proximity Technology A Division of Franklin Electronic Publishers, Inc. Burlington, New Jersey USA. © Copyright 1991 Text &
Satz Datentechnik © Copyright 1991 All Rights Reserved Proximity Technology A Division of Franklin Electronic Publishers, Inc. Burlington, New
Jersey USA. © Copyright 2004 Bertelsmann Lexikon Verlag © Copyright 2004 All Rights Reserved Proximity Technology A Division of Franklin
Electronic Publishers, Inc. Burlington, New Jersey USA. © Copyright 2004 MorphoLogic Inc. © Copyright 2004 All Rights Reserved Proximity
Technology A Division of Franklin Electronic Publishers, Inc. Burlington, New Jersey USA. © Copyright 1990 William Collins Sons & Co. Ltd. ©
Copyright 1990 All Rights Reserved Proximity Technology A Division of Franklin Electronic Publishers, Inc. Burlington, New Jersey USA. © Copyright
1993, 1994, 1995 Russicon Company Ltd. © Copyright 1995 All Rights Reserved Proximity Technology A Division of Franklin Electronic Publishers,
Inc. Burlington, New Jersey USA.
Portions of Adobe Acrobat include technology used under license from Autonomy and are copyrighted.
This product contains either BISAFE and/or TIPEM software by RSA Data Security, Inc.
e_Db is a licensed product from Simple Software Solutions, Inc.
Adobe Systems Incorporated, 345 Park Avenue, San Jose, California 95110, USA.
Notice to U.S. Government End Users. The Software and Documentation are “Commercial Items,” as that term is defined at 48 C.F.R. §2.101, consisting
of “Commercial Computer Software” and “Commercial Computer Software Documentation,” as such terms are used in 48 C.F.R. §12.212 or 48 C.F.R.
§227.7202, as applicable. Consistent with 48 C.F.R. §12.212 or 48 C.F.R. §§227.7202-1 through 227.7202-4, as applicable, the Commercial Computer
Software and Commercial Computer Software Documentation are being licensed to U.S. Government end users (a) only as Commercial Items and (b)
with only those rights as are granted to all other end users pursuant to the terms and conditions herein. Unpublished-rights reserved under the
copyright laws of the United States. Adobe agrees to comply with all applicable equal opportunity laws including, if appropriate, the provisions of
Executive Order 11246, as amended, Section 402 of the Vietnam Era Veterans Readjustment Assistance Act of 1974 (38 USC 4212), and Section 503 of
the Rehabilitation Act of 1973, as amended, and the regulations at 41 CFR Parts 60-1 through 60-60, 60-250, and 60-741. The affirmative action clause
and regulations contained in the preceding sentence shall be incorporated by reference.
Part Number: 90069962 (03/07)

ug.book Page iii Thursday, April 5, 2007 1:21 PM
iii
Contents
Chapter 1: Getting started
Installation . . . . . . . . . . . . . . . . . . . . . . . . . . . . . . . . . . . . . . . . . . . . . . . . . . . . . . . . . . . . . . . . . . . . . . . . . . . . . . . . . . 1
Using Adobe Help . . . . . . . . . . . . . . . . . . . . . . . . . . . . . . . . . . . . . . . . . . . . . . . . . . . . . . . . . . . . . . . . . . . . . . . . . . . 2
Resources . . . . . . . . . . . . . . . . . . . . . . . . . . . . . . . . . . . . . . . . . . . . . . . . . . . . . . . . . . . . . . . . . . . . . . . . . . . . . . . . . . . 4
Workflows. . . . . . . . . . . . . . . . . . . . . . . . . . . . . . . . . . . . . . . . . . . . . . . . . . . . . . . . . . . . . . . . . . . . . . . . . . . . . . . . . . . 8
What’s new. . . . . . . . . . . . . . . . . . . . . . . . . . . . . . . . . . . . . . . . . . . . . . . . . . . . . . . . . . . . . . . . . . . . . . . . . . . . . . . . . 25
ug.book Page iv Thursday, April 5, 2007 1:21 PM

ug.book Page 1 Thursday, April 5, 2007 1:21 PM
1
Chapter 1: Getting started
Installation
Requirements
To review complete system requirements and recom-
mendations for your Adobe® software, see the Read
Me file included with your software.
Install the software
1 Close any other Adobe applications open on your
computer.
2 Insert the installation disc into the disc drive, and
follow the on-screen instructions.
Note: For more information, see the Read Me file
included with your software.
Activate the software
Adobe software may include license management
technology to ensure compliance with the product
license agreement. When present, this technology
prompts you to verify the license of your product
within 30 days after you first use it. Verification is
mandatory.
You may be prompted to activate the software. The
verification process doesn’t collect, transmit, or use
any information about the identity of users. For more
informationonthistopic,see theReadMefileonyour
installation disc, or visit the Adobe website at
www.adobe.com/go/activation.
1 If the Activation dialog box isn’t already open,
choose Help > Activation > Activate.
2 Follow the on-screen instructions.
Note: If you want to install the software on a different
computer, you must first deactivate the software on your
computer: Choose Help > Activation > Deactivate.
Register
Register your product to receive complimentary
installation support, notifications of updates, and
other services.
❖ To register, follow the on-screen instructions in the
Registration dialog box, which appears after you
install and activate the software.
If you postpone registration, you can register at any
time by choosing Help > Registration.
Read Me
TheinstallationdisccontainstheReadMe fileforyour
software. (This file is also copied to the application
folder during product installation.) Open the file to
read important information about the following
topics:
• System requirements
• Installation
• Registration
• Electronic licensing
• Legal notices
ug.book Page 2 Thursday, April 5, 2007 1:21 PM
2 CHAPTER 1
Getting started
Using Adobe Help
Adobe Help resources
Documentation for your Adobe software is available
in a variety of formats.
In-product and LiveDocs Help
In-product Help provides access to all documentation
and instructional content available at the time the
software ships. It is available through the Help menu
in your Adobe software.
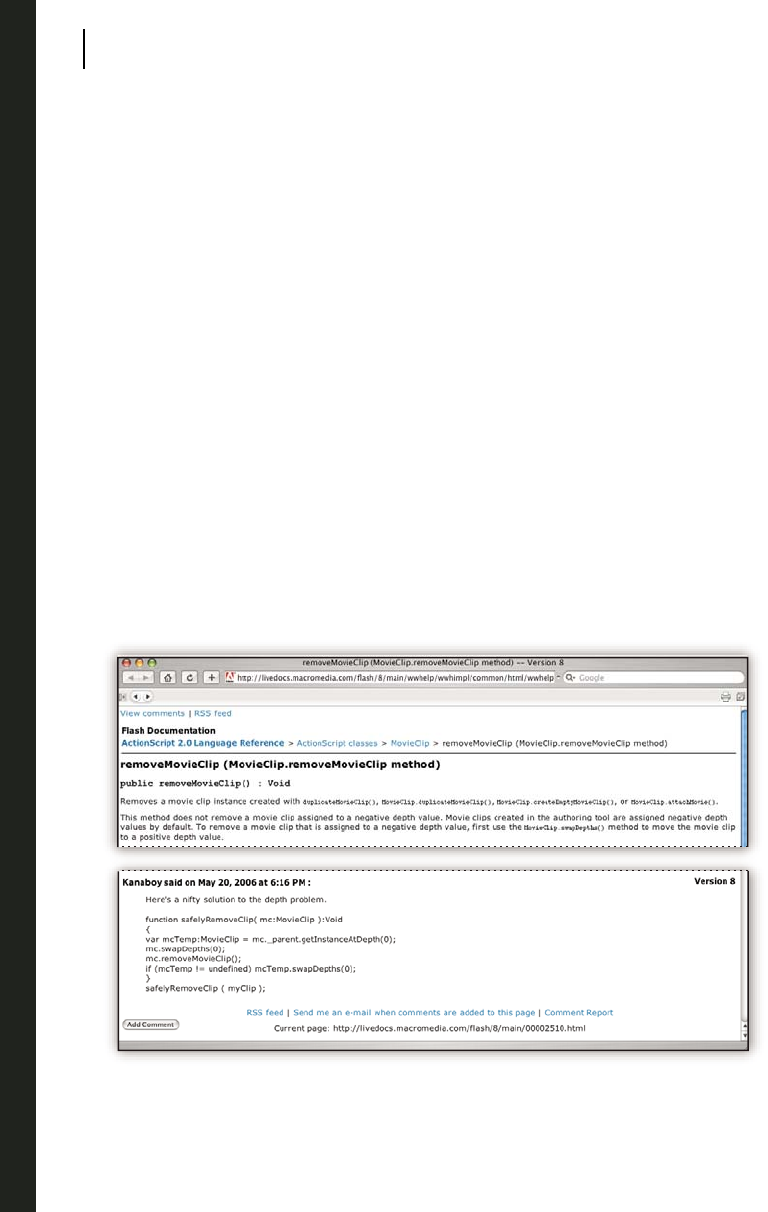
LiveDocs Help includes all the content from
in-product Help, plus updates and links to additional
instructional content available on the web. For some
products, you can also add comments to the topics in
LiveDocs Help. Find LiveDocs Help for your product
in the Adobe Help Resource Center, at
www.adobe.com/go/documentation.
Most versions of in-product and LiveDocs Help let
you search across the Help systems of multiple
products. Topics may also contain links to relevant
content on the web or to topics in the Help of another
product.
ThinkofHelp, bothintheproductandontheweb, as
a hub for accessing additional content and commu-
nities of users. The most complete and up-to-date
version of Help is always on the web.
How To topics
The How To topics provide a brief overview of the
most common tasks. If you need more information,
clickthelinkatthe bottomoftheHow Totopictoview
the related Help topic.

ug.book Page 3 Thursday, April 5, 2007 1:21 PM
3
ADOBE ACROBAT 3D VERSION 8
User Guide
PDF documentation
The in-product Help is also available as an Adobe PDF
that is optimized for printing. Other documents, such
as installation guides and white papers, may also be
provided as PDFs.
All PDF documentation is available through the Adobe
Help Resource Center, at
www.adobe.com/go/documentation. To see the PDF
documentation included with your software, look in the
Documents folder on the installation or content DVD.
Printed documentation
Printed editions of the in-product Help may be
available for purchase in the Adobe Store, at
www.adobe.com/go/store. You can also find books
published by Adobe publishing partners in the Adobe
Store.
A printed workflow guide is included with all Adobe
Creative Suite® 3 products, and stand-alone Adobe
products may include a printed getting started guide.
Note: Printed documentation is not available in all
languages.
Using Help in the product
In-product Help is available through the Help menu.
Afteryou starttheAdobeHelpViewer,youcan access
Help for additional Adobe products installed on your
computer. Topics may contain links to additional
content on the web.
If you search for a phrase, such as “shape tool,”
enclose it in quotation marks to see only those topics
that include all the words in the phrase (applies to
roman language versions of the software).
Accessibility features
Adobe Help content is accessible to people with
disabilities—such as mobility impairments, blindness,
and low vision. In-product Help supports these
standard accessibility features:
• The user can change text size with standard context
menu commands (Microsoft® Windows®) and
standard menu commands (Apple Mac OS).
• Links are underlined for easy recognition.
• If link text doesn’t match the title of the destination,
the title is referenced in the Title attribute of the
Anchor tag. For example, the Previous and Next
links include the titles of the previous and next
topics.
• Content supports high-contrast mode.
• Images without captions include alternate text.
• Each frame has a title to indicate its purpose.
• Standard HTML tags define content structure for
screen reading or text-to-speech tools.
• Style sheets control formatting, so there are no
embedded fonts.
Keyboard shortcuts for Help toolbar controls
(Windows)
Back button Alt+Left Arrow
Forward button Alt+Right Arrow
Print Ctrl+P
About button Ctrl+I
Help For menu Alt+Down Arrow or Alt+Up Arrow to
view Help for another application
ug.book Page 4 Thursday, April 5, 2007 1:21 PM
4 CHAPTER 1
Getting started
Keyboard shortcuts for Help navigation (Windows)
• To move between panes, press Ctrl+Tab (forward)
and Shift+Ctrl+Tab (backward).
• To move through and outline links in a pane, press
Tab (forward) or Shift+Tab (backward).
• To activate an outlined link, press Enter.
• To change text size, press Ctrl/Command+plus sign
(+) or Ctrl/Command+minus sign (-).
Resources
Adobe Video Workshop
Adobe Creative Suite 3 Video Workshop offers over
200 training videos covering a wide range of subjects
for print, web, and video professionals.
You can use Adobe Video Workshop to learn about
any Creative Suite 3 product. Many videos show you
how to use Adobe applications together.
Note: Adobe Video Workshop is not available in all
languages.
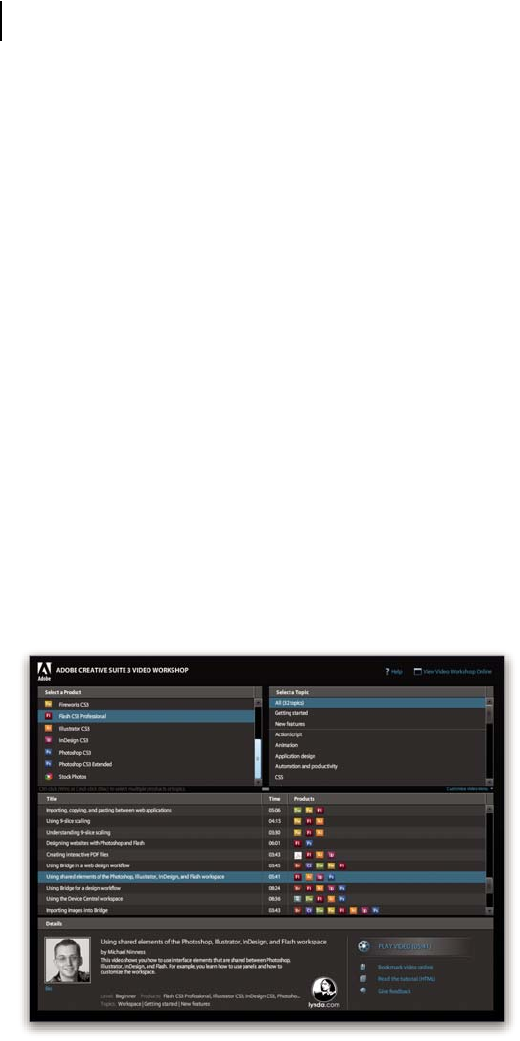
When you start Adobe Video Workshop, you choose
the products you want to learn and the subjects you
want to view. You can see details about each video to
focus and direct your learning.
Community of presenters
With this release, Adobe Systems invited the
community of its users to share their expertise and
insights. Adobe and lynda.com present tutorials, tips,
and tricks from leading designers and developers such
as Joseph Lowery, Katrin Eismann, and Chris
Georgenes. You can see and hear Adobe experts such
as LynnGrillo,GregRewis,and RussellBrown.Inall,
over 30 product experts share their knowledge.
ug.book Page 5 Thursday, April 5, 2007 1:21 PM
5
ADOBE ACROBAT 3D VERSION 8
User Guide
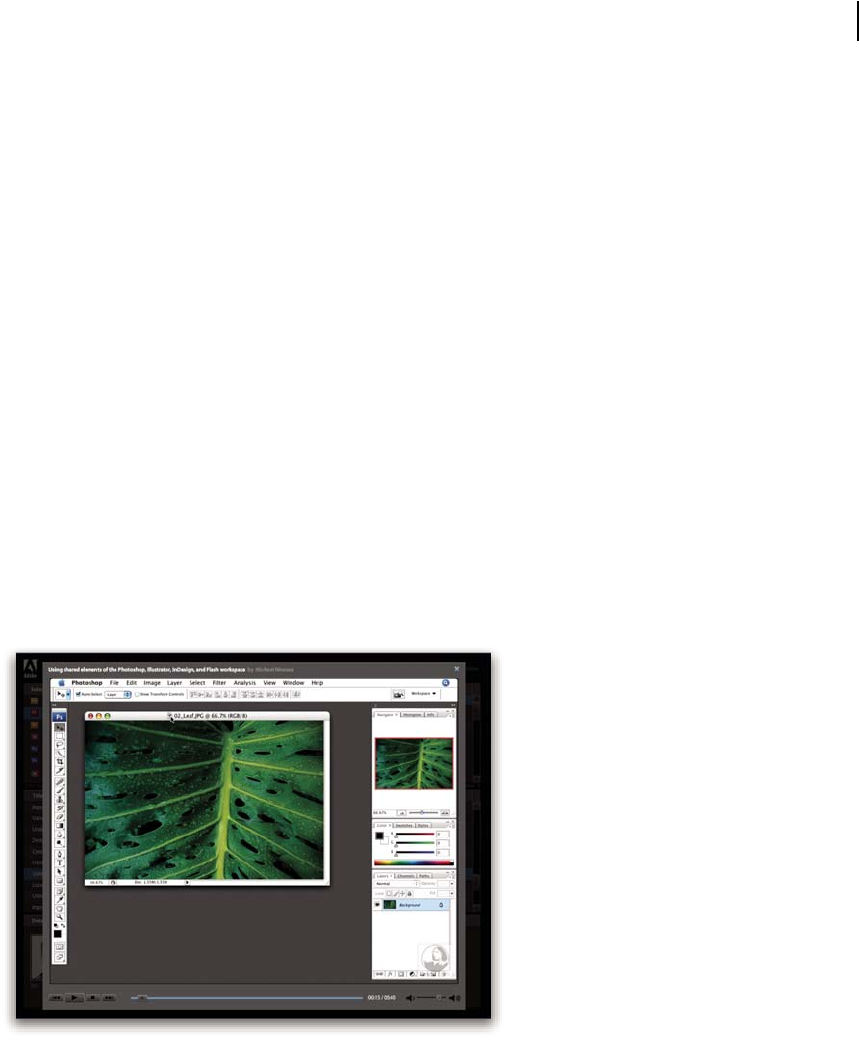
Tutorials and source files
Adobe Video Workshop includes training for novices
and experienced users. You’ll also find videos on new
featuresandkey techniques.Eachvideocoversasingle
subject and typically runs about 3-5 minutes. Most
videos come with an illustrated tutorial and source
files, so you can print detailed steps and try the tutorial
on your own.
Using Adobe Video Workshop
You can access Adobe Video Workshop using the
DVD included with your Creative Suite 3 product. It’s
also available online at
www.adobe.com/go/learn_videotutorials. Adobe will
regularly add new videos to the online Video
Workshop, so check in to see what’s new.
Acrobat videos
Adobe Video Workshop covers a wide range of
subjects for Adobe Acrobat®, including these:
• Setting up the workspace and taskbars
• Combining files into a PDF
• Converting PDFs
• Modifying PDFs
• Adding comments to PDFs
• Working with shared reviews
• Reviewing and summarizing comments
• Adding security to forms
• Collaborating in real time with Adobe Acrobat
Connect™
• Preflighting files
• Printing documents

ug.book Page 6 Thursday, April 5, 2007 1:21 PM
6 CHAPTER 1
Getting started
To access Adobe Creative Suite 3 video tutorials, visit
Adobe Video Workshop at
www.adobe.com/go/learn_videotutorials.
Note: Adobe Video Workshop is not available in all
languages.
Extras
You have access to a wide variety of resources that will
help you make the most of your Adobe software. Some
of these resources are installed on your computer
during the setup process; additional content is
included on the installation or content disc, if appli-
cable. Unique extras are also offered online by the
Adobe Exchange community, at
www.adobe.com/go/exchange.
Installed resources
During software installation, a number of resources
are placed in your application folder. To view those
files, navigate to the application folder on your
computer.
Disc content
The disc included with your product may contain
additional resources for use with the software, such as
presets, plug-ins, a PDF version of the Help, technical
information, and other documents.
Adobe Exchange
For more free content, visit
www.adobe.com/go/exchange, an online community
where users download and share thousands of free
actions, extensions, plug-ins, and other content for use
with Adobe products.
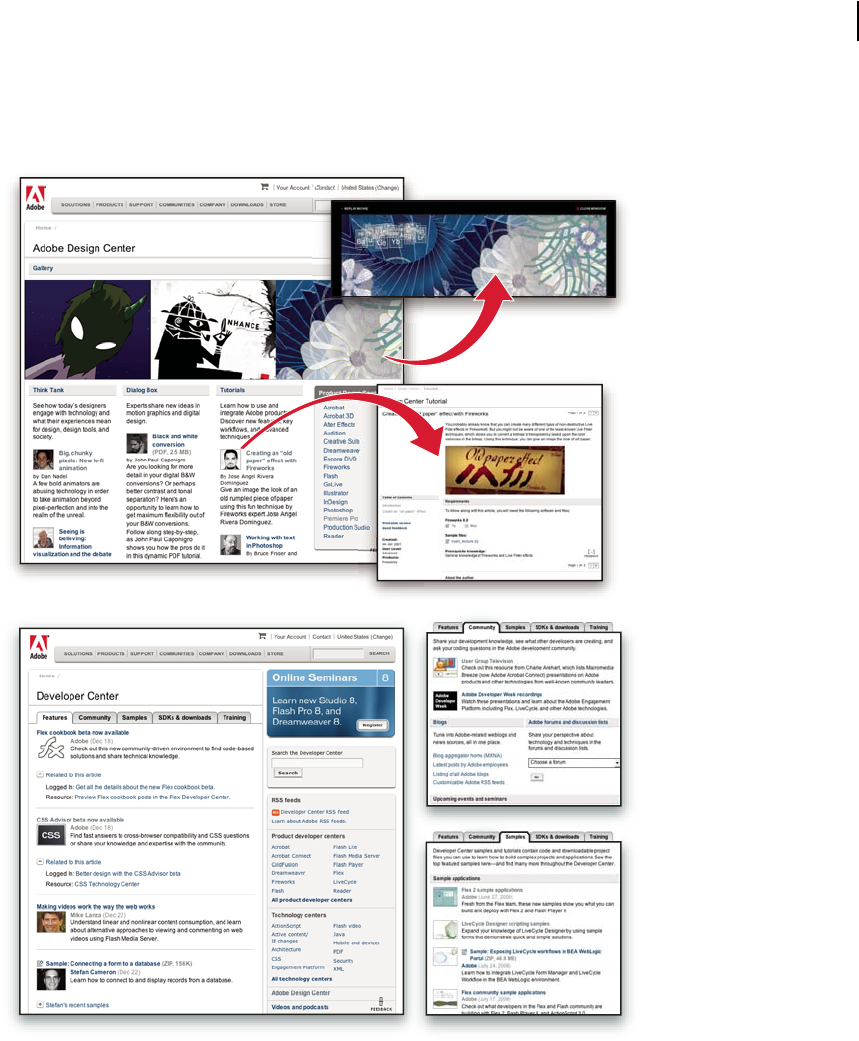
Adobe Design Center
Adobe Design Center offers articles, inspiration, and
instruction from industry experts, top designers, and
Adobe publishing partners. New content is added
monthly.
You can find hundreds of tutorials for design products
and learn tips and techniques through videos, HTML
tutorials, and sample book chapters.
New ideas are the heart of Think Tank, Dialog Box,
and Gallery:
• ThinkTankarticlesconsiderhowtoday’sdesigners
engage with technology and what their experiences
mean for design, design tools, and society.
• In Dialog Box, experts share new ideas in motion
graphics and digital design.
• The Gallery showcases how artists communicate
design in motion.
Visit Adobe Design Center at
www.adobe.com/designcenter.
Adobe Developer Center
Adobe Developer Center provides samples, tutorials,
articles, and community resources for developers who
build rich Internet applications, websites, mobile
content, and other projects using Adobe products. The
Developer Center also contains resources for devel-
opers who develop plug-ins for Adobe products.
In addition to sample code and tutorials, you'll find
RSS feeds, online seminars, SDKs, scripting guides,
and other technical resources.
Visit Adobe Developer Center at
www.adobe.com/go/developer.

ug.book Page 8 Thursday, April 5, 2007 1:21 PM
8 CHAPTER 1
Getting started
and paid technical support options. Follow the
Training link for access to Adobe Press books, a
variety of training resources, Adobe software certifi-
cation programs, and more.
Downloads
Visit www.adobe.com/go/downloads to find free
updates, tryouts, and other useful software. In
addition, the Adobe Store (at
www.adobe.com/go/store) provides access to
thousands of plug-ins from third-party developers,
helping you to automate tasks, customize workflows,
create specialized professional effects, and more.
Adobe Labs
Adobe Labs gives you the opportunity to experience
and evaluate new and emerging technologies and
products from Adobe.
At Adobe Labs, you have access to resources such as
these:
• Prerelease software and technologies
• Code samples and best practices to accelerate your
learning
• Early versions of product and technical documen-
tation
• Forums, wiki-based content, and other collabo-
rative resources to help you interact with
like-minded developers
Adobe Labs fosters a collaborative software devel-
opment process. In this environment, customers
quickly become productive with new products and
technologies. Adobe Labs is also a forum for early
feedback,whichtheAdobe developmentteamsuseto
create software that meets the needs and expectations
of the community.
Visit Adobe Labs at www.adobe.com/go/labs.
User communities
User communities feature forums, blogs, and other
avenues for users to share technologies, tools, and
information. Users can ask questions and find out how
others are getting the most out of their software.
User-to-user forums are available in English, French,
German, and Japanese; blogs are posted in a wide
range of languages.
To participate in forums or blogs, visit
www.adobe.com/communities.
Workflows
Adobe® Acrobat® 3D Version 8 software offers robust
tools to support many aspects of your document
processes.
• Create Adobe PDFs from many different applica-
tions.
• Assemble files from multiple sources into a PDF
package.
• Convert PDFs to other formats, such as Word,
HTML, or JPG.
• Restrict access to your PDFs using various security
features.
• Approve a PDF by digitally signing and certifying it.
ug.book Page 9 Thursday, April 5, 2007 1:21 PM
9
ADOBE ACROBAT 3D VERSION 8
User Guide
• Conduct reviews using numerous commenting and
review tools.
• Create fillable forms, distribute them securely, and
collect the form data.
Browse through the following Quickstart topics to get
an overview of Acrobat 3D capabilities. For more
information on a topic, see Help.
Create PDFs
PDFs retain the appearance of your original
documents, so you don’t need to worry about losing
document quality. And because PDFs can be viewed
on Windows, Mac OS, or UNIX by using free Adobe
Reader® software, anyone can view and print PDFs
without having the source applications. You can create
PDFs from within Acrobat 3D, or from various source
applications.
For example, you can convert a Microsoft Outlook
email message discussing project issues to a PDF and
then attach it to a PDF containing the project specifi-
cation and schedule. Or you may have personnel
documents that are currently only on paper. You can
easily create PDFs from each of these paper
documentsaspartoftheprocessofcreatinganonline
human resources package.
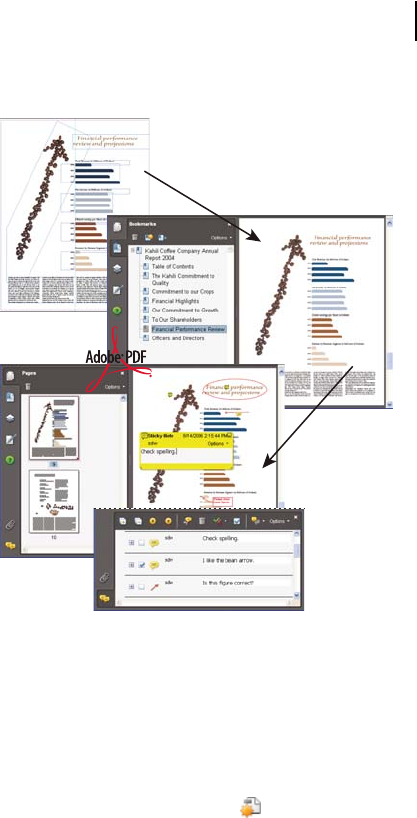
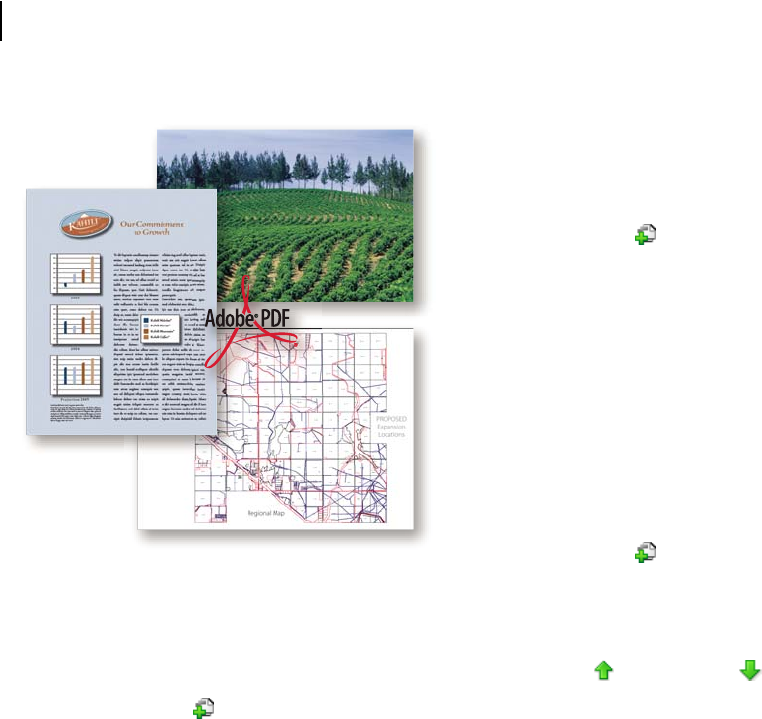
Convert your original document (top) to Adobe PDF (center), and
en add bookmarks, comments, and so on in Acrobat (bottom). th
Create from a file
To create a PDF from within Acrobat, the application
that created the original file must be installed on the
system in most cases.
1 Click the Create PDF button and choose From
File.
2 Select the file you want to convert, and click Open.
The authoring application opens automatically or a
progress dialog box appears. If the file is in an unsup-
ported format, a message appears, telling you that the
file cannot be converted to a PDF.
ug.book Page 10 Thursday, April 5, 2007 1:21 PM
10 CHAPTER 1
Getting started
Create from a paper document
You can create a PDF directly from a paper document
using Acrobat 3D and your scanner.
1 Click the Create PDF button and choose From
Scanner.
2 Select the input, output, and document options in
the Acrobat Scan dialog box, and then click Scan.
3 If creating a new PDF, specify a filename and
location, and click Save.
4 Select Scan More Pages or Scanning Complete.
Create from a web page
Youcan download andconvert webpages from thetop
level, or any number of subordinate levels, of a URL.
1 Click the Create PDF button and choose From
Web Page.
2 Type the URL into the text box. (Click Browse to
convert a web page you have already downloaded.)
3 Specify the number of levels to download and
where to download files from, and then click Create.
Create from scratch
You can create small PDFs that can be edited in
Acrobat 3D.
1 Choose File > Create PDF > From Blank Page.
2 Click in the document and begin typing. Use
optionsontheNewDocumenttoolbar tochangetext
attributes.
3 Save the document.
4 To continue editing, choose Document > Resume
Editing.
To convert the PDF so that it cannot be re-edited,
choose Document > Prevent Further Edits.
Create from Word
After you install Acrobat 3D, an Acrobat PDFMaker
toolbar is added to Microsoft® Word. In Word 2007 for
Windows,youaccessthePDFMakeroptionsfromthe
Acrobat ribbon instead of the toolbar.
1 In Word, open the file you want to convert.
2 Do one of the following:
• (Word 2007 for Windows) Click Acrobat and then
click the Create PDF button .
• (Other versions of Word) Click the Convert To
Adobe PDF button .
3 Specify a filename and location, and click Save.
4 (Mac OS only) Click View File or Done.
You can also convert a file to PDF and then email it for
review by clicking Create And Send For Review
(Office 2007) or Send For Review (other versions
of Office).
Create from Outlook (Windows)
After you install Acrobat 3D, an Acrobat PDFMaker
toolbar is added to Outlook.
1 Select the desired email messages and click Create
Adobe PDF From Selected Messages .
2 Specify a filename and location, and click Save.
TheselectedmessagesareconvertedtoaPDFpackage
or a merged PDF, depending upon conversion
settings. To convert email folders, select the desired
folders and click Create Adobe PDF From Folders .
You can also automatically archive email messages and
folders.

ug.book Page 11 Thursday, April 5, 2007 1:21 PM
11
ADOBE ACROBAT 3D VERSION 8
User Guide
Create from Lotus Notes (Windows)
After you install Acrobat 3D, an Acrobat PDFMaker
toolbar is added to IBM Lotus Notes and commands
are added to the Actions menu.
1 Select the desired email messages and click Convert
Selected Messages To Adobe PDF .
2 Specify a filename and location, and click Save.
The messages are converted to a merged PDF or a PDF
package, depending upon conversion settings. You can
convert an entire folder to PDF by clicking Convert
Selected Folder To Adobe PDF .
Create from Internet Explorer (Windows)
You can convert an entire web page or a selected
portion of it to PDF.
1 In Microsoft Internet Explorer, open the web page
you want to convert.
2 (Optional) Drag to select the text and images you
want to convert.
3 Click Convert Web Page To PDF .
4 Specify a filename and location, and click Save.
You can also convert one or more web pages, and even
entire websites, from within Acrobat 3D.
Create using Adobe PDF printer
In many applications, you can use the Print command
with the Adobe PDF printer to convert a file to PDF.
1 Open the file you want to convert, and choose
File > Print.
2 Choose Adobe PDF from the list of printers, and
print the file.
3 If prompted, specify a filename and location, and
click Save.
You can also choose a different default Adobe PDF
printer setting or create a customized setting.
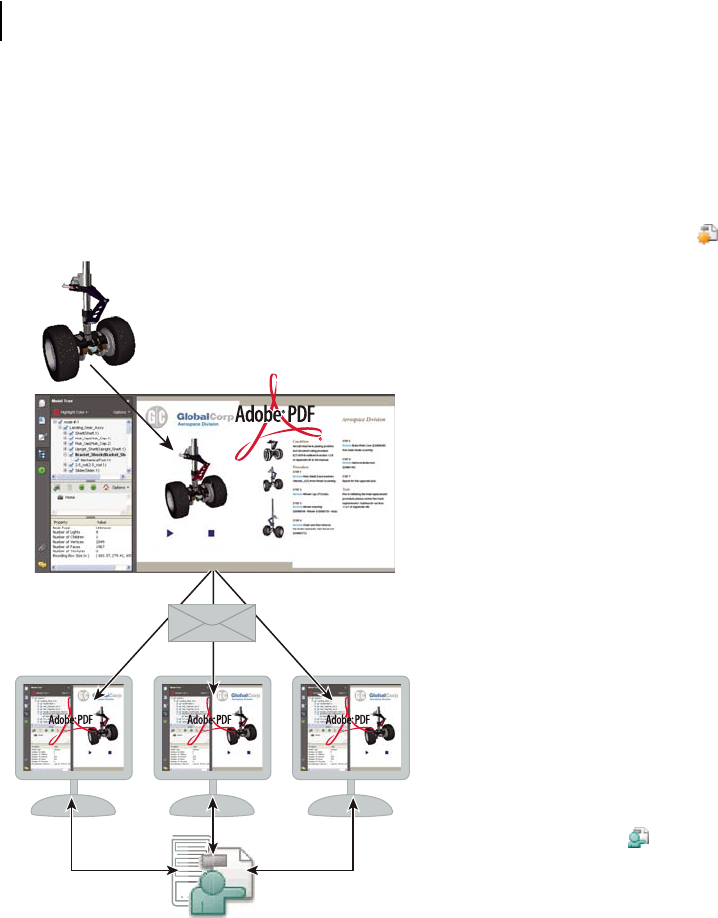
Collaborate on 3D designs
Share and collaborate on your 3D design ideas by
converting them to secure PDF files that others can
comment on in free Adobe Reader. Start an email-
based review to solicit feedback from your collabo-
rators. The email-based review wizard enables
commenting for Reader users by default. Or, you can
start an Acrobat Connect meeting that lets you
demonstrate and discuss 3D designs on your desktop
in real time.
Note: If you want to secure your 3D PDF, do so before
you start a review. You can’t change security properties
in a Reader-enabled PDF.
ug.book Page 12 Thursday, April 5, 2007 1:21 PM
12 CHAPTER 1
Getting started
Collaborators can explore all aspects of the 3D model,
from hidden internal structures to exploded anima-
tions. They can rotate, cross-section, and measure
parts while adding their comments in notes, drawings,
and other markups.
Convert a 3D file to PDF
Convert any supported 3D file to PDF. (For a list of
supported formats, choose Edit > Preferences, and
select Convert To PDF on the left.)
1 Click the Create PDF button on the Tasks
toolbar, and choose From File.
2 Browse to select the 3D CAD file you want to
convert.
3 Select the desired preset or individual settings.
Add comments to a 3D model
By adding comments, you create a new view that’s
associated with those comments.
1 SelectatoolfromtheComment&Markuptoolbar.
2 Clickinthe3Dmodeltoadd acommentandcreate
a new view in the Model Tree.
You can add comments to an existing comment view
by selecting that view in the Model Tree before you
click in the model.
Start a meeting
If you have an Adobe Acrobat Connect account, you
can start a meeting to review PDFs in a web browser.
You can also create a trial account to start a meeting.
Note: Acrobat Connect is not available in all languages.
1 Click Start Meeting in the Tasks toolbar.
2 Click Log In, and then type your Meeting URL,
login, and password. (Or click Create Trial Account
and follow the on-screen instructions.)
3 Click Send An E-mail Invitation or Share My
Screen.
ug.book Page 13 Thursday, April 5, 2007 1:21 PM
13
CAD, CAM, CAE interoperability
From drawing board to manufacturing plant, PDF can
ease the flow of Computer Aided Design, Manufac-
turing, and Engineering (CAD, CAM, CAE) infor-
mation. For example, you can quickly convert an
entire assembly to a PDF that’s a fraction of the
original file size while retaining geometric dimen-
sioning and tolerancing and other product specifica-
tions.
By using Acrobat 3D, manufacturers and suppliers can
open virtually any 3D CAD file without installing the
original CAD application or a CAD translator. Import
and view Product Manufacturing Information (PMI)
from CATIA V5, I-DEAS, JT, NX, and
Pro/ENGINEER files. Once the design is finalized,
export geometry to a standard file format that can be
reused in CAM applications to cut, build, and
assemble the parts.
ADOBE ACROBAT 3D VERSION 8
User Guide
View product information for a 3D model
You can view Product Manufacturing Information
(PMI) in the Model Tree and in the 3D model, if you
imported it during PDF conversion.
1 Click the 3D model, and click the Model Tree icon
in the 3D toolbar.
2 In the Model Tree, click each view to see the PMI
associated with that view.
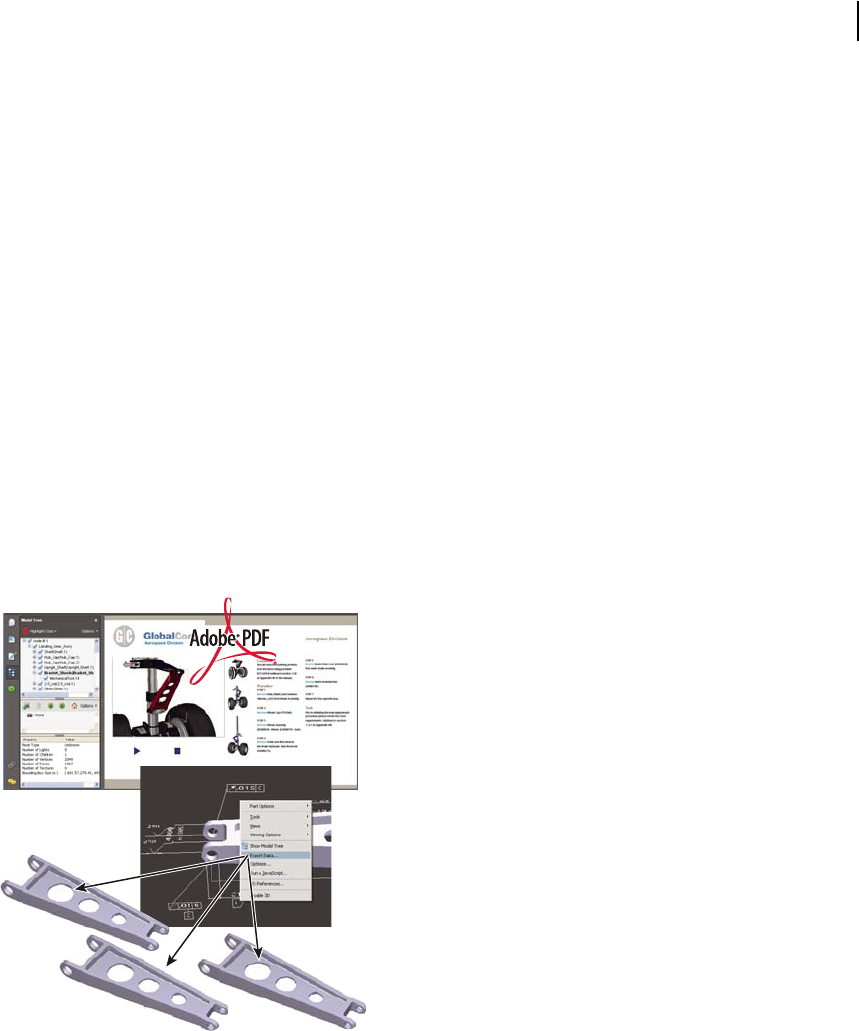
Export geometry from a 3D model
If geometry was retained during conversion, you can
export it as IGES, STEP, VRML, or ParaSolid file
formats, which most CAE and CAM applications can
read.
1 Right-click the 3D model and choose Export Data
from the menu.
2 Choose a file type and click Settings to specify
options for that file type.
Combine files
Combine files from various sources into a single,
merged PDF or an assembled PDF package of related
files. For example, you might collect brochures,
presentations, spreadsheets, and contracts into a
cohesive sales proposal.
If you merge files into a single PDF, you can then add
unifying elements to help tie the document together.
Forexample,you canaddaheaderorfootertothenew
file.Orrenumberpages sothat thepagenumbersthat
appearin thePageNavigationtoolbarareconsecutive
across the merged files. You can also rotate, delete, and
replace pages as necessary to create a cohesive look
and keep the PDF up-to-date.
ug.book Page 14 Thursday, April 5, 2007 1:21 PM
14 CHAPTER 1
Getting started
Merge documents from different applications into one Adobe PDF.
Create a PDF from multiple files
You can easily merge files of different types into a
single PDF.
1 Click Combine Files , and then click Add Files.
2 Selectthefilesyouwanttocombine,and clickAdd
Files.
3 Adjust the order of files as desired, and then choose
a file size and conversion setting.
4 Click Next, select Merge Files Into A Single PDF,
and click Create.
Rather than merging files, you can also create a PDF
package of files.
Assemble PDFs in a package
A PDF package lets you assemble related information
into a single PDF while maintaining individual PDFs
within it.
1 Click Combine Files , and then click Add Files.
2 Selectthefilesyouwanttocombine,and clickAdd
Files.
3 Adjust the order of files as desired, and then choose
a file size and conversion setting.
4 Click Next, select Assemble Files Into A PDF
Package, and click Create.
Modify a list of files to combine
When combining files, you have several options for
adjusting the set of files.
1 Click Combine Files , click Add Files, and add
the desired files.
2 To modify the list of files or remove a file from the
list, select a file, and then do any of the following:
• Click Move Up or Move Down or drag the
file to a new location.
• Click Choose Pages to include a subset of pages.
(Button name might change based on file type.)
• Click Remove or press Delete.
Add headers and footers
You can add a single header and footer throughout a
PDF or apply different headers and footers selectively
to various pages.
1 Choose Document > Header & Footer > Add. If a
message appears, click Add New.
2 Specify font and margin settings.

ug.book Page 15 Thursday, April 5, 2007 1:21 PM
15
ADOBE ACROBAT 3D VERSION 8
User Guide
3 In the header and footer text boxes, type the desired
text. Click the buttons below the boxes to insert a page
number or date.
You can save header and footer settings for easy reuse.
Renumber pages
When you renumber pages, only the numbers that
appear in the Pages panel and the toolbar are affected.
To change the numbers that appear on the document
pages, add a header or footer.
1 Click the Pages button , and choose Number
Pages from the Options menu.
2 Specify which pages the numbering will be applied to.
3 Specify the numbering style, prefix (if any), and
starting number.
You can also continue the numbering style of the
previous section.
Rotate pages
You can rotate all or selected pages in a PDF.
1 Choose Document > Rotate Pages.
2 Specify the direction of the rotation and the page
range.
3 Choose the desired options from the Rotate menus.
To temporarily rotate a page, choose View > Rotate
View > Clockwise or Counterclockwise.
Delete pages
After combining files, you can delete unwanted or
blank pages.
1 (Optional) Click the Pages button in the
navigation pane and select the pages you want to
delete.
2 Choose Document > Delete Pages.
3 Click Selected to delete selected pages or click From
and specify a range.
If you want to retain a copy of the original PDF, make
sure that you save the new document using Save As
rather than Save.
Replace pages
To quickly update a PDF, you can replace individual
pages.
1 Choose Document > Replace Pages.
2 Select the document that contains the replacement
pages, and click Select.
3 Under Original, specify the pages you want to
replace. Under Replacement, specify the beginning
replacement page.
Interactive elements, such as links and bookmarks,
associated with the original pages aren’t deleted.
Export
If youdon’thaveaccessto theoriginalsourcefilefor a
PDF, you can convert the PDF to an editable format.
You can also copy selected text and images to reuse in
other documents. Or extract pages and save them as a
new PDF.
ug.book Page 16 Thursday, April 5, 2007 1:21 PM
16 CHAPTER 1
Getting started
For example, you might save a brochure in HTML
format for use on your company’s website. Or extract
a few relevant pages from a large in-house document
to share with clients. You could easily repurpose
images and text from a design specification by copying
them into a Word, Adobe Photoshop®, or Adobe
InDesign® document.
Export as Word
If you don’t have the original file from which a PDF
was created, you can save the PDF as a Word
document that you can then edit in Word.
1 Click Export in the Tasks toolbar, and then
choose Word Document.
2 Click Settings to set conversion options.
Note: When you save a PDF to Word format, the
resulting file isn’t equivalent to a file created in Word;
some coding information may be lost.
Export as HTML or XML
To easily use the content of a PDF on the web, simply
convert the PDF to HTML or XML format.
1 Click Export in the Tasks toolbar, and then
choose HTML Web Page or XML 1.0.
2 Click Settings to set conversion options.
You can save a PDF in HTML 3.2 format by clicking
Export, and choosing More Formats > HTML 3.2.
Export as text
You can save a PDF in Rich Text Format (RTF), as
accessible text, or as plain text. RTF preserves the most
formatting. Accessible text preserves such items as
comments, form fields, and alternate text.
1 Click Export in the Tasks toolbar, choose More
Formats, and then choose the desired text format.
2 If saving to RTF or plain text, click Settings to adjust
the conversion settings.
Select and copy text
You can copy words, lines, or columns of text from a PDF.
1 Using the Select tool , do any of the following:
• Drag across text.
• Double-click or triple-click to select a word or a line
of text.
2
Move the pointer over the icon that appears next to the
selected text, and then choose an option from the menu.
Ifyoucannotselecttext, itmaybepartofanimage or
from a scanned document.
Select and copy an image
You can copy an image from a PDF to the clipboard or
to another application, or you can save it to a file.
1 Using the Select tool , click an image or drag to
select a portion of it after the pointer changes to a
crosshairs icon.
2 Do any of the following:
• Drag the image into an open document in another
application.
• Right-click/Control-click the image and choose
Copy Image or Save Image As.

ug.book Page 17 Thursday, April 5, 2007 1:21 PM
17
ADOBE ACROBAT 3D VERSION 8
User Guide
Take a snapshot of a page
Use the Snapshot tool to copy all selected content. Text
and images are both copied as an image.
1 Choose Tools > Select & Zoom > Snapshot tool.
2 Dragonthepagetoselectcontent,orclicktocopy
the entire page.
The selected content is copied to the clipboard when
you release the mouse button.
Extract pages
When you extract pages, they are saved in a new PDF.
1 Choose Document > Extract Pages.
2 Specify the range of pages to extract.
3 Choose whether you want to delete the pages after
extracting them.
4 To save the extracted pages as individual files,
rather than a single PDF, select Extract Pages As
Separate Files.
All links, comments, and form fields on the extracted
pages are also extracted, but bookmarks and articles
are not.
Secure
You can use password or certificate encryption, as well
as server-based policies, to help control access to your
PDFs. These security features allow you to restrict
what others can do and see in the PDFs you create.
For example, you can create read-only files for web
distribution, or you can limit access in files that you
send out for review so that only commenting is
allowed. You can redact sensitive content in a legal
brief or examine a PDF for personal information
before making it available to the public.
Examine a PDF for hidden content
Before making a PDF available to others, you may
wish to remove content that reveals the document
history or that contains your personal information,
such as metadata that lists your name as the author.
1 Choose Document > Examine Document.
2 Select the items you want removed from the PDF,
and click Remove All Checked Items.
3 Save the document with a new name.
Youcanalso examineaPDFattheendofaredaction
process.
Redact sensitive content
Use redaction to remove sensitive content from a PDF.
Important: Save a copy of the PDF before applying
redaction markups.
1 Choose View > Toolbars > Redaction.
2 Click Mark For Redaction , and do any of the
following:
• Double-click a word or an image.
• Drag across text.
• Ctrl-drag/Control-drag over an area of the page.
3 ClickApply Redactions .Searchforandremove
hidden content, if desired.
Use Search And Redact to remove all instances of a
search string.

ug.book Page 18 Thursday, April 5, 2007 1:21 PM
18 CHAPTER 1
Getting started
Add a document password
One way to restrict access to a PDF is to add a
Document Open password.
Important: There is no way to open the PDF if you
forget the password.
1 Click Secure on the Tasks toolbar, and choose
Password Encrypt.
2 Select Require A Password To Open The
Document, and type a case-sensitive password in the
text box.
If the PDF already has security applied, you may need
to supply the Permissions password that lets you
change security settings.
Prevent changes to a PDF
Add security restrictions to help prevent others from
changing your PDF.
1 Click Secure on the Tasks toolbar, and choose
Password Encryption.
2 Select Restrict Editing And Printing Of The
Document, and type a Permissions password.
3
Choose an option from the Changes Allowed menu.
For information on using other security methods to
restrict access, see Help.
Create secure attachments
You can add security to both PDF and non-PDF
documents by embedding them in an encrypted
envelope, called a security envelope,thatyou cansend
as an email attachment.
1 Click Secure on the Tasks toolbar, and choose
Create Security Envelope.
2 Click Add File To Send, and select the desired
documents.
3 Click Next, and follow the on-screen instructions to
create the security envelope.
Recipients can extract and save the encrypted
documents. Once saved, the documents are no longer
encrypted.
Secure PDFs using policies
You can quickly apply security options by using either
a user policy that you create or an organizational policy
created by an Adobe LiveCycle® Policy Server admin-
istrator and shared by a group of users. Two user
policies come with Acrobat 3D.
1 Click Secure on the toolbar, and choose one of
the policies listed at the top of the menu.
2 Click Yes, and then change the security settings as
desired.
Create a user security policy
Security policies provide an easy way for you to apply
the same security settings to multiple PDFs. Security
policies include encryption, permission settings, and
informationaboutwhocanopenthePDFsorchange
security settings.
1 Click Secure on the toolbar, and choose Manage
Security Policies.
2 Click New, and select the type of security you want.
3 Click Next, and follow the on-screen instructions to
set up the policy and choose the desired security
settings.
ug.book Page 19 Thursday, April 5, 2007 1:21 PM
A
B
19
Sign
Digitally signing a PDF is much like signing a paper
document. For example, you can use a digital
signature to indicate that you approve of the contents,
that you have reviewed the contents, or that you agree
to the terms outlined in the document.
Adding a digital signature also allows you to track any
changes made to the PDF. For added security, you can
certify a PDF so that recipients can be assured that the
PDF has not been altered. Finally, you can check
digital signatures to ensure that they are valid.
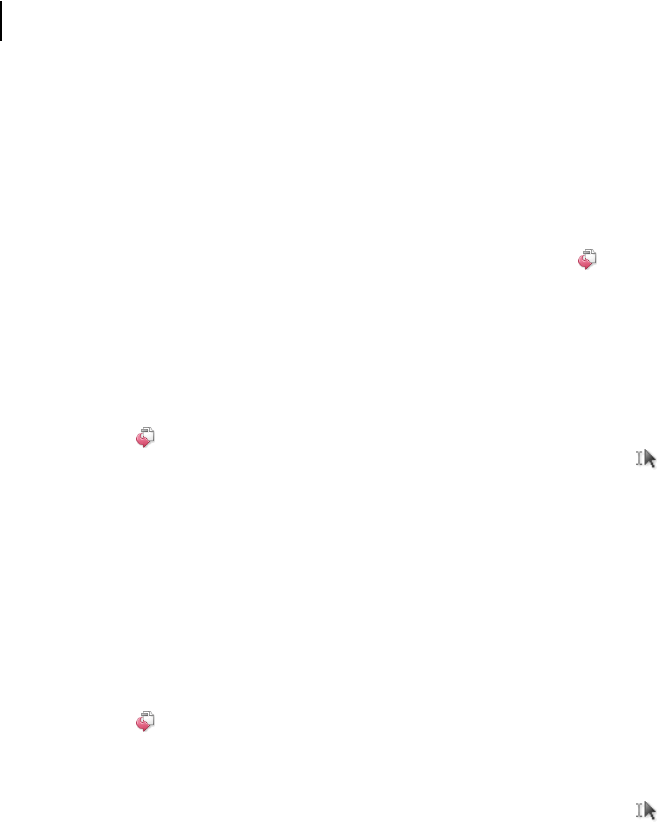
Sign a PDF to indicate you’ve read it or to certify its contents.
A. Certifying signature B. Digital signature
ADOBE ACROBAT 3D VERSION 8
User Guide
Create a self-signed digital ID
A digital ID is required to sign documents and apply
certificate security. Self-signed digital IDs created
from Acrobat 3D may be adequate for many situa-
tions. See the Adobe website for information on
acquiring a digital ID from Adobe security partners.
1 Choose Advanced > Security Settings.
2 Select Digital IDs, and click Add ID.
3 Select Create A Self-Signed Digital ID For Use With
Acrobat.
4 Follow the on-screen instructions to set up the self-
signed digital ID.
Register a digital ID
You must register a digital ID in Acrobat 3D before
you can use it.
1 Choose Advanced > Security Settings.
2 Select Digital IDs, and click Add ID.
3 Select Browse For An Existing Digital ID File.
4 Follow the on-screen instructions to select the
digital ID file, type your password, and register the
digital ID.
You can create self-signed digital IDs in Acrobat 3D.
Or, see the Adobe website for information on
acquiring a digital ID from Adobe security partners.
Share your certificate
Your digital ID includes a certificate that others
require to validate your signature and encrypt
documents for you.
1 Choose Advanced > Security Settings.
2 Select Digital IDs on the left.

ug.book Page 20 Thursday, April 5, 2007 1:21 PM
20 CHAPTER 1
Getting started
3 Select the ID you want to share, and click
Export .
4 Follow the on-screen instructions to email the
certificate or save it to a file.
If you use a third-party security method, you usually
don’t need to share your certificate with others.
Create a signature appearance
You can modify your digital signature appearance. For
example, you can include your scanned signature.
1 (Optional) Save the desired image on a page by
itself, and convert the page to PDF.
2 Choose Edit > Preferences (Windows) or Acrobat
3D (Mac OS) > Preferences, and select Security.
3 Click New, and type a title.
4 (Optional) Select Imported Graphic, click File, and
select the desired file.
5 Specify options as desired.
Sign a PDF
Use a digital signature to indicate your approval. For
best results, change your security preferences to
always sign in Preview Document mode, so that you
can view and sign the PDF in a secure state.
1 Click the signature field. Or, click Sign , and
choose Sign Document.
2 Follow the on-screen instructions to apply your
digital signature.
If the document does not contain an unsigned
signature field, click Sign and choose Place Signature
to sign the PDF.
Certify a PDF
Certifying a PDF indicates that you approve of its
content and allows you to specify the types of changes
that are permitted for the PDF to remain certified.
1 ClickSign onthe Taskstoolbar,chooseCertify
With Visible Signature or Certify Without Visible
Signature, and click OK.
2 If certifying with a visible signature, draw a
signature field.
3 Follow the on-screen instructions to apply the
certifying signature.
4 Save the PDF using a different filename.
Validate signatures
When you open a document, a status icon appears
next to the signature, indicating if the signature is
valid.
1 Click Signatures in the navigation pane, and
select the signature.
2 Right-click/Control-click and choose Show
Signature Properties.
3 Use the various tabs and options in the Signature
Properties dialog box to resolve any signature issues.
For example, if the identity is unknown or unverified,
click the Signer tab, and click Show Certificate to
determine if the certificate is trusted.
Review & Comment
Start an automated email or shared review to simplify
the reviewing process. When you review a PDF using
Acrobat 3D, all users can comment on a single,
unchanging document using a wide variety of
commenting tools, from sticky notes and stamps to
ug.book Page 21 Thursday, April 5, 2007 1:21 PM
21
text edits, highlights, and drawing markups. If you set
up a shared review, reviewers can see and respond to
others reviewers’ comments. Using the Review
Tracker, you can invite additional reviewers, rejoin a
review, and track the progress of shared reviews.
For example, suppose you have a specification that
needs to be reviewed by your project team, which
includes people in several locations. Set up a shared
review to send the PDF to all the review participants.
When the participants (including Adobe Reader 8
users if you have enabled commenting for Adobe
Reader) open the email attachment, Acrobat opens the
Commenting toolbar and instructions on how to
complete the review.
C
D
A
E
F
B
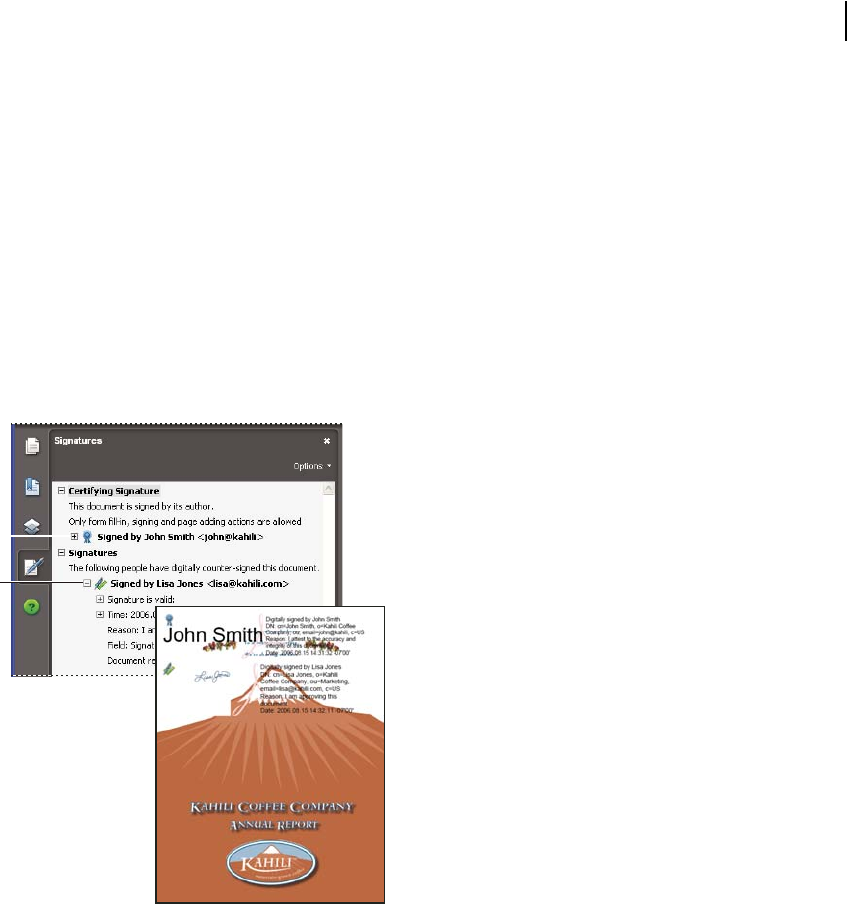
AdddifferentkindsofcommentstoyourPDF.Theyalsoappearin
the Comments list.
A. Note B. Drawing markup C. Stamp D. Replaced Text E. File
attachment F. Highlighted text
ADOBE ACROBAT 3D VERSION 8
User Guide
Start an email review
An email-based review lets you track review status and
merge received comments into the PDF.
1 Click Review & Comment and choose Attach
For Email Review.
2 If prompted, enter your identity information to
create a reviewer profile.
3 Follow the on-screen instructions to select the PDF,
invite reviewers, and send the email invitation.
If your email application doesn’t send email automati-
cally, you may need to answer alert messages and
switch to your email application to finish sending the
message.
Start a shared review
A shared review allows reviewers, including those
using Adobe Reader, to see and respond to others’
comments during the review.
Important: To conduct a shared review, you and your
reviewers need write access to a shared comment server.
1 Click Review & Comment and choose Send For
Shared Review.
2 If prompted, enter your identity information to
create a reviewer profile.
3 Follow the on-screen instructions to select (or add)
aserver,selectthePDF,invitereviewers,andsendthe
email invitation.

ug.book Page 22 Thursday, April 5, 2007 1:21 PM
22 CHAPTER 1
Getting started
Track and manage reviews
The Review Tracker provides information for all
documents that you’ve sent and received for review.
Use the Review Tracker to rejoin a review, send a
reminder, or invite additional reviewers.
1 Click Review & Comment , and choose Review
Tracker.
2 Select the desired PDF on the left.
3 Do any of the following:
• To rejoin a review, double-click the PDF.
• To send a message, click Email All Reviewers or
Email Initiator.
• To invite additional reviewers, click Add Reviewers.
Invite additional reviewers
If you initiated a review, you can invite more
reviewers.If youareareviewer,asktheinitiatortoadd
reviewers so the initiator can track all reviewers and
receive notification when comments are received.
1 Click Review & Comment , and choose Review
Tracker.
2 Select the desired PDF under Reviews I’ve Sent, and
click Add Reviewers.
3 Follow the on-screen instructions to add email
addresses, change the message as needed, and send the
invitation.
Participate in an email review
When you open the PDF attachment in an email
review, a tracked copy of the PDF opens with a
document message bar, a Send Comments button, and
a Comment & Markup toolbar.
Important: If you’re prompted to connect to a server
when you open the PDF, you’ve been invited to a shared
review.
1 Open the PDF attachment from your email appli-
cation.
2 Use commenting tools to add comments.
3 Save the PDF, and then click Send Comments.
Participate in a shared review
When you open the shared PDF, commenting tools and
a document message bar with instructions also open.
1 Open the PDF attachment or link.
2 Click Connect, and type your login name and
password, if prompted.
3 Type your name, email address, and job title to
create a reviewer profile, if prompted.
4 Add comments.
5 When you want to share your comments, click
Publish Comments.
In a shared review, you can see all reviewers’
comments that have been published.
Create drawing markups
You can add lines, arrows, and shapes to a PDF by
using the drawing markup tools.
1 Choose Tools > Comment & Markup, and choose
the desired tool.
2 Draw in the PDF. For example, click and drag to
form a line, arrow, or rectangle.
3 (Optional) Using the Select tool, double-click the
markup, and then type a comment in the pop-up note.

ug.book Page 23 Thursday, April 5, 2007 1:21 PM
E
D
A
B
C
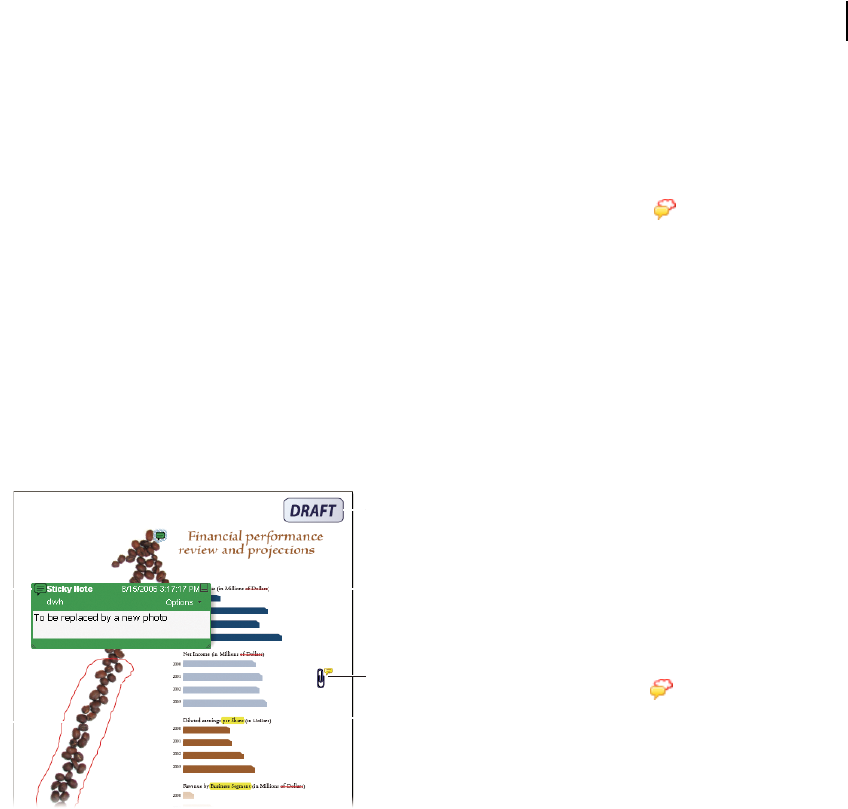
Interactive form fields make it easy to collect data.
A. Check box B. Radio button C. Combo box D. Text box
23
ADOBE ACROBAT 3D VERSION 8
User Guide
To change properties, such as line color and width,
right-click/Control-click the markup and choose
Properties.
Forms
You can create a PDF form with interactive form fields
from many different sources—an existing electronic
document such as a Word document or a spreadsheet,
a scanned paper document, or a template. You can
then distribute the form through email or a shared
server and track the forms that have been returned to
you. Finally, you can easily collect and review form
data and export it to other applications.
For example, you could convert all of your human
resources forms to PDF and post them for easy access
on a shared server. You could then track a specific
form, such as a yearly benefits enrollment form, and
know who has filled out and returned the form. After
you have collected the returned data, you could then
export it to a spreadsheet or a personnel database.
E. Button
Create a form
The Create New Form wizard guides you through
creating aPDF formfromatemplate(Windowsonly),
an electronic document, spreadsheet data, or a
scanned paper document.
1 Click Forms on the toolbar, and choose Create
New Form.
2 Select the source for the PDF form, and click
Continue.
3 Follow the on-screen instructions.

ug.book Page 24 Thursday, April 5, 2007 1:21 PM
24 CHAPTER 1
Getting started
Forms created with the wizard are LiveCycle Designer
forms. To create an Acrobat form instead, choose
Forms > Run Form Field Recognition.
Edit a form
Depending upon how a PDF form was created, you
can edit it in either Acrobat 3D or LiveCycle Designer
(Windows only).
Note: (Windows) PDF forms created in Acrobat 3D can be
edited in LiveCycle Designer, but those created or edited in
LiveCycle Designer cannot be edited in Acrobat 3D.
1 Open a PDF form.
2 Choose Forms > Edit Form In Designer or Edit
Form In Acrobat.
3 Add or modify form fields and field properties as
desired.
Distribute a form
After you create a PDF form, you can distribute it by
using the Distribute Form wizard.
Note: To use the wizard, the form must contain a submit
button.
1 Open the desired form.
2 Click the Forms button on the Tasks toolbar,
and choose Distribute Form.
3 Follow the on-screen instructions to prepare the
form for distribution.
4 Specify if you want to email the form or save and
send it later.
5 Follow the on-screen instructions to distribute the
form.
Track and manage forms
The Forms Tracker helps you manage forms you’ve
distributed.
1 Click the Forms button on the Tasks toolbar,
and choose Track Forms.
2 Select an icon on the left to see forms in that
category:
• To Do displays forms you’ve received.
• History displays forms you’ve distributed.
• Search Results allows you to search for specific
forms.
• Forms Library displays forms you’ve saved in the
library for future distribution.
Compile data received by email
Asusersreturntheirform data,you cancompileit into
a data set.
1 Open the email attachment containing the returned
form.
2 In the dialog box that appears, select an existing
data set or create a new set for the form data.
The new data is added and the data set opens, allowing
youtoreviewallresponses. Youcan also compiledata
by clicking Forms on the Tasks toolbar, and
choosing Compile Returned Forms.

ug.book Page 25 Thursday, April 5, 2007 1:21 PM
25
ADOBE ACROBAT 3D VERSION 8
User Guide
Review form responses
After you’ve compiled returned form data into a data
set, the PDF automatically opens for you to review the
responses.
❖ With the desired data set PDF open, do any of the
following:
• To review an individual response, select a line in the
response list.
• To sort the response list, click the desired column
heading.
• To add data, click Import Data .
• To delete data, select a record and press Delete.
Export form data to a spreadsheet
Once you’ve collected PDF form data in FDF or XML
format, you can organize the form data into a comma-
delimited spreadsheet (CSV) file.
1 Choose Forms > Manage Form Data > Merge Data
Files Into Spreadsheet.
2 Click Add Files, and then select the desired data
files.
3 Click Export, choose a location for the CSV file,
and click Save.
What’s new
Viewing, navigating, and searching
Getting Started window At a glance, see the main
features of Adobe® Acrobat® 3D Version 8 and click
links to start tasks or learn more about features. See
“Start in the Getting Started window” in Acrobat Help.
Maximized work area View PDFs in a new visual
design for the work area, navigation pane, and
toolbars. User interface elements have been removed
to maximize space. See “View the work area” in
Acrobat 3D Help.
Customizable toolbars
Easily hide or show individual
tools by right-clicking/Control-clicking a toolbar, or
use the More Tools dialog box to customize toolbars.
See“Displayand arrangetoolbars” inAcrobat3DHelp.
Search enhancements Find words or use advanced
search tools, all from the same integrated toolbar.
View search results in a floating, resizable panel.
Search documents in a PDF package. See “Search
features overview” in Acrobat 3D Help.
Embedded PDF search index Embed a search index
for a specific file directly within the PDF to speed up
searching. See “Create and manage an index in a PDF”
in Acrobat Help.
PDF creation, assembly, and editing
PDF from a blank page Create a blank PDF page and
type text onto the page. Format text using formatting
controls. Lock the document so that it can’t be edited.
See “Create a PDF from a blank page” in Acrobat Help.
PDF packages Assemble PDF files (including PDF
forms) and non-PDF files into a single package. Files
aren’t modified when packaged, so signatures and
security options stay intact. Documents within a
package are viewed in the same window. Easily add,
delete, or extract documents from the package. Search
and print the current or selected document, or all
documents within the package. See “About PDF
packages” in Acrobat Help.
Combined files user interface Combine files into a
single PDF with concatenated pages, or assemble files

ug.book Page 26 Thursday, April 5, 2007 1:21 PM
26 CHAPTER 1
Getting started
into a PDF package. Choose simple options to control
the size of the resulting PDF. See “Combining different
types of files” in Acrobat Help.
Mail merge to PDF within Microsoft® Word Convert
Word mail merge documents to PDF and send them
out by email. See “Create PDFs from Word mail
merges” in Acrobat Help.
Microsoft Excel worksheet enhancements
(Windows) Select and order worksheets for
conversion. Convert all links and bookmarks. Create
PDF/A-compliant files. See “Application-specific
PDFMaker settings” in Acrobat Help.
Microsoft PowerPoint presentation enhancements
(Windows) Convert overlapping shapes and images,
action buttons, action settings, and speaker notes.
Convert backgrounds to a separate, nonprinting layer.
Create PDF/A-compliant files. See “Application-
specific PDFMaker settings” in Acrobat Help.
Email conversion enhancements Convert an email
message or a complete mail folder to PDF from Lotus
Notes. Create PDF packages of email from both
Microsoft Outlook and Lotus Notes. In Outlook on
Windows, convert email archives to PDF packages and
automatically archive email on a schedule. See
“Convert email messages to PDFs (Windows),”
“Migrate Outlook PDF archives to PDF packages
(Windows),” and “Set up automatic email archiving
(Windows)” in Acrobat Help.
Scanning enhancements Scan to PDF or PDF/A from
a broader range of scanners. Add metadata while
scanning. Optimize a scanned PDF. See “Scan a paper
document to PDF” in Acrobat Help.
PDF/A-compliant files Create PDF/A-compliant files
when scanning paper documents and when creating
PDFs from Word, Microsoft Excel, Microsoft Power-
Point, Adobe Acrobat Distiller, and the Acrobat
Preflight tool.
Bates numbering Apply identifying labels to a batch
of related documents—typically legal documents
associated with a court case. Bates numbering appears
asaheaderorfooteroneachpageofeachPDF inthe
batch. See “Add a Bates numbering header or footer”
in Acrobat Help.
Document examination Inspect PDFs for metadata,
annotations, attachments, hidden data, form fields,
hidden layers, or bookmarks. Remove some or all of
the information. See “Examine a PDF for hidden
content” in Acrobat Help.
Headers, footers, watermarks, and backgrounds Save
header, footer, watermark, and background options as
named settings for reuse. Remove or update existing
headers, footers, watermarks, and backgrounds.
Shrink content to accommodate headers and footers.
Preview changes in real time. Set underline text. See
“Add and edit headers and footers” in Acrobat Help.
Review and commenting
Acrobat Connect meetings Access the real-time, web-
based collaboration capabilities of Acrobat Connect
(sold separately). Click the Start Meeting button to
escalate from a document review to real-time commu-
nication with others over the Internet. Acrobat
Connect uses Adobe Flash® CS3 Professional and a
personal meeting room for screen sharing, audio and
video conferencing, whiteboarding, and more. When
you first click the Start Meeting button, you can create
a free trial account. Each subsequent time, you go
directly to your Acrobat Connect personal meeting

ug.book Page 27 Thursday, April 5, 2007 1:21 PM
27
ADOBE ACROBAT 3D VERSION 8
User Guide
room. (Acrobat Connect is not available in all
languages.) See “Meetings” in Acrobat 3D Help.
Shared reviews Initiate a review where comments are
stored on a central server, allowing all participants to
see comments in real time. No extra server software is
needed. Shared reviews work with a folder on a
network server, a Windows SharePoint workspace, or
a web folder on a web server. Comments are automat-
ically retrieved, even if Reader isn’t running and could
be added even when you are disconnected from the
network. Notifications alert users that there are new
comments. Comments from reviewers outside the
firewall can be merged into the shared review, and you
can enable Reader users to participate in reviews. See
“Start a shared review” in Acrobat Help.
Review Tracker Provides details about all active
reviews. For shared reviews, details include the
number of comments from a reviewer, the review
deadline, server status, unread reviews, and a
summary of updated shared reviews. See “Tracking
PDF reviews” in Acrobat 3DHelp.
Commenting and markup enhancements
View and
accuratelyplacecalloutandcloud markupsasyou apply
them. The callout leader automatically moves as you
position thecallout.Selectedcommentsarehighlighted
for easier visibility when zoomed out. Rotate stamps
and select all tools from a single, integrated toolbar. See
“Commenting” in Acrobat 3D Help.
Forms
Simple forms creation (Windows) Use a wizard to
create PDF forms from templates, existing electronic
documents, paper forms, or spreadsheet data.
Customize forms with contact information and logos.
Edit in Adobe LiveCycle® Designer. See “Creating and
editing forms” in Acrobat Help.
PDF background artwork Import a PDF as
background artwork on a form in LiveCycle Designer.
Add form fields on top of the background. See
LiveCycle Designer Help.
Forms Tracker Track the forms you initiate or fill out.
See “About Forms Tracker” in Acrobat Help.
Export and compile form data Aggregate returned
forms into a PDF package. Export the form data to a
spreadsheet. See “Submitting forms” and “Export
records from a PDF data set” in Acrobat Help.
Form field recognition Automatically recognize form
fields on noninteractive PDF documents and convert
them to interactive fields that can be filled electroni-
cally. See “Creating new forms” in Acrobat Help.
Reader-enabled rights EnableReader 7and8usersto
fill in, digitally sign, and locally save forms and other
PDFs. See “Enable Reader users to save form data” in
Acrobat Help.
Digital signatures
Roaming IDs Enroll in a signing service where the
server holds your private key. Authenticate to the
server from Acrobat and allow the document to be
signed with your credentials stored on the server. See
“Set up a roaming ID” in Acrobat 3D Help.
Signature preview mode and conformance checker
Before signing, view the document content as it will
appear after eliminating transparency, scripts, fonts,
and other dynamic content that can alter a document’s
appearance. Acrobat 3D automatically runs the
Document Integrity Checker, which now includes
checking for Qualified Signatures conformance before

ug.book Page 28 Thursday, April 5, 2007 1:21 PM
28 CHAPTER 1
Getting started
entering signature preview mode. See “Sign in Preview
Document mode” in Acrobat 3D Help.
Certificate enhancements Predetermine the signing
certificate. Configure the chain model for certificate
validation. See “Sharing and managing certificates” in
Acrobat 3D Help.
Seed values Specify which choices a user can make
when signing a document. See “Customizing signature
properties using seed values” in Acrobat Help.
Signatures in Reader Allow Reader users to draw a
signature field. See “Before you certify a PDF” in
Acrobat Help.
Architecture, engineering, and construction
Batch conversion/direct conversion From Autodesk
AutoCAD, convert multiple AutoCAD files to
multiple PDFs. Convert AutoCAD files to PDF with
improved speed. See “Convert AutoCAD files to PDF
(Windows)” in Acrobat Help.
DWG/DWF support Convert AutoCAD DWF and
DWG format files without installing AutoCAD.
2D Measurement tool enhancements Measurementis
recalculated if start or end points move. Measure-
ments snap to lines, intersections, or corners. See
“Measure the height, width, or area of objects” in
Acrobat Help.
3D Computer Aided Design (CAD)
Produce compact PDFs Adjust 3D conversion settings
to create highly compressed, universally-accessible
PDF files that are a fraction of the size of the original
CAD file or assembly. See “About PRC and U3D
conversion formats” in Acrobat Help.
Import PMI Import and view geometric dimensioning
and tolerancing specifications in the 3D model as
Product Manufacturing Information (PMI) instead of
sending a separate 2D drawing. Supported file formats
include CATIA V5, I-DEAS, JT, NX, and
Pro/ENGINEER. See “View Product Manufacturing
Information (PMI)” in Acrobat Help.
Export geometry Export geometry to standard
formats (IGES, STEP, ParaSolid, and VRML) for
interoperability with Computer Aided Manufacturing
(CAM) applications. See “Exporting geometry from
3D models” in Acrobat Help.
Support for latest CAD applications Open the latest
versions of most CAD file formats without installing
the CAD application. See “About supported 3D file
formats” in Acrobat Help.
Legal
Redaction tools
Mark text, images, and sensitive areas
for redaction. Permanently apply redaction. Modify the
appearance of redaction marks, including color and
codes. See “Redact sensitive content” in Acrobat Help.
Search and redact From within the Search feature,
mark some or all search results for redaction. See
“Search and redact words” in Acrobat Help.
Bates numbering Apply identifying labels to a batch
of related documents—typically legal documents
associated with a court case. Bates numbering appears
asaheaderorfooteroneachpageofeachPDF inthe
batch. See “Add a Bates numbering header or footer”
in Acrobat Help.
Creative professional
Color management improvements
In Adobe Creative
Suite, synchronize settings for on-screen color across the

ug.book Page 29 Thursday, April 5, 2007 1:21 PM
29
ADOBE ACROBAT 3D VERSION 8
User Guide
applications with a single click. See “Synchronize color
settings across Adobe applications” in Acrobat Help.
Shared transparency flattener presets Define
flattener presets in one Adobe application, such as
Acrobat, and then easily share those swatches with
other applications, such as Adobe Illustrator® and
Adobe InDesign®. See “Create a flattener preset” in
Acrobat Help.
Preflight Locate, modify, or remove PDF elements
using customizable fixup profiles. Create an inventory
of PDF content, including Extensible Metadata
Platform (XMP) metadata. Perform advanced inspec-
tions on Cos objects and fonts. Convert to and validate
PDF/X-4 and PDF/A files. Edit droplet settings for
automated preflight inspections. See “Correcting
problem areas” and “Advanced inspections” in
Acrobat Help.
Booklet printing Print pages as a simple booklet, such
as 2-up, saddle-stitched. See “Print a booklet” in
Acrobat Help.
Metadata in documents and objects Maintain and
access document and object-level metadata. See
“Document properties and metadata” in Acrobat 3D
Help.
TouchUp Object tool enhancement
See and change
the color space of a selected object. Scale, rotate, or clip
an object. See “Move or edit an object” in Acrobat Help.
Additional new features
FIPS mode Version 8.1 of Acrobat 3D provides a FIPS
mode to restrict data protection to Federal Infor-
mation Processing Standard (FIPS) 140-2 approved
algorithms using the RSABSAFE Crypto-C 2.0
encryption module with FIPS 140-2 validation certif-
icate 608. See “Securing PDFs in FIPS mode” in
Acrobat Help.
Microsoft Windows Vista™ support Version 8.1 of
Acrobat 3D supports Windows Vista.
Installing Acrobat on 64-bit versions of Windows
Version 8.1 of Acrobat 3D supports the 64-bit versions
of Microsoft Windows XP and Windows Vista.
Version Cue 2.0 Manage files and versions as a single
user or in a small workgroup. Integrate with Adobe
Bridge to manage files for your Creative Suite projects.
See “Adobe Version Cue” in Acrobat Help.
Digital Editions Read and organize eBooks and other
publications with Adobe® Digital Editions (a separate
product). When you first click the Digital Editions
menu item, you can download and install the Adobe
Digital Editions software. After installation, choose
Digital Editions to go directly to your Adobe Digital
Editions bookshelf. See “Adobe Digital Editions” in
Acrobat 3DHelp.
Printing over the Internet Print documents to a
FedEx Kinkos office in the United States. See “Print
over the Internet” in Acrobat 3D Help.
2D Measurement tool enhancements Measurementis
recalculated if start or end points move. Measure-
ments snap to lines, intersections, or corners. See
“Measure the height, width, or area of objects” in
Acrobat 3D Help.
ug.book Page 30 Thursday, April 5, 2007 1:21 PM
