Adobe Fireworks MX User Guide En
User Manual: adobe Adobe Fireworks - MX - User Guide Free User Guide for Adobe Fireworks Software, Manual
Open the PDF directly: View PDF ![]() .
.
Page Count: 447 [warning: Documents this large are best viewed by clicking the View PDF Link!]
- Contents
- Getting Started
- Graphic Design Basics Tutorial
- What you’ll learn
- What you should know
- Copy the Tutorials folder
- View the completed file
- Create and save a new document
- Explore the Fireworks work environment
- Create and edit vector objects
- Import a bitmap and select pixels
- Add and edit Live Effects
- Work with layers and objects
- Create and edit a mask
- Create and edit text
- Export the document
- Take the next steps
- Web Design Basics Tutorial
- What you’ll learn
- What you should know
- Copy the Tutorials folder
- View the completed web page
- Open the source file
- Import a graphic
- Slice the document
- Create a drag-and-drop rollover
- Create and edit buttons to make a navigation bar
- Create and edit a pop-up menu
- Optimize the document
- Export HTML
- Test the completed file
- Take the next steps
- Fireworks Basics
- About vector and bitmap graphics
- About working in Fireworks
- Creating a new document
- Opening and importing files
- Saving Fireworks files
- The Fireworks work environment
- Changing the canvas
- Selecting and Transforming Objects
- Selecting objects
- Selecting pixels
- Bitmap selection tool options
- Creating pixel selection marquees
- Adjusting selection marquees
- Moving a marquee
- Adjusting a marquee selection with the Spacebar
- Adding to a pixel selection
- Subtracting pixels from a selection
- Creating a marquee from intersecting marquees
- Using thumbnails and modifier keys to modify pixel selections
- Creating an inverse pixel selection
- Feathering a pixel selection
- Expanding or contracting a marquee
- Selecting an area around an existing marquee
- Smoothing the border of a marquee
- Transferring a marquee selection
- Saving and restoring marquee selections
- Creating and moving a floating pixel selection
- Inserting a new bitmap by cutting or copying
- Editing selected objects
- Transforming and distorting selected objects and selections
- Organizing objects
- Working with Bitmaps
- Working with Vector Objects
- Drawing vector objects
- Drawing basic shapes
- Drawing freeform paths
- Drawing paths by plotting points
- Drawing straight path segments
- Drawing curved path segments
- Adjusting the shape of a straight path segment
- Adjusting the shape of a curved path segment
- Converting path segments to straight or curved
- Selecting points
- Moving points and point handles
- Inserting and deleting points on a path
- Continuing an existing path
- Merging two open paths
- Auto-joining similar open paths
- Editing paths
- Drawing vector objects
- Using Text
- Entering text
- Editing text
- Applying strokes, fills, and effects to text
- Attaching text to a path
- Transforming text
- Converting text to paths
- Importing text
- Checking spelling
- Using the Text Editor
- Applying Color, Strokes, and Fills
- Using Live Effects
- Layers, Masking, and Blending
- Using Styles, Symbols, and URLs
- Slices, Rollovers, and Hotspots
- Creating Buttons and Pop-up Menus
- Creating button symbols
- About button states
- Using the Button Editor
- Creating a simple two-state button
- Creating a three- or four-state button
- Using bevel effects to draw button states
- Converting Fireworks rollovers into buttons
- Inserting buttons into a document
- Importing button symbols
- Editing button symbols
- Setting interactive button properties
- Creating navigation bars
- Creating pop-up menus
- Creating button symbols
- Creating Animation
- Optimizing and Exporting
- About optimizing
- Using the Export Wizard
- Optimizing in the workspace
- Using preset optimization settings
- Previewing and comparing optimization settings
- Choosing a file type
- Optimizing GIFs, PNGs, TIFFs, BMPs, and PICTs
- Choosing a color palette
- Setting the color depth
- Removing unused colors
- Dithering to approximate lost colors
- Viewing colors in a palette
- Locking colors in a palette
- Editing colors in a palette
- Using websafe colors
- Saving palettes
- Adjusting compression
- Making areas transparent
- Interlacing: Downloading gradually
- Optimizing JPEGs
- Matching a target background color
- Saving and reusing optimization settings
- Exporting from Fireworks
- Using the Quick Export button
- Using Fireworks with Other Applications
- Working with Macromedia Dreamweaver MX
- Working with Macromedia Flash MX
- Placing Fireworks files into Flash
- Importing Fireworks PNG files into Flash
- Copying and pasting Fireworks graphics into Flash
- About exporting Fireworks graphics to other formats for use in Flash
- Exporting Fireworks graphics and animations as SWF files
- Exporting PNGs with transparency
- Importing exported Fireworks graphics and animations into Flash
- Using Fireworks to edit graphics imported into Flash
- About extending Fireworks with custom commands created in Flash
- Placing Fireworks files into Flash
- Working with Macromedia FreeHand
- Working with Macromedia Director
- Working with Macromedia HomeSite
- Working with Microsoft FrontPage
- Working with Adobe Photoshop
- About working with Adobe GoLive
- About working with HTML editors
- Automating Repetitive Tasks
- Finding and replacing
- Batch processing
- Changing optimization settings with a batch process
- Scaling graphics with a batch process
- Finding and replacing during a batch process
- Changing filenames with a batch process
- Performing commands with a batch process
- Specifying the batch process output location
- Saving batch processes as scripts
- Running scripts by dragging and dropping
- Using the Project Log
- Extending Fireworks
- Preferences and Keyboard Shortcuts
- Setting preferences
- Changing keyboard shortcut sets
- Working with configuration files
- About user configuration files
- About master configuration files that affect all users
- Locating configuration files
- Location of the Fireworks preferences file
- Customizing configuration files for all users
- About reinstalling Fireworks
- Viewing package contents (Macintosh only)
- Running Fireworks MX Classic (Macintosh only)
- Index

®
Using Fireworks MX
ZFW60M200

macromedia
™
®
Using Fireworks MX
2
Trademarks
Afterburner, AppletAce, Attain, Attain Enterprise Learning System, Attain Essentials, Attain Objects for Dreamweaver, Authorware,
Authorware Attain, Authorware Interactive Studio, Authorware Star, Authorware Synergy, Backstage, Backstage Designer, Backstage
Desktop Studio, Backstage Enterprise Studio, Backstage Internet Studio, Design in Motion, Director, Director Multimedia Studio,
Doc Around the Clock, Dreamweaver, Dreamweaver Attain, Drumbeat, Drumbeat 2000, Extreme 3D, Fireworks, Flash, Fontographer,
FreeHand, FreeHand Graphics Studio, Generator, Generator Developer’s Studio, Generator Dynamic Graphics Server, Knowledge
Objects, Knowledge Stream, Knowledge Track, Lingo, Live Effects, Macromedia, Macromedia M Logo & Design, Macromedia Flash,
Macromedia Xres, Macromind, Macromind Action, MAGIC, Mediamaker, Object Authoring, Power Applets, Priority Access, Roundtrip
HTML, Scriptlets, SoundEdit, ShockRave, Shockmachine, Shockwave, Shockwave Remote, Shockwave Internet Studio, Showcase, Tools
to Power Your Ideas, Universal Media, Virtuoso, Web Design 101, Whirlwind and Xtra are trademarks of Macromedia, Inc. and may be
registered in the United States or in other jurisdictions including internationally. Other product names, logos, designs, titles, words or
phrases mentioned within this publication may be trademarks, servicemarks, or tradenames of Macromedia, Inc. or other entities and
may be registered in certain jurisdictions including internationally.
This guide contains links to third-party Web sites that are not under the control of Macromedia, and Macromedia is not responsible for
the content on any linked site. If you access a third-party Web site mentioned in this guide, then you do so at your own risk. Macromedia
provides these links only as a convenience, and the inclusion of the link does not imply that Macromedia endorses or accepts any
responsibility for the content on those third-party sites.
Apple Disclaimer
APPLE COMPUTER, INC. MAKES NO WARRANTIES, EITHER EXPRESS OR IMPLIED, REGARDING THE ENCLOSED
COMPUTER SOFTWARE PACKAGE, ITS MERCHANTABILITY OR ITS FITNESS FOR ANY PARTICULAR PURPOSE.
THE EXCLUSION OF IMPLIED WARRANTIES IS NOT PERMITTED BY SOME STATES. THE ABOVE EXCLUSION MAY
NOT APPLY TO YOU. THIS WARRANTY PROVIDES YOU WITH SPECIFIC LEGAL RIGHTS. THERE MAY BE OTHER
RIGHTS THAT YOU MAY HAVE WHICH VARY FROM STATE TO STATE.
Copyright © 2002 Macromedia, Inc. All rights reserved. U.S. Patents 5,353,396, 5,361,333, 5,434,959, 5,467,443, 5,500,927,
5,594,855 and 5,623,593. Portions of the software licensed under U.S. Patent No. 4,558,302 and foreign counterparts. Other patents
pending. Portions Copyright 1988, 2000 Aladdin Enterprises. All rights reserved. This software is based in part on the work of the
Independent JPEG Group. Portions Copyright 1998 Soft Horizons. All rights reserved. This manual may not be copied, photocopied,
reproduced, translated, or converted to any electronic or machine-readable form in whole or in part without prior written approval of
Macromedia, Inc.
Part Number ZFW60M100
Acknowledgments
Writing: Dale Crawford, Tonya Estes, David Jacowitz, Kenneth Price
Editing: Rosana Francescato
Project management: Stuart Manning
Production: Caroline Branch, John Francis, Patrice O’Neill
Photography: Chris Basmajian
Multimedia: Aaron Begley
First Edition: June 2002
Macromedia, Inc.
600 Townsend St.
San Francisco, CA 94103

3
CONTENTS
INTRODUCTION
Getting Started . . . . . . . . . . . . . . . . . . . . . . . . . . . . . . . . . . . . . . . . . . . . . . . . . . . . . 7
System requirements . . . . . . . . . . . . . . . . . . . . . . . . . . . . . . . . . . . . . . . . . . . . . . . . . . . . 7
Installing Fireworks . . . . . . . . . . . . . . . . . . . . . . . . . . . . . . . . . . . . . . . . . . . . . . . . . . . . . 8
What’s new in Fireworks . . . . . . . . . . . . . . . . . . . . . . . . . . . . . . . . . . . . . . . . . . . . . . . . 10
CHAPTER 1
Graphic Design Basics Tutorial. . . . . . . . . . . . . . . . . . . . . . . . . . . . . . . . . . . . . . 13
What you’ll learn. . . . . . . . . . . . . . . . . . . . . . . . . . . . . . . . . . . . . . . . . . . . . . . . . . . . . . 13
What you should know . . . . . . . . . . . . . . . . . . . . . . . . . . . . . . . . . . . . . . . . . . . . . . . . . 13
Copy the Tutorials folder. . . . . . . . . . . . . . . . . . . . . . . . . . . . . . . . . . . . . . . . . . . . . . . . 14
View the completed file. . . . . . . . . . . . . . . . . . . . . . . . . . . . . . . . . . . . . . . . . . . . . . . . . 14
Create and save a new document. . . . . . . . . . . . . . . . . . . . . . . . . . . . . . . . . . . . . . . . . . 14
Explore the Fireworks work environment . . . . . . . . . . . . . . . . . . . . . . . . . . . . . . . . . . . 16
Create and edit vector objects . . . . . . . . . . . . . . . . . . . . . . . . . . . . . . . . . . . . . . . . . . . . 17
Import a bitmap and select pixels . . . . . . . . . . . . . . . . . . . . . . . . . . . . . . . . . . . . . . . . . 20
Add and edit Live Effects. . . . . . . . . . . . . . . . . . . . . . . . . . . . . . . . . . . . . . . . . . . . . . . . 23
Work with layers and objects. . . . . . . . . . . . . . . . . . . . . . . . . . . . . . . . . . . . . . . . . . . . . 24
Create and edit a mask . . . . . . . . . . . . . . . . . . . . . . . . . . . . . . . . . . . . . . . . . . . . . . . . . 28
Create and edit text . . . . . . . . . . . . . . . . . . . . . . . . . . . . . . . . . . . . . . . . . . . . . . . . . . . . 30
Export the document . . . . . . . . . . . . . . . . . . . . . . . . . . . . . . . . . . . . . . . . . . . . . . . . . . 36
Take the next steps . . . . . . . . . . . . . . . . . . . . . . . . . . . . . . . . . . . . . . . . . . . . . . . . . . . . 40
CHAPTER 2
Web Design Basics Tutorial. . . . . . . . . . . . . . . . . . . . . . . . . . . . . . . . . . . . . . . . . 41
What you’ll learn. . . . . . . . . . . . . . . . . . . . . . . . . . . . . . . . . . . . . . . . . . . . . . . . . . . . . . 41
What you should know . . . . . . . . . . . . . . . . . . . . . . . . . . . . . . . . . . . . . . . . . . . . . . . . . 41
Copy the Tutorials folder. . . . . . . . . . . . . . . . . . . . . . . . . . . . . . . . . . . . . . . . . . . . . . . . 42
View the completed web page . . . . . . . . . . . . . . . . . . . . . . . . . . . . . . . . . . . . . . . . . . . . 42
Open the source file . . . . . . . . . . . . . . . . . . . . . . . . . . . . . . . . . . . . . . . . . . . . . . . . . . . 43
Import a graphic . . . . . . . . . . . . . . . . . . . . . . . . . . . . . . . . . . . . . . . . . . . . . . . . . . . . . . 43
Slice the document . . . . . . . . . . . . . . . . . . . . . . . . . . . . . . . . . . . . . . . . . . . . . . . . . . . . 43
Create a drag-and-drop rollover. . . . . . . . . . . . . . . . . . . . . . . . . . . . . . . . . . . . . . . . . . . 46
Create and edit buttons to make a navigation bar . . . . . . . . . . . . . . . . . . . . . . . . . . . . . 50
Create and edit a pop-up menu . . . . . . . . . . . . . . . . . . . . . . . . . . . . . . . . . . . . . . . . . . . 56
Optimize the document . . . . . . . . . . . . . . . . . . . . . . . . . . . . . . . . . . . . . . . . . . . . . . . . 62
Export HTML . . . . . . . . . . . . . . . . . . . . . . . . . . . . . . . . . . . . . . . . . . . . . . . . . . . . . . . 65
Test the completed file. . . . . . . . . . . . . . . . . . . . . . . . . . . . . . . . . . . . . . . . . . . . . . . . . . 68
Take the next steps . . . . . . . . . . . . . . . . . . . . . . . . . . . . . . . . . . . . . . . . . . . . . . . . . . . . 69

Contents4
CHAPTER 3
Fireworks Basics. . . . . . . . . . . . . . . . . . . . . . . . . . . . . . . . . . . . . . . . . . . . . . . . . . . 71
About vector and bitmap graphics . . . . . . . . . . . . . . . . . . . . . . . . . . . . . . . . . . . . . . . . . 71
About working in Fireworks . . . . . . . . . . . . . . . . . . . . . . . . . . . . . . . . . . . . . . . . . . . . . 72
Creating a new document . . . . . . . . . . . . . . . . . . . . . . . . . . . . . . . . . . . . . . . . . . . . . . . 73
Opening and importing files . . . . . . . . . . . . . . . . . . . . . . . . . . . . . . . . . . . . . . . . . . . . . 74
Saving Fireworks files . . . . . . . . . . . . . . . . . . . . . . . . . . . . . . . . . . . . . . . . . . . . . . . . . . 80
The Fireworks work environment . . . . . . . . . . . . . . . . . . . . . . . . . . . . . . . . . . . . . . . . . 81
Changing the canvas . . . . . . . . . . . . . . . . . . . . . . . . . . . . . . . . . . . . . . . . . . . . . . . . . . . 92
CHAPTER 4
Selecting and Transforming Objects. . . . . . . . . . . . . . . . . . . . . . . . . . . . . . . . 101
Selecting objects . . . . . . . . . . . . . . . . . . . . . . . . . . . . . . . . . . . . . . . . . . . . . . . . . . . . . 101
Selecting pixels . . . . . . . . . . . . . . . . . . . . . . . . . . . . . . . . . . . . . . . . . . . . . . . . . . . . . . 104
Editing selected objects . . . . . . . . . . . . . . . . . . . . . . . . . . . . . . . . . . . . . . . . . . . . . . . . 115
Transforming and distorting selected objects and selections. . . . . . . . . . . . . . . . . . . . . 116
Organizing objects. . . . . . . . . . . . . . . . . . . . . . . . . . . . . . . . . . . . . . . . . . . . . . . . . . . . 120
CHAPTER 5
Working with Bitmaps . . . . . . . . . . . . . . . . . . . . . . . . . . . . . . . . . . . . . . . . . . . . . 125
Working with bitmaps. . . . . . . . . . . . . . . . . . . . . . . . . . . . . . . . . . . . . . . . . . . . . . . . . 125
Creating bitmap objects. . . . . . . . . . . . . . . . . . . . . . . . . . . . . . . . . . . . . . . . . . . . . . . . 125
Drawing, painting, and editing bitmap objects . . . . . . . . . . . . . . . . . . . . . . . . . . . . . . 127
Retouching bitmaps . . . . . . . . . . . . . . . . . . . . . . . . . . . . . . . . . . . . . . . . . . . . . . . . . . 130
Adjusting bitmap color and tone . . . . . . . . . . . . . . . . . . . . . . . . . . . . . . . . . . . . . . . . . 133
Blurring and sharpening bitmaps. . . . . . . . . . . . . . . . . . . . . . . . . . . . . . . . . . . . . . . . . 143
CHAPTER 6
Working with Vector Objects. . . . . . . . . . . . . . . . . . . . . . . . . . . . . . . . . . . . . . . 147
Drawing vector objects . . . . . . . . . . . . . . . . . . . . . . . . . . . . . . . . . . . . . . . . . . . . . . . . 147
Editing paths. . . . . . . . . . . . . . . . . . . . . . . . . . . . . . . . . . . . . . . . . . . . . . . . . . . . . . . . 160
CHAPTER 7
Using Text . . . . . . . . . . . . . . . . . . . . . . . . . . . . . . . . . . . . . . . . . . . . . . . . . . . . . . . . 171
Entering text . . . . . . . . . . . . . . . . . . . . . . . . . . . . . . . . . . . . . . . . . . . . . . . . . . . . . . . 171
Editing text . . . . . . . . . . . . . . . . . . . . . . . . . . . . . . . . . . . . . . . . . . . . . . . . . . . . . . . . . 173
Applying strokes, fills, and effects to text . . . . . . . . . . . . . . . . . . . . . . . . . . . . . . . . . . . 182
Attaching text to a path. . . . . . . . . . . . . . . . . . . . . . . . . . . . . . . . . . . . . . . . . . . . . . . . 182
Transforming text . . . . . . . . . . . . . . . . . . . . . . . . . . . . . . . . . . . . . . . . . . . . . . . . . . . . 185
Converting text to paths . . . . . . . . . . . . . . . . . . . . . . . . . . . . . . . . . . . . . . . . . . . . . . . 185
Importing text. . . . . . . . . . . . . . . . . . . . . . . . . . . . . . . . . . . . . . . . . . . . . . . . . . . . . . . 186
Checking spelling . . . . . . . . . . . . . . . . . . . . . . . . . . . . . . . . . . . . . . . . . . . . . . . . . . . . 187
Using the Text Editor . . . . . . . . . . . . . . . . . . . . . . . . . . . . . . . . . . . . . . . . . . . . . . . . . 189

Contents 5
CHAPTER 8
Applying Color, Strokes, and Fills . . . . . . . . . . . . . . . . . . . . . . . . . . . . . . . . . . 191
Using the Colors section of the Tools panel. . . . . . . . . . . . . . . . . . . . . . . . . . . . . . . . . 192
Organizing swatch groups and color models . . . . . . . . . . . . . . . . . . . . . . . . . . . . . . . . 193
Using color boxes and color pop-up windows . . . . . . . . . . . . . . . . . . . . . . . . . . . . . . . 200
Working with strokes . . . . . . . . . . . . . . . . . . . . . . . . . . . . . . . . . . . . . . . . . . . . . . . . . 201
Working with fills . . . . . . . . . . . . . . . . . . . . . . . . . . . . . . . . . . . . . . . . . . . . . . . . . . . . 206
Applying gradient and pattern fills . . . . . . . . . . . . . . . . . . . . . . . . . . . . . . . . . . . . . . . 207
Adding texture to strokes and fills . . . . . . . . . . . . . . . . . . . . . . . . . . . . . . . . . . . . . . . . 213
CHAPTER 9
Using Live Effects. . . . . . . . . . . . . . . . . . . . . . . . . . . . . . . . . . . . . . . . . . . . . . . . . 215
Applying Live Effects. . . . . . . . . . . . . . . . . . . . . . . . . . . . . . . . . . . . . . . . . . . . . . . . . . 215
Editing Live Effects . . . . . . . . . . . . . . . . . . . . . . . . . . . . . . . . . . . . . . . . . . . . . . . . . . . 220
CHAPTER 10
Layers, Masking, and Blending. . . . . . . . . . . . . . . . . . . . . . . . . . . . . . . . . . . . . 223
Working with layers. . . . . . . . . . . . . . . . . . . . . . . . . . . . . . . . . . . . . . . . . . . . . . . . . . . 223
Masking images. . . . . . . . . . . . . . . . . . . . . . . . . . . . . . . . . . . . . . . . . . . . . . . . . . . . . . 229
Blending and transparency . . . . . . . . . . . . . . . . . . . . . . . . . . . . . . . . . . . . . . . . . . . . . 247
CHAPTER 11
Using Styles, Symbols, and URLs . . . . . . . . . . . . . . . . . . . . . . . . . . . . . . . . . . 251
Using styles . . . . . . . . . . . . . . . . . . . . . . . . . . . . . . . . . . . . . . . . . . . . . . . . . . . . . . . . 251
Using symbols. . . . . . . . . . . . . . . . . . . . . . . . . . . . . . . . . . . . . . . . . . . . . . . . . . . . . . . 255
Working with URLs . . . . . . . . . . . . . . . . . . . . . . . . . . . . . . . . . . . . . . . . . . . . . . . . . . 260
CHAPTER 12
Slices, Rollovers, and Hotspots . . . . . . . . . . . . . . . . . . . . . . . . . . . . . . . . . . . . 265
Creating and editing slices. . . . . . . . . . . . . . . . . . . . . . . . . . . . . . . . . . . . . . . . . . . . . . 265
Making slices interactive . . . . . . . . . . . . . . . . . . . . . . . . . . . . . . . . . . . . . . . . . . . . . . . 273
Preparing slices for export . . . . . . . . . . . . . . . . . . . . . . . . . . . . . . . . . . . . . . . . . . . . . . 280
Working with hotspots and image maps . . . . . . . . . . . . . . . . . . . . . . . . . . . . . . . . . . . 284
CHAPTER 13
Creating Buttons and Pop-up Menus . . . . . . . . . . . . . . . . . . . . . . . . . . . . . . . 289
Creating button symbols . . . . . . . . . . . . . . . . . . . . . . . . . . . . . . . . . . . . . . . . . . . . . . . 289
Creating navigation bars . . . . . . . . . . . . . . . . . . . . . . . . . . . . . . . . . . . . . . . . . . . . . . . 299
Creating pop-up menus. . . . . . . . . . . . . . . . . . . . . . . . . . . . . . . . . . . . . . . . . . . . . . . . 299
CHAPTER 14
Creating Animation. . . . . . . . . . . . . . . . . . . . . . . . . . . . . . . . . . . . . . . . . . . . . . . . 309
Building animation . . . . . . . . . . . . . . . . . . . . . . . . . . . . . . . . . . . . . . . . . . . . . . . . . . . 309
Working with animation symbols . . . . . . . . . . . . . . . . . . . . . . . . . . . . . . . . . . . . . . . . 310
Working with frames. . . . . . . . . . . . . . . . . . . . . . . . . . . . . . . . . . . . . . . . . . . . . . . . . . 314
Tweening. . . . . . . . . . . . . . . . . . . . . . . . . . . . . . . . . . . . . . . . . . . . . . . . . . . . . . . . . . . 319
Previewing an animation . . . . . . . . . . . . . . . . . . . . . . . . . . . . . . . . . . . . . . . . . . . . . . . 320
Exporting your animation . . . . . . . . . . . . . . . . . . . . . . . . . . . . . . . . . . . . . . . . . . . . . . 320
Working with existing animations . . . . . . . . . . . . . . . . . . . . . . . . . . . . . . . . . . . . . . . . 322
Using multiple files as one animation . . . . . . . . . . . . . . . . . . . . . . . . . . . . . . . . . . . . . 323

Contents6
CHAPTER 15
Optimizing and Exporting . . . . . . . . . . . . . . . . . . . . . . . . . . . . . . . . . . . . . . . . . . 325
About optimizing . . . . . . . . . . . . . . . . . . . . . . . . . . . . . . . . . . . . . . . . . . . . . . . . . . . . 325
Using the Export Wizard. . . . . . . . . . . . . . . . . . . . . . . . . . . . . . . . . . . . . . . . . . . . . . . 326
Optimizing in the workspace. . . . . . . . . . . . . . . . . . . . . . . . . . . . . . . . . . . . . . . . . . . . 328
Exporting from Fireworks . . . . . . . . . . . . . . . . . . . . . . . . . . . . . . . . . . . . . . . . . . . . . . 346
Using the Quick Export button. . . . . . . . . . . . . . . . . . . . . . . . . . . . . . . . . . . . . . . . . . 359
CHAPTER 16
Using Fireworks with Other Applications . . . . . . . . . . . . . . . . . . . . . . . . . . . . 361
Working with Macromedia Dreamweaver MX . . . . . . . . . . . . . . . . . . . . . . . . . . . . . . 362
Working with Macromedia Flash MX . . . . . . . . . . . . . . . . . . . . . . . . . . . . . . . . . . . . . 375
Working with Macromedia FreeHand . . . . . . . . . . . . . . . . . . . . . . . . . . . . . . . . . . . . . 380
Working with Macromedia Director . . . . . . . . . . . . . . . . . . . . . . . . . . . . . . . . . . . . . . 384
Working with Macromedia HomeSite. . . . . . . . . . . . . . . . . . . . . . . . . . . . . . . . . . . . . 387
Working with Microsoft FrontPage . . . . . . . . . . . . . . . . . . . . . . . . . . . . . . . . . . . . . . . 389
Working with Adobe Photoshop . . . . . . . . . . . . . . . . . . . . . . . . . . . . . . . . . . . . . . . . . 392
About working with Adobe GoLive. . . . . . . . . . . . . . . . . . . . . . . . . . . . . . . . . . . . . . . 396
About working with HTML editors . . . . . . . . . . . . . . . . . . . . . . . . . . . . . . . . . . . . . . 397
CHAPTER 17
Automating Repetitive Tasks. . . . . . . . . . . . . . . . . . . . . . . . . . . . . . . . . . . . . . . 399
Finding and replacing . . . . . . . . . . . . . . . . . . . . . . . . . . . . . . . . . . . . . . . . . . . . . . . . . 400
Batch processing . . . . . . . . . . . . . . . . . . . . . . . . . . . . . . . . . . . . . . . . . . . . . . . . . . . . . 405
Using the Project Log . . . . . . . . . . . . . . . . . . . . . . . . . . . . . . . . . . . . . . . . . . . . . . . . . 412
Extending Fireworks . . . . . . . . . . . . . . . . . . . . . . . . . . . . . . . . . . . . . . . . . . . . . . . . . . 413
CHAPTER 18
Preferences and Keyboard Shortcuts. . . . . . . . . . . . . . . . . . . . . . . . . . . . . . . 417
Setting preferences. . . . . . . . . . . . . . . . . . . . . . . . . . . . . . . . . . . . . . . . . . . . . . . . . . . . 417
Changing keyboard shortcut sets . . . . . . . . . . . . . . . . . . . . . . . . . . . . . . . . . . . . . . . . . 420
Working with configuration files . . . . . . . . . . . . . . . . . . . . . . . . . . . . . . . . . . . . . . . . . 423
INDEX. . . . . . . . . . . . . . . . . . . . . . . . . . . . . . . . . . . . . . . . . . . . . . . . . . . . . . . . . . . . . 429

7
INTRODUCTION
Getting Started
Macromedia Fireworks MX is the solution for professional web graphics design and production.
It is the first production environment to address and solve the special challenges facing web
graphics designers and developers.
You can use Fireworks to create, edit, and animate web graphics, add advanced interactivity, and
optimize images in a professional environment. In Fireworks, you can create and edit both bitmap
and vector graphics in a single application. Everything is editable, all the time. And you can
automate the workflow to meet the demands of time-consuming updates and changes.
Fireworks integrates with other Macromedia products such as Dreamweaver, Flash, FreeHand,
and Director, as well as your other favorite graphics applications and HTML editors, to provide a
true integrated web solution. You can easily export Fireworks graphics with HTML and
JavaScript code customized for the HTML editor you’re using.
System requirements
Before installing Fireworks, make sure your computer is equipped with the following hardware
and software.
Microsoft Windows™
•300MHz Intel® Pentium® II Processor
•Windows 98 SE, ME, NT® 4 (Service Pack 6), 2000, or XP
•64 MB of available RAM (128 MB recommended) plus 80 MB of available disk space
•800-by-600-pixel resolution, 256-color display or better
•Adobe Type Manager® Version 4 or later for use with Type 1 fonts
•CD-ROM drive
Macintosh®
•Power Macintosh G3 Processor, running OS 9.1 or later, or OS X version 10.1 or later
•64 MB of available RAM (128 MB recommended) plus 80 MB of available disk space
•800-by-600-pixel resolution, 256-color display or better
•Adobe Type Manager Version 4 or later for use with Type 1 fonts (OS 9.x only)
•CD-ROM drive

Introduction8
Installing Fireworks
Be sure to read the ReadMe document on the Fireworks CD-ROM for late-breaking information
or instructions.
To install Fireworks:
1Insert the Fireworks CD into your computer’s CD-ROM drive.
2Do one of the following:
•In Windows, the Fireworks installation program starts automatically. If it doesn’t start, choose
Start > Run. Click Browse and choose the Setup.exe file on the Fireworks CD. Click OK in the
Run dialog box.
•On the Macintosh, double-click the Fireworks Installer icon.
3Follow the onscreen instructions.
The installation program prompts you to enter required information.
4If prompted, restart your computer.
Running Fireworks on systems connected by a network
Macromedia uses network license detection to prevent copies of Fireworks with the same serial
number from running on multiple systems that are connected by a local area network.
If you attempt to launch Fireworks and more than the allowed number of users defined by the
license are also running Fireworks on the same network, you will be alerted of the license restriction.
If you believe you’ve received this message in error, or you would like to obtain additional licenses
for the product, contact Macromedia Technical Support at http://www.macromedia.com/
support/email/.
Viewing the files installed with Fireworks
At some point you may need to view or access the files installed with Fireworks. During
installation, Fireworks places files in various locations on your system. It’s important to
understand where these files reside and why. For more information, see “Working with
configuration files” on page 423.
Macintosh users should pay special attention to the new format Fireworks uses to store the
application and its default configuration files. For more information, see “Viewing package
contents (Macintosh only)” on page 427.
Learning Fireworks
A variety of resources are available for learning Fireworks, including a printed quick-start manual
(Getting Started with Fireworks MX), a help system you can launch from the application, a PDF
version of the complete Fireworks documentation, and several web-based information sources.
Fireworks Help is available whenever the Fireworks application is active, and contains the
complete Fireworks documentation. Choose Help > Using Fireworks to open Fireworks Help.
Mac OS X users choose Help > Fireworks Help.

Getting Started 9
Fireworks tutorials provide an interactive introduction to the key features in Fireworks that you
can complete in about an hour each. They include common Fireworks tasks such as using the
drawing and editing tools, optimizing images, and creating interactive elements such as rollovers
and navigation bars.
The Answers panel is a central location where you can find tutorials, TechNotes, and the most
up-to-date information about Fireworks, all in one place. The Answers panel is dynamic; with
just the click of a button you can get the latest updates and information about Fireworks directly
from Macromedia.
The Fireworks application itself contains many dialog boxes and tooltips designed to assist you in
using the program. Tooltips appear when your pointer pauses over a user interface element.
Getting Started with Fireworks MX includes overview information about basic Fireworks features.
The Using Fireworks MX PDF is a searchable, printable document containing the complete
Fireworks documentation. The PDF is available on the installation CD and on the Macromedia
website at http://www.macromedia.com.
Macromedia’s website is updated regularly with the latest information on Fireworks in addition
to advice from expert users, advanced topics, examples, tips, and updates. Check Macromedia’s
website for news on Fireworks and how to get the most out of the program at http://
www.macromedia.com/support/fireworks.
The Fireworks discussion group provides a lively exchange for Fireworks users, technical support
representatives, and the Fireworks development team. Use a newsgroup reader to go to news://
forums.macromedia.com/macromedia.fireworks.
Extending Fireworks MX includes information about writing JavaScript to automate Fireworks
tasks. Every command or setting in Fireworks can be controlled using special JavaScript
commands that Fireworks can interpret. A PDF version of Extending Fireworks MX is available on
the CD and on the Macromedia website at http://www.macromedia.com/support/fireworks/
extend.html.
Registering Fireworks
To get additional Macromedia support, it’s a good idea to register your copy of Macromedia
Fireworks, electronically or by mail.
When you register, you will be put on the priority list to receive up-to-the-minute notices
about upgrades and new Macromedia products. You will receive timely e-mail notices about
product updates and new content appearing on both the www.macromedia.com and the
www-euro.macromedia.com websites.
To register your copy of Fireworks, do one of the following:
•Choose Help > Online Registration and fill out the electronic form.
•Choose Help > Mail Registration, print the form, and mail it to the address shown on the form.

Introduction10
What’s new in Fireworks
New features in Fireworks MX make it an increasingly approachable application with enhanced
power to create graphics and interactivity for websites. Fireworks MX maximizes productivity for
seasoned veteran web designers, HTML developers who also work with graphics, and emerging
web developers who need to develop graphics-rich, interactive web pages with little or no coding
or JavaScript knowledge.
Fireworks MX has undergone a major refinement, with a streamlined user interface, more
powerful button and pop-up menu capabilities, and intuitive bitmap and vector tools. Integration
with other Macromedia applications—as well as third-party applications—makes it easy to bring
various file formats into Fireworks and send them to other applications smoothly as you work.
Also new to Fireworks is the ability to create JavaScript commands with Macromedia Flash that
appear in Fireworks MX as panels or dialog boxes.
Ease-of-use features
A comfortable, intuitive work environment—including a Property inspector and tools that work
the way professionals would expect—make Fireworks MX an easy application to learn and get to
work quickly. Fireworks MX has a new look that is better organized and more consistent with
other applications in the Macromedia MX Studio.
Panel management enhancements include the ability to place panels in groups, then collapse the
groups so that only the panel group title bar is visible until you need to use the panels. You can
dock the panel groups in a panel docking area to organize your workspace or drag groups or
individual panels anywhere in the workspace. For more information, see “Organizing panel
groups and panels” on page 85.
The Property inspector is a dynamic panel full of options that change as you do your work. Open
a document, and the Property inspector displays document properties such as canvas color and
size. Choose a tool from the Tools panel, and the Property inspector displays tool options. Select a
vector object, and it displays stroke and fill information.
You can change these and other options—including Live Effects, blending modes, and opacity—
directly from the Property inspector, instead of having to click to open or activate panel after panel.
The Property inspector—familiar to Macromedia Dreamweaver and Flash users—reduces the number
of panels in the workspace. For more information, see “Using the Property inspector” on page 83.
Modeless bitmap and vector editing eliminates the need to constantly keep up with vector and
bitmap modes. Choosing a tool or selecting an object type automatically determines whether you
will be creating and editing bitmaps, vectors, or text.
Bitmap-editing enhancements give you intuitive capabilities to create bitmaps by cutting or
copying and pasting, to move marquee selections among bitmaps, and to fine-tune images with a
new group of image-retouching tools. Also, common selection commands are organized in a new
Selection menu.
Tools panel sections that separate the tools used for creating and editing bitmaps, vectors, and
web objects offer cues for intuitively choosing the proper tool and achieving predictable creative
results. Other tools and tool features are separated into Select, Colors, and View categories. For
more information, see “Using the Tools panel” on page 82.
The Quick Export button displays convenient options for exporting a variety of file formats or
HTML styles, or launching other Macromedia products from the document window,
eliminating setup time and streamlining the workflow. For more information, see “Using the
Quick Export button” on page 359.

Getting Started 11
Onscreen text allows you to visually integrate text and graphics without having to use the Text
Editor. Simply choose the Text tool, click on the canvas, and start typing. In the Property
inspector, you can either set text attributes for the Text tool before you begin typing or highlight
existing text and format it. Fireworks MX has a range of new text and paragraph controls to
format text. For more information, see “Using Text” on page 171.
Variable zooming lets you drag the Magnify tool to determine the precise magnification amount.
After you drag to magnify your document, the magnification amount is displayed in the Set
Magnification text box at the bottom of the document.
Windows XP and Macintosh OS X compatibility takes advantage of the latest operating systems.
Fireworks MX is fully carbonized to support all the OS X user-interface improvements.
XHTML exporting allows you to export, update, and roundtrip XHTML in all the same styles
Fireworks offers for HTML. You can roundtrip legacy documents that have been converted to
XHTML in Dreamweaver MX.
The Answers panel, a new feature in Fireworks MX, Dreamweaver MX, and Flash MX, is an
updatable link to web content, conveniently located in the Fireworks workspace. When you are
online, you can click the Update button and download fresh reference information from
Macromedia, or search online databases for documentation such as TechNotes.
The spell-checker searches every text block in your document for misspelled words. When it
finds a word it doesn’t recognize, it offers suggestions for correcting it or allows you to add it to
your dictionary.
Cross-platform font caching makes it easy to share files among work groups and clients without
worrying about cross-platform font issues. Fireworks maintains the appearance of all text in a
document on systems that do not have the fonts in the document.
Power enhancement features
Fireworks MX has a series of powerful new creativity and automation features that emerging web
designers will find easy to use and experienced developers will appreciate. These features make
Fireworks an essential part of the web designer and developer process from concept to integration.
The Data-driven Graphics Wizard allows you to assign variables to text, images, hotspots, and
slices, and then generate multiple documents based on the original, each with unique information
taken from a comma-delimited or XML database file.
The Nav Bar Builder on the Commands menu automates the process of quickly creating
navigation bars using convenient Fireworks MX button symbols. You can select an instance of a
button symbol, and then choose the number of copies to make, choose vertical or horizontal
orientation and spacing, and assign button labels and URLs in an integrated dialog box.
Pop-up Menu Editor enhancements have added creative control to the most popular new feature
in Fireworks 4. Now you can create a horizontal or vertical pop-up menu, and determine border
characteristics, cell spacing, and cell size independently from text size. You can also set placement
of menus relative to the trigger object as well as placement of submenus relative to the trigger
menu item or main pop-up menu. Fireworks automatically generates JavaScript code for you;
exported menus are fully compatible with Dreamweaver MX. For more information, see
“Creating pop-up menus” on page 299.

Introduction12
Instance-level button symbol editing lets you create a button symbol and then easily differentiate
individual buttons with unique text, URLs, and targets using the Property inspector. Meanwhile,
you can edit other graphical characteristics at the symbol level, and have the edits update across all
button instances without affecting the instance-level properties. For more information, see
“Creating button symbols” on page 289.
Open workflow features
You need not be confined by someone else’s workflow. Using Fireworks MX, you can integrate
graphic production into your development process with an open, efficient workflow that
recognizes and supports the file formats, applications, and standards you use.
JavaScript commands with SWF interface take JavaScript command creation to a higher level.
Developers can create and execute complex commands to extend and automate Fireworks MX by
combining Fireworks JavaScript extensibility API with interfaces developed in Flash MX using
components and ActionScript. For more information, see Extending Fireworks MX, available as a
PDF on the installation CD and at http://www.macromedia.com/support/fireworks/extend.html.
Macromedia Exchange support means that users—even those who are not interested in creating
JavaScript commands—can download user-created commands from the Exchange. The
commands appear in the Fireworks MX workspace as easy-to-use panels or dialog boxes.
Fireworks MX ships with several user-created commands in the Commands menu, as well as a
user-created Align panel in the Window menu.
Slice table layout controls let you define and optimize slice table layouts by dragging slice guides.
Fireworks automatically resizes attached slices, adding and deleting slices as needed. For more
information, see “Moving slice guides to edit slices” on page 271.
The Reconstitute Tables feature instantly builds a new Fireworks PNG source file when you
point to any HTML file containing tables with image slices. Macromedia Fireworks and
Dreamweaver behaviors such as image rollovers and pop-up menus are imported and attached to
the appropriate slices.
This comes in handy when you are working on existing website projects and the only available
files are the posted HTML pages. You can bring the HTML files into Fireworks and create PNG
source files from them. For more information, see “Creating Fireworks PNG files from HTML
files” on page 76.
Roundtrip Photoshop 6 text allows you to open a Photoshop 6 or 7 file with editable text intact,
so the graphic can be edited and then exported back to the Photoshop format, while maintaining
the correct text appearance and editability. For more information, see “About importing text from
Photoshop” on page 393.
Roundtrip with Microsoft FrontPage is available with a click of the Quick Export button. Launch
and Edit tables work on the original file in Fireworks; the tables are updated in FrontPage without
losing code changes that have been made in FrontPage. For more information, see “Exporting
Fireworks HTML to FrontPage” on page 390.
Macromedia Sitespring integration puts best practices in production and client management in
the Fireworks MX workspace. Simply choose Window > Sitespring to open the Sitespring
window. For more information, consult the Sitespring documentation.

13
CHAPTER 1
Graphic Design Basics Tutorial
This tutorial will guide you through the basic tasks of designing graphics with Macromedia
Fireworks MX. You’ll get hands-on experience using the industry’s leading web graphics
application and learn basic graphic design concepts along the way.
If you are already familiar with designing graphics in Fireworks, you may want to proceed to
the “Web Design Basics Tutorial” on page 41, where you’ll learn about designing web pages
with Fireworks.
What you’ll learn
By taking this tutorial, in less than an hour you’ll accomplish the tasks required to create an ad for
classic rental cars using Fireworks. You will learn to do the following:
•Copy the Tutorials folder
•View the completed file
•Create and save a new document
•Explore the Fireworks work environment
•Create and edit vector objects
•Import a bitmap and select pixels
•Add and edit Live Effects
•Work with layers and objects
•Create and edit a mask
•Create and edit text
•Export the document
What you should know
Although this tutorial is designed for beginning Fireworks users, it covers many new features in
Fireworks, so experienced Fireworks users can benefit from it too. You don’t need to be a graphic
designer to perform this tutorial, but you should possess basic computer skills and be able to use
common desktop applications. This includes knowing how to browse for files and folders on
your hard disk.
Chapter 114
Copy the Tutorials folder
Before you begin, you’ll make a copy of the Tutorials folder, so that you can save the results of
your work while allowing you or another user to complete the tutorial at a later time using the
original files.
1Navigate to the Fireworks application folder on your hard disk.
Note: If you are unable to view your Fireworks application folder, you may have limited access to files on your
system. You can download the files you need for this tutorial from the Fireworks Support Center on the web at
http://www.macromedia.com/support/fireworks/.
2Drag a copy of the Tutorials folder to your desktop.
View the completed file
View the completed tutorial file to see what your finished project will look like.
1Launch your web browser.
2On your hard disk, navigate to the Tutorials folder you copied to your desktop, and browse to
Tutorial1/Complete.
Note: Some versions of Microsoft Windows hide extensions for known file types by default. If you have not
changed this setting, the files in the Complete folder won’t display extensions. When dealing with web
graphics, it’s best to be able to see file extensions. See Windows Help for information about how to turn file
extensions back on.
3Select the final.jpg file and drag it to the open browser window.
For this tutorial, you will use Fireworks to design and export a copy of this ad for classic rental cars.
Note: The Complete folder also includes the Fireworks document from which this JPEG file was generated. To
view the document, double-click final.png.
Create and save a new document
Now that you’ve viewed the final.jpg file, you’re ready to begin your project.
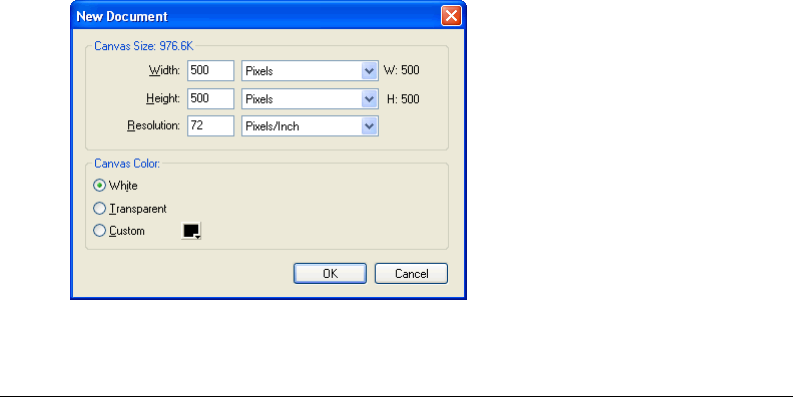
1In Fireworks, choose File > New.
The New Document dialog box opens.
Graphic Design Basics Tutorial 15
2Enter 480 for the width and 214 for the height. Ensure that both measurements are in pixels
and that the canvas color is white, and click OK.
A document window opens, with a title bar that reads Untitled-1.png (Windows) or
Untitled-1 (Macintosh).
3If the document window isn’t maximized, that is, if it doesn’t fill the center of the screen,
maximize it by clicking the maximize button (Windows) or the zoom box (Macintosh) at the
top of the document window. This will give you plenty of room to work.
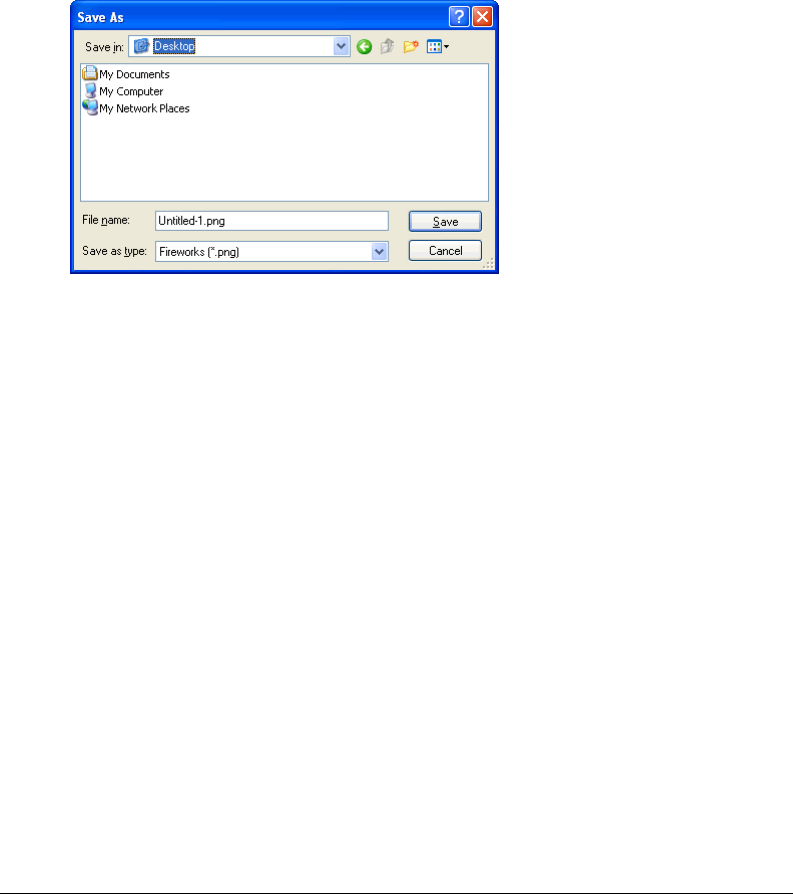
4Choose File > Save As.
The Save As (Windows) or Save (Macintosh) dialog box opens.
5Browse to the Tutorials/Tutorial1 folder on your desktop.
6Name the file vintage.
7Choose the Add Filename Extension option if it’s not already selected (Macintosh only).
8Click Save.
The title bar displays the new filename with a PNG extension. PNG is the native file format
for Fireworks. The PNG file is your source file; it is where you’ll do all of your work in
Fireworks. At the end of this tutorial, you’ll learn how to export your document to another
format for use on the web.
As you complete the tutorial, remember to save your work frequently by choosing File > Save.
Note: While completing the tutorial, you may find it useful to undo a change you’ve made. Fireworks can undo
several of your recent changes, depending on the number of undo steps you have set in Preferences. To undo the
most recent change, choose Edit > Undo.
Chapter 116
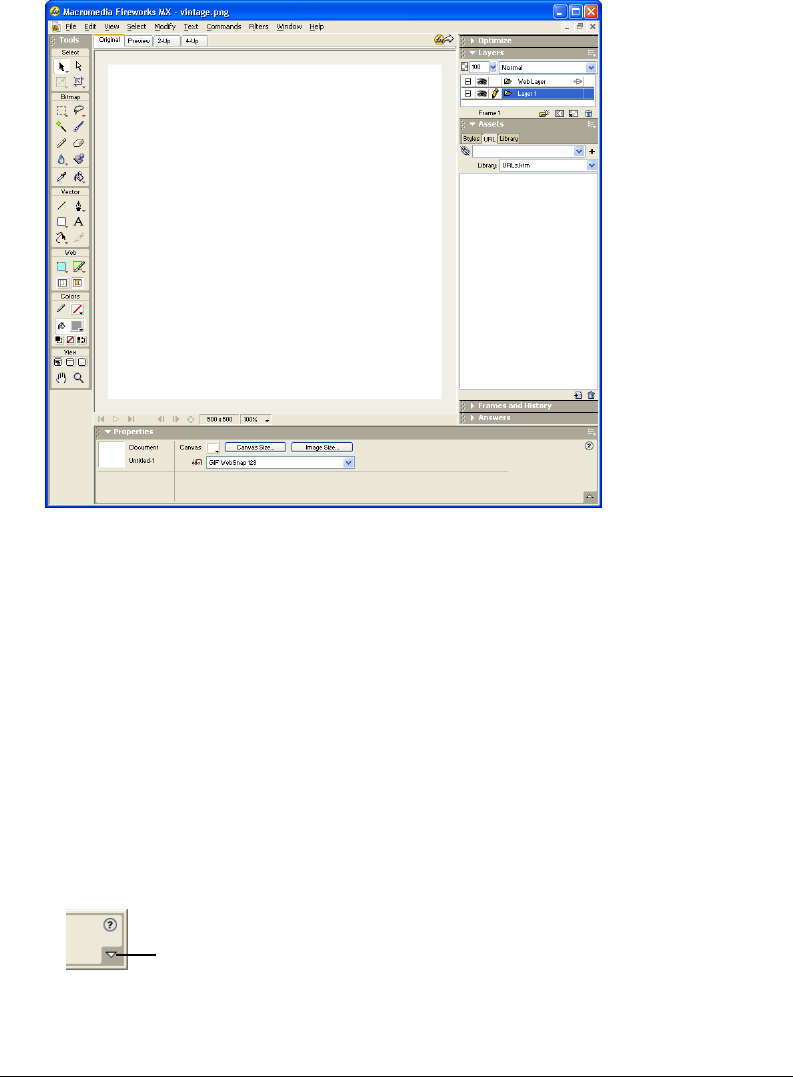
Explore the Fireworks work environment
Before you continue, examine the elements that make up the Fireworks work environment:
•In the center of the screen is the document window. In the center of the document window is
the canvas. This is where the Fireworks document and any graphics you create are displayed.
•At the top of the screen is a menu bar. Most Fireworks commands are accessible from the
menu bar.
•On the left side of the screen is the Tools panel. If the Tools panel isn’t visible, choose Window
> Tools. The Tools panel is where you’ll find tools for selecting, creating, and editing a variety
of graphic items and web objects.
•At the bottom of the screen is the Property inspector. If the Property inspector isn’t visible,
choose Window > Properties. The Property inspector displays properties for a selected object
or tool. You can change these properties. If no objects or tools are selected, the Property
inspector displays document properties.
The Property inspector displays either two or four rows of properties. If the Property inspector
is at half height, that is, displaying only two rows, you can click the expander arrow in the
lower right corner to see all properties.
Expander arrow at half height state
Graphic Design Basics Tutorial 17
•On the right side of the screen are a variety of panels, such as the Layers panel and Optimize
panel. You can open these and other panels from the Window menu.
•Move your pointer over the various interface elements. If you hold the pointer over an item on
the interface long enough, a tooltip appears. Tooltips identify tools, menus, buttons, and other
interface features throughout Fireworks. Tooltips disappear when you move the pointer away
from the interface elements they identify.
You’ll learn more about each of these elements as you progress through the tutorial.
Create and edit vector objects
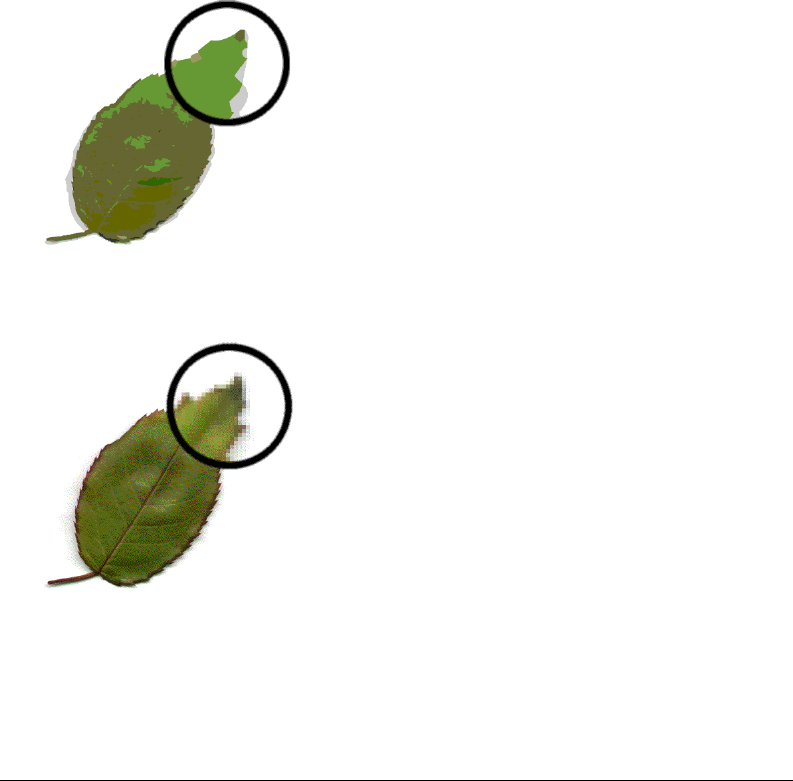
With Fireworks, you can create and edit two kinds of graphics: vector objects and bitmap images.
A vector object is a mathematical description of a geometric form. Vector paths are defined by
points. Vector paths do not show a degradation in quality when you zoom in on them or scale
them larger or smaller. The leaf in the illustration below is a collection of vector objects. Notice
how smooth the leaf’s edges appear even when you zoom in.
In contrast, a bitmap image is made up of a grid of colored pixels. Images with complex color
variations, such as photographs, are most often bitmap images.
While many applications offer tools to edit either vector shapes or bitmap images, Fireworks lets
you work with both types of graphics. You will work with vector graphics in this section.
Chapter 118
Create vector objects
Now you’ll create two of the graphical elements for your document. First you’ll create a blue
rectangle that will be positioned at the bottom of the document. Then you will create a rectangle
that will act as a border for the contents of the canvas.
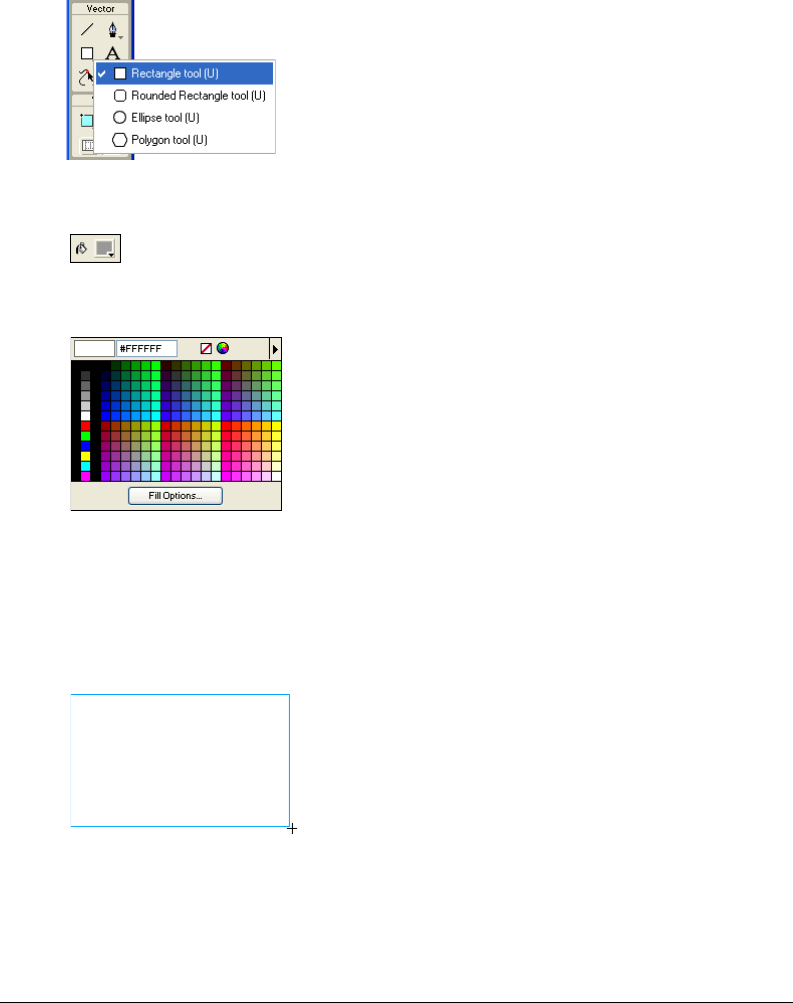
1Choose the Rectangle tool in the Vector section of the Tools panel.
2In the Property inspector, click the Fill Color box.
The Fill Color pop-up window opens.
3Type 333366 in the text box at the top of the window, then press Enter.
The Fill Color box changes to a dark blue color to reflect your color choice.
4In the document window, position the cross-hair pointer over the canvas, and drag downward
and to the right to create a rectangle. You can draw the rectangle anywhere on the canvas.
You’ll resize and position it later in this procedure.
5When you release the mouse button, a dark blue rectangle appears, selected, in the area
you defined.
You can tell when an object is selected because it displays blue corner points. Most objects also
have a blue highlight around their outer edges, but rectangles are an exception.
Graphic Design Basics Tutorial 19
6In the lower left corner of the Property inspector, enter 480 in the width box and 15 in the
height box, then press Enter.
The rectangle is resized to fit the specified dimensions.
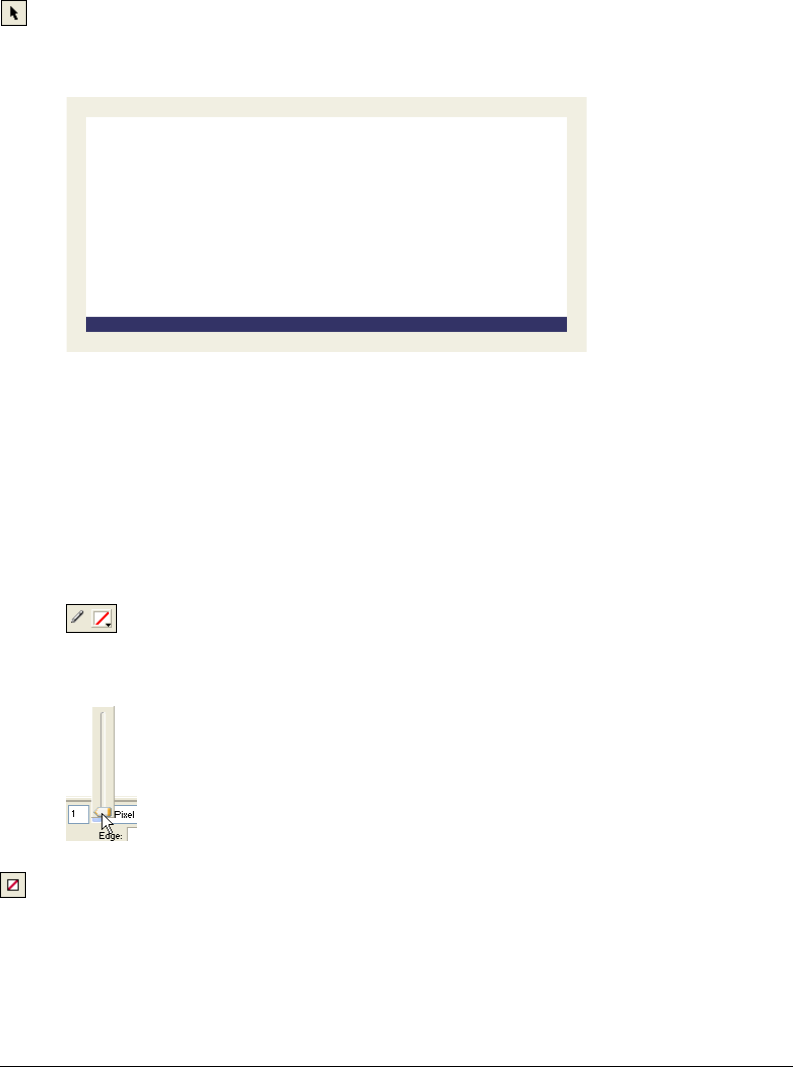
7Choose the Pointer tool in the Select section of the Tools panel.
8Drag the rectangle so that it is positioned at the bottom of the canvas, as shown below. Use the
arrow keys for exact placement.
9Choose the Rectangle tool again, and draw a second rectangle. Draw it anywhere on the canvas,
and make it any size you want. You’ll change its properties and position in the next section.
Set object properties
Here, you’ll edit the second rectangle you created by changing its size, position, and color in the
Property inspector.
1With the rectangle still selected, click the Stroke Color box in the Property inspector and enter
CCCCCC as the color value. Press Enter to apply the change.
2Set the Tip Size to 1 by dragging the pop-up slider or typing in the text box.
3Click the Fill Color box in the Property inspector and click the Transparent button.

Chapter 120
4In the Property inspector, enter the following values in the width, height, and coordinate
boxes. Then click outside the Property inspector to apply your changes.
•Width: 480
•Height: 215
•X: 0
•Y: 0
The rectangle becomes a gray border around the edge of the canvas.
If your system uses gray as the color for the window background, it may be difficult for you to
see the rectangle at this point. But don’t worry, it’s still there.
5Choose the Pointer tool and click anywhere away from the rectangle to deselect it.
The properties change in the Property inspector. Because no objects are selected, you now see
document properties instead of object properties.
Import a bitmap and select pixels
Next you will import a bitmap image and create a floating selection from its pixels.
Import an image
You will modify an image of a classic automobile. First you need to import the image.
1Choose File > Import and navigate to the Tutorials folder on your desktop. Browse to the
Tutorial1/Assets folder.
2Select car.jpg and click Open.
Graphic Design Basics Tutorial 21
3Align the insertion pointer with the upper left corner of the canvas and click, as shown in the
following illustration.
The image appears, selected, on the canvas.
4Click anywhere outside the selected image to deselect it.
Create a pixel selection
Next you’ll select the pixels that make up the car in the image you imported, and copy and paste
the pixels as a new object.
1Choose the Zoom tool in the View section of the Tools panel.
2Click once on the image.
The view is magnified to 150%. Zooming in allows you to better see what you are selecting
and gives you finer control over your selection.
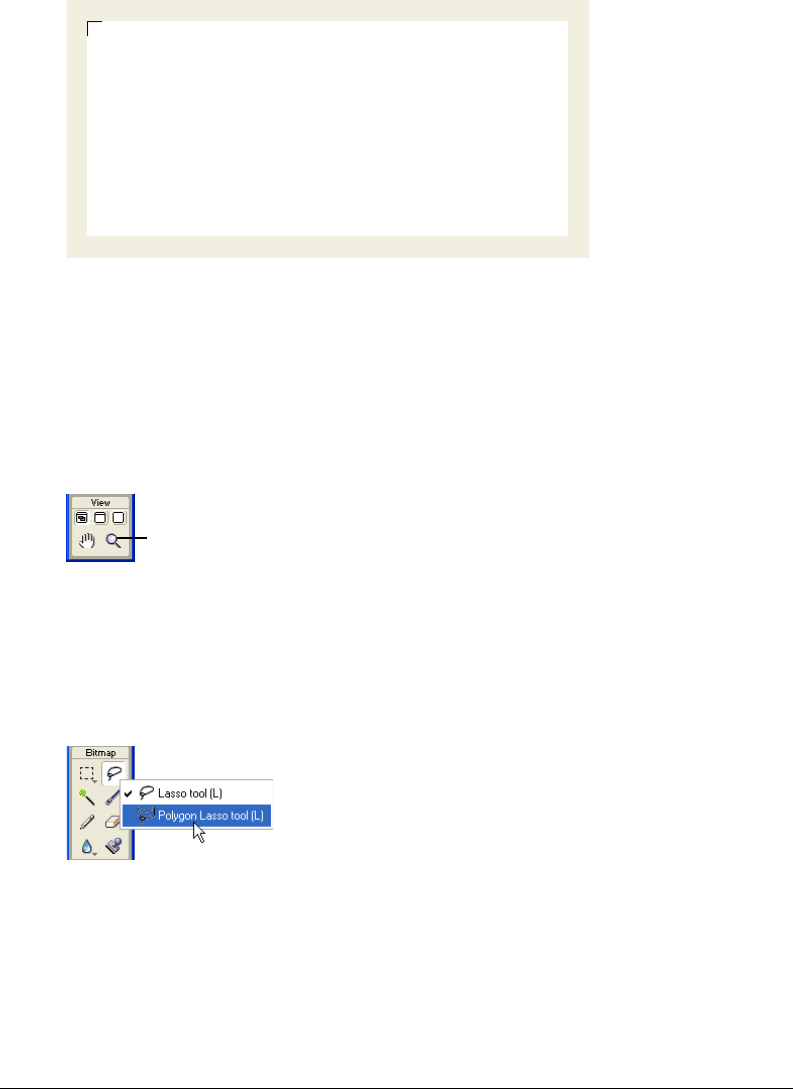
3Click and hold down the mouse button on the Lasso tool in the Bitmap section of the Tools
panel. Choose the Polygon Lasso tool from the pop-up menu that appears.
The Polygon Lasso tool allows you to draw a selection around pixels using a series of straight
lines. You’ll use the Polygon Lasso tool to select the pixels that make up the car image.
4In the Property inspector, set the Edge option to Anti-alias.
Zoom tool
Chapter 122
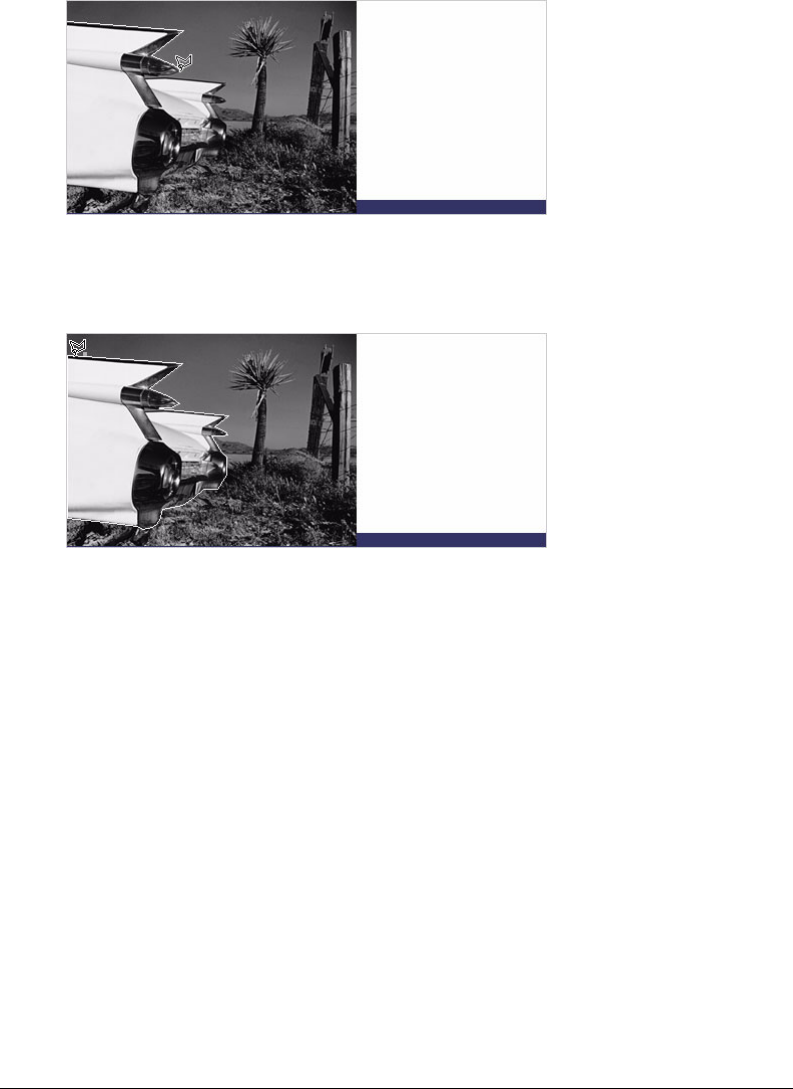
5Click with the Polygon Lasso tool pointer on the top edge of the car, then click repeatedly
around the edge of the car to continue the selection.
6Complete the selection by moving the pointer over the spot where you started the selection. A
small gray square appears beside the Polygon Lasso pointer to indicate you are about to
complete the selection. Click to complete the selection.
A marquee border appears around the pixels you selected.
7Choose Edit > Copy.
The selection is copied to the Clipboard.
8Choose Edit > Paste.
The car image is pasted into the document as a new bitmap object.
9Choose the Pointer tool and double-click anywhere outside the bitmap to deselect it.
10 Click the Set Magnification pop-up menu at the bottom of the document window and return
the view to 100%.
Graphic Design Basics Tutorial 23
Add and edit Live Effects
Next you’ll apply Live Effects to the original bitmap image. You’ll change the image’s hue and
saturation and apply a blur.
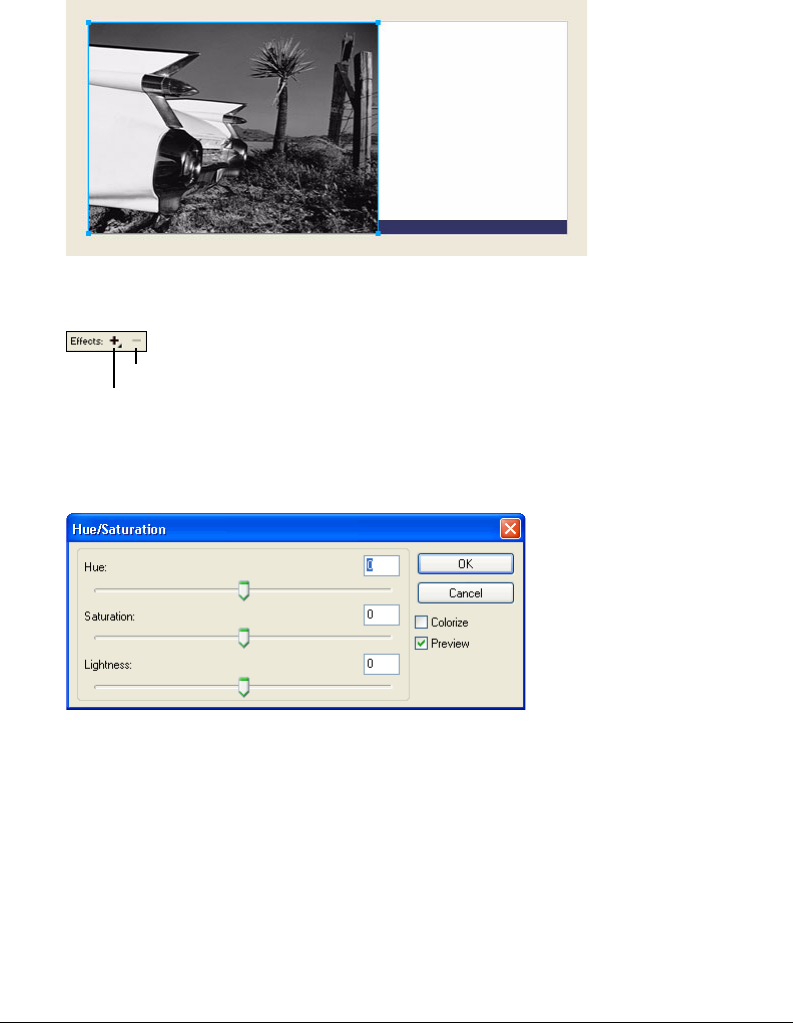
1Click anywhere on the desert image. (Be careful not to click on the car, however.)
2In the Property inspector, click the Add Effects button (the button with the plus (+) sign).
3Choose Adjust Color > Hue/Saturation from the Effects pop-up menu.
The Hue/Saturation dialog box opens.
Delete Effects button
Add Effects button
Chapter 124
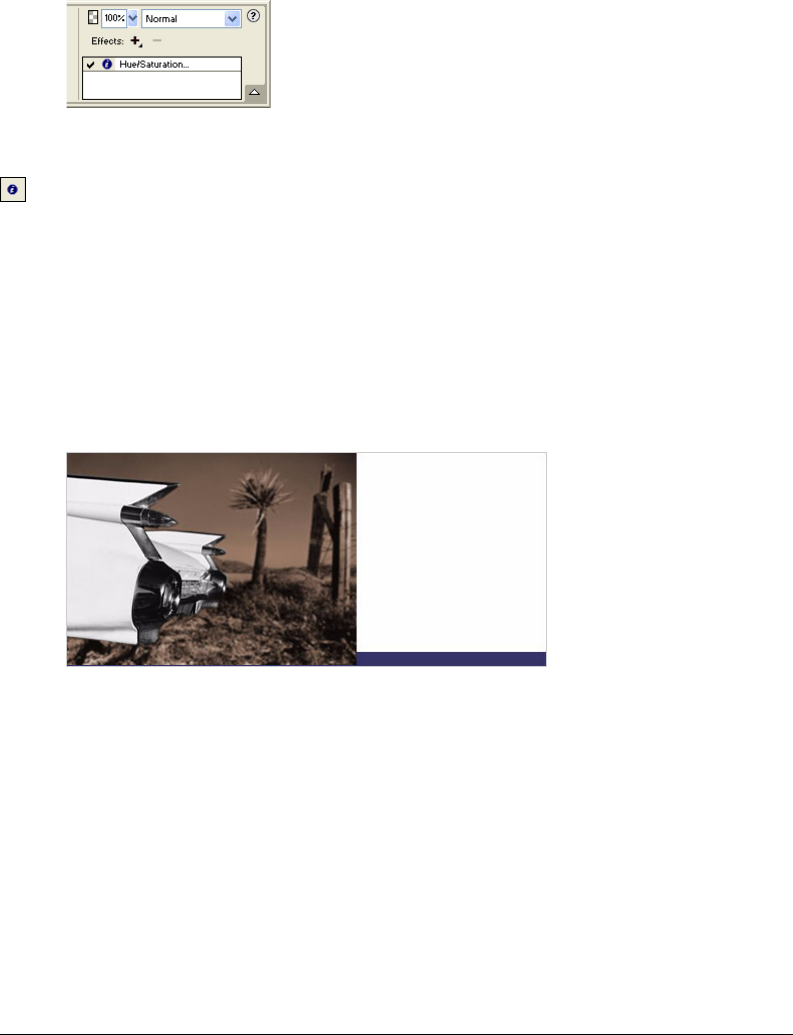
4Choose the Colorize option and click OK.
The image becomes colorized on the canvas, and the effect is added to the Live Effects list in
the Property inspector. Live Effects are editable; you can always add to this list, delete the
effect, or edit the effect.
5Double-click the Hue/Saturation effect to edit it.
Tip: Alternatively, you can click the info button beside the effect.
The Hue/Saturation dialog box opens again.
6Change the Hue to 25 and the Saturation to 20, and click OK.
The image’s hue and saturation levels change to display a sepia appearance, as in an
old photograph.
7Click the Add Effects button again to add another Live Effect.
8Choose Blur > Blur More from the Effects pop-up menu.
The pixels of the selected bitmap become blurred, and the new effect is added to the Live
Effects list in the Property inspector.
Work with layers and objects
Layers divide a Fireworks document into discrete planes. A document can be made up of many
layers, and each layer can contain many objects. In Fireworks, the Layers panel lists layers and the
objects contained in each layer.
Using the Layers panel, you can name, hide, show, and change the stacking order of layers and
objects, as well as merge bitmaps and apply bitmap masks. You can also add and delete layers
using the Layers panel.
In this part of the tutorial, you’ll use the Layers panel to merge the two bitmap images. Then
you’ll name the objects in your document. You’ll also use the Layers panel to change the stacking
order of objects.
Later in the tutorial you’ll use the Layers panel to apply a mask to the merged image.
Graphic Design Basics Tutorial 25
Merge bitmaps
Now that you’ve applied Live Effects to the background image, you will merge it with the
grayscale car image to create a single bitmap.
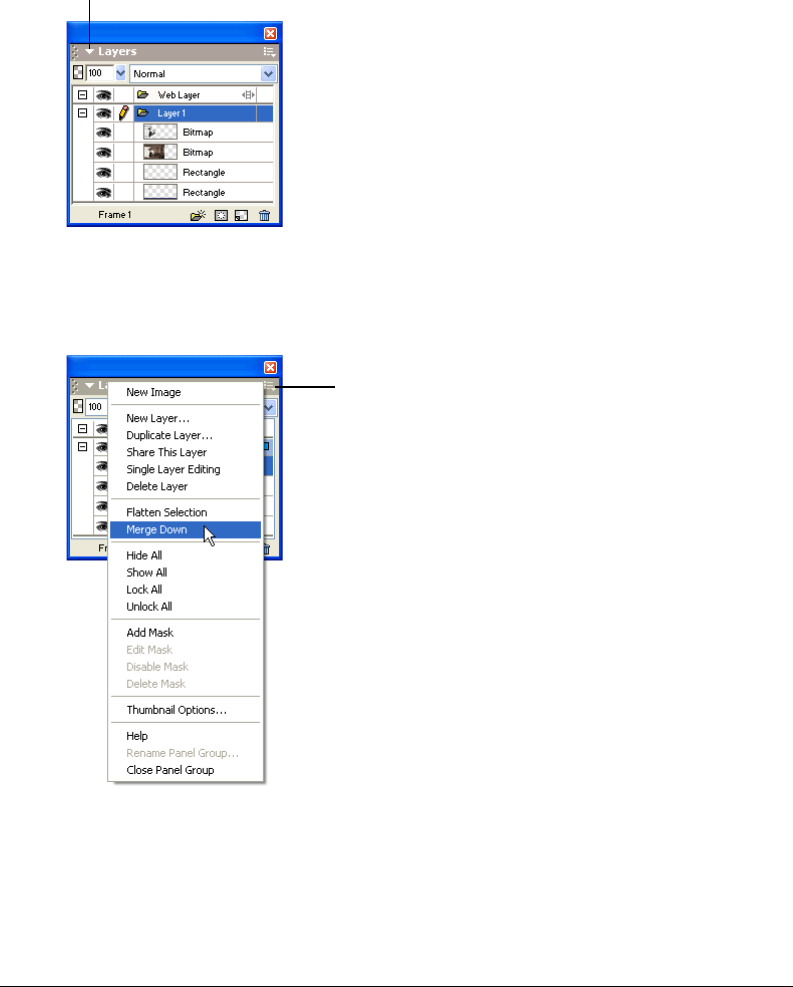
1If the Layers panel is minimized or isn’t visible, click its expander arrow or choose
Window > Layers.
2Click the thumbnail of the grayscale car image in the Layers panel.
3With the car image selected, click the Options pop-up menu icon at the upper right of the
Layers panel.
Expander arrow
Options pop-up
menu icon
Chapter 126
4Choose Merge Down.
In the Layers panel, the two bitmap objects merge into one bitmap.
In the Property inspector there are no longer any effects in the Live Effects list. This is because
merging down combines the pixels of each bitmap and renders them uneditable as separate
images. The Live Effects you apply to an object or bitmap are no longer editable after you
perform a merge down with another bitmap.
Name objects
It’s always a good idea to name your objects so you can easily identify them later. When a
document gets large and contains many objects, it can be difficult to manage if your objects don’t
have unique names.
Here you’ll name the objects in your document using both the Layers panel and the
Property inspector.
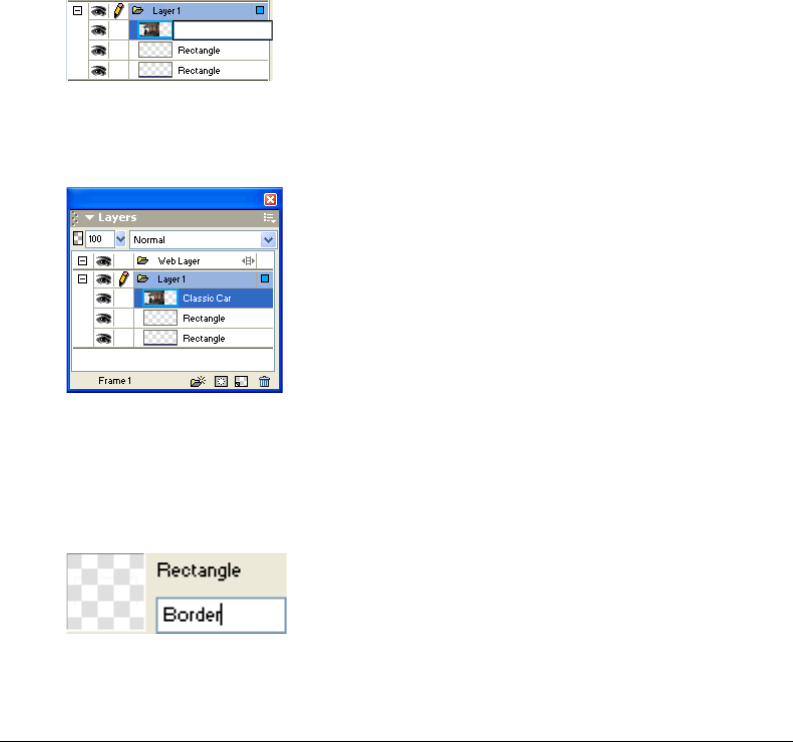
1Double-click the word Bitmap beside the image thumbnail in the Layers panel.
A text box appears.
2Type Classic Car in the text box and press Enter.
The new name is applied to the bitmap object.
3In the document window, select the gray rectangle that borders the document. If it’s too hard
to see on the canvas, select it in the Layers panel.
This time you’ll name an object using the Property inspector.
4Type Border in the Object Name box of the Property inspector, and press Enter.
The name you enter is also displayed beside the object thumbnail in the Layers panel.
Graphic Design Basics Tutorial 27
5Enter a name for the remaining rectangle object using either the Layers panel or the Property
inspector. Use any name you like, but be sure to choose a name that is meaningful so you can
easily identify and manage objects in the document later.
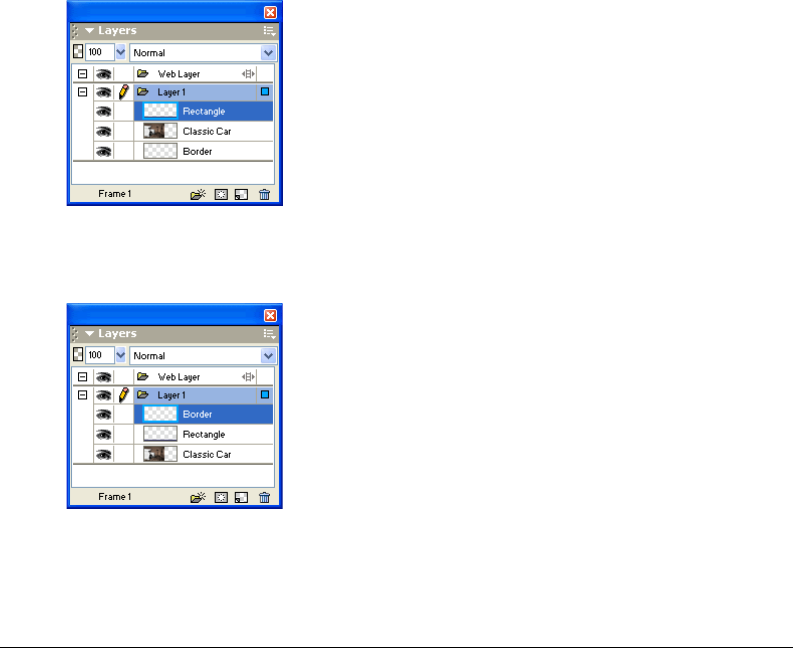
Change the object stacking order
The merged bitmap image overlaps the border object and the blue rectangle. The border and blue
rectangle need to rest on top, so you’ll use the Layers panel to change the stacking order of objects
in the document.
1Click the thumbnail of the blue rectangle in the Layers panel to select it.
2Drag it to the top of Layer 1, above the Classic Car thumbnail.
Note: The topmost layer in the Layers panel is always the Web Layer. You’ll learn more about the Web Layer in
“Web Design Basics Tutorial” on page 41.
As you drag, the pointer changes to reflect that you are dragging an object (Windows only). A
dark line in the Layers panel indicates where the object will be dropped if you release the
mouse button at that time.
3Release the mouse button.
The blue rectangle is dropped just above the bitmap object in the Layers panel. The stacking
order of objects also changes on the canvas. The blue rectangle now overlaps the bitmap object
and the border object.
4You want the border object to be the topmost object, so select its thumbnail and drag it to the
top of the Layers panel, above the blue rectangle.
Chapter 128
Create and edit a mask
Now that you’ve made various modifications to the classic car image, you’ll perform one last
procedure to give it the appearance of becoming gradually transparent.
In Fireworks you can apply two kinds of masks: vector masks and bitmap masks. For this tutorial,
you’ll apply a simple bitmap mask to the car image. You’ll then modify it by giving it a gradient fill.
The pixels in the mask will either display or hide the car image, depending on their grayscale value.
Apply a mask
First you will apply an empty, white bitmap mask to the car image. A white mask shows a selected
object or image, whereas black pixels in a mask hide a selected object or image.
You’ll also paint on the mask to make the car image appear to be fading into the background.
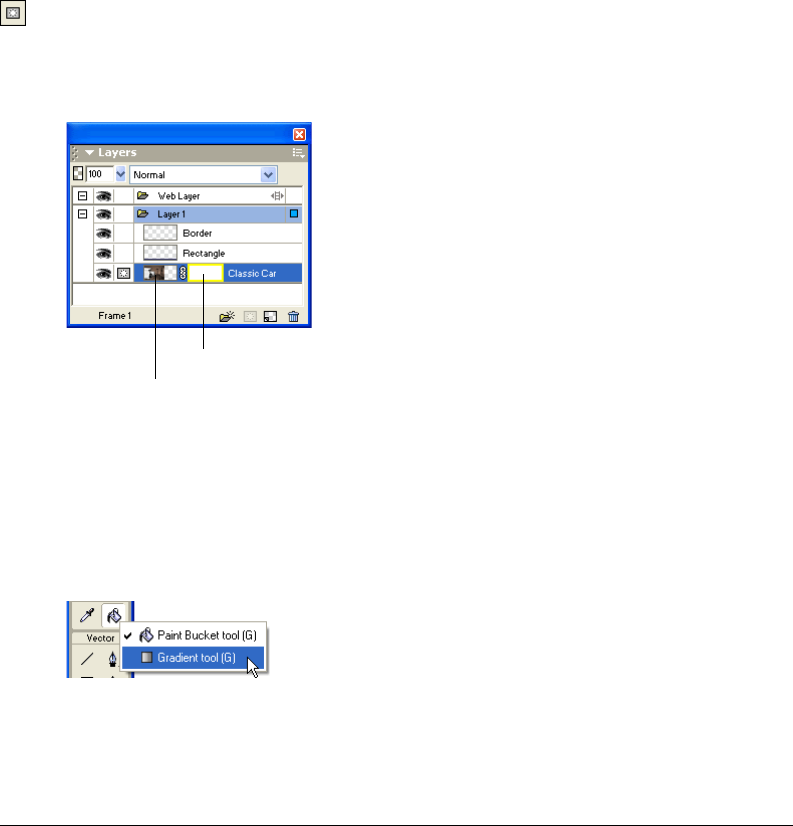
1With the Pointer tool, select the bitmap image.
2Click the Add Mask button at the bottom of the Layers panel.
An empty, transparent mask is added to the selected image. You can see the mask has been
added by looking at the mask thumbnail in the Layers panel. The yellow highlight around the
mask thumbnail indicates it is selected.
Edit the mask
Now you will give the bitmap image a transparent appearance by adding a gradient fill to the mask.
1With the mask thumbnail selected in the Layers panel, click and hold down the mouse button
on the Paint Bucket tool in the Bitmap section of the Tools panel. Choose the Gradient tool
from the pop-up menu that appears.
2Click the Fill Color box in the Property inspector.
The Edit Gradient pop-up window opens.
Mask thumbnail
Mask object
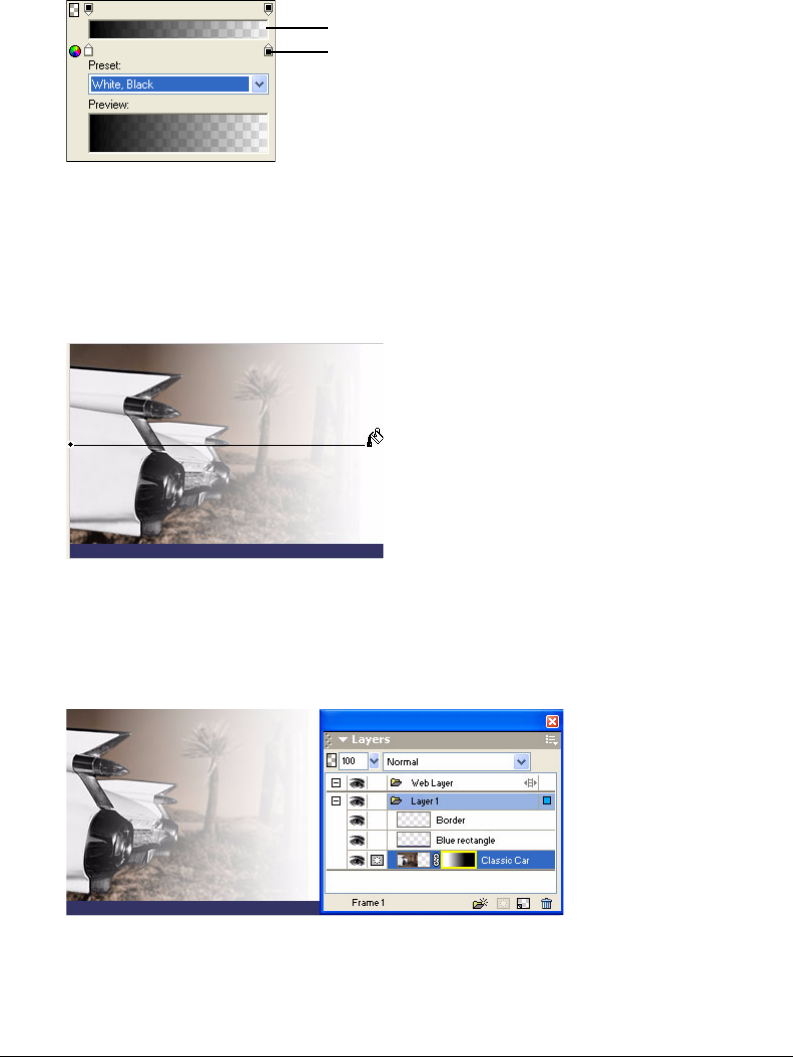
Graphic Design Basics Tutorial 29
3Choose White, Black from the bottom of the Preset pop-up menu.
The color ramp and swatches change to reflect the new setting. The color swatches located just
beneath the color ramp allow you to modify the colors in the gradient.
4Drag the left (white) color swatch about 1/4 of the way to the right to adjust the gradient.
5Click outside the Edit Gradient pop-up window to close it.
6On the canvas, drag the Gradient pointer across the bitmap image, as shown in the following
illustration. Visual feedback appears onscreen as you drag, allowing you to define the angle and
distance in which the gradient will be applied.
7Release the mouse button.
The mask is modified with the gradient fill you created. The mask affects the car image by
giving it a gradiated transparent appearance.The mask thumbnail in the Layers panel displays
the gradient fill you applied.
Color ramp
Color swatches
Chapter 130
8Choose the Pointer tool and click the mask thumbnail in the Layers panel.
The Property inspector shows that the mask was applied using its grayscale appearance. The
darker pixels in the mask knock out the image of the car, while the lighter pixels in the mask
show the car.
Create and edit text
Next you’ll add text to the document and apply text properties using the Property inspector. You’ll
create four text blocks, two for the ad title and two for the body text.
Create the title text
First you’ll create the title text for the car rental ad.
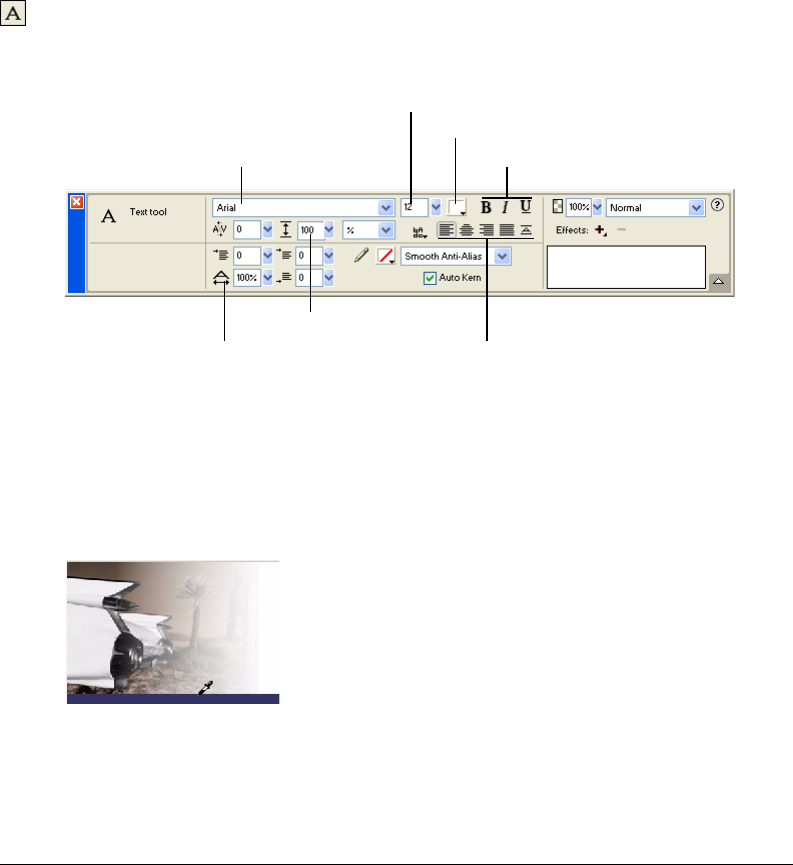
1Choose the Text tool in the Vector section of the Tools panel, and move the pointer over the
document window.
The pointer changes to an I-beam, and the Property inspector displays text properties.
2In the Property inspector, do the following:
•Choose Times New Roman from the Font pop-up menu.
•Enter 85 as the font size.
•Click the Fill Color box. The pointer changes to the eyedropper pointer. Click the eyedropper
pointer on the blue rectangle on the canvas.
The color pop-up window closes, and the Fill Color box changes to reflect the chosen color.
•Ensure that none of the style buttons (Bold, Italic, Underline) are selected.
•Click the Left Alignment button.
Font
Size
Fill Color
Style buttons
Alignment buttons
Leading
Horizontal Scale
Graphic Design Basics Tutorial 31
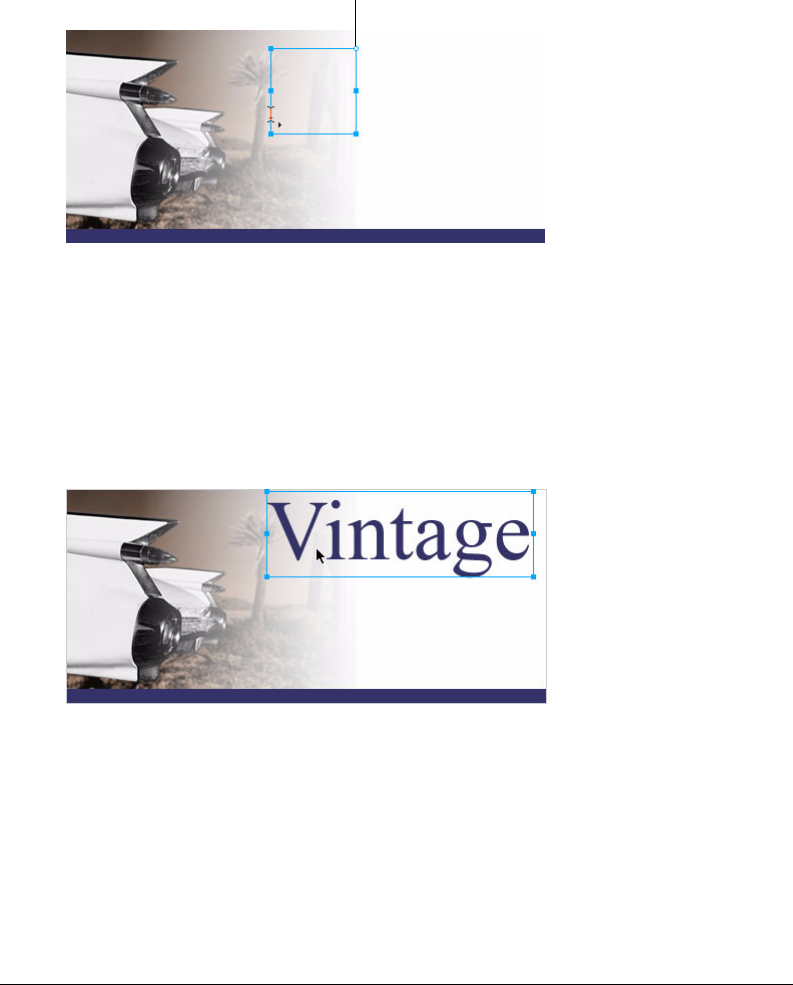
3With the I-beam pointer, click once in the middle of the canvas.
An empty text block is created.
The hollow circle in the upper right corner of the text block indicates that the text block is
auto-sizing. An auto-sizing text block in Fireworks adjusts its width based on the longest line of
text in the block.
4Type Vintage in the text block.
The width of the text block expands as you type.
5Click once outside the text block to apply your text entry.
The text block remains selected, and the Text tool is still the selected tool. The hollow circle on
the text block is no longer visible. This indicator is visible only when you are entering or
editing text.
6Choose the Pointer tool and drag the text to position it as shown in the following illustration.
7Click outside the text block to deselect it, and choose the Text tool again.
8In the Property inspector, choose Arial as the font and 12 as the font size.
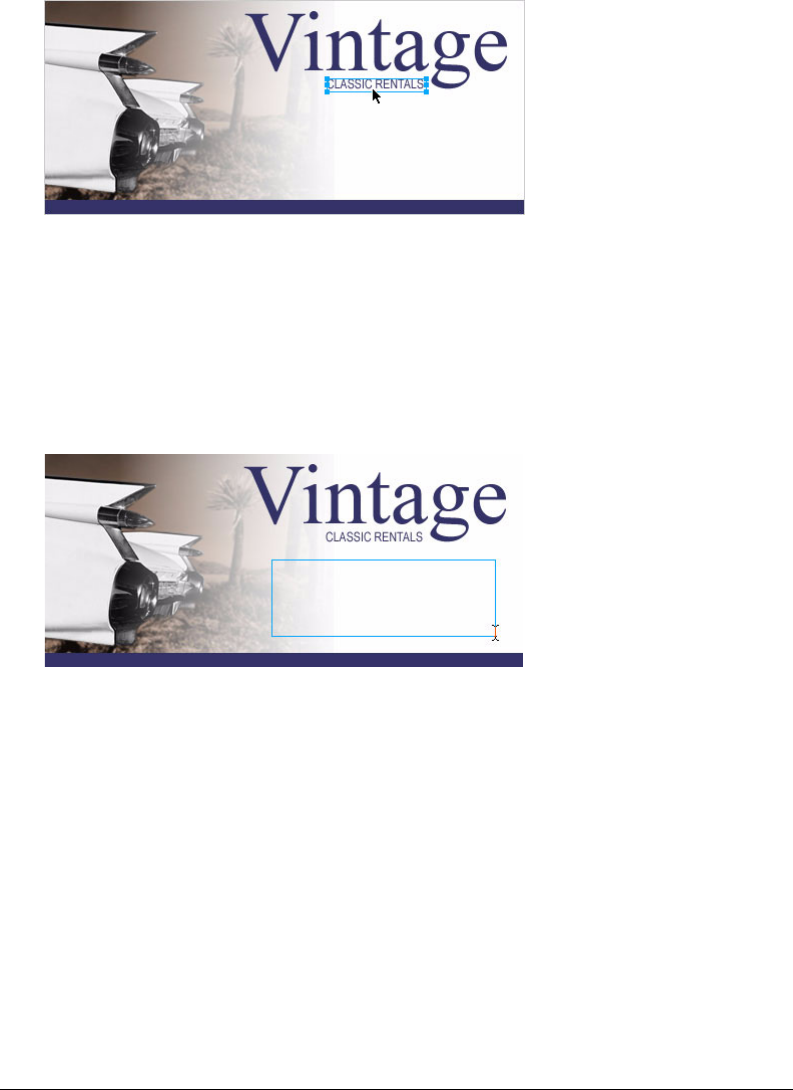
9Click on the canvas again, somewhere beneath the text block you just created, and type
CLASSIC RENTALS in uppercase letters.
10 Choose the Pointer tool to apply the text entry.
Switching to another tool in the Tools panel applies text entries and edits just like clicking
outside a text block does. Pressing the Esc key will achieve the same result.
Auto-sizing indicator
Chapter 132
11 Drag the new text block to position it just beneath the Vintage text block, as shown in the
following illustration.
12 Click outside the text block to deselect it.
Create the body text
Next you’ll create two text blocks that make up the body text for this ad.
1Choose the Text tool.
2This time, instead of just clicking on the canvas, drag to draw a marquee with the I-beam
pointer, as shown in the following illustration.
A text block appears. The hollow square in the upper right corner indicates that the text block
is a fixed-width text block, defined by the marquee you drew. Fixed-width text blocks retain
the width you specify no matter how much text you type. The hollow corner handle is a toggle.
Double-clicking it will toggle a text block between auto-sizing and fixed-width.
3Type the following text without entering any line breaks as you type:
Indulge yourself by traveling in a Vintage classic automobile, with a chauffeur to whisk you
to any destination.

Graphic Design Basics Tutorial 33
Tip: If you are viewing this tutorial online, you can simply copy and paste the text above into the text block
in Fireworks.
The text flows into the text block you created. The text block grows vertically but not
horizontally.
4Choose the Pointer tool and click outside the text block to deselect it. Then choose the Text
tool again.
5In the Property inspector, click the Fill Color box and choose white as the text color.
6Click in the lower left corner of the canvas.
A new text block appears on top of the blue rectangle.
7Type the following in uppercase letters without entering any line breaks:
SPORTS - LUXURY - CONVERTIBLE - LIMOUSINE - ANTIQUE - NEO-CLASSIC -
EXOTIC - ROADSTER
Tip: If you are viewing this tutorial online, you can simply copy and paste the text above.
8Choose the Pointer tool and reposition the text block as shown below.
Any text you create in Fireworks can be edited as you would edit text in a word processor. To edit
text, simply double-click a text block with the Pointer tool, highlight the text you want to change,
and type over it. Or click the I-beam pointer anywhere in the text block to add new text.
Chapter 134
Set text properties
Now that the text blocks have been created, you’ll use the Property inspector to change various
text properties.
1Select the Vintage text block.
Properties for the text block appear in the Property inspector. These properties are similar to
those displayed when the Text tool is selected.
2In the Property inspector, do the following:
•Choose Smooth Anti-Alias from the Anti-Aliasing Level pop-up menu, if it’s not already selected.
Anti-aliasing smooths text edges to make text characters appear cleaner and more readable.
In general, serif fonts such as Times New Roman look best if set to Smooth Anti-Alias when
their size is greater than 45 points. Similarly, sans serif fonts such as Arial look best if set to
Smooth Anti-Alias when their size is greater than 32 points.
Tip: The term serif refers to the tiny lines (often referred to as “feet”) attached to text characters of fonts such as
Times New Roman. Arial is considered a sans serif font because its text characters do not contain serifs.
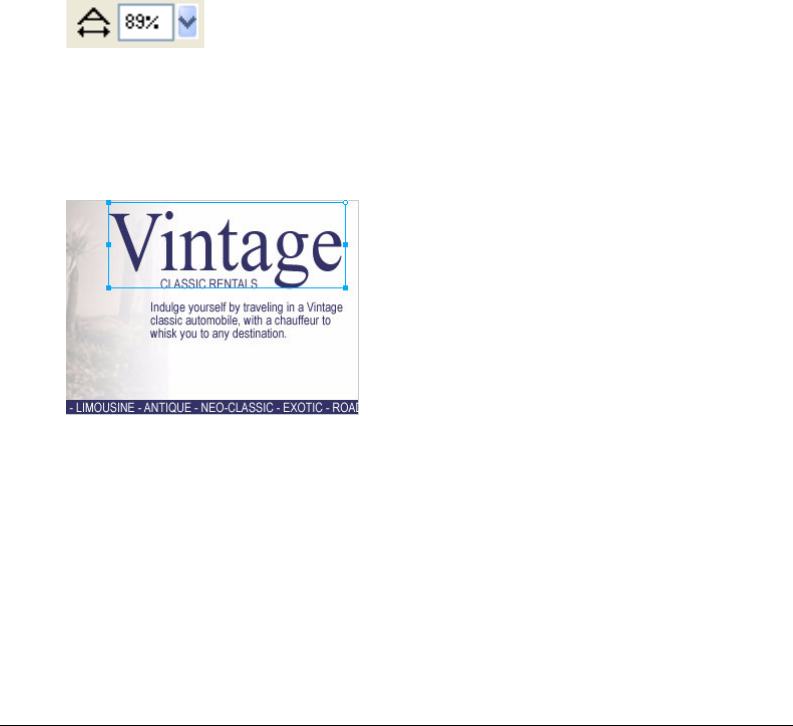
•Set the Horizontal Scale option in the Property inspector to 89%, and press Enter.
The characters in the Vintage text block become thinner. Horizontal Scale stretches or shrinks
the characters in selected text horizontally. The default setting is 100%. Anything greater will
stretch text horizontally, and anything less will decrease its width.
3Drag the Vintage text block so that it is positioned as shown in the following illustration.
4Select the Classic Rentals text block.
5In the Property inspector, do the following:
•Click the Fill Color box, enter FF6600 as the color value, and press Enter.
•Click the Bold button.
•Choose Crisp Anti-Alias from the Anti-Aliasing Level pop-up menu.
In general, sans serif fonts such as Arial look best if set to Crisp Anti-Alias when their size is
between 12 and 18 points. Similarly, serif fonts look best if set to Crisp Anti-Alias when their
size is between 24 and 32 points.
Graphic Design Basics Tutorial 35
6Drag the text block to reposition it as shown below.
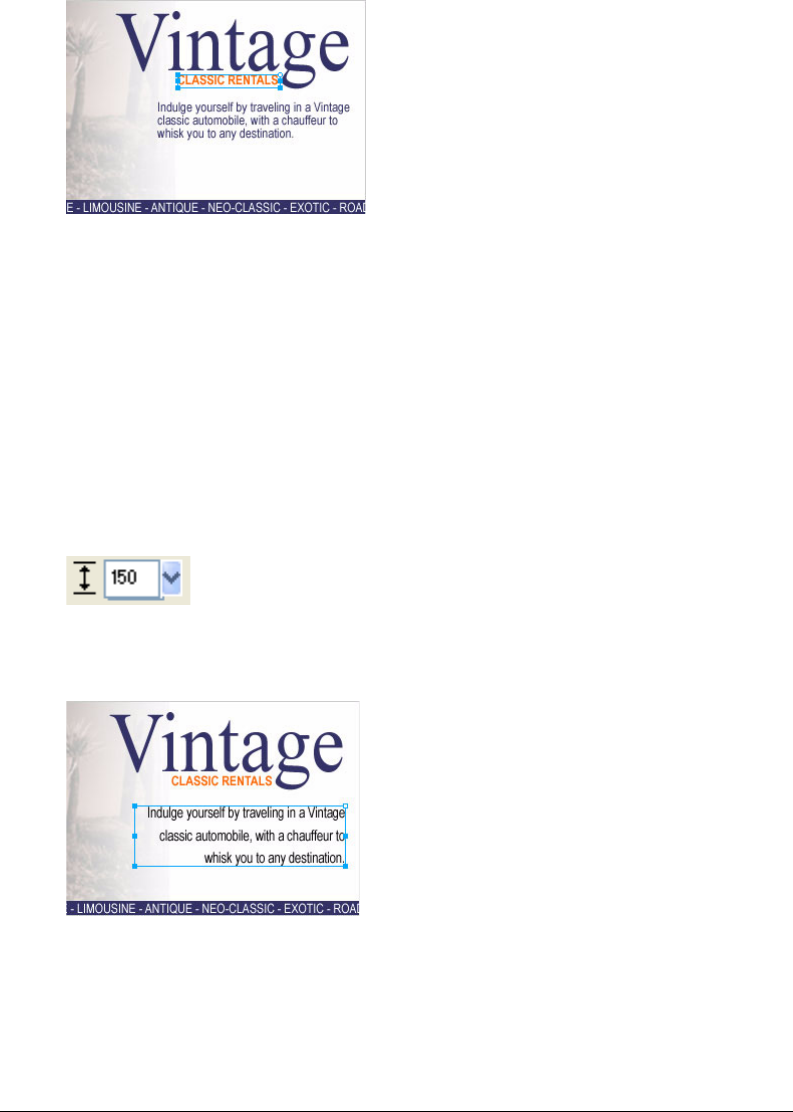
7Select the Indulge text block.
8In the Property inspector, do the following:
•Set the font size to 13.
•Choose black as the text color.
•Click the Right Alignment button.
•Choose Crisp Anti-Alias from the Anti-Aliasing Level pop-up menu.
•Set the Horizontal Scale option to 88%.
•Set the Leading option to 150%, and press Enter. Leading sets the space between lines of text.
Normal leading for text is 100%. Anything above 100% increases the space between lines, and
anything lower moves lines closer together.
9Drag one of the text block’s corner handles to resize it, so that the text flows as shown below. If
necessary, drag the entire text block to reposition it as well.
10 Select the text block at the bottom of the document.

Chapter 136
11 In the Property inspector, do the following:
•Set the font size to 13.
•Choose Crisp Anti-Alias from the Anti-Aliasing Level pop-up menu.
•Set the Horizontal Scale option to 75%, and press Enter.
12 Reposition the text block if necessary.
Add a drop shadow
You can apply Live Effects to text. Here you’ll add a drop shadow to the Vintage text using the
Live Effects controls in the Property inspector.
1Select the Vintage text block.
2Click the Add Effects button in the Property inspector. Choose Shadow and Glow >
Drop Shadow from the Effects pop-up menu.
Options for the new effect appear in a pop-up window.
3Enter 5 for Distance and 60% for Opacity. Click outside the pop-up window to close it.
A drop shadow effect is added to the Vintage text block.
4Click an empty area of the document window to deselect the text block.
Export the document
You’ve created a vector object and edited its properties, imported a bitmap image and made
modifications to its pixels, and created and formatted text. You are ready to optimize and export
the document.
Optimize the graphic
Before you export any document from Fireworks, you should always optimize it. Optimizing
ensures that a graphic is exported with the best possible balance of compression and quality.
1Do one of the following to open the Optimize panel if it isn’t already open:
•Choose Window > Optimize.
•If the panel is minimized on the right side of the screen, click the expander arrow to view the
entire panel.
Graphic Design Basics Tutorial 37
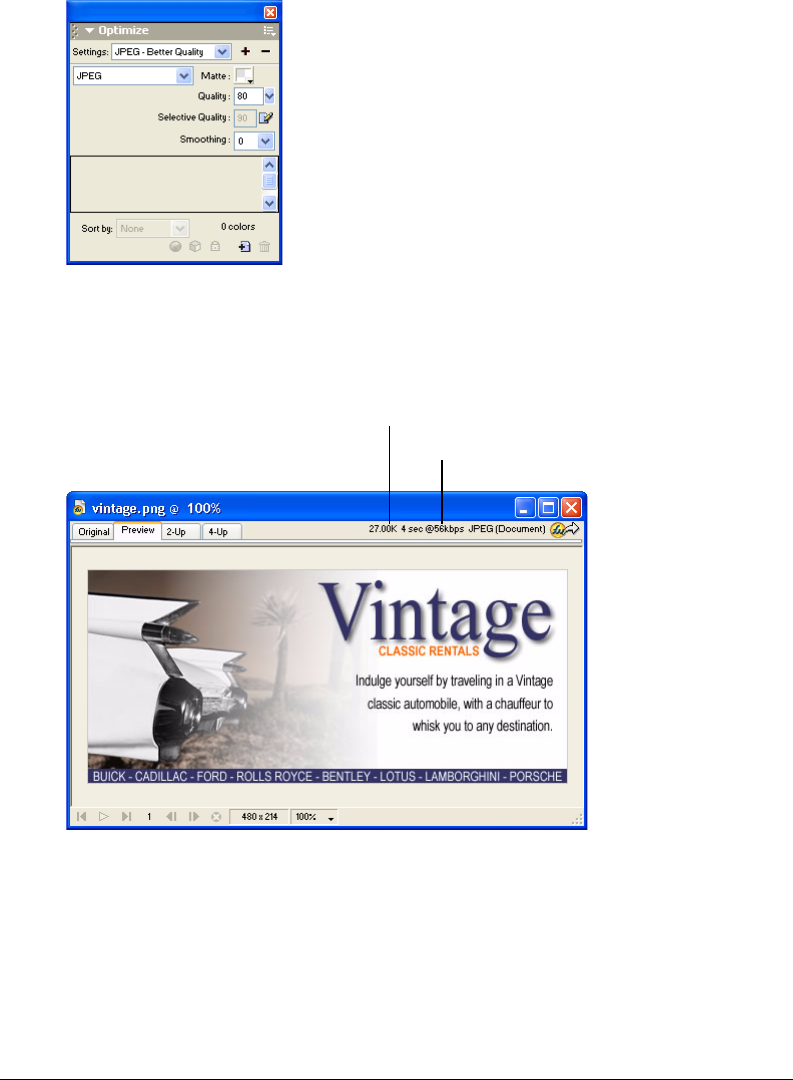
2Choose JPEG – Better Quality from the Settings pop-up menu.
The options in the panel change to reflect the new setting.
These settings can be changed, but for this tutorial you will use the default settings.
3Click the Preview tab near the top of the document window.
The Preview tab displays your document as it will appear when exported with the current settings.
At the upper right of the window, Fireworks displays what the file size will be for the exported
file and the estimated time it will take to display the graphic when it is viewed on the web.
File size
Download time
Chapter 138
Export the graphic
You’ve optimized your graphic, so now you’re ready to export it as a JPEG file.
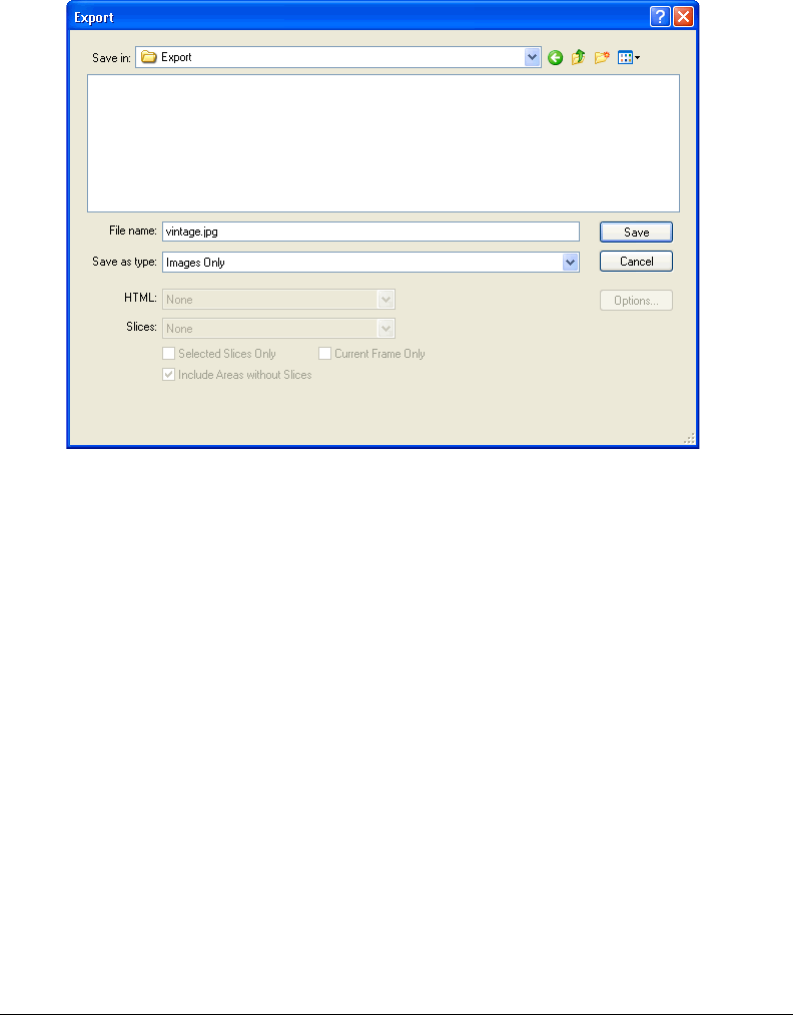
1Choose File > Export.
The Export dialog box opens.
The filename listed has a .jpg extension. Fireworks chose this file format because you selected it
in the Optimize panel.
2Navigate to the Tutorials folder on your desktop, and browse to Tutorial1/Export.
3Ensure that the Save As Type (Windows) or Save As (Macintosh) pop-up menu reads Images
Only, and click Save.
The JPEG file is exported to the location you specified.
Remember that the PNG file is your source file, or working file. Although you’ve exported
your document in JPEG format, you also must save the PNG so any changes that you’ve made
will be reflected in the source file as well.
4Choose File > Save to save the changes to the PNG file.
5Choose File > Close.
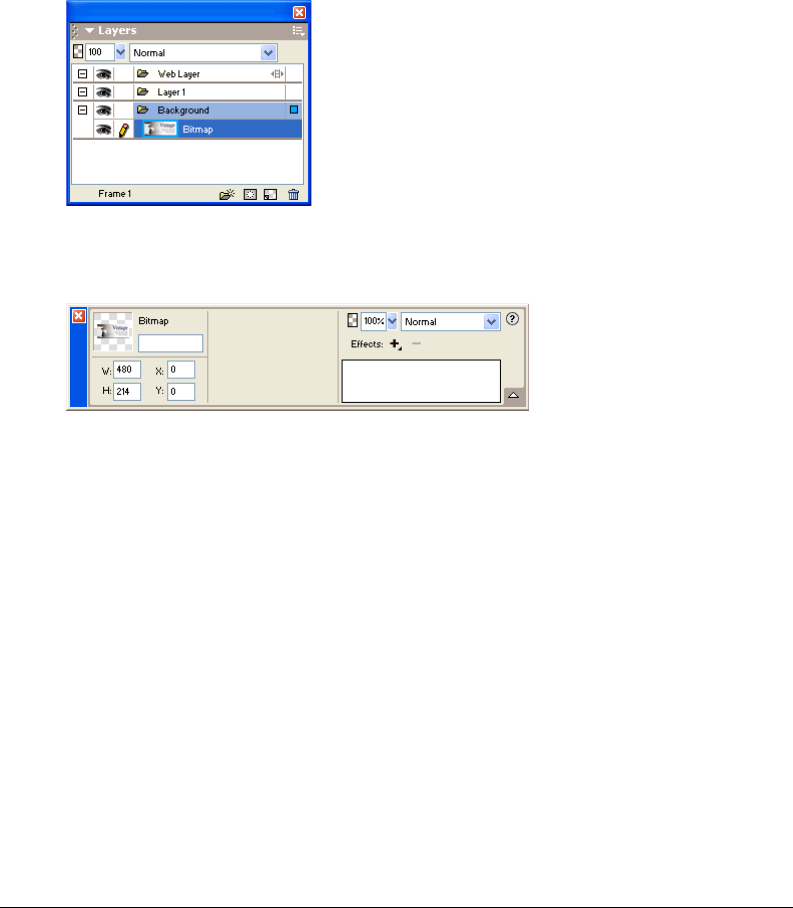
Graphic Design Basics Tutorial 39
View the exported document
The new file created during the export process is located in the folder you specified.
1In Fireworks, choose File > Open and browse to the Export folder.
Fireworks created a file in this location called vintage.jpg.
2Select vintage.jpg and click Open.
The graphic opens in a new document window in Fireworks. In the Layers panel, all your
objects have been flattened. When objects are flattened, they merge into a single object and are
uneditable as separate objects.
The Property inspector displays properties for a bitmap. All the Live Effects and other attributes
you applied using the Property inspector are no longer available for the selected bitmap.
The document looks this way because Fireworks had to flatten the image and all its properties
when you chose to export it to JPEG format. However, you still have your source PNG file, so
if you need to do more work on the design, you can always open the PNG file and all the
objects will still be editable.
3Choose File > Open and select vintage.png in the Tutorial1 folder. Click Open.
In the Layers panel, all your objects are again available as separate objects. Each object is
editable, along with its properties.
4Click on each object.
The Property inspector displays the various options for each object you select.
5Select the Vintage text on the canvas.
The Drop Shadow Live Effect for this text object appears in the Property inspector.
You can now see the benefit of using a Fireworks PNG as your source file. You can make
changes to a document and it always remains editable, even if you choose to export the
document to another format such as JPEG.

Chapter 140
Take the next steps
You’ve accomplished the tasks required to create graphics in Fireworks. You learned how to create
and save a new document, and how to add both vector objects and bitmap graphics to your
document. You also applied Live Effects, worked with layers, created a mask, and added text.
Finally, you learned to export the completed graphic.
For detailed information about any of the features covered in this tutorial, and for information on
additional Fireworks features, refer to the index of Using Fireworks or search the Fireworks Help
topics. For more Fireworks tutorials, visit the Macromedia website at http://
www.macromedia.com. Also be sure to visit Macromedia’s award-winning Support Center at
http://www.macromedia.com/support/fireworks.
To learn how you can use Fireworks to create interactive web pages, see “Web Design Basics Tutorial”
on page 41. You’ll use the JPEG image you exported in this document and import it to a web page.
You’ll also learn about creating web interactivity such as buttons, rollovers, and pop-up menus.

41
CHAPTER 2
Web Design Basics Tutorial
This tutorial will guide you through the basic tasks of designing web graphics and interactivity
with Macromedia Fireworks MX. You’ll get hands-on experience using the industry’s leading web
graphics application and learn web design concepts along the way.
What you’ll learn
By taking this tutorial, you’ll replicate a typical Fireworks production workflow for designing a
web page. You will learn to do the following:
•Copy the Tutorials folder
•View the completed web page
•Open the source file
•Import a graphic
•Slice the document
•Create a drag-and-drop rollover
•Create and edit buttons to make a navigation bar
•Create and edit a pop-up menu
•Optimize the document
•Export HTML
•Test the completed file
What you should know
Before taking this tutorial, you should be familiar with designing graphics in Fireworks or other
vector and bitmap graphics applications. You should possess the basic skills covered in the
Fireworks “Graphic Design Basics Tutorial” on page 13. Specifically, you should know how to
accomplish the following tasks in Fireworks:
•Saving a document
•Selecting objects
•Editing object properties
•Displaying and using panels
•Working with layers and objects
•Creating and editing text
•Exporting a graphic

Chapter 242
Copy the Tutorials folder
Before you begin, you’ll make a copy of the Tutorials folder so that you can save the results of your
work while allowing you or another user to complete the tutorial at a later time using the original files.
If you completed the Graphic Design Basics tutorial, you’ve already made a copy of the Tutorials
folder, so you can skip this step.
1Navigate to the Fireworks application folder on your hard disk.
Note: If you are unable to view your Fireworks application folder, you may have limited access to files on your
system. You can download the files you need for this tutorial from the Fireworks Support Center on the web at
http://www.macromedia.com/support/fireworks/.
2Drag a copy of the Tutorials folder to your desktop.
View the completed web page
Next you’ll view the completed tutorial file to see how your finished project will appear after you
export it as an HTML file.
1Launch your web browser.
2On your hard disk, navigate to the Tutorials folder you copied to your desktop, and browse to
the Tutorial2/Complete folder.
Note: Some versions of Microsoft Windows hide extensions for known file types by default. If you have not
changed this setting, the files in the Complete folder won’t display extensions. When dealing with web pages and
web graphics, it’s best to be able to see file extensions. See Windows Help for information about how to turn file
extensions back on.
3Select the final.htm file and drag it to the open browser window.
For this tutorial, you will complete a partially finished version of this page for Global, a rental
car company.
4Move the pointer over the large Vintage image.
When the pointer moves over the Vintage image, another image on the page changes. This is
called a disjoint rollover.
5Move the pointer across the navigation bar along the top of the web page. The buttons change
in response to the pointer passing over them. Click the Rates button to test the link.
The link takes you to the Fireworks page at http://www.macromedia.com, but you will enter
your own URL for this and other items as you complete the tutorial.
6Use your browser’s Back button to return to the final.htm page.
7Move the pointer over the Worldwide Airports image. A pop-up menu appears. Roll over each
item in the menu with the pointer, including the first item, which contains a submenu.
8Click United States to test the link, then return to the final.htm page.
9When you finish viewing the web page, you can either close it or leave it open for reference as
you take the tutorial.
Note: The Complete folder also includes the Fireworks document from which the HTML file is generated. To
view this document, double-click final.png.

Web Design Basics Tutorial 43
Open the source file
You’ve viewed the final.htm file in a browser, so you’re ready to begin.
1In Fireworks, choose File > Open.
2Navigate to the Tutorials folder on your desktop. Browse to Tutorial2/Start and
open global.png.
Note: As you perform the tutorial, remember to save your work frequently by choosing File > Save.
Import a graphic
Now that you’ve opened the unfinished design for the Global web page, you’ll import a graphic.
If you completed the Fireworks Graphic Design Basics tutorial, you will use the JPEG you
created. If you did not take that tutorial, a completed image is provided for you.
1Choose File > Import and do one of the following:
•If you completed the Graphic Design Basics tutorial, browse to the Tutorial1/Export folder.
•If you didn’t complete the Graphic Design Basics tutorial, browse to the Tutorial2/Assets folder.
2Select vintage.jpg and click Open.
3Click anywhere in the empty, white area of the canvas.
The image appears, selected.
4Drag the image so that it is positioned as shown in the following illustration.
Slice the document
Web designers use a process called slicing to cut web documents into smaller pieces, for a variety
of reasons. Smaller images download more quickly over the web, so users can watch a page load
progressively rather than waiting for one large image to download. In addition, slicing makes it
possible to optimize various parts of a document differently. Slicing is also necessary for adding
interactivity.
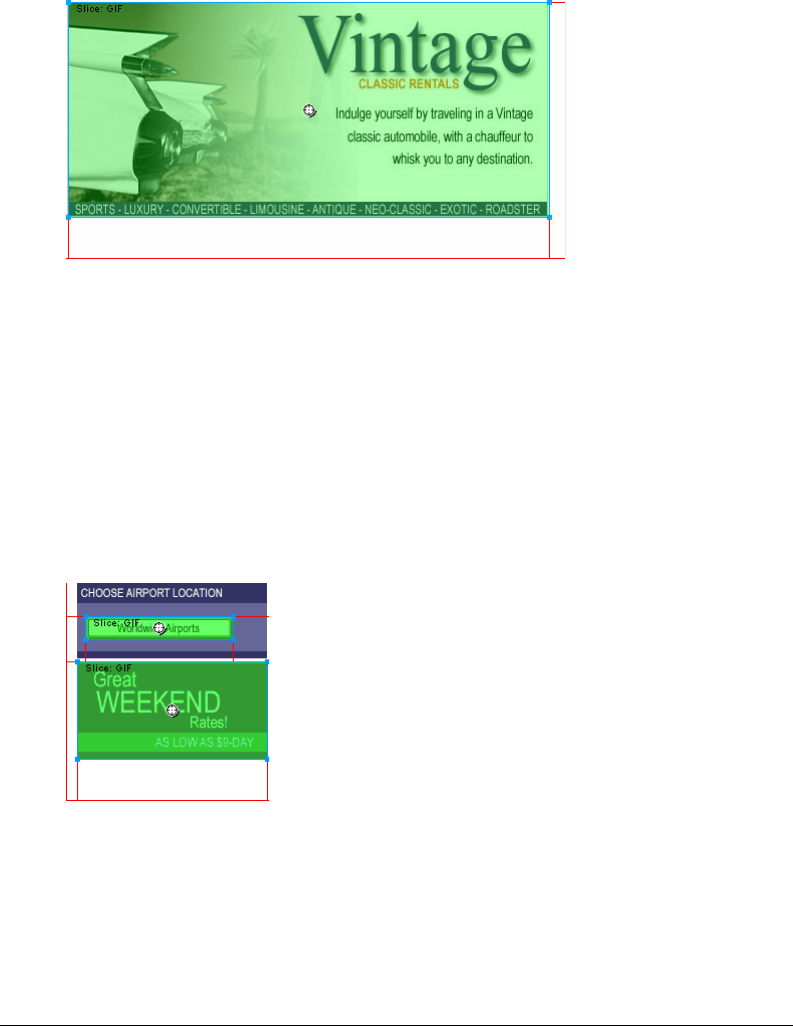
Chapter 244
Here you’ll create slices for some of the graphic elements in the web page. Later you’ll add
interactivity to these slices as well as set optimization and compression settings for them.
1With the Vintage image still selected, choose Edit > Insert > Slice.
A slice is inserted on top of the image. Slices have a green overlay by default.
2Click anywhere outside the slice to deselect it.
Red slice guides define the slice, spanning the width and height of the document. When you
created the slice, Fireworks auto-sliced the rest of the document for you.
Note: If you don’t see the red slice guides, choose View > Slice Guides.
3Shift-click the Worldwide Airports graphic and the Great Weekend Rates graphic on the left
side of the document to select both at the same time.
4Choose Edit > Insert > Slice. In the message box that appears, choose Multiple. This allows you
to insert multiple slices at the same time.
Slices are inserted on top of each of the selected graphics. Adding additional slices changes the
layout of auto-slices in the rest of the document.
5Click anywhere outside the slices to deselect them.
There is now a space between the Vintage slice and the Great Weekend Rates slice. This is a
thin auto-slice.
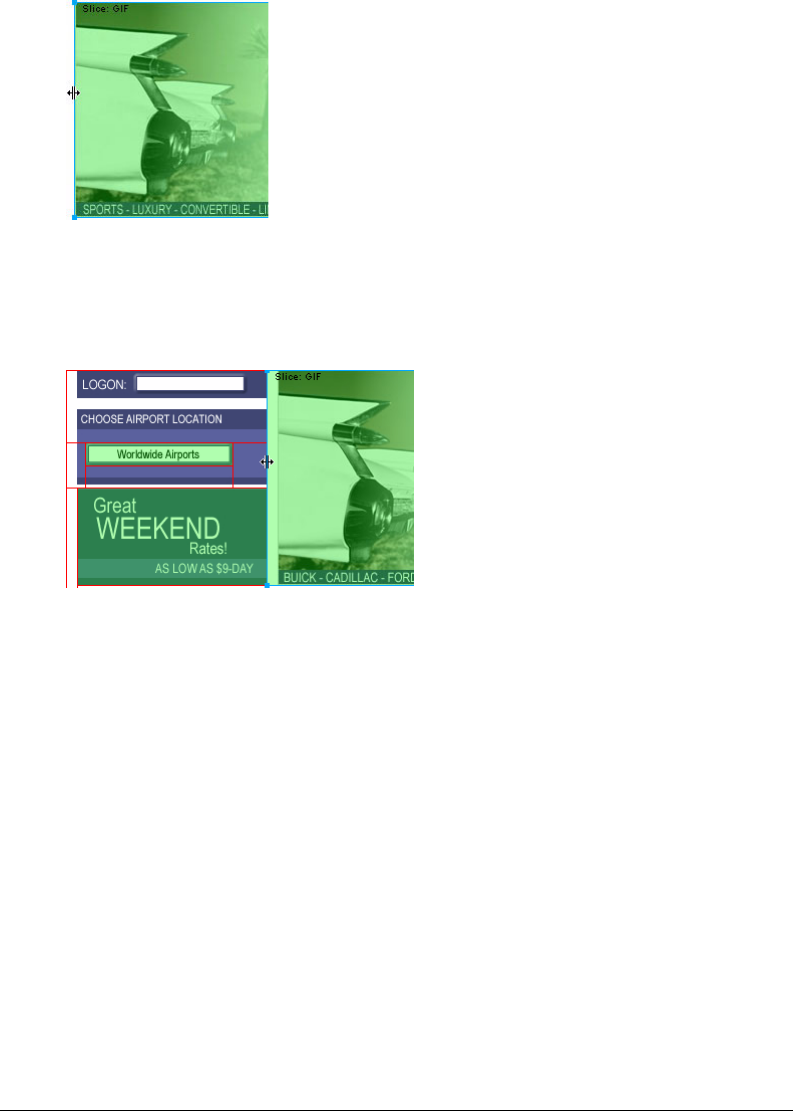
Web Design Basics Tutorial 45
6Place the pointer over the Vintage image’s left slice guide.
The pointer changes to the guide movement pointer, indicating you can grab the slice guide
and drag it. By dragging a slice guide, you can change the shape of a slice.
7Drag the slice guide to the left until it snaps with the right slice guide on the Great Weekend
Rates graphic, as shown in the illustration below.
8Release the mouse button.
The Vintage slice now extends all the way to the edge of the Great Weekend Rates slice, and
the tiny auto-slice is deleted. Think of slices as table cells in a spreadsheet application or word
processor. Dragging slice guides to resize a slice in Fireworks resizes other slices just like
dragging cell borders in a table resizes other table cells. If you drag a slice guide over and
beyond auto-slices, the slice guides merge and the unnecessary auto-slices are deleted.
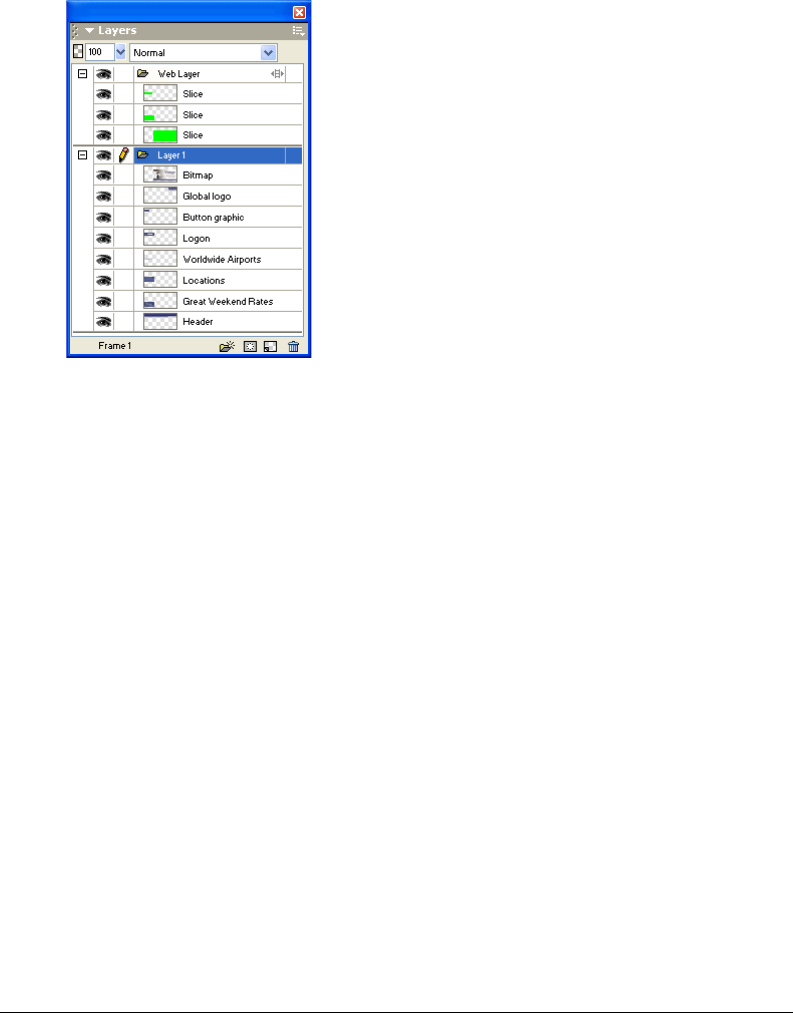
Chapter 246
9If the Layers panel is minimized or isn’t visible, click its expander arrow or choose
Window > Layers.
At the top of the panel is the Web Layer. It contains all of a document’s web objects. The three
slices you created are listed here. The Web Layer is always the topmost layer in any document.
It can’t be moved, renamed, or deleted.
Create a drag-and-drop rollover
Now that you’ve sliced your document, you’re ready to add interactivity. You’ll use two of the
slices you inserted in the previous step to create a drag-and-drop rollover.
There are two kinds of rollovers: simple rollovers and disjoint rollovers. A simple rollover displays
a different image when the pointer moves over it in a web browser. A disjoint rollover causes
another image to change in a different part of the screen when the pointer moves over it. You’ll
create a disjoint rollover here.
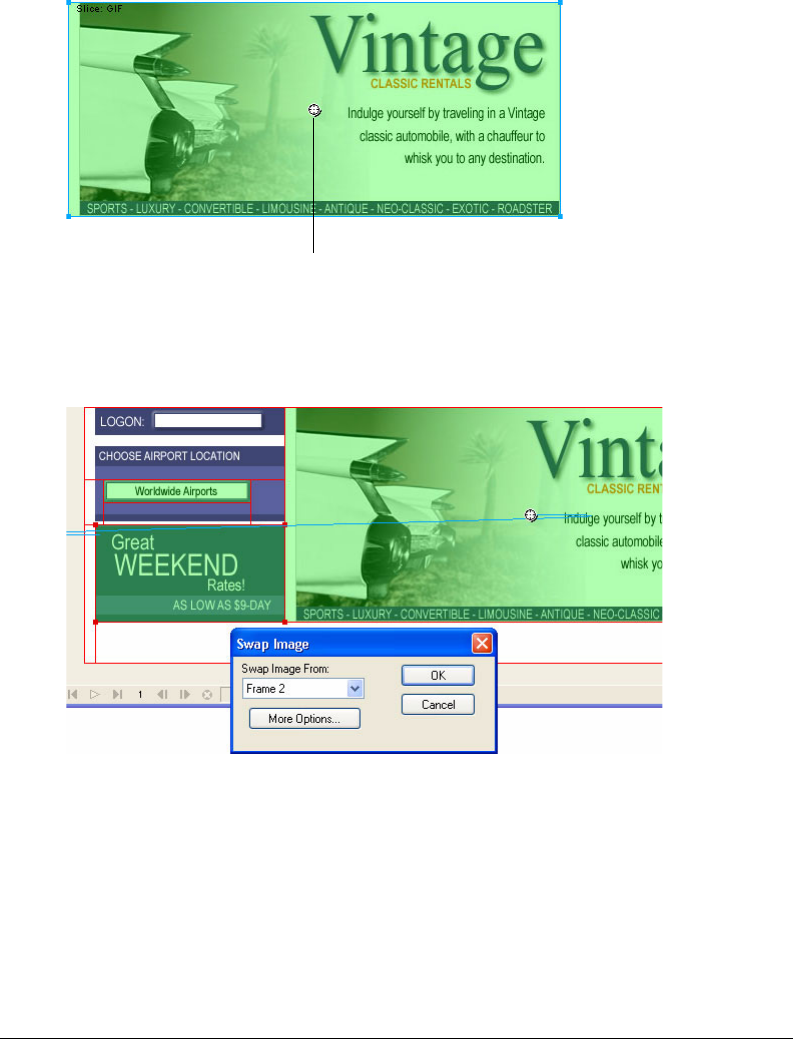
Web Design Basics Tutorial 47
1Select the slice covering the Vintage image.
The round icon in the center of the slice is called a behavior handle. It allows you to add
behaviors, or interactivity, to a slice. If you are familiar with behaviors in Macromedia
Dreamweaver, you’ll recognize many of the same behaviors in Fireworks.
Behaviors can also be applied using the Behaviors panel. But for simple interactivity like
rollovers, a slice’s behavior handle is a faster and easier method of applying a behavior.
2Drag the behavior handle onto the Great Weekend Rates slice, and release the mouse button.
A blue behavior line extends from the behavior handle to the corner of the slice, and the Swap
Image dialog box appears.
3Ensure that Frame 2 is selected in the Swap Image From pop-up menu, and click OK.
When the pointer moves over the Vintage slice in a browser, an image in Frame 2 will replace the
Great Weekend Rates graphic. The Vintage image is considered the trigger for the rollover effect,
and the image that replaces the Great Weekend Rates graphic is considered the swap image.
Behavior handle
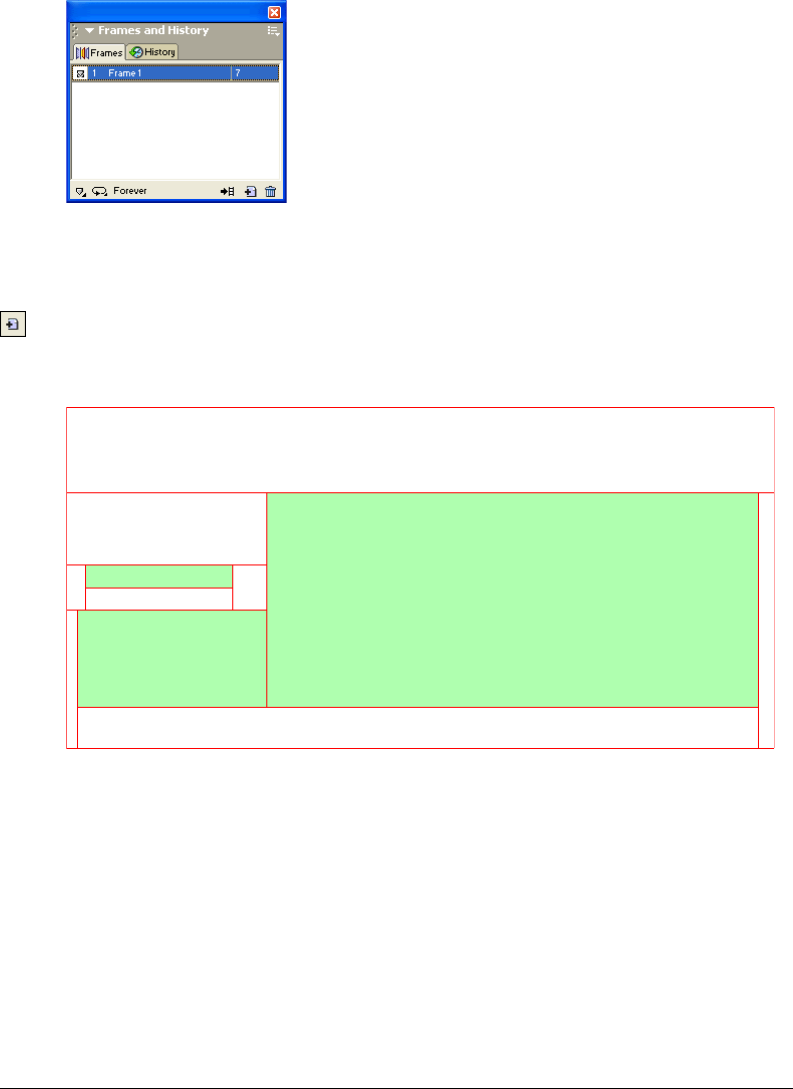
Chapter 248
4If the Frames panel is minimized or isn’t visible, click the expander arrow for the Frames and
History panel group and click the Frames tab, or choose Window > Frames.
The Frames panel lists the frames available in the current document. Currently there is only
one frame in the document. The Frames panel is typically used for animation. In the case of
rollovers, it is used to hold swap images.
5Click the New/Duplicate Frame button at the bottom of the panel.
A new frame is created in the Frames panel, named Frame 2. The workspace is now empty
except for the slices you inserted.
No objects are listed in the Layers panel, except the contents of the Web Layer. That’s because
layers in Fireworks are not shared across all frames by default, with the exception of the Web
Layer, which is always shared. Objects on the Web Layer appear in every frame of the
document, so any changes you make to web objects, such as slices, affect all frames.
6Choose File > Import and browse to the Tutorial2/Assets folder. Select the file named rates.gif
and click Open.
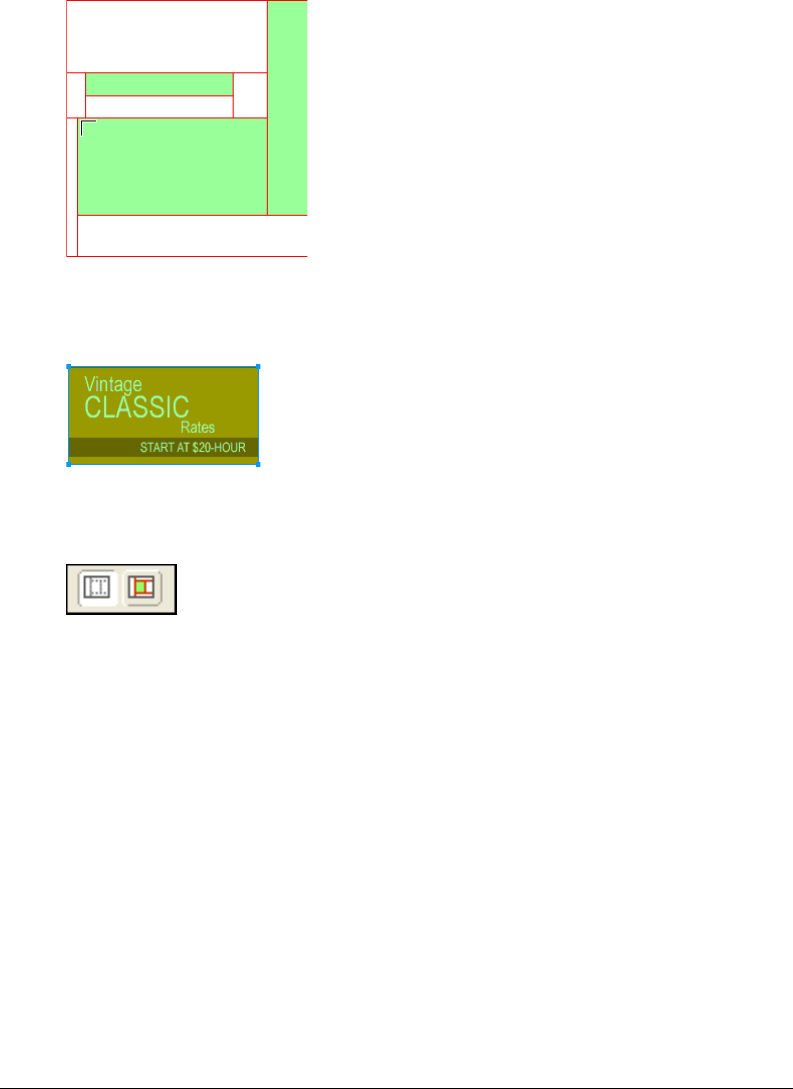
Web Design Basics Tutorial 49
7Place the insertion pointer over the slice where the Great Weekend Rates graphic was located in
Frame 1. Align the pointer as best you can with the upper left corner of the slice.
8Click to insert the graphic.
The Vintage Classic Rates graphic appears.
9Click the Preview tab at the top of the document window, and hide the slices in the document
by clicking the Hide Slices and Hotspots button in the Web section of the Tools panel.
Move the pointer over the Vintage image. The Great Weekend Rates image changes when the
pointer rolls over the Vintage image.
Tip: If the image seems to jump a bit or the transition between graphics doesn’t look smooth, adjust the position
of the swap image in Frame 2 while in Original view. For precise positioning, turn on Onion Skinning in the
Frames panel or verify that the X and Y coordinates of the Vintage Classic Rates image are the same as those of
the Great Weekend Rates image in the Property inspector. When you are finished, return to Frame 1 and turn off
Onion Skinning if necessary. For more about these options, refer to the index of Using Fireworks or search
Fireworks Help.
10 When you are finished, click the Original tab at the top of the document window to return to
normal view, and turn slices back on by clicking the Show Slices and Hotspots button in the
Tools panel.
You have successfully created a disjoint rollover. Simple rollovers are created in a similar manner:
when dragging a slice’s behavior handle as you did in step 2, you simply drag it back onto the
same slice.
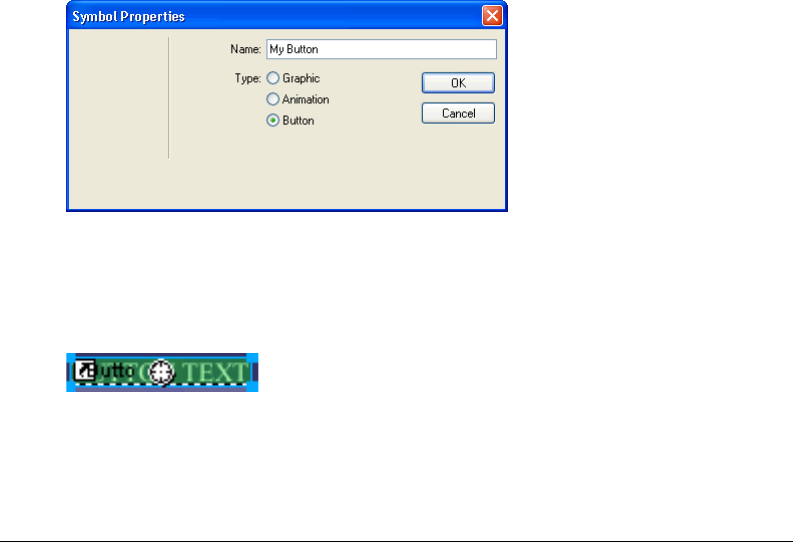
Chapter 250
Generally, web designers add a rollover effect to an image to provide users with a visual cue that
the graphic is clickable. If the Global web site was an actual site on the Internet, you’d probably
want the Vintage and Rates images to link to other pages that provide more information. For the
purposes of this tutorial, you’ll leave the disjoint rollover as it is. You’ll get plenty of practice
attaching links to other web objects in the following section.
Create and edit buttons to make a navigation bar
Buttons are web objects that link to other web pages. Their appearance typically changes
depending on the user’s mouse movement or other action, such as clicking, as a visual cue
indicating interactivity. For example, a button displays a different rollover effect when the pointer
moves over it than when it has been clicked.
A navigation bar—also known as a nav bar—is a series of buttons that appears on one or more
pages of a web site. Typically, all the buttons within a nav bar look the same, except for their text.
Here you’ll create a nav bar for the Global web site.
Create a button symbol
The initial graphic and text for one button has already been created for you. You’ll convert this
graphic into a button symbol.
1In Fireworks, select the button graphic (labeled BUTTON TEXT) in the upper left corner of
the document.
2Choose Modify > Symbol > Convert to Symbol.
The Symbol Properties dialog box opens.
3Type My Button in the Name text box, choose Button as the symbol type, and click OK.
A slice appears on top of the button graphic, and a shortcut icon appears at the left of the slice.
This indicates that the selection in the workspace is an instance of the symbol you just created.
Symbols are like master copies of your graphics. When you change a symbol, all of the
instances of that symbol in your document change automatically. Symbols reside in the library.
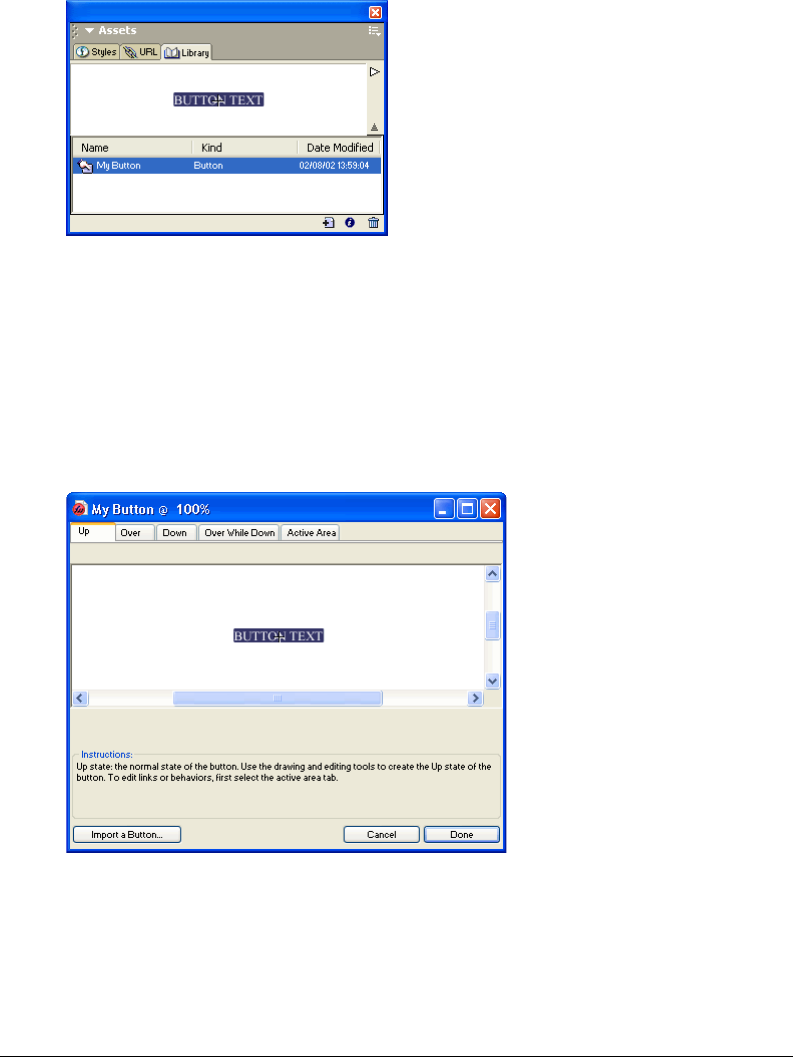
Web Design Basics Tutorial 51
4If the Library panel is minimized or isn’t visible, click the Assets panel group’s expander arrow
and click the Library tab, or choose Window > Library.
Your symbol is listed in the Library panel.
Create button states
Next you’ll create various states for the button symbol. Button states are the different ways a
button appears when rolled over or clicked in a web browser.
1Double-click the button instance you created.
Tip: Alternatively, you can double-click the preview of the button in the Library panel or the symbol icon beside it
in the Library panel’s symbol list.
The Button Editor opens with the button graphic displayed in the work area.
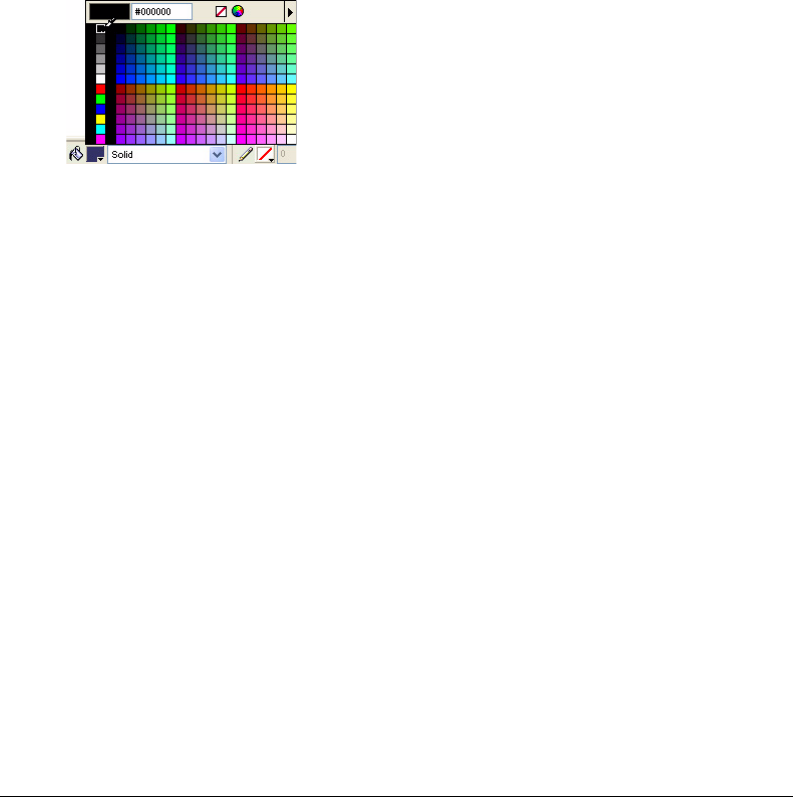
Chapter 252
2Click the tabs at the top of the Button Editor.
The first four tabs represent the button states. The last tab, Active Area, represents the hot area
on the button, or where a user must click or roll over to activate the button states. The active
area is also the swap area for the button, or the area that changes with each button state.
Currently there are no states for the button symbol other than the Up state, the state of the
button before it is rolled over or clicked.
3Click the Over tab at the top of the Button Editor, then click the Copy Up Graphic button.
The button graphic is copied from the Up tab. The Over state of a button is its appearance
when the pointer rolls over it. To give users visual feedback, you’ll change the color of the
rectangle behind the text.
4Select the rectangle. Be sure to select the rectangle and not the text; if you are unsure which one
you are selecting, check the Layers panel to see which one is selected.
5Click the Fill Color box in the Property inspector and choose black as the color.
The rectangle is now black.
6Click the Down tab at the top of the Button Editor, and click the Copy Over Graphic button.
The button graphic is copied from the Over tab. The Down state of a button is its appearance
after a user clicks it. This time you won’t change the color of the rectangle; you’ll leave it as it is.
7Click Done in the Button Editor to apply your changes to the button symbol.
8Click the Preview tab in the document window and test the button’s states. Turn slices off if
necessary. When you are finished, click the Original tab and turn slices back on.
Create multiple button instances
Next you’ll create more instances of the button symbol.
1Select the button in the workspace if it isn’t already selected.
2Choose Edit > Clone.
A new instance of the button appears on top of the original button.

Web Design Basics Tutorial 53
3Hold down Shift while pressing the Right Arrow key repeatedly to move the new instance
to the right.
This moves the instance in 10-pixel increments. If necessary, use the arrow keys alone to move
the selection one pixel at a time. Position the instance to the immediate right of the original
instance, but not overlapping, as shown in the illustration below.
4Clone two more instances of the button, and position each to the right of the previous instance.
Tip: As a shortcut, press Alt (Windows) or Option (Macintosh) while dragging the selected instance with the
pointer to make a copy of it. After positioning the new instance to the immediate right of the previous instance,
choose Edit > Repeat Duplicate to automatically create and place another copy of the instance.
Change button instance text
Now that you’ve created all the buttons for your nav bar, you need to give each button unique
text. You can easily change the text on a button instance using the Property inspector.
1Select the button instance at the far left.
Properties for the button instance appear in the Property inspector. With the exception of the
Export Settings pop-up menu, these properties apply to the selected instance only. Making
changes here will not affect the original button symbol in the library.
2In the Property inspector, replace the text in the Text box with the word HOME in uppercase
letters. Then press Enter.
The text on the button changes to reflect your entry.
3For the remaining three buttons, change the button text to VEHICLES, RATES, and
CONTACT US, respectively.
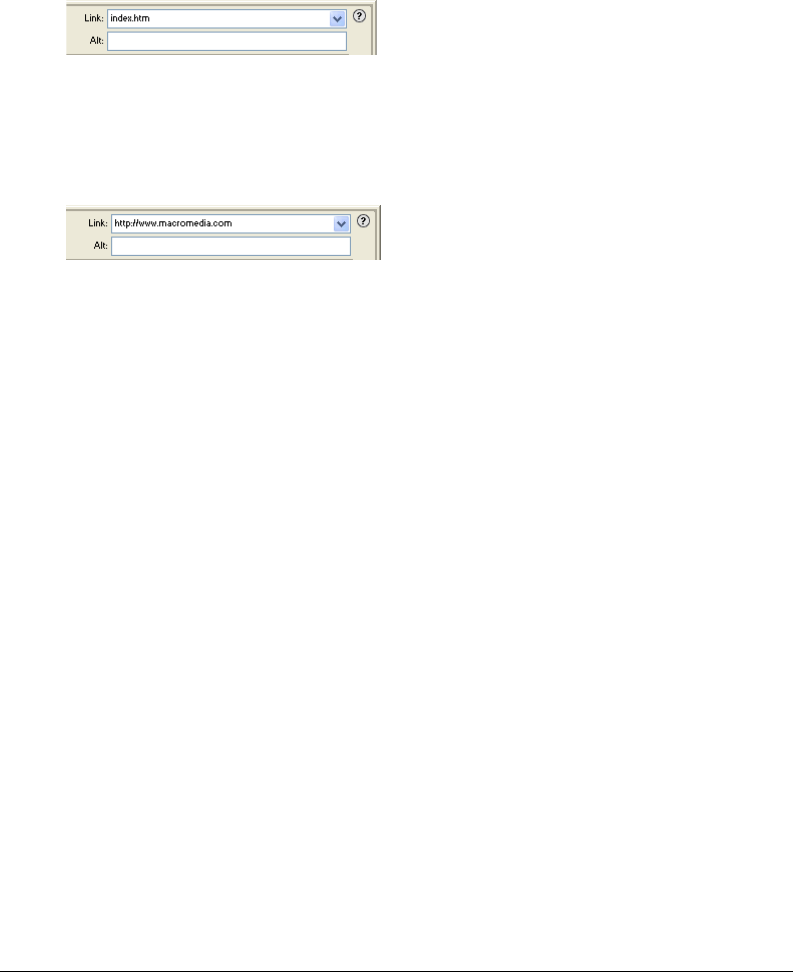
Chapter 254
Assign URLs to the buttons
Next you’ll assign a unique URL, or link, to each button instance. A URL, or Uniform Resource
Locator, is the address or location of a page on the web. You can easily assign URLs to buttons
using the Property inspector.
1Select the button instance labeled Home.
2Enter index.htm in the Link text box of the Property inspector.
When clicked in a web browser, the Home button will jump to a page called index.htm. You’ll
discover later in the tutorial why you linked the Home button to this page.
3Select the Vehicles button instance and enter your favorite URL in the Link text box of the
Property inspector.
For the purposes of this tutorial, any working URL will do. If you were creating a real web site,
you would enter the URL that you wanted the Vehicles button to jump to.
Note: Be sure to enter the URL of an actual web site, so that you can test your button links later.
4Assign a URL to each of the remaining button instances. Once again, any working URL will do.
5Choose File > Preview in Browser > Preview in [your preferred browser]. To test button links,
you must preview the document in a browser.
Note: If your browser is not listed, you must first select a browser by choosing File > Preview in Browser > Set
Primary Browser.
When the document opens in your browser, test the buttons you created. Except for the Home
button, which links to a file you haven’t created yet, each button should jump to the link you
specified in Fireworks.
Edit the button symbol
Next you will modify the original button symbol. The changes you make will be automatically
applied to all the button instances in your nav bar.
You may be wondering what the original button symbol looks like now that you’ve changed text
on several of its instances.
1Double-click any of the button instances in the workspace.
The Button Editor opens with the original button symbol and text displayed in the workspace.
The original button symbol is still intact and displays the original text.
When you changed the text of each button in the workspace, you only edited each button
instance. If you make any changes here to the rectangle or to text appearance, you will be editing
the original symbol, so those changes will be reflected in all the instances in the workspace.
2Click the Over tab.
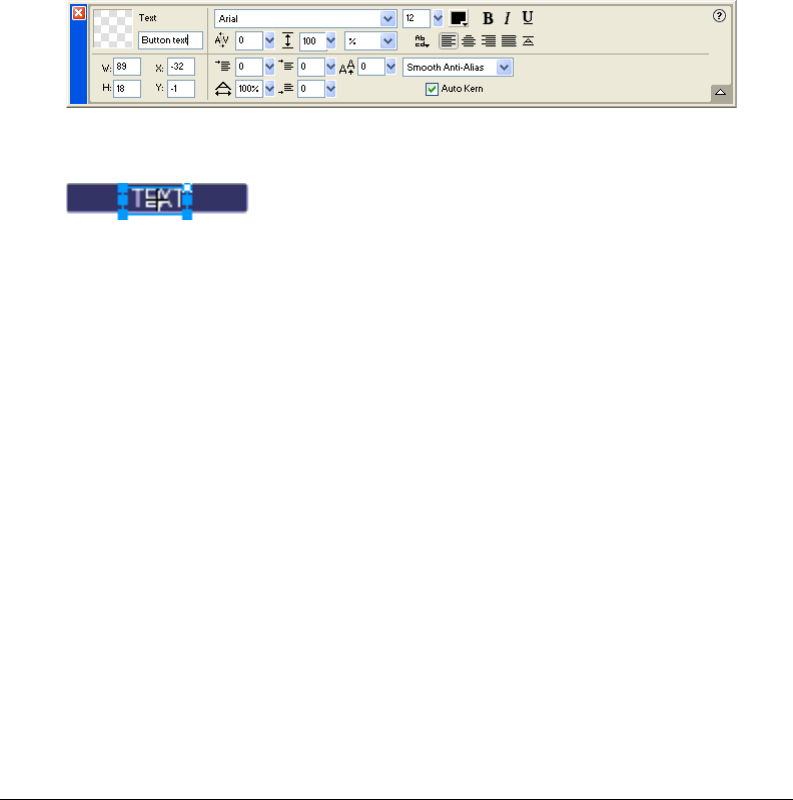
Web Design Basics Tutorial 55
3Select the black rectangle.
4Click the Fill Color box in the Property inspector and enter FF6633 as the color value. Press
Enter to apply the color change.
The rectangle is now orange.
5Click Done in the Button Editor to apply the change to the button symbol.
6Click the Preview tab in the document window and test the buttons.
Each button’s Over state is now orange. You changed only the button symbol, but the change
was applied to all the button instances in your nav bar.
7Click the Original tab, and double-click any button instance in the workspace. This time you’ll
change the text in the button symbol.
8Select the button text in the Button Editor, and in the Property inspector choose Arial as the
font. Do this for each button state.
9Double-click the text block in the Button Editor, and delete the word BUTTON.
10 Click Yes in the message box that asks if you want to change the text in the other button states.
Examine the various button states in the Button Editor. The text changes in one state are
reflected across all the button states. Compare this to when you changed the font; you had to
change it in each state. That’s because you can apply different graphical and text attributes to
each state of a button. This is useful if you want the text color to change when a user rolls over
a button, for example.
11 Click Done to exit the Button Editor.
The font on each button instance changes to reflect the new font selection, but the text
remains the same. Button instances reflect only the changes you make to a button symbol’s
graphical appearance, including its text attributes, but not changes you make to the text itself.
Button symbols make it possible for you to change the graphical appearance of all button
instances in a nav bar quickly, while preserving each instance’s unique text.
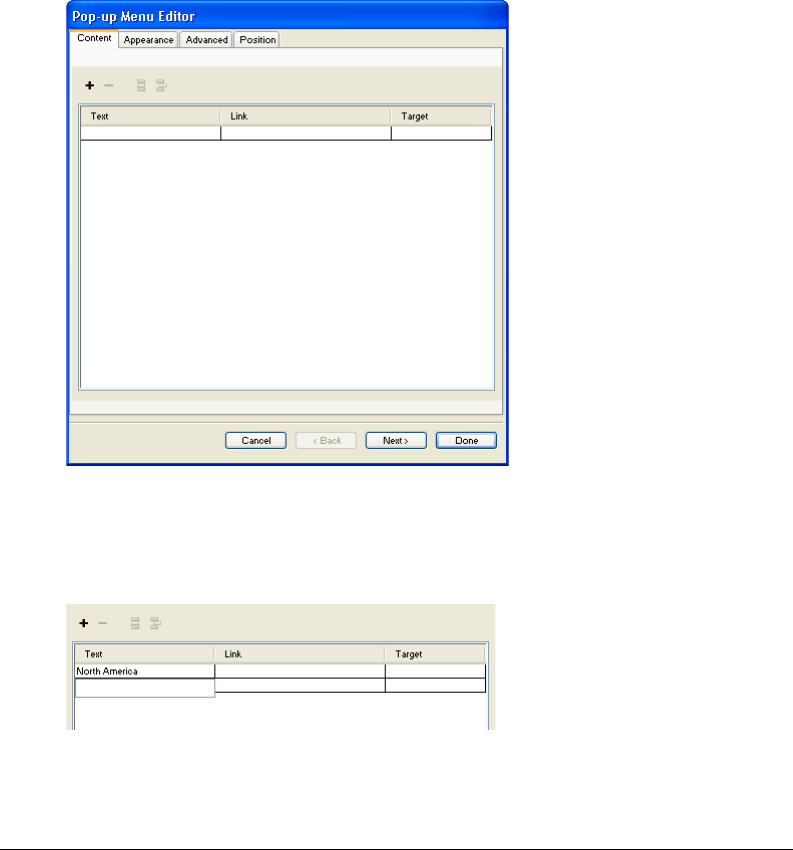
Chapter 256
Create and edit a pop-up menu
A pop-up menu is a menu that appears when you move the pointer over a trigger image in a
browser. It contains a list of items that link to other web pages.
Here you’ll create and edit a pop-up menu that lists Global’s airport locations.
Create pop-up menu list items
First you’ll create the pop-up menu list items using the Pop-up Menu Editor.
1Select the slice covering the Worldwide Airports graphic.
2Choose Modify > Pop-up Menu > Add Pop-up Menu.
The Pop-up Menu Editor opens.
3Double-click the text box in the upper left corner (Windows only).
4Type North America in the text box and press Enter.
The next text box is highlighted, ready for you to create another entry.
5Type Europe and press Enter.
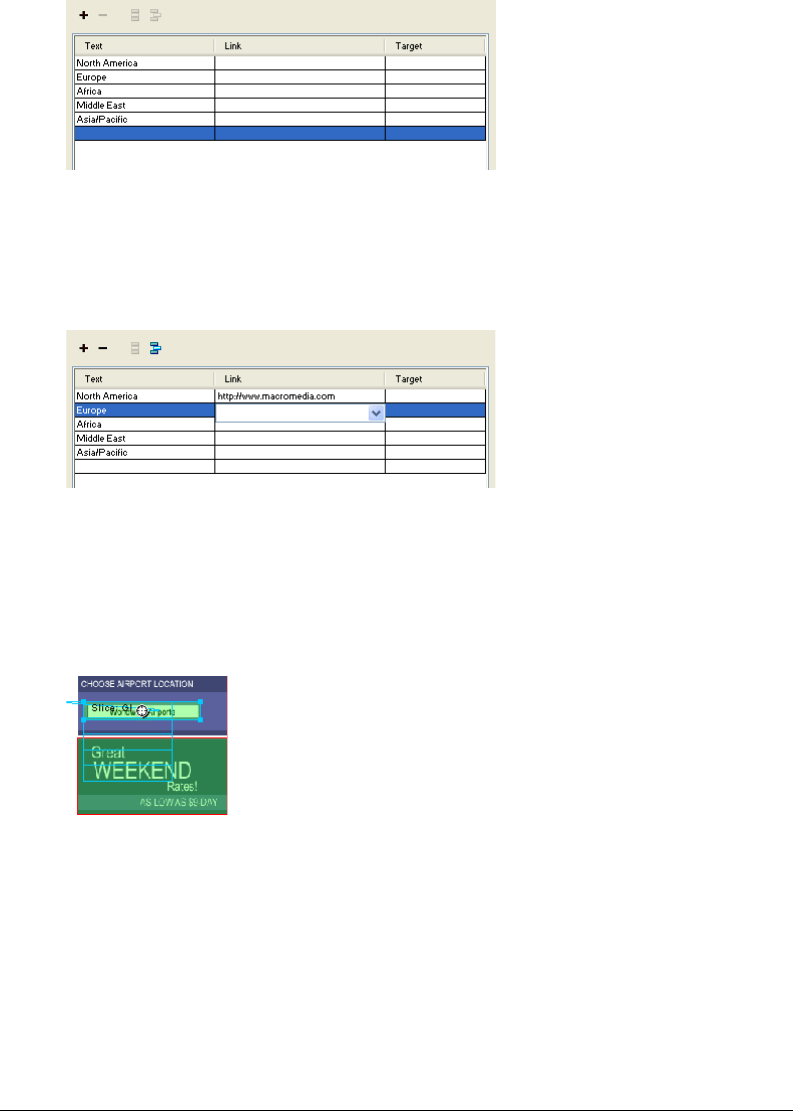
Web Design Basics Tutorial 57
6Create three more entries for Africa, Middle East, and Asia/Pacific.
7Double-click the Link text box for the North America entry.
8Enter a working URL of your choice and press Enter.
For the purposes of this tutorial, any URL will do. Be sure it’s an actual URL so that you’ll be
able to test your links later.
9Enter URLs for the remaining entries.
Note: There is always one extra line at the bottom of the entry list in the Pop-up Menu Editor. It’s there so you can
easily add new entries without having to click the Add Menu button.
10 Click Done to close the Pop-up Menu Editor.
In the workspace, an outline of your pop-up menu appears attached to the slice.
11 To test your pop-up menu, choose File > Preview in Browser > Preview in [your preferred
browser] to preview the document in a browser.
Note: Pop-up menus must be previewed in a browser; they aren’t visible using the Preview tab in Fireworks.
When the document opens in your browser, move the pointer over the Worldwide Airports
graphic. The pop-up menu you created appears. Click each entry to test the links.
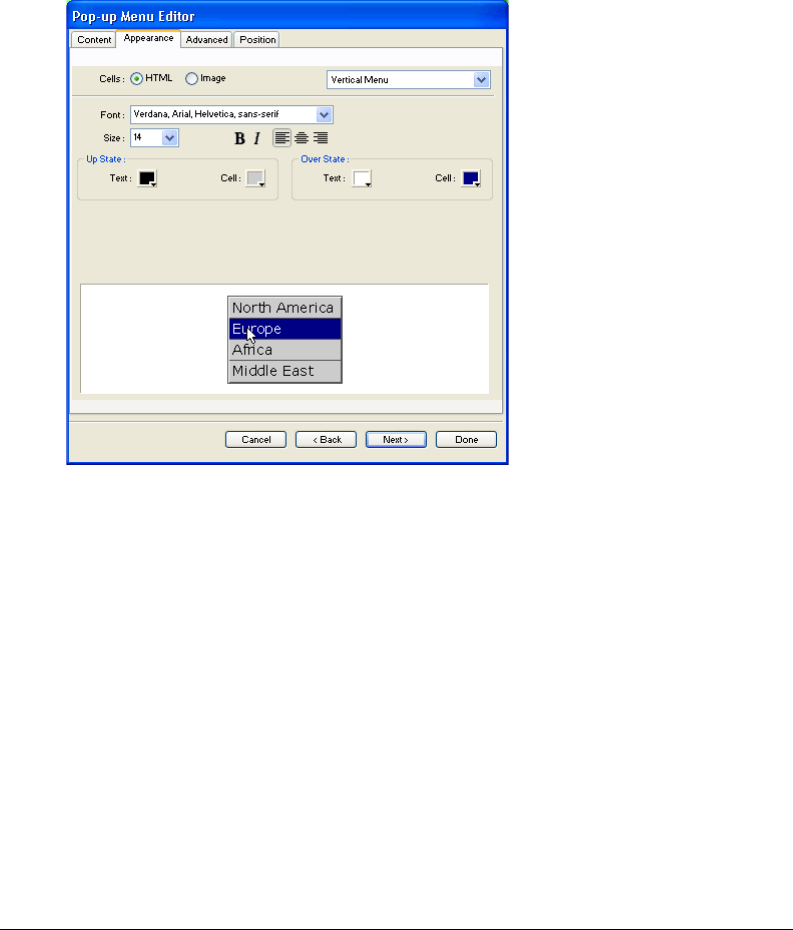
Chapter 258
Customize the pop-up menu
Next you’ll return to the Pop-up Menu Editor to modify the appearance of the pop-up menu.
1In Fireworks, double-click the pop-up menu outline.
The Pop-up Menu Editor opens with your entries displayed.
2Click the Next button.
The Appearance tab appears. This is where you can change the colors and fonts used in
pop-up menus.
3Choose HTML as the cell type and Vertical Menu as the alignment.
4Choose Arial, Helvetica, sans-serif as the font and 12 as the font size.
5In the Up State section, set the text color to black, if black is not already selected. Then click
the Cell Color box. If CCCCCC is not already displayed in the text box at the top of the color
pop-up window, enter CCCCCC and press Enter.
These color values are the default colors selected in the Pop-up Menu Editor if you’ve never
created a pop-up menu before. Once you change these colors, they will be used every time you
create a pop-up menu, until you choose other colors.
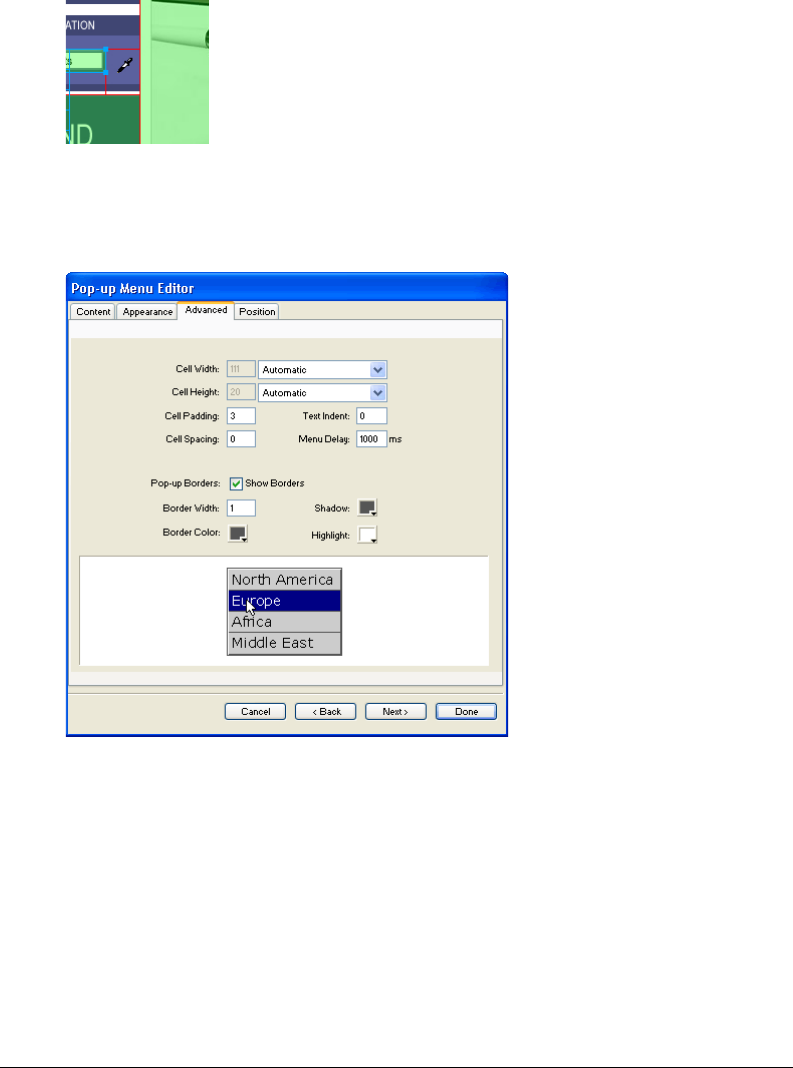
Web Design Basics Tutorial 59
6In the Over State section, set the text color to White if it’s not already selected, and click the
Cell Color box. Click the eyedropper pointer on the blue rectangle on the canvas that
surrounds the Worldwide Airports graphic, as shown below.
7Click the Next button.
The Advanced tab appears. The Advanced tab allows you to change various cell and border
properties. Here you’ll increase the cell width, making the pop-up menu appear wider.
8Choose Pixels from the Cell Width pop-up menu.
This activates the Cell Width box.
9Enter 137 as the cell width.
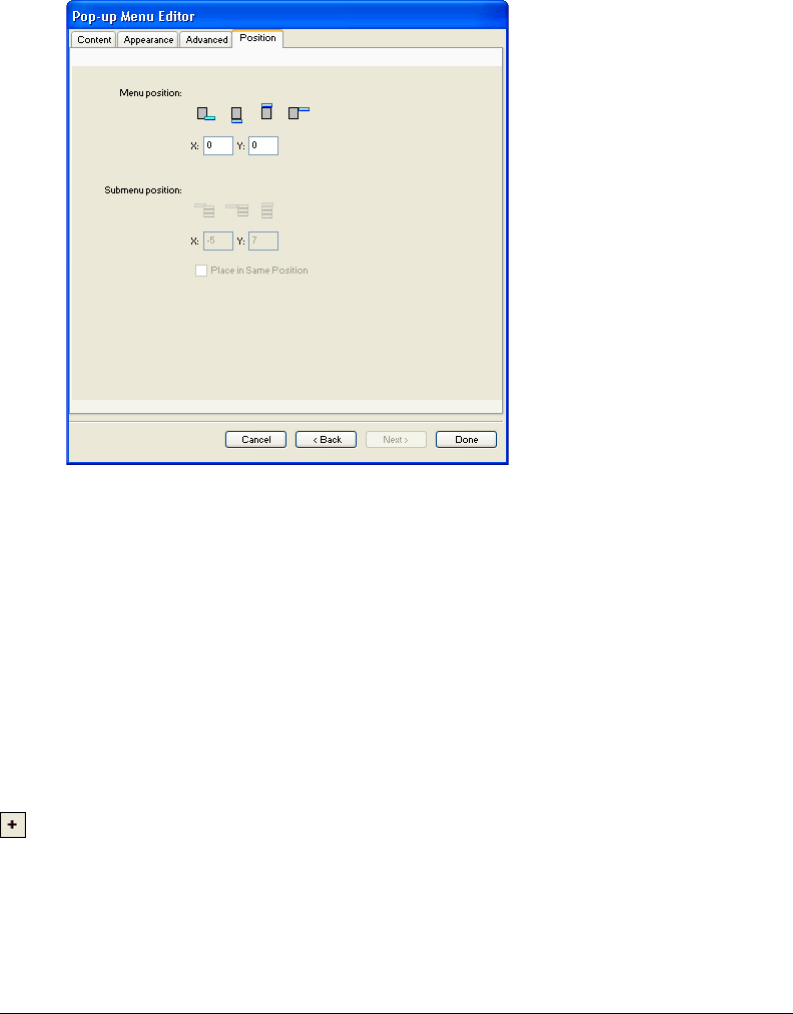
Chapter 260
10 Choose Automatic from the Cell Height pop-up menu, and click the Next button.
The Position tab appears. This is where you can specify the position on the screen where the
pop-up menu will appear. Coordinates of 0,0 mean that the upper left corner of the pop-up
menu will align with the upper left corner of the slice that triggers it. There are also several
preset positions you can choose from.
11 Enter 3 in the X and Y Menu Position boxes, then click Done.
Note: You can also reposition a pop-up menu by dragging its outline in the workspace.
12 Preview your pop-up menu changes in a browser.
Move the pointer over the Worldwide Airports graphic. The pop-up menu is positioned
differently and appears wider. Roll over each entry in the menu to see your color changes.
Edit the pop-up menu
Next you’ll use the Pop-up Menu Editor again to add another entry to the pop-up menu. You’ll
also change the order of entries and add a submenu.
1In Fireworks, double-click the pop-up menu outline.
2Click the Europe entry to select it.
3Click the Add Menu button above the entry list.
A blank line is inserted.
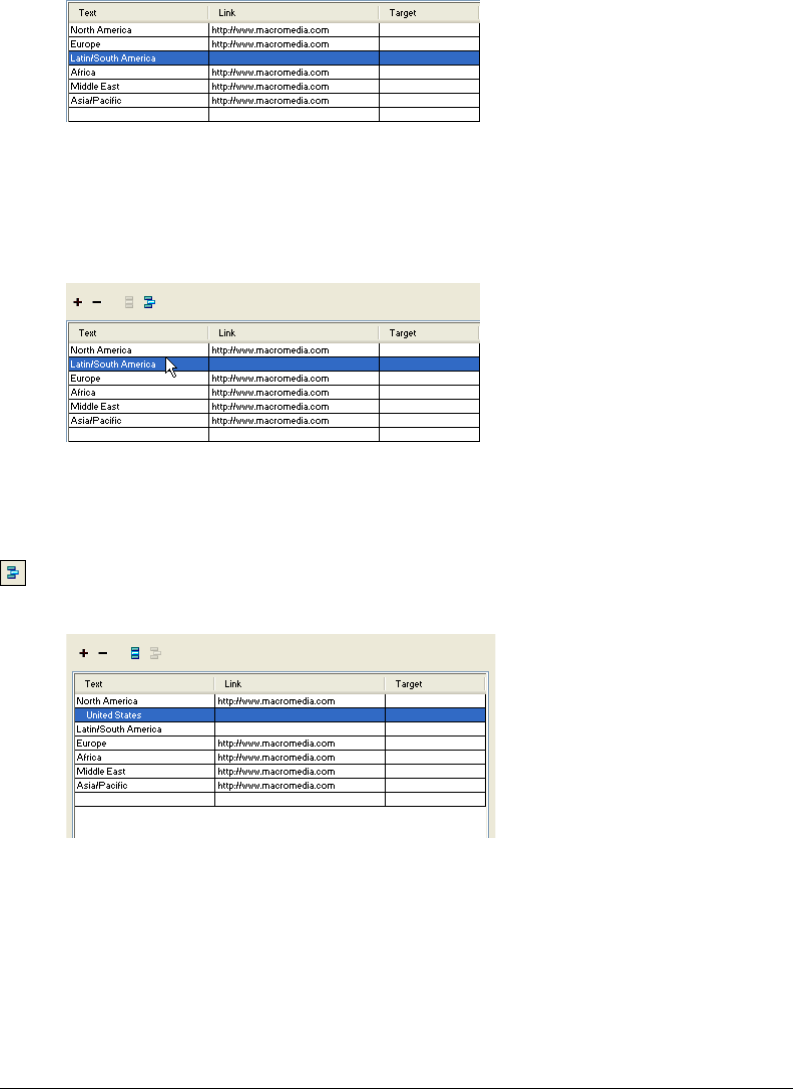
Web Design Basics Tutorial 61
4Double-click the Text field of the new entry and enter Latin/South America. Click anywhere
outside the Text field to apply the entry.
The Americas are not together in the list.
5Drag the Latin/South America entry up one line and release the mouse button. As you drag, a
black line indicates where the entry will be dropped if you release the mouse button at that point.
The entry is dropped where you specified.
6Select the North America entry and click the Add Menu button.
7Double-click the Text field of the new entry and enter United States. Then click anywhere
outside the entry fields. Be careful not to select another entry, however.
8Select the United States entry if it’s not already selected, and click the Indent Menu button.
The entry is indented beneath the North America entry.
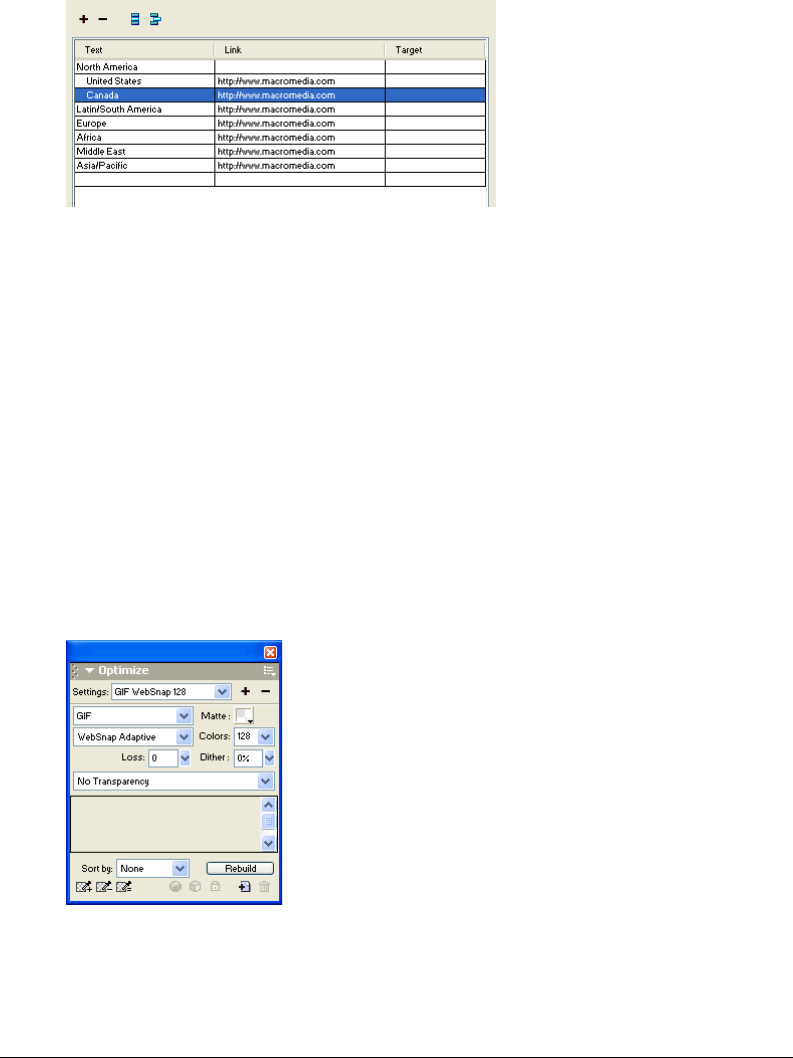
Chapter 262
9Click the Add Menu button again, and create a new entry for Canada.
You’ve just created a submenu that will appear when you roll over the North America entry
in a browser.
10 Assign URLs to all the new entries. Optionally, you can delete the link for North America,
because users will be choosing items from its submenu.
11 Click Done to close the Pop-up Menu Editor, and then preview the pop-up menu changes
in a browser.
Optimize the document
Your document is almost ready for the web. The only thing you need to do before exporting it is
to optimize it. Before you export any document from Fireworks, you should always optimize it.
Optimizing ensures that your graphics will be exported with the best possible balance of
compression and quality.
When different kinds of graphics are in the same document, it’s a good idea to choose an
appropriate file format and compression setting for each. The Global web page is composed of a
variety of elements: bitmaps, vector objects, and text.
1If the Optimize panel is minimized or isn’t visible, click its expander arrow or choose
Window > Optimize.

Web Design Basics Tutorial 63
Fireworks chooses GIF as the default export file format and Websnap Adaptive as the default
color palette. Most of the graphics on the Global Rental Cars web page will be fine using these
settings. The Vintage bitmap image, however, contains a photograph and a gradient. Because
of its complex color variations, it will be best exported in another format.
2Click the 2-Up preview tab in the document window.
The 2-Up tab allows you to view the results of your optimization settings and compare them
with the original. By now you’ve probably noticed the white slice overlay each time you view
one of the Preview tabs. The overlay allows you to focus on just the area you want to optimize.
3Click the slice for the Vintage image in the preview on the right.
The slice overlay disappears so you can view the image beneath the slice. At the bottom of the
preview, the export file format for the selected slice is displayed, as well as the estimated export
file size, and the amount of time the graphic will take to download from the web.
Tip: Use the Hand tool in the View section of the Tools panel to view more of the image if it’s not entirely visible.
4Hide the slices for a moment by clicking the Hide Slices and Hotspots button in the Web
section of the Tools panel.
This allows you to compare the preview with the original and see the difference between the
two graphics. The preview on the right has bands in the gradient.
5Turn slices back on again, and click the Vintage image with the Pointer tool.
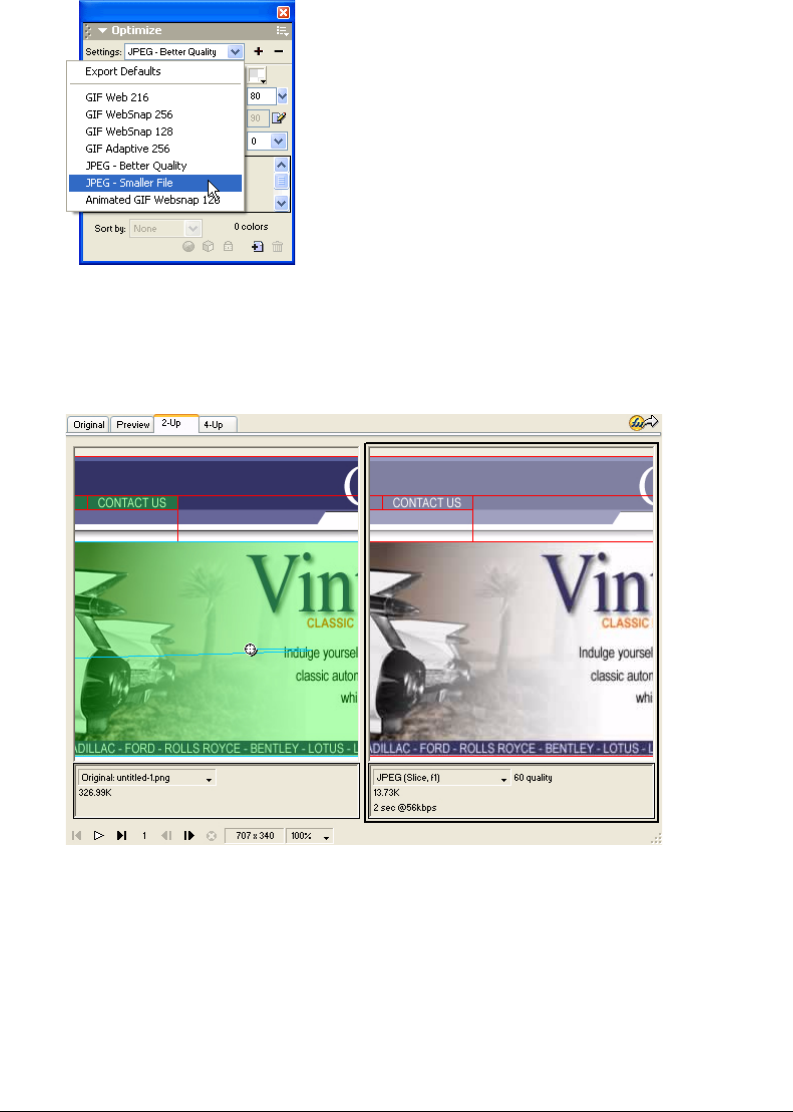
Chapter 264
6In the Optimize panel, choose JPEG – Smaller File from the Settings pop-up menu.
The gradient bands are now gone, and the file size has decreased significantly. That’s because
photographs and images with complex color variations are better optimized and compressed as
JPEGs than as GIFs.
Now that the file size has been decreased, the image has become fuzzy.
7To improve the appearance of the bitmap, drag the Quality slider in the Optimize panel to 77
and set the Smoothing option to 0.
The bitmap is much clearer, but the file size has also increased. However, it is still an
improvement over the file size when the image was optimized as a GIF.
8Click the Original tab to return to normal view.
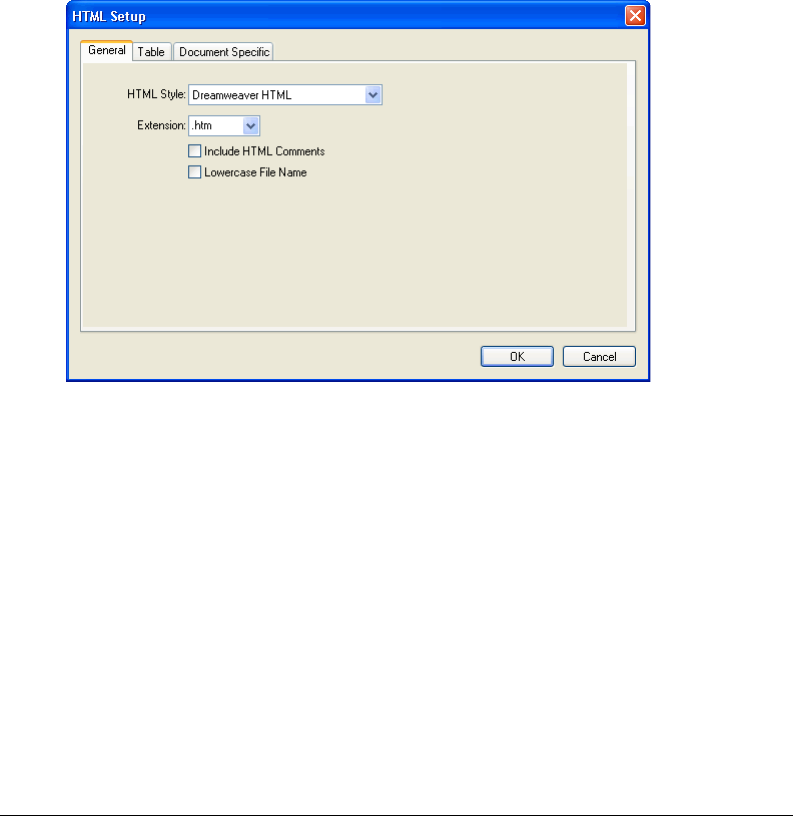
Web Design Basics Tutorial 65
Export HTML
HTML, or HyperText Markup Language, is the primary method used on the Internet to create
and display web pages. You don’t need to understand HTML to use Fireworks, but it helps to
keep in mind that Fireworks slices become cells in an HTML table when exported.
Here you’ll export and view your finished document in a web browser. You’ll also examine the
HTML code that Fireworks exports.
Set HTML preferences
Before you export the document, you need to set HTML export preferences.
1Choose File > HTML Setup.
The HTML Setup dialog box opens. The options you set in this dialog box will affect all future
Fireworks documents you create, except the options on the Document Specific tab.
2On the General tab, choose an HTML style.
If you use an HTML editor such as Macromedia Dreamweaver or Microsoft FrontPage, choose
it from this pop-up menu. Doing so allows you to easily open and edit the exported file in that
HTML editor. If you don’t use an HTML editor or you use one that’s not in this list, choose
Generic HTML.
3Choose .htm as the file extension.
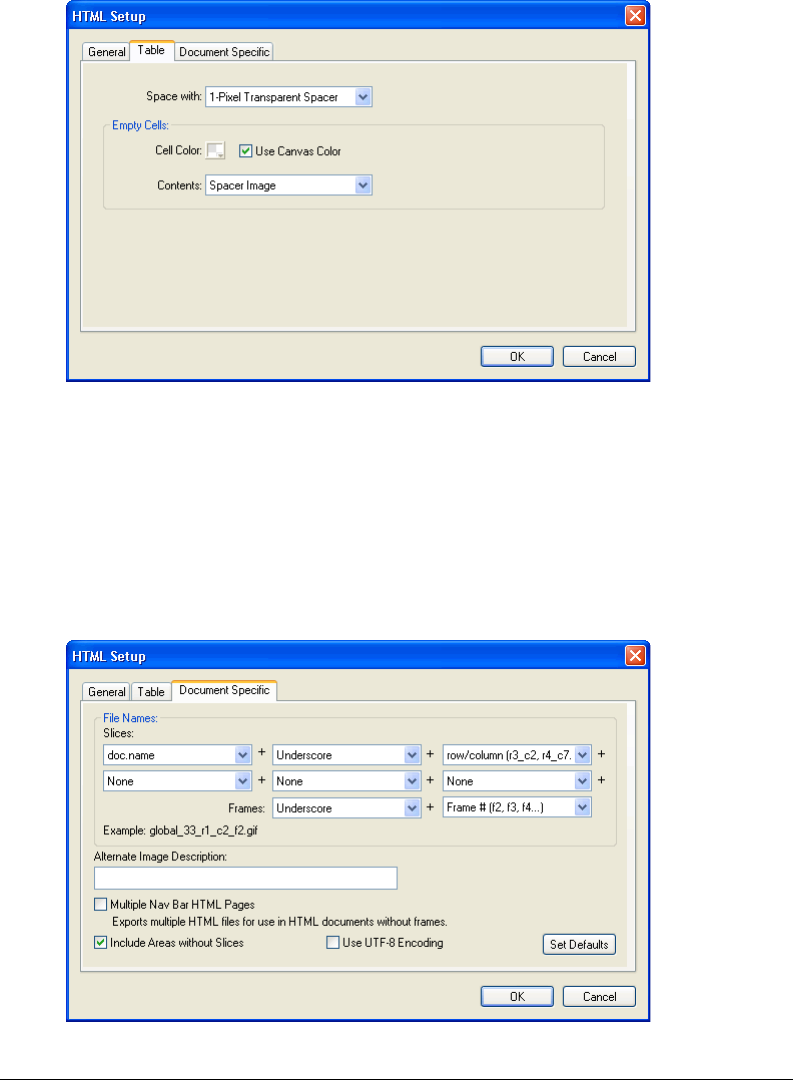
Chapter 266
4Click the Table tab.
The Table tab allows you to change HTML table properties.
5In the Space With pop-up menu, choose 1-Pixel Transparent Spacer.
When this option is chosen, Fireworks exports a graphic file called spacer.gif, which is a 1-pixel
transparent image. Spacers are used by web designers to aid in page layout. They hold empty
HTML table cells open. Without them, empty HTML table cells collapse, altering your
intended page layout. You’ll see the spacer.gif file later when you view your exported files.
You don’t need to understand spacers, but it’s useful to know about this option if you want to
use them in the future.
6Click the Document Specific tab.
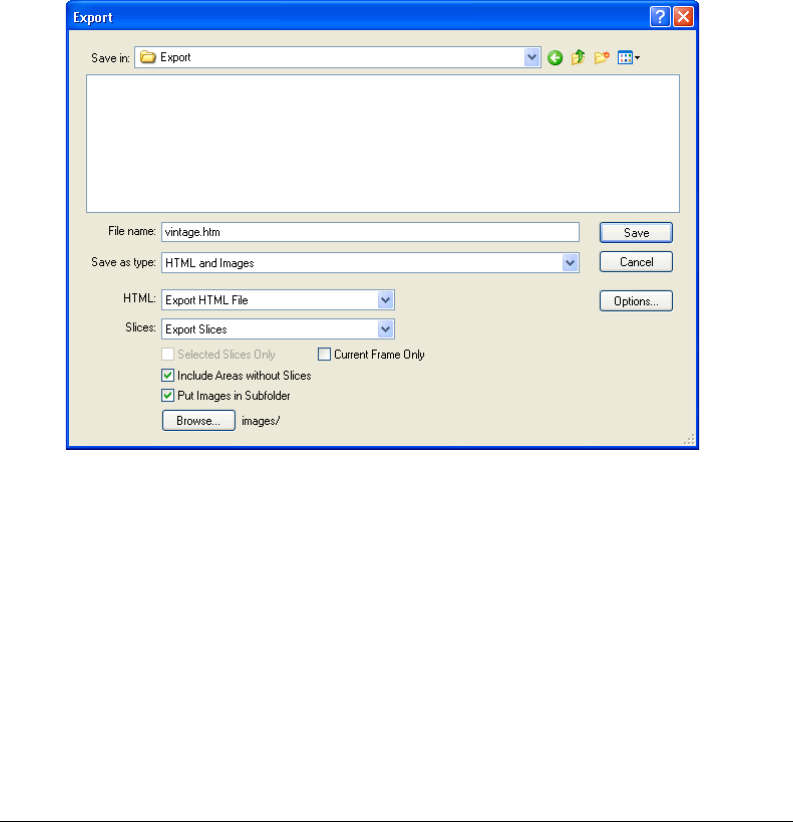
Web Design Basics Tutorial 67
The Document Specific tab allows you to choose a variety of document-specific preferences,
including a customized naming convention for your exported files. Remember that the options
you set here apply only to the current Fireworks document.
Tip: You can apply the settings on the Document Specific tab to all new documents by clicking the
Set Defaults button.
7Click OK to accept the settings on the Document Specific tab and close the HTML
Setup dialog box.
Export the document to HTML format
Your document is now ready for export.
1Choose File > Export.
The Export dialog box opens.
2In the dialog box, navigate to the Tutorial2/Export folder.
3Ensure that HTML and Images is selected as the file type, and enter index.htm as the filename.
Naming the home page index.htm is a common convention used on the web. Many browsers will
even automatically display the index.htm page when a URL lists a location but not a page name.
Additionally, earlier in the tutorial you assigned the Home button a URL of index.htm.
Currently there is only a single page in the Global web site, so linking this page to itself may not
make much sense at this point. But if you create other pages for this site in the future, you can
use this navigation bar on all its pages, providing users with a consistent navigation method.
4Ensure that Export HTML File is chosen in the HTML pop-up menu and Export Slices is
chosen in the Slices pop-up menu.

Chapter 268
5Choose the following options, and leave all the others deselected:
•Include Areas Without Slices
•Put Images in Subfolder
When you choose this option, Fireworks allows you to choose a folder in which to store your
exported graphic files. Fireworks creates the folder for you if it doesn’t exist. If you don’t
choose a folder, Fireworks chooses a folder named images by default. For this tutorial, accept
the default setting.
6Click Save.
The files are exported to the location you specified.
7Choose File > Save to save your PNG file.
Test the completed file
Your files have been exported, so it’s time to check out what you created.
View the list of exported files
First, you’ll examine the list of files that Fireworks exported. The new files created during the
export process appear in your Export folder.
1On your desktop, browse to the Export folder and open it.
Fireworks created an HTML file there called index.htm. This is the home page for the Global
web site. It also created a file called mm_menu.js, which contains the code necessary to display
pop-up menus.
2Open the images subfolder.
Fireworks also exported graphics files for all your artwork. Each slice in Fireworks exports as its
own separate graphic file. There are several GIF files and one JPEG file. The JPEG is the
bitmap image you optimized earlier.The file called spacer.gif is the result of the spacing option
you selected in the HTML Setup dialog box and will be used to aid in page layout.
Web Design Basics Tutorial 69
View the Fireworks HTML file in a browser
Now that you’ve examined the exported files, you’re ready to test the web page in a browser.
1From the Export folder, drag the index.htm file to an open web browser.
2In the browser, click the buttons you added to test the links, then return to the index.htm file.
3Test the other features that you added.
4Most web browsers let you view the source code with a command such as View > Source. Find
and execute the command that lets you view the code.
5Scroll through the source code. If you know HTML and JavaScript, you will recognize the
code that Fireworks created for you. If you don’t know HTML and JavaScript, you can
appreciate that Fireworks gives you no compelling reason to have to learn either.
Take the next steps
You’ve accomplished the major tasks in the production workflow to create a web page with
Fireworks. You learned how to open a document, import graphics into it, and slice the document.
You also created a drag-and-drop rollover, created buttons, and created a pop-up menu. Finally,
you learned to optimize and export your completed document.
For detailed information about any of the features covered in the tutorial, and for information on
additional Fireworks features, refer to the index of Using Fireworks or search Fireworks Help. For
more tutorials, visit http://www.macromedia.com. Also be sure to visit Macromedia’s award-
winning Support Center at http://www.macromedia.com/support/fireworks.

Chapter 270

71
CHAPTER 3
Fireworks Basics
Macromedia Fireworks MX is an application for designing graphics for use on the web. Its
innovative solutions tackle the major problems facing graphic designers and webmasters. Using
the wide range of tools in Fireworks, you can create and edit both vector and bitmap graphics
within a single file.
The advent of Fireworks freed web designers from having to jump back and forth among as many
as a dozen task-specific applications. Its nondestructive Live Effects eliminate the frustration of
having to re-create web graphics from scratch after any simple edit. Fireworks generates
JavaScript, making rollovers easy to create. Efficient optimization features shrink the size of web
graphic files without sacrificing quality.
If you are new to Fireworks, it would be helpful for you to understand general Fireworks concepts
such as opening, importing, and saving files; finding your way around the Fireworks
environment; and working within a file. Once you create a new file or open an existing file, the
Fireworks work environment is available to you. Fireworks MX introduces several improvements
in the workspace, including the Property inspector, a segmented Tools panel, and panel groups.
About vector and bitmap graphics
Computers display graphics in either vector or bitmap format. Understanding the difference
between the two formats helps you understand Fireworks, which contains both vector and bitmap
tools and is capable of opening or importing both formats.
About vector graphics
Vector graphics describe images using lines and curves, called vectors, that include color and
position information. For example, the image of a leaf may be described by a series of points, the
result of which is the leaf’s outline. The leaf color is determined by the color of the outline, or
stroke, and the color of the area enclosed by the outline, or the fill.
When you edit a vector graphic, you modify the properties of the lines and curves that describe its
shape. Vector graphics are resolution-independent, which means you can move, resize, reshape, or
change the color of a vector graphic, as well as display it on output devices of varying resolutions,
without changing the quality of its appearance.

Chapter 372
About bitmap graphics
Bitmap graphics are comprised of dots, called pixels, arranged in a grid. Your computer screen is a
large grid of pixels. In a bitmap version of the leaf, the image would be determined by the location
and color value of each pixel in the grid. Each dot is assigned a color. When viewed at the correct
resolution, the dots fit together like tiles in a mosaic to form the image.
When you edit a bitmap graphic, you modify pixels rather than lines and curves. These bitmap
graphics are resolution-dependent, which means that the data describing the image is fixed to a
grid of a particular size. Enlarging a bitmap graphic can make the image’s edges ragged, as pixels
are redistributed within the grid. Displaying a bitmap graphic on an output device with a lower
resolution than the image itself can also degrade the image’s quality.
About working in Fireworks
Fireworks is a versatile application for creating, editing, and optimizing web graphics. You can
create and edit both bitmap and vector images, design web effects such as rollovers and pop-up
menus, crop and optimize graphics to reduce their file size, and save time by automating
repetitive tasks. When a document is complete, you can export it as a JPEG, GIF, or other file
format—along with HTML files containing HTML tables and JavaScript code—for use on the
web. You also can export a file type specific to another application such as Photoshop or
Macromedia Flash, if you want to continue working in the other application.
Vector and bitmap objects
In the Fireworks Tools panel, you will find distinct sections containing vector and bitmap
drawing and editing tools. In Fireworks MX, the tool you choose determines whether the object
you create is a vector or bitmap object. For example, choose the Pen tool from the Vector section
of the Tools panel, and you can begin drawing vector paths by plotting points. Choose the Brush
tool, and you can drag to paint a bitmap object. Choose the Text tool, and you can begin typing.
After drawing vector objects, bitmap objects, or text, you can use a wide array of tools, effects,
commands, and techniques to enhance and complete your graphics. You can use the Fireworks
tools in the Button Editor to create interactive navigation buttons.
You can also use the Fireworks tools to edit imported graphics. You can import and edit JPEG,
GIF, PNG, PSD, and many other file formats. Once you have imported a graphic image, you can
adjust its color and tone, as well as crop, retouch, and mask it.
Interactive graphics
Slices and hotspots are web objects that specify interactive areas in a web graphic. Slices cut an
image into different sections and enable you to apply rollover behaviors, animation, and Uniform
Resource Locator (URL) links to parts of the overall image. In addition, slices let you export the
sections using different settings. On a web page, each slice appears in a table cell. Hotspots let you
assign URL links and behaviors to all or part of a graphic. For more information, see Chapter 12,
“Slices, Rollovers, and Hotspots,” on page 265.
Slices and hotspots have drag-and-drop rollover handles that let you quickly assign swap image
and rollover behaviors to graphics directly in the workspace. The Button Editor and Pop-up
Menu Editor are convenient Fireworks features that help you build special interactive graphics for
navigating web sites.
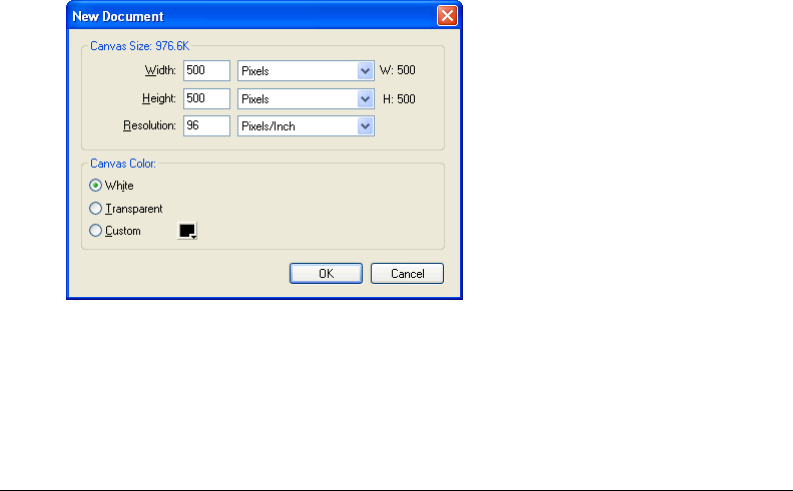
Fireworks Basics 73
About optimizing and exporting graphics
Fireworks has powerful optimization features to help you find the balance between file size and
acceptable quality as you prepare to export graphics. You can optimize web graphics in Fireworks
to minimize their file size so they load quickly when viewing web sites, while comparing the
quality of the graphics in the Preview, 2-Up, or 4-Up view in the workspace.
You can slice an image into smaller parts and then optimize each part in the format that best suits
the content. For added optimization flexibility, you can use selective JPEG compression to focus
the most important part of a JPEG while reducing the quality of the background.
After you optimize your graphics, the next step is to export them for use on the web. From your
Fireworks source PNG document, you can export a number of file types, including JPEG, GIF,
animated GIF, and HTML tables containing sliced images in multiple file types. For more
information, see “Optimizing and Exporting” on page 325.
Creating a new document
When you choose File > New to create a new document in Fireworks, you create a Portable
Network Graphic, or PNG document. PNG is the native file format for Fireworks. After you
create graphics in Fireworks, you can export them in other familiar web graphic formats, such as
JPEG, GIF, and animated GIF. You can also export graphics to many of the popular formats used
off the web, such as TIFF and BMP. Whatever optimization and export settings you choose, the
original Fireworks PNG file is preserved to allow easy editing later.
To create a web graphic in Fireworks, you must first set up a new document or open an existing
one. You can adjust the setup options later in the Property inspector.
To create a new document:
1Choose File > New.
The New Document dialog box opens.
2Enter the canvas width and height measurements in pixels, inches, or centimeters.
3Enter a resolution in pixels per inch or pixels per centimeter.
4Select white, transparent, or a custom color for the canvas.
Note: Use the Custom color box pop-up window to choose a custom canvas color.

Chapter 374
5Click OK to create the new document.
To create a new document the same size as an object on the Clipboard:
1Copy an object to the Clipboard from any of the following:
•Another Fireworks document
•A web browser
•Any of the applications listed in “Pasting into Fireworks” on page 77
2Choose File > New.
The New Document dialog box opens with the width and height dimensions of the object on
the Clipboard.
3Set the resolution and canvas color, and click OK.
4Choose Edit > Paste to paste the object from the Clipboard into the new document.
Opening and importing files
In Fireworks, you can easily open, import, and edit both vector and bitmap images created in
other graphics programs. In addition, you can import images from a digital camera or scanner.
For more information on importing graphics from Photoshop, Macromedia FreeHand,
CorelDraw, or Illustrator, see “Using Fireworks with Other Applications” on page 361.
To open a Fireworks document:
1Choose File > Open.
The Open dialog box appears.
2Select the file and click Open.
Tip: To open a file without overwriting the previous version, choose Open as Untitled, and then save the file using
a different name.
Opening recently closed documents
The File menu lists up to 10 recently closed documents in the Open Recent submenu.
To open a recently closed file:
1Choose File > Open Recent.
2Choose a file from the submenu.
Opening graphics created in other applications
With Fireworks, you can open files created in other applications or file formats, including
Photoshop, Macromedia FreeHand, Illustrator, uncompressed CorelDRAW, WBMP, EPS, JPEG,
GIF, and animated GIF files.
When you open a file format other than PNG using File > Open, you create a new Fireworks
PNG document based on the file you open. While this new document is a PNG file, the original
file remains unchanged.
For more information about working with FreeHand, Photoshop, Illustrator, and CorelDraw, see
“Using Fireworks with Other Applications” on page 361.
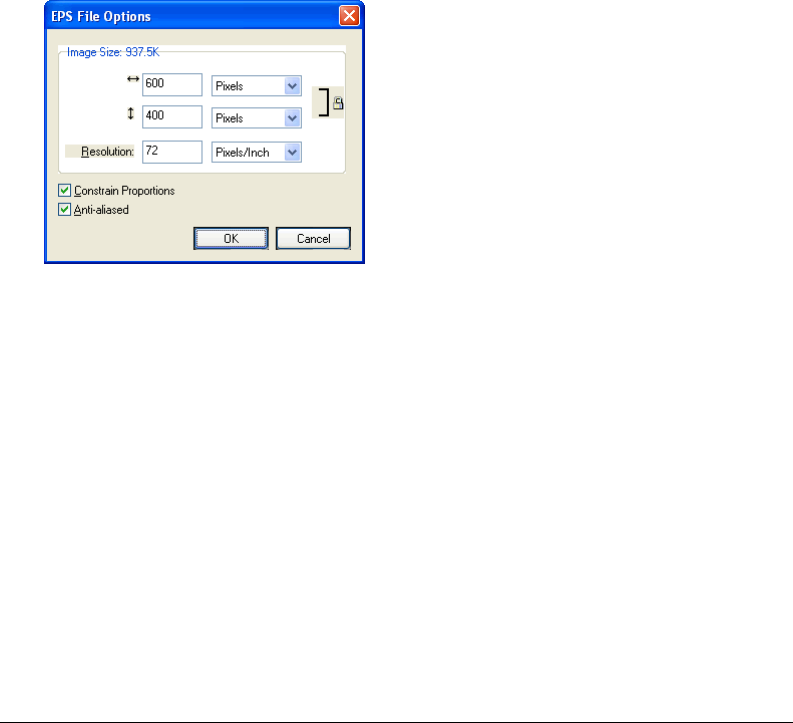
Fireworks Basics 75
Animated GIFs
You can bring animated GIF files into Fireworks in two ways:
•You can import an animated GIF as an animation symbol, which lets you edit and move all the
elements of the animation as a single unit and use the Library panel to create new instances of
the symbol.
Note: When you import an animated GIF, the frame delay setting defaults to 0.07 seconds. If necessary, use the
Frames panel to restore the original timing.
•You can open an animated GIF as you would open a normal GIF file. Each element of the GIF
is placed as a separate image in its own Fireworks frame. You can convert the graphic to an
animation symbol in Fireworks.
EPS files
Fireworks opens most EPS files, such as Photoshop EPS files, as flattened bitmap images, in
which all objects are combined on a single layer. Some EPS files exported from Illustrator,
however, retain their vector information.
When you open or import most EPS files, the EPS File Options dialog box opens.
Image Size determines the image’s dimensions and the units in which the image’s proportions are
displayed. You can choose from pixels, percent, inches, and centimeters.
Resolution indicates the pixels per unit for the resolution.
Constrain Proportions opens the file in the same proportions as the original.
Anti-aliased smooths jagged edges in the opened EPS file.
When you open or import Illustrator EPS files that contain vector information, you’ll see the
Vector File Options dialog box. This is the same dialog box that appears when you open or
import FreeHand files. For information about the options in this dialog box, see “Importing
FreeHand graphics into Fireworks” on page 380.

Chapter 376
WBMP files
Fireworks can open WBMP files, which are 1-bit (monochrome) files optimized for mobile
computing devices. This format is for use on Wireless Application Protocol (WAP) pages. You can
open a WBMP file directly using File > Open or import a WBMP file using File > Import.
Creating Fireworks PNG files from HTML files
Fireworks can open and import HTML content created in other applications. When you open or
import an HTML file, Fireworks reconstructs the layout and behaviors defined by the HTML
code, allowing you to re-create web pages that contain sliced graphics, JavaScript buttons, and
other types of interactivity. This allows you to salvage inherited websites even if you don’t have the
source PNG files. With this feature, you can quickly open or import a web page to update
graphics, change document layout, or alter navigational links, buttons, and other interactive
elements, all without having to rebuild the page from scratch or modify its scripting.
Because Fireworks exports HTML content in the form of an HTML table, it also determines the
document layout for imported HTML based on HTML tables. An HTML file must contain at
least one table for Fireworks to be able to reconstruct it. For more about HTML, see “Exporting
HTML” on page 351.
You can get HTML content into Fireworks in several ways:
•You can open all the HTML tables within an HTML file.
•You can open the first HTML table that Fireworks encounters in an HTML file.
•You can import the first HTML table that Fireworks encounters into an existing
Fireworks document.
Note: Fireworks can also import documents that use UTF-8 encoding and those that are written in XHTML.
XHTML files usually have the extension .xhtm or .xhtml. For more information on these file types, see “Exporting files
with UTF-8 encoding” on page 358 and “Exporting XHTML” on page 357.
To open all tables of an HTML file:
1Choose File > Reconstitute Table.
2Select the HTML file that contains the tables you want to open, and click Open.
Each of the tables opens in its own document window.
To open only the first table of an HTML file:
1Choose File > Open.
2Select the HTML file that contains the table you want to open, and click Open.
The first table in the HTML file opens in a new document window.
To import the first table of an HTML file into an open Fireworks document:
1Choose File > Import.
2Select the HTML file you want to import from, and click Open.
3Click the insertion pointer where you’d like the imported table to appear.

Fireworks Basics 77
Inserting objects into a Fireworks document
You can import, drag and drop, or copy and paste vector objects, bitmap images, or text created
in other applications into a Fireworks document. You can also import images from a digital
camera or scanner.
Dragging and dropping
You can drag vector objects, bitmap images, or text into Fireworks from any application that
supports dragging and dropping:
•FreeHand 7 or later
•Flash 3 or later
•Photoshop 4 or later
•Illustrator 7 or later
•Microsoft Office 97 or later
•Microsoft Internet Explorer 3 or later
•Netscape Navigator 3 or later
•CorelDRAW 7 or later
To drag and drop into Fireworks:
From the other application, drag the object or text into Fireworks.
Pasting into Fireworks
Pasting an object copied from another application into Fireworks places the object in the center
of the active document. You can copy and paste an object or text in any of these formats from
the Clipboard:
•FreeHand 7 or later
•Illustrator
•PNG
•PICT (Macintosh)
•DIB (Windows)
•BMP (Windows)
•ASCII text
•EPS
•WBMP
•TXT
•RTF

Chapter 378
To paste into Fireworks:
1In the other application, copy the object or text that you wish to paste.
2In Fireworks, paste the object or text into your document.
Location of pasted objects
When you paste an object into Fireworks, the placement of the pasted object depends on what
is selected:
•If at least one object on a single layer is selected, the pasted object is placed in front of—or
stacked directly above—the selected object on the same layer.
•If the layer itself is selected and either no objects or all objects are selected, the pasted object is
placed in front of—or stacked directly above—the topmost object on the same layer.
•If two or more objects on more than one layer are selected, the pasted object is placed in front
of—or stacked directly above—the topmost object in the topmost layer.
•If the Web Layer or an object on the Web Layer is selected, the pasted object is placed in front
of—or stacked above—all other objects on the bottommost layer.
Note: The Web Layer is a special layer that contains all web objects and always remains at the top of the Layers
panel. For more information about layers, see Chapter 10, “Layers, Masking, and Blending,” on page 223.
Resampling pasted objects
When you paste a bitmap with a resolution that differs from that of the destination Fireworks
document, Fireworks asks whether you want the bitmap to be resampled.
Resampling adds pixels to or subtracts pixels from a resized bitmap to match the appearance of
the original bitmap as closely as possible. Resampling a bitmap to a higher resolution typically
causes little loss of quality. Resampling to a lower resolution, however, always causes data loss and
usually a drop in quality.
To resample a bitmap object by pasting:
1Copy the bitmap to the clipboard in Fireworks or another program.
2Choose Edit > Paste in Fireworks.
If the bitmap image on the clipboard has a different resolution than the current document, a
dialog box appears, asking you to choose whether or not to resample.
3Choose one of the following:
•Resample maintains the pasted bitmap’s original width and height, adding or subtracting
pixels as necessary.
•Don’t Resample maintains all the original pixels, which may make the relative size of the
pasted image larger or smaller than expected.

Fireworks Basics 79
Importing PNG files
You can import Fireworks PNG files into the current layer of the active Fireworks document. Any
hotspot objects and slice objects are placed on the document’s Web Layer. For more information
about slices and web objects, see “Viewing and displaying slices and slice guides” on page 268. For
more information about layers, see “Working with layers” on page 223.
To import a PNG file into a Fireworks document layer:
1In the Layers panel, select the layer into which you want to import the file.
2Choose File > Import to open the Import dialog box.
3Navigate to the file to be imported and click Open.
4On the canvas, position the import pointer where you want to place the upper left corner
of the image.
5Import the file:
•Click to import the full-size image.
•Drag the import pointer to resize the image as you import.
Fireworks retains the proportions of the image.
Importing from a scanner or digital camera
A scanner or digital camera must be TWAIN compliant (Windows) or support Photoshop
Acquire plug-ins (Macintosh) in order to be able to import images. Images imported into
Fireworks from a scanner or digital camera open as new documents.
Note: Fireworks cannot import from image scanners or digital cameras unless the appropriate software drivers,
modules, and plug-ins have been installed. For specific instructions about installation, settings, and options, consult
your documentation for the TWAIN module or Photoshop Acquire plug-in.
On the Macintosh, Fireworks automatically looks for the Photoshop Acquire plug-ins in the
Plug-ins folder within the Fireworks application folder. If you do not want to put the plug-ins
there, you must point Fireworks to an alternative location.
Note: The exact location of the Plug-ins folder varies depending on your operating system. For more information,
see “Working with configuration files” on page 423.
To direct Fireworks to Photoshop Acquire plug-ins:
1In Fireworks, choose Edit > Preferences.
Note: On Mac OS X, choose Fireworks > Preferences.
2Click the Folders tab.
3Choose Photoshop Plug-Ins.
4Click Browse if the Select the Photoshop Plug-ins Folder (Windows) or Choose a Folder
(Macintosh) dialog box doesn’t automatically open.
5Navigate to the folder containing the Photoshop plug-ins.
To import an image from a scanner or digital camera:
1Connect the scanner or camera to your computer.
2Install the software that accompanies the scanner or camera if you have not already done so.

Chapter 380
3In Fireworks, choose File > Scan and choose a TWAIN module or Photoshop Acquire plug-in
that corresponds to the device from which you are importing an image.
Note: For most TWAIN modules or Photoshop Acquire plug-ins, additional dialog boxes prompt you to set
other options.
4Follow the instructions to apply the desired settings.
The imported image is opened as a new Fireworks document.
Saving Fireworks files
When you create or open a document in Fireworks, the document’s filename has the extension
.png. This occurs even if you open a file with a different extension, such as .jpg, .gif, or .psd. The
file displayed in the Fireworks document window becomes your source file, or working file. Any
edits you perform are applied to the PNG file.
Using a Fireworks PNG as your source file has the following advantages:
•The source PNG file is always editable. You can go back and make additional changes even
after you’ve exported the file for use on the web.
•If you open an existing file of a different format, such as JPEG, and then make changes to it,
your original file is protected. The changes are actually made to a Fireworks PNG file, leaving
the original file unchanged.
•Complex graphics can be sliced into pieces in the PNG file, and then exported as multiple files
with different file formats and various optimization settings.
Fireworks documents are always saved in PNG format. To save changes you’ve made to a JPEG,
GIF, or other graphic file back to its original format, you must export the file.
Note: In Windows, when you open a non-PNG file in Fireworks, the file is still identified using its original extension in
the Fireworks document window. However, any edits you make are actually made to the Fireworks PNG file.
To save a new Fireworks document:
1Choose File > Save As.
The Save As dialog box opens.
2Browse to the desired location and type the filename.
You do not need to enter an extension; Fireworks will do that for you.
3Click Save.
To save an existing Fireworks document:
Choose File > Save.
To save (export) a document to another format:
1Choose a file format in the Optimize panel.
2Choose File > Export to export the document.
For more information, see “Optimizing and Exporting” on page 325.
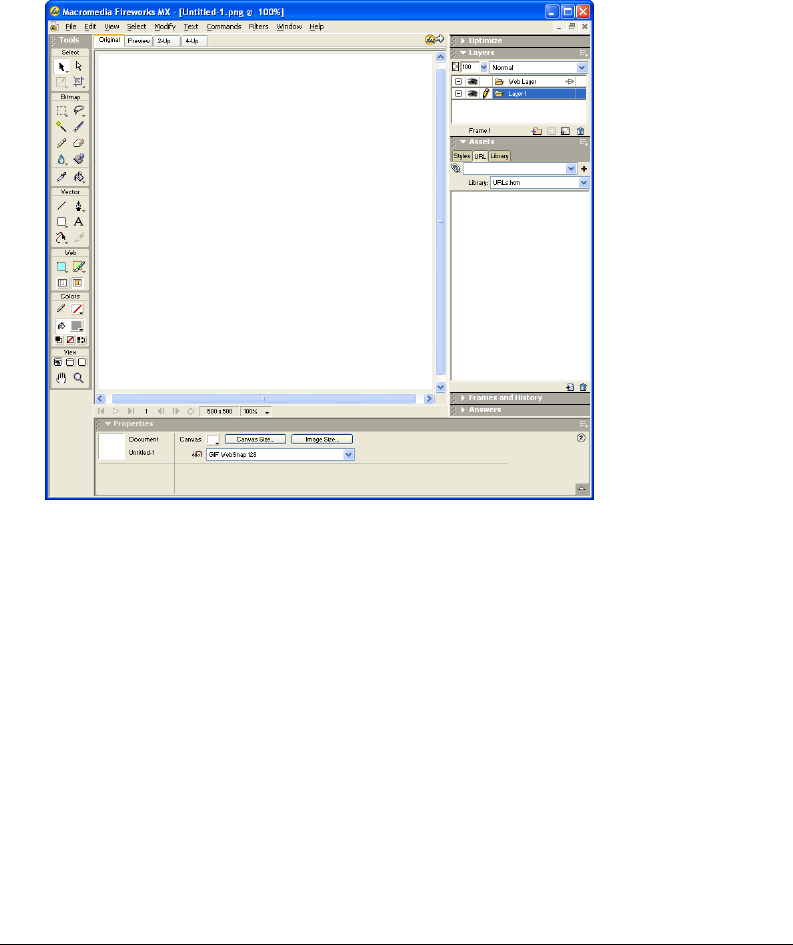
Fireworks Basics 81
The Fireworks work environment
When you open a document in Fireworks MX for the first time, the work environment is activated,
including the Tools panel, Property inspector, menus, and other panels. The Tools panel, on the left
side of the screen, contains labeled categories, including bitmap, vector, and web tool groups. The
Property inspector appears along the bottom of the document by default and initially displays
document properties. It then changes to display properties for a newly chosen tool or currently
selected object as you work in the document. The panels are initially docked in groups along the
right side of the screen. The document window appears in the center of the application.
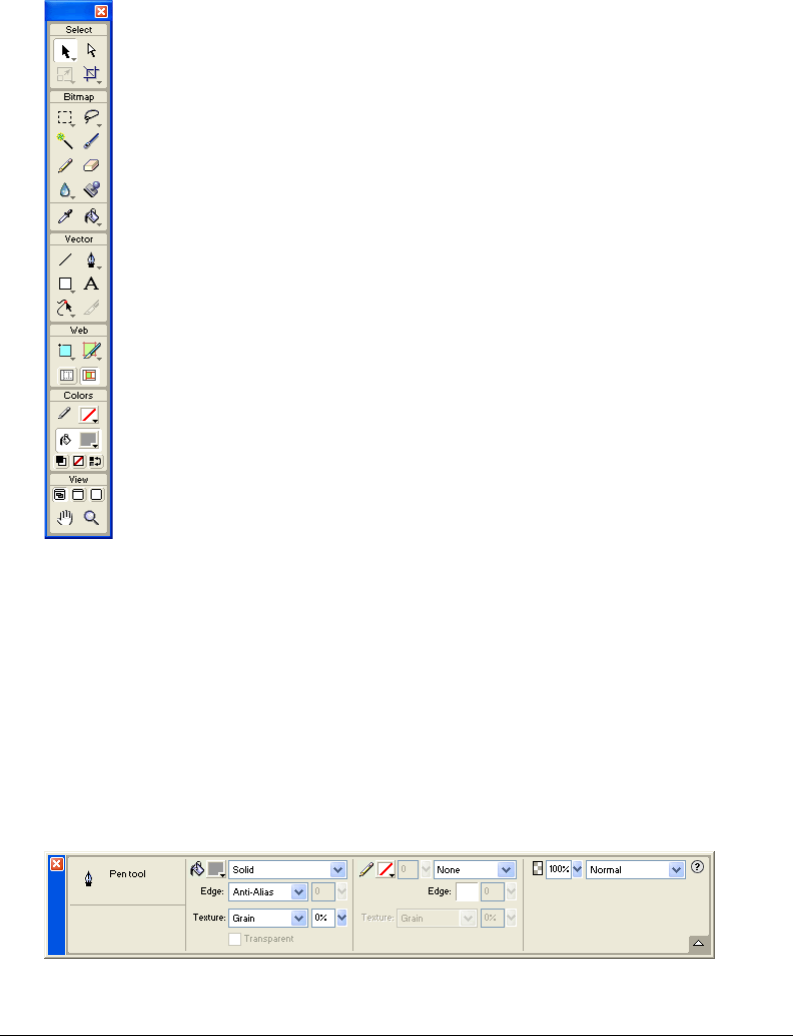
Chapter 382
Using the Tools panel
The Tools panel is organized into six categories: Select, Bitmap, Vector, Web, Colors, and View.
In previous versions of Fireworks, you had to switch between vector and bitmap modes. Now, you
simply choose a tool and begin using it. The application applies the tool appropriately.
Changing tool options
When you choose a tool, the Property inspector displays tool options. Some tool options remain
displayed as you work with the tool. For other tools, such as the basic shape, Pen, and Line tools,
the Property inspector displays the properties of selected objects. For more information about the
Property inspector, see “Using the Property inspector” on page 83.
To display tool options in the Property inspector for a tool that you are already using:
Choose Select > Deselect to deselect all objects.
For information about specific tool options, see the sections that introduce the various tools
throughout Using Fireworks or Fireworks Help.

Fireworks Basics 83
Selecting a tool from a tool group
A small triangle in the lower right corner of a tool in the Tools panel indicates that it is part of a
tool group. For example, the Rectangle tool is part of the basic shape tool group, which also
includes the Rounded Rectangle, Ellipse, and Polygon tools.
To choose an alternative tool from a tool group:
1Click the tool icon and hold down the mouse button.
A pop-up menu appears with tool icons, tool names, and shortcut keys. The currently selected
tool has a check mark to the left of the tool name.
2Drag the pointer to highlight the tool you want, and release the mouse button.
The tool appears in the Tools panel, and the tool options appear in the Property inspector.
Using the Property inspector
The Property inspector is a context-sensitive panel that displays current selection properties,
current tool options, or document properties. By default, the Property inspector is docked at the
bottom of the workspace.
The Property inspector can be open at half height, displaying two rows of properties, or at full
height, displaying four rows. You can also fully collapse the Property inspector while leaving it in
the workspace.
Note: Most procedures in Using Fireworks assume that the Property inspector is displayed at full height.
To undock the Property inspector:
Drag the gripper at the upper left corner to another part of the workspace.
To dock the Property inspector at the bottom of the workspace (Windows only):
Drag the side bar on the Property inspector to the bottom of the screen.
To expand a half-height Property inspector to full height, revealing additional options:
•Click the expander arrow in the lower right corner of the Property inspector.
•Click the icon in the upper right of the Property inspector and choose Full Height from the
Property inspector Options menu.
Note: In Windows, the Options menu is available only when the Property inspector is docked.
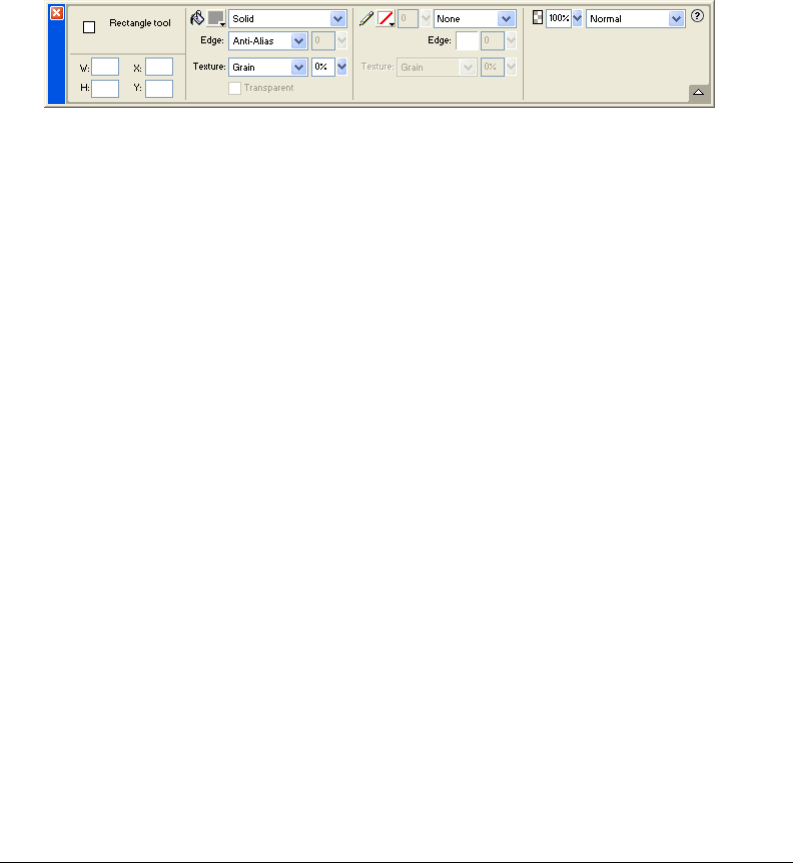
Chapter 384
To reduce the Property inspector to half height:
•Click the expander arrow in the lower right corner of the Property inspector.
•Choose Half Height from the Property inspector Options menu.
Note: In Windows, the Options menu is available only when the Property inspector is docked.
To collapse the Property inspector when it is docked:
•Click the expander arrow or the title of the Property inspector.
•Choose Collapse Panel Group from the docked Property inspector’s Options menu.
For more information about specific Property inspector options, see the appropriate sections
throughout Using Fireworks or Fireworks Help.
Using panels
Panels are floating controls that help you edit aspects of a selected object or elements of the
document. Panels let you work on frames, layers, symbols, color swatches, and more. Each panel
is draggable, so you can group panels together in custom arrangements.
The Color Mixer and Swatches panel manage the current document’s color palette.
The Layers and Frames panels organize a document’s structure and contain options for creating,
deleting, and manipulating layers and frames. The Frames panel includes options for creating
animations.
The Info panel provides information about the dimensions of selected objects and the exact
coordinates of the pointer as you move it across the canvas.
The Behaviors panel manages behaviors, which determine what hotspots and slices do in response
to mouse movement.
The History panel lists commands you have recently used so that you can quickly undo and redo
them. In addition, you can select multiple actions, and then save and reuse them as commands. For
more information, see “Using the History panel to undo and repeat multiple actions” on page 99.
The Library panel contains graphic symbols, button symbols, and animation symbols. You can
easily drag instances of these symbols from the Library panel onto your document. You can make
global changes to all instances by modifying only the symbol. For more information, see Chapter
11, “Using Styles, Symbols, and URLs,” on page 251.
The Optimize panel lets you manage the settings that control an object’s size and file type and
work with the color palette of the file or slice to be exported.
The Styles panel lets you store and reuse combinations of object characteristics or choose a stock style.
The URL panel lets you create libraries containing frequently used URLs.
The Find and Replace panel lets you search for and replace elements such as text, URLs, fonts,
and colors in a document or multiple documents.

Fireworks Basics 85
The Project Log helps track and control changes you make in multiple files when using Find and
Replace or when batch processing.
The Answers panel is a new resource that dynamically downloads a broad range of helpful
information from the Macromedia web site. The panel has keyword search functions for finding
web-based information from a variety of sources.
Organizing panel groups and panels
By default, Fireworks MX panels are docked in groups in the docking area on the right side of the
workspace. You can undock panel groups, add panels to a group, undock individual panels,
rearrange the order of docked panel groups, and collapse and close panel groups. You can also
open and close individual panels.
To undock or move a panel group or panel:
Drag the panel gripper on the upper left corner away from the panel docking area on the right
side of the screen.
To dock a panel group or panel:
Drag the panel gripper onto the panel docking area.
As you drag a panel or panel group over the panel docking area, a placement preview line or
rectangle shows where it would be placed among the groups.
To collapse or expand a panel group or panel, do one of the following:
•Click the title of the panel group or panel.
Note: The title bar is still visible when the panel group or panel is collapsed.
•Click the expander arrow in the upper left corner of the panel group or panel.
To separate a panel from a panel group:
Drag the panel’s tab away from the panel group.
To add a panel to an open panel group:
Drag the panel gripper to the area below the panel group name.
To rename a panel group:
1Click the icon in the upper right of the panel group and choose Rename Panel Group from the
Options menu.
2Enter the new name.
To return panels to their default positions for your screen resolution, do one of the following:
•Choose Commands > Panel Layout Sets > 800 x 600.
•Choose Commands > Panel Layout Sets > 1024 x 768.
•Choose Commands > Panel Layout Sets > 1280 x 1024.

Chapter 386
To open a panel:.
Choose the panel name from the Window menu.
Tip: A check mark next to a panel name in the Window menu indicates that the panel is open.
To close a panel, do one of the following:
•Choose the panel name from the Window menu.
•Click the close button in the panel title bar when the panel is undocked.
To hide all panels and the Property inspector:
Choose View > Hide Panels. To view hidden panels, choose View > Hide Panels again.
Note: Panels that are hidden when you choose Hide Panels remain hidden when you deselect this command.
Setting panel options
Generally, you can set options on a panel using pop-up menus, color palettes, sliders, or dials.
Some options have text boxes in which you can enter text or values.
To change an option using a pop-up menu:
1Click the option.
2Change the value:
•Choose an option or color swatch.
•Drag the slider or dial.
•Type the first letter of the option you want to choose, and press the letter repeatedly to cycle
through all options beginning with that letter (Windows only).
To enter information in a panel text box:
1Click inside the text box.
2Type a value.
3Press Enter.
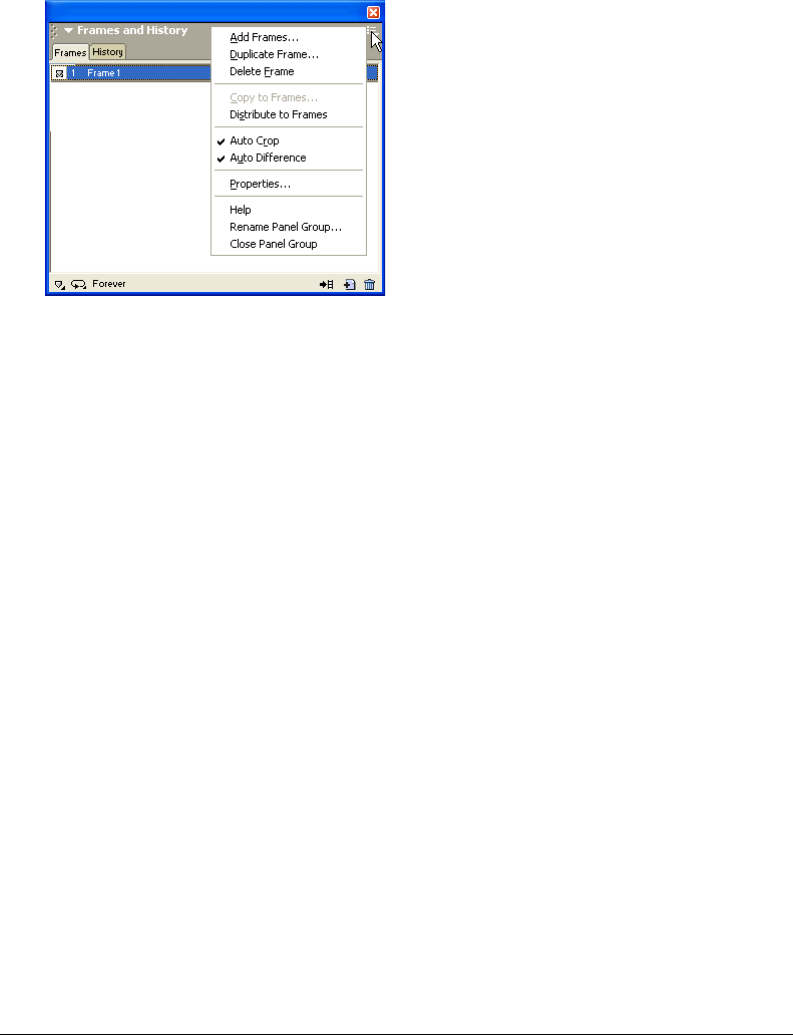
Fireworks Basics 87
Using the panel group or panel Options menu
Each panel group and panel has an Options menu listing a range of choices specific to the active
panel or panel group. An Options menu also appears in the Property inspector (except in
Windows when the Property inspector is undocked).
To choose an option from a panel group or panel Options menu:
1Click the Options menu icon in the upper right corner of the panel group or panel to open
the menu.
2Click to choose a menu item.
Saving panel layouts
You can save the layout of panels using the Commands menu. Then the next time you open
Fireworks, the panels are arranged in the same position.
To save a panel layout:
1Choose Commands > Save Panel Layout.
2Name the panel layout and click OK.
To open a saved panel layout:
Choose Commands > Panel Layout Sets and choose a panel layout from the submenu.

Chapter 388
About the Quick Export button
The Quick Export button lets you export your Fireworks files to a number of Macromedia
applications, including Dreamweaver, Flash, Director, and FreeHand. In addition, you can export
your files to Photoshop, FrontPage, Adobe® GoLive®, and Illustrator, or you can preview your files
in the browser of your choice. For more information, see “Using the Quick Export button” on page
359.
Opening and moving toolbars (Windows only)
Fireworks MX for Windows includes two toolbars containing common Fireworks commands.
To show or hide a toolbar:
Choose Window > Toolbars and choose a toolbar.
To undock a toolbar:
Drag the toolbar away from its docked location.
Note: If a toolbar is undocked, you can click the close button at the upper right of the title bar to close it.
To dock a toolbar:
Drag the toolbar onto a docking area at the top, bottom, left, or right of the application window
until the placement preview rectangle appears.
Navigating and viewing a document
You can control your document’s magnification, its number of views, and its display mode. In
addition, you can easily pan the view of a document, which is helpful if you zoom in and can no
longer see the entire canvas.
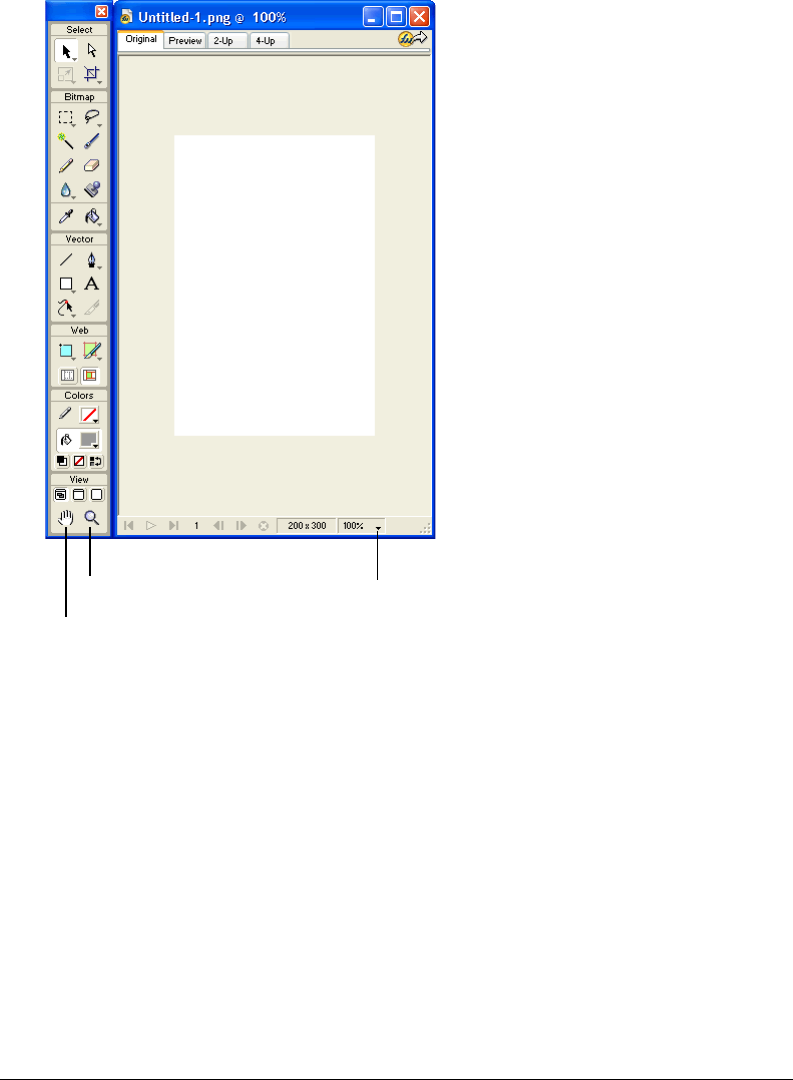
Fireworks Basics 89
Zooming and panning
Fireworks lets you zoom in or out at a preset or user-defined magnification percentage.
To zoom in using preset increments, do one of the following:
•Choose the Zoom tool and click to specify the new center point inside the document window.
Each click magnifies the image to the next preset magnification.
•Choose a zoom setting from the Set Magnification pop-up menu at the bottom of the
document window.
•Choose Zoom In or a preset magnification from the View menu.
To zoom out using preset increments, do one of the following:
•Choose the Zoom tool and Alt-click (Windows) or Option-click (Macintosh) inside the
document window. Each click reduces the view to the next preset percentage.
•Choose a zoom setting from the Set Magnification pop-up menu at the bottom of the
document window.
•Choose Zoom Out or a preset magnification from the View menu.
Zoom tool
Hand tool
Zoom pop-up
menu

Chapter 390
To zoom in on a specific area without being constrained by preset zoom increments:
1Choose the Zoom tool.
2Drag over the part of the image that you want to magnify.
The size of the zoom selection box determines the precise magnification percentage, which is
displayed in the Set Magnification text box.
Note: You cannot enter a magnification percentage in the Set Magnification text box.
To zoom out based on a specific area:
Alt-drag (Windows) or Option-drag (Macintosh) a selection area with the Zoom tool.
To return to 100% magnification:
Double-click the Zoom tool in the Tools panel.
To pan around the document:
1Choose the Hand tool.
2Drag the hand pointer.
As you pan beyond the canvas, the view continues to pan so that you can work with pixels
along the canvas edge.
To fit the document in the current view:
Double-click the Hand tool.
Using view modes to manage the workspace
The view mode buttons in the View area of the Tools panel allow you to choose from any of three
view modes to control the layout of your workspace:
Standard Screen mode is the default document window view.
Full Screen with Menus mode is a maximized document window view set against a gray
background with menus, toolbars, scroll bars, and panels visible.
Full Screen mode is a maximized document window view set against a black background with no
menus, toolbars, or title bars visible.
To change view modes, do one of the following:
•To change to Full Screen with Menus mode, click the Full Screen with Menus Mode button in
the Tools panel.
•To change to Full Screen Mode, click the Full Screen Mode button in the Tools panel.
•To return to Standard Screen mode, Right-click (Windows) or Control-click (Macintosh) in
the document window and select Exit Full Screen Mode, or click the Standard Screen Mode
button in the Tools panel.
Fireworks Basics 91
Displaying multiple document views
You can use multiple views to see one document at different magnifications simultaneously.
Changes you make in one view are automatically reflected in all other views of the same document.
To open an additional document view at a different zoom setting:
1Choose Window > New Window.
2Choose a zoom setting for the new window.
To tile document views:
Choose Window > Tile Horizontal or Window > Tile Vertical.
To close a document view window:
Click the window’s Close button.
Controlling document redraw
Display modes affect a document’s onscreen representation, but not its object data or output quality.
To control document redraw:
Choose View > Full Display.
When Full Display is selected, Fireworks displays the document in all available colors with full
detail. When Full Display is deselected, Fireworks displays paths as 1 pixel wide with no fill and
displays images with an X through them.
Display and draft modes
To display a document as it would appear on a different platform:
•In Windows, choose View > Macintosh Gamma.
•On the Macintosh, choose View > Windows Gamma.
Fireworks previews how the document would appear on the other computer platform. For
example, if you are working on the Windows platform, you can use this command to preview
how a document would appear on the Macintosh platform.

Chapter 392
Using the Mini-Launcher
The Mini-Launcher contains icons for opening and closing your most frequently used panels,
including the Color Mixer and Info, Optimize, Layers, Library, Styles, and Behaviors panels. If
you have it turned on, the Mini-Launcher is located at the bottom of the document window. The
Mini-Launcher is not visible by default.
To display the Mini-Launcher:
1Choose Edit > Preferences.
2On the General Tab, choose Show Tab Icons from the Workspace section, and click OK.
To open or close a panel from the Mini-Launcher:
Click the panel’s corresponding icon.
Note: The background of the panel icon is highlighted while the panel is open.
Using the status bar (Windows only)
When turned on, the status bar is displayed at the bottom of the Fireworks application window. It
provides useful hints and information about selected objects and tools. The status bar is turned
off by default.
To turn the status bar on or off:
Choose View > Status Bar.
To use the status bar:
Select an object or tool, or move the pointer over a tool in the Tools panel.
Information about the selected object or operation is displayed in the status bar.
Changing the canvas
When you first create a new Fireworks document, you must specify document characteristics. You
can modify the size and color of the canvas and change the image’s resolution anytime using the
Modify menu or the Property inspector. As you work with the document, you can also rotate the
canvas and trim unwanted parts.
Changing canvas size, color, and resolution
Fireworks makes it easy to change to the canvas size, canvas color, and image resolution.
To change the canvas size:
1Do one of the following:
•Choose Modify > Canvas > Canvas Size.
•Choose Select > Deselect, click the Pointer tool to display the document properties in the
Property inspector, then click the Canvas Size button.
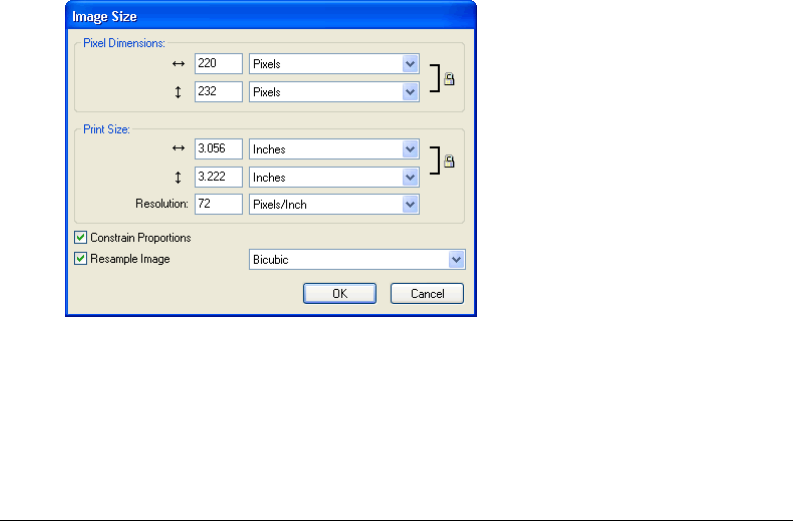
Fireworks Basics 93
2Enter the new dimensions in the Width and Height text boxes.
3Click an Anchor button to specify which sides of the canvas Fireworks will add to or delete
from, and click OK.
Note: By default, the center anchor is selected, indicating that changes to the size of the canvas are made
on all sides.
To change the canvas color from the Modify menu:
1Choose Modify > Canvas > Canvas Color.
2Choose White, Transparent, or Custom. If you choose Custom, click a color in the swatches
pop-up window.
To select the canvas color from the Property inspector:
1Choose Select > Deselect, click the Pointer tool to display the document properties in the
Property inspector, then click the Canvas color box.
2Pick a color from the swatches pop-up window or click the eyedropper on a color
anywhere onscreen. To choose a transparent canvas, click the None button in the swatches
pop-up window.
To resize a document and all of its contents:
1Do one of the following:
•Choose Select > Deselect, click the Pointer tool to display the document properties in the
Property inspector, then click the Image Size button in the Property inspector.
•Choose Modify > Canvas > Image Size.
The Image Size dialog box opens.
2In the Pixel Dimensions text boxes, enter new horizontal and vertical dimensions.
You can change the units of measure. If Resample Image is deselected, you can change the
resolution or print size but not pixel dimensions.
3In the Print Size text boxes, enter horizontal and vertical dimensions for the printed image.

Chapter 394
4In the Resolution text box, enter a new resolution for the image.
You can choose between pixels/inch and pixels/cm as the units, or choose Resample Image.
Changing the resolution also changes the pixel dimensions.
5Do one of the following:
•To maintain the same ratio between the document’s horizontal and vertical dimensions, choose
Constrain Proportions.
•Deselect Constrain Proportions to resize width and height independently.
6Select Resample Image to add or remove pixels when resizing the image to approximate the
same appearance at a different size.
7Click OK.
About resampling
Resampling in Fireworks differs from that in most image-editing applications. Fireworks contains
pixel-based bitmap image objects and path-based vector objects.
•When a bitmap object is resampled, pixels are added to or removed from the image to make it
larger or smaller.
•When a vector object is resampled, little quality loss occurs because the path is redrawn
mathematically at a larger or smaller size.
Since the attributes of vector objects in Fireworks are visible as pixels, some strokes or fills may
appear slightly different after resampling because the pixels that compose the stroke or fill must
be redrawn.
Note: Guides, hotspot objects, and slice objects are resized when the document’s image size is changed.
Resizing bitmap objects always presents a unique problem—do you add or remove pixels to resize
the image, or do you change the number of pixels per inch or centimeter?
You can alter the size of a bitmap image by adjusting the resolution or by resampling the image.
When adjusting the resolution, you change the size of the pixels in the image so that more or fewer
pixels fit in a given space. Adjusting the resolution without resampling does not result in data loss.
Resampling up, or adding pixels to make the image larger, may result in quality loss because the
pixels being added do not always correspond to the original image.
Downsampling, or removing pixels to make the image smaller, always causes quality loss because
pixels are discarded to resize the image. Data loss in the image is another side effect of
downsampling.
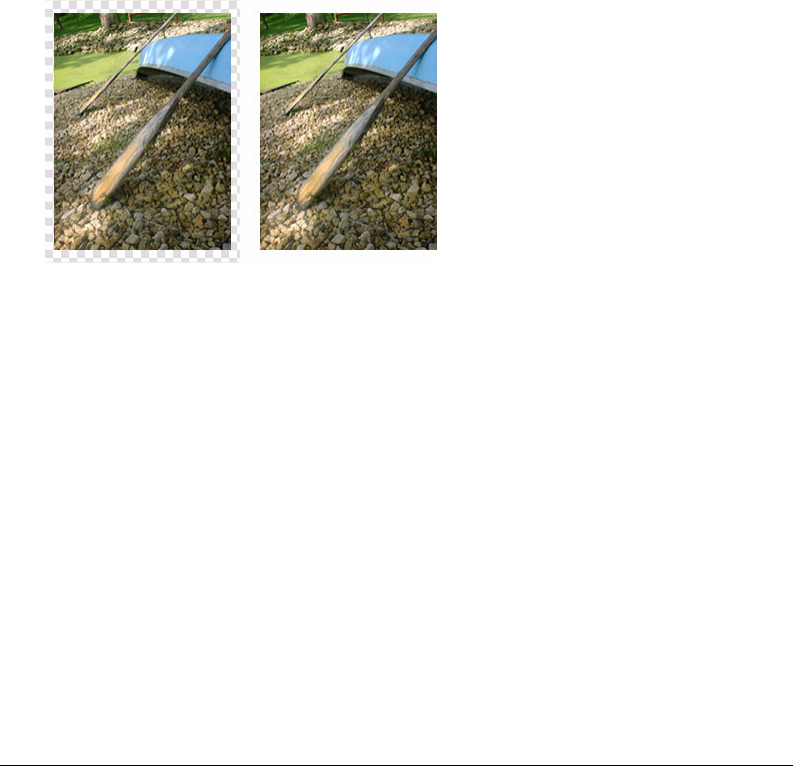
Fireworks Basics 95
Rotating the canvas
Rotating the canvas is helpful when an image is imported upside down or sideways. You can
rotate the canvas 180 degrees, 90 degrees clockwise, or 90 degrees counterclockwise.
When you rotate the canvas, all objects in the document rotate.
To rotate the canvas, do one of the following:
•Choose Modify > Canvas > Rotate 180°.
•Choose Modify > Canvas > Rotate 90° CW.
•Choose Modify > Canvas > Rotate 90° CCW.
Trimming the canvas
If your document contains extra space around the contents of the canvas, you can trim the canvas.
You can also remove empty canvas space by cropping the document. For more information about
cropping, see “Cropping a document” on page 96.
Original; Trimmed canvas
To trim the canvas:
Choose Modify > Canvas > Trim Canvas.
Portions of the canvas that extend beyond the outermost pixels of the document are removed
automatically. Each edge of the canvas is cropped to the edges of the object or objects in the
document. If the document has more than one frame, Trim Canvas crops it to include all objects
in all frames, not just the current frame.
Fitting the canvas
You can modify the canvas by expanding it to fit objects that extend beyond its boundary.
To fit the canvas:
Choose Modify > Canvas > Fit Canvas.
Chapter 396
Cropping a document
By cropping, you can delete unwanted portions of a document. The canvas resizes to fit an area
that you define.
By default, cropping deletes objects that extend beyond the canvas boundaries. You can retain
objects outside the canvas by changing a preference before cropping.
To crop a document:
1Choose the Crop tool from the Tools panel or choose Edit > Crop Document.
2Drag a bounding box on the canvas. Adjust the crop handles until the bounding box surrounds
the area of the document that you want to keep.
3Double-click inside the bounding box or press Enter to crop the document.
The canvas resizes to the area you defined, and objects beyond the edges of the canvas are deleted.
Tip: You can retain objects outside the canvas by deselecting Delete Objects when Cropping on the Editing tab of
the Preferences dialog box before cropping. For more information about preferences, see “Setting preferences”
on page 417.
Using context menus
Context menus let you quickly access commands that are relevant to the current selection.
To display a context menu:
Right-click (Windows) or Control-click (Macintosh) a selected item in the document window.
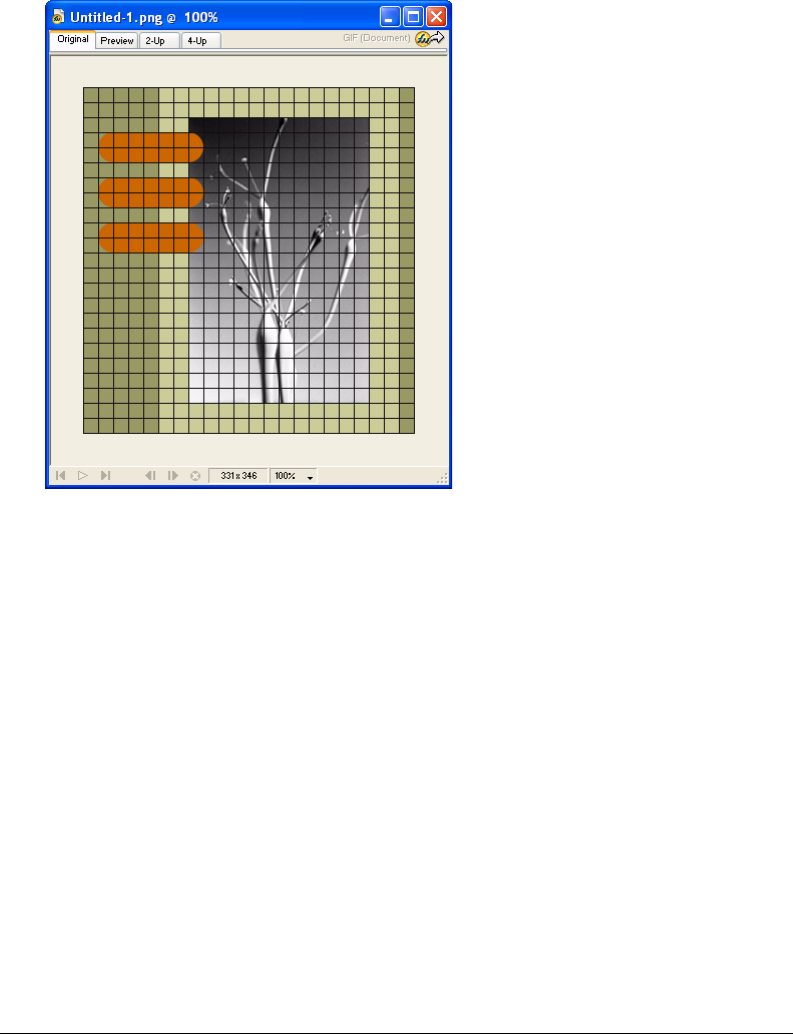
Fireworks Basics 97
Using rulers, guides, and the grid
You can use rulers and guides to lay out objects as precisely as possible and to help you draw. You
can place guides in the document and snap objects to those guides or turn on the Fireworks grid
and snap objects to the grid.
Using rulers
Rulers help you to measure, organize, and plan the layout of your work. Because Fireworks images
are intended for the web, where graphics are measured in pixels, the rulers in Fireworks always
measure in pixels, regardless of the unit of measurement you used when creating the document.
To show and hide rulers:
Choose View > Rulers.
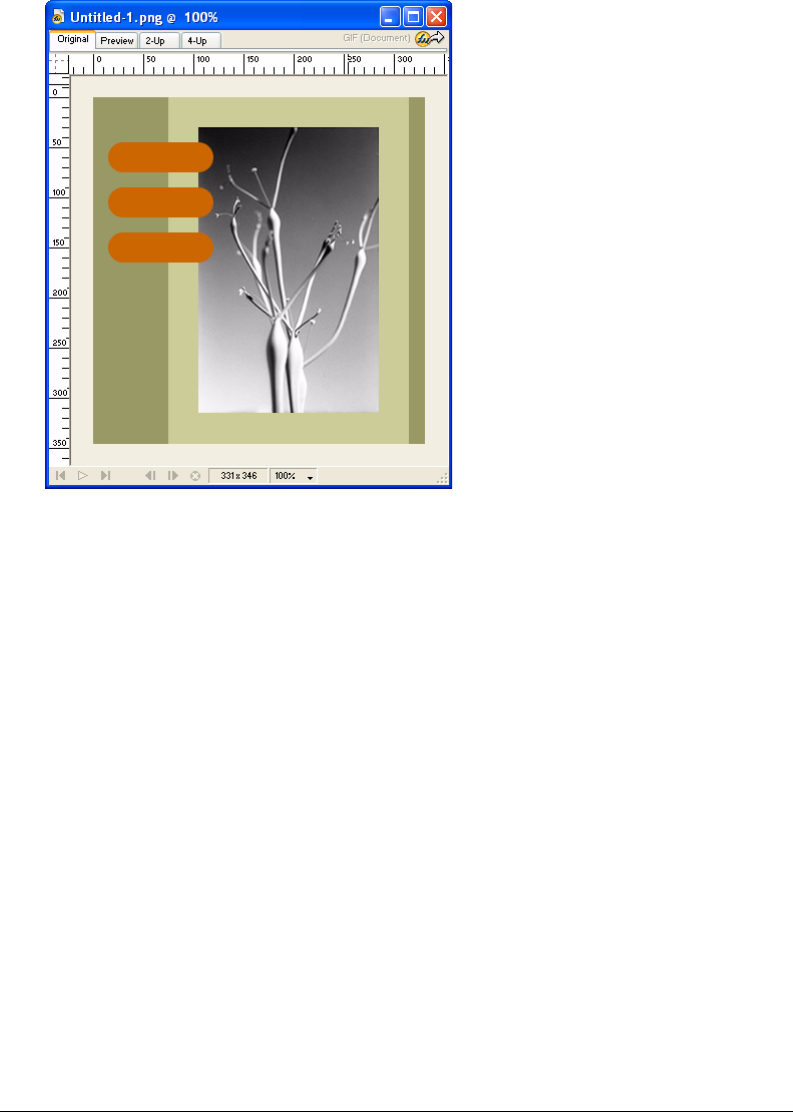
Chapter 398
Vertical and horizontal rulers appear along the margins of the document window.
Using guides
Guides are lines that you drag onto the document canvas from the rulers. They serve as drawing aids
to help you place and align objects. You can use guides to mark important parts of your document,
such as the margins, the document center point, and areas where you want to work precisely.
To help you align objects, Fireworks lets you snap objects to guides. You can prevent guides from
being accidentally moved by locking them.
Note: Guides do not reside on a layer or export with a document. They are merely design tools.
Fireworks also has slice guides that allow you to slice a document for use on the web. Regular
image guides are different from slice guides, however. For information on slice guides, see
“Moving slice guides to edit slices” on page 271.
To create a horizontal or vertical guide:
1Click and then drag from the corresponding ruler.
2Position the guide on the canvas and release the mouse button.
Note: You can reposition the guide by dragging it again.
To move a guide to a specific position:
1Double-click the guide.
2Enter the new position in the Move Guide dialog box, and click OK.

Fireworks Basics 99
To show or hide guides:
Choose View > Guides > Show Guides.
To snap objects to guides:
Choose View > Guides > Snap to Guides.
To change guide colors:
1Choose View > Guides > Edit Guides.
2Select the new guide color from the color box pop-up window, and click OK.
To lock or unlock all guides:
Choose View > Guides > Lock Guides.
To remove a guide:
Drag the guide off the canvas.
Using the grid
The Fireworks grid displays a system of horizontal and vertical lines on the canvas. The grid is useful
for precisely placing objects. In addition, you can view, edit, resize, and change the color of the grid.
Note: The grid does not reside on a layer or export with a document. It is merely a design tool.
To show and hide the grid:
Choose View > Grid > Show Grid.
To snap objects to the grid:
Choose View > Grid > Snap to Grid.
To change the grid color:
1Choose View > Grid > Edit Grid.
2Select the new grid color from the color box pop-up window, and click OK.
To change the size of the grid’s cells:
1Choose View > Grid > Edit Grid.
2Enter the appropriate values in the horizontal and vertical spacing text boxes, and click OK.
Using the History panel to undo and repeat multiple actions
With the History panel, you can view, modify, and repeat the actions taken to create the
document. The History panel lists the most recent actions you have performed in Fireworks, up
to the number specified in the Undo Steps field in the Fireworks Preferences dialog box.
With the History panel, you can do any of the following:
•Quickly undo and redo recent actions.
•Choose recently performed actions from the History panel and repeat them.

Chapter 3100
•Copy selected commands to the Clipboard as the JavaScript text equivalent.
•Save a group of recently performed actions as a custom command, and then choose it from the
Command menu to reuse as a single command. For more information about creating
commands using the History panel, see “Scripting with the History panel” on page 413.
To undo and redo actions:
1Choose Window > History to open the History panel.
2Drag the Undo marker up or down.
To repeat actions:
1Perform the actions.
2Do one of the following to highlight the actions to be repeated in the History panel:
•Click an action to highlight it.
•Control-click (Windows) or Command-click (Macintosh) to highlight multiple individual
actions.
•Shift-click to highlight a continuous range of actions.
3Click the Replay button at the bottom of the History panel.
To save actions for reuse:
1Highlight the actions to be saved in the History panel.
2Click the Save button at the bottom of the panel.
3Enter a command name and click OK.
To use the saved custom command:
Choose the command name from the Commands menu.
101
CHAPTER 4
Selecting and Transforming Objects
As you work in Macromedia Fireworks MX, you will need to manipulate vector and bitmap
objects, text blocks, slices and hotspots, and areas of pixels. Using the selection and
transformation tools, you can move, copy, delete, rotate, scale, or skew objects. In documents that
have multiple objects, you can organize the objects by stacking, grouping, and aligning them.
Selecting objects
Before you can do anything with any object on the canvas, you must select it. This applies to a
vector object, path, or points; a text block, word, or letter; a slice or hotspot; an instance; or a
bitmap object.
You can use any of the following to select objects:
The Layers panel displays each object. You can click an object in the Layers panel to it select when
the panel is open and layers are expanded. For more information, see Chapter 10, “Layers,
Masking, and Blending,” on page 223.
For information about selecting specific areas of pixels within a bitmap image, see “Selecting
pixels” on page 104.
The Pointer tool selects objects when you click the objects or drag a selection area around them.
The Subselection tool selects an individual object within a group or the points of a vector object.
The Select Behind tool selects an object that is behind another object.
The Export Area tool selects an area to be exported as a separate file.
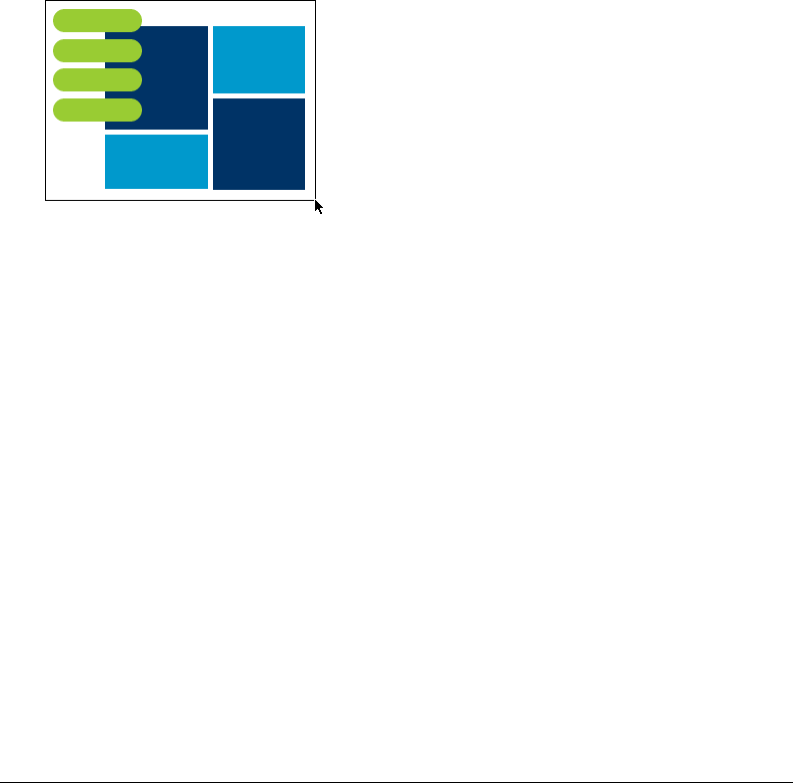
Chapter 4102
Using the Pointer tool
The Pointer tool selects objects when you click them or when you drag a selection area around all
or part of the objects.
To select an object by clicking, do one of the following:
•Move the Pointer tool over the object’s path or bounding box and click.
•Click the object’s edge or fill.
•Select the object in the Layers panel.
Tip: To preview what you would select if you were to click on an object beneath the pointer on the canvas,
choose the Mouse Highlight option in the Editing tab of the Preferences dialog box. For more about preferences,
see “Setting preferences” on page 417.
To select objects by dragging:
Drag the Pointer tool to include one or more objects in the selection area.
Using the Subselection tool
You use the Subselection tool to select, move, or modify points on a vector path or an object that
is part of a group.
To move or modify objects with the Subselection tool:
1Choose the Subselection tool.
2Make a selection.
Selection handles appear.
3Do one of the following:
•To modify an object, drag one of its points or selection handles.
•To move the entire object, drag anywhere in the object except a point or selection handle.
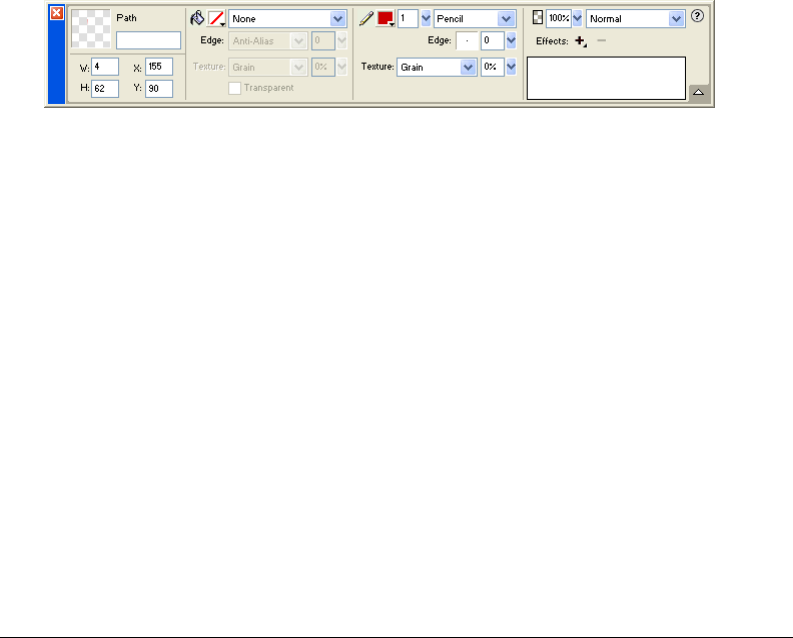
Selecting and Transforming Objects 103
Using the Select Behind tool
When working with graphics that contain multiple objects, you can use the Select Behind tool to
select an object that is hidden or obscured by other objects.
To select an object that is behind other objects:
Click the Select Behind tool repeatedly over the stacked objects, progressing through the objects
top to bottom in stacking order until you select the object you want.
Note: You also can select a hard-to-reach object by clicking it in the Layers panel when the layers are expanded.
Selection information in the Property inspector
Whenever you select an object, the Property inspector identifies the selection. The upper left area
of the Property Inspector contains the following information about the selection:
•A description of the item being inspected
•A text box to enter a name for that item
Note: The name will appear in the title bar of the document whenever you select this item. For slices and buttons,
the name is the filename when exported.
•The number of objects when more than one object is selected
Note: If the status bar is turned on (Windows only), selected objects are also identified in the status bar at the
bottom of the document window.
The Property inspector also displays information and settings for the object type selected. For
example, when you select a vector path, the Property inspector displays properties for the vector
path such as stroke width and color.
Modifying a selection
After you select a single object, you can add objects to the selection and deselect objects that are
selected. Using a single command, you can select or deselect everything on every layer in a
document. You can also hide the selection path so you can edit a selected object while viewing it
as it will appear on the web or in print.
To add to a selection:
Hold down Shift while clicking additional objects with the Pointer, Subselection, or Select
Behind tool.
To deselect an object while leaving other objects selected:
Hold down Shift while clicking the selected object.
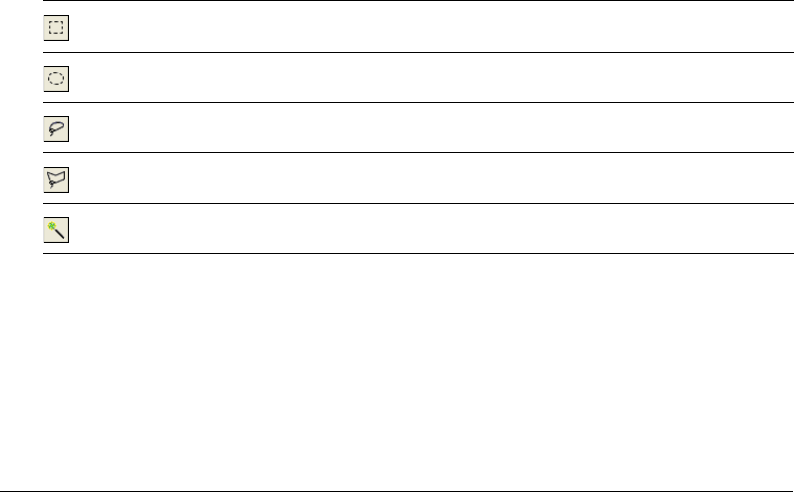
Chapter 4104
To select everything on every layer in the document:
Choose Select > Select All.
Note: Select All does not select hidden objects.
To deselect all selected objects:
Choose Select > Deselect.
Note: You must deselect the Single Layer Editing preference to select all visible objects on all layers in a document.
When the Single Layer Editing preference is chosen, only objects on the current layer are selected. For more
information, see “Organizing layers” on page 226.
To hide the path selection feedback of a selected object:
Choose View > Hide Edges.
Note: You can use the Layers panel or the Property inspector to identify the selected object when the outline and
points are hidden.
To hide selected objects:
Choose View > Hide Selection.
Note: Hidden objects are not exported. (This does not apply to slice and hotspot web objects on the Web Layer.)
To show all objects:
Choose View > Show All.
Tip: To hide objects whether they are selected or not, you can click or drag along the Eye column in the Layers panel.
Selecting pixels
You can edit pixels over an entire canvas or choose one of the selection tools to constrain your
editing to a particular area of an image:
The pixel selection tools draw selection marquees that define the area of selected pixels. After you
draw the selection marquee, you can manipulate it by moving it, adding to it, or basing another
selection on it. You can edit the pixels inside the selection, apply filters to the pixels, or erase pixels
without affecting the pixels beyond the selection. You can also create a floating selection of pixels
that you can edit, move, cut, or copy.
The Marquee tool selects a rectangular area of pixels in an image.
The Oval Marquee tool selects an elliptical area of pixels in an image.
The Lasso tool selects a freeform area of pixels in an image.
The Polygon Lasso tool selects a straight-edged freeform area of pixels in an image.
The Magic Wand tool selects an area of similarly colored pixels in an image.

Selecting and Transforming Objects 105
Bitmap selection tool options
When you choose the Marquee, Oval Marquee, Lasso, Polygon Lasso, or Magic Wand tool, the
Property inspector displays three Edge options for the tool:
Hard creates a marquee selection with a defined edge.
Anti-alias prevents jagged edges in the marquee selection.
Feather lets you soften the edge of the pixel selection.
You must set the Feather option before creating a feathered selection using a selection tool. You
can feather existing selections using the Feather command in the Select menu. For more
information, see “Feathering a pixel selection” on page 112.
When you choose the Marquee, Oval Marquee, or Magic Wand tool, the Property inspector also
displays three style options:
Normal lets you create a marquee in which the height and width are independent of each other.
Fixed Ratio constrains the height and width to defined ratios.
Fixed Size sets the height and width to a defined dimension.
Note: The Magic Wand tool also has a Tolerance setting. For more information, see “Selecting areas of similar color”
on page 107.
Creating pixel selection marquees
The Marquee, Oval Marquee, and Lasso tools in the Bitmap section of the Tools panel allow you
to select specific pixel areas of a bitmap image by drawing a marquee around them.
To select a rectangular or elliptical area of pixels:
1Choose the Marquee or Oval Marquee tool.
2Set the Style and Edge options in the Property inspector. For more information, see “Bitmap
selection tool options” on page 105.
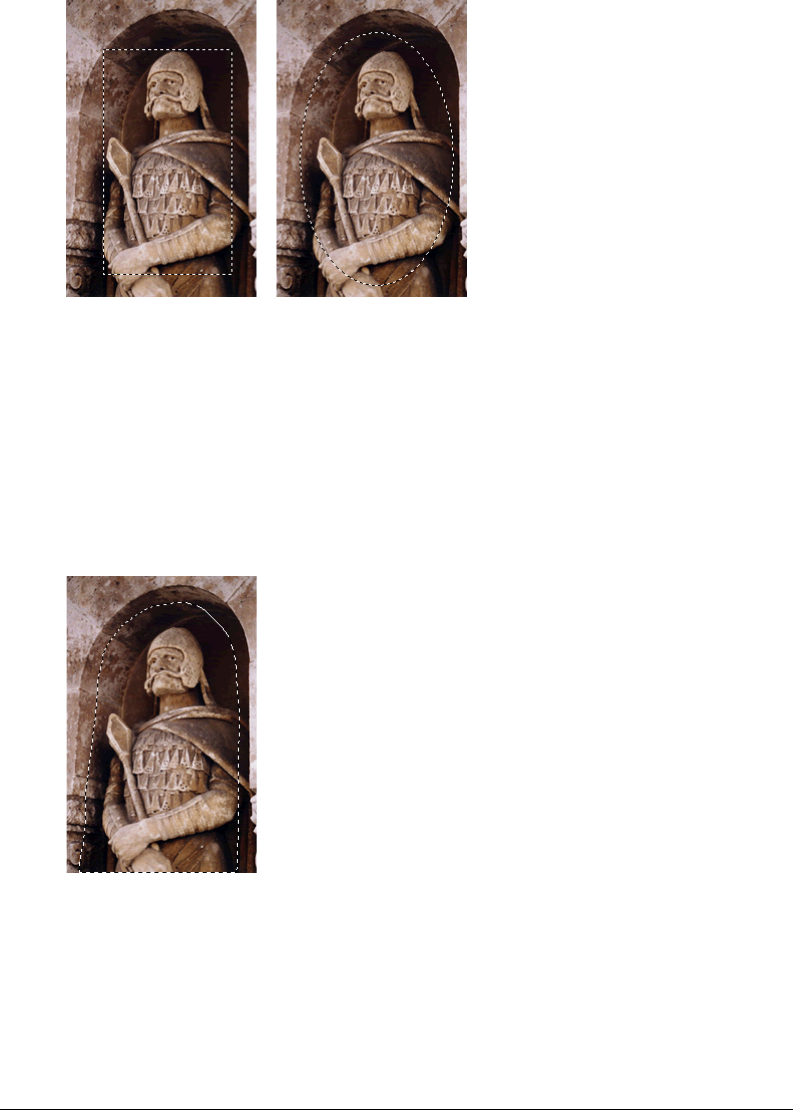
Chapter 4106
3Drag to draw a selection marquee, which defines the pixel selection.
Hold down Shift as you drag the Marquee or Oval Marquee tool to draw square or circular
marquees. To draw a marquee from a center point, deselect any other active marquees, and
then hold down Alt (Windows) or Option (Macintosh) while you draw.
To select a freeform area of pixels:
1Choose the Lasso tool.
2Choose an Edge option in the Property inspector. For more information, see “Bitmap selection
tool options” on page 105.
3Drag the pointer around the pixels you want to select.

Selecting and Transforming Objects 107
Plotting points to create a marquee selection
The Polygon Lasso tool allows you to select specific pixels in a bitmap image by clicking
repeatedly around the perimeter of the pixel area you want to select.
To select a polygonal area of pixels:
1Choose the Polygon Lasso tool.
2Choose an Edge option in the Property inspector. For more information, see “Bitmap selection
tool options” on page 105.
3Click to plot points around the perimeter of the object or area to outline the selection.
Hold down Shift to constrain Polygon Lasso marquee segments to 45-degree increments.
4Do one of the following to close the polygon:
•Click the starting point.
•Double-click in the workspace.
Selecting areas of similar color
The Magic Wand tool allows you to select areas of pixels that are similar in color. By adjusting the
Magic Wand’s Tolerance and Edge options in the Property inspector, you can control how the
Magic Wand selects pixels.
To select an area of pixels of similar color range:
1Choose the Magic Wand tool.
2Choose an Edge option in the Property inspector. For more information, see “Bitmap selection
tool options” on page 105.
3Set the tolerance level by dragging the tolerance slider in the Property inspector.
Tolerance represents the tonal range of colors that are selected when you click a pixel with the
Magic Wand. If you enter 0 and click a pixel, only adjacent pixels of exactly the same tone are
selected. If you enter 65, a wider range of tones is selected.
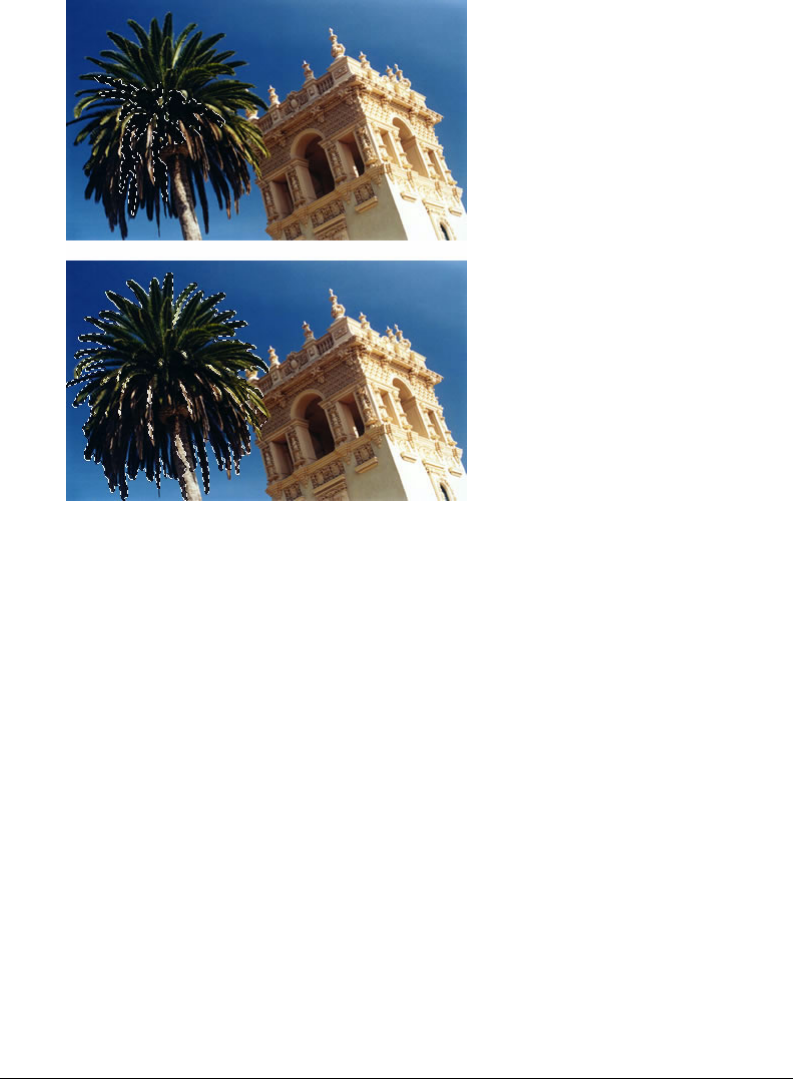
Chapter 4108
4Click the area of color you want to select.
A marquee appears around the selected range of pixels.
Pixels selected with a lower tolerance (above), then a higher tolerance (below)
To select similar colors throughout the document:
1Select an area of color with a marquee or lasso tool, or with the Magic Wand tool.
2Choose Select > Select Similar.
One or more marquees select all areas containing the selected range of pixels, according to the
current Tolerance setting in the Property inspector for the Magic Wand tool.
Note: To adjust the tolerance for the Select Similar command, choose the Magic Wand tool and then change the
Tolerance setting in the Property inspector before using the command.

Selecting and Transforming Objects 109
Removing a selection marquee
You can remove a selection marquee without affecting the document.
To remove a marquee, do one of the following:
•Draw another marquee.
•Click outside the current selection with a marquee or lasso tool.
•Press Esc.
•Choose Select > Deselect.
Adjusting selection marquees
After selecting pixels with a marquee or lasso tool, you can edit or move the marquee border
without affecting the pixels beneath it. You can manually add pixels to or delete pixels from a
marquee border using modifier keys.
In addition, you can expand or contract the marquee border by a specified amount, select an
additional area of pixels around the existing marquee, or smooth the border of the marquee.
Moving a marquee
You can move a marquee to place it over a different area of pixels.
To move the marquee, do one of the following:
•Drag the marquee with a marquee or lasso tool or the Magic Wand tool.
•Use the arrow keys to nudge the marquee in 1-pixel increments.
•Press Shift and use the arrow keys to move the marquee in 10-pixel increments.
Adjusting a marquee selection with the Spacebar
You can easily reposition a marquee as you draw it by pressing the Spacebar while drawing.
To reposition a selection with the Spacebar:
1Begin dragging to draw the selection.
2Without releasing the mouse button, hold down the Spacebar.
3Drag the marquee to another location on the canvas.
4While still holding down the mouse button, release the Spacebar.

Chapter 4110
5Continue dragging to draw the selection.
Adding to a pixel selection
After drawing a selection marquee with any bitmap selection tool, you can add to the selection
with the same tool or another bitmap selection tool.
To add to an existing pixel selection:
1Choose any bitmap selection tool.
2Hold down Shift and draw additional selection marquees.
3Repeat steps 1 and 2 with any bitmap selection tool to continue adding to the selection.
Overlapping marquees join to form a contiguous marquee.
Subtracting pixels from a selection
You can subtract pixels from a selection, or punch out parts of a selection, defining pixel areas
inside the original marquee that will no longer be part of the selection.
To subtract pixels from a selection:
Hold down Alt (Windows) or Option (Macintosh) and use a bitmap selection tool to select the
pixel area to be punched out.
Creating a marquee from intersecting marquees
You can select pixels within an existing marquee by drawing a marquee that overlaps the original.
To select a pixel area defined by the area of intersection of two marquees:
1Hold down Alt+Shift (Windows) or Option+Shift (Macintosh) while creating a new marquee
selection that overlaps the original marquee.
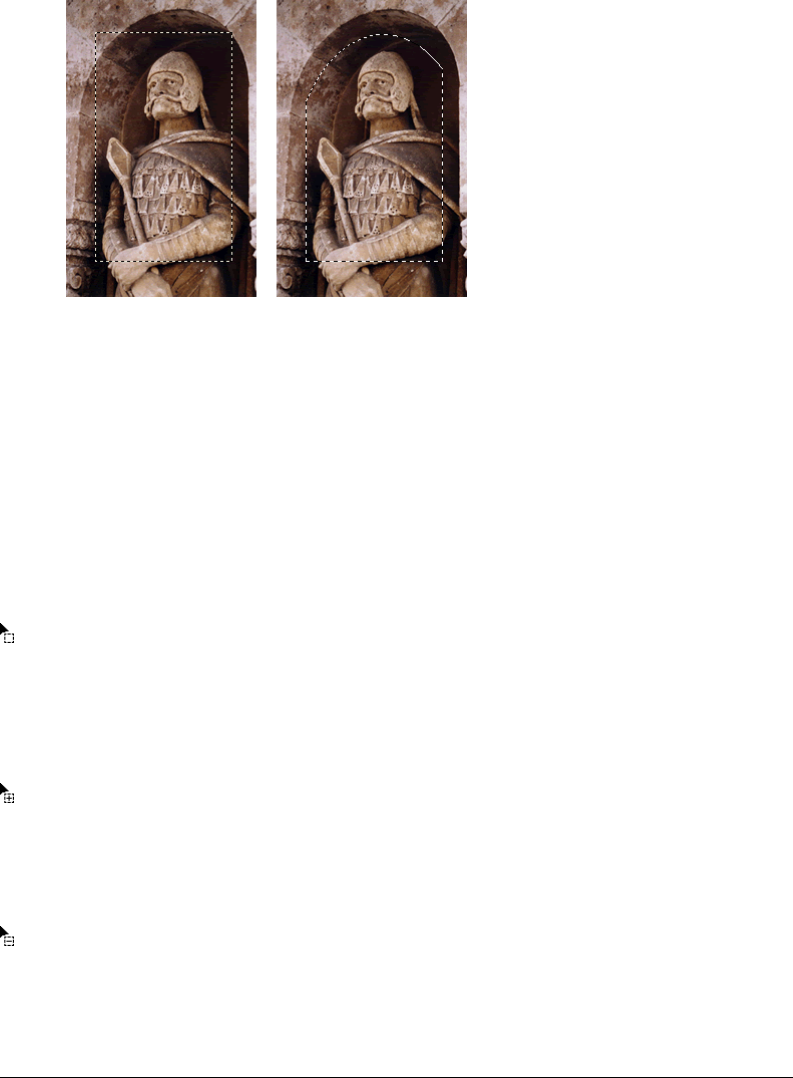
Selecting and Transforming Objects 111
2Release the mouse button.
Only the pixels within the intersection area of the two marquees are selected.
Rectangular marquee; rectangular marquee after a circular marquee intersects it
Using thumbnails and modifier keys to modify pixel selections
With a bitmap selected, you can create a pixel selection on that bitmap using the opacity of any
object or mask in the Layers panel. For more information about the Layers panel, see “Working
with layers” on page 223.
To create or replace a pixel selection on a selected bitmap using the opacity of an object:
1In the Layers panel, position the pointer over the thumbnail of the object you want to use to
create the pixel selection.
2Hold down Control (Windows) or Command (Macintosh).
The pointer changes to indicate you are about to select the alpha channel, or the opaque area,
of the object.
3Click the thumbnail.
A new pixel selection is created on the selected bitmap.
To add to the current pixel selection:
Control-Shift-click (Windows) or Command-Shift-click (Macintosh) the thumbnail of an object
in the Layers panel to add the shape of its opaque area to the current pixel selection.
Tip: When positioned over the thumbnail with the specified modifier keys held down, the pointer indicates you are
about to add to the pixel selection.
To subtract from the current pixel selection:
Control-Alt-click (Windows) or Command-Option-click (Macintosh) the thumbnail of an object
in the Layers panel to subtract the shape of its opaque area from the current pixel selection.
Tip: When positioned over the thumbnail with the specified modifier keys held down, the pointer indicates you are
about to subtract from the pixel selection.

Chapter 4112
To create a pixel selection on a selected bitmap from the intersection of overlapping objects:
1Control-click (Windows) or Command-click (Macintosh) an object’s thumbnail to select its
alpha channel, or opaque area.
2Control-Shift-Alt-click (Windows) or Command-Shift-Option-click (Macintosh) another object.
A pixel selection is created on the selected bitmap from the intersection of the opaque areas of
the two overlapping objects.
Tip: When positioned over the thumbnail with the specified modifier keys held down, the pointer indicates you
are about to create a pixel selection from the intersection of the opaque areas of two overlapping objects.
Creating an inverse pixel selection
Starting with a current pixel selection, you can create another pixel selection that selects all the
pixels that are not currently selected. You can use this method to select and then erase all pixels
surrounding the original selection, for example.
To create an inverse pixel selection:
1Make a pixel selection using any bitmap selection tool.
2Choose Select > Inverse Selection.
All pixels that were not within the original selection are now selected.
Feathering a pixel selection
Feathering creates a see-through effect for the selected pixels. When using the Feather command,
you can try out various feather amounts and view the results before deselecting the pixels. You can
also feather a selection by setting a feather amount in the Property inspector before using a
bitmap selection tool. For more information, see “Bitmap selection tool options” on page 105.
To feather a pixel selection:
1Choose Select > Feather.
2Enter a Feather amount in the Feather dialog box.
The selection marquee changes size to reflect the feather amount.
3If necessary, change the number in the Feather dialog box to adjust the feather amount.
4Click OK.
Tip: To view the appearance of the feathered selection without the surrounding pixels, choose Select >
Select Inverse, and then press Delete. You can then use the History panel or Edit > Undo to try again.
Expanding or contracting a marquee
Once you have drawn a marquee to select pixels, you can expand or contract its border.
To expand the border of a marquee:
1After drawing the marquee, choose Select > Expand Marquee.
2Enter the number of pixels by which you want to expand the border of the marquee, and click OK.
To contract the border of a marquee:
1After drawing the marquee, choose Select > Contract Marquee.
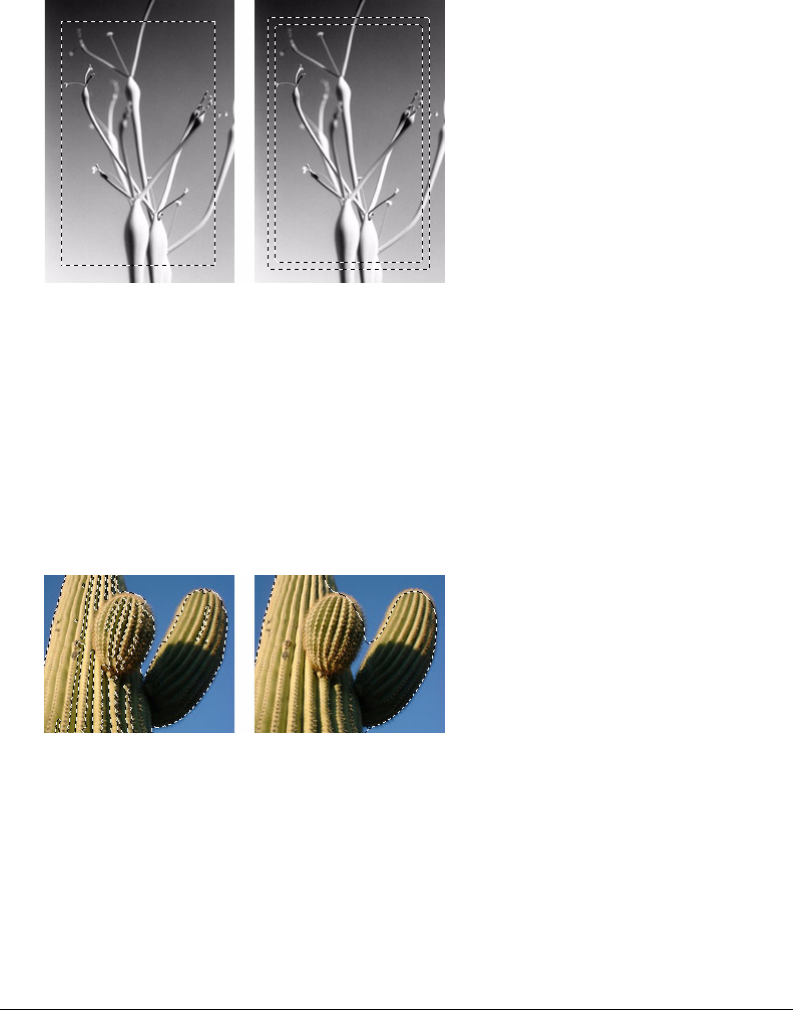
Selecting and Transforming Objects 113
2Enter the number of pixels by which you want to contract the border of the marquee, and click OK.
Selecting an area around an existing marquee
You can create an additional marquee to frame an existing marquee at a specified width. This lets
you create special graphics effects, such as feathering the edges of a pixel selection.
Original marquee; after framing with an additional marquee
To select an area around an existing marquee:
1After drawing a marquee, choose Select > Border Marquee.
2Enter the width of the marquee that you want to place around the existing marquee, and click OK.
Smoothing the border of a marquee
You can eliminate excess pixels along the edges of a pixel selection. This is useful if excess pixels
appear along the border of a pixel selection or marquee after you use the Magic Wand tool.
A pixel selection before and after smoothing
To smooth the border of a marquee:
1Choose Select > Smooth Marquee.
2Enter a sample radius to specify the desired degree of smoothing, and click OK.

Chapter 4114
Transferring a marquee selection
You can transfer a marquee selection from one bitmap to another bitmap object on the same layer
or one on a different layer. You can also transfer the marquee selection to a mask.
To transfer a marquee selection to another bitmap object:
1Make a selection by drawing the marquee.
2In the Layers panel, select a different bitmap object on the same layer or an object on a
different layer.
The marquee is transferred to that object.
Note: Fireworks treats masks and masked objects as separate objects. For more information on masks,
see “Masking images” on page 229.
Saving and restoring marquee selections
You can save the size, shape, and location of a selection to reapply later.
To save a marquee selection:
Choose Select > Save Bitmap Selection.
To restore a marquee selection:
Choose Select > Restore Bitmap Selection.
Note: You can save only one selection at a time.
Creating and moving a floating pixel selection
When you drag a marquee to a new location, the marquee itself is moved. If you want to move,
edit, cut, or copy a selection of pixels, you must first make the pixels a floating selection.
To create a floating pixel selection:
1Make a pixel selection with a bitmap selection tool.
2Do one of the following:
•Hold down Control (Windows) or Command (Macintosh) and drag the selection using any
tool from the Bitmap section of the Tools panel.
•Choose the Pointer tool and drag the selection.
To move a floating selection, do one of the following:
•Drag the floating selection with the Pointer tool or any bitmap selection tool.
•If a nonselection bitmap tool is active, hold down Control (Windows) or Command
(Macintosh) and drag the floating selection.
•Use the arrow keys or Shift+arrow keys.
When you deselect the floating pixel selection or choose any vector or web tool, the floating
selection becomes part of the current bitmap object.

Selecting and Transforming Objects 115
Inserting a new bitmap by cutting or copying
You can insert a new bitmap based on a pixel selection into the current layer of a document by
cutting or copying the selected pixels.
To insert a new bitmap by cutting and pasting a pixel selection:
1Select an area of pixels using a pixel selection tool.
2Choose Edit > Insert > Bitmap via Cut.
A new bitmap object based on the pixel selection is created in the current layer, and the
selected pixels are removed from the original bitmap object. In the Layers panel, a thumbnail
of the new bitmap appears in the current layer, above the object from which it was cut.
To insert a new bitmap by copying and pasting a pixel selection:
1Select an area of pixels using a pixel selection tool.
2Choose Edit > Insert > Bitmap via Copy.
A new bitmap object based on the pixel selection is created in the current layer, and the
selected pixels remain in the original bitmap object. In the Layers panel, a thumbnail of the
new bitmap appears in the current layer, above the object from which it was copied.
Editing selected objects
Fireworks gives you a number of ways to edit selected objects: you can move objects on the canvas
or from application to application, you can replicate objects with the Clone and Duplicate
commands, or you can remove objects from the workspace altogether.
To move a selection, do one of the following:
•Drag it with the Pointer, Subselection, or Select Behind tool.
•Press any arrow key to move the selection in 1-pixel increments.
•Hold down Shift while pressing any arrow key to move the selection in 10-pixel increments.
•In the Property inspector, enter the X and Y coordinates for the location of the top left corner
of the selection.
•Enter the object’s X and Y coordinates in the Info panel. If the X and Y boxes aren’t visible,
drag the bottom edge of the panel.
To move or copy selected objects by pasting:
1Select an object or multiple objects.
2Choose Edit > Cut or Edit > Copy.
3Choose Edit > Paste.
To duplicate one or more selected objects:
Choose Edit > Duplicate.
As you repeat the command, duplicates of the selected object appear in a cascading arrangement
from the original, 10 pixels lower and 10 pixels to the right of the previous duplicate. The most
recently duplicated object becomes the selected object.
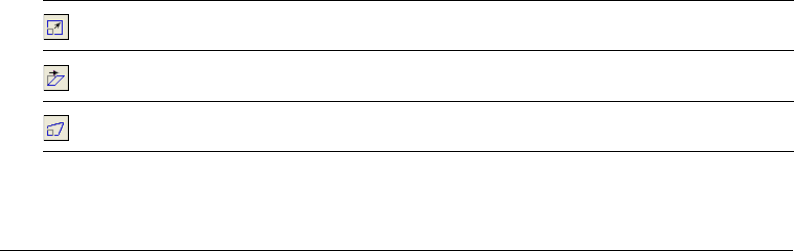
Chapter 4116
Note: You cannot use the Duplicate or Clone commands with bitmap selections. Use the Subselection tool or
Rubber Stamp tool to duplicate parts of a bitmap image. For more information about using the Subselection tool,
see the following procedures. For more information about using the Rubber Stamp tool, see “Retouching bitmaps”
on page 130.
To duplicate a selected object by dragging:
Alt-drag (Windows) or Option-drag (Macintosh) the object using the Pointer tool.
To duplicate a pixel selection, do one of the following:
•Drag the pixel selection using the Subselection tool.
•Alt-drag (Windows) or Option-drag (Macintosh) the object using the Pointer tool.
To clone a selection:
Choose Edit > Clone.
The clone of the selection is stacked precisely in front of the original and becomes the
selected object.
Tip: To move a selected clone away from the original with pixel-by-pixel precision, use the arrow keys or Shift+arrow
keys. This is a convenient way to maintain a specific distance between clones or maintain the vertical or horizontal
alignment of the clones.
To delete selected objects, do one of the following:
•Press Delete or Backspace.
•Choose Edit > Clear.
•Choose Edit > Cut.
•Right-click (Windows) or Control-click (Macintosh) the object and choose Edit > Cut from
the context menu.
To cancel or deselect a selection, do one of the following:
•Choose Select > Deselect.
•Click anywhere in the image outside of the selected area if you are using the Marquee, Oval
Marquee, or Lasso tool.
•Press Esc.
Transforming and distorting selected objects and selections
You can transform a selected object or group, or a pixel selection, using the Scale, Skew, and
Distort tools and menu commands:
Scale enlarges or reduces an object.
Skew slants an object along a specified axis.
Distort moves the sides or corners of an object in the direction you drag a selection handle while the tool
is active. This is helpful in creating a 3-D look.

Selecting and Transforming Objects 117
Choosing any transformation tool or Transform menu command displays the transform handles
around selected objects.
Original object
Object rotated, scaled, skewed, distorted, and flipped vertically and horizontally
To transform selected objects using the transform handles:
1Choose a transformation tool.
As you move the pointer on or near the selection handles, the pointer changes to indicate the
current transformation.
2Do one of the following to transform the objects:
•Place the pointer near a corner point and then drag to rotate.
•Drag a transform handle to transform according to the active transformation tool.
3Double-click inside the window or press Enter to apply your changes.
Resizing (scaling) objects
Scaling an object enlarges or reduces it horizontally, vertically, or in both directions.
To scale a selected object:
1Display the transform handles:
•Choose the Scale tool.
•Choose Modify > Transform > Scale.
Center point
Transform handles
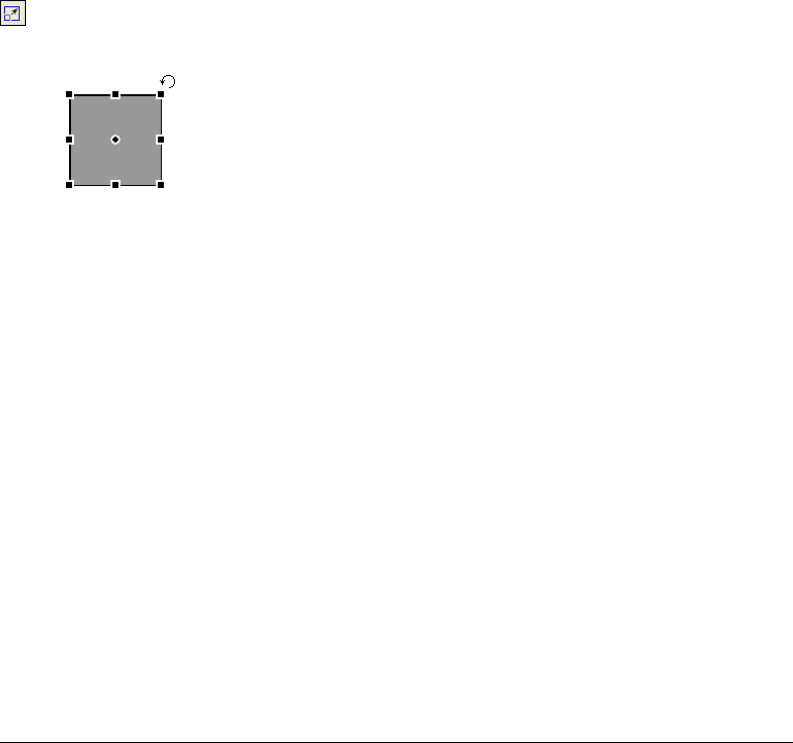
Chapter 4118
2Drag the transform handles:
•To scale the object both horizontally and vertically, drag a corner handle. Proportions are
constrained if you press the Shift key as you scale.
•To scale the object horizontally or vertically, drag a side handle.
Note: You can also resize selected objects by entering dimensions in the Property inspector. For more
information, see “Transforming objects numerically” on page 119.
Rotating objects
When rotated, an object pivots on its center point. You rotate an object by dragging its transform
handles or by choosing a preset angle.
Note: You can also rotate the document canvas. For more information, see “Rotating the canvas” on page 95.
To rotate a selected object 90 or 180 degrees:
Choose Modify > Transform and choose a Rotate command from the submenu.
To rotate a selected object by dragging:
1Choose any transformation tool.
2Move the pointer outside the object until the rotation pointer appears.
3Drag to rotate the object.
Tip: To constrain rotation to 15-degree increments relative to the horizon, Shift-drag the pointer.
4Double-click inside the window or press Enter to apply your changes.
To relocate the axis of rotation:
Drag the center point away from the center.
To reset the axis of rotation to the center of the selection, do one of the following:
•Double-click the center point
•Press Esc to deselect the object, then select it again.

Selecting and Transforming Objects 119
Flipping objects
You can flip an object across its vertical or horizontal axis without moving its relative position on
the canvas.
To flip a selected object:
Choose Modify > Transform > Flip Horizontal or Flip Vertical.
Skewing objects
Skewing an object transforms it by slanting it along the horizontal or vertical axis, or both axes.
To skew a selected object:
1Do one of the following to display the transform handles:
•Choose the Skew tool.
•Choose Modify > Transform > Skew.
2Drag a handle to skew the object.
3Double-click inside the window or press Enter to remove the transform handles.
To achieve the illusion of perspective:
Drag a corner point.
Distorting objects
You change the size and proportions of an object by dragging a selection handle with the Distort tool.
To distort a selected object:
1Do one of the following to display the transform handles:
•Choose the Distort tool.
•Choose Modify > Transform > Distort.
2Drag a handle to distort the object.
3Double-click inside the window or press Enter to apply your changes.
Transforming objects numerically
Instead of dragging to scale, resize, or rotate an object, you can transform it by entering specific values.
To resize selected objects using the Property inspector or Info panel:
Enter new width (W) or height (H) measurements.
Note: If the W and H boxes aren’t visible in the Property inspector, click the expander arrow to see all properties.
To scale or rotate selected objects using Numeric Transform:
1Choose Modify > Transform > Numeric Transform.
The Numeric Transform dialog box opens.
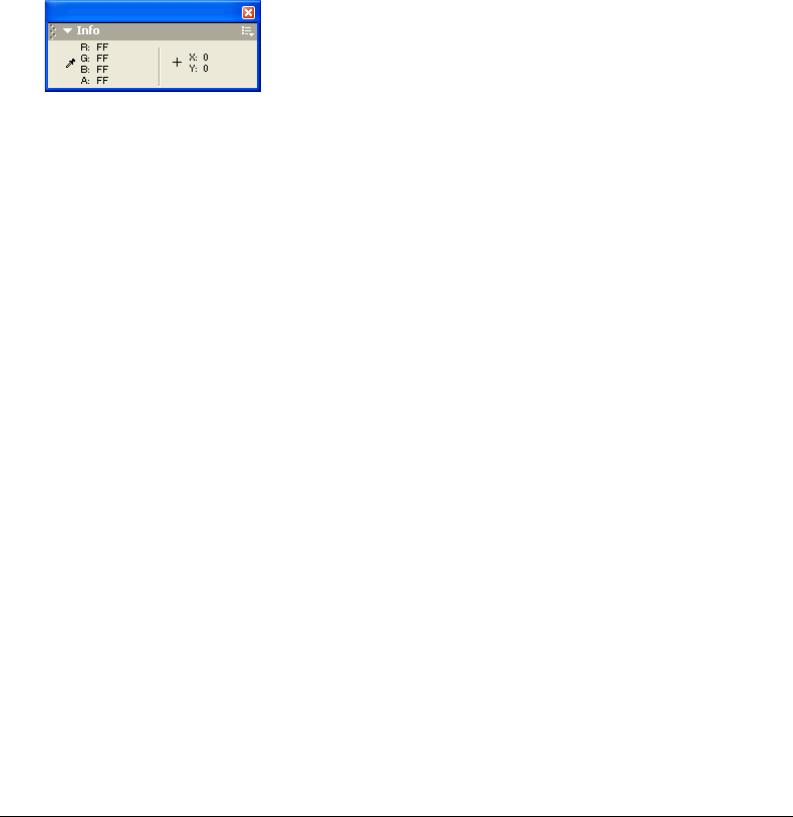
Chapter 4120
2From the pop-up menu, choose the type of transformation to perform on the current selection:
Scale, Resize, or Rotate.
3Choose Constrain Proportions to maintain horizontal and vertical proportions when scaling or
resizing a selection.
4Choose Scale Attributes to transform the fill, stroke, and effects of the object along with the
object itself.
5Deselect Scale Attributes to transform the path only.
6Type numeric values to transform the selection, then click OK.
Viewing transformation information in the Info panel
The Info panel lets you view numerical transformation information for the currently selected
object. The information updates as you edit the object.
•For scaling and free transformations, the Info panel shows the width (W) and height (H) of the
original object before transformation and the percentage of increase or decrease in width and
height during the transformation.
•For skewing and distorting, the Info panel shows the skew angle in one-degree increments and
the X and Y pointer coordinates during the transformation.
To view transformation information as you transform a selection:
Choose Window > Info.
Organizing objects
When working with multiple objects within a single document, you can use several techniques to
organize the document:
•You can group individual objects to treat them as one or protect each object’s relationship to
the others in the group.
•You can arrange objects behind or in front of other objects. The way objects are arranged is
called the stacking order.
•You can align selected objects to an area of the canvas or to a vertical or horizontal axis.
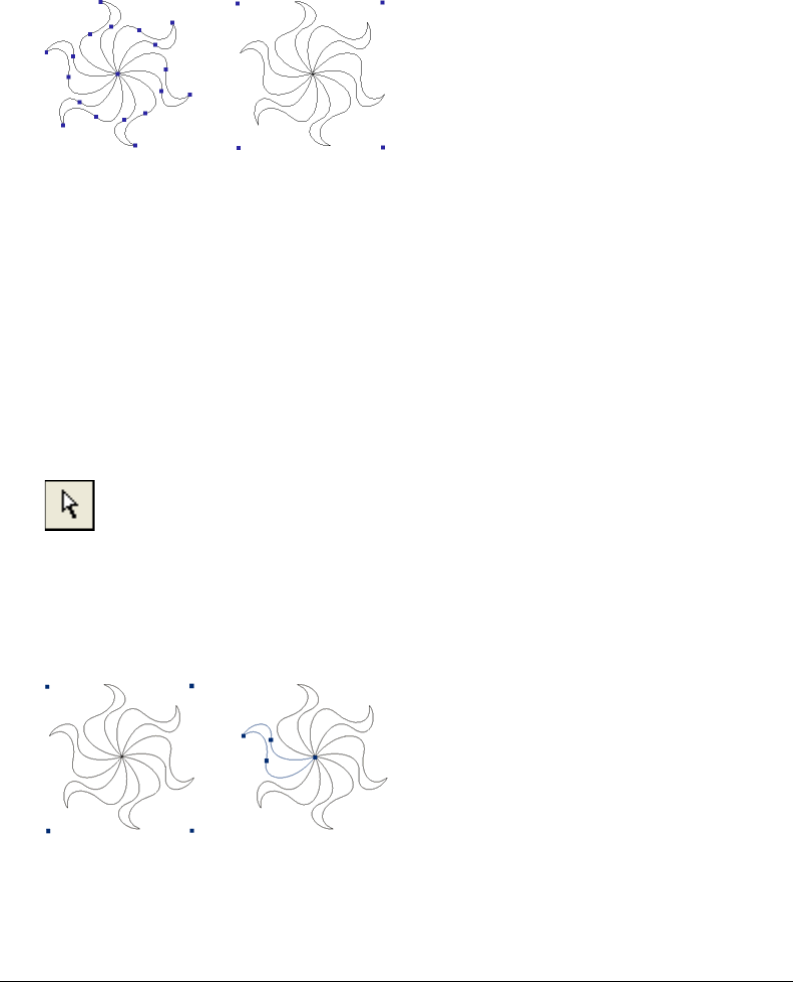
Selecting and Transforming Objects 121
Grouping objects
You can group individual selected objects and then manipulate them as if they were a single
object. For example, after drawing the petals of a flower as individual objects, you can group them
to select and move the entire flower as a single object.
You can edit groups without ungrouping them. You can select an individual object in a group for
editing without ungrouping the objects. You can also ungroup the objects anytime.
Grouping selected objects as a single object
To group two or more selected objects:
Choose Modify > Group.
To ungroup selected objects:
Choose Modify > Ungroup.
Selecting objects within groups
To work with individual objects within a group, you can either ungroup the objects or use the
Subselection tool to select individual objects while leaving the group intact.
Subselection tool
Modifying the attributes of a subselected object changes only the subselected object, not the
entire group. Moving a subselected object to another layer removes the object from the group.
Subselecting an object within a group

Chapter 4122
To select an object that is part of a group:
Choose the Subselection tool and click the object or drag a selection area around it. To add
objects to or remove them from the selection, hold down Shift as you click or drag.
To select the group that contains a subselected object, do one of the following:
•Right-click (Windows) or Control-click (Macintosh) anywhere on the group and choose Select
> Superselect from the context menu.
•Choose Select > Superselect.
To select all objects within a selected group, do one of the following:
•Right-click (Windows) or Control-click (Macintosh) anywhere on the group and choose Select
> Subselect from the context menu.
•Choose Select > Subselect.
Stacking objects
Within a layer, Fireworks stacks objects based on the order in which they were created, placing the
most recently created object on the top of the stack. The stacking order of objects determines how
they appear when they overlap.
Layers also affect the stacking order. For example, if a document has two layers named Layer 1
and Layer 2, and Layer 1 is listed below Layer 2 on the Layers panel, then everything on Layer 2
appears in front of everything on Layer 1. You can change the order of layers by dragging the layer
in the Layers panel to a new position. For more information, see “Organizing layers” on page 226.
To change the stacking order of a selected object or group within a layer:
•Choose Modify > Arrange > Bring to Front or Send to Back to move the object or group to the
top or bottom of the stacking order.
•Choose Modify > Arrange > Bring Forward or Send Backward to move the object or group up
or down one position in the stacking order.
If more than one object or group is selected, the objects move in front of or behind all unselected
objects while maintaining their order relative to one another.
Aligning objects
The Align commands in the Modify menu give you a wide range of arrangement options,
allowing you to do any of the following:
Align objects along a horizontal or vertical axis.
Align selected objects vertically along their right edge, center, or left edge, or horizontally along
their top edge, center, or bottom edge.
Note: Edges are determined by the bounding boxes enclosing each selected object.
Distribute selected objects so that their centers or edges are evenly spaced.
You can apply one or more Align commands to selected objects.

Selecting and Transforming Objects 123
To align selected objects, do one of the following:
•Choose Modify > Align > Left to align the objects to the leftmost selected object.
•Choose Modify > Align > Center Vertical to align the center points of the objects along a
vertical axis.
•Choose Modify > Align > Right to align the objects to the rightmost selected object.
•Choose Modify > Align > Top to align the objects to the topmost selected object.
•Choose Modify > Align > Center Horizontal to align the center points of the objects along a
horizontal axis.
•Choose Modify > Align > Bottom to align the objects to the bottommost selected object.
To evenly distribute the widths or heights of three or more selected objects:
Choose Modify > Align > Distribute Widths or Modify > Align > Distribute Heights.
About arranging objects among layers
The Layers panel offers another dimension of organizational control. You can move selected
objects from one layer to another by dragging the object thumbnail or the blue selection indicator
in the Layers panel to another layer. For more information, see “Organizing layers” on page 226.

Chapter 4124

125
CHAPTER 5
Working with Bitmaps
Bitmaps are graphics composed of small colored squares called pixels, which combine like the tiles
of a mosaic to create an image. Examples of bitmap graphics include photographs, scanned images,
and graphics created from paint programs. They are sometimes referred to as raster images.
Macromedia Fireworks MX combines the functionality of photo-editing, vector-drawing, and
painting applications. You can create bitmap images by drawing and painting with bitmap tools,
by converting vector objects to bitmap images, or by opening or importing images.
Fireworks has a powerful set of Live Effects for tone and color adjustment, as well as a number of
ways to retouch your bitmap images, including cropping, feathering, and duplicating or cloning
images. In addition, Fireworks now has a new set of image-retouching tools—Blur, Sharpen,
Dodge, Burn, and Smudge.
Methods for selecting and transforming images and pixel areas are described in Chapter 4,
“Selecting and Transforming Objects,” on page 101.
Working with bitmaps
The Bitmap section of the Tools panel contains bitmap selection and editing tools. To edit the
pixels of a bitmap in your document, you can choose a tool from the Bitmap section. Unlike in
previous versions of Fireworks, you do not need to deliberately switch between bitmap mode and
vector mode, but you can still work with bitmaps, vector objects, and text. Switching to the
appropriate mode is as simple as choosing a vector or bitmap tool from the Tools panel.
Note: Previous versions of Fireworks display a striped border around the canvas to indicate that Fireworks is in
bitmap mode. If you prefer to see the familiar striped border when working with bitmaps, you can choose Bitmap
Options > Display Striped Border from the Edit category of the Preferences dialog box.
Creating bitmap objects
You can create bitmap graphics by using the Fireworks bitmap drawing and painting tools, by
cutting or copying and pasting pixel selections, or by converting a vector image into a bitmap
object. Another way to create a bitmap object is to insert an empty bitmap image in your
document and then draw, paint, or fill it.
When you create a new bitmap object, it is added to the current layer. In the Layers panel with
layers expanded, you can see a thumbnail and name for each bitmap object under the layer on
which it resides. While some bitmap applications consider each bitmap object a layer, Fireworks
organizes bitmap objects, vector objects, and text as separate objects that reside on layers. For
more information, see “Working with layers” on page 223.

Chapter 5126
To create a new bitmap object:
1Choose the Brush or Pencil tool from the Bitmap section of the Tools panel.
2Paint or draw with the Brush or Pencil tool to create bitmap objects on the canvas.
A new bitmap object is added to the current layer in the Layers panel. For more information on
using the Pencil or Brush tools, see “Drawing, painting, and editing bitmap objects” on page
127.
You can create a new empty bitmap, and then draw or paint pixels in the empty bitmap.
To create an empty bitmap object, do one of the following:
•Click the New Bitmap Image button in the Layers panel.
•Choose Edit > Insert > Empty Bitmap.
•Draw a selection marquee, starting in a blank area of the canvas, and fill it. For more
information, see “Creating pixel selection marquees” on page 105.
An empty bitmap is added to the current layer in the Layers panel. If the empty bitmap is
deselected before any pixels have been drawn, imported, or otherwise placed on it, the empty
bitmap object automatically disappears from the Layers panel and the document.
To cut or copy pixels and paste them as a new bitmap object:
1Make a pixel selection using the Marquee tool, Lasso tool, or Magic Wand tool.
For more information, see “Selecting pixels” on page 104.
2Do one of the following:
•Choose Edit > Cut, then Edit > Paste.
•Choose Edit > Copy, then Edit > Paste.
•Choose Edit > Insert > Bitmap via Copy to copy the current selection into a new bitmap.
•Choose Edit > Insert > Bitmap via Cut to cut the current selection for placement into a new bitmap.
The selection appears in the Layers panel as an object on the current layer.
Note: You can also Right-click (Windows) or Control-click (Macintosh) a pixel marquee selection and choose a
cut or copy option from the Context menu. For more information about the Bitmap via Cut and Bitmap via Copy
options, see “Inserting a new bitmap by cutting or copying” on page 115.
To convert selected vector objects to a bitmap image, do one of the following:
•Choose Modify > Flatten Selection.
•Choose Flatten Selection from the Layers panel Options menu.
A vector-to-bitmap conversion is irreversible, except when Edit > Undo or undoing actions in
the History panel is still an option. Bitmap images cannot be converted to vector objects.

Working with Bitmaps 127
Drawing, painting, and editing bitmap objects
The Bitmap section of the Tools panel contains tools for selecting, drawing, painting, and editing
pixels in a bitmap image.
Drawing bitmap objects
You can use the Pencil tool to draw one-pixel freehand or constrained, straight lines, much the
same way you would use a real pencil to draw a hard-edged line. You can also zoom in on a
bitmap and click the Pencil tool to edit individual pixels.
To draw an object with the Pencil tool:
1Choose the Pencil tool.
2Set tool options in the Property inspector:
Anti-aliased smooths the edges of the lines you draw.
Auto Erase uses the fill color when the Pencil tool is clicked over the stroke color.
Preserve Transparency restricts the Pencil tool to drawing only in existing pixels, not in
transparent areas of a graphic.
3Drag to draw. Shift-drag to constrain the path to a horizontal, vertical, or diagonal line.
Painting bitmap objects
You can use the Brush tool to paint a brush stroke using the color in the Stroke Color box, or you
can use the Paint Bucket tool to change the color of selected pixels to the color in the Fill Color
box. With the Gradient tool, you can fill bitmap or vector objects with a combination of colors in
adjustable patterns.
To paint an object with the Brush tool:
1Choose the Brush tool.
2Set the stroke attributes in the Property inspector.
3Drag to paint.
For more information about setting Brush tool options, see “Working with strokes” on page 201.
To change the color of pixels to the color in the Fill Color box:
1Choose the Paint Bucket tool.
2Choose a color in the Fill Color box.
3Set the tolerance value in the Property inspector.
Note: The tolerance determines how similar in color pixels must be to be filled. A low tolerance value fills pixels
with color values similar to the pixel you click. A high tolerance fills pixels with a broader range of color values.
4Click the image.
All pixels within the tolerance range change to the fill color.
Chapter 5128
To apply a gradient fill to a pixel selection:
1Make the selection.
2Choose the Gradient tool.
3Set the fill attributes in the Property inspector.
4Click the pixel selection to apply the fill.
The Paint Bucket and Gradient tools can also fill selected vector objects. For more information
about creating, applying, and editing gradient fills, see “Working with fills” on page 206.
Sampling a color to use as a stroke or fill color
With the Eyedropper tool, you can sample color from an image to designate a new stroke or fill
color. You can sample the color of a single pixel, an average of color values within a 3-by-3-pixel
area, or an average of color values within a 5-by-5-pixel area.
To sample a stroke or fill color:
1If the correct attribute is not already active, do one of the following:
•Click the stroke icon next to the Stroke Color box in the Tools panel to make it the active attribute.
•Click the fill icon next to the Fill Color box in the Tools panel to make it the active attribute.
Note: Do not click the color box itself. If you do, the eyedropper pointer that appears is not the Eyedropper tool. For
information on the color box eyedropper pointer, see “Sampling colors from a color pop-up window” on page 200.
2Open a Fireworks document or any file that Fireworks can open. For more information, see
“Opening graphics created in other applications” on page 74.
3Choose the Eyedropper tool from the Bitmap section of the Tools panel. Set the Color
Averaging Sample setting in the Property inspector:
1-pixel creates a stroke or fill color from a single pixel.
3x3 pixels creates a stroke or fill color from the average of color values within a 3-by-3-pixel area.
5x5 pixels creates a stroke or fill color from the average of color values within a 5-by-5-pixel area.
4Click the Eyedropper tool anywhere in the document.
The sampled color appears in all Stroke Color or Fill Color boxes throughout Fireworks.
Erasing bitmap objects
You can use the Eraser tool to remove pixels. By default, the Eraser tool pointer represents the size
of the current eraser, but you can change the size and appearance of the pointer in the Preferences
dialog box. For more information, see “Editing preferences” on page 418.
Eraser tool
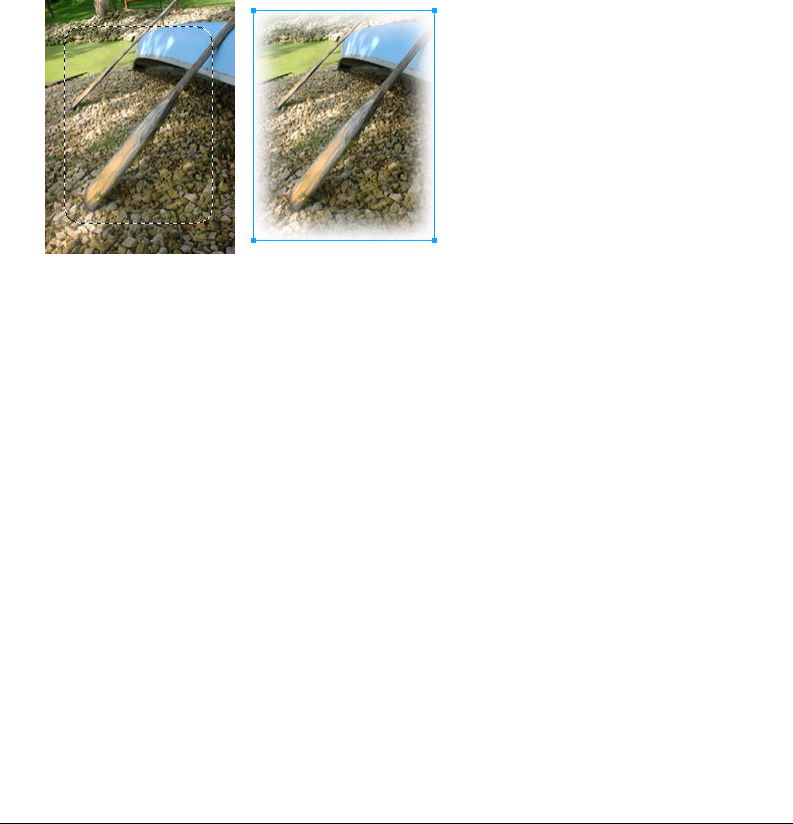
Working with Bitmaps 129
To erase pixels in a selected bitmap object or pixel selection:
1Choose the Eraser tool.
2In the Property inspector, choose the round or square eraser shape.
3Drag the Edge slider to set the softness of the eraser’s edge.
4Drag the Size slider to set the size of the eraser.
5Drag the Eraser Opacity slider to set the degree of opacity.
6Drag the Eraser tool over the pixels you want to erase.
Feathering pixel selections
Feathering blurs the edges of a pixel selection and helps the selected area blend with the surrounding
pixels. Feathering is useful when copying a selection and pasting it onto another background.
To feather the edges of a pixel selection as you make a pixel selection:
1Choose a bitmap selection tool from the Tools panel.
2Choose Feather from the Edge pop-up menu in the Property inspector.
3Drag the slider to set the number of pixels you want to blur along the edge of the selection.
4Make a selection.
To feather the edges of a pixel selection from the menu bar:
1Choose Select > Feather.
2Type a value in the Feather Selection dialog box to set the feather radius, and click OK.
The radius value determines the number of pixels that are feathered on each side of the
selection border.
Chapter 5130
Retouching bitmaps
Fireworks provides a wide range of tools to help you retouch your images. You can alter an image’s
size, reduce or sharpen its focus, or copy and “stamp” a part of it to another area.
Cloning pixels
The Rubber Stamp tool clones an area of a bitmap image so you can stamp it elsewhere in the image.
Cloning pixels is useful when you want to fix a scratched photograph or remove dust from an image;
you can copy a pixel area of a photo and replace the scratch or dust spot with the cloned area.
To clone portions of a bitmap image:
1Choose the Rubber Stamp tool.
2Click an area to designate it as the source, or the area you want to clone.
The sampling pointer becomes a cross-hair pointer.
Note: To designate a different area of pixels to clone, you can Alt-click (Windows) or Option-click (Macintosh)
another area of pixels to designate it as the source.
3Move to a different part of the image and drag the pointer.
You will see two pointers. The first one, the source of the cloning, is the shape of a cross hair.
See “Editing preferences” on page 418 for more information.
Depending upon the brush preferences you’ve selected, the second pointer is a rubber stamp, a
cross hair, or a blue circle. As you drag the second pointer, pixels beneath the first pointer are
copied and applied to the area beneath the second.
The Rubber Stamp tool enables you to copy or clone one area of an image to another.
The Blur tool decreases the focus of selected areas in an image.
The Smudge tool picks up color and pushes it in the direction that you drag in an image.
The Sharpen tool sharpens areas in an image.
The Dodge tool lightens parts of an image.
The Burn tool darkens parts of an image.

Working with Bitmaps 131
To set Rubber Stamp tool options:
1Choose the Rubber Stamp tool.
2Choose from among the following options in the Property inspector:
Size determines the size of the stamp.
Edge determines the softness of the stroke (100% is hard; 0% is soft).
Source Aligned affects the sampling operation. When Source Aligned is selected, the sampling
pointer moves vertically and horizontally in alignment with the second. When Source Aligned is
deselected, the sample area is fixed, regardless of where you move and click the second pointer.
Use Entire Document samples from all objects on all layers. When this option is deselected, the
Rubber Stamp tool samples from the active object only.
Opacity determines how much of the background can be seen through the stroke.
Blend Mode affects how the cloned image affects the background.
To duplicate a pixel selection, do one of the following:
•Drag the pixel selection with the Subselection tool.
•Alt-drag (Windows) or Option-drag (Macintosh) the pixel selection using the Pointer tool.
Blurring, sharpening, and smudging pixels
The Blur and Sharpen tools affect the focus of pixels. The Blur tool lets you emphasize or
deemphasize parts of an image by selectively blurring the focus of elements, in much the same
way that a photographer controls depth of field. The Sharpen tool can be useful for repairing
scanning problems or out-of-focus photographs. The Smudge tool lets you gently blend colors, as
when creating a reflection of an image.
To blur or sharpen an image:
1Choose the Blur or Sharpen tool.
2Set brush options in the Property inspector:
Size sets the size of the brush tip.
Edge specifies the softness of the brush tip.
Shape sets a round or square brush tip shape.
Intensity sets the amount of blurring or sharpening.
3Drag the tool over the pixels to be sharpened or blurred.
Tip: Holding down Alt (Windows) or Option (Macintosh) will toggle the tool behavior.

Chapter 5132
To smudge colors in an image:
1Choose the Smudge tool.
2Set the tool options in the Property inspector:
Size specifies the size of the brush tip.
Shape sets a round or square brush tip shape.
Edge specifies the softness of the brush tip.
Pressure sets the intensity of the stroke.
Smudge Color allows you to smudge using a specified color at the beginning of each stroke. If
this option is deselected, the tool uses the color under the tool pointer.
Use Entire Document smudges using color data from all objects on all layers. If this option is
deselected, the Smudge tool uses colors from the active object only.
3Drag the tool over the pixels to be smudged.
Lightening and darkening pixels
You use the Dodge or Burn tool to lighten or darken parts of an image, respectively. This is
similar to the darkroom technique of adding light to or withholding light from a photograph.
To lighten or darken parts of an image:
1Choose the Dodge tool to lighten parts of an image or the Burn tool to darken parts of an image.
2Set the brush options in the Property inspector:
Size sets the size of the brush tip.
Shape sets a round or square brush tip shape.
Edge sets the softness of the brush tip.
3Set the exposure in the Property inspector.
The exposure ranges from 0% to 100%. For a lessened effect, specify a lower percentage value;
for a stronger effect, specify a higher value.
4Set the range in the Property inspector:
Shadows changes mainly the dark portions of the image.
Highlights changes mainly the light portions of the image.
Midtones changes mainly the middle range per channel in the image.
5Drag over the part of the image you want to lighten or darken.
Hold down Alt (Windows) or Option (Macintosh) as you drag the tool to temporarily switch
from the Dodge tool to the Burn tool or from the Burn tool to the Dodge tool.
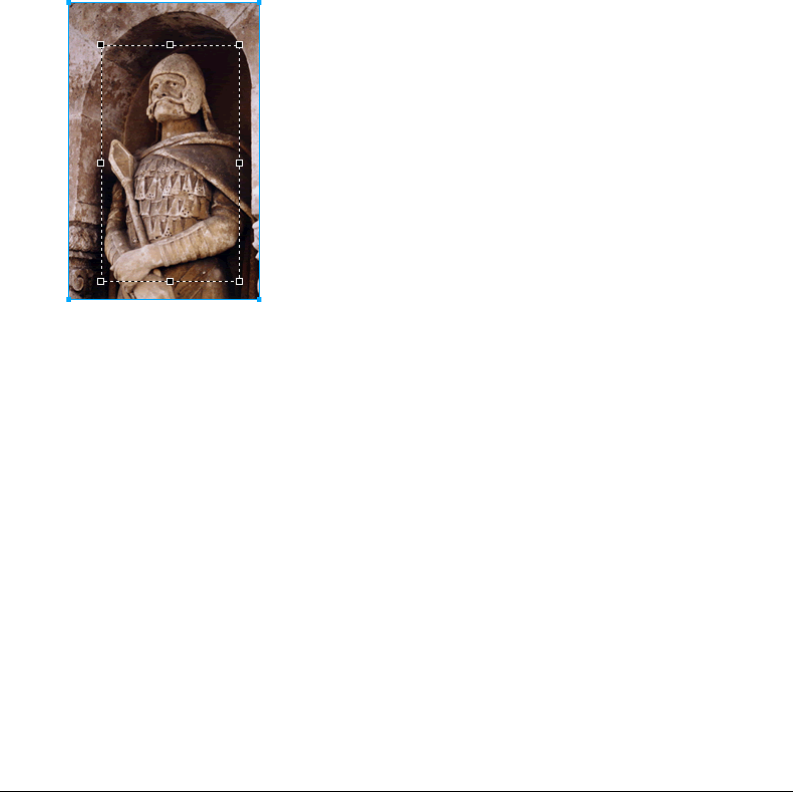
Working with Bitmaps 133
Cropping a selected bitmap
You can isolate a single bitmap object within a Fireworks document and crop only that bitmap
object, leaving other objects on the canvas intact.
To crop a bitmap image without affecting other objects in the document:
1Select a bitmap object by clicking the object on the canvas or by clicking its thumbnail in the
Layers panel, or draw a selection marquee using a bitmap selection tool.
2Choose Edit > Crop Selected Bitmap.
The crop handles appear around the entire selected bitmap or around the selection marquee, if
you drew one in step 1.
3Adjust the crop handles until the bounding box surrounds the area of the bitmap image that
you want to keep.
Note: To cancel a crop selection, press Esc.
Bounding box
4Double-click inside the bounding box or press Enter to crop the selection.
Every pixel in the selected bitmap outside the bounding box is removed, but other objects in
the document remain.
Adjusting bitmap color and tone
Fireworks has color- and tone-adjustment filters to help you improve and enhance the colors in
your bitmap images. You can adjust the contrast and brightness, the tonal range, and the hue and
color saturation of your images.
You can easily add your favorite Photoshop plug-ins to Fireworks and apply them to bitmaps
using the Filters menu or the Live Effects area of the Property inspector. Applying filters as Live
Effects from the Property inspector is nondestructive. Live Effects do not permanently alter the
pixels; you can remove or edit them anytime.
If you apply a filter to a selected vector object using the Filters menu, the selection is converted
to a bitmap.

Chapter 5134
If you prefer to apply filters in an irreversible, permanent way, you can choose them from the
Filters menu. However, we recommend that you use filters as Live Effects whenever possible. For
more information on adding Photoshop plug-ins, see “Applying filters and Photoshop plug-ins as
Live Effects” on page 219.
Filters from the Filters menu can be applied to pixel selections, but Live Effects cannot. You can,
however, define an area of a bitmap and create a separate bitmap from it, and then apply a Live
Effect to it.
To apply a Live Effect to an area defined by a bitmap selection marquee:
1Choose a bitmap selection tool and draw a selection marquee.
2Choose Edit > Cut.
3Choose Edit > Paste.
The selection is pasted in the exact same place where the original pixels were located, but the
selection is now a separate bitmap object.
4Click the thumbnail of the new bitmap object in the Layers panel to select the bitmap object.
5Apply a Live Effect from the Property inspector.
The Live Effect is applied only to the new bitmap object, simulating the application of a filter
to a pixel selection.
Note: Although Live Effects are more flexible, large numbers of Live Effects in a document can slow down
Fireworks performance. For more information, see “Controlling document redraw” on page 91.
Adjusting tonal range
You can use the Levels and Curves features to adjust a bitmap’s tonal range. With Levels, you can
correct bitmaps that contain a high concentration of pixels in the highlights, midtones, or
shadows. Or you can use Auto Levels and let Fireworks adjust the tonal range for you. If you want
more precise control over a bitmap’s tonal range, you can use Curves, which enables you to adjust
any color along the tonal range without affecting other colors.
Using the Levels feature
A bitmap with a full tonal range should have an even number of pixels in all areas. The Levels feature
corrects bitmaps with a high concentration of pixels in the highlights, midtones, or shadows.
Highlights is applied when a high concentration of light pixels looks washed out.
Midtones is applied when too many pixels in the midtones looks bland.
Shadows is applied when an area of excessively dark pixels hides much of the detail.
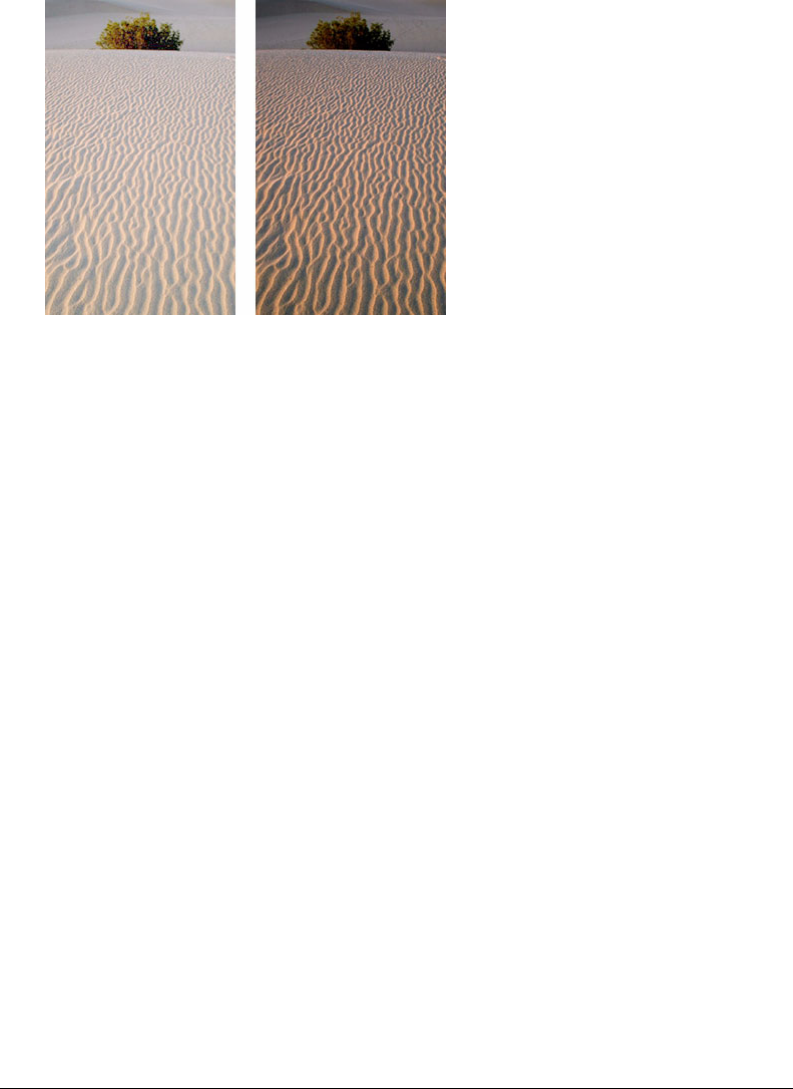
Working with Bitmaps 135
Levels sets the darkest pixels and the lightest pixels as black and white, then redistributes the
midtones proportionally. This produces an image with the sharpest detail in all of its pixels.
Original with pixels concentrated in the highlights; image after adjusting with Levels
You can use the Histogram in the Levels dialog box to view the pixel distribution of a bitmap. The
Histogram is a graphical illustration of the distribution of pixels in the highlights, midtones, and
shadows of a bitmap.
The Histogram helps you determine the best method of correcting an image’s tonal range. A high
concentration of pixels in the shadows or highlights indicates that you could improve the image
by applying the Levels or Curves feature.
The horizontal axis illustrates the color values from darkest (0) to brightest (255). Read the
horizontal axis from left to right: the left depicts the darker pixels, the center depicts the midtone
pixels, and the right depicts the brighter pixels.
The vertical axis depicts the number of pixels at each brightness level. Typically, you should adjust
the highlights and shadows first. Adjusting the midtones second lets you improve their brightness
value without affecting the highlights and shadows.
To adjust highlights, midtones, and shadows:
1Select the bitmap image.
2Do one of the following to open the Levels dialog box:
•In the Property inspector, click the Add Effects button, and then choose Adjust Color >
Levels from the Add Effects pop-up menu.
•Choose Filters > Adjust Color > Levels.
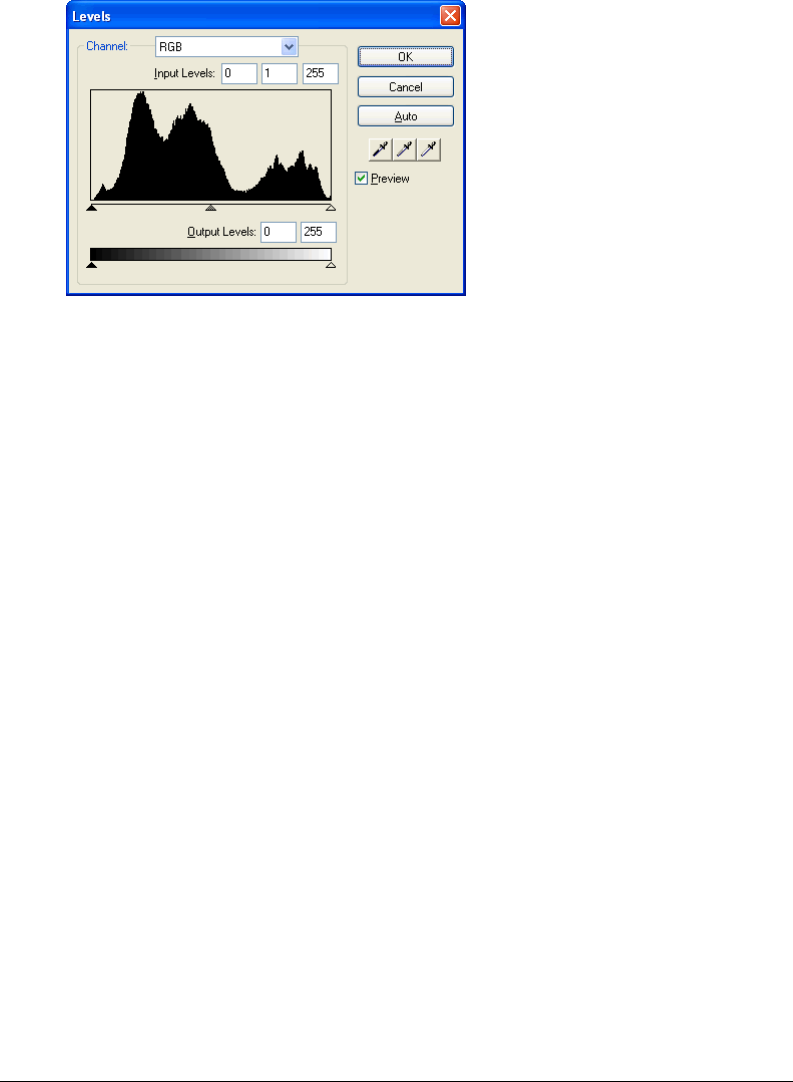
Chapter 5136
Note: Applying a filter from the Filters menu is destructive; that is, it cannot be undone except when Edit > Undo is
an option. To maintain the ability to adjust, turn off, or remove this filter, apply it as a Live Effect, as described in
the first bulleted option in this step. For more information, see “Using Live Effects” on page 215.
Levels dialog box
Tip: To view your changes in the workspace, choose Preview in the dialog box. As you make changes, the image
updates automatically.
3In the Channel pop-up menu, choose whether you want to apply changes to individual color
channels (Red, Blue, or Green) or to all color channels (RGB).
4Drag the Input Levels sliders under the Histogram to adjust the highlights, midtones, and shadows:
•The right slider adjusts the highlights using values from 255 to 0.
•The center slider adjusts the midtones using values from 10 to 0.
•The left slider adjusts the shadows using values from 0 to 255.
As you move the sliders, the values are automatically entered in the Input Levels boxes.
Note: The shadow value cannot be higher than the highlight value; the highlight value cannot be lower than the
shadow value; and the midtones must fall between the shadow and highlight settings.
5Drag the Output Levels sliders to adjust the contrast values in the image:
•The right slider adjusts the highlights using values from 255 to 0.
•The left slider adjusts the shadows using values from 0 to 255.
As you move the sliders, the values are automatically entered in the Output Levels boxes.

Working with Bitmaps 137
Using Auto Levels
You can use Auto Levels to have Fireworks make tonal range adjustments for you.
To adjust highlights, midtones, and shadows automatically:
1Select the image.
2Do one of the following to choose Auto Levels:
•In the Property inspector, click the Add Effects button, and then choose Adjust Color >
Auto Levels from the Add Effects pop-up menu.
•Choose Filters > Adjust Color > Auto Levels.
Note: Applying a filter from the Filters menu is destructive; that is, it cannot be undone except when Edit > Undo
is an option. To maintain the ability to adjust, turn off, or remove this filter, apply it as a Live Effect, as described in
the first bulleted option in this step. For more information, see “Using Live Effects” on page 215.
Tip: You can also adjust highlights, midtones, and shadows automatically by clicking the Auto button in the
Levels or Curves dialog box.
Using Curves
Curves is similar to Levels, but it provides more precise control over the tonal range. Whereas
Levels uses highlights, shadows, and midtones to correct the tonal range, Curves lets you adjust
any color along the tonal range, instead of only three variables, without affecting other colors. For
example, you can use Curves to correct for a color cast caused by lighting conditions.
The grid in the Curves dialog box illustrates two brightness values:
The horizontal axis depicts the original brightness of the pixels, shown in the Input box.
The vertical axis represents the new brightness values, shown in the Output box.
When you first open the Curves dialog box, the diagonal line indicates that no changes have been
made, so the input and output values are the same for all pixels.
To adjust a specific point in the tonal range:
1Select the image.
2Do one of the following to open the Curves dialog box:
•In the Property inspector, click the Add Effects button, and then choose Adjust Color >
Curves from the Add Effects pop-up menu.
•Choose Filters > Adjust Color > Curves.
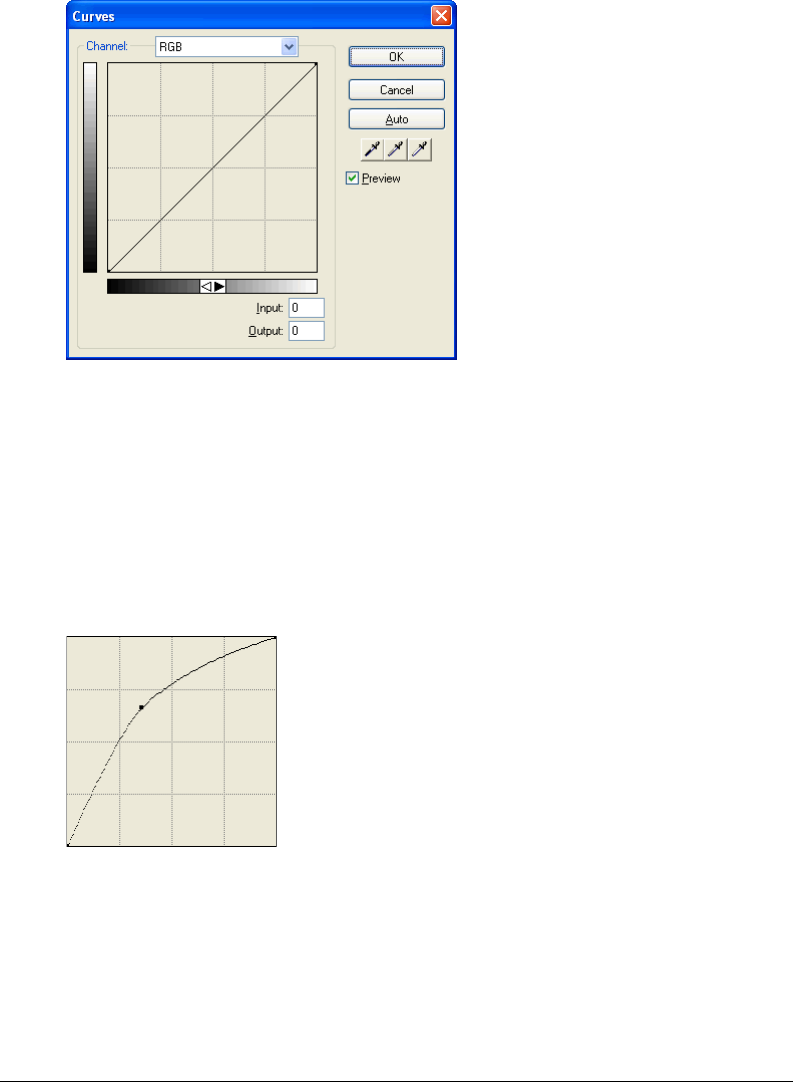
Chapter 5138
Note: Applying a filter from the Filters menu is destructive; that is, it cannot be undone except when Edit > Undo is
an option. To maintain the ability to adjust, turn off, or remove this filter, apply it as a Live Effect, as described in
the first bulleted option in this step. For more information, see “Using Live Effects” on page 215.
Curves dialog box
3In the Channel pop-up menu, choose whether you want to apply changes to individual color
channels or to all colors.
4Click a point on the grid’s diagonal line and drag it to a new position to adjust the curve.
•Each point on the curve has its own Input and Output values. When you drag a point, the
Input and Output values update automatically.
•The curve displays brightness values of 0 to 255, with 0 representing the shadows.
Curve after dragging a point to adjust
Tip: You can also adjust highlights, midtones, and shadows automatically by clicking the Auto button in the
Curves dialog box.
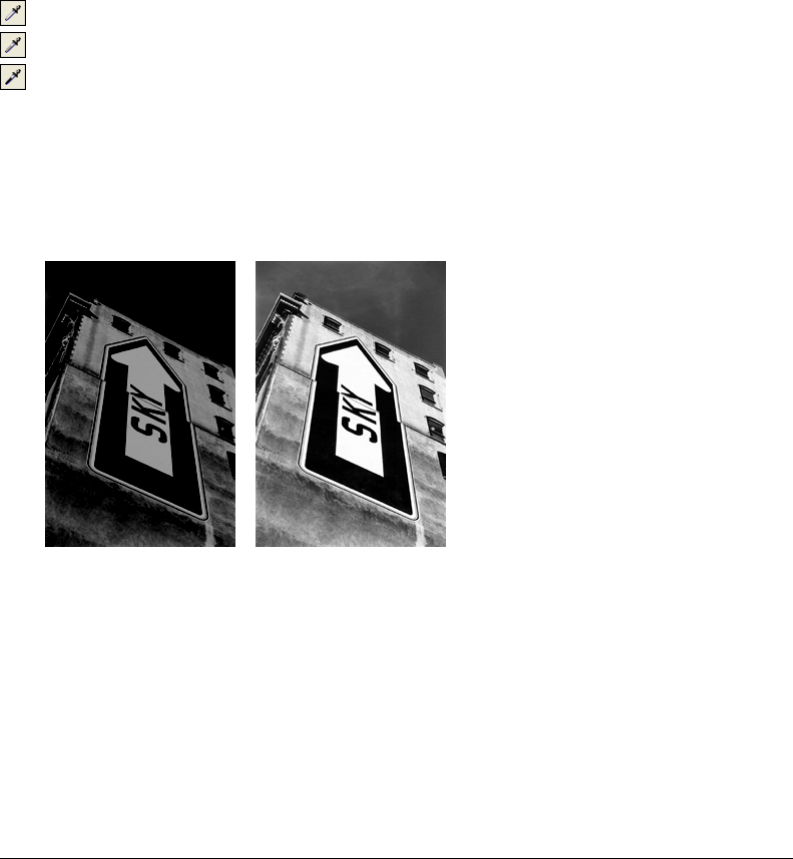
Working with Bitmaps 139
To delete a point along the curve:
Drag the point off the grid.
Note: You cannot delete the end points of the curve.
Using tonal eyedroppers
You can adjust the highlights, shadows, and midtones using the Shadow, Highlight, or Midtone
eyedropper in the Levels or Curves dialog box.
To adjust the tonal balance manually using the tonal eyedroppers:
1Open the Levels or Curves dialog box, and choose a color channel from the Channel pop-up menu.
2Choose the appropriate eyedropper to reset the tonal values in the image:
•Click the lightest pixel in the image with the Highlight eyedropper to reset the highlight value.
•Click a pixel of neutral color in the image with the Midtone eyedropper to reset the midtone value.
•Click the darkest pixel in the image with the Shadow eyedropper to reset the shadow value.
3Click OK.
Adjusting brightness and contrast
The Brightness/Contrast feature modifies the contrast or brightness of pixels in an image. This
affects the highlights, shadows, and midtones of an image. You typically use Brightness/Contrast
when correcting images that are too dark or too light.
Original; after adjusting brightness

Chapter 5140
To adjust the brightness or contrast:
1Select the image.
2Do one of the following to open the Brightness/Contrast dialog box:
•In the Property inspector, click the Add Effects button, and then choose Adjust Color >
Brightness/Contrast from the Add Effects pop-up menu.
•Choose Filters > Adjust Color > Brightness/Contrast.
Note: Applying a filter from the Filters menu is destructive; that is, it cannot be undone except when Edit > Undo
is an option. To maintain the ability to adjust, turn off, or remove this filter, apply it as a Live Effect, as described in
the first bulleted option in this step. For more information, see “Using Live Effects” on page 215.
3Drag the Brightness and Contrast sliders to adjust the settings.
Values range from -100 to 100.
4Click OK.
Applying the Color Fill Live Effect
You can use the Color Fill Live Effect to change the color of objects quickly, either by replacing
the pixels entirely with a given color or by blending a color into an existing object. When you
blend colors, the color is added on top of the object. Blending a color into an existing object
works similarly to using Hue/Saturation; however, it lets you apply a specific color from a color
swatch panel quickly.
To add a Color Fill effect to a selected object:
1In the Property inspector, click the Add Effects button, and then choose Adjust Color >
Color Fill from the Add Effects pop-up menu.
2Choose a blending mode.
The default mode is Normal. For information about each blending mode, see “About blending
modes” on page 247.
3Choose a fill color from the color box pop-up menu.
4Choose a percentage of opacity for the fill color and press Enter.
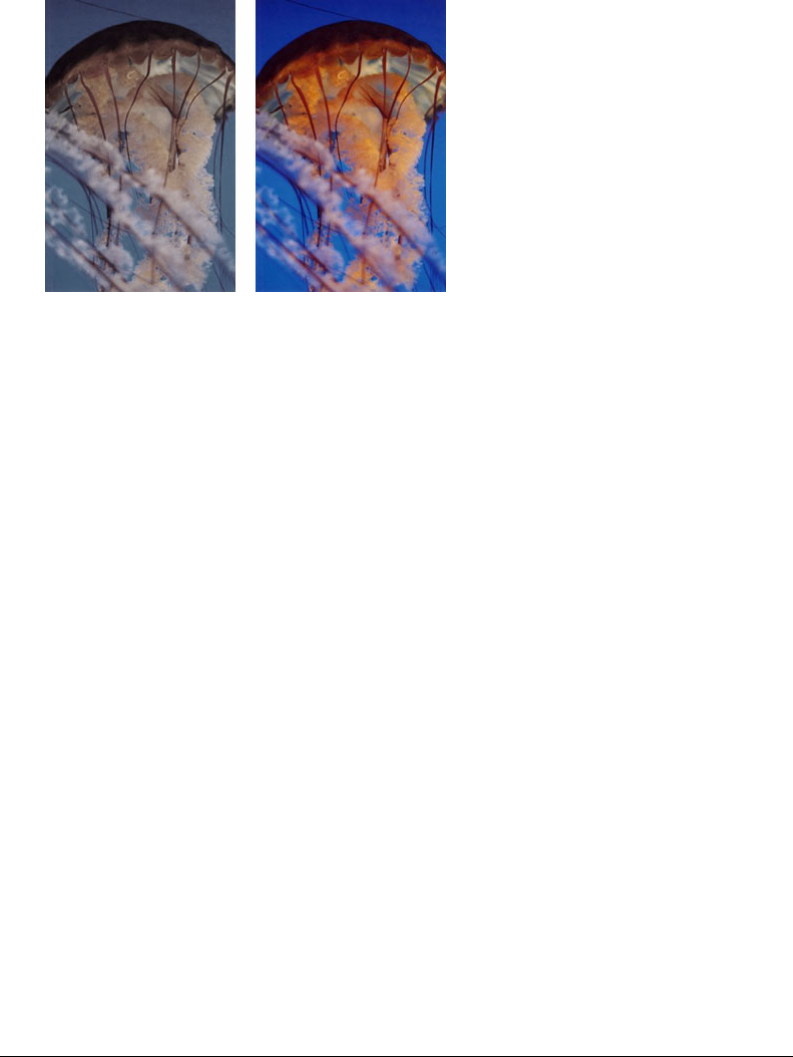
Working with Bitmaps 141
Adjusting hue and saturation
You can use the Hue/Saturation feature to adjust the shade of a color, its hue; the intensity of a
color, its saturation; or the lightness of a color in an image.
Original; after adjusting the saturation
To adjust the hue or saturation:
1Select the image.
2Do one of the following to open the Hue/Saturation dialog box:
•In the Property inspector, click the Add Effects button, and then choose Adjust Color >
Hue/Saturation from the Add Effects pop-up menu.
•Choose Filters > Adjust Color > Hue/Saturation.
Note: Applying a filter from the Filters menu is destructive; that is, it cannot be undone except when Edit > Undo is
an option. To maintain the ability to adjust, turn off, or remove this filter, apply it as a Live Effect, as described in
the first bulleted option in this step. For more information, see “Using Live Effects” on page 215.
3Drag the Hue slider to adjust the color of the image.
Values range from -180 to 180.
4Drag the Saturation slider to adjust the purity of the colors.
Values range from -100 to 100.
5Drag the Lightness slider to adjust the lightness of the colors.
Values range from -100 to 100.
6Click OK.
To change an RGB image to a two-tone image or to add color to a grayscale image:
Choose Colorize in the Hue/Saturation dialog box.
Note: When you choose Colorize, the value range of the Hue and Saturation sliders changes. Hue changes to
0 to 360. Saturation changes to 0 to 100.
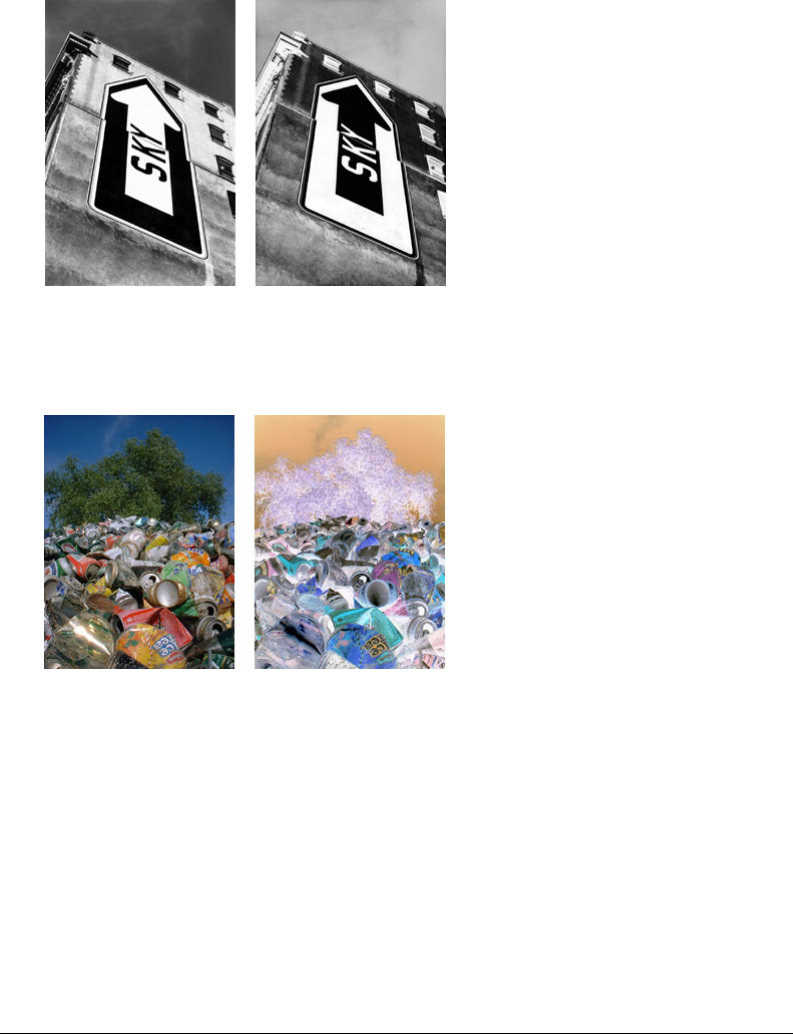
Chapter 5142
Inverting an image’s color values
You can use Invert to change each color in an image to its inverse on the color wheel. For
example, applying the filter to a red object (R=255, G=0, B=0) changes the color to light blue
(R=0, G=255, B=255).
A black and white image; the image inverted
A color image; the image inverted
To invert colors:
1Select the image.
2Do one of the following:
•In the Property inspector, click the Add Effects button, and then choose Adjust Color >
Invert from the Add Effects pop-up menu.
•Choose Filters > Adjust Color > Invert.
Note: Applying a filter from the Filters menu is destructive; that is, it cannot be undone except when Edit > Undo
is an option. To maintain the ability to adjust, turn off, or remove this filter, apply it as a Live Effect, as described in
the first bulleted option in this step. For more information, see “Using Live Effects” on page 215.
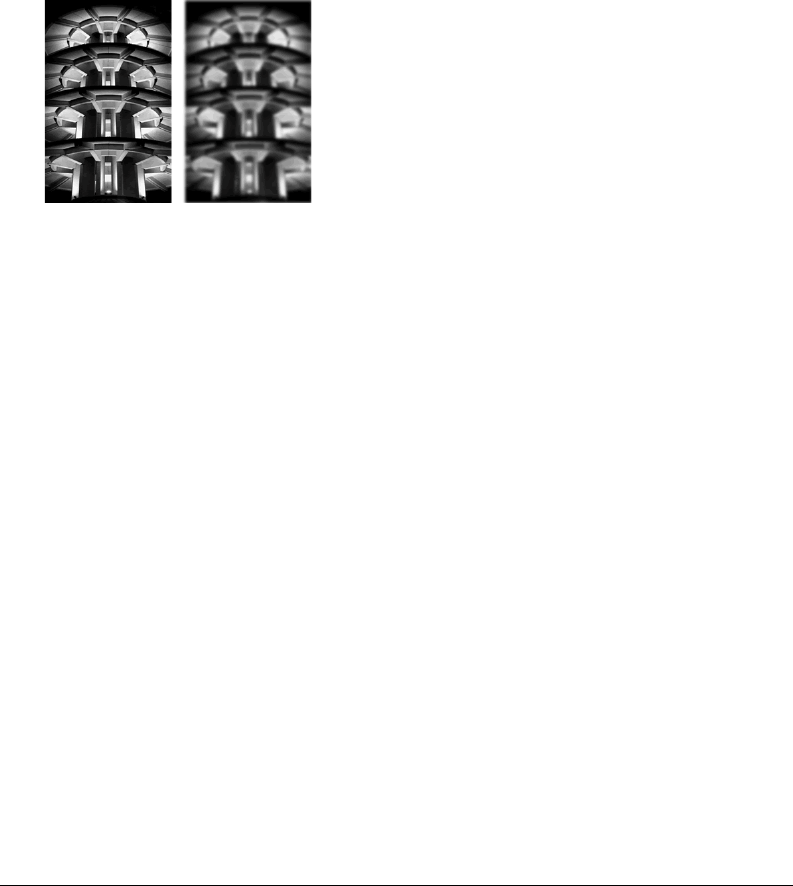
Working with Bitmaps 143
Blurring and sharpening bitmaps
Fireworks has a set of blurring and sharpening options that you can apply as Live Effects or
irreversible, permanent filters.
Blurring an image
Blurring softens the look of a bitmap image. Fireworks has three blurring options:
Blur softens the focus of selected pixels.
Blur More blurs about three times as much as Blur.
Gaussian Blur applies a weighted average of blur to each pixel to produce a hazy effect.
Before and after using Gaussian Blur
To blur an image:
1Select the image.
2Do one of the following:
•In the Property inspector, click the Add Effects button, and then choose Blur > Blur or
Blur More from the Add Effects pop-up menu.
•Choose Filters > Blur > Blur or Blur More.
Note: Applying a filter from the Filters menu is destructive; that is, it cannot be undone except when Edit > Undo
is an option. To maintain the ability to adjust, turn off, or remove this filter, apply it as a Live Effect, as described in
the first bulleted option in this step. For more information, see “Using Live Effects” on page 215.
To blur an image using Gaussian Blur:
1Select the image.
2Do one of the following to open the Gaussian Blur dialog box:
•In the Property inspector, click the Add Effects button, and then choose Blur > Gaussian Blur
from the Add Effects pop-up menu.
•Choose Filters > Blur > Gaussian Blur.
Note: Applying a filter from the Filters menu is destructive; that is, it cannot be undone except when Edit > Undo
is an option. To maintain the ability to adjust, turn off, or remove this filter, apply it as a Live Effect, as described in
the first bulleted option in this step. For more information, see “Using Live Effects” on page 215.
3Drag the Blur Radius slider to set the strength of the blur effect.
Values range from 0.1 to 250. An increase in radius results in a stronger blur effect.
4Click OK.
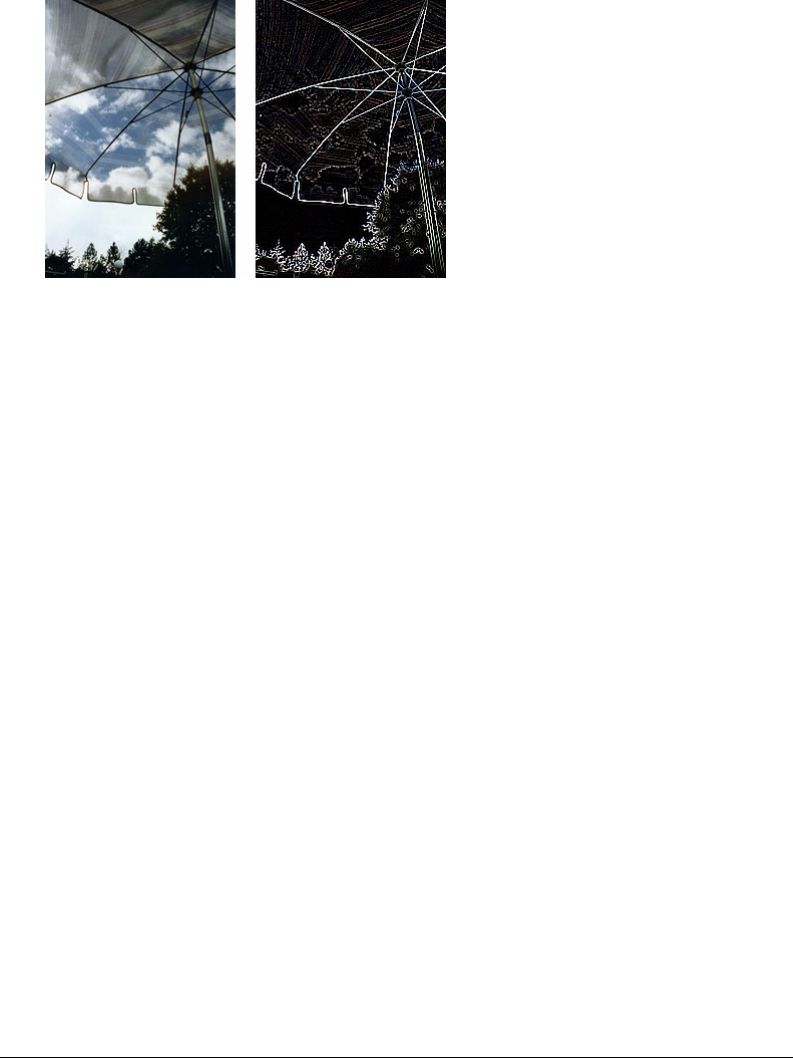
Chapter 5144
Using the Find Edges effect to create a sketch look
The Find Edges effect changes your bitmaps to look like line drawings by identifying the color
transitions in the images and changing them to lines.
Original; after applying Find Edges
To apply the Find Edges effect to a selected area, do one of the following:
•In the Property inspector, click the Add Effects button, and then choose Other > Find Edges
from the Add Effects pop-up menu.
•Choose Filters > Other > Find Edges.
Note: Applying a filter from the Filters menu is destructive; that is, it cannot be undone except when Edit > Undo
is an option. To maintain the ability to adjust, turn off, or remove this filter, apply it as a Live Effect, as described in
the first bulleted option in this step. For more information, see “Using Live Effects” on page 215.
Converting an image to a transparency
You can use the Convert to Alpha effect to convert an object or text into a transparency based
upon the transparency of the image.
To apply the Convert to Alpha effect to a selected area, do one of the following:
•In the Property inspector, click the Add Effects button, and then choose Other >
Convert to Alpha from the Add Effects pop-up menu.
•Choose Filters > Other > Convert to Alpha.
Note: Applying a filter from the Filters menu is destructive; that is, it cannot be undone except when Edit > Undo
is an option. To maintain the ability to adjust, turn off, or remove this filter, apply it as a Live Effect, as described in
the first bulleted option in this step. For more information, see “Using Live Effects” on page 215.
Using the Sharpen feature to sharpen an image
You can use the Sharpen feature to correct images that are blurry. Fireworks has three Sharpen options:
Sharpen adjusts the focus of a blurred image by increasing the contrast of adjacent pixels.
Sharpen More increases the contrast of adjacent pixels about three times as much as Sharpen.

Working with Bitmaps 145
Unsharp Mask sharpens an image by adjusting the contrast of the pixel edges. This option offers
the most control, so it is usually the best option for sharpening an image.
Original; after sharpening
To sharpen an image using a sharpen option:
1Select the image.
2Do one of the following to choose a sharpen option:
•In the Property inspector, click the Add Effects button, and then choose Sharpen >
Sharpen or Sharpen More from the Add Effects pop-up menu.
•Choose Filters > Sharpen > Sharpen or Sharpen More.
Note: Applying a filter from the Filters menu is destructive; that is, it cannot be undone except when Edit > Undo
is an option. To maintain the ability to adjust, turn off, or remove this filter, apply it as a Live Effect, as described in
the first bulleted option in this step. For more information, see “Using Live Effects” on page 215.
To sharpen an image using Unsharp Mask:
1Select the image.
2Do one of the following to open the Unsharp Mask dialog box:
•In the Property inspector, click the Add Effects button, and then choose Sharpen >
Unsharp Mask from the Add Effects pop-up menu.
•Choose Filters > Sharpen > Unsharp Mask.
Note: Applying a filter from the Filters menu is destructive; that is, it cannot be undone except when Edit > Undo is
an option. To maintain the ability to adjust, turn off, or remove this filter, apply it as a Live Effect, as described in
the first bulleted option in this step. For more information, see “Using Live Effects” on page 215.
3Drag the Sharpen Amount slider to select the amount of sharpening effect from 1% to 500%.
4Drag the Pixel Radius slider to select a radius from 0.1 to 250.
An increase in radius results in a greater area of sharp contrast surrounding each pixel edge.
5Drag the Threshold slider to select a threshold of 0 to 255.
Values between 2 and 25 are most commonly used. An increase in threshold sharpens only
those pixels of a higher contrast in the image. A decrease in threshold includes pixels of lower
contrast. A threshold of 0 sharpens all pixels in the image.
6Click OK.

Chapter 5146

147
CHAPTER 6
Working with Vector Objects
A vector object is a computer graphic whose shape is defined by a path. The shape of a vector path
is determined by points that are plotted along the path. A vector object’s stroke color follows the
path. Its fill occupies the area inside the path. The stroke and fill typically determine how the
graphic looks when published in print or on the web.
Macromedia Fireworks MX has many tools for drawing and editing vector objects using a variety
of techniques. With the basic shape tools, you can quickly draw straight lines, circles and ellipses,
squares and rectangles, stars, and any equilateral polygon with 3 to 360 sides.
You can draw freeform vector paths with the Vector Path and Pen tools. The Pen tool enables you
to draw complex shapes with smooth curves and straight lines by plotting points one by one.
After you have drawn vector objects, Fireworks offers several methods for editing them. You can
change an object’s shape by moving, adding, or deleting points. You can use point handles to
change the shape of adjacent path segments. Freeform tools let you alter the shape of objects by
editing paths directly.
Commands on the Modify menu give you more options for editing objects, including combining
objects to create a single object, creating an object from the intersection of several objects, and
expanding the stroke of an object. You can also import graphics and manipulate them using
these commands.
Drawing vector objects
Fireworks has many tools for drawing vector objects. With these you can draw basic shapes,
freeform paths, and complex shapes by plotting points one by one.
Drawing basic shapes
Squares, rectangles, circles, ovals, stars, and other polygons are easy to draw using the basic shape
tools. You can draw a rectangle with rounded corners and adjust the corner radius after you draw
it. You can also draw a variety of stars, from narrow and pointy to wide and stubby.

Chapter 6148
The basic shape drawing tools are in the Vector section of the Tools panel. When you use any
drawing or painting tool to create an object, the tool applies the current stroke and fill attributes
to the object. To change the current stroke and fill attributes, as well as the stroke and fill
attributes of existing objects, see Chapter 8, “Applying Color, Strokes, and Fills,” on page 191.
The basic shape tools
Drawing lines, rectangles, and ellipses
You can use the Line, Rectangle, or Ellipse tool to quickly draw basic shapes. The Rectangle tool
draws rectangles as grouped objects. To move a rectangle corner point independently, you must
ungroup the rectangle or use the Subselection tool. To draw a rectangle with rounded corners, see
“Drawing rectangles with rounded corners” on page 149.
To draw a line, rectangle, or ellipse:
1Choose the Line, Rectangle, or Ellipse tool.
2If desired, set the stroke and fill attributes in the Property inspector. See Chapter 8, “Applying
Color, Strokes, and Fills,” on page 191.
3Drag on the canvas to draw the shape.
For the Line tool, Shift-drag to constrain lines to 45-degree increments.
For the Rectangle or Ellipse tool, Shift-drag to constrain shapes to squares or circles.
To draw a line, rectangle, or ellipse from a specific center point:
Position the pointer at the intended center point and Alt-drag (Windows) or Option-drag
(Macintosh) the drawing tool.
To both constrain a shape and draw from the center point:
Position the pointer at the intended center point and Shift-Alt-drag (Windows) or
Shift-Option-drag (Macintosh) the drawing tool.
To adjust the position of a basic shape as you draw it:
While holding down the mouse button, press and hold the Spacebar, then drag the object to
another location on the canvas. Release the Spacebar to continue drawing the object.
Note: An exception is the Line tool. Pressing the Spacebar while using the Line tool does not change a line’s
position on the canvas.
To resize a selected line, rectangle, or ellipse, do one of the following:
•Enter new width (W) or height (H) values in the Property inspector or the Info panel.
•Choose the Scale tool in the Select section of the Tools panel and drag a corner transform
handle. This resizes the object proportionally.
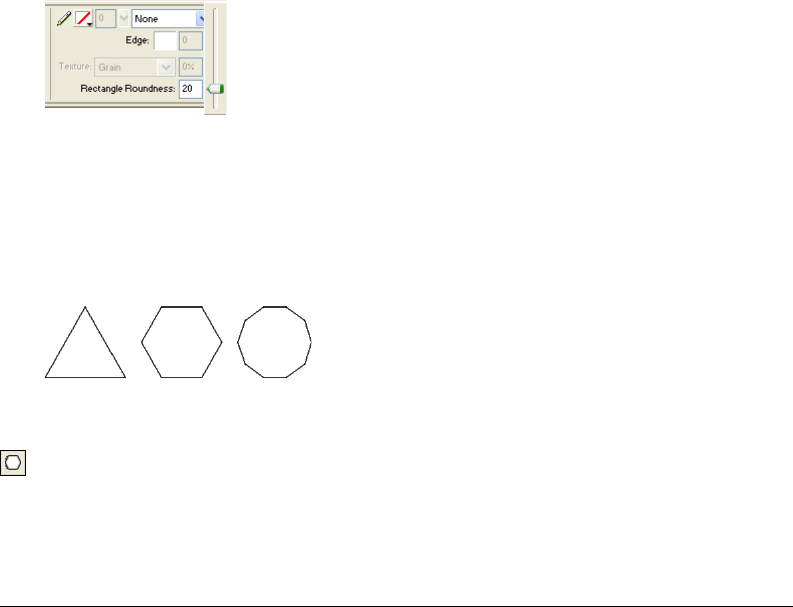
Working with Vector Objects 149
Note: You can also resize an object proportionally by choosing Modify > Transform > Scale and dragging a
corner transform handle, or by choosing Modify > Transform > Numeric Transform and entering new dimensions.
For more information on resizing and scaling objects, see “Transforming and distorting selected objects and
selections” on page 116.
•Drag a corner point on a rectangle.
Note: Scaling a vector object does not change its stroke width.
Drawing rectangles with rounded corners
You can draw rectangles with rounded corners by using the Rounded Rectangle tool, or by using
the Roundness option in the Property inspector to adjust the corner roundness of selected
rectangles. The Rounded Rectangle tool draws rectangles as grouped objects. To move rounded
rectangle points independently, you must ungroup the rectangle or use the Subselection tool.
To draw a rectangle with rounded corners:
1Choose the Rounded Rectangle tool, located in the Rectangle tool pop-up menu.
2Drag on the canvas to draw the rectangle.
Tip: You can adjust the corner roundness as you draw by pressing any of the arrow keys or the 1 or 2 number
keys repeatedly.
To round the corners of a selected rectangle:
Enter a value from 0 to 100 in the Roundness box in the Property inspector and press Enter, or
drag the pop-up slider.
Note: If the Property inspector is at half height, click the expander arrow in the lower right corner to expand it to
full height.
Drawing polygons
With the Polygon tool, you can draw any equilateral polygon, from a triangle to a polygon
with 360 sides.
To draw a polygon:
1Choose the Polygon tool, which is one of the basic shape drawing tools in the Vector section
of the Tools panel.
2In the Property inspector, do one of the following to specify the number of sides for the polygon:
•Use the Sides pop-up slider to choose 3 to 25 sides.
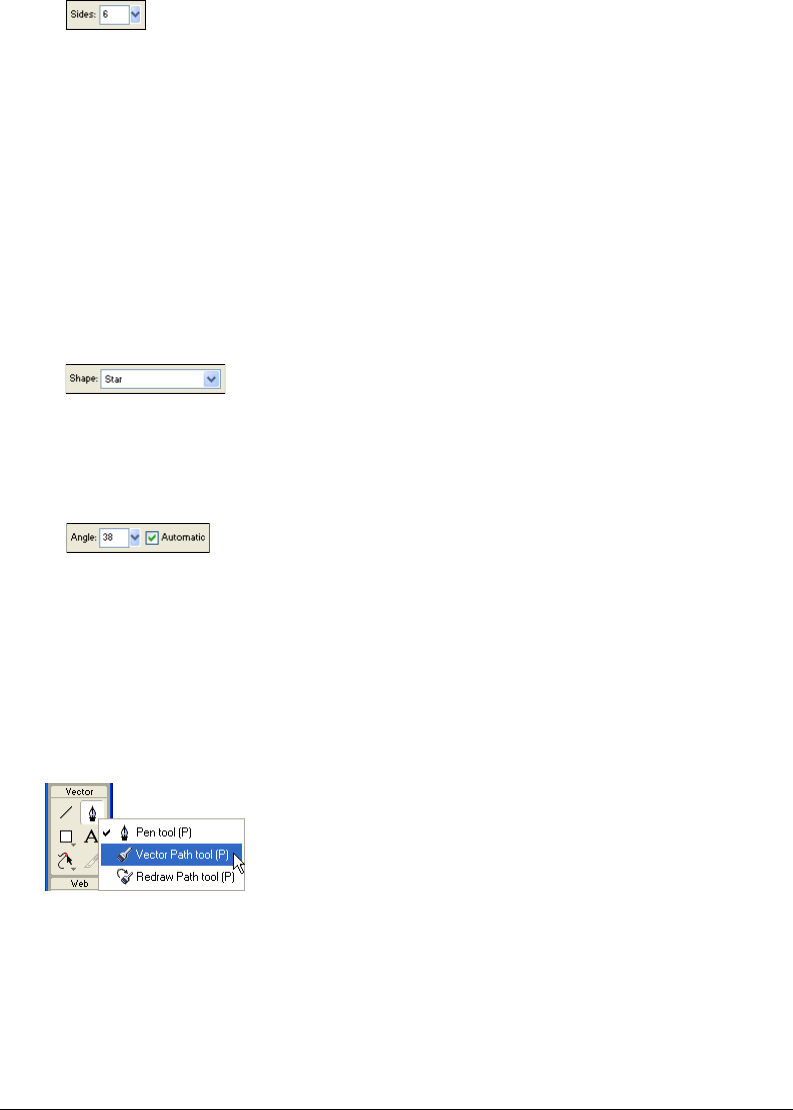
Chapter 6150
•Enter a number from 3 to 360 in the Sides text box.
3Drag to draw the polygon.
To constrain a polygon’s orientation to increments of 45 degrees, hold down Shift as you draw.
The Polygon tool always draws from a center point.
Drawing stars
Using the Polygon tool’s Star option, you can draw stars with 3 to 360 points and the full range of
point angles.
To draw a star:
1Choose the Polygon tool.
2In the Property inspector, choose Star from the Shape pop-up menu.
3Enter the number of points for the star in the Sides text box.
4Choose Automatic or enter a value in the Angle text box. Values closer to 0 result in long, thin
points; values closer to 100 result in short, stubby points.
5Drag on the canvas to draw the star.
To constrain a star’s orientation to increments of 45 degrees, hold down Shift as you drag. The
Polygon tool always draws from a center point.
Drawing freeform paths
You can draw freeform vector paths with the Vector Path tool, in much the same way you would
draw using a felt-tip marker or crayon.
Vector Path tool, located in the Pen tool pop-up menu
You can change the stroke and fill attributes of paths drawn with the Vector Path tool. See
Chapter 8, “Applying Color, Strokes, and Fills,” on page 191.
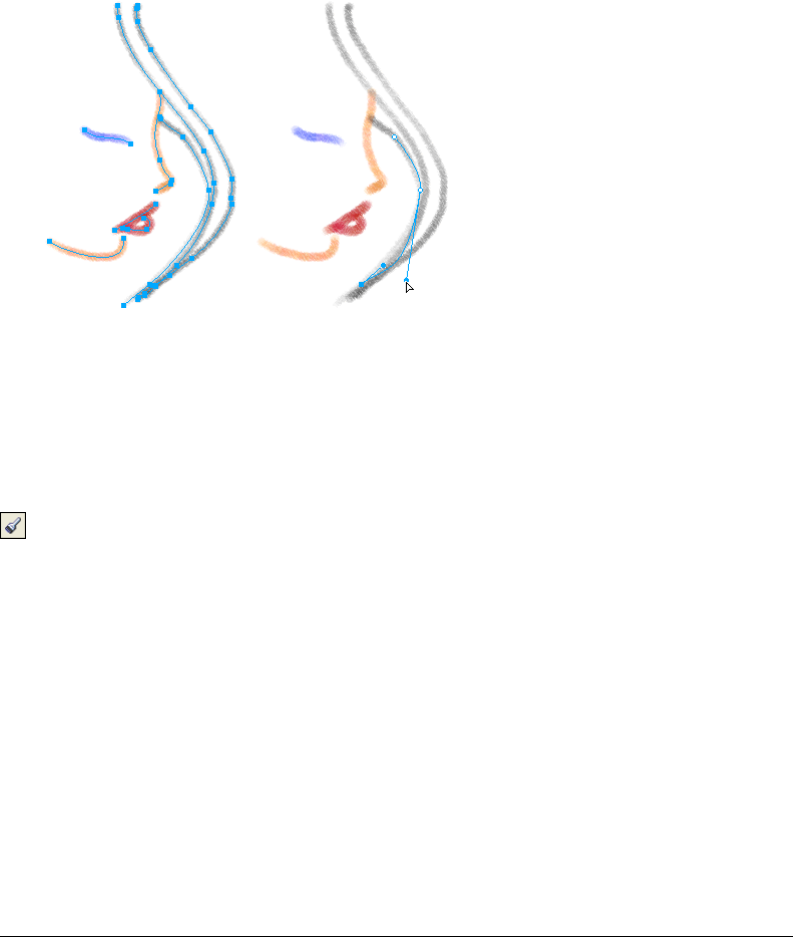
Working with Vector Objects 151
Using the Vector Path tool
The Vector Path tool has a wide variety of brush stroke categories, including Air Brush,
Calligraphy, Charcoal, Crayon, and Unnatural. Each category typically has a choice of strokes,
such as Light Marker and Dark Marker, Splattered Oil, Bamboo, Ribbon, Confetti, 3D,
Toothpaste, and Viscous Alien Paint.
Although the strokes may look like paint or ink, each has the points and paths of a vector object.
That means that you can change the shape of the stroke using any of several vector-editing
techniques. After you reshape the path, the stroke is redrawn.
A painting edited by moving vector points
You can also modify existing brush strokes and add fills to selected objects you have drawn with
the Vector Path tool. The new stroke and fill settings are retained for subsequent use of the Vector
Path tool within the current document.
To draw a freeform vector path:
1Choose the Vector Path tool, located in the Pen tool pop-up menu.
2If desired, set stroke and fill attributes in the Property inspector. See Chapter 8, “Applying
Color, Strokes, and Fills,” on page 191.
3Drag to draw. To constrain the path to a horizontal or vertical line, hold down Shift while
dragging.
4Release the mouse button to end the path. To close the path, release the mouse button when
you have returned the pointer to the point at the beginning of the path.
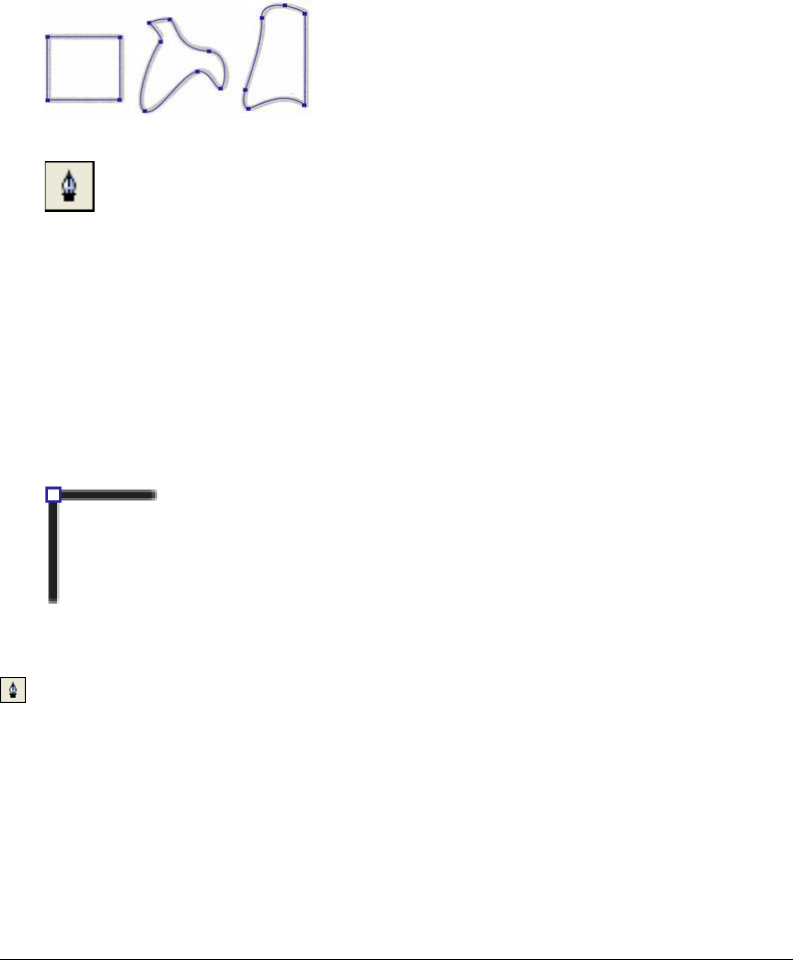
Chapter 6152
Drawing paths by plotting points
One way to draw and edit vector objects in Fireworks is to plot points as if drawing a
connect-the-dots picture. When you click each point with the Pen tool, the path of the
vector object draws automatically from the last point you clicked.
In addition to connecting the points with only straight segments, the Pen tool can draw smooth,
mathematically derived curve segments known as Bézier curves. Each point’s type—corner point
or curve point—determines whether the adjacent curves are straight lines or curves.
Pen tool
You can modify straight and curved path segments by dragging their points. You can further
modify curved path segments by dragging their point handles. You can also convert straight path
segments to curved (and vice versa) by converting their points.
Drawing straight path segments
Drawing straight line segments with the Pen tool is a simple matter of clicking to place the points.
Each click with the Pen tool plots a corner point.
To draw a path with straight line segments:
1Choose the Pen tool.
2If desired, choose Edit > Preferences and enable any of the following options on the Editing tab
of the Preferences dialog box, then click OK:
•Show Pen Preview previews the line segment that would result from the next click.
•Show Solid Points shows solid points while you draw.
Note: On Mac OS X, choose Fireworks > Preferences to open the Preferences dialog box.
3Click on the canvas to place the first corner point.
4Move the pointer and click to place the next point. A straight line segment joins the two points.

Working with Vector Objects 153
5Continue plotting points. Straight segments bridge each gap between points.
6Do one of the following to end the path, either open or closed:
•Double-click the last point to end the path as an open path.
•Choose another tool to end the path as an open path.
Note: When you choose any selection tool or vector tool other than the Text tool and then return to the Pen tool,
your next click resumes drawing the object.
•To close the path, click the first point you plotted. A closed path’s beginning and ending points
are the same.
Note: Loops formed by a path overlapping itself are not closed paths. Only paths that begin and end on the same
point are closed paths.
Drawing curved path segments
To draw curved path segments, you click and drag as you plot points. As you draw, the current
point shows point handles. Whether drawn with the Pen tool or with another Fireworks drawing
tool, all points on all vector objects have point handles. These handles are visible only on curve
points, however.
To draw an object with curved segments:
1Choose the Pen tool.
2Click to place the first corner point.

Chapter 6154
3Move to the location of the next point, then click and drag to produce a curve point. Each
time you click and drag, Fireworks extends the line segment to the new point.
4Continue plotting points. If you click and drag a new point, you produce a curve point; if you
just click, you produce a corner point.
Tip: You can temporarily switch to the Subselection tool to change the location of points and the shape of
curves as you draw. Press Control (Windows) or Command (Macintosh) while dragging a point or point handle
with the Pen tool.
5Do one of the following to end the path, either open or closed:
•Double-click the last point to end the path as an open path.
•Choose another tool to end the path as an open path. When you choose certain tools and then
return to the Pen tool, your next click resumes drawing the object.
•To close a path, click the first point you plotted. A closed path’s beginning and ending points
are the same.
Adjusting the shape of a straight path segment
You can lengthen, shorten, or change the position of a straight path segment by moving its points.
To change a straight path segment:
1Select the path with the Pointer or Subselection tool.
2Click a point with the Subselection tool to select it.
Selected corner points appear as solid blue squares.
3Drag the point or use the arrow keys to move the point to a new location.
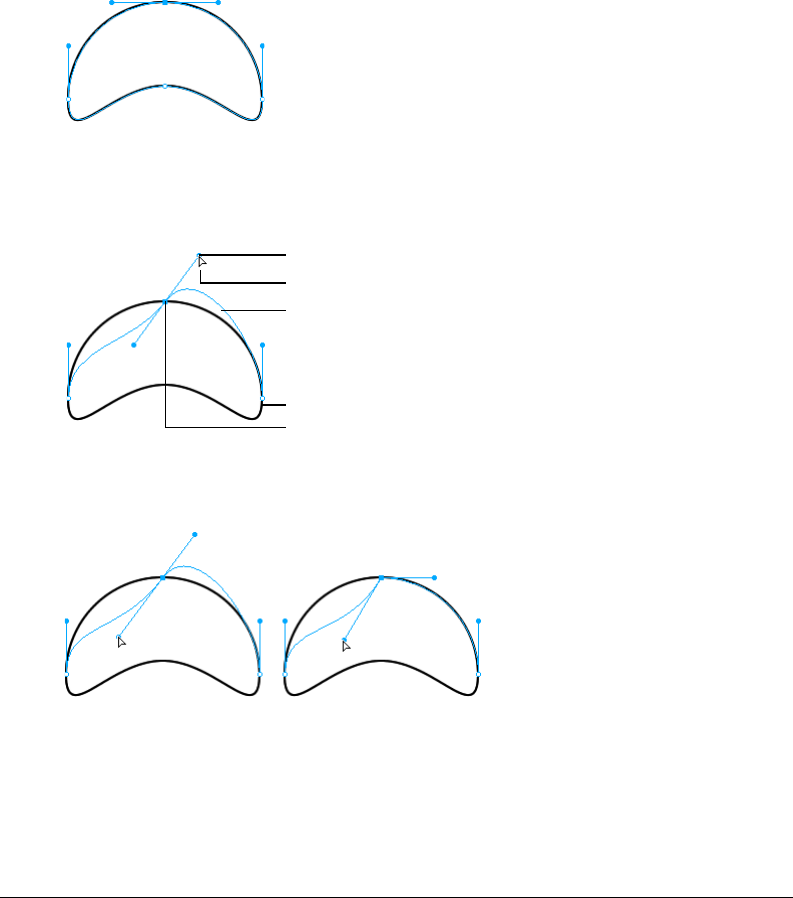
Working with Vector Objects 155
Adjusting the shape of a curved path segment
You can edit a vector object’s shape by dragging its point handles with the Subselection tool. The
point handles determine the degree of curvature between fixed points. These curves are known as
Bézier curves.
To edit the Bézier curve of a path segment:
1Select the path with the Pointer or Subselection tool.
2Click a curve point with the Subselection tool to select it.
A selected curve point appears as a solid blue square. The point handles extend from the point.
3Drag the handles to a new location. To constrain handle movement to 45-degree angles, press
Shift while dragging.
The blue path preview shows where the new path will be drawn if you release the mouse button.
For example, if you drag the left point handle downward, the right point handle goes up.
Alt-drag a handle to move it independently.
Subselection pointer
Point handles
Path preview
Selected point
Path
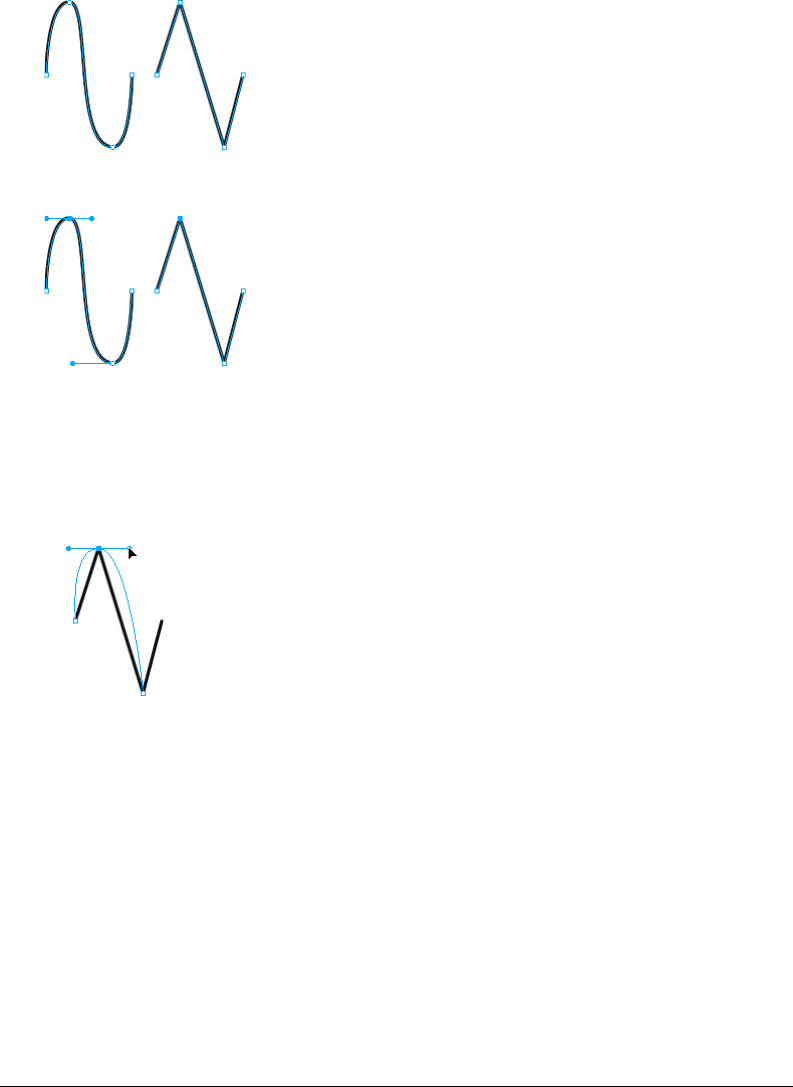
Chapter 6156
Converting path segments to straight or curved
Straight path segments are intersected by corner points. Curved path segments contain curve points.
You can convert a straight segment to a curved segment and vice versa by converting its point.
To convert a corner point on a selected path to a curve point:
1Choose the Pen tool.
2Click a corner point and drag away from it.
The handles extend, curving the adjacent segments.
Note: To edit the point’s handles, choose the Subselection tool or press Control (Windows) or Command (Mac)
while the Pen tool is active.
To convert a curve point on a selected path to a corner point:
1Choose the Pen tool.
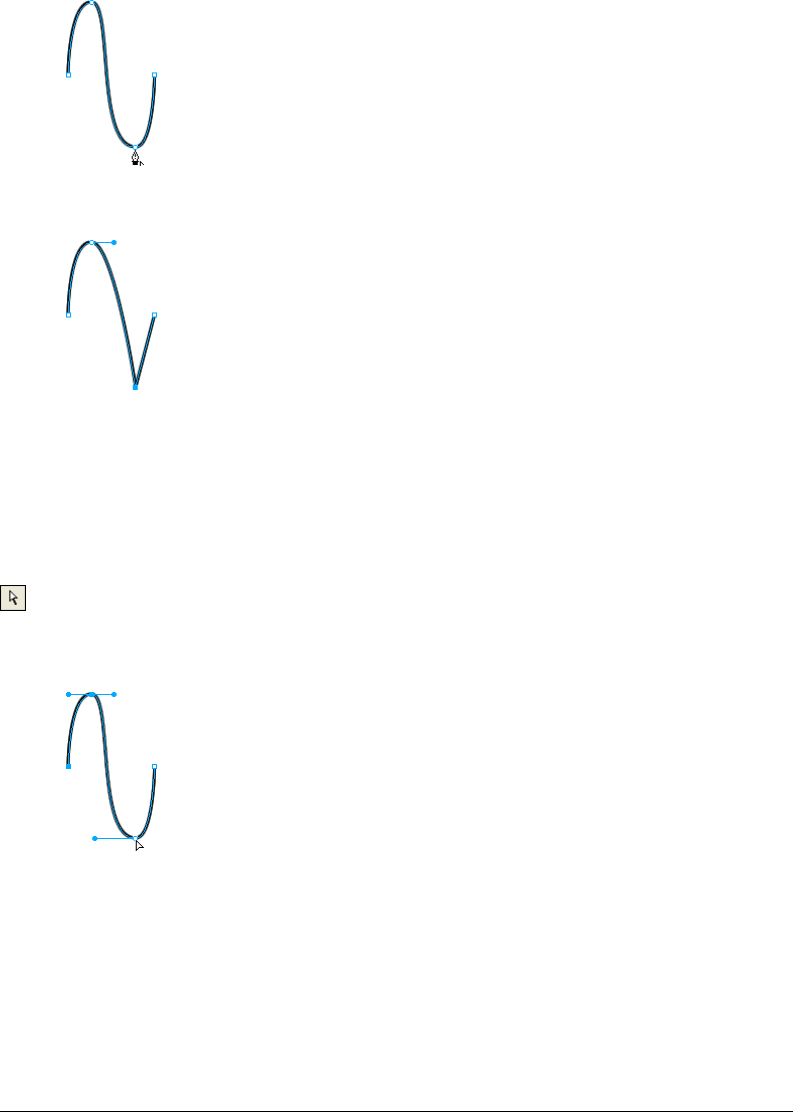
Working with Vector Objects 157
2Click a curve point.
The handles retract and the adjacent segments straighten.
Selecting points
The Subselection tool allows you to select multiple points. Before selecting a point with the
Subselection tool, you must select the path using the Pointer or Subselection tool or by clicking its
thumbnail in the Layers panel.
To select specific points on a selected path:
1Choose the Subselection tool.
2Do one of the following:
•Click a point, or hold down Shift and click multiple points one by one.
•Drag around the points to be selected.
To display a curve point’s handles:
Click the point with the Subselection tool. If either point nearest the clicked point is a curve
point, the near handle is also displayed.
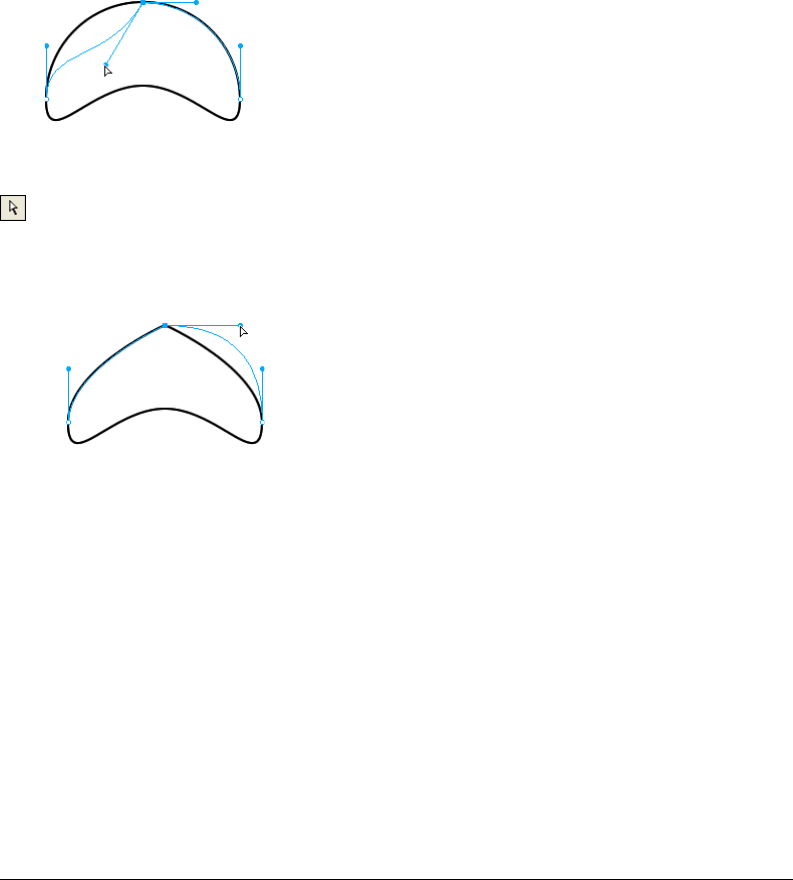
Chapter 6158
Moving points and point handles
You can change an object’s shape by dragging its points and point handles with the Subselection tool.
To move a point:
Drag it with the Subselection tool.
The path redraws to reflect the point’s new position.
To change the shape of a path segment:
Drag a point handle with the Subselection tool. Alt-drag (Windows) or Option-drag (Macintosh)
to drag one handle at a time.
To adjust the handle of a corner point:
1Choose the Subselection tool.
2Select a corner point.
3Alt-drag (Windows) or Option-drag (Macintosh) the point to display its handle and bend the
adjacent segment.
Dragging a corner point handle with the Subselection tool to edit the adjacent path segment

Working with Vector Objects 159
Inserting and deleting points on a path
You can add points to a path and delete points from a path. Adding points to a path gives you
control over a specific segment within the path. Deleting points from the path reshapes it or
simplifies editing.
To insert a point on a selected path:
Using the Pen tool, click anywhere on the path where there is not a point.
To delete a point from a selected path segment, do one of the following:
•Click a corner point on a selected object with the Pen tool.
•Double-click a curve point on a selected object with the Pen tool.
•Select a point with the Subselection tool and press Delete or Backspace.
Continuing an existing path
You can use the Pen tool to continue drawing an existing open path.
To resume drawing an existing open path:
1Choose the Pen tool.
2Click the end point and continue the path.
The Pen tool pointer changes to indicate that you are adding to a path.

Chapter 6160
Merging two open paths
You can connect two open paths to form one continuous path. When you connect two paths, the
topmost path’s stroke, fill, and effect attributes become the attributes of the newly merged path.
To merge two open paths:
1Choose the Pen tool.
2Click the end point of one of the paths.
3Move the pointer to the end point of the other path and click.
Auto-joining similar open paths
You can easily join one open path with another that has similar stroke and fill characteristics.
To auto-join two open paths:
1Select an open path.
2Choose the Subselection tool and drag an end point of the path within a few pixels of the end
point of the similar path.
The end point snaps to the other path, and the two become a single path.
Editing paths
Fireworks offers several methods for editing vector objects. You can change an object’s shape by
moving, adding, or deleting points, or you can move point handles to change the shape of
adjacent path segments. Freeform tools let you alter the shape of objects by editing paths directly.
You can also use path operations to create new shapes by combining or altering existing paths.
Editing with vector tools
In addition to dragging points and point handles, you can use several Fireworks tools to edit
vector objects directly.
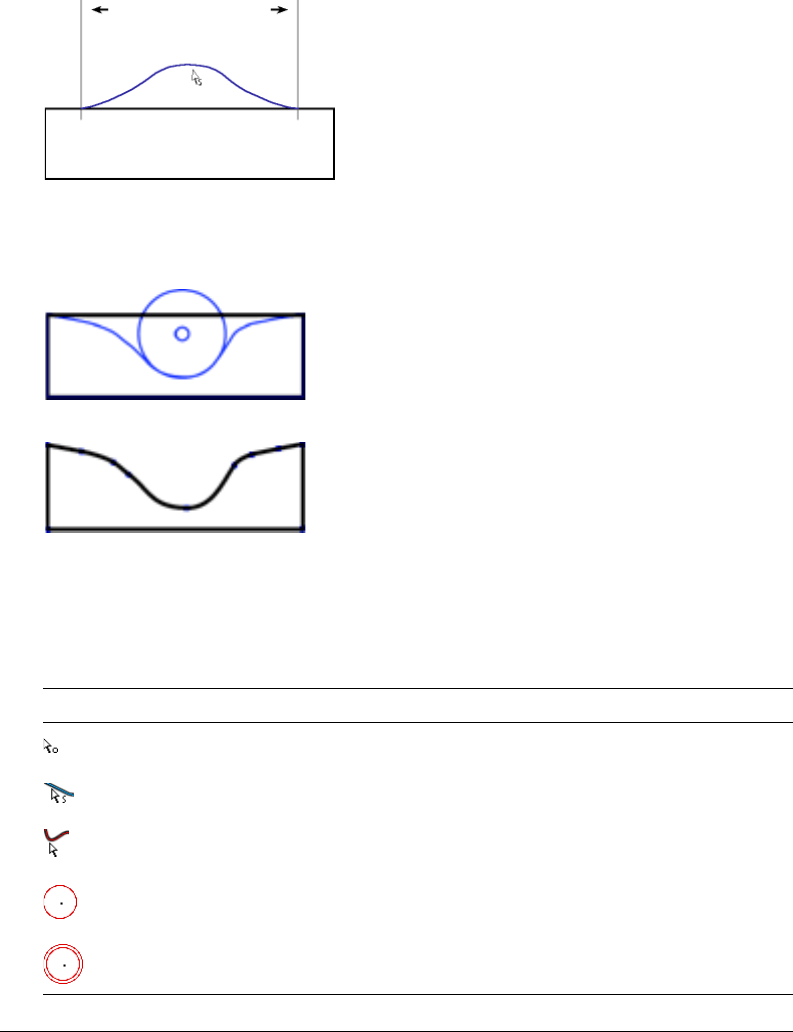
Working with Vector Objects 161
Bending and reshaping vector objects
The Freeform tool allows you to bend and reshape vector objects directly instead of manipulating
points. You can push or pull any part of a path, regardless of where the points are located. Fireworks
automatically adds, moves, or deletes points along the path as you change the vector object’s shape.
Freeform tool pulling a path segment
Freeform tool pushing a path segment, and path redrawn to reflect the push
As you move the pointer over a selected path, it changes to the push or pull pointer, depending on
its location relative to the selected path.
This pointer Indicates
The Freeform tool is in use.
The Freeform tool is in use, and the pull pointer is in position to pull the selected path.
The Freeform tool is in use, and the pull pointer is pulling the selected path.
The Freeform tool is in use, and the push pointer is active.
The Reshape Area tool is in use, and the reshape area pointer is active. The area from the inner
circle to the outer circle represents reduced strength.
Specified length
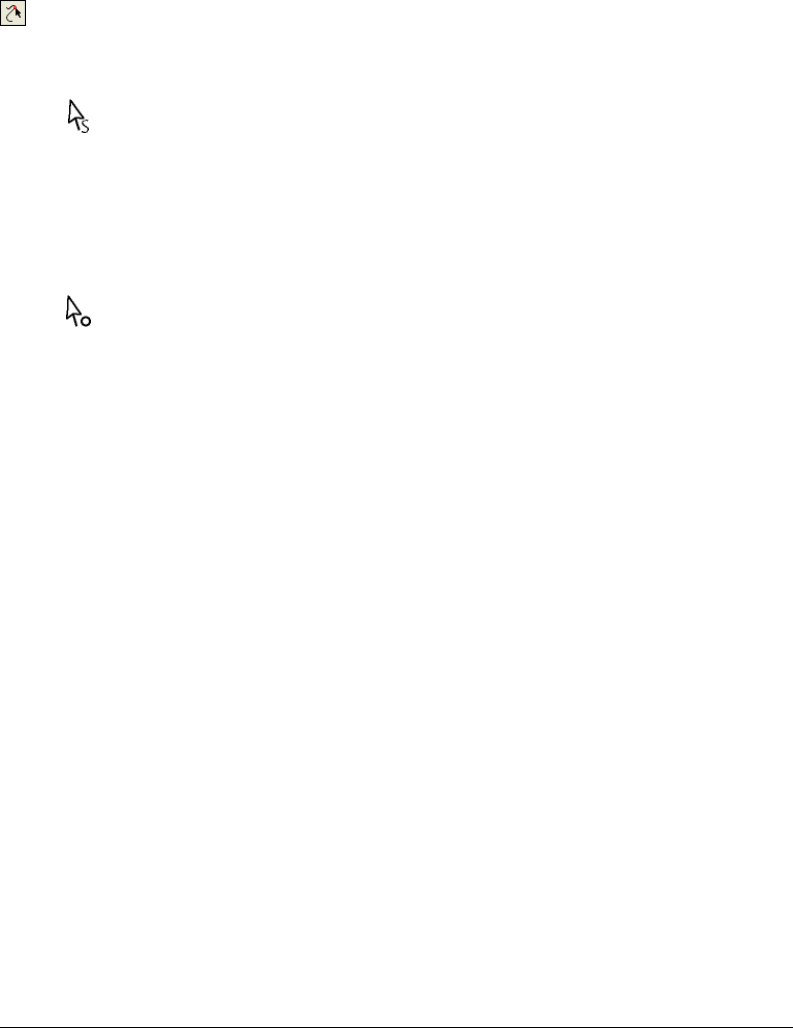
Chapter 6162
When the pointer is directly over the path, you can pull the path. When the pointer is not directly
over the path, you can push the path. You can change the size of the push or pull pointer.
Note: The Freeform tool also responds to pressure from a Wacom or other compatible tablet.
To pull a selected path:
1Choose the Freeform tool.
2Move the pointer directly over the selected path.
The pointer changes to the pull pointer.
3Drag the path.
To push a selected path:
1Choose the Freeform tool.
The pointer changes to the push or pull pointer.
2Point slightly away from the path.
3Drag toward the path to push it. Nudge the selected path to reshape it.
To change the size of the push pointer, do one of the following:
•While holding down the mouse button, press the Right Arrow key or 2 to increase the width of
the pointer.
•While holding down the mouse button, press the Left Arrow key or 1 to decrease the width of
the pointer.
•To set the size of the pointer and set the length of the path segment that it affects, deselect all
objects in the document, and then enter a value from 1 to 500 in the Size text box of the
Property inspector. The value indicates the size of the pointer in pixels.
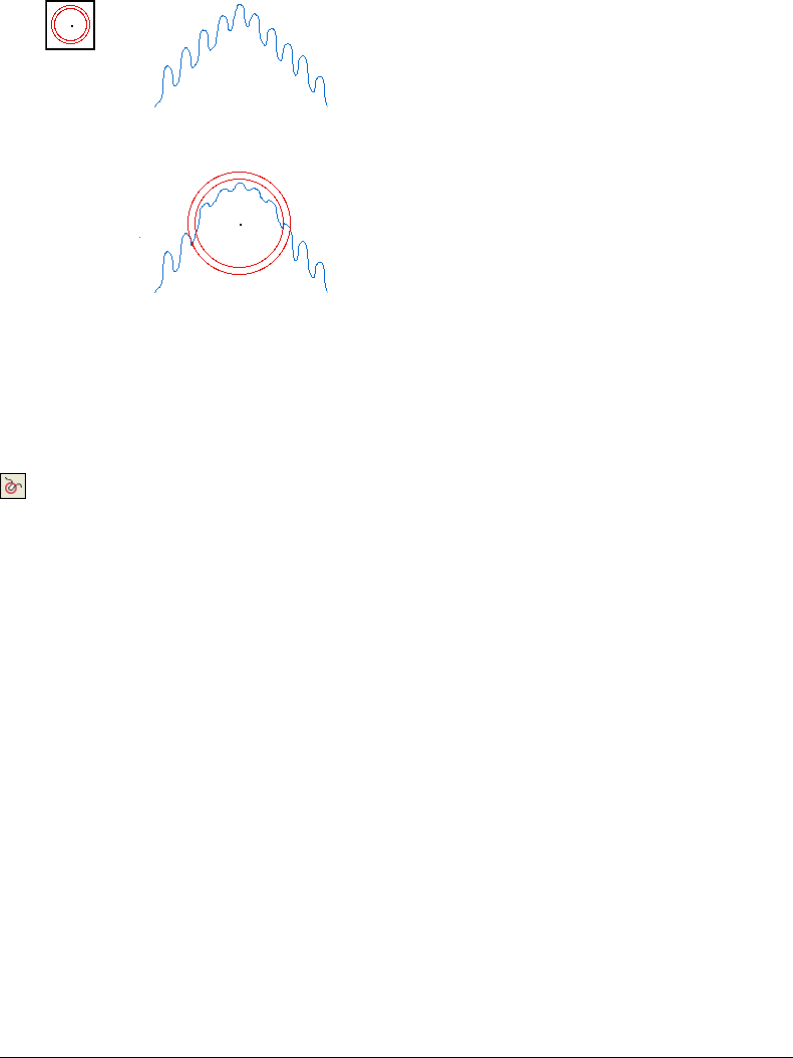
Working with Vector Objects 163
Distorting paths
You can use the Reshape Area tool to pull the area of all selected paths within the outer circle of
the reshape area pointer.
The pointer’s inner circle is the boundary of the tool at full strength. The area between the inner
and outer circle reshapes paths at less than full strength. The pointer’s outer circle determines the
gravitational pull of the pointer. You can set its strength.
Note: The Reshape Area tool also responds to pressure from a Wacom or other compatible tablet.
To distort selected paths:
1Choose the Reshape Area tool, located in the Freeform tool pop-up menu.
2Drag across the paths to redraw them.
To change the size of the reshape area pointer, do one of the following:
•While holding down the mouse button, press the Right Arrow key or 2 to increase the width of
the pointer.
•While holding down the mouse button, press the Left Arrow key or 1 to decrease the width of
the pointer.
•To set the size of the pointer and set the length of the path segment that it affects, deselect all
objects in the document, and then enter a value from 1 to 500 in the Size text box of the
Property inspector. The value indicates the size of the pointer in pixels.
To set the strength of the inner circle of the reshape area pointer:
Enter a value from 1 to 100 in the Strength text box of the Property inspector. The value indicates the
percentage of the pointer’s potential strength. The higher the percentage, the greater the strength.
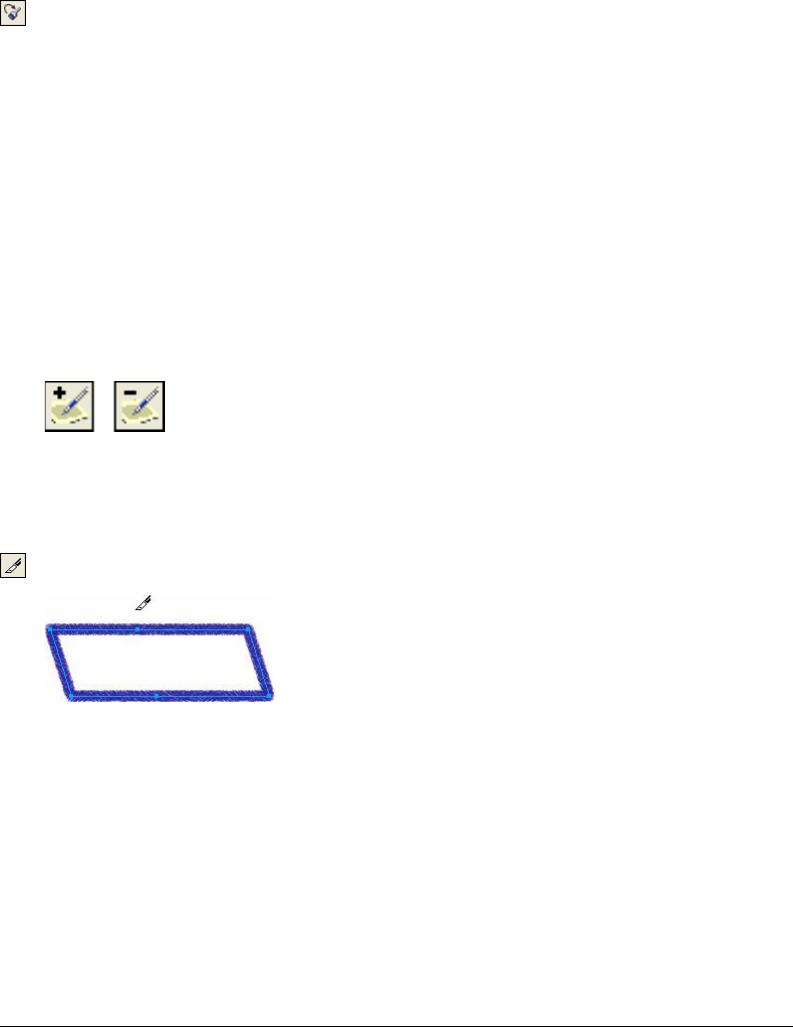
Chapter 6164
Redrawing paths
You can use the Redraw Path tool to redraw or extend a segment of a selected path while retaining
the path’s stroke, fill, and effect characteristics.
To redraw or extend a segment of a selected path:
1Choose the Redraw Path tool, located in the Pen tool pop-up menu.
2Move the pointer directly over the path.
The pointer changes to the redraw path pointer.
3Drag to redraw or extend a path segment. The portion of the path to be redrawn is
highlighted in red.
4Release the mouse button.
Changing a path’s appearance by varying pressure and speed
You can change the appearance of a path using the Path Scrubber tools. Using varying pressure or
speed, you can change a path’s stroke properties. These properties include stroke size, angle, ink
amount, scatter, hue, lightness, and saturation. You can specify which of these properties is
affected by the Path Scrubber tools using the Sensitivity tab of the Edit Stroke dialog box. You can
also specify how much pressure and speed affects these properties. For details on setting options in
the Edit Stroke dialog box, see “Working with strokes” on page 201.
Path Scrubber tools
Cutting paths into multiple objects
The Knife tool allows you to slice a path into two or more paths.

Working with Vector Objects 165
To cut a selected path:
1Choose the Knife tool.
Note: Using the eraser on Wacom pens automatically selects the Knife tool.
2Do one of the following:
•Drag the pointer across the path.
•Click on the path.
3Deselect the path.
Editing with path operations
You can use path operations in the Modify menu to create new shapes by combining or altering
existing paths. For some path operations, the stacking order of selected path objects defines how
the operation works. For information on arranging the stacking order of selected objects, see
“Stacking objects” on page 122.
Note: Using a path operation removes all pressure and speed information from the affected paths.
Combining path objects
You can combine path objects into a single path object. You can connect the end points of two open
paths to create a single closed path, or you can join multiple paths to create a composite path.
To create one continuous path from two open paths:
1Choose the Subselection tool.
2Select two end points on two open paths.
3Choose Modify > Combine Paths > Join.
To create a composite path:
1Select two or more open or closed paths.
2Choose Modify > Combine Paths > Join.
To break apart a composite path:
1Select the composite path.
2Choose Modify > Combine Paths > Split.
To combine selected closed paths as one path enclosing the entire area of the original paths:
Choose Modify > Combine Paths > Union. The resulting path assumes the stroke and fill
attributes of the object that is placed farthest back.

Chapter 6166
Creating an object from the intersection of other objects
Using the Intersect command, you can create an object from the intersection of two or more objects.
To create a closed path that encloses the area common to all selected closed paths:
Choose Modify > Combine Paths > Intersect. The resulting path assumes the stroke and fill
attributes of the object that is placed farthest back.
Removing portions of a path object
You can remove portions of a selected path object as defined by the overlapping portions of
another selected path object arranged in front of it.
To remove portions of a path object:
1Select the path object that defines the area to be removed.
2Choose Modify > Arrange > Bring to Front.
3Hold down Shift and add to the selection the path object from which the portions are to
be removed.
4Choose Modify > Combine Paths > Punch.
Stroke and fill attributes remain unchanged.

Working with Vector Objects 167
Cropping a path
You can crop a path using the shape of another path. The front or topmost path defines the shape
of the cropped area.
To crop a selected path:
1Select the path object that defines the area to be cropped.
2Choose Modify > Arrange > Bring to Front.
3Hold down Shift and add to the selection the path object to be cropped.
4Choose Modify > Combine Paths > Crop.
The resulting path object retains the stroke and fill attributes of the object that is placed
farthest back.
Simplifying a path
You can remove points from a path while maintaining its overall shape. The Simplify command
removes redundant points on your path by an amount you specify.
You might want to use Simplify if you have a straight line that contains more than two points,
for example. (Only two points are necessary to produce a straight line.) Or perhaps your path
contains points that lie exactly on top of one another. Simplify will remove points that are
unnecessary to reproduce the path you’ve drawn.
To simplify a selected path:
1Choose Modify > Alter Path > Simplify.
The Simplify dialog box appears.
2Enter a simplification amount and click OK.
As you increase the amount of simplification, you increase the amount by which you’re
permitting Fireworks to alter the path in order to reduce the number of points on that path.
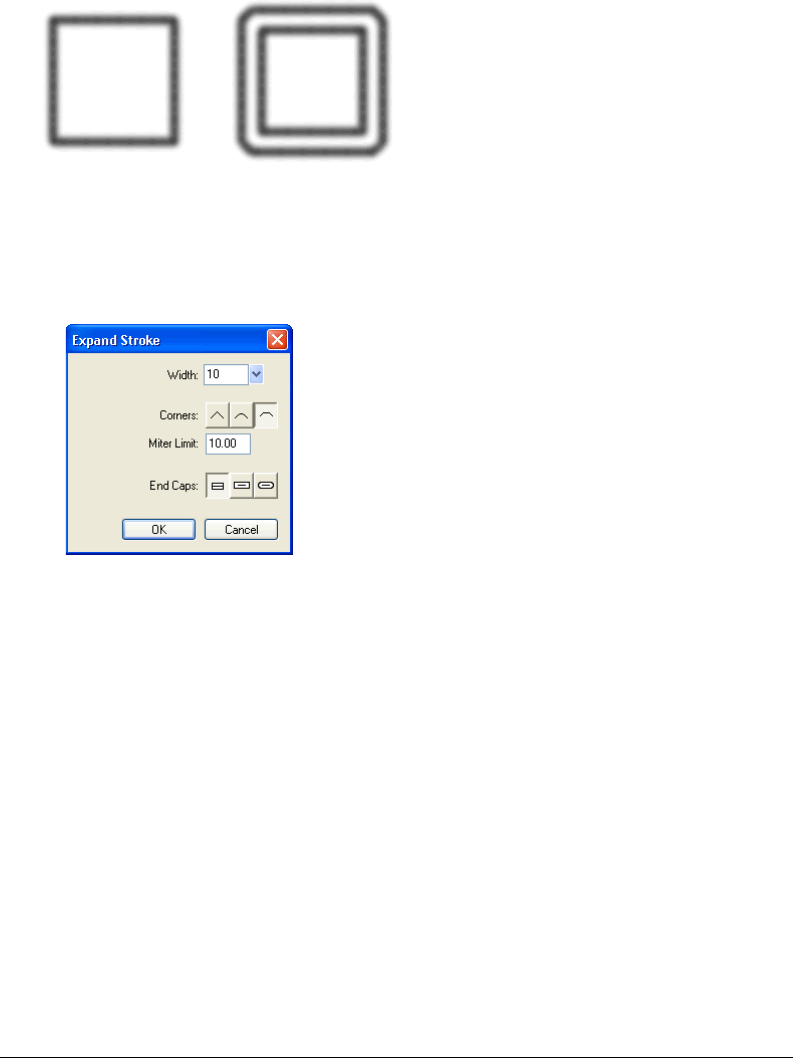
Chapter 6168
Expanding a stroke
You can convert the stroke of a selected path into a closed path. The resulting path creates the
illusion of a path with no fill and a stroke that takes on the same attributes as the original object’s fill.
Note: Expanding the stroke of a path that intersects itself can produce interesting results. If the original path
contains a fill, the intersecting portions of the path will not contain a fill after the stroke is expanded.
To expand a selected object’s stroke:
1Choose Modify > Alter Path > Expand Stroke to open the Expand Stroke dialog box.
2Set the width of the resulting closed path.
3Specify a corner type: miter, round, or beveled.
4If you chose miter, set the miter limit, the point at which a miter corner automatically becomes
a beveled corner. The miter limit is the ratio of miter corner length to stroke width.
5Choose an end cap option: butt, square, or round. Then click OK.
A closed path in the shape of the original and with the same stroke and fill attributes replaces
the original path.

Working with Vector Objects 169
Contracting or expanding a path
You can contract or expand the path of a selected object by a specific number of pixels.
To expand or contract a selected path:
1Choose Modify > Alter Path > Inset Path to open the Inset Path dialog box.
2Choose a direction to contract or expand the path:
Inside contracts the path.
Outside expands the path.
3Set the width between the original path and the contracting or expanding path.
4Specify a corner type: miter, round, or beveled.
5If you chose miter, set the miter limit, the point at which a miter corner automatically becomes
a beveled corner. The miter limit is the ratio of miter corner length to stroke width.
6Click OK.
A smaller or larger path object with the same stroke and fill attributes replaces the original
path object.

Chapter 6170
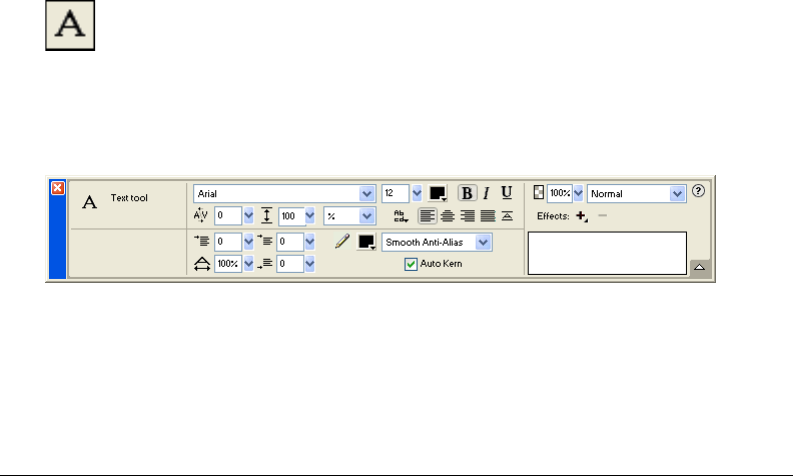
171
CHAPTER 7
Using Text
Macromedia Fireworks MX has many text features typically reserved for sophisticated desktop
publishing applications. You can create text in a variety of fonts and sizes and adjust kerning,
spacing, color, leading, baseline shift, and more. Combining Fireworks text-editing features with
the wide range of strokes, fills, effects, and styles makes text a lively element of your graphic
designs. You can also use the Fireworks spell-checker to correct misspellings.
The capability to edit text anytime—even after you apply Live Effects such as drop shadows and
bevels—means you can easily make changes to text. You can also copy objects that include text
and change the text for each copy. Vertical text, transformed text, text attached to paths, and text
converted to paths and images extend the design possibilities.
You can import text while retaining rich text format attributes. Also, when you import a Photoshop
document containing text, the text remains editable. Fireworks handles missing fonts upon import
by asking you to choose a substitute font or allowing you to import text as a static image.
Entering text
You can enter, format, and edit text in your graphics using the Text tool and the options in the
Property inspector.
Text t oo l
Note: If the Property inspector is minimized, click the expander arrow in the lower right corner to see all text properties.
The Property inspector when the Text tool is selected

Chapter 7172
Creating text blocks
All text in a Fireworks document appears inside a rectangle with handles called a text block.
To enter text:
1Choose the Text tool.
The Property inspector displays options for the Text tool.
2Choose color, font, size, spacing, and other text characteristics.
3Do one of the following:
•Click in your document where you want the text block to begin. This creates an auto-sizing
text block.
•Drag to draw a text block. This creates a fixed-width text block.
For information on the different types of text blocks, see “Using auto-sizing and fixed-width
text blocks” on page 173.
4Type your text. To enter a paragraph break, press Enter.
5If desired, highlight text within the text block after you type it and reformat it.
6When you are finished entering text, do one of the following:
•Click outside the text block.
•Choose another tool in the Tools panel.
•Press Esc.
Moving text blocks
You can select a text block and move it anywhere in your document, as you would any other
object. You can also move text blocks as you drag to create them.
To move a text block:
Drag it to the new location.
To move a text block while you drag to create it:
1While holding down the mouse button, press and hold down the Spacebar on the keyboard,
then drag the text block to another location on the canvas.
2Release the Spacebar to continue drawing the text block.
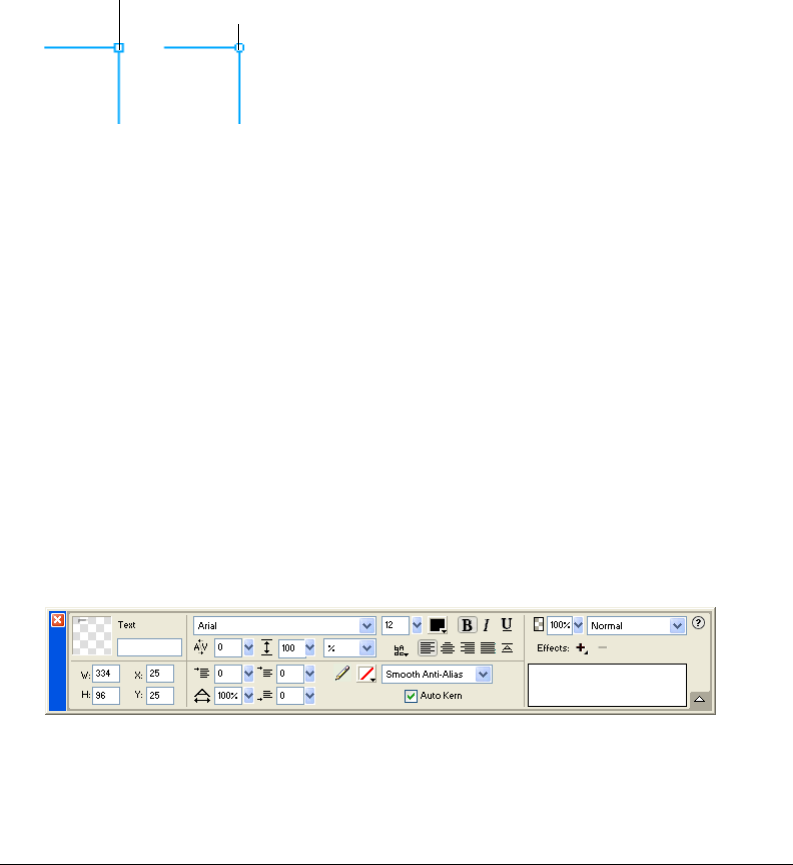
Using Text 173
Using auto-sizing and fixed-width text blocks
Fireworks has both auto-sizing text blocks and fixed-width text blocks. An auto-sizing text block
expands horizontally as you type. If you remove text, the text in an auto-sizing text block shrinks
to fit the remaining text. Auto-sizing text blocks are created by default when you click on the
canvas with the Text tool and start typing.
Fixed-width text blocks allow you to control the width of wrapped text. Fixed-width text blocks
are created by default when you drag to draw a text block using the Text tool.
When the text pointer is active within a text block, a hollow circle or hollow square appears in the
upper right corner of the text block. The circle indicates that the text block is auto-sizing; the
square indicates that it is fixed-width. Clicking the corner toggles between the two.
A fixed-width text block and an auto-sizing text block
To change a text block to fixed-width or auto-sizing:
1Double-click inside the text block.
2Double-click the circle or square in the upper right corner of the text block.
The text block switches to the other type.
To change a selected text block to fixed-width by resizing it:
Drag a resize handle.
This automatically changes the text block from auto-sizing to fixed-width.
Editing text
Within a text block, you can vary all aspects of text, including size, font, spacing, leading, and
baseline shift. When you edit text, its stroke, fill, and effect attributes redraw accordingly.
You can change a text block’s attributes using the Property inspector. If the Property inspector is
minimized, click the expander arrow in the lower right corner to see all text properties.
Property inspector when text is selected
Auto-sizing indicator
Fixed-width indicator

Chapter 7174
You can also use the Text Editor and the commands in the Text menu to edit text, but the
Property inspector offers the quickest way to change text attributes and provides more detailed
editing control than the other two options. For more information about the Text Editor, see
“Using the Text Editor” on page 189.
Note: Changes you make during a text-editing session constitute only one Undo. Choosing Edit > Undo while editing
text will undo every text edit you’ve made from the time you double-clicked the text block to edit its contents.
To edit text:
1Select the text you want to change:
•Click a text block with the Pointer or Subselection tool to select the entire block. To select
multiple blocks simultaneously, hold down Shift as you select each block.
•Double-click a text block with the Pointer or Subselection tool, and highlight a range of text.
•Click inside a text block with the Text tool, and highlight a range of text.
2Make your changes.
For information about changing text attributes, see “Choosing a font, size, and text style” on
page 174, “Applying text color” on page 175, “Setting kerning” on page 176, “Setting leading”
on page 177, “Setting text orientation” on page 178, “Setting text alignment” on page 179, and
“Indenting text” on page 179.
3Do one of the following to apply your changes:
•Click outside the text block.
•Choose another tool in the Tools panel.
•Press Esc.
Choosing a font, size, and text style
You use the Property inspector to change the font, size, and style attributes of the text within a
text block.
Note: To use Type 1 fonts on Macintosh 9.x operating systems, you need Adobe Type Manager 4 or later. You do not
need it for OS X.
To change the font, size, and style of selected text using the Property inspector:
1To change the font, choose a font from the Font pop-up menu.
2To change the font size, drag the Font Size pop-up slider or enter a value in the text box. Font
size is measured in points.
3To apply a bold, italic, or underline style, click the corresponding style button.
Note: When you transform a text block and it results in resizing or scaling text, the pretransformation font size
remains the same in the Property inspector when the text is selected. Subsequently changing the font size of
transformed text changes the text size, but only relative to the transformation.
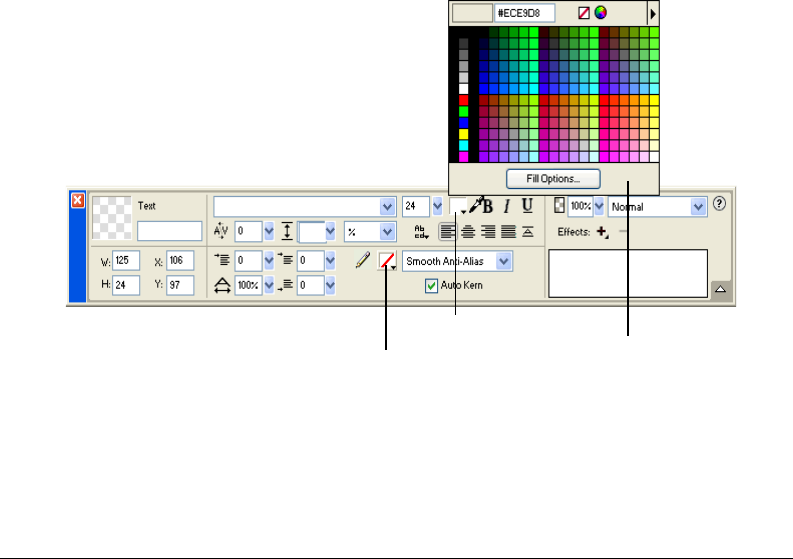
Using Text 175
Applying text color
Text color is controlled by the Fill Color box. By default, text is black and has no stroke. You can
change the color of all text within a selected text block or of highlighted text within a text block.
The Text tool retains the current text color from text block to text block.
The Text tool retains the current text color independently of the fill color of other tools. When
you use another tool after using the Text tool, the fill and stroke settings revert to the most recent
settings from before the Text tool was used. Likewise, when you return to the Text tool, the fill
color reverts to the most recent Text tool setting and the stroke is reset to None. The current Text
tool color is retained as you switch from document to document or close and reopen Fireworks.
You can add a stroke and Live Effects to all text within a selected text block, but not to
highlighted text within a text block. Stroke characteristics and Live Effects applied to a text block
update as you edit text within the text block, but the Text tool does not retain stroke
characteristics or Live Effects if you create a new text block. For more information, see “Applying
strokes, fills, and effects to text” on page 182.
Applying color to all text in selected text blocks
You can apply text color to all text within selected text blocks using the Property inspector, any
Fill Color box, or the Eyedropper tool. You can also use any of these methods to set the text color
for the Text tool.
To set the text color for all text within a selected text block, do one of the following:
•Click the Fill Color box in the Property inspector and choose a color from the color pop-up
window, or sample a color from anywhere on the screen using the eyedropper pointer while
either color pop-up window is open.
Fill Color box in the Property inspector
Stroke Color box Fill Color pop-up
window
Fill Color box

Chapter 7176
•Click the Fill Color box in the Tools panel and choose a color from the color pop-up window,
or sample a color from anywhere on the screen using the eyedropper pointer while the Fill
Color box pop-up window is open.
•Click the icon next to the Fill Color box in the Tools panel, choose the Eyedropper tool, and
then click to sample a color anywhere in any open document.
The color of the Fill Color box in the Tools panel changes to reflect the color you sample with either
the eyedropper pointer or the Eyedropper tool, and the color of the selected text also changes.
Applying color to highlighted text within a text block
You can change the text color of highlighted text within a text block using the Property inspector
or any Fill Color box. You cannot use the Eyedropper tool to edit the color of highlighted text.
Note: If you attempt to apply a stroke or Live Effect to highlighted text within a text block, the entire text block is
automatically selected.
To apply text color only to highlighted text within a text block, do one of the following:
•Click the Fill Color box in the Property inspector and choose a color from the color pop-up
window, or sample a color from anywhere on the screen using the eyedropper pointer while the
Fill Color box pop-up window is open.
•Click the Fill Color box in the Tools panel and choose a color from the color pop-up window,
or sample a color from anywhere on the screen using the eyedropper pointer while the Fill
Color box pop-up window is open.
Setting kerning
Kerning increases or decreases the spacing between certain pairs of letters to improve their
appearance. Most fonts include information that automatically reduces the amount of space
between certain letter pairs, such as “TA” or “Va.” Fireworks auto-kerning uses a font’s kerning
information when displaying text, but you may want to turn it off at smaller point sizes, or when
the text has no anti-aliasing. Kerning is measured as a percentage.
You can use the Property inspector or the keyboard to set kerning.
To disable automatic kerning:
In the Property inspector, deselect Auto Kern. If the Property inspector is minimized, click the
expander arrow in the lower right corner to see all properties.
To set kerning:
1Do one of the following to select the text you want to kern:
•Click between two characters with the Text tool.
•Use the Text tool to highlight the characters you want to change.
•Use the Pointer tool to select an entire text block. Shift-click to select multiple text blocks.
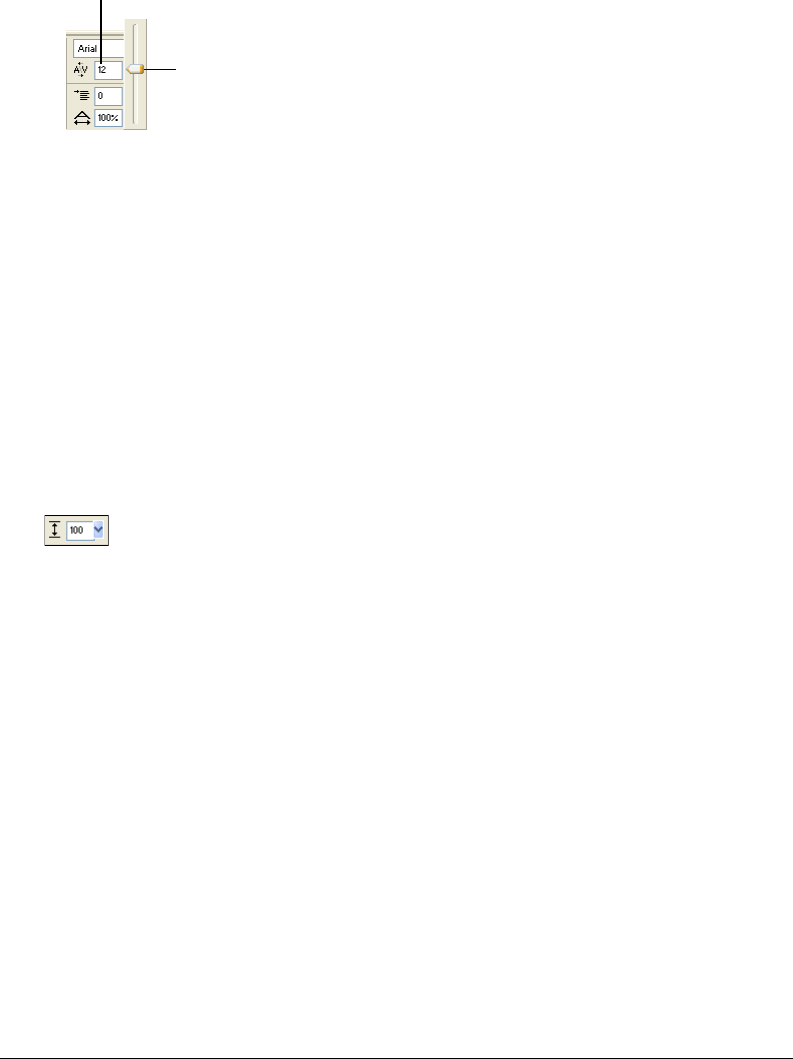
Using Text 177
2Do one of the following:
•In the Property inspector, drag the Kerning pop-up slider or enter a percentage in the text box.
Zero represents normal kerning. Positive values move letters farther apart. Negative values
move letters closer together.
•Hold down Control (Windows) or Command (Macintosh) while pressing the Left Arrow or
Right Arrow keys on the keyboard.
The Left Arrow key increases the space between letters by 1%, and the Right Arrow key moves
letters closer together by 1%.
Tip: Hold down Shift and Control (Windows) or Shift and Command (Macintosh) while pressing the Left Arrow
or Right Arrow keys to adjust kerning by 10% increments.
Setting leading
Leading determines the distance between adjacent lines in a paragraph. Leading can be measured
in pixels or as a percentage of the point size that lines are separated baseline to baseline.
You can use the Property inspector or the keyboard to set leading.
Leading options in the Property inspector
To set the leading of selected text in the Property inspector:
1In the Property inspector, drag the Leading pop-up slider or enter a value in the text box. The
default is 100%.
2To change the leading unit type, choose % or px (pixels) from the Leading Units pop-up menu.
To set the leading of selected text using the keyboard:
Hold down Control (Windows) or Command (Macintosh) while pressing the Up Arrow or
Down Arrow keys.
The Up Arrow key increases the space between lines, and the Down Arrow key moves lines
closer together.
Tip: Hold down Shift and Control (Windows) or Shift and Command (Macintosh) while pressing the Up Arrow or
Down Arrow keys to adjust leading by increments of 10.
Kerning percentage
Kerning pop-up slider
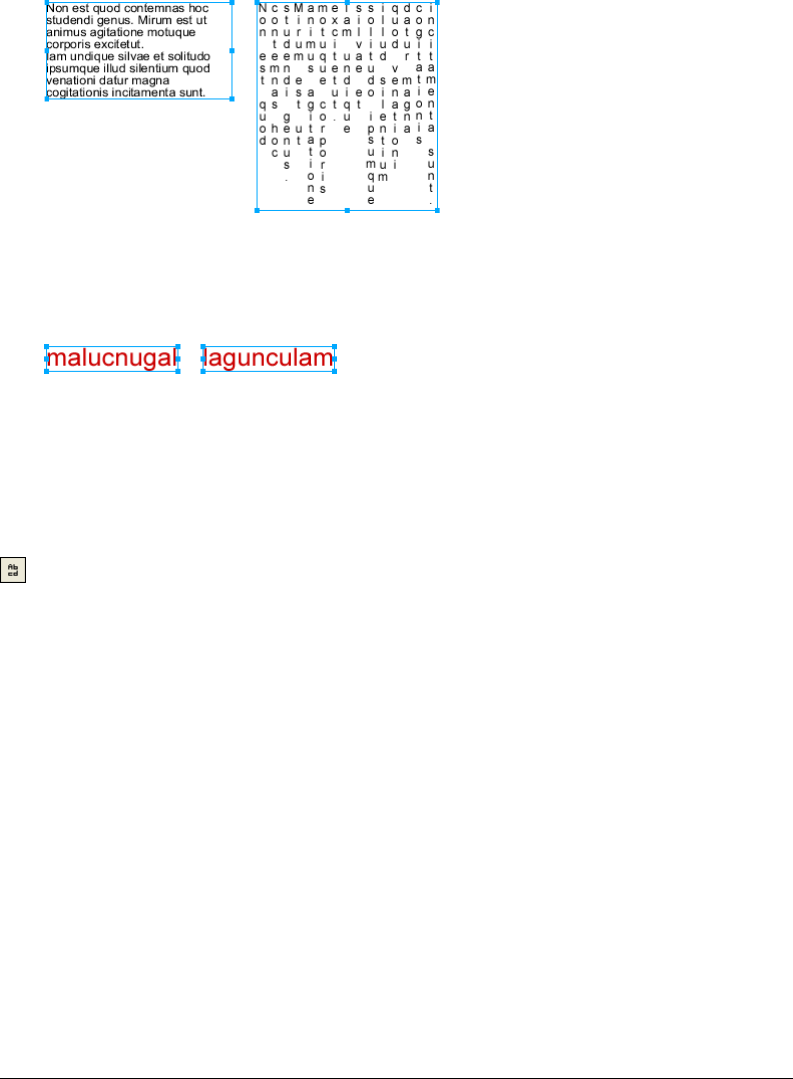
Chapter 7178
Setting text orientation
A text block can be oriented horizontally or vertically. By default, text is oriented horizontally.
Horizontal and vertical orientation
Text can also flow right to left or left to right.
Text flowing left to right and right to left
In Fireworks, you set horizontal and vertical orientation as well as the direction of text flow in the
Property inspector. These settings apply to entire text blocks only.
To set the orientation of a selected text block:
1Click the Text Orientation button in the Property inspector.
2Select an orientation option from the pop-up menu:
Horizontal Left to Right is the default setting for text in Fireworks for most languages. It orients
text horizontally and displays characters from left to right.
Horizontal Right to Left orients text horizontally and displays characters from right to left. It is
useful for displaying text in languages where text flows from right to left, such as Hebrew or Arabic.
Vertical Left to Right orients text vertically. If you apply this to lines of text separated by hard
or soft returns, each line of text is displayed as a column. The columns flow from left to right.
Vertical Right to Left orients text vertically. Multiple lines of text separated by returns are
displayed as columns that flow from right to left. This option is useful for displaying text in
languages such as Japanese in which text flows from right to left in columns.
Note: Vertical text characters always flow from top to bottom. Choosing one of the Vertical orientation options
affects only the order of text columns, not the order of text characters.
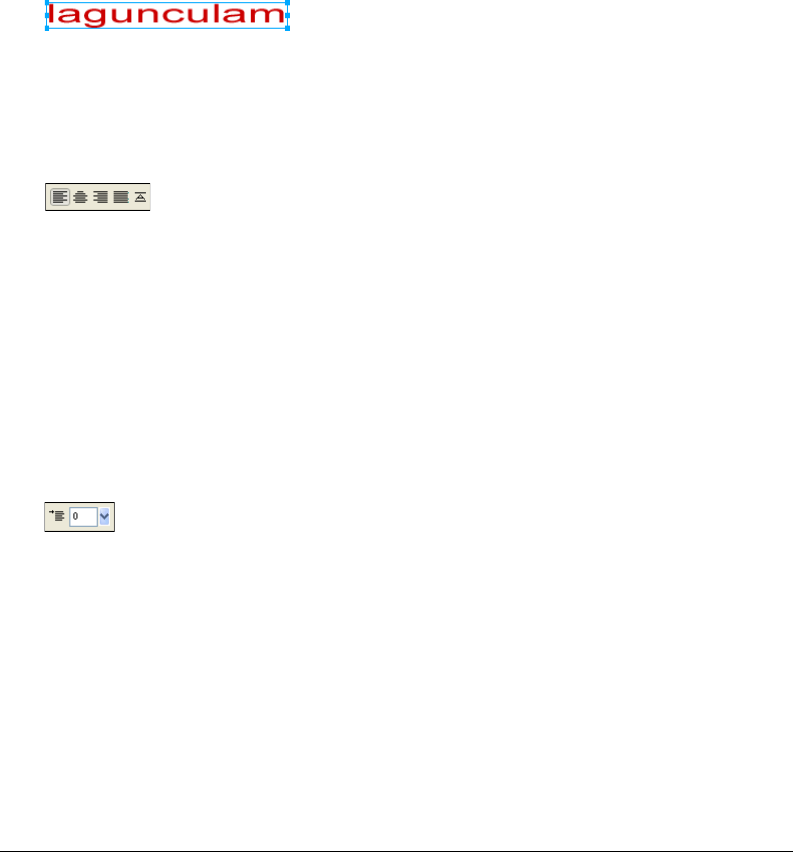
Using Text 179
Setting text alignment
Alignment determines the position of a paragraph of text relative to the edges of its text block.
Aligning horizontal text aligns it relative to the left and right edges of a text block. Aligning
vertical text aligns it relative to the top and bottom edges of a text block. For more information on
setting horizontal or vertical text orientation, see “Setting text orientation” on page 178.
You can align horizontal text to the left or right edges of the text block, center it, or fully justify it,
so that text aligns to both the left and right edges. By default, horizontal text is left-aligned.
Vertical text can be aligned to the top or bottom of a text block, centered within the text block, or
fully justified between both the top and bottom edges.
To achieve a stretched effect, or to fit text into a specific space, you can set the alignment to stretch
the text horizontally (for horizontally oriented text) or vertically (for vertically oriented text).
Horizontal text stretched to fill a text block
The alignment controls appear in the Property inspector when text is highlighted or a text block
is selected.
Text alignment options in the Property inspector
To set text alignment:
1Select the text.
2Click an alignment button in the Property inspector.
Indenting text
You can indent the first line of a paragraph using the Property inspector. Indentation is measured
in pixels.
Paragraph indent option in the Property inspector
If the Property inspector is minimized, click the expander arrow in the lower right corner to see
all properties.
To indent the first line of selected paragraphs:
In the Property inspector, drag the Paragraph Indent pop-up slider or enter a value in the text box.
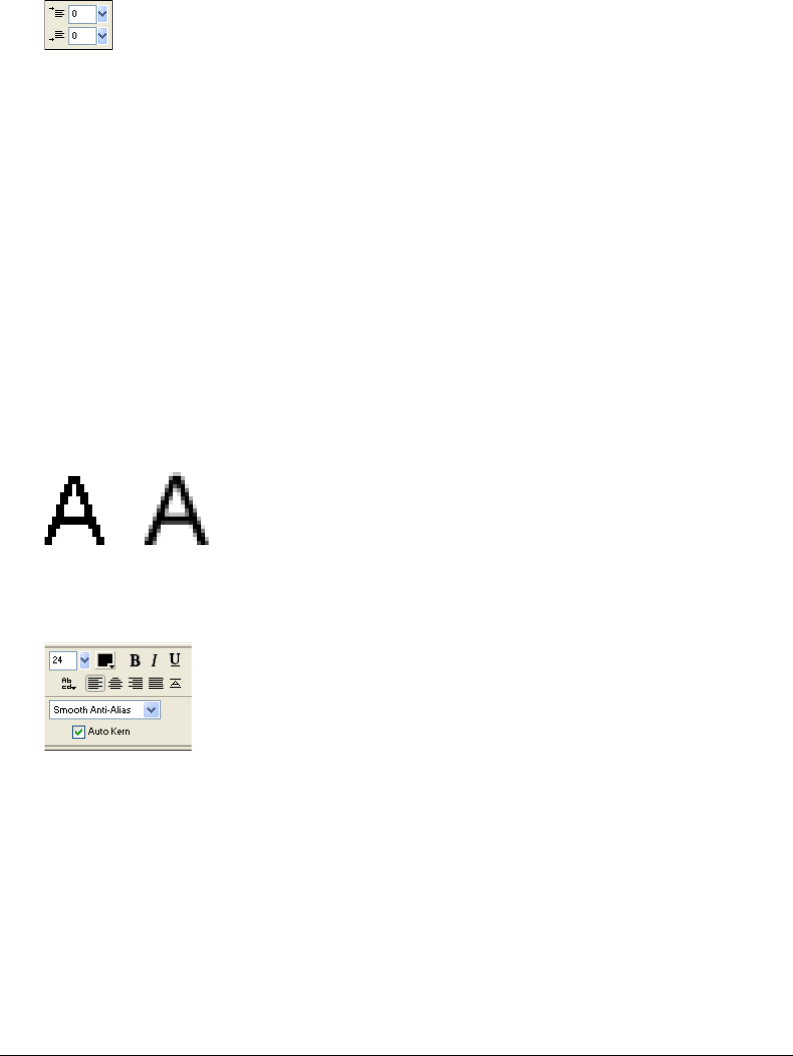
Chapter 7180
Setting paragraph spacing
You can specify the amount of spacing you want before and after paragraphs using the Property
inspector. Paragraph spacing is measured in pixels.
Paragraph spacing options in the Property inspector
If the Property inspector is minimized, click the expander arrow in the lower right corner to see
all properties.
To set the space that precedes selected paragraphs:
In the Property inspector, drag the Space Preceding Paragraph pop-up slider or enter a value in
the text box.
To set the space after selected paragraphs:
In the Property inspector, drag the Space After Paragraph pop-up slider or enter a value in the text box.
Smoothing text edges
To smooth out a text edge, you anti-alias it. This makes the edges of the text blend into the
background so that the text is cleaner and more readable when it is large.
You use the Property inspector to set anti-aliasing. If the Property inspector is minimized, click
the expander arrow in the lower right corner to see all properties.
Anti-aliasing options in the Property inspector
Anti-aliasing applies to all characters in a given text block.
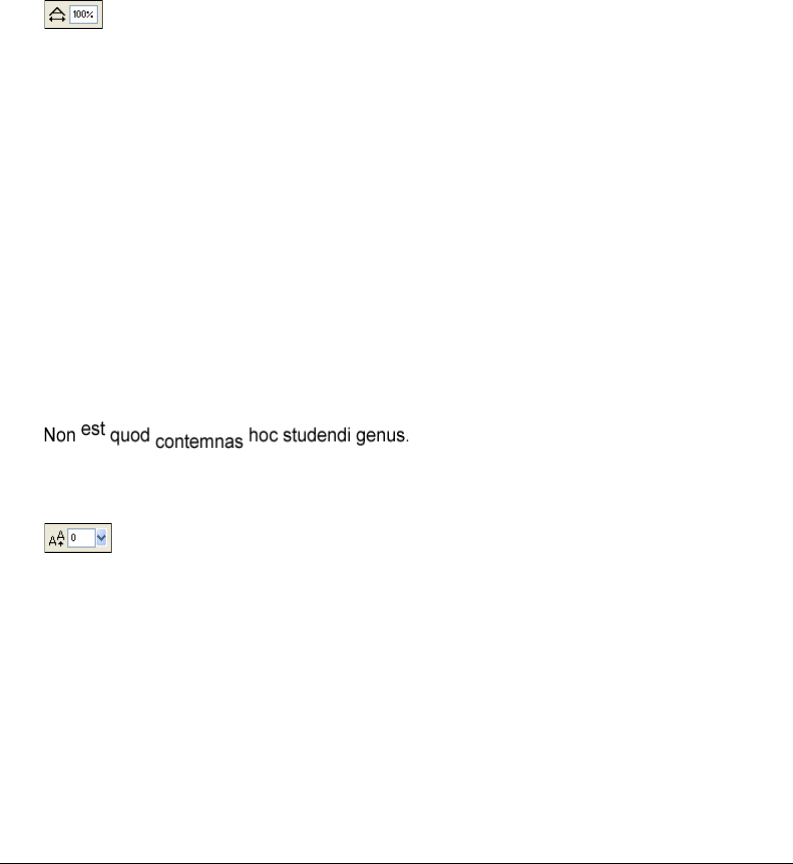
Using Text 181
To apply an anti-aliased edge to selected text:
In the Property inspector, choose an option from the Anti-Aliasing Level pop-up menu: Crisp,
Strong, Smooth, or No Anti-Alias.
Note: When you open vector files, such as FreeHand files, in Fireworks, text is anti-aliased. You can edit this
attribute using the Property inspector. For more information on opening vector files, see “Working with other vector
graphics applications” on page 383.
Expanding and contracting character width
You can expand or contract the character width of horizontal text using the Horizontal Scale
option in the Property inspector.
Horizontal scale is measured in percentage values. 100% is the default.
Horizontal Scale option in the Property inspector
If the Property inspector is minimized, click the expander arrow in the lower right corner to see
all properties.
To expand or contract selected characters:
In the Property inspector, drag the Horizontal Scale pop-up slider or enter a value in the text box.
Dragging the slider higher than 100% will expand the width or height of the characters, and
dragging it lower will contract their width or height.
Setting baseline shift
Baseline shift determines how closely text sits above or below its natural baseline. If there is no
baseline shift, the text sits on the baseline. You can use baseline shift to create subscript and
superscript characters.
The baseline shift controls are in the Property inspector. Baseline shift is measured in pixels.
Baseline Shift option in Property inspector
To set baseline shift for selected text:
In the Property inspector, drag the Baseline Shift pop-up slider or enter a value in the text box to
specify the amount to subscript or superscript the text. Entering positive values will create
superscript characters. Negative values will create subscript characters.

Chapter 7182
Applying strokes, fills, and effects to text
You can apply strokes, fills, and effects to text in a selected text block, as you would to any other
object. You can apply any style in the Styles panel to text, even if it is not a text style. You can also
create a new style by saving text attributes.
After you create text, it remains editable in Fireworks. Strokes, fills, effects, and styles update
automatically as you edit the text.
Text with stroke, fill, effect, and style applied
You can apply solid text color to highlighted text within a text block. However, stroke attributes,
Live Effects, and nonsolid fill attributes such as gradient fills are applied to all text in a selected
text block, not just to the highlighted text.
For more information about strokes and fills, see Chapter 8, “Applying Color, Strokes, and Fills,”
on page 191. For more about using styles, see “Using styles” on page 251. For information about
Live Effects, see “Applying Live Effects” on page 215.
The Text tool does not retain stroke or Live Effect settings when you create a new text block.
However, you can save stroke, fill, and Live Effects attributes that you apply to text for reuse as a
style in the Styles panel. Saving text attributes as a style saves only the attributes, not the text itself.
To save text attributes as a style:
1Create a text object and apply the attributes you want.
2Select the text object.
3Choose New Style from the Styles panel Options menu.
4Choose the properties for the new style and name it.
5Click OK.
Attaching text to a path
To free text from the restrictions of rectangular text blocks, you can draw a path and attach text to
it. The text flows along the shape of the path and remains editable. For more information on
drawing different types of paths, see “Drawing basic shapes” on page 147.
A path to which you attach text temporarily loses its stroke, fill, and effect attributes. Any stroke,
fill, and effect attributes you apply subsequently are applied to the text, not the path. If you then
detach the text from the path, the path regains its stroke, fill, and effect attributes.
Note: Attaching text that contains hard or soft returns to a path can produce unexpected results.
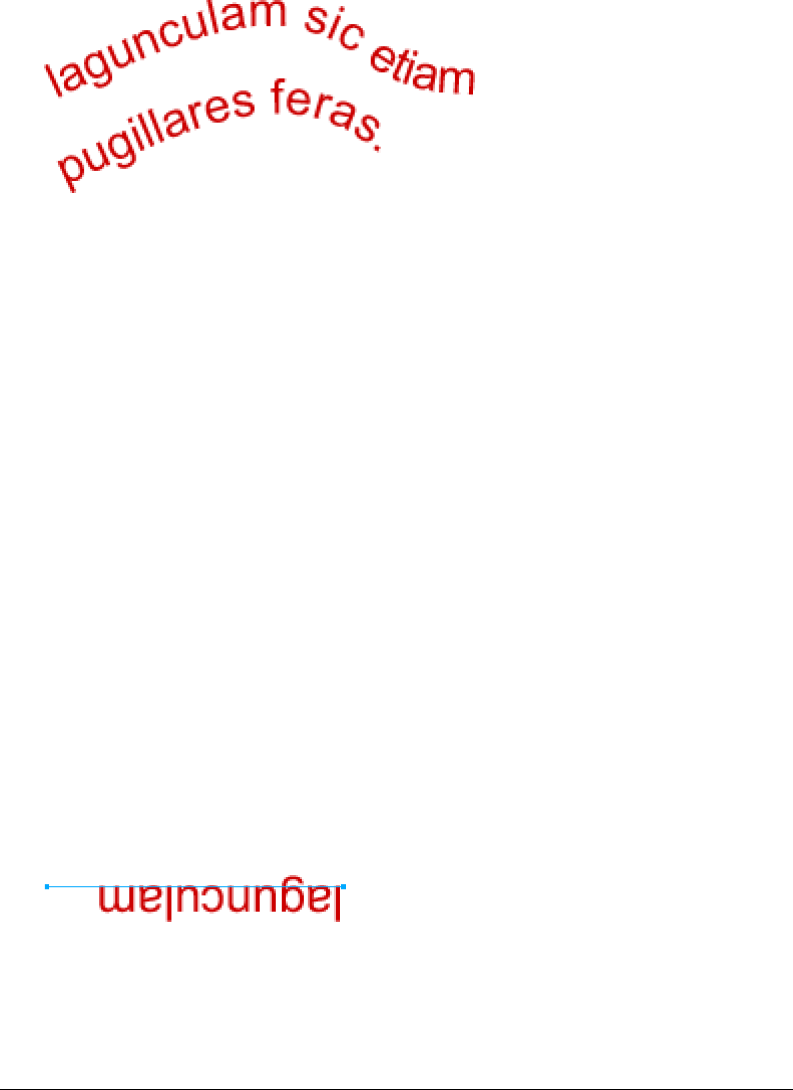
Using Text 183
If text attached to an open path exceeds the length of the path, the remaining text returns and
repeats the shape of the path.
Text on a path that returns and repeats the path shape
To place text on a path:
1Shift-select a text block and a path.
2Choose Text > Attach to Path.
To detach text from a selected path:
Choose Text > Detach from Path.
Editing paths and text attached to paths
Text that you have attached to a path remains editable. In addition, you can edit the shape of the path.
To edit text attached to a path, do one of the following:
•Double-click the text-on-a-path object with the Pointer or the Subselection tool.
•Choose the Text tool and select the text to edit.
To edit the shape of the path:
1Choose Text > Detach from Path.
2Edit the path.
3Place the text back on the path.
Changing text orientation and direction on a path
The order in which you draw a path establishes the direction of the text attached to it. For example,
if you draw a path from right to left, the attached text appears backward and upside down.
Text attached to a path drawn right to left
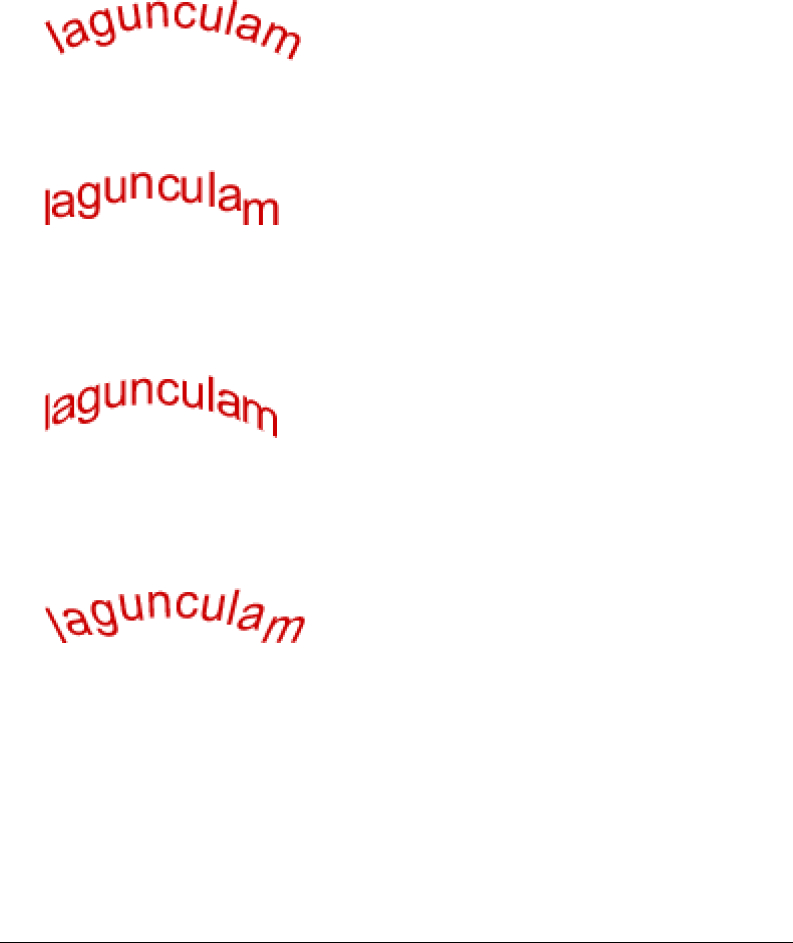
Chapter 7184
You can change the orientation or reverse the direction of the text attached to a path. You can also
change the starting point of text on a path.
To change the text’s orientation on a selected path:
Choose Text > Orientation and select an orientation.
To reverse the text’s direction on a selected path:
Choose Text > Reverse Direction.
Text rotated around path
Text oriented vertically on a path
Text skewed vertically around path
Text skewed horizontally around path
To move the starting point of text attached to a path:
1Select the text-on-a-path object.
2In the Property inspector, enter a value in the Text Offset text box. Then press Enter.
Note: If the Property inspector is minimized, click the expander arrow in the lower right corner to see all properties.

Using Text 185
Transforming text
You can transform text blocks in the same ways you can transform other objects. You can scale,
rotate, skew, and flip text to create unique text effects.
You can still edit the transformed text, although severe transformations may make the text
difficult to read. Transforming text does not change the point size of the text. When you
transform a text block and that results in resizing or scaling text, the pretransformation font size
remains the same in the Property inspector when the text is selected. Subsequently changing the
font size of transformed text will change the text size, but only relative to the transformation. For
more information, see “Transforming and distorting selected objects and selections” on page 116.
Converting text to paths
You can convert text to paths and then edit the shapes of the letters as you would any vector
object. All vector-editing tools are available to edit text once you have converted it to paths.
However, you can no longer edit it as text.
To convert selected text to paths:
Choose Text > Convert to Paths.
Text converted to paths retains all of its visual attributes, but you can edit it only as paths. You can
edit the converted text as a group or edit the converted characters individually.
To edit converted text character paths individually, do one of the following:
•Select the converted text with the Subselection tool.
•Select the converted text and choose Modify > Ungroup.
You can edit the individual converted character paths using the vector-editing tools. For more
information on editing paths, see “Editing paths” on page 160.
You can create a composite path from a text object that was created by converting text to paths.
To create a composite path from a path group that was created by converting text to paths:
1Select the path group.
2Choose Modify > Ungroup.
3Choose Modify > Combine Paths > Join.

Chapter 7186
Importing text
You can use text from other documents by dragging and dropping or copying and pasting from
the source document into the current Fireworks document. You can also open or import an entire
text file in Fireworks.
Fireworks can import RTF (rich text format) and ASCII (plain text) formats.
To open or import a text file:
1Choose File > Open or File > Import.
2Navigate to the folder containing the file.
3Choose the file and click OK.
Photoshop text
You can open or import a Photoshop file containing text, or you can copy and paste or drag and
drop text from a Photoshop file into the current Fireworks document. For more information, see
“Placing Photoshop graphics into Fireworks” on page 392.
RTF files
When importing RTF text, Fireworks maintains these attributes:
•Font, size, and style (bold, italic, underline)
•Alignment (left, right, center, justified)
•Leading
•Baseline shift
•Range kerning
•Horizontal scale
•Color of the first character
All other RTF information is ignored.
Fireworks cannot import RTF text by copying and pasting or dragging and dropping.
ASCII text
You can import ASCII text using any of the import methods. Imported ASCII text is set to the
current default font, 12 pixels high, and uses the current fill color.
Handling missing fonts
If you open a document in Fireworks that contains fonts not installed on your computer,
Fireworks asks if you want to replace the fonts or maintain their appearance. This is useful if you
share files with users on other computers that may not have the same fonts installed.
Choosing Maintain Appearance replaces the text with a bitmap image that represents the
appearance of the text in its original font. You can still edit the text, but when you do so,
Fireworks replaces the bitmap image with a font that’s installed on your system. This can cause
the appearance of the text to change.

Using Text 187
You can choose fonts to replace the missing fonts. Once you have replaced fonts, the document
opens and you can edit and save the text. When the document is reopened on a computer that
contains the original fonts, Fireworks remembers and uses the original fonts.
To select a replacement font:
1Open a document with missing fonts.
The Missing Fonts dialog box opens.
2Choose a missing font from the Change Missing Font list.
3Do one of the following:
•Choose a replacement font from the To list.
•Choose to display the text in the default system font.
•To leave the missing font as is, click No Change.
4Click OK.
The next time you open a document with the same missing fonts, the Missing Fonts dialog box
includes the font you chose.
Checking spelling
You can use the Check Spelling command in the Text menu to check spelling for specific text
blocks or all text in a document.
To spell-check text:
1Select one or more text blocks. If no text blocks are selected, spelling will be checked for the
entire document.
2Choose Text > Check Spelling.
3If you have not checked spelling before in Fireworks, a dialog box opens requesting that you
choose a dictionary. Click OK to close the dialog box. Choose a language from the Dictionary
list, and click OK.
If you don’t choose a language, you will be prompted to choose a language dictionary every
time you spell-check a document.
Note: The Macromedia.tlx option is always selected at the top of the Dictionary list. For more information about
this option, see “Customizing spell checking” on page 188.

Chapter 7188
4The Check Spelling dialog box appears. For each word found, choose the appropriate option:
Add to Personal adds the unrecognized word to your personal dictionary.
Ignore skips the current instance of the unrecognized word.
Ignore All skips all instances of the unrecognized word during the current spell-checking
session. The next time you spell-check, the unrecognized word will be identified again.
Change replaces the current instance of the unrecognized word with text that you type in the
Change To box or with the selection in the Suggestions list.
Change All replaces all instances of the unrecognized word in the same manner.
Delete removes a duplicate word when one is found.
When Fireworks finishes checking the spelling in a document, the Check Spelling dialog box
closes and a message appears indicating that the spell-check is complete.
Customizing spell checking
You can customize the way Fireworks spell-checks documents using the Spelling Setup dialog box.
From here you can specify one or more language dictionaries for Fireworks to use during spell
checking, as well as edit the words in your personal dictionary. You can also specify which items
you want Fireworks to spell-check, including Internet and file addresses.
To customize spell checking in Fireworks:
1Do one of the following:
•Choose Text > Spelling Setup.
•Click the Setup button in the Check Spelling dialog box.
2Choose the desired options in the Spelling Setup dialog box:
•Choose one or more language dictionaries.
Note: The Macromedia.tlx option is always selected at the top of the dictionary list. This is the file that contains
your custom spelling dictionary.
•Browse for a custom dictionary by clicking the folder icon beside the Personal Dictionary
Path text box.
•Edit the custom dictionary by clicking the Edit Personal Dictionary button and adding,
deleting, or modifying words in the list.
•Choose the types of words you want to include in the spell-check.
3Click OK.
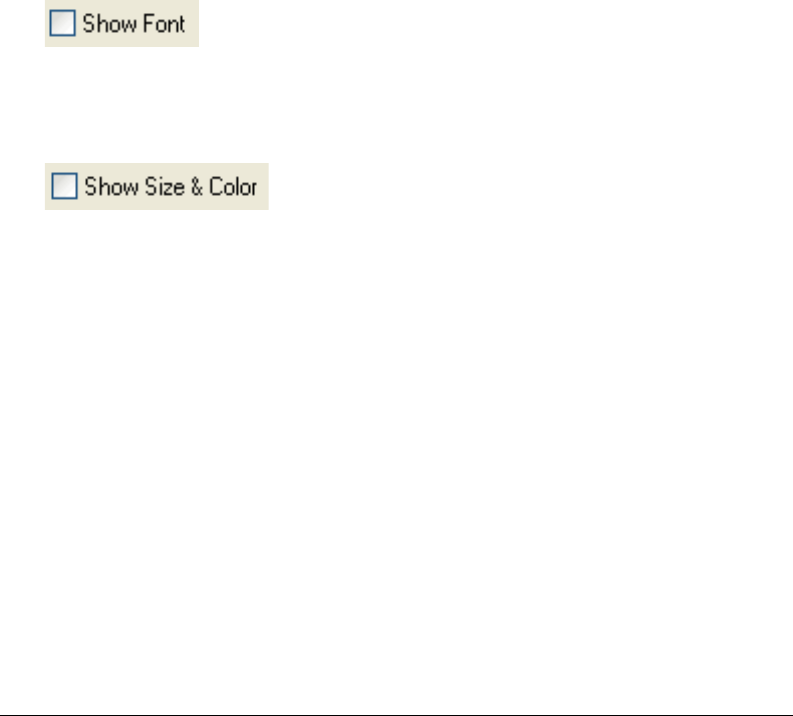
Using Text 189
Using the Text Editor
In Fireworks 4 and previous versions, text was created and edited using the Text Editor. All text-
editing and formatting options found in the Text Editor are now located in the Property
inspector. However, you can still access the Text Editor through the Text menu.
The Text Editor is useful for working with text that might be difficult to edit onscreen, such as
large text blocks, text attached to a path, or text with hard-to-read fonts and sizes. You can choose
to display such text in the system font and default size if necessary to make editing easier.
Note: Some text features new to Fireworks MX are not available from the Text Editor.
To display the Text Editor:
1Select a text block and choose Text > Editor.
2Modify and format the text using the options available.
3Click OK to apply changes and close the Text Editor.
To view text in the system font:
Deselect Show Font in the Text Editor.
To view text in the default size:
Deselect Show Size & Color in the Text Editor.

Chapter 7190

191
CHAPTER 8
Applying Color, Strokes, and Fills
Macromedia Fireworks MX has a wide range of panels, tools, and options for organizing and
choosing colors, and applying colors to bitmap images and vector objects.
In the Swatches panel, you can choose a preset swatch group such as Color Cubes, Continuous
Tone, or Grayscale, or you can create custom swatch groups that include your favorite colors or
colors approved by your client. In the Color Mixer, you can choose a color model such as
Hexadecimal, RGB, or Grayscale, and then choose stroke and fill colors directly from the color
bar or by entering specific color values.
Throughout the Fireworks workspace you will find color boxes that show the current color
choices for options and object characteristics. When you click a color box, a color pop-up window
opens, where you can choose a color for the color box. Move the pointer away from an open color
pop-up window, and you can click any color on your screen to apply it to the color box.
The Colors section of the Tools panel contains stroke and fill color controls and other color
options. The Bitmap section contains the Paint Bucket, Gradient Fill, and Eyedropper tools,
which you can use to apply color to bitmap selections, areas of similar color, and vector objects. For
information on these bitmap tools, see Chapter 5, “Working with Bitmaps,” on page 125.
Note: For information about color correction using Live Effects and filters, see “Adjusting bitmap color and tone”
on page 133.
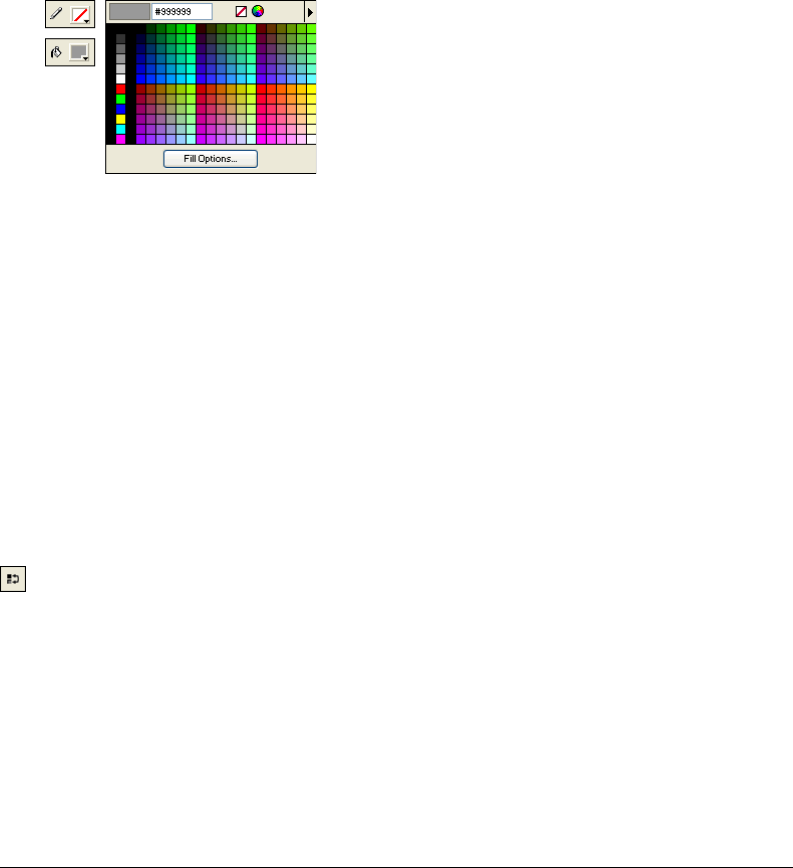
Chapter 8192
Using the Colors section of the Tools panel
The Colors section of the Tools panel contains controls for activating the Stroke Color and Fill
Color boxes, which in turn determine whether the strokes or fills of selected objects are affected
by color choices. Also, the Colors section has controls for quickly resetting colors to the default,
setting the stroke and fill color settings to None, and swapping fill and stroke colors.
To make the Stroke Color or Fill Color box active:
Click the icon next to the Stroke Color or Fill Color box in the Tools panel. The active color box
area appears as a depressed button in the Tools panel.
Note: The Paint Bucket tool fills pixel selections and vector objects with the color shown in the Fill Color box in
the Tools panel.
Color boxes in the Tools panel and the color pop-up window
To reset colors to the default:
Click the Default Colors button in the Tools panel or in the Color Mixer.
To remove the stroke and fill from selected objects using the No Stroke or Fill button:
1Click the No Stroke or Fill button in the Colors section of the Tools panel.
The active characteristic changes to a stroke or fill of None.
2To set the inactive characteristic to None as well, click the No Stroke or Fill button again.
Note: You can also set the fill or stroke of selected objects to None by clicking the Transparent button in any Fill
Color or Stroke Color box pop-up window, or by choosing None from the Fill Options or Stroke Options pop-up
menu in the Property inspector.
To swap fill and stroke colors:
Click the Swap Colors button in the Tools panel or in the Color Mixer.
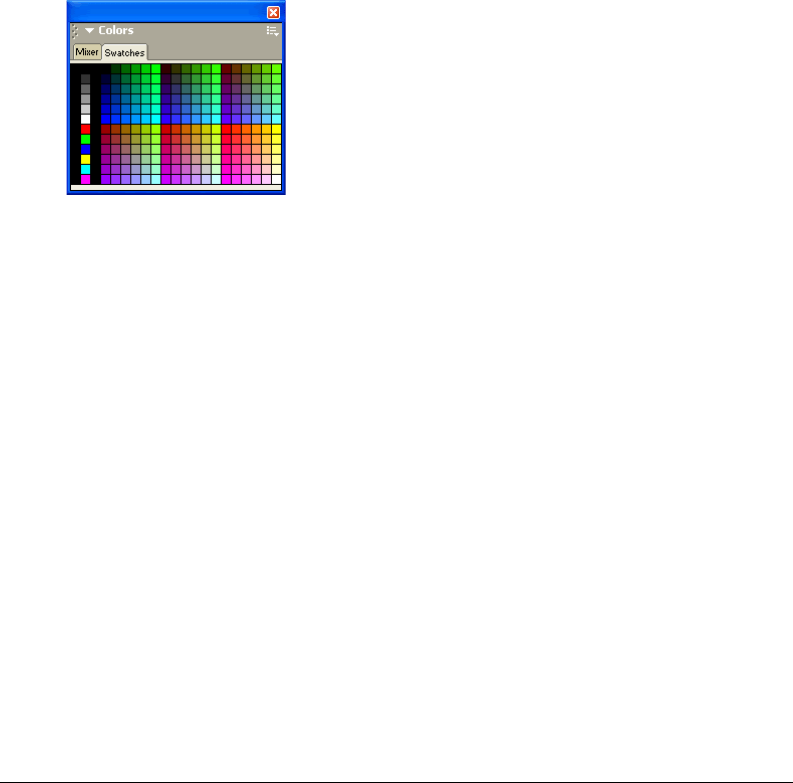
Applying Color, Strokes, and Fills 193
Organizing swatch groups and color models
The Swatches panel and Color Mixer combine to form the Colors panel group. In the Swatches
panel you can view, change, create, and edit swatch groups, as well as choose stroke and fill colors.
You can use the Color Mixer to choose a color model, mix stroke and fill colors by dragging color
value sliders or entering color values, and choose stroke and fill colors directly from the color bar.
Applying colors using the Swatches panel
The Swatches panel displays all the colors in the current swatch group. You can use the Swatches
panel to apply stroke and fill colors to selected vector objects or text.
To apply a color to the stroke or fill of a selected object using the Swatches panel:
1Click the icon next to the Stroke Color or Fill Color box in the Tools panel or Property
inspector to make it active.
2If the Swatches panel is not already open, choose Window > Swatches.
Swatches panel
3Click a swatch to apply the color to the stroke or fill of the selected object. The color appears in
the active Stroke Color or Fill Color box.
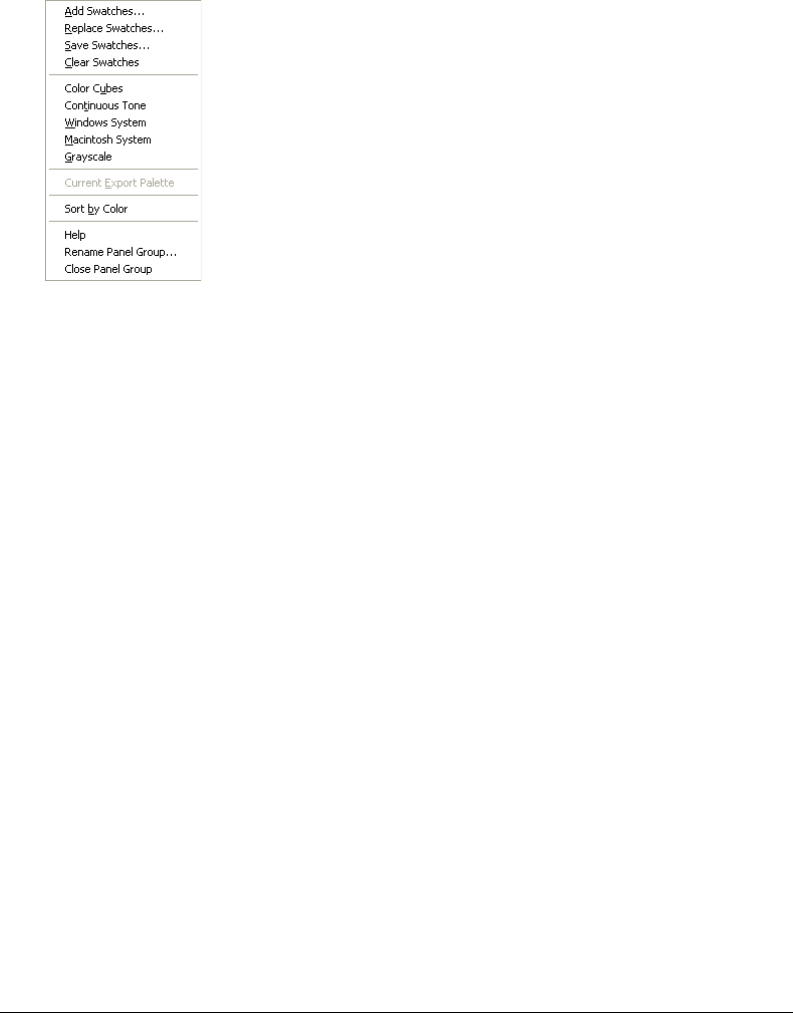
Chapter 8194
Changing swatch groups
You can easily switch to another swatch group or create your own. The Swatches panel Options
menu contains the following swatch groups: Color Cubes, Continuous Tone, Macintosh System,
Windows System, and Grayscale. You can import custom swatches from color palette files saved
as ACT or GIF files.
Swatches panel Options menu
To choose a swatch group:
Choose a swatch group from the Swatches panel Options menu.
Note: Choosing Color Cubes returns you to the default swatch group.
To choose a custom swatch group:
1Choose Replace Swatches from the Swatches panel Options menu.
2Navigate to the folder and choose a swatch file.
3Click Open.
The color swatches in the swatch file replace the previous swatches.
Note: For information on creating a custom swatch group, see “Customizing the Swatches panel” on page 195
and “Saving palettes” on page 339.
To append swatches from an external color palette to the current swatches:
1Choose Add Swatches from the Swatches panel Options menu.
2Navigate to the desired folder and choose a color palette file.
Note: Fireworks can add new swatches from palettes exported as ACT or GIF files.
3Click OK.
The new swatches are appended to the end of the current swatches.

Applying Color, Strokes, and Fills 195
Customizing the Swatches panel
You can add, delete, replace, and sort color swatches or entire swatch groups using the Swatches panel.
Note: Choosing Edit > Undo does not undo swatch additions or deletions.
Swatches panel
To add a color to the Swatches panel:
1Choose the Eyedropper tool from the Tools panel.
2Choose the number of pixels to sample from the Sample pop-up menu in the Property
inspector: 1 pixel, 3x3 Average, or 5x5 Average.
3Click anywhere inside any open Fireworks document window to sample a color.
4Move the tip of the eyedropper pointer to the open space after the last swatch in the Swatches panel.
The eyedropper pointer becomes the paint bucket pointer.
5Click to add the swatch.
Tip: When you choose Snap to Web Safe in the Options menu of the color pop-up window, any non-websafe
color you pick up with the eyedropper pointer is changed to the nearest websafe color.
To replace a swatch with another color:
1Choose the Eyedropper tool from the Tools panel.
2Choose the number of pixels to sample from the Sample pop-up menu in the Property
inspector: 1 pixel, 3x3 Average, or 5x5 Average.
3Click anywhere inside any Fireworks document window to sample a color.
4Hold down Shift and place the pointer over a swatch in the Swatches panel.
The pointer becomes the paint bucket pointer.
5Click the swatch to replace it with the new color.
To delete a swatch from the Swatches panel:
1Hold down Control (Windows) or Command (Macintosh) and place the pointer over a swatch.
The pointer becomes the scissors pointer.
2Click the swatch to delete it from the Swatches panel.
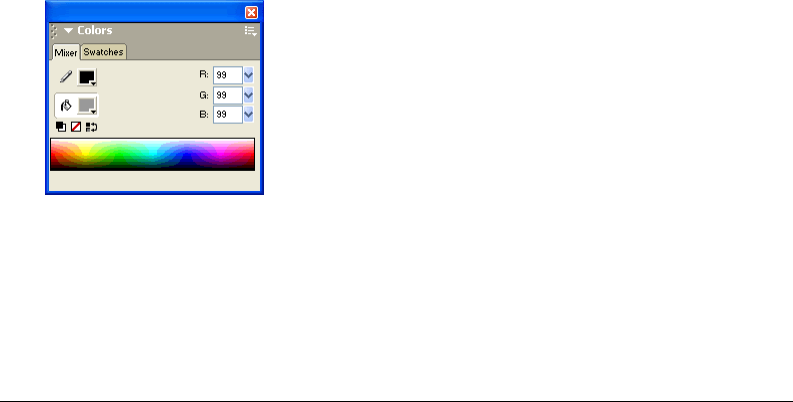
Chapter 8196
To save a selection of sampled colors:
1Add sampled colors to the Swatches panel.
2Choose Save Swatches from the Swatches panel Options menu.
The Export Swatches dialog box opens.
3Choose a filename and directory and click Save.
Clearing and sorting swatches
You can clear and sort swatches using the Swatches panel Options menu:
To clear or sort swatches:
Choose one of the following from the Swatches panel Options menu:
Clear Swatches clears the entire Swatches panel.
Sort by Color sorts the swatches by color value.
Creating colors in the Color Mixer
In the Color Mixer, you can create colors by dragging sliders or entering values for each
component of a color model such as RGB, Hexadecimal, or CMY. The color you create is applied
to the active Stroke Color or Fill Color box. The Color Mixer also has a color bar displaying the
range of colors in the current color model. You can click anywhere in the color bar to apply a
color. You can also click the system color picker button to choose a Windows or Macintosh
system color.
Tip: Although CMY is a color model option, graphics directly exported from Fireworks are not ideal for printing. To
repurpose exported Fireworks graphics for print, you can import them into FreeHand MX, which automatically
performs CMYK conversion of RGB images when output to digital color separations. For more information, see
FreeHand MX documentation.
Mixing colors in the Color Mixer
You can use the Color Mixer to view the values of the active color and edit color values to create
new colors.

Applying Color, Strokes, and Fills 197
By default, the Color Mixer identifies RGB colors as hexadecimal, displaying hexadecimal color
values for red (R), green (G), and blue (B) color components. Hexadecimal RGB values are
calculated based on a range of values from 00 to FF.
You can choose alternative color models from the Color Mixer Options menu. The current color’s
component values change with each new color model.
To display the Color Mixer:
Choose Window > Color Mixer.
To apply a color from the color bar to a selected vector object:
1Click the icon next to the Stroke Color or Fill Color box in the Color Mixer.
2Move the pointer over the color bar.
The pointer becomes the eyedropper pointer.
3Click to pick a color.
The color is applied to the selected object and becomes the active stroke or fill color.
To pick a color from the Color Mixer:
1Deselect all objects before mixing a color to prevent unwanted object editing as you mix colors.
2Click either the Stroke Color or Fill Color box to make it the destination for the new color.
3Choose a color model from the Color Mixer Options menu.
4Do any of the following to specify color component values:
•Enter values in the color component text boxes.
•Use the pop-up sliders.
•Pick a color from the color bar.
You can add this color to the Swatches panel to reuse. For more information, see “Customizing
the Swatches panel” on page 195.
Choose To express color components as
RGB Values of Red, Green, and Blue, where each component has a value from 0 to 255. 0-0-0 is
black and 255-255-255 is white.
Hexadecimal RGB values of Red, Green, and Blue, where each component has a hexadecimal value from 00
to FF. 00-00-00 is black and FF-FF-FF is white.
HSB Values of Hue, Saturation, and Brightness, where Hue has a value from 0 to 360 degrees, and
Saturation and Brightness have a value from 0 to 100%.
CMY Values of Cyan, Magenta, and Yellow, where each component has a value from 0 to 255. 0-0-
0 is white and 255-255-255 is black.
Grayscale A percentage of black. The single Black (K) component has a value from 0 to 100%, where 0 is
white and 100 is black, and in between are shades of gray.

Chapter 8198
To cycle the color bar through the color models:
Shift-click the color bar at the bottom of the Color Mixer.
Note: The options in the Color Mixer do not change.
Creating colors using the system color pickers
You can create colors using the Windows System or the Macintosh System dialog boxes, instead
of using the Color Mixer and Swatches panel.
To pick a color from the system color picker:
1Click any color box.
2Choose Windows OS or Mac OS from any color pop-up window Options menu.
The system color swatches are displayed in the pop-up window.
3Choose a color from the system color picker.
The color becomes the new stroke or fill color.
For information on adding a color to the Swatches panel from the color picker, see “Customizing
the Swatches panel” on page 195.
Viewing color values
In addition to the Color Mixer and color pop-up window, you can use the Info panel to identify
color values.
To view the color value of any part of your document using the Info panel:
1Choose Window > Info to display the Info panel.
2Move the pointer over the object containing the color you want to view (Windows only).
To view the color value of the active stroke or fill color, do one of the following:
•Choose Window > Color Mixer for RGB or other color system values.
•Click a color box to open the color pop-up window and view the hexadecimal value at the top
of the window.
•Place the pointer over a color box and read the tooltip (Windows only).
Note: By default, the color’s RGB values appear in the Info panel and the Color Mixer, and its hexadecimal value
appears in the color pop-up window, as well as the color box tooltip in Windows. However, you can change the
color model displayed in the Color Mixer or the Info panel anytime.
To display color information for an alternate color model:
Choose another color model from the Info panel Options menu or the Color Mixer Options menu.

Applying Color, Strokes, and Fills 199
Dithering with websafe colors
Sometimes you might need to use a color that is not a websafe color. For example, your company
logo may use a color that is not websafe. To approximate a websafe color that doesn’t shift or
dither when exported with a websafe palette, you use a web dither fill.
Note: Web dithering can increase the size of the file.
Two websafe colors create a web dither fill.
To use the web dither fill:
1Select an object containing a non-websafe color.
2Choose Web Dither from the Fill Options pop-up menu in the Property inspector.
3Click the Fill Color box in the Property inspector.
The color pop-up window opens, displaying options for web dither fills. The object’s
non-websafe color appears in the Source color box in the Fill Options window. The two
websafe dither colors appear in the color boxes to the right. The web dither appears on the
object and becomes the active fill color.
Note: Setting the edge of a web dither fill to Anti-Alias or Feather results in colors that are not websafe.
4Click outside the pop-up window to close it.
To create the illusion of a true transparent fill in a web browser:
1Select the object to which you want to apply a transparent fill.
2Choose Web Dither from the Fill Options pop-up menu in the Property inspector.
3Click the Fill Color box in the Property inspector. The color pop-up window opens, displaying
options for web dither fills.
4Click the Transparent option.
The color boxes on the right side of the pop-up window change to reflect your selection, and
the object on the canvas becomes semi-opaque, or translucent.
5Click outside the pop-up window to close it.
6Export the object as a GIF or PNG with Index Transparency or Alpha Channel Transparency
set. For more information on exporting files with transparency, see “Making areas transparent”
on page 340.
When you view the graphic in a web browser, the web page background shows through every
other pixel of the transparent web dither fill, creating the appearance of transparency.
Note: Not all browsers support PNG files.

Chapter 8200
Using color boxes and color pop-up windows
Throughout Fireworks MX you will find color boxes—from the Colors section of the Tools panel
to the Property inspector to the Color Mixer. Each displays the current color assigned to the
associated object property.
Choosing colors from a color pop-up window
When you click any color box, a color pop-up window similar to the Swatches panel opens. You
can choose to display the same swatches in a color pop-up window as those that are displayed in
the Swatches panel, or you can display different swatches.
To choose a color for a color box:
1Click the color box.
The color pop-up window opens.
2Do one of the following:
•Click a swatch to apply it to the color box.
•Click the eyedropper pointer on a color anywhere on the screen to apply it to the color box.
•Click the Transparent button to make the stroke or fill transparent.
To display the current Swatches panel swatch group in the color pop-up window:
Choose Swatches Panel from the color pop-up window Options menu.
To display a different swatch group in the color pop-up window:
Choose a swatch group from the color pop-up window Options menu. Choosing a swatch group
here does not affect the Swatches panel.
Sampling colors from a color pop-up window
When a color pop-up window is open, the pointer becomes a special eyedropper that can sample
colors from almost anywhere on the screen. This is known as sampling.
To sample a color from anywhere on the screen for the current color box:
1Click any color box.
The color pop-up window opens, and the pointer changes to an eyedropper.
2Click anywhere in the Fireworks workspace to choose a color for the color box.
The color is applied to the characteristic or feature associated with the color box, and the color
pop-up window closes.
Tip: Shift-click to choose a websafe color.
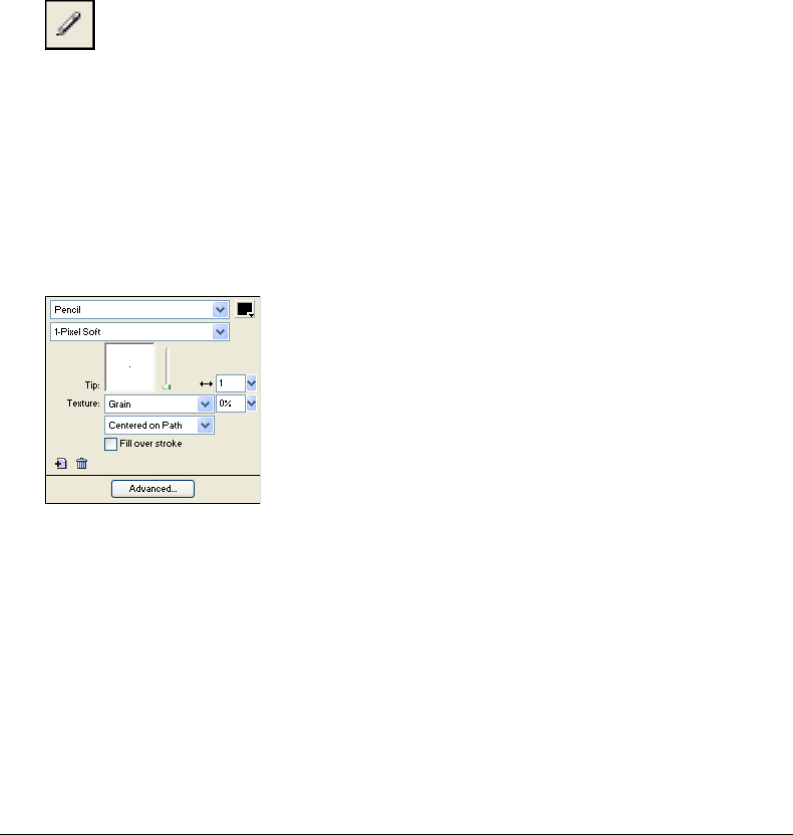
Applying Color, Strokes, and Fills 201
Working with strokes
Using the Property inspector, the Stroke Options pop-up menu, and the Edit Stroke dialog box,
you can have full control of every brush nuance, including ink amount, tip size and shape,
texture, edge effect, and aspect.
Applying strokes
You can change the stroke attributes of the Pen, Pencil, and Brush tools so that the next vector
object you draw has the new stroke attributes, or you can apply stroke attributes to an object or
path after you draw it.
The current stroke color appears in the Stroke Color box in the Tools panel, the Property
inspector, and the Color Mixer. You can change the stroke color of a drawing tool or selected
object from any of these three panels.
The pencil icon indicates the Stroke Color box in the Tools panel, the Property inspector, and the Color Mixer.
To change stroke attributes of selected objects, do one of the following:
•Choose from among the stroke attributes in the Property inspector.
Tip: Choose Stroke Options from the Stroke Options pop-up menu for more attributes.
•Click the Stroke Color box in the Tools panel and click Stroke Options. Choose from among
the stroke attributes in the Stroke Options pop-up window.
Use the options in the Property inspector or the Stroke Options pop-up window to change the stroke
applied to an object.
To change the stroke color of a drawing tool:
1Press Control+D (Windows) or Command+D (Macintosh) to deselect all objects.
2Choose a drawing tool in the Tools panel.
3Click the Stroke Color box in the Tools panel or Property inspector to open the color
pop-up window.
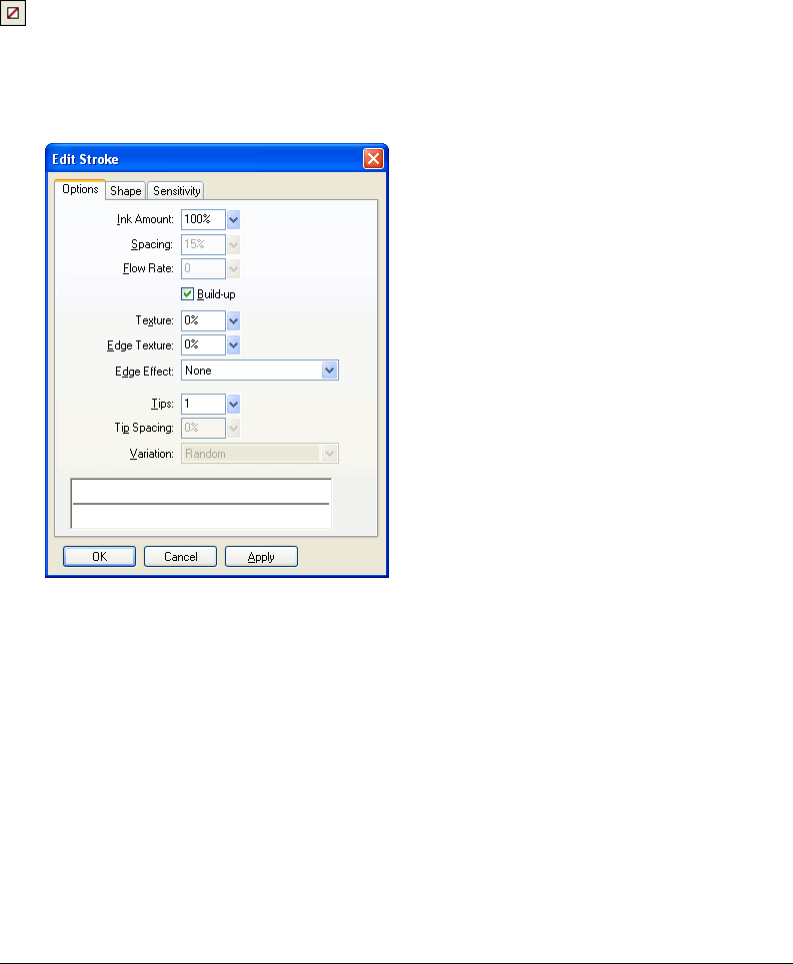
Chapter 8202
4Choose a color for the stroke from the set of swatches.
5Drag to draw the object.
Note: A newly created stroke assumes the color currently displayed in the Stroke Color box.
To remove all stroke attributes from a selected object, do one of the following:
•Choose None from the Stroke Options pop-up menu in the Property inspector or the Stroke
Options pop-up window.
•Click the Stroke Color box in either the Tools panel or the Property inspector and click the
Transparent button.
Creating custom strokes
You can use the Edit Stroke dialog box to change specific stroke characteristics.
The Edit Stroke dialog box has three tabs: Options, Shape, and Sensitivity.
The stroke preview at the bottom of each tab shows the current brush with the current settings. A
stroke in the preview that tapers or fades or otherwise changes from left to right illustrates the
current pressure- and speed-sensitivity settings.
To open the Edit Stroke dialog box:
1Do one of the following to open the Stroke Options pop-up window:
•Choose Stroke Options from the Stroke Options pop-up menu in the Property inspector.
•Choose Stroke Options from the Stroke Color box pop-up window in the Tools panel.
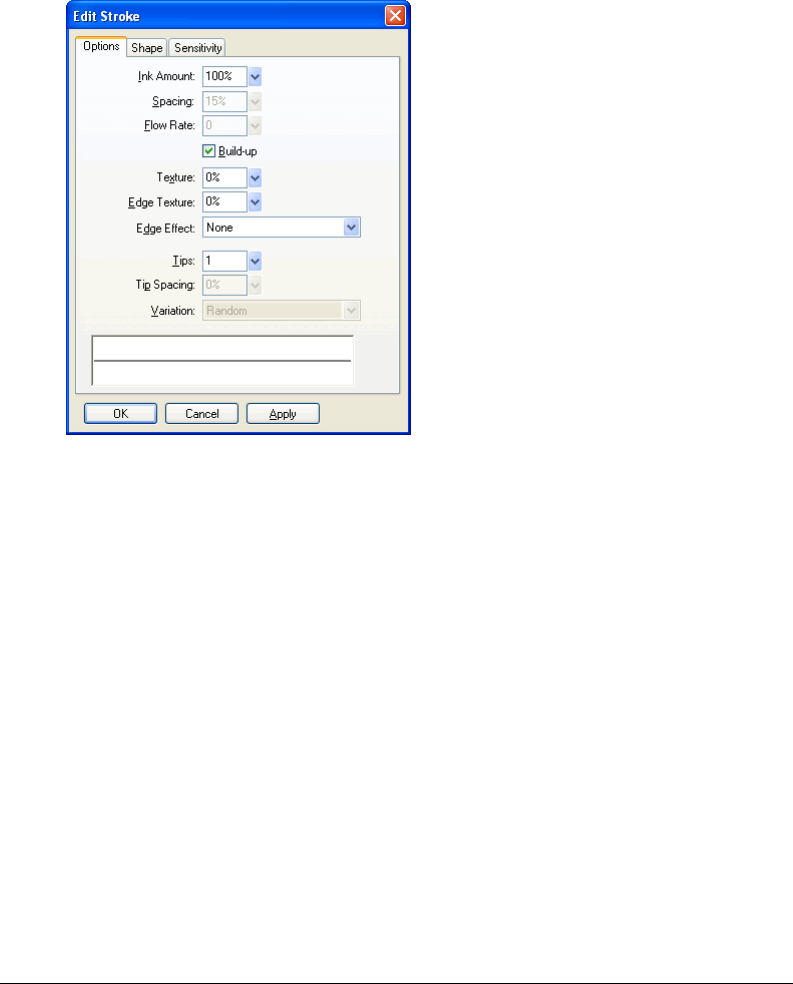
Applying Color, Strokes, and Fills 203
2Click Advanced.
The Edit Stroke dialog box opens.
To set general brush stroke options:
1On the Options tab of the Edit Stroke dialog box, set the ink amount, spacing, and flow rate.
Higher flow rates create brush strokes that flow over time, as with an airbrush.
2To overlap brush stroke stamps for dense strokes, choose Build-up.
3To set the stroke texture, change the Texture option. The higher the number, the more
apparent the texture becomes.
4To set texture on the edges, enter a number in the Edge Texture text box and choose an edge
effect from the Edge Effect pop-up menu.
5Set the number of tips you want the brush stroke to have. For multiple tips, enter a Tip
Spacing value and choose the color variation method. You can choose Random, Uniform,
Complementary, Hue, or Shadow.
6Click Apply to apply the settings to selected strokes, then click OK.
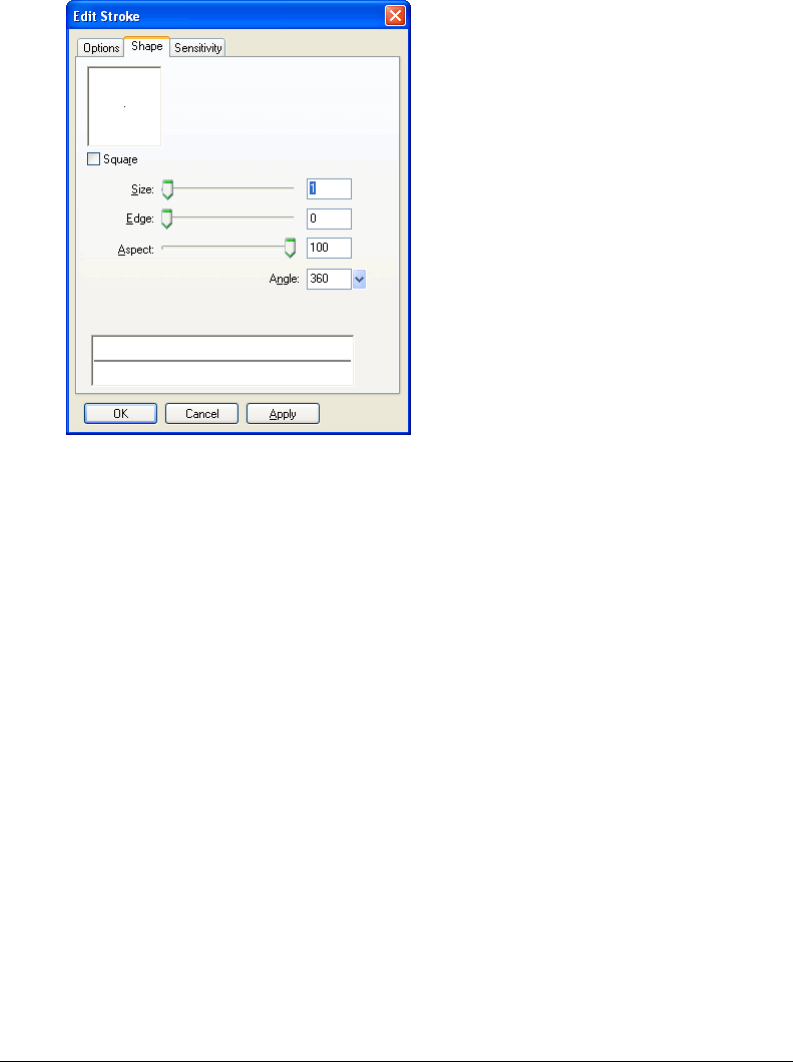
Chapter 8204
To modify the brush tip:
1On the Shape tab of the Edit Stroke dialog box, select Square for a square tip, or deselect it for
a round tip.
2Enter values for the brush tip size, edge softness, tip aspect, and tip angle.
3Click Apply, then click OK.
Fireworks has stroke settings for fine-tuning the stroke attributes controlled by speed and pressure
when using a Wacom pressure-sensitive tablet and pen. You can choose the stroke attribute to
control with the pen.

Applying Color, Strokes, and Fills 205
To set stroke sensitivity:
1On the Sensitivity tab of the Edit Stroke dialog box, choose a stroke property such as Size, Ink
Amount, or Saturation from the Stroke Property pop-up menu.
2From the Affected By options, choose the degree to which sensitivity data affects the current
stroke property.
3Click OK.
Placing strokes on paths
By default, an object’s brush stroke is centered on a path. You can change options for placing the
brush stroke completely inside or outside the path. This lets you control the overall size of stroked
objects as well as create effects such as using strokes on the edges of beveled buttons.
Centered stroke, stroke inside, and stroke outside
Chapter 8206
You can use the Stroke pop-up menu in the Stroke Options window to reorient brush strokes.
To move a brush stroke inside or outside the selected path:
1Click the Stroke Color box in the Tools panel or the Property inspector to open the color box
pop-up window.
2Choose an option from the Location of Stroke Relative to Path pop-up menu: Inside,
Centered, or Outside.
3Optionally, choose the Fill over Stroke option.
Normally, the stroke overlaps the fill. Choosing Fill over Stroke draws the fill over the stroke. If
you choose this option for an object with an opaque fill, any part of the stroke that falls inside
the path is obscured. A fill with a degree of transparency may tint or blend with a brush stroke
inside a path.
Creating stroke styles
You can change specific stroke characteristics such as ink amount, tip shape, and tip sensitivity,
and save the custom stroke as a style for reuse across many documents.
To create custom strokes:
1Do one of the following:
•Click the Stroke Color box in the Tools panel and then click Stroke Options.
•Choose Stroke Options from the Stroke Options pop-up menu in the Property inspector.
The Stroke Options pop-up window opens.
2Edit the desired brush stroke attributes.
3Save your custom stroke attributes as a style. For more information, see “Creating and deleting
styles” on page 252.
Working with fills
Using the Property inspector, the Fill Options pop-up menu, the Fill Options pop-up window,
and the Gradient pop-up window, as well as a collection of bitmap textures and patterns, you can
create a wide variety of fills for vector objects and text. Using the Paint Bucket or Gradient tool,
you can also fill pixel selections based on current fill settings.
Setting fill attributes of the drawing tools
You can set the fill attributes of the Rectangle, Rounded Rectangle, Ellipse, and Polygon drawing
tools that are applied to objects as you draw. The current fill appears in the Fill Color box in the
Property inspector, the Tools panel, and the Color Mixer. You can use any of these panels to
change a drawing tool’s fill.
The paint bucket icon indicates the Fill Color box in the Tools panel, the Property inspector, and the
Color Mixer.
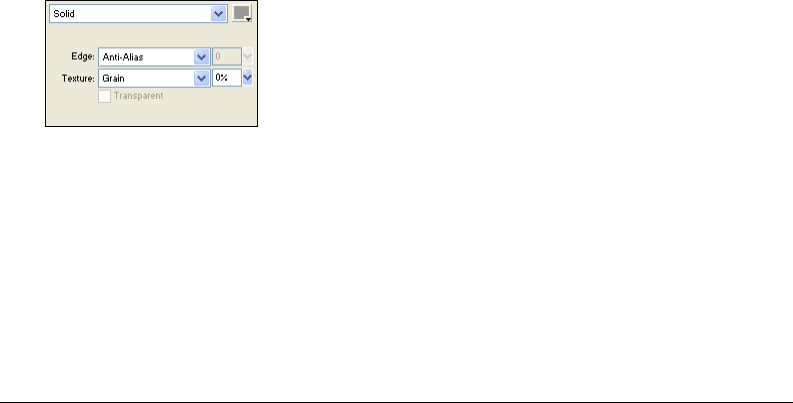
Applying Color, Strokes, and Fills 207
To change the solid fill color of applicable vector drawing tools and the Paint Bucket tool:
1Choose a vector drawing tool or the Paint Bucket tool.
2Do one of the following:
•Press Control+D (Windows) or Command+D (Macintosh) to deselect all objects, and then
click the Fill Color box in the Property inspector to open the Fill Color pop-up window.
3Click the Fill Color box in the Tools panel or Color Mixer to open the color pop-up window.
4Choose a color for the fill from the set of swatches, or sample a color from anywhere on the
screen using the eyedropper pointer.
5Use the tool as desired.
Note: Choosing the Text tool always causes the Fill Color box to revert to the last solid text color used by the Text tool.
Editing solid fills
A solid fill is a solid color that fills the interior of an object. You can change an object’s fill color in
the Tools panel, Property inspector, or Color Mixer.
To edit a selected vector object’s solid fill in the Property inspector:
1Click the Fill Color box in the Property inspector, Tools panel, or Color Mixer to open the
color pop-up window.
2Choose a swatch from the color pop-up window.
The fill appears in the selected object and becomes the active fill color.
Applying gradient and pattern fills
You can change fills to display a variety of solid, dithered, pattern, or gradient characteristics,
ranging from solid colors to gradients resembling satin, ripples, or folds. Additionally, you can
change various attributes of a fill, such as color, edge, texture, and transparency.
You can choose from a number of preset gradient and pattern fills, or you can create your own.
Note: A newly created fill assumes the current color displayed in the Fill Color box in the Tools panel.
Use the Fill options in the Property inspector or the Fill Options pop-up window to edit fill attributes.

Chapter 8208
Applying a pattern fill
You can fill a path object with a bitmap graphic, known as a pattern fill. Fireworks ships with
more than a dozen pattern fills, including Berber, Leaves, and Wood.
To apply a pattern fill to a selected object:
1Do one of the following:
•Choose Pattern from the Fill Options pop-up menu in the Property inspector.
•Click the Fill Color box in the Tools panel, click Fill Options, and choose Pattern from the Fill
Options pop-up menu.
2Choose a pattern from the Pattern Name pop-up menu.
The pattern fill appears in the selected object and becomes the active fill color.
Adding a custom pattern
You can set a bitmap file as a new pattern fill. You can use files with these formats as patterns:
PNG, GIF, JPEG, BMP, TIFF, and PICT (Macintosh only). When a pattern fill is a 32-bit
transparent image, the transparency affects the fill when used in Fireworks. If an image is not
32-bit, it becomes opaque.
When you add a new pattern, its name appears in the Pattern Name pop-up menu of the Fill
Options pop-up window.
To create a new pattern from an external file:
1With vector object properties displayed in the Property inspector, choose Pattern from the Fill
Options pop-up menu.
2Click the Fill Color box and choose Other from the Pattern Name pop-up menu.
3Navigate to the bitmap file you want to use as the new pattern, and click Open.
The new pattern is added to the bottom of the Pattern Name list.
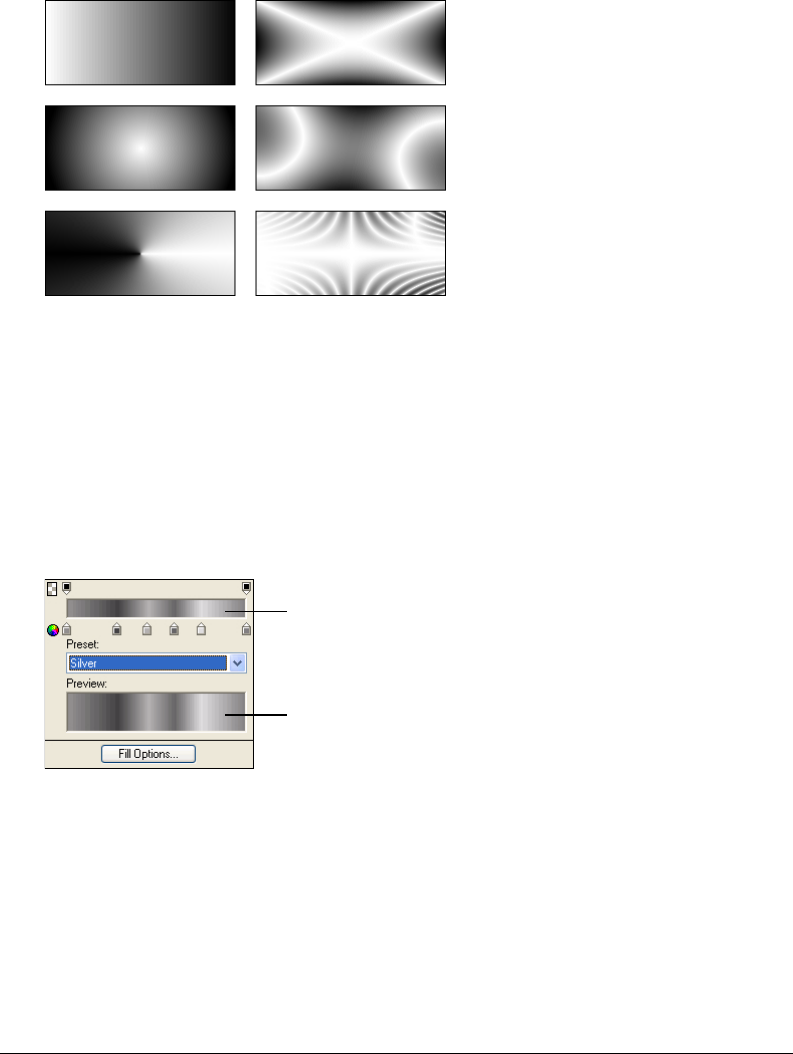
Applying Color, Strokes, and Fills 209
Applying a gradient fill
Fill categories other than None, Solid, Pattern, and Web Dither are gradient fills. These fills blend
colors to create various effects.
Objects with various gradient fills
To apply a gradient fill to a selected object:
Choose a gradient from the Fill Options pop-up menu in the Property inspector. The fill appears
in the selected object and becomes the active fill.
Editing a gradient fill
You can edit the current gradient fill by clicking any Fill Color box and then using the Edit
Gradient pop-up window.
Edit Gradient pop-up window
To open the Edit Gradient pop-up window:
1Select an object that has a gradient fill or choose a gradient fill from the Fill Options pop-up
menu in the Property inspector.
2Click the Fill Color box in the Property inspector or Tools panel to open the pop-up window.
The Edit Gradient pop-up window opens with the current gradient in the color ramp and preview.
Color ramp
Preview

Chapter 8210
To add a new color or opacity swatch to the gradient, do one of the following:
•To add a color swatch, click the area below the gradient color ramp.
•To add an opacity swatch, click the area above the gradient color ramp.
To remove a color or opacity swatch from the gradient:
Drag the swatch away from the Edit Gradient pop-up window.
To set or change the color of a color swatch:
1Click the color swatch.
2Choose a color from the pop-up window.
To set or change the transparency of an opacity swatch:
1Click the opacity swatch.
2Do one of the following:
•Drag the slider to the percentage of transparency, where 0 is completely transparent and 100 is
completely opaque.
•Enter a numeric value from 0 to 100 to set the opacity value.
Note: The transparency checkerboard shows through the gradient in transparent areas.
3When you have finished editing the gradient, press Enter or click outside the Edit Gradient
pop-up window. The gradient fill appears in any selected objects and becomes the active fill.
To adjust the transition between colors in the fill:
Drag color swatches left or right.
Creating fills with the Gradient tool
The Gradient tool is in the same tool group as the Paint Bucket tool. This new tool operates
similarly to the Paint Bucket tool, but it fills an object with a gradient, instead of a solid color.
Like the Paint Bucket tool, it retains the properties of the last-used gradient.
To use the Gradient tool:
1Click the Paint Bucket tool in the Tools panel and choose the Gradient tool from the pop-up menu.
2Choose from the following attributes in the Property inspector:
Fill Options is a pop-up menu from which you can choose a gradient type.
The Fill Color box, when clicked, displays the Edit Gradient pop-up window, from which you
can set a variety of color and transparency options.
Edge determines if the gradient has a hard, anti-aliased, or feathered fill edge. If you choose a
feathered edge, you can determine the amount of the feathering.
Texture gives you many options to choose from, including Grain, Metal, Hatch, Mesh,
or Sandpaper.
3Click and drag the pointer to establish a starting point of the gradient as well as the direction
and length of the gradient area.

Applying Color, Strokes, and Fills 211
Transforming and distorting fills
You can move, rotate, skew, and change the width of an object’s pattern or gradient fill. When
you use the Pointer or Gradient tools to select an object with a pattern or gradient fill, a set of
handles appears on or near the object. You can drag these handles to adjust the object’s fill.
Use the fill handles to interactively adjust a pattern or gradient fill.
To move the fill within an object:
Drag the round handle, or click in a new location within the fill using the Gradient tool.
To rotate the fill:
Drag the lines connecting the handles.
To adjust the fill width and skew:
Drag a square handle.
Setting hard-edged, anti-aliased, or feathered fill edges
In Fireworks, you can set the edge of a fill to be a regular hard line or soften the edge by
anti-aliasing or feathering it. By default, edges are anti-aliased. Anti-aliasing smooths jagged
edges that may occur on rounded objects, such as ellipses and circles, by subtly blending the edge
into the background.
Feathering, however, makes a noticeable blend on either side of the edge. This gives the edge a
softened effect—almost a glow.
To change the edge of a selected object:
1Do one of the following to display the Edge pop-up menu:
•Click the Edge pop-up menu in the Property inspector.
•Click the Fill Color box in the Tools panel, click Fill Options, and click the Edge pop-up menu.
2Choose an edge option: Hard Edge, Anti-Alias, or Feather.
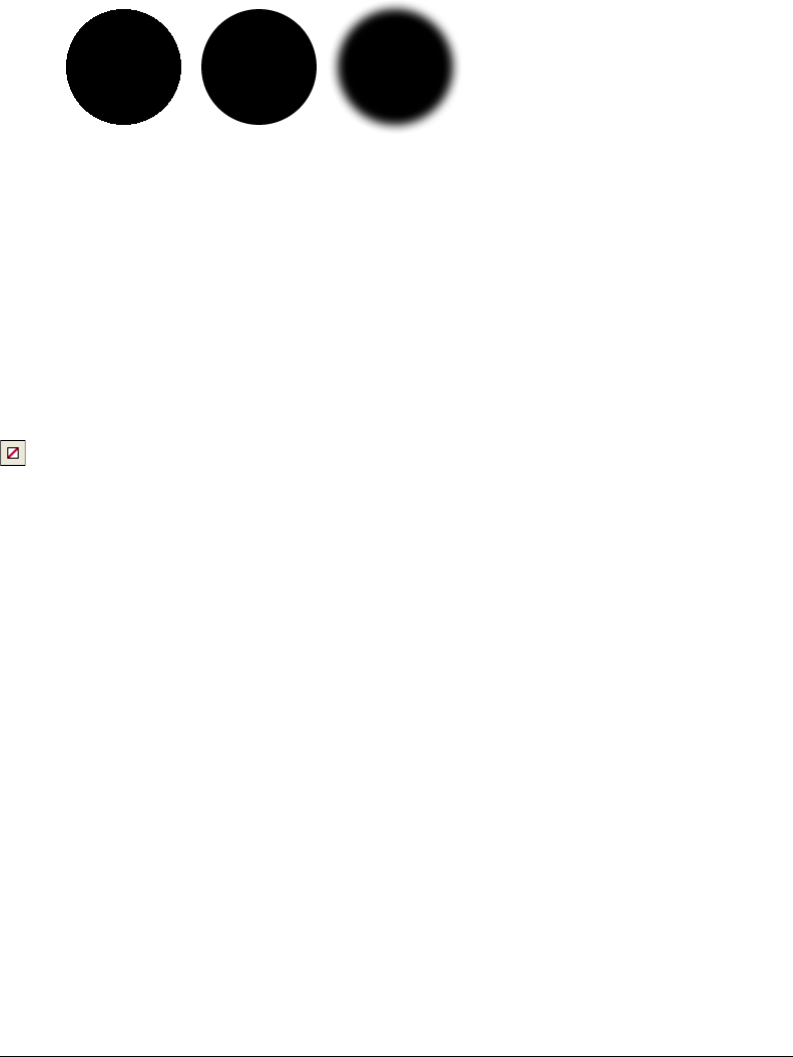
Chapter 8212
3For a feathered edge, also choose the number of pixels on each side of the edge that are to
be feathered.
The default is 10. You can choose from 0 to 100. The higher the level, the more feathering occurs.
About saving a custom gradient fill
To save the current gradient settings as a custom gradient for use across many documents, you
must create a style. For more information, see “Creating and deleting styles” on page 252.
Removing a fill
You can easily remove fill attributes from selected objects.
To remove the fill from a selected object, do one of the following:
•Choose None from the Fill Options pop-up menu in the Property inspector or from the Fill
Options pop-up menu in the Fill Options pop-up window.
•Click any Fill Color box and click the Transparent button. This option removes only solid fills.
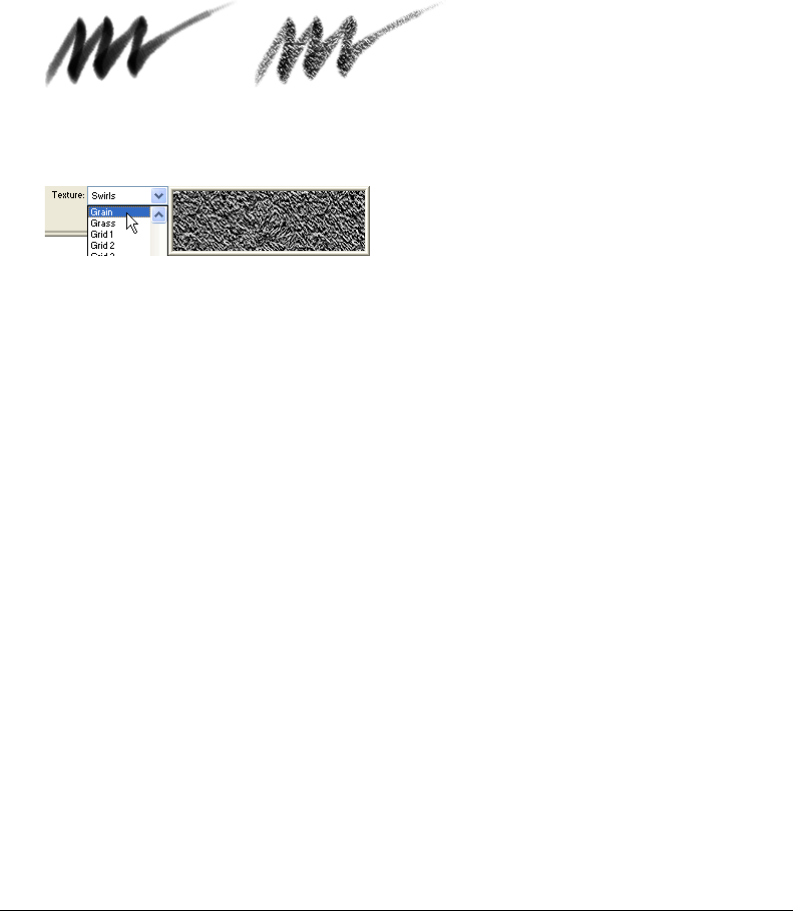
Applying Color, Strokes, and Fills 213
Adding texture to strokes and fills
You can add three-dimensional effects to both strokes and fills by adding texture. Fireworks
provides several textures, or you can use external textures.
Adding texture to a stroke
Textures modify the brightness of the stroke, but not the hue, and give strokes a less mechanical,
more organic look, as if you were laying paint on a textured surface. Textures are more effective
when used with wide strokes. You can add a texture to any stroke. Fireworks ships with several
textures to choose from, such as Chiffon, Oilslick, and Sandpaper.
Use the Stroke options in the Property inspector or the Stroke Options pop-up window to add a texture
to a brush stroke.
The Texture pop-up menu previews the highlighted texture.
To add texture to the stroke of a selected object:
1Do one of the following to open the Stroke Texture pop-up menu:
•Click the Stroke Texture pop-up menu in the Property inspector.
•Click the Stroke Color box in the Tools panel, click Stroke Options, and click the Texture
pop-up menu.
2Do one of the following:
•Choose a texture from the pop-up menu.
•Choose Other from the pop-up menu and navigate to a texture file to use an external texture.
Note: You can use files with these formats as textures: PNG, GIF, JPEG, BMP, TIFF, and PICT (Macintosh only).
3Enter a percentage from 0 to 100 to control the depth of the texture.
Increasing the percentage increases the texture intensity.

Chapter 8214
Adding texture to a fill
Textures modify the brightness of a fill, but not the hue, and give fills a less mechanical, more
organic look. You can add a texture to any fill. Fireworks ships with several textures from which to
choose, such as Chiffon, Oilslick, and Sandpaper. You can also use bitmap files as textures.This
allows you to create almost any type of custom texture.
To add texture to the fill of a selected object:
1Do one of the following to open the Fill Texture pop-up menu:
•Click the Fill Texture pop-up menu in the Property inspector.
•Click the Fill Color box in the Tools panel, click Fill Options, and click the Texture
pop-up menu.
2Do one of the following:
•Choose a texture from the pop-up menu.
•Choose Other from the pop-up menu and navigate to a texture file to use an external texture.
3Enter a percentage from 0 to 100 to control the depth of the texture.
Increasing the percentage increases the texture intensity.
4Choose Transparent to introduce a level of transparency to the fill.
The Texture percentage also controls the degree of transparency.
Adding a custom texture
You can use bitmap files from Fireworks and other applications as textures. You can use files with
these formats as textures: PNG, GIF, JPEG, BMP, TIFF, and PICT (Macintosh only).
When you add a new texture, its name appears in the Texture Name pop-up menu.
To create a new texture from an external file:
1With vector object properties displayed in the Property inspector, choose Other from either of
the Texture Name pop-up menus.
2Navigate to the bitmap file you want to use as the new texture, and click Open.
The new texture is added to the bottom of the Texture Name list.
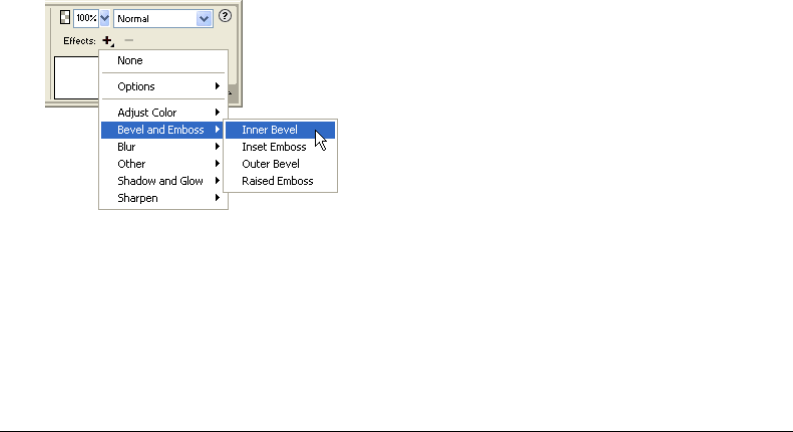
215
CHAPTER 9
Using Live Effects
Macromedia Fireworks MX Live Effects are enhancements that you can apply to vector objects,
bitmap images, and text. Live Effects include bevels and embossing, drop shadows and glows,
color correction, and blurring and sharpening. You can apply Live Effects to selected objects
directly from the Property inspector.
Live Effects automatically update when you edit objects that have them applied. After you apply a
Live Effect, you can change its options anytime, or rearrange the order of effects to experiment
with a combined effect. You can turn Live Effects on and off or delete them in the Property
inspector. When you remove an effect, the object or image returns to its previous appearance.
Some effects now listed among Fireworks Live Effects—such as Auto Levels, Gaussian Blur, and
Unsharp Mask—were once available only as irreversible plug-ins or filters. In addition to these,
you can add third-party plug-ins to be used in Fireworks as Live Effects. If you prefer, you can use
these filters in the traditional manner using the Filters menu. For more information, see
“Adjusting bitmap color and tone” on page 133.
Applying Live Effects
You can apply one or more Live Effects to selected objects using the Property inspector. Each time
you add a new effect to the object, it is added to the list in the Effects pop-up menu in the
Property inspector. You can turn each effect on or off.
Effects pop-up menu in the Property inspector

Chapter 9216
When objects eligible for Live Effects are selected, the location of the Live Effects options differs
slightly depending on whether the Property inspector is at full height or half height:
•When the Property inspector is maximized to full height, use the Add Effects button, the
Delete Effects button, and the list of applied Live Effects displayed in the Property inspector.
•When the Property inspector is at half height, click Edit Effects to display the Add Effects
button, the Delete Effects button, and the list of applied Live Effects.
Note: In Using Fireworks MX, steps involving Live Effects assume the Property inspector is open at full height.
You can customize each Live Effect to get the look you want. When you choose Bevel, Blur,
Emboss, Glow, Shadow, or Sharpen, a pop-up window opens in which you can adjust the effect
settings. When you choose color correction effects, dialog boxes open containing controls to adjust
color characteristics such as auto levels, brightness and contrast, hue and saturation, color inversion,
curves, and color fill. When you choose a blur or sharpen effect, it is applied directly to the object.
Experiment with the settings until you get the look you want. If you want to change the effect
settings later, see “Editing Live Effects” on page 220.
Inner Bevel pop-up window
To apply a Live Effect to selected objects:
1Click the Add Effects button in the Property inspector, then choose an effect from the Effects
pop-up menu.
The effect is added to the Effects list for the selected object.
2If a pop-up window or dialog box opens, enter the settings for the effect and then do one of
the following:
•If the Live Effect has a dialog box, click OK.
•If the Live Effect has a pop-up window, press Enter or click anywhere in the workspace.
3Repeat steps 1 and 2 to apply more Live Effects.
Note: The order in which Live Effects are applied affects the overall effect. You can drag Live Effects to
rearrange their stacking order. For more information, see “Reordering Live Effects” on page 220.
Tip: To apply a Live Effect so that it appears to affect only a pixel selection within an image, you can cut and
paste the selection in place to create a new bitmap image, select it, and then apply the Live Effect.
Contrast
Softness
Button bevel preset
Width of bevel
Angle of bevel
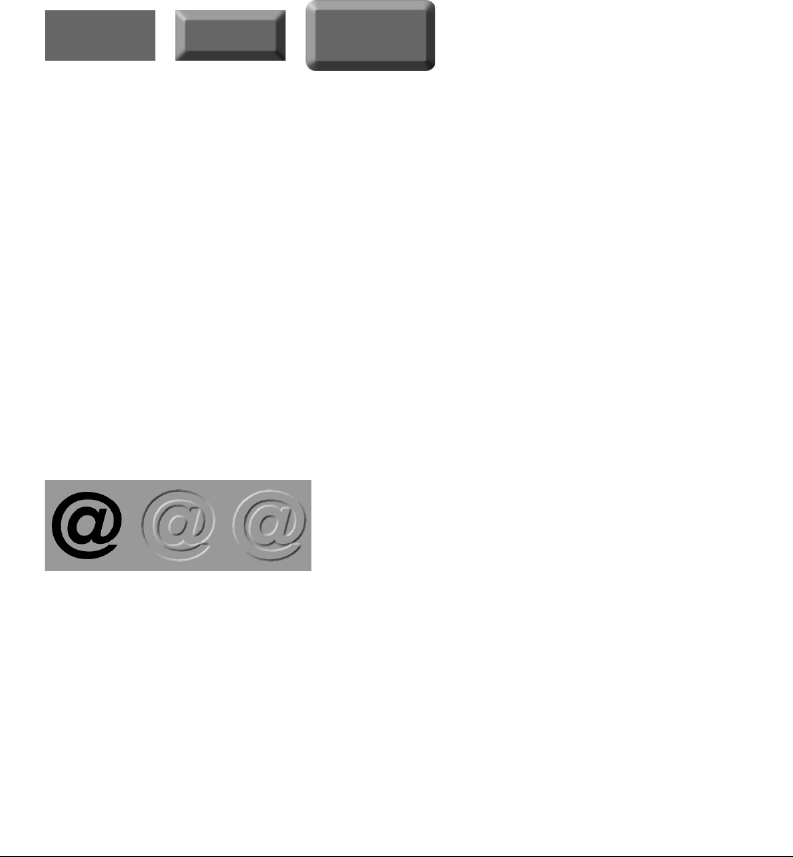
Using Live Effects 217
To enable or disable an effect applied to an object:
Click the check box next to the effect in the Effects list in the Property inspector.
To enable or disable all effects applied to an object:
Click the Add Effects button in the Property inspector, then choose Options > All On
or Options > All Off from the pop-up menu.
For information on permanently removing effects, see “Removing Live Effects” on page 220.
Applying beveled edges
Applying a beveled edge to an object gives it a raised look. You can create an inner bevel or an
outer bevel.
A rectangle with Inner Bevel and Outer Bevel
To apply a beveled edge to a selected object:
1Click the Add Effects button in the Property inspector, then choose a bevel option from the
pop-up menu:
•Bevel and Emboss > Inner Bevel
•Bevel and Emboss > Outer Bevel
2Edit the effect settings in the pop-up window.
3Click outside the window or press Enter to close it.
Applying embossing
You can use the Emboss effect to make an image, object, or text appear inset into or raised
from the canvas.
An object with Inset Emboss and Raised Emboss
To apply an Emboss effect:
1Click the Add Effects button in the Property inspector, then choose an emboss option from the
pop-up menu:
•Bevel and Emboss > Inset Emboss
•Bevel and Emboss > Raised Emboss

Chapter 9218
2Edit the effect settings in the pop-up window.
If you want the original object to appear in the embossed area, choose Show Object.
3When you finish, click outside the window or press Enter to close it.
Note: For backward compatibility, Emboss effects on objects in older documents open with the Show Object
option deselected.
Applying shadows and glows
Fireworks makes it easy to apply drop shadows, inner shadows, and glows to objects. You can
specify the angle of the shadow to simulate the angle of the light shining on the object.
Drop Shadow, Inner Shadow, and Glow effects
To apply a shadow or inner shadow:
1Click the Add Effects button in the Property inspector, then choose a shadow option from the
pop-up menu:
•Shadow and Glow > Drop Shadow
•Shadow and Glow > Inner Shadow
2Edit the effect settings in the pop-up window:
•Drag the Distance slider to set the distance of the shadow from the object.
•Click the color box to open the color pop-up window and set the shadow color.
•Drag the Opacity slider to set the percentage of transparency in the shadow.
•Drag the Softness slider to set the sharpness of the shadow.
•Drag the Angle dial to set the direction of the shadow.
•Select Knock Out to hide the object and display the shadow only.
3When you finish, click outside the window or press Enter to close it.
To apply a glow:
1Click the Add Effects button in the Property inspector, then choose Shadow and Glow > Glow.
2Edit the effect settings in the pop-up window:
•Click the color box to open the color pop-up window and set the glow color.
•Drag the Width slider to set the width of the glow.
•Drag the Opacity slider to set the percentage of transparency in the glow.
•Drag the Softness slider to set the sharpness of the glow.
•Drag the Offset slider to specify the distance of the glow from the object.
3When you finish, click outside the window or press Enter to close it.

Using Live Effects 219
Applying filters and Photoshop plug-ins as Live Effects
You can apply all the built-in filters and plug-ins in the Filters menu as Live Effects using the
Property inspector. Applying them as Live Effects ensures that you can edit or remove them from
an object anytime.
Photoshop 6 and 7 plug-ins are not compatible with Fireworks MX. On the Macintosh, third-
party filters designed to run on Mac OS 9 are supported by Fireworks MX when running on Mac
OS 9, and third-party filters designed to run on Mac OS X are supported by Fireworks MX when
running on Mac OS X.
Note: The menu known as the Xtras menu in previous versions of Fireworks has been renamed the Filters menu in
Fireworks MX. Fireworks Xtras are now known as filters.
Plug-ins from the Filters menu
When you install a Photoshop plug-in in Fireworks, it is added to the Filters menu and to the
Property inspector. You should use the Filters menu to apply filters and Photoshop plug-ins only
when you are certain that you will not want to edit or remove the effect. You can remove a filter
only if the Undo command is available.
Installing Photoshop plug-ins
You can use the Property inspector to apply some Photoshop plug-ins as Live Effects. Not all
Photoshop plug-ins can be used as Live Effects. You can also import Photoshop plug-ins by
pointing to a plug-ins folder using the Preferences dialog box. For more information, see “Folders
preferences” on page 419.
When you share a Fireworks file in which a Photoshop plug-in is applied as a Live Effect, whoever
opens it can view the effect only on a computer in which the plug-in is installed. Built-in
Fireworks effects, however, are saved with the Fireworks file.
To install Photoshop plug-ins:
1Click the Add Effects button in the Property inspector, then choose Options > Locate Plugins.
2Navigate to the folder where the Photoshop plug-ins are installed and click OK.
3Restart Fireworks to load the plug-ins.
Note: If you move the plug-ins to a different folder, repeat the above steps, or choose File > Preferences and click
the Folders tab to change the path to the plug-ins. Then restart Fireworks.
To apply a Photoshop plug-in to a selected object as a Live Effect:
Click the Add Effects button in the Property inspector, then choose an effect from the
Options submenu.
About applying effects to grouped objects
When you apply an effect to a group, the effect is applied to all objects in the group. If the objects
are ungrouped, each object’s effect settings revert to those applied to the object individually.
You can apply an effect to an individual object within a group by selecting only that object with
the Subselection tool. For information on selecting a group or objects within a group, see
“Selecting objects within groups” on page 121.

Chapter 9220
Editing Live Effects
Clicking a Live Effect’s info button in the Property inspector opens a pop-up window with the
current settings for the effect, which you can edit.
To edit a Live Effect:
1In the Property inspector, click the info button next to the effect you want to edit.
The appropriate pop-up window or dialog box opens.
Note: If the Property inspector is open at half height, click Add Effects to open the Live Effects list.
2Adjust the effect settings.
Note: If an effect is not editable, the info button is dimmed. For example, you cannot edit Auto Levels.
3Click outside the window or press Enter.
Reordering Live Effects
You can rearrange the order of the effects applied to an object. Reordering effects changes the
sequence in which the effects are applied, which can change the combined effect.
In general, effects that change the interior of an object, such as the Inner Bevel effect, should be
applied before effects that change the object’s exterior. For example, you should apply the Inner
Bevel effect before you apply the Outer Bevel, Glow, or Shadow effect.
To reorder effects applied to a selected object:
Drag an effect to the desired position in the list in the Property inspector.
Note: Effects at the top of the list are applied before the effects at the bottom.
Removing Live Effects
You can easily remove individual effects or all effects from an object.
To remove a single effect applied to a selected object:
Select the effect you want to remove from the Effects list in the Property inspector, then click the
Delete Effects button.
To remove all effects from a selected object:
Click the Add Effects button in the Property inspector, then choose None from the pop-up menu.

Using Live Effects 221
Creating custom Live Effects
You can save a particular combination of settings for Live Effects by creating a custom Live Effect.
All custom Live Effects appear in the Add Effects pop-up menu in the Property inspector and in
the Styles panel. Custom Live Effects are actually styles with all property options deselected except
for the Effect option.
•You can create a custom Live Effect using the Property inspector or Styles panel.
•You can apply a custom Live Effect to selected objects from the Add Effects pop-up menu or
the Styles panel.
•You can rename or delete a custom Live Effect using the Styles panel.
To create a custom Live Effect using the Property inspector:
1Apply Live Effect settings to selected objects. For more information, see “Applying Live
Effects” on page 215.
2Click the Add Effects button in the Property inspector, then choose Options > Save As Style.
The Add Style dialog box opens.
3Type a name for the style and click OK.
The custom Live Effect name is added to the Add Effects pop-up menu, and a style icon
representing the Live Effect is added to the Styles panel.
To create a custom Live Effect using the Styles panel:
1Apply Live Effect settings to selected objects. For more information, see “Applying Live
Effects” on page 215.
2Choose Add Style from the Styles panel Options menu.
The Add Style dialog box opens.
3Deselect all properties except the Effect property, enter a name, and click OK.
The custom Live Effect name is added to the Add Effects pop-up menu, and a style icon
representing the Live Effect is added to the Styles panel.
Note: If you choose any additional properties in the Add Style dialog box, the style will no longer be an item on the
Add Effects pop-up menu in the Property inspector, although it will remain on the Styles panel as a typical style.
To apply a custom Live Effect to selected objects, do one of the following:
•Click the Add Effects button in the Property inspector, then choose the custom Live Effect.
•Click the icon for the custom Live Effect in the Styles panel.
You can rename or delete a custom Live Effect as you would any other style in the Styles panel. For
more information, see “Creating and deleting styles” on page 252 and “Editing styles” on page 253.
Note: You cannot rename or delete a standard Fireworks effect.
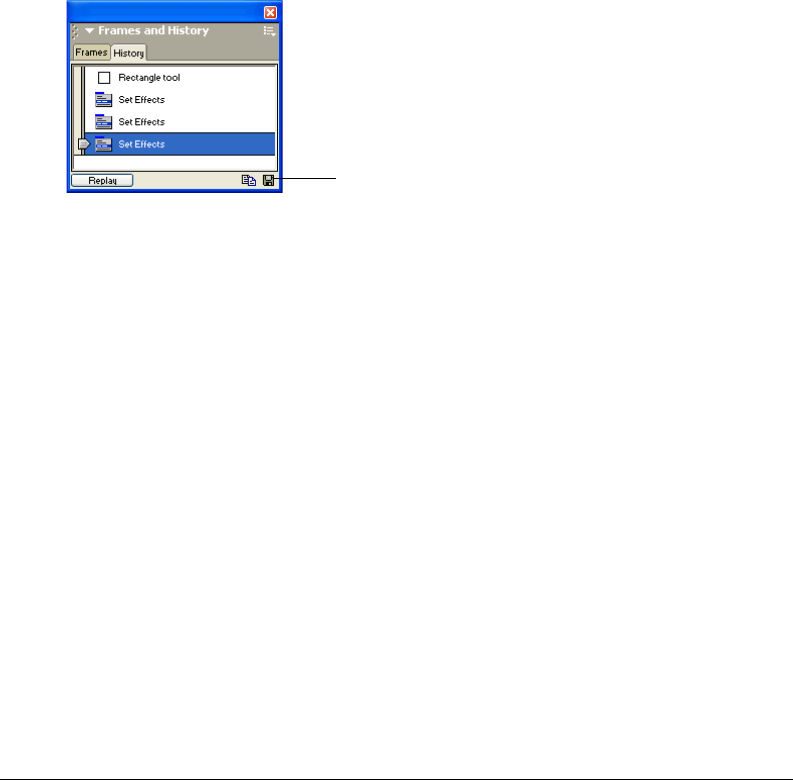
Chapter 9222
Saving Live Effects as commands
You can save and reuse an effect by creating a command based on it. Using the History panel, you
can automate all the Live Effects applied to an object by creating a command available from the
Commands menu. You can use these commands in batch processing. For more information, see
“Performing commands with a batch process” on page 409.
To save effect settings as a command:
1Apply the effects to the object.
2If the History panel is not visible, choose Window > History.
3Shift-click the range of actions you want to save as a command.
4Do one of the following:
•Choose Save as Command from the History panel Options menu.
•Click the Save button at the bottom of the History panel.
5Enter a command name and click OK to add the command to the Commands menu.
Save button

223
CHAPTER 10
Layers, Masking, and Blending
Layers divide a Macromedia Fireworks MX document into discrete planes, as though the
components of the illustration were drawn on separate tracing paper overlays. A document can be
made up of many layers, and each layer can contain many objects. In Fireworks, the Layers panel
lists layers and the objects contained in each layer. Fireworks layers are similar to layer sets in
Photoshop 6. Photoshop layers are similar to individual Fireworks objects.
Masking gives you creative control over layers and objects. You can apply masks and blending
modes from the Layers panel. You can also create masks using options on the Select and Modify
menus. You can use a vector object or a bitmap object to block out part of the underlying image.
For example, if you want to block out part of a photograph so that it appears to have an elliptical
frame around it, you can paste an elliptical shape as a mask on top of the photograph. All areas
outside the ellipse disappear as if cropped, showing only the part of the picture inside the ellipse.
Blending techniques give you another level of creative control. You can create unique effects by
blending the colors in overlapping objects. Fireworks has several blending modes to help you
achieve the look you want.
Working with layers
Each object in a document resides on a layer. You can either create layers before you draw or add
layers as needed. The canvas is below all layers and is not itself a layer. For information on
working with the canvas, see “Changing the canvas” on page 92.
You can view the stacking order of layers and objects in the Layers panel. This is the order in
which they appear in the document. Fireworks stacks layers based on the order in which you
created them, placing the most recently created layer on the top of the stack. The stacking order
determines how objects on one layer overlap objects on another. You can rearrange the order of
layers and of objects within layers.
The Layers panel displays the current state of all layers in the current frame of a document. To view
other frames, you can use the Frames panel or choose an option from the Frame pop-up menu at the
bottom of the Layers panel. For more information, see “Working with frames” on page 314.
The name of the active layer is highlighted in the Layers panel. You can expand a layer to view a
list of all the objects on it. The objects are displayed in thumbnails.
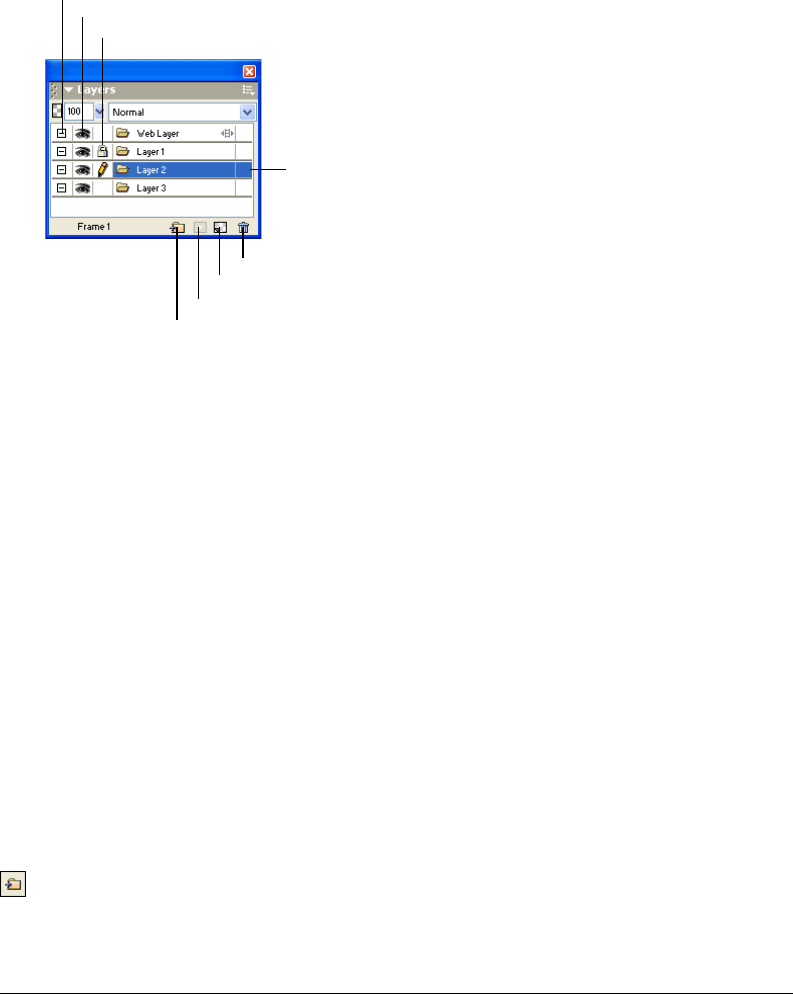
Chapter 10224
Masks are also shown in the Layers panel. Selecting the mask thumbnail allows you to edit the
mask. You can also create new bitmap masks using the Layers panel. For more information about
masking, see “Masking images” on page 229.
Opacity and blend mode controls are at the top of the Layers panel. For more information, see
“Adjusting opacity and applying blends” on page 249.
Activating layers
When you click a layer or an object on a layer, that layer becomes the active layer. Subsequent
objects you draw, paste, or import reside initially on the active layer.
To activate a layer, do one of the following:
•Click the layer name in the Layers panel.
•Select an object on that layer.
Adding and removing layers
Using the Layers panel, you can add new layers, delete unwanted layers, and duplicate existing
layers and objects.
When you create a new layer, a blank layer is inserted above the currently selected layer. The new
layer becomes the active layer and is highlighted in the Layers panel. When you delete a layer, the
layer above it becomes the active layer.
Creating a duplicate layer adds a new layer that contains the same objects as the currently selected
one. Duplicated objects retain the opacity and blending mode of the objects from which they
were copied. Changes can be made to the duplicated objects without affecting the originals.
To add a layer, do one of the following:
•Click the New/Duplicate Layer button with no layer selected.
•Choose Edit > Insert > Layer.
•Choose New Layer from the Layers panel Options menu, and click OK.
Active Layer
Lock/Unlock Layer
Expand/Collapse Layer
Show/Hide Layer
New/Duplicate Layer
Add Mask
Delete Layer
New Bitmap Image

Layers, Masking, and Blending 225
To delete a layer, do one of the following:
•Drag the layer to the trash can icon in the Layers panel.
•Select the layer and click the trash can icon in the Layers panel.
To duplicate a layer, do one of the following:
•Drag a layer to the New/Duplicate Layer button.
•Select a layer and choose Duplicate Layer from the Layers panel Options menu. Then choose
the number of duplicate layers to insert and where to place them in the stacking order:
At the Top places the new layer or layers at the top of the Layers panel. The Web Layer is
always the top layer, so choosing At the Top places the duplicate layer below the Web Layer.
Before Current Layer places the new layer or layers above the selected layer.
After Current Layer places the new layer or layers below the selected layer.
At the Bottom places the new layer or layers at the bottom of the Layers panel.
To duplicate an object:
Alt-drag (Windows) or Option-drag (Macintosh) the object to the desired location.
Viewing layers
The Layers panel displays objects and layers in a hierarchical structure. If a document contains
many objects and layers, the Layers panel can become cluttered and difficult to navigate.
Collapsing the display of layers helps eliminate clutter. When you need to view or select specific
objects within a layer, you can expand that layer. You can also expand or collapse all layers at once.
To expand or collapse the objects on a layer:
Click the Plus (+) or Minus (-) button (Windows) or the triangle (Macintosh) to the left of the
layer name in the Layers panel.
To expand or collapse all layers:
Alt-click the Plus (+) or Minus (-) button (Windows) or Option-click the triangle (Macintosh) to
the left of the layer name in the Layers panel.
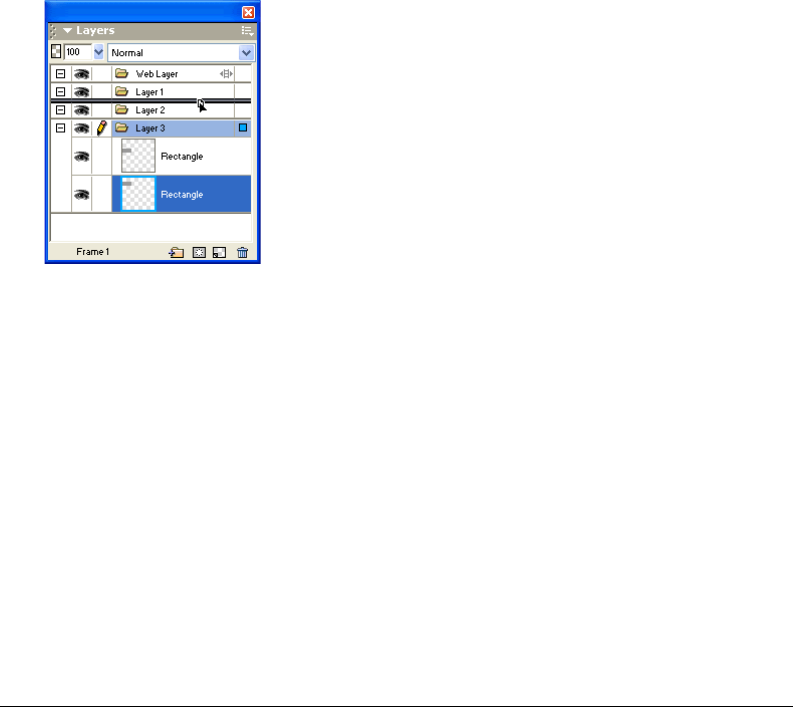
Chapter 10226
Organizing layers
You can organize layers and objects in a document by naming them and rearranging them in the
Layers panel. Objects can be moved within a layer or between layers.
Moving layers and objects in the Layers panel changes the order in which objects appear on the
canvas. Objects at the top of a layer appear above other objects in that layer on the canvas.
Objects on the topmost layer appear in front of objects on lower layers.
Note: The Layers panel will auto-scroll when you drag a layer or object up or down beyond the bounds of the
viewable area.
To name a layer or object:
1Double-click a layer or object in the Layers panel.
2Type a new name for the layer or object and press Enter.
Note: The Web Layer cannot be renamed. However, you can name web objects within the Web Layer, such as
slices and hotspots. For more information, see “Using the Web Layer” on page 228.
To move a layer or object:
Drag the layer or object to the desired location in the Layers panel.
To move all selected objects on a layer to another location:
Drag the layer’s blue selection indicator to another layer.
All selected objects within the layer move to the other layer simultaneously.
To copy all selected objects on a layer to another location:
Alt-drag (Windows) or Option-drag (Macintosh) the layer’s blue selection indicator to another layer.
All selected objects within the layer are copied to the other layer.

Layers, Masking, and Blending 227
Protecting layers and objects
The Layers panel offers a number of options that let you control the accessibility of objects.
You can protect objects in your document from inadvertent selection and editing. Locking a layer
prevents objects on that layer from being selected or edited. The Single Layer Editing feature
protects objects on all but the active layer from unwanted selection or changes. You can also use
the Layers panel to control the visibility of objects and layers on the canvas. When an object or
layer is hidden in the Layers panel, it does not appear on the canvas, so it cannot be inadvertently
changed or selected.
Note: Hidden layers and objects are not included when you export your document. Objects on the Web Layer can
always be exported, however, whether they are hidden or not. For more information about exporting, see “Exporting
from Fireworks” on page 346.
To lock a layer:
Click the square in the column immediately to the left of the layer name.
A padlock icon indicates that the layer is locked.
Note: While layers can be locked, individual objects cannot.
To lock multiple layers:
Drag the pointer along the Lock column in the Layers panel.
To lock or unlock all layers:
Choose Lock All or Unlock All in the Layers panel Options menu.
To turn on or off Single Layer Editing:
Choose Single Layer Editing from the Layers panel Options menu.
A check mark indicates that Single Layer Editing is active.
To show or hide a layer or objects on a layer:
Click the square in the middle column to the left of a layer or object name.
The eye icon indicates that a layer is visible.
To show or hide multiple layers or objects:
Drag the pointer along the Eye column in the Layers panel.
To show or hide all layers and objects:
Choose Show All or Hide All from the Layers panel Options menu.

Chapter 10228
Merging objects in the Layers panel
If you work with bitmap objects, you may find that the Layers panel easily becomes cluttered. You
can merge objects together in the Layers panel, if the bottommost selected object is immediately
above a bitmap object. Objects and bitmaps to be merged do not have to be adjacent in the Layers
panel or reside on the same layer.
Merging down causes all selected vector objects and bitmap objects to be flattened into the
bitmap object that lies just beneath the bottommost selected object. The result is a single bitmap
object. Vector objects and bitmap objects cannot be edited separately once merged, and editability
for vector objects is lost.
To merge objects:
1Select the object or objects on the Layers panel that you want to merge with a bitmap object.
Shift-click to select more than one object.
Tip: You can merge the contents of a selected layer into a bitmap object that is the topmost object on the layer
immediately beneath the selected layer.
2Do one of the following:
•Choose Merge Down from the Layers panel Options menu.
•Choose Modify > Merge Down.
•Choose Merge Down from the context menu that appears when you right-click (Windows) or
Control-click (Macintosh) the selected objects on the canvas.
The selected object or objects merge with the bitmap object. The result is a single bitmap object.
Note: Merge Down will not affect slices, hotspots, or buttons.
Sharing layers
You can share a layer across all frames in a document. This allows you to update an object on a
layer and have that object be updated automatically in all frames. This is useful when you want
objects such as background elements to appear on all frames of an animation.
To share a selected layer across frames, do one of the following:
•Choose Share This Layer from the Layers panel Options menu.
•Double-click the layer name in the Layers panel, and choose Share Across Frames.
Using the Web Layer
The Web Layer is a special layer that appears as the top layer in each document. The Web Layer
contains web objects, such as slices and hotspots, used for assigning interactivity to exported
Fireworks documents. For more information on web objects, see Chapter 12, “Slices, Rollovers,
and Hotspots,” on page 265.
You cannot unshare, delete, duplicate, move, or rename the Web Layer. You also cannot merge
objects that reside on the Web Layer. It is always shared across all frames, and web objects are
visible on every frame.

Layers, Masking, and Blending 229
To rename a slice or hotspot in the Web Layer:
1Double-click the slice or hotspot in the Layers panel.
2Type the new name, and then click outside the window or press Enter.
Note: When you rename a slice, that name is used when exporting the slice.
About importing Photoshop grouped layers
Photoshop files that contain layers are imported with each layer placed as a separate object on a
single Fireworks layer. Grouped layers are imported as individual layers, as if the layers were
ungrouped in Photoshop before importing into Fireworks. The clipping effect on Photoshop
grouped layers is lost on import.
Masking images
As the name suggests, masks hide or show parts of an object or image. You can apply many kinds
of creative effects to objects using any of several masking techniques.
You can create a mask that acts as a cookie cutter on other objects, by cropping or clipping
underlying objects or images with its path. Or you can create a mask that acts like a foggy
window, allowing you to reveal or hide portions of the objects beneath it by drawing on the mask.
This type of mask uses the shades of its grayscale appearance to affect the amount of visibility of
selected objects. Or you can create a mask that uses its own transparency to affect visibility.
You can create a mask using the Layers panel or the Edit, Select, or Modify menus. After you
create a mask, you can adjust the position of the masked selection on the canvas or modify the
appearance of a mask by editing the mask object. You can also apply transformations to the mask
as a whole or to the components of a mask individually.
About masks
You can use either a vector or a bitmap object as the mask object. Using a vector object as a mask
produces a vector mask, and using a bitmap object produces a bitmap mask. You can also use
multiple objects or grouped objects to create a mask.
About vector masks
If you have used other vector-illustration applications such as Macromedia FreeHand, you may be
familiar with vector masks, which are sometimes called clipping paths or paste insides. The path
of a vector mask object crops or clips the underlying objects to the shape of its path, creating a
cookie-cutter effect.
A vector mask applied using its path outline
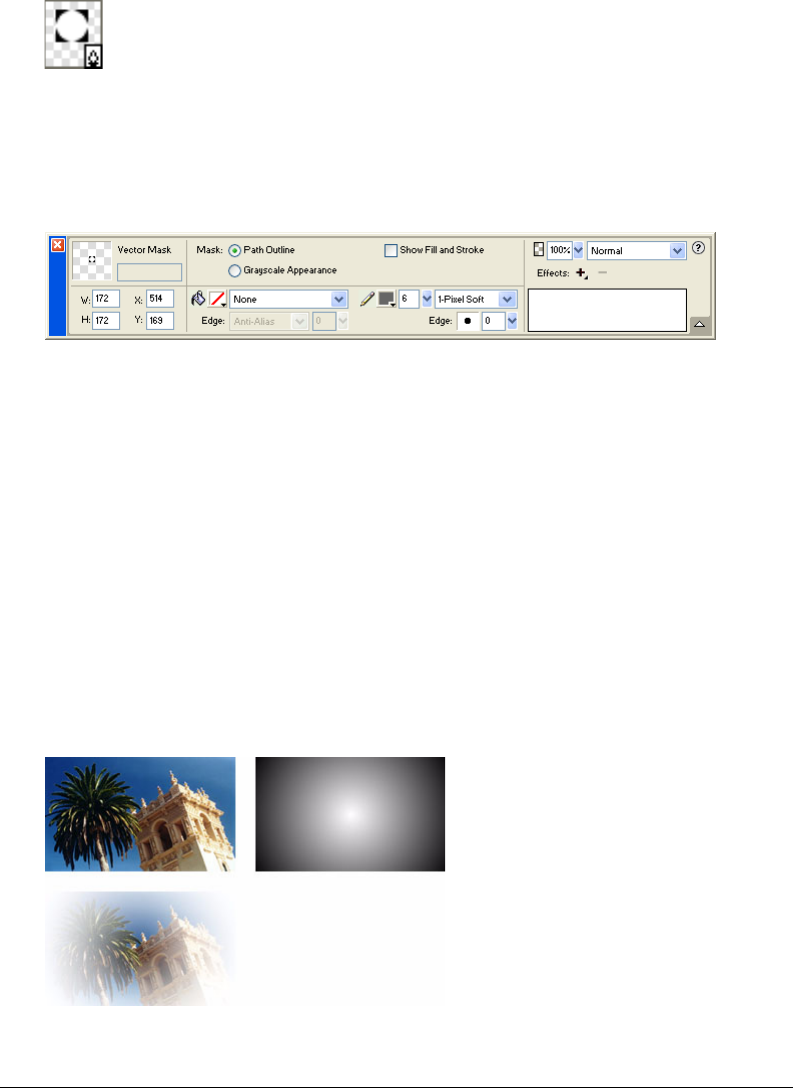
Chapter 10230
When you create a vector mask, a mask thumbnail with a pen icon appears in the Layers panel to
indicate you’ve created a vector mask.
A vector mask thumbnail in the Layers panel
When a vector mask is selected, the Property inspector displays information about how the mask
is applied. The bottom half of the Property inspector displays additional properties that allow you
to edit the mask object’s stroke and fill.
Vector mask properties in the Property inspector
By default, vector masks are applied using their path outline, but you can also apply them in other
ways. For more information, see “Changing the way masks are applied” on page 244.
Note: Vector masks created in Fireworks 4 that were applied using their grayscale appearance will import as
uneditable bitmap masks in Fireworks MX.
About bitmap masks
If you’re a Photoshop user, you may be familiar with layer masks. Fireworks bitmap masks are
similar to layer masks in that the pixels of a mask object affect the visibility of underlying objects.
However, Fireworks bitmap masks are much more versatile: you can easily change how they are
applied, whether using their grayscale appearance or their own transparency. In addition, the
Fireworks Property inspector makes mask properties and bitmap tool options more readily
accessible, greatly simplifying the mask-editing process. When a mask is selected, the Property
inspector displays a variety of properties not only for a selected mask but also for any bitmap tools
you might use to edit the mask.
Original objects and a bitmap mask applied using its grayscale appearance
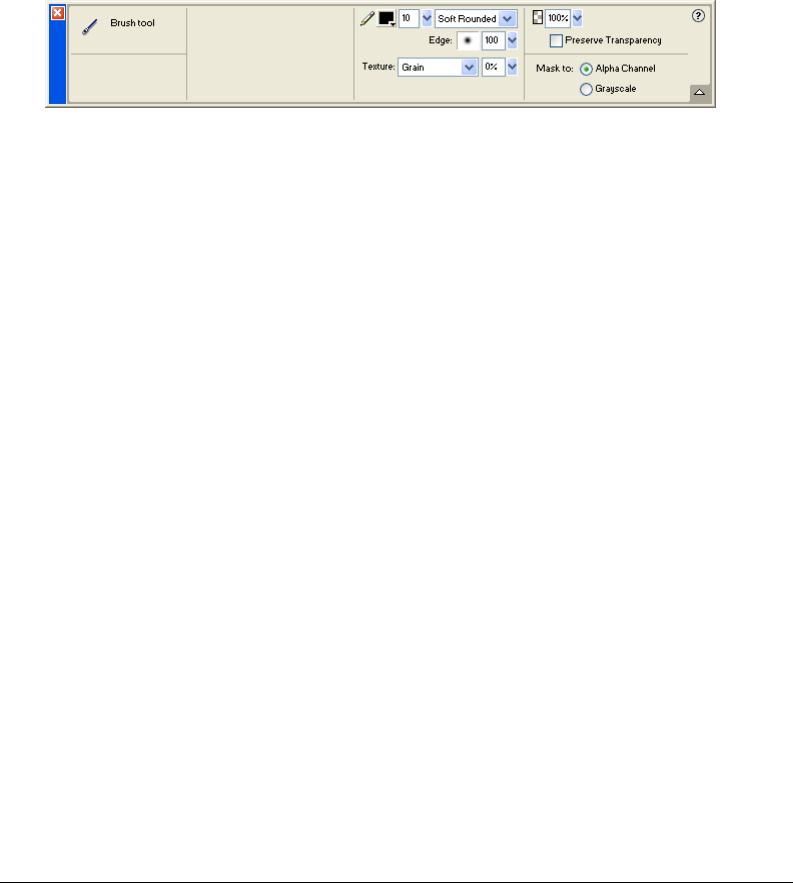
Layers, Masking, and Blending 231
Bitmap masks can be applied in two ways:
•Using an existing object to mask other objects. This technique is similar to the way vector
masks are applied.
•Creating what’s known as an empty mask. Empty masks start out as either totally transparent
or totally opaque. A transparent (or white) mask shows the whole masked object, and an
opaque (or black) mask hides the whole masked object. You can use the bitmap tools to draw
on or modify the mask object, revealing or hiding the underlying masked objects.
When you create a bitmap mask, the Property inspector displays information about how the mask is
applied. If you choose a bitmap tool when a bitmap mask is selected, the Property inspector displays
both the mask’s properties and options for the selected tool, simplifying the mask-editing process.
Bitmap mask properties in the Property inspector when a bitmap tool is selected
By default, most bitmap masks are applied using their grayscale appearance, but you can also
apply them using their alpha channel. For more information, see “Changing the way masks are
applied” on page 244.
Note: Fireworks MX grayscale masks now behave more like masks in other graphics applications. Grayscale masks
created in Fireworks MX differ from those created in previous versions of Fireworks in that white always reveals
masked objects, while black always hides masked objects. Compare this with Fireworks 4, where a black mask
revealed underlying objects and a white mask hid underlying objects.
Creating a mask from an existing object
A mask can be created from an existing object. When used as a mask, a vector object’s path
outline can be used to clip or crop other objects. When a bitmap object is used as a mask, either
the brightness of its pixels or its transparency affects the visibility of other objects.
Masking objects using the Paste as Mask command
Using the Paste as Mask command, you can create masks by masking an object or group of
objects with another object. Paste as Mask creates either a vector mask or a bitmap mask,
depending on the type of mask object you use. When a vector object is used as the mask, Paste as
Mask creates a vector mask that crops or clips masked objects using the path outline of the vector
object. When a bitmap image is used as the mask, Paste as Mask creates a bitmap mask that affects
the visibility of masked objects using the grayscale color values of the bitmap object.
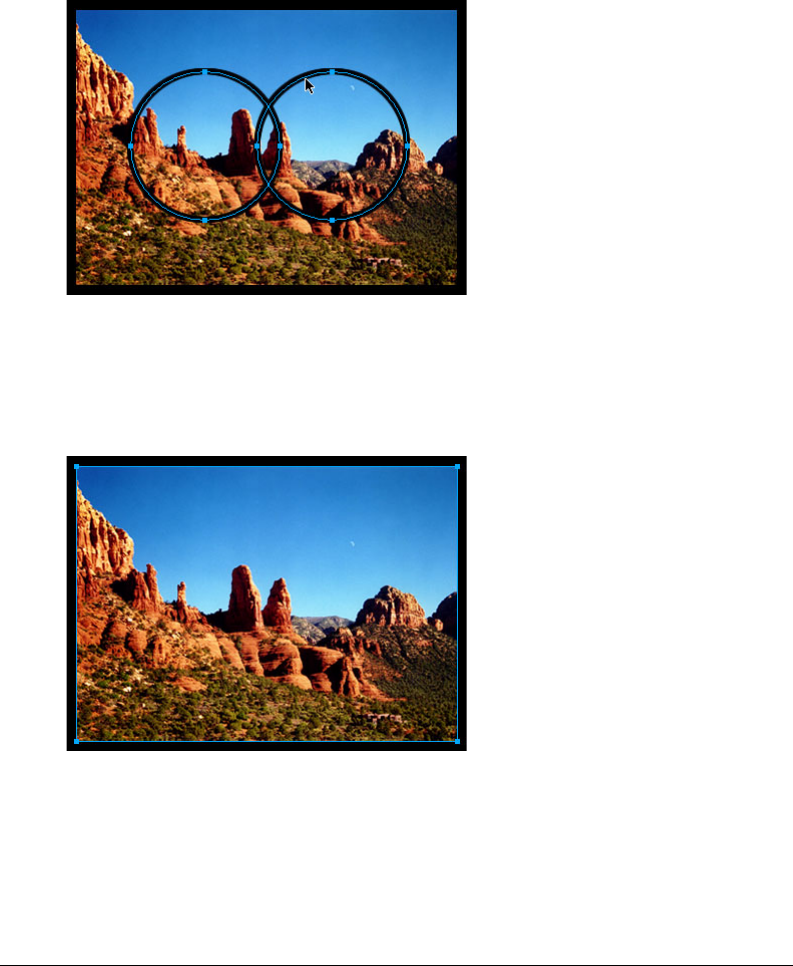
Chapter 10232
To create a mask with the Paste as Mask command:
1Select the object you want to use as the mask. Shift-click to select multiple objects.
Note: Using multiple objects as the mask will always create a vector mask, even if both objects are bitmaps.
2Position the selection so that it overlaps the object or group of objects to be masked.
The object or objects you want to use as the mask can be either in front of or behind the
objects or group to be masked.
3Choose Edit > Cut to cut the object or objects you want to use as the mask.
4Select the object or group you want to mask.
If you are masking multiple objects, the objects must be grouped. For more information about
grouping objects, see “Grouping objects” on page 121.
5Do one of the following to paste the mask:
•Choose Edit > Paste as Mask.
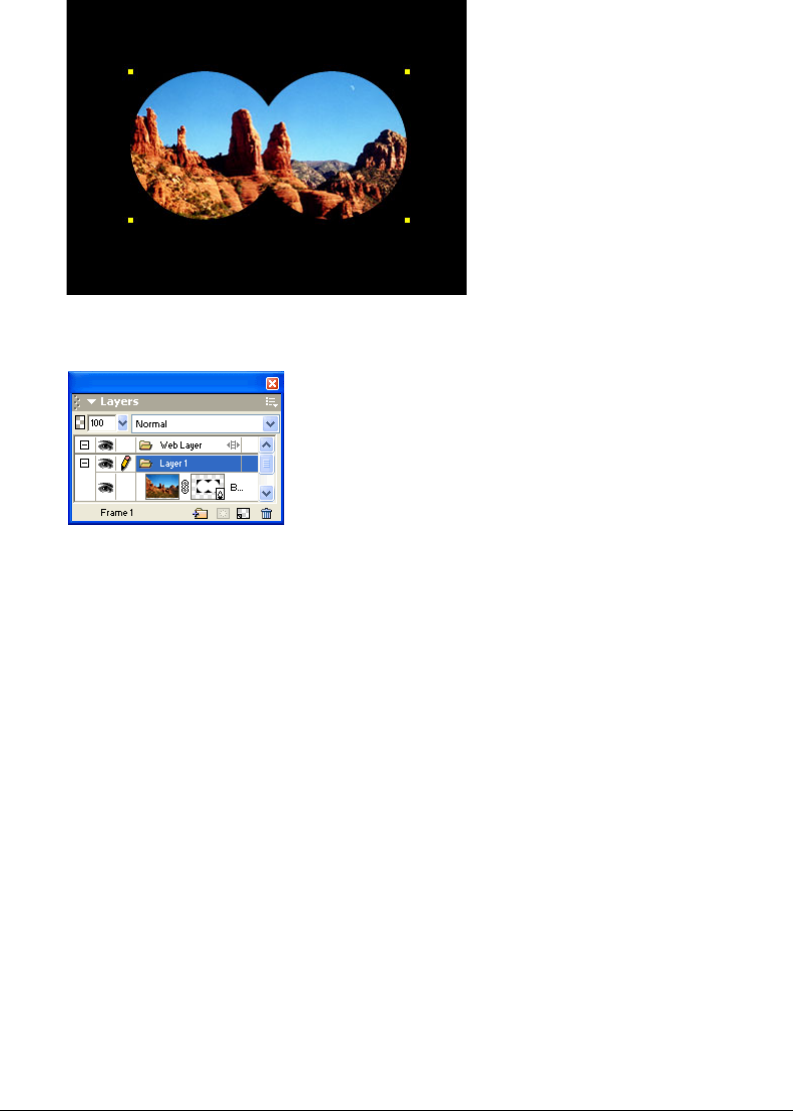
Layers, Masking, and Blending 233
•Choose Modify > Mask > Paste as Mask.
A mask applied
The mask in the Layers panel
Masking objects using the Paste Inside command
If you are a Macromedia FreeHand user, you may be familiar with the Paste Inside method of
creating masks. Paste Inside creates either a vector mask or a bitmap mask, depending on the type
of mask object you use. The Paste Inside command creates a mask by filling a closed path or
bitmap object with other objects: vector graphics, text, or bitmap images. The path itself is
sometimes referred to as a clipping path, and the items it contains are called contents or paste
insides. Contents extending beyond the clipping path are hidden.
The Paste Inside command in Fireworks produces a similar effect to the Paste as Mask command,
with a couple of differences:
•With Paste Inside, the object you cut and paste is the object to be masked. Compare this with
Paste as Mask, where the object you cut and paste is the mask object.
•With vector masks, Paste Inside shows the fill and stroke of the mask object itself. A vector
mask object’s fill and stroke are not visible by default with Paste as Mask. You can toggle a
vector mask’s fill and stroke on or off, however, using the Property inspector. For more
information, see “Changing the way masks are applied” on page 244.
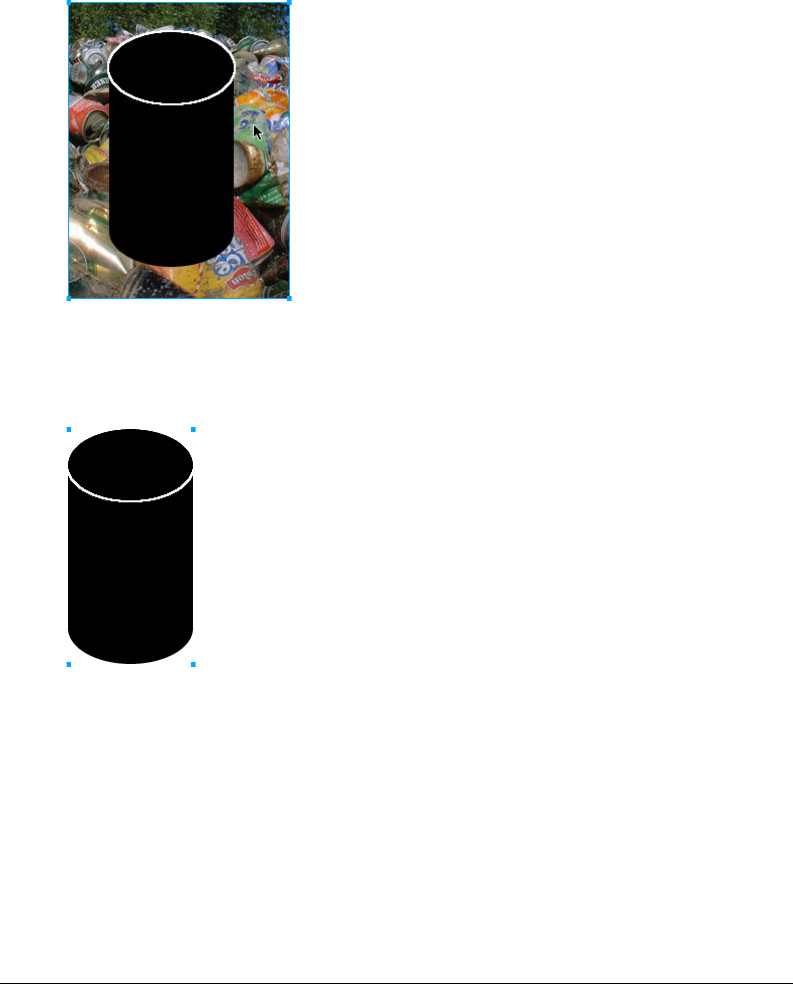
Chapter 10234
To create a mask using the Paste Inside command:
1Select the object or objects to use as the paste inside contents.
2Position the object or objects so that they overlap the object into which you want to paste
the contents.
Note: Stacking order is not important, as long as the objects you want to use as the paste inside contents remain
selected. These objects can be above or below the mask object in the Layers panel.
3Choose Edit > Cut to move the objects to the Clipboard.
4Select the object into which you want to paste the contents. This object will be used as the
mask, or clipping path.

Layers, Masking, and Blending 235
5Choose Edit > Paste Inside.
The objects you pasted appear to be inside or clipped by the mask object.
Using text as a mask
Text masks are a type of vector mask and are applied the same way you apply masks using existing
objects. You simply use text as the mask object. The most common way to apply a text mask is
using its path outline. But you can apply a text mask using its grayscale appearance as well.
A text mask applied using its path outline
For more information, see “Creating a mask from an existing object” on page 231. For more
information about the different ways masks can be applied, see “Changing the way masks are
applied” on page 244.
Masking objects using the Layers panel
The quickest way to add an empty, transparent bitmap mask is through the Layers panel. The
Layers panel adds a white mask to an object, which you can customize by drawing on it with the
bitmap tools.
Note: For details on creating empty, opaque (or black) masks, see “Masking objects using the Reveal and Hide
commands” on page 236.
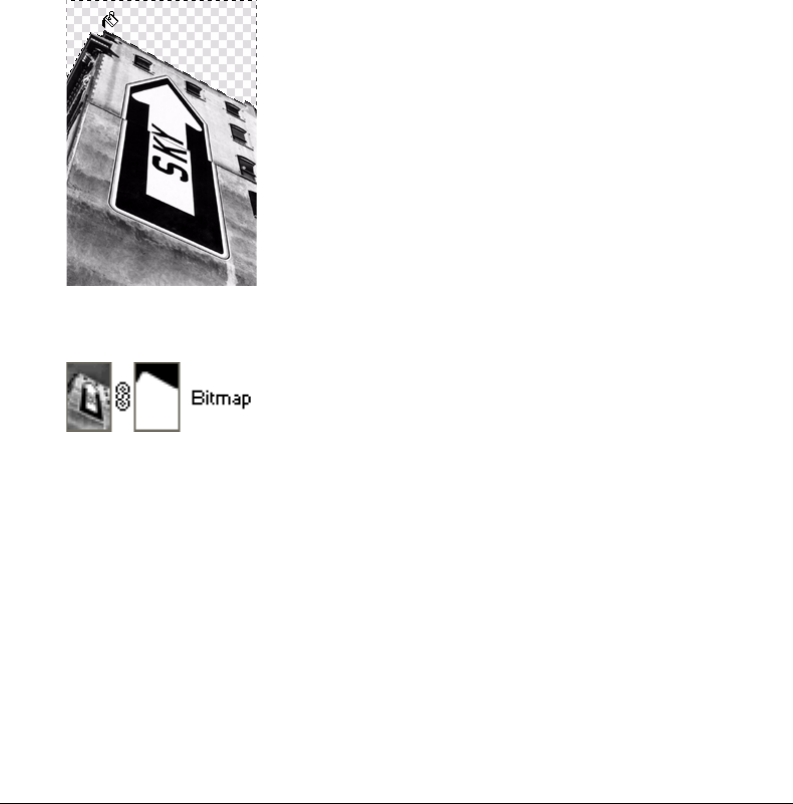
Chapter 10236
To create a bitmap mask using the Layers panel:
1Select the object you want to mask.
2Click the Add Mask button at the bottom of the Layers panel.
An empty mask is applied to the selected object. The Layers panel displays a mask thumbnail
representing the empty mask.
3Optionally, if the masked object is a bitmap, use one of the marquee or lasso tools to create a
pixel selection.
4Choose a bitmap painting tool from the Tools panel, such as the Brush, Pencil, Paint Bucket,
or Gradient tool.
5Set the desired tool options in the Property inspector.
6With the mask still selected, draw on the empty mask. In the areas where you draw, the
underlying masked object is hidden.
Original image; mask applied
The mask as it appears in the Layers panel
Note: For more information about modifying a bitmap mask’s appearance by drawing on it, see “Modifying a
mask’s appearance” on page 243.
Masking objects using the Reveal and Hide commands
The Modify > Mask submenu has several options for applying empty bitmap masks to objects:
Reveal All applies an empty, transparent mask to an object, which reveals the entire object. Reveal
All produces the same effect as clicking the Add Mask button in the Layers panel.
Hide All applies an empty, opaque mask to an object, which hides the entire object.
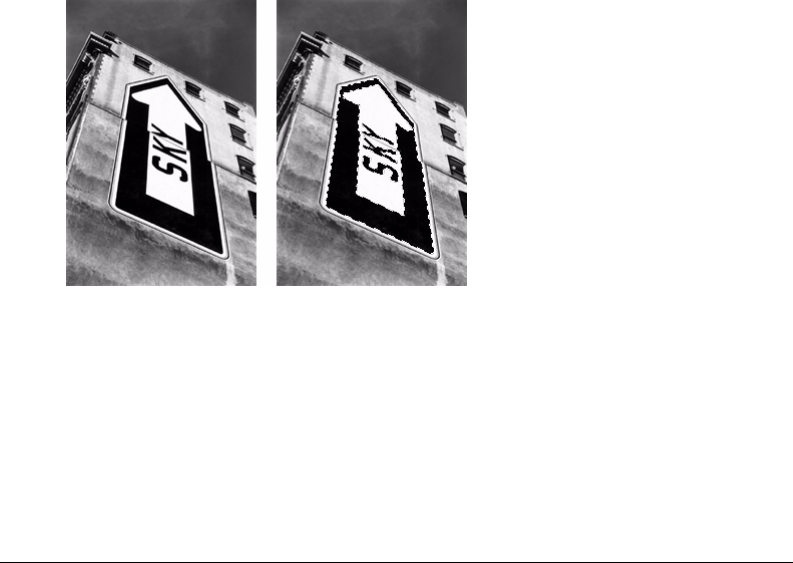
Layers, Masking, and Blending 237
Reveal Selection can be used only with pixel selections. It applies a transparent pixel mask using
the current pixel selection. The other pixels in the bitmap object are hidden.
Hide Selection can be used only with pixel selections. It applies an opaque pixel mask using the
current pixel selection. The other pixels in the bitmap object are shown.
To use the Reveal All and Hide All commands to create a mask:
1Select the object you want to mask.
2Do one of the following to create the mask:
•Choose Modify > Mask > Reveal All to show the object.
•Choose Modify > Mask > Hide All to hide the object.
3Choose a bitmap painting tool from the Tools panel, such as the Brush, Pencil, or Paint Bucket.
4Set the desired tool options in the Property inspector.
If you’ve applied a Hide All mask, you must choose a color other than black.
5Draw on the empty mask. In the areas where you draw, the underlying masked object is either
hidden or shown, depending on the type of mask you applied.
Note: For more information about modifying a bitmap mask’s appearance by drawing on it, see “Modifying a
mask’s appearance” on page 243.
To use Reveal Selection and Hide Selection commands to create a mask:
1Choose the Magic Wand or any marquee or lasso tool from the Tools panel.
2Select pixels in a bitmap.
Original image; pixels selected with the Magic Wand
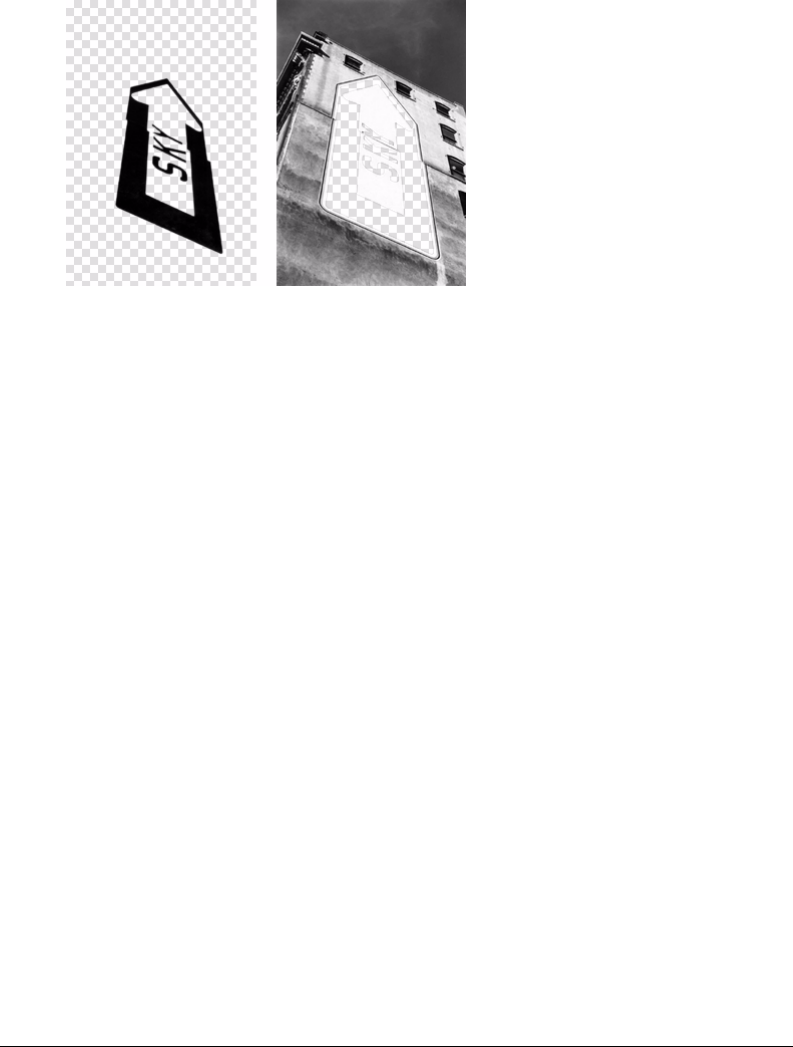
Chapter 10238
3Do one of the following to create the mask:
•Choose Modify > Mask > Reveal Selection to show the area defined by the pixel selection.
•Choose Modify > Mask > Hide Selection to hide the area defined by the pixel selection.
The results of Reveal Selection and Hide Selection
A bitmap mask is applied using the pixel selection. You can further edit the mask to reveal or
hide the remaining pixels of the masked object using the bitmap tools in the Tools panel. For
more information about modifying a bitmap mask’s appearance by drawing on it, see
“Modifying a mask’s appearance” on page 243.
About importing and exporting Photoshop layer masks
In Photoshop, you can mask images using layer masks or grouped layers. Fireworks lets you
successfully import images that employ layer masks without losing the ability to edit them. Layer
masks are imported as bitmap masks.
Fireworks masks can also be exported to Photoshop. They are converted into Photoshop layer
masks. If the masked objects include text and you want to maintain text editability in Photoshop,
you must choose Maintain Editability over Appearance when exporting.
Note: If text is used as the mask object, it is converted to a bitmap and is no longer editable as text once imported
into Photoshop.
Grouping objects to form a mask
You can group two or more objects to create a mask. The topmost object becomes the mask object.
You can group objects as either bitmap masks or vector masks. The stacking order determines the
type of mask applied. If the top object is a vector object, the result is a vector mask. If the top
object is a bitmap object, the result is a bitmap mask.
Note: For more information about vector and bitmap masks, see “About masks” on page 229.

Layers, Masking, and Blending 239
To group objects to form a mask:
1Shift-click two or more overlapping objects.
You can select objects from different layers.
2Choose Modify > Mask > Group as Mask.
Editing masks
Masks can be modified in many ways. By modifying a mask’s position, shape, and color, you can
change the visibility of masked objects. You can also change a mask’s type and the way it is
applied. In addition, masks can be replaced, disabled, or deleted.
The results of editing a mask are immediately visible, even if the mask object itself is not visible
on the canvas. The mask thumbnail in the Layers panel displays the edits you make to the mask.
Masked objects can also be modified. You can rearrange masked objects without moving the
mask. You can also add additional masked objects to an existing mask group.
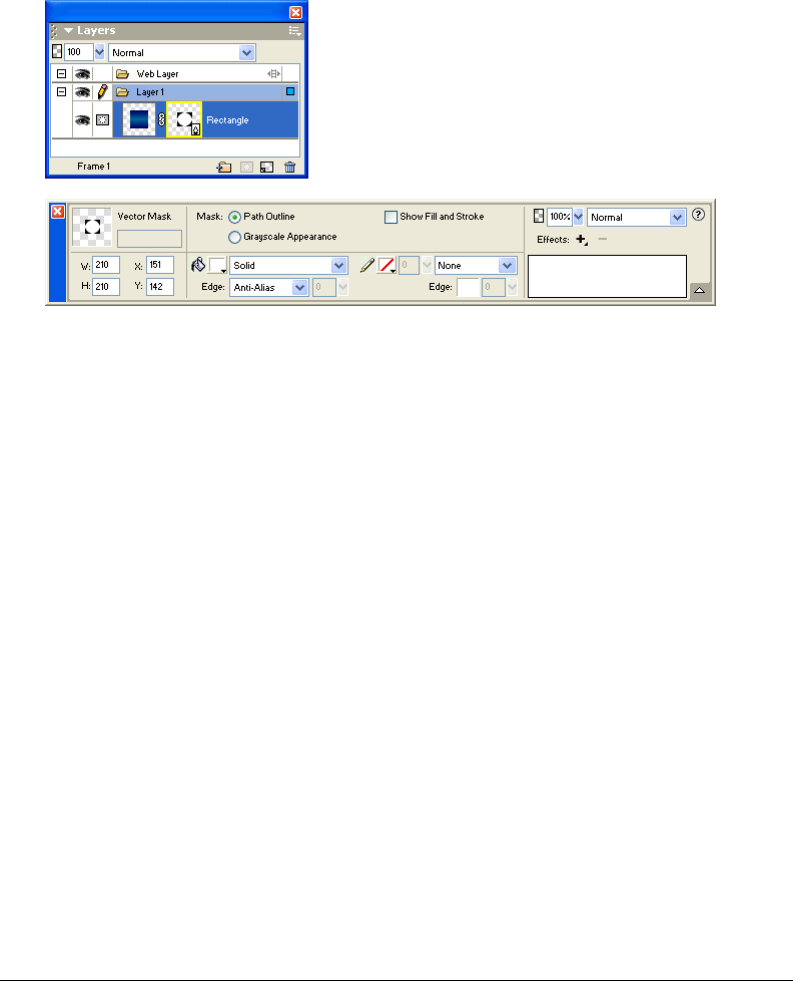
Chapter 10240
Selecting masks and masked objects using mask thumbnails
Masks and masked objects can be easily identified and selected using the thumbnails in the Layers
panel. Thumbnails allow you to easily select and edit just the mask or the masked objects, without
affecting the other objects.
When you select the mask thumbnail, the mask icon appears beside it in the Layers panel, and the
mask’s properties show in the Property inspector, where they can be changed if desired.
To select a mask:
Click the mask thumbnail in the Layers panel.
The Layers panel displays a yellow highlight around a mask thumbnail when it is selected.
To select masked objects:
Click the masked object thumbnail in the Layers panel.
The Layers panel displays a blue highlight around a masked object’s thumbnail when it is selected.
Selecting masks and masked objects using the Subselection tool
You can use the Subselection tool to select individual masks and masked objects on the canvas
without selecting the other components of the mask.
When you select a mask or a masked object with the Subselection tool, the Property inspector
shows the properties for the selected object.
To select a mask or masked object independently:
Click the object on the canvas with the Subselection tool.
When selected, masks display a yellow highlight and masked objects display a blue highlight.
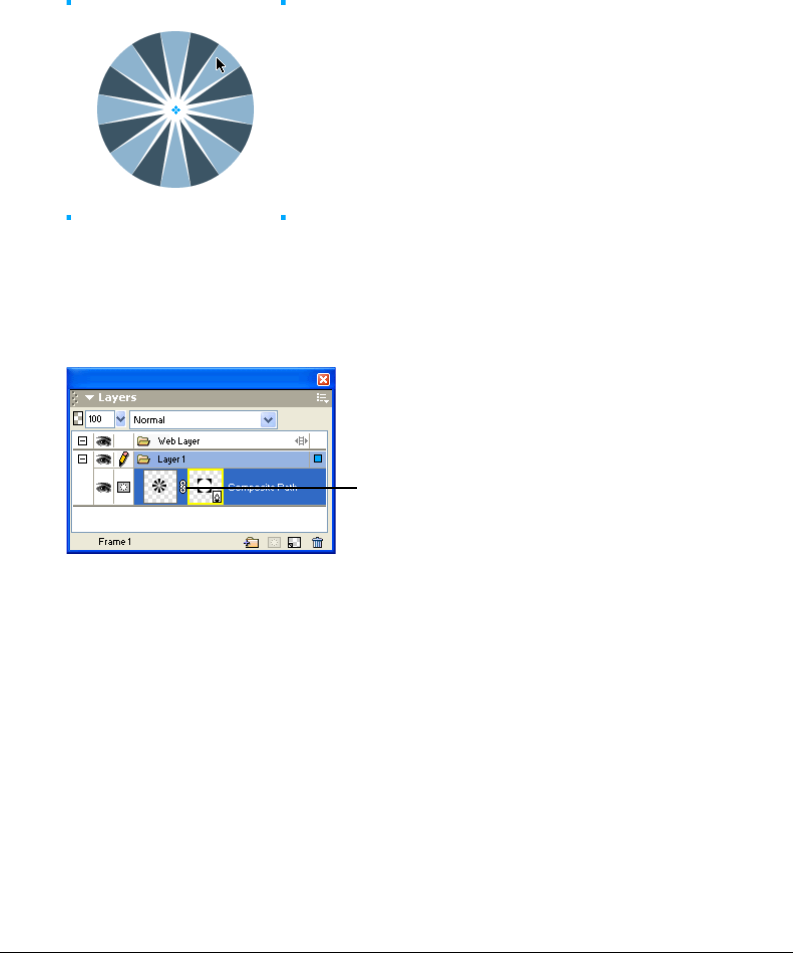
Layers, Masking, and Blending 241
Moving masks and masked objects
You can reposition masks and masked objects. They can be moved together or independently.
To move a mask and its masked objects together:
1Select the mask on the canvas using the Pointer tool.
2Drag the mask to a new location, but be careful not to drag the move handle or you’ll move the
masked object separately from the mask.
To move masks and masked objects independently by unlinking:
1Click the link icon on the mask in the Layers panel.
This unlinks masks from masked objects so they can be moved independently.
2Select the thumbnail of the object you want to move: the mask or the masked objects.
3Drag the object or objects on the canvas with the Pointer tool.
Note: If you move masked objects, all masked objects will move together.
4Click between the mask thumbnails in the Layers panel. This relinks the masked objects
to the mask.
Link icon
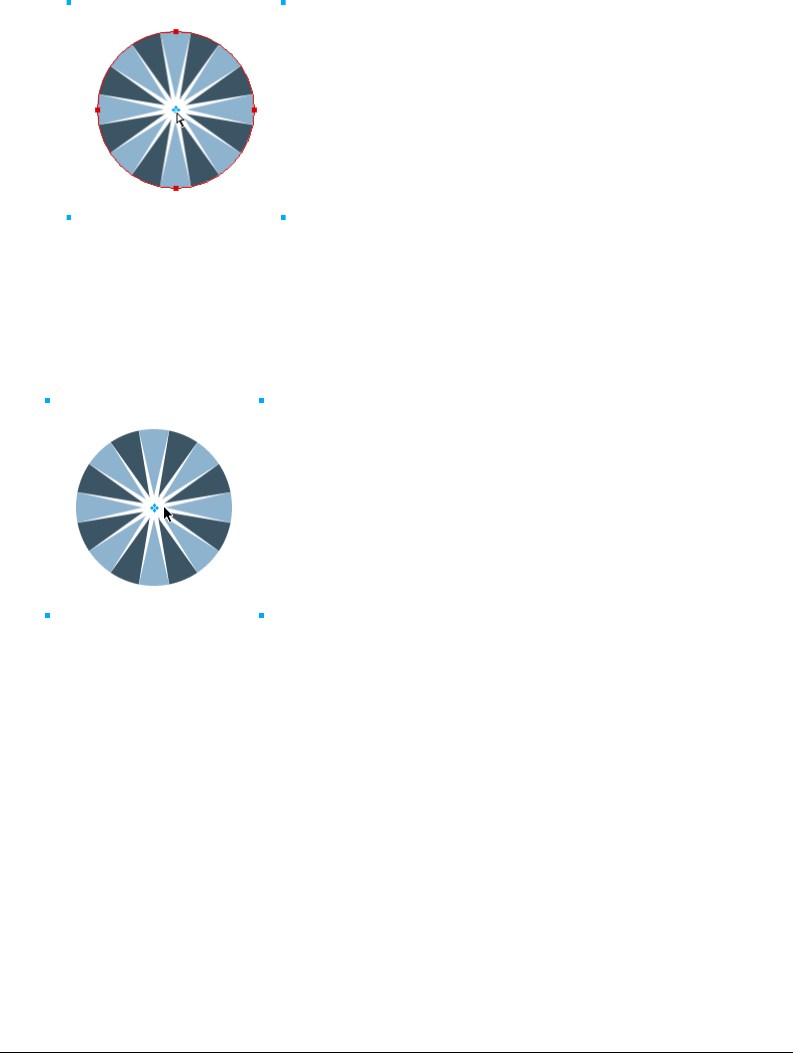
Chapter 10242
To move a mask independently using its move handle:
1Select the mask on the canvas using the Pointer tool.
2Choose the Subselection tool and drag the mask’s move handle to a new location.
To move masked objects independently of the mask using the move handle:
1Select the mask on the canvas using the Pointer tool.
2Drag the move handle to a new location.
The objects move without affecting the position of the mask.
Note: If there is more than one masked object, all masked objects will move together.
To move masked objects independently of each other:
Click the object with the Subselection tool to select it, then drag the object.
This is the only method that allows you to select and move an individual masked object without
affecting other masked objects.

Layers, Masking, and Blending 243
Modifying a mask’s appearance
By modifying a mask’s shape and color, you can change the visibility of masked objects.
The shape of a bitmap mask can be modified by drawing on it with the bitmap tools. The shape
of a vector mask can be modified by moving the mask object’s points.
If a mask is applied using its grayscale appearance, you can modify its colors to affect the opacity
of the underlying masked objects. Using midtone colors on a grayscale mask gives masked objects
a translucent appearance. Lighter colors display the masked objects, while darker colors hide
masked objects and show the background.
You can also alter a mask by adding additional mask objects to it. In addition, the transformation
tools provide another method for altering masks.
To modify a selected mask’s shape, do one of the following:
•Draw onto a bitmap mask with any of the bitmap drawing tools.
•Move the points of a vector mask object with the Subselection tool.
To modify a selected mask’s color, do one of the following:
•For grayscale bitmap masks, use the bitmap tools to draw onto the mask using various
grayscale color values.
•For grayscale vector masks, change the color of the mask object.
Note: Use lighter colors to display the masked objects and darker colors to hide the masked objects.
To modify a mask by adding more mask objects:
1Choose Edit > Cut to cut the selected object or objects you want to add.
2Select the thumbnail of the masked object in the Layers panel.
3Choose Edit > Paste as Mask.
4Choose Add when asked whether to replace the existing mask or add to it.
The object or objects are added to the mask.
To modify a mask using the transformation tools:
1Select the mask on the canvas using the Pointer tool.
2Use a transformation tool or a command from the Modify > Transform submenu to apply a
transformation to the mask. For more information about using the transformation tools, see
“Transforming and distorting selected objects and selections” on page 116.
The transformation is applied to the mask and its masked objects.
Note: You can apply a transformation to the mask object alone by first unlinking the mask from the mask objects
in the Layers panel and then performing the transformation.
Chapter 10244
Changing the way masks are applied
You can use the Property inspector to ensure that you are editing a mask and to identify the type of
mask you are working on. When a mask is selected, the Property inspector lets you change the way the
mask is applied. If the Property inspector is minimized, click the expander arrow to see all properties.
Vector masks are applied using their path outline by default. The outline of the path or text is
used as the mask. Optionally, you can show the mask’s fill and stroke. This produces the same
result as using Paste Inside to create masks. For more information, see “Creating a mask from an
existing object” on page 231.
A vector mask applied using its path outline with Show Fill and Stroke enabled
By applying a bitmap mask using its alpha channel, you can create a mask that looks similar to a
vector mask applied using its path outline. When you apply a mask using its alpha channel, the
transparency of the mask object affects the visibility of the object being masked.
A bitmap mask applied using its alpha channel

Layers, Masking, and Blending 245
Both vector and bitmap masks can be applied using their grayscale appearance. Bitmap masks are
applied using their grayscale appearance by default. When a mask is applied using its grayscale
appearance, the lightness of its pixels determines how much of the masked object is displayed.
Light pixels display the masked object. Darker pixels in the mask knock out the image and show
the background. Applying masks using their grayscale appearance creates interesting effects if the
mask object contains a pattern or gradient fill.
A vector mask with a pattern fill applied using its grayscale appearance
You can also convert vector masks into bitmap masks. Bitmap masks cannot be converted into
vector masks, however.
For more information about vector and bitmap masks, see “About masks” on page 229.
To apply a vector mask using its path outline:
Choose Path Outline in the Property inspector when a vector mask is selected.
To show a vector mask’s fill and stroke:
Choose Show Fill and Stroke in the Property inspector when a vector mask that has been applied
using its path outline is selected.
To apply a bitmap mask using its alpha channel:
Choose Alpha Channel in the Property inspector when a bitmap mask is selected.
To apply a vector or bitmap mask using its grayscale appearance:
Choose Grayscale Appearance in the Property inspector when a mask is selected.
To convert a vector mask to a bitmap mask:
1In the Layers panel, select the thumbnail of the mask object.
2Choose Modify > Flatten Selection.

Chapter 10246
Adding objects to a masked selection
You can add more objects to an existing masked selection.
To add additional masked objects to a masked selection:
1Choose Edit > Cut to cut the selected object or objects you want to add.
2Select the thumbnail of the masked object in the Layers panel.
3Choose Edit > Paste Inside.
The object or objects are added to the masked objects.
Note: Using the Paste Inside command on an existing mask won’t show the mask object’s stroke and fill unless
the original mask was applied using its stroke and fill.
Replacing, disabling, and deleting masks
You can replace a mask with a new mask object. You can also disable or delete a mask. Disabling a
mask temporarily hides it. Deleting a mask permanently removes it.
To replace a mask:
1Choose Edit > Cut to cut the selected object or objects you want to use as the mask.
2Select the thumbnail of the masked object in the Layers panel and choose Edit > Paste as Mask.
3Click Replace when asked whether to replace the existing mask or add to it.
The existing mask object is replaced with the new one.
To disable or enable a selected mask, do one of the following:
•Choose Disable Mask or Enable Mask from the Layers panel Options menu.
•Choose Modify > Mask > Disable Mask or Modify > Mask > Enable Mask.
A red X appears on the mask thumbnail when it is disabled. Clicking the X enables the mask.
To delete a selected mask:
1Do one of the following to delete the mask:
•Choose Delete Mask from the Layers panel Options menu.
•Choose Modify > Mask > Delete Mask.
•Drag the mask thumbnail to the trash can icon in the Layers panel.
2Choose whether you want to apply or discard the effect of the mask on the masked objects
before deleting the mask:
Apply keeps the changes you have made to the object, but the mask is no longer editable. If the
object being masked is a vector object, both the mask and vector object are converted into a
single bitmap image.
Discard gets rid of the changes you have made and restores the object to its original form.
Cancel aborts the delete operation and leaves the mask intact.

Layers, Masking, and Blending 247
Blending and transparency
Compositing is the process of varying the transparency or color interaction of two or more
overlapping objects. In Fireworks, blending modes allow you to create composite images.
Blending modes also add a dimension of control to the opacity of objects and images.
About blending modes
Choosing a blending mode applies it to the entire appearance of selected objects. Objects within a
single document or a single layer can have blending modes that differ from those of other objects
within the document or layer.
When objects with different blending modes are grouped, the group’s blending mode overrides
individual blending modes. Ungrouping the objects restores each object’s individual blending mode.
A blending mode contains these elements:
Blend color is the color to which the blending mode is applied.
Opacity is the degree of transparency to which the blending mode is applied.
Base color is the color of pixels underneath the blend color.
Result color is the result of the blending mode’s effect on the base color.
These are the blend modes in Fireworks:
Normal applies no blending mode.
Multiply multiplies the base color by the blend color, resulting in darker colors.
Screen multiplies the inverse of the blend color by the base color, resulting in a bleaching effect.
Darken selects the darker of the blend color and base color to use as the result color. This replaces
only pixels that are lighter than the blend color.
Lighten selects the lighter of the blend color and base color to use as the result color. This replaces
only pixels that are darker than the blend color.
Difference subtracts the blend color from the base color or the base color from the blend color.
The color with less brightness is subtracted from the color with more brightness.
Hue combines the hue value of the blend color with the luminance and saturation of the base
color to create the result color.
Saturation combines the saturation of the blend color with the luminance and hue of the base
color to create the result color.
Color combines the hue and saturation of the blend color with the luminance of the base color to
create the result color, preserving the gray levels for coloring monochrome images and tinting
color images.
Luminosity combines the luminance of the blend color with the hue and saturation of the base color.
Invert inverts the base color.
Tint adds gray to the base color.
Erase removes all base color pixels, including those in the background image.
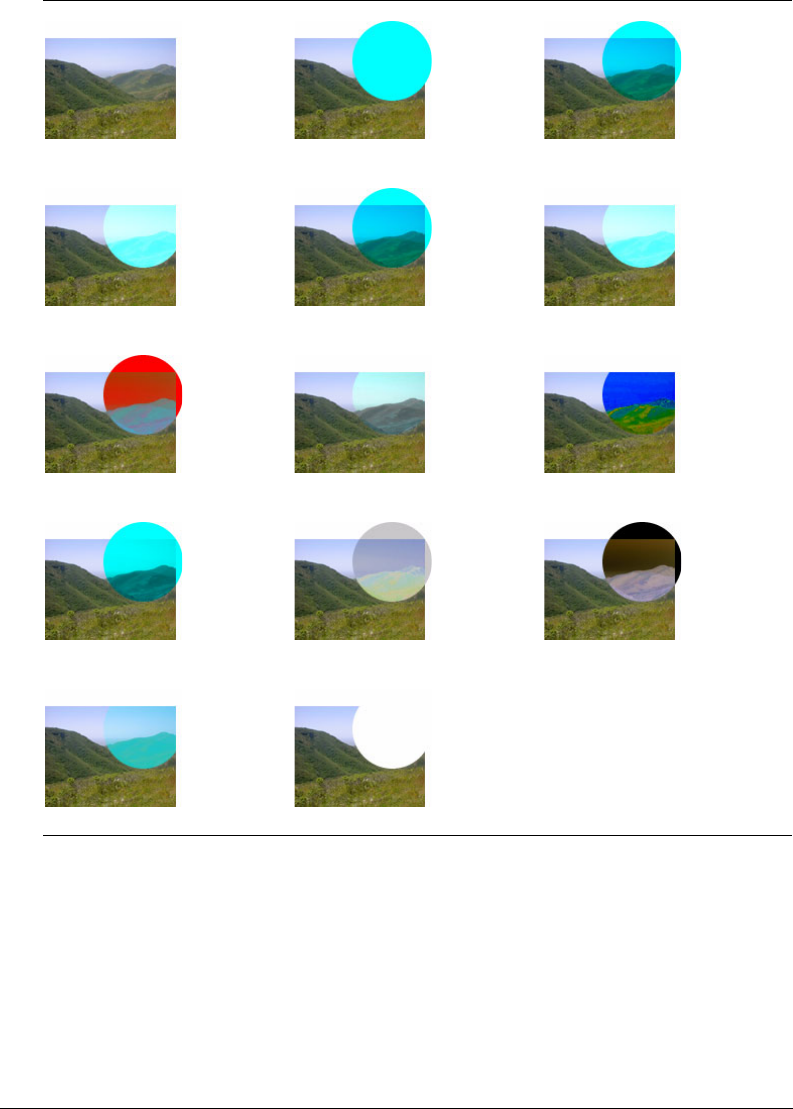
Chapter 10248
Blending mode examples
Original image Normal Multiply
Screen Darken Lighten
Difference Hue Saturation
Color Luminosity Invert
Tint Erase

Layers, Masking, and Blending 249
Adjusting opacity and applying blends
You can use the Property inspector or the Layers panel to adjust the opacity of selected objects and
to apply blending modes. An Opacity setting of 100 renders an object completely opaque. A
setting of 0 (zero) renders an object completely transparent.
You can also specify a blending mode and opacity before you draw an object.
To specify a blending mode and opacity before you draw an object:
With the desired tool selected in the Tools panel, set blend and opacity options in the Property
inspector before you draw the object.
Note: Blend and opacity options are not available for all tools.
To set a blending mode and opacity level for existing objects:
1With two objects overlapping, select the top object.
2Choose a blending option from the Blend Mode pop-up menu in the Property inspector or the
Layers panel.
3Choose a setting from the Opacity pop-up slider or type a value in the text box.
To set a default blending mode and opacity level to be applied to objects as you draw them:
1Choose Select > Deselect to avoid inadvertently applying a blending mode and opacity.
2With a vector or bitmap drawing tool selected, choose a blending mode and opacity level in
the Property inspector.
The blending mode and opacity level you choose will be used as the default for any subsequent
objects you draw with that specific tool.
About the Fill Color Live Effect
Fireworks also offers a Live Effect that allows you to adjust the color of an object by altering the
object’s opacity and blend mode. This Live Effect, called Fill Color, produces the same effect as
overlapping an object with one that has a different opacity and blend mode. For more details on
using the Fill Color Live Effect, see Chapter 9, “Using Live Effects,” on page 215.

Chapter 10250

251
CHAPTER 11
Using Styles, Symbols, and URLs
Macromedia Fireworks MX provides three panels in which you can store and reuse styles,
symbols, and URLs. Styles are stored in the Styles panel, symbols are stored in the Library panel,
and URLs are stored in the URL panel. By default, all three panels are organized in the Assets
panel group.
The Styles panel contains a set of predefined Fireworks styles to choose from. In addition, if you
have created a combination of strokes, fills, and other attributes and want to reuse it, you can save
the attributes as a style. Rather than rebuilding attributes each time, you can simply save them in
the Styles panel and then apply that combination of attributes to other objects.
Fireworks has three types of symbols: graphic, animation, and button. Each has unique
characteristics for its specific use. You can create new symbols, as well as duplicate, import, and
edit symbols, using the Library panel. For information on specific features built into the
animation and button symbols, see Chapter 14, “Creating Animation,” on page 309 and Chapter
13, “Creating Buttons and Pop-up Menus,” on page 289.
A URL, or Uniform Resource Locator, is an address of a specific page or file on the Internet. If
you are using the same URL many times, you can add it to the URL panel. You can organize and
group your URLs in URL libraries.
Using styles
You can save and reapply a set of predefined fill, stroke, effect, and text attributes by creating a
style. When you apply a style to an object, that object takes on the style’s characteristics.
Fireworks has many predefined styles. You can add, change, and remove styles. The Fireworks
CD-ROM and the Macromedia web site have many more predefined styles that you can import
into Fireworks. You can also export styles and share them with other Fireworks users or import
styles from other Fireworks documents.
Note: Styles cannot be applied to bitmap objects.
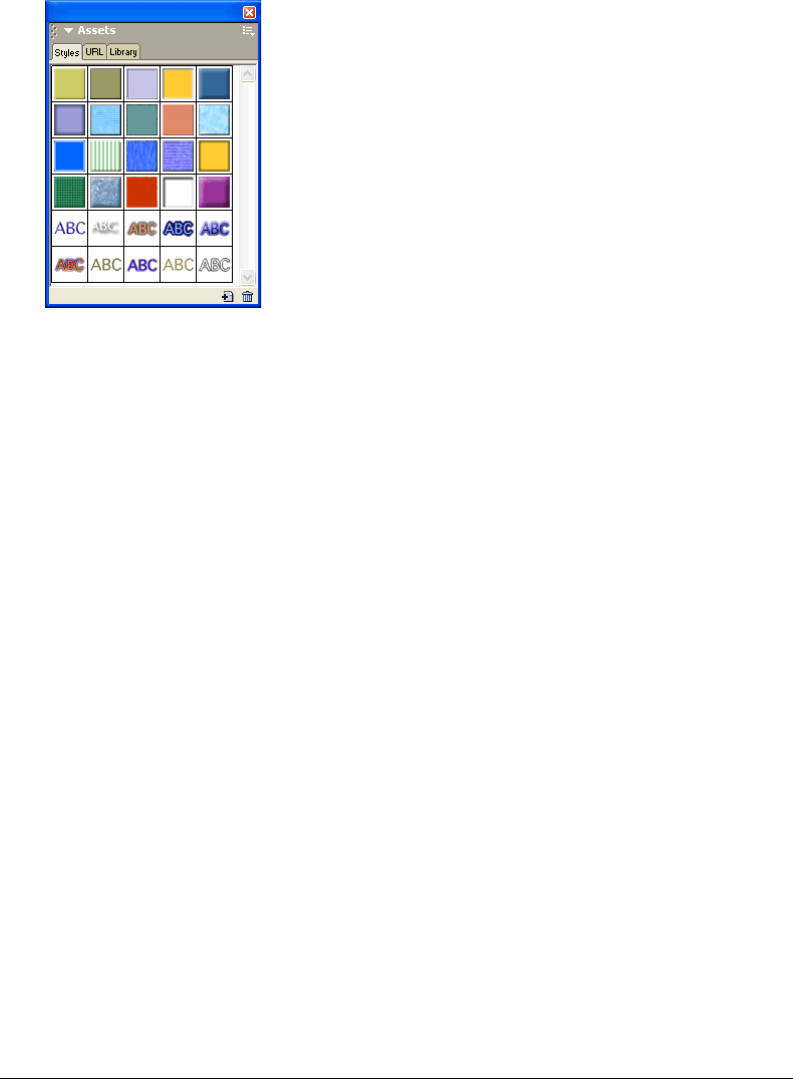
Chapter 11252
Applying a style
You can use the Styles panel to create, store, and apply styles to objects or text.
Styles panel
When you apply a style to an object, you can later update the style without affecting the original
object. Fireworks does not keep track of which style you applied to an object. If you delete a
custom style you cannot recover it. But if you delete a style supplied in Fireworks, you can recover
it and all other deleted styles using the Reset Styles command in the Styles panel Options menu.
However, resetting styles also deletes your custom styles.
To apply a style to a selected object or text block:
1Choose Window > Styles to open the Styles panel.
2Click a style in the Styles panel.
Creating and deleting styles
You can create a style based on the attributes of a selected object. The style will be displayed in
the Styles panel.
You can also delete styles from the Styles panel.
The following attributes can be saved in a style:
•Fill type and color, including patterns, textures, and vector gradient attributes such as angle,
position, and opacity
•Stroke type and color
•Effects
•Text attributes such as font, point size, style (bold, italic, or underline), alignment, anti-
aliasing, auto-kerning, horizontal scale, range kerning, and leading

Using Styles, Symbols, and URLs 253
To create a new style:
1Create or select a vector object or text with the stroke, fill, effect, or text attributes you want.
2Click the New Style button at the bottom of the Styles panel.
3Choose the attributes you want to be part of the style from the New Style dialog box.
Note: To save other text attributes not listed, such as alignment, anti-aliasing, auto-kerning, horizontal scale,
range kerning, and leading, choose the Text Other option.
4Name the style if you wish, and click OK.
An icon depicting the style appears in the Styles panel.
To base a new style on an existing style:
1Apply the existing style to a selected object.
2Edit the attributes of the object.
3Save the attributes by creating a new style, as described in the previous procedure.
To delete a style:
1Select a style from the Styles panel.
Shift-click to select multiple styles; Control-click (Windows) or Command-click (Macintosh)
to select multiple noncontiguous styles.
2Click the Delete Styles button in the Styles panel.
Editing styles
If you want to change the attributes that a style contains, you can edit the style from the Styles panel.
To edit a style:
1Choose Select > Deselect to deselect any objects on the canvas.
2Double-click a style in the Styles panel.
3In the Edit Style dialog box, choose or deselect components of the attributes you wish to apply.
The Edit Style dialog box contains the same options as the New Style dialog box. For details on
choosing attributes to include in a style, see “Creating and deleting styles” on page 252.
4Click OK to apply the changes to the style.
Exporting and importing styles
You may want to share styles with other Fireworks users to save time and maintain consistency.
You can share styles by exporting them for use on other computers.
To export styles:
1Select a style from the Styles panel.
Shift-click to select multiple styles; Control-click (Windows) or Command-click (Macintosh)
to select multiple noncontiguous styles.
2Choose Export Styles from the Styles panel Options menu.
3Enter a name and location for the document that will contain the saved styles.
4Click Save.

Chapter 11254
To import styles:
1Choose Import Styles from the Styles panel Options menu.
2Choose a styles document to import.
All styles in the styles document are imported and placed directly after the selected style in the
Styles panel.
Using style defaults
If you want to delete all custom styles from the Styles panel and restore any deleted default styles,
you can reset the Styles panel to its default state. You can also change the size of the icons
displayed in the Styles panel.
To reset the Styles panel to the default styles:
Choose Reset Styles from the Styles panel Options menu.
Note: Resetting styles to the default removes any custom styles you may have saved.
To change the size of the style preview icons:
Choose Large Icons from the Styles panel Options menu to switch between large and small
preview sizes.
Applying attributes without creating a style
You can copy attributes from one object and apply them to other objects, without creating a new
style in the Styles panel. You can use this method to quickly apply attributes to an object when
you are not planning to reuse those attributes on other objects. Attributes that can be copied and
applied include fills, strokes, effects, and text attributes.
To copy attributes from one object and apply them to other objects:
1Select the object whose attributes you want to copy.
2Choose Edit > Copy.
3Deselect the original object, then select the object or objects to which you want to apply the
new attributes.
4Choose Edit > Paste Attributes.
The selected objects take on the same attributes as the original object.

Using Styles, Symbols, and URLs 255
Using symbols
Fireworks has three types of symbols: graphic, animation, and button. Each has unique
characteristics for its specific use. Instances are representations of a Fireworks symbol. When the
symbol object (the original) is edited, the instances (copies) automatically change to reflect the
modifications to the symbol.
Symbols are useful whenever you want to reuse a graphic element. You can place instances in
multiple Fireworks documents and retain the association with the symbol. Symbols are helpful for
creating buttons and animating objects across multiple frames. For more information about the
additional features built into animation and button features, see “Creating animation symbols”
on page 310 and “Creating button symbols” on page 289.
Creating a symbol
You can create graphic, animation, and button symbols using the Edit > Insert submenu. You can
create a symbol from any object, text block, or group, and then organize them in the Library panel.
To place instances in a document, you simply drag them from the Library panel onto the canvas.
To create a new symbol from a selected object:
1Select the object and choose Modify > Symbol > Convert to Symbol.
2Type a name for the symbol in the Name text box of the Symbol Properties dialog box.
3Choose a symbol type: Graphic, Animation, or Button. Then click OK.
The symbol appears in the library, the selected object becomes an instance of the symbol, and
the Property inspector displays symbol options.
To create a symbol from scratch:
1Do one of the following:
•Choose Edit > Insert > New Symbol.
•Choose New Symbol from the Library panel Options menu.
2Choose a symbol type: Graphic, Animation, or Button. Then click OK.
Depending on which symbol type you choose, the Symbol Editor or Button Editor opens.
3Create the symbol using the tools in the Tools panel, then close the editor.
For more information, see “Creating button symbols” on page 289 and “Creating animation
symbols” on page 310.

Chapter 11256
Placing instances
You can place instances of a symbol in the current document.
To place an instance:
Drag a symbol from the Library panel to the current document.
An instance of a symbol on the canvas
Editing symbols
You can modify a symbol in the Symbol Editor, which automatically modifies all associated instances.
Note: For most types of edits, modifying an instance affects the symbol and all other instances. There are some
exceptions, however. For more information, see “Editing instances” on page 257.
To edit a symbol and all its instances:
1Do one of the following to open the Symbol Editor:
•Double-click an instance.
•Select an instance and choose Modify > Symbol > Edit Symbol.
2Make changes to the symbol and close the window.
The symbol and all instances reflect the modifications.
To rename a symbol:
1Double-click the symbol name in the Library panel.
2Change the name in the Symbol Properties dialog box and click OK.
To duplicate a symbol:
1In the Library panel, select the symbol.
2Choose Duplicate from the Library panel Options menu.
To change a symbol’s type:
1Double-click the symbol name in the Library.
2Choose a different Symbol Type option.
To select all unused symbols in the Library panel:
Choose Select Unused Items from the Library panel Options menu.

Using Styles, Symbols, and URLs 257
To delete a symbol:
1In the Library panel, select the symbol.
2Choose Delete from the Library panel Options menu.
3Click Delete. The symbol and all its instances are deleted.
Editing instances
When you double-click an instance to edit it, you’re actually editing the symbol itself in the
Symbol Editor or Button Editor. To edit only the current instance, you need to break the link
between the instance and the symbol. This permanently breaks the relationship between the two,
however, and any future edits you make to the symbol won’t be reflected in the former instance.
Button symbols have several convenient features that allow you to retain the symbol-instance
relationship for a group of buttons, while assigning unique button text and URLs to each
instance. For more information, see “Editing button symbols” on page 295.
Breaking symbol links
You can modify an instance without affecting the symbol or other instances by first breaking the
link between it and the symbol.
To release an instance from a symbol:
1Select the instance.
2Choose Modify > Symbol > Break Apart.
The selected instance becomes a group. The symbol in the Library panel is no longer associated
with that group. After separation from the symbol, a former button instance loses its button
symbol characteristics and a former animation instance loses its animation symbol
characteristics.
Editing instance properties
These instance properties can be modified in the Property inspector without affecting the symbol
or other instances:
•Blending mode
•Opacity
•Effects
•Width and height
•X and Y coordinates
Note: Button instances have additional properties that can be edited without affecting the symbol. For more
information about editing button instances, see “Editing button symbols” on page 295.
To edit instance properties without affecting the symbol or breaking the symbol link:
1Select the instance.
2Modify instance properties in the Property inspector.

Chapter 11258
Importing and exporting symbols
The Library panel stores animation, graphic, and button symbols that you create in the current
document. It also stores symbols that you import into the current document. The Library panel is
document-specific, but you can use the symbols from one library in more than one Fireworks
document by importing and exporting, cutting and pasting, or dragging and dropping.
You can import symbols from other libraries, including libraries containing symbols prepared in
Macromedia Fireworks and libraries containing symbols that you or someone else previously
exported. Conversely, if you have created symbols that you would like to reuse or share, you can
export your own symbol libraries. When you export a symbol library, it is exported as a PNG file.
Importing symbols
Fireworks MX has symbol libraries in the Edit > Libraries submenu from which you can import
prepared animation symbols, graphic symbols, and button symbols, as well as navigation bars and
multi-symbol themes. Using these symbols, you can quickly create a sophisticated web page
containing advanced navigation elements without having to spend time creating original symbols.
To import one or more prepared symbols from a Fireworks symbol library:
1Open a Fireworks document.
2Choose Edit > Libraries and choose a library:
Animations opens a collection of animated symbols.
Bullets opens a collection of graphic symbols resembling various bullets.
Buttons opens a collection of 2-, 3-, and 4-state Fireworks button symbols.
Themes opens a list of animation, graphic, and button symbols; each theme consists of a similarly
designed and similarly named trio of symbols that are color-coordinated to be used together.
Other opens an Open dialog box, from which you can navigate to previously exported symbol
library PNG files. For more information, see the next procedure.
In addition, you can import symbols from previously exported library PNG files located on your
hard disk, on a CD, or on a network. For more information about exporting symbols, see
“Exporting symbols” on page 259.
To import symbols from another file into the current document:
1Do one of the following:
•Choose Import Symbols from the Library panel Options menu.
•Choose Edit > Libraries > Other.
2Navigate to the folder containing the file, choose the file, and click Open.

Using Styles, Symbols, and URLs 259
3Select the symbols to import and click Import.
The imported symbols appear in the Library panel.
You can also import and export individual symbols into and out of the Library panels of multiple
documents by dragging and dropping or copying and pasting instances.
To import a symbol by dragging and dropping or copying and pasting, do one of the following:
•Drag a symbol instance from the document containing the symbol into the destination
document.
•Copy a symbol instance in the document containing the symbol, then paste it into the
destination document.
The symbol is imported into the Library panel of the destination document and retains a
relationship to the symbol in the original document. For more information, see “Updating
exported symbols and instances in multiple documents” on page 260.
Exporting symbols
If you have created or imported symbols in a Fireworks document that you want to save to reuse
in other documents or share with others, you can use the Library panel Options menu to export
them in a PNG file. You can then import the symbols by navigating to the PNG file that contains
the symbols using the Edit > Libraries submenu. For more information, see “Importing symbols”
on page 258.
To export symbols:
1Choose Export Symbols from the Library panel Options menu.
2Select the symbols to export, and click Export.
3Navigate to a folder, type a name for the symbol file, and click Save.
Fireworks saves the symbols in a single PNG file.

Chapter 11260
Updating exported symbols and instances in multiple documents
The original symbol maintains its link to all exported symbols in other documents, so that
you can change symbol and instance properties in all documents if you edit the symbol in the
original document.
To update all exported symbols and instances:
1In the original document, double-click an instance to open the appropriate symbol editor,
modify the symbol, and close the editor.
2Save the file.
3In the document to which the symbol was exported, select the symbol in the Library panel.
4Choose Update from the Library panel Options menu.
Note: To update all exported symbols, select all the symbols in the Library panel and choose Update.
You can automatically break the link between the exported symbol and the original document by
editing the symbol in the current document. Breaking the link lets you edit the exported symbol
independently from the original symbol.
To break the link between an exported symbol and the original symbol:
In the document into which the symbol was exported, double-click an instance of the symbol to
open the appropriate symbol editor, modify the symbol, and close the symbol editor.
The link between the symbol in the current document and the original symbol is broken.
Note: Fireworks does not warn you that a break from the original symbol is about to occur, so be sure you are aware
of which symbol is in the original document before editing a symbol that appears in more than one document.
Working with URLs
Assigning a URL to a web object creates a link to a file such as a web page. You can assign URLs
to hotspots, buttons, and slice objects. When you intend to use the same URLs several times, you
can create a URL library in the URL panel and store the URLs in the library. You use the URL
panel to add, edit, and organize your URLs.
For example, if your website contains several navigation buttons to return to your home page, you
can add the URL for your home page to the URL panel. Then you assign this URL to each
navigation button by selecting it in the URL library. You can use the Find and Replace feature to
change a URL across multiple documents (see “Finding and replacing” on page 400).
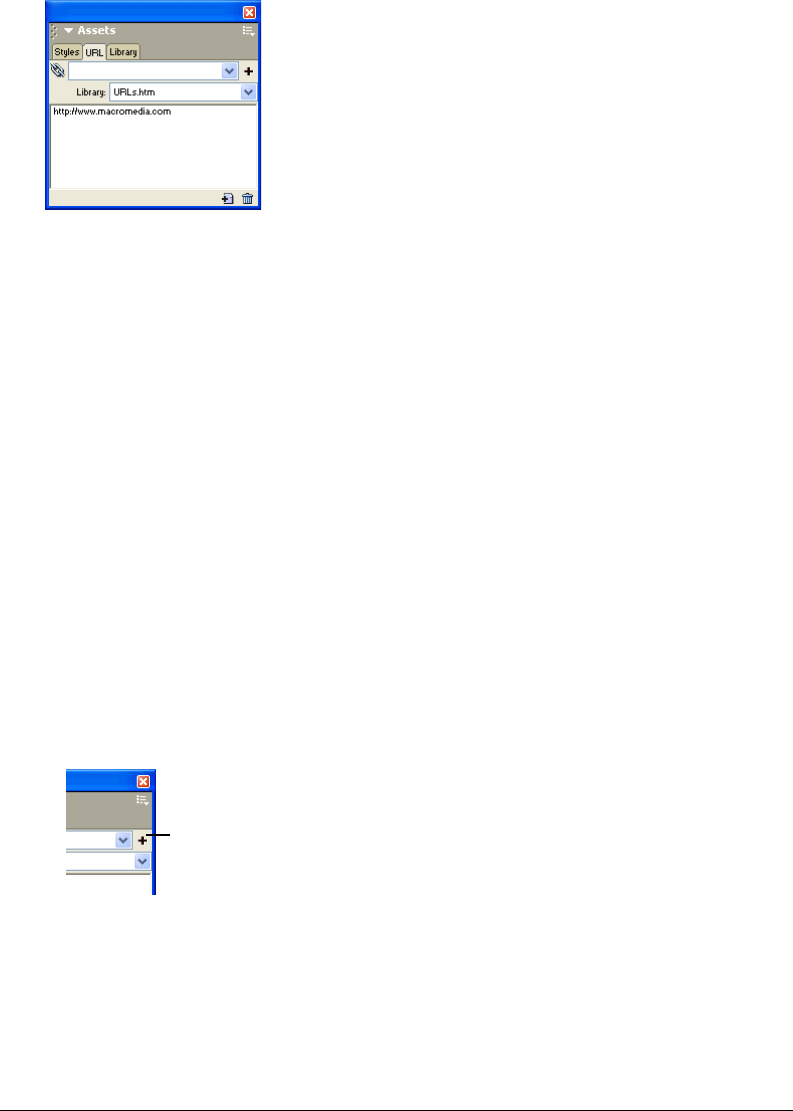
Using Styles, Symbols, and URLs 261
URL libraries are available for all Fireworks documents and are saved between sessions.
URL panel
Creating a URL library
You can group URLs together in libraries. This keeps related URLs together, making them easier
to access. You can save URLs in the default URL library, URLs.htm, or in new URL libraries that
you create.
URLs.htm and any new libraries you create are stored in the URL Libraries folder on your hard
disk. The exact location of this folder varies depending on your operating system. For more
information, see “Working with configuration files” on page 423.
To create a new URL library:
1Choose New URL Library from the URL panel Options menu.
2Enter the library name in the text box and click OK.
The new library name appears in the Library pop-up menu in the URL panel.
To add a new URL to a URL library:
1Choose a library from the Library pop-up menu.
2Enter a URL in the Link text box.
3Click the Plus (+) button.
The Plus (+) button adds the current URL to the library.
You can further organize your URLs by adding only those that are in use in your document.
Add URL
Chapter 11262
To simultaneously add a URL to the library while assigning it to a web object:
1Select the object.
2Do one of the following to enter the URL:
•Choose Add URL from the URL panel Options menu, enter an absolute or relative URL,
and click OK.
•Enter a URL in the Link text box. Click the Plus (+) button.
The URL appears in the URL preview pane. See “Assigning URLs” on page 280 and “Setting
the URL for a button symbol or instance” on page 297.
To add used URLs to a URL library:
1Choose a library from the Library pop-up menu.
2Choose Add Used URLs to Library from the URL panel Options menu.
To delete a selected URL from the URL preview panel:
Click the Delete URL from Library button at the bottom of the URL panel.
To delete all unused URLs from the library:
1Choose Clear Unused URLs from the URL panel Options menu.
2Click OK.
Editing URLs
You can easily edit URLs using the URLs panel. You can edit just a single occurrence of a URL,
or you can make your changes ripple throughout the document.
To edit a URL:
1Select the URL to be edited from the URL preview pane.
2Choose Edit URL from the URL panel Options menu.
3Edit the URL. Select Change All Occurrences in Document if you want to update this link
throughout the entire document.
About absolute and relative URLs
When you enter a URL in the URL panel, you can enter an absolute or relative URL:
•If you are linking to a web page that is beyond your own website, you must use an absolute URL.
•If you are linking to a web page within your website, you can use an absolute URL or a relative URL.
Absolute URLs are complete URLs that include the server protocol, which is usually http:// for
web pages. For example, http://www.macromedia.com/support/fireworks is the absolute URL for
the Macromedia Fireworks Support web page. Absolute URLs remain accurate regardless of the
location of the source document, but they do not link correctly if the target document is moved.

Using Styles, Symbols, and URLs 263
Relative URLs are relative to the folder containing the source document. These examples show
the navigation syntax of relative URLs:
•file.htm links to a file located in the same folder as the source document.
•../../file.htm links to a file located in the folder two levels above the folder containing the
source document. Each ../ represents one level.
•htmldocs/file.htm links to a file located in a folder named htmldocs, which is within the folder
containing the source document.
Relative URLs are usually the simplest ones to use for links to files that will always remain in the
same folder as the current document.
Importing and exporting URLs
If you have URLs in the URL panel that you want to use again in other Fireworks documents,
you can export them for later use. You can then easily import them into any of your other
Fireworks documents for easy access.
You can also import all URLs referenced within any existing HTML document.
To export URLs:
1Choose Export URLs from the URL panel Options menu.
2Enter a filename and click Save.
An HTML file is created. This file contains the URLs you have exported.
To import URLs:
1Choose Import URLs from the URL panel Options menu.
2Select an HTML file and click Open.
All URLs contained within this file are imported.

Chapter 11264

265
CHAPTER 12
Slices, Rollovers, and Hotspots
Slices are the basic building blocks for creating interactivity in Macromedia Fireworks MX. Slices
are web objects—they exist not as images, but ultimately as HTML code. You can view, select,
and rename them through the Web Layer in the Layers panel. This chapter describes the concepts
you need to understand slicing and covers how you can use slices to incorporate interactivity into
your web pages.
Using the drag-and-drop rollover method of attaching interactivity to slices, you can quickly
create rollover and swap-image effects in the workspace. You can view the assigned behaviors in
the Behaviors panel and create more complex interactions using this panel.
You can also incorporate interactivity into your web pages with hotspots. Hotspots are generally
used to create image maps, which are graphics that contain a number of hot areas that link to
other web pages. Hotspots can also receive mouse events, allowing JavaScript behaviors to be
acted on in slices.
Creating and editing slices
Slicing cuts up a Fireworks document into smaller pieces and exports each piece as a separate file.
Upon export, Fireworks also creates an HTML file containing table code to reassemble the graphic
in a browser.
Slicing cuts a document into multiple pieces, which export as separate files.
Slicing an image has at least three major advantages:
Optimizing One challenge of web graphic design is ensuring that images download quickly
without sacrificing quality. Slicing enables you to optimize each individual slice using the most
appropriate file format and compression settings. For more information, see “Optimizing and
Exporting” on page 325.
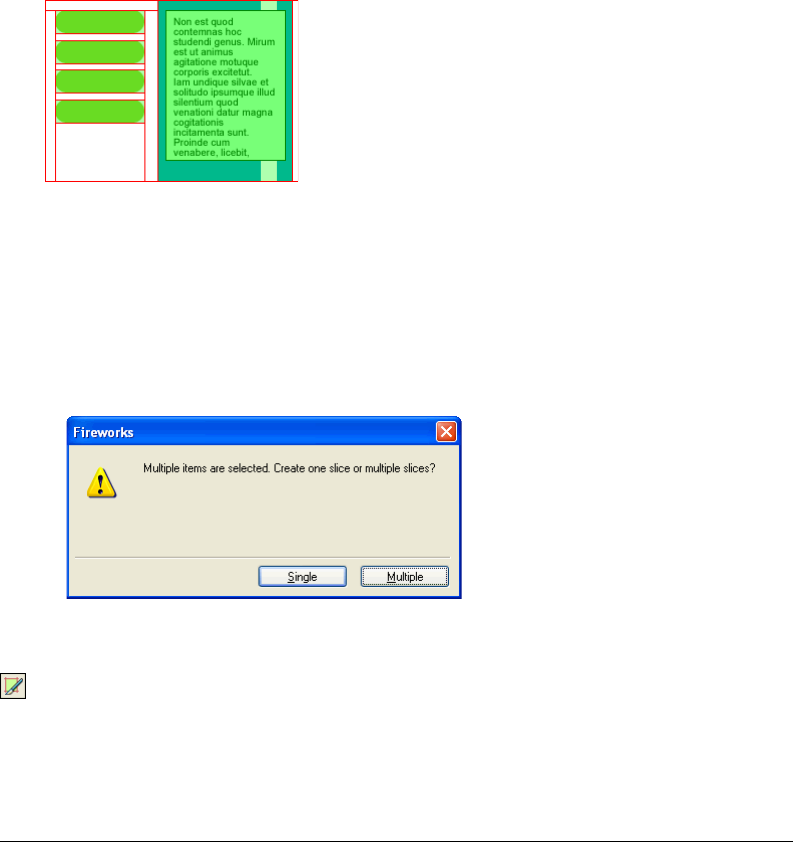
Chapter 12266
Interactivity You can use slices to create areas that respond when the user’s pointer passes over or clicks
them. For information on attaching interactivity to slices, see “Making slices interactive” on page 273.
Updating parts of a web page Slicing allows you to easily update parts of a web page that change
frequently. For example, your company’s web page might have an employee-of-the-month section
that changes monthly. Slicing enables you to quickly change just the employee’s name and photo
without replacing the entire page.
Creating slice objects
You can create a slice object by drawing it with the Slice tool or by inserting a slice based on a
selected object.
The lines extending from the slice object are slice guides, which determine the boundaries of the
separate image files into which the document is split on export. These guides are red by default.
To insert a rectangular slice based on a selected object:
1Choose Edit > Insert > Slice. The slice is a rectangle whose area includes the outermost edges of
the selected object.
2If more than one object is selected, choose how to apply slice guides:
Single creates a single slice object that covers all selected objects.
Multiple creates a slice object for each selected object.
To draw a rectangular slice object:
1Choose the Slice tool.
2Drag to draw the slice object. The slice object and slice guides appear on the Web Layer.
Note: You can adjust the position of a slice as you drag to draw it. While holding down the mouse button, simply
press and hold down the Spacebar on the keyboard, then drag the slice to another location on the canvas.
Release the Spacebar to continue drawing the slice.
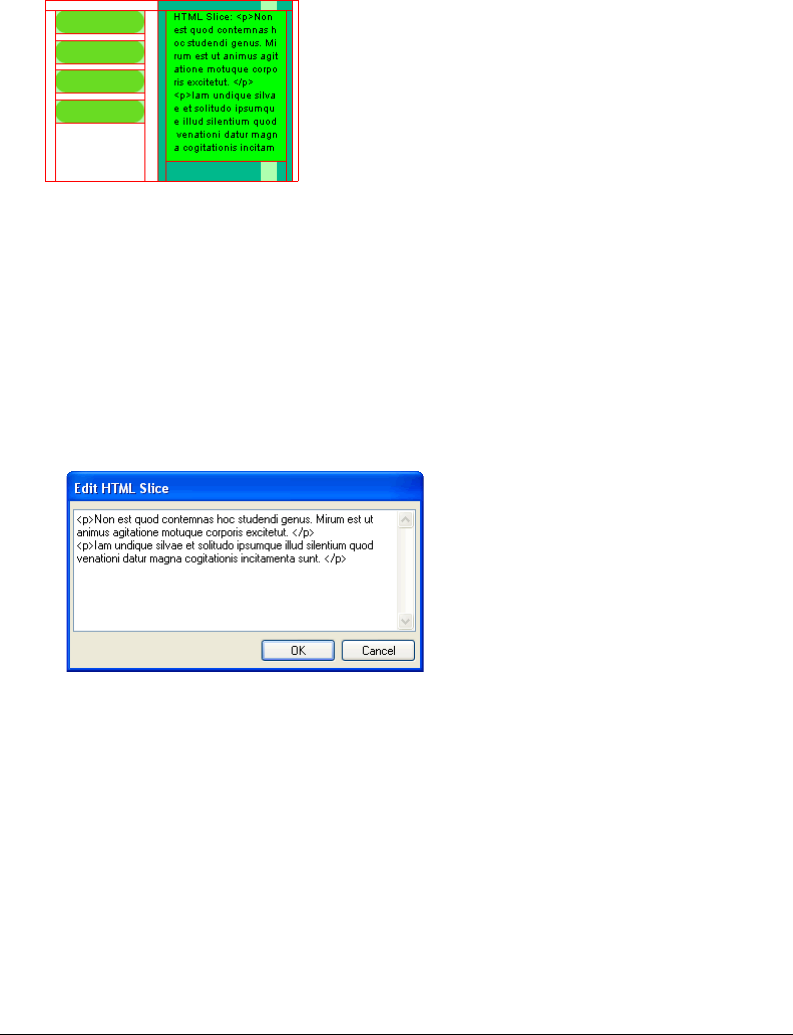
Slices, Rollovers, and Hotspots 267
Creating HTML slices
An HTML slice designates an area of a sliced image where ordinary HTML text appears in the
browser. An HTML slice does not export any pixel image data; it exports HTML text that
appears in the table cell defined by the slice.
HTML slices are useful if you want to quickly update text that appears on your website without
having to create new graphics.
To create an HTML slice:
1Draw a slice object and leave it selected.
2In the Property inspector, choose HTML from the Type pop-up menu.
3Click Edit.
4Type text in the Edit HTML Slice window, and format the text if desired by adding HTML
text formatting tags.
Note: Alternatively, you can add HTML text formatting tags to the HTML after it has been exported using a text
editor or HTML editor.
5Click OK to apply your changes and close the Edit HTML Slice window.
The text and HTML tags you entered appear in your Fireworks PNG file.
Note: HTML text slices may vary in appearance when viewed in different browsers and on different operating
systems, because font size and type can be set in the browser.

Chapter 12268
Creating nonrectangular slices
Rectangular slices may not be sufficient when you’re trying to attach interactivity to a
nonrectangular image. If you plan to attach a rollover effect to a slice, for example, and your slice
objects overlap or have irregular shapes, then a rectangular slice may swap unwanted background
graphics along with the swap image. Fireworks solves this problem by allowing you to draw slices
in any polygonal shape using the Polygon Slice tool.
You can also convert vector paths to slices to create irregular slice shapes.
To draw a polygon slice object:
1Choose the Polygon Slice tool.
2Click to place the vector points of the polygon. The Polygon Slice tool draws only straight
line segments.
3When drawing a polygon slice object around objects with soft edges, be sure to include the
entire object to avoid creating unwanted hard edges in the slice graphic.
4To stop using the Polygon Slice tool, choose an alternative tool from the Tools panel. You do
not have to click the first point again to close the polygon.
Note: Be careful not to overuse polygon slices, as they require more JavaScript code than similar rectangular
slices. A high number of polygon slices could adversely affect web browser processing time.
To create a polygon slice from a vector object or path:
1Select a vector path.
2Choose Edit > Insert > Hotspot.
3Choose Edit > Insert > Slice.
A slice is generated that conforms to the shape of the vector object.
Viewing and displaying slices and slice guides
You can control the visibility of slices and other web objects in your document using the Layers
panel and the Tools panel. When you turn slice visibility off for the whole document, slice guides
are hidden too.
Using the Property inspector, you can organize slices by assigning a unique color to each slice
object. Slice guide color can also be changed through the View menu.
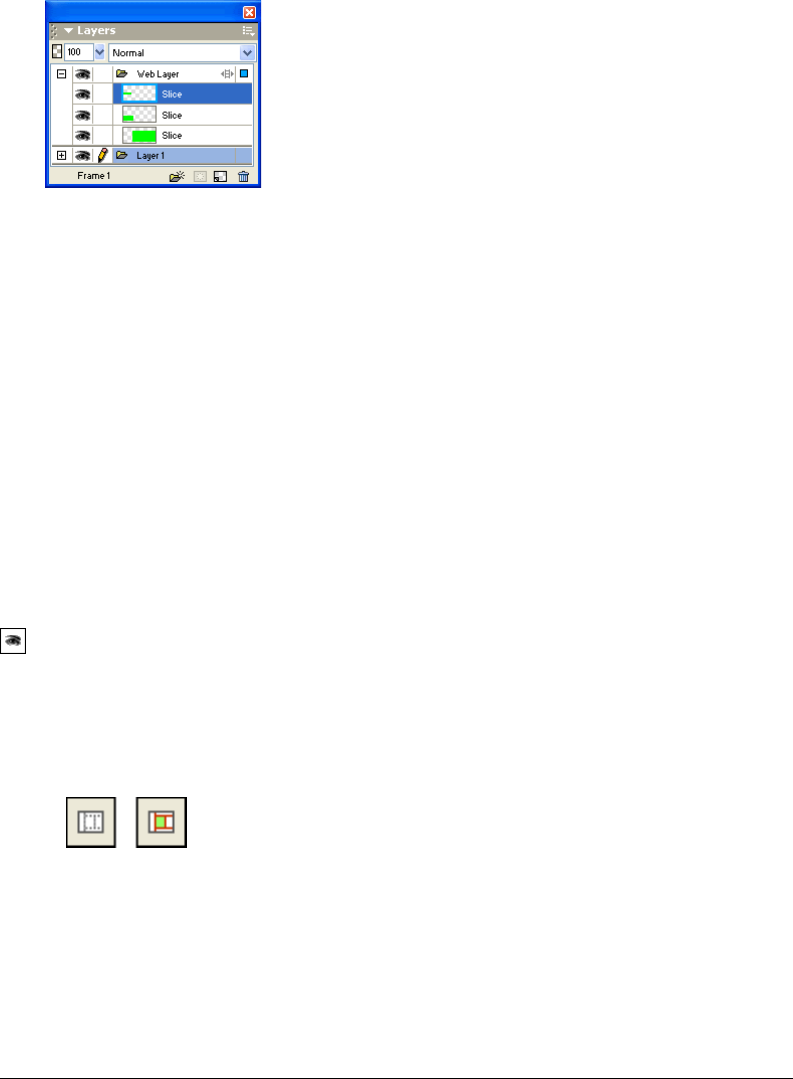
Slices, Rollovers, and Hotspots 269
Viewing slices in the Layers panel
The Web Layer displays all the web objects in the document so that you can select and view each one.
To view and select a slice in the Layers panel:
1Choose Window > Layers to open the Layers panel.
2Expand the Web Layer by clicking the Plus (+) button (Windows) or triangle (Macintosh).
The full list of web objects currently in your document is displayed in the Web Layer.
3Click a slice name to select it.
The slice is highlighted in the Web Layer and is selected on the canvas.
Showing and hiding slices
Hiding a slice renders the slice invisible in the Fireworks PNG file. You can turn off all or some
web objects. Because slices are web objects, they are listed beneath the Web Layer in the Layers
panel, where visibility can be toggled on or off for a selected slice. You can also control slice
visibility through the Tools panel. Hiding a slice object does not prevent the slice from being
exported in the HTML.
To hide and show particular slices and hotspots:
1Click the eye icon next to the individual web objects in the Layers panel.
2Click in the Eye column to turn visibility back on. The eye icon reappears when web objects
are visible again.
To hide or show all hotspots, slices, and guides, do one of the following:
•Click the appropriate Hide/Show Slices button in the Tools panel.
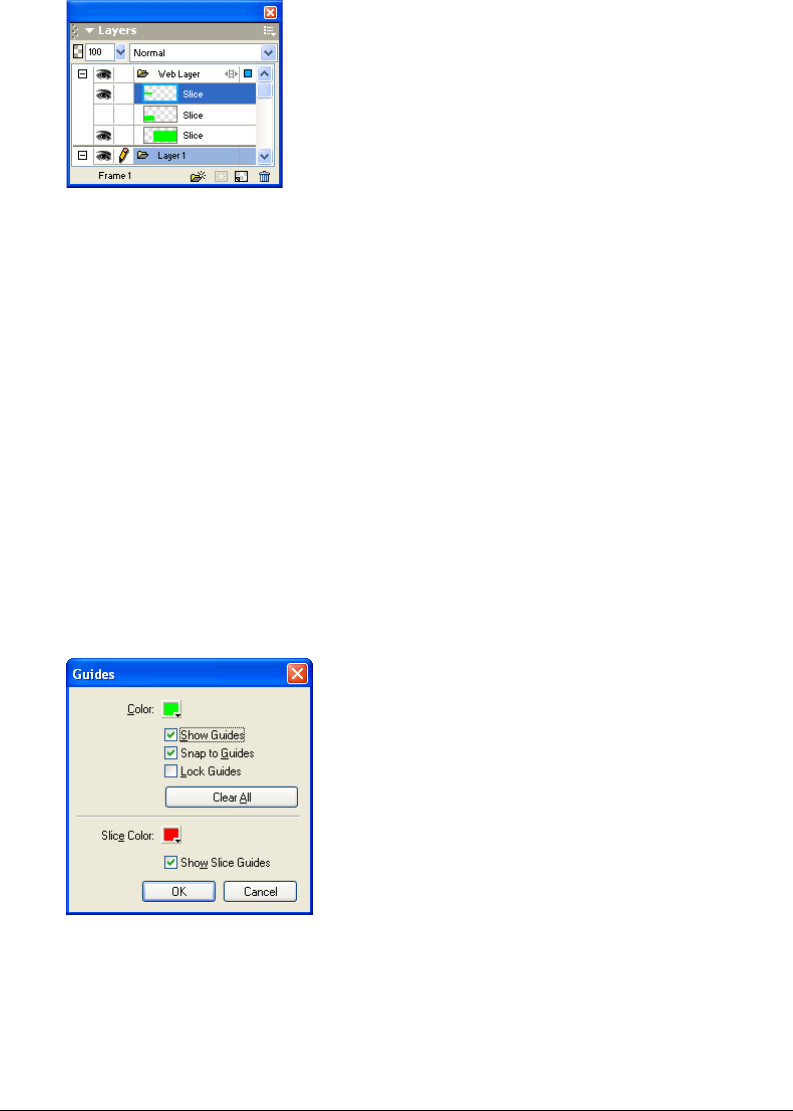
Chapter 12270
•Click the eye icon next to the Web Layer in the Layers panel.
To hide or show slice guides in any document view:
Choose View > Slice Guides.
Changing slice and slice guide color
If the colors used in a document are similar to the slice color, viewing slices against objects in the
document can prove difficult. To make viewing slices easier, you can assign a new slice color to
selected slices. Assigning unique colors to individual slices also helps you organize them. Slice
guide color can be altered as well.
Note: When you preview your document, deselected slices are visible as a white overlay.
To change the color of a selected slice object:
In the Property inspector, choose a new color from the color box.
To change the color of slice guides:
1Choose View > Guides > Edit Guides.
2Choose a new color from the Slice Color section of the Guides dialog box, and click OK.
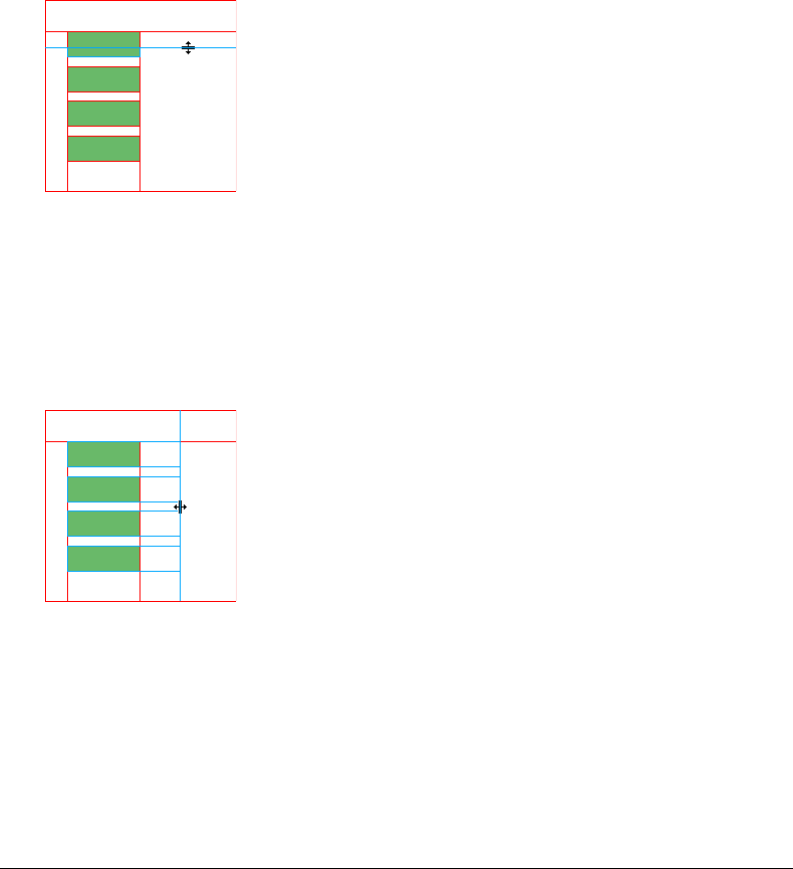
Slices, Rollovers, and Hotspots 271
Editing slices
In Fireworks you can work with a slice layout as if it were a table in a word-processing application.
When you drag a slice guide to resize a slice, all adjacent rectangular slices automatically resize as
well. In addition, you can use the Tools panel to resize and transform slices as you would vector
and bitmap objects.
Moving slice guides to edit slices
Slice guides define the perimeter and position of slices. Slice guides extending beyond slice objects
define how the rest of the document will be sliced upon export. You can change the shape of a
rectangular slice object by dragging the slice guides that surround it. Nonrectangular slice objects
cannot be resized by moving slice guides.
Resizing a slice object by dragging its slice guides
Note: Dragging slice guides that surround a Fireworks button in the document window will resize the slice that
defines the active area (or slice) for that button. The active area for a Fireworks button cannot be deleted, however,
by dragging the slice guides that surround it.
If multiple slice objects are aligned along a single slice guide, you can drag that slice guide to resize
all the slice objects simultaneously.
Resizing multiple slice objects by dragging a single guide
In addition, dragging one guide along a given coordinate will cause all other guides on that same
coordinate to move with it.

Chapter 12272
To resize one or more slices:
1Position the Pointer or Subselection tool over a slice guide.
The pointer changes to the guide movement pointer.
2Drag the slice guide to the desired location.
The slices are resized, and all adjacent slices are automatically resized as well.
To remove a slice guide:
Use the Pointer or Subselection tool to drag the slice guide beyond the edge of the canvas.
To move adjacent slice guides:
1Shift-drag a slice guide across adjacent slices guides.
2Release the slice guide in the desired location.
All slice guides that you dragged across are moved to this location.
Tip: You can cancel this operation by releasing the Shift key before you release the mouse button. All slice guides
that were picked up snap back to their original positions.
Using tools to edit slice objects
You can use the Pointer, Subselection, and Transform tools to reshape or resize a slice. You can
crop, scale, skew, and distort slices.
Note: Resizing and reshaping slices using these tools can create overlapping slices, because the size of adjacent
slice objects will not automatically be adjusted. When slices overlap, the topmost slice will take precedence if
interactivity is involved. To avoid overlapping slices, use slice guides to edit slices. For more information, see
“Moving slice guides to edit slices” on page 271.
To edit the shape of a selected slice, do one of the following:
•Choose the Pointer or Subselection tool and drag the slice’s corner points to modify its shape.
•Use a transformation tool to perform the desired transformation and press Enter.
For more information on using the transformation tools, see “Transforming and distorting
selected objects and selections” on page 116.
Note: Transforming a rectangular slice may change its shape, position, or dimensions, but the slice itself
remains rectangular.
About using the Property inspector or Info panel to edit slice objects
You can also change a slice object’s position and size numerically using the Property inspector. For
more information about changing an object’s dimensions numerically, see “Transforming objects
numerically” on page 119. For more information about changing an object’s position numerically,
see “Editing selected objects” on page 115.
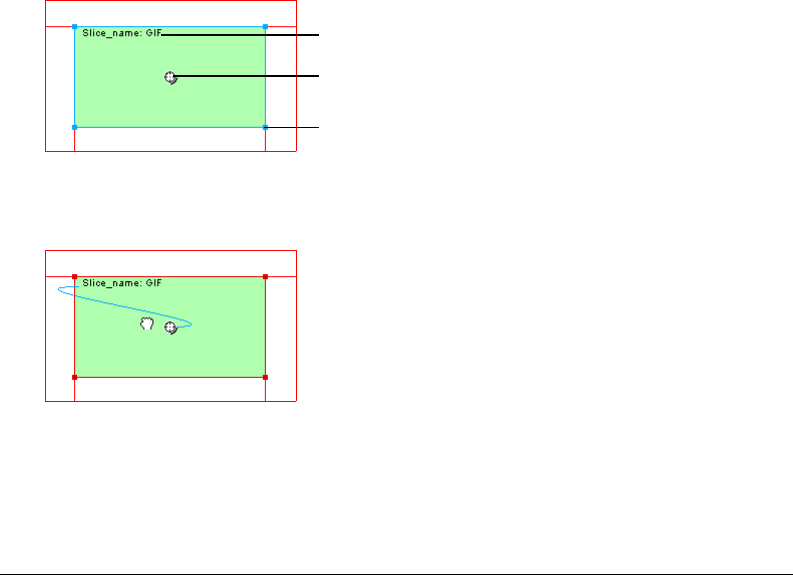
Slices, Rollovers, and Hotspots 273
Making slices interactive
The basic building blocks for creating interactivity in Fireworks are slice objects. Fireworks offers
two ways to make slices interactive:
•The drag-and-drop rollover method is the easiest way to make a slice interactive. By merely
dragging a slice’s behavior handle and dropping it onto a target slice, you can quickly create
simple interactivity.
•The Behaviors panel allows you to create more complex interactivity. The Behaviors panel
contains a variety of interactive behaviors you can attach to slices. By attaching multiple
behaviors to a single slice, you can create interesting effects. You can also create your own
custom interactions by editing existing behaviors.
Behaviors in Fireworks MX are compatible with Macromedia Dreamweaver MX behaviors.
When you export a Fireworks rollover to Dreamweaver, you can edit Fireworks behaviors using
the Dreamweaver Behaviors panel.
Adding simple interactivity to slices
The drag-and-drop rollover method is a fast and efficient way to create rollover and swap-image effects.
Specifically, the drag-and-drop rollover method allows you to determine what happens to a
slice when the pointer passes over it. The end result is commonly referred to as a rollover image.
Rollover images are graphics that change appearance in a web browser when you move the
pointer over them.
When a slice is selected, a round circle with cross hairs appears in the center of the slice. This is
called a behavior handle.
By dragging the behavior handle from a triggering slice and dropping it onto a target slice, you
can easily create rollover and swap-image effects. The trigger and target can be the same slice.
Hotspots also have behavior handles for incorporating rollover effects. For more information, see
“Creating hotspots” on page 285.
Slice name
Behavior handle
Selection handle
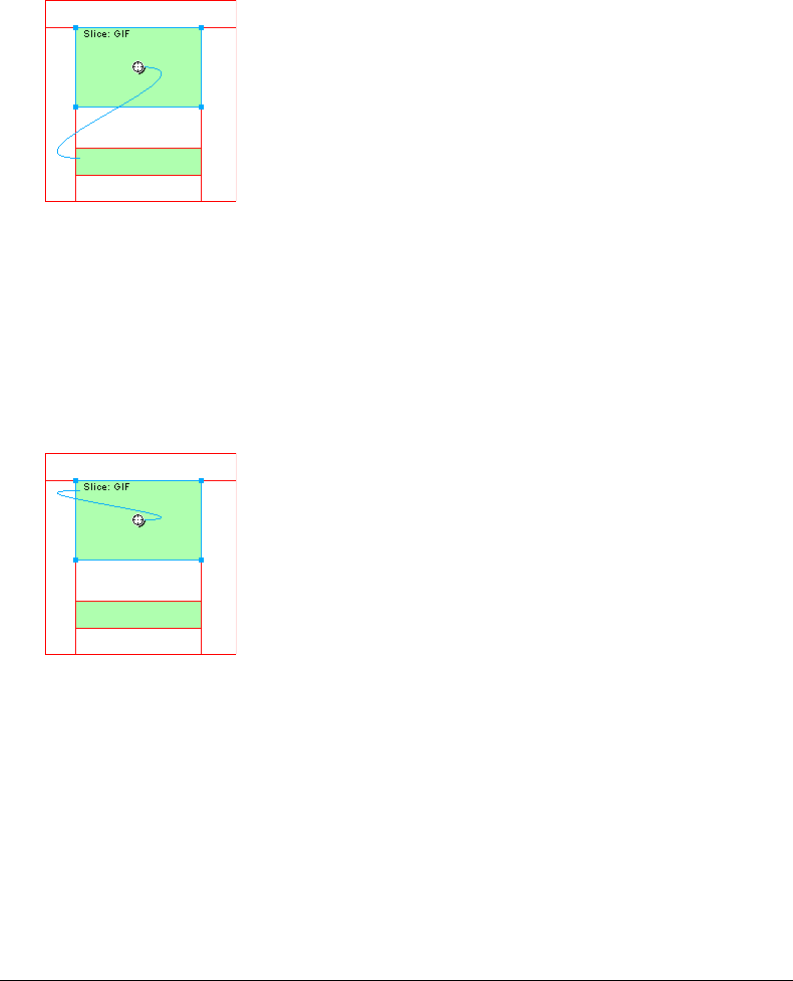
Chapter 12274
About rollovers
Rollovers all work the same way. One graphic triggers the display of another when the pointer
rolls over it. The trigger is always a web object—a slice, hotspot, or button.
The simplest rollover swaps an image in Frame 1 with an image directly below it in Frame 2. You
can build more complicated rollovers as well. Swap-image rollovers can swap an image from any
frame; disjoint rollovers display an image away from the pointer.
In Fireworks, when you select a trigger web object created using a behavior handle or the
Behaviors panel, all of its behavior relationships are displayed. By default, a rollover interaction is
represented by a blue behavior line.
Creating a simple rollover
A simple rollover swaps an image with another image on a frame under the same web object. A
simple rollover involves only one slice or hotspot.
You can choose the swap image from any frame.
To attach a simple rollover to a selected image or object:
1Ensure that the image or object is not on a shared layer. For more information, see “Sharing
layers” on page 228.
2Choose Edit > Insert > Slice to create a slice on top of the image or object.
3Create a new frame in the Frames panel by clicking the New/Duplicate Frame button.
4Create, paste, or import an image to use as the swap image.
Position the image beneath the slice you created in step 2, which is still visible even though
you’re in Frame 2. Slices are visible across all frames.
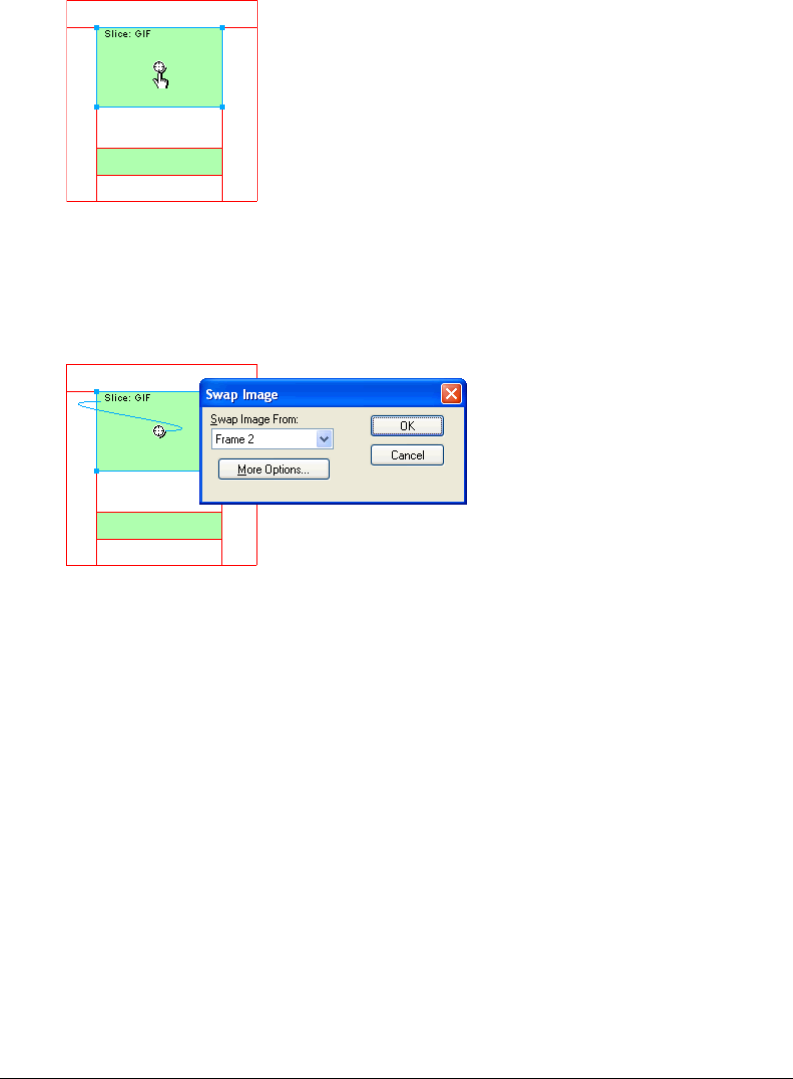
Slices, Rollovers, and Hotspots 275
5Select Frame 1 in the Frames panel to return to the frame that has the original image.
6Select the slice and place the pointer over the behavior handle. The pointer changes into a hand.
Note: You can select the slice while in any frame.
7Drag the behavior handle to the upper left edge of the slice.
A blue behavior line extends from the center to the upper left corner of the slice, and the Swap
Image dialog box opens.
8In the Swap Image From pop-up menu, select the frame in which the image to be swapped is
located, and click OK.
9Click the Preview tab to view and test the rollover, or press F12 to preview it in a browser.
Creating a disjoint rollover
A disjoint rollover swaps an image under a web object when the pointer rolls over another web
object. In response to a pointer rolling over or clicking a trigger image, an image appears in a
different location on the web page. The image that is rolled over is considered the trigger; the
image that changes is considered the target.
As with simple rollovers that use just one slice, you first have to set up the trigger and target slices
and the frame in which the swap image resides. Then you can link the trigger to the target slice
with a behavior line.
Note: The trigger for a disjoint rollover doesn’t have to be a slice. Hotspots and buttons also have behavior handles
that can be used to create disjoint rollovers. For more information on hotspots, see “Creating hotspots” on page
285. For more information about buttons, see “Creating button symbols” on page 289.
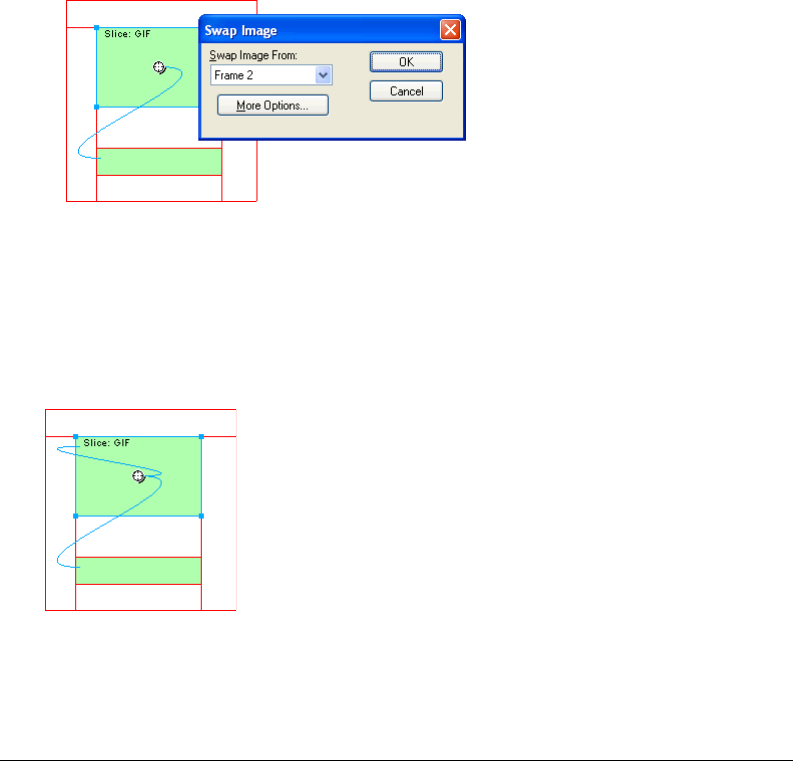
Chapter 12276
To attach a disjoint rollover to a selected image:
1Choose Edit > Insert > Slice to attach a slice to the trigger image.
Note: This step is not necessary if the selected object is a button or if a slice or hotspot already covers the image.
2Create a new frame by clicking the New/Duplicate Frame button in the Frames panel.
3Place a second image, to be used as the target, in the new frame in the desired location on the
canvas. You can place the image anywhere other than beneath the slice you created in step 1.
4Select the image, and then choose Edit > Insert > Slice to attach a slice to the image.
5Select Frame 1 in the Frames panel to return to the frame that has the original image.
6Select the slice, hotspot, or button that covers the trigger area (the original image) and place
the pointer over the behavior handle. The pointer changes into a hand.
7Drag the behavior handle for the trigger slice to the target slice you created in step 4.
The behavior line extends from the center of the trigger to the upper left corner of the target
slice, and the Swap Image dialog box opens.
8From the Swap Image From pop-up menu, select the frame you created in step 2, and click OK.
9Click the Preview tab to view and test the disjoint rollover.
Applying multiple rollovers to a slice
You can drag more than one behavior handle from a single slice to create multiple rollover
interactions. For example, you can trigger a rollover and a disjoint rollover from the same slice.
A slice triggering a rollover behavior and a disjoint rollover behavior
Note: You can also add multiple behaviors using the Behaviors panel. For more information, see “Using the
Behaviors panel to add interactivity to slices” on page 277.

Slices, Rollovers, and Hotspots 277
To apply more than one rollover to a selected slice:
1Drag a behavior handle from the selected slice to the edge of the same slice or onto another slice.
Dragging the handle to the upper left edge of the same slice creates a simple rollover, and
dragging it to another slice creates a disjoint rollover.
2Select the frame of the swap image and click OK.
3Create more rollovers by repeating steps 1 and 2 as many times as desired.
Removing a drag-and-drop rollover
You can easily remove a drag-and-drop rollover from a slice, hotspot, or button.
To remove a drag-and-drop rollover from a selected web object or button:
1Click on the blue behavior line you want to remove.
2Click OK to remove the rollover interaction.
Using the Behaviors panel to add interactivity to slices
In addition to rollovers, you can attach other types of interactivity to slices using the Behaviors
panel. You can create custom interactions by editing existing behaviors.
Note: Although you can create simple, disjoint, and complex rollovers with the Behaviors panel, the drag-and-drop
rollover method is recommended. For more information, see “Adding simple interactivity to slices” on page 273.
The following behaviors are available in Fireworks:
Simple Rollover adds a rollover effect to the selected slice or web object using Frame 1 as the Up
state and Frame 2 as the Over state. Once you select this behavior, you will need to create an image
in the second frame, using the same slice, to create the Over state. The Simple Rollover option is
actually a behavior group containing the Swap Image and Swap Image Restore behaviors.
Swap Image replaces the image under the specified slice with the contents of another frame under
the same slice or the contents of an external file.
Swap Image Restore restores the rollover to its default appearance in Frame 1.
Set Nav Bar Image sets a slice to be a part of a Fireworks navigation bar. Each slice that is part of
the navigation bar must have this behavior. The Set Nav Bar Image option is actually a behavior
group containing the Nav Bar Over, Nav Bar Down, and Nav Bar Restore behaviors. This
behavior is automatically set for you by default when you use the Button Editor to create a button
that includes a Down and an Over While Down state. For more information on buttons, see
“Creating button symbols” on page 289.
Nav Bar Over specifies the Over state for the currently selected slice when it is part of a navigation
bar and optionally specifies the Over While Down state.
Nav Bar Down specifies a Down state for the currently selected slice when it is part of a navigation bar.
Nav Bar Restore restores all the other slices in the navigation bar to their Up state.
Set Pop-up Menu attaches a pop-up menu to a slice or hotspot. This behavior is automatically set
for you if you use the Pop-up Menu Editor. For more information, see “Creating pop-up menus”
on page 299.
Set Text of Status Bar lets you define text for display in the status bar at the bottom of most
browser windows.
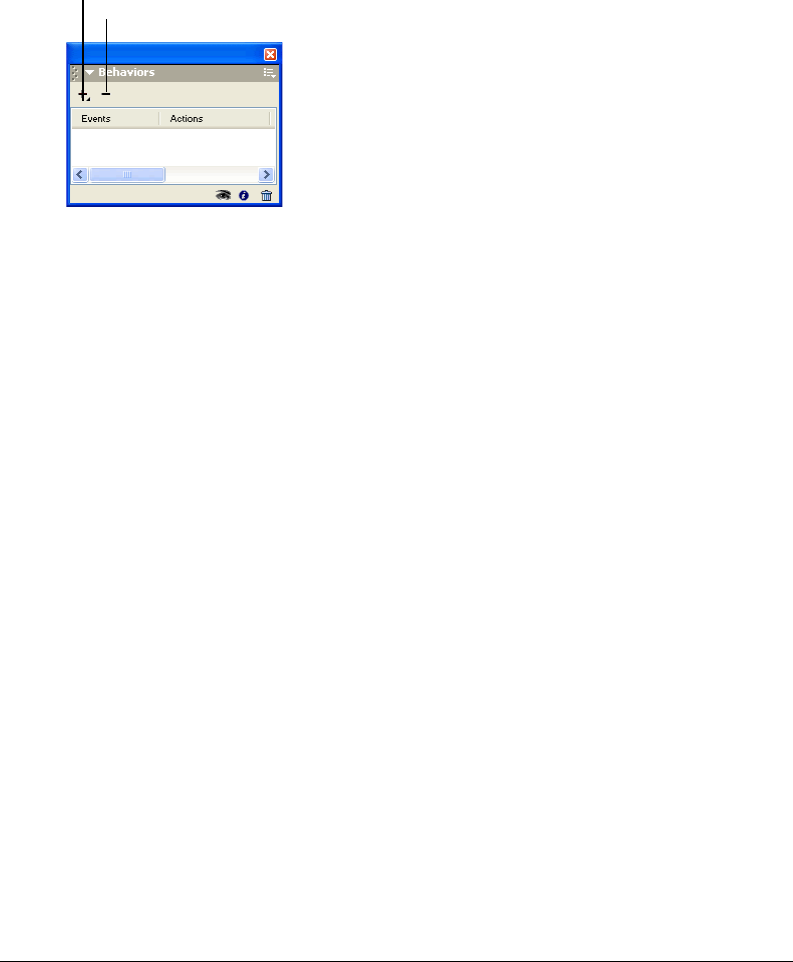
Chapter 12278
Attaching behaviors
Using the Behaviors panel, you can attach a behavior to a slice. You can also attach more than
one behavior.
To attach a behavior to a selected slice using the Behaviors panel:
1Click the Add Behavior button in the Behaviors panel.
2Select a behavior from the Add Behavior pop-up menu. For an explanation of each behavior,
see “Using the Behaviors panel to add interactivity to slices” on page 277.
Editing behaviors
The Behaviors panel also gives you the ability to edit existing behaviors. You can specify the type
of event (such as clicking) that triggers the behavior.
Note: You cannot change the event for Simple Rollover and Set Nav Bar Image.
To change the mouse event that activates the behavior:
1Select the trigger slice containing the behavior you want to modify.
All behaviors associated with that slice are displayed in the Behaviors panel.
2Select the behavior you want to edit.
Add Behavior
Remove Behavior Button
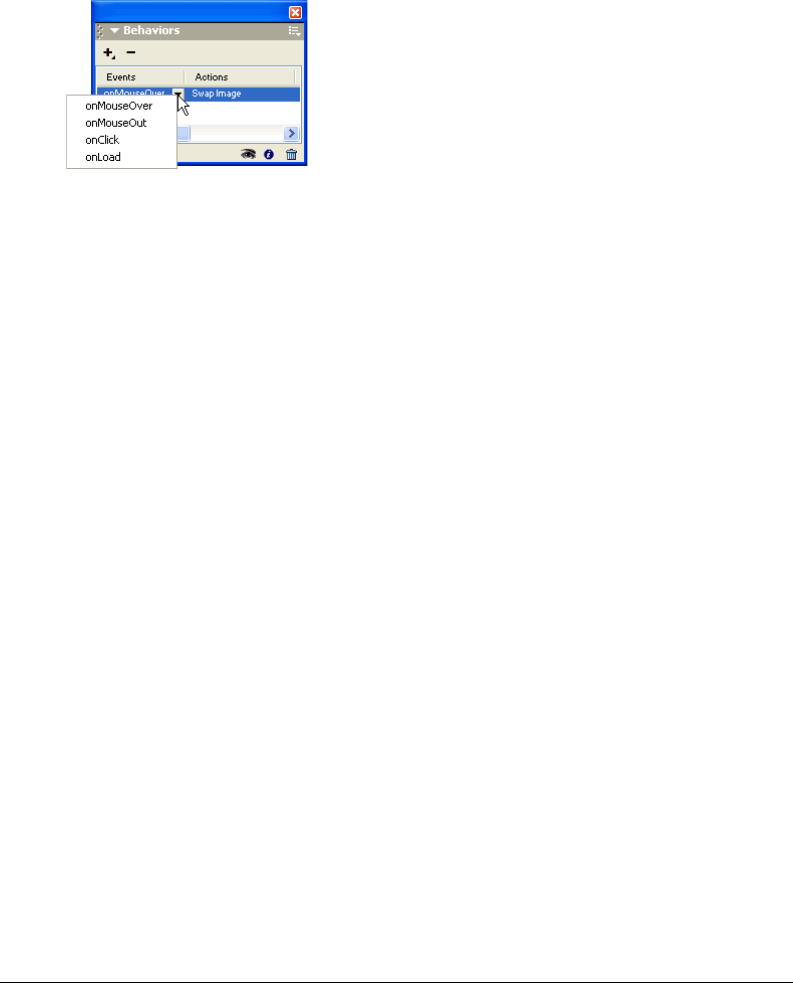
Slices, Rollovers, and Hotspots 279
3Click the arrow beside the event and choose a new event from the pop-up menu:
onMouseOver triggers the behavior when the pointer rolls over the trigger area.
onMouseOut triggers the behavior when the pointer leaves the trigger area.
onClick triggers the behavior when the trigger object is clicked.
onLoad triggers the behavior when the web page is loaded.
Using external image files for rollover states
You can use an image outside of the current Fireworks document as the source image for a
rollover state. You can use GIFs, animated GIFs, JPEGs, or PNGs. When you choose an external
file as the image source, that file is swapped with the target slice when the rollover is triggered in a
web browser.
The file must have the same width and height as the slice it is swapping into. If it does not, the
browser resizes the file to fit within the slice object. Resizing the file may reduce its quality,
especially in the case of an animated GIF.
To choose an external image file as the source for a rollover state:
1While in the Swap Image, Nav Bar Over, or Nav Bar Down dialog box, choose Image File and
click the folder icon.
Note: If you don’t see this option in the Swap Image dialog box, choose More Options and then perform step 1.
2Navigate to the file you want to use, and click Open.
3If necessary, deselect Preload Images (if the external file is an animated GIF).
Precaching can interrupt the display of animated GIFs as rollover states. To avoid this problem,
deselect Preload Images when setting up the rollover.
Note: If you plan to export your document for use on the web, be sure that your external image file is accessible
from the exported Fireworks HTML. Fireworks creates document-relative paths to image files. It is a good idea
to place external files within your local site before using them as rollover states in Fireworks. Then when you
upload your files to the web, be sure that the external image file is uploaded as well. For more information on
Fireworks HTML, see “Exporting HTML” on page 351.
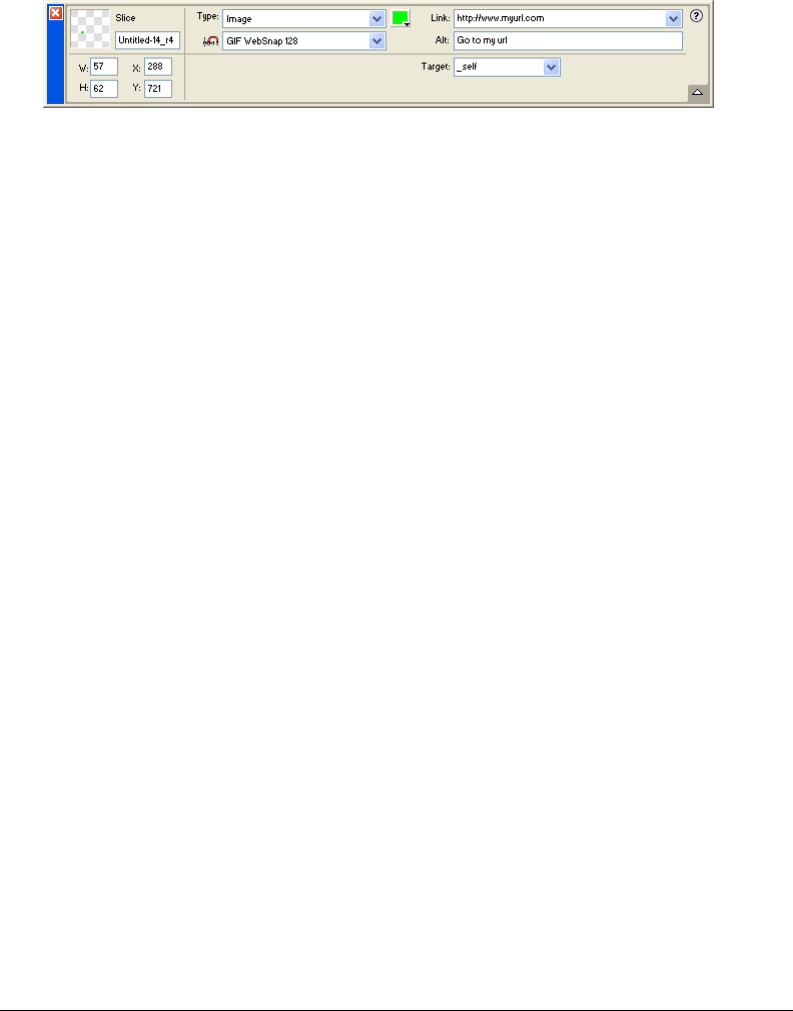
Chapter 12280
Preparing slices for export
Using the Property inspector, you can make slices interactive by assigning them URLs and target
frames. You can also specify alternate text to be displayed in a browser while an image is loading. In
addition, you can choose an export file format to optimize a selected slice. If the Property inspector
is minimized, click the expander arrow in the lower right corner to see all slice properties.
Slice properties in the Property inspector
Using the Property inspector or the Layers panel, you can give slices unique names. Fireworks uses
the name you specify to name the files that are generated from slicing upon export. If you don’t
enter a slice name in the Property inspector or the Layers panel, Fireworks will automatically
name slices for you upon export. You can change the auto-naming convention that Fireworks uses
through the HTML Setup dialog box.
When you export a sliced Fireworks document, it is exported as an HTML file and a series of graphic
files. You can define properties for the exported HTML file using the HTML Setup dialog box.
Assigning URLs
A URL, or Uniform Resource Locator, is the address of a specific page or file on the Internet.
When you assign a URL to a slice, users can navigate to that address by clicking the area defined
by the slice in their web browser.
To assign a URL to a selected slice:
Enter a URL in the Link text box of the Property inspector.
Tip: If you intend to reuse URLs, you can create a URL library in the URL panel and then store URLs in the library.
For more information, see “Working with URLs” on page 260.
Entering alternate text
Alternate, or alt, text appears on the image placeholder while the image is downloading from the
web; it also substitutes for graphics that fail to download. In some newer versions of browsers, the
text also appears next to the pointer as a tooltip.
Entering brief, meaningful alternate text has become increasingly important in web design. A
growing number of visually impaired people are using screen-reading applications, which convert
alternate text to a computer-generated voice as the mouse pointer passes over graphics on a web page.
To specify alt text for a selected slice:
In the Property inspector, type the text in the Alt Text box.

Slices, Rollovers, and Hotspots 281
Assigning a target
A target is an alternate web page frame or web browser window in which the linked document
opens. You can specify a target for a selected slice in the Property inspector. If the Property
inspector is minimized, click the expander arrow to see all properties.
To specify a target for a selected slice in the Property inspector:
Type the name of the HTML frame in the Target text box or choose a reserved target from the
Target pop-up menu:
_blank loads the linked documents in a new, unnamed browser window.
_parent loads the linked document in the parent frameset or window of the frame that contains
the link. If the frame containing the link is not nested, then the linked document loads into the
full browser window.
_self loads the linked document in the same frame or window as the link. This target is implied,
so you usually need not specify it.
_top loads the linked document in the full browser window, thereby removing all frames.
Export settings
You can optimize a slice by selecting an option from the Export Settings pop-up menu in the
Property inspector. You can choose from common export settings to quickly set a file format and
apply several format-specific settings. For more information on these settings and how to
customize them, see “Using preset optimization settings” on page 329.
Naming slices
Slicing cuts an image into pieces. Each piece on each frame exports as a separate file, so each file
must have a name.
Fireworks automatically names each slice file upon export. You can accept the default naming
convention, change the convention, or enter a custom name for each slice.
Custom-naming slice files
You can assign specific names to slices, so you can easily identify slice files in your website file
structure. For example, if you have a button on a navigation bar that returns to the home page,
you could name the slice Home.
To enter a custom slice name, do one of the following:
•Select the slice on the canvas, enter a name in the Object Name box in the Property inspector,
and press Enter.
•Double-click the name of the slice in the Web Layer, enter a new name, and press Enter.
Do not add a file extension to the base name. Fireworks automatically adds file extensions to
slice files upon export.

Chapter 12282
Auto-naming slice files
If you do not enter a slice name in either the Property inspector or the Layers panel, Fireworks
reverts to auto-naming. Auto-naming assigns a unique name to each slice file automatically based
on the default naming convention.
To auto-name a slice file:
When you export your sliced image, enter a name in the File Name (Windows) or Name
(Macintosh) text box in the Export dialog box. Do not add a file extension. Fireworks
automatically adds file extensions to slice files upon export.
Changing the default auto-naming convention
You can change the naming convention for slices from the Document Specific tab in the HTML
Setup dialog box.
Fireworks lets you build your own naming convention using a wide range of naming options. You
can create a naming convention that contains up to six elements. An element can consist of any of
the following auto-naming options.
For example, if the document name is mydoc, the naming convention doc.name + “slice” + Slice
# (A,B,C...) results in a slice called mydocsliceA. Chances are that you will never require a naming
convention that uses all six elements.
If a slice has more than one frame, by default Fireworks adds a number to each frame’s file. For
example, if you enter the custom slice filename home for a three-state button, then Fireworks
names the Up state graphic home.gif, the Over state graphic home_f2.gif, and the Down state
graphic home_f3.gif. You can create your own naming convention for multiframe slices using the
HTML Setup dialog box.
To change the default auto-naming convention:
1Choose File > HTML Setup to open the HTML Setup dialog box.
2Click the Document Specific tab.
Option Description
None No name is applied to the element.
doc.name The element takes the name of the document.
“slice” You can insert the word “slice” into the naming convention.
Slice # (1,2,3...)
Slice # (01,02,03...)
Slice # (A,B,C...)
Slice # (a,b,c...)
The element is labeled numerically or alphabetically, according to the particular style
you choose.
row/column (r3_c2, r4_c7...) Row (r##) and Col (c##) designate the rows and columns of the table that web
browsers use to reconstruct a sliced image. You can use this information in the
naming convention.
Underscore
Period
Space
Hyphen
The element uses any of these characters typically as separators between other
elements.
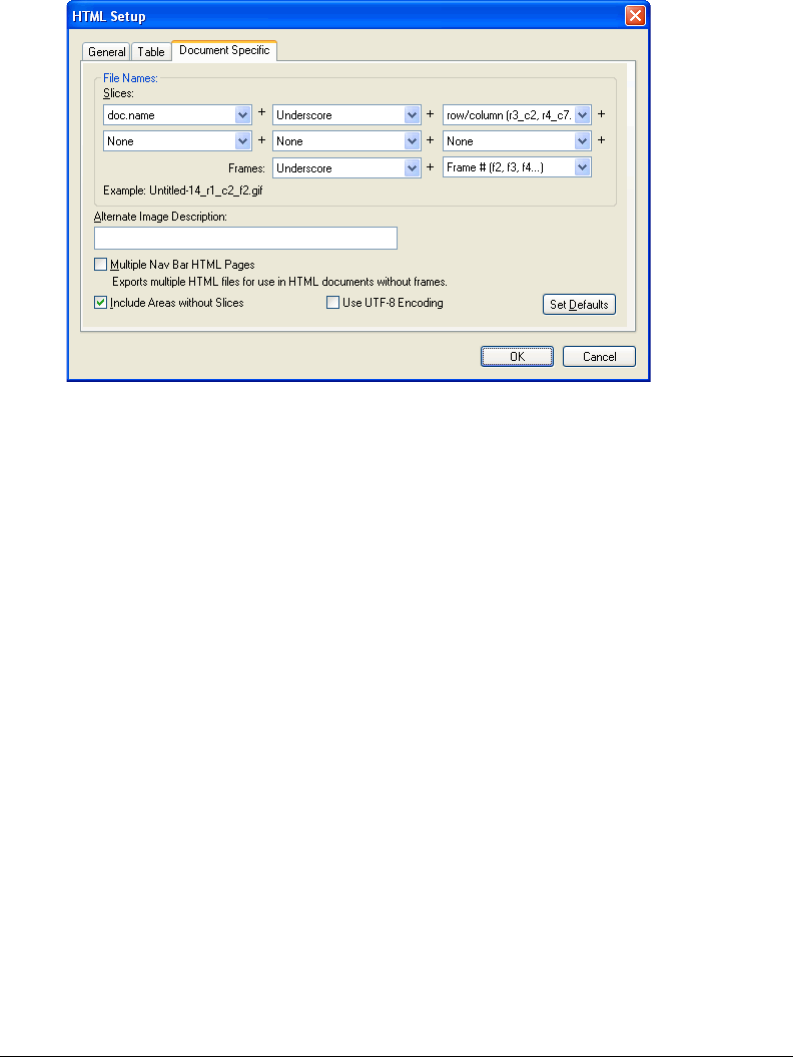
Slices, Rollovers, and Hotspots 283
3In the File Names section, build your new naming convention by selecting from the desired lists.
For example, the naming convention doc.name + “slice” + Slice # (A,B,C...) would appear
as follows:
4(Optional) To set this information as the default for all new Fireworks documents, click
Set Defaults.
Note: Use caution when choosing None as a menu option for slice auto-naming. If you choose None as the
option for any of the first three menus, Fireworks exports slice files that overwrite one another, resulting in a
single exported graphic and a table that displays this graphic in every cell.
Defining how HTML tables are exported
Slicing defines how the HTML table structure will appear when a Fireworks document is
exported for use on the web.
When you export a sliced Fireworks document to HTML, your document is reassembled using
an HTML table. Each sliced element from the Fireworks document resides in a table cell. Once
exported, a Fireworks slice translates to a table cell in HTML.
You can specify how a Fireworks table will be reconstructed in a browser. Among other options,
you can choose whether to use spacers or nested tables when exporting to HTML:
•Spacers are images that help table cells align properly when viewed in a browser.
•A nested table is a table within a table. Nested tables do not use spacers. They may load more
slowly in browsers, but because there are no spacers, it is easier to edit their HTML.
For more information about HTML, see “Exporting HTML” on page 351.
To define how Fireworks exports HTML tables:
1Choose File > HTML Setup, or click the Options button in the Export dialog box.
2Click the Table tab.
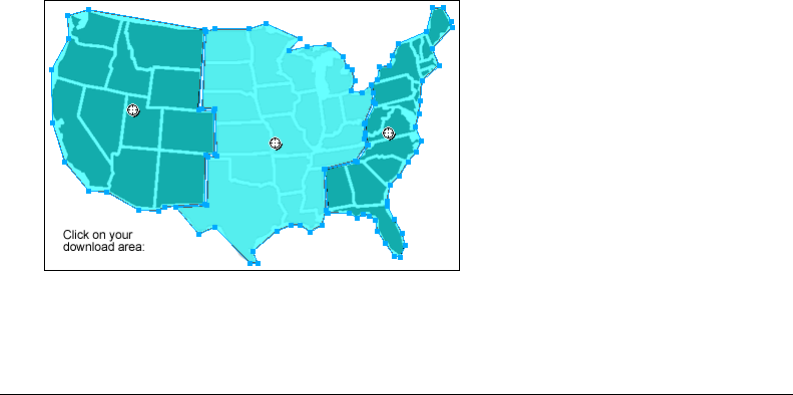
Chapter 12284
3Choose a spacing option from the Space With pop-up menu:
Nested Tables — No Spacers creates a nested table with no spacers.
Single Table — No Spacers creates a single table with no spacers. This option can cause tables
to display incorrectly in some cases.
1-Pixel Transparent Spacer uses a 1-pixel by 1-pixel transparent GIF as a spacer that is resized
as needed in the HTML. This generates a 1-pixel-high row across the top of the table and a 1-
pixel-wide column down the right side.
4Choose a cell color for HTML slices:
•To give cells the same background color as the document canvas, choose Use Canvas Color.
•To choose a different color, deselect Use Canvas Color and choose a color from the color
pop-up window.
5Choose what to place in empty cells from the Contents pop-up menu:
None causes empty cells to remain blank.
Spacer Image places a small transparent image called spacer.gif in empty cells.
Non-breaking Space places an HTML space tag in empty cells. The cell appears hollow.
Note: Empty cells occur only if you deselect Include Areas Without Slices in the Export dialog box during export.
6Click OK.
For more information about specifying HTML export options, see “Setting HTML export
options” on page 358.
Note: You can specify unique table export settings for sliced objects for each document. Or you can use the Set
Defaults button on the Document Specific tab of the HTML Setup dialog box to apply defaults for all new
documents.
Working with hotspots and image maps
Web designers sometimes use hotspots to make small parts of a larger graphic interactive. A
hotspot is an area of a web graphic that links to a URL. An image map is nothing more than a
graphic upon which one or more hotspots have been placed.
An image map with hotspots
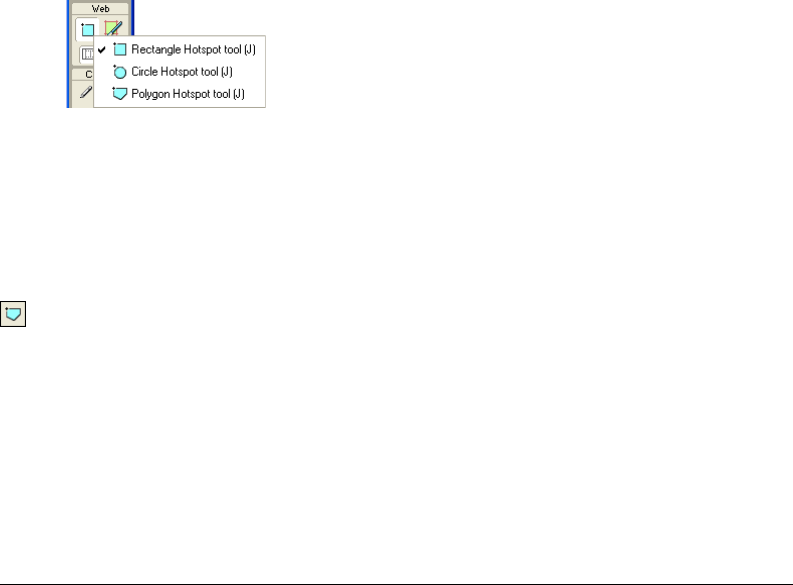
Slices, Rollovers, and Hotspots 285
Hotspots and image maps are often less resource-intensive than sliced graphics. Slicing can be
more resource-intensive to web browsers because of the additional HTML code they must
download and the processing power required to reassemble sliced graphics.
Note: It is possible to create a sliced image map. Exporting a sliced image map typically generates many graphic
files. For more information about slicing, see “Creating slice objects” on page 266.
Hotspots are ideal when you want areas of an image to link to other web pages, but you don’t
need those areas to highlight or produce rollover effects in response to mouse movement or
actions. Hotspots and image maps are also ideal when the graphic onto which you’ve placed your
hotspots would be best exported as a single graphic file—in other words, the entire graphic would
best be exported using the same file format and optimization settings.
Creating hotspots
After you identify areas on a source graphic that would make good navigation points, you create
the hotspots and then assign URL links to them. There are two ways to create hotspots:
•You can draw the hotspot around a target area in the graphic using the Rectangle, Circle, or
Polygon (odd-shaped) Hotspot tools.
•You can select an object and insert the hotspot over it.
A hotspot need not always be a rectangle or a circle. You can also create polygon hotspots
composed of many points. This can be a good approach when working with intricate images.
To create a rectangular or circular hotspot:
1Choose the Rectangle Hotspot or Circle Hotspot tool from the Web section of the Tools panel.
2Drag the Hotspot tool to draw a hotspot over an area of the graphic. Hold down Alt
(Windows) or Option (Macintosh) to draw from a center point.
Note: You can adjust the position of a hotspot as you drag to draw it. While holding down the mouse button,
simply press and hold down the Spacebar on the keyboard, then drag the hotspot to another location on the
canvas. Release the Spacebar to continue drawing the hotspot.
To create an odd-shaped hotspot:
1Choose the Polygon Hotspot tool.
2Click to place vector points, much as you would draw straight segments with the Pen tool.
Whether the path is open or closed, the fill defines the hotspot area.
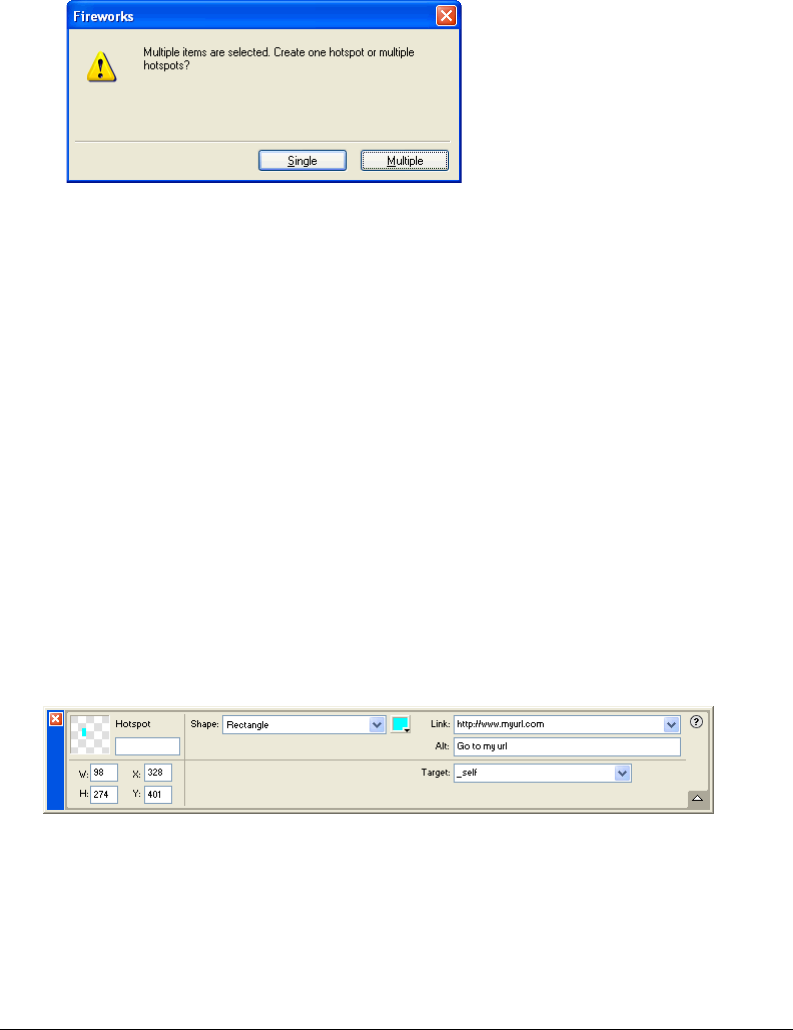
Chapter 12286
To create a hotspot by tracing one or more selected objects:
1Choose Edit > Insert > Hotspot.
If you selected more than one object, a message appears asking whether you want to create a
single rectangular hotspot covering all objects or multiple hotspots, one for each object.
2Click Single or Multiple. The Web Layer displays the new hotspot or hotspots.
Editing hotspots
Hotspots are web objects, and like many other objects, they can be edited using the Pointer,
Subselection, and Transform tools. For more information on using these tools to edit a web
object, see “Using tools to edit slice objects” on page 272.
You can change a hotspot’s position and size numerically using the Property inspector or the Info
panel. For more information about changing an object’s dimensions numerically, see
“Transforming objects numerically” on page 119. For more information about changing an
object’s position numerically, see “Editing selected objects” on page 115.
You can also change a hotspot’s shape using the Property inspector.
To convert a selected hotspot into a rectangle, circle, or polygon hotspot:
In the Property inspector, choose Rectangle, Circle, or Polygon from the Hotspot Shape pop-up menu.
Preparing hotspots for export
You can use the Property inspector to assign URLs, alternate text, targets, and custom names to
hotspots. If the Property inspector is minimized, click the expander arrow in the lower right to see
all properties.
You assign hotspot properties the same way you assign slice properties. For more information on
using the Property inspector to assign URLs, alt text, target frames, and custom names, see
“Preparing slices for export” on page 280.

Slices, Rollovers, and Hotspots 287
Creating image maps
After you’ve inserted several hotspots on top of a desired graphic, you must export the graphic as
an image map so it will function in a web browser. Exporting an image map generates the
graphics and the HTML containing map information for hotspots and corresponding URL links.
Note: Fireworks produces only client-side image maps when exporting.
As an alternative to exporting, you can copy your image map to the Clipboard and paste it into
Dreamweaver or another HTML editor.
To export an image map or copy it to the Clipboard:
1Optimize the graphic to prepare it for export.
For more information, see “About optimizing” on page 325.
2Choose File > Export.
3If you are exporting your image (as opposed to copying it to the Clipboard), navigate to the
folder where you want to place the HTML file, and name the file.
If you have already built a local file structure for your website, you can save the graphic in the
appropriate folder for the site from here.
4In the Save as Type pop-up menu, choose HTML and Images.
5Choose an option from the HTML pop-up menu:
Export HTML File generates the required HTML file and corresponding graphics files, which
you can later import into Dreamweaver or another HTML editor.
Copy to Clipboard simply copies the image map to the Clipboard so you can later paste it into
Dreamweaver or another HTML editor.
6For Slices, choose None.
7If necessary, choose Put Images in Subfolder and browse to the appropriate folder. (This is not
required if you are copying to the Clipboard.)
8Click Save to close the Export dialog box.
Tip: When you are exporting files, Fireworks can use HTML comments to clearly label the beginning and end of
code for image maps and other web features created in Fireworks. By default, HTML comments are not included
in the code. To include them, choose Include HTML Comments in the HTML Setup dialog box.
For information on placing exported Fireworks content into Dreamweaver or another HTML
editor, see “Using Fireworks with Other Applications” on page 361.
Creating rollovers with hotspots
Using the drag-and-drop rollover method of creating interactivity, you can easily attach a disjoint
rollover effect to a hotspot if the target area is defined by a slice. Rollover effects are applied to
hotspots the same way that they are to slices. For more information, see “Adding simple
interactivity to slices” on page 273.
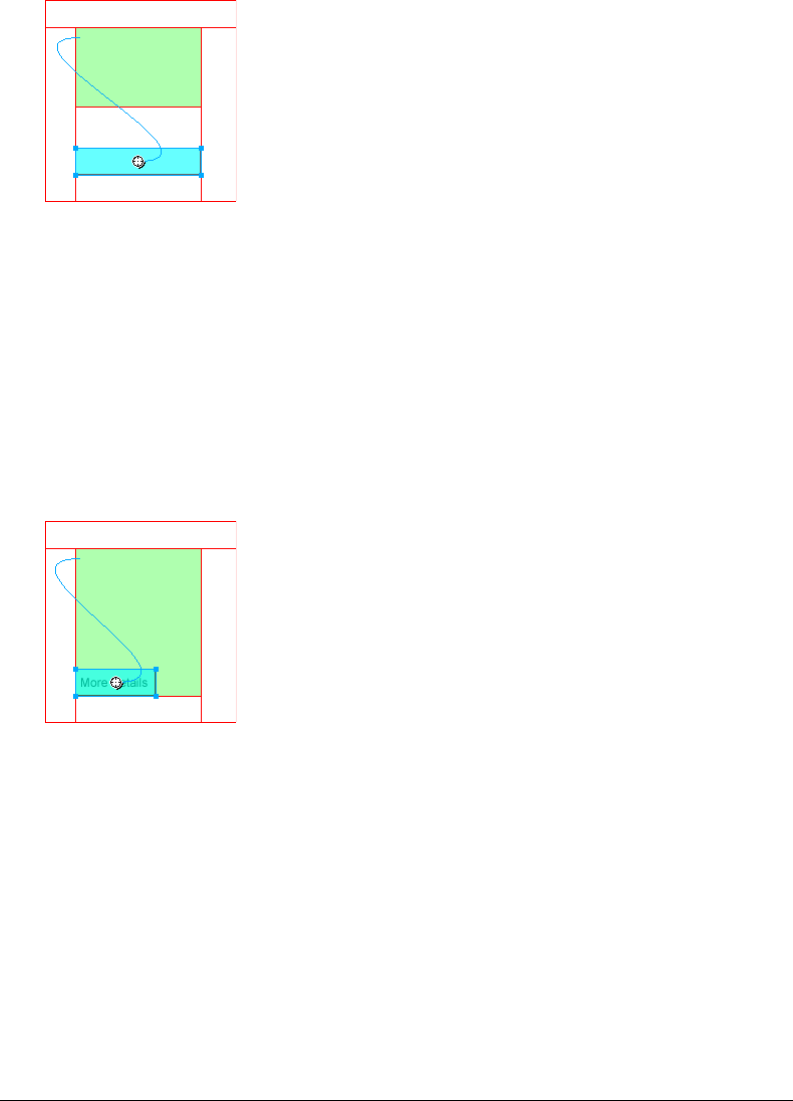
Chapter 12288
Note: A hotspot can only trigger a disjoint rollover. It cannot be the target of a rollover coming from another
hotspot or slice.
Once you have created a disjoint rollover with a hotspot, the connecting blue line remains visible
only while the hotspot is selected.
Using hotspots on top of slices
You can place a hotspot on top of a slice to trigger an action or behavior. You may want to do this if
you have a large graphic and you want only a small portion of it to act as the trigger for an action.
For example, perhaps you have a large graphic with text on it, and you want just the text to trigger
an action or behavior, such as a rollover effect. You could place a slice on top of the graphic, and
then a hotspot on top of the text. Just rolling over the text will trigger the rollover effect, yet the
entire graphic beneath the slice will swap out when the rollover effect occurs. Avoid creating
hotspots that overlap more than one slice, or unpredictable behavior may result.
To create a trigger for a rollover effect using a hotspot on top of a slice:
1Insert a slice on top of the image you want to swap out.
2Create a new frame in the Frames panel, and insert an image that will be used as your swapped
image. Be sure to place it beneath the slice you inserted in step 1.
3Drag and drop a behavior line from the hotspot to the slice that contains the image you
want to swap.
The Swap Image dialog box opens.
4Choose the frame holding the rollover image from the Swap Image From list, and click OK.

289
CHAPTER 13
Creating Buttons and Pop-up Menus
In Macromedia Fireworks MX you can create a variety of JavaScript buttons and pop-up menus,
even if you know nothing about JavaScript.
The Fireworks Button Editor leads you through the button creation process, automating many
button-making tasks. The result is a convenient button symbol. Once you’ve created a button
symbol, you can easily create instances of the symbol to make a navigation bar, or nav bar.
Fireworks also has a Pop-up Menu Editor, which allows you to quickly and easily create vertical or
horizontal pop-up menus. The Advanced tab of the Pop-up Menu Editor gives you creative
control over cell spacing and padding, text indentation, cell borders, and other properties.
When you export a button or pop-up menu, Fireworks automatically generates the JavaScript
necessary to display it in a web browser. In Macromedia Dreamweaver, you can easily insert
JavaScript and HTML code from Fireworks into your web pages, or you can cut and paste the
code into any HTML file. For more information, see “Working with Macromedia Dreamweaver
MX” on page 362.
Creating button symbols
Buttons are navigation elements for a web page. Buttons created in the Button Editor have the
following characteristics:
•You can make almost any graphic or text object into a button.
•You can create a button from scratch, convert an existing object into a button, or import
already-created buttons.
•A button is a special type of symbol. You can drag instances of it from the symbol library into
your document.
This allows you to change the graphical appearance of a single button and automatically
update the appearance of all button instances in a nav bar. For more information on symbols,
see “Using symbols” on page 255.
•You can edit the text, URL, and target for one button instance without affecting other
instances of the same button, and without breaking the symbol-instance relationship.
•A button instance is encapsulated. Dragging the button instance in the document moves all the
components and states associated with it, so there is no more need for messy multiframe editing.
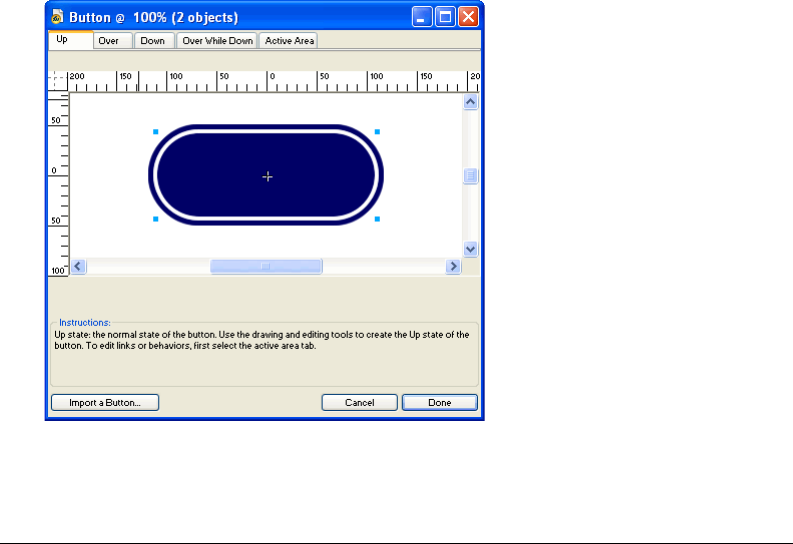
Chapter 13290
•A button is easy to edit. Double-click the instance on the canvas, and you can change it in the
Button Editor or the Property inspector.
•Like other symbols, buttons have a registration point. The registration point is a center point
that helps you align text and the different button states while in the Button Editor.
About button states
A button can have up to four different states. Each state represents the button’s appearance in
response to a mouse event:
The Up state is the default or at-rest appearance of the button.
The Over state is the way the button appears when the pointer is moved over it. This state alerts
the user that clicking the mouse is likely to result in an action.
The Down state is often a depressed image of the button, representing the button after it is clicked.
This button state typically represents the current web page on multibutton navigation bars.
The Over While Down state is the appearance when the user moves the pointer over a button in
the Down state. This button state typically shows that the pointer is over the button for the
current web page on multibutton navigation bars.
With the Button Editor, you can create all of these different button states, as well as an area for
triggering the button action.
Using the Button Editor
The Button Editor is where you create and edit a JavaScript button symbol in Fireworks. The tabs
along the top of the Button Editor correspond to the four button states and the active area. The
tips on each option in the Button Editor help you make design decisions for all four button states.
The Button Editor

Creating Buttons and Pop-up Menus 291
Creating a simple two-state button
With the Button Editor, you can create custom buttons by drawing shapes, importing graphic
images, or dragging objects from the document window. The Button Editor then takes you
through the steps to control the button’s behavior.
To create an Up state:
1Choose Edit > Insert > New Button to open the Button Editor.
The Button Editor opens to the Up state tab.
2Import or create the Up state graphic:
•Drag and drop or import the graphic that will appear as the button’s Up state into the work
area of the Button Editor.
•Use the drawing tools to create a graphic or use the Text tool to create a button from text.
•Click Import a Button and select a ready-made editable button from the Button Import
library. If you choose this option, you won’t have to worry about creating the remaining states
for your button. Each of the button’s states will be automatically filled with the appropriate
graphics and text.
3If desired, choose the Text tool and create text for the button.
To create an Over state:
1With the Button Editor open, click the Over tab.
2Do one of the following to create the button’s Over state:
•Click Copy Up Graphic to paste a copy of the Up state button into the Over window, and then
edit it to change its appearance.
•Drag and drop, import, or draw a graphic.
Creating a three- or four-state button
When creating a button, in addition to the Up and Over states, you may want to add a Down
state and an Over While Down state. These states add visual cues for web page users.
You can create a nav bar using two-state or even one-state buttons, but only a button with all four
states qualifies as a real nav bar button in Fireworks. Fireworks has several Nav Bar behaviors that
make buttons act as though they are related to each other. For example, you can create nav bar
buttons that act like the push buttons on an old car radio: when you click a button, it remains
down until another button is clicked.
While four-state buttons are not necessary for creating a nav bar, using them allows you to take
advantage of the built-in Nav Bar behaviors in Fireworks.
For details about creating the Up and Over states for a button, see “Creating a simple two-state
button” on page 291.

Chapter 13292
To create a Down state:
1With a two-state button open in the Button Editor, click the Down tab.
2Do one of the following to create the button’s Down state:
•Click Copy Over Graphic to paste a copy of the Over state button into the Down window, and
then edit it to change its appearance.
•Drag and drop, import, or draw a graphic.
Note: When you insert or create a graphic for the Down state, the Include Nav Bar Down State option is
automatically chosen. This button state is for buttons that are part of navigation bars.
To create an Over While Down state:
1With a three-state button open in the Button Editor, click the Over While Down tab.
2Do one of the following to create the button’s Over While Down state:
•Click Copy Down Graphic to paste a copy of the Down state graphic into the Over While
Down window, and then edit it to change its appearance.
•Drag and drop, import, or draw a graphic.
Note: When you insert or create a graphic for the Over While Down State, the Include Nav Bar Over While Down
State option is automatically chosen. This button state is for buttons that are part of navigation bars.
Using bevel effects to draw button states
As you create graphics for each button state, you can apply Live Effects presets to create common
appearances for each state. For example, if you are creating a four-state button, you could apply the
Raised effect to the Up state graphic, the Highlighted effect to the Down state graphic, and so on.
To apply preset Live Effects to a button symbol:
1With the desired button symbol open in the Button Editor, select the graphic to which you
want to add a Live Effect.
2Click the Add Effects button in the Property inspector.
3In the pop-up menu that appears, do one of the following:
•Choose Bevel and Emboss > Inner Bevel.
•Choose Bevel and Emboss > Outer Bevel.
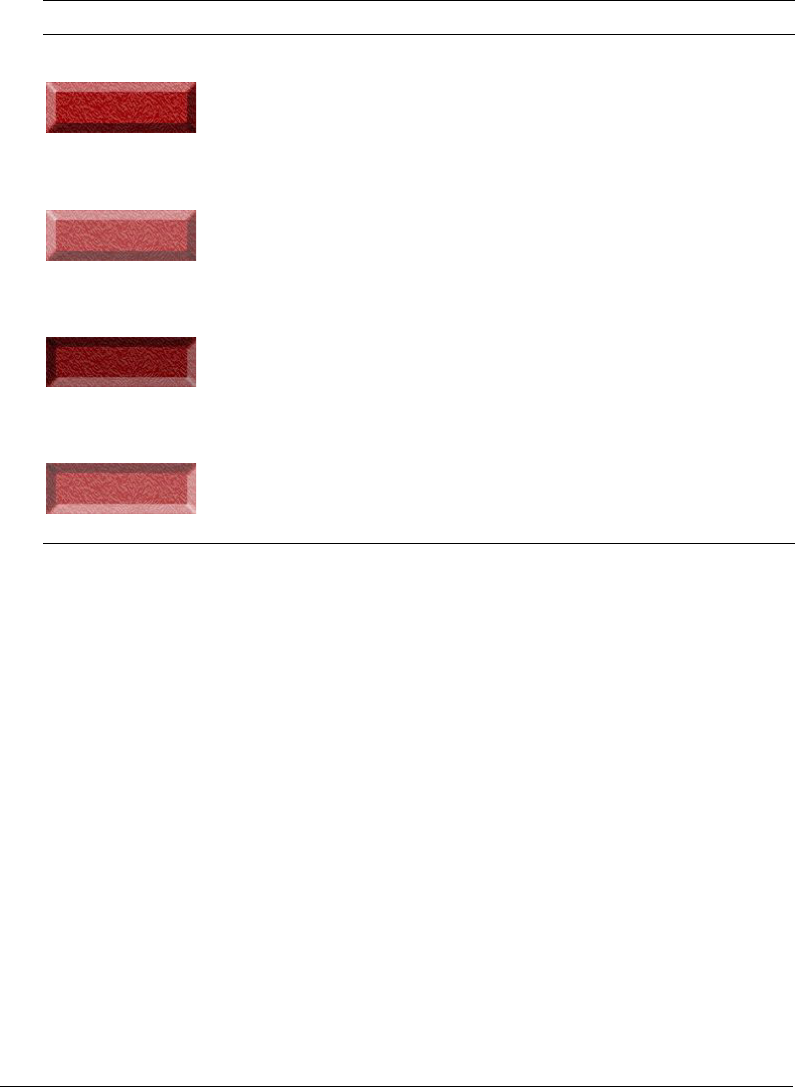
Creating Buttons and Pop-up Menus 293
4In the pop-up window that appears, choose a button preset. The button presets are
described below.
5Repeat steps 1 through 4 for the remaining button states, giving each state a different Button
Preset effect.
Converting Fireworks rollovers into buttons
You can create buttons from rollovers that you created in previous versions of Fireworks. The
components convert to a button, and the new button is placed in the library.
For more information about rollovers, see “Making slices interactive” on page 273.
To convert a Fireworks rollover into a button:
1Delete the slice or hotspot covering the rollover images.
2Choose Show All Frames from the Onion Skinning pop-up menu in the Frames panel.
3Select all the objects to be included in the button.
Tip: Use the Select Behind tool to select objects that are hidden behind others. For more information, see “Using
the Select Behind tool” on page 103.
4Choose Modify > Symbol > Convert to Symbol.
The Symbol Properties dialog box opens.
5Enter a name for the symbol in the Name text box.
Button preset effect Description
Raised The bevel appears raised from the underlying objects.
Highlighted The button’s colors lighten.
Inset The bevel appears sunken into the underlying objects.
Inverted The bevel appears sunken into the underlying objects and the colors lighten.

Chapter 13294
6Choose the Button symbol type.
7Click OK.
The new button is added to the library.
Tip: You can also convert four-frame animations to buttons. Simply select all four objects, and each is placed on its
own button state.
Inserting buttons into a document
You can insert instances of button symbols into a document from the Library panel.
To place instances of a button symbol in a document:
1Open the Library panel.
2Drag the button symbol into the document.
To place additional instances of a button symbol in a document, do one of the following:
•Select an instance, and then choose Edit > Clone to place another instance directly in front of
the selected instance. The new instance becomes the selected object.
Tip: Cloning button instances is convenient when creating an aligned nav bar, because you can move the clones
one direction with the arrow keys while maintaining alignment with the other position coordinate.
•Drag another button instance from the Library panel to the document.
•Alt-drag (Windows) or Option-drag (Macintosh) an instance on the canvas to create another
button instance.
•Copy an instance and then paste additional instances.
Importing button symbols
Button symbols in the Library panel are document-specific. If you have an open document with
symbols in the Library panel, and then create a new document, the Library panel in the new
document will be empty. However, there are several methods you can use to import button symbols
into a document’s Library panel, either from a library or from another Fireworks document.
To import button symbols into a document’s Library panel, do one of the following:
•Drag and drop a button instance from another Fireworks document into the document.
•Cut and paste a button instance from another Fireworks document into the document.
•Export button symbols from another Fireworks document to a PNG library file, and then
import button symbols from the PNG library file into the document.
•Choose Edit > Libraries and import button symbols into the document’s Library panel from
the button libraries on the submenu. These libraries contain a wide variety of premade button
symbols prepared by Macromedia.
The methods for importing and exporting button symbols are the same as those for animation
and graphic symbols. For more information, see “Importing symbols” on page 258 and
“Exporting symbols” on page 259.

Creating Buttons and Pop-up Menus 295
Editing button symbols
Fireworks MX button symbols are a special kind of symbol. They have two kinds of properties:
some properties that change in all instances when you edit an instance or the symbol, and other
properties that affect only the current instance.
Fireworks button symbols let you take advantage of the convenience of symbols while allowing
you to edit certain properties of a button instance, such as text, without affecting other instances.
Editing symbol-level properties
Button symbols are edited in the Button Editor. The properties that change in an instance when
you edit its button symbol are those that would typically be common among a series of buttons
used in a nav bar or throughout a web site:
•Modifications to graphical appearance such as stroke color and type, fill color and type, path
shape, and images
•Live Effects, opacity, or blend mode applied to individual objects within the button symbol
•Size and position of the active area
•Core button behavior
•Optimization and export settings
•URL link (also available as an instance-level property)
•Target frame (also available as an instance-level property)
To edit button properties at the symbol level:
1Do one of the following to open the button in the Button Editor:
•Double-click a button instance in the workspace.
•In the Library panel, double-click the button preview or the symbol icon beside the
button symbol.
2Make changes to the button’s graphical characteristics, and click Done.
Changes are applied to all instances of the button symbol.
Editing instance-level properties
Instance-level properties are edited in the Property inspector when a single instance is selected.
The properties that you can change for an instance without affecting the associated symbol or any
other instances of that symbol are those that would typically differ from button to button in a
series of buttons:
•An instance’s object name, which appears in the Layers panel and is used for naming the
exported slices for the button instance upon export
•Live Effects, opacity, or blend mode applied to the entire instance
•Text characters and text formatting, such as font, size, orientation, and color
•URL link (also available as a symbol-level property)
•Alternate (alt) image description
•Target frame (also available as a symbol-level property)

Chapter 13296
•Additional behaviors assigned to an instance using the Behaviors panel
•The Show Down State on Load option in the Property inspector for instances within a nav bar
Note: In Fireworks MX, you need not choose the Show Down State on Load option for every button instance in a
nav bar. The Document Specific section of the HTML Setup dialog box contains an option called Export Multiple
Files. When you choose this option and then export a nav bar, Fireworks MX exports each HTML page with the
corresponding button’s Down state. For more information, see “Setting HTML export options” on page 358.
To edit instance-level properties of a single button symbol instance:
1Select the button instance in the work area.
2Set the properties in the Property inspector.
Setting interactive button properties
With Fireworks, you can control the interactive elements of a button, including the active area,
URL, target, and alternative (alt) image description.
Modifying the active area of a button symbol
The active area of a button symbol triggers interactivity when a user moves the pointer over it or
clicks it in a web browser. The active area of a button is a symbol-level property and is unique to
button symbols.
When a button symbol is created, Fireworks automatically creates a special slice large enough to
enclose all the states of a button. You can edit a button slice only in the Active Area tab of the
Button Editor. Each button can have only one slice. If you draw a slice using a slice tool in the
active area, the previous slice is replaced by the newly drawn slice. You can draw hotspot objects in
the Active Area tab, but you can edit those hotspots only in the Button Editor.
Note: Web objects that define a button symbol’s active area appear in the document when slices and hotspots are
not hidden, but a button’s web objects are not listed in the Layers panel and cannot be edited in the workspace.
To edit a slice or hotspot in a button symbol’s active area:
1Do one of the following to open the button symbol in the Button Editor:
•Double-click a button instance in the workspace.
•In the Library panel, double-click the button preview or the symbol icon beside the button symbol.
2Click the Active Area tab.
3Do one of the following:
•Use the Pointer tool to move or reshape the slice or move a slice guide.
•Use any of the slice or hotspot tools to draw a new active area.

Creating Buttons and Pop-up Menus 297
Setting the URL for a button symbol or instance
A URL, or Uniform Resource Locator, is a link to another web page, website, or anchor on the
same web page. The URL can be a symbol- or instance-level button property. You can attach a
URL to a selected button instance in the Property inspector or in the URL panel.
You can attach a URL to a symbol, so that the same URL appears in the Link text box in the
Property inspector for each instance. This is helpful when entering absolute URLs within a site;
you need only complete the last part of the URL in each instance’s Link text box in the Property
inspector to link the button instances.
Note: For information on static versus relative URLs, see “About absolute and relative URLs” on page 262.
To set the URL for a button symbol in the Button Editor:
1Do one of the following to open the button in the Button Editor:
•Double-click a button instance in the workspace.
•In the Library panel, double-click the button preview or the symbol icon beside the button symbol.
2Click the Active Area tab in the Button Editor.
3Select the Active Area slice or hotspot.
4Do one of the following:
•Enter the URL in the Link text box in the Property inspector.
•Choose a URL from the URL panel.
Note: Changing the URL for a button symbol won’t change the URL for existing button instances of that symbol
that already have unique URLs assigned to them. This also applies to changes made to a button symbol’s target
and alt text.
To set the URL for a selected button instance in the workspace, do one of the following:
•Enter the URL in the Link text box in the Property inspector.
•Choose a URL from the URL panel.
Setting the target for a button
The target is the window or frame in which the destination web page will appear when a button
instance is clicked. If you don’t enter a target in the Property inspector, the web page will appear
in the same frame or window as the link that called it. The target can be a symbol- or instance-
level button property. You can set the target for a symbol, so that all instances of the symbol will
have the same target option.
To set the target for a button symbol in the Button Editor:
1Do one of the following to open the button in the Button Editor:
•Double-click a button instance in the workspace.
•In the Library panel, double-click the button preview or the symbol icon beside the button symbol.

Chapter 13298
2Do one of the following in the Property inspector:
•Choose a preset target from the Target pop-up menu:
None or _self loads the web page into the same frame or window as the link.
_blank loads the web page into a new, unnamed browser window.
_parent loads the web page into the parent frameset or window of the frame that contains
the link.
_top loads the web page into the full browser window, removing all frames.
•Enter a target in the Target text box.
Note: Changing the target for a button symbol won’t change the target for existing button instances of that
symbol that already have unique targets assigned to them. This also applies to changes made to a button
symbol’s URL and alt text.
To set the target for a button instance in the workspace:
1Select the button instance in the workspace.
2Do one of the following in the Property inspector:
•Choose a preset target from the Target pop-up menu:
None or _self loads the web page into the same frame or window as the link.
_blank loads the web page into a new, unnamed browser window.
_parent loads the web page into the parent frameset or window of the frame that contains
the link.
_top loads the web page into the full browser window, removing all frames.
•Enter a target in the Target text box.
Setting the alternate (alt) text for a button symbol or instance
Alternate (alt) text appears on or near an image placeholder while an image is downloading from
the web or in place of an image if it fails to download. It also replaces graphics if the user has the
browser set to refrain from displaying images. Alt text can be a symbol- or instance-level button
property. You can set alternate text for a button symbol or instance in the Property inspector.
Note: Applications that assist the visually impaired audibly read the alternative text for graphics on web pages in a
browser. It is recommended that you enter concise, meaningful alternate text whenever possible.
To set the alt text for a button symbol in the Button Editor:
1Do one of the following to open the button in the Button Editor:
•Double-click a button instance in the workspace.
•In the Library panel, double-click the button preview or the symbol icon beside the
button symbol.
2In the Property inspector, enter the text that you wish to appear as alt text in a browser.
Note: Changing the alt text for a button symbol won’t change the alt text for existing button instances of that
symbol that already have unique alt text assigned to them. This also applies to changes made to a button
symbol’s target and URL.

Creating Buttons and Pop-up Menus 299
To set the alt text for a button instance in the workspace:
1Select the button instance in the workspace.
2Enter the description in the Alt Text box in the Property inspector.
Creating navigation bars
A navigation bar, or nav bar, is a group of buttons that provide links to different areas of a website.
It generally remains consistent throughout the site, providing a constant method of navigation,
no matter where the user is within the site. The nav bar looks the same from web page to web
page, but in some cases, the links may be specific to the function of each page.
In Fireworks, you make a nav bar by creating a button symbol in the Button Editor and then
placing instances of that symbol in the workspace.
To create a basic nav bar:
1Create a button symbol. For more information, see “Creating button symbols” on page 289.
2Drag an instance (copy) of the symbol from the Library panel to the workspace.
3Do one of the following to make a copy of the button instance:
•Select the button instance and choose Edit > Clone.
•Alt-drag (Windows) or Option-drag (Macintosh) the button instance.
A copy of the button instance is created.
4Hold down Shift as you press an arrow key repeatedly to position the cloned button. For more
precise control, use the arrow keys without holding down Shift.
5Repeat steps 3 and 4 to create additional button instances.
6Select each instance and assign it unique text, a URL, and other properties using the
Property inspector.
Creating pop-up menus
Pop-up menus are menus that are displayed in a browser in response to a pointer moving over or
clicking a triggering web object, such as a slice or hotspot. Pop-up menu items can have URL
links attached to them for navigation. For example, you can use pop-up menus to organize several
navigation options that are related to a button in a nav bar. You can create submenus in pop-up
menus for as many levels as you want to create.
Each pop-up menu item appears as an HTML or image cell, which has an Up state, an Over state,
and text in both states. To preview a pop-up menu, you must press F12 to preview it in a browser.
The previews in the Fireworks MX workspace do not display pop-up menus.
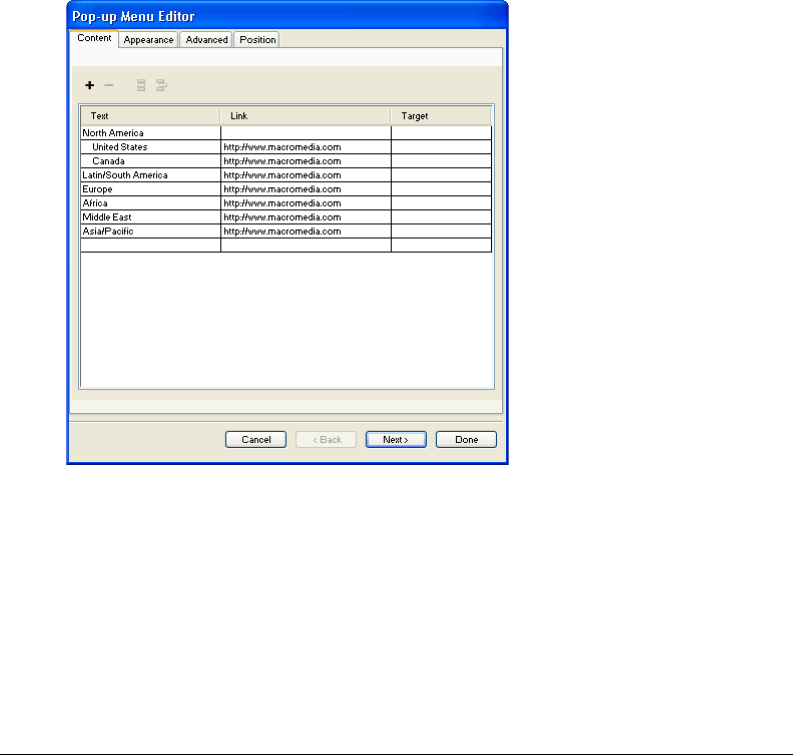
Chapter 13300
About the Pop-up Menu Editor
The Pop-up Menu Editor is a tabbed dialog box that guides you through the creation of a pop-up
menu. Its many options for controlling the characteristics of a pop-up menu are organized in four tabs:
Content contains options that determine the basic menu structure, as well as the text, URL link,
and target for each menu item.
Appearance contains options that determine the appearance of each menu cell’s Up state and
Over state, as well as the menu’s vertical and horizontal orientation.
Advanced contains options that determine the cell dimensions, padding, and spacing; the cell
border width and color; menu delay; and text indentation.
Position contains options that determine the menu and submenu placement:
•The Menu setting places the pop-up menu relative to the slice. Preset positions include
bottom, lower right, top, and upper right of a slice.
•The Submenu setting places the pop-up submenu to the right or lower right of the parent
menu, or below it.
Depending on the design of the pop-up menu, you may not use all the tabs or options in the
Pop-up Menu Editor. You can edit settings in any tab anytime, but you must add at least one
menu item in the Content tab to create a menu that you can preview in a browser.

Creating Buttons and Pop-up Menus 301
Creating a basic pop-up menu
The Content tab of the Pop-up Menu Editor is where you determine the basic structure and
content of the pop-up menu. The current or default settings for the options on the other Pop-up
Menu Editor tabs are applied to the menu when you create it.
To create a simple pop-up menu:
1Select a hotspot or slice that will be the trigger area for the pop-up menu.
2Do one of the following to open the Pop-up Menu Editor:
•Choose Modify > Pop-up Menu > Add Pop-up Menu.
•Click the behavior handle in the middle of the slice and choose Add Pop-up Menu.
3Click the Content tab.
4Click the Add Menu button to add an empty menu item.
You can add and delete cells anytime.
5Double-click each cell and enter or choose the appropriate information:
Text specifies the text for the menu item.
Link determines the URL of the menu item. You can enter a custom link, or choose one from
the Link pop-up menu, if any are available. If you’ve entered URLs for other web objects in the
document, those URLs will be listed in the Link pop-up menu.
Target designates the target for the URL. You can enter a custom target, or choose a preset one
from the Target pop-up menu.
Entering content into the last line in the window automatically adds an empty line below it.
Tip: To navigate from an active cell to another cell and continue entering information, press the Tab key to move
between cells and the Up Arrow and Down Arrow keys to scroll through the list vertically.
6Repeat steps 4 and 5 until you have added all menu items.
7Optionally, to delete a menu item, highlight it and click the Delete Menu button.
8Do one of the following:
•Click Next to move to the Appearance tab or choose another tab to continue building the
pop-up menu.
•Create submenu entries for the pop-up menu. For information, see “Creating submenus
within a pop-up menu” on page 302.
•Click Done to complete the pop-up menu by closing the Pop-up Menu Editor.
In the workspace, the hotspot or slice onto which you built the pop-up menu displays a blue
behavior line attached to an outline of the top level of the pop-up menu.
Note: To view a pop-up menu, you must press F12 to preview it in a browser. The previews in the Fireworks MX
workspace do not display pop-up menus.

Chapter 13302
Creating submenus within a pop-up menu
Using the Indent Menu and Outdent Menu buttons on the Content tab of the Pop-up Menu
Editor, you can create submenus—pop-up menus that appear when the pointer moves over or
clicks another pop-up menu item. You can create as many levels of submenus as you want.
To create a pop-up submenu:
1Open the Content tab of the Pop-up Menu Editor and create menu items. Create the menu
items that you wish to use for the submenu as well, placing them directly under the menu item
for which they will be a submenu. For more information, see “Creating a basic pop-up menu”
on page 301.
2Click to highlight a pop-up menu item that you wish to make a submenu item.
3Click the Indent Menu button to designate the item as a submenu item under the item directly
above it on the menu item list.
4To add the next item to the submenu, highlight it and click Indent Menu.
All items that are contiguously indented at the same level constitute a single pop-up submenu.
5Optionally, highlight a menu or submenu item and click Add Menu to insert a new item just
below the highlighted item.
6Do one of the following:
•Click Next to move to the next tab or choose another tab to continue building the pop-up menu.
•Click Done to close the Pop-up Menu Editor.
To create a pop-up submenu within a pop-up submenu:
1Highlight a submenu item in the Content tab of the Pop-up Menu Editor. For more
information, see the previous procedure.
2Click the Indent Menu button to indent it again, so that it is indented from the submenu item
directly above it.
You can continue indenting to create submenus within submenus for as many levels as you want.
To move a menu item into a higher-ranking submenu or into the main pop-up menu:
1Highlight the menu item in the Content tab of the Pop-up Menu Editor.
2Click the Outdent Menu button.
For more information about positioning submenus, see “Positioning pop-up menus and
submenus” on page 306.
3Do one of the following to complete the pop-up menu or continue building it:
•Click Next to move to the Appearance tab or choose another tab to continue building the
pop-up menu.
•Click Done to close the Pop-up Menu Editor.
In the workspace, the hotspot or slice onto which you built the pop-up menu displays a blue
behavior line attached to an outline of the top level of the pop-up menu.
Note: To view a pop-up menu, you must press F12 to preview it in a browser. The previews in the Fireworks MX
workspace do not display pop-up menus.
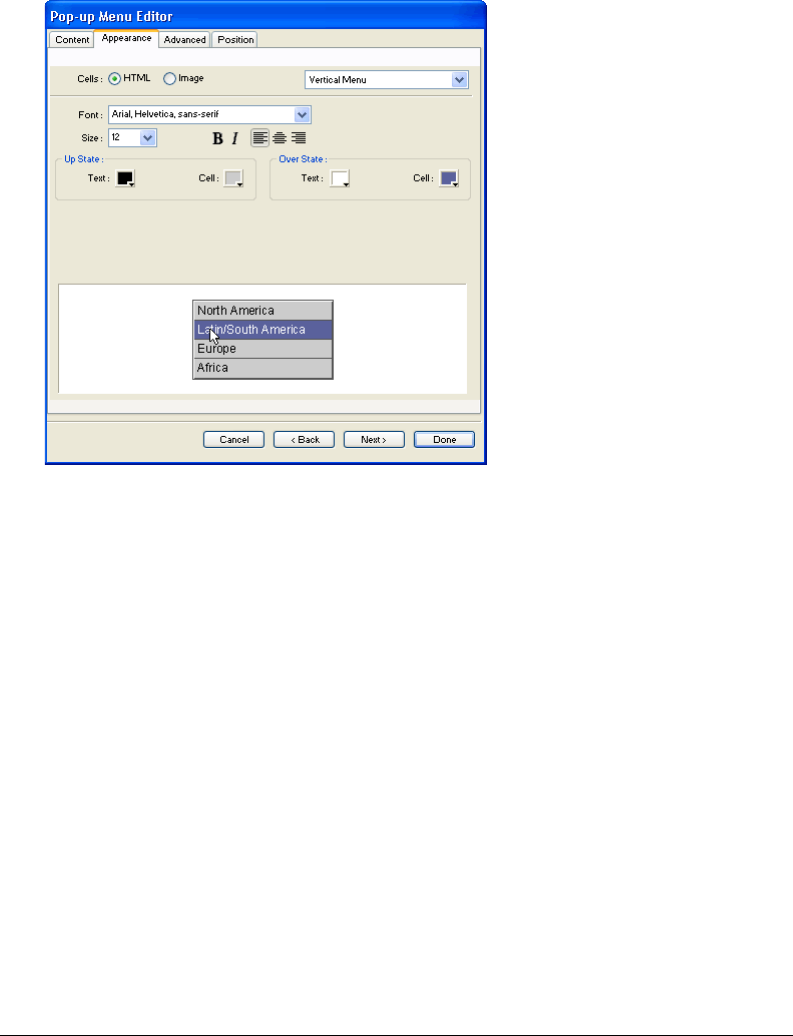
Creating Buttons and Pop-up Menus 303
Designing the appearance of a pop-up menu
Once you have created a basic menu and optional submenus, you can format the text, apply
graphic styles to the Over and Up states, and choose vertical or horizontal orientation in the
Appearance tab of the Pop-up Menu Editor.
To set the orientation of a pop-up menu:
1With the desired pop-up menu open in the Pop-up Menu editor, click the Appearance tab.
For information about how to open an existing pop-up menu in the Pop-up Menu Editor, see
“Editing pop-up menus” on page 308.
2Choose Vertical or Horizontal from the Orientation pop-up menu.
To set whether a pop-up menu is HTML- or image-based:
1With the desired pop-up menu open in the Pop-up Menu editor, click the Appearance tab.
For information about how to open an existing pop-up menu in the Pop-up Menu Editor, see
“Editing pop-up menus” on page 308.
2Choose a Cells option:
HTML sets the menu’s appearance using HTML code only. This setting produces pages with
smaller file sizes.
Image gives you a selection of graphic image styles to use as the cell background. This setting
produces pages with larger file sizes.
Note: You can add to this selection of styles by creating your own custom pop-up menu styles. For more
information, see “Adding pop-up menu styles” on page 304.

Chapter 13304
To format text in the current pop-up menu:
1With the desired pop-up menu open in the Pop-up Menu editor, click the Appearance tab.
For information about how to open an existing pop-up menu in the Pop-up Menu Editor, see
“Editing pop-up menus” on page 308.
2Choose a preset size from the Size pop-up menu or enter a value in the Size text box.
Note: When cell width and height are set to Automatic in the Advanced tab of the Pop-up Menu Editor, text size
determines the size of graphics associated with the menu item.
3Choose a system font group from the Font pop-up menu or enter the name of a custom font.
Note: Be careful when choosing a font. If users who will view your web page don’t have the font you choose
installed on their system, a replacement font will be displayed in their web browser.
4Optionally, click a text style button to apply a bold or italic style.
5Click a justification button to align text to the left or right or center it.
6Choose a text color from the Text Color box.
To set the appearance of the menu cells:
1With the desired pop-up menu open in the Pop-up Menu editor, click the Appearance tab.
For information about how to open an existing pop-up menu in the Pop-up Menu Editor, see
“Editing pop-up menus” on page 308.
2Choose the text and cell colors for each state.
3If Image is selected as the cell type, choose a graphical style for each state.
4Do one of the following:
•Click Next to move to the Advanced tab or choose another tab to continue building the
pop-up menu.
•Click Done to close the Pop-up Menu Editor.
In the workspace, the hotspot or slice onto which you built the pop-up menu displays a blue
behavior line attached to an outline of the top level of the pop-up menu.
Note: To view a pop-up menu, you must press F12 to preview it in a browser. The previews in the Fireworks MX
workspace do not display pop-up menus.
Adding pop-up menu styles
You can add custom cell styles to the Pop-up Menu Editor. Custom cell styles are available along
with the preset choices on the Appearance tab when you choose the Image option as the cell type,
which sets pop-up menus to use graphical backgrounds in their cells.
To add a custom cell style to the cell style choices on the Pop-up Menu Editor’s Appearance tab:
1Apply any combination of stroke, fill, texture, and Live Effects to an object, and save it as a style
using the Styles panel. For more information, see “Creating and deleting styles” on page 252.
2Select the new style in the Styles panel, and then choose Export Style from the Styles panel
Options menu.
3Navigate to the Nav Menu folder on your hard disk, rename the style file if you wish, and
click Save.
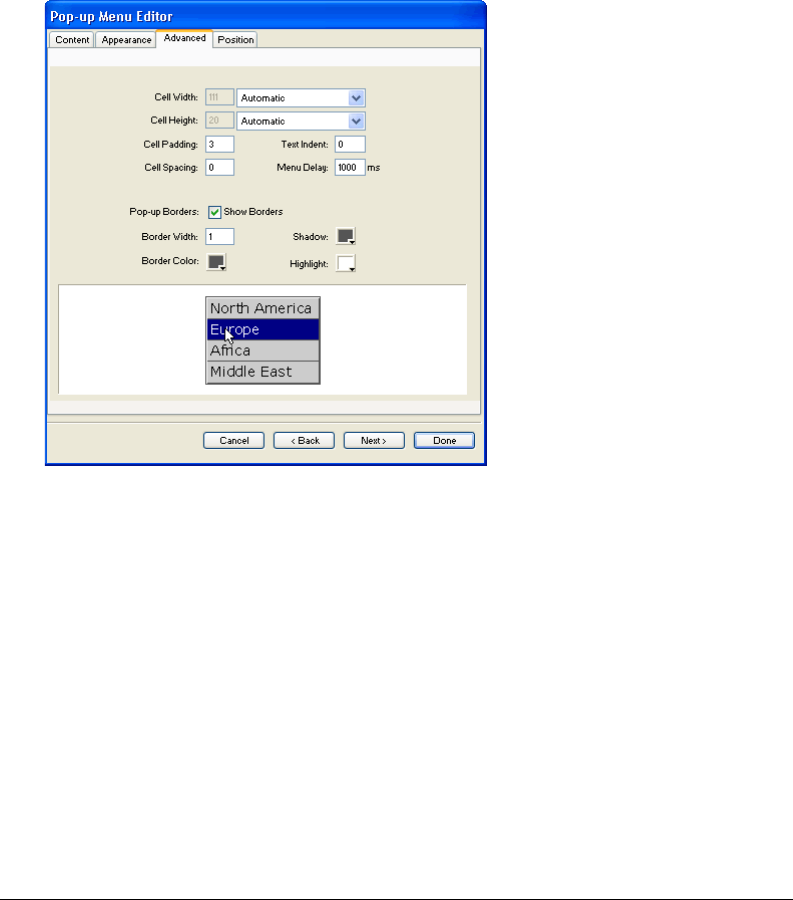
Creating Buttons and Pop-up Menus 305
Note: The exact location of the Nav Menu folder varies depending on your operating system. For more
information, see “Working with configuration files” on page 423.
When you return to the Appearance tab of the Pop-up Menu Editor and choose the Image cell
background option, the new style is available along with the preset styles for the Up and Over
states of the pop-up menu cells.
Setting advanced pop-up menu properties
The Advanced tab of the Pop-up Menu Editor offers additional settings to control cell size,
padding, and spacing; text indentation; menu disappearance delay; and border width, color,
shadow, and highlight.
To set advanced cell properties for the current pop-up menu:
1With the desired pop-up menu open in the Pop-up Menu editor, click the Advanced tab.
For information about how to open an existing pop-up menu in the Pop-up Menu Editor, see
“Editing pop-up menus” on page 308.
2Choose a width or height constraint from the Automatic/Fixed pop-up menu:
Automatic forces the cell height to conform to the text size set in the Appearance tab of the Pop-up
Menu Editor and the cell width to conform to the menu item that contains the longest text.
Pixels allows you to enter specific measurements in pixels in the Cell Width and Cell Height
text boxes.
3Enter a value in the Cell Padding text box to determine the distance between pop-up menu
text and the edge of the cell.
4Enter a value in the Cell Spacing text box to set the amount of space between menu cells.

Chapter 13306
5Enter a value in the Text Indent text box to set the amount of indentation for pop-up menu text.
6Enter a value in the Menu Delay text box to set the amount of time in seconds that the menu
remains visible after the pointer is moved away from it.
7Set pop-up border properties:
Show Borders allows you to show or hide pop-up menu borders. If this option is not selected,
the following options will be disabled.
Border Width sets the width of the pop-up menu border.
Border Color, Shadow, and Highlight allow you to modify the color of pop-up menu borders.
Note: Many of these options are disabled if the Image Cell type is selected on the Appearance tab.
8Do one of the following to complete the pop-up menu or continue building it:
•Click Next to move to the Position tab or choose another tab to continue building the
pop-up menu.
•Click Done to close the Pop-up Menu Editor. In the workspace, the hotspot or slice onto
which you built the pop-up menu displays a blue behavior line attached to an outline of the
top level of the pop-up menu.
Note: To view a pop-up menu, you must press F12 to preview it in a browser. The previews in the Fireworks MX
workspace do not display pop-up menus.
Positioning pop-up menus and submenus
The Position tab of the Pop-up Menu Editor lets you specify a pop-up menu’s position. You can
also position a top-level pop-up menu by dragging its outline in the workspace when the Web
Layer is visible.

Creating Buttons and Pop-up Menus 307
To set the position for a pop-up menu using the Pop-up Menu Editor:
1With the desired pop-up menu open in the Pop-up Menu editor, click the Position tab.
For information about how to open an existing pop-up menu in the Pop-up Menu Editor, see
“Editing pop-up menus” on page 308.
2Do one of the following to define the menu position:
•Click a Position button to position the pop-up menu relative to the slice that triggers it.
•Enter X and Y coordinates. Coordinates of 0,0 align the upper left corner of the pop-up menu
with the upper left corner of the slice that triggers it.
3Do one of the following:
•If you have submenus, position them as described in the next procedure.
•Click Back to modify properties on other tabs.
•Click Done to close the Pop-up Menu Editor.
To set the position for a pop-up submenu using the Pop-up Menu Editor:
1With the desired pop-up menu open in the Pop-up Menu editor, click the Position tab.
For information about how to open an existing pop-up menu in the Pop-up Menu Editor,
see “Editing pop-up menus” on page 308.
2Do one of the following to define the submenu position:
•Click a Submenu Position button to position the submenu relative to the pop-up menu item
that triggers it.
•Enter X and Y coordinates. Coordinates of 0,0 align the upper left corner of the pop-up
submenu with the upper right corner of the menu or menu item that triggers it.
3Do one of the following:
•To make each submenu’s position relative to the parent menu item that triggers it, choose the
Place in Same Position option for the submenu position.
•To make each submenu’s position relative to the entire pop-up menu, deselect Place in
Same Position.
4Click Done to close the Pop-up Menu Editor or click Back to modify properties on other tabs.
To set the position for a pop-up menu by dragging it:
1If necessary, do one of the following to display the Web Layer:
•Click the Show Slices and Hotspots button in the Tools panel.
•Click the Eye column in the Layers panel.
2Select the web object that is the trigger for the pop-up menu.
3Drag the pop-up menu outline to another location in the workspace.

Chapter 13308
Editing pop-up menus
In the Pop-up Menu Editor, you can edit or update the contents of a pop-up menu, rearrange the
menu items, or change other properties on any of the four tabs.
To edit a pop-up menu in the Pop-up Menu Editor:
1If necessary, do one of the following to display the Web Layer:
•Click the Show Slices and Hotspots button in the Tools panel.
•Click the Eye column in the Layers panel.
2Select the slice to which the pop-up menu is attached.
3Double-click the pop-up menu’s blue outline in the workspace.
The Pop-up Menu Editor opens with your pop-up menu entries displayed.
4Make the desired modifications on any of the four tabs and click Done.
To change a pop-up menu entry:
1With the desired pop-up menu displayed in the Pop-up Menu editor, click the Content tab.
2Double-click the Text, Link, or Target text boxes and edit the menu text.
3Click outside the entry list to apply the change.
4Click Done.
To move an entry in the pop-up menu:
1With the desired pop-up menu displayed in the Pop-up Menu Editor, click the Content tab.
2Drag the menu item to a new location in the list.
3Click Done.
About exporting pop-up menus
Fireworks generates all the JavaScript necessary to view pop-up menus in web browsers. When a
Fireworks document containing pop-up menus is exported to HTML, a JavaScript file called
mm_menu.js is exported to the same location as the HTML file.
When you upload your files, you should upload mm_menu.js to the same directory location as
the web page containing the pop-up menu. If you want to post the file to a different location, you
must update the hyperlink referencing mm_menu.js in the Fireworks HTML code to reflect the
custom location. If your document contains several pop-up menus, or you have several
documents with pop-up menus, Fireworks does not create extra mm_menu.js files; only a single
file is used for all menus in all documents.
When you include submenus, Fireworks generates an image file called arrows.gif. This image is
the tiny arrow that appears next to a menu entry that tells users a submenu exists. No matter how
many submenus a document contains, Fireworks always uses the same arrows.gif file.
For more information about exporting HTML and JavaScript, see “Exporting HTML” on page 351.

309
CHAPTER 14
Creating Animation
Animated graphics add an exciting, sophisticated look to your website. In Macromedia Fireworks
MX, you can create animated graphics with banner ads, logos, and cartoons that move. For
example, you can make your company mascot dance across a page while the logo fades in and out.
One way you can make animations in Fireworks is by creating symbols and changing their
properties over time to create the illusion of motion. A symbol is like an actor whose movements
you choreograph. The action of each symbol is stored in a frame. When you play all the frames
together in a sequence, you get animation.
You can apply different settings to the symbol to gradually change the content of successive
frames. You can make a symbol appear to move across the canvas, fade in or out, get bigger or
smaller, or rotate.
Because you can have multiple symbols in a single file, you can create a complex animation in
which different types of action occur all at once.
The Optimize panel lets you set optimization and export settings to control how your file is
created. Fireworks can export animations as animated GIF or Flash SWF files. You can also
import Fireworks animations directly into Macromedia Flash for further editing.
Building animation
In Fireworks, you can create animation by assigning properties to objects called animation
symbols. The animation of a symbol is broken down into frames, which contain the images and
objects that make up each step of the animation. You can have more than one symbol in an
animation, and each symbol can have a different action. Different symbols can contain differing
numbers of frames. The animation ends when all the action of all the symbols is complete.
To build an animation using animation symbols in Fireworks:
1Create an animation symbol, either by creating a symbol from scratch or by converting an
existing object into a symbol. For more information, see “Creating animation symbols” on
page 310.
2Use the Property inspector or the Animate dialog box to enter settings for the animation
symbol. You can set the degree and direction of movement, scaling, opacity (fading in or out),
and angle and direction of rotation. For more information, see “Editing animation symbols”
on page 311.
Note: Degree and direction of movement options are found only in the Animate dialog box.
3Use the Frame Delay controls in the Frames panel to set the speed of the animated motion. For
more information, see “Setting the frame delay” on page 314.

Chapter 14310
4Optimize the document as an animated GIF. For more information, see “Optimizing an
animation” on page 321.
5Export the document as an Animated GIF or SWF, or save it as a Fireworks PNG and import
it into Macromedia Flash for further editing. For more information, see “Animation export
formats” on page 322.
Working with animation symbols
Animation symbols perform the action in your Fireworks file like actors in a movie. For example,
in an animation of three geese flying across the sky, each goose is a cast member.
An animation symbol can be any object you create or import, and you can have many symbols in
one file. Each symbol has its own properties and animates independently. So you can create
symbols that move across the screen while others fade or shrink.
You do not need to use symbols for every aspect of your animation. However, using symbols and
instances for graphics that appear in multiple frames will keep your animation file size smaller, in
addition to the other advantages discussed in this chapter.
You can change animation symbol properties at any time using the Animate dialog box or the
Property inspector. You can also edit symbol artwork in the Symbol Editor. The Symbol Editor
lets you edit your symbol without affecting the rest of the document. You can also change a
symbol’s motion by moving its motion path.
Since animation symbols are automatically placed in the library, you can reuse them to create
other animations.
Creating animation symbols
Once you have created an animation symbol, you can set properties that determine the number of
frames in the animation and the type of action, such as scaling or rotation. By default, a new
animation symbol has five frames, each with a delay time of 0.07 seconds.
To create an animation symbol:
1Choose Edit > Insert > New Symbol.
2In the Symbol Properties dialog box, enter a name for the new symbol.
3Choose Animation and click OK.
4In the Symbol Editor, use the drawing or text tools to create a new object.
You can draw either vector or bitmap objects.
5Close the Symbol Editor window.
Fireworks places the symbol in the library and a copy in the center of the document.
You can add new frames to the symbol using the Frames slider in the Property inspector.
Choose Window > Properties to open the Property inspector, if it’s not already open.
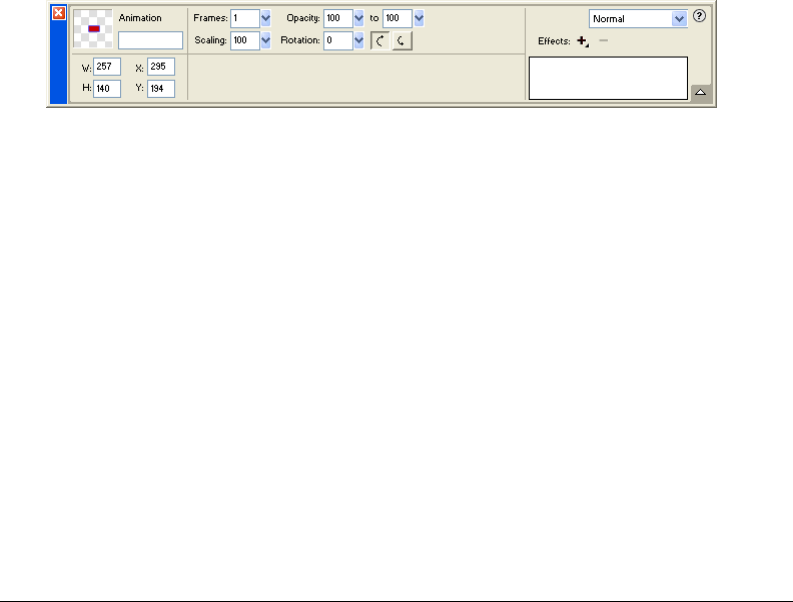
Creating Animation 311
To convert an object to an animation symbol:
1Select the object.
2Choose Modify > Animation > Animate selection.
3Enter the desired settings in the dialog box. For more information on settings, see “Editing
animation symbols” on page 311.
Animation controls appear on the object’s bounding box and a copy of the symbol is added
to the library.
Editing animation symbols
You can manipulate the properties of animation symbols to make your website come alive. You
can change a variety of properties in a symbol, from the animation speed to the opacity and
rotation. By manipulating these properties, you can make a symbol appear to rotate, speed up,
fade in and out, or any combination of these.
A key property for any animation symbol is its number of frames. This property sets how many
steps it takes the symbol to complete its animation. When you set the number of frames for a
symbol, Fireworks automatically adds the required number of frames to the document to
complete the action. If the symbol requires more frames than currently exist in the animation,
Fireworks asks if you want to add extra frames.
Changing animation properties
You can change animation properties using either the Animate dialog box or the Property inspector.
Animation symbol properties in the Property inspector
You can edit any of the following properties for an animation symbol:
Frames is the number of frames you want to include in the animation. Although the slider only
lets you set a maximum of 250, you can enter any number you wish in the Frames text box. The
default is 5.
Movement is the distance, in pixels, that you want each object to move. This option is available
only in the Animate dialog box. Values range from 0 to 250 pixels, and the default is 72.
Movement is linear, and there are no keyframes (unlike in Macromedia Flash and Director).
Direction is the direction, in degrees, in which you want the object to move. Values range from 0
to 360 degrees. This option is available only in the Animate dialog box.
You can also change Movement and Direction values by dragging the object’s animation handles
(see “Editing symbol motion paths” on page 313).
Scaling is the percent change in size from start to finish. Values range from 0 to 250, and the
default is 100%. To scale an object from 0 to 100%, the original object must be very small; vector
objects are recommended.
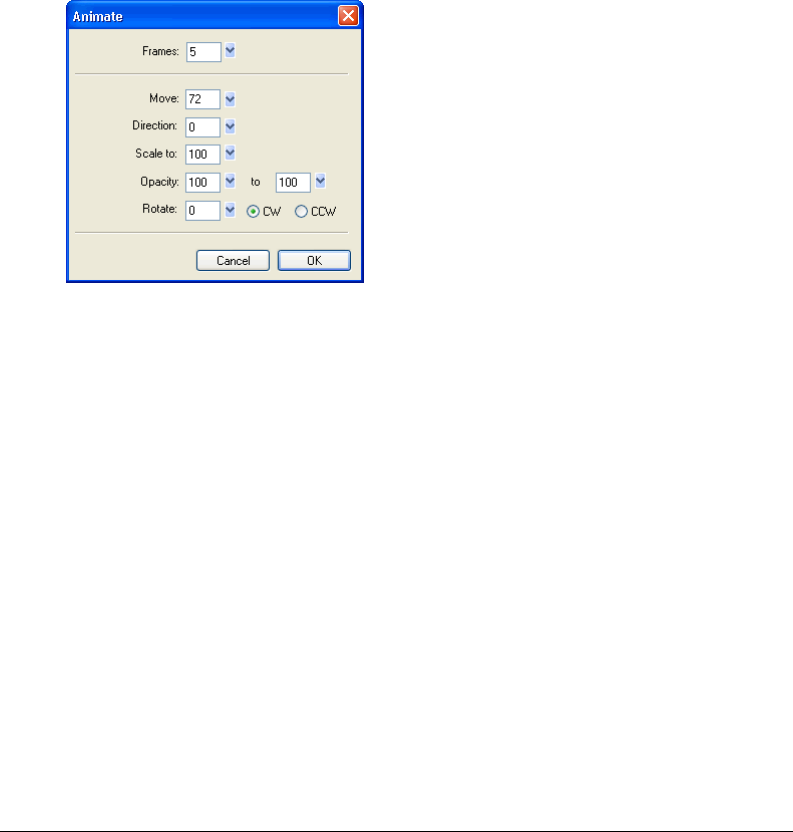
Chapter 14312
Opacity is the degree of fading in or out from start to finish. Values range from 0 to 100, and the
default is 100%. Creating a fade in/fade out requires two instances of the same symbol—one to
play the fade in, the other to play the fade out.
Rotation is the amount, in degrees, that the symbol rotates from start to finish. Values range from
0 to 360 degrees. You can enter higher values for more than one rotation. The default is 0 degrees.
CW and CCW indicate the direction in which the object rotates. CW indicates clockwise and
CCW indicates counterclockwise rotation.
To change animation symbol properties:
1Select an animation symbol.
2Choose Modify > Animation > Settings to open the Animate dialog box or Window >
Properties to open the Property inspector if it is not already open.
3Change the desired properties.
Removing animations
You can remove animations either by deleting the animation symbol from the library or by
removing the animation from the symbol.
To remove a symbol from the library:
1In the Library panel, select the animation symbol you want to remove.
2Drag the symbol to the trash can icon in the lower right corner.
To remove the animation from a selected animation symbol:
Choose Modify > Animation > Remove Animation.
The symbol becomes a graphic symbol and is no longer animated. If you later convert the symbol
back into an animation symbol, the previous animation settings return.
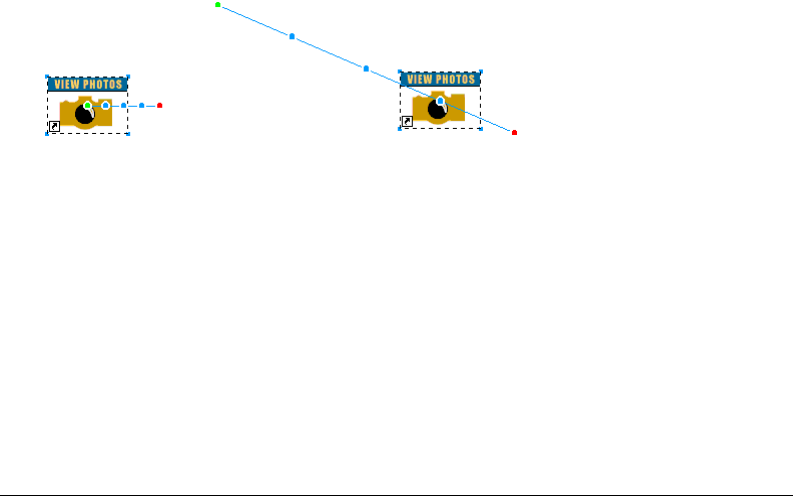
Creating Animation 313
Editing symbol graphics
You can change the graphic your symbol is based on as well as its properties. You edit symbol graphics
in the Symbol Editor. The Symbol Editor lets you use any of the drawing, text, or color tools to edit
the graphic. While you’re working in the Symbol Editor, only the selected symbol is affected.
Since the symbol is a library item, if you change the appearance of one of its instances, all the
other instances change as well.
To change a selected symbol’s graphic attributes:
1Do one of the following to open the Symbol Editor:
•Double-click the symbol object.
•Choose Modify > Symbol > Edit Symbol.
•Click the Edit button in the Animate dialog box.
2Modify the animation symbol and change any text, strokes, fills, and effects as appropriate.
3Close the Symbol Editor.
Editing symbol motion paths
When you select an animation symbol, it has a unique bounding box and a motion path attached
that indicates the direction in which the symbol moves.
The green dot on the motion path indicates the starting point, while the red dot shows the end
point. The blue points on the path represent frames. For example, a symbol with five frames
would have one green dot, three blue dots, and one red dot on its path. The position of the object
on the path indicates the current frame. So if the object appears at the third dot, Frame 3 is the
current frame.
You can change the direction of the motion by changing the angle of the path.
To change movement or direction:
Drag one of the symbol’s animation start or end handles to a new location. The green point
indicates the starting point; the red indicates the ending point.
Shift-drag to constrain the direction of movement to 45-degree increments.
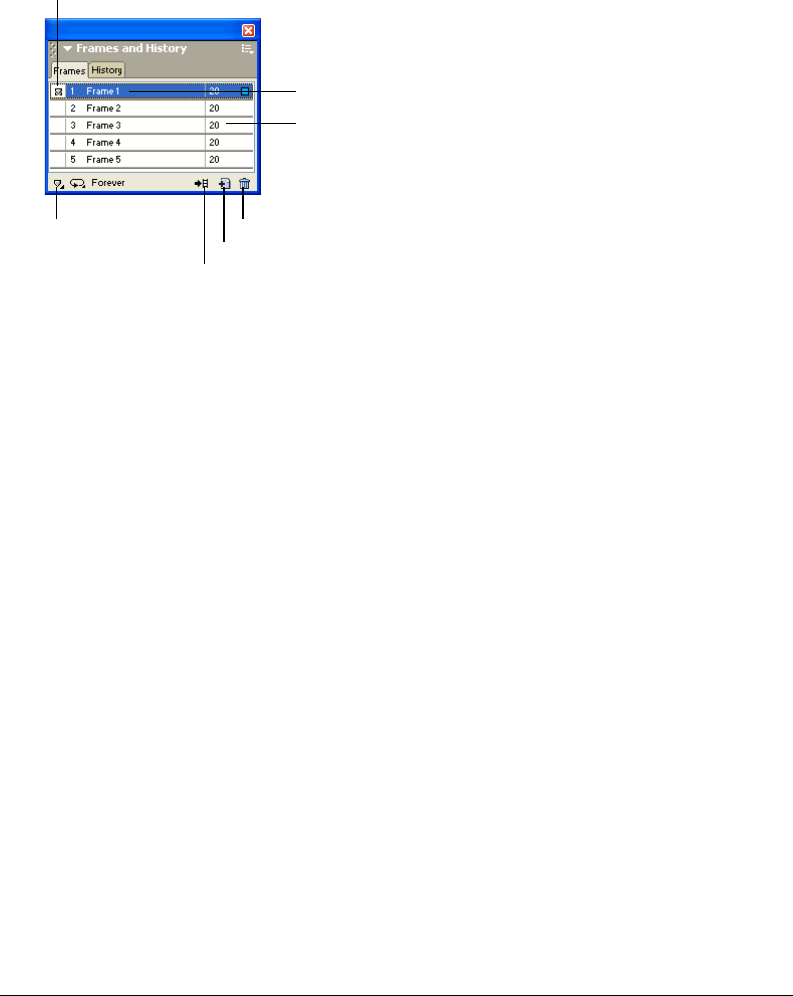
Chapter 14314
Working with frames
You build animations by creating a number of frames. You can see the contents of each frame
using the Frames panel. The Frames panel is where you create and organize frames. You can name
the frames, reorganize them, manually set the timing of the animation, and move objects from
one frame to another.
Each frame also has a number of associated properties. By setting the frame delay or hiding a frame,
you can make your animation look the way you want during the building and editing process.
Setting the frame delay
The frame delay determines how long the current frame is displayed. It is specified in hundredths
of a second. For example, a setting of 50 displays the frame for half a second, while a setting of
300 displays it for three seconds.
To set the frame delay value:
1Select one or more frames:
•To select a contiguous range of frames, Shift-click the first and last frame names.
•To select a noncontiguous range of frames, hold down Control (Windows) or Command
(Macintosh) and click each frame name.
2Do one of the following:
•Choose Properties from the Frames panel Options menu.
•Double-click the frame delay column.
The Frame Properties pop-up window appears.
3Enter a value for the frame delay.
4Press Enter, or click outside the panel to close the pop-up window.
Onion Skinning column
Onion Skinning
options
Distribute to Frames
New/Duplicate Frame
Delete Frame
Frame name
Frame Delay
column
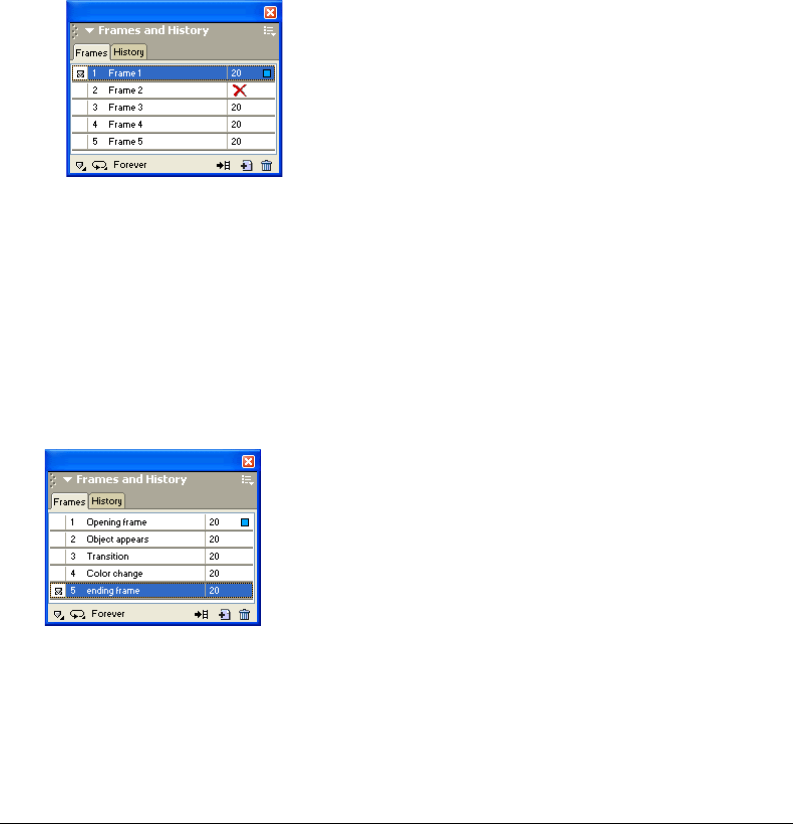
Creating Animation 315
Showing and hiding frames for playback
You can show or hide frames for playback. If a frame is hidden, it is not displayed during playback
and it is not exported.
To show or hide a frame:
1Do one of the following:
•Choose Properties from the Frames panel Options menu.
•Double-click the frame delay column.
The Frame Properties pop-up window appears.
2Deselect Include when Exporting.
A red X is displayed in place of the frame delay time.
3Press Enter or click outside the Frame Properties pop-up window to close it.
Naming animation frames
As you set up an animation, Fireworks creates the appropriate number of frames and displays
them in the Frames panel. The frames are named with a default of Frame 1, Frame 2, and so on.
When you move a frame in the panel, Fireworks renames each one to reflect the new order.
It’s a good idea to name your frames for easy reference and to keep track of them. That way you
always know which frame contains which part of the animation. When you rename a frame and
then move it, its name doesn’t change.
To change a frame’s name:
1In the Frames panel, double-click the frame’s name.
2In the pop-up text box, type a new name and press Enter.

Chapter 14316
Adding, moving, copying, and deleting frames
You can add, copy, delete, and change the order of frames in the Frames panel.
To add a new frame:
Click the New/Duplicate Frame button at the bottom of the Frames panel.
To add frames to a specific place in the sequence:
1Choose Add Frames from the Frames panel Options menu.
2Enter the number of frames to add.
3Choose where to insert the frames: before the current frame, after it, or at the beginning or
end. Then click OK.
To make a copy of a frame:
Drag an existing frame to the New/Duplicate Frame button at the bottom of the Frames panel.
To copy a selected frame and place it in a sequence:
1Choose Duplicate Frame from the Frames panel Options menu.
2Enter the number of duplicates to create for the selected frame, choose where the duplicate
frames are to be inserted, and click OK.
Duplicating a frame is useful when you want objects to reappear in another part of the animation.
To reorder frames:
Drag the frames one by one to a new location in the list.
To delete the selected frame, do one of the following:
•Click the Delete Frame button in the Frames panel.
•Drag the frame to the Delete Frame button.
•Choose Delete Frame from the Frames panel Options menu.
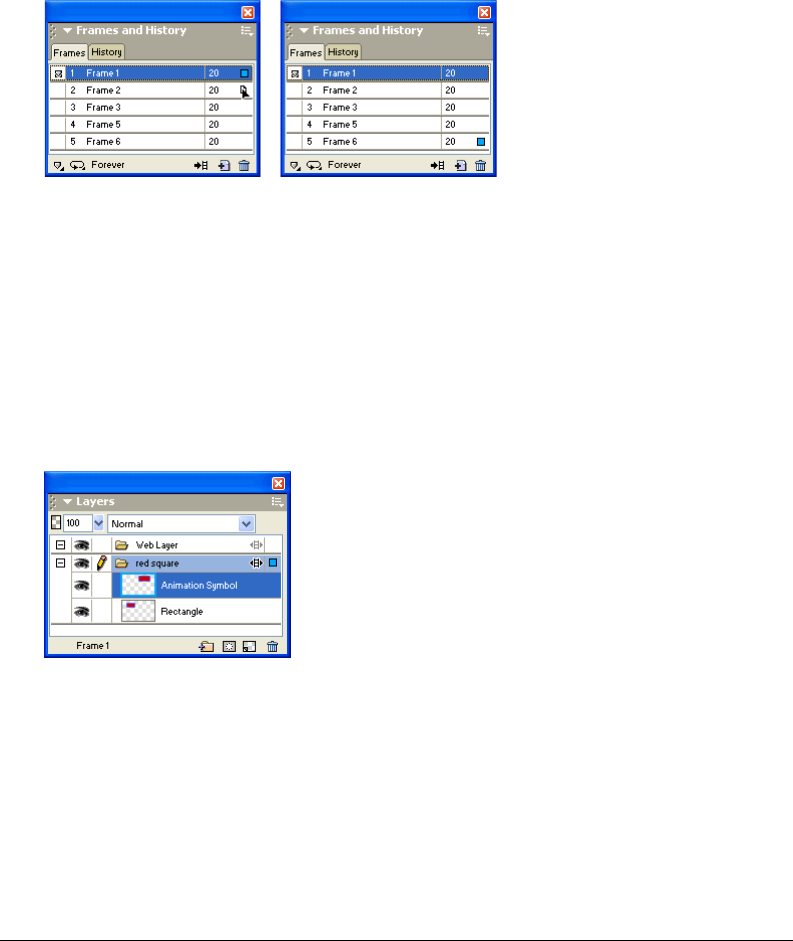
Creating Animation 317
Moving selected objects in the Frames panel
You can use the Frames panel to move objects to a different frame. Objects that appear in only a
single frame appear to vanish as the animation plays. You can move objects to make them appear
or disappear at different points in the movie.
To move a selected object to a different frame:
In the Frames panel, drag the selection indicator (the small blue square) at the right of the frame
delay time to the new frame.
Sharing layers across frames
Layers divide a Fireworks document into discrete planes, like separate tracing paper overlays. With
animations, you can use layers to organize objects that are part of the scenery or backdrop for the
animation. This gives you the convenience of being able to fix objects on one layer so that they don’t
affect the rest of your animation. For more information, see “Working with layers” on page 223.
If you want objects to appear throughout an animation, you can place them on a layer and then
use the Layers panel to share the layer across frames. When a layer is shared across frames, all
objects on that layer are visible in every frame.
You can edit objects on shared layers from any frame; those edits are reflected in all other frames.
In this example, the red square layer is shared across frames.
To share a layer across frames:
1Double-click the layer.
2Select Share Across Frames.
Note: All the contents in a shared layer appear in every frame.
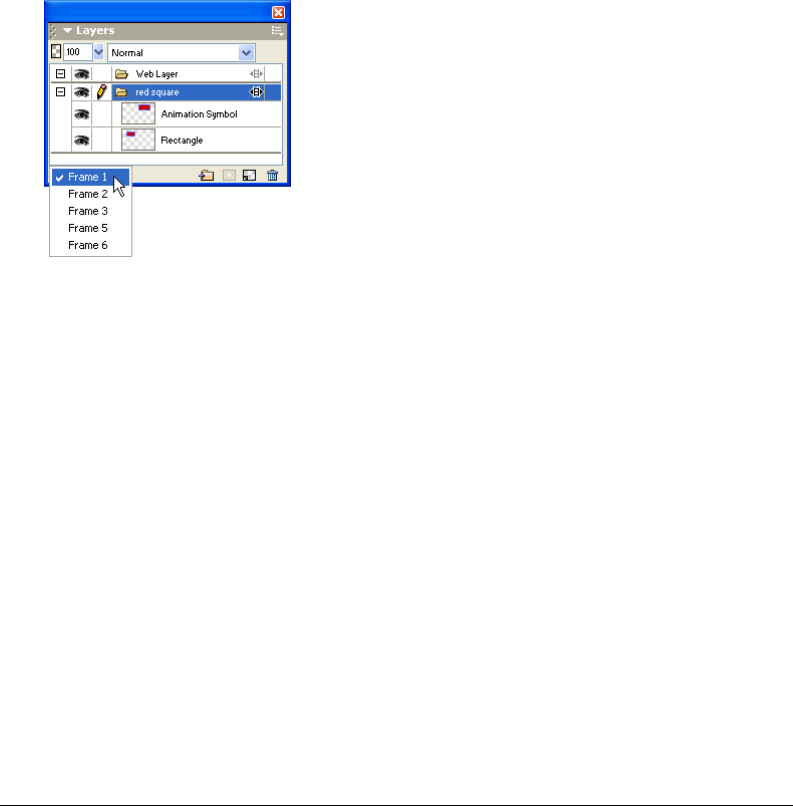
Chapter 14318
To disable sharing a particular layer across frames:
1Double-click the shared layer.
2Deselect Share Across Frames.
3Choose one of the following options for how to copy objects to frames:
•Leave the contents of the shared layer in the current frame only.
•Copy the contents of the shared layer to all frames.
Viewing objects within a specific frame
You can easily view objects within a specific frame using the Frame pop-up menu in the Layers panel.
To view objects within a specific frame:
Choose the desired frame from the Frame pop-up menu at the bottom of the Layers panel.
All objects within the selected frame are listed in the Layers panel and displayed on the canvas.
Using onion skinning
Onion skinning lets you view the contents of frames preceding and following the currently
selected frame. You can smoothly animate objects without having to flip back and forth through
them. The term onion skinning comes from a traditional animation technique of using thin,
translucent tracing paper to view animated sequences.
When onion skinning is turned on, objects in frames before or after the current frame are
dimmed so that you can distinguish them from objects in the current frame.
By default, Multi-Frame Editing is enabled, which means you can select and edit dimmed objects
in other frames without leaving the current frame. You can use the Select Behind tool to select
objects in frames in sequential order.
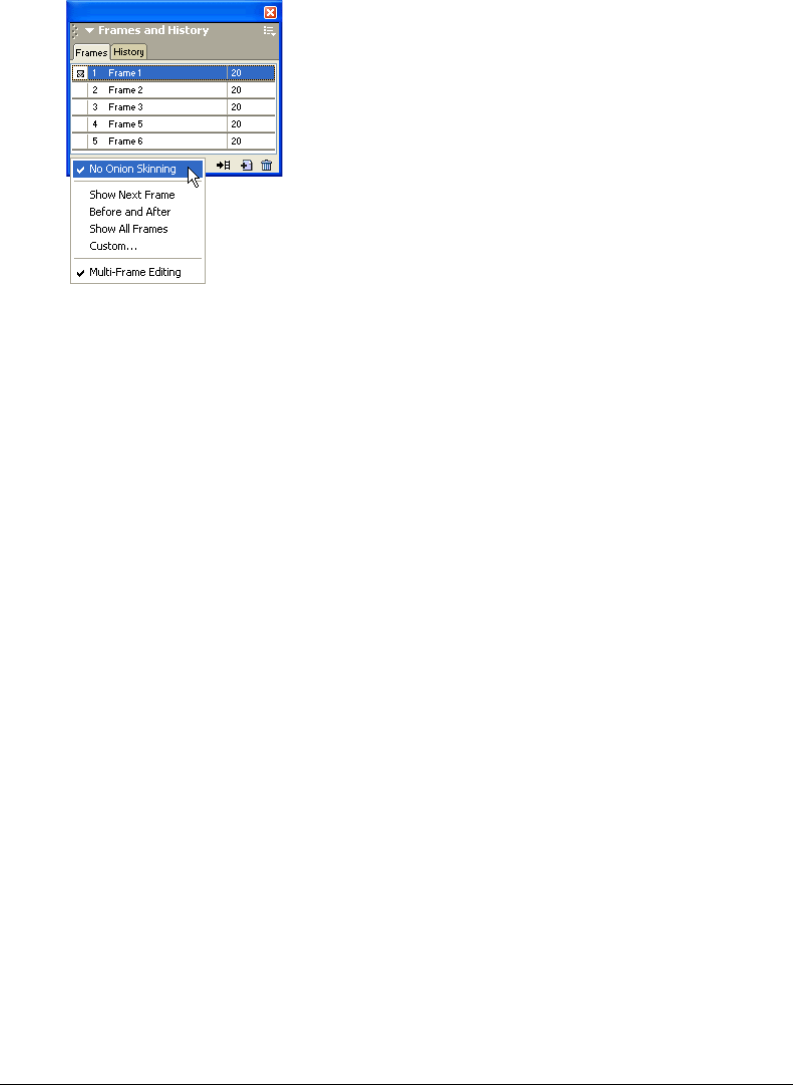
Creating Animation 319
To adjust the number of frames visible before and after the current frame:
1In the Frames panel, click the Onion Skinning button.
2Choose a display option:
•No Onion Skinning turns off onion skinning and displays only the contents of the current frame.
•Show Next Frame displays the contents of the current frame and the next frame.
•Before and After displays the contents of the current and adjacent frames.
•Show All Frames displays the contents of all frames.
•Custom sets a custom number of frames and controls the opacity of onion skinning.
•Multi-Frame Editing lets you select and edit all visible objects. Deselect this option to select
and edit only objects in the current frame.
Tweening
Tweening is a traditional animation term that describes the process in which a lead animator draws
only the keyframes (frames containing major changes) while assistants draw the frames in between.
In Fireworks, tweening blends two or more instances of the same symbol, creating interim
instances with interpolated attributes. Tweening is a manual process useful for more sophisticated
movement of an object across the canvas and for objects whose Live Effects change in each frame
of the animation.
For example, you can tween an object so that it seems to move along a linear path.
To tween instances:
1Select two or more instances of the same graphic symbol on the canvas. Do not select instances
of different symbols.
2Choose Modify > Symbol > Tween Instances.
3Enter the number of tween steps to be inserted between the original pair in the Tween
Instances dialog box.

Chapter 14320
4To distribute the tweened objects to separate frames, choose Distribute to Frames and click OK.
If you choose not to distribute the objects to separate frames, you can do it later by selecting all
instances and clicking the Distribute to Frames button in the Frames panel.
Note: In most cases, using animation symbols is preferable to tweening. For more information, see “Working with
animation symbols” on page 310.
Previewing an animation
You can preview an animation while you are working on it to check its progress. You can also
preview an animation after optimization to see how it will look in a web browser.
To preview an animation in the workspace:
Use the frame controls that appear at the bottom of the document window.
Frame controls
Keep the following in mind when previewing animations:
•To set how long each frame appears in the document window, enter frame delay settings in the
Frames panel.
•Frames excluded from the export do not appear when previewing.
•Previewing the animation in the Original view displays the full-resolution source graphic, not
the optimized preview used for the exported file.
To preview an animation in the Preview window:
1Click the Preview tab at the top of the document window.
2Use the frame controls.
Note: Previewing animations in 2-Up or 4-Up view is not recommended.
To preview an animation in a web browser:
Choose File > Preview in Browser, and choose a browser from the submenu.
Note: Animated GIF must be selected as the Export file format in the Optimize panel, or no motion will be visible
when previewing the document in your browser. This is required even if you plan to import your animation into Flash
as a SWF or Fireworks PNG file.
Exporting your animation
Once you have set up the symbols and frames that make up your animation, you are ready to
export the file as an animation. Before you export the files, you first need to enter a few settings to
make your animation load more easily and play more smoothly. You can set playback settings like
looping and transparency and then use optimization to make your exported file smaller and easier
to download.
Note: If you plan to import your animation into Macromedia Flash for further editing, you do not need to export it.
Flash MX can directly import Fireworks PNG source files. See “Working with Macromedia Flash MX” on page 375.
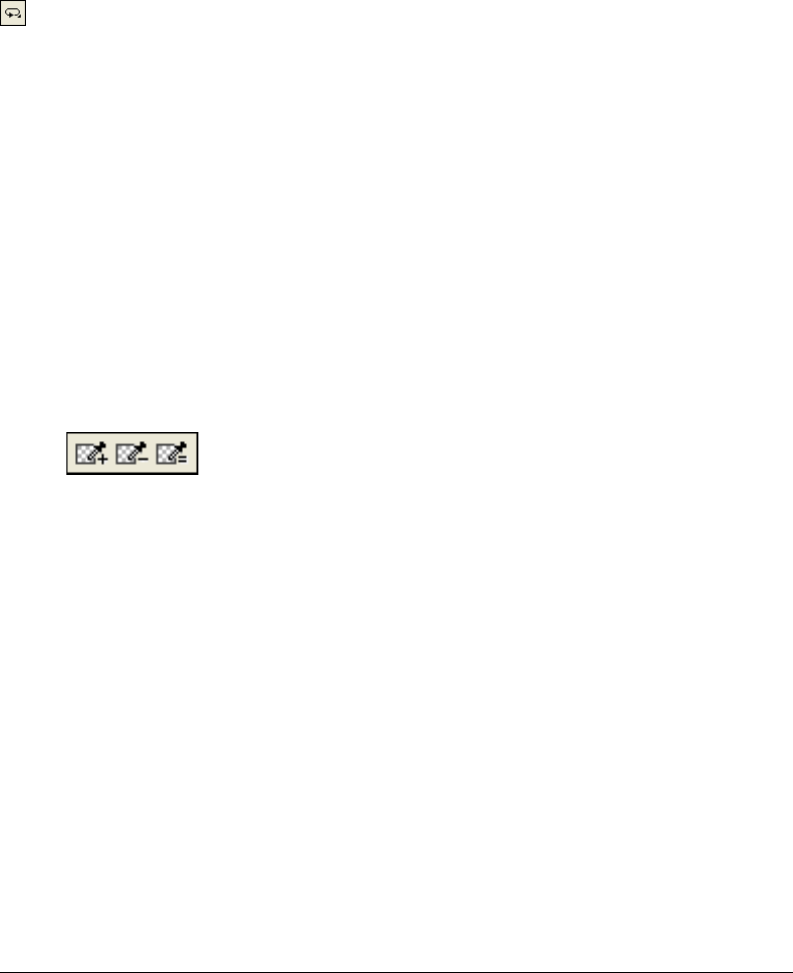
Creating Animation 321
Setting the animation repetition
The Loop setting in the Frames panel determines how many times the animation repeats. This
feature loops frames over and over so you can minimize the number of frames needed to build
the animation.
To set the selected animation to repeat:
1Choose Window > Frames to display the Frames panel.
2Click the GIF Animation Looping button at the bottom of the panel.
3Choose the number of times to repeat the animation after the first time.
If you choose 4, for example, the animation plays five times in all. Forever repeats the
animation continuously.
Setting transparency
As part of the optimization process, you can set one or more colors within an animated GIF to
display as transparent in a web browser. This is useful when you want a web page background
color or image to show through the animation.
To display a color as transparent in a web browser:
1Choose Window > Optimize if the Optimize panel is not visible.
2From the Transparency pop-up menu in the Optimize panel, choose either Index Transparency
or Alpha Transparency. For a description of these options, see “Making areas transparent” on
page 340.
3Use the transparency tools in the Optimize panel to select colors for transparency.
Optimizing an animation
Optimization compresses your file into the smallest package for fast loading and exporting,
making viewing time much quicker on your website.
To optimize an animation:
1If you plan to export your animation as an animated GIF, choose Animated GIF as the Export
file format in the Optimize panel.
Choose Window > Optimize if the panel is not visible.
2Set the Palette, Dither, or Transparency options. For more information on optimizing options,
see “Optimizing GIFs, PNGs, TIFFs, BMPs, and PICTs” on page 333.
3In the Frames panel, set the frame delay. For more information, see “Setting the frame delay”
on page 314.

Chapter 14322
Animation export formats
After you create and optimize an animation, it is ready to export.
Animated GIFs give the best results for clip art and cartoonlike graphics. For information about
exporting animated GIFs, see “Exporting an animation” on page 349.
You can export the animation as a Flash SWF file, and then import it into Macromedia Flash
MX. Or you can skip the export step and import your Fireworks PNG source file directly into
Flash MX. This option gives you the most control over how your animation is imported. You can
import all layers and frames of your animation if desired, and then further edit them within Flash.
For more information, see “Working with Macromedia Flash MX” on page 375.
You can also export frames or layers from your animations as multiple files. This can be useful
when you have many symbols on different layers for the same object. For example, you can export
a banner ad as multiple files if each letter of a company name is animated in a graphic. Each letter
is separate from the others. For more information about exporting layers or frames to multiple
files, see “Exporting frames or layers” on page 350.
Working with existing animations
You can use an existing animated GIF file as part of your Fireworks animation. There are two
ways of using the file: you can import the GIF into an existing Fireworks file, or you can open the
GIF as a new file.
When you import an animated GIF, Fireworks converts it to an animation symbol and places it in
the currently selected frame. If the animation has more frames than the current movie, you can
choose to automatically add more frames.
Imported GIFs lose their original frame delay settings and assume the frame delay of the current
document. Since the imported file is an animation symbol, you can apply additional motion to it.
For example, you can import an animation of a man walking in place and then apply direction
and motion properties to have the man walk across the screen.
When you open an animated GIF in Fireworks, a new file is created and each frame in the GIF is
placed in a separate frame. Although the GIF is not an animation symbol, it does retain all the
frame delay settings from the original file.
Once the file is imported, you need to set its file format to Animated GIF in order to export the
motion from Fireworks.
To import an animated GIF:
1Choose File > Import.
2Locate the file and click Open.
3Click Yes to add additional frames to your animation.
If you click Cancel, only the first frame of the animated GIF is displayed. Although the whole
document is imported, you must add additional frames to view it.
To open an animated GIF:
Choose File > Open and locate the GIF file.

Creating Animation 323
Using multiple files as one animation
Fireworks can create an animation based on a group of image files. For example, you can create a
banner ad based on several existing graphics by opening each graphic and placing it in a separate
frame in the same document.
To open multiple files as an animation:
1Choose File > Open.
2Shift-click to select multiple files.
3Select Open as Animation and click OK.
Fireworks opens the files in a new single document, placing each file in a separate frame in the
order in which you selected it.

Chapter 14324

325
CHAPTER 15
Optimizing and Exporting
The ultimate goal in web graphic design is to create great-looking images that download as fast as
possible. To do that, you must select a file format with the best compression for your image while
maintaining as much quality as possible. This balancing act is optimization—finding the right
mix of color, compression, and quality.
Exporting graphics from Macromedia Fireworks MX is a two-step process:
•First, you prepare a document or individual sliced graphics for export by choosing
optimization settings and comparing previews to determine an acceptable balance between
quality and file size.
•Then, you export the document or individual sliced graphics using export settings suitable for
their destination on the web or elsewhere.
If you are new to optimizing and exporting web graphics, you can use the Export Wizard. The
wizard guides you through the export process and suggests settings. It also displays the Export
Preview, where you can optimize a document as part of the export process.
If you are comfortable with the tasks of optimizing and exporting graphics, you’ll want to use the
other tools available in Fireworks for optimizing and exporting. For optimizing, you use the
Optimize panel and the preview tabs in the document window. They offer you greater control over
the optimization process. For exporting, you use the Export dialog box or the Quick Export button.
The Quick Export button makes exporting graphics for use in other applications easy by
automatically setting the appropriate options in the Export dialog box for you. If you use
Fireworks with other applications, the Quick Export button can simplify your design workflow.
About optimizing
Optimizing graphics in Fireworks involves doing the following:
•Choosing the best file format. Each file format has a different method of compressing color
information. Choosing the appropriate format for certain types of graphics can greatly
reduce file size.
•Setting format-specific options. Each graphic file format has a unique set of options. You can
use options such as color depth to reduce file size. Some graphic formats such as GIF and
JPEG also have options for controlling image compression.
•Adjusting the colors in the graphic (for 8-bit file formats only). You can limit colors by
confining the image to a specific set of colors called a color palette. Then you trim unused
colors from the color palette. Fewer colors in the palette means fewer colors in the image,
which results in a smaller file size for paletted image file types.
You should experiment with all optimization controls to find the best balance of quality and size.
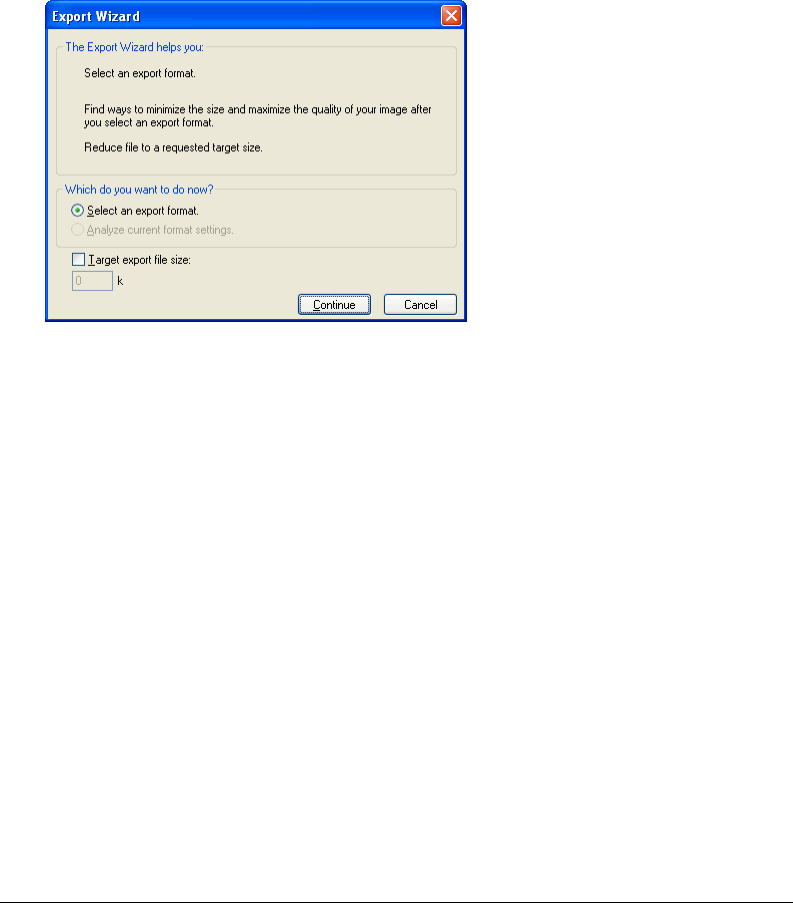
Chapter 15326
Using the Export Wizard
You can use the Export Wizard if you are new to optimizing and exporting web graphics. Using
the Export Wizard, you can easily export graphics without understanding the details of
optimizing and exporting.
The Export Wizard takes you step by step through the optimization and export process. Answer
questions about the file destination and intended use, and the Export Wizard suggests file type
and optimization settings.
If you prefer to optimize to a target file size, the Export Wizard optimizes the exported file to fit
within the size constraint you set.
Export Wizard
Once you are more comfortable with optimizing and exporting, you’ll want to use the Optimize
panel and the Preview tab in the document window to optimize graphics. They are more
convenient than the Export Wizard and offer more optimization control for users who are
familiar with the optimization process. After you optimize graphics in this manner, you must
perform an additional step to export the graphics. For more information, see “Optimizing in the
workspace” on page 328 and “Exporting from Fireworks” on page 346.
To export a document using the Export Wizard:
1Choose File > Export Wizard.
2Answer any questions that appear and click Continue in each panel.
Tip: Choose Target Export File Size in the first panel to optimize to a maximum file size.
Fireworks makes recommendations about file formats.
3Click Exit.
The Export Preview opens with recommended export options. For more information, see the
next section.
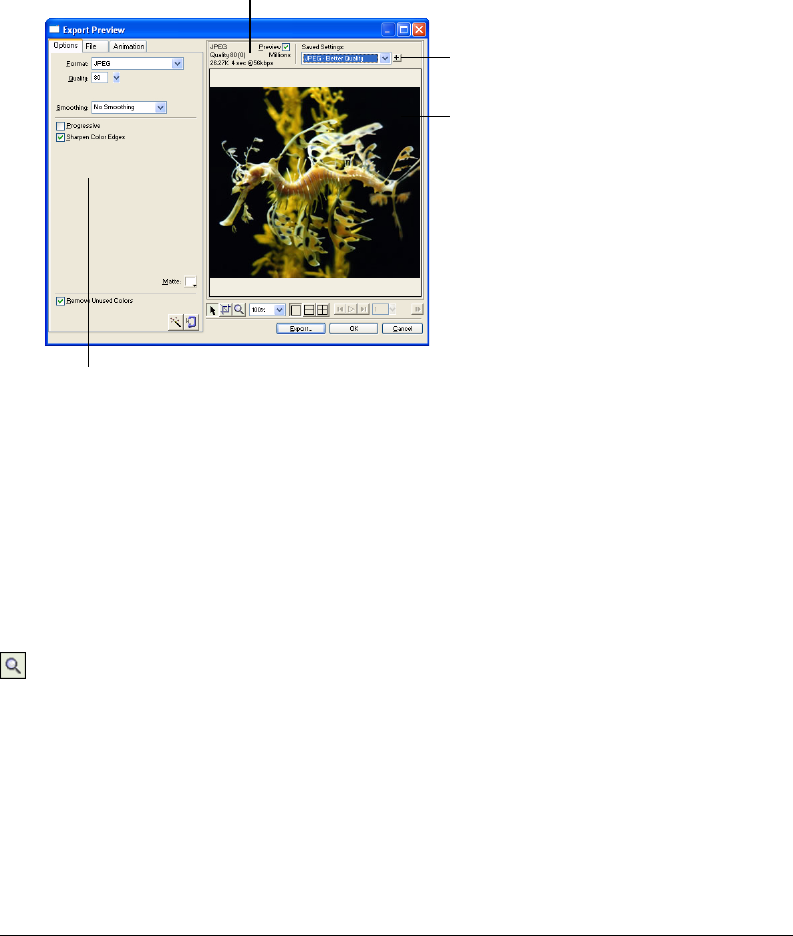
Optimizing and Exporting 327
Using Export Preview
The Export Preview displays recommended optimization and export options for the
current document.
Note: Export Preview was used in early versions of Fireworks to simultaneously optimize and export graphics. You
can still open the Export Preview through the Export Wizard or by choosing File > Export Preview.
The preview area of the Export Preview displays the document or graphic exactly as it will be
exported and estimates file size and download time with the current export settings.
You can use split views to compare various settings to find the smallest file size that maintains an
acceptable level of quality. You can also constrain the file size using the Optimize to Size wizard.
When you export animated GIFs or JavaScript rollovers, the estimated file size represents the total
size across all frames.
Note: To increase redraw speed of the Export Preview, deselect Preview. To stop the redraw of the preview area
when changing settings, press Esc.
To export using Export Preview:
1Choose File > Export Preview to open the Export Preview, if it isn’t already open.
2Use the Zoom button at the bottom of the dialog box to zoom in or out in the preview. Click
this button to magnify the preview. Alt-click (Windows) or Option-click (Macintosh) the
button to zoom out.
Saved set of options for the selected export
Save export settings
in the active view
Preview chosen
export settings
File size and download time estimates
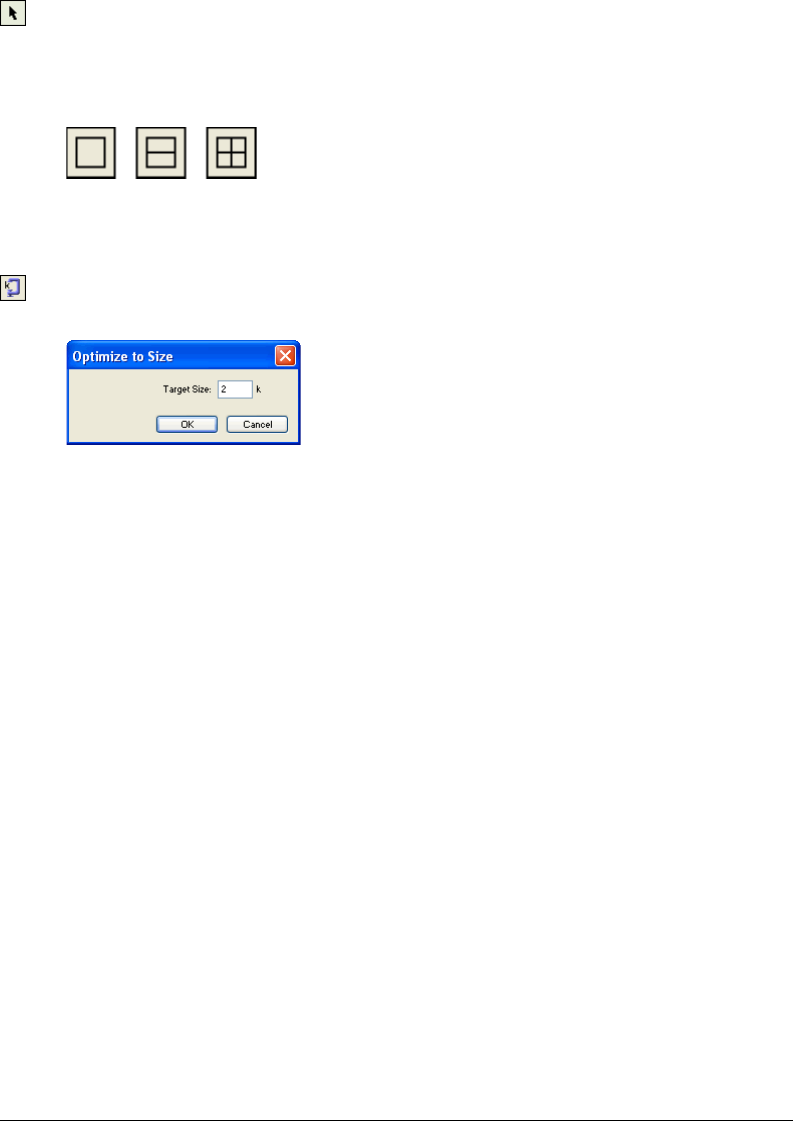
Chapter 15328
3Do one of the following to pan the preview area:
•Click the Pointer button at the bottom of the dialog box and drag in the preview.
•Hold down the Spacebar when the Zoom pointer is active and drag in the preview.
4Click a split-view button to divide the preview area into two or four previews to compare
optimization settings.
Each preview window can display a preview of the graphic with different export settings.
Note: When you zoom or pan while multiple views are open, all views zoom and pan simultaneously.
5Click the Optimize to Size Wizard button to optimize a graphic based on a target file size.
Enter a file size in kilobytes and click OK.
The Optimize to Size Wizard attempts to match the requested file size using these methods:
•Adjusting JPEG quality
•Modifying JPEG smoothing
•Altering the number of colors in 8-bit images
•Changing dither settings in 8-bit images
•Enabling or disabling optimization settings
6Click Export when you have finished changing optimization settings.
7In the Export dialog box, type a name for the file, choose a destination, set any other options
if desired, and click Save.
For more information about the options in the Export dialog box, see “Exporting from
Fireworks” on page 346.
Optimizing in the workspace
Exporting graphics for use on the web is a two-step process: optimizing, then exporting.
Optimizing graphics ensures they possess the right mix of color, compression, and quality. After
you finalize a graphic’s optimization settings, the graphic is ready for export.
You don’t have to use the Export Wizard and Export Preview in Fireworks if you’re comfortable
optimizing and exporting graphics. Fireworks has optimization and export features in the
workspace that give you greater control over how files are exported:
•The Optimize panel contains the key controls for optimizing. For 8-bit file formats, it also
contains a color table that displays the colors in the current export color palette.
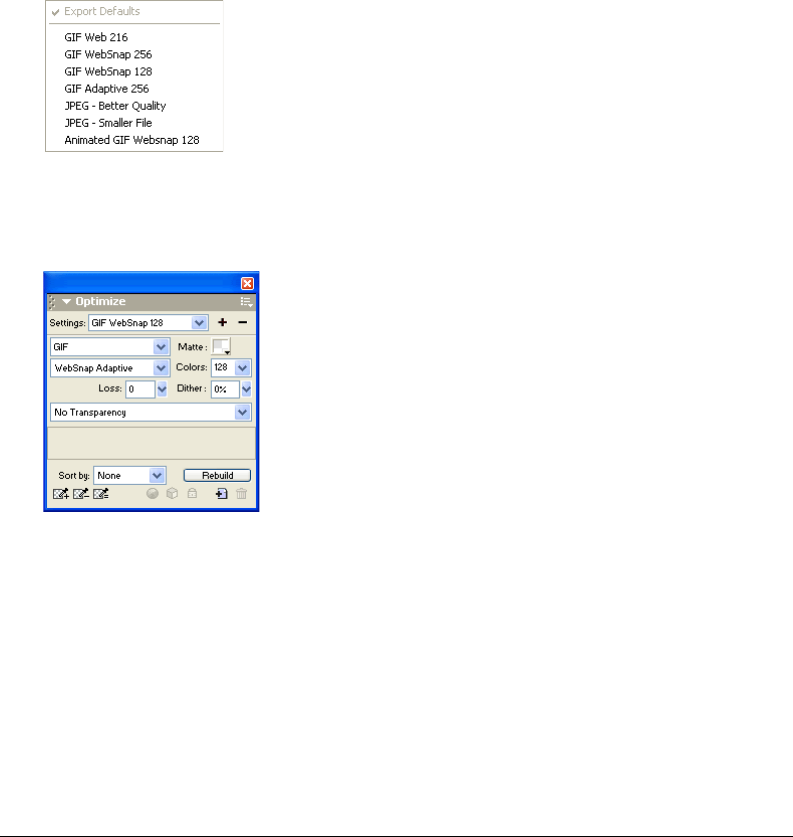
Optimizing and Exporting 329
•When a slice is selected, the Property inspector has a Slice Export Settings pop-up menu from
which you can choose preset or saved optimization settings.
•The Preview tabs show how the exported graphic would appear given the current optimization
settings.
You can optimize the whole document the same way, or select individual slices or selected areas of
a JPEG and assign different optimization settings for each.
Using preset optimization settings
You can choose from common optimization settings in the Property inspector or the Optimize
panel to quickly set a file format and apply several format-specific settings. When you choose an
option from the Settings pop-up menu, the rest of the options in the Optimize panel will
automatically be set for you. You can further adjust each option individually if desired.
If you need more custom optimization control than the presets offer, you can create custom
optimization settings in the Optimize panel. You can also modify a graphic’s color palette using
the color table in the Optimize panel.
To choose a preset optimization:
Choose a preset from the Settings pop-up menu in the Property inspector or the Optimize panel:
GIF Web 216 forces all colors to websafe colors. The color palette contains up to 216 colors (see
“Optimizing GIFs, PNGs, TIFFs, BMPs, and PICTs” on page 333).
GIF WebSnap 256 converts non-websafe colors to their closest websafe color. The color palette
contains up to a maximum of 256 colors.
GIF WebSnap 128 converts non-websafe colors to their closest websafe color. The color palette
contains up to 128 colors.
Chapter 15330
GIF Adaptive 256 is a color palette that contains only the actual colors used in the graphic. The
color palette contains up to a maximum of 256 colors.
JPEG – Better Quality sets quality to 80 and smoothing to 0, resulting in a high-quality but
larger graphic.
JPEG – Smaller File sets quality to 60 and smoothing to 2, resulting in a graphic less than half the
size of a Better Quality JPEG but with reduced quality.
Animated GIF Websnap 128 sets the file format to Animated GIF and converts non-websafe
colors to their closest websafe color. The color palette contains up to 128 colors.
For more information about file types, see “Choosing a file type” on page 333.
To specify custom optimization settings:
1In the Optimize panel, choose an option from the Export File Format pop-up menu.
2Set format-specific options, such as color depth, dither, and quality.
3Choose other optimization settings from the Optimize panel Options menu, as necessary.
For more information about specific optimization controls, see the appropriate sections within
“Optimizing in the workspace” on page 328.
4You can name and save custom optimization settings. Names of saved settings are added to the
preset optimization settings in the Settings pop-up menu in the Optimize panel and the
Property inspector when slice properties, button properties, or document properties are
displayed. For more information, see “Saving and reusing optimization settings” on page 346.
To modify the color palette:
Choose Window > Optimize to view and edit a document’s color palette.
For more information, see “Optimizing GIFs, PNGs, TIFFs, BMPs, and PICTs” on page 333.
To optimize individual slices:
1Click a slice to select it. Shift-click to select more than one slice.
2Optimize the selected slices using the Optimize panel.
Previewing and comparing optimization settings
The preview tabs display the graphic as it would appear in a web browser, based on optimization
settings. You can preview rollover and navigation behaviors, as well as animation.
The Original tab and the preview tabs are at the upper left corner of the document window.
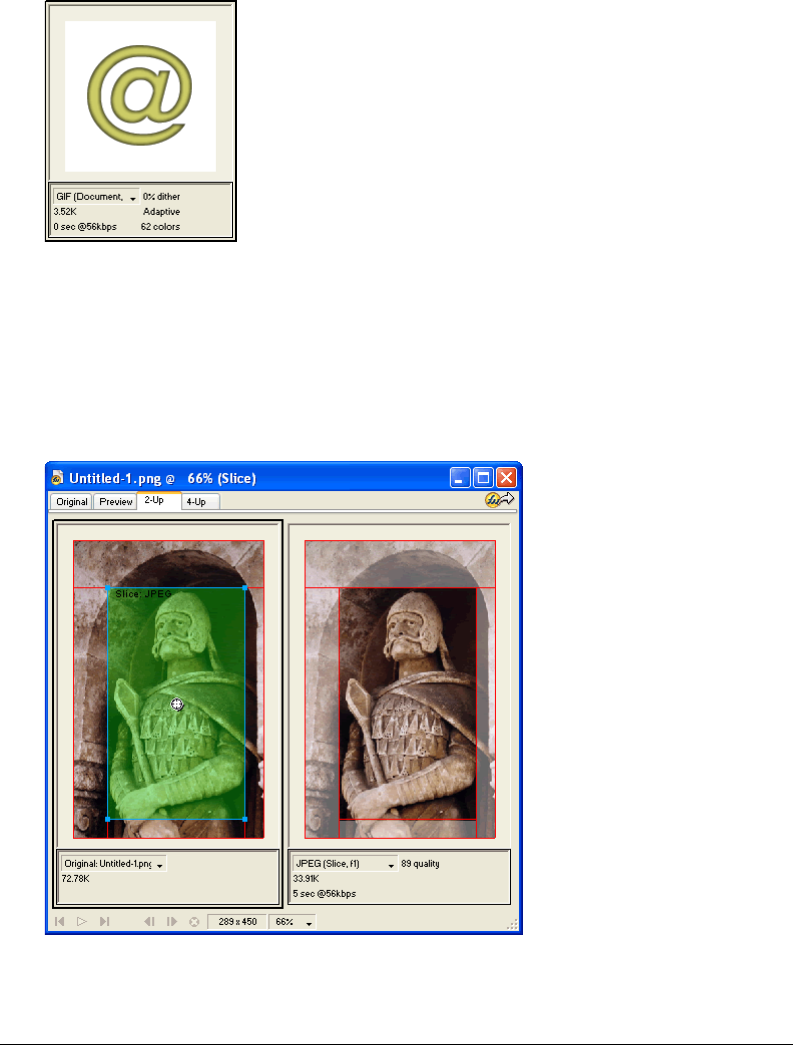
Optimizing and Exporting 331
The preview tabs display a document’s total size, estimated download time, and file format. The
estimated download time is the average amount of time it would take to download all the
document’s slices and frames on a 56K modem. The 2-Up and 4-Up previews display additional
information that varies depending on the file type selected.
A preview with GIF selected as the file type
You can use the Optimize panel to optimize a document while viewing a preview as if you were in
Original view. You can optimize the entire document at once or only selected slices. The slice
overlay helps you differentiate the slices currently being optimized from the rest of the document.
The slice overlay displays areas not currently being optimized with a dimmed, transparent white
tint. You can turn the slice overlay on or off.
When you optimize a selected slice, the portions not being optimized are dimmed.
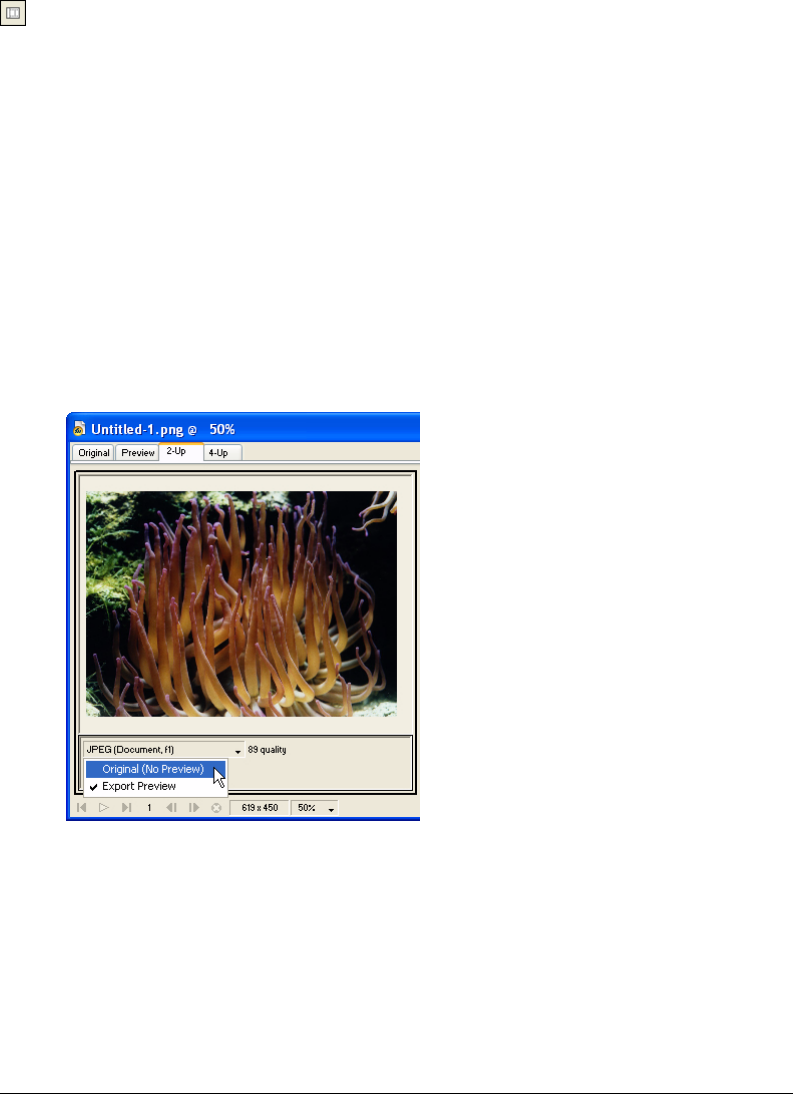
Chapter 15332
To preview a graphic based on the current optimization settings:
Click the Preview tab in the upper left corner of the document window.
Note: Click Hide Slices in the Tools panel to hide slices and slice guides while previewing.
To compare views with different optimization settings:
1Click the 2-Up or 4-Up tab in the upper left of the document window.
2Click one of the split-view previews to select it.
3Enter settings in the Optimize panel.
4Select the other previews and specify different optimization settings for each preview to
compare them.
When you choose 2-Up or 4-Up preview, the first view displays the original Fireworks PNG
document so that you can compare it with optimized versions. You can switch this view with
another optimized version.
To switch any optimized view with the original view in the 2-Up or 4-Up preview:
1Select an optimized view.
2Choose Original (No Preview) from the Preview pop-up menu at the bottom of the preview.
To switch the original view with an optimized view in the 2-Up or 4-Up preview:
1Select the view containing the original.
2Choose Export Preview from the Preview pop-up menu.
To hide or show the slice overlay:
Choose View > Slice Overlay.

Optimizing and Exporting 333
Choosing a file type
You should base your choice of file format upon the design and use of your graphic. A graphic’s
appearance can vary from one format to another, especially when different types of compression
are used. In addition, only certain graphic file types are accepted by most web browsers. Still other
file types are ideal for print publishing or use in multimedia applications.
The following file types are available:
GIF, or Graphics Interchange Format, is a popular web graphic format. GIFs contain a maximum
of 256 colors. GIFs can also contain a transparent area and multiple frames for animation. Images
with areas of solid color compress best when exported as GIFs. A GIF is usually ideal for cartoons,
logos, graphics with transparent areas, and animations.
JPEG was developed by the Joint Photographic Experts Group specifically for photographic or
high-color images. JPEG supports millions of colors (24-bit). The JPEG format is best for
scanned photographs, images using textures, images with gradient color transitions, and any
images that require more than 256 colors.
PNG, or Portable Network Graphic, is a versatile web graphic format. However, not all web
browsers can view PNG graphics. A PNG can support up to 32-bit color, can contain
transparency or an alpha channel, and can be progressive. PNG is the native file format for
Fireworks. However, Fireworks PNG files contain additional application-specific information
that is not stored in an exported PNG file or in files created in other applications.
WBMP, or Wireless Bitmap, is a graphic format created for mobile computing devices such as cell
phones and PDAs. This format is used on Wireless Application Protocol (WAP) pages. WBMP is
a 1-bit format, so only two colors are visible: black and white.
TIFF, or Tagged Image File Format, is a graphic format used for storing bitmap images. TIFFs are
most commonly used in print publishing. Many multimedia applications also accept imported
TIFF graphics.
BMP, the Microsoft Windows graphic file format, is a common file format used to display bitmap
images. BMPs are used primarily on the Windows operating system. Many applications can
import BMP images.
PICT, developed by Apple Computer, is a graphic file format commonly used on Macintosh
operating systems. Most Mac applications are capable of importing PICT images.
Optimizing GIFs, PNGs, TIFFs, BMPs, and PICTs
Each graphic file format in Fireworks has a set of optimization options. For the most part, only
the 8-bit file types such as GIF, PNG 8, TIFF 8, BMP 8, and PICT 8 offer a significant amount
of optimization control.
Note: JPEGs are an exception. For more on JPEG optimization controls, see “Optimizing JPEGs” on page 342.
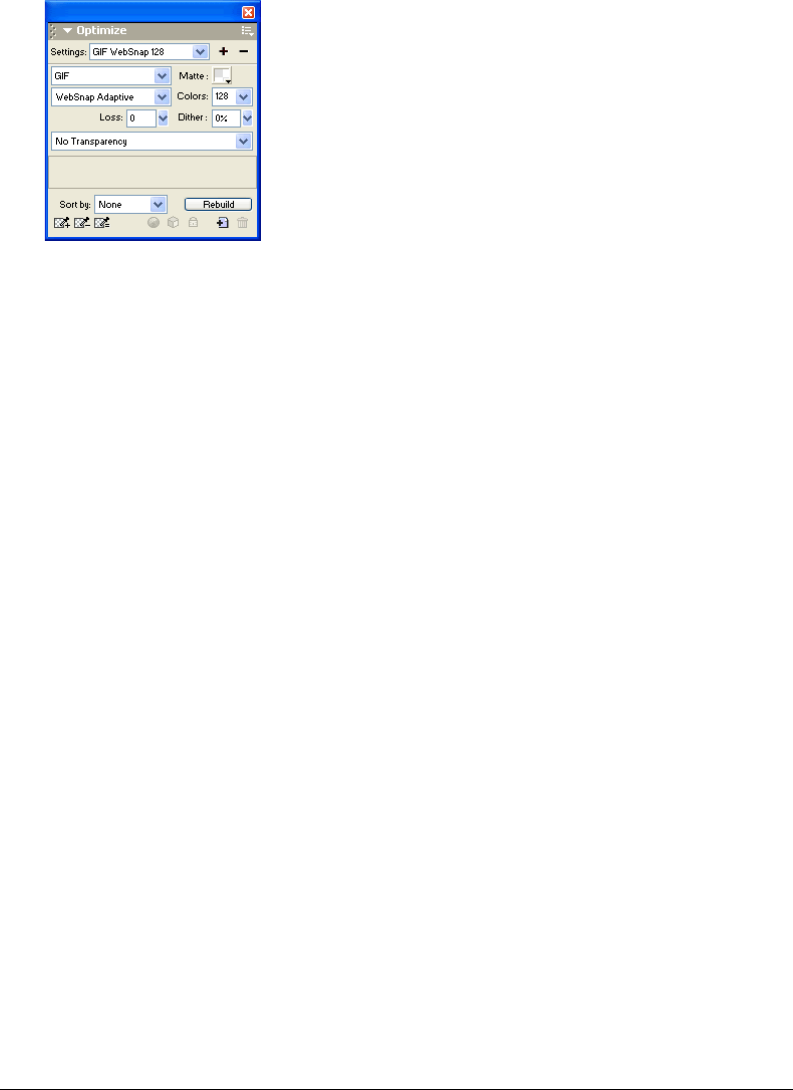
Chapter 15334
Fireworks optimization settings are similar for all 8-bit graphic file formats. For web file formats
such as GIF and PNG, you can also specify the amount of compression you want on the graphic.
You can optimize 8-bit file types by adjusting their color palettes. Fewer colors in the palette
means fewer colors in the image, resulting in a smaller file size. The drawback to reducing colors
is that it can also diminish image quality.
As you experiment with different optimization settings, you can use the 2-Up and 4-Up previews
to test and compare a graphic’s appearance and estimated file size. For more information on using
the preview tabs, see “Previewing and comparing optimization settings” on page 330.
Choosing a color palette
Exported GIFs and other 8-bit image formats contain a color palette. A color palette is a list of up
to 256 colors available to the file. Only colors defined in the color palette appear in the graphic;
however, some color palettes contain colors that are not in the graphic.
The following palettes are available in Fireworks:
Adaptive is a custom palette derived from the actual colors in the document. Adaptive palettes
most often produce the highest quality image.
WebSnap Adaptive is an adaptive palette in which colors that are close to websafe colors
are converted to the closest websafe color. Websafe colors are those that come from the
Web 216 palette.
Web 216 is a palette of the 216 colors common to both Windows and Macintosh computers.
This palette is often called a websafe or browser-safe palette because it produces fairly consistent
results in various web browsers on either platform when viewed on 8-bit monitors.
Exact contains the exact colors used in the image. Only images containing 256 or fewer colors may
use the Exact palette. If the image contains more than 256 colors, the palette switches to Adaptive.
System (Windows) and System (Macintosh) each contain the 256 colors defined by the Windows
or Macintosh platform standards, respectively.
Grayscale is a palette of 256 or fewer shades of gray. Choosing this palette converts the exported
image to grayscale.
Black and White is a two-color palette consisting only of black and white.
Uniform is a mathematical palette based on RGB pixel values.
Custom is a palette that has been modified or loaded from an external palette (ACT file) or a GIF file.
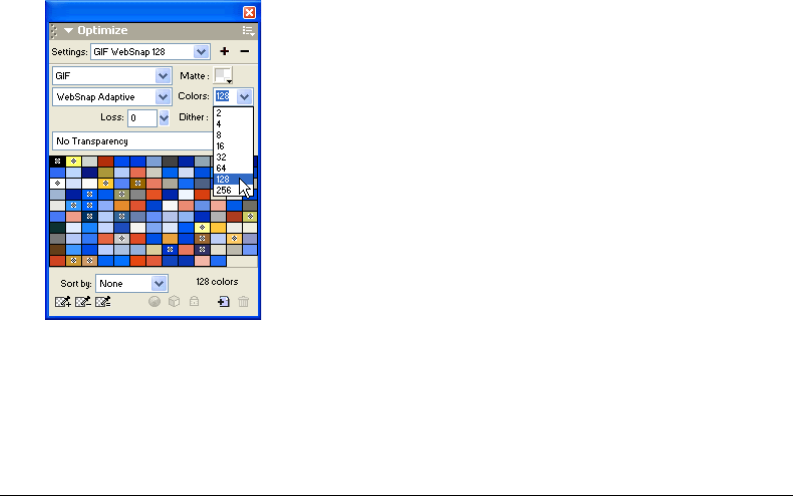
Optimizing and Exporting 335
Adjusting the color palette during optimization affects the colors in the exported image. You can
optimize and customize color palettes using the color table in the Optimize panel.
To choose a color palette:
Choose an option from the Indexed Palette pop-up menu in the Optimize panel.
To import a custom palette:
1Do one of the following:
•Choose Load Palette from the Optimize panel Options menu.
•Choose Custom from the Optimize panel Indexed Palette pop-up menu.
2Navigate to an ACT or GIF palette file and click Open.
Note: Windows users must choose GIF Files from the Files of Type pop-up menu in order to see files with a .gif
extension in the Open dialog box.
The colors from the ACT or GIF file are added to the color table in the Optimize panel.
Setting the color depth
Color depth is the number of colors in the exported graphic. You can make your files smaller by
reducing the number of colors they use. Reducing color depth discards some colors in the image,
beginning with those used least. Pixels containing discarded colors convert to the closest color
remaining in the palette. This can reduce the quality of the image.
Note: The color depth option is available only for GIFs and other 8-bit graphic file formats.
To choose a color depth:
Choose an option from the Colors pop-up menu in the Optimize panel or type a value in the text
box. You can choose from 2 to 256 colors.
Tip: The actual colors in the image could be lower than the maximum number of colors you choose. The number at
the bottom of the color table indicates the actual number of colors visible in the image. If no number is visible, you’ll
see a Rebuild button, which indicates you should rebuild the color palette. For more information, see “Viewing colors
in a palette” on page 337.

Chapter 15336
To choose a color depth beyond 256 colors:
Choose a 24- or 32-bit file format from the Export File Format pop-up menu in the Optimize panel.
Note: Higher color depths create larger exported files and are typically not ideal for web graphics. Only use
24- or 32-bit color depths when exporting photographic images with continuous tones or complex gradient
blends of colors. For high-color-depth graphics on the web, use JPEGs. For more information, see “Optimizing
JPEGs” on page 342.
Removing unused colors
Removing unused colors from an image before exporting makes its file size smaller.
Note: This option is available only for GIFs and other 8-bit graphic file formats.
To remove unused colors:
Choose Remove Unused Colors from the Optimize panel Options menu.
Deselect Remove Unused Colors to include all colors in the palette, including colors that are not
present in the exported image.
Dithering to approximate lost colors
Dithering approximates colors not in the current palette by alternating similarly colored pixels.
From a distance, the colors blend to create the appearance of the missing color. Dithering is
especially helpful when exporting images with complex blends or gradients or when exporting
photographic images to an 8-bit graphic file format such as GIF.
Dithering can greatly increase file size.
Note: The dithering option is available only for GIFs, other 8-bit graphic file formats, and WBMPs.
To dither a graphic:
Enter a percentage value in the Dither text box of the Optimize panel.
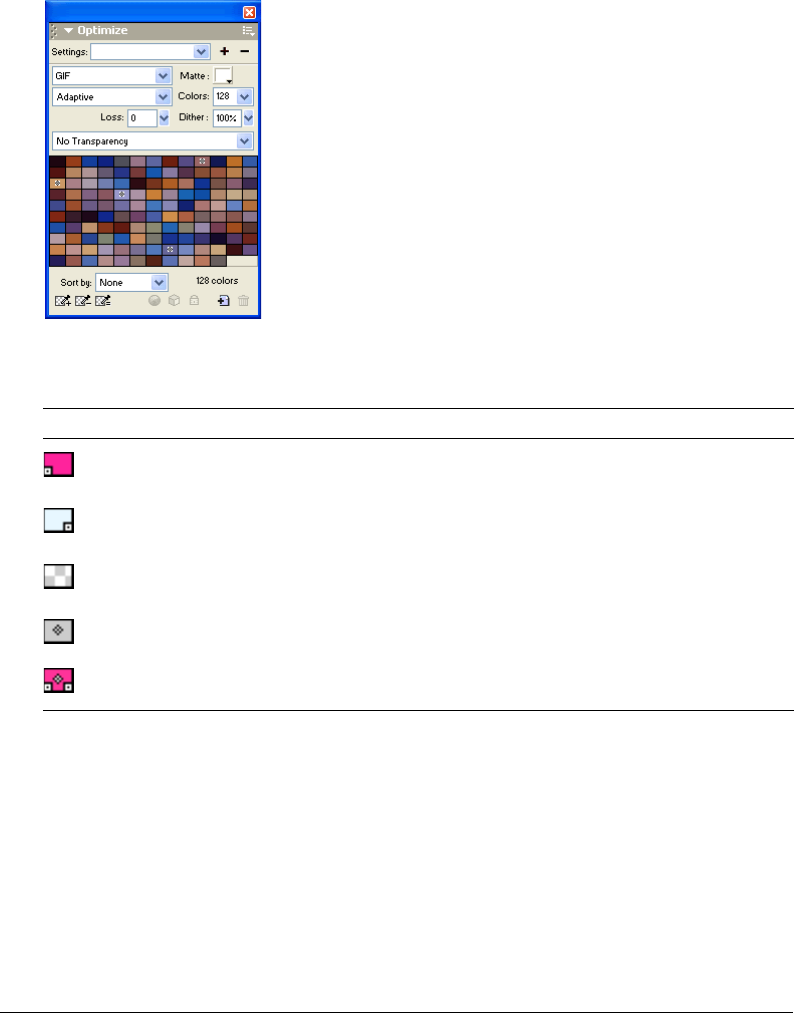
Optimizing and Exporting 337
Viewing colors in a palette
The color table in the Optimize panel displays colors in the current preview when you are
working in 8-bit color or less and lets you modify an image’s palette. The color table updates
automatically when you are in Preview mode. It appears empty if you are optimizing more than
one slice at a time or if you are not optimizing in an 8-bit format such as GIF.
Various small symbols appear on some color swatches, indicating certain characteristics of
individual colors, as follows:
If you edit the document, the color table may no longer show all the colors in the document.
When this occurs, you should rebuild the color table. A Rebuild button will appear at the bottom
of the Optimize panel when you need to rebuild the color table.
To rebuild the color table to reflect edits in the document:
Click Rebuild at the bottom of the Optimize panel.
When the table is rebuilt, the Rebuild button disappears, and the actual number of colors used in
the image is displayed in its place.
This symbol Indicates
The color has been edited, affecting only the exported document. This does not change the color
in the source document.
The color is locked.
The color is transparent.
The color is websafe.
The color has multiple attributes. In this case, the color is websafe, is locked, and has been edited.

Chapter 15338
To select a color:
Click the color in the Optimize panel color table.
To select multiple colors:
Control-click (Windows) or Command-click (Macintosh) the colors.
To select a range of colors:
1Click a color.
2Hold Shift and click the last color in the range you want to select.
To preview all the pixels in the document that contain a specific color:
1Click the Preview tab of the document window.
2Click and hold on a swatch in the Optimize panel color table.
The pixels that contain the selected swatch temporarily change to another highlight color until
you release the mouse button.
Note: When previewing pixels in the document using the 2-Up or 4-Up view, select a view other than the
Original view.
Locking colors in a palette
You can lock individual colors so that you cannot remove or change them when changing palettes
or when reducing the number of colors in a palette. If you switch to another palette after colors
have been locked, locked colors are added to the new palette.
To lock a selected color:
•Click the Lock button at the bottom of the Optimize panel.
To unlock a color:
1Select a locked color in the Optimize panel color table.
2Click the Lock button in the Optimize panel.
To unlock all colors:
Choose Unlock All Colors from the Optimize panel Options menu.
Editing colors in a palette
You can change a color in the current palette by editing it in the Optimize panel color table.
Editing a color replaces all instances of that color in the image to be exported. Editing does not
replace the color in the original image.
To edit a color:
1Do one of the following to open the system color picker:
•Select a color and click the Edit Color button at the bottom of the Optimize panel.
•Double-click a color in the color table.

Optimizing and Exporting 339
2Change the color using the system color picker.
The new color replaces every instance of the replaced color in the preview area.
Note: Right-click (Windows) or Control-click (Macintosh) a color in the palette to display a shortcut menu of edit
options for the color.
Using websafe colors
Websafe colors are colors that are common to both Macintosh and Windows platforms. These
colors are not dithered when viewed in a web browser on a computer display set to 256 colors.
Fireworks has several methods of applying and using websafe colors.
To force all colors to be websafe colors:
Choose Web 216 from the Indexed Palette pop-up menu in the Optimize panel.
To create an adaptive palette that favors websafe colors:
Choose the WebSnap Adaptive palette.
Non-websafe colors that are close to websafe colors are converted to the closest websafe color.
To force a color to its closest websafe equivalent:
1Select a color in the Optimize panel color table.
2Click the Snap to Web Safe button.
Changing colors to websafe in the Optimize panel affects only the exported version of the
image, not the actual image.
Saving palettes
You can save custom palettes as external palette files. You can use saved palettes with other
Fireworks documents or in other applications that support external palette files, such as
Macromedia FreeHand, Macromedia Flash, and Adobe Photoshop. Saved palette files have the
.act extension.
To save a custom color palette:
1Choose Save Palette from the Optimize panel Options menu.
2Type a name for the palette and choose a destination folder.
3Click Save.
You can load the saved palette file into the Swatches panel or Optimize panel for use when
exporting other documents.
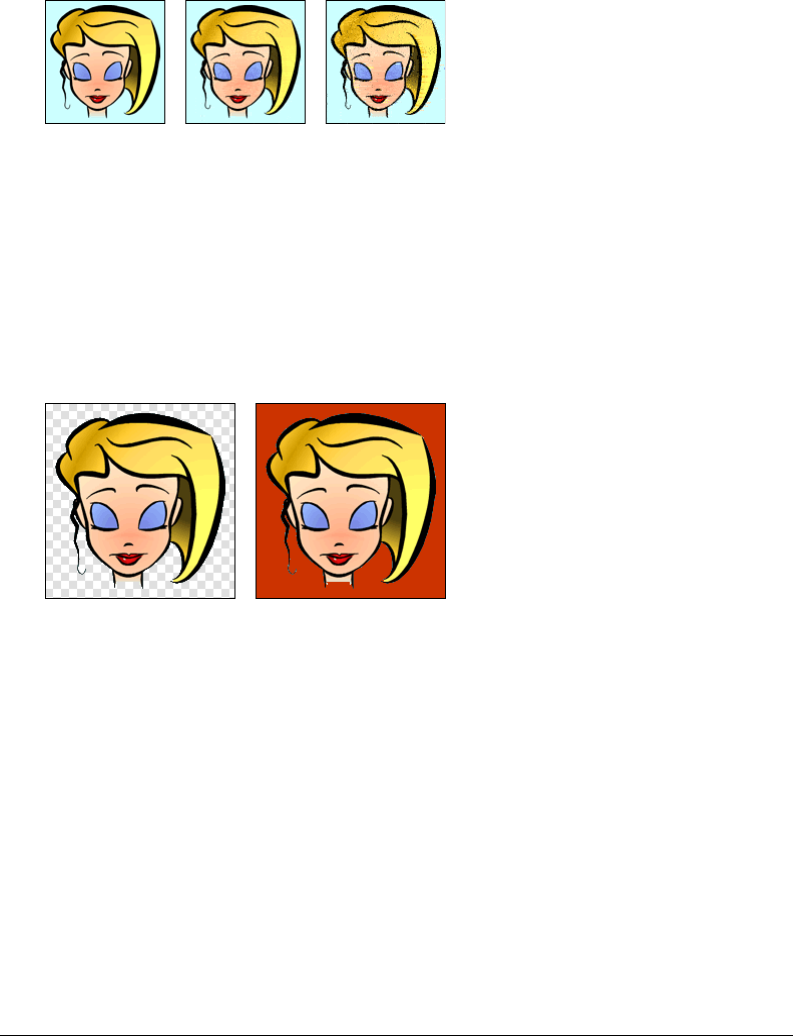
Chapter 15340
Adjusting compression
You can compress GIF files to make them even smaller than usual by changing their loss setting.
Higher loss settings can yield smaller files but lower image quality. A loss setting between 5 and
15 typically yields the best results.
Original GIF; loss value of 30; loss value of 100
To change a GIF’s compression:
Enter a Loss setting in the Optimize panel.
Making areas transparent
You can set transparent areas for GIFs and 8-bit PNGs so that in a web browser the background
of the web page is visible through those areas. In Fireworks, a gray-and-white checkerboard on the
preview tabs denotes transparent areas.
Optimized image preview in Fireworks; image exported with transparency and placed on a web page
with a colored background
Note: 32-bit PNGs automatically contain transparency, though you won’t see a transparency option for 32-bit
PNGs in the Optimize panel.
You should use index transparency when exporting GIF images that contain transparent areas.
With index transparency, you set specific colors to be transparent upon export. Index
transparency turns on or turns off pixels with specific color values. Because GIFs support index
transparency, it is the most common form of transparency used on the web.
Note: GIF images are exported without transparency by default in Fireworks. Although the canvas behind an image
or object appears transparent in Original view in Fireworks, this does not mean that the background for that image will
be transparent when you export it as a GIF for use on the web. You must choose Index Transparency before export.
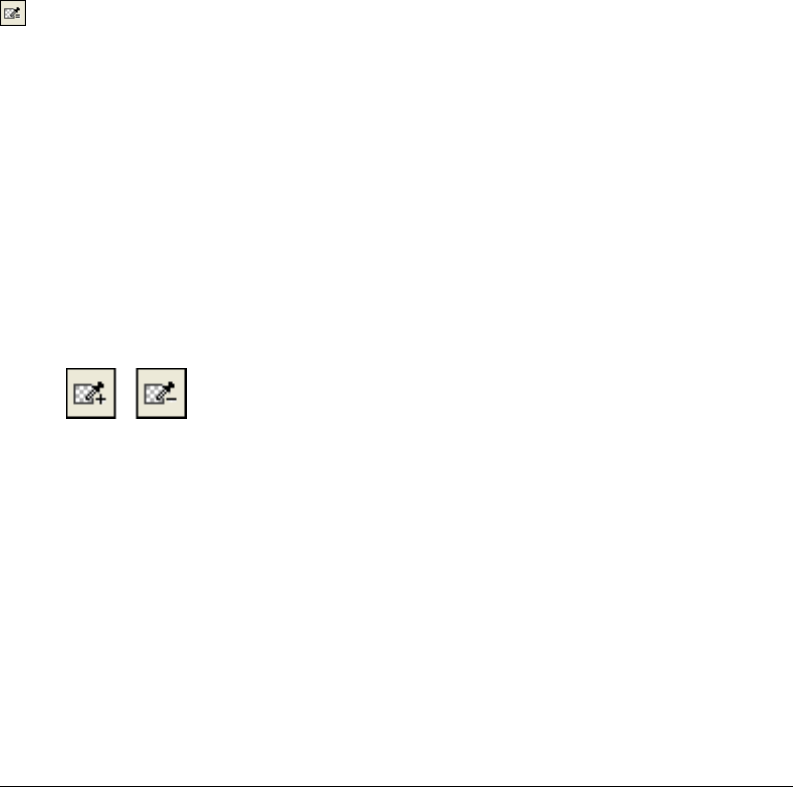
Optimizing and Exporting 341
You can also use alpha transparency, although it is not often used with web graphics because only
PNGs support it and most web browsers do not support PNG format. Alpha transparency is
often used in exported graphics that contain gradient transparency and semi-opaque pixels. Alpha
transparency also comes in handy if you are exporting files to Macromedia Flash or Director,
because both applications support this type of transparency.
Note: Setting colors to transparent affects only the exported version of the image, not the actual image. You can see
what the exported image will look like in a preview. For information about the preview tabs, see “Previewing and
comparing optimization settings” on page 330.
To select a color for transparency:
1Click the Preview, 2-Up, or 4-Up tab. On the 2-Up or 4-Up tab, click a view other than
the original.
2In the Optimize panel, choose Index Transparency from the Transparency pop-up menu at the
bottom of the panel.
The canvas color is made transparent in the preview.
3To choose a different color, click the Select Transparency Color button.
The pointer changes to an eyedropper.
4Do one of the following to choose the color to make transparent:
•Click a color swatch in the Optimize panel color table.
•Click a color in the document.
To add or remove transparent colors:
1Click the Preview, 2-Up, or 4-Up tab. On the 2-Up or 4-Up tab, click a view other
than the original.
Note: You can add or remove transparent colors in Original view but won’t be able to see your results until you
display a preview.
2In the Optimize panel, click the Add Color to Transparency or Remove Color from
Tran spare n c y but to n.
3Do one of the following to choose another color to make transparent or to remove from
transparency:
•Click a color swatch in the Optimize panel color table.
•Click a color in the preview.
To make an image background transparent:
1Click the Preview, 2-Up, or 4-Up tab. On the 2-Up or 4-Up tab, click a view other than
the original.
2Choose GIF as the file format in the Optimize panel, and choose Index Transparency from the
Transparency pop-up menu.
The canvas color is made transparent in the preview, and the graphic is ready for export.
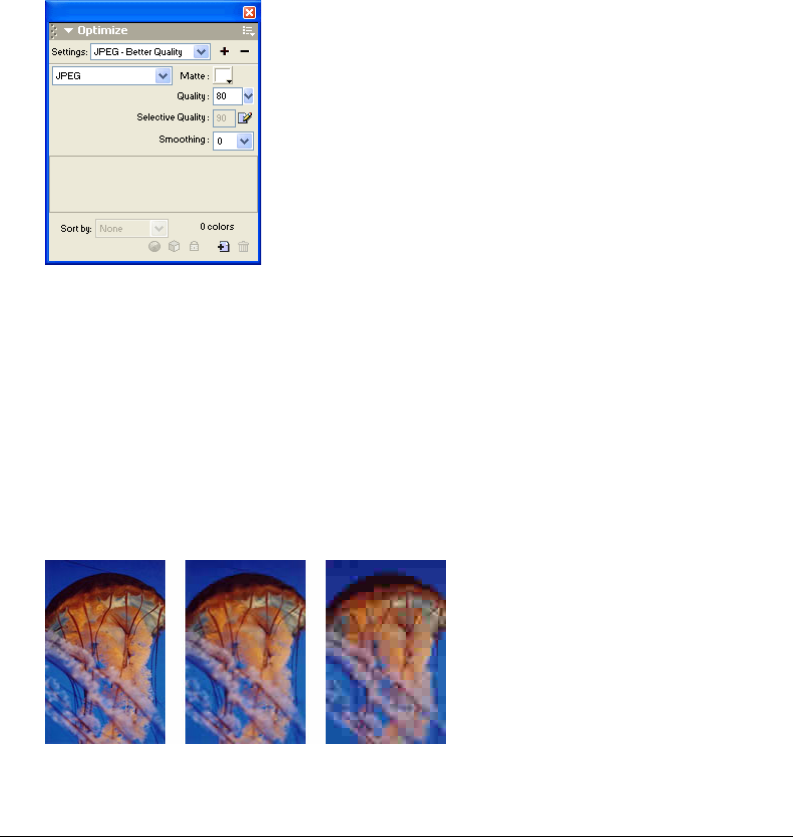
Chapter 15342
Interlacing: Downloading gradually
When viewed in a web browser, interlaced images appear gradually while they are downloading.
They display at a low resolution first and then transition to full resolution by the time the
download is complete.
Note: This option is available only for GIF and PNG file formats. You can get similar results with a JPEG by making it
progressive. For more information, see “Optimizing JPEGs” on page 342.
To make an exported GIF or PNG interlaced:
Choose Interlaced from the Optimize panel Options menu.
Optimizing JPEGs
Using the Optimize panel, you can optimize JPEGs by setting compression and smoothing options.
JPEGs are always saved in 24-bit color, so you can’t optimize a JPEG by editing its color palette.
The color table is empty when a JPEG image is selected.
As you experiment with different optimization settings, you can use the 2-Up and 4-Up previews
to test and compare a JPEG’s appearance and estimated file size. For more information on using
the preview tabs, see “Previewing and comparing optimization settings” on page 330.
Adjusting JPEG Quality
JPEG is a lossy format, which means that some image data is discarded when it is compressed,
reducing the quality of the final file. However, image data can sometimes be discarded with little
or no noticeable difference in quality.
Original image; Quality setting of 50; Quality setting of 20
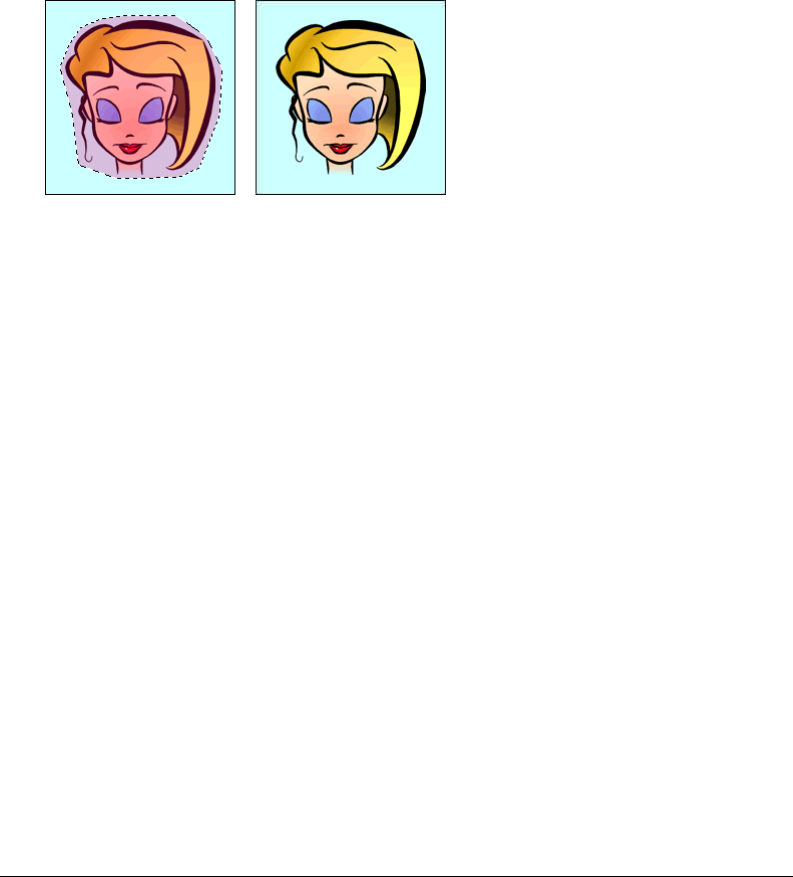
Optimizing and Exporting 343
To control how much quality is lost when compressing a JPEG file for export:
Adjust the quality with the Quality slider pop-up menu in the Optimize panel.
•A high percentage setting maintains image quality but compresses less, producing larger files.
•A low percentage setting yields a small file but produces a lower-quality image.
Selectively compressing areas of a JPEG
Selective JPEG compression lets you compress different areas of a JPEG at different levels. Areas
of particular interest in an image can be compressed at a high level. Areas of lesser significance,
such as backgrounds, can be compressed at a low level, reducing the overall size of the image while
retaining the quality of the more important areas.
The selected area in this image is being compressed at a quality level of 90, while the unselected area is
being compressed at a quality level of 50.
To compress selected areas of a JPEG:
1In Original view, select an area of the graphic for compression using one of the Marquee tools.
2Choose Modify > Selective JPEG > Save Selection as JPEG Mask.
3Choose JPEG from the Export File Format pop-up menu in the Optimize panel, if it’s not
already selected.
4Click the Edit Selective Quality Options button in the Optimize panel.
The Selective JPEG Settings dialog box opens.
5Choose Enable Selective Quality and enter a value in the text box.
Entering a low value compresses the Selective JPEG area more than the rest of the image.
Entering a high value compresses the Selective JPEG area less than the rest of the image.
6Change the Overlay Color for the Selective JPEG area if desired. This does not affect the output.
7Select Preserve Text Quality. All text items will automatically be exported at a higher level,
regardless of the Selective Quality value.
8Select Preserve Button Quality. All button symbols will automatically be exported at a higher level.
9Click OK.

Chapter 15344
To modify the selective JPEG compression area:
1Choose Modify > Selective JPEG > Restore JPEG Mask as Selection.
The selection is highlighted.
2Use the Marquee tool or another selection tool to make changes to the size of the area.
3Choose Modify > Selective JPEG > Save Selection as JPEG Mask.
4Change selective quality settings in the Optimize panel if desired.
Note: To undo a selection, choose Modify > Selective JPEG > Remove JPEG Mask.
Blurring or sharpening detail
You can set Smoothing in the Optimize panel to help decrease the file size of JPEGs. Smoothing
blurs hard edges, which do not compress well in JPEGs. Higher numbers produce more blurring
in the exported JPEG, typically creating smaller files. A smoothing setting of about 3 reduces the
size of the image while still maintaining reasonable quality.
To help preserve fine edges between two colors:
Choose Sharpen JPEG Edges from the Optimize panel Options menu.
Use Sharpen JPEG Edges when exporting JPEGs with text or fine detail to preserve the sharpness
of these areas. Choosing Sharpen JPEG Edges increases file size.
Using progressive JPEGs
Progressive JPEGs, such as interlaced GIFs and PNGs, are displayed at a low resolution initially
and then increase in quality as they download.
To export a progressive JPEG:
Choose Progressive JPEG from the Optimize panel Options menu.
Note: Some older bitmap-editing applications cannot open progressive JPEGs.
Matching a target background color
Anti-aliasing makes an object appear smoother by blending the color of an object into the
background on which it is placed. For example, if the object is black and the page on which it
rests is white, anti-aliasing adds several shades of gray to the pixels surrounding the object’s border
to make a smooth transition between the black and white.
By setting the Matte option in the Optimize panel, you can anti-alias objects that lie directly
above the canvas to the Matte color. This is useful when exporting graphics for placement on web
pages with colored backgrounds.
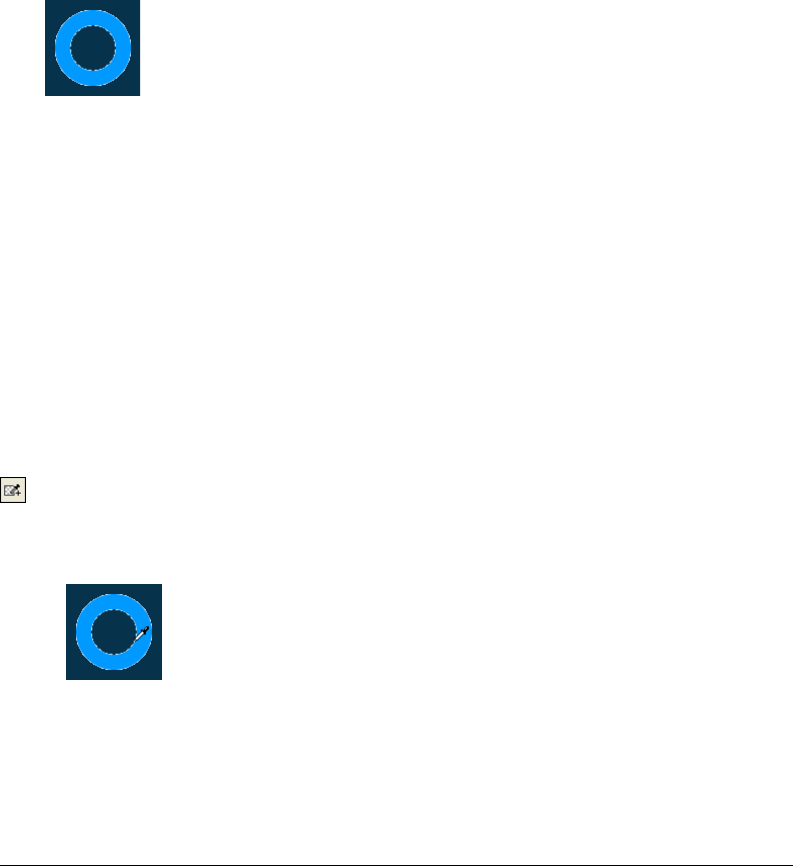
Optimizing and Exporting 345
To match a target background color:
In the Optimize panel, select a color from the Matte pop-up menu. Match it as closely as possible
to the target background color onto which the exported graphic will be placed.
Note: Anti-aliasing is applied only to soft-edged objects that lie directly on top of the canvas.
Removing halos
When you make the canvas color transparent on an image that was previously anti-aliased, the
pixels from the anti-aliasing remain. Then when you export the graphic and place it onto a web
page with a different background color, the perimeter pixels of the anti-aliased object may be
apparent on the web page’s background. These form a halo, which is especially noticeable on a
dark background.
You can easily prevent halos in native Fireworks PNG files and in imported Photoshop files. For
exported files such as GIFs, however, you must remove the halo manually.
To prevent halos in native Fireworks PNG files and imported Photoshop files, do one of the
following:
•Set the Canvas Color in the Property inspector or the Matte Color in the Optimize panel to
the color of the target web page background.
•With the object you want to export selected, choose Hard from the Edge pop-up menu in the
Property inspector.
To remove a halo manually from a GIF or other exported graphic file:
1With the file open in Fireworks, click the Preview, 2-Up, or 4-Up tab. On the 2-Up or 4-Up
tab, click a view other than the original.
2In the Optimize panel, choose Index Transparency from the Transparency pop-up menu.
3Click the Add Color to Transparency button and click a pixel in the halo.
All pixels of the same color are removed in the preview.
4If the halo is still there, repeat step 3 until the halo is gone.

Chapter 15346
Saving and reusing optimization settings
You can save custom optimization settings for future use in optimization or batch processing.
Saving custom presets stores the following information:
•Settings and color table in the Optimize panel
•Frame delay settings chosen in the Frames panel (for animations only)
To save optimization settings as a preset:
1Click the Save Current Settings button on the Optimize panel.
2Type a name for the optimization preset and click OK.
Saved optimization settings appear at the bottom of the Settings pop-up menu in the Optimize
panel and in the Property inspector. They are available in all subsequent documents. The
preset file is saved in the Export Settings folder on your hard disk.
Note: The exact location of the Export Settings folder varies depending on your operating system. For more
information, see “Working with configuration files” on page 423.
To share saved optimization settings with another Fireworks user:
Copy the saved optimization preset file from the Export Settings folder to the same folder on
another computer.
To delete a custom preset optimization:
1In the Optimize panel Saved Settings pop-up menu, choose the optimization setting you
want to delete.
2Click the Delete Saved Setting button on the Optimize panel.
You cannot delete a Fireworks preset optimization setting.
Exporting from Fireworks
Exporting from Fireworks is a two-step process. First you must prepare your graphic or document
for export by optimizing it. After your graphic or document has been optimized, you can export
it. For more information about optimization, see “About optimizing” on page 325.
You can export Fireworks graphics in a number of ways. You can export a document as a single
image in GIF, JPEG, or another graphic file format. Or you can export the entire document as an
HTML file and associated image files. Or you can choose to export selected slices only. You can
also export only a specified area of your document. In addition, you can export Fireworks frames
and layers as separate image files.
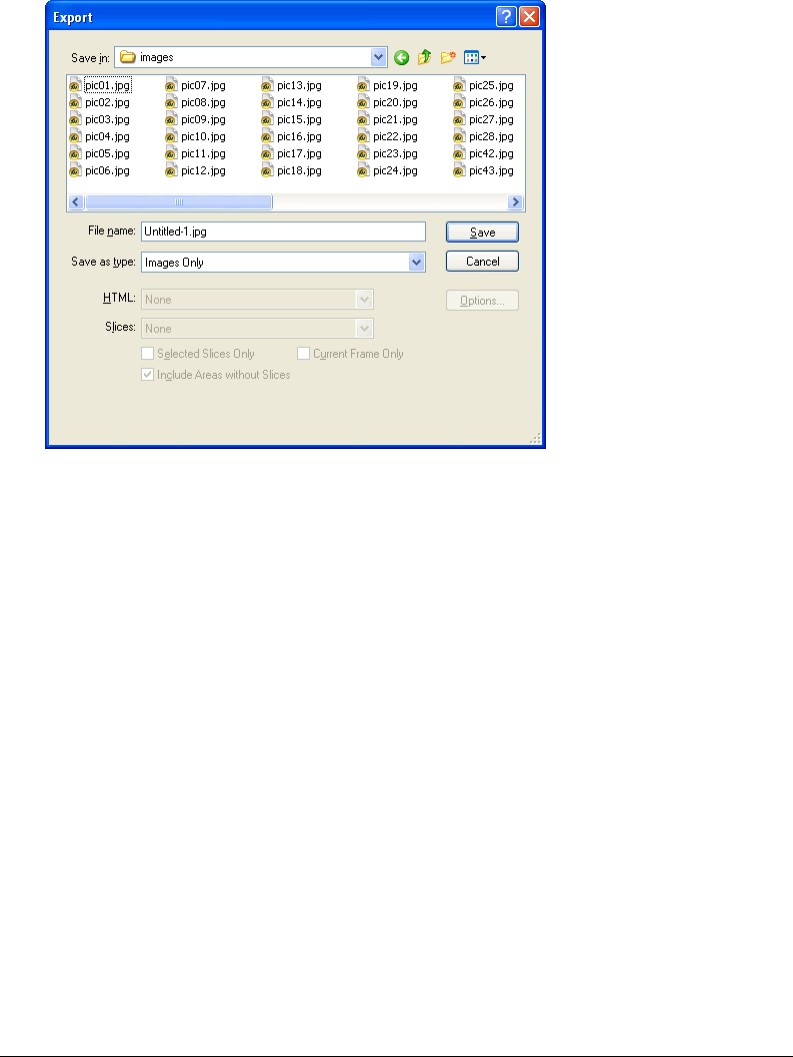
Optimizing and Exporting 347
Exporting a single image
You use the File > Export command to export a graphic after you have finished optimizing it in
the workspace.
Export dialog box
Note: To export only specific images within a document, you must first slice your document and then export only the
desired slices. For more information, see “Exporting selected slices” on page 348.
To export a Fireworks document as a single image:
1Choose File > Export.
2Choose a location to export the image file to.
For web graphics, the best location is typically a folder within your local website.
3Enter a filename. You do not need to enter a file extension; Fireworks will do that for you upon
export using the file type you specified in your optimization settings. For more information on
optimizing, see “About optimizing” on page 325.
4Choose Images Only from the Save As Type pop-up menu.
5Click Save.
Exporting a sliced document
By default, when you export a sliced Fireworks document, an HTML file and associated images
are exported. The exported HTML file can be viewed in a web browser or imported into other
applications for further editing.
Note: You can get Fireworks HTML into other applications using any of several techniques. For more about HTML
and the other ways to export Fireworks HTML, see “Exporting HTML” on page 351.

Chapter 15348
Before export, be sure you have the appropriate HTML style selected in the HTML Setup dialog
box. For more information, see “Setting HTML export options” on page 358.
To export a sliced Fireworks document:
1Choose File > Export.
2Navigate to the desired folder on your hard drive.
3Choose HTML and Images from the Save as Type pop-up menu.
4Type a filename in the File Name (Windows) or Save As (Macintosh) box.
5Choose Export HTML File from the HTML pop-up menu.
6Choose Export Slices from the Slices pop-up menu.
7(Optional) Choose Put Images in Subfolder.
8Click Save.
The files Fireworks exported appear on your hard drive. Images and an HTML file are
generated in the location you specified in the Export dialog box. For more information about
the options available in the Export dialog box when HTML and Images is selected as the file
type, see “Exporting Fireworks HTML” on page 353.
Exporting selected slices
You can export selected slices in a Fireworks document. Shift-click to select multiple slices.
Note: For more information on slicing, see “Creating and editing slices” on page 265.
To export selected slices:
1Do one of the following:
•Choose File > Export.
•To export an individual slice, right-click (Windows) or Control-click (Macintosh) the slice and
choose Export Selected Slice.
2Choose a location in which to store the exported files.
Typically, the best location is a folder within your local website.
3Enter a filename. You do not need to enter an extension; Fireworks will do that for you.
If you are exporting multiple slices, Fireworks will use the name you enter as the root name for
all exported graphics, excluding those you have custom-named using the Layers panel or the
Property inspector.
4Choose Export Slices from the Slices pop-up menu.
5To export only the slices you selected before export, choose Selected Slices Only, and ensure
that the Include Areas Without Slices option is not selected.
6Click Save.
Each slice is exported using its optimization settings as defined in the Optimize panel. For
more information about optimizing, see “About optimizing” on page 325.

Optimizing and Exporting 349
Updating a slice
If you’ve already exported a sliced document, and you’ve made changes to the original document
in Fireworks since you exported it, you can update just the image or slice that changed without
having to export and upload the entire sliced image. It is recommended that you use custom slice
naming so that you can easily locate the replacement slice. For more information, see “Naming
slices” on page 281.
To update a single slice:
1Hide the slice and edit the area underneath.
2Show the slice again and select it.
3Choose File > Export.
4Choose Selected Slices Only.
5Click Save to export the slice into the same folder as the original slice using the same base name.
6Click OK when asked to replace the existing file.
If you retain the original filename for the updated slice and upload the slice to the same place
on your website where the original came from, the new slice replaces the original slice in the
HTML document.
Note: Avoid resizing the slice beyond its original export size in Fireworks or you could create unexpected results
in the HTML document once the slice is updated.
Exporting an animation
After you create and optimize an animation, it is ready to export. You can export an animation as
an Animated GIF, as a Flash SWF file, or as multiple files.
If your document contains more than one animation, you can insert slices on top of each
animation to export each using different animation settings, such as looping and frame delay.
For more information about exporting animations as Flash SWF files, see “Working with
Macromedia Flash MX” on page 375. For more information about exporting to multiple files, see
“Exporting frames or layers” on page 350.
To export an animation as an animated GIF:
1Choose Edit > Deselect to deselect all slices and objects, and choose Animated GIF as the file
format in the Optimize panel.
For more information on optimizing, see “Optimizing GIFs, PNGs, TIFFs, BMPs, and
PICTs” on page 333.
2Choose File > Export.
3In the Export dialog box, type a name for the file and choose the destination.
4Click Save.
To export multiple animations with different animation settings as animated GIFs:
1Shift-click the animations to select them all.
2Choose Edit > Insert > Slice.
A message box appears, asking if you want to insert one slice or multiple slices.

Chapter 15350
3Click Multiple.
4Select each slice individually and use the Frames panel to set different animation settings for
each. For more information about animation settings, see Chapter 14, “Creating Animation,”
on page 309.
5Choose Edit > Deselect to deselect all slices and objects, and choose Animated GIF as the file
format in the Optimize panel.
For more information on optimizing, see “Optimizing GIFs, PNGs, TIFFs, BMPs, and
PICTs” on page 333.
6Right-click (Windows) or Control-click (Macintosh) each slice and choose Export Selected
Slice from the context menu to export each slice individually. In the Export dialog box, type a
name for each file, choose the destination, and click Save.
Exporting frames or layers
Fireworks can export each layer or frame in a document as a separate image file, using the
optimization settings specified in the Optimize panel. The name of the layer or frame determines
the filename of each exported file. This export method is sometimes used to export animations.
To export frames or layers as multiple files:
1Choose File > Export.
2Type a filename and choose a destination folder.
3In the Save As Type pop-up menu, choose one the following:
•To export frames as multiple files, choose Frames to Files.
•To export layers as multiple files, choose Layers to Files.
Note: This exports all layers on the current frame.
4Choose Trim Images to automatically crop the exported images to fit the objects on each frame.
If you want to export frames or layers the same size as the document, deselect Trim Images.
5Click Save.
Exporting an area
You can use the Export Area tool to export a portion of a Fireworks document.
To export a portion of a document:
1Choose the Export Area tool from the Tools panel.
2Drag a marquee defining the portion of the document to export.
Note: You can adjust the position of the marquee as you drag. While holding down the mouse button, press and
hold down the Spacebar on the keyboard, then drag the marquee to another location on the canvas. Release the
Spacebar to continue drawing the marquee.
When you release the mouse button, the export area remains selected.

Optimizing and Exporting 351
3Resize the export area if necessary:
•Shift-drag a handle to resize the export area marquee proportionally.
•Alt-drag (Windows) or Option-drag (Macintosh) a handle to resize the marquee from the center.
•Alt-Shift-drag (Windows) or Option-Shift-drag (Macintosh) a handle to constrain the
proportions and resize from the center.
4Double-click inside the export area marquee to go to Export Preview.
5Adjust settings in the Export Preview, and click Export.
6In the Export dialog box, type a filename and choose a destination folder.
7In the Save As pop-up menu, choose Images Only.
8Click Save.
Note: To cancel without exporting, double-click outside the export area marquee, press Esc, or choose
another tool.
Exporting HTML
Unless you specify otherwise, when you export a sliced Fireworks document, what you’re actually
exporting is an HTML file and a series of images.
Fireworks generates pure HTML that can be read by most web browsers and HTML editors.
There are a variety of ways to export Fireworks HTML:
•Export an HTML file, which you can later open for editing in an HTML editor.
•Copy HTML code to the Clipboard in Fireworks, and then paste that code directly into an
existing HTML document.
•Export an HTML file, open it in an HTML editor, manually copy sections of code from the
file, and paste that code into another HTML document.
•Use the Update HTML command to make changes to an HTML file you’ve previously created.
Note: Macromedia Dreamweaver and Microsoft FrontPage share a tight integration with Fireworks. Fireworks
handles the export of HTML to these applications differently than it does other HTML editors. If you are exporting
Fireworks HTML to either of these applications, see Chapter 16, “Using Fireworks with Other Applications,” on page
361.
You can also export HTML as Cascading Style Sheet (CSS) layers. Fireworks supports UTF-8
encoding and XHTML, so you can export documents using these standards as well.
To define how Fireworks exports HTML, you use the HTML Setup dialog box. These settings
can be document-specific or used as your default settings for all HTML that Fireworks exports.

Chapter 15352
About HTML
HTML code is automatically generated by Fireworks when you export, copy, or update HTML.
You do not need to understand it to use it. Once it is generated there is no need to change it to
make it work, as long as you do not rename or move files.
HTML stands for HyperText Markup Language and currently is the standard for displaying web
pages on the Internet. An HTML file is a text file that contains these elements:
•Text that will appear on the web page
•HTML tags that define the formatting and structure of that text and of the entire document as
well as links to images and other HTML documents (web pages)
HTML tags are enclosed in brackets and look something like this:
<TAG> affected text </TAG>
The opening tag tells a browser to format the text following in a certain way or to include a
graphic. The closing tag (</TAG>), when there is one, indicates the end of that formatting.
Including comments in HTML
Fireworks HTML is well commented, telling you what the pieces of code relate to. Fireworks
HTML comments begin with <!-- and end with -->. Anything between these two markers is
not interpreted as HTML or JavaScript code. If you want comments included in your HTML,
you must tell Fireworks you want this option turned on.
To include comments in exported HTML:
Before exporting, choose the Include HTML Comments option on the General tab of the
HTML Setup dialog box.
Results of exporting
When you export or copy HTML from Fireworks, the following is generated so that your
Fireworks image can be re-created on a web page:
•The HTML code necessary to reassemble sliced images and any JavaScript code if the
document contains interactive elements. Fireworks HTML contains links to the exported
images and sets the web page background color to the canvas color.
•One or more image files, depending on how many slices are in your document and how many
states you include in buttons.
•A file called spacer.gif, if necessary. Spacer.gif is a transparent, 1-pixel by 1-pixel GIF that
Fireworks uses to fix spacing problems when sliced images are reassembled in an HTML table.
You may choose whether Fireworks exports a spacer. For more information, see “Setting
HTML export options” on page 358.
•If your Fireworks document contains pop-up menus, a file called mm_menu.js is created that
contains the code necessary for displaying pop-up menus.
•If you export or copy HTML to Macromedia Dreamweaver, notes files are created that help
enable the tight integration between Fireworks and Dreamweaver.

Optimizing and Exporting 353
Exporting Fireworks HTML
Fireworks lets you export HTML in Generic, Dreamweaver, FrontPage, and Adobe® GoLive®
formats. Generic HTML will work in most HTML editors. Exporting Fireworks HTML
generates an HTML file and the associated image files in a location you specify.
Note: Fireworks also exports HTML when you export to Macromedia Director and to CSS layers. For more
information, see “Working with Macromedia Director” on page 384 and “Exporting CSS layers” on page 357.
The export method of getting Fireworks HTML into other applications is ideal if you are
working in a team environment. Exporting an HTML file segments the workflow so that one
person can perform a task in one application, and another can take over at a later time using
another application.
You can set up global HTML export preferences using the HTML Setup dialog box. For more
information, see “Setting HTML export options” on page 358.
Note: Macromedia Dreamweaver and Microsoft FrontPage share a tight integration with Fireworks. Fireworks
exports HTML to these applications differently than it does other HTML editors. If you are exporting Fireworks
HTML to either of these applications, follow these instructions, but for additional application-specific notes, also see
Chapter 16, “Using Fireworks with Other Applications,” on page 361.
To export Fireworks HTML:
1Do one of the following to open the Export dialog box:
•Choose File > Export.
•Click the Quick Export button at the upper right corner of the document window, then
choose an export option from the destination application’s pop-up menu. Fireworks
automatically fills in the text boxes of the Export dialog box with the appropriate settings for
the selected application.
Note: Non-Macromedia applications are found in the Quick Export > Other submenu.
2Navigate to the desired site folder on your hard drive.
3Choose HTML and Images from the Save as Type pop-up menu.
4Click the Options button and choose your HTML editor from the HTML Style pop-up menu on
the General tab of the HTML Setup dialog box. If your HTML editor is not listed, choose Generic.
Note: It’s important that you choose your HTML editor as the HTML style; if you do not, interactive elements
such as buttons and rollovers may not function correctly when imported into your HTML editor.
5Click OK to return to the Export dialog box.
6Type a filename in the File Name (Windows) or Save As (Macintosh) box.
7Choose Export HTML file from the HTML pop-up menu.
Choosing Export HTML generates an HTML file and the associated image files in the
location you specify.
8Choose Export Slices from the Slices pop-up menu if your document contains slices.
9Choose Put Images in Subfolder if you want images stored in a separate folder. You can choose
a specific folder or use the Fireworks default, which is a folder named images.
10 Click Save.
After export, you’ll see the files Fireworks exported on your hard drive. Images and an HTML
file are generated in the location you specified in the Export dialog box.

Chapter 15354
Copying HTML to the Clipboard
A fast way to export Fireworks-generated HTML is to copy it to the Clipboard.
Copying HTML code in Fireworks can be accomplished in either of two ways. You can use the
Copy HTML Code command, or you can choose Copy to Clipboard as an option in the Export
dialog box. Doing so will copy the Fireworks HTML to the Clipboard and generate the associated
image files in the location you specify. You’ll later paste this HTML into a document in your
preferred HTML editor.
Although copying to the Clipboard is a fast way to get Fireworks HTML into other applications,
it is not ideal in every situation. Copying HTML to the Clipboard has the following
disadvantages:
•You don’t have the option to save images into a subfolder. They must reside in the same folder
as the HTML file where you paste the copied HTML. An exception is HTML copied to
Macromedia Dreamweaver.
•Any links or paths used in Fireworks pop-up menus will map to your hard drive. HTML
copied to Dreamweaver is an exception.
•If you use an HTML editor other than Dreamweaver or Microsoft FrontPage, JavaScript code
associated with buttons, behaviors, and rollover images is copied but may not function correctly.
If these issues pose a problem for you, use the Export HTML option instead of copying HTML
to the Clipboard.
Note: Before you copy HTML code, be sure that you’ve selected the appropriate HTML style and chosen Include
HTML Comments from the General tab of the HTML Setup dialog box. For more information, see “Setting HTML
export options” on page 358.
To copy Fireworks HTML using the Copy HTML Code option:
1Do one of the following:
•Choose Edit > Copy HTML Code.
•Click the Quick Export button and choose Copy HTML Code from the pop-up menu.
2Follow the wizard as it guides you through the settings for exporting your HTML and images.
When prompted, specify a desired folder as the destination for the exported images. This must
be the location where your HTML file will reside.
Note: If you plan to paste the HTML code into Macromedia Dreamweaver, it does not matter where you export the
images, as long as they reside in the same Dreamweaver site as the HTML file into which you will paste your code.
The wizard exports the images to the specified destination and copies the HTML code to
the Clipboard.
To copy Fireworks HTML using the Export dialog box:
1Choose File > Export.
Note: Optionally, if you are exporting to Dreamweaver, click the Quick Export button and choose Copy HTML
to Clipboard from the Dreamweaver submenu.
2In the Export dialog box, specify a folder as the destination for the exported images. This must
be the same location where your HTML file will reside.
Note: If you plan to paste the HTML code into Macromedia Dreamweaver, it does not matter where you export the
images, as long as they reside in the same Dreamweaver site as the HTML file into which you will paste your code.

Optimizing and Exporting 355
3Choose HTML and Images from the Save as Type pop-up menu.
4Choose Copy to Clipboard from the HTML pop-up menu.
5If your document contains slices, choose Export Slices from the Slices pop-up menu.
6Click the Options button, choose your HTML editor from the HTML Setup dialog box,
and click OK.
7Click Save in the Export dialog box.
To paste HTML copied from Fireworks into an HTML document:
1In your HTML editor, open an existing HTML document or create a new one. Save the
document to the same location in which you exported your images.
Note: Saving the HTML file to the same location as the exported images is not necessary if you use Macromedia
Dreamweaver. As long as you export the images from Fireworks to a Dreamweaver site, and save the HTML file to
a location somewhere within that site, Dreamweaver automatically resolves the paths to the associated images.
2View the HTML code, and place the insertion point in the desired location between the
<BODY> tags.
Note: HTML code copied from Fireworks does not include the opening or closing <HTML> and <BODY> tags.
3Paste the HTML code. Refer to the help system within your specific HTML editor for
instructions on pasting contents from the Clipboard.
When pasting code into HTML editors, it is important to keep images and HTML files in the
correct location, or links could be broken. If possible when you copy to the Clipboard, make
sure images are exported to the final location where they will reside on the website. Fireworks
uses document-relative URLs, so if the HTML or images are moved, the URL links are broken.
Copying and pasting HTML from an exported Fireworks file
You can open exported Fireworks HTML in an HTML editor and copy and paste sections of
code into another HTML file.
To copy code from an exported Fireworks file and paste it into another HTML document:
1Open the Fireworks HTML file you exported in an HTML editor.
2Highlight the necessary code and copy it to the Clipboard.
3Open an existing HTML document or create a new one.
4Paste the code from the Clipboard into the desired location within the new HTML file. You do
not have to copy the <HTML> and <BODY> tags, as these should already be included in the
destination HTML document.
If you chose Include HTML Comments in the HTML Setup dialog box in Fireworks, follow
the instructions in the comments to copy and paste the code into the appropriate location.

Chapter 15356
5If your Fireworks document contains interactive elements, you’ll need to copy the JavaScript
code as well.
JavaScript code is surrounded by <SCRIPT> tags and is located in the <HEAD> section of the
document. Copy and paste the entire <SCRIPT> section, unless your destination document
already has a <SCRIPT> section. In this case you should copy and paste only the contents of the
<SCRIPT> section into the existing <SCRIPT> section, being careful not to overwrite the
contents of the existing section. Also ensure there are no duplicate JavaScript functions in the
<SCRIPT> section after you paste the code.
Updating exported HTML
The Update HTML command allows you to make changes to a Fireworks HTML document
you’ve previously exported. This feature is useful if you want to update only a portion of a
document.
Note: Update HTML works differently with Macromedia Dreamweaver documents than it does with other HTML
documents. For more information, see “Working with Macromedia Dreamweaver MX” on page 362.
When updating Fireworks HTML, you can choose to replace just the images that changed, or
overwrite all code and images. If you choose to replace only the images that changed, any changes
you made to the HTML file outside of Fireworks will be preserved.
Note: For considerable changes to document layout, make your changes in Fireworks and re-export the HTML file.
To update HTML using the Update HTML command:
1Do one of the following:
•Choose File > Update HTML.
•Click the Quick Export button and choose Update HTML from the pop-up menu.
2Select the file to update in the Locate HTML File dialog box.
3Click Open.
4If no Fireworks-generated HTML is found, click OK to insert new HTML at the end of the
document.
5If Fireworks-generated HTML is found, choose one of the following and click OK:
Replace Images and Their HTML replaces the previous Fireworks HTML.
Update Images Only overwrites only the images.
6If the Select Images Folder dialog box appears, choose a folder and click Open.

Optimizing and Exporting 357
Exporting CSS layers
Cascading Style Sheets (CSS) give you added control over how web pages are displayed. CSS
layers let you create style sheets or templates that define how different elements, such as headers
and links, should appear. With CSS, you can control the style and layout of multiple web pages at
once. CSS layers can overlap and be stacked on top of one another. In Fireworks, normal HTML
output does not overlap.
To export a graphic in CSS layers:
1Choose File > Export.
2In the Export dialog box, type a filename and choose a destination folder.
3Choose CSS Layers from the Save As Type pop-up menu.
4In the Source pop-up menu, choose one of the following:
•Fireworks Layers exports all layers as CSS layers.
•Fireworks Frames exports all frames as CSS layers.
•Fireworks Slices exports the slices in the document as CSS layers.
5Select Trim Images to automatically crop the exported images and layers to fit the objects.
6Select Put Images in Subfolder to choose a folder for images.
7Click Save.
Exporting XHTML
In the not-too-distant future, XHTML is expected to replace HTML as the standard for
displaying web content. Not only is XHTML backward compatible—meaning that most current
web browsers can view it—but it can also be read by any device that displays XML content, such
as PDAs, mobile phones, and other hand-held devices.
XHTML is a combination of HTML, the current standard for formatting and displaying web
pages, and XML (eXtensible Markup Language). XHTML contains the elements of HTML while
adhering to the more strict syntax rules of XML.
To support this new standard, Fireworks allows you to export XHTML.
Note: Fireworks can also import XHTML. For more information, see “Creating Fireworks PNG files from HTML
files” on page 76.
For more information on XHTML, visit the World Wide Web Consortium’s (W3C’s) XHTML
specification at http://www.w3.org.
To export XHTML from Fireworks:
1Choose File > HTML Setup, choose an XHTML style from the HTML Style pop-up menu on
the General tab, and click OK.
2Export your document using any of the methods available for exporting or copying HTML.
For more information about the various ways you can export and copy HTML from
Fireworks, see “Exporting HTML” on page 351.
Note: Fireworks uses UTF-8 encoding when exporting to XHTML. For more information about UTF-8
encoding, see “Exporting files with UTF-8 encoding” on page 358.

Chapter 15358
Exporting files with UTF-8 encoding
Historically, web browsers were not able to display different character sets within a single HTML
document. For example, Chinese text and English text could not be displayed on the same page
because web browsers weren’t capable of displaying different character sets in a single document.
UTF-8, which stands for Universal Character Set Transformation Format-8, is a text encoding
method that allows web browsers to display different character sets on the same HTML page.
Fireworks allows you to export HTML with UTF-8 encoding.
Note: Fireworks can also import documents that use UTF-8 encoding. For more information, see “Creating
Fireworks PNG files from HTML files” on page 76.
To export documents with UTF-8 encoding:
1Choose File > HTML Setup, choose Use UTF-8 Encoding on the Document Specific tab,
and click OK.
Note: For more information on HTML setup options, see “Setting HTML export options” on page 358.
2Export your document using any of the methods available for exporting or copying HTML.
For more information about the various ways you can export and copy HTML from
Fireworks, see “Exporting HTML” on page 351.
Setting HTML export options
The HTML Setup dialog box allows you to define how Fireworks exports HTML. These settings
can be document-specific or can be used as your default setting for all HTML exports. Changes
made in the Document Specific tab affect the current document only, but you can use these settings
as defaults for new documents if you click the Set Defaults button before closing the HTML Setup
dialog box. General and Table settings are global preferences and affect all new documents.
To define how Fireworks exports HTML:
1Choose File > HTML Setup or click the Options button in the Export dialog box.
2In the General tab, choose from the following options:
•Choose an HTML Style to set the style for exported HTML.
Generic HTML will work in any HTML editor. However, if your document contains
behaviors or other interactive content, choose your specific editor if it appears in the list.
Interactive elements export differently from Fireworks depending on the selected HTML style.
To export your document using the XHTML standard, choose the appropriate XHTML style
from the pop-up menu. For more information about XHTML, see “Exporting XHTML” on
page 357.
•Choose a file extension from the Extension pop-up menu or enter a new one.
•Select Include HTML Comments to include comments regarding where to copy and paste in the
HTML. This option is recommended if your document contains interactive elements such as
buttons, behaviors, or rollover images. HTML comments help you determine which parts of
the code to copy and paste.
•Select Lowercase File Name to make the name of the HTML file and the associated image files
lowercase on export.
Note: This will not lowercase the HTML file’s extension if an uppercase extension was selected in the
Extension pop-up menu.
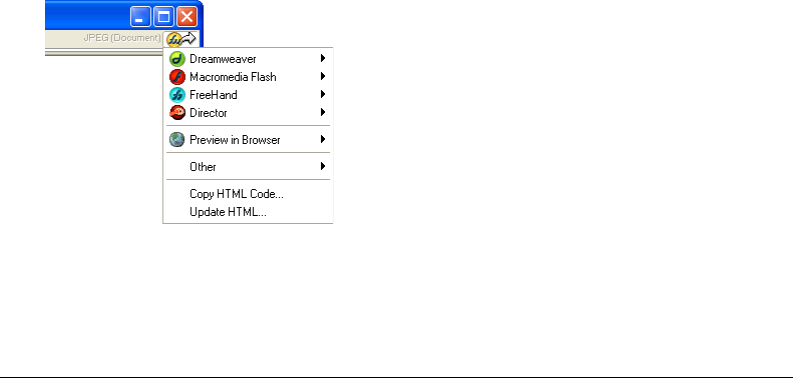
Optimizing and Exporting 359
•Choose an associated application from the File Creator pop-up menu (Macintosh). When you
double-click the exported HTML file on your hard disk, it automatically opens in the
application you specified.
3In the Table tab, choose settings for your HTML tables. For information on defining
properties for exported Fireworks HTML tables, see “Defining how HTML tables are
exported” on page 283.
4In the Document Specific tab, choose from the following options:
•Choose a formula for auto-naming slices in the Slice Auto-Naming pop-up menus. You can
use the default settings, or choose your own options.
Note: Use caution when choosing None as a menu option for slice auto-naming. If you choose None as the
option for any of the first three menus, Fireworks exports slice files that overwrite one another, resulting in a
single exported graphic and a table that displays this graphic in every cell.
•Enter text into the Alternate Image Description text box. This alt text appears in place of all
images while they are downloading from the web and in place of any images that fail to
download. In some browsers it may also appear as a tooltip when the pointer passes over the
image. This is also an aid for vision-impaired web users.
•Choose Multiple Nav Bar HTML Pages when exporting a navigation bar that will link several
pages together. When this option is chosen, Fireworks exports additional pages for each button
in the navigation bar.
•Choose UTF-8 Encoding if your document displays characters from multiple character sets. For
more information about UTF-8 encoding, see “Exporting files with UTF-8 encoding” on page
358.
5Click Set Defaults to save these settings as your global default settings.
6Click OK.
Using the Quick Export button
The Quick Export button, located in the upper right corner of the document window, offers easy
access to common options for exporting Fireworks files to other applications. Using the Quick
Export button, you can export to a variety of formats, including Macromedia applications and
other applications, such as Microsoft FrontPage and Adobe® GoLive®.

Chapter 15360
All the export options available through the Quick Export button are also accessible elsewhere in
Fireworks, such as the Export dialog box and the Edit menu. The Quick Export button provides
a shortcut to the most common export options. For more information on exporting to each
format, see “Using Fireworks with Other Applications” on page 361.
For most formats, several export methods are available. You can export Dreamweaver HTML, for
example, or update existing Dreamweaver HTML. Or you can copy Dreamweaver HTML to the
Clipboard. You can export a Flash SWF file or copy selected objects as vectors.
You can even use the Quick Export button to launch other applications, as well as preview
Fireworks documents in a preferred browser. By streamlining the export process, the Quick
Export button saves time and improves the design workflow.
Note: The Quick Export button will export graphics and slices using the settings you specify in the Optimize panel,
so be sure you have optimized your graphic before exporting with the Quick Export button. For more information on
optimization, see “About optimizing” on page 325.
To export a Fireworks document or selected graphics using the Quick Export button:
1Click the Quick Export button and choose an export option from the pop-up menu displayed.
The appropriate options will automatically be set for you in the Export dialog box. Make
changes to the options if desired.
2 Choose a location to store the exported files, type a filename, and click Save.
To launch another Macromedia application using the Quick Export button:
Click the Quick Export button and choose the Launch option from the application submenu.
Customizing the Quick Export pop-up menu
You can add additional options to the Quick Export pop-up menu if you know JavaScript and XML.
To add options to the Quick Export pop-up menu:
1Create your own JSF files and drop them into the Quick Export Menu folder on your hard disk.
Note: The exact location of this folder varies depending on your operating system. For more information, see
“Working with configuration files” on page 423.
2Edit the Quick Export Menu.xml file by including references to the new JSF files.
The next time you start Fireworks, the new options you created are added to the Quick Export
pop-up menu. For more information, see Extending Fireworks MX, available as a PDF on the
Macromedia Fireworks MX installation CD.

361
CHAPTER 16
Using Fireworks with Other Applications
Whether you’re creating content for the web or multimedia, Macromedia Fireworks MX is an
essential component of any designer’s toolbox. Fireworks works well with other applications,
offering a variety of integration features that streamline the design process.
You can export Fireworks graphics to many applications, including other Macromedia products.
When used in conjunction with other Macromedia applications, Fireworks offers powerful
integration features:
•Fireworks can be launched to edit selected graphics from inside many Macromedia
applications, such as Dreamweaver, Flash, HomeSite, FreeHand, and Director.
•Fireworks behaviors are preserved upon export to many Macromedia applications, allowing
you to export interactive elements such as buttons and rollovers.
•Dreamweaver and Fireworks share a tight integration known as Roundtrip HTML. Roundtrip
HTML allows you to make changes in one application and have those changes seamlessly
reflected in the other.
•Flash and Fireworks also share a tight integration. You can import Fireworks PNG source files
directly into Flash without having to export to any other graphics format. Flash offers a variety
of options that allow you to control how Fireworks objects and layers are imported.
Fireworks also simplifies the task of working with non-Macromedia applications. You can easily
launch and edit Fireworks graphics and tables from Microsoft FrontPage, for example, or import
and export Photoshop graphics as fully editable files.

Chapter 16362
Working with Macromedia Dreamweaver MX
Unique integration features make it easy to work on files interchangeably in Macromedia
Dreamweaver and Macromedia Fireworks. Dreamweaver and Fireworks recognize and share
many of the same file edits, including changes to links, image maps, table slices, and more.
Together, the two applications provide a streamlined workflow for editing, optimizing, and
placing web graphics files in HTML pages.
If you want to modify Fireworks images and tables placed in a Dreamweaver document, you can
launch Fireworks to make edits and then return to the updated document in Dreamweaver. If you
want to make quick optimization edits to placed Fireworks images and animations, you can
launch the Fireworks Export Preview dialog box and enter updated settings. In either case,
updates are made to the placed files in Dreamweaver, as well as to the source Fireworks files, if
those source files were launched.
To further streamline the web design workflow, you can create image placeholders in
Dreamweaver for future Fireworks images. You can later select those placeholders and launch
Fireworks to create desired graphics in the dimensions specified by the Dreamweaver placeholder
images. Once in Fireworks, you can change the image dimensions if desired.
Placing Fireworks images in Dreamweaver files
Fireworks graphics can be placed into a Dreamweaver document in a couple of ways. You can
place a finished Fireworks graphic using the Insert menu in Dreamweaver, or you can create a new
Fireworks document from a Dreamweaver image placeholder.
Inserting Fireworks images into Dreamweaver
You can insert Fireworks-generated GIF or JPEG images directly in a Dreamweaver document.
You must export the images from Fireworks first. For information on exporting GIF and JPEG
images, see “Exporting a single image” on page 347.
To insert a Fireworks image into a Dreamweaver document:
1Place the insertion point where you want the image to appear in the Dreamweaver
Document window.
2Do one of the following:
•Choose Insert > Image.
•Click the Insert Image button in the Common category of the Objects panel.
3Navigate to the image you exported from Fireworks, and click Open.
If the image file is not in the current Dreamweaver site, a message appears asking whether you
want to copy the file to the site folder.

Using Fireworks with Other Applications 363
Creating new Fireworks files from Dreamweaver placeholders
Image placeholders combine the power of Fireworks and Dreamweaver by allowing you to
experiment with various web page layouts before creating the final artwork for your page. Image
placeholders allow you to specify the size and position of future Fireworks images to be placed
in Dreamweaver.
When you create a Fireworks image from a Dreamweaver image placeholder, a new Fireworks
document is created with a canvas of the same dimensions as the selected placeholder. Inside
Fireworks, you can use any Fireworks tools to create your graphic. You can even slice your
document and add interactivity using buttons, rollovers, and other behaviors.
Note: All behaviors applied within Fireworks are preserved upon export back to Dreamweaver. Likewise, most
Dreamweaver behaviors applied to image placeholders are also preserved during launch and edit with Fireworks.
There is one exception, however: disjoint rollovers applied to image placeholders in Dreamweaver are not preserved
when launched and edited in Fireworks.
Once the Fireworks session has ended and you’ve returned to Dreamweaver, the new Fireworks
graphic you created takes the place of the image placeholder originally selected.
To create a Fireworks image from an image placeholder in Dreamweaver:
1In Dreamweaver, save the desired HTML document to a location inside your Dreamweaver
site folder.
2Position the insertion point in the desired position in your document and choose Insert >
Image Placeholder.
An image placeholder is inserted into the Dreamweaver document.
3Do one of the following:
•Select the image placeholder and click Create in the Property inspector.
•Control-double-click (Windows) or Command-double-click (Macintosh) the image
placeholder.
•Right-click (Windows) or Control-click (Macintosh) and choose Create Image in Fireworks.
Dreamweaver launches Fireworks, if it is not already open. The document window indicates
that you are editing an image from Dreamweaver.
4Create an image in Fireworks, and click Done when you are finished.
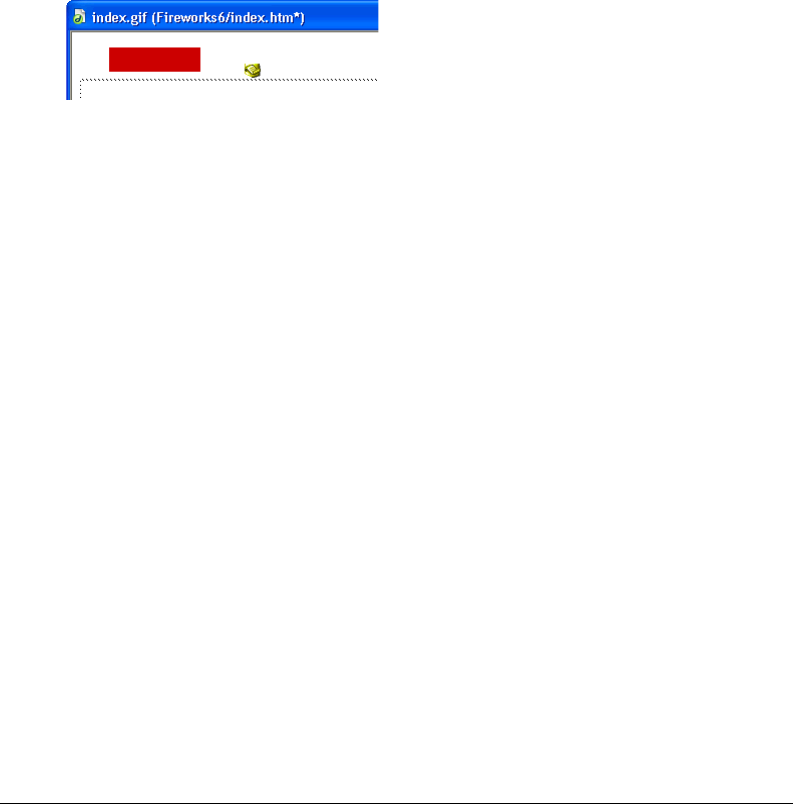
Chapter 16364
5Specify a name and location for the source PNG file in the Save As dialog box, and click Save.
Note: If you entered a name for the image placeholder from the Property inspector in Dreamweaver, that name
will be used as the default filename in Fireworks.
For more information on saving Fireworks PNG files, see “Saving Fireworks files” on page 80.
6Specify a name for the exported image file or files in the Export dialog box. These are the
JPEGs or GIFs that will be displayed in Dreamweaver.
7Specify a location for the exported image file or files. The location you choose should be within
your Dreamweaver site folder.
For more information on exporting, see “Exporting from Fireworks” on page 346.
8 Click Save.
When you return to Dreamweaver, the image placeholder you originally selected is replaced
with the new Fireworks image or table you created.
Placing Fireworks HTML into Dreamweaver
There are a few ways to place Fireworks HTML into Dreamweaver. You can export HTML or
you can copy Fireworks HTML to the Clipboard. You can also open an exported Fireworks
HTML file in Dreamweaver and copy and paste selected sections of code. You can easily update
code you’ve exported to Dreamweaver using the Update HTML command in Fireworks. You can
even export HTML as a Dreamweaver library item.
Fireworks HTML can also be exported as Cascading Style Sheet (CSS) layers. For more
information, see “Exporting HTML” on page 351..
Note: Before exporting, copying, or updating Fireworks HTML for use in Dreamweaver, be sure to choose
Dreamweaver as the HTML type in the HTML Setup dialog box. For more information, see “Setting HTML export
options” on page 358.
Exporting Fireworks HTML to Dreamweaver
Exporting Fireworks files to Dreamweaver is a two-step process. From Fireworks, you export files
directly to a Dreamweaver site folder. This will generate an HTML file and the associated image
files in the location you specify. You then place the HTML code into Dreamweaver using the
Insert feature.
Note: Before exporting, be sure to choose Dreamweaver as the HTML type in the HTML Setup dialog box. For
more information, see “Setting HTML export options” on page 358.
To export Fireworks HTML:
Export your document to HTML format. See “Exporting Fireworks HTML” on page 353.
To insert Fireworks HTML into a Dreamweaver document:
1In Dreamweaver, save your document in a defined site.

Using Fireworks with Other Applications 365
2Place the insertion point in the document where you want the inserted HTML code to begin.
3Do one of the following:
•Choose Insert > Interactive Images > Fireworks HTML.
•Click the Insert Fireworks HTML button in the Common category of the Objects panel.
4In the dialog box that appears, click Browse to choose the desired Fireworks HTML file.
5Choose Delete File After Insertion to move the HTML file to the Recycle Bin (Windows) or
Trash (Macintosh) when the operation is complete.
Use this option if you no longer need the Fireworks HTML file after inserting it. This option
does not affect the source PNG file associated with the HTML file.
Note: If the HTML file is on a network drive, it is permanently deleted, not moved to the Recycle Bin or Trash.
6Click OK to insert the HTML code, along with its associated images, slices, and JavaScript,
into the Dreamweaver document.
Copying Fireworks HTML to the Clipboard for use in Dreamweaver
A fast way to place Fireworks-generated HTML in Dreamweaver is to copy it to the Clipboard
from Fireworks, and then paste it directly into a Dreamweaver document. All HTML and
JavaScript code associated with the Fireworks document are copied into the Dreamweaver
document, images are exported to a location you specify, and Dreamweaver updates the HTML
with site-relative links to those images.
Note: Before copying to the Clipboard, be sure to choose Dreamweaver as the HTML type in the HTML Setup
dialog box. For more information, see “Setting HTML export options” on page 358.
To copy Fireworks HTML to the Clipboard for use in Dreamweaver:
Copy HTML to the Clipboard in Fireworks, and then paste it into a Dreamweaver document.
See “Copying HTML to the Clipboard” on page 354.
Copying code from an exported Fireworks file and pasting it into
Dreamweaver
You can open an exported Fireworks HTML file in Dreamweaver and then manually copy and
paste only the desired sections into another Dreamweaver document.
Note: Before exporting from Fireworks, be sure to choose Dreamweaver as the HTML type in the HTML Setup
dialog box. For more information, see “Setting HTML export options” on page 358.
To copy code from an exported Fireworks file and paste it into Dreamweaver:
Export a Fireworks HTML file, and then copy and paste the code into an existing Dreamweaver
document. See “Copying and pasting HTML from an exported Fireworks file” on page 355.
Updating Fireworks HTML exported to Dreamweaver
The Update HTML command in Fireworks allows you to make changes to an HTML document
you’ve previously exported to Dreamweaver.
Note: While Update HTML is a useful feature for updating HTML you’ve previously exported to Dreamweaver,
Roundtrip HTML provides even more benefits. For more information, see “Editing Fireworks files from
Dreamweaver” on page 367.

Chapter 16366
With Update HTML, you can edit a source PNG image in Fireworks and then automatically
update any exported HTML code and image files placed in a Dreamweaver document. This
command lets you update Dreamweaver files even when Dreamweaver is not running.
Note: Before updating HTML, be sure to choose Dreamweaver as the HTML type in the HTML Setup dialog box.
For more information, see “Setting HTML export options” on page 358.
To update Fireworks HTML placed in Dreamweaver:
1Make changes to the desired PNG document in Fireworks.
2Choose File > Update HTML, or click the Quick Export button and choose Update HTML
from the Dreamweaver pop-up menu.
3Navigate to the Dreamweaver file containing the HTML you wish to update, and click Open.
4Navigate to the folder destination where you want to place the updated image files, and click Open.
Fireworks updates the HTML and JavaScript code in the Dreamweaver document. Fireworks
also exports updated images associated with the HTML and places the images in the specified
destination folder.
If Fireworks cannot find matching HTML code to update, it gives you the option of inserting
new HTML code into the Dreamweaver document. Fireworks places the JavaScript section of
the new code at the beginning of the document and places the HTML table or link to the
image at the end.
Exporting Fireworks files to Dreamweaver libraries
Dreamweaver library items simplify the process of editing and updating frequently used website
components, such as company logos or other graphics that appear on every page of a site. A
library item is a portion of an HTML file located in a folder named Library at your root site.
Library items appear in the Dreamweaver Library palette. You can drag a copy from the Library
palette to any page in your website.
You cannot edit a library item directly in the Dreamweaver document; you can edit only the
master library item. Then, you can have Dreamweaver update every copy of that item as it is
placed throughout your website. Dreamweaver library items are much like Fireworks symbols;
changes to the master library (LBI) document are reflected in all library instances across your site.
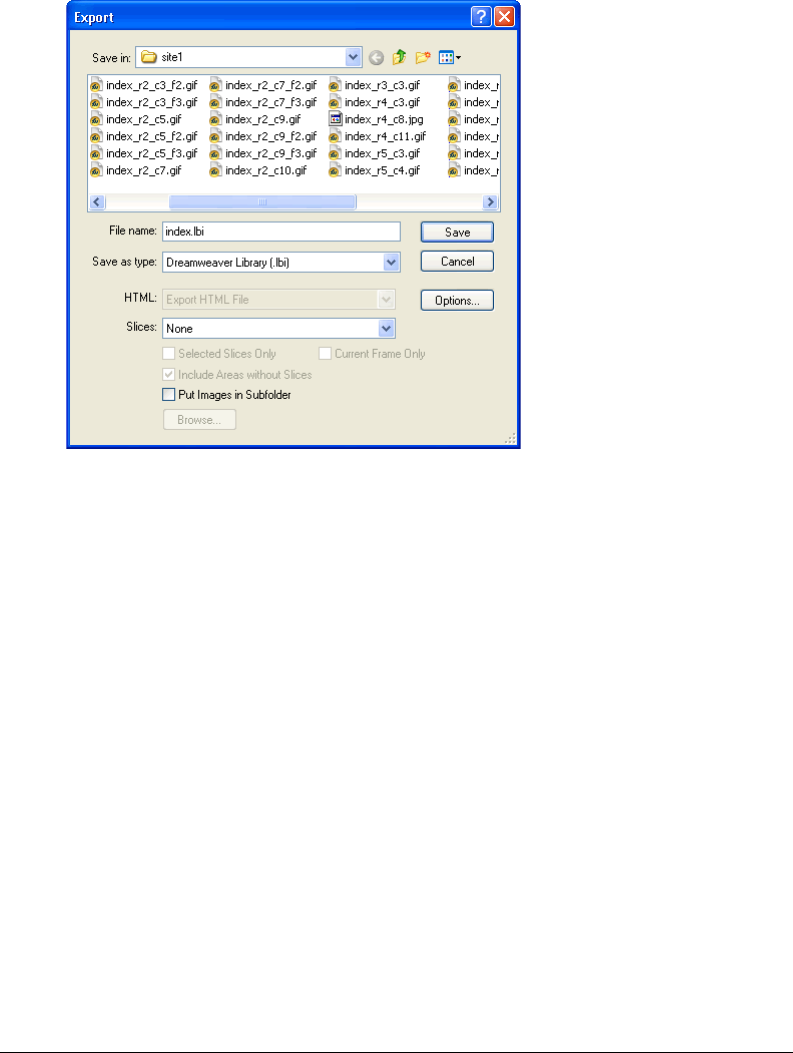
Using Fireworks with Other Applications 367
To export a Fireworks document as a Dreamweaver library item:
1Choose File > Export.
2Choose Dreamweaver Library from the Save as Type pop-up menu.
Choose the Library folder in your Dreamweaver site as the location in which to place the files.
If this folder does not exist, use the Select Folder dialog box to create or locate the folder. The
folder must be named Library; the case is important, because Dreamweaver is case-sensitive.
Note: Dreamweaver will not recognize the exported file as a library item unless it is saved into the Library folder.
3In the Export dialog box, type a filename.
4If your image contains slices, choose slicing options. For more information, see “Exporting a
sliced document” on page 347.
5Select Put Images in Subfolder to choose a separate folder for saving images.
6Click Save.
Editing Fireworks files from Dreamweaver
Roundtrip HTML is a powerful feature that tightly integrates Fireworks and Dreamweaver. It
allows you to make changes in one application and have those changes seamlessly reflected in the
other. With Roundtrip HTML, you use launch-and-edit integration to edit Fireworks-generated
images and tables placed in a Dreamweaver document. Dreamweaver automatically launches the
Fireworks source PNG file for the placed image or table, letting you make desired edits in
Fireworks. The updates you make in Fireworks are applied to the placed image or table when you
return to Dreamweaver.
Note: Before working with Roundtrip HTML, you should perform some preliminary tasks. For more information, see
“Setting launch-and-edit options” on page 372.

Chapter 16368
About Roundtrip HTML
Fireworks recognizes and preserves most types of edits made to a document in Dreamweaver,
including changed links, edited image maps, edited text and HTML in HTML slices, and
behaviors shared between Fireworks and Dreamweaver. The Property inspector in Dreamweaver
helps you identify Fireworks-generated images, table slices, and tables in a document.
Although Fireworks supports most types of Dreamweaver edits, radical changes made to a table’s
structure in Dreamweaver can create irreconcilable differences between the two applications. If
you make radical changes to a table layout in Dreamweaver and then attempt to launch and edit
the table in Fireworks, a message appears warning you that changes you make in Fireworks will
overwrite any edits previously made to the table in Dreamweaver. If you want to make
considerable changes to a table layout, use the Dreamweaver launch and edit feature to edit the
table in Fireworks.
Editing Fireworks images
You can launch Fireworks to edit individual images placed in a Dreamweaver document.
Note: Before editing Fireworks graphics from Dreamweaver, you should perform some preliminary tasks. For more
information, see “Setting launch-and-edit options” on page 372.
To launch and edit a Fireworks image placed in Dreamweaver:
1In Dreamweaver, choose Window > Properties to open the Property inspector, if needed.
2Do one of the following:
•Select the desired image. (The Property inspector identifies the selection as a Fireworks image
and displays the name of the known PNG source file for the image.) Then click Edit in the
Property inspector.
•Control-double-click (Windows) or Command-double-click (Macintosh) the image you
want to edit.
•Right-click (Windows) or Control-click (Macintosh) the desired image, and choose Edit with
Fireworks from the context menu.
Dreamweaver launches Fireworks, if it is not already open.
3If prompted, specify whether to locate a source Fireworks file for the placed image. For more
information on Fireworks source PNG files, see “Saving Fireworks files” on page 80.
4In Fireworks, edit the image. The document window indicates that you are editing an image
from Dreamweaver.
Dreamweaver recognizes and preserves all edits applied to the image in Fireworks.
5When you are finished making edits, click Done in the document window.
The image is exported using the current optimization settings, the GIF or JPEG file used by
Dreamweaver is updated, and the PNG source file is saved if a source file was selected.
Note: When you open an image from the Dreamweaver Site window, the Fireworks integration features
described above are not in effect; Fireworks does not open the original PNG file. To use the Fireworks integration
features, open images from within the Dreamweaver Document window.

Using Fireworks with Other Applications 369
Editing Fireworks tables
When you launch and edit an image slice that is part of a placed Fireworks table, Dreamweaver
automatically launches the source PNG file for the entire table.
Note: Before editing Fireworks tables from Dreamweaver, you should perform some preliminary tasks. For more
information, see “Setting launch-and-edit options” on page 372.
To launch and edit a Fireworks table placed in Dreamweaver:
1In Dreamweaver, choose Window > Properties to open the Property inspector if needed.
2Do one of the following:
•Click inside the table, and click the TABLE tag in the status bar to select the entire table. (The
Property inspector identifies the selection as a Fireworks table and displays the name of the
known PNG source file for the table.) Then click Edit in the Property inspector.
•Click the upper left corner of the table to select it, and then click Edit in the Property inspector.
•Select an image in the table, then click Edit in the Property inspector.
•Control-double-click (Windows) or Command-double-click (Macintosh) the image you
want to edit.
•Right-click (Windows) or Control-click (Macintosh) the image, then choose Edit with
Fireworks from the context menu.
Dreamweaver launches Fireworks, if it is not already open. The source PNG file for the entire
table appears in the document window.
Note: For more information on Fireworks source PNG files, see “Saving Fireworks files” on page 80.
3In Fireworks, make the desired edits.
Dreamweaver recognizes and preserves all edits applied to the image in Fireworks.
4When you are finished making edits, click Done in the document window.
The HTML and image slice files for the table are exported using the current optimization
settings, the table placed in Dreamweaver is updated, and the PNG source file is saved.
About Dreamweaver behaviors
If a single, unsliced Fireworks graphic is inserted into a Dreamweaver document and a
Dreamweaver behavior is applied, that graphic will have a slice on top of it when it is launched
and edited in Fireworks. The slice initially won’t be visible because slices are automatically turned
off when you launch and edit single, unsliced graphics to which Dreamweaver behaviors are
applied. You can view the slice by turning on its visibility from the Web Layer of the Layers panel.
When you view properties for a slice in Fireworks that has a Dreamweaver behavior attached, the
Link text box in the Property inspector may display javascript:;. Deleting this text is harmless.
You can type over it to enter a URL if desired, and the behavior will still be intact when you
return to Dreamweaver.

Chapter 16370
Dreamweaver supports all behaviors applied in Fireworks, including those required for rollovers
and buttons. The following Dreamweaver behaviors are supported by Fireworks during a
launch-and-edit session:
•Simple Rollover
•Swap Image
•Swap Image Restore
•Set Text of Status Bar
•Set Nav Bar Image
•Pop-up Menu
Optimizing Fireworks images and animations placed in Dreamweaver
You can launch Fireworks from Dreamweaver to make quick export changes, such as resampling
or changing the file type, to placed Fireworks images and animations. Fireworks lets you make
changes to optimization settings, animation settings, and the size and area of the exported image.
To change optimization settings for a Fireworks image placed in Dreamweaver:
1In Dreamweaver, select the desired image and choose Commands > Optimize Image in Fireworks.
2If prompted, specify whether to launch a source Fireworks file for the placed image.
A dialog box opens. Although the title bar doesn’t display this name, this is actually the
Fireworks Export Preview dialog box.
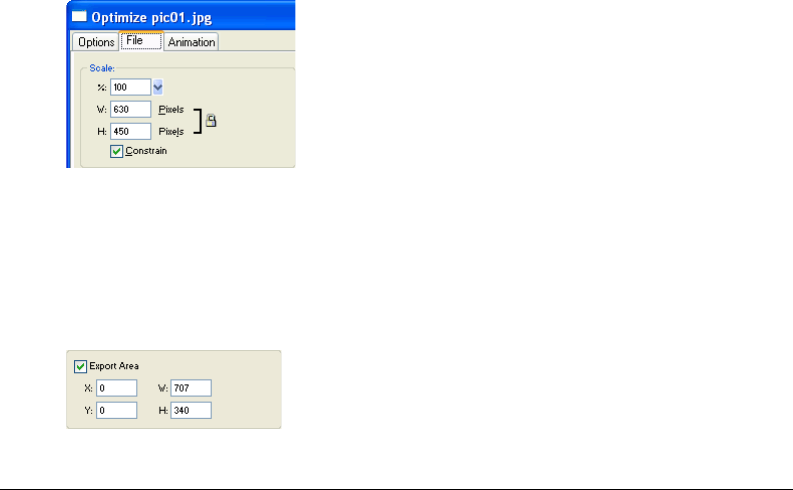
Using Fireworks with Other Applications 371
3Make the desired edits in the Export Preview dialog box:
•To edit optimization settings, click the Options tab. For more information, see “Using Export
Preview” on page 327.
•To edit the size and area of the exported image, click the File tab and change the desired
settings. If you change image dimensions in Fireworks, you’ll also need to reset the size of the
image in the Property inspector when you return to Dreamweaver.
•To edit animation settings for the image, click the Animation tab and change the desired settings.
4When you are finished editing the image, click Update.
The image is exported using the new optimization settings, the GIF or JPEG placed in
Dreamweaver is updated, and the PNG source file is saved if a source file was selected.
If you changed the format of the image, Dreamweaver’s link checker prompts you to update
references to the image. For example, if you changed the format of an image called my_image
from GIF to JPEG, clicking OK at this prompt changes all references to my_image.gif in your
site to my_image.jpg.
Resizing placed Fireworks images
When launching and optimizing a Fireworks image from Dreamweaver, you can resize the image
and select a specific image area to be exported.
Note: If you change image dimensions in Fireworks, you’ll also need to reset the size of the image in the Property
inspector when you return to Dreamweaver.
To specify exported image dimensions:
1In Fireworks, in the Export Preview dialog box, click the File tab.
2To scale the image as it is exported, specify a scale percentage or enter the desired width and
height in pixels. Select Constrain to scale the width and height proportionally.
3To export a selected area of the image, select the Export Area option and do one of the
following to specify the export area:
•Drag the dotted border that appears around the preview until it encloses the desired export
area. (Drag inside the preview to move hidden areas into view.)
•Enter pixel coordinates for the boundaries of the export area.
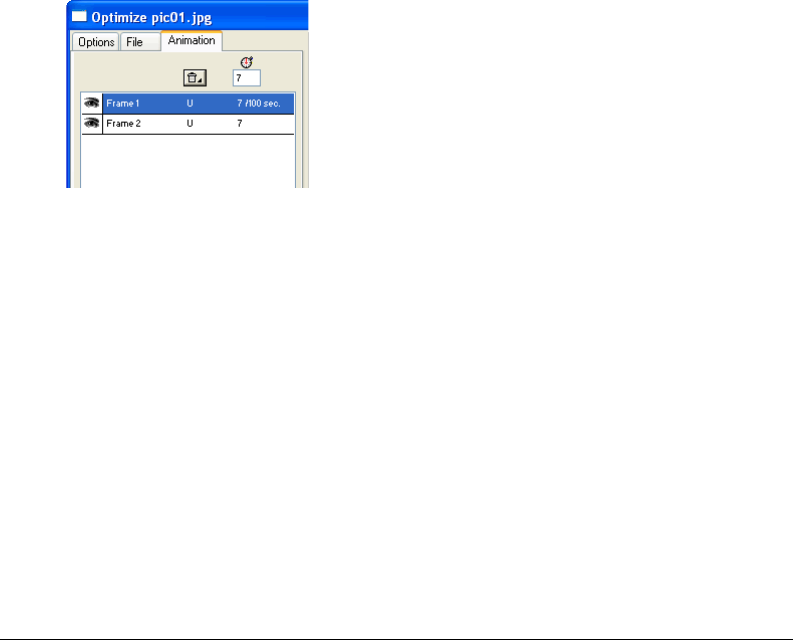
Chapter 16372
Changing animation settings
If you are launching and optimizing a placed Fireworks animation, you can also edit the
animation settings. The animation options in the Export Preview dialog box are similar to those
available in the Fireworks Frames panel.
Note: You cannot edit individual graphic elements within a Fireworks animation during an optimizing session
launched from Dreamweaver. To edit the graphic elements in an animation, you must launch and edit the Fireworks
animation. For more information, see “Editing Fireworks files from Dreamweaver” on page 367.
To edit an animated image:
1In Fireworks, in the Export Preview dialog box, click the Animation tab.
2Use the following techniques to preview animation frames at any time:
•To display a single frame, select the desired frame in the list on the left side of the dialog box,
or use the frame controls in the lower right area of the dialog box.
•To play the animation, click the Play/Stop control in the lower right area of the dialog box.
3Make edits to the animation:
•To specify the frame disposal method, select the desired frame in the list and choose an option
from the pop-up menu (indicated by the trash can icon).
•To set the frame delay, select the desired frame in the list and enter the delay time in
hundredths of a second.
•To set the animation to play repeatedly, click the Looping button and choose the desired
number of repetitions from the pop-up menu.
•Choose the Auto-Crop option to crop each frame as a rectangular area, so that only the image
area that differs between frames is output. Selecting this option reduces file size.
•Choose the Auto-Difference option to output only pixels that change between frames.
Selecting this option reduces file size.
Setting launch-and-edit options
To effectively use Roundtrip HTML, you should perform some preliminary tasks, such as setting
Fireworks as your primary image editor in Dreamweaver and specifying launch-and-edit
preferences in Fireworks.
Note: You should also define a local site in Dreamweaver prior to working with Roundtrip HTML. For more
information, see Using Dreamweaver MX.
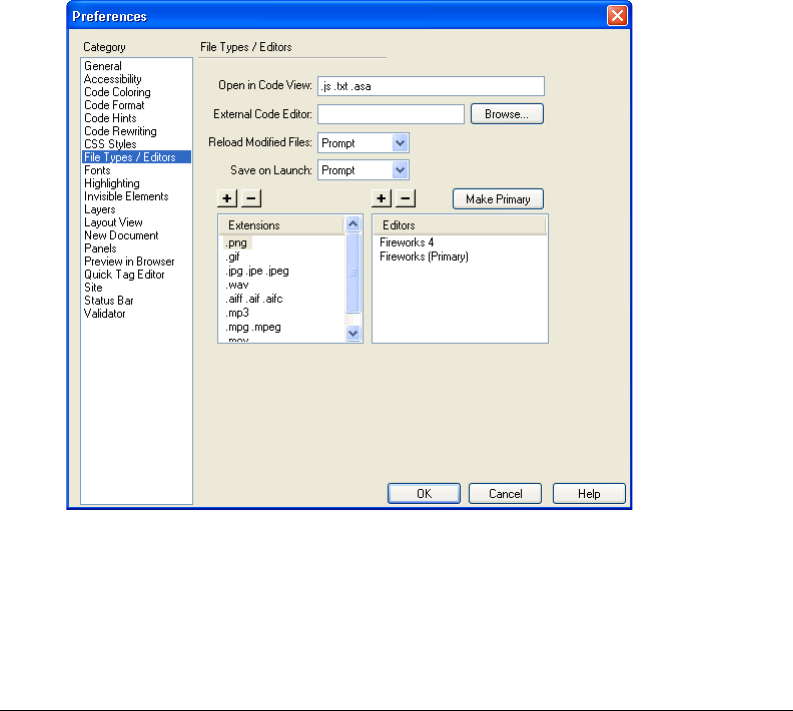
Using Fireworks with Other Applications 373
Designating Fireworks as the primary external image editor for
Dreamweaver
Dreamweaver provides preferences for automatically launching specific applications to edit
specific file types. To use the Fireworks launch-and-edit features, make sure that Fireworks is set as
the primary editor for GIF, JPEG, and PNG files in Dreamweaver.
Although you can use earlier versions of Fireworks as external image editors, these versions offer
limited launch-and-edit capabilities. When working with Roundtrip HTML, Fireworks 4 does
not fully support edits made to cell properties in Dreameweaver tables, nor does it support
behaviors applied in Dreamweaver. Fireworks 3 does not fully support the launch and edit of
placed tables and slices within tables, while Fireworks 2 does not support the launch and edit of
source PNG files for placed images.
To set Fireworks as the primary external image editor for Dreamweaver:
1In Dreamweaver, choose Edit > Preferences and then choose File Types/Editors.
2In the Extensions list, select a web image file extension (.gif, .jpg, or .png).
3In the Editors list, if Fireworks appears in the list, select it. If Fireworks is not in the list, click
the Plus (+) button, locate the Fireworks application on your hard disk, and click Open.
4Click Make Primary.
5Repeat steps 2 through 4 to set Fireworks as the primary editor for other web image
file extensions.

Chapter 16374
About Design Notes and source files
Whenever you export a Fireworks file from a saved PNG source to a Dreamweaver site, Fireworks
writes a Design Note that contains information about the file. For example, when you export a
Fireworks table, Fireworks writes a Design Note for each exported image. These Design Notes
contain references to the source PNG file that spawned the exported files.
When you launch and edit a Fireworks image from within Dreamweaver, Dreamweaver uses the
Design Note to locate a source PNG for that file. For best results, always save your Fireworks
source PNG file and exported files in a Dreamweaver site. This ensures that any user sharing the
site will be able to locate the source PNG when launching Fireworks from within Dreamweaver.
Specifying launch-and-edit preferences for Fireworks source files
The Fireworks launch-and-edit preferences let you specify how to handle source PNG files when
launching Fireworks files from another application.
Dreamweaver recognizes the Fireworks launch-and-edit preferences only in certain cases in which
you launch and optimize a Fireworks image. Specifically, you must be launching and optimizing
an image that is not part of a Fireworks table and that does not contain a correct Design Note
path to a source PNG file. In all other cases, including all launch-and-edit cases of Fireworks
images, Dreamweaver automatically launches the source PNG file, prompting you to locate the
source file if it cannot be found.
To specify launch-and-edit preferences for Fireworks:
1In Fireworks, choose Edit > Preferences.
Note: On Mac OS X, choose Fireworks > Preferences.
2Click the Launch and Edit tab (Windows) or choose Launch and Edit from the pop-up menu
(Macintosh).
3Specify the preference options to use when editing or optimizing Fireworks images placed in an
external application:
Always Use Source PNG automatically launches the Fireworks PNG file that is defined in the
Design Note as the source for the placed image. Updates are made to both the source PNG and
its corresponding placed image.
Never Use Source PNG automatically launches the placed Fireworks image, whether or not a
source PNG file exists. Updates are made to the placed image only.
Ask When Launching lets you specify each time whether or not to launch the source PNG file.
When you edit or optimize a placed image, Fireworks displays a message prompting you to
make a launch-and-edit decision. You can also specify global launch-and-edit preferences from
this prompt.

Using Fireworks with Other Applications 375
Working with Macromedia Flash MX
Fireworks integrates well with Macromedia Flash. You can easily export Fireworks vectors,
bitmaps, animations, and multistate button graphics for use in Flash. Launch-and-edit
functionality also makes it easy to edit Fireworks graphics from within Flash.
Note: Fireworks button behaviors and other types of interactivity are not imported into Flash.
Placing Fireworks files into Flash
You can place Fireworks graphics into Flash in a number of ways. The best way is to import a
Fireworks PNG file. This method gives you the most control over how graphics and animations
are imported into Flash.
While offering you less control than importing Fireworks PNGs, you can also import JPEGs,
GIFs, PNGs, and SWFs that have been exported from Fireworks. You can also manually copy
graphics from Fireworks and paste them directly into Flash.
Importing Fireworks PNG files into Flash
You can import Fireworks PNG source files directly into Flash, without having to export to any
other graphics format. All Fireworks vectors, bitmaps, animations, and multistate button graphics
can be imported into Flash.
Note: Fireworks button behaviors and other types of interactivity are not imported into Flash.
When you import a Fireworks PNG file into Flash, you can choose from a variety of import
options. You can import all layers and objects as a library symbol, or you can import all content
onto a single, new layer. With vector and text objects, you can maintain their editability
completely, or choose to maintain appearance only when objects have effects applied or other
properties that aren’t available in Flash. Or you can forgo all editability and choose to import the
Fireworks PNG file as a single, flattened bitmap image.
To import a Fireworks PNG into Flash:
1Save the desired document in Fireworks.
For information on saving files, see “Saving Fireworks files” on page 80.
2Switch to an open document in Flash.
3(Optional) Click the keyframe and layer onto which you want to import the Fireworks
content. This is necessary only if you plan to import the PNG as a library symbol (movie clip).
4Choose File > Import.

Chapter 16376
5Navigate to and select the desired PNG file from the Import dialog box, and click OK.
The Fireworks PNG Import Settings dialog box appears.
6Choose a File Structure option:
The Import as Movie Clip and Retain Layers option imports the Fireworks file as a movie clip
that contains all the layers and frames from the original Fireworks file. The movie clip is
inserted into the current layer and keyframe. If a keyframe wasn’t selected before import, the
movie clip is placed in the previous keyframe.
The Import into New Layer in Current Scene option imports the Fireworks file onto a single,
new layer, with all its frames intact.
7Choose the way you’d like vector objects and text imported:
The Rasterize if Necessary to Maintain Appearance option preserves the editability of vector
objects, unless they have special fills, strokes, or effects that Flash does not support. To preserve
the appearance of such objects, Flash converts them to non-editable bitmap images.
The Keep All Paths Editable option preserves the editability of all vector objects. If objects have
special fills, strokes, or effects that Flash does not support, those properties are lost.
8Choose the way you’d like text imported:
The Rasterize if Necessary to Maintain Appearance option preserves the editability of text,
unless it has special fills, strokes, or effects that Flash does not support. To preserve the
appearance of such text, Flash converts it to a non-editable bitmap image.
The Keep all Text Editable option preserves the editability of all text. If text objects contain
special fills, strokes, or effects that Flash does not support, those properties are lost.
9Choose the Import as a Single, Flattened Bitmap option if you want to import the file as a
single bitmap image and lose all editability.
Note: If this option is selected, none of the other options in the dialog box are available.
10 Click OK.
The Fireworks PNG file is imported into Flash using the import options you chose.

Using Fireworks with Other Applications 377
Copying and pasting Fireworks graphics into Flash
A quick way to place Fireworks graphics into Flash is to copy and paste them.
Note: To copy graphics into previous versions of Flash, you must choose Edit > Copy Path Outlines.
When Fireworks graphics are copied and pasted into Flash, some attributes are lost, such as Live
Effects and textures. In addition, Flash supports only solid fills, gradient fills, and basic strokes.
To copy and paste graphics in Flash:
1Select the object or objects to copy.
2Choose Edit > Copy or click the Quick Export button and choose Copy from the Macromedia
Flash pop-up menu.
3In Flash, create a new document and choose Edit > Paste.
Note: You may have to ungroup the objects using Modify > Ungroup so that they will be editable as separate
vector objects in Flash.
About exporting Fireworks graphics to other formats for use in Flash
You can export Fireworks graphics as JPEGs, GIFs, and PNGs, and then import them into Flash.
For information on exporting JPEGs and GIFs, see “Exporting a single image” on page 347. For
information on exporting to PNG format, see “Exporting PNGs with transparency” on page 379.
For information on importing any of these formats into Flash, see “Importing exported Fireworks
graphics and animations into Flash” on page 379.
Note: Although PNG is the native file format for Fireworks, PNG graphic files exported from Fireworks are different
from source PNG files you save in Fireworks. Exported PNG files are no different than GIFs or JPEGs; they only
contain image data and don’t contain any additional information like slicing, layers, interactivity, Live Effects, or other
editable content. For more information on PNG source files, see “Saving Fireworks files” on page 80.
Exporting Fireworks graphics and animations as SWF files
Fireworks graphics and animations can be exported as Flash SWF files. You can make several
choices about how objects are exported.
Some formatting is lost unless you choose Maintain Appearance in the Flash SWF Export
Options dialog box. Stroke size and stroke color are maintained. Formatting lost during export to
SWF format includes the following:
•Live Effects
•Fill and stroke categories, textures, and feathered edges
•Anti-aliasing on objects (the Flash Player applies anti-aliasing at the document level, so
anti-aliasing is applied to the document when you export)
•Opacity and blending modes (objects with opacity become symbols with an alpha channel)
•Layers
•Masks
•Slice objects, image maps, and behaviors
•Some text formatting options, such as kerning and bitmap strokes
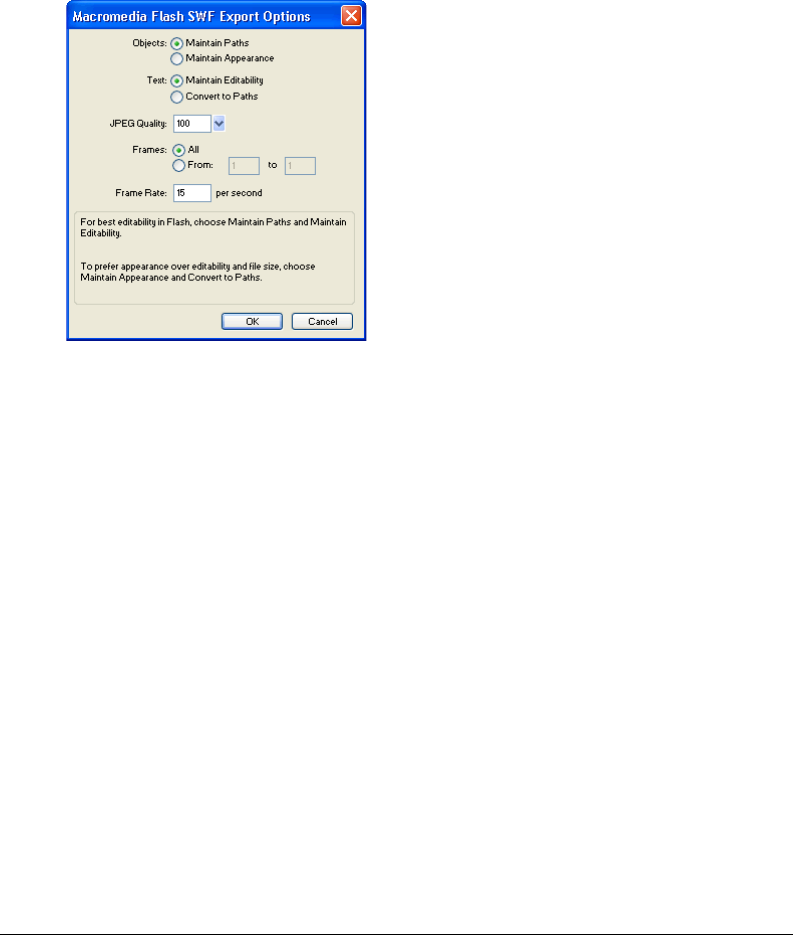
Chapter 16378
To export a Fireworks graphic or animation as a SWF file:
1Choose File > Export or click the Quick Export button and choose Export SWF from the
Macromedia Flash pop-up menu.
2In the Export dialog box, type a filename and choose a destination folder.
3Choose Macromedia Flash SWF from the Save As pop-up menu.
4Click the Options button.
The Flash SWF Export Options dialog box appears.
5In the Objects section, choose one of the following:
Maintain Paths allows you to maintain path editability. Effects and formatting are lost.
Maintain Appearance converts vector objects to bitmap objects and preserves the appearance of
applied strokes and fills. Editability is lost.
6In the Text section, choose one of the following:
Maintain Editability allows you to maintain text editability. Effects and formatting are lost.
Convert to Paths converts text to paths, preserving any custom kerning or spacing you entered
in Fireworks. Editability as text is lost.
7Set the quality of JPEG images using the JPEG Quality pop-up slider.
8Select the frames to be exported and the frame rate in seconds.
9Click OK.
10 Click Save in the Export dialog box.
For information on importing an exported SWF file into Flash, see “Importing exported
Fireworks graphics and animations into Flash” on page 379.

Using Fireworks with Other Applications 379
Exporting PNGs with transparency
The PNG format allows for transparency with 32-bit color images. The Fireworks PNG, the
source file format for Fireworks, also supports transparency with 32-bit color images. You can
import Fireworks PNG source files directly into Flash.
You can also create transparency with an 8-bit PNG. You can export Fireworks 8-bit PNG
graphics with transparency for insertion into Flash.
To export an 8-bit PNG with transparency:
1In Fireworks, choose Window > Optimize to open the Optimize panel if it isn’t already open.
2Choose PNG 8 as the Export file format and Alpha Transparency from the Transparency
pop-up menu.
3Choose File > Export.
4Select Images Only from the Save as Type pop-up menu. Name the file, then click Save.
For information on importing exported PNG files into Flash, see “Importing exported Fireworks
graphics and animations into Flash” on page 379.
Importing exported Fireworks graphics and animations into Flash
You use the Import command in Flash to import graphics and animations that were exported
from Fireworks.
To import Fireworks graphics and animations into Flash:
1Create a new document in Flash.
2Choose File > Import and locate the graphic or animation file.
3Click Open to import the file.
Using Fireworks to edit graphics imported into Flash
With launch-and-edit integration, you can use Fireworks to make changes to a graphic that you
previously imported into Flash. You can edit any imported graphic this way, even if the graphic
wasn’t exported from Fireworks.
Note: Fireworks native PNG files imported into Flash are an exception, unless you imported the PNG as a flattened
bitmap image.
If the graphic was exported from Fireworks, and you saved the original PNG file along with the
exported graphic file, you can launch the original PNG file in Fireworks from inside Flash to make
your changes. When you return to Flash, both the PNG file and the graphic in Flash are updated.
1In Flash, right-click (Windows) or Control-click (Macintosh) the graphic file in the Library panel.
2Choose Edit with Fireworks from the pop-up menu.
Note: If Edit with Fireworks does not appear in the pop-up menu, choose Edit With and locate your
Fireworks application.

Chapter 16380
3Click Yes in the Find Source box if you want to locate the original PNG file for your Fireworks
graphic, and click Open.
Note: If you have changed Fireworks launch-and-edit preferences, this dialog box might not appear.
The file opens in Fireworks and the document window indicates that you are editing a
file from Flash.
4Make changes to the image and click Done when finished.
Fireworks exports a new graphic file to Flash, and if you edited the original PNG file, it is also saved.
About extending Fireworks with custom commands created in Flash
With Flash, you can create SWF movies that contain JavaScript code. These movies can be used
as Fireworks commands, accessible from the Commands menu in Fireworks, or as panels,
accessible from the Window menu.
For more information, see Extending Fireworks MX, available as a PDF on the Macromedia
Fireworks installation CD.
Working with Macromedia FreeHand
Because both applications support vectors, vector graphics can be easily shared between Fireworks
and Macromedia FreeHand. The appearance of objects may differ between applications, however,
because Fireworks and FreeHand do not share all the same features. For more information, see
“Working with other vector graphics applications” on page 383.
The procedures provided in this section apply not only to using Fireworks with FreeHand but also to
using Fireworks with other vector graphics applications, such as Adobe Illustrator and CorelDraw. For
more information, see “Working with other vector graphics applications” on page 383.
Placing FreeHand graphics into Fireworks
You can place FreeHand graphics into Fireworks in a number of ways. You can import them, copy
and paste them, or drag and drop them. Fireworks MX supports FreeHand 7 graphics or later.
Importing FreeHand graphics into Fireworks
Fireworks can import vector graphics that were created in FreeHand. You can set the following
options when importing a FreeHand graphic:
Scale specifies the scale percentage for the imported file.
Width and Height specify the width and height of the imported file in pixels, inches, or centimeters.
Resolution specifies the resolution of the imported file.
Anti-Alias smooths imported objects to avoid jagged edges. You can choose this option separately
for paths or text.
Note: To change selected objects to Anti-Alias or Hard Edge, use Modify > Alter > Hard Fill, Anti-Alias Fill, or Feather
Fill after importing.
File Conversion specifies how multipage documents are handled when imported:
•The Open a Page option imports only the specified page.
•The Open Pages as Frames option imports all the pages from the document and places each in
a separate frame.
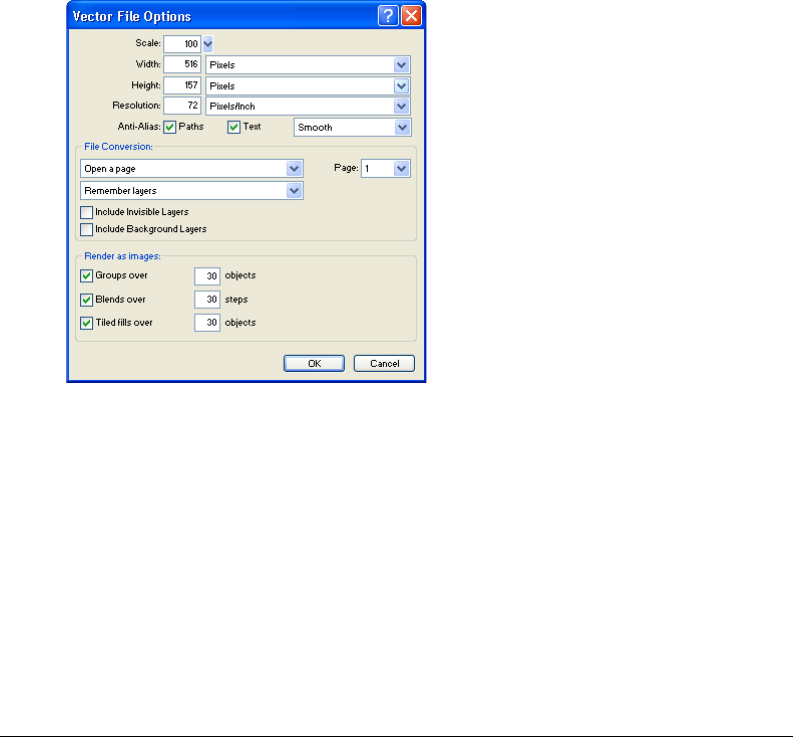
Using Fireworks with Other Applications 381
•The Ignore Layers option imports all objects on a single layer.
•The Remember Layers option maintains the layer structure of the imported file.
•The Convert Layers to Frames option places each layer of the imported document into a
separate frame.
Include Invisible Layers imports objects on layers that have been turned off. Otherwise, invisible
layers are ignored.
Include Background Layers imports objects from the document’s background layer. Otherwise,
the background layer is ignored.
Render as Images rasterizes complex groups, blends, or tiled fills and places each as a single
bitmap object in a Fireworks document. Enter a number in the text box to determine how many
objects a group, blend, or tiled fill can contain before it is rasterized during import.
To import vector graphics from a FreeHand file:
1In Fireworks, choose File > Open to navigate to the desired FreeHand file, and click Open.
The Vector File Options dialog box appears.
2Choose the desired options.
3Click OK.
Copying and pasting or dragging and dropping FreeHand graphics into
Fireworks
You can quickly place FreeHand graphics into Fireworks by copying and pasting or dragging and
dropping them.

Chapter 16382
To copy and paste a selected FreeHand graphic into Fireworks:
1In FreeHand, choose Edit > Copy.
2Create a new document in Fireworks or open an existing one.
3Choose Edit > Paste.
To drag and drop a FreeHand graphic into Fireworks:
Drag the graphic from FreeHand into an open document in Fireworks.
Placing Fireworks graphics into FreeHand
You can export vector paths from Fireworks to FreeHand. You can also copy and paste Fireworks
vector graphics into FreeHand.
To export a vector graphic to FreeHand:
1In Fireworks, choose File > Export or click the Quick Export button and choose Export to
FreeHand from the FreeHand pop-up menu.
2In the Export dialog box, type a filename and choose a destination folder.
3Choose Illustrator 7 from the Save As pop-up menu.
Note: Illustrator 7 is the graphics file format you use when exporting from Fireworks to any other vector graphics
application, including Macromedia FreeHand. Most vector applications can read the Illustrator 7 file format.
4Click the Options button.
5In the Illustrator Export Options dialog box, choose one of the following:
•Export Current Frame Only preserves layer names and exports only the current frame.
•Convert Frames to Layers exports each Fireworks frame as a layer.
6Choose FreeHand Compatible to export the file for use in FreeHand.
Choosing FreeHand Compatible omits bitmaps and converts gradient fills to solid fills.
7Click OK.
8Click Save in the Export dialog box.
Note: Upon export, Fireworks sets object edges to Hard.
9Switch to an open document in FreeHand.
10 Choose File > Open or File > Import to navigate to the file you exported from Fireworks, and
click Open.
Copying and pasting vectors into FreeHand
You can use the Copy Path Outlines command to copy selected Fireworks paths to FreeHand.
Copy Path Outlines copies only Fireworks paths.
Note: The copy-and-paste method of placing Fireworks vectors into other applications works not only with
FreeHand but also with Illustrator, CorelDraw, and Adobe Photoshop.

Using Fireworks with Other Applications 383
To copy selected Fireworks paths:
1Choose Edit > Copy Path Outlines or click the Quick Export button and choose Copy Path
Outlines from the FreeHand pop-up menu.
2Switch to an open document in FreeHand.
3Choose Edit > Paste to paste the paths.
Working with other vector graphics applications
Fireworks can share vector graphics with other vector graphics applications, including Adobe
Illustrator and CorelDraw. In Fireworks, you export and import vector graphics from these
applications in the same way that you export and import graphics from Macromedia FreeHand.
For more information, see “Working with Macromedia FreeHand” on page 380.
Unsupported features
Because Fireworks and other vector graphic editors do not always share the same features, the
appearance of objects will differ between applications.
Most other vector graphic editors, including Macromedia FreeHand, do not support the
following Fireworks features:
•Live Effects
•Blending modes
•Texture, pattern, web dither fills, and gradient fills
•Slice objects and image maps
•Many text formatting options
•Guides, grids, and canvas color
•Bitmap images
•Some strokes
Note: Because these features are not supported by most other vector graphics applications, Fireworks does not
include them upon export to those applications.
Likewise, Fireworks does not support every feature found in other vector graphics editors. For
example, when Fireworks imports CorelDraw (CDR) files, it makes the following adjustments to
account for unsupported features:
•Master page contents are repeated in each Fireworks frame.
•Only the two end objects of a CorelDraw blend are imported. The objects are grouped
after import.
•Dimensions convert to vector objects.
•Basic text is imported. Most character and paragraph parameters are unsupported.
•Colors are converted to RGB.
Note: Fireworks cannot open compressed CorelDraw files.

Chapter 16384
Working with Macromedia Director
You can combine the power of Fireworks and Director. Fireworks lets you export graphics and
interactive content into Director. The export process preserves the behaviors and slices of the
graphic. You can safely export sliced images with rollovers and even layered images. This lets
Director users take advantage of the optimization and graphic design tools of Fireworks without
compromising quality.
Note: If you are using Director 8.0 or earlier, you need to download and install the free Fireworks Import Xtra for
Director at http://www.macromedia.com.
Placing Fireworks files into Director
Director can import flattened images from Fireworks, such as JPEGs and GIFs. It can also import
32-bit PNG images with transparency. For sliced, interactive, and animated content, Director can
import Fireworks HTML.
For information on exporting flattened Fireworks images such as JPEGs and GIFs, see “Exporting
a single image” on page 347.
Exporting graphics with transparency
In Director, transparency can be achieved by importing 32-bit PNG images. You can export
32-bit PNG graphics with transparency from Fireworks.
To export a 32-bit PNG with transparency:
1In Fireworks, choose Window > Optimize, change the export file format to PNG 32, and set
Matte to transparent.
2Choose File > Export.
3Select Images Only from the Save as Type pop-up menu. Name the file, then click Save.
Exporting layered and sliced content to Director
By exporting Fireworks slices to Director, you can export sliced and interactive content such as
buttons and rollover images. By exporting layers to Director, you can export layered Fireworks
content such as animations.
To export Fireworks files to Director:
1In Fireworks, choose File > Export.
Note: Alternatively, you can click the Quick Export button and choose Source as Layers or Source as Slices from
the Director pop-up menu. Choose Source as Layers if you are exporting an animation, and Source as Slices if
you are exporting interactive content such as buttons.
2In the Export dialog box, type a filename and choose a destination folder.
3Choose Director from the Save As pop-up menu.
4Choose an option from the Source pop-up menu:
Fireworks Layers exports each layer in the document. Choose this option if you are exporting
layered content or an animation.
Fireworks Slices exports the slices in the document. Choose this option if you are exporting
sliced or interactive content such as rollover images and buttons.
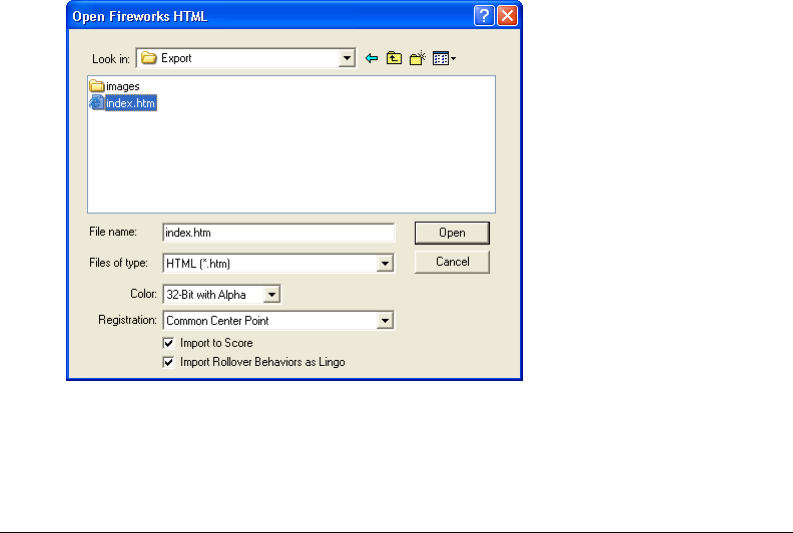
Using Fireworks with Other Applications 385
5Select Trim Images to automatically crop the exported images to fit the objects on each frame.
6Select Put Images in Subfolder to choose a folder for images.
7Click Save.
Importing Fireworks files into Director
In Director, you can import flattened images that you have exported from Fireworks, such as
JPEGs, GIFs, and 32-bit PNGs. Or you can import Fireworks layers, slices, and interactive
elements by inserting Fireworks HTML.
To import a flattened Fireworks image:
1In Director, choose File > Import.
2Navigate to the desired file and click Import.
3Change options if desired in the Image Options dialog box. For information about each
option, see Using Director.
4Click OK.
The imported graphic appears in the cast as a bitmap.
To import layered, sliced, or interactive Fireworks content:
1In Director, choose Insert > Fireworks > Images from Fireworks HTML.
Note: The location and name of this menu command may be different depending on your version of Director.
2Locate the Fireworks HTML file you exported for use in Director.
The Open Fireworks HTML dialog box appears.
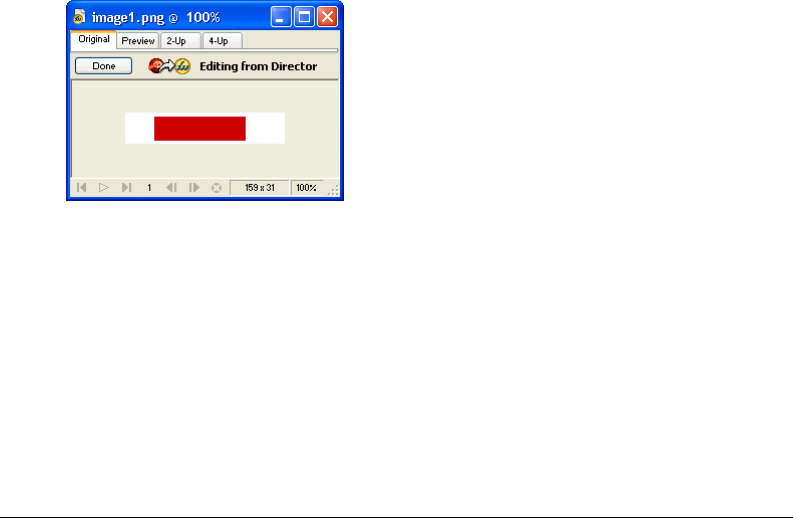
Chapter 16386
3Change options if desired:
Color allows you to specify a color depth for the imported graphics. If they contain
transparency, choose 32-bit color.
Registration allows you to set the registration point for the imported graphics.
Import Rollover Behaviors as Lingo converts Fireworks behaviors to Lingo code.
Import to Score places cast members into the Score upon import.
4Click Open.
The graphics and code from the Fireworks HTML file are imported.
Note: If you are importing a Fireworks animation, drag keyframes in Director to offset the timing of each
imported layer as necessary.
Editing Director cast members in Fireworks
Using launch-and-edit integration, you can make changes to Director cast members by launching
Fireworks to edit them from inside Director. You can also launch Fireworks from inside Director
to optimize cast members.
To launch Fireworks to edit a Director cast member:
1In Director, right-click (Windows) or Control-click (Macintosh) the graphic in the Cast window.
2Choose Launch External Editor from the pop-up menu.
Note: If Fireworks does not launch as your external image editor, in Director choose File > Preferences > Editors
and set Fireworks as the external editor for bitmap graphic file types.
The file opens in Fireworks, and the document window indicates that you are editing a file
from Director.
3Make changes to the image and click Done when finished.
Fireworks exports the new graphic to Director.

Using Fireworks with Other Applications 387
Optimizing cast members in Director
You can launch Fireworks from Director to make quick optimization changes to selected cast members.
To launch Fireworks to change optimization settings for a Director cast member:
1In Director, select the cast member in the Cast window and click Optimize in Fireworks on the
Bitmap tab of the Property inspector.
2In Fireworks, change the optimization settings as desired.
3Click Update when finished. Click Done if the MIX Editing dialog box appears.
The image is exported back to Director using the new settings.
Working with Macromedia HomeSite
You can use Fireworks and HomeSite together to create and edit web pages. Exporting and
opening Fireworks HTML in HomeSite is simple, and inserting Fireworks graphics into
HomeSite documents is just as easy. But even more important, Fireworks and HomeSite share a
powerful integration that allows you to launch Fireworks from HomeSite to edit web graphics.
Placing Fireworks images into HomeSite
You can insert Fireworks-generated GIF or JPEG images into a HomeSite document. You must
export the images from Fireworks first. For information on exporting GIF and JPEG images, see
“Exporting a single image” on page 347.
To insert a Fireworks image into a HomeSite document:
1In HomeSite, save your document.
Note: HomeSite creates relative paths to images, but it cannot do so unless your document is saved.
2In the Resources window, navigate to the Fireworks image you exported.
3Create a link to the Fireworks image in your document:
•Drag the file from the Resources window to the desired location within the HTML code on
the Edit tab of the Document window.
•On the Edit tab of the Document window, place the insertion point where you want to insert the
Fireworks image, then right-click the file in the Resources window and choose Insert as Link.
A link to the Fireworks image is created in the HTML code. Click the Browse tab to preview your
image within the document.
Placing Fireworks HTML into HomeSite
There are a few ways to place Fireworks HTML into HomeSite. You can export Fireworks
HTML, or you can copy HTML to the Clipboard. You can also open an exported Fireworks
HTML file in HomeSite and copy and paste selected sections of code. In addition, you can easily
update code you’ve exported to HomeSite using the Update HTML command in Fireworks.
Note: Before exporting, copying, or updating Fireworks HTML for use in HomeSite, be sure to set the HTML type
to Generic in the HTML Setup dialog box. For more information, see “Setting HTML export options” on page 358.

Chapter 16388
Exporting Fireworks HTML to HomeSite
Exporting HTML from Fireworks generates an HTML file and the associated image files in the
location you specify. You can then open the HTML file in HomeSite for further editing.
Note: Before exporting, be sure to set the HTML type to Generic in the HTML Setup dialog box. For more
information, see “Setting HTML export options” on page 358.
To export Fireworks HTML to HomeSite:
Export your document to HTML in Fireworks, and then open the exported file in HomeSite by
choosing File > Open. See “Exporting Fireworks HTML” on page 353.
Copying Fireworks HTML to the Clipboard for use in HomeSite
A fast way to place Fireworks-generated HTML in HomeSite is to copy it to the Clipboard from
Fireworks, and then paste it directly into a HomeSite document. When you copy Fireworks
HTML to the Clipboard, the required images are exported to a location you specify.
Note: Before copying to the Clipboard, be sure to set the HTML type to Generic in the HTML Setup dialog box. For
more information, see “Setting HTML export options” on page 358.
To copy Fireworks HTML for use in HomeSite:
Copy HTML to the Clipboard in Fireworks, and then paste it into an new HomeSite document.
See “Copying HTML to the Clipboard” on page 354.
Copying code from an exported Fireworks file and pasting it into
HomeSite
You can open an exported Fireworks HTML file in HomeSite and then manually copy and paste
only the desired sections into another HomeSite document.
Note: Before exporting, be sure to set the HTML type to Generic in the HTML Setup dialog box. For more
information, see “Setting HTML export options” on page 358.
To copy code from an exported Fireworks file and paste it into HomeSite:
Export a Fireworks HTML file, and then copy and paste the desired code into an existing
HomeSite document. See “Copying and pasting HTML from an exported Fireworks file” on page
355.
Updating Fireworks HTML exported to HomeSite
The Update HTML command allows you to make changes to a Fireworks HTML document
you’ve previously exported to HomeSite.
Note: Before updating HTML, be sure to set the HTML type to Generic in the HTML Setup dialog box. For more
information, see “Setting HTML export options” on page 358.
To update Fireworks HTML exported to HomeSite:
Use the Update HTML command in Fireworks. See “Updating exported HTML” on page 356.

Using Fireworks with Other Applications 389
Editing Fireworks images in HomeSite
You can use launch-and-edit integration to edit images in a HomeSite document. HomeSite
automatically launches Fireworks, letting you make the desired edits to the image. When you exit
Fireworks, the updates you made are automatically applied to the placed image in HomeSite.
Together, the two applications provide a streamlined workflow for editing web graphics in
HTML pages.
To launch and edit Fireworks images placed in HomeSite:
1In HomeSite, save your document.
2Do one of the following:
•Right-click the image file on one of the Files tabs in the Resources window.
•Right-click the image on the Thumbnails tab of the Results window.
•Right-click the associated <img> tag in the HTML code on the Edit tab of the Document window.
3Choose Edit in Macromedia Fireworks from the pop-up menu.
HomeSite launches Fireworks, if it is not already open.
4If prompted, specify whether to locate a Fireworks source file for the placed image. For more
information on Fireworks source PNG files, see “Saving Fireworks files” on page 80.
5In Fireworks, edit the image.
The document window indicates that you are editing a Fireworks image from another application.
6When you are finished making edits, click Done in the document window.
The updated image is exported back to HomeSite, and the PNG source file is saved if a source
file was selected.
Working with Microsoft FrontPage
Fireworks has powerful integration capabilities when used in combination with many applications,
even non-Macromedia products. Fireworks makes it easy to create and edit web page designs with
Microsoft FrontPage. Using Roundtrip HTML, you can easily launch Fireworks from FrontPage to
create or edit graphics and HTML tables. Roundtrip HTML, a powerful integration feature that
Fireworks shares with both FrontPage and Macromedia Dreamweaver, allows you to make changes
in one application and have those changes seamlessly reflected in the other.
Placing Fireworks images into FrontPage
Fireworks graphics can be placed into a FrontPage document in a couple of ways. You can place a
finished Fireworks graphic using the Insert menu in FrontPage, or you can create a new Fireworks
graphic by clicking the Edit in Fireworks button on the FrontPage main toolbar.
Inserting Fireworks images into FrontPage
You can insert Fireworks-generated GIF or JPEG images directly in a FrontPage document. You
must export the images from Fireworks first. For information on exporting GIF and JPEG
images, see “Exporting a single image” on page 347.

Chapter 16390
To insert a Fireworks image into a FrontPage document:
1In Edit or Code view, place the insertion point where you want the image to appear.
2Choose Insert > Picture > From File.
3Navigate to the desired Fireworks file, and click OK.
Creating new Fireworks images in FrontPage
You can launch Fireworks from within FrontPage to create an unsliced image.
Note: If you want to create a sliced image, you must first create and export a single, unsliced image. Then you can
launch and edit the graphic again in Fireworks to add slices and interactivity. For more information on launching and
editing existing graphics from FrontPage, see “Editing Fireworks files in FrontPage” on page 392.
To create an unsliced Fireworks image from FrontPage:
1Click the Launch and Edit Selected Graphic in Fireworks button in the FrontPage main toolbar.
2When a message appears asking if you’d like to create a new image, click Yes. Fireworks
launches, if it is not already open.
3Open a new document in Fireworks and create an image.
4Choose File > Save when you are finished. Specify a name and location for the source PNG file
from the Save As dialog box, and click Save.
For more information on saving Fireworks PNG files, see “Saving Fireworks files” on page 80.
5Choose File > Export. Specify a name and location for the exported image file from the Export
dialog box.
6Click Save in the Export dialog box to export your file.
7Return to FrontPage.
8In Edit or Code view, place the insertion point where you want the image to appear.
9Choose Insert > Picture > From File.
10 Navigate to the image file you just exported, and click Insert.
Placing Fireworks HTML into FrontPage
There are a few ways to place Fireworks HTML into FrontPage. You can export HTML or you
can copy Fireworks HTML to the Clipboard. You can also open an exported Fireworks HTML
file in FrontPage and copy and paste selected sections of code. In addition, you can easily update
code you’ve exported to FrontPage using the Update HTML command in Fireworks.
Note: Before exporting, copying, or updating Fireworks HTML for use in FrontPage, be sure to choose
FrontPage as the HTML type in the HTML Setup dialog box. For more information, see “Setting HTML export
options” on page 358.
Exporting Fireworks HTML to FrontPage
Exporting HTML from Fireworks generates an HTML file and the associated image files in the
location you specify. You can then open the HTML file in FrontPage for further editing.
Note: Before exporting Fireworks HTML for use in FrontPage, be sure to choose FrontPage as the HTML type in
the HTML Setup dialog box. For more information, see “Setting HTML export options” on page 358.

Using Fireworks with Other Applications 391
To export Fireworks HTML to FrontPage:
Export your Fireworks document to HTML, and then open the exported HTML file in
FrontPage by choosing File > Open. See “Exporting Fireworks HTML” on page 353.
Copying Fireworks HTML to the Clipboard for use in FrontPage
A fast way to place Fireworks-generated HTML in FrontPage is to copy it to the Clipboard from
Fireworks, and then paste it directly into a FrontPage document. All HTML and JavaScript code
associated with the Fireworks document will be copied into the FrontPage document, and all
images are exported to a location you specify.
Note: Before copying Fireworks HTML for use in FrontPage, be sure to choose FrontPage as the HTML type in the
HTML Setup dialog box. For more information, see “Setting HTML export options” on page 358.
To copy Fireworks HTML to the Clipboard for use in FrontPage:
Copy HTML to the Clipboard in Fireworks and then paste it into an new FrontPage document.
See “Copying HTML to the Clipboard” on page 354.
Note: This method is not recommended if your Fireworks document contains buttons or other interactive elements
that require JavaScript code, because the HTML and JavaScript will need to be modified once pasted into
FrontPage. For more information, see “Exporting HTML” on page 351.
Copying code from an exported Fireworks file and pasting it into
FrontPage
You can open an exported Fireworks HTML file in FrontPage and then manually copy and paste
only the desired sections into another FrontPage document.
Note: Be sure to choose FrontPage as the HTML type in the HTML Setup dialog box before you export from
Fireworks. For more information, see “Setting HTML export options” on page 358.
To copy code from an exported Fireworks file and paste it into FrontPage:
Export a Fireworks HTML file, and then copy and paste the desired code into an existing
FrontPage document. See “Copying and pasting HTML from an exported Fireworks file” on page
355.
Updating Fireworks HTML exported to FrontPage
The Update HTML command allows you to make changes to a Fireworks HTML document
you’ve previously exported to FrontPage.
Note: Before updating Fireworks HTML, be sure to choose FrontPage as the HTML type in the HTML Setup dialog
box. For more information, see “Setting HTML export options” on page 358.
To update Fireworks HTML exported to FrontPage:
Use the Update HTML command in Fireworks. See “Updating exported HTML” on page 356.

Chapter 16392
Editing Fireworks files in FrontPage
Using Fireworks and FrontPage together is easy with Roundtrip HTML, a feature that allows you
to make changes in one application and have those changes seamlessly reflected in the other.
With Roundtrip HTML, you use launch-and-edit integration to edit Fireworks-generated images
and tables placed in a FrontPage document. FrontPage automatically launches Fireworks, letting
you make the desired Fireworks edits to the image. The updates you make in Fireworks are
automatically applied to the placed image in FrontPage. Together, the two applications provide a
streamlined workflow for editing and placing web graphics files in HTML pages.
To launch and edit Fireworks images and tables placed in FrontPage:
1In FrontPage, save your document.
2Select the image or table slice you wish to edit and click the Launch and Edit Selected Graphic
in Fireworks button.
FrontPage launches Fireworks, if it is not already open.
3If prompted, specify whether to launch a source Fireworks file for the placed image or table slice.
For more information on Fireworks source PNG files, see “Saving Fireworks files” on page 80.
Note: When you launch and edit an image or slice that is part of a Fireworks table, Fireworks launches the source
PNG file for the entire table.
4In Fireworks, edit the image. The document window indicates that you are editing a Fireworks
image from FrontPage.
5When you are finished making edits, click Done in the document window.
The image or HTML is exported using the current optimization settings, the graphics used by
FrontPage are updated, and the PNG source file is saved if a source file was selected.
Working with Adobe Photoshop
Fireworks provides excellent support for importing native Photoshop (PSD) files, with options for
retaining many aspects of the imported files, including layers, masks, and editable text. As a result,
you can bring Photoshop images into Fireworks for further editing and web optimization without
losing the ability to export the images back into Photoshop.
Placing Photoshop graphics into Fireworks
You can drag and drop individual Photoshop graphics into Fireworks, or you can import an entire
Photoshop file.
Dragging and dropping individual Photoshop graphics into Fireworks
You can place Photoshop graphics into Fireworks by dragging and dropping them.
To drag and drop a Photoshop graphic into Fireworks:
Drag the graphic from Photoshop into an open document in Fireworks.
Each graphic you drag becomes a new bitmap object. Text is also imported as a bitmap object
and becomes uneditable as text. For more information, see “About importing text from
Photoshop” on page 393.

Using Fireworks with Other Applications 393
Importing Photoshop files into Fireworks
When you import or open a Photoshop file in Fireworks, the Photoshop file is imported into a
PNG file using the import preferences that you have specified. In addition to preserving layers
and text as specified by the import options, Fireworks preserves and converts the following
Photoshop features:
•Layer masks convert to Fireworks object masks.
•Layer effects convert to Fireworks Live Effects, if a corresponding Live Effect exists. For
example, the Drop Shadow layer effect converts to a Drop Shadow Live Effect in Fireworks.
Note: Layer effects and Live Effects may vary in appearance slightly.
•Blending modes for layers convert to Fireworks blending modes for corresponding objects, if
those blending modes are supported by Fireworks.
•The first alpha channel in the Channels palette converts to transparent areas in the Fireworks
image. Fireworks does not support additional Photoshop alpha channels.
Photoshop adjustment layers, clipping groups, and paths are not supported by Fireworks.
Fireworks ignores these features when importing Photoshop files.
Note: In Windows, Photoshop filenames must include a PSD extension for Fireworks to recognize the
Photoshop file type.
To import a Photoshop file into Fireworks:
1Choose File > Import or File > Open and navigate to a Photoshop (PSD) file.
2Click Open.
The Photoshop file is imported into a PNG file. If you make changes and want to save the file
as a PSD, you must export it to PSD format. For more information, see “Placing Fireworks
graphics into Photoshop” on page 395.
About importing text from Photoshop
You can open or import a Photoshop file containing text.
When opening Photoshop files that contain text, Fireworks will check to see if you have the
necessary fonts on your system. If you don’t, Fireworks will ask if you want to replace the fonts or
maintain their appearance. For more information, see “Handling missing fonts” on page 186.
If the text in your Photoshop file has effects applied to it that Fireworks supports, the effects will
still be applied when brought into Fireworks. However, because Fireworks and Photoshop apply
effects differently, the effects may appear different in each application.
When Photoshop 6 or 7 files that contain text are opened or imported in Fireworks, a cached
image of the text is displayed so its appearance remains the same as it was in Photoshop. Once you
edit the text, the cached image will be replaced with actual text that may differ in appearance
from the original text.
Note: Fireworks cannot export text in Photoshop 6 or 7 format. If you edit a document containing Photoshop 6 or 7
text and then export the document back to Photoshop, the file will be exported in Photoshop 5.5 format. However, if
you don’t make any change to the text, the file will be exported in Photoshop 6 format. For more about exporting
Photoshop files, see “Placing Fireworks graphics into Photoshop” on page 395.

Chapter 16394
Specifying Photoshop file import options
The import preference options in Fireworks let you specify how to handle layers and text in
imported Photoshop files. Depending on the options that you choose, you can control the degree
of appearance and editability retained in imported files.
To specify import options for Photoshop files:
1Choose Edit > Preferences.
Note: On Mac OS X, choose Fireworks > Preferences.
2Click the Import tab (Windows) or choose Import from the pop-up menu (Macintosh).
3Specify import options:
Layers: Convert to Fireworks Objects imports each layer in the Photoshop file as a separate
object on a single layer in Fireworks.
Layers: Share Layer Between Frames makes the imported layers visible across all frames in the
Fireworks file.
Layers: Convert to Frames imports each layer in the Photoshop file as an object on a
separate frame in Fireworks. This option is useful for importing files that you want to use
as animations.
Text: Editable converts text in the Photoshop file to editable Fireworks text. This option lets
you edit imported text using the Fireworks Text tool and the Property inspector. The converted
text may vary slightly in appearance from the original.
Text: Maintain Appearance converts text in the Photoshop file to a bitmap object in Fireworks.
This option maintains the original appearance of the text but does not allow you to edit it
using the Fireworks Text tool.
Use Flat Composite Image imports the Photoshop file as a flattened image without layers.
4Click OK.
Importing Photoshop filters and plug-ins
Fireworks lets you import Photoshop and other third-party filters and plug-ins. You can import
filters into either the Live Effects window or the Filters menu. Importing filters into either
location makes them available from both.
Note: Photoshop 6 and 7 plug-ins and filters are not compatible with Fireworks MX. On the Macintosh, third-party
filters designed to run on Mac OS 9 are supported by Fireworks MX when running on Mac OS 9, and third-party
filters designed to run on Mac OS X are supported by Fireworks MX when running on Mac OS X.
For more information on the Live Effects window and the Filters menu, see “Using Live Effects”
on page 215.
To import Photoshop and other third-party filters and plug-ins using the Preferences dialog box:
1Choose Edit > Preferences.
Note: On Mac OS X, choose Fireworks > Preferences.
2Click the Folders tab (Windows) or choose Folders from the pop-up menu (Macintosh).

Using Fireworks with Other Applications 395
3Choose the Photoshop Plug-ins option.
The Select a Folder (Windows) or Choose a Folder (Macintosh) dialog box opens.
Note: If the dialog box doesn’t automatically open, click Browse.
4Navigate to the folder where the Photoshop or other filters and plug-ins are installed, and click
Select (Windows) or Choose (Macintosh).
5Click OK to close the Preferences dialog box.
6Restart Fireworks to load the filters and plug-ins.
To import Photoshop and other third-party filters and plug-ins using the Live Effects window:
1Select any vector object, bitmap object, or text block on the canvas and click the Add Effects
button in the Property inspector.
Note: The Add Effects button is available only when an object is selected on the canvas.
2Choose Options > Locate Plug-ins from the pop-up menu that appears.
3Navigate to the folder where the Photoshop or other filters and plug-ins are installed, and click
Select (Windows) or Choose (Macintosh). If a message appears asking if you want to restart
Fireworks, click OK.
4Restart Fireworks to load the filters and plug-ins.
Placing Fireworks graphics into Photoshop
Fireworks provides extensive support for exporting files in Photoshop (PSD) format. Export
settings let you control which elements in the file remain editable when you reopen it in Photoshop.
A Fireworks image exported into Photoshop maintains the same editability when reopened in
Fireworks as other Photoshop graphics. Export options for editability, appearance, and file size let
you determine the best possible export procedure for your particular graphic. Photoshop users can
work with their graphic in Fireworks and then continue editing in Photoshop.
To export a file in Photoshop format:
1Choose File > Export or click the Quick Export button and choose Other > Export to
Photoshop.
2In the Export dialog box, name your file and choose Photoshop PSD from the Save As menu.
3To specify grouped export settings, choose an option from the Settings menu. These settings
provide preset combinations of individual export options for objects, effects, and text in the
Fireworks file. Individual export options are described in detail in “Customizing files for export
to Photoshop” on page 396.
•Maintain Editability over Appearance converts objects to layers, keeps effects editable, and
converts the text to editable Photoshop text layers. Choose this option if you plan to edit the
image extensively in Photoshop and do not need to preserve the exact appearance of the
Fireworks image.
•Maintain Fireworks Appearance converts each object into an individual Photoshop layer, and
effects and text become noneditable. Choose this option if you want to maintain control over
the Fireworks objects in Photoshop but also want to maintain the original appearance of the
Fireworks image.

Chapter 16396
•Smaller Photoshop File flattens each layer into a fully rendered image. Choose this option if
you are exporting a file containing a large number of Fireworks objects.
•Custom allows you to choose specific settings for objects, effects, and text.
4Click Save to export the Photoshop file.
Note: Photoshop 5.5 and earlier cannot open files with more than 100 layers. You must delete or merge objects
if the Fireworks document you are exporting contains more than 100 objects.
Customizing files for export to Photoshop
When you export a file to Photoshop, you can choose customized settings for exporting objects,
effects, and text.
To customize settings for export to Photoshop:
1In the Export dialog box while Photoshop PSD is selected as the export file type, choose
Custom from the Settings pop-up menu.
2In the Objects pop-up menu, choose one of the following:
Convert to Photoshop Layers converts individual Fireworks objects to Photoshop layers and
Fireworks masks to Photoshop layer masks.
Flatten Each Fireworks Layer flattens all Fireworks objects into a single Photoshop layer.
When you choose this option, you lose the ability to edit the Fireworks objects in Photoshop.
You also lose features, such as blending modes, that are associated with the Fireworks objects.
3In the Effects pop-up menu, choose one of the following:
Maintain Editability converts Fireworks Live Effects to their equivalent in Photoshop. If the
effects do not exist in Photoshop, they are discarded.
Render Effects flattens effects into their objects. When you choose this option, you preserve
the appearance of the effects, at expense of the ability to edit them in Photoshop.
4In the Text pop-up menu, choose one of the following:
Maintain Editability converts text to an editable Photoshop layer. Text formatting that is not
supported by Photoshop will be lost.
Render Text turns text into an image object. When you choose this option, you preserve the
appearance of the text, at expense of the ability to edit it.
About working with Adobe GoLive
You can use Fireworks and Adobe® GoLive® together to create and edit web pages. You can export
and copy Fireworks HTML to Adobe GoLive the same way you can with most other HTML
editors. The only exception is that you must choose GoLive HTML as your HTML style before
you export or copy HTML from Fireworks.
For more information on choosing an HTML style, see “Setting HTML export options” on page
358. For information on exporting and copying Fireworks HTML, see “Exporting HTML” on
page 351.
Note: The Adobe GoLive HTML style does not support pop-up menu code. If your Fireworks document contains
pop-up menus, you should choose Generic HTML as the HTML style before exporting.

Using Fireworks with Other Applications 397
About working with HTML editors
Fireworks generates pure HTML that can be read by all HTML editors. For general information
on placing Fireworks HTML into HTML editors, see “Exporting HTML” on page 351.
Fireworks offers special integration features for Macromedia Dreamweaver, Macromedia
HomeSite, and Microsoft FrontPage. For details on working with these applications, see Chapter
16, “Using Fireworks with Other Applications,” on page 361.
Fireworks can also import HTML content. This is a powerful feature, allowing you to open and
edit most any HTML document within Fireworks. For more information, see “Creating
Fireworks PNG files from HTML files” on page 76.

Chapter 16398

399
CHAPTER 17
Automating Repetitive Tasks
Web designers often get bogged down in repetitive tasks, such as optimizing images or converting
images to fit within certain constraints. Part of the power of Macromedia Fireworks MX is its
capability to automate and simplify many tedious drawing, editing, and file conversion tasks.
To speed up your editing process, you can use Find and Replace to search for and replace elements
within a file or elements from multiple files. You can find and replace elements such as URLs,
fonts, color, text, and commands created in the History panel.
You can use the Batch Process feature to convert entire groups of image files into other formats or to
change their color palettes. Batch Process can apply custom optimization settings to groups of files.
You can also resize a group of files, making Batch Process an ideal tool for creating thumbnails.
Using the History panel, you can create commands that are shortcuts for commonly used features
or create a script that can perform a complex series of steps. Fireworks can understand and execute
JavaScript, so advanced users can automate very complex tasks by writing JavaScript commands
and then executing them within Fireworks. You can control nearly every Fireworks command or
setting through JavaScript using special JavaScript commands that Fireworks can interpret.
The Extension Manager lets you import, install, and delete extensions in Macromedia
applications to extend the capabilities of Fireworks.
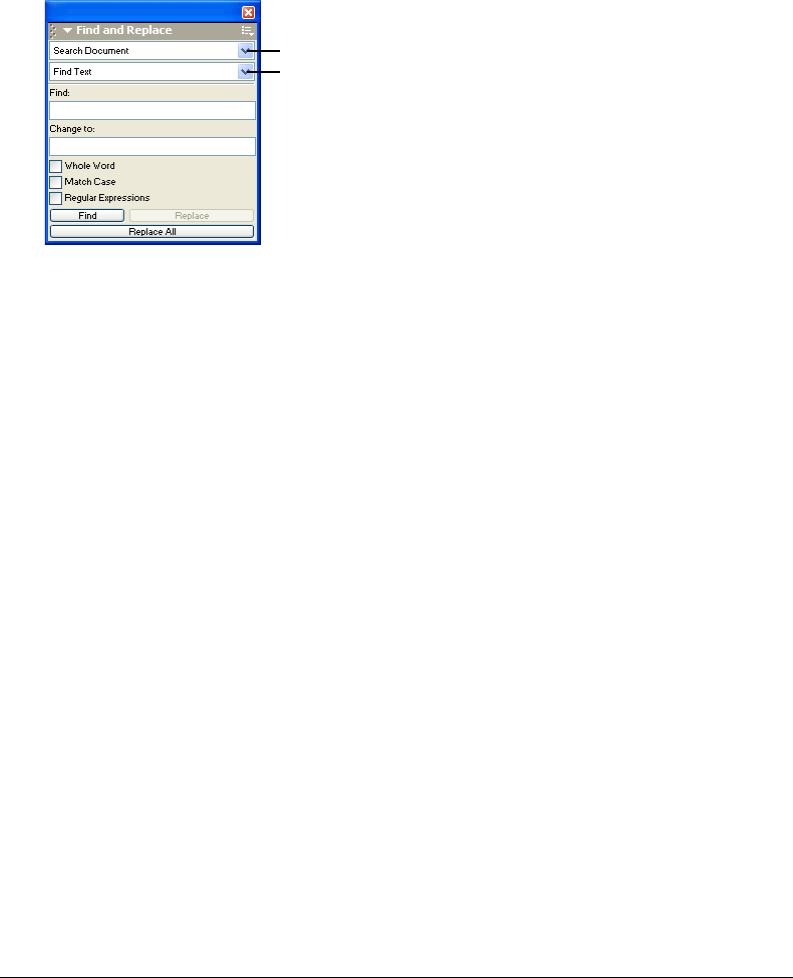
Chapter 17400
Finding and replacing
The Find and Replace feature helps you search for and replace elements, such as text, URLs,
fonts, and colors. Find and Replace can search the current document or multiple files.
As you use Find and Replace, Fireworks tracks and stores a log of the changes in the Project Log
panel. Find and Replace works only in Fireworks PNG files or in files containing vector objects,
such as FreeHand, uncompressed CorelDraw, and Illustrator files.
Find and Replace panel
To select the source for the search:
1Open the document.
2Do one of the following to open the Find and Replace panel:
•Choose Window > Find and Replace.
•Choose Edit > Find and Replace.
•Press Control+F (Windows) or Command+F (Macintosh).
3From the Search pop-up menu, choose a source for the search:
Search Selection finds and replaces elements only among the currently selected objects and text.
Search Frame finds and replaces elements only within the current frame.
Search Document finds and replaces elements in the active document.
Search Project Log finds and replaces elements in files listed in the Project Log. For more
information, see “Managing searches with the Project Log” on page 412.
Search Files finds and replaces elements across multiple files. If this option is not already
chosen in the Search pop-up menu, choosing it will open a dialog box in which you can choose
which files to search. If Search Files is already selected in the Search pop-up menu, you’ll have
the option to choose which files to search after you begin the search operation by clicking Find,
Replace, or Replace All.
4From the Find pop-up menu, choose an attribute to search for. The options in the panel
change depending on your selection.
5Set the options for the selected Find attribute.
Search option
Find option
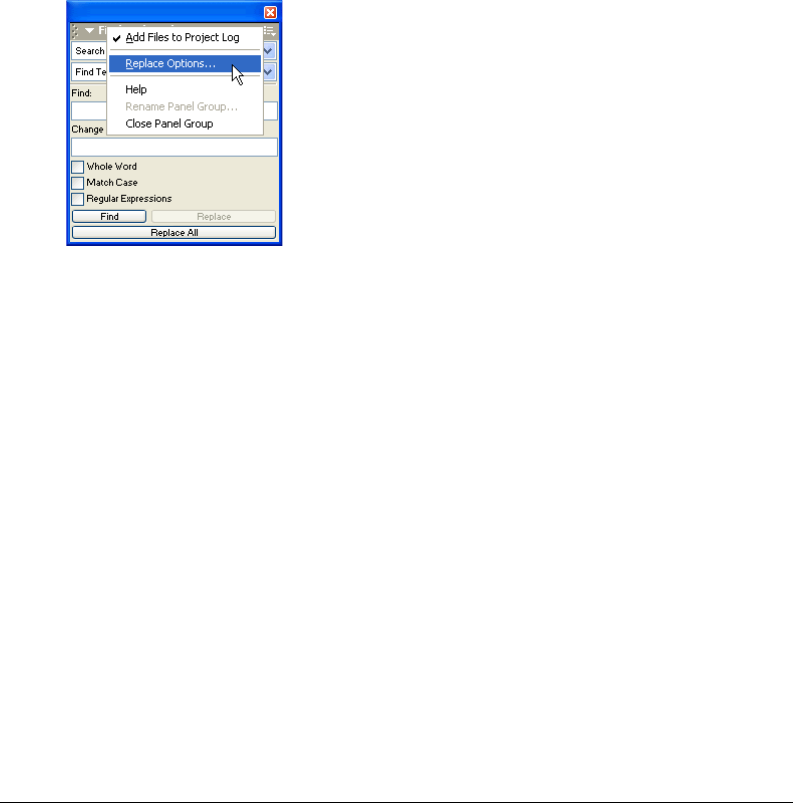
Automating Repetitive Tasks 401
6Choose a find-and-replace operation:
Find locates the next instance of the element. Found elements appear selected in the document.
Replace changes a found element with the contents of the Change To option.
Replace All finds and replaces every occasion of a found element throughout the search range.
Note: Replacing objects in multiple files automatically saves those files; you cannot reverse the change using
Edit > Undo. For more information, see “Finding and replacing during a batch process” on page 408.
Setting options for finding and replacing in multiple files
When finding and replacing among multiple files, you can determine how multiple open files are
handled after the search.
To save, close, and back up each file after it is searched:
1Choose Replace Options from the Find and Replace panel Options menu.
2Choose Save and Close Files to save and close each file after the find and replace.
Only the originally active documents remain open.
Note: If Save and Close is disabled and you are batch processing a large number of files, Fireworks may run out
of memory and abort the batch process.
3Choose one of the following from the Backups pop-up menu:
No Backups finds and replaces without backing up original files. The changed files replace the
original files.
Overwrite Existing Backups creates and stores only one backup copy of each file changed
during a find and replace. If you perform additional find-and-replace operations, the previous
original file always replaces the backup copy. The backup copies are stored in a subfolder called
Original Files.
Incremental Backups saves all backup copies of files changed during a find and replace. The
original files are moved to an Original Files subfolder within their current folder, and an
incremental number is appended to each filename. If you perform additional find-and-replace
operations, the original file is copied to the Original Files folder, and the next higher number is
added to its filename. For example, for a file named Drawing.png, the first time you find and
replace, the backup file is named Drawing-1.png. The second time you find and replace, the
backup file is named Drawing-2.png, and so on.
4Click OK.
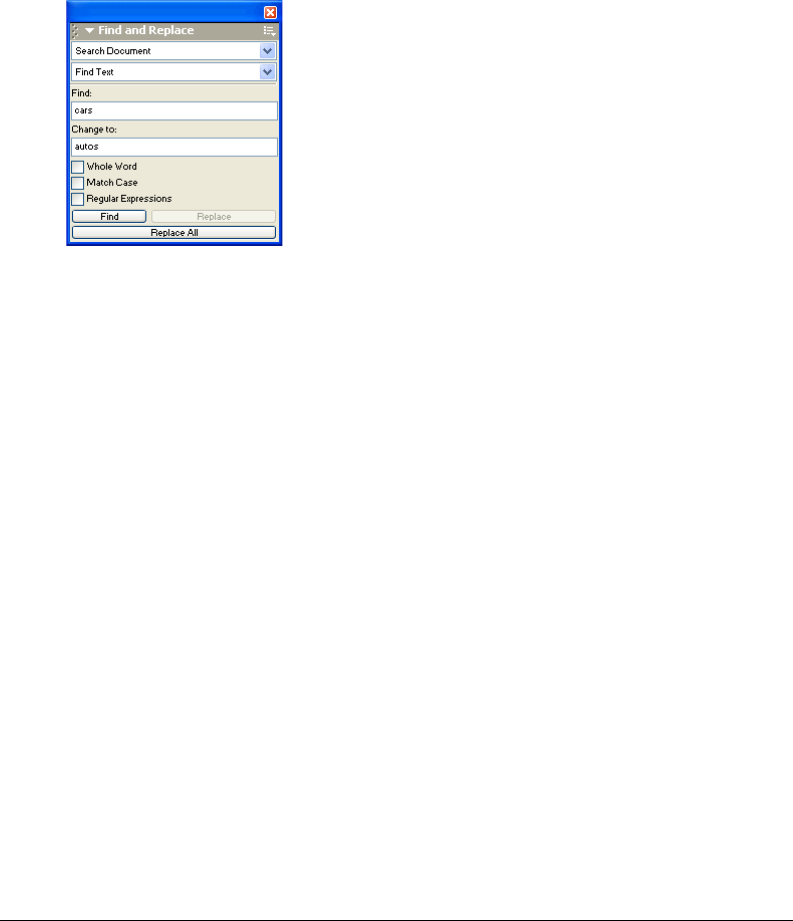
Chapter 17402
Finding and replacing text
Fireworks makes it easy to search for and replace text. You have a variety of options to refine your
search to consider case or to find entire words or parts of words.
To search for and replace words, phrases, or text strings:
1Choose Find Text from the Find pop-up menu of the Find and Replace panel.
2Enter the text to search for in the Find text box.
3Enter the replacement text in the Change To text box.
4If you wish, choose options to further define the search:
Whole Word finds the text only in the same form in which it appears in the Find option, not as
part of any other word.
Match Case distinguishes between uppercase and lowercase letters when searching text.
Regular Expressions matches parts of words or numbers conditionally during a search.
Finding and replacing fonts
You can also quickly find and replace fonts in your Fireworks documents.
To search for and replace fonts in one or more Fireworks documents:
1Choose Find Font from the Find pop-up menu of the Find and Replace panel.
2Choose the font and font style to find.
Tip: You can restrict your search by minimum and maximum point sizes.
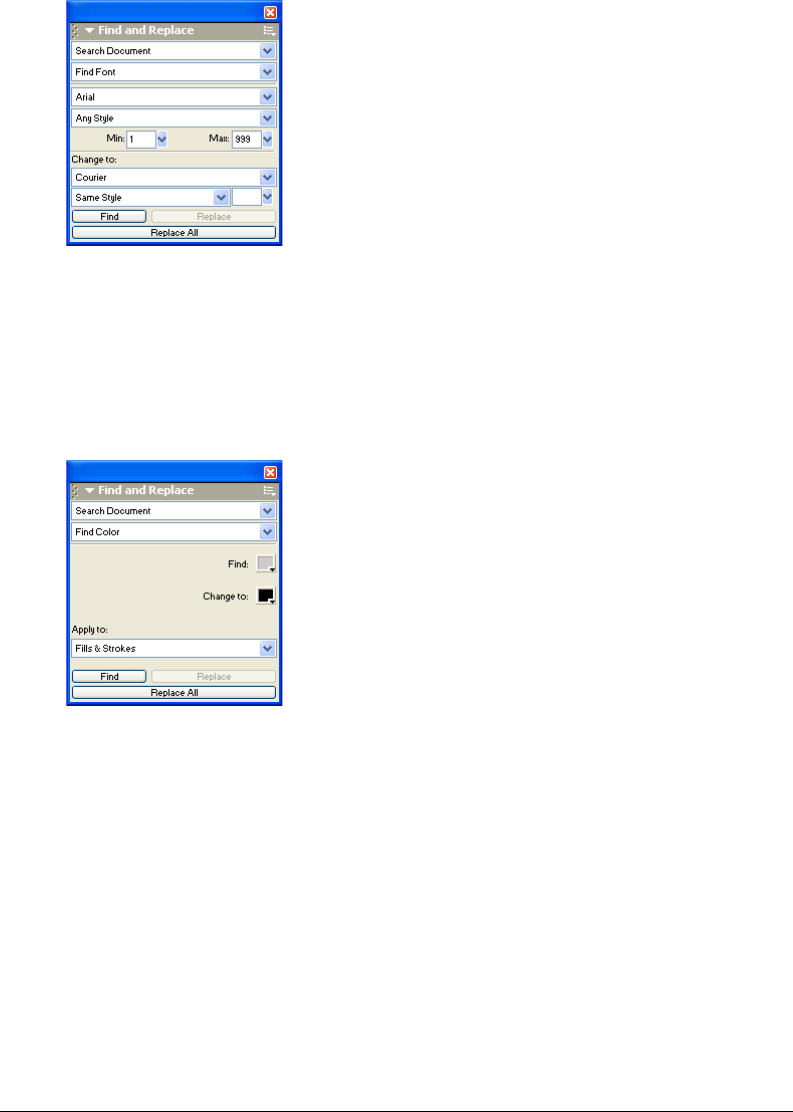
Automating Repetitive Tasks 403
3Specify the font, font style, and point size to use as a replacement in the Change To area.
Finding and replacing colors
You can find all instances of a certain color in your Fireworks documents and then change it to
something else.
To search for and replace colors in Fireworks documents:
1Choose Find Color from the Find pop-up menu.
2Choose an item from the Apply To pop-up menu to determine how the colors found in the
find and replace are applied:
Fills & Strokes finds and replaces both fill and stroke colors.
All Properties finds and replaces fill, stroke, and effect colors.
Fills finds and replaces a fill color, except within pattern fills.
Strokes finds and replaces stroke colors only.
Effects finds and replaces effect colors only.

Chapter 17404
Finding and replacing URLs
In addition to words, typefaces, and colors, Fireworks allows you to find and replace URLs
assigned to interactive elements in your documents.
To search for and replace URLs assigned to web objects:
1Choose Find URL from the Find pop-up menu of the Find and Replace panel.
2Enter the URL to search for in the Find text box.
3Enter the replacement URL in the Change To text box.
4If you wish, choose options to further define the search:
Whole Word finds the text only in the same form in which it appears in the Find option, not as
part of any other word.
Match Case distinguishes between uppercase and lowercase letters when searching text.
Regular Expressions matches parts of words or numbers conditionally during a search.
Finding and replacing non-websafe colors
A non-websafe color is a color not included in the Web216 color palette. A color is websafe if it
dependably appears to be the same color on both Macintosh and Windows platforms. For more
information about websafe colors, see “Optimizing GIFs, PNGs, TIFFs, BMPs, and PICTs” on
page 333.
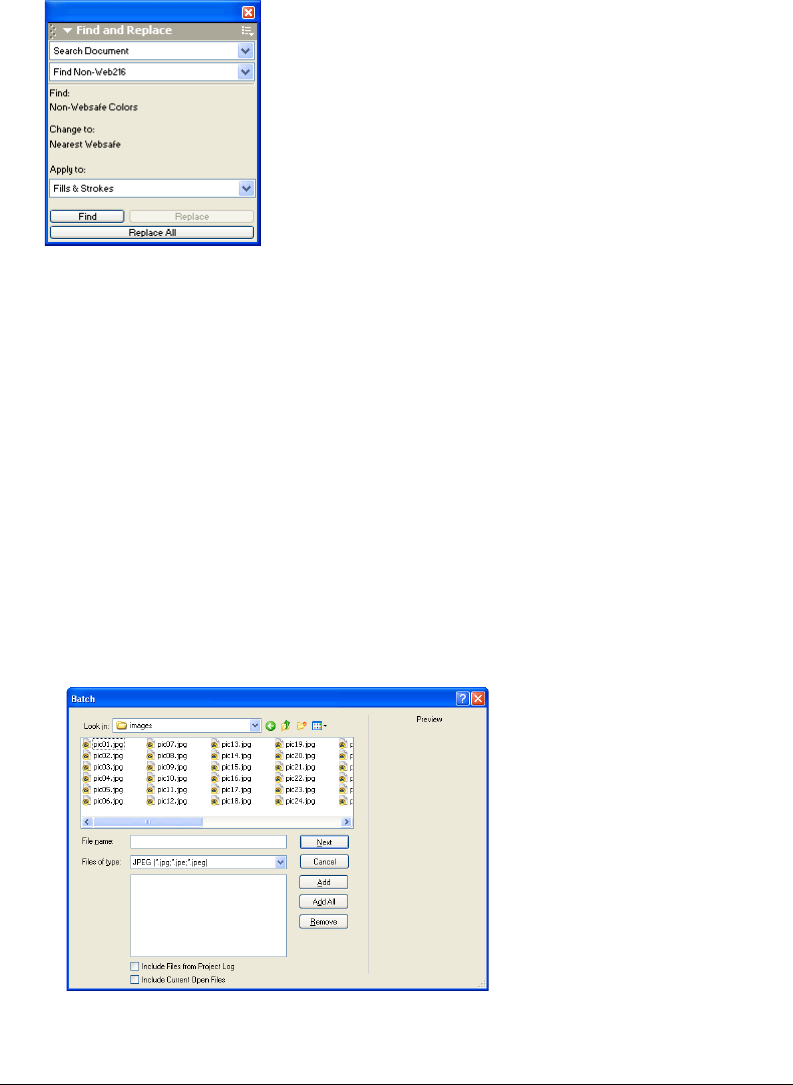
Automating Repetitive Tasks 405
To search for all non-websafe colors and replace them with websafe colors:
Choose Find Non-Web216 from the Find pop-up menu of the Find and Replace panel.
Note: Find Non-Web216 does not find or replace pixels within image objects.
Batch processing
Batch processing is a convenient way to automatically convert a group of graphic files. These are
the batch processing options:
•Convert a selection of files to another format.
•Convert a selection of files to the same format with different optimization settings.
•Scale exported files.
•Find and replace text, colors, URLs, fonts, and non-Web216 colors.
•Rename groups of files by adding a prefix or suffix.
•Perform commands on a selection of files.
To batch process files:
1Choose File > Batch Process.
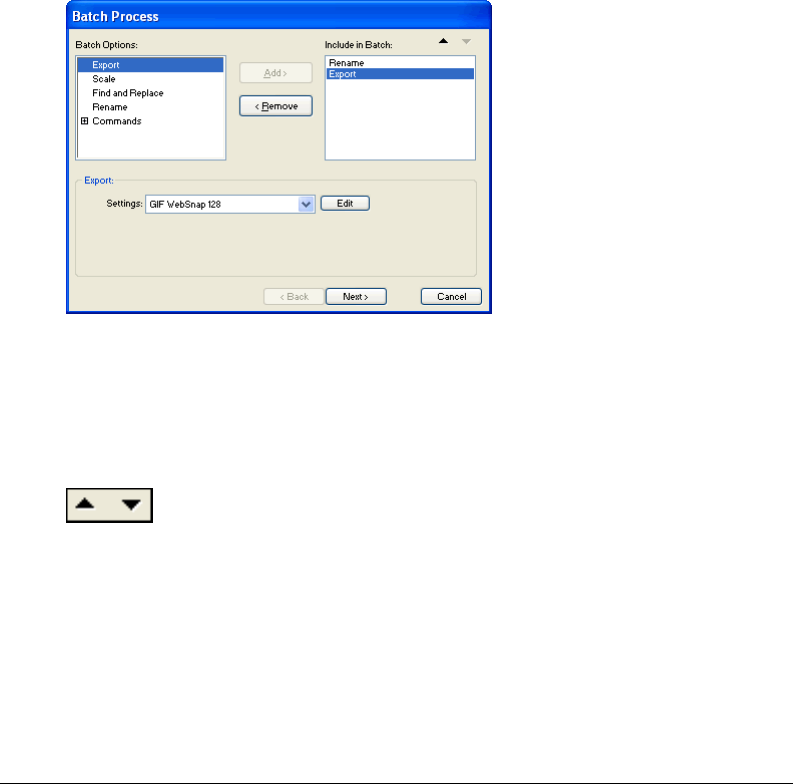
Chapter 17406
2Choose the files to process. You can choose files from different folders or group them by file type.
Add adds selected files and folders to the list of files to batch process. If a folder is selected, all
valid, readable files within the folder are added to the batch process.
Note: Valid files are files that have been created, named, and saved. If the latest file version is not saved, you are
asked to save it, and you can then continue the batch process. If you don’t save the file, the entire batch process ends.
Add All adds all valid files in the currently selected folder to the list of files to batch process.
Remove removes selected files from the list of files to batch process.
3Choose Include Files from Project Log to add all files from the Project Log.
These files do not appear in the list of files to batch process, but they are included in the process.
4Choose Include Current Open Files to add all currently open files.
These files do not appear in the list of files to batch process, but they are included in the process.
5Click Next, then do one or both of the following:
•To add a task to the batch, select it in the Batch Options list and click Add. Each task can be
added only once. For more information on adding commands, see “Performing commands
with a batch process” on page 409.
•To reorder the list, select the task in the Include in Batch list and click the up and down
arrow buttons.
Note: The order in which tasks appear in the Include in Batch list is the order in which the tasks will be performed
during the batch process, with the exception of Export, which is always performed last.
6To view extra options for a task, select the task in the Include in Batch list.
7Choose settings for each option as required.
To remove a task from the batch, select the task in the Include in Batch list and click Remove.
8Click Next.
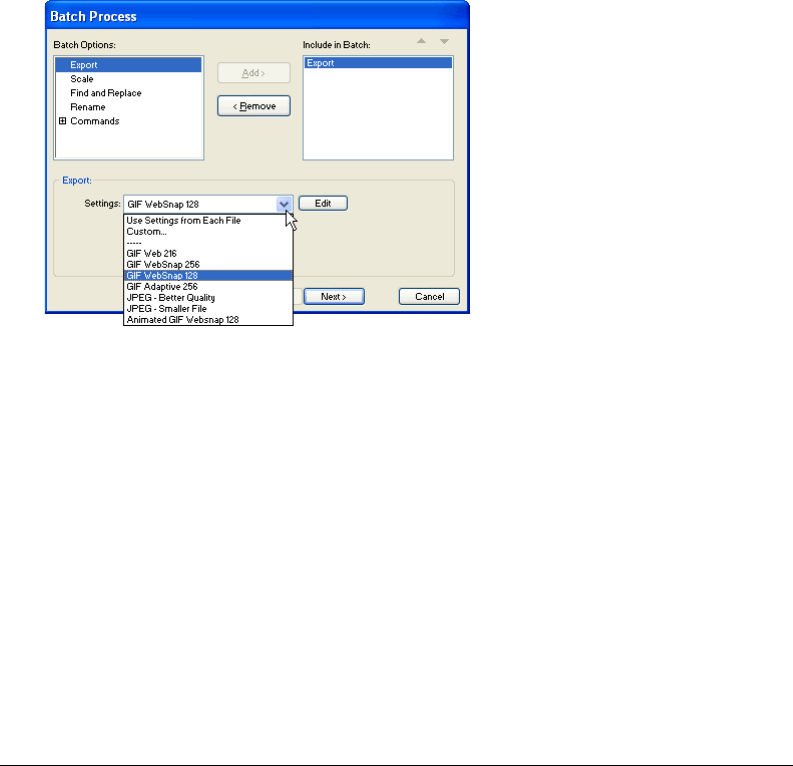
Automating Repetitive Tasks 407
9Choose options for saving processed files:
Same Location as Original File saves the file in the same location as its source file and
overwrites the source file if the filenames are the same and in the same format.
Custom Location lets you choose a location in which to save the processed files.
10 Select Backups to choose backup options for the original files.
It is always safer to back up files. For more information, see “Specifying the batch process
output location” on page 410.
11 Click Save Script if you want to save the batch process settings for future use.
For more information, see “Saving batch processes as scripts” on page 410.
12 Click Batch to perform your batch process.
Changing optimization settings with a batch process
You can change file optimization settings using the Export option in the Batch Process dialog box.
To set export settings for a batch process:
1Choose Export from the Batch Options list and click Add.
2From the Settings pop-up menu, choose from the following options and click OK:
•Choose Use Settings from Each File to keep each file’s previous export settings during the
batch process. For example, when you batch process a folder of GIFs and JPEGs, the resulting
files remain GIFs and JPEGs and the original palette and compression settings are used when
exporting each file.
•Choose Custom or click Edit to change settings in the Export Preview dialog box.
•Choose a preset export setting such as GIF Web216 or JPEG – Better Quality. All files will be
converted to this setting.
3Click Next to continue the batch process.
For information on completing the batch process, see “Batch processing” on page 405.
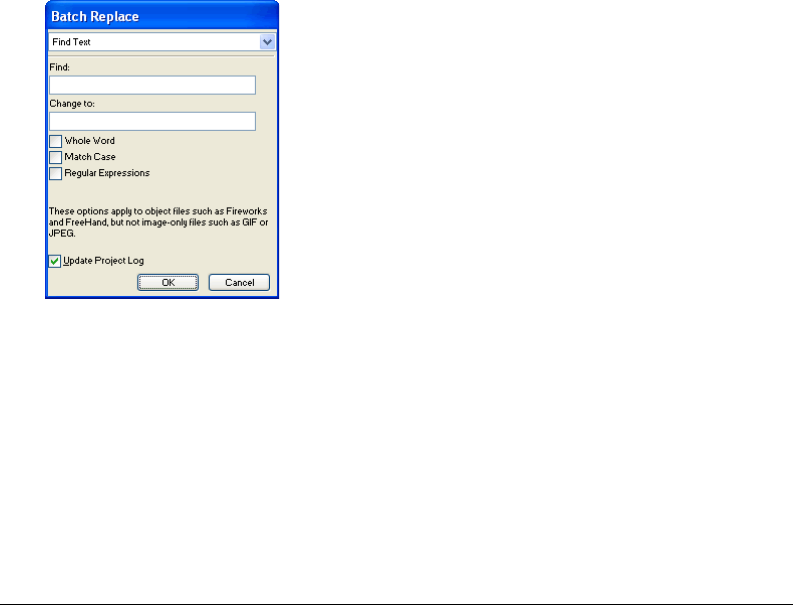
Chapter 17408
Scaling graphics with a batch process
You can alter the height and width of images being exported using the Scale option in the Batch
Process dialog box.
To set scaling options for batch-processed files:
1Choose Scale from the Batch Options list and click Add.
2In the Scale pop-up menu, choose an option:
No Scaling exports files unaltered.
Scale to Size scales images to the exact width and height you specify.
Scale to Fit Area makes images fit proportionally with the maximum width and height
range you specify.
Tip: Use Scale to Fit Area to convert a group of images to uniformly sized thumbnail images.
Scale to Percentage scales images by a percentage.
3Click Next to continue the batch process.
For information on completing the batch process, see “Batch processing” on page 405.
Finding and replacing during a batch process
You can find and replace text, fonts, colors, or URLs within buttons, hotspots, or slices using the
Find and Replace option in the Batch Process dialog box.
Batch Replace affects only the following file formats: Fireworks PNG, Illustrator, FreeHand, and
CorelDraw. Batch Replace does not affect GIFs and JPEGs.
To select attributes to find and replace during a batch process:
1Choose Find and Replace from the Batch Options list and click Add.
2Click Edit.
3Select the type of attribute to find and replace from the Find pop-up menu: text, font, color,
URL, or Non-Web216.
4Enter the specific element to find in the Find text box.

Automating Repetitive Tasks 409
5Enter the specific element to replace in the Change To text box.
Tip: Choose Update Project Log to add changed files to the Project Log so they are easy to locate later.
6Click OK to store Find and Replace settings.
7Click Next to continue the batch process.
For information on completing the batch process, see “Batch processing” on page 405. For
more information about Find and Replace options, see “Finding and replacing” on page 400.
Changing filenames with a batch process
You can change the names of files being processed using the Rename option in the Batch Process
dialog box.
To set naming options for batch-processed files:
1Choose Rename from the Batch Options list and click Add.
2Choose an option from the Rename pop-up menu:
Original Name leaves filenames unchanged.
Add Prefix lets you enter text to add to the beginning of the filename. For example, if you enter
“night_”, then the file Sunrise.gif is renamed night_Sunrise.gif when it is batch processed.
Add Suffix lets you enter text to add to the end of the filename before the file extension. For
example, if you enter “_day”, then the file Sunset.gif is renamed Sunset_day.gif when it is
batch processed.
3Click Next to continue the batch process.
For information on completing the batch process, see “Batch processing” on page 405.
Performing commands with a batch process
You can perform JavaScript commands on files using the Commands option in the Batch Process
dialog box.
To set command options for batch-processed files:
1Click the Plus (+) button (Windows) or the triangle (Macintosh) beside the Commands option
in the Batch Options list to view the available commands.
2Select a command and click Add to add it to the Include in Batch list.
Note: These commands cannot be edited.
3Click Next to continue the batch process.
For information on completing the batch process, see “Batch processing” on page 405. For
more information on creating commands, see “Scripting with the History panel” on page 413.
Note: Some commands do not work during a batch process. Choose commands that work within the document
without requiring any object to be selected.

Chapter 17410
Specifying the batch process output location
After you’ve chosen all batch options in the Batch Process dialog box, you must choose options
for saving your files. You can save backup copies of the original files from a batch process. Backup
copies of files are placed in an Original Files subfolder in the same folder as each original file.
To back up batch-processed files:
1Choose a location for the batch output.
2Choose Backups to set your backup options.
3Choose how you want to back up the files:
Overwrite Existing Backups overwrites the previous backup file.
Incremental Backups keeps copies of all the backup files. When you run a new batch process, a
number is appended to the end of the filename of the new backup copy.
Note: If Backup is deselected, batch processing in the same file format overwrites the original file if the name is
the same. However, batch processing in a different file format creates a new file and does not move or delete the
original file.
4Click Batch to finish the batch process, or click Back to return to the Batch Process dialog box.
Saving batch processes as scripts
You can save batch process settings as a script or command to re-create the batch process easily in
the future. After you have chosen all batch options in the Batch dialog box, you will be presented
with options for saving your files.
To create a batch script:
1Click Save Script to create a batch script.
2Enter a name and destination for the script.
3Click Save.
Note: Saving your script into the Commands folder on your hard disk adds it to the Commands menu in
Fireworks. The location of the Commands folder varies depending on your operating system. For more
information, see “Working with configuration files” on page 423.
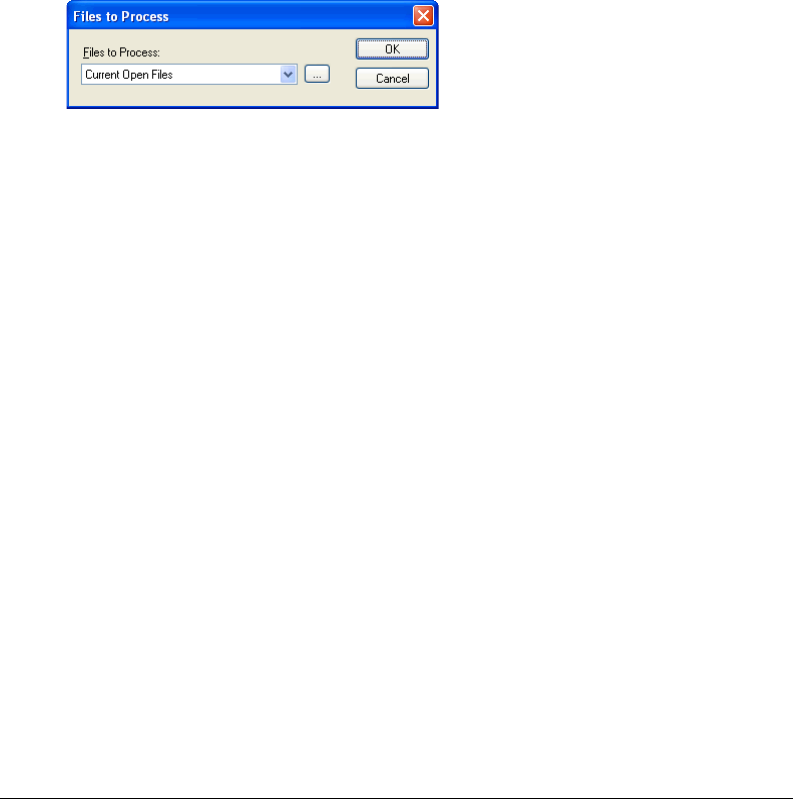
Automating Repetitive Tasks 411
To run a batch script:
1Do one of the following:
•In Fireworks, choose Commands > Run Script.
•Outside Fireworks, double-click the script filename on your hard disk.
2Select a script and click Open.
3Choose the files to process with the script:
Current Open Files processes all open documents.
Project Log (All Files) processes all files listed in the Project Log panel.
Project Log (Selected Files) processes the files currently selected in the Project Log panel.
Custom lets you select files to process.
Note: Click the Ellipses (...) button beside the Files to Process pop-up menu to select files to process.
4Click OK.
For more information on choosing files, see “Batch processing” on page 405.
Running scripts by dragging and dropping
If you have a batch process that you repeat frequently, save it as a script, then drag that script from
your hard drive to the Fireworks icon on your desktop to run the batch process. The Fireworks
application launches and runs that script.
To run a script by dragging and dropping:
1Save a script.
2Do one of the following:
•Drag the script file icon onto the Fireworks desktop icon.
•Drag the script file icon into an open Fireworks document.
Note: Dragging multiple script files and multiple graphic files into Fireworks processes the graphic files multiple
times, once for each script.
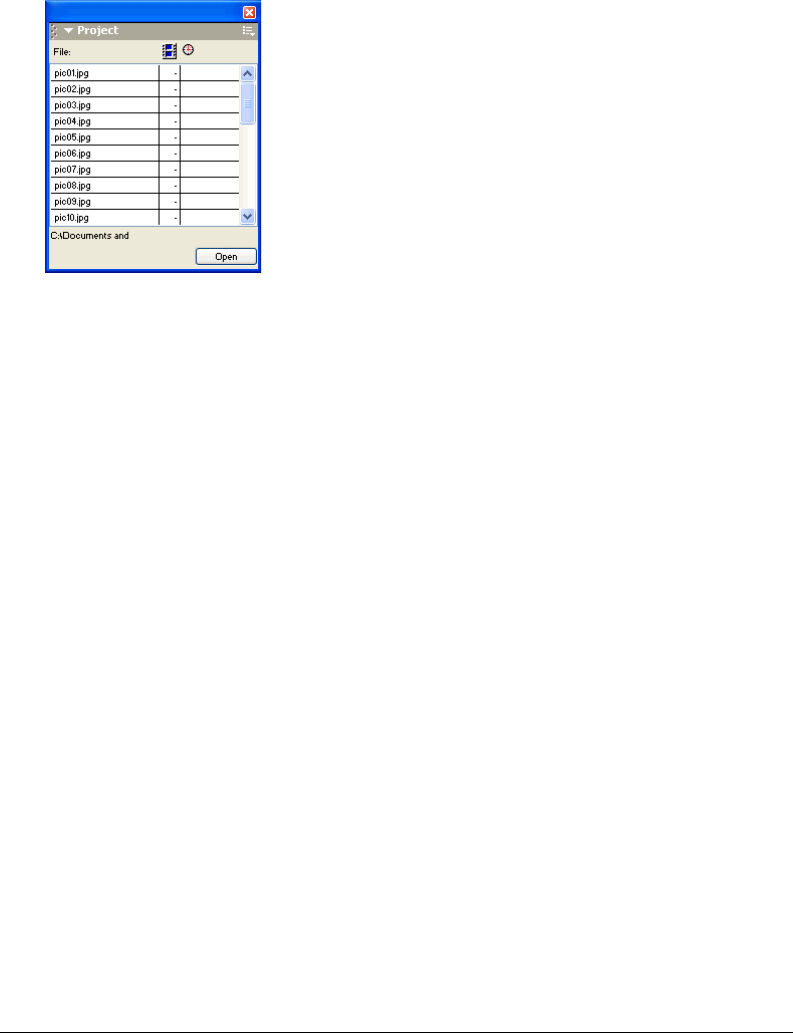
Chapter 17412
Using the Project Log
The Project Log helps track and control changes you make in multiple files when using Find and
Replace or when batch processing. Any documents changed by Find and Replace are recorded in
the Project Log.
Managing searches with the Project Log
You can use the Project Log to navigate through selected files, export selected files using their last
export settings, or select files to be batch processed. The Project Log records each changed
document and displays the frame of the document that contains the change, as well as the date
and time of the change.
You can manually add files to the Project Log to track files that you plan to edit frequently.
To add files to the Project Log manually:
1Choose Window > Project Log.
2Choose Add Files to Log from the Project Log panel Options menu.
3Navigate to the file you want to add.
4Select the file.
5Click Open.
To open files listed in the Project Log, do one of the following:
•Double-click the file.
•Select the file and click Open.
To remove entries from the Project Log:
Select one or more entries and choose Clear Selection or Clear All from the Project Log panel
Options menu.
To export a file listed in the Project Log using its last export settings:
Select the file and choose Export Again.

Automating Repetitive Tasks 413
Viewing and printing the Project Log
The latest version of the Project Log is stored as an HTML file on your hard disk. Its exact
location varies depending on your operating system. For more information, see “Working with
configuration files” on page 423.
To view or print the Project Log:
Open the Project_Log.htm file in a browser.
Extending Fireworks
Extending Fireworks has never been easier. Fireworks offers a variety of different ways you can
create custom commands that enhance its capabilities.
With the Extension Manager, you can install and manage extensions that extend the functionality
of Fireworks. Or you can write custom JavaScript code and use it as a custom command in
Fireworks. Flash SWF movies can also be used within Fireworks as custom commands. In
addition, the Fireworks History panel provides an easy-to-use interface that allows you to create
custom commands from a series of recorded tasks.
Once you install an extension or create a custom command, it is located in the Commands menu
in Fireworks.
Note: If stored as a SWF file in the Command Panels folder on your hard disk, commands are available as panels in
the Window menu. For more information, see “About scripting with Flash SWF files” on page 415.
Using the Macromedia Extension Manager
An extension is a command script, library, filter, pattern, or texture that can be added to a
Macromedia application to enhance its capabilities. Fireworks ships with the Macromedia
Extension Manager, which allows you to easily install, manage, and delete extensions. Upon
installation, Fireworks includes a collection of default extensions in the Commands menu.
You can also use the Extensions Manager to bundle your own extensions and send them to the
Macromedia Exchange for Fireworks. Through the Exchange, you can share your extensions with
other Fireworks users. To learn more about the Macromedia Exchange, visit http://
www.macromedia.com/exchange/.
Fireworks extensions are stored in the Configuration/Commands folder within the Fireworks
application folder on your hard disk. For more information about the location of the Commands
folder, see “Working with configuration files” on page 423.
Note: User-created commands, such as those saved using the History panel, and some third-party extensions are
handled differently. They are stored in the Commands subfolder in each user’s configuration folder. For more
information, see “Working with configuration files” on page 423.
For more information about using the Extension Manager, see Using the Macromedia Extension
Manager, accessible from the Extension Manager Help menu.
Scripting with the History panel
The History panel records a list of the steps you have performed while working in Fireworks.
Each step is stored on a separate line of the History panel, starting with the most recent. By
default, the panel remembers 20 steps. However, you can change this value at any time.

Chapter 17414
Creating commands
You can save groups of steps in the History panel as a command that you can reuse. You can
execute saved commands in any Fireworks document. They are not document-specific.
Saved commands are stored as JSF files in your user-specific Commands folder on your hard disk.
The exact location of this folder varies depending on your operating system. For more
information, see “Working with configuration files” on page 423.
To save steps as a command:
1Choose the steps to save as a command:
•Click a step, then Shift-click another to select a range of steps to save as a command.
•Control-click (Windows) or Command-click (Macintosh) to select noncontiguous steps.
2Click the Save Steps as Command button at the bottom of the History panel.
3Enter a name for the command and click OK.
The command appears on the Commands menu.
To undo or redo steps using the History panel:
•Drag the Undo Marker up the panel until you reach the last step you want to undo or redo.
•Click along the Undo Marker track on the left of the History panel.
Note: Undone steps remain in the History panel highlighted in gray.
To change the number of steps the History panel remembers:
1Choose Edit > Preferences.
Note: On Mac OS X, choose Fireworks > Preferences.
2Change Undo Steps to the number of steps you want the History panel to record.
Note: Additional steps require more computer memory.
To clear all steps from the History panel:
Choose Clear History from the History panel Options menu.
This frees memory and disk space.
Note: Clearing actions from the History panel removes your ability to undo edits.
Playing commands
You can execute recorded commands or a selection of actions in the History panel at any time.
To play back a saved command:
1If necessary, select one or more objects.
2Choose the command from the Commands menu.
To replay a selection of steps:
1Select one or more objects.
2Choose the steps in the History panel.

Automating Repetitive Tasks 415
3Click the Replay button at the bottom of the History panel.
Steps marked with an X are nonrepeatable and cannot be played back. Separator lines indicate
that a different object has become selected. Commands created from steps that cross a
separator line can produce unpredictable results.
To apply selected steps to objects in many documents:
1Select a range of steps.
2Click the Copy Steps to Clipboard button at the bottom of the History panel.
3Select one or more objects in any Fireworks document.
4Choose Edit > Paste.
To repeat the last step:
Choose Edit > Repeat Command Script.
About scripting with JavaScript
You can reduce the tedium of some repetitive tasks by writing your own JavaScript in a text
editor to run within Fireworks. You can control nearly every command or setting in Fireworks
through JavaScript.
Macromedia Dreamweaver also uses JavaScript. You can write scripts that control Fireworks from
within Dreamweaver.
For documentation on the JavaScript API, see Extending Fireworks MX, available as a PDF on the
Macromedia Fireworks MX installation CD.
About scripting with Flash SWF files
With Flash, you can create SWF movies that contain JavaScript code. These movies can be used
as Fireworks commands, accessible from the Commands menu in Fireworks.
You can even create a SWF movie and use it as a Fireworks panel, accessible from the Window
menu. The Align panel in Fireworks is an example of a Flash movie imported as a panel.
SWF movies that are used as commands are stored in the Commands folder on your hard disk,
and SWF movies that are used as panels are stored in the Command Panels folder. The exact
location of these folders varies from system to system and depends on whether you want your
custom commands accessible only by you or by all users who log in to your system. For more
information about folder locations, see “Working with configuration files” on page 423.
For more detailed instructions about creating commands from Flash SWF movies, see Extending
Fireworks MX, available as a PDF on the Macromedia Fireworks MX installation CD.
Managing commands
You can rename or delete any commands that appear in the Commands menu.
Commands that you create can be renamed and deleted using the Manage Saved Commands
option in Fireworks. Other commands and extensions that were installed with Fireworks or that
you downloaded and installed from the Macromedia Exchange website must be managed using
the Extension Manager.

Chapter 17416
To rename a custom command that you created:
1Choose Commands > Manage Saved Commands.
2Select the command.
3Click Rename, enter a new name, and click OK.
To delete a custom command that you created, do one of the following:
•In Fireworks, choose Commands > Manage Saved Commands. Then select the command and
click Delete.
•On your hard disk, delete the JSF file for the command from your user-specific Commands
folder. The exact location of this folder varies depending on your operating system. For more
information, see “Working with configuration files” on page 423.
To rename or delete a command that shipped with Fireworks or that you downloaded from the
Macromedia Exchange:
Choose Command > Manage Extensions.
The Extension Manager opens. For information about how to manage extensions, see Extension
Manager Help.
Editing or customizing a command script
Command scripts are saved as JavaScript. If you know JavaScript, you can open and edit
commands in any text editor, such as Notepad (Windows) or SimpleText (Macintosh).
To edit a command using JavaScript:
1From your desktop, navigate to the appropriate Commands or Command Panels folder on
your hard disk.
Note: The exact location of these folders varies from system to system and depends on whether the command is
available just to your user profile or to all users. For more information, see “Working with configuration files” on
page 423.
2Open the desired script file in a text editor and modify the JavaScript code.
3Save and close the script.
To edit selected actions from the History panel using JavaScript:
1In Fireworks, select a range of steps in the History panel.
2Click the Copy Steps to Clipboard button at the bottom of the History panel.
3Create a new document in a text-editing application.
4Paste the steps into the new text document.
5Modify the steps as desired.
6Save and close the script.
7Copy the script to the Commands folder on your hard disk.
Note: The exact location of this folder varies from system to system and depends on whether you want the
command to be available just to your user profile or to all users. For more information, see “Working with
configuration files” on page 423.
The new command will be available in the Commands menu the next time you start Fireworks.

417
CHAPTER 18
Preferences and Keyboard Shortcuts
Macromedia Fireworks preference settings let you control the general appearance of the user
interface, as well as editing and folder aspects. In addition, Fireworks allows you to customize
your keyboard shortcuts. This means that you can customize your shortcuts and standardize them
among your favorite software programs.
Setting preferences
Fireworks has preference settings that control the general appearance of the user interface as well
as options related to specific features such as default colors, tool options, folder locations, and
file conversions.
To set preferences:
1Choose Edit > Preferences.
Note: On Mac OS X, choose Fireworks > Preferences.
2Select the preferences group you wish to modify: General, Editing, Launch and Edit, Folders,
or Import.
3Make your changes and click OK.
General preferences
The following options are on the General preferences tab:
Undo Steps sets undo/redo steps to a number between 0 and 999. This setting applies to both the
Edit > Undo command and the History panel. A large number of undos can increase the amount of
memory Fireworks requires. You must restart Fireworks for the change in this setting to take effect.
Color Defaults sets the default colors for brush strokes, fills, and highlight paths. The Stroke and
Fill options do not automatically change the colors displayed in the color boxes of the Tools
panel; they allow you to change the default colors that are specified by the Set Default Stroke/Fill
Colors button in the Tools panel.

Chapter 18418
Interpolation sets one of four different scaling methods that Fireworks uses to interpolate pixels
when images are scaled:
•Bicubic interpolation gives the sharpest and highest quality most of the time and is the default
scaling method.
•Bilinear interpolation gives sharper results than Soft interpolation but not as sharp as Bicubic.
•Soft interpolation, which was used in Fireworks 1, gives a soft blur and eliminates sharp details.
This method is useful when others produce unwanted artifacts.
•Nearest Neighbor interpolation results in jagged edges and sharp contrasts with no blurring.
The effect is similar to zooming in or out on an image with the Zoom tool.
Workspace: Show Tab Icons is deselected by default. It allows you to display or hide the graphical
icons on panel tabs that were visible in previous versions of Fireworks. This option also affects the
display of the Mini-Launcher at the bottom of the document window.
Saving files: Add Preview Icons (Macintosh only) allows you to display or hide thumbnails of
Fireworks PNG files on your hard disk. Deselecting this option displays the traditional Fireworks
icon used for Fireworks PNG files. This option takes effect after you save the file.
Editing preferences
The editing preferences control pointer appearance and visual cues for working with bitmap objects.
Precise Cursors replaces tool icon pointers with the cross-hair pointer.
Delete Objects While Cropping permanently deletes pixels or objects that are outside the
bounding box of a selection when you choose Edit > Crop Document or Modify > Canvas >
Canvas Size.
Brush Size Painting Cursors sets the size and shape of the Brush, Eraser, Blur, Sharpen, Dodge,
Burn, and Smudge tool pointers to accurately reflect what you are about to draw or erase. For
certain large multi-tipped brushes, the pointer will default to the cross-hair pointer. When this
option and Precise Cursors are turned off, tool icon pointers are displayed.
Display Striped Border places the familiar striped border around the entire canvas when you are
working with bitmap objects (bitmap mode).
Show Pen Preview provides a preview of the next path segment that will be created if you click at
that moment with the Pen tool.
Show Solid Points shows selected points as hollow and deselected points as solid.
Turn off “Hide Edges” automatically disables Hide Edges when the selection changes.
Pick Distance lets you specify how close to an object the pointer must be before you can select it.
Pick Distance can be between 1 and 10 pixels.
Snap Distance lets you specify how close the object you are moving must be before it snaps to a
grid or guide line. Snap Distance works when Snap to Grid or Snap to Guides is turned on. Snap
Distance can be between 1 and 10 pixels.

Preferences and Keyboard Shortcuts 419
Launch and Edit preferences
By setting launch-and-edit preferences, you can control how external applications, such as
Macromedia Flash, Macromedia Director, and Microsoft FrontPage, launch and edit graphics
in Fireworks.
In most cases, Fireworks attempts to locate the source PNG for a graphic on its own. When it
can’t locate the source PNG, Fireworks uses the launch-and-edit preferences that you set to
determine how it will handle locating the source PNG file.
Note: Macromedia Flash is an exception. When launching and editing graphics in Flash, Fireworks always uses the
preferences you set in the Launch and Edit section of the Preferences dialog box.
When Editing from External Application determines whether the original Fireworks PNG file
opens when you use Fireworks to edit images from within other applications.
When Optimizing from External Application determines whether the original Fireworks PNG file
opens when you optimize a graphic.
Note: This setting does not apply to Director, which always automatically opens and optimizes a graphic without
asking for a source PNG, even if you set this preference differently in Fireworks.
For more information on working with Fireworks graphics within Flash, see “Working with
Macromedia Flash MX” on page 375. For more information on working with Fireworks graphics
in Director, see “Working with Macromedia Director” on page 384. For more information on
working with Fireworks graphics within FrontPage, see “Working with Microsoft FrontPage” on
page 389.
Note: Macromedia Dreamweaver handles launch-and-edit settings differently. Dreamweaver always opens the
source PNG, even if you set launch-and-edit preferences differently in Fireworks. If no Design Note exists or if the
path to the source PNG is broken, Dreamweaver always prompts you to locate the source PNG file. For more
information on working with Fireworks graphics and interactive elements within Dreamweaver, see “Working with
Macromedia Dreamweaver MX” on page 362.
Folders preferences
The folders preferences give you access to additional Photoshop plug-ins, texture files, and pattern
files from external sources. Also, on Mac OS 9.x, you can specify where you want Fireworks to
store temporary cache files.
Additional Materials (Photoshop Plug-Ins, Textures, and Patterns) targets folders containing plug-
ins, textures, and patterns. The folders can be in another folder on your hard disk, on a CD-
ROM or other external drive, or on a network volume.
Photoshop plug-ins appear in the Fireworks Filters menu and the Property inspector’s Add Effects
menu. Textures or patterns stored as PNG, JPEG, and GIF files appear as options in the Pattern
and Texture pop-up menus in the Property inspector.
For more information about textures and patterns, see “Adding texture to a fill” on page 214.
Scratch Disks (Primary and Secondary) specify where Fireworks stores temporary cache files,
which can sometimes grow very large. If you have more than one hard disk in your computer,
target the disk with the most free space as your primary scratch disk. You can specify a secondary
hard disk in case the primary disk runs out of free space.
The Scratch Disks feature is available only on the Mac OS 9 operating system. Because Windows
and Mac OS X are more efficient with memory management, the Scratch Disk feature is not
necessary on these systems.

Chapter 18420
Photoshop Import preferences
The preferences in the Import tab let you manage Photoshop file conversions:
•You can convert layers as objects or new frames.
•You can choose between editing imported text or maintaining its appearance.
•You can import a Photoshop file as a flattened bitmap object.
For more information on the Import preferences, see “Placing Photoshop graphics into
Fireworks” on page 392.
Restoring preferences
You can restore preferences to their original settings by deleting the preferences file. The first time
Fireworks is launched after the preferences file has been deleted, a new preferences file is created,
restoring Fireworks to its original configuration.
To restore default preferences:
1Quit Fireworks.
2Locate the Fireworks MX Preferences file on your hard disk and delete it.
The exact location of this file varies from system to system. For more information, see
“Location of the Fireworks preferences file” on page 426.
3Relaunch Fireworks.
Changing keyboard shortcut sets
Fireworks lets you use keyboard shortcuts to choose menu commands, choose tools from the Tools
panel, and speed up miscellaneous tasks that do not exist as menu commands. Using shortcuts
increases your productivity by allowing you to quickly perform simple actions. If you are
accustomed to using shortcuts from other applications such as FreeHand, Illustrator, Photoshop, or
products that use the Macromedia standard, you can switch to the shortcut set you prefer.
To change the current shortcut set:
1Choose Edit > Keyboard Shortcuts to open the Keyboard Shortcuts dialog box.
Note: On Mac OS X, choose Fireworks > Keyboard Shortcuts.
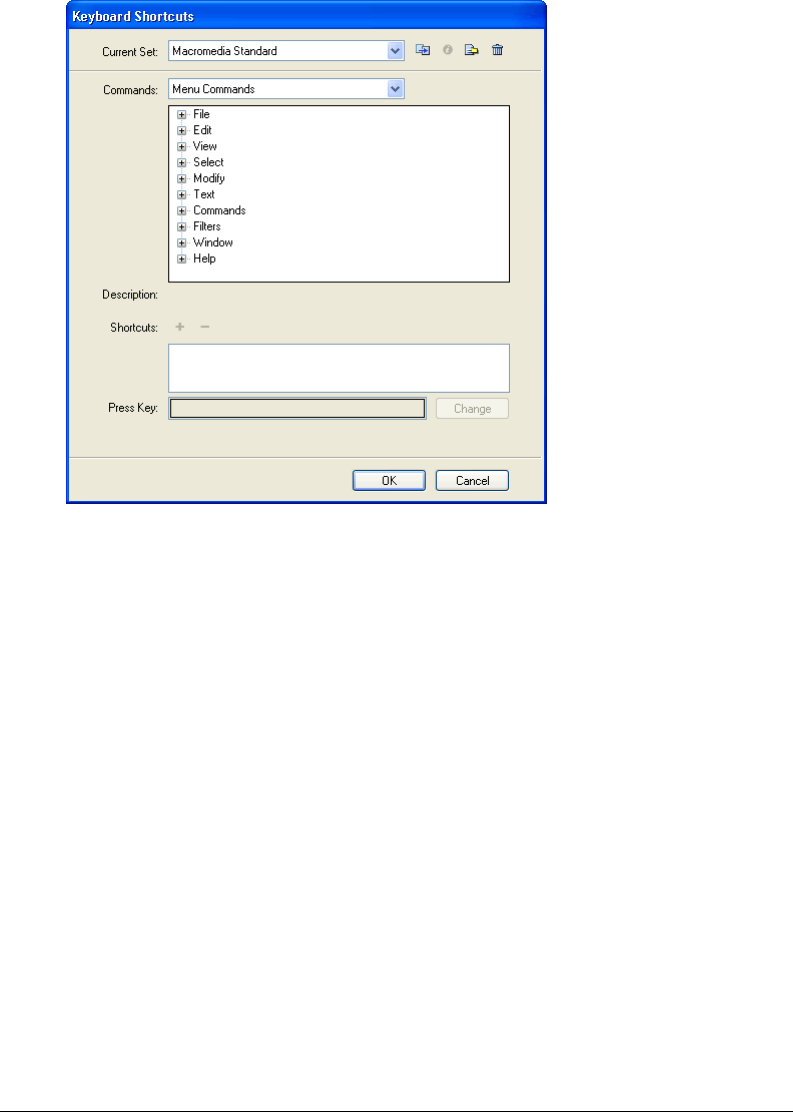
Preferences and Keyboard Shortcuts 421
2Select the set you prefer from the Current Set pop-up menu and click OK.
Keyboard Shortcuts dialog box
Creating custom and secondary shortcuts
You can create your own custom keyboard shortcuts, and you can create secondary shortcuts if
you need to have several different ways to perform an action. A custom shortcut set is always
based on a preinstalled set.
Note: In Fireworks, shortcuts to tools cannot include modifier keys: Control, Shift, and Alt (Windows) or Command,
Shift, Option, and Control (Macintosh). Tool shortcuts consist of a single letter or number key.
To create a custom or secondary shortcut for a menu command, tool, or miscellaneous action:
1Choose Edit > Keyboard Shortcuts to open the Keyboard Shortcuts dialog box.
2Click the Duplicate Set button.
3Enter a name for the custom set in the Duplicate Set dialog box and click OK.
The name of the new custom menu appears in the Current Set text box.
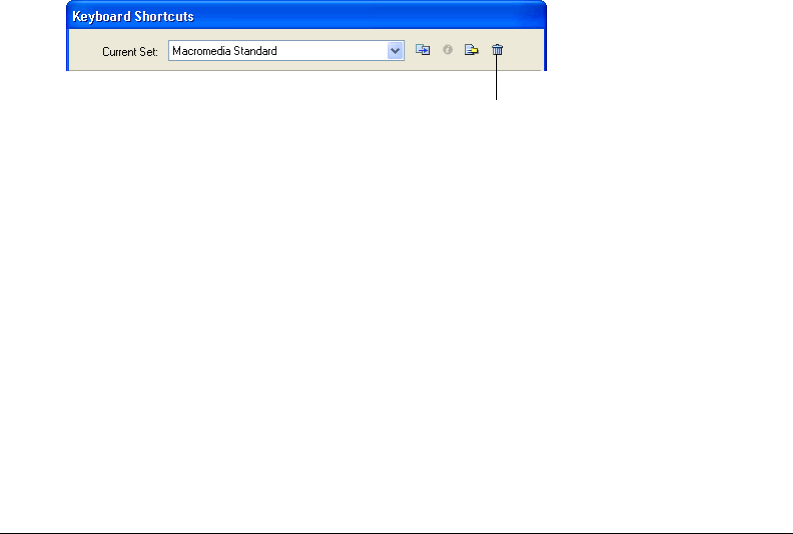
Chapter 18422
4Select the appropriate shortcut category from the Commands list.
•Choose Menu Commands to create a custom shortcut for any command accessed through
the menu bar.
•Choose Tools to create a custom shortcut for any tool on the Tools panel.
•Choose Miscellaneous to create a custom shortcut for a range of predefined actions.
Once selected, all possible shortcuts in the particular category appear in the Commands scroll list.
5Choose the command whose shortcut you want to modify from the Commands list.
If a shortcut exists, it is displayed in the Shortcuts list.
6Click in the Press Key text box, and press the desired keys for the new shortcut on the keyboard.
If the key combination you choose is already used by another shortcut, a warning message
appears below the Press Key text box.
7Do one of the following:
•Click the Add a New Shortcut (+) button to add a secondary shortcut to the shortcut list.
•Click Change to replace the selected shortcut.
Deleting custom shortcuts and custom shortcut sets
You can delete any custom shortcut or any custom shortcut set.
To delete a custom shortcut set:
1Choose Edit > Keyboard Shortcuts to open the Keyboard Shortcuts dialog box.
2Click the Delete Set button.
3Choose the shortcut set you want to delete from the Delete Set dialog box.
4Click the Delete button.
To delete a custom shortcut:
1Select the command in the Commands list.
2Select the custom shortcut from the Shortcuts list.
3Click the Delete a Selected Shortcut (-) button.
Delete Set button

Preferences and Keyboard Shortcuts 423
Creating a reference sheet for the current shortcut set
A reference sheet is a record of the current shortcut set stored in HTML table format. You can
view the reference sheet in a web browser or print it.
To create a reference sheet:
1Choose Edit > Keyboard Shortcuts to open the Keyboard Shortcuts dialog box.
2Click the Export Set as HTML button beside the Current Set text box.
The Save dialog box is displayed.
3Enter the name for the reference sheet, and select the appropriate location for the file.
4Click Save.
Working with configuration files
To accommodate multiuser systems, Fireworks supports user configuration files. This lets users
customize features in Fireworks such as styles, keyboard shortcuts, commands, and so forth,
without affecting the configuration of Fireworks for other users.
Fireworks creates a different set of configuration files for each user. Fireworks also installs master
configuration files in the Fireworks application folder. Master configuration files contain the
default settings for Fireworks and affect all users. Some configuration files are located only in the
Fireworks application folder, such as Fireworks plug-ins. On some systems, only system
administrators have access to the master configuration files in the Fireworks application folder.
About user configuration files
Fireworks user configuration files are stored in your user configuration folder. The exact location
of this folder varies depending on your operating system. For more information, see “Locating
configuration files” on page 424.
Inside the Fireworks MX user configuration folder, Fireworks user configuration files are
organized as follows:
Commands, command panels, styles, export settings, and URL libraries reside in subfolders inside
the Macromedia/Fireworks MX folder.
The Project Log is stored in a file called Project_Log.htm, which resides in the Macromedia/
Fireworks MX folder.
Preferences are stored in a file named Fireworks MX Preferences.txt (Windows) or Fireworks
MX Preferences (Macintosh). The location of the file varies from system to system. It is not
always located inside the user configuration folder. For more information, see “Location of the
Fireworks preferences file” on page 426.
Keyboard shortcuts reside in the Macromedia/Fireworks MX/English/Keyboard Shortcuts folder.
Your personal spelling dictionary is stored in a file named Personal Dictionary.tlx in the
Macromedia/Common folder. This dictionary is shared with other Macromedia applications.
Custom style (STL) files can be saved in Nav Menu, a subfolder of the Macromedia/Fireworks
MX folder. You can save STL files there for use as cell backgrounds in the Pop-up Menu Editor.
Many other user-configurable files are also stored in the Macromedia/Fireworks MX folder.

Chapter 18424
About master configuration files that affect all users
Master configuration files that affect all users are located in the Fireworks application folder,
which is the location on your hard disk where you installed Fireworks. For information on
locating this folder, see “Locating configuration files” on page 424.
Note: Many configuration files are stored in subfolders within the Fireworks application folder. Their exact location
varies depending on your operating system. Also, Macintosh users should be familiar with the new package concept
from Apple. For more information see “Viewing package contents (Macintosh only)” on page 427.
Master configuration files in the Fireworks application folder include the following:
The Keyboard Shortcuts folder contains the default shortcut sets. Any changes you make to keyboard
shortcuts within Fireworks will not be saved here, but rather in your user configuration folder.
The Keyboard Shortcuts folder is located within the English subfolder on Windows systems. On
Macintosh systems, this folder is located in the Contents/Resources/English.lproj folder inside the
Fireworks application package. For more information, see “Locating configuration files” on page 424.
The Plug-ins folder is where you can install additional plug-ins and filters. Third-party filters or
plug-ins are installed here only if you choose this folder when installing them. There is no user-
configuration equivalent to this folder, so any plug-ins you install here are available to all users.
The exact location of the Plug-ins subfolder within the Fireworks application folder varies
depending on your operating system.
The Quick Export Menu folder is where the contents of the Quick Export pop-up menu are stored.
If you know JavaScript and XML, you can customize this menu. For more information, see
“Customizing the Quick Export pop-up menu” on page 360.
The Quick Export Menu folder is located inside the English subfolder on Windows systems. On
Macintosh systems, this folder is located in the Contents/Resources/English.lproj folder inside the
Fireworks application package. For more information, see “Locating configuration files” on page 424.
The Configuration folder contains a variety of subfolders, including Batch Code, Commands,
Command Panels, Libraries, Patterns, Spelling, and Textures. Any changes you make here will
apply to all users.
The Fireworks application folder also contains many other configuration files.
Locating configuration files
The exact location of configuration files varies depending on your operating system and whether
you use a multiuser system or a single-user system.
Note: Windows systems often hide certain files and folders by default. Ensure that your Folder View options are set
to display all files and folders. On some systems, you may also need to click Show Files once you get to a folder in
order to see its contents. See Windows Help for information about viewing all files and folders.
To locate your user configuration folder:
On your hard disk, navigate to the path below that corresponds to your operating system, where
User ID is the user name or ID that you use to log in to your system:
Mac OS X: HD/Users/User ID/Library/Application Support/Macromedia/Fireworks MX
Mac OS 9.1 or later, single-user system: HD/System Folder/Application Support/Macromedia/
Fireworks MX
Mac OS Mac 9.1 or later, multiuser system, regular user: HD/Users/User ID/Preferences/
Macromedia/Fireworks MX

Preferences and Keyboard Shortcuts 425
Mac OS Mac 9.1 or later, multiuser system, administrator (Owner): HD/System Folder/
Application Support/Macromedia/Fireworks MX
Windows 98 and Windows ME, single-user system: C:\Windows\Application
Data\Macromedia\Fireworks MX
Windows 98 and Windows ME, multiuser system: C:\Windows\Profiles\User ID\Application
Data\Macromedia\Fireworks MX
Windows NT 4: C:\WINNT\Profiles\User ID\Application Data\Macromedia\Fireworks MX
Windows 2000 and Windows XP: C:\Documents and Settings\User ID\Application
Data\Macromedia\Fireworks MX
If you can’t locate your user configuration folder using one of the above paths, your system might
have a custom setup. For information on how to locate your user configuration folder manually,
see “Locating your user configuration folder on customized systems” on page 425.
Note: The names of some system folders may vary on localized systems.
To locate master configuration files, which affect all users:
Navigate to the location on your hard disk where you installed Fireworks.
The default location on Windows systems is Program Files/Macromedia/Fireworks MX. On
Macintosh systems, the default location is Applications/Macromedia/Fireworks MX.
Note: The names of some system folders may vary on localized systems.
Locating your user configuration folder on customized systems
If you were unable to locate your Fireworks user configuration folder using the procedure
described in “Locating configuration files” on page 424, you may be on a system that was set up
with a custom configuration. You will need to locate your user configuration folder manually by
performing a search on your hard disk.
If you have difficulty locating your user configuration folder, contact your system administrator
for assistance.
Note: The names of some system folders may vary on localized systems.
To locate your user configuration folder on Mac OS X, Windows XP, Windows NT, Windows
2000, multiuser Windows 98, and multiuser Windows ME systems:
1Perform a search on your hard disk for the user name or ID that you use to log in to your system.
More than one file or folder may appear in your search results.
2Open the folder that’s labeled with your user name or user ID.
3Open the Application Data/Macromedia/Fireworks MX folder (Windows) or Application
Support/Macromedia/Fireworks MX folder (Macintosh).
To locate your user configuration folder on single-user Mac OS 9.x, single-user Windows 98, and
single-user Windows ME systems:
1Perform a search for the Application Data folder (Windows) or Application Support folder
(Macintosh) on your hard disk.
2Open the Macromedia/Fireworks MX folder.

Chapter 18426
To locate your user configuration folder on a multiuser Mac OS 9.x system:
1Perform a search on your hard disk for the user name or ID that you use to log in to your system.
More than one file or folder may appear in your search results.
2Open the folder that’s labeled with your user name or user ID.
3Open the Preferences/Macromedia/Fireworks MX folder.
Location of the Fireworks preferences file
Fireworks preferences are stored in a file named Fireworks MX Preferences.txt (Windows) or
Fireworks MX Preferences (Macintosh). The location of this file varies depending on your
operating system.
•In Windows, preferences are found in the Application Data/Macromedia/Fireworks MX folder.
•On the Mac OS X, preferences are found in the Library/Preferences folder within your user folder.
•On single-user Mac OS 9.x systems, preferences are found in the System/Preferences folder.
•On multiuser Mac OS 9.x systems, preferences are found in the Preferences folder within your
user folder. But if you have administrator-level (Owner-level) access, the location of your
preferences will be the same as they would be on a single-user system.
For more information about locating your user folder or the Application Data folder, see
“Locating configuration files” on page 424.
Customizing configuration files for all users
Whether you’re on a multiuser or a single-user system, Fireworks changes your user configuration
files and not the master configuration files in the Fireworks application folder when you save most
settings. This is because many users don’t have access to all files if they are on multiuser systems.
Users with administrator-level access can customize features for all users by modifying the master
configuration files in the Fireworks application folder.
To save a master configuration setting for all users:
Save or drag a copy of the file into the appropriate location within the Fireworks application folder.
For information on locating the Fireworks application folder, see “Locating configuration files”
on page 424.
About reinstalling Fireworks
When you uninstall or reinstall Fireworks, your user configuration files are left untouched on
most systems. If you wish to reinstall Fireworks using the default settings, you must manually
delete your user configuration files before reinstalling the application. For information on
locating these files, see “Locating configuration files” on page 424.
On Windows XP, Windows 2000, and Windows NT 4 systems, however, you will be asked
during the uninstall process if you want to remove preferences and configuration files. Doing so
will remove these files for all users on the system.

Preferences and Keyboard Shortcuts 427
Viewing package contents (Macintosh only)
On the Macintosh, Fireworks is installed in a format called the application program package. This
is a new feature from Apple that allows applications to be installed in a self-contained package.
The application package is where the Fireworks application file is stored, along with all of the
default configuration files that come with Fireworks. Package contents are hidden by default.
Once you open the package, you’ll notice a number of files and folders. Two of those folders are
specific to your operating system. The files in the MacOS folder apply only to Mac OS X users,
while the files in the MacOSClassic folder apply only to Classic Mac users. For more information,
see “Running Fireworks MX Classic (Macintosh only)” on page 427.
To show or hide the contents of the Fireworks application program package:
1Navigate to the location on your hard disk where you installed Fireworks.
2Control-click the Fireworks MX icon and choose Show Package Contents from the context menu.
A new window opens displaying the package contents. For an explanation of the contents, see
“About master configuration files that affect all users” on page 424.
Running Fireworks MX Classic (Macintosh only)
For Mac OS X, Fireworks has the new Aqua interface. On Macintosh systems, Fireworks installs
both the Aqua version of the application and the traditional Classic version. Fireworks
automatically launches the appropriate version of the application for your operating system.
Mac OS X users can, however, run the Classic application if desired.
Tip: Mac OS X users might want to run the Classic version of Fireworks if, for example, they have older plug-ins that
aren’t supported by Mac OS X. They can run the Classic version of Fireworks to use those plug-ins. For more
information about the Fireworks package, see “Viewing package contents (Macintosh only)” on page 427.
To run the Classic version of Fireworks on a Mac OS X system:
1On your hard disk, select the Fireworks package. It is located inside the Fireworks application
folder, which is where you installed Fireworks.
2Choose File > Get Info.
3Choose Open in the Classic Environment.
4Close the Get Info window.
5Launch Fireworks MX as you normally would.
After you change this setting, Fireworks will launch in the Classic environment every time you
open it. To go back to the Aqua version of Fireworks, you must deselect the Open in Classic
Environment option in the Get Info window before launching Fireworks.

Chapter 18428

429
INDEX
Numerics
24-bit color 336
32-bit color 336
A
absolute URLs, entering 262
ACT file format, swatches 194
Add Preview Icons preference 418
adding
frames 316
styles 253
adjusting
hue or saturation 141
tonal range using eyedropper 139
Adobe GoLive 359
Adobe Type Manager 7
aligning objects 122
alpha channel of an object, selecting 111
alpha, converting images to 144
alt (alternate) text 280
assigning to buttons or instances 298
animation 309
adding frames 316
creating from multiple files 323
custom frame viewing 319
deleting frames 316
disabling layer sharing 318
editing 372
exporting 322
frames 311
inserting frames 316
looping 321
managing frames 314
movement 311
moving objects to another frame 317
multiframe editing 319
naming frames 315
onion skinning 318
animation continued
opacity 312
opening 322
optimizing 321
playing 320
previewing 320
properties 311
removing 312
reordering frames 316
rotation 312
scaling 311
setting frame delay 314
sharing layers across frames 317
transparency 321
turning frames on and off 315
viewing all frames 319
viewing current and adjacent frames 319
viewing multiple frames 318
viewing next frame 319
Answers panel 9, 85
anti-aliasing
edges 211
removing halos 345
smoothing text edges 180
target background color 344
application program package 427
arranging frames 316
Auto Levels feature for adjusting tonal range 134
automating tasks 399
auto-naming slices 281, 282
changing default naming convention 282
B
backing up during Find and Replace 401
baseline shift 181
Batch Process dialog box 405

Index430
batch processing 405
backing up files 410
commands 409
export settings 407
filenames 409
Find and Replace 408
optimization settings 407
saving as scripts 410
saving files 407
scaling graphics 408
batch scripts 410
dragging and dropping 411
running 411
behaviors
Behaviors panel 277
Macromedia Dreamweaver 4 273
Nav Bar Down 277
Nav Bar Over 277
Nav Bar Restore 277
Set Nav Bar Image 277
Set Pop-up Menu 277
Set Text of Status Bar 277
Simple Rollover 277
Swap Image 277
Behaviors panel 84, 277
beveled edges 217
bicubic interpolation scaling method 418
bilinear interpolation scaling method 418
bitmap graphics 72
See also bitmaps
bitmap masks 229, 230
creating 236
using an existing object as 233, 235
bitmap mode 72
applying with tools 82
Display Striped Border preference 418
switching to 125
bitmaps
adjusting brightness and contrast 139
adjusting color and tone 133
adjusting hue and saturation 141
blurring and sharpening 143
erasing 129
retouching 130
blending
applying 249
colors of overlapping objects 247
objects 319
setting blending mode 249
blending modes 247
Color 247
Darken 247
Difference 247
Erase 247
Hue 247
Invert 247
Lighten 247
Luminosity 247
Multiply 247
Saturation 247
Screen 247
Tint 247
Blur filter 143
Blur More filter 143
Blur tool 130
blurring 143
bitmap areas 130
images 131
BMP file format 333
bold text 174
Border command 113
boundaries 201
brightness 139
Brightness/Contrast filter 139
Bring Forward command 122
Bring to Front command 122
browser, viewing Fireworks files in 69
Brush Size Painting Cursors preference 418
Brush tool 127, 151
brushes
saving settings 206
setting tip 204
stroke options 203
Burn tool 130
Button Editor 290
creating symbols in 255
editing symbols in 257
button states
Down 290, 292
Over 290, 291
Over While Down 290, 292
Up 290, 291
button symbols
creating 50
editing 54, 295
inserting in a document 294

Index 431
buttons
active area 296
assigning URLs to 54
Button Editor 289
creating 50, 289
defined 290
exporting 289
instance text 53
instances 52
Live Effects 292
navigation bars 299
overview 289
setting a target 297
states 51
C
canvas
modifying characteristics 92
modifying resolution 93
rotating 95
trimming 95
carbonized interface 427
cell border properties 306
cellular phone graphics. See WBMP files
center point
and axis of rotation 118
drawing from 148
character spacing. See kerning
Check Spelling command 187
circles, drawing 148
cloning
bitmap areas 130
images 130
objects 116
CMY color model 197
color
adjusting 133
applying from Swatches panel 193
changing 127
changing stroke 201
choosing color depth 335
choosing swatch group 194
choosing using Eyedropper tool 200
color models 197
creating in Color Mixer 197
creating with system color picker 198
deleting from Swatches panel 195
dithering with websafe 199
fills 140
finding and replacing 403
finding and replacing non-websafe 404
color continued
gradient fills 209
inverting values 142
picking from color bar 197
pop-up window 200
removing unused 336
replacing a swatch 195
resetting default 192
sampling 128, 200
saving custom swatches 196
setting preferences 417
viewing color values 198
color bar 193, 196
choosing a color with 197
cycling through color models 198
color correction
brightness and contrast 139
Curves 137
Levels 134
using eyedropper 139
Color Mixer 84, 196
creating colors with 197
displaying 197
mixing colors in 196
resetting default colors in 192
swapping stroke and fill colors in 192
color models
CMY 197
Grayscale 197
Hexadecimal 197
HSB 197
RGB 197
color palettes
Adaptive 334
appending to current swatches 194
Black and White 334
Custom 334
editing 338
Exact 334
Grayscale 334
importing 335
locking colors 338
optimizing 338
saving 339
setting number of colors 335
System (Macintosh) 334
System (Windows) 334
Uniform 334
viewing 337
Web 216 334
WebSnap Adaptive 334

Index432
color picker, system 198
color table 337
edited swatch in 337
locked swatch in 337
selecting colors in 338
swatch with multiple attributes in 337
transparent swatch in 337
updating 337
websafe swatch in 337
colorizing images 141
combining. See merging
command scripts, editing 416
commands
batch processing 409
creating 414
deleting custom 416
editing 416
renaming custom 416
renaming or deleting Fireworks commands 416
saving 100
Commands menu 414
managing saved commands 415
composite paths 165
compositing 247
compression
adjusting 340
and optimization 328
blurring edges 344
choosing a file type 333
selective 343
configuration files 423
customizing 426
locating 424
master 424
on multiuser systems 424
configuring Fireworks 417
Constrain Proportions option 75
constraining rotation 118
context menus 96
Contract command 112
contracting paths 169
contrast 139
copying
all selected objects on a layer 226
bitmaps 115
frames 316
HTML 354
object attributes 254
objects 115
pixels 104
copying and pasting
Fireworks HTML 354
objects from other applications 77
symbol instances 259
corner points 152
Crop command 167
cropping
canvas 95
documents 96
CSS layers, exporting 357
curve points 153
curve segments, editing 155
custom shortcut sets. See keyboard shortcuts
cutting paths 164
D
darkening
bitmap areas 130
images 132
default preferences 420
Delete Objects While Cropping preference 418
deleting
frames 316
layers 225
Live Effects 220
masks 246
points 159
points on curves 139
selected objects 116
styles 253
swatches 195
Deselect command 109
deselecting all objects 104
Design Notes for Macromedia Dreamweaver and
Fireworks integration 374
discussion group, Fireworks 9
disjoint rollovers 275
applying to a slice 276
attaching to hotspots 287
creating 275
display modes, switching 91
Display Striped Border preference 418
Distort tool 119
distorting objects 119
dithering 336
with websafe colors 199
docking panels 85
documents
creating new 73
default mode 147
multiple views 91

Index 433
documents continued
opening 74
recent 74
saving 80
tiling views 91
Dodge tool 130
dots. See pixels
Down button state 290
downsampling 94
DPI. See resolution
drag-and-drop behaviors
blue line 274
creating disjoint rollovers with 275
definition 274
deleting 276, 277
for single slice 274
dragging and dropping 77
drawing
bending adjacent segments 158
changing adjacent segments 158
converting straight paths to curved 156
distorting objects 119
selecting a point 157
splitting paths 165
drawing area. See canvas
drop shadows 36, 218
duplicating
by dragging 116
selected objects 115
E
edges
beveled 217
showing and hiding 104
Edit Gradient dialog box 209
Edit Stroke dialog box 202
editing
actions in the History panel 416
animation symbols 311
behaviors 278
bitmap objects 127
button symbols 54
gradient fills 209
Live Effects 220
paths 160
pixels 104
pop-up menus 308
selected objects 115
single layer 227
solid fills 207
styles 253
effects
applying to objects 216
editing 220
finding and replacing 403
glow 218
Live Effects 215
plug-ins 219
removing 220
setting defaults 222
Effects pop-up menu 215
Ellipse tool 148
ellipses, drawing 148
embossing 217
EPS files, opening in Fireworks 75
Eraser tool 129
erasing bitmaps 129
Expand command 112
Expand Stroke command 168
expanding strokes 168, 169
Export Area tool 350
Export dialog box 347
Export Preview 327
comparing optimization settings 328
optimizing 327
panning area 328
previewing 327
previewing optimization 327
zooming 327
Export Wizard 326
exporting 38
an area 350
animated GIFs 322
animations 320, 349
batch process settings 407
buttons 289
CSS layers 357
customizing files for Photoshop 396
Fireworks files to Dreamweaver 388, 391
frames as multiple files 350
graphics 73
hotspots 286
HTML 65, 351
images 347
layers as multiple files 350
results 352
slices 280, 348
styles 253
symbols 259
to Illustrator 382
to Macromedia Director 384

Index434
exporting continued
to Macromedia Dreamweaver 366
to Macromedia Flash 375, 377
to Macromedia FreeHand 382
to Photoshop 395
to WBMP files 333
UTF-8 358
XHTML 357
extending Fireworks 9
Extension Manager 413
external editor preference 373
external files, converting to rollovers 279
eyedropper pointer 197, 200, 207
Eyedropper tool 128, 195
F
Feather command 129
feathering 129
creating feathered edges 211
pixel selections 112
file formats
BMP 333
GIF 333
JPEG 333
PNG 333
TIFF 333
file size
reducing quality 342
setting loss to reduce size 340
filenames, changing in a batch process 409
Fill Color box 127
Fill Color Live Effect 249
fills
adding texture to 214
adjusting 211
applying color fills 140
applying gradient 128, 209
applying pattern 208
applying solid 207
changing color for basic shape tools 207
changing edges 211
drawing over strokes 206
editing gradient 209
editing solid 207
feathering or anti-aliasing 211
finding and replacing 403
moving 211
resetting default color 192
rotating 211
saving custom gradient 212
saving gradient 212
fills continued
swapping stroke and fill colors 192
transforming gradient 211
transforming pattern 211
transparency illusion 199
web dither fill 199
filters 23
Blur 143
Blur More 143
Brightness/Contrast 139
Find Edges 144
Gaussian Blur 143
Hue/Saturation 141
Invert 142
Photoshop plug-ins 219
Sharpen 144
Sharpen More 144
Unsharp Mask 145
Find and Replace panel 84, 400, 402
Find Edges filter 144
finding and replacing 400
batch processed files 408
colors 403
fonts 402
multiple files 401
non-websafe colors 404
selecting source for search 400
text 402
URLs 404
uses 400
Fireworks Help 8
Fireworks MX Classic 427
Fireworks Support Center website 9
Flatten Selection command 126
flattening bitmaps 25
flipping objects 119
floating pixel selections
creating 114
moving 114
fonts
finding and replacing 402
handling missing 186
styles 174
type sizes 174
frame delay
animations 314
default setting 75

Index 435
frames
adding 316
custom viewing 319
deleting 316
disabling layer sharing 318
exporting 350
inserting 316
managing 314
moving objects to another frame 317
multiframe editing 319
names in animation 315
onion skinning 318
reordering 316
setting delay 314
sharing layers for animation 317
turning off onion skinning 319
turning on and off 315
viewing all 319
viewing current and adjacent 319
viewing next 319
Frames panel 84, 314
freeform paths 150
FrontPage 359
creating Fireworks images in 389
editing Fireworks files in 392
placing Fireworks HTML in 390
placing Fireworks images in 389
Full Screen with Menus mode 90
G
Gaussian Blur filter 143
GIF file format
choosing 333
choosing a color palette 334
swatches 194
glow effects 218
GoLive 359, 396
gradient fills 128
adding new color 210
adjusting 211
adjusting color transition 210
applying 209
changing colors 210
converting images to transparency 144
Edit Gradient dialog box 209
editing 209
moving 211
removing colors from 210
rotating 211
saving custom 212
transforming 211
Grayscale color model 197
grid
altering cell size 99
changing default color 99
showing/hiding 99
snapping objects to 99
grouping objects 121
guides
locking 99
snapping objects to 99
H
halos, removing 345
handles, transform 117
Hexadecimal color model 197
Hide All command 236
Hide Panels command 86
Hide Selection command 237
hiding
edges 104
layers 227
objects on layers 227
panels 86
toolbars 88
highlights 135
Histogram 135
History panel 84, 99
changing the number of steps in 414
clearing all steps from 414
editing actions with 416
replaying steps 415
HomeSite
placing Fireworks HTML in 387
placing Fireworks images in 387
hotspots 72
applying drag-and-drop rollovers 287
assigning URLs 280
creating 284, 285
editing shape 286
irregular 285
on top of slices 288
HSB color model 197
HTML 352
copying and pasting from Fireworks to
Dreamweaver 354
exporting 65, 351, 353
inserting from Fireworks into Dreamweaver 364
opening tables 76
preferences for exporting 65
replacing older version 356
Roundtrip 368

Index436
HTML continued
Setup 358
updating Fireworks HTML placed in Macromedia
Dreamweaver 366
working with editors 397
hue, adjusting 133, 141
Hue/Saturation filter 141
I
icon images. See thumbnails
Illustrator, exporting to 382
image maps
creating 284
exporting 287
images
exporting 347
painting 127
selecting 104
selecting pixels 104
images as fills. See Paste Inside command
import text 186
ASCII text 186
Photoshop files 186, 393
RTF files 186
Import Xtra for Director 384
importing
from digital camera 79
graphics 43
images 20
Photoshop files 393
Photoshop import preferences 420
PNG files 79
styles 254
symbols 259
indenting text 179
Info panel 84
inserting
Fireworks HTML into Dreamweaver 364
Fireworks images into Dreamweaver 362
Inset Path command 169
installing Fireworks 8
installing Photoshop plug-ins 219
instance-level properties 295
instances
defined 255
placing in document 256
tweening 319
interactive button properties 296
interactivity 72
interlacing graphics 342
interpolation (scaling) 418
Intersect command 166
Invert filter 142
italic text 174
J
JavaScript 7
joining. See merging
JPEG files
choosing JPEG format 333
editing selected areas 344
optimization settings 342
progressive 344
selective JPEG compression 343
Sharpen JPEG Edges command 344
K
kerning 176
keyboard shortcuts
changing current set 420
custom shortcut sets 421
deleting custom shortcut sets 422
reference sheet for current set 423
secondary shortcuts 421
Knife tool 164
L
Launch and Edit preferences 374
launching Fireworks from Dreamweaver. See
Macromedia Dreamweaver and Fireworks
integration
layers 24
activating 224
adding and removing 224
disabling sharing across frames 318
duplicating 225
exporting 350
locking 227
moving 226
naming 226
sharing 228
sharing across frames for animation 317
viewing 225
Layers panel 84
naming slices 281
viewing slices 269
leading 177
learning Fireworks
newsgroup 9
resources 8
letter spacing. See kerning
Levels feature for adjusting tonal range 134

Index 437
Library panel 84, 255
inserting button symbols 294
lightening
bitmap areas 130
images 132
line spacing. See leading
Line tool 148
lines
drawing 148
lines. See strokes
Live Effects 23
applying 221
creating 221
editing 220
enabling or disabling 217
Fill Color 249
in buttons 292
Photoshop plug-ins 219
removing 220
renaming 221
locking layers 227
M
Macintosh 7
OS 9.1 424
OS X 424
system requirements for 7
Macromedia Director 7
cast members 386
exporting to 384
placing Fireworks files in 384
Macromedia Dreamweaver 7
behaviors 369
Dreamweaver 4 behaviors 273
editing Fireworks images in 367
exporting to 366
files 362
libraries 366
making Fireworks the default image editor 373
placeholders 363
Macromedia Dreamweaver and Fireworks integration
Design Notes 374
editing Fireworks animations 372
external editor preference 373
Launch and Edit preferences 374
launching and editing Fireworks images 368
launching and editing Fireworks tables 369
launching and optimizing Fireworks images 370
Optimize Image in Fireworks command 370
resizing Fireworks images 371
updating Fireworks HTML 366
Macromedia Flash 7
exporting to 375, 377
importing Fireworks PNG to 375
Macromedia FreeHand 7
exporting to 382
placing Macromedia Fireworks graphics in 380
Macromedia Help 8
macros 415
marquees 21, 104
contracting 112
deselecting 109
expanding 112
moving 109
removing 109
saving and restoring 114
selecting area around 113
selecting pixels by intersecting 110
smoothing 113
transferring to another object 114
masks 28, 229
applying 28
bitmap 230
creating empty 236
deleting 246
disabling 246
editing 28
enabling 246
grouping objects to form a mask 238
modifying 243
moving with masked objects 241
text as a mask 235
using an existing object as 233, 235
vector 229
merging
bitmaps 25
paths 160, 165
midtones 135
Mini-Launcher 92
mirroring. See flipping objects
mobile phone graphics. See WBMP files
modes
entering bitmap 72
entering vector 72
vector 147
mouse events 278
multiple button instances 52

Index438
N
naming objects 26
nav (navigation) bars
creating 50, 299
Down state 277
Over state 277
Restore behavior 277
navigating a document 88
nearest neighbor interpolation scaling method 418
nested tables 283
new document, matching clipboard size 74
new features 10
newsgroup, Fireworks 9
Numeric Transform command 119
O
object-oriented graphics. See vector graphics
objects 24
converting to animation 311
creating bitmaps 126
distorting 119
grouping 121
locating pasted 78
merging 228
moving selected 115
naming 26
properties 19
removing an effect 220
selecting 102
selecting alpha channel 111
skewing 119
slanting 119
stacking 122
stacking order 27
ungrouping 121
vector 17
onion skinning
Button Editor 289
custom viewing 319
defined 318
multiframe editing 319
turning off 319
viewing all frames 319
viewing current and adjacent frames 319
viewing next frame 319
opacity
adjusting 249
See also transparency
opening
animated GIFs 75, 322
documents 74
graphics created in other applications 74
opening continued
multiple document views 91
multiple files as animations 323
recent files 74
WBMP files 76
optimization settings
changing in a batch process 407
comparing two or four settings 332
deleting preset settings 346
JPEG 342
preset 281, 329
reusing 330, 346
saving 330, 346
sharing with another user 346
Optimize Image in Fireworks command 370
Optimize panel 84
optimizing 36, 62
animations 321
basics 325
Fireworks images from Dreamweaver 370
graphics 73
using Export Wizard 327
Options menu in panels 87
OS X, Macintosh 424
outlines 201
See also strokes
ovals, drawing 148
Over button state 290
Over While Down button state 290
overlapping slices 272
P
package contents, viewing 427
panels 84
Answers 85
Behaviors 84, 277
docking 85
Find and Replace 84, 400, 402
Frames 84, 314
hiding 86
History 84, 99
Info 84
Layers 84
Library 84, 255
moving 85
opening custom layouts 87
Optimize 84
Options menu in 87
organizing 85
Project Log 85
removing from a group 85
restoring default positions 85

Index 439
panels continued
saving custom layouts 87
Styles 84, 252
Swatches 84, 193
Tool s 8 2
undocking 85
URL 84, 260
panning 90
paragraph spacing 180
Paste Inside command 234
pasted images 78
pasting HTML 355
Path Scrubber tools 164
paths 164
adding stroke texture 213
bending adjacent segments 158
changing adjacent segments 158
changing shape 158
converting straight to curved 156
copying and pasting 382
creating custom strokes 202
cropping 167
editing strokes 201
pulling 162
pushing 162
resetting default colors 192
selecting a point 157
splitting 165
swapping stroke and fill colors 192
pattern fills
adjusting 211
applying 208
moving 211
rotating 211
transforming 211
Pen tool 152
adding points with 159
curved segments 153
deleting points with 159
resuming path 159
straight segments 152
Pencil tool 127
perspective illusion 119
Photoshop
Acquire installation plug-ins 79
applying plug-ins 219
customizing files for export 396
exporting to 395
grouped layers 229
import preferences 420
Photoshop continued
importing files into Fireworks 393
installing plug-ins 219
layer masks 238
patterns 419
plug-ins 394, 419
textures 419
Photoshop and Fireworks
exporting PSD files from Fireworks 395
importing PSD files into Fireworks 393
Pick Distance preference 418
PICT file format 333
pixels
adjusting tonal range using eyedropper 139
cloning 130
contracting selection border 112
copying 104
cutting 104
expanding selection border 112
feathering 129
moving 104
painting 127
selecting 21, 104
selecting area around a marquee 113
selecting freeform area 106
selecting polygonal area 107
selecting similar colors 107
smoothing a marquee border 113
tonal range 135
playing
animations 320
macros 414
saved commands 414
plotting points 152
plug-ins 23, 394
location of files 424
PNG file format
choosing 333
choosing a color palette 334
transparency 379
point handles 155
displaying 157
Pointer tool 102, 104
points
adding 159
bending adjacent segments 158
changing adjacent segments 158
converting 156
converting straight to curved 156
deleting 159

Index440
points continued
moving 158
selecting 157
Polygon tool 149
drawing stars with 150
polygons
constraining 150
drawing 149
pop-up menus
advanced properties 305
creating 56
customizing 58
description 300
designing appearance 303
editing 60, 308
entering menu text 301, 302
exporting 308
setting position 306
Precise Cursors preference 418
preferences 417
color defaults 417
default 420
editing options 418
folder options 419
for exporting HTML 65
Import 394
import options 420
interpolation options 418
Launch and Edit 374
location of files 423, 426
restoring defaults 420
setting 417
Undo Steps 417
Preview tab 330
previewing
documents in a browser 360
documents on different platforms 91
optimization settings 330, 332
pixels containing specific color 338
strokes 202
with Export Preview 327
progressive JPEGs 344
Project Log 85, 412
adding files to 412
exporting a file 412
logging Find and Replace changes 400
opening files 412
printing 413
removing an entry 412
searching 412
viewing 413
properties
object 19
text 34
viewing in Property inspector 83
Property inspector 83, 103
collapsing 84
docking 83
expanding 83
masking with 244
reducing 84
selection information 103
undocking 83
working with text in 171
Punch command 166
Q
Quick Export 359
button 88
pop-up menu 360
R
RAM. See system requirements
raster images 125
Rectangle tool 148
rectangles
drawing 148
rounded corners 149
redoing using History panel 414
Redraw Path tool 164
redrawing paths 164
reducing points 167
reinstalling Fireworks 426
relative URLs, entering 262
removing
effects 220
parts of a path 166
renaming symbols 256
repeating actions 100
replacing elements 400
replaying animations 320
resampling
bitmap objects 94
described 94
downsampling 94
resampling up 94
vector objects 94
reshaping vector objects 163
resizing Fireworks images from Dreamweaver 371
resolution 7
resources for learning Fireworks 8
Reveal All command 236

Index 441
Reveal Selection command 237
RGB color model 197
rollovers 72
active area 296
converting to buttons 293
creating 46, 289
defined 273
external images for 279
navigation bars 299
odd-shaped 268
simple 277
Simple Rollover behavior 277
swap image 274
rotating
constraining 118
objects 118
relocating axis of rotation 118
Rounded Rectangle tool 149
Rubber Stamp tool 130
rulers 97
S
saturation, adjusting 133
saving documents 80
Scale tool 117
scaling
graphics 408
interpolation options 418
objects 117
scratch disks 419
scripting 415
editing scripts 416
Flash SWF files 415
scrolling the canvas. See panning
searching 400
See also finding and replacing
segments, converting 156
selecting
adding to a pixel selection 110, 111
additional objects 103
alpha area 111
area around a marquee 113
canceling a selection 116
contracting a marquee border 112
deselecting a marquee 109
deselecting an object 103
expanding a marquee border 112
feathering a pixel selection 112
feathering edges 129
floating pixel selection 114
freeform area of pixels 106
selecting continued
grouped objects 121
images 104
inverting a pixel selection 112
overlapping areas of bitmaps 112
pixel areas 105
pixels 21, 104
points 157
polygonal area of pixels 107
similar colors 107
smoothing a marquee border 113
subtracting from a pixel selection 111
selection rectangles. See marquees
Selective JPEG compression
Enable Selective Quality 343
overlay color 343
preserve button quality 343
preserve text quality 343
selective JPEG compression 343
Selective Quality button 343
Send Backward command 122
Send to Back command 122
Set Nav Bar Image behavior 277
Set Pop-up Menu behavior 277
Set Text of Status Bar behavior 277
shadows 36, 135, 218
shapes. See vector graphics
sharing layers 228
Sharpen filter 144
Sharpen More filter 144
Sharpen tool 130
sharpening 144
bitmap areas 130
images 131
shortcut sets. See keyboard shortcuts
Show Pen Preview preference 418
Show Solid Points preference 418
Show Tab Icons preference 418
Show/Hide hotspots and slices 269
showing
edges 104
panels 86
rulers 97
toolbars 88
Simple Rollover behavior 277
simple rollovers, creating 277
Simplify command 167
simplifying paths 167
Skew tool 119
skewing objects 119

Index442
slanting objects 119
slice guides
changing color 270
removing 272
viewing 270
slices 72
auto-naming 281, 282
changing color 270
creating 266
editing Fireworks table slices from Macromedia
Dreamweaver 369
exporting 347, 348
overlapping 272
polygon 268
resizing 272
showing or hiding slice overlay 332
text 267
updating 349
using nested tables 283
using spacer 283
slicing 43
definition 265
for interactivity 266
Smooth command 113
Smudge tool 130
smudging
bitmap areas 130
images 132
Snap Distance preference 418
soft interpolation scaling method 418
solid fills
adding texture to 214
applying 207
spacers 283
spell checking 187
Split command 165
splitting a document 43
squares, drawing 148
stacking objects 122
Standard Screen mode 90
stars
constraining 150
drawing with Polygon tool 150
status bar (Windows) 92
straight segments, editing 154
Stroke Color box 201
strokes 201
adding texture 213
changing centering 205
changing color of drawing tools 201
strokes continued
choosing 201
creating custom 202
drawing fill over 206
edges of 201
editing 201
finding and replacing 403
reorienting 205
resetting default color 192
saving settings 206
setting sensitivity 205
swapping stroke and fill colors 192
textures 201
styles
adding 253
applying 252
basing on existing styles 253
defined 251
deleting 253
editing 253
enlarging preview icons 254
exporting 253
importing 254
new 253
resetting to defaults 254
Styles panel 84, 252
Subselection tool
auto-joining paths with 160
selecting masks with 240
Swap Image behavior 277
swap image rollovers 274
creating disjoint rollovers 275
with single slice 274
swatch group, choosing custom 194
Swatches panel 84, 193
appending swatches 194
deleting a color 195
replacing a color 195
saving custom 196
Windows System colors 194
swatches, choosing custom 194
symbol library 255
Symbol Properties dialog box 255
symbol-level properties 295
symbols
breaking a link 257
creating 255
creating instances 256
defined 255
deleting 257

Index 443
symbols continued
duplicating 256
editing 256
editing graphics 313
exporting 259
importing 259
modifying 256
placing instances in document 256
tweening 319
system color picker 198
system requirements for Fireworks 7
T
temporary files 419
testing files 68
text
alignment 179
attributes, saving 182
button instances 53
checking spelling 187
color 175
creating 30, 32
direction of 178
editing 173
entering 171
expanding or contracting character width 181
finding and replacing 402
indenting 179
orientation 178
paragraph spacing 180
properties 34
slices 267
Text Edi t or 1 89
text blocks
auto-sizing 173
fixed-width 173
moving 172
resizing 173
text paths
attaching text to path 182
changing shape of path 183
converting text to path 185
detaching from path 183
editing text attached to a path 183
moving starting point of text 184
placing text on a path 184
text styles
bold 174
effects 182
fills 182
italic 174
strokes 182
underline 174
Text tool 171
texture
adding to fills 214
adding to strokes 213
thumbnails
in Layers panel 223
selecting masks with 240
TIFF file format, choosing 333
tonal range 134
adjusting with Curves 137
adjusting with Levels 134
tone, adjusting 133
toolbars
docking 88
showing and hiding 88
unlocking 88
tools
Blur 130
Brush 127
Burn 130
changing options 82
changing stroke color 201
Colors section in Tools panel 192
Distort 119
Dodge 130
Eraser 129
Eyedropper 128
Lasso 104
Magic Wand 104
Marquee 104
Oval Marquee 104
Pencil 127
Pointer 102, 104
Polygon Lasso 104
Rubber Stamp 130
Scale 117
Sharpen 130
Skew 119
Smudge 130
Subselection 160, 240
Text 171

Index444
tools continued
tool group pop-up menus 83
Tr a n s f or m 1 16
Zoom 89
Tool s pa n e l 82
tooltips 9
transformation tools
Distort 119
Scale 117
Skew 119
transforming
by dragging 117
gradient fills 211
numerically 119
objects 116
pattern fills 211
text 185
transparency
adding or removing colors 341
animation 321
converting images to gradient transparency 144
in PNG files 379
selecting a color 341
See also opacity
transparency illusion 199
transparent areas 340
triangles, drawing 149
trimming the canvas 95
Turn off Hide Edges preference 418
tutorials 9
Graphic Design Basics Tutorial 13
Web Design Basics Tutorial 41
Tween Instances command 319
tweening
characteristics 319
defined 319
objects 319
typefaces. See fonts
U
underlined text 174
undoing 99
setting number of undo steps 417
using History panel 414
ungrouping objects 121
uninstalling Fireworks 426
Union command 165
Unsharp Mask filter 145
Up button state 290
Update HTML command 356, 366
updating slices 349
URL library 260
adding URLs 261
adding used URLs 262
creating 261
entering absolute or relative URLs 262
URL panel 84, 260
URLs
assigning to a web object 262
assigning to buttons 54
assigning to buttons or instances 297
finding and replacing 404
selecting target options 281
user configuration files 423
UTF-8 encoding 358
V
valid files, defined 406
vector graphics 71
vector masks 229
converting to bitmap mask 245
creating 232
using an existing object as 233, 235
vector mode 72
drawing in 147
switching to 125
vector objects 17
creating 18
reshaping 161
view modes 90
viewing Fireworks files in a browser 69
W
WAP graphics. See WBMP files
WBMP files
exporting to 333
opening from Fireworks 76
Web Layer 228
websafe colors 339
Windows
system requirements for 7
Windows 2000 425
Windows 98 425
Windows ME 425
Windows NT4 425
Windows XP 425
Windows System Colors as a swatch group 194


Index446
