Adobe Using InDesign In Design CS5.5 Instruction Manual Cs5 En
User Manual: adobe InDesign - CS5.5 - Instruction Manual Free User Guide for Adobe InDesign Software, Manual
Open the PDF directly: View PDF ![]() .
.
Page Count: 710 [warning: Documents this large are best viewed by clicking the View PDF Link!]
- Legal notices
- Contents
- Chapter 1: What’s new
- Chapter 2: Workspace
- Workspace basics
- Customize menus and keyboard shortcuts
- Toolbox
- Viewing the workspace
- Working with ConnectNow
- Setting preferences
- Recovery and undo
- Chapter 3: Layout
- Creating documents
- Rulers and measurement units
- Grids
- Ruler guides
- Pages and spreads
- Master pages
- Layers
- Laying out frames and pages
- Numbering pages, chapters, and sections
- Text variables
- Chapter 4: Working with documents
- Working with files and templates
- Saving documents
- Converting QuarkXPress and PageMaker documents
- Exporting
- Chapter 5: Text
- Creating text and text frames
- Adding text to frames
- Threading text
- Articles (CS5.5)
- Linked stories (CS5.5)
- Editing text
- Find/Change
- Glyphs and special characters
- Spell-checking and language dictionaries
- Check spelling
- Hyphenation and spelling dictionaries
- Create or add user dictionaries
- Set the default language dictionary for the current document
- Set the default language dictionary for all new documents
- Remove, relink, and reorder user dictionaries
- Add words to dictionaries
- Remove or edit words in dictionaries
- Export a word list
- Import a word list
- Change dictionary preferences
- Using dictionaries in a workgroup
- Footnotes
- Tracking and reviewing changes
- Adding editorial notes in InDesign
- Chapter 6: Styles
- Paragraph and character styles
- About character and paragraph styles
- Styles panel overview
- Add paragraph and character styles
- Map styles to export tags (CS5.5)
- Convert Word styles to InDesign styles
- Apply styles
- Edit character and paragraph styles
- Delete character or paragraph styles
- Override character and paragraph styles
- Convert style bullets and numbering to text
- Find and replace character and paragraph styles
- Drop caps and nested styles
- Object styles
- Working with styles
- Paragraph and character styles
- Chapter 7: Combining text and objects
- Anchored objects
- About anchored objects
- Create an anchored object
- Position a custom-positioned anchored object
- Working with anchored objects using drag-and-drop (CS5.5)
- Selecting and copying anchored objects
- View anchored object markers on the page
- Reposition an anchored object on the page manually
- Resize an anchored object
- Release an anchored object
- Wrapping text around objects
- Creating type on a path
- Captions
- Anchored objects
- Chapter 8: Typography
- Formatting text
- Using fonts
- Leading
- Kerning and tracking
- Formatting characters
- Formatting paragraphs
- Aligning text
- Tabs and indents
- Bullets and numbering
- Create bulleted or numbered lists
- Format a bulleted or numbered list
- Change bullet characters
- Change numbered list options
- Defining lists
- Create a paragraph style for running lists
- Create multi-level lists
- Create running captions for figures and tables
- Restart or continue numbering for a list
- Convert list bullets or numbers to text
- Text composition
- Chapter 9: Tables
- Creating tables
- Selecting and editing tables
- Formatting tables
- Table strokes and fills
- Table and cell styles
- About table and cell styles
- Table/Cell Styles panels overview
- Define table and cell styles
- Load (import) table styles from other documents
- Apply table and cell styles
- Base one table or cell style on another
- Edit table and cell styles
- Delete table and cell styles
- Redefine table or cell styles based on current formatting
- Override table and cell styles
- Break the link to table or cell styles
- Chapter 10: Long document features
- Creating book files
- Creating a table of contents
- Creating an index
- Working with markers
- Chapter 11: Drawing
- Understanding paths and shapes
- Drawing with the line or shape tools
- Drawing with the Pencil tool
- Drawing with the Pen tool
- Editing paths
- Applying line (stroke) settings
- Change corner appearance
- Compound paths and shapes
- Chapter 12: Graphics
- Understanding graphics formats
- Importing files from other applications
- Importing Adobe Illustrator graphics
- Importing Adobe Photoshop (.PSD) files
- Importing PDF pages
- Importing InDesign (.indd) pages
- Importing other graphics formats
- TIFF (.tif) files
- Graphics Interchange Format (.gif) files
- JPEG (.jpg) files
- Bitmap (.bmp) files
- Encapsulated PostScript (.eps) files
- Desktop Color Separations (.dcs) files
- Macintosh PICT (.pict) files
- Windows Metafile Format (.wmf) and Enhanced Metafile Format (.emf) files
- PCX (.pcx) files
- Portable Network Graphics (.png) files
- Scitex CT (.sct) files
- Placing graphics
- Managing graphics links
- About links and embedded graphics
- Links panel overview
- Embed an image within the document
- Update, restore, and replace links
- Choose how relinked graphics are scaled
- Update modified links
- Replace a link with a different source file
- Restore missing links
- Find missing links
- Specify a default Relink folder
- Copy links to a different folder
- Relink to a different folder
- Relink files with different file extensions
- Replace an imported file using the Place command
- Copy the link pathname
- Edit original artwork
- Reusing graphics and text
- Chapter 13: Frames and objects
- Selecting objects
- Transforming objects
- Aligning and distributing objects
- Grouping, locking, and duplicating objects
- Working with frames and objects
- Clipping paths
- Chapter 14: Transparency effects
- Adding transparency effects
- Blending colors
- Flattening transparent artwork
- About flattening
- About transparency flattener presets
- Apply a flattener preset for output
- Create or edit a transparency flattener preset
- Export and import a custom transparency flattener preset
- Rename or delete a custom transparency flattener preset
- Flatten an individual spread
- Ignore the flattener preset on an individual spread
- Transparency Flattener options
- Preview which areas of artwork will be flattened
- Refresh the preview in the Flattener Preview panel
- Best practices when creating transparency
- Chapter 15: Color
- Understanding spot and process colors
- Applying color
- Apply color
- Select a color with the Color Picker
- Apply the last used color
- Remove fill or stroke color
- Applying colors by dragging and dropping
- Apply a color or gradient swatch
- Apply color using the Color panel
- Create a swatch from a color in the Color panel
- Cycle through color modes
- Apply colors using the Eyedropper tool
- Apply colors to grayscale images
- Working with swatches
- Tints
- Gradients
- Mixing inks
- Using colors from imported graphics
- Chapter 16: Trapping color
- Trapping documents and books
- About ink trapping
- Trapping methods
- About automatic trapping
- Automatic trapping requirements
- Differences between built-in trapping and Adobe In-RIP Trapping
- Trapping imported bitmap images
- Trapping imported vector graphics
- Trapping text
- Maximizing trapping performance
- Setting aside disk space for built-in trapping
- Trap a document or book
- Trap presets
- Adjusting ink options for trapping
- Trapping documents and books
- Chapter 17: PDF
- Exporting to Adobe PDF
- Adobe PDF options
- Adobe PDF option categories
- About PDF/X standards
- PDF compatibility levels
- General options for PDFs
- Compression and downsampling options for PDFs
- Marks and Bleeds options for PDFs
- Color management and PDF/X output options for PDFs
- Font, OPI, and flattening options for PDFs
- Adding security to PDF files
- Security options for PDFs
- Font embedding and substitution
- Preparing a document for on-screen viewing
- Preparing PDFs for service providers
- Structuring PDFs
- Chapter 18: Interactive documents
- Interactive web documents for Flash
- Dynamic PDF documents
- Bookmarks
- Hyperlinks
- Cross-references
- Movies and sounds
- Animation
- Page transitions
- Buttons
- Digital Publishing Suite overview
- Chapter 19: XML
- Working with XML
- Importing XML
- Tagging content for XML
- Structuring documents for XML
- Exporting XML
- Chapter 20: Printing
- Printing documents
- About printing
- Print a document or book
- Printing documents with multiple page sizes
- Specifying pages to print
- Specify paper size and page orientation
- Choose which layers are printed or exported to PDF
- Printing to non-PostScript language printers
- Print as bitmap
- Preview documents
- Setting up a printer
- Use print presets
- Printer’s marks and bleeds
- Printing thumbnails and oversized documents
- Printing graphics and fonts
- Managing color
- Preflighting files before handoff
- Creating PostScript and EPS files
- Creating PostScript or EPS files
- Choosing the right method for creating a PostScript file
- About device- and driver-dependent PostScript files
- Create a device-independent PostScript file
- Create a device-dependent PostScript file using InDesign
- Create a PostScript file using a PostScript printer driver (Windows)
- Create a PostScript file using a PostScript printer driver (Mac OS)
- Export pages in EPS format
- Printing booklets
- Printing documents
- Chapter 21: Color separations
- Preparing to print separations
- Overprinting
- Inks, separations, and screen frequency
- Ink Manager overview
- Specify which colors to separate
- Separate spot colors as process
- Create an ink alias for a spot color
- Display or output spot colors using Lab values
- About halftone screen frequency
- Specify a halftone screen frequency and resolution
- About emulsion and image exposure
- Specify emulsion
- Specify the image exposure
- Checking separation and document settings
- Proofing color separations
- Producing in-RIP separations
- Print or save separations
- Chapter 22: Automation
- Scripting
- Plug-ins
- Data merge
- About data merge
- Basic steps for merging data
- About data source files
- Add image fields in the data source file
- About target documents
- Select a data source
- Insert data fields
- Adding data field placeholders to master pages
- Update, remove, or replace data source files
- Preview records in the target document
- Switching preview on or off
- Edit data field placeholders
- Set content placement options
- Merge records
- Update data fields
- Overset text reports
- Content placement options
- Chapter 23: Sharing content between InCopy and InDesign
- Understanding a basic managed-file workflow
- Sharing content
- Assignment packages
- Working with managed files
- Adjusting your workflow
- Chapter 24: Comparison of PageMaker and InDesign menus
- Chapter 25: Keyboard shortcuts
- Default keyboard shortcuts
- Keys for tools
- Keys for selecting and moving objects
- Keys for transforming objects
- Keys for editing paths and frames
- Keys for tables
- Keys for finding and changing text
- Keys for working with type
- Keys for navigating through and selecting text
- Keys for viewing documents and document workspaces
- Keys for working with XML
- Keys for indexing
- Keys for panels
- Keys for the Control panel
- Keys for type panels and dialog boxes
- Keys for the character and paragraph styles
- Keys for the Tabs panel
- Keys for the Layers panel
- Keys for the Pages panel
- Keys for the Color panel
- Keys for using the Separations Preview panel
- Keys for the Swatches panel
- Keys for the Transform panel
- Keys for resolving conflicts between Mac OS 10.3x and 10.4
- Default keyboard shortcuts

Using
ADOBE® INDESIGN® CS5 & CS5.5

iii
Last updated 11/16/2011
Contents
Chapter 1: What’s new
What’s new (CS5.5) . . . . . . . . . . . . . . . . . . . . . . . . . . . . . . . . . . . . . . . . . . . . . . . . . . . . . . . . . . . . . . . . . . . . . . . . . . . . . . . . . . . . . . . . . . . . . . . . . . . . 1
What’s new (CS5) . . . . . . . . . . . . . . . . . . . . . . . . . . . . . . . . . . . . . . . . . . . . . . . . . . . . . . . . . . . . . . . . . . . . . . . . . . . . . . . . . . . . . . . . . . . . . . . . . . . . . . 7
Chapter 2: Workspace
Workspace basics . . . . . . . . . . . . . . . . . . . . . . . . . . . . . . . . . . . . . . . . . . . . . . . . . . . . . . . . . . . . . . . . . . . . . . . . . . . . . . . . . . . . . . . . . . . . . . . . . . . . 16
Customize menus and keyboard shortcuts . . . . . . . . . . . . . . . . . . . . . . . . . . . . . . . . . . . . . . . . . . . . . . . . . . . . . . . . . . . . . . . . . . . . . . . . . . . . 27
Toolbox . . . . . . . . . . . . . . . . . . . . . . . . . . . . . . . . . . . . . . . . . . . . . . . . . . . . . . . . . . . . . . . . . . . . . . . . . . . . . . . . . . . . . . . . . . . . . . . . . . . . . . . . . . . . . . 30
Viewing the workspace . . . . . . . . . . . . . . . . . . . . . . . . . . . . . . . . . . . . . . . . . . . . . . . . . . . . . . . . . . . . . . . . . . . . . . . . . . . . . . . . . . . . . . . . . . . . . . . 35
Working with ConnectNow . . . . . . . . . . . . . . . . . . . . . . . . . . . . . . . . . . . . . . . . . . . . . . . . . . . . . . . . . . . . . . . . . . . . . . . . . . . . . . . . . . . . . . . . . . . 39
Setting preferences . . . . . . . . . . . . . . . . . . . . . . . . . . . . . . . . . . . . . . . . . . . . . . . . . . . . . . . . . . . . . . . . . . . . . . . . . . . . . . . . . . . . . . . . . . . . . . . . . . 40
Recovery and undo . . . . . . . . . . . . . . . . . . . . . . . . . . . . . . . . . . . . . . . . . . . . . . . . . . . . . . . . . . . . . . . . . . . . . . . . . . . . . . . . . . . . . . . . . . . . . . . . . . . 42
Chapter 3: Layout
Creating documents . . . . . . . . . . . . . . . . . . . . . . . . . . . . . . . . . . . . . . . . . . . . . . . . . . . . . . . . . . . . . . . . . . . . . . . . . . . . . . . . . . . . . . . . . . . . . . . . . . 44
Rulers and measurement units . . . . . . . . . . . . . . . . . . . . . . . . . . . . . . . . . . . . . . . . . . . . . . . . . . . . . . . . . . . . . . . . . . . . . . . . . . . . . . . . . . . . . . . . 49
Grids . . . . . . . . . . . . . . . . . . . . . . . . . . . . . . . . . . . . . . . . . . . . . . . . . . . . . . . . . . . . . . . . . . . . . . . . . . . . . . . . . . . . . . . . . . . . . . . . . . . . . . . . . . . . . . . . . 54
Ruler guides . . . . . . . . . . . . . . . . . . . . . . . . . . . . . . . . . . . . . . . . . . . . . . . . . . . . . . . . . . . . . . . . . . . . . . . . . . . . . . . . . . . . . . . . . . . . . . . . . . . . . . . . . . 56
Pages and spreads . . . . . . . . . . . . . . . . . . . . . . . . . . . . . . . . . . . . . . . . . . . . . . . . . . . . . . . . . . . . . . . . . . . . . . . . . . . . . . . . . . . . . . . . . . . . . . . . . . . 62
Master pages . . . . . . . . . . . . . . . . . . . . . . . . . . . . . . . . . . . . . . . . . . . . . . . . . . . . . . . . . . . . . . . . . . . . . . . . . . . . . . . . . . . . . . . . . . . . . . . . . . . . . . . . . 70
Layers . . . . . . . . . . . . . . . . . . . . . . . . . . . . . . . . . . . . . . . . . . . . . . . . . . . . . . . . . . . . . . . . . . . . . . . . . . . . . . . . . . . . . . . . . . . . . . . . . . . . . . . . . . . . . . . . 78
Laying out frames and pages . . . . . . . . . . . . . . . . . . . . . . . . . . . . . . . . . . . . . . . . . . . . . . . . . . . . . . . . . . . . . . . . . . . . . . . . . . . . . . . . . . . . . . . . . 84
Numbering pages, chapters, and sections . . . . . . . . . . . . . . . . . . . . . . . . . . . . . . . . . . . . . . . . . . . . . . . . . . . . . . . . . . . . . . . . . . . . . . . . . . . . . 88
Text variables . . . . . . . . . . . . . . . . . . . . . . . . . . . . . . . . . . . . . . . . . . . . . . . . . . . . . . . . . . . . . . . . . . . . . . . . . . . . . . . . . . . . . . . . . . . . . . . . . . . . . . . . 95
Chapter 4: Working with documents
Working with files and templates . . . . . . . . . . . . . . . . . . . . . . . . . . . . . . . . . . . . . . . . . . . . . . . . . . . . . . . . . . . . . . . . . . . . . . . . . . . . . . . . . . . . 100
Saving documents . . . . . . . . . . . . . . . . . . . . . . . . . . . . . . . . . . . . . . . . . . . . . . . . . . . . . . . . . . . . . . . . . . . . . . . . . . . . . . . . . . . . . . . . . . . . . . . . . . 105
Converting QuarkXPress and PageMaker documents . . . . . . . . . . . . . . . . . . . . . . . . . . . . . . . . . . . . . . . . . . . . . . . . . . . . . . . . . . . . . . . . . 110
Exporting . . . . . . . . . . . . . . . . . . . . . . . . . . . . . . . . . . . . . . . . . . . . . . . . . . . . . . . . . . . . . . . . . . . . . . . . . . . . . . . . . . . . . . . . . . . . . . . . . . . . . . . . . . . 114
Chapter 5: Text
Creating text and text frames . . . . . . . . . . . . . . . . . . . . . . . . . . . . . . . . . . . . . . . . . . . . . . . . . . . . . . . . . . . . . . . . . . . . . . . . . . . . . . . . . . . . . . . . 128
Adding text to frames . . . . . . . . . . . . . . . . . . . . . . . . . . . . . . . . . . . . . . . . . . . . . . . . . . . . . . . . . . . . . . . . . . . . . . . . . . . . . . . . . . . . . . . . . . . . . . . 134
Threading text . . . . . . . . . . . . . . . . . . . . . . . . . . . . . . . . . . . . . . . . . . . . . . . . . . . . . . . . . . . . . . . . . . . . . . . . . . . . . . . . . . . . . . . . . . . . . . . . . . . . . . 142
Articles (CS5.5) . . . . . . . . . . . . . . . . . . . . . . . . . . . . . . . . . . . . . . . . . . . . . . . . . . . . . . . . . . . . . . . . . . . . . . . . . . . . . . . . . . . . . . . . . . . . . . . . . . . . . . 147
Linked stories (CS5.5) . . . . . . . . . . . . . . . . . . . . . . . . . . . . . . . . . . . . . . . . . . . . . . . . . . . . . . . . . . . . . . . . . . . . . . . . . . . . . . . . . . . . . . . . . . . . . . . . 148
Editing text . . . . . . . . . . . . . . . . . . . . . . . . . . . . . . . . . . . . . . . . . . . . . . . . . . . . . . . . . . . . . . . . . . . . . . . . . . . . . . . . . . . . . . . . . . . . . . . . . . . . . . . . . 150
Find/Change . . . . . . . . . . . . . . . . . . . . . . . . . . . . . . . . . . . . . . . . . . . . . . . . . . . . . . . . . . . . . . . . . . . . . . . . . . . . . . . . . . . . . . . . . . . . . . . . . . . . . . . . 161
Glyphs and special characters . . . . . . . . . . . . . . . . . . . . . . . . . . . . . . . . . . . . . . . . . . . . . . . . . . . . . . . . . . . . . . . . . . . . . . . . . . . . . . . . . . . . . . . . 176
Spell-checking and language dictionaries . . . . . . . . . . . . . . . . . . . . . . . . . . . . . . . . . . . . . . . . . . . . . . . . . . . . . . . . . . . . . . . . . . . . . . . . . . . . 183
Footnotes . . . . . . . . . . . . . . . . . . . . . . . . . . . . . . . . . . . . . . . . . . . . . . . . . . . . . . . . . . . . . . . . . . . . . . . . . . . . . . . . . . . . . . . . . . . . . . . . . . . . . . . . . . . 189
Tracking and reviewing changes . . . . . . . . . . . . . . . . . . . . . . . . . . . . . . . . . . . . . . . . . . . . . . . . . . . . . . . . . . . . . . . . . . . . . . . . . . . . . . . . . . . . . 193
Adding editorial notes in InDesign . . . . . . . . . . . . . . . . . . . . . . . . . . . . . . . . . . . . . . . . . . . . . . . . . . . . . . . . . . . . . . . . . . . . . . . . . . . . . . . . . . . 196

iv
USING INDESIGN
Contents
Last updated 11/16/2011
Chapter 6: Styles
Paragraph and character styles . . . . . . . . . . . . . . . . . . . . . . . . . . . . . . . . . . . . . . . . . . . . . . . . . . . . . . . . . . . . . . . . . . . . . . . . . . . . . . . . . . . . . . 198
Drop caps and nested styles . . . . . . . . . . . . . . . . . . . . . . . . . . . . . . . . . . . . . . . . . . . . . . . . . . . . . . . . . . . . . . . . . . . . . . . . . . . . . . . . . . . . . . . . . 206
Object styles . . . . . . . . . . . . . . . . . . . . . . . . . . . . . . . . . . . . . . . . . . . . . . . . . . . . . . . . . . . . . . . . . . . . . . . . . . . . . . . . . . . . . . . . . . . . . . . . . . . . . . . . 213
Working with styles . . . . . . . . . . . . . . . . . . . . . . . . . . . . . . . . . . . . . . . . . . . . . . . . . . . . . . . . . . . . . . . . . . . . . . . . . . . . . . . . . . . . . . . . . . . . . . . . . 218
Chapter 7: Combining text and objects
Anchored objects . . . . . . . . . . . . . . . . . . . . . . . . . . . . . . . . . . . . . . . . . . . . . . . . . . . . . . . . . . . . . . . . . . . . . . . . . . . . . . . . . . . . . . . . . . . . . . . . . . . 220
Wrapping text around objects . . . . . . . . . . . . . . . . . . . . . . . . . . . . . . . . . . . . . . . . . . . . . . . . . . . . . . . . . . . . . . . . . . . . . . . . . . . . . . . . . . . . . . . 228
Creating type on a path . . . . . . . . . . . . . . . . . . . . . . . . . . . . . . . . . . . . . . . . . . . . . . . . . . . . . . . . . . . . . . . . . . . . . . . . . . . . . . . . . . . . . . . . . . . . . . 234
Captions . . . . . . . . . . . . . . . . . . . . . . . . . . . . . . . . . . . . . . . . . . . . . . . . . . . . . . . . . . . . . . . . . . . . . . . . . . . . . . . . . . . . . . . . . . . . . . . . . . . . . . . . . . . . 238
Chapter 8: Typography
Formatting text . . . . . . . . . . . . . . . . . . . . . . . . . . . . . . . . . . . . . . . . . . . . . . . . . . . . . . . . . . . . . . . . . . . . . . . . . . . . . . . . . . . . . . . . . . . . . . . . . . . . . 241
Using fonts . . . . . . . . . . . . . . . . . . . . . . . . . . . . . . . . . . . . . . . . . . . . . . . . . . . . . . . . . . . . . . . . . . . . . . . . . . . . . . . . . . . . . . . . . . . . . . . . . . . . . . . . . . 244
Leading . . . . . . . . . . . . . . . . . . . . . . . . . . . . . . . . . . . . . . . . . . . . . . . . . . . . . . . . . . . . . . . . . . . . . . . . . . . . . . . . . . . . . . . . . . . . . . . . . . . . . . . . . . . . . 249
Kerning and tracking . . . . . . . . . . . . . . . . . . . . . . . . . . . . . . . . . . . . . . . . . . . . . . . . . . . . . . . . . . . . . . . . . . . . . . . . . . . . . . . . . . . . . . . . . . . . . . . . 251
Formatting characters . . . . . . . . . . . . . . . . . . . . . . . . . . . . . . . . . . . . . . . . . . . . . . . . . . . . . . . . . . . . . . . . . . . . . . . . . . . . . . . . . . . . . . . . . . . . . . . 253
Formatting paragraphs . . . . . . . . . . . . . . . . . . . . . . . . . . . . . . . . . . . . . . . . . . . . . . . . . . . . . . . . . . . . . . . . . . . . . . . . . . . . . . . . . . . . . . . . . . . . . . 260
Aligning text . . . . . . . . . . . . . . . . . . . . . . . . . . . . . . . . . . . . . . . . . . . . . . . . . . . . . . . . . . . . . . . . . . . . . . . . . . . . . . . . . . . . . . . . . . . . . . . . . . . . . . . . 265
Tabs and indents . . . . . . . . . . . . . . . . . . . . . . . . . . . . . . . . . . . . . . . . . . . . . . . . . . . . . . . . . . . . . . . . . . . . . . . . . . . . . . . . . . . . . . . . . . . . . . . . . . . . 269
Bullets and numbering . . . . . . . . . . . . . . . . . . . . . . . . . . . . . . . . . . . . . . . . . . . . . . . . . . . . . . . . . . . . . . . . . . . . . . . . . . . . . . . . . . . . . . . . . . . . . . 275
Text composition . . . . . . . . . . . . . . . . . . . . . . . . . . . . . . . . . . . . . . . . . . . . . . . . . . . . . . . . . . . . . . . . . . . . . . . . . . . . . . . . . . . . . . . . . . . . . . . . . . . . 285
Chapter 9: Tables
Creating tables . . . . . . . . . . . . . . . . . . . . . . . . . . . . . . . . . . . . . . . . . . . . . . . . . . . . . . . . . . . . . . . . . . . . . . . . . . . . . . . . . . . . . . . . . . . . . . . . . . . . . . 290
Selecting and editing tables . . . . . . . . . . . . . . . . . . . . . . . . . . . . . . . . . . . . . . . . . . . . . . . . . . . . . . . . . . . . . . . . . . . . . . . . . . . . . . . . . . . . . . . . . 294
Formatting tables . . . . . . . . . . . . . . . . . . . . . . . . . . . . . . . . . . . . . . . . . . . . . . . . . . . . . . . . . . . . . . . . . . . . . . . . . . . . . . . . . . . . . . . . . . . . . . . . . . . 299
Table strokes and fills . . . . . . . . . . . . . . . . . . . . . . . . . . . . . . . . . . . . . . . . . . . . . . . . . . . . . . . . . . . . . . . . . . . . . . . . . . . . . . . . . . . . . . . . . . . . . . . . 304
Table and cell styles . . . . . . . . . . . . . . . . . . . . . . . . . . . . . . . . . . . . . . . . . . . . . . . . . . . . . . . . . . . . . . . . . . . . . . . . . . . . . . . . . . . . . . . . . . . . . . . . . 307
Chapter 10: Long document features
Creating book files . . . . . . . . . . . . . . . . . . . . . . . . . . . . . . . . . . . . . . . . . . . . . . . . . . . . . . . . . . . . . . . . . . . . . . . . . . . . . . . . . . . . . . . . . . . . . . . . . . 313
Creating a table of contents . . . . . . . . . . . . . . . . . . . . . . . . . . . . . . . . . . . . . . . . . . . . . . . . . . . . . . . . . . . . . . . . . . . . . . . . . . . . . . . . . . . . . . . . . 319
Creating an index . . . . . . . . . . . . . . . . . . . . . . . . . . . . . . . . . . . . . . . . . . . . . . . . . . . . . . . . . . . . . . . . . . . . . . . . . . . . . . . . . . . . . . . . . . . . . . . . . . . 325
Working with markers . . . . . . . . . . . . . . . . . . . . . . . . . . . . . . . . . . . . . . . . . . . . . . . . . . . . . . . . . . . . . . . . . . . . . . . . . . . . . . . . . . . . . . . . . . . . . . . 338
Chapter 11: Drawing
Understanding paths and shapes . . . . . . . . . . . . . . . . . . . . . . . . . . . . . . . . . . . . . . . . . . . . . . . . . . . . . . . . . . . . . . . . . . . . . . . . . . . . . . . . . . . . 340
Drawing with the line or shape tools . . . . . . . . . . . . . . . . . . . . . . . . . . . . . . . . . . . . . . . . . . . . . . . . . . . . . . . . . . . . . . . . . . . . . . . . . . . . . . . . . 343
Drawing with the Pencil tool . . . . . . . . . . . . . . . . . . . . . . . . . . . . . . . . . . . . . . . . . . . . . . . . . . . . . . . . . . . . . . . . . . . . . . . . . . . . . . . . . . . . . . . . . 344
Drawing with the Pen tool . . . . . . . . . . . . . . . . . . . . . . . . . . . . . . . . . . . . . . . . . . . . . . . . . . . . . . . . . . . . . . . . . . . . . . . . . . . . . . . . . . . . . . . . . . . 347
Editing paths . . . . . . . . . . . . . . . . . . . . . . . . . . . . . . . . . . . . . . . . . . . . . . . . . . . . . . . . . . . . . . . . . . . . . . . . . . . . . . . . . . . . . . . . . . . . . . . . . . . . . . . . 351
Applying line (stroke) settings . . . . . . . . . . . . . . . . . . . . . . . . . . . . . . . . . . . . . . . . . . . . . . . . . . . . . . . . . . . . . . . . . . . . . . . . . . . . . . . . . . . . . . . 358
Change corner appearance . . . . . . . . . . . . . . . . . . . . . . . . . . . . . . . . . . . . . . . . . . . . . . . . . . . . . . . . . . . . . . . . . . . . . . . . . . . . . . . . . . . . . . . . . . 362
Compound paths and shapes . . . . . . . . . . . . . . . . . . . . . . . . . . . . . . . . . . . . . . . . . . . . . . . . . . . . . . . . . . . . . . . . . . . . . . . . . . . . . . . . . . . . . . . . 363

v
USING INDESIGN
Contents
Last updated 11/16/2011
Chapter 12: Graphics
Understanding graphics formats . . . . . . . . . . . . . . . . . . . . . . . . . . . . . . . . . . . . . . . . . . . . . . . . . . . . . . . . . . . . . . . . . . . . . . . . . . . . . . . . . . . . . 369
Importing files from other applications . . . . . . . . . . . . . . . . . . . . . . . . . . . . . . . . . . . . . . . . . . . . . . . . . . . . . . . . . . . . . . . . . . . . . . . . . . . . . . . 371
Placing graphics . . . . . . . . . . . . . . . . . . . . . . . . . . . . . . . . . . . . . . . . . . . . . . . . . . . . . . . . . . . . . . . . . . . . . . . . . . . . . . . . . . . . . . . . . . . . . . . . . . . . . 378
Managing graphics links . . . . . . . . . . . . . . . . . . . . . . . . . . . . . . . . . . . . . . . . . . . . . . . . . . . . . . . . . . . . . . . . . . . . . . . . . . . . . . . . . . . . . . . . . . . . . 389
Reusing graphics and text . . . . . . . . . . . . . . . . . . . . . . . . . . . . . . . . . . . . . . . . . . . . . . . . . . . . . . . . . . . . . . . . . . . . . . . . . . . . . . . . . . . . . . . . . . . 396
Chapter 13: Frames and objects
Selecting objects . . . . . . . . . . . . . . . . . . . . . . . . . . . . . . . . . . . . . . . . . . . . . . . . . . . . . . . . . . . . . . . . . . . . . . . . . . . . . . . . . . . . . . . . . . . . . . . . . . . . 402
Transforming objects . . . . . . . . . . . . . . . . . . . . . . . . . . . . . . . . . . . . . . . . . . . . . . . . . . . . . . . . . . . . . . . . . . . . . . . . . . . . . . . . . . . . . . . . . . . . . . . . 408
Aligning and distributing objects . . . . . . . . . . . . . . . . . . . . . . . . . . . . . . . . . . . . . . . . . . . . . . . . . . . . . . . . . . . . . . . . . . . . . . . . . . . . . . . . . . . . 424
Grouping, locking, and duplicating objects . . . . . . . . . . . . . . . . . . . . . . . . . . . . . . . . . . . . . . . . . . . . . . . . . . . . . . . . . . . . . . . . . . . . . . . . . . . 428
Working with frames and objects . . . . . . . . . . . . . . . . . . . . . . . . . . . . . . . . . . . . . . . . . . . . . . . . . . . . . . . . . . . . . . . . . . . . . . . . . . . . . . . . . . . . 431
Clipping paths . . . . . . . . . . . . . . . . . . . . . . . . . . . . . . . . . . . . . . . . . . . . . . . . . . . . . . . . . . . . . . . . . . . . . . . . . . . . . . . . . . . . . . . . . . . . . . . . . . . . . . 438
Chapter 14: Transparency effects
Adding transparency effects . . . . . . . . . . . . . . . . . . . . . . . . . . . . . . . . . . . . . . . . . . . . . . . . . . . . . . . . . . . . . . . . . . . . . . . . . . . . . . . . . . . . . . . . . 442
Blending colors . . . . . . . . . . . . . . . . . . . . . . . . . . . . . . . . . . . . . . . . . . . . . . . . . . . . . . . . . . . . . . . . . . . . . . . . . . . . . . . . . . . . . . . . . . . . . . . . . . . . . . 451
Flattening transparent artwork . . . . . . . . . . . . . . . . . . . . . . . . . . . . . . . . . . . . . . . . . . . . . . . . . . . . . . . . . . . . . . . . . . . . . . . . . . . . . . . . . . . . . . 454
Chapter 15: Color
Understanding spot and process colors . . . . . . . . . . . . . . . . . . . . . . . . . . . . . . . . . . . . . . . . . . . . . . . . . . . . . . . . . . . . . . . . . . . . . . . . . . . . . . 463
Applying color . . . . . . . . . . . . . . . . . . . . . . . . . . . . . . . . . . . . . . . . . . . . . . . . . . . . . . . . . . . . . . . . . . . . . . . . . . . . . . . . . . . . . . . . . . . . . . . . . . . . . . 465
Working with swatches . . . . . . . . . . . . . . . . . . . . . . . . . . . . . . . . . . . . . . . . . . . . . . . . . . . . . . . . . . . . . . . . . . . . . . . . . . . . . . . . . . . . . . . . . . . . . . 469
Tints . . . . . . . . . . . . . . . . . . . . . . . . . . . . . . . . . . . . . . . . . . . . . . . . . . . . . . . . . . . . . . . . . . . . . . . . . . . . . . . . . . . . . . . . . . . . . . . . . . . . . . . . . . . . . . . . 479
Gradients . . . . . . . . . . . . . . . . . . . . . . . . . . . . . . . . . . . . . . . . . . . . . . . . . . . . . . . . . . . . . . . . . . . . . . . . . . . . . . . . . . . . . . . . . . . . . . . . . . . . . . . . . . . 480
Mixing inks . . . . . . . . . . . . . . . . . . . . . . . . . . . . . . . . . . . . . . . . . . . . . . . . . . . . . . . . . . . . . . . . . . . . . . . . . . . . . . . . . . . . . . . . . . . . . . . . . . . . . . . . . . 485
Using colors from imported graphics . . . . . . . . . . . . . . . . . . . . . . . . . . . . . . . . . . . . . . . . . . . . . . . . . . . . . . . . . . . . . . . . . . . . . . . . . . . . . . . . . 487
Chapter 16: Trapping color
Trapping documents and books . . . . . . . . . . . . . . . . . . . . . . . . . . . . . . . . . . . . . . . . . . . . . . . . . . . . . . . . . . . . . . . . . . . . . . . . . . . . . . . . . . . . . 489
Trap presets . . . . . . . . . . . . . . . . . . . . . . . . . . . . . . . . . . . . . . . . . . . . . . . . . . . . . . . . . . . . . . . . . . . . . . . . . . . . . . . . . . . . . . . . . . . . . . . . . . . . . . . . . 493
Adjusting ink options for trapping . . . . . . . . . . . . . . . . . . . . . . . . . . . . . . . . . . . . . . . . . . . . . . . . . . . . . . . . . . . . . . . . . . . . . . . . . . . . . . . . . . . 499
Chapter 17: PDF
Exporting to Adobe PDF . . . . . . . . . . . . . . . . . . . . . . . . . . . . . . . . . . . . . . . . . . . . . . . . . . . . . . . . . . . . . . . . . . . . . . . . . . . . . . . . . . . . . . . . . . . . . 501
Adobe PDF options . . . . . . . . . . . . . . . . . . . . . . . . . . . . . . . . . . . . . . . . . . . . . . . . . . . . . . . . . . . . . . . . . . . . . . . . . . . . . . . . . . . . . . . . . . . . . . . . . . 506
Preparing PDFs for service providers . . . . . . . . . . . . . . . . . . . . . . . . . . . . . . . . . . . . . . . . . . . . . . . . . . . . . . . . . . . . . . . . . . . . . . . . . . . . . . . . . 515
Structuring PDFs . . . . . . . . . . . . . . . . . . . . . . . . . . . . . . . . . . . . . . . . . . . . . . . . . . . . . . . . . . . . . . . . . . . . . . . . . . . . . . . . . . . . . . . . . . . . . . . . . . . . 517
Chapter 18: Interactive documents
Interactive web documents for Flash . . . . . . . . . . . . . . . . . . . . . . . . . . . . . . . . . . . . . . . . . . . . . . . . . . . . . . . . . . . . . . . . . . . . . . . . . . . . . . . . . 523
Dynamic PDF documents . . . . . . . . . . . . . . . . . . . . . . . . . . . . . . . . . . . . . . . . . . . . . . . . . . . . . . . . . . . . . . . . . . . . . . . . . . . . . . . . . . . . . . . . . . . . 530
Bookmarks . . . . . . . . . . . . . . . . . . . . . . . . . . . . . . . . . . . . . . . . . . . . . . . . . . . . . . . . . . . . . . . . . . . . . . . . . . . . . . . . . . . . . . . . . . . . . . . . . . . . . . . . . . 533
Hyperlinks . . . . . . . . . . . . . . . . . . . . . . . . . . . . . . . . . . . . . . . . . . . . . . . . . . . . . . . . . . . . . . . . . . . . . . . . . . . . . . . . . . . . . . . . . . . . . . . . . . . . . . . . . . 535
Cross-references . . . . . . . . . . . . . . . . . . . . . . . . . . . . . . . . . . . . . . . . . . . . . . . . . . . . . . . . . . . . . . . . . . . . . . . . . . . . . . . . . . . . . . . . . . . . . . . . . . . . 541
Movies and sounds . . . . . . . . . . . . . . . . . . . . . . . . . . . . . . . . . . . . . . . . . . . . . . . . . . . . . . . . . . . . . . . . . . . . . . . . . . . . . . . . . . . . . . . . . . . . . . . . . . 548
Animation . . . . . . . . . . . . . . . . . . . . . . . . . . . . . . . . . . . . . . . . . . . . . . . . . . . . . . . . . . . . . . . . . . . . . . . . . . . . . . . . . . . . . . . . . . . . . . . . . . . . . . . . . . 551

vi
USING INDESIGN
Contents
Last updated 11/16/2011
Page transitions . . . . . . . . . . . . . . . . . . . . . . . . . . . . . . . . . . . . . . . . . . . . . . . . . . . . . . . . . . . . . . . . . . . . . . . . . . . . . . . . . . . . . . . . . . . . . . . . . . . . . 556
Buttons . . . . . . . . . . . . . . . . . . . . . . . . . . . . . . . . . . . . . . . . . . . . . . . . . . . . . . . . . . . . . . . . . . . . . . . . . . . . . . . . . . . . . . . . . . . . . . . . . . . . . . . . . . . . . 558
Digital Publishing Suite overview . . . . . . . . . . . . . . . . . . . . . . . . . . . . . . . . . . . . . . . . . . . . . . . . . . . . . . . . . . . . . . . . . . . . . . . . . . . . . . . . . . . . 566
Chapter 19: XML
Working with XML . . . . . . . . . . . . . . . . . . . . . . . . . . . . . . . . . . . . . . . . . . . . . . . . . . . . . . . . . . . . . . . . . . . . . . . . . . . . . . . . . . . . . . . . . . . . . . . . . . . 567
Importing XML . . . . . . . . . . . . . . . . . . . . . . . . . . . . . . . . . . . . . . . . . . . . . . . . . . . . . . . . . . . . . . . . . . . . . . . . . . . . . . . . . . . . . . . . . . . . . . . . . . . . . . 570
Tagging content for XML . . . . . . . . . . . . . . . . . . . . . . . . . . . . . . . . . . . . . . . . . . . . . . . . . . . . . . . . . . . . . . . . . . . . . . . . . . . . . . . . . . . . . . . . . . . . 581
Structuring documents for XML . . . . . . . . . . . . . . . . . . . . . . . . . . . . . . . . . . . . . . . . . . . . . . . . . . . . . . . . . . . . . . . . . . . . . . . . . . . . . . . . . . . . . . 586
Exporting XML . . . . . . . . . . . . . . . . . . . . . . . . . . . . . . . . . . . . . . . . . . . . . . . . . . . . . . . . . . . . . . . . . . . . . . . . . . . . . . . . . . . . . . . . . . . . . . . . . . . . . . 594
Chapter 20: Printing
Printing documents . . . . . . . . . . . . . . . . . . . . . . . . . . . . . . . . . . . . . . . . . . . . . . . . . . . . . . . . . . . . . . . . . . . . . . . . . . . . . . . . . . . . . . . . . . . . . . . . . 597
Printer’s marks and bleeds . . . . . . . . . . . . . . . . . . . . . . . . . . . . . . . . . . . . . . . . . . . . . . . . . . . . . . . . . . . . . . . . . . . . . . . . . . . . . . . . . . . . . . . . . . . 607
Printing thumbnails and oversized documents . . . . . . . . . . . . . . . . . . . . . . . . . . . . . . . . . . . . . . . . . . . . . . . . . . . . . . . . . . . . . . . . . . . . . . . 609
Printing graphics and fonts . . . . . . . . . . . . . . . . . . . . . . . . . . . . . . . . . . . . . . . . . . . . . . . . . . . . . . . . . . . . . . . . . . . . . . . . . . . . . . . . . . . . . . . . . . 611
Managing color . . . . . . . . . . . . . . . . . . . . . . . . . . . . . . . . . . . . . . . . . . . . . . . . . . . . . . . . . . . . . . . . . . . . . . . . . . . . . . . . . . . . . . . . . . . . . . . . . . . . . 613
Preflighting files before handoff . . . . . . . . . . . . . . . . . . . . . . . . . . . . . . . . . . . . . . . . . . . . . . . . . . . . . . . . . . . . . . . . . . . . . . . . . . . . . . . . . . . . . 617
Creating PostScript and EPS files . . . . . . . . . . . . . . . . . . . . . . . . . . . . . . . . . . . . . . . . . . . . . . . . . . . . . . . . . . . . . . . . . . . . . . . . . . . . . . . . . . . . . 623
Printing booklets . . . . . . . . . . . . . . . . . . . . . . . . . . . . . . . . . . . . . . . . . . . . . . . . . . . . . . . . . . . . . . . . . . . . . . . . . . . . . . . . . . . . . . . . . . . . . . . . . . . . 628
Chapter 21: Color separations
Preparing to print separations . . . . . . . . . . . . . . . . . . . . . . . . . . . . . . . . . . . . . . . . . . . . . . . . . . . . . . . . . . . . . . . . . . . . . . . . . . . . . . . . . . . . . . . 634
Overprinting . . . . . . . . . . . . . . . . . . . . . . . . . . . . . . . . . . . . . . . . . . . . . . . . . . . . . . . . . . . . . . . . . . . . . . . . . . . . . . . . . . . . . . . . . . . . . . . . . . . . . . . . 639
Inks, separations, and screen frequency . . . . . . . . . . . . . . . . . . . . . . . . . . . . . . . . . . . . . . . . . . . . . . . . . . . . . . . . . . . . . . . . . . . . . . . . . . . . . . 642
Chapter 22: Automation
Scripting . . . . . . . . . . . . . . . . . . . . . . . . . . . . . . . . . . . . . . . . . . . . . . . . . . . . . . . . . . . . . . . . . . . . . . . . . . . . . . . . . . . . . . . . . . . . . . . . . . . . . . . . . . . . 649
Plug-ins . . . . . . . . . . . . . . . . . . . . . . . . . . . . . . . . . . . . . . . . . . . . . . . . . . . . . . . . . . . . . . . . . . . . . . . . . . . . . . . . . . . . . . . . . . . . . . . . . . . . . . . . . . . . . 651
Data merge . . . . . . . . . . . . . . . . . . . . . . . . . . . . . . . . . . . . . . . . . . . . . . . . . . . . . . . . . . . . . . . . . . . . . . . . . . . . . . . . . . . . . . . . . . . . . . . . . . . . . . . . . 651
Chapter 23: Sharing content between InCopy and InDesign
Understanding a basic managed-file workflow . . . . . . . . . . . . . . . . . . . . . . . . . . . . . . . . . . . . . . . . . . . . . . . . . . . . . . . . . . . . . . . . . . . . . . . 661
Sharing content . . . . . . . . . . . . . . . . . . . . . . . . . . . . . . . . . . . . . . . . . . . . . . . . . . . . . . . . . . . . . . . . . . . . . . . . . . . . . . . . . . . . . . . . . . . . . . . . . . . . . 668
Assignment packages . . . . . . . . . . . . . . . . . . . . . . . . . . . . . . . . . . . . . . . . . . . . . . . . . . . . . . . . . . . . . . . . . . . . . . . . . . . . . . . . . . . . . . . . . . . . . . . 673
Working with managed files . . . . . . . . . . . . . . . . . . . . . . . . . . . . . . . . . . . . . . . . . . . . . . . . . . . . . . . . . . . . . . . . . . . . . . . . . . . . . . . . . . . . . . . . . 676
Adjusting your workflow . . . . . . . . . . . . . . . . . . . . . . . . . . . . . . . . . . . . . . . . . . . . . . . . . . . . . . . . . . . . . . . . . . . . . . . . . . . . . . . . . . . . . . . . . . . . 681
Chapter 24: Comparison of PageMaker and InDesign menus
PageMaker menu commands . . . . . . . . . . . . . . . . . . . . . . . . . . . . . . . . . . . . . . . . . . . . . . . . . . . . . . . . . . . . . . . . . . . . . . . . . . . . . . . . . . . . . . . . 685
Chapter 25: Keyboard shortcuts
Default keyboard shortcuts . . . . . . . . . . . . . . . . . . . . . . . . . . . . . . . . . . . . . . . . . . . . . . . . . . . . . . . . . . . . . . . . . . . . . . . . . . . . . . . . . . . . . . . . . . 692
1
Last updated 11/16/2011
Chapter 1: What’s new
Important: This page provides a list of features in InDesign CS5.5 and InDesign CS5. This page does NOT tell you how
to use these features. For more information about any of the new features, click the corresponding links provided.
What’s new (CS5.5)
The CS5.5 Design Standard Feature Tour on Adobe TV contains several videos to show you the new features.
EPUBS
Articles
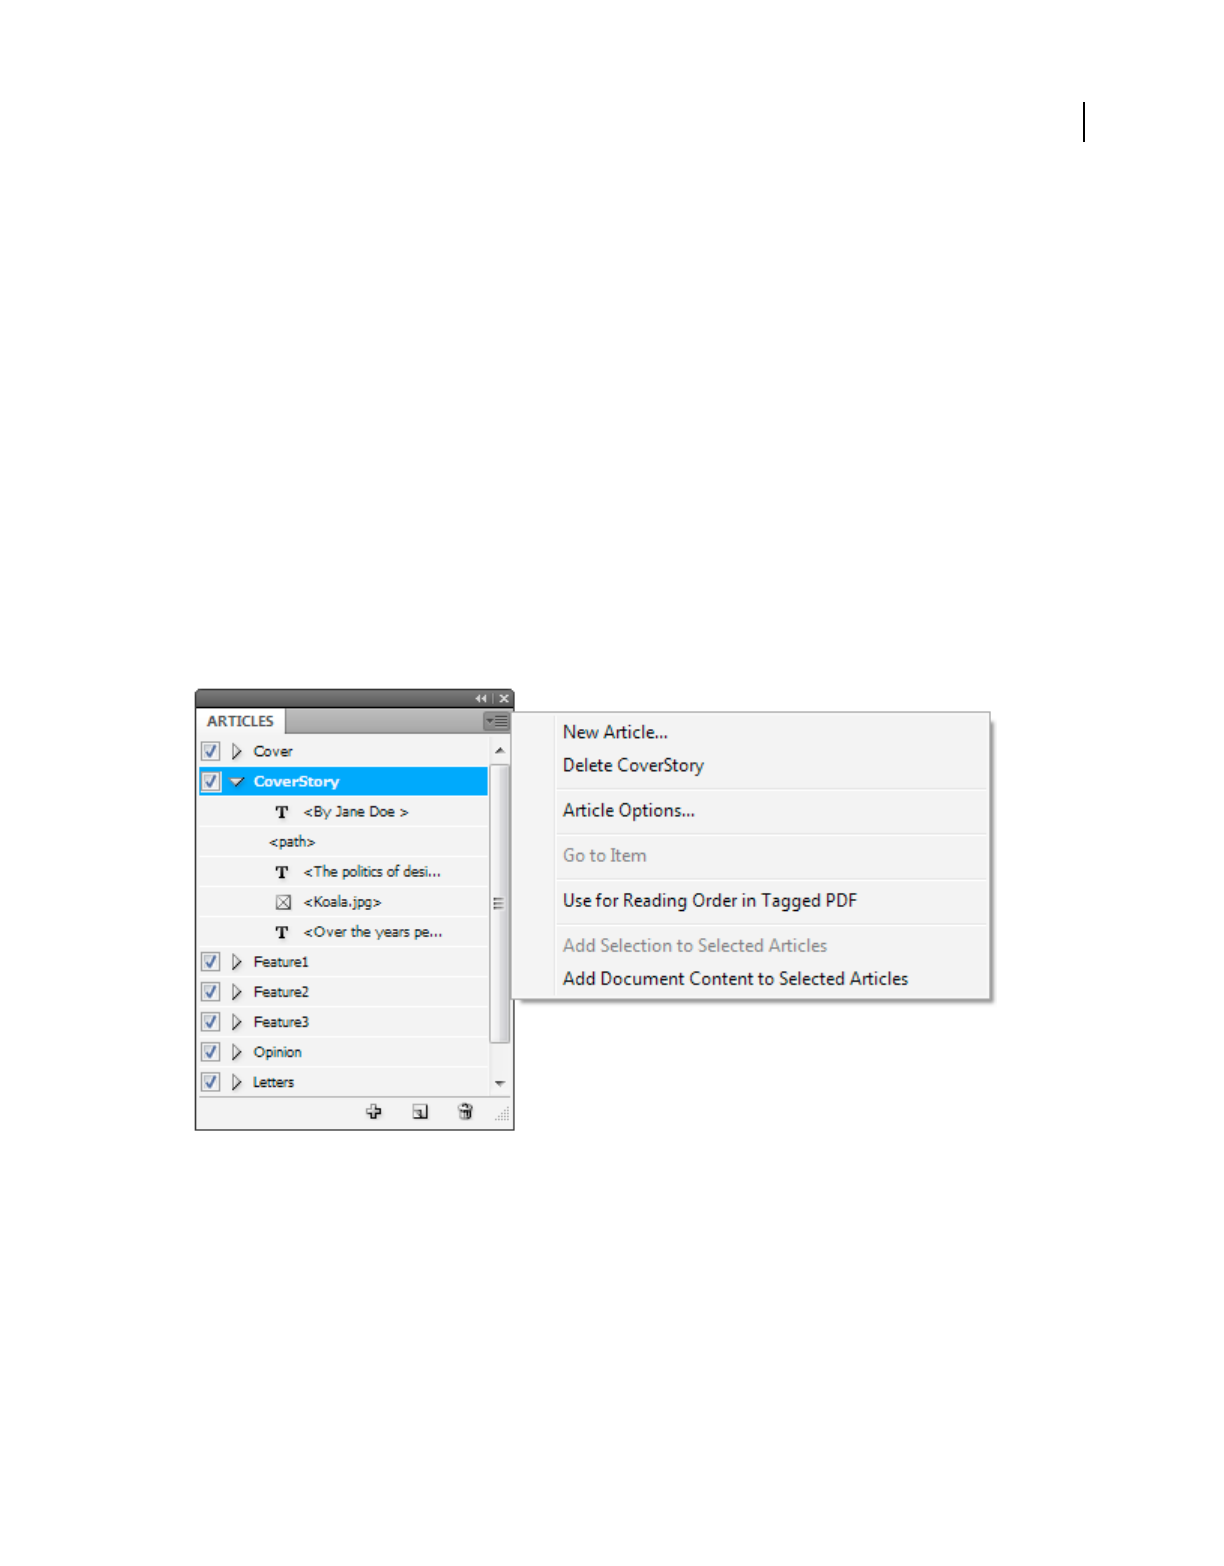
Articles provide an easy way to create relationships among page items. These relationships are used to define the
content to export to EPUB, HTML, or Accessible PDFs; and to define the order of the content.
Articles panel with the options pullout menu
For more details, see “Articles (CS5.5)” on page 147
Linked stories
Adobe InDesign CS5.5 linked stories makes it easier to manage multiple versions of the same story or text content in
the same document.
For more details, see “Linked stories (CS5.5)” on page 148
2
USING INDESIGN
What’s new
Last updated 11/16/2011
Object Export options
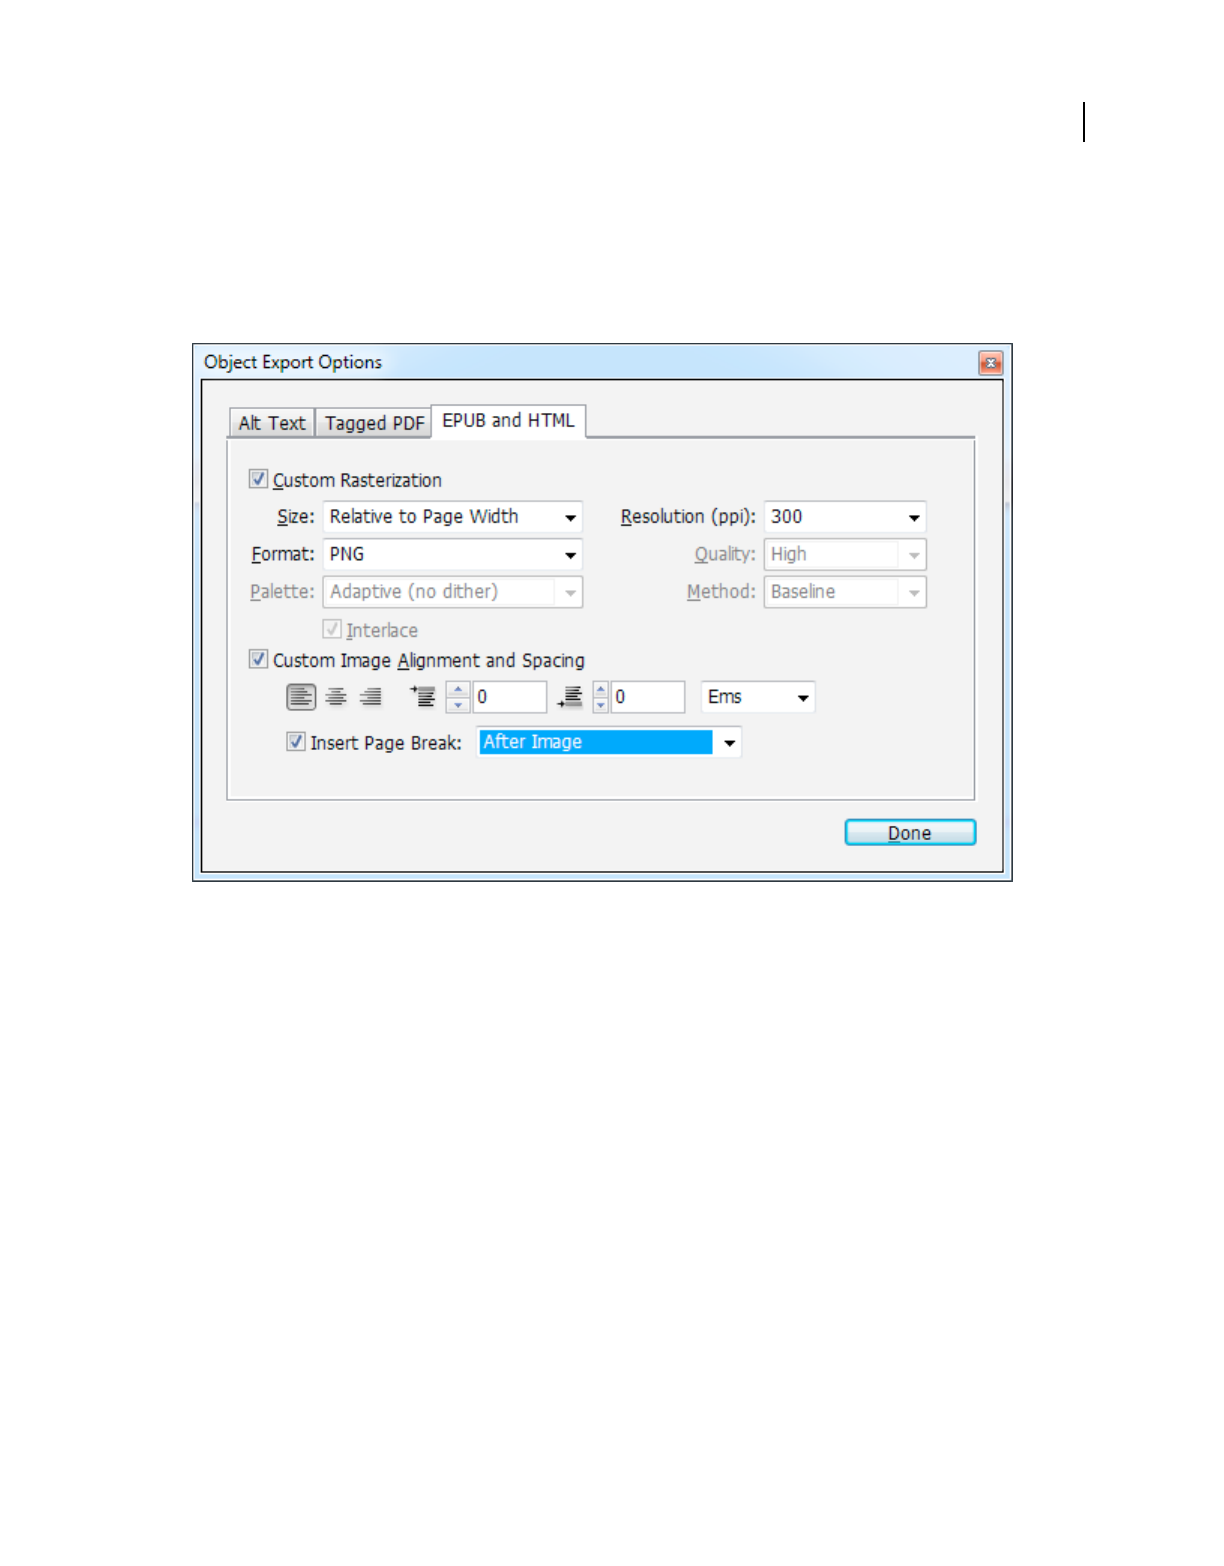
Object export options are used to specify export parameters required when you export to different formats such as
EPUB, HTML, or accessible PDFs. Object export options are applied to both text frames and graphic frames, as well
as groups. Object export options are specified to individual objects or groups and can override the global export
settings. Choose Object > Object Export Options.
Object export options dialog box
For more details, see “Object export options (CS5.5)” on page 436
Map styles to export tags
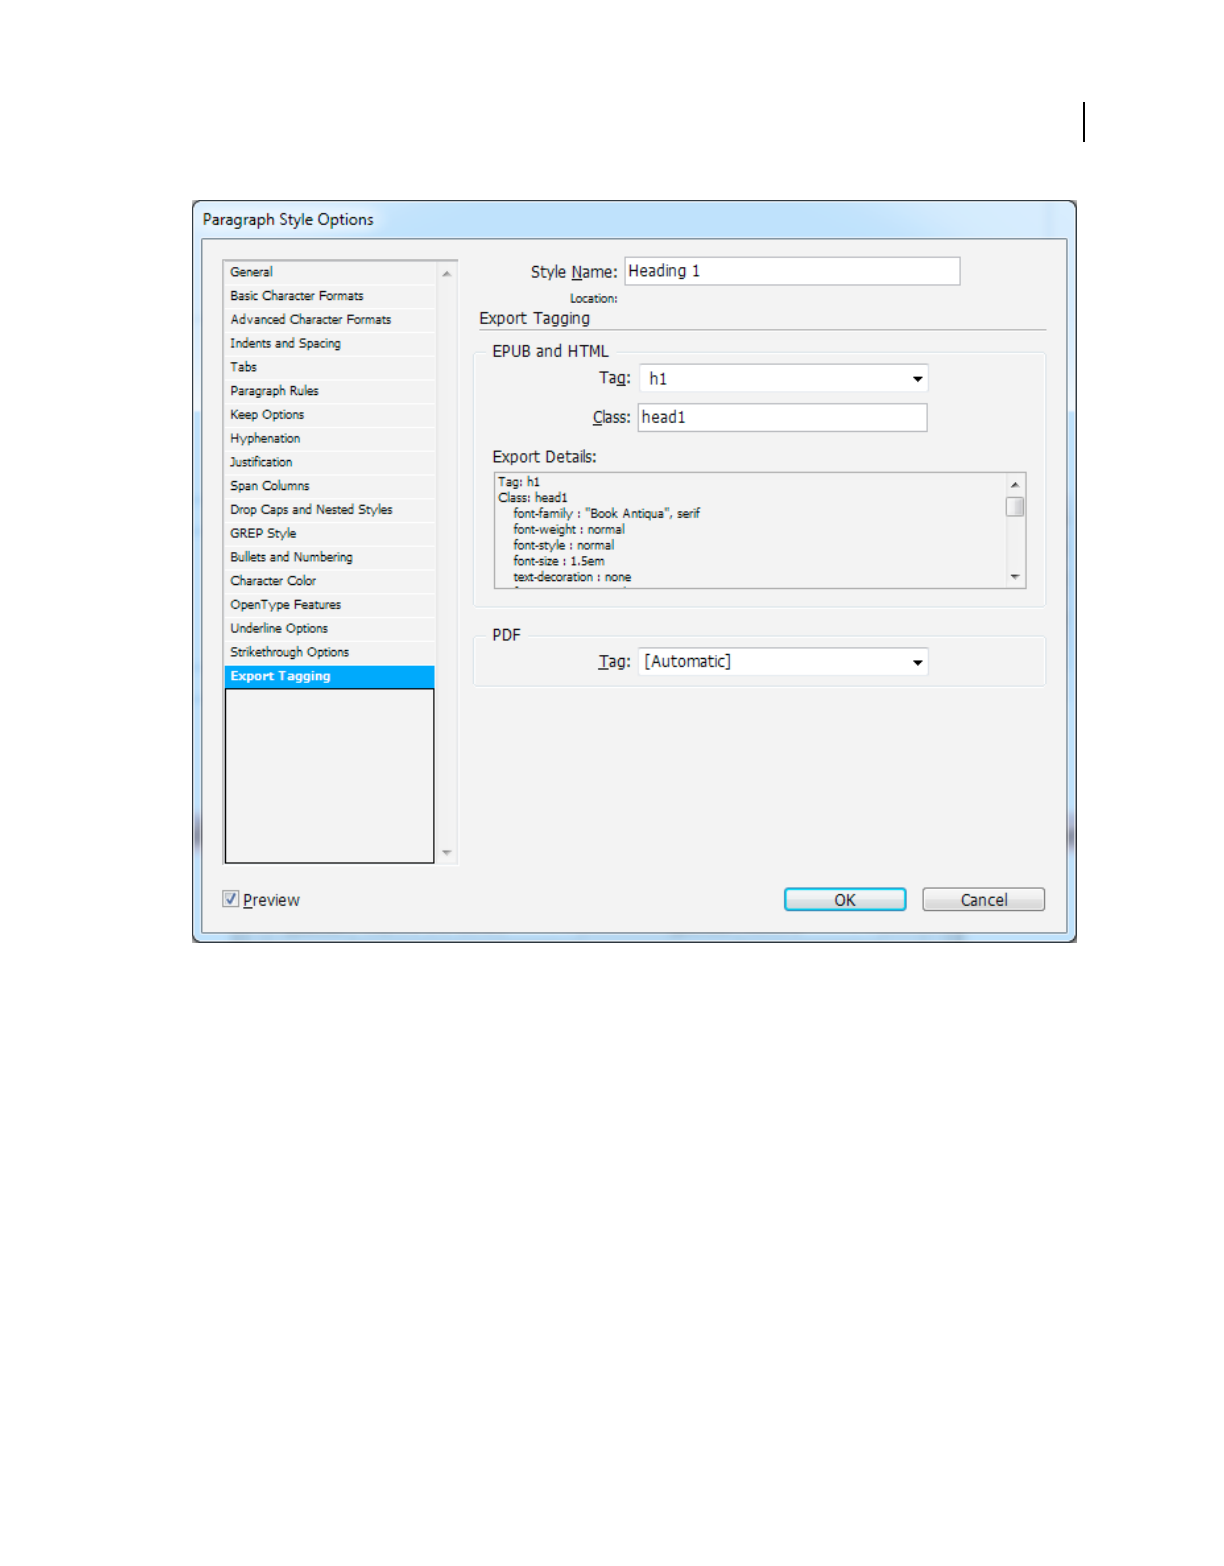
The Paragraph and Character styles have a new subfeature—Export Tagging. Export Tagging lets you define how text
with InDesign styles should be marked up in HTML/EPUB or in the tagged PDF output.
3
USING INDESIGN
What’s new
Last updated 11/16/2011
Paragraph Style dialog box with Export Tagging options
See “Map styles to export tags (CS5.5)” on page 201
Integration with Adobe Digital Publishing Suite
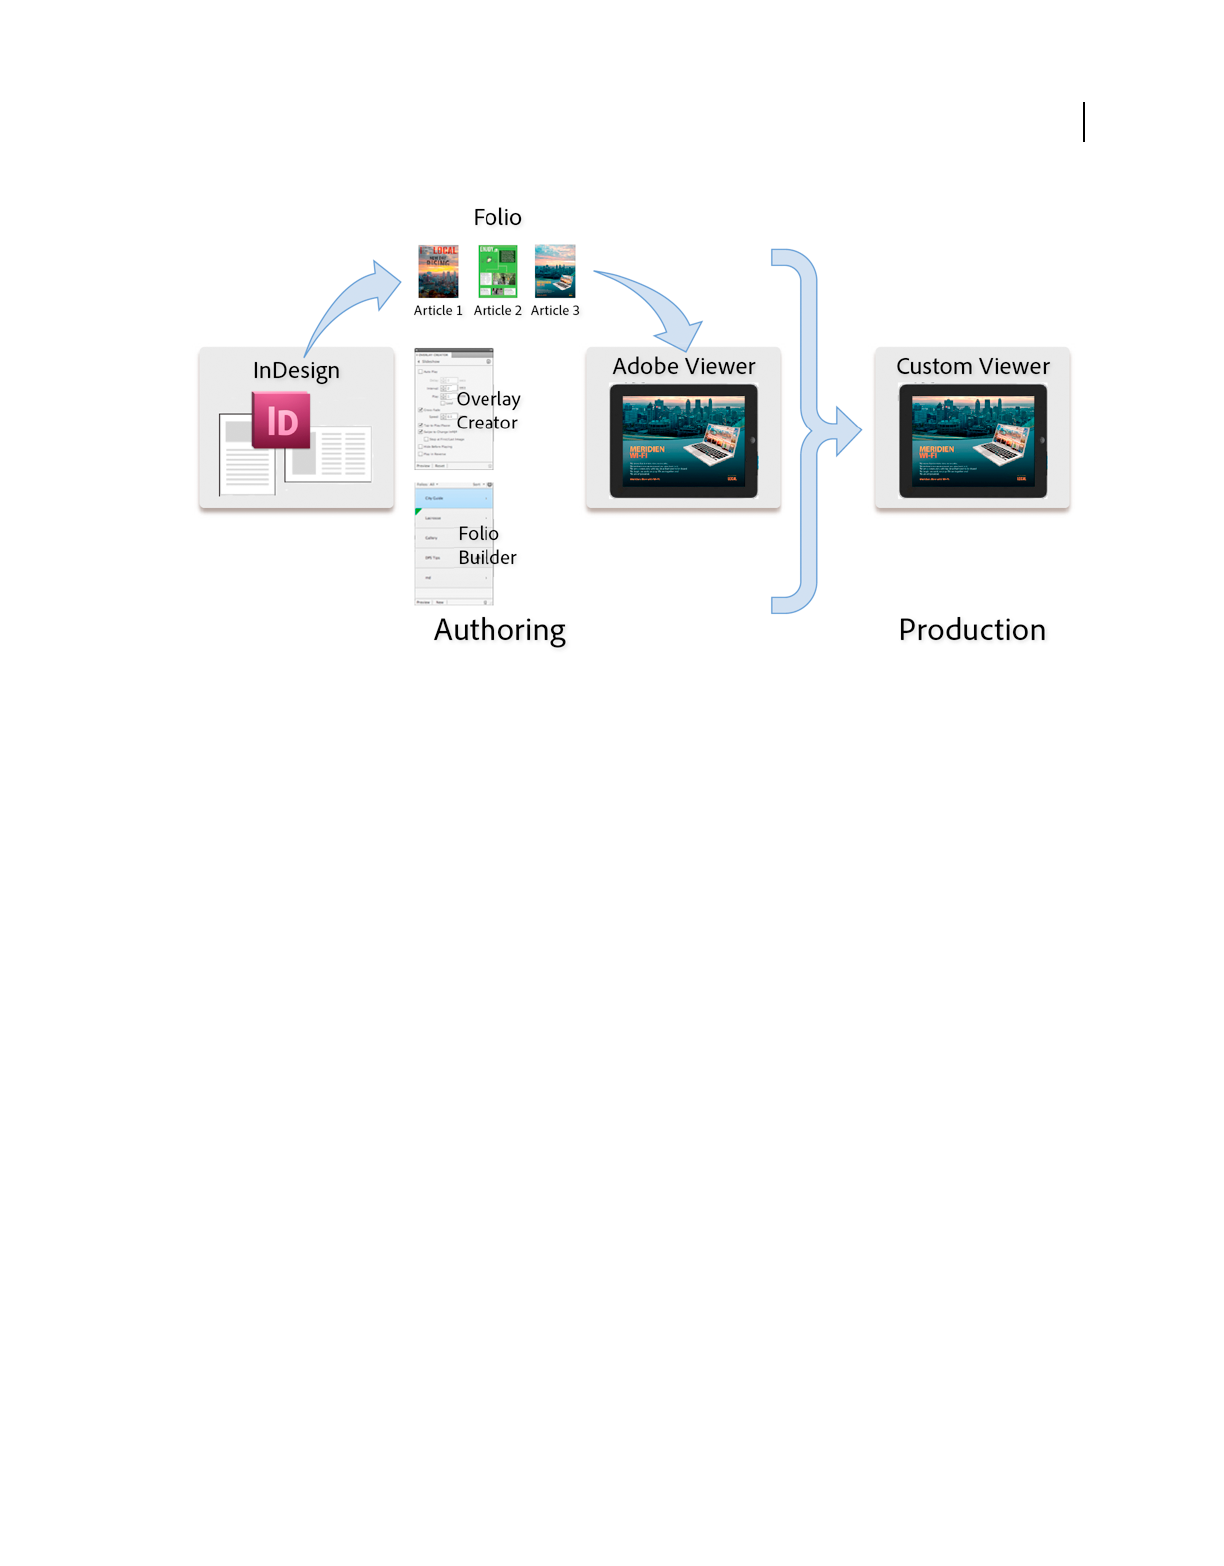
To create richly designed, interactive publications for tablet devices, InDesign includes Folio Builder and Overlay
Creator panels. You can use these panels to create digital publications called folios.
4
USING INDESIGN
What’s new
Last updated 11/16/2011
InDesign and Digital Publishing Suite workflow
See “Digital Publishing Suite overview” on page 566 for a bird’s eye view of the solution. For information on creating
digital publications for mobile devices, see www.adobe.com/go/learn_dps_help_en
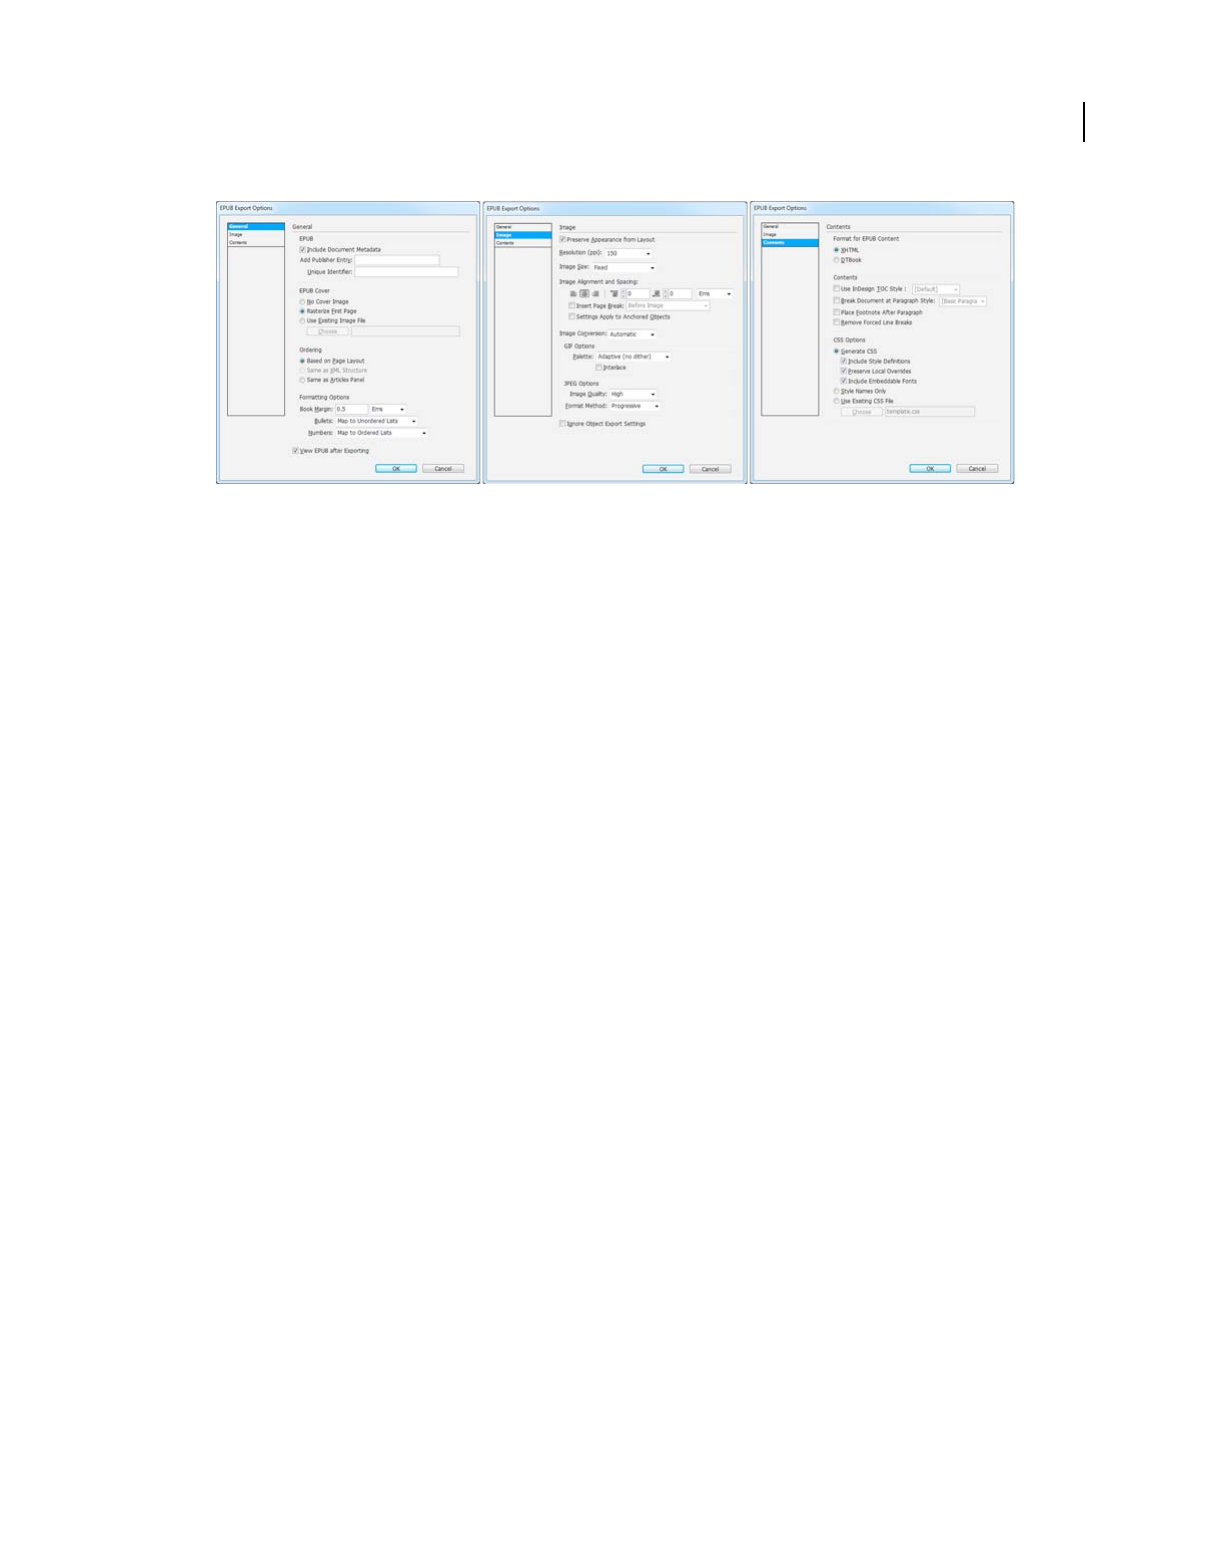
Improved EPUB and HTML export
InDesign CS5.5 contains a re-engineered EPUB and HTML export solution that offers several improvements to the
EPUB export workflow.
See “Export content for EPUB (CS5.5)” on page 124 and “Export content to HTML (CS5.5)” on page 119
Some of the features are listed below:
•General export options: Define book margins, use article order to specify reading order. See “EPUB General export
options” on page 124.
•Image export options: Define image resolution PPI settings, size, and added support for PNG images. You can also
specify image alignment settings, space before and after images, and insert page breaks. See “EPUB Images options”
on page 125.
•Content export options: Break document by paragraph styles, enhancements to footnotes, remove soft returns. See
“EPUB Contents options” on page 126.
5
USING INDESIGN
What’s new
Last updated 11/16/2011
EPUB Export options
•Audio and video tags in HTML: Placed audio and h.264 video files are enclosed in HTML5 <audio> and <video>
tags. An increasing numbers of hardware and software vendors now support HTML5 audio and video tags.
•J-language features: Support for vertical text and Ruby characters.
•Added support for sublists: Sublists formatted using the InDesign auto-bullet and auto-number features are
represented as nested ordered and unordered lists.
•Table headers and footers: Table headers and footers are exported to EPUB and HTML.
•Table of contents: InDesign table of content is now included in the EPUB export instead of the NCX manifest.
•Publish date: Publish date metadata value is automatically inserted. Other data such as author and keywords, that
you provide using the File > File Info are also exported to the EPUB file.
Usability and productivity
PDF Enhancements
Support for PDF/X-4:2010 has been added. PDF/X-4:2010 is identical to the earlier PDF/X-4:2008, except that it
relaxes certain restrictions on how layers can be specified in the PDF. This change allows InDesign CS5.5 to allow
creating layers in the exported PDF, and provides PDF 1.6 compatibility. Apart from layers support, PDF 1.6 also
allows JPEG2000 compression as an option for the color and grayscale images.
If you earlier used PDF/X-4:2008 to certify files that you sent to printers, don’t expect any changes in your workflow.
Note: The default [PDF/X-4:2008] Adobe PDF preset has been retained, but updated to use the PDF/X-4:2010
specification, so that your existing workflows do not break.
Dictionary enhancements
InDesign supports the open-source HunSpell dictionaries for most languages to verify spelling and to hyphenate
words, in addition to the existing Proximity and WinSoft dictionaries.
Proximity Portuguese orthogonal agreement dictionary has been added.
For information on working with dictionaries, see “Hyphenation and spelling dictionaries” on page 185.
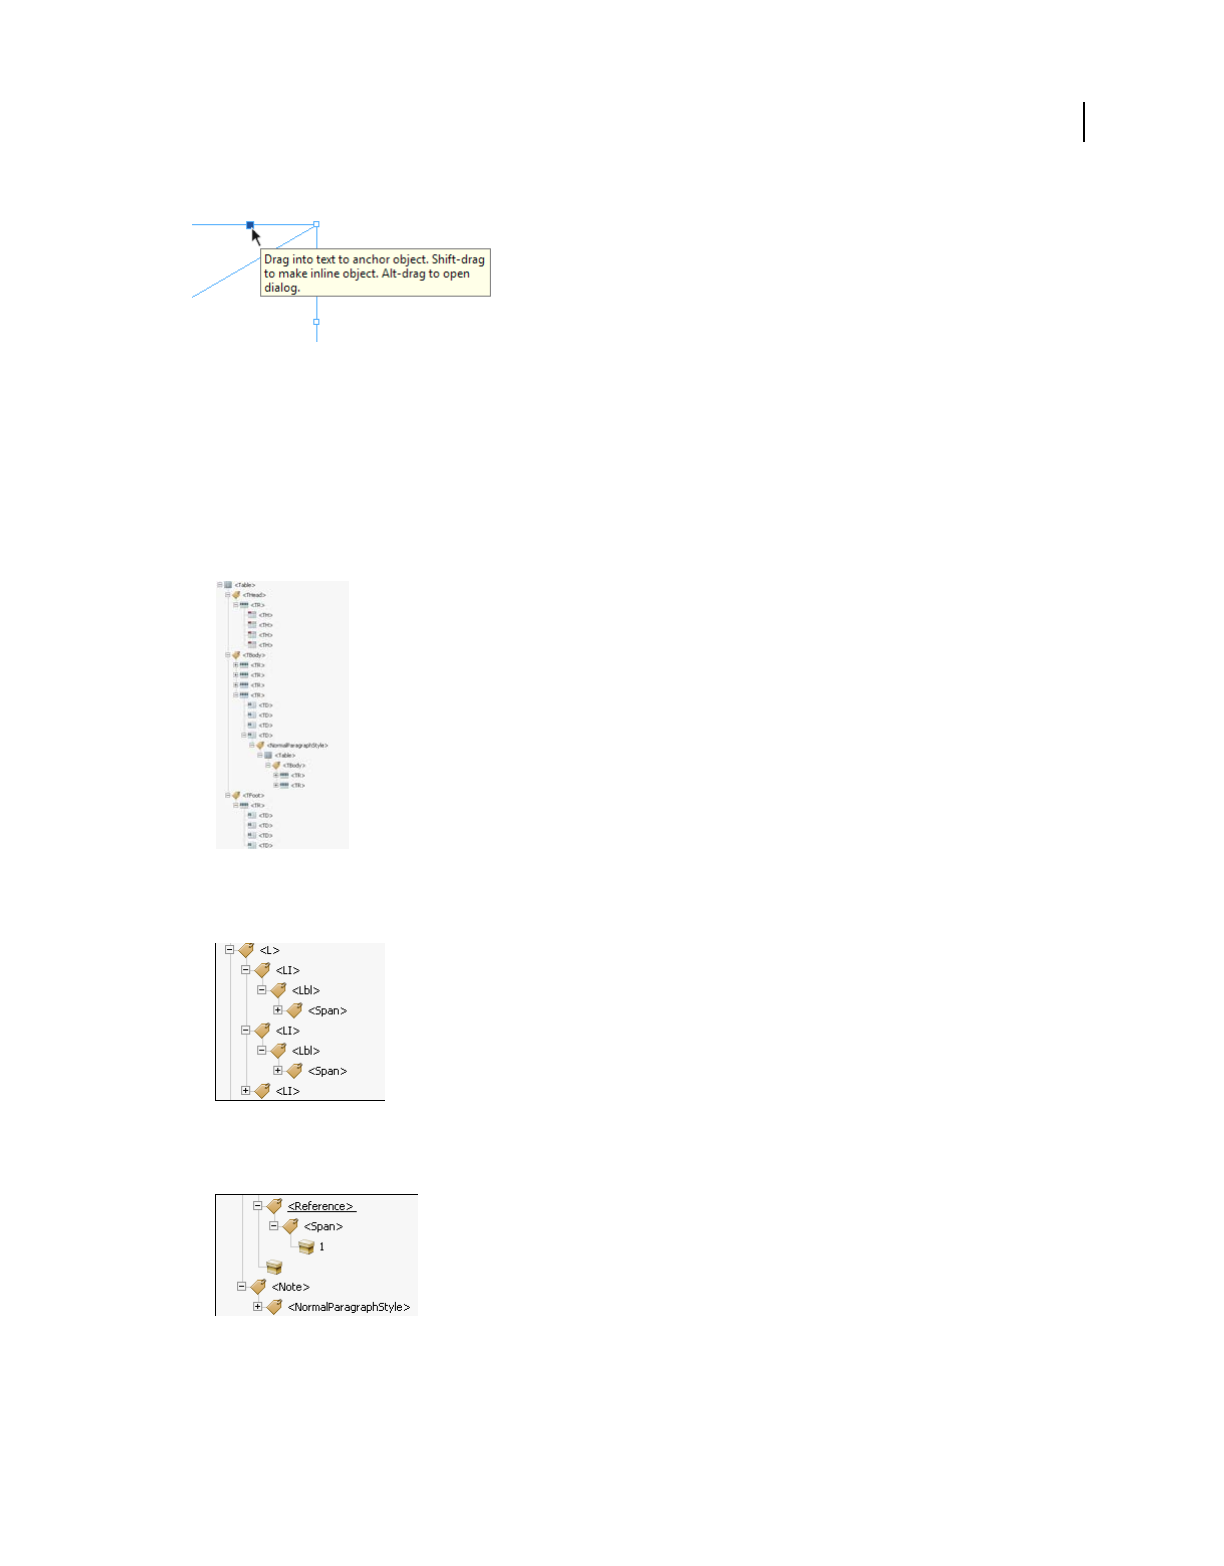
Drag and drop anchored objects
You can now drag an existing object into a text frame to anchor it. Drag the blue square near the top right corner to
the location you want to anchor it to.
6
USING INDESIGN
What’s new
Last updated 11/16/2011
Drag the blue square to anchor the object
See “Working with anchored objects using drag-and-drop (CS5.5)” on page 227
Better PDF tag support
Create accessible PDFs for Adobe Acrobat, Adobe Reader, or other software such as screen readers. InDesign
automatically adds tags for the following:
•Tables and nested tables
Table tags in exported PDF
•Lists and nested lists
List tags in exported PDF
•Footnotes
Footnote tags in exported PDF
•Hyperlinks

7
USING INDESIGN
What’s new
Last updated 11/16/2011
Hyperlink tags in exported PDF
Note: The THead, TBody, and TFoot tags are honored only if you export to PDF version 1.5 or higher
For information exporting as PDF, see “Export to PDF for printing” on page 501 and “Create interactive documents
for PDF” on page 530.
PDF enhancements
Support for PDF/X-4:2010 has been added. PDF/X-4:2010 is identical to the earlier PDF/X-4:2008, except that it
relaxes certain restrictions on how layers can be specified in the PDF. This change allows InDesign CS5.5 to allow
creating layers in the exported PDF, and provides PDF 1.6 compatibility. Apart from layers support, PDF 1.6 also
allows JPEG2000 compression as an option for the color and grayscale images.
If you earlier used PDF/X-4:2008 to certify files that you sent to printers, don’t expect any changes in your workflow.
Note: The default [PDF/X-4:2008] Adobe PDF preset has been retained, but updated to use the PDF/X-4:2010
specification, so that your existing workflows do not break.
What’s new (CS5)
The InDesign CS5 Feature Tour contains video overviews for most of the new features on Adobe TV.
Design and layout
Multiple page sizes
You can define different page sizes for pages within a single document. This feature is especially useful when you want
to manage related designs in one file. For example, you can include business card, postcard, letterhead, and envelope
pages in the same document.
To create multiple page sizes, use the Page tool to select a page, and then change the settings in the Control panel. See
“Use multiple page sizes” on page 69.
New Layers panel
The new InDesign Layers panel is now more similar to the Illustrator Layers panel. Each layer has a disclosure triangle
that can be expanded to reveal the objects and their stacking order on that given layer for the active spread.
By default, new page items are given generic names such as <rectangle> and <path>. You can give any page item a
custom name by click-pause-clicking the item name in the Layers panel.
You can change the stacking order of objects by dragging items in the list. The Layers panel also lets you show or hide
and lock or unlock individual page items.
See “Layers” on page 78.

8
USING INDESIGN
What’s new
Last updated 11/16/2011
Custom page sizes
Instead of editing a text file to create custom page sizes, you can use the Custom Page Size dialog box to make custom
page sizes available when you create documents. See “Create custom page sizes” on page 46.
Simplified transformations
InDesign includes several new selection and transformation features that simplify manipulating objects.
Content grabber The content grabber appears as a circle when you hover over an image using the Selection tool. Use
the content grabber to select and move the content of a frame with the Selection tool still selected. This behavior
effectively replaces that of the Position tool, which is removed from InDesign CS5. If you rotate the content with the
frame, a horizontal line appears in the center of the content grabber. This line mirrors the rotation angle of the content.
The content grabber draws over each frame that is part of a group. Use the Selection tool to reposition content within
a frame that is part of the group.
If you don’t want the content grabber to appear when you hover over an image, choose View > Extras > Hide Content
Grabber.
See “Select objects” on page 402.
Double-click behavior Double-clicking graphics with the Selection tool no longer switches to the Direct Selection tool.
Instead, double-clicking a graphic frame now selects the content in the frame. If the content is selected, double-clicking
the content selects the content’s frame. (When the content is selected, you can also click the edge of its containing
frame to select the frame.)
In a group, double-clicking an item in the group selects the item you double-clicked. To reselect the group, double-
click the edge of the selected item or group. In all cases, the Selection tool remains the active tool. This approach gives
you a quick and consistent way to select graphic frames and groups.
Frame edge highlighting InDesign now temporarily draws the frame edges as you use the Selection tool to hover over
items on a page. This method makes it easier to find the item you want before you select it. The color of the frame edge
drawn matches the color of the layer the object is on. Groups are drawn with a dashed line. This feedback is especially
helpful when working in Preview Mode or with Hide Frame Edges selected.
Path and point highlighting When you hover over a page item with the Direct Selection tool, InDesign displays the
path and display the path points. This feedback makes it easier to view the path point you want to manipulate. You no
longer have to select the object with the Direct Selection tool and then select the path point. You can simply drag the
point you want.
Rotate As in Illustrator, you don’t have to switch to the Rotate tool to rotate a selected page item. With the Selection
tool, you can simply position the pointer just outside a corner handle, and drag to rotate the item. When you stop
dragging, the Selection tool remains the active tool. See “Rotate an object using the Selection tool” on page 415.
Transform multiple selected items You no longer have to group multiple items before you can resize, scale, or rotate
them with the Selection tool. Simply select the items you want to transform, and you see a transformation bounding
box around the selected items. Dragging a handle resizes the selected elements; holding down Shift resizes them
proportionally. Holding down Ctrl (Windows) or Command (Mac OS) scales them. Holding down Ctrl+Shift
(Windows) or Command+Shift (Mac OS) scales them proportionally. Including Alt (Windows) or Option (Mac OS)
performs the transformations from the center of the selected objects. See “Transform objects” on page 412.
Live Screen Drawing In InDesign CS5, you see the content draw as you drag it. In previous InDesign versions, you
pause before dragging to see the content draw. You can change the Live Screen Drawing setting in Interface
preferences to use the previous behavior. See “Change Interface preferences” on page 26.

9
USING INDESIGN
What’s new
Last updated 11/16/2011
Favor the selected object If you select one of several overlapping page items and begin dragging, the selected object
remains selected. To select a different item, simply click a portion of that different item that is not overlapping or
intersecting the currently selected item.
Live Distribute When transforming multiple selected objects, InDesign CS5 lets you proportionally resize the space
between the selected items instead of resizing the actual items. See “Distribute objects using Live Distribute” on
page 428.
Reordering of the Transformation Tools The Rotate, Scale, and Shear tools appear under the Free Transform tool in
the Tools panel. You can rotate, resize, and scale objects without having to switch from the Selection tool.
Gap tool
The Gap tool provides a quick way to adjust the size of a gap between two or more items. The Gap tool is a one-step
way to adjust your layout by directly manipulating the whitespace. See “Align objects using the Gap tool” on page 427.
Paragraphs that span or split columns
In InDesign CS5, you can make a paragraph span multiple columns without creating separate text frames. You can
also split a paragraph into multiple columns within the same text frame. See “Create paragraphs that span or split
columns” on page 267.
Keep with previous
The Keep Options dialog box now has a Keep With Previous option that keeps the first line of the current paragraph
with the last line of the previous paragraph. See “Control paragraph breaks using Keep Options” on page 263.
Balanced columns
The Balance Columns setting in the Text Frame Options dialog box lets you automatically balance text across columns
in a multiple column text frame. See “Add columns to a text frame” on page 131.
Vertical justification in non-rectangular frames
In previous versions of InDesign, applying a non-rectangular text frame causes vertical justification settings to be
ignored. In InDesign CS5, you can apply both vertical justification and corner effects and other irregular-shaped
frames. See “Align or justify text vertically within a text frame” on page 267.
Live corner effects
Click the yellow square that appears near the upper right corner of a selected frame to apply corner effects to
rectangular frames. In addition, you can now apply a different corner effect and a different corner radius to each
corner. See “Use Live Corners” on page 363.
Swatches in Control panel
You can apply swatches to objects directly in the Control panel. Select an object and choose the swatch from the Fill
or Stroke menu in the Control panel. You can also drag the current color swatch displayed in the Control panel and
apply it to other objects. See “Apply color” on page 465.
Grid place enhancements
When placing multiple files, simply start dragging, and then use the arrow keys to change the number of columns and
rows of the placed images. While dragging, hold down Ctrl (Windows) or Command (Mac OS) and press arrow keys
to change the gutter space. See “Place multiple graphics” on page 383 and “Create contact sheets” on page 388.

10
USING INDESIGN
What’s new
Last updated 11/16/2011
Auto-Fit
Select the Auto-Fit option so that the image is resized automatically whenever you resize the frame. See “Using Auto
Fit” on page 433.
Drawing multiple frames in a grid
When using frame creation tools such as the Rectangle or Type tool, you can press arrow keys to create equally spaced
frames. See “Draw multiple objects as a grid” on page 343.
Duplicating objects into a grid
You can create a grid of objects while dragging a copy of a selected object. See “Duplicate objects into a grid” on
page 430.
Live captions from metadata
In InDesign CS5, you can generate captions based on image metadata using a number of methods.
•You can generate captions while you place images by turning on the Create Static Captions checkbox in the Place
dialog box.
•You can generate captions from placed images. First, use the Caption Setup dialog box to identify which metadata
is included in the image. Then choose an option from the Object > Captions menu to generate either a live or static
caption.
•You can add a text variable to a text frame that display the metadata of the image that touches or is grouped with
the text frame.
See “Captions” on page 238.
Mini Bridge
Mini Bridge is a subset of Adobe Bridge that is available as a panel within InDesign. Mini Bridge lets you navigate your
file system and preview files as visual thumbnails without having to leave InDesign. You can drag-and-drop files from
Mini Bridge to InDesign as an alternative way to place files into a document. Doing so loads the dragged images into
the place cursor, just like dragging from Bridge. You can also drag selected items into Mini Bridge to create snippets.
For a video on using Mini Bridge with InDesign, see www.adobe.com/go/lrvid5051_br_en.
Improved Adobe Bridge integration
InDesign CS5 and Adobe Bridge CS5 are more integrated in two ways.
Page Thumbnails A new File Handling preference option lets you generate page thumbnails for more than the first
page of InDesign files. The default number of pages to generate thumbnails for is set to 2, but you can change it to 1,
2, 5, 10, or All. You can now see previews of the pages within an INDD file in the Preview pane of Bridge. Choosing
more thumbnail pages may cause your InDesign document to take longer to save. See “Include previews in saved
documents” on page 106.
View Links in an InDesign File while in Bridge You can view the links inside an InDesign document while in Adobe
Bridge, without having to open the document in InDesign. For example, suppose that you don’t remember the location
of an image, but you remember placing it in an InDesign document. In Adobe Bridge, navigate to the InDesign file,
and then display thumbnails of all the placed files contained within the selected InDesign file.
See “Using Adobe Bridge with InDesign” on page 103.

11
USING INDESIGN
What’s new
Last updated 11/16/2011
Cross media design
Interactive documents and presentations
FLV and MP3 import You can import video files in Flash Video format (.FLV and .F4V), H.264-encoded files (such as
MP4), and SWF files. You can import audio files in MP3 format. Legacy media file types like QuickTime (.MOV),
.AVI, and .WMV are still supported. However, use FLV, F4V, MP4, and MP3 formats to take full advantage of the rich
media support offered in the most recent versions of Acrobat, Adobe Reader, and Adobe Flash Player.
Use Adobe Media Encoder to convert older media file types to .FLV. See “Relink legacy media files” on page 551.
Media panel The Media panel lets you preview SWF, FLV, F4V, MP4, and MP3 files directly in InDesign. For FLV,
F4V, and MP4 files, you can choose any frame in the video as the placeholder poster image. You can choose which
video playback controls you want the viewer of your interactive document to have. The Media panel lets you create
navigation points, which are time-code markers that you can target with button actions. See “Add movies and sound
files to documents” on page 548.
Motion presets The Animation panel lets you assign a motion preset to any page item as a way to quickly create an
animation. These motion presets are the same motion presets found in Adobe Flash CS5 Professional. Furthermore,
InDesign can import any custom motion preset created in Flash, enabling InDesign and Flash users to collaborate to
create animation effects. See “Animate a document with motion presets” on page 552.
Animation panel Use the Animation panel to create or edit animation effects. You can edit supported animation
attributes such as Position, Scale, Rotate, and Opacity. Save any custom animation created in InDesign as a custom
motion preset that can be shared with others.
Use the Animation panel to specify when an animated object is played, such as when the page is loaded or clicked. See
“Animation” on page 551.
Timing panel Use the Timing panel to change the order of when animated objects play. See “Use the Timing panel to
change the animation order” on page 555.
Object States panel Use the Object States panel to create multiple versions of an object. For example, you can create a
single page object with 20 different states, and each state contains a different photo. Anyone who opens the PDF or
SWF file can click forward and back buttons to browse the photo gallery. See “Create a multi-state object slide show”
on page 564.
Preview panel In InDesign, you can preview interactivity and animation of the current selection, the current spread,
or the entire document using the Preview panel. You can also test interactive elements in a web browser. See “Preview
interactive documents” on page 532.
Pixels as unit of measurement You can now specify Pixels for your unit of measure in Preferences > Units &
Increments. You can override the current unit of measure by adding “px” to your values in edit fields in the Control
panel, dialog boxes, and other panels. When using pixels, objects and X/Y coordinates snap to whole pixel values, and
the line weights listed in the Stroke panel also change to pixels. See “Change rulers and measurement units” on page 49.
Convert URLs to hyperlinks Use the Convert URLs To Hyperlinks command to search the current selection, story, or
document for URL strings and convert them to hyperlinks. You can also assign a character style to the found URLs.
See “Convert URLs to hyperlinks” on page 539.
Improved export to Flash Player
SWF file export can now include animation, video, audio, and remote rollovers. In addition, several new options let
you control the final SWF file output. See “Create interactive SWF (Flash) files for the web” on page 523.

12
USING INDESIGN
What’s new
Last updated 11/16/2011
Improved export to Flash Professional
InDesign CS5 exports to FLA format rather than XFL format for editing the file in Flash Professional. FLA export
options support rich media content and offer more ways to handle text. See “Create FLA files for the web” on page 526.
Improved export to Interactive PDF
InDesign CS5 includes separate commands for exporting print and interactive PDF files.
InDesign CS5 exports all rich media content to the Rich Media Annotation Layer when exporting to Interactive PDF,
resulting in more reliable playback in Adobe Reader. For best results, video files must be in FLV or F4V format and
audio files must be in MP3 format.
A few new options are available when exporting to interactive PDF, including initial view options, presentation
settings, and page transitions. See “Create interactive documents for PDF” on page 530.
Improved XHTML export
Exporting to XHTML is a way to extract your content out of an InDesign document and hand it over to a web
developer who can repurpose it using a web application such as Dreamweaver. InDesign CS5 enhancements include
the ability to match the attributes of InDesign text formatting, preserve local formatting, and control the order of
content. InDesign Tables are now assigned unique IDs, allowing them to be referenced as Spry data sets in
Dreamweaver. See “Export content to Dreamweaver (CS5)” on page 116.
Improved JPEG export
The Export JPEG dialog box includes several new options, including the ability to specify the color space, use
document bleed settings, and simulate overprinting. See “Export to JPEG format” on page 115.
Collaboration
Integrated comment and review
CS Review is an online service that provides a simple way to share designs on the web so others can provide feedback.
Use the CS Review panel in InDesign to upload snapshots of the current document to an Acrobat.com workspace,
where others can add comments. See “Reviewing InDesign documents” on page 104.
Track text changes
When the Track Text Changes feature is turned on, changes made to the text are tracked on a per user basis. You can
view changes in Story Editor (but not in Layout view). Text changes that are supported include deleting text, moving
text, and inserting text. Use the Track Changes panel to accept and reject changes in the document. See “Tracking and
reviewing changes” on page 193.
Document installed fonts
Any fonts in a Document Fonts folder that’s in the same location as an InDesign document are available when the
document is opened. Fonts installed by one document are not available to other documents. The Package command
can generate a Document Fonts folder when you want to share your document or move it to a different computer. See
“Document installed fonts” on page 249.
Buzzword integration
Buzzword is a web-based text editor that lets users create and store text files on a web server. In InDesign CS5, you can
import and export text from Buzzword documents. See “Import Buzzword documents” on page 141 and “Export
content to Buzzword” on page 127.

13
USING INDESIGN
What’s new
Last updated 11/16/2011
Presentation Mode
InDesign CS5 has a new screen mode called Presentation Mode. In Presentation Mode, the application menu and all
panels are hidden. Keystrokes and clicks let you move forward or backward through the document one spread at a
time. See “Use Presentation Mode” on page 532.
Color labels for page thumbnails
You can now assign colored labels to the page thumbnails in the Pages panel. See “Create color labels for page
thumbnails” on page 64.
Usability and productivity
Background tasks
When you save large documents or export them to PDF or IDML files, you can continue working on your document.
You can also queue up multiple PDF exports in the background. Use the Background Tasks panel (Window > Utilities
> Background Tasks) to view the progress of the export processes. See “Background Tasks panel” on page 506.
Spring-loaded tools shortcut
You can temporarily switch from the current tool to any other tool by holding down the appropriate letter key. As you
hold down the key, your current tool changes the new tool, and when you release it, you return to the previous tool.
For example, press the U key to use the Gap tool, and then release it to return to the Selection tool. See “Select tools
temporarily” on page 32.
Tool Hints panel
The Tool Hints panel (Window > Utilities > Tool Hints) lists all the hidden modifier key behaviors available for the
currently selected tool. See “View tool hints” on page 32.
Community Help
Adobe Community Help offers access to complete Adobe product documentation as well as to community-created
learning content and other learning content on Adobe.com. Adobe Community Help includes an AIR-based viewer
that displays the latest online Help or defaults to a local version of Help when a web connection is unavailable.
Community Help also includes expert-moderated comments and user ratings on Adobe documentation, knowledge
base articles, tutorials, and other content.
Specify starting page number
When you create a document in InDesign CS5, you can make the first page start on a specified page number. If you
specify an even number with facing pages turned on, the document begins with a two-page spread. You can also change
the starting page number in the Document Setup dialog box after you’ve created a document. See “Create new
documents” on page 44.
Edit Original for multiple selected items
You can choose the Edit Original command to open multiple images in their respective editing applications. See “Edit
original artwork” on page 395.
New options for locking objects
To lock and unlock objects, you can now choose Object > Lock or Object > Unlock All On Spread. Clicking the lock
icon also unlocks a locked object.

14
USING INDESIGN
What’s new
Last updated 11/16/2011
The new Prevent Selection Of Locked Objects option in General preferences lets you determine whether you can select
locked objects.
Relink file extensions
Relink files based on file extension. For example, you can replace a set of JPEG files with TIFF files. See “Relink files
with different file extensions” on page 395.
Hide objects
You can now choose Object > Hide to hide objects on the page. Hidden objects are not printed or exported, and they
cannot be selected. Choose Object > Show All On Spread to view all hidden objects.
Sticky Preview check boxes
InDesign now remembers whether the Preview checkbox is selected in a dialog box after you exit and restart.
Place cursor when dragging from Adobe Bridge
In previous versions, dragging an image from Adobe Bridge or the desktop inserted the image on to the page, creating
a frame the size of the image. In InDesign CS5, this action loads the place cursor, letting you drag a proportionally sized
frame for your image.
Open book files in Explorer or Finder
A command appears on the books panel menu that lets you view a document in an Explorer or Finder window.
Miscellaneous enhancements
Round CMYK values to whole numbers The Colors panel round the values for the CMYK sliders to the nearest whole
value.
Delete all guides A new Delete All Guides On Spread command appears in the View > Grids & Guides menu.
Zoom from dialog boxes You can now use the keyboard shortcuts to zoom in and out of your document when you
have a modal dialog box open. Press Ctrl+- or Ctrl+= (Windows) or Command+- or Command +=.
New default font The default font is changed from Times (Mac) and Times New Roman (Windows) to the cross-
platform OpenType version of Minion Pro Regular.
Collapse multiple links to same source In InDesign, links to images placed multiple times in a document are collapsed
into a single row in the Links panel. You can now turn off this collapsing behavior with a new option in the Panel
Options dialog box.
Remember Story Editor window location When you close and reopen a Story Editor window, InDesign reopens the
window to its previous width, height, and location on the screen.
Fold marks If you select Crop Marks while printing spreads, fold marks are printed as solid lines.
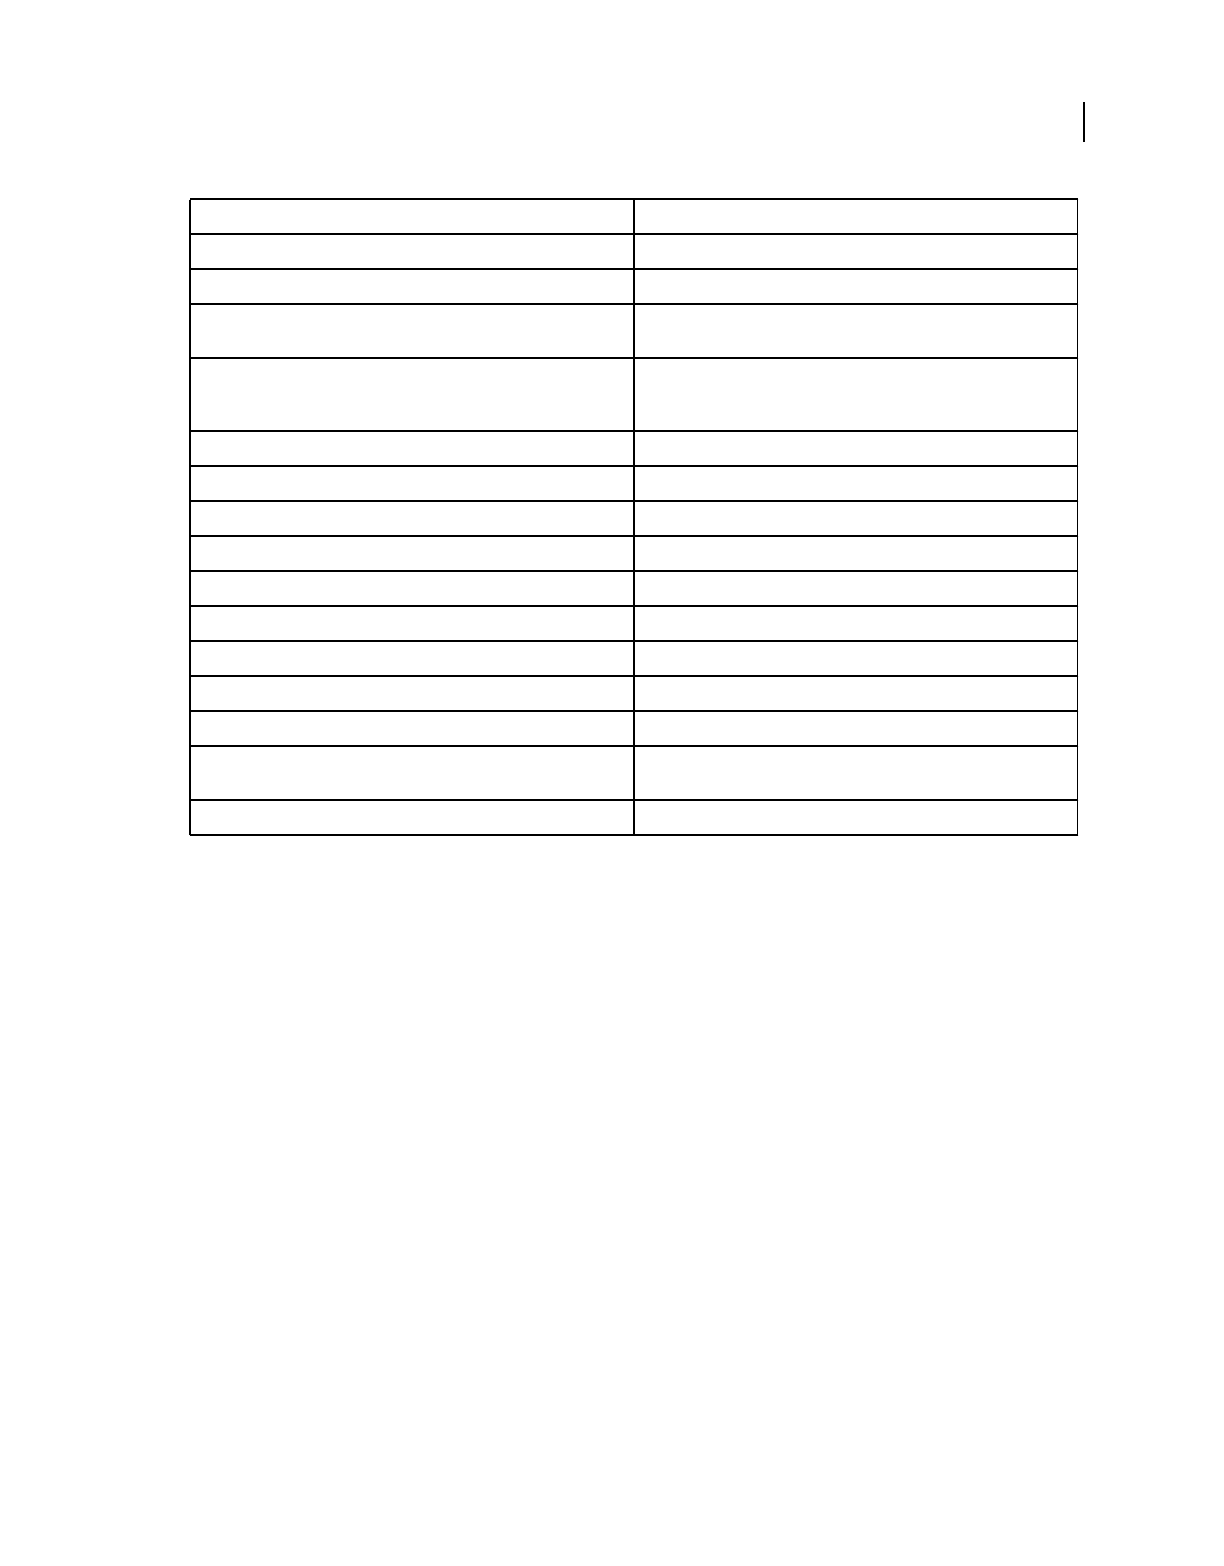
Menu commands changed or moved The following menu commands have new names or new locations.
Choose Window > Workspace > [New in CS5] to highlight menu commands of new and enhanced features.
InDesign CS4 command InDesign CS5 new location
File > Export For Digital Editions File > Export For > EPUB
File > Export For Dreamweaver File > Export for > Dreamweaver
Object > Lock Position Object > Lock
15
USING INDESIGN
What’s new
Last updated 11/16/2011
Object > Unlock Position Object > Unlock All On Spread
Object > Interactive > Movie Options / Sound Options Media panel
Object > Paths > Convert Point > Line End / Corner / Smooth / Smooth
Symmetrical
Object > Convert Point > Plain / Corner / Smooth / Symmetrical
View > Show/Hide Hyperlinks, Show/Hide Text Threads, Show/Hide
Frame Edges, Show/Hide Assigned Frames, and Show/Hide Notes
View > Extras > Show/Hide Hyperlinks, Show/Hide Text Threads,
Show/Hide Frame Edges, Show/Hide Assigned Frames, and
Show/Hide Notes
Window > Assignments Window > Editorial > Assignments
Window > Attributes Window > Output > Attributes
Window > Automation > Data Merge / Script Label / Scripts Window > Utilities > Data Merge / Script Label / Scripts
Window > Color Window > Color > Color
Window > Gradient Window > Color > Gradient
Window > Object Styles Window > Styles > Objects Styles
Window > Swatches Window > Color > Swatches
Window > Tags Window > Utilities > Tags
Window > Type & Tables > Notes Window > Editorial > Notes
Window > Type & Tables > Cell Styles / Character Styles / Paragraph
Styles > Table Styles
Window > Styles > Cell Styles / Character Styles / Paragraph Styles >
Table Styles
Help/InDesign > Configure Plug-ins Help/InDesign > Manage Extensions
InDesign CS4 command InDesign CS5 new location

16
Last updated 11/16/2011
Chapter 2: Workspace
The Adobe® InDesign® workspace is arranged to help you focus on designing and producing pages efficiently. When
you first start InDesign, you see the default workspace, which you can customize to suit your needs.
Click the following links for details and procedures.
Workspace basics
Click the following links for more information.
Workspace overview
You create and manipulate your documents and files using various elements, such as panels, bars, and windows. Any
arrangement of these elements is called a workspace. The workspaces of the different applications in Adobe® Creative
Suite® 5 share the same appearance so that you can move between the applications easily. You can also adapt each
application to the way you work by selecting from several preset workspaces or by creating one of your own.
Although the default workspace layout varies in different products, you manipulate the elements much the same way
in all of them.
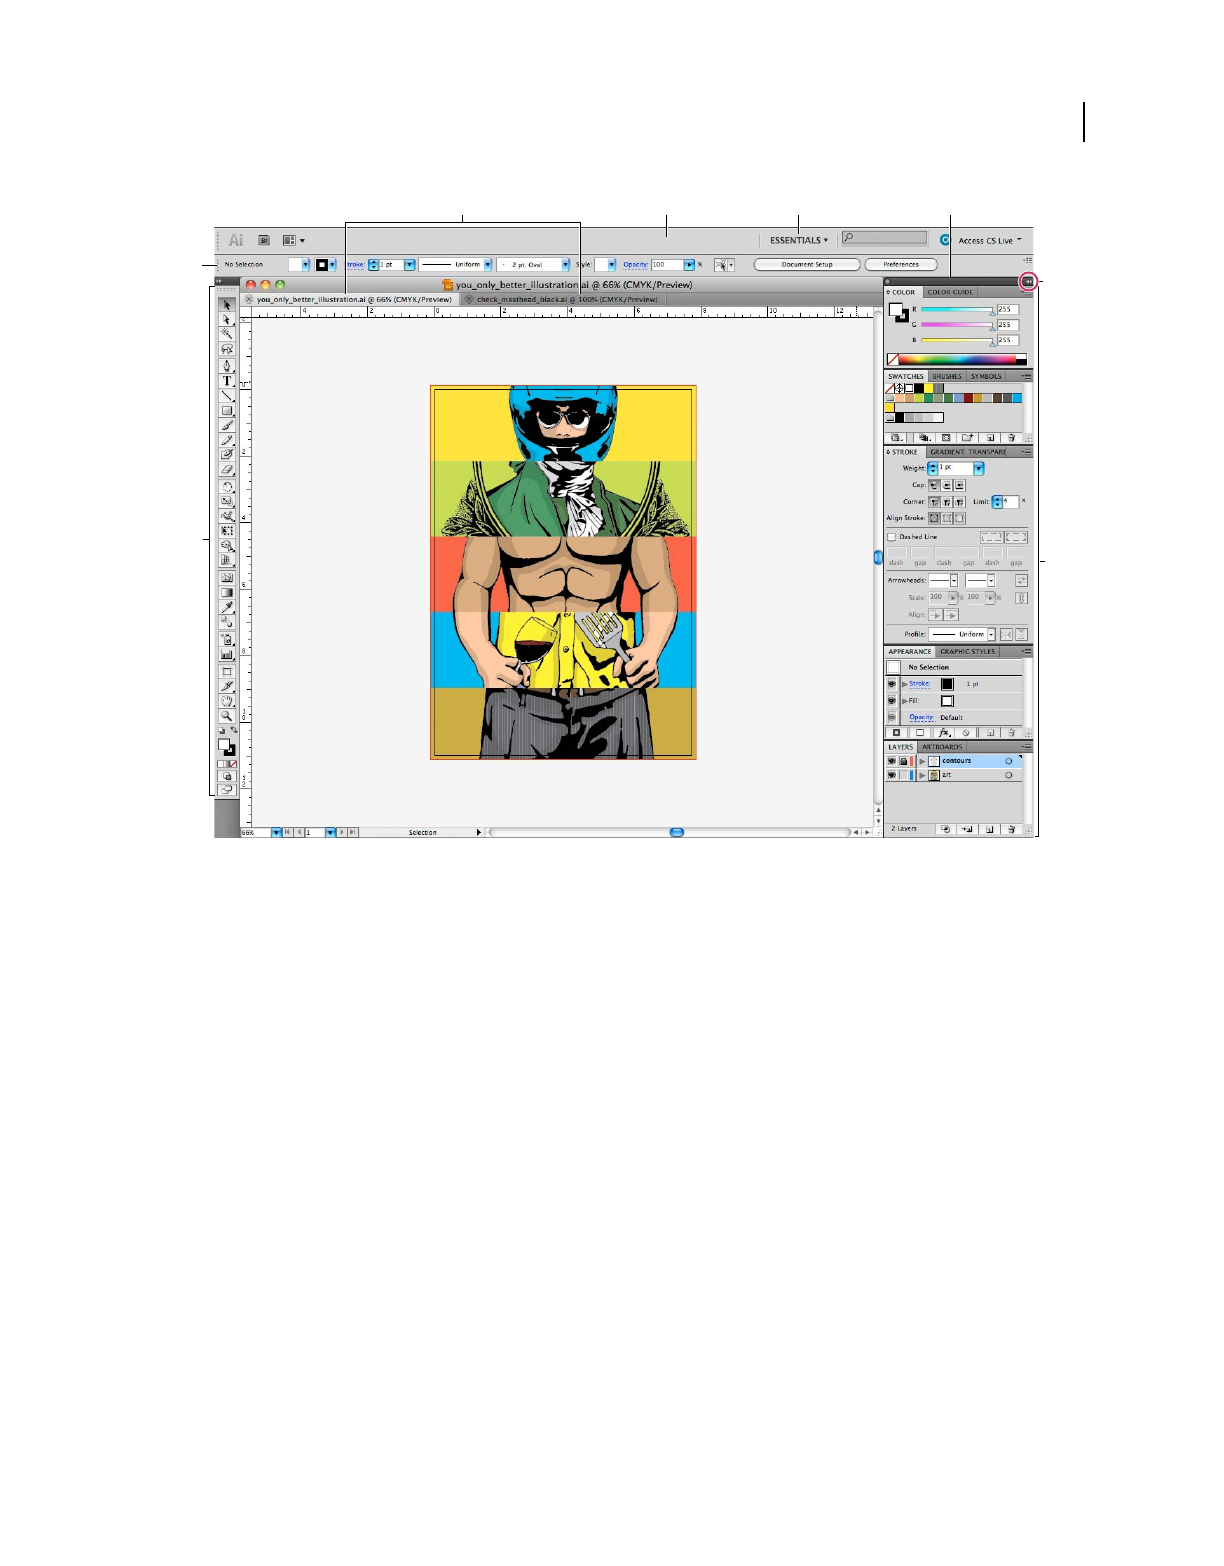
17
USING INDESIGN
Workspace
Last updated 11/16/2011
Default Illustrator workspace
A. Tabbed Document windows B. Application bar C. Workspace switcher D. Panel title bar E. Control panel F. Tools panel G. Collapse To
Icons button H. Four panel groups in vertical dock
•The Application bar across the top contains a workspace switcher, menus (Windows only), and other application
controls. On the Mac for certain products, you can show or hide it using the Window menu.
•The Tools panel contains tools for creating and editing images, artwork, page elements, and so on. Related tools are
grouped.
•The Control panel displays options for the currently selected tool. In Illustrator, the Control panel displays options
for the currently selected object. (In Adobe Photoshop® this is known as the Options bar. In Adobe Flash®, Adobe
Dreamweaver®, and Adobe Fireworks® this is known as the Property Inspector and includes properties of the
currently selected element.)
•The Document window displays the file you’re working on. Document windows can be tabbed and, in certain cases,
grouped and docked.
•Panels help you monitor and modify your work. Examples include the Timeline in Flash, the Brush panel in
Illustrator, the Layers panel in Adobe Photoshop®, and the CSS Styles panel in Dreamweaver. Panels can be
grouped, stacked, or docked.
•The Application frame groups all the workspace elements in a single, integrated window that lets you treat the
application as a single unit. When you move or resize the Application frame or any of its elements, all the elements
within it respond to each other so none overlap. Panels don’t disappear when you switch applications or when you
accidentally click out of the application. If you work with two or more applications, you can position each
application side by side on the screen or on multiple monitors.
G
F
H
AB DC
E

18
USING INDESIGN
Workspace
Last updated 11/16/2011
If you are using a Mac and prefer the traditional, free-form user interface, you can turn off the Application frame.
In Adobe Illustrator®, for example, select Window > Application Frame to toggle it on or off. (In Flash, the
Application frame is on permanently for Mac, and Dreamweaver for Mac does not use an Application frame.)
Hide or show all panels
•(Illustrator, Adobe InCopy®, Adobe InDesign®, Photoshop, Fireworks)To hide or show all panels, including the
Tools panel and Control panel, press
Tab.
•(Illustrator, InCopy, InDesign, Photoshop) To hide or show all panels except the Tools panel and Control panel,
press Shift+Tab.
You can temporarily display hidden panels if Auto-Show Hidden Panels is selected in Interface preferences. It’s
always on in Illustrator. Move the pointer to the edge of the application window (Windows®) or to the edge of the
monitor (Mac
OS®) and hover over the strip that appears.
•(Flash, Dreamweaver, Fireworks) To hide or show all panels, press F4.
Display panel options
❖Click the panel menu icon in the upper-right corner of the panel.
You can open a panel menu even when the panel is minimized.
In Photoshop, you can change the font size of the text in panels and tool tips. In the Interface preferences, choose a
size from the UI Font Size menu.
(Illustrator) Adjust panel brightness
❖ In User Interface preferences, move the Brightness slider. This control affects all panels, including the Control
panel.
Reconfigure the Tools panel
You can display the tools in the Tools panel in a single column, or side by side in two columns. (This feature is not
available in the Tools panel in Fireworks and Flash.)
In InDesign and InCopy, you also can switch from single-column to double-column (or single-row) display by setting
an option in Interface preferences.
❖ Click the double arrow at the top of the Tools panel.
Manage windows and panels
You can create a custom workspace by moving and manipulating Document windows and panels. You can also save
workspaces and switch among them. For Fireworks, renaming custom workspaces can lead to unexpected behavior.
Note: The following examples use Photoshop for demonstration purposes. The workspace behaves the same in all the
products.
Rearrange, dock, or float document windows
When you open more than one file, the Document windows are tabbed.
•To rearrange the order of tabbed Document windows, drag a window’s tab to a new location in the group.
•To undock (float or untab) a Document window from a group of windows, drag the window’s tab out of the group.
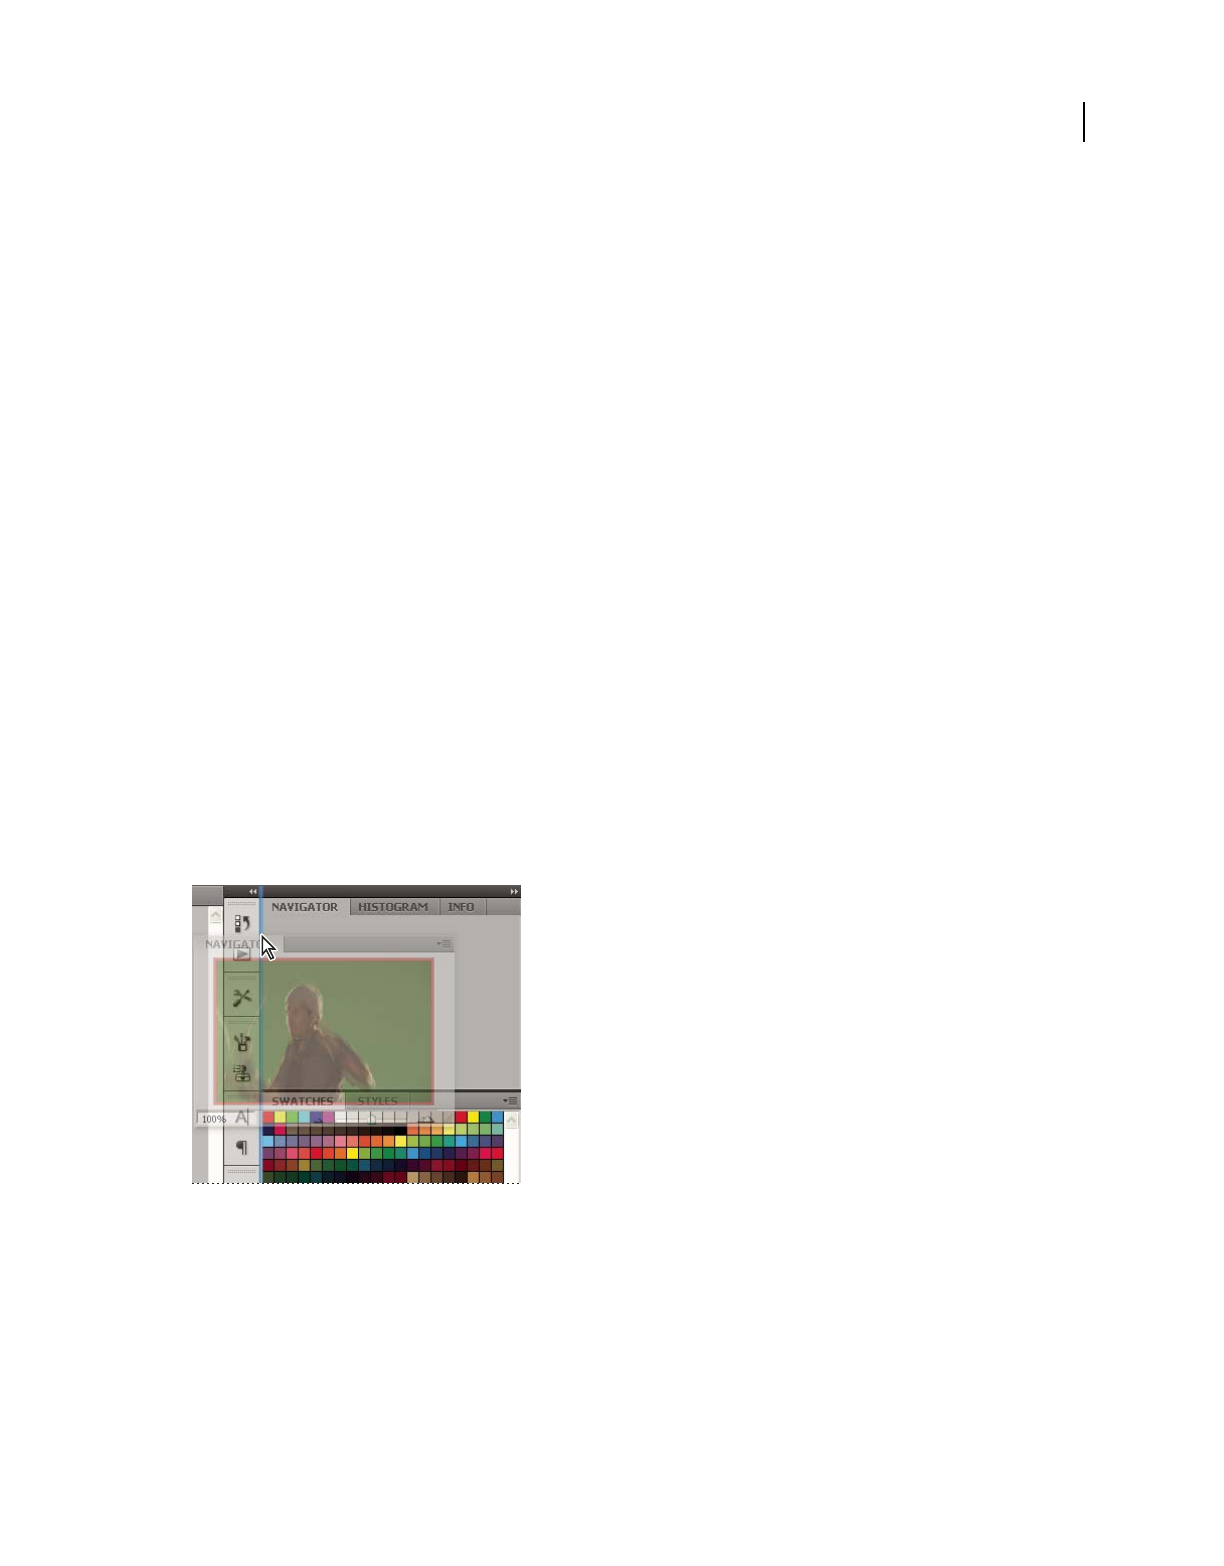
19
USING INDESIGN
Workspace
Last updated 11/16/2011
Note: In Photoshop you can also choose Window > Arrange > Float in Window to float a single Document window,
or Window > Arrange > Float All In Windows to float all of the Document windows at once. See tech note kb405298
for more information.
Note: Dreamweaver does not support docking and undocking Document windows. Use the Document window’s
Minimize button to create floating windows (Windows), or choose Window > Tile Vertically to create side-by-side
Document windows. Search “Tile Vertically” in Dreamweaver Help for more information on this topic. The workflow
is slightly different for Macintosh users.
•To dock a Document window to a separate group of Document windows, drag the window into the group.
•To create groups of stacked or tiled documents, drag the window to one of the drop zones along the top, bottom, or
sides of another window. You can also select a layout for the group by using the Layout button on the Application bar.
Note: Some products do not support this functionality. However, your product may have Cascade and Tile commands
in the Window menu to help you lay out your documents.
•To switch to another document in a tabbed group when dragging a selection, drag the selection over the document’s
tab for a moment.
Note: Some products do not support this functionality.
Dock and undock panels
A dock is a collection of panels or panel groups displayed together, generally in a vertical orientation. You dock and
undock panels by moving them into and out of a dock.
•To dock a panel, drag it by its tab into the dock, at the top, bottom, or in between other panels.
•To dock a panel group, drag it by its title bar (the solid empty bar above the tabs) into the dock.
•To remove a panel or panel group, drag it out of the dock by its tab or title bar. You can drag it into another dock
or make it free-floating.
Navigator panel being dragged out to new dock, indicated by blue vertical highlight
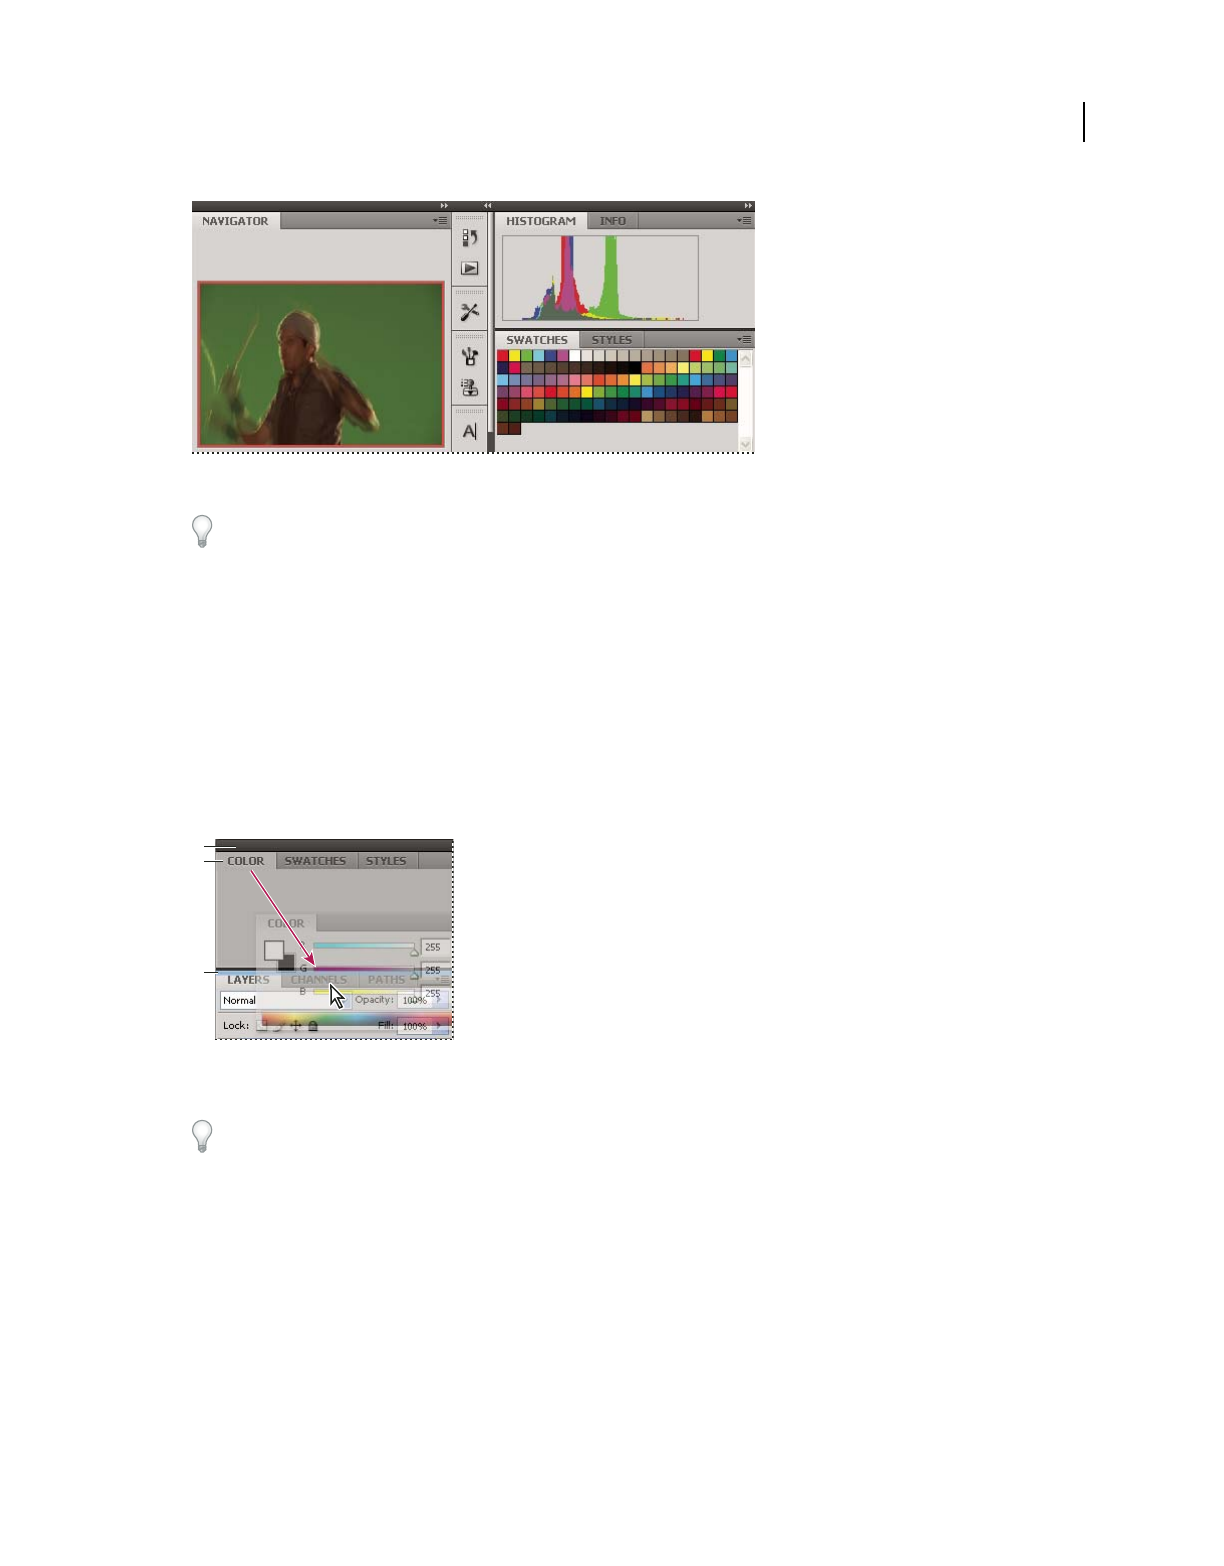
20
USING INDESIGN
Workspace
Last updated 11/16/2011
Navigator panel now in its own dock
You can prevent panels from filling all the space in a dock. Drag the bottom edge of the dock up so it no longer meets
the edge of the workspace.
Move panels
As you move panels, you see blue highlighted drop zones, areas where you can move the panel. For example, you can
move a panel up or down in a dock by dragging it to the narrow blue drop zone above or below another panel. If you
drag to an area that is not a drop zone, the panel floats freely in the workspace.
Note: The position of the mouse (rather than the position of the panel), activates the drop zone, so if you can’t see the drop
zone, try dragging the mouse to the place where the drop zone should be.
•To move a panel, drag it by its tab.
•To move a panel group, drag the title bar.
Narrow blue drop zone indicates Color panel will be docked on its own above the Layers panel group.
A. Title bar B. Tab C. Drop zone
Press Ctrl (Windows) or Command (Mac OS) while moving a panel to prevent it from docking. Press Esc while
moving the panel to cancel the operation.
Add and remove panels
If you remove all panels from a dock, the dock disappears. You can create a dock by moving panels to the right edge
of the workspace until a drop zone appears.
•To remove a panel, right-click (Windows) or Control-click (Mac) its tab and then select Close, or deselect it from
the Window menu.
•To add a panel, select it from the Window menu and dock it wherever you want.
A
B
C
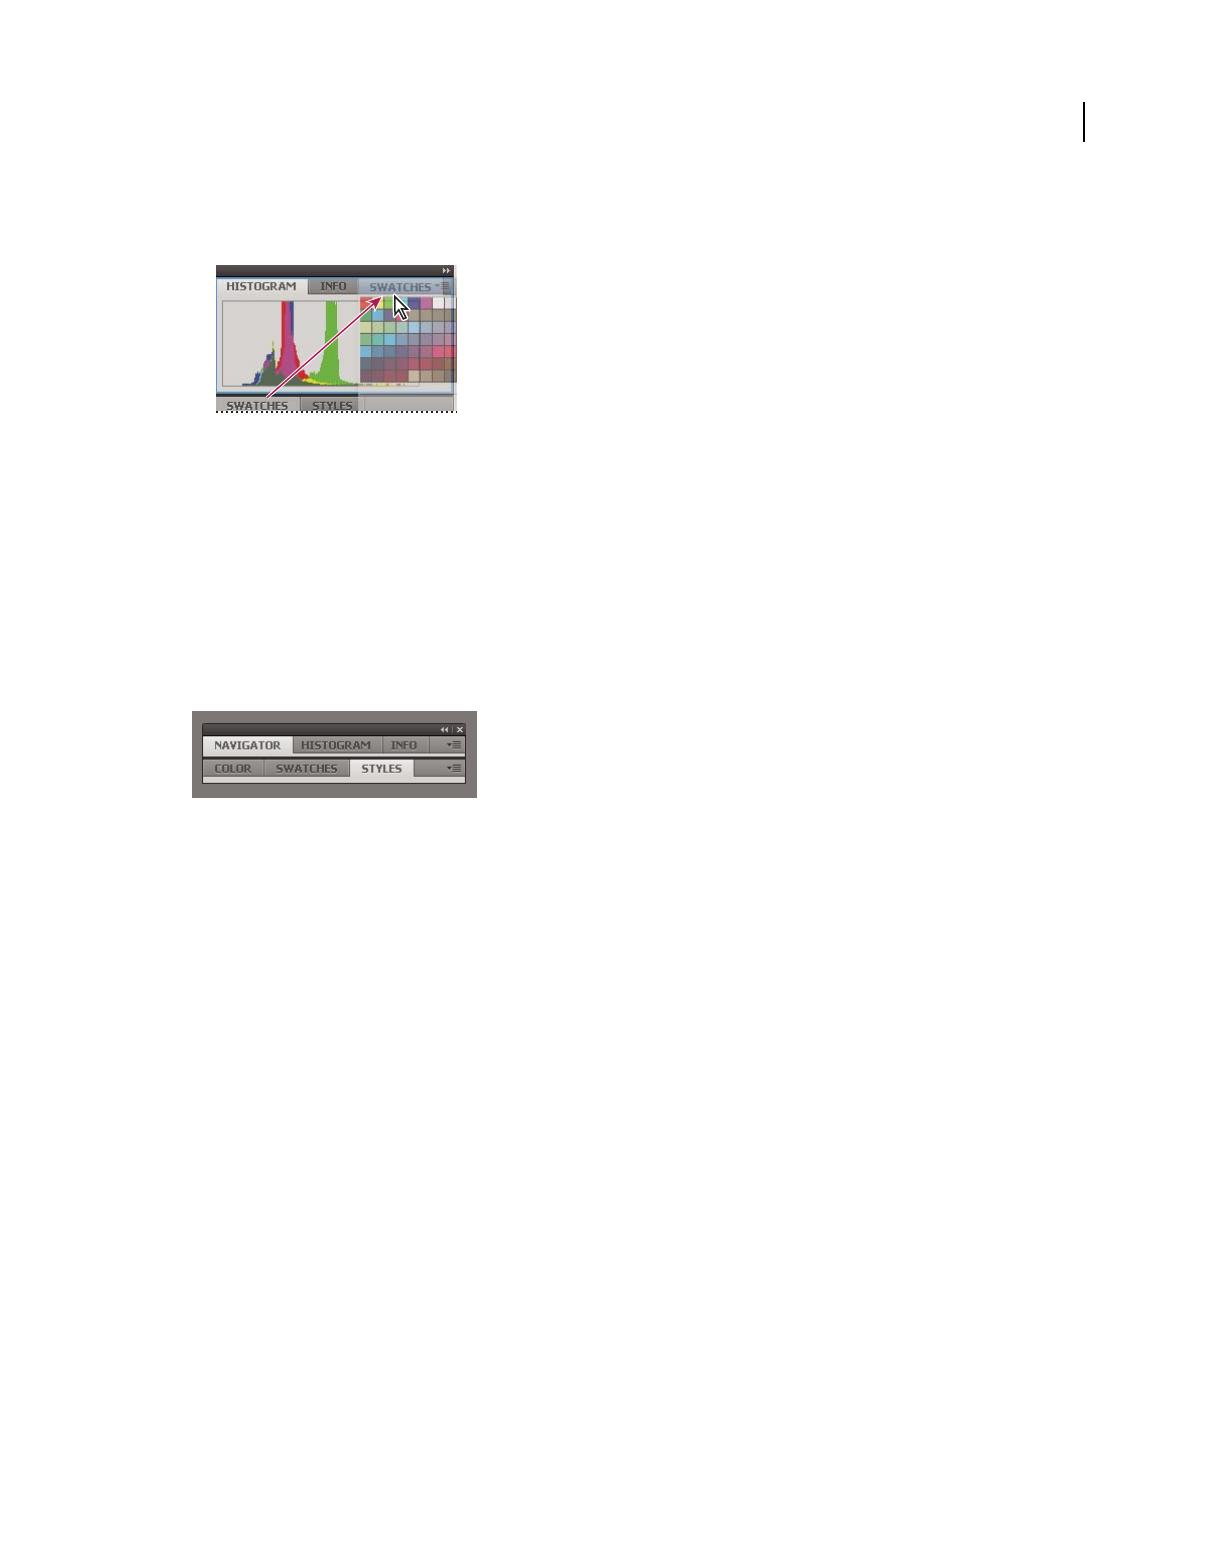
21
USING INDESIGN
Workspace
Last updated 11/16/2011
Manipulate panel groups
•To move a panel into a group, drag the panel’s tab to the highlighted drop zone in the group.
Adding a panel to a panel group
•To rearrange panels in a group, drag a panel’s tab to a new location in the group.
•To remove a panel from a group so that it floats freely, drag the panel by its tab outside the group.
•To move a group, drag the title bar (the area above the tabs).
Stack floating panels
When you drag a panel out of its dock but not into a drop zone, the panel floats freely. The floating panel allows you
to position it anywhere in the workspace. You can stack floating panels or panel groups so that they move as a unit
when you drag the topmost title bar.
Free-floating stacked panels
•To stack floating panels, drag a panel by its tab to the drop zone at the bottom of another panel.
•To change the stacking order, drag a panel up or down by its tab.
Note: Be sure to release the tab over the narrow drop zone between panels, rather than the broad drop zone in a title bar.
•To remove a panel or panel group from the stack, so that it floats by itself, drag it out by its tab or title bar.
Resize panels
•To minimize or maximize a panel, panel group, or stack of panels, double-click a tab. You can also double-click the
tab area (the empty space next to the tabs).
•To resize a panel, drag any side of the panel. Some panels, such as the Color panel in Photoshop, cannot be resized
by dragging.
Collapse and expand panel icons
You can collapse panels to icons to reduce clutter on the workspace. In some cases, panels are collapsed to icons in the
default workspace.
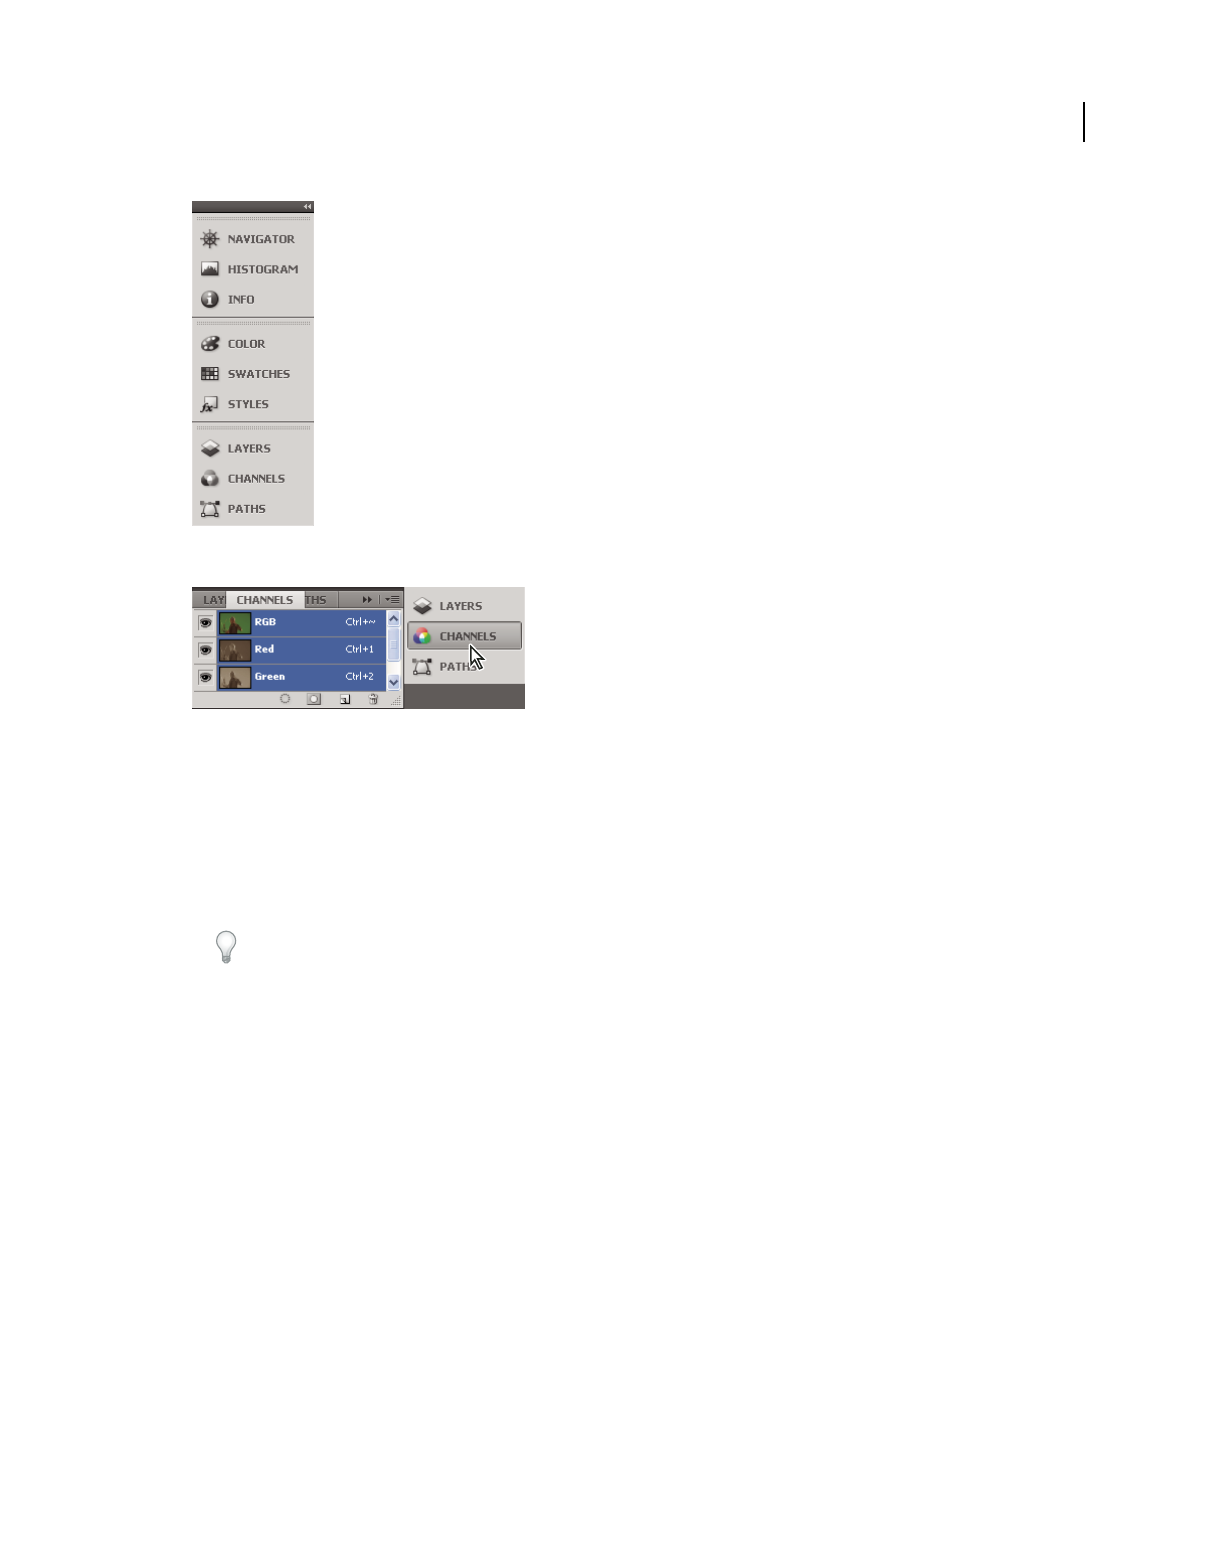
22
USING INDESIGN
Workspace
Last updated 11/16/2011
Panels collapsed to icons
Panels expanded from icons
•To collapse or expand all panel icons in a column, click the double arrow at the top of the dock.
•To expand a single panel icon, click it.
•To resize panel icons so that you see only the icons (and not the labels), adjust the width of the dock until the text
disappears. To display the icon text again, make the dock wider.
•To collapse an expanded panel back to its icon, click its tab, its icon, or the double arrow in the panel’s title bar.
In some products, if you select Auto-Collapse Icon Panels from the Interface or User Interface Options preferences,
an expanded panel icon collapses automatically when you click away from it.
•To add a floating panel or panel group to an icon dock, drag it in by its tab or title bar. (Panels are automatically
collapsed to icons when added to an icon dock.)
•To move a panel icon (or panel icon group), drag the icon. You can drag panel icons up and down in the dock, into
other docks (where they appear in the panel style of that dock), or outside the dock (where they appear as floating
icons).
Save and switch workspaces
By saving the current size and position of panels as a named workspace, you can restore that workspace even if you
move or close a panel. The names of saved workspaces appear in the workspace switcher in the Application bar.
Save a custom workspace
1With the workspace in the configuration you want to save, do one of the following:
•(Illustrator) Choose Window > Workspace > Save Workspace.
•(Photoshop, InDesign, InCopy) Choose Window > Workspace > New Workspace.
•(Dreamweaver) Choose Window > Workspace Layout > New Workspace.

23
USING INDESIGN
Workspace
Last updated 11/16/2011
•(Flash) Choose New Workspace from the workspace switcher in the Application bar.
•(Fireworks) Choose Save Current from the workspace switcher in the Application bar.
2Type a name for the workspace.
3(Photoshop, InDesign) Under Capture, select one or more options:
Panel Locations Saves the current panel locations (InDesign only).
Keyboard shortcuts Saves the current set of keyboard shortcuts (Photoshop only).
Menus or Menu Customization Saves the current set of menus.
Display or switch workspaces
❖Select a workspace from the workspace switcher in the Application bar.
In Photoshop, you can assign keyboard shortcuts to each workspace to navigate among them quickly.
Delete a custom workspace
•Select Manage Workspaces from the workspace switcher in the Application bar, select the workspace, and then
click Delete. (The option is not available in Fireworks.)
•(Photoshop, InDesign, InCopy) Select Delete Workspace from the workspace switcher.
•(Illustrator) Choose Window > Workspace > Manage Workspaces, select the workspace, and then click the Delete icon.
•(Photoshop, InDesign) Choose Window > Workspace > Delete Workspace, select the workspace, and then click
Delete.
Restore the default workspace
1Select the Default or Essentials workspace from the workspace switcher in the application bar. For Fireworks, see
the article http://www.adobe.com/devnet/fireworks/articles/workspace_manager_panel.html.
Note: In Dreamweaver, Designer is the default workspace.
2For Fireworks (Windows), delete these folders:
Windows Vista \\Users\<username>\AppData\Roaming\Adobe\Fireworks CS4\
Windows XP \\Documents and Settings\<username>\Application Data\Adobe\Fireworks CS4
3(Photoshop, InDesign, InCopy) Select Window > Workspace > Reset [Workspace Name].
(Photoshop) Restore a saved workspace arrangement
In Photoshop, workspaces automatically appear as you last arranged them, but you can restore the original, saved
arrangement of panels.
•To restore an individual workspace, choose Window > Workspace > Reset Workspace Name.
•To restore all the workspaces installed with Photoshop, click Restore Default Workspaces in the Interface
preferences.
To rearrange the order of workspaces in the application bar, drag them.
24
USING INDESIGN
Workspace
Last updated 11/16/2011
About view modes
You can change the visibility of the document window using the Mode buttons at the bottom of the toolbox or by
choosing commands from the View
> Screen Mode menu. When the toolbox is displayed in a single column, you can
select view modes by clicking the current mode button and selecting a different mode from the menu that appears.
Normal Mode Displays artwork in a standard window with all visible grids and guides showing, non-printing
objects showing, and a white pasteboard.
Preview Mode Displays artwork as if it were output, with all non-printing elements suppressed (grids, guides, non-
printing objects), and the pasteboard set to the preview background color defined in Preferences.
Bleed Mode Displays artwork as if it were output, with all non-printing elements suppressed (grids, guides, non-
printing objects), the pasteboard set to the preview background color defined in Preferences, and any printing
elements within the document's bleed area (defined in Document Setup) showing.
Slug Mode Displays artwork as if it were output, with all non-printing elements suppressed (grids, guides, non-
printing objects), the pasteboard set to the preview background color defined in Preferences, and any printing
elements within the document's slug area (defined in Document Setup) showing.
Presentation Mode Displays artwork as if it were a slideshow presentation, with no menus, panels, or tools
displayed. See “Use Presentation Mode” on page 532.
Using the status bar
The status bar (at the lower left of a document window) shows information about the status of a file and lets you turn
to a different page. Click the status bar menu to do any of the following:
•Show the current file in the file system by choosing Reveal In Explorer (Windows®) or Reveal In Finder (Mac OS®).
•Show the current file in Adobe® Bridge® by choosing Reveal in Bridge.
•Show the current file in Adobe Mini Bridge by choosing Reveal in Mini Bridge.
In Mac OS, you can display the zoom percentage in the status bar by hiding the application bar (Window >
Application Bar). In Windows, you cannot hide the application bar.
More Help topics
“Using Adobe Bridge with InDesign” on page 103
“Adobe Version Cue” on page 103
Control panel overview
The Control panel (Window > Control) offers quick access to options, commands, and other panels related to the
current page item or objects you select. By default, the Control panel is docked to the top of the document window;
however, you can dock it to the bottom of the window, convert it to a floating panel, or hide it altogether.
Options displayed in the Control panel vary depending on the type of object you select:
•When you select a frame, the Control panel displays options for resizing, repositioning, skewing, and rotating the
frame, or applying an object style.
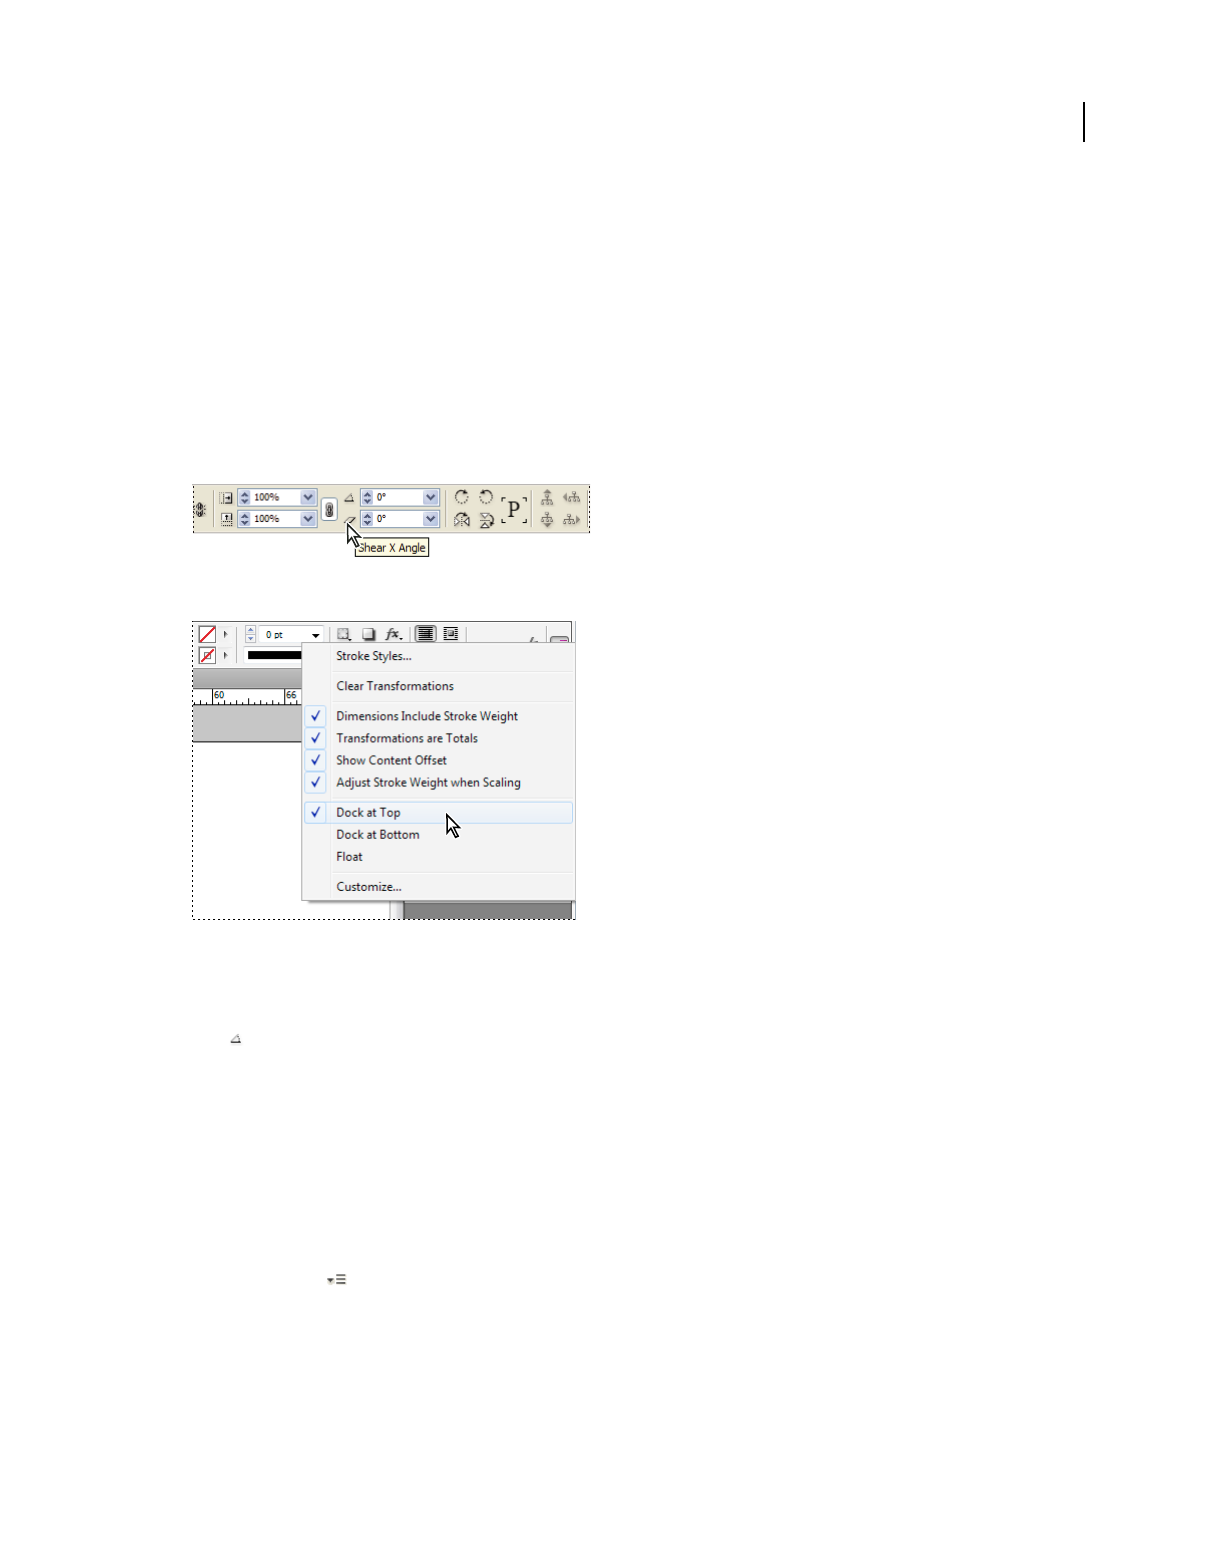
25
USING INDESIGN
Workspace
Last updated 11/16/2011
•When you select text inside a frame, the Control panel displays either character or paragraph options. Click the
paragraph and character icons on the left side of the Control panel to determine whether paragraph or character
options are displayed. If your monitor size and resolution allows, the Control panel displays additional options. For
example, if the character icon is selected, all the character options are displayed, and some paragraph options
appear on the right of the Control panel. If you click the paragraph icon, all paragraph options are displayed, and
some character options appear on the right.
•When you select a table cell, the Control panel displays options for adjusting row and column dimensions, merging
cells, aligning text, and adding strokes.
As the options in the Control panel change, you can get more information about each option by using tool tips—
pop-up descriptions that appear when you hover over an icon or option label with the pointer.
Control panel with tool tip displayed
Control panel menu
To open dialog boxes associated with Control panel icons, Alt-click (Windows) or Option-click (Mac OS) as you click
a Control panel icon. For example, when a frame is selected, hold down Alt or Option and click the Rotation Angle
icon
to open the Rotate dialog box.
For a video tutorial on using the Control panel, see www.adobe.com/go/vid0064.
More Help topics
“Keys for the Control panel” on page 701
Control Panel video
Display the panel menu
❖Click the icon to the right of the Control panel.
Dock or float the Control panel
❖Do one of the following:
•Drag the vertical bar on the left side of the Control panel until the toolbar is docked to the top or bottom of the
application window (Windows) or screen (Mac
OS).

26
USING INDESIGN
Workspace
Last updated 11/16/2011
•Choose Dock At Top, Dock At Bottom, or Float from the Control panel menu.
Customize the Control panel
1Choose Customize from the Control panel menu locatedd on the right side of the Control panel.
2Specify options that you want to display or hide, and then click OK.
About the Navigator panel
If you’re familiar with previous versions of InDesign, you may wonder why you can’t find the Navigator panel. The
Navigator panel does not appear in InDesign CS5. The Power Zoom feature effectively replaces the Navigator panel.
See “Use power zoom” on page 36.
Use context menus
Unlike the menus that appear at the top of your screen, context-sensitive menus display commands related to the
active tool or selection. You can use context menus as a quick way to choose commonly used commands.
1Position the pointer over the document, object, or panel.
2Click the right mouse button.
Note: (Mac OS) If you don’t have a two-button mouse, you can display a context menu by pressing the Control key as you
click with the mouse.
Change Interface preferences
1Choose Edit > Preferences > Interface (Windows) or InDesign > Preferences > Interface (Mac OS).
2Choose the settings you want to specify, and click OK.
Tool Tips Tool tips appear when you hold the mouse pointer over interface items such as tools in the toolbar and
options in the Control panel. Choose None to turn off tool tips.
Show Thumbnails On Place When you place a graphic, a thumbnail of the image appears in the loaded graphics cursor.
Similarly, a thumbnail of the first few lines of text appears in the loaded text cursor. Deselect this option if you don’t
want thumbnails to appear when placing graphics or text.
Show Transformation Values When you’re creating, sizing, or rotating an object, the cursor displays the [x,y]
coordinates, width and height, or rotation information.
Enable Multi-Touch Gestures Select this option to allow Windows and Mac OS multi-touch mouse gestures to work
in InDesign. For example, when you use the Magic Mouse in Mac OS, the swipe gesture scrolls up or down or moves
to the previous or next page or spread, and the rotate gesture rotates the spread.
Highlight Object Under Selection Tool Select this option to highlight the frame edges of objects when the direct
selection tool is moved over it.
Floating Tools Panel Specify whether the toolbar appears as a single column, double column, or single row.
Auto-Collapse Icon Panels When this option is selected, clicking the document window closes the open panel
automatically.
Auto-Show Hidden Panels When you hide panels by pressing Tab, holding the mouse pointer over the side of the
document window temporarily reveals the panels if this option is selected. If this option is not selected, you must press
Tab again to display panels.

27
USING INDESIGN
Workspace
Last updated 11/16/2011
Open Documents As Tabs When this option is deselected, documents you create or open appear as floating windows
rather than tabbed windows.
Enable Floating Document Window Docking If this option is selected, you can dock floating documents with each
other as tabbed windows. If this option is deselected, floating document windows aren’t docked with other document
windows, unless you hold down Ctrl (Windows) or Command (Mac OS) while dragging.
Hand Tool To control whether to greek text and images when you scroll a document, drag the Hand Tool slider to the
desired level of performance versus quality.
Live Screen Drawing Select an option to determine whether the image redraws as you drag an object. If Immediate is
selected, the image redraws while you drag. If Never is selected, dragging an image moves only the frame, and then
image is moved when you release the mouse button. If Delayed is selected, the image redraws only if you pause before
dragging. Delayed offers the same behavior as in InDesign CS4.
Customize menus and keyboard shortcuts
Customize menus
Hiding and colorizing menu commands is a way to remove menu clutter and emphasize commands you frequently
use. Note that hiding menu commands simply removes the menu command from view; it doesn’t disable any features.
At any time, you can view hidden commands by selecting the Show All Menu Items command at the bottom of a menu,
or you can choose Window
> Workspace > Show Full Menus to show all the menus for the selected workspace. You
can include customized menus in workspaces you save.
You can customize the main menu, context menus, and panel menus. Context menus appear when you right-click
(Windows) or Control-click (Mac
OS) an area. Panel menus appear when you click the icon in the upper right of a
panel.
Note: If you select a different workspace, such as Getting Started, some menu commands are hidden. To display menu
commands, choose Show All Menu Items at the bottom of the menu, or choose a different workspace, such as Advanced.
More Help topics
“Save a custom workspace” on page 22
Create a custom menu set
1Choose Edit > Menus.
You cannot edit the default menu set.
2Click Save As, type the name of the menu set, and click OK.
3From the Category menu, choose Application Menus or Context & Panel Menus to determine which menus are
customized.
4Click the arrows to the left of the menu categories to display subcategories or menu commands. For each command
you want to customize, click the eye icon under Visibility to show or hide the command; click None under Color
to select a color from the menu.
5Click Save, and then click OK.
Select a custom menu set
1Choose Edit > Menus.

28
USING INDESIGN
Workspace
Last updated 11/16/2011
2Choose the menu set from the Set menu, and then click OK.
Edit or delete a custom menu set
1Choose Edit > Menus.
2Choose the menu set from the Set menu, and then do one of the following:
•To edit a menu set, change the visibility or color of menu commands, click Save, and then click OK.
•To delete a menu set, click Delete and then click Yes. If you’ve modified the menu set without saving it, you’re
prompted to save the current menu set. Click Yes to save the menu set, or click No to discard changes.
Show hidden menu items
•Choose Window > Workspace > Show Full Menus. This command turns on all menus for the selected workspace.
You can hide the menus again by resetting the workspace.
•Choose Show All Menu Items at the bottom of the menu that includes hidden commands.
Holding down Ctrl (Windows) or Command (Mac OS) and clicking a menu name temporarily displays any menu
commands you’ve hidden by customizing menus.
Missing menu commands
If you can’t find a menu command, it may be hidden. If you select a workspace other than Advanced, some menu
commands are hidden. It’s also possible that you or someone else used the Menus command to hide menu items.
If you can’t find a command you’re looking for, try any of these techniques:
•Choose Show All Menu Items at the bottom of the menu.
•Choose Window > Workspace > Show Full Menus.
•Choose Window > Workspace, and select a different workspace (Advanced shows all menu items).
•Choose Edit > Menus, locate the menu command, and make sure it isn’t hidden.
If menu commands are still missing, try restoring preferences.
More Help topics
“Restore all preferences and default settings” on page 41
Use keyboard shortcut sets
Tool tips provide an instantaneous reference for shortcuts. InDesign also provides a shortcut editor in which you can
view and generate a list of all shortcuts, and edit or create your own shortcuts. The shortcut editor includes all the
commands that accept shortcuts, but some of these commands are undefined in the Default shortcut set.
You can also associate keyboard shortcuts with paragraph or character styles (see “Add paragraph and character styles”
on page 199) or scripts.
For a video tutorial on using keyboard shortcuts, see www.adobe.com/go/vid0066.
Mike Witherell provides a reference guide of keyboard shortcuts on Free keyboard shortcuts (English only).

29
USING INDESIGN
Workspace
Last updated 11/16/2011
More Help topics
“Default keyboard shortcuts” on page 692
“Scripting” on page 649
Change the active shortcut set
1If you want the shortcut set to be active for all documents, make sure that no documents are open.
2Choose Edit > Keyboard Shortcuts.
3Select a shortcut set in the Set menu. For example, select Shortcuts for QuarkXPress® 4.0.
4Click OK.
View shortcuts
1Choose Edit > Keyboard Shortcuts.
2For Set, select a shortcut set.
3For Product Area, select the area containing the commands you want to view.
4From Commands, select a command. The shortcut is displayed in the Current Shortcut section.
Generate a list of shortcuts for printing
1Choose Edit > Keyboard Shortcuts.
2For Set, select a shortcut set.
3Click Show Set.
A text file opens with all current and undefined shortcuts for that set.
Create a new shortcut set
1Choose Edit > Keyboard Shortcuts.
2Click New Set.
3Type a name for the new set, select a shortcut set in the Based On Set menu, and click OK.
Create or redefine a shortcut
1Choose Edit > Keyboard Shortcuts.
2For Set, select a shortcut set or click New Set to create a new shortcut set.
Note: You cannot edit the Default or the QuarkXPress shortcut sets. Instead, create a new set based on one of these sets,
and then edit the new set.
3For Product Area, select the area containing the command you want to define or redefine.
4In the Commands list, select the command that you want to define or redefine.
5In the New Shortcut box, press the keys for your new keyboard shortcut. If the key sequence is currently being used
for another command, InDesign displays that command under Current Shortcuts. You can choose to change the
original shortcut also, or try another shortcut.
Note: Do not assign single-key shortcuts to menu commands, because they interfere with the typing of text. If an insertion
point is active when you type a single-key shortcut, InDesign actives the keyboard shortcut instead of inserting the
character in the text.

30
USING INDESIGN
Workspace
Last updated 11/16/2011
6In the Context list, select the context in which you want the keyboard shortcut to function. The context ensures that
the shortcut performs the way you intended. For example, you can assign Ctrl+G to merge table cells (Table
context) and Ctrl+G to insert special characters (Text context).
Note: Assign shortcuts in the Default context when you want them to function regardless of the current state of the
document. Shortcuts you assign in other contexts, such as Table or Text, override shortcuts assigned in the Default
context.
7Do one of the following:
•Click Assign to create a new shortcut where none currently exists.
•Click Assign to add another shortcut to a command. Menu commands can have multiple keyboard shortcuts.
8Click OK to close the dialog box, or click Save to keep the dialog box open while you enter more shortcuts.
Copying keyboard shortcut sets
Keyboard shortcut sets (*.indk) are saved in two locations. The application preset shortcuts appear in the Presets folder
in the main application folder. The shortcut sets you create appear in the Shortcut Sets folder in the following locations:
Windows XP Documents and Settings\[username]\Application Data\Adobe\InDesign\[version]\[language]InDesign
Shortcut Sets
Windows Vista and Windows 7
Users\[username]\AppData\Roaming\Adobe\InDesign\[Version]\[Language]\InDesign Shortcut Sets
Mac OS Users/[username]/Library/Preferences/Adobe InDesign/[version]/[language]/InDesign Shortcut Sets
If you created a keyboard shortcut set on one computer and want to use it on a different computer, copy the *.indk file
to the same location on the other computer.
You can move a keyboard set from the custom location to the application folder. Doing so makes the custom shortcuts
available to all the users sharing a computer. However, make sure that you do not have two sets with the same name,
one in each place. Make sure that the application keyboard sets and the custom sets have different names.
Toolbox
Toolbox overview
Some tools in the toolbox are for selecting, editing, and creating page elements. Other tools are for choosing type,
shapes, lines, and gradients. You can change the overall layout of the toolbox to fit your preferred window and panel
layout. By default, the toolbox appears as a single vertical column of tools. You can also set it up as a double vertical
column or as one horizontal row. However, you can’t rearrange the positions of individual tools in the toolbox. You
can drag the top of the toolbox to move it.
Select a tool from the default toolbox by clicking it. The toolbox also contains several hidden tools related to the visible
tools. Hidden tools are indicated by arrows to the right of the tool icons. Select a hidden tool by clicking and holding
the current tool in
the toolbox and then selecting the tool that you want.
The name of the tool and its keyboard shortcut appear when you hold the pointer over the tool—this text is called the
tool tip. You can turn off tool tips by choosing None from the Tool Tips menu in Interface preferences.
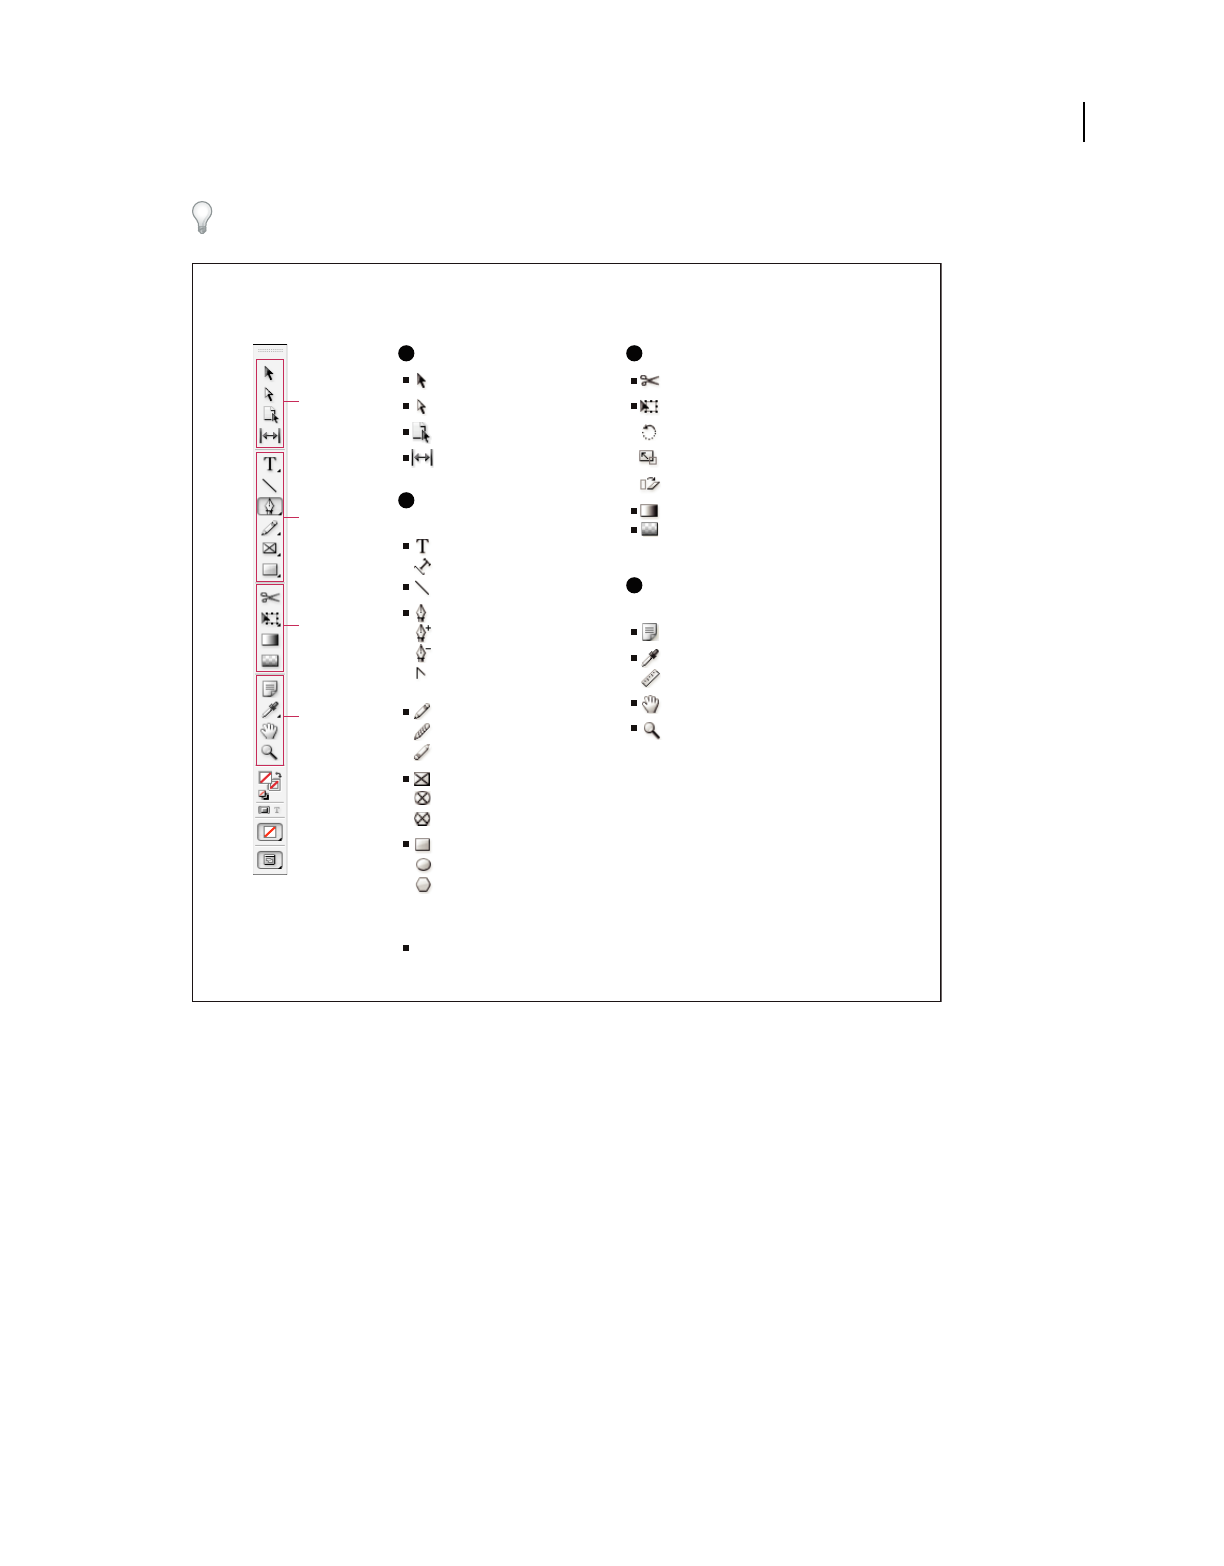
31
USING INDESIGN
Workspace
Last updated 11/16/2011
Open the Tool Hints panel (choose Window > Utilities > Tool Hints) to see which shortcut and modifier keys work
with the selected tool.
Display the toolbox
❖Choose Window > Tools.
Display tool options
❖Double-click a tool in the toolbox.
This procedure works only for some tools, such as the Eyedropper, Pencil, and Polygon tools.
Display and select hidden tools
1In the toolbox, position the pointer over a tool that has hidden tools and hold down the mouse button.
2When the hidden tools appear, select a tool.
A
B
D
C
Indicates default tool * Keyboard shortcuts appear in parenthesis
Selection tools
Selection (V, Escape)*
Direct Selection (A)
Page (Shift + P)
Gap (U)
Drawing and
Type tools
Type (T)
Type On a Path (Shift+T)
Line (\)
Pen (P)
Add Anchor Point (=)
Delete Anchor Point (-)
Convert Direction
Point (Shift+C)
Pencil (N)
Smooth
Erase
Rectangle Frame (F)
Ellipse Frame
Polygon Frame
Rectangle (M)
Ellipse (L)
Polygon
Transformation tools
Scissors (C)
Free Transform (E)
Rotate (R)
Scale (S)
Shear (O)
Gradient Swatch (G)
Gradient Feather
(Shift+G)
Modication and
Navigation tools
Note
Eyedropper (I)
Measure (K)
Hand (H)
Zoom (Z)
Toolbox overview
B
A
C
D
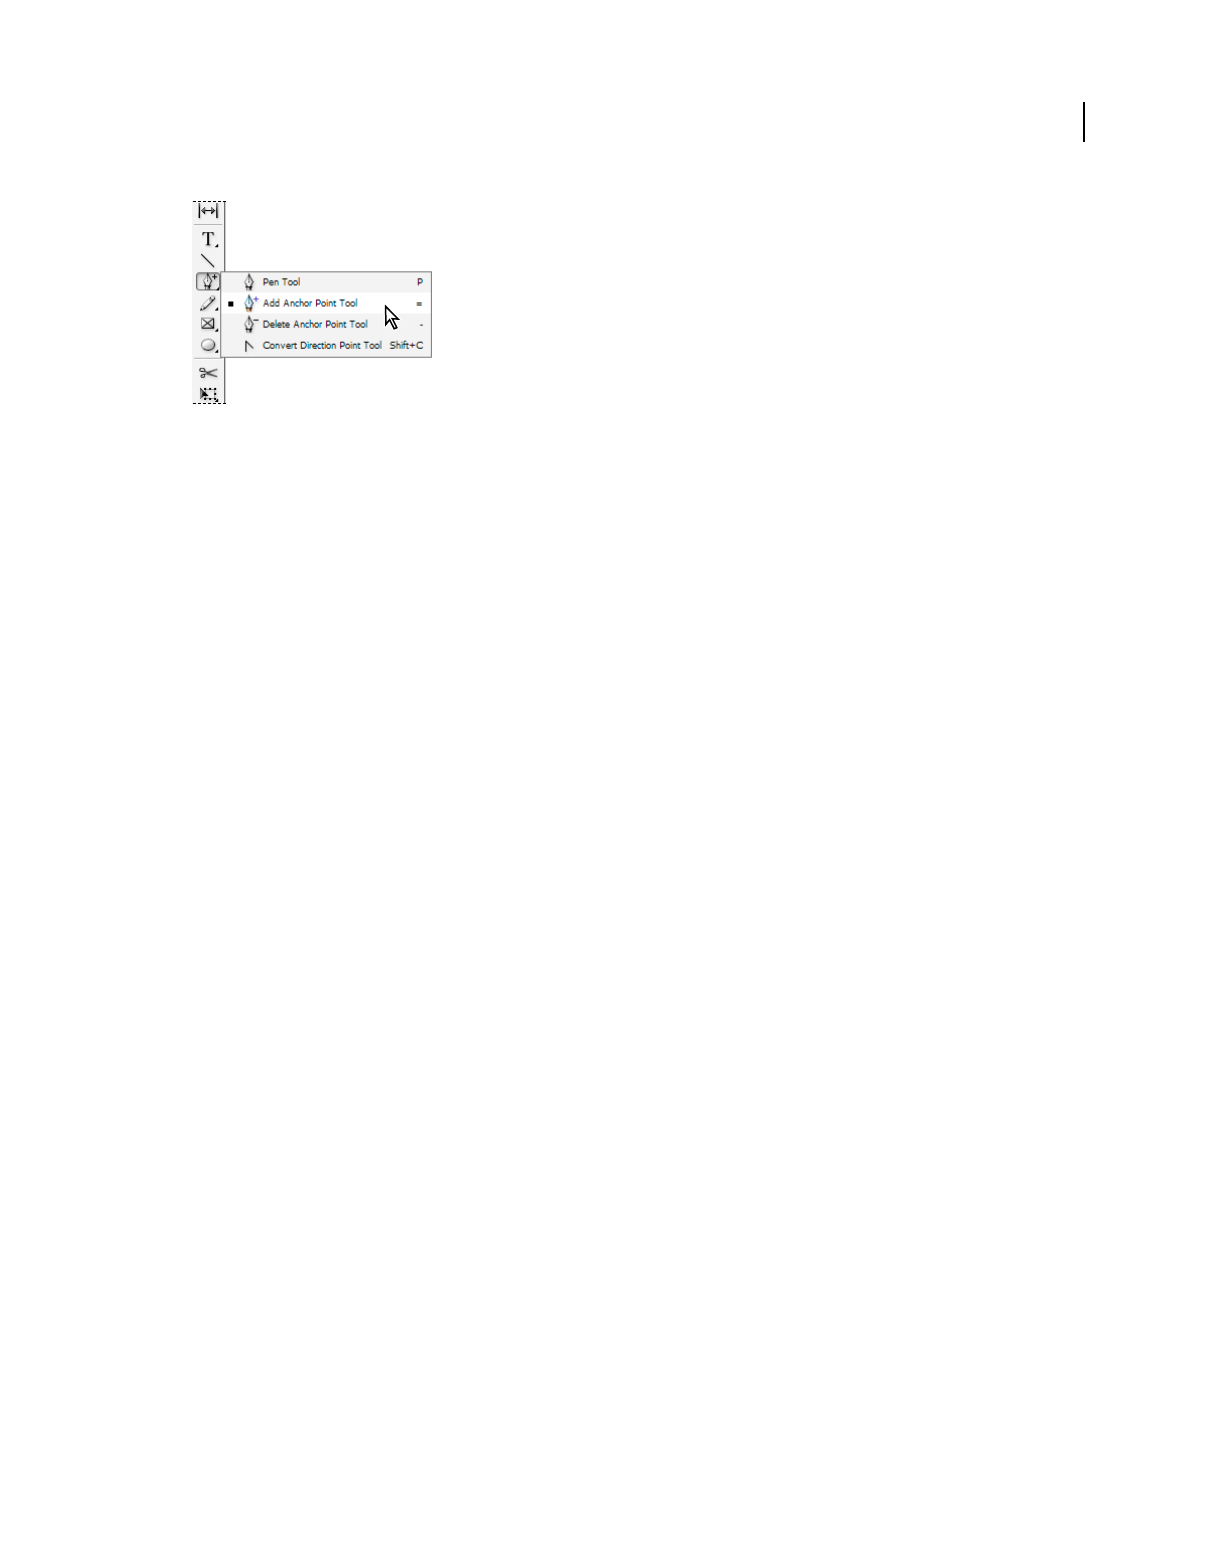
32
USING INDESIGN
Workspace
Last updated 11/16/2011
Hidden tools menu
Select tools temporarily
1When one tool is selected, hold down the keyboard shortcut of a different tool.
2With the keyboard shortcut still held down, perform an action.
3Release the keyboard shortcut to return to the previous tool.
For example, if the Gap tool is selected, hold down the V key to temporarily use the Selection tool. When you release
the V key, the Gap tool is selected.
View tool hints
The Tool Hints panel describes how modifier keys work with the selected tool.
1Choose Window > Utilities > Tool Hints to display the Tool Hints panel.
2Select a tool in the toolbox to view a description of that tool and its modifier keys and shortcuts.
Change the toolbox layout
1Choose Edit > Preferences > Interface (Windows) or InDesign > Preferences > Interface (Mac OS).
2Choose a layout option from the Floating Tools Panel menu and click OK.
You can also click the double arrow icon at the top of the toolbox to change the toolbox layout.
Tools overview
Type tools Create and format type in standard or customized blocks or paths. (See “Create text frames” on page 128.)
Drawing tools Draw and style simple and complex objects, including rectangles, ellipses, polygons, freeform shapes.
(See “Drawing” on page 340.)
Selection tools Select (activate) objects, points, or lines. (See “Selecting objects” on page 402.)
Transform tools Reshape, reorient, and resize objects. (See “Transforming objects” on page 408.)
Navigation tools Move around in, control the view of, and measure distances in a document. (See “Zoom in and out”
on page 35 and “Rulers and measurement units” on page 49.)
The Scissors tool Splits paths and frames. (See “Split a path” on page 356.)
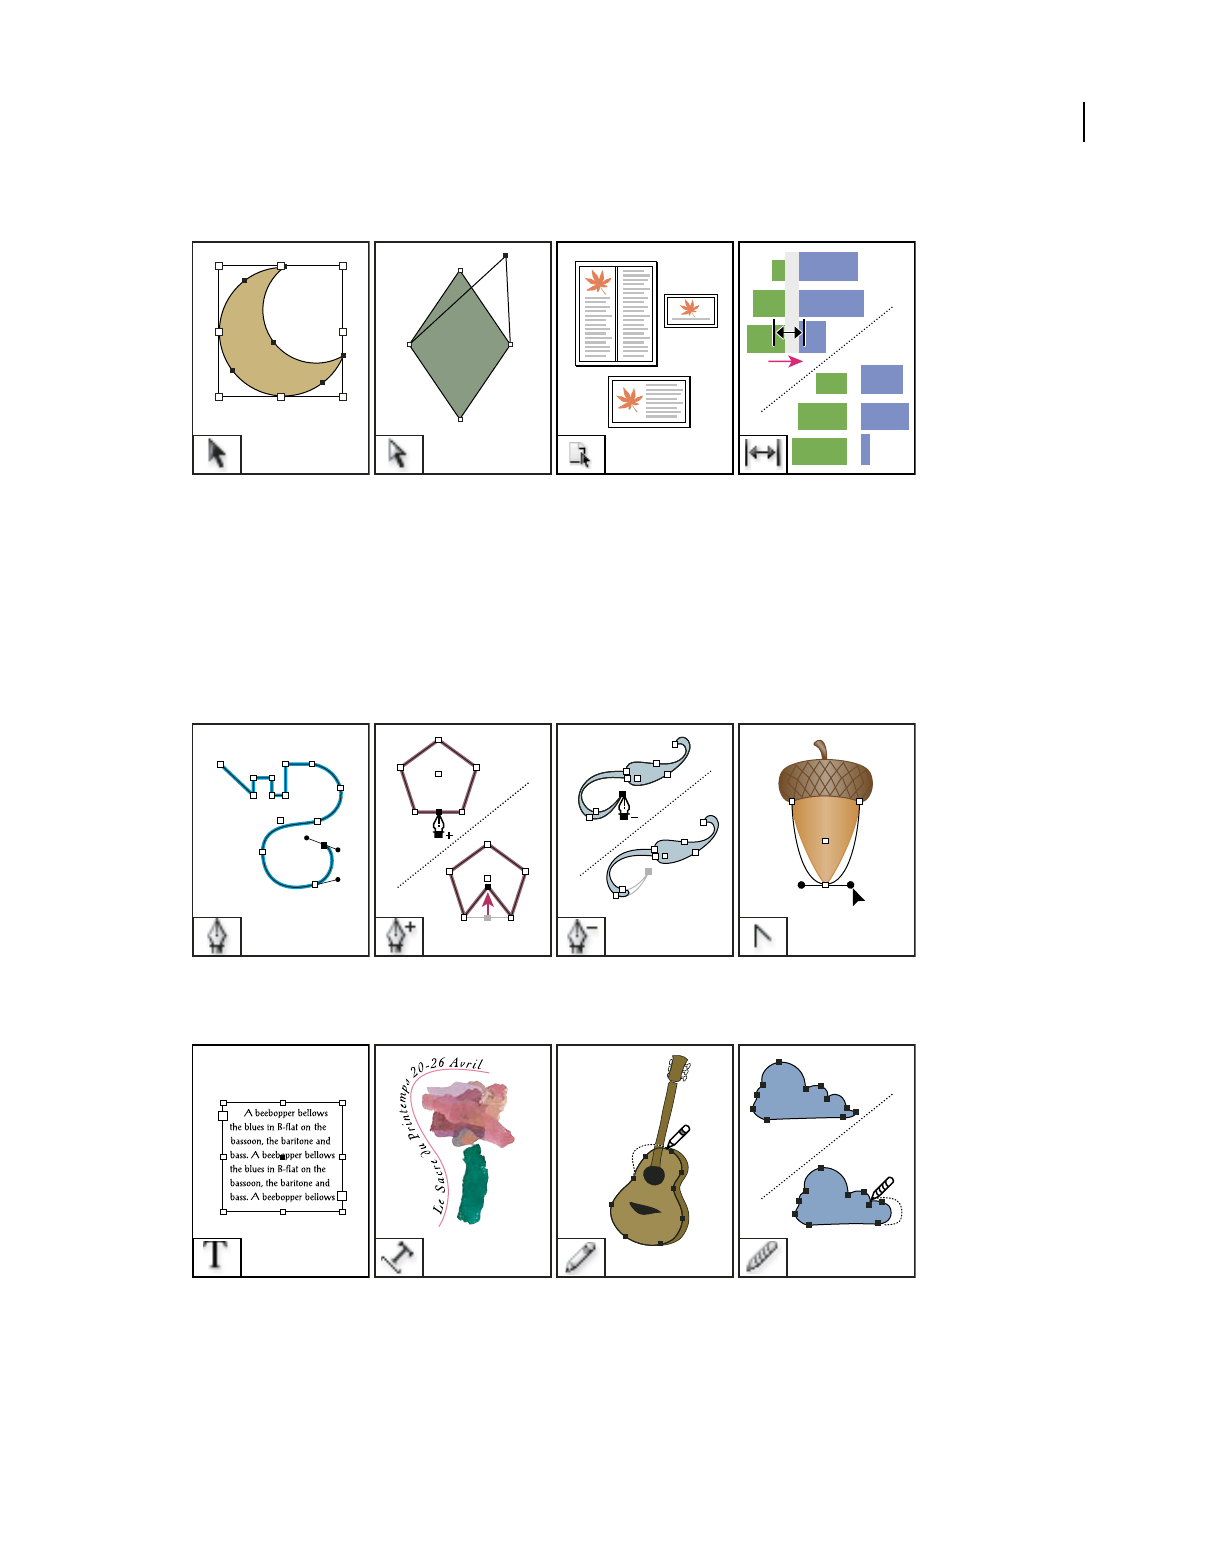
33
USING INDESIGN
Workspace
Last updated 11/16/2011
Gallery of selection tools
More Help topics
“Selecting objects” on page 402
Gallery of drawing and type tools
Selection tool lets you
select entire objects.
Direct Selection tool lets
you select points on a path
or contents within a
frame.
Page tool lets you create
multiple page sizes within
a document.
Gap tool lets you adjust
the space between objects.
Pen tool lets you draw
straight and curved paths.
Add Anchor Point tool
lets you add anchor points
to a path.
Delete Anchor Point tool
lets you remove anchor
points from a path.
Convert Direction Point
tool lets you convert
corner points and smooth
points.
Type tool lets you create
text frames and select
text.
Type on a Path tool lets
you create and edit type
on paths.
Pencil tool lets you draw a
freeform path.
Smooth tool lets you
remove excess angles from
a path.
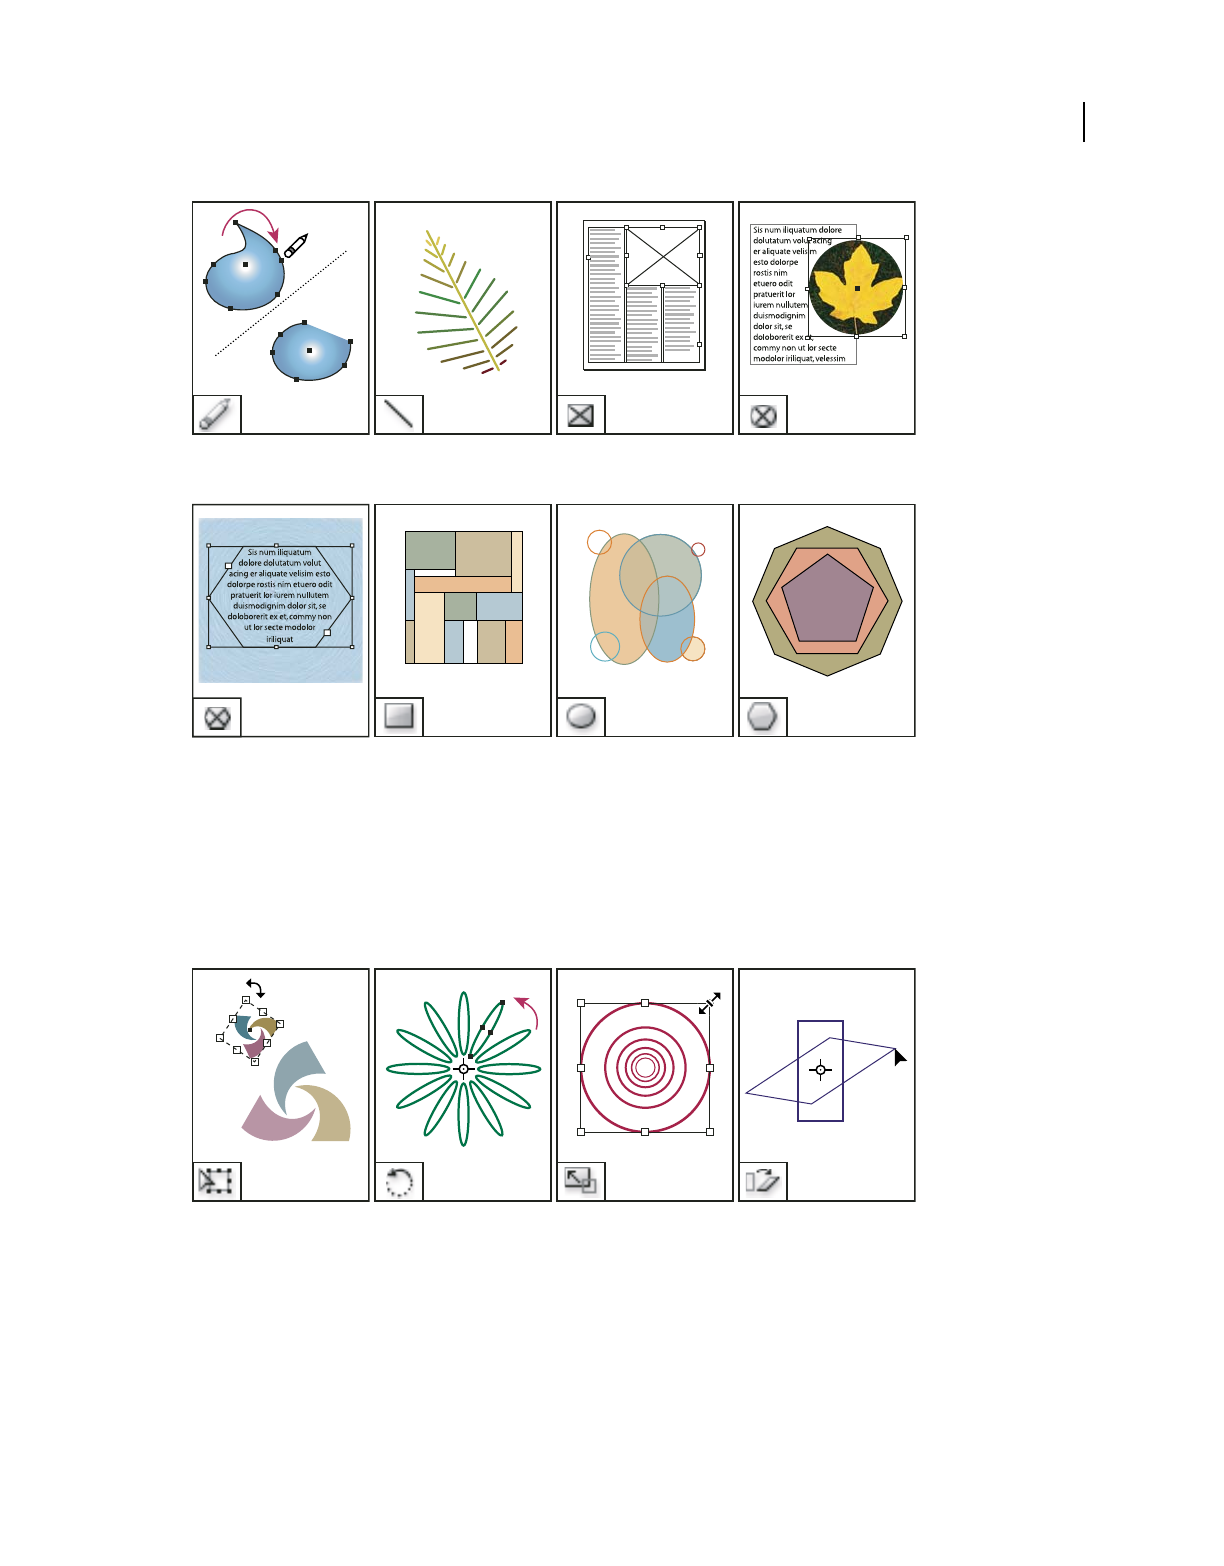
34
USING INDESIGN
Workspace
Last updated 11/16/2011
More Help topics
“Understanding paths and shapes” on page 340
Gallery of transformation tools
More Help topics
“Transforming objects” on page 408
Erase tool lets you delete
points on a path.
Line tool lets you draw a
line segment.
Rectangle Frame tool lets
you create a square or
rectangle placeholder.
Ellipse Frame tool lets you
create a circle or oval
placeholder.
Polygon Frame tool lets
you create a multi-sided
shape placeholder.
Rectangle tool lets you
create a square or
rectangle.
Ellipse tool lets you create
a circle or oval.
Polygon tool lets you
create multi-sided shape.
Free Transform tool lets
you rotate, scale, or shear
an object.
Rotate tool lets you rotate
objects around a fixed
point.
Scale tool lets you resize
objects around a fixed
point.
Shear tool lets you skew
objects around a fixed
point.
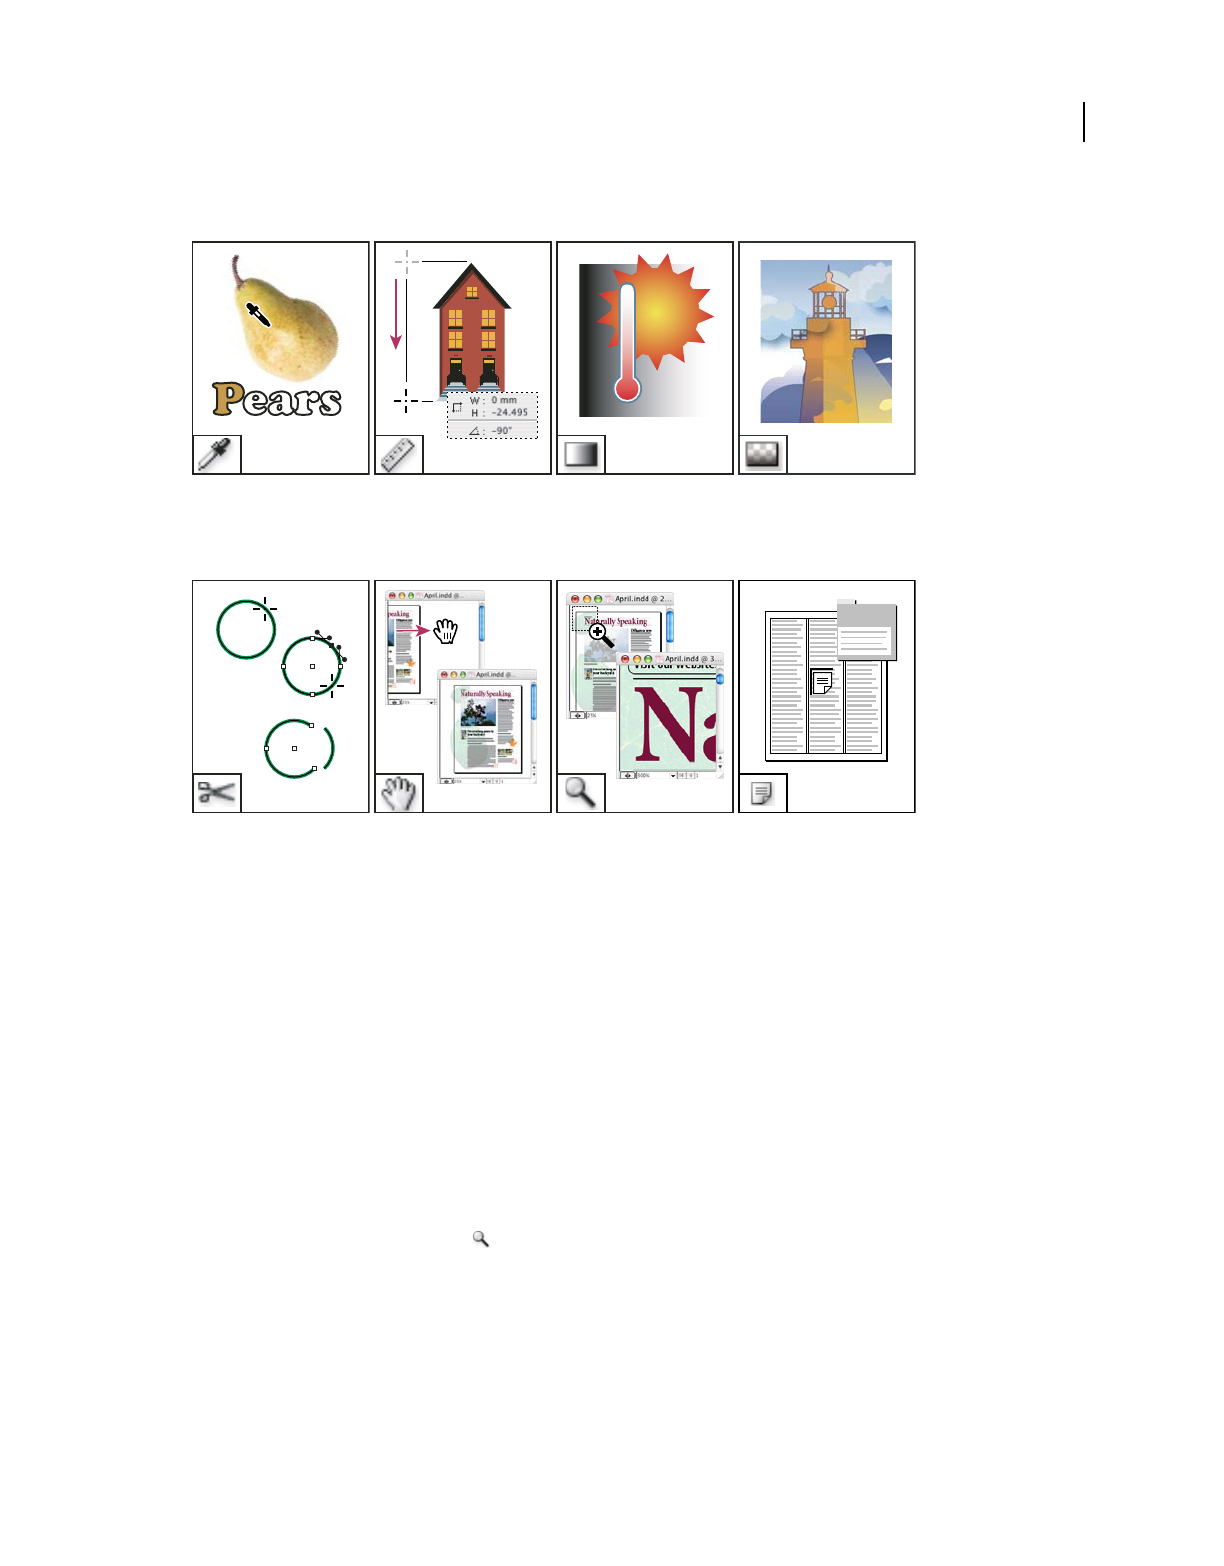
35
USING INDESIGN
Workspace
Last updated 11/16/2011
Gallery of modification and navigation tools
Viewing the workspace
Zoom in and out
Use the Zoom tool or the Zoom commands to magnify the size of documents.
More Help topics
“Keys for tools” on page 692
Zoom in or out
•To zoom in, select the Zoom tool and click the area you want to magnify. Each click magnifies the view to the
next preset percentage, centering the display around the point you click. At maximum magnification, the center of
the Zoom tool appears blank. To zoom out, hold down Alt (Windows) or Option (Mac
OS) and click the area you
want to reduce. Each click reduces the view.
•To magnify to the next preset percentage, activate the window you want to view and choose View > Zoom In. To
reduce the view to
the previous preset percentage, choose View > Zoom Out.
•To set a specific magnification level, type or choose a level in the Zoom Level box in the application bar.
Eyedropper tool lets you
sample color or type
attributes from objects
and apply them to other
objects.
Measure tool measures
the distance between two
points.
Gradient Swatch tool lets
you adjust the beginning
and ending points and
angle of gradients within
objects.
Gradient Feather tool lets
you fade an object into the
background.
Scissors tool cuts paths at
specified points.
Hand tool moves the page
view within the document
window.
Zoom tool increases and
decreases the view
magnification in the
document window.
Note tool lets you add
comments.

36
USING INDESIGN
Workspace
Last updated 11/16/2011
In Mac OS, you can display the zoom percentage in the status bar by hiding the application bar (Window >
Application Bar). In Windows, you cannot hide the application bar.
•To zoom in or out, press Alt (Windows) or Option (Mac OS) while using the mouse scroll wheel or sensor.
•To magnify by dragging, select the Zoom tool and drag around the area you want to magnify.
Use power zoom
Power zoom offers a quick way to scroll through your document pages. Using the grabber hand, you can use zoom in
or out and scroll through your entire document. This feature is especially useful for long documents.
1Click the Hand tool .
To activate the grabber hand, you can also hold down the spacebar or hold down Alt/Option while in text mode.
2With the grabber hand active, click and hold down the mouse button.
The document zooms out so that you can see more of the spread. A red box indicates the view area.
3With the mouse button still held down, drag the red box to scroll through the document pages. Press arrow keys or
use the mouse scroll wheel to change the size of the red box.
4Release the mouse button to zoom in on the new area of the document.
The document window returns to its original zoom percentage or to the size of the red box.
Zoom to Actual Size
•Double-click the Zoom tool.
•Choose View > Actual Size.
•Type or choose a magnification level of 100 in the Zoom Level box in the application bar.
Adjust the view
Focus on the desired area of your document by fitting pages and spreads within the active window and by scrolling the view.
More Help topics
“Keys for viewing documents and document workspaces” on page 698
Fit the page, spread, or pasteboard within the active window
•Choose View > Fit Page In Window.
•Choose View > Fit Spread In Window.
•Choose View > Entire Pasteboard.
Scroll the view
You can easily adjust the degree to which pages or objects are centered in the document window. These techniques are
also useful for navigating between pages.
❖Do any of the following:
•Select the Hand tool from the Tools panel, and then click and drag in the document window. Holding down Alt
(Windows) or Option (Mac OS) and pressing the spacebar temporarily activates the Hand tool.
•Click the horizontal or vertical scroll bars or drag the scroll box.
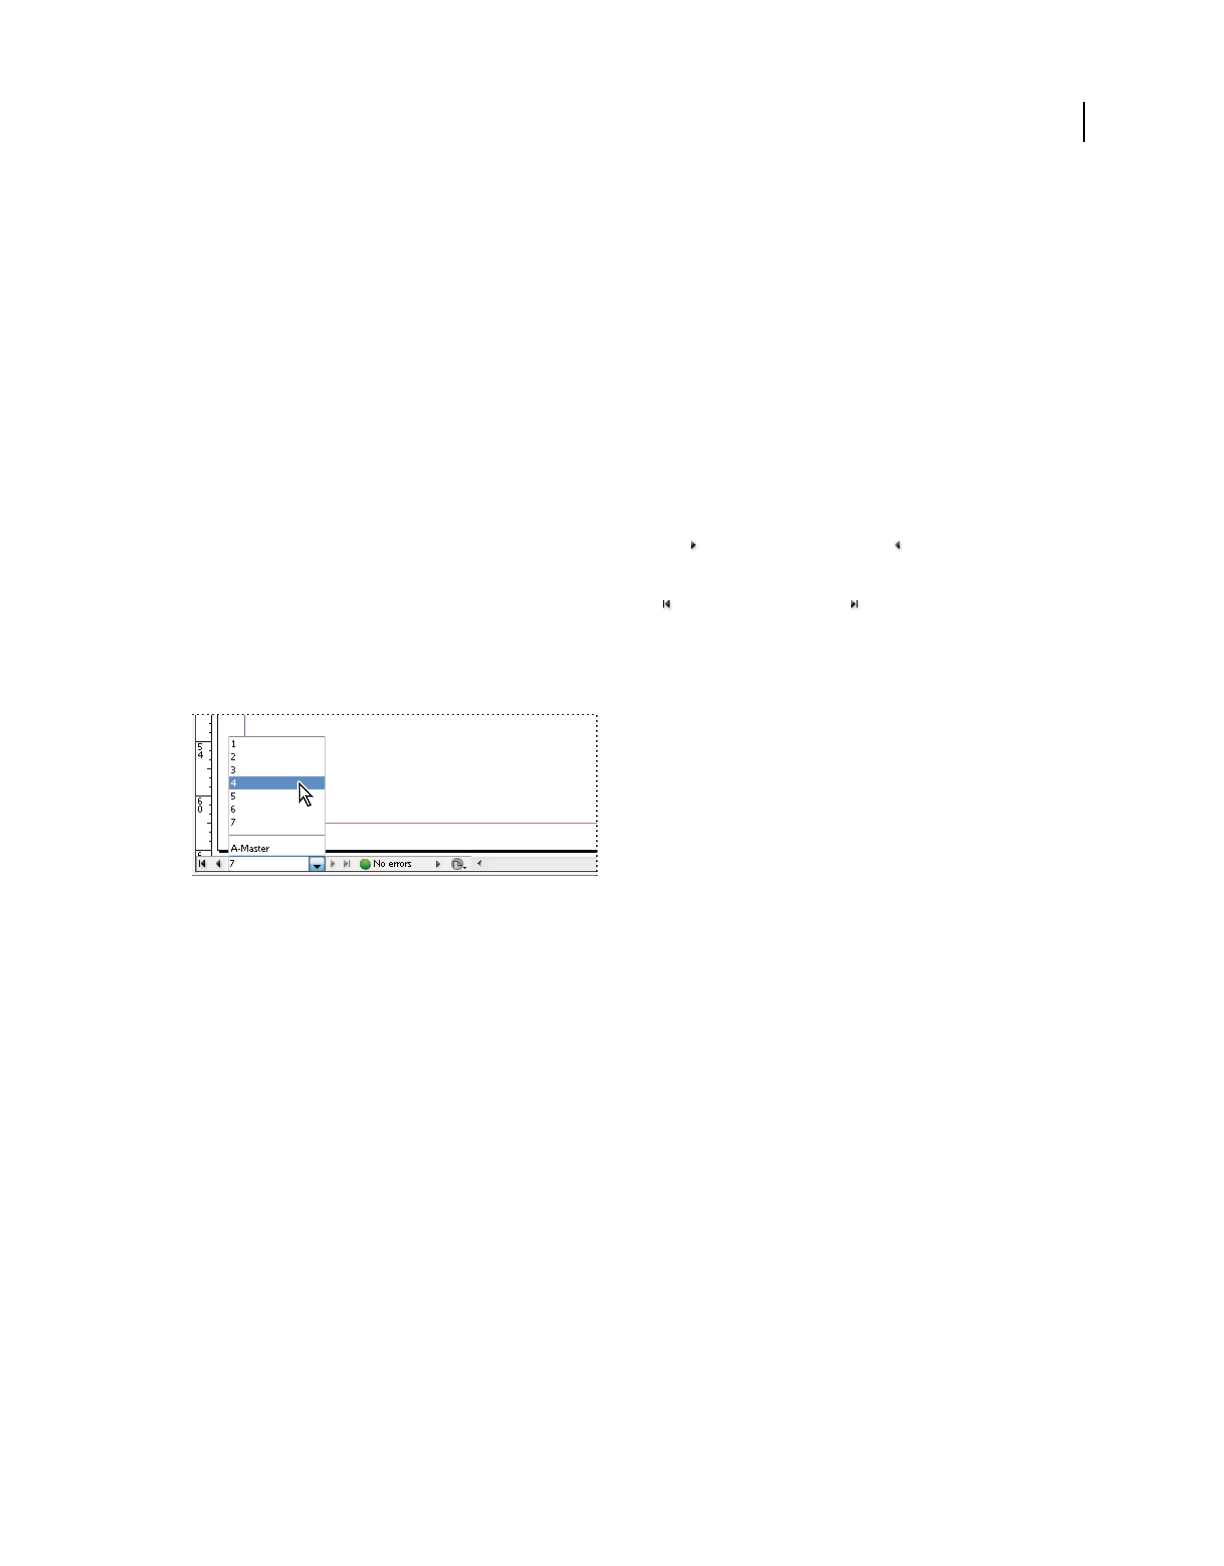
37
USING INDESIGN
Workspace
Last updated 11/16/2011
•Press Page Up or Page Down.
•Use the mouse scroll wheel or sensor to scroll up and down. To pan left or right, press Ctrl (Windows) or Command
(Mac
OS) as you use the mouse scroll wheel or sensor.
Turn pages
InDesign makes it easy to jump from page to page in a document. For example, just as most web browsers provide
Back and Forward buttons to navigate through pages you’ve visited, InDesign keeps track of the order in which you’ve
viewed pages in a document.
❖Do any of the following:
•To move through pages in the order in which you viewed them during the current session, choose Layout > Go
Back or Go Forward.
•To go to the next or previous page, click the Next Page button or Previous Page button at the bottom of
the document window, or choose Layout > Next Page or Previous Page.
•To go to the first or last page, click the First Spread button or Last Spread button at the lower left of
the document window, or choose Layout > First Page or Last Page.
•To go to a specific page, choose Layout > Go To Page, specify the page number, and click OK. Or, click the
downward-facing arrow at the right of the page box, and then choose a page.
Choose page from page box to go to specific page
•To go to a master page, click in the page box at the lower left of the document window. Type the first few letters
of
the master page name, and press Enter (Windows) or Return (Mac OS). Or, in the Pages panel, double-click a
master page icon.
Work with additional windows
You can open additional windows for the same document or for other InDesign documents. With additional windows,
you can compare different spreads simultaneously, especially spreads that aren’t adjacent. You can also display
different magnifications of the same page, so that you can work closely on details while watching how the changes
affect the overall layout. In addition, you can display a master page in one window, and pages based on it in other
windows, to see how editing the master page affects various parts of the document.
When you reopen the document, only the last-used window appears.
•To create a new window for the same document, choose Window > Arrange > New Window.
•To cascade or tile windows, choose Window > Arrange > Cascade to arrange all windows into a stack, with each
window offset slightly. Or, choose Window
> Arrange > Tile to display all windows equally without overlapping.
•To activate a window, click the window tab or title bar. Or, choose the name of the view in the Window menu.
Multiple windows for a document are numbered in the order they were created.
•To close all windows for the active document, press Shift+Ctrl+W (Windows) or Shift+Command+W (Mac OS).

38
USING INDESIGN
Workspace
Last updated 11/16/2011
•To close all windows for all open documents, press Shift+Ctrl+Alt+W (Windows) or Shift+Command+Option+W
(Mac
OS).
Use anti-aliasing for smoothing edges
Anti-aliasing smooths the jagged edges of type and bitmap images by softening the color transition between edge pixels
and background pixels. Since only the edge pixels change, no detail is lost.
1Choose Edit > Preferences > Display Performance (Windows) or InDesign > Preferences > Display Performance
(Mac
OS).
2From the Adjust View Settings menu, choose the view setting for which you want to turn on anti-aliasing.
You can enable or disable anti-aliasing for each of the view settings. For example, you can enable anti-aliasing for High
Quality view and disable it for Fast view.
3Select Enable Anti-aliasing.
Greek type
When display capabilities are insufficient to show text at a small size, InDesign displays the text as a dimmed bar. This
behavior is called greeking type. Any type at or below the specified type size is replaced on-screen with non-letterforms
that act as placeholders.
1Choose Edit > Preferences > Display Performance (Windows) or InDesign > Preferences > Display Performance
(Mac
OS).
2From the Adjust View Settings menu, choose the view setting for which you want to change the Greek Type setting.
You can specify different Greek Type values for each of the view settings.
3For Greek Type Below, type a value, and then click OK.
To control whether to greek text and images when you scroll a document, open the Interface section of the Preferences
dialog box, drag the Hand Tool slider to the desired level of performance versus quality, and then click
OK.
Calculate values in panels and dialog boxes
You can perform simple math in any numerical edit box. For example, if you want to move a selected object 3 units to
the right using the current measurement units, you don’t have to work out the new horizontal position—simply type
+3 after the current value in the Transform panel.
Panels use the measurement system selected in the Preferences dialog box; however, you can specify values in another
measurement instead.
1In a text box that accepts numerical values, do one of the following:
•To replace the entire current value with a mathematical expression, select the entire current value.
•To use the current value as part of a mathematical expression, click before or after the current value.
2Type a simple mathematical expression using a single mathematical operator, such as + (plus), - (minus),
*
(multiplication), / (division), or % (percent).
For example, 0p0+3 or 5mm + 4.
3Press Enter or Return to apply the calculation.

39
USING INDESIGN
Workspace
Last updated 11/16/2011
In the Control panel and the Transform panel, you can duplicate the selected object and apply the calculation to the
duplicate (instead of the original). Enter the calculation and press Alt+Enter (Windows) or Option+Return
(Mac
OS).
More Help topics
“Enter values in panels and dialog boxes” on page 39
Enter values in panels and dialog boxes
Panels and dialog boxes use the measurement units and increments defined in the Edit > Preferences > Units &
Increments (Windows) or InDesign
> Preferences > Units & Increments (Mac OS) dialog box. However, you can
specify values using any of the supported measurement units at any time by temporarily overriding the current
preference settings.
❖Do any of the following:
•Type a value in the box, and then press Enter or Return.
•Drag the slider.
•Drag the dial.
•Click the arrow buttons in the panel to change the value.
•Click in the box and then use the up or down arrow keys on the keyboard to change the value.
•Select a value from the menu associated with the box.
Note: When you make a change using the arrow buttons, arrow keys, or pop-up menus, InDesign applies the change
immediately.
More Help topics
“Rulers and measurement units” on page 49
“Calculate values in panels and dialog boxes” on page 38
Working with ConnectNow
Adobe® ConnectNow provides you with a secure, personal online meeting room where you can meet and collaborate
with others via the web in real time. With ConnectNow, you can share and annotate your computer screen, send chat
messages, and communicate using integrated audio. You can also broadcast live video, share files, capture meeting
notes, and control an attendee's computer.
You can access ConnectNow directly from the application interface.
1Choose File > Share My Screen.
2In the Sign In to Adobe CS Live dialog box, enter your email address and password, and click Sign In. If you don’t
have an Adobe ID, click the Create Adobe ID button.
3To share your screen, click the Share My Computer Screen button at the center of the ConnectNow application
window.
For complete instructions on using ConnectNow, see Adobe ConnectNow Help.

40
USING INDESIGN
Workspace
Last updated 11/16/2011
For a video tutorial about using ConnectNow, see Using ConnectNow to share your screen (7:12). (This
demonstration is in Dreamweaver.)
Setting preferences
About preferences and defaults
Preferences include settings such as panel positions, measurement options, and display options for graphics and
typography. Preference settings specify how InDesign documents and objects behave initially.
Set general preferences
This section covers preference settings in the General tab of the Preferences dialog box. For information on other
preferences, search for the appropriate setting.
1Choose Edit > Preferences > General (Windows) or InDesign > Preferences > General (Mac OS), and then choose
the type of preferences you want to specify.
2In the Page Numbering section, choose a page numbering method from the View menu. (See “Display absolute or
section numbering in the Pages panel” on page 92.)
3In the Font Downloading and Embedding section, specify a threshold to trigger font subsetting based on the
number of glyphs a font contains. This setting affects font downloading options in the Print and Export dialog
boxes.
4In the When Scaling section, you can determine how scaled objects are reflected in panels and how the content of
scaled frames behaves.
•Select Apply To Content if you want the point size to change when a text frame is scaled. (See “Scale type” on
page 258.) If this option is selected when a graphics frame is scaled, the percentage size of the image changes, but
the frame reverts its percentage to 100%. (See “Scale objects” on page 419.)
•Select Adjust Scaling Percentage to display the original point size with the new point size in parentheses when you
scale text. If this option is selected when you scale graphics frames, the percentage size of both the frame and image
changes.
5Click Reset All Warning Dialogs to display all warnings, even the ones you’ve already checked not to display. (As
warnings appear, you can select a check box to prevent the warning from appearing again.)
Set defaults
If you change settings when no documents are open, your changes set the defaults for new documents. If a document
is open when you change settings, the changes affect only that document.
Similarly, if you change settings when no objects are selected, your changes set the defaults for new objects.
Change default settings for new documents
1Close all documents.
2Change any menu items or panel or dialog box settings.

41
USING INDESIGN
Workspace
Last updated 11/16/2011
If you use the same page size and language for most of your documents, you can change these defaults with no
document open. For example, to change the default page size, close all documents, choose File > Document Setup, and
select a desired page size. To set a default dictionary, close all documents, choose Edit
> Preferences > Dictionary
(Windows) or InDesign
> Preferences > Dictionary (Mac OS), and select an option from the Language menu.
Specify default settings for new objects in a document
1With document open, choose Edit > Deselect All.
2Change any menu items or panel or dialog box settings.
Restore all preferences and default settings
When InDesign is behaving erratically, deleting preferences (also referred to as “trashing preferences” or “removing
preferences”) often solves the problem.
It’s a good idea to make a backup copy of the preference files called InDesign Defaults and InDesign SavedData.
Instead of removing your preferences, you can copy these backup files over the problematic corrupt preference files
and not lose any customizations.
Mike Witherell provides a detailed list of which files are affected when you restore preferences in Adobe InDesign
Presets (PDF, English only).
❖Do one of the following:
•(Windows) Start InDesign, and then press Shift+Ctrl+Alt. Click Yes when asked if you want to delete preference
files.
•(Mac OS) While pressing Shift+Option+Command+Control, start InDesign. Click Yes when asked if you want to
delete preference files.
Various program preferences and default settings are stored in the Adobe InDesign preferences files. These files,
including the InDesign Defaults file, are saved each time you exit from InDesign. For manual deletion or renaming,
the locations of the preference files are as follows:
•Mac OS
InDesign SavedData Users/[user]/Library/Caches/Adobe InDesign/Version [version]/InDesign SavedData
InDesign Defaults Users/[user]/Library/Preferences/Adobe InDesign/Version [version]/InDesign Defaults
•Windows XP
InDesign SavedData \Documents and Settings\[username]\Local Settings\Application
Data\Adobe\InDesign\Version [version]\Caches
InDesign Defaults \Documents and Settings\[username]\Application Data\Adobe\InDesign\Version [version]
•Windows Vista or Windows 7
InDesign SavedData Users\[username]\AppData\Roaming\Adobe\InDesign\Version [version]\Caches\InDesign
SavedData
InDesign Defaults C:\Users\[username]\AppData\Roaming\Adobe\InDesign\Version [version]\InDesign
Defaults
About InDesign styles and presets
You can store settings for reuse, including settings for the following items:
•Creating paragraph and character styles. (See “Add paragraph and character styles” on page 199.)

42
USING INDESIGN
Workspace
Last updated 11/16/2011
•Creating object styles. (See “Object styles” on page 213.)
•Creating table and cell styles. (See “Table and cell styles” on page 307.)
•Creating PDF export presets. (See “Customize Adobe PDF presets” on page 505.)
•Creating print presets. All the attributes in the Print dialog box are included in the style. (See “Print a document or
book” on page 598.)
•Creating trap presets. (See “Trapping color” on page 489.)
•Creating transparency flattener presets. (See “Flattening transparent artwork” on page 454.)
•Creating table of contents styles. (See “Create TOC styles for multiple lists” on page 321.)
•Saving the workspace configuration.
•Creating document presets. (See “Define document presets” on page 46.)
•Creating stroke styles. (See “Define custom stroke styles” on page 360.)
In general, change the feature settings in the dialog box, and then save the settings. Styles and presets are stored in the
document in which they are created. You can use the settings from another document by importing or loading the
styles and presets from that document. In addition, most presets can be exported or saved to a separate file and
distributed to other computers.
Mike Witherell provides a detailed list of presets in Adobe InDesign Presets (PDF, English only).
You can also share styles and presets across all documents in a book file. For more information, see “Synchronize book
documents” on page 315.
Recovery and undo
Recover documents
InDesign guards your data against unexpected power or system failures using an automatic recovery feature.
Automatically recovered data exists in a temporary file that is separate from the original document file on disk. Under
normal circumstances you don’t need to think about automatically recovered data, because any document updates
stored in the automatic recovery file are automatically added to the original document file when you choose the Save
or Save As command or exit from InDesign normally. Automatically recovered data is important only if you’re unable
to save successfully before an unexpected power or system failure.
Even though these features exist, you should save your files often and create backup files in case of unexpected power
or system failures.
Find recovered documents
1Restart your computer.
2Start InDesign.
If automatically recovered data exists, InDesign automatically displays the recovered document. The word
[Recovered] appears after the filename in the title bar of the document window to indicate that the document contains
unsaved changes that were automatically recovered.
Note: If InDesign fails after attempting to open a document using automatically recovered changes, the automatically
recovered data may be corrupted.

43
USING INDESIGN
Workspace
Last updated 11/16/2011
3Do one of the following:
•To save the recovered data, choose File > Save As, specify a location and a new filename, and click Save. The Save
As command keeps the recovered version that includes the automatically recovered data; the word [Recovered]
disappears from the title bar.
•To discard automatically recovered changes and use the most recent version of the document that was explicitly
saved to disk before the failure occurred, close the file without saving it and open the file on disk, or choose File
>
Revert.
Change the location of recovered documents
1Choose Edit > Preferences > File Handling (Windows) or InDesign > Preferences > File Handling (Mac OS).
2Under Document Recovery Data, click Browse (Windows) or Choose (Mac OS).
3Specify the new location for the recovered document, click Select (Windows) or Choose (Mac OS), and then
click
OK.
Undo mistakes
If necessary, you can cancel a lengthy operation before it’s completed, undo recent changes, or revert to a previously
saved version. You can undo or redo up to several hundred of the most recent actions (the amount is limited by the
amount of RAM available and the kinds of actions you performed). The series of actions is discarded when you choose
the Save As command, close a document, or when you exit from the program.
❖Do one of the following:
•To undo the most recent change, choose Edit > Undo [action]. (You cannot undo certain actions, such as scrolling.)
•To redo an action, choose Edit > Redo [action].
•To undo all changes made since the last time you saved the project, choose File > Revert (InDesign) or File > Revert
Content (InCopy).
•To close a dialog box without applying changes, click Cancel.

44
Last updated 11/16/2011
Chapter 3: Layout
For detailed information and instructions, click the links below.
Creating documents
For detailed information and instructions, click the links below.
Create new documents
Page design begins with the basics: starting a new document, setting up pages, and positioning margins and columns
or changing grid settings.
More Help topics
“Recommended workflow for InDesign documents” on page 100
“Use document templates” on page 104
“Add documents to a book file” on page 313
Create a new document
1Choose File > New > Document.
The New Document dialog box combines the Document Setup and the Margins And Columns dialog boxes, so that
you can set up the page size, margins, and page columns all in one place. You can change these settings at any time.
2Specify document setup options. (See “New Document options” on page 44.)
To specify the dimensions of the bleed and slug areas, click More Options. The bleed and slug areas extend out from
the edges of the defined Page Size. To make the bleed or slug areas extend evenly on all sides, click the Make All
Settings The Same icon
.
3Click OK to open a new document with the settings you specified.
To set default layout settings for all new documents, choose File > Document Setup or Layout > Margins And
Columns, and set options when no documents are open.
New Document options
Document Preset Choose a preset that you have saver earlier.
Intent If you are creating a document to be output to PDF or SWF for the web, choosing the Web option changes
several options in the dialog box, such as turning off Facing Pages, changing the orientation from portrait to landscape,
and using a page size based on monitor resolution. You can edit any of these settings, but you cannot change the Intent
setting after the document is created.
Number of pages Specify the number of pages to create in the new document.
Start Page # Specify which number the document starts on. If you specify an even number (such as 2) with Facing
Pages selected, the first spread in the document begins with a two-page spread. See “Start a document with a two-page
spread” on page 67.

45
USING INDESIGN
Layout
Last updated 11/16/2011
Facing Pages Select this option to make left and right pages face each other in a double-page spread, such as for books
and magazines. Deselect this option to let each page stand alone, such as when you’re printing flyers or posters or when
you want objects to bleed in the binding.
After you’ve created a document, you can use the Pages panel to create spreads with more than two pages or force the
first two pages to open as a spread. (See “Control spread pagination” on page 66.)
Master Text Frame Select this option to create a text frame the size of the area within the margin guides, matching the
column settings you specified. The master text frame is added to the A-Master. (See “Using text frames on master
pages” on page 130.)
The Master Text Frame option is available only when you’ve chosen File > New > Document.
Page Size Choose a page size from the menu, or type values for Width and Height. Page size represents the final size
you want after bleeds or other marks outside the page are trimmed.
Orientation Click Portrait (tall) or Landscape (wide). These icons interact dynamically with the dimensions
you enter in Page Size. When Height is the larger value, the portrait icon is selected. When Width is the larger value,
the landscape icon is selected. Clicking the deselected icon switches the Height and Width values.
To specify the dimensions of the bleed and slug areas, click More Options in the New Document dialog box. To make
the bleed or slug areas extend evenly on all sides, click the Make All Settings The Same icon .
Bleed The Bleed area allows you to print objects that are arranged at the outer edge of the defined page size. For a page
of the required dimensions, if an object is positioned at its edge, some white may appear at the edge of the printed area
due to slight misalignment during printing or trimming. For this reason, you should position an object that is at the
edge of the page of the required dimensions a little beyond the edge, and trim after printing. Bleed area is shown by a
red line on the document. You can set bleed area settings from Bleed in the Print dialog box.
Slug The slug area is discarded when the document is trimmed to its final page size. The slug area holds printing
information, customized color bar information, or displays other instructions and descriptions for other information
in the document. Objects (including text frames) positioned in the slug area are printed but will disappear when the
document is trimmed to its final page size.
Objects outside the bleed or slug area (whichever extends farther) do not print.
Note: You can also click Save Preset to save document settings for future use.
Document window overview
Each page or spread in your document has its own pasteboard and guides, which are visible in Normal View mode.
(To switch to Normal View, choose View
> Screen Mode > Normal.) The pasteboard is replaced with a gray
background when the document is viewed using one of the Preview modes. (See “Preview documents” on page 604.)
You can change the color of this preview background and guides in Guides & Pasteboard preferences.
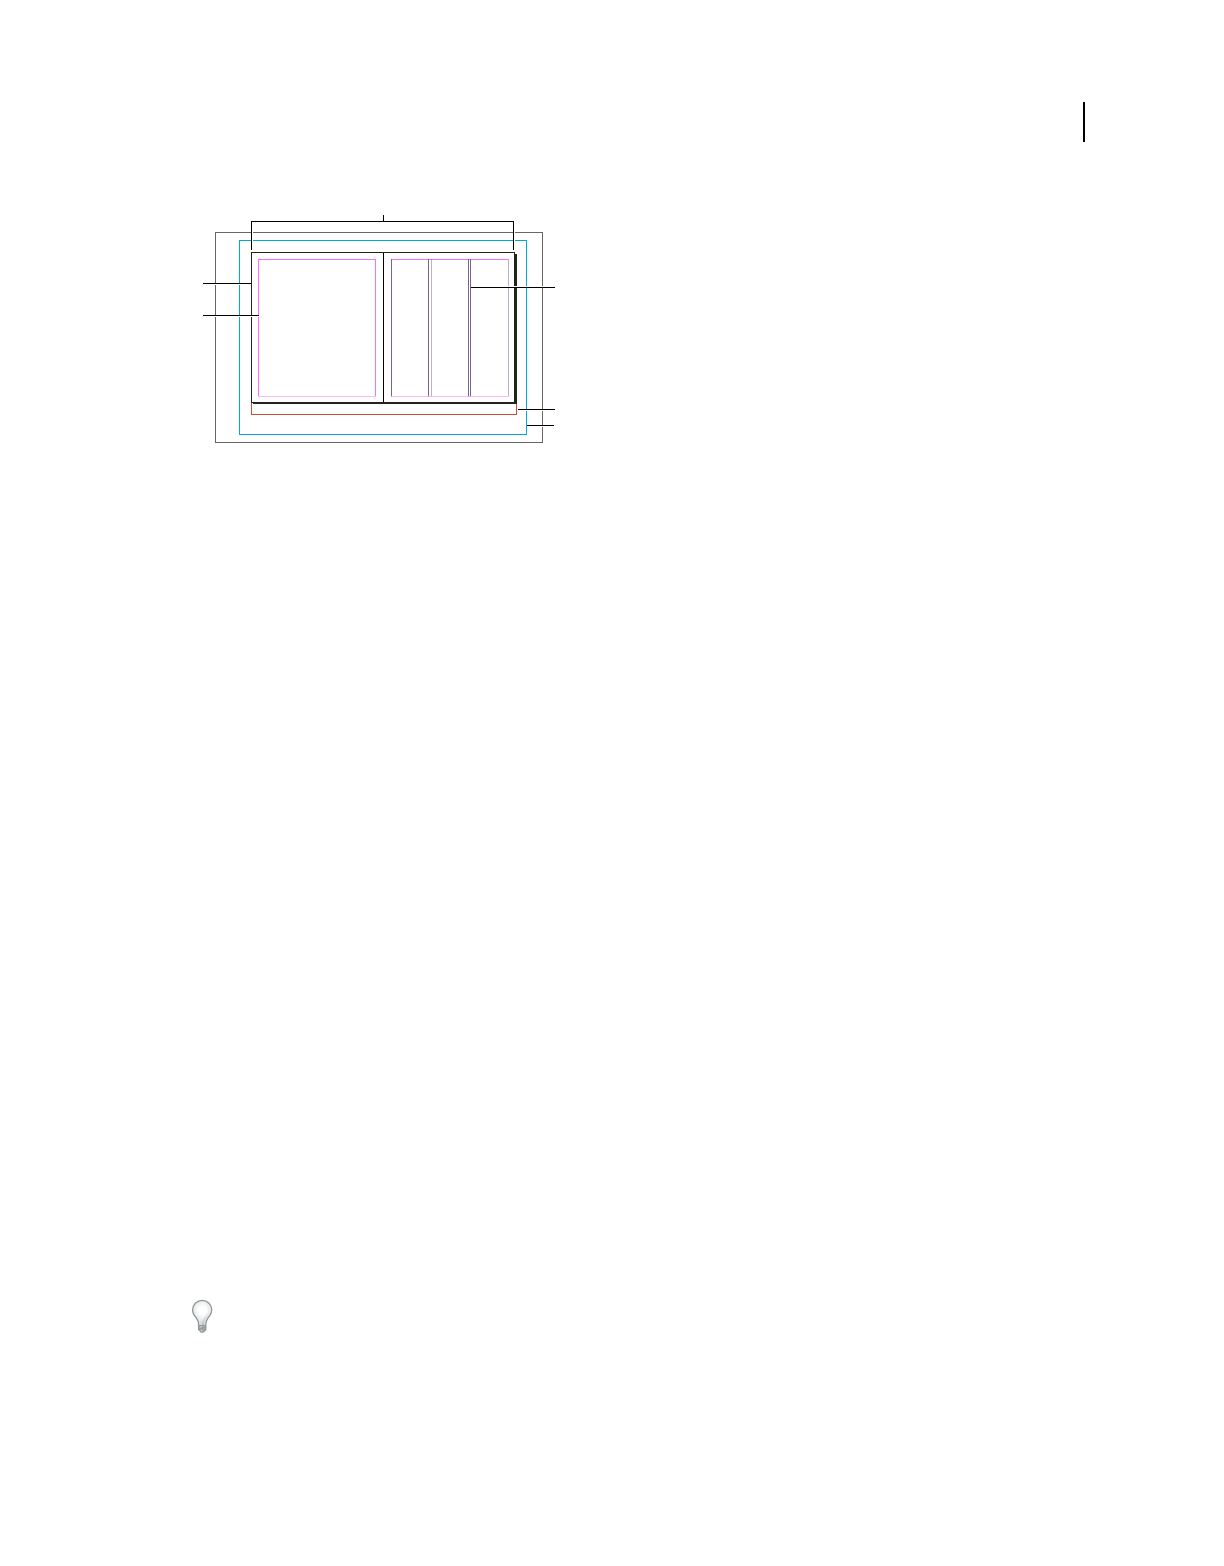
46
USING INDESIGN
Layout
Last updated 11/16/2011
Document and guides in Normal View Mode
A. Spread (black lines) B. Page (black lines) C. Margin guides (magenta lines) D. Column guides (violet lines) E. Bleed area (red lines) F. Slug
area (blue lines)
Document window notes:
•Lines of other colors are ruler guides which, when present, appear in the layer color when selected. See “Layers” on
page 78.
•Column guides appear in front of margin guides. When a column guide is exactly in front of a margin guide, it hides
the margin guide.
Create custom page sizes
You can create custom page sizes that appear in the Page Size menu in the New Document dialog box.
1Choose File > New > Document.
2Choose Custom Page Size from the Page Size menu.
3Type a name for the page size, specify page size settings, and then click Add.
The New Doc Sizes.txt file that lets you create custom page sizes in previous version of InDesign is not available in
InDesign CS5.
More Help topics
“Change document setup, margins, and columns” on page 48
Define document presets
You can save document settings for page size, columns, margins, and bleed and slug areas in a preset to save time and
ensure consistency when creating similar documents.
1Choose File > Document Presets > Define.
2Click New in the dialog box that appears.
3Specify a name for the preset and select basic layout options in the New Document Preset dialog box. (See “New
Document options” on page 44 for a description of each option.)
4Click OK twice.
You can save a document preset to a separate file and distribute it to other users. To save and load document preset
files, use the Save and Load buttons in the Document Presets dialog box.
A
E
B
C
D
F

47
USING INDESIGN
Layout
Last updated 11/16/2011
Create a document using a preset
1Do one of the following:.
•Choose File > Document Preset > [name of preset]. (Hold down Shift while choosing the preset to create a new
document based on the preset without opening the New Document dialog box.)
•Choose File > New > Document, and then choose a preset from the Document Preset menu in the New
Document dialog box.
The New Document dialog box displays the preset layout options.
2Make changes to the options (if desired) and click OK.
To skip the New Document dialog box, press the Shift key as you select a preset from the Document Preset menu.
Customize the pasteboard and guides
You can control the colors used to display guides for page margins and columns, as well as the guides for the bleed and
slug areas on the pasteboard. To make it easier to distinguish between the Normal and Preview modes, you can change
the color of the preview background.
InDesign also lets you control how close an object needs to be to snap to a guide, whether guides should be displayed
in front of or behind objects, as well as the size of the pasteboard.
1Choose Edit > Preferences > Guides & Pasteboard (Windows) or InDesign > Preferences > Guides & Pasteboard
(Mac
OS).
2Under Color, choose the desired colors from each of the following menus, or choose Custom to specify a custom
color using the color picker.
Margins Sets the color of the page margins.
Columns Sets the color of the column guides for the page.
Bleed Sets the color of the bleed area (which is set in the Document Setup dialog box).
Slug Sets the color of the slug area (which is set in the Document Setup dialog box).
Preview Background Sets the color of the pasteboard when in the Preview mode.
3To set how close an object must be to snap to a guide or grid, specify a value in pixels for Snap To Zone.
4To display guides behind objects, select Guides In Back.
5To specify how far the pasteboard extends out from the page or spread (or the bleed or slug area, if specified), enter
values for Horizontal Margins and Vertical Margins.
6Click OK to close the Preferences dialog box.
You can change the on-screen color of your paper. With no text or objects selected, double-click the Paper color in the
Swatches panel (choose Window > Swatches). The Paper color appears on-screen only and does not affect output; it
is intended only to simulate designing for nonwhite paper.
More Help topics
“Ruler guides” on page 56

48
USING INDESIGN
Layout
Last updated 11/16/2011
Change document setup, margins, and columns
After you create a document, you may change your mind about how you want it set up. For example, you may want
single pages instead of facing pages, or you may want to change the page size or margin settings.
Change document setup
Changing options in the Document Setup dialog box affects every page in the document. If you change page size or
orientation after objects have been added to pages, you can use the Layout Adjustment feature to minimize the amount
of time needed for arranging existing objects. See “About automatic layout adjustment” on page 86.
1Choose File > Document Setup.
2Specify the document options, and then click OK. (See “New Document options” on page 44.)
Change page margin and column settings
You can change column and margin settings for pages and spreads. When you change the column and margin settings
on a master page, you change the setting for all pages to which the master is applied. Changing the columns and
margins of regular pages affects only those pages selected in the Pages panel.
Note: The Margins And Columns dialog box doesn’t alter columns inside text frames. Text frame columns exist only
within individual text frames, not on the page itself. You can set up columns within individual text frames by using the
Text Frame Options dialog box. (See “Add columns to a text frame” on page 131.) Text frame columns can also be affected
by the Layout Adjustment feature.
1Do one of the following:
•To change margin and column settings for one spread or page, go to the spread you want to change, or select
one spread or page in the Pages panel.
•To change margin and column settings for multiple pages, select those pages in the Pages panel, or select a
master that controls the pages you want to change.
2Choose Layout > Margins And Columns, specify the following options, and then click OK.
Margins Type values to specify the distance between margin guides and each edge of the page. If Facing Pages is
selected in the New Document or
Document Setup dialog box, the Left and Right margin option names change to
Inside and Outside, so that you can specify additional inside margin space to accommodate binding.
Columns Specify the number of columns.
Create unequal column widths
When you have more than one column on a page, the column guides in the middle appear in pairs. When you drag
one column guide, the pair moves. The space between the column guides is the gutter value you specified; the pair
moves together to maintain that value.
Note: You cannot create unequal column widths for columns in a text frame. Instead, created threaded, side-by-side text
frames with different column widths.
1Go to the master or spread you want to change.
2If column guides are locked, choose View > Grids & Guides > Lock Column Guides to deselect it.
3Using the Selection tool , drag a column guide. You can’t drag it past an adjacent column guide or beyond the
edge of the page.
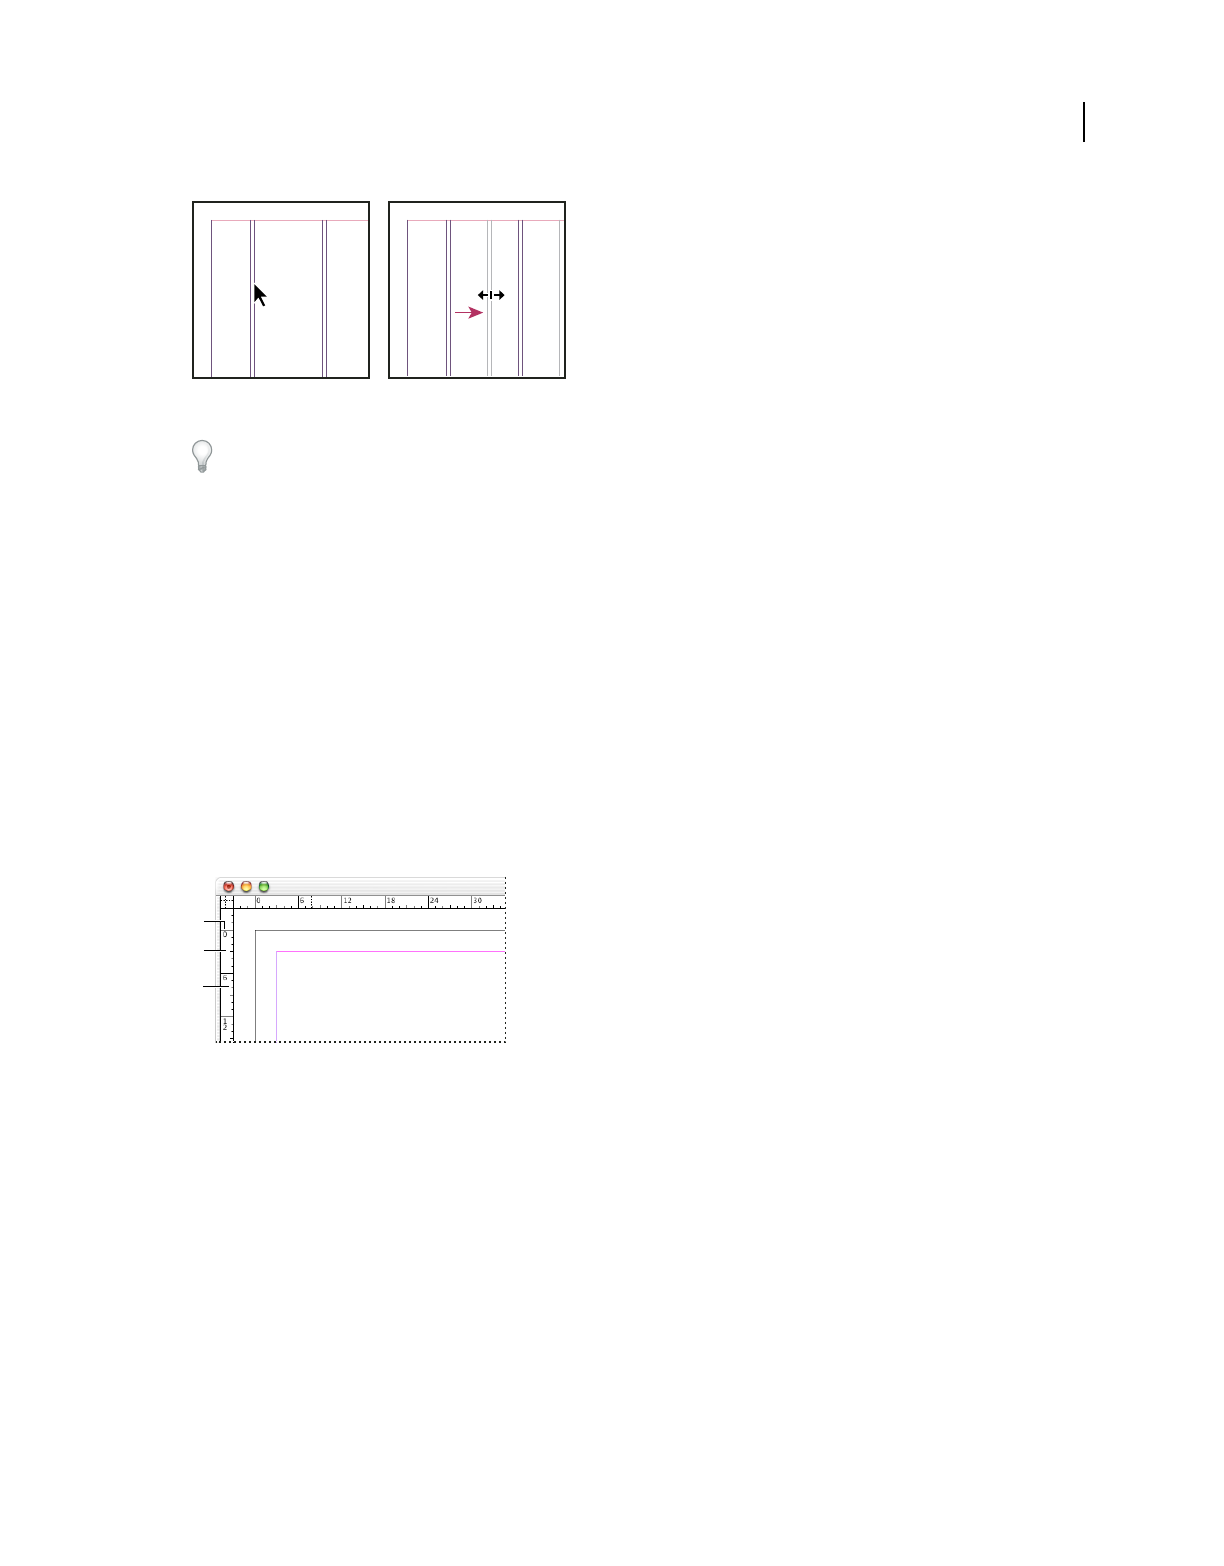
49
USING INDESIGN
Layout
Last updated 11/16/2011
Dragging a column guide to create unequal column widths
To create columns with unequal gutters, create evenly spaced ruler guides and then drag individual guides to the
desired location. (See “Create ruler guides” on page 56.)
Rulers and measurement units
For detailed information and instructions, click the links below.
Change rulers and measurement units
You can change measurement units for the on-screen rulers and for use in panels and dialog boxes; you can also change
these settings at any
time and temporarily override the current measurement units as you enter a value. By default,
rulers begin measuring from the upper-left corner of a page or spread. You can change this by moving the zero point.
(See “Change the zero point” on page 51.)
Changing the measurement units doesn’t move guides, grids, and objects, so when ruler tick marks change, they might
not line up with objects aligned to the old tick marks.
Rulers in a document window
A. Labeled tick marks B. Major tick marks C. Minor tick marks
You can set up different measurement systems for horizontal and vertical rulers. The system you select for the
horizontal ruler governs tabs, margins, indents, and other measurements. Each spread has its own vertical ruler;
however, all vertical rulers use the same settings you specify in
the Units & Increments preferences dialog box.
The default units of measure for the rulers are picas (a pica equals 12 points). However, you can change custom ruler
units and control where the major tick marks appear on a ruler. For example, if you change the custom ruler units for
the vertical ruler to 12 points, a major ruler increment appears every 12 points (if such display is possible in the current
magnification). The tick mark labels include your customized major tick marks, so when the ruler reads 3 in the same
example, it marks the third instance of the 12-point increment, or 36 points.
A
B
C
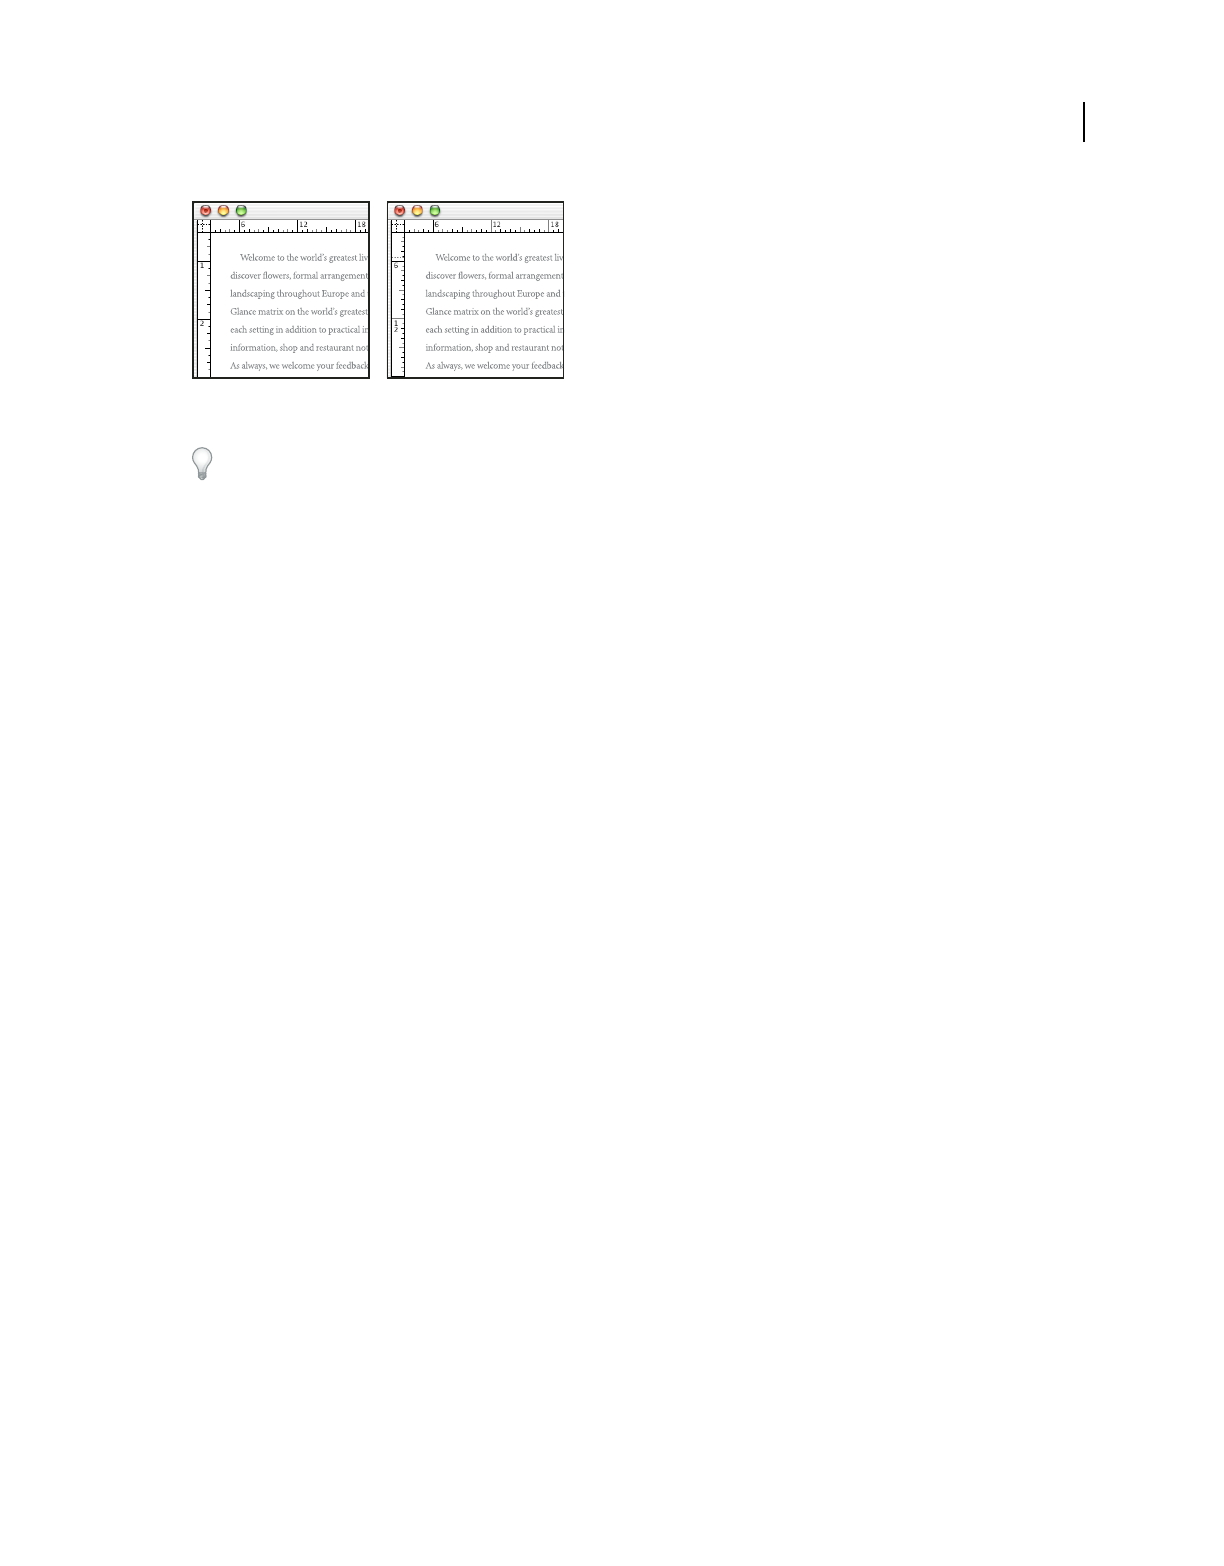
50
USING INDESIGN
Layout
Last updated 11/16/2011
Vertical ruler using inches (left), and custom 12-point increments (right)
Setting custom ruler increments in the vertical ruler is useful for lining up a ruler’s major tick marks with a baseline
grid.
More Help topics
“Grids” on page 54
“Keys for selecting and moving objects” on page 693
Show or hide rulers
❖In Normal View Mode (View > Screen Mode > Normal), choose View > Show Rulers or Hide Rulers.
Change measurement units and rulers
1Choose Edit > Preferences > Units & Increments (Windows) or InDesign > Preferences > Units & Increments
(Mac
OS).
2To change the origin of the zero point, in the Origin menu under Ruler Units, do one of the following:
•To set the ruler origin at the top-left corner of each spread, choose Spread. The horizontal ruler measures across
the entire spread.
•To set the ruler origin at the top-left corner of each page, choose Page. The horizontal ruler starts at zero for each
page in a spread.
•To set the ruler origin at the center of the spine, choose Spine. The horizontal ruler measures in negative
numbers to the left of the spine and positive numbers to the right of the spine.
3To change the measurement system used for rulers, dialog boxes, and panels, choose the desired system for
Horizontal and Vertical, or choose Custom and type the number of points at which you want the ruler to display
major tick marks.
If you specify a measurement system other than points, the Increment Every baseline grid value is still displayed in
points. This makes it easier to match text size and leading values, which are displayed in points.
4To change the value you want used for text size, choose Points or Pixels from the Text Size menu. This option is
especially useful when you’re designing a document for the web.
5To change the value you want used for stroke weight settings, choose Points, Millimeters, or Pixels from the Stroke
menu. This option is especially useful when you’re designing a document for the web.
6To change the value you want used for calculating points, specify the desired point size per inch for Points/Inch.
7Set any of the following Keyboard Increments:
Cursor Key Controls the increment for the arrow keys when nudging objects.
Size/Leading Controls the increment for increasing or decreasing the point size or leading using the keyboard
shortcuts.
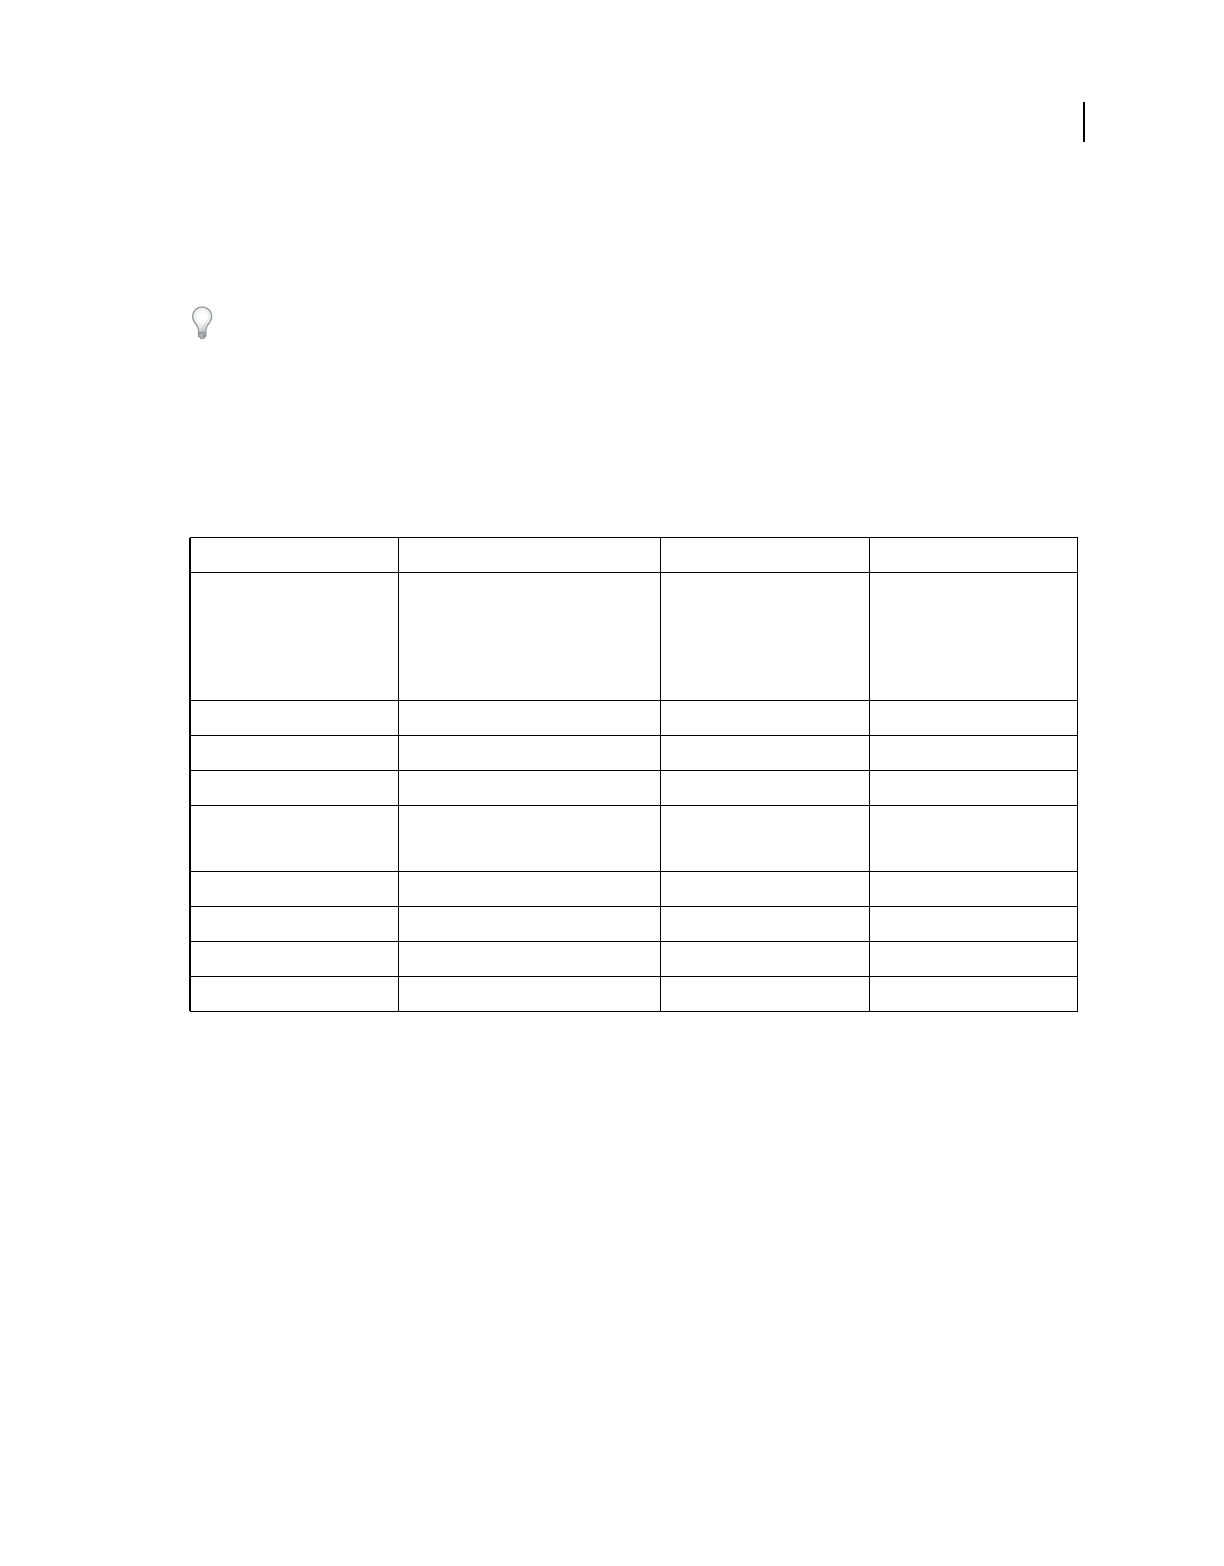
51
USING INDESIGN
Layout
Last updated 11/16/2011
Baseline Shift Controls the increment for shifting the baseline using the keyboard shortcuts.
Kerning/Tracking Controls the increment for kerning and tracking using the keyboard shortcuts.
8Click OK.
You can also change ruler units by right-clicking (Windows) or Control-clicking (Mac OS) a ruler and choosing the
units from the context menu. By right-clicking or Control-clicking at the intersection of the horizontal and vertical
rulers, you can change the ruler units for both rulers at the same time.
Override default measurement units
You can specify a unit of measurement that is different from the default.
❖Highlight the existing value in a panel or dialog box, and type the new value using the notation in the following
table:
Change the zero point
The zero point is the position at which the zeros on the horizontal and vertical rulers intersect. By default, the zero
point is at the top left corner of the first page of each spread. This means that the default position of the zero point is
always the same relative to a spread, but may seem to vary relative to the pasteboard.
The X and Y position coordinates in the Control panel, Info panel, and Transform panel are displayed relative to the
zero point. You can move the zero point to measure distances, to create a new reference point for measurement, or to
tile oversized pages. By default, each spread has one zero point at the upper left corner of the first page, but you can
also locate it at the binding spine, or specify that each page in a spread has its own zero point.
To specify: Type these letters after the value: Examples Result
Inches i
in
inch
"
5.25i
5.25in
5.25inch
5.25”
5 1/4 inches
Millimeters mm 48mm 48 millimeters
Centimeters cm 12cm 12 centimeters
Picas p 3p 3 picas
Points pt
p (before value)
6pt
p6
6 points
Picas and points p (between values) 3p6 3 picas, 6 points
Pixels px 5px 5 pixels
Ciceros c 5c 5 ciceros
Agates ag 5ag agates
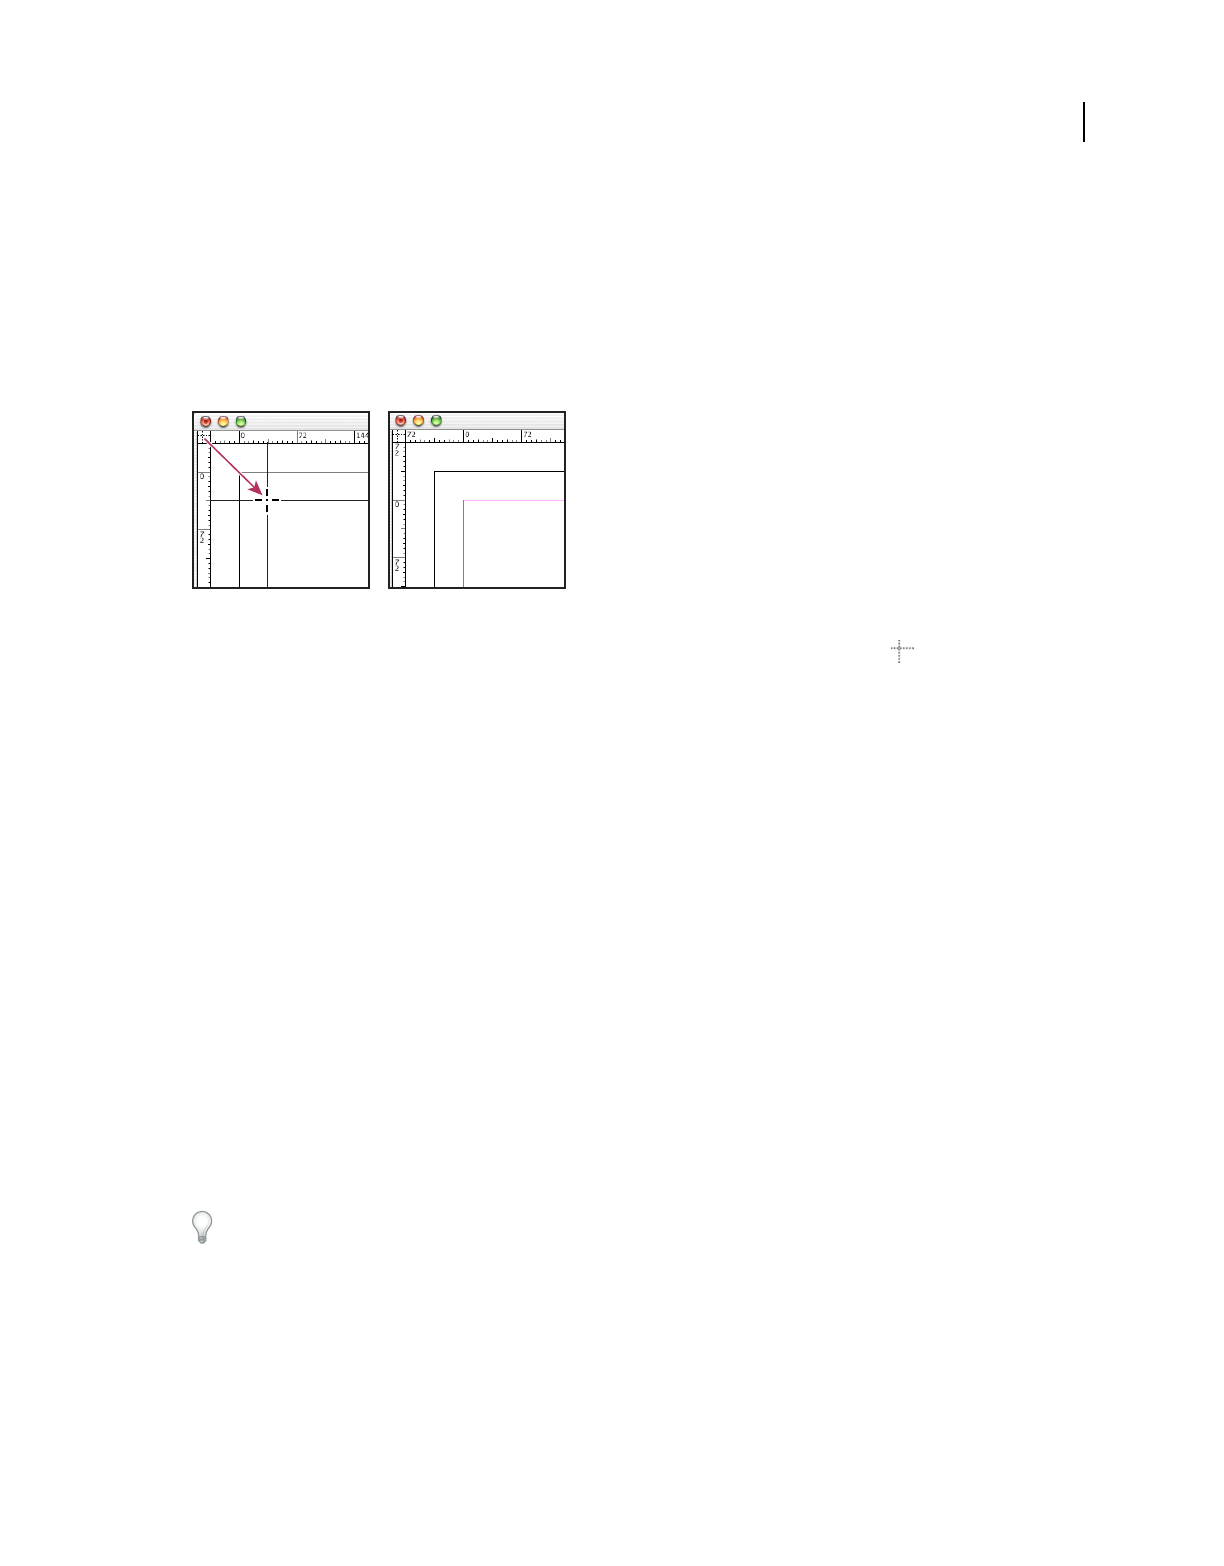
52
USING INDESIGN
Layout
Last updated 11/16/2011
Adjust the zero point
When you move the zero point, it moves to the same relative location in all spreads. For example, if you move the zero
point to the top left corner of
the second page of a page spread, it will appear in that position on the second page of all
other spreads in the document.
❖Do one of the following:
•To move the zero point, drag from the intersection of the horizontal and vertical rulers to the position on the layout
where you want to set the zero point.
Establishing a new zero point
•To reset the zero point, double-click the intersection of the horizontal and vertical rulers .
•To lock or unlock the zero point, right-click (Windows) or Control-click (Mac OS) the zero point of the rulers, and
choose Lock Zero Point in the context menu.
Change the default zero point
Using the Origin setting in the Preferences dialog box, you can set the default zero point for rulers as well as the scope
of the horizontal ruler. The scope determines whether the ruler measures across the page, across the entire spread, or,
for multipage spreads, from the center of the spine.
If you set the ruler origin at each spread’s binding spine, the origin becomes locked at the spine. You won’t be able to
reposition the ruler origin by dragging it from the intersection of the rulers unless you choose another origin option.
1Choose Edit > Preferences > Units & Increments (Windows) or InDesign > Preferences > Units & Increments
(Mac
OS).
2In the Ruler Units section, in the Origin menu, do one of the following:
•To set the ruler origin at the top-left corner of each spread, choose Spread. The horizontal ruler measures across
the entire spread.
•To set the ruler origin at the top-left corner of each page, choose Page. The horizontal ruler starts at zero for each
page in a spread.
•To set the ruler origin at the center of the spine, choose Spine. The horizontal ruler measures in negative numbers
to the left of the spine and positive numbers to the right of the spine.
You can also change horizontal ruler origin settings using the context menu that appears when you right-click
(Windows) or Control-click (Mac OS) the horizontal ruler.
Measure objects
The Measure tool calculates the distance between any two points in the document window. When you measure from
one point to another, the distance measured is displayed in the Info panel. All measurements except the angle are
calculated in the units of measure currently set for the document.
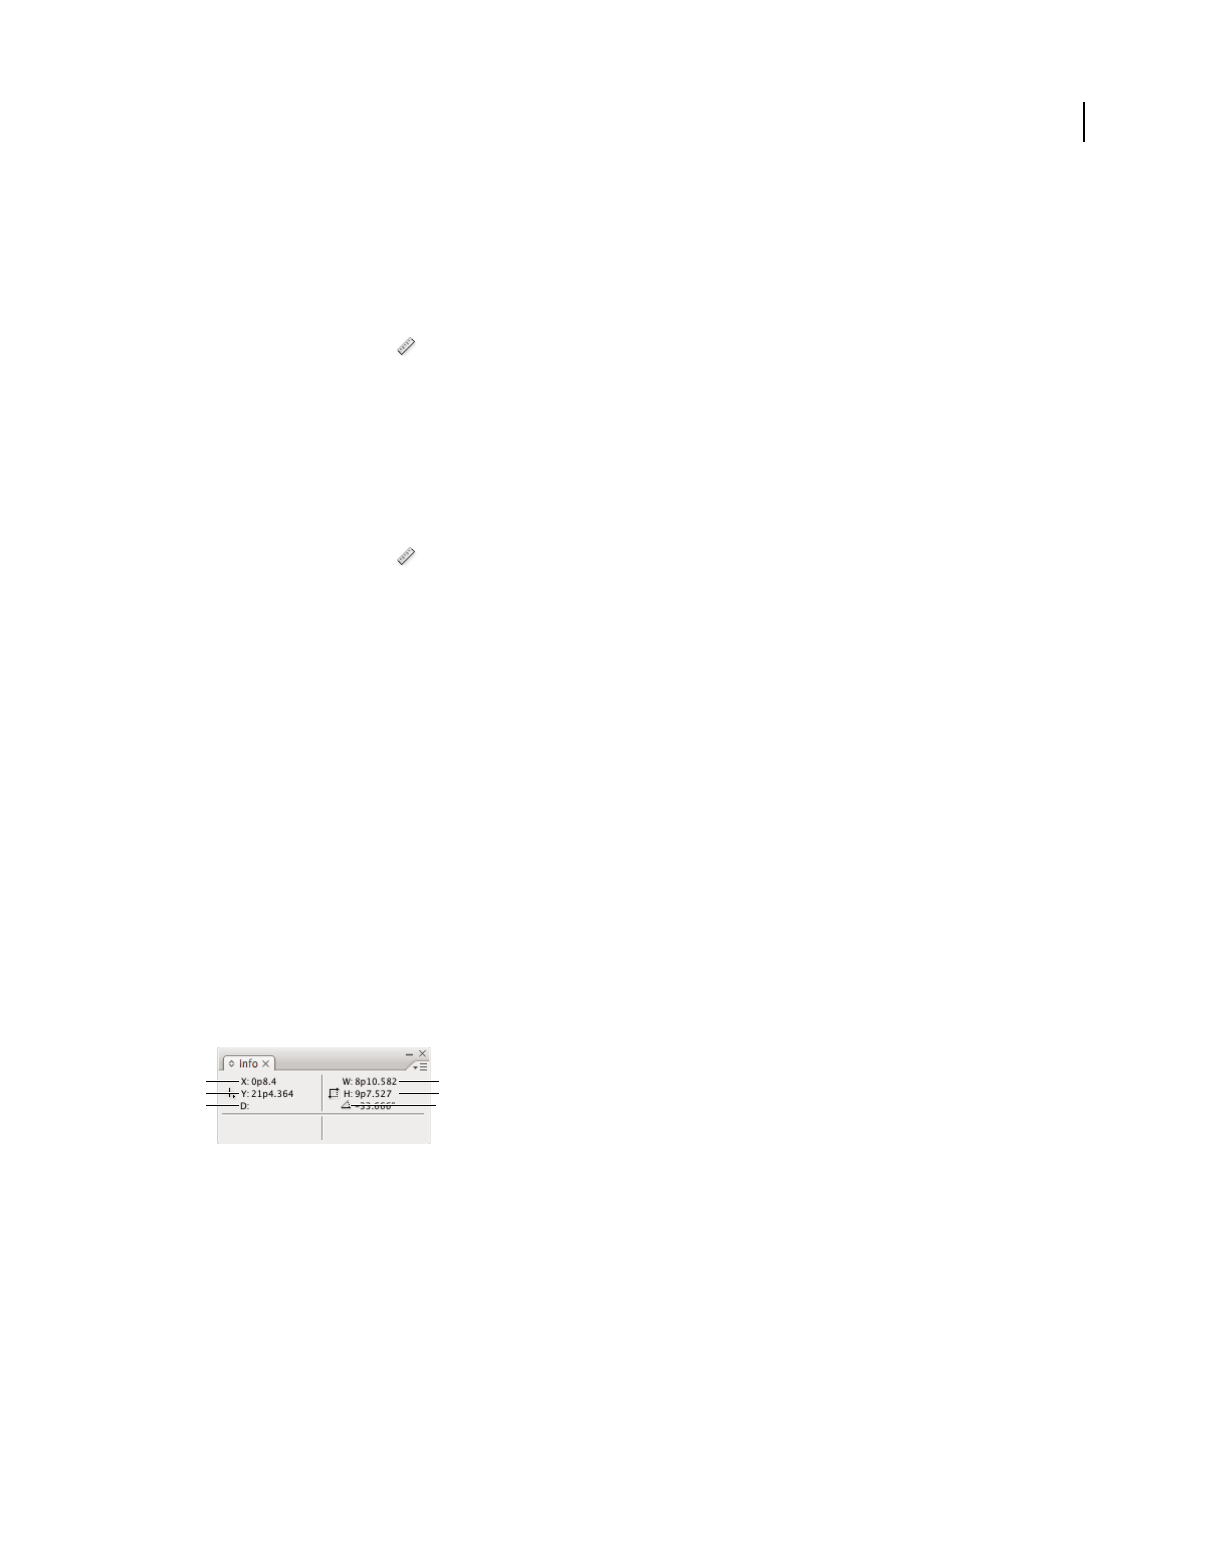
53
USING INDESIGN
Layout
Last updated 11/16/2011
After you use the Measure tool to measure an item, the line or lines remain visible until you take another measurement
or select a different tool.
Measure the distance between two points
1Make sure the Info panel is visible (Window > Info).
2Select the Measure tool . (Click and hold the Eyedropper tool to display the Measure tool.)
3Click the first point and drag to the second point. Shift-drag to constrain the tool’s motion to multiples of 45°. You
cannot drag beyond a single pasteboard and its spread.
The width and height measurements appear in the Info panel.
Measure angles
1Make sure the Info panel is visible (Window > Info).
2Select the Measure tool . (Click and hold the Eyedropper tool to display the Measure tool.)
3Do one of the following:
•To measure an angle from the x axis, drag the tool.
•To measure a custom angle, drag to create the first line of the angle. Position the tool over either end point of the
measure line. To create the second line of the angle, either double-click and drag, or press Alt (Windows) or Option
(Mac
OS) and drag.
When you measure a custom angle, the Info panel shows the length of the first line as D1 and the length of the second
line as
D2.
Info panel overview
The Info panel displays information for selected objects, the current document, or the area below the current tool,
including values for position, size, and rotation. When you move an object, the Info panel displays its position relative
to its starting point as well.
The Info panel is also useful for determining word counts and character counts in stories.
Unlike other InDesign panels, the Info panel is for viewing only; you cannot enter or edit the values it displays. You
can view additional information about a selected object by choosing Show Options from the panel menu.
Info panel
A. Horizontal (X) position of the cursor B. Vertical (Y) position of the cursor C. Distance an object or tool has moved relative to its starting
position D. Width in current units E. Height in current units F. Degree of rotation
Display the Info panel
❖Choose Window > Info.
To change the current measurement system, click the small triangle next to the plus icon.
Determine the word count
1Place the insertion point inside a text frame, or select text.
2Choose Window > Info.
D
E
F
A
B
C
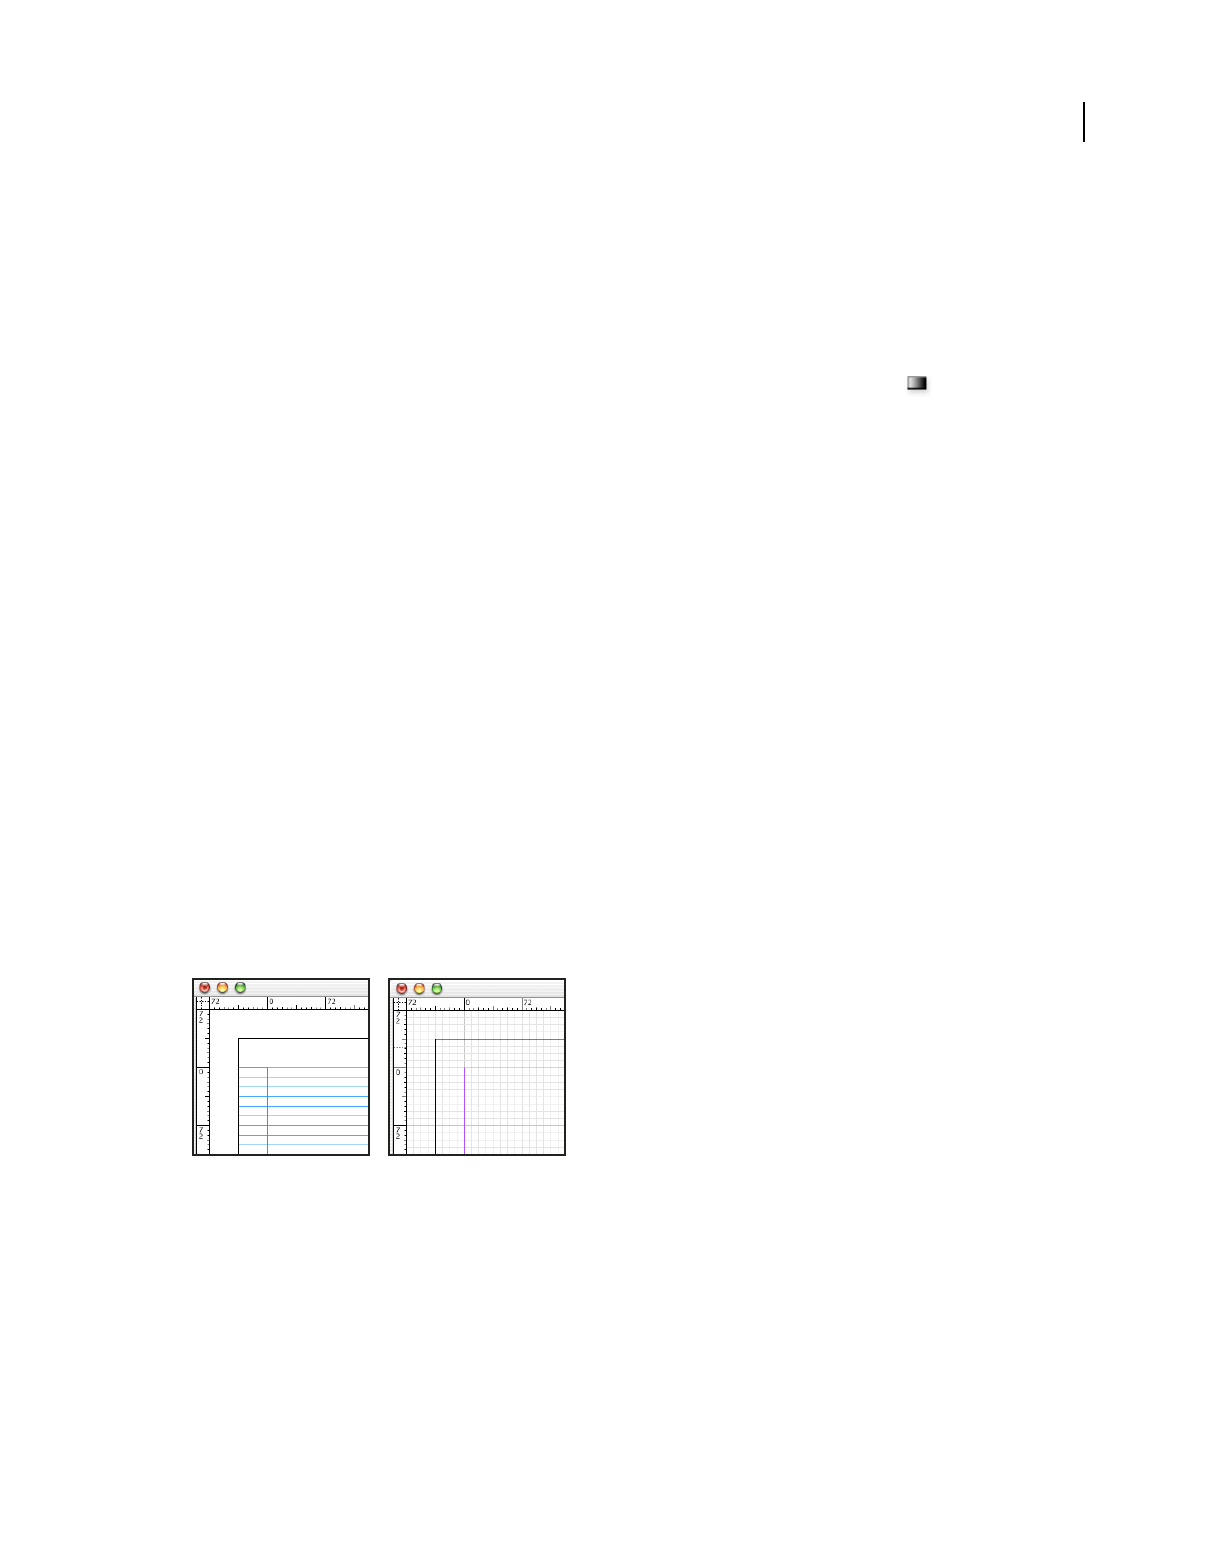
54
USING INDESIGN
Layout
Last updated 11/16/2011
The Info panel displays the number of words and characters in the story or the selected text. If any text is overset, a “+”
sign appears, followed by a number representing the overset characters, words, or lines.
View additional Info panel options
❖Choose Show Options in the Info panel menu.
Depending on the object or tool selected, you may see the following:
•Values for the fill and stroke colors of the selected object, and information about gradients .
•The names of any swatches. You can display color-space values instead by clicking the small triangle next to the fill
or stroke icon.
•Information about the current document, such as location, last modified date, author, and file size, when nothing
in the document is selected.
•Number of characters, words, lines, and paragraphs when you create a text insertion point or select text using one
of the Type tools. (If any text is overset, a “+” sign appears, followed by a number representing the overset
characters, words, or lines.)
•File type, resolution, and color space when a graphic file is selected. Resolution is displayed as both actual pixels per
inch (the resolution of the native graphic file) and effective pixels per inch (the resolution of the graphic after it has
been resized in InDesign). If color management has been enabled, the ICC color profile is also displayed.
•The shear angle or horizontal and vertical scaling if the Shear tool, Scale tool, or the Free Transform tool is selected.
Grids
Use grids
Two kinds of nonprinting grids are available: a baseline grid for aligning columns of text, and a document grid for
aligning objects. On the screen, a baseline grid resembles ruled notebook paper, and a document grid resembles graph
paper. You can customize both kinds of grids.
Baseline grid (left) and document grid (right)
When a grid is visible, you can observe the following characteristics:
•The baseline grid covers entire spreads, but the document grid covers the entire pasteboard.
•Baseline grids and document grids appear on every spread and cannot be assigned to any master.
•The document grid can appear in front of or behind all guides, layers, and objects, but cannot be assigned to any
layer.
Set up a baseline grid
Use Grid Preferences to set up a baseline grid for the entire document.
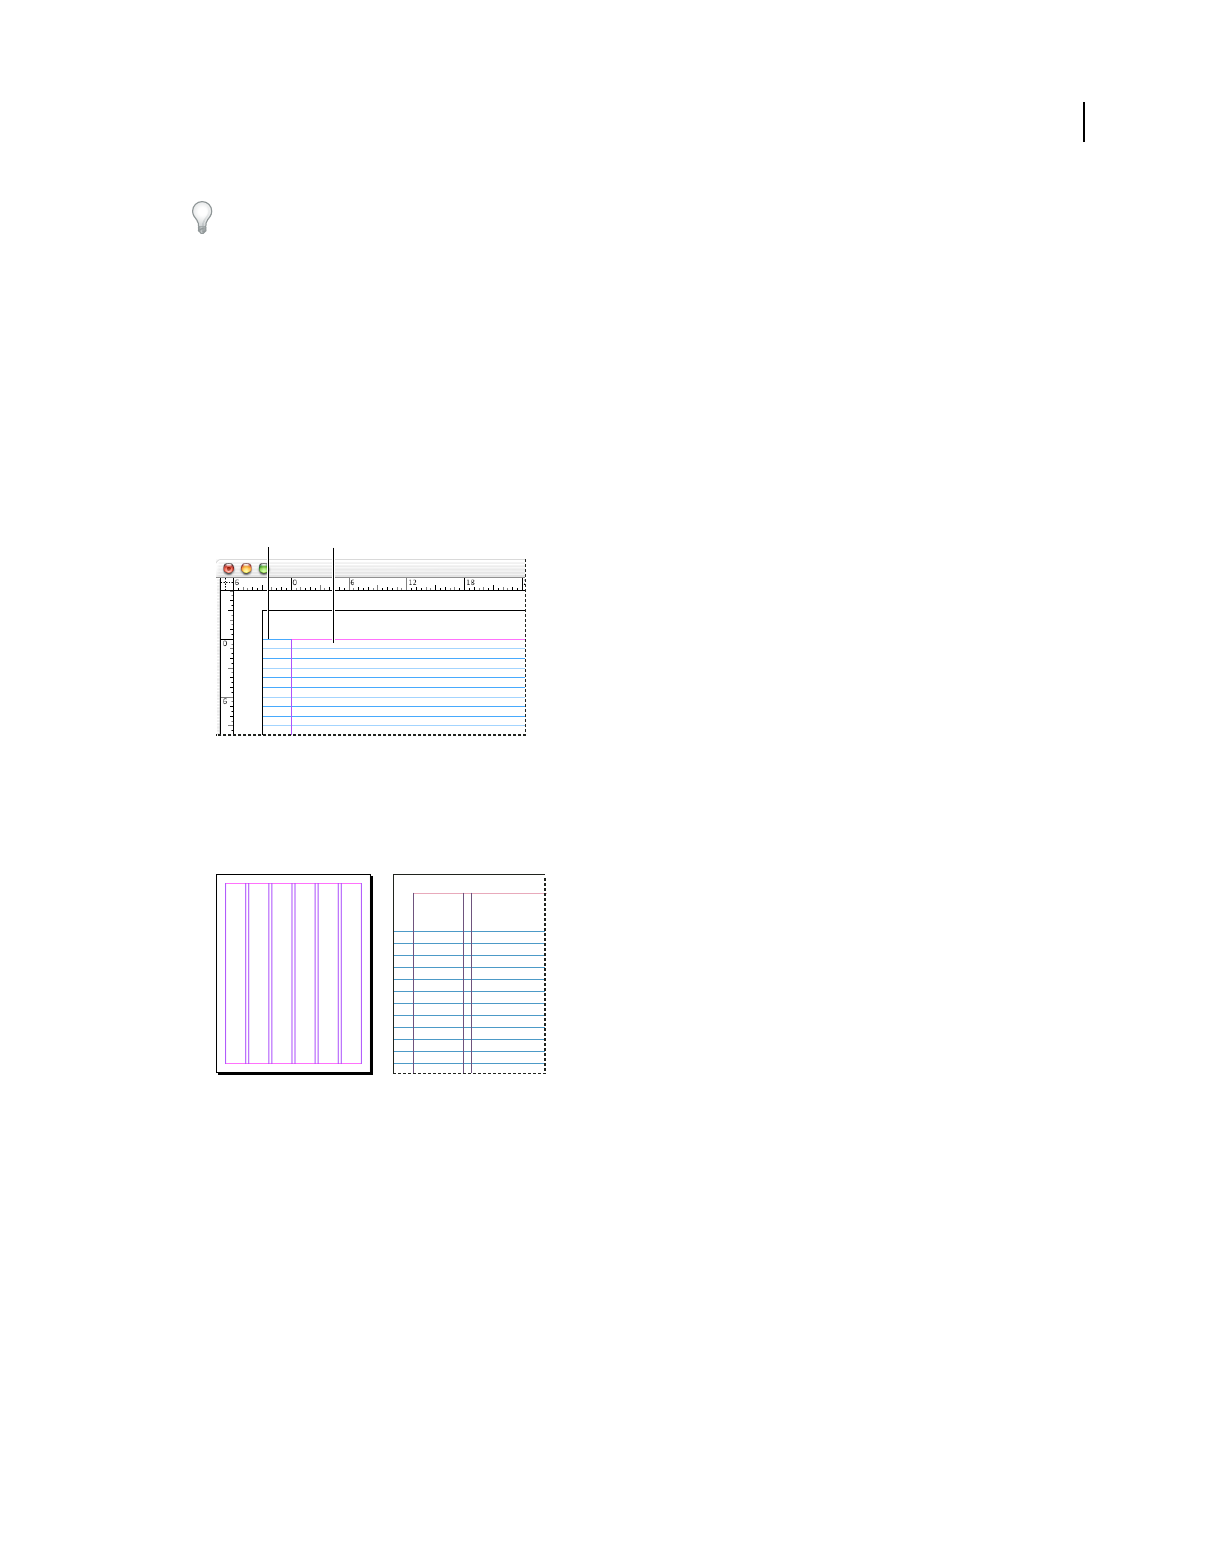
55
USING INDESIGN
Layout
Last updated 11/16/2011
You can set up a baseline grid for a frame by using the Text Frame Options. (See “Change text frame properties” on
page 131.)
1Choose Edit > Preferences > Grids (Windows) or InDesign > Preferences > Grids (Mac OS).
2Specify a baseline grid color by choosing a color in the Color menu. You can also choose Custom in the Color menu.
3For Relative To, specify whether you want the grid to start at the top of the page or the top margin.
4For Start, type a value to offset the grid from either the top of the page or the top margin of the page, depending on
the option you choose from the Relative To menu. If you have trouble aligning the vertical ruler to this grid, try
starting with a value of zero.
5For Increment Every, type a value for the spacing between grid lines. In most cases, type a value that equals your
body text leading, so that lines of text align perfectly to this grid.
Baseline grid in document window
A. First grid line B. Increment between grid lines
6For View Threshold, type a value to specify the magnification below which the grid does not appear. Increase the
view threshold to prevent crowded grid lines at lower magnifications.
Baseline grid at magnification below view threshold (left) and above view threshold (right)
7Click OK.
Note: The Snap To Guides command controls both snapping to guides and snapping to the baseline grid.
Set up a document grid
1Choose Edit > Preferences > Grids (Windows) or InDesign > Preferences > Grids (Mac OS).
2
Specify a document grid color by choosing a color in the Color menu. You can also choose Custom in the Color menu.
3To set horizontal grid spacing, specify a value for Gridline Every in the Horizontal section of the Document Grid
section, and then specify a value for Subdivisions between each grid line.
4To set vertical grid spacing, specify a value for Gridline Every in the Vertical section of the Document Grid section,
and then specify a value for Subdivisions between each grid line.
AB

56
USING INDESIGN
Layout
Last updated 11/16/2011
5Do one of the following, and click OK:
•To put the document and baseline grids behind all other objects, make sure that Grids In Back is selected.
•To put the document and baseline grids in front of all other objects, deselect Grids In Back.
To put guides behind all other objects, you can also choose Guides In Back in the context menu that appears when you
right-click (Windows) or Control-click (Mac OS) an empty area of the document window.
Show or hide grids
•To show or hide the baseline grid, choose View > Grids & Guides > Show/Hide Baseline Grid.
•To show or hide the document grid, choose View > Grids & Guides > Show/Hide Document Grid.
Snapping objects to grids
When snapping is enabled, moving an object within the snap zone of a grid location will cause the object to snap to
that location.
More Help topics
“Ruler guides” on page 56
Snap objects to the document grid
1Choose View > Grids & Guides and make sure that Snap To Document Grid is selected (checked). If it is not
selected, click it.
Note: The Snap to Guides command controls both snapping to guides and snapping to the baseline grid.
2To specify the snap-to zone, choose Edit > Preferences > Guides & Pasteboard (Windows) or InDesign >
Preferences
> Guides & Pasteboard (Mac OS), type a value for Snap to Zone, and click OK. The Snap to Zone value
is always in pixels.
To snap an object to a grid, drag an object toward a grid until one or more of the object’s edges is within the grid’s
snap-to zone.
Ruler guides
Create ruler guides
Ruler guides are different from grids in that they can be positioned freely on a page or on a pasteboard. You can create
two kinds of ruler guides: page guides, which appear only on the page on which you create them, or spread guides,
which span all pages and the pasteboard of a multiple-page spread. You can drag any ruler guide to the pasteboard. A
ruler guide is displayed or hidden with the layer on which it was created.
New ruler guides always appear on the target spread. For example, if several spreads are visible in the document
window and you drag a new guide into the window, the new guide becomes visible only on the target spread.
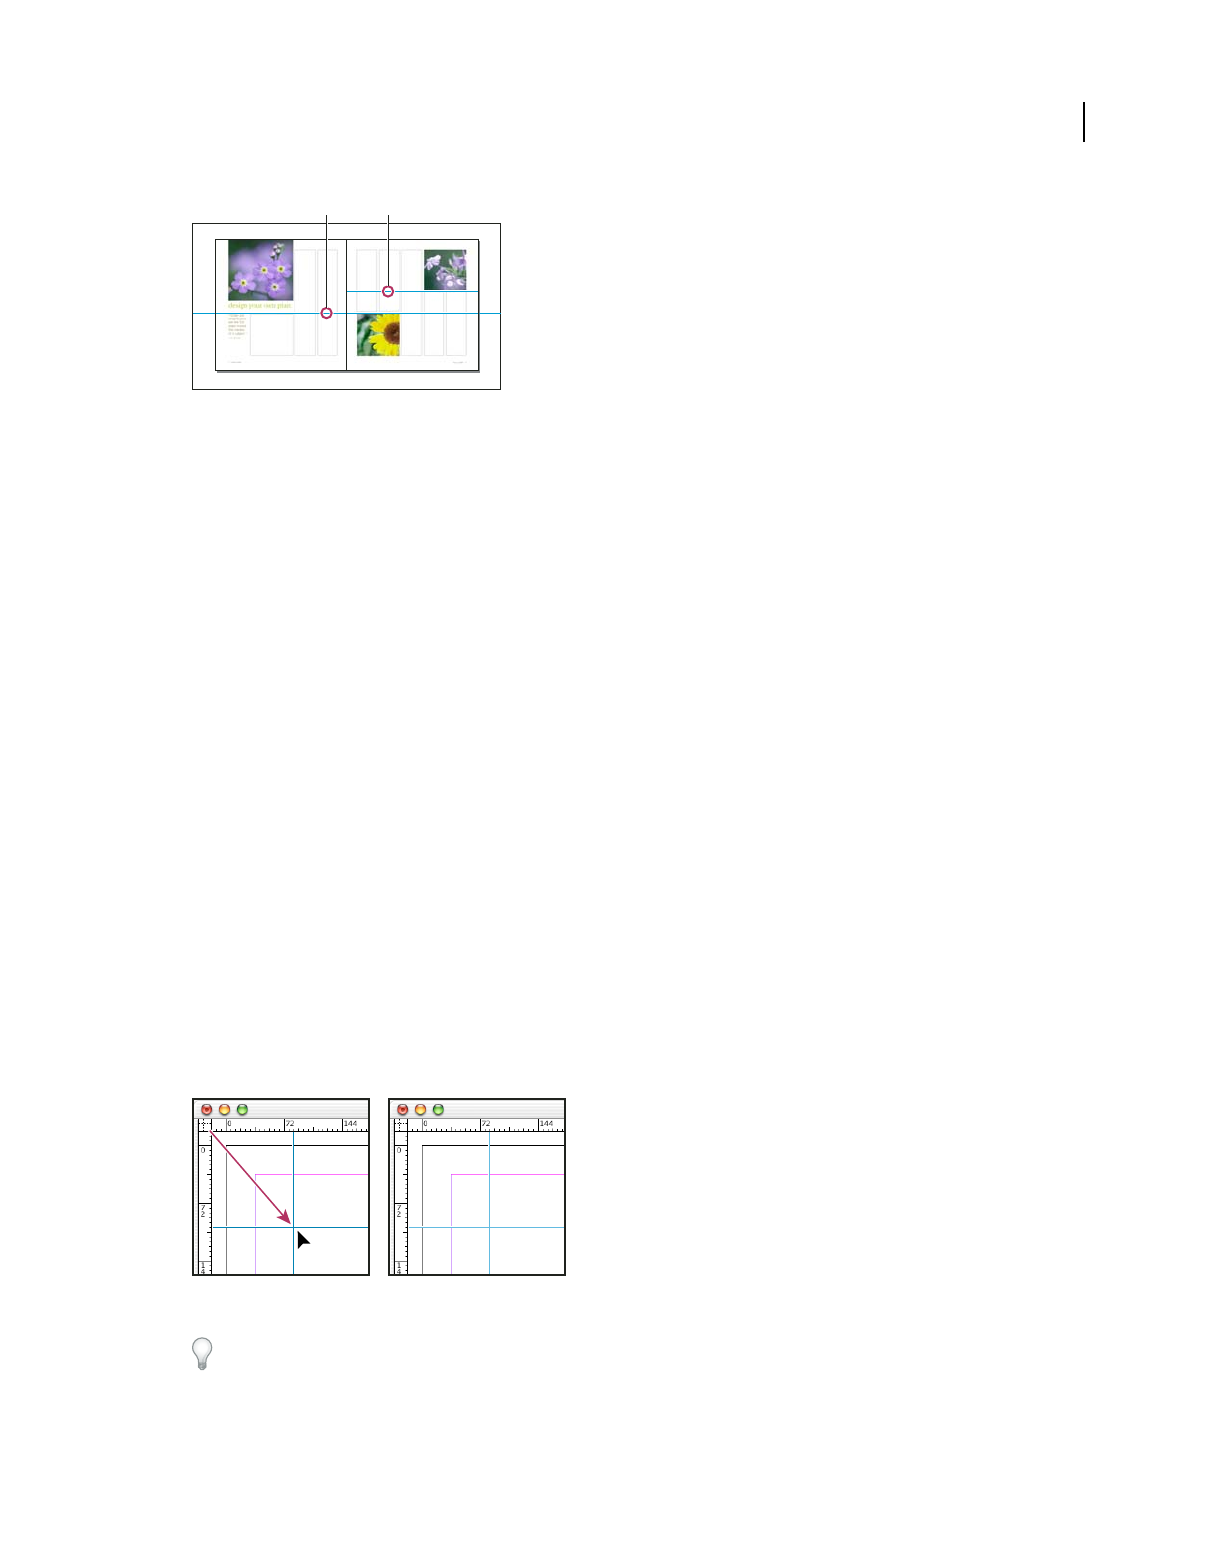
57
USING INDESIGN
Layout
Last updated 11/16/2011
Guides in the document window
A. Spread guide B. Page guide
More Help topics
“Layers” on page 78
“Customize the pasteboard and guides” on page 47
Create a ruler guide
1Make sure that both rulers and guides are visible, make sure the correct spread is targeted, and view the document
in Normal View mode, not Preview mode.
2If the document contains multiple layers, click a layer name in the Layers panel to target the layer.
3Do one of the following:
•To create a page guide, position the pointer inside a horizontal or vertical ruler and then drag to the desired location
on the target spread. If you drop the guide onto the pasteboard, it spans the pasteboard and spread; it will act as a
page guide if you later drag it onto a page.
•To create a spread guide, drag from the horizontal or vertical ruler, keeping the pointer in the pasteboard but
positioning the guide at the desired location on the target spread.
•To toggle between horizontal and vertical guides, select the guide and hold down Alt (Windows) or Option (Mac OS).
•To create a spread guide when the pasteboard is not visible (for example, when you’ve zoomed in), press Ctrl
(Windows) or Command (Mac
OS) as you drag from the horizontal or vertical ruler to the target spread.
•To create a spread guide without dragging, double-click a specific position on the horizontal or vertical ruler. If you
want to snap the guide to the nearest tick mark, hold down the Shift key when you double-click the ruler.
•To create vertical and horizontal guides simultaneously, press Ctrl (Windows) or Command (Mac OS) as you drag
from the target spread’s ruler intersection to the desired location.
A vertical and horizontal guide created concurrently
To reposition a ruler guide numerically, select the guide and enter values for X and Y in the Control panel.
A B
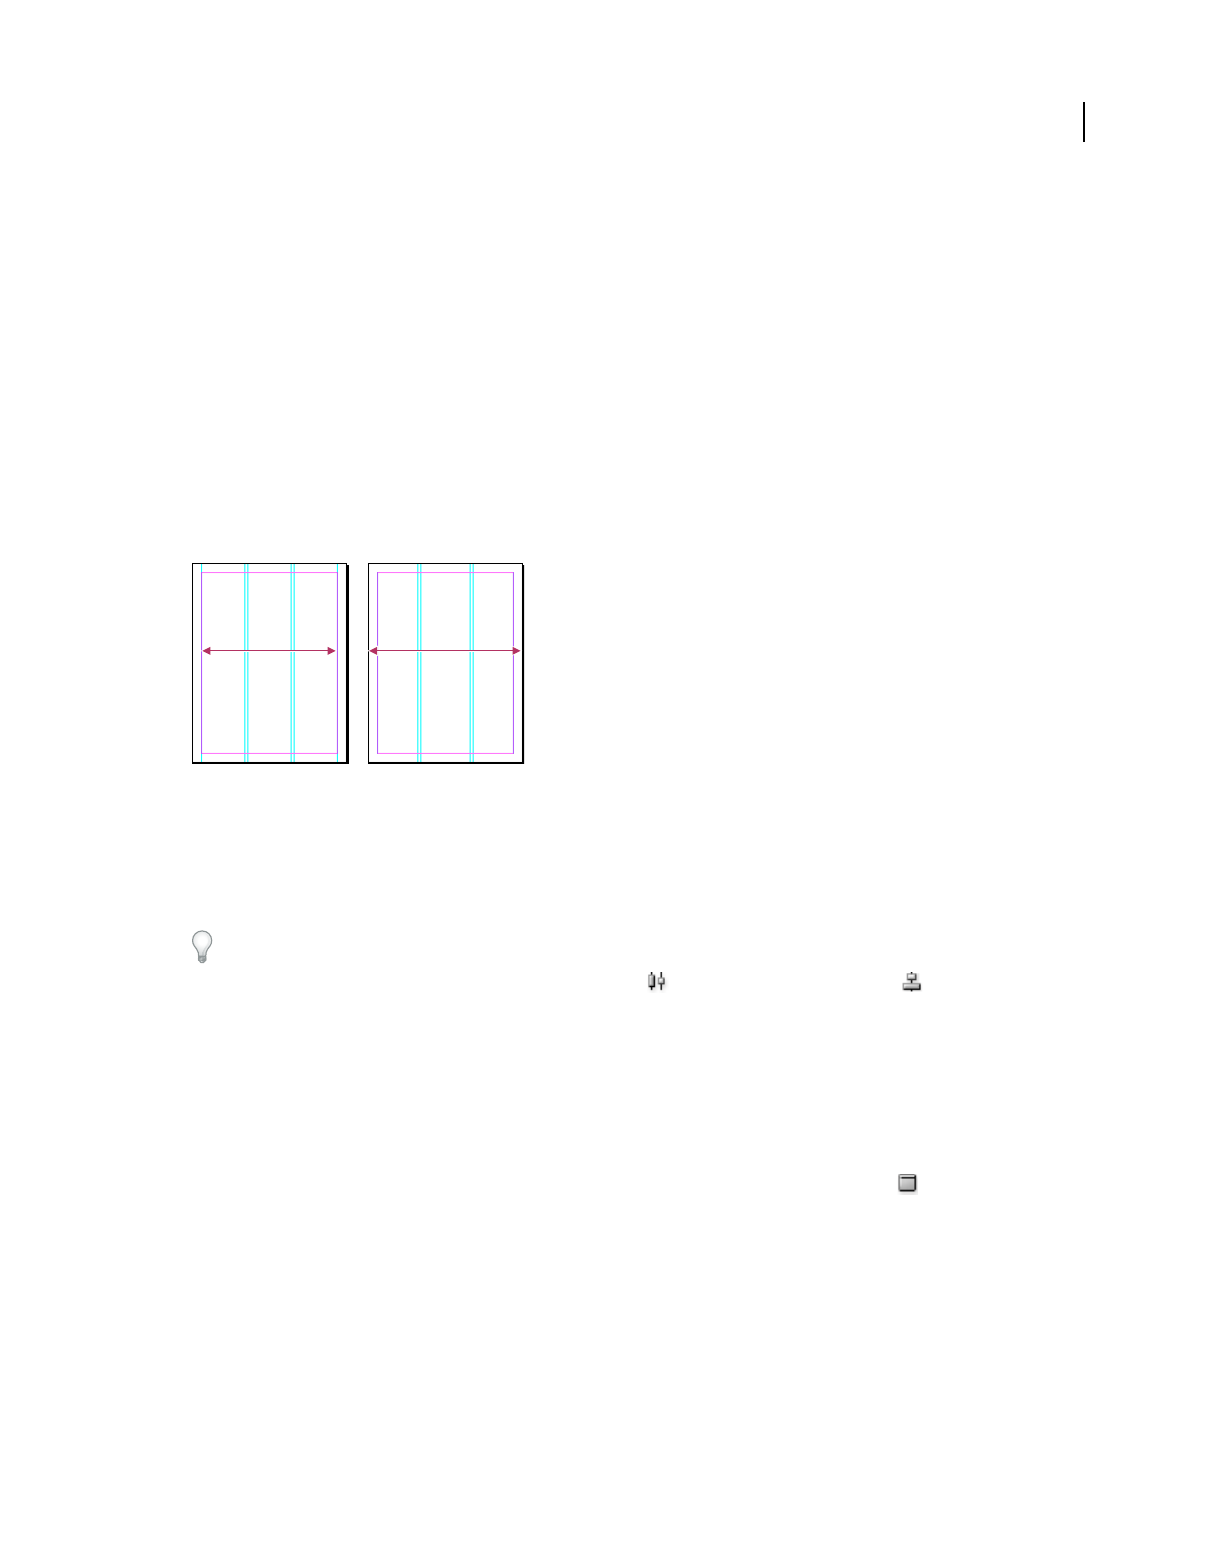
58
USING INDESIGN
Layout
Last updated 11/16/2011
Create a set of evenly spaced page guides
1If the document contains multiple layers, click a layer name in the Layers panel to target the layer.
2Choose Layout > Create Guides.
3For Number, type a value to specify the number of rows or columns you want to create.
4For Gutter, type a value to specify the spacing between rows or columns. Start with a low value, such as 1 pica; large
gutters leave little space for columns.
Columns created with the Create Guides command are not the same as those created with the Layout > Margins And
Columns command. For example, columns created using Create Guides cannot control text flow when a text file is
placed. Use the Margins And Columns command to create major column divisions appropriate for autoflow text, and
use the Create Guides command to create column grids and other layout aids.
5For Fit Guides To, click Margins to create the guides within the page margins, or click Page to create the guides
within the page edges.
Ruler guides evenly spaced within page margins (left) and page edges (right)
6To delete any existing guides (including guides on locked or hidden layers), select Remove Existing Ruler Guides.
7If you like, select Preview to see the effect of your settings on the page, and then click OK.
Note: The Create Guides command can create page guides only; it cannot create spread guides.
To space existing guides a uniform distance apart, select the guides (by dragging or pressing Shift as you click with the
mouse). Then, select Use Spacing from the Control panel, type the space value in the text box, and press Enter or
Return to confirm. Click either Distribute Horizontal Centers
or Distribute Vertical Centers to the left of the Use
Spacing option.
Show or hide guides
•To show or hide all margin, column, and ruler guides, choose View > Grids & Guides > Show/Hide Guides.
•To show or hide ruler guides on one layer only without changing the visibility of the layer’s objects, double-click
the layer name in the Layers panel, select or deselect Show Guides, and then click
OK.
•To show or hide guides and all other non-printing elements, click the Preview Mode icon at the bottom of the
Toolbox.
Work with ruler guides
You can change the attributes of individual ruler guides, and you can move, cut, copy, paste, or delete multiple ruler
guides simultaneously. Cut or copied ruler guides can be pasted to other pages or documents, but not to other
programs. To change attributes of specific guides, you must select the guides you want to change. When no guides are
selected, the Ruler Guides command sets the defaults for new guides only.

59
USING INDESIGN
Layout
Last updated 11/16/2011
Select ruler guides
Unselected ruler guides appear light blue by default. Selected ruler guides are highlighted in their layer color. When a
guide is selected, the Reference Point icon in the Control panel changes to
or , representing the selected guide.
•To select a single ruler guide, use the Selection tool or the Direct Selection tool and click the guide to highlight
it in its layer color.
If you can’t select a ruler guide and the View > Grids & Guides > Lock Guides command is already deselected, the
guide might be on that page’s master, or on a layer where guides are locked.
•To select multiple ruler guides, hold down Shift as you click guides using the Selection or Direct Selection tool. You
can also drag over multiple guides, as long as the selection marquee doesn’t touch or enclose any other object.
•To select all ruler guides on the target spread, press Ctrl+Alt+G (Windows) or Command+Option+G (Mac OS).
Move ruler guides
❖Using Selection tool or the Direct Selection tool , do any of the following:
•To move a ruler guide, drag it.
•To move multiple ruler guides, shift-select the guides you want to move, and then drag them.
Move selected guides just as you would any other selected object, including nudging with the arrow keys and using the
Control or Transform panels.
•To make a guide snap to a ruler tick mark, press Shift as you drag it. Or select the guide, press and hold down the
Shift key, and then click the mouse button.
•To move a spread guide, drag the part of the guide that’s on the pasteboard, or press Ctrl (Windows) or Command
(Mac
OS) as you drag the guide from within the page.
•To move guides to another page or document, select one or more guides, choose Edit > Copy or Edit > Cut, go to
another page, and then choose Edit
> Paste. If you’re pasting onto a page of the same size and orientation as the
guides’ original page, the guides appear in the same position.
Note: The Paste Remembers Layers option affects the layer on which pasted guides appear.
Delete ruler guides
•To delete individual guides, select one or more ruler guides and then press Delete. (You can also drag ruler guides
and drop them on a ruler to delete them.)
•To delete all ruler guides on the target spread, right-click (Windows) or Ctrl-click (Mac OS) a selected guide or
ruler, and choose Delete All Guides On Spread.
If you cannot delete a guide, it may be locked, it may be on a master page, or it may be on a locked layer.
Customize ruler guides
1Do one of the following:
•To change options for one or more existing ruler guides, select those ruler guides.
•To set default options for new ruler guides, deselect all guides by clicking in an empty area.
2Choose Layout > Ruler Guides.
3For View Threshold, specify the magnification below which ruler guides do not appear. This prevents ruler guides
from appearing too close together at lower magnifications.
4For Color, choose a color or choose Custom to specify a custom color in the system color picker. Then click OK.
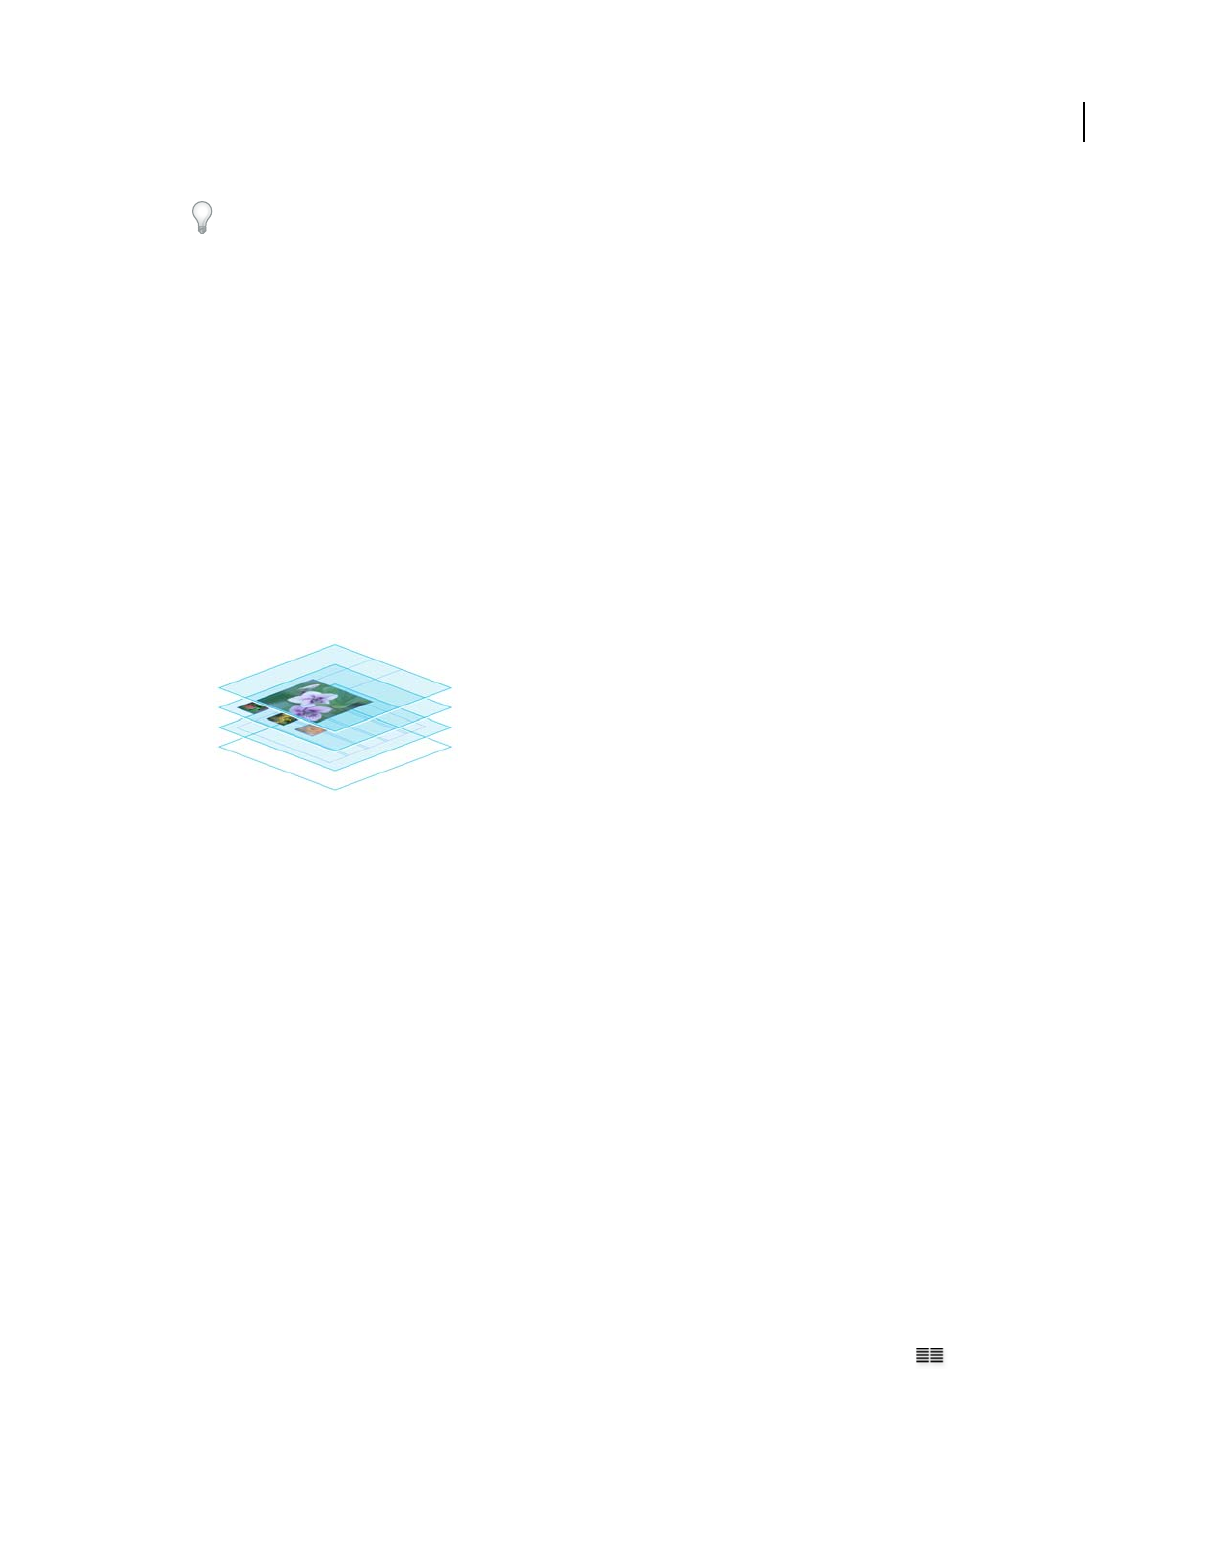
60
USING INDESIGN
Layout
Last updated 11/16/2011
You can set the current magnification as the view threshold for new ruler guides by pressing Alt (Windows) or Option
(Mac OS) as you drag the ruler guides you’ve selected.
Lock or unlock ruler guides
•To lock or unlock all ruler guides, choose View > Grids & Guides > Lock Guides to select or deselect the menu
command.
•To lock or unlock ruler guides on one layer only, without changing the visibility of the layer’s objects, double-click
the layer name in the Layers panel, select or deselect Lock Guides, and then click
OK.
Change ruler guide stacking order
By default, ruler guides appear in front of all other guides and objects. However, some ruler guides may block your
view of such objects as lines with narrow stroke widths. You can change the Guides in Back preference to display ruler
guides in front of or behind all other objects. However, regardless of the Guides in Back setting, objects and ruler
guides are always in front of margin and column guides. Also, although putting guides on different layers organizes
them structurally, it does not affect their visual stacking order—the Guides in Back preference stacks all ruler guides
as a single set in relation to all page objects.
Default stacking order
A. Ruler guides B. Page objects C. Margin and column guides D. Page
1Choose Edit > Preferences > Guides & Pasteboard (Windows) or InDesign > Preferences > Guides & Pasteboard
(Mac
OS).
2Select Guides in Back, and click OK.
Snap objects to guides and grids
To precisely align objects to guides, use the Snap To Guides and Snap To Document Grid commands. Object edges
will snap to (be pulled toward) the nearest grid intersection or guide when you draw, move, or resize the objects.
The exact range within which an object snaps to guides is called the snap-to zone, which you can adjust. When you
select both the Snap To Guides and the Snap To Document Grid commands, the grid takes precedence.
Keep the following guidelines in mind as you align objects to guides and grids:
•To snap an object to a guide, drag an object toward a guide until one or more of the object’s edges is within the
guide’s snap-to zone.
•Guides must be visible for objects to snap to them. However, objects can snap to the document and baseline grids
whether the grids are visible or not.
•Objects on one layer snap to ruler guides visible on any other layer. If you don’t want objects to snap to guides on
a certain layer, hide that layer’s guides.
•For the baselines of text to snap to the baseline grid, press the Align to Baseline Grid button for individual
paragraphs or paragraph styles.
1Choose View > Grids & Guides and make sure that Snaps To Guides is selected (checked).
A
B
C
D

61
USING INDESIGN
Layout
Last updated 11/16/2011
Note: The Snap To Guides command controls both snapping to guides and snapping to the baseline grid.
2To specify the snap-to zone, choose Edit > Preferences > Guides & Pasteboard (Windows) or InDesign >
Preferences
> Guides & Pasteboard (Mac OS), type a value for Snap To Zone, and click OK. The Snap To Zone
value is always in pixels.
Use smart guides
The Smart Guides feature makes it easy to snap objects to items in your layout. As you drag or create an object,
temporary guides appear, indicating that the object is aligned with an edge or center of the page or with another page
item.
By default, the Smart Guides feature is selected. You can turn off smart guides, or you can turn off any of the smart
guide categories:
Smart Object Alignment Smart object alignment allows for easy snapping to page item centers or edges. In addition to
snapping, smart guides dynamically draw to indicate which object is being snapped to.
Smart Dimensions Smart dimension feedback appears when you’re resizing, creating, or rotating page items. For
example, if you rotate one object on your page 24 degrees, a rotation icon appears as you rotate another object close to
24 degrees. This hint lets you snap the object to the same rotation angle of the adjacent object. Similarly, as you resize
an object next to another object, a line segment with arrows at each end lets you snap the object to the same width or
height as the adjacent object.
Smart Spacing Smart spacing lets you quickly arrange page items with the help of temporary guides that indicate when
the spacing between objects is even.
Smart Cursors Smart cursor feedback appears in a gray box as X and Y values when you’re moving or resizing object
or as a measurement when you’re rotating values. The Show Transformation Values option in Interface preferences
lets you turn smart cursors on and off.
For a video tutorial on using smart guides, see www.adobe.com/go/lrvid4029_id.
Turn smart guides on or off
❖Choose View > Grids & Guides > Smart Guides.
Turn smart guide categories on or off
1Open the Guides & Pasteboard preferences.
2Indicate whether you want Align To Object Center, Align To Object Edge, Smart Dimensions, and Smart Spacing
turned on or off, and click OK.
To turn off smart cursors, which displays the X and Y values of objects you mouse over, deselect Show Transformation
Values in Interface preferences.
Change the appearance of smart guides
1Open the Guides & Pasteboard section of the Preferences dialog box.
2Choose a different color from the Smart Guides menu, and click OK.
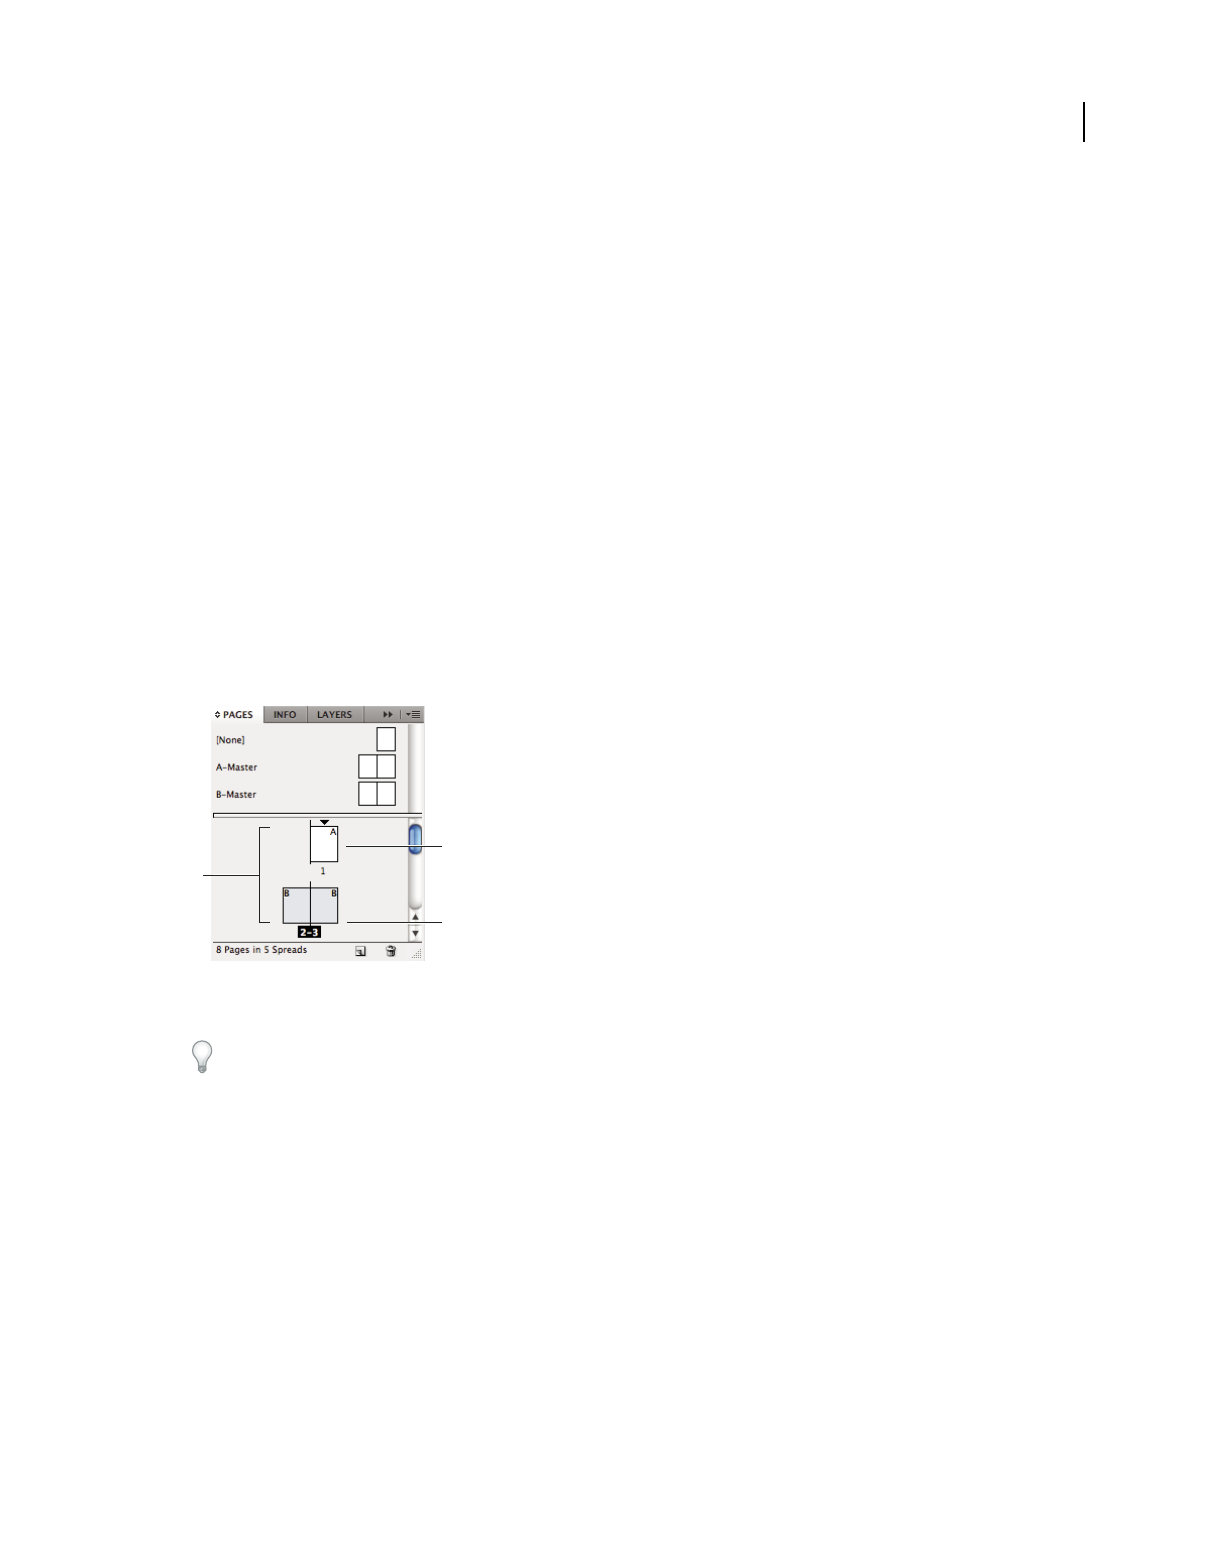
62
USING INDESIGN
Layout
Last updated 11/16/2011
Tips for using Smart Guides
❖Smart Guides take effect only on page items and intersections that are in the current page view. If you have many
objects on a page and are trying to align an object to another object or objects in particular, zoom in on that area
specifically.If you don’t want Smart Guides to snap to column guides, turn off Snap To Guides temporarily by
choosing View > Grids & Guides > Snap To Guides.The Smart Guides feature is accurate regardless of zoom
percentage, so it isn’t necessary to zoom in to see if two objects are really aligned at their left edges, for example.
Pages and spreads
For detailed information and instructions, click the links below.
About pages and spreads
When you select the Facing Pages option in the File > Document Setup dialog box, document pages are arranged in
spreads. A spread is a set of
pages viewed together, such as the two pages visible whenever you open a book or
magazine. Every InDesign spread includes its own pasteboard, which is an area outside a page where you can store
objects that aren’t yet positioned on a page. Each spread’s pasteboard provides space to accommodate objects that
bleed, or extend past the edge of a page.
Pages panel
A. Page icons B. Page with master “A” applied C. Selected spread
In a long document, you can move to a page quickly by choosing Layout > Go To Page.
Change the page and spread display
The Pages panel provides information about and control over pages, spreads, and masters (pages or spreads that
automatically format other pages or spreads). By default, the Pages panel displays thumbnail representations of each
page’s content.
1If the Pages panel isn’t visible, choose Window > Pages.
2Choose Panel Options in the Pages panel menu.
3In the Icons section, specify which icons appear next to the page thumbnails in the Pages panel. These icons indicate
whether transparency or page transitions have been added to a spread, and whether the spread view is rotated.
4In the Pages and Masters sections:
•Select an icon size for pages and masters.
A
B
C
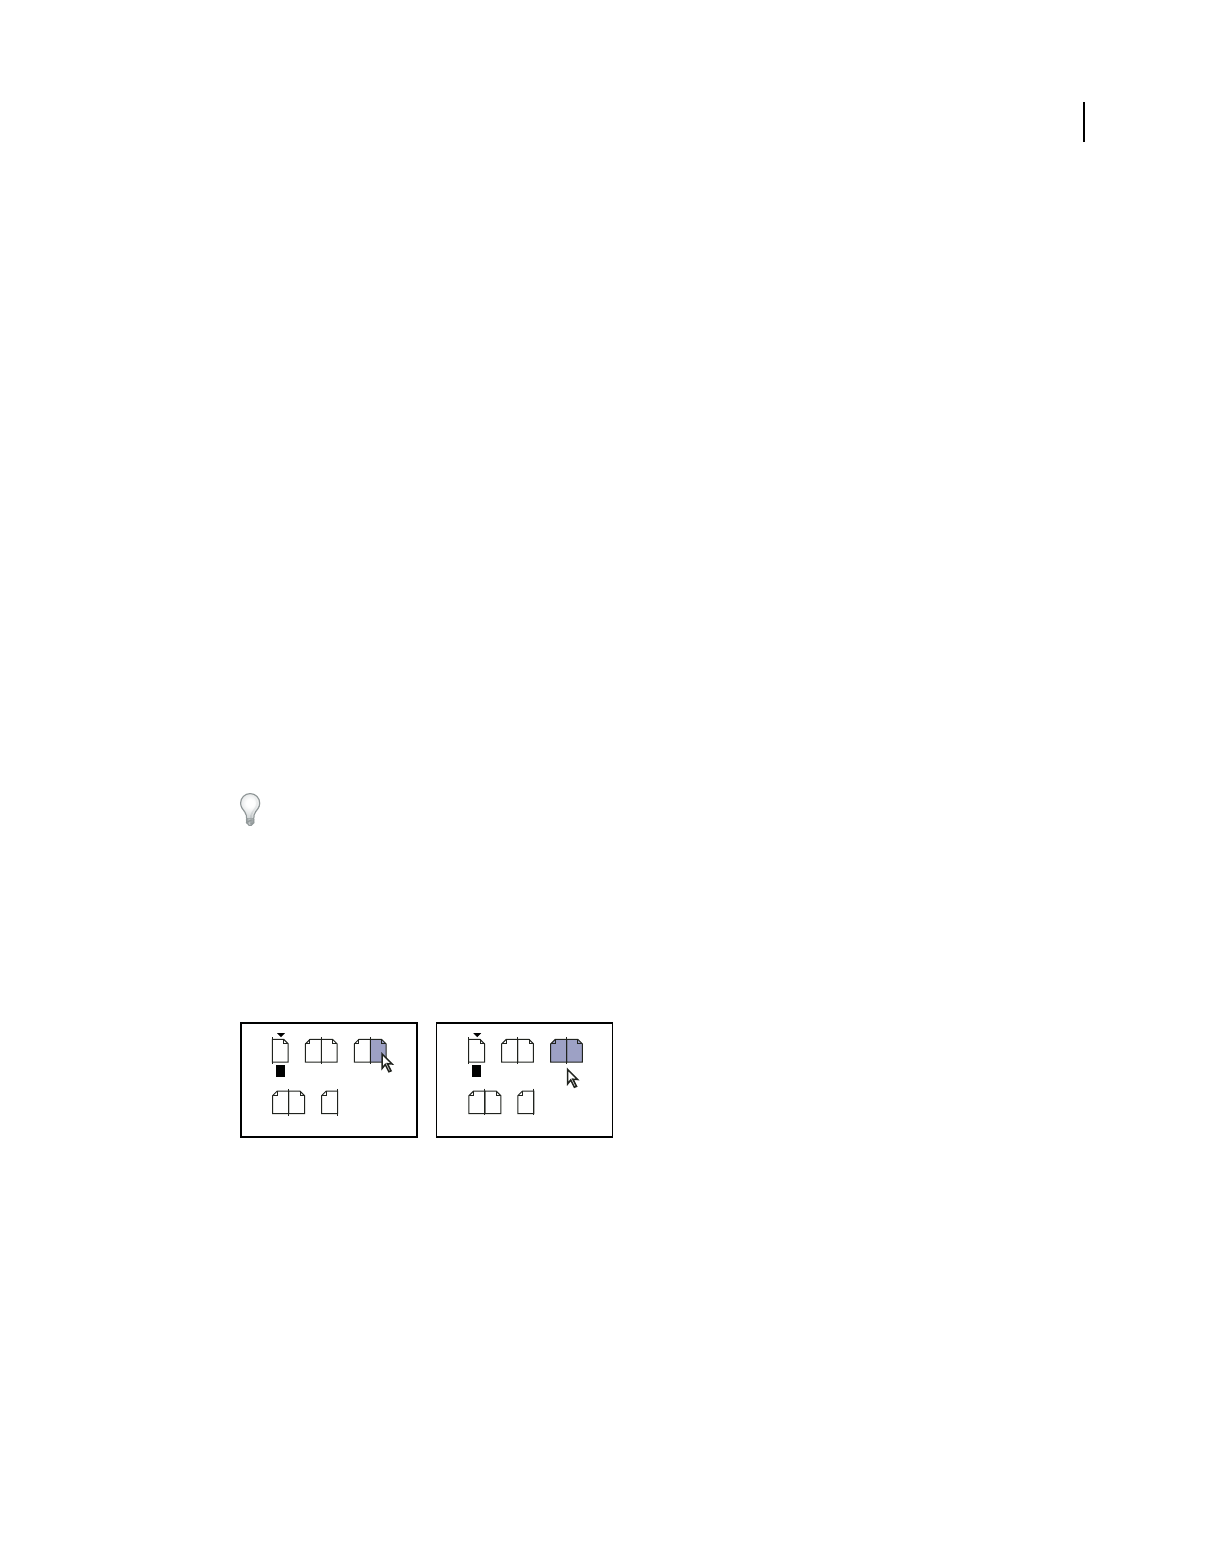
63
USING INDESIGN
Layout
Last updated 11/16/2011
•Select Show Vertically to display spreads in one vertical column. Deselect this option to allow spreads to be
displayed side-by-side.
•Select Show Thumbnails to display thumbnail representations of the content of each page or master. (This
option is not available if certain options are selected for Icon Size.)
5In the Panel Layout section, select Pages On Top to display the page icon section above the master icon section, or
select Masters On Top to display the master icon section above the page icon section.
6Choose an option in the Resize menu to control how the sections are displayed when you resize the panel:
•To resize both the Pages and Masters sections of the panel, choose Proportional.
•To maintain the size of the Pages section and resize only the Masters section, choose Pages Fixed.
•To maintain the size of the Masters section and resize only the Pages section, choose Masters Fixed.
Target or select a page or spread
You either select or target pages or spreads, depending on the task you are performing. Some commands affect the
currently selected page or spread, while others affect the target page or spread. For example, you can drag ruler guides
only to the target page or spread, but page-related commands, such as Duplicate Spread or Delete Page, affect the page
or spread selected in the Pages panel. Targeting makes a page or spread active and is helpful when, for example, several
spreads are visible in the document window and you want to paste an object onto a specific spread.
❖In the Pages panel:
•To both target and select a page or spread, double-click its icon or the page numbers under the icon. If the page
or spread is not visible in the document window, it shifts into view.
You can also both target and select a page or spread by clicking a page, any object on the page, or its pasteboard
in the document window.
The vertical ruler is dimmed alongside all but the targeted page or spread.
•To select a page, click its icon. (Don’t double-click unless you want to select it and move it into view.)
•To select a spread, click the page numbers under the spread icon.
Note: Some spread options, such as those in the Pages panel menu, are available only when an entire spread is
selected.
Page 1 is targeted and page 5 is selected (left), and page 1 is targeted and entire spread is selected (right).
Add new pages to a document
❖Do any of the following:
•To add a page after the active page or spread, click the New Page button in the Pages panel or choose Layout >
Pages
> Add Page. The new page uses the same master as the existing active page.
•To add multiple pages to the end of the document, choose File > Document Setup. In the Document Setup
dialog box, specify the total number of pages for the document. InDesign adds pages after the last page or spread.
•To add pages and specify the document master, choose Insert Pages from the Pages panel menu or choose
Layout
> Pages > Insert Pages. Choose where the pages will be added and select a master to apply.
1
8
A A A A
2–3 4–5
6–7
1
8
A A A A
2–3 4–5
6–7

64
USING INDESIGN
Layout
Last updated 11/16/2011
Create color labels for page thumbnails
You can assign colored labels to the page thumbnails in the Pages panel. For example, you can use color labels to
indicate the status of the pages, such as a green label for complete spreads, a yellow label for spreads being worked on,
and a red label for unstarted spreads.
1In the Pages panel, select the pages to which you want to apply the color labels.
2From the Pages panel menu, choose Color Label, and then choose the color to assign.
The color label appears below the thumbnail in the Pages panel.
Applying a color label to master pages affects all pages to which the master is applied. However, when you apply a color
label to individual document pages, the color label for the document pages is used. To use a color label for master pages,
select the document pages you want to change and choose Color Label > Use Master Color from the Pages panel menu.
Move, duplicate, and delete pages and spreads
You can use the Pages panel to freely arrange, duplicate, and recombine pages and spreads. Keep the following
guidelines in mind when adding, arranging, duplicating, or removing pages within a document:
•InDesign preserves the threads between text frames.
•InDesign redistributes pages according to how the Allow Document Pages To Shuffle command is set.
•An object that spans multiple pages stays with the page on which the object’s bounding box covers the most area.
More Help topics
“Control spread pagination” on page 66
“Move or copy pages between documents” on page 65
“Copy masters” on page 74
Move pages using Move Pages command
1Choose Layout > Pages > Move Pages, or choose Move Pages from the Pages panel menu.
2Specify the page or pages you want to move.
3For Destination, choose where you want to move the pages, and specify a page if necessary. Click OK.
Move pages by dragging
❖As you drag, the vertical bar indicates where the page will appear when you drop it. If the black rectangle or bar
touches a spread when Allow Pages to Shuffle is turned off, the page you’re dragging will extend that spread;
otherwise, document pages will be redistributed to match the Facing Pages setting in the File
> Document Setup
dialog box.
In the Pages panel, drag a page icon to a new position within the document.
Moving a page’s position using the Pages panel
1
8
A A A A
2–3
6–7
1
8
A A AA
2–3 4–5
[4–5]
B
B B B
6–7

65
USING INDESIGN
Layout
Last updated 11/16/2011
Duplicate a page or spread
❖In the Pages panel, do one of the following:
•Drag the page range numbers under a spread to the New Page button. The new spread appears at the end of the
document.
•Select a page or spread, and then choose Duplicate Page or Duplicate Spread in the Pages panel menu. The new page
or spread appears at the end of the document.
•Press Alt (Windows) or Option (Mac OS) as you drag the page icon or page range numbers under a spread to a new
location.
Note: Duplicating a page or spread also duplicates all objects on the page or spread. Text threads from the duplicated
spread to other spreads are broken, but all text threads within the duplicated spread remain intact—as do all text threads
on the original spread.
Remove a page from a spread while keeping it in the document
1Select the spread and deselect Allow Selected Spread To Shuffle in the Pages panel menu.
2In the Pages panel, drag a page out of the spread until the vertical bar is not touching any other pages.
Delete a page or spread from the document
❖Do one of the following:
•In the Pages panel, drag one or more page icons or page-range numbers to the Delete icon.
•Select one or more page icons in the Pages panel, and click the Delete icon.
•Select one or more page icons in the Pages panel, and then choose Delete Page(s) or Delete Spread(s) in the Pages
panel menu.
Move or copy pages between documents
When you move or copy a page or spread from one document to another, all of the items on the page or spread,
including graphics, links, and text, are copied to the new document. Section markers are preserved. Threaded text
frames are also included, but text that is threaded to pages outside the spread does not transfer. If the page or spread
you are copying contains styles, layers, or masters with the same names as their counterparts in the destination
document, the destination document’s settings are applied to the page or spread.
If you copy a page from a document that has a different size than the document you are copying to, the page and page
item positions may not match exactly.
If you move or copy a spread with a rotated view, the rotated view is cleared in the target document.
If you want to move or copy a multiple-page spread, deselect Allow Document Pages To Shuffle in the destination
document to keep the spread together.
More Help topics
“Copy masters” on page 74
Move or copy pages between documents
1To move pages from one document to another, open both documents.
2Choose Layout > Pages > Move Pages, or choose Move Pages from the Pages panel menu.
3Specify the page or pages you want to move.
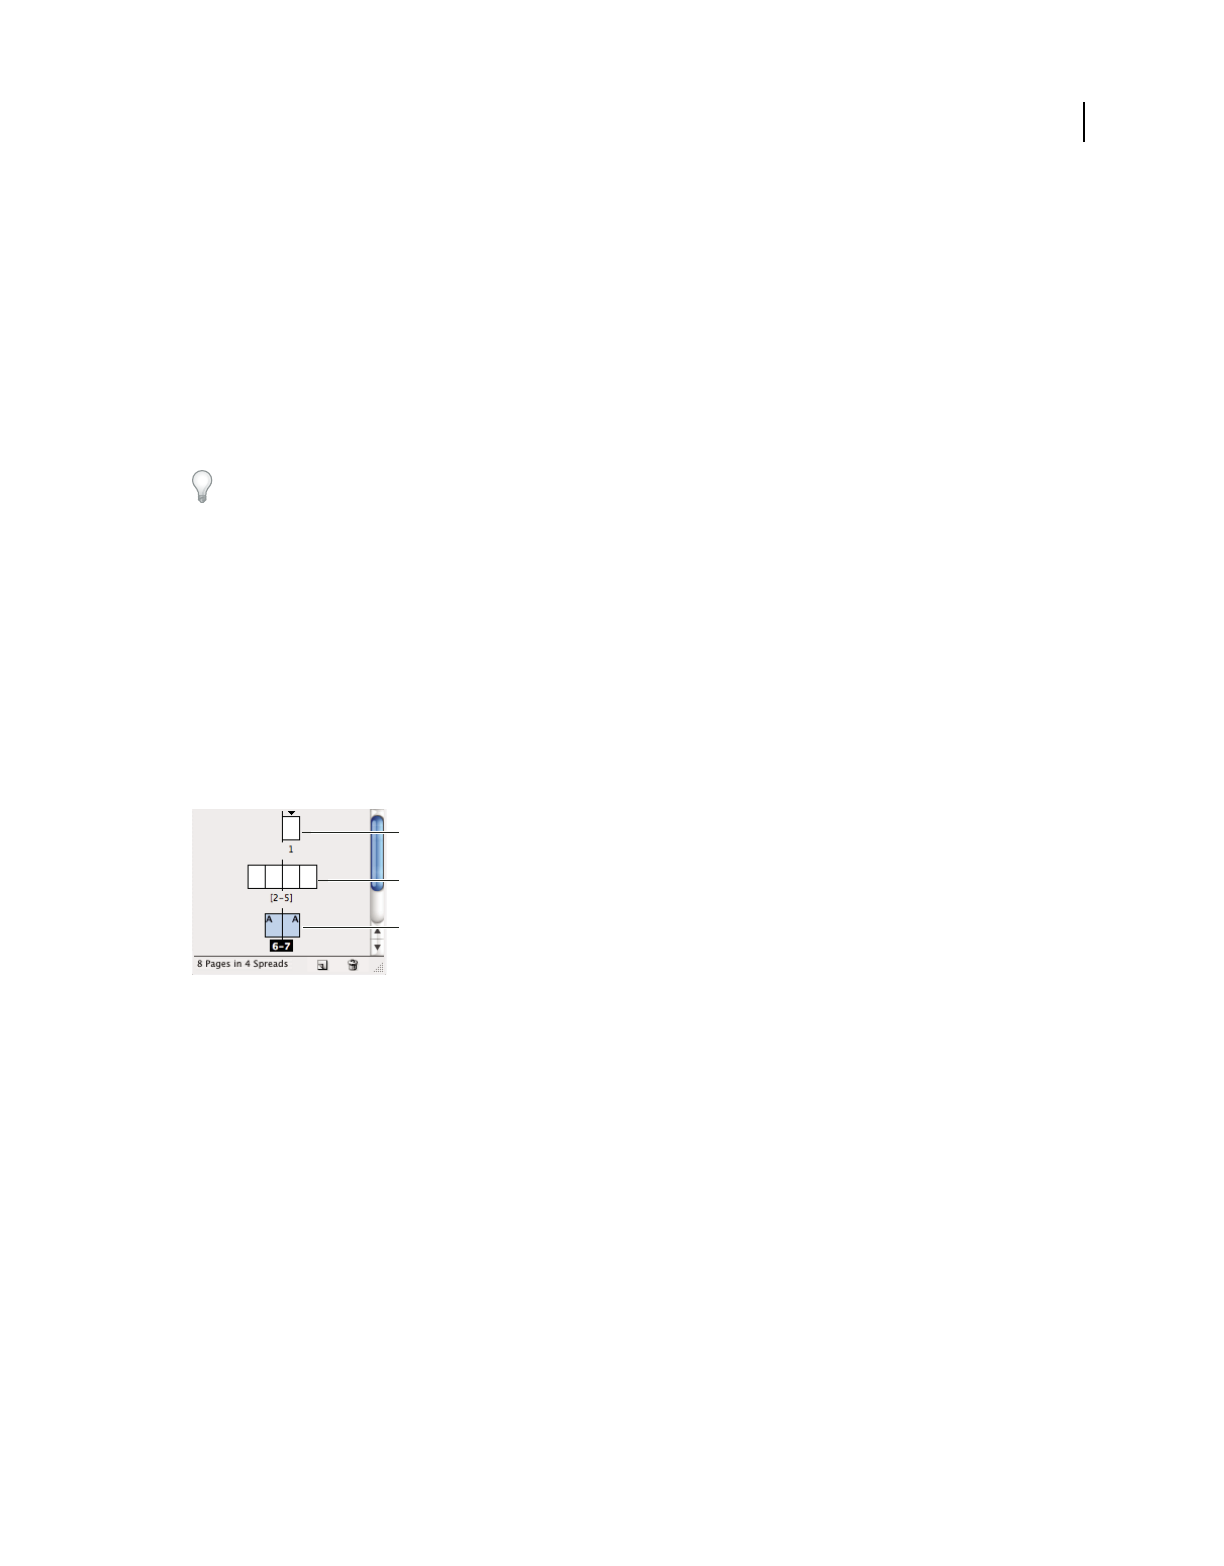
66
USING INDESIGN
Layout
Last updated 11/16/2011
4Choose the destination document name from the Move To menu.
5For Destination, choose where you want to move the pages, and specify a page if necessary.
6If you want to remove the pages from the original document, select Delete Pages After Moving.
Note: When you copy pages between documents, their associated masters are copied automatically. If the new document
contains a master with the same name as the master applied to the copied page, however, the master of the new document
is applied to the copied page instead.
Move or copy pages between documents by dragging
1To move pages from one document to another, make sure that both documents are open and visible.
You can choose Window > Arrange > Tile to display documents side-by-side.
2Drag the original document’s page icon to the new document.
3In the Insert Pages dialog box, specify where the pages will be added.
4If you want to remove the pages from the original document, select Delete Pages After Inserting.
Control spread pagination
Most documents use two-page spreads exclusively. When you add or remove pages before a spread, the pages shuffle
by default. However, you may want to keep certain pages in a spread together. For example, you can create gatefold or
accordion foldouts by creating a multiple-page spread (also called an island spread) and adding pages to it. By not
allowing pages to shuffle, you can ensure that pages are kept in the same spread.
Pages panel
A. One-page spread B. Four-page spread, identified by brackets around page numbers C. Entire two-page spread selected
Create a multiple-page spread
1Do one of the following:
•To keep a single spread together, select a spread in the Pages panel, and then deselect Allow Selected Spread To
Shuffle in the Pages panel
menu. You can identify an island spread in the Pages panel by the brackets around its
page numbers.
•To allow the creation of spreads of more than two pages in the entire document and to preserve those spreads when
you add, remove, or arrange preceding pages, deselect Allow Document Pages To Shuffle on the Pages panel menu.
InDesign will preserve spreads of more than two pages while letting two-page spreads repaginate normally.
2Add pages to the selected spread either by using Insert Pages to insert a new page in the middle of a spread or by
dragging an existing page to the spread in the Pages panel. To drag an entire spread, drag its page numbers.
A
B
C

67
USING INDESIGN
Layout
Last updated 11/16/2011
Adding a page to a spread using the Pages panel
Note: You can include up to ten pages in a spread. When you have reached the limit, the black vertical bar will not appear.
Redistribute pages
You can redistribute a spread’s pages to match the Facing Pages setting in the File > Document Setup dialog box.
❖Do either of the following:
•If an individual spread has been allowed to shuffle, select the spread, and choose Allow Selected Spread To Shuffle
in the Pages panel menu to select it.
•If document pages have been allowed to shuffle and you added pages to a spread, choose Allow Document Pages
To Shuffle from the Pages panel menu to select it. Click No to redistribute pages. If you click Yes to maintain the
multiple-page spreads, brackets surround the numbers on those spreads in the Pages panel, indicating that those
spreads are not allowed to shuffle.
Start a document with a two-page spread
Instead of beginning the document with a single page, you can begin your document with a two-page spread.
1Do either of the following actions:
•To create a document, choose File > New Document.
•To edit an existing document, choose File > Document Setup.
2For Start Page #, specify an even number, such as 2, and then click OK.
Rotate the spread view
In some instances, you need to edit rotated content. Instead of turning your head sideways to look at the rotated
content, you can rotate the spread view. This option is especially useful for working on rotated calendars and tables.
Rotating the spread view does not affect printing or output.
1
A A A
6–7 8–9 9
A A A
7–8
5–6
4–5 1
[2–3] [2–4]
A
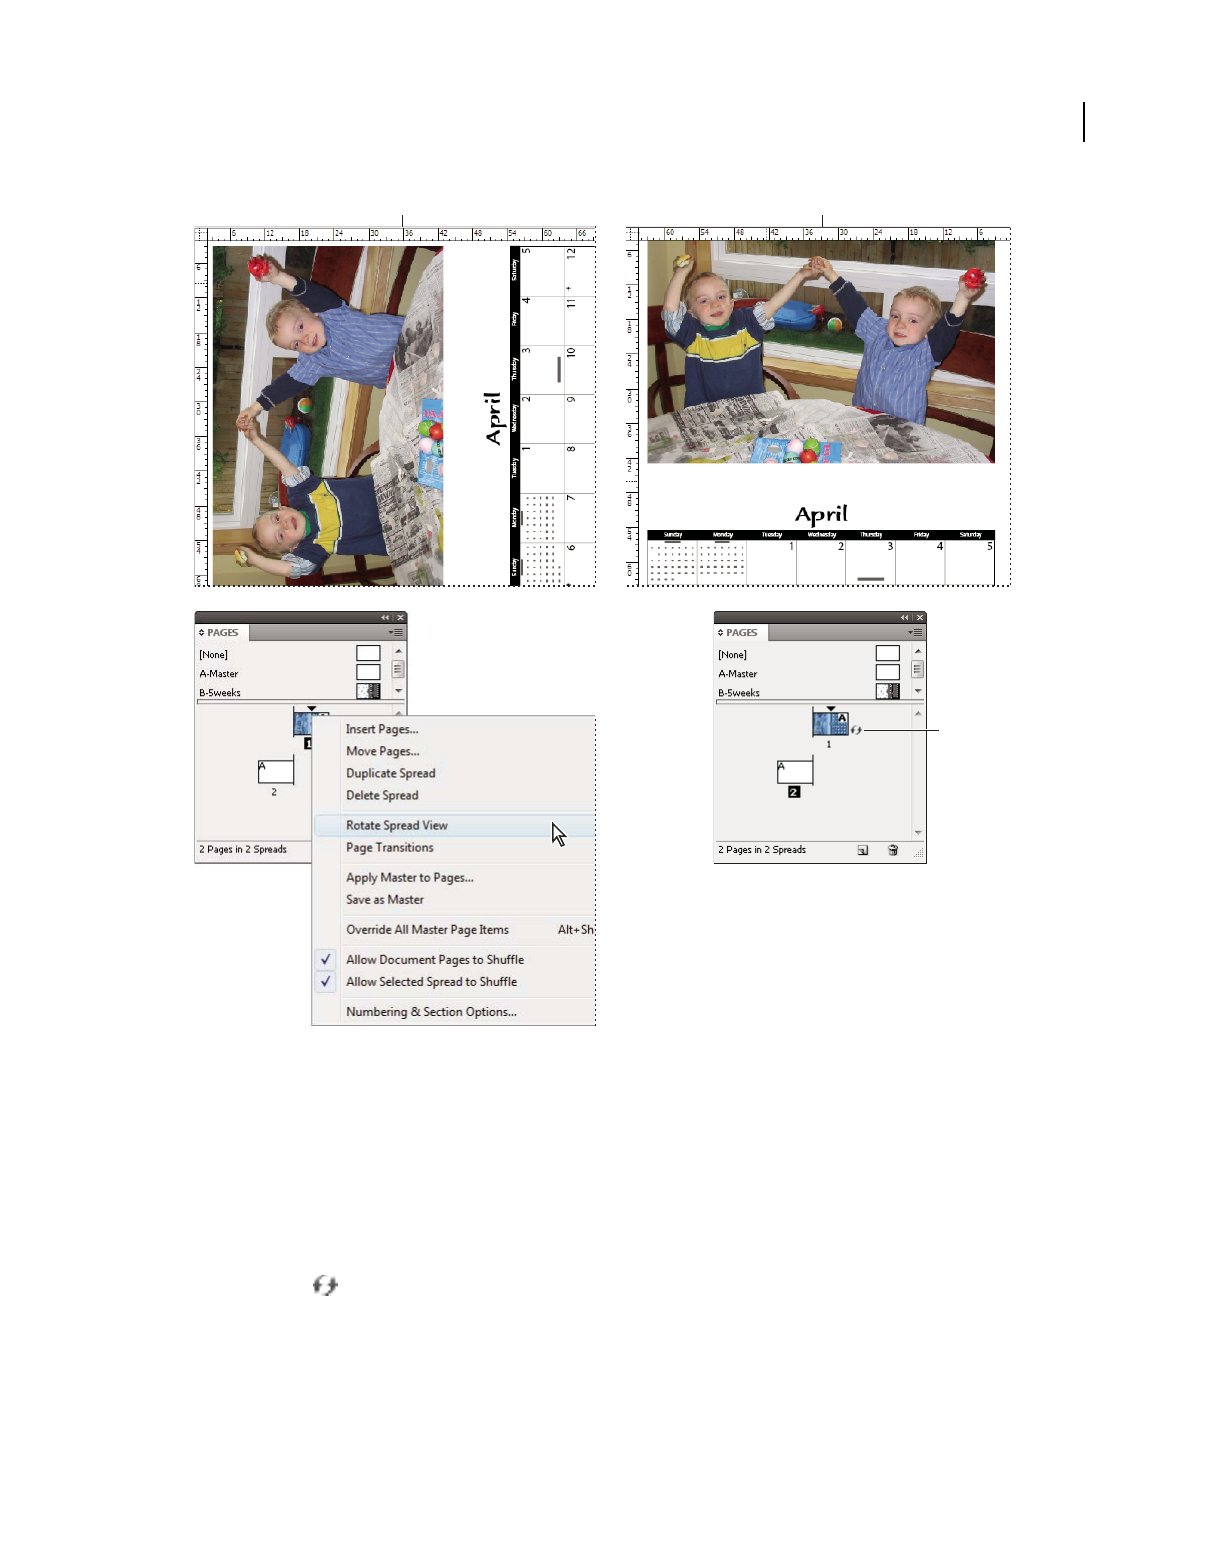
68
USING INDESIGN
Layout
Last updated 11/16/2011
Rotating the spread
A. Before rotating spread B. Rotated spread view C. Rotate icon in Pages panel
For a video tutorial on rotating the spread view, see www.adobe.com/go/lrvid4031_id.
1In the Pages panel, select the page or spread that you want to rotate.
2Do any of the following:
•From the Pages panel menu, choose Rotate Spread View > 90° CW, 90° CCW, or 180°.
•Choose View > Rotate Spread > 90° CW, 90° CCW, or 180°.
A rotation icon appears next to the rotated spread in the Pages panel.
Objects you place or create mirror the rotated view. For example, if you create a text frame when the spread view is
rotated 90 degrees, the text frame is also rotated. However, objects you paste are not rotated.
A B
C
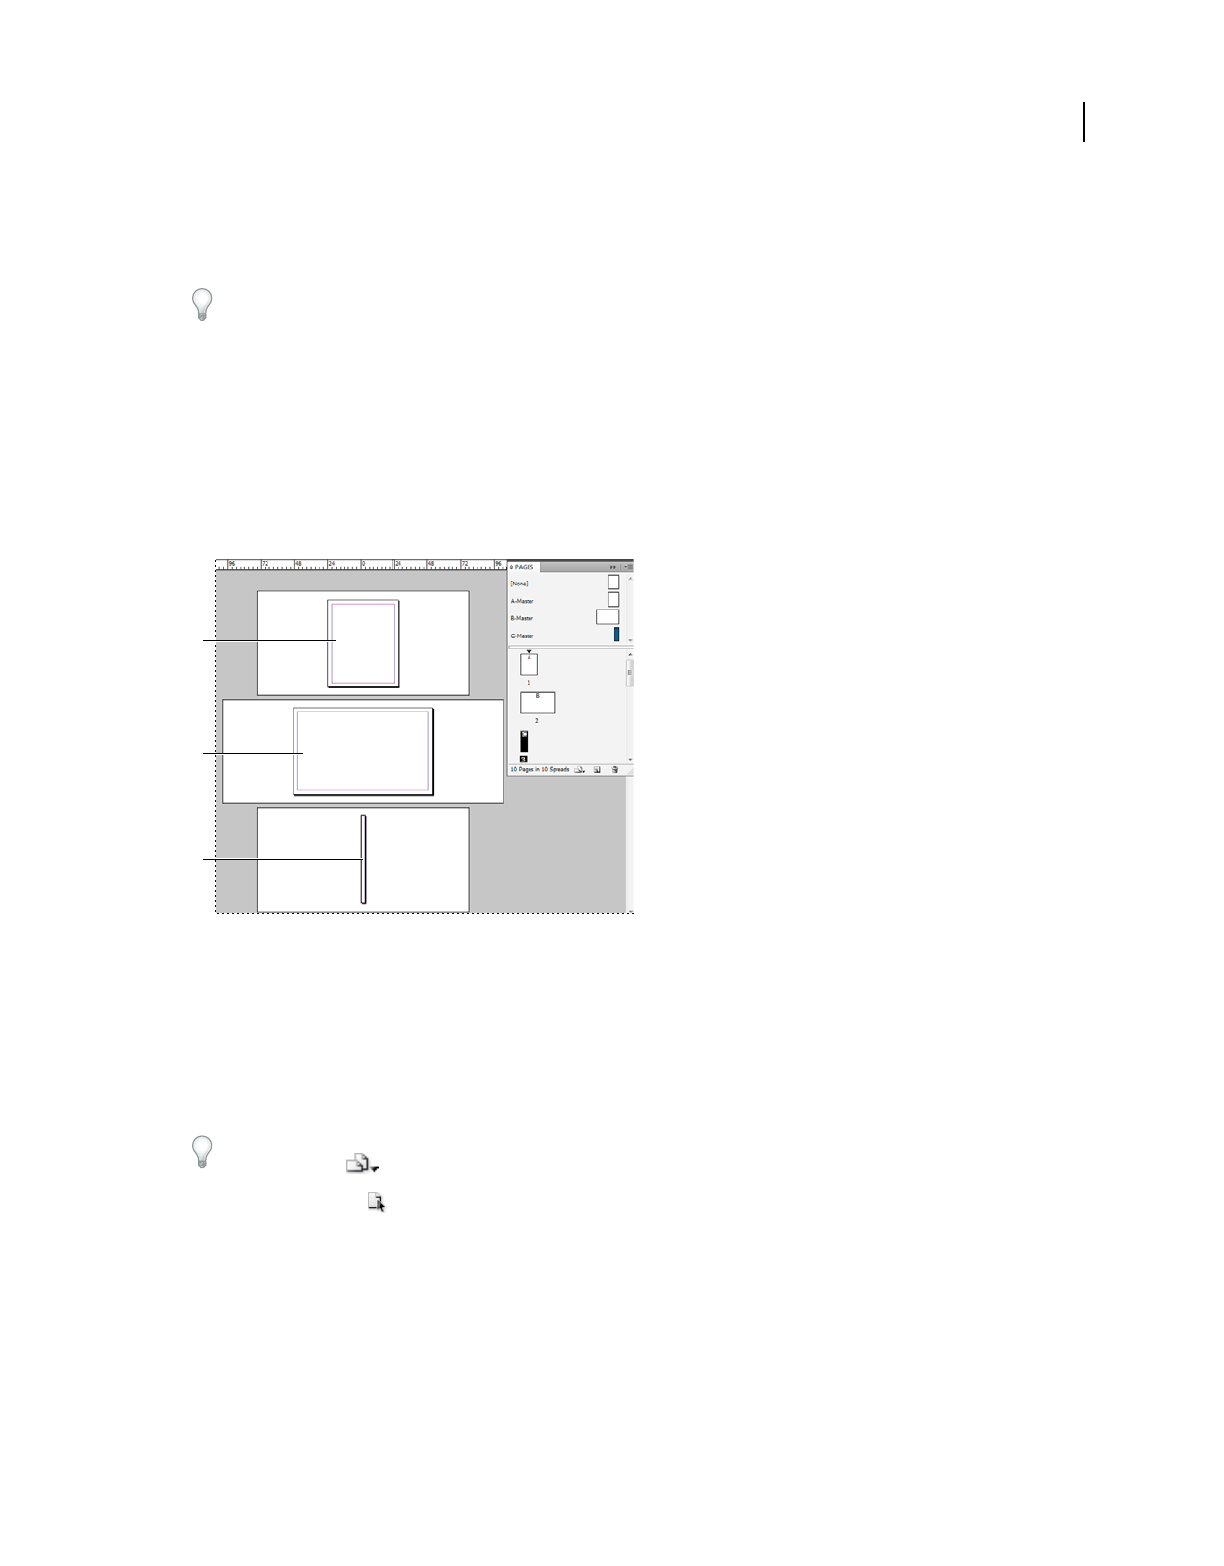
69
USING INDESIGN
Layout
Last updated 11/16/2011
When transforming objects, keep in mind that you’re working on a rotated page view. For example, if you’re editing a
table on a rotated spread view, changing the “left” side of the table will change what appears to be the top of the table
in the rotated view.
Before you output the file or send it to someone else, it’s a good idea to avoid confusion by clearing the spread rotation.
Choose View > Rotate Spread > Clear Rotation.
Use multiple page sizes
You can define different page sizes for pages within a single document. This feature is especially useful when you want
to manage related designs in one file. For example, you can include business card, postcard, letterhead, and envelope
pages in the same document. Using multiple page sizes is also useful for creating gate-fold layouts in magazines.
For video tutorials on creating multiple page sizes in a document, see www.adobe.com/go/lrvid5153_id_en and
http://tv.adobe.com/go/4950/.
Multiple page sizes in same document
A. Magazine page B. Gate-fold page C. Spine page
Create different page sizes within a document
Use the Page tool to select the master page or layout page you want to resize, and then use the Control panel to change
the settings. A page inherits its page size from its master page, but you can change the size of a layout page so that it’s
different from the master page applied to it. A master page can be based on another master page of a different size, so
that a range of pages of mixed sizes can share the same master content.
To apply a different page size quickly, select the page in the Pages panel, and then choose a page size from the Edit
Page Size button .
1Using the Page tool , select one or more master pages or layout pages that you want to resize.
Make sure that the entire page is selected in the layout, not only in the Pages panel.
2Specify settings in the Control panel to change the page size of the selected pages:
X and Y values Change the Y value to determine the vertical position of the page in relation to other pages in the
spread.
W and H page size values Change the width and height of the selected pages. You can also specify a page size preset
from the menu. To create a custom page size that appears in this list, choose Custom Page Size from the menu,
specify the page size settings, and click OK.
A
B
C
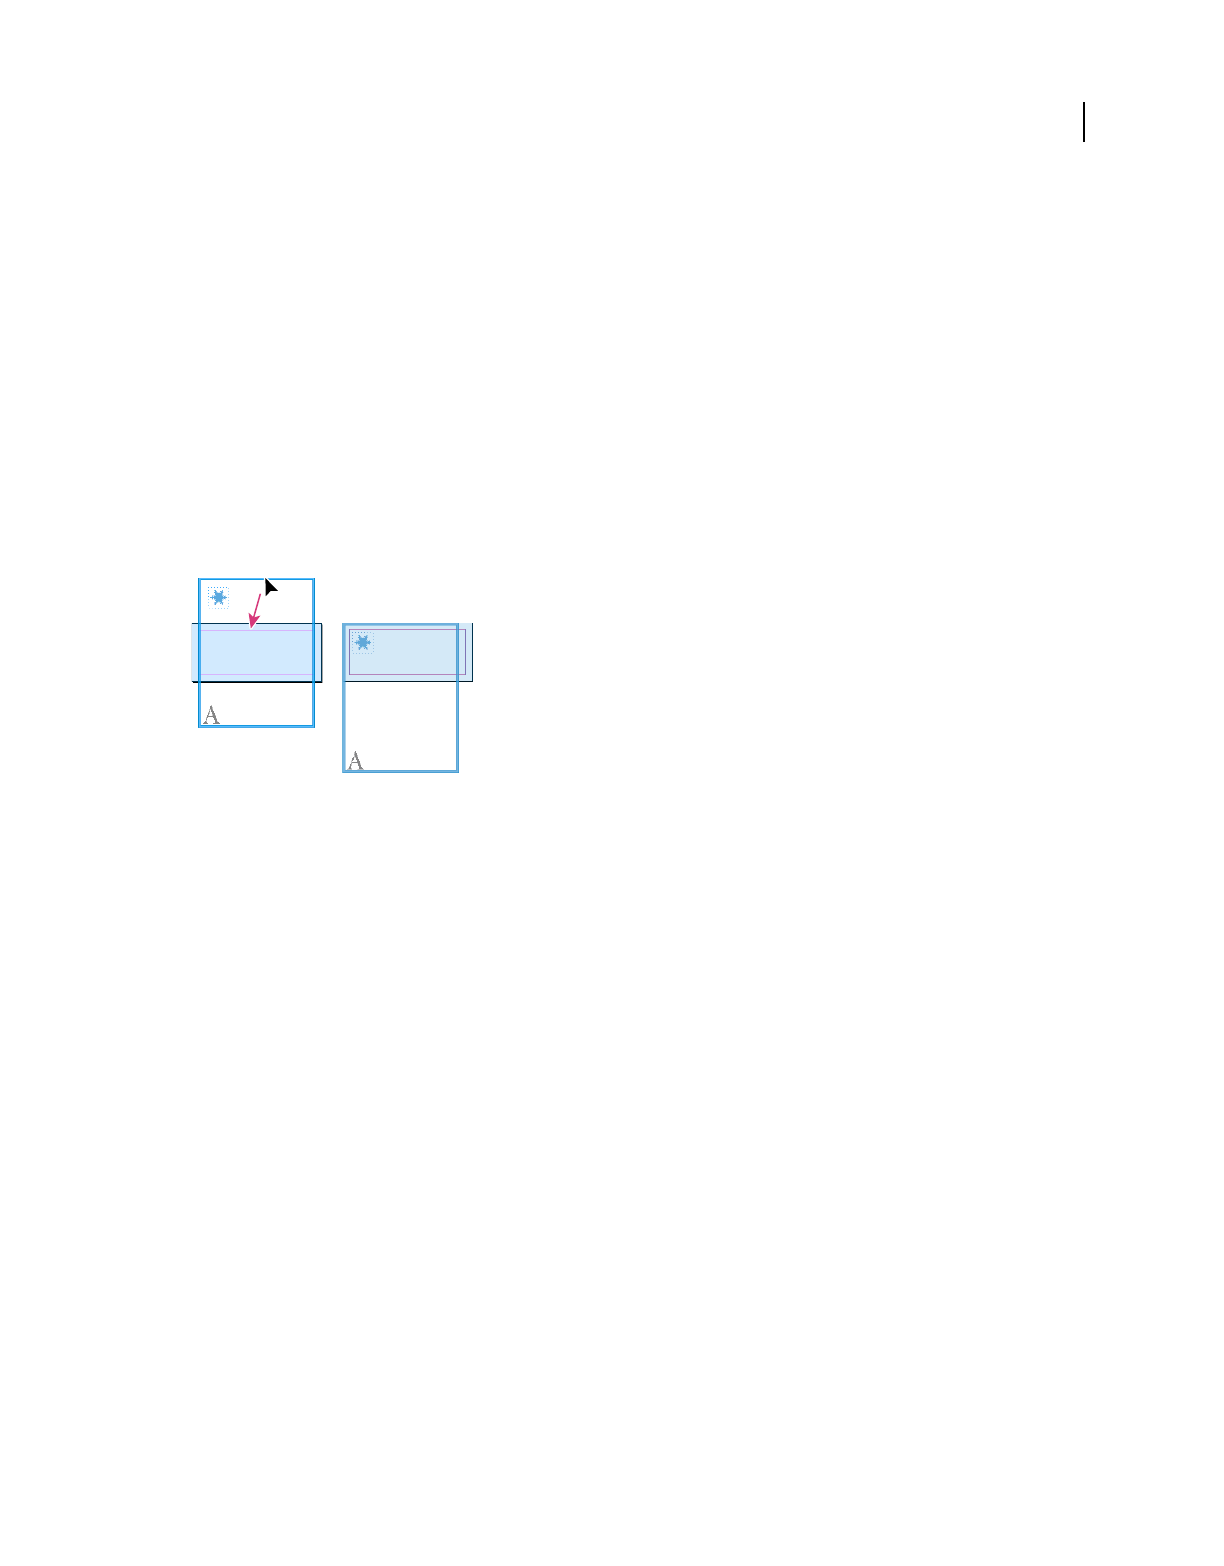
70
USING INDESIGN
Layout
Last updated 11/16/2011
Orientation Select a landscape or portrait page orientation.
Enable Layout Adjustment Select this option if you want the objects on the page to be adjusted automatically when
the page size changes. See “About automatic layout adjustment” on page 86.
Show Master Page Overlay Select this option to display a master page overlay on top of any page that is selected
with the Page tool.
Objects Move With Page Select this option to make the objects move along with the page when you adjust the X
and Y values.
Use master page overlays
When you use the Page tool to select a page and turn on the Show Master Page Overlay option, a shaded box appears
over the selected page. You can move the master page overlay so that master page items appear in the proper location.
The Show Master Page Overlay option is especially useful if the master page and document page have different page
sizes.
Aligning the master page overlay to a smaller layout page
1Using the Page tool, select a page.
2In the Control panel, select Show Master Page Overlay.
3Drag the edge of the master page overlay to position the page items.
Master pages
For detailed information and instructions, click the links below.
About masters, stacking order, and layers
A master is like a background that you can quickly apply to many pages. Objects on a master appear on all pages with
that master applied. Master items that appear on document pages are surrounded by a dotted border. Changes you
make to a master are automatically applied to associated pages. Masters commonly contain repeating logos, page
numbers, headers, and footers. They can also contain empty text or graphic frames that serve as placeholders on
document pages. A master item cannot be selected on a document page unless the master item is overridden.
Masters can have multiple layers, just like pages in your document. Objects on a single layer have their own stacking
order within that layer. Objects on a master page layer appear behind objects assigned to the same layer in the
document page.
If you want a master item to appear in front of objects on the document page, assign a higher layer to the object on the
master. A master item on a higher layer appears in front of all objects on lower layers. Merging all layers will move
master items behind document page objects.
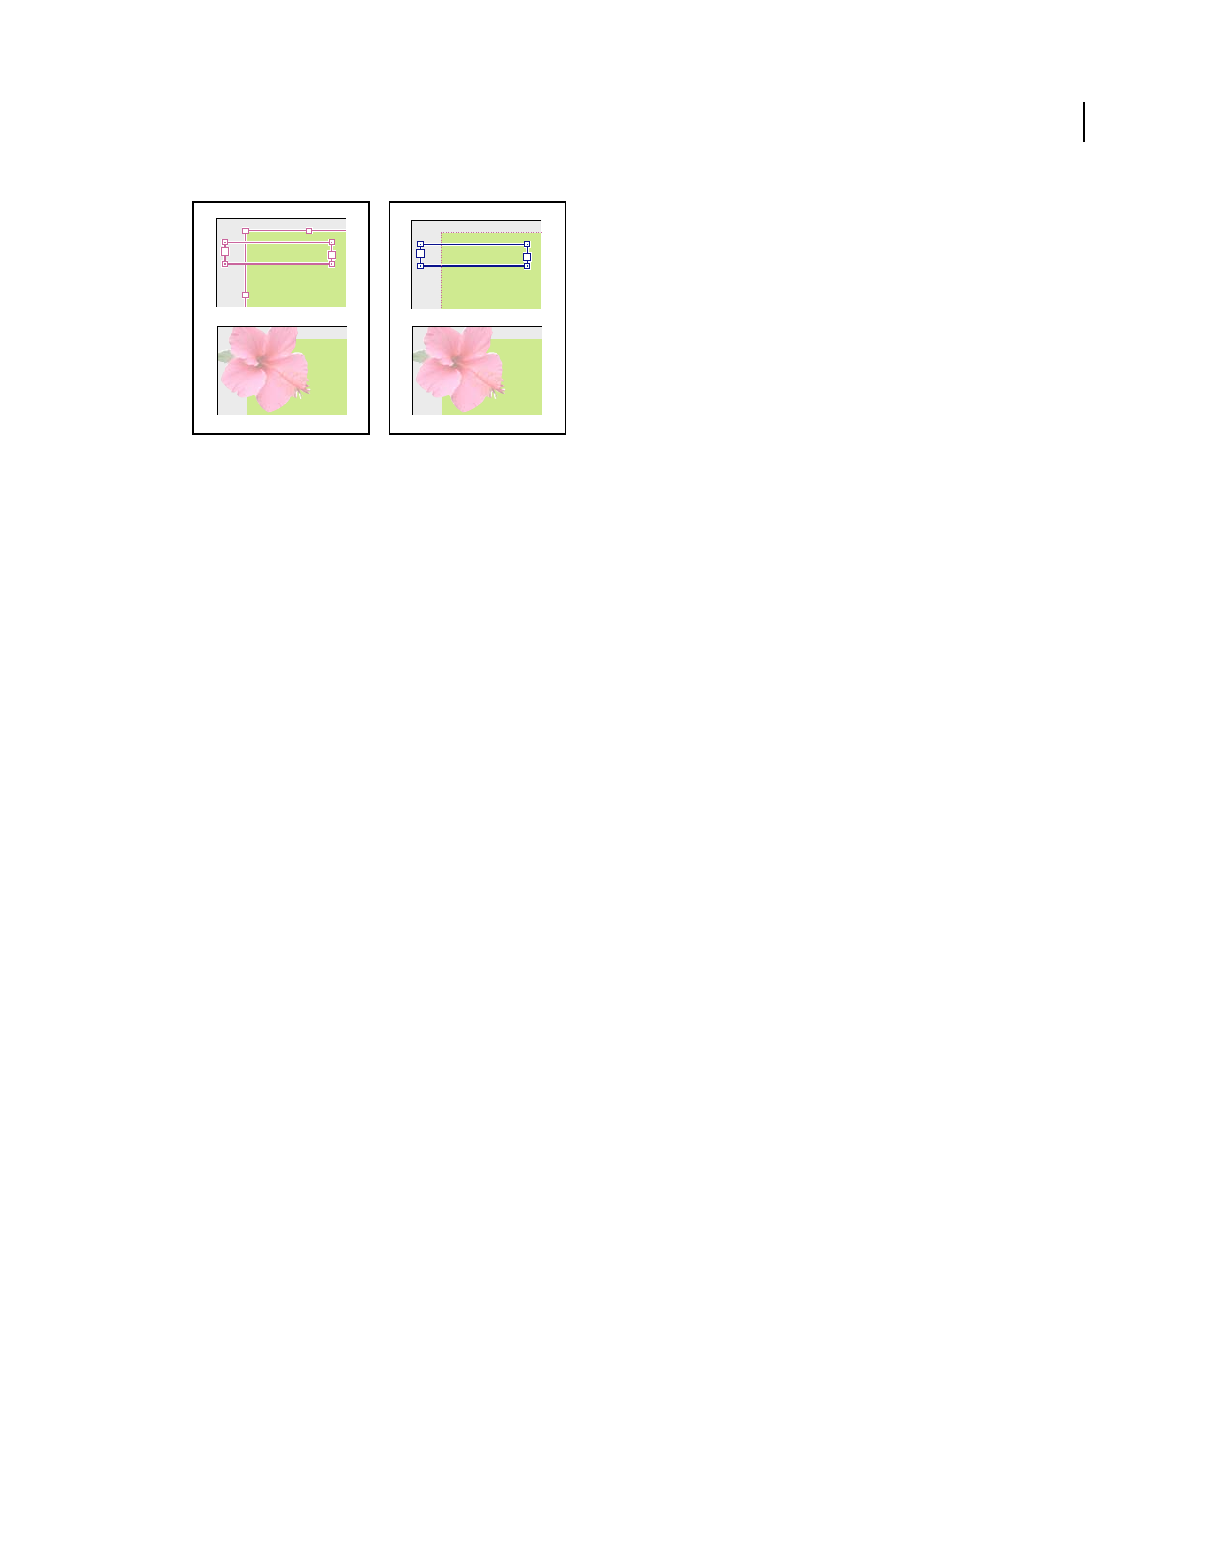
71
USING INDESIGN
Layout
Last updated 11/16/2011
Master items (top left) appear behind page objects on the same layer (bottom left); moving a master item to a higher layer (top right) moves it
in front of all objects on lower layers (bottom right).
Tips and guidelines for masters
•You can compare alternative design ideas by creating a variety of masters and applying them in turn to sample
pages containing typical content.
•To quickly lay out new documents, you can save a set of masters in a document template, along with paragraph and
character styles, color libraries, and other styles and presets.
•If you change column or margin settings on a master, or apply a new master with different column and margin
settings, you can force objects on the page to adjust to the new layout automatically. (See “About automatic layout
adjustment” on page 86.)
•Automatic page numbers inserted on a master display the correct page number for each section of the document
to which the master is applied. (See “Add basic page numbering” on page 88.)
More Help topics
“Override or detach master items” on page 75
Create masters
By default, any document you create has a master page. You can create additional masters from scratch or from an
existing master page or document page. After you apply master pages to other pages, any changes made to the source
master carry forward to the masters and document pages that are based on it. With careful planning, this provides an
easy way to make layout changes to multiple pages across your document.
For a video tutorial on working with master pages, see www.adobe.com/go/vid0069.
More Help topics
Master Pages video
“Apply master pages” on page 73
Create a master from scratch
1Choose New Master in the Pages panel menu.
2Specify the following options, and click OK:
•For Prefix, type a prefix that identifies the applied master for each page in the Pages panel. You can type as many
as four characters.
•For Name, type a name for the master spread.
•For Based On Master, choose an existing master spread on which you’ll base this master spread, or choose None.
A • Section
A • Section
8 • Hibiscus
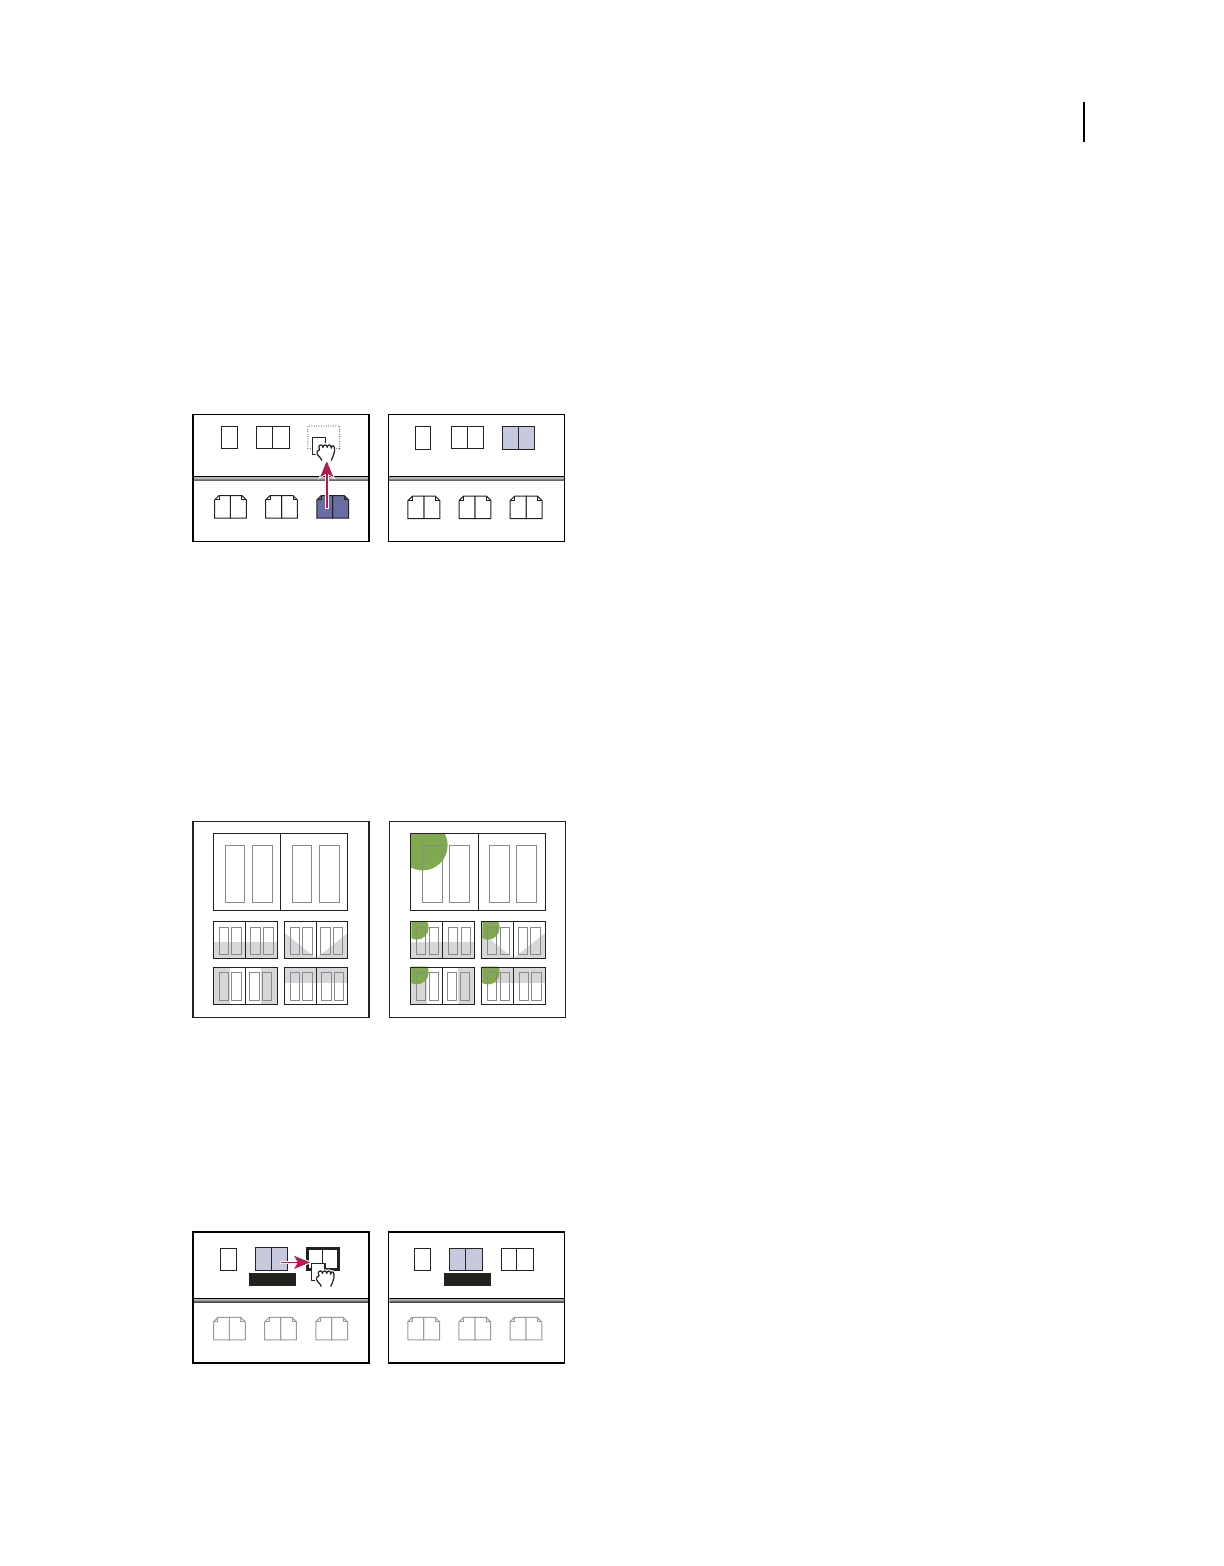
72
USING INDESIGN
Layout
Last updated 11/16/2011
•For Number Of Pages, type a value for the number of pages you want in the master spread (as many as ten).
Create a master from an existing page or spread
•Drag an entire spread from the Pages section of the Pages panel to the Masters section.
•Select a spread in the Pages panel and choose Save As Master from the Pages panel menu.
Any objects on the original page or spread become part of the new master. If the original page used a master, the new
master is based on the original page’s master.
Creating a new master spread based on another page or spread
Base one master on another
You can create a master variation that is based on and updates with another master (called the parent master) within
the same document. The master spreads based on the parent master are called child masters. For example, if your
document has ten chapters that use master spreads that vary only slightly, base all of them on a master spread that
contains the layout and objects common to all ten. This way, a change to the basic design requires editing just the
parent master instead of editing all ten separately. Vary the formatting on your child masters. You can override parent
master items on a child master to create variations on a master, just as you can override master items on document
pages. This is a powerful way to keep a consistent yet varied design up to date.
Original parent and child masters (left); when the parent master is modified, the child masters are automatically updated (right)
❖To base one master on another, in the Masters section of the Pages panel, do either of the following:
•Select a master spread, and choose Master Options for [master spread name] in the Pages panel menu. For Based
On Master, choose a different master, and click
OK.
•Select the name of the master spread you want to use as the base and drag it onto the name of another master to
apply
it.
B-Master based on A-Master
None
4–5 6–7 8–9
None
4–5 6–7 8–9
A-Master B-Master
A-Master
[None]
10–11 12–13 14–15
[None]
10–11 12–13 14–15
A-Master B-Master A-Master B-Master
AA

73
USING INDESIGN
Layout
Last updated 11/16/2011
Edit the layout of a master
You can edit the layout of master pages at any time; changes you make are automatically reflected on all pages with
that master applied. For example, any text or graphic you add to a master will appear on document pages to which the
master is applied.
Note: When you override or detach a master page object on a particular page, that object may not update to reflect
changes made on the master page.
1In the Pages panel, double-click the icon for the master you want to edit, or select the master page from the text box
list at the bottom of the document window. The master spread appears in the document window.
2Make changes to the master.
InDesign automatically updates any pages using that master.
To change the size of the master page, select it using the Page tool, and then use the options in the Control panel to
change the dimension. See “Use multiple page sizes” on page 69.
Use multiple views to see the results of master edits. Choose Window > Arrange > New Window, and then choose
Window > Arrange > Tile. Set one view to a page and the other view to the master applied to that page. Then edit the
master and watch the page update.
More Help topics
“Create headers and footers” on page 93
Change master page options
You can edit master page options to change the name or prefix of the master, base the master on another master, or
change the number of pages in the master spread.
1In the Pages panel, click the name of a master spread to select the master spread.
2Choose Master Options For [master name] in the Pages panel menu.
3Change any option, and then click OK.
Apply master pages
If your document contains custom spreads (such as a 3- or 4-page foldout in a magazine), any master you apply should
contain the same number of pages.
If your master page has a different page size than the layout page, applying the master page changes the size of the
layout page. If the layout page has a custom page size, you can specify whether to keep the custom layout page size or
apply the size of the master page.
Note: Master items on a document page have a dotted border. If you cannot view master items on a document page, the
master item may be hidden on a lower layer or the master items may be hidden. Choose Show Master Items from the
Pages panel menu.
Apply a master to a document page or spread
•To apply a master to one page, drag the master page icon to a page icon in the Pages panel. When a black rectangle
surrounds the desired page, release the mouse button.
•To apply a master to a spread, drag the master page icon to a corner of the spread in the Pages panel. When a black
rectangle surrounds all pages in the desired spread, release the mouse button.
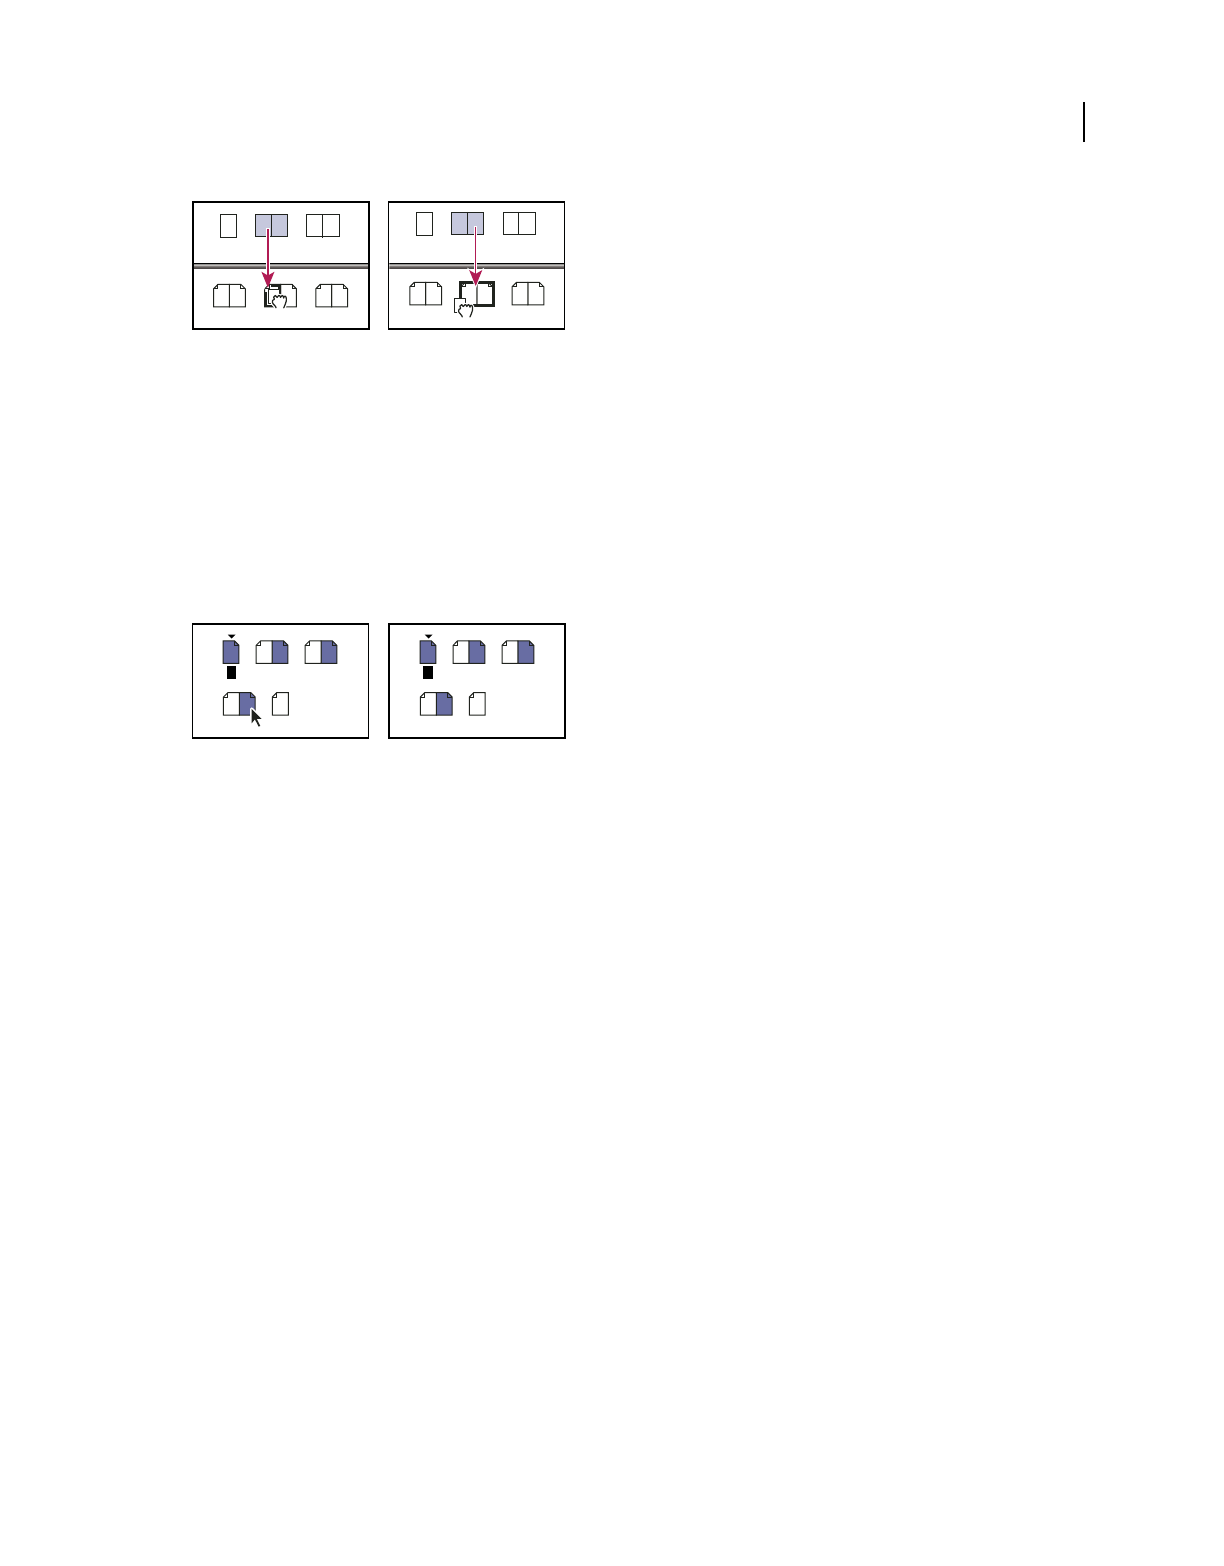
74
USING INDESIGN
Layout
Last updated 11/16/2011
Applying a master to a page (left) and applying a master to a spread (right)
Apply a master to multiple pages
❖Do one of the following:
•In the Pages panel, select the pages to which you want to apply a new master. Then press Alt (Windows) or Option
(Mac OS) as you click a master.
•Choose Apply Master To Pages from the Pages panel menu, select a master for Apply Master, make sure that the
page ranges in the To Pages option are the ones you want, and click
OK. You can apply a master to multiple pages
at once. For example, you can type 5, 7-9, 13-16 to apply the same master to pages 5, 7-9, and 13-16. (See “Display
absolute or section numbering in the Pages panel” on page 92.)
Applying a master to a discontiguous range of pages
Unassign masters from document pages
❖Apply the None master from the Masters section of the Pages panel.
When you unassign a master from a page, its layout and items no longer apply to the page. If a master contains most
of the elements you want, but you need to customize the appearance of a few pages, you can override master items and
edit or modify them on those document pages, instead of unassigning the master.
Copy masters
You can copy masters within the same document or from one document to another to use as the starting point for a
new master. You can also copy masters to other documents when you synchronize documents in a book or import
master pages from another document.
More Help topics
“Synchronize book documents” on page 315
“Import a master from another document” on page 77
Copy a master within a document
❖In the Pages panel, do one of the following:
•Drag the page name of a master spread to the New Page button at the bottom of the panel.
•Select the page name of a master spread, and choose Duplicate Master Spread [spread name] in the panel menu.
When you copy a master, the page prefix of the copied master becomes the next letter in the alphabet.
None
10–11 12–13
A-Master B-Master
14–15
None
10–11 12–13 14–15
A-Master B-Master
1
8
AA AA
2–3 4–5
6–7
1
8
BA BA
2–3 4–5
6–7
B
B

75
USING INDESIGN
Layout
Last updated 11/16/2011
Copy or move a master to another document
1Open the document you want to add the master to. Then open the document with the master you want to copy.
2In the Pages panel of the source document, do either of the following:
•Click and drag the master spread to the destination document’s window to copy it.
•Select the master you want to move or copy. Choose Layout > Pages > Move Master, and choose the destination
document name from the Move To menu. If you want to remove the page or pages from the source document,
select Delete Pages After Moving, and then click OK.
If the target document already has a master with the same prefix, the moved master is assigned the next available letter
in the alphabet.
Delete a master from a document
1In the Pages panel, select one or more master page icons.
To select all unused master pages, choose Select Unused Masters in the Page panel menu.
2Do one of the following:
•Drag a selected master page or spread icon to the Delete icon at the bottom of the panel.
•Click the Delete icon at the bottom of the panel.
•Choose Delete Master Spread [spread name] in the panel menu.
When you delete a master, the [None] master is applied to any document page to which the deleted master was applied.
Override or detach master items
When you apply a master page to a document page, all objects on the master, called master items, appear on the
document page. Sometimes you want a specific page to be only slightly different from a master. In this situation you
don’t need to re-create the master layout on the
page or create a new master. You can override or detach the master
item, and other master items on the document page will continue to update with the master.
Note the difference between overriding and detaching master items on a document page:
Override master item attributes Overriding a master item puts a copy of it on the document page without breaking its
association with the master page. Once the item itself is overridden, you can selectively override one or more attributes
of the item to customize it. For example, you can change the fill color of the local copy. After that, changes to the fill
color on the master page itself will not update to the local copy. However, other attributes, such as size, will continue
to update because they have not been overridden on the local copy. Overrides can be removed later to make the object
match the master.
Attributes you can override for a master page object include strokes, fills, contents of a frame, and any transformations
(such as rotating, scaling, shearing, or resizing), corner options, text frame options, lock state, transparency, and object
effects.
Detach items from their master On a document page, you can detach (disassociate) a master item from its master. The
item must be overridden on the document page, creating a local copy, before you can detach it. A detached item does
not update with the master because its association with the master page is broken.
More Help topics
“Apply text wrap on master page items” on page 232

76
USING INDESIGN
Layout
Last updated 11/16/2011
Override a master item
1Make sure the master item can be overridden.
You can override a master item only if Allow Master Item Overrides On Selection is selected in the Pages panel menu
for that item.
2Do either of the following:
•To override specific master items on a document page, press Ctrl+Shift (Windows) or Command+Shift (Mac OS)
and click the item (or drag to select multiple items). Change the selected master items as desired. The item can now
be selected like any other page item, but retains its association with the master page.
•To override all master page items on a document spread, target the spread, and then choose Override All Master
Page Items in the Pages panel menu. You can now select and modify any and all master items as you wish.
Once you override any master item, its dotted bounding box becomes a solid line, to show that a local copy has been
created.
Note: If you override a threaded text frame, all visible frames in that thread are overridden, even if they are on a different
page in a spread.
Detach a master item
•To detach a single master item from its master, first override it by pressing Ctrl+Shift (Windows) or
Command+Shift (Mac
OS) and clicking the item on a document page. Then choose Detach Selection From Master
in the Pages panel menu.
•To detach all overridden master items on a spread, override the master page items you want to detach, and target
that spread in the document. (Don’t go to the original master page.) Choose Detach All Objects From Master from
the Pages panel menu. If the command isn’t available, there aren’t any overridden objects on that spread.
Prevent a master item from being overridden
In some instances, you want to override all but a few master items. For example, you may want to override master items
such as background images on a document page, but you want to prevent a page-numbering header from being
overridden. By preventing the header from being overridden, you can choose the Override All Master Items option to
override all master items except for the header.
1On the master page, select the item.
2Deselect Allow Master Item Overrides On Selection on the Pages panel menu.
Master items that do not allow overrides have no frame edge when displayed on the document page. If you prevent a
threaded text frame from being overridden, all text frames in that thread have the same setting applied.
Reapply master items
If you’ve overridden master items, you can restore them to match the master page. When you do this, the object’s
attributes revert to their state on the corresponding master, and will once again update when you edit the master. The
local copy of the object is removed, and the master item cannot be selected, as indicated by its dotted border. You can
remove overrides for selected objects or all objects on a spread, but not across an entire document at once.
❖Do one of the following:
•To remove master overrides from one or more objects, select objects that were originally master items. In the Pages
panel, target a spread and choose Remove Selected Local Overrides in the Pages panel menu.

77
USING INDESIGN
Layout
Last updated 11/16/2011
•To remove all master overrides from a spread, in the Pages panel, target the spread (or master spread) from which
you want to remove all master overrides. Choose Edit
> Deselect All to make sure that no objects are selected. In
the Pages panel, choose Remove All Local Overrides in the Pages panel menu.
If you’ve detached master page objects, you cannot restore them to the master page; however, you can delete the
detached objects and reapply the master to the page.
If you reapply a master to a page that contains overridden master page objects, the objects with overrides are detached
and all master page objects reapplied. This may result in two copies of some objects on the page. You’ll need to delete
the detached objects to exactly match the look of the master.
Hide master items
Use the Hide Master Items to hide master page items on one or more pages in your document. Hidden master items
are not printed or output.
1In the Pages panel, select the pages and spreads on which you’d like the master items to be hidden.
2From the Pages panel menu, choose Hide Master Items.
To display master items again, select the spreads in the Pages panel and choose Show Master Items from the Pages
panel menu.
Import a master from another document
You can import masters from another InDesign document (any version) into the active document. If your destination
document contains master pages that have different names from any master page in the source document, those pages
and their document page overrides will be unchanged.
1In the Pages panel menu, choose Load Master Pages.
2Locate and double-click the InDesign document containing the master pages you want to import.
3Determine what should occur if a loaded master has the same name as a master in the current document.
•Choose Replace Master Pages if you want the masters from the source to override the destination document’s
masters with the same names. If your destination document does not have any overridden items, it is safe to Replace
Master Pages on import.
•Choose Rename Master Pages to change the page prefixes to the next available letter in the alphabet.
Once you have imported masters from a source document, a link is set up between the source document and the
destination document. When you subsequently load masters from the same source document, the association between
overridden items and their parent items on reloaded master pages is maintained. This association lets you keep master
pages in different documents consistent without putting those documents into a book.
If you want to use this method of keeping master pages consistent, you should load the master pages from the source
document before overriding any objects on the master. If your document has overridden items and you have never
imported masters from any source, those overridden items become detached the first time you load from a source
document and replace master pages with the same name as the parent master of the overridden items.
If you subsequently import masters from a different source document, however, and choose Replace Master Pages, the
overridden items may become detached. Any same-named masters from the new source document will be applied to
the document page containing overridden items, creating two sets of objects.
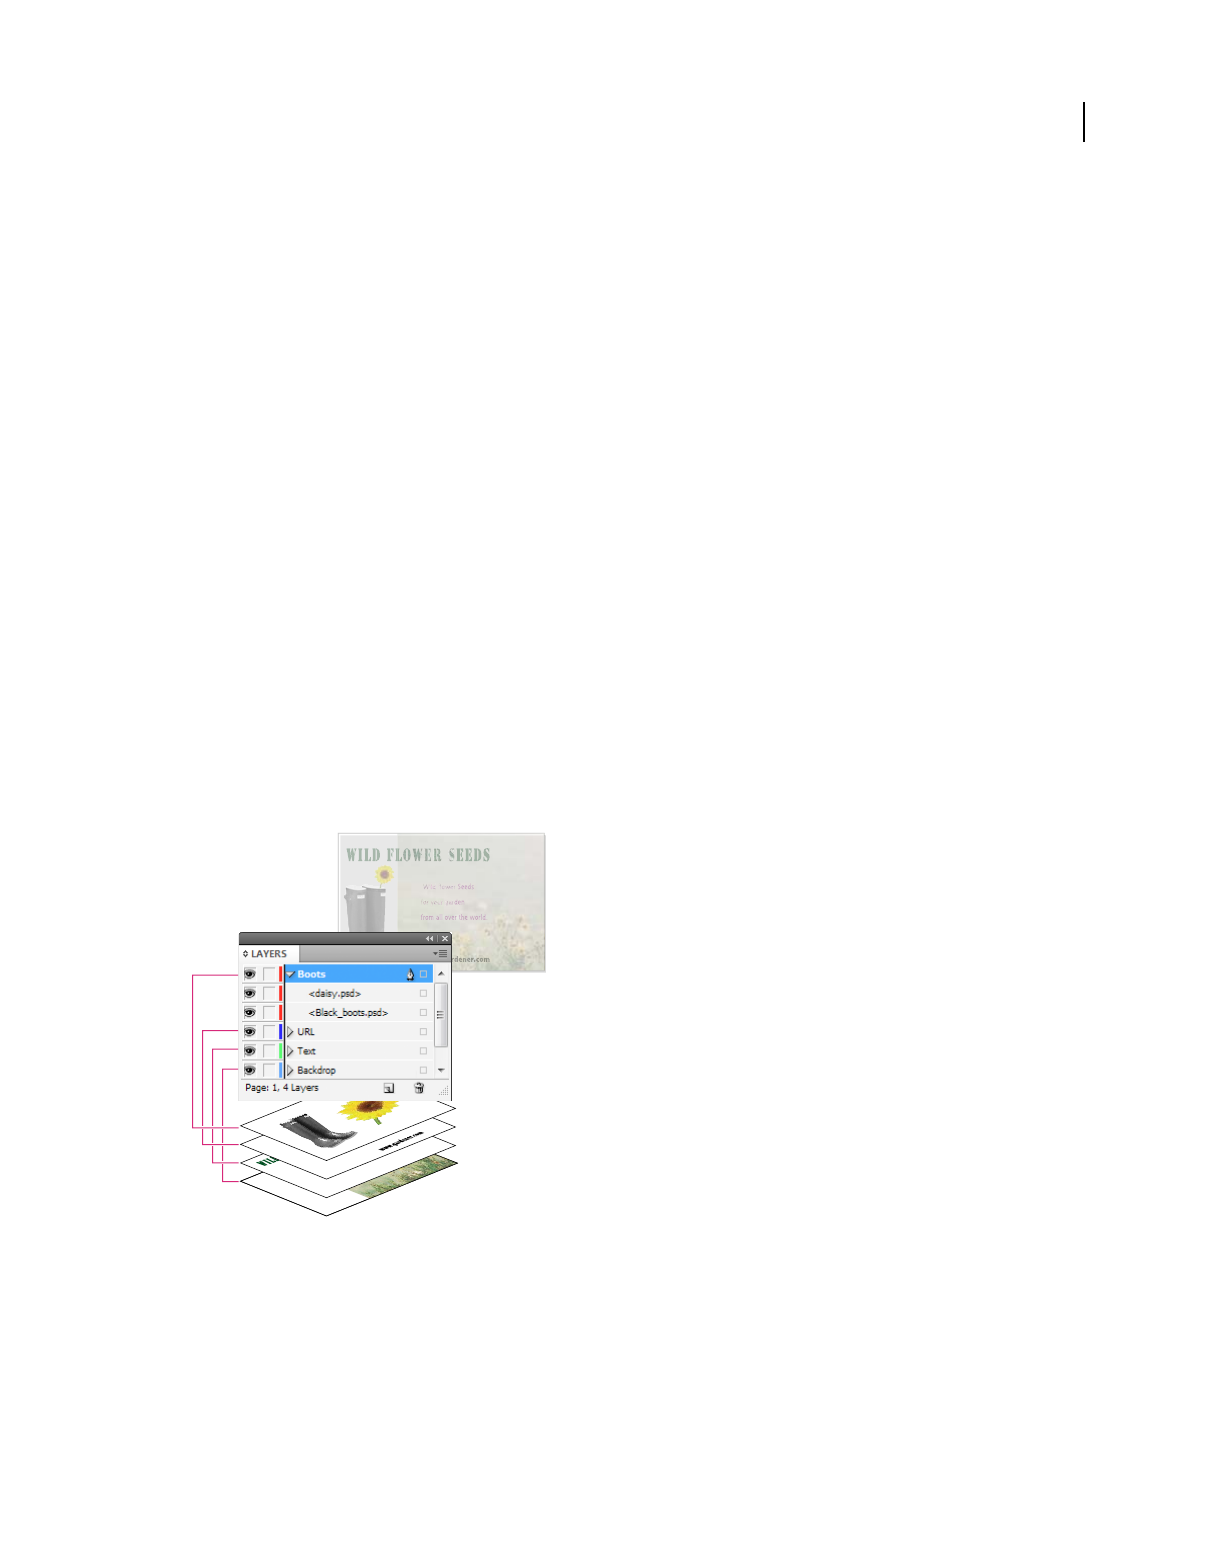
78
USING INDESIGN
Layout
Last updated 11/16/2011
Layers
About layers
Each document includes at least one named layer. By using multiple layers, you can create and edit specific areas or
kinds of content in your document without affecting other areas or kinds of content. For example, if your document
prints slowly because it contains many large graphics, you can use one layer for just the text in your document; then,
when it’s time to proofread the text, you can hide all other layers and quickly print the text layer only. You can also use
layers to display alternate design ideas for the same layout, or versions of advertisements for different regions.
Think of layers as transparent sheets stacked on top of each other. If a layer doesn’t have objects on it, you can see
through it to any objects on layers behind
it.
Additional layer notes:
•Each document layer has a disclosure triangle that can be expanded to reveal the objects and their stacking order
on that layer for the active spread. Groups, buttons, and multi-state objects also have disclosure triangles that can
be expanded to display their contained objects. You can re-order these objects, lock and unlock them, and add or
remove them from groups.
•Objects on masters appear at the bottom of each layer. Master items can appear in front of document page objects
if the master page objects are on a higher layer. (See “About masters, stacking order, and layers” on page 70.)
•Layers involve all pages of a document, including masters. For example, if you hide Layer 1 while editing page 1 of
your document, the layer is hidden on all pages until you decide to show it again.
•For information on converting layers from Adobe PageMaker® or QuarkXPress, see “Converting QuarkXPress and
PageMaker documents” on page 110.
The Layers panel lists layers with the frontmost layer appearing at the top of the panel.
For a video tutorial on using layers, see www.adobe.com/go/lrvid5151_id_en.
Create layers
You can add layers at any time using the New Layer command on the Layers panel menu or the New Layer button at
the bottom of the Layers panel. The number of layers a document can have is limited only by the RAM available to
InDesign.

79
USING INDESIGN
Layout
Last updated 11/16/2011
More Help topics
“Show or hide frame edges” on page 85
Create layers
1Choose Window > Layers.
2To create a new layer, do any of the following:
•To create a new layer above the selected layer, click the New Layer button.
•To create a new layer below the selected layer, hold down Ctrl (Windows) or Command (Mac OS) as you click the
New Layer button.
•To create a new layer at the top of the list, hold down Ctrl+Shift (Windows) or Command+Shift (Mac OS) as you
click the New Layer button.
•To create a new layer and open the New Layer dialog box, hold down Alt (Windows) or Option (Mac OS) as you
click the New Layer button.
Specify layer options
1Choose New Layer in the Layers panel menu, or double-click an existing layer.
2Specify the layer options, and then click OK.
Color Assign a color to identify the objects on that layer.
Show Layer Select this option to make a layer visible. Selecting this option is the same as making the eye icon visible
in the Layers panel.
Show Guides Select this option to make the guides on the layer visible. When this option is not selected for a layer, the
guides cannot be made visible, even by selecting View
> Show Guides for the document.
Lock Layer Select this option to prevent changes to any objects on the layer. Selecting this option is the same as making
the crossed-out pencil icon visible in the Layers panel.
Lock Guides Select this option to prevent changes to all ruler guides on the layer.
Print Layer Select this option to allow the layer to be prevented from printing. When printing or exporting to PDF,
you can determine whether to print hidden and nonprinting layers.
Suppress Text Wrap When Layer Is Hidden Select this option if you want text on other layers to flow normally when
the layer is hidden and it contains objects with text wrap applied.
Assign a layer color
Assigning a color to a layer makes it easier to distinguish the layers of different selected objects. For each layer that
contains a selected object, the Layers panel displays a dot in the layer’s color. On
the page, each object displays the color
of its layer in its selection handles, bounding box, text ports, text wrap boundary (if used), frame edges (including the
X displayed by an empty graphics frame), and hidden characters. The layer color does not appear for a deselected frame
if its edges are hidden.
1In the Layers panel, double-click a layer or select a layer and choose Layer Options for [layer name].
2For Color, choose a color or choose Custom to specify a color in the system color picker.
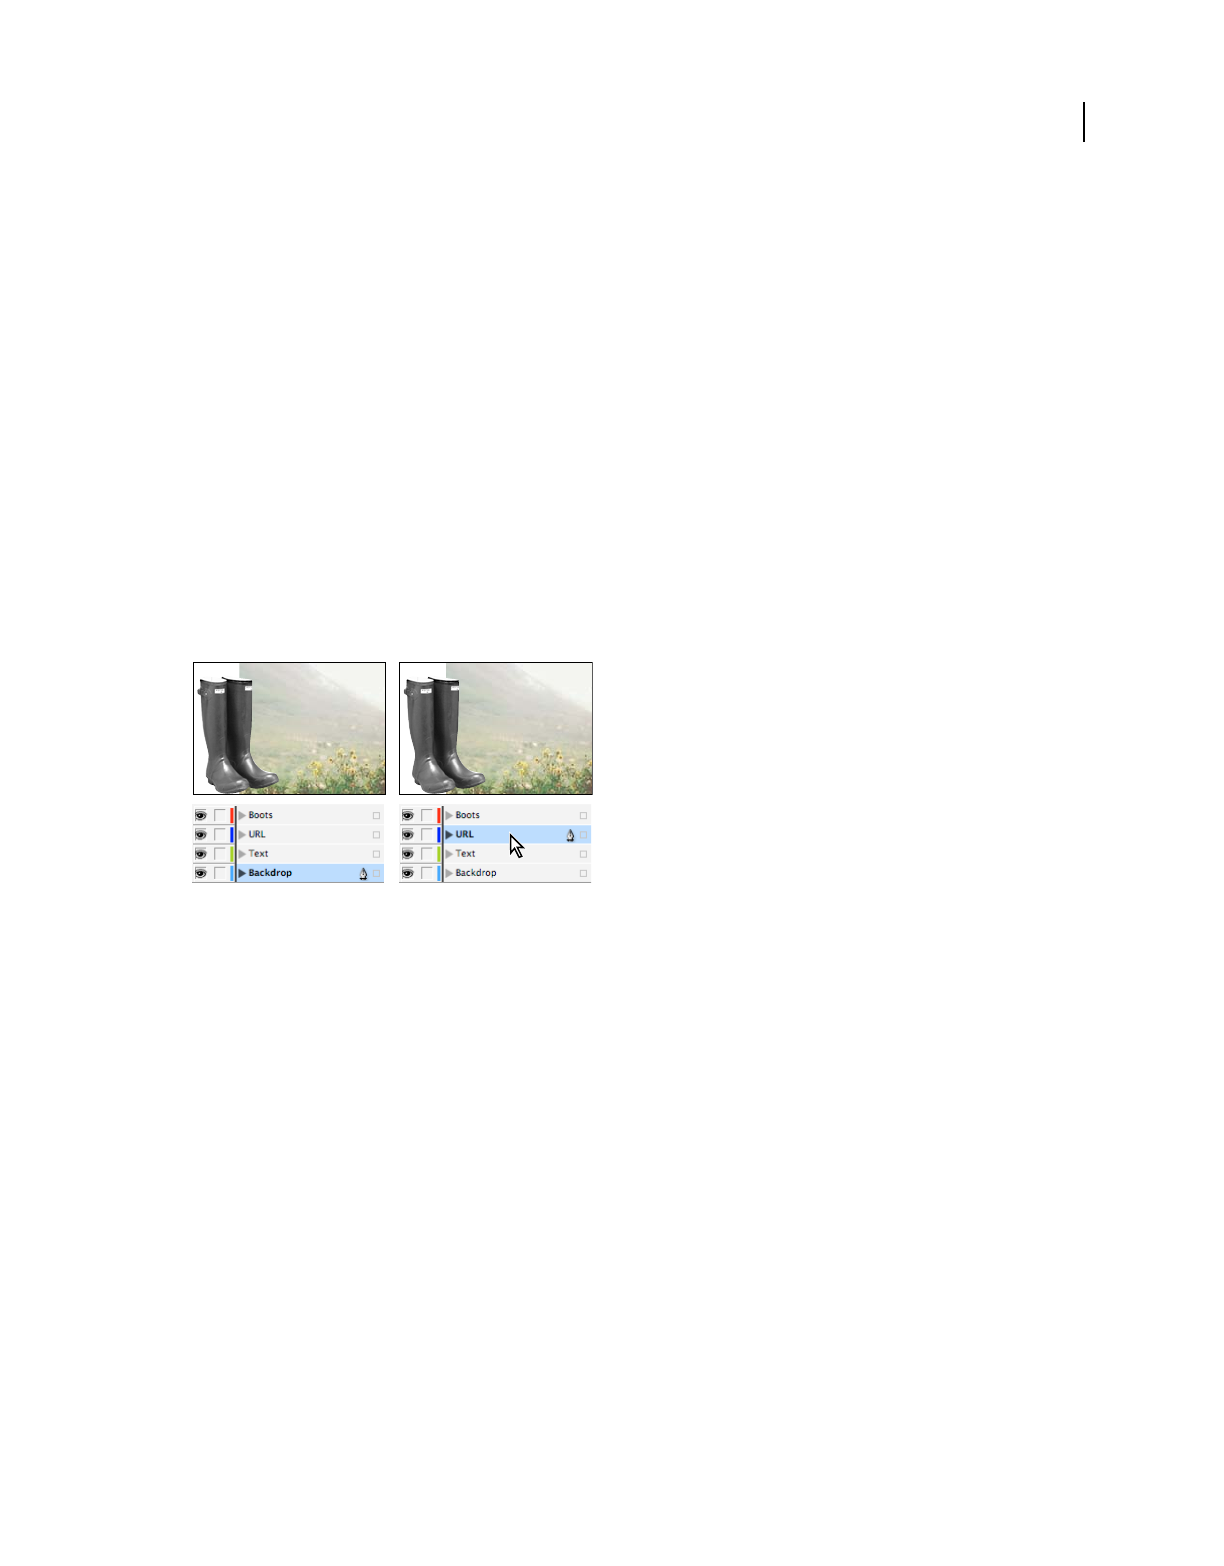
80
USING INDESIGN
Layout
Last updated 11/16/2011
Add objects to layers
Any new object is placed on the target layer, the layer currently displaying the pen icon in the Layers panel. Targeting
a layer also selects it. If multiple layers are selected, targeting one of them doesn’t change the selection, but targeting a
layer outside the selection deselects the other layers.
You can add objects to the target layer by any of the following methods:
•Creating new objects with the Type tool or drawing tools.
•Importing, placing, or pasting text or graphics.
•Selecting objects on other layers, and then moving them to the new layer.
You cannot draw or place a new object on a hidden or locked layer. When you select a drawing tool or the Type
tool, or place a file when the target layer is hidden or locked, the pointer changes to the crossed-out-pencil icon
when it is positioned over the document window. Either show or unlock the target layer, or target a visible,
unlocked layer. If you choose Edit
> Paste when the target layer is hidden or locked, an alert message gives you the
choice of showing or unlocking the target layer.
When you click a layer in the Layers panel to target it, the pen icon appears on the layer you clicked, and the layer also
highlights to indicate that it is targeted.
Changing the target layer for the next new object
Select, move, and copy objects on layers
By default, you can select any object on any layer. In the Layers panel, dots mark layers that contain selected objects.
The layer’s selection color helps you identify an object’s layer. To prevent selecting objects on a specific layer, lock the
layer.
❖Do any of the following:
•To select individual objects on a layer, click the triangle icon next to the layer to display all, and select the target
object. You can also drag the target object to a different location without selecting it.
Wild owers
for your gard
from all over
Wild owers
for your gard
from all over
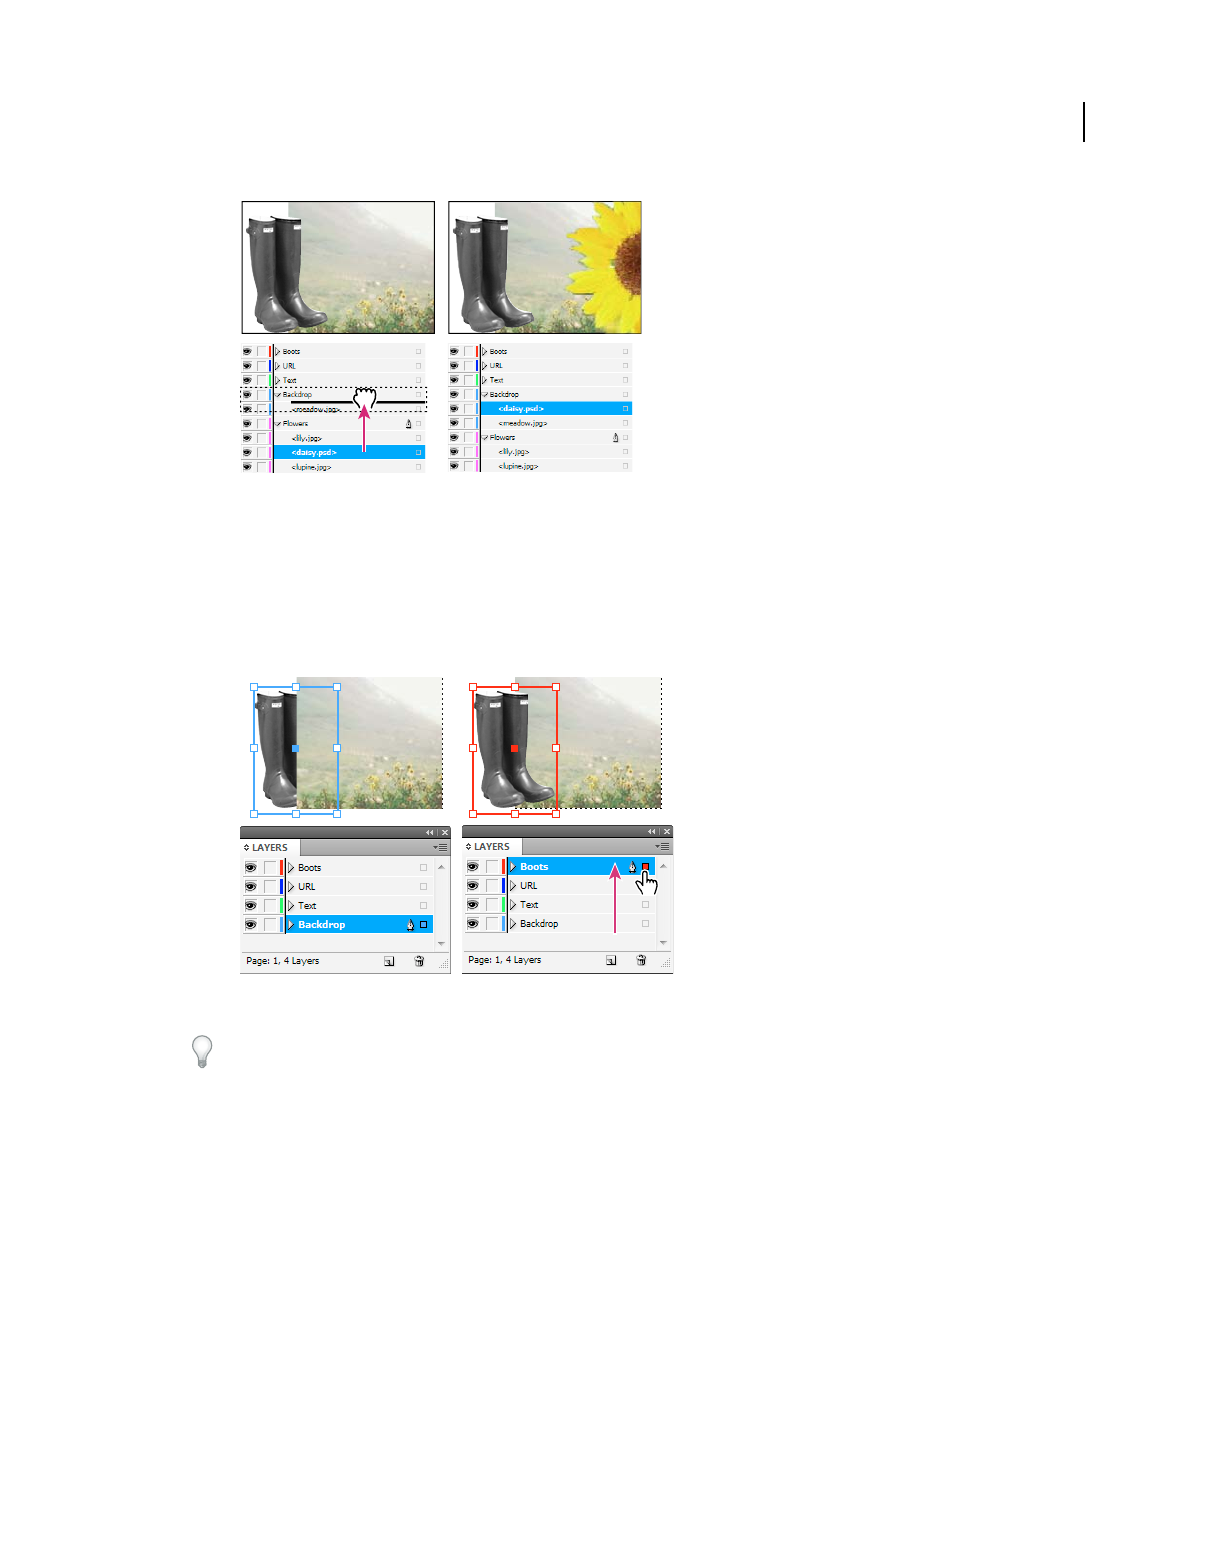
81
USING INDESIGN
Layout
Last updated 11/16/2011
Dragging objects from one layer to another
•To select all objects on a specific layer, hold down Alt (Windows) or Option (Mac OS) as you click a layer in the
Layers panel.
•To move or copy objects to another layer, use the Selection tool to select one or more objects on a document
page or master. In the Layers panel, drag the colored dot on the right side of the layer list to move the selected
objects to the other layer.
Moving an object to a new layer
To move selected objects to a locked layer, hold down Ctrl (Windows) or Command (Mac OS) as you drag the colored
dot. To copy selected objects to another layer, hold down Alt (Windows) or Option (Mac OS) as you drag the colored
dot on the right side of the layer list to the other layer. To copy selected objects to a locked layer, hold down Ctrl+Alt
(Windows) or Command+Option (Mac
OS) as you drag the colored dot.
Paste objects into different layers
The Paste Remembers Layers command affects how objects pasted from other locations interact with existing layers.
If the Paste Remembers Layers command is selected, objects cut or copied from different layers retain their layer
assignments when pasted to the new page or position. If you paste objects to a document that doesn’t have the same
layers as the document from which they were copied, InDesign adds the objects’ layer names to the Layers panel in the
second document, and pastes each object on its layer.
If the Paste Remembers Layers command is deselected, objects cut or copied from different layers are pasted together
on the target layer.
1Make sure that Paste Remembers Layers is deselected in the Layers panel menu.
Wild owers
for your gard
from all over
Wild owers
for your gard
from all over
W
i
ld
d
d
d
d
d
d
d
d
d
d
d
d
d
d
d
d
d
d
d
d
d
d
d
d
d
d
d
d
d
d
d
d
d
d
o
ow
w
w
w
w
w
w
w
w
w
w
w
ow
o
o
o
o
o
ow
w
w
w
o
o
o
o
o
o
o
o
ow
w
w
w
w
o
o
o
o
o
o
o
ow
w
w
o
ow
ow
o
o
ow
w
w
w
ow
w
w
w
w
w
ow
o
e
e
er
er
er
er
er
e
r
r
r
r
r
r
r
r
r
r
r
r
r
r
r
r
r
r
r
s
s
s
s
s
s
s
s
s
s
s
s
s
s
s
s
s
s
s
s
s
s
s
s
s
s
s
s
s
s
s
s
s
s
s
s
s
s
s
s
s
s
s
s
s
s
s
s
s
s
f
or
yo
o
o
o
o
o
o
o
o
o
o
o
o
o
o
o
o
o
o
o
o
o
o
o
u
u
u
u
ur
ur
ur
r
r
u
u
u
u
u
u
ur
u
u
u
u
u
u
u
u
u
u
u
u
u
u
u
r
u
u
u
u
u
u
u
u
u
u
u
u
u
u
u
u
u
u
u
u
u
u
u
u
u
u
u
u
u
u
u
u
u
u
u
u
u
ur
u
u
u
u
u
u
u
u
u
u
u
u
u
u
u
u
u
u
u
u
u
u
u
u
u
u
u
u
r
u
u
u
u
u
g
g
g
g
g
g
g
g
g
g
g
g
g
g
g
g
g
g
g
g
g
g
g
g
g
g
g
g
g
g
g
g
g
g
g
g
g
g
g
g
g
g
g
g
g
g
g
g
g
g
g
g
g
g
g
g
g
g
g
g
g
g
g
g
g
a
a
a
ar
arar
ar
ar
r
r
a
a
a
a
ar
r
r
a
a
a
a
r
a
a
a
r
r
a
a
a
a
r
a
a
a
a
ar
a
a
a
a
a
a
a
a
a
a
a
a
a
a
r
r
a
a
a
r
r
a
a
a
a
r
a
r
a
a
a
a
a
r
a
a
a
d
dd
d
d
d
d
d
d
d
d
d
d
d
d
d
d
d
d
d
d
d
d
d
d
d
ee
e
e
e
e
e
e
f
r
om
m
m
m
m
m
m
m
m
m
m
m
m
m
m
m
m
m
m
m
m
m
m
m
m
m
m
m
m
m
m
m
m
m
m
m
m
m
m
m
m
m
m
m
m
m
m
m
m
m
m
m
m
m
m
m
m
m
m
m
m
m
m
m
m
a
a
a
a
a
a
a
a
a
a
a
a
a
a
a
a
a
a
a
a
a
ll
ll
ll
ll
ll
l
l
l
l
l
l
ll
l
l
l
l
l
l
l
l
l
l
l
l
l
l
l
l
l
l
l
l
l
l
l
l
l
l
l
l
o o
o
o
o
o
veve
ve
ve
ve
ve
ve
e
e
e
e
e
ve
ve
ve
ve
e
e
ve
ve
v
e
e
e
e
ve
ve
v
v
ve
e
e
e
e
e
v
ve
e
e
e
e
e
e
e
e
ve
ve
e
e
e
e
e
e
e
ve
e
e
e
e
e
e
e
ve
e
e
e
e
e
e
e
e
e
e
e
e
e
e
e
e
e
e
e
e
e
e
e
e
e
r
r
r
r
r
r
r
r
r
r
r
r
r
r
r
r
r
r
r
r
r
r
r
r
r
r
r
r
r
r
r
r
r
r
r
r
r
r
r
r
r
r
r
r
r
r
r
r
r
r
r
r
Wild owers
for your gard
from all over
Wild owers
for your gard
from all over
Wild owers
for your gard
from all over
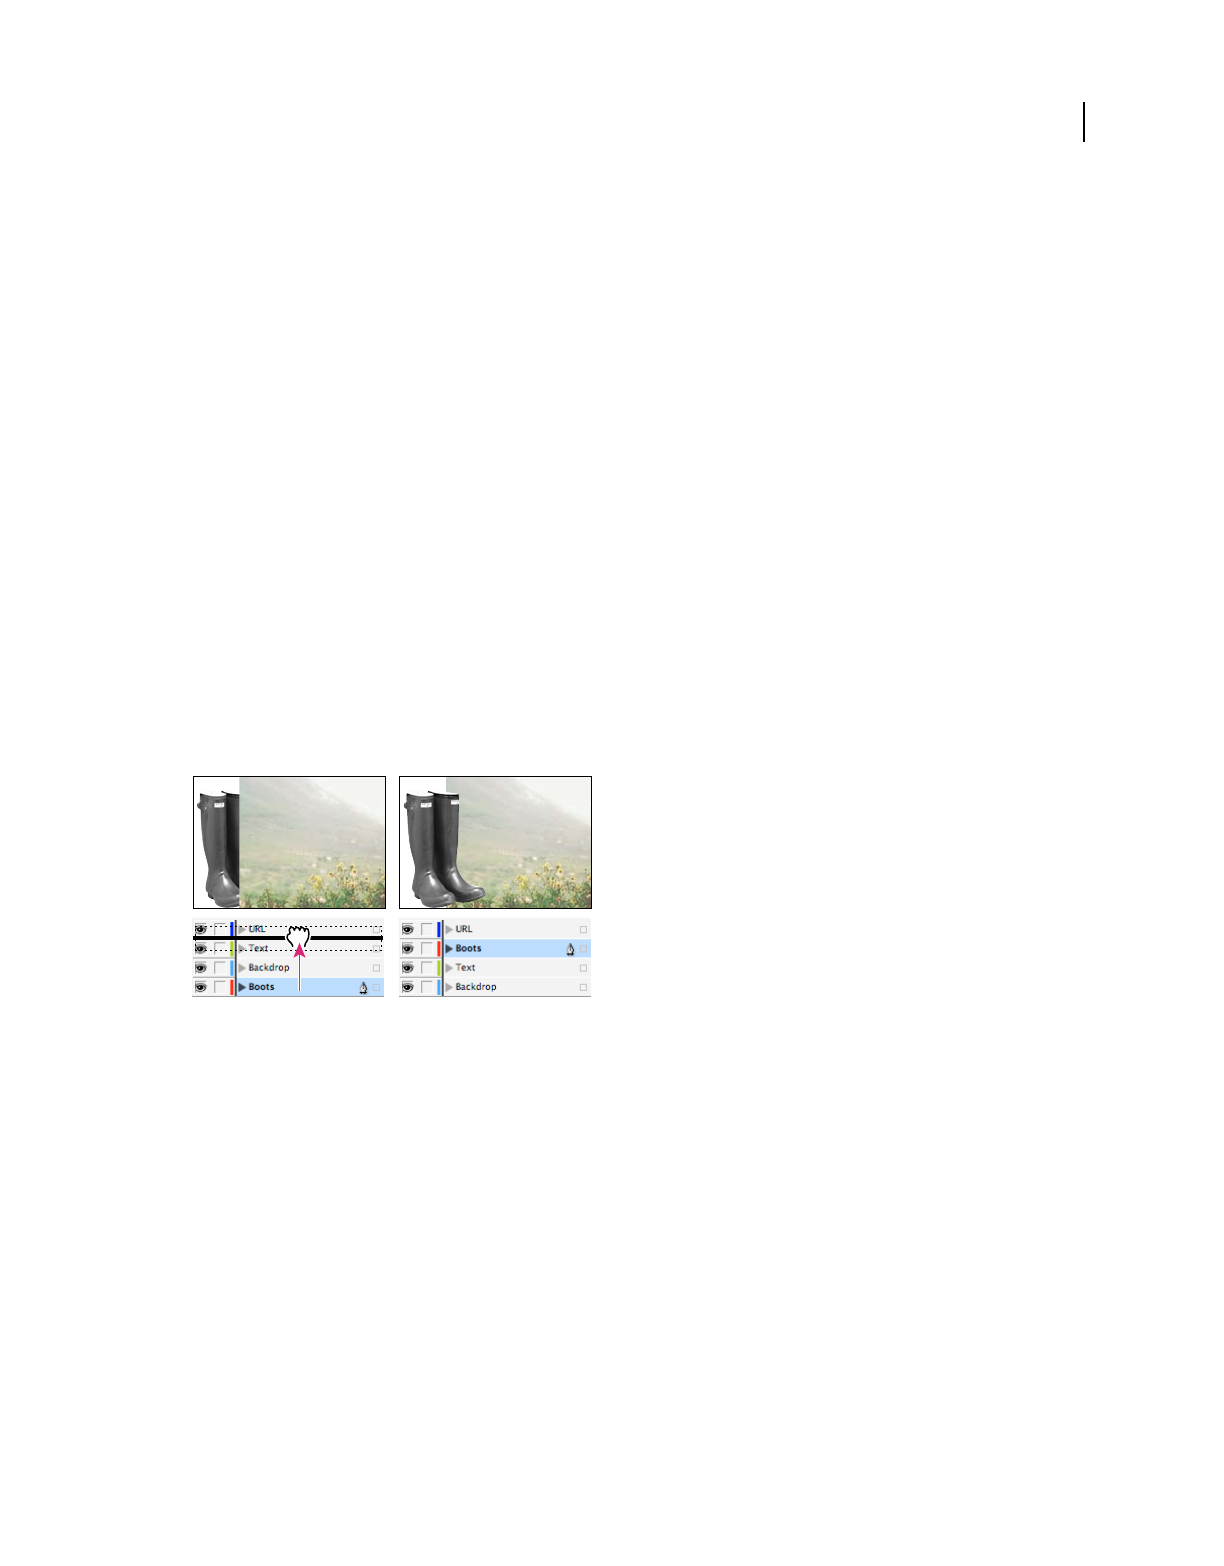
82
USING INDESIGN
Layout
Last updated 11/16/2011
2Select objects and choose Edit > Copy or Edit > Cut.
3In the Layers panel, click the other layer to target it.
4Choose Edit > Paste.
Duplicate a layer
When you duplicate a layer, you copy its contents and settings. The duplicate layer then appears above the original
layer in the Layers panel. Any duplicated frames that were threaded to other frames on the layer remain threaded.
Duplicated frames whose originals were threaded to frames on other layers are no longer threaded to those frames.
❖In the Layers panel, do one of the following:
•Select the layer name and choose Duplicate Layer [layer name] in the Layers panel menu.
•Drag a layer name and drop it on the New Layer button.
Change the order of layers
Change the stacking order of layers in your document by rearranging the layers on the Layers panel. Rearranging layers
changes the order of layers on every page, not just on the target spread.
You can also change the stacking order of objects within a layer by repositioning objects within the layer. See “Arrange
objects in a stack” on page 407.
❖In the Layers panel, drag a layer up or down in the list. You can also drag multiple selected layers.
Reordering layers
Show or hide layers and objects
You can hide or display any layer at any time, and you can hide or display objects on a layer. Hidden layers and objects
can’t be edited, and don’t appear on
screen or in print. Hiding layers can be useful when you want to do any of the
following:
•Hide parts of a document that are not meant to appear in the final document.
•Hide alternate versions of a document.
•Simplify the display of a document, to make it easier to edit other parts of the document.
•Prevent a layer from printing.
•Speed up screen redraw when a layer contains high-resolution graphics.
Wild owers
for your gard
from all over
Wild owers
for your gard
from all over

83
USING INDESIGN
Layout
Last updated 11/16/2011
By default, text continues to wrap around objects on hidden layers. To ignore text wrap settings for hidden objects,
choose Layer Options from the Layers panel menu, and then select the Suppress Text Wrap When Layer Is Hidden
option.
❖Do any of the following:
•To hide or show one layer at a time, in the Layers panel, click the square at the far left of a layer name to hide or
show the eye icon for that layer.
•To show or hide individual objects in a layer, click the disclosure triangle to view all objects in a layer, and then click
the eye icon to show or hide the object.
•To hide all layers except the selected layer, or to hide all objects on a layer except the selected object, choose Hide
Others in the Layers panel menu. Or, Alt-click (Windows) or Option-click (Mac OS) the square on the far left side
of the layer or object you want to remain visible.
•To show all layers, choose Show All Layers in the Layers panel menu. Or, Alt-click (Windows) or Option-click (Mac
OS) the square on the far left side of a visible layer or object to show all layers or all objects in a layer.
Set a layer as nonprinting
1Select the layer in the Layers panel.
2Choose Layer Options from the Layers panel menu.
3To prevent the layer from being printed, deselect Print Layer, and then click OK.
Note: When you print or export to PDF, you will still have the option of printing hidden and nonprinting layers.
Lock or unlock layers
Locking is useful for preventing accidental changes to a layer. A locked layer displays a crossed-out pencil icon in the
Layers panel. Objects on locked layers cannot be selected or edited directly; however, if objects on locked layers have
attributes that can be edited indirectly, they will change. For example, if you edit a tint swatch, objects on locked layers
using that tint swatch will reflect the change. Similarly, putting a series of threaded text frames on both locked and
unlocked layers will not prevent text on locked layers from recomposing.
You can also use the Layers panel to lock or unlock objects in a layer. See “Lock or unlock objects” on page 429.
❖Do any of the following:
•To lock or unlock one layer at a time, in the Layers panel, click a square in the second column from the left to show
(lock) or hide (unlock) the layer.
•To lock all layers except the target layer, choose Lock Others in the Layers panel menu. Or, Alt-click (Windows) or
Option-click (Mac OS) the the square left of the layer you want to remain unlocked.
•To unlock all layers, choose Unlock All Layers in the Layers panel menu.
Delete layers
Remember that each layer is document-wide—it appears on every page of a document. Before deleting a layer, consider
hiding all other layers first, and then turn to each page of the document to verify that it is safe to delete the remaining
objects.
❖Do any of the following:
•To delete a layer, drag a layer from the Layers panel to the Delete icon or choose Delete Layer [layer name] from
the
Layers panel menu.
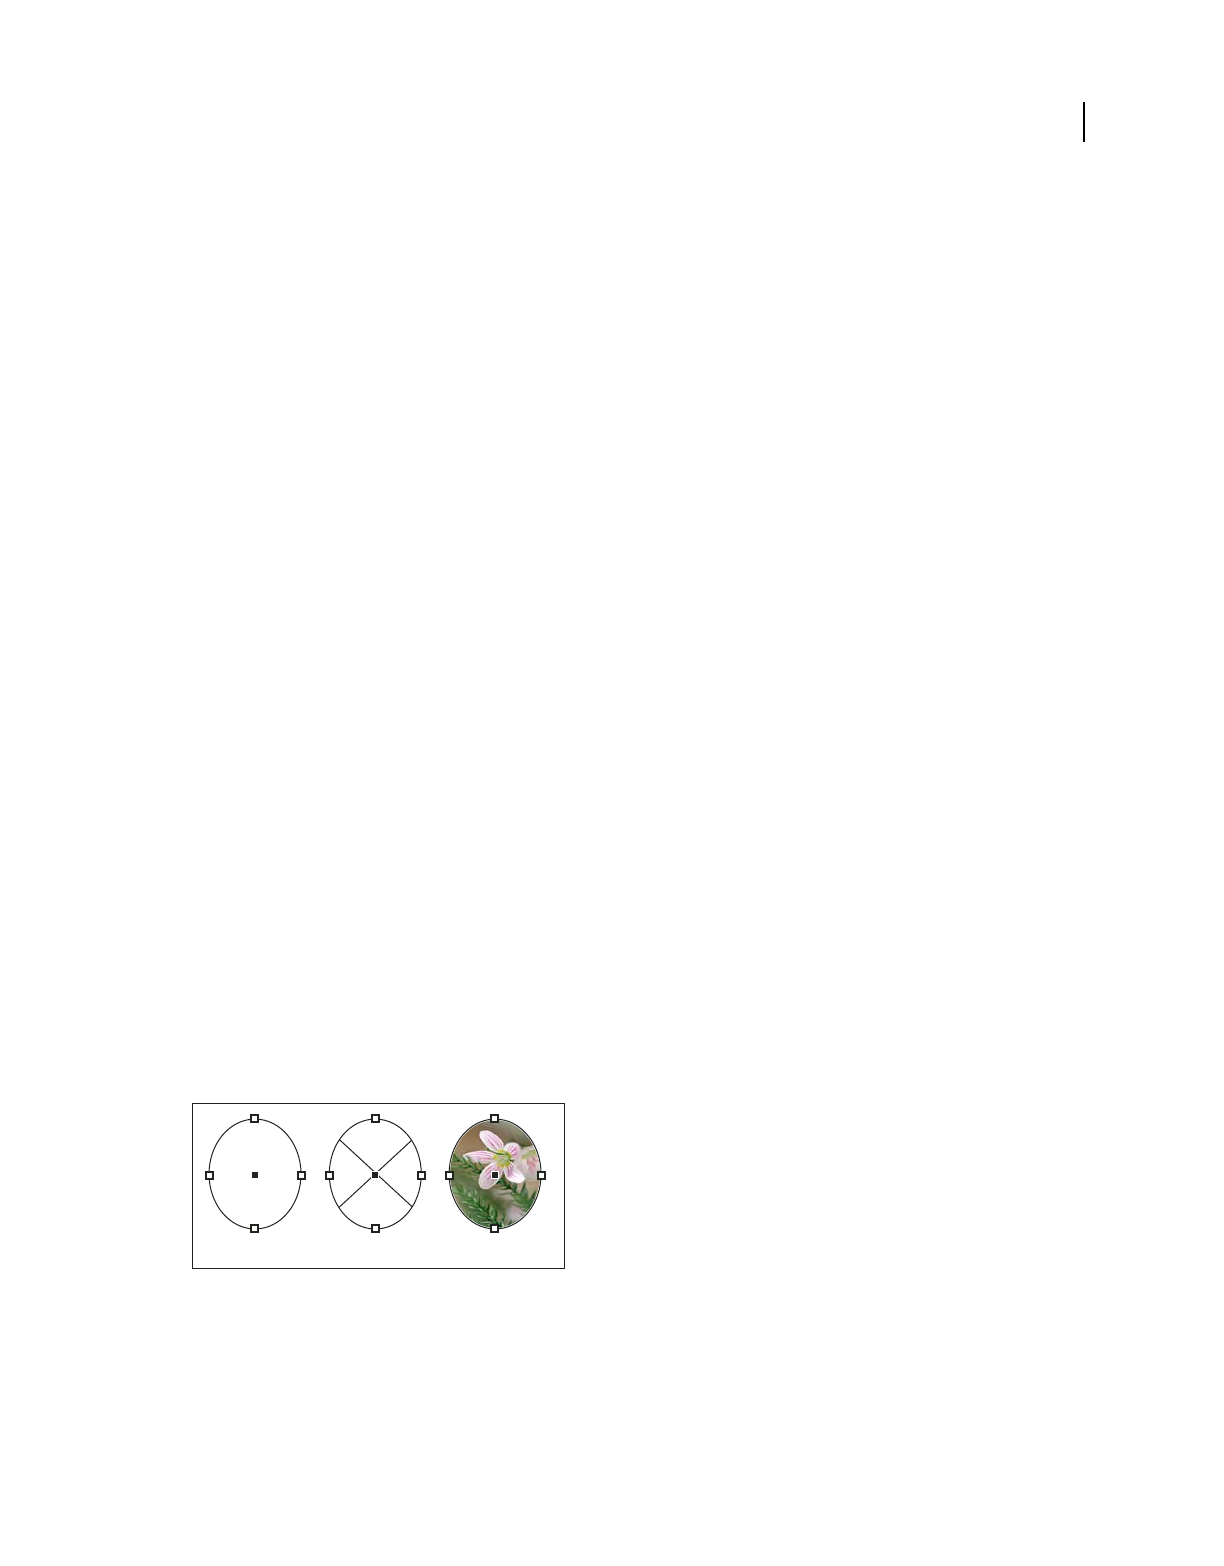
84
USING INDESIGN
Layout
Last updated 11/16/2011
•To delete multiple layers, hold Ctrl (Windows) or Command (Mac OS) while you click the layers to select them.
Then drag the layers from the Layers panel to the Delete icon or choose Delete Layers from the
Layers panel menu.
•To delete all empty layers, choose Delete Unused Layers in the Layers panel menu.
•To delete an object on a layer, select the object in the Layers panel, and then click the Delete icon.
Merge layers in a document
You can reduce the number of layers in a document without deleting any objects by merging layers. When you merge
layers, objects from all selected layers are moved to the target layer. Of the layers you merge, only the target layer
remains in the document; the other selected layers are deleted. You can also flatten a document by merging all
layers.
Note: If you merge layers containing a mix of page objects and master items, the master items move to the back of the
resulting merged layer.
1In the Layers panel, select any combination of layers. Be sure to include the layer you want to target as the merged
layer. If you’re flattening the document, select all layers in the panel.
2Click any selected layer to make it the target layer, indicated by the pen.
3Choose Merge Layers in the Layers panel menu.
You can also merge identically named layers for exporting a book to PDF.
More Help topics
“Prepare layers before exporting a book to PDF” on page 502
Laying out frames and pages
For detailed information and instructions, click the links below.
About paths and frames
You can draw objects in a document and use them as paths or as frames. Paths are vector graphics like those you create
in a drawing program such as Adobe Illustrator®. Frames are identical to paths, with only one difference—they can be
containers for text or other objects. A frame can also exist as a placeholder—a container without contents. As
containers and placeholders, frames are the basic building blocks for a document’s layout.
Paths and frames
A. Path B. Frame as graphic container C. Frame with placed graphic
You can draw both paths and frames using tools in the Toolbox. You can also create frames by simply placing
(importing) or pasting contents into a path.
Note: In QuarkXPress, paths are referred to as lines, and frames are referred to as boxes.
ABC
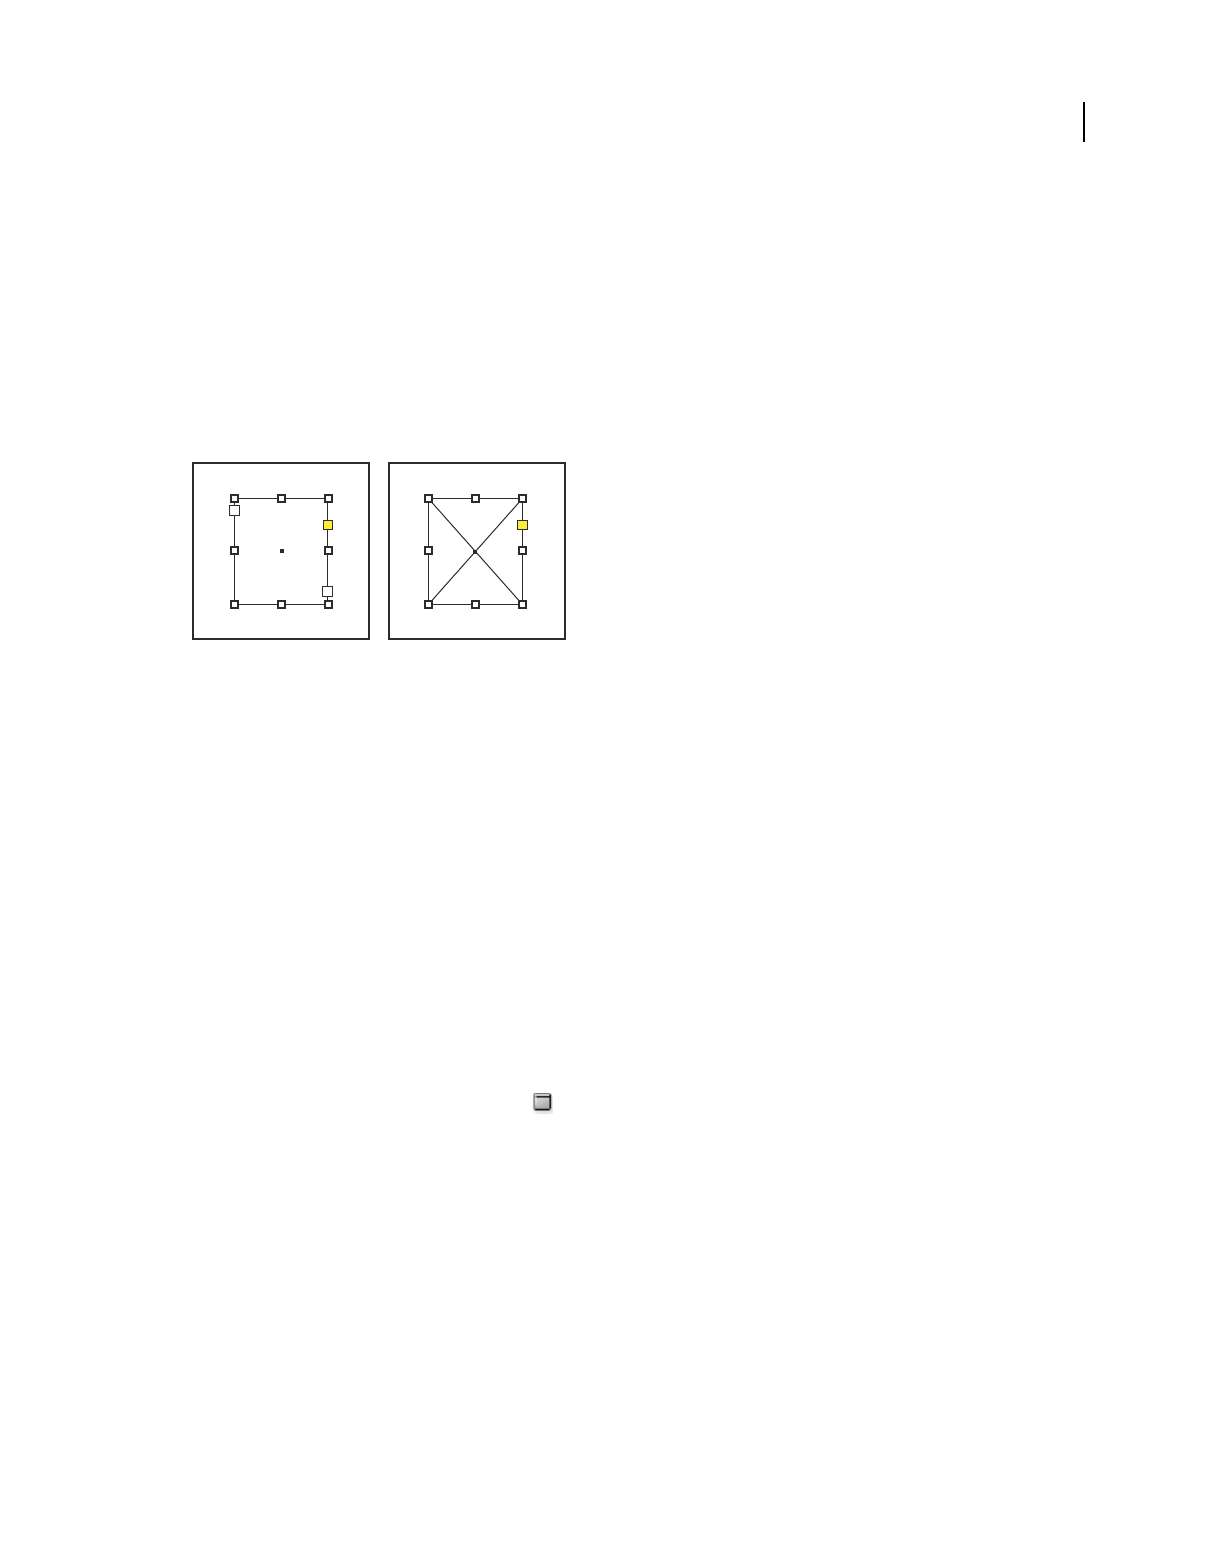
85
USING INDESIGN
Layout
Last updated 11/16/2011
Because a frame is just a container version of a path, you can do anything to a frame that you can do to a path, such as
add a color or a gradient to its fill or stroke, or edit the shape of the frame itself with the Pen tool. You can even use a
frame as a path, or a path as a frame, at any time. This flexibility makes it easy to change your design and provides a
wide range of design choices.
Frames can contain text or graphics. A text frame determines the area to be occupied by text and how text will flow
through the layout. You can recognize text frames by the text ports in their respective upper left and lower right
corners.
A graphics frame can function as a border and background, and can crop or mask a graphic. When acting as an empty
placeholder, a graphics frame displays a crossbar.
Text frame (left) and empty graphics frame (right)
If you don’t see the crossbar inside an empty graphics frame, the frame edges display may be turned off.
More Help topics
“Understanding paths and shapes” on page 340
Show or hide frame edges
Unlike paths, you can see the nonprinting strokes (outlines) of frames by default even when the frames aren’t selected.
If the document window is getting crowded, use the Show/Hide Frame Edges command to simplify the screen display
by hiding the frame edges. Doing this also hides the crossbar in a graphics placeholder frame. The display setting for
frame edges doesn’t affect the display of the text ports on text frames.
Note: The frame edge is defined as a frame’s stroke, not the outer edge of the stroke’s weight.
❖Do any of the following:
•To show or hide frame edges, choose View > Extras > Show/Hide Frame Edges.
•To hide frame edges, click Preview Mode at the bottom of the Toolbox.
Using placeholders to design pages
When your final text and graphics are available, you can simply add them to a document; InDesign automatically
creates frames when you import them (unless you’re importing text or graphics directly into existing frames).
However, when you don’t have the content yet or you want to block out the design before adding text and graphics,
you can use frames as placeholders.
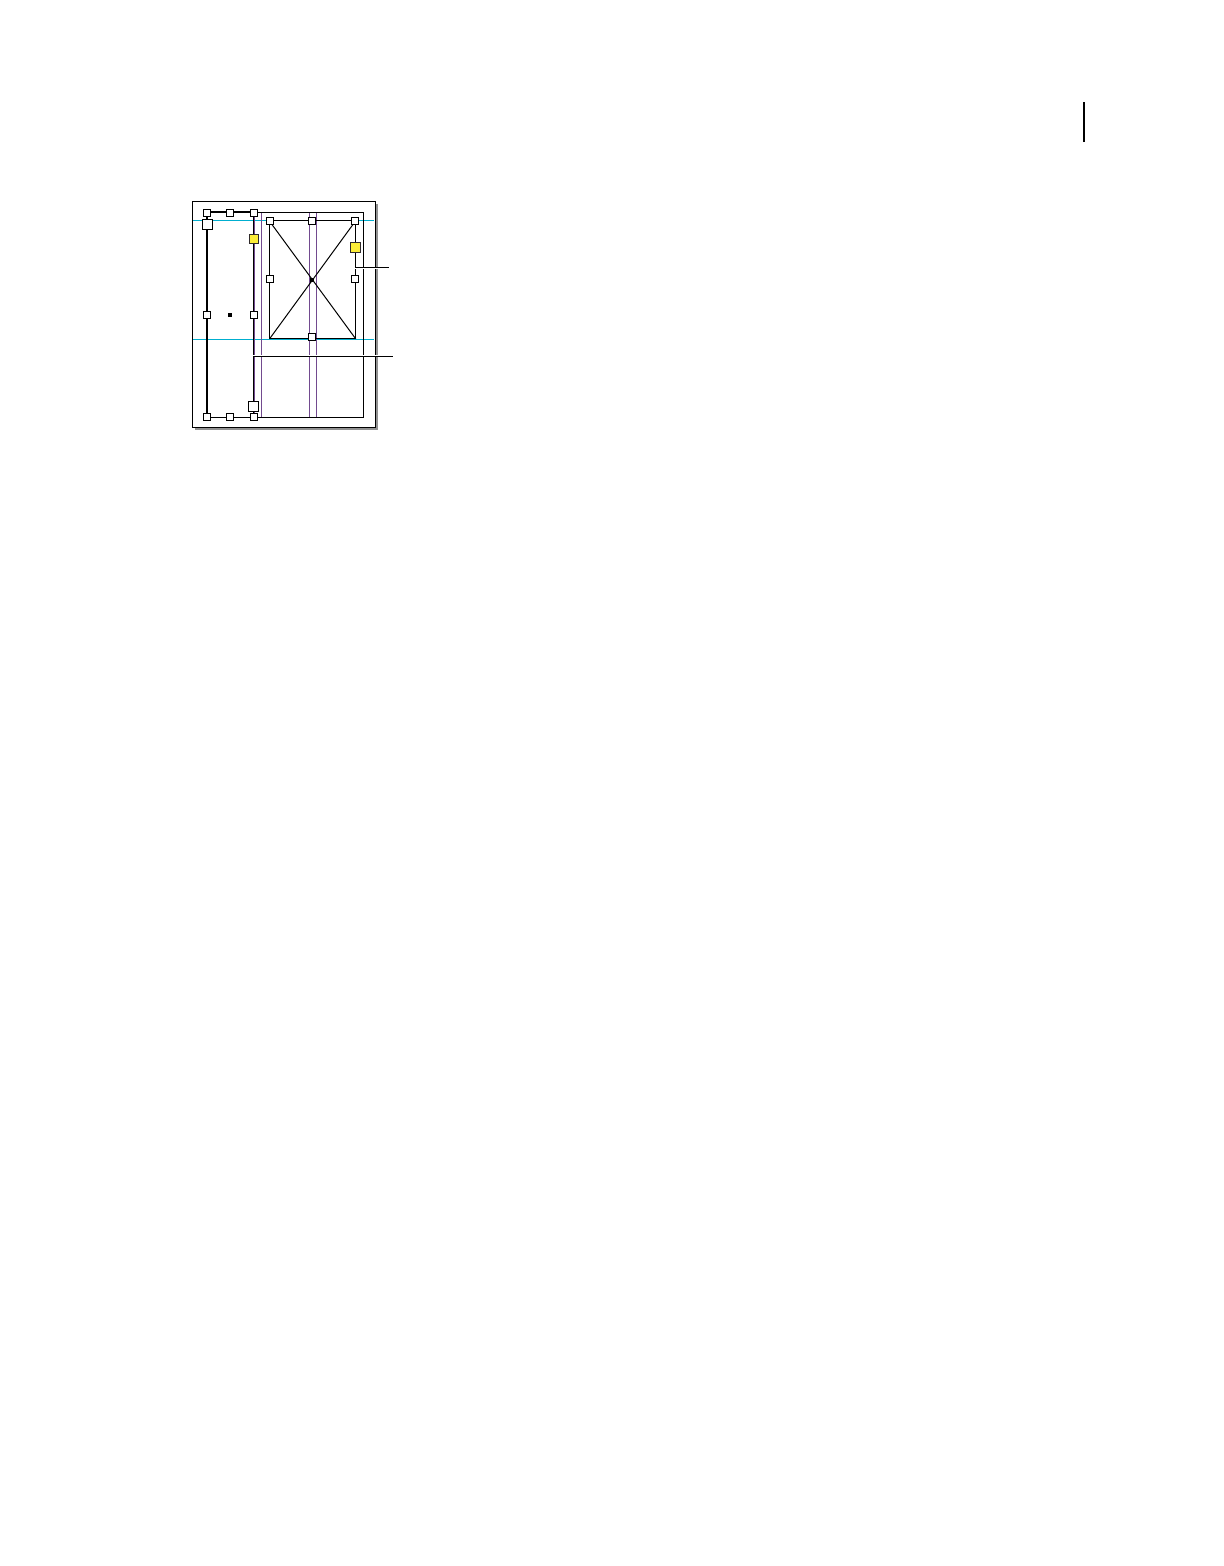
86
USING INDESIGN
Layout
Last updated 11/16/2011
Types of placeholders
A. Graphics frame placeholder B. Text frame placeholder
For example, you might use any of these strategies:
•Draw text frames using the Type tool, and draw graphics frames using the drawing tools. Thread empty text frames
together so that importing final text takes just one step.
•Draw empty placeholder shapes using drawing tools. When you’re ready to start designating areas for text and
graphics, redefine the placeholders as either text or graphics frames.
•Set frame fitting options for a placeholder frame so that when you place an image in the frame, the image is cropped
and fit accordingly.
More Help topics
“Use document templates” on page 104
“Draw a placeholder shape” on page 344
“Set frame fitting options” on page 433
Redefine the purpose of paths and frames
•To use a path or text frame as a graphics placeholder frame, select a path or an empty text frame, and then choose
Object
> Content > Graphic.
•To use a path or graphics frame as a text placeholder frame, select a path or an empty graphics frame, and then
choose Object
> Content > Text.
•To use a text or graphics frame as a path only, select an empty frame, and then choose Object > Content >
Unassigned.
Note: When a frame contains text or graphics, you cannot redefine it using the Object > Content menu. However, if you
replace a graphic with text, the content type is automatically redefined.
About automatic layout adjustment
If you use the Document Setup or Margins and Columns commands to make changes to an existing layout, such as
altering column widths or page orientation, you could spend considerable time and effort in rearranging objects to fit
the new layout. The Layout Adjustment feature can do much of that work automatically. For example, you can quickly
reformat a wide four-column document designed for an A4-size page to a tall two-column format on a U.S. legal-size
page. With Layout Adjustment, text and graphics frames are moved and resized as necessary based on the new relative
positions of column guides, page margins, and page edges.
Note: Dragging column guides does not trigger layout adjustment.
B
A

87
USING INDESIGN
Layout
Last updated 11/16/2011
The Layout Adjustment feature produces more predictable results when a layout is tightly based on a framework of
margins, page columns, and ruler guides, and where objects are snapped to guides. Results are less predictable when
objects don’t adhere to margins, columns, and guides, or when extraneous ruler and column guides clutter a page.
Layout adjustment is not affected by the document grid or the baseline grid.
Page designed vertically, for print (left); page orientation changed for on-screen viewing, with layout automatically refitted by the Layout
Adjustment feature (right)
You can modify the rules in the Layout Adjustment dialog box. The Layout Adjustment feature attempts to
approximate the proportions of the old layout in the new layout by doing the following:
•Adding or removing column guides, if the new layout specifies a different number of columns.
•If the page size changes, moving ruler guides to maintain proportional distances from page edges, margins, or
column guides.
•Moving objects already aligned to any margin, column, bleed/slug, or ruler guide, or to any two guides
perpendicular to each other, so that the objects stay with those guides if the guides move during layout adjustment.
Also, objects already aligned to any page edge or to any page edges perpendicular to each other are moved.
•Proportionally resizing objects already aligned to two parallel margin, column, bleed/slug, or ruler guides or to
guides on three sides, so that the objects stay with those guides if the guides move during layout adjustment. Also,
objects aligned to two parallel page edges or to page edges on three sides are moved.
•Maintain the relative position of objects that are anchored to the text as specified in the Anchored Object Options
dialog box.
•Moving objects to keep them in the same relative position on the page, if the page size changes.
Note: Layout Adjustment affects columns inside a text frame differently than it does page columns. If the frame itself is
resized by Layout Adjustment and the Fixed Column Width option is not selected in the Object
> Text Frame Options
dialog box, text frame columns are resized proportionally. If the Fixed Column Width option is selected, columns are
added or removed as necessary.
More Help topics
“Use multiple page sizes” on page 69
Set options for layout adjustment
Note that changing options in the Layout Adjustment dialog box does not immediately change anything. Layout
adjustment is triggered only by changes to page size, page orientation, margins, or column settings, or when a new
master is applied. When you want to restore a layout to its previous state, you must undo the action that triggered the
layout adjustment.
1Choose Layout > Layout Adjustment.
2Select Enable Layout Adjustment.
3Specify the layout adjustment options, and click OK.
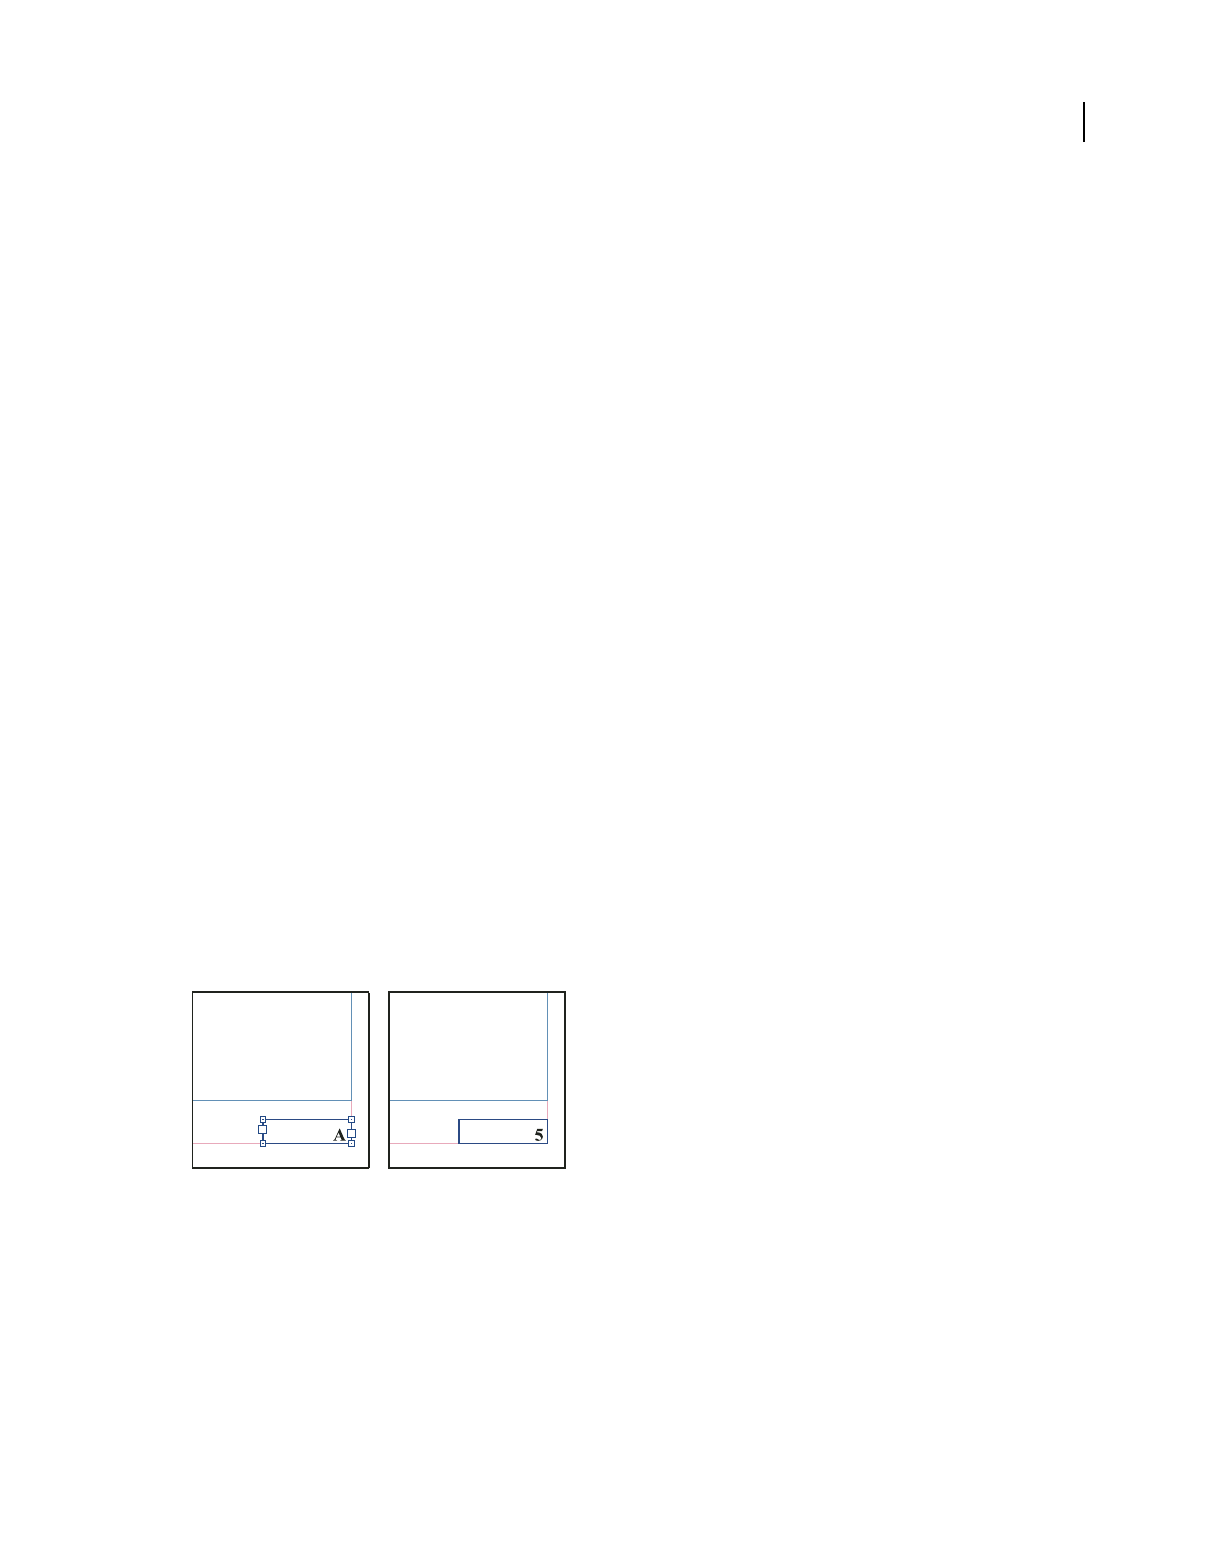
88
USING INDESIGN
Layout
Last updated 11/16/2011
Layout Adjustment options
Enable Layout Adjustment Select this option so that layout adjustment will occur whenever you change page size, page
orientation, margins, or columns.
Snap Zone Type a value to specify how near an object must be to the closest margin guide, column guide, or page edge
to snap to that element during layout adjustment.
Allow Graphics And Groups To Resize Select this option to let the Layout Adjustment feature scale graphics, frames,
and groups. When deselected, graphics and groups can be moved by Layout Adjustment, but not resized.
Allow Ruler Guides To Move Select this option when you want ruler guides to be repositioned by the Layout
Adjustment feature.
Ignore Ruler Guide Alignments Select this option when ruler guides are not well positioned for layout adjustment.
Objects will still align to column and margin guides and to page edges.
Ignore Object And Layer Locks Select this option when you want the Layout Adjustment feature to reposition objects
that are locked individually, or locked as a result of being on a locked layer.
Numbering pages, chapters, and sections
For detailed information and instructions, click the links below.
Add basic page numbering
You can add a current page number marker to your pages to specify where a page number sits on a page and how it will
look. Because a page number marker updates automatically, the page number it displays is always correct—even as you
add, remove, or rearrange pages in the document. Page number markers can be formatted and styled as text.
Add a page number marker to a master page
Page number markers are commonly added to master pages. When master pages are applied to document pages, the
page numbering is updated automatically, similar to headers and footers.
Page number on master A (left) and page 5 based on same master (right)
If the automatic page number is on a master page, it displays the master page prefix. On a document page, the
automatic page number displays the page number. On a pasteboard, it displays
PB.
1In the Pages panel, double-click the master page to which you want to add your page number. To create master
pages, see “Create masters” on page 71.
2Create a new text frame large enough to hold the longest page number and any text you want to appear next to it.
Position the text frame where you want the page number to appear.
If your document has facing pages, create separate text frames for the left and right master pages.
y
ear,
b
e sure you
u
r mailing list so
be kept abreast
iting excursions
89
USING INDESIGN
Layout
Last updated 11/16/2011
3In the page number text frame, add any text that will come before or after the page number (such as “Page “).
4Position the insertion point where you want the page number to appear, and then choose Type > Insert Special
Character
> Markers > Current Page Number.
5Apply the master page to the document pages on which you want the page numbering to appear. To apply master
pages, see “Apply master pages” on page 73.
To remove the page number from the first page in the document, you have two options. Either apply a different or the
None master, or override and delete the master text frame on the document page. Ctrl/Cmd+Shift-click a master text
frame to override it.
Change the page numbering style
By default, pages are numbered using Arabic numerals (1, 2, 3...); however, you can number pages using upper or
lowercase Roman (i, ii, iii...) or alphanumeric (a, b, c...) numbering. You can also number pages using preceding zeros.
Each part of the document that uses a different numbering style is called a section. For more information on sections,
see “Define section numbering” on page 91.
Use the Numbering & Section Options dialog box to change the page numbering style to use a different format. You
can also use this dialog box to restart page numbering or to start page numbering at a number you specify.
1In the Pages panel, select the page where you want the new numbering style section to begin.
2Choose Layout > Numbering & Section Options.
3Specify options, and then click OK. See “Document numbering options” on page 92.
A section indicator icon appears above the page icon in the Pages panel, indicating the start of a new section.
Note: If a number or letter appears before the current page number you inserted, it means a section prefix is included. If
you don’t want this prefix, deselect Include Prefix When Numbering Pages in the Numbering & Section Options dialog box.
Common page numbering tasks
InDesign offers several different features that help you create page numbering effects.
Add section and chapter numbering
Determine what kind of numbering you want to use for your document or book. For long documents, you can assign
chapter numbers. Each document can be assigned only one chapter number. If you want to use different numbering
within a document, you can define ranges of pages as sections; these sections can be numbered differently. For
example, the first ten pages of a document (the front matter) might use Roman numerals, and the rest of the document
might use Arabic numerals.
To do this: Do this:
Add page numbering to documents in a book. See “Number pages, chapters, and paragraphs in a book” on page 317.
Add section numbers and chapter numbers. See “Add section and chapter numbering” on page 89.
Create running headers or running footers that use text variables
such as the create date, filename, or the current heading or title.
See “Create headers and footers” on page 93 and “Text variables” on
page 95.
Create a “Page x of y” effect in which x is the current page and y is
the total number of pages.
Insert a Current Page Number marker for x, and insert the Last Page
Number text variable for y (choose Type > Text Variables > Insert Variable >
Last Page Number).
Create a “Continued on page x” story jump. See “Add automatic page numbers for story jumps” on page 94.
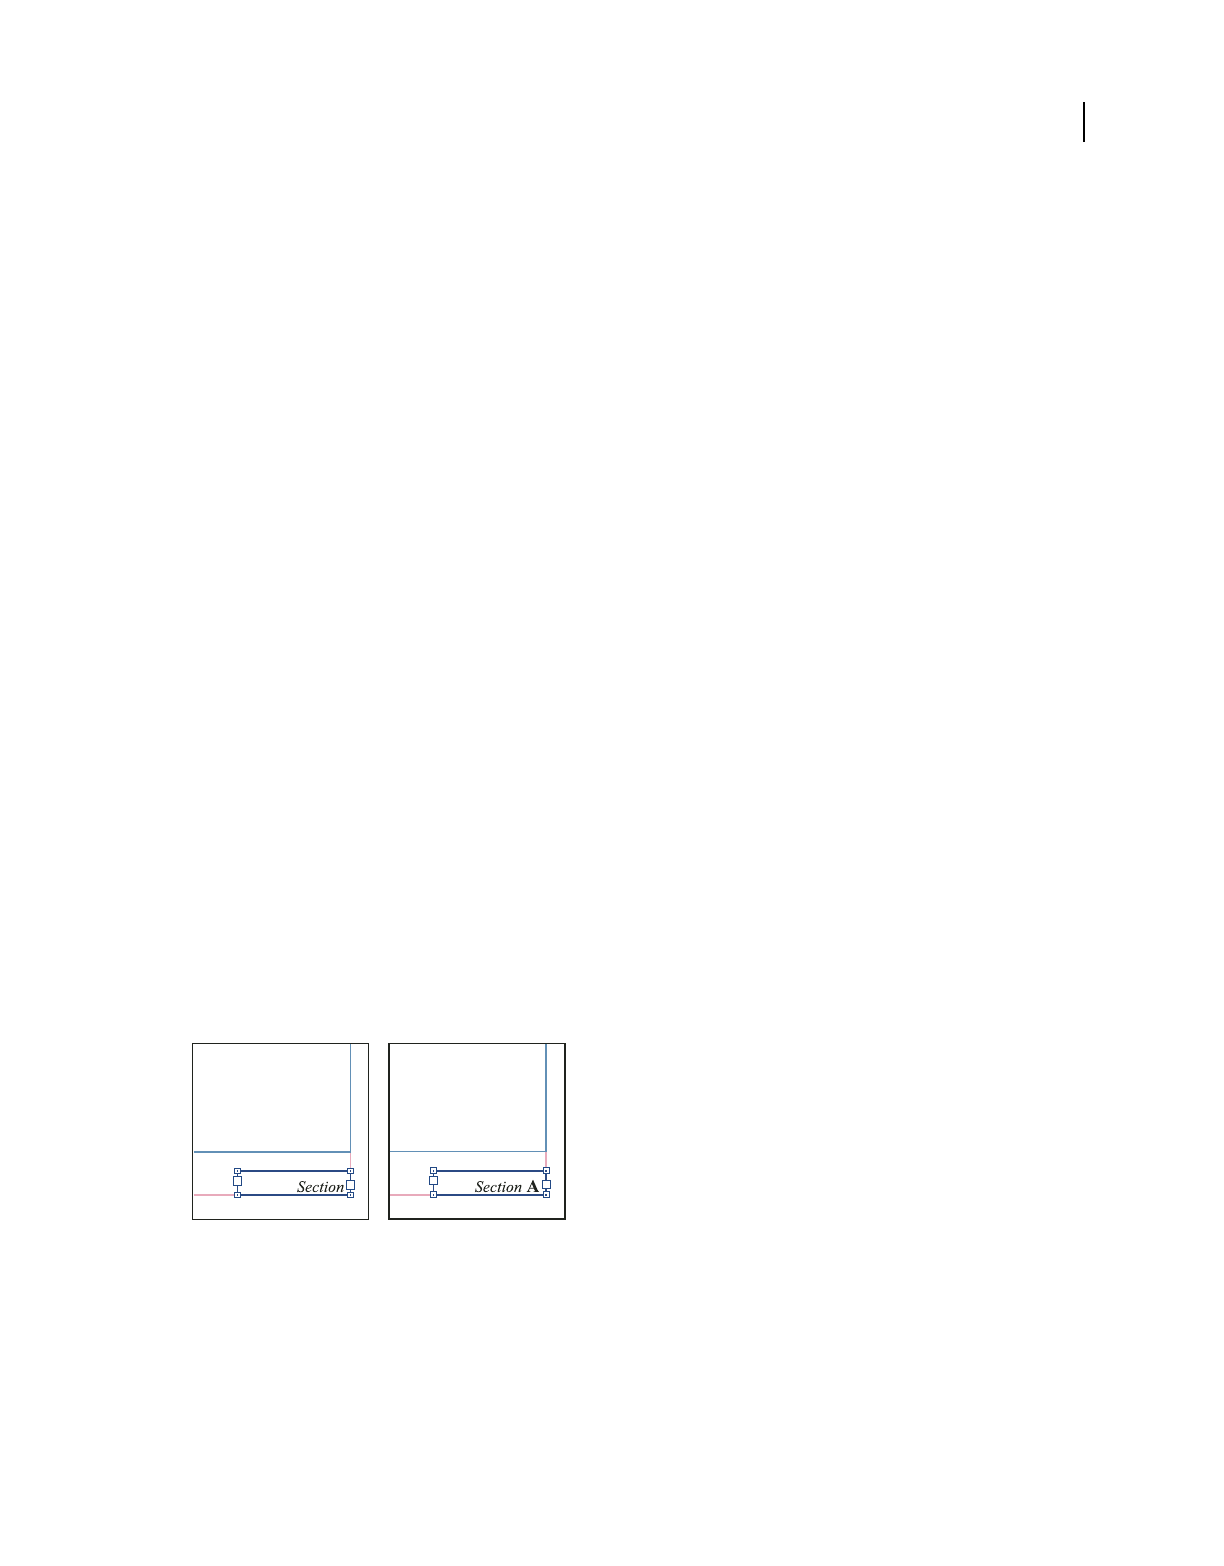
90
USING INDESIGN
Layout
Last updated 11/16/2011
A single InDesign document can contain up to 9,999 pages, but page numbers can be as large as 99,999. (For example,
you can correctly number a 100-page document that starts on page 9,949.) By default, the first page is a recto (right)
page numbered
1. Odd-numbered pages always appear on the right; if you use the Section Options command to
change the first page number to an even number, the first page becomes a verso (left) page.
For information on creating basic page numbering in a document, see “Add basic page numbering” on page 88.
More Help topics
“Number pages, chapters, and paragraphs in a book” on page 317
Add an automatically updated chapter number
You can add a chapter number variable to your document. Like page numbers, chapter numbers can be updated
automatically and formatted and styled as text. A chapter number variable is commonly used in documents that are
part of a book. A document can have only one chapter number assigned to it; if you want to divide a single document
into chapters, you can create sections instead.
Note: Chapter numbers cannot be included as a prefix in a generated index or table of contents (such as 1-3, 1-4, and so
on). If you want chapter numbers to be included as prefixes, use section prefixes instead of chapter numbers.
1If necessary, create a text frame where you want a chapter number to appear. If you want a chapter number to
appear on several pages, create the text frame on a master page, and apply that master page to the document pages.
2In the chapter number text frame, add any text that will come before or after the chapter number.
3Place the insertion point where you want the chapter number to appear, and then choose Type > Text Variables >
Insert Text Variable
> Chapter Number.
You can update the starting number and format of chapter numbering by choosing Layout > Numbering & Section
Options.
Add an automatically updated section marker
1Define sections in your document. (See “Define section numbering” on page 91.)
2On a page or master that you’re using in a section, drag the Type tool to create a text frame large enough for the
section marker text, or click in an existing frame.
3Choose Type > Insert Special Character > Markers > Section Marker.
On master page A, section marker (left) and section marker with page number marker inserted (right)
Change the format of page and chapter numbering
1Choose Layout > Numbering & Section Options.
2Under Page Numbering or Document Chapter Numbering, select a new number format for Style. (See “Document
numbering options” on page 92.)
3Click OK.
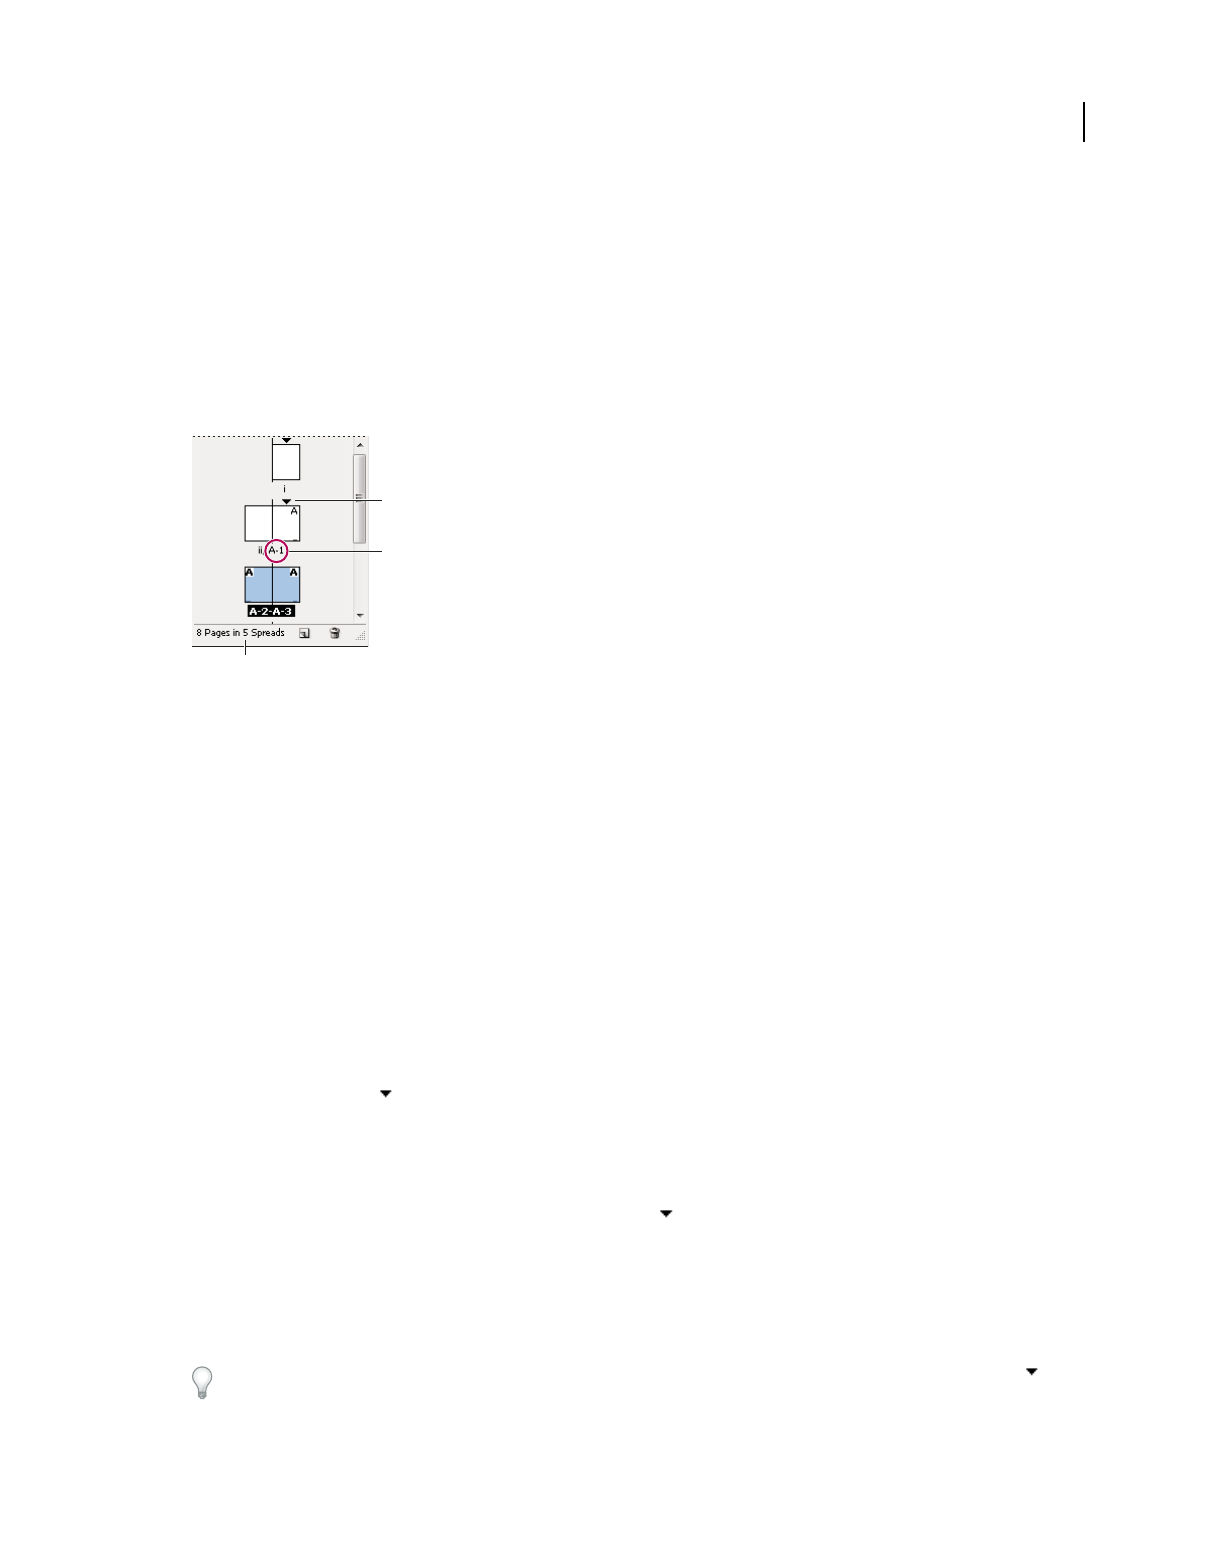
91
USING INDESIGN
Layout
Last updated 11/16/2011
Define section numbering
By default, page and chapter numbers in a book are numbered consecutively. Using Numbering & Section Options,
you can restart page numbering at a specified page, add prefixes to page numbers, and change the numbering style of
both pages and chapters.
You can define a section prefix to label section pages automatically. For example, if you specify A– for Section Prefix
on page 16 of a document and include the section prefix, the page will appear in the table of contents or index as A–
16. Text you type for a section marker appears when you choose Type
> Insert Special Character > Markers > Section
Marker.
Pages panel
A. Section indicator icon shows start of section B. Page number is changed for new section C. Status bar displays document length
More Help topics
“Add basic page numbering” on page 88
“Number pages, chapters, and paragraphs in a book” on page 317
Define sections in a document
1In the Pages panel, select the first page in the section you want to define.
2Choose Layout > Numbering & Section Options, or choose Numbering & Section Options in the Pages panel.
3If you’re changing the numbering options for any page other than the first page of the document, make sure that
Start Section is selected. This option marks the selected page as the beginning of a new section.
4As necessary, specify the numbering and section options (see “Document numbering options” on page 92), and
then click OK.
A section indicator icon appears above the page icon in the Pages panel, indicating the start of a new section.
5To end the section, repeat the section numbering steps on the first page that follows the section.
Edit or remove section numbering
1In the Pages panel, double-click the section indicator icon that appears above the page icon in the Pages panel.
Or, select a page that uses a section marker, and choose Numbering & Section Options in the Pages panel menu.
2Do any of the following, and then click OK:
•To change the style or starting number, change section and numbering options.
•To remove a section, deselect the Start Section option.
To quickly identify a section in the Pages panel, position the pointer precisely over any section indicator icon . A
tool tip appears, displaying the starting page number or section prefix.
A
B
C
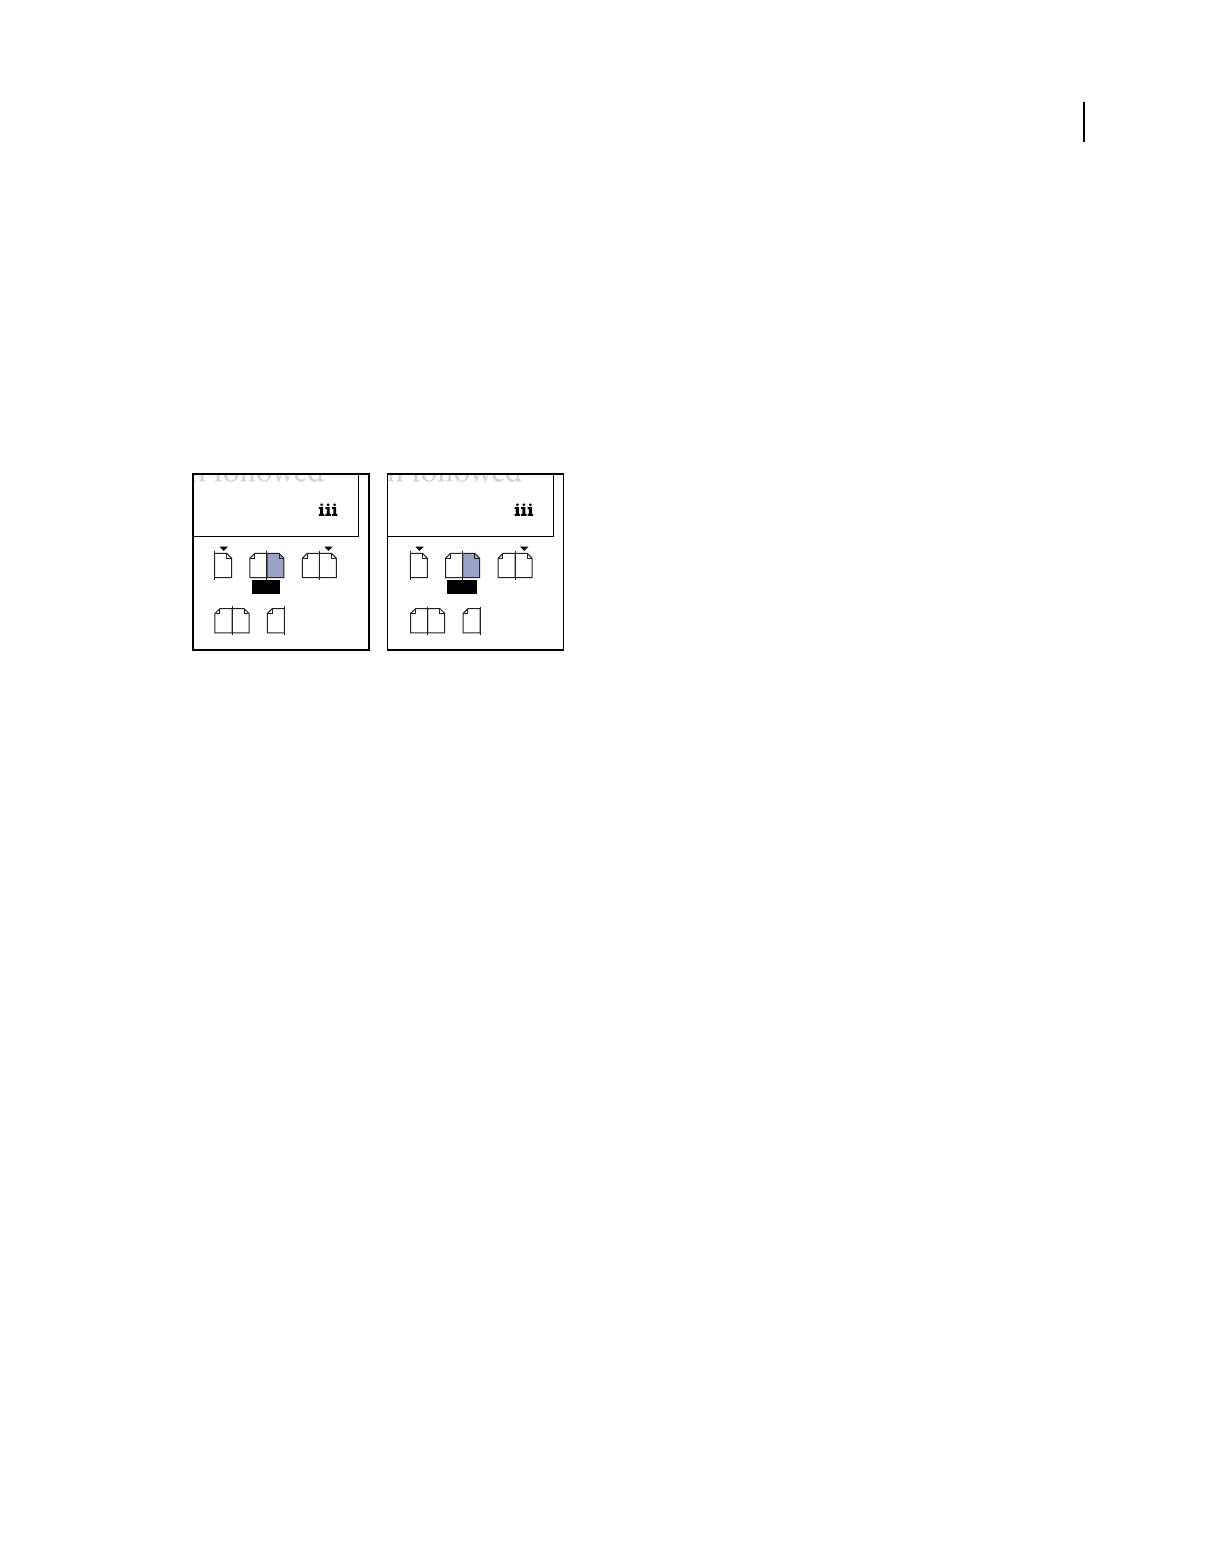
92
USING INDESIGN
Layout
Last updated 11/16/2011
Display absolute or section numbering in the Pages panel
The Pages panel can display absolute numbering (labeling all pages with consecutive numbers, starting at the first page
of the document) or section numbering (labeling pages by section, as specified in the Section Options dialog box).
Changing the numbering display affects how pages are indicated in the InDesign document, as in the Pages panel and
in the page box at the bottom of a document window. The numbering display also affects how you specify page ranges
when printing and exporting the document. However, the numbering display does not change the appearance of page
numbers on document pages.
1Choose Edit > Preferences > General (Windows) or InDesign > Preferences > General (Mac OS).
2For Page Numbering, choose a numbering method in the View menu.
Pages panel showing absolute numbering (left) and section numbering (right)
Document numbering options
You can change document numbering options when you select a document page (not a master page) and choose
Layout
> Numbering & Section Options. You can also change these options when you choose Document Numbering
Options from the Book panel menu.
Automatic Page Numbering Select if you want the page numbers of the current section to follow the numbering of the
previous section. Using this option, the page numbers in the document or section update automatically when you add
pages prior to
it.
Start Page Numbering At Type the starting number for your document or for the first page of the current section. For
example, if you want to restart the numbering for a section, type
1 . The remaining pages in the section will be
renumbered accordingly.
Note: If you chose a non-Arabic page-numbering style (such as Roman numerals), you still must type an Arabic numeral
in this box.
Section Prefix Type a label for the section. Include the spaces or punctuation you want to appear between the prefix
and the page number (for example, A–16 or A
16). The prefix is limited to eight characters.
You cannot enter a blank space by pressing the spacebar—copy and paste a fixed-width space character from the
document window instead. Note that plus
(+) or comma (,) symbols cannot be used in section prefixes. (See “Insert
white space characters” on page 182.)
Style (Page Numbering)
Choose a page-numbering style from the menu. The style applies to all pages in this section only.
Section Marker Type a label that InDesign inserts on the page at the location of a section marker character that appears
when you choose Type
> Insert Special Character > Markers > Section Marker.
Include Prefix When Numbering Pages Select if you want the section prefix to appear when you generate a table of
contents or index, or when you print pages that contain automatic page numbers. Deselect this option to display the
section prefix in InDesign but hide the prefix in the printed document, index, and table of contents.
8
A A A
6–7 4
A A A
2–3
B
B B
B
B B
4–5 iv–1 1 i 2–3 ii–iii
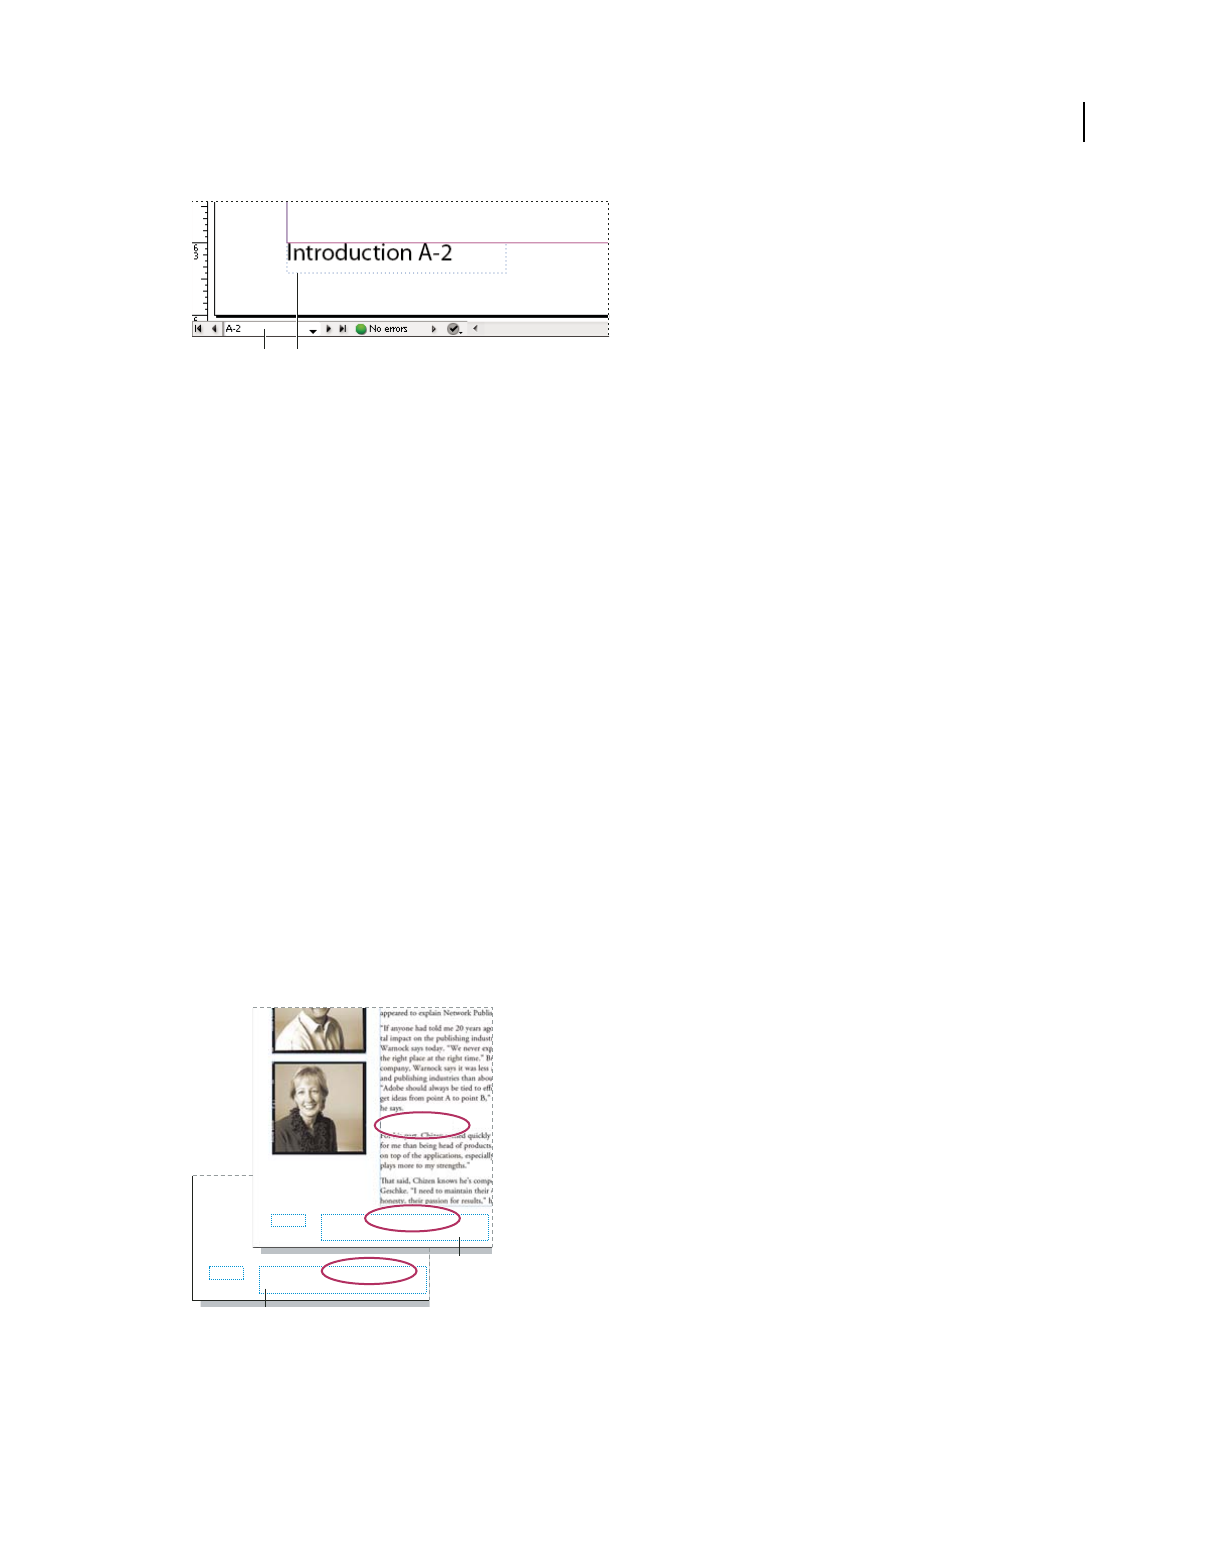
93
USING INDESIGN
Layout
Last updated 11/16/2011
Section prefix in document window
A. Section prefix in the page box at the bottom of the document window B. Section marker and prefix on the page itself
Style (Document Chapter Numbering) Choose a chapter-numbering style from the menu. This chapter style is used
throughout the document.
Automatic Chapter Numbering Select this option to number chapters sequentially in a book.
Start Chapter Numbering At Specify the starting number of the chapter numbering. This option is useful if you don’t
want chapters to be numbered sequentially in the book.
Same As Previous Document In The Book The same chapter number as the previous document in a book is used. Select
this option if the current document is part of the same chapter as the previous document in a book.
Create headers and footers
Headers and footers run through the top and bottom of the pages in your document, providing important background
information. To create a simple header or footer that includes page numbering, see “Add basic page numbering” on
page 88.
Headers and footers can include such items as page, chapter, or section numbers; title or heading text; the author’s
name; and the document’s filename and creation or modification date.
You can add many of these items by using text variables. InDesign includes several preset variables, such as Creation
Date and File Name. You can modify these variables, and you can create your own. For example, you can create a
variable that displays the first use of a Heading paragraph style in the header or footer. Once you create or edit the
variables you need, you assemble them on the master page to create your header and footer, and then you apply the
master page to the appropriate document pages.
Using page numbers and variables to create a footer
A. Footer variable inserted on master page B. Variable text on document page that grabs text from the first heading on the page
For a video tutorial on creating headers and footers, see www.adobe.com/go/vid0078.
B
A
226
A
1991-2007 * Playing to Strengths
<Footer Date> * <Footer Variable>
Playing to Strengths
A
B

94
USING INDESIGN
Layout
Last updated 11/16/2011
More Help topics
“Master pages” on page 70
“Text variables” on page 95
Create a header or footer on a master page
1If necessary, create or edit the variables you want to use in your header or footer. (See “Create variables for running
headers and footers” on page 94.)
2Go to the master page where you want to add the header or footer.
The header or footer will appear on any document page to which the master page is applied.
3Create a text frame large enough to include all the header or footer information. Place the text frame above or below
where the content of the document pages will appear.
4Add text, page numbers, and variables as needed.
5Apply the master page to document pages where you want the header or footer to appear.
6If necessary, create headers and footers for additional master pages.
Create variables for running headers and footers
By default, the Running Header variables insert the first occurrence (on the page) of the text to which the specified
style is applied. Running Header variables are especially useful for displaying the current heading or title in the header
or footer.
1If your content is not already formatted, create and apply the paragraph style or character style for the text you want
to appear in the header (such as a title or heading style).
2Choose Type > Text Variables > Define.
3Click New, and then type a name for the variable.
4From the Type menu, choose Running Header (Paragraph Style) or Running Header (Character Style).
5Specify the following options:
Style Choose the style to display in your header or footer.
Use Decide whether you want the first or last occurrence of the style that’s applied on the page. First On Page is the
first paragraph (or character) that begins on a page. If there is no occurrence of the style on the page, the previous
occurrence of the applied style is used. If there is no previous occurrence in the document, the variable is empty.
Delete End Punctuation If selected, the variable displays the text minus any end punctuation (periods, colons,
exclamation points, and question marks).
Change Case Select this option to change the case of the text that appears in the header or footer. For example, you
may want to use sentence case in your footer, even though the heading on the page appears in title case.
6Click OK, and then click Done in the Text Variables dialog box.
You can now insert the variable in a header or footer you create on the master page.
Add automatic page numbers for story jumps
You can easily maintain the jump lines of stories that continue to other pages, such as a line that says “Continued on
page 42.” Use a jump line page number to automatically update the number of the page containing a story’s next or
previous threaded text frame when you move or reflow the story’s threaded text frames.
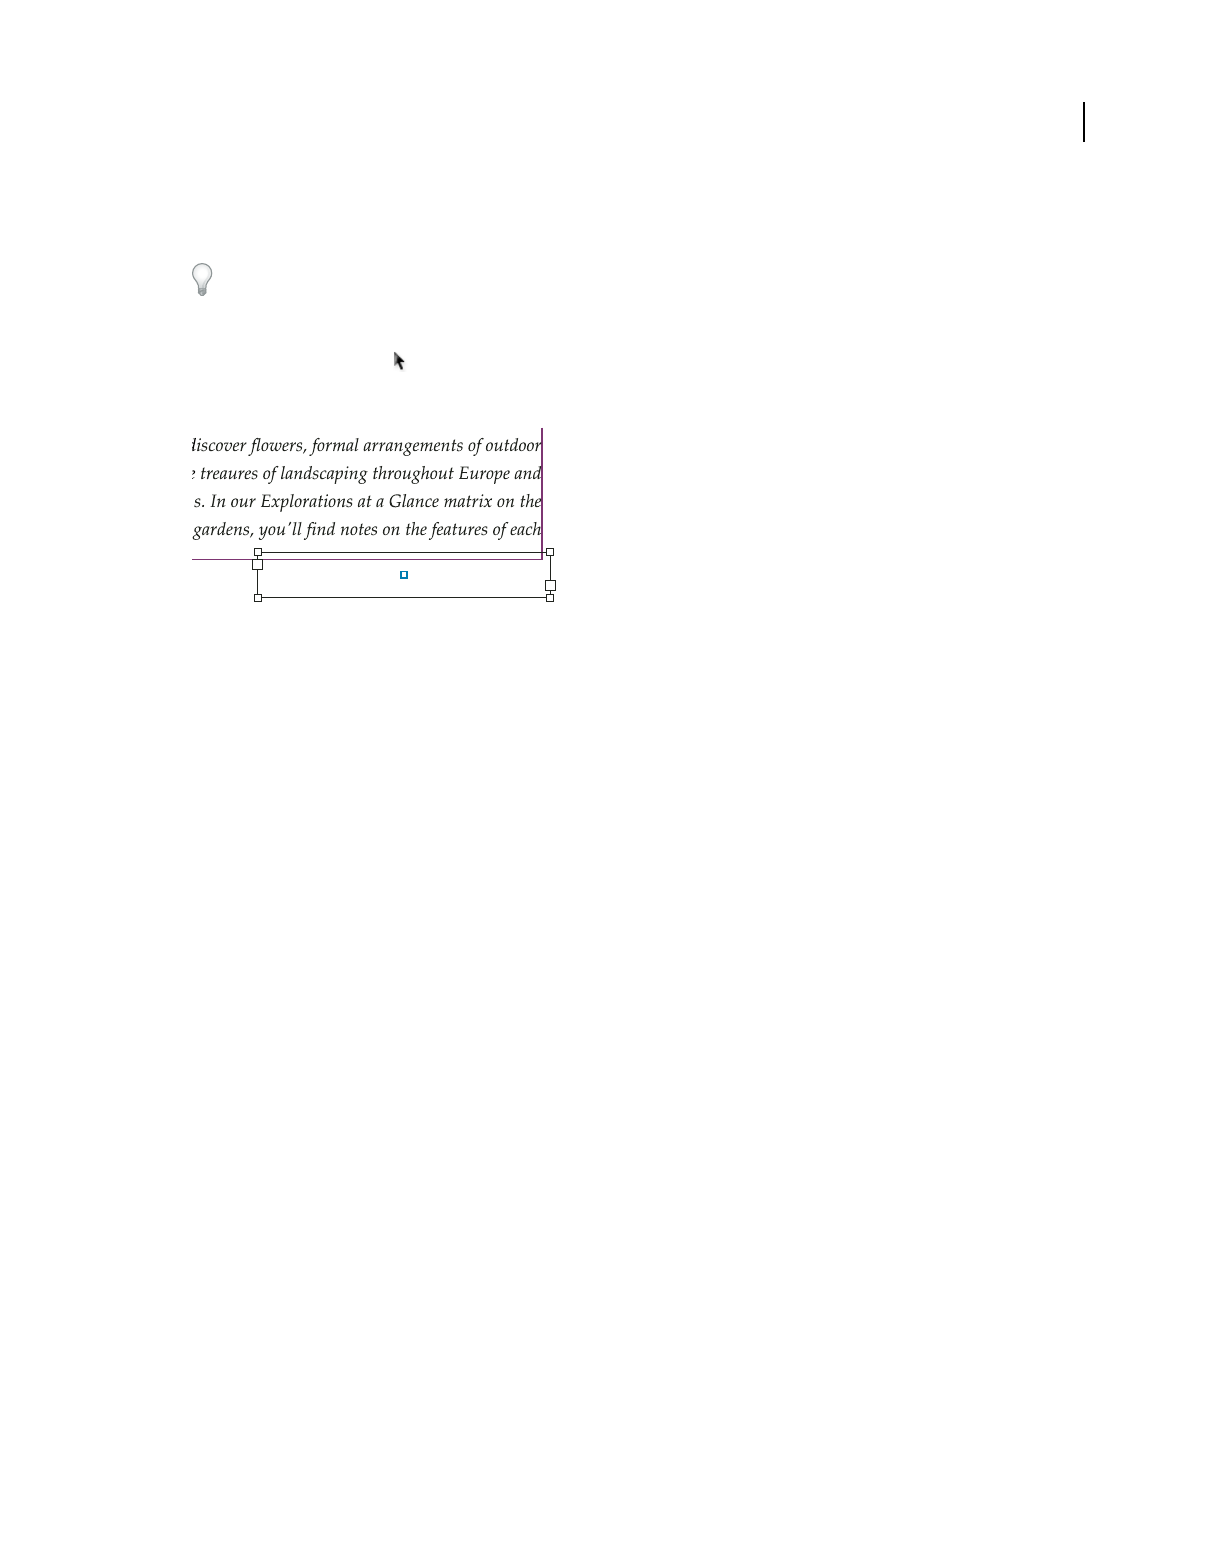
95
USING INDESIGN
Layout
Last updated 11/16/2011
Usually the jump line page number should be in a separate text frame from the story it tracks. That way, the jump line
page number remains in position even if the story’s text reflows.
If you insert a Current Page Number character in the Find/Change dialog box, jump line page numbers can also be
found.
1With the Type tool, drag to create a new text frame where you want the jump line to appear.
2With the Selection tool , position the new text frame so that it touches or overlaps the frame containing the story
you want to track.
Make sure text frame touches or overlaps the story you want it to track.
3Select the Type tool and click an insertion point in the new text frame. Then type the text that you want to appear
before the page number, such as “Continued on” or “Continued from”.
4Then choose Type > Insert Special Character > Marker and one of the following options:
Next Page Number Inserts the number of the page containing the story’s next frame. Use this character when creating
a “continued on” jump line.
Previous Page Number Inserts the number of the page containing the story’s previous frame. Use this character when
creating a “continued from” jump line.
The page number automatically updates to reflect the current location of the next or previous frame of the story.
5To prevent the story from being moved without its jump line, Shift-select the frames with the Selection tool, then
choose Object
> Group.
6If necessary, repeat this procedure to add more jump lines.
Note: If an unwanted character appears at the beginning of the page number (so that, for example, a jump line reads
“Cont’d on page A16” instead of “Cont’d on page 16”), you probably included a section prefix in the Numbering & Section
Options dialog box. Turn off or edit the prefix.
More Help topics
“Cross-references” on page 541
Text variables
Create and edit text variables
A text variable is an item you insert in your document that varies according to the context. For example, the Last Page
Number variable displays the page number of the last page of the document. If you add or remove pages, the variable
is updated accordingly.
continued on page 42

96
USING INDESIGN
Layout
Last updated 11/16/2011
InDesign includes several preset text variables that you can insert in your document. You can edit the format of these
variables, or you can create your own. Some variables, such as Running Header and Chapter Number, are especially
useful for adding to master pages to ensure consistent formatting and numbering. Other variables, such as Creation
Date and File Name, are useful for adding to the slug area for printing.
Note: Adding too much text to a variable may cause overset or compressed text. Variable text does not break across lines.
More Help topics
“Create headers and footers” on page 93
Create or edit text variables
The options available for creating the variable depend on the type of variable you specify. For example, if you choose
the Chapter Number type, you can specify text to appear both before and after the number, and you can specify the
numbering style. You can create several different variables based on the same variable type. For example, you can
create one variable that displays “Chapter 1” and another that displays “Ch. 1.”
Similarly, if you choose the Running Header type, you can specify which style is used as the basis for the header, and
you can select options for deleting end punctuation and changing the case.
1If you want to create text variables for use in all new documents you create, close all documents. Otherwise, the text
variables you create appear only in the current document.
2Choose Type > Text Variables > Define.
3Click New, or select an existing variable and click Edit.
4Type a name for the variable, such as “Full Chapter” or “Running Title.”
5From the Type menu, choose a variable type, specify the options for that type, and then click OK.
Different options are available depending on the variable type you select.
Text Before / Text After For all variable types (except Custom Text), you can specify text that will be added before
or after the variable. For example, you can add the word “of” before the Last Page Number variable and the phrase
“total pages” after the variable to create an “of 12 total pages” effect. You can also paste text into the boxes, but
special characters such as tabs and auto page numbers are stripped out. To insert special characters, click the
triangle to the right of the text box.
Style For all numbered variable types, you can specify the numbering style. If [Current Numbering Style] is
selected, the variable uses the same numbering style selected in the document’s Numbering & Section Options
dialog box.
Variable types
Chapter Number
A variable created with the Chapter Number type inserts the chapter number. You can insert text before or after the
chapter number, and you can specify a numbering style.
If the document’s chapter number is set to continue from the previous document in the book, you may need to update
the book’s numbering in order for the appropriate chapter number to appear.
97
USING INDESIGN
Layout
Last updated 11/16/2011
Creation Date, Modification Date, and Output Date
Creation Date inserts the date or time the document is first saved; Modification Date inserts the date or time the
document was last saved to disk; Output Date inserts the date or time the document starts a print job, exports to PDF,
or packages the document. You can insert text before and after the date, and you can modify the date format for all
date variables.
Date Format You can type date formats directly into the Date Format box, or you can choose format options by
clicking the triangle to the right of the box. For example, the date format “MM/dd/yy” displays as 12/22/07. By
changing the format to “MMM. d, yyyy” the date will display as Dec. 22, 2007.
Date variables use the language applied to text. For example, the creation date may appear in Spanish text as “01
diciembre 2007” and in German as “01 Dezember 2007.”
File Name
This variable inserts the name of the current file into the document. It’s commonly added to the slug area of the
document for printing or used in headers and footers. In addition to Text Before and Text After, you can choose the
following options.
Include Entire Folder Path Select to include the full folder path with the file name. The standard path conventions for
either Windows or Mac
OS are used.
Abbreviation Description Example
M Month number, no leading zero 8
MM Month number, leading zero 08
MMM Abbreviated month name Aug
MMMM Full month name August
d Day number, no leading zero 5
dd Day number, leading zero 05
E Weekday name, abbreviated Fri
EEEE Full weekday name Friday
yy or YY Year number, last two digits 07
y (Y) or yyyy (YYYY) Full year number 2007
G or GGGG Era, abbreviated or expanded AD or Anno Domini
h Hour, no leading zero 4
hh Hour, leading zero 04
H Hour, no leading zero, 24-hour format 16
HH Hour, leading zero, 24-hour format 16
m Minute, no leading zero 7
mm Minute leading zero 07
s Second, no leading zero 7
ss Second, leading zero 07
a AM or PM, two characters PM
z or zzzz Time zone, abbreviated or expanded PST or Pacific Standard Time

98
USING INDESIGN
Layout
Last updated 11/16/2011
Include File Extension Select to include the file name extension.
The File Name variable is updated whenever you save the file with a new name or to a new location. The path or
extension does not appear in the document until it’s saved.
Image Name
The Image Name variable is useful for generating automatic captions from metadata. The Image Name variable
includes a Metadata Caption variable type. If a text frame containing this variable is adjacent to or grouped with an
image, the variable displays the metadata of that image. You can edit the Image Name variable to determine which
metadata field is used.
See “Define caption variables” on page 240.
Last Page Number
The Last Page Number type is useful for adding the total number of pages in a document to headers and footers using
the common “Page 3 of 12” format. In this case, the number 12 is generated by the Last Page Number, and it’s updated
whenever pages are added or removed. You can insert text before or after the last page number, and you can specify a
numbering style. From the Scope menu, choose an option to determine whether the last page number in the section
or document is used.
Note that the Last Page Number variable does not count the pages in the document.
Running Header (Paragraph or Character Style)
The Running Header variables insert the first or last occurrence on the page of the text to which the specified style is
applied. If no text on the page is formatted with the specified style, the text from a previous page is used.
See “Create variables for running headers and footers” on page 94.
Custom Text
This variable is commonly used for inserting placeholder text, or a text string that may need to be changed quickly. For
example, if you’re working on a project that uses a code name for a company, you can create a custom text variable for
the code name. When you are able to use the real company name, you can simply change the variable to update all the
occurrences.
To insert special characters in a text variable, click the triangle to the right of the text box.
Insert text variables
1Place the insertion point where you want the variable to appear.
2Choose Type > Text Variables > Insert Variable, and then choose the variable you want to insert.
The variable appears on the page as if you’d typed it in the document. For example, the Creation Date variable might
appear as December 22, 2007. If you choose Type
> Show Hidden Characters, the variable instance is surrounded by
a box using the current layer color.
Note: Text variables do not break across lines.
Delete, convert, and import text variables
Use the Text Variables dialog box to delete, convert, and import text variables.

99
USING INDESIGN
Layout
Last updated 11/16/2011
Delete text variables
If you want to delete an instance of a text variable inserted in a document, simply select the variable and press
Backspace or Delete. You can also delete the variable itself. When you do so, you can decide how to replace the
variables inserted in the document.
1Choose Type > Text Variables > Define.
2Select the variable, and then click Delete.
3Specify how the variable will be replaced by specifying a different variable, converting the variable instances to text,
or deleting the variable instances altogether.
Convert text variables to text
•To convert a single instance, select the text variable in the document window, and then choose Type > Text
Variables
> Convert Variable To Text.
•To convert all instances of the text variable in the document, choose Type > Text Variables > Define, select the
variable, and then click Convert To Text.
Import text variables from another document
1Choose Type > Text Variables > Define.
2Click Load, and then double-click the document that has the variables you want to import.
3In the Load Text Variables dialog box, make sure that a check mark appears next to the variables you want to
import. If any existing variable has the same name as one of the imported variables, choose one of the following
options under Conflict With Existing Text Variable, and then click OK:
Use Incoming Definition Overwrites the existing variable with the loaded variable and applies its new attributes to
all text in the current document that used the old variable. The definitions of the incoming and existing variables
are displayed at the bottom of the Load Text Variables dialog box so that you can view a comparison.
Auto-Rename Renames the loaded variable.
4Choose OK, and then click Done.
You can also copy variables to other documents when you synchronize a book file.

100
Last updated 11/16/2011
Chapter 4: Working with documents
Working with files and templates
Recommended workflow for InDesign documents
You can improve performance and prevent many problems by establishing a good workflow to use with Adobe
InDesign.
Maintain a clean computer system
Over time, changes occur to software and hardware that can lead to performance loss and system problems.
Defragmenting the hard disk, removing older versions of software, updating device drivers, optimizing memory,
running virus protection utilities, and performing other maintenance tasks can prevent applications and files from
becoming damaged. Performing these tasks regularly helps ensure that InDesign opens, displays, and prints
documents as expected.
Create a project folder
Before you begin a project, determine which files you’ll need and how you’ll store them. If you’ve experienced
problems with broken links, consider storing your linked files in the same folder as your document. InDesign
maintains links to files you place in a document, but if a link is broken, InDesign looks for the file in the document’s
folder. Storing a document and its linked files in the same folder makes it easy to move them from one computer to
another. Storing files in one folder also ensures that InDesign finds the original graphics when printing a document.
If InDesign cannot locate a linked graphic, it won’t reflect changes you make to the original graphic, and it may print
the graphic poorly or not at all.
If your project consists of multiple documents (for example, chapters in a book), you may find it useful to create a
project folder that contains a folder for each document and its linked files.
Consider using a template
Use a template if you frequently create similar projects. Templates let you create consistent documents more quickly
while protecting the original file. For example, if you create a monthly newsletter, your template might include ruler
guides, page numbers, the newsletter masthead, and styles you want to use in each issue. (See “Use document
templates” on page 104.)
Open documents locally
Before you open a document stored on a network volume or on removable media, copy the document and any linked
graphics to your local hard disk. The slower access time and data transfer rate of a network volume or removable media
can cause data to become lost or corrupted, possibly damaging the document. However, be aware of overriding
someone else’s work if you copy the local files back to a network server.
Solve problems before converting a file
Damaged Adobe PageMaker or QuarkXPress® files usually remain damaged when opened in InDesign. If an error or
other unexpected behavior occurs with a converted file, open the original file in the source application and
troubleshoot it for damage.
If the converted file has problems, export it to IDML format, and then open the IDML file and save it as an InDesign
document.

101
USING INDESIGN
Working with documents
Last updated 11/16/2011
Save documents
Save documents frequently, and create backup copies of important files. You can clear unnecessary data from a
document by using the Save As command. When you use the Save command, InDesign appends new information to
the document but doesn’t remove outdated data, such as information about a deleted graphic. When you use the Save
As command, however, InDesign completely rewrites the document, including only information about objects and
pages currently in the document. A document that contains only necessary data occupies less hard drive space and
redraws and prints more quickly.
Practice good design habits
•Create styles in a document. Creating styles with no documents open can cause duplicate styles to appear when you
create a new document. To share styles in documents, save the styles and load them.
•Use appropriate fonts. When choosing fonts for a document, consider how you intend to format and print the text.
InDesign works well with OpenType®, Type 1 (also called PostScript), and TrueType fonts. Damaged or poorly
constructed fonts can damage an InDesign document or cause it to print with unexpected results, so use reliable
fonts created by established font vendors. If you work with a service bureau, find out its font requirements.
•Avoid using too many text frames. Use as few text frames as possible to keep the document file size smaller and the
layout easier to manipulate.
Be smart with art
•Use the appropriate graphics file format. When you create graphics for a project, consider how you plan to print
the document. If you intend to print the document at a service bureau, ask the service bureau which graphic formats
work best with the output device it uses. The service bureau can also advise you on the optimal resolution for
images.
•Store graphics externally. When you import a graphic file, InDesign creates a link to the graphic by default. Linking
helps minimize the file size of the document and improves the performance of InDesign. When you print the
document, the original graphic file must be available and linked. If InDesign can’t find the original, the graphic may
print as a low resolution preview or as a gray box.
Verify links and fonts before you print
To ensure that a document prints correctly, verify that all links are intact and all fonts are available. A link becomes
broken if you delete, move, or rename the original graphic. Use the Preflight and Package features before handing off
files to a service bureau.
For a video tutorial on creating documents, see www.adobe.com/go/lrvid4273_id.
Open InDesign documents
In general, you open document and template files the same way you do in other programs. When you open an
InDesign template, it opens as a new, untitled document by default. Document files use the extension .indd, template
files use the extension .indt, snippet files use the extension .idms, library files use the extension .indl, interchange files
use the extension .inx, markup files use the extension .idml, and book files use the extension .indb.
You can also use the File > Open command to open files from earlier versions of InDesign, InDesign Interchange (.inx)
files, InDesign Markup (.idml) files, Adobe PageMaker 6.0 and later, QuarkXPress 3.3 and 4.1, and QuarkXPress
Passport 4.1 files. In addition, other software vendors may make plug-in software that lets you open other file formats.
To view additional information about an InDesign document, hold down Ctrl and choose Help > About InDesign
(Windows) or hold down Command and choose InDesign > About InDesign (Mac OS).

102
USING INDESIGN
Working with documents
Last updated 11/16/2011
More Help topics
“Save backwards to the previous InDesign version” on page 107
“Add documents to a book file” on page 313
“Hyphenation and spelling dictionaries” on page 185
Use the Open command
1Choose File > Open and select one or more documents.
2Do one of the following, and then click Open:
•Select Normal (Windows) or Open Normal (Mac OS) to open the original document or a copy of a template.
•Select Original (Windows) or Open Original (Mac OS) to open an original document or template.
•Select Copy (Windows) or Open Copy (Mac OS) to open a copy of a document or template.
3If a warning message appears telling you that the color settings in the document are different from the color settings
in the application, select an option, and click
OK.
Note: Color warning messages are off by default, but you can show warnings if you change the default settings in the
Color Settings dialog box (Edit
> Color Settings.)
4If a warning message appears telling you that the document contains missing fonts, do one of the following:
•Click OK. InDesign will automatically format the text with a substitute.
•Click Find Font to search for and list fonts used throughout your document.
For more information on finding missing fonts, see “Find and change fonts” on page 174.
5If a warning message appears telling you that the document contains missing or modified links, use the Links panel
to fix the links. See “Update, restore, and replace links” on page 392.
Open recent document
❖Choose File > Open Recent, and select one of the documents you saved recently.
To specify how many recent documents are displayed, choose Edit > Preferences > File Handling (Windows), or
InDesign
> Preferences > File Handling, and then specify a number for Number Of Recent Items To Display. The
maximum number is 30.
Choosing word lists when opening documents
When opening a document, you may see an alert message asking if you want to use the word list in the document or
an exception word list in the user dictionary. An exception word list includes words that were added to the User
Dictionary while the document was worked on. If you know which exception word list you use, click its button. If
you’re not sure, click either button, choose Edit
> Spelling > Dictionary to inspect the word lists, and then, if necessary,
choose Edit
> Preferences > Dictionary (Windows) or InDesign > Preferences > Dictionary (Mac OS) to reset the
word list used for composition. See “Hyphenation and spelling dictionaries” on page 185.
Convert earlier versions of InDesign documents
❖To convert previous versions of InDesign documents to the current version, choose File > Open and open the file.
Keep in mind the following points:
•If you used third-party plug-ins to create an earlier version of a document, check with the manufacturer to make
sure that they are installed correctly for and are compatible with InDesign
CS5 before you convert the document.

103
USING INDESIGN
Working with documents
Last updated 11/16/2011
•When you convert a document, you may see an alert message asking if you want to use the exception word list in
the user dictionary or the one in the document. For information about this alert message, see “Choosing word lists
when opening documents” on page 102.
•Library files created in earlier versions of InDesign will open and convert in InDesign CS5, even if the library is
locked. You have to specify a name and location for the converted library files; the default naming convention is
filename-X.indl.
•InDesign CS4 can’t open InDesign CS5 documents directly. To open an InDesign CS5 document in InDesign CS4,
you must do two things. First, choose File
> Export in InDesign CS5 to save the document in IDML format. Second,
update InDesign CS4 with special plug-ins that let you open the IDML file. (See “Save backwards to the previous
InDesign version” on page 107.)
If you’re experiencing problems with a document that was created in a previous version of InDesign, use the Export
dialog box in InDesign CS5 to save the document in InDesign Markup (IDML) format. Then open the IDML file and
save it as an InDesign document.
More Help topics
“Save backwards to the previous InDesign version” on page 107
“Plug-ins” on page 651
Using Adobe Bridge with InDesign
Adobe Bridge is a cross-platform application included with Adobe Creative Suite components that helps you locate,
organize, and browse the assets you need to create print, web, video, and audio content. You can start Adobe Bridge
from any Creative Suite component (except Adobe Acrobat®), and use it to access both Adobe and non-Adobe asset
types.
From Adobe Bridge, you can:
•Manage image, footage, and audio files: Preview, search, sort, and process files in Adobe Bridge without opening
individual applications. You can also edit metadata for files, and use Adobe Bridge to place files into your
documents, projects, or compositions.
•View the links inside an InDesign document as thumbnails while in Adobe Bridge, without actually having to open
the InDesign document in InDesign.
•Drag assets from Adobe Bridge into the InDesign document window, or drag assets from the document window
into Adobe Bridge to create snippets. See “Use snippets” on page 396.
•Perform automated tasks, such as batch commands.
•Synchronize color settings across color-managed Creative Suite components.
•Start a real-time web conference to share your desktop and review documents.
More Help topics
“Reusing graphics and text” on page 396
Adobe Version Cue
Adobe Version Cue® and Adobe Drive are not included in Adobe Creative Suite 5, nor any future version of the
Creative Suite. Adobe continues to invest in asset management enablement through open industry standards and
partnerships. For more information, see www.adobe.com/go/learn_vc_end_en.

104
USING INDESIGN
Working with documents
Last updated 11/16/2011
Use document templates
Templates are useful starting points for standard documents because you can preset them with layout, graphics, and
text. For example, if you prepare a monthly magazine, you can create a template that contains the layout of a typical
issue, including ruler guides, grids, master pages, custom styles and swatches, placeholder frames, layers, and any
standard graphics or text. That way you can simply open the template each month and import new content.
You create a template the same way you create a regular document; the only difference occurs when you save the
document. When you prepare a template for others to use, you may want to add a layer containing instructions about
the template; hide or delete the layer before printing the document. See “Layers” on page 78.
More Help topics
“Designing calendars and business cards from templates” on page 105
Save a document as a template
1Choose File > Save As, and specify a location and filename.
2Choose InDesign CS5 Template for Save As Type (Windows) or Format (Mac OS), and then click Save.
Start a new document from a template
1Choose File > Open.
2Locate and select a template.
3Select Normal (Windows) or Open Normal (Mac OS), and then click Open.
4Save the new document with its own name.
Edit an existing template
1Choose File > Open.
2Locate and select a template.
3Select Original (Windows) or Open Original (Mac OS), and then click Open.
Reviewing InDesign documents
Adobe offers several methods for reviewing InDesign documents.
Tracking editing changes
As you or another person edits text, InDesign highlights added text and strikes through deleted text when Track
Changes is turned on. Use the Story Editor to view changes. The document owner can go through the edits and accept
or reject changes. See “Tracking and reviewing changes” on page 193.
Using Acrobat to review a PDF file
You can export the InDesign document to PDF and use Adobe Acrobat to set up an e-mail review or a shared review
on Acrobat.com or another server. Reviewers can add comments using the Sticky Note tool and other markup
methods. The document owner can then go through the PDF review comments and edit the original InDesign
document. For more information, see Acrobat Help.

105
USING INDESIGN
Working with documents
Last updated 11/16/2011
Using CS Review
CS Review is an online subscription service that lets you share your designs on the web so that others can provide
immediate feedback. When you create a review using the CS Review panel, you upload one or more snapshots of the
file to the Acrobat.com workspace. Reviewers can then add comments.
When you create a review, you can divide the review into parts that offer separate areas for review commenting. A
review can consist of parts from different files and applications. As the review progresses, you can add and remove
review parts as part of a dynamic review process.
Designing calendars and business cards from templates
One way to create a calendars, business cards, resumes or CVs, and other specialized documents is to use templates.
Adobe provides several templates at the Adobe Marketplace and Exchange site:
www.adobe.com/go/exchange
Use search to locate additional resources for specialty documents.
More Help topics
“Use document templates” on page 104
Saving documents
Save documents
Saving a document saves the current layout, references to source files, which page is currently displayed, and the zoom
level. Protect your work by saving often. You can save a file as any of the following:
•A regular document.
•A copy of the document, which creates a duplicate of the document under a different name, leaving the original
document active.
•A template, which normally opens as an untitled document. A template can contain settings, text, and graphics that
you preset as a starting point for other documents.
Saving a document also updates the metadata (or file information) that is part of the InDesign document. This
metadata includes a thumbnail preview, fonts used in the document, color swatches, and all metadata in the File
Info dialog box, all of which enable efficient searching. For example, you might want to search for all documents
that use a particular color.
You can view this metadata in Bridge and in the Advanced area of the File Info dialog box. You can control whether
to update the preview when you save by using a preference setting. The other metadata (fonts, colors, and links) are
updated whenever you save a document.
The Save, Save As, and Save a Copy commands store documents in the InDesign file format. For information about
storing documents in other file formats, see the Index.

106
USING INDESIGN
Working with documents
Last updated 11/16/2011
If you’re saving a document in order to bring it to a prepress service provider for final output, InDesign can
automatically collect all necessary files, such as linked graphics and fonts, in one folder. (See “Package files” on
page 621.)
❖Do one of the following:
•To save a document under a new name, choose File > Save As, specify a location and filename, and click Save. The
newly named file becomes the active document. Using the Save As command might reduce the file size.
•To save an existing document under the same name, choose File > Save.
•To save all open documents to their existing locations and filenames, press Ctrl+Alt+Shift+S (Windows) or
Command+Option+Shift+S (Mac
OS).
•To save a copy of a document under a new name, choose File > Save a Copy, specify a location and filename, and
click Save. The saved copy does not become the active document.
Important: To avoid problems, avoid reserved characters that have special meanings in some operating systems. For
example, avoid filenames with spaces, tabs, or initial periods, or filenames that use these characters: / \ : ; * ? <
> , $ %.
Similarly, avoid using characters with accents (such as ü, ñ, or é), even when using a non-English version of InDesign.
Problems may occur if the file is opened in a different platform.
If you have frequently work with several documents open at the same time and want to save them all at once, use a
keyboard shortcut. Choose Edit > Keyboard Shortcuts, choose Views, Navigation from the Product Area menu, and
select Save All in the Commands list. You can then edit or add a shortcut. You can use Quick Apply to specify the Save
All command.
More Help topics
“Save backwards to the previous InDesign version” on page 107
“Use document templates” on page 104
“Recover documents” on page 42
“Print thumbnails” on page 609
Include previews in saved documents
Thumbnail previews of documents and templates provide easy identification of those files in Adobe Bridge and Adobe
Mini Bridge. A preview is created when you save a document or template. A document preview includes a JPEG image
of only the first spread; a template preview includes a JPEG image of each page in the template. You can control the
size of the preview and the number of pages to suit your needs. For example, Extra Large 1024x1024 enables you to
quickly scan the contents of a page at high-resolution before you open the file.
You can enable the option in Preferences or in the Save As dialog box. Because previews increase both file size and the
time it takes to save the document, you may prefer to enable the option on demand using the Save As dialog box.
1Do one of the following:
•To include a preview every time you save a document, choose Edit > Preferences > File Handling (Windows) or
InDesign
> Preferences > File Handling (Mac OS).
•To include a preview for a specific document, choose File > Save As.
2Select Always Save Preview Images With Documents.
3If you are setting the preview using the Preferences dialog box, choose the number of preview pages from the Pages
menu, and choose an option from the Preview Size menu.

107
USING INDESIGN
Working with documents
Last updated 11/16/2011
Note: Selecting the preview option in the Save As dialog box also selects the option in the Preferences dialog box, and uses
the default Pages and Preview Size settings.
Save an InDesign Markup (IDML) document
In some cases you may want to save an InDesign in interchange markup format. It’s especially useful to save in this
format when you open a QuarkXPress or PageMaker publication in InDesign, when you open a document created in
a previous version of InDesign, or when you’re experiencing problems with your document, such as not being able to
delete color swatches.
1Choose File > Export.
2From the Save As Type (Windows) or Format (Mac OS) menu, choose InDesign Markup (IDML).
3Click Save.
You can open the saved IDML file in InDesign CS5 and InDesign CS4 but not in any previous version of InDesign.
For information on using IDML for development purposes, see
www.adobe.com/go/learn_id_indesignmarkup_cs4_en.
Save backwards to the previous InDesign version
To open an InDesign CS5 document in InDesign CS4, do two things. First, in InDesign CS5, export the document to
the InDesign Markup Language (IDML). (The IDML format replaces the Interchange INX format used for saving
backwards in previous versions.)
Second, make sure that the computer running InDesign CS4 is updated with the appropriate plug-ins so that it can
open the exported IDML file. The person running InDesign CS4 can obtain the compatibility plug-ins by choosing
Help
> Updates and following the prompts. Plug-ins can also be installed from the Adobe website: Visit Product
updatespage on the Adobe website, and choose to the InDesign from the product list.
Opening a document in a previous version of InDesign is also referred to as “saving down.”
Note: Content created using features specific to InDesign CS5 may be modified or omitted when you open the document
in InDesign CS4.
1Choose File > Export.
2From the File Type (Windows) or Format (Mac OS) menu, choose InDesign Markup (IDML).
3Click Save.
You can open the .idml file in InDesign CS4 to convert it to an untitled InDesign document.
Note: To open the InDesign CS5 document in InDesign CS3, open the exported IDML file in InDesign CS4, save it and
export it to InDesign CS3 Interchange (INX), and then open the exported INX file in InDesign CS3. Make sure that all
InDesign versions are up to date.
Work with metadata
Metadata is a set of standardized information about a file, such as author name, resolution, color space, copyright, and
keywords applied to it. You can use metadata to streamline your workflow and organize your files.

108
USING INDESIGN
Working with documents
Last updated 11/16/2011
About the XMP standard
Metadata information is stored using the Extensible Metadata Platform (XMP) standard, on which Adobe Bridge ,
Adobe Illustrator, Adobe InDesign, and Adobe Photoshop are built. XMP is built on XML, and in most cases the
metadata is stored in the file. If it isn’t possible to store the information in the file, metadata is stored in a separate file
called a sidecar file. XMP facilitates the exchange of metadata between Adobe applications and across publishing
workflows. For example, you can save metadata from one file as a template, and then import the metadata into other
files.
Metadata that is stored in other formats, such as Exif, IPTC (IIM), GPS, and TIFF, is synchronized and described with
XMP so that it can be more easily viewed and managed. Other applications and features also use XMP to communicate
and store information such as version comments, which you can search using Adobe Bridge.
In most cases the metadata remains with the file even when the file format changes, for example, from PSD to JPG.
Metadata is also retained when files are placed in an Adobe document or project.
You can use the XMP Software Development Kit to customize the creation, processing, and interchange of metadata.
For example, you can use the XMP SDK to add fields to the File Info dialog box. For more information on XMP and
the XMP SDK, visit the Adobe website.
Working with metadata in Adobe Bridge and Adobe Creative Suite components
Many of the powerful Adobe Bridge features that allow you to organize, search, and keep track of your files and
versions depend on XMP metadata in your files. Adobe Bridge provides two ways of working with metadata: through
the Metadata panel and through the File Info dialog box (InDesign) or the Content File Info dialog box (InCopy).
In some cases, multiple views exist for the same metadata property. For example, a property may be labeled Author in
one view and Creator in another, but both refer to the same underlying property. Even if you customize these views
for specific workflows, they remain standardized through XMP.
Add metadata using the File Info dialog box
The File Info dialog box displays camera data, file properties, an edit history, copyright, and author information of the
current document. The File Info dialog box also displays custom metadata panels. You can add metadata directly in
the File Information dialog box. Any information you enter in a field overrides existing metadata and applies the new
value to all selected files.
1Choose File > File Info (InDesign) or File > Content File Info (InCopy).
2Select any of the following from the tabs at the top of the dialog box:
Use the Right and Left arrows to scroll the tabs, or click the down-pointing arrow and choose a category from the list.
Description Lets you enter document information about the file, such as document title, author, description, and
keywords that can be used to search for the document. To specify copyright information, select Copyrighted from the
Copyright Status pop-up menu. Then enter the copyright owner, notice text, and the URL of the person or company
holding the copyright.
IPTC Includes four areas: IPTC Content describes the visual content of the image. IPTC Contact lists the contact
information for the photographer. IPTC Image lists descriptive information for the image. IPTC Status lists workflow
and copyright information.
Camera Data Includes two areas: Camera Data 1 displays read-only information about the camera and settings used
to take the photo, such as make, model, shutter speed, and f-stop. Camera Data 2 lists read-only file information about
the photo, including pixel dimensions and resolution

109
USING INDESIGN
Working with documents
Last updated 11/16/2011
Video Data Lists information about the video file, including video frame width and height, and lets you enter
information such as tape name and scene name.
Audio Data Lets you enter information about the audio file, including the title, artist, bit rate, and loop settings.
Mobile SWF Lists information about mobile media files, including title, author, description, and content type.
Categories Lets you enter information based on Associated Press categories.
Origin Lets you enter file information that is useful for news outlets, including when and where the file was created,
transmission information, special instructions, and headline information.
DICOM Lists patient, study, series, and equipment information for DICOM images.
History Displays Adobe Photoshop history log information for images saved with Photoshop. The History tab appears
only if Adobe Photoshop is installed.
Illustrator Lets you apply a document profile for print, web, or mobile output.
Advanced Displays fields and structures for storing metadata by using namespaces and properties, such as file format
and XMP, Exif, and PDF properties.
Raw Data Displays XMP text information about the file.
3Type the information to add in any displayed field.
4Click OK to apply the changes.
Export metadata as an XMP file
You can save metadata in an XMP file to share with other users. These XMP files can be used as templates for
populating InDesign documents and other documents created with XMP-enabled applications. Templates you export
are stored in a shared location that all XMP-enabled applications can access. They also appear in the pop-up menu at
the bottom of the File Info dialog box.
1Choose File > File Info (InDesign) or File > Content File Info (InCopy).
2Choose Export from the pop-up menu at the bottom of the dialog box.
3Type a filename, choose a location for the file, and click Save.
To view metadata templates in Explorer (Windows) or the Finder (Mac OS), click the pop-up menu at the bottom of
the File Info dialog box and choose Show Templates Folder.
Import metadata from an XMP file
When you import metadata into a document from an exported XMP template file, you can specify whether to clear all
metadata in the current document and add the new metadata, keep all but the matching metadata, or add matching
metadata to the existing metadata.
❖Choose File > File Info (InDesign) or File > Content File Info (InCopy).
•Choose an XMP file from the pop-up menu at the bottom of the dialog box, select an import option, and click OK.
•Choose Import from the pop-up menu at the bottom of the dialog box, select an import option, and click OK. Then
double-click the XMP template file you want to import.

110
USING INDESIGN
Working with documents
Last updated 11/16/2011
Edit metadata in image files
When you generate captions of placed images in InDesign, the metadata from the placed image is used. Although you
can edit the metadata of InDesign documents, you cannot edit the metadata of placed files in InDesign. Instead, change
the metadata of placed images using their original applications, using Finder or Explorer, or using Adobe Bridge or
Adobe Mini Bridge.
1In InDesign, right-click (Windows) or Control-click (Mac OS) the image, and then choose Edit Original.
You can also choose Edit With and then choose an application such as Adobe Illustrator or Adobe Photoshop.
2In the original application, choose File > File Info.
3Edit the metadata, and then click OK.
You can also select an image in Adobe Bridge and choose File > File Info to edit the image metadata. See “Add metadata
using the File Info dialog box” on page 108.
Converting QuarkXPress and PageMaker documents
Open QuarkXPress files in InDesign
InDesign can convert document and template files from QuarkXPress 3.3 or 4.1x. InDesign can also convert
document and template files from multi-language QuarkXPress Passport
4.1x files, so there is no longer any need to
save these files as single-language files first. (To convert documents created with QuarkXPress
5.0 or later, reopen the
documents in QuarkXPress and save them in 4.0 format.)
For more information, see the QuarkXPress Conversion Guide (PDF) at www.adobe.com/go/learn_quarkconv.
Open a QuarkXPress document or template
1Make sure that the original application file is closed.
2To ensure that all links are maintained, copy all linked files to the same QuarkXPress document folder.
3In InDesign, choose File > Open.
4In Windows, choose QuarkXPress (3.3-4.1x) or QuarkXPress Passport (4.1x) from the Files Of Type menu.
5Select a file and click Open.
Note: If InDesign cannot convert a file or a specific part of a file, it displays a warning describing the reasons it cannot
convert it and the results of the conversion.
6If a warning dialog box appears, do one of the following:
•Click Save to save a copy of the warnings as a text file, and then open the file in InDesign.
•Click Close to close the dialog box and open the file in InDesign.
7To more accurately convert text wrap applied in QuarkXPress, do the following in InDesign:
•Select Text Wrap Only Affects Objects Beneath in the Composition area of the Preferences dialog box.
•Assign the Adobe Single-Line Composer in the Paragraph panel menu to one or more paragraphs.
If you’re experiencing problems with the converted QuarkXPress document, use the Export dialog box to save the
document in InDesign Markup (IDML) format. Then open the IDML file and save it as an InDesign document.

111
USING INDESIGN
Working with documents
Last updated 11/16/2011
Save a QuarkXPress template as an InDesign template
1Open the template in InDesign.
2Choose File > Save As and specify a location and filename.
3Choose InDesign CS4 Template for Save As Type (Windows) or Format (Mac OS), and then click Save.
What gets converted from QuarkXPress
When you open a QuarkXPress file, InDesign converts the original file information to native InDesign information:
•Text boxes are converted to InDesign text frames.
To accurately convert text wrap applied in QuarkXPress, select Text Wrap Only Affects Text Beneath in the
Composition area of the Preferences dialog box.
•Styles are converted to InDesign styles.
•Because QuarkXPress uses different color profiles, they are ignored in InDesign.
•Text and graphics links are preserved and appear in the Links panel.
Note: Embedded graphics—those added to the original document using the Paste command—are not converted. For
more information on embedded graphics, see “About links and embedded graphics” on page 389.
InDesign does not support OLE or Quark XTensions. Consequently, when you open files that contain OLE or
Quark XTensions graphics, those graphics will not appear in the InDesign document. If your QuarkXPress
document does not convert, check the original and remove any objects that were created by an XTension; then save,
and try to convert again.
•All master pages and layers are converted to InDesign masters and layers.
•All master-page objects, as well as QuarkXPress guides, are placed on the corresponding InDesign master pages.
•Grouped objects remain grouped except where nonprinting items are included in a group.
•All strokes and lines (including paragraph rules) are converted to the stroke styles they most closely resemble.
Custom strokes and dashes are converted to custom strokes and dashes in InDesign.
Colors are converted exactly to InDesign colors, except in the following situations:
•Multi-ink colors from QuarkXPress are mapped to mixed inks in InDesign, unless the multi-ink color does not
contain at least one spot color. In this case, the multi-ink color is converted to a process color instead.
•QuarkXPress 4.1 colors from the color library are converted based on their CMYK values.
•QuarkXPress 3.3 HSB colors are converted to RGB, and colors from the color library are converted based on their
CMYK values.
•QuarkXPress 4.1 HSB and LAB colors are converted to RGB, and colors from the color library are converted based
on their RGB/CMYK values.
For information about other conversion issues, check the support documents on the Adobe website at
www.adobe.com/support.
Convert PageMaker documents
InDesign can convert document and template files from Adobe PageMaker 6.0 and later. When you open a PageMaker
file, InDesign converts the original file information to native InDesign information. InDesign files are saved with an
.indd filename extension.

112
USING INDESIGN
Working with documents
Last updated 11/16/2011
For more information, see the PageMaker Conversion Guide (PDF) at www.adobe.com/go/learn_pmconv.
Before opening the document in InDesign, you may want to do the following:
•If the PageMaker file or its linked graphics are located on a network server, floppy disk, or removable drive, it may
not open as expected if an interruption in data transfer occurs. To prevent data transfer problems, copy documents
and their links to the hard disk, preferably in the same folder where the PageMaker publication is stored, before
opening them in InDesign.
•You may want to use Save As in PageMaker to clear unnecessary hidden data.
•To ensure that all links are maintained, copy all linked files to the same folder where the PageMaker publication is
stored.
•Make sure that all necessary fonts are available in InDesign.
•Repair broken graphics links in the PageMaker publication.
•If you have a problem converting a large PageMaker document, convert portions of the PageMaker file separately
to isolate the problem.
If you cannot open a corrupt PageMaker document in PageMaker, try opening it in InDesign. InDesign can recover
most documents that PageMaker cannot open.
More Help topics
PageMaker Conversion Guide
Open a PageMaker document or template
1Make sure that the original application file is closed.
2In InDesign, choose File > Open.
3In Windows, choose PageMaker (6.0-7.0) in the Files of Type menu.
4Select a file and click Open.
Note: If InDesign cannot convert a file or a specific part of a file, it displays a warning describing the reasons it cannot
convert it and the results of the conversion attempt.
5If a warning dialog box appears, do one of the following:
•Click Save to save a copy of the warnings as a text file, and then open the file in InDesign.
•Click Close to open the file in InDesign without saving the text file.
If you’re experiencing problems with the converted PageMaker document, use the Export dialog box to save the
document in InDesign Markup (IDML) format. Then open the IDML file and save it as an InDesign document.
Save a PageMaker template as an InDesign template
1Open the template in InDesign.
2Choose File > Save As and specify a location and filename.
3Choose InDesign CS4 Template for Save As Type (Windows) or Format (Mac OS), and then click Save.

113
USING INDESIGN
Working with documents
Last updated 11/16/2011
Common PageMaker conversion issues
Note the following:
•All master pages and layers are converted to InDesign masters and layers. Master pages in PageMaker convert to
master pages in InDesign and retain all objects including page numbering and guides. To maintain the order of
overlapping items, InDesign creates two layers when converting a PageMaker publication: Default and Master
Default. Master Default contains the Master page items.
•PageMaker document guides are placed on the Default layer in InDesign.
•All items on the PageMaker pasteboard appear on the pasteboard of the first spread in the InDesign document.
•All objects designated in PageMaker as Non-Printing are converted with Nonprinting selected in the InDesign
Attributes panel.
•Grouped objects remain grouped except where nonprinting items are included in a group.
Text and tables conversion issues
Note the following:
•Text is converted to InDesign text frames.
•Tables in PageMaker files are converted to InDesign tables.
•Styles are converted to InDesign styles. The [No style] in PageMaker is the equivalent of [No Paragraph Style] in
InDesign. However, [No Paragraph Style] picks up the attributes of a named style if that style was selected before
any typing occurred in the PageMaker publication.
•InDesign uses the Adobe Paragraph Composer for all paragraphs, causing some text to reflow. You can assign the
Adobe Single-Line Composer to one or more paragraphs to create line breaks more similarly to the PageMaker
composition engine, but text may still reflow.
•InDesign uses only Baseline leading. Proportional and Top of Caps leading in PageMaker convert to Baseline
leading in InDesign, possibly resulting in text shifting.
•The First Baseline of converted text may appear different than text created in InDesign. The First Baseline of
converted text is set to Leading, but the First Baseline of text created in InDesign is set to Ascent by default.
•InDesign uses a different hyphenation method than PageMaker, so line breaks may be different.
•Shadow text converts as plain text. Outline text converts as text with a stroke of 0.25 inches and a fill of Paper.
Book, index, and TOC conversion issues
Note the following:
•InDesign ignores Booklists when opening PageMaker publications. If you want to open all the publications on a
Booklist together, run the Build Booklet plug-in in PageMaker with a layout of None selected so that the booked
publications are combined into one. Note that text blocks and frames will no longer be threaded.
•Index entries from a PageMaker publication appear in the InDesign Index panel. Text with cross-references that
use the See Herein or See Also Herein option are mapped as See or See Also.
•Table of Contents text converts as a Table of Contents, with PageMaker TOC Style available in the style pop-up
menu in the InDesign TOC dialog box.
Linking and embedding conversion issues
Note the following:
•Text and graphics links are preserved and appear in the Links panel.

114
USING INDESIGN
Working with documents
Last updated 11/16/2011
•If InDesign cannot locate the original link to a graphic, a warning appears asking you to repair the link in
PageMaker.
•InDesign does not support OLE (object linking and embedding). Consequently, when you open files that contain
OLE graphics, those graphics will not appear in the InDesign document.
Color and trapping conversion issues
Note the following:
•Colors are converted exactly to InDesign colors. PageMaker HLS colors are converted to RGB colors, and colors
from other color libraries are converted based on their CMYK values.
•Tints are converted as percentages of the parent color. If the parent color isn’t in the Swatches panel, it’s added
during conversion. When an object with a tint is selected, the parent color is selected in the Swatches panel, and the
tint value appears in the pop-up menu.
•Color profiles for PageMaker files are converted directly. All Hexachrome colors are converted to RGB values.
Profiles that are not ICC-compliant are replaced using the default CMS settings and profiles you specified for
InDesign.
•All strokes and lines (including paragraph rules) are converted to the default stroke styles they most closely
resemble. Custom strokes and dashes are converted to custom strokes and dashes in InDesign.
•InDesign does not support screen patterns or angles applied to TIFF images in Image Control; it drops these from
imported TIFF files.
•When Auto-Overprint Black Strokes or Fills (or both) is selected in the Trapping Preferences dialog box in
PageMaker, the setting carries over to InDesign, but Overprint Stroke or Overprint Fill is deselected in the
Attributes panel.
For information about other PageMaker conversion issues, check the support documents on the Adobe website.
Exporting
Export text
You can save all or part of an InDesign story in file formats that you can open later in other applications. Each story
in a document exports to a separate document.
InDesign can export text in several file formats, which are listed in the Export dialog box. The formats listed are used
by other applications, and they may retain many of the type specifications, indents, and tabs set in your document.
You can save sections of commonly used text and page layout items as snippets.
1Using the Type tool , click in the story you want to export.
2Choose File > Export.
3Specify a name and location for the exported story, and select a text file format under Save as Type (Windows) or
Format (Mac
OS).
If you don’t see a listing for your word-processing application, you can save the document in a format the application
can import, such as RTF. If your word-processing application doesn’t support any other InDesign export formats, use
a text-only format. Note, however, that exporting in text-only format removes all character attributes from the text.
4Click Save to export the story in the format you’ve selected.

115
USING INDESIGN
Working with documents
Last updated 11/16/2011
To retain all formatting, use the Adobe InDesign Tagged Text export filter. For more information, view the Tagged
Text PDF at www.adobe.com/go/learn_id_taggedtext_cs5_en (PDF).
More Help topics
“Export to PDF for printing” on page 501
“Use snippets” on page 396
Export to JPEG format
JPEG uses a standardized image compression mechanism to compress full-color or grayscale images for onscreen
display. Use the Export command to export a page, spread, or selected object in JPEG format.
1If desired, select an object to export. (You do not need to select anything to export a page or spread.)
2Choose File > Export.
3Specify a location and a filename.
4For Save As Type (Windows) or Format (Mac OS), choose JPEG, and click Save.
The Export JPEG dialog box appears.
5In the Export section, do one of the following:
Selection Export the currently selected object.
Range Enter the number of the page or pages you want to export. Separate numbers in a range by using a hyphen,
and separate multiple pages or ranges by using commas.
Select All Export all pages in the documents.
Spreads Export facing pages in a spread to a single JPEG file. Deselect this option to export each page in a spread
as a separate JPEG file.
6For Quality, choose from a range of options that determine the trade-off between file compression (smaller file size)
and image quality:
•Maximum includes all available high-resolution image data in the exported file and requires the most disk space.
Choose this option if the file will be printed on a high-resolution output device.
•Low includes only screen-resolution versions (72 dpi) of placed bitmap images in the exported file. Choose this
option if the file will be displayed onscreen only.
•Medium and High include more image data than Low, but use varying levels of compression to reduce file size.
7For Format Method, choose one of the following options:
•Progressive displays a JPEG image in increasing detail as it is downloaded to a web browser.
•Baseline displays a JPEG image after it has been downloaded completely.
8Select or type the resolution for the exported JPEG image.
9Specify the color space of the exported file. You can choose to export as RGB, CMYK, or Gray.
10 Select any of the following items, and then click Export.
Embed Color Profile When this option is selected, the document’s color profile is embedded in the exported JPEG
file. The name of the color profile is displayed in small text to the right of the option. You can select the desired
profile for the document by choosing Edit > Assign Profiles before exporting to JPEG.
If Gray is chosen from the Color Space menu, the Embed Color Profile option is disabled.

116
USING INDESIGN
Working with documents
Last updated 11/16/2011
Use Document Bleed Settings If this option is selected, the bleed area specified in Document Setup appears in the
resulting JPEG. This option is disabled if the Selection option is chosen.
Anti-Alias Anti-aliasing smooths the jagged edges of text and bitmap images.
Simulate Overprint This option is similar to the Overprint Preview feature but works for any of the selected color
spaces. If selected, the JPEG file that InDesign exports simulates the effects of overprinting spot inks with different
neutral density values by converting spot colors to process colors for printing.
More Help topics
“JPEG (.jpg) files” on page 376
Exporting content for the web
To repurpose InDesign content for the web, you have several options:
Dreamweaver (XHTML) Export a selection or the entire document to a basic, unformatted HTML document. You can
link to images on a server or create a separate folder for images. You can then use any HTML editor, such as Adobe
Dreamweaver®, to format the content for the web. See “Export content to Dreamweaver (CS5)” on page 116.
Copy and paste Copy text or images from the InDesign document and paste it into your HTML editor.
Adobe PDF Export a document to Adobe PDF and post the PDF on the web. The PDF can include interactive elements
such as movies, sound clips, buttons, and page transitions. See “Dynamic PDF documents” on page 530.
Flash (SWF) Export to a SWF file that’s ready to be viewed immediately in Flash Player or on the web. A SWF file can
include buttons, hyperlinks, and page transitions such as wipe, dissolve, and page curl. See “Create interactive SWF
(Flash) files for the web” on page 523.
Flash (FLA) Export to a FLA file that can be edited in Adobe Flash Professional. See “Create FLA files for the web” on
page 526.
Digital Editions (EPUB) Export a document or book as a reflowable XHTML-based eBook that is compatible with the
Adobe Digital Editions reader software. See “Export content for EPUB (CS5)” on page 121.
XML For advanced repurposing workflows, export the content from InDesign in XML format, which you can then
import into an HTML editor such as Dreamweaver. See “Working with XML” on page 567.
Export content to Dreamweaver (CS5)
Exporting to XHTML is an easy way to get your InDesign contents into web-ready form. When you export contents
to XHTML, you can control how text and images are exported. InDesign preserves the names of paragraph, character,
object, table, and cell styles applied to the exported contents by marking the XHTML contents with CSS style classes
of the same name. Using Adobe Dreamweaver or any CSS-capable HTML editor, you can quickly apply formatting
and layout to the contents.
What gets exported InDesign exports all stories, linked and embedded graphics, SWF movie files, footnotes, text
variables (as text), bulleted and numbered lists, internal cross-references, and hyperlinks that jump to text or web
pages. Tables are also exported, but certain formatting, such as table and cell strokes, is not exported. Tables are
assigned unique IDs, so they can be referenced as Spry data sets in Dreamweaver.
What doesn’t get exported InDesign does not export objects you draw (such as rectangles, ovals, and polygons),
movie files (except for SWF), hyperlinks (except for links to web pages and links applied to text that jump to text
anchors in the same document), pasted objects (including pasted Illustrator images), text converted to outlines, XML

117
USING INDESIGN
Working with documents
Last updated 11/16/2011
tags, books, bookmarks, SING glyphlets, page transitions, index markers, objects on the pasteboard that aren’t selected
and don’t touch the page, or master page items (unless they’re overridden or selected before export).
1If you’re not exporting the entire document, select the text frames, range of text, table cells, or graphics you want
to export.
2Choose File > Export For > Dreamweaver.
3Specify the name and location of the HTML document, and then click Save.
4In the XHTML Export Options dialog box, specify the desired options in the General, Images, and Advanced areas,
and then click Export.
A document with the specified name and an .html extension (such as “newsletter.html”) is created; if specified, a web
images subfolder (such as “newsletter-web-images”) is saved in the same location.
XHTML export options
In the XHTML dialog box (File > Export For > Dreamweaver), specify the following options.
General options
The General area includes the following options.
Export Determines whether only the selected items or the entire document is exported. If a text frame is selected, the
entire story—including overset text—is exported.
If Document is selected, all page items from all spreads are exported, except for master page items that have not been
overridden and page items on invisible layers. XML tags and generated indexes and tables of contents are also ignored.
Bullets Select Map To Unordered List to convert bullet paragraphs into List Items, which are formatted in HTML
using the <ul> tag. Select Convert To Text to format using the <p> tag with bullet characters as text.
Ordering Use either the page order or XML structure to determine the reading order of page objects.
If Base On Page Layout is selected, InDesign determines the reading order of page objects by scanning left to right and
top to bottom. In some instances, especially in complex, multi-column documents, the design elements may not
appear in the desired reading order. Use Dreamweaver to rearrange and format the contents.
If Same As XML Structure is selected, the XML Structure panel controls the ordering of the exported content and
which content gets exported. If your content is already tagged, you can simply drag the tags in the XML Structure panel
to set the XHTML Export order. If your content is not tagged, you can choose Add Untagged Items from the Structure
panel menu to generate tags that you can reorder. If you do not want an item to be included in the export, you can
simply delete the tag in the XML Structure panel. (Deleting a tag does not delete the content from the INDD file.) See
“Tag page items” on page 520.
Numbers Determines how numbers are converted in the HTML file.
•Map To Ordered List Converts numbered lists into List Items, which are formatted in HTML using the <ol> tag.
•Map To Static Ordered List Converts numbered lists into List Items, but assigns a <value> attribute based on the
paragraph’s current number in InDesign.
•Convert To Text Converts numbered lists into paragraphs that begin with the paragraph’s current number as text.
Images options
From the Copy Images menu, determine how images are exported to HTML.
Original Exports the original image to the web images subfolder. When this option is selected, all other options are
dimmed.

118
USING INDESIGN
Working with documents
Last updated 11/16/2011
Optimized Lets you change settings to determine how the image is exported.
•Formatted Preserves InDesign formatting, such as rotation or scale, as much as possible for web images.
•Image Conversion Lets you choose whether the optimized images in your document are converted to GIF or JPEG.
Choose Automatic to let InDesign decide which format to use in each instance.
•GIF Options (Palette) Lets you control how InDesign handles colors when optimizing GIF files. The GIF format
uses a limited color palette, which cannot exceed 256 colors.
Choose Adaptive (No Dither) to create a palette using a representative sample of colors in the graphic without any
dithering (mixing of small spots of colors to simulate additional colors). Choose Web to create a palette of web-safe
colors that are a subset of Windows and Mac
OS system colors. Choose System (Win) or System (Mac) to create a
palette using the built-in system color palette. This choice may cause unexpected results.
•JPEG Options (Image Quality) Determines the trade-off between compression (for smaller file sizes) and image
quality for each JPEG image created. Low produces the smallest file and lowest image quality.
•JPEG Options (Format Method) Determines how quickly JPEG graphics display when the file containing the image
is opened on the web. Choose Progressive to make the JPEG images display gradually and in increasing detail as they
are downloaded. (Files created with this option are slightly larger and require more RAM for viewing.) Choose
Baseline to make each JPEG file display only after it has been completely downloaded; a placeholder appears in its place
until the file displays.
Link To Server Path Rather than exporting images to a subfolder, this option lets you enter a local URL (such as
“images/”) that appears in front of the image file. In the HTML code, the link attribute displays the path and extension
you specify. This option is especially effective when you’re converting images to web-compatible images yourself.
Note: InDesign does not check the path you specify for Java™ scripts, external CSS styles, or image folders, so use
Dreamweaver to verify paths.
Advanced options
Use the Advanced area to set CSS and JavaScript options.
CSS Options Cascading Style Sheets (CSS) are a collection of formatting rules that control the appearance of content
in a web page. When you use CSS to format a page, you separate content from presentation. The content of your page—
the HTML code—resides in the HTML file itself, while the CSS rules defining the presentation of the code reside in
another file (an external style sheet) or within the HTML document (usually in the Head section). For example, you
can specify different font sizes for selected text, and you can use CSS to control the format and positioning of block-
level elements in a web page.
•Embedded CSS When exporting to XHTML, you can create a list of CSS styles that appears in the Head section of
the HTML file with declarations (attributes).
If Include Style Definitions is selected, InDesign attempts to match the attributes of the InDesign text formatting with
CSS equivalents. If this option is deselected, the HTML file includes empty declarations. You can edit later these
declarations in Dreamweaver.
If Preserve Local Overrides is selected, local formatting such as italic or bold is included.
•No CSS Selecting this option omits the CSS section from the HTML file.
•External CSS Specify the URL of the existing CSS style sheet, which is usually a relative URL, such as
“/styles/style.css.” InDesign does not check whether the CSS exists or is valid, so you’ll want to use Dreamweaver to
confirm your external CSS setup.
JavaScript Options Select Link To External JavaScript to run a JavaScript when the HTML page is opened. Specify the
URL of the JavaScript, which is usually a relative URL. InDesign does not check whether the JavaScript exists or is valid.

119
USING INDESIGN
Working with documents
Last updated 11/16/2011
Export content to HTML (CS5.5)
Export to HTML
Exporting to HTML is an easy way to get your InDesign content into web-ready form. When you export content to
HTML, you can control how text and images are exported. InDesign preserves the names of paragraph, character,
object, table, and cell styles applied to the exported contents by marking the HTML contents with CSS style classes of
the same name. Using Adobe Dreamweaver or any CSS-capable HTML editor, you can quickly apply formatting and
layout to the contents.
What gets exported InDesign exports all stories, linked and embedded graphics, SWF movie files, footnotes, text
variables (as text), bulleted and numbered lists, internal cross-references, and hyperlinks that jump to text or web
pages. Tables are also exported, but certain formatting, such as table and cell strokes, is not exported. Tables are
assigned unique IDs, so they can be referenced as Spry data sets in Dreamweaver. Placed audio and h.264 video files
are enclosed in HTML5 <audio> and <video> tags.
What doesn’t get exported InDesign does not export objects you draw (such as rectangles, ovals, and polygons),
hyperlinks (except for links to web pages and links applied to text that jump to text anchors in the same document),
pasted objects (including pasted Illustrator images), text converted to outlines, XML tags, books, bookmarks, SING
glyphlets, page transitions, index markers, objects on the pasteboard that aren’t selected and don’t touch the page, or
master page items (unless they’re overridden or selected before export).
1If you’re not exporting the entire document, select the text frames, range of text, table cells, or graphics you want
to export.
2Choose File > Export and select HTML from the Save As Type list.
3Specify the name and location of the HTML document, and then click Save.
4In the HTML Export Options dialog box, specify the desired options in the General, Image, and Advanced areas,
and then click OK.
A document with the specified name and an .html extension (such as “newsletter.html”) is created; if specified, a web
images subfolder (such as “newsletter-web-images”) is saved in the same location.
HTML export options
In the HTML dialog box, specify the following options.
General options
The General area includes the following options.
Export Determines whether only the selected items or the entire document is exported. If a text frame is selected, the
entire story—including overset text—is exported.
If Document is selected, all page items from all spreads are exported, except for master page items that have not been
overridden and page items on invisible layers. XML tags and generated indexes and tables of contents are also ignored.
Ordering lets you specify the reading order of page objects.
•Base On Page Layout The location of the items on the page determines the reading order.
If Base On Page Layout is selected, InDesign determines the reading order of page objects by scanning left to right and
top to bottom. In some instances, especially in complex, multi-column documents, the design elements may not
appear in the desired reading order. Use Dreamweaver to rearrange and format the contents.
•Same As XML Structure If Same As XML Structure is selected, the XML Structure panel controls the ordering of the
exported content and which content gets exported. If your content is already tagged, you can simply drag the tags in

120
USING INDESIGN
Working with documents
Last updated 11/16/2011
the XML Structure panel to set the XHTML Export order. If your content is not tagged, you can choose Add Untagged
Items from the Structure panel menu to generate tags that you can reorder. If you do not want an item to be included
in the export, you can simply delete the tag in the XML Structure panel. (Deleting a tag does not delete the content
from the INDD file.) See “Tag page items” on page 520.
•Same As Articles Panel The order of elements in the Articles panel determines the reading order. Only the checked
articles are exported. See “Include articles for export” on page 148.
Margin Specify a simple margin in Ems or pixels. Specifying margins in Ems is better for multiscreen compatibility.
The same value is applied to all margins: top, bottom, left, and right.
Bullets Select Map To Unordered List to convert bullet paragraphs into List Items, which are formatted in HTML
using the <ul> tag. Select Convert To Text to format using the <p> tag with bullet characters as text. If you have used
native InDesign auto-bullets, sub-bullets are also included.
Numbers Determines how numbers are converted in the HTML file. If you have used native InDesign auto-
numbering, sub-bullets are also included
•Map To Ordered List Converts numbered lists into List Items, which are formatted in HTML using the <ol> tag.
•Map To Static Ordered List Converts numbered lists into List Items, but assigns a <value> attribute based on the
paragraph’s current number in InDesign.
•Convert To Text Converts numbered lists into paragraphs that begin with the paragraph’s current number as text.
View HTML After Exporting Starts the browser, if present.
Image options
Copy Images Specify how images are exported to HTML.
•Original Exports the original image to the “<document_name>-web-images” subfolder. When this option is
selected, all other options are dimmed.
•Optimized Lets you change settings to determine how the image is exported.
•Link To Server Path Rather than exporting images to a subfolder, this option lets you enter a local URL (such as
“images/”) that appears in front of the image file. In the HTML code, the link attribute displays the path and extension
you specify. This option is especially effective when you’re converting images to web-compatible images yourself.
Preserve Appearance from Layout Check to inherit the image object attributes from the layout.
Resolution (ppi) Specify the resolution of the images in pixels per inch (ppi). While operating systems have
standardized on either 72 ppi or 96 ppi, mobile devices range from 132 ppi (iPad), to 172 ppi (Sony Reader), to over
300 ppi (iPhone 4). You can specify a ppi value for each object selected. Values include 72, 96, 150 (average for all ebook
devices today), and 300.
Image Size Specify if image size must remain fixed or resized relative to the page. Relative to Page Size sets a relative
percentage value based on the size of the image relative to the InDesign page width. This option causes the images to
rescale proportionally, relative to the width of the reading area.
Image Alignment and Spacing Specify the image alignment, left, center, right, and the top and bottom padding.
Settings Apply to Anchored Objects Check to apply these settings to all anchored objects.
Image Conversion Lets you choose whether the optimized images in your document are converted to GIF, JPEG, or
PNG. Choose Automatic to let InDesign decide which format to use in each instance. Choosing PNG disables the
image compression settings.; use PNG for lossless images or for images that include transparency.
GIF Options (Palette) Lets you control how InDesign handles colors when optimizing GIF files. The GIF format uses
a limited color palette, which cannot exceed 256 colors.

121
USING INDESIGN
Working with documents
Last updated 11/16/2011
Choose Adaptive to create a palette using a representative sample of colors in the graphic without any dithering
(mixing of small spots of colors to simulate additional colors). Choose Web to create a palette of web-safe colors that
are a subset of Windows and Mac
OS system colors. Choose System (Win) or System (Mac) to create a palette using
the built-in system color palette. This choice may cause unexpected results.
Select Interlace to load the images progressively by filling in missing lines. If this option is not selected, an image looks
fuzzy and gradually becomes clear as the image reaches full resolution.
JPEG Options (Image Quality) Determines the trade-off between compression (for smaller file sizes) and image quality
for each JPEG image created. Low produces the smallest file and lowest image quality.
JPEG Options (Format Method) Determines how quickly JPEG graphics display when the file containing the image is
opened on the web. Choose Progressive to make the JPEG images display gradually and in increasing detail as they are
downloaded. (Files created with this option are slightly larger and require more RAM for viewing.) Choose Baseline
to make each JPEG file display only after it has been completely downloaded; a placeholder appears in its place until
the file displays.
Ignore Object Conversion Settings Ignores Object Export Options applied on individual images. See “Apply Object
export options” on page 436.
Advanced options
Use the Advanced area to set CSS and JavaScript options.
CSS Options Cascading Style Sheets (CSS) are a collection of formatting rules that control the appearance of content
in a web page. When you use CSS to format a page, you separate content from presentation. The content of your page—
the HTML code—resides in the HTML file itself, while the CSS rules defining the presentation of the code reside in
another file (an external style sheet) or within the HTML document (usually in the Head section). For example, you
can specify different font sizes for selected text, and you can use CSS to control the format and positioning of block-
level elements in a web page.
•Embedded CSS When exporting to XHTML, you can create a list of CSS styles that appears in the Head section of
the HTML file with declarations (attributes).
If Include Style Definitions is selected, InDesign attempts to match the attributes of the InDesign text formatting with
CSS equivalents. If this option is deselected, the HTML file includes empty declarations. You can edit later these
declarations in Dreamweaver.
If Preserve Local Overrides is selected, local formatting such as italic or bold is included.
•No CSS Selecting this option omits the CSS section from the HTML file.
•External CSS Specify the URL of the existing CSS style sheet, which is usually a relative URL, such as
“/styles/style.css.” InDesign does not check whether the CSS exists or is valid, so you’ll want to use Dreamweaver to
confirm your external CSS setup.
JavaScript Options Select Link To External JavaScript to run a JavaScript when the HTML page is opened. Specify the
URL of the JavaScript, which is usually a relative URL. InDesign does not check whether the JavaScript exists or is valid.
Export content for EPUB (CS5)
You can export a document or book as a reflowable eBook in EPUB format that is compatible with the Adobe Digital
Editions reader software.
1To export a document, open the document and choose File > Export For > EPUB.
2Specify a filename and location, and then click Save.

122
USING INDESIGN
Working with documents
Last updated 11/16/2011
3In the Digital Editions Export Options dialog box, specify the desired options in the General, Images, and Contents
areas, and then click Export.
InDesign creates a single .epub file containing the XHTML-based content. The exported file includes a JPEG
thumbnail image from the first page in the specified document (or the style source document if a book was selected).
This thumbnail is used to depict the book in the Digital Editions Reader library view. To view the file, you need the
Digital Editions software, which you can download free from the Adobe website.
The .epub file is essentially a .zip file. To view and edit the contents of the .epub file, change the extension from .epub
to .zip, and then extract the contents. This is especially useful for editing the CSS file.
EPUB resources
For a list of EPUB articles and resources, see www.adobe.com/go/learn_id_epub_en.
For more information on the EPUB format, see www.idpf.org.
Download a free copy of the Digital Editions reader at www.adobe.com/products/digitaleditions.
See the blog Digital Editions for information on Digital Editions.
For information on exporting to Kindle, see the InDesign to Kindle white paper.
Digital Editions General export options
The General section of the Digital Editions Export Options dialog box includes the following options.
Include Document Metadata The metadata from the document (or the style source document if a book was selected)
is included with the exported file.
Add Publisher Entry Specify the publisher information that appears in the eBook metadata. You may want you to
specify a URL for the publisher so that someone who receives the eBook can visit the web page and purchase the eBook.
Unique Identifier Every EPUB document requires a unique identifier. You can specify the unique identifier attribute.
If you leave this field empty, a unique identifier is automatically created.
Reading Order If you select Base On Page Layout, the reading order of the page items in the EPUB is determined by
their location on the page. InDesign reads from left to right and top to bottom. If you want more control over the
reading order, use the XML Tags panel to tag your page items. If you select Same As XML Structure, the order of the
tags in Structure View determines the reading order. See “Tag page items” on page 520.
Bullets Select Map To Unordered List to convert bullet paragraphs into List Items, which are formatted in HTML
using the <ul> tag. Select Convert To Text to format using the <p> tag with bullet characters as text.
Numbers Determines how numbers are converted in the HTML file.
•Map To Ordered List Converts numbered lists into List Items, which are formatted in HTML using the <ol> tag.
•Map To Static Ordered List Converts numbered lists into List Items, but assigns a <value> attribute based on the
paragraph’s current number in InDesign.
•Convert To Text Converts numbered lists into paragraphs that begin with the paragraph’s current number as text.
View eBook After Exporting Starts the Adobe Digital Editions Reader, if present. An alert message appears if your
system doesn’t have a reader configured to view .epub documents.

123
USING INDESIGN
Working with documents
Last updated 11/16/2011
Digital Editions Images options
The Images section of the Digital Editions Export Options dialog box includes the following options. From the Image
Conversion menu, determine how images are exported to HTML.
Formatted Preserves InDesign formatting, such as rotation or scale, as much as possible for web images.
Image Conversion Lets you choose whether the optimized images in your document are converted to GIF or JPEG.
Choose Automatic to let InDesign decide which format to use in each instance.
GIF Options (Palette) Lets you control how InDesign handles colors when optimizing GIF files. The GIF format uses
a limited color palette, which cannot exceed 256 colors.
Choose Adaptive to create a palette using a representative sample of colors in the graphic without any dithering
(mixing of small spots of colors to simulate additional colors). Choose Web to create a palette of web-safe colors that
are a subset of Windows and Mac
OS system colors. Choose System (Win) or System (Mac) to create a palette using
the built-in system color palette. This choice may cause unexpected results.
Select Interlace to display a slowly loaded image gradually by filling in missing lines. If this option is not select, an
image looks fuzzy and gradually becomes clear as the image reaches full resolution.
JPEG Options (Image Quality) Determines the trade-off between compression (for smaller file sizes) and image quality
for each JPEG image created. Low produces the smallest file and lowest image quality.
JPEG Options (Format Method) Determines how quickly JPEG graphics display when the file containing the image is
opened on the web. Choose Progressive to make the JPEG images display gradually and in increasing detail as they are
downloaded. (Files created with this option are slightly larger and require more RAM for viewing.) Choose Baseline
to make each JPEG file display only after it has been completely downloaded; a placeholder appears in its place until
the file displays.
Digital Editions Contents options
The Contents section of the Digital Editions Export Options dialog box includes the following options.
Format For EPUB Content Specify whether you want to use the XHTML or DTBook format.
Include InDesign TOC Entries Select this option if you want to generate a table of contents on the left side of the eBook.
From the TOC Style menu, specify the TOC style you want to use in the eBook. You can choose Layout > Table Of
Contents Styles to create a special TOC style for your eBook.
Suppress Automatic Entries For Documents Select this option if you don’t want the document names to appear in the
eBook table of contents. This option is especially useful when you’re creating an eBook from a book.
Use First Level Entries As Chapter Breaks Select this options to split the ebook into multiple files, with each file
beginning with the first level TOC entry. If a content file exceeds 260kb, a new chapter begins at the start of a paragraph
between first level entries to help avoid the 300kb limit.
Generate CSS Cascading Style Sheets (CSS) are a collection of formatting rules that control the appearance of content
in a web page. When you use CSS to format a page, you separate content from presentation.
•Include Style Definitions When exporting to EPUB, you can create a list of CSS styles that can be edited.
•Preserve Local Overrides If this option is selected, local formatting such as italic or bold is included.
•Include Embeddable Fonts Includes in the eBook all fonts that are allowed to be embedded. Fonts include
embedding bits that determine whether the font is allowed to be embedded.
Style Names Only Selecting this option includes only undefined style names in the EPUB stylesheet.
Use Existing CSS File Specify the URL of the existing CSS style sheet, which is usually a relative URL, such as
“/styles/style.css.” InDesign does not check whether the CSS exists or is valid, so you’ll want to confirm your CSS setup.

124
USING INDESIGN
Working with documents
Last updated 11/16/2011
Export content for EPUB (CS5.5)
You can export a document or book as a reflowable eBook in EPUB format that is compatible with the Adobe Digital
Editions reader software, and other eBook reader software.
1Do one of the following:
•Open the document and choose File > Export.
•Open a book and from the Book panel menu, choose Export Book to EPUB.
2Specify a filename and location.
3From the Save as Type list choose EPUB, and then click Save.
4In the EPUB Export Options dialog box, specify the desired options in the General, Image, and Contents areas.
InDesign creates a single .epub file containing the XHTML-based content. If specified, the exported file may include
a cover image. The cover image is created from an image, or created from a JPEG thumbnail image from the first page
in the specified document (or the style source document if a book was selected). The thumbnail is used to depict the
book in the EPUB readers or the Digital Editions Reader library view. To view the file, you need an EPUB reader. You
can also use the Adobe Digital Editions software, which you can download free from the Adobe website.
The .epub file is essentially a .zip file. To view and edit the contents of an .EPUB file, change the extension from .epub
to .zip, and then extract the contents. This is especially useful for editing the CSS file.
Note: InDesign objects such as shapes, lines, text frames, and objects that contain placed images, are always exported
when you choose the Based on Page Layout ordering option. Empty objects are not exported unless you have applied a
setting to the InDesign object via the Object Export Options to make it export as a JPEG, GIF, or PNG.
EPUB resources
Use the following links to learn about EPUB format.
•For a list of EPUB articles and resources, see www.adobe.com/go/learn_id_epub_en.
•For more information on the EPUB format, see www.idpf.org.
•Download a free copy of the Digital Editions reader at www.adobe.com/products/digitaleditions.
•See the blog Digital Editions for information on Digital Editions.
•For information on exporting to Kindle, see the InDesign to Kindle white paper.
•Learn how to convert your InDesign files to the EPUB format and start selling your eBooks for viewing on the Apple
iPad. See the InDesign to iPad white paper.
EPUB General export options
The General section of the EPUB Export Options dialog box includes the following options.
Include Document Metadata The metadata from the document (or the style source document if a book was selected)
is included with the exported file.
Add Publisher Entry Specify the publisher information that appears in the eBook metadata. You can specify a URL for
the publisher so that someone who receives the eBook can visit the publisher’s website.
Unique Identifier Every EPUB document requires a unique identifier. You can specify the unique identifier attribute.
If you leave this field empty, a unique identifier is automatically created.
EPUB Cover Specifies the cover image for the eBook. Choose one of the following:
•No Cover Image If this option is selected no cover image is added to the eBook.

125
USING INDESIGN
Working with documents
Last updated 11/16/2011
•Rasterize First Page If this option is selected creates an image file from the first page of the eBook to use as the
cover.
•Use Existing Image File If this option is selected you can specify an image on your computer to use as the cover.
Ordering lets you specify the order in which the page elements are exported.
•Base On Page Layout The location of the items on the page determines the reading order.
If Base On Page Layout is selected, InDesign determines the reading order of page objects by scanning left to right and
top to bottom. In some instances, especially in complex, multicolumn documents, the design elements may not appear
in the desired reading order. Use Dreamweaver to rearrange and format the contents.
•Same As XML Structure The order of the tags in Structure View determines the reading order. See “Tag page items”
on page 520.
•Same As Articles Panel The order of elements in the Articles panel determines the reading order. Only the checked
articles are exported. See “Include articles for export” on page 148.
Book Margin Specify a simple margin in Ems or pixels. Specifying margins in Ems is better for multiscreen
compatibility. The same value is applied to all margins: top, bottom, left, and right.
Bullets Select Map To Unordered List to convert bullet paragraphs into List Items, which are formatted in HTML
using the <ul> tag. Select Convert To Text to format using the <p> tag with bullet characters as text. If you have used
native InDesign auto-bullets, subbullets are also included.
Numbers Determines how numbers are converted in the HTML file. If you have used native InDesign auto-
numbering, subbullets are also included
•Map To Ordered List Converts numbered lists into List Items, which are formatted in HTML using the <ol> tag.
•Map To Static Ordered List Converts numbered lists into List Items, but assigns a <value> attribute based on the
paragraph’s current number in InDesign.
•Convert To Text Converts numbered lists into paragraphs that begin with the paragraph’s current number as text.
View EPUB After Exporting Starts the Adobe Digital Editions Reader, if present.
EPUB Images options
The Images section of the Digital Editions Export Options dialog box includes the following options. From the Image
Conversion menu, determine how images are exported to HTML.
Preserve Appearance from Layout Check to inherit the image object attributes from the layout.
Resolution (ppi) Specify the resolution of the images in pixels per inch (ppi). While operating systems have
standardized on either 72 ppi or 96 ppi, mobile devices range from 132 ppi (iPad), to 172 ppi (Sony Reader), to over
300 ppi (iPhone 4). You can specify a ppi value for each object selected. Values include 72, 96, 150 (average for all
eBook devices today), and 300.
Image Size Specify if image size must remain fixed or resized relative to the page. Relative to Page Size sets a relative
percentage value based on the size of the image relative to the InDesign page width. This option causes the images to
rescale proportionally, relative to the width of the reading area.
Image Alignment and Spacing Specify the image alignment, left, center, right, and the top and bottom padding.
Insert Page Break Check to insert page breaks with images. Page breaks can be inserted Before Image, After Image, or
Before and After Image.
Settings Apply to Anchored Objects Check to apply these settings to all anchored objects.

126
USING INDESIGN
Working with documents
Last updated 11/16/2011
Image Conversion Lets you choose whether the optimized images in your document are converted to GIF, JPEG, or
PNG. Choose Automatic to let InDesign decide which format to use in each instance. Choosing PNG disables the
image compression settings.; use PNG for lossless images or for images that include transparency.
GIF Options (Palette) Lets you control how InDesign handles colors when optimizing GIF files. The GIF format uses
a limited color palette, which cannot exceed 256 colors.
Choose Adaptive to create a palette using a representative sample of colors in the graphic without any dithering
(mixing of small spots of colors to simulate additional colors). Choose Web to create a palette of web-safe colors that
are a subset of Windows and Mac
OS system colors. Choose System (Win) or System (Mac) to create a palette using
the built-in system color palette. This choice may cause unexpected results.
Select Interlace to load the images progressively by filling in missing lines. If this option is not selected, an image looks
fuzzy and gradually becomes clear as the image reaches full resolution.
JPEG Options (Image Quality) Determines the trade-off between compression (for smaller file sizes) and image quality
for each JPEG image created. Low produces the smallest file and lowest image quality.
JPEG Options (Format Method) Determines how quickly JPEG graphics display when the file containing the image is
opened on the web. Choose Progressive to make the JPEG images display gradually and in increasing detail as they are
downloaded. (Files created with this option are slightly larger and require more RAM for viewing.) Choose Baseline
to make each JPEG file displays only after it has been downloaded; a placeholder appears in its place until the file
displays.
Ignore Object Conversion Settings Ignores Object Export Options applied on individual images. See “Apply Object
export options” on page 436.
EPUB Contents options
The Contents section of the EPUB Options dialog box includes the following options.
Format For EPUB Content Specify whether you want to use the XHTML or DTBook format. DTBook is a specialized
format that is intended for sight impaired end readers.
Use InDesign TOC Style Select this option if you want to generate a table of contents based on the selected TOC style.
From the TOC Style menu, specify the TOC style you want to use to build the table of contents in the eBook. You can
choose Layout > Table Of Contents Styles to create a special TOC style for your eBook.
Break Document at Paragraph Style You can split the eBook at the specified paragraph style. Splitting results in a
larger number of HTML files in the EPUB package, but can be helpful for breaking up long files and increases
performance in the EPUB readers.
Place Footnote After Paragraph Check to place footnotes after the paragraph. If deselected, footnotes are converted to
endnotes.
Remove Forced Line Breaks Check to remove all soft-returns in the exported eBook.
Generate CSS Cascading Style Sheets (CSS) are a collection of formatting rules that control the appearance of content
in a web page. When you use CSS to format a page, you separate content from presentation.
•Include Style Definitions When exporting to EPUB, you can create a list of CSS styles that can be edited.
•Preserve Local Overrides If this option is selected, local formatting such as italic or bold is included.
•Include Embeddable Fonts Includes all fonts that are embeddable, in the eBook. Fonts include embedding bits that
determine if the font is enbeddable.
Style Names Only Includes only undefined style names in the EPUB style sheet.

127
USING INDESIGN
Working with documents
Last updated 11/16/2011
Use Existing CSS File Specify the URL of the existing CSS style sheet, which is usually a relative URL, such as
“/styles/style.css.” InDesign does not check whether the CSS exists or is valid, so you’ll want to confirm your CSS setup.
Export content to Buzzword
Buzzword is a web-based text editor that lets users create and store text files on a web server. When you export a story
to Buzzword, you create a text file on the Buzzword server.
1Select text or place the insertion point in a text frame that is part of the story you want to export.
2Do one of the following:
•In InDesign choose File > Export For > Buzzword.
•In InCopy choose File > Export to Buzzword.
3If you haven’t already signed in to CS Live, click Sign In, specify your e-mail address and password, and then click
Sign In.
4In the Export Story For Buzzword dialog box, specify the name of the Buzzword document to be created and then
click OK.
The Buzzword document is opened on Acrobat.com. You can then move the document to a different workspace and
share it with other people.
More Help topics
“Import Buzzword documents” on page 141
Use the web color swatch library
InDesign includes a color swatch library called Web, which consists of the colors most web browsers use to display text
and graphics in web pages. The 216 colors in the library, often called web-safe colors, are consistent across platforms,
because they are a subset of the colors that browsers use in both Windows and Mac
OS. The web-safe colors in
InDesign are the same as those in the Adobe Photoshop web-safe color palette and the Adobe Illustrator browser-safe
color palette.
Each color in the library is named by its RGB values. Each color’s hexadecimal code, which HTML uses to define the
color, is stored within the color swatch.
1Choose New Color Swatch in the Swatches panel menu.
2For Color Mode, choose Web.
3Select the web-safe color, and then click OK.
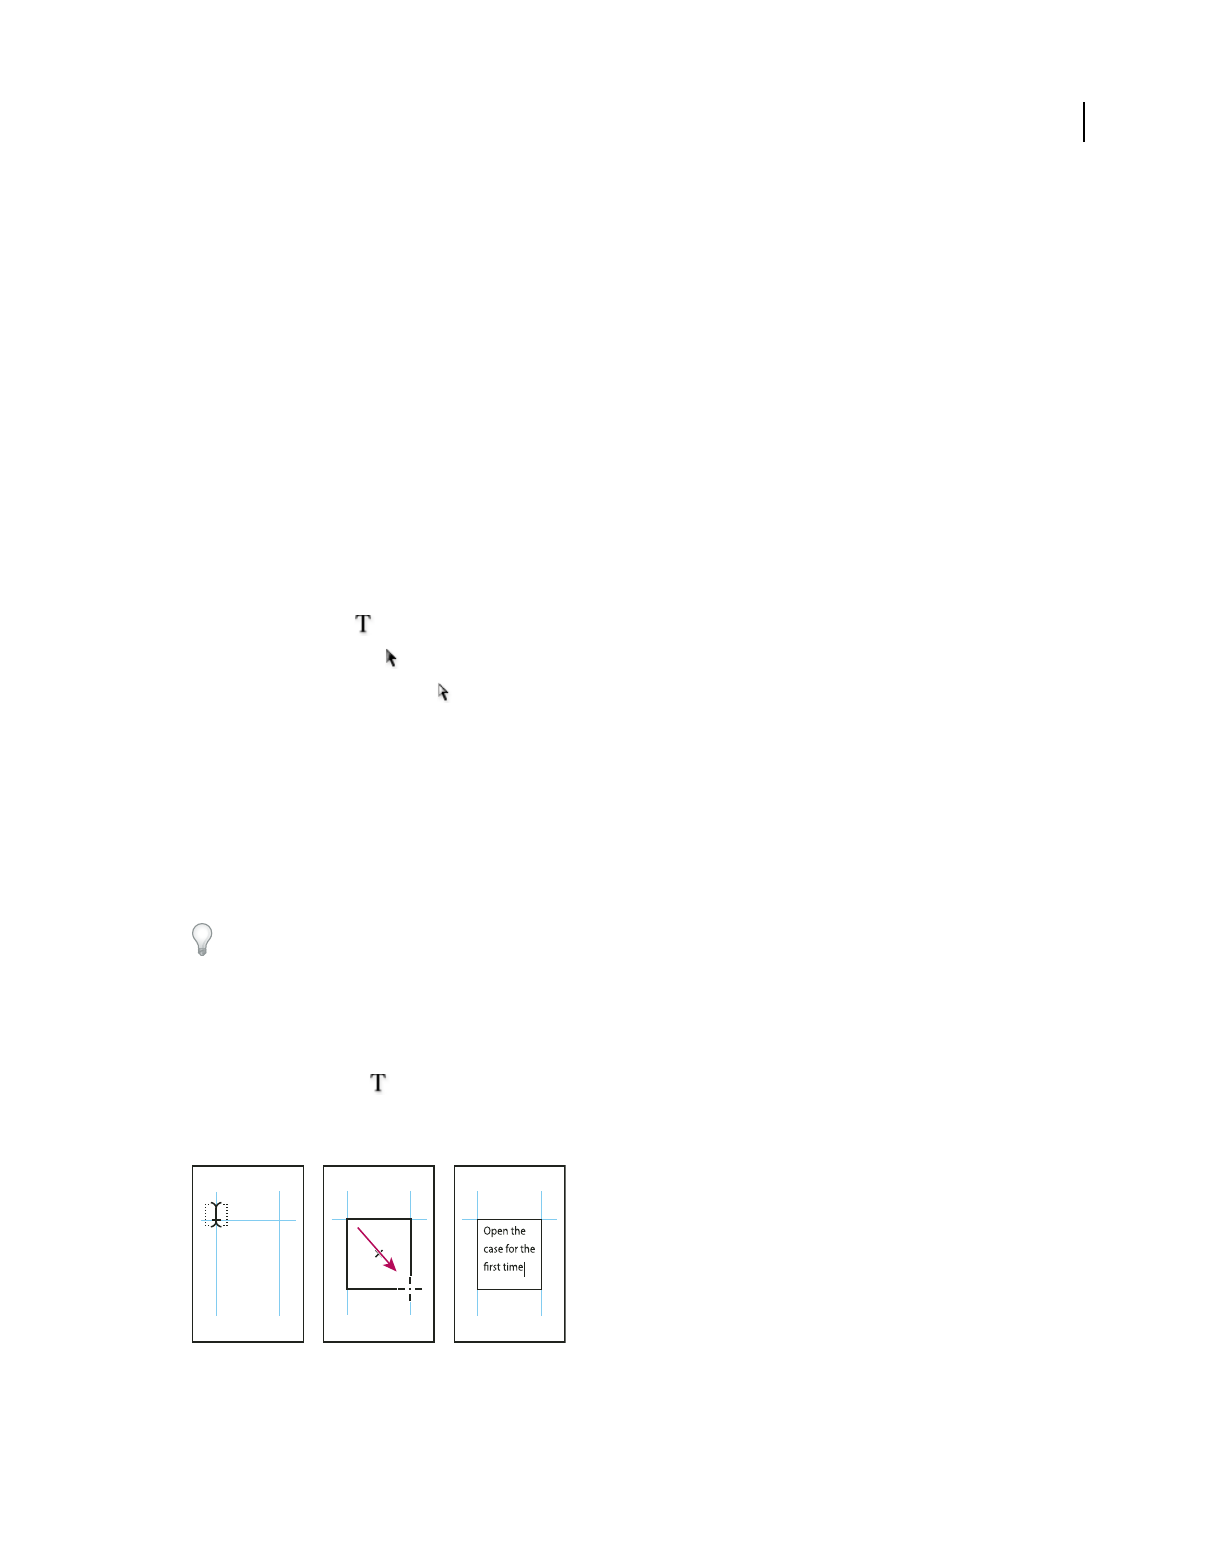
128
Last updated 11/16/2011
Chapter 5: Text
For detailed information and instructions, click the links below.
Creating text and text frames
Create text frames
Text in InDesign resides inside containers called text frames. (A text frame is similar to a text box in QuarkXPress and
a text block in Adobe PageMaker.) For a video tutorial on making a text frame, see www.adobe.com/go/lrvid4274_id.
Like graphics frames, text frames can be moved, resized, and changed. The tool with which you select a text frame
determines the kind of changes you can make:
•Use the Type tool to enter or edit text in a frame.
•Use the Selection tool for general layout tasks such as positioning and sizing a frame.
•Use the Direct Selection tool to alter a frame’s shape.
Text frames can also be connected to other text frames so that the text in one frame can flow into another frame.
Frames that are connected in this way are threaded. Text that flows through one or more threaded frames is called a
story. When you place (import) a word-processing file, it comes into your document as a single story, regardless of the
number of frames it may occupy.
Text frames can have multiple columns. Text frames can be based on, yet independent of, page columns. In other
words, a two-column text frame can sit on a
four-column page. Text frames can also be placed on master pages and
still receive text on document pages.
If you use the same type of text frame repeatedly, you can create an object style that includes text frame formatting
such as stroke and fill colors, text frame options, and text wrap and transparency effects.
When you place or paste text, you don’t need to create a text frame; InDesign automatically adds frames based on the
page’s column settings.
❖Do any of the following:
•Select the Type tool , and then drag to define the width and height of a new text frame. Hold down Shift as you
drag to constrain the frame to a square. When you release the mouse button, a text insertion point appears in the
frame.
Dragging to create new text frame
•Using the Selection tool, click the in port or out port of another text frame, and then click or drag to create another
frame.

129
USING INDESIGN
Text
Last updated 11/16/2011
•Use the Place command to place a text file.
•Using the Type tool , click inside any empty frame. If the Type Tool Converts Frames To Text Frames option is
selected in Type preferences, the empty frame is converted to a text frame.
More Help topics
“Threading text” on page 142
“Place (import) text” on page 136
“Object styles” on page 213
Move and resize text frames
Use the Selection tool to move or resize text frames.
If you want to move or resize a text frame without switching from the Type tool to a selection tool, hold down Ctrl
(Windows) or Command (Mac OS), and then drag the frame.
More Help topics
“Create text frames” on page 128
Move a text frame
•Using the Selection tool, drag the frame.
•Using the Type tool, hold down Ctrl (Windows) or Command (Mac OS) and drag the frame. When you release the
key, the Type tool is still selected.
Resize a text frame
❖Do any of the following:
•To resize using the Type tool , hold down Ctrl (Windows) or Command (Mac OS), and drag any frame handle.
If you hold down the mouse button for one second before you begin dragging, the text will recompose while you
resize the frame.
Note: If you click the text frame instead of dragging it, you’ll lose your text selection or insertion point location.
•To resize using the Selection tool , drag any of the frame handles on the frame’s border. Hold down Ctrl
(Windows) or Command (Mac OS) to scale the text within the frame. (See “Scale type” on page 258.)
•To quickly fit the frame to its content, use the Selection tool to select the text frame, and double-click any handle.
For example, if you double-click the center bottom handle, the bottom of the frame snaps to the bottom of the text.
If you double-click the center right handle, the height is preserved while the width narrows to fill the frame.
You can also double-click a handle on an overset text frame to expand the height or width to fit all text in the frame.
If a text frame includes more overset text than can reasonably fit on the page, the text frame isn’t resized.
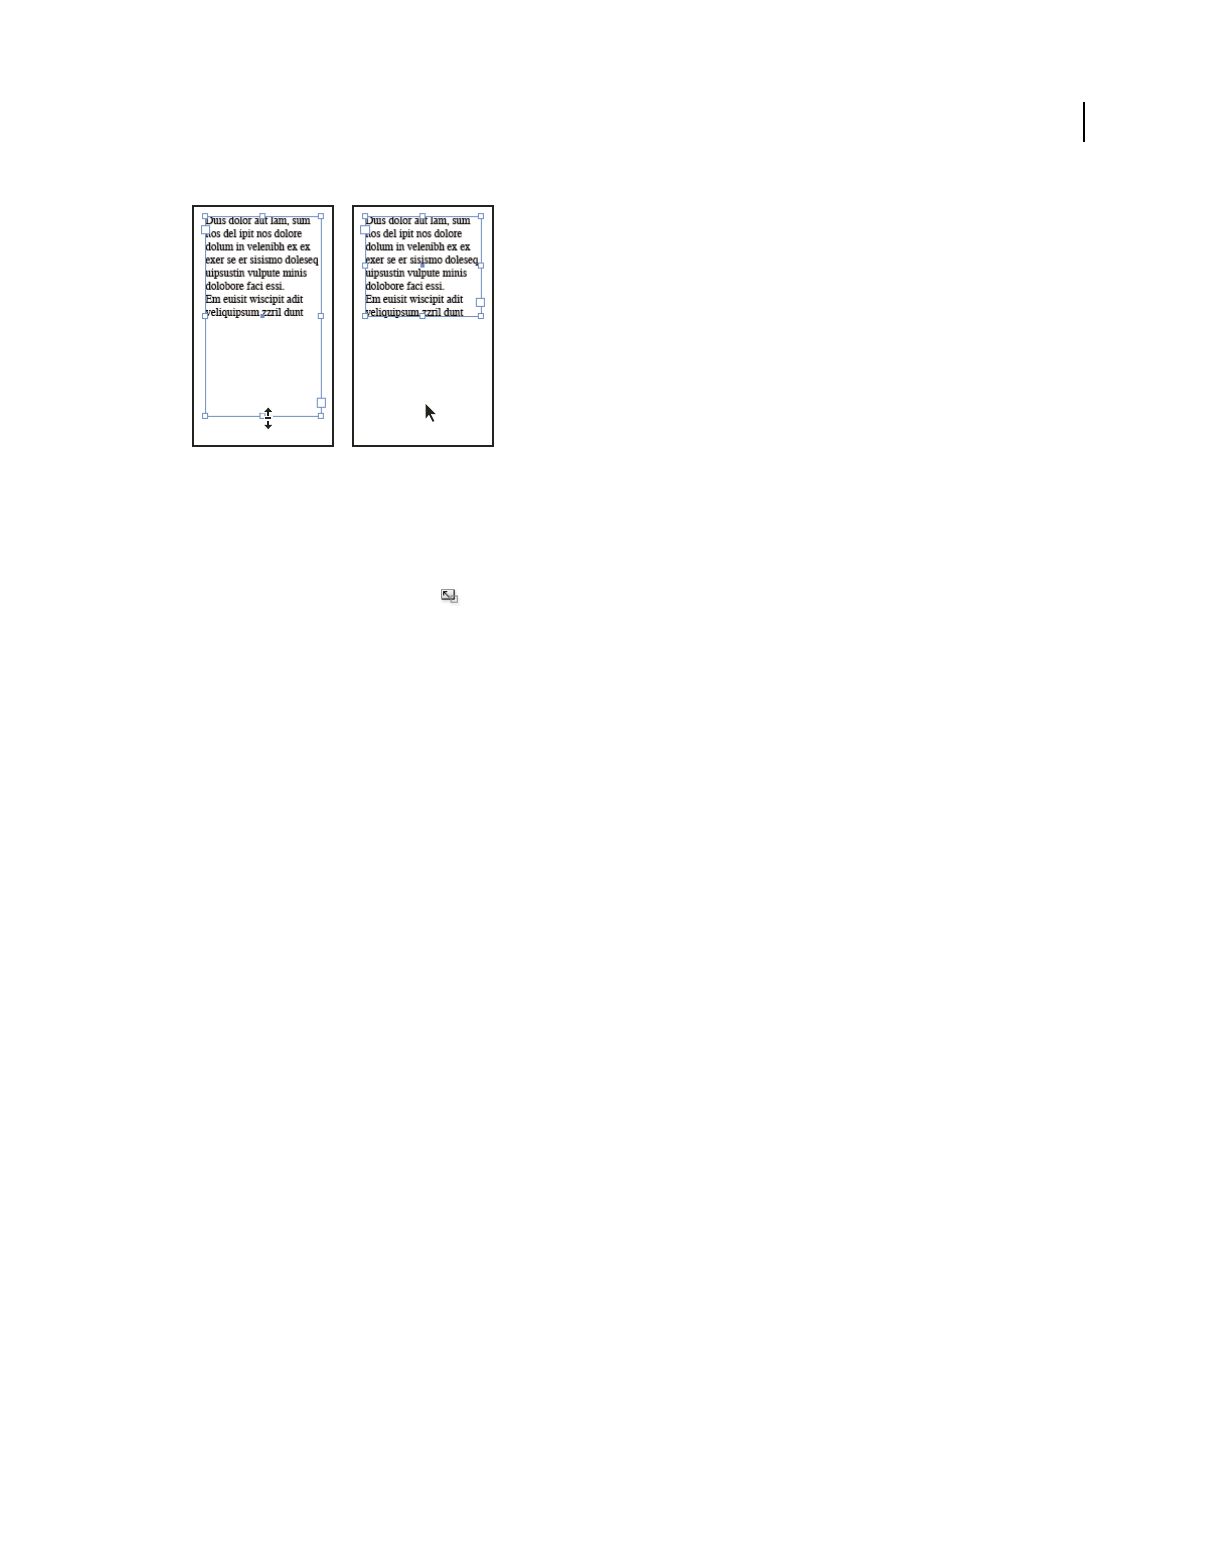
130
USING INDESIGN
Text
Last updated 11/16/2011
Double-click handle to resize text frame.
•To fit the text frame to the content, select the frame using the Selection tool, and choose Object > Fitting > Fit Frame
to Content. The bottom of the text frame fits the contents of the text. If a text frame includes more overset text than
can reasonably fit on the page, the text frame isn’t resized.
•To resize using the Scale tool , drag to resize the frame. (See “Scale type” on page 258.)
Using text frames on master pages
When you start a new document, you can select the Master Text Frame option so that an empty text frame is placed
on the document’s default master page. This frame has the column and margin attributes specified in the New
Document dialog box.
Follow these guidelines for using text frames on master pages:
•Set master text frames when you want each page in your document to contain a page-sized text frame into which
you can flow or type your text. If your document requires more variation, such as pages with different numbers of
frames or frames of different lengths, leave the Master Text Frame option deselected, and use the Type tool to create
text frames on masters.
•Whether or not you select the Master Text Frame option, you can add text frames to a master page to act as
placeholders. You can thread these empty placeholder frames together to establish a flow.
•Flow text into master text frames using the same procedures you would use with frames created on document pages.
•If you need to type text in a master text frame on a document page, hold down Ctrl+Shift (Windows) or
Command+Shift (Mac
OS) as you click the text frame on the document page. Then click in the frame using the
Type tool and begin typing.
•You can use Smart Text Reflow to add or remove pages automatically as you type and edit text. By default, when
you type text at the end of a threaded text frame based on a master page, a new page is added, allowing you to
continue typing in the new text frame. You can edit Smart Text Reflow settings.
•If you change the page margins, text frames adjust to the new margins only if the Enable Layout Adjustment option
is selected.
•Selecting the Master Text Frame option does not affect whether new pages are added when you autoflow text.
More Help topics
“Override or detach master items” on page 75
“Use Smart Text Reflow” on page 146
“Master pages” on page 70
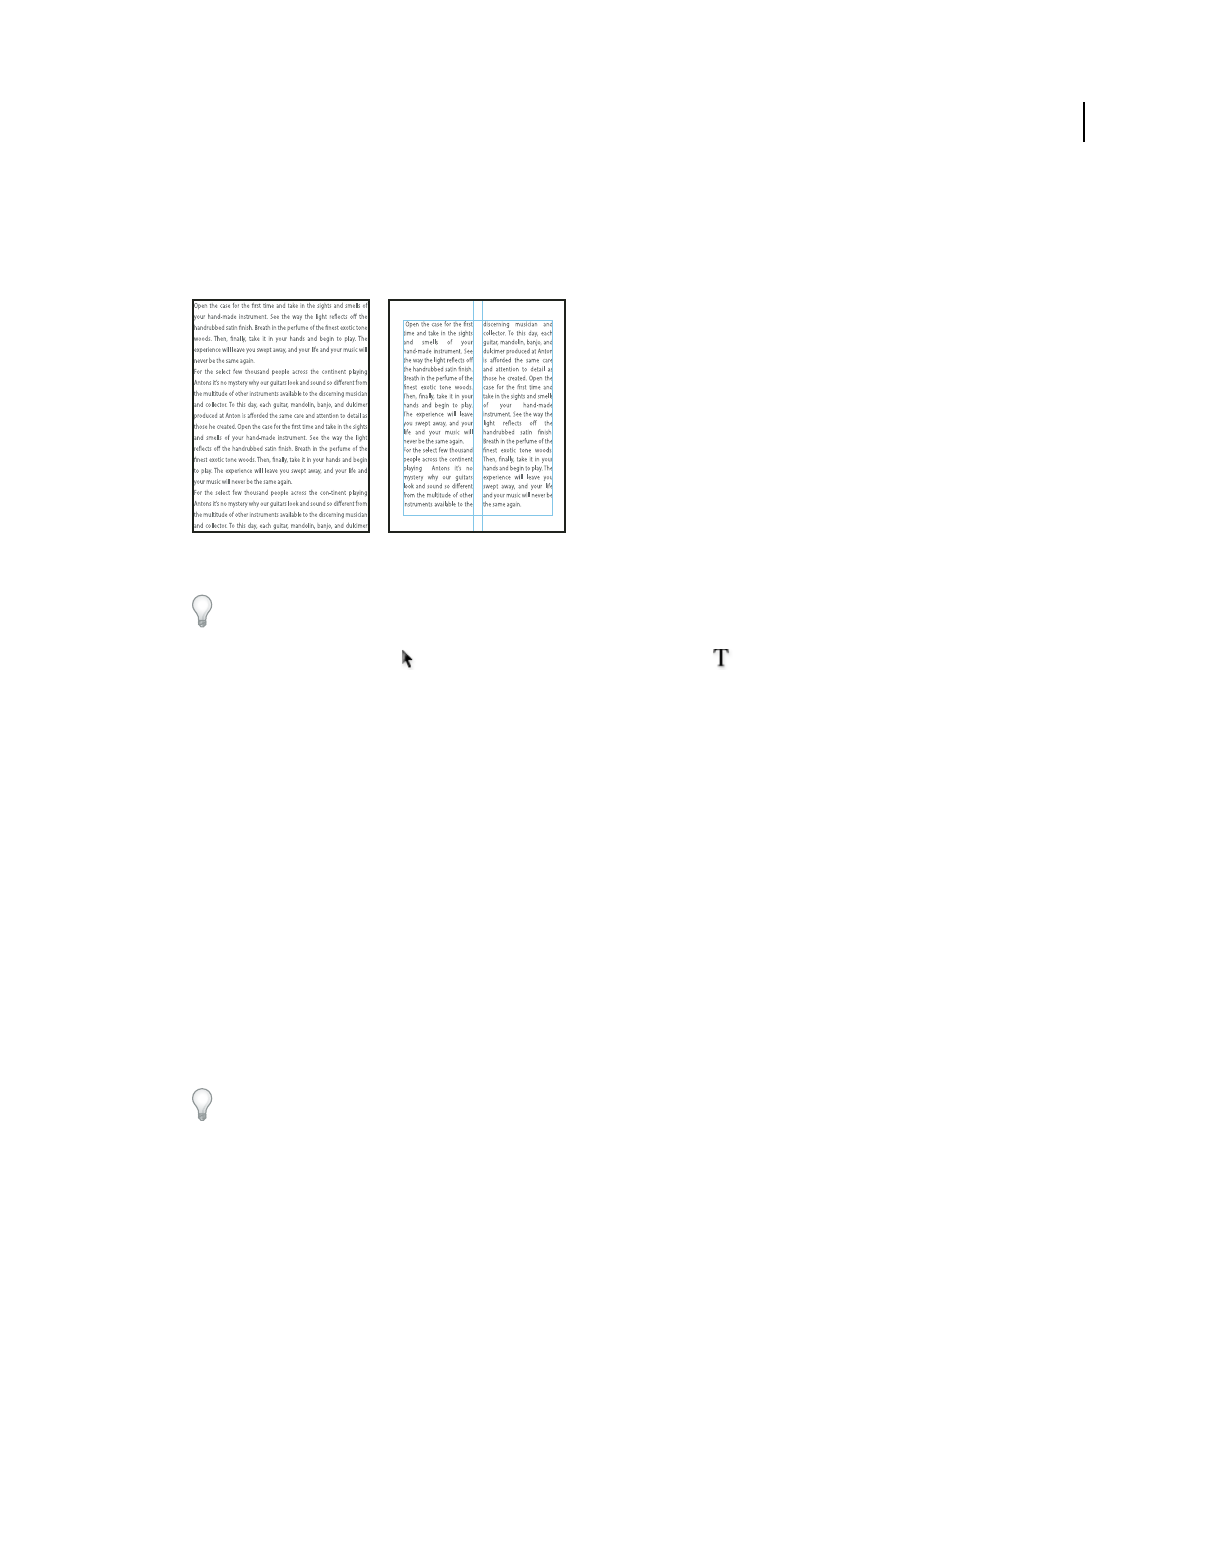
131
USING INDESIGN
Text
Last updated 11/16/2011
Change text frame properties
Use Text Frame Options to change settings such as the number of columns in the frame, the vertical alignment of text
within the frame, or the inset spacing, which is the distance of the margins between the text and the frame.
Before (left) and after (right) setting inset and creating two columns in a text frame
If you need to use the same text frame properties for multiple text frames, create an object style that you can apply to
your text frames.
1Using the Selection tool , select a frame, or using the Type tool , click inside the text frame or select text.
2Choose Object > Text Frame Options, or hold down Alt (Windows) or Option (Mac OS) and then double-click the
text frame using a selection tool.
3Change text frame options, and then click OK.
These text frame options are available when you’re defining an object style for text boxes. See “Object styles” on
page 213.
More Help topics
“Change document setup, margins, and columns” on page 48
“Using text frames on master pages” on page 130
“Grids” on page 54
Add columns to a text frame
You can create columns within a text frame by using the Text Frame Options dialog box.
You cannot create columns of unequal width in a text frame. To create columns of unequal width or height, add
threaded text frames side-by-side on either a document page or a master page.
1Using the Selection tool, select a frame, or using the Type tool, click inside the text frame or select text.
2Choose Object > Text Frame Options.
3Specify the number of columns, the width of each column, and the spacing between each column (gutter) for the
text frame.
4(Optional) Select Fixed Column Width to maintain column width when you resize the frame. If this option is
selected, resizing the frame can change the number of columns, but not their width.
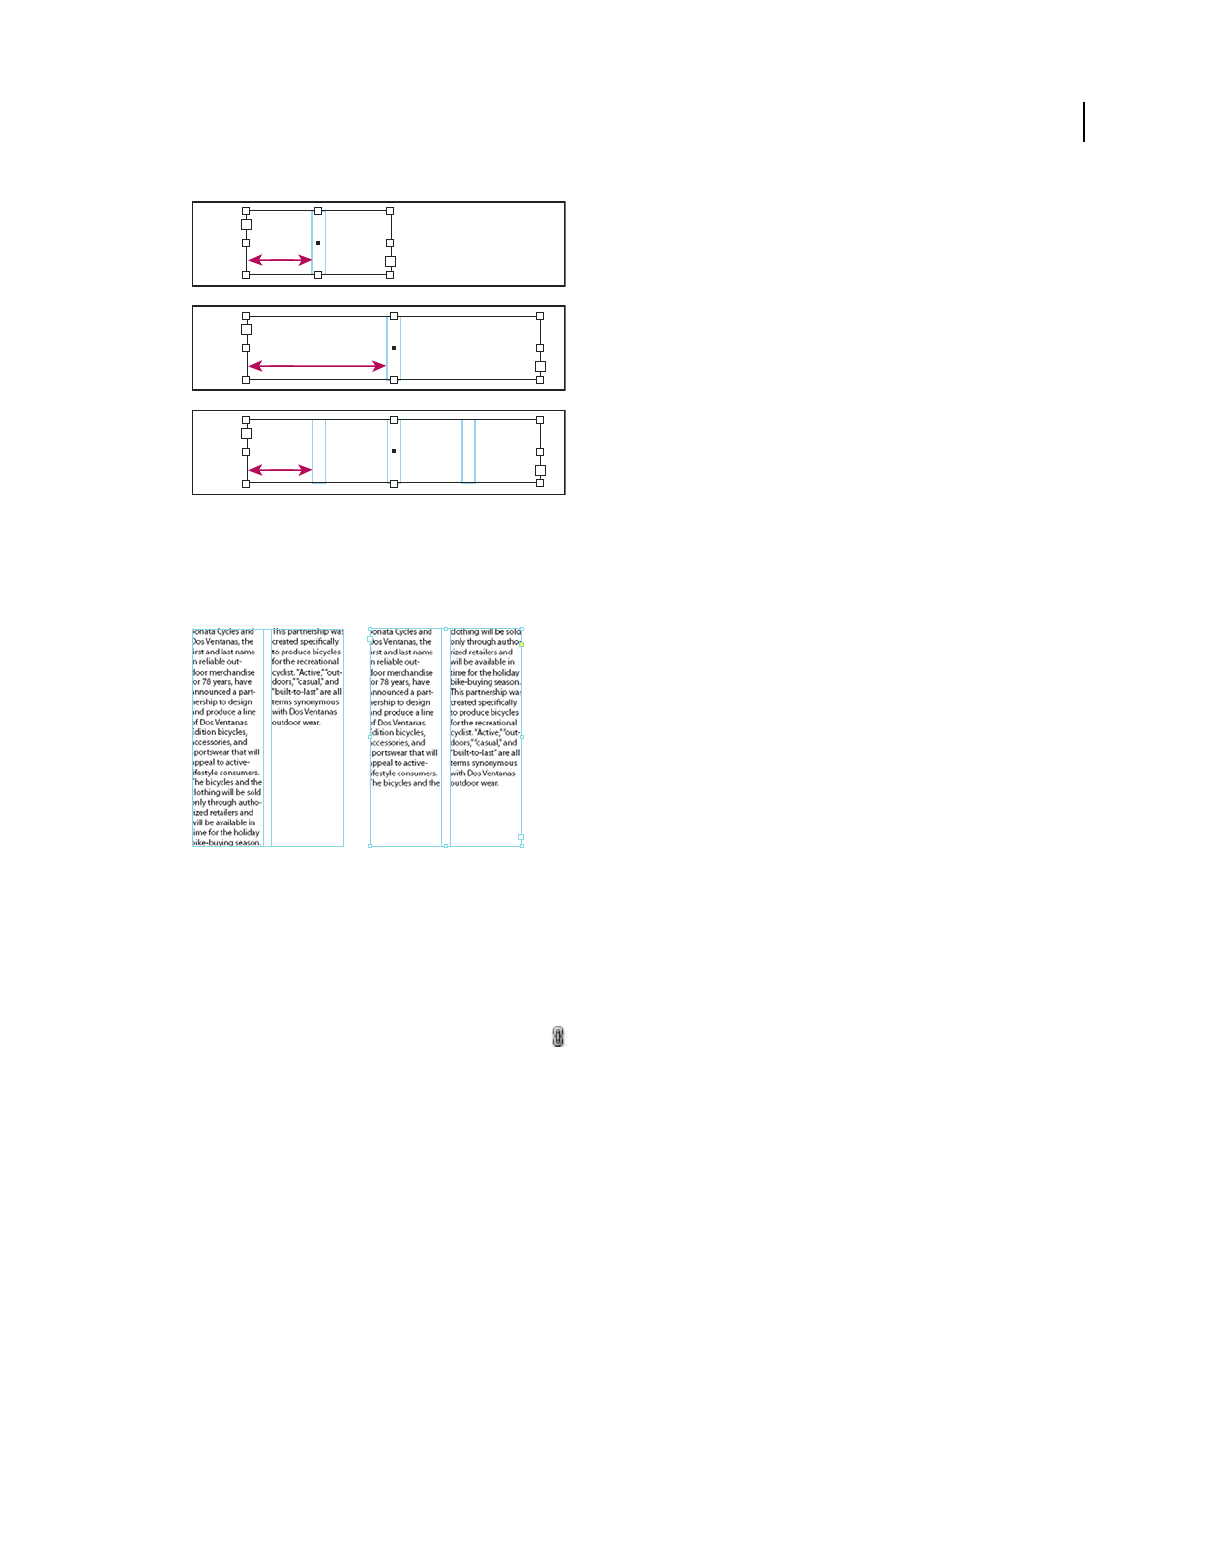
132
USING INDESIGN
Text
Last updated 11/16/2011
Fixed column width
A. Original 2-column text frame B. Resized with Fixed Column Width deselected (still 2 columns) C. Resized with Fixed Column Width
selected (4 columns)
5(Optional) Select Balanced Columns to make text even at the bottom of a multi-column text frame.
Before and after balancing columns
Change text frame inset spacing (margins)
1Using the Selection tool, select a frame, or using the Type tool, click inside the text frame or select text.
2Choose Object > Text Frame Options.
3In the Inset Spacing section on the General tab, type the offset distances you want for Top, Left, Bottom, and Right.
(Click the Make All Settings The Same icon
to use the same spacing on all sides.)
If the frame you’ve selected has a non-rectangular shape, the Top, Left, Bottom, and Right options are dimmed, and
an Inset option is available instead.
First baseline offset options
To change the first baseline options of a selected text frame, choose Object > Text Frame Options, and click the
Baseline Options tab. The following options appear in the Offset menu under First Baseline:
Ascent The height of the “d” character in the font falls below the top inset of the text frame.
Cap Height The top of uppercase letters touch the top inset of the text frame.
Leading Use the text’s leading value as the distance between the baseline of the first line of text and the top inset of the
frame.
X Height The height of the “x” character in the font falls below the top inset of the frame.
Fixed Specify the distance between the baseline of the first line of text and the top inset of the frame.
A
B
C

133
USING INDESIGN
Text
Last updated 11/16/2011
Min Select a minimum value for the baseline offset. For example, if Leading is selected and you specify a minimum
value of 1p, InDesign uses the leading value only when it’s greater than 1 pica.
If you want to snap the top of the text frame to a grid, choose either Leading or Fixed so that you can control the
location of the first baseline of text in text frames.
Set baseline grids for a text frame
In some cases, you might want to use a baseline grid for a frame rather than for the entire document. Use the Text
Frame Options dialog box to apply a baseline grid to a text frame. When you set up a baseline grid for a text frame,
note the following:
•The document baseline grid doesn’t appear behind or in front of text frames that use their own baseline grids.
•If Grids In Back is selected in Grids Preferences, then frame-based baseline grids take precedence over document-
based baseline grids. If Grids In Back is not selected, then document-based baseline grids take precedence over
frame-based baseline grids.
1Choose View > Grids & Guides > Show Baseline Grid to display all baseline grids, including those in a text frame.
2Select the text frame or place the insertion in a text frame, and then choose Object > Text Frame Options.
If you want the baseline grid to apply to all frames in a thread (even if one or more threaded frames do not include
text), place the insertion point in text, choose Edit
> Select All, and then apply the baseline grid settings in the Text
Frame Options dialog box.
3Click the Baseline Options tab.
4Under Baseline Grid, select Use Custom Baseline Grid, and do any of the following:
Start Type a value to offset the grid from the top of the page, the top margin of the page, the top of the frame, or the
top inset of the frame, depending on what you choose from the Relative To menu.
Relative To Specify whether you want the baseline grid to begin relative to the top of the page, the top margin of the
page, the top of the text frame, or the top of the text frame inset.
Increment Every Type a value for the spacing between grid lines. In most cases, type a value that equals your body text
leading, so that lines of text align perfectly to the grid.
Color Select a color for the grid lines, or choose (Layer Color) to use the same color as the layer on which the text frame
appears.
If you can’t see the baseline grid in a text frame, choose View > Grids & Guides > Show Baseline Grid to make sure
that baseline grids aren’t hidden. If the baseline grid still doesn’t appear, check the threshold for viewing baseline grids
in the Grids section of the Preferences dialog box. To see the grid, you might need to zoom in on the frame or reduce the
threshold level.
Determine word and character counts
1Place the insertion point in a text frame to view counts for the entire thread of frames (the story), or select text to
view counts only for the selected text.
2Choose Window > Info to display the Info panel.
The Info panel displays the number of characters, words, lines, and paragraphs in a text frame. The position of the
insertion point within the text frame also appears.
More Help topics
“Info panel overview” on page 53

134
USING INDESIGN
Text
Last updated 11/16/2011
Working with additional languages
You can assign languages to different text. Assigning the appropriate language to text is especially useful for spell-
checking and hyphenating. (See “Assign a language to text” on page 257.)
If you need to work with Asian text, special versions of InDesign are available for Japanese, Simplified Chinese,
Traditional Chinese, and Korean. These versions let you create layout grids and frame grids for composing multibyte
characters, and they include a number of features for formatting multibyte text, along with additional fonts.
Similarly, a special version of InDesign is available for formatting Middle Eastern languages, such as Hebrew, Arabic,
Farsi, and Urdu, that use right-to-left text formatting. This version is called InDesign ME.
For more information on purchasing InDesign ME or an Asian-language version of InDesign, see the Adobe website.
Adding text to frames
Add text to a document
Add text to a document by typing or by pasting or placing text from a word-processing application. If your word-
processing application supports drag-and-drop, you can also drag text into InDesign frames. For large blocks of text,
the Place command is an efficient, versatile way to add text to your document. InDesign supports a variety of word-
processing, spreadsheet, and text file formats.
When you place or paste text, you do not need to create a text frame first; InDesign will create one for you
automatically.
When you place text, you can select Show Import Options to determine whether the imported text maintains its styles
and formatting. Before you paste text, you can select All Information or Text Only under Clipboard Handling
Preferences to determine whether the pasted text includes additional information such as swatches and styles.
If the text you import into your document includes pink, green, or another color of highlighting, you likely have one
or more composition preference options turned on. Open the Composition section of the Preferences dialog box, and
notice which options are turned on under Highlight. For example, if the pasted text is formatted with fonts not available,
the text is highlighted in pink.
More Help topics
“Place (import) text” on page 136
“Work with missing fonts” on page 248
Type text in a document
1To place the insertion point inside the text frame, do one of the following:
•Using the Type tool , drag to create a new text frame, or click in an existing text frame.
•Using a selection tool, double-click inside an existing text frame. The Type tool is selected automatically.
2Begin typing.
If you created a text frame on a master page, hold down Ctrl+Shift (Windows) or Command+Shift (Mac OS) as you
click in the frame on your document page. This makes a copy of the master page frame on the document page. You
can then use the Type tool to add text to the selected frame.

135
USING INDESIGN
Text
Last updated 11/16/2011
Type Asian text using inline input
1Choose Edit > Preferences > Advanced Type (Windows) or InDesign > Preferences > Advanced Type (Mac OS).
2Select Use Inline Input For Non-Latin Text, and then click OK.
You can use a system input method, if available, for adding 2-byte and 4-byte characters. This method is especially
useful for entering Asian characters.
Insert placeholder text
InDesign can add placeholder text that you can easily replace with real text later. Adding placeholder text can give you
a more complete sense of your document’s design.
1Use the Selection tool to select one or more text frames, or use the Type tool to click in a text frame.
2Choose Type > Fill With Placeholder Text.
If you add placeholder text to a frame that’s threaded to other frames, the placeholder text is added at the start of the
first text frame (if all frames are empty) or at the end of the existing text (if some text is already in the threaded frames),
through to the end of the last threaded frame.
To remove or replace placeholder text, double-click in any frame in the thread, choose Edit > Select All, and then delete
the text.
To change the text that is used as placeholder text, create a text file with the text you wish to use, name it
Placeholder.txt, and save it in the application folder.
Paste text
If the insertion point is not inside a text frame when you paste text into InDesign, a new plain text frame will be created.
If the insertion point is inside a text frame, the text will be pasted inside that frame. If you have text selected when you
paste, the pasted text will overwrite the selected text.
More Help topics
“Drag and drop text” on page 136
Paste text from another application
1To preserve formatting and information such as styles and index markers, open the Clipboard Handling section of
the Preferences dialog box, and select All Information under Paste. To remove these items and other formatting
when pasting, select Text Only.
2Cut or copy text in another application or in an InDesign document.
3If you like, select text or click in a text frame. Otherwise, the text will be pasted into its own new frame.
4Do one of the following:
•Choose Edit > Paste. If the pasted text doesn’t include all the formatting, you may need to change settings in the
Import Options dialog box for RTF documents.
•Choose Edit > Paste Without Formatting. (Paste Without Formatting is dimmed if you paste text from another
application when Text Only is selected in Clipboard Handling Preferences.)
You can also drag text from another application and drop it into an InDesign document, or you can insert a text file
or word-processing file into an InDesign document directly from Windows Explorer or Mac OS Finder. The text will
be added to a new frame. Shift-dragging removes the formatting. The option you select in the Clipboard Handling section
of the Preferences dialog box determines whether information such as index markers and swatches is preserved.

136
USING INDESIGN
Text
Last updated 11/16/2011
Adjust spacing automatically when pasting text
When you paste text, spaces can be automatically added or removed, depending on the context. For example, if you
cut a word and then paste it between two words, a space appears before and after the word. If you paste that word at
the end of a sentence, before the period, a space is not added.
1Choose Edit > Preferences > Type (Windows) or InDesign > Preferences > Type (Mac OS).
2Select Adjust Spacing Automatically When Cutting And Pasting Words, and then click OK.
Drag and drop text
You can use the mouse to drag and drop text in the Story Editor or in the Layout View. You can even drag text from
the Story Editor to the layout window (or vice versa), or into some dialog boxes such as Find/Change. Dragging the
text from a locked or checked-in story copies the text rather than moves it. You can also copy text or create a new frame
when dragging and dropping text.
Jeff Witchel provides a video tutorial about drag and drop at Using InDesign Drag and Drop Text.
1To enable drag and drop, choose Edit > Preferences > Type (Windows) or InDesign > Preferences > Type
(Mac
OS), select Enable In Layout View, Enable In Story Editor (InDesign), or Enable In Galley/Story View
(InCopy), and then click
OK.
2Select the text that you want to move or copy.
3Hold the pointer over the selected text until the drag and drop icon appears, and then drag the text.
As you drag, the selected text remains in place, but a vertical bar indicates where the text will appear when you release
the mouse button. The vertical bar appears in any text frame that you drag the mouse over.
4Do any of the following:
•To drop the text in a new location, position the vertical bar where you would like the text to appear and release the
mouse button.
•To drop the text in a new frame, hold down Ctrl (Windows) or Command (Mac OS) after you start dragging, and
then release the mouse button before releasing the key.
•To drop the text without formatting, hold down Shift after you start dragging, and then release the mouse button
before releasing the key.
•To copy the text, hold down Alt (Windows) or Option (Mac OS) after you start dragging, and then release the
mouse button before releasing the key.
You can also use a combination of these modifier keys. For example, to copy unformatted text to a new frame, hold
down Alt+Shift+Ctrl (Windows) or Option+Shift+Command (Mac OS) after you start dragging.
If the text you drop doesn’t have the proper spacing, select the Adjust Spacing Automatically option in Type
Preferences.
More Help topics
“Paste text” on page 135
Place (import) text
When you place a text or spreadsheet file, you can specify options to determine how the imported text is formatted.

137
USING INDESIGN
Text
Last updated 11/16/2011
For a video tutorial on importing content into InDesign, see www.adobe.com/go/vid0067. For a video tutorial on
placing and flowing text, see www.adobe.com/go/lrvid4278_id.
1(Optional) To create links to the files being placed, click File Handling in the Preferences dialog box and select
Create Links When Placing Text And Spreadsheet Files.
Selecting this option creates a link to the placed file. You can use the Links panel to update, relink, or remove links to
text files. However, if you format linked text in InDesign, the formatting may not be preserved when you update the
link. If this option isn’t selected, imported text and spreadsheet files are embedded (not linked).
2Do one of the following:
•To create a new frame for the placed text, make sure that no insertion point is present and that no text or frames
are selected.
•To add text to a frame, use the Type tool to select text or place the insertion point.
•To replace the contents of an existing frame, use a selection tool to select the frame. If the frame is threaded, a loaded
text cursor appears.
If you accidentally replace a text file or graphic using this method, choose Edit > Undo Replace, and then click or drag
to create a text frame.
3Choose File > Place.
4Select Replace Selected Item if you want the imported file to replace the contents of a selected frame, to replace
selected text, or to be added to the text frame at the insertion point. Deselect this option to flow the imported file
into a new frame.
5Select Show Import Options, and then double-click the file you want to import.
6Set import options, and then click OK.
If you haven’t already designated an existing frame to receive text, the pointer becomes a loaded text icon, ready to flow
text wherever you click or drag.
If you receive an alert that the requested filter wasn’t found, you may be trying to place a file from a different word-
processing application or from an earlier version of Microsoft® Word, such as Word 6. Open the file in its original
application and save it as RTF, which preserves most formatting.
If the imported Microsoft Excel document displays red dots in cells, adjust cell size or text attributes so that overset
content becomes visible. You can also place the file as unformatted tabbed text, and then convert the tabbed text to a
table.
More Help topics
“Flow text manually or automatically” on page 145
“Link or embed imported text files” on page 142
“Convert Word styles to InDesign styles” on page 202
“Work with missing fonts” on page 248
“Open QuarkXPress files in InDesign” on page 110
Importing Content video

138
USING INDESIGN
Text
Last updated 11/16/2011
About import filters
InDesign imports most character and paragraph formatting attributes from text files but ignores most page-layout
information, such as margin and column settings (which you can set in InDesign). Note the following:
•InDesign generally imports all formatting information specified in the word-processing application, except
information for word-processing features not available in InDesign.
•InDesign can add imported styles to its list of styles for the document. A disk icon appears next to imported
styles. (See “Convert Word styles to InDesign styles” on page 202.)
•The import options appear when you select Show Import Options in the Place dialog box, or when you import an
Excel file. If Show Import Options is deselected, InDesign uses the import options last used for a similar document
type. The
options you set remain in effect until you change them.
•If InDesign cannot find a filter that recognizes a file by either its file type or file extension, an alert message appears.
For best results in Windows, use the standard extension (such as .doc, .docx, .txt, .rtf, .xls, or .xlsx) for the type of
file you’re importing. You may need to open the file in its original application and save it in a different format, such
as RTF or text-only.
For more information on import filters, see the Filters ReadMe PDF file at
www.adobe.com/go/lr_indesignfilters_cs5_en.
Microsoft Word and RTF import options
If you select Show Import Options when placing a Word file or an RTF file, you can choose from these options:
Table Of Contents Text
Imports the table of contents as part of the text in the story. These entries are imported as text only.
Index Text Imports the index as part of the text in the story. These entries are imported as text only.
Footnotes Imports Word footnotes. Footnotes and references are preserved, but renumbered based on the
document’s footnote settings. If the Word footnotes are not imported properly, try saving the Word document in RTF
format and importing the RTF file.
Endnotes Imports endnotes as part of the text at the end of the story.
Use Typographer’s Quotes Ensures that imported text includes left and right quotation marks (“ ”) and
apostrophes
(’) instead of straight quotation marks (" ") and apostrophes (').
Remove Styles And Formatting From Text And Tables Removes formatting, such as typeface, type color, and type
style, from the imported text, including text in tables. Paragraph styles and inline graphics aren’t imported if this
option is selected.
Preserve Local Overrides When you choose to remove styles and formatting from text and tables, you can select
Preserve Local Overrides to maintain character formatting, such as bold and italics, that is applied to part of a
paragraph. Deselect this option to remove all formatting.
Convert Tables To When you choose to remove styles and formatting from text and tables, you can convert tables to
either basic, unformatted tables or unformatted, tab-delimited text.
If you want to import unformatted text and formatted tables, import the text without formatting, and then paste the
tables from Word into InDesign.
Preserve Styles And Formatting From Text And Tables Preserves the Word document’s formatting in the InDesign or
InCopy document. You can use the other options in the Formatting section to determine how styles and formatting
are preserved.
Manual Page Breaks Determines how page breaks from the Word file are formatted in InDesign or InCopy. Select
Preserve Page Breaks to use the same page breaks used in Word, or select Convert To Column Breaks or No Breaks.

139
USING INDESIGN
Text
Last updated 11/16/2011
Import Inline Graphics Preserves inline graphics from the Word document in InDesign.
Import Unused Styles Imports all styles from the Word document, even if the styles aren’t applied to text.
Convert Bullets & Numbers To Text Imports bullets and numbers as actual characters, preserving the look of the
paragraph. However, in numbered lists, the numbers are not automatically updated when the list items are changed.
Track Changes Selecting this option causes Track Changes markups from the Word document to appear in the
InDesign document. In InDesign, view track changes in Story Editor.
Import Styles Automatically Imports styles from the Word document into the InDesign or InCopy document. If a
yellow warning triangle appears next to Style Name Conflicts, then one or more paragraph or character styles from the
Word document have the same name as an InDesign style.
To determine how these style name conflicts are resolved, select an option from the Paragraph Style Conflicts and
Character Style Conflicts menu. Choosing Use InDesign Style Definition causes the imported style text to be formatted
based on the InDesign style. Choosing Redefine InDesign Style causes the imported style text to be formatted based on
the Word style, and changes existing InDesign text formatted with the Word style. Choosing Auto Rename causes the
imported Word styles to be renamed. For example, if InDesign and Word have a Subheading style, the imported Word
style is renamed Subheading_wrd_1 when Auto Rename is selected.
Note: InDesign converts paragraph and character styles but not bulleted and numbered list styles.
Customize Style Import Lets you use the Style Mapping dialog box to select which InDesign style should be used for
each Word style in the imported document.
Save Preset Stores the current Word Import Options for later reuse. Specify the import options, click Save Preset, type
the name of the preset, and click
OK. The next time you import a Word style, you can select the preset you created
from the Preset menu. Click Set As Default if you want the selected preset to be used as the default for future imports
of Word documents.
Text-file import options
If you select Show Import Options when placing a text file, you can choose from these options:
Character Set Specifies the computer language character set, such as ANSI, Unicode UTF8, or Windows CE, that was
used to create the text file. The default selection is the character set that corresponds to the default language and
platform of InDesign or InCopy.
Platform Specifies whether the file was created in Windows or Mac OS.
Set Dictionary To Specifies the dictionary to be used by the imported text.
Extra Carriage Returns Specifies how extra paragraph returns are imported. Choose Remove At End Of Every Line or
Remove Between Paragraphs.
Replace Replaces the specified number of spaces with a tab.
Use Typographer’s Quotes Ensures that imported text includes left and right quotation marks (“ ”) and
apostrophes
(’) instead of straight quotation marks (" ") and apostrophes (').
Microsoft Excel import options
You can choose from these options when importing an Excel file:
Sheet Specifies the worksheet you want to import.
View Specifies whether to import any stored custom or personal views, or to ignore the views.
Cell Range Specifies the range of cells, using a colon (:) to designate the range (such as A1:G15). If there are named
ranges within the worksheet, these names appear in the Cell Range menu.

140
USING INDESIGN
Text
Last updated 11/16/2011
Import Hidden Cells Not Saved In View Includes any cells formatted as hidden cells in the Excel spreadsheet.
Table Specifies how the spreadsheet information appears in the document.
•Formatted Table InDesign tries to preserve the same formatting used in Excel, although the formatting of text
within each cell may not be preserved. If the spreadsheet is linked rather than embedded, updating the link will
override any formatting applied to the table in InDesign.
•Unformatted Table The table is imported without any formatting from the spreadsheet. When this option is
selected, you can apply a table style to the imported table. If you format text using paragraph and characters styles, the
formatting is preserved even if you update the link to the spreadsheet.
•Unformatted Tabbed Text The table is imported as tab-delimited text, which you can then convert to a table in
InDesign or InCopy.
•Formatted Only Once InDesign preserves the same formatting used in Excel during the initial import. If the
spreadsheet is linked rather than embedded, formatting changes made to the spreadsheet are ignored in the linked
table when you update the link. This option isn’t available in InCopy.
Table Style Applies the table style you specify to the imported document. This option is available only if Unformatted
Table is selected.
Cell Alignment Specifies the cell alignment for the imported document.
Include Inline Graphics Preserves inline graphics from the Excel document in InDesign.
Number Of Decimal Places To Include Specifies the number of decimal places of spreadsheet figures.
Use Typographer’s Quotes Ensures that imported text includes left and right quotation marks (“ ”) and
apostrophes
(’) instead of straight quotation marks (" ") and apostrophes (').
Tagged-text import options
You can import (or export) a text file capable of taking advantage of InDesign formatting capabilities by using the
tagged text format. Tagged-text files are text files containing information describing the formatting you want InDesign
to apply. Properly tagged text can describe almost anything that can appear in an InDesign story, including all
paragraph-level attributes, character-level attributes, and special characters.
For information on specifying tags, view the Tagged Text PDF at www.adobe.com/go/learn_id_taggedtext_cs5_en
(PDF).
The following options are available when you import a tagged-text file and select Show Import Options in the Place
dialog box.
Use Typographer’s Quotes Ensures that imported text includes left and right quotation marks (“ ”) and
apostrophes
(’) instead of straight quotation marks (" ") and apostrophes (').
Remove Text Formatting Removes formatting, such as typeface, type color, and type style, from the imported text.
Resolve Text Style Conflicts Using Specifies which character or paragraph style to apply when there is a conflict
between the style in the tagged-text file and the style in the InDesign document. Select Publication Definition to use
the definition that already exists for that style in the InDesign document. Select Tagged File Definition to use the
style
as defined in the tagged text.
Show List Of Problem Tags Before Place Displays a list of unrecognized tags. If a list appears, you can choose to cancel
or continue the import. If you continue, the file may not look as expected.
Save Word or RTF import options as presets
1When placing a Word or RTF file, make sure that Show Import Options is selected, and choose Open.

141
USING INDESIGN
Text
Last updated 11/16/2011
2In the Import Options dialog box, specify the desired settings.
3Click Save Preset, type a preset name, and click OK.
4(Optional) Click Set As Default to use the preset each time you import a file of that file type.
You can then select custom presets from the Preset menu in the Import Options dialog box whenever you open a Word
or RTF file.
Import Buzzword documents
Buzzword is a web-based text editor that lets users create and store text files on a web server. In InDesign CS5, you can
import and export text from Buzzword documents.
When you import a Buzzword document, a URL-based link is created to the Buzzword document on the server. When
the Buzzword document is updated outside InDesign, you can use the Links panel to update the imported version in
InDesign. However, doing so removes any changes to the Buzzword text you’ve made in InDesign.
Note: The Acrobat.com Buzzword application is available only in English, French, and German.
1Choose File > Place From Buzzword.
2If you haven’t already signed in to CS Live, click Sign In, specify your e-mail address and password, and then click
Sign In.
Once you sign in, the Place Buzzword Documents dialog box displays a list of the Buzzword documents you can
import.
3Select one or more documents you want to import, or paste the URL of the Buzzword document into the Paste URL
field.
4Select any of the following options, and then click OK.
Show Import Options If you select this option, the Buzzword Import Options dialog box appears before you place
the file.
Replace Selected Item Select this option to replace the object currently selected in the document.
Link To Document Select this option to create a link between the Buzzword document and the placed text. If you
establish a link and update the Buzzword document, the Links panel indicates that the file has been modified. If you
update the link, the text in InDesign is updated. However, formatting changes you’ve made to this text in InDesign
are lost.
5If you selected Show Import Options, specify settings in the Buzzword Import Options dialog box.
This dialog box includes most of the same options found in the RTF Import Options dialog box. See “Microsoft
Word and RTF import options” on page 138. Buzzword currently does not have a styles feature, so none of the style
options are valid at this time.
6With the loaded text cursor, click or drag to create a text frame.
More Help topics
“Export content to Buzzword” on page 127
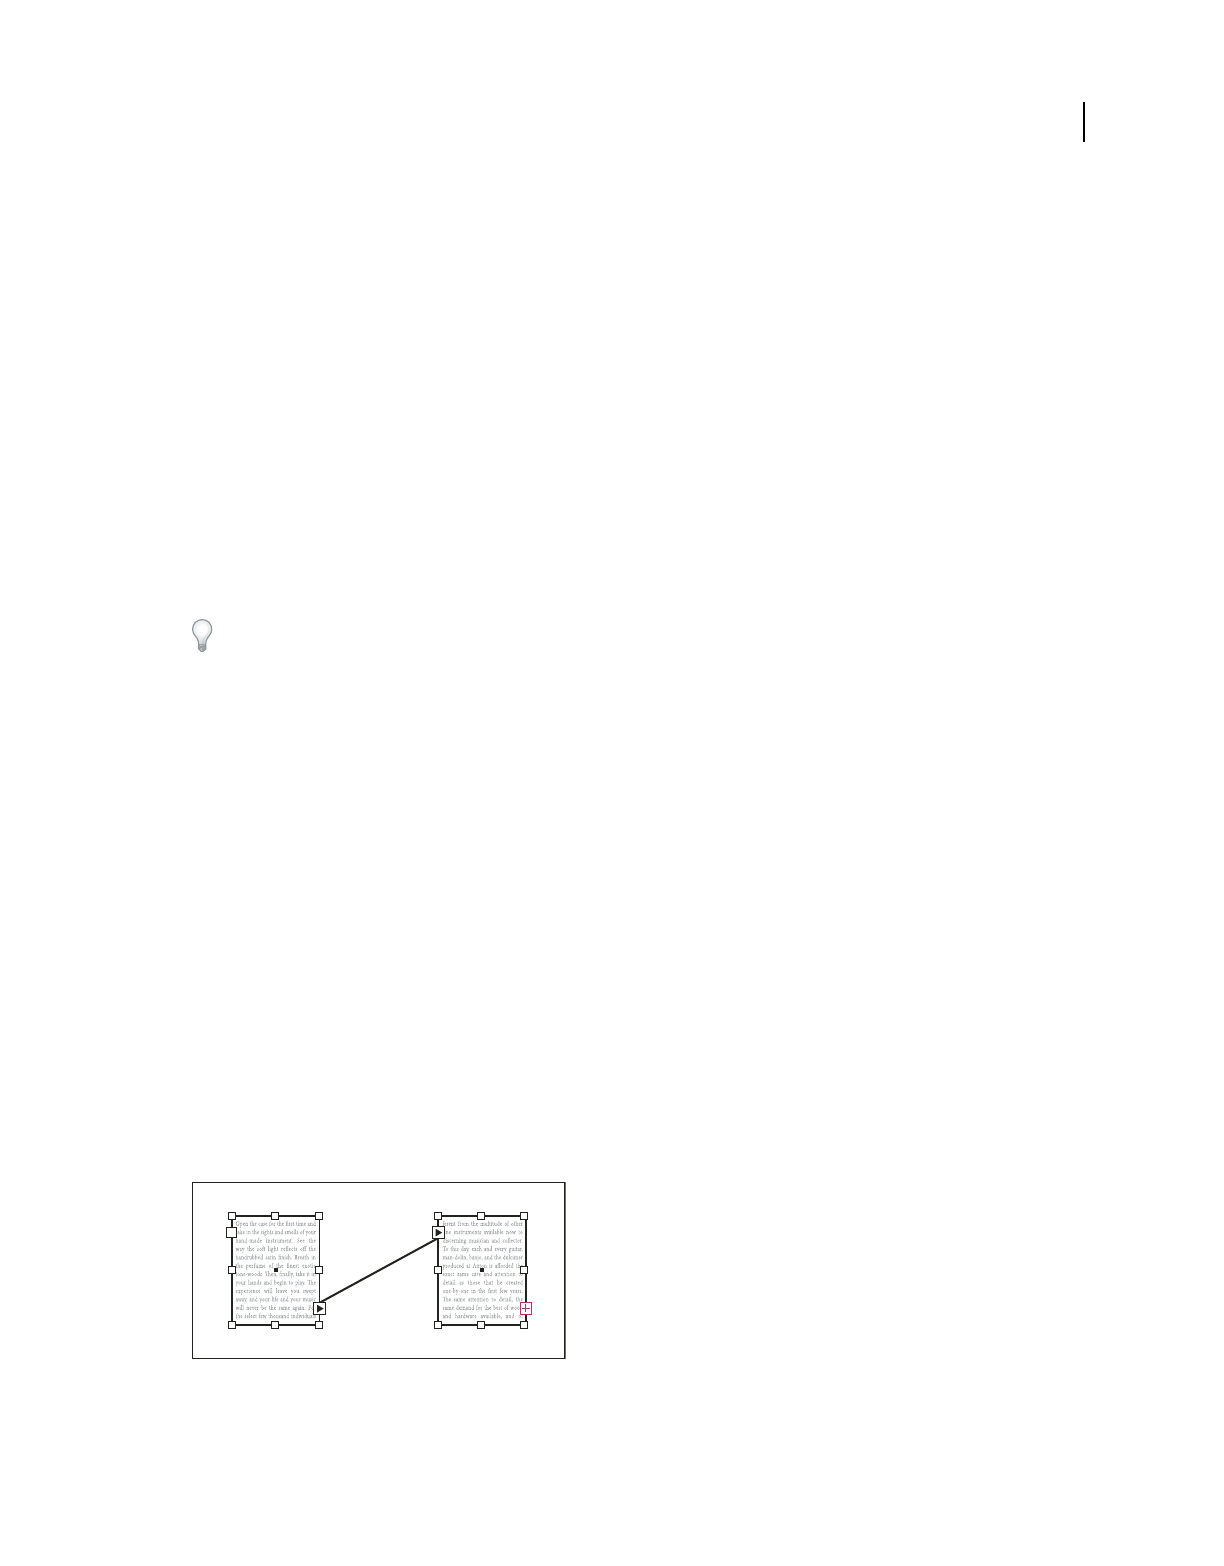
142
USING INDESIGN
Text
Last updated 11/16/2011
Link or embed imported text files
By default, text you place in InDesign is not linked to the original text file. However, if you select the Create Links
When Placing Text And Spreadsheet Files option in File Handling preferences before you place a file, the name of the
text file appears in the Links panel. You can use the Links panel to update and manage the file. When you update a
linked text file, any editing or formatting changes applied within InDesign are lost. Because of this risk, linked text files
are not automatically updated when the original file is edited. However, you can easily use the Links panel to update
content or to unlink (embed) the file.
1Do one of the following:
•To apply this change to a document, open the document.
•To apply this change to any new document you create, close all documents.
2Choose Edit > Preferences > File Handling (Windows) or InDesign > Preferences > File Handling (Mac OS).
3To create links in placed files, select Create Links When Placing Text And Spreadsheet Files. If this option is turned
on, use the Links panel to update, relink, or remove links. If this option is turned off, text files are embedded (not
linked).
To unlink (embed) a linked text file, select the file in the Links panel, and then choose Unlink from the Links panel
menu.
More Help topics
“Managing graphics links” on page 389
“Convert Word styles to InDesign styles” on page 202
Threading text
Thread text frames
The text in a frame can be independent of other frames, or it can flow between connected frames. To flow text between
connected frames (also called text boxes), you must first connect the frames. Connected frames can be on the same
page or spread, or on another page in the document. The process of connecting text among frames is called threading
text. It is also referred to as linking text frames or linking text boxes.
Each text frame contains an in port and an out port, which are used to make connections to other text frames. An empty
in port or out port indicates the beginning or end of a story, respectively. An arrow in a port indicates that the frame
is linked to another frame. A red plus sign (+) in an out port indicates that there is more text in the story to be placed
but no more text frames in which to place it. This remaining unseen text is called overset text.
Threaded frames
A. In port at beginning of story B. Out port indicating thread to next frame C. Text thread D. In port indicating thread from previous frame
E. Out port indicating overset text
A
BE
D
C
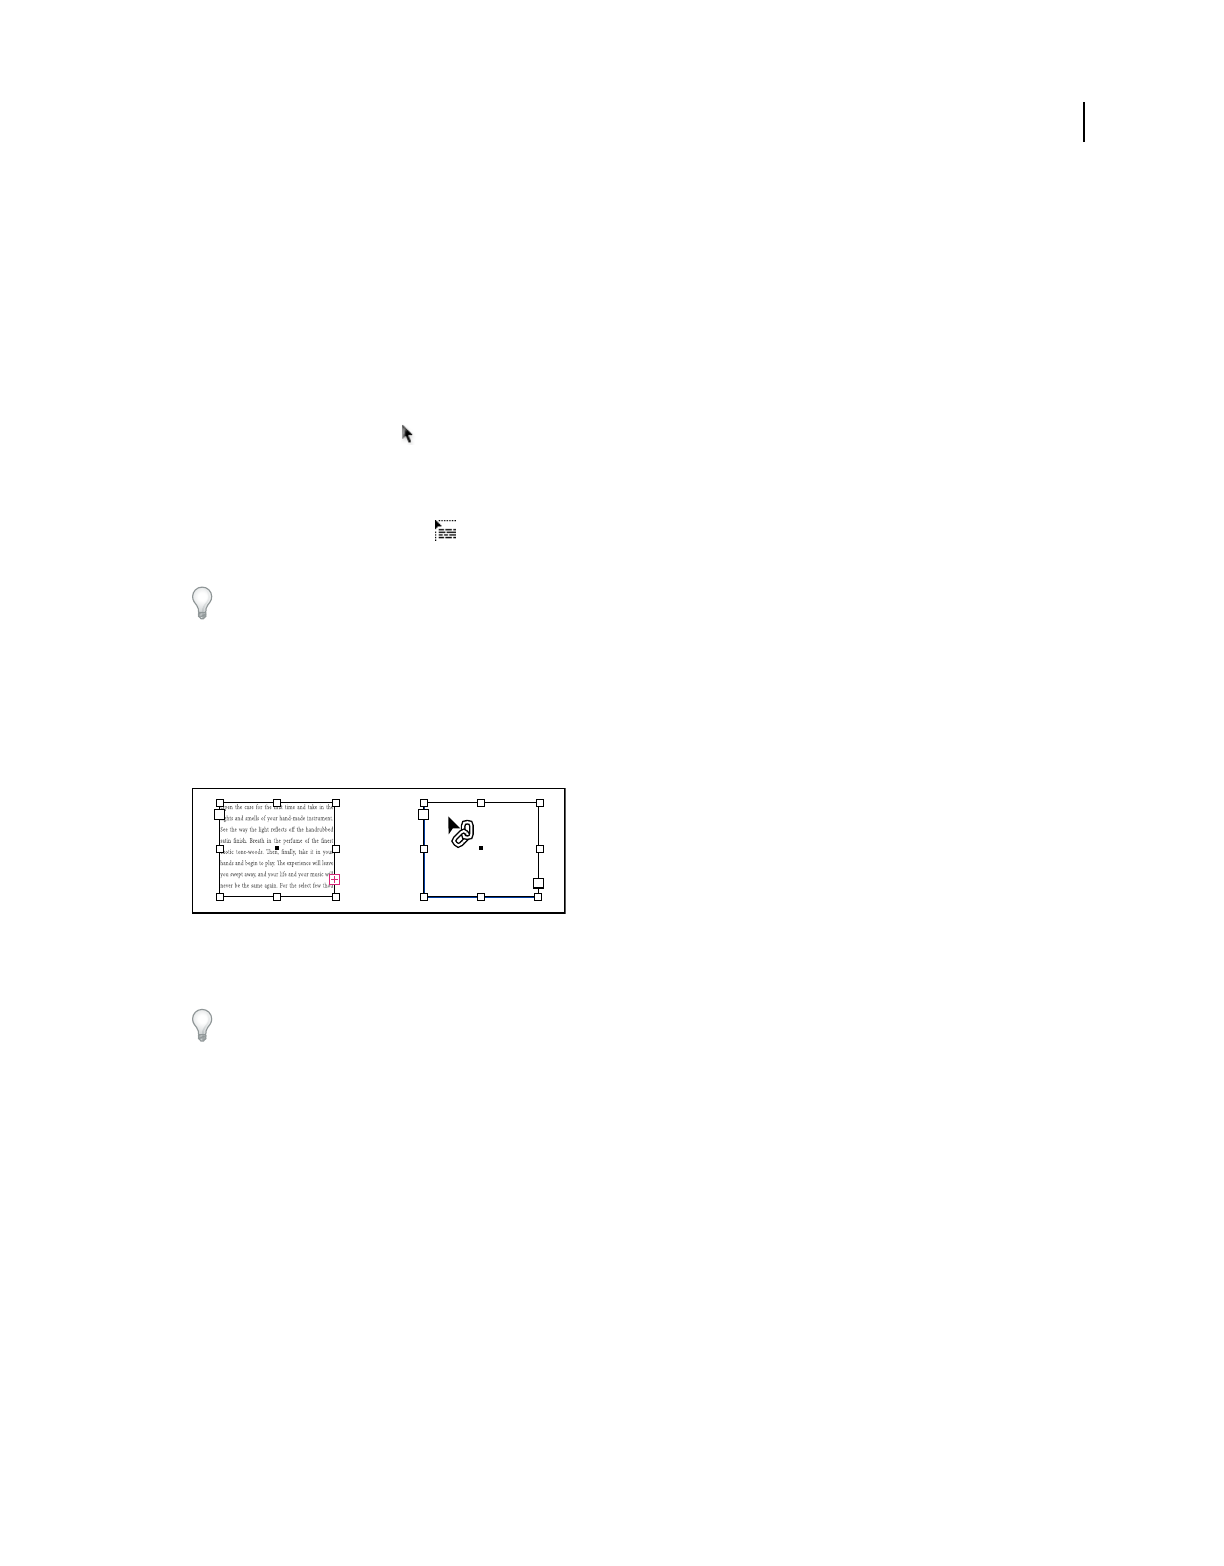
143
USING INDESIGN
Text
Last updated 11/16/2011
Choose View > Extras > Show Text Threads to see visual representatives of threaded frames. You can thread text
frames whether or not they contain text.
More Help topics
“Add text to a document” on page 134
“Move and resize text frames” on page 129
Add a new frame to the thread
1Using the Selection tool , select a text frame, and then click the in port or out port to load a text icon.
Clicking the in port lets you add a frame before the selected frame; clicking the out port lets you add a frame after the
selected frame.
2Position the loaded text icon where you want a new text frame to appear, and then click or drag to create a new
text frame.
When the loaded text icon is active, you can perform many actions, including turning pages, creating new pages, and
zooming in and out. If you start to thread two frames and change your mind, you can cancel the thread by clicking
any tool in the Toolbox. No text will be lost.
Add an existing frame to the thread
1Using the Selection tool, select a text frame, and then click the in port or the out port to load a text icon.
2Position the loaded text icon over the frame you want to connect to. The loaded text icon changes to the thread icon.
Adding existing frame to thread
3Click inside the second frame to thread it to the first.
You can add automatic “continued on” or “continued from” jump lines that track threaded stories as they jump from
frame to frame. (See “Add automatic page numbers for story jumps” on page 94.)
Add a frame inside a sequence of threaded frames
1Using the Selection tool, click the out port at the point in the story where you want to add a frame. When you release
the mouse button, a loaded text icon appears.
2Drag to create a new frame, or select a different text frame. InDesign threads the frame into the series of linked
frames containing the story.
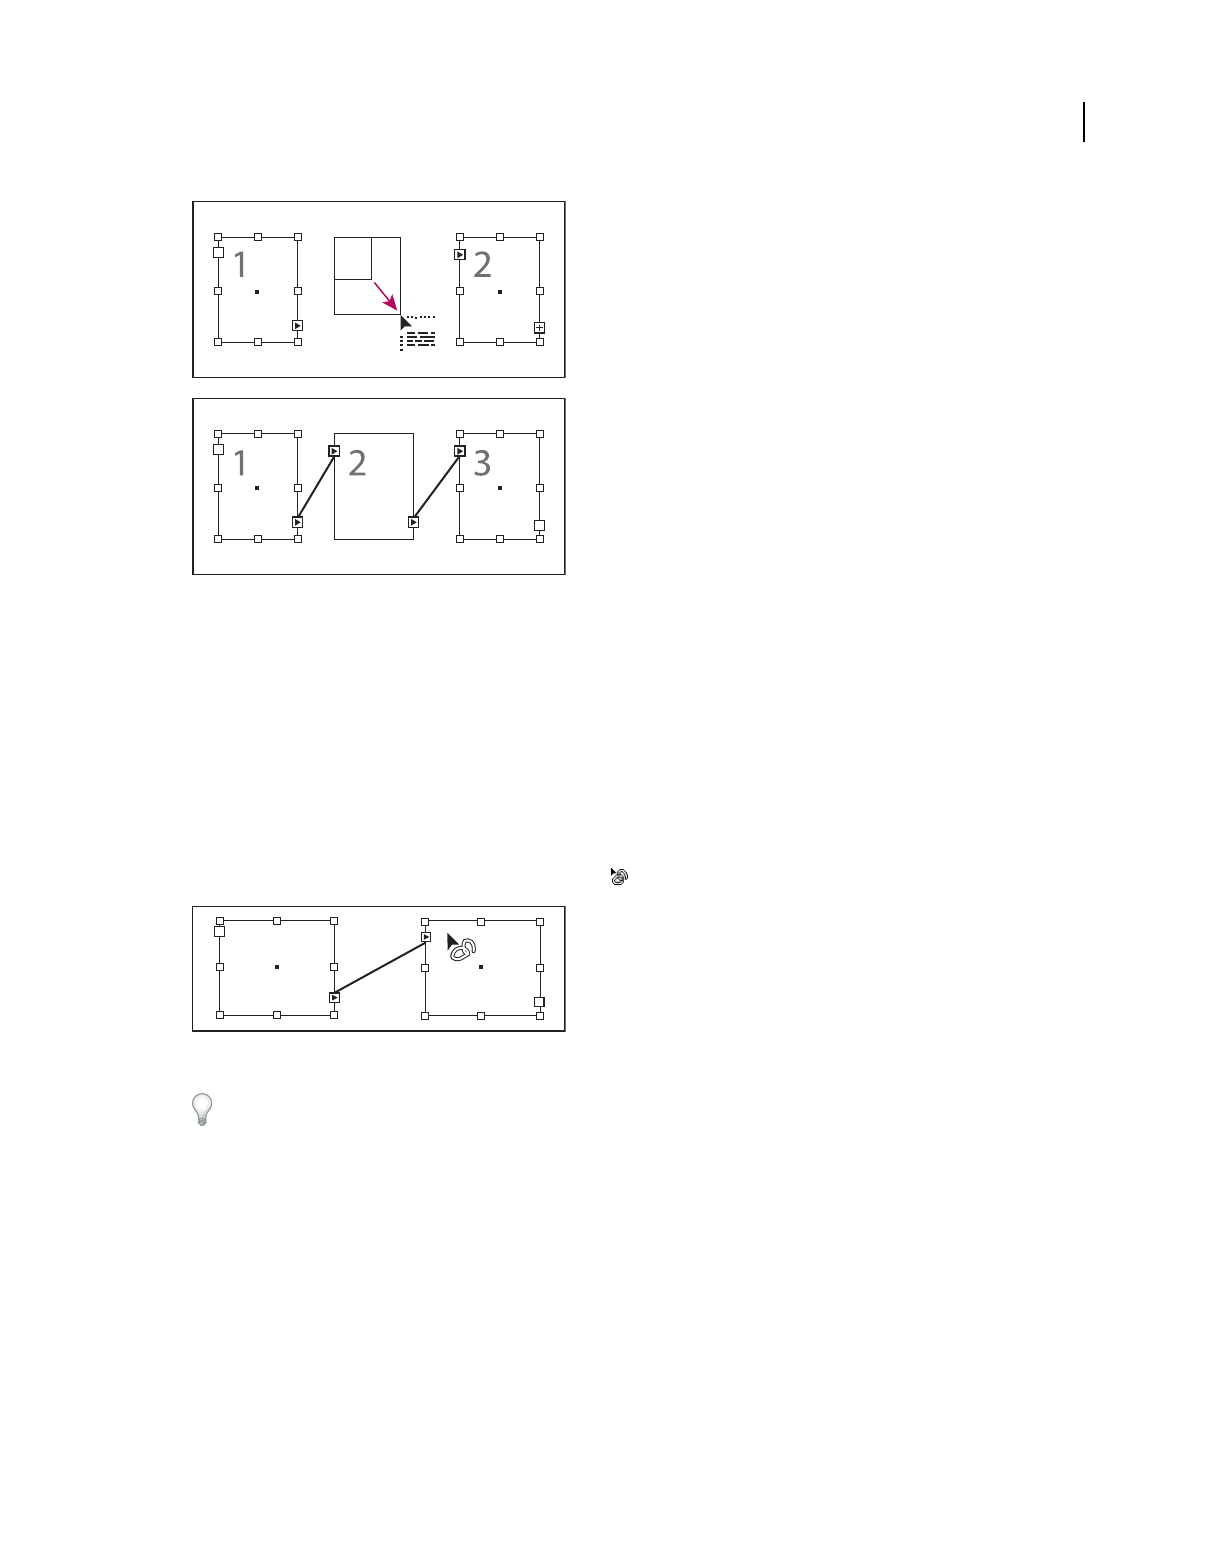
144
USING INDESIGN
Text
Last updated 11/16/2011
Adding frame inside a thread (top) and result (bottom)
Unthread text frames
When you unthread a text frame, you break the connection between the frame and all subsequent frames in the thread.
Any text that previously appeared in the frames becomes overset text (no text is deleted). All subsequent frames are
empty.
❖Using the Selection tool, do one of the following:
•Double-click an in port or out port to break the connection between frames.
•Click an in port or an out port that represents a thread to another frame. For example, in a two-framed thread, click
either the out port of the first frame or the in port of the second frame. Position the loaded text icon over the
previous or next frame to display the unthread icon
. Click in the frame you want to remove from the thread.
Removing frame from thread
To break one story into two stories, cut the text that needs to go in the second story, break the connection between the
frames, and then paste the text into the first frame of the second story.
Cut or delete threaded text frames
Whenever you cut or delete text frames, no text is deleted; the text remains in the thread.
Cut a frame from a thread
You can cut a frame from a thread and paste the frame elsewhere. The frame is removed with a copy of the text, but
no text is removed from the original story. When you cut and paste a series of threaded text frames at once, the pasted
frames maintain their connection to each other, but lose connection to any other frames in the original story.
1Using the Selection tool, select one or more frames (Shift-click to select multiple objects).
For the select few thousand individuals across the
di erent from the multitude of other instruments
available to the discerning musician and collector.
To this day, each and every guitar, mandolin,
banjo, and dulcimer produced at Anton is a orded
the exact same care and attention to detail as those
that he created one-by-one in the rst few years.
Open the case for the rst time and take in the
sights and smells of your hand-made instrument.
See the way the light re ects o the handrubbed
satin nish. Breath in the perfume of the nest
exotic tone-woods. en, nally, take it in your
hands and begin to play. e experience will leave
you swept away, and your life and your music will
never be the same again. For the select few thou
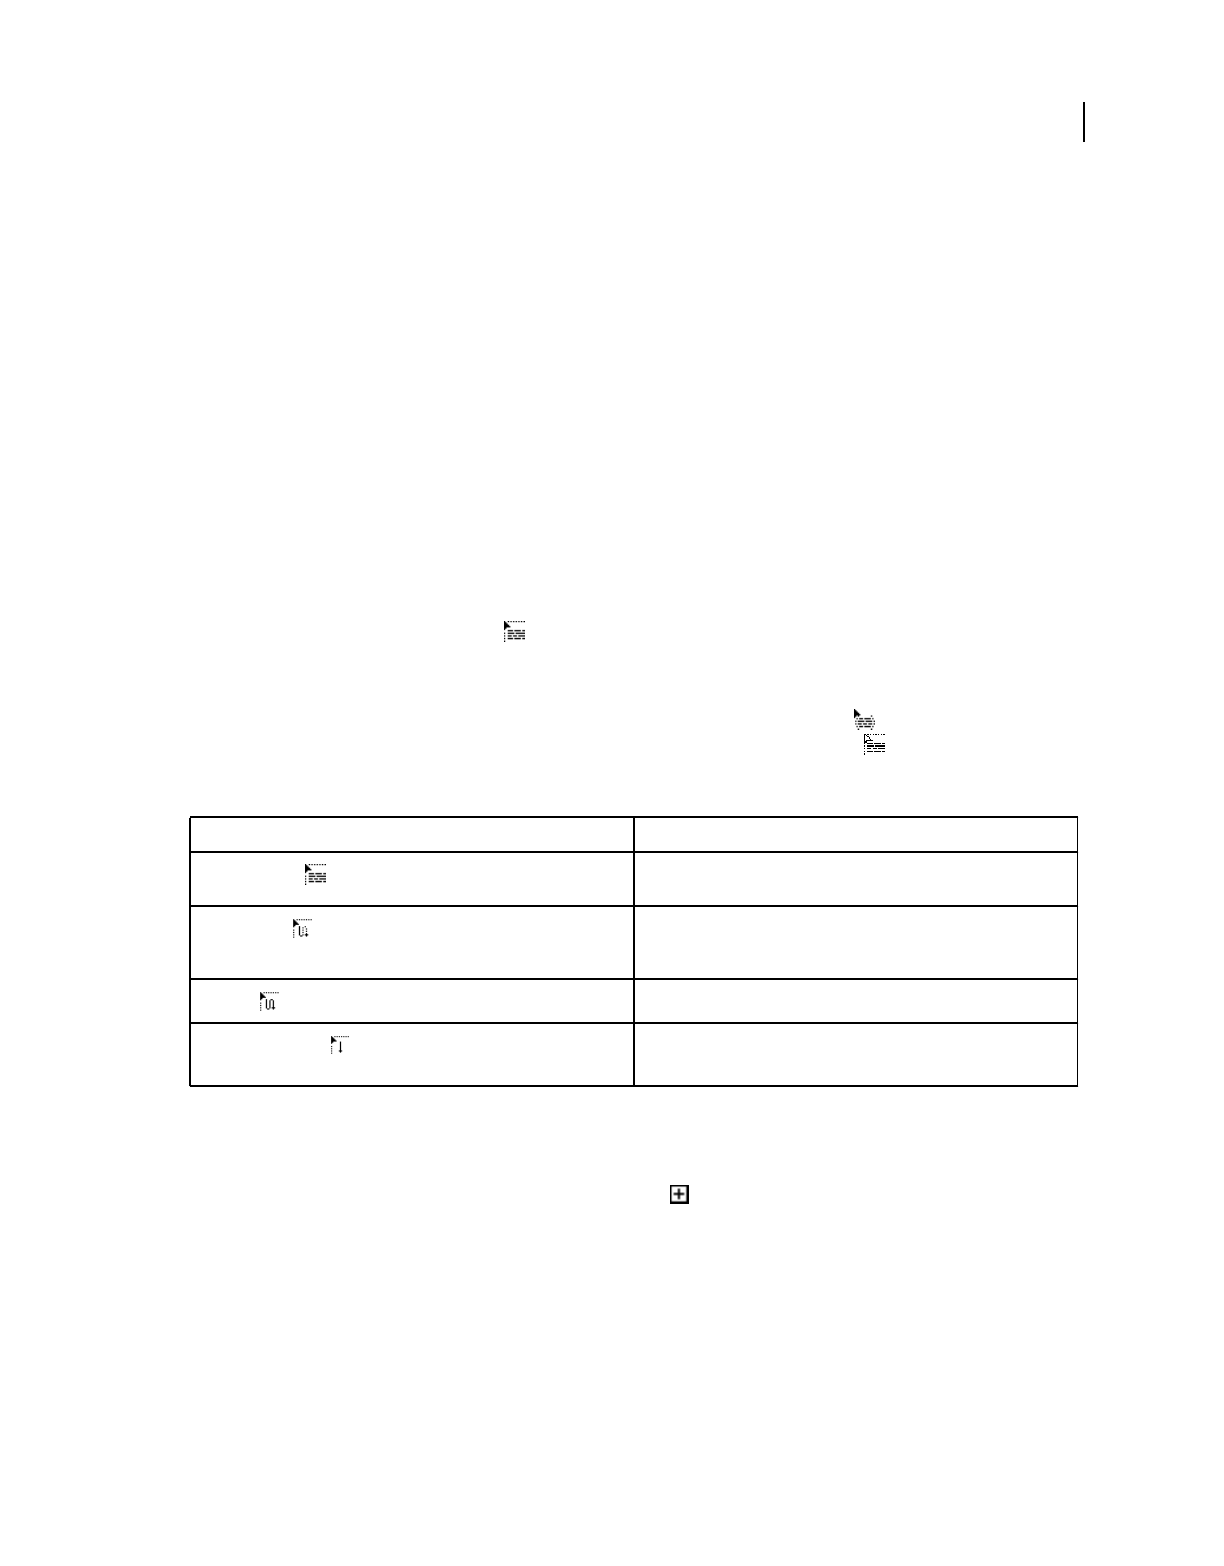
145
USING INDESIGN
Text
Last updated 11/16/2011
2Choose Edit > Cut. The frame disappears, and any text contained in it flows to the next frame in the story. When
you cut the last frame in a story, the text is stored as overset text in the previous frame.
3If you want to use the disconnected frame elsewhere in your document, go to the page where you want the
disconnected text to appear and choose Edit
> Paste.
Delete a frame from a thread
When you delete a text frame that is part of a thread, no text is deleted: it is overset or it flows into the next frame in
succession. If the text frame isn’t connected to any other frame, the frame and text are deleted.
1To select the text frame, do one of the following:
•Using a selection tool, click the frame.
•Using the Type tool, hold down Ctrl (Windows) or Command (Mac OS), and then click the frame.
2Press Backspace or Delete.
Flow text manually or automatically
Your pointer becomes a loaded text icon after you place text or click an in port or out port. The loaded text icon
lets you flow text onto your pages. By holding down a modifier key, you can determine how the text is flowed. The
loaded text icon changes appearance, depending on where it is placed.
When you position the loaded text icon over a text frame, parentheses enclose the icon . When you position the
loaded text icon next to a guide or grid snapping point, the black pointer becomes white .
You can flow text using four methods:
For a video tutorial on placing and flowing text, see www.adobe.com/go/lrvid4278_id.
Flow text manually
1Use the Place command to select a file, or click the out port of a selected text frame.
2Do one of the following:
•Position the loaded text icon anywhere within an existing frame or path, and then click. The text flows into the
frame and any other frames linked to it. Note that text always starts filling the frame at the top of the leftmost
column, even when you click in a different column.
•Position the loaded text icon in a column to create a text frame the width of that column. The top of the frame
appears where you click.
•Drag the loaded text icon to create a text frame the width and height of the area you define.
Method What it does
Manual text flow Adds text one frame at a time. You must reload the text icon to
continue flowing text.
Semi-autoflow by holding down Alt (Windows) or Option
(Mac OS) when you click.
Works like manual text flow, except that the pointer becomes a loaded
text icon each time the end of a frame is reached, until all text is flowed
into your document.
Autoflow by Shift-clicking. Adds pages and frames until all text is flowed into your document.
Fixed-page autoflow by holding down Shift+Alt (Windows) or
Shift+Option (Mac OS) when you click.
Flows all text into the document, adding frames as necessary without
adding pages. Any remaining text is overset.

146
USING INDESIGN
Text
Last updated 11/16/2011
3If there is more text to be placed, click the out port and repeat steps 1 and 2 until all text has been placed.
Note: When you place text in a frame that is threaded to other frames, text autoflows through the threaded frames,
regardless of the text flow method you choose.
Flow text semi-automatically
❖With a loaded text icon, Alt-click (Windows) or Option-click (Mac OS) a page or frame.
The text flows one column at a time, as in manual flow, but the loaded text icon automatically reloads after each
column is placed.
Flow text automatically
❖With the loaded text icon displayed, hold down Shift as you do one of the following:
•Click the loaded text icon in a column to create a frame the width of that column. InDesign creates new text frames
and new document pages until all text is added to the document.
•Click inside a text frame that is based on a master text frame. The text autoflows into the document page frame and
generates new pages as needed, using the master frame’s attributes. (See “About masters, stacking order, and layers”
on page 70.)
Flow text automatically without adding pages
❖With a loaded text icon, hold down Shift+Alt (Windows) or Shift+Option (Mac OS).
Use Smart Text Reflow
You can use the Smart Text Reflow feature to add or remove pages when you’re typing or editing text. This feature is
useful when you’re using InDesign as a text editor and you want a new page to be added whenever you type more text
than can fit on the current page. It’s also useful in avoiding overset text or empty pages for situations in which the text
flow changes due to editing text, showing or hiding conditional text, or making other changes to the text flow.
By default, Smart Text Reflow is limited to master text frames — text frames that are on a master page. If the document
includes facing pages, master text frames must appear on both left and right master pages, and the master text frames
must be threaded for Smart Text Reflow to work.
You can change settings to allow pages to be added or removed when working in text frames that aren’t based on
master pages. However, a text frame must be threaded to at least one other text frame on a different page for Smart
Text Reflow to work.
Smart Text Reflow settings appear in Type preferences. These settings apply to the current document. To change
default settings for all new documents, close all documents and specify the settings.
1Choose Edit > Preferences > Type (Windows) or InDesign > Preferences > Type (Mac OS).
2Select Smart Text Reflow.
3Select any of the following options and then click OK.
Add Pages To Use this option to determine where the new page is created. For example, suppose you have a three-page
document with text frames on the first two pages and a full-page graphic on the third page. If you’re typing to the end
of page two, you can determine whether the new page is added before or after the full-page graphic on the third page.
Choose End Of Story to add a new page after the second page. Choose End Of Document to add a new page after the
page with the full-page graphic.
In a document with multiple sections, you can choose End Of Section to add the page at the end of the section.

147
USING INDESIGN
Text
Last updated 11/16/2011
Limit To Master Text Frames If this option is turned off, you can also add or remove pages when editing text frames
that aren’t based on master pages. To prevent unwanted text reflow from occurring, Smart Text Reflow takes effect
only if the text frame you’re editing is threaded to at least one other text frame on a different page.
Note: When using Smart Text Reflow in text frames that aren’t based on master pages, pages are added with full-page,
single-column text frames, regardless of the attributes of the text frame to which the new frame is threaded.
Preserve Facing-Page Spreads This option determines whether facing-page spreads are preserved when text is
reflowed in the middle of a document. If this option is selected when text reflows in the middle of the document, a new
two-page spread is added. If this option is not selected, a single new page is added, and subsequent pages are “shuffled.”
If your layout includes design elements specific to the right or left side of the spread, turn on this option. If your left
and right pages are interchangeable, you can turn off this option. This option is dimmed if the document does not have
facing pages.
Delete Empty Pages Select this option to delete pages when you edit text or hide conditions. Pages are deleted only if
the emptied text frame is the only object on the page.
To see how Smart Text Reflow can let you use InDesign as a text editor, create a document with Facing Pages turned
off and Master Text Frame selected. In Type preferences, make sure that Smart Text Reflow and Delete Empty Pages
are selected. On the first page, hold down Ctrl+Shift (Windows) or Command+Shift (Mac
OS), and click the master text
frame to override it. When you type enough text to fill this text frame, a new page and text frame is added automatically.
If you delete enough text, a page is removed.
Articles (CS5.5)
Articles provide an easy way to create relationships among page items. These relationships can be used to define the
content to be exported to EPUB, HTML, or Accessible PDFs; and to define the order of the content. You can create
articles from a combination of existing page items within a layout, including images, graphics, or text. Once an article
has been created, page items can be added, removed, or reordered. Articles can be created manually by dragging one
or more page items to an article in the Articles panel.
You can also add bulk content to an article. Adding selected content to selected article, or adding an entire document
content to an article is supported.
Note: The XML structure panel provides another mechanism to decide the order of the content to be exported to the ePub,
HTML, and Accessible PDF exports workflows. The Articles panel is designed to be simpler, easier to use, and more
accessible, for people without XML skills. However, the ability to use the XML structure panel has not been removed; it is
now an option alongside the use of the Articles panel during the export process. See “Structuring documents for XML” on
page 586.
Create an article and add content to it
1Choose Window > Articles to open the Articles panel.
2Select the page items to add to the article.
To create an empty article, don’t select a page item in the layout.
3Do one of the following:
•Choose New Article from the Articles panel menu.
•Click Create New Article at the bottom of the Articles panel.

148
USING INDESIGN
Text
Last updated 11/16/2011
•Drag story or page element to the Articles panel.
4In the New Article dialog box, enter a name for the article.
5Select Include When Exporting to add the article to the EPUB/HTML export output.
Add all page items in a document to an article
To add all the page items to an article:
1Choose Window > Articles to open the Articles panel.
2Select an article to add the items to. If you don’t select an article, a new article is created.
3Press Command (Mac OS) or Ctrl (Windows) and then click the in the Articles panel.
4If a New Article dialog box opens, enter a name for the article.
5Select Include When Exporting to add the article to the EPUB/HTML export.
If you’ve selected an article, choose Add Document Content to Selected Articles from the articles panel menu.
Managing articles
You can manage articles using the Articles panel. You can drag page elements into the Articles panel to add them to
an article. Drag items in the Articles panel to change the order, or move them from one article to another.
The Articles panel pop-up menu also provides options to manage content.
Include articles for export
You can create articles and select which articles to include while exporting to EPUB or HTML. By default, all articles
are selected for export.
To include an article while exporting, in the Articles panel, select the article and do one of the following:
•Select the check box next to the article.
•Choose Article Options from the Articles panel pop-up menu and then select Include When Exporting.
Linked stories (CS5.5)
Replicating content across various pages is no easy task; copy-pasting is error prone and time consuming. Use linked
stories to manage multiple versions of a story or text content in the same document. Linked stories make it easier to
support emerging workflows, where for example, you need to design for vertical and horizontal layouts. Linked stories
also work well for traditional print and publishing workflows, where you might need to synchronize boilerplate text
on different pages.
Linked stories behave similar to traditional links. See “Use the Links panel” on page 391 for an overview. You can
designate a story as the parent, and then place the same story at other places in the document as child stories. Whenever
you update the parent story, the child stories are flagged in the Links panel and you can update them to synchronize
with the parent story. You can create linked stories using regular stories or text on path stories. Anchored objects inside
stories are also supported.
Linked stories remain in sync when you update any applied styles InDesign styles.

149
USING INDESIGN
Text
Last updated 11/16/2011
Linked stories are flagged as out of sync in the Links panel, even though there are no visible changes. Global changes
in the document that causes InDesign to recompose the stories, flags the links. These global changes may be due to
updates to options or definitions of the following:
•Footnotes
•Text variables
•Conditional text
•Swatches
•XML Tags
•Named grids
Additionally, if you replace all fonts, or replace all instances of an object, InDesign recomposes all the stories, and flags
the links.
Create a linked story
1Select a story by either selecting the text frame or place the insertion cursor in the text. You can also select multiple
stories by using Shift+Click if you’re selecting text frames.
2Choose Edit > Place and Link Story. The cursor is loaded with the story.
3Click in an existing empty text frame or draw a frame to place the linked story.
The icon displays on the upper-left corner of linked story. The story is displayed as linked story in the Links
panel. By default, the name of the story in the Links panel is created using the first few characters of the original story.
You can also change the default name of linked story through Layers panel.
Specify linked story options
1In the Links panel, select the linked story.
2From the Links panel menu, choose Linked Story Options.
3Select the options as required:
•Update Link When Saving Document
•Warn if Link Update will Overwrite Local Edits
•Remove Forced Line Breaks
To specify default story options, with all documents closed, open the links panel menu and choose Linked Story
Options.
To specify Linked Story Options while creating linked stories, press the Shift key when you choose Edit > Place and
Link Story.
Update a linked story
If an original story is edited, the Links panel displays next to the linked story.
❖In the Links panel, double-click to update the child story.
If you have made local edits to a child story, the edits are overwritten with content from the original story. If you set
Warn if Link Update Will Overwrite Local Edits, a warning message displays.

150
USING INDESIGN
Text
Last updated 11/16/2011
Use the Link Info pane to determine if you’ve made local edits to the story; story status displays “Text Modified” if
you’ve made local edits.
Edit original story
If you’re working on a linked story, and need to go to the original story, do the following:
1In the Links panel, select the linked story.
2Click or choose Edit Original from the Links panel menu ( ).
Focus shifts to the page that contains the original story.
Editing text
Select text
❖Using the Type tool, do one of the following:
•Drag the I-bar cursor over a character, word, or an entire text block to select it.
•Double-click a word to select it. Spaces next to the word are not selected.
•Triple-click anywhere in a line to select a line. If the Triple Click To Select A Line preferences option is deselected,
triple-clicking selects the entire paragraph.
•If the Triple Click To Select A Line option is selected, quadruple-click anywhere in a paragraph to select the entire
paragraph.
•Quintuple-click to select the entire story, or click anywhere in a story and choose Edit > Select All.
If you cannot select text in a frame, the text frame could be on a locked layer or on a master page. Try unlocking the
layer or going to the master page. The text frame may also be beneath another text frame or transparent object. See
“Select text in a frame that is covered” on page 150.
More Help topics
“Keys for navigating through and selecting text” on page 697
Change what triple-clicking does
1Choose Edit > Preferences > Type (Windows) or InDesign > Preferences > Type (Mac OS).
2Select Triple Click To Select A Line to enable triple-clicking to select a line (this is the default). Deselect this option
if you want triple-clicking to select a paragraph.
Select text in a frame that is covered
1Using the Selection tool , hold down Ctrl (Windows) or Command (Mac OS) and click to select the text frame.
2Select the Type tool, and then click inside the text frame or select text.
View hidden (nonprinting) characters
1Choose Type > Show Hidden Characters.
2If hidden characters still do not appear, turn off preview mode. Choose View > Screen Mode > Normal and choose
View > Overprint Preview to deselect it.
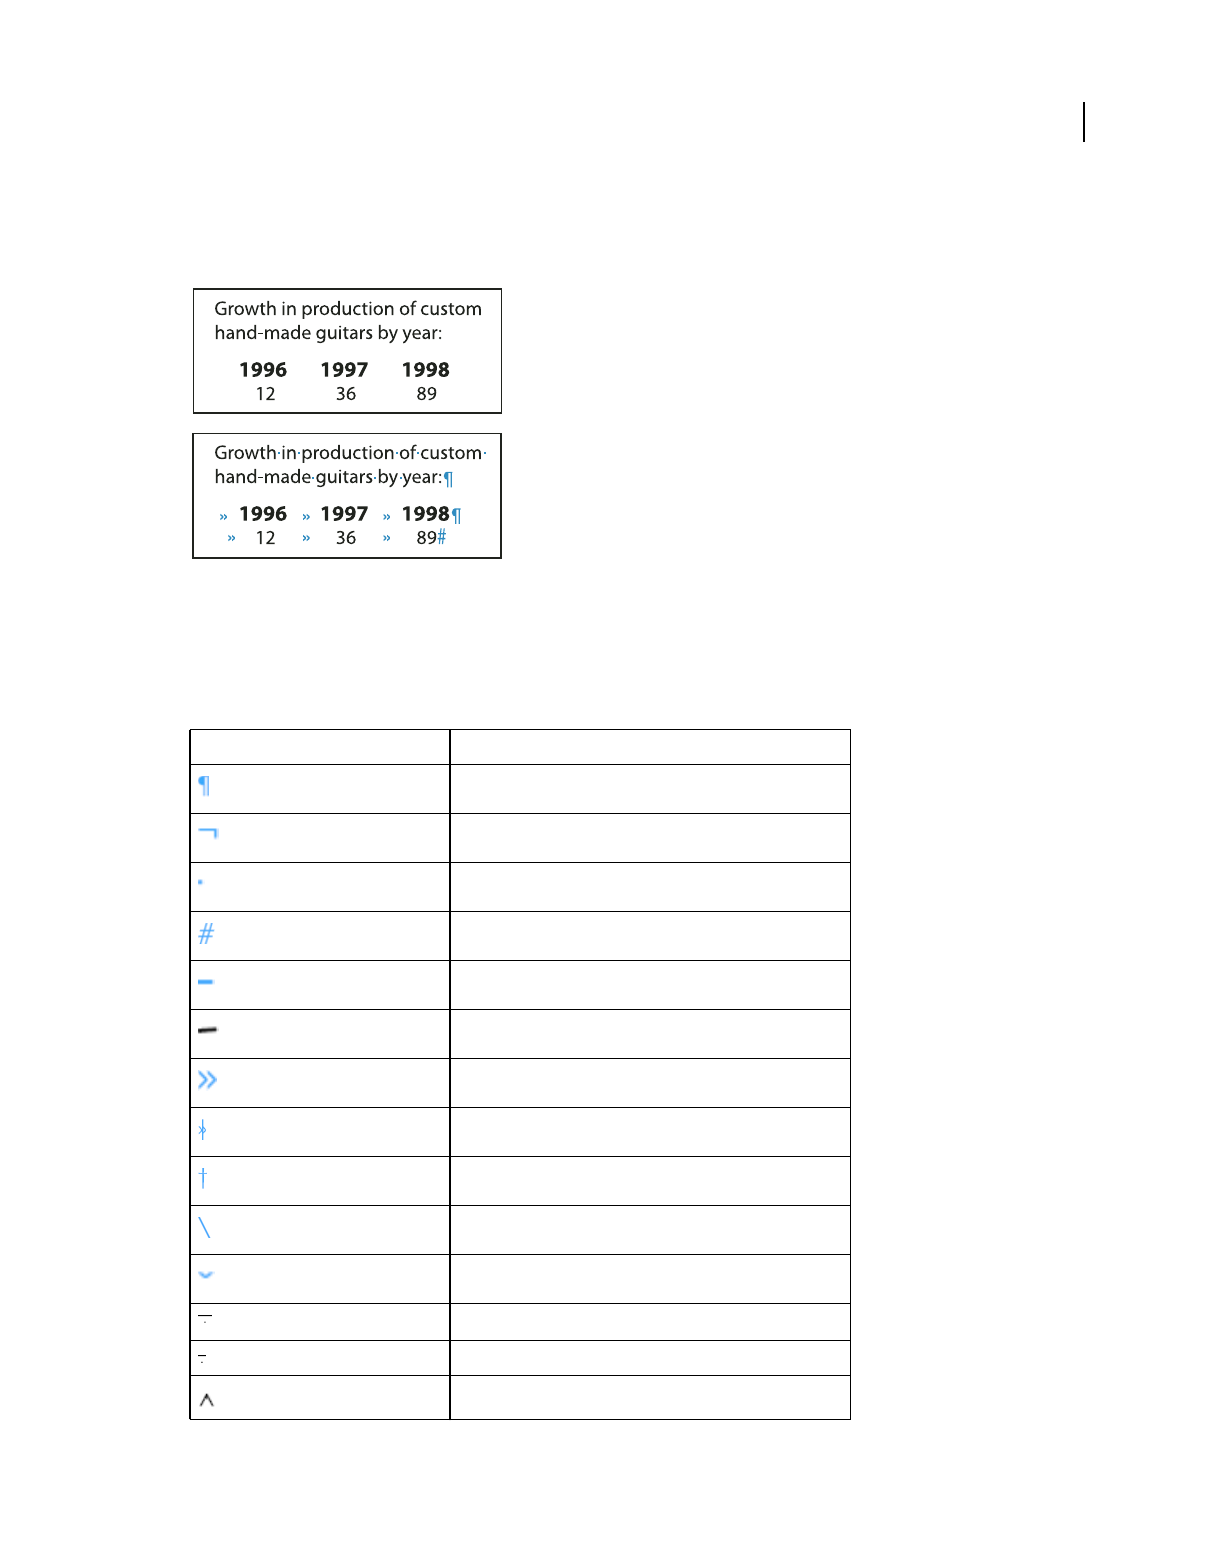
151
USING INDESIGN
Text
Last updated 11/16/2011
Nonprinting characters such as those for spaces, tabs, ends of paragraphs, index markers, and ends of stories appear.
These special characters are visible only in a document window and a story editor window; they don’t print or output
to formats such as PDF and XML. The hidden characters appear in the same color as the layer color.
Nonprinting characters hidden (top) and visible (bottom)
Anne Marie Concepcion provides a comprehensive list of special characters at Free Guide to InDesign Special
Characters.
List of hidden characters
Hidden character What it represents
End of Paragraph
Soft return (line break)
Space
End of Story
Discretionary Hyphen
Nonbreaking Hyphen
Tab
Right Indent Tab
Indent to Here
End Nested Style Here
Non-Joiner
Em Space
En Space
Nonbreaking Space
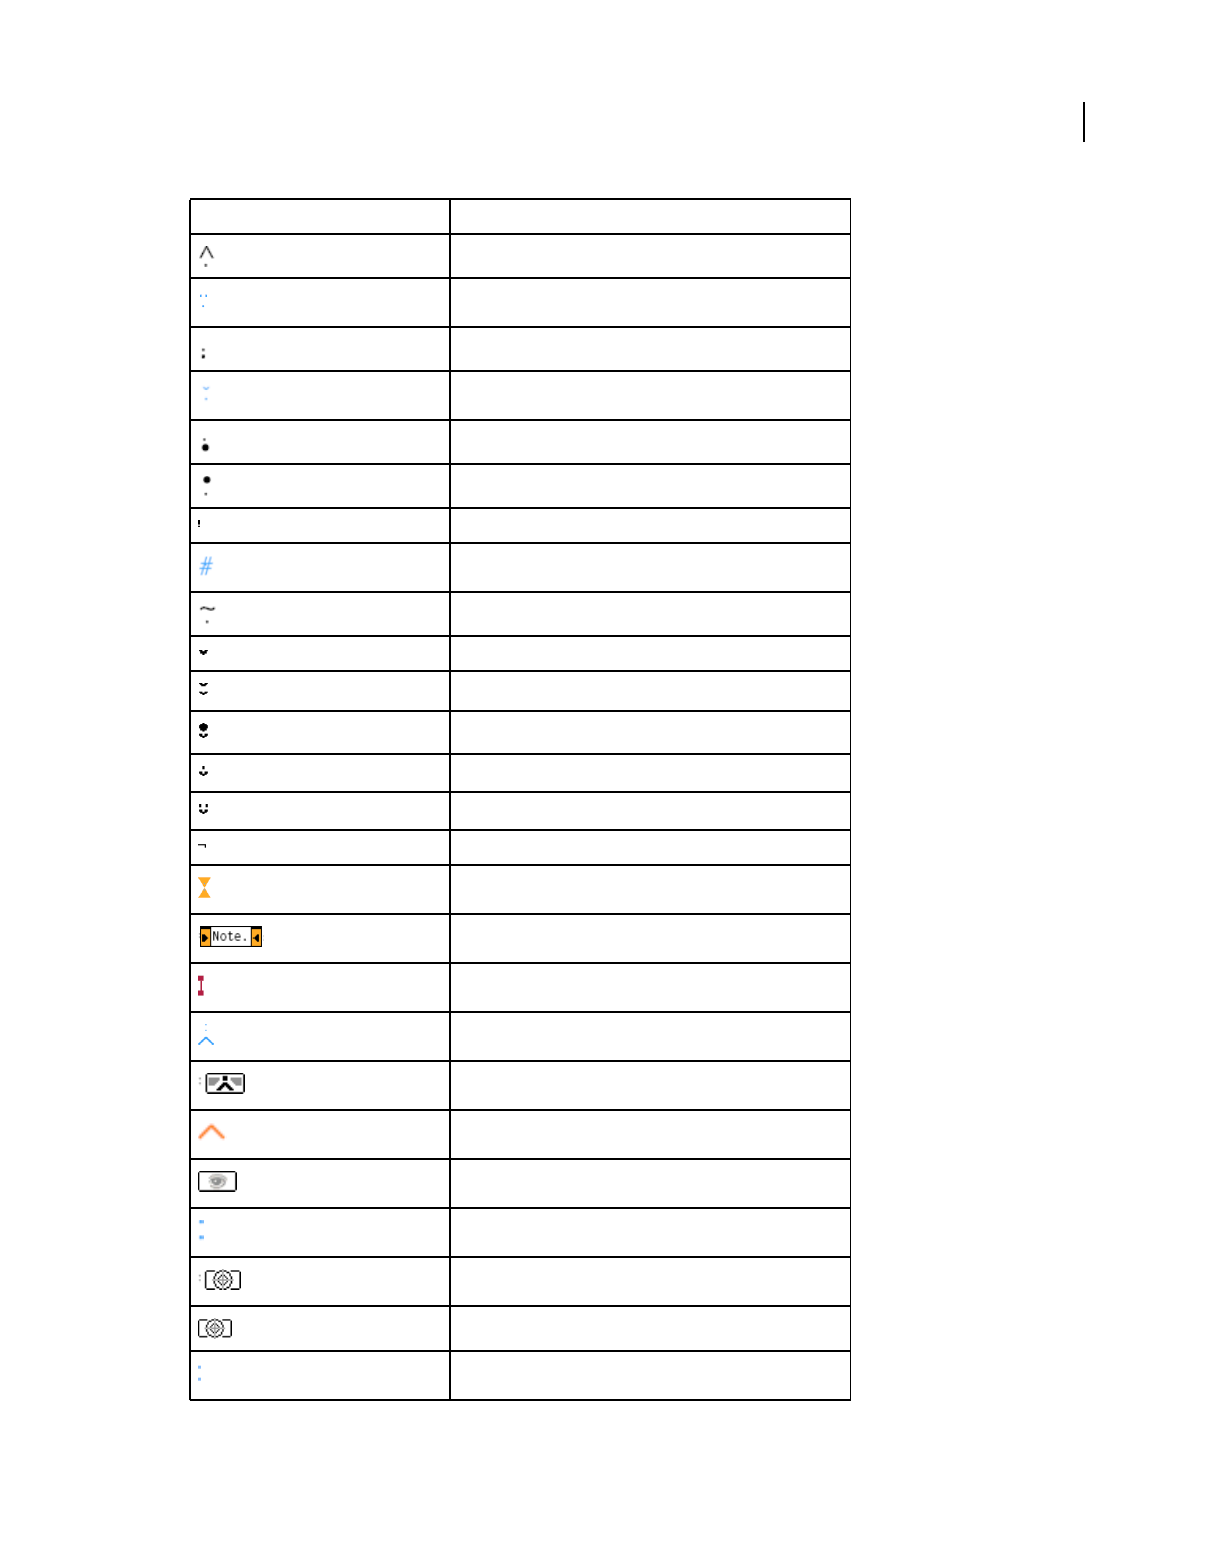
152
USING INDESIGN
Text
Last updated 11/16/2011
Nonbreaking Space (Fixed Width)
Hair Space
Sixth Space
Thin Space
Quarter Space
Third Space
Punctuation Space
Figure Space
Flush Space
Column Break
Frame Break
Page Break
Odd Page Break
Even Page Break
Forced Line Break
InCopy Note
InCopy Note (in Story Editor)
Position marker (InCopy only)
Index marker
Index marker (in Story Editor)
Hidden conditional text
Hidden conditional text (in Story Editor)
Bookmark or hyperlink destination marker (often a text anchor)
Bookmark or hyperlink destination marker (in Story Editor)
Hyperlink destination (in Story Editor)
Cross-referenced paragraph
Hidden character What it represents
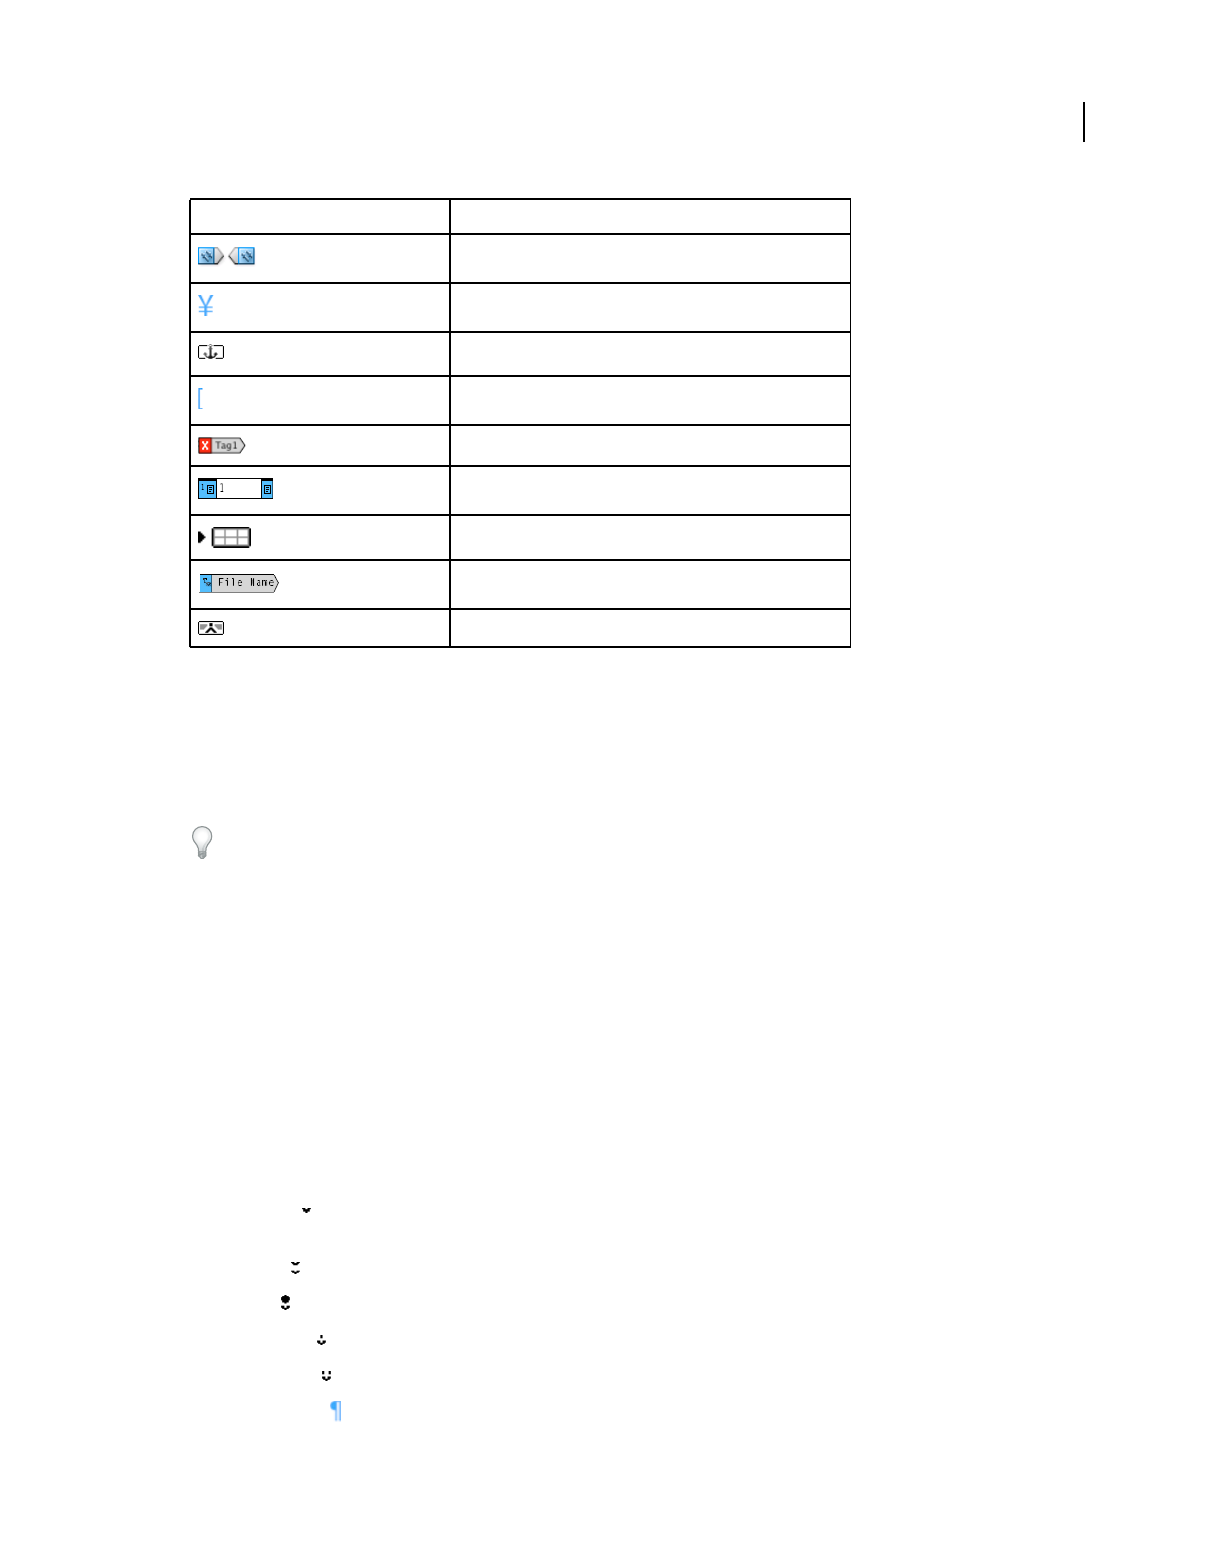
153
USING INDESIGN
Text
Last updated 11/16/2011
Add column, frame, and page breaks
Control column, frame, and page breaks by inserting special break characters in the text.
1Using the Type tool, click to place the insertion point where you want the break to occur.
2Choose Type > Insert Break Character, and then choose a break option from the submenu.
You can also create breaks by using the Enter key on the numeric keypad. For a column break, press Enter; for a frame
break, press Shift+Enter; and for a page break, press Ctrl+Enter (Windows) or Command+Return (Mac OS).
To remove a break character, choose Type > Show Hidden Characters so that you can see nonprinting characters, and
then select and delete the break character.
Note: If you create a break by changing paragraph settings (as in the Keep Options dialog box), the break precedes the
paragraph that contains the setting. If you create a break using a special character, the break occurs immediately after
the special character.
More Help topics
“Ways to control paragraph breaks” on page 263
Break options
The following options appear on the Type > Insert Break Character menu:
Column break Flows text to the next column in the current text frame. If the frame has only one column, the text
goes to the next threaded frame.
Frame break Flows text to the next threaded text frame, regardless of the current text frame’s column setup.
Page break Flows text to the next page with a text frame threaded to the current text frame.
Odd page break Flows text to the next odd-numbered page with a text frame threaded to the current text frame.
Even page break Flows text to the next even-numbered page with a text frame threaded to the current text frame.
Paragraph Return Inserts a paragraph return (the same as pressing Enter or Return).
Cross-reference hyperlink (in Story Editor)
Anchored object
Anchored object (in Story Editor)
XML tag
XML tag (in Story Editor)
Footnote (in Story Editor)
Table (in Story Editor)
Variable (in Story Editor)
Index marker (in Story Editor)
Hidden character What it represents
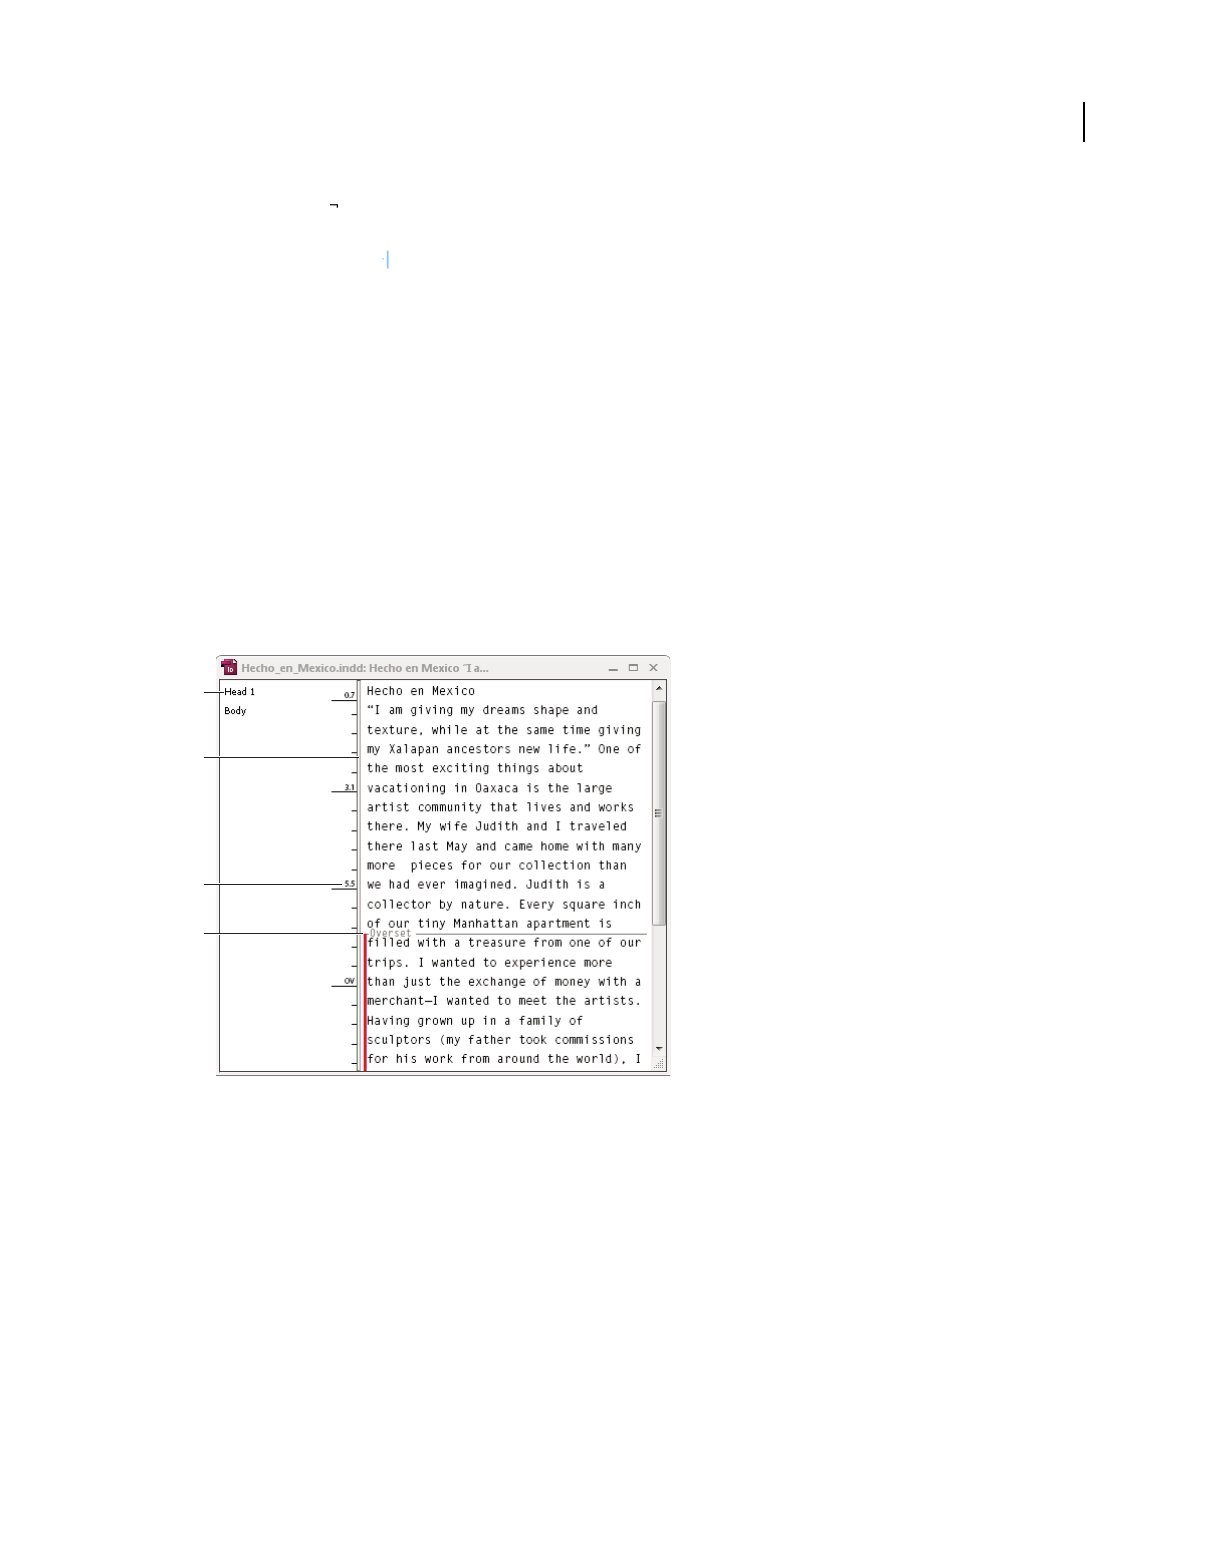
154
USING INDESIGN
Text
Last updated 11/16/2011
Forced Line Break Forces a line to break where the character is inserted, starting a new line without starting a new
paragraph (the same as pressing Shift+Enter or Shift+Return). A forced line break is also called a soft return.
Discretionary Line Break Indicates where a line of text should break if the line needs to break. A discretionary line
break is similar to a discretionary hyphen, only no hyphen is added where the line breaks.
Related break options are available in the Keep Options dialog box and in the Paragraph Style Options dialog box.
Use the Story Editor
You can edit text in InDesign either on the layout page or in the story editor window. Writing and editing in a story
editor window allows the entire story to appear in the typeface, size, and spacing that you specify in Preferences,
without layout or formatting distractions. The Story Editor is also where you can view track changes to text.
Each story appears in a different story editor window. All the text in the story appears in the story editor, including
overset text. You can open several story editor windows simultaneously, including multiple instances of the same story.
A vertical depth ruler indicates how much text is filling the frame, and a line indicates where text is overset.
When you edit a story, changes are reflected in the layout window. Open stories are listed in the Window menu. You
cannot create a new story in a story editor window.
Story Editor window
A. Paragraph styles B. Drag divider to adjust column width C. Vertical depth ruler D. Overset text indicator
You can view and edit tables in Story Editor, where text is displayed in sequential columns and rows for easy editing.
Quickly expand or collapse tables, and decide whether to view them by row or column.
The Story Editor also displays text that has been added, removed, or edited if you turn on Track Changes. See
“Tracking and reviewing changes” on page 193.
More Help topics
“Working with tables in Story Editor” on page 298
“Tracking and reviewing changes” on page 193
A
B
C
D

155
USING INDESIGN
Text
Last updated 11/16/2011
Open the Story Editor
1Select the text frame, click an insertion point in the text frame, or select multiple frames from different stories.
2Choose Edit > Edit In Story Editor.
To open another instance of the same story editor window, make the story editor active, and choose Window >
Arrange > New Window.
Return to the layout window
❖In Story Editor, do one of the following:
•Choose Edit > Edit In Layout. When you use this method, the layout view displays the same text selection or
insertion-point location as last appeared in the story editor, and the story window remains open but moves behind
the layout window.
•Click in the layout window. The story window remains open but moves behind the layout window.
•Close the story editor window.
•Choose the document name from the bottom of the Window menu.
Show or hide Story Editor items
You can show or hide the style name column and the depth ruler, expand or collapse footnotes, and show or hide
paragraph break marks to indicate the start of new paragraphs. These settings affect all open story editor windows, as
well as all subsequently opened windows.
•With the story editor active, choose View > Story Editor > Show Style Name Column or Hide Style Name Column.
You can also adjust the width of the style name column by dragging the vertical bar. Subsequent story editor
windows have the same column width.
•With the Story Editor active, choose View > Story Editor > Show Depth Ruler or Hide Depth Ruler.
•With the Story Editor active, choose View > Story Editor > Expand All Footnotes or Collapse All Footnotes.
•With the Story Editor active, choose View > Story Editor > Show Paragraph Break Marks or Hide Paragraph Break
Marks.
Story Editor preferences
Use Story Editor Display preferences to change the appearance of the Story Editor. Although the Story Editor
suppresses all but the most basic text styling attributes, some objects and attributes are represented, including the
following:
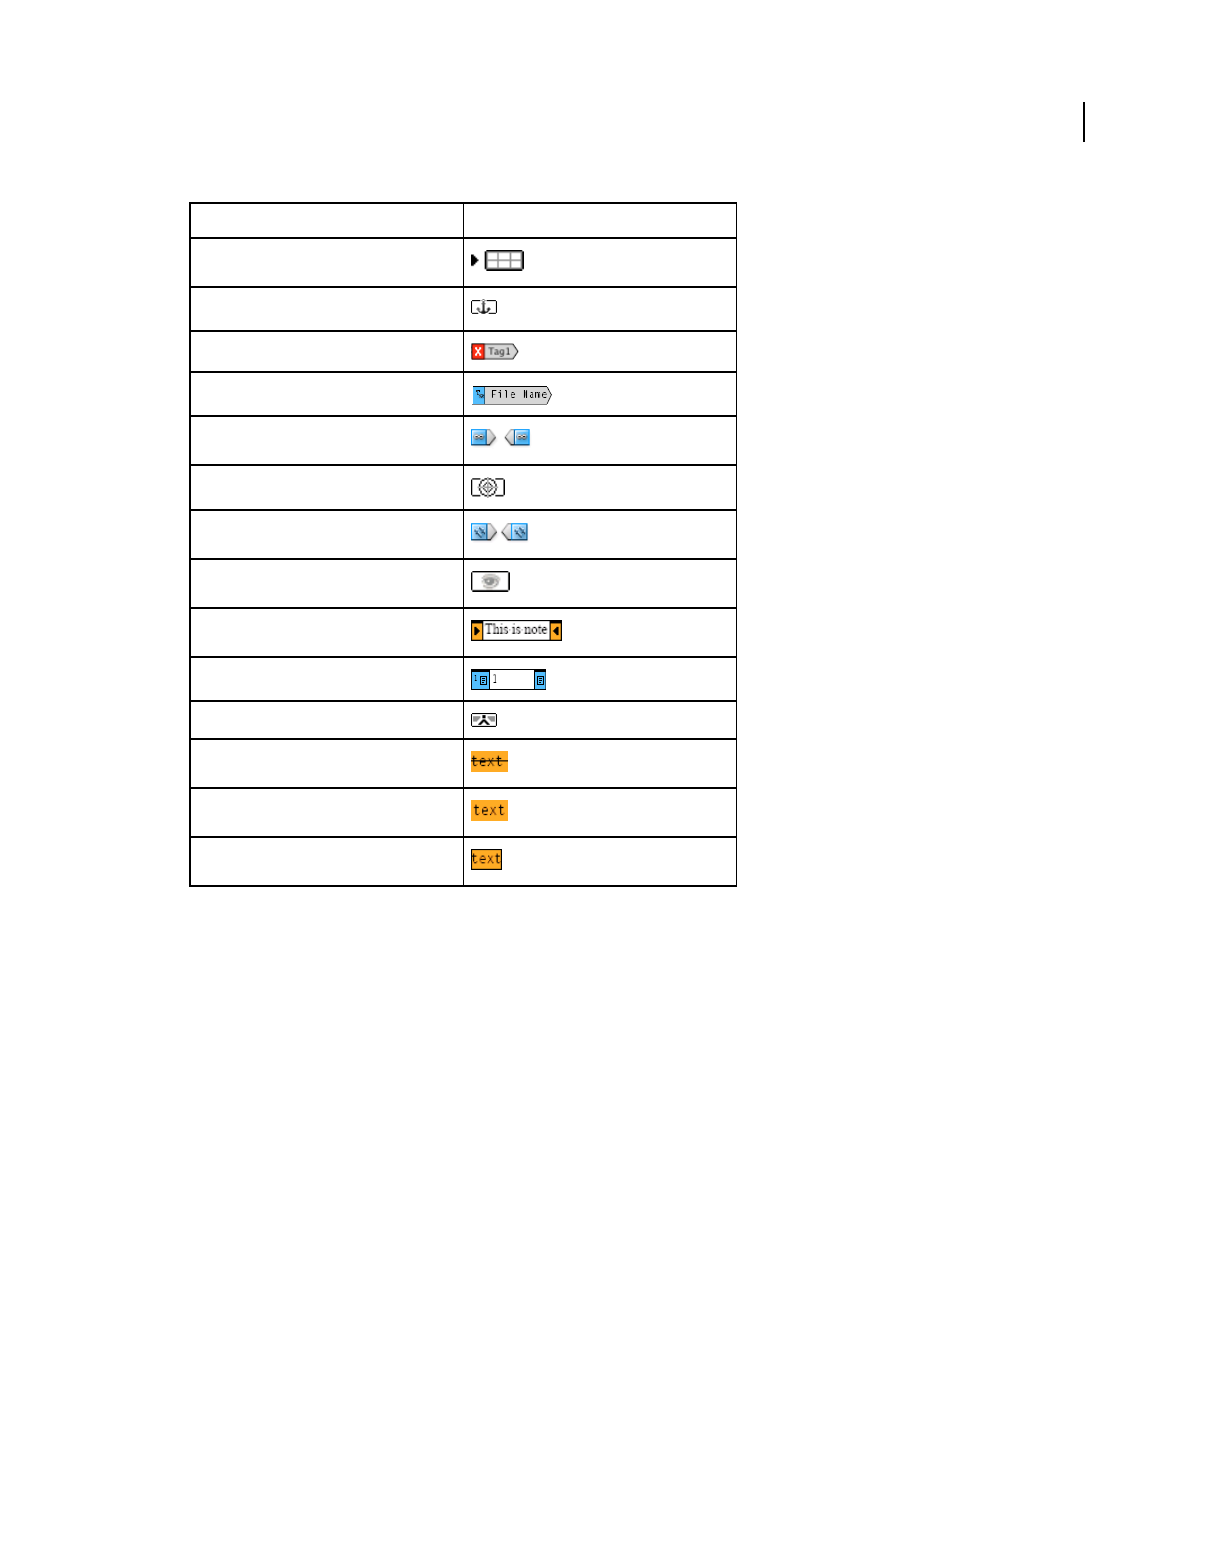
156
USING INDESIGN
Text
Last updated 11/16/2011
Text Display Options Choose a display font, size, line spacing, text color, and background. You can also specify a
different theme, such as selecting Classic System to view yellow text on a black background. These settings affect the
display of text in the story editor window, not how they appear in layout view.
Enable Anti-Aliasing Smooth the jagged edges of type, and choose the Type of anti-aliasing: LCD Optimized, Soft, or
the Default setting, which uses shades of gray to smooth text. LCD Optimized uses colors, rather than shades of gray,
to smooth text, and works best on light-colored backgrounds with black text. Soft uses shades of gray, but produces a
lighter, fuzzier appearance than Default.
Cursor Options Change the appearance of the text cursor. For example, select Blink if you want the cursor to blink.
Text from inline frames does not appear in the parent story editor window, but it can appear in its own story editor
window.
Use conditional text
Conditional text is a way to create different versions of the same document. After you create conditions, you apply
them to ranges of text. You can then create different versions of documents by showing and hiding conditions. For
example, if you’re creating a computer manual, you can create separate conditions for Mac
OS and Windows. Before
you print the Mac
OS version of the user guide, you can show all text to which the “Mac” condition is applied and hide
all text to which the “Windows” condition is applied. You can then reverse the condition states for printing the user
guide for Windows.
Attribute Icon
Table
Inline objects
XML tags
Variables
Hyperlink sources
Hyperlink anchors
Cross-reference
Hidden conditional text
Note
Footnotes
Index markers
Deleted text
Added text
Moved text
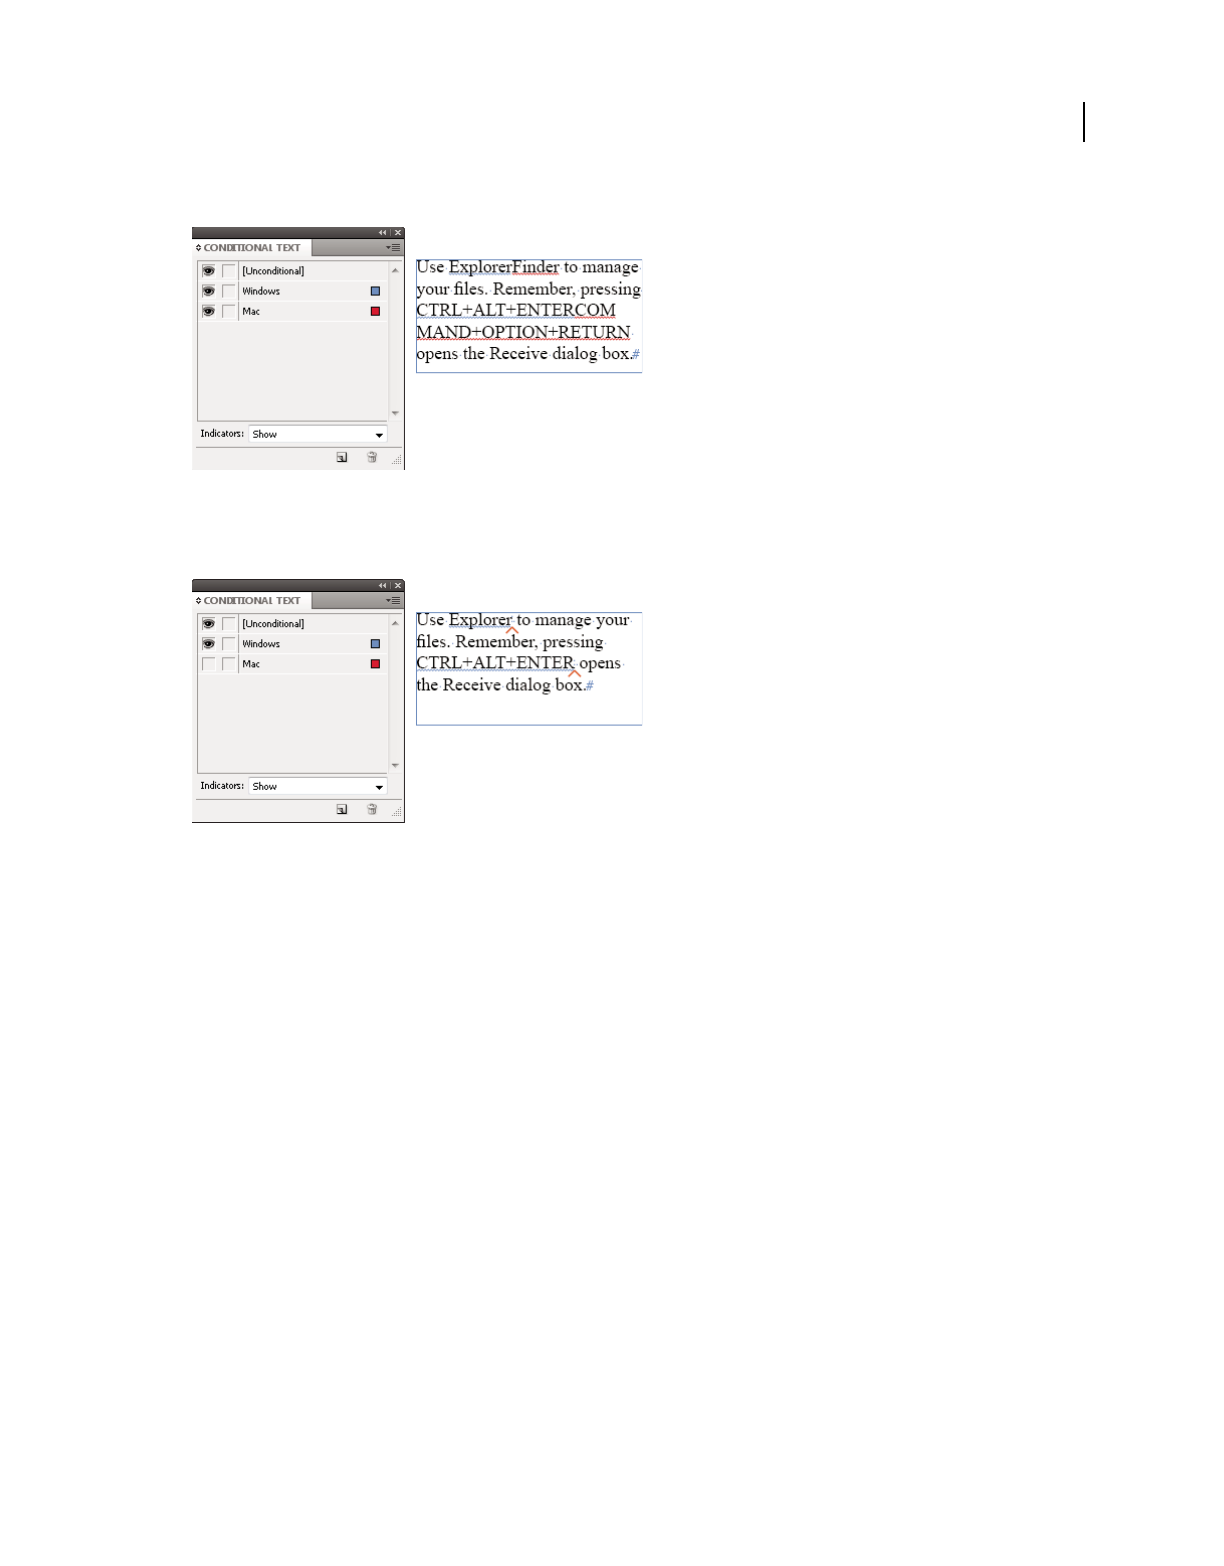
157
USING INDESIGN
Text
Last updated 11/16/2011
Conditional text shown
A. All conditions shown B. Conditional indicators
Conditional text hidden
A. “Mac” condition hidden B. Hidden condition symbols
Conditions can be applied only to text. You can make anchored objects conditional, but only by selecting the anchored
object marker. You can apply conditions to text within table cells, but you cannot apply conditions to table cells,
columns, or rows. You cannot apply conditions to text in locked InCopy stories.
For a video tutorial on using conditional text, see www.adobe.com/go/lrvid4026_id.
More Help topics
“Use Smart Text Reflow” on page 146
Planning conditional documents
When planning a project with conditional text, examine the nature of the material and look at how several people can
take turns working with it if the document is handed off. Plan to treat conditional text consistently to make the
document easier to use and maintain. Use the following guidelines.
Number of versions Define how many versions your finished project will contain. For example, if you’re creating a
manual that describes a program that runs on both Windows and Mac OS platforms, you might want to produce at
least two versions: a Windows version and a Mac OS version. If you want to produce these versions with editorial
comments sprinkled in the text during the review process, you’ll want even more versions: Mac OS with comments,
Mac OS without comments, Windows with comments, and Windows without comments.
For documents with many conditions, you can define condition sets that can be applied to the document for quick
versioning.
AB
AB

158
USING INDESIGN
Text
Last updated 11/16/2011
Number of condition tags required Decide how many condition tags you need to produce the desired versions. A
version of a document is defined by a unique set of condition tags. For example, a version of a finished Windows
manual might be defined by having a Windows condition tag showing, a Mac OS condition tag hidden, and a
Comments condition tag hidden. In this example, you would need to decide whether to use one condition tag for
Windows comments and another for Mac OS comments, or whether to use a single condition tag for both Windows
and Mac OS comments.
Organization of content Evaluate the extent to which the document can be conditional and how you can organize the
material to simplify development and maintenance. For example, you might be able to organize a book so that
conditional text is limited to a few documents. Or you might choose to keep versions of a particular chapter in separate
files rather than in conditional text, and then use a different book file for each version of the book.
In some instances, such as when working with multiple languages, you may want to create separate layers that you can
show or hide rather than using conditions, with each layer including text from a different language.
Tagging strategy Determine the smallest unit of conditional text. For example, if a document will be translated to
another language, a whole sentence should be the smallest amount of text you make conditional. Because word order
often changes during translation, using conditional text for part of a sentence could complicate translation.
Inconsistency in applying conditions to spaces and punctuation can result in extra spacing or misspelled words.
Decide whether to make spaces and punctuation conditional. If conditional text begins or ends with punctuation,
make the punctuation conditional too. This makes the text easier to read when you're viewing more than one version.
To avoid word spacing problems, such as having an unconditional space followed by a conditional space, set standards
for handling spaces following conditional text (either always conditional or always unconditional).
To avoid confusion, decide the order in which conditional text will appear and use this order throughout the
document.
Indexes and cross-references When indexing a document, pay attention to whether index markers are placed inside
or outside conditional text. Keep in mind that index markers in hidden conditional text are not included in the
generated index.
If you create a cross-reference to conditional text, make sure that the source text has the same condition. For example,
if you add a cross-reference in a “Windows” paragraph and the text anchor appears in a “Mac” condition, the cross-
reference is unresolved when the “Mac” condition is hidden. “HT” appears next to the cross-reference in the
Hyperlinks panel.
If you create a cross-reference to a paragraph in which some text is conditional and then change the visibility settings
of that condition, update the cross-reference.
Create conditions
Conditions you create are saved in the current document. If no documents are open when you create a condition, that
condition appears in all new documents you create.
You can make conditional text easy to identify by specifying condition indicators, such as wavy red underlines.
1Choose Window > Type & Tables > Conditional Text to display the Conditional Text panel.
2Choose New Condition from the Conditional Text panel menu, and type a name for the condition.
3In the Indicator group, specify the appearance of the indicator to which the condition is applied.
By default, indicators (such as wavy red lines) are set to appear in the document but not be printed or output. You can
choose an option from the Indicators menu in the Conditional Text panel to hide indicators or to print and output
them, which can be useful for review purposes.
4Click OK.

159
USING INDESIGN
Text
Last updated 11/16/2011
Apply conditions to text
You can apply multiple conditions to the same text. By default, condition indicators identify conditional text.
However, if indicators are hidden, you can use the Conditional Text panel to determine which conditions have been
applied to the current text. A solid check mark indicates the condition is applied to the current text. A dim check mark
indicates that the condition is applied only to part of the selection.
1Select the text to which you want to apply the condition.
2In the Conditional Text panel (Windows > Type & Tables > Conditional Text), do any of the following:
•To apply a condition, click the condition, or click the box next to the condition name.
•To apply a condition and remove other conditions applied to the text, Alt-click (Windows) or Option-click
(Mac
OS) a condition.
•To remove a condition, click the box next to the condition name to remove the check mark. Or, click
[Unconditional] to remove all conditions from the selected text.
Note: You cannot apply keyboard shortcuts to specific conditions. However, you can apply conditions using Quick Apply.
Show or hide conditions
When you hide a condition, all text to which that condition is applied is hidden. Hiding conditions often causes the
page numbering to change in a document or book. You can use the Smart Text Reflow feature to add and remove pages
automatically as you hide and show conditions.
Hidden conditional text is generally ignored in the document. For example, hidden text is not printed or exported,
index markers in hidden conditional text are not included in a generated index, and hidden conditional text is not
included when searching or spell-checking text.
When you hide a condition, the hidden text is stored in a hidden condition symbol . If you select text that contains
a hidden condition symbol and try to delete it, InDesign prompts you to confirm that you want to delete the hidden
conditional text. You cannot apply other conditions, styles, or formatting to hidden conditional text.
If text has several conditions applied to it and at least one of those conditions is shown while another is hidden, the
text is not hidden.
•To show or hide individual conditions, click the visibility box next to a condition name. The eye icon indicates the
condition is shown.
•To show or hide all conditions, choose Show All or Hide All from the Conditional Text panel menu.
Use condition sets
A condition set captures the visibility settings for all conditions so that you can quickly apply different document
renditions. For example, suppose you have a complex document with platform conditions for Mac
OS, Windows XP,
Vista, UNIX , language conditions for English, French, German, and Spanish, and editorial conditions such as
Editorial Review and Internal Comments. For reviewing the Vista version in French, you can create a set that shows
only the Vista, French, and Editorial Review conditions, and hides all the rest.
While sets aren’t necessary to do this, they help you quickly and reliably change different condition visibility settings.
1Apply conditions to text as necessary.
2If the Set menu doesn’t appear in the Conditional Text panel, choose Show Options from the Conditional Text
panel menu.
3In the Conditional Text panel, make the conditions visible or hidden as needed.
4Choose Create New Set from the Set menu, specify a name for the set, and click OK.

160
USING INDESIGN
Text
Last updated 11/16/2011
The new set becomes the active set.
5Do any of the following:
•To apply the condition set to a document, choose the condition set name from the Set menu.
•To override a condition set, select the set to make it active, and change the visibility setting of any condition. A plus
sign (+) appears next to the condition set. Choose the condition set again to remove overrides. Choose Redefine
“[Condition Set]” to update the condition set with the new visibility settings.
•To delete a condition set, select the condition set, and then choose Delete “[Condition Set].” Deleting a condition
set does not delete the set’s conditions, nor does it remove the conditions from wherever they are applied.
Manage conditions
❖Do any of the following:
Delete a condition Select a condition and click the Delete Condition icon at the bottom of the Conditional Text panel.
Specify a condition to replace the deleted condition and click OK. The condition you specify is applied to all text to
which the deleted condition was applied.
To delete multiple conditions, Shift-click to select contiguous conditions, or Ctrl-click (Windows) or Command-click
(Mac
OS) to select non-contiguous conditions, and then click the Delete Condition icon.
Remove a condition from text Removing a condition tag from text is different from deleting a tag from a document.
When you remove a tag from text, the tag remains in the document so it can be applied again later.
To remove a condition from text, select the text and click the box next to the condition to remove the check mark, or
click [Unconditional] to remove all conditions from the selected text.
Load (import) conditions Choose Load Conditions (to load only conditions) or Load Conditions And Sets from the
Conditional Text panel menu. Select the InDesign document from which you want to import the conditions, and click
Open. Loaded conditions and sets replace any condition or set that has an identical name.
You cannot load conditions from an InCopy file in InDesign, but you can load conditions from an InDesign file in
both InDesign and InCopy.
Loaded sets ignore the visibility settings of the conditions currently in the Conditional Text panel.
Synchronize conditions in a book To make sure you’re using the same conditions in all documents in a book, create
the conditions you want in the style source document, select Conditional Text Settings in the Synchronize Options
dialog box, and then synchronize the book.
Show or hide condition indicators Choose Show or Hide from the Indicators menu in the Conditional Text panel to
show or hide condition indicators. If you’re showing one version and want to see which areas are conditional, show
the condition indicators. If you find the condition indicators distracting while viewing the layout, hide the condition
indicators. Choose Show And Print if you want the condition indicators to be printed and output.
Change a condition name In the Conditional Text panel, click a condition, pause, and then click the condition name
to select it. Type a different name.
Edit condition indicators In the Conditional Text panel, double-click a condition, or select a condition and choose
Condition Options from the panel menu. Specify indicator settings, and click OK.
Find and change conditional text
Use the Find/Change dialog box to find text to which one or more conditions have been applied and replace it with
one or more other conditions.
1Show any conditional text you want included in the search.
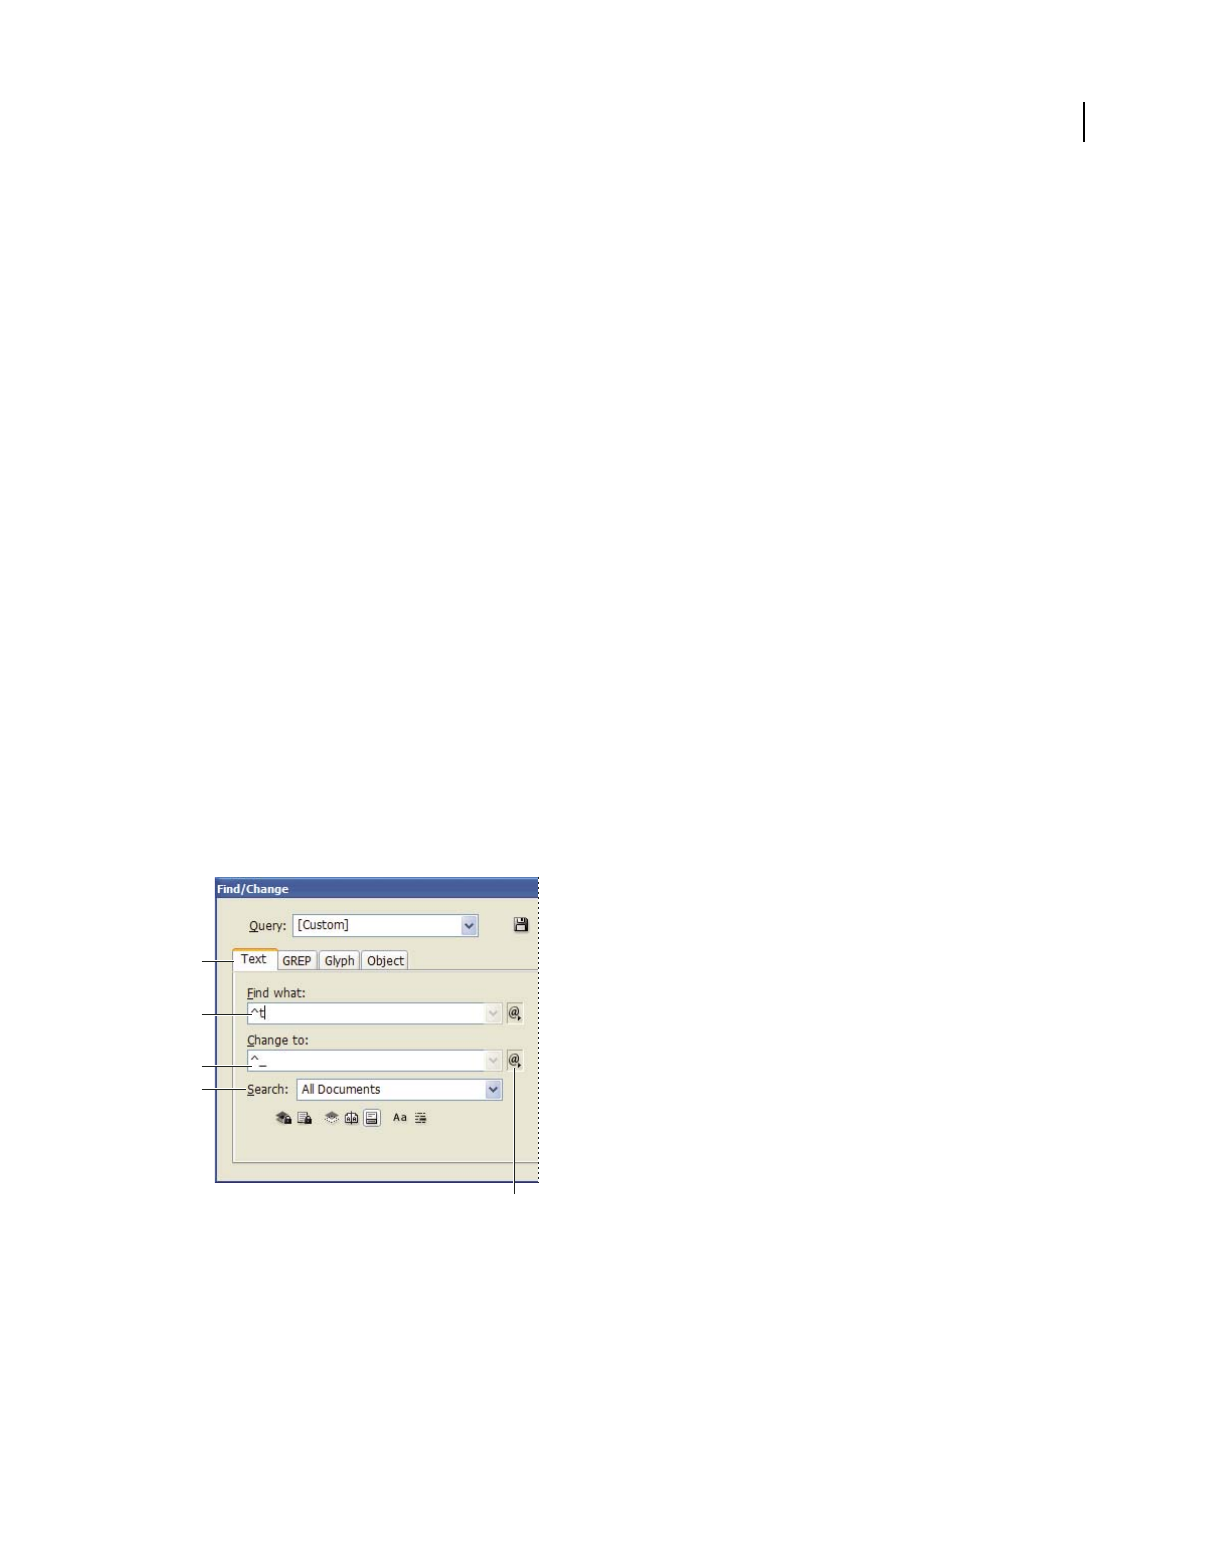
161
USING INDESIGN
Text
Last updated 11/16/2011
Hidden text is excluded from the search.
2Choose Edit > Find/Change.
3If the Find Format and Change Format boxes don’t appear at the bottom of the dialog box, click More Options.
4Click the Find Format box to display the Find Format Settings dialog box. Under Conditions, select [Any
Condition] to search for text in which any conditon is applied, [Unconditional] to search for text in which no
condition is applied, or select the specific condition or conditions you want to search for. Click
OK.
This feature finds text that perfectly matches the selected conditions. For example, if you select both Condition 1 and
Condition 2, text to which only one of the conditions are applied isn’t found, nor is text found to which these two
conditions and another is applied.
5Click the Change Format box to display the Change Format Settings dialog box. Specify the different formatting
option, such as a condition or a character style, and then click OK.
If you select the Conditions section in the Change Format Settings dialog box, the [Any Condition] makes no changes
to the found conditional text. This option is useful if you want to apply different formatting, such as a character style.
Select [Unconditional] to remove all conditions from the found text. If you select a specific condition, specify whether
you want it to replace any condition applied to the found text or be added to it.
6Click Find, and then use the Change, Change/Find, or Change All buttons to replace the condition.
Find/Change
Find/Change overview
The Find/Change dialog box contains tabs that let you specify what you want to find and change.
Find/Change dialog box
A Find/Change tabs B. Find a tab character C. Replace with an em dash D. Search options E. Metacharacters menu
Text Search for and change specific occurrences of characters, words, groups of words, or text formatted a certain way.
You can also search for and replace special characters such as symbols, markers, and white space characters. Wildcard
options help to broaden your search.
GREP Use advanced, pattern-based search techniques to search for and replace text and formatting.
A
B
C
D
E

162
USING INDESIGN
Text
Last updated 11/16/2011
Glyph Search for and replace glyphs using Unicode or GID/CID values, especially useful to search for and replace
glyphs in Asian languages.
Object Search for and replace formatting effects and attributes in objects and frames. For example, you can find
objects with a 4-pt stroke and replace the stroke with a drop shadow.
For a video tutorial on finding and changing text, objects, and expressions, see www.adobe.com/go/vid0080.
More Help topics
Find/Change video
Find and change text
If you want to list, find, and replace fonts in your document, you might want to use the Find Font command instead
of the Find/Change command.
More Help topics
“Find and change fonts” on page 174
Find and change text
1To search a range of text or a story, select the text or place the insertion point in the story. To search more than one
document, open the documents.
2Choose Edit > Find/Change, and then click the Text tab.
3Specify the range of your search from the Search menu, and click icons to include locked layers, master pages,
footnotes, and other items in the search.
4In the Find What box, describe what you want to search for:
•Type or paste the text you want to find.
•To search for or replace tabs, spaces, or other special characters, select a representative character (metacharacter)
from the pop-up menu to the right of the Find What box. You can also choose wildcard options such as Any Digit
or Any Character.
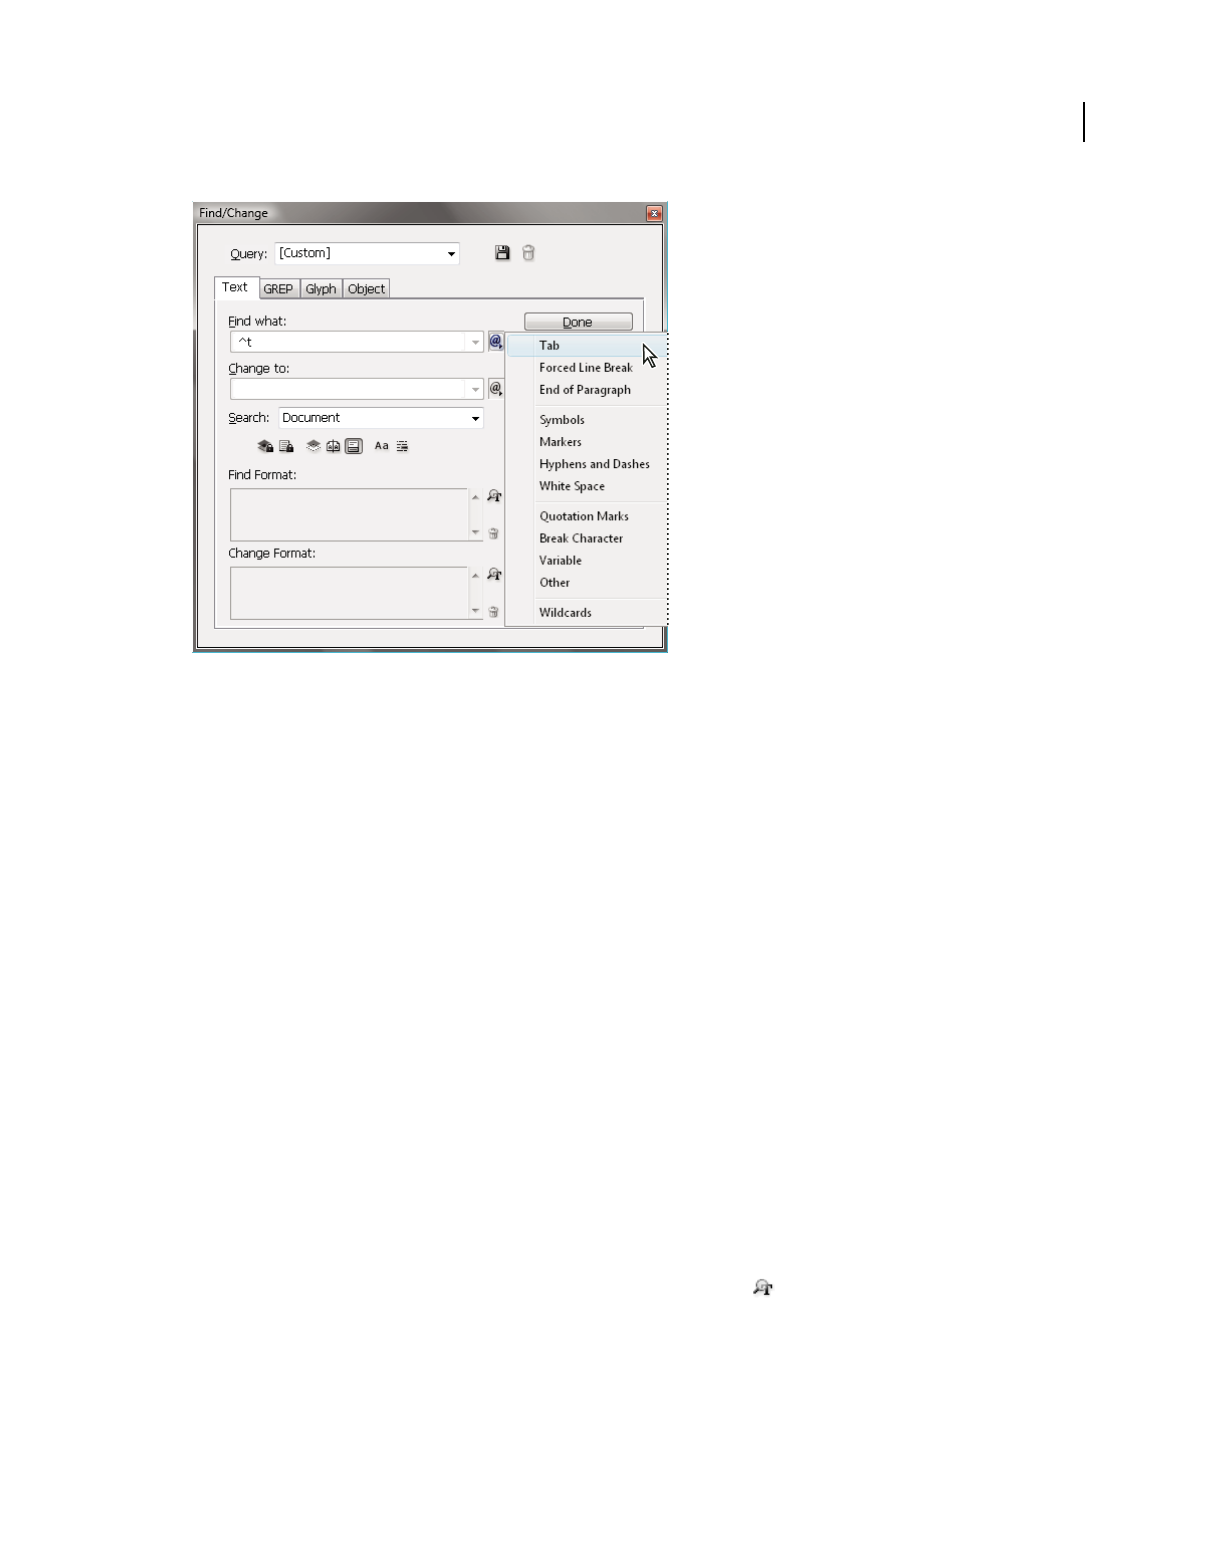
163
USING INDESIGN
Text
Last updated 11/16/2011
Use metacharacters to search for special characters, such as a tab.
•Use a predefined query to find and replace text. (See “Find/change items using queries” on page 175.)
5In the Change To box, type or paste the replacement text. You can also select a representative character from the
pop-up menu to the right of the Change To box.
6Click Find.
7
To continue searching, click Find Next, Change (to change the current occurrence), Change All (a message indicates
the total number of changes), or Change/Find (to change the current occurrence and search for the next one).
8Click Done.
If you don’t get the search results you expected, make sure that you clear any formatting you may have included in a
previous search. You may also need to expand your search. For example, you may be searching only a selection or a
story instead of the document. Or, you may be searching for text that appears on an item, such as a locked layer,
footnote, or hidden conditional text, that is currently excluded from the search.
If you change your mind about replacing text, choose Edit > Undo Replace Text (or Undo Replace All Text).
To find the next occurrence of a previously searched-for phrase without having to open the Find/Change dialog box,
choose Edit
> Find Next. In addition, previous search strings are stored in the Find/Change dialog box. You can select
a search string from the menu to the right of the option.
Find and change formatted text
1Choose Edit > Find/Change.
2If the Find Format and Change Format options don’t appear, click More Options.
3Click the Find Format box, or click the Specify Attributes To Find icon to the right of the Find Format Settings
section.
4On the left side of the Find Format Settings dialog box, select a type of formatting, specify the format attributes, and
then click
OK.

164
USING INDESIGN
Text
Last updated 11/16/2011
Some OpenType formatting options appear in both the OpenType Options and Basic Character Formats (Position
menu) sections. For information on OpenType and other formatting attributes, search for the related topic in
InDesign Help.
Note: To search for (or replace with) formatting only, leave the Find What or Change To box blank.
5If you want to apply formatting to the text found, click the Change Format box, or click the Specify Attributes To
Change icon
in the Change Format Settings section. Then select a type of formatting, specify the format
attributes, and click OK.
6Use the Find and Change buttons to format the text.
If you specify formatting for your search criteria, info icons appear above the Find What or Change To boxes. These
icons indicate that formatting attributes have been set and that the find or change operation will be restricted
accordingly.
To quickly remove all formatting attributes in the Find Format Settings or Change Format Settings sections, click the
Clear button.
Common Find/Change techniques
Wildcard searches Specify wildcards, such as Any Digit or Any White Space, to broaden your search. For example,
typing “s^?ng” in the Find What box searches for words beginning with an “s” and ending with “ng,” such as “sing,”
“sang,” “song,” and “sung.” You can either type wildcard characters or choose an option from the Wildcards submenu
in the pop-up menu next to the Find What text field.
Clipboard for metacharacter searches To search for metacharacters such as em dashes or bullet characters, you may
want to select the text first and paste it into the Find What box to spare the trouble of entering metacharacters.
InDesign automatically converts pasted special characters to their metacharacter equivalent.
Replace with clipboard contents You can replace search items with either formatted or unformatted content copied to
the clipboard. You can even replace text with a graphic you copied. Simply copy the item, and then, in the Find/Change
dialog box, choose an option from the Other submenu from the pop-up menu to the right of the Change To box.
Find and remove unwanted text To remove unwanted text, define the text you want to remove in the Find What box
and leave the Change To box empty (make sure that no formatting is set in this box).
XML tagging You can apply XML tags to text you search for.
Search options for finding and changing text
Search menu Contains options that determine the range of the search.
•Documents Search the entire document or All Documents to search all open documents.
•Story Search all text in the currently selected frame, including text in other threaded text frames and overset text.
Select Stories to search stories in all selected frames. This option appears only if a text frame is selected or an insertion
point is placed.
•To End Of Story Search from the insertion point. This option appears only if an insertion point is placed.
•Selection Search only selected text. This option appears only if text is selected.
Include Locked Layers Searches for text on layers that have been locked using the Layer Options dialog box. You
cannot replace text on locked layers.
Include Locked Stories Searches for text in stories that have been checked out as part of an InCopy workflow. You
cannot replace text in locked stories.

165
USING INDESIGN
Text
Last updated 11/16/2011
Include Hidden Layers Searches for text on layers that have been hidden using the Layer Options dialog box. When
text on a hidden layer is found, you can see highlighting where the text appears, but you cannot see the text. You can
replace text on hidden layers.
Text in a hidden condition is always omitted from searching.
Include Master Pages Searches for text on master pages.
Include Footnotes Searches footnote text.
Case Sensitive Searches for only the word or words that exactly match the capitalization of the text in the Find
What box. For example, a search for PrePress won’t find Prepress, prepress, or PREPRESS.
Whole Word Disregards search characters if they are part of another word. For example, if you search for any as a
whole word, InDesign disregards many.
Search using GREP expressions
On the GREP tab of the Find/Change dialog box, you can construct GREP expressions to find alphanumeric strings
and patterns in long documents or many open documents. You can enter the GREP metacharacters manually or
choose them from the Special Characters For Search list. GREP searches are case-sensitive by default.
InDesign Secrets provides a list of GREP resources at InDesign GREP.
1Choose Edit > Find/Change, and click the GREP tab.
2At the bottom of the dialog box, specify the range of your search from the Search menu, and click icons to include
locked layers, master pages, footnotes, and other items in the search.
3In the Find What box, do any of the following to construct a GREP expression:
•Enter the search expression manually. (See “Metacharacters for searching” on page 169.)
•Click the Special Characters For Search icon to the right of the Find What option and choose options from the
Locations, Repeat, Match, Modifiers, and Posix submenus to help construct the search expression.
4In the Change To box, type or paste the replacement text.
5Click Find.
6
To continue searching, click Find Next, Change (to change the current occurrence), Change All (a message indicates
the total number of changes), or Change/Find (to change the current occurrence and search for the next one.
You can also use GREP Styles to apply a character style to text that conforms to a GREP expression. In fact, the GREP
Styles dialog box is a good way to test your GREP expression. Add the examples you want to find to a paragraph, and
then specify a character style and GREP expression in the GREP Styles dialog box. When you turn on Preview, you can
edit the expression until it affects all your examples properly.
More Help topics
“Create GREP styles” on page 212
“Metacharacters for searching” on page 169

166
USING INDESIGN
Text
Last updated 11/16/2011
Tips for constructing GREP searches
Here are some tips for constructing GREP expressions.
•Many searches under the GREP tab are similar to those under the Text tab, but be aware that you need to insert
different codes depending on which tab you’re using. In general, the Text tab metacharacters begin with a ^ (such
as ^t for a tab) and GREP tab metacharacters begin with a \ (such as \t for a tab). However, not all metacharacters
follow this rule. For example, a paragraph return is ^p in the Text tab and \r in the GREP tab. For a list of the
metacharacters used for the Text and GREP tabs, see “Metacharacters for searching” on page 169.
•To search for a character that has symbolic meaning in GREP, enter a backslash (\) before the character to indicate
that the character that follows is literal. For example, a period ( . ) searches for any character in a GREP search; to
search for an actual period, enter “\.”
•Save the GREP search as a query if you intend to run it often or share it with someone else. (See “Find/change items
using queries” on page 175.)
•Use parentheses to divide your search into subexpressions. For example, if you want to search for “cat” or “cot,”
you can use the c(a|o)t string. Parentheses are especially useful to identify groupings. For example, searching for
“the (cat) and the (dog)” identifies “cat” as Found Text 1 and “dog” as Found Text 2. You can use the Found Text
expressions (such as $1 for Found Text 1) to change only part of the found text.
GREP search examples
Follow these examples to learn how to take advantage of GREP expressions.
Example 1: Finding text within quotation marks
Suppose you want to search for any word enclosed in quotation marks (such as “Spain”), and you want to remove the
quotation marks and apply a style to the word (so that it becomes Spain instead of “Spain”). The expression
(")(\w+)(") includes three groupings, as indicated by parentheses ( ). The first and third groupings search for any
quotation mark, and the second grouping searches for one or more word characters.
You can use the Found Text expressions to refer to these groupings. For example, $0 refers to all found text, and $2
refers to only the second grouping. By inserting $2 in the Change To field and specifying a character style in the Change
Format field, you can search for a word within quotation marks, and then replace the word with a character style.
Because only $2 is specified, the $1 and $3 groupings are removed. (Specifying $0 or $1$2$3 in the Change To field
would apply the character style to the quotation marks as well.)
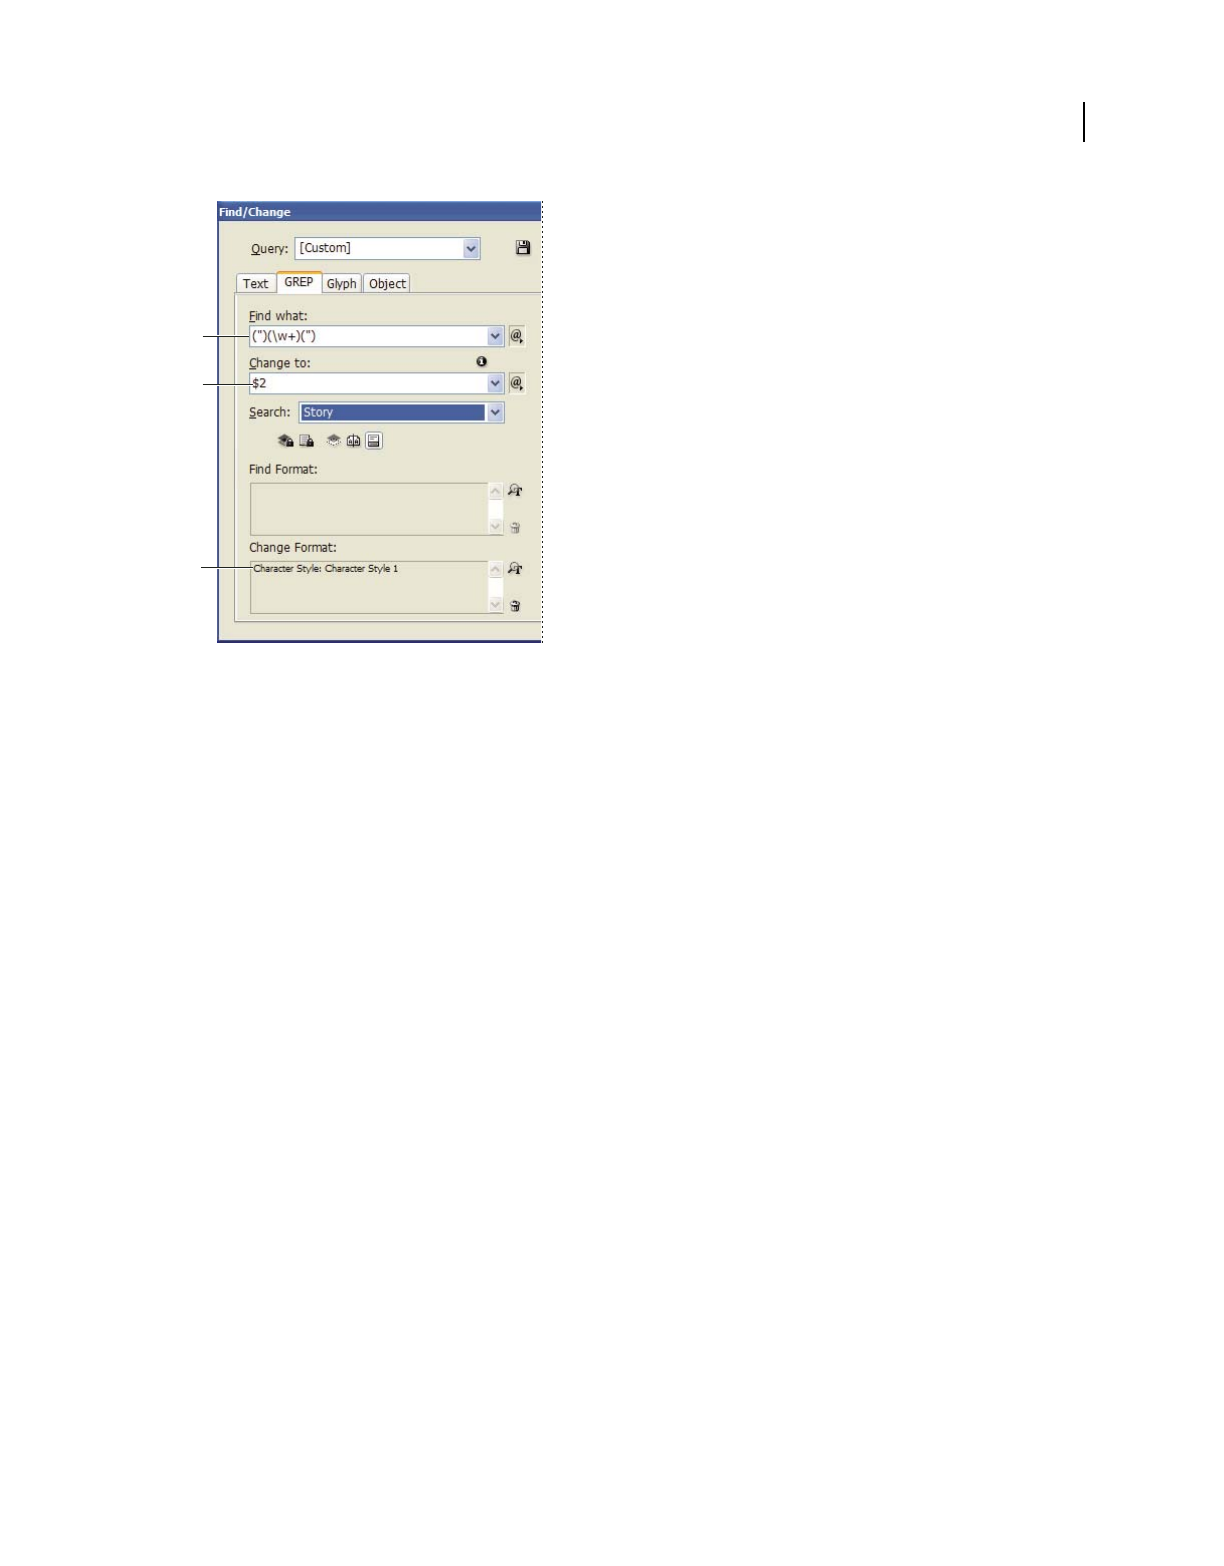
167
USING INDESIGN
Text
Last updated 11/16/2011
GREP example
A. Finds all word characters enclosed in quotation marks B. The character style is applied to the second grouping (the word) while the first and
third groupings (open and close quotes) are removed C. Character style specified
This example searches only for single words enclosed in quotation marks. If you want to search for phrases enclosed
in parentheses, add wildcard expressions, such as (\s*.*\w*\d*), which looks for spaces, characters, word characters,
and digits.
Example 2: Phone numbers
InDesign includes a number of search presets that you can choose from the Queries menu. For example, you can
choose the Phone Number Conversion query, which looks like this:
\(?(\d\d\d)\)?[-. ]?(\d\d\d)[-. ]?(\d\d\d\d)
Phone numbers in the United States can appear in a variety of formats, such as 206-555-3982, (206) 555-3982,
206.555.3982, and 206 555 3982. This string looks for any of these variations. The first three digits (\d\d\d) of the phone
number may or may not be enclosed in parentheses, so a question mark appears after the parentheses: \(? and \)?. Note
that the backslash \ indicates that the actual parenthesis is being searched for and that it’s not part of a subexpression.
The brackets [ ] locate any character within them, so in this case, [-. ] finds either a hyphen, a period, or a space. The
question mark after the brackets indicate that the items within it are optional in the search. Finally, the digits are
enclosed in parentheses, which signify groupings that can be referred to in the Change To field.
You can edit the grouping references in the Change To field to suit your needs. For example, you could use these
expressions:
206.555.3982 = $1.$2.$3
206-555-3982 = $1-$2-$3
(206) 555-3982 = ($1) $2-$3
206 555 3982 = $1 $2 $3
Additional GREP examples
Experiment with the examples in this table to learn more about GREP searches.
A
B
C
168
USING INDESIGN
Text
Last updated 11/16/2011
Expression Search string Sample text Matches (in bold)
Class of characters
[ ]
[abc]
Finds the letter a, b, or c.
Maria cuenta bien. Mariacuentabien.
Beginning of paragraph
^
^~_.+
This searches the beginning of the
paragraph (^) for an em dash (~_) followed
by any character ( . ) one or more times (+).
“We saw—or at least we think
we saw—a purple cow.”
—Konrad Yoes
“We saw—or at least we think we
saw—a purple cow.”
—Konrad Yoes
Negative lookahead
(?!pattern)
InDesign (?!CS.*?)
The negative lookahead matches the search
string only if it is not followed by the
specified pattern.
InDesign, InDesign 2.0,
InDesign CS, and InDesign CS2
InDesign, InDesign 2.0, InDesign
CS, and InDesign CS2
Positive lookahead
(?=pattern)
InDesign (?=CS.*?)
The positive lookahead matches the search
string only if it is followed by the specified
pattern.
Use similar patterns for negative
lookbehinds (?<!pattern) and positive
lookbehinds (?<=pattern).
InDesign, InDesign 2.0,
InDesign CS, and InDesign CS2
InDesign, InDesign 2.0, InDesign CS,
and InDesign CS2
Groupings
( )
(quick) (brown) (fox) The quick brown fox jumps up
and down.
The quick brown fox jumps up and
down.
All found text = quick brown fox;
Found Text 1= quick; Found Text 2 =
brown; Found Text 3= fox
Non-marking
parentheses
(?:expression)
(quick) ($:brown) (fox) The quick brown fox jumps up
and down.
The quick brown fox jumps up and
down.
All found text = quick brown fox;
Found Text 1= quick; Found Text 2 =
fox
Case-insensitive on
(?i)
(?i)apple
You can also use (?i:apple)
Apple apple APPLE AppleappleAPPLE
Case-insensitive off
(?-i)
(?-i)apple Apple apple APPLE Apple apple APPLE
Multiline on
(?m)
(?m)^\w+
In this example, the expression looks for one
or more (+) word characters (\w) at the
beginning of a line (^). The (?m) expression
allows all lines within the found text to be
treated as separate lines.
(?m)^\w matches the beginning of each
paragraph. (?-m)^\w matches only the
beginning of the story.
One Two Three Four Five Six
Seven Eight
One Two ThreeFour Five SixSeven
Eight
Multiline off
(?-m)
(?-m)^\w+ One Two Three Four Five Six
Seven Eight
One Two Three Four Five Six Seven
Eight
169
USING INDESIGN
Text
Last updated 11/16/2011
Metacharacters for searching
Metacharacters represent a character or symbol in InDesign. Metacharacters in the Text section of the Find/Change
dialog box begin with a caret
(^); metacharacters in the GREP section begin with a tilde (~) or backslash (\). You can
type metacharacters in the Text tab or GREP tab of the Find/Change dialog box.
Save time fixing punctuation errors by saving search strings as queries.
Single-line on
(?s)
(?s)c.a
The searches for any character ( . ) between
the letters c and a. The (?s) expression
matches any character, even if it falls on the
next line.
(.) matches anything other than a paragraph
return. (?s)(.) matches anything, including
paragraph returns.
abc abc abc abc abc abcabc abc
Single-line off (?-s)c.a abc abc abc abc abc abc abc abc
Repeat number of
times
{ }
b{3} matches exactly 3 times
b(3,} matches at least 3 times
b{3,}? matches at least 3 times (shortest
match)
b{2,3} matches at least 2 times and not more
than 3
b{2,3}? matches at least 2 times and not
more than 3 (shortest match)
abbc abbbc abbbbc abbbbbc abbc abbbc abbbbc abbbbbc
abbc abbbc abbbbc abbbbbc
abbc abbbc abbbbc abbbbbc
abbc abbbc abbbbc abbbbbc
abbc abbbc abbbbc abbbbbc
Character: Text tab metacharacter: GREP tab metacharacter:
Tab Character ^t \t
End of Paragraph ^p \r
Forced Line Break ^n \n
Any Page Number ^# ~#
Current Page Number ^N ~N
Next Page Number ^X ~X
Previous Page Number ^V ~V
* Any Variable ^v ~v
Section Marker ^x ~x
* Anchored Object Marker ^a ~a
* Footnote Reference Marker ^F ~F
* Index Marker ^I ~I
Bullet Character ^8 ~8
Caret Character ^^ \^
Expression Search string Sample text Matches (in bold)
170
USING INDESIGN
Text
Last updated 11/16/2011
Backslash Character \ \\
Copyright Symbol ^2 ~2
Ellipsis ^e ~e
Tilde ~ \~
Paragraph Symbol ^7 ~7
Registered Trademark Symbol ^r ~r
Section Symbol ^6 ~6
Trademark Symbol ^d ~d
Open Parenthesis Character ( \(
Close Parenthesis Character ) \)
Open Brace Character { \{
Close Brace Character } \}
Open Bracket Character [ \[
Close Bracket Character ] \]
Em Dash ^_ ~_
En Dash ^= ~=
Discretionary Hyphen ^- ~-
Nonbreaking Hyphen ^~ ~~
Em Space ^m ~m
En Space ^> ~>
Third Space ^3 ~3
Quarter Space ^4 ~4
Sixth Space ^% ~%
Flush Space ^f ~f
Hair Space ^| ~|
Nonbreaking Space ^s ~s
Nonbreaking Space (fixed width) ^S ~S
Thin Space ^< ~<
Figure Space ^/ ~/
Punctuation Space ^. ~.
^ Clipboard Contents, Formatted ^c ~c
^ Clipboard Contents, Unformatted ^C ~C
Any Double Quotation Mark " "
Any Single Quotation Mark ' '
Character: Text tab metacharacter: GREP tab metacharacter:

171
USING INDESIGN
Text
Last updated 11/16/2011
Straight Double Quotation Mark ^" ~"
Double Left Quotation Mark ^{ ~{
Double Right Quotation Mark ^} ~}
Straight Single Quotation Mark ^' ~'
Single Left Quotation Mark ^[ ~[
Single Right Quotation Mark ^] ~]
Standard carriage return ^b ~b
Column Break ^M ~M
Frame Break ^R ~R
Page Break ^P ~P
Odd Page Break ^L ~L
Even Page Break ^E ~E
Discretionary Line Break ^k ~k
Right Indent Tab ^y ~y
Indent to Here ^i ~i
End Nested Style Here ^h ~h
Nonjoiner ^j ~j
* Running header (paragraph style) variable ^Y ~Y
* Running header (character style) variable ^Z ~Z
* Custom text variable ^u ~u
* Last page number variable ^T ~T
* Chapter number variable ^H ~H
* Creation date variable ^S ~S
* Modification date variable ^o ~o
* Output date variable ^D ~D
* File name variable ^l (lowercase L) ~l (lowercase L)
* Any Digit ^9 \d
* Any character that is not a digit \D
* Any Letter ^$ [\l\u]
* Any Character ^? . (inserts period in Change To)
* White Space (any space or tab) ^w \s (Inserts space in Change To)
* Any character that is not a white space \S
* Any word character \w
* Any character that is not a word character \W
Character: Text tab metacharacter: GREP tab metacharacter:
172
USING INDESIGN
Text
Last updated 11/16/2011
* Any uppercase letter \u
* Any character that is not an uppercase letter \U
* Any lowercase letter \l
* Any character that is not a lowercase letter \L
^ All Found Text $0
Found Text 1-9 $1 (specifies the number of the
grouping found, such as $3 for the
third grouping; groupings are
enclosed in parentheses)
* Kanji ^K ~K
* Beginning of Word \<
* End of Word \>
* Word Boundary \b
* Opposite of Word Boundary \B
* Beginning of Paragraph ^
* End of Paragraph [location] $
* Zero or One Time ?
* Zero or More Times *
* One or More Times +
* Zero or One Time (Shortest Match) ??
* Zero or More Times (Shortest Match) *?
* One or More Times (Shortest Match) +?
* Marking Subexpression ( )
* Non-marking Subexpression (?: )
* Character Set [ ]
* Or |
* Positive Lookbehind (?<= )
* Negative Lookbehind (?<! )
* Positive Lookahead (?= )
* Negative Lookahead (?! )
* Case-insensitive On (?i)
* Case-insensitive Off (?-i)
* Multiline On (?m)
* Multiline Off (?-m)
* Single-line On (?s)
* Single-line Off (?-s)
Character: Text tab metacharacter: GREP tab metacharacter:
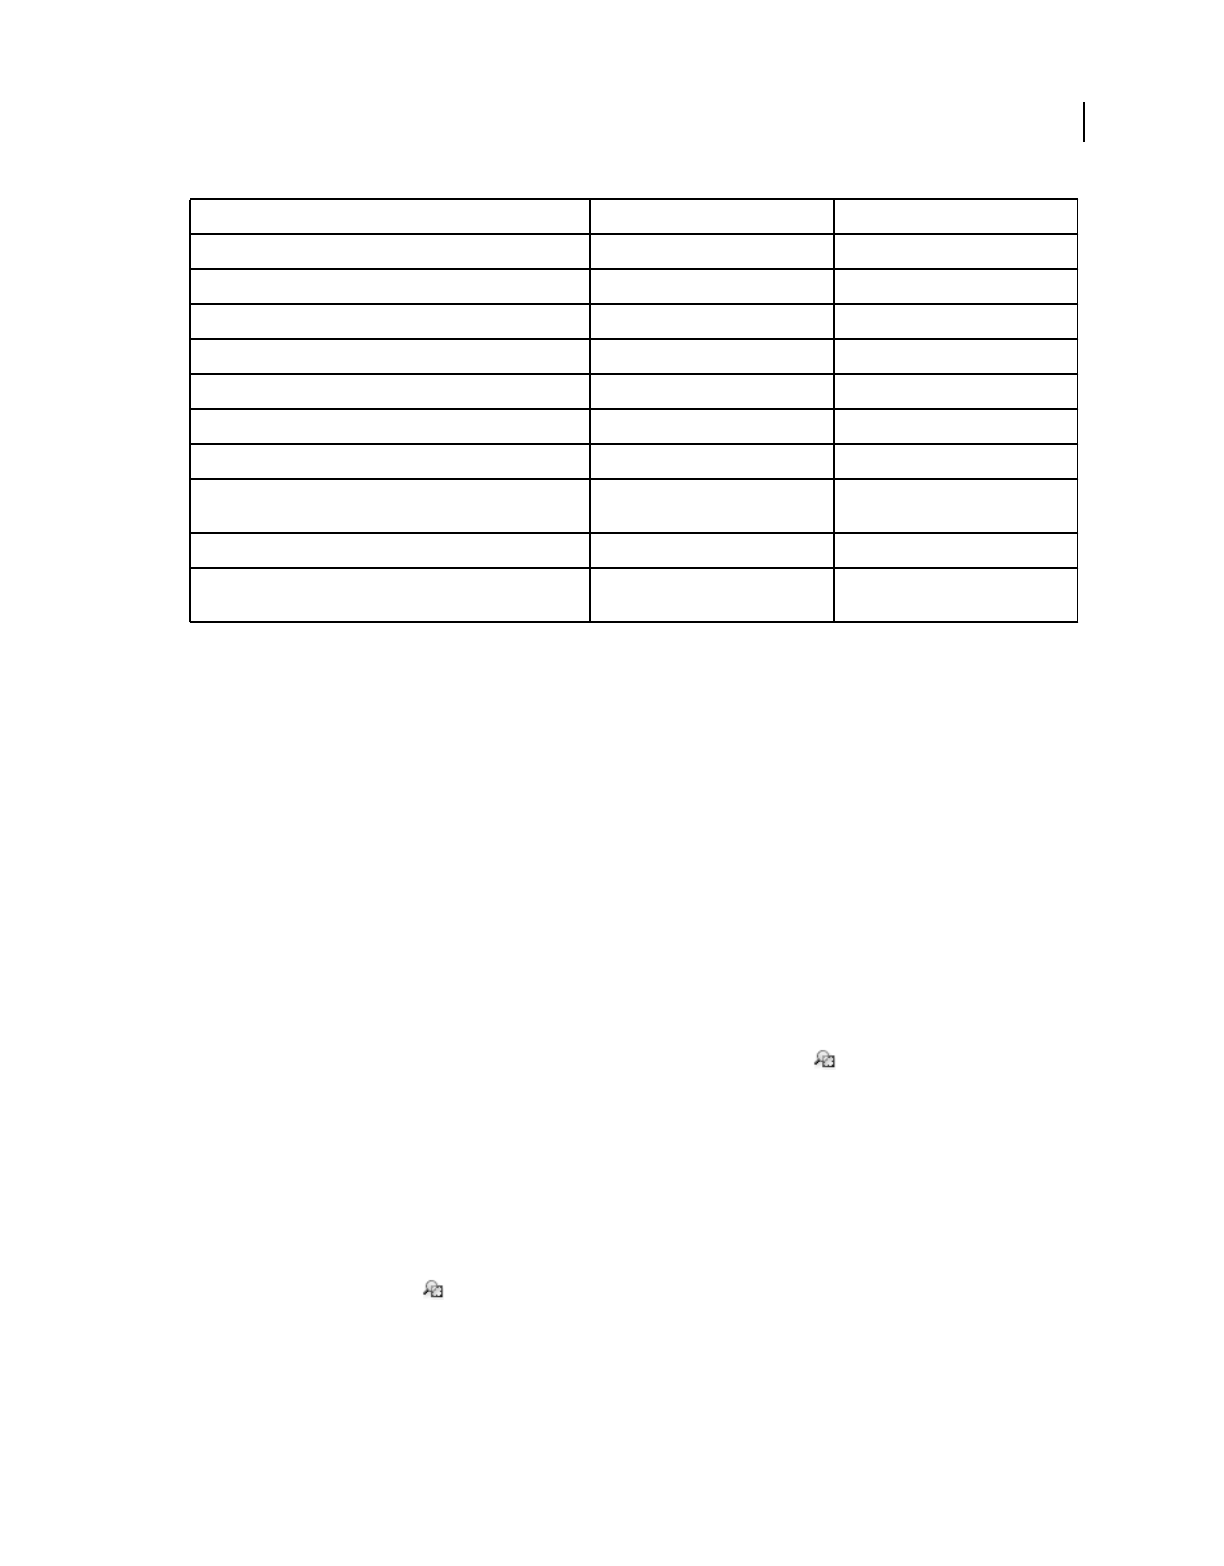
173
USING INDESIGN
Text
Last updated 11/16/2011
* Can be entered in the Find What box only, not the Change To box.
^ Can be entered in the Change To box, not the Find What box.
More Help topics
“Search using GREP expressions” on page 165
“Find and change text” on page 162
Find and change objects
You can use the Find/Change command to find and replace the attributes and effects applied to objects, graphics
frames, and text frames. For example, to give drop shadows a uniform color, transparency, and offset distance, you can
use the Find/Change command to search for and replace drop shadows throughout a document.
1Choose Edit > Find/Change.
2Click the Object tab.
3Click the Find Object Format box, or click the Specify Attributes To Find icon .
4On the left side of the Find Object Format Options dialog box, select a type of formatting, specify the format
attributes, and then click
OK.
Make sure that the categories you want to search for are in the appropriate state. You can use one of three states for
each Effects category: turned on, turned off, or ignored. For example, setting Drop Shadow to On includes drop
shadow formatting in the search; setting Drop Shadow to Off searches for objects in which drop shadow formatting is
turned off; setting Drop Shadow to Ignore leaves drop shadows out of the search.
5If you want to apply formatting to the object found, click the Change Object Format box, or click the Specify
Attributes To Change icon
in the Change Format Settings section. Then select a type of formatting, specify the
format attributes, and click OK.
6Click the Find and Change buttons to format the objects.
* Any alphanumeric character [[:alnum:]]
* Any alphabetic character [[:alpha:]]
* Any blank character, either space or tab [[:blank:]]
* Any control character [[:control:]]
* Any graphical character [[:graph:]]
* Any printable character [[:print:]]
* Any punctuation character [[:punct:]]
* Any character whose code is greater than 255 (applies only to
the wide character traits classes)
[[:unicode:]]
* Any hexadecimal digit character 0-9, a-f, and A-F [[:xdigit:]]
* Any character of a certain glyph set, such as a, à, á, â, ã, ä, å, A,
À, Á, Â, Ã, Ä and Å
[[=a=]]
Character: Text tab metacharacter: GREP tab metacharacter:

174
USING INDESIGN
Text
Last updated 11/16/2011
Find and change glyphs
The Glyph section of the Find/Change dialog box is especially useful for replacing glyphs that share the same unicode
value with other similar glyphs, such as alternate glyphs.
InDesign Secrets provides a clear example about finding and changing glyphs at Finding and Changing Glyphs.
1Choose Edit > Find/Change.
2At the bottom of the dialog box, specify a range from the Search menu, and click icons to determine whether items
such as locked layers, master pages, and footnotes are included in the search.
3Under Find Glyph, select the Font Family and Font Style in which the glyph is located.
The Font Family menu displays only those fonts that are applied to text in the current document. Fonts in unused
styles do not appear.
4Do one of the following to enter the glyph you want to find in the Glyph box:
•Click the button beside the Glyph box, and then double-click a glyph on the panel. This panel works like the Glyphs
panel.
•Choose Unicode or GID/CID, and enter the code for the glyph.
You can use other methods to enter the glyph you want to find in the Glyph box. Select a glyph in the document
window and choose Load Selected Glyph In Find from the context menu, or select a glyph in the Glyphs panel and
choose Load Glyph In Find from the context menu.
5Under Change Glyph, enter the replacement glyph by using the same techniques you use to enter the glyph you’re
searching for.
6Click Find.
7
To continue searching, click Find Next, Change (to change the most recently found glyph), Change All (a message
indicates the total number of changes), or Change/Find (to change the current occurrence and search for the next one).
8Click Done.
Find and change fonts
Use the Find Font command to search for and list the fonts used throughout your document. You can then replace any
fonts (except those in imported graphics) with any other fonts available on your system. You can even replace a font
that’s part of a text style. Note the following:
•A font name is listed once for its use in the layout and listed each time in imported graphics. For example, if you
use the same font three times in the layout and three times in imported graphics, it will be listed in the Find Font
dialog box four times—once for all layout instances, and three more times for each imported graphic. If fonts are
not completely embedded in graphics, the font name may not be listed in the Find Font dialog box.
•Find Font is not available in a Story Editor window.
•The Find Font dialog box displays icons to indicate the kinds of fonts or font conditions, such as Type 1 fonts ,
imported images , TrueType fonts , OpenType fonts , and missing fonts .
•Use the Type > Find Font command to help ensure consistent output by analyzing font usage on pages and in
imported graphics. To find and change specific text attributes, characters, or styles, use the Edit
> Find/Change
command instead.
1Choose Type > Find Font.
2Select one or more font names in the Fonts In Document list.

175
USING INDESIGN
Text
Last updated 11/16/2011
3Do one of the following:
•To find the first occurrence in the layout of the font selected in the list, click Find First. The text using that font
moves into view. The Find First button is unavailable if the selected font is used in an imported graphic or if you
selected multiple fonts in the list.
•To select an imported graphic that uses a font marked in the list by an imported image icon , click Find Graphic.
The graphic also moves into view. The Find Graphic button isn’t available if the selected font is used only in the
layout or if you selected multiple fonts in the Fonts In Document list.
4To see details about a selected font, click More Info. To hide the details, click Less Info. The Info area is blank if you
selected multiple fonts in the list.
A font may be listed as Unknown if the file of the selected graphic doesn’t supply information about it. Fonts in bitmap
graphics (such as TIFF images) won’t appear in the list at all because they aren’t true characters.
5To replace a font, select the new font you want to use from the Replace With list, and do one of the following:
•To change just one occurrence of the selected font, click Change. This option is not available if multiple fonts are
selected.
•To change the font in that occurrence, and then find the next instance, click Change/Find. This option is not
available if multiple fonts are
selected.
•To change all instances of the font selected in the list, click Change All. If you want any paragraph or character style
that includes the font being searched for to be redefined, select Redefine Style When Changing All.
When there are no more occurrences of a font in your file, its name is removed from the Fonts In Document list.
Note: To change fonts in imported graphics, use the program that originally exported the graphic, and then replace the
graphic or update the link using the Links panel.
6If you clicked Change, click Find Next to locate the next instance of the font.
7Click Done.
You can open the Find Font dialog box while preflighting a document. In the Preflight dialog box, switch to the Fonts
tab and click Find Font.
To view the system folder in which a font appears, select the font in the Find Font dialog box and choose Reveal In
Explorer (Windows) or Reveal In Finder (Mac OS).
Find/change items using queries
You can find and change text, objects, and glyphs by using or constructing a query. A query is a defined find-and-
change operation. InDesign offers several preset queries for changing punctuation formats and other useful actions,
such as changing telephone number formats. By saving a query you constructed, you can run it again and share it with
others.
Search using queries
1Choose Edit > Find/Change.
2Choose a query from the Query list.
The queries are grouped by type.
3Specify a range to search on the Search menu.
The search range is not stored with the query.
4Click Find.

176
USING INDESIGN
Text
Last updated 11/16/2011
5To continue searching, click Find Next, Change (to change the most recently found text or punctuation mark),
Change All (a message indicates the total number of changes), or Change/Find (to change text or punctuation
marks and continue your search).
After you select a search query, you can adjust the settings to fine-tune your search.
Save queries
Save a query in the Find/Change dialog box if you want to run it again or share it with others. The names of queries
you save appear in the Query list in the Find/Change dialog box.
1Choose Edit > Find/Change.
2Select Text, GREP, or a different tab to undertake the search you want.
3Below the Search menu, click icons to determine whether items such as locked layers, master pages, and footnotes
are included in the search.
These items are included in the saved query. However, the range of the search isn’t saved with the query.
4Define the Find What and Change To fields. (See “Metacharacters for searching” on page 169 and “Search using
GREP expressions” on page 165.)
5Click the Save Query button in the Find/Change dialog box and enter a name for the query.
If you use the name of an existing query, you are asked to replace it. Click Yes if you want to update the existing query.
Delete queries
❖Select it on the Query list and click the Delete Query button.
Load queries
Customized queries are stored as XML files. The names of customized queries appear in the Query list in the
Find/Change dialog box.
❖To load a query that was given to you so that it appears in the Query list, copy the query file to the appropriate
location:
Mac OS
Users\[username]\Library\Preferences\Adobe InDesign\[Version]\[Language]\Find-Change Queries\[query type]
Windows XP Documents and Settings\[username]\Application Data\Adobe\InDesign\[Version]\[Language]\Find-
Change Queries\[query type]
Windows Vista and Windows 7 Users\[username]\AppData\Roaming\Adobe\InDesign\[Version]\[Language]\Find-
Change Queries\[query type]
Glyphs and special characters
Glyphs panel overview
Enter glyphs by way of the Glyphs panel. The panel initially shows glyphs in the font where the cursor is located, but
you can view a different font, view a type style in the font (for example, Light, Regular, or Bold), and make the panel
display a subset of glyphs in the font (for example, math symbols, numbers, or punctuation symbols).
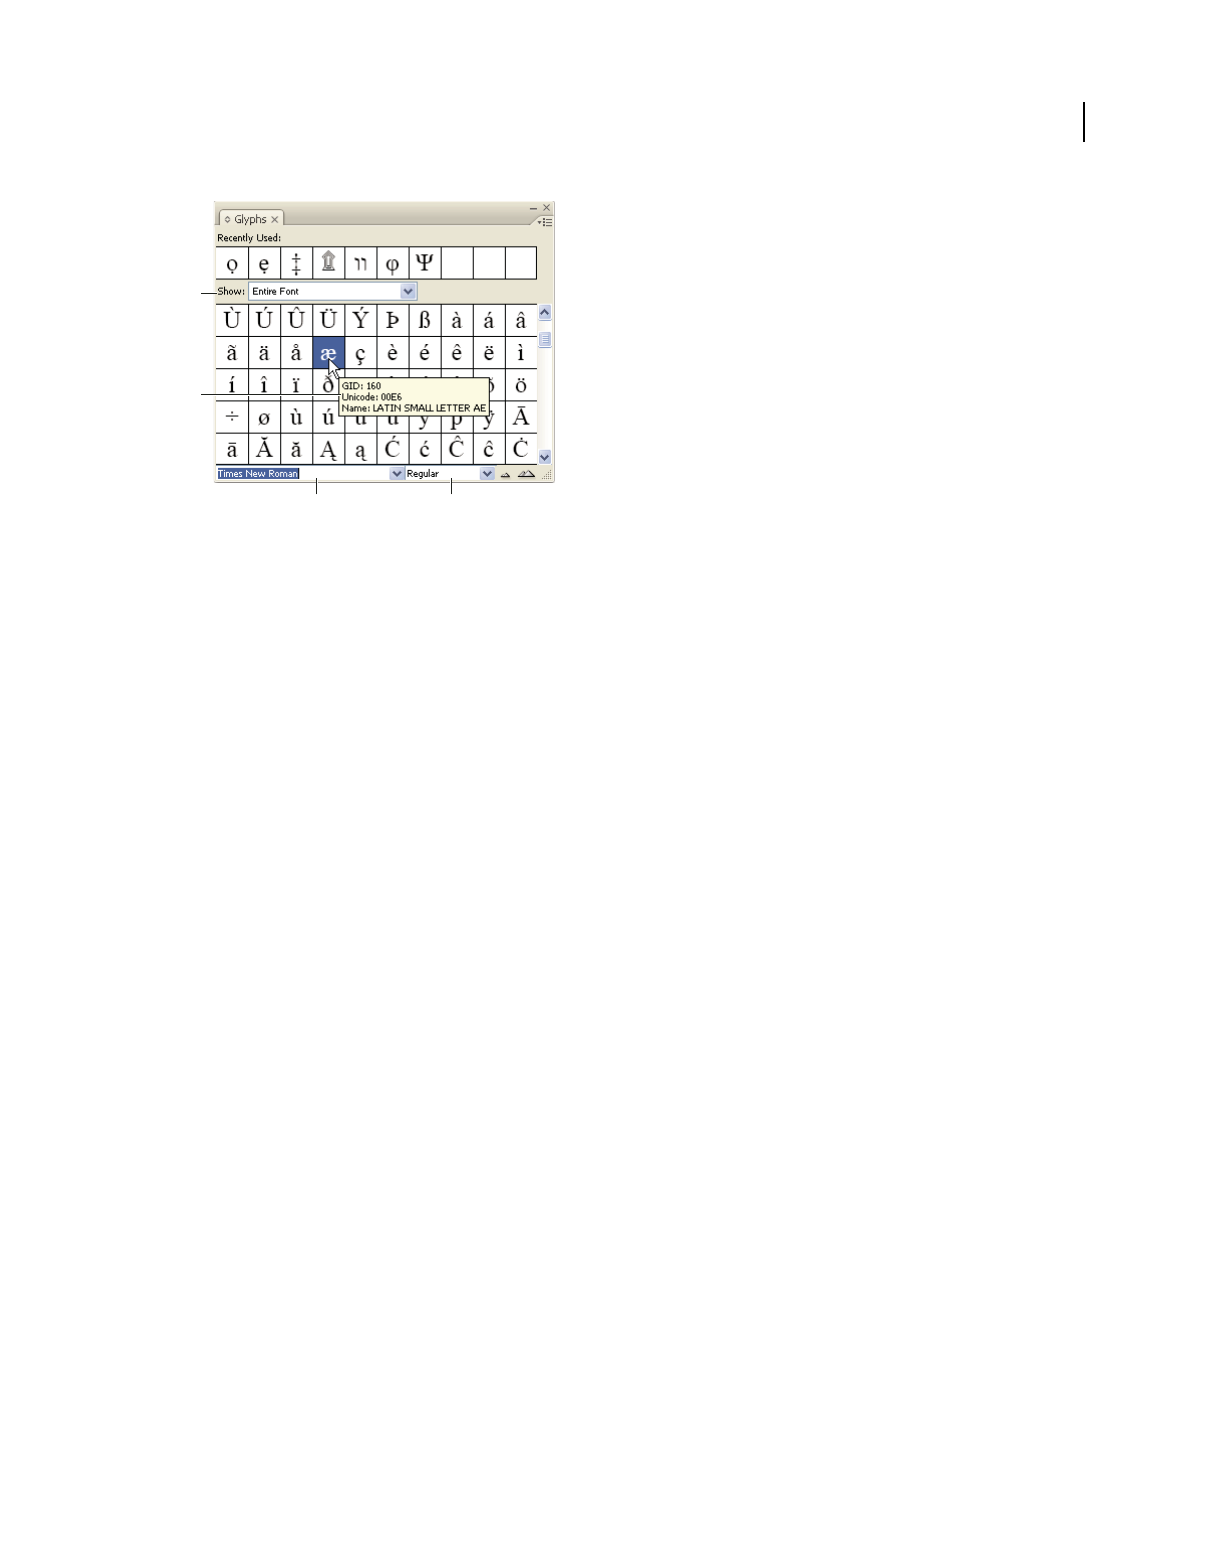
177
USING INDESIGN
Text
Last updated 11/16/2011
Glyphs panel
A. Show subset of glyphs B. Tool tip C. Font list D. Font style
By moving the pointer over a glyph, you can read its CID/GID value, Unicode value, and name in a tool tip.
Open the Glyphs panel
❖Choose Type > Glyphs or Window > Type & Tables > Glyphs.
Change the Glyphs panel view
•Click the cycle widget (it’s located to the left of the word “Glyphs” on the Glyphs panel) to change views of the panel.
Clicking the widget presents these views in succession: the collapsed panel, the entire panel, and the panel without
recently used glyphs.
•Click the Zoom In or Zoom Out buttons in the lower-right corner of the Glyphs panel.
•Resize the Glyphs panel by dragging the lower-right corner.
Filter the glyphs that appear
❖Do one of the following on the Show list to determine which glyphs appear on the Glyphs panel:
•Choose Entire Font to display all glyphs available in the font.
•Choose an option below Entire Font to narrow the list to a subset of glyphs. For example, Punctuation displays only
punctuation glyphs; Math Symbols narrows the choices to mathematical symbols.
Sort glyphs in the Glyphs panel
❖Choose By CID / GID or By Unicode to determine how glyphs are sorted in the Glyphs panel.
Insert glyphs and special characters
A glyph is a specific form of a character. For example, in certain fonts, the capital letter A is available in several forms,
such as swash and small cap. You can use the Glyphs panel to locate any glyph in a font.
OpenType fonts such as Adobe Caslon™ Pro provide multiple glyphs for many standard characters. Use the Glyphs
panel when you want to insert these alternate glyphs in your document. You can also use the Glyphs panel to view and
insert OpenType attributes such as ornaments, swashes, fractions, and ligatures.
A
B
C D

178
USING INDESIGN
Text
Last updated 11/16/2011
More Help topics
“OpenType fonts” on page 245
“Glyphs panel overview” on page 176
Insert special characters
You can insert common characters such as em dashes and en dashes, registered trademark symbols, and ellipses.
1Using the Type tool, position the insertion point where you want to insert a character.
2Choose Type > Insert Special Character, and then select an option from any of the categories in the menu.
If special characters that you use repeatedly do not appear on the list of special characters, add them to a glyph set that
you create.
More Help topics
“Create and edit custom glyph sets” on page 180
Insert a glyph from a specified font
1Using the Type tool, click to place the insertion point where you want to enter a character.
2Choose Type > Glyphs to display the Glyphs panel.
3To display a different set of characters in the Glyphs panel, do any of the following:
•Select a different font and type style, if available. From the Show menu, choose Entire Font. Or, if you selected an
OpenType font, choose from a number of OpenType categories.
•Choose a custom glyph set from the Show menu. (See “Create and edit custom glyph sets” on page 180.)
4Scroll through the display of characters until you see the glyph you want to insert. If you selected an OpenType font,
you can display a pop-up menu of alternate glyphs by clicking and holding the glyph box.
5Double-click the character you want to insert. The character appears at the text insertion point.
Insert a recently used glyph
InDesign tracks the previous 35 distinct glyphs you inserted and makes them available under Recently Used in the first
row of the Glyphs panel (you have to expand the panel to see all 35 glyphs on the first row).
❖Do one of the following:
•Double-click a glyph under Recently Used.
•Choose Recent Glyphs on the Show list to display all recently used glyphs in the main body of the Glyphs panel,
and then double-click a glyph.
Clear recently used glyphs
•To clear a selected glyph from the Recently Used section, right-click (Windows®) or Control-click (Mac OS) a glyph
in the Recently Used section, and then choose Delete Glyph From Recently Used.
•To clear all recently used glyphs, choose Clear All Recently Used.
Replace a character with an alternate glyph
When a character includes alternate glyphs, it appears in the Glyphs panel with a triangle icon in the lower-right
corner. You can click and hold the character in the Glyphs panel to display a pop-up menu of the alternate glyphs, or
you can display alternate glyphs in the Glyphs panel.
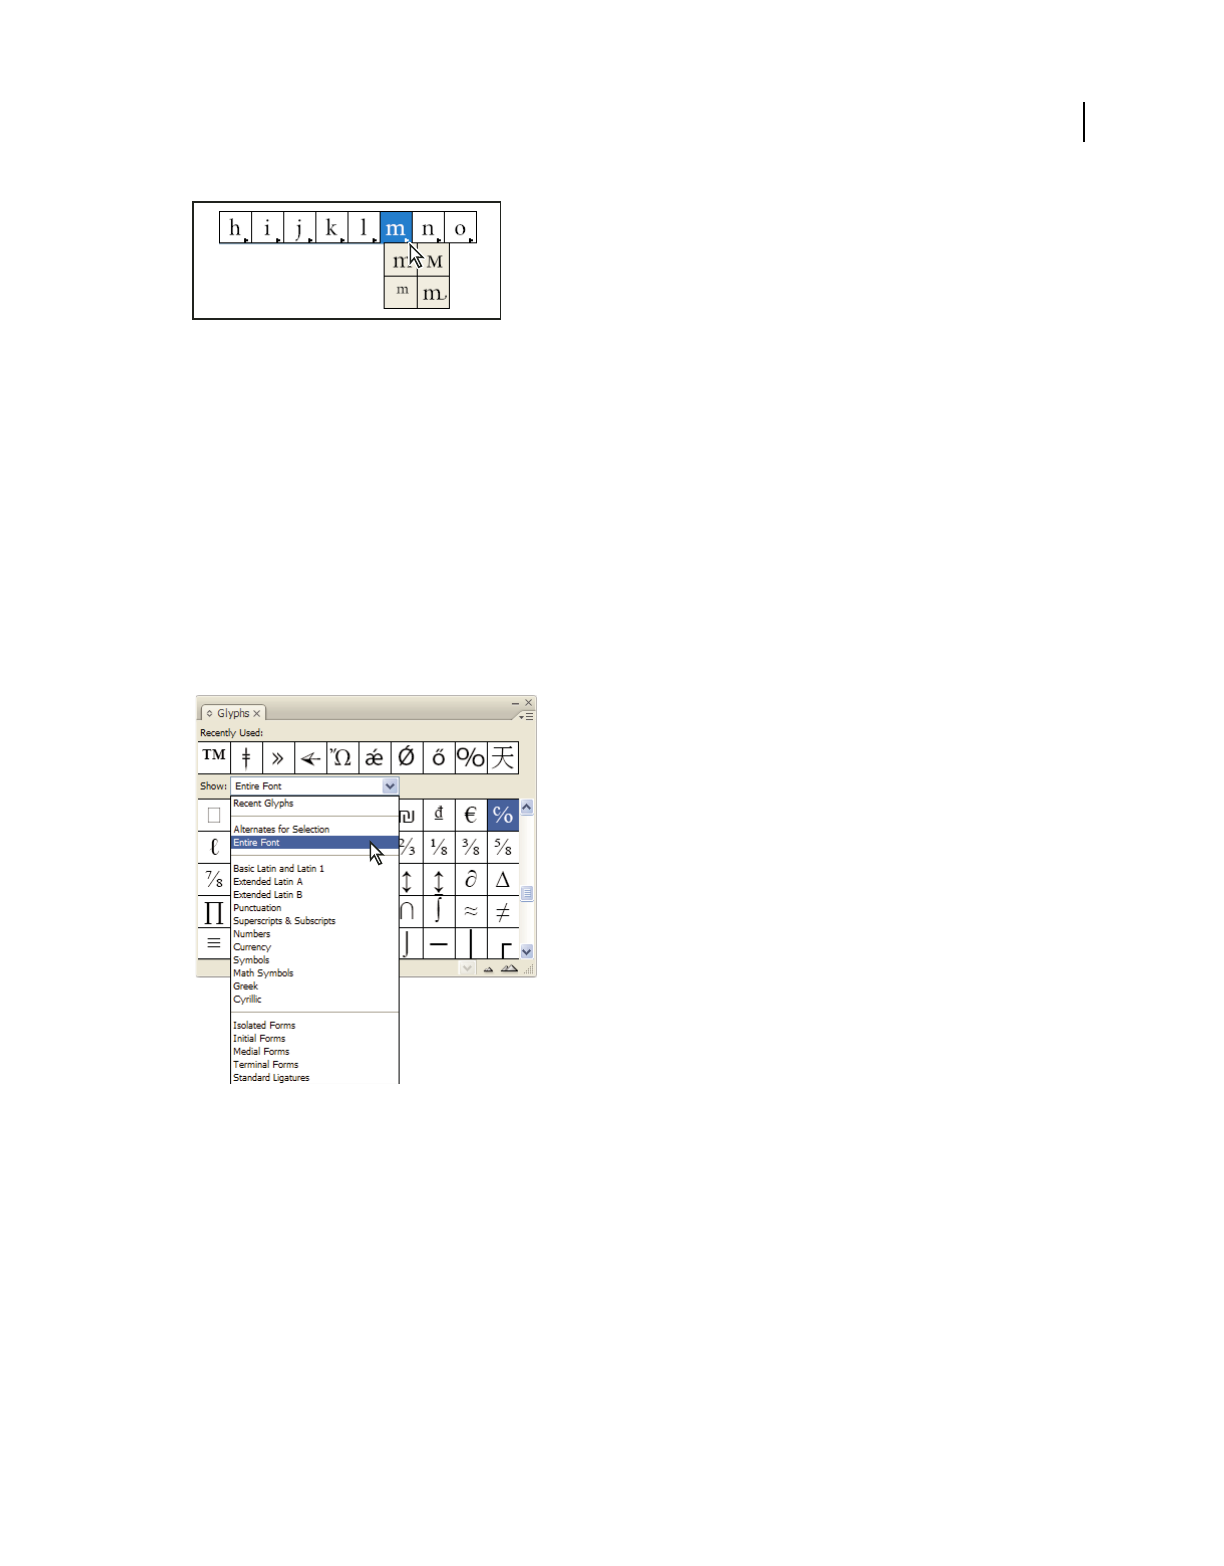
179
USING INDESIGN
Text
Last updated 11/16/2011
Selecting alternate glyphs in OpenType font
1Choose Type > Glyphs to display the Glyphs panel.
2Select Alternates For Selection from the Show list.
3Using the Type tool, select a character in your document.
4Do one of the following to replace the selected character in the document:
•Double-click a glyph in the Glyphs panel.
•Select a glyph on the menu.
Display OpenType glyph attributes in the Glyphs panel
For easy selection, the Glyphs panel allows you to display characters for only the selected OpenType attributes. You
can select various options from the Show menu in the Glyphs panel.
Show menu options in the Glyphs panel
1In the Glyphs panel, choose an OpenType font from the font list.
2Choose an option from the Show menu.
The options displayed vary depending on which font is selected. For information on applying OpenType font
attributes, see “Apply OpenType font attributes” on page 246. For more information on OpenType fonts, see
www.adobe.com/go/opentype.
Highlight alternate glyphs in the text
1Choose Edit > Preferences > Composition (Windows) or InDesign > Preferences > Composition (Mac OS).
2Select Substituted Glyphs, and then click OK. Substituted glyphs in the text are highlighted in nonprinting yellow.

180
USING INDESIGN
Text
Last updated 11/16/2011
Create and edit custom glyph sets
A glyph set is a named collection of glyphs from one or more fonts. Saving commonly used glyphs in a glyph set
prevents you from having to look for them each time you need to use them. Glyph sets are not attached to any
particular document; they are stored with other InDesign preferences in a separate file that can be shared.
You can determine whether the font is remembered with the added glyph. Remembering fonts is useful, for example,
when you are working with dingbat characters that may not appear in other fonts. If a glyph’s font is remembered, but
the font is missing, the font’s square appears in pink in the Glyphs panel and the Edit Glyph Set dialog box. If a font is
not remembered with an added glyph, a “u” appears next to the glyph, indicating that the font’s unicode value
determines the appearance of the glyph.
Create a custom glyph set
1Choose Type > Glyphs.
2Do one of the following:
•From the Glyphs panel menu, choose New Glyph Set.
•Open the context menu on the Glyphs panel and choose New Glyph Set.
3Type the name of the glyph set.
4Choose the insert order in which glyphs will be added to the glyph set, and click OK:
Insert At Front Each new glyph is listed first in the set.
Append At End Each new glyph is listed last in the set.
Unicode Order All glyphs are listed by the order of their unicode values.
5To add glyphs to the custom set, select the font containing the glyph at the bottom of the Glyphs panel, click the
glyph to select it, and then choose the name of the custom glyph set from the Add To Glyph Set menu on the Glyphs
panel menu.
View a custom glyph set
❖Do one of the following on the Glyphs panel:
•Choose the glyph set on the Show list.
•On the Glyphs panel menu, choose View Glyph Set, and then the name of the glyph set.
Edit custom glyph sets
1Choose Edit Glyph Set from the Glyph panel menu, and then choose the custom glyph set.
2Select the glyph you want to edit, do any of the following, and then click OK:
•To bind the glyph to its font, select Remember Font With Glyph. A glyph that remembers its font ignores the font
applied to the selected text in the document when the glyph is inserted into that text. It also ignores the font
specified in the Glyph panel itself. If you deselect this option, the Unicode value of the current font is used.
•To view additional glyphs, choose a different font or style. If the glyph is not defined with a font, you cannot select
a different font.
•To remove a glyph from the custom glyph set, choose Delete From Set.
•To change the order in which glyphs are added to the set, choose an Insert Order option. Unicode Order is not
available if Insert At Front or Append At End was selected when the glyph set was created.

181
USING INDESIGN
Text
Last updated 11/16/2011
Delete glyphs from custom glyph sets
1In the Glyphs panel, choose the Custom Glyph Set from the Show menu.
2Right-click (Windows) or Control-click (Mac OS) a glyph, and then choose Delete Glyph From Set.
Delete custom glyph sets
1Do one of the following:
•From the Glyphs panel menu, choose Delete Glyph Set.
•From the context menu, choose Delete Glyph Set.
2Click the name of a custom glyph set.
3Click Yes to confirm.
Save and load glyph sets
Custom glyph sets are stored in files kept in the Glyph Sets folder, a subfolder of the Presets folder. You can copy glyph
set files to other computers and in so doing make custom glyph sets available to others. Copy glyph set files to and from
these folders to share them with others:
Mac OS Users\[username]\Library\Preferences\Adobe InDesign\[Version]\[Language]\Glyph Sets
Windows XP
Documents and Settings\[username]\Application Data\Adobe\InDesign\[Version]\[Language]\Glyph Sets
Windows Vista and Windows 7
Users\[username]\AppData\Roaming\Adobe\InDesign\[Version]\[Language]\Glyph Sets
Use quotation marks
You can specify different quotation marks for different languages. These quotation mark characters appear
automatically during typing if the Use Typographer’s Quotes option is selected in the Type section of the Preferences
dialog box.
More Help topics
“Create hanging punctuation” on page 264
Specify which quotation marks to use
1Choose Edit > Preferences > Dictionary (Windows) or InDesign > Preferences > Dictionary (Mac OS).
2Choose a language from the Language menu.
3Do any of the following, and then click OK:
•For Double Quotes, select a pair of quotation marks, or type the pair of characters you want to use.
•For Single Quotes, select a pair of quotation marks, or type the pair of characters you want to use.
Insert straight quotation marks
❖Do one of the following:
•Choose Type > Insert Special Character > Quotation Marks > Straight Double Quotation Marks or Straight Single
Quotation Mark (Apostrophe).
•Deselect the Use Typographer’s Quotes option in the Type section of the Preferences dialog box, and then type the
quotation mark or apostrophe.

182
USING INDESIGN
Text
Last updated 11/16/2011
•Press Shift+Ctrl+Alt+' (Windows) or Shift+Command+Option+' (Mac OS) to switch between turning on and off
the Use Typographer’s Quotes preferences option.
The character frequently used to indicate feet, arcminutes, or minutes of time is the prime mark. It looks like a slanted
apostrophe. The character frequently used to indicate inches, arcseconds, or seconds of time is the double prime mark.
These symbols are different from apostrophes and double quotation marks. Some fonts include the prime and double
prime marks. Use the Glyphs panel to insert these marks. If the font doesn’t have a prime or double prime mark, insert
the straight quotation mark, and italicize it.
Insert white space characters
A white space character is a blank space that appears between characters. You can use white-space characters for many
different purposes, such as preventing two words from being broken at the end of a line.
1Using the Type tool, position the insertion point where you want to insert a certain amount of white space.
2
Choose Type > Insert White Space, and then select one of the spacing options (such as Em Space) in the context menu.
Representative symbols of the white-space characters appear when you choose Type > Show Hidden Characters.
White space options
The following options appear on the Type > Insert White Space menu:
Em Space Equal in width to the size of the type. In 12-point type, an em space is 12 points wide.
En Space One-half the width of an em space.
Nonbreaking Space The same flexible width as pressing the spacebar, but it prevents the line from being broken at
the space character.
Nonbreaking Space (Fixed Width) A fixed width space prevents the line from being broken at the space character,
but does not expand or compress in justified text. The fixed width space is identical to the Nonbreaking Space
character inserted in InDesign CS2.
Third Space One-third the width of an em space.
Quarter Space One-fourth the width of an em space.
Sixth Space One-sixth the width of an em space.
Flush Space Adds a variable amount of space to the last line of a fully justified paragraph, useful for justifying text
in the last line. (See “Change Justification settings” on page 288.)
Hair Space One-twenty-fourth the width of an em space.
Thin Space One-eighth the width of an em space. You may want to use a thin space on either side of an em dash or
en dash.
Figure Space Same width as a number in the typeface. Use a figure space to help align numbers in financial tables.
Punctuation Space Same width as an exclamation point, period, or colon in the typeface.

183
USING INDESIGN
Text
Last updated 11/16/2011
Spell-checking and language dictionaries
Check spelling
You can spell-check a selected range of text, in all of the text in a story, in all stories in a document, or in all stories in
all open documents. Misspelled or unknown words, words typed twice in a row (such as “the the”), and words with
possible capitalization errors are highlighted. In addition to checking the spelling in a document, you can also enable
dynamic spelling so that potentially misspelled words are underlined while you type.
When you check spelling, the dictionary for the languages you assigned to the text is used. You can quickly add words
to the dictionary.
More Help topics
“Hyphenation and spelling dictionaries” on page 185
“Assign a language to text” on page 257
Set spelling preferences
1Choose Edit > Preferences > Spelling (Windows) or InDesign > Preferences > Spelling (Mac OS).
2Do any of the following:
•Select Misspelled Words to find words that do not appear in the language dictionary.
•Select Repeated Words to find duplicate words such as “the the.”
•Select Uncapitalized Words to find words (such as “germany”) that appear in the dictionary only as capitalized
words (“Germany”).
•Select Uncapitalized Sentences to find uncapitalized words following periods, exclamation points, and question
marks.
3Select Enable Dynamic Spelling to underline potentially misspelled words while you type.
4Specify the underline color of misspelled words (words not found in the user dictionaries), repeated words (such
as “the the”), uncapitalized words (such as “nigeria” instead of “Nigeria”), and uncapitalized sentences (sentences
that don’t begin with a capital letter).
Check spelling
1If your document includes foreign-language text, select the text and use the Language menu on the Character panel
to specify the language for that text.
2Choose Edit > Spelling > Check Spelling.
Spell-checking begins.
3If you want to change the range of your spell-checking, do any of the following, and then click Start to begin
checking the spelling:
•Select Document to check the entire document. Select All Documents to check all open documents.
•Select Story to check all text in the currently selected frame, including text in other threaded text frames and overset
text. Select Stories to check stories in all selected frames.
•Select To End Of Story to check from the insertion point.
•Select Selection to check only selected text. This option is available only if text is selected.

184
USING INDESIGN
Text
Last updated 11/16/2011
4When unfamiliar or misspelled words or other possible errors are displayed, choose an option:
•Click Skip to continue spell-checking without changing the highlighted word. Click Ignore All to ignore all
occurrences of the highlighted word, until InDesign is restarted.
•Select a word from the Suggested Corrections list or type the correct word in the Change To box, and then click
Change to change only that occurrence of the misspelled word. You can also click Change All to change all
occurrences of the misspelled word in your document.
•To add a word to a dictionary, select the dictionary from the Add To menu, and click Add.
•Click Dictionary to display the Dictionary dialog box, where you can specify the target dictionary and language,
and specify hyphenation breaks in the added word. If you want to add the word to all languages, choose All
Languages from the Language menu. Click Add.
Correct spelling errors as you type
By turning on Autocorrect, you can allow capitalization errors and common typing mistakes to be replaced while you
type. Before Autocorrect will work, you must create a list of commonly misspelled words and associate them with the
correct spelling.
1Choose Edit > Preferences > Autocorrect (Windows) or InDesign > Preferences > Autocorrect (Mac OS).
2Choose Enable Autocorrect. (You can also choose Edit > Spelling > Autocorrect to turn this feature on or off
quickly.)
3From the Language menu, choose which language the autocorrections are applied to.
4To correct capitalization errors (such as typing “germany” instead of “Germany”), select Autocorrect Capitalization
Errors. You don’t need to add the capitalized words to the list of autocorrections.
5To add a word that you commonly misspell, click Add, type the misspelled word (such as “teh”), type the correction
(such as “the”), and then click
OK.
6Continue to add words that you commonly misspell, and then click OK.
When you type any misspelled word you added to the list, the word is automatically replaced by the word you entered
as the correction.
To remove autocorrect words you’ve added, select the word in the list and choose Remove. To edit autocorrect words,
select the word, click Edit, retype the correction, and click OK.
Use dynamic spelling
When dynamic spelling is enabled, you can correct spelling errors by using the context menu. Potentially misspelled
words are underlined (based on the dictionary associated with the language of the text). If you type text in different
languages, select the text and assign the correct language.
1To enable dynamic spelling, choose Edit > Spelling > Dynamic Spelling.
Potentially misspelled words are underlined in your document.
2Right-click (Windows) or Control-click (Mac OS) the underlined word, and do one of the following:
•Select a suggested correction. If a word is repeated or needs to be capitalized, you can choose Delete Repeated Word
[word] or Capitalize [word].
•Select Add [word] To User Dictionary. This automatically adds the word to the current dictionary without opening
the Dictionary dialog box. The word remains unchanged in the text.

185
USING INDESIGN
Text
Last updated 11/16/2011
•Select Dictionary. This opens the Dictionary dialog box where you can select the Target dictionary, change
hyphenation breaks, and specify a language. If you want to add the word to all languages, choose All Languages
from the Language menu, and then click Add. The word is added to the selected dictionary and remains unchanged
in the text.
•Select Ignore All to ignore occurrences of this word in all documents. When InDesign is restarted, the word is
flagged again as a misspelling.
Note: If you select Ignore All and then decide that you don’t want to ignore that word after all, Choose Ignored Words
from the Dictionary List menu in the Dictionary dialog box and remove the word from the list.
Hyphenation and spelling dictionaries
InDesign uses Proximity dictionaries for most languages to verify spelling and to hyphenate words. You can add words
to each dictionary to customize it. You can assign different languages to text, and InDesign uses the appropriate
dictionary to handle spelling and hyphenation. You can create additional user dictionaries, and you can import or
export word lists saved in a plain text file.
When you customize the words in a dictionary, you actually create lists of added words (words that aren’t already in
the dictionary) and removed words (existing dictionary words that you want to be flagged as a potential misspelling).
The Dictionary dialog box lets you display and edit added words, removed words, and ignored words (words that are
ignored for the current session because you clicked Ignore All). You can add words that apply to all languages, which
is especially useful for last names, street names, and other items that aren’t specific to a language.
If you want to use the language dictionaries from a previous version of InDesign or InCopy, use your system Find
command to locate the user dictionary files (.udc), and then add them to your list of dictionaries in Dictionary
preferences.
Where dictionary words are stored
By default, hyphenation and spelling exceptions are located in user dictionary files stored outside the document on the
computer where InDesign is installed (dictionary file names end with a .clam or .not extension). However, you can also
store exception lists inside any InDesign document. In addition, you can store word lists in an external user dictionary,
in the document, or in both. The location of existing dictionaries appears in the Dictionary preferences.
Storing hyphenation and spelling exceptions inside a document makes it easier to treat text consistently when you
move that document to other computers. For this reason, you can merge the user dictionary into the document in
Dictionary preferences. You can also control the location of exceptions from the Create Package Folder dialog box (see
“Package files” on page 621). In contrast, storing an exception list outside the document makes it easier to use the same
list of exceptions for multiple documents.
Note: If the user dictionary is merged into the exceptions list, the entire user dictionary is added to the document, even if
the words are not used, thereby increasing the document’s file size.
Applying languages to text
You can use the Language menu in the Control panel or Character panel to apply a language to selected text. You can
also specify a default language for an entire document, or for all new documents. (See “Assign a language to text” on
page 257.)
Exception word lists
You can exclude words from being considered. For example, if you want to use an alternate spelling for a common
word such as “bicycle,” which you may need to spell in a different way for your company name or for a specific
document, add the word to the list of excluded words so that it will be flagged during a spell check. InDesign can
maintain a separate set of added and removed words for each installed language.

186
USING INDESIGN
Text
Last updated 11/16/2011
Create or add user dictionaries
You can create a user dictionary, or you can add user dictionaries from previous InDesign or InCopy versions, from
files that others have sent you, or from a server where your workgroup’s user dictionary is stored. The dictionary you
add is used for all your InDesign documents.
1Choose Edit > Preferences > Dictionary (Windows) or InDesign > Preferences > Dictionary (Mac OS).
2From the Language menu, choose the language with which you want to associate the dictionary.
3Do one of the following:
•To create a new dictionary, click the New User Dictionary icon below the Language menu. Specify the name
and location of the user dictionary (which includes a .udc extension), and then click Save.
•To add an existing dictionary, click the Add User Dictionary icon , select the user dictionary file, which includes
a .udc or .not extension, and then click Open.
Note: If you can’t find the dictionary file, you might want to use your system Find command to locate the .udc files (try
using *.udc), note the location, and then try again.
The dictionary is added to the list under the Language menu. You can add words to the dictionary when checking
spelling or by using the Dictionary dialog box.
Set the default language dictionary for the current document
You can change the default language dictionary for a document or for all new documents you create. Changing the
default dictionary in an existing document doesn’t affect text that has already been created or text that you type into
an existing text frame.
Use the Character Style or Paragraph Style panel to set a specific dictionary for a specific style. The Language menu
appears in the Advanced Character Formats section.
1Open the document.
2Select the Selection tool from the toolbar and make sure no items are selected in the document.
3Choose Type > Character.
4Choose the desired dictionary from the Language menu on the Character panel. If you cannot see the language
option in the Character panel, select Show Options and then select your language from the list.
Set the default language dictionary for all new documents
1Start InDesign, but do not open a document.
2Choose Type > Character.
3Choose the desired dictionary from the Language pop-up menu on the Character panel. If you cannot see the
language option in the Character panel, select Show Options and then select your language from the list.
Remove, relink, and reorder user dictionaries
1Choose Edit > Preferences > Dictionary (Windows) or InDesign > Preferences > Dictionary (Mac OS).
2From the Language menu, choose the language to which the dictionary belongs.
3Do any of the following:
•To remove a dictionary from the list, select it and click the Remove User Dictionary icon . You must have at least
one dictionary per language.
•If the language dictionary includes a question mark icon next to it, select the dictionary, click the Relink User
Dictionary icon
, and then locate and open the user dictionary.

187
USING INDESIGN
Text
Last updated 11/16/2011
•To change the order of the user dictionaries, drag and drop them. The order of the dictionaries in the list is the order
in which the dictionaries are checked.
Add words to dictionaries
If, during a spell check, InDesign displays an unfamiliar word in the Check Spelling dialog box, select the dictionary
from the Add To menu, and then click Add. You can also use the Dictionary dialog box to let you specify the target
dictionary and language, and to indicate how words are added to an exception word list.
1Choose Edit > Spelling > User Dictionary.
2In the Language menu, choose a language. Each language contains at least one dictionary. If you want the word to
be added to all languages, choose All Languages.
3In the Target menu, choose the dictionary where you want to store the word. The Target menu lets you store the
changes in an external user dictionary or in any open document.
4In the Dictionary List menu, choose Added Words.
5In the Word box, type or edit the word to be added to the word list.
6Click Hyphenate to see the word’s default hyphenation. Tildes (~) indicate possible hyphenation points.
7If you don’t like the hyphenation points, follow these guidelines to indicate your preferred hyphenation of the word:
•Type one tilde (~) to indicate the best possible hyphenation points, or the only acceptable hyphenation point, in
the word.
•Type two tildes (~~) to indicate your second choice.
•Type three tildes (~~~) to indicate a poor but acceptable hyphenation point.
•If you want the word never to be hyphenated, type a tilde before its first letter.
If you need to include an actual tilde in a word, type a backslash before the tilde (\~).
8Click Add, and then click Done. The word is added to the currently selected Dictionary List.
Note: Remember that hyphenation points interact with the hyphenation settings in your documents. As a result, the word
might not break where you expect it to. Control these settings by choosing Hyphenation in the Paragraph panel menu.
(See “Hyphenate text” on page 286.)
Remove or edit words in dictionaries
1Choose Edit > Spelling > User Dictionary.
2In the Language menu, choose a language.
3In the Target menu, choose the dictionary from which you want to remove the word. The Target menu lets you
choose an external user dictionary or any open document.
4In the Dictionary List menu, do one of the following:
•To modify the list of additions to the selected Target word list, choose Added Words.
•To modify the list of words that are flagged as misspelled, choose Removed Words.
•To modify the list of words that are being ignored during the current InDesign session, choose Ignored Words. This
list includes all the words for which you’ve chosen Ignore All.
5In the word list, edit the word, or select the word and click Remove.
6Click Done.

188
USING INDESIGN
Text
Last updated 11/16/2011
Export a word list
You can export word lists to a text file (.txt) and then import that list of words into a user dictionary in InDesign. The
words in the text file must be separated by a space, tab, or paragraph return. You can export added words and removed
words, but you cannot export ignored words, which are used only in the current session.
1Choose Edit > Spelling > User Dictionary.
2Choose the language from the Language menu and the dictionary from the Target menu that contains the list of
words you want to export.
3Click Export, specify the file name and location, and then click Save.
The list of words is saved in a text file. You can edit this list of words in any text editor, and then import the word list.
You can also send the word list to others, who can import it into their user dictionaries.
Import a word list
1Choose Edit > Spelling > User Dictionary.
2Choose the language from the Language menu and the dictionary from the Target menu.
3Click Import, locate the text file containing your list of spelling exceptions, and then click Open.
Change dictionary preferences
Use Dictionary preferences to specify how InDesign handles hyphenation and spelling dictionaries. Most languages in
InDesign use Proximity dictionaries to verify spelling and to hyphenate words. If you have installed hyphenation or
spelling components from a different company, you can select a different vendor for each installed language.
Note: The Dictionary Preferences dialog box does not enable you to specify the language dictionary used for spell checking
or hyphenating text. This dialog box is used to specify which hyphenation and spelling plug-ins InDesign uses for the
language specified in the Language field. If you use only the default hyphenation and spelling plug-in, you don't need to
change any settings in the Dictionary Preferences dialog box. If you install a different spelling or hyphenation plug-in
provided by a third-party developer, it appears as an option in the Hyphenation Vendor and Spelling Vendor menus in
this dialog box. This would let you select one vendor's hyphenation or spelling engine for some languages and another
vendor's hyphenation or spelling engine for other languages.
1Choose Edit > Preferences > Dictionary (Windows) or InDesign > Preferences > Dictionary (Mac OS).
2For Language, specify the language for which you want to edit settings or change the hyphenation or spelling
vendor.
3Create, add, or remove user dictionaries. (See “Create or add user dictionaries” on page 186.)
4If you have installed a hyphenation component from a company other than Adobe, select it in the Hyphenation
menu.
5
If you have installed a spelling dictionary component from a company other than Adobe, select it in the Spelling menu.
6In the Compose Using menu in the Hyphenation Exceptions menu, do one of the following:
•To compose text using the hyphenation exceptions list stored in the external user dictionary, choose User
Dictionary.
•To compose text using the hyphenation exceptions list stored inside the document, choose Document.
•To compose text using both lists, choose User Dictionary And Document. This is the default setting.
7To add the exceptions list stored in the external user dictionary to the exceptions list stored within the document,
select Merge User Dictionary Into Document.

189
USING INDESIGN
Text
Last updated 11/16/2011
Note: If you work with many different partners or clients, you might want to deselect the Merge User Dictionary Into
Document option. For example, if you’re a service provider, you probably don’t want your user dictionary merged with
every customer’s file.
8To recompose all stories when certain settings are changed, select Recompose All Stories When Modified. Selecting
this option recomposes stories when you change the Compose Using settings (see step 6) or when you use the
Dictionary command to add or remove words. Recomposing all stories can take some time, depending on the
amount of text in the document.
9Click OK.
Using dictionaries in a workgroup
Make sure that each station in your workgroup has the same customized user dictionaries installed and added, so that
a document uses the same spelling and hyphenation rules regardless of who is working on
it. You can either make sure
that everyone adds the same dictionaries to their computer, or you can share a user dictionary over the network server.
A lock icon indicates that a dictionary is locked and can be used, but not edited. When a user dictionary is stored on
a server, the first user to load the dictionary locks the file; all subsequent users see that the dictionary is locked. Files
can also be locked through the operating system, when the file is made read-only. If you share a user dictionary over
the network server, you may want to lock the file so that it’s read-only for all users, allowing only the administrator to
add words.
Make sure that everyone in the workgroup uses the customized user dictionary installed on the common network
workstation, and not the dictionary stored with a document. However, before you take a document to a service
provider, you might want to merge the user dictionary into the document.
If you don’t share a customized user dictionary on a common network workstation, locate user dictionary files and
copy them from one workstation to another. The location of user dictionaries appear in the Dictionary preferences.
After you update a shared workstation’s user dictionary, the changes don’t appear in individual workstations until a
user restarts InDesign or presses Ctrl+Alt+/ (Windows) or Command+ Option+/ (Mac OS) to recompose all text.
Footnotes
Create footnotes
A footnote consists of two linked parts: the footnote reference number that appears in text, and the footnote text that
appears at the bottom of the column. You can create footnotes or import them from Word or RTF documents.
Footnotes are automatically numbered as they are added to a document. Numbering restarts in each story. You can
control the numbering style, appearance, and layout of footnotes. You cannot add footnotes to tables or to footnote
text.
The width of the footnote text is based on the width of the column containing the footnote reference marker. Footnotes
cannot space columns in a text frame.
You cannot create endnotes in InDesign. However, Bob Bringhurst provides a workaround for creating endnotes at
Endnotes in InDesign. Endnotes in converted Microsoft Word documents are formatted as text, not footnotes.
For a video tutorial on creating footnotes, see www.adobe.com/go/vid0218.
1Place the insertion point where you want the footnote reference number to appear.
2Choose Type > Insert Footnote.
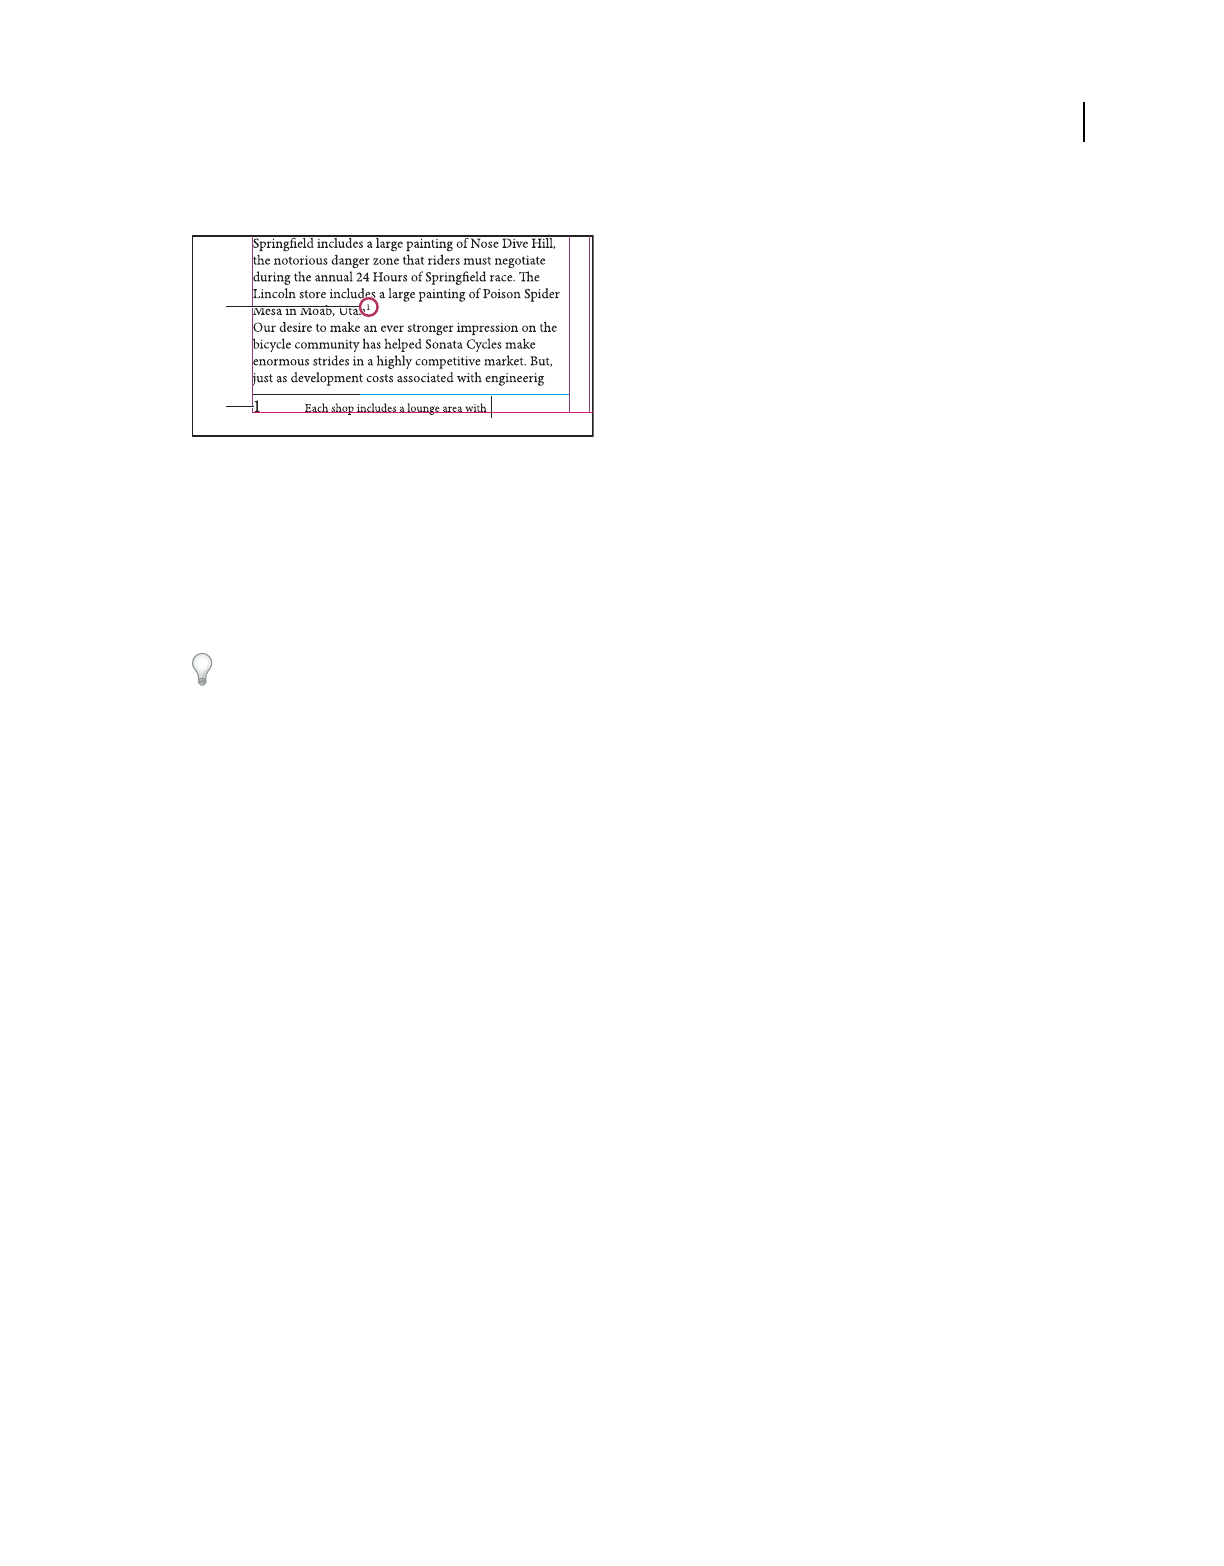
190
USING INDESIGN
Text
Last updated 11/16/2011
3Type the footnote text.
Footnote added to document
A. Reference number B. Footnote text
As you type, the footnote area expands while the text frame remains the same size. The footnote area continues to
expand upward until it reaches the line with the footnote reference. At that point, the footnote is split to the next text
frame column or threaded frame, if possible. If the footnote cannot be split and if more text is added than can fit in the
footnote area, the line containing the footnote reference is moved to the next column, or an overset icon appears. In
such a case, you should resize the frame or change the text formatting.
When the insertion point is in a footnote, you can choose Type > Go To Footnote Reference to return to where you
were typing. If you use this option frequently, consider creating a keyboard shortcut.
More Help topics
“Place (import) text” on page 136
Creating Footnotes video
Change footnote numbering and layout
Changes you make to footnote numbering and layout affect existing footnotes and all new ones.
1Choose Type > Document Footnote Options.
2In the Numbering And Formatting tab, select options that determine the numbering scheme and formatting
appearance of the reference number and footnote text.
3Click the Layout tab, and select options that control the look of the footnote section on the page.
4Click OK.
More Help topics
“Overprint rules above footnotes” on page 642
Footnote numbering and formatting options
The following options appear in the Numbering And Formatting section of the Footnote Options dialog box:
Numbering Style Choose the numbering style for footnote reference numbers.
Start At Specify the number used for the first footnote in the story. Each story in a document begins with the same
Start At number. If you have multiple documents in a book with continued page numbering, you may want to start the
footnote numbering in each chapter to continue where the last chapter left off.
The Start At option is especially useful for documents in a book. Footnote numbering is not continued across
documents in a book.
A
B

191
USING INDESIGN
Text
Last updated 11/16/2011
Restart Numbering Every If you want numbering to restart within the document, select this option and choose Page,
Spread, or Section to determine when footnote numbering is restarted. Some numbering styles, such as asterisks
(*),
work best when reset every page.
Show Prefix/Suffix In Select this option to show prefixes or suffixes in the footnote reference, the footnote text, or both.
Prefixes appear before the number (such as
[1) and suffixes appear after the number (such as 1]). This option is
especially useful for placing footnotes within characters, such as
[1]. Type a character or characters or select an option
for Prefix, Suffix, or both. To select special characters, click the icons next to the Prefix and Suffix controls to display
a menu.
If you think the footnote reference number is too close to the preceding text, adding one of the space characters as a
prefix might improve the appearance. You can also apply a character style to the reference number.
Position This option determines the appearance of the footnote reference number, which is superscript by default. If
you prefer to format the number using a character style (such as a character style that includes OpenType superscript
settings), choose Apply Normal, and specify the character style.
Character Style You may want to choose a character style to format the footnote reference number. For example,
instead of using superscript, you might want to use a character style at a normal position with an elevated baseline. The
menu displays the character styles available in the Character Styles panel.
Paragraph Style You may want to choose a paragraph style that formats the footnote text for all footnotes in the
document. The menu displays the paragraph styles available in the Paragraph Styles panel. By default, the [Basic
Paragraph] style is used. Note that the [Basic Paragraph] style may not have the same appearance as the default font
settings for the document.
Separator The separator determines the white space that appears between the footnote number and the start of the
footnote text. To change the separator, first select or delete the existing separator, and then choose a new separator.
You can include multiple characters. To insert white space characters, use the appropriate metacharacter, such as ^m
for em space.
Footnote layout options
The following options appear in the Layout section of the Footnote Options dialog box:
Minimum Space Before First Footnote This option determines the minimum amount of space between the bottom of
the column and the first footnote line. You cannot use a negative value. Any Space Before setting in the footnote
paragraph is ignored.
Space Between Footnotes This option determines the distance between the last paragraph of one footnote and the
first paragraph of the next footnote in a column. You cannot use a negative value. The Space Before/Space After values
in a footnote’s paragraph apply only if the footnote includes multiple paragraphs.
First Baseline Offset This option determines the distance between the start of the footnote area (where the footnote
divider appears by default) and the first line of footnote text.
For information on the First Baseline options, see “Change text frame properties” on page 131.
Place End Of Story Footnotes At Bottom Of Text Select this option if you want the last column’s footnotes to appear
just below the text in the last frame of the story. If this option is not selected, any footnote in the last frame of the story
appears at the bottom of the column.
Allow Split Footnotes Select this option if you want footnotes to break across a column when the footnote exceeds the
amount of space available for it in that column. If splitting is not allowed, the line containing the footnote reference
number moves to the next column, or the text becomes overset.
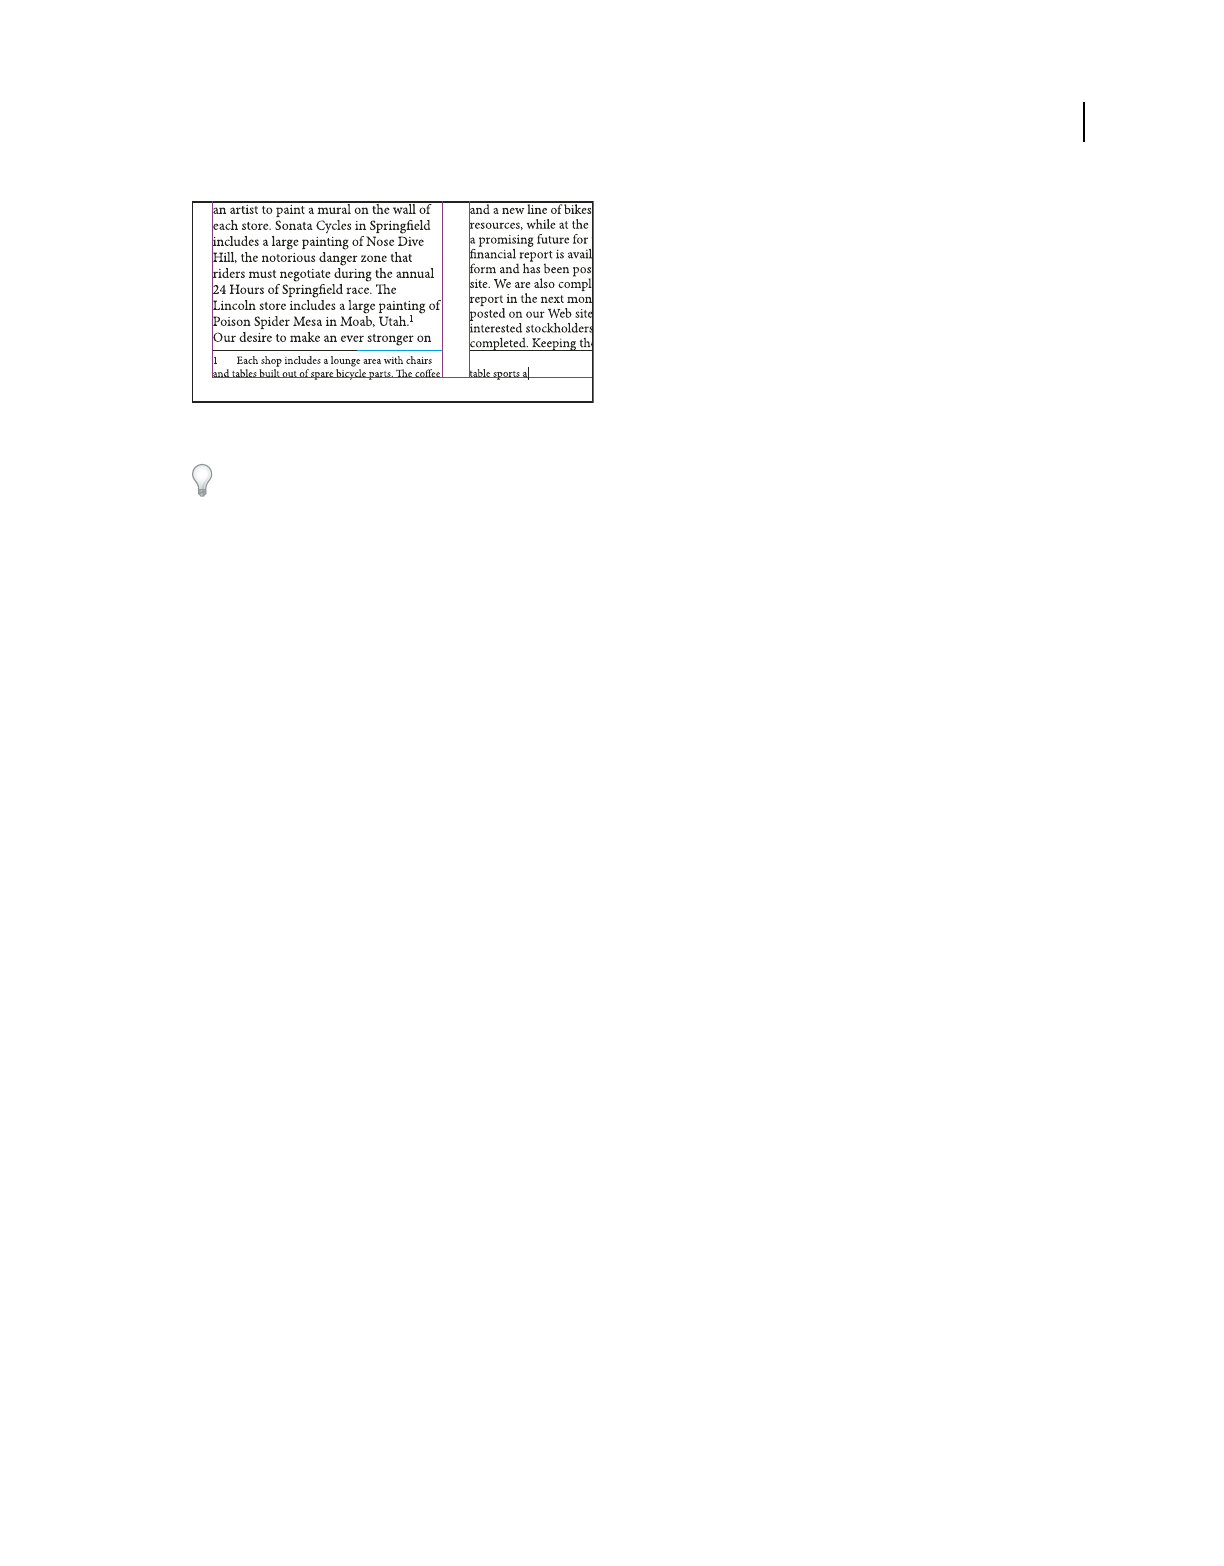
192
USING INDESIGN
Text
Last updated 11/16/2011
Footnote split across column.
If Allow Split Footnotes is turned on, you can still prevent an individual footnote from splitting by placing the insertion
point in the footnote text, choosing Keep Options from the Paragraph panel menu, and selecting the Keep Lines
Together and All Lines In Paragraph options. If the footnote contains multiple paragraphs, use the Keep With Next X
Lines option in the first paragraph of the footnote text. You can choose Type
> Insert Break Character > Column Break
to control where the footnote is split.
Rule Above Specify the location and appearance of the footnote divider line that appears above the footnote text. A
divider line (also called a “separator line”) also appears above any footnote text continued in a separate frame. The
options you select apply to either the First Footnote In Column or Continued Footnotes, whichever is selected in the
menu. These options are similar to those that appear when you specify a paragraph rule. If you want to remove the
footnote divider line, deselect Rule On.
Delete footnotes
❖To delete a footnote, select the footnote reference number that appears in text, and then press Backspace or Delete.
If you delete only the footnote text, the footnote reference number and footnote structure remain.
Work with footnote text
As you edit footnote text, note the following:
•When the insertion point is in footnote text, choosing Edit > Select All selects all the footnote text for that footnote,
but no other footnote or text.
•Use the arrow keys to navigate among footnotes.
•Footnote numbering is not continued across documents in a book. If you don’t want numbering to restart in each
document with the book, you need to change the Start At value manually in each document after the editing is final.
•In Story Editor, you can click the footnote icon to expand or collapse a footnote. You can expand or collapse all
footnotes by choosing View
> Story Editor > Expand All Footnotes or Collapse All Footnotes.
•You can select and apply character and paragraph formatting to footnote text. You can also select and change the
appearance of the footnote reference number, but the recommended method is using the Document Footnote
Options dialog box.
•When you cut or copy text that includes the footnote reference number, the footnote text is also added to the
clipboard. If you copy the text to a different document, the footnotes in that text use the characteristics of the new
document’s numbering and layout appearance.
•If you accidentally delete the footnote number at the start of the footnote text, you can add it back by placing the
insertion point at the beginning of the footnote text, right-clicking (Windows) or Control-clicking (Mac
OS), and
choosing Insert Special Character
> Markers > Footnote Number.
•Text wrap has no effect on footnote text.
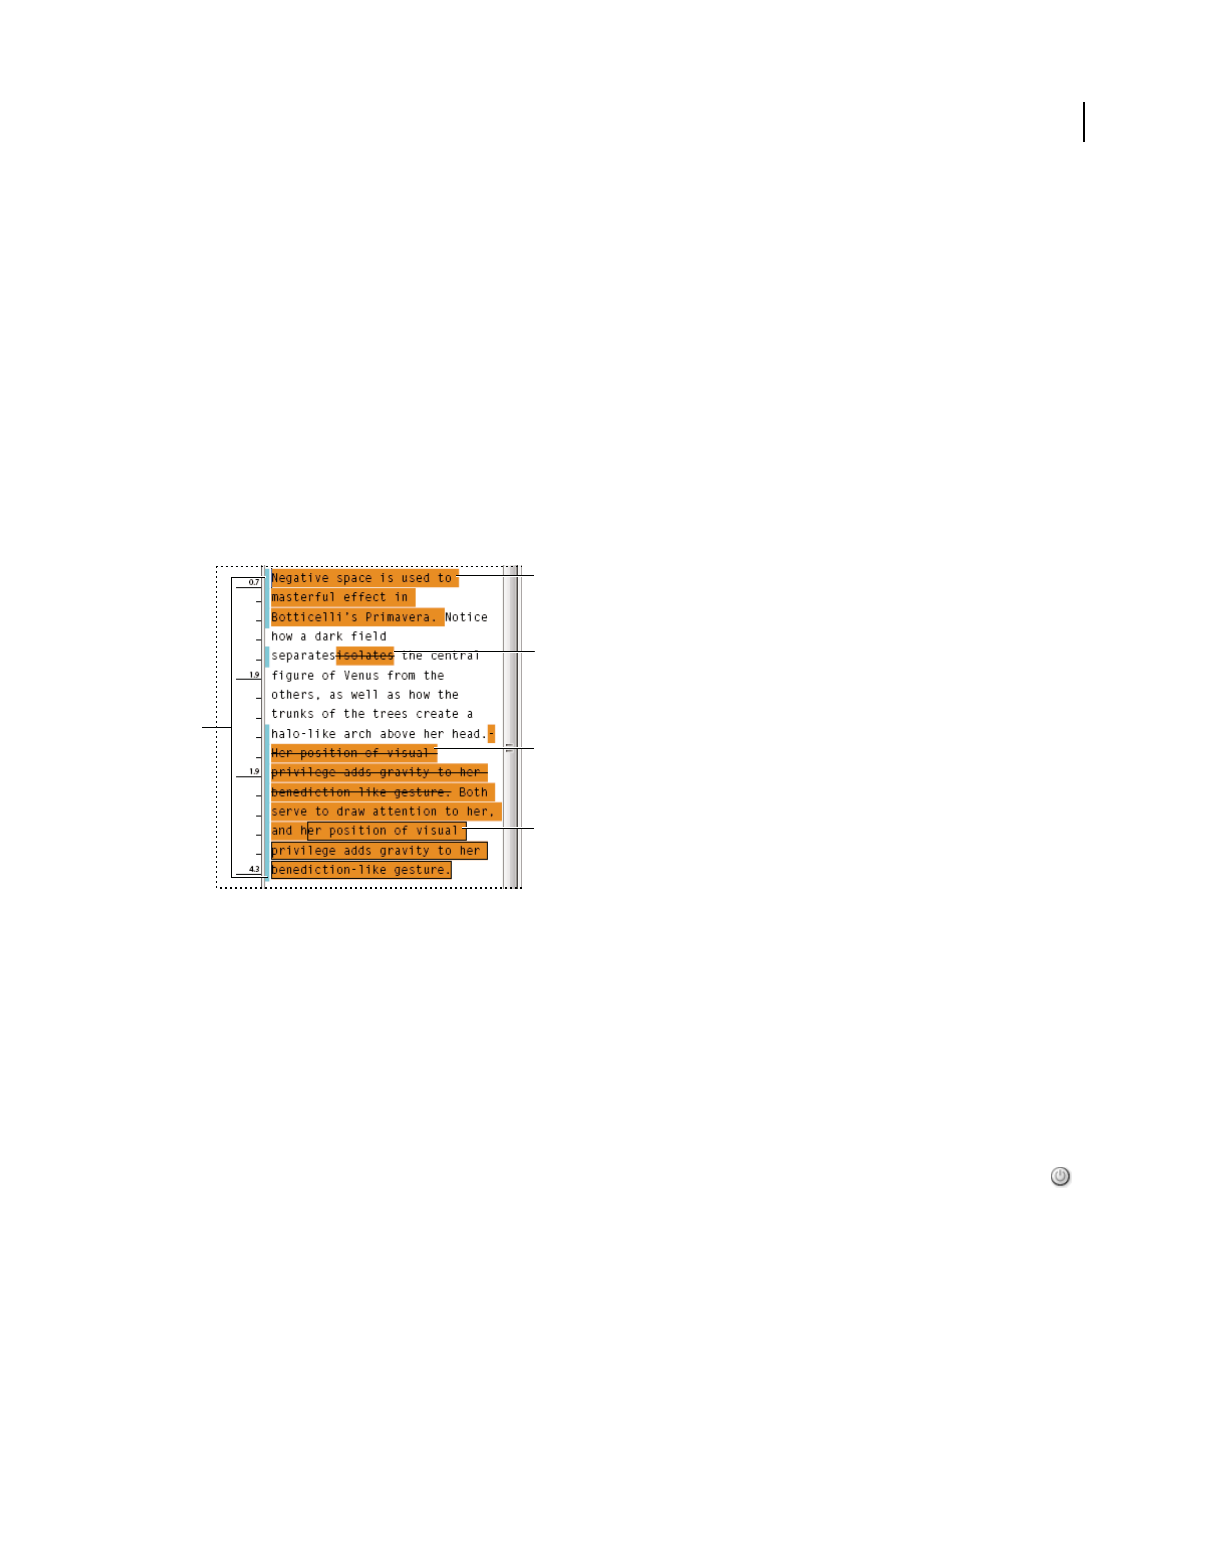
193
USING INDESIGN
Text
Last updated 11/16/2011
•If you clear overrides and character styles on a paragraph that includes a footnote reference marker, the footnote
reference numbers lose the attributes you applied in the Document Footnote Options dialog box.
Tracking and reviewing changes
Track changes
A valuable feature is the ability to track changes made to a story by each contributor in the writing and editing process.
Whenever anyone adds, deletes, or moves text within an existing story, the change is marked in the Story Editor in
InDesign or the Galley and Story views in InCopy. You can then accept or reject the changes.
Use the Track Changes panel in InDesign or the Track Changes toolbar in InCopy to turn Track Changes on or off
and to show, hide, accept, or reject changes made by contributors.
Change tracking shown in Story Editor (InDesign)
A. Change bars B. Added text C. Deleted text D. Moved text (from) E. Moved text (to)
More Help topics
“Adding editorial notes in InDesign” on page 196
Turn on change tracking
1Choose Window > Editorial > Track Changes to open the Track Changes panel (InDesign), or choose Window >
Track Changes to open the Track Changes toolbar (InCopy).
2With the insertion point in text, do any of the following:
•To enable change-tracking in only the current story, click the Enable Track Changes In Current Story icon .
•(InDesign) To enable tracking in all stories, choose Enable Track Changes In All Stories from the Track Changes
panel menu.
•(InCopy) To enable tracking in all open stories in a multistory document, choose Changes > Enable Tracking
In All Stories.
3Add, delete, or move text within the story as needed.
B
C
D
E
A

194
USING INDESIGN
Text
Last updated 11/16/2011
How change tracking is displayed
When Track Changes is turned on, each change is marked by default as follows in Story Editor (InDesign) or in Galley
and Story views (InCopy):
The Track Changes section of the Preferences dialog box lets you choose a color to identify your changes. It also lets
you select which changes (adding, deleting, or moving text) you want tracked and the appearance of tracking.
Added text Highlighted.
Deleted text Highlighted and marked with a strikethrough.
Moved (cut-and-pasted) text Highlighted and marked with a strikethrough in its original location; highlighted and
boxed in the new location.
Note: If you cut text from one document and paste it into another, it is displayed as deleted text in the document of its
original location and as added text in its new location.
Copied text Highlighted in the new location. The original text is unchanged.
Change bars A change bar is a vertical line that appears to the left of a line of text that has been changed. You can
choose whether to show or hide change bars as you work. You can also specify what color to use for displaying the
change bars.
Show or hide changes
When changes are hidden, the text appears as it would with the change-tracking feature turned off. That is, added text
is visible, deleted text is invisible, and moved or pasted text appears where it has been inserted.
(InDesign) When change-tracking is turned on, editing is tracked regardless of whether you work in Story Editor or
in the document layout. You can view changes only in Story Editor, not in the layout.
(InCopy) When change-tracking is turned on, editing is tracked regardless of whether you work in Galley, Story, or
Layout view. You can view changes only in the Galley and Story views, not the Layout view.
❖In the Track Changes panel (InDesign) or the Track Changes toolbar (InCopy), click the Show/Hide Changes
button
.
Turn off change tracking
❖With the insertion point in text, do any of the following:
•To disable change-tracking in only the current story, click the Disable Track Changes In Current Story icon .
•(InDesign) To disable tracking in all stories, choose Disable Track Changes In All Stories from the Track
Changes panel menu.
•(InCopy) To disable tracking in all open stories in a multistory document, choose Changes > Disable Tracking
In All Stories.
Note: If you disable tracking, no further changes are tracked. Previously tracked changes are not affected.
Accept and reject changes
When changes have been made to a story, whether by you or by others, the change-tracking feature enables you to
review all changes and decide whether to incorporate them into the story. You can accept or reject single changes, only
portions of a tracked change, or all changes at once.

195
USING INDESIGN
Text
Last updated 11/16/2011
When you accept a change, it becomes a normal part of the text flow and is no longer highlighted as a change. When
you reject a change, the text reverts to how it was before the change was made.
1In Story Editor (InDesign) or Galley or Story view (InCopy), position the insertion point at the beginning of the
story.
2In the Track Changes panel (InDesign) or the Track Changes toolbar (InCopy), click the Next Change button .
3Do any of the following:
•To accept the highlighted change and incorporate it into the text flow, click the Accept Change button .
•To reject the change and revert to the original text, click the Reject Change button .
To accept or reject the highlighted change and go to the next change, Alt-click (Windows) or Option-click (Mac
OS) the Accept Change or Reject Change button.
•To move back to the previous change or skip over a change and go to the next one, click the Previous Change
button
or Next Change button .
•To accept or reject all changes without reviewing, click the Accept All Changes In Story button or the Reject
All Changes In Story button .
•To accept or reject all changes in the story or in the document, or to accept or reject all changes by a certain
participant, choose the appropriate option from the Track Changes panel menu (InDesign) or from the Changes
menu (InCopy).
Note: If you change your mind about accepting or rejecting a change, you can undo the change by choosing Edit > Undo
or pressing Ctrl+Z (Windows) or Command+Z (Mac
OS).
Choosing an Accept All Changes or Reject All Changes command also applies to hidden conditional text.
Set Track Changes preferences
Preference settings let you control many tracking options. You can choose a color to identify your changes and select
what changes you want tracked: adding, deleting, or moving text. You can also set the appearance of each type of
tracked change, and you can have changes identified with colored change bars in the margins.
1Choose Edit > Preferences > Track Changes (Windows) or InDesign > Preferences > Track Changes (Mac OS).
2Select each type of change that you want to track.
3For each type of change, specify the text color, background color, and marking method.
4Select Prevent Duplicate User Colors to ensure that all users are assigned different colors.
5To show change bars, select the Change Bars option. Choose a color from the Change Bar Color menu, and specify
whether you want change bars to appear in the left or right margin.
6Select Include Deleted Text When Spellchecking if you want to spell-check text marked to be deleted.
7Click OK.
Change the user name and color
1Choose File > User.
2Specify the user name and color to be used for change-tracking and notes, and then click OK.

196
USING INDESIGN
Text
Last updated 11/16/2011
Adding editorial notes in InDesign
The Notes feature in InDesign uses the workflow user names to identify the author of a note or a tracked change. Notes
and tracked changes are color-coded for each user as defined in Notes preferences in InDesign or the User dialog box
in InCopy (File
> User).
Notes can appear only in text. In InDesign, they can be printed only from the Story Editor, and they cannot be exported
to PDF.
More Help topics
“Enter user identification” on page 666
Add editorial notes
When you add editorial notes to managed content in InDesign, these notes become available to others in the workflow.
The notes are primarily intended to be used with an InCopy workflow, but you can take advantage of them in
InDesign. For example, you can place text in notes that you might want to put into a story later. In InCopy, when you
export to Adobe PDF, notes can be converted to PDF comments.
1Using the Type tool, click where you want to place the note, and choose Type > Notes > New Note.
When editing in Story Editor, bookends appear. In Layout view, the Notes panel appears.
2Type your note between the note bookends, or type your note in the Notes panel.
You can add as many notes as you want in any location. However, you cannot create a note within another note.
To show or hide notes, choose View > Extras > Show Notes or Hide Notes.
Use Notes mode
Notes Mode is a convenient way to add, split, or delete notes, depending on where the insertion point is located or
what text is selected.
1Do any of the following:
•To create a new note, place the insertion point in text.
•To convert text to a note, select the text.
•To split a note, place the insertion point inside a note.
•To convert the note to text, select the note bookends (in Story Editor).
•To move the insertion point out of a note, place the insertion point at the beginning or end of the note.
2Choose Type > Notes > Notes Mode.
Manage notes
A note anchor marks the location of a note. The Notes panel displays the contents of the note, along with specific
information about the note.
•To convert text to a note, select text and choose Type > Notes > Convert To Note. A new note is created. The
selected text is removed from the body of the story and pasted into the new note. The note anchor or bookend is
located where the text you selected was cut.

197
USING INDESIGN
Text
Last updated 11/16/2011
•To convert a note to text, select the text in the Notes panel that you want to add to the text of the document. Or, in
Story Editor, select the text in the inline note. Then choose Type > Notes
> Convert To Text.
•To split a note, place the insertion point in the note where you want it to be split and choose Type > Notes > Split Note.
•To navigate among notes, click the insertion point in the story and choose Type > Notes > Previous Note or Notes >
Next Note.
Edit Notes preferences
Preferences settings let you set the color for note anchors, bookends, and backgrounds when inline in the Story Editor.
You can also choose to display note info as a tool tip, as well as choose whether to include note content in Find/Change
operations and spell checking in the Story Editor.
1Choose Edit > Preferences > Notes (Windows) or InDesign > Preferences > Notes (Mac OS).
2Select a color for note anchors and note bookends from the Note Color menu. Select [User Color] to use the color
specified in the User dialog box. This is especially useful if more than one person is working on the file.
3Select Show Note Tool Tips to display note information and some or all of the note content as a tool tip when the
mouse pointer hovers over a note anchor in Layout view or a note bookend in Story Editor.
4Specify whether you want to include inline note content when using the Find/Change and Spell Check commands
(in Story Editor only).
Note: In Layout view, you cannot use the Find/Change and Spell Check commands to search for the contents of notes,
regardless of the settings in the Preferences dialog box. However, Change All does edit the contents of notes.
5Select either [None] or [Note Color] (the color you chose in step 2) to use for the background color of an inline note.
6Click OK.

198
Last updated 11/16/2011
Chapter 6: Styles
Paragraph and character styles
About character and paragraph styles
A character style is a collection of character formatting attributes that can be applied to text in a single step. A
paragraph style includes both character and paragraph formatting attributes, and can be applied to a paragraph or
range of paragraphs. Paragraph styles and character styles are found on separate panels. Paragraph and characters
styles are sometimes called text styles.
When you change the formatting of a style, all text to which the style has been applied will be updated with the new
format.
For a video tutorial on making a paragraph style, see www.adobe.com/go/lrvid4277_id. For a video tutorial on using
text styles, see www.adobe.com/go/vid0076.
Thomas Silkjaer provides samples of styles at Free InDesign Style Template.
[Basic Paragraph] styles
By default, each new document contains a [Basic Paragraph] style that is applied to text you type. You can edit this
style, but you can’t rename or delete it. You can rename and delete styles that you create. You can also select a different
default style to apply to text.
Character style attributes
Unlike paragraph styles, character styles do not include all the formatting attributes of selected text. Instead, when you
create a character style, InDesign makes only those attributes that are different from the formatting of the selected text
part of the style. That way, you can create a character style that, when applied to text, changes only some attributes,
such as the font family and size, ignoring all other character attributes. If you want other attributes to be part of the
style, add them when editing the style.
Next Style
You can automatically apply styles as you type text. If, for example, your document’s design calls for the style “body
text” to follow a heading style named “heading
1,” you can set the Next Style option for “heading 1” to “body text.”
After you’ve typed a paragraph styled with “heading
1,” pressing Enter or Return starts a new paragraph styled with
“body text.”
If you use the context menu when applying a style to two or more paragraphs, you can cause the parent style to be
applied to the first paragraph and the Next Style to be applied to the additional paragraphs. (See “Apply styles” on
page 202.)
To use the Next Style feature, choose a style from the Next Style menu when you’re creating or editing a style.
Jeff Witchel provides a video tutorial about using the Next Style feature at Using the Next Style feature.

199
USING INDESIGN
Styles
Last updated 11/16/2011
Styles panel overview
Use the Character Styles panel to create, name, and apply character styles to text within a paragraph; use the Paragraph
Styles panel to create, name, and apply paragraph styles to entire paragraphs. Styles are saved with a document and
display in the panel each time you open that document.
When you select text or position the insertion point, any style that has been applied to that text is highlighted in either
of the Styles panels, unless the style is in a collapsed style group. If you select a range of text that contains multiple
styles, no style is highlighted in the Styles panel. If you select a range of text to which multiple styles are applied, the
Styles panel displays “(Mixed).”
Open the Paragraph Styles panel
❖Choose Type > Paragraph Styles, or click the Paragraph Styles tab, which appears by default on the right side of the
application window.
Open the Character Styles panel
❖Choose Type > Character Styles, or click the Character Styles tab on the right side of the application window.
Add paragraph and character styles
More Help topics
“Group styles” on page 218
“Create nested styles” on page 207
“Apply styles” on page 202
“Duplicate styles or style groups” on page 218
Define paragraph or character styles
1If you want to base a new style on the formatting of existing text, select that text or place the insertion point in it.
If a group is selected in the Styles panel, the new style will be part of that group.
2Choose New Paragraph Style from the Paragraph Styles panel menu, or choose New Character Style from the
Character Styles panel menu.
3For Style Name, type a name for your new style.
4For Based On, select which style the current style is based on.
Note: The Based On option lets you link styles to each other, so that changes in one style ripple through the styles that are
based on it. By default, new styles are based on [No Paragraph Style] for paragraph styles or [None] for character styles,
or on the style of any currently selected text.
5For Next Style (Paragraph Styles panel only), specify which style is applied after the current style when you press
Enter or Return.
6To add a keyboard shortcut, position the insertion point in the Shortcut box, and make sure Num Lock is turned
on. Then hold down any combination of Shift, Alt, and Ctrl (Windows), or Shift, Option, and Command (Mac
OS),
and press a number on the numeric keypad. You cannot use letters or non-keypad numbers for defining style
shortcuts. If your keyboard does not have a Num Lock key, you cannot add keyboard shortcuts to styles.
7If you want the new style to be applied to the selected text, select Apply Style To Selection.

200
USING INDESIGN
Styles
Last updated 11/16/2011
8To specify the formatting attributes, click a category (such as Basic Character Formats) on the left, and specify the
attributes you want to add to your style.
When specifying a Character Color in the Style Options dialog box, you can create a new color by double-clicking the
fill or stroke box.
9For character styles, attributes you do not specify are ignored; when the style is applied, text will retain the
paragraph style formatting for that attribute. To remove an attribute setting from a character style:
•From a setting’s menu, choose (Ignore).
•In a text box, delete the option text.
•In a check box, click until you see a small box (Windows) or a hyphen (-) (Mac OS).
•For a character color, hold down Ctrl (Windows) or Command (Mac OS) and click the color swatch.
10 When you’ve finished specifying the formatting attributes, click OK.
Styles you create appear only in the current document. If no document is open, the styles you create will appear in all
new documents.
Base one paragraph or character style on another
Many document designs feature hierarchies of styles sharing certain attributes. The headings and subheads, for
example, often use the same font. You can easily create links between similar styles by creating a base, or parent, style.
When you edit the parent style, the child styles will change as well. You can then edit the child styles to distinguish
them from the parent style.
To create a style that’s nearly identical to another style, but without the parent-child relationship, use the Duplicate
Style command and then edit the copy.
1Create a new style.
2In the New Paragraph Style or New Character Style dialog box, select the parent style in the Based On menu. The
new style becomes the child style.
By default, new styles are based on [No Paragraph Style] or [None], or on the style of any currently selected text.
3Specify formatting in the new style to distinguish it from the style on which it’s based. For example, you might want
to make the font used in a subheading slightly smaller than the one used in the heading (parent) style.
If you make changes to the formatting of a child style and decide you want to start over, click Reset To Base. That
restores the child style’s formatting to be identical to the style on which it’s based. Then you can specify new formatting.
Similarly, if you change the Based On style of the child style, the child style definition is updated to match its new parent
style.
Import styles from other documents
You can import paragraph and character styles from another InDesign document (any version) into the active
document. During import, you can determine which styles are loaded and what should occur if a loaded style has the
same name as a style in the current document. You can also import styles from an InCopy document.
1In the Character Styles or Paragraph Styles panel, do one of the following:
•Choose Load Character Styles or Load Paragraph Styles in the Styles panel menu.
•Choose Load All Text Styles in the Styles panel menu to load both character and paragraph styles.
2Double-click the InDesign document containing the styles you want to import.

201
USING INDESIGN
Styles
Last updated 11/16/2011
3In the Load Styles dialog box, make sure that a check mark appears next to the styles you want to import. If any
existing style has the same name as one of the imported styles, choose one of the following options under Conflict
With Existing Style, and then click
OK:
Use Incoming Style Definition Overwrites the existing style with the loaded style and applies its new attributes to all
text in the current document that used the old style. The definitions of the incoming and existing styles are displayed
at the bottom of the Load Styles dialog box so that you can view a comparison.
Auto-Rename Renames the loaded style. For example, if both documents have a Subheading style, the loaded style is
renamed “Subheading copy” in the current document.
You can also use the Books feature to share styles. (See “Synchronize book documents” on page 315.)
Map styles to export tags (CS5.5)
Use Export Tagging to define how text with InDesign styles is marked up in HTML, EPUB, or tagged PDF output.
You can also specify CSS class names to add to the exported content. In EPUB/HTML export, CSS classes can be used
to differentiate between slight variations in styling. Class names are required if you are using the option to Include Style
Definitions and the tags are mapped to the basic styles such as p, h1, and h2; class names are then used to generate style
definitions.
You cannot preview Export Tagging within the InDesign layout, as it only impacts the exported EPUB, HTML, or PDF file.
Edit All Export Tags lets you efficiently view and modify the mappings in a single dialog box.
More Help topics
“EPUB Contents options” on page 126
Define style-tag mapping
1For the style to map, open the paragraph or character Style Options dialog box.
2Click Export Tagging in the left pane, and do one of the following:
•Choose a Tag to map for EPUB and HTML output.
•Specify a Class to map for EPUB and HTML output. Class names are used to generate style definitions for default tags.
•Choose a Tag to map for PDF output. This option is only available for paragraph styles.
Edit all export tags
You can view and modify all export tags together in a single window.
1Select Edit All Export Tags in the Paragraph or Character style panel menu.
2Click EPUB and HTML, or PDF.
3Click the tag corresponding to the style. It gets converted to a list; choose the new value.

202
USING INDESIGN
Styles
Last updated 11/16/2011
Convert Word styles to InDesign styles
While importing a Microsoft Word document into InDesign or InCopy, you can map each style used in Word to a
corresponding style in InDesign or InCopy. By doing so, you specify which styles format the imported text. A disk
icon
appears next to each imported Word style until you edit the style in InDesign or InCopy.
1Do one of the following:
•To add the Word document to existing text in InDesign or InCopy, choose File > Place. Select Show Import
Options, and then double-click the Word document.
•To open the Word document in a stand-alone InCopy document, start InCopy, choose File > Open, and then
double-click the Word file.
2Select Preserve Styles And Formatting From Text And Tables.
3Select Customized Style Import, and then click Style Mapping.
4In the Style Mapping dialog box, select the Word style, and then select an option from the menu under InDesign
style. You can choose the following options:
•If there is no style name conflict, choose New Paragraph Style, New Character Style, or choose an existing InDesign
style.
•If there is a style name conflict, choose Redefine InDesign Style to format the imported style text with the Word
style. Choose an existing InDesign style to format the imported style text with the InDesign style. Choose Auto
Rename to rename the Word style.
5Click OK to close the Style Mapping dialog box, and then click OK to import the document.
More Help topics
“Place (import) text” on page 136
“Paste text” on page 135
Apply styles
By default, applying a paragraph style won’t remove any existing character formatting or character styles applied to
part of a paragraph, although you have the option of removing existing formatting when you apply a style. A plus
sign
(+) appears next to the current paragraph style in the Styles panel if the selected text uses a character or paragraph
style and also uses additional formatting that isn’t part of the applied style. Such additional formatting is called an
override or local formatting.
Character styles remove or reset character attributes of existing text if those attributes are defined by the style.
More Help topics
“Use Quick Apply” on page 243
“Override character and paragraph styles” on page 205
Apply a character style
1Select the characters to which you want to apply the style.
2Do one of the following:
•Click the character style name in the Character Styles panel.
•Select the character style name from the drop-down list in the Control panel.
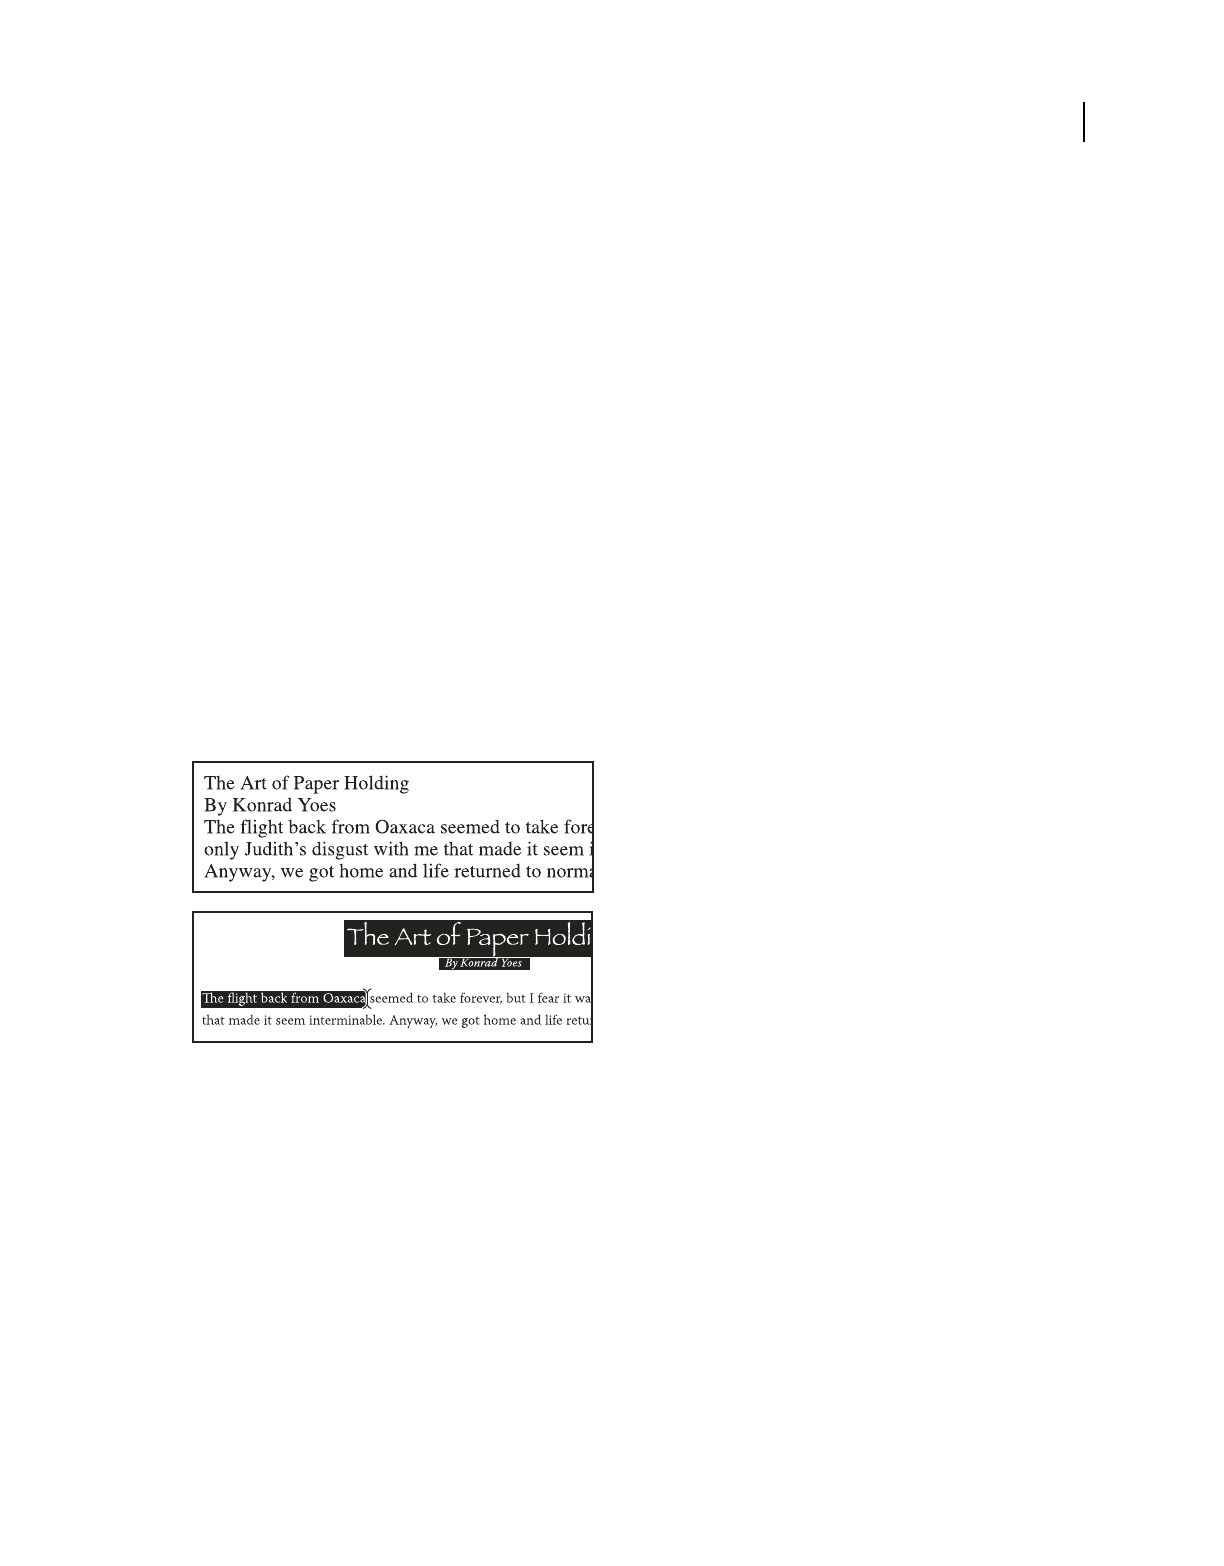
203
USING INDESIGN
Styles
Last updated 11/16/2011
•Press the keyboard shortcut you assigned to the style. (Make sure that Num Lock is on.)
Apply a paragraph style
1Click in a paragraph, or select all or part of the paragraphs to which you want to apply the style.
2Do one of the following:
•Click the paragraph style name in the Paragraph Styles panel.
•Select the paragraph style name from the menu in the Control panel.
•Press the keyboard shortcut you assigned to the style. (Make sure that Num Lock is on.)
3If any unwanted formatting remains in the text, choose Clear Overrides from the Paragraph Styles panel.
Apply sequential styles to multiple paragraphs
The Next Style option specifies which style will be automatically applied when you press Enter or Return after applying
a particular style. It also lets you apply different styles to multiple paragraphs in a single action.
For example, suppose you have three styles for formatting a newspaper column: Title, Byline, and Body. Title uses
Byline for Next Style, Byline uses Body for Next Style, and Body uses [Same Style] for Next Style. If you select an entire
article, including the title, the author’s byline, and the paragraphs in the article, and then apply the Title style using the
special “Next Style” command in the context menu, the article’s first paragraph will be formatted with the Title style,
the second paragraph will be formatted with the Byline style, and all other paragraphs will be formatted with the Body
style.
Before and after applying a style with Next Style.
1Select the paragraphs to which you want to apply the styles.
2In the Paragraph Styles panel, right-click (Windows) or Control-click (Mac OS) the parent style, and then choose
Apply [Style Name] Then Next Style.
If the text includes formatting overrides or character styles, the context menu also lets you remove overrides, character
styles, or both.
Edit character and paragraph styles
One of the advantages of using styles is that when you change the definition of a style, all of the text formatted with
that style changes to match the new style definition.
Note: If you edit styles in InCopy content that’s linked to an InDesign document, the modifications are overridden when
the linked content is updated.

204
USING INDESIGN
Styles
Last updated 11/16/2011
More Help topics
“Override character and paragraph styles” on page 205
Edit a style using the dialog box
1Do one of the following:
•If you don’t want the style to be applied to selected text, right-click (Windows) or Control-click (Mac OS) the style
name in the Styles panel, and choose Edit [style name].
•In the Styles panel, double-click the style name, or select the style and choose Style Options in the Styles panel
menu. Note that this applies the style to any selected text or text frame or, if no text or text frame is selected, sets
the style as the default style for any text you type in new frames.
2Adjust settings in the dialog box, and then click OK.
Redefine a style to match selected text
After you apply a style, you can override any of its settings. If you decide you like the changes you made, you can
redefine the style so that it matches the formatting of the text you changed.
Note: If you redefine styles in InCopy content linked to an InDesign document, the modifications are overridden when
the linked content is updated.
1Using the Type tool , select the text formatted with the style you want to redefine.
2Make changes to the paragraph or character attributes as necessary.
3Choose Redefine Style in the Styles panel menu.
Delete character or paragraph styles
When you delete a style, you can select a different style to replace it, and you can choose whether to preserve the
formatting. When you delete a style group, you delete all styles within the group. You are prompted to replace each
style in the group one at a time.
1Select the style name in the Styles panel.
2Do one of the following:
•Choose Delete Style in the panel menu or click the Delete icon at the bottom of the panel.
•Right-click (Windows) or Control-click (Mac OS) the style, and then choose Delete Style. This method is especially
useful for deleting a style without applying it to text.
3In the Delete Paragraph Style dialog box, select the style to replace it.
If you select [No Paragraph Style] to replace a paragraph style or [None] to replace a character style, select Preserve
Formatting to keep the formatting of text to which the style is applied. The text preserves its formatting but is no longer
associated with a style.
4Click OK.
To delete all unused styles, choose Select All Unused in the Styles panel menu, and then click the Delete icon. When
you delete an unused style, you are not prompted to replace the style.
More Help topics
“Group styles” on page 218

205
USING INDESIGN
Styles
Last updated 11/16/2011
Override character and paragraph styles
When you apply a paragraph style, character styles and other previous formatting remain intact. After you apply a
style, you can override any of its settings by applying formatting that’s not part of the style. When formatting that is
not part of a style is applied to text with that style applied, it is called an override or local formatting. When you select
text with an override, a plus sign
(+) appears next to the style name. In character styles, an override is displayed only
if the applied attribute is part of the style. For example, if a character style only changes text color, applying a different
font size to the text does not appear as an override.
You can clear character styles and formatting overrides when you apply a style. You can also clear overrides from a
paragraph to which a style has been applied.
If a style has a plus sign (+) next to it, hold the mouse pointer over the style to view a description of the override
attributes.
More Help topics
“Redefine a style to match selected text” on page 204
Preserve or remove overrides when applying paragraph styles
•To apply a paragraph style and preserve character styles, but remove overrides, hold down Alt (Windows) or
Option (Mac
OS) as you click the name of the style in the Paragraph Styles panel.
•To apply a paragraph style and remove both character styles and overrides, hold down Alt+Shift (Windows) or
Option+Shift (Mac
OS) as you click the name of the style in the Paragraph Styles panel.
Right-click (Windows) or Control-click (Mac OS) the style in the Paragraph Styles panel, and then choose an option
from the context menu. You can then clear overrides, character styles, or both while applying the style.
Clear paragraph style overrides
1Select the text containing the overrides. You can even select multiple paragraphs with different styles.
2In the Paragraph Styles panel, do any of the following:
•To remove paragraph and character formatting, click the Clear Overrides icon , or choose Clear Overrides from
the Paragraph Styles panel.
•To remove character overrides, but preserve paragraph formatting overrides, hold down Ctrl (Windows) or
Command (Mac
OS) as you click the Clear Overrides icon.
•To remove paragraph-level overrides, but preserve character-level overrides, in the Paragraph Styles panel, hold
down Shift+Ctrl (Windows) or Shift+Command (Mac
OS) as you click the Clear Overrides icon.
Note: When you clear overrides, paragraph-level overrides are removed from the entire paragraph, even if only part of
the paragraph is selected. Character-level overrides are removed only from the selection.
Clearing overrides does not remove character style formatting. To remove character style formatting, select the text
containing the character style, and then click [None] in the Character Styles panel.
Break the link between text and its style
When you break the link between text and its style, the text retains its current formatting. However, future changes to
that style will not be reflected in the text that was separated from the style.
1Select the text that is marked with the style that you want to break from.
2Choose Break Link To Style from the Styles panel menu.

206
USING INDESIGN
Styles
Last updated 11/16/2011
If no text is selected when you choose Break Link To Style, any new text you type uses the same formatting as the
selected style, but no style is assigned to that text.
Convert style bullets and numbering to text
When you create a style that adds bullets or numbering to paragraphs, these bullets and numbers may be lost if the text
is copied or exported to a different application. To avoid this problem, convert the style bullets or numbering to text.
Note: If you convert style bullets in an InCopy story linked to an InDesign layout, the change may be overridden when
the content is updated in InDesign.
1In the Paragraph Styles panel, select the style that contains the bullets and numbering.
2In the Paragraph Styles panel menu, choose Convert “[style]” Bullets and Numbering to Text.
If you convert bullets and numbering to text in a style on which another style is based (a parent style), the bullets and
numbering in the child style are also converted to text.
After you convert numbering to text, you may need to update numbers manually if you edit the text.
More Help topics
“Create a paragraph style for running lists” on page 281
Find and replace character and paragraph styles
Use the Find/Change dialog box to find instances of a particular style and replace it with another.
1Choose Edit > Find/Change.
2For Search, select Document to change the style throughout the document.
3Leave the Find What and Change To options blank. If the Find Format and Change Format boxes don’t appear at
the bottom of the dialog box, click More Options.
4Click the Find Format box to display the Find Format Settings dialog box. Under Style Options, select the character
or paragraph style you want to search for, and then click
OK.
5Click the Change Format box to display the Change Format Settings dialog box. Under Style Options, select the
replacement character or paragraph style, and then click
OK.
6Click Find, and then use the Change, Change/Find, or Change All buttons to replace the style.
More Help topics
“Find and change text” on page 162
“Find and change fonts” on page 174
Drop caps and nested styles
There are three main ways to use Drop Caps and Nested Styles feature: to apply a character style to a drop cap, to apply
a nested style to text at the beginning of a paragraph, and to apply a nested line style to one or more lines in a paragraph.
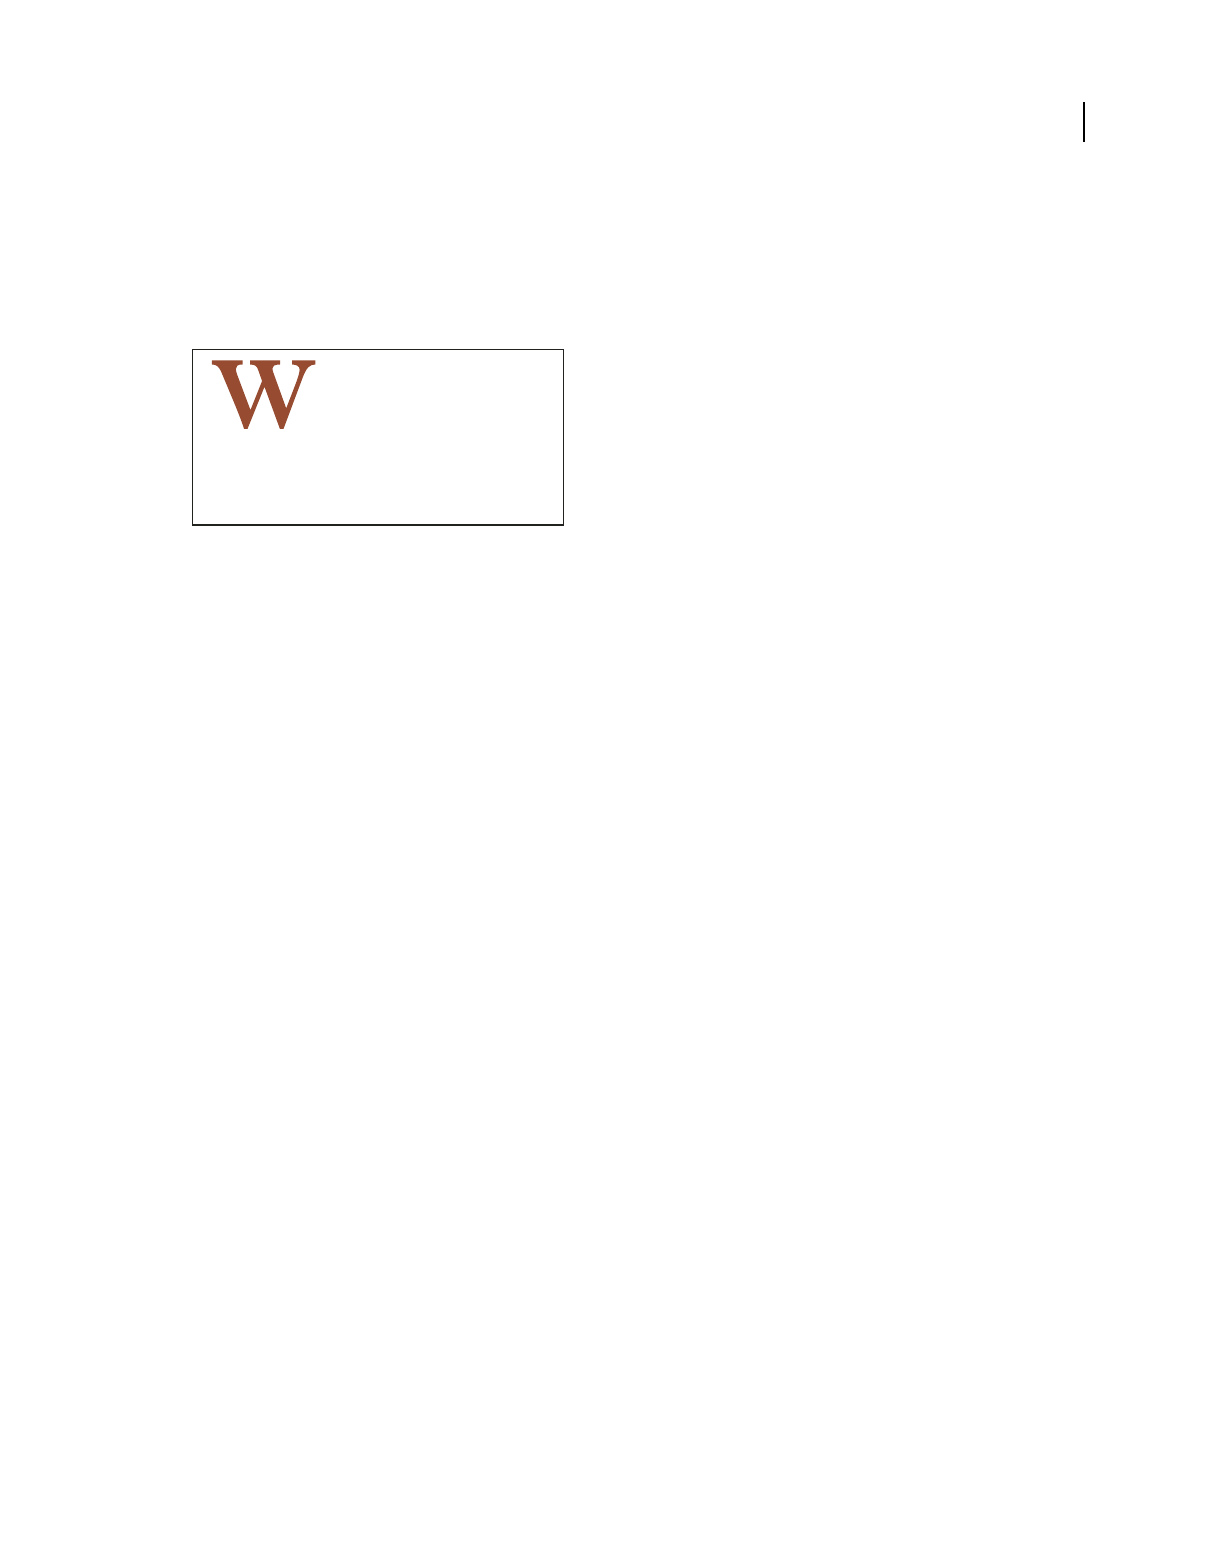
207
USING INDESIGN
Styles
Last updated 11/16/2011
Apply a character style to a drop cap
You can apply a character style to the drop-cap character or characters in a paragraph. For example, if you want a drop-
cap character to have a different color and font than the rest of the paragraph, you can define a character style that has
these attributes. Then you can either apply the character style directly to a paragraph, or you can nest the character
style in a paragraph style.
Drop cap formatted automatically by nested character style
1Create a character style that has the formatting you want to use for the drop-cap character.
2Do one of the following:
•To apply the drop cap to a single paragraph, choose Drop Caps And Nested Styles from the Paragraph panel menu.
•To nest the character style in a paragraph style, double-click the paragraph style, and then click Drop Caps And
Nested Styles.
3Specify the number of drop-cap lines and characters, and then choose the character style.
4If the drop cap is aligned too far away from the left edge, select Align Left Edge.
Selecting this option uses the original left side bearing of the drop-cap character rather than the larger value. It’s
particularly useful for drop caps formatted in sans serif fonts.
5If the drop cap character overlaps the text below it, select Scale For Descenders.
6Click OK.
If you want to apply a different nested style to any characters after the drop cap, use the New Nested Style option. (See
“Create nested styles” on page 207.)
More Help topics
“Use drop caps” on page 261
Create nested styles
You can specify character-level formatting for one or more ranges of text within a paragraph or line. You can also set
up two or more nested styles to work together, one taking over where the previous one ends. For paragraphs with
repetitive and predictable formatting, you can even loop back to the first style in the sequence.
Nested styles are especially useful for run-in headings. For example, you can apply one character style to the first letter
in a paragraph and another character style that takes effect through the first colon
(:). For each nested style, you can
define a character that ends the style, such as a tab character or the end of a word.
hat you don’t feel,
you will not grasp by art,
Unless it wells out of your soul
And with sheer pleasure takes control,
Compelling every listener’s heart.
But sit – and sit, and patch and knead,
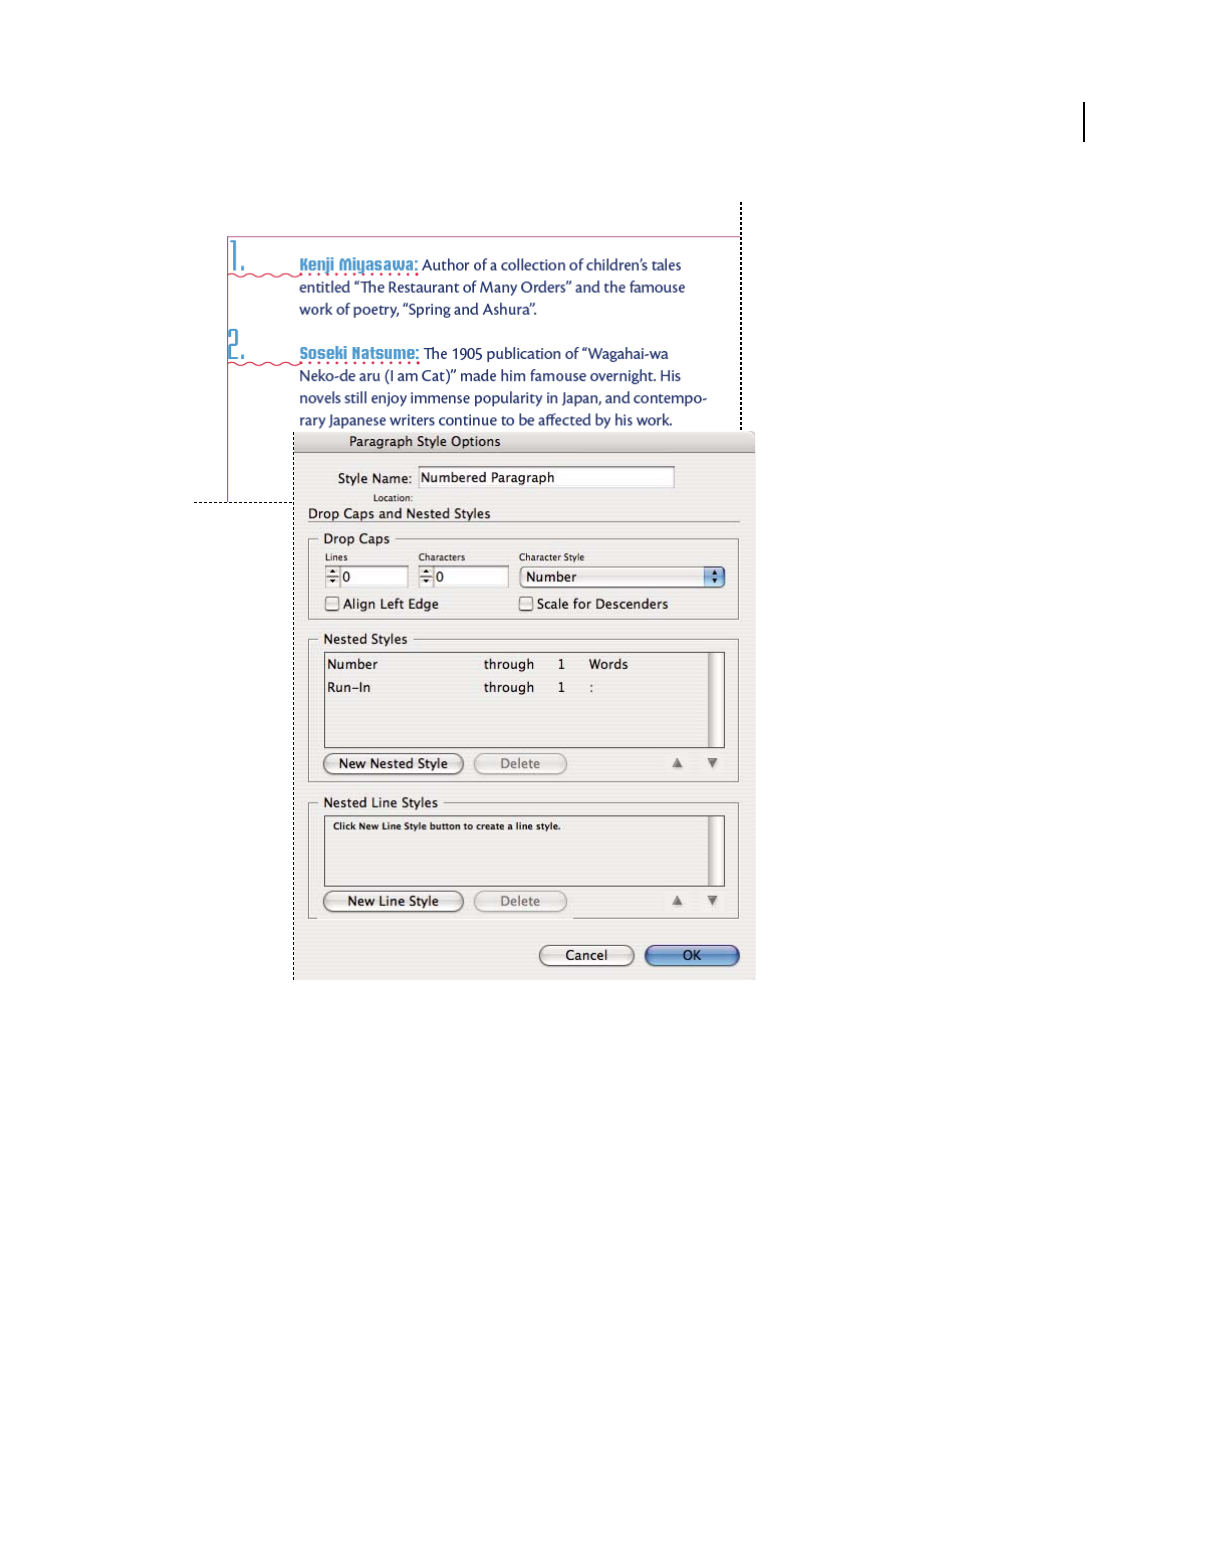
208
USING INDESIGN
Styles
Last updated 11/16/2011
In this example, the Number character style formats the first word, and the Run-in character style formats text through the first colon.
Michael Murphy provides an article on nested styles at InDesign's Nested Styles Auto-Format Multiple Paragraphs.
He also provides a series of video tutorials that starts at Nested Style Sheets.
Create one or more nested styles
1Create one or more character styles that you want to use to format text.
2Do one of the following:
•To add nested styles to a paragraph style, double-click the paragraph style, and then click Drop Caps And Nested
Styles.
•To add nested styles to a single paragraph, choose Drop Caps And Nested Styles from the Paragraph panel menu.
Note: For best results, apply nested styles as part of paragraph styles. If you apply nested styles as local overrides to a
paragraph, subsequent editing or formatting changes in the nested style can produce unexpected character formatting in
the styled text.
3Click New Nested Style one or more times.

209
USING INDESIGN
Styles
Last updated 11/16/2011
4Do any of the following for each style, and then click OK:
•Click the character style area, and then select a character style to determine the appearance of that section of the
paragraph. If you haven’t created a character style, choose New Character Style and specify the formatting you want
to use.
•Specify the item that ends the character style formatting. You can also type the character, such as a colon (:) or a
specific letter or number. You cannot type a word.
•Specify how many instances of the selected item (such as characters, words, or sentences) are required.
•Choose Through or Up To. Choosing Through includes the character that ends the nested style, while choosing Up
To formats only those characters that precede this character.
•Select a style and click the up button or down button to change the order of the styles in the list. The order
of the styles determines the sequence in which the formatting is applied. The formatting defined by the second style
begins where the formatting of the first style concludes. If you apply a character style to the drop cap, the drop-cap
character style acts as the first nested style.
Create nested line styles
You can apply a character style to a specified number of lines in a paragraph. As with nested styles, you can set up two
or more nested line styles to work together, and you can create a repeating sequence.
Attributes applied by nested line styles can co-exist with attributes applied by nested styles. For example, a nested line
style can apply a color while a nested style can apply italics. If both set conflicting settings of the same attribute, such
as red and blue, the nested style takes precedence over the nested line style.
1Create one or more character styles that you want to use to format text.
2Do one of the following:
•To add nested line styles to a paragraph style, double-click the paragraph style, and then click Drop Caps And
Nested Styles.
•To add nested line styles to a single paragraph, choose Drop Caps And Nested Styles from the Paragraph panel
menu.
3Click New Nested Line Style one or more times.
4Click the character style area, and then select a character style to determine the appearance of that section. If you
haven’t created a character style, choose New Character Style and specify the formatting you want to use.
5Specify the number of paragraph lines you want the character style to affect.
Select a style and click the up button or down button to change the order of the styles in the list. The order
determines the sequence in which the formatting is applied.
6Click OK.
Loop through nested styles
You can repeat a series of two or more nested styles throughout a paragraph. A simple example would be to alternate
red and green words in a paragraph. Or, in nested line styles you could alternate red and green lines in a paragraph.
The repeating pattern remains intact even if you add or remove words in the paragraph.
1Create the character styles you want to use.
2Edit or create a paragraph style, or place the insertion point in the paragraph you want to format.
3In the Drop Caps And Nested Styles section or dialog box, click New Nested Style (or New Nested Line Style) at
least twice and choose settings for each style.
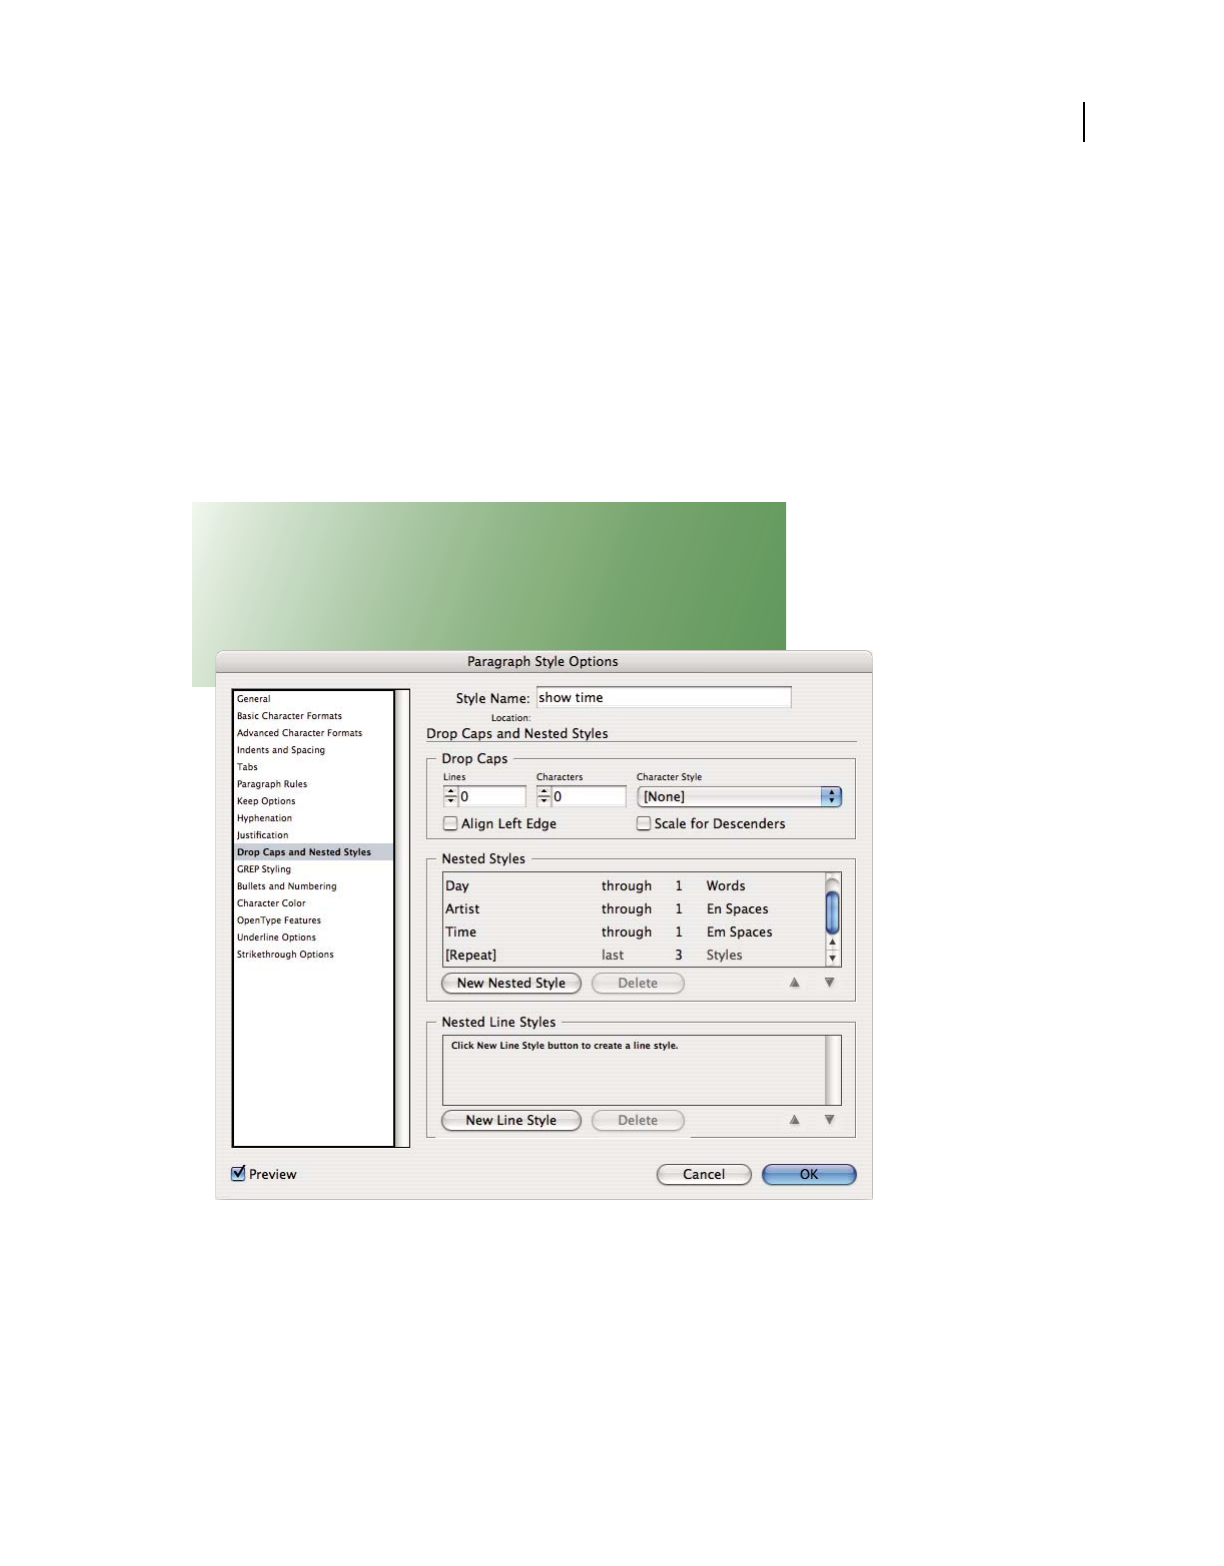
210
USING INDESIGN
Styles
Last updated 11/16/2011
4Do either of the following:
•For nested styles, click New Nested Style again, choose [Repeat] in the character style area, and specify how many
nested styles will be repeated.
•For nested line styles, click New Nested Line Style again, choose [Repeat] in the character style area, and specify
how many lines will be repeated.
In some cases, you may want to skip the first style or styles. For example, an events calendar paragraph may include
“This Week’s Events” followed by days of the week and their events. In this case, you could create five nested styles:
one for “This Week’s Events,” one each for the day, event, and event time, and a final style with a [Repeat] value of 3,
thereby excluding the first nested style from the loop.
The [Repeat] item should be the last in the list. Any nested style below [Repeat] is ignored.
Looping through nested styles
5Click OK.
Nested style character style options
To determine how a nested character style ends, select any of the following:
NIGHT&DAY 4/2 (MON) Dana Bettis - 8pm 4/3 (TUE) Mot Mazu - 8 & 10pm
4/4 (WED) Osamu Noda & Electric Wires - 9pm 4/5 (THU) Zagaby - 9pm
4/6-7 (FRI&SAT) Stan Macoo - 9 & 11pm

211
USING INDESIGN
Styles
Last updated 11/16/2011
If you don’t want the character to be included in the nested style formatted, choose Up To instead of Through when
you define the nested style.
Sentences Periods, question marks, and exclamation points indicate the end of a sentence. If a quotation mark follows
the punctuation, it is included as part of the sentence.
Words Any space or white space character indicates the end of a word.
Characters Any character other than zero-width markers (for anchors, index markers, XML tags and so on) is
included.
Note: If you select Characters, you can also type a character, such as a colon or a period, to end the nested style. If you
type multiple characters, any of those characters will end the style. For example, if your run-in headings end with a
hyphen, colon, or question mark, you can type -:? to end the nested style where any of these characters appears.
Letters Any character that does not include punctuation, white space, digits, and symbols.
Digits The Arabic numerals 0–9 are included.
End Nested Style Character Extends the nested style up to or through the appearance of the End Nested Style character
you insert. To insert this character, choose Type
> Insert Special Character > Other > End Nested Style Here.
Tab Characters Extends the nested style up to or through the tab character (not the tab setting).
Forced Line Break Extends the nested style up to or through the forced line break. (Choose Type > Insert Break
Character
> Forced Line Break.)
Indent To Here Character Extends the nested style up to or through the Indent To Here character. (Choose Type >
Insert Special Character
> Other > Indent To Here.)
Em Spaces, En Spaces, or Non-breaking Spaces Extends the nested style up to or through the space character. (Choose
Type
> Insert White Space > [space character].)
Anchored Object Marker Extends the nested style up to or through an inline graphic marker, which appears where an
inline graphic is inserted.
Auto Page Number / Section Marker Extends the nested style up to or through the page number or section name
marker.
End a nested style
In most cases, a nested style ends where the condition of the defined style is met, such as after three words or where a
period appears. However, you can also end a nested style before the condition is met using the End Nested Style Here
character.
1Place the insertion point where you want the nested style to end.
2Choose Type > Insert Special Character > Other > End Nested Style Here.
This character ends the nested style at that point, regardless of the nested style definition.
Remove the formatting of a nested style
•In the Drop Caps And Nested Styles dialog box, or in the Drop Caps And Nested Styles section of the Paragraph
Style Options dialog box, select the nested style and click Delete.
•Apply a different paragraph style.
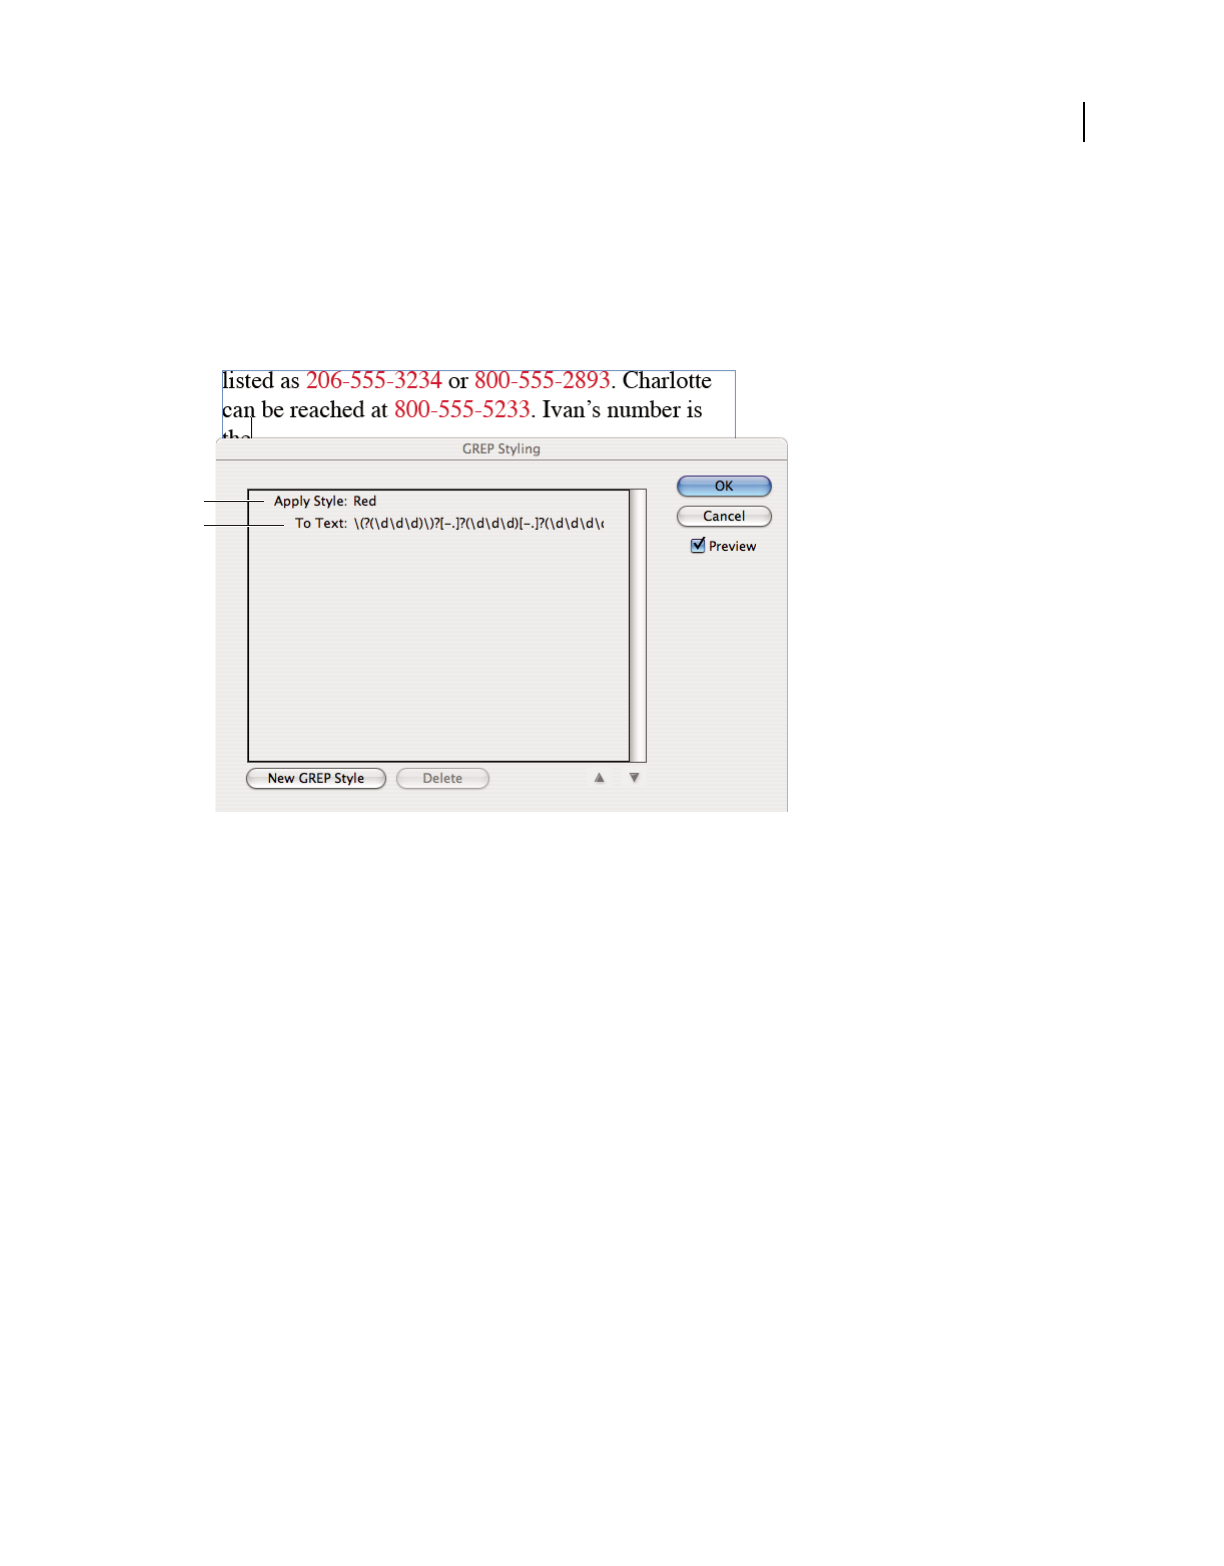
212
USING INDESIGN
Styles
Last updated 11/16/2011
Create GREP styles
GREP is an advanced, pattern-based search technique. You can use GREP styles to apply a character style to text that
conforms to the GREP expression you specify. For example, suppose you want to apply a character style to all the
phone numbers in text. When you create a GREP style, you select the character style and specify the GREP expression.
All paragraph text that matches the GREP expression is formatted with the character style.
Using GREP style to format phone numbers with a character style
A. Character style B. GREP expression
For a video tutorial on creating GREP styles, see www.adobe.com/go/lrvid4028_id.
David Blatner provides real-world examples of GREP styles at 5 Cool Things You Can Do with GREP Styles. Cari
Jansen provides a four-part series about GREP styles that begins at Introducing GREP Styles.
1Do one of the following:
•To apply GREP styling to individual paragraphs, select the paragraphs and choose Grep Styles from the
Paragraph or Control panel menu.
•To use GREP styles in a paragraph style, create or edit a paragraph style, and click the GREP Styling tab on the
left side of the Paragraph Style Options dialog box.
2Click New GREP Style.
3Click to the right of Apply Style, and then specify a character style. If you haven’t created a character style to use,
choose New Character Style and specify the formatting you want to use.
4Click to the right of To Text and do any of the following to construct a GREP expression:
•Enter the search expression manually. (See “Metacharacters for searching” on page 169.)
•Click the Special Characters For Search icon to the right of the To Text field. Choose options from the Locations,
Repeat, Match, Modifiers, and Posix submenus to help construct the GREP expression.
5Click OK.
B
A

213
USING INDESIGN
Styles
Last updated 11/16/2011
More Help topics
“Search using GREP expressions” on page 165
GREP styles video
Object styles
About object styles
Just as you use paragraph and character styles to quickly format text, you can use object styles to quickly format
graphics and frames. Object styles include settings for stroke, color, transparency, drop shadows, paragraph styles, text
wrap, and more. You can assign different transparency effects for the object, fill, stroke, and text.
You can apply object styles to objects, groups, and frames (including text frames). A style can either clear and replace
all object settings or it can replace only specific settings, leaving other settings unchanged. You control which settings
the style affects by including or excluding a category of settings in the definition.
When creating styles, you might find that several styles share some of the same characteristics. Rather than setting
those characteristics each time you define the next style, you can base one object style on another. When you change
the base style, any shared attributes that appear in the “parent” style change in the “child” style as well.
For a video tutorial on using object styles, see www.adobe.com/go/vid0072.
More Help topics
Object Styles video
Object Styles panel overview
Use the Object Styles panel to create, edit, and apply object styles. For each new document, the panel initially lists a
default set of object styles. Object styles are saved with a document and display in the panel each time you open that
document. The Text Frame icon
marks the default style for text frames; the Graphics Frame icon marks the
default style for graphics frames and drawn shapes.
Open the Object Style panel
❖Choose Window > Styles > Object Styles.
Change how object styles are listed in the panel
•Select Small Panel Rows from the panel menu to display a more condensed version of the object styles.
•Drag the object style to a different position. When a black line appears in the desired position, release the mouse
button.
•Select Sort By Name from the panel menu to list the object styles in alphabetical order.
Define object styles
You can define a style based on the settings you’ve already applied to an object, or you can create a style from scratch
or based on another style.
1Select the object or text frame that uses the settings you want the object style to include.
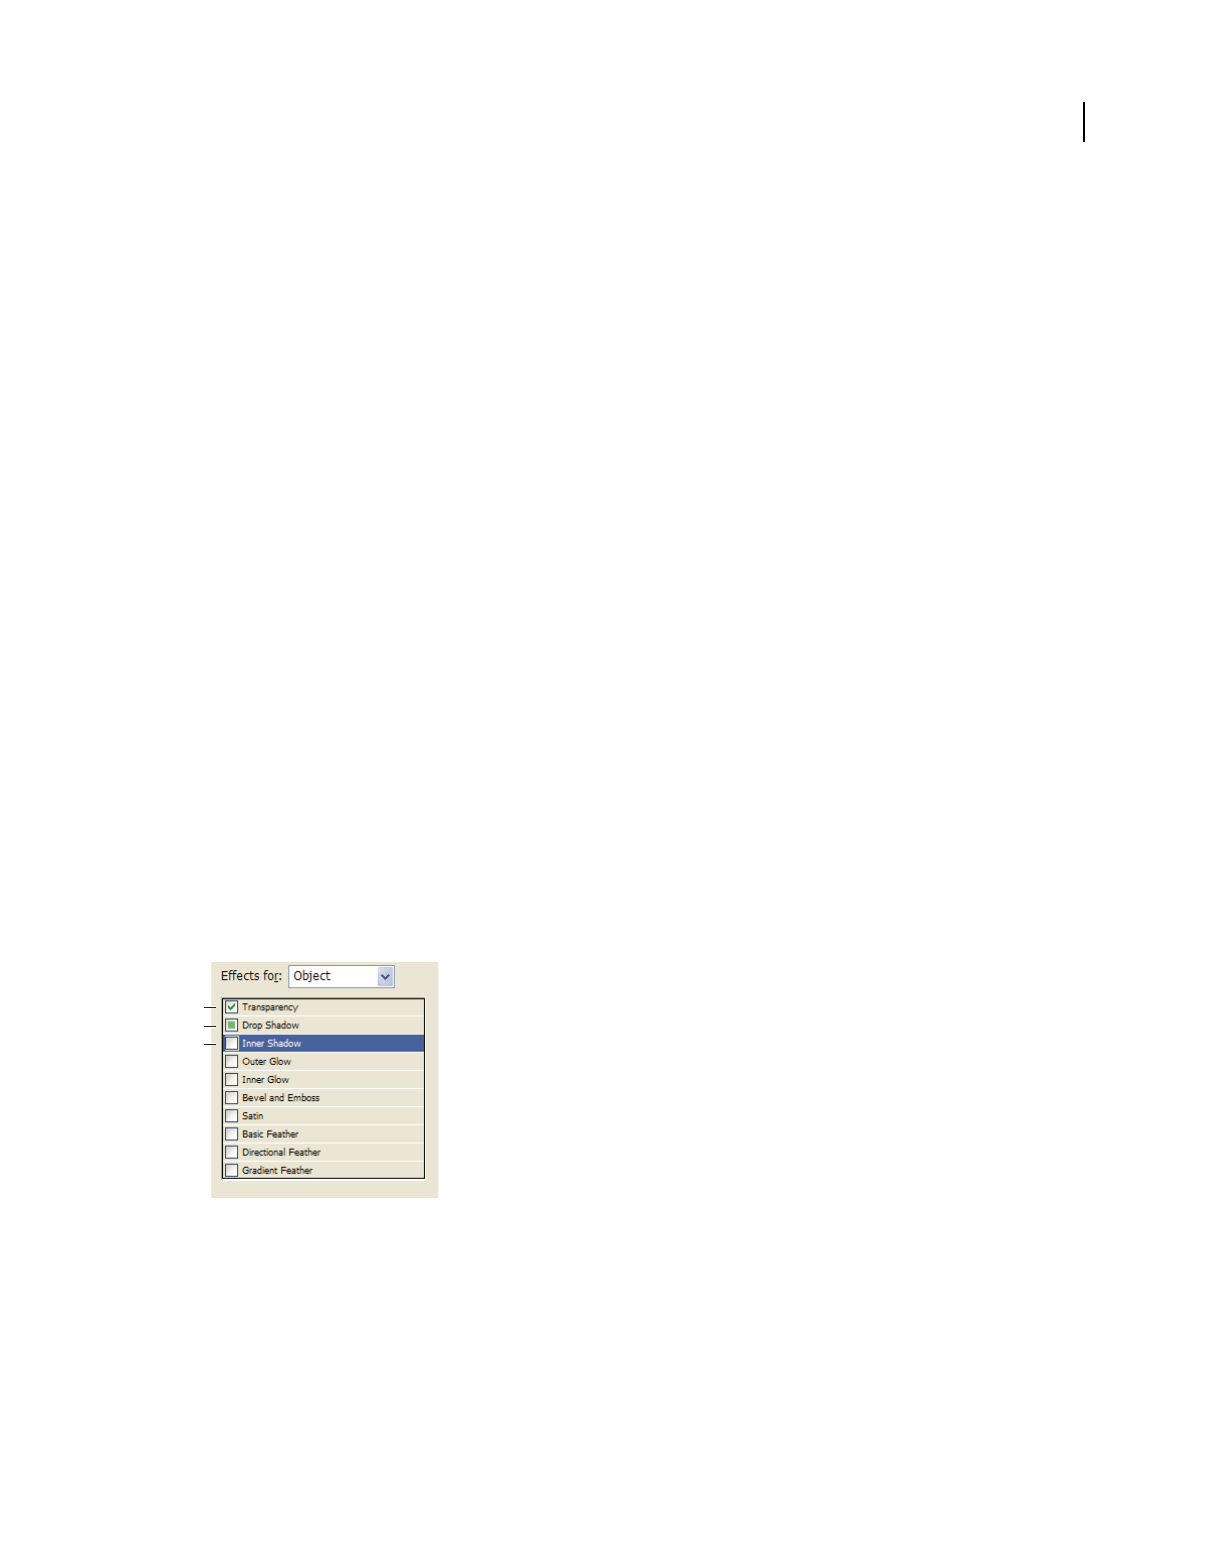
214
USING INDESIGN
Styles
Last updated 11/16/2011
2Choose New Object Style from the Object Styles panel menu, or Alt-click (Windows) or Option-click (Mac OS) the
Create New Style button.
3In the New Object Style dialog box, type a name for the style.
4To base the style on another style, choose a style for Based On.
Note: The Based On option lets you link styles to each other, so that changes in one style ripple through the styles that are
based on it. If you make changes to the formatting of a child style and decide you want to start over, click Reset To Base.
That restores the child style’s formatting to be identical to the style on which it’s based.
5To add a keyboard shortcut, position the insertion point in the Shortcut box, and make sure Num Lock is turned
on. Then hold down any combination of Shift, Alt, and Ctrl (Windows) or Shift, Option, and Command (Mac
OS),
and press a number on the numeric keypad. You cannot use letters or non-keypad numbers for defining style
shortcuts.
6Under Basic Attributes, select any additional categories that contain options you want to define, and set the options
as desired. Click the check box to the left of each category to indicate whether it should be included or ignored in
the style.
7To apply effects, choose an option in Effects For (Object, Stroke, Fill, or Text), and then select categories of effects
and specify their settings. You can specify different effects for each category. Indicate which Effects categories
should be turned on, turned off, or ignored in the style.
8Click OK.
Object style categories
If you want the style to apply only certain attributes, leaving any other settings untouched, make sure that the
categories you want the style to control are in the appropriate state. You can use any of three states for each category:
turned on, turned off, or ignored. For example, checking the Drop Shadow box will include drop shadow formatting
in the object style. Deselecting the Drop Shadow box will indicate that drop shadow is turned off as part of the style —
any drop shadow applied to an object appears as an override. Setting the Drop Shadow box to “ignore” (a small box in
Windows or a hyphen in Mac
OS) will leave drop shadow out of the style, so any drop shadow applied to the style does
not appear as an override.
Object style categories
A. Turned on B. Ignored C. Turned off
Note: Categories in which the settings can be turned on or off individually, such as Fill, Stroke, and Transparency, have
only two states. They can either be turned on or ignored.
The Paragraph Styles category is ignored by default, even if you’re creating a text frame. This category is applicable
only if the object is an unthreaded text frame.
A
B
C

215
USING INDESIGN
Styles
Last updated 11/16/2011
Apply object styles
If you apply an object style to a group of objects, the object style is applied to each object in the group. To apply an
object style to a group of objects, nest the objects within a frame. (The Edit > Paste Into command is one way to paste
an object into a frame.)
1Select an object, frame, or group.
2Click an object style in the Control panel or the Object Styles panel to apply a style.
If you choose Clear Overrides When Applying Style from the Object Styles panel, clicking an object style clears
overrides by default. If this option is not selected, you can Alt-click (Windows) or Option-click (Mac
OS) the object
style to clear overrides while applying the style.
You can also drag an object style onto an object to apply the style without first selecting the object.
If a group is selected when you apply an object style, the style is applied to each object in the group.
Once you apply a style, you can apply other settings to the object as needed. Although you may override a setting
defined in the style, you do not lose the connection to the style.
More Help topics
“Use Quick Apply” on page 243
Use default object styles
For each new document, the Object Styles panel lists a default set of object styles. Whenever you create an object, an
object style is applied to it. By default, if you create a text frame, the [Basic Text Frame] object style is applied. If you
draw a path or shape, the [Basic Graphics Frame] object style is applied. If you place an image or draw a placeholder
shape that has an X in it, the [None] object style is applied. You can select a different object style to use as the default
for text frames and graphics frames.
•To change the default style for a text frame, choose Default Text Frame Style from the Object Styles panel menu,
and then select the object style.
•To change the default style for a graphics frame, choose Default Graphics Frame Style from the Object Styles panel
menu, and then select the object style.
•To change the default style for any object type, drag the icon that marks the default object type from one object style
to another.
Note: If you select an object style when no frame is selected, that object style becomes the new default object style for text
or graphics, depending on which tool is selected in the toolbox.
You can edit the [Basic] styles, but you cannot delete them.
Clear object style overrides
When formatting is applied to an object that differs from part of the style definition applied to that object, it is called
an override. When you select an object with an override, a plus sign
(+) appears next to the style name.
Use the Clear Overrides command to override any formatting that is either turned on or off in the object style; use the
Clear Attributes Not Defined By Style to clear ignored attributes.
Clear object style overrides
1Select an object or group that you want to change.

216
USING INDESIGN
Styles
Last updated 11/16/2011
2In the Object Styles panel, click the Clear Overrides button at the bottom of the Object Styles panel.
An override is displayed only if the applied attribute is part of the style.
Clear attributes ignored in an object style
You may want to remove attributes from an object, even if those attributes are ignored in a style. For example, if the
Fill category is ignored in an object style and you apply a red fill to a frame to which the object style is applied, choosing
Clear Attributes Not Defined By Style removes the red fill.
Note: If an object style category is turned off (unchecked) rather than ignored, use the Clear Overrides command to
override the style.
1Select an object or group that you want to change.
2In the Object Styles panel, click the Clear Attributes Not Defined By Style button at the bottom of the Object
Styles panel.
Break the link to an object style
You can break the link between an object and the style applied to it. The object will retain the same attributes, but will
no longer change if the style is changed.
1Select the object that has the object style applied to it.
2Choose Break Link To Style from the Object Styles panel menu.
If you don’t want to retain the formatting of the object style, choose [None] in the Object Styles panel.
Rename an object style
1Make sure no objects are currently selected so that a style isn’t mistakenly applied.
2In the Object Styles panel, double-click the object style you want to rename.
3In the Object Style Options dialog box, type a new name for the style, and click OK.
You can also edit an object style directly in the panel. Click the style, pause, and then click again to edit the style name.
Edit object styles
1Do one of the following:
•If you don’t want the style to be applied to the selected frame or set as the default, right-click (Windows) or Control-
click (Mac
OS) the style name in the Object Styles panel, and choose Edit [style name].
•In the Object Styles panel, double-click the style name, or select the style and choose Style Options in the Styles
panel menu. Note that this applies the style to any selected object or sets it as the default object type.
2In the Object Style Options dialog box, select the category that contains the options you want to change, and change
the desired settings.
3Determine whether object style categories are turned on, turned off, or ignored.
4Click OK.
Delete an object style
1In the Object Styles panel, select an object style.

217
USING INDESIGN
Styles
Last updated 11/16/2011
2Choose Delete Style from the panel menu or drag the style to the Delete icon at the bottom of the Object Styles
panel.
3If you delete a style that is applied to objects or on which other styles are based, you will be prompted to specify a
replacement style in the Delete Object Style dialog box. Do one of the following:
•To restyle objects that currently use the deleted style, choose the style you want to apply to the objects and click OK.
•To leave objects unchanged, choose [None], make sure Preserve Formatting is checked, and click OK. Any objects
that use the deleted style retain the same attributes, but are no longer associated with a style.
•To remove all attribute settings you’ve applied, choose [None], deselect Preserve Formatting, and click OK.
Note: To delete all styles not applied to objects, choose Select All Unused from the Object Styles panel menu, and then
click the Delete icon.
Redefine an object style
After you apply an object style, you can override any of its settings. If you decide you like the changes you made to a
particular object, you can redefine the style so that it matches the formatting of the object you changed. Be aware that
the Redefine Object Style command redefines only categories that are turned on or turned off, but not categories that
are ignored. If the object includes additional settings, you’ll need to add those settings separately to the style, or simply
create a new object style.
1Select an object that is using the style you want to change.
2Adjust the desired appearance attributes.
3In the Object Styles panel, choose Redefine Style from the Object Styles panel menu.
The object style definition changes to match the override settings you applied. All occurrences of the object style in the
document are updated to use the new settings.
Note: If the Redefine Object Style option is not available, the attributes you set are not part of the object style definition.
To change the style definition directly, choose Object Style Options instead, or create a new style from the object.
Import object styles
You can import styles from other documents. In addition to object styles themselves, InDesign imports any swatches,
custom strokes, character styles, or paragraph styles that are used in the styles. If a swatch, stroke, or paragraph style
that you import has the same name but different values than an existing swatch or style, InDesign renames it.
1Select Load Object Styles from the Object Styles panel menu.
2Select the file from which you want to import object styles, and click Open.
3In the Load Styles dialog box, make sure that a check mark appears next to the styles you want to import. If there
is a style name conflict, choose one of the following options under Conflict With Existing Style, and then click
OK:
Use Incoming Style Definition Overwrites the existing style with the loaded style and applies its new attributes to all
objects in the current document that used the old style. The definitions of the incoming and existing styles are
displayed at the bottom of the Load Styles dialog box so that you can view a comparison.
Auto-Rename Renames the loaded style.
The object styles appear in the Object Styles panel.

218
USING INDESIGN
Styles
Last updated 11/16/2011
Working with styles
Duplicate styles or style groups
❖Right-click (Windows) or Control-click (Mac OS) a style or style group in the Styles panel, and then choose
Duplicate Style.
A new style or group appears in the Styles panel, with the same name followed by “copy.” If you duplicated a group of
styles, the style names within the new group remain the same.
You can also duplicate styles by copying them to another group.
Group styles
You can organize styles by grouping them into separate folders in the Character Styles, Paragraph Styles, Object Styles,
Table Styles, and Cell Styles panels. You can even nest groups within groups. Styles do not need to be in a group; you
can add them to a group or to the root level of the panel.
Create a style group
1In the Styles panel:
•To create the group at the root level, deselect all styles.
•To create a group within a group, select and open a group.
•To include existing styles in the group, select the styles.
2Choose New Style Group from the Styles panel menu, or choose New Group From Styles to move the selected styles
into the new group.
3Type the name of the group and click OK.
4To move a style into the group, drag the style over the style group. When the style group is highlighted, release the
mouse button.
Copy styles to a group
When you copy a style to a different group, the styles are not linked. Even though they have the same name, editing
one style does not change the attributes of the other style.
1Select the style or group you want to copy.
2Choose Copy To Group from the Styles panel menu.
3Select the group (or [Root] level) that you want to copy the styles or group to, and then click OK.
If the group already contains style names identical to those being copied, incoming styles are renamed.
Expand or collapse style groups
•To expand or collapse only one group, click the triangle icon next to it.
•To expand or collapse the group and all its subgroups, Ctrl-click (Windows) or Command-click (Mac OS) the
triangle icon.
Delete style groups
Deleting a style group deletes the group and everything inside it, including styles and other groups.
1Select the group you want to delete.

219
USING INDESIGN
Styles
Last updated 11/16/2011
2Choose Delete Style Group from the Styles panel menu, and then click Yes.
3For each style in the group, specify a replacement style or choose [None], and then click OK.
If you want to use the same replacement style for all styles, select Apply To All.
If you cancel the replacement of any style, the group is not deleted. You can recover deleted styles by choosing Edit >
Undo Delete Styles.
Move and reorder styles
By default, styles you create appear at the bottom of the style group or panel.
•To alphabetize all groups and styles within groups, choose Sort By Name from the Styles panel menu.
•To move a single style, drag it to a new location. A black line indicates where the style will be moved to; a highlighted
group folder indicates that the style will be added to that group.
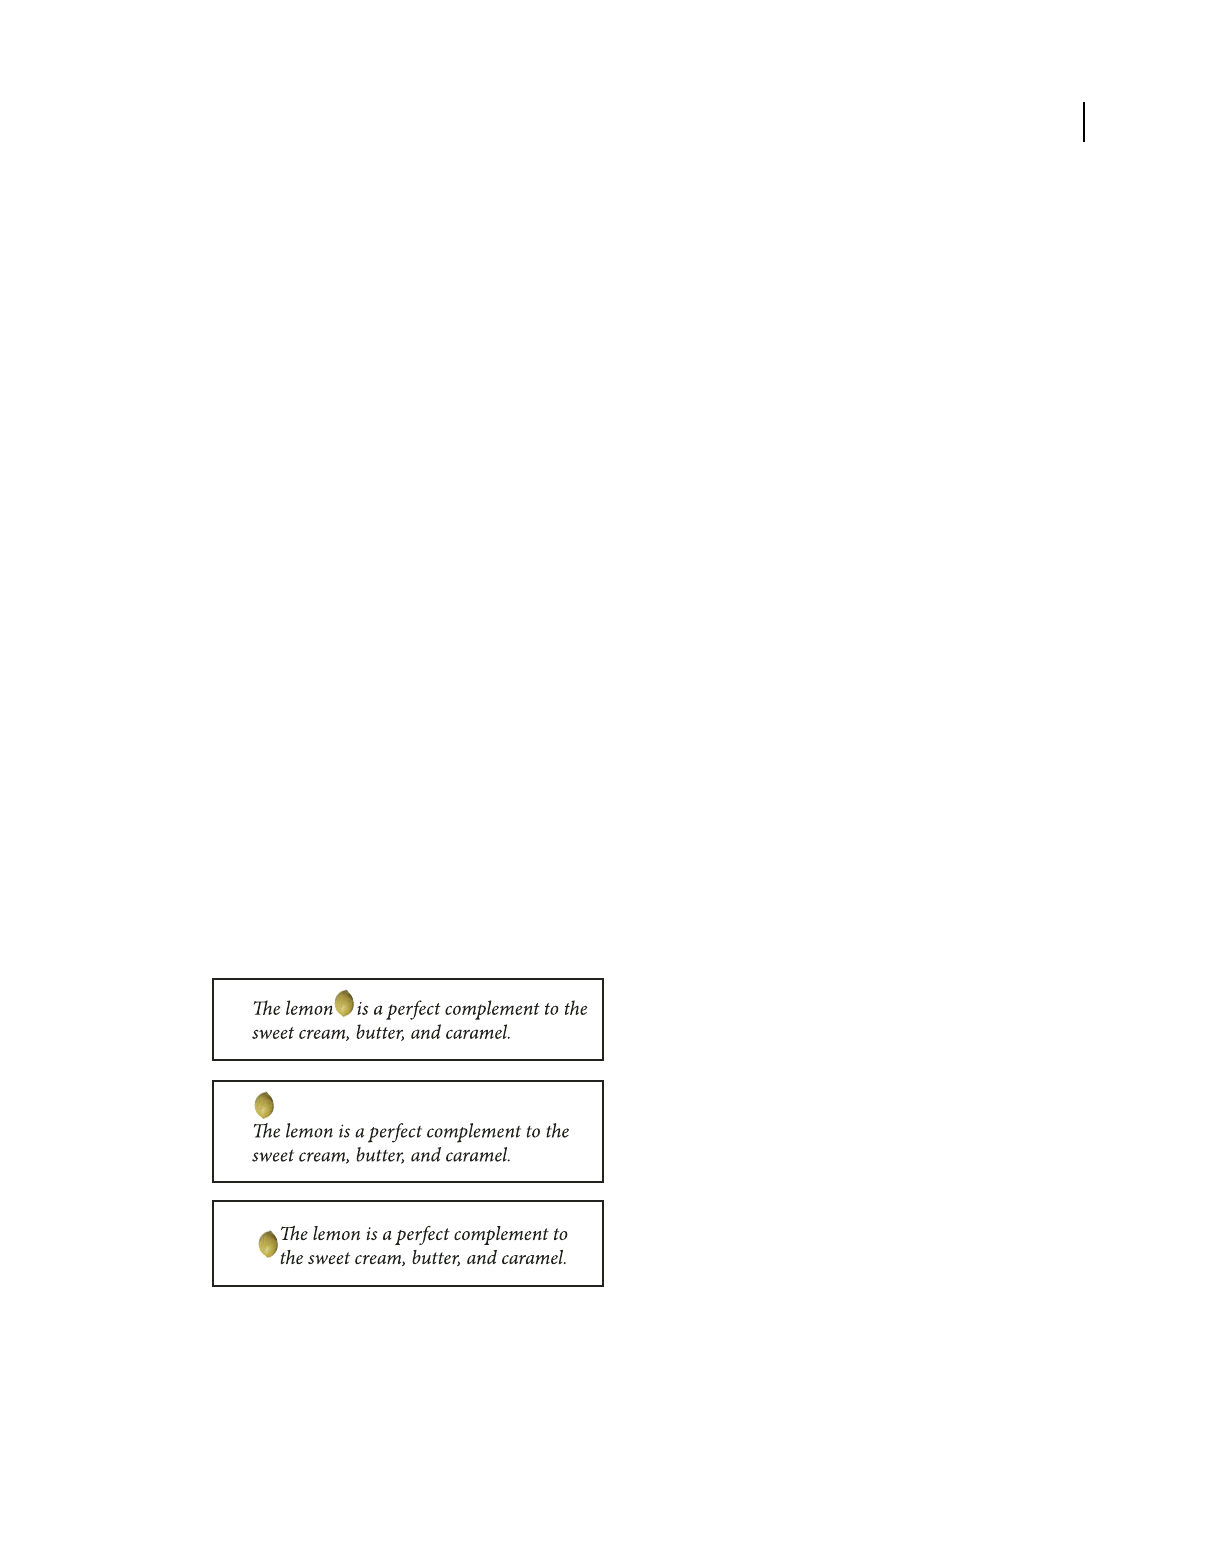
220
Last updated 11/16/2011
Chapter 7: Combining text and objects
Anchored objects
About anchored objects
Anchored objects are items, such as images or text boxes, that are attached—or anchored—to specific text. The
anchored object travels with the text containing the anchor as the text reflows. Use anchored objects for all objects that
you want associated with a particular line or block of text, for example, sidebars and callouts, figures, or icons
associated with a specific word.
You can create an anchored object by pasting or placing an object (or frame) into text using the Type tool or by using
the Insert Anchored Object command. When you place the object, Adobe InDesign CS4 adds an anchor marker at the
insertion point. Anchored objects inherit the rotation and skew attributes of the text frame they’re anchored to—even
when the object is positioned outside of the text frame. You can select the object and change these attributes.
You can create anchored objects that use any of the following positions:
Inline Aligns the anchored object with the baseline of the insertion point. You can adjust the Y Offset to position the
object above or below the baseline. This is the default type of anchored object. In earlier versions of InDesign, these
objects were called inline graphics.
Above Line Places the anchored object above the line with the following choices of alignment: Left, Center, Right,
Towards Spine, Away From Spine, and (Text Alignment). Text Alignment is the alignment applied to the paragraph
that holds the anchor marker.
Custom Places the anchored object in the position that you define in the Anchored Object Options dialog box. You
can position the object anywhere inside or outside the text frame.
Note: You can use inline and above line positioned objects with type on a path. (See “Add anchored objects to type on a
path” on page 237.)
Sample document with anchored objects
A. Inline position B. Above line position (aligned left) C. Custom position (aligned to the edge of the text frame)
For a video tutorial on working with anchored frames, see www.adobe.com/go/vid0073.
Tim Cole provided a shortcut on inserting anchored frames at Anchored Frames Productivity Shortcut.
A
B
C

221
USING INDESIGN
Combining text and objects
Last updated 11/16/2011
Create an anchored object
If an object isn’t available to place into the document (for example, sidebar text that is not written yet), you can create
an empty anchored frame as a placeholder for content you can add later. You can resize the anchored frame at any time
and the position settings for the frame update automatically.
1Do one of the following:
•To add an anchored object, use the Type tool to position an insertion point where you want the object’s anchor to
appear, and then place or paste the object.
If the frame for the object is taller than the line of text in which it appears, text might overlap the imported image or
you might see increased space above the line. Consider selecting a different anchored object position, inserting a soft
or hard line break, resizing the inline object, or specifying a different leading value for the surrounding lines.
•To anchor an existing object, select it and choose Edit > Cut. Then, using the Type tool, position the insertion point
where you want the object to appear, and choose Edit
>Paste. By default, the anchored object’s position is inline.
•To add a placeholder frame for an object that isn’t available (for example, text you have yet to write for a sidebar),
use the Type tool to position the insertion point where you want the object’s anchor to appear; then choose Object
>
Anchored Object
> Insert.
You can anchor text characters by creating outlines of the text. Creating outlines automatically converts each
character of text to an inline anchored object.
2To position the object, select it with a selection tool and choose Object > Anchored Object > Options. Specify
options as desired.
To bypass the Anchored Object dialog box, use the Insert Anchored Object/Go To Anchor Marker keyboard shortcut.
You’ll need to designate keys for this shortcut in the Keyboard Shortcut Editor (it’s listed in the Text and Tables area).
Pressing the shortcut twice deselects the object and positions the cursor back in the main text. (See “Use keyboard shortcut
sets” on page 28.)
Inserted Anchored Objects options
When you insert a placeholder for an anchored object, you can specify the following options for the contents:
Content Specifies the type of object the placeholder frame will contain.
Note: If you choose Text, an insertion point appears in the text frame; if you choose Graphic or Unassigned, InDesign
selects the object frame.
Object Style Specifies the style you want to use to format the object. If you have defined and saved object styles, they
will appear in this menu.
Paragraph Style Specifies the paragraph style you want to use to format the object. If you have defined and saved
paragraph styles, they will appear in this menu.
Note: If the object style has a paragraph style enabled and you choose a different style from the Paragraph Style menu, or
if you make changes to the Anchored Position options for a style, a plus sign (+) appears in the Object Style menu
indicating that overrides have been made.
Height and Width Specify the dimensions of the placeholder frame.
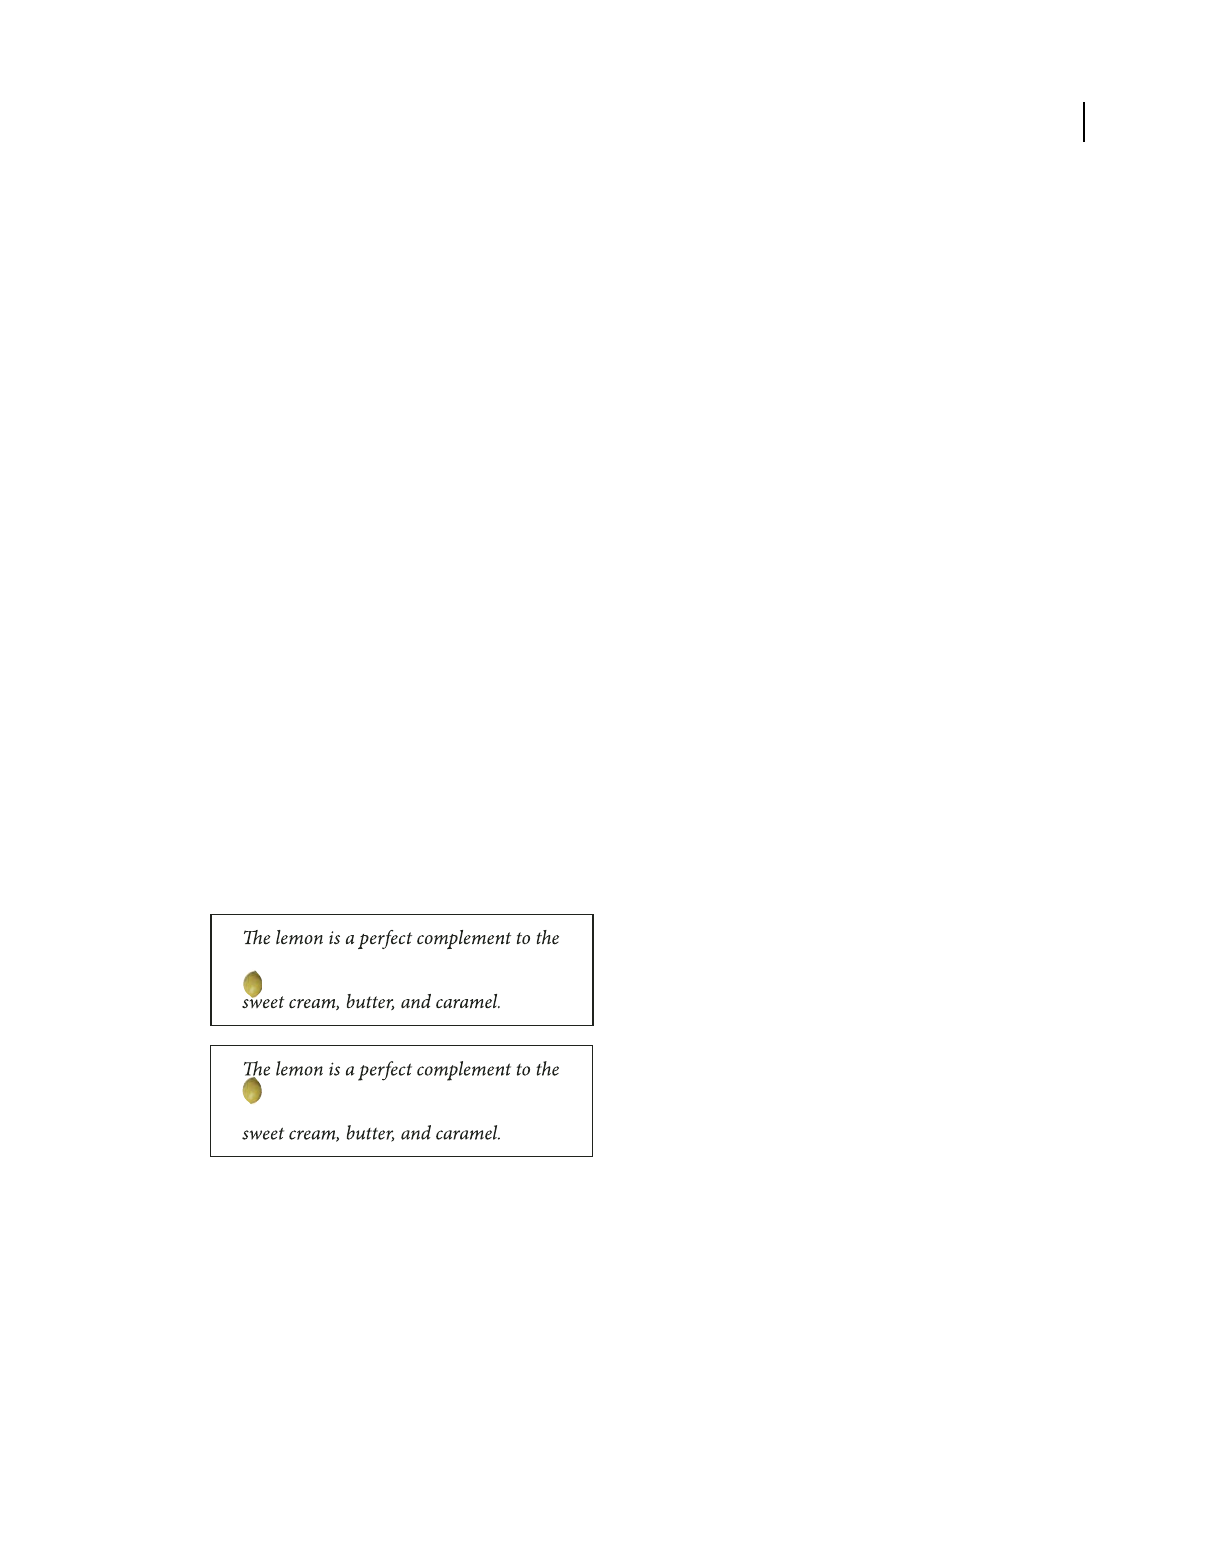
222
USING INDESIGN
Combining text and objects
Last updated 11/16/2011
Inline and Above Line position options
When you choose Inline or Above Line from the Position menu in the Anchored Object Options dialog box, the
following options are available for setting the position of the anchored object. (You can also access these options in the
Insert Anchored Object dialog box.)
Inline Aligns the bottom of the anchored object to the baseline. Inline objects are subject to certain constraints when
moving along the y axis: the top of the object can’t go below the bottom leading slug and the bottom of the object can’t
go above the top of the leading slug.
Y Offset Adjusts the position on the baseline. You can also use the mouse to drag the object vertically on the page.
Above Line Aligns the object above the text line containing the anchor marker and below the line of text above the
anchor marker.
Alignment Choose from the following options:
•Left, Right, and Center Align the object within the text column. These options ignore indent values applied to the
paragraph and align the object within the entire column.
•Towards Spine and Away From Spine Align the object left or right depending on the side of the spread the object is
on. These options ignore indent values applied to the paragraph and align the object within the entire column.
•(Text Alignment) Aligns the object based on the alignment defined by the paragraph. This option uses the
paragraph indent values when aligning the object.
Space Before Specifies the position of the object relative to the bottom of the leading slug in the preceding line of text.
Positive values lower both the object and the text below it. Negative values move the text below the object up toward
the object. The maximum negative value is the height of the object.
Space After Specifies the position of the object relative to the cap-height of the first character in the line below the
object. A value of 0 aligns the bottom of the object to the cap-height position. Positive values move the text below the
object down (away from the bottom of the object). Negative values move the text below the object up (toward the
object).
Using the Space Before and Space After options
A. A Space Before value of 0P10 moves the object and it’s associated text further away from the text line above it. B. A Space After value of 0p10
moves the object and the text line above it further away from its associated text line (below).
Note: Anchored objects set to Above Line will always remain with the line that holds the anchor; the text won’t compose
such that the object is on the bottom of one page and the anchor marker’s line is at the top of the next page.
A
B
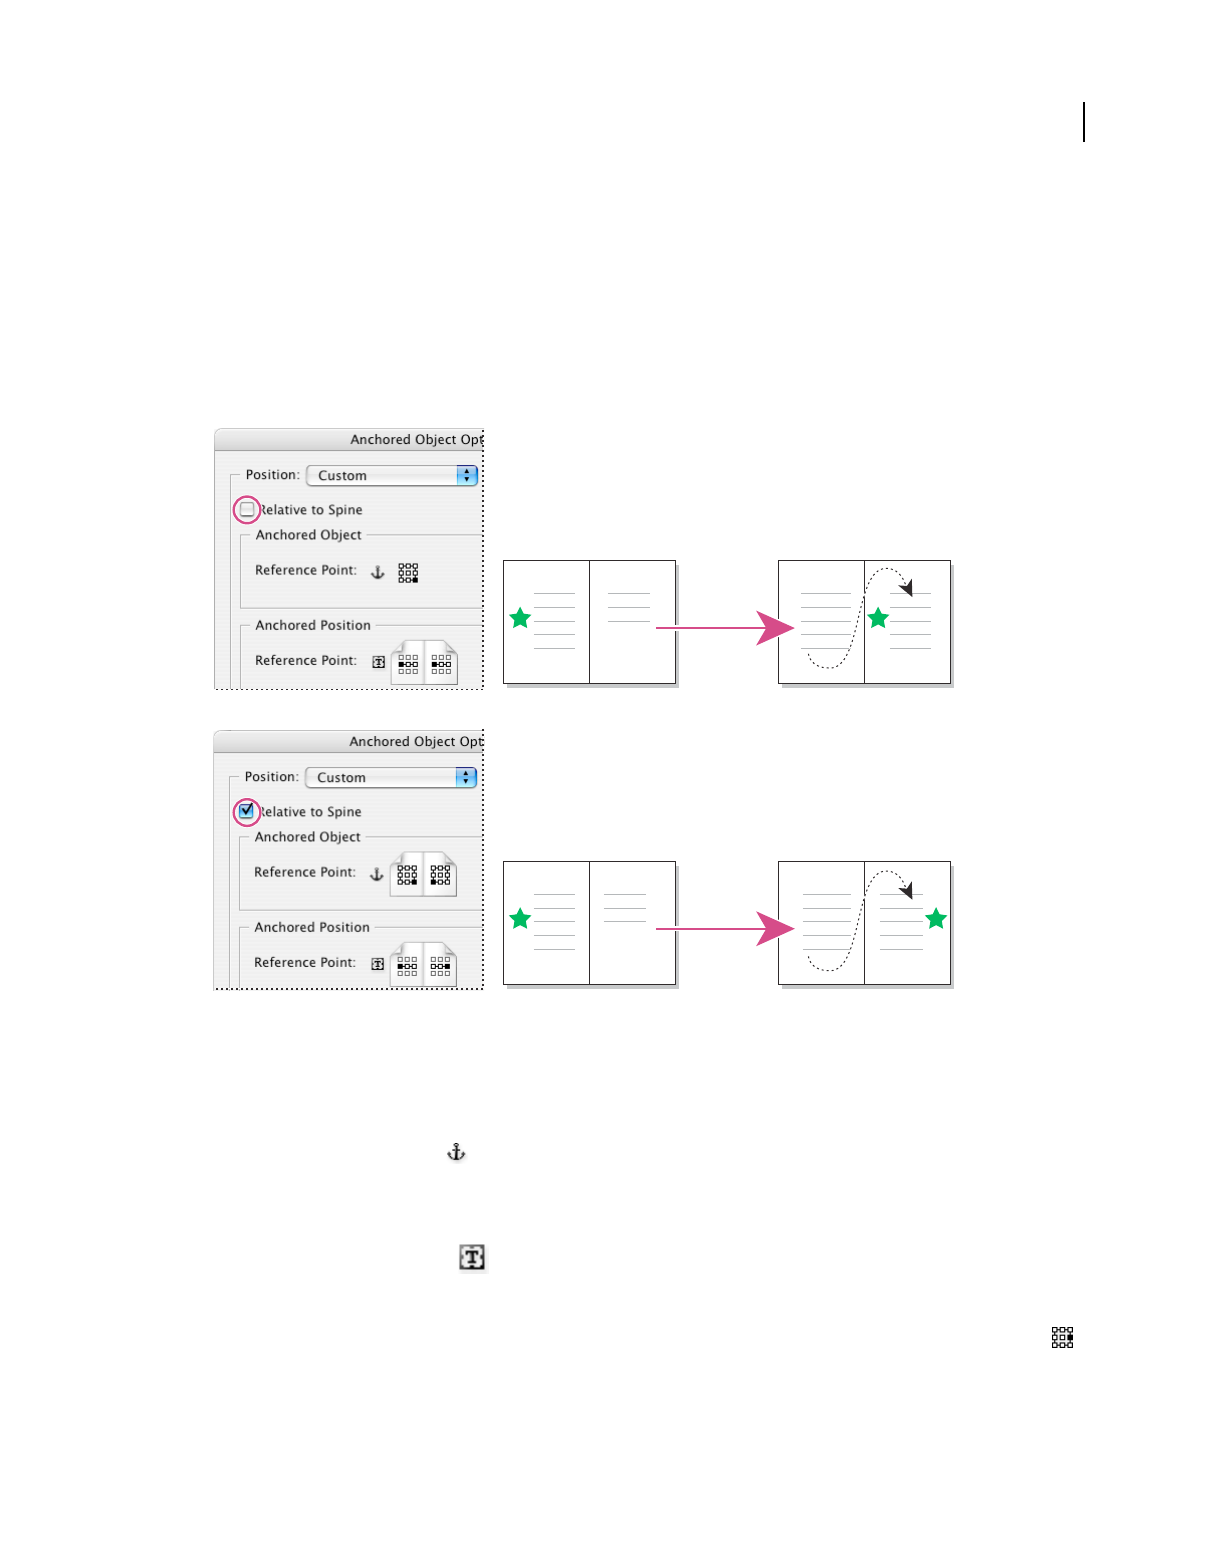
223
USING INDESIGN
Combining text and objects
Last updated 11/16/2011
Custom position options
You can use the following options when positioning a custom-positioned anchored object. You can specify these
options in the Insert Anchored Object dialog box or the Anchored Object Options dialog box. For step-by-step
instructions for using these options, see “Position a custom-positioned anchored object” on page 225.
Relative To Spine Specifies whether the object aligns relative to the document spine. When you select this option, the
Anchored Object Reference Point proxy displays as a two page spread. The two pages mirror each other. When
selected, objects positioned on one side of a spread, for instance the outside margin, remain on the outside margin even
when the text reflows to a facing page.
Using the Relative To Spine option
A. Relative To Spine not selected: the object remains on the left side of the text frame when text reflows across to the right side of the spread.
B. Relative To Spine selected: the object remains on the outside edge of the page when the text reflows to the right side of the spread.
Note: If, after you select Relative To Spine you adjust the X Offset value, the direction the object moves may change. This
change occurs because the direction of movement depends partly on the side of the spread the object is on.
Anchored Object Reference Point Specifies the location on the object that you want to align to the location on the
page (as specified by the Anchored Position Reference Point). For example, if you want to align the right side of the
object with a page item, such as a text frame, click a rightmost point on this proxy. For more information on using this
reference point, see “Position a custom-positioned anchored object” on page 225.
Anchored Position Reference Point Specifies the location on the page (as defined by the X and Y Relative To
options), to which you want to align the object. For example, if you choose Text Frame for X Relative To and Line
(Baseline) for Y Relative To, this proxy represents the horizontal area of the text frame and the vertical area of the text
line containing the object’s anchor marker. If you click the leftmost point on this proxy, the object’s reference point
will align with the left edge of the text frame and the baseline of the text.
A
B
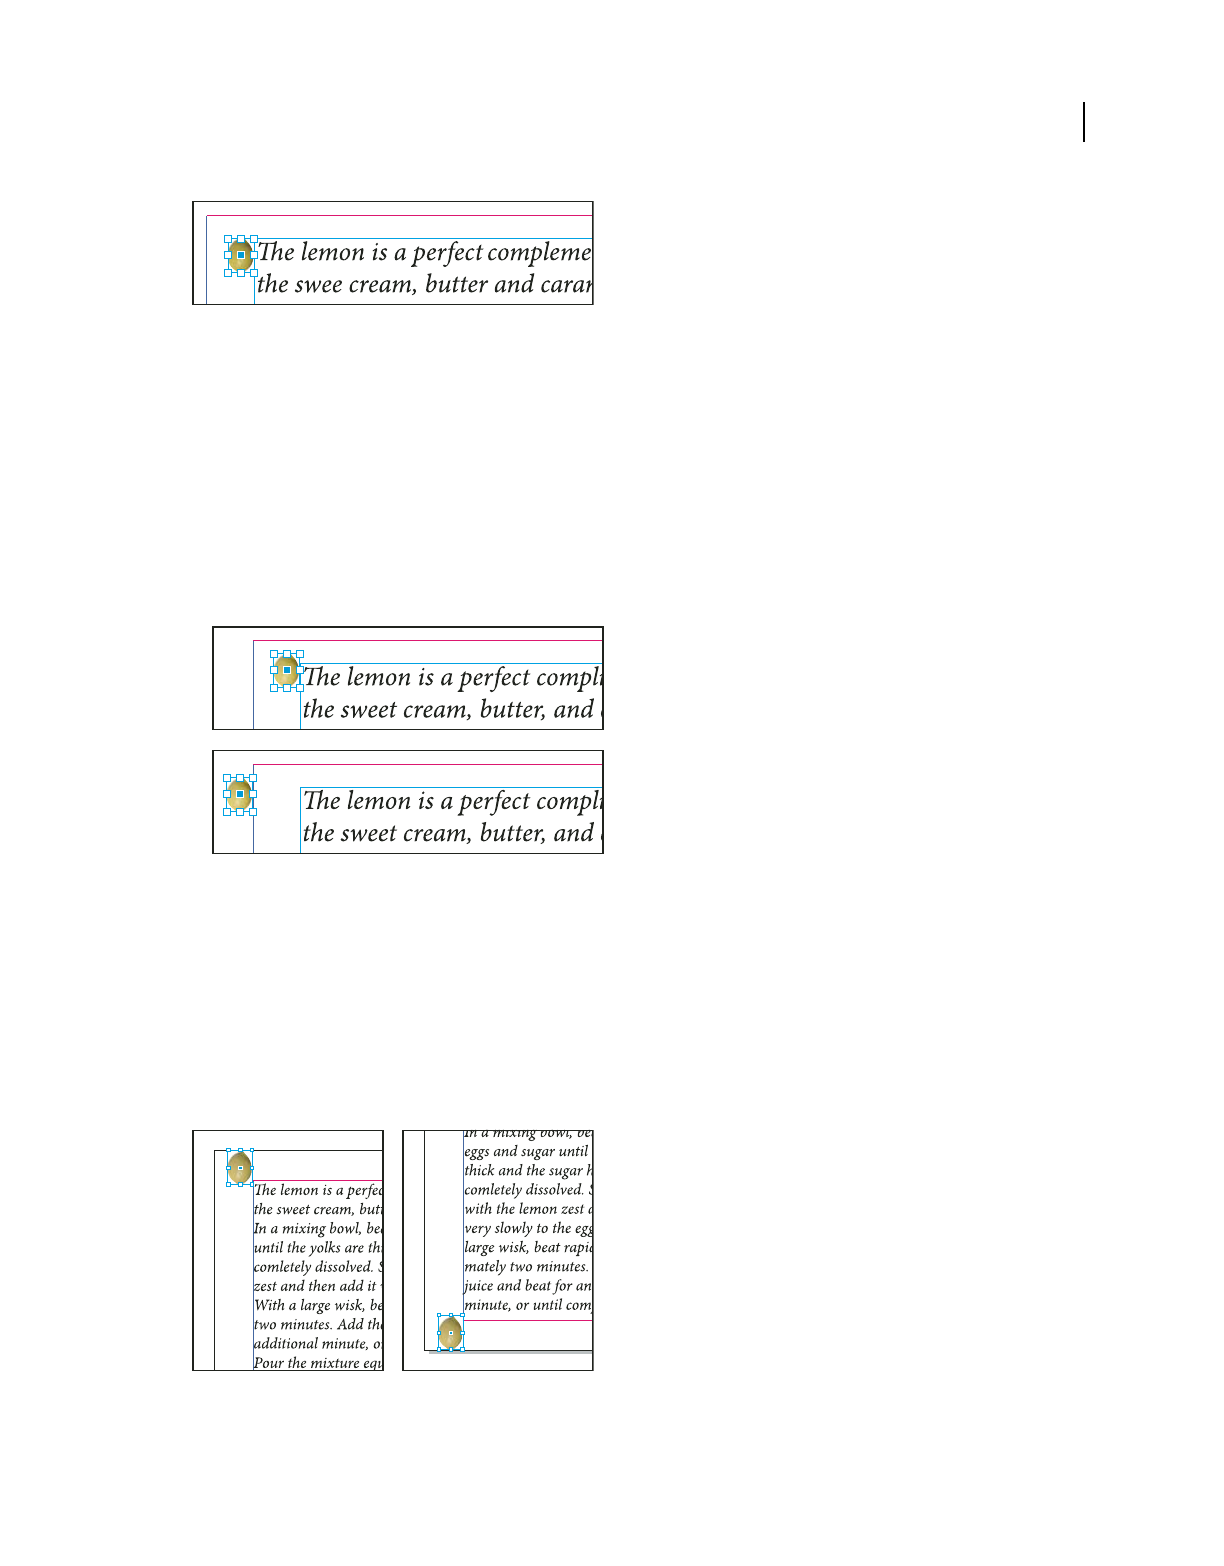
224
USING INDESIGN
Combining text and objects
Last updated 11/16/2011
Right side of object aligned with left side of text frame
Note: Depending on what you choose for X Relative To and Y Relative To, the Anchored Position Reference Point proxy
displays either three or nine positions. Line options, such as Line (Baseline) provide only three options—middle left,
center, and middle right—because the vertical positioning is established by the anchor marker in the text.
X Relative To Specifies what you want to use as the basis for horizontal alignment. For instance, Text Frame lets you
align the object to the left, center, or right side of the text frame. Where exactly it aligns horizontally depends on the
reference points you choose and any offset you specify for X Offset.
For example, if you want the object to appear in the page margin with its right edge flush with the page margin, choose
Page Margin for X Relative To and specify a rightmost point on the Anchored Object Reference Point proxy and a
leftmost point for the Anchored Position Reference Point proxy.
The X Relative To option
A. Aligning the right side of the object to the left side of the text frame B. Aligning the right side of the object to the left side of the page margin
X Offset Moves the object left or right. Whether it moves to the left or right depends on the reference point. If aligning
to the center of the page item, positive values move the object to the right. The direction of movement also depends
on whether you’ve selected Relative To Spine.
Y Relative To Specifies what the object aligns with vertically. For example, Page Edge lets you use the edge of the page
as the basis for aligning the object to the top, center, or bottom of the page. The Anchored Position Reference Point
specifies if the object aligns to the top, center, or bottom of this page item. If you choose a line option, such as Line
(Baseline), the Anchored Position Reference Point displays only the middle horizontal row of points.
The Y Relative To option
A. Aligning the top of the object to the top page edge B. Aligning the bottom of the object to the bottom the page edge
A
B
A B
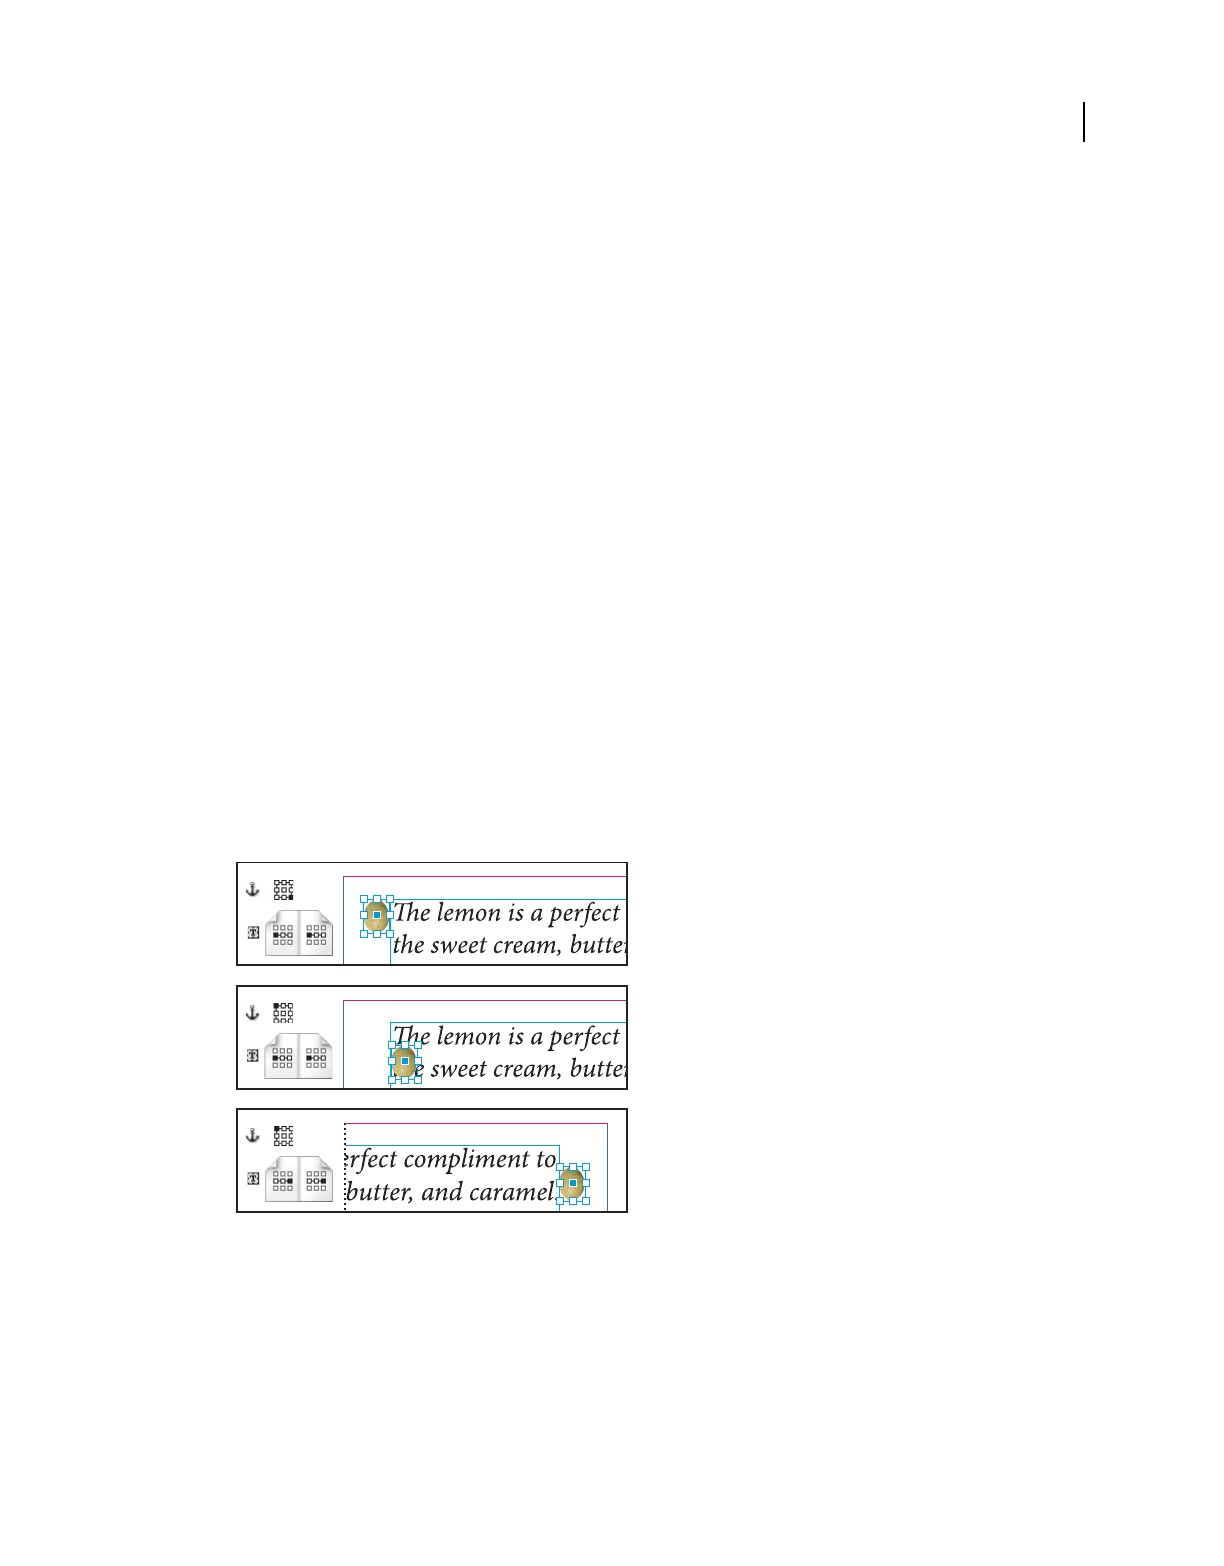
225
USING INDESIGN
Combining text and objects
Last updated 11/16/2011
Y Offset Moves the object up or down. Positive values move the object downward.
Keep Within Top/Bottom Column Boundaries Keeps the object inside the text column if reflowing text would
otherwise cause it to move outside of the boundaries. In such instances, the bottom of the object will align to the
bottom inset, or the top of the object will align to the top inset. For example, an anchored object off to the side of a line
of text and in the middle of a column looks fine; however, without this option selected, if the anchored marker flows
to the bottom of the column, the object may drop below the column edge or partially off the page. When this option
is selected, you can’t drag the object above or below the column boundaries. If you resize the object, it will move back
into alignment with the top or bottom boundaries of the column, if necessary. This option is only available when you
select a line option, such as Line (Baseline) for Y Relative To.
Note: When InDesign overrides the object’s position to fall within the bounds of the column, the Y offset value you specify
appears in the dialog box with a plus sign (+).
Prevent Manual Positioning Ensures that you can’t move the anchored object by dragging or nudging it on the page.
Preview Displays the position adjustments on the page as you make them.
Position a custom-positioned anchored object
Note the following when using the Anchored Object Options dialog box to position custom-positioned anchored
objects.
•The custom position options include four main options: The two Reference Point proxies and the X and Y Relative
To menus. These options all work together to specify the object’s location. For instance, what you choose for X
Relative To and Y Relative To determines what the Anchored Position Reference Point represents—it could be a
text frame, a text line within a column, or an entire page. The following image represents how you can change the
location of the object by choosing a different reference point while leaving the X and Y Relative To options
unchanged.
Changing the location of the anchored object (X Relative To set to Text Frame; Y Relative To set to Line (Baseline))
A. Choosing the lower right point on the Anchored Object proxy and left center point on Anchored Position proxy. B. Changing Anchored
Object proxy point to upper left corner and leaving the Anchored Position proxy point at center left C. Leaving the Anchored Object proxy
at top left and changing Anchored Position proxy point to center right
A
B
C
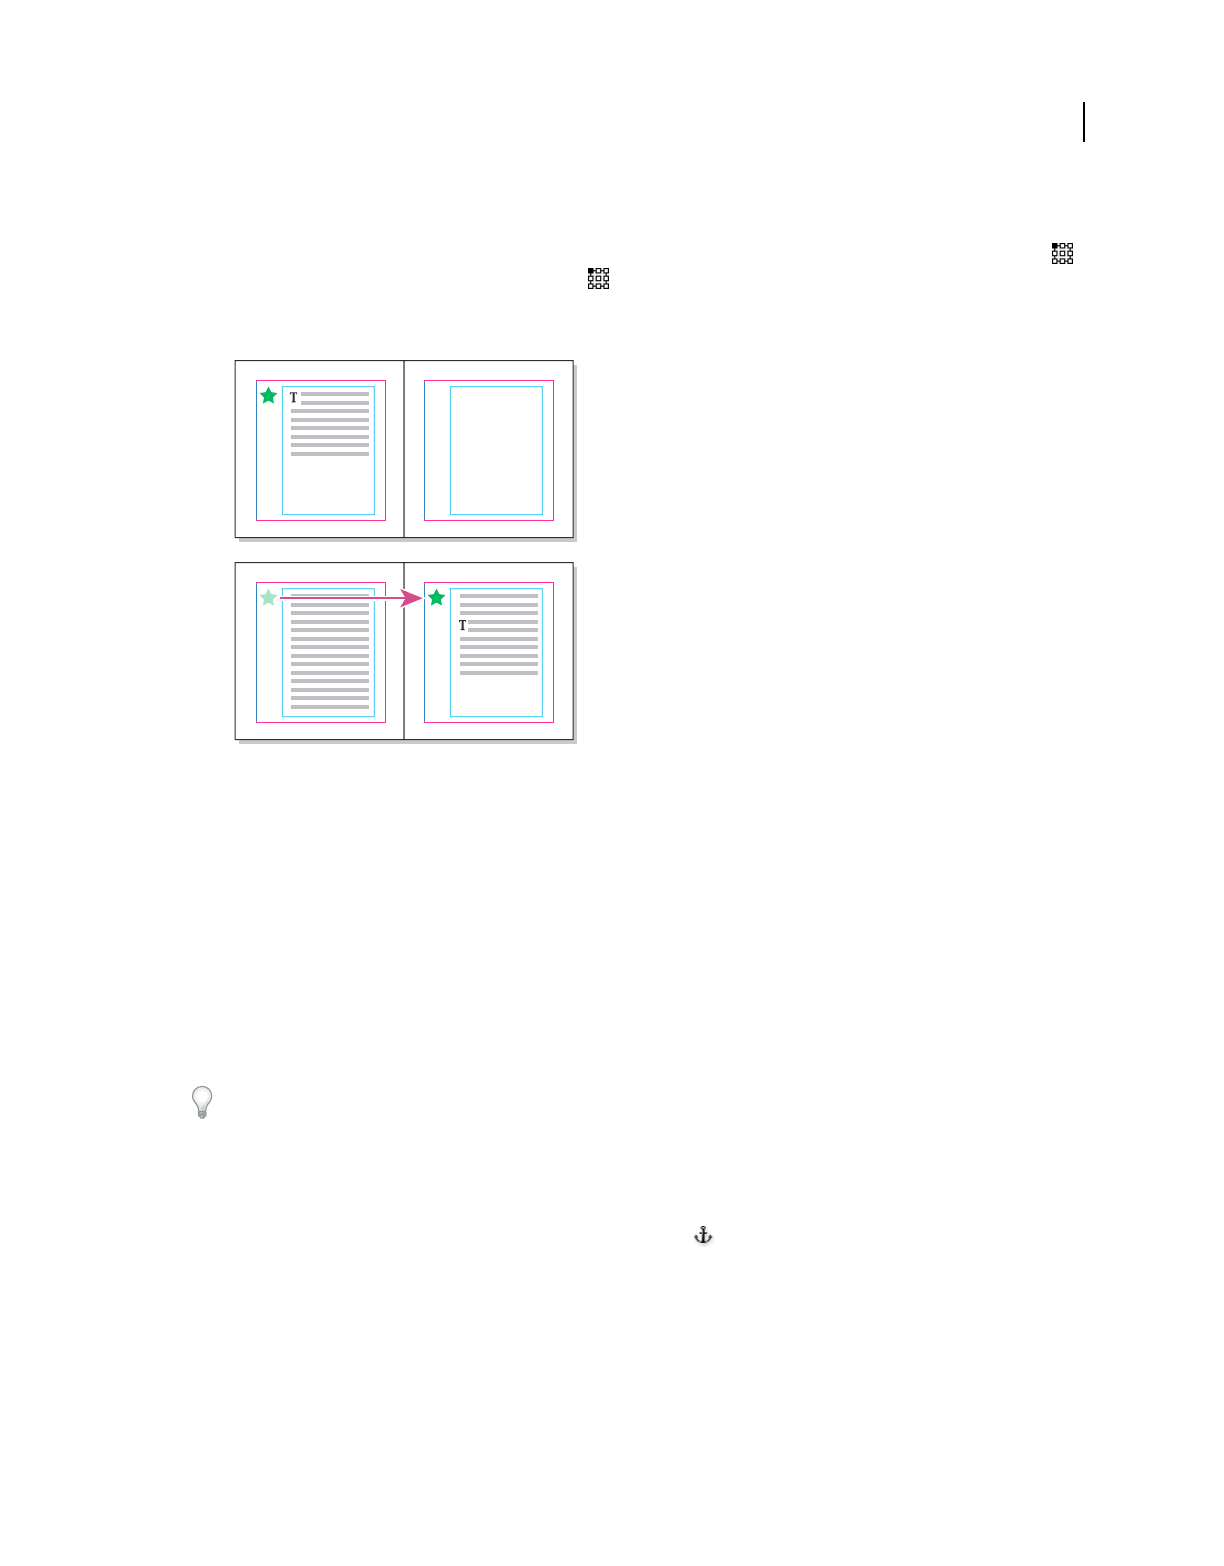
226
USING INDESIGN
Combining text and objects
Last updated 11/16/2011
•To create an anchored object that maintains its position on the page (such as the top left corner) as text reflows and
moves only when the text reflows to another page, anchor the object to the page margins or page edges. For
example, set both X Relative To and Y Relative To to Page Margin, click the top left reference point for the object
and the top left reference point for the page item . As the text reflows, the object remains in the top left corner,
within the page margins. Only when the text line containing the anchor flows to another page does the object
move—to the top left corner of the next page.
Positioning anchored object to a specific location on the page
A. Position object using use Page Margin or Page Edge for X and Y Relative To B. When text reflows, object does not follow text until text
moves to another page.
•To keep the object aligned with a specific line of text so that the object stays with that text when it reflows, choose
a Line option from the Y Relative To menu.
•To keep the object within the text frame, but not with a specific line of text when text reflows, choose Text Frame
from the X Relative To menu.
•To align the object relative to the margin (for example, to create a sidebar that stays in the outside margin as the
text reflows from page to page), select Relative To Spine.
1Select the object and choose Object > Anchored Object > Options.
2From the Position menu, choose Custom.
To see the object move on the page as you specify options, select Preview at the bottom of the dialog box.
3To keep the object on the same side of the page, relative to the document spine, select Relative To Spine. For
example, select this if you want the object to always appear in the outside margin, no matter what side of the spread
it is on.
4Click the point on the Anchored Object Reference Point proxy that represents the point on the object that you
want to align to the page.
5From the X Relative To menu, choose the page item that you want to use as the horizontal basis for alignment of
the object. For example, choose Text Frame to align the object to left, right, or center of the text frame.
6From the Y Relative To menu, choose the page item that you want to use as the vertical basis for alignment of the
object. For example, if you want the object to align to the baseline of the text to which it’s anchored, choose Line
(Baseline).
45
45
A
B

227
USING INDESIGN
Combining text and objects
Last updated 11/16/2011
7Click the point on the Anchored Position Reference Point proxy that represents where within the page items
chosen from the X and Y Relative To menus that you want to align the object.
8Specify an X Offset or Y Offset to nudge or move the object away from the alignment point.
9To ensure that the object does not extend below or above a column edge as text reflows, select Keep within
Top/Bottom Column Boundaries. This option is only available when you select a line option, such as Line
(Baseline), from the Y Relative To menu.
10 Click OK.
Working with anchored objects using drag-and-drop (CS5.5)
You can drag an existing object into a text frame to anchor it or move it. Use the Selection tool or Direct Selection
tool to select the object, and then drag the blue square near the upper-right corner of the text frame. Do one of the
following:
•To anchor an existing object, drag the blue square to the position where you want the object’s anchor to appear.
•To create an inline object, press Shift and drag the blue square to the position where you want the object to appear.
•To specify anchored object options, press Alt (Windows) or Option (Mac OS) and drag the blue square to the
position where you want the object’s anchor to appear.
Selecting and copying anchored objects
Using the Selection tool, you can select only one anchored object at a time. Using the Type tool, you can select a range
of text with multiple anchored object markers. When you select multiple anchor markers with the Type tool, you can
change the position options for all the anchored objects at once.
Note: If you have more than one anchored object in the same position—for example, if one line of type holds the markers
for two anchored objects with the same anchoring attributes—the objects will overlap each other.
When you copy text containing an anchored object marker, you copy the anchored object as well. If you copy an
anchored object and paste it outside of text, the anchored object becomes an independent image that is not linked to text.
View anchored object markers on the page
To view anchors and their relationship to the text on the page, you can display object markers. Use any of the following
methods:
•To view the anchor markers in the text, choose Type > Show Hidden Characters.
•To view a dashed line from an anchor marker to its associated custom-positioned object, select the object and
choose View
> Extras > Show Text Threads. The thread extends from the anchor marker to the current proxy point
for the anchored object.
•To view anchor symbols on anchored objects, choose View > Extras > Show Frame Edges. Viewing anchor
symbols is helpful when determining which objects are anchored.
Reposition an anchored object on the page manually
Moving a frame moves its anchored objects, unless the object is positioned relative to margins or pages.

228
USING INDESIGN
Combining text and objects
Last updated 11/16/2011
Note: Before moving an anchored object, make sure that you deselect the Prevent Manual Positioning option for the
object in the Anchored Objects dialog box or choose Object
> Unlock Position.
❖Do one of the following:
•To move inline anchored objects, use the Selection tool or Direct Selection tool to select the object, and then
drag vertically. You can move inline objects vertically only, not horizontally.
If you want to move an inline or above line object outside of the text frame, convert it to a custom-positioned object
and then move it as desired.
•To move an inline anchored object parallel to the baseline, place the insertion point before or after the object and
specify a new value for kerning.
If you want to move an inline or above line object outside of the text frame, convert it to a custom-positioned object
and then move it as desired.
•To move custom-positioned anchored objects, use the Selection tool or Direct Selection tool to select the
object, and then drag vertically or horizontally.
You can also rotate and transform an anchored object. (See “Transform objects” on page 412 and “Rotate objects” on
page 414.)
Resize an anchored object
Before resizing an anchored object, make sure that you deselect the Prevent Manual Positioning option in the
Anchored Objects Options dialog box.
❖Use the Selection tool or Direct Selection tool to select the object, and then drag the side or corner handle.
Note: Vertically resizing inline or above line anchor markers might result in the object becoming overset. If the anchor
marker is overset, the object will be overset as well.
Resizing an anchored object might also reposition the object. For example, if you’ve aligned the right side of an object
to the left side of the text frame, and then you drag the object’s right side handle 1 pica to the left (away from the text
frame boundary), the object will resize and then move back 1 pica to the right.
Release an anchored object
If you no longer want an object to move relative to its associated text, you can release it to remove its anchor.
❖Select the anchored object with a selection tool, and choose Object > Anchored Object > Release.
The object’s position on the page doesn’t move.
Note: Release doesn’t work for inline or above line objects. If you can’t use Release, select the anchored object and then
cut and paste it. You can also use the Type tool to select and cut the anchored object.
Wrapping text around objects
Wrap text around objects
You can wrap text around any object, including text frames, imported images, and objects you draw in InDesign.
When you apply a text wrap to
an object, InDesign creates a boundary around the object that repels text. The object
that text wraps around is called the wrap object. Text wrap is also referred to as runaround text.
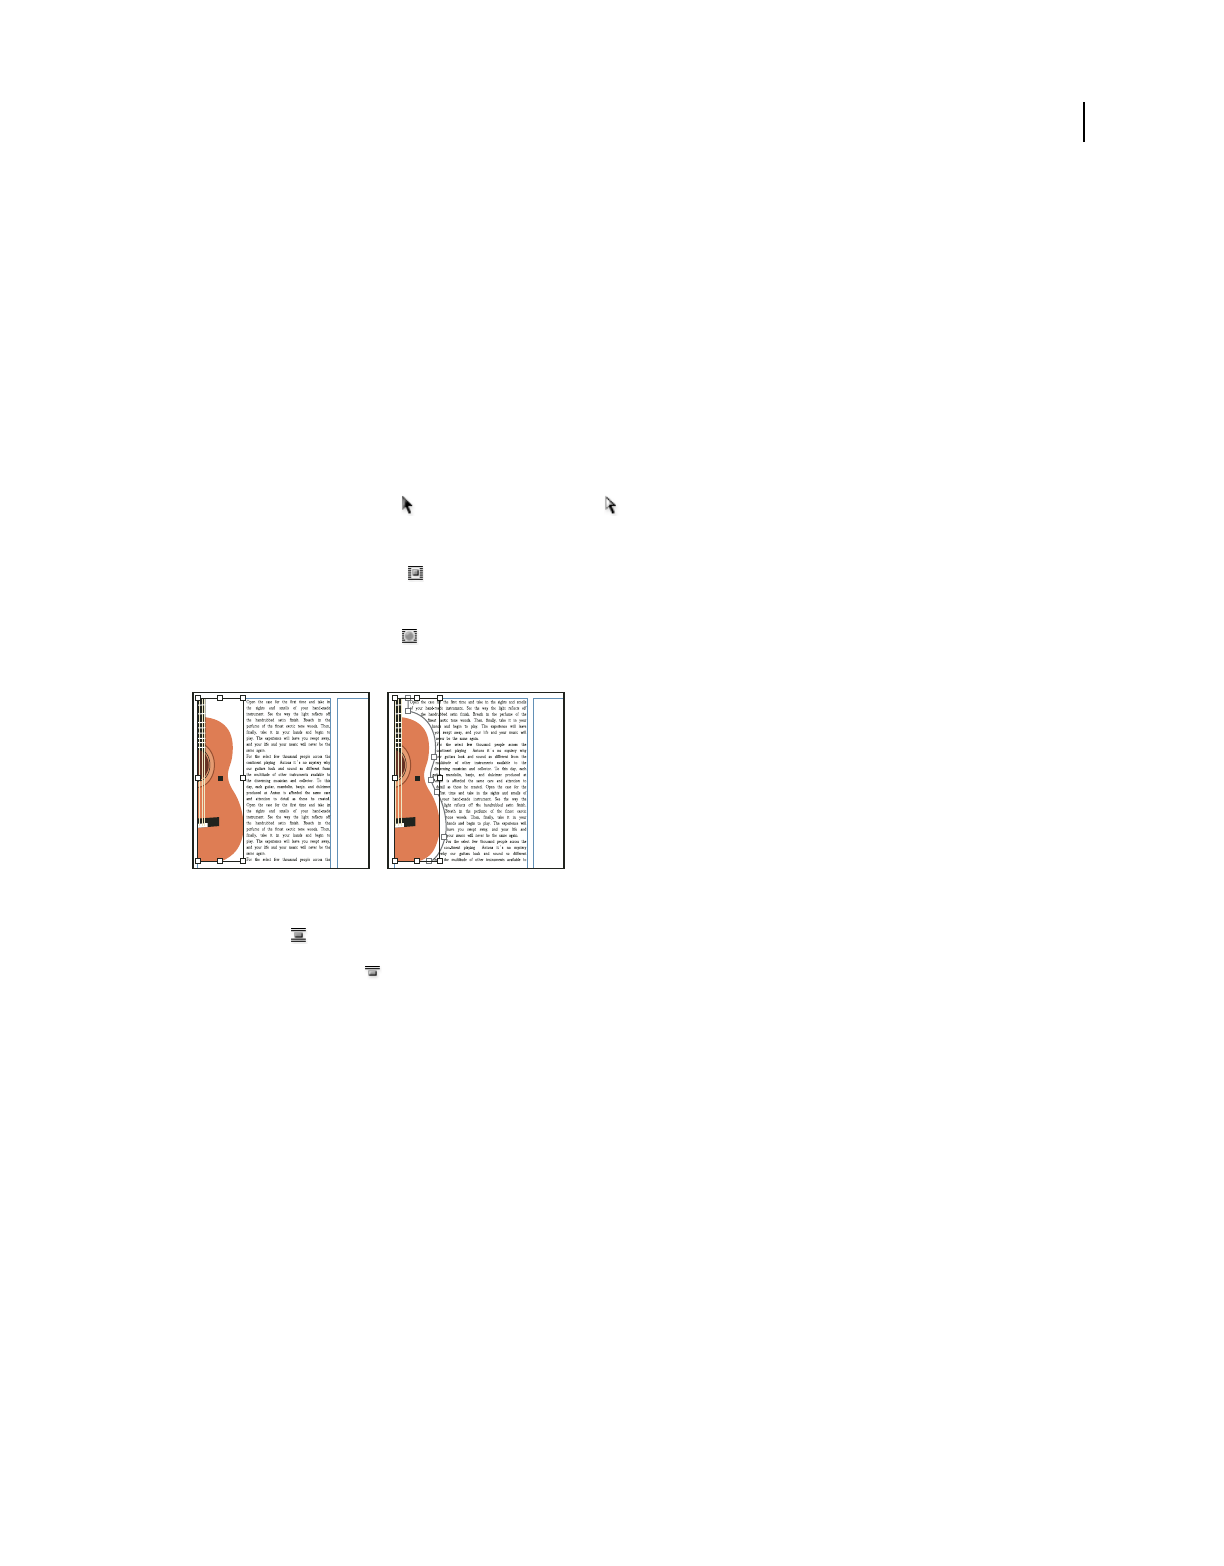
229
USING INDESIGN
Combining text and objects
Last updated 11/16/2011
Keep in mind that text wrap options apply to the object being wrapped, not the text itself. Any change to the wrap
boundary will remain if you move the wrap object near a different text frame.
For a video tutorial on using text wrap, see www.adobe.com/go/lrvid4280_id.
InDesign Magazine provides an article about text wrap at Take Control of Text Wrap.
More Help topics
“Compound paths and shapes” on page 363
Wrap text around simple objects
1To display the Text Wrap panel, choose Window > Text Wrap.
2Using the Selection tool or Direct Selection tool , select the object you want to wrap text around.
3In the Text Wrap panel, click the desired wrap shape:
Wrap Around Bounding Box Creates a rectangular wrap whose width and height are determined by the bounding
box of the selected object, including any offset distances you specify.
Wrap Around Object Shape Also known as contour wrapping, creates a text wrap boundary that is the same shape
as the frame you’ve selected (plus or minus any offset distances you specify).
Wrap Around Bounding Box setting (left) compared to Wrap Around Object Shape setting (right)
Jump Object Keeps text from appearing in any available space to the right or left of the frame.
Jump To Next Column Forces the surrounding paragraph to the top of the next column or text frame.
4 From the Wrap To menu, specify whether the wrap is applied to a specific side (such as the right side or largest
area) or towards or away from the spine. (If you don’t see the Wrap To menu, choose Show Options from the Text
Wrap panel menu.)
This option is available only if you selected Wrap Around Bounding Box or Wrap Around Object Shape.
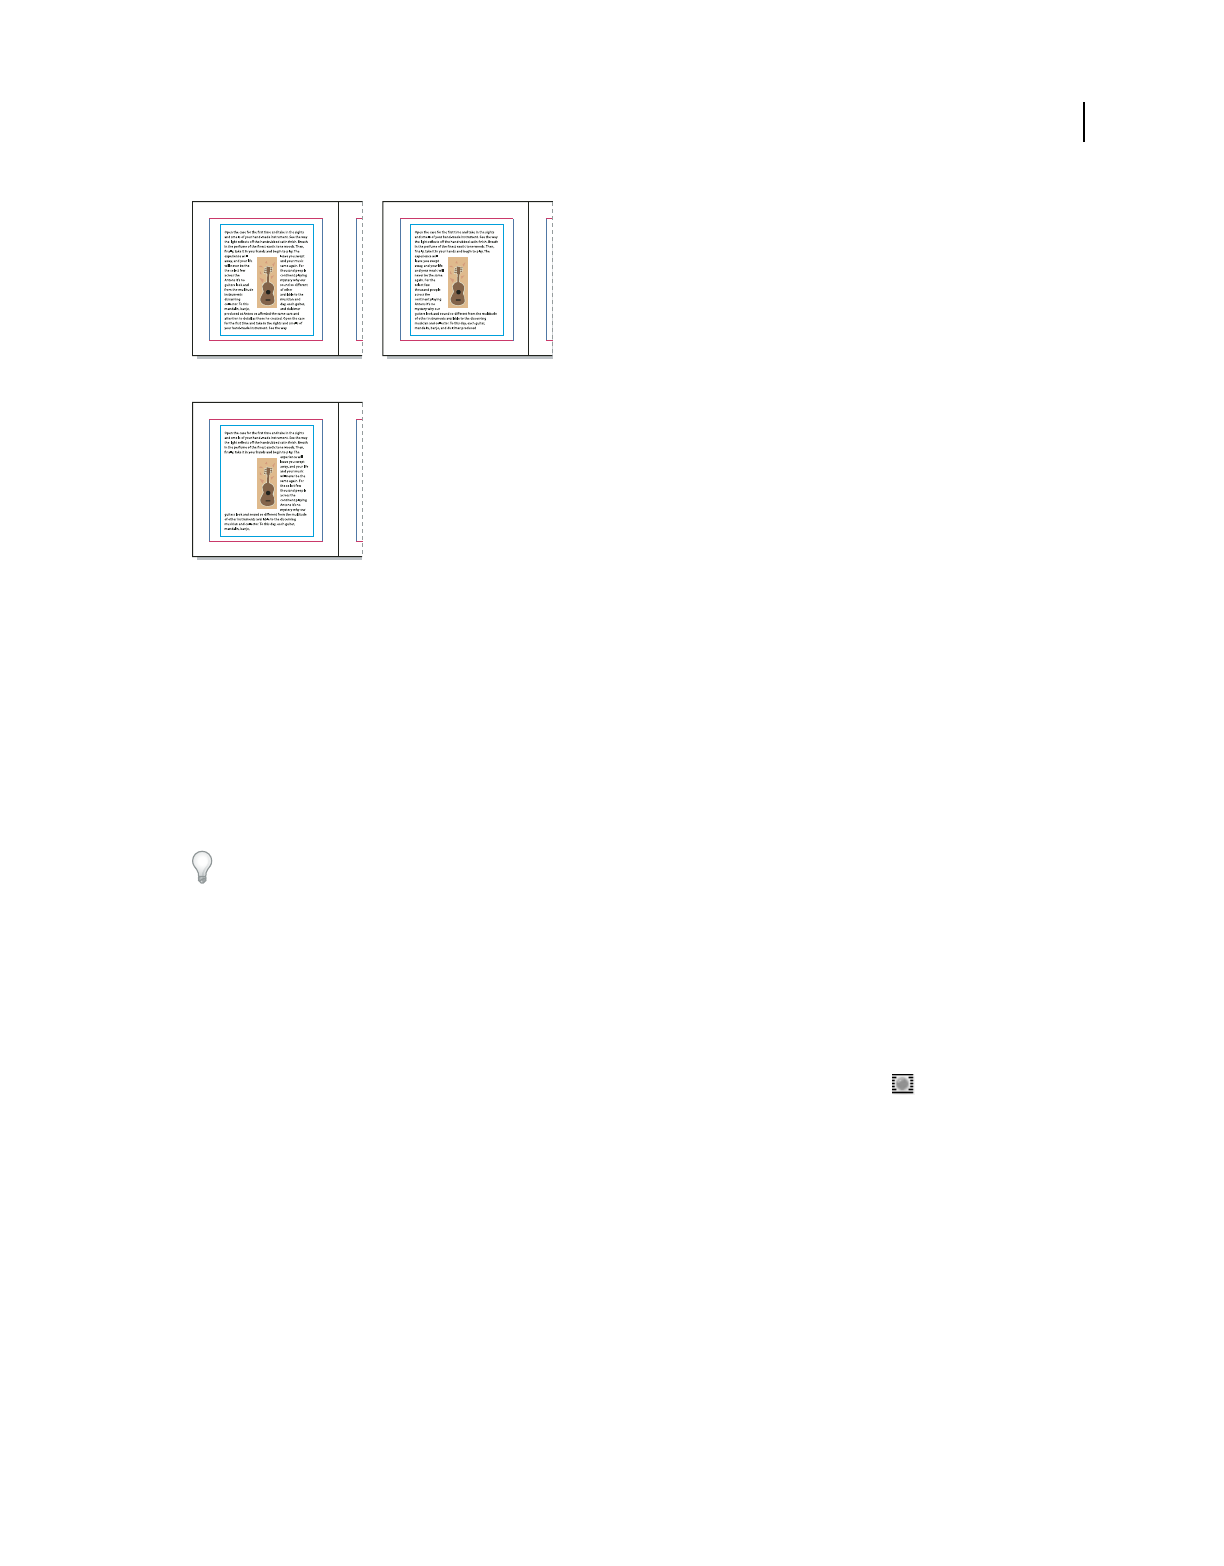
230
USING INDESIGN
Combining text and objects
Last updated 11/16/2011
Wrap To options
A. Both right and left sides B. Side towards spine C. Side away from spine
5Specify offset values. Positive values move the wrap away from the frame; negative values move the wrap within the
frame.
If you can’t get the text to wrap around an image, make sure that Ignore Text Wrap isn’t selected for the text frame that
doesn’t wrap. Also, if Text Wrap Only Affects Text Beneath is selected in Composition preferences, make sure that the
text frame is beneath the wrap object.
Text frames inside a group aren’t affected by a text wrap you apply to the group.
To set default text wrap options for all new objects, deselect all objects and then specify text wrap settings.
Wrap text around imported images
To wrap text around an imported image, save the clipping path in the application where you created the image, if
possible. When you place the image in InDesign, select the Apply Photoshop Clipping Path option in the Image Import
Options dialog box.
1To display the Text Wrap panel, choose Window > Text Wrap.
2Select an imported image, and in the Text Wrap panel, click Wrap Around Object Shape .
3Specify offset values. Positive values move the wrap away from the frame; negative values move the wrap within the
frame.
4Choose Show Options from the Text Wrap panel menu to display additional options.
5From the Type menu, choose a contour option:
Bounding Box Wraps text to the rectangle formed by the image’s height and width.
Detect Edges Generates the boundary using automatic edge detection. (To adjust edge detection, select the object and
choose Object
> Clipping Path > Options.)
Alpha Channel Generates the boundary from an alpha channel saved with the image. If this option isn’t available, no
alpha channels were saved with the image. InDesign recognizes the default transparency in Adobe Photoshop (the
A
B
C
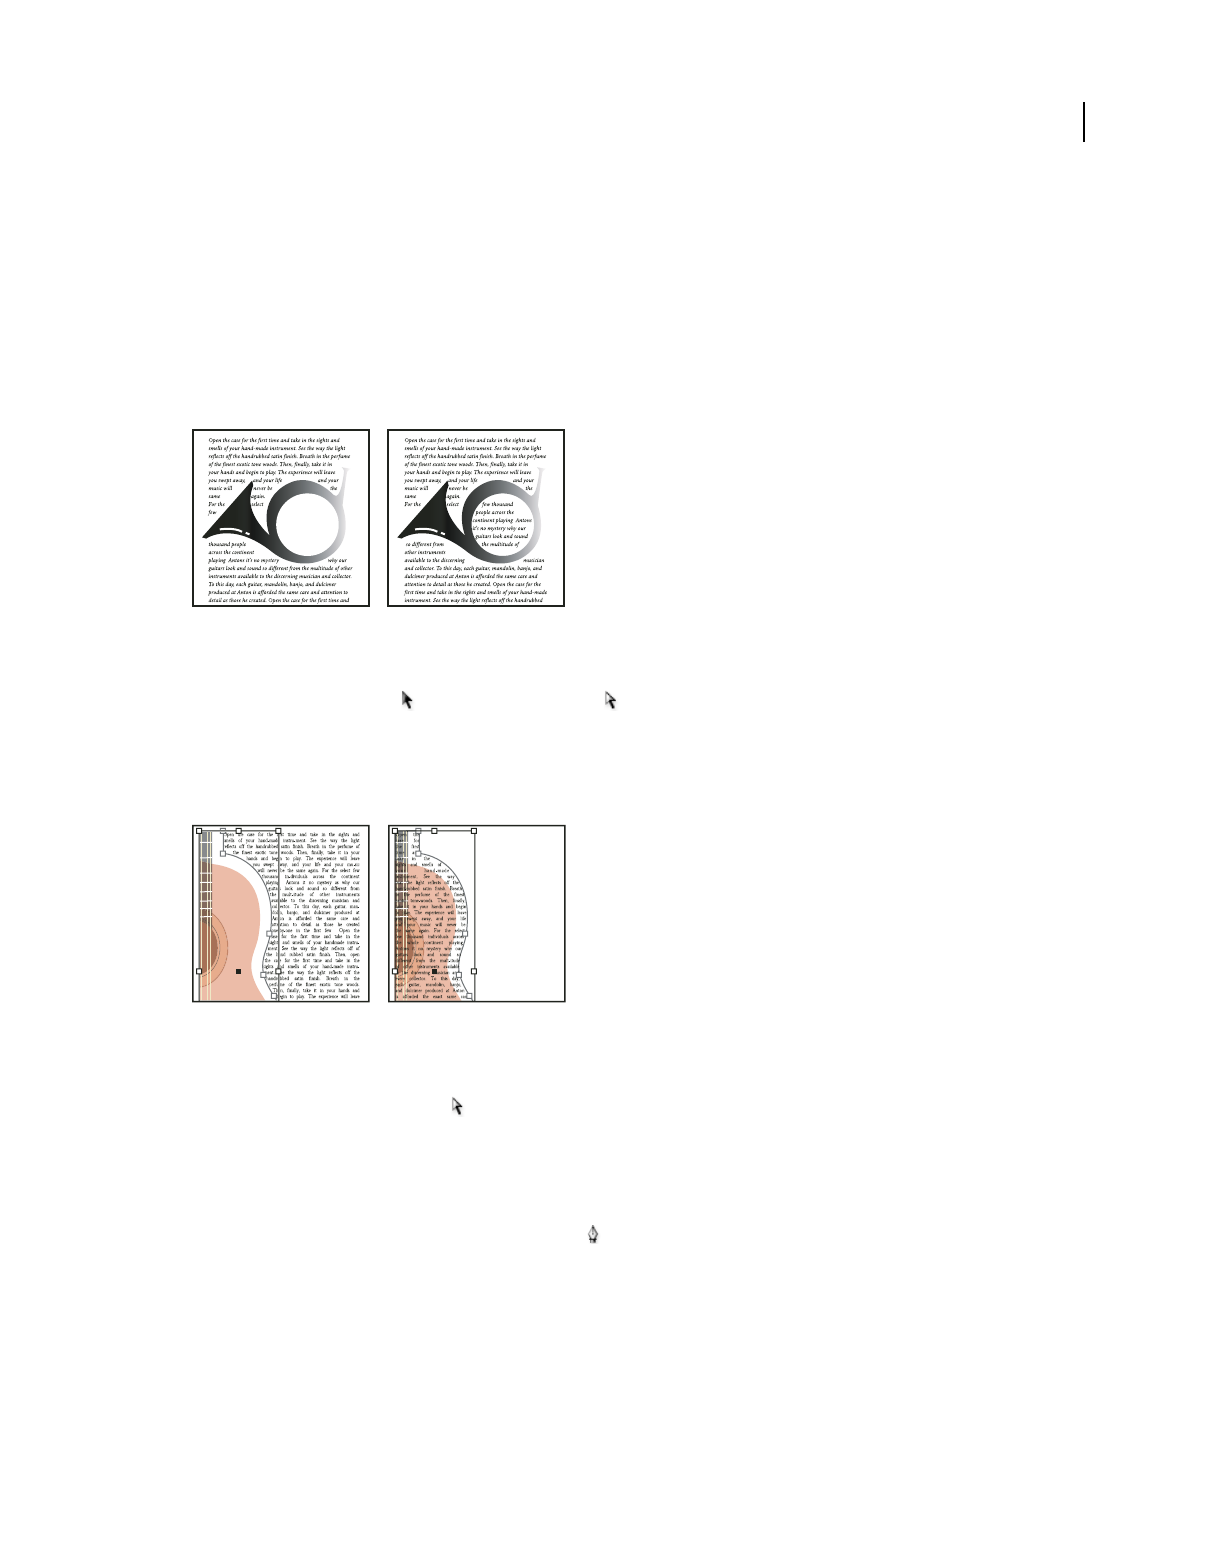
231
USING INDESIGN
Combining text and objects
Last updated 11/16/2011
checkerboard pattern) as an alpha channel; you must otherwise use Photoshop to delete the background or create and
save one or more alpha channels with the image.
Photoshop Path Generates the boundary from a path saved with the image. Choose Photoshop Path, and then choose
a path from the Path menu. If the Photoshop Path option isn’t available, no named paths were saved with the image.
Graphic Frame Generates the boundary from the container frame.
Same As Clipping Generates the boundary from the imported image’s clipping path.
6To let text appear inside “holes” of an image, such as the inside of a tire image, select Include Inside Edges.
Include Inside Edges off (left) and on (right)
Create an inverted text wrap
1Using the Selection tool or Direct Selection tool , select an object, such as a compound path, that will allow
text to wrap inside it.
2To display the Text Wrap panel, choose Window > Text Wrap.
3
Apply a text wrap to an object, and select the Invert option. Invert is commonly used with the Object Shape text wrap.
Object Shape text wrap (left) and with Invert option selected (right)
Change the shape of a text wrap
1Using the Direct Selection tool , select an object that has a text wrap applied to it. If the text wrap boundary is the
same shape as the object, the boundary is superimposed on the object.
2Do any of the following:
•To uniformly change the distance between the text and wrap object, specify offset values in the Text Wrap panel.
•To edit the text wrap boundary, use the Pen tool and Direct Selection tool.
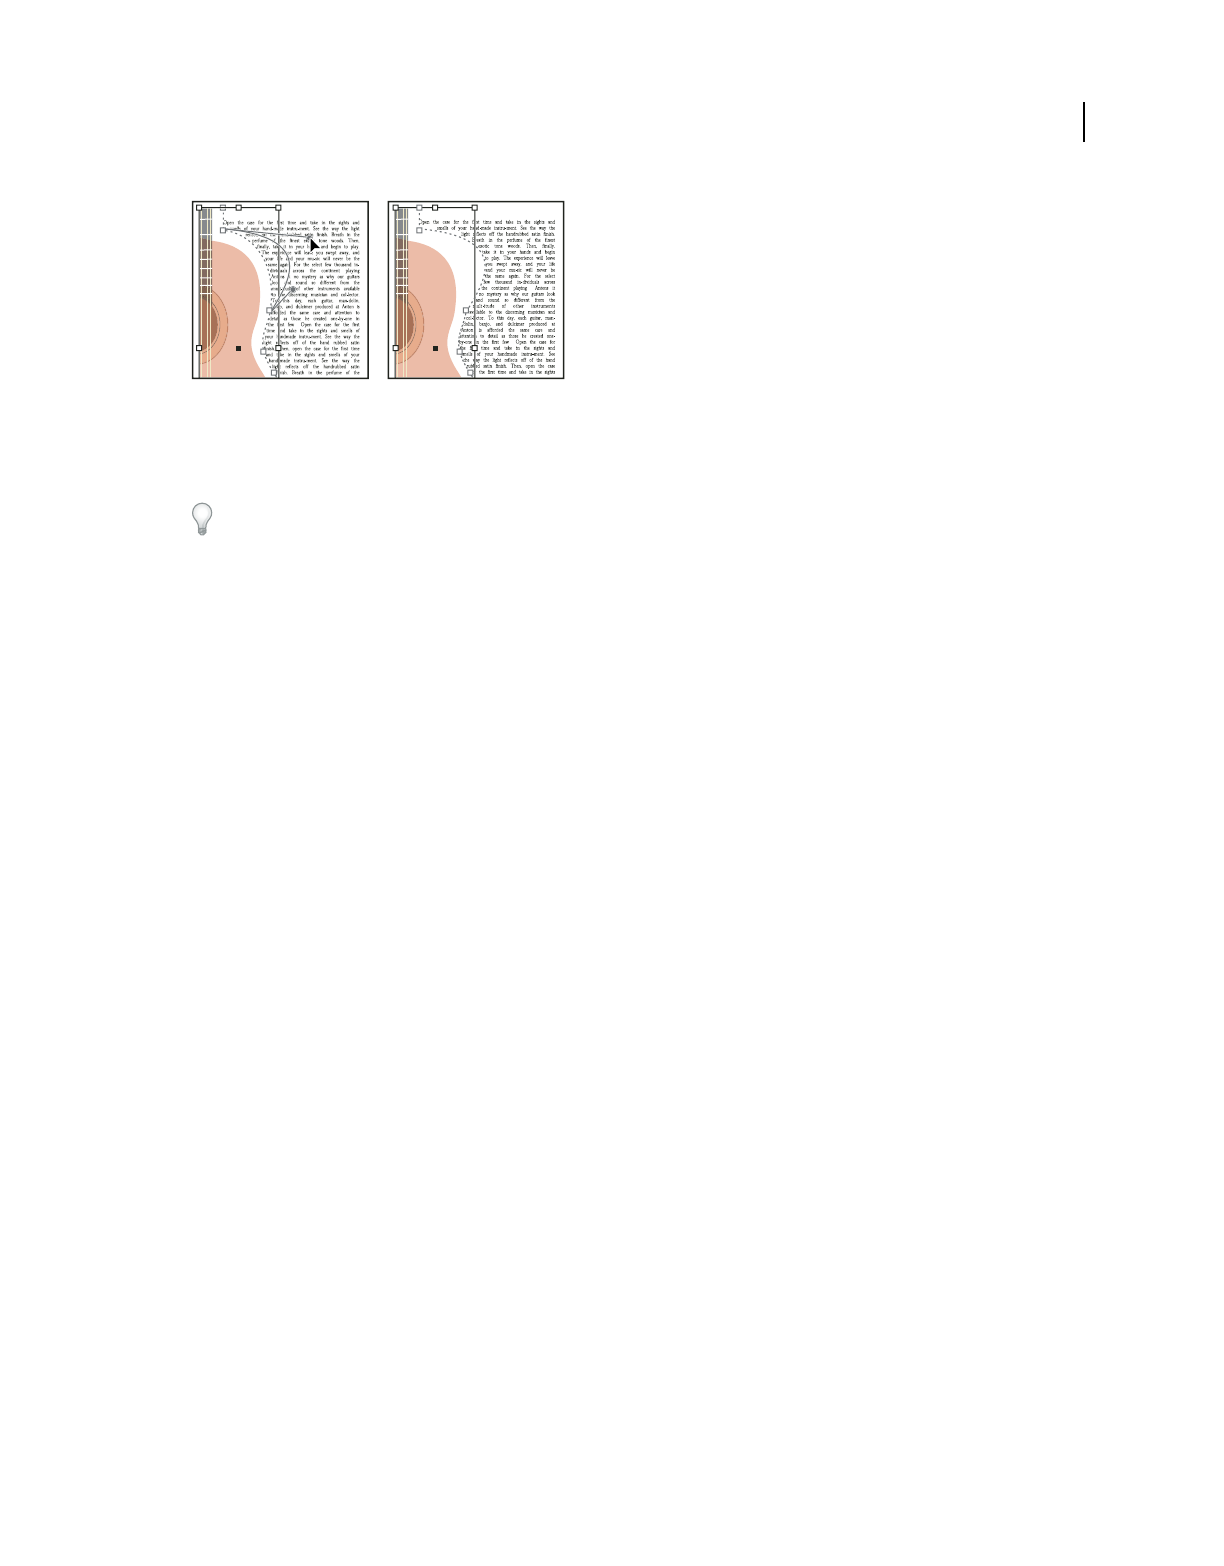
232
USING INDESIGN
Combining text and objects
Last updated 11/16/2011
Editing text wrap boundary
If you manually change the shape of a text wrap path, User-Modified Path is selected in the Type menu and remains
dimmed in the menu. This indicates that the path of the shape has changed.
If you want to use the original clipping path rather than the edited text wrap boundary, choose Same As Clipping from
the Type menu in the Text Wrap panel.
Apply text wrap on master page items
If the Apply To Master Page Only option is selected, you must override a master page item on a document page to wrap
text around it. If this option is deselected, text on both master pages and document pages can wrap around the master
page items without the master page items being overridden.
1Select the object on the master page.
2From the Text Wrap panel menu, select or deselect Apply To Master Page Only.
This option is available only when an object on a master page is selected and has a wrap applied to it.
More Help topics
“Master pages” on page 70
Wrapping text around anchored objects
If you apply text wrap to an anchored object, the wrap affects the lines of text in the story that follow the anchor marker.
However, the wrap doesn’t affect the line of text that includes the anchor marker or any lines before it.
When you paste an object as an inline object, its text wrap boundaries are preserved.
Suppress text wrap on hidden layers
When you hide a layer that contains a wrap object, the text frames on other layers wrap around the object, unless you
select the Suppress Text Wrap When Layer Is Hidden option in the Layer Options dialog box. If this option is selected,
hiding a layer can cause text on other layers to be recomposed.
1In the Layers panel, double-click the layer that contains the wrap object.
2Select Suppress Text Wrap When Layer Is Hidden.
Justify text next to wrap objects
When you specify how text is justified next to wrap objects, the change applies to the entire document.
1Choose Edit > Preferences > Composition (Windows) or InDesign > Preferences > Composition (Mac OS).
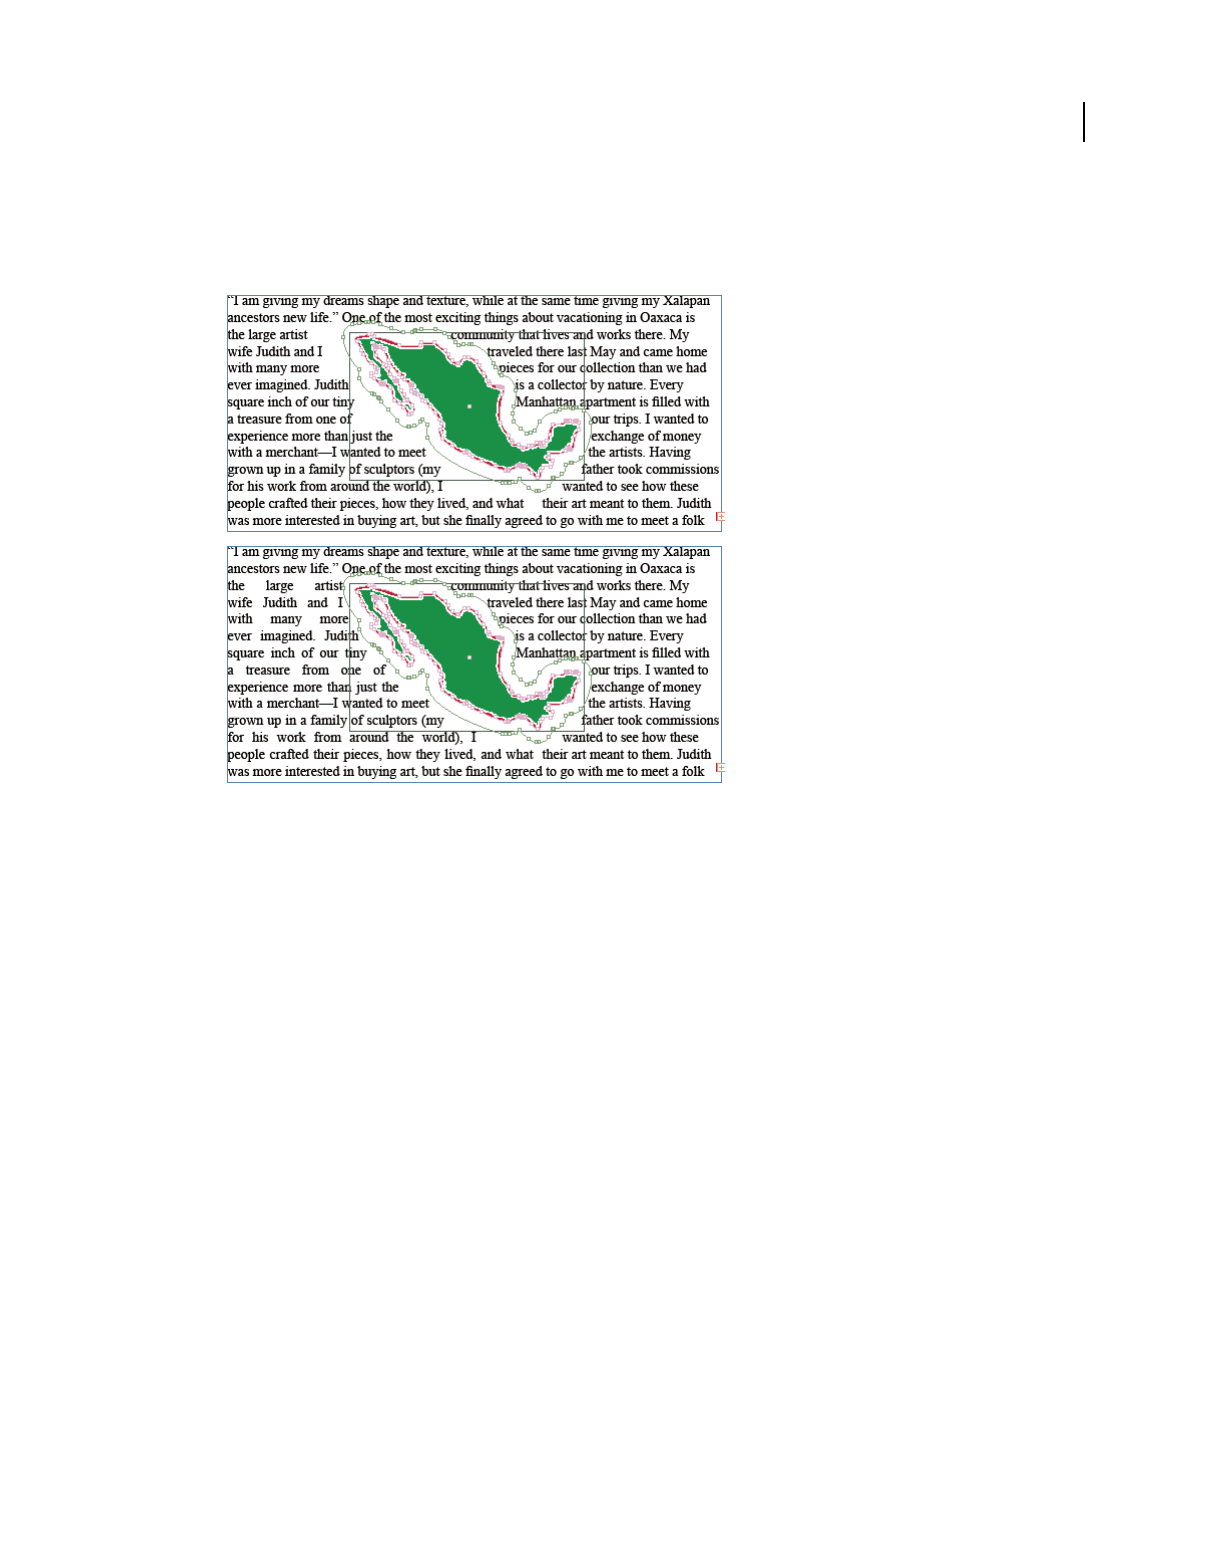
233
USING INDESIGN
Combining text and objects
Last updated 11/16/2011
2Select one of the following options, and click OK:
Justify Text Next To An Object Justifies text next to wrap objects that separate a column of text. This setting takes effect
only when the text wrap completely interrupts lines of text so that each line is divided into two or more parts.
Justify Text Next To An Object
A. Option turned off B. Option turned on
Skip By Leading Moves wrapped text to the next available leading increment below a text-wrapped object. If this
option isn’t selected, lines of text may jump below an object in a way that prevents text from lining up with text in
neighboring columns or text frames. Selecting this option is especially useful when you want to make sure that the text
aligns to the baseline grid.
Text Wrap Only Affects Text Beneath Text stacked above the wrapped object isn’t affected by the text wrap. Stacking
order is determined by layer position in the Layers panel and by the stacking order of objects on a layer.
Ignore text wrap in a text frame
In some cases, you’ll want to turn off text wrap in a text frame. For example, you may want one text frame to wrap
around an image, but you may want a different text frame to appear within the image.
1Select the text frame, and choose Object > Text Frame Options.
2Select Ignore Text Wrap, and click OK.
A
B
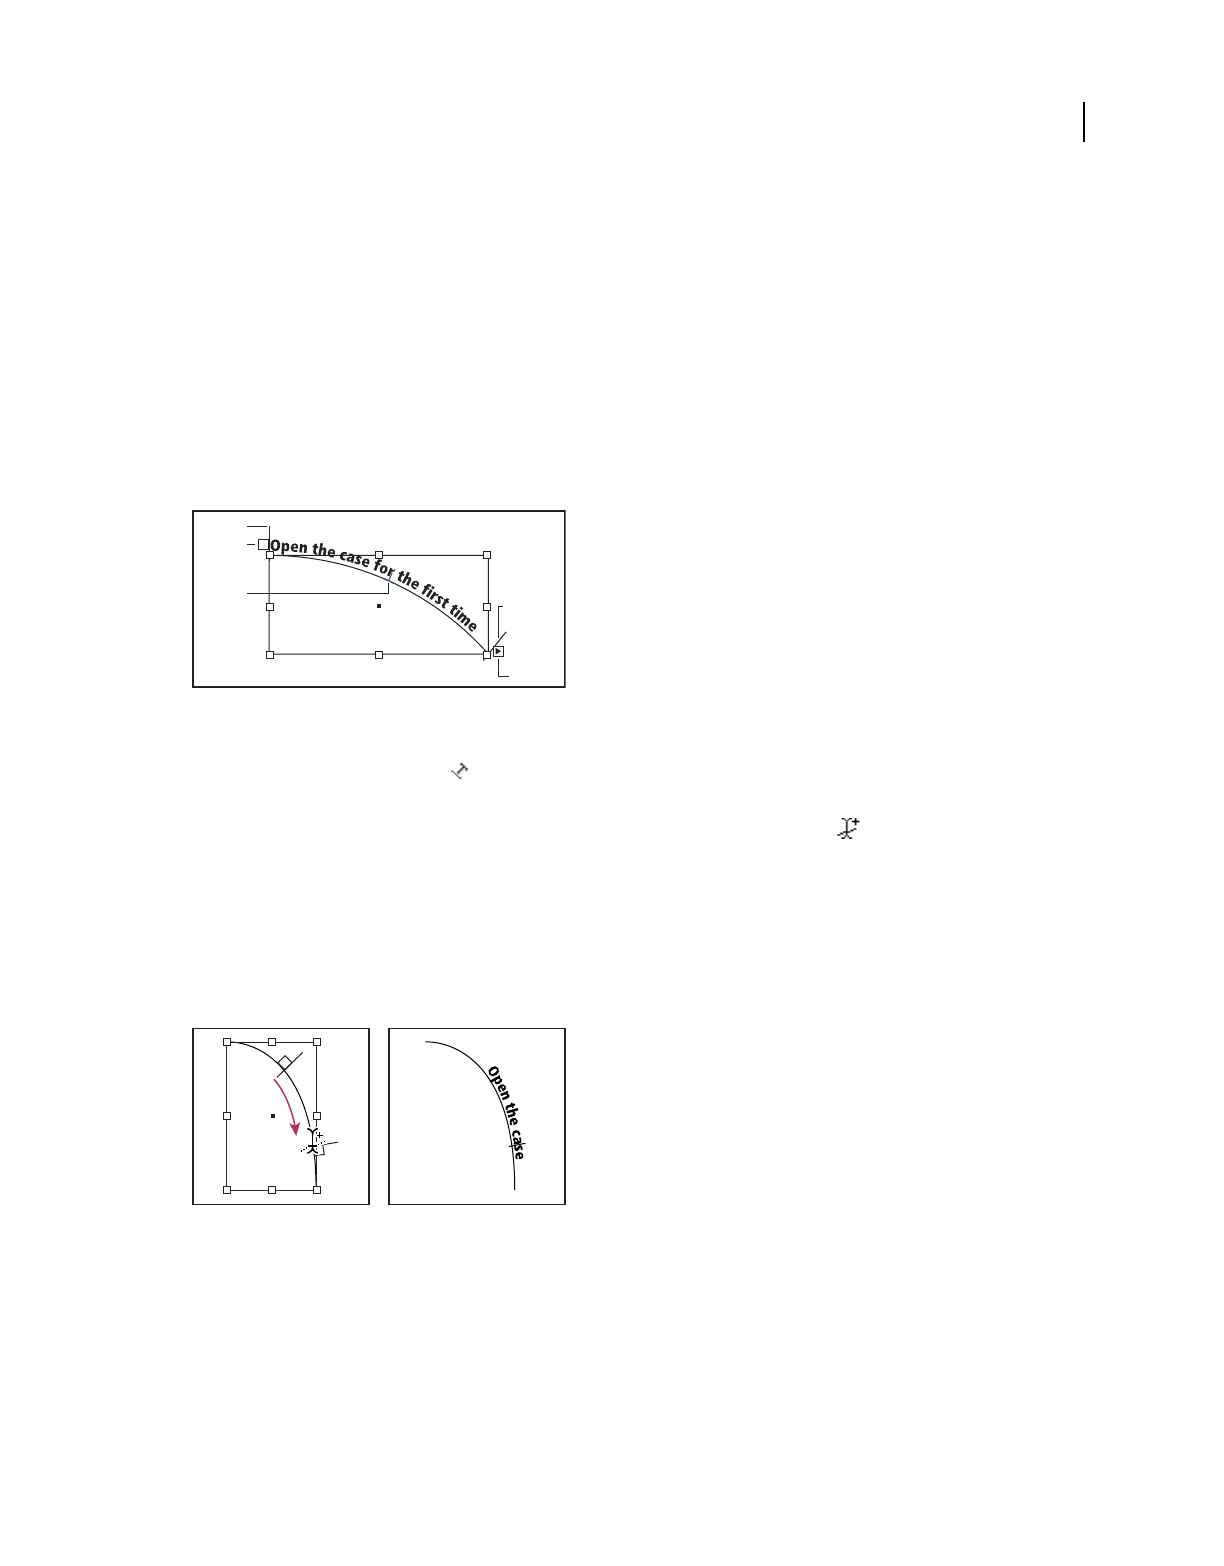
234
USING INDESIGN
Combining text and objects
Last updated 11/16/2011
Creating type on a path
Create type on a path
You can format text to flow along the edge of an open or closed path of any shape. Apply options and effects to type on
a path: Slide it along the path, flip it over to the other side of the path, or use the shape of the path to distort the
characters. Type on a path has an in port and an out port just like other text frames, so you can thread text to and from it.
You can include only one line of type on a path, so any type that won’t fit on the path will be overset (hidden), unless
you’ve threaded it to another path or text frame. You can add inline or above line anchored objects to type on a path.
You can’t create type on a path using compound paths, such as those that result from using the Create Outlines
command.
Type on a path
A. Start bracket B. In port C. Center bracket D. End bracket E. Out port indicating threaded text
1Select the Type On A Path tool . (Click and hold the Type tool to display a menu containing the Type On A Path
tool.)
2Position the pointer on the path until a small plus sign appears next to the pointer , and then follow these steps:
•To type using default settings, click the path. An insertion point appears at the start of the path by default. If the
current default paragraph settings specify an indent, or any alignment other than left, the insertion point may
appear somewhere other than at the start of the path.
•To confine the text to a specific portion of the path, click the path where you would like the text to start, and drag
along the path to where you want the text to end, then release the mouse. (For information about changing the start
and end position of text, see “Adjust the type on a path position” on page 235.)
Changing location of type on path
Note: If neither clicking nor dragging seems to work, make sure that the small plus sign appears next to the Type On A
Path tool.
3Type the text you want. If you clicked to place the insertion point on the path, type will appear along the entire
length of the path. If you dragged, type will appear only along the length you dragged.
Note: If the path was originally visible, it remains visible after you add type to it. To hide the path, select it with the
Selection or Direct Selection tool, and then apply a fill and stroke of None.
E
A
D
C
B
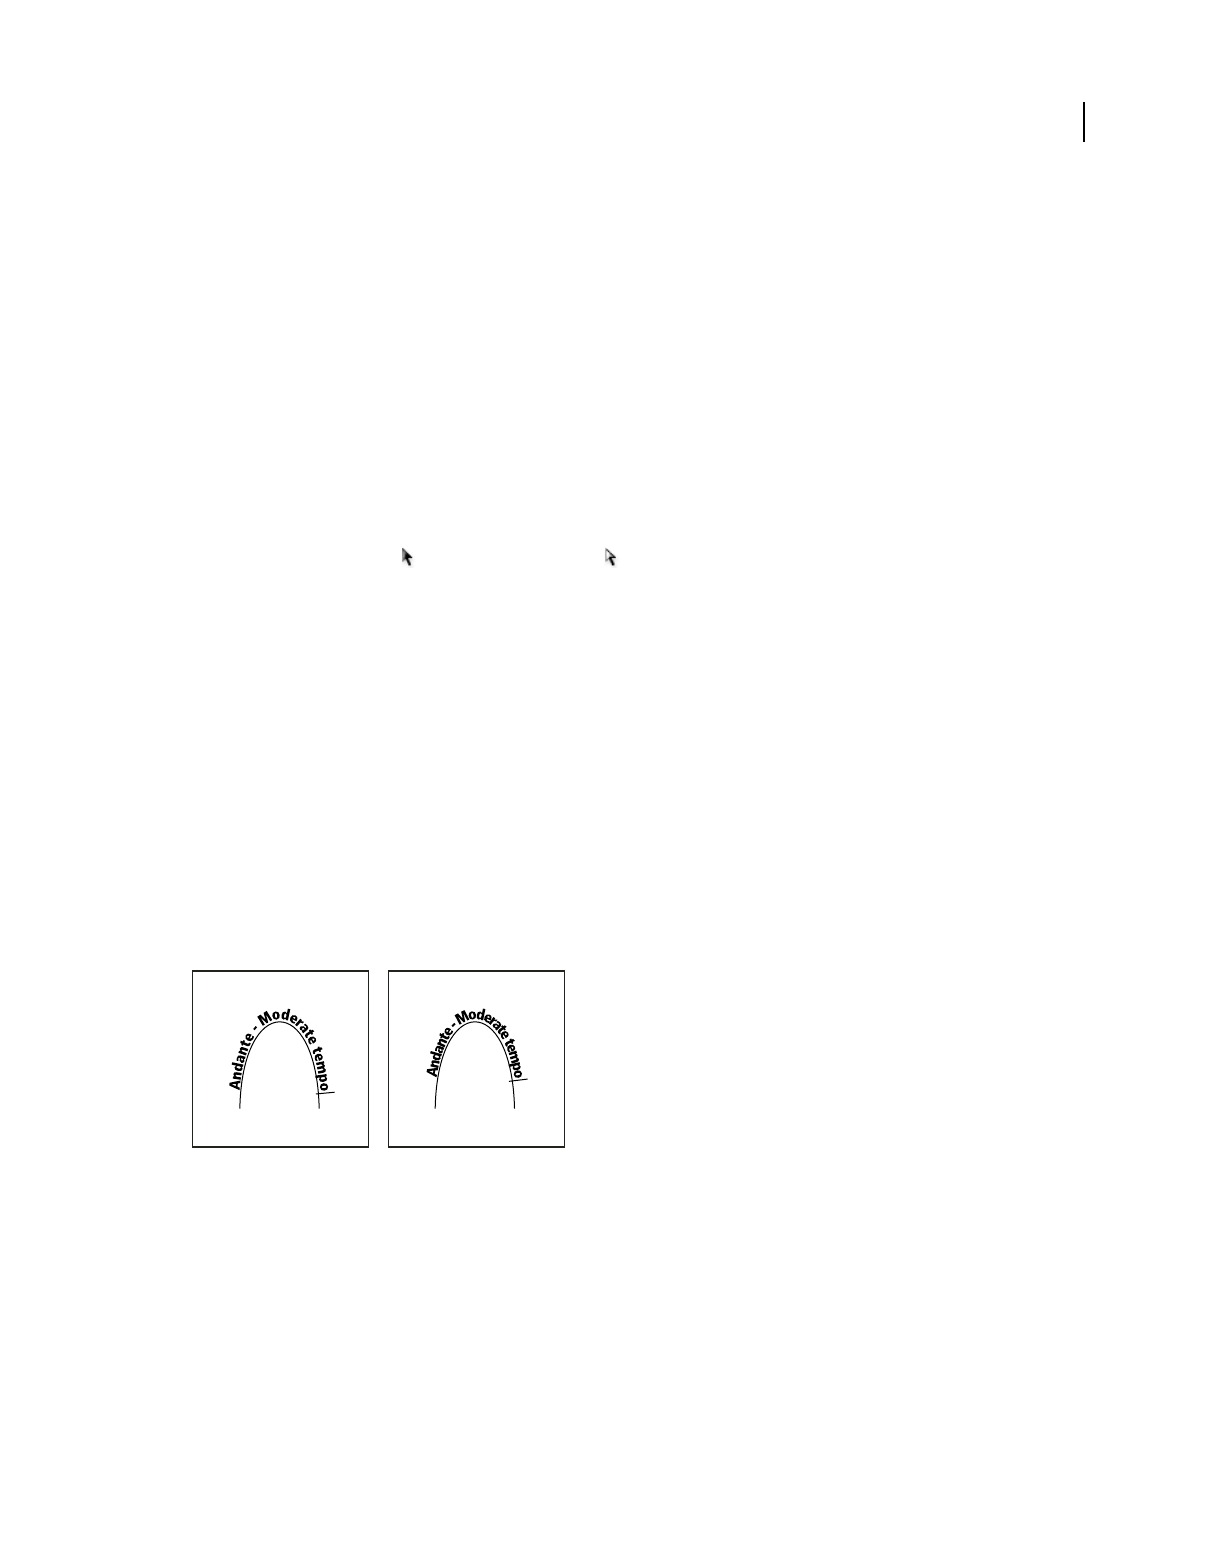
235
USING INDESIGN
Combining text and objects
Last updated 11/16/2011
Edit or delete type on a path
You can apply character and paragraph options to type on a path. However, paragraph rules and paragraph spacing
options have no effect on type on a path. The alignment setting in the Paragraph panel controls the alignment of type
on a path.
Edit and format path-type characters
1Using the Type On A Path tool, do one of the following:
•To add an insertion point, click between any two characters in the type on a path.
•To select characters, drag through the type on a path.
2Edit and format the text as needed.
Delete type from a path
1Using the Selection tool or Direct Selection tool , select one or more type-on-a-path objects.
2Choose Type > Type on a Path > Delete Type From Path.
If the path text is threaded, type moves to the next threaded text frame or type-on-a-path object. If the path text isn’t
threaded, text is deleted. The path remains, but loses any type-on-a-path attributes—all brackets, in and out ports, and
threading properties are removed.
Note: If the path’s fill and stroke are set to None, the path is invisible after you delete the type. To make the path visible,
press the D key immediately after you choose Type
> Type on a Path > Delete Type From Path. This applies the default
fill and stroke to the selected path.
Tighten character spacing around sharp turns and acute angles
1Using the Selection tool or the Type tool, select the type on a path.
2Choose Type > Type on a Path > Options, or double-click the Type On A Path tool.
3For Spacing, type a value in points. Higher values remove the extra space from between characters positioned on
sharp curves or angles.
Type on a path before (left) and after (right) applying spacing adjustment
Note: The Spacing value compensates for the way characters fan out around a curve or sharp angle. It has no effect on
characters positioned on straight segments. To change spacing of characters anywhere along the path, select them, and
then apply kerning or tracking.
Adjust the type on a path position
You can change the start or end position of type on a path, slide type, and change the path position in other ways.
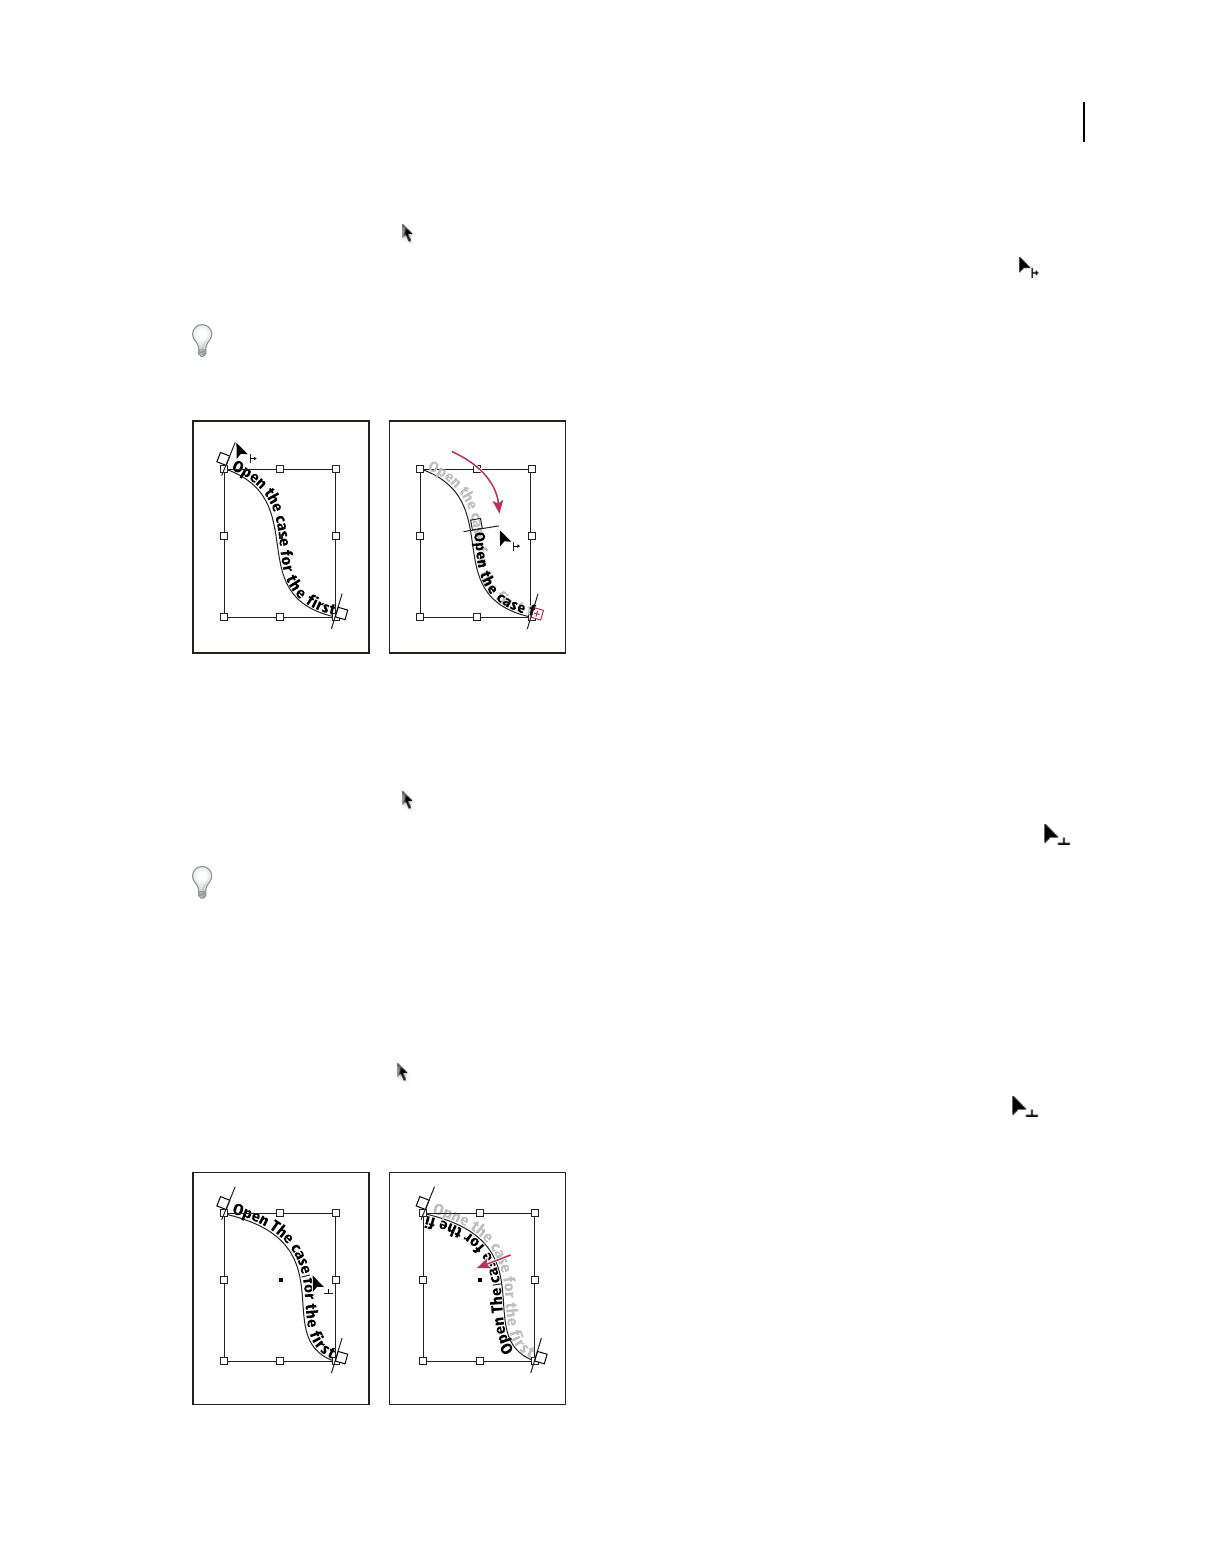
236
USING INDESIGN
Combining text and objects
Last updated 11/16/2011
Change the start or end position of type on a path
1Using the Selection tool , select the type on a path.
2Position the pointer over the path type’s start or end bracket until a small icon appears next to the pointer . Do
not position it over the bracket’s in port or out port.
Zoom in on the path to more easily select the bracket.
3Drag the start or end bracket along the path.
Position the pointer on start or end bracket, and then drag to reposition boundary of type on a path.
Note: If you apply a paragraph indent value, it’s measured from the start and end brackets.
Slide type along a path
1Using the Selection tool , select the type on a path.
2Position the pointer over the path type’s center bracket until a center bracket icon appears next to the pointer .
Zoom in on the path to more easily select the bracket.
3Drag the center bracket along the path.
Note: The text won’t move if both the start and end brackets are at the ends of the path. To create some space for dragging
text, drag the start or end bracket away from the ends of the path.
Flip type on a path
1Click the Selection tool , and select the type on a path.
2Position the pointer over the type’s center bracket until a center bracket icon appears next to the pointer .
3Drag the center bracket across the path.
Position pointer on center bracket, and then drag across path to flip type.
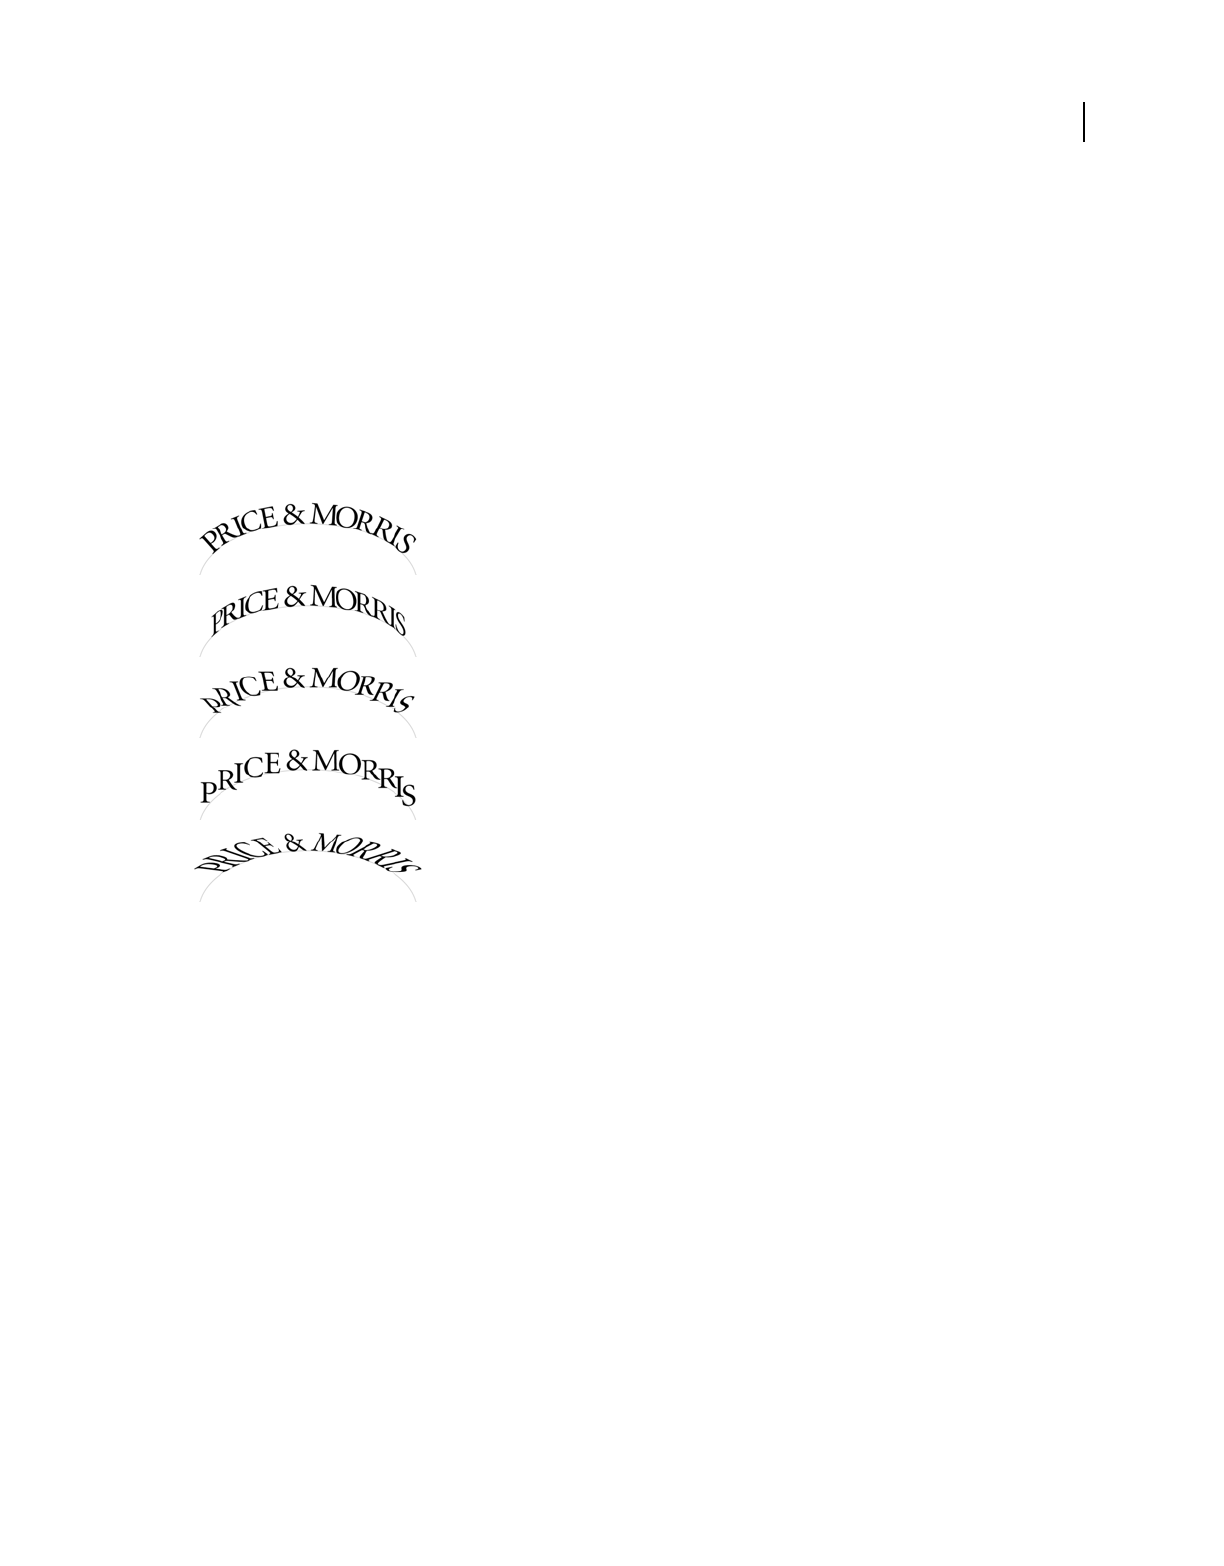
237
USING INDESIGN
Combining text and objects
Last updated 11/16/2011
You can also flip type on a path using a dialog box. Using the Selection tool or the Type tool, select the type on a path.
Choose Type
> Type on a Path > Options. Select the Flip option, and then click OK.
Apply an effect to type on a path
1Using the Selection tool or the Type tool, select the type on a path.
2Choose Type > Type on a Path > Options, or double-click the Type On A Path tool.
3Choose one of the following in the Effect menu, and then click OK:
•To keep the center of each character’s baseline parallel to the path’s tangent, choose Rainbow. This is the default
setting.
Type on a path effects
A. Rainbow effect B. Skew effect C. 3D Ribbon effect D. Stair Step effect E. Gravity effect
•To keep characters’ vertical edges perfectly vertical regardless of the path shape, while letting characters’ horizontal
edges follow the path, choose Skew. The resulting horizontal distortion is useful for text that appears to follow
waves or go around a cylinder, as on a beverage can label.
•To keep characters’ horizontal edges perfectly horizontal regardless of the path shape, while keeping each
character’s vertical edge perpendicular to the path, choose 3D Ribbon.
•To keep the left edge of each character’s baseline on the path without rotating any characters, choose Stair Step.
•To keep the center of each character’s baseline on the path while keeping each vertical edge in line with the path’s
center point, choose Gravity. You can control this option’s perspective effect by adjusting the arc of the text’s path.
Add anchored objects to type on a path
1Using the Type tool or the Type On A Path tool, click an insertion point in the text where you want the anchor for
the object to appear.
2Add the anchored object. You can add inline or above line anchored objects or frames to the path. (See “Anchored
objects” on page 220.)
A
B
C
D
E

238
USING INDESIGN
Combining text and objects
Last updated 11/16/2011
Note: The options available for above line anchored objects in a text path differ slightly from options for anchored objects
in a regular text frame: the Alignment option is relative to the anchored object marker and the Space Before option is not
available.
Captions
A caption is descriptive text that appears below an image. InDesign provides several methods for creating captions that
display the image metadata you specify. InDesign provides a special caption variable that displays the specified
metadata of an image. If a text frame containing the variable is next to or grouped with the image, the variable displays
the metadata of that image. You can generate a caption from an existing image or while placing it, and you can create
a text frame that contains a caption variable.
For video tutorials on generating captions from metadata, see www.adobe.com/go/lrvid5156_id_en and
http://tv.adobe.com/go/4958/.
Caption generated from image metadata
Generate a caption from an image
When you generate a caption from an existing image, you can generate either a static caption, which can be modified
only manually, or a live caption, which is updated if the image or the image metadata changes. For example, if you
move a live caption next to a different image, the caption displays metadata from the different image.
When you choose Generate Live Caption, a new variable is generated automatically based on the current caption
settings. For example, if the Description metadata type is selected in the Caption Setup dialog box, a variable called
“Live Metadata Caption: Description” is created.
1To determine the content and appearance of the caption you generate, choose Object > Captions > Caption
Settings, and specify settings. See “Specify caption setup options” on page 239.
2Choose Object > Captions > Generate Live Caption or Generate Static Caption.
Note: When you generate a live caption that displays a long string of text, such as a Description, the caption does not
break across lines because it is a variable. If a caption is compressed into a single line, consider converting a live caption
to a static caption. To convert a live caption to a static caption, select the live caption and choose Object > Captions >
Convert To Static Caption.
You can also generate a static caption while placing an image. In the Place dialog box, select Create Static Captions,
and then place the caption text frame after placing the image.

239
USING INDESIGN
Combining text and objects
Last updated 11/16/2011
Specify caption setup options
Use the Captions Settings dialog box to determine the content and formatting of captions you generate. These captions
affect only future captions you generate, not existing captions.
1Choose Object > Captions > Caption Settings.
2Choose the metadata you want to include, and specify the text that appears before and after the metadata.
3To include multiple rows of metadata, click the plus sign icon.
4Specify the following options, and click OK.
Text Before / Text After The text that appears before or after the specified metadata.
Metadata Choose the metadata option, such as Description or City, from the list.
Alignment Specify where to place the caption in relation to the image.
Offset Specify how far apart the caption text is from the edge of the text frame next to the image.
Paragraph Style Specify a paragraph style to apply to the caption text. If you want the caption to include automatic
numbering, such as “Figure 1,” “Figure 2,” and so on, include the numbering in the paragraph style. See “Create
running captions for figures and tables” on page 283.
Layer Specify to which layer the caption belongs.
Group Caption With Image Indicate whether the image frame and caption text frame are grouped.
Create captions using variables
When a text frame containing a caption variable is adjacent to or grouped with an image, the caption variable displays
the metadata of that image.
Caption variables
A. Text frame with caption variable not next to image B. Text frame moved next to image
1If necessary, define the caption variable you want to use. See “Define caption variables” on page 240.
2Create the text frame to be used for the caption.
3With the insertion point in the text frame, choose Type > Text Variables > Insert Variable, and then choose the
caption variable you want to include. Insert as many caption variables as needed.
4Move the caption text frame next to an image frame, or group the caption text frame with the image frame.
If the caption variable is blank, edit the image metadata, and then use the Links panel to update the image. To edit
image metadata, see “Edit metadata in image files” on page 110.
AB

240
USING INDESIGN
Combining text and objects
Last updated 11/16/2011
Define caption variables
Caption variables are updated automatically when a text frame containing a caption variable is moved next to an
image. By default, the Name metadata is used for the variable type when you choose Type > Text Variables > Insert
Variable > Image Name. You can edit the Image Name variable, or you can create new variables that specify image
metadata.
1Choose Type > Text Variables > Define.
2Choose New to create a variable or Edit to edit an existing variable.
3For Type, select Metadata Caption.
4Choose an option from the Metadata menu.
5Specify text that appears before or after the metadata, and then choose OK.
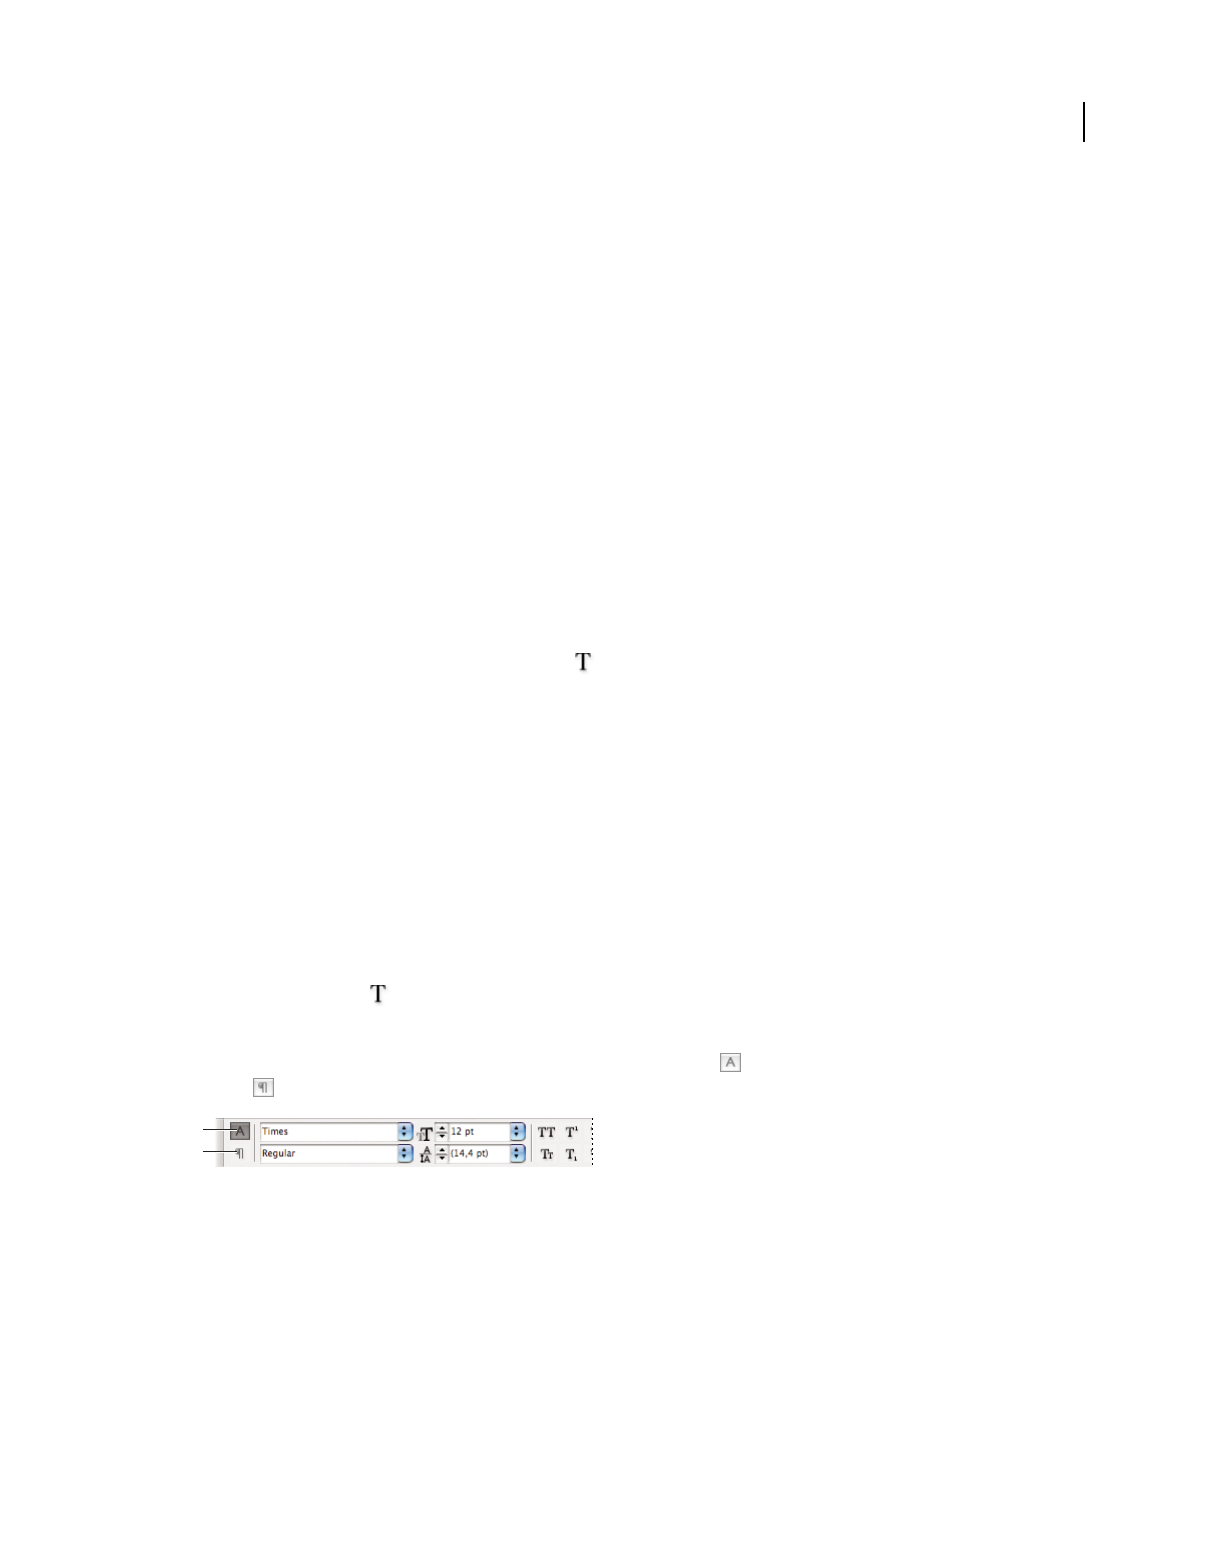
241
Last updated 11/16/2011
Chapter 8: Typography
Formatting text
Format text
Use the Control panel to change the appearance of text. When text is selected or when the insertion point is placed in
text, the Control panel displays either the character formatting controls or the paragraph formatting controls, or a
combination of both, depending on your monitor resolution. These same text formatting controls appear in the
Character panel and Paragraph panel. You can also use the Character panel and Paragraphs panel to change the
appearance of text.
For a video tutorial on formatting characters, see www.adobe.com/go/lrvid4275_id. For a video tutorial on formatting
paragraphs, see www.adobe.com/go/lrvid4276_id.
Note the following methods of formatting text:
•To format characters, you can use the Type tool to select characters, or you can click to place the insertion point,
select a formatting option, and then begin typing.
•To format paragraphs, you don’t need to select an entire paragraph—selecting any word or character, or placing
the insertion point in a paragraph will do. You can also select text in a range of paragraphs.
•To set the formatting for all future text frames that you’ll create in the current document, make sure that the
insertion point is not active and that nothing is selected, and then specify text formatting options. To set default
text formatting for all new documents, close all documents, and then specify the text settings. See “Set defaults” on
page 40.
•Select a frame to apply formatting to all text inside it. The frame cannot be part of a thread.
•Use paragraph styles and character styles to format text quickly and consistently.
For a video tutorial on working with text, see www.adobe.com/go/vid0075.
1Select the Type tool .
2Click to place an insertion point, or select the text that you want to format.
3In the Control panel, click the Character Formatting Control icon or the Paragraph Formatting Control
icon .
Control panel
A. Character formatting controls B. Paragraph formatting controls
4Specify formatting options.
More Help topics
Working with Text video
“Control panel overview” on page 24
A
B
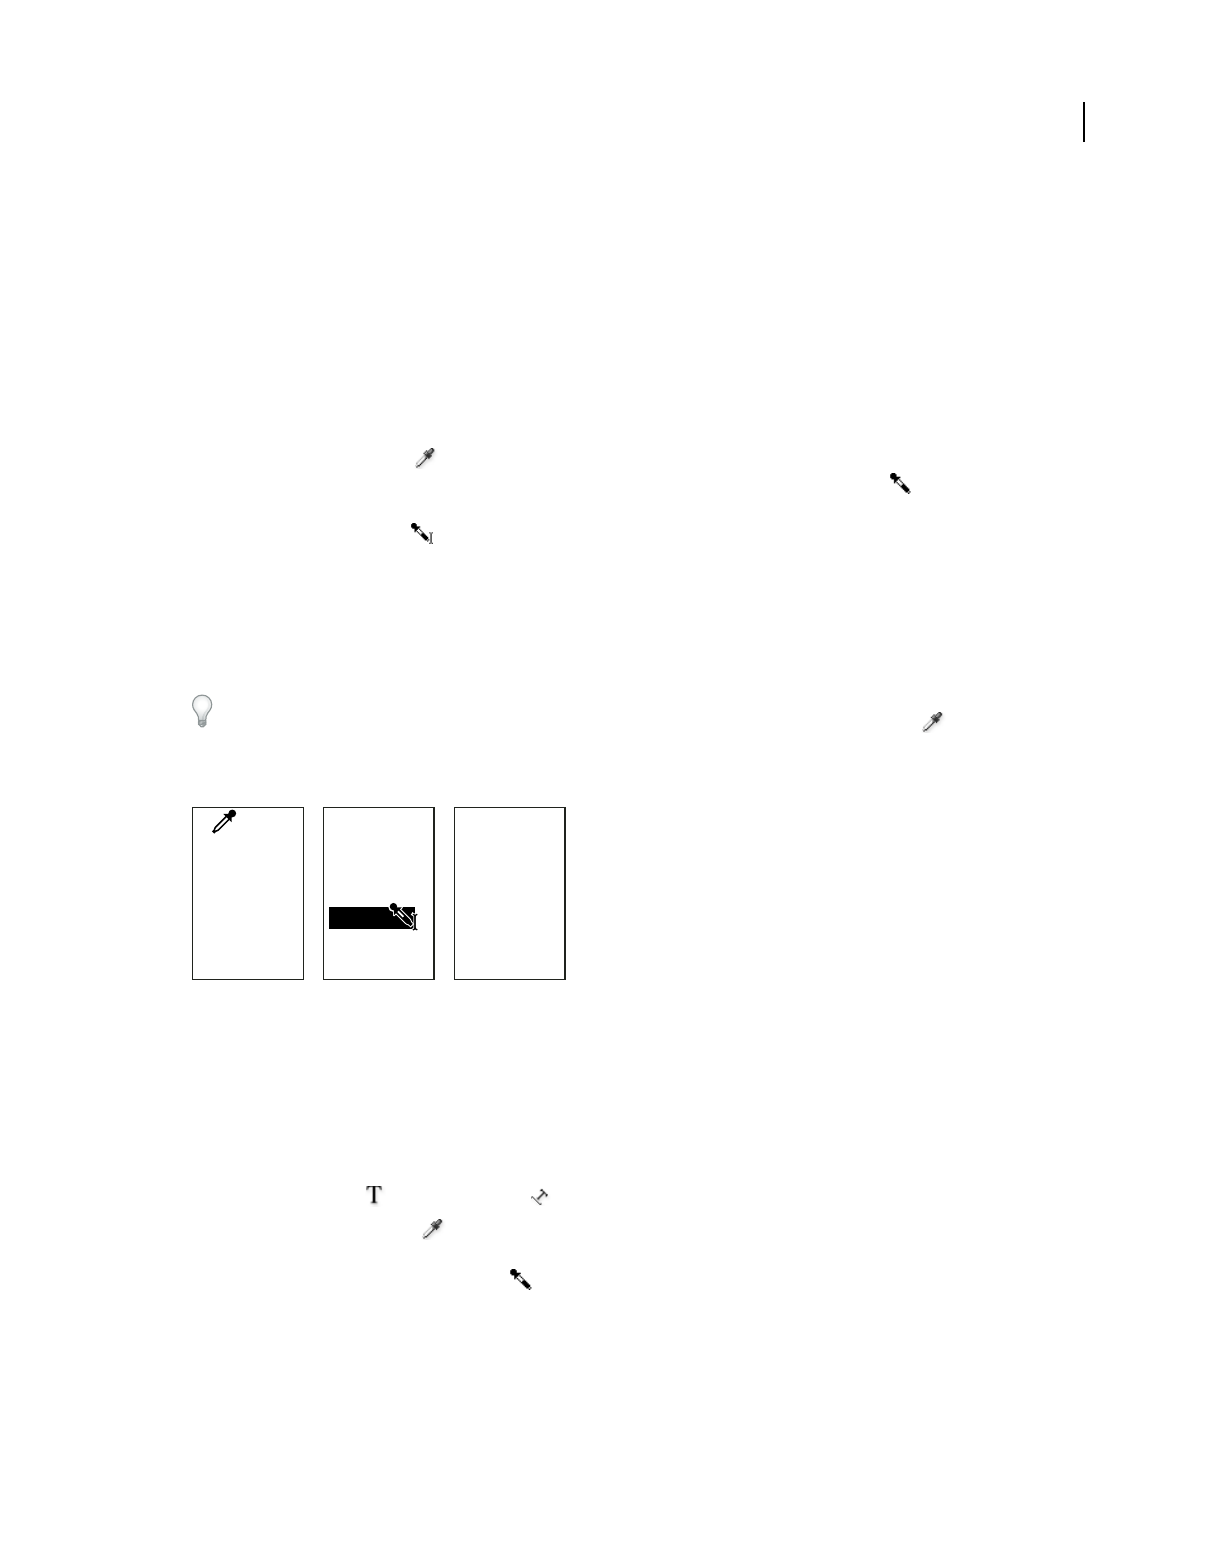
242
USING INDESIGN
Typography
Last updated 11/16/2011
Copy type attributes (Eyedropper)
You can use the Eyedropper tool to copy type attributes such as character, paragraph, fill, and stroke settings, and then
apply those attributes to other type. By default, the Eyedropper tool copies all type attributes. To customize the
attributes you want to copy with the Eyedropper tool, use the Eyedropper Options dialog box.
More Help topics
“Apply colors using the Eyedropper tool” on page 468
Copy type attributes to unselected text
1With the Eyedropper tool , click the text that is formatted with the attributes you want to copy. (The text can be
in another open document.) The eyedropper pointer reverses direction, and appears full , to indicate that it’s
loaded with the attributes you copied. When you position the eyedropper pointer over text, an I-beam appears next
to the loaded eyedropper
.
2With the Eyedropper tool, select the text you want to change.
The selected text takes on the attributes loaded in the eyedropper. As long as the Eyedropper tool is selected, you can
continue to select text to apply formatting.
3To deselect the Eyedropper tool, click another tool.
To clear the formatting attributes currently held by the eyedropper tool, press Alt (Windows) or Option (Mac OS)
while the Eyedropper tool is loaded. The Eyedropper tool reverses direction and appears empty , to indicate that
it’s ready to pick up new attributes. Click an object containing the attributes you want to copy, and then drop the new
attributes on another object.
The eyedropper is clicked on formatted text to copy its formatting (left), and then dragged across unformatted text (middle) to apply that
formatting (right).
If you use the Eyedropper tool to copy a paragraph style from text in one document to text in another, and the
paragraph style has the same name but different sets of attributes, any style differences will appear as local overrides
to the destination style.
Copy type attributes to selected text
1With the Type tool or Path Type tool , select the text to which you want to copy attributes.
2Using the Eyedropper tool , click the text from which you want to copy attributes. (The text from which you
want to copy attributes must be in the same InDesign document as the text you want to change.) The Eyedropper
tool reverses direction and appears full
, to indicate that it’s loaded with the attributes you copied. The attributes
are applied to the text you selected in step 1.
EDMUND : Some
good guard,
Until their greater
p
at are to censure
CORDELIA: We
a
Who, with best me
a
worst.
EDMUND : Some
o
good guard,
Until their greater
p
at are to censure
CORDELIA: We
a
Who, with best me
a
worst.
EDMUND : So
m
away: good guard,
Until their greater
p
at are to censure
CORDELIA: We
a
Who, with best me
a
worst.
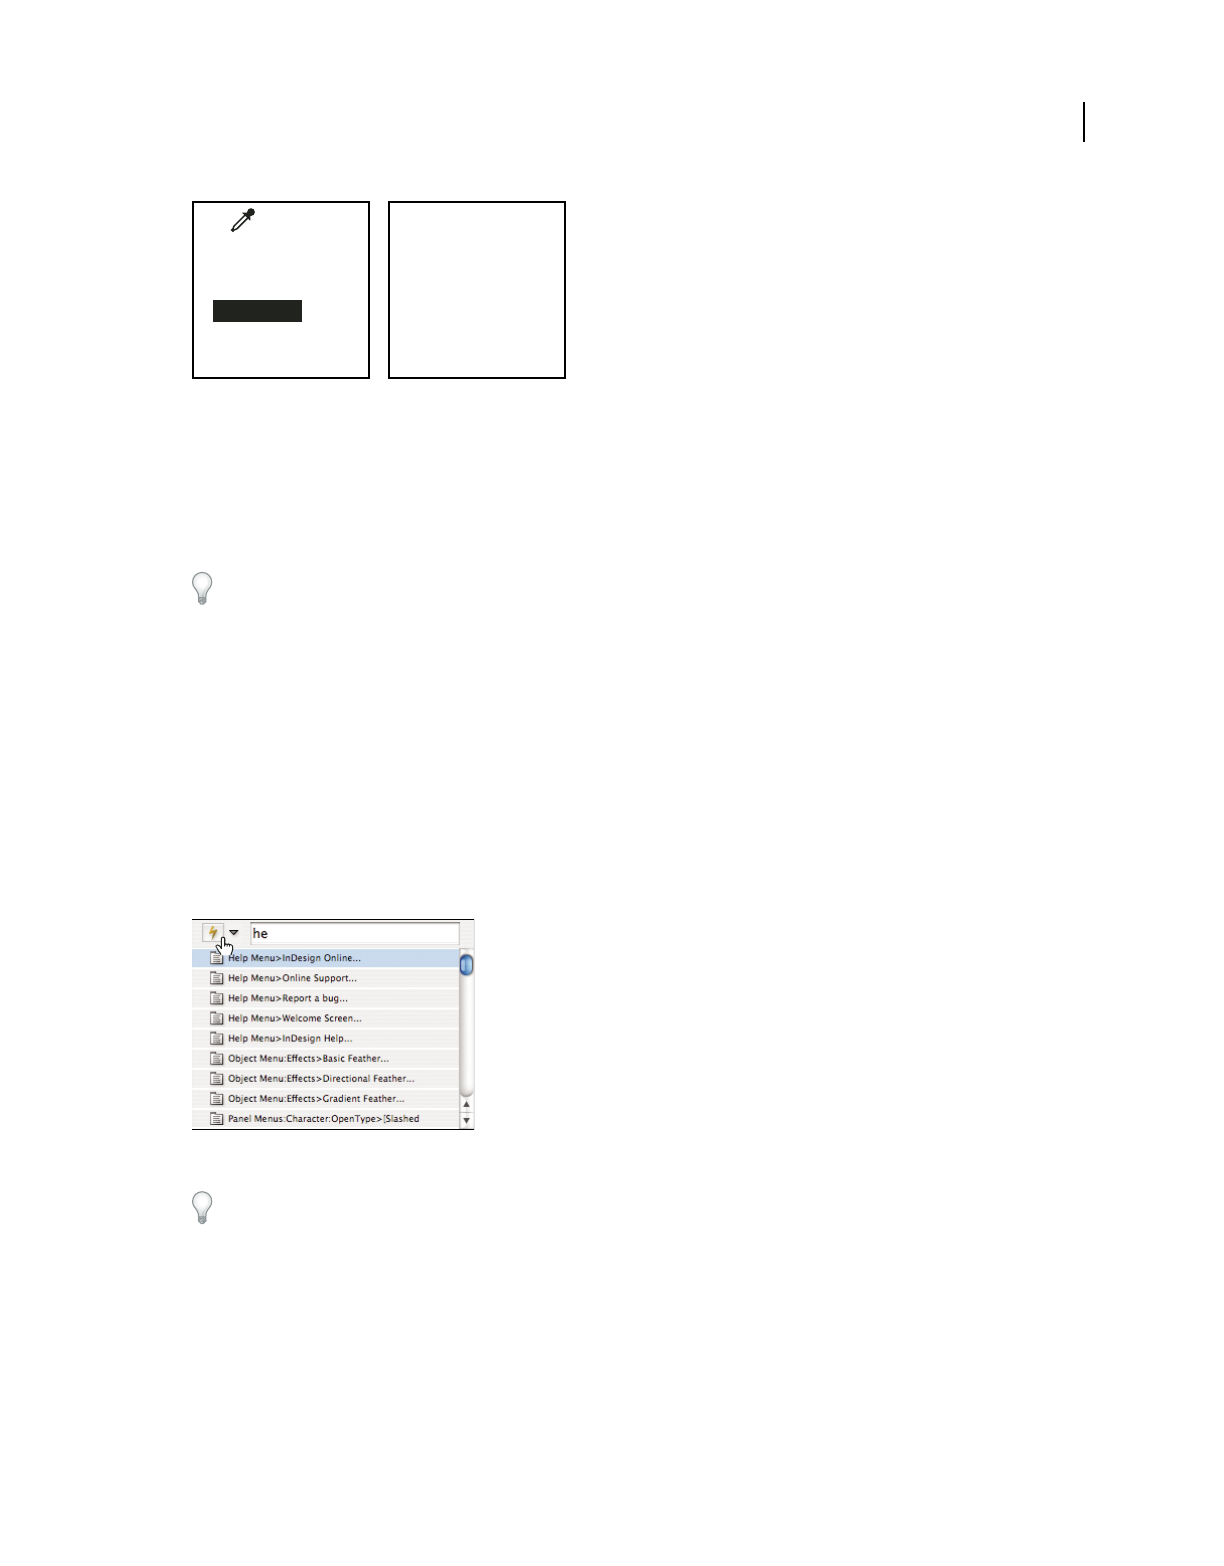
243
USING INDESIGN
Typography
Last updated 11/16/2011
Type attributes copied to selected text
Change which text attributes the Eyedropper tool copies
1In the toolbox, double-click the Eyedropper tool.
2Choose Character Settings or Paragraph Settings in the Eyedropper Options dialog box.
3Select the attributes you want to copy with the Eyedropper tool, and then click OK.
To copy or apply paragraph attributes only without having to change settings in the Eyedropper Options dialog box,
hold down Shift as you click text with the Eyedropper tool.
Use Quick Apply
Use Quick Apply to find and apply styles, menu commands, scripts, variables, and most other commands that can be
found in the Keyboard Shortcuts dialog box.
1Select the text or frame to which you want to apply the style, menu command, script, or variable.
2Choose Edit > Quick Apply, or press Ctrl+Enter (Windows) or Command+Return (Mac OS).
3Start typing the name of the item you want to apply.
The name you type doesn’t need to be an exact match. For example, typing he will locate styles such as Head 1, Head 2,
and Subhead, as well as Help menu commands such as Help Menu
> InDesign Help.
Use Quick Apply to find styles, menu commands, scripts, and variables.
You can narrow the search to only a single category by typing the appropriate prefix at the beginning of the search,
such as m: for menu or p: for paragraph styles. To view a list of prefixes, click the down arrow to the left of the Quick
Apply text box. You can deselect categories in this list that you don’t want to appear.
4Select the item you want to apply, and then:
•To apply a style, menu command, or variable, press Enter or Return.
•To apply a paragraph style and remove overrides, press Alt+Enter (Windows) or Option+Return (Mac OS).
•To apply a paragraph style and remove overrides and character styles, press Alt+Shift+Enter (Windows) or
Option+Shift+Return (Mac
OS).
EDMUND : Some oc
e
away: good guard, Unti
l
p
leasures rst be know
n
censure them.
CORDELIA: We are n
o
Who, with best meaning,
h
the worst.
EDMUND : Some oc
e
away: good guard, Unti
l
p
leasures rst be know
n
censure them.
CORDELIA: We are no
t
Who, with best meaning,
h
the worst.

244
USING INDESIGN
Typography
Last updated 11/16/2011
•To apply an item without closing the Quick Apply list, press Shift+Enter (Windows) or Shift+Return (Mac OS).
•To close the Quick Apply list without applying an item, press Esc or click anywhere else in the document window.
•To edit a style, press Ctrl+Enter (Windows) or Command+Return (Mac OS).
When the Quick Apply list is displayed, press the left and right arrow keys to scroll through the edit field; press the up
and down arrow keys to scroll through the list of items.
Using fonts
About fonts
A font is a complete set of characters—letters, numbers, and symbols—that share a common weight, width, and style,
such as 10-pt Adobe Garamond Bold.
Typefaces (often called type families or font families) are collections of fonts that share an overall appearance, and are
designed to be used together, such as Adobe Garamond.
A type style is a variant version of an individual font in a font family. Typically, the Roman or Plain (the actual name
varies from family to family) member of a font family is the base font, which may include type styles such as regular,
bold, semibold, italic, and bold italic.
Installing fonts
When you install InDesign or Adobe Creative Suite, fonts are automatically installed in the system fonts folder.
•Windows: On Windows the fonts are located in the “\Windows\Fonts” folder. For example, c:\Windows\Fonts\
•Mac OS: On Mac, the fonts are located in the “/Library/Fonts”
For information on installing and activating fonts to be used in all applications, see your system documentation or
your font manager documentation.
You can make fonts available in InDesign by copying the font files into the Fonts folder inside the InDesign application
folder on your hard drive. However, fonts in this Fonts folder are available only to InDesign.
If two or more fonts are active in InDesign and use the same family name but have different Adobe PostScript names,
the fonts are available in InDesign. Duplicate fonts are listed in the menus with their font technologies abbreviated in
parentheses. For example, a Helvetica TrueType font appears as “Helvetica
(TT),” a Helvetica PostScript Type 1 font
appears as “Helvetica
(T1),” and a Helvetica OpenType font appears as “Helvetica (OTF).” If two fonts have the same
PostScript name and one includes .dfont in its name, the other font is used.
More Help topics
“Installing OpenType fonts” on page 246
Apply a font to text
When you specify a font, you can select the font family and its type style independently. When you change from one
font family to another, InDesign attempts to match the current style with the style available in the new font family. For
example, Arial Bold would change to Times Bold when you change from Arial to Times.

245
USING INDESIGN
Typography
Last updated 11/16/2011
When you apply a bold or italic style to type, InDesign applies the typeface style specified by the font. In most cases,
the specific version of bold or italic is applied as expected. However, some fonts may apply a bold or italic variation
that isn’t exactly labeled bold or italic, respectively. For example, some font designers specify that when you apply bold
to a font, the semibold variation is applied.
1Select the text you want to change.
2Do any of the following:
•In the Character panel or Control panel, select a font in the Font Family menu or a style in the Type Style menu.
(In Mac
OS, you can select type styles in the Font Family submenus.)
•In the Character panel or Control panel, click in front of the font family name or type style name (or double-click
its first word) and type in the first few characters of the name you want. As you type, InDesign displays font family
or type style names that match the characters you’ve typed.
•Choose a font in the Type > Font menu. Note that you choose both a font family and a type style when you use this menu.
Specify a typeface size
By default, typeface size is measured in points (a point equals 1/72 of an inch). You can specify any typeface size from
0.1 to 1296 points, in 0.001-point increments.
Note: In Fireworks, the typeface size is measured in pixels by default.
1Select the characters or type objects you want to change. If you don’t select any text, the typeface size applies to new
text you create.
2Do one of the following:
•In the Character panel or Control bar set the Font Size option.
•Choose a size from the Type > Size menu. Choosing Other lets you type a new size in the Character panel.
You can change the unit of measurement for type in the Preferences dialog box. This option is not available in
Fireworks.
Previewing fonts
You can view samples of a font in the font family and font style menus in the Character panel and other areas in the
application from where you can choose fonts. The following icons are used to indicate different kinds of fonts:
•OpenType
•Type 1
•TrueType
•Multiple Master
•Composite
You can turn off the preview feature or change the point size of the font names or font samples in Type preferences.
OpenType fonts
OpenType fonts use a single font file for both Windows® and Macintosh® computers, so you can move files from one
platform to another without worrying about font substitution and other problems that cause text to reflow. They may
include a number of features, such as swashes and discretionary ligatures, that aren’t available in current PostScript
and TrueType fonts.
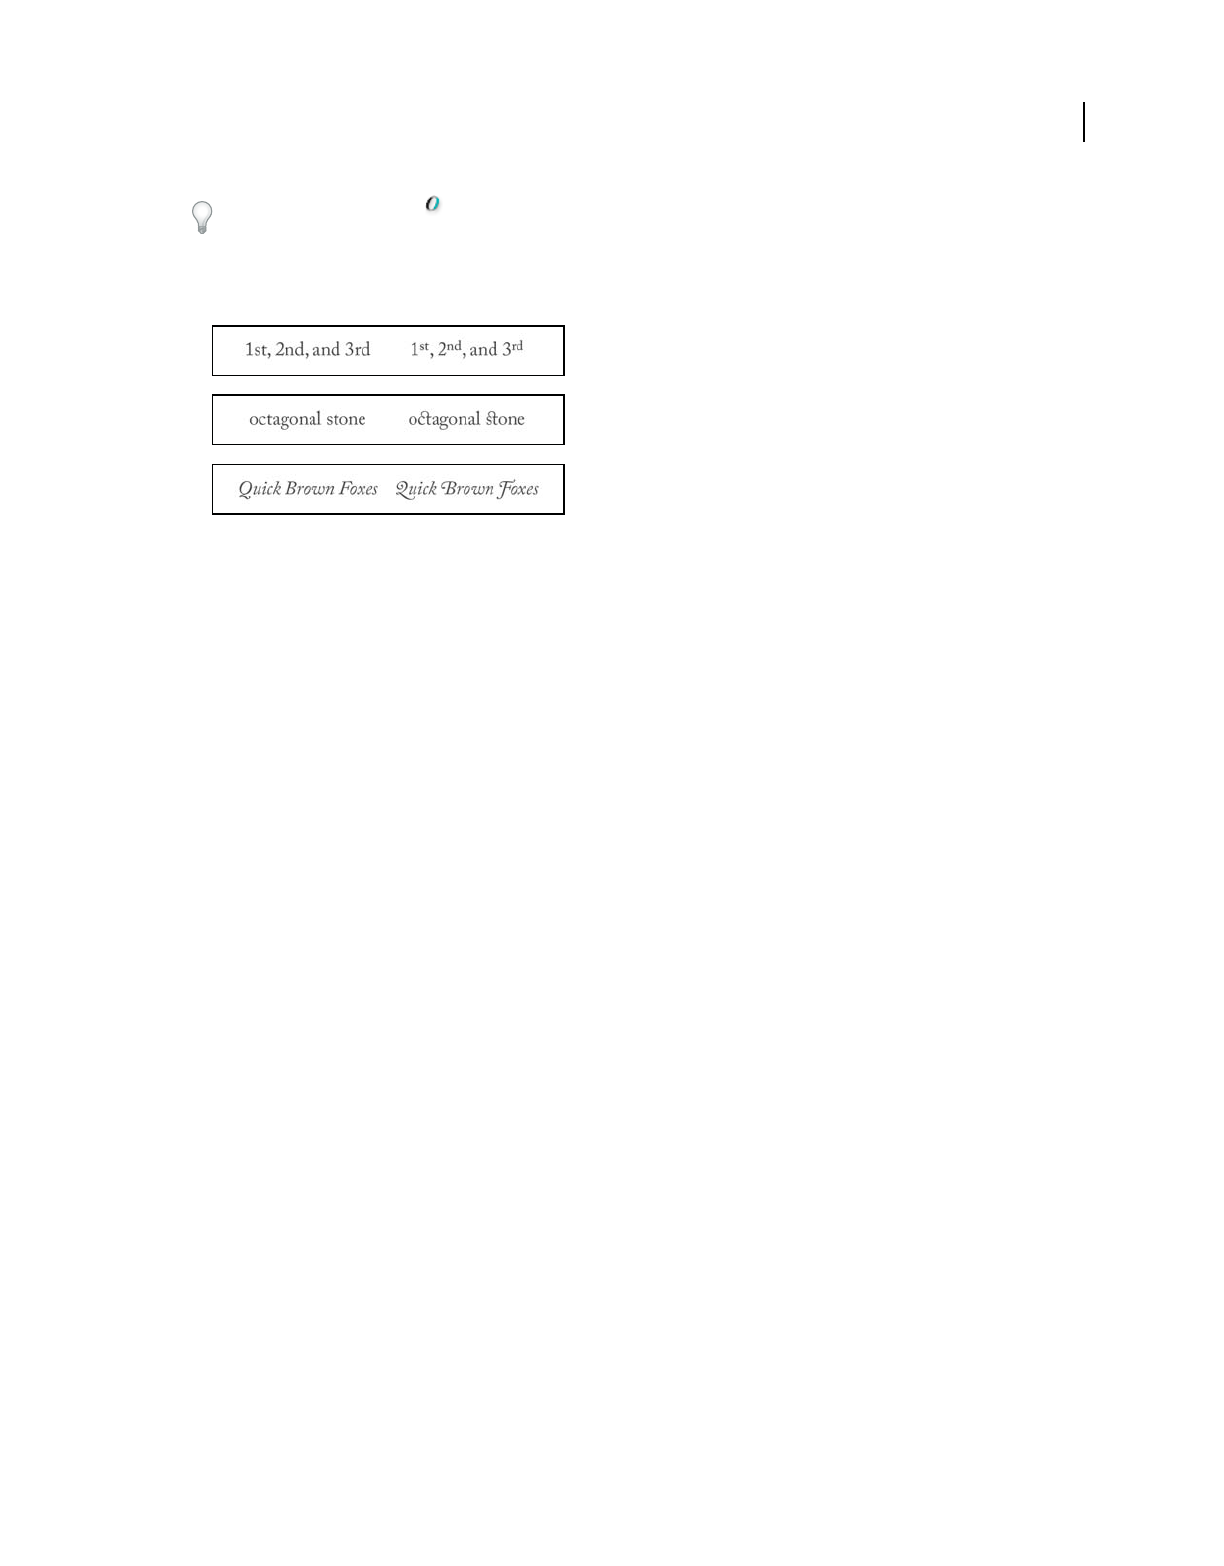
246
USING INDESIGN
Typography
Last updated 11/16/2011
OpenType fonts display the icon.
When working with an OpenType font, you can automatically substitute alternate glyphs, such as ligatures, small
capitals, fractions, and old style proportional figures, in your text.
Regular (left) and OpenType (right) fonts
A. Ordinals B. Discretionary ligatures C. Swashes
OpenType fonts may include an expanded character set and layout features to provide richer linguistic support and
advanced typographic control. OpenType fonts from Adobe that include support for central European (CE) languages
include the word “Pro,” as part of the font name in application font menus. OpenType fonts that don’t contain central
European language support are labeled “Standard,” and have an “Std” suffix. All OpenType fonts can also be installed
and used alongside PostScript Type
1 and TrueType fonts.
For more information on OpenType fonts, see www.adobe.com/go/opentype.
Installing OpenType fonts
InDesign includes fonts from various OpenType families, including Adobe Garamond Pro, Adobe Caslon Pro, Trajan
Pro, Caflisch Script Pro, Myriad Pro, Lithos, and Adobe Jenson Pro.
OpenType fonts are installed automatically when you install InDesign or Adobe Creative Suite 4. Additional
OpenType fonts are located in the Adobe Fonts folder in the Goodies folder on the application DVD. For information
on installing and using OpenType fonts, browse the application DVD or see the Adobe website.
More Help topics
“Installing fonts” on page 244
Apply OpenType font attributes
Use the Character panel or Control panel to apply OpenType font attributes, such as fractions and swashes to text.
For more information on OpenType fonts, see www.adobe.com/go/opentype.
More Help topics
“Insert glyphs and special characters” on page 177
“OpenType fonts” on page 245
Apply OpenType font attributes
1Select text.
2In the Character panel or Control panel, make sure that an OpenType font is selected.
A
B
C

247
USING INDESIGN
Typography
Last updated 11/16/2011
3Choose OpenType from the Character panel menu, and then select an OpenType attribute, such as Discretionary
Ligatures or Fractions.
Features not supported in the current font appear in square brackets, such as [Swash].
You can also select OpenType font attributes when defining a paragraph or character style. Use the OpenType
Features section of the Style Options dialog box.
OpenType font attributes
When you use an OpenType font, you can select specific OpenType features from the Control panel or Character panel
menu when formatting text or when defining styles.
Note: OpenType fonts vary greatly in the number of type styles and kinds of features they offer. If an OpenType feature
is unavailable, it’s surrounded in square brackets (such as [Swash]) in the Control panel menu.
Discretionary Ligatures Font designers may include optional ligatures that shouldn’t be turned on in all
circumstances. Selecting this option allows these additional optional ligatures to be used, if they are present. For more
information on ligatures, see “Apply ligatures to letter pairs” on page 255.
Fractions Numbers separated by a slash (such as 1/2) are converted to a fraction character, when fractions are
available.
Ordinal Ordinal numbers such as 1st and 2nd are formatted with superscript letters (1st and 2nd) when ordinals are
available. Letters such as the superscript a and o in the Spanish words segunda (2a) and segundo (2o) are also typeset
properly.
Swash When available, regular and contextual swashes, which may include alternate caps and end-of-word
alternatives, are provided.
Titling Alternatives When available, characters used for uppercase titles are activated. In some fonts, selecting this
option for text formatted in both uppercase and lowercase letters can yield undesired effects.
Contextual Alternatives When available, contextual ligatures and connecting alternates are activated. Alternate
characters are included in some script typefaces to provide better joining behavior. For example, the letter pair “bl” in
the word “bloom” can be joined so that it looks more like handwriting. This option is selected by default.
All Small Caps For fonts that include real small caps, selecting this option turns characters into small caps. For more
information, see “Change the case of type” on page 257.
Slashed Zero Selecting this options displays the number 0 with a diagonal slash through it. In some fonts (especially
condensed fonts), it can be difficult to distinguish between the number 0 and the capital letter
O.
Stylistic Sets Some OpenType fonts include alternate glyph sets designed for esthetic effect. A stylistic set is a group of
glyph alternates that can be applied one character at a time or to a range of text. If you select a different stylistic set, the
glyphs defined in the set are used instead of the font’s default glyphs. If a glyph character in a stylistic set is used in
conjunction with another OpenType setting, the glyph from the individual setting overrides the character set glyph.
You can see the glyphs for each set using the Glyphs panel.
Positional Forms In some cursive scripts and in languages such as Arabic, what a character looks like can depend on
its position inside a word. The character may change form when it appears at the start (initial position), middle (medial
position), or end (final position) of a word, and it may change form as well when it appears alone (isolated position).
Select a character and choose a Positional Forms option to format it correctly. The General Form option inserts the
common character; the Automatic Form option inserts a form of the character according to where the character is
located in the word and whether the character appears in isolation.

248
USING INDESIGN
Typography
Last updated 11/16/2011
Superscript/Superior & Subscript/Inferior Some OpenType fonts include raised or lowered glyphs that are sized
correctly relative to the surrounding characters. If an OpenType font doesn’t include these glyphs for non-standard
fractions, consider using the Numerator and Denominator attributes.
Numerator & Denominator Some OpenType fonts convert only basic fractions (such as 1/2 or 1/4) to fraction glyphs,
not non-standard fractions (such as 4/13 or 99/100). Apply Numerator and Denominator attributes to these non-
standard fractions in such cases.
Tabular Lining Same widths are provided for full-height figures. This option is appropriate in situations where
numbers need to line up from one line to the next, as in tables.
Proportional Oldstyle Varying-height figures with varying widths are provided. This option is recommended for a
classic, sophisticated look in text that doesn’t use all caps.
Proportional Lining Full-height figures with varying widths are provided. This option is recommended for text that
uses all caps.
Tabular Oldstyle Varying-height figures with fixed, equal widths are provided. This option is recommended when you
want the classic appearance of old-style figures, but you need them to align in columns, as in an annual report.
Default Figure Style Figure glyphs use the default figure style of the current font.
Work with missing fonts
When you open or place documents that include fonts not installed on your system, an alert message appears,
indicating which fonts are missing. If you select text that uses a missing font, the Character panel or Control panel
indicates that this font is missing by displaying it in brackets in the font style pop-up menu.
InDesign substitutes missing fonts with an available font. When this happens, you can select the text and apply any
other available font. Missing fonts for which others have been substituted will appear at the top of the Type
> Font
menu in a section marked “Missing Fonts.” By default, text formatted with missing fonts appears in pink highlighting.
If a TrueType font is installed and the document contains a Type 1 (T1) version of the same font, the font is displayed
as missing.
You can choose Type > Find Font to find and change missing fonts. If a missing font is part of a style, you can update
the font in that style by changing its style definition.
More Help topics
“Find and change fonts” on page 174
“Installing fonts” on page 244
Make missing fonts available
❖Do any of the following:
•Install the missing fonts on your system.
•Place the missing fonts in the Fonts folder, which is located in the InDesign application folder. Fonts in this folder
are available only to InDesign. See “Installing fonts” on page 244.
•Activate the missing fonts using a font-management application.
If you don’t have access to the missing fonts, use the Find Font command to search for and replace missing fonts.

249
USING INDESIGN
Typography
Last updated 11/16/2011
Highlight substituted fonts in your document
If the Select Substituted Fonts preferences option is selected, text formatted with missing fonts appears in pink
highlighting so that you can easily identify text formatted with a missing font.
1Choose Edit > Preferences > Composition (Windows®) or InDesign > Preferences > Composition (Mac OS®).
2Select Substituted Fonts, and then click OK.
Document installed fonts
Fonts in a Document Fonts folder that is in the same location as an InDesign document are temporarily installed when
the document is opened. The Package command can generate a Document Fonts folder when you want to share your
document or move it to a different computer.
Fonts in the Document Fonts folder are not the same as fonts available from the standard operating system font
locations. They are installed when the document is opened and supersede any font of the same PostScript name.
However, they supersede only fonts within the document. Fonts installed by one document are not available to other
documents. When you close the document, the fonts that were installed for the document are uninstalled. Document
installed fonts are listed in a submenu of the Font menu.
Some Type1 fonts are not available in the document. In addition, Mac OS fonts are not available when running
InDesign in Windows.
For a video on using document installed fonts, see http://tv.adobe.com/go/4955/.
More Help topics
“Package files” on page 621
Multiple master fonts
Multiplemaster fonts are customizable Type 1 fonts whose typeface characteristics are described in terms of variable
design axes, such as weight, width, style, and optical size.
Some multiple master fonts include an optical size axis, which lets you use a font specifically designed for optimal
readability at a particular size. Generally, the optical size for a smaller font, such as 10 point, is designed with heavier
serifs and stems, wider characters, less contrast between thick and thin lines, taller x height, and looser spacing between
letters than the optical size for a larger font, such as 72 point.
1Choose Edit > Preferences > Type (Windows) or InDesign > Preferences > Type (Mac OS).
2Select Automatically Use Correct Optical Size, and click OK.
Leading
About leading
The vertical space between lines of type is called leading. Leading is measured from the baseline of one line of text to
the baseline of the line above it. Baseline is the invisible line on which most letters—that is, those without descenders—
sit.
The default auto-leading option sets the leading at 120% of the type size (for example, 12-point leading for 10-point
type). When auto-leading is in use, InDesign displays the leading value in parentheses in the Leading menu of the
Character panel.

250
USING INDESIGN
Typography
Last updated 11/16/2011
Leading
A. Leading B. Text height C. Larger text size of one word increases leading for that one line.
Change leading
By default, leading is a character attribute, which means that you can apply more than one leading value within the
same paragraph. The largest leading value in a line of type determines the leading for that line. However, you can select
a preferences option so that leading applies to the entire paragraph, instead of to text within a paragraph. This setting
does not affect the leading in existing frames.
Change leading of selected text
1Select the text you want to change.
2Do any of the following:
•In the Character panel or Control panel, choose the leading you want from the Leading menu .
•Select the existing leading value and type a new value.
•While creating a paragraph style, change the leading using the Basic Character Formats panel.
If InDesign ignores the leading change, it may be due to Vertical Justification or Align To Baseline Grid being selected.
Choose Object > Text Frame Options and make sure Vertical Justification is set to Top, and make sure Do Not Align
To Baseline Grid is selected in the Paragraph panel, Control panel, or paragraph style.
You can also adjust vertical space by aligning text to the baseline grid. When baseline grid is set, the baseline grid
setting takes precedence over the leading value.
Change the default leading percentage
1Select the paragraphs that you want to change.
2Choose Justification from the Paragraph panel menu or from the Control panel menu.
3For Auto Leading, specify a new default percentage. The minimum value is 0%, and the maximum value is 500%.
Apply leading to whole paragraphs
1Choose Edit > Preferences > Type (Windows) or InDesign > Preferences > Type (Mac OS).
2Select Apply Leading To Entire Paragraph, and then click OK.
Note: When you use a character style to apply leading to text, the leading affects only the text to which the style is applied,
not the entire paragraph, regardless of whether the Apply Leading To Entire Paragraph option is selected.
ocers take them away: good
guard,Until their greater
pleasures rst be known at
are to censure them.
CORDELIA: We are not the
rst Who, with best meaning,
have incurr'd the worst.
A
C
B
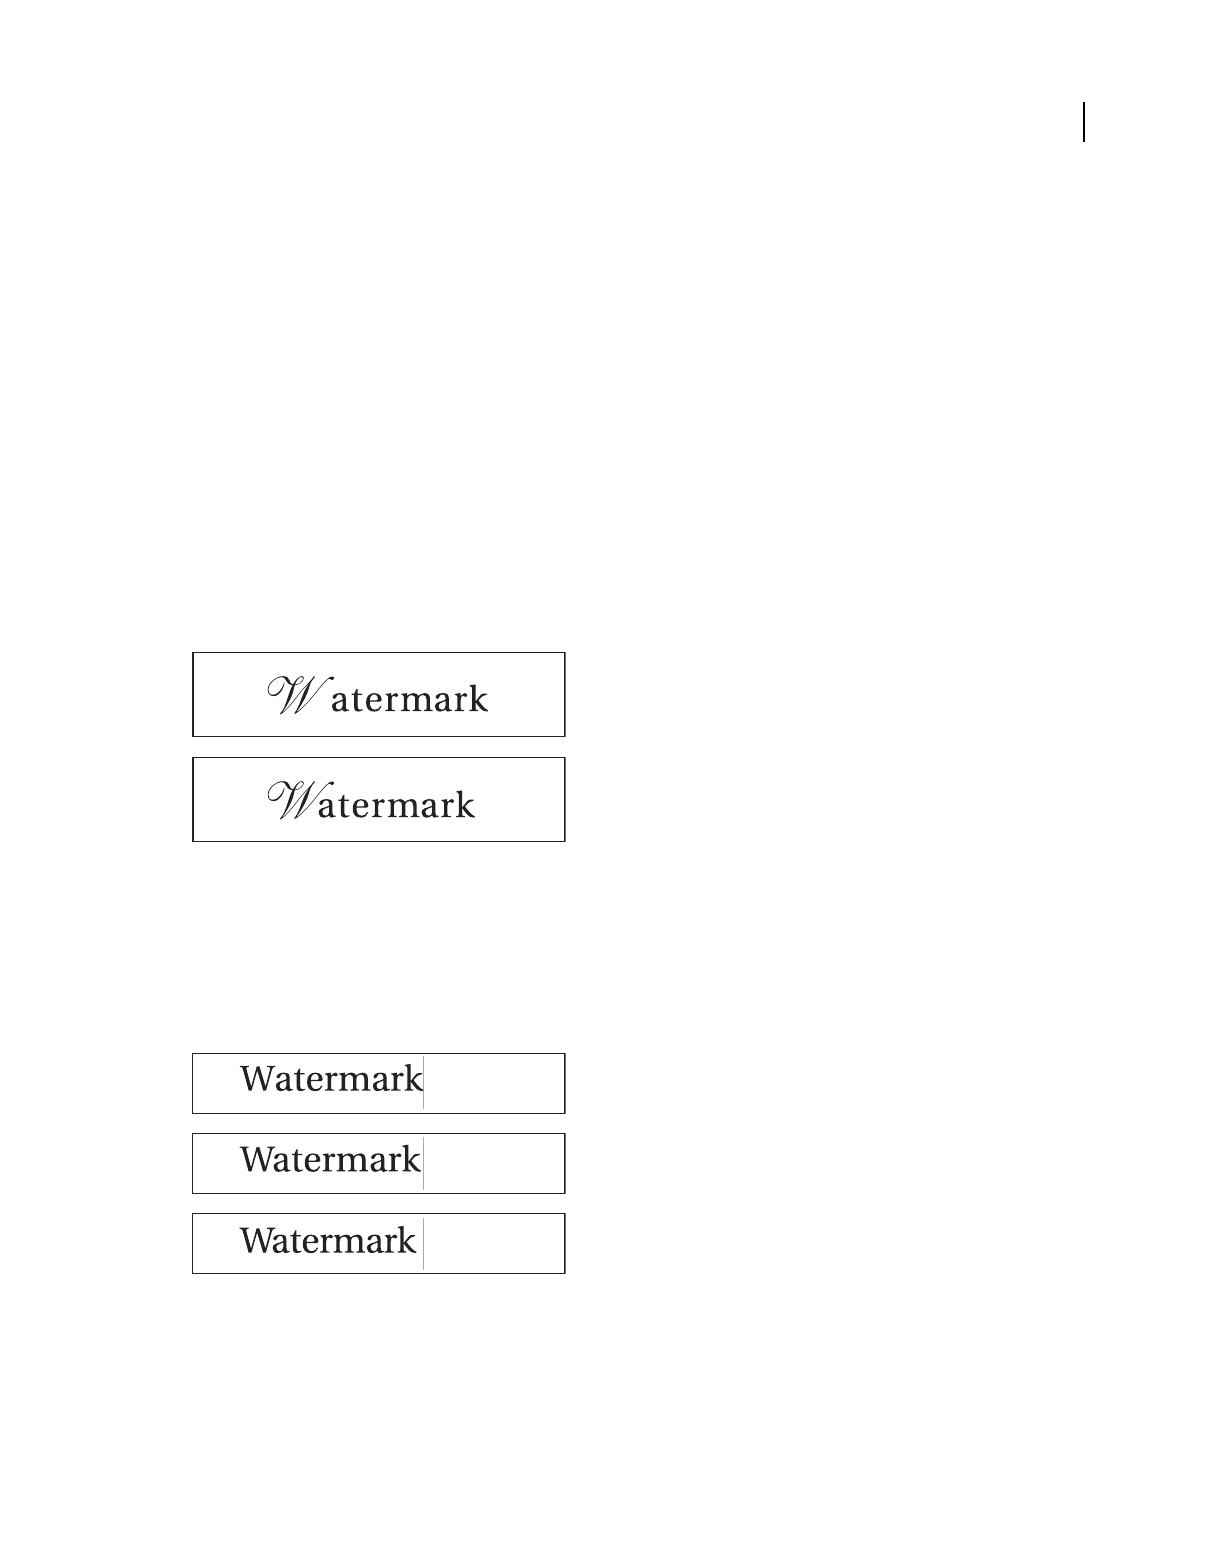
251
USING INDESIGN
Typography
Last updated 11/16/2011
Kerning and tracking
About kerning and tracking
Kerning is the process of adding or subtracting space between specific pairs of characters. Tracking is the process of
loosening or tightening a block of text.
Types of kerning
You can automatically kern type using metrics kerning or optical kerning. Metrics kerning uses kern pairs, which are
included with most fonts. Kern pairs contain information about the spacing of specific pairs of letters. Some of these
are: LA, P., To, Tr, Ta, Tu, Te, Ty, Wa, WA, We, Wo, Ya, and Yo.
InDesign uses metrics kerning by default so that specific pairs are automatically kerned when you import or type text.
To disable metrics kerning, select
"0".
Optical kerning adjusts the spacing between adjacent characters based on their shapes. Some fonts include robust
kern-pair specifications. However, when a font includes only minimal built-in kerning or none at all, or if you use two
different typefaces or sizes in one or more words on a line, you may want to use the optical kerning option.
Before applying the optical kerning option to the “W” and “a” pair (top), and after (bottom)
You can also use manual kerning, which is ideal for adjusting the space between two letters. Tracking and manual
kerning are cumulative, so you can first adjust individual pairs of letters, and then tighten or loosen a block of text
without affecting the relative kerning of the letter pairs.
Word kerning isn’t the same as the Word Spacing option in the Justification dialog box; word kerning changes the
kerning value only between a specific word’s first character and the word space preceding that character.
Kerning and tracking
A. Original B. Kerning applied between “W” and “a” C. Tracking applied
A
C
B

252
USING INDESIGN
Typography
Last updated 11/16/2011
How kerning and tracking are measured
You can apply kerning, tracking, or both to selected text. Tracking and kerning are both measured in 1/1000 em, a unit
of measure that is relative to the current type size. In a 6-point font, 1
em equals 6 points; in a 10-point font, 1 em equals
10 points. Kerning and tracking are strictly proportional to the current type size.
Tracking and manual kerning are cumulative, so you can first adjust individual pairs of letters, and then tighten or
loosen a block of text without affecting the relative kerning of the letter pairs.
When you click to place the insertion point between two letters, InDesign displays kerning values in the Character
panel and the Control panel. Metrics and optical kerning values (or defined kern pairs) appear in parentheses.
Similarly, if you select a word or a range of text, InDesign displays the tracking values in the Character panel and
Control panel.
Apply kerning to text
You apply either of two types of automatic kerning: metrics kerning or optical kerning, or you can adjust the spacing
between letters manually.
More Help topics
“Keys for working with type” on page 696
Use metrics kerning
1Set the text insertion point between the characters you want to pair kern, or select text.
2In the Character panel or Control panel, select Metrics in the Kerning menu.
To avoid using the built-in kerning information of a font for selected text, choose “0” in the Kerning menu.
Use optical kerning
1Set the text insertion point between characters you want to pair kern or select the text you want to kern.
2In the Character panel or Control panel, select Optical in the Kerning menu.
Adjust kerning manually
1Using the Type tool , click to place an insertion point between two characters.
Note: If a range of text is selected, you can’t manually kern the text (you can choose only Metrics, Optical, or 0). Instead,
use tracking.
2Do any of the following:
•In the Character panel or the Control panel, type or select a numeric value in the Kerning menu.
•Press Alt+Left/Right Arrow (Windows) or Option+Left/Right Arrow (Mac OS) to decrease or increase the kerning
between two characters.
The amount of the word kerning adjustment is the same as the Kerning value in the Units & Increments Preferences
dialog box. When you press the shortcut and hold down the Ctrl or Command key, the kerning amount is the Kerning
preferences value multiplied by
5.
Change the default kerning increment value
❖In the Units & Increments section of the Preferences dialog box, type a new value for the Kerning option and
click
OK.
253
USING INDESIGN
Typography
Last updated 11/16/2011
Turn off kerning for selected text
1Select text.
2In the Character panel or Control panel, type or choose 0 in the Kerning menu.
You can also press Alt+Ctrl+Q (Windows) or Option+Command+Q (Mac OS) to reset kerning and tracking. When
you do so, kerning is set to Metrics regardless of which kerning option was previously applied.
Adjust tracking
1Select a range of characters.
2In the Character panel or Control panel, type or select a numeric value for Tracking .
Highlight text containing custom kerning and tracking
In some instances, you’ll want to be aware of text that has custom tracking and kerning applied. If you select the
Custom Tracking/Kerning preferences option, green highlighting appears over text with custom tracking or kerning.
1Choose Edit > Preferences > Composition (Windows) or InDesign > Preferences > Composition (Mac OS).
2Select Custom Tracking/Kerning, and then click OK.
Adjust kerning between words
❖With the Type tool , select a range of text and do one of the following:
•To add space between selected words, press Alt+Ctrl+\ (Windows) or Option+Command+\ (Mac OS).
•To remove space between selected words, press Alt+Ctrl+Backspace (Windows) or Option+Command+Delete
(Mac
OS).
•To multiply the kerning adjustment by 5, hold down Shift as you press the keyboard shortcut.
Formatting characters
For a video tutorial on formatting characters, see www.adobe.com/go/lrvid4275_id.
Apply baseline shift
Use Baseline Shift to move a selected character up or down relative to the baseline of the surrounding text. This option
is especially useful when you’re hand-setting fractions or adjusting the position of inline graphics.
Baseline shift values applied to text
1Select text.
2In the Character panel or Control panel, type a numeric value for Baseline Shift . Positive values move the
character’s baseline above the baseline of the rest of the line; negative values move it below the baseline.
To increase or decrease the value, click in the Baseline Shift box, and then press the Up or Down Arrow key. Hold
down Shift while you press the Up or Down Arrow key to change the value in greater increments.
10 th 1/2 10th 1
/2
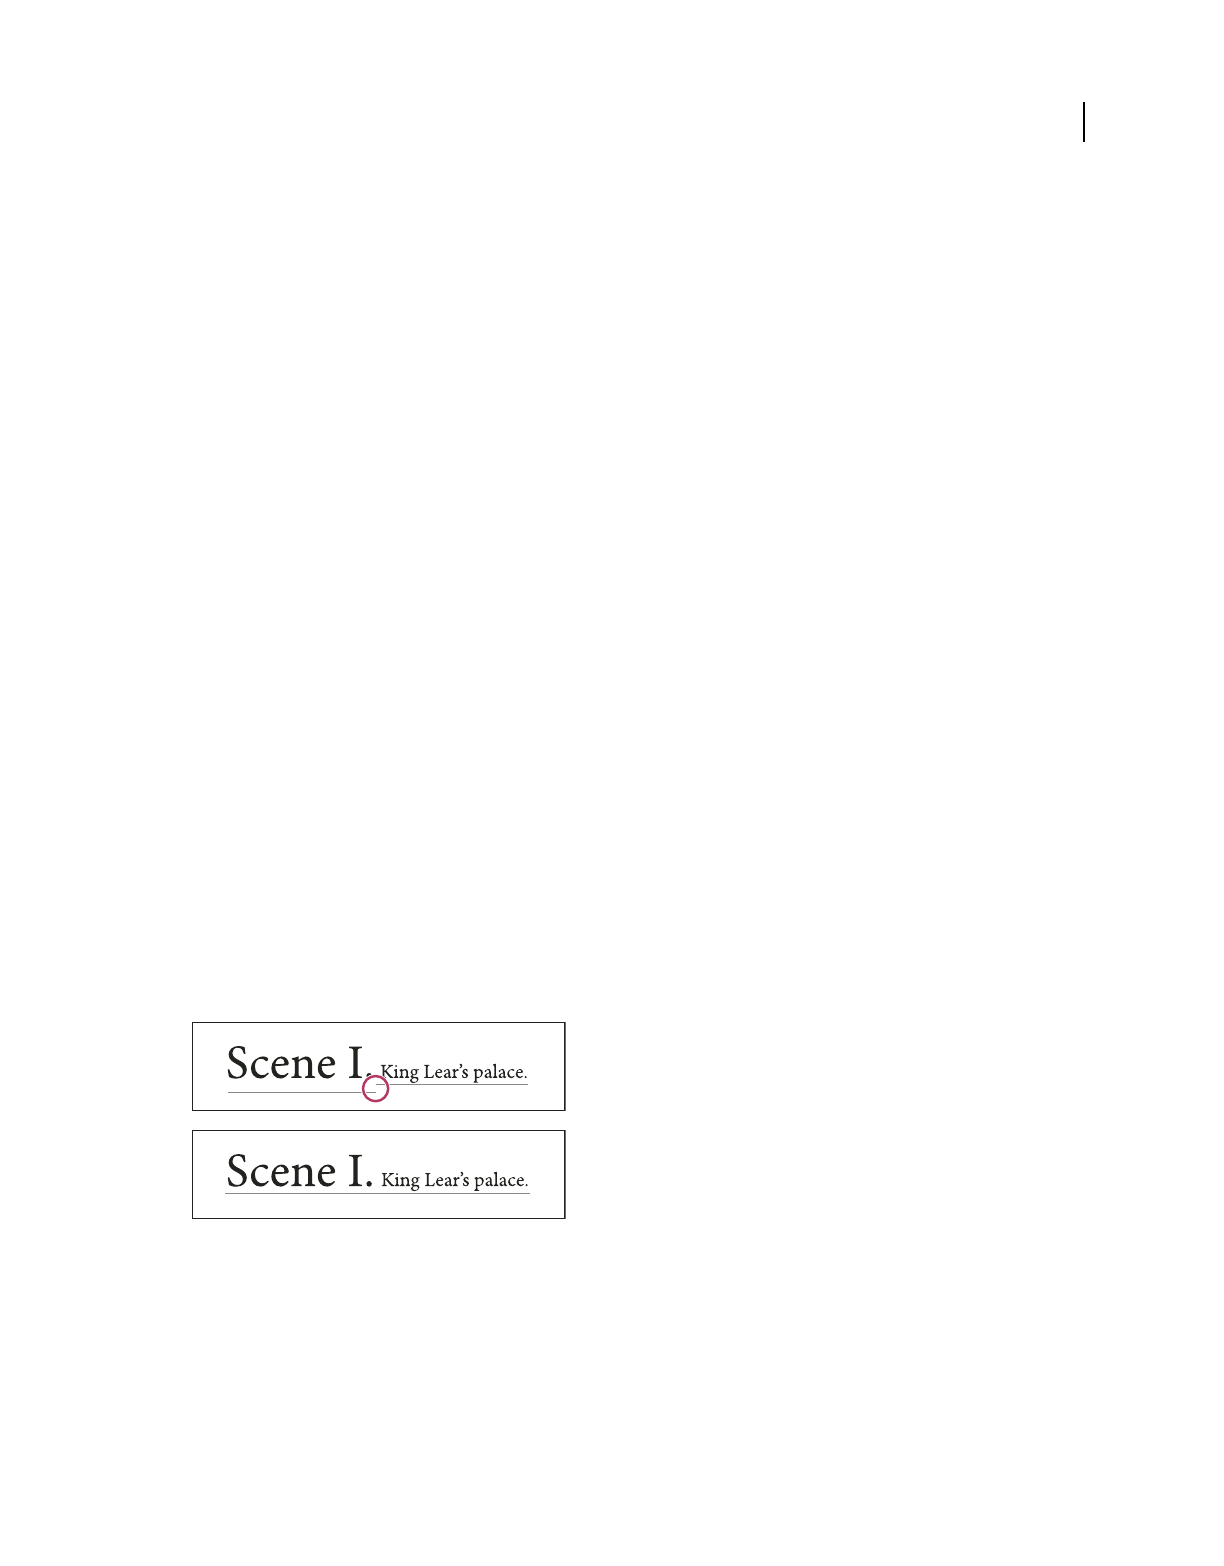
254
USING INDESIGN
Typography
Last updated 11/16/2011
To change the default increment for baseline shift, specify a value for Baseline Shift in the Units & Increments section
of the Preferences dialog box.
Make characters superscript or subscript in a non-OpenType font
1Select text.
2Choose Superscript or Subscript in the Character panel menu or in the Control panel.
When you choose Superscript or Subscript, a predefined baseline shift value and type size are applied to the selected
text.
The values applied are percentages of the current font size and leading, and are based on settings in the Type
Preferences dialog box. These values do not appear in the Baseline Shift or Size boxes of the Character panel when you
select the text.
Note: You can change the default size and position of superscripts and subscripts using Advanced Type preferences.
More Help topics
“Apply OpenType font attributes” on page 246
Apply underline or strikethrough
The default weight of an underline and strikethrough depends on the size of the type.
Jeff Witchel provides a video tutorial about underlining at Custom Underlines in InDesign.
Apply underline or strikethrough
1Select text.
2Choose Underline or Strikethrough in the Character panel menu or the Control panel.
Change underline or strikethrough options
Creating custom underlining is especially useful when you want to create an even underline below characters of
different sizes, or for creating special effects, such as background highlighting.
Before and after adjusting underlines
1From the Character panel menu or the Control panel menu, choose Underline Options or Strikethrough Options.
2Do any of the following, and then click OK:
•Select Underline On or Strikethrough On to turn on underline or strikethrough for the current text.
•For Weight, choose a weight or type a value to determine the thickness of the underline or strikethrough line.
•For Type, select one of the underline or strikethrough options.
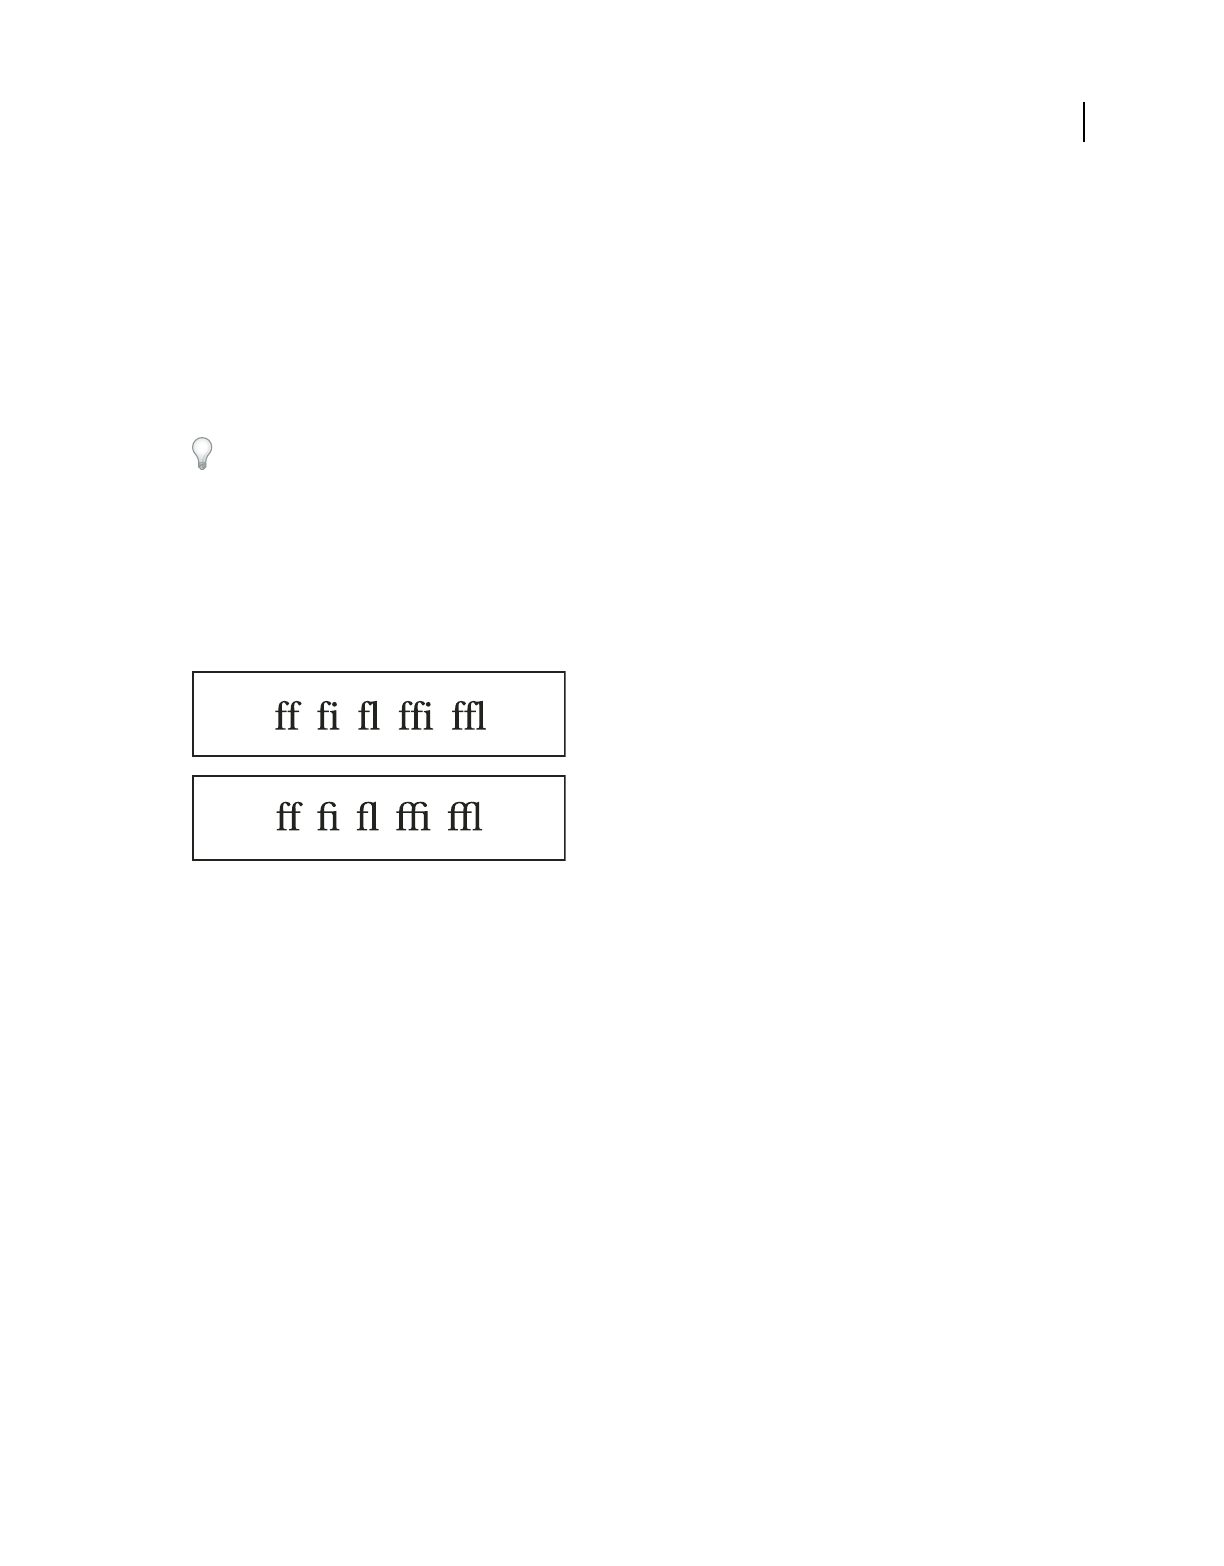
255
USING INDESIGN
Typography
Last updated 11/16/2011
•For Offset, determine the vertical position of the line. The offset is measured from the baseline. Negative values
move the underline above the baseline and the strikethrough below the baseline.
•Select Overprint Stroke when you want to make sure that the stroke doesn’t knock out underlying inks on a printing
press.
•Choose a color and tint. If you specified any line type other than solid, choose a gap color or gap tint to change the
appearance of the area between dashes, dots, or lines.
•Select Overprint Stroke or Overprint Gap if the underline or strikethrough will be printed over another color, and
you want to avoid errors that can occur with printing misregistration.
To change the underline or strikethrough options in a paragraph or character style, use the Underline Options or
Strikethrough Options section of the dialog box that appears when you create or edit the style.
Apply ligatures to letter pairs
InDesign can automatically insert ligatures, which are typographic replacement characters for certain letter pairs, such
as “fi” and “fl,” when they are available in a given font. The characters that InDesign uses when the Ligature option is
selected appear and print as ligatures, but are fully editable, and do not cause the spell checker to flag a word
erroneously.
Individual characters (top) and ligature combinations (bottom)
With OpenType fonts, when you choose Ligatures from the Character panel menu or Control panel menu, InDesign
produces any standard ligature defined in the font, as determined by the font designer. However, some fonts include
more ornate, optional ligatures, which can be produced when you choose the Discretionary Ligatures command.
1Select text.
2Choose Ligatures from the Character panel menu or the Control panel menu.
More Help topics
“OpenType fonts” on page 245
Change the color, gradient, or stroke of text
You can apply colors, gradients, and strokes to characters and continue to edit the text. Use the Swatches panel and
Stroke panel to apply colors, gradients, and strokes to text, or change Character Color settings when creating or editing
a style.
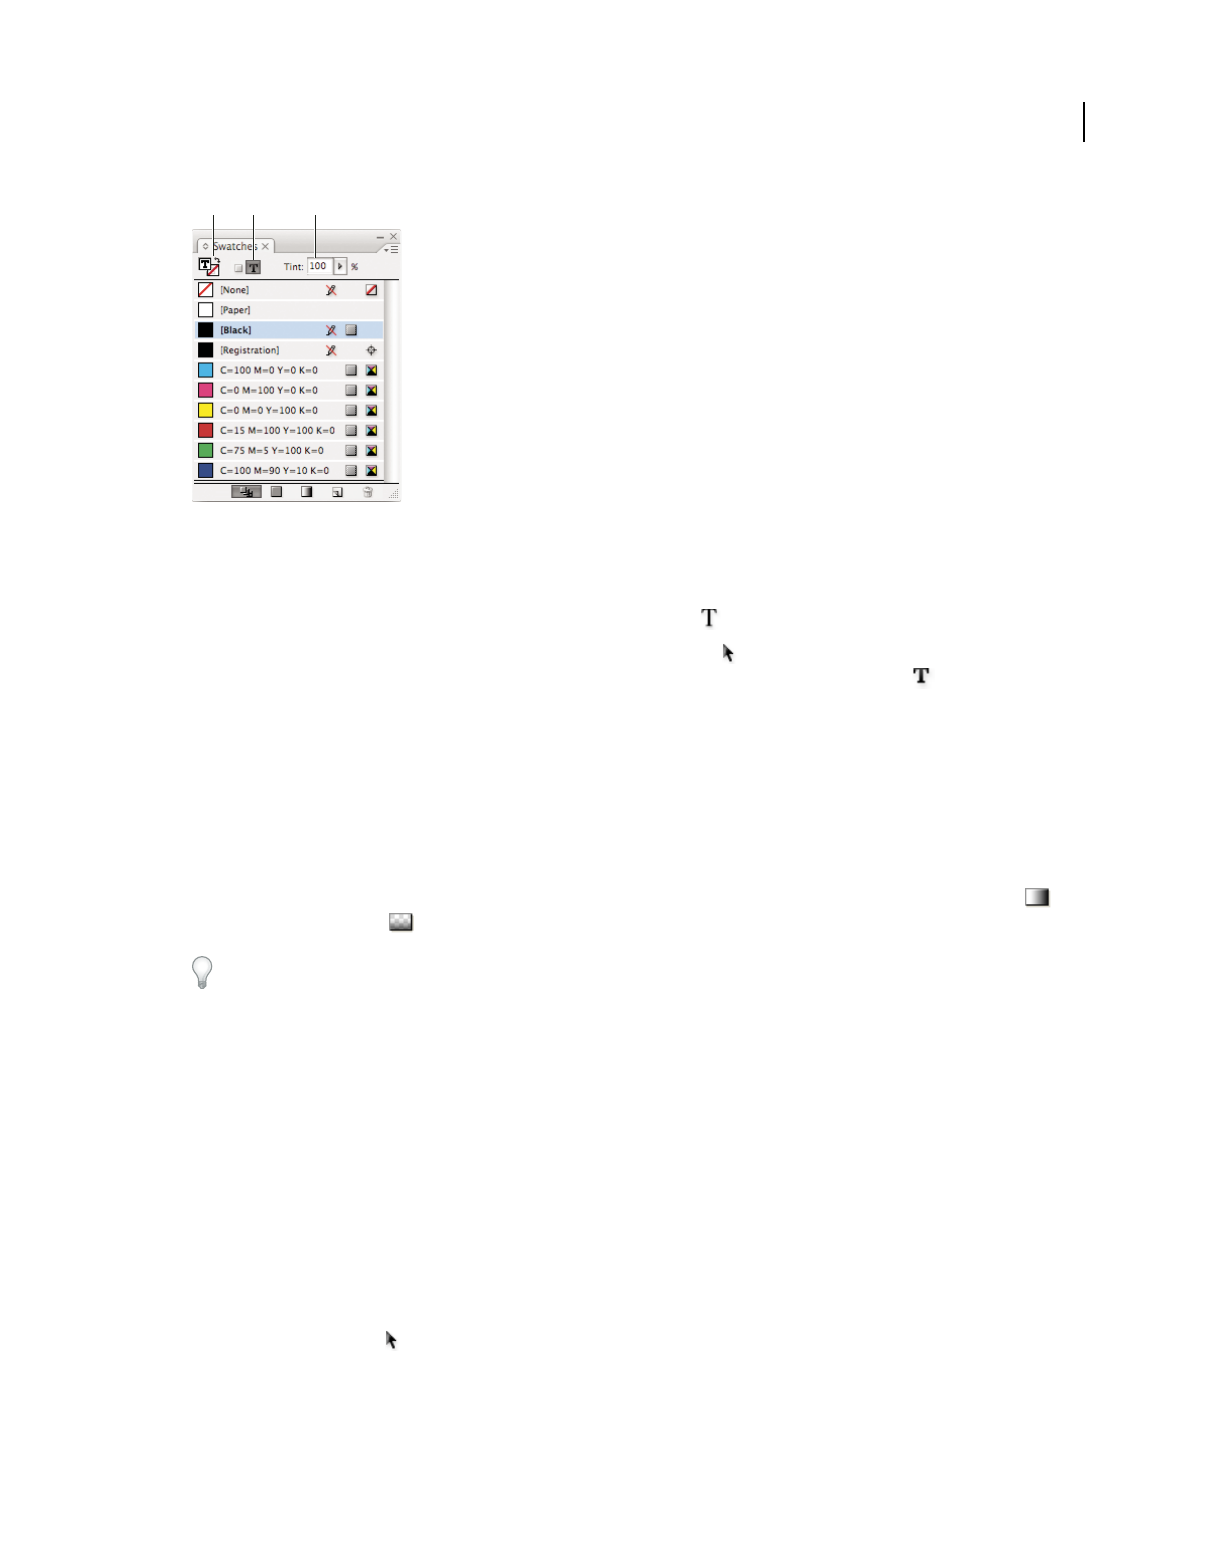
256
USING INDESIGN
Typography
Last updated 11/16/2011
Swatches
A. Swatch affects fill or stroke B. Swatch affects container or text C. Tint percentage
1Do one of the following:
•To apply color changes to text inside a frame, use the Type tool to select text.
•To apply color changes to all text in a frame, use the Selection tool to select the frame. When applying color to
the text rather than the container, make sure that you select the Formatting Affects Text icon in the Tools panel
or in the Swatches panel.
2In the Tools panel or in the Swatches panel, select whether you want to apply the color change to the fill or stroke.
If you select Stroke, the color change affects only the outline of characters.
3Do any of the following:
•In the Swatches panel, click a color or gradient swatch.
•In the Stroke panel, specify a weight or other stroke options. (See “Stroke panel options” on page 359.)
You can also apply a gradient to text by dragging across the selected text using either the Gradient Swatch tool or
the Gradient Feather tool .
To create reverse type, you can change the text fill color to white or [Paper] and the frame’s fill color to a dark color.
You can also create reverse type by using a paragraph rule behind text; however, if the rule is black, you’ll need to
change the type to white.
More Help topics
“Applying color” on page 465
“Add rules (lines) above or below paragraphs” on page 261
“Applying gradients to text” on page 484
Add transparency effects to text
Use the Effects panel to add transparency effects, such as drop shadows, to text.
Mike Rankin provides examples about transparency effects at InDesign Eye Candy, Part I.
1Use the Selection tool to select the text frame.
2Choose Object > Effects > [effect].
3Choose Text from the Settings For menu.
A B C
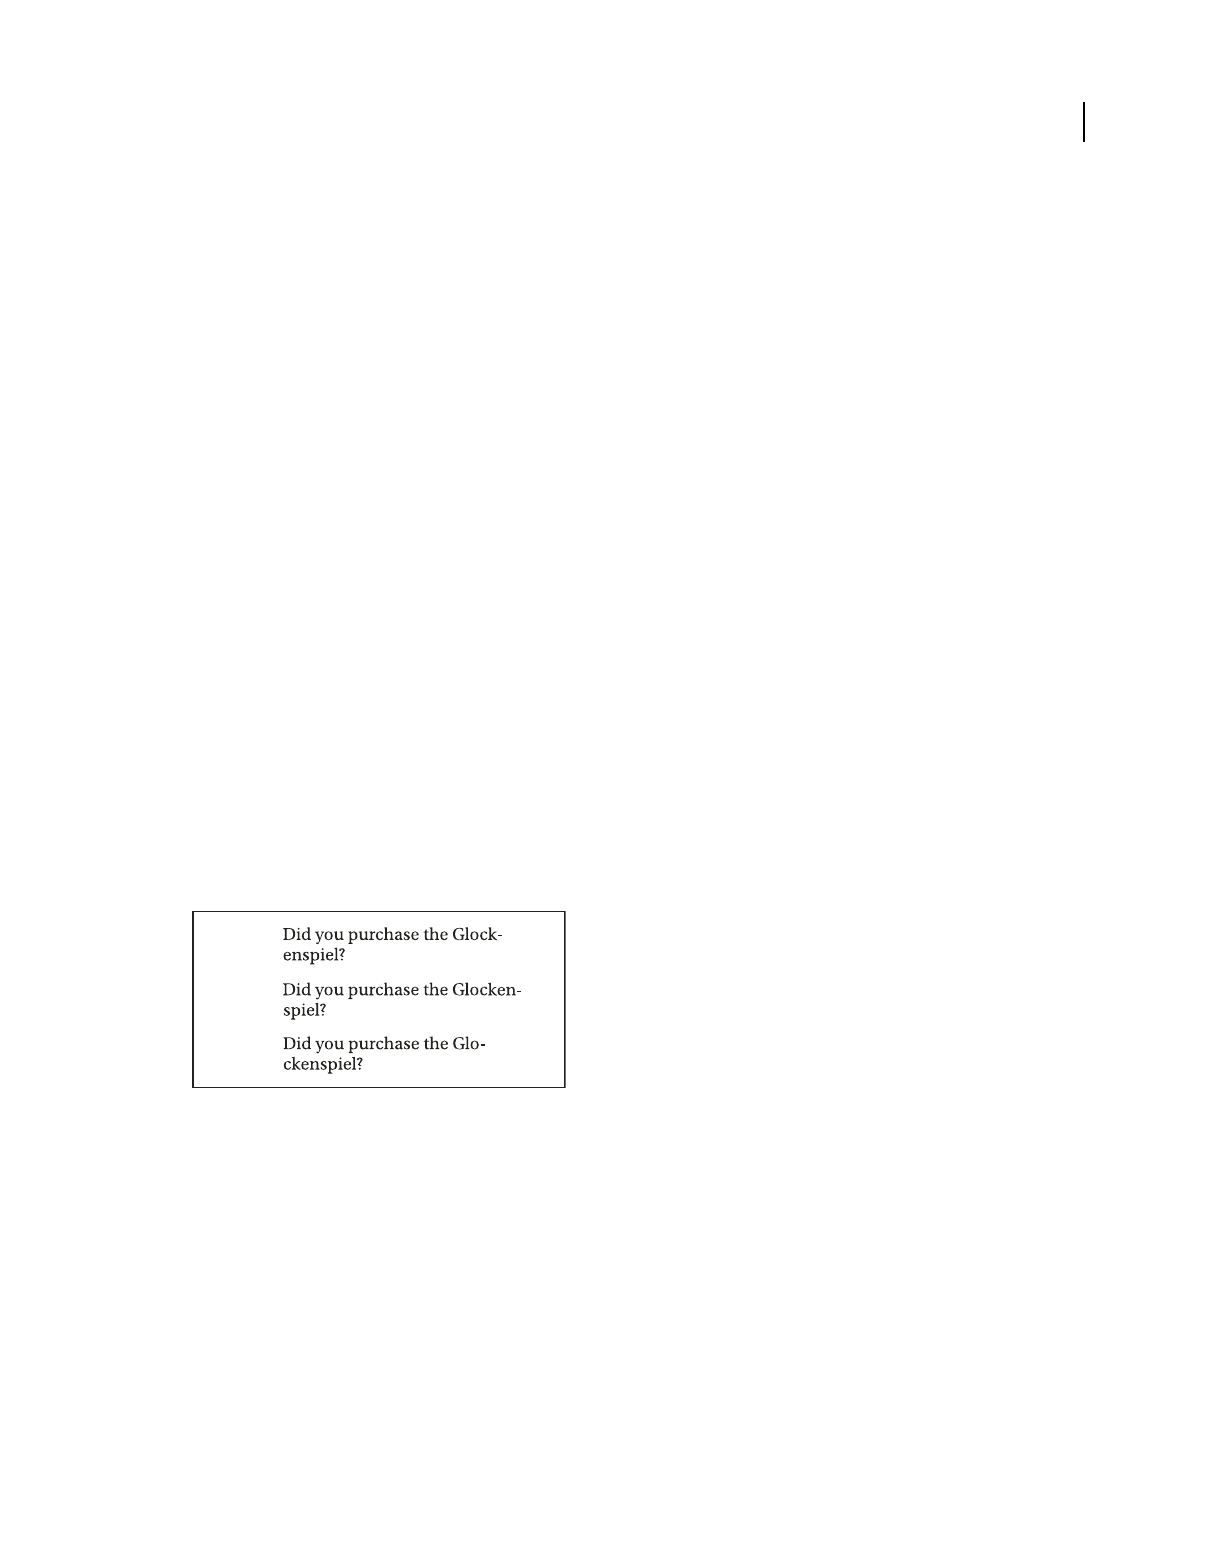
257
USING INDESIGN
Typography
Last updated 11/16/2011
You can choose Object if you want the effects you choose to apply to the text frame’s stroke and fill as well as the text
inside it.
4Specify the effect attributes and click OK.
If you want to change the text’s blending mode or opacity settings, make these changes on the Effects panel.
More Help topics
“Transparency effects” on page 445
Assign a language to text
Assigning a language to text determines which spelling and hyphenation dictionary is used. Assigning a language does
not change the actual text.
1Do any of the following:
•To apply the language only to selected text, select the text.
•To change the default dictionary used in InDesign, choose the language with no documents open.
•To change the default dictionary for a specific document, open the document, choose Edit > Deselect All, and then
choose the language.
2In the Character panel, choose the appropriate dictionary in the Language menu.
InDesign uses Proximity (and WinSoft for some languages) dictionaries for both spelling and hyphenation. These
dictionaries let you specify a different language for as little as a single character of text. Each dictionary contains
hundreds of thousands of words with standard syllable breaks. Changing the default language does not affect existing
text frames or documents.
You can customize language dictionaries to ensure that any unique vocabulary you use is recognized and treated
correctly.
How dictionaries affect hyphenation
A. “Glockenspiel” in English B. “Glockenspiel” in Traditional German C. “Glockenspiel” in Reformed German
More Help topics
“Hyphenation and spelling dictionaries” on page 185
Change the case of type
The All Caps or Small Caps commands change the appearance of text, but not the text itself. Conversely, the Change
Case command changes the case setting of selected text. This distinction is important when searching or spell-checking
text. For example, suppose you type “spiders” in your document and apply All Caps to the word. Using Find/Change
(with Case Sensitive selected) to search for “SPIDERS” will not find the instance of “spiders” to which All Caps was
applied. To improve search and spell-check results, use the Change Case command rather than All Caps.
Anne-Marie Concepcion provides an article about small caps at Small Caps vs OpenType All Small Caps.
A
B
C
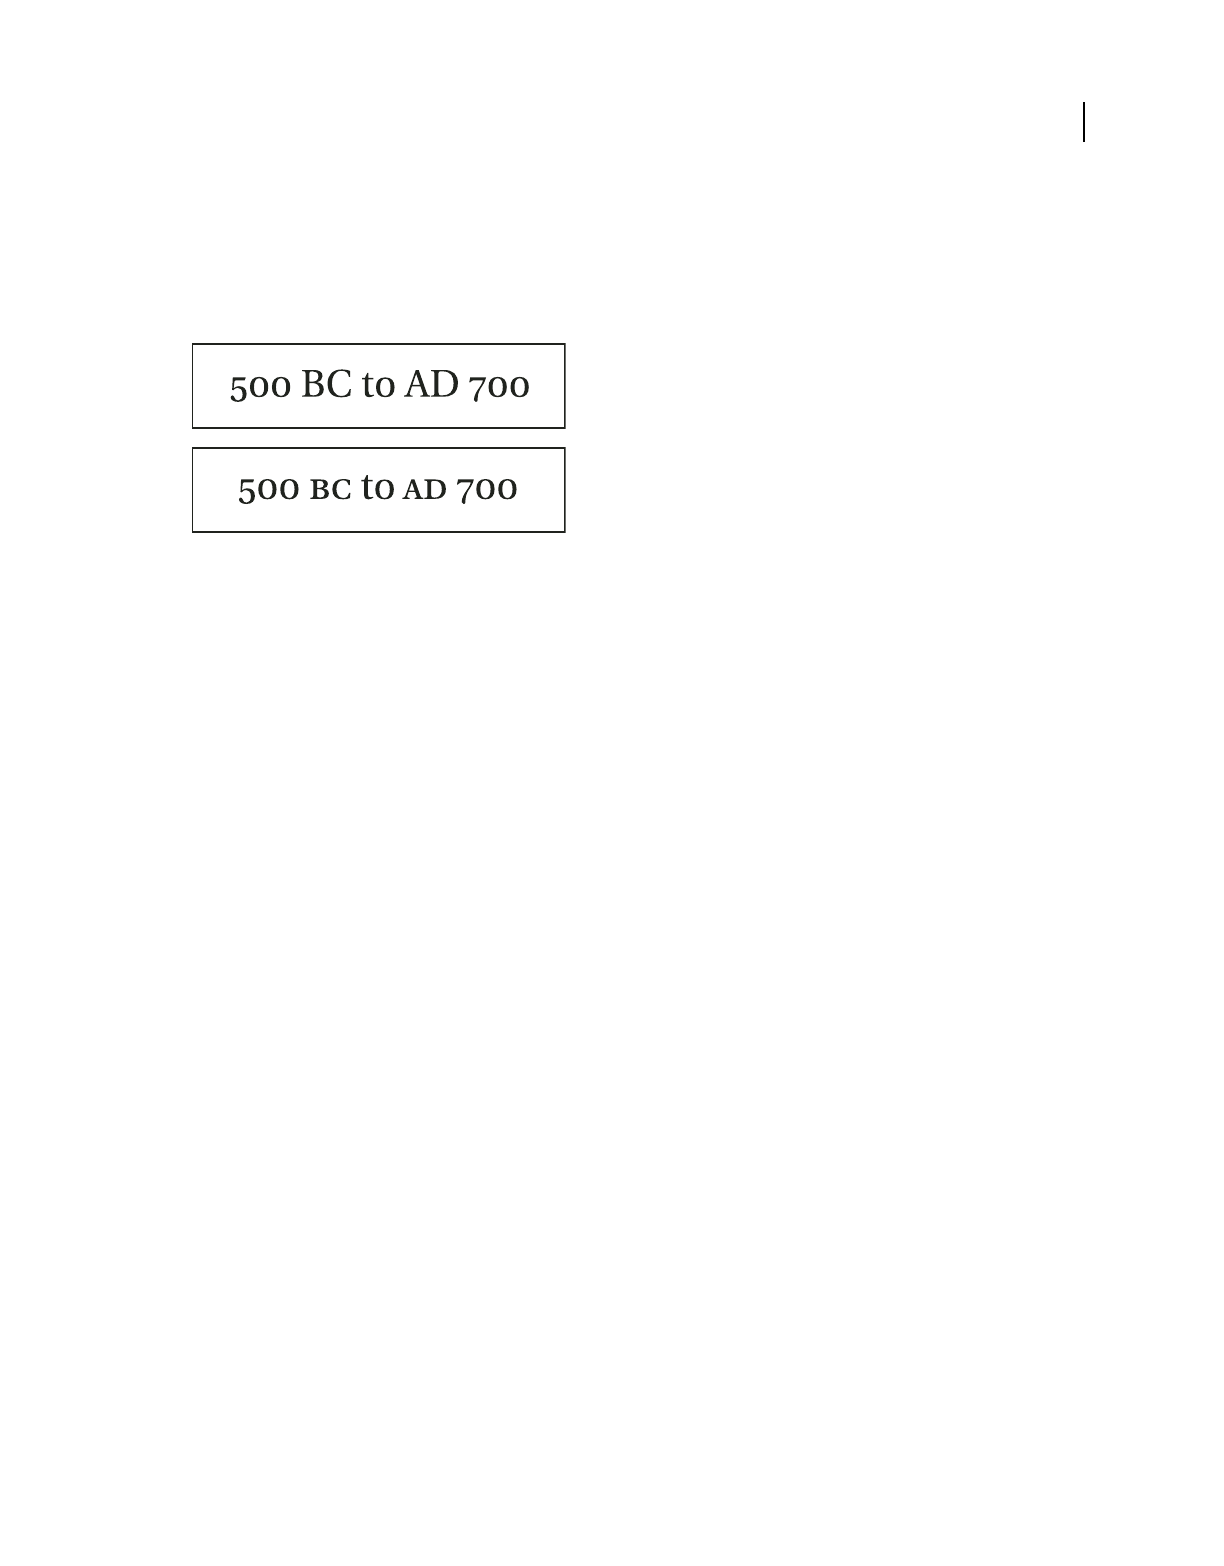
258
USING INDESIGN
Typography
Last updated 11/16/2011
Change text to All Caps or Small Caps
InDesign can automatically change the case of selected text. When you format text as small caps, InDesign
automatically uses the small-cap characters designed as part of the font, if available. Otherwise, InDesign synthesizes
the small caps using scaled-down versions of the regular capital letters. The size of synthesized small caps is set in the
Type Preferences dialog box.
Before (top) and after (bottom) setting BC and AD in small caps to complement old-style numerals and surrounding text
If you select All Caps or Small Caps in an OpenType font, InDesign creates more elegant type. If you’re using an
OpenType font, you can also choose All Small Caps from the Character panel menu or the Control panel. (See “Apply
OpenType font attributes” on page 246.)
1Select text.
2Choose All Caps or Small Caps in the Character panel menu or in the Control panel. If the text was originally typed
in all caps, selecting Small Caps will not change the text.
Specify the size for small caps
1Choose Edit > Preferences > Advanced Type (Windows) or InDesign > Preferences > Advanced Type (Mac OS).
2For Small Caps, type a percentage of the original font size for text to be formatted as small caps. Then click OK.
Change capitalization
1Select text.
2Choose one of the following in the Type > Change Case submenu:
•To change all characters to lowercase, choose Lowercase.
•To capitalize the first letter of each word, choose Title Case.
•To change all characters to uppercase, choose Uppercase.
•To capitalize the first letter of each sentence, choose Sentence Case.
Note: The Sentence Case command assumes that the period (.), exclamation point (!), and question mark (?) characters
mark the ends of sentences. Applying Sentence Case may cause unexpected case changes when these characters are used
in other ways, as in abbreviations, file names, or Internet URLs. In addition, proper names may become lowercase when
they should be uppercase.
Scale type
You can specify the proportion between the height and width of the type, relative to the original width and height of
the characters. Unscaled characters have a value of 100%. Some type families include a true expanded font, which is
designed with a larger horizontal spread than the plain type style. Scaling distorts the type, so it is generally preferable
to use a font that is designed as condensed or expanded, if one is available.
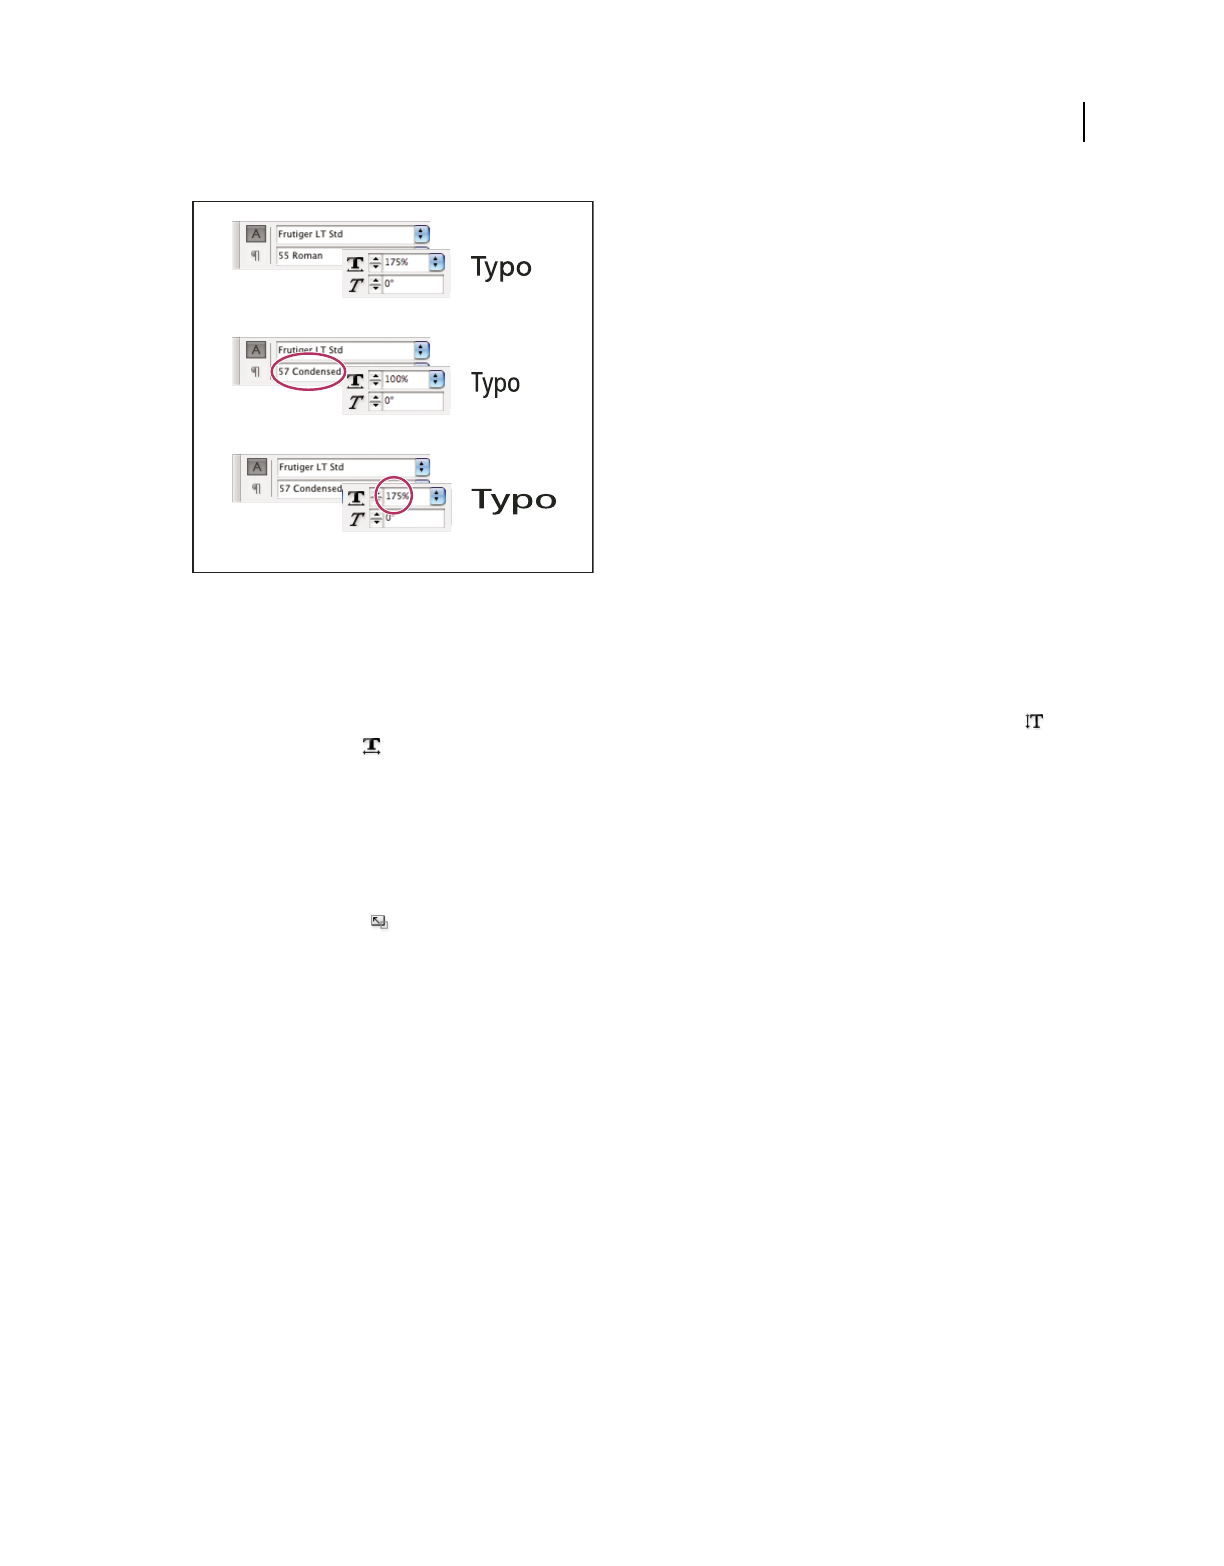
259
USING INDESIGN
Typography
Last updated 11/16/2011
Scaling fonts horizontally
A. Unscaled type B. Unscaled type in condensed font C. Scaled type in condensed font
Adjust vertical or horizontal scaling
1Select text you want to scale.
2In the Character panel or Control panel, type a numeric value to change the percentage of Vertical Scaling or
Horizontal Scaling .
Scale text by resizing the text frame in InDesign
❖Do any of the following:
•Using the Selection tool, hold down Ctrl (Windows) or Command (Mac OS), and then drag a corner of the text
frame to resize it.
•Using the Scale tool , resize the frame.
(See “Scale objects” on page 419.)
Determine the appearance of scaled text values
When you change the scale of a frame, the text inside the frame is also scaled. For example, when you double the size
of a text frame, the text also doubles in size; 20-point text increases to 40 points.
David Blatner provides an article about scaled text frames at Making a Magnifying Glass Text Frame in InDesign.
You can change a preferences option to indicate how scaled text appears in panels:
•By default, with Apply To Content selected, the Font Size boxes in the Control panel and Character panel list the
new size of text (such as 40 pt). If you select the Adjust Scaling Percentage option, the Font Size boxes display both
the original and the scaled size of the text, such as “20 pt (40).”
•The scaling values in the Transform panel tell you the horizontal and vertical percentage by which the frame was
scaled. By default, with Apply To Content selected, scaling values display at 100% after a text is scaled. If you select
the Adjust Scaling Percentage option, the scaling values reflect the scaled frame, so doubling the scale of a frame
displays as 200%.
A
B
C

260
USING INDESIGN
Typography
Last updated 11/16/2011
Tracking scale changes to frames is useful if you have to revert a frame and the text inside it to their original size. It’s
useful as well for finding out by how much you changed the size of a frame. To track scale changes to frames and the
text inside these frames:
1Choose Edit > Preferences > General (Windows) or InDesign > Preferences > General (Mac OS).
2Select Adjust Scaling Percentage, and then click OK.
Note the following:
•The Adjust Scaling Percentage preference applies to frames that you scale after the preference is turned on, not to
existing frames.
•The Adjust Scaling Percentage preference stays with the text. The scaled point size continues to appear in
parentheses even if you turn off the Adjust Scaling Percentage preference and scale the frame again.
•To remove the scaled point size from the Transform panel, choose Redefine Scaling as 100% in the Transform
panel. Choosing this option doesn’t change the appearance of the scaled frame.
•If you edit the text or scale a frame within threaded frames when the Adjust Scaling Percentage preference is
selected, the text is scaled, even if it moves to a different frame. However, if Apply To Content is selected, any text
that flows to a different frame as a result of editing is no longer scaled.
Skew type
1Select text.
2In the Character panel, type a numeric value for Skewing . Positive values slant type to the right; negative values
slant type to the left.
Note that applying an angle to type does not produce true italic characters.
Formatting paragraphs
For a video tutorial on formatting paragraphs, see www.adobe.com/go/lrvid4276_id.
Adjust paragraph spacing
You can control the amount of space between paragraphs. If a paragraph begins at the top of a column or frame,
InDesign does not honor the Space Before value. In such a case, you can increase the leading of the first line of the
paragraph or increase the top inset of the text frame in InDesign.
1Select text.
2In the Paragraph panel or the Control panel, adjust the appropriate values for Space Before and Space After .
To ensure formatting consistency, change paragraph spacing in the paragraph styles you define.
More Help topics
“Add paragraph and character styles” on page 199
261
USING INDESIGN
Typography
Last updated 11/16/2011
Use drop caps
You can add drop caps to one or more paragraphs at a time. The drop cap’s baseline sits one or more lines below the
baseline of the first line of a paragraph.
You can also create a character style that can be applied to the drop-cap characters. For example, you can create a tall
cap (also called a raised cap) by specifying a 1-line, 1-character drop cap and applying a character style that increases
the size of the first letter.
One-character, three-line drop cap (left), and five-character, two-line drop cap (right)
More Help topics
“Drop caps and nested styles” on page 206
“Apply a character style to a drop cap” on page 207
Create a drop cap
1With the Type tool selected, click in the paragraph where you want the drop cap to appear.
2In the Paragraph panel or Control panel, type a number for Drop Cap Number Of Lines to indicate the number
of lines you want the drop cap to occupy.
3For Drop Cap One Or More Characters , type the number of drop cap characters you want.
4To apply a character style to the drop cap character, choose Drop Caps And Nested Styles from the Paragraph panel
menu, and then choose the character style you created.
You can also use the Drop Caps And Nested Styles dialog box to align the drop cap to the text edge, reducing the
amount of space on the left side of the drop cap, and adjust for drop cap letters with descenders, such as “g” and “y.”
If you want to resize, skew, or change the typeface of the drop cap letter for added effect, select the letter or letters and
make the formatting changes.
Remove a drop cap
1With the Type tool selected, click in the paragraph where the drop cap appears.
2In the Paragraph panel or Control panel, type 0 for Drop Cap Number Of Lines or Drop Cap Number Of
Characters.
Add rules (lines) above or below paragraphs
Rules are paragraph attributes that move and are resized along with the paragraph on the page. If you’re using a rule
with headings in your document, you may want to make the rule part of a paragraph style definition. The width of the
rule is determined by the column width.
The offset for a rule above a paragraph is measured from the baseline of the top line of text to the bottom of the rule.
The offset for a rule below a paragraph is measured from the baseline of the last line of text to the top of the rule.
Aer breakfast I wa
n
man and guess out
but Jim didn’t wan
t
bad luck; and besides, h
e
ha’nt us; he said a man t
h
likely to go a-ha'nting
a
planted and comforta
b
reasonable, so I didn’t s
a
After breakfas
t
guess ou
t
want to. He said it would f
e
come and ha'nt us; he sai
d
to go a-ha'nting around t
h
at sounded pretty reas
o
keep from studying over i
and what they done it for
.
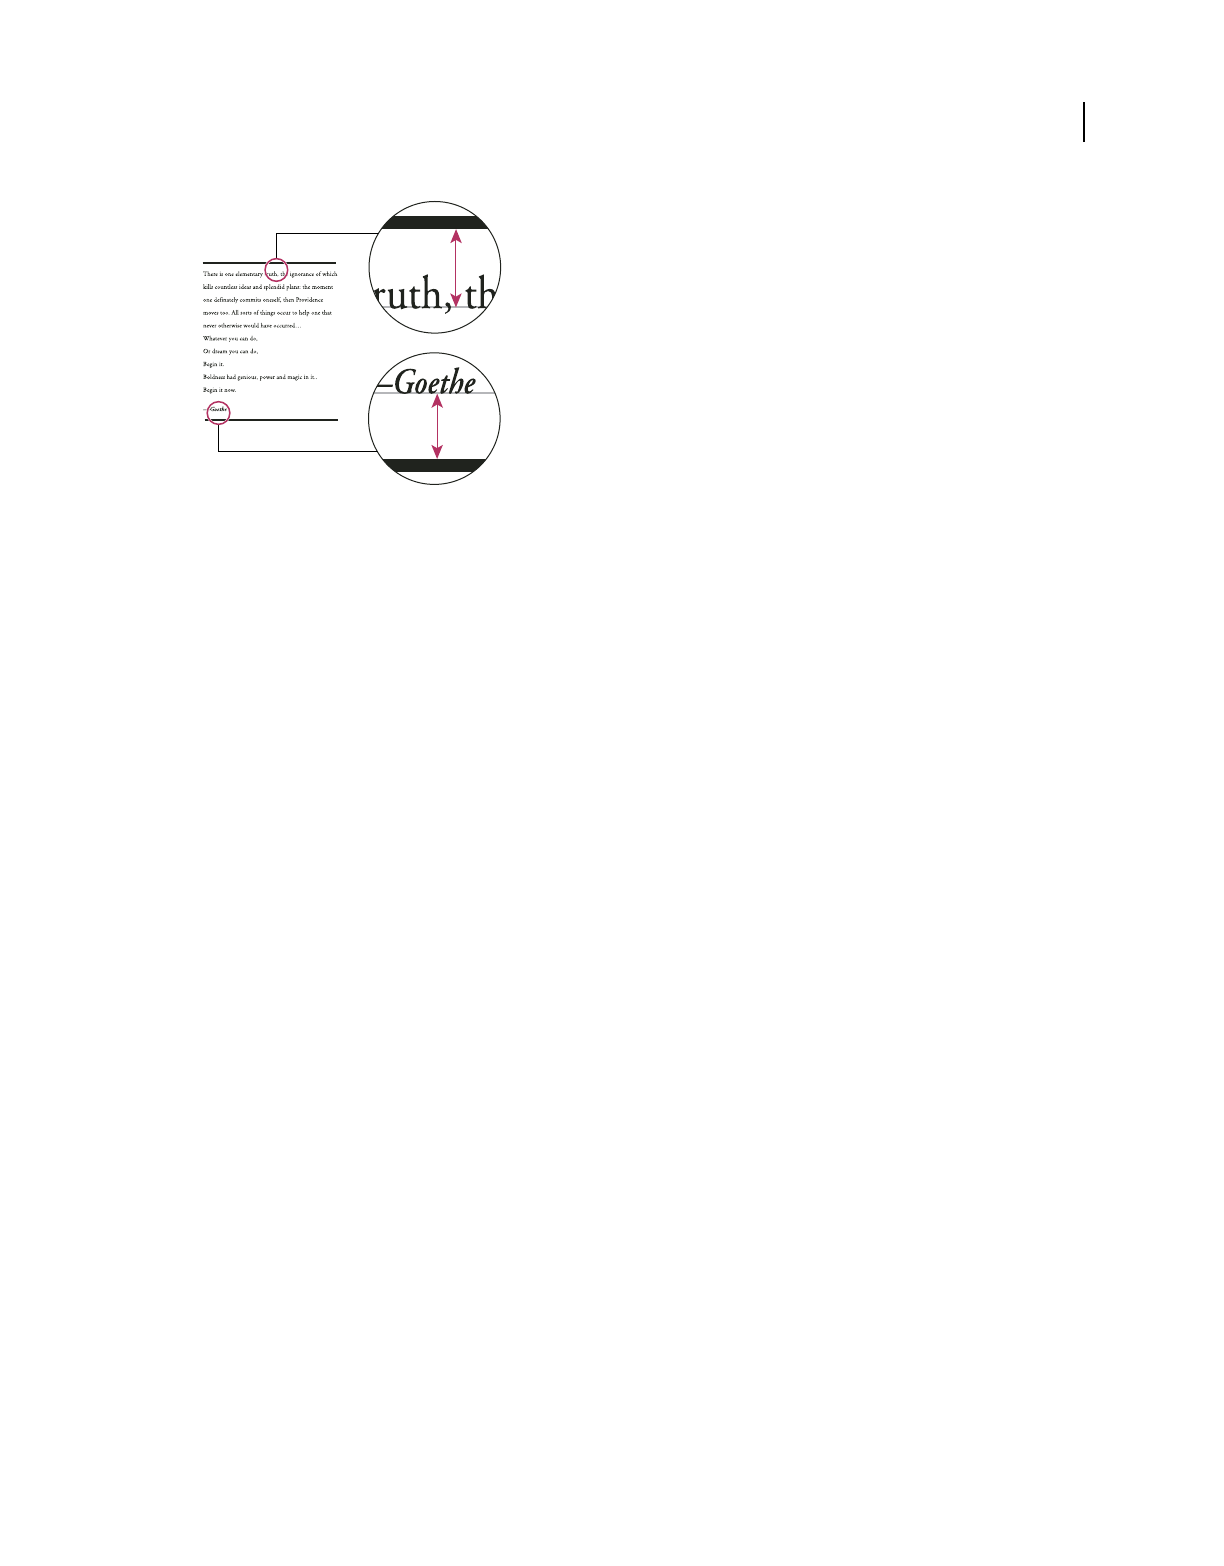
262
USING INDESIGN
Typography
Last updated 11/16/2011
Placement of rules
A. Rule above paragraph B. Rule below paragraph
Michael Murphy provides a video tutorial about creating special effects using paragraph rules at Paragraph Rules Rule.
Creative Curio provides an article about creative uses of paragraph rules at Creative Uses for Paragraph Rules in
InDesign, Pt 1.
Add a rule above or below a paragraph
1Select text.
2Choose Paragraph Rules from the Paragraph panel menu or Control panel menu.
3At the top of the Paragraph Rule dialog box, select Rule Above or Rule Below.
4Select Rule On.
Note: If you want both a rule above and below, make sure that Rule On is selected for both Rule Above and Rule Below.
5Select Preview to see what the rule will look like.
6For Weight, choose a weight or type a value to determine the thickness of the rule. For Rule Above, increasing the
weight expands the rule upwards. For Rule Below, increasing the weight expands the rule downward.
7Select Overprint Stroke when you want to make sure that the stroke doesn’t knock out underlying inks on a printing
press.
8Do one or both of the following:
•Choose a color. The available colors are those listed in the Swatches panel. Select the Text Color option to make the
rule the same color as the first character in the paragraph for Rule Above and the last character for Rule Below.
•Choose a tint or specify a tint value. The tint is based on the color you specified. Note that you can’t create tints of
the built-in colors None, Paper, Registration, or Text Color.
•If you specified any line type other than solid, choose a gap color or gap tint to change the appearance of the area
between dashes, dots, or lines.
9Choose the width of the rule. You can choose either Text (from the left edge of text to the line end) or Column (from
the left edge of the column to the right edge of the column). If the left edge of the frame has a column inset, the rule
begins at the inset.
10 To determine the vertical position of the rule, type a value for Offset.
11 To make sure that the rule above text is drawn within the text frame, select Keep In Frame. If this option isn’t
selected, the rule can appear outside the text frame.
B
A

263
USING INDESIGN
Typography
Last updated 11/16/2011
To make sure the paragraph rule at the top of one column aligns with the text at the top of the adjacent column, select
Keep In Frame.
12 Set left or right indents for the rule (not for text) by typing values for Left Indent and Right Indent.
13 Select Overprint Stroke if the paragraph rule will be printed over another color and you want to avoid errors that
can occur with printing misregistration. Then click
OK.
Remove a paragraph rule
1Using the Type tool , click in the paragraph containing the paragraph rule.
2Choose Paragraph Rules from the Paragraph panel menu or Control panel menu.
3Deselect Rule On and click OK.
Ways to control paragraph breaks
You can eliminate orphans and widows, words or single lines of text that become separated from the other lines in a
paragraph. Orphans fall at the bottom of a column or page, and widows fall at the top of a column or page. Another
typographic problem to avoid is a heading that stands alone on a page with the following paragraph on the next page.
You have several options for fixing widows, orphans, short exit lines, and other paragraph break problems:
Discretionary hyphens A discretionary hyphen (Type > Insert Special Character > Hyphens And Dashes >
Discretionary Hyphen) appears only if the word breaks. This option prevents the common typographic problem of
hyphenated words, such as “care-giver,” appearing in the middle of a line after text reflows. Similarly, you can also add
a discretionary line break character.
No Break Choose No Break from the Character panel menu to prevent selected text from breaking across a line.
Nonbreaking spaces Insert a nonbreaking space (Type > Insert White Space > [nonbreaking space]) between words
you want to keep together.
Keep Options Choose Keep Options from the Paragraph panel menu to specify how many lines in the following
paragraph remain with the current paragraph.
Start Paragraph Use Start Paragraph in the Keep Options dialog box to force a paragraph (usually a title or heading)
to appear at the top of a page, column, or section. This option works especially well as part of a heading paragraph style.
Hyphenation Settings Choose Hyphenation from the Paragraph panel menu to change hyphenation settings.
Edit text Editing text may not be an option depending on the kind of document you work with. If you have license to
rewrite, then subtle rewording can often create a better line break.
Use a different composer In general, use Adobe Paragraph Composer to let InDesign compose paragraphs
automatically. If a paragraph isn’t composed the way you’d like, choose Adobe Single-line Composer from the
Paragraph panel menu or Control panel menu and adjust selected lines individually. See “Compose text” on page 285.
Control paragraph breaks using Keep Options
You can specify how many lines of the following paragraph remain with the current paragraph as it moves between
frames—a convenient way to ensure that headings don’t become isolated from the body text they introduce. InDesign
can highlight the paragraphs that sometimes break in violation of your settings.
You may not want to use Keep Options if your document does not require your columns to share the same last
baseline.
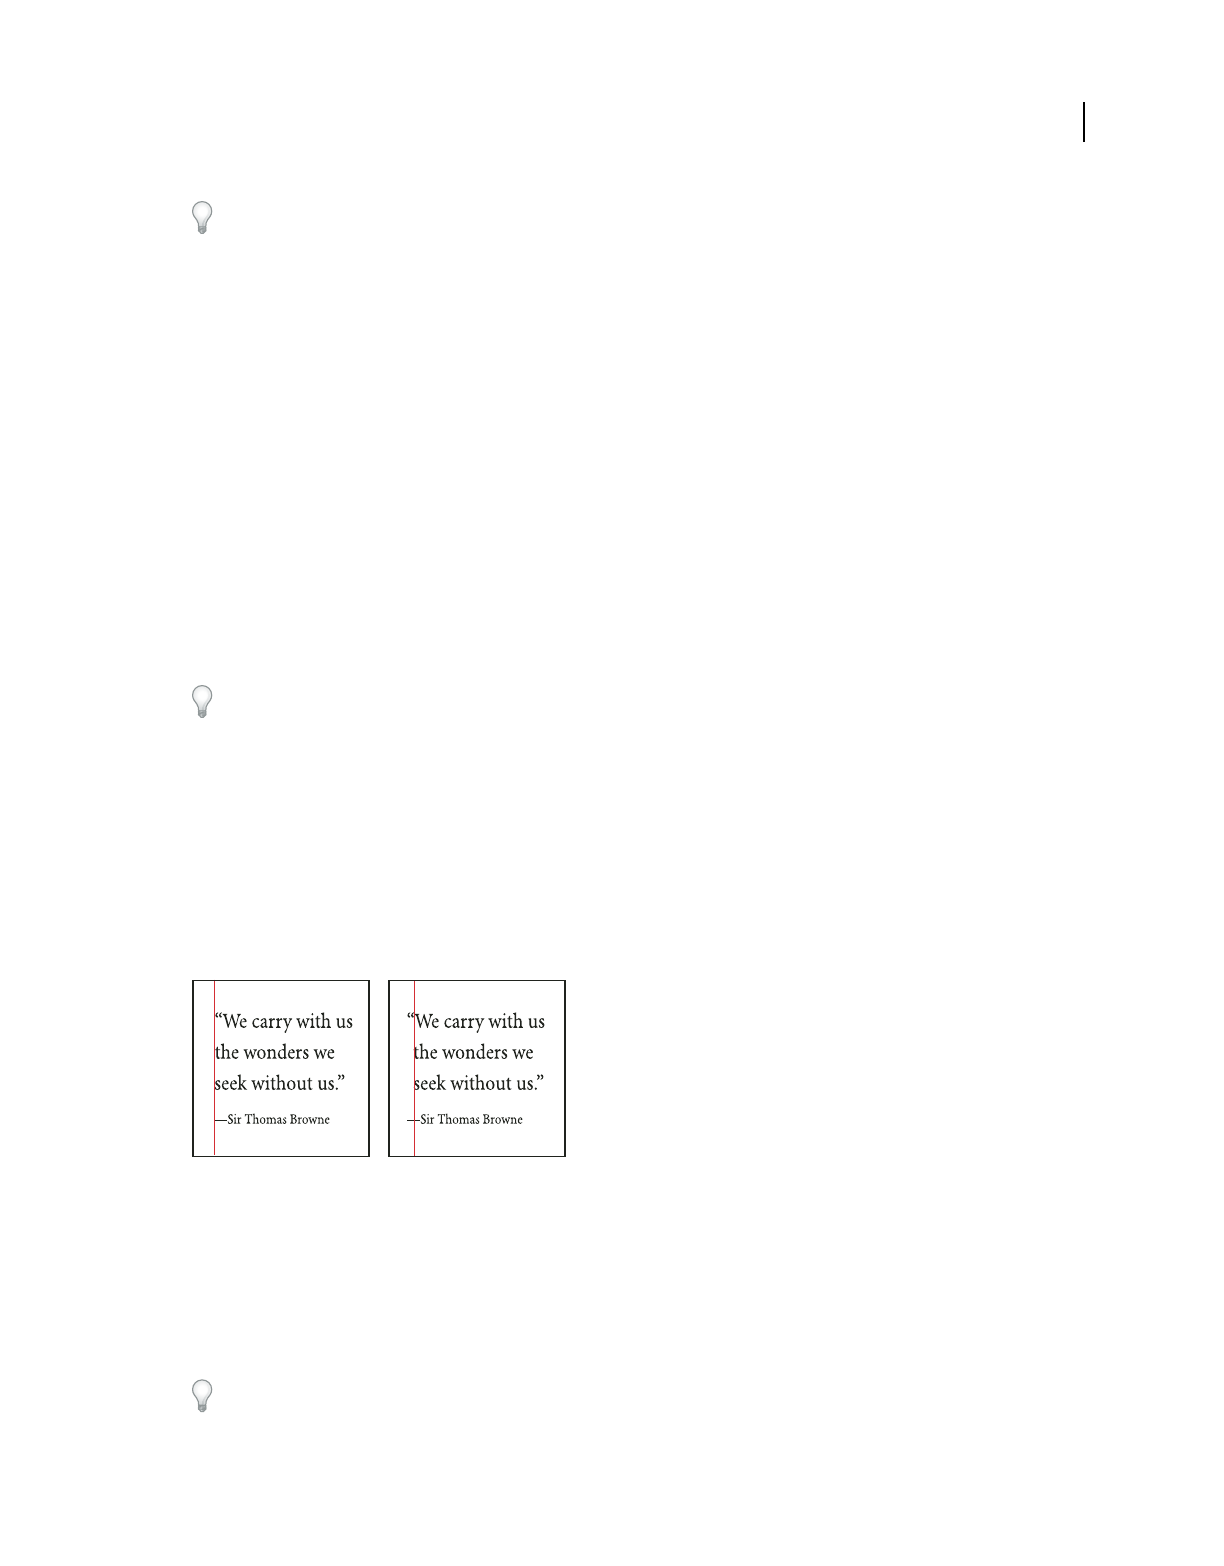
264
USING INDESIGN
Typography
Last updated 11/16/2011
To highlight paragraphs that violate Keep Options, choose Edit > Preferences > Composition (Windows) or
InDesign > Preferences > Composition (Mac OS), select Keep Violations, and click OK.
1Select the paragraph or paragraphs you want to affect.
2Choose Keep Options in the Paragraph panel menu or Control panel menu. (You can also change keep options
when creating or editing a paragraph style.)
3Select any of these options and then click OK:
•Select Keep With Previous to keep the first line of the current paragraph with the last line of the previous paragraph.
•For Keep With Next _ Lines, specify the number of lines (up to five) of the subsequent paragraph that the last line
of the current paragraph stays with. This option is especially useful for making sure that a heading stays with the
next few lines of the paragraph that follows it.
•Select the Keep Lines Together option and select All Lines In Paragraph to prevent the paragraph from breaking.
•Select the Keep Lines Together option, select At Start/End Of Paragraph, and specify the number of lines that must
appear at the beginning or ending of the paragraph to prevent orphans and widows.
•For Start Paragraph, choose an option to force InDesign to push the paragraph to the next column, frame, or page.
If Anywhere is selected, the start position is determined by the Keep Line Settings option. For other options, they
will be forced to start from these positions.
When you create paragraph styles for headings, use the Keep Options panel to make sure that your headings remain
with the paragraph that follows them.
More Help topics
“Add column, frame, and page breaks” on page 153
Create hanging punctuation
Punctuation marks and letters such as “W” can make the left or right edges of a column appear to be misaligned.
Optical Margin Alignment controls whether punctuation marks (such as periods, commas, quotation marks, and
dashes) and edges of letters (such as W and
A) hang outside the text margins, so that the type looks aligned.
Before (left) and after (right) applying Optical Margin Alignment
1Select a text frame, or click anywhere in the story.
2Choose Type > Story.
3Select Optical Margin Alignment.
4Select a font size to set the appropriate amount of overhang for the size of type in your story. For optimal results,
use the same size as the text.
To turn off Optical Margin Alignment for an individual paragraph, choose Ignore Optical Margin from the
Paragraph panel menu or Control panel menu.
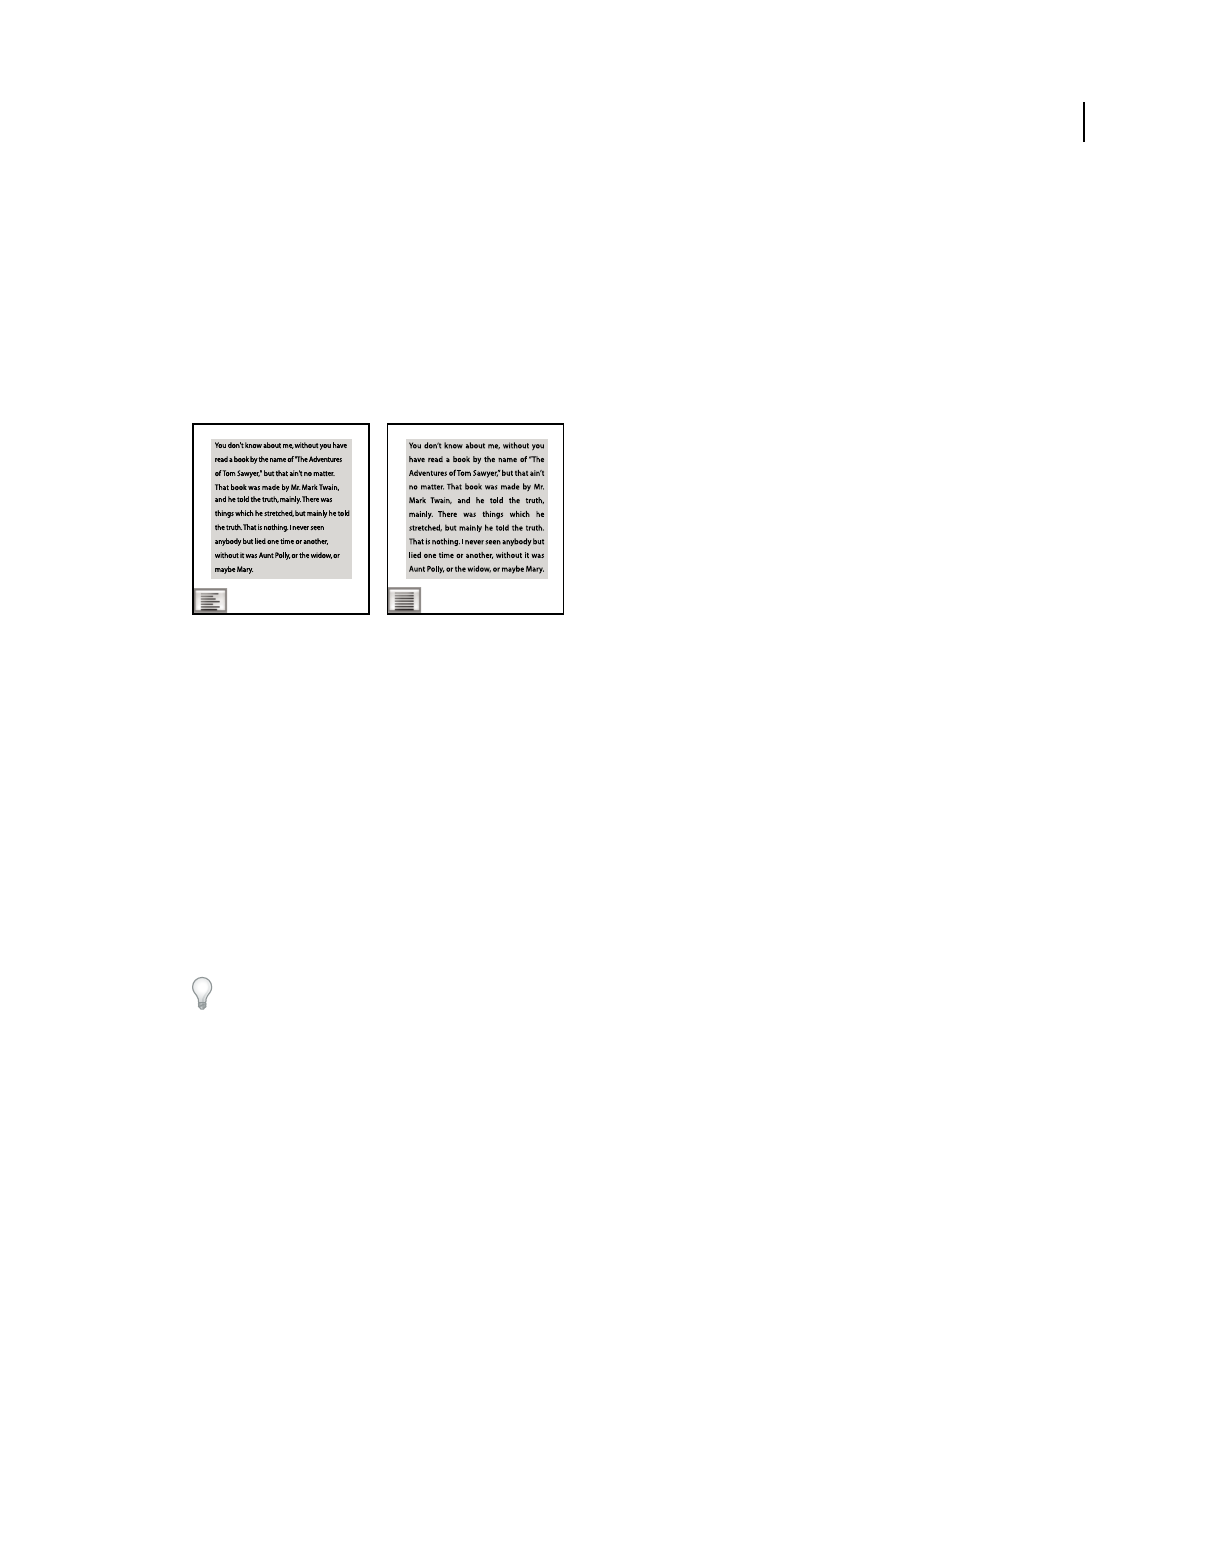
265
USING INDESIGN
Typography
Last updated 11/16/2011
Aligning text
Align or justify text
Text can be aligned with one or both edges (or insets) of a text frame. Text is said to be justified when it is aligned with
both edges. You can choose to justify all text in a paragraph excluding the last line (Justify Left or Justify Right), or you
can justify text in a paragraph including the last line (Justify All). When you have only a few characters on the last line,
you may want to use a special end-of-story character and create a flush space.
Justify Left (left) and Justify All (right)
Note: When you justify all lines of text and you are using the Adobe Paragraph Composer, InDesign shifts text to ensure
that the paragraph has consistent text density and is visually appealing. You can fine-tune spacing in justified text.
1Select text.
2Click one of the Alignment buttons (Align Left, Align Center, Align Right, Left Justify, Center Justify, Right Justify
and Full Justify) in the Paragraph panel or Control panel.
3(Optional) Click Align Towards Spine or Align Away From Spine.
When you apply Align Towards Spine to a paragraph, text on a left-hand page is right-aligned, but when the same text
flows onto (or if the frame is moved to) a right-hand page, it becomes left aligned. Similarly, when you apply Align
Away From Spine to a paragraph, text on a left-hand page is left aligned, while text on a right-hand page is right
aligned.
If you want the left side of a line of text to be left-aligned and the right side to be right-aligned, position the insertion
point where you want to right-align the text, press Tab, and then right-align the rest of the line.
More Help topics
“Align or justify text vertically within a text frame” on page 267
“Change Justification settings” on page 288
Align paragraphs to a baseline grid
The baseline grid represents the leading for body text in a document. You can use multiples of this leading value for
all elements of the page to ensure that text always lines up between columns and from page to page. For example, if the
body text in your document has 12-point leading, you could give your heading text 18-point leading and add 6 points
of space before the paragraphs that follow the headings.
Using a baseline grid ensures consistency in the location of text elements on a page. You can adjust the leading for the
paragraph to ensure that its baselines align to the page’s underlying grid. This is useful if you want the baselines of text
in multiple columns or adjacent text frames to align. Change settings for the baseline grid by using the Grids section
of the Preferences dialog box.
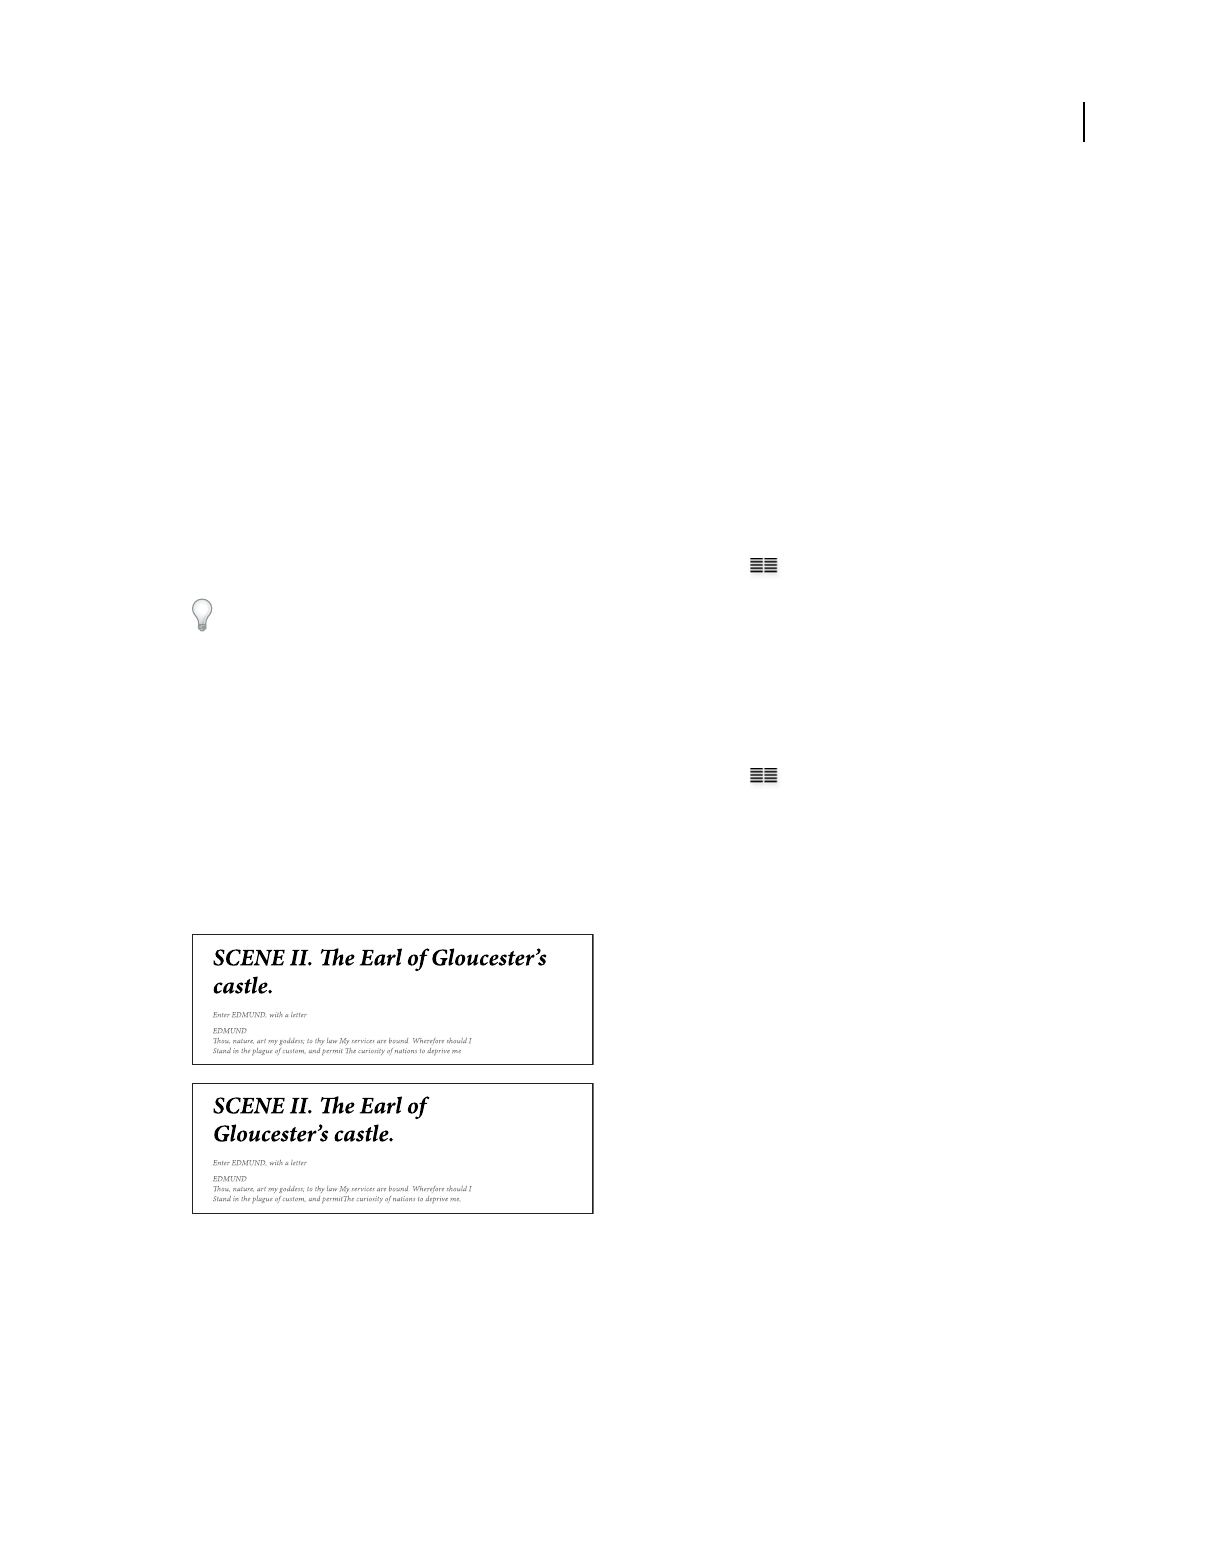
266
USING INDESIGN
Typography
Last updated 11/16/2011
You can also align only the first line of a paragraph to the baseline grid, allowing the rest of the lines to follow the
specified leading values.
To view the baseline grid, choose View > Grids & Guides > Show Baseline Grid.
Note: The baseline grid is visible only if the document zoom level is greater than the view threshold setting in Grids
Preferences. You may need to zoom in to view the baseline grid.
More Help topics
“Grids” on page 54
“Set baseline grids for a text frame” on page 133
Align paragraphs to the baseline grid
1Select text.
2In the Paragraph panel or Control panel, click Align To Baseline Grid .
To ensure that the leading of your text does not change, set the baseline grid leading to the same leading value as your
text, or to a factor thereof.
Align only the first line to the baseline grid
1Select the paragraphs you want to align.
2Choose Only Align First Line To Grid from the Paragraph menu or Control panel menu.
3In the Paragraph panel or Control panel, click Align To Baseline Grid .
Create balanced headline text
You can balance ragged aligned text across multiple lines. This feature is especially useful for multiline headings, pull-
quotes, and centered paragraphs.
Before and after applying Balance Ragged Lines to the title
1Click in the paragraph you want to balance.
2In the Paragraph panel or Control panel, choose Balance Ragged Lines from the menu.
This feature takes effect only when the Adobe Paragraph Composer is selected.
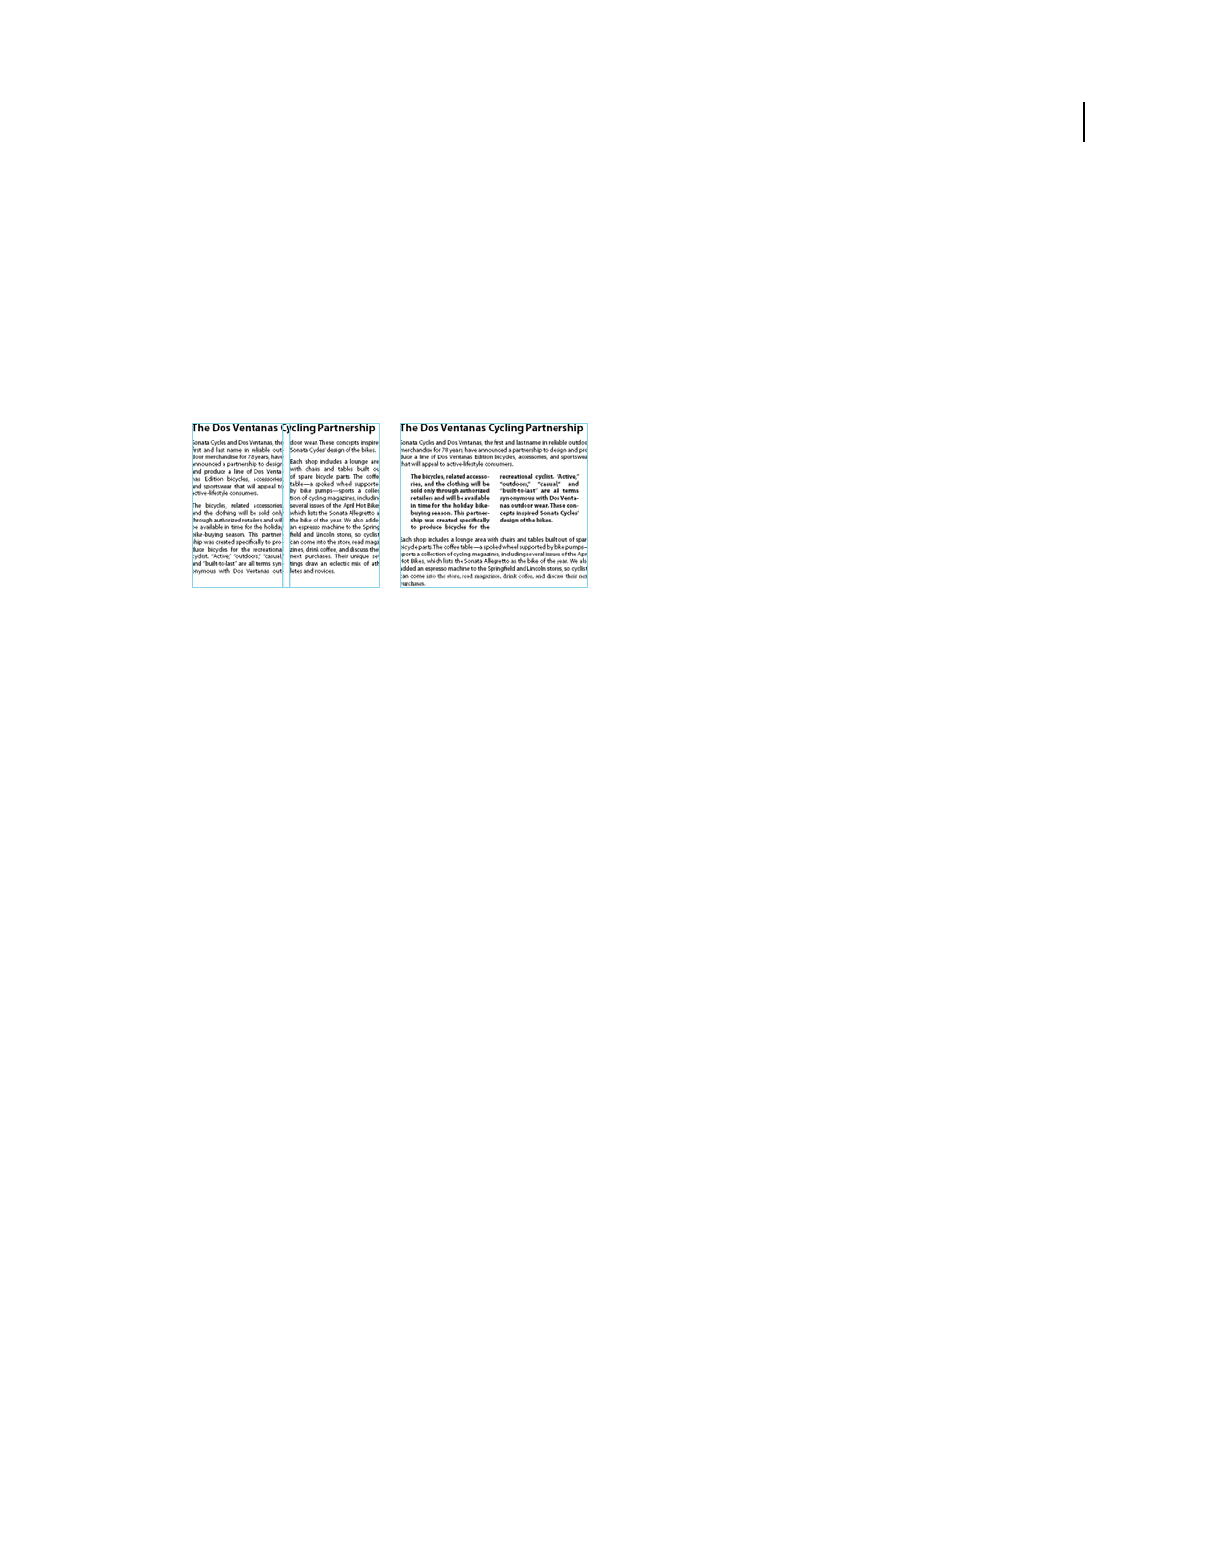
267
USING INDESIGN
Typography
Last updated 11/16/2011
Create paragraphs that span or split columns
You can make a paragraph span across multiple columns in a text frame to create a straddle head effect. You can choose
whether a paragraph spans all columns or a specified number of columns. When a paragraph is set to span across
columns in a multicolumn text frame, any text before the spanning paragraph becomes balanced as a result.
You can also split a paragraph into multiple columns within the same text frame.
For a video tutorial on creating paragraphs that span or split columns, go to www.adobe.com/go/lrvid5151_id_en or
http://tv.adobe.com/go/4952/.
Paragraph spanning and splitting multiple columns
A. Heading that spans columns B. Split column
Span a paragraph across columns
1Place the insertion point inside the paragraph.
You can also make this feature part of a paragraph style, such as a heading style.
2Choose Span Columns from the Control panel menu or a Paragraph panel menu.
3Choose Span Columns from the Paragraph Layout menu.
4Choose the number of columns you want the paragraph to span from the Span menu. Choose All if you want the
paragraph to span across all the columns.
5To add extra space before or after the span paragraph, specify Space Before Span and Space After Span values, and
then click OK.
Split a paragraph into columns
1Place the insertion point inside the paragraph.
You can also make this feature part of a paragraph style, such as a heading style.
2Choose Span Columns from the Control panel menu or a Paragraph panel menu.
3Choose Split Columns from the Paragraph Layout menu.
4Specify the following options, and then click OK:
Sub-columns Choose the number of columns you want the split the paragraph into.
Space Before Split / Space After Split Add space before or after the split paragraph.
Inside Gutter Determine the space between the split paragraphs.
Outside Gutter Determine the space between the outside of the split paragraphs and the margins.
Align or justify text vertically within a text frame
You can align or distribute lines of text in a frame along its vertical axis to help keep type vertically consistent among
frames and their columns.
AB
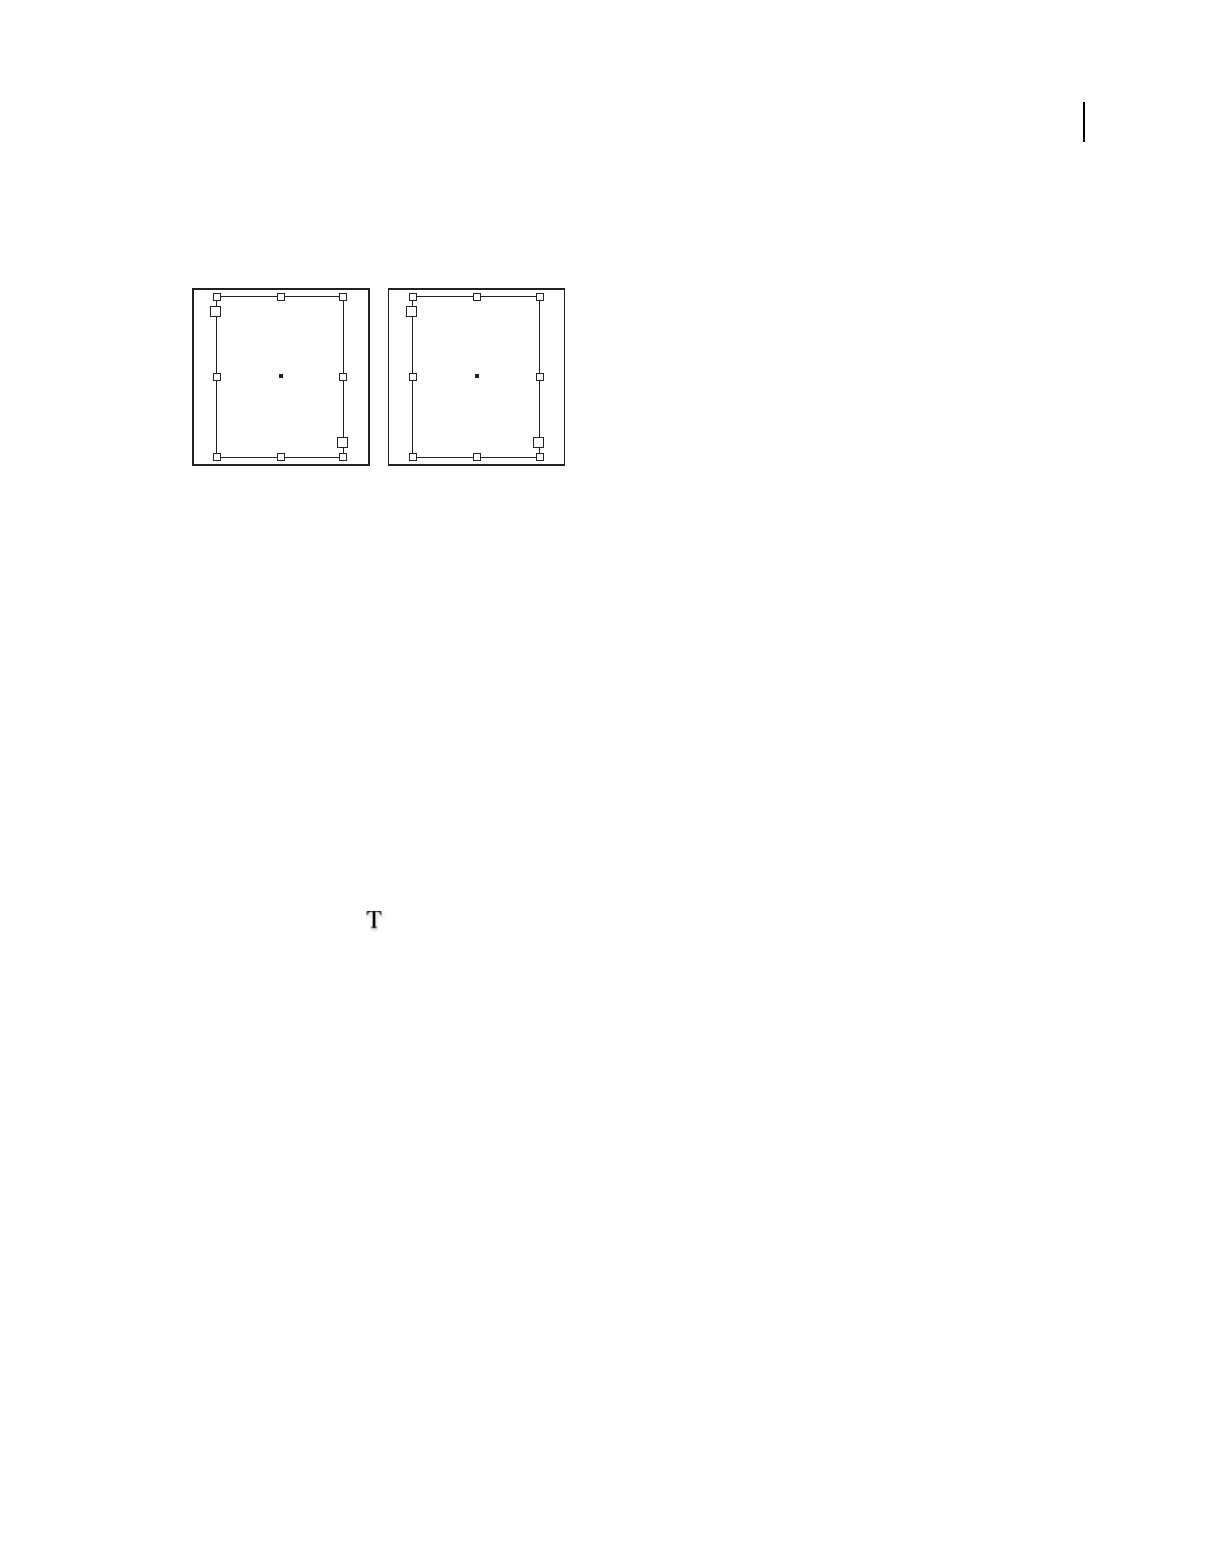
268
USING INDESIGN
Typography
Last updated 11/16/2011
You can align text to the top, center, or bottom of the frame using each paragraph’s leading and paragraph spacing
values. You can also justify text vertically, which evenly spaces lines regardless of their leading and paragraph spacing
values.
Vertical justification—Bottom (left) and Justify (right)
Vertical text alignment and justification is calculated from the baseline positions of each line of text in the frame. Keep
the following in mind as you adjust vertical alignment:
•The top of the frame is defined as the baseline of the first line of top-aligned text. The First Baseline Offset option
in the Text Frame Options dialog box affects this value.
•The bottom of the frame is defined as the baseline of the last line of bottom-aligned text. Footnote text is not
justified.
•When the Align to Baseline Grid option is applied to paragraphs with Top, Center, or Bottom alignment, all lines
will be aligned to the baseline grid. With the Justified option, only the first and last lines will be aligned to the
baseline grid.
•If you adjust a text frame’s Top or Bottom Inset values in the Text Frame Options dialog box, you change the
location of the first or last baseline, respectively.
1Do one of the following:
•With the Selection tool, select a text frame.
•With the Type tool , click in a text frame.
2Choose Object > Text Frame Options.
3In the Vertical Justification section of the Text Frame Options dialog box, choose one of the following options in
the Align menu:
•To vertically align text down from the top of the frame, choose Top. (This is the default setting.)
•To center lines of text in the frame, choose Center.
•To vertically align lines of text up from the bottom of the frame, choose Bottom.
•To evenly distribute lines of text vertically between the top and bottom of the frame, choose Justify.
4If you choose Justify and you want to prevent the leading value from becoming disproportionately larger than the
paragraph spacing value, specify a Paragraph Spacing Limit value. The space between paragraphs is expanded up
to the value you specify; if the text still doesn’t fill the frame, the space between lines is adjusted until the frame is
filled. The paragraph spacing limit value is applied in addition to the Space Before or Space After values entered on
the Paragraph panel.
Yo u don’t know about
me, without you have
read a book by the name
of “e Adventures of
Tom Sawyer,” but that
ain’t no matter.
at book was made by
Mr. Mark Twain, and he
told the truth, mainly.
Yo u don’t know about
me, without you have
read a book by the name
of “e Adventures of
Tom Sawyer,” but that
ain’t no matter.
at book was made by
Mr. Mark Twain, and he
told the truth, mainly.
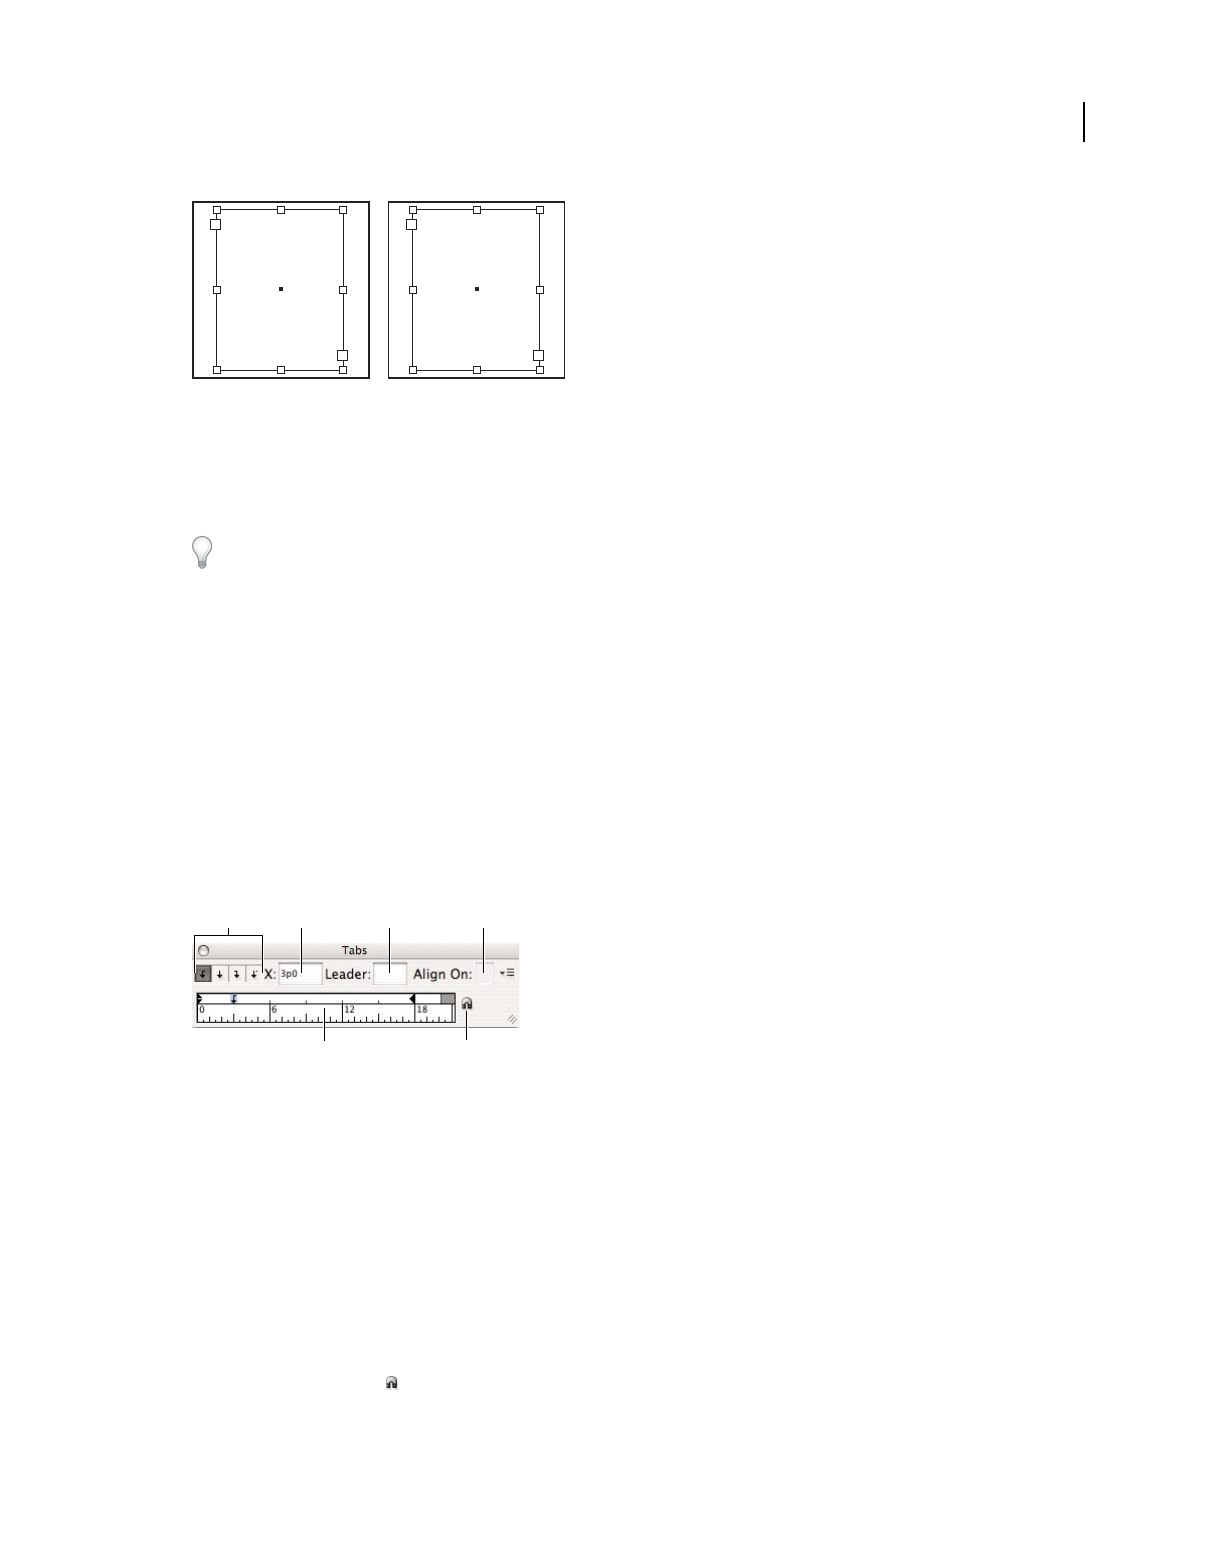
269
USING INDESIGN
Typography
Last updated 11/16/2011
Paragraph spacing limit set to zero (left) and 1 pica (right)
Note: Be careful about vertically justifying multi-column text frames. If the last column contains only a few lines, too
much white space may appear between the lines.
5Click OK.
An easy way to adjust the Paragraph Spacing Limit value is to select Preview, and then click the up or down arrow
next to the Paragraph Spacing Limit value until paragraph spacing appears to be balanced with leading.
Tabs and indents
Tabs dialog box overview
Tabs position text at specific horizontal locations in a frame. The default tab settings depend on the Horizontal ruler
units setting in the Units & Increments preferences dialog box.
Tabs apply to an entire paragraph. The first tab you set deletes all default tab stops to its left. Subsequent tabs delete all
default tabs between the tabs you set. You can set left, center, right, and decimal or special-character tabs.
You set tabs using the Tabs dialog box.
Tabs dialog box
A. Tab alignment buttons B. Tab position C. Tab Leader box D. Align On box E. Tab ruler F. Snap above frame
Open the Tabs dialog box
1Using the Type tool, click in the text frame.
2Choose Type > Tabs.
If the top of the frame is visible, the Tabs dialog box snaps to the current text frame and matches its width to the current
column.
Align the Tabs dialog box ruler with your text
1Scroll through your document to display the top of the text frame.
2Click the magnet icon on the Tabs dialog box. The Tabs dialog box snaps to the top of the column that includes
the selection or the insertion point.
EDMUND : Some
ocers take th m away:
good guard,Until their
greater pleasures rst
be known at are to
censure them.
CORDELIA: We are
not the rst Who, with
best meaning, have
incurr’d the worst.
EDMUND : Some
ocers take th m away:
good guard,Until their
greater pleasures rst
be known at are to
censure them.
CORDELIA:We are
not the rst Who, with
best meaning, have
incurr’d the worst.
B
EF
ACD
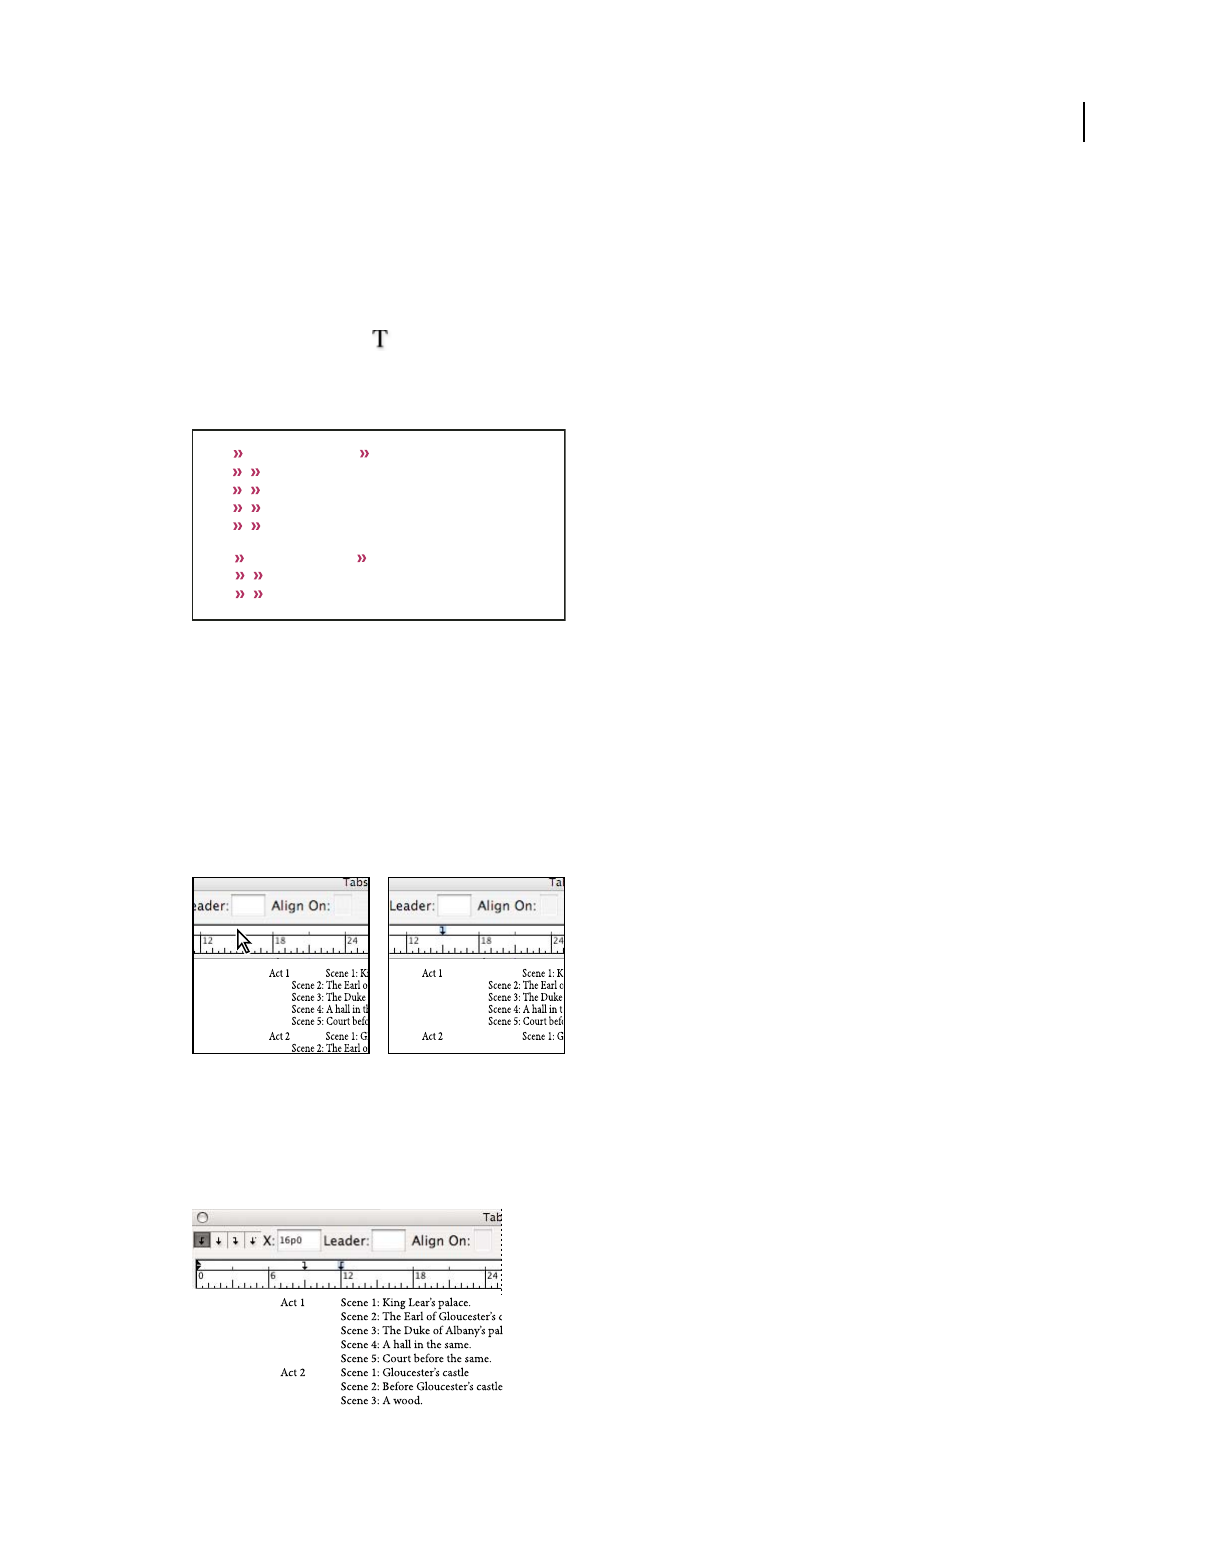
270
USING INDESIGN
Typography
Last updated 11/16/2011
Set tabs
You can set left, center, right, and decimal or special-character tabs. When you use the special-character tab, you can
set a tab to align to any character you choose, such as a colon or a dollar sign.
Bob Bringhurst provides an article about various tab and indent effects at Tabs and Indents Gallery.
1Using the Type tool , click an insertion point in the paragraph.
2Press the Tab key. Add tabs in the paragraphs where you want to add horizontal space. (You can also add tabs after
you create your tab settings.)
Using tabs to align text
3Choose Type > Tabs to display the Tabs dialog box.
4To specify which paragraphs will be affected, select a paragraph or a group of paragraphs.
5For the first tab, click a tab-alignment button (left, right, center, or decimal) in the Tabs dialog box to specify how
text will align to the tab’s position.
6Do one of the following:
•Click a location on the tab ruler to position a new tab.
Adding a new tab setting
•Type a position in the X box and press Enter or Return. If the X value is selected, press the up or down arrow key
to increase or decrease the tab value by 1 point, respectively.
7For subsequent tabs with different alignments, repeat steps 3 and 4.
The first tab setting is right-aligned; the second tab setting is left-aligned.
Act 1Scene 1: King Lear’s palace.
Scene 2: e Earl of Gloucester’s castle.
Scene 3: e Duke of Albany’s palace.
Scene 4: A hall in the same.
Scene 5: Court before the same.
Act 2Scene 1: Gloucester’s castle
Scene 2: Before Gloucester’s castle.
Scene 3: A wood.
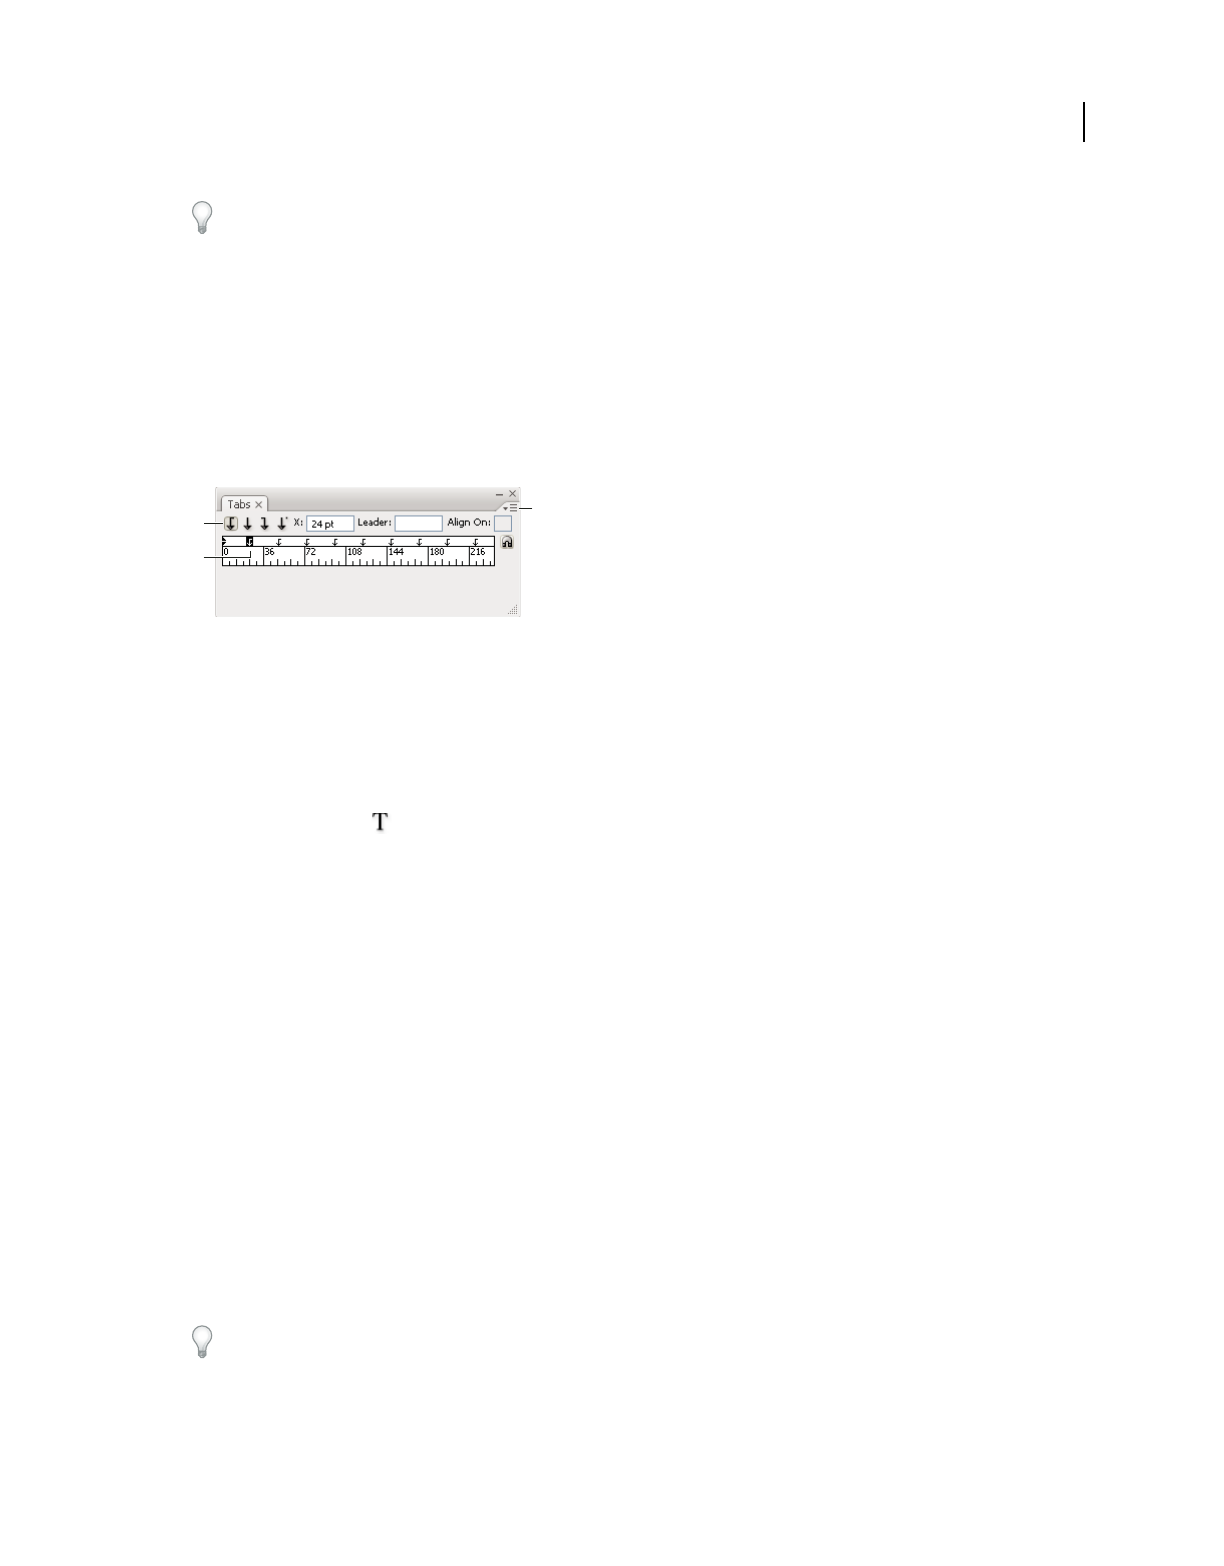
271
USING INDESIGN
Typography
Last updated 11/16/2011
To insert a tab character in a table, choose Type > Insert Special Character > Other > Tab.
Repeat tabs
The Repeat Tab command creates multiple tabs based on the distance between the tab and the left indent or the
previous tab stop.
1Click an insertion point in the paragraph.
2In the Tabs panel, select a tab stop on the ruler.
3Choose Repeat Tab from the panel menu.
Repeated tabs
A. Tab-alignment buttons B. Tab stop on the ruler C. Panel menu
Move, delete, and edit tab settings
Use the Tabs dialog box to move, delete, and edit tab settings.
Move a tab setting
1Using the Type tool , click an insertion point in the paragraph.
2In the Tabs dialog box, select a tab on the tab ruler.
3Do one of the following:
•Type a new location for X and press Enter or Return.
•Drag the tab to a new location.
Delete a tab setting
1Click an insertion point in the paragraph.
2Do one of the following:
•Drag the tab off the tab ruler.
•Select the tab, and choose Delete Tab from the panel menu.
•To return to the default tab stops, choose Clear All from the panel menu.
Change a tab from one alignment to another
1In the Tabs dialog box, select a tab on the tab ruler.
2Click a tab-alignment button.
You can also hold down Alt (Windows) or Option (Mac OS) while clicking the tab setting to cycle through the four
alignment options.
C
B
A
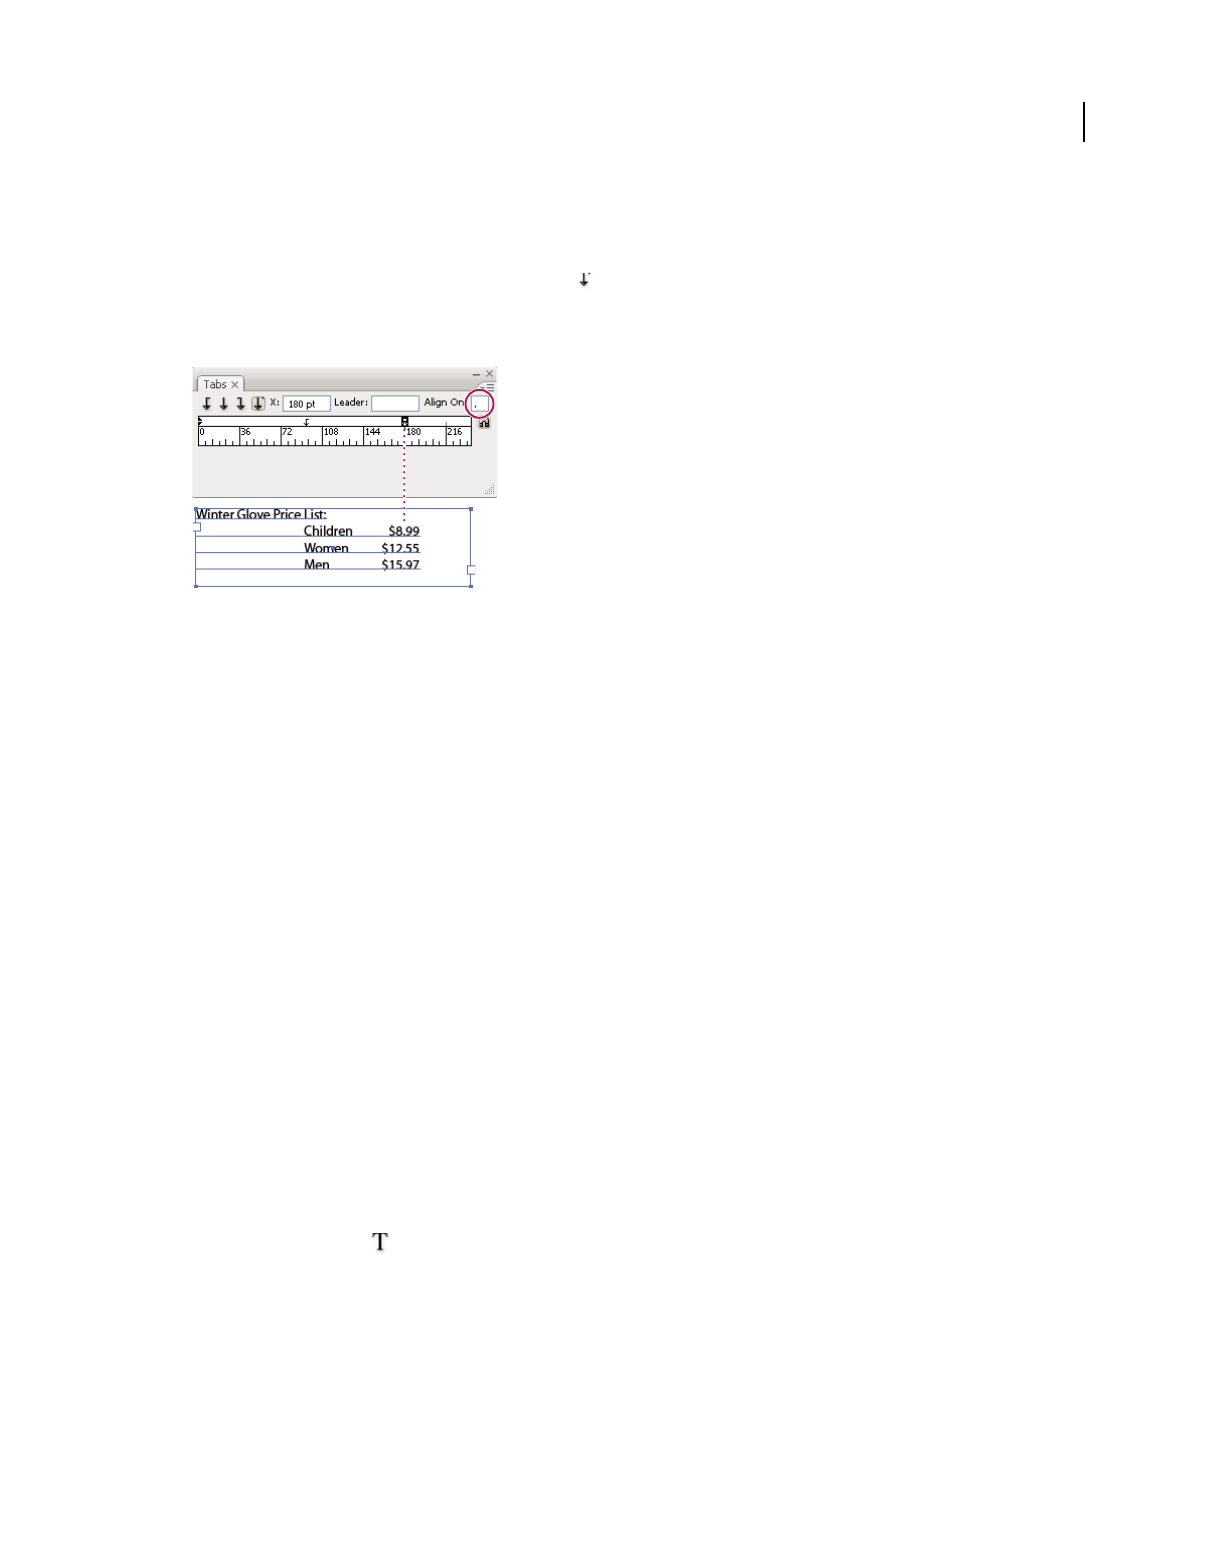
272
USING INDESIGN
Typography
Last updated 11/16/2011
Specify characters for decimal tabs
You use decimal tabs to align text with a character you specify, such as a period or a dollar sign.
1In the Tabs panel, create or select a decimal tab on the tab ruler.
2In the Align On box, type the character to which you want to align. You can type or paste any character. Make sure
that the paragraphs you’re aligning contain that character.
Text aligned using a decimal tab
Add tab leaders
A tab leader is a repeated pattern of characters, such as a series of dots or dashes, between a tab and the following text.
1In the Tabs panel, select a tab stop on the ruler.
2Type a pattern of as many as eight characters in the Leader box, and then press Enter or Return. The characters you
entered repeat across the width of the tab.
3To change the font or other formatting of the tab leader, select the tab character in the text frame, and use the
Character panel or Type menu to apply formatting.
Insert right indent tabs
In one step, you can add a right-aligned tab at the right indent, making it easier to prepare tabular text that spans an
entire column. Right indent tabs are slightly different from regular tabs. A right indent tab:
•Aligns all subsequent text to the right edge of the text frame. If the same paragraph includes any tabs after the right
indent tab, those tabs and their text are pushed to the next line.
•Is a special character located in the text, not in the Tabs dialog box. You add a right indent tab using a context menu,
not the Tabs dialog box. As a result, a right indent tab can’t be part of a paragraph style.
•Is different from the Right Indent value in the Paragraph panel. The Right Indent value keeps the entire right edge
of the paragraph away from the right edge of the text frame.
•Can be used with a tab leader. Right indent tabs use the tab leader of the first tab stop past the right margin, or, if
there isn't one, the last tab stop before the right margin.
1Using the Type tool , click on the line where you want to add the right indent tab.
2Choose Type > Insert Special Character > Other > Right Indent Tab.
Set indents
Indents move text inward from the right and left edges of the frame. In general, use first-line indents, not spaces or
tabs, to indent the first line of a paragraph.
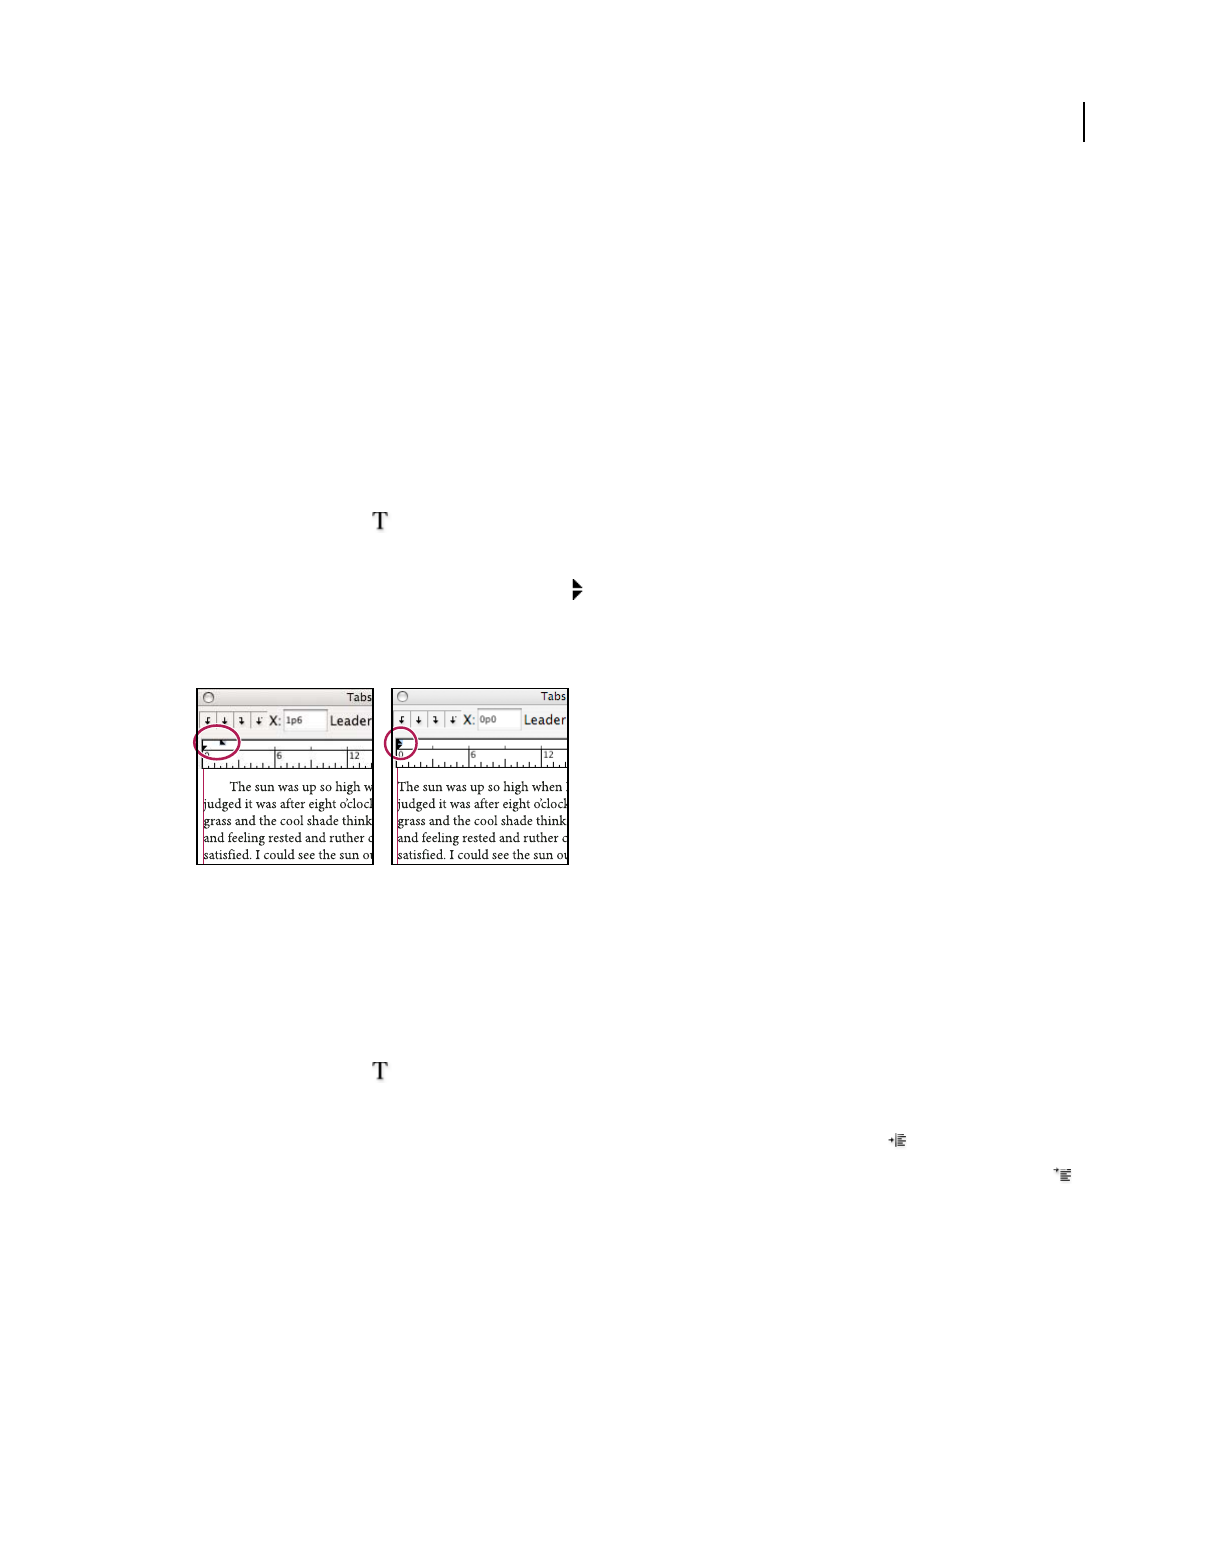
273
USING INDESIGN
Typography
Last updated 11/16/2011
A first-line indent is positioned relative to the left-margin indent. For example, if a paragraph’s left edge is indented
one pica, setting the first-line indent to one pica indents the first line of the paragraph two picas from the left edge of
the frame or inset.
You can set indents using the Tabs dialog box, the Paragraph panel, or the Control panel. You can also set indents
when you create bulleted or numbered lists.
Bob Bringhurst provides an article about various tab and indent effects at Tabs and Indents Gallery.
More Help topics
“Create bulleted or numbered lists” on page 275
Set an indent using the Tabs dialog box
1Using the Type tool , click in the paragraph you want to indent.
2Choose Type > Tabs to display the Tabs dialog box.
3Do one of the following to the indent markers in the Tabs dialog box:
•Drag the top marker to indent the first line of text. Drag the bottom marker to move both markers and indent the
entire paragraph.
First-line indent (left) and no indent (right)
•Select the top marker and type a value for X to indent the first line of text. Select the bottom marker and type a value
for X to move both markers and indent the entire paragraph.
For more information on using the Tabs dialog box, see “Tabs dialog box overview” on page 269.
Set indents using the Paragraph panel or the Control panel
1Using the Type tool , click in the paragraph you want to indent.
2Adjust the appropriate indent values in the Paragraph panel or Control panel. For example, do the following:
•To indent the entire paragraph one pica, type a value (such as 1p) in the Left Indent box .
•To indent only the first line of a paragraph one pica, type a value (such as 1p) in the First Line Left Indent box .
•To create a hanging indent of one pica, type a positive value (such as 1p) in the Left Indent box and type a negative
value (such as -1p) in the First Line Left Indent box. See “Set indents” on page 272.
Reset indents
1Click in the paragraph in which you want to reset indents to the zero mark.
2Choose Reset Indents from the Tabs dialog box menu.
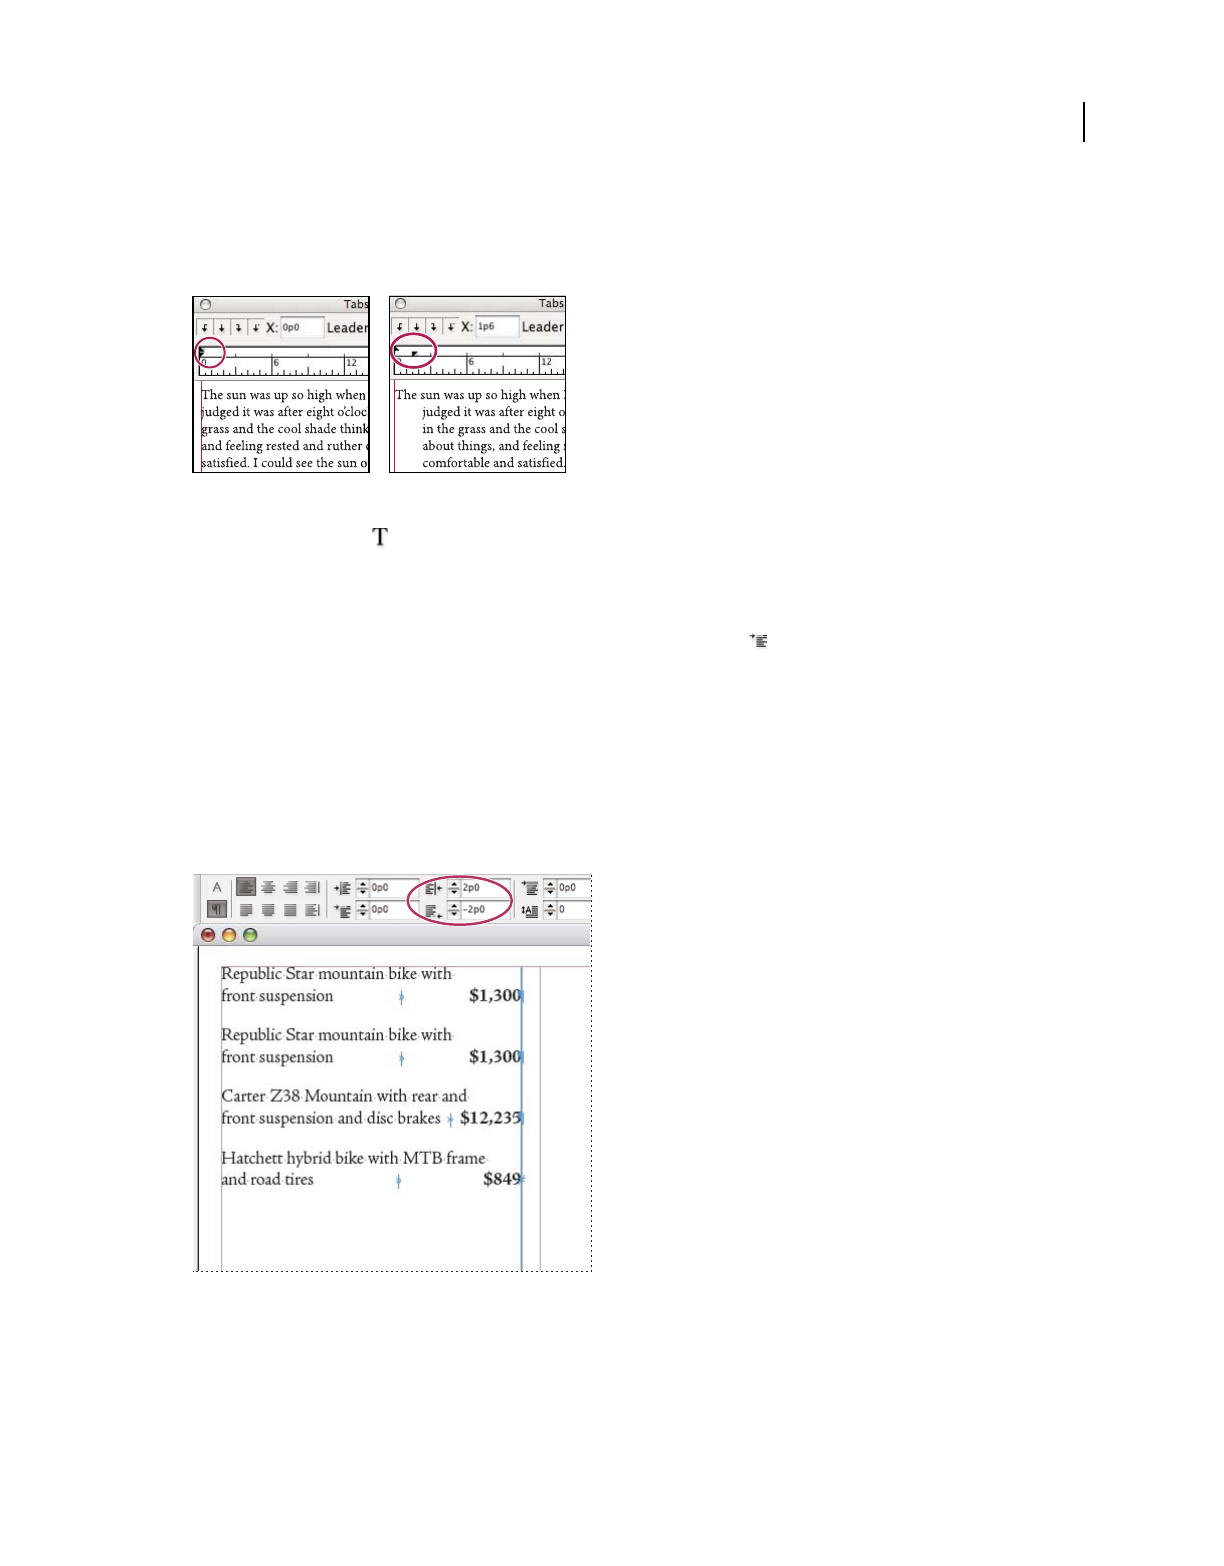
274
USING INDESIGN
Typography
Last updated 11/16/2011
Create a hanging indent
In a hanging indent, all the lines in a paragraph are indented except for the first line. Hanging indents are especially
useful when you want to add inline graphics at the beginning of the paragraph.
No indent (left) and hanging indent (right)
1Using the Type tool , click in the paragraph you want to indent.
2In the Tabs dialog box or the Control panel, specify a left indent value greater than zero.
3To specify a negative first-line left indent value, do one of the following:
•In the Control panel, type a negative value for the first-line left indent .
•In the Tabs dialog box, drag the top marker to the left, or select the marker and type a negative value for X.
In most cases, you’ll specify the negative equivalent of the value you entered in step 2; for instance, if you specified a
left indent of 2 picas, your first-line left indent will typically be –2 picas.
Right-indent the last line of a paragraph
You can use the Last Line Right Indent option to add a hanging indent on the right side of the last line in a paragraph.
This option is especially useful for right-aligning prices in a sales catalog.
Last line right indent
1Type your paragraphs. In the last line of each paragraph, place the insertion point before the text to be indented,
and choose Type
> Insert Special Character > Other > Right Indent Tab.
2Select the paragraphs.
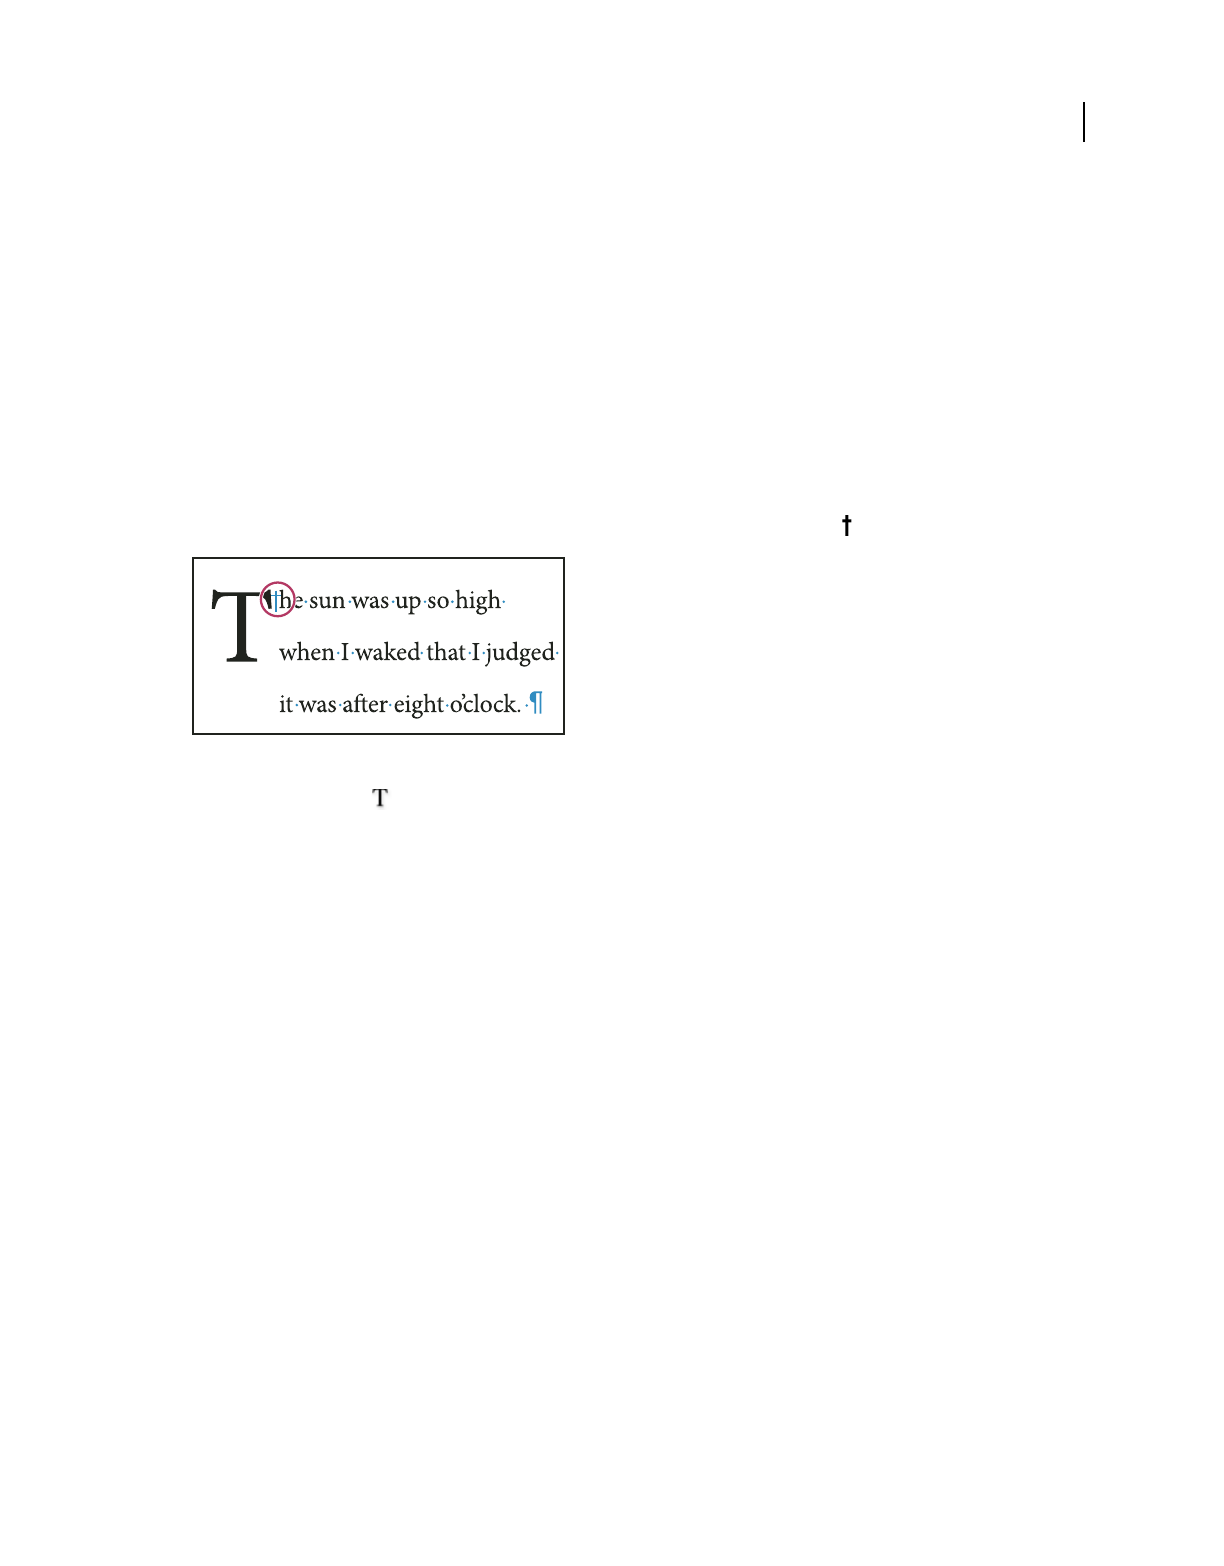
275
USING INDESIGN
Typography
Last updated 11/16/2011
3To create a right indent for paragraphs, specify a value (such as 2p) in the Right Indent field of the Paragraph panel
or Control panel.
4To offset the right indent value for the text that follows the tab, type a negative value (such as -2p) in the Last Line
Right Indent field of the Paragraph panel or Control panel.
Use Indent To Here
You can use the Indent To Here special character to indent lines in a paragraph independently of a paragraph’s left
indent value. The Indent To Here special character is different from the paragraph’s left indent in the following ways:
•Indent To Here is part of the text flow, as if it were a visible character. If text reflows, the indent moves with it.
•Indent To Here affects all lines after the line where you’ve added its special characters, so you can indent just some
of the lines in a paragraph.
•When you choose Type > Show Hidden Characters, the Indent To Here character is visible.
Indent To Here special character
1Using the Type tool , click the insertion point where you would like to indent.
2Choose Type > Insert Special Character > Other > Indent To Here.
Bullets and numbering
Create bulleted or numbered lists
In bulleted lists, each paragraph begins with a bullet character. In numbered lists, each paragraph begins with an
expression that includes a number or letter and a separator such as a period or parenthesis. The numbers in a
numbered list are updated automatically when you add or remove paragraphs in the list. You can change the type of
bullet or numbering style, the separator, the font attributes and character styles, and the type and amount of indent
spacing.
You cannot use the Type tool to select the bullets or numbers in a list. Instead, edit their formatting and indent spacing
using the Bullets And Numbering dialog box, the Paragraph panel, or the Bullets And Numbering section of the
Paragraph Styles dialog box (if the bullets or numbers are part a style).
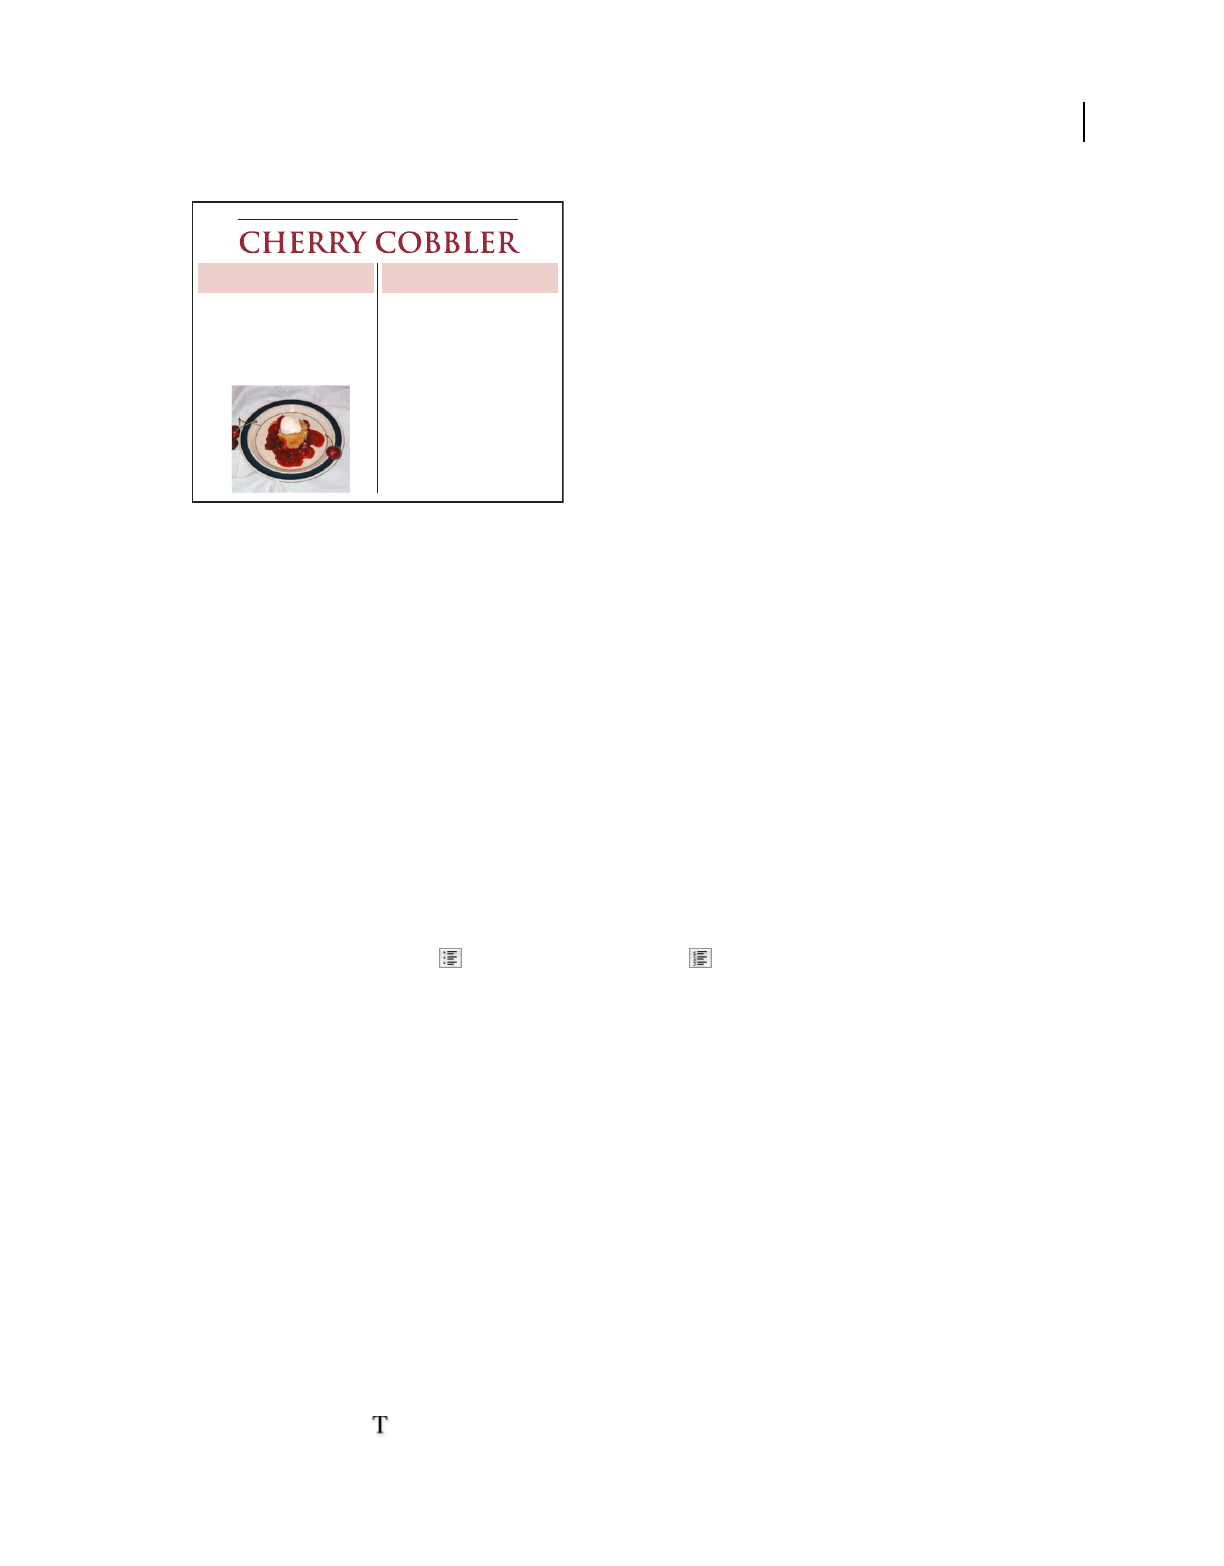
276
USING INDESIGN
Typography
Last updated 11/16/2011
Bulleted list and numbered list
A quick way to create a bulleted or numbered list is to type the list, select it, and then click the Bulleted List or
Numbered List button in the Control panel. These buttons let you turn the list on or off and switch between bullets
and numbers. You can also make bullets and numbering part of a paragraph style and construct lists by assigning styles
to paragraphs.
Note: Automatically generated bullet and number characters aren’t actually inserted in the text. Therefore, they cannot
be found during a text search or selected with the Type tool unless you convert them to text. In addition, bullets and
numbering don’t appear in the story editor window (except in the paragraph style column).
For a video tutorial on creating bulleted and numbered lists, see www.adobe.com/go/vid0077.
InDesign Docs provides a series of articles about using bullets and numbering to create outlines, multi-level lists, figure
captions, and numbered steps.
1Select the set of paragraphs that will become the list, or click to place the insertion point where you want the list to
begin.
2Do any of the following:
•Click the Bulleted List button or the Numbered List button in the Control panel (in Paragraph mode). Hold
down Alt (Windows) or Option (Mac OS) while clicking a button to display the Bullets And Numbering dialog box.
•Choose Bullets And Numbering from the Paragraph panel or Command panel. For List Type, choose either Bullets
or Numbers. Specify the settings you want, and then click
OK.
•Apply a paragraph style that includes bullets or numbering.
3To continue the list in the next paragraph, move the insertion point to the end of the list and press Enter or Return.
4To end the list (or list segment, if the list is to be continued later in the story), click the Bulleted List or Numbered
List button in the Control panel again, or choose Bullets And Numbering from the Paragraph panel menu.
More Help topics
“Create a paragraph style for running lists” on page 281
“Create multi-level lists” on page 282
Bulleted and Numbered Lists video
Format a bulleted or numbered list
1Using the Type tool , select the bulleted or numbered paragraphs you want to reformat.
Cooking Instructions
1. Mix the cherries, sugar,
corn starch and orange in
a large saucepan.
2. Cook on medium heat
until the mixure comes
to a full boil, then let it
stand for about 10 minutes
to thicken, stirring a couple
of times during the cooling.
3. Transfer to a shallow baking
dish.
Filling Ingredients
• 4 cups pitted red cherries
• 2/3 cup sugar
• 2 tablespoons corn starch
• 2 tablespoons orange juice
277
USING INDESIGN
Typography
Last updated 11/16/2011
2Do any of the following to open the Bullets And Numbering dialog box:
•Choose Bullets And Numbering from the Control panel menu (in Paragraph mode) or the Paragraph panel menu.
•Alt-click (Windows) or Option-click (Mac OS) either the Bulleted List button or the Numbered List
button .
3In the Bullets And Numbering dialog box, do any of the following:
•Change the bullet character.
•Change the numbered list options.
•Choose a style for the numbers or bullets from the Character Style list.
4To change the position of the bullet or number, specify any of the following:
Alignment Left-aligns, centers, or right-aligns the bullets or numbers within the horizontal space allotted for numbers.
(If this space is narrow, the difference between the three options is negligible.)
Left Indent Specifies how far the lines after the first line are indented.
First Line Indent Controls where the bullet or number is positioned.
Increase the First Line Indent value if you want the punctuation in long lists to be aligned. For example, if you want
“9.” and “10.” to be aligned on the period, change the Alignment to Right and gradually increase the first line indent
until the numbers align (make sure Preview is turned on).
To create the hanging indent effect, specify a positive Left Indent value (such as 2p0), and then specify an equal
negative value (such as -2p0) for First Line Indent.
Position settings
A. Hanging indent B. Left-aligned list
Note: The Left Indent, First Line Indent, and Tab Position settings in the Bullets And Numbering dialog box are
paragraph attributes. For that reason, changing these settings in the Paragraph panel also changes bulleted and
numbered list formats.
Tab Position Activates the tab position to create space between the bullet or number and the start of the list item.
By default, bullets and numbers inherit some of their text formatting from the first character in the paragraph to which
they’re attached. If the first character in one paragraph is different from the first characters in other paragraphs, the
numbering or bullet character may appear inconsistent with the other list items. If this is not the formatting you desire,
create a character style for numbers or bullets and apply it to your list by using the Bullets And Numbering dialog box.
Cooking Instructions
1. Mix the cherries, sugar,
corn starch and orange in
a large saucepan.
2. Cook on medium heat
until the mixure comes
to a full boil, then let it
stand for about 10 minutes
to thicken, stirring a couple
of times during the cooling.
Cooking Instructions
1. Mix the cherries, sugar,
corn starch and orange in
a large saucepan.
2. Cook on medium heat
until the mixure comes
to a full boil, then let it
stand for about 10 minutes
to thicken, stirring a couple
of times during the cooling.
B
A
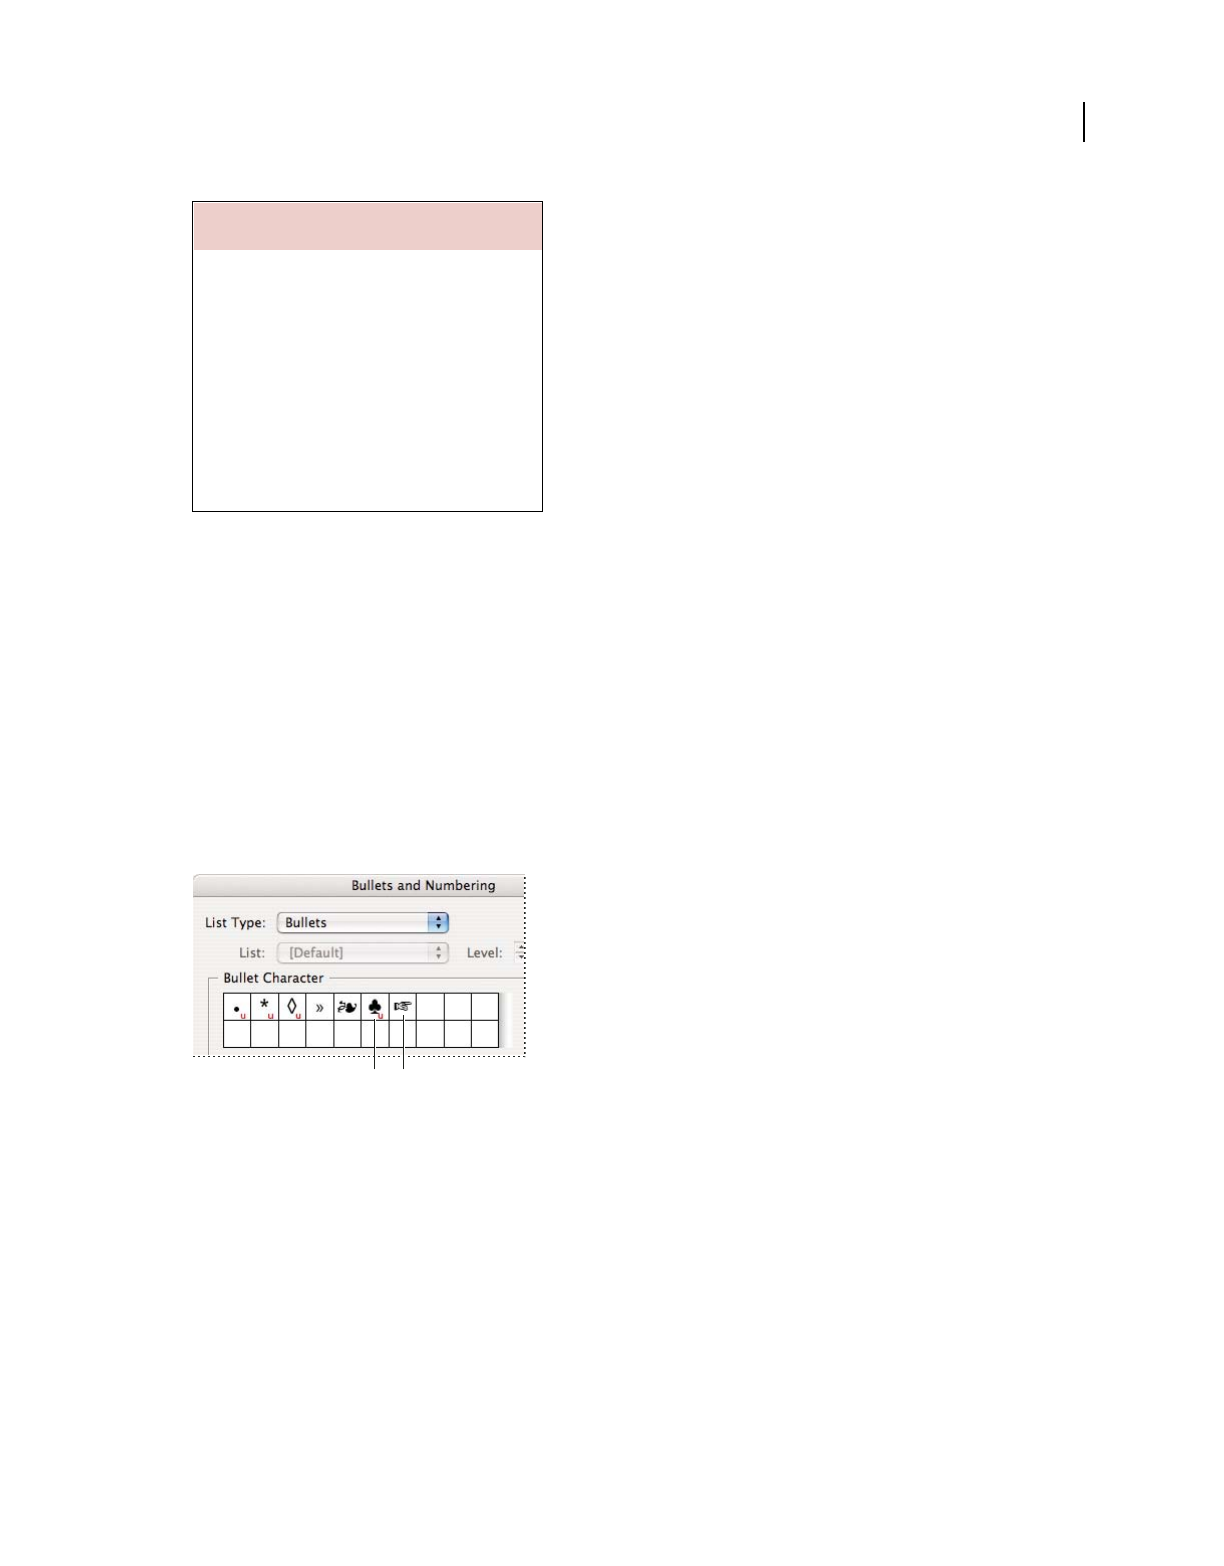
278
USING INDESIGN
Typography
Last updated 11/16/2011
Italicized first word of step 3 causes numbering to be italicized as well, unless you create character style for numbers and apply it to list.
Change bullet characters
If you don’t want to use one of the existing bullet characters, you can add other bullet characters to the Bullet Character
grid. A bullet character that is available in one font may not be available in another font. You can choose whether the
font is remembered with any bullet character you add.
If you want to use a bullet found in a specific font (such as the pointing hand from Dingbats), be sure to set the bullet
to remember that font. If you use a basic bullet character, it’s probably best not to remember the font, because most
fonts have their own version of that bullet character. Depending on whether you select the Remember Font With Bullet
option, a bullet you add can reference either a Unicode value and a specific font family and style, or just a Unicode
value.
Note: Bullets that reference only the Unicode value (without a remembered font) appear with a red “u” indicator.
Bullets And Numbering dialog box
A. Bullet without remembered font B. Bullet with remembered font
Change the bullet character
1On the Control panel menu or Paragraph panel menu, select Bullets And Numbering.
2In the Bullets And Numbering dialog box, select Bullets from the List Type menu.
3Select a different bullet character, and then click OK.
Add a bullet character
1In the Bullets And Numbering dialog box, select Bullets from the List Type menu, then click Add.
2Select the glyph that you want to use as the bullet character. (Different font families and font styles contain different
glyphs.)
Cooking Instructions
1. Mix the cherries, sugar, corn starch
and orange in a large saucepan.
2. Cook on medium heat until
the mixure comes to a full boil,
then let it stand for about 10
minutes to thicken, stirring a
couple of times during the cooling.
3. Transfer to a shallow baking dish.
AB

279
USING INDESIGN
Typography
Last updated 11/16/2011
3If you want the new bullet to remember the currently chosen font and style, select Remember Font With Bullet.
4Click Add.
Note: The list of bullet characters is stored in the document, like paragraph and character styles. When you paste or load
paragraph styles from another document, any bullet character used in those styles appears in the Bullets And Numbering
dialog box, along with the other bullets defined for the current document.
Remove a bullet character
1In the Bullets And Numbering dialog box, select Bullets from the List Type menu.
2Select the bullet character you want to remove, and click Delete. (The first preset bullet character cannot be deleted.)
Change numbered list options
In a numbered list, the numbers are updated automatically when you add or remove paragraphs in the list. Paragraphs
that are part of the same list are numbered sequentially. These paragraphs do not have to be consecutive to one another
as long as you define a list for the paragraphs.
You can also create a multi-level list, in which list items are numbered in outline form and are indented by different
degrees.
1Open the Bullets And Numbering dialog box.
2Under Numbering Style, select the type of numbering you want to use from the Format menu.
3In the Number box, use the default expression—period (.) and tab space (^t)—or construct a number expression
of your own. To enter a number expression, delete the period after the number metacharacter (^#) and do one of
the following:
•Type a character (such as a closing parenthesis) or more than one character in place of the period.
•Choose an item (such as Em Dash or Ellipses) from the Insert Special Character menu.
•Type a word or character before the number metacharacter. For example, to number questions in a list, you can
type the word Question.
4Choose a character style for the expression. (The style you choose applies to the entire number expression, not just
to the number.)
5For Mode, choose one of the following options:
Continue From Previous Number Numbers lists sequentially.
Start At Starts numbering at a number or other value that you enter in the text box. Enter a number, not a letter, even
if your list uses letters or Roman numerals for numbering.
6Specify any other options, and then click OK.
Defining lists
A defined list can be interrupted by other paragraphs and lists, and can span different stories and different documents
in a book. For example, use defined lists to create a multi-level outline, or to create a running list of numbered table
names throughout your document. You can also define lists for separately numbered or bulleted items that are mixed
together. For example, in a list of questions and answers, define one list for numbering the questions and another for
numbering the answers.
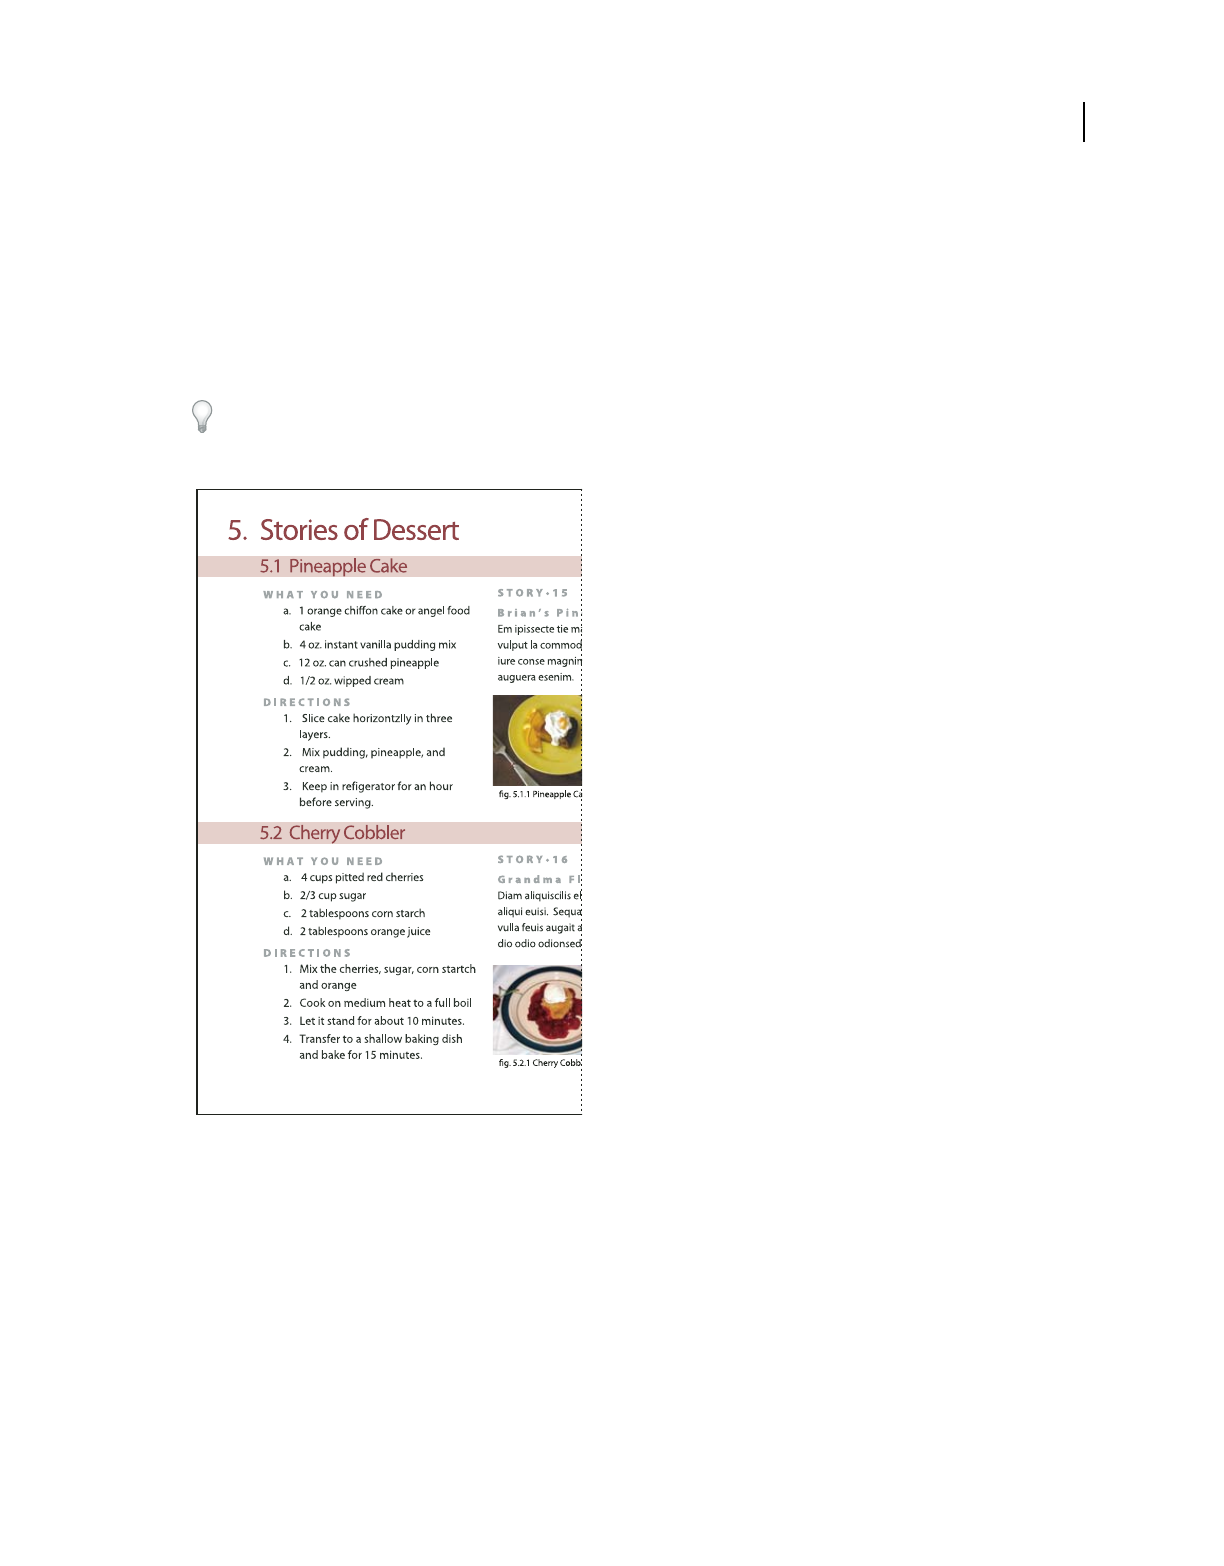
280
USING INDESIGN
Typography
Last updated 11/16/2011
Defined lists are often used to track paragraphs for numbering purposes. When you create a paragraph style for
numbering, you can assign the style to a defined list, and paragraphs are numbered in that style according to where
they appear in the defined list. The first paragraph to appear is given number 1 (“Table 1”), for example, and the next
paragraph is given number 2 (“Table 2”), even if it appears several pages later. Because both paragraphs belong to the
same defined list, they can be numbered consecutively no matter how far apart they are in the document or book.
Define a new list for each type of item you want to number—step-by-step instructions, tables, and figures, for example.
By defining multiple lists, you can interrupt one list with another and maintain number sequences in each list.
If list items appear in unthreaded frames on the same page, items are numbered in the order in which the text frames
are added to the page. To reorder the items, cut and paste the text frames one by one in the order in which you want
them to be listed.
Defined lists let you interrupt one list with another.
For a video tutorial on creating bulleted and numbered lists, see www.adobe.com/go/vid0077.
Define a list
1Choose Type > Bulleted And Numbered Lists > Define Lists.
2Click New in the Define Lists dialog box.
3Enter a name for the list, choose whether you want to continue numbering across stories, and continue numbering
from previous documents in your book.
4Click OK twice.

281
USING INDESIGN
Typography
Last updated 11/16/2011
After you define a list, you can use it in a paragraph style, such as a style for tables, figures, or ordered lists, as well as
apply it by way of the Control panel and Paragraph panel.
Note: Some lists are defined automatically. For example, when you import a numbered list from a Microsoft Word
document, InDesign defines a list automatically for your document.
Edit a defined list
1Choose Type > Bulleted And Numbered Lists > Define Lists.
2Select a list and click Edit.
3Enter a new name for the list or change your selection of Continue Numbers options.
Paragraph styles that are assigned to the list are reassigned to the list under its new name.
Delete a defined list
1Choose Type > Bulleted And Numbered Lists > Define Lists.
2Select a list.
3Click Delete, and then select a different list or the [Default] list to replace your list with.
Create a paragraph style for running lists
To create a running list—a list that is interrupted by other paragraphs or that spans multiple stories or documents—
create a paragraph style and apply the style to paragraphs that you want to be part of the list. For example, to create a
running list of the tables in your document, create a paragraph style called Tables, make a defined list part of the style,
and then apply the Tables paragraph style to all paragraphs you want in your Table list.
InDesign Docs provides a series of articles about using bullets and numbering to create figure captions and numbered
steps.
1Choose New Paragraph Style from the Paragraph Styles panel menu.
2Enter a style name.
3On the left side of the New Paragraph Style dialog box, click Bullets And Numbering.
4For List Type, select Bullets or Numbering.
5If you are creating a style for numbered lists, choose a defined list from the List menu, or choose New List and define
the list.
6Specify the bullet or numbering characteristics.
7Use the Bullet or Number Position section of the New Paragraph Style dialog box to change the indent spacing. For
example, to create a hanging indent, type 2p for Left Indent and -2p for First Line Indent.
8Specify other paragraph style attributes for the style, and then click OK.
More Help topics
“Add paragraph and character styles” on page 199
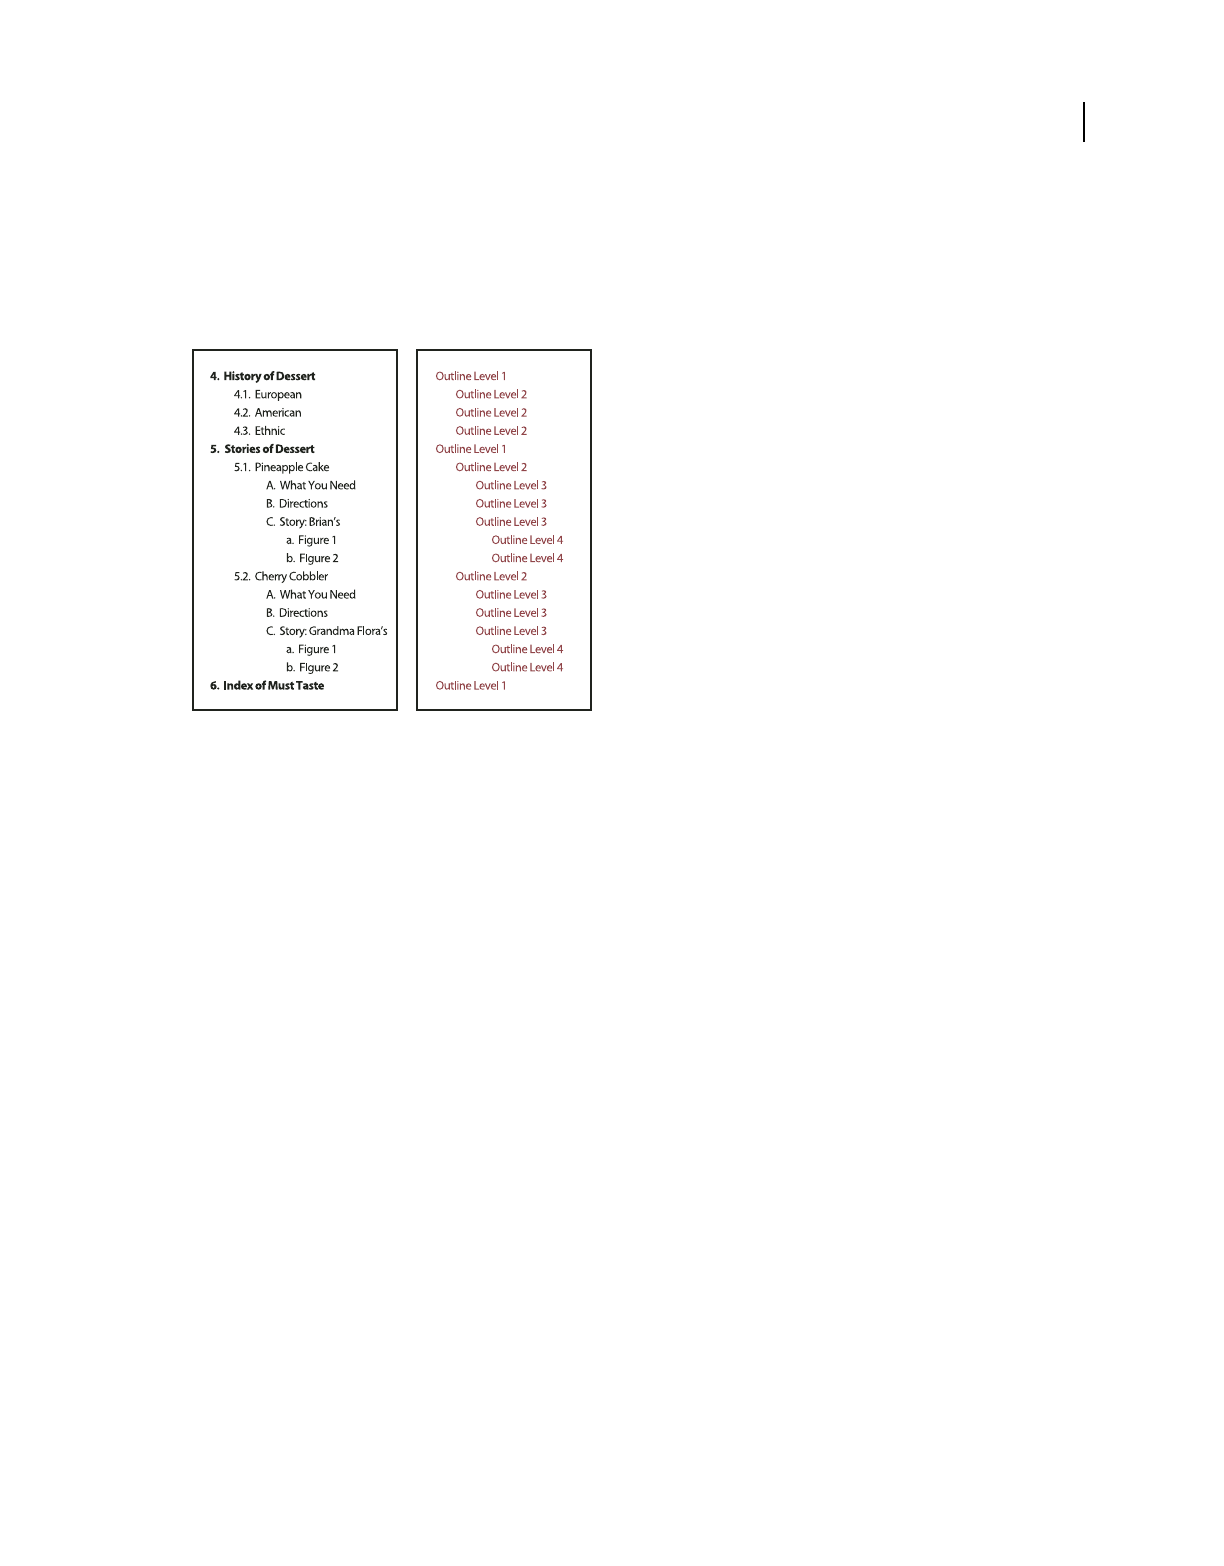
282
USING INDESIGN
Typography
Last updated 11/16/2011
Create multi-level lists
A multi-level list is a list that describes hierarchical relationships between the list paragraphs. These lists are also called
outline lists because they resemble outlines. The list’s numbering scheme (as well as indentations) show rank as well as
how items are subordinate to one another. You can tell where each paragraph fits in the list with respect to the
paragraphs before and after it. You can include up to nine levels in a multi-level list.
Multi-level list with numbers and letters marking hierarchy levels
To create a multi-level list, define the list and then create a paragraph style for each level you want. For example, a list
with four levels requires four paragraph styles (each one assigned the same defined list). As you create each style, you
define its numbering format and paragraph formatting.
Gabriel Powell provides a video tutorial about creating outlines and multi-level lists at Creating an automatic
numbered list.
Bob Bringhurst provides a series of articles about using bullets and numbering to create outlines, multi-level lists,
figure captions, and numbered steps.
1Choose New Paragraph Style from the Paragraph Styles panel menu.
2Enter a style name.
3If you already created a style for your multi-level list, choose the style you will assign to levels above this one from
the Based On menu; otherwise, choose No Paragraph Style or Basic Paragraph.
4On the left side of the New Paragraph Style dialog box, click Bullets And Numbering.
5Choose Numbers from the List Type menu.
6Choose a list you defined from the List menu. If you haven’t yet defined your list, you can choose New List from
the menu and define it now.
7In the Level box, enter a number that describes which level of the multi-level list you’re creating a style for.
8From the Format menu, choose the type of numbering you want to use.

283
USING INDESIGN
Typography
Last updated 11/16/2011
9In the Number box, enter metacharacters or select metacharacters from the menus to describe the number
formatting you want for list items at this level.
•To include numbering prefixes from higher levels, enter text or click at the start of the Number box and choose
Insert Number Placeholder and then select a Level option (for example, Level 1), or enter ^ and then the list level
(for example, enter ^1). In a list with first levels numbered 1, 2, 3, and so on, and second levels numbered a, b, c,
and so on, including the first-level prefix in the second level renders second-level numbers as 1a, 1b, 1c; 2a, 2b, 2c;
3a, 3b, 3c.
•To create a number expression, enter punctuation, enter metacharacters, or select options on the Insert Special
Character list.
10 Select Restart Numbers At This Level After to renumber beginning at 1 when a paragraph at this level appears after
a paragraph at a higher level; deselect this option to number paragraphs at this level consecutively throughout the
list without regard for where the paragraphs appear in the list hierarchy.
To restart numbers after a specific level or range of levels, type the level number or range (such as 2-4) in the Restart
Numbers At This Level After field.
11 In the Bullet or Number Position area, choose Indent or Tab Position options to indent list items at this level farther
than list items at higher levels. Indenting helps subordinate items in lists stand out.
12 Click OK.
In some cases, such as with numbered steps, you may want to restart numbering within the same story. To avoid
restarting the numbered list manually, create a separate style that’s identical to the Level 1 style with one exception.
For Mode, chose Start At, and then specify 1. Name this style something like “Level 1 Restart.”
Create running captions for figures and tables
Running captions number figures, tables, and other items consecutively in a document. For example, the first figure
caption starts with the words “Figure 1,” the second with “Figure 2,” and so on. To make sure that figures, tables, or
similar items are numbered consecutively, define a list for the item, and then create a paragraph style that includes the
list definition. You can also add descriptive words such as “Figure” or “Table” to the numbering scheme of the
paragraph style.
Bob Bringhurst provides an article about creating figure captions at Numbered Lists Part III - Figure Captions.
List items are numbered in the order in which they are added to the page. To reorder the items, cut and paste the items
one by one in the order in which you want them to be listed.
1Create a new paragraph style and, in the Bullets And Numbering section of the Paragraph Style Options dialog box,
choose Numbers from the List Type menu.
2Choose a defined list from the List menu (or choose New List to define a list).
3Under Numbering Style, select the type of numbering you want to use from the Format menu.
For example, select the A, B, C, D... option to create a list for “Figure A,” “Figure B,” and so on.
4In the Number box, enter a descriptive word and any spacing or punctuation (as needed) along with the numbering
metacharacters.
For example, to create a “Figure A” effect, enter the word “Figure” and a space before the numbering metacharacters
(such as Figure ^#.^t). This adds the word “Figure” followed by a sequential number (^#), a period, and a tab (^t).
Note: To include chapter numbers in running captions, choose Insert Number Placeholder > Chapter Number from the
Number list, or enter ^H where you want the chapter number to appear in the number scheme.
5Finish creating the style and click OK.

284
USING INDESIGN
Typography
Last updated 11/16/2011
After you create the style, apply it to text figure captions or table titles.
You can use the Table Of Contents feature to generate a list of tables or figures.
More Help topics
“Creating a table of contents” on page 319
“Captions” on page 238
Restart or continue numbering for a list
InDesign offers commands for restarting a list and continuing a list:
Restarting a numbered list Place the insertion point in the paragraph and choose Restart Numbering from the context
menu or choose Type > Bulleted And Numbered Lists > Restart Numbering. In normal lists, this command assigns the
number 1 (or letter A) to a paragraph and makes it the first paragraph in a list. In multi-level lists, this command
assigns the first lower-level number to a nested paragraph.
Continuing a numbered list Choose Continue Numbering from the context menu or choose Type > Bulleted And
Numbered Lists
> Continue Numbering. This command resumes numbering a list that was interrupted by
commentary, graphics, or nested list items. InDesign also offers commands for numbering lists that begin in one story
or book and cross into the next story or book.
Number a list from the previous or current story
Whether a list resumes numbering from the previous story or starts numbering anew in the current story depends on
how the list is defined.
1Choose Type > Bulleted And Numbered Lists > Define Lists.
2Select a list and click the Edit button.
Don’t choose the Default list because it can’t run across stories.
3Select Continue Numbers Across Stories to resume numbering the list from the previous story, or deselect this
option to start the list in the current story at 1 (or A).
4Click OK twice.
Number a list from the previous or current document in a book
Whether a list resumes numbering from the previous document in a book or starts numbering anew in the current
document depends on how the list is defined.
1Choose Type > Bulleted And Numbered Lists > Define Lists.
2Select a list and click the Edit button.
3Select Continue Numbers From Previous Document In Book to resume numbering the list from the previous
document (you must choose Continue Numbers Across Stories to activate this option), or deselect this option to
start the list in the current document at 1 (or A).
4Click OK twice.
To make sure that numbering is updated properly in a book, synchronize the documents in the book and choose
Update Numbering > Update All Numbers from the books panel menu.

285
USING INDESIGN
Typography
Last updated 11/16/2011
Convert list bullets or numbers to text
1Select the paragraphs containing the bulleted or numbered list.
2Do one of the following:
•From the Paragraph panel menu, choose Convert Numbering To Text or Convert Bullets To Text.
•Right-click (Windows) or Command-click (Mac OS) the selection, and then choose Convert Numbering To Text
or Convert Bullets To Text.
Note: To remove the list numbers or bullets, click the Numbered List button or Bulleted List button to unapply list
formatting to the selected text.
More Help topics
“Convert style bullets and numbering to text” on page 206
Text composition
Compose text
The appearance of text on your page depends on a complex interaction of processes called composition. Using the word
spacing, letterspacing, glyph scaling, and hyphenation options you’ve selected, InDesign composes your type in a way
that best supports the specified parameters.
InDesign offers two composition methods: Adobe Paragraph Composer (the default) and Adobe Single-line
Composer (both are available from the Control panel menu). You can select which composer to use from the
Paragraph panel menu, the Justification dialog box, or the Control panel menu.
For a video tutorial on working with text, see www.adobe.com/go/vid0075.
InDesign Magazine provides an article about fixing composition problems at Mind the Gaps.
More Help topics
Working with Text video
“Change Justification settings” on page 288
“Justify text next to wrap objects” on page 232
Composition methods
InDesign offers two composition methods: Adobe Paragraph Composer (the default) and Adobe Single-line
Composer. Both composition methods evaluate possible breaks, and choose those that best support the hyphenation
and justification options you’ve specified for a given paragraph.
The Adobe Paragraph Composer
Considers a network of breakpoints for an entire paragraph, and thus can optimize earlier lines in the paragraph in
order to eliminate especially unattractive breaks later on. Paragraph composition results in more even spacing with
fewer hyphens.
The Paragraph Composer approaches composition by identifying possible breakpoints, evaluating them, and
assigning a weighted penalty to them based on such principles as evenness of letterspacing, word spacing, and
hyphenation.

286
USING INDESIGN
Typography
Last updated 11/16/2011
You can use the Hyphenation dialog box to determine the relationship between better spacing and fewer hyphens. (See
“Hyphenate text” on page 286.)
The Adobe Single-line Composer
Offers a traditional approach to composing text one line at a time. This option is useful if you want to restrict
composition changes from late-stage edits.
Choose a composition method for a paragraph
❖Do any of the following:
•From the Paragraph panel menu, choose Adobe Paragraph Composer (the default) or Adobe Single-line
Composer.
•From the Paragraph panel menu or the Control panel menu, choose Justification, and then choose an option
from the Composer menu.
Note: Additional composition engine plug-ins from other companies may be available, along with interfaces that let you
customize an engine’s parameters.
Set composition preferences
1Choose Edit > Preferences > Composition (Windows) or InDesign > Preferences > Composition (Mac OS).
2To use on-screen highlighting to identify compositional problems, select Keep Violations And H&J Violations
(hyphenation and justification).
3To justify text that wraps around an object, select Justify Text Next To An Object.
4Click OK.
Hyphenate text
The settings you choose for hyphenation and justification affect the horizontal spacing of lines and the aesthetic appeal
of type on your pages. Hyphenation options determine whether words can be hyphenated and, if they can, which
breaks are allowable.
Justification is controlled by the alignment option you choose, the word spacing and letterspacing you specify, and
whether or not you have used glyph scaling. You can also justify single words in narrow columns of fully justified text.
Eda Warren provides an article about avoiding composition problems at Mind the Gaps.
More Help topics
“Adjust word and letterspacing in justified text” on page 288
“Hyphenation and spelling dictionaries” on page 185
Adjust hyphenation manually
You can hyphenate words manually or automatically, or you can use a combination of the two methods. The safest
way to hyphenate manually is to insert a discretionary hyphen, which is not visible unless the word needs to be broken
at the end of a line. Placing a discretionary hyphen at the beginning of a word prevents it from being broken.
1Using the Type tool , click where you want to insert the hyphen.
2Do one of the following:
•Choose Type > Insert Special Character > Hyphens And Dashes > Discretionary Hyphen.

287
USING INDESIGN
Typography
Last updated 11/16/2011
•Press Ctrl+Shift+- (Windows) or Command+Shift+- (Mac OS) to insert a discretionary hyphen.
Note: Entering a discretionary hyphen in a word does not guarantee that the word will be hyphenated. Whether or not
the word breaks depends on other hyphenation and composition settings. However, entering a discretionary hyphen in a
word does guarantee that the word can be broken only where the discretionary hyphen appears.
Adjust hyphenation automatically
Hyphenation is based on word lists that can be stored either in a separate user dictionary file on your computer, or in
the document itself. To ensure consistent hyphenation, you may want to specify which word list to refer to, especially
if you will be taking your document to a service provider or if you work in a workgroup.
❖To turn automatic hyphenation on or off for a paragraph, in the Paragraph panel or Control panel, select or deselect
the Hyphenation option. (You can also include this option in a paragraph style.)
When you set automatic hyphenation options, you can determine the relationship between better spacing and fewer
hyphens. You can also prevent capitalized words and the last word in a paragraph from being hyphenated.
Set automatic hyphenation options for a paragraph
1Click in a paragraph or select the range of paragraphs you want to affect.
2Choose Hyphenation from the Paragraph panel menu.
3Select the Hyphenate option.
4Make changes to the following settings as needed, and then click OK:
Words With At Least _ Letters Specify the minimum number of characters for hyphenated words.
After First _ Letters / Before Last _ Letters Specify the minimum number of characters at the beginning or end of a
word that can be broken by a hyphen. For example, by specifying 3 for these values, aromatic would be hyphenated as
aro- matic instead of ar- omatic or aromat- ic.
Hyphen Limit _ Hyphens Specify the maximum number of hyphens that can appear on consecutive lines. Zero means
unlimited hyphens.
Hyphenation Zone Specify the amount of white space allowed at the end of a line of unjustified text before
hyphenation begins. This option applies only when you’re using the Single-line Composer with nonjustified text.
Better Spacing / Fewer Hyphens To alter the balance between these settings, adjust the slider at the bottom of the
dialog box.
Hyphenate Capitalized Words To prevent capitalized words from being hyphenated, deselect this option.
Hyphenate Last Word To prevent last words in paragraphs from being hyphenated, deselect this option.
Hyphenate Across Column To prevent words from being hyphenated across a column, frame, or page, deselect this
option.
Prevent unwanted word breaks
By using nonbreaking hyphens, you can prevent certain words from breaking at all—for example, proper names or
words which, when broken, become unattractive fragments. By using nonbreaking spaces, you can also keep multiple
words from breaking—for example, clusters of initials and a last name (P.
T. Barnum).
Prevent text from breaking
1Select the text you want to keep on the same line.
2Choose No Break from the Character panel menu or the Control panel menu.

288
USING INDESIGN
Typography
Last updated 11/16/2011
Another way to prevent a word from breaking is to place a discretionary hyphen at the beginning of the word. Press
Ctrl+Shift+- (Windows) or Command+Shift+- (Mac OS) to insert a discretionary hyphen.
Create a nonbreaking hyphen
1Using the Type tool , click where you want to insert the hyphen.
2Choose Type > Insert Special Character > Hyphens And Dashes > Nonbreaking Hyphen.
Create a nonbreaking space
1Using the Type tool , click where you want to insert the space.
2Choose Type > Insert White Space> Nonbreaking Space (or any other white space character).
The Nonbreaking Space varies in width depending on point size, the justification setting, and word space settings,
whereas the Nonbreaking Space (Fixed Width) character maintains the same width regardless of context.
Change Justification settings
Use the Justification panel to precisely control how word spacing, letterspacing, and glyph scaling. Adjusting spacing
is especially useful with justified type, although you can also adjust spacing for unjustified type.
Adjust word and letterspacing in justified text
1Insert the cursor in the paragraph you want to change, or select a type object or frame to change all of its paragraphs.
2Choose Justification from the Paragraph panel menu.
3Enter values for Word Spacing, Letter Spacing, and Glyph Spacing. The Minimum and Maximum values define a
range of acceptable spacing for justified paragraphs only. The Desired value defines the desired spacing for both
justified and unjustified paragraphs:
Word Spacing The space between words that results from pressing the spacebar. Word Spacing values can range from
0% to 1000%; at 100%, no additional space is added between words.
Letter Spacing The distance between letters, including kerning or tracking values. Letter Spacing values can range
from -100% to 500%: at 0%, no space is added between letters; at 100%, an entire space width is added between letters.
Glyph Scaling
The width of characters (a glyph is any font character). Glyph Scaling values can range from 50% to 200%.
Spacing options are always applied to an entire paragraph. To adjust the spacing in a few characters, but not an entire
paragraph, use the Tracking option.
4Set the Single Word Justification option to specify how you want to justify single-word paragraphs.
In narrow columns, a single word can occasionally appear by itself on a line. If the paragraph is set to full justification,
a single word on a line may appear to be too stretched out. Instead of leaving such words fully justified, you can center
them or align them to the left or right margins.
Set glyph scaling in justified text
1Click an insertion point in a paragraph or select the paragraphs you want to affect.
2Choose Justification from the Paragraph panel menu.
3Type values for Glyph Scaling Minimum, Desired, and Maximum. Then click OK.
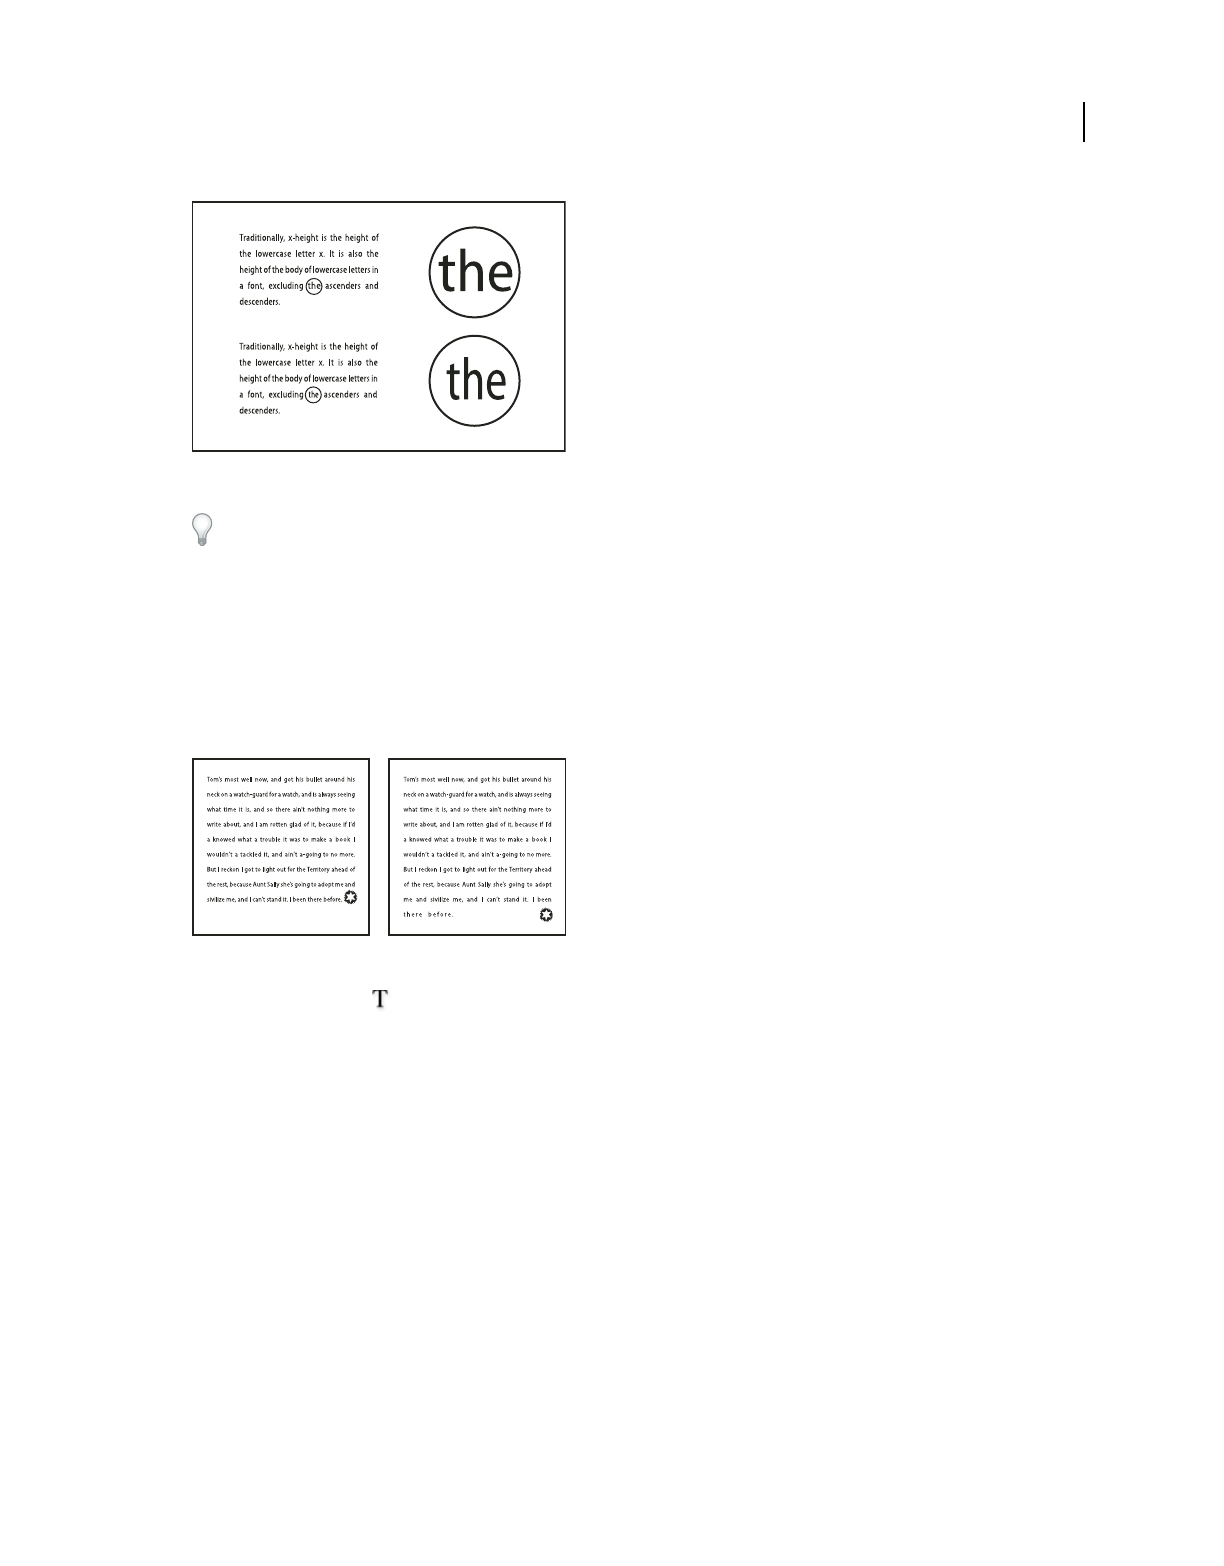
289
USING INDESIGN
Typography
Last updated 11/16/2011
Before (top) and after (bottom) glyph scaling in justified text
Glyph scaling can help in achieving even justification; however, values more than 3% from the 100% default value
may result in distorted letter shapes. Unless you’re striving for a special effect, it’s best to keep glyph scaling to subtle
values, such as 97–100–103.
Use a flush space with justified text
Using a flush space character adds a variable amount of space to the last line of a fully justified paragraph—between
the last word and an end-of-story character from a decorative font. Used with nonjustified text, the flush space appears
as a normal word space. In justified text, it expands to absorb all available extra space on the last line. Using a flush
space can make a dramatic difference in the way the entire paragraph is formatted by the Adobe Paragraph Composer.
Before and after adding a flush space character
1Using the Type tool , click directly in front of the end-of-story character.
2Choose Type > Insert White Space > Flush Space.
Note: The effect of a flush space isn’t apparent until you apply the Justify All Lines option to the paragraph.
Highlight lines that are too loose or tight
Because composing a line of type involves factors in addition to word spacing and letterspacing (hyphenation
preferences, for example), InDesign cannot always honor your settings for word spacing and letterspacing. However,
compositional problems in lines of text can be highlighted in yellow; the darkest of three shades indicates the most
serious problems.
1Choose Edit > Preferences > Composition (Windows) or InDesign > Preferences > Composition (Mac OS).
2Select H&J Violations and click OK.

290
Last updated 11/16/2011
Chapter 9: Tables
Creating tables
A table consists of rows and columns of cells. A cell is like a text frame in which you can add text, anchored frames, or
other tables. Create tables in Adobe InDesign CS5 or export them from other applications.
Create tables
A table consists of rows and columns of cells. A cell is like a text frame in which you can add text, inline graphics, or
other tables. You can create tables from scratch or by converting them from existing text. You can also embed a table
within a table.
When you create a table, the new table fills the width of the container text frame. A table is inserted on the same line
when the insertion point is at the beginning of the line, or on the next line, when the insertion point is in the middle
of a line.
Tables flow with surrounding text just as inline graphics do. For example, a table moves through threaded frames when
the text above it changes in point size or when text is added or deleted. However, a table cannot appear on a text-on-
path frame.
For a video tutorial on creating and formatting tables, see www.adobe.com/go/vid0081.
Michael Murphy provides an article on creating and formatting tables at Mind Your Table Manners.
More Help topics
“Formatting tables” on page 299
Creating and Formatting Tables video
Create a table from scratch
The table you create fills the width of the text frame.
1Using the Type tool , place the insertion point where you want the table to appear.
2Choose Table > Insert Table.
3Specify the numbers of rows and columns.
4If your table contents will continue on more than one column or frame, specify the number of header or footer rows
in which you want the information to be repeated.
5(Optional) Specify a table style.
6Click OK.
The row height of a table is determined by the specified table style. For example, a table style may use cell styles to
format different parts of the table. If any of these cell styles include paragraph styles, the leading value of the paragraph
styles determines the row height of that area. If no paragraph style is used, the document’s default slug determines the
row height. (The slug is based on the leading value. In this context, a slug is the approximate height of the highlighting
in selected text.)

291
USING INDESIGN
Tables
Last updated 11/16/2011
Create a table from existing text
Before you convert text to a table, make sure that you set up the text properly.
1To prepare the text for conversion, insert tabs, commas, paragraph returns, or another character to separate
columns. Insert tabs, commas, paragraph returns, or another character to separate rows. (In many instances, text
can be converted to a table without having to be edited.)
2Using the Type tool , select the text you want to convert to a table.
3Choose Table > Convert Text To Table.
4For both Column Separator and Row Separator, indicate where new rows and columns should begin. Choose Tab,
Comma, or Paragraph, or type the character, such as a semicolon
(;), in the Column Separator and Row Separator
field. (Any character you type appears in the menu the next time you create a table from text.)
5If you specify the same separator for columns and rows, indicate the number of columns you want the table to
include.
6(Optional) Specify a table style to format the table.
7Click OK.
If any row has fewer items than the number of columns in a table, empty cells fill out the row.
Embed a table within a table
1Do one of the following:
•Select the cells or table you want to embed, and then choose Edit > Cut or Copy. Place the insertion point in the cell
where you want the table to appear, and then choose Edit
> Paste.
•Click inside a cell, choose Table > Insert Table, specify the number of rows and columns, and then click OK.
2Adjust the cell inset as necessary. (See “Format text within a table” on page 301.)
If you create a table within a cell, you cannot use the mouse to select any part of the table that oversets the cell
boundary. Instead, expand the row or column; or place the insertion point in the first part of the table, and use
keyboard shortcuts to move the insertion point and select text.
Importing tables from other applications
When you use the Place command to import a Microsoft Word document that includes tables, or a Microsoft Excel
spreadsheet, imported data is an editable table. You can use the Import Options dialog box to control the formatting.
You can also paste data from an Excel spreadsheet or a Word table into an InDesign or InCopy document. The
Clipboard Handling preference settings determine how text pasted from another application is formatted. If Text Only
is selected, the information appears as unformatted tabbed text, which you can then convert to a table. If All
Information is selected, the pasted text appears in a formatted table.
If you’re pasting text from another application into an existing table, insert enough rows and columns to accommodate
the pasted text, select the Text Only option in Clipboard Handling preferences, and make sure that at least one cell is
selected (unless you want to embed the pasted table into a cell).
If you want more control over formatting the imported table, or if you want to maintain spreadsheet formatting, use
the Place command to import the table. If you want to maintain a link to the spreadsheet, select the Create Links When
Placing Text And Spreadsheet Files option in File Handling preference settings.

292
USING INDESIGN
Tables
Last updated 11/16/2011
You can also copy and paste tabbed text across a selection of table cells. This technique is a great way to replace content
while preserving formatting. For example, suppose you want to update the content of a formatting table in a monthly
magazine. One possibility is to link to an Excel spreadsheet. However, if your content comes from a different source, you
can copy the tabbed text containing the new content, select the range of cells in the formatted InDesign table, and paste.
More Help topics
“Place (import) text” on page 136
Add text to a table
You can add text, anchored objects, XML tags, and other tables to table cells. The height of a table row expands to
accommodate additional lines of text, unless you set a fixed row height. You cannot add footnotes to tables.
❖Using the Type tool , do any of the following:
•Position the insertion point in a cell, and type text. Press Enter or Return to create a new paragraph in the same cell.
Press Tab to move forward through cells (pressing Tab in the last cell inserts a new row). Press Shift+Tab to move
backwards through cells.
•Copy text, position the insertion point in a cell, and then choose Edit > Paste.
•
Position the insertion point in a cell where you want to add text, choose File > Place, and then double-click a text file.
More Help topics
“Resize columns, rows, and tables” on page 300
“Work with overset cells” on page 303
“Tag items” on page 582
Add graphics to a table
For a video tutorial on placing images into a table, see www.adobe.com/go/vid0083.
❖Do any of the following:
•Position the insertion point where you want the graphic, choose File > Place, and then double-click the graphic’s
filename.
•Position the insertion point where you want the graphic, choose Object > Anchored Object > Insert, and then
specify settings. You can later add a graphic to the anchored object.
•Copy a graphic or a frame, position the insertion point, and then choose Edit > Paste.
When you add a graphic that is larger than the cell, the cell height expands to accommodate the graphic, but the width
of the cell doesn’t change—the graphic may extend beyond the right side of the cell. If the row in which the graphic is
placed is set to a fixed height, a graphic that is taller than the row height causes the cell to be overset.
To avoid an overset cell, you may want to place the image outside the table, resize the image, and then paste it into
the table cell.
Add table headers and footers
When you create a long table, the table may span more than one column, frame, or page. You can use headers or footers
to repeat the information at the top or bottom of each divided portion of the table.
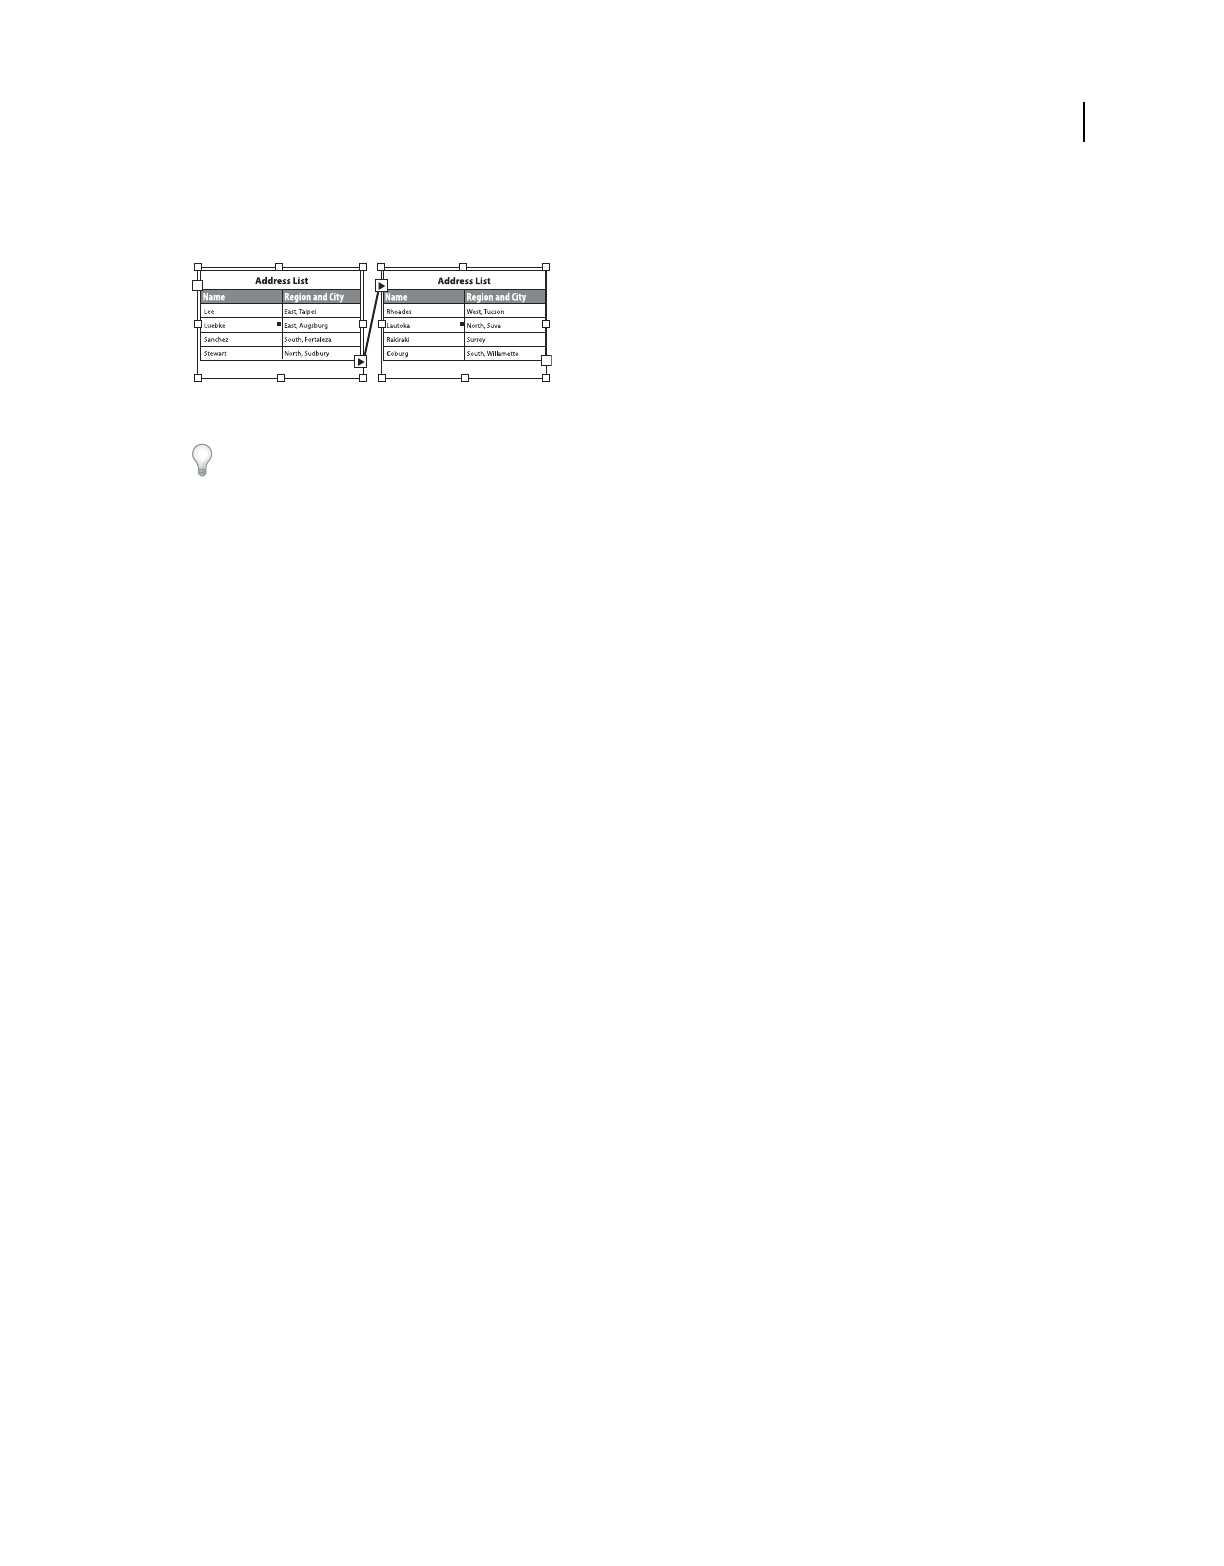
293
USING INDESIGN
Tables
Last updated 11/16/2011
You can add header and footer rows when you create the table. You can also use the Table Options dialog box to add
header and footer rows and change how they appear in the table. You can convert body rows to header or footer rows.
Header rows repeated once per frame
To number tables sequentially, such as Table 1A, Table 1B, and so on, add a variable to the table header or footer.
(See “Create running captions for figures and tables” on page 283.)
For a video tutorial on creating table headers and footers, see www.adobe.com/go/vid0082.
More Help topics
“Break tables across frames” on page 301
“Create variables for running headers and footers” on page 94
Convert existing rows to header or footer rows
1Select the rows at the top of the table to create header rows, or at the bottom of the table to create footer rows.
2Choose Table > Convert Rows > To Header or To Footer.
Change header or footer row options
1Place the insertion point in the table, and then choose Table > Table Options > Headers And Footers.
2Specify the number of header or footer rows. Blank rows may be added to the top or bottom of the table.
3Specify whether the information in the header or footer appears in every text column (if text frames have more than
one column), once per frame, or only once per page.
4Select Skip First if you don’t want the header information to appear in the first row of the table. Select Skip Last if
you don’t want the footer information to appear in the last row of the table.
The Skip First option is especially useful if you want to indicate that the header or footer is continued. For example,
for a table that spans multiple pages, you may want the header text to be “Table 2 (Continued).” Since you don't want
“(Continued)” to appear at the beginning of the table, select Skip First, and simply type Table 2 in the first row of the
table.
5Click OK.
Remove header or footer rows
❖Do any of the following:
•Place the insertion point in the header or footer row, and then choose Table > Convert Rows > To Body.
•Choose Table > Table Options > Headers And Footers, and then specify a different number of header rows or
footer rows.
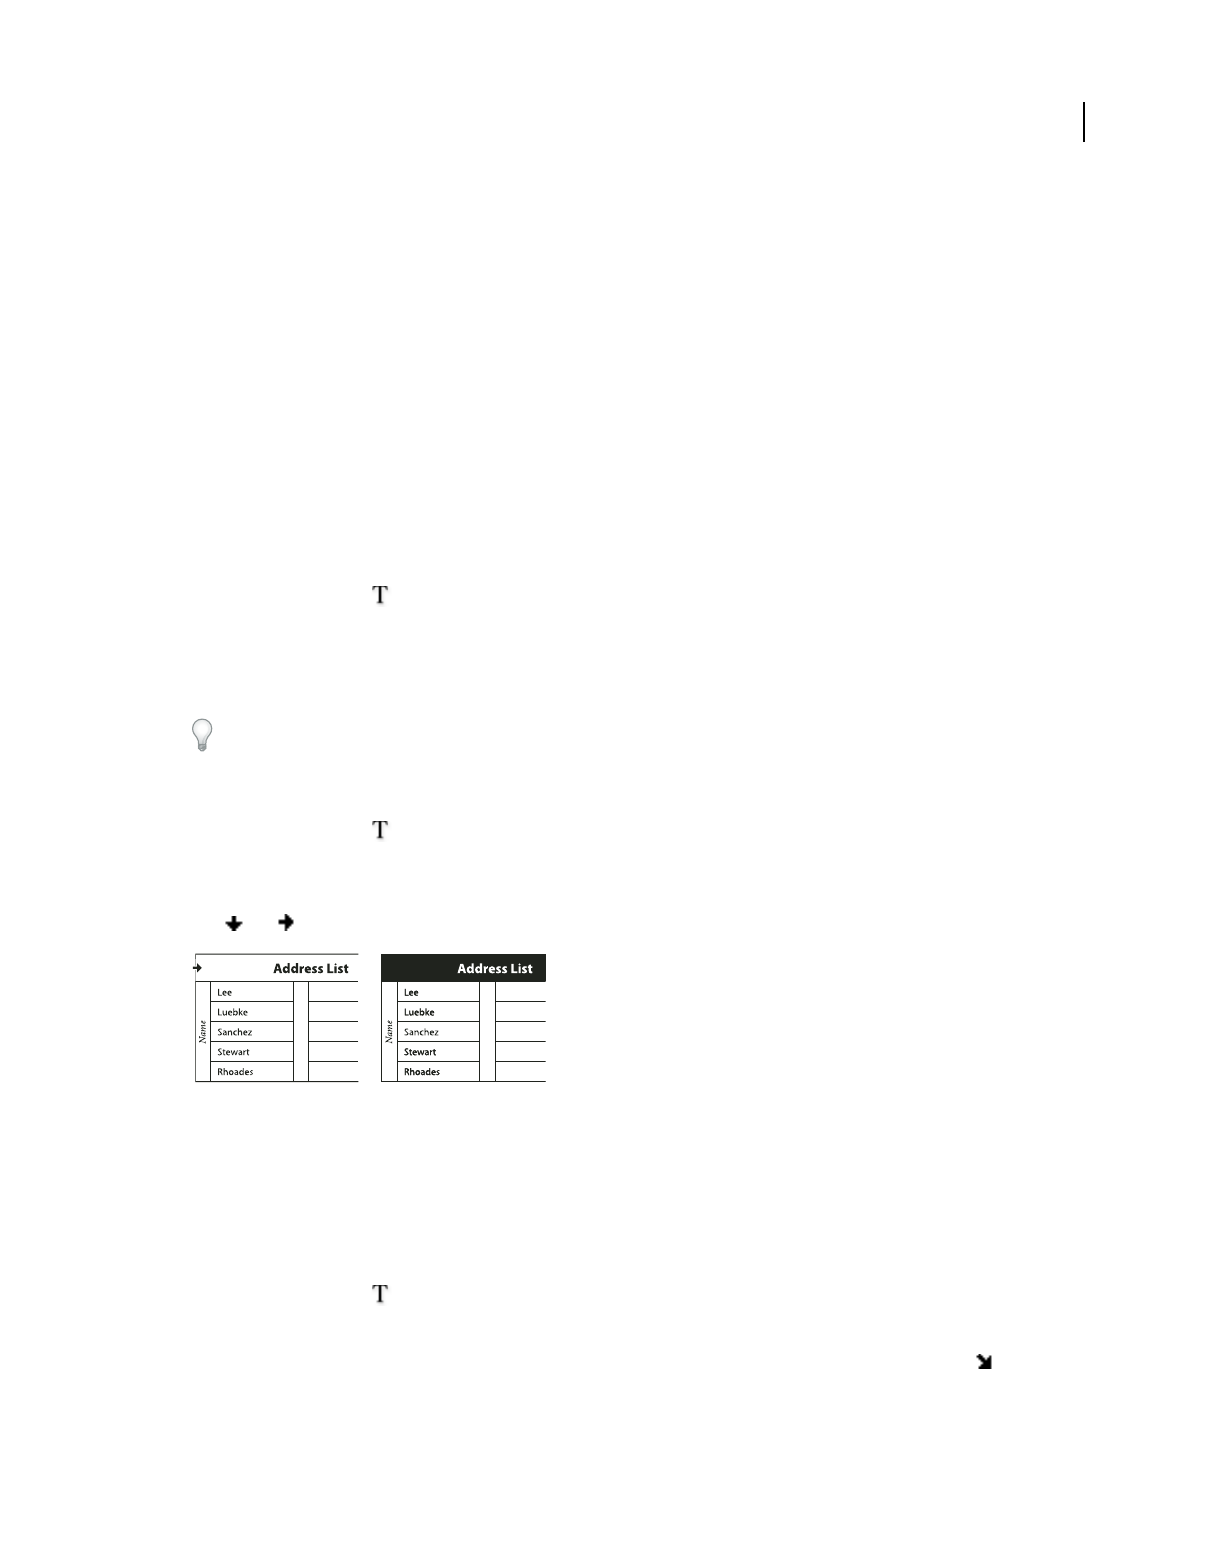
294
USING INDESIGN
Tables
Last updated 11/16/2011
Selecting and editing tables
Select table cells, rows, and columns
When you select part or all of the text in a cell, that selection has the same appearance as would text selected outside a
table. However, if the selection spans more than one cell, the cells and their contents are both selected.
If a table spans more than one frame, holding the mouse pointer over any header or footer row that is not the first
header or footer row causes a lock icon to appear, indicating that you cannot select text or cells in that row. To select
cells in a header or footer row, go to the beginning of the table.
More Help topics
“Keys for tables” on page 695
Select cells
❖Using the Type tool , do any of the following:
•To select a single cell, click inside a cell, or select text, and then choose Table > Select > Cell.
•To select multiple cells, drag across a cell border. Be careful not to drag the column or row line so that you don’t
resize the table.
To switch between selecting all of the text in a cell and selecting the cell, press Esc.
Select entire columns or rows
❖Using the Type tool , do any of the following:
•Click inside a cell, or select text, and then choose Table > Select > Column or Row.
•Move the pointer over the top edge of a column or the left edge of a row so that the pointer becomes an arrow shape
( or ), and then click to select the entire column or row.
Before and after selecting Row
Select all header, body, or footer rows
1Click inside a table, or select text.
2Choose Table > Select > Header Rows, Body Rows, or Footer Rows.
Select the entire table
❖Using the Type tool , do any of the following:
•Click inside a table, or select text, and then choose Table > Select > Table.
•Move the pointer over the upper left corner of the table so that the pointer becomes an arrow shape , and then
click to select the entire table.
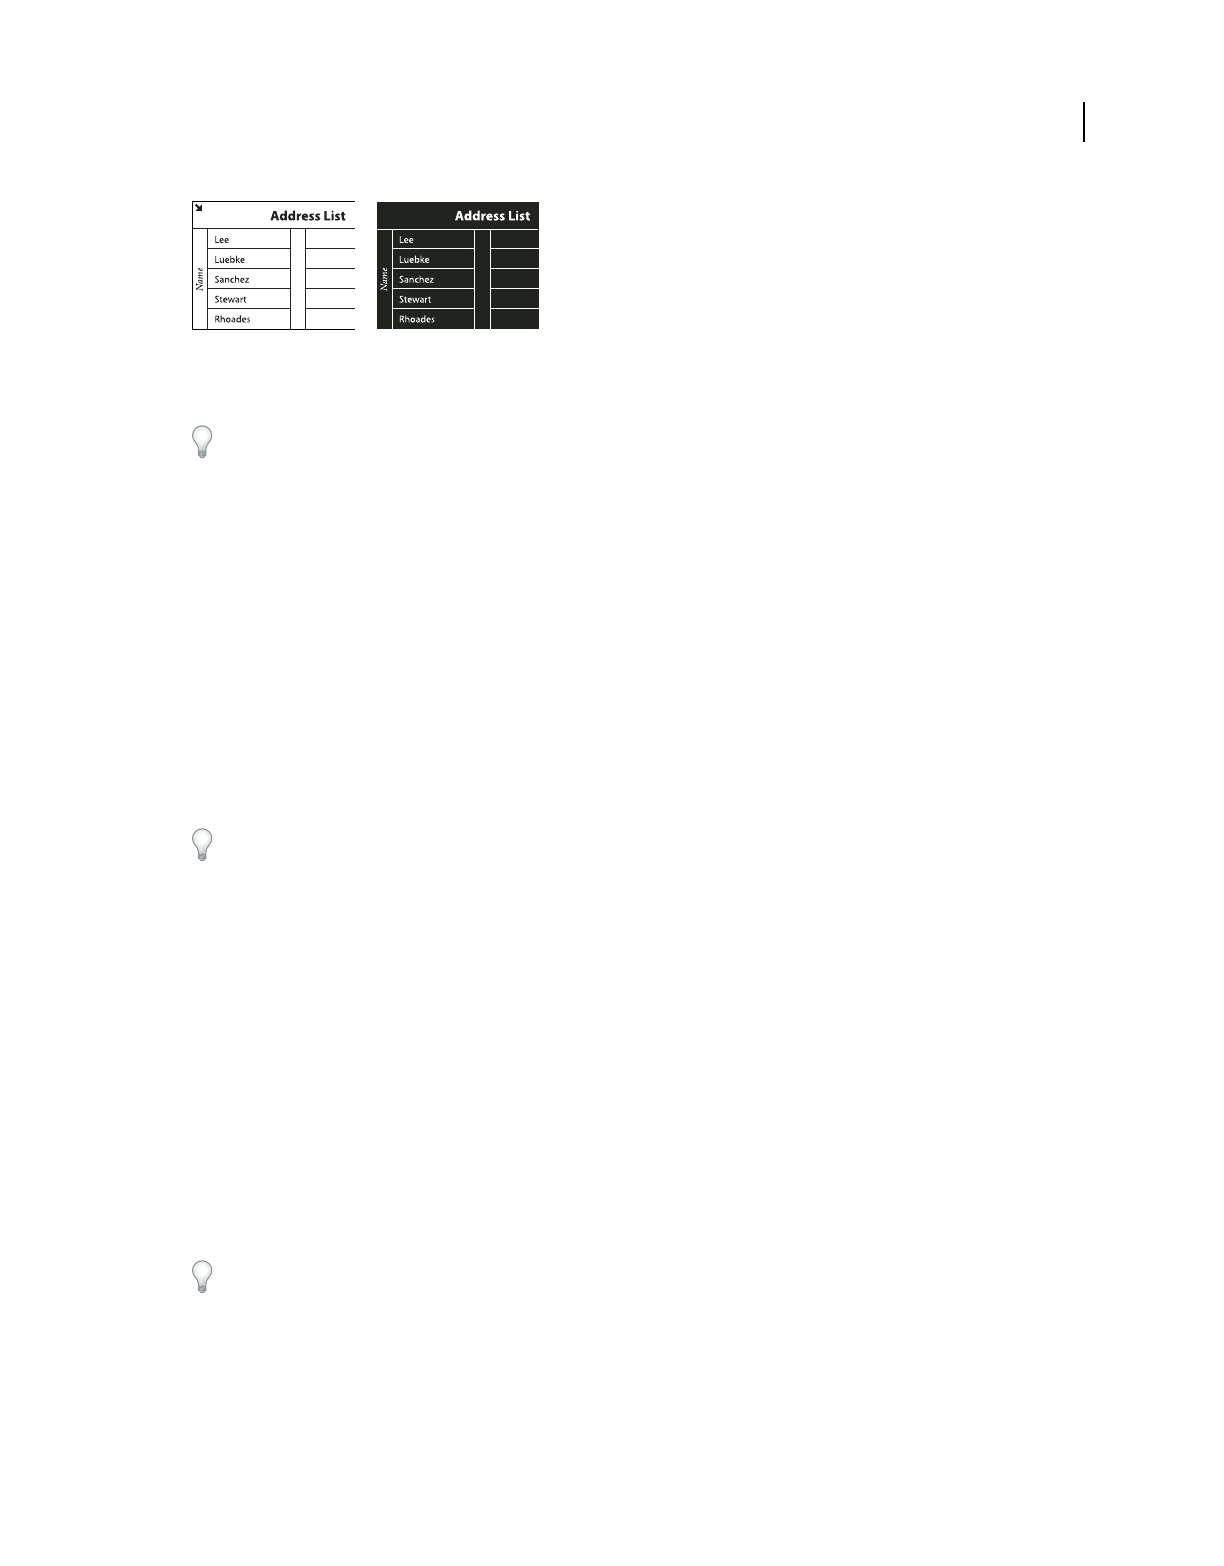
295
USING INDESIGN
Tables
Last updated 11/16/2011
Before and after selecting table
•Drag the Type tool across the entire table.
You can also select a table in the same way you select an anchored graphic—place the insertion point immediately
before or after a table, and then hold down Shift while pressing the Right Arrow key or Left Arrow key, respectively,
to select the table.
Insert rows and columns
You can insert rows and columns using a number of different methods.
Insert a row
1Place the insertion point in a row below or above where you want the new row to appear.
2Choose Table > Insert > Row.
3Specify the number of rows you want.
4Specify whether the new row or rows should appear before or after the current row, and then click OK.
The new cells have the same formatting as the text in the row in which the insertion point was placed.
You can also create a new row by pressing Tab when the insertion point is in the last cell.
Insert a column
1Place the insertion point in a column next to where you want the new column to appear.
2Choose Table > Insert > Column.
3Specify the number of columns you want.
4Specify whether the new column or columns should appear before or after the current column, and then click OK.
The new cells have the same formatting as the text in the column in which the insertion point was placed.
Insert multiple rows and columns
1With the insertion point in a cell, choose Table > Table Options > Table Setup.
2Specify a different number of rows and columns, and then click OK.
New rows are added to the bottom of the table; new columns are added to the right side of the table.
You can also change the number of rows and columns using the Table panel. To display the Table panel, choose
Window > Type & Tables > Table.

296
USING INDESIGN
Tables
Last updated 11/16/2011
Insert a row or column by dragging
When adding columns, if you drag more than one and one-half times the width of the column being dragged, new
columns are added that have the same width as the original column. If you drag to insert only one column, that column
can have a narrower or wider width than the column from where you dragged. The same behavior is true of rows,
unless the Row Height for the row being dragged is set to At Least. In this case, if you drag to create only one row,
InDesign will resize the new row, if necessary, so that it’s tall enough to contain text.
1Position the Type tool over the border of a column or row so that a double-arrow icon ( or ) appears.
2Hold down the mouse button, and then hold down Alt (Windows) or Option (Mac OS) while dragging down to
create a new row, or to the right to create a new column. (If you press Alt or Option before holding down the mouse
button, the Hand tool appears—so make sure you begin dragging before you press Alt or Option.)
Note: Dragging to insert rows or columns doesn’t work at the top or left edges of a table. These fields are used to select
rows or columns.
Delete rows, columns, or tables
•To delete a row, column, or table, place the insertion point inside the table, or select text in the table, and then
choose Table
> Delete > Row, Column, or Table.
•To delete rows and columns by using the Table Options dialog box, choose Table > Table Options > Table Setup.
Specify a different number of rows and columns, and then click
OK. Rows are deleted from the bottom of the table;
columns are deleted from the right side of the table.
•To delete a row or column by using the mouse, position the pointer over the border of the bottom or right side of
the table so that a double-arrow icon ( or ) appears; hold down the mouse button; and then hold down Alt
(Windows) or Option (Mac OS) while dragging either up to delete rows, or to the left to delete columns.
Note: If you press Alt or Option before holding down the mouse button, the Hand tool will appear—so press Alt or Option
after you begin dragging.
•To delete cell contents without deleting cells, select the cells containing the text you want to delete, or use the Type
tool
to select the text within the cells. Press Backspace or Delete, or choose Edit > Clear.
Change the alignment of a table within a frame
A table assumes the width of the paragraph or table cell in which it is created. However, you can change the size of the
text frame or table so that the table is wider or narrower than the frame. In such a case, you can decide where you want
the table to be aligned within the frame.
1Place the insertion point to the right or left of the table. Make sure that the text insertion point is placed on the table
paragraph and not inside the table. The insertion point becomes as tall as the table in the frame.
2Click an alignment button (such as Align Center) in the Paragraph panel or Control panel.
More Help topics
“Resize columns, rows, and tables” on page 300
Navigate within a table
Use the Tab or arrow keys to move within a table. You can also jump to a specific row, especially useful in long tables.

297
USING INDESIGN
Tables
Last updated 11/16/2011
More Help topics
“Keys for tables” on page 695
Move within a table using Tab
•Press Tab to move to the next cell. If you press Tab in the last table cell, a new row is created. For information on
inserting tabs and indents in a table, see “Format text within a table” on page 301.
•Press Shift+Tab to move to the previous cell. If you press Shift+Tab in the first table cell, the insertion point moves
to the last table cell.
Move within a table using arrow keys
❖Press the arrow keys to navigate within and between table cells. If you press the Right Arrow key when the insertion
point is at the end of the last cell in a row, the insertion point moves to the beginning of the first cell in the same
row. Similarly, if you press the Down Arrow key when the insertion point is at the end of the last cell in a column,
the insertion point moves to the beginning of the first cell in the same column.
Jump to a specific row in a table
1Choose Table > Go To Row.
2Do any of the following:
•Specify the row number you want to jump to, and then click OK.
•If a header or footer row is defined in the current table, choose Header or Footer from the menu, and then click OK.
Cut, copy, and paste table contents
When text is selected within a cell, cutting, copying, and pasting actions are the same as for text selected outside a table.
You can also cut, copy, and paste cells and their contents. If the insertion point is in a table when you paste, multiple
pasted cells appear as a table within a table. You can also move or copy the entire table.
1Select the cells you want to cut or copy, and then choose Edit > Cut or Copy.
2Do any of the following:
•To embed a table within a table, place the insertion point in the cell where you want the table to appear, and then
choose Edit
> Paste.
•To replace existing cells, select one or more cells in the table—making sure that there are sufficient cells below and
to the right of the selected cell—and then choose Edit
> Paste.
More Help topics
“Select table cells, rows, and columns” on page 294
Move or copy a table
1To select the entire table, place the insertion point in the table and choose Table > Select > Table.
2Choose Edit > Cut or Copy, move the insertion point where you want the table to appear, and then choose Edit >
Paste.
Convert tables to text
1Using the Type tool , place the insertion point inside the table, or select text in the table.

298
USING INDESIGN
Tables
Last updated 11/16/2011
2Choose Table > Convert Table To Text.
3For both Column Separator and Row Separator, specify the separators you want to use.
For best results, use a different separator for columns and rows, such as tabs for columns and paragraphs for rows.
4Click OK.
When you convert a table to text, the table lines are removed and the separator you specify is inserted at the end of
each row and column.
Combine tables
Use the Paste command to merge two or more tables into a single table.
1In the target table, insert at least as many blank rows as you’ll be pasting from the other tables. (If you insert fewer
rows than are copied, you cannot paste.)
2In the source table, select the cells you want to copy. (If you copy more column cells than are available in the target
table, you cannot paste.)
3Select at least one cell where you want the incoming rows to be inserted, and then choose Edit > Paste.
If the pasted rows use different formatting than the rest of the table, define one or more cell styles, and then apply the
cell styles to the pasted cells. Hold down Alt (Windows) or Option (Mac OS) while clicking the cell style to override
existing formatting.
Anne-Marie Concepcion provides an article about combining tables at Joining Tables.
More Help topics
“Cut, copy, and paste table contents” on page 297
“Table and cell styles” on page 307
Working with tables in Story Editor
When you choose Edit > Edit In Story Editor, tables and their contents appear in Story Editor. You can edit tables in
Story Editor.
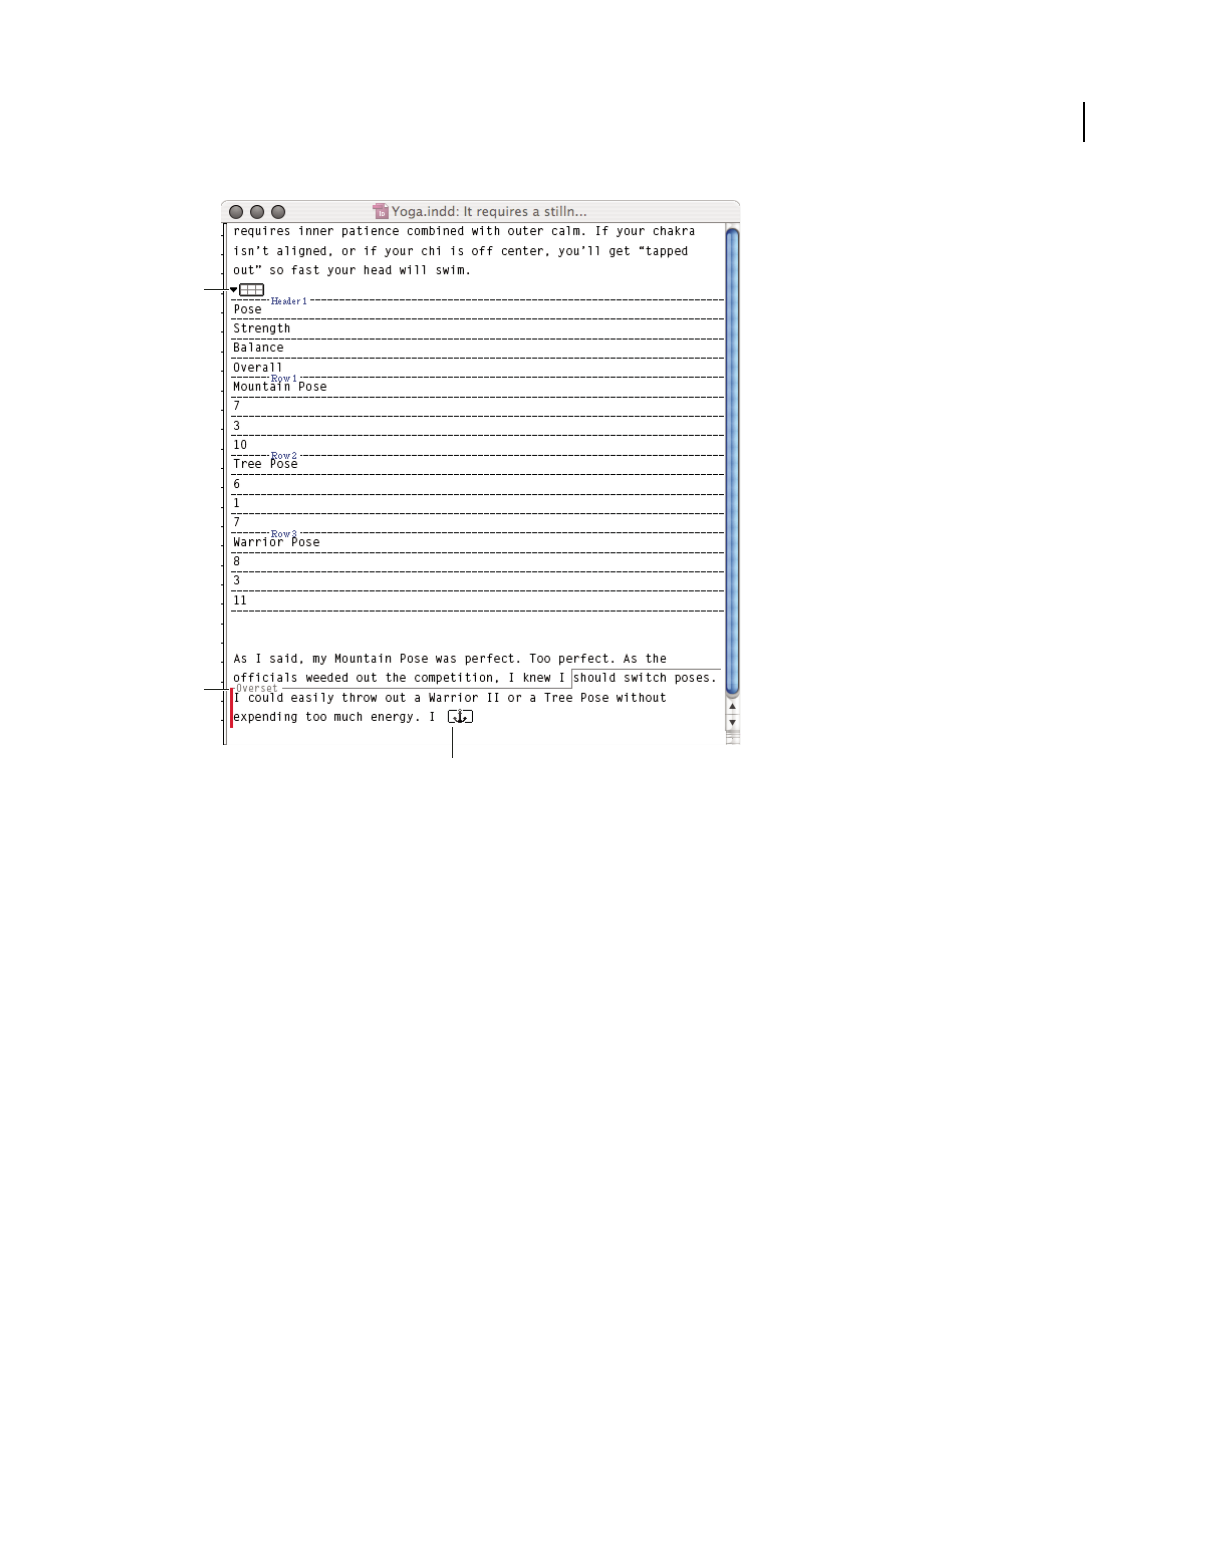
299
USING INDESIGN
Tables
Last updated 11/16/2011
Editing tables in Story Editor
A. Table icon B. Overset text C. Overset graphic
•To expand or collapse the table in Story Editor, click the triangle to the left of the table icon at the top of the table.
•To determine whether the table is sorted by rows or columns, right-click (Windows) or Ctrl-click (Mac OS) the
table icon and choose Arrange By Rows or Arrange By Columns.
•Use Layout view to modify and format the table. You cannot select columns or rows in Story Editor.
Formatting tables
Formatting tables
Use the Control panel or Character panel to format text within a table—just like formatting text outside a table. In
addition, two main dialog boxes help you format the table itself: Table Options and Cell Options. Use these dialog
boxes to change the number of rows and columns, to change the appearance of the table border and fill, to determine
the spacing above and below the table, to edit header and footer rows, and to add other table formatting.
Use the Table panel, the Control panel, or the context menu to format the table structure. Select one or more cells and
then right-click (Windows) or Control-click (Mac
OS) to display a context menu with table options.
For a video tutorial on creating and formatting tables, see www.adobe.com/go/vid0081.
A
B
C
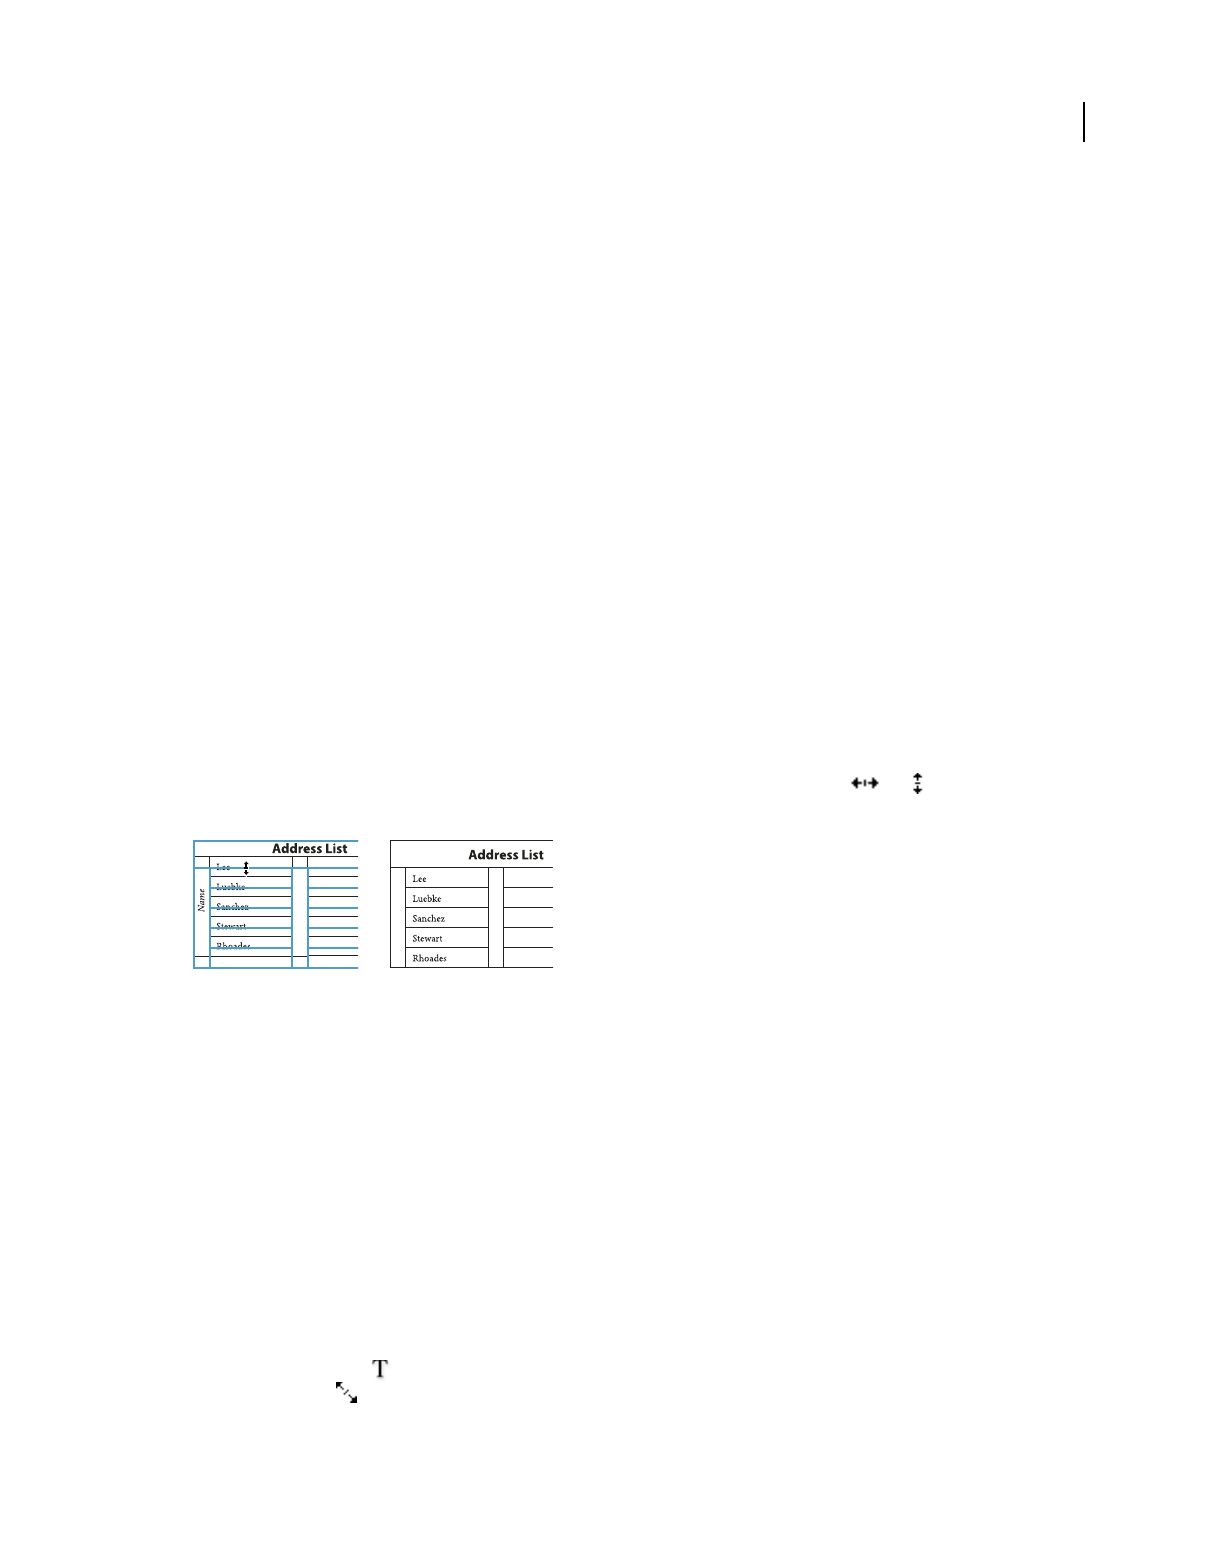
300
USING INDESIGN
Tables
Last updated 11/16/2011
More Help topics
“Table strokes and fills” on page 304
Creating and Formatting Tables video
Resize columns, rows, and tables
You can resize columns, rows, and tables using a number of different methods.
More Help topics
“Change the alignment of a table within a frame” on page 296
Resize columns and rows
1Select cells in the columns and rows you want to resize.
2Do one of the following:
•In the Table panel, specify Column Width and Row Height settings.
•Choose Table > Cell Options > Rows And Columns, specify Row Height and Column Width options, and then
click
OK.
Note: If you select At Least to set a minimum row height, rows increase in height as you add text or increase the point
size. If you select Exactly to set a fixed row height, the row height does not change when you add or remove text. A fixed
row height often results in an overset condition in the cell. (See “Work with overset cells” on page 303.)
•Position the pointer over the edge of a column or row so that a double-arrow icon ( or ) appears, and then
drag left or right to increase or decrease the column width, or drag up or down to increase or decrease row height.
Before and after dragging to resize rows
By default, row height is determined by the slug height of the current font. Thus, row height also changes if you change
the point size of type for entire rows of text, or if you change the row height setting. The maximum row height is
determined by the Maximum setting in the Rows And Columns section of the Cell Options dialog box.
Resize rows or columns without changing the table width
•Hold down Shift while dragging an inside row or column edge (not the table boundary). One row or column gets
bigger as the other gets smaller.
•To resize rows or columns proportionally, hold down Shift while dragging the right table border or bottom table edge.
Holding down Shift while dragging the right table edge will resize all the columns proportionally; holding down Shift
while dragging the bottom table edge will resize all rows proportionally.
Resize the entire table
❖Using the Type tool , position the pointer over the lower-right corner of the table so that the pointer becomes
an arrow shape , and then drag to increase or decrease the table size. Hold down Shift to maintain the table’s
height and width proportions.
Name

301
USING INDESIGN
Tables
Last updated 11/16/2011
Note: If the table spans more than one frame in a story, you cannot use the pointer to resize the entire table.
Distribute columns and rows evenly
1Select cells in the columns or rows that should be the same width or height.
2Choose Table > Distribute Rows Evenly or Distribute Columns Evenly.
Change the spacing before or after a table
1Place the insertion point in the table and choose Table > Table Options > Table Setup.
2Under Table Spacing, specify different values for Space Before and Space After, and then click OK.
Note that changing the spacing before the table does not affect the spacing of a table row that falls at the top of a frame.
Break tables across frames
Use Keep options to determine how many rows should remain together, or to specify where a row breaks, such as at
the top of a column or frame.
When you create a table that is taller than the frame in which it resides, the frame is overset. If you thread the frame to
another frame, the table continues in that frame. Rows move into threaded frames one at a time—you can’t break a
single row across multiple frames. Specify header or footer rows to repeat information in the new frame.
1Position the insertion point in the appropriate row, or select a range of cells in the rows you want to keep together.
2Choose Table > Cell Options > Rows And Columns.
3To keep the selected rows together, select Keep With Next Row.
4To cause the row to break in a specified location, select an option (such as In Next Frame) from the Start Row menu,
and then click
OK.
If you create a single table that spans both pages of a spread, you may want to add a blank column in the middle of
the table to create inset margins.
More Help topics
“Add table headers and footers” on page 292
Add text before a table
A table is anchored to the paragraphs that immediately precede and follow it. If you insert a table at the beginning of
the text frame, you can’t click above the table to place an insertion point. Instead, use the arrow keys to move the
insertion point before the table.
❖Place the insertion point at the beginning of the paragraph in the first cell, press the Left Arrow key, and begin
typing.
Format text within a table
In general, use the same methods to format text in a table that you would use to format text that’s not in a table.
More Help topics
“Work with overset cells” on page 303
“Specify characters for decimal tabs” on page 272

302
USING INDESIGN
Tables
Last updated 11/16/2011
Insert tabs into a table cell
When the insertion point is in a table, pressing Tab moves the insertion point to the next cell. However, you can insert
a tab within a table cell. Use the Tabs panel to define tab settings in the table. Tab settings affect the paragraph in which
the insertion point is placed.
1Using the Type tool , place the insertion point where you want to insert a tab.
2Choose Type > Insert Special Character > Other > Tab.
To change tab settings, select the columns or cells you want to affect, choose Type > Tabs to display the Tabs panel,
and then adjust tab settings.
Note: When you use the Tabs ruler to apply a decimal tab to a cell or group of cells, you usually don’t need to press Tab
at the beginning of each paragraph to decimal-align the text in the cells. Paragraphs are automatically aligned on the
decimal character, unless the paragraph contains additional formatting, such as center alignment, that overrides the
decimal tab.
Change the alignment of text within a table cell
1Using the Type tool , select the cell or cells you want to affect.
2Choose Table > Cell Options > Text.
3Under Vertical Justification, select an Align setting: Align Top, Align Center, Align Bottom, or Justify Vertically.
If you select Justify, specify the Paragraph Spacing Limit; this will set a maximum amount of space to be added between
paragraphs. (See “Align or justify text vertically within a text frame” on page 267.)
4For First Baseline, select an option to determine how text is to be offset from the top of the cell.
The settings are the same as the corresponding settings in the Text Frame Options dialog box. (See “Change text frame
properties” on page 131.)
5Click OK.
Note: To change the horizontal alignment of text within a cell, use the alignment option in the Paragraph panel. To align
text in a cell to a decimal tab, use the Tabs panel to add a decimal tab setting.
Rotate text in a cell
1Position the insertion point in the cell you want to rotate, or select the cells you want to affect.
2Choose Table > Cell Options > Text, or display the Table panel.
3Select a value for Rotation, and click OK.
Change cell inset spacing
1Using the Type tool , place the insertion point in or select the cell or cells you want to affect.
2Choose Table > Cell Options > Text, or display the Table panel.
3Under Cell Insets, specify values for Top, Bottom, Left, and Right, and then click OK.
In many cases, increasing the cell inset spacing will increase the row height. If the row height is set at a fixed value,
make sure that you leave enough room for the inset values, to avoid causing overset text.
Merge and split cells
You can merge (combine) or split (divide) cells in a table.

303
USING INDESIGN
Tables
Last updated 11/16/2011
Merge cells
You can combine two or more cells in the same row or column into a single cell. For example, you can merge the cells
in the top row of the table to create a single cell to be used for the table title.
1Using the Type tool , select the cells you want to merge.
2Choose Table > Merge Cells.
Unmerge cells
❖Place the insertion point in the merged cell and choose Table > Unmerge Cells.
Split cells
You can split cells horizontally or vertically, which is especially useful when creating form tables. You can select
multiple cells and split them vertically or horizontally.
1Place the insertion point in the cell you want to split, or select a row, column, or block of cells.
2Choose Table > Split Cell Vertically or Split Cell Horizontally.
More Help topics
“Combine tables” on page 298
Work with overset cells
In most cases, a table cell will expand vertically to accommodate new text and graphics being added. However, if you
set a fixed row height and add text or graphics that are too large for the cell, a small red dot appears in the lower-right
corner of the cell, indicating that the cell is overset.
You cannot flow overset text into another cell. Instead, edit or resize the contents, or expand the cell or the text frame
in which the table appears.
In the case of inline graphics or text with fixed leading, it is possible for the cell contents to extend beyond cell edges.
You can select the Clip Contents To Cell option, so that any text or inline graphics that otherwise extend beyond any
cell edge are clipped to the cell boundary. However, when inline graphics are overset to extend beyond cell bottom
edges (Horizontal), this does not apply.
Display the contents of an overset cell
❖Do one of the following:
•Increase the size of the cell.
•Change the text formatting. To select the cell’s contents, click in the overset cell, press Esc, and then use the Control
panel to format the text.
Clip an image in a cell
If an image is too large for a cell, it extends beyond the cell borders. You can clip the parts of the image that extend
beyond the cell borders.
1Place the insertion point in the cell you want to clip, or select the cell or cells you want to affect.
2Choose Table > Cell Options > Text.
3Select Clip Contents To Cell, and then click OK.

304
USING INDESIGN
Tables
Last updated 11/16/2011
Table strokes and fills
About table strokes and fills
You can add strokes and fills to your tables in a number of ways. Use the Table Options dialog box to change the stroke
of the table border, and to add alternating strokes and fills to columns and rows. To change the strokes and fills of
individual cells or header/footer cells, use the Cell Options dialog box, or use the Swatches, Stroke, and Color panels.
By default, the formatting you select using the Table Options dialog box overrides any corresponding formatting
previously applied to table cells. However, if you select the Preserve Local Formatting option in the Table Options
dialog box, the strokes and fills applied to individual cells are not overridden.
If you use the same formatting repeatedly for tables or cells, create and apply table styles or cell styles.
More Help topics
“Table and cell styles” on page 307
Change the table border
You can change the table border by using either the Table Setup dialog box or the Stroke panel.
1With the insertion point in a cell, choose Table > Table Options > Table Setup.
2Under Table Border, specify the desired weight, type, color, tint, and gap settings. (See “Table stroke and fill
options” on page 306.)
3Under Stroke Drawing Order, select the drawing order from the following options:
Best Joins If selected, row strokes will appear to the front at the points where strokes of different colors cross. In
addition, when strokes such as double lines cross, the strokes are joined and the crossing points are connected.
Row Strokes In Front If selected, row strokes appear in front.
Column Strokes In Front If selected, column strokes appear in front.
InDesign 2.0 Compatibility If selected, row strokes appear in front. In addition, when strokes such as double lines
cross, they are joined and the crossing points are connected only at points where strokes cross in a T-shape.
4If you do not want stroke formatting of individual cells to be overridden, select Preserve Local Formatting.
5Click OK.
If you remove the stroke and fill from a table, choose View > Extras > Show Frame Edges to display the cell boundaries
of a table.
Add stroke and fill to cells
You can add stroke and fill to cells using the Cell Options dialog box, Stroke panel, or Swatches panel.
Add stroke and fill using Cell Options
You can determine which cell lines are formatted with a stroke or fill by selecting or deselecting lines in the Preview
proxy. If you want to change the appearance of all rows or columns in the table, use an alternating stroke or fill pattern
in which the second pattern is set to 0.
1Using the Type tool , place the insertion point in or select the cell or cells in which you want to add a stroke or
fill. To add a stroke or fill to header/footer rows, select the header/footer cells at the beginning of the table.
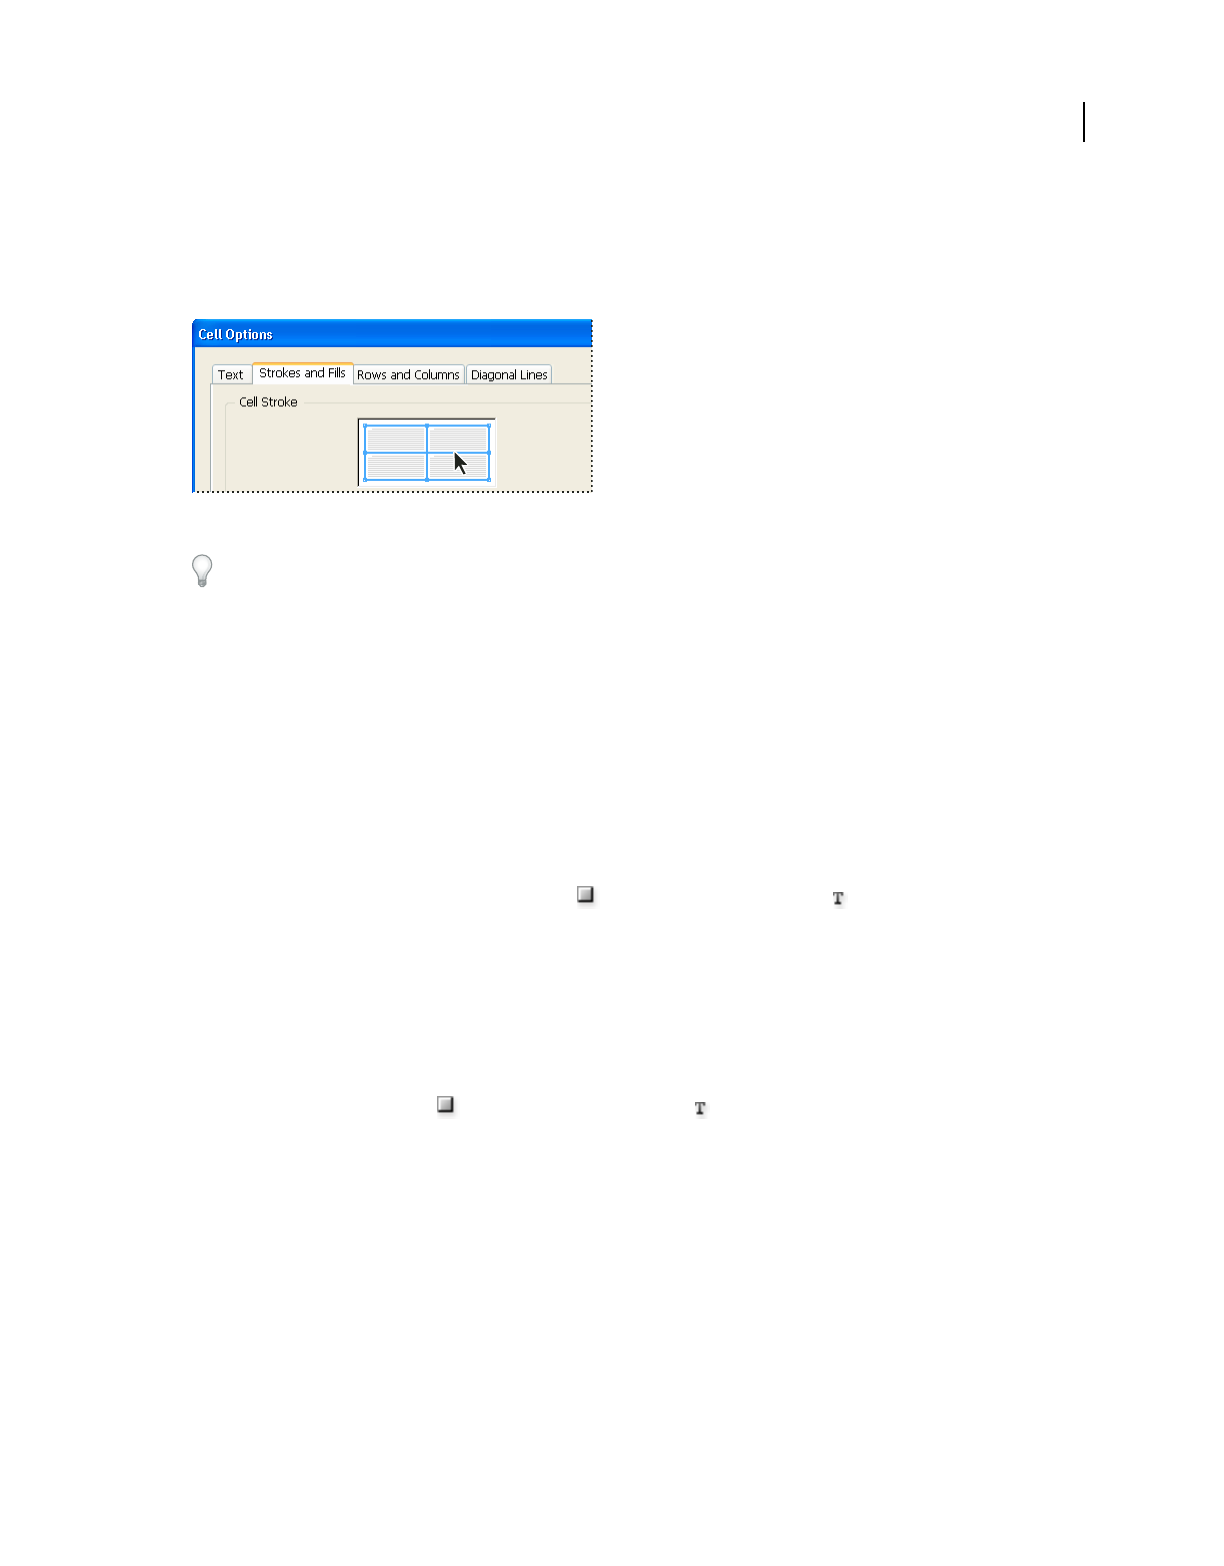
305
USING INDESIGN
Tables
Last updated 11/16/2011
2Choose Table > Cell Options > Strokes And Fills.
3In the proxy preview area, specify which lines will be affected by stroke changes. For example, if you want to add a
heavy stroke to the outside lines but not to the inside lines of the selected cells, click an inside line to deselect it.
(Selected lines are blue; deselected lines are gray.)
Select the lines you want to affect in proxy preview area.
In the proxy preview area, double-click any outside line to select the entire outer selection rectangle. Double-click any
inside line to select the inside lines. Triple-click anywhere in the proxy to select or deselect all lines.
4For Cell Stroke, specify desired weight, type, color, tint, and gap settings. (See “Table stroke and fill options” on
page 306.)
5For Cell Fill, specify desired color and tint settings.
6Select Overprint Stroke and Overprint Fill if desired, and then click OK.
Add a stroke to cells using the Stroke panel
1Select the cell or cells you want to affect. To apply a stroke to header or footer cells, select the header or footer row.
2Choose Window > Stroke to display the Stroke panel.
3In the proxy preview area, specify which lines will be affected by stroke changes.
4In the Tools panel, make sure the Object button is selected. (If the Text button is selected, the stroke changes
will affect the text, not the cells.)
5Specify a weight value and stroke type.
Add a fill to cells using the Swatches panel
1Select the cell or cells you want to affect. To apply a fill to header or footer cells, select the header or footer row.
2Choose Window > Color > Swatches to display the Swatches panel.
3Make sure the Object button is selected. (If the Text button is selected, the color changes will affect the text,
not the cells.)
4Select a swatch.
Add a gradient to cells using the Gradient panel
1Select the cells you want to affect. To apply a gradient to header or footer cells, select the header or footer row.
2Choose Window > Color > Gradient to display the Gradient panel.
3Click in the Gradient Ramp to apply a gradient to the selected cells. Adjust the gradient settings as necessary.
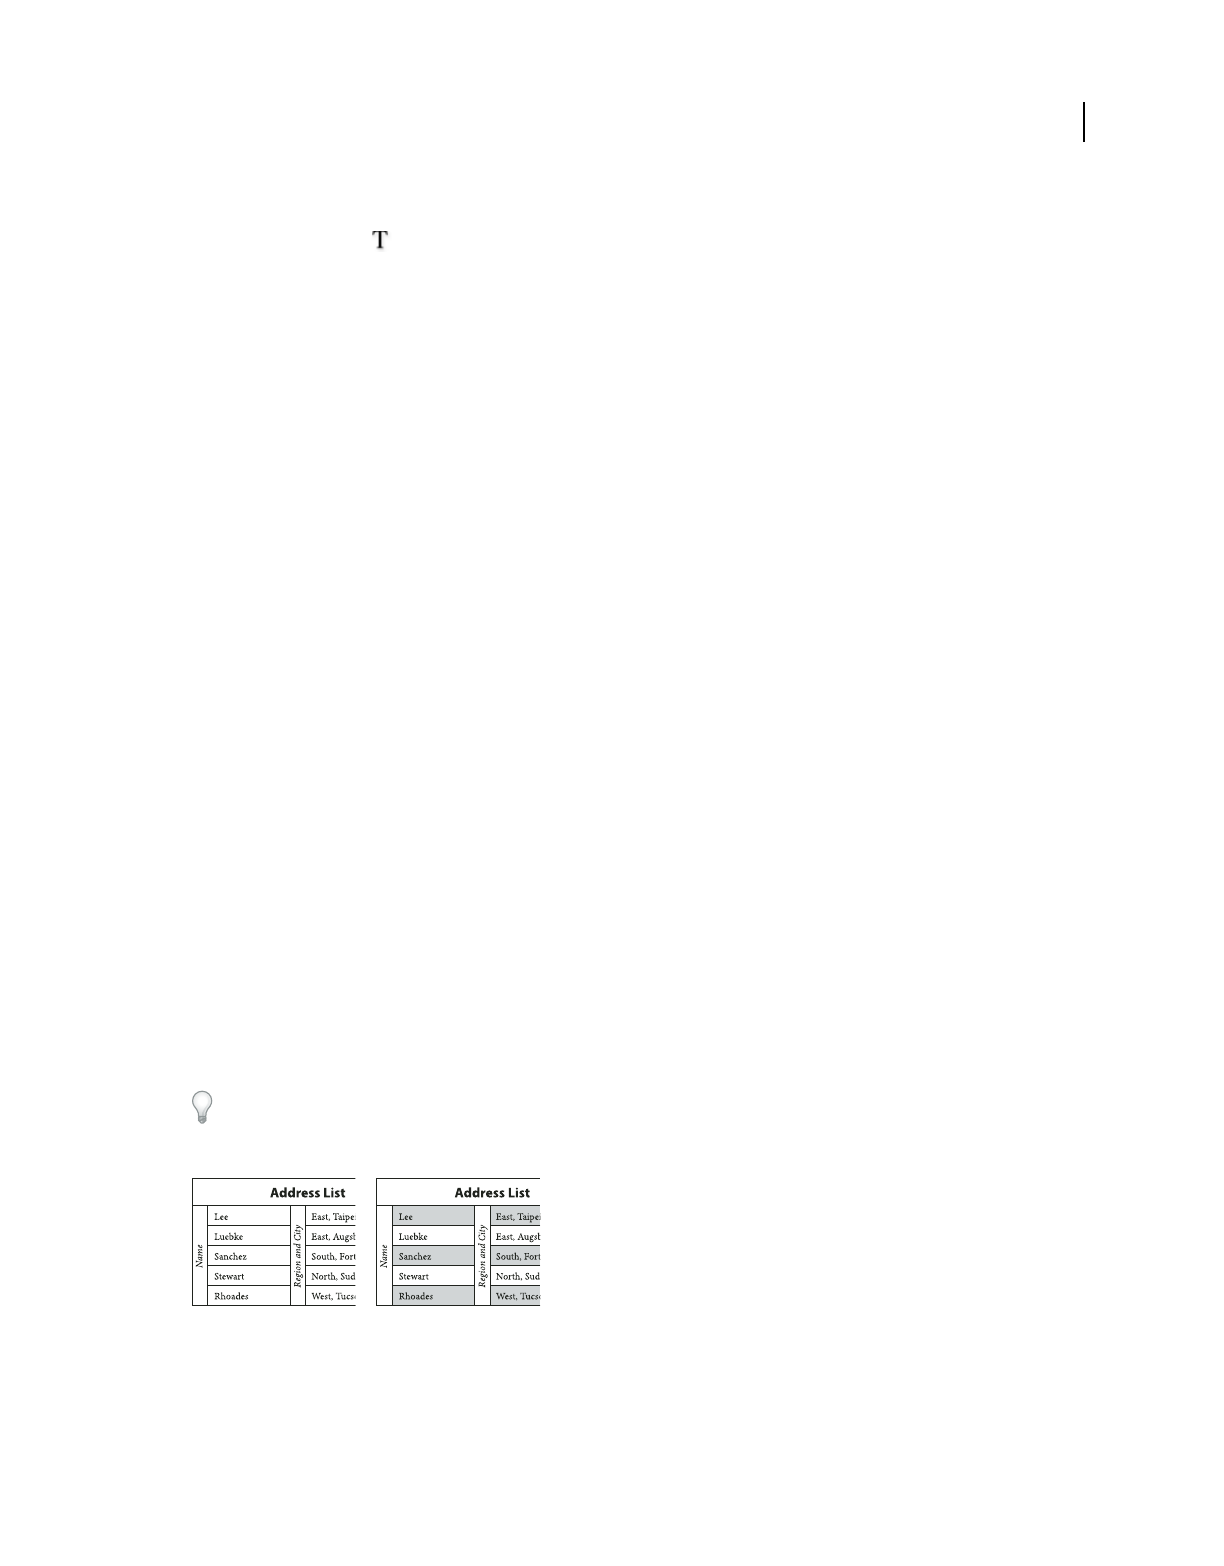
306
USING INDESIGN
Tables
Last updated 11/16/2011
Add diagonal lines to a cell
1Using the Type tool , place the insertion point in or select the cell or cells in which you want to add diagonal
lines.
2Choose Table > Cell Options > Diagonal Lines.
3Click the button for the type of diagonal line you want to add.
4Under Line Stroke, specify desired weight, type, color, and gap settings; specify a Tint percentage and Overprint
options.
5From the Draw menu, choose Diagonal In Front to place the diagonal line in front of the cell contents; choose
Content In Front to place the diagonal line behind the cell contents, and then click
OK.
Table stroke and fill options
When selecting strokes and fills for the table or cells, use the following options:
Weight Specifies the line thickness for the table or cell border.
Type Specifies the line style, such as Thick - Thin.
Color Specifies the color of the table or cell border. The choices listed are those available in the Swatches panel.
Tint Specifies the percentage of ink of the specified color to be applied to the stroke or fill.
Gap Color Applies a color to the areas between the dashes, dots, or lines. This option is not available if Solid is selected
for Type.
Gap Tint
Applies tint to the areas between the dashes, dots, or lines. This option is not available if Solid is selected for Type.
Overprint When selected, causes the ink specified in the Color drop-down list to be applied over any underlying
colors, rather than knocking out those inks.
Alternate strokes and fills in a table
You can alternate strokes and fills to enhance readability or improve the appearance of your table. Alternating strokes
and fills in table rows does not affect header and footer rows. However, alternating strokes and fills in columns does
affect header and footer rows.
Alternating stroke and fill settings override cell stroke formatting, unless you select the Preserve Local Formatting
option in the Table Options dialog box.
If you want to apply a fill or stroke to every body cell in the table, and not just alternating patterns, you can still use
the alternating stroke and fill settings to create such non-alternating patterns. To create such an effect, specify 0 for
Next in the second pattern.
Before (left) and after (right) alternating fills in a table
Add alternating strokes to a table
1With the insertion point in a cell, choose Table > Table Options > Alternating Row Strokes or Alternating Column
Strokes.

307
USING INDESIGN
Tables
Last updated 11/16/2011
2For Alternating Pattern, select the type of pattern you want to use. Select Custom if you want to specify a pattern;
for example, one column with a thick black line followed by three columns with thin yellow lines.
3Under Alternating, specify the fill options for both the first pattern and the next pattern. For example, you may
want to add a solid stroke to the first column and a Thick
- Thin line to the next column, so that they alternate.
Specify 0 for Next if you want the strokes to affect every row or column.
Note: In tables that span multiple frames, alternating strokes and fills for rows do not restart at the beginning of
additional frames in the story. (See “Break tables across frames” on page 301.)
4Select Preserve Local Formatting if you want formatted strokes previously applied to the table to remain in effect.
5For Skip First and Skip Last, specify the number of rows or columns at the beginning and end of the table in which
you do not want stroke attributes to appear, and then click
OK.
Add alternating fills to a table
1With the insertion point in a cell, choose Table > Table Options > Alternating Fills.
2For Alternating Pattern, select the type of pattern you want to use. Select Custom if you want to specify a pattern,
such as one row shaded in gray followed by three rows shaded in yellow.
3Under Alternating, specify the fill options for both the first pattern and the subsequent pattern. For example, if you
selected Every Second Column for Alternating Pattern, you may want to shade the first two columns in a gray tint
and leave the next two columns blank. Specify 0 for Next if you want the fill to apply to every row.
4Select Preserve Local Formatting if you want previously formatted fills applied to the table to remain in effect.
5For Skip First and Skip Last, specify the number of rows or columns at the beginning and end of the table in which
you do not want fill attributes to appear, and then click
OK.
Turn off alternating strokes and fills in a table
1Place the insertion point in the table.
2Choose Table > Table Options > Alternating Row Strokes, Alternating Column Strokes, or Alternating Fills.
3For Alternating Pattern, choose None, and then click OK.
Table and cell styles
About table and cell styles
Just as you use text styles to format text, you can use table and cell styles to format tables. A table style is a collection of
table formatting attributes, such as table borders and row and column strokes, that can be applied in a single step. A
cell style includes formatting such as cell insets, paragraph styles, and strokes and fills. When you edit a style, all tables
or cells to which the style is applied are updated automatically.
Note: There is one important difference between text styles and table styles. While all character styles attributes can be
part of a paragraph style, cell style attributes are not part of the table style. For example, you cannot use a table style to
change the border color of interior cells. Instead, create a cell style and include it in the table style.
[Basic Table] and [None] styles
By default, each new document contains a [Basic Table] style that can be applied to tables you create and a [None] style
that can be used to remove cell styles applied to cells. You can edit the [Basic Table] style, but you can’t rename or
delete either [Basic Table] or [None].
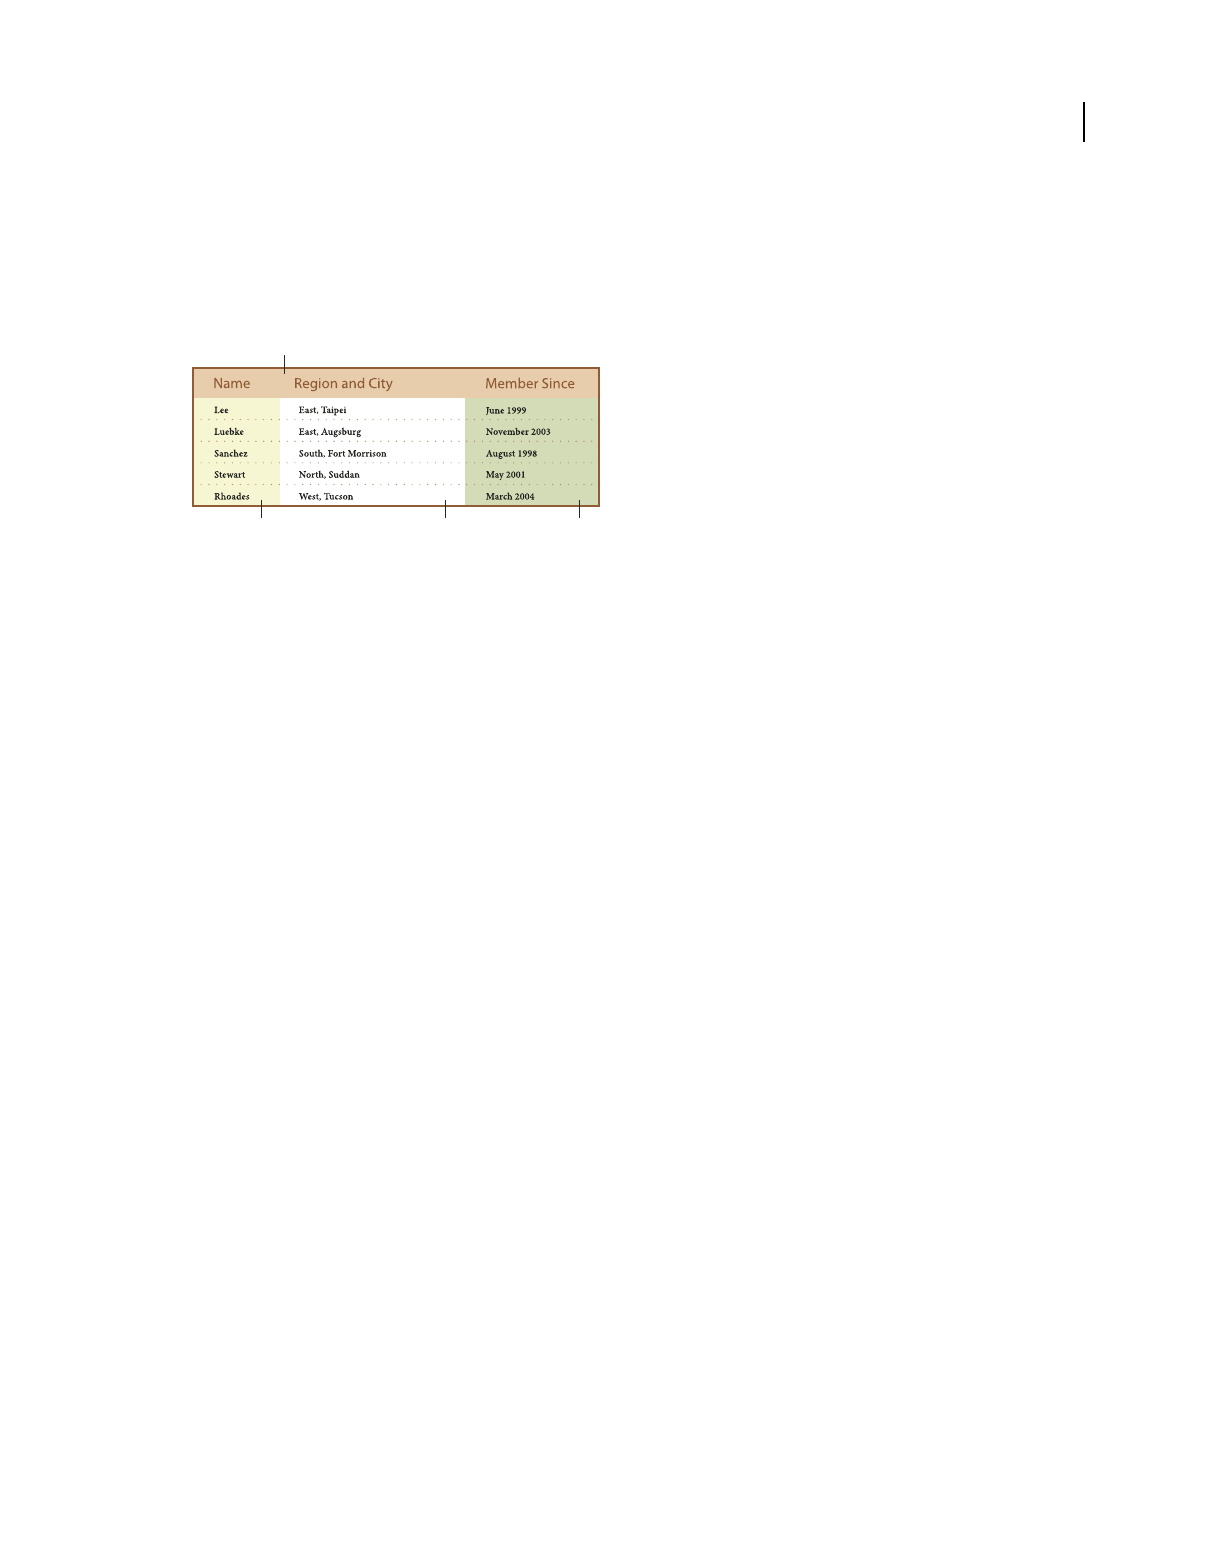
308
USING INDESIGN
Tables
Last updated 11/16/2011
Using cell styles in table styles
When you create a table style, you can specify which cell styles are applied to different regions of the table: header and
footer rows, left and right columns, and body rows. For example, for the header row, you can assign a cell style that
applies a paragraph style, and for the left and right columns, you can assign different cell styles that apply shaded
backgrounds.
Cell styles applied to regions in table style
A. Header row formatted with cell style that includes paragraph style B. Left column C. Body cells D. Right column
Cell style attributes
Cell styles do not necessarily include all the formatting attributes of a selected cell. When you create a cell style, you
can determine which attributes are included. That way, applying the cell style changes only the desired attributes, such
as cell fill color, and ignores all other cell attributes.
Formatting precedence in styles
If a conflict occurs in formatting applied to a table cell, the following order of precedence determines which formatting
is used:
Cell style precedence 1. Header/Footer 2. Left column/Right column 3. Body rows. For example, if a cell appears in
both the header and the left column, the formatting from the header cell style is used.
Table style precedence 1. Cell overrides 2. Cell style 3. Cell styles applied from a table style 4. Table overrides 5. Table
styles. For example, if you apply one fill using the Cell Options dialog box and another fill using the cell style, the fill
from the Cell Options dialog box is used.
For a video tutorial on using table styles, see www.adobe.com/go/vid0084.
Table/Cell Styles panels overview
Use the Table Styles panel (Window > Styles >Table Styles) to create and name table styles, and to apply the styles to
existing tables or tables you create or import. Use the Cell Styles panel (Window
> Styles > Cell Styles) to create and
name cell styles, and to apply the styles to table cells. Styles are saved with a document and appear in the panel each
time you open that document. You can save table and cell styles in groups for easier management.
When you position the insertion point in a cell or table, any style that is applied is highlighted in either of the panels.
The name of any cell style that is applied through a table style appears in the lower left corner of the Cell Styles area. If
you select a range of cells that contains multiple styles, no style is highlighted and the Cell Styles panel displays
“(Mixed).”
Open the Table Styles or Cell Styles panel
❖Choose Window > Styles, and choose Table Styles or Cell Styles.
A
BCD

309
USING INDESIGN
Tables
Last updated 11/16/2011
Change how styles are listed in the panel
•Select Small Panel Rows to display a condensed version of the styles.
•Drag the style to a different position. You can also drag styles to groups that you create.
•Choose Sort By Name from the panel menu to list the styles alphabetically.
Define table and cell styles
For a video tutorial on using table styles, see www.adobe.com/go/vid0084.
1If you want to base a new style on the formatting of an existing table or cell, place the insertion point in a cell.
2If desired, define a paragraph style for the cell style.
3Choose Window > Styles >Table Styles to open the Table Style panel, or choose Window > Styles > Cell Styles to
open the Cell Styles panel.
4
Choose New Table Style from the Table Styles panel menu, or choose New Cell Style from the Cell Styles panel menu.
5For Style Name, type a name.
6For Based On, select which style the current style is based on.
7To define a style shortcut, position the insertion point in the Shortcut text box and make sure that Num Lock is on.
Then hold down any combination of Shift, Alt, or Ctrl (Windows) or Shift, Option, and Command (Mac
OS), and
press a number on the numeric keypad. You cannot use letters or non-keypad numbers for defining style shortcuts.
8To specify the formatting attributes, click a category on the left and specify the attributes you want. For example,
to assign a paragraph style to a cell style, click the General category, and then choose the paragraph style from the
Paragraph Style menu.
For cell styles, options that don’t have a setting specified are ignored in the style. If you don’t want a setting to be part
of the style, choose (Ignore) from the setting’s menu, delete the contents of the field, or click a check box until a small
box appears in Windows or a hyphen (-) appears in Mac
OS.
9If you want the new style to appear in a style group you’ve created, drag it to the style group folder.
More Help topics
“Group styles” on page 218
Table Styles video
Load (import) table styles from other documents
You can import table and cell styles from another InDesign document into the active document. During import, you
can determine which styles are loaded and what should occur if a loaded style has the same name as a style in the
current document. You can also import styles from an InCopy document.
1From the menu of the Cell Styles or Table Styles panel, choose Load Cell Styles, Load Table Styles, or Load Table
And Cell Styles.
2Double-click the InDesign document containing the styles you want to import.

310
USING INDESIGN
Tables
Last updated 11/16/2011
3In the Load Styles dialog box, make sure that a check mark appears next to the styles you want to import. If any
existing style has the same name as one of the imported styles, choose one of the following options under Conflict
With Existing Style, and then click
OK:
Use Incoming Style Definition Overwrites the existing style with the loaded style and applies its new attributes to all
cells in the current document that used the old style. The definitions of the incoming and existing styles appear at the
bottom of the Load Styles dialog box so you can compare them.
Auto-Rename Renames the loaded style. For example, if both documents have a style named “Table Style 1,” the
loaded style is renamed “Table Style 1 copy” in the current document.
Apply table and cell styles
Unlike paragraph and character styles, table and cell styles do not share attributes, so applying a table style does not
override cell formatting, and applying a cell style does not override table formatting. By default, applying a cell style
removes formatting applied by any previous cell style, but does not remove local cell formatting. Similarly, applying a
table style removes formatting applied by any previous table style, but does not remove overrides made using the Table
Options dialog box.
In the Styles panel, a plus sign (+) appears next to the current cell or table style if the selected cell or table has additional
formatting that isn’t part of the applied style. Such additional formatting is called an override.
1Position the insertion point in a table, or select the cells to which you want to apply the style.
2Do one of the following:
•Click the table or cell style in the Table Styles or Cell Styles panel (chose Window > Styles >Table Styles or Cell
Styles). If the style is in a style group, expand the style group to locate the style.
•Press the shortcut you defined for the style. (Make sure that Num Lock is on.)
More Help topics
“Use Quick Apply” on page 243
Base one table or cell style on another
You can create links between similar table or cell styles by creating a base, or parent, style. When you edit the parent
style, any changed attribute that appears in the child styles will change as well. By default, table styles are based on [No
Table Style], and cell styles are based on [None].
1Create a new style.
2In the New Table Style or New Cell Style dialog box, select the parent style in the Based On menu. The new style
becomes the child style.
3Specify formatting for the new style to distinguish it from the parent style.
More Help topics
“Duplicate styles or style groups” on page 218

311
USING INDESIGN
Tables
Last updated 11/16/2011
Edit table and cell styles
One of the advantages of using styles is that when you change the definition of a style, all of the tables or cells formatted
with that style change to match the new style definition.
1Do one of the following:
•If you don’t want the style to be applied to a selected table or cell, right-click (Windows) or Control-click (Mac OS)
the style in the Styles panel, and choose Edit [style name].
•In the Styles panel, double-click the style, or select the style and choose Style Options from the Styles panel menu.
Note that this method applies the cell style to any selected cell or the table style to any selected table. If no table is
selected, double-clicking a table style sets it as the default style for any table you create.
2Adjust settings in the dialog box, and then click OK.
Delete table and cell styles
When you delete a style, you can select a different style to replace it, and you can choose whether to preserve the
formatting.
1Select the style in the Styles panel.
2Do one of the following:
•Choose Delete Style from the panel menu.
•Click the Delete icon at the bottom of the panel, or drag the style to the Delete icon.
•Right-click (Windows) or Control-click (Mac OS) the style, and then choose Delete Style. This method is especially
useful for deleting a style without applying it to the selected cell or table.
3Select the style to replace it.
If you select [No Table Style] to replace a table style or [None] to replace a cell style, select Preserve Formatting to keep
the formatting of the table or cell to which the style is applied. The table or cell preserves its formatting but is no longer
associated with a style.
4Click OK.
Redefine table or cell styles based on current formatting
After you apply a style, you can override any of its settings. If you decide you like the changes, you can redefine the
style to retain the new formatting.
1Place the insertion point in the table or cell that is formatted with the style you want to redefine.
2Make changes to the table or cell as necessary.
3Choose Redefine Style from the Styles panel menu.
Note: For cell styles, changes to only those attributes that are part of the cell style will enable the Redefine Style command.
For example, if the cell style includes a red fill and you override a cell to use a blue fill, you can redefine the style based on
that cell. But if you change an attribute that is ignored in the cell style, you can’t redefine the style with that attribute.

312
USING INDESIGN
Tables
Last updated 11/16/2011
Override table and cell styles
After you apply a table or cell style, you can override any of its settings. To override a table style, you can change
options in the Table Options dialog box. To override a cell, you can change options in the Cell Options dialog box or
use other panels to change the stroke or fill. If you select a table or cell that has an override, a plus sign
(+) appears next
to the style in the Styles panel.
You can clear table and cell overrides when you apply a style. You can also clear overrides from a table or cell to which
a style has already been applied.
If a style has a plus sign (+) next to it, hover over the style to view a description of the override attributes.
Preserve or remove overrides while applying a table style
•To apply a table style and preserve cell styles but remove overrides, hold down Alt (Windows) or Option (Mac OS)
as you click the style in the Table Styles panel.
•To apply a table style and remove both cell styles and overrides, hold down Alt+Shift (Windows) or Option+Shift
(Mac
OS) as you click the style in the Table Styles panel.
Right-click (Windows) or Control-click (Mac OS) the style in the Table Styles panel, and then choose Apply [table
style], Clear Cell Styles to apply a style and clear cell styles.
Remove overrides while applying a cell style
❖To apply a cell style and remove overrides, hold down Alt (Windows) or Option (Mac OS) as you click the name
of the style in the Cell Styles panel.
Note: Only those attributes that are part of the cell style are considered overrides. For example, if the cell style includes a
red fill and all other attributes are ignored, changing a different cell option is not considered an override.
Clear attributes not defined by a cell style
❖Choose Clear Attributes Not Defined By Style from the Cell Styles panel menu.
Clear table or cell overrides
1Select the table or cells containing the overrides.
2
In the Styles panel, click the Clear Overrides In Selection icon , or choose Clear Overrides from the Styles panel menu.
Break the link to table or cell styles
When you break the link between tables or cells and the style applied to them, the tables or cells retain their current
formatting. However, future changes to that style won’t affect them.
1Select the cells to which the style has been applied.
2Choose Break Link To Style from the Styles panel menu.

313
Last updated 11/16/2011
Chapter 10: Long document features
Creating book files
Create a book file
A book file is a collection of documents that can share styles, swatches, master pages, and other items. You can
sequentially number pages in booked documents, print selected documents in a book, or export them to
PDF. One
document can belong to multiple book files.
One of the documents added to a book file is the style source. By default, the style source is the first document in the
book, but you can select a new style source at any time. When you synchronize documents in a book, the specified styles
and swatches from the style source replace those in other booked documents.
Michael Murphy provides a video tutorial about creating books at Book Basics.
1Choose File > New > Book.
2Type a name for the book, specify a location, and then click Save.
The Book panel appears. The book file is saved with the file name extension .indb.
3Add documents to the book file.
More Help topics
“Synchronize book documents” on page 315
Add documents to a book file
When you create a book file, it opens in the Book panel. The Book panel is the working area of a book file, where you
add, remove, or rearrange documents.
1Choose Add Document in the Book panel menu, or click the plus button at the bottom of the Book panel.
2Select the Adobe InDesign document or documents you want to add, and then click Open.
You can drag and drop files onto the Book panel from an Explorer (Windows) or Finder (Mac OS) window. You can
also drag a document from one book to another. Hold down Alt (Windows) or Option (Mac OS) to copy the
document.
3If you included documents created in earlier versions of InDesign, they will be converted to Adobe InDesign CS5
format when added to the book. In the Save As dialog box, specify a new name for the converted document (or leave
the name as is), and then click Save.
Note: You must convert Adobe PageMaker or QuarkXPress documents before adding them to the book file.
4If necessary, change the order of the documents in the panel by dragging them up or down to the appropriate
locations in the list.
5To designate a document as the style source, click the box next to the document’s name in the panel.
To open a document in a book file, double-click the document name in the Book panel.

314
USING INDESIGN
Long document features
Last updated 11/16/2011
More Help topics
“Synchronize book documents” on page 315
Manage book files
Each open book file appears on its own tab in the Book panel. If multiple books are open at the same time, click a tab
to bring that book to the front and access its panel menu.
Icons in the Book panel indicate a document’s current status, such as open , missing (the document was moved,
renamed, or deleted), modified (the document was edited or its page or section numbers changed while the book
was closed), or in use (if someone else has the document open in a managed workflow). No icon appears next to
closed documents.
To view the pathname of any document in a book, hold the mouse pointer over the document name until a tooltip
appears. Or, choose Document Information from the Book panel menu.
More Help topics
“Create a book file” on page 313
“Synchronize book documents” on page 315
Save a book file
Book files are separate from document files. For example, when you choose the Save Book command, InDesign saves
the changes to the book, not the documents in the book.
❖Do one of the following:
•To save a book under a new name, choose Save Book As in the Book panel menu, specify a location and filename,
and click Save.
•To save an existing book under the same name, choose Save Book in the Book panel menu, or click the Save
button
at the bottom of the Book panel.
Note: If you are sharing book files over a server, make sure that you have a file management system in place so that you
don’t save over each other’s changes accidentally.
Close a book file
•To close a single book, choose Close Book in the book’s panel menu.
•To close all open books docked together in the same panel, click the close button on the Book panel’s title bar.
Remove book documents
1Select the document in the Book panel.
2Choose Remove Document in the Book panel menu.
Removing the document from the book file doesn’t delete the file on disk; the document is removed only from the book file.
Replace book documents
1Select the document in the Book panel.
2
Choose Replace Document in the Book panel menu, locate the document you want to replace it with, and then click Open.

315
USING INDESIGN
Long document features
Last updated 11/16/2011
Open a book file in Explorer or Finder
1In the books panel, select a document.
2From the books panel menu, choose Reveal In Explorer (Windows) or Reveal In Finder (Mac OS).
A browser window opens that displays the selected file.
Synchronize book documents
When you synchronize documents in a book, the items you specify—styles, variables, master pages, trap presets, cross-
reference formats, conditional text settings, numbered lists, and swatches—are copied from the style source to the
specified documents in the book, replacing any items that have identical names.
If items in the style source are not found in the documents being synchronized, they are added. Items that are not
included in the style source are left as is in the documents being synchronized.
For a video tutorial on synchronizing book documents, see www.adobe.com/go/vid0216.
More Help topics
Synchronizing Book Documents video
Select items to synchronize
1Choose Synchronize Options in the Book panel menu.
2Select the items you want to copy from the style source to other book documents.
Be sure to select all styles included in the definition of other styles. For example, an object style may contain paragraph
and character styles, which in turn include swatches.
3Select Smart Match Style Groups to avoid duplicating uniquely named styles that have been moved into or out of
style groups.
Suppose the style source includes a character style in a style group, and the documents being synchronized include this
same character style outside the style group. If this option is selected, the character style is moved into the style group
in synchronized documents.
If this option is not selected, a second instance of the character style is created in the style group with options that
match the style source. The character style outside the style group does not change.
Note: If a document contains multiple styles that have the same name (for example, Character Style 1 in a style group
and Character Style 1 outside of a style group), InDesign behaves as if the option is not selected. For best results, create
styles with unique names.
4Click OK.
Synchronize documents in a book file
You can synchronize the book while documents in the book are closed. InDesign opens the closed documents, makes
any changes, and then saves and closes the documents. Documents that are open when you synchronize are changed
but not saved.
1In the Book panel, click the blank box next to the document that you want to be the style source; the style source
icon
indicates which document is the style source.

316
USING INDESIGN
Long document features
Last updated 11/16/2011
Selected style source
2Make sure that the items you want copied from the style source are selected in the Synchronize Options dialog box.
3In the Book panel, select the documents you want to synchronize with the style source document. If no document
is selected, the entire book will be synchronized.
To make sure that no documents are selected, click the blank gray area below the booked documents—you may need
to scroll or resize the Book panel. You can also hold down Ctrl (Windows) or Command (Mac OS) and click a selected
document to deselect it.
4Choose Synchronize Selected Documents or Synchronize Book from the Book panel menu, or click the
Synchronize button
at the bottom of the Book panel.
Note: Choosing Edit > Undo will undo changes only in documents that are open at the time synchronization occurs.
Synchronizing master pages
Master pages are synchronized in the same way as other items—master pages with the same name (such as A-Master)
as those in the style source are replaced. Synchronizing masters is useful for documents that use the same design
elements, such as running headers and footers. However, if you want to preserve page items on a master page in
documents other than the style source, either don’t synchronize master pages or create master pages with different
names.
Any master page items that are overridden on document pages after you synchronize masters for the first time are
detached from the master. Therefore, if you plan on synchronizing master pages in your book, it’s a good idea to
synchronize all the documents in your book at the start of the design process. That way, overridden master page items
will maintain their connection to the master page and will continue to be updated from modified master page items in
the style source.
It’s also a good idea to synchronize master pages using only one style source. If you synchronize from a different style
source, overridden master page items may become detached from the master page. If you need to synchronize using a
different style source, deselect the Master Pages option in the Synchronize Options dialog box before doing so.
Convert book files from previous InDesign versions
You can convert a book file created in a previous version of InDesign by opening and saving it in InDesign CS5. When
you synchronize, update numbering, print, package, or export a converted book, the documents it contains are also
converted to InDesign CS5 format. You can decide whether you want to overwrite or keep the original document files.
Convert a book file for use with InDesign CS5
1In InDesign CS5, choose File > Open.
2Select the book file created in a previous version of InDesign and click OK.
A warning appears if the book file contains documents saved in a previous InDesign format.
3Choose Save Book As from the Book panel menu. Specify a new name for the converted book file, and click Save.

317
USING INDESIGN
Long document features
Last updated 11/16/2011
Convert documents in a book file
1Open the book file in InDesign CS5.
2In the Book panel menu:
•If you want the original documents to be overwritten during conversion, select Automatic Document Conversion.
•If you want to keep the original documents and save the converted documents with new names, deselect Automatic
Document Conversion. (The book list will be updated to include the converted files, not the originals.)
3Do any of the following to convert the documents:
•Choose Synchronize Book from the Book panel menu. (See “Synchronize book documents” on page 315.)
•Choose Update Numbering > Update All Numbers from the Book panel menu.
4If Automatic Document Conversion is not selected, InDesign prompts you to save each converted document with
a new name.
Note: Documents are also converted when you print or export the book to Adobe PDF.
Number pages, chapters, and paragraphs in a book
You can determine how pages, chapters, and paragraphs are numbered in a book. In a book file, the numbering styles
and starting numbers for pages and chapters are determined by each document’s settings in the Numbering & Section
Options dialog box or the Document Numbering Options dialog box. You can open one of these dialog boxes by
choosing Layout
> Numbering & Section Options in the document or by choosing Document Numbering Options in
the Book panel menu.
For information on adding page numbering to a document, see “Add basic page numbering” on page 88.
For numbered paragraphs (such as lists of figures), numbering is determined by the numbered list style definition
contained by the paragraph style.
The page range appears beside each document name in the Book panel. By default, InDesign updates page and section
numbering in the Book panel when you add or remove pages in booked documents, or when you make changes to the
book file, such as reordering, adding, or removing documents. If you turn off the setting to automatically update page
and section numbers, you can update numbering in a book manually.
If the book is updated and the numbering seems incorrect, the problem may be that absolute numbers are displayed
instead of section numbers in General preferences. See “Display absolute or section numbering in the Pages panel” on
page 92.
If a document is missing or cannot be opened, the page range is shown as “?” from the place where the missing
document should be to the end of the book, indicating that the true page range is unknown. Remove or replace the
missing document before you update numbering. If the In Use icon
appears, someone using a different computer
has opened the document in a managed workflow; the person must close the document before you can update
numbering.
For a video tutorial on numbering pages in a book, see www.adobe.com/go/vid0217.
More Help topics
“Add basic page numbering” on page 88
“Create a paragraph style for running lists” on page 281
Setting Pagination video

318
USING INDESIGN
Long document features
Last updated 11/16/2011
Change page and chapter numbering options for each document
1Select the document in the Book panel.
2Choose Document Numbering Options in the Book panel menu, or double-click the document’s page numbers in
the Book panel.
3Specify the page, section, and chapter numbering options. (See “Document numbering options” on page 92.)
4Click OK.
Note: If you specify a starting page number in a booked document instead of selecting Automatic Page Numbering, the
booked document will begin on the specified page; all subsequent documents in the book will be renumbered accordingly.
Start numbering on an odd or even page
You can start document numbering on odd- or even-numbered pages in booked documents.
1Choose Book Page Numbering Options in the Book panel menu.
2Choose Continue On Next Odd Page or Continue On Next Even Page.
3Select Insert Blank Page to add a blank page to the end of any document in which the subsequent document must
begin on an odd- or even-numbered page, and then click
OK.
Turn off automatic page numbering in a book
1Choose Book Page Numbering Options from the Book panel menu.
2Deselect Automatically Update Page & Section Numbers, and then click OK.
3To update page numbering manually, choose Update Numbering > Update All Numbers in the Book panel menu.
You can also update only page and section numbers or only chapter and paragraph numbers.
Use sequential paragraph numbering in books
To use sequential paragraph numbering for lists of figures, tables, or other items, you first define a numbered list that
is used in a paragraph style. The numbered list you define determines whether paragraph numbering maintains
sequential numbering across documents in a book.
1Open the document that is used as the style source for the book.
2Choose Type > Bulleted And Numbered Lists > Define Lists.
3Click New to define a list or select an existing list and choose Edit.
4Select both Continue Numbers Across Stories and Continue Numbers From Previous Document In Book.
5Click OK.
6Define a paragraph style that uses a numbered list, and apply it to the text in each document that contains the list.
(See “Create a paragraph style for running lists” on page 281.)
To make sure the same numbered list setting is used across all documents in the book, select the Paragraph Styles and
Numbered Lists options in the Synchronize Options dialog box, and then synchronize the book.

319
USING INDESIGN
Long document features
Last updated 11/16/2011
Print or output a book file
One advantage of using a book file is that you can use a single command to output—for print, preflight, package, or
export to EPUB or PDF—selected booked documents or the entire book.
1In the Book panel, do one of the following:
•To output specific documents, select the desired documents.
•To output the entire book, make sure no documents are selected.
2Choose an output command (such as Print Book or Print Selected Documents) in the Book panel menu.
More Help topics
“Print a document or book” on page 598
“Export content for EPUB (CS5)” on page 121
“Preflight books” on page 620
“Export to PDF for printing” on page 501
“Create interactive documents for PDF” on page 530
Creating a table of contents
About tables of contents
A table of contents (TOC) can list the contents of a book, magazine, or other publication; display a list of illustrations,
advertisers, or photo credits; or include other information to help readers find information in a document or book file.
One document may contain multiple tables of contents—for example, a list of chapters and a list of illustrations.
Each table of contents is a separate story consisting of a heading and a list of entries sorted either by page number or
alphabetically. Entries, including page numbers, are pulled directly from content in your document and can be
updated at any time—even across multiple documents in a book file.
The process for creating a table of contents requires three main steps. First, create and apply the paragraph styles you’ll
use as the basis for the TOC. Second, specify which styles are used in the TOC and how the TOC is formatted. Third,
flow the TOC into your document.
Table of contents entries can be automatically added to the Bookmarks panel for use in documents exported as
Adobe
PDF.
For a video tutorial on creating a table of contents, see www.adobe.com/go/vid0219.
Tips for planning a table of contents
Consider the following when planning a table of contents:
•Some tables of contents are built from content that does not actually appear in the published document, such as a
list of advertisers in a magazine. To do this in InDesign, enter content on a hidden layer and include it when
generating a TOC.
•You can load TOC styles from other documents or books to build new tables of contents with the same settings and
formatting. (You might need to edit an imported TOC style if the names of paragraph styles in the document do
not match those in the source document.)
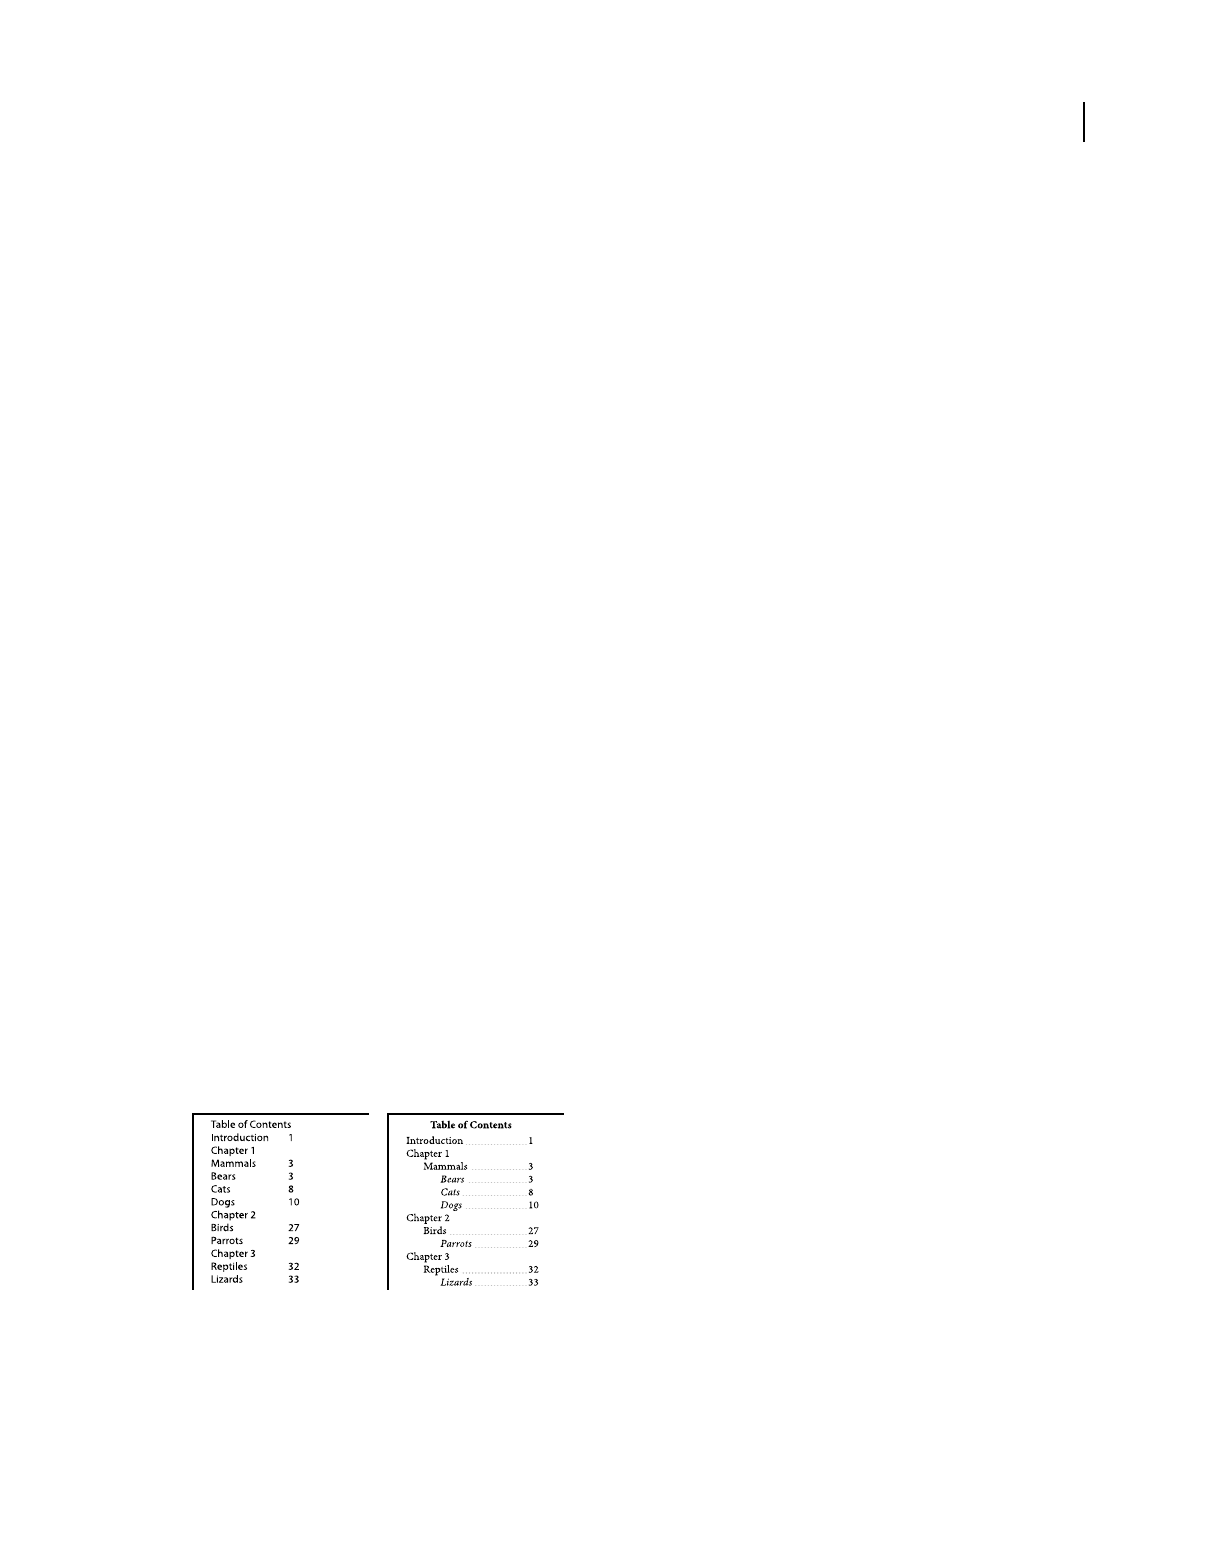
320
USING INDESIGN
Long document features
Last updated 11/16/2011
•You can create paragraph styles for the table of contents’ title and entries, including tab stops and leaders, if desired.
You can then apply these paragraph styles when you generate the table of contents.
•You can create character styles to format the page numbers and the characters separating them from the entries.
For example, if you want the page numbers to be in bold, create a character style that includes the bold attribute,
and then select that character style when you create the table of contents.
More Help topics
Creating a Table of Contents video
Creating tables of contents in books
For best results, be sure to do the following before creating a table of contents for a book:
•Before you create a table of contents, verify that the book list is complete, that all documents are listed in the correct
order, and that all headings have been formatted with the appropriate paragraph styles.
•Be sure to use paragraph styles consistently throughout the book. Avoid creating documents with styles that have
identical names but different definitions. If multiple styles have the same name but different style definitions,
InDesign uses the style definition in the current document (if a definition exists there), or the first occurrence of
the style in the book.
•If the necessary styles do not appear in the pop-up menus in the Table of Contents dialog box, you may need to
synchronize the book so that the styles are copied to the document containing the table of contents.
•If you want number prefixes (such as 1-1, 1-3, and so on) to appear in your table of contents, use section numbering
rather than chapter numbering. Section number prefixes can be included in a table of contents.
More Help topics
“Synchronize book documents” on page 315
Generate a table of contents
Before you generate a table of contents, decide which paragraphs should be included (such as chapter titles and section
headings), and then define paragraph styles for each. Make sure that these styles are applied to all appropriate
paragraphs in the document or booked documents.
When you generate the table of contents, you can also use paragraph and character styles to format the table of
contents.
Table of contents without paragraph styles (left) and with paragraph styles applied to entries (right)

321
USING INDESIGN
Long document features
Last updated 11/16/2011
If paragraphs that are to be included in the table of contents appear in different stories on the same page, their order
in the TOC is determined by their position on the page.
1Do one of the following:
•If you’re creating a table of contents for a single document, you may want to add a new page at the beginning of the
document.
•If you’re creating a table of contents for multiple documents in a book, create or open the document to be used for
the table of contents, make sure that it’s included in the book, and then open the book file.
2Choose Layout > Table Of Contents.
If you’ve defined a TOC style that has the appropriate settings for your TOC, you can choose it from the TOC Style menu.
3In the Title box, type a title for your TOC (such as Contents or List of Figures). This title will appear at the top of the
table of contents. To format the title, choose a style from the Style menu.
4Select Include Book Documents to create a single table of contents for all documents in the book list, and to
renumber the book’s pages. Deselect this option if you want to generate a table of contents for the current document
only. (This option is dimmed if the current document is not part of a book file.)
5Determine which content you want to include in the table of contents by double-clicking paragraph styles in the
Other Styles list to add them to the Include Paragraph Styles list.
6Select Replace Existing Table Of Contents to replace all existing table of contents stories in the document. Deselect
this option if you want to generate a new table of contents, such as a list of figures.
7Specify options to determine how each paragraph style in the table of contents is formatted. (See “Options for
formatting a table of contents” on page 322.)
It’s a good idea to define a TOC style that contains the formatting and other options for your table of contents,
especially if you want to include multiple TOCs in your document. To do so, click Save Style. You can also create TOC
styles by choosing Layout
> Table Of Contents Styles.
8Click OK.
A loaded text cursor appears. Before you click or drag, you can move to a different page or create a new page
without losing the loaded text.
9Click or drag the loaded text cursor on a page to place the new table of contents story.
Note: Avoid threading the TOC frame to other text frames in the document. If you replace the existing TOC, the entire
story will be replaced by the updated TOC.
More Help topics
“About character and paragraph styles” on page 198
Create TOC styles for multiple lists
Use TOC styles if you need to create different tables of contents in your document or book. For example, you can use
one TOC style for a list of contents and another for a list of advertisers, illustrations, or photo credits. Create a TOC
style for each type of list.
Creating TOC styles are also useful if you want to use the same TOC formatting in another document.
Note: Don’t confuse TOC styles with paragraph styles that have a “TOC” prefix. TOC-prefixed paragraph styles (for
example “TOC title”) are used to format the table of contents entries themselves. In contrast, a TOC style is a collection
of settings used to automatically create a table of contents.

322
USING INDESIGN
Long document features
Last updated 11/16/2011
Create a TOC style
1Choose Layout > Table Of Contents Styles.
2Click New.
3Type a name for the TOC style you are creating.
4In the Title box, type a title for your TOC (such as Contents or List of Figures). This title will appear at the top of the
table of contents. To specify a title style, choose a style from the Style menu.
5From the Other Styles list, select the paragraph styles that represent content you want to include in the table of
contents, then click Add to add them to the Include Paragraph Styles list.
6Specify options to determine how each paragraph style is formatted. (See “Options for formatting a table of
contents” on page 322.)
Import TOC styles from another document
1Choose Layout > Table Of Contents Styles.
2Click Load, select the InDesign file containing the TOC styles you want to copy, and then click Open.
3Click OK.
Note: If the paragraph styles in your document do not match the paragraph styles in the TOC style you import, you’ll need
to edit the TOC style before generating a table of contents.
Options for formatting a table of contents
When generating or editing a table of contents, use these options to determine the appearance of the generated table
of contents text. Some of these options are available only when you click More Options in the dialog box.
Note: The settings in the Style section apply only to the style currently selected under Include Paragraph Styles. You can
specify different formatting options for each style.
Entry Style For each style in Include Paragraph Styles, choose a paragraph style to apply to the associated table of
contents entries.
Page Number You might want to create a character style that formats the page number. You can then select this style
in the Style pop-up list to the right of Page Number. (See “Add paragraph and character styles” on page 199.)
If you want the page numbers of the TOC to include prefixes, or to use a different numbering convention, see “Define
section numbering” on page 91.
Between Entry And Number Specify which characters you want between the table of contents entry and its page
number. The default is ^t, which tells InDesign to insert a tab. You can choose other special characters, such as Right
Indent Tab or Em Space, in the pop-up list. For a complete list of special characters and how to work with them, see
“Insert glyphs and special characters” on page 177.
Select the existing text in the box before you choose a different special character, to make sure that you don’t include
both characters.
You might want to create a character style that formats the space between the entry and the page number. You can
then select this style in the Style pop-up list to the right of Between Entry And Number. (See “Add paragraph and
character styles” on page 199.)
If the entry’s paragraph style includes a tab leader setting, and if the tab character (^t) is selected, a tab leader appears
in the generated table of contents. For more information, see “Create TOC entries with tab leaders” on page 323.
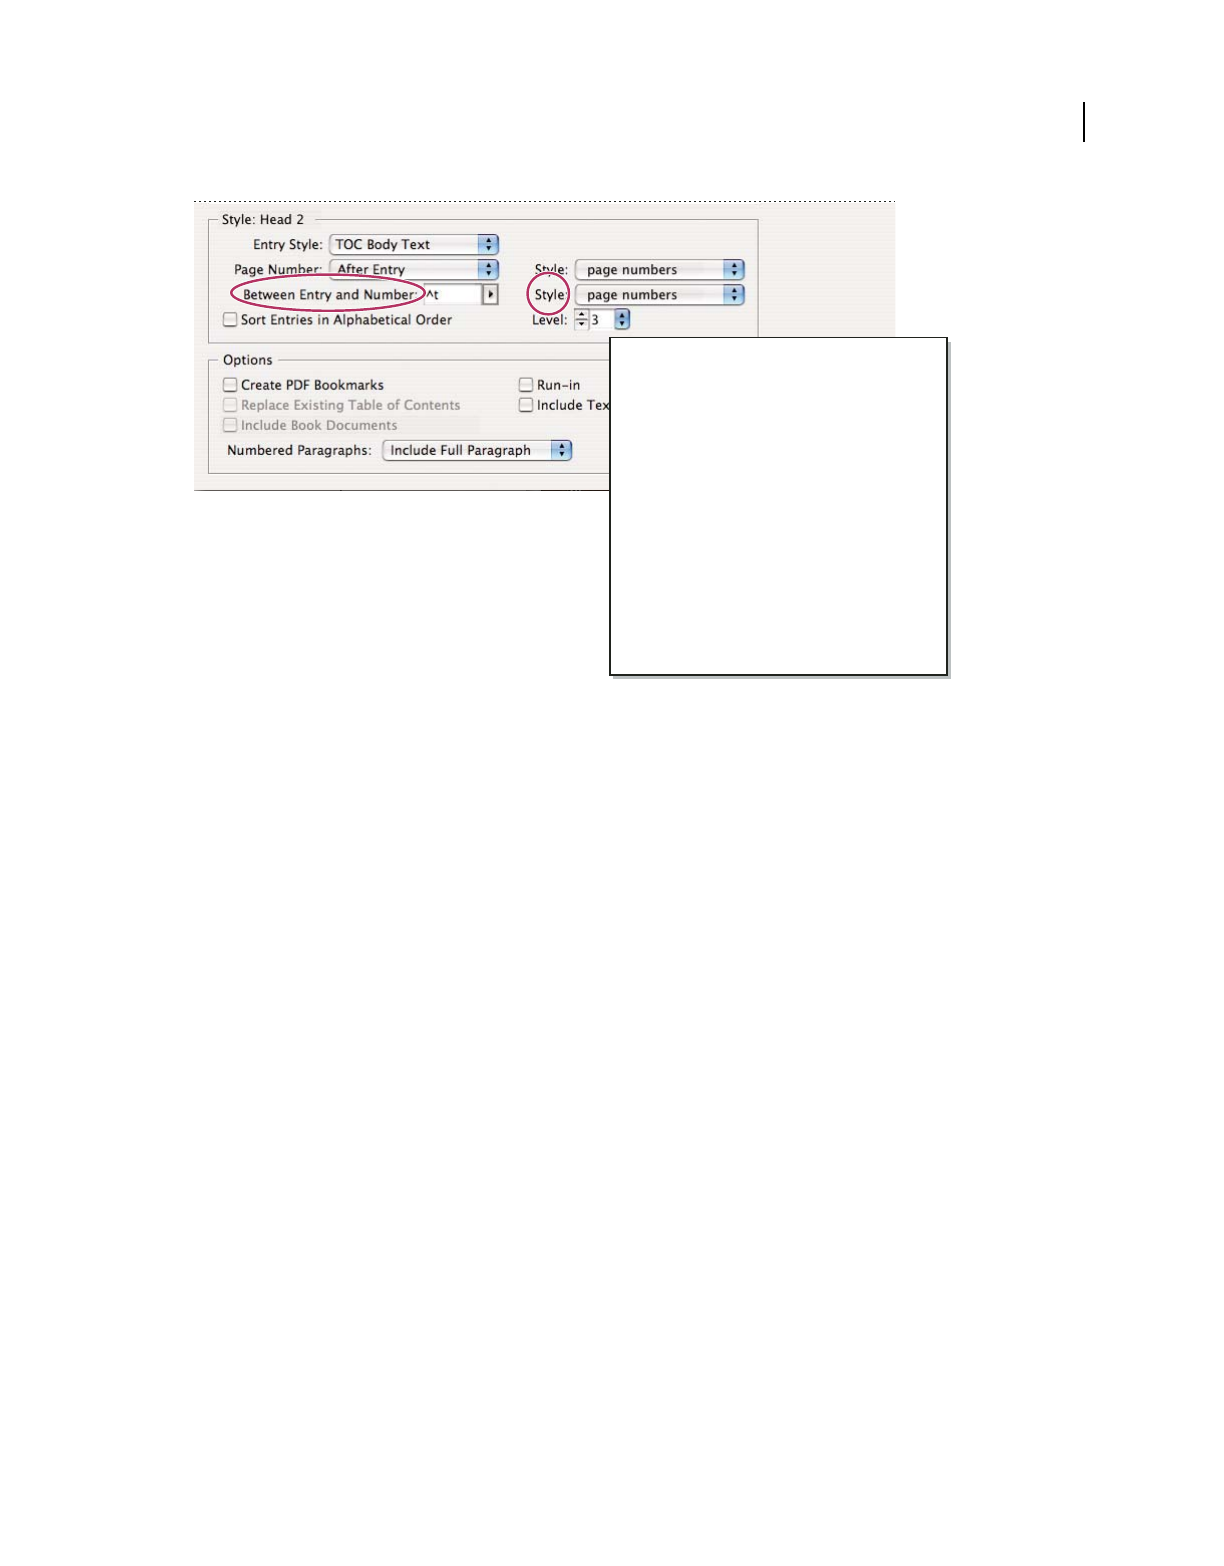
323
USING INDESIGN
Long document features
Last updated 11/16/2011
You can specify a character that separates an entry and page number, as well as a style to apply to a character.
Sort Entries in Alphabetical Order Select this option to sort table of contents entries in the selected style alphabetically.
This option is useful for creating simple lists, such as lists of advertisers. Nested entries (Level 2 or 3) sort alphabetically
within their group (Level 1 or 2, respectively).
Note: The sort order for a table of contents is determined by the document’s default language setting. To change the
default language setting, make sure nothing is selected and then choose a language from the Language menu in the
Character panel.
Level By default, each item added to the Include Paragraph Styles box is set one level lower than the item immediately
above it. You can change this hierarchy by specifying a new level number for the selected paragraph style. This option
adjusts only the display in the dialog box. It has no effect on the final table of contents unless the list is alphabetized,
in which case the entries are sorted by level.
Create PDF Bookmarks Select this option if you want the table of contents entries to appear in the Bookmarks panel of
Adobe Acrobat or Adobe Reader® when the document is exported to PDF.
Run-in Select this option if you want all TOC entries to be run into a single paragraph. A semicolon followed by a
space
(; ) separates the entries.
Include Text On Hidden Layers Select this option only if you want the paragraphs on hidden layers to be included in
your table of contents. This is useful when creating a list of advertisers or illustrations that may not appear as visible
text in the document itself. Deselect this option when you’ve used layers to store various versions or translations of the
same text.
Numbered Paragraphs If your table of contents includes a paragraph style that uses numbering, specify whether the
TOC entry includes the full paragraph (both number and text), only the numbers, or only the paragraph.
Create TOC entries with tab leaders
Entries in a table of contents are often formatted with dots or tab leaders separating the entry from its associated page
number.
Contents
Introduction 1
Chapter 1 3
Mammals 3
Bears 3
Cats 8
Dogs 10
Chapter 2 26
Birds 27
Parrots 29
Chapter 3 31
Reptiles 32
Lizards 33
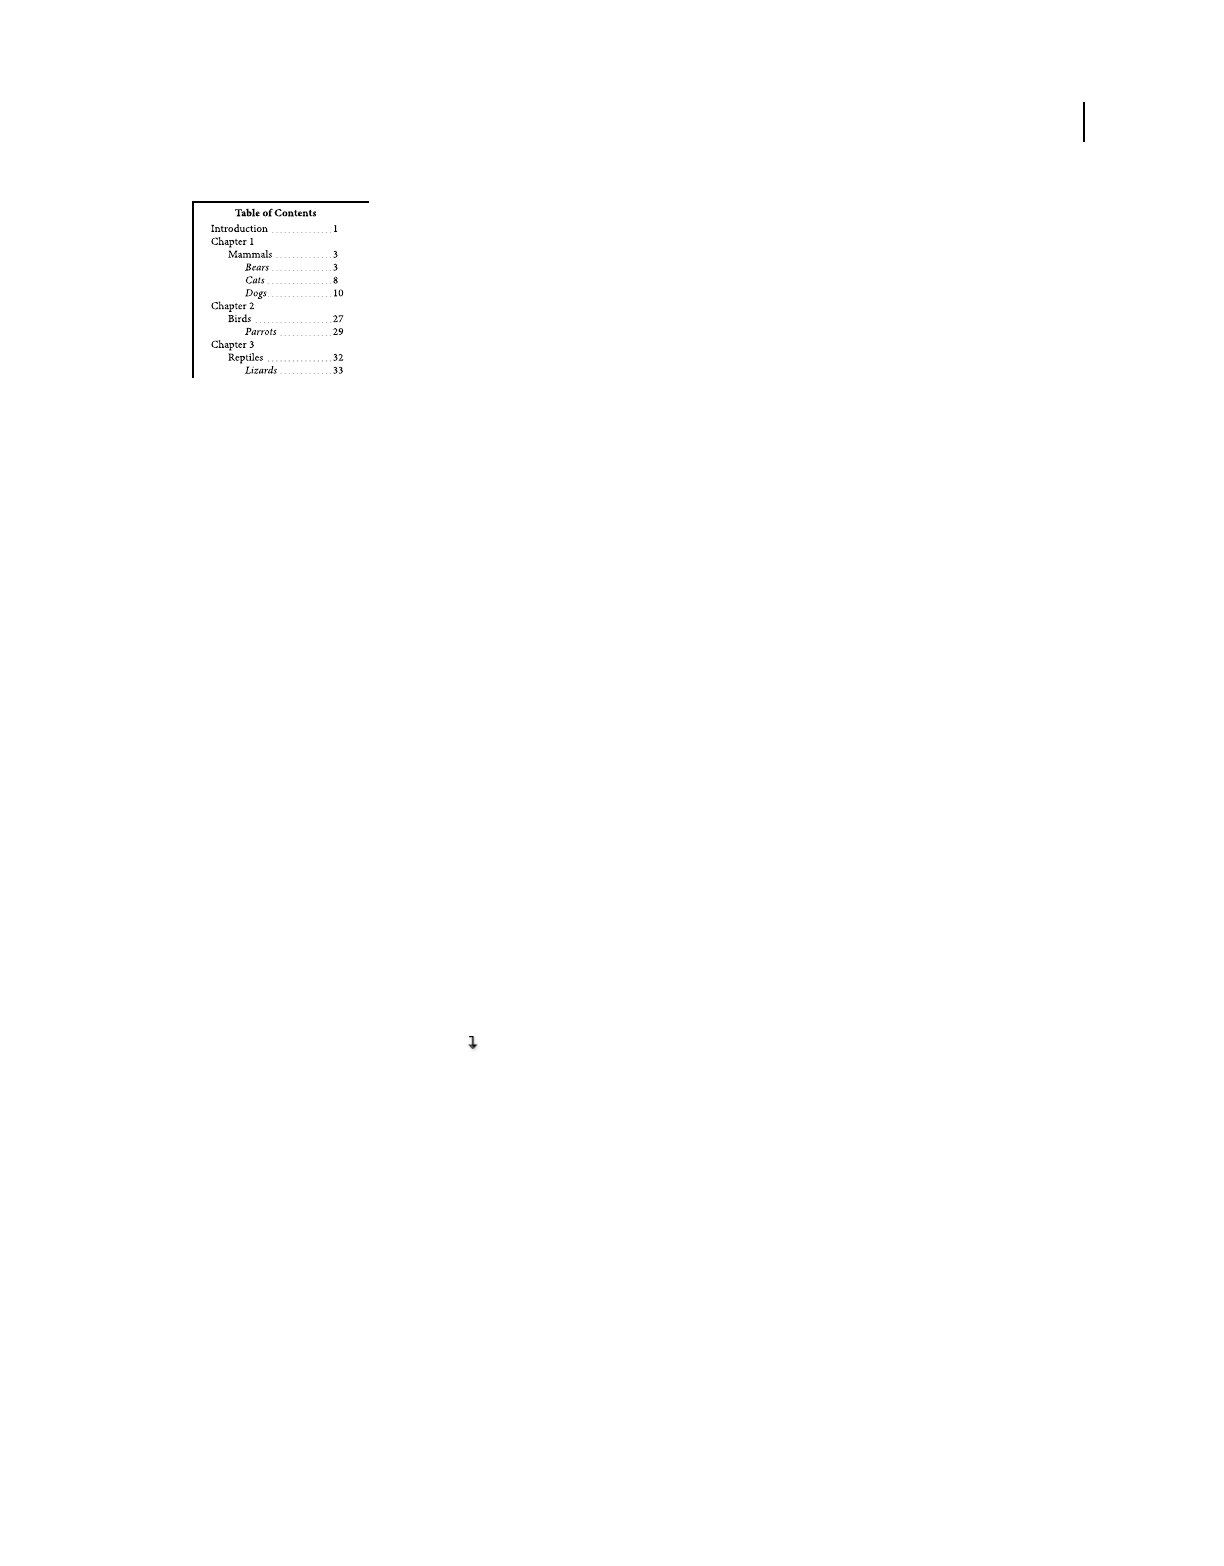
324
USING INDESIGN
Long document features
Last updated 11/16/2011
Table of contents with dot leaders
1Create a paragraph style with a tab leader. (See “Create a paragraph style with a tab leader” on page 324.)
2To update the table of contents settings, do one of the following:
•Choose Layout > Table Of Contents Style. Select a TOC style, and click Edit.
•Choose Layout > Table Of Contents (if you are not using a TOC style).
3Under Include Paragraph Styles, select an item you want to appear with a tab leader in the table of contents.
4For Entry Style, select the paragraph style that contains the tab leader.
5Click More Options.
6Verify that Between Entry And Number is set to ^t (representing a tab). Click OK or Save to exit.
7Update the table of contents, if necessary, by choosing Layout > Update Table Of Contents. Otherwise, place the
new table of contents story.
Create a paragraph style with a tab leader
1Choose Window > Styles > Paragraph Styles to display the Paragraph Styles panel.
2In the Paragraph Styles panel, do one of the following:
•Double-click the name of the paragraph style applied to entries in your table of contents.
•From the panel menu, choose New Paragraph Style.
3Enter a name, if necessary, for the paragraph style.
4Click Tabs.
5Select the right-justified tab icon , and then click on the ruler to position the tab stop.
If the paragraphs you’re applying the style to include numbered list items, make sure that you include two tab settings
— the first for the indented number and the second for the tab leader.
6For Leader, type a period (.).
7Select other style options as desired, and click OK.
Update and edit a table of contents
The table of contents is like a snapshot of content in your document. If page numbers in your document change, or if
you edit headings or other elements associated with table of contents entries, you’ll need to regenerate the table of
contents to update it.
More Help topics
“Edit character and paragraph styles” on page 203
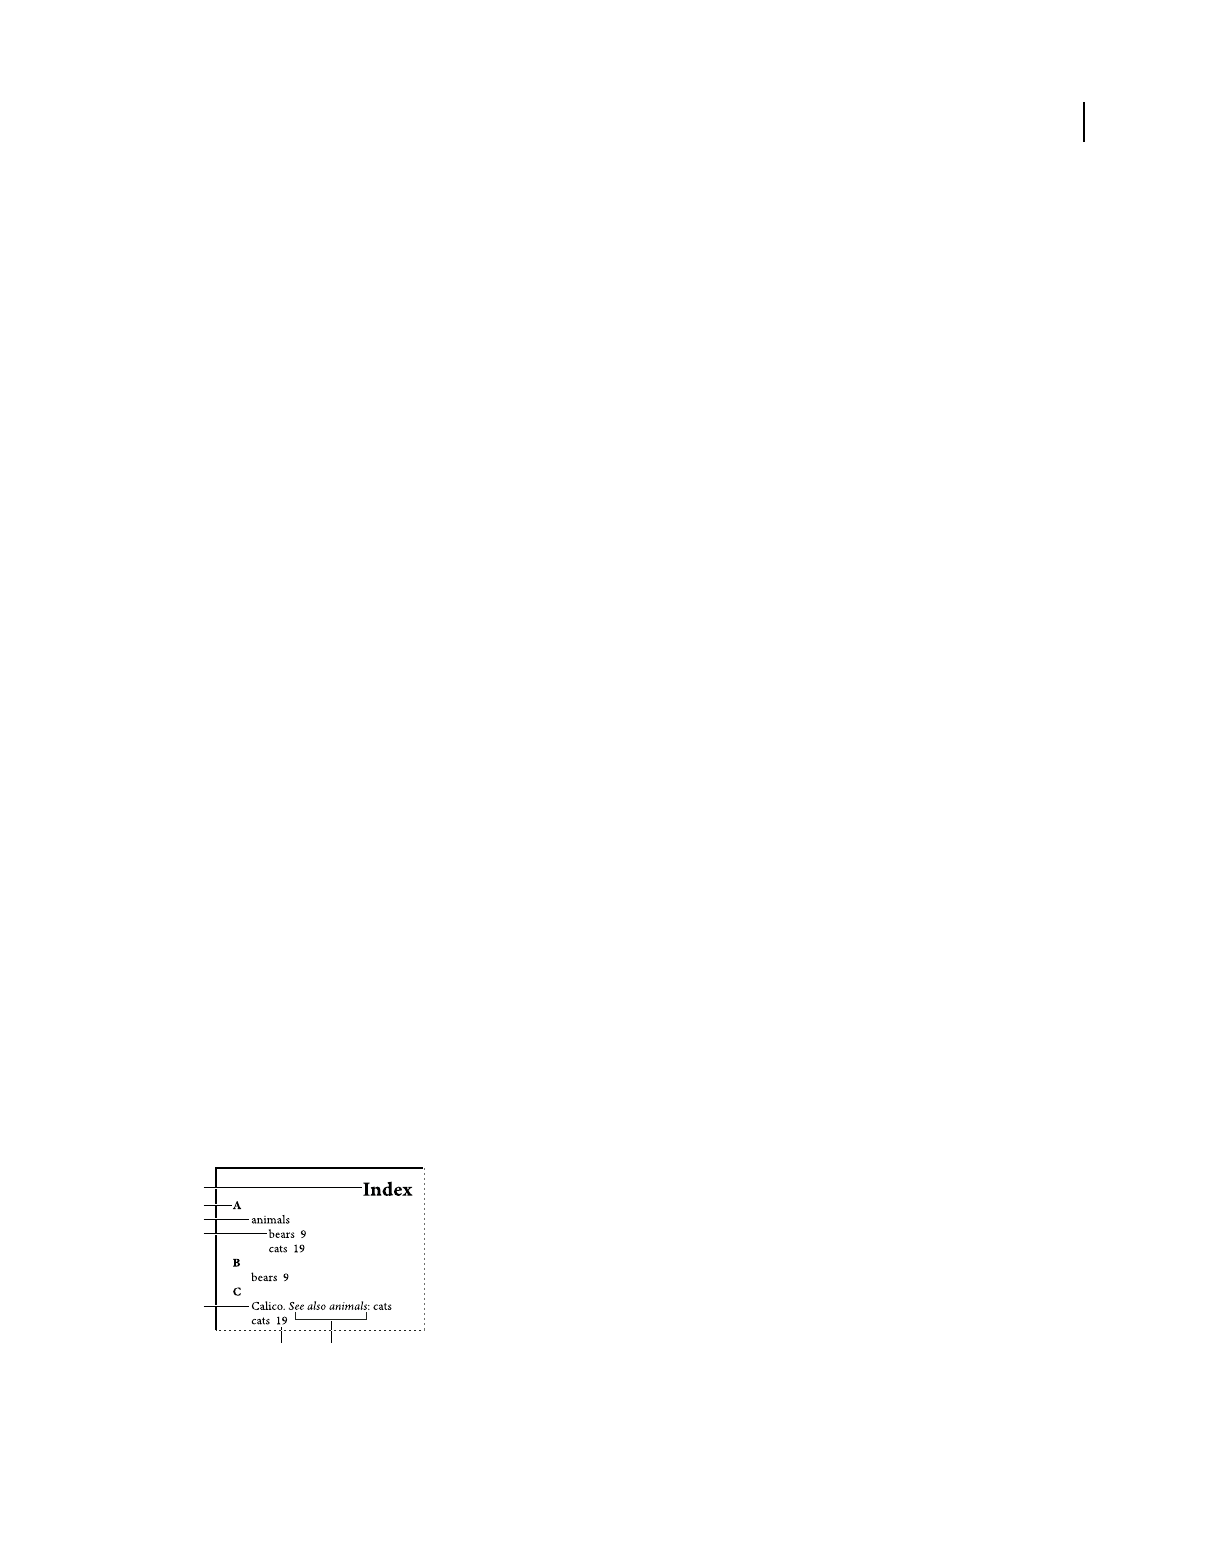
325
USING INDESIGN
Long document features
Last updated 11/16/2011
Update a table of contents
1Open the document containing the table of contents.
2Do any of the following:
•To make changes to table of contents entries, edit your document or booked documents, not the table of contents
story itself.
•To change the formatting applied to the table of contents title, entries, or page numbers, edit the paragraph or
character styles associated with these elements.
•To change how pages are numbered (for example, 1, 2, 3 or i, ii, iii), change section numbering in the document or
book. (See “Number pages, chapters, and paragraphs in a book” on page 317.)
•To specify a new title, include other paragraph styles in the table of contents, or further format table of contents
entries, edit the TOC style.
3Select or place the insertion point in the text frame containing the table of contents, and then choose Layout >
Update Table Of Contents.
4If you have multiple tables of contents in your document, such as a list of figures and a list of advertisers, select the
text frame containing a different list, and then choose Layout > Update Table Of Contents.
Editing a table of contents
If your table of contents requires editing, edit the actual paragraphs in the document—not the table of contents story—
and then generate a new table of contents. If you edit the table of contents story, you’ll lose your revisions when you
generate a new table of contents. For the same reason, you should edit the styles used to format the table of contents
entries, rather than formatting the table of contents directly.
Creating an index
About indexing
You can create a simple keyword index or a comprehensive, detailed guide to the information in your book. You can
create only one index for a document or book. To create an index, you first place index markers in the text. You
associate each index marker with the word, called a topic, that you want to appear in the index.
When you generate the index, each topic is listed, along with the page on which it was found. The topics are sorted
alphabetically, typically under section headings (A, B, C, and so on). An index entry consists of a topic (the term
readers look up) paired with either a page reference (page number or range) or a cross-reference. A cross-reference,
preceded by “See” or “See also,” points the reader to other entries in the index, rather than to a page number.
Parts of an index
A. Title B. Section heading C. Index entry D. Subentry E. Topic F. Page reference G. Cross-reference
B
A
C
D
E
F G

326
USING INDESIGN
Long document features
Last updated 11/16/2011
For a video tutorial on creating an index, see www.adobe.com/go/vid0220.
Tips for creating an index
Creating a well-planned and complete index can help make the information in your document immediately accessible
to your readers. Here are a few guidelines to consider:
•Think about how you want your index to look. How many topic levels will it have? Will it refer the reader to other
related topics? Will a simple keyword index suffice, or do you want a more complex index with cross-references to
related topics and a well-researched list of equivalent terms?
•Anticipate the variety of ways by which your readers might look up information. For instance, one reader may
search for information on animals by looking under beasts; another may look for wildlife or fauna.
•Add index entries when the content of your document is fairly stable. If you delete large portions of your text later,
you may lose some of your indexing work.
•A well-planned index presents topics consistently. Common indexing problems include mixing uppercase and
lowercase (cats and Cats) and singular and plural forms (cat and cats). Use a topic list to keep terms consistent.
•Review your index several times before you generate the final index. Look for duplicate entries, weak subject areas,
misspellings, and inconsistencies in capitalization and wording; for example, InDesign treats Cheetah, cheetah, and
cheetahs as separate entries.
Workflow for creating an index
To create an index, follow these basic steps:
1. Create a topic list (optional) A topic list helps you maintain consistency in your index entries. (See “Create a list of
topics for an index” on page 327.)
2. Add index markers. Add index markers on the pages in your document that you want the index entries to refer to.
(See “Add index entries” on page 328.)
3. Generate the index. Generating the index creates a set of entries for markers and their accompanying page
numbers. (See “Generate an index” on page 333.)
4. Flow the index story. Use the loaded text cursor to flow the index into a text frame. In most cases, you’ll want the
index to start on a new page. After you flow the index, you can format the pages and index.
You’ll likely repeat these steps several times as you refine your index prior to publication.
More Help topics
“Add index entries” on page 328
Creating an Index video
Index panel overview
You create, edit, and preview the index using the Index panel (Window > Type & Tables > Index). The panel includes
two modes: Reference and Topic. In Reference mode, the preview area displays complete index entries for the current
document or book. In Topic mode, the preview area displays only topics, not page numbers or cross-references. Topic
mode is used primarily for creating the index structure, whereas Reference mode is where you add your index entries.
In Reference mode, index entries are alphabetized and divided into sections by letter. Triangles next to entries let you
expand or collapse the entry to view subentries, page numbers, and cross-references.
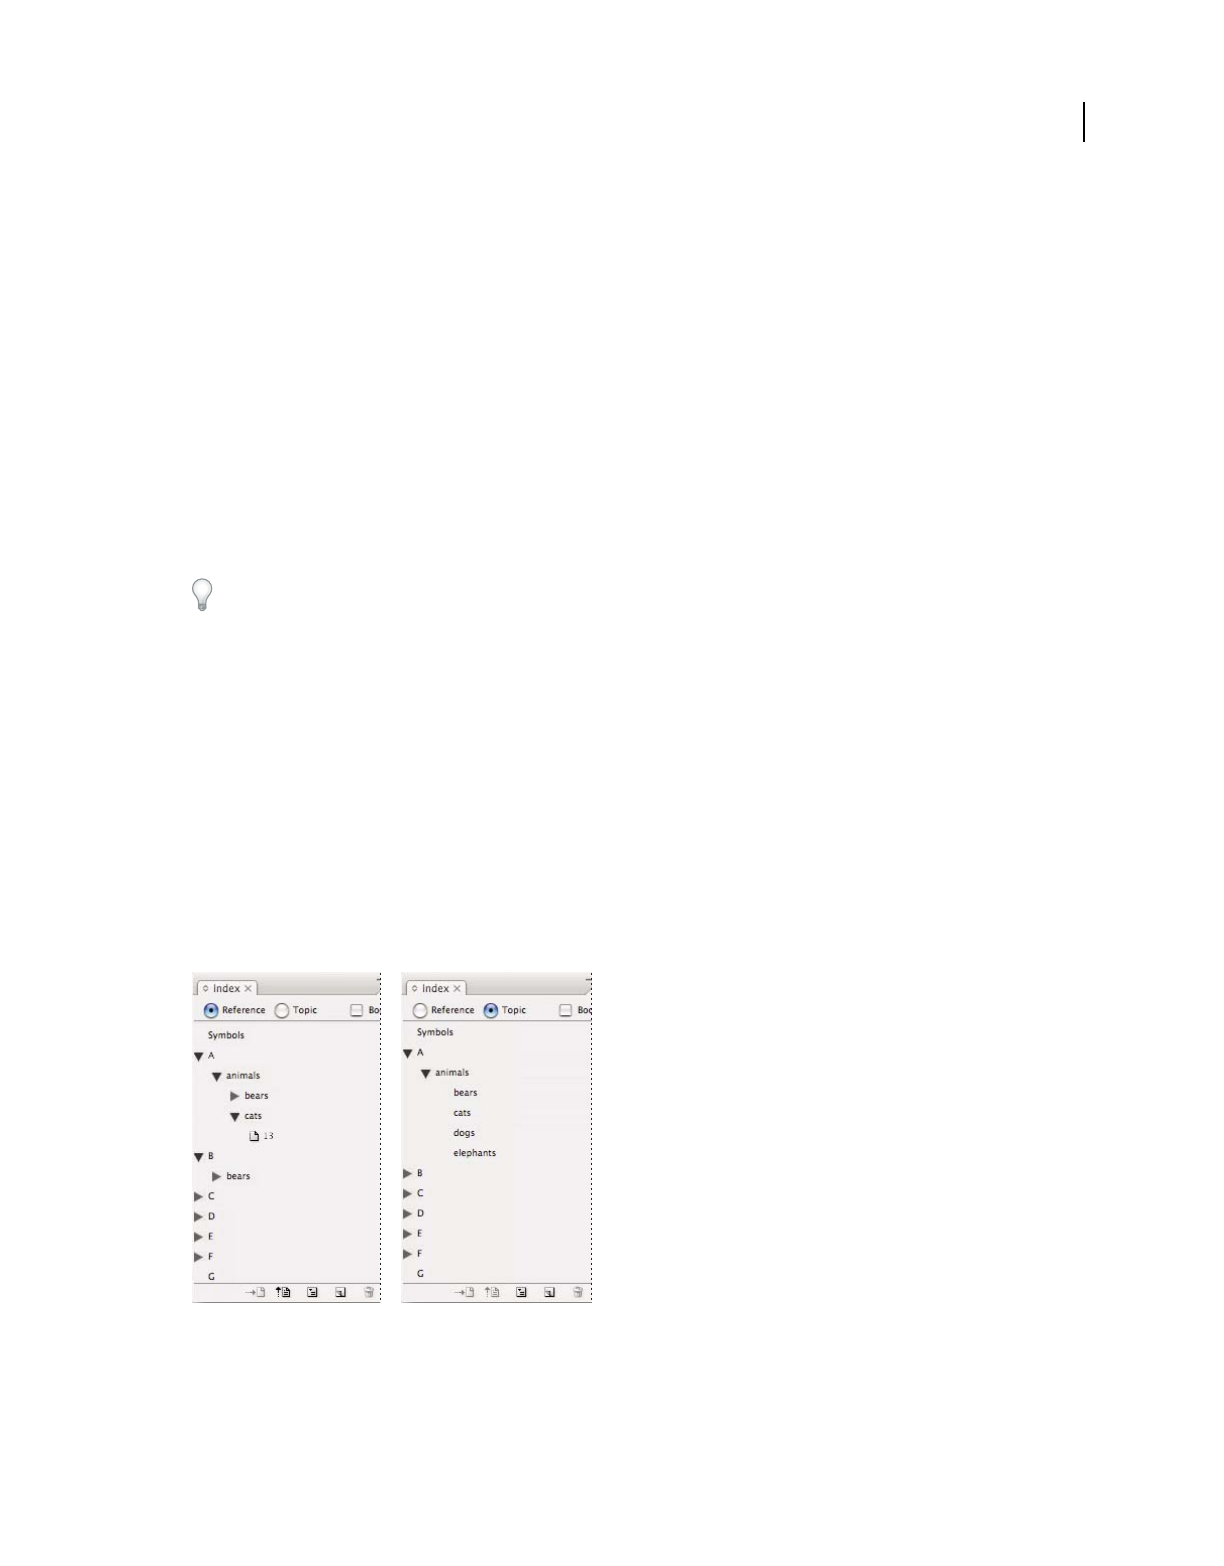
327
USING INDESIGN
Long document features
Last updated 11/16/2011
The following codes appear in place of page references to indicate index entries that may not be included in the
generated index. You may need to choose Update Preview in the Index panel to view the codes.
PB Indicates index entries on the pasteboard. These entries will not appear in the generated index.
HL Indicates index entries on a hidden layer. When you generate the index, you have the option of including index
entries on a hidden layer.
HT Indicates index entries in a hidden condition. Index entries in hidden conditions are not included in the index.
PN Indicates index entries in overset text. When you include these entries in the generated index, they appear without
page numbers.
Master Indicates index entries on a master page. These entries will not appear in the generated index.
Click a triangle to expand or collapse an individual entry. Alt-click (Windows) or Option-click (Mac OS) a triangle to
expand or collapse all subentries under an entry. Ctrl-click (Windows) or Command-click (Mac OS) a triangle to
expand or collapse all entries.
Choose Update Preview in the Index panel menu to update the preview area. This option is especially useful if you’ve
edited your document extensively or moved index markers in the document window.
More Help topics
“Add index entries” on page 328
Creating an Index video
Create a list of topics for an index
You can create or import a list of topics to use as a starting point when creating index entries. Later, when you add
entries to the index, you can select topics from the topic list (instead of typing them each time) to ensure that
information is indexed consistently throughout your document or book.
You create and edit a topic list using the Index panel in Topic mode. Note that Topic mode displays topics only; to
preview index entries, with their associated page numbers and cross-references, use Reference mode instead.
Index panel in Reference mode (left) and Topic mode (right)
Topics in the topic list appear in the New Page Reference dialog box as well. To create an index entry, simply select a
topic and then associate it with a page or cross-reference. Unused topics (those without page or cross-references) are
excluded when you generate an index.

328
USING INDESIGN
Long document features
Last updated 11/16/2011
Creating a topic list before you add index entries is optional. Each time you create an index entry, its topic is
automatically added to the topic list for future use.
By default, topics you add to the Topics list do not appear in the Reference list, which displays only the topics that have
been associated with a page. However, to display the topics in the Reference list, you can choose Show Unused Topics
from the Index panel menu in Reference mode.
Add topics to the topics list
1Choose Window > Type & Tables > Index to display the Index panel.
2Select Topic.
3Choose New Topic from the Index panel menu or click the Create New Index Entry icon at the bottom of the panel.
4Do one of the following:
•Under Topic Levels, type the topic name (for example, animals) in the first box. To create a subtopic, type a name
(cats) in the second box. In this example, “cats” is indented under “animals.” To create a subtopic under the
subtopic, type a name (Calicos) in the third box, and so on.
•Select an existing topic. Enter subtopics in the second, third, and fourth boxes.
5Click Add to add the topic, which will now appear in the New Topic dialog box as well as the Index panel.
6Click Done when you’ve finished adding topics.
To delete a topic that you’ve just added, click Done, select the topic in the Index panel, and then click the Delete
Selected Entry button.
Import topics from another InDesign document
1Choose Import Topics in the Index panel menu.
2Select the document containing the index topics you want to import, and then click Open.
Edit an index topic
Use the Index panel to edit entries before or after you generate an index. Changes you make to your entries in the Index
panel will appear in the next index that you generate, but changes that you make to the generated index story will be
lost when you regenerate the index.
1Open a document containing the index topics.
2In the Index panel, select Topic.
3In the preview area, double-click a topic to edit.
4Edit the topic as desired, and then click OK.
Add index entries
You create index entries using the Index panel in Reference mode. An index entry consists of two parts: a topic and a
reference. Topics can be defined ahead of time using a topic list. References can be page numbers or cross-references
to other topics.
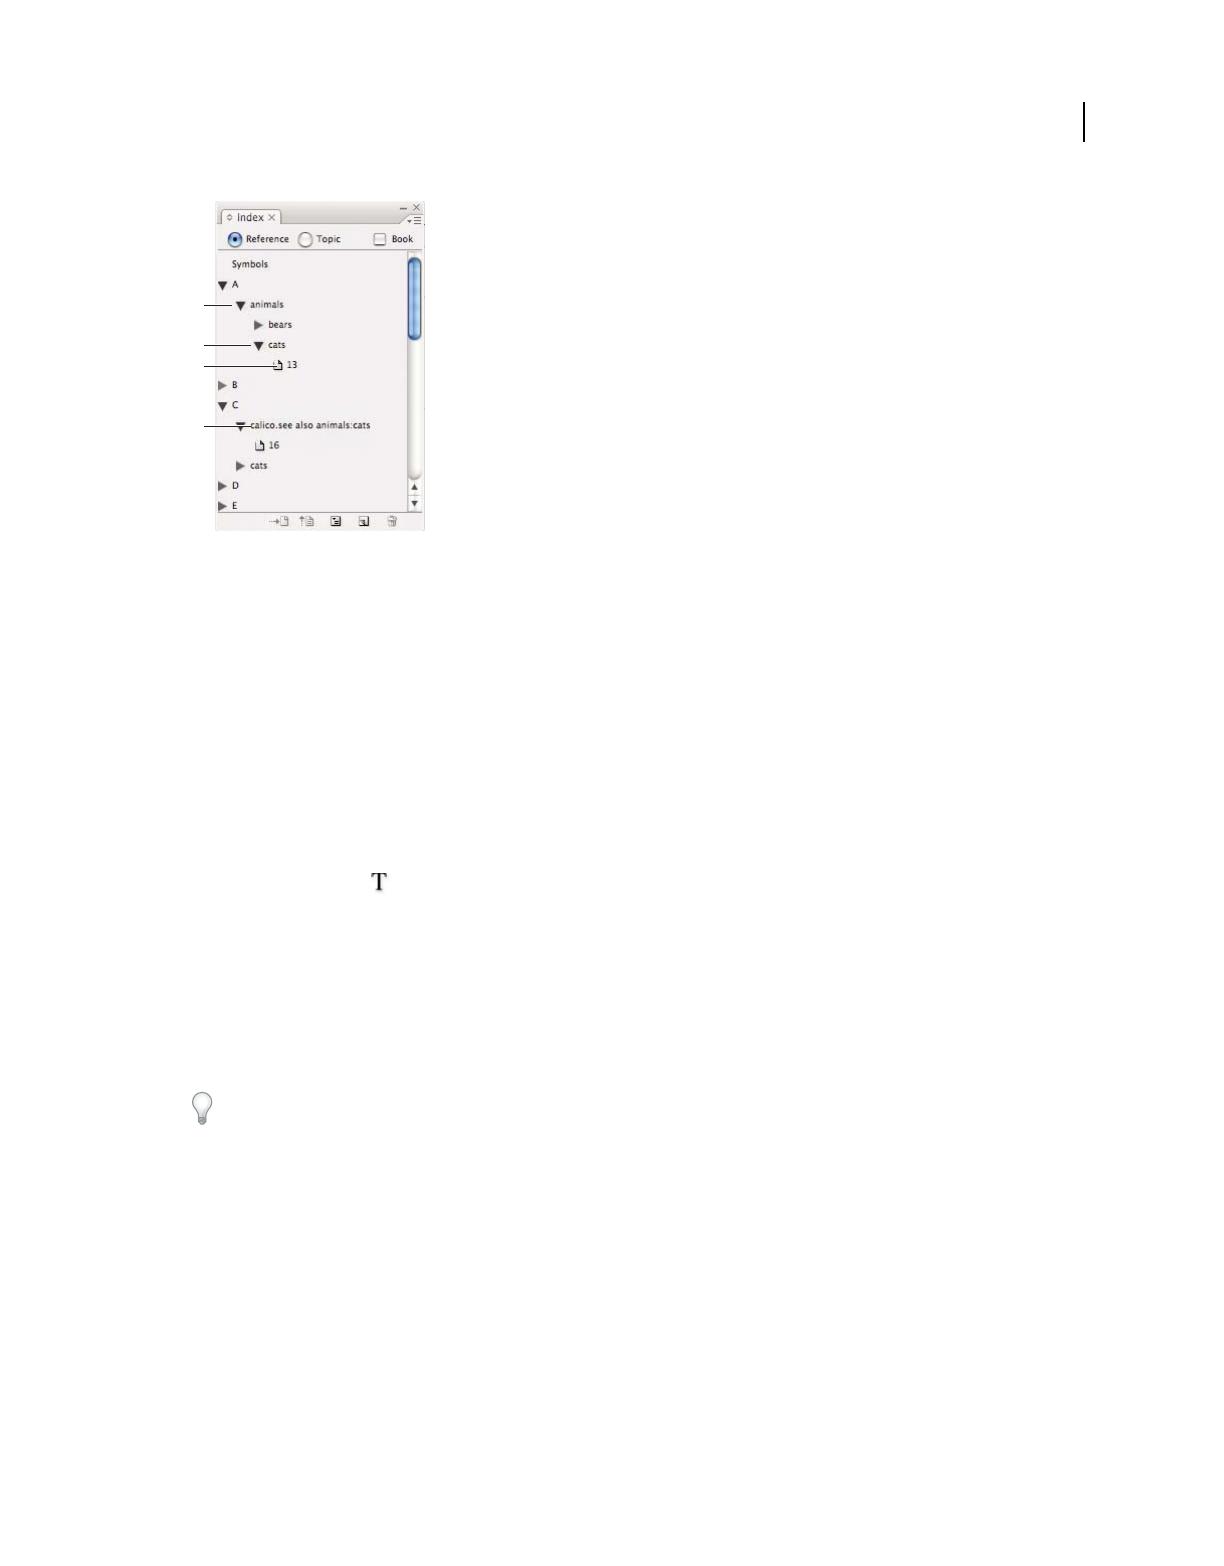
329
USING INDESIGN
Long document features
Last updated 11/16/2011
Index panel in Reference mode
A. Entry B. Subentry C. Page reference D. Cross-reference
An index marker is inserted at the beginning of the word in which text is selected or at the insertion point. You can
view index markers by choosing Type
> Show Hidden Characters.
More Help topics
“Working with markers” on page 338
“Page range options in indexes” on page 332
“Add “See” or “See also” cross-references to an index” on page 332
Add an index entry
1Using the Type tool , place the insertion point where you want the index marker to appear, or select text in the
document to use as the basis for an index reference.
When selected text contains inline graphics or special characters, some characters (such as index markers and inline
graphics) are stripped out in the Topic Level box. Other characters, such as em dashes and copyright symbols, are
converted to metacharacters (for example, ^_ or ^2).
2Choose Window > Type & Tables > Index to display the Index panel.
3Select Reference.
If entries added to the Topic list do not appear in the Reference, choose Show Unused Topics from the Index panel
menu. You can then use those topics when adding entries.
4To view index entries from any open documents in a book file, select Book.
5Choose New Page Reference in the Index panel menu. (If this command does not appear, make sure Reference is
selected and that there is an insertion point or text selection in the document.)
6To add text to the Topic Levels box, do any of the following:
•To create a simple index entry (such as cats), type the entry in the first Topic Levels box. (If text was selected, that
text appears in the Topic Levels box.)
•To create entries and subentries, type the parent name (for this example, animals) in the first Topic Levels box, and
type subentries (cats and Calicos) in subsequent boxes. If necessary, click the up and down arrows to change places
with the item above or below the selected item.
C
B
D
A
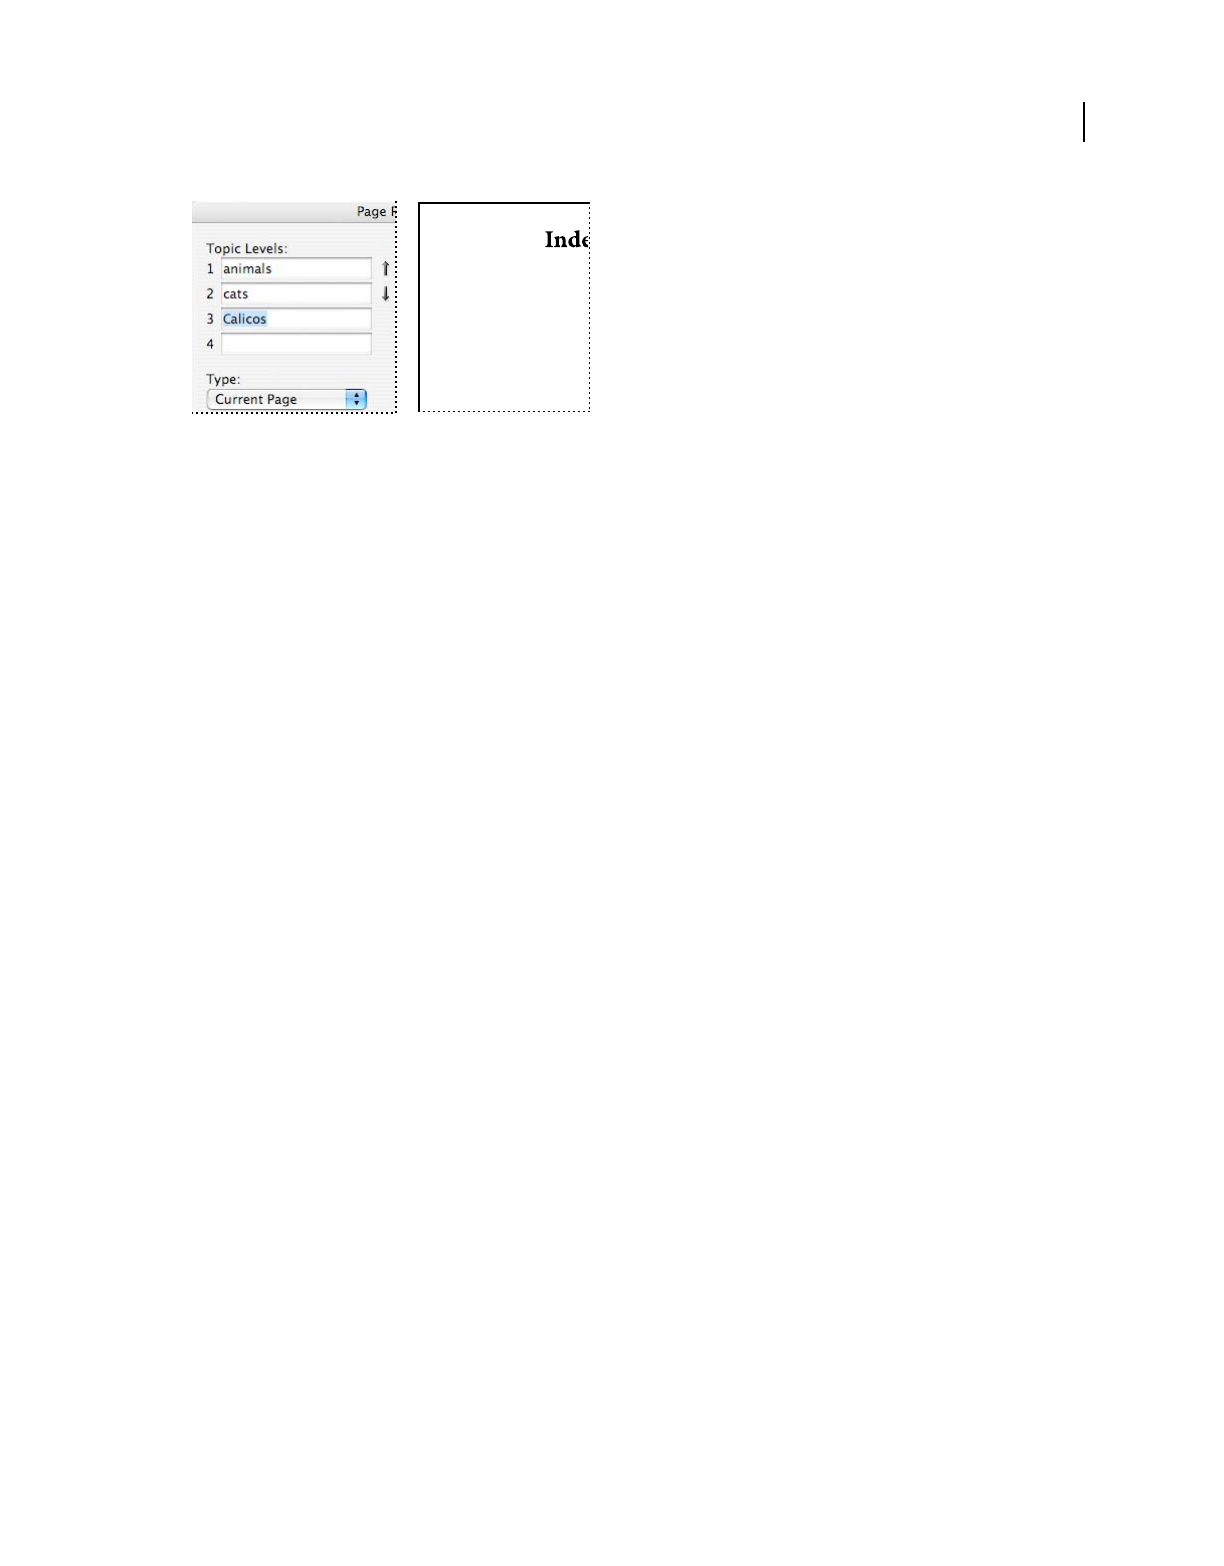
330
USING INDESIGN
Long document features
Last updated 11/16/2011
Index entry in the Topic Levels box (left) and resulting appearance in the Index (right)
•Double-click any topic in the list box at the bottom of the dialog box.
7To change the way an entry is sorted in the final index, use the Sort By boxes. For example, to sort the topic de la
Vega under V (instead of D), you would type Vega in the Sort By box and de la Vega in the Topic Level box.
You can also select the sort order of numbers, symbols, and languages, and you can edit sort information for Chinese
characters. (See “Change the sort order of indexes” on page 335.)
8Specify the type of index entry:
•To create index entries that have a page number or range (such as cats 82–87), choose an option that describes the
span of the entry in the Type pop-up menu. (See “Page range options in indexes” on page 332.)
•To create an index entry without a page number, choose Suppress Page Range in the Type menu. Although no page
number will appear in the generated index, the page number appears in parentheses in the Index panel.
•To create an index entry which refers to another entry, select one of the cross-reference options (such as See or See
also) from the Type pop-up menu, and input the entry name in the Referenced text box, or drag the existing entry
from the list at the bottom to the Referenced box. You can also customize the See and See also terms displayed in
the cross-reference entries by selecting Custom Cross Reference from the Type pop-up menu. (See “Add “See” or
“See also” cross-references to an index” on page 332.)
9To add emphasis to a particular index entry, select Number Style Override, and then specify a character style.
10 To add an entry to the index, do any of the following:
•Click Add to add current entry and leave the dialog box open for additional entries.
•Click Add All to locate all instances of the selected text in the document window and create an index marker for
each one. Add All is available only if text in the document is selected.
•Click OK to add the index entry and close the dialog box.
Note: If you click Cancel after clicking Add, the entries you just added are not removed. Use the Undo command to
remove these entries.
11 To close the dialog box, click OK or Done.
Index a word, phrase, or list quickly
Using an indexing shortcut, you can quickly index individual words, a phrase, or a list of words or phrases. Adobe
InDesign recognizes two indexing shortcuts: one for standard index entries; the other for proper names. The proper
name shortcut creates index entries by reversing the order of a name so it is alphabetized by the last name. In this way,
you can list a name with the first name first, but have it appear in the index sorted by last name. For example, the name
James Paul Carter would appear in the index as Carter, James Paul.
A
animals
bears 9
cats
Calicos 19
B
bears
Black 10

331
USING INDESIGN
Long document features
Last updated 11/16/2011
To prepare a list for indexing, separate each item you want to be indexed with any of the following: a return, a soft
return (Shift + Return key), a tab, a right-indent tab (Shift + Tab), a semicolon, or a comma. The indexing shortcut
adds a marker in front of each entry and places all the items into the index.
1In the document window, select the word or words you want to index.
2Do one of the following:
•For standard words or phrases, press Shift+Alt+Ctrl+[ (Windows) or Shift+Option+Command+[ (Mac OS).
•For proper names that you want indexed by the last name, press Shift+Alt+Ctrl+] (Windows) or
Shift+Option+Command+] (Mac
OS).
An index marker using the default settings is added at the beginning of the selection or to the beginning of each item
selected.
To index compound last names or names with a title, include one or more nonbreaking spaces between the words. For
example, if you want to index “James Paul Carter Jr.” by “Carter” instead of “Jr.”, place a nonbreaking space between
“Carter” and “Jr.” (To insert a nonbreaking space, choose Type
> Insert White Space > Nonbreaking Space.)
Create a new entry from an existing one
Often, a subject you’re indexing appears in multiple places in a document or book. When this happens, you can create
multiple index entries based on other entries already in your index to ensure consistency.
1In the document window, click an insertion point, or select text where the index marker will appear.
2In the Index panel, select Reference, and scroll the preview area to the entry you want to copy.
3Do one of the following:
•Drag an entry to the New Entry button to insert an index marker at the insertion point, or at the beginning of
the selection.
•Select an entry in the panel preview area, and then hold down Alt (Windows) or Option (Mac OS) and click the
New Entry button. The New Page Reference dialog box appears, with information about the selected entry. Make
any changes, and then click Add or OK.
Alternatively, you can create a topic list, and then select topics from the list as you create index entries.
Index every occurrence of a word automatically
Using the Add All option is an effective way to index all occurrences of a specified term in a document or a book. When
you click Add All, InDesign creates index markers at every occurrence of the words selected in the document—not the
text specified in the dialog box. (You can later delete entries that point to less significant information.)
When searching for occurrences of the selected text, InDesign considers only whole words, and searches are case-
sensitive. For example, if cheetah is selected, cheetahs and Cheetah will not be indexed.
1In the document window, select the text you want to search for.
2In the Index panel, select Reference.
3To create index entries for any open documents in the book, select Book.
4Choose New Page Reference in the Index panel menu.
5Choose Add All. InDesign adds index markers to all text that matches the selected text, regardless of whether the
text has been indexed, so you may end up with multiple entries for the same word or phrase.

332
USING INDESIGN
Long document features
Last updated 11/16/2011
Edit an index entry
To change a topic (such as renaming it or applying a new sort order) and automatically update all entries that use that
topic, use the Index panel in Topic mode. To change one entry at a time, use Reference mode. In Reference mode, you
can also add cross-references or locate the index marker associated with a page reference.
1Open the document containing the index entries.
2In the Index panel, do one of the following:
•Select Topic to edit a topic and automatically update all entries using that topic.
•Select Reference to edit an individual entry.
3In the preview area, select an entry or page reference. To select a page reference, select the page icon below the entry.
4Double-click an entry or page reference to edit.
5Edit the entry, and then click OK.
Page range options in indexes
You can create index entries that include a page range (such as cats 82–87) instead of a single page number. The Type
pop-up menu in the New Page Reference dialog box includes the following page-range options:
Current Page The page range does not extend beyond the current page.
To Next Style Change The page range extends from the index marker to the next change of paragraph style.
To Next Use Of Style The page range extends from the index marker to the page where the next occurrence of the
paragraph style specified in the adjacent paragraph style pop-up menu appears.
To End Of Story The page range extends from the index marker to the end of the current thread of text frames that
contain text.
To End Of Document The page range extends from the index marker to the end of the document.
To End Of Section The page range extends from the index marker to the end of the current section as defined in the
Pages panel. (See “Document numbering options” on page 92.)
For Next # Of Paragraphs The page range extends from the index marker to the end of the number of paragraphs
specified in the adjacent box, or to the end of as many paragraphs as exist.
For Next # Of Pages The page range extends from the index marker to the end of the number of pages specified in the
adjacent box, or to the end of as many pages as exist.
Suppress Page Range Turn off page range.
Add “See” or “See also” cross-references to an index
Cross-references are index entries that point to related entries, instead of a page number. You create cross-references
using the Index panel. Cross-references can serve different purposes in an index:
•Cross-references associate common terms with equivalents used in your document or book. For example, Fauna.
See Animals. Entries with such cross-references do not contain page references; they simply point to equivalent
terms that are indexed more fully.
•Cross-references point to other entries related to, but not equivalent to, a topic. For example, Cats. See also
Wildcats. In this case, the index entry containing the cross-reference also contains page numbers and/or subentries
that are directly related to the entry’s topic.
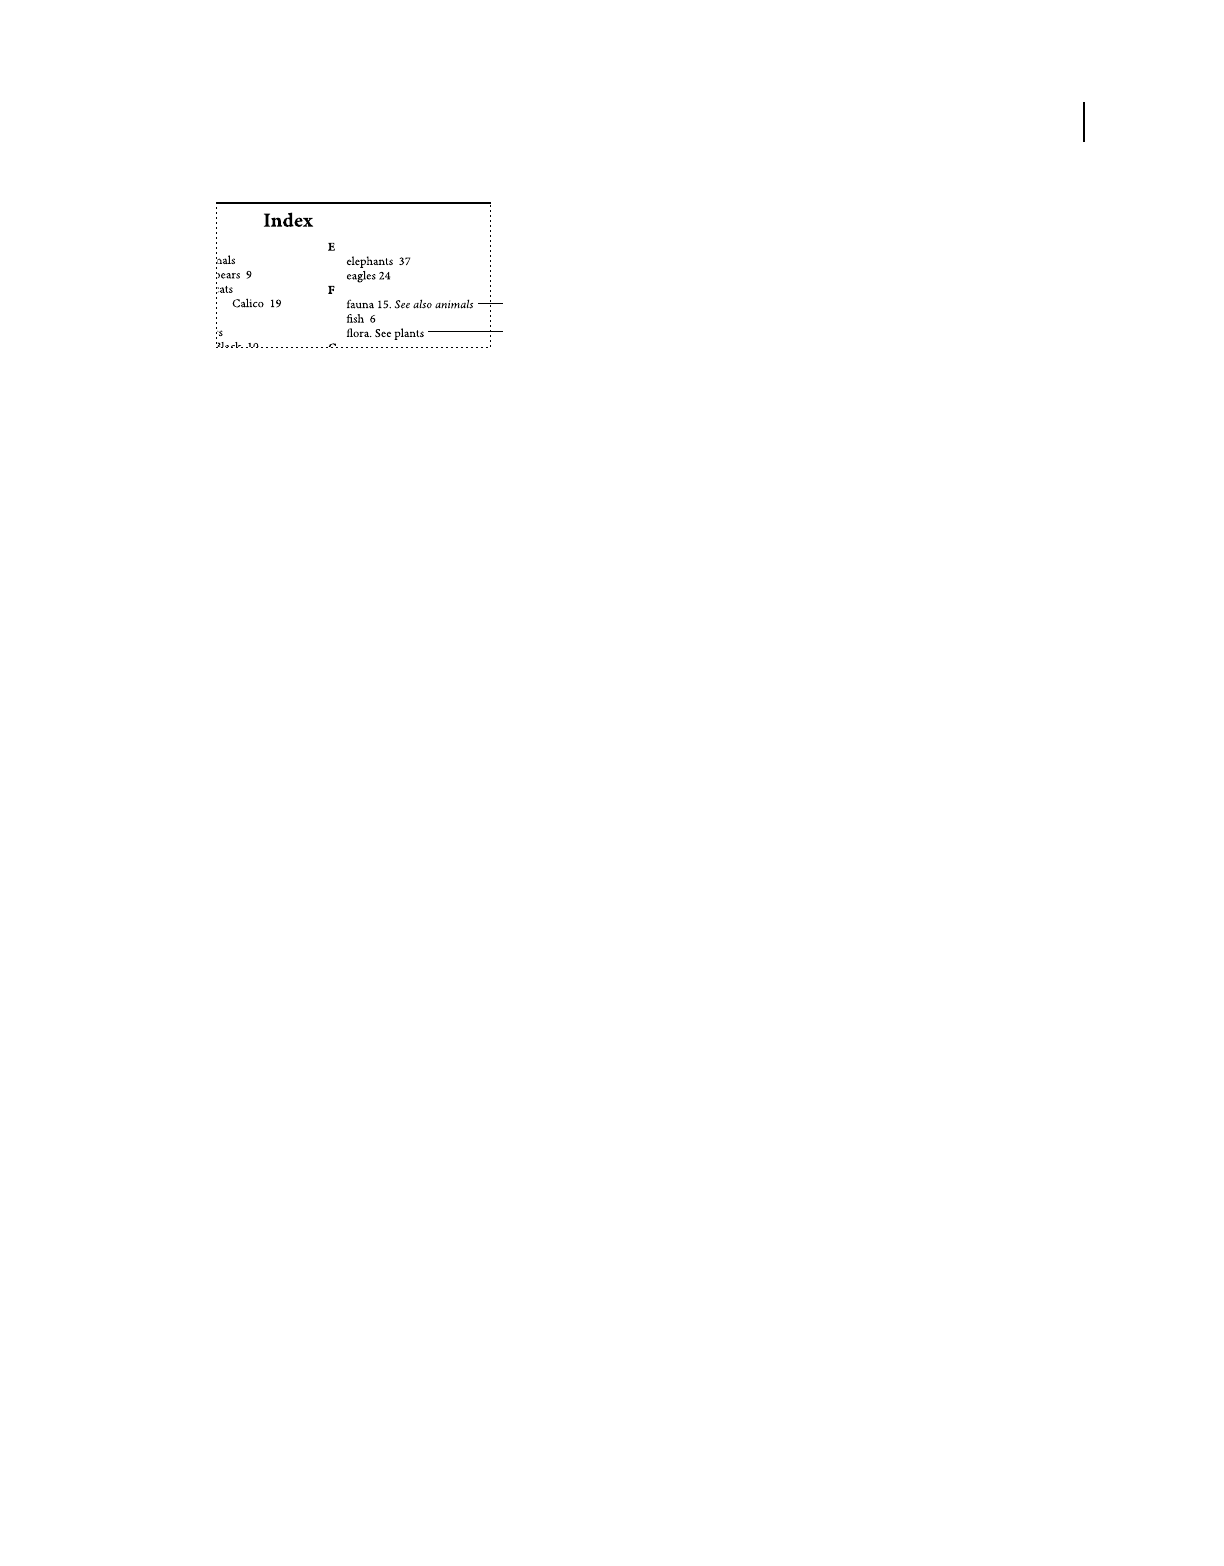
333
USING INDESIGN
Long document features
Last updated 11/16/2011
Two types of cross-references
A. Cross-reference to related information (See also) B. Cross-reference to an equivalent term (See)
When you create a cross-reference in InDesign, you can also select a cross-reference prefix. “See” and “See also” are
static text. When you choose “See [also],” InDesign automatically assigns the correct prefix to the cross-reference each
time the index is generated:
•Entries with page numbers, subentries, or both are given “See also.”
•Entries without page numbers or subentries are given “See.”
Using the “See [also]” option frees you from the task of manually updating cross-references as the contents of your
index entries change.
1Choose Window > Type & Tables > Index.
2Select Reference.
3(Optional) Select Book to view index entries from any open documents in a book file.
4Choose New Page Reference in the Index panel menu.
5Enter a topic or topics in the Topic Levels boxes.
6In the Type menu, choose a cross-reference prefix (such as See also) from the bottom of the menu.
7Type a topic in the Referenced box, or drag an existing topic from the topic list at the bottom.
8Click Add to add the cross-reference to the index.
Cross-references appear in the Index panel and the generated index, but are not associated with index markers in the
document itself.
Cross-references with “See [also]” appear as “See [also]” in the Index panel; however, the correct prefix will appear in
the generated index story.
More Help topics
“Cross-references” on page 541
“Index panel overview” on page 326
Generate an index
Once you’ve added index entries and previewed them in the Index panel, you’re ready to generate an index story to
place in your document for publication.
An index story can appear as a separate document or in an existing document. When you generate an index story,
InDesign compiles index entries and updates page numbers across your document or book. If you add or delete index
entries or update numbering in your document, however, you’ll need to regenerate the index to update it.
If an index marker appears in overset text when you generate the index, you are asked if you would like to include these
markers in the index. If you click Yes, the entry appears in the index without a page number. If an index marker
appears in hidden conditional text, the entry is excluded from the index.
A
B
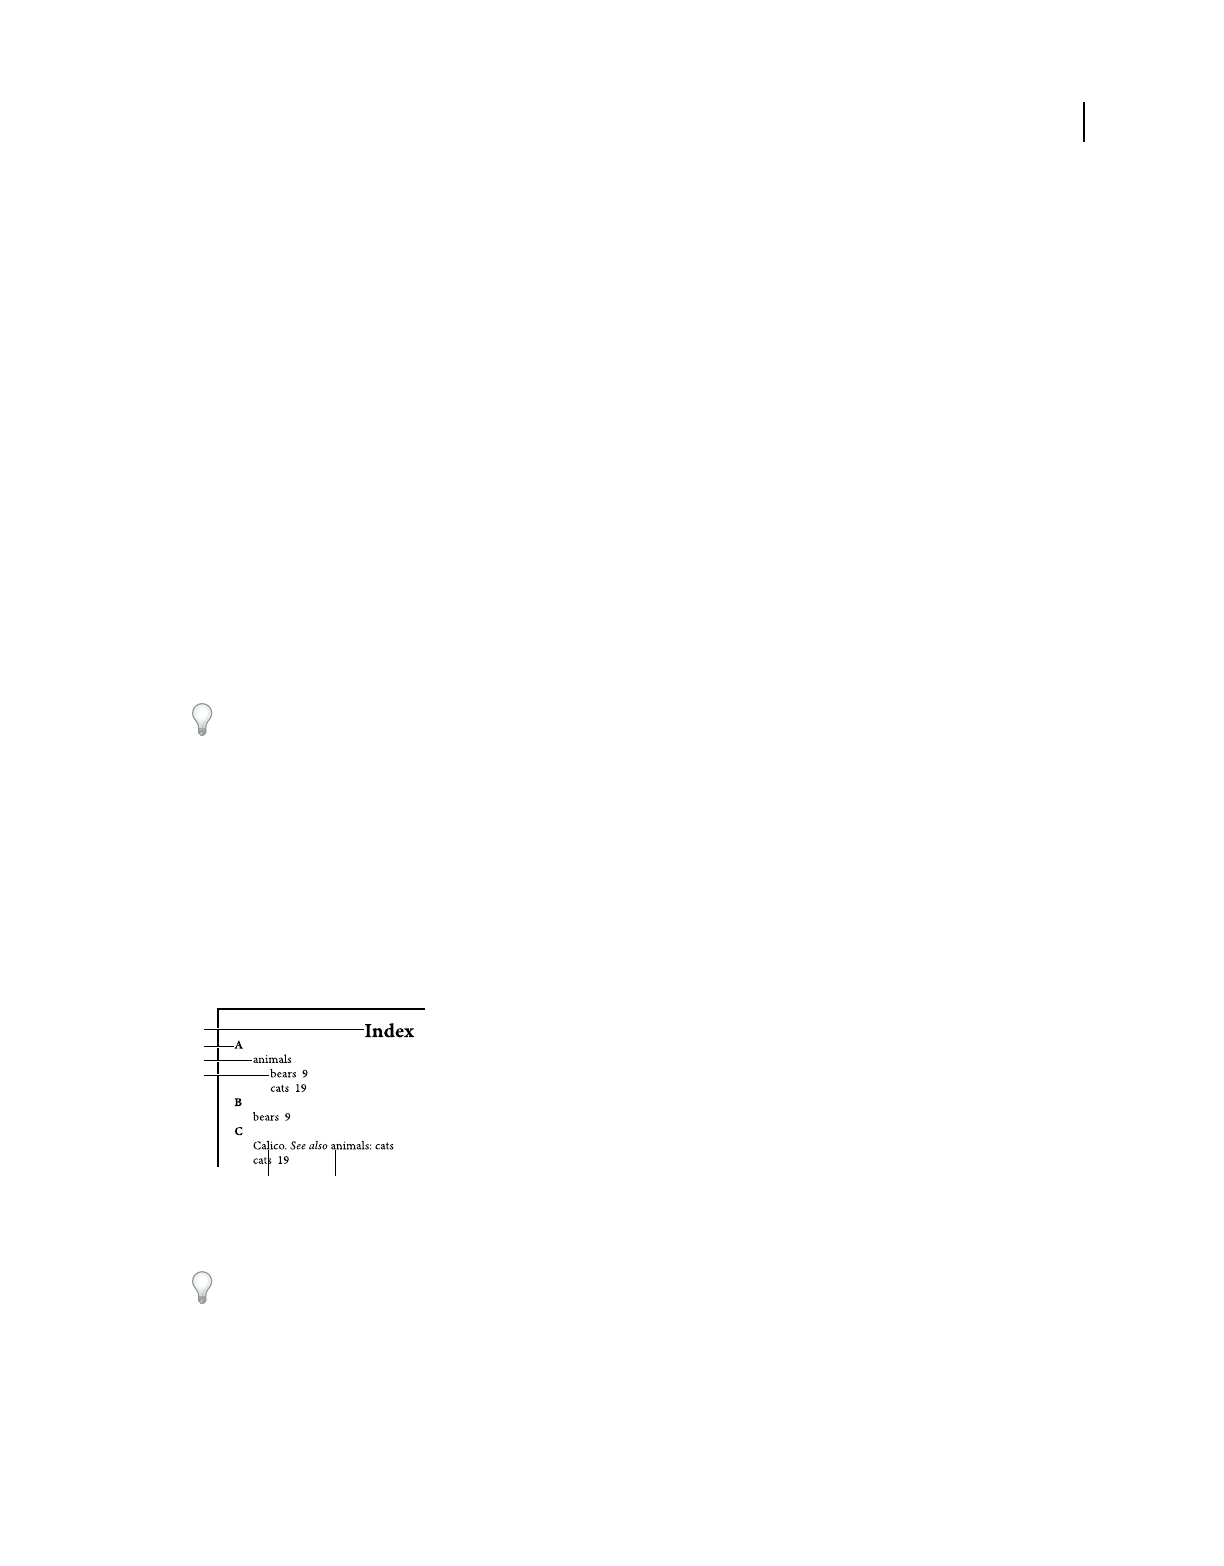
334
USING INDESIGN
Long document features
Last updated 11/16/2011
For a video tutorial on creating an index, see www.adobe.com/go/vid0220.
1Do one of the following:
•If you’re creating an index for a single document, you may want to add a new page at the end of the document.
•If you’re creating an index for multiple documents in a book, create or open the document to be used for the index,
and make sure that it’s included in the book.
2Choose Generate Index in the Index panel menu. Specify settings for the following options:
•For Title, type the text that will appear at the top of the index. To determine how the title is formatted, select a style
in the Title Style pop-up menu.
•Select Replace Existing Index to update an existing index. This option is dimmed if you haven’t generated an index.
Deselecting this options lets you create multiple indexes.
•Select Include Book Documents to create a single index for all documents in the current book list and to renumber
the book’s pages. Deselect this option if you want to generate an index for the current document only.
•Select Include Entries On Hidden Layers if you want index markers on hidden layers to be included in your index.
•To view additional index options, click More Options.
3Click OK. If Replace Existing Index is deselected, a loaded text icon appears. Place the index story as you would any
other text.
If you edit entries in the index story, these changes are overridden when you regenerate the index. For best results, edit
the index in the Index panel, and then generate the index again.
More Help topics
Creating an Index video
Index formatting options
When you click More Options in the Generate Index dialog box, formatting options appear that let you determine the
style and appearance of the generated index. InDesign includes a number of built-in paragraph and character styles
that you can select to format the generated index, or you can create and select your own styles. After you generate the
index, you can edit these styles in the Paragraph Styles and Character Styles panels.
Index with nested entries
A. Title B. Section heading C. Level 1 entry D. Level 2 subentry E. Topic F. Cross-reference
To replace the entry separators (such as the values for Following Topic or Between Entries), select the existing
separator and then type or choose a replacement character.
Nested or Run-in Select Nested if you want the index formatted in the default style, with subentries nested under an
entry as separate indented paragraphs. Select Run-in if you want all levels of an entry to appear in a single paragraph.
The Between Entries option determines which character separates the entries.
B
A
C
D
E F

335
USING INDESIGN
Long document features
Last updated 11/16/2011
Include Index Section Headings Select this option to generate section headings consisting of alphabet characters (A, B,
C, and so on) representing the section that follows.
Include Empty Index Sections Select this option to generate section headings for all letters of the alphabet, even if the
index lacks any first-level entries that begin with a particular letter.
Level Style For each index level, choose a paragraph style to be applied to each level of index entries. You can edit these
styles in the Paragraph Styles panel after you generate the index.
Section Heading Select the paragraph style that determines the appearance of the section headings (A, B, C, and so on)
in the generated index.
Page Number Select the character style that determines the appearance of the page numbers in the generated index.
This setting does not affect index entries you formatted using the Number Style Override option.
Note: If you want the page numbers in the index to include prefixes, as in B-1 or II-1, see “Define section numbering” on
page 91.
Cross-reference Select the character style that determines the appearance of cross-reference prefixes (such as See and
See also) in the generated index.
Cross-referenced Topic Select the character style that determines the appearance of the topic being referred to (such
as beasts in See also beasts) in the generated index.
Following Topic Type or select a special character to separate the entry from the page number (such as Animals 38).
The default is two spaces. Determine formatting for this character by editing the corresponding Level Style, or by
selecting another.
Between Page Numbers Type or select a special character to separate one page number or range from another. The
default is a comma followed by an en space.
Between Entries If Run-in is selected, type or select a special character to determine how entries and subentries are
separated. If Nested is selected, this setting determines how two cross-references under a single entry are to be
separated.
Before Cross-reference Type or select a special character that appears between a reference and a cross-reference, as in
Animals. See also beasts. The default is a period followed by a space. Determine formatting for this character by
switching or editing the corresponding level style.
Page Range Type or select a special character to separate the first and last numbers in a page range (such as
Animals
38–43). The default is an en dash. Determine formatting for this character by switching or editing the Page
Number style.
Entry End Type or select a special character to appear at the end of entries. If Run-in is selected, the specified character
appears at the end of the last cross-reference. The default is no character.
Change the sort order of indexes
You can change the sort order of languages and symbols. This is especially useful for Greek, Cyrillic, and Asian
languages. It’s also useful if you want to change where symbols appear in your index. If you want symbols at the end,
you can move the Symbol category to the bottom of the priority list.
Changing the sort order affects the sort order in the Index panel and in the index stories that are generated afterwards.
You can create multiple indexes with different sort orders. For example, you can generate an index in German, change
the sort order, and then generate a separate index in Swedish — just make sure Replace Existing Index isn’t selected
when you generate the index.
1Choose Sort Options from the Index panel menu.

336
USING INDESIGN
Long document features
Last updated 11/16/2011
2Make sure the items you want sorted are selected.
3To determine the type of language script used, click the item under Header Type and choose a different option from
the menu.
For example, for Cyrillic, you can choose Russian, Belarusian, Bulgarian, or Ukrainian. For Chinese, you can choose
Pinyin, which is primarily used for Simplified Chinese, or Stroke Count, which is primarily used for Traditional
Chinese.
4To change the order of a language or symbol, select it in the list, and then click the Up or Down buttons in the lower
right part of the list.
Items that are higher on the list are sorted before lower items. Any characters from languages that aren’t included in
the Sort Options dialog box are sorted under symbols. For example, if you have Greek text in your document but don’t
include Greek under Sort Options, any indexed Greek text will appear under Symbols.
Sort order of Japanese and Korean indexes
When creating index entries for Asian languages, note the following:
•Asian languages use different sorting convention based on their specific typographic rules.
•When making an index for Japanese text, the yomi for index entries in the Topic Level box should be entered in the
Yomi box using full-width hiragana and katakana. It is not necessary to input the yomi for full-width hiragana,
katakana, alphanumeric characters, some symbols, half-width alphanumeric characters, or index entries that only
have symbols in the Yomi box. Entries input in the Topic Level box are sorted. In some cases, when full-width and
half-width symbols are mixed in an entry, sorting may not take place as expected. An appropriate, yomi should be
entered in these cases.
•Half-width katakana or kanji cannot be input in the Yomi text box. However, full-width symbols, such
as
and , can be input.
•Hiragana and katakana are distinguished and hiragana is sorted before katakana. Upper- and lowercase alphabetic
characters are also distinguished, and uppercase characters are sorted before lowercase.
•If the same characters are input in the Topic Level box, they are handled as separate index entries if a different yomi
is entered. For example if “Cat” is input as an index entry with a reading of “Neko” in katakana, and then input a
second time with a reading of “Neko” in hiragana, two index items for “Cat” will be generated. This feature can also
be used to classify the same term under separate index topics. For example, when entering the term “The Cats” in
an index, if “Cats” is input in the Yomi text box and two index entries are created without any input, the term “The
Cats” will be generated under the T and C index topics.
•For Korean sort order, you can specify Korean Consonant or Korean Consonant Plus Vowel.
Sort order of Chinese indexes
You determine the sort order of Chinese characters in two places -- in the Sort Options dialog box, and in the Sort By
field when you create or edit an index entry.
Sort Options dialog box Choosing Sort Options from the Index panel menu lets you change the sort order and specify
whether to use Pinyin or Stroke Count.
Sort By When you’re creating or editing an index entry, typing Chinese characters in the Topic Levels fields enables
you to edit Chinese sort information.
For Pinyin, if multiple words have the same Pinyin, the order is sorted by (1) tone and (2) stroke count in ascending
order. For Stroke Count, each character is sorted by (1) stroke count, (2) first stroke, and (3) second stroke. You can
either edit the sort information directly in the Sort By field, or you can click the arrow to the right of the Sort By field

337
USING INDESIGN
Long document features
Last updated 11/16/2011
to open either the Pinyin Entry dialog box or Stroke Count Entry dialog box. You can edit the fields and click OK.
Repeat this process for each topic level.
Manage an index
After you set up your index and add index markers to your document, you can manage your index in a variety of ways.
You can view all index topics in a book, remove topics from the Topic list that aren’t used in the Reference list, find
entries in either the Reference or Topics list, and remove index markers from the document.
More Help topics
“Working with markers” on page 338
View all index topics in a book
When the Book option is selected, the Index panel displays entries from the entire book, not just the current document.
1Open the book file and all of the documents it contains.
2Select Book at the top of the Index panel.
If others need to access documents in the book while the index is being created, you can create a master list of topics
in a separate document, and then import topics from the master list to each document in the book. Note that if the
master list changes, you will need to import topics to each document again.
When you are indexing a book with multiple documents, you can display the index topics for all the documents listed
by generating the book’s index, including all the documents. Then you don’t have to use Import Topics in the Index
menu to manually import the topics into each document.
Remove unused topics from the Topic list
Once you have created your index, you can delete topics that weren’t included in the index.
1Choose Window > Type & Tables > Index to display the Index panel.
2Choose Remove Unused Topics in the Index panel menu. All topics that do not have page numbers associated with
them are deleted.
Delete index markers
❖Do either of the following:
•In the Index panel, select the entry or topic you want to delete. Click the Delete Selected Entry button .
Note: If the selected entry is the heading for multiple subheadings, all subheadings are also deleted.
•In the document window, select the index marker and press Backspace or Delete.
Note: To view index markers in the document window, choose Type > Show Hidden Characters.
Find an index entry in the Index panel
1Choose Show Find Field in the Index panel menu.
2In the Find box, type the name of the entry you want to locate, and then click the Up Arrow or Down Arrow.
Locate index markers in a document
1Choose Type > Show Hidden Characters to display index markers in the document window.
2In the Index panel, click Reference, and then select the entry you want to locate.
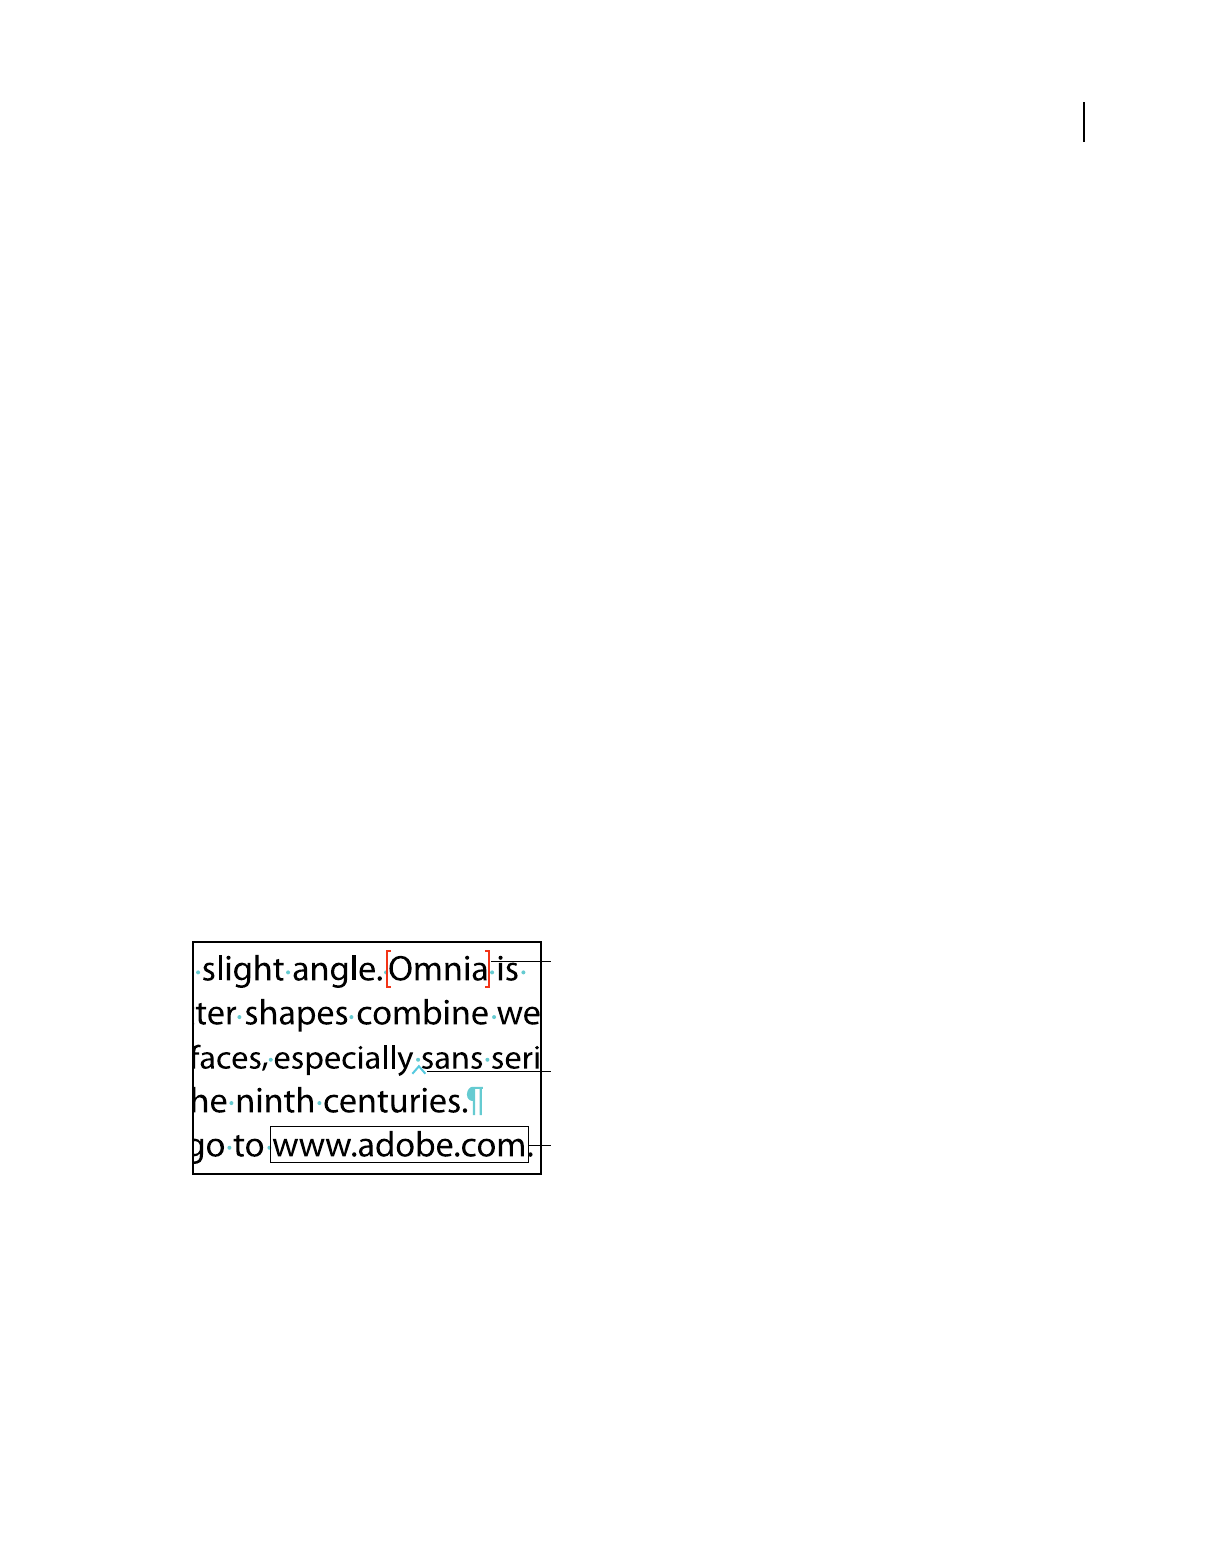
338
USING INDESIGN
Long document features
Last updated 11/16/2011
3Choose Go To Selected Marker in the Index panel menu. The insertion point appears to the right of the index
marker. You can then press Shift+Left Arrow to select the marker for cutting, copying, or deleting.
Capitalize index entries
The Capitalize dialog box provides a global solution for editing the capitalization of index entries so that you don’t
have to edit entries one by one. For example, if you’ve indexed some of your entries as lowercase (cats) and others as
uppercase (Cats), these entries will be considered separate topics. You can fix this problem by capitalizing selected
entries.
1In the preview area of the Index panel, select an entry.
2Choose Capitalize in the Index panel menu.
3Select whether you want to capitalize only the selected topic, the selected topic and all subtopics, all Level 1 topics,
or all topics, and then click
OK.
Working with markers
About markers
InDesign inserts a marker in text for items such as index entries, XML tags, and hyperlink text and anchors. These
markers have no width and they don’t affect composition of text. However, you can select these markers and cut, copy,
or delete them. InDesign uses the location of the marker to produce an accurate bookmark or page reference in the
table of contents, index, and exported PDF files.
You can view all markers at once, or view hyperlink or tagged text markers only. You can also view markers in Story
Editor, where they are larger and easier to identify.
Note: When you select a word, all of its markers are also selected. Keep this in mind when you are cutting, copying, or
deleting text.
Types of markers
A. Tagged text B. Index marker C. Hyperlink
View markers
•To display markers, choose Type > Show Hidden Characters.
•To view hyperlink markers only, choose View > Extras > Show Hyperlinks.
•To view tagged text markers only, choose View > Structure > Show Tag Markers.
A
B
C

339
USING INDESIGN
Long document features
Last updated 11/16/2011
Select markers
1Choose Type > Show Hidden Characters.
2Place the insertion point next to the marker.
3Holding down Shift, press the Left Arrow or Right Arrow key to select a marker.
You can also locate markers using different methods. For example, you can locate an index marker by choosing the Go
To Selected Marker option in the Index panel menu.

340
Last updated 11/16/2011
Chapter 11: Drawing
Understanding paths and shapes
Types of paths and shapes
You can create paths and combine them in a variety of ways in InDesign. InDesign creates the following types of paths
and shapes:
Simple paths Simple paths are the basic building blocks of compound paths and shapes. They consist of one open or
closed path, which may be self-intersecting.
Compound paths Compound paths consist of two or more simple paths that interact with or intercept each other.
They are more basic than compound shapes and are recognized by all PostScript-compliant applications. Paths
combined in a compound path act as one object and share attributes (such as colors or stroke styles).
Compound shapes Compound shapes consist of two or more paths, compound paths, groups, blends, text outlines,
text frames, or other shapes that interact with and intercept one another to create new, editable shapes. Some
compound shapes appear as compound paths, but their component paths can be edited on a path-by-path basis and
do not need to share attributes.
Types of paths and shapes
A. Three simple paths B. Compound path C. Compound shape
For a video tutorial on working with objects, see www.adobe.com/go/vid0071.
More Help topics
Working with Objects video
About paths
As you draw, you create a line called a path. A path is made up of one or more straight or curved segments. The
beginning and end of each segment are marked by anchor points, which work like pins holding a wire in place. A path
can be closed (for example, a circle), or open, with distinct endpoints (for example, a wavy line).
You change the shape of a path by dragging its anchor points, the direction points at the end of direction lines that
appear at anchor points, or the path segment itself.
AB C
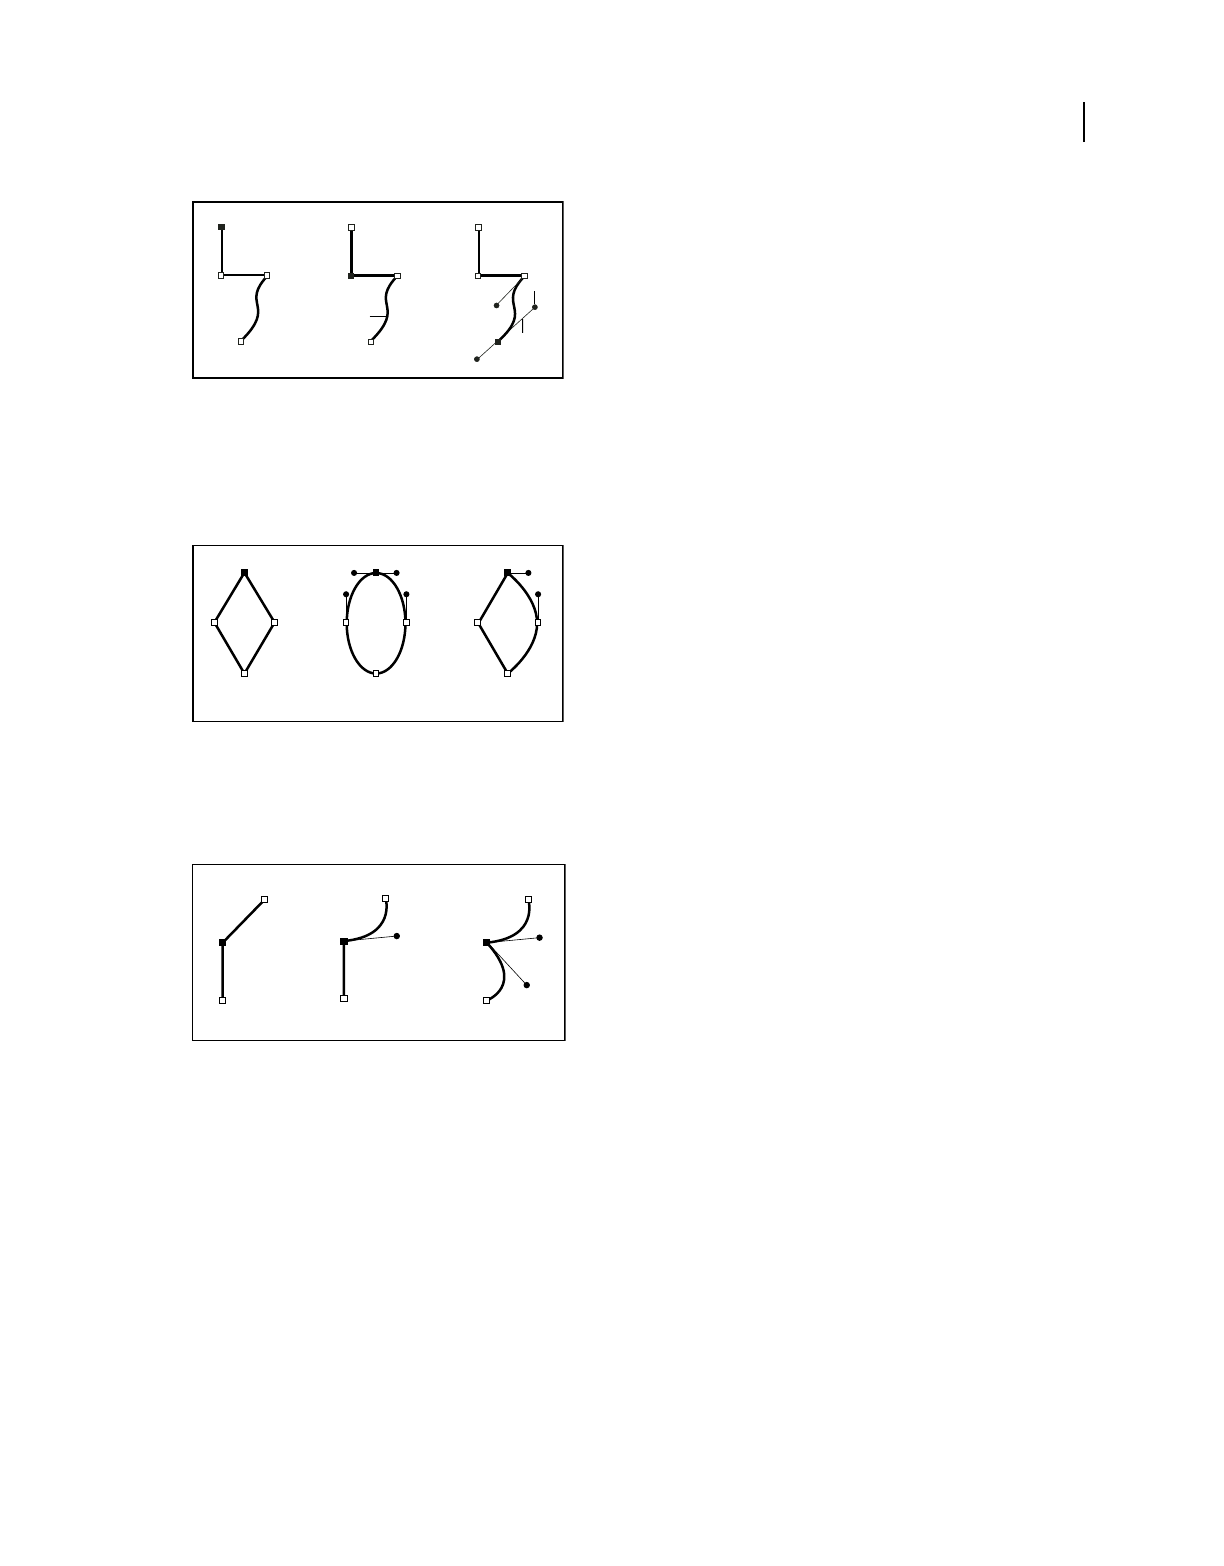
341
USING INDESIGN
Drawing
Last updated 11/16/2011
Components of a path
A. Selected (solid) endpoint B. Selected anchor point C. Unselected anchor point D. Curved path segment E. Direction line F. Direction point
Paths can have two kinds of anchor points: corner points and smooth points. At a corner point, a path abruptly changes
direction. At a smooth point, path segments are connected as a continuous curve. You can draw a path using any
combination of corner and smooth points. If you draw the wrong kind of point, you can always change it.
Points on a path
A. Four corner points B. Four smooth points C. Combination of corner and smooth points
A corner point can connect any two straight or curved segments, while a smooth point always connects two curved
segments.
A corner point can connect both straight segments and curved segments.
Note: Don’t confuse corner and smooth points with straight and curved segments.
A path’s outline is called a stroke. A color or gradient applied to an open or closed path’s interior area is called a fill. A
stroke can have weight (thickness), color, and a dash pattern (Illustrator and InDesign) or a stylized line pattern
(InDesign). After you create a path or shape, you can change the characteristics of its stroke and fill.
In InDesign, each path also displays a center point, which marks the center of the shape but is not part of the actual
path. You can use this point to drag the path, to align the path with other elements, or to select all anchor points on
the path. The center point is always visible; it can’t be hidden or deleted.
A
B
D
C
E
F
A B C
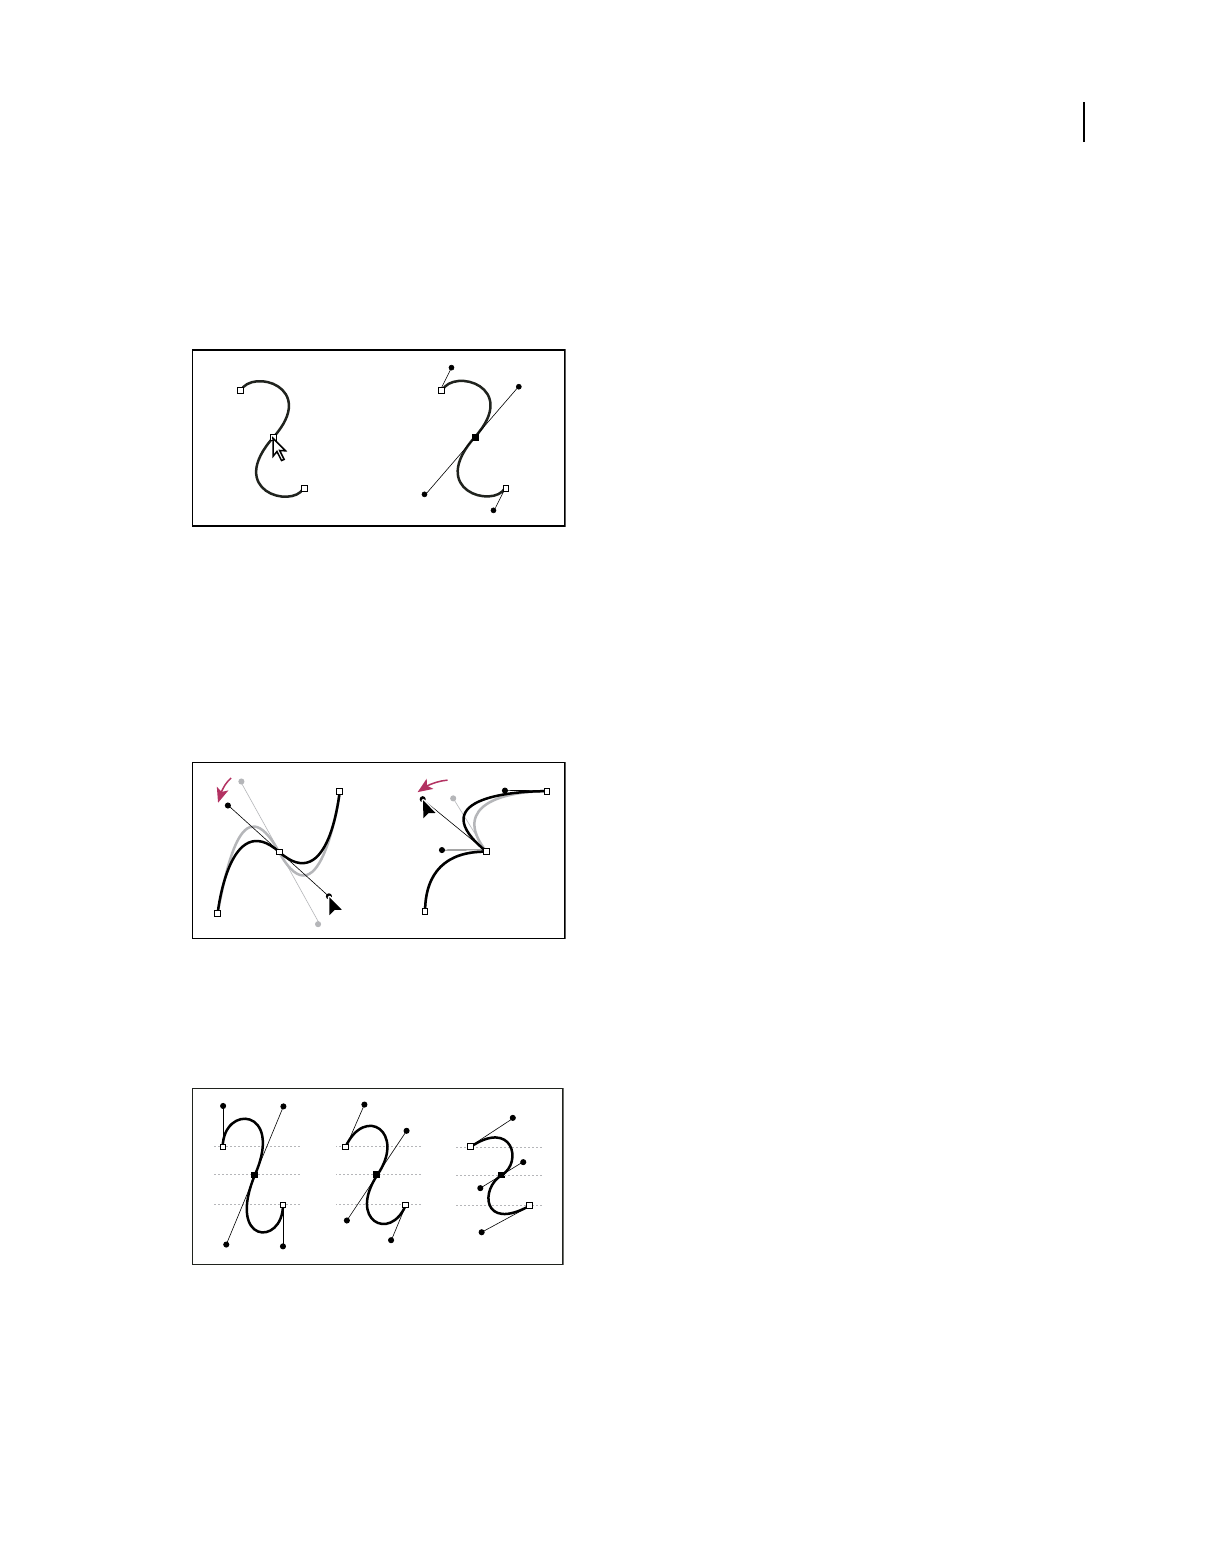
342
USING INDESIGN
Drawing
Last updated 11/16/2011
About direction lines and direction points
When you select an anchor point that connects curved segments (or select the segment itself), the anchor points of the
connecting segments display direction handles, which consist of direction lines that end in direction points. The angle
and length of the direction lines determine the shape and size of the curved segments. Moving the direction points
reshapes the curves. Direction lines don’t appear in the final output.
After selecting an anchor point (left), direction lines appear on any curved segments connected by the anchor point (right).
A smooth point always has two direction lines, which move together as a single, straight unit. When you move a
direction line on a smooth point, the curved segments on both sides of the point are adjusted simultaneously,
maintaining a continuous curve at that anchor point.
In comparison, a corner point can have two, one, or no direction lines, depending on whether it joins two, one, or no
curved segments, respectively. Corner point direction lines maintain the corner by using different angles. When you
move a direction line on a corner point, only the curve on the same side of the point as that direction line is adjusted.
Adjusting direction lines on a smooth point (left) and a corner point (right)
Direction lines are always tangent to (perpendicular to the radius of) the curve at the anchor points. The angle of each
direction line determines the slope of the curve, and the length of each direction line determines the height, or depth,
of
the curve.
Moving and resizing direction lines changes the slope of curves.
Note: In Illustrator, you can show or hide anchor points, direction lines, and direction points by choosing View > Show
Edges or View
> Hide Edges.
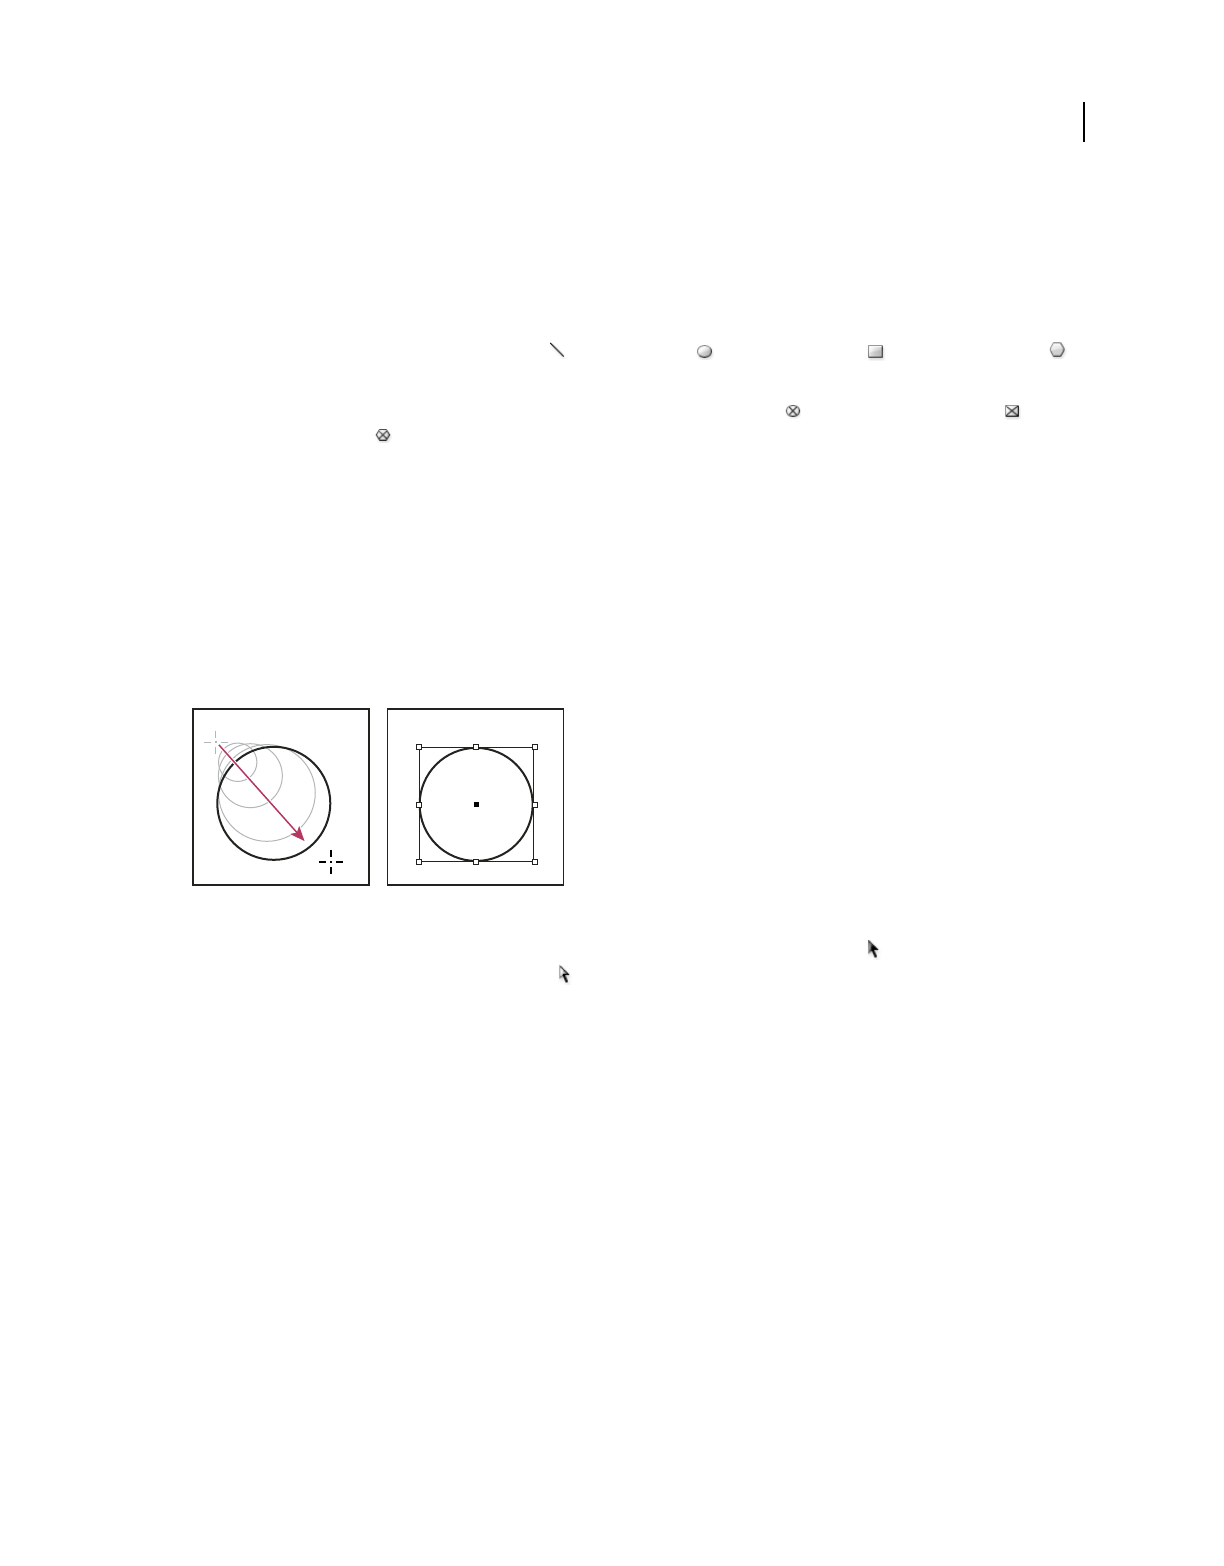
343
USING INDESIGN
Drawing
Last updated 11/16/2011
Drawing with the line or shape tools
Draw basic lines and shapes
1In the toolbox, do one of the following:
•To draw a line or shape, select the Line tool , the Ellipse tool , the Rectangle tool , or the Polygon tool .
(Click and hold the Rectangle tool to select either the Ellipse or Polygon tool.)
•To draw a placeholder (empty) graphics frame, select the Ellipse Frame tool , the Rectangle Frame tool , or the
Polygon Frame tool .
2Drag in the document window to create the path or frame.
•To draw from the center out, hold down Alt (Windows) or Option (Mac OS).
•To constrain a line to 45° angles, or to constrain the width and height of a path or frame to the same proportions,
hold down Shift as you drag.
•To create multiple shapes in a grid, press the arrow keys while holding down the mouse button. See “Draw multiple
objects as a grid” on page 343.
•
To change the number of sides of a polygon, begin dragging, press the Spacebar, and then press the Up and Down
arrow keys. Press the Left and Right arrow keys to change the star inset. Press the Spacebar again to return to grid mode.
Dragging to create a basic circle
Note: The result shown above displays a bounding box around the path. If the Selection tool was recently active, you’ll
see this bounding box. If the Direct Selection tool was more recently active, the path appears with anchor points
instead.
More Help topics
“Selecting objects” on page 402
“Gallery of drawing and type tools” on page 33
Draw multiple objects as a grid
When using frame-creation tools such as the Rectangle tool or Type tool, you can create a grid of equally spaced frames
by using modifier keys.
For a video on drawing objects in a grid, see http://tv.adobe.com/go/4949/.
1Select a tool that lets you draw a frame.
2Begin dragging. While still holding down the mouse button, do any of the following actions:
•Press the Left and Right Arrow keys to change the number of columns. Press the Up and Down Arrow keys to
change the number of rows.

344
USING INDESIGN
Drawing
Last updated 11/16/2011
•Hold down Ctrl (Windows) or Command (Mac OS) and press arrow keys to change the spacing between the
frames.
3Release the mouse button.
If you want to use the arrow keys to change the number of sides or star inset while using the Polygon tool, press the
Spacebar while holding down the mouse button.
Draw a placeholder shape
A placeholder shape is an ellipse, rectangle, or polygon that appears in the document window with an X, indicating
that it should be replaced by text or an image later.
1In the toolbox, select the Ellipse Frame tool , the Rectangle Frame tool , or the Polygon Frame tool .
2Drag in the document window to create the path or frame. Hold down Shift to constrain the width and height of
the frame.
You can change the crop amount, reference point, and other fitting options for a placeholder frame by choosing
Object > Fitting > Frame Fitting Options.
Specify polygon settings
1If you want the polygon settings to apply to existing shapes, select the polygons.
2Double-click the Polygon tool , specify the following settings, and click OK:
•For Number of Sides, type a value for the number of sides you want for the polygon.
•For Star Inset, type a percentage value to specify the length of a star’s spikes. The tips of the spikes touch the outer
edge of the polygon’s bounding box, and the percentage determines the depth of the depression between each spike.
Higher percentages create longer, thinner spikes.
Change the shape of a path automatically
You can convert any path into a predefined shape. For example, you can convert a rectangle to a triangle. The stroke
settings for the original path remain the same for the new path. If the new path is a polygon, its shape is based on the
options in the Polygon Settings dialog box. If the new path has a corner effect, its radius size is based on the size setting
in the Corner Options dialog box.
1Select the path.
2Do any of the following:
•Choose Object > Convert Shape > [new shape].
•In the Pathfinder panel (Window > Object & Layout > Pathfinder), click a shape button in the Convert Shape area.
Drawing with the Pencil tool
Draw with the Pencil tool
The Pencil tool works primarily the same way in Adobe Illustrator and InDesign. It lets you draw open and closed
paths as if you were drawing with a pencil on paper. It is most useful for fast sketching or creating a hand-drawn look.
Once you draw a path, you can immediately change it if needed.

345
USING INDESIGN
Drawing
Last updated 11/16/2011
Anchor points are set down as you draw with the Pencil tool; you do not determine where they are positioned.
However, you can adjust them once the path is complete. The number of anchor points set down is determined by the
length and complexity of the path and by tolerance settings in the Pencil Tool Preferences dialog box. These settings
control how sensitive the Pencil tool is to the movement of your mouse or graphics-tablet stylus.
For a video on drawing with the Pencil tool in Illustrator, see www.adobe.com/go/vid0039.
More Help topics
Pencil tool in Illustrator video
Draw freeform paths with the Pencil tool
1Select the Pencil tool .
2Position the tool where you want the path to begin, and drag to draw a path. The Pencil tool displays a small x
to indicate drawing a freeform path.
As you drag, a dotted line follows the pointer. Anchor points appear at both ends of the path and at various points
along it. The path takes on the current stroke and fill attributes, and remains selected by default.
Draw closed paths with the Pencil tool
1Select the Pencil tool.
2Position the tool where you want the path to begin, and start dragging to draw a path.
3After you’ve begun dragging, hold down Alt (Windows) or Option (Mac OS). The Pencil tool displays a small circle
(and, in InDesign, a solid eraser) to indicate that you’re creating a closed path.
4When the path is the size and shape you want, release the mouse button (but not the Alt or Option key). After the
path closes, release the Alt or Option key.
You don’t have to position the cursor over the starting point of the path in order to create a closed path; if you release
the mouse button in some other location, the Pencil tool will close the shape by creating the shortest possible line back
to the original point.
Edit paths with the Pencil tool
You can edit any path using the Pencil tool and add freeform lines and shapes to any shape.
Add to a path with the Pencil tool
1Select an existing path.
2Select the Pencil tool.
3Position the pencil tip on an endpoint of the path.
You can tell you’re close enough to the endpoint when the small x next to the pencil tip disappears.
4Drag to continue the path.
Connect two paths with the Pencil tool
1Select both paths (Shift-click or drag around the two with the Selection tool).
2Select the Pencil tool.
3Position the pointer where you want to begin from one path, and start dragging toward the other path.
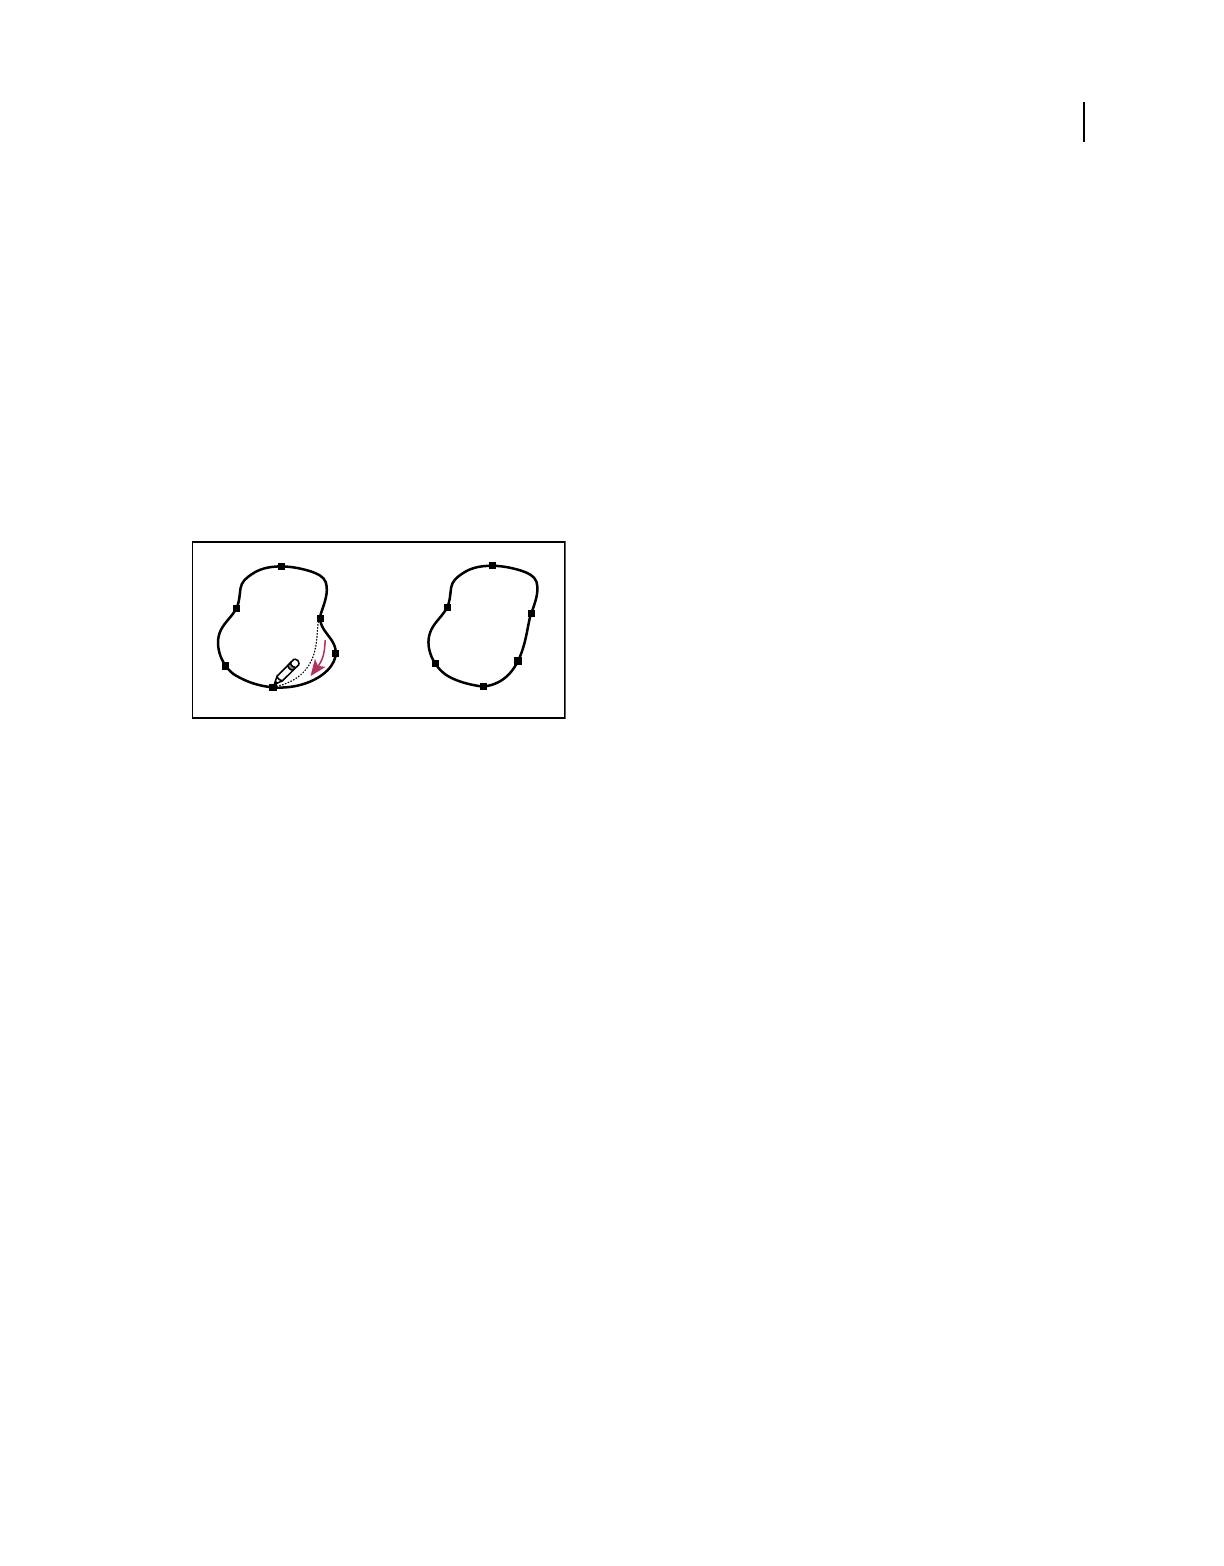
346
USING INDESIGN
Drawing
Last updated 11/16/2011
4After you begin dragging, hold down Ctrl (Windows) or Command (Mac OS). The Pencil tool displays a small
merge symbol to indicate you’re adding to the existing path.
5Drag onto the endpoint of the other path, release the mouse button, and then release the Ctrl or Command key.
Note: For best results, drag from one path to the other as if you were simply continuing the paths in the direction they
were created.
Reshape paths with the Pencil tool
1Select the path you want to change.
2Position the Pencil tool on or near the path to redraw.
You can tell you’re close enough to the path when the small x disappears from the tool.
3Drag the tool until the path is the desired shape.
Using the Pencil tool to edit a closed shape
Note: Depending on where you begin to redraw the path and in which direction you drag, you may get unexpected results.
For example, you may unintentionally change a closed path to an open path, change an open path to a closed path, or
lose a portion of a shape.
Pencil tool options
Double-click the Pencil tool to set any of the following options:
Fidelity Controls how far you have to move your mouse or stylus before a new anchor point is added to the path. The
higher the value, the smoother and less complex the path. The lower the value, the more the curves will match the
pointer’s movement, resulting in sharper angles. Fidelity can range from 0.5 to 20 pixels.
Smoothness Controls the amount of smoothing applied when you use the tool. Smoothness can range from 0% to
100%. The higher the value, the smoother the path. The lower the value, the more anchor points are created, and the
more the line’s irregularities are preserved.
Fill New Pencil Strokes (Illustrator only) Applies a fill to pencil strokes you draw after selecting this option, but not to
existing pencil strokes. Remember to select a fill before you draw the pencil strokes.
Keep Selected Determines whether to keep the path selected after you draw it. This option is selected by default.
Edit Selected Paths Determines whether or not you can change or merge a selected path when you are within a certain
distance of it (specified with the next option).
Within: _ pixels Determines how close your mouse or stylus must be to an existing path in order to edit the path with
the Pencil tool. This option is only available when the Edit Selected Paths option is selected.

347
USING INDESIGN
Drawing
Last updated 11/16/2011
Drawing with the Pen tool
Draw straight line segments with the Pen tool
The simplest path you can draw with the Pen tool is a straight line, made by clicking the Pen tool to create two anchor
points. By continuing to click, you create a path made of straight line segments connected by corner points.
Clicking Pen tool creates straight segments.
1Select the Pen tool.
2Position the Pen tool where you want the straight segment to begin, and click to define the first anchor point (do
not drag).
Note: The first segment you draw will not be visible until you click a second anchor point. (Select the Rubber Band option
in Photoshop to preview path segments.) Also, if direction lines appear, you’ve accidentally dragged the Pen tool; choose
Edit
> Undo, and click again.
3Click again where you want the segment to end (Shift-click to constrain the angle of the segment to a multiple of
45°).
4Continue clicking to set anchor points for additional straight segments.
The last anchor point you add always appears as a solid square, indicating that it is selected. Previously defined anchor
points become hollow, and deselected, as you add more anchor points.
5Complete the path by doing one of the following:
•To close the path, position the Pen tool over the first (hollow) anchor point. A small circle appears next to the Pen
tool pointer
when it is positioned correctly. Click or drag to close the path.
Note: To close a path in InDesign, you can also select the object and choose Object > Paths > Close Path.
•To leave the path open, Ctrl-click (Windows) or Command-click (Mac OS) anywhere away from all objects.
To leave the path open, you can also select a different tool, or choose Select > Deselect in Illustrator or Edit > Deselect
All in InDesign. In InDesign or Illustrator, you can also simply press Enter or Return to leave the path open.
Draw curves with the Pen tool
You create a curve by adding an anchor point where a curve changes direction, and dragging the direction lines that
shape the curve. The length and slope of the direction lines determine the shape of the curve.
Curves are easier to edit and your system can display and print them faster if you draw them using as few anchor points
as possible. Using too many points can also introduce unwanted bumps in a curve. Instead, draw widely spaced anchor
points, and practice shaping curves by adjusting the length and angles of the direction lines.
1Select the Pen tool.
2Position the Pen tool where you want the curve to begin, and hold down the mouse button.
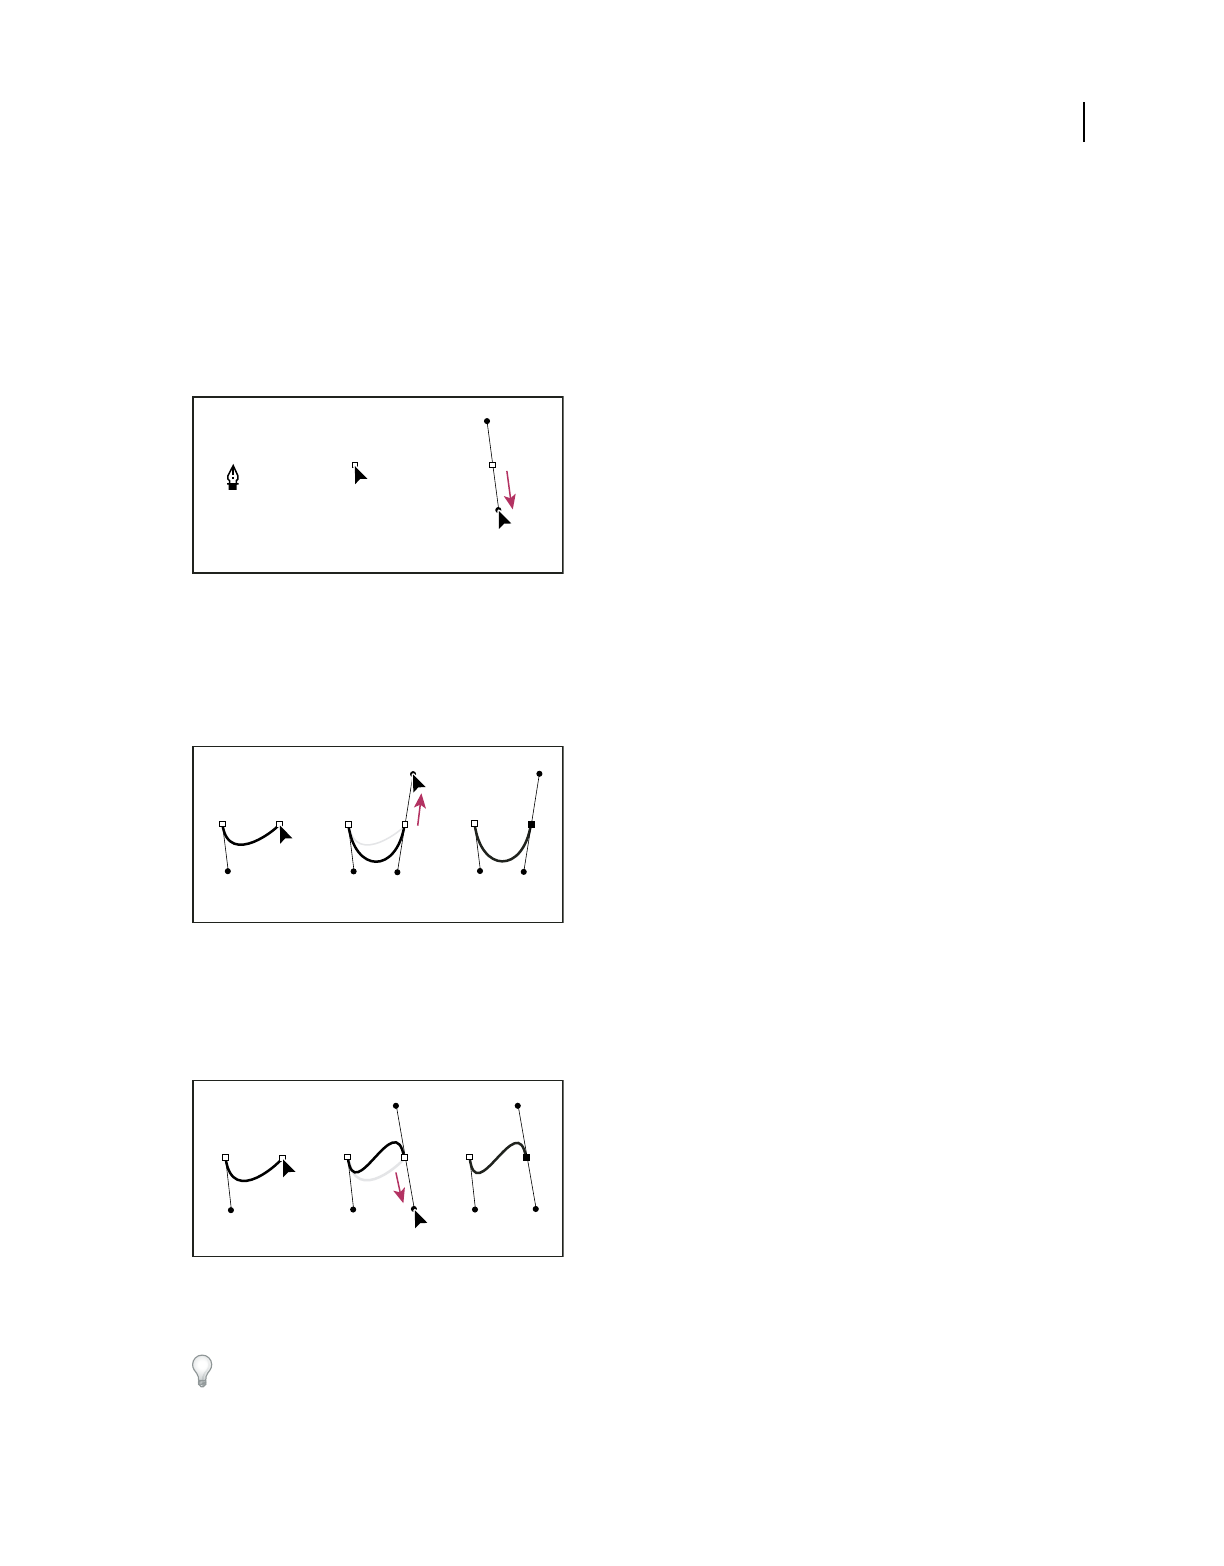
348
USING INDESIGN
Drawing
Last updated 11/16/2011
The first anchor point appears, and the Pen tool pointer changes to an arrowhead. (In Photoshop, the pointer changes
only after you’ve started dragging.)
3Drag to set the slope of the curve segment you’re creating, and then release the mouse button.
In general, extend the direction line about one third of the distance to the next anchor point you plan to draw. (You
can adjust one or both sides of the direction line later.)
Hold down the Shift key to constrain the tool to multiples of 45°.
Drawing the first point in a curve
A. Positioning Pen tool B. Starting to drag (mouse button pressed) C. Dragging to extend direction lines
4Position the Pen tool where you want the curve segment to end, and do one of the following:
•To create a C-shaped curve, drag in a direction opposite to the previous direction line. Then release the mouse
button.
Drawing the second point in a curve
A. Starting to drag second smooth point B. Dragging away from previous direction line, creating a C curve C. Result after releasing mouse
button
•To create an S-shaped curve, drag in the same direction as the previous direction line. Then release the mouse
button.
Drawing an S curve
A. Starting to drag new smooth point B. Dragging in same direction as previous direction line, creating an S curve C. Result after releasing
mouse button
(Photoshop only) To change the direction of the curve sharply, release the mouse button, and then Alt-drag
(Windows) or Option-drag (Mac OS) the direction point in the direction of the curve. Release the Alt (Windows) or
Option (Mac
OS) key and the mouse button, reposition the pointer where you want the segment to end, and drag in the
opposite direction to complete the curve segment.
A B C
ABC
ABC

349
USING INDESIGN
Drawing
Last updated 11/16/2011
5Continue dragging the Pen tool from different locations to create a series of smooth curves. Note that you are
placing anchor points at the beginning and end of each curve, not at the tip of the curve.
Alt-drag (Windows) or Option-drag (Mac OS) direction lines to break out the direction lines of an anchor point.
6Complete the path by doing one of the following:
•To close the path, position the Pen tool over the first (hollow) anchor point. A small circle appears next to the Pen
tool pointer
when it is positioned correctly. Click or drag to close the path.
Note: To close a path in InDesign, you can also select the object and choose Object > Paths > Close Path.
•To leave the path open, Ctrl-click (Windows) or Command-click (Mac OS) anywhere away from all objects.
To leave the path open, you can also select a different tool, or choose Select > Deselect in Illustrator or Edit > Deselect
All in InDesign.
For a video on using the Pen tool in Illustrator, see www.adobe.com/go/vid0037.
More Help topics
Pen tool in Illustrator video
Reposition anchor points as you draw
❖After you click to create an anchor point, keep the mouse button pressed down, hold down the spacebar, and drag
to reposition the anchor point.
Finish drawing a path
❖Complete a path in one of the following ways:
•To close a path, position the Pen tool over the first (hollow) anchor point. A small circle appears next to the Pen
tool pointer
when it is positioned correctly. Click or drag to close the path.
Note: To close a path in InDesign, you can also select the object and choose Object > Paths > Close Path.
•To leave a path open, Ctrl-click (Windows) or Command-click (Mac OS) anywhere away from all objects.
To leave the path open, you can also select a different tool, or choose Select > Deselect in Illustrator or Edit > Deselect
All in InDesign. In InDesign, you can also simply press Enter or Return to leave the path open.
Draw straight lines followed by curves
1Using the Pen tool, click corner points in two locations to create a straight segment.
2Position the Pen tool over the selected endpoint. In Illustrator and InDesign, a convert-point icon appears next to
the Pen tool when it is positioned correctly (In Photoshop, a small diagonal line, or slash, appears next to the Pen
tool). To set the slope of the curved segment you’ll create next, click the anchor point, and drag the direction line
that appears.
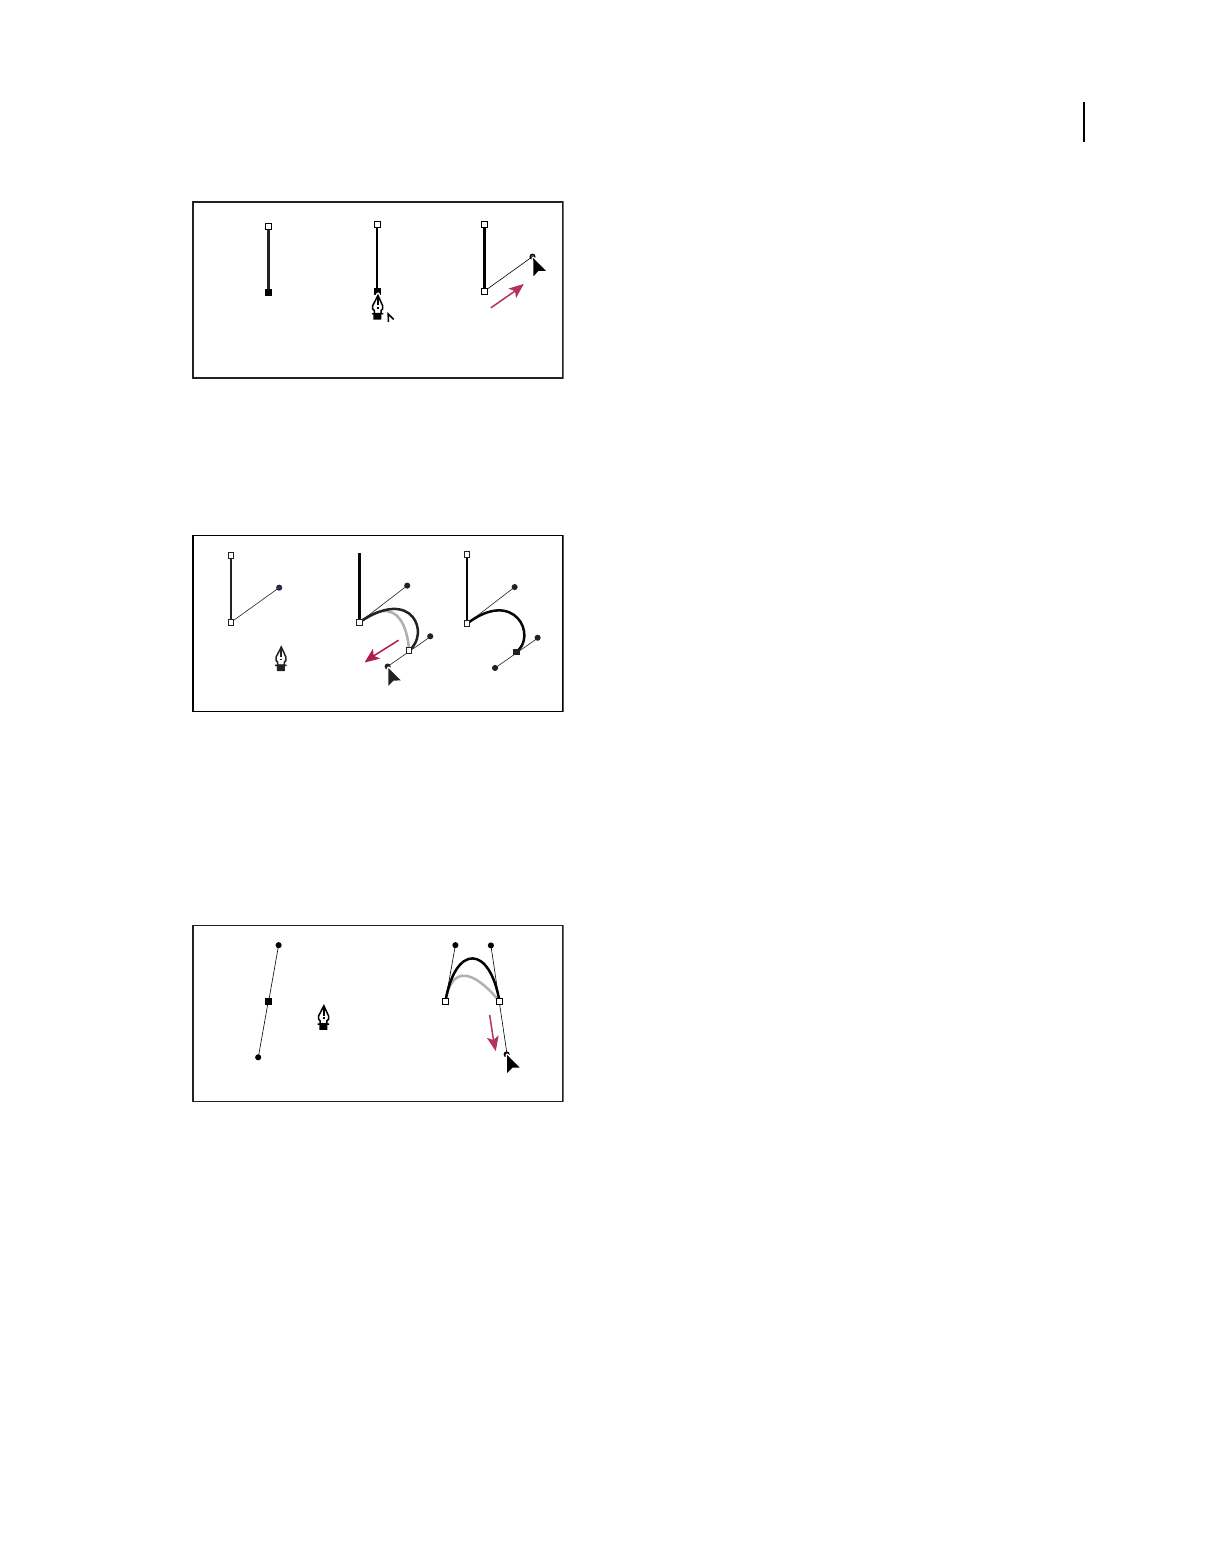
350
USING INDESIGN
Drawing
Last updated 11/16/2011
Drawing a straight segment followed by a curved segment (part 1)
A. Straight segment completed B. Positioning Pen tool over endpoint (the Convert Point icon appears only in Illustrator and InDesign)
C. Dragging direction point
3Position the pen where you want the next anchor point; then click (and drag, if desired) the new anchor point to
complete the curve.
Drawing a straight segment followed by a curved segment (part 2)
A. Positioning Pen tool B. Dragging direction line C. New curve segment completed
Draw curves followed by straight lines
1Using the Pen tool, drag to create the first smooth point of the curved segment, and release the mouse button.
2Reposition the Pen tool where you want the curved segment to end, drag to complete the curve, and release the
mouse button.
Drawing a curved segment followed by a straight segment (part 1)
A. First smooth point of curved segment completed and Pen tool positioned over endpoint B. Dragging to complete the curve
3Position the Pen tool over the selected endpoint. A convert-point icon appears next to the Pen tool when it is
positioned correctly. Click the anchor point to convert the smooth point to a corner point.
4Reposition the Pen tool where you want the straight segment to end, and click to complete the straight segment.
ABC
ABC
AB
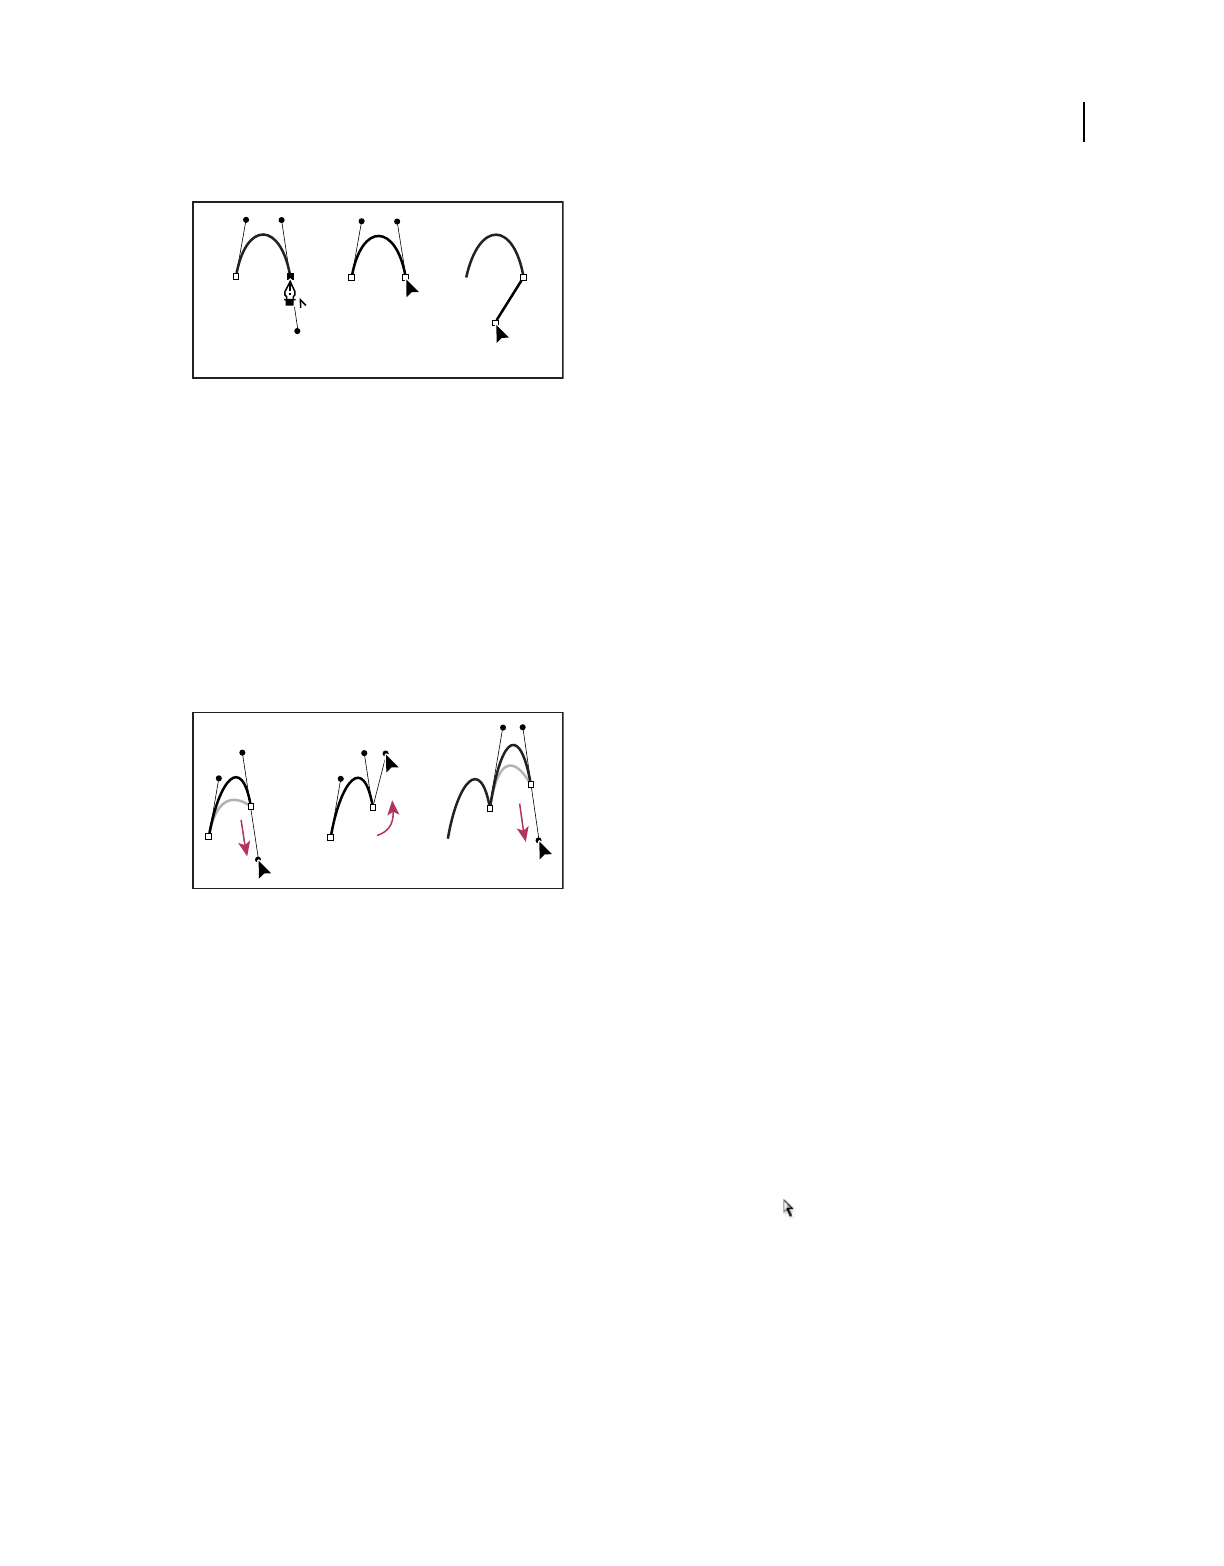
351
USING INDESIGN
Drawing
Last updated 11/16/2011
Drawing a curved segment followed by a straight segment (part 2)
C. Positioning Pen tool over existing endpoint D. Clicking endpoint E. Clicking next corner point
Draw two curved segments connected by a corner
1Using the Pen tool, drag to create the first smooth point of a curved segment.
2Reposition the Pen tool and drag to create a curve with a second smooth point; then press and hold Alt (Windows)
or Option (Mac
OS) and drag the direction line toward its opposing end to set the slope of the next curve. Release
the key and the mouse button.
This process converts the smooth point to a corner point by splitting the direction lines.
3Reposition the Pen tool where you want the second curved segment to end, and drag a new smooth point to
complete the second curved segment.
Drawing two curves
A. Dragging a new smooth point B. Pressing Alt/Option to split direction lines while dragging, and swinging direction line up C. Result after
repositioning and dragging a third time
Editing paths
Select paths, segments, and anchor points
Before you can reshape or edit a path, you need to select the path’s anchor points, segments, or a combination of both.
Select anchor points
•If you can see the points, you can click them with the Direct Selection tool to select them. Shift-click to select
multiple points.
•Select the Direct Selection tool and drag a boundary around the anchor points. Shift-drag around additional anchor
points to select them.
•Make sure the path that contains the anchor points is not selected. Move the Direct Selection tool over the anchor
point until the pointer displays a hollow square, and then click the anchor point. Shift-click additional anchor
points to select them.
DE
C
AB C

352
USING INDESIGN
Drawing
Last updated 11/16/2011
•(Illustrator only) Select the Lasso tool, and drag around the anchor points. Shift-drag around additional anchor
points to select them.
Select path segments
Do any of the following:
•Select the Direct Selection tool , and click within 2 pixels of the segment, or drag a marquee over part of the
segment. Shift-click or Shift-drag around additional path segments to select them.
•(Illustrator only) Select the Lasso tool , and drag around part of the path segment. Shift-drag around additional
path segments to select them.
Select all anchor points and segments in a path
1Select the Direct Selection tool or, in Illustrator, the Lasso tool.
2Drag around the entire path.
If the path is filled, you can also click inside the path with the Direct Selection tool to select all anchor points.
Copy a path
❖Select a path or segment with the Selection tool or Direct Selection tool and do one of the following:
•Use the standard menu functions to copy and paste paths within or between applications.
•Press and hold Alt (Windows) or Option (Mac OS) and drag the path to the desired position, and then release the
mouse button and Alt/Option key.
Adjust path segments
You can edit a path segment at any time, but editing existing segments is slightly different from drawing them. Keep
the following tips in mind when editing segments:
•If an anchor point connects two segments, moving that anchor point always changes both segments.
•When drawing with the Pen tool, you can temporarily activate the Direct Selection tool (InDesign and Photoshop)
so that you can adjust segments you’ve already drawn; press Ctrl (Windows) or Command (Mac
OS) while
drawing. In Illustrator, pressing Ctrl or Command while drawing activates the last-used selection tool.
•When you initially draw a smooth point with the Pen tool, dragging the direction point changes the length of the
direction line on both sides of the point. However, when you edit an existing smooth point with the Direct Selection
tool, you
change the length of the direction line only on the side you’re dragging.
Move straight segments
1With the Direct Selection tool , select the segment you want to adjust.
2Drag the segment to its new position.
Adjust the length or angle of straight segments
1With the Direct Selection tool , select an anchor point on the segment you want to adjust.
2Drag the anchor point to the desired position. Shift-drag to constrain the adjustment to multiples of 45°.
In Illustrator or InDesign, if you’re simply trying to make a rectangle wider or narrower, it’s easier to select it with the
Selection tool and resize it using one of the handles on the sides of its bounding box.
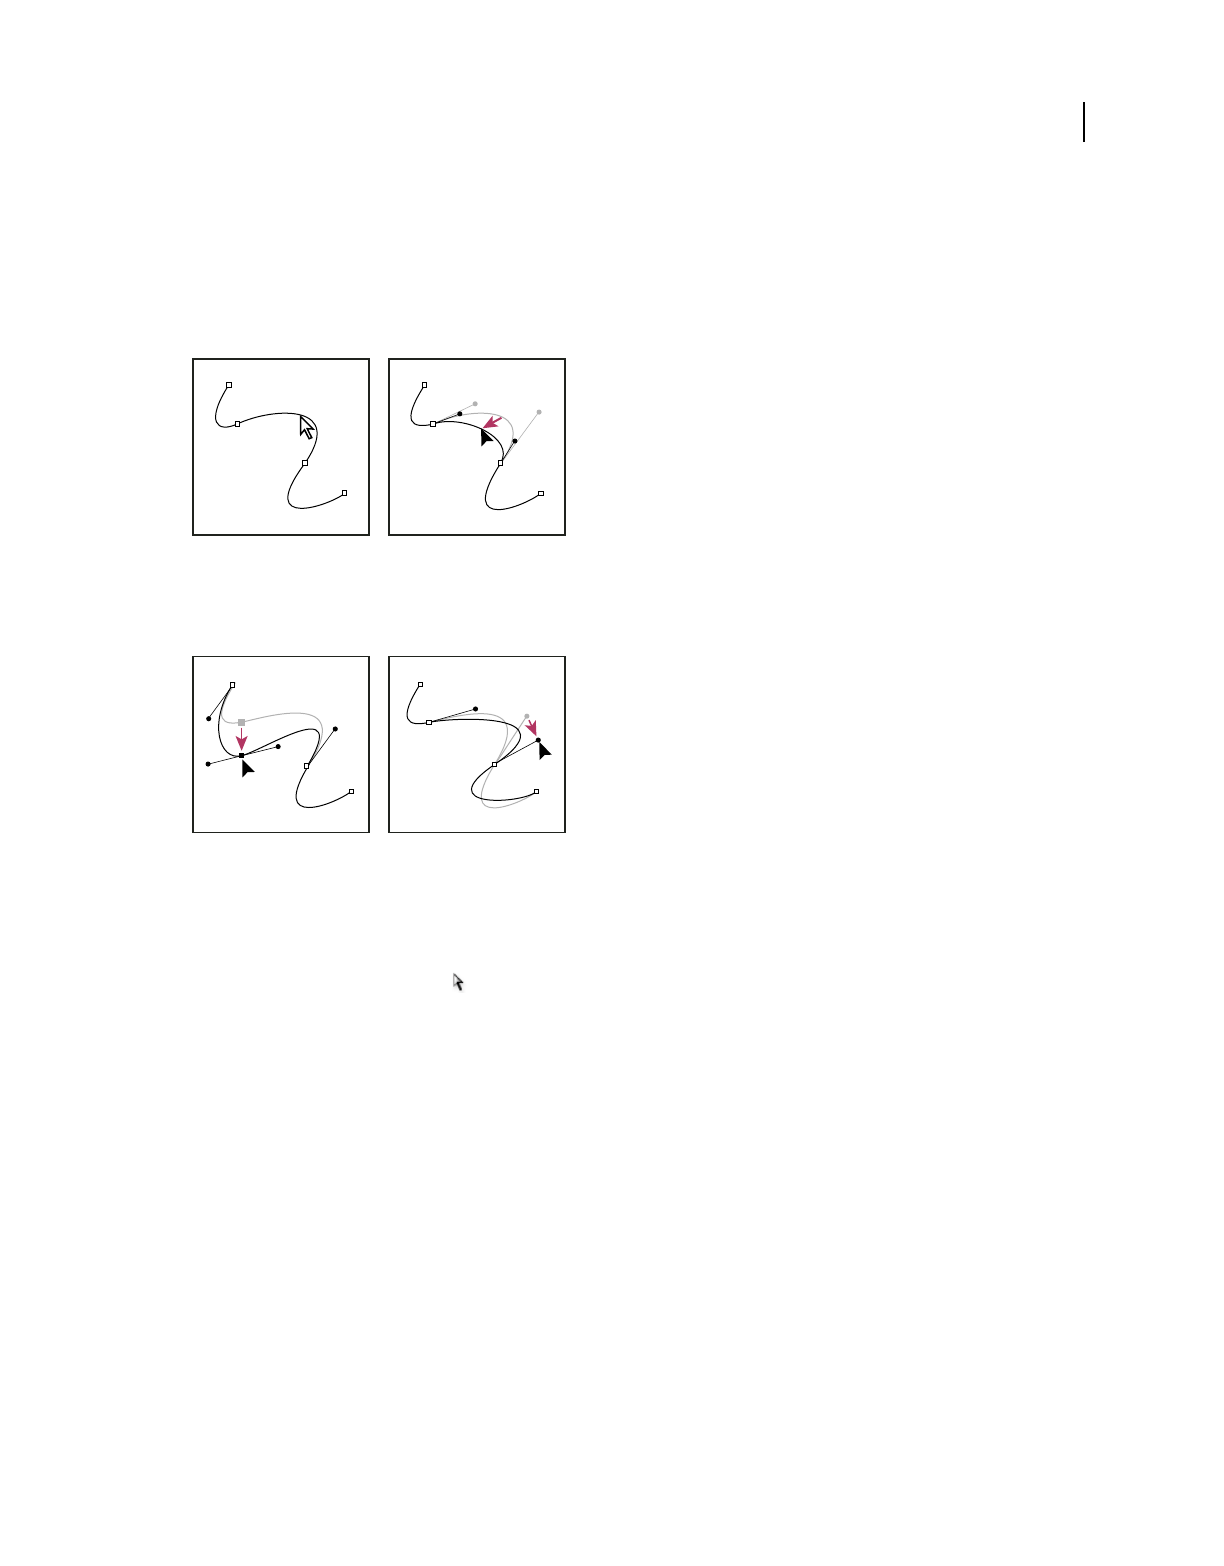
353
USING INDESIGN
Drawing
Last updated 11/16/2011
Adjust the position or shape of curved segments
1With the Direct Selection tool, select a curved segment, or an anchor point on either end of the curved segment.
Direction lines appear, if any are present. (Some curved segments use just one direction line.)
2Do any of the following:
•To adjust the position of the segment, drag the segment. Shift-drag to constrain the adjustment to multiples of 45°.
Click to select the curve segment. Then drag to adjust.
•To adjust the shape of the segment on either side of a selected anchor point, drag the anchor point or the direction
point. Shift-drag to constrain movement to multiples of 45°.
Drag the anchor point, or drag the direction point.
Note: You can also apply a transformation, such as scaling or rotating, to a segment or anchor point.
Delete a segment
1Select the Direct Selection tool , and select the segment you want to delete.
2Press Backspace (Windows) or Delete (Mac OS) to delete the selected segment. Pressing Backspace or Delete again
erases the rest of the path.
Delete the handle of an anchor point
•Using the Convert Anchor Point Tool (Illustrator) or the Convert Direction Point Tool (InDesign), click the
anchor point of the handle.
•Drag the direction point and drop it onto the anchor point.
Extend an open path
1Using the Pen tool, position the pointer over the endpoint of the open path you want to extend. The pointer changes
when it’s precisely positioned over the endpoint.
2Click the endpoint.
3Do one of the following:
•To create a corner point, position the Pen tool where you want to end the new segment, and click. If you are
extending a path that ends at a smooth point, the new segment will be curved by the existing direction line.

354
USING INDESIGN
Drawing
Last updated 11/16/2011
Note: In Illustrator, if you extend a path that ends in a smooth point, the new segment will be straight.
•To create a smooth point, position the Pen tool where you want to end the new curved segment, and drag.
Connect two open paths
1Using the Pen tool, position the pointer over the endpoint of the open path that you want to connect to another
path. The pointer changes when it’s precisely positioned over the endpoint.
2Click the endpoint.
3Do one of the following:
•To connect the path to another open path, click an endpoint on the other path. When you precisely position the
Pen tool over the other path’s endpoint, a small merge symbol
appears next to the pointer.
•To connect a new path to an existing path, draw the new path near the existing path, and then move the Pen tool
to the existing path’s (unselected) endpoint. Click that endpoint when you see the small merge symbol that appears
next to the pointer.
In InDesign, you can also use the Pathfinder panel to join paths. To close the path of an open path, use the Selection
tool to select the path and click Close Path in the Pathfinder panel. To close the end points between two paths, select
the paths and click Join Path. You may want to click Join Path a second time to join the second endpoint.
Move or nudge anchor points or segments using the keyboard
1Select the anchor point or path segment.
Note: In Photoshop, you can move only anchor points in this manner.
2Click or hold down any of the arrow keys on the keyboard to move 1 pixel at a time in the direction of the arrow.
Hold down the Shift key in addition to the arrow key to move 10 pixels at a time.
Note: In Illustrator and InDesign, you can change the distance of a nudge by changing the Keyboard Increment
preference. When you change the default increment, holding down Shift nudges 10 times the specified distance.
Add or delete anchor points
Adding anchor points can give you more control over a path or it can extend an open path. However, it’s a good idea
not to add more points than necessary. A path with fewer points is easier to edit, display, and print. You can reduce
the complexity of a path by deleting unnecessary points.
The toolbox contains three tools for adding or deleting points: the Pen tool , the Add Anchor Point tool , and the
Delete Anchor Point tool .
By default, the Pen tool changes to the Add Anchor Point tool as you position it over a selected path, or to the Delete
Anchor Point tool as you position it over an anchor point. (In Photoshop, you must select Auto Add/Delete in the
options bar to enable the Pen tool to automatically change to the Add Anchor Point or Delete Anchor Point tool.)
You can select and edit multiple paths simultaneously in Photoshop and InDesign; however, you can add or delete
points to only one path at a time in Illustrator. In Photoshop and InDesign, you can reshape a path while adding anchor
points by clicking and dragging as you add.
Note: Don’t use the Delete, Backspace, and Clear keys or the Edit > Cut or Edit > Clear commands to delete anchor
points: these keys and commands delete the point and the line segments that connect to that point.
Add or delete anchor points
1Select the path you want to modify.
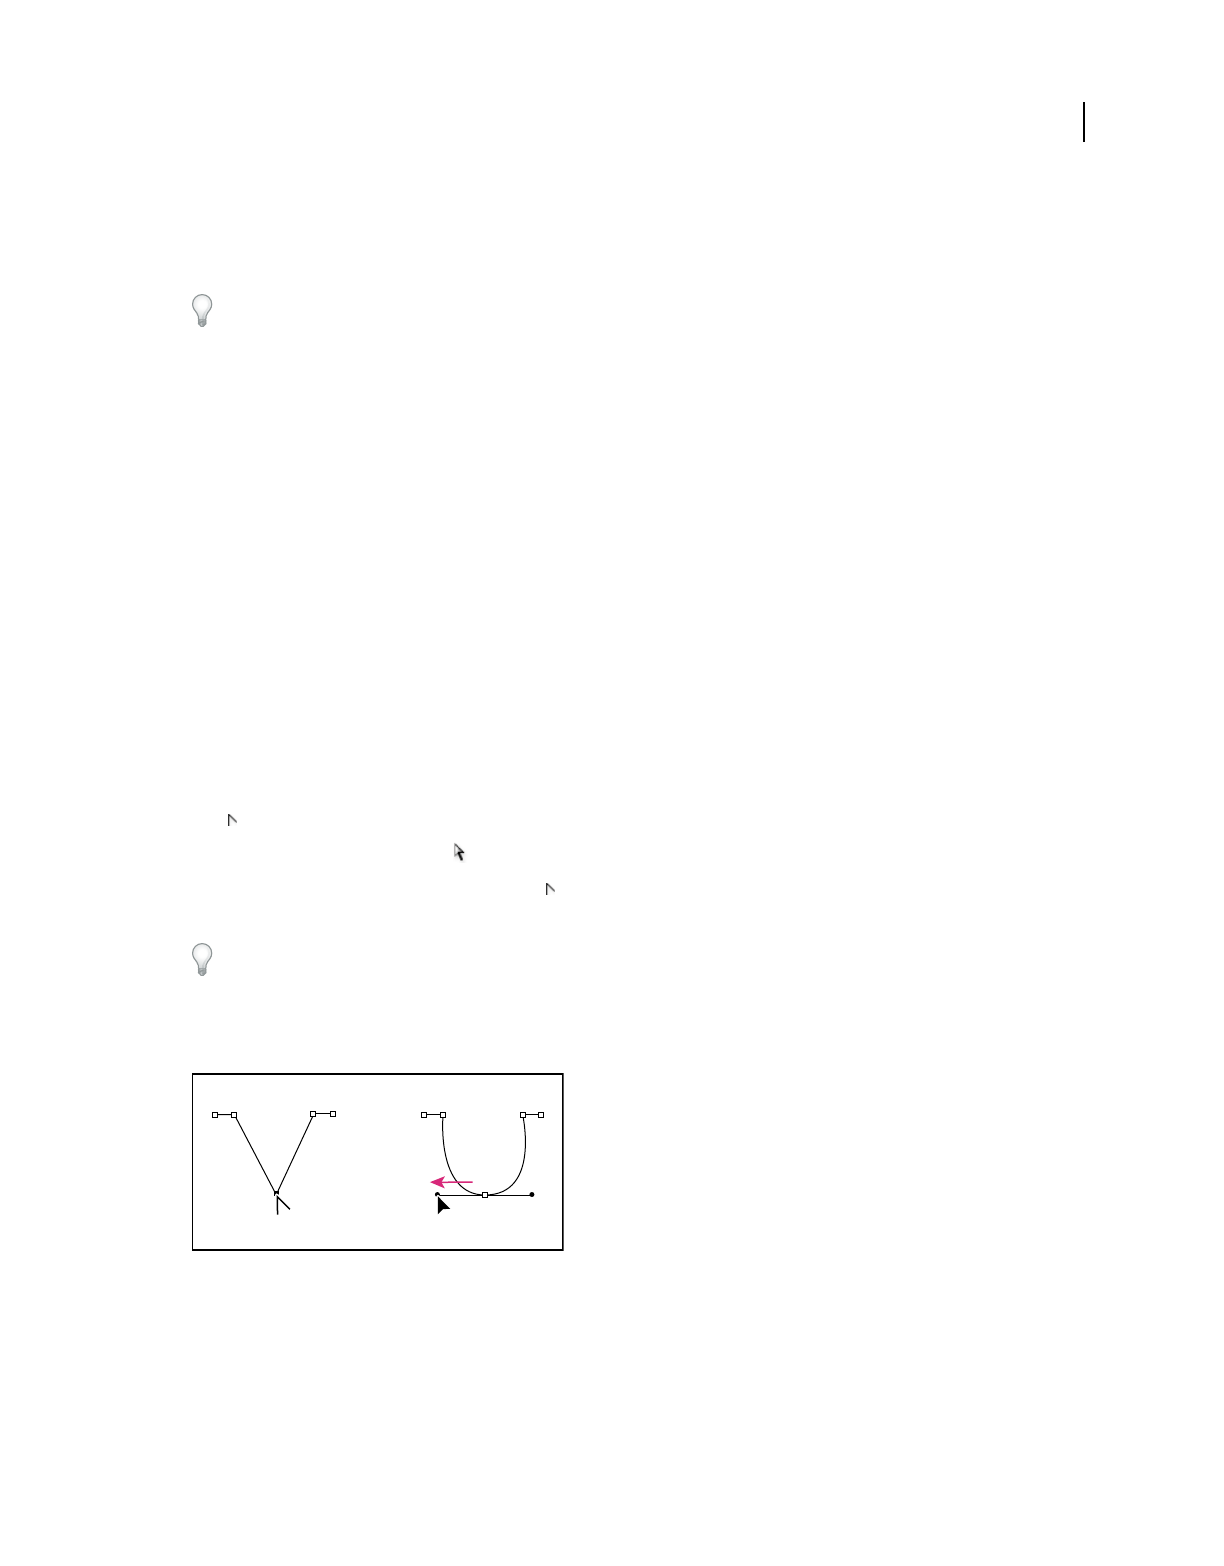
355
USING INDESIGN
Drawing
Last updated 11/16/2011
2Select the Pen tool, the Add Anchor Point tool, or the Delete Anchor Point tool.
3To add an anchor point, position the pointer over a path segment and click. To delete an anchor point, position the
pointer over an anchor point and click.
In Illustrator, you can add anchor points to a path by selecting the object and choosing Object > Path > Add Anchor
Points.
Disable or temporarily override automatic Pen tool switching
You can override automatic switching of the Pen tool to the Add Anchor Point tool or the Delete Anchor Point tool.
This is useful when you want to start a new path on top of an existing path.
•In Photoshop, deselect Auto Add/Delete in the options bar.
•In Illustrator, hold down Shift as you position the Pen tool over the selected path or an anchor point. (To prevent
Shift from constraining the Pen tool, release Shift before you release the mouse button.)
•In Illustrator, choose Edit > Preferences > General (Windows) or Illustrator > Preferences > General (Mac OS),
and select Disable Auto Add/Delete.
•In InDesign, hold down any shortcut key, make your edits, and then release the mouse button. For example, with
the Pen tool selected, you can hold down the A key to display the Direct Selection tool, edit points, and the Pen tool
is selected when you release the A key.
Convert between smooth points and corner points
Paths can have two kinds of anchor points—corner points and smooth points. At a corner point, a path abruptly
changes direction. At a smooth point, path segments are connected as a continuous curve. The Convert Direction Point
tool
. lets you change an anchor point from a corner point to a smooth point or visa versa.
1Using the Direct Selection tool , select the path you want to modify.
2Switch to the Convert Direction Point tool . (If necessary, position the pointer over the Pen tool and drag to
choose the Convert Direction Point tool.)
To temporarily switch from the Convert Direction Point tool to the Direct Selection tool, press Ctrl (Windows) or
Command (Mac OS).
3Position the Convert Direction Point tool over the anchor point you want to convert, and do one of the following:
•To convert a corner point to a smooth point, drag direction lines out of the corner point.
Dragging direction lines out of corner point to create smooth point
•To convert a smooth point to a corner point without using direction lines, click a smooth point.
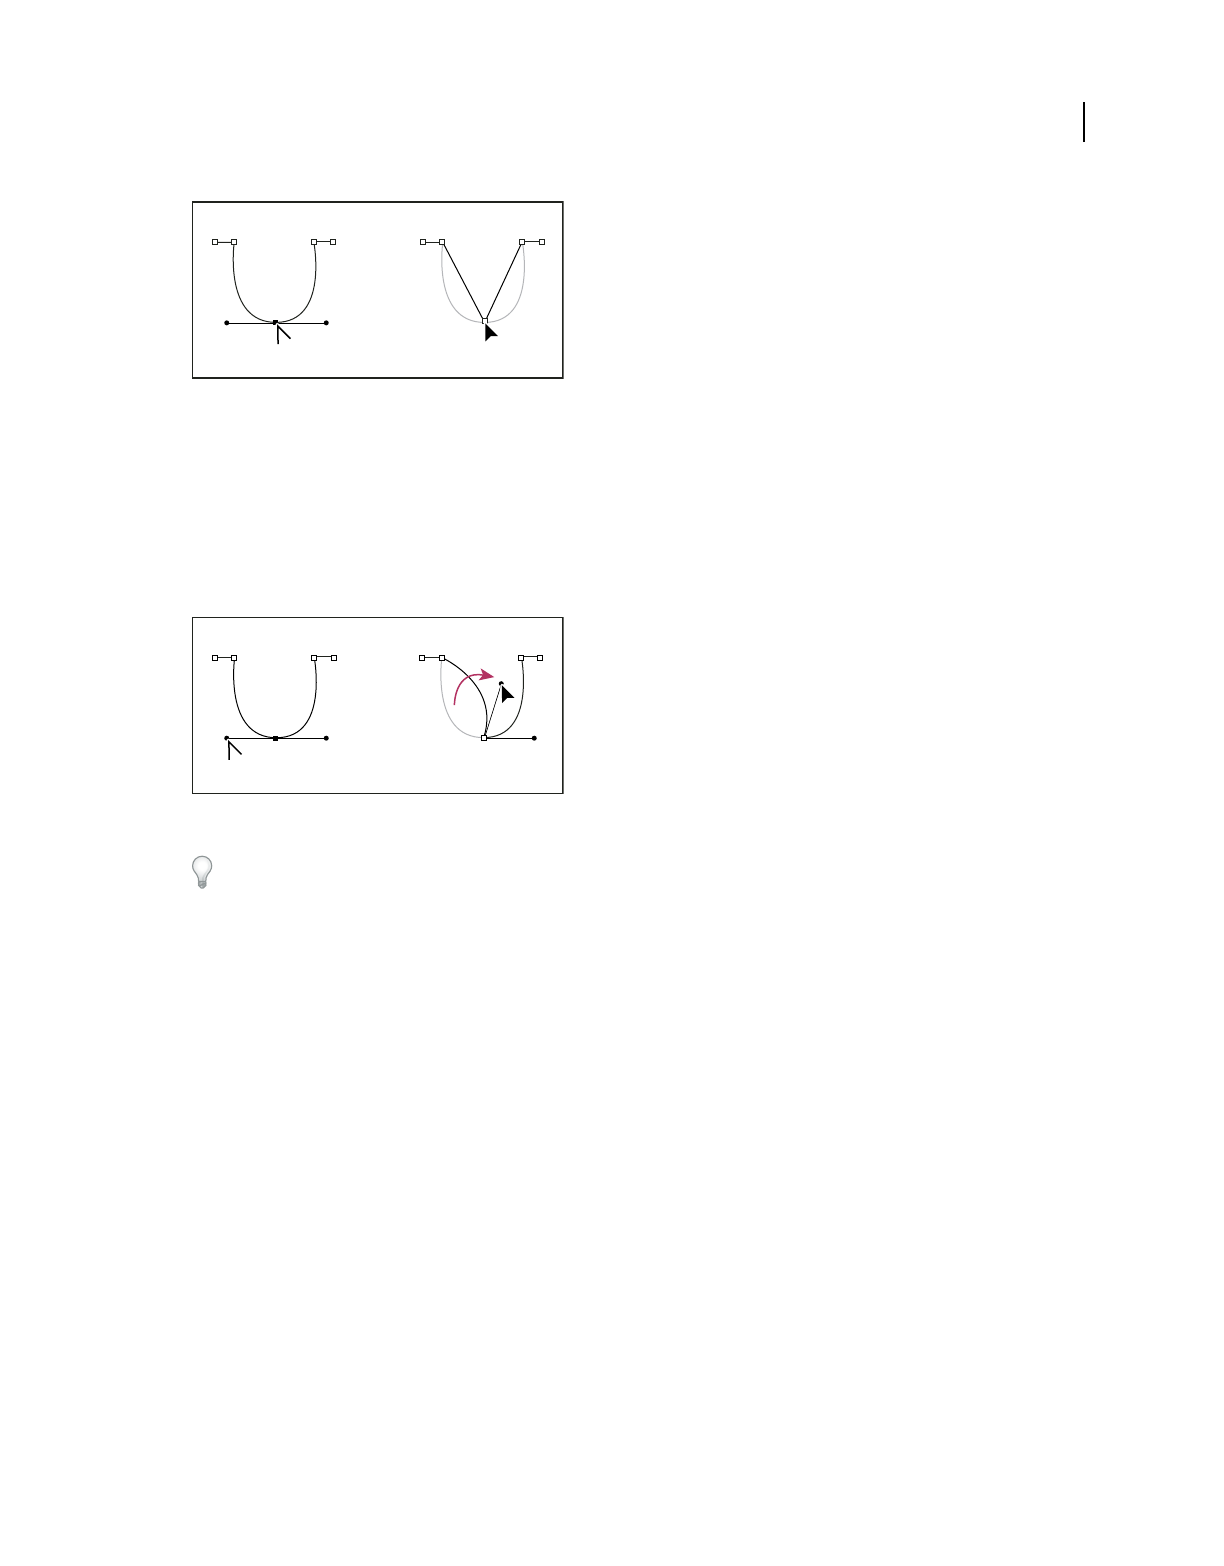
356
USING INDESIGN
Drawing
Last updated 11/16/2011
Clicking smooth point to create corner point
•To convert a corner point without using direction lines to a corner point with independent direction lines, first drag
direction lines out of a corner point (making it a smooth point). Release the mouse button, and then drag either
direction line.
•To convert a point, open the Pathfinder panel (choose Window > Object & Layout > Pathfinder), and click the
Plain, Corner, Smooth, or Symmetrical button in the Convert Point section.
•To convert a smooth point to a corner point with independent direction lines, drag either direction line.
Converting smooth point to corner point
To convert points, you can also use the Direct Selection tool to select a point, and then choose a command from the
Object > Convert Point menu. For example, you can select the smooth point at the bottom of a “U” shape and choose
Object
> Convert Point > Plain. Doing so removes the direction lines and makes a “V” shape. Choose Corner to create a
point with direction lines that can move independently of each other. Choose Smooth to create a point with handles that
can have unequal lengths. Choose Symmetrical to create a point with handles of equal lengths.
More Help topics
“About paths” on page 340
“About direction lines and direction points” on page 342
“Adjust path segments” on page 352
Split a path
You can split a path, graphics frame, or empty text frame at any anchor point or along any segment. When you split a
path, keep the following in mind:
•If you want to split a closed path into two open paths, you must slice in two places along the path. If you slice a
closed path only once, you get a single path with a gap in it.
•Any paths resulting from a split inherit the path settings of the original path, such as stroke weight and fill color.
You may need to reset stroke alignment from inside to outside.
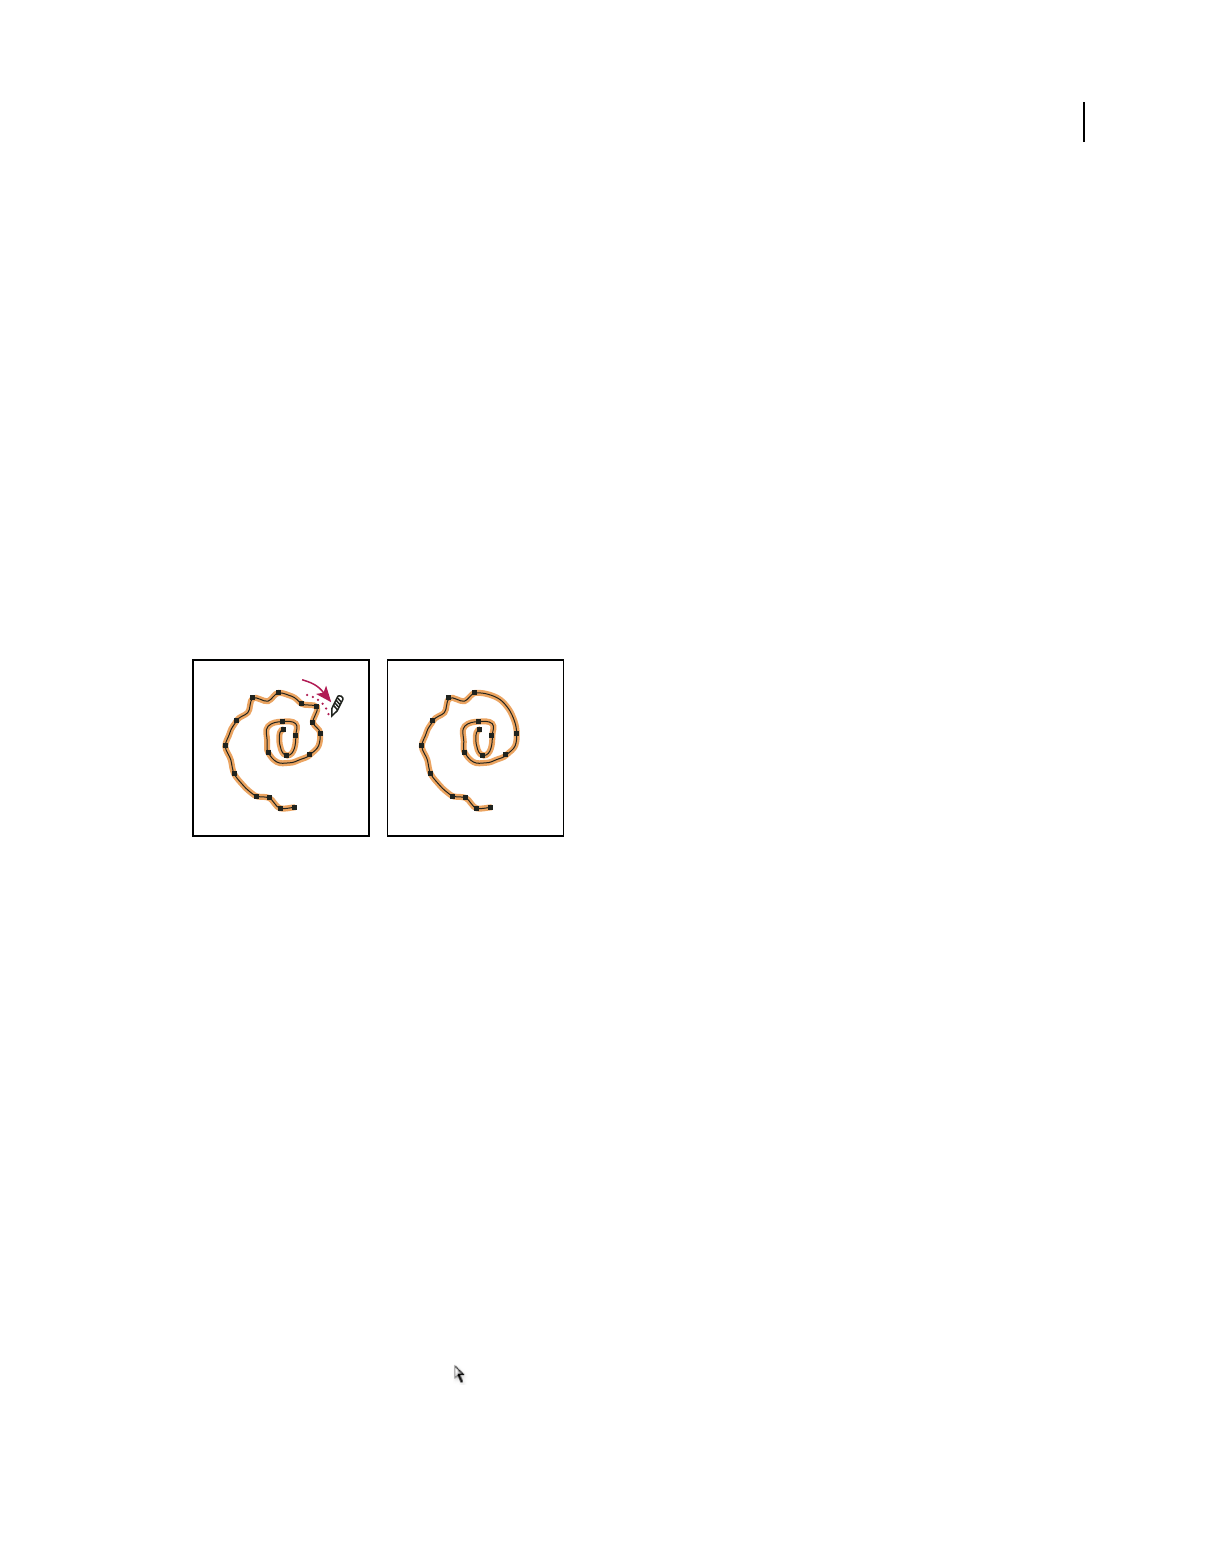
357
USING INDESIGN
Drawing
Last updated 11/16/2011
Split a path using the Scissors tool
1(Optional) Select the path to see its current anchor points.
2Select the Scissors tool and click the path where you want to split it. When you split the path in the middle of a
segment, the two new endpoints appear on top of the other, and one endpoint is selected.
3Use the Direct Selection tool to adjust the new anchor point or path segment.
Open a path using the Pathfinder panel
1Select the closed path.
2To open the Pathfinder panel, choose Window > Object & Layout > Pathfinder.
3Click Open Path in the Pathfinder panel.
Smooth out paths
Use the Smooth tool to remove excess angles from an existing path or a section of a path. The Smooth tool retains the
original shape of the path as nearly as possible. Smoothed paths generally have fewer points, which can make them
easier to edit, display, and print.
Path before and after using Smooth tool
1Select the path.
2Select the Smooth tool.
Note: If the Pencil tool is selected, hold down Alt (Windows) or Option (Mac OS) to temporarily change the Pencil to the
Smooth tool.
3Drag the tool along the length of the path segment you want to smooth out.
4Continue smoothing until the stroke or path is of the desired smoothness.
5To change the amount of smoothing, double-click the Smooth tool and set the following options:
Fidelity Controls how far your curves can stray before you have to modify the path. With lower Fidelity values, the
curves will closely match the pointer’s movement, resulting in sharper angles. With higher Fidelity values, the path will
ignore small pointer movements, resulting in smoother curves. The pixel value range is 0.5 to 20 pixels.
Smoothness Controls the amount of smoothing applied when you use the tool. Smoothness can range from 0% to
100%; the higher the value, the smoother the path.
Keep Selected Determines whether to keep the path selected after you smooth it.
Reshape closed paths or objects
1Using the Direct Selection tool , do one of the following:
•Drag around the anchor points you want to select.
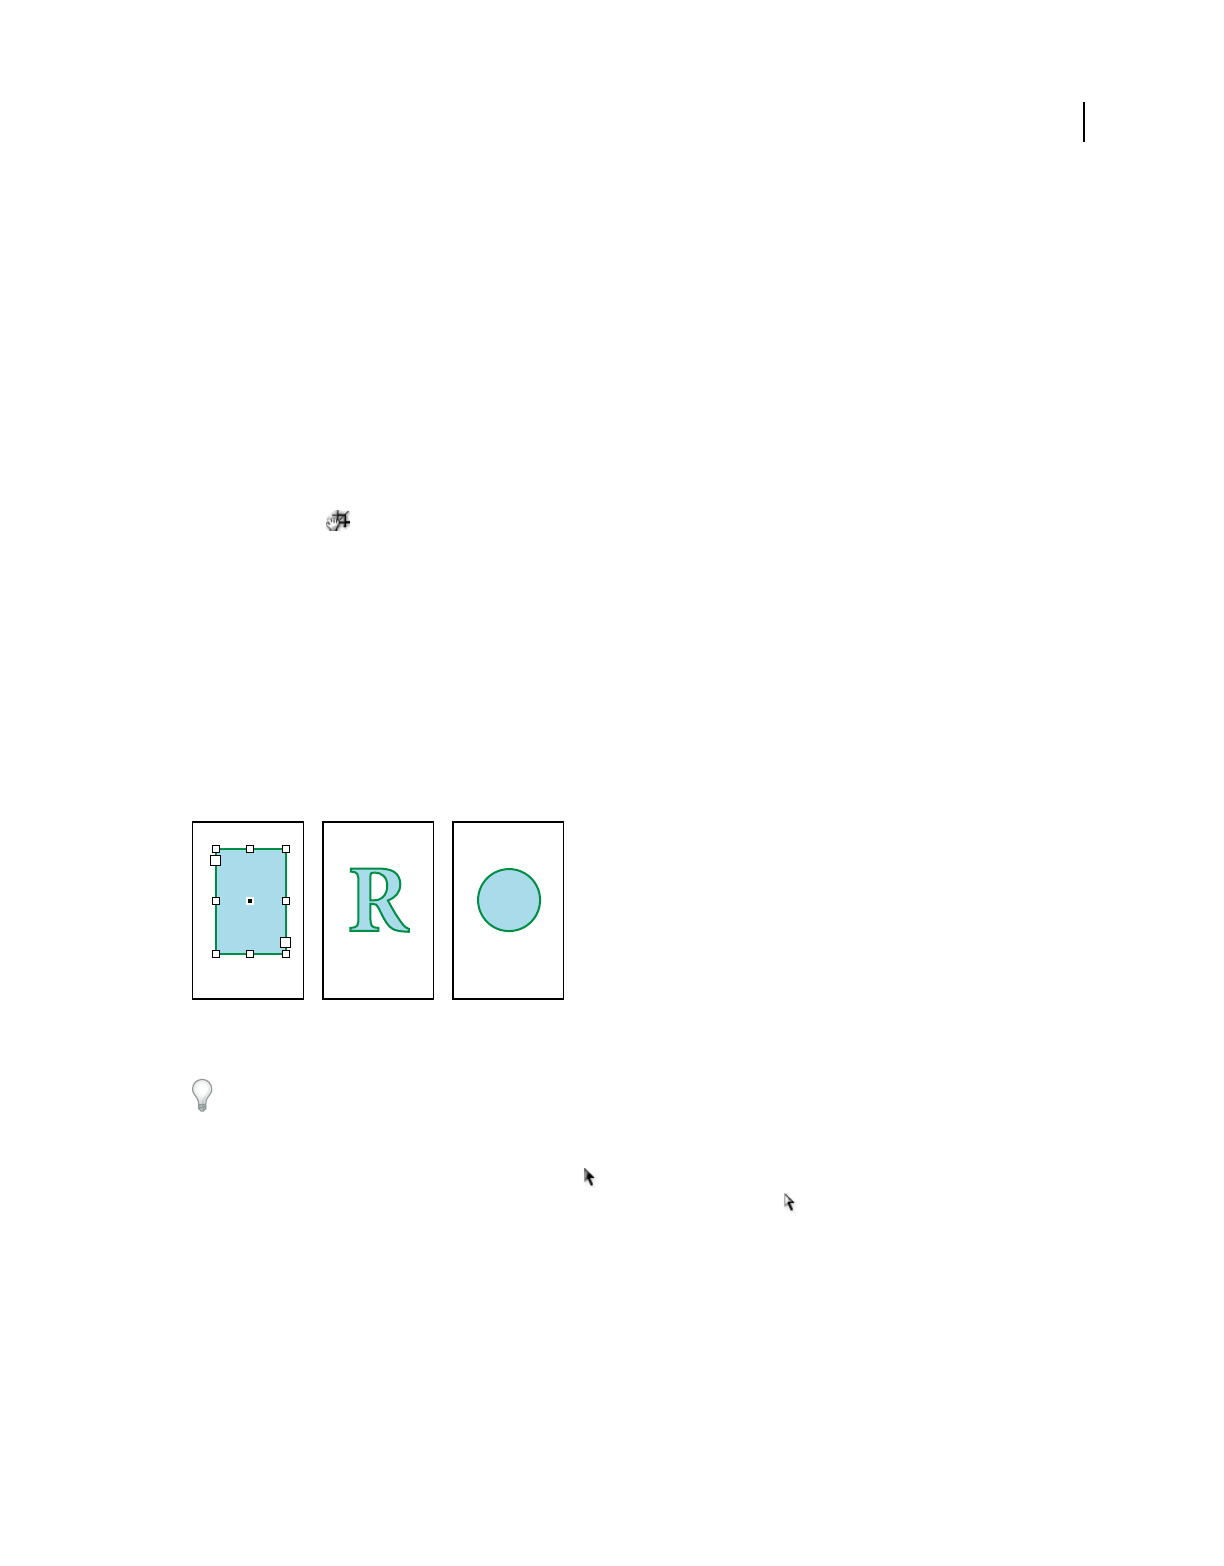
358
USING INDESIGN
Drawing
Last updated 11/16/2011
•Hold down Shift as you click the anchor points you want to select.
2Position the pointer over the anchor point or path segment that you want to act as a focal point (that is, a point that
pulls the selected path segments), and click the anchor point or path segment.
3Drag the highlighted anchor points to adjust the path. The amount of movement of a given path segment is relative
to its distance from a highlighted point:
•Selected points that act as the focal point move with the selection tool during dragging.
•Selected points that aren’t the focal point move in tandem with the dragged focal point.
•Unselected anchor points are not affected by reshaping.
About the Position tool
The Position tool is not available in InDesign CS5. Instead, you can use the Selection tool to select and manipulate
either the frame or the content within the frame. See “Select objects” on page 402.
Applying line (stroke) settings
Set strokes
You can apply strokes, or line settings, to paths, shapes, text frames, and text outlines. The Stroke panel provides
control over the weight and appearance of the stroke, including how segments join, start and end shapes, and options
for corners. You can also select stroke settings in the Control panel when a path or frame is selected.
Applying strokes
A. Stroke applied to text frame B. Stroke applied to text outline C. Stroke applied to circle
If you frequently use the same stroke settings, you can save the settings in an object style, and quickly apply the same
settings to any object. For more information, see “Object styles” on page 213.
1Select the path whose stroke you want to modify.
Note: When you select a path using the Selection tool , you activate a bounding box that encompasses the entire object.
If you want to see the actual path, select the path using the Direct Selection tool instead.
2Choose Window > Stroke to display the Stroke panel.
3For Weight, choose a stroke weight in the menu, or type a value and press Enter or Return.
Note: Strokes thinner than 0.25 point may be too thin to see when printed on high-resolution output devices such as an
imagesetter. To remove the stroke, type a value of 0 (zero).
4If additional options are not visible, choose Show Options from the panel menu to display the other stroke
attributes.
5Change other stroke attributes as desired.
ABC

359
USING INDESIGN
Drawing
Last updated 11/16/2011
Note: If you want to change the stroke’s color, use the toolbox and Swatches panel. See “Apply color” on page 465.
More Help topics
“Change the color, gradient, or stroke of text” on page 255
Stroke panel options
Miter Limit Specifies the limit of point length to stroke width before a mitered join becomes a beveled square join. For
example, a value of 9 requires the point length to be 9 times the stroke width before the point becomes beveled. Type
a value (between 1 and 500) and press Enter or Return. The Miter Limit does not apply to a round join.
You can include miter limit and stroke alignment settings in a paragraph or character style. Click the Character Color
section, and then click the stroke icon to make the options available.
Cap Select a cap style to specify the appearance of both ends of an open path:
•Butt cap Creates squared ends that abut (stop at) the endpoints.
•Round cap Creates semicircular ends that extend half the stroke width beyond the endpoints.
•Projecting cap Creates squared ends that extend half the stroke width beyond the endpoints. This option makes
the stroke weight extend evenly in all directions around the path.
Note: You can specify a cap option for a closed path, but the cap will not be visible unless the path is opened (for example,
by cutting with the Scissors tool). Also, cap styles are easier to see at thicker stroke weights.
Join Specify the appearance of the stroke at corner points:
•Miter join Creates pointed corners that extend beyond the endpoint when the miter’s length is within the miter
limit.
•Round join Creates rounded corners that extend half the stroke width beyond the endpoints.
•Bevel join Creates squared corners that abut the endpoints.
Note: You can specify miter options for a path that doesn’t use corner points, but the miter options will not apply until
you create corner points by adding them or by converting smooth points. Also, miters are easier to see at thicker stroke
weights.
Align Stroke Click an icon to specify the position of the stroke relative to its path.
Type Choose a stroke type in the menu. If you choose Dashed, a new set of options appears.
Start Choose for the beginning of the path.
End Choose for the end of the path.
Gap Color Specify a color to appear in the space between dashes, dots, or multiple lines in a patterned stroke.
Gap Tint Specify a tint (when a gap color is specified).
Although you can define dashed strokes in the Stroke panel, it’s easier to create a dashed stroke using a custom stroke
style.
Add start and end shapes
Keep the following guidelines in mind as you work with start and end shapes:
•You can’t edit the available start and end shapes, but if you’ve obtained plug-in software that adds more options,
the Start and End menus in the Stroke panel can include additional shapes.
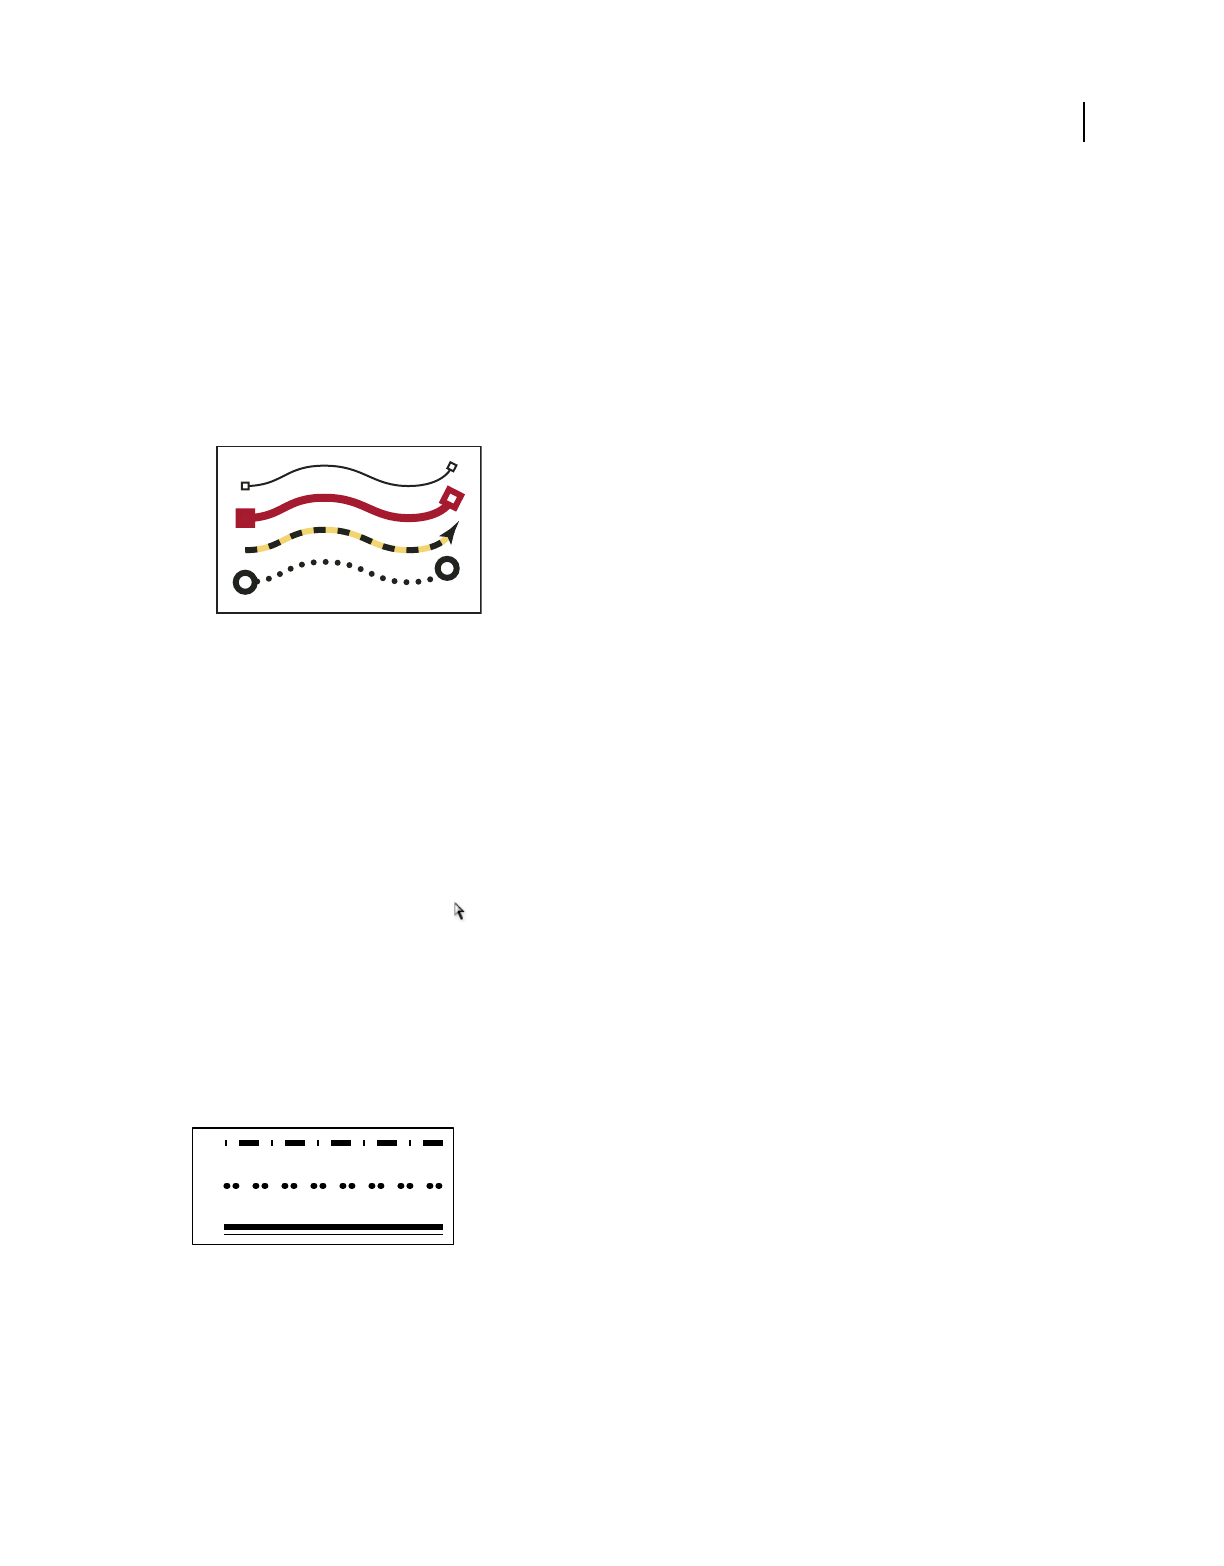
360
USING INDESIGN
Drawing
Last updated 11/16/2011
•Start and end shapes are sized in proportion to the stroke weight. However, adding a start or end shape does not
change the length of the path.
•Start and end shapes automatically rotate to match the angle of an endpoint’s direction line.
•Start and end shapes appear at endpoints of open paths only; they won’t appear on individual dashes of a dashed
stroke.
•If you apply start and end shapes to a compound path that includes open subpaths, each open subpath will use the
same start and end shapes.
•You can apply start and end shapes to a closed path, but they won’t be visible unless you open the path.
Sample start and end shapes
Create arrows using start and end shapes
Use the Start and End menus in the Stroke panel to add an arrowhead or other shape to the end of an open path.
1Use the Line tool to draw a line, or create an open path.
2With the line or path selected, open the Stroke panel, and choose a style in the Start and End menus. The Start menu
applies a shape to the first endpoint of a path (as determined by the order in which the path’s points were drawn),
and the End menu applies a shape to the last endpoint.
Switch a path’s start and end shapes
1Using the Direct Selection tool , select a path.
2Choose Object > Paths > Reverse Path, or click the Reverse Path button in the Pathfinder panel.
Define custom stroke styles
You can create a custom stroke style using the Stroke panel. A custom stroke style can be dashed, dotted, or striped; in
the style, you can define the stroke’s pattern, cap, and corner attributes. You specify other stroke attributes, such as
weight, gap color, and start and end shapes, after the custom stroke style has been applied to an object.
Custom stroke styles
A. Dashed B. Dotted C. Striped
Custom stroke styles can be saved and loaded into other InDesign documents.
1Choose Window > Stroke to display the Stroke panel.
2In the panel menu, choose Stroke Styles.
3Click New.
A
B
C
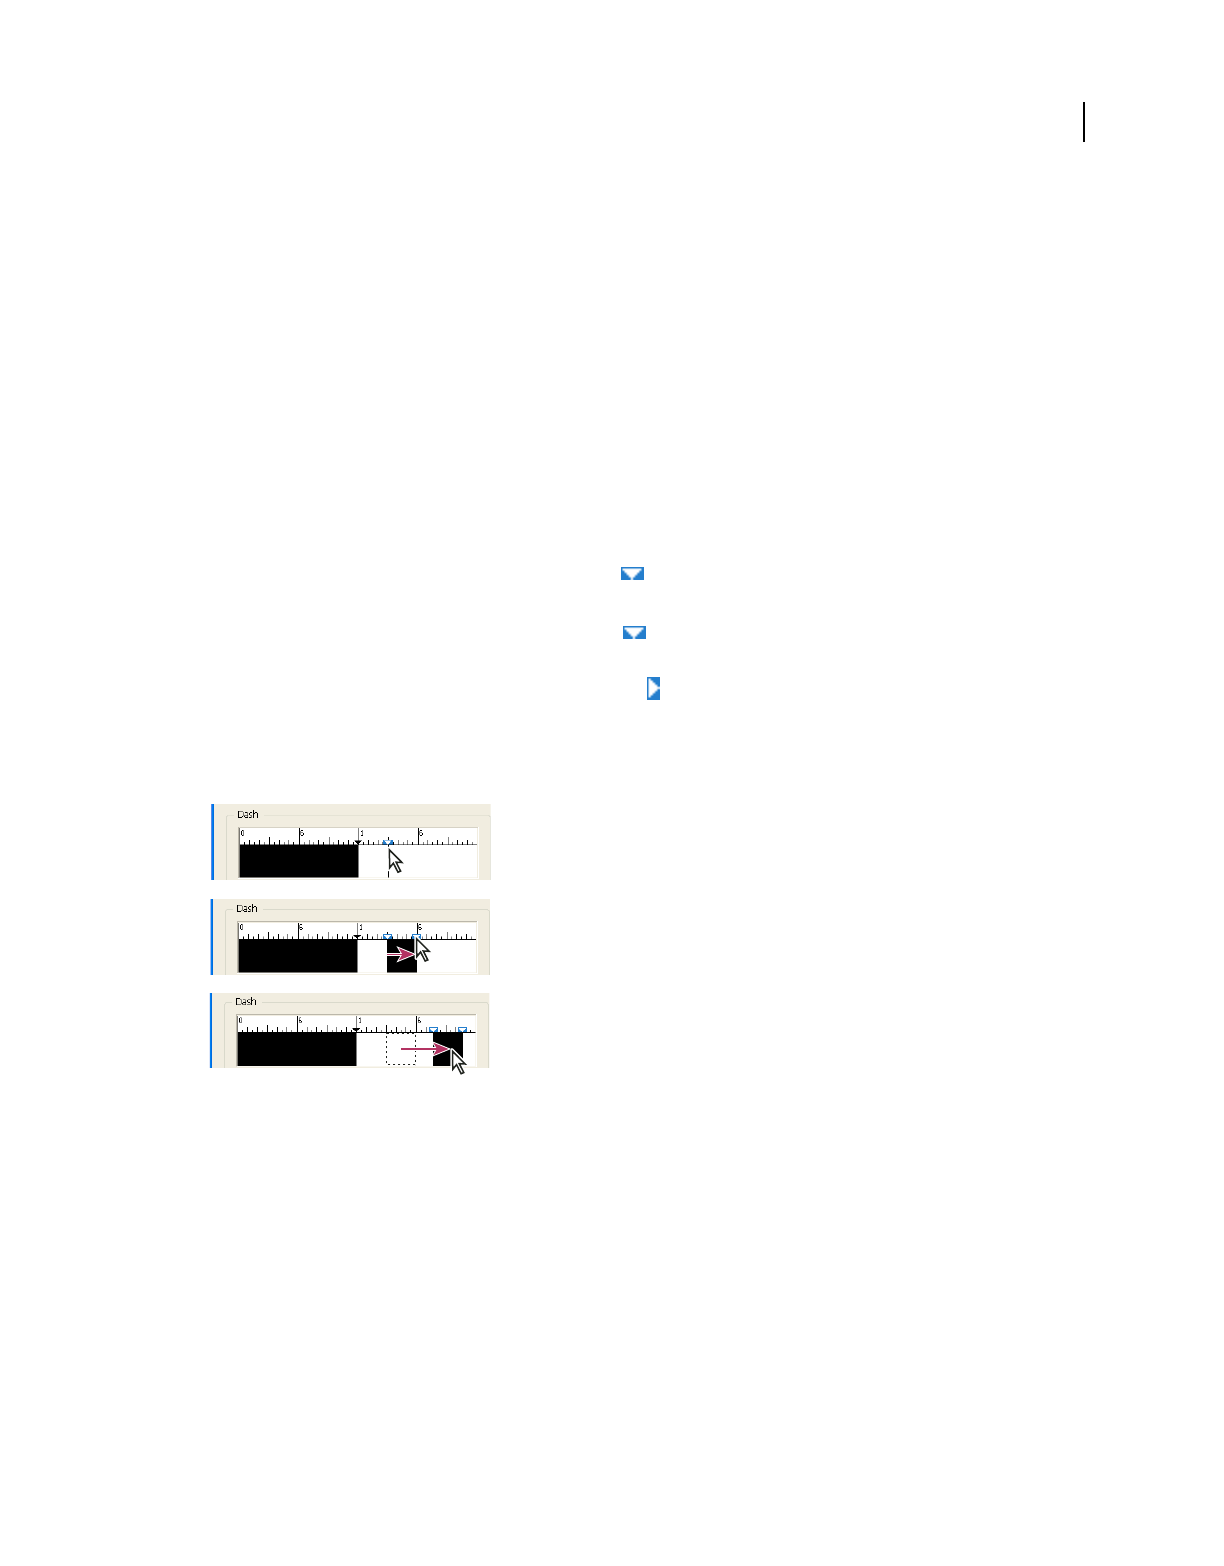
361
USING INDESIGN
Drawing
Last updated 11/16/2011
4Enter a name for the stroke style.
5For Type, select one of the following:
•Dash to define a style with dashes spaced at regular or varying intervals.
•Striped to define a style with one or more parallel lines.
•Dotted to define a style with dots spaced at regular or varying intervals.
The options in the dialog box change to match your selection.
6For Pattern Length, specify the length of the repeating pattern (dashed or dotted styles only). The ruler updates to
match the length you specify.
7To define the stroke pattern, do any of the following:
•Click the ruler to add a new dash, dot, or stripe.
•Drag a dash, dot, or stripe to move it.
•To adjust the width of a dash, move its ruler markers . You can also select the dash and then enter values for
Start (where the dash starts on the ruler) and Length.
•To adjust the position of a dot, move its ruler marker . You can also select the dot and then enter a value for
Center (where the center of the dot is positioned).
•To adjust the thickness of a stripe, move its ruler markers . You can also select the stripe and enter values for Start
and Width, both of which are expressed as a percentage of the stroke’s weight.
•To delete a dash, dot, or stripe, drag it out of the ruler window. (However, a custom stroke style must contain at
least one dash, dot, or stripe.)
Creating a dashed line in New Stroke Style dialog box
A. Clicking to add a dash to the pattern B. Dragging a marker to make the dash wider C. Dragging the dash to adjust the white space between
dashes
8To preview the stroke at different line weights, specify a line weight using the Preview Weight option.
9For dashed and dotted patterns, use the Corners option to determine how dashes or dots are positioned to keep a
pattern regular around a corner.
10 For dashed patterns, select a style for Cap to determine the shape of the dashes. This setting overrides the Cap
setting in the Stroke panel.
11 Do one of the following:
•Click Add to save the stroke style and define another one. Click Done to exit the dialog box.
•Click OK to save the stroke style and exit the dialog box.
A
B
C
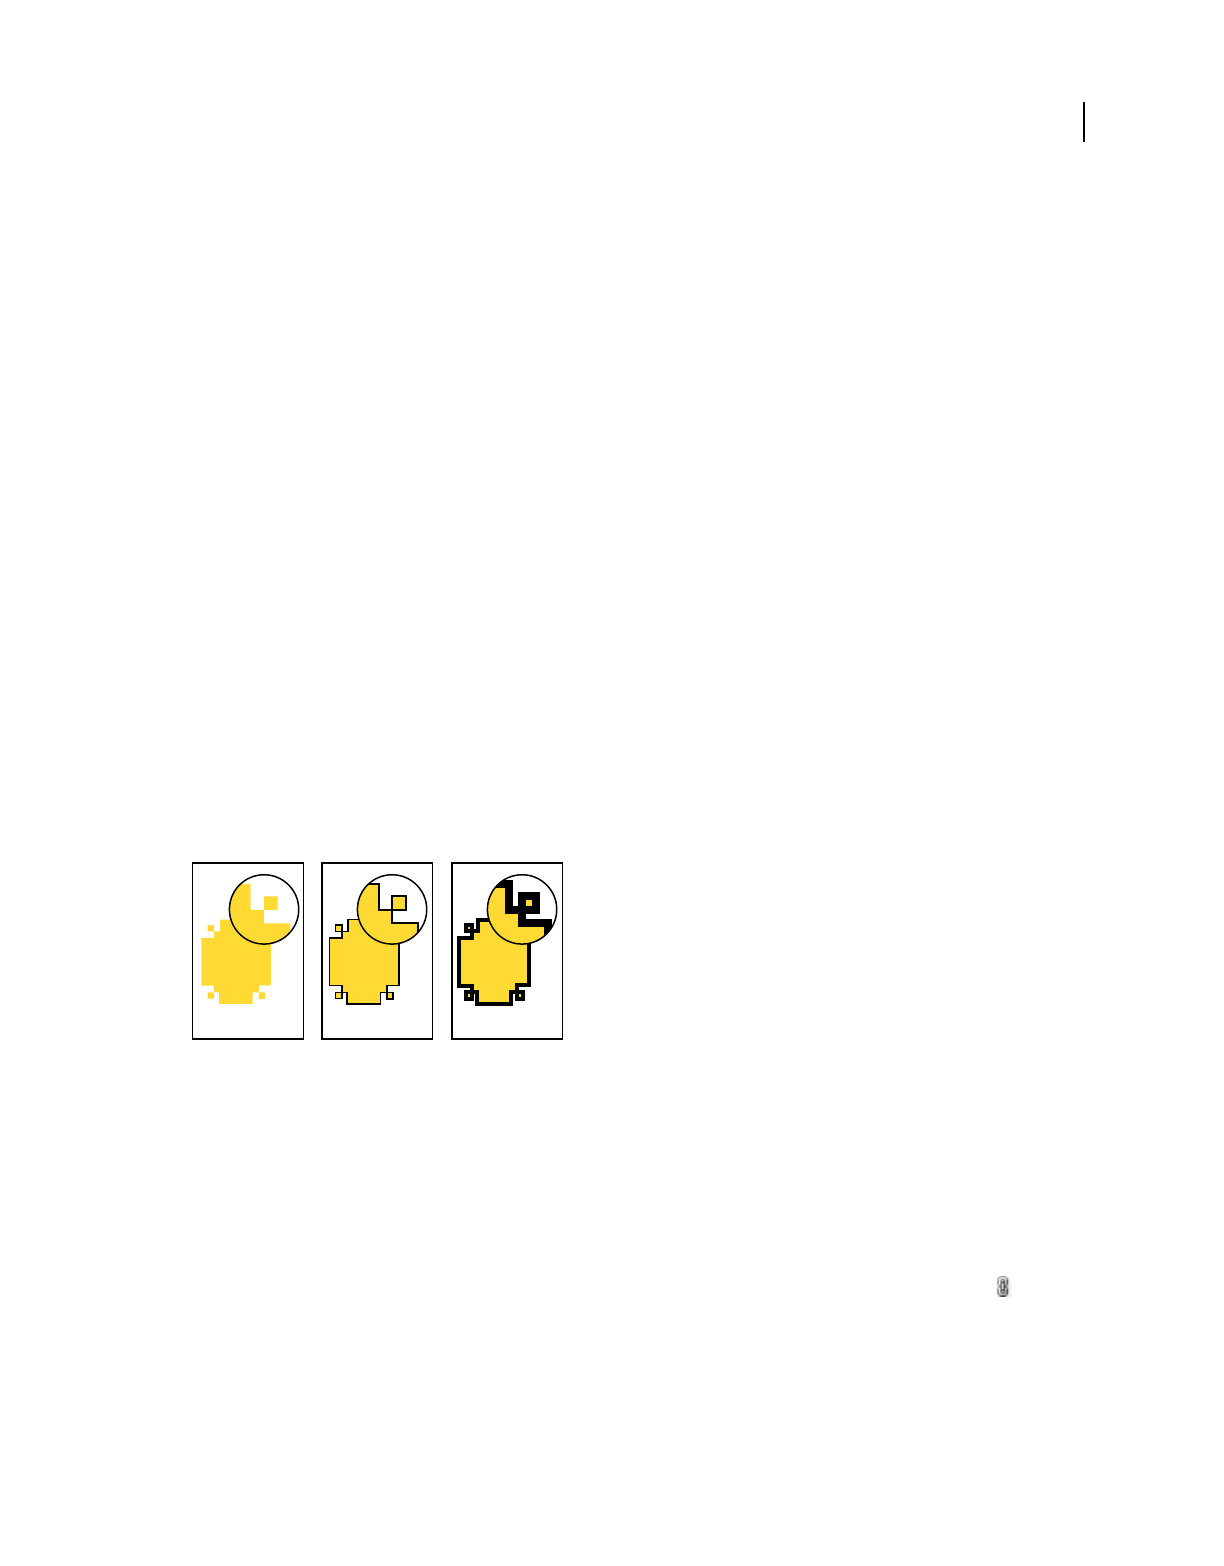
362
USING INDESIGN
Drawing
Last updated 11/16/2011
Save custom stroke styles
You can save custom stroke styles for use in other InDesign documents.
Save a custom stroke style
1In the Stroke panel menu, choose Stroke Styles.
2Select a custom stroke style and click Save.
Note: You cannot save or edit the default stroke styles (enclosed in square brackets).
3Specify a name and location for the stroke style (.inst) file, and click OK.
To load a custom stroke style
1In the Stroke panel menu, choose Stroke Styles.
2Click Load.
3Select the stroke style (.inst) file that contains the custom stroke style you want to import, and click OK.
To apply a custom stroke style
❖With a path or frame selected, choose a custom stroke style from the Type menu in the Stroke panel.
Change corner appearance
You can use the Corner Options command to quickly apply corner effects to any path. Available corner effects range
from simple, rounded corners to fancy ornamentation.
Effects of different line weights on corner shapes
A. Fancy corner effect with no stroke B. Same effect with 1-point stroke C. Same effect with 4-point stroke
For a video on using corner effects, see http://tv.adobe.com/go/4948/.
Apply corner shapes using the Corner Options dialog box
1Using a selection tool, select a path.
2Choose Object > Corner Options.
3To apply the corner effect to all four corners of a rectangle, select the Make All Settings The Same icon . When
the option is not selected, dots appear on both sides of the icon (like a broken chain link).
4Choose a corner effect and specify a size for one or more of the corners.
The size value determines the radius by which the corner effect extends from each corner point.
5Select Preview if you want to see the results of the effect before applying it. Then click OK.
AB C

363
USING INDESIGN
Drawing
Last updated 11/16/2011
Use Live Corners
With Live Corners, you can apply corner effects to rectangular frames by clicking the yellow box that appears on the
frame and dragging. In addition, you can apply a different corner effect and a different corner radius to each corner.
1Select a rectangular frame, and click the yellow box.
Four yellow diamonds appear on the selected frame, indicating Live Corners mode. If the yellow box does not
appear on the selected frame, choose View > Extras > Show Live Corners.
2To add corner effects, do any of the following tasks:
•To adjust the radii of all four corners together, drag one of the diamonds towards the center of the frame.
•To adjust a single corner, hold down Shift as you drag a diamond.
•To cycle through the various effects, Alt-click (Windows) or Option-click (Mac OS) a yellow diamond.
3To stop editing corners, click anywhere outside the selected frame.
To remove corner effects, choose Object > Corner Options, and then choose None.
If you don’t want the yellow box to appear when you select a frame, choose View > Extras > Hide Live Corners.
Guidelines for applying corner shapes
Note the following:
•If you’ve obtained plug-in software that adds more effects, the Corner Options command in the Stroke panel can
include additional shapes.
•Corner effects appear on all of a path’s corner points, but never on smooth points. The effects change angles
automatically when you move a path’s corner points.
•If a corner effect significantly changes the path by, for example, creating a bulge inward or outward, it may affect
how a frame interacts with its contents or with other parts of the layout. Increasing the size of a corner effect may
push an existing text wrap or frame inset farther away from the frame.
•You can’t edit a corner effect, but you can change its appearance by changing the corner radius or modifying the
stroke.
•If you applied corner effects but can’t see them, make sure that the path uses corner points and that a stroke color
or gradient has been applied to it. Then increase the Size option in the Corner Options dialog box, or increase the
stroke weight in the Stroke panel.
Compound paths and shapes
About compound paths
You can combine several paths into a single object, called a compound path. Create a compound path when you want
to do any of the following:
•Add transparent holes to a path.
•Preserve the transparent holes within some text characters, such as o and e, when you convert characters to editable
letterforms using the Create Outlines command. Using the Create Outlines command always results in the creation
of compound paths.
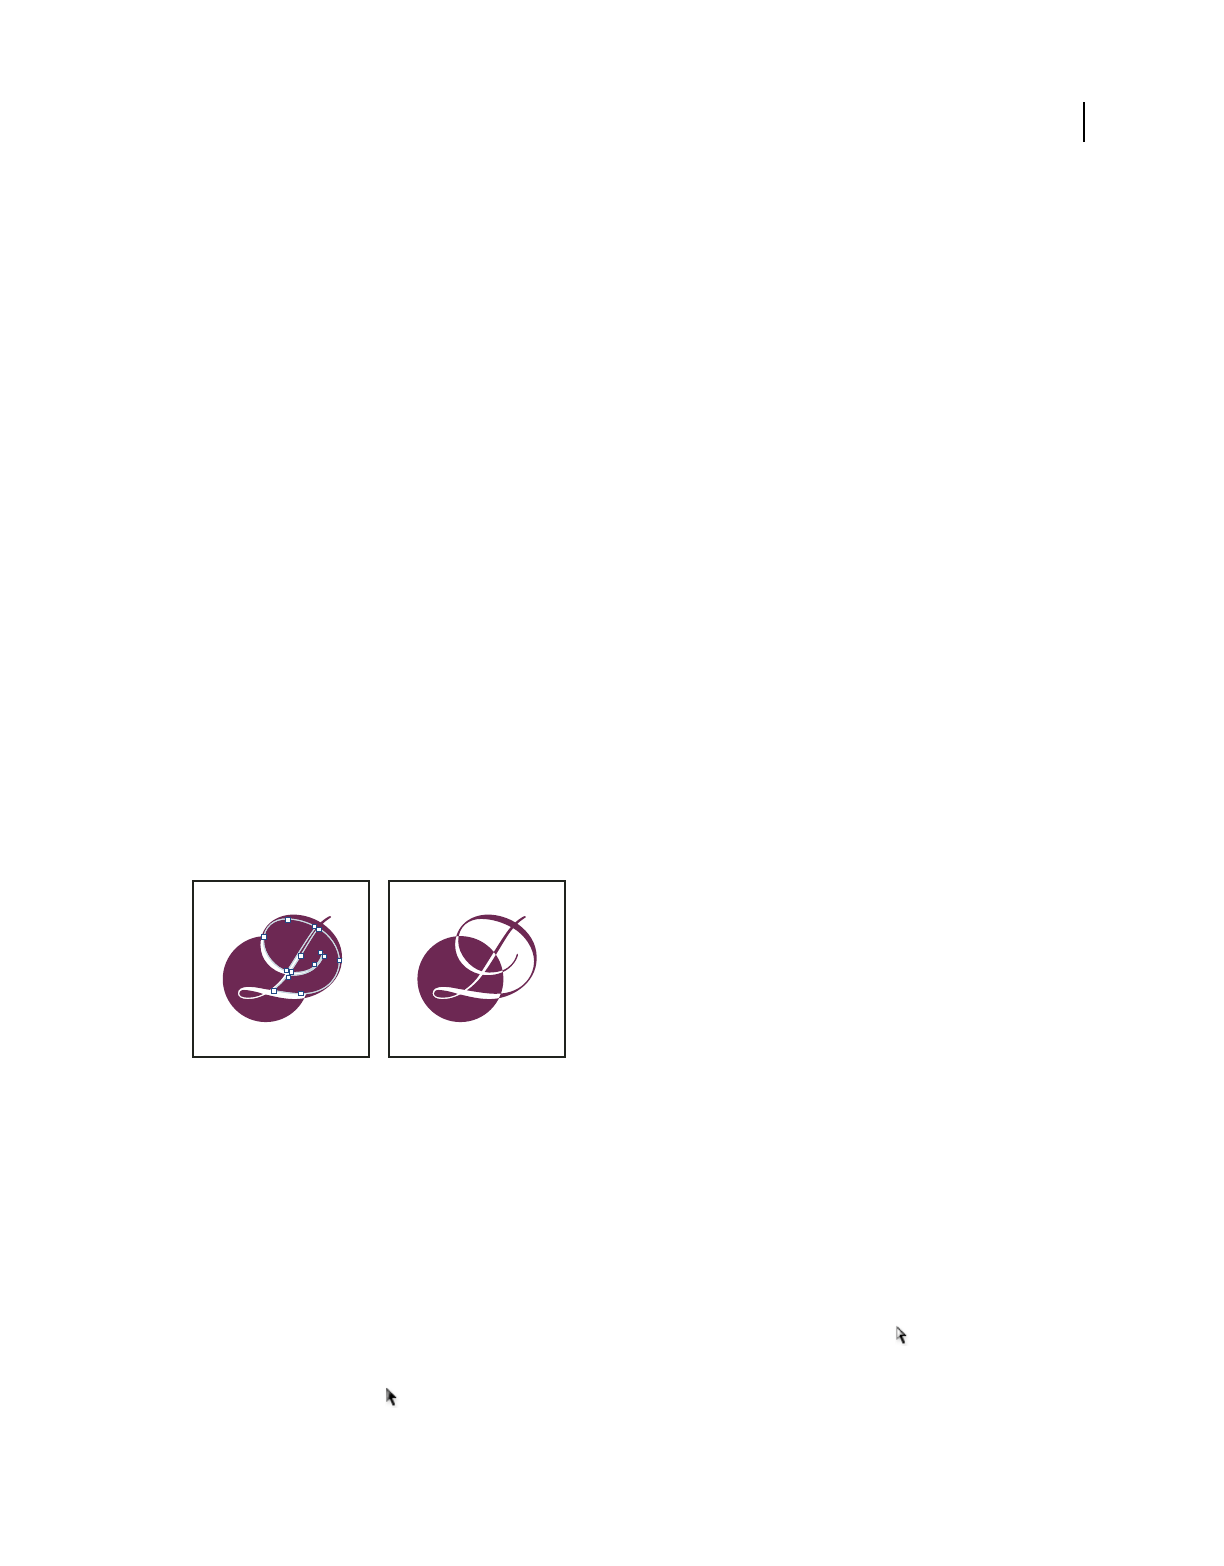
364
USING INDESIGN
Drawing
Last updated 11/16/2011
•Apply a gradient, or add contents that span multiple paths. Although you can also apply a gradient across multiple
objects using the Gradient tool, applying a gradient to a compound path is often a better method because you can
later edit the entire gradient by selecting any of the subpaths. With the Gradient tool, later editing requires selecting
all of the paths you originally selected.
Best practices for editing compound paths
Keep the following guidelines in mind as you edit compound paths:
•Changes to path attributes (such as stroke and fill) always alter all subpaths in a composite path—it doesn’t matter
which selection tool you use, or how many subpaths you select. To preserve the individual stroke and fill attributes
of the paths you want to combine, group them instead.
•In a compound path, any effect that is positioned relative to a path’s bounding box—such as a gradient, or an image
pasted inside—is actually positioned relative to the bounding box of the entire compound path (that is, the path
that encloses all of the subpaths).
•If you make a compound path, then change its properties and release it, using the Release command, the released
paths inherit the compound path’s properties; they don’t regain their original properties.
•If your document contains compound paths with many smooth points, some output devices may have problems
printing them. If so, simplify or eliminate the compound paths, or convert them to bitmap images using a program
such as Adobe Photoshop.
•If you apply a fill to a compound path, holes sometimes don’t appear where you expect them to. For a simple path
like a rectangle, the inside, or the area you can fill, is easy to see—it’s the area within the enclosed path. However,
with a compound path, InDesign must determine whether the intersections created by a compound path’s subpaths
are inside (filled areas) or outside (holes). The direction of each subpath—the order in which its points were
created—determines whether the area it defines is inside or outside. If a subpath is filled when you want it to be a
hole, or vice versa, click Reverse Path in the Pathfinder panel to reverse the direction of that subpath.
Compound path containing two subpaths with same path directions (left) and opposite path directions (right)
Create a compound path
You can create a compound path from two or more open or closed paths. When you create a compound path, all of
the originally selected paths become subpaths of the new compound path. The selected paths inherit the stroke and fill
settings of the object farthest back in the stacking order.
Note: If one or more selected objects have contents, such as text or imported images, the attributes and contents of a
compound path are set by the attributes and contents of the object farthest back. Selected objects farther behind, without
contents, won’t affect the compound path.
You can change the shape of any part of a compound path by using the Direct Selection tool to select an anchor
point on one subpath.
1Use the Selection tool to select all of the paths you want to include in the compound path.
2Choose Object > Paths > Make Compound Path. A hole appears wherever selected paths overlap.
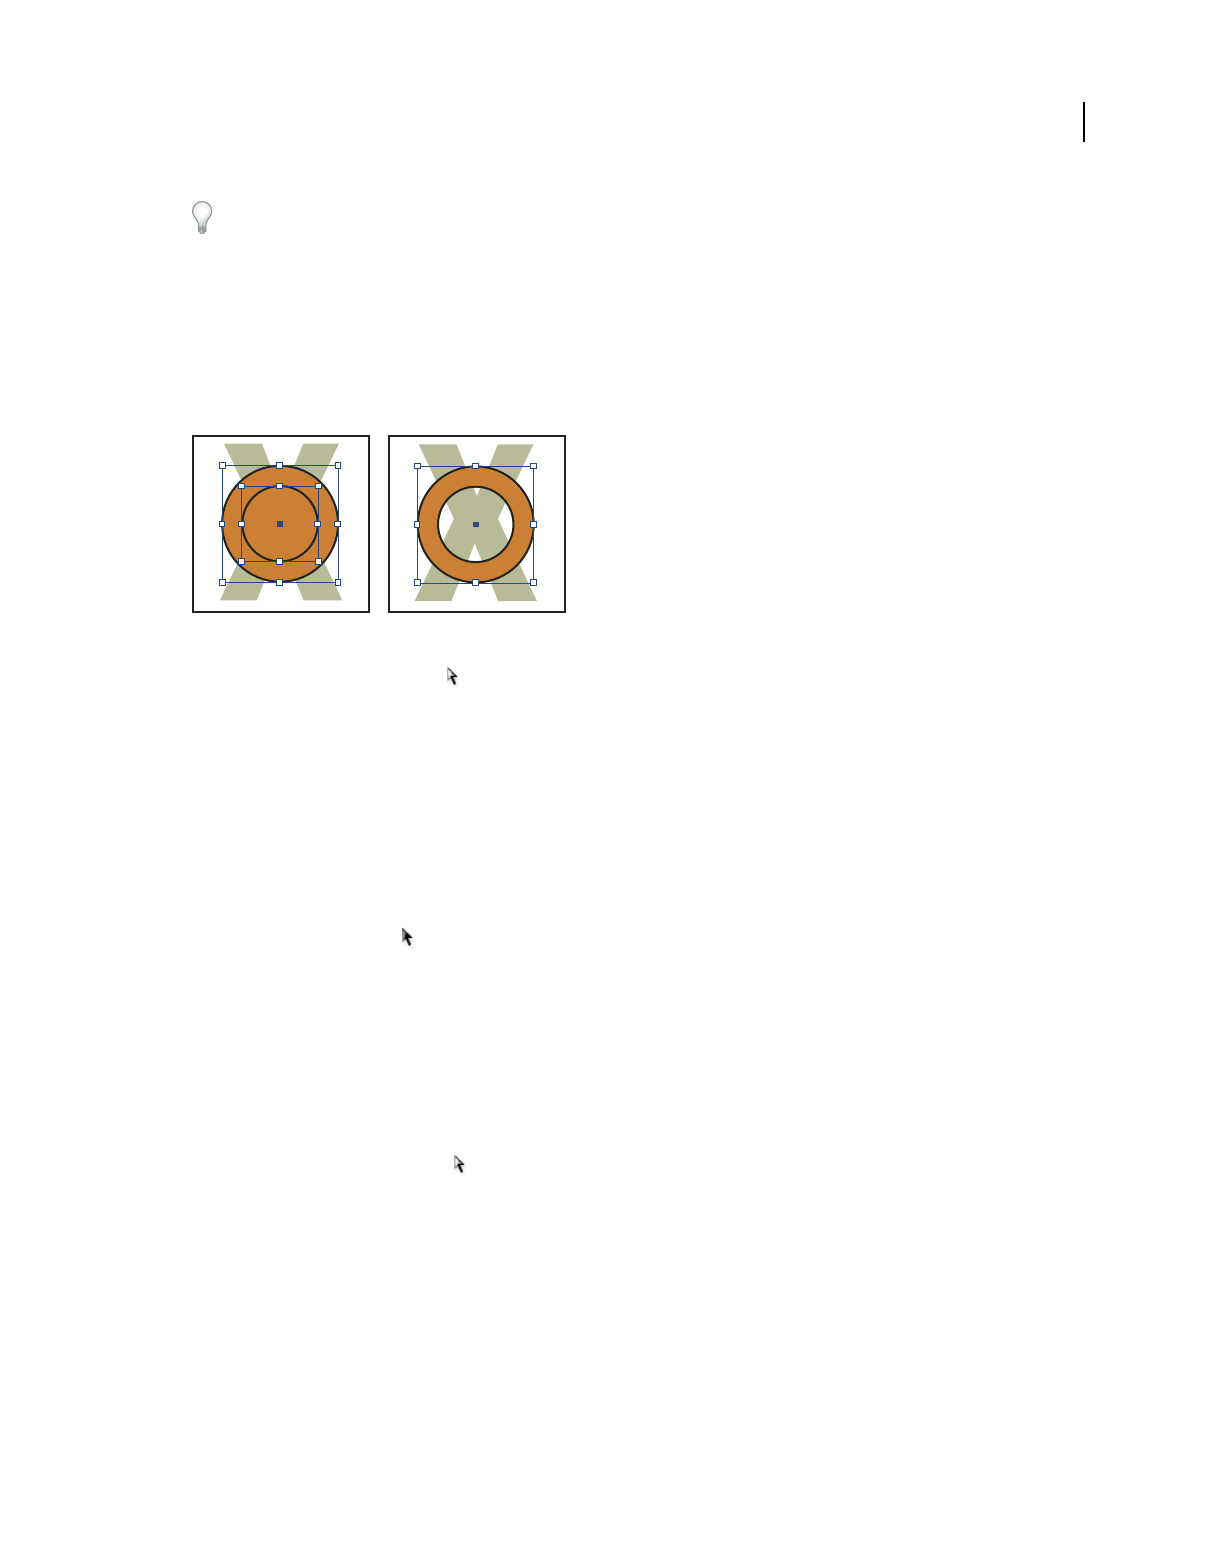
365
USING INDESIGN
Drawing
Last updated 11/16/2011
You can fill a hole created by a subpath or turn a subpath into a hole. Using the Direct Selection tool, select a point
on the subpath you want to change. Then select Object > Paths > Reverse Path or click Reverse Path in the Pathfinder
panel.
Change holes to fills in a compound path
The direction of each subpath—the order in which its points were created—determines whether the area it defines is
inside (filled areas) or outside (empty). If, in your compound path, holes sometimes don’t appear where you expect
them to, you can reverse the direction of that subpath.
Two separate closed paths (left) and two subpaths of the same compound path (right); the compound path uses the center circle as a hole
1With the Direct Selection tool , select the part of the compound path to reverse (or a point on that part). Do not
select the entire compound path.
2Do one of the following:
•Choose Object > Paths > Reverse Path.
•Click Reverse Path in the Pathfinder panel.
Break up a compound path
You can break up a compound path by releasing it, which turns each of its subpaths into an independent path.
1Using the Selection tool , select a compound path.
2Choose Object > Paths > Release Compound Path.
Note: The Release command is unavailable when the selected compound path is contained inside a frame, or when the
path contains text.
Change the holes in a compound path
You can eliminate a hole created by a subpath or fill a subpath that has created a hole by reversing its direction.
1Using the Direct Selection tool , select a point on the subpath you want to reverse. Don’t select the entire
compound path.
2Choose Object > Paths > Reverse Path, or click Reverse Path in the Pathfinder panel.
Create compound shapes
You create compound shapes using the Pathfinder panel (Window > Object & Layout > Pathfinder). Compound
shapes can be made up of simple or compound paths, text frames, text outlines, or other shapes. The appearance of the
compound shape depends on which Pathfinder button you choose.
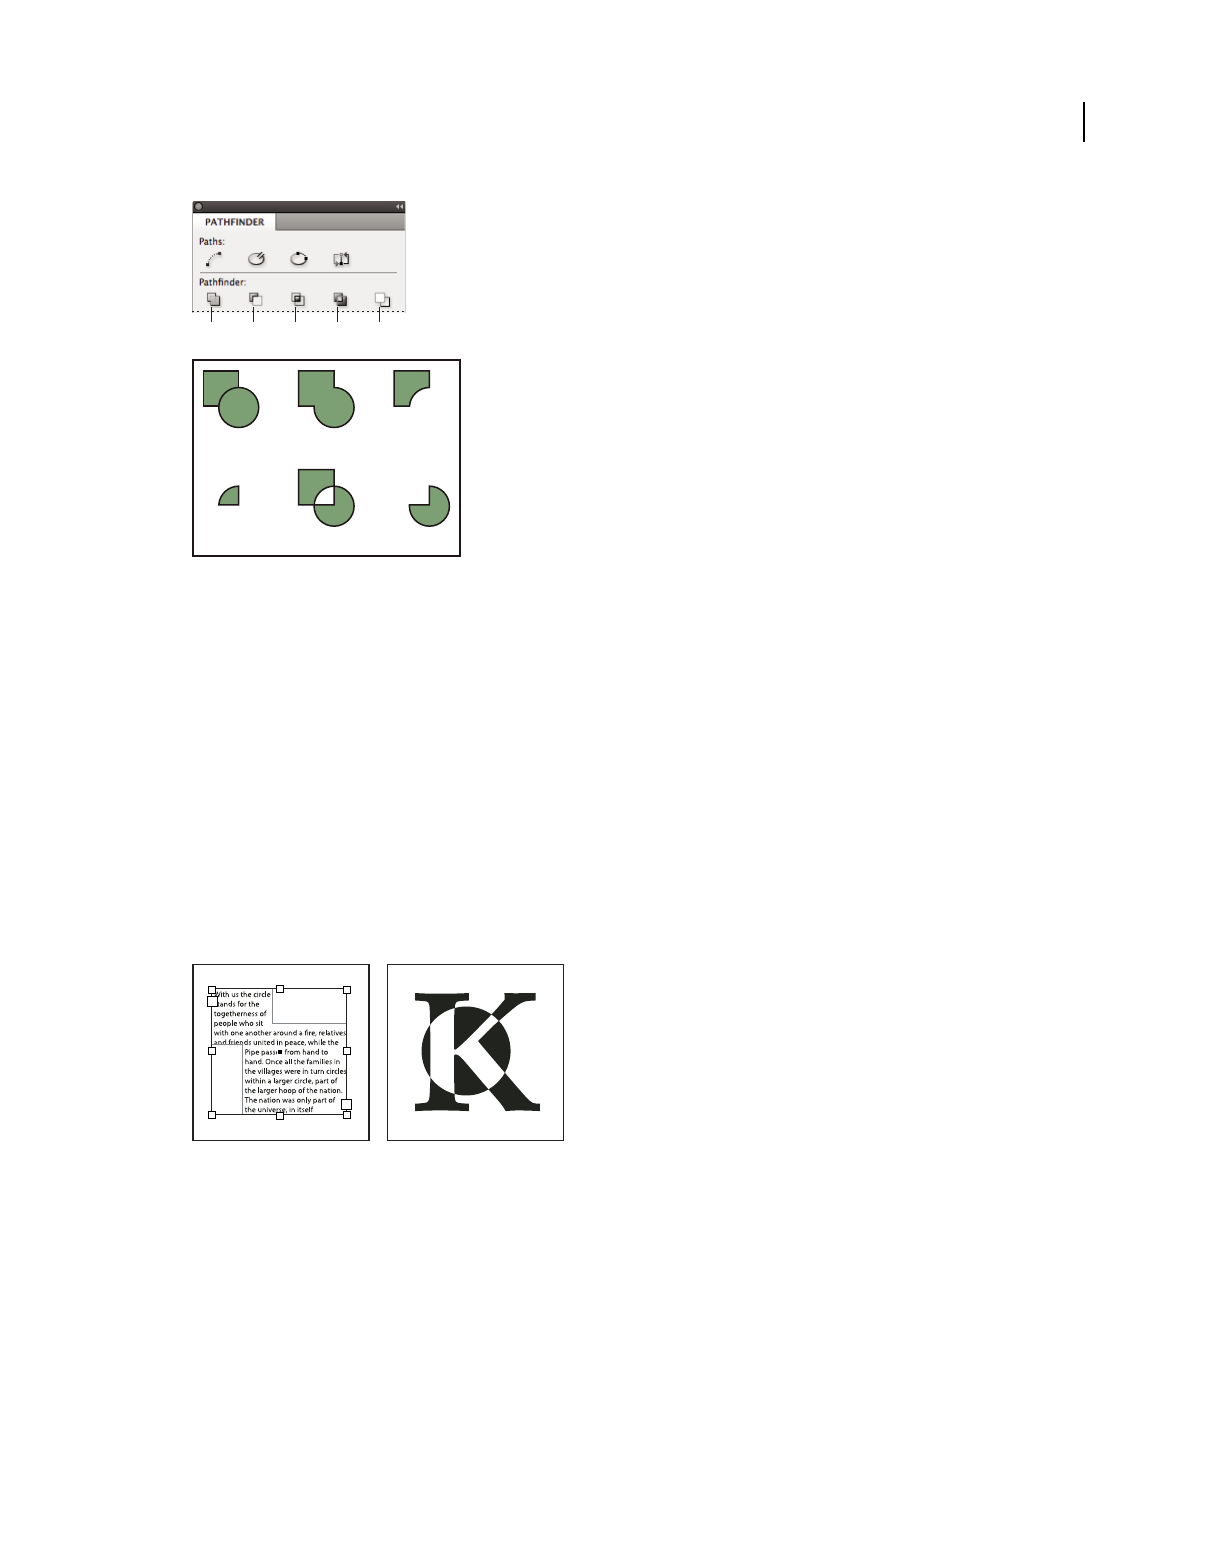
366
USING INDESIGN
Drawing
Last updated 11/16/2011
Pathfinder panel
A. Original objects B. Add C. Subtract D. Intersect E. Exclude Overlap F. Minus Back
Add Traces the outline of all objects to create a single shape.
Subtract Objects in the front “punch holes” in the backmost object.
Intersect Creates a shape from overlapping areas.
Exclude Overlap Creates a shape from areas that do not overlap.
Minus Back Objects in the back “punch holes” in the frontmost object.
In most cases, the resulting shape adopts the attributes (fill, stroke, transparency, layer, and so on) of the frontmost
object. When you subtract shapes, however, objects in the front are deleted. The resulting shape takes on the attributes
of the backmost object instead.
When you include a text frame in a compound shape, the shape of the text frame changes, but the text itself stays the
same. To alter the text itself, create a compound path using text outlines.
Compound shape used as a text frame (left) compared to one created from a text outline (right)
More Help topics
“Selecting objects” on page 402
Create a compound shape
You can work with a compound shape as a single unit or release its component paths to work with each separately. For
example, you might apply a gradient fill to a part of the compound shape, but leave the rest of the shape unfilled.
BCDE F
ABC
DEF
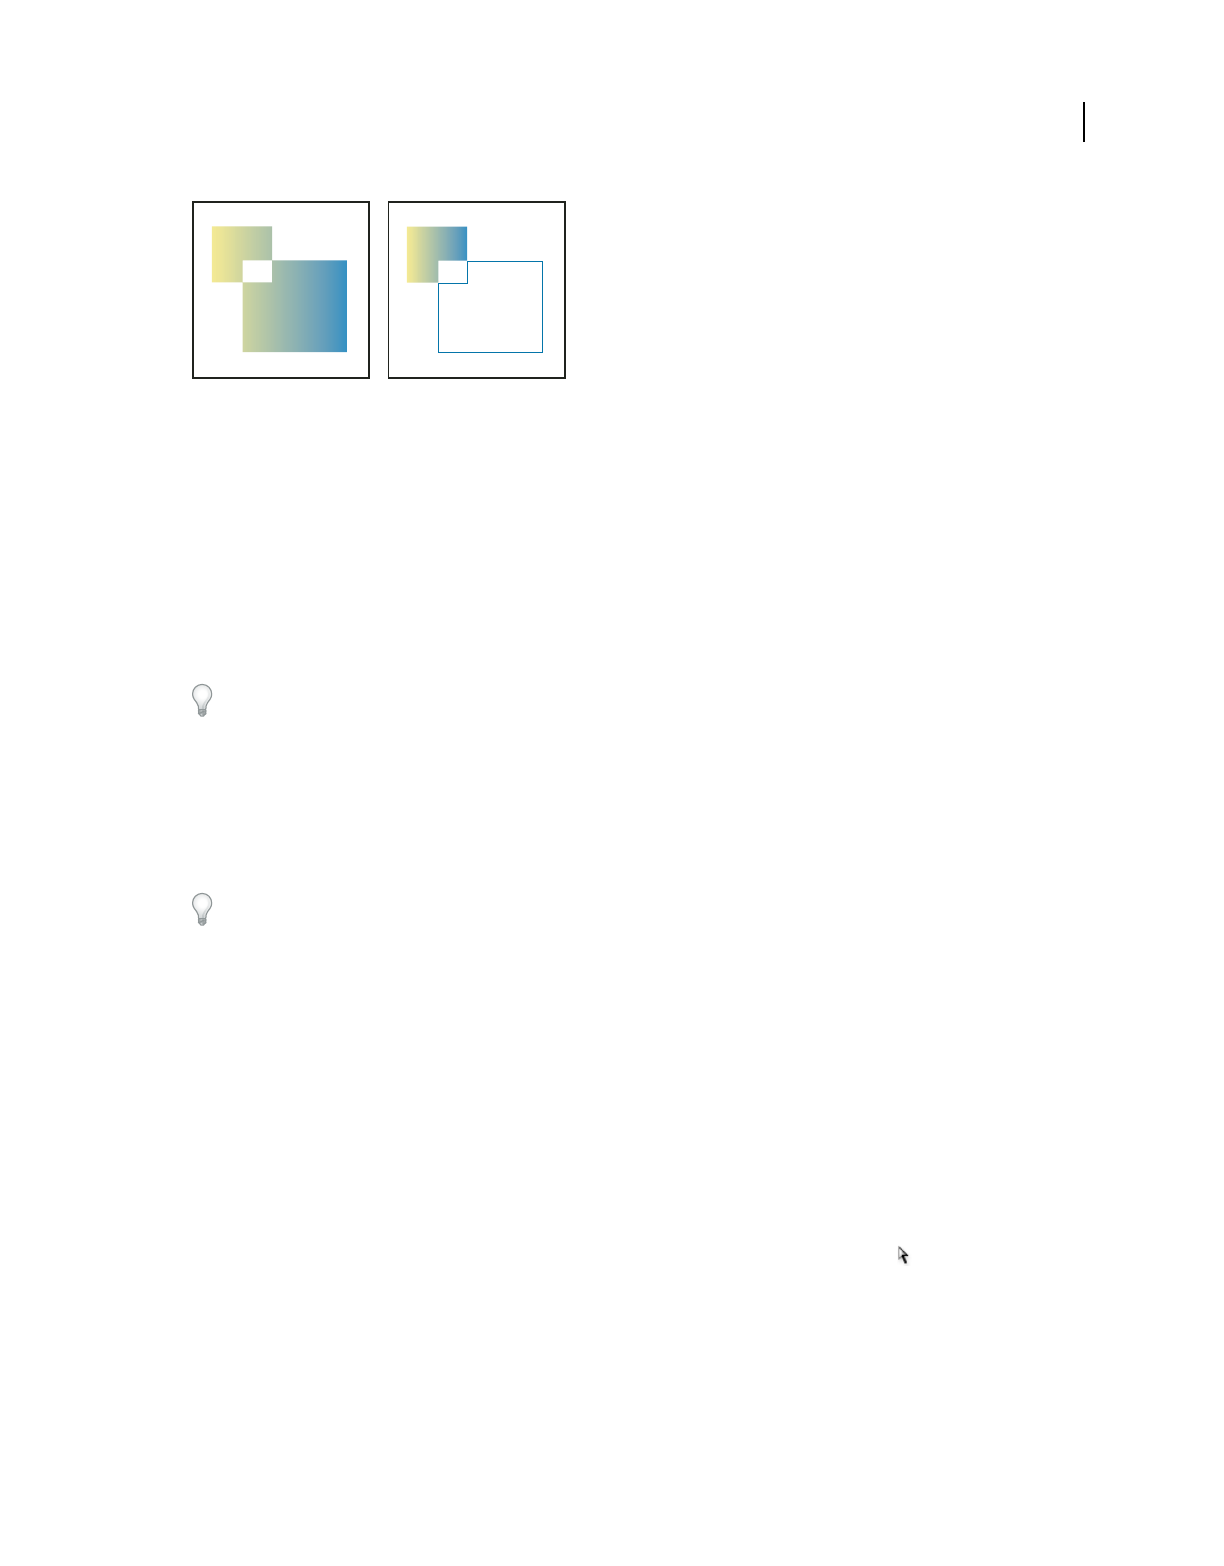
367
USING INDESIGN
Drawing
Last updated 11/16/2011
Gradient applied to a compound shape (left) compared to gradient applied to one part of the compound shape (right)
1Choose Window > Object & Layout > Pathfinder to open the panel.
2Select the objects you want to combine in a compound shape.
3Click a button (such as Add) in the Pathfinder section on the Pathfinder panel.
You can also choose a command from the Object > Pathfinder submenu.
Release paths in a compound shape
❖Select the compound shape. Choose Object > Paths > Release Compound Path. The compound shape is separated
into its component paths.
To regroup component paths without losing changes you’ve applied to individual paths, choose Group in the Object
menu, rather than Compound Paths > Make.
Create paths from text outlines
Use the Create Outlines command to convert selected text characters into a set of compound paths that you can edit
and manipulate as you would any other path. The Create Outlines command is useful for creating effects in large
display type, but it is rarely useful for body text or other smaller-size type.
If you simply want to apply a color stroke, or a gradient fill or stroke to text characters, you don’t need to convert the
text to outlines. You can use the toolbox and the Swatches, Color, or Gradient panels to apply colors and gradients
directly to the strokes or fills of selected characters.
The Create Outlines command gets its font outline information from the actual Type 1, TrueType, or OpenType files.
When you create outlines, characters are converted in their current positions, retaining all graphics formatting, such
as stroke and fill.
Note: Some font manufacturers block the information needed to create outlines. If you select such a protected font and
choose Type
> Create Outlines, a message will explain that the font cannot be converted.
When you convert type to outlines, the type loses its hints—instructions built into outline fonts for adjusting their
shapes, so that your system displays or prints them optimally at small sizes. Therefore, type converted to outlines may
not display as well when rendered in small sizes or at low resolutions.
After converting type to outlines, you can do any of the following:
•Alter the letterforms by dragging individual anchor points using the Direct Selection tool .
•Copy the outlines and use the Edit > Paste Into command to mask an image by pasting it into the converted
outlines.
•Use the converted outlines as text frames, so that you can type or place text in them.
•Change the stroke attributes of letterforms.
•Use text outlines to create compound shapes.

368
USING INDESIGN
Drawing
Last updated 11/16/2011
Working with text outlines
A. Type character before conversion to text outline B. Text outline with image pasted into it C. Text outline used as a text frame
Because converted text outlines become sets of compound paths, you can edit individual subpaths of converted
outlines by using the Direct Selection tool. You can also break the character outlines into independent paths by
releasing them from the compound path.
More Help topics
“Compound paths and shapes” on page 363
Convert text outlines to paths
By default, creating outlines from type removes the original text. However, if you prefer, you can make outlines appear
over a copy of the original text, so that none of the text is lost.
When you select type characters in a text frame and convert them to outlines, the resulting outlines become anchored
(inline) objects that flow with the text. Because the converted text is no longer true type, you will no longer be able to
highlight and edit the characters using the Type tool. In addition, typographical controls will no longer apply. Make
sure that you’re satisfied with the typographic settings of the type you convert to outlines, and be sure to create a copy
of the original text.
1Use the Selection tool to select a text frame, or use the Type tool to select one or more characters.
2Choose Type > Create Outlines.
Convert a copy of text outlines to paths
1Use the Selection tool to select a text frame, or use the Type tool to select one or more characters.
2Hold down Alt (Windows) or Option (Mac OS) as you choose Type > Create Outlines. The copy is created exactly
on top of the original; use the Selection tool to drag it away, if you like.
CAB
&&&&&&&&
& & & & & & & &
& & & & & & & &
& & & & & & & &
& & & & & & & &
& & & & & & & &
& & & & & & & &
& & & & & & & &
&&&&&&&&
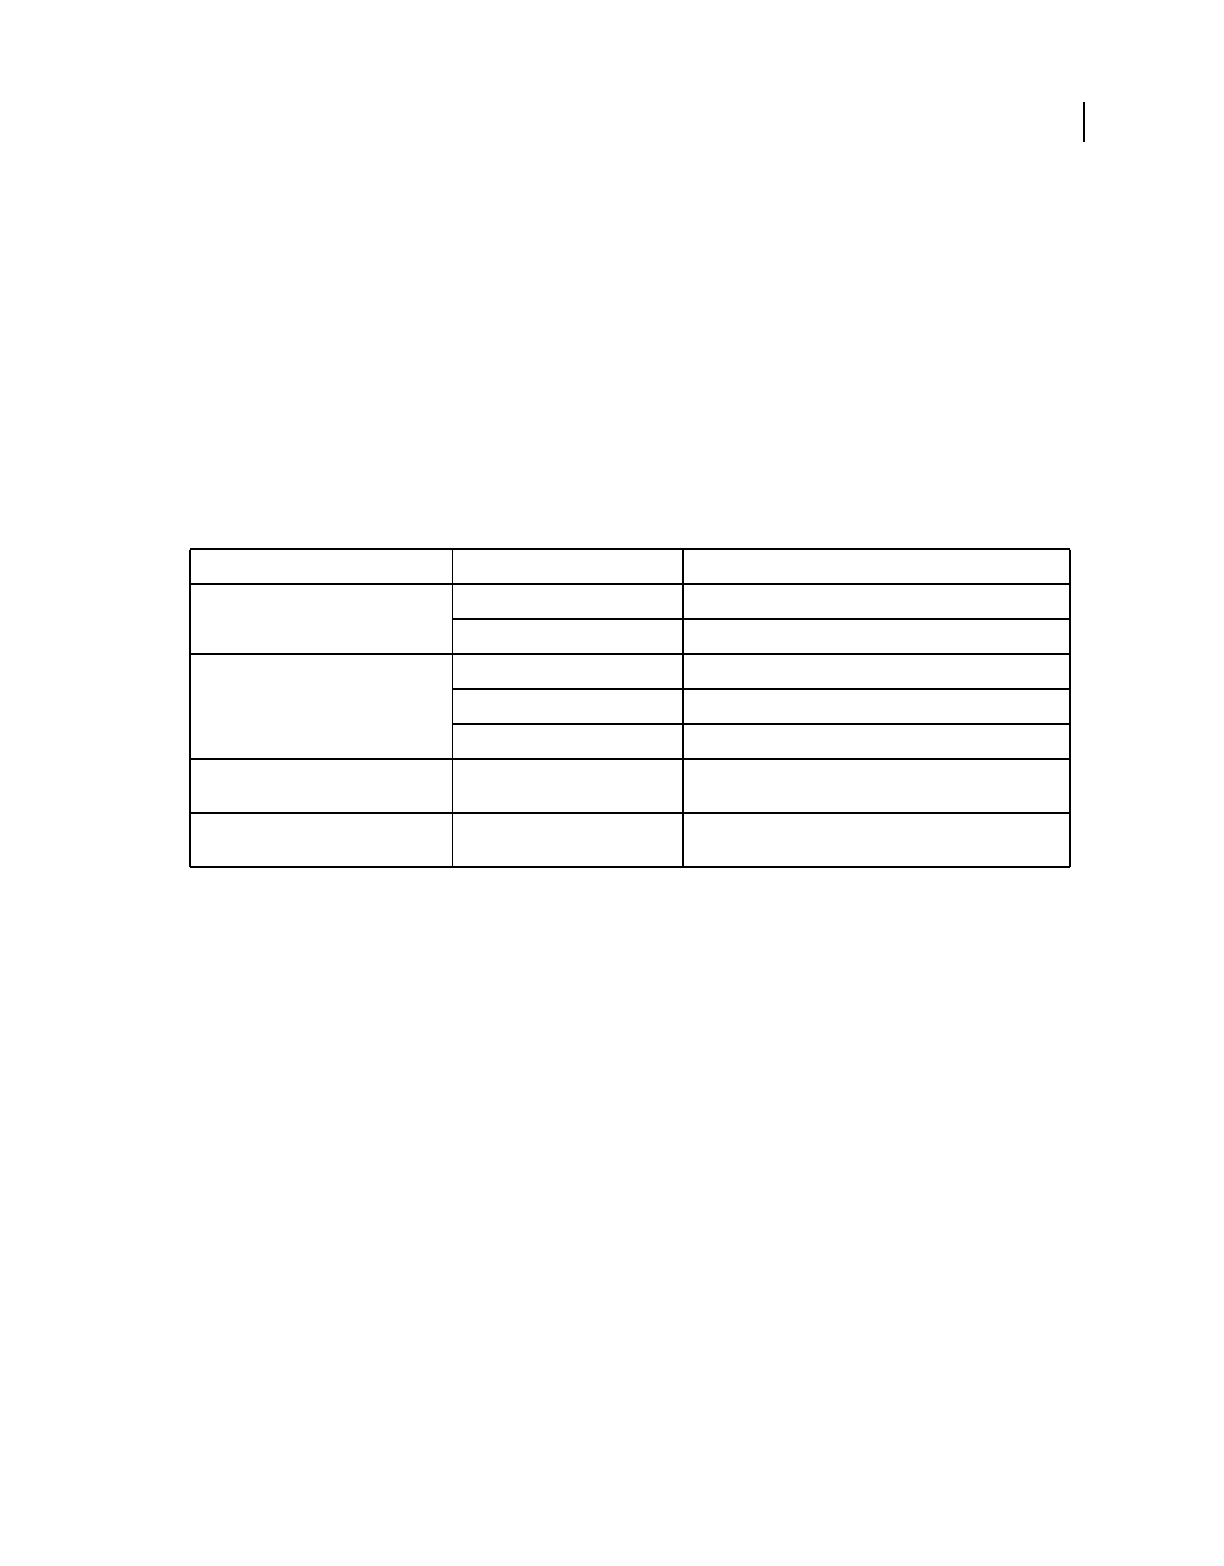
369
Last updated 11/16/2011
Chapter 12: Graphics
Understanding graphics formats
Choosing the right graphics format
InDesign can import a wide range of graphics file formats. Consult with the service providers who will help you
produce your document to clarify which formats to use. You can then plan your document around those formats and
the options that best apply to your project.
The following table summarizes what graphics formats would work best for the kind of document you’re designing.
About vector graphics
Vector graphics (sometimes called vector shapes or vector objects) are made up of lines and curves defined by
mathematical objects called vectors, which describe an image according to its geometric characteristics.
You can freely move or modify vector graphics without losing detail or clarity, because they are resolution-
independent—they maintain crisp edges when resized, printed to a PostScript printer, saved in a PDF file, or imported
into a vector-based graphics application. As a result, vector graphics are the best choice for artwork, such as logos, that
will be used at various sizes and in various output media.
The vector objects you create using the drawing and shape tools in Adobe Creative Suite are examples of vector
graphics. You can use the Copy and Paste commands to duplicate vector graphics between Creative Suite components.
More Help topics
“About bitmap images” on page 369
About bitmap images
Bitmap images—technically called raster images—use a rectangular grid of picture elements (pixels) to represent
images. Each pixel is assigned a specific location and color value. When working with bitmap images, you edit pixels
rather than objects or shapes. Bitmap images are the most common electronic medium for continuous-tone images,
such as photographs or digital paintings, because they can more efficiently represent subtle gradations of shades and
color.
Final output Graphics type Format
High resolution (>1000 dpi) Vector drawings Illustrator, EPS, PDF
Bitmap images Photoshop, TIFF, EPS, PDF
Process-color separations Vector drawings Illustrator, EPS, PDF
Color bitmap images Photoshop, CMYK TIFF, DCS, EPS, PDF
Color-managed graphics Illustrator, Photoshop, RGB TIFF, RGB EPS, PDF
Low-resolution printing, or PDF for
online viewing
All Any (BMP images only)
Web All Any (InDesign converts graphics to JPEG and GIF when
exporting to HTML)
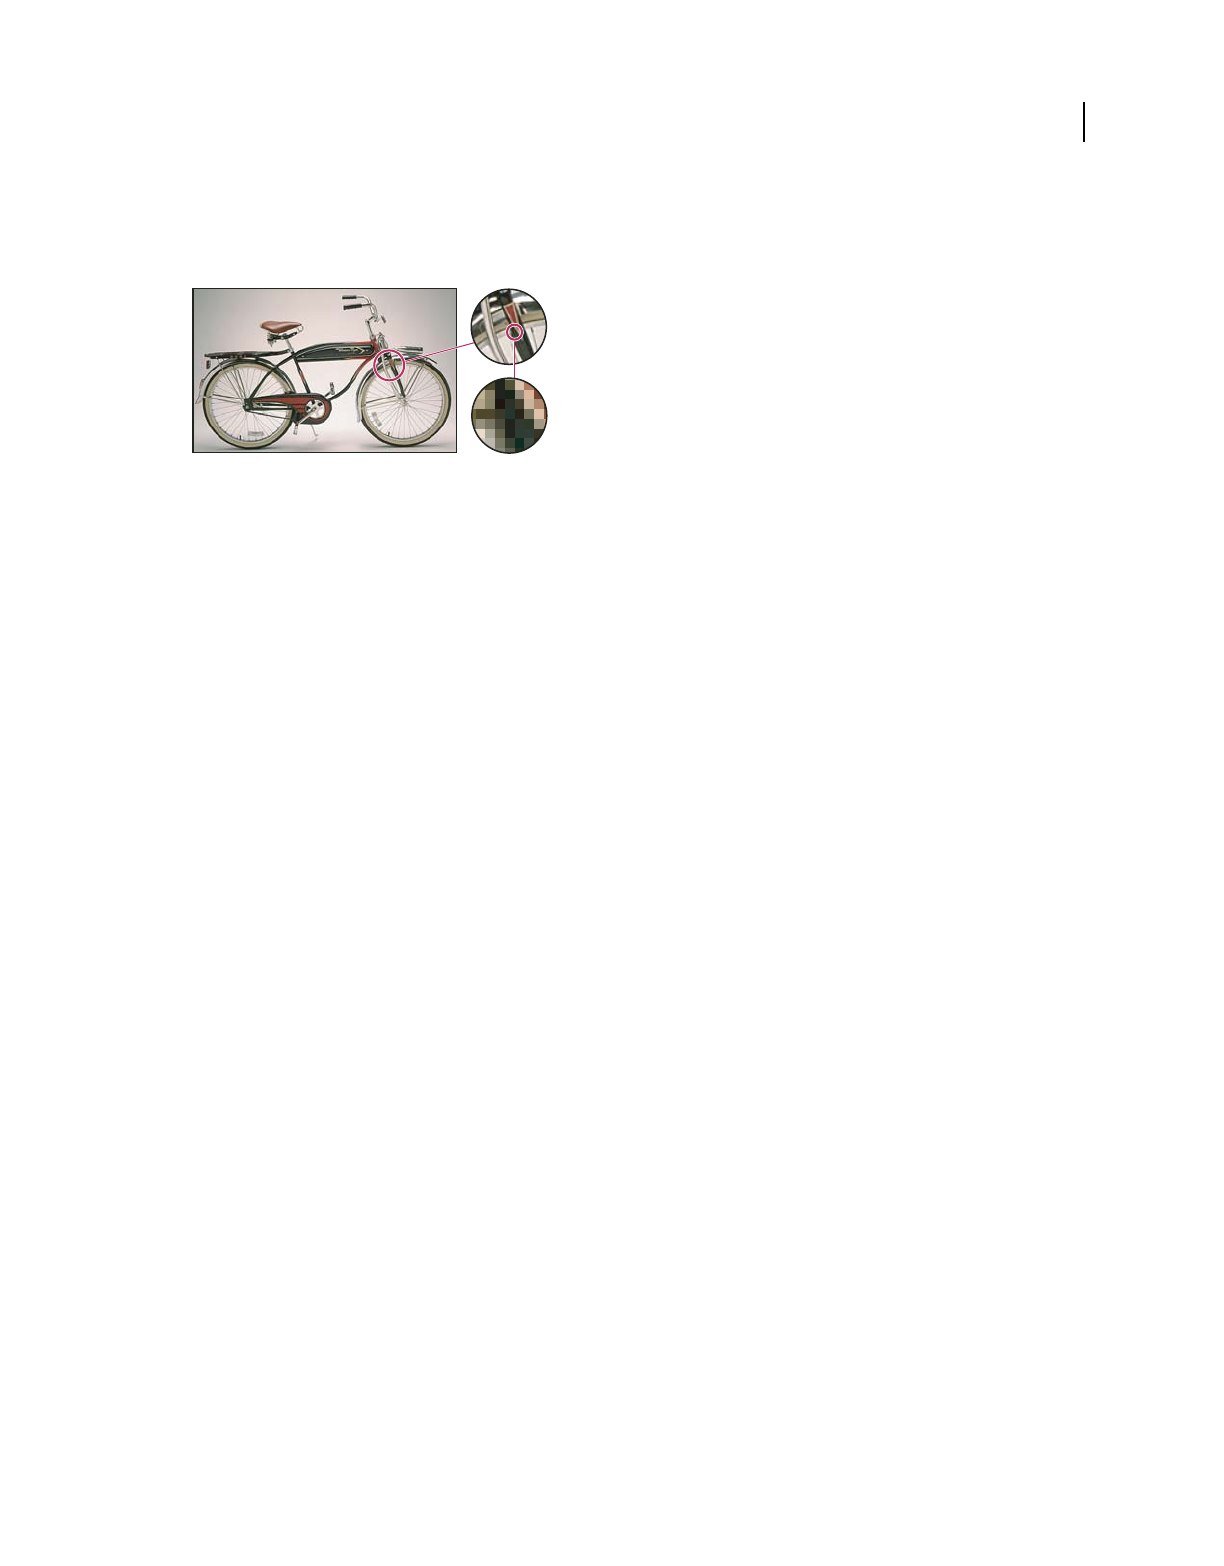
370
USING INDESIGN
Graphics
Last updated 11/16/2011
Bitmap images are resolution-dependent—that is, they contain a fixed number of pixels. As a result, they can lose detail
and appear jagged if they are scaled to high magnifications on-screen or if they are printed at a lower resolution than
they were created for.
Example of a bitmap image at different levels of magnification
Bitmap images sometimes require large amounts of storage space, and often need to be compressed to keep file sizes
down when used in certain Creative Suite components. For instance, you compress an image file in its original
application before you import it into a layout.
Note: In Adobe Illustrator, you can create bitmap effects in your artwork using effects and graphic styles.
More Help topics
“About vector graphics” on page 369
Image resolution guidelines for final output
Bitmap images contain a fixed number of pixels, usually measured in pixels per inch (ppi). An image with a high
resolution contains more, and therefore smaller, pixels than an image of the same printed dimensions with a low
resolution. For example, a
1-inch-by-1-inch image with a resolution of 72 ppi contains a total of 5184 pixels (72 pixels
wide x 72 pixels high = 5184). The same 1-inch-by-1-inch image with a resolution of 300
ppi would contain a total of
90,000 pixels.
For imported bitmap images, image resolution is determined by the source file. For bitmap effects, you can specify a
custom resolution. To determine the image resolution to use, consider the medium of final distribution for the image.
The following guidelines can help you determine your requirements for image resolution:
Commercial printing Commercial printing requires 150 to 300 ppi (or more) images, depending on the press (dpi) and
screen frequency (lpi) you’re using; always consult your prepress service provider before making production decisions.
Because commercial printing requires large, high-resolution images, which take more time to display while you’re
working with them, you may want to use low-resolution versions for layout and then replace them with high-
resolution versions at print time.
In Illustrator and InDesign, you can work with low resolution versions by using the Links panel. In InDesign you can
choose either Typical or Fast Display from the View
> Display Performance menu; in Illustrator you can choose
View
> Outline. Alternatively, if your service provider supports Open Prepress Interface (OPI), they may provide low-
resolution images to you.
Desktop printing Desktop printing usually requires images within the range of 72 ppi (for photographs printed on
a
300 ppi printer) to 150 ppi (for photographs printed on devices up to 1000 ppi). For line art (1-bit images), make sure
that the resolution of your graphics matches the resolution of the printer.
Web publishing Because online publishing generally requires images with pixel dimensions that fit the intended
monitor, the images are usually less than 500 pixels wide and 400 pixels tall, to leave room for browser window controls
or such layout elements as captions. Creating an original image at screen resolution—96
ppi for Windows–based
images, and 72
ppi for Mac OS–based images—lets you see the image as it will likely appear when viewed from a typical
24:1
3:1
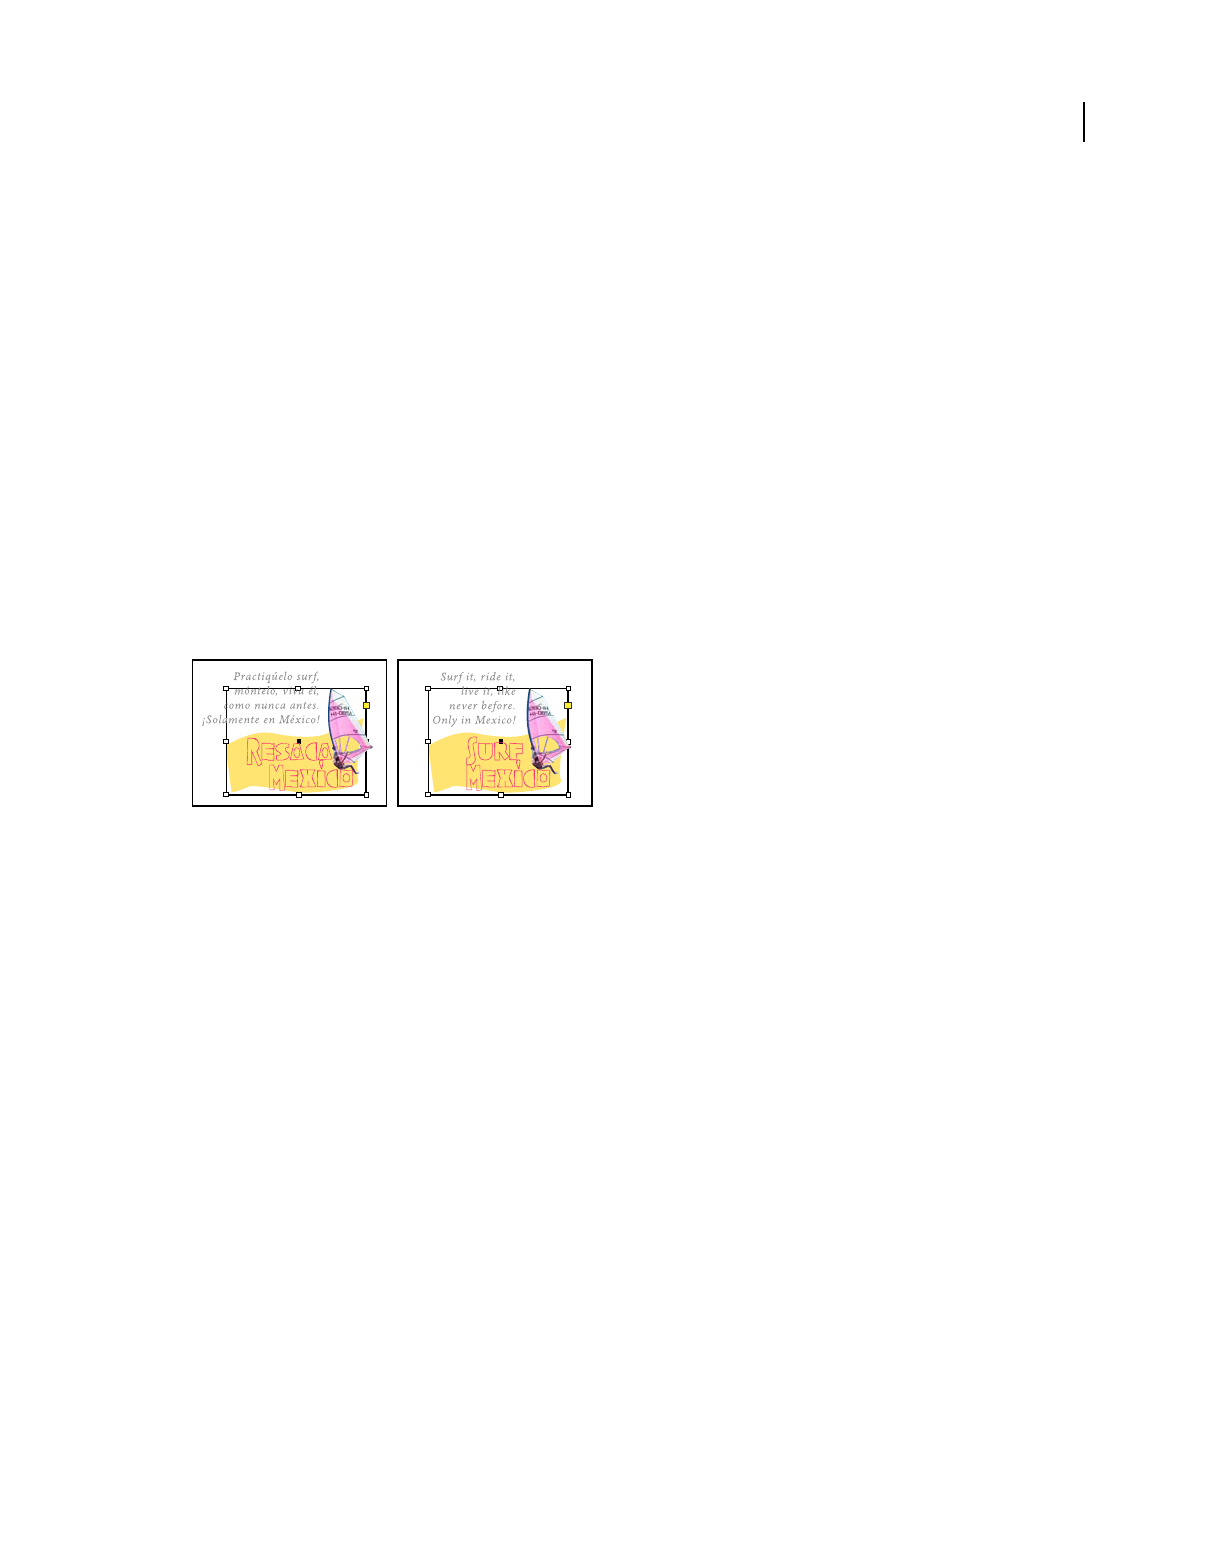
371
USING INDESIGN
Graphics
Last updated 11/16/2011
web browser. When you’re publishing online, the only times you’re likely to need resolutions above those ranges are
when you want viewers to be able to zoom in for more detail in a PDF document, or when you’re producing a
document for printing on demand.
Importing files from other applications
Importing Adobe Illustrator graphics
How you import Illustrator graphics depends on how much editing the graphics require after you import them. You
can import Illustrator graphics into InDesign in their native (.ai) format.
If you want to adjust layer visibility in InDesign...
Import the graphic using the Place command, and when you want to edit it, choose Edit > Edit Original to open the
graphic in Illustrator. For example, for a multilanguage publication, you can create a single illustration that includes
one text layer for each language. You can transform the illustration as a single object in InDesign but you cannot edit
the paths, objects, or text within the illustration.
Layered file with Spanish and English layers
If you want to edit objects and paths in InDesign...
Copy the art from Illustrator and paste it into your InDesign document. For example, in a magazine, you might use
the same design element in each issue, but change its color every month. By pasting a graphic into InDesign, you can
change objects’ color, path, and transparency using the InDesign tools designed for that purpose.
Importing Illustrator graphics with multiple artboards
Illustrator CS4 graphics can include multiple artboards. When you import an Illustrator graphic with multiple
artboards, you can use Import Options to specify which artboard, or “page,” will be imported.
More Help topics
“Control graphics’ display performance” on page 387
“Acrobat (.pdf) and Illustrator (.ai) import options” on page 381
“Control layer visibility in imported images” on page 384
“Paste or drag graphics” on page 385
Create a layered PDF in Adobe Illustrator
You can save an Illustrator graphic as a layered PDF and control the visibility of layers in InDesign. Adjusting layer
visibility in InDesign lets you vary an illustration depending on context. Rather than create multiple versions of the
same illustration, say for a multilanguage publication, you can place the same illustration where needed and adjust the
visibility of the layers as appropriate.
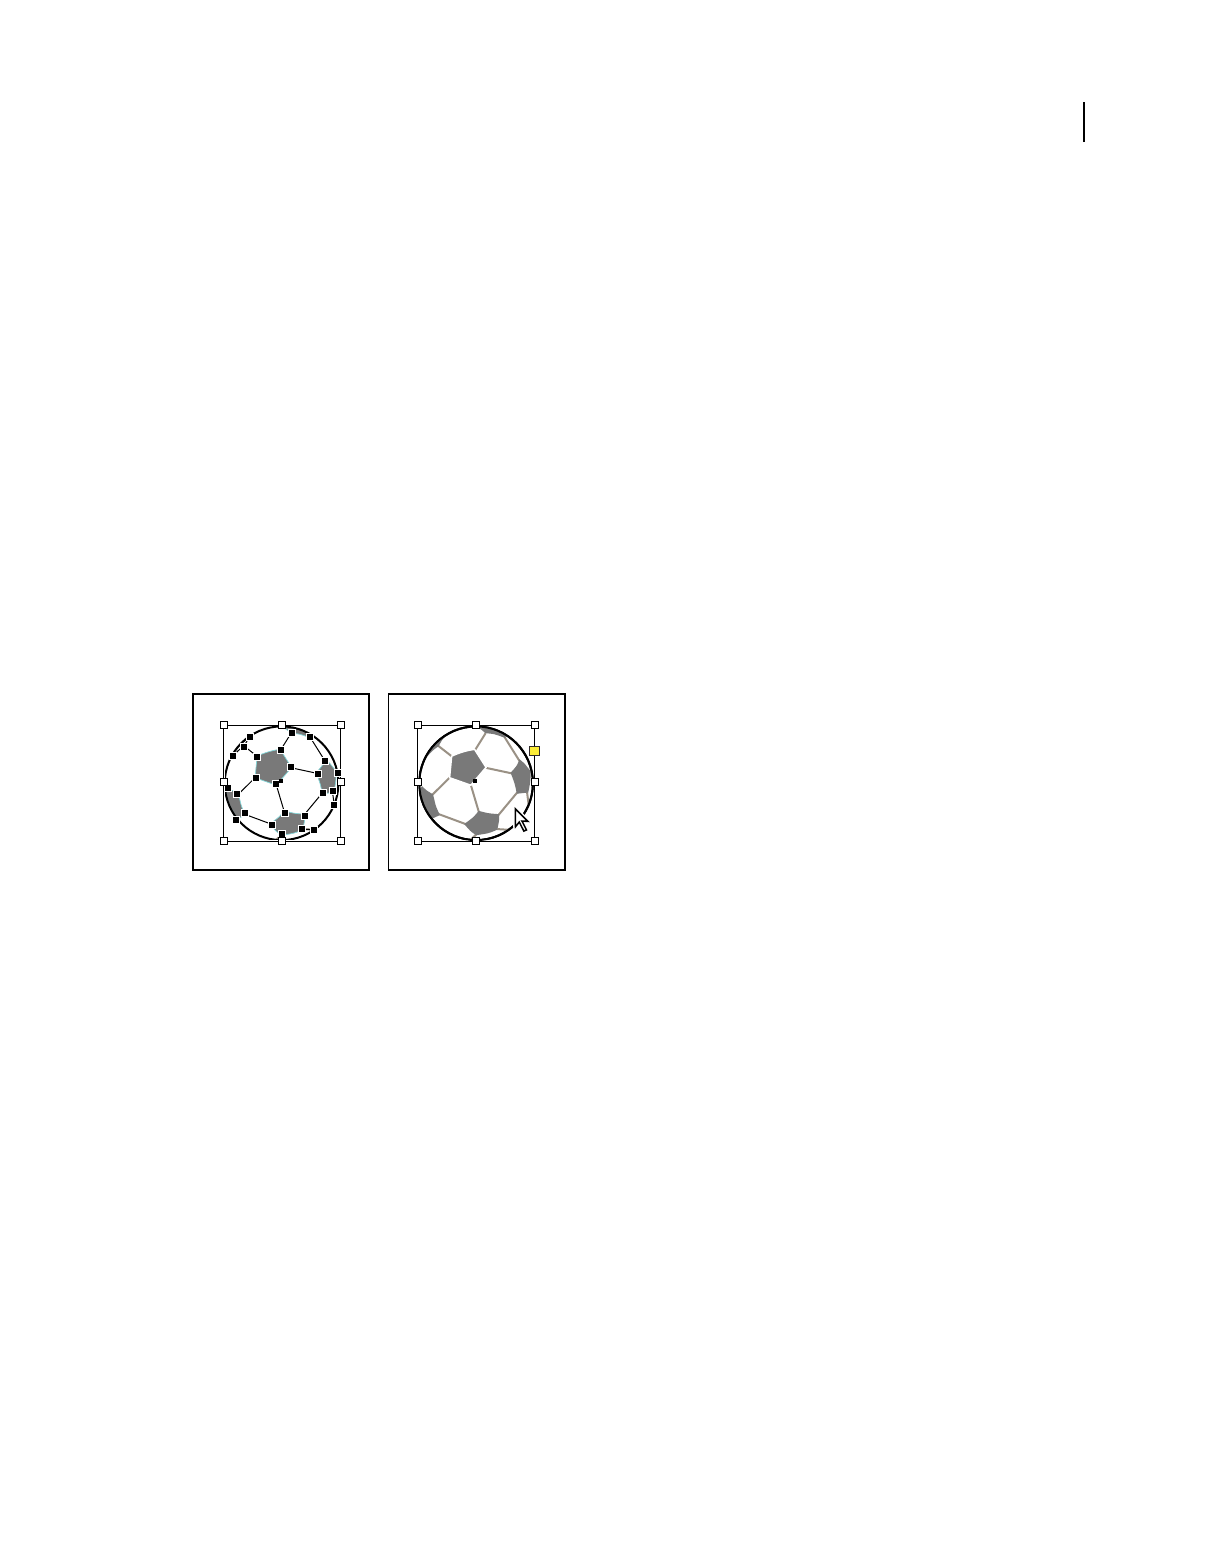
372
USING INDESIGN
Graphics
Last updated 11/16/2011
You can transform a PDF as a single object (you can rotate or resize it, for example), but you cannot edit the paths,
objects, or text within the illustration.
If you’re placing an Illustrator file that includes multiple artboards, you can specify which artboard is used, as when
placing multipage PDF files.
Note: Don’t place layers in nested layer sets if you want to adjust layers in InDesign.
1In Illustrator, choose File > Save As.
2In the Save As dialog box, type a filename and choose a location for the file.
3For Format, choose Adobe PDF (.pdf), and click Save.
4In the Adobe PDF Options dialog box, choose Acrobat 6 (1.5) or later for Compatibility.
5Select Create Acrobat Layers From Top-Level Layers, and click Save PDF.
Pasting Illustrator graphics into InDesign
When you paste a graphic from Illustrator 8.0 or later into an InDesign document, the artwork appears in InDesign as
a grouped collection of editable objects. For example, if you paste an Illustrator drawing of a soccer ball with
individually created patches into InDesign, the patches are pasted as a group, which can be ungrouped and edited using
tools in InDesign. You cannot change the visibility of layers within the illustration.
Illustration of soccer ball in Illustrator (left) and same illustration pasted into InDesign (right)
Important: Before pasting a graphic, make sure that Illustrator is configured to copy as AICB (see Illustrator Help). In
InDesign, make sure that Prefer PDF When Pasting isn’t selected in the Clipboard Handling preferences. If these options
aren’t set properly, the Illustrator graphic cannot be edited in InDesign.
Issues you may encounter when pasting or dragging art from Illustrator to InDesign
Color Illustrator supports the Grayscale, RGB, HSB, CMYK, and Web Safe RGB color models. InDesign supports
LAB, CMYK and RGB. When you paste or drag artwork from Illustrator into InDesign, RGB and CMYK colors
convert in the expected color model. Grayscale colors are converted to the appropriate K value in a CMYK color in
InDesign. HSB and Web Safe RGB objects are converted to RGB color in InDesign. Colors in smooth shades and
gradients can be edited in InDesign.
Gradients Linear or radial gradients created in Illustrator can be modified using the Gradient tool or Gradient panel
in InDesign. Gradients with multiple spot colors or complex patterns may appear as non-editable items in InDesign.
If your illustration contains complex gradients, import it using the Place command instead.
Transparency Transparency is flattened when Illustrator art is pasted or dragged into InDesign.
Graphic styles Illustrator Graphic Styles don’t become InDesign Object Styles when art is pasted or dragged into
InDesign.
Patterns Illustrator objects filled or stroked with patterns become embedded EPS images when pasted or dragged into
InDesign.

373
USING INDESIGN
Graphics
Last updated 11/16/2011
Text If you drag text from Illustrator into InDesign, it’s converted to outlines and isn’t editable with the Text tool. If
you select text using the Text tool in Illustrator, and then copy it into a text frame in InDesign, the text loses its
formatting but is editable. If you drag the text into InDesign without a frame selected, the text loses all formatting and
isn’t editable.
When you paste text from Illustrator, the text is imported as one or more objects that can be transformed and colorized
in InDesign, but not edited. For example, if you create text on a path in Illustrator and paste it into InDesign, the text
can be colorized, rotated, and scaled, but it cannot be edited using the Type tool. If you want to edit the text, use the
Type tool and paste it into a text frame.
Artwork Artwork copied from Illustrator and pasted into InDesign is embedded in the InDesign document. No link
to the original Illustrator file is created.
Importing Adobe Photoshop (.PSD) files
You can place graphics created in Adobe Photoshop 4.0 and later directly into an InDesign layout.
Layers and layer comps You can adjust the visibility of the top-level layers in InDesign, as well as view different layer
comps. Changing layer visibility or layer comps in InDesign does not alter the original Photoshop file.
Paths, masks, or alpha channels If you save paths, masks, or alpha channels in a Photoshop file, InDesign can use them
to remove backgrounds, or to wrap text around graphics. Graphics that contain paths, masks, or alpha channels act as
transparent objects when imported.
ICC color management profile If you place a Photoshop image with an embedded ICC color management profile,
InDesign reads the embedded profile, provided that color management is active. You can override the embedded
profile for the image using the Import Options dialog box or assign a different color profile to the graphic in InDesign.
Overriding the color profile in InDesign will not remove or alter the profile embedded in the Photoshop image.
Spot-color channels Spot-color channels in Adobe Photoshop PSD or TIFF files appear in InDesign as spot colors in
the Swatches panel. If the image uses a spot color that InDesign does not recognize, the spot color may appear gray in
the InDesign document and print incorrectly as a composite. (The image will print correctly on color separations,
however.) To simulate the graphic as a composite, you can create a spot color with the correct color values, and then
alias the PSD color to this new spot color. The graphic will then print correctly as composite and display correctly
on-screen when Overprint Preview is turned on (choose View
> Overprint Preview). Be sure to remove the alias before
printing separations, so that the image prints on the plate you expect.
More Help topics
“Import options for graphics” on page 379
“Place (import) graphics” on page 378
“Create an ink alias for a spot color” on page 644
Importing PDF pages
Using the Place command, you can specify which pages you want to import from a multipage PDF or an Illustrator
file with multiple artboards. You can place a single page, a range of pages, or all pages. Multipage PDF files let designers
combine illustrations for a publication into a single file.
The page range options appear when you select Show Import Options in the Place dialog box. See
“Acrobat (.pdf) and
Illustrator (.ai) import options
” on page 381. The dialog box includes a preview, so you can view a thumbnail of the pages
before you place them. If you place multiple pages, InDesign reloads the graphics icon with the next page, letting you
place the pages one after the next. InDesign doesn’t import movies, sound, links, or buttons when you place a PDF file.

374
USING INDESIGN
Graphics
Last updated 11/16/2011
Comparing screen and device resolution in placed PDF pages
A placed PDF page displays at the best resolution possible for the given scale and screen resolution. When printed on
a PostScript output device, a placed PDF page always prints at the resolution of the device. When printed on a non-
PostScript printer, a placed PDF page prints at the same resolution as the other InDesign objects in the document. For
example, vector (drawn) objects will print at the same resolution as other vector objects in the document. Bitmap
images will print at the best resolution supplied in the placed PDF.
Linking to placed PDFs
A placed PDF page appears in the InDesign document as an on-screen preview, which is linked to a specific page in
the original PDF. After placing a PDF page, you may break links by doing any of the following:
•If you add a password to the original PDF that has been placed in an InDesign document, and you update the link,
you’ll be prompted to enter the password.
•If you delete pages in the original PDF and update the link, the placed PDF page changes to the page that now falls
on the originally placed page number.
•If you reorder the pages in the original PDF file and update the link, the placed PDF page may be different from
what you expect. When that happens, place the page again.
Color in placed PDF pages
InDesign preserves colors embedded in PDF pages, even if the color comes from a color library not installed with
InDesign (such as the PANTONE Hexachrome® library). In addition, any color traps included in a placed PDF page
are preserved.
When color management is active, InDesign displays the placed PDF using its embedded ICC or output intent profile
(PDF/X only). When color management is turned off, or when you place a PDF that doesn’t contain an ICC or output
intent profile, colors in the placed PDF are calibrated using the color profile in the InDesign document.
When you export or print the document, you can preserve the ICC profile embedded in the placed PDF or replace it
with the document profile instead. Output intent profiles are used for display and are included when you export as
PDF/X; they aren’t used when you print the document, and they aren’t included when you export to any other format.
Security settings in placed PDF pages
Because a placed PDF page is linked to the original PDF, the placed page also includes the security settings of the
original file. If someone later changes the security settings in the original file, the security settings are updated in the
placed PDF page when you update the links.
If you correctly enter a required master password when placing a PDF page, you override any restrictions in the PDF
page, enabling the placed PDF page to export as expected.
More Help topics
“Acrobat (.pdf) and Illustrator (.ai) import options” on page 381
“Control layer visibility in imported images” on page 384
“Import options for graphics” on page 379
Importing InDesign (.indd) pages
Using the Place command, you can import pages from one InDesign document into another. You can import a page,
a page range, or all of the pages in the document. The pages are imported as objects (much the same way that PDFs are
imported).

375
USING INDESIGN
Graphics
Last updated 11/16/2011
Add pages in your document to hold the pages you want to import. After you choose File > Place and select an INDD
file, you can choose Show Import Options and then choose which pages to import, which layers to make visible, and
how to crop the imported pages. You can scroll in the Preview window to examine the thumbnail pages closely. The
page or pages you select are loaded in the graphics icon. If you place multiple pages, InDesign loads the graphics icon
with the following page so you can import pages one after the other.
Note: The Links panel lists the names of each page you imported. If a page you imported contains a graphic or other item
that was imported into it, this item is listed as well in the Links panel. The names of these secondary imported items are
listed under a disclosure triangle in the Links panel to distinguish them from imported pages.
More Help topics
“Place (import) graphics” on page 378
“Control layer visibility in imported images” on page 384
Importing other graphics formats
InDesign supports a variety of graphics formats, including bitmap formats such as TIFF, GIF, JPEG, and BMP, and
vector formats such as EPS. Other supported formats include DCS, PICT, WMF, EMF, PCX, PNG, and Scitex CT
(.sct). You can import an SWF file as a movie file.
More Help topics
“Place (import) graphics” on page 378
“Import options for graphics” on page 379
“Exporting” on page 114
“Import swatches” on page 474
“Movies and sounds” on page 548
TIFF (.tif) files
TIFF is a flexible bitmap image format supported by virtually all painting, image-editing, and page-layout applications.
Also, virtually all desktop scanners can produce TIFF images.
The TIFF format supports CMYK, RGB, grayscale, Lab, indexed-color, and bitmap files with alpha and spot-color
channels. You can select an alpha channel when you place a TIFF file. Spot-color channels appear in InDesign as spot
colors in the Swatches panel.
You can use an image-editing program such as Photoshop to create a clipping path to create a transparent background
for a TIFF image. InDesign supports clipping paths in TIFF images and recognizes encoded OPI comments.
Graphics Interchange Format (.gif) files
Graphics Interchange Format (GIF) is a standard for displaying graphics on the World Wide Web and other online
services. Because it compresses image data without losing detail, its compression method is called lossless. Such
compression works well with graphics that use a limited number of solid colors such as logos and charts; however, GIF
cannot display more than 256 colors. For this reason it is less effective for displaying photographs online (use JPEG
instead) and is not recommended for commercial printing. If an imported GIF file contains transparency, the graphic
interacts only where the background is transparent.

376
USING INDESIGN
Graphics
Last updated 11/16/2011
JPEG (.jpg) files
The Joint Photographic Experts Group (JPEG) format is commonly used to display photographs and other
continuous-tone images in HTML files over the web and in other online media. The JPEG format supports CMYK,
RGB, and grayscale color modes. Unlike GIF, JPEG retains all of the color information in an RGB image.
JPEG uses an adjustable, lossy compression scheme that effectively reduces file size by identifying and discarding extra
data not essential to the display of the image. A higher level of compression results in lower image quality; a lower level
of compression results in better image quality, but a larger file size. In most cases, compressing an image using the
Maximum quality option produces a result that is indistinguishable from the original. Opening a JPEG image
automatically decompresses it.
Note: JPEG encoding, which can be performed on an EPS or DCS file in an image-editing application such as Photoshop,
does not create a JPEG file. Instead, it compresses the file using the JPEG compression scheme explained above.
JPEG works well for photographs, but solid-color JPEG images (images that contain large expanses of one color) tend
to lose sharpness. InDesign recognizes and supports clipping paths in JPEG files created in Photoshop. JPEG can be
used for both online and commercially printed documents; work with your prepress service provider to preserve JPEG
quality in printing.
Bitmap (.bmp) files
BMP is the standard Windows bitmap image format on DOS and Windows-compatible computers. However, BMP
does not support CMYK, and its color support is limited to 1, 4, 8, or 24 bits. It is less than ideal for commercially
printed or online documents, and it is not supported by some web browsers. BMP graphics can provide acceptable
quality when printed on low-resolution or non-PostScript printers.
Encapsulated PostScript (.eps) files
The Encapsulated PostScript (EPS) file format is used to transfer PostScript language artwork between applications,
and is supported by most illustration and page-layout programs. Typically, EPS files represent single illustrations or
tables that are placed into your layout, but an EPS file can also represent a complete page.
Because they are based on the PostScript language, EPS files can contain text, vector, and bitmap graphics. Since
PostScript cannot normally be displayed on-screen, InDesign creates a bitmap preview for an EPS file for on-screen
display. InDesign recognizes clipping paths in Photoshop-created EPS files.
When you import an EPS file, any spot colors it contains are added to the Swatches panel in InDesign. EPS allows for
prepress-quality resolution, precision, and color. This format includes all of the color and image data required to color-
separate DCS images embedded in the EPS graphic. EPS isn’t ideal for online publishing in HTML, but it works well
for online publishing in PDF.
EPS files can contain Open Prepress Interface (OPI) comments, which let you use fast, low-resolution versions
(proxies) of images for positioning on a page. For final output, either InDesign or your prepress service provider can
automatically replace the proxies with high-resolution versions.
Desktop Color Separations (.dcs) files
Desktop Color Separations (DCS), developed by Quark, is a version of the standard EPS format. The DCS 2.0 format
supports multichannel CMYK files with
multiple spot channels. (These spot channels appear as spot colors in the
Swatches panel in InDesign.) The DCS 1.0 format supports CMYK files without spot channels. InDesign recognizes
clipping paths in Photoshop-created DCS 1.0 and DCS 2.0 files.
DCS files are intended to be used in a preseparated, host-based workflow. In most cases, color separations files
associated with a DCS image are excluded when you export or print a composite to a PDF, EPS, or PostScript file. (The
sole exception is made for 8-bit DCS files that were created in Photoshop and that do not contain vector graphics.)

377
USING INDESIGN
Graphics
Last updated 11/16/2011
InDesign can rebuild a composite image from DCS 2.0 or 1.0 separations files, if the files were created in Photoshop.
For best results, do not include DCS 1.0 files or DCS 2.0 files created in programs other than Photoshop when you are
creating high-resolution color composite proofs or separating a document in-RIP or from a composite file.
Macintosh PICT (.pict) files
The Macintosh PICT (or Picture) format is used for Mac OS graphics and page-layout applications, and for
transferring files between applications. The PICT format compresses images that contain large areas of solid color.
InDesign can import PICT files created from Mac
OS screenshots and a variety of other applications, including clip
art collections. However, PICT files are not recommended for high-resolution commercial printing.
InDesign supports RGB PICT images with variable resolutions and embedded QuickTime images. PICT graphics do
not support color separations, are device-dependent, and are not recommended for high-resolution commercial
printing. The PICT format can provide acceptable quality only when printed on low-resolution or non-PostScript
printers.
Windows Metafile Format (.wmf) and Enhanced Metafile Format (.emf) files
Windows Metafile Format (WMF) and Windows Enhanced Metafile Format (EMF) are native Windows formats used
primarily for vector graphics, such as clip art, shared between Windows applications. Metafiles may contain raster
image information; InDesign recognizes the vector information and provides limited support for raster operations.
Color support is limited to 16-bit RGB, and neither format supports color separations. As a general rule, avoid using
Metafile formats for commercially printed documents.
PCX (.pcx) files
The PCX format is commonly used in Windows systems. Most Windows software supports version 5 of the PCX
format.
The PCX format supports RGB, indexed-color, grayscale, and bitmap color modes, as well as the RLE compression
method, which is lossless. It does not support alpha channels. Images can have a bit depth of 1,
4, 8, or 24 bits.
However, PCX is not ideal for commercially printed or online documents. PCX graphics can provide acceptable
quality only when printed on low-resolution or non-PostScript printers.
Portable Network Graphics (.png) files
The Portable Network Graphics (PNG) format uses adjustable, lossless compression to display 24-bit photographs or
solid-color images on the World Wide Web and in other online media. PNG was developed as a patent-free alternative
to the GIF file format. It supports transparency in an alpha channel or a designated color. PNG is best used for online
documents. Color PNG graphics placed in an InDesign document are RGB bitmap images.
Scitex CT (.sct) files
The Scitex Continuous Tone (CT) format is used for high-end image processing on Scitex computers. Scitex CT files
often come from Scitex scanners, which produce high-quality scans for commercial printing. The Scitex CT format
supports CMYK, RGB, and grayscale files, but does not support alpha channels. Contact Scitex to obtain utilities for
transferring files saved in the Scitex CT format to a Scitex system.

378
USING INDESIGN
Graphics
Last updated 11/16/2011
Placing graphics
Place (import) graphics
The Place command is the primary method used to insert graphics into InDesign because it provides the highest level
of
support for resolution, file formats, multipage PDF and INDD files, and color. To place graphics is also referred to
as import images and insert pictures.
If you’re creating a document in which those characteristics aren’t critical, you can copy and paste to import graphics
InDesign. Pasting, however, embeds a graphic in a document; the link to the original graphic file is broken and doesn’t
appear in the Links panel, and you can’t update the graphic from the original file. However, pasting Illustrator graphics
allows you to edit paths in InDesign. See “Importing Adobe Illustrator graphics” on page 371.
The options available to you when you place a graphics file depend on the type of graphic. These options appear when
you select Show Import Options in the Place dialog box. If you don’t select Show Import Options, InDesign applies
the default settings or the last settings used in placing a graphics file of that type.
The names of graphics you’ve placed (imported) appear in the Links panel.
Note: If you place or drag a graphic from a removable media, such as a CD-ROM, the link will break when you remove
that media from your system.
For a video tutorial on placing an image, see www.adobe.com/go/lrvid4279_id.
1Do one of the following:
•To import a graphic without first creating a frame, make sure that nothing in the document is selected.
•To import a graphic into an existing frame, select the frame. If the new image is larger than the frame, you can refit
the frame later by choosing Object
> Fitting > [fitting command].
•To replace an existing image, select its graphics frame.
2Choose File > Place and select one or more graphics files of any available format.
If you select multiple files, you can click or drag in the document to place the selected files one at a time. (See “Place
multiple graphics” on page 383.)
3To replace an object you selected, select Replace Selected Item.
4To add a caption based on the image metadata, select Create Static Captions. See “Generate a caption from an
image” on page 238.
5To set format-specific import options, do one of the following:
•Select Show Import Options, and then click Open.
•Hold down Shift as you click Open or Shift-double-click a file name.
Note: When you place a graphic created in Illustrator 9.0 or later by using the Show Import Options dialog box, the
options are identical to those for PDFs. When you place an Illustrator 5.5–8.x graphic, the options are identical to those
for EPS files.
6If the Image Import Options dialog box appears (because you chose to set format-specific import options), select
import options and click OK. (See “Import options for graphics” on page 379.)
7Do one of the following:
•To import into a new frame, drag to create a frame. Or, click the loaded graphics icon in the layout at the place
where you want the upper left corner of the graphic to appear.
Note: When you drag to create a frame, the frame has the same proportions as the graphic unless you Shift-drag.

379
USING INDESIGN
Graphics
Last updated 11/16/2011
•To import into an existing, unselected frame, click the loaded graphics icon anywhere in that frame.
•To import into an existing selected frame, you don’t need to do anything if Replace Selected Item is selected. The
image automatically appears in that frame.
•To replace an existing graphic, hold down Alt (Windows) or Option (Mac OS) and click the loaded graphics icon
on the graphic you want to replace.
•To place all the specified pages of a multipage file (such as a PDF or INDD file) at the same time, one overlapping
another, hold down Alt (Windows) or Option (Mac
OS) and click the loaded graphics icon where you want the
pages to appear.
If you accidently replace an existing graphic with an image you’re placing, press Ctrl+Z (Windows) or Command+Z
(Mac OS) to return the original image to the frame and display the loaded graphics icon.
8To place the next graphic or the next page of a multipage PDF, click the loaded graphics icon in the layout where
desired. If necessary, you can scroll to a different location or change pages without losing the loaded graphics icon.
Note: The image you place may appear to have a low resolution, depending on your settings. The display setting of an
image does not affect final output of the file. To change your image display settings, see “Control graphics’ display
performance” on page 387.
More Help topics
“Import options for graphics” on page 379
“About links and embedded graphics” on page 389
“Choosing the right graphics format” on page 369
Importing Content video
Import options for graphics
The options for importing graphics vary depending on the type of image being imported. To display import options,
make sure that Show Import Options is selected in the Place dialog box.
Encapsulated PostScript (.eps) import options
When you place an EPS graphic (or a file saved with Illustrator 8.0 or earlier) and select Show Import Options in the
Place dialog box, you’ll see a dialog box containing these options:
Read Embedded OPI Image Links This option tells InDesign to read links from OPI comments for images included (or
nested) in the graphic.
Deselect this option if you’re using a proxy-based workflow and plan to have your service providers perform the image
replacement using their OPI software. When this option is deselected, InDesign preserves the OPI links but does not
read them. When you print or export, the proxy and the links are passed on to the output file.
Select this option if you’re using a proxy-based workflow and you want InDesign, instead of your service provider, to
perform image replacement when you output the final file. When you select this option, the OPI links appear in the
Links panel.
Also select this option when you import EPS files containing OPI comments that are not part of a proxy-based
workflow. For example, if you import an EPS file containing OPI comments for an omitted TIFF or bitmap image,
you’ll want to select this option so that InDesign can access the TIFF information when you output the file.
Apply Photoshop Clipping Path Regardless of whether this option is selected, a placed EPS file includes a clipping path
in InDesign. However, deselecting this option may result in a different bounding box size.
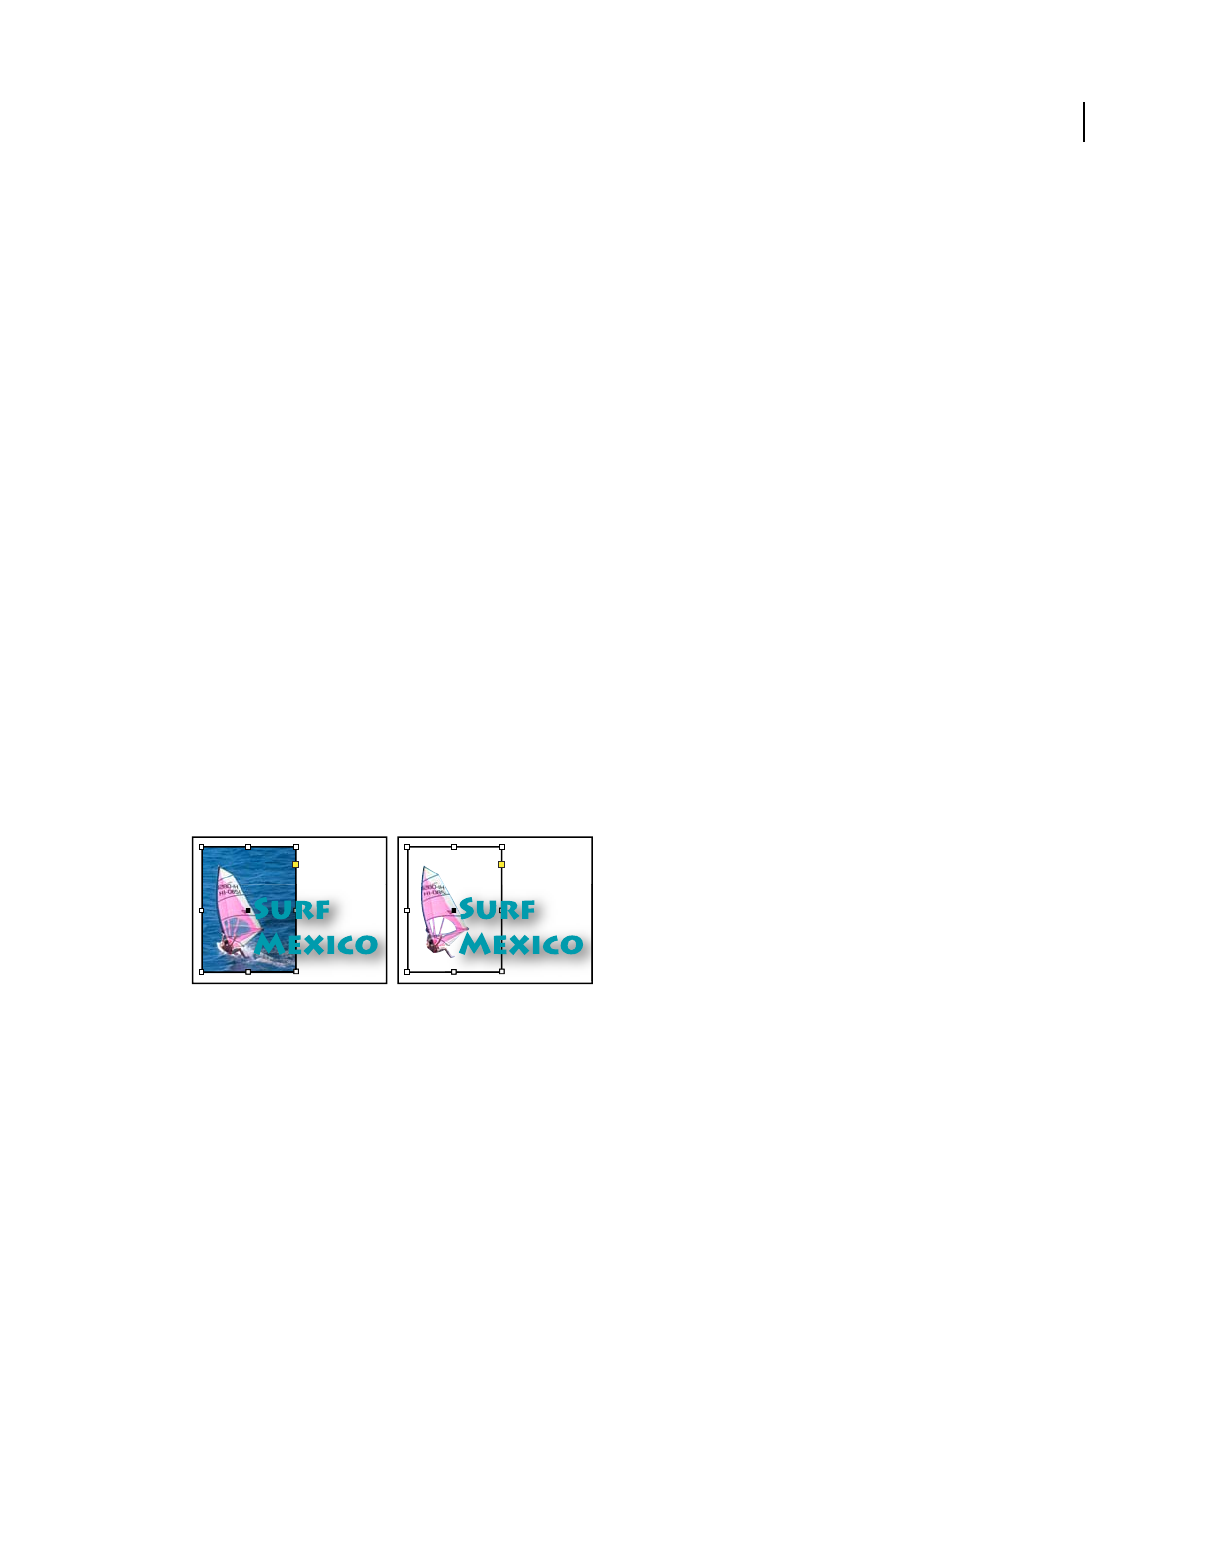
380
USING INDESIGN
Graphics
Last updated 11/16/2011
Proxy Generation This creates a low-resolution bitmap representation of an image when drawing the file to the screen.
The following settings control how the proxy will be generated:
•Use TIFF Or PICT Preview Some EPS images contain an embedded preview. Select this option to generate the proxy
image of the existing preview. If a preview does not exist, the proxy will be generated by rasterizing the EPS to an
offscreen bitmap.
•Rasterize The PostScript Select this option to ignore the embedded preview. This option is typically slower but
provides the highest-quality results.
Note: When you import more than one single file into the same document, all instances share the proxy setting of the first
instance of the imported file.
Bitmap import options
You can apply color-management options to individual imported graphics when using color-management tools with
a document. You can also import a clipping path or an alpha channel saved with an image created in Photoshop. Doing
so lets you directly select an image and modify its path without changing the graphics frame.
When you place a PSD, TIFF, GIF, JPEG, or BMP file and select Show Import Options in the Place dialog box, you’ll
see a dialog box containing these options:
Apply Photoshop Clipping Path If this option isn’t available, the image wasn’t saved with a clipping path, or the file
format doesn’t support clipping paths. If the bitmap image doesn’t have a clipping path, you can create one in
InDesign.
Alpha channel Select an alpha channel to import the area of the image saved as an alpha channel in Photoshop.
InDesign uses the alpha channel to create a transparent mask on the image. This option is available only for images
that contain at least one alpha channel.
Image imported without clipping path (left) and with clipping path (right)
Click the Color tab to view the following options:
Profile If Use Document Default is selected, leave this option unchanged. Otherwise, choose a color source profile that
matches the gamut of the device or software used to create the graphic. This profile enables InDesign to properly
translate its color to the gamut of the output device.
Rendering Intent Choose a method for scaling the color range of the graphic to the color range of the output device.
Typically, you’ll choose Perceptual (Images) because it accurately represents colors in photographs. The Saturation
(Graphics), Relative Colorimetric, and Absolute Colorimetric options are better for areas of solid color; they don’t
reproduce photographs well. Rendering Intent options aren’t available for bitmap, grayscale, and index-color mode
images.

381
USING INDESIGN
Graphics
Last updated 11/16/2011
Portable Network Graphics (.png) import options
When you place a PNG image and select Show Import Options in the Place dialog box, you’ll see a dialog box with
three sections of import settings. Two sections contain the same options available for other bitmap image formats. The
other section, PNG Settings, contains the following settings:
Use Transparency Information This option is enabled by default when a PNG graphic includes transparency. If an
imported PNG file contains transparency, the graphic interacts only where the background is transparent.
White Background If a PNG graphic does not contain a file-defined background color, this option will be selected by
default. However, it is only enabled if Use Transparency Information is activated. If this option is selected, white is
used as the background color when applying transparency information.
File Defined Background Color If a PNG graphic was saved with a non-white background color, and Use
Transparency Information is selected, this option is selected by default. If you don’t want to use the default background
color, click White Background to import the graphic with a white background, or deselect Use Transparency
Information to import the graphic without any transparency (displaying areas of the graphic that are currently
transparent). Some image-editing programs can’t specify a non-white background color for PNG graphics.
Apply Gamma Correction Select this option to adjust the gamma (midtone) values of a PNG graphic as you place it.
This option lets you match image gamma to the gamma of the device you will use to print or display the graphic (such
as a low-resolution or non-PostScript printer or computer monitor). Deselect this option to place the image without
applying any gamma correction. By default, this option is selected if the PNG graphic was saved with a gamma value.
Gamma Value This option, available only if Apply Gamma Correction is selected, displays the gamma value that was
saved with the graphic. To change the value, type a positive number from 0.01
to 3.0.
When PNG files are imported, the settings in the Image Import Options dialog box are always based on the selected
file, not on the default or last-used settings.
Acrobat (.pdf) and Illustrator (.ai) import options
The layout, graphics, and typography in a placed PDF are preserved. As with other placed graphics, you cannot edit a
placed PDF page within InDesign. You can control the visibility of layers in a layered PDF. You can also place more
than one page of a multipage PDF.
When you place a PDF that was saved with passwords, you’ll be prompted to enter the required passwords. If the PDF
file was saved with usage restrictions (for example, no editing or printing), but no passwords, you can place the file.
When you place a PDF (or a file saved with Illustrator 9.0 or later) and select Show Import Options in the Place dialog
box, you’ll see a dialog box containing the following options:
Show Preview Preview a page in the PDF before you place it. If you’re placing a page from a PDF that contains multiple
pages, click the arrows, or type a page number under the preview image to preview a specific page.
Pages Specify the pages you want to place: the page displayed in the preview, all pages, or a range of pages. For
Illustrator files, you can specify which artboard to place.
If you specify multiple pages, hold down Alt (Windows) or Option (Mac OS) while placing the file to place them all at
the same time, overlapping each other.
Crop To Specify how much of the PDF page to place:
•Bounding Box Places the PDF page’s bounding box, or the minimum area that encloses the objects on the page,
including page marks. The Bounding Box (Visible Layers Only) option uses the bounding box only of the visible layers
of the PDF file. The Bounding Box (All Layers) option places the bounding box of the entire layer area of the PDF file,
even if layers are hidden.
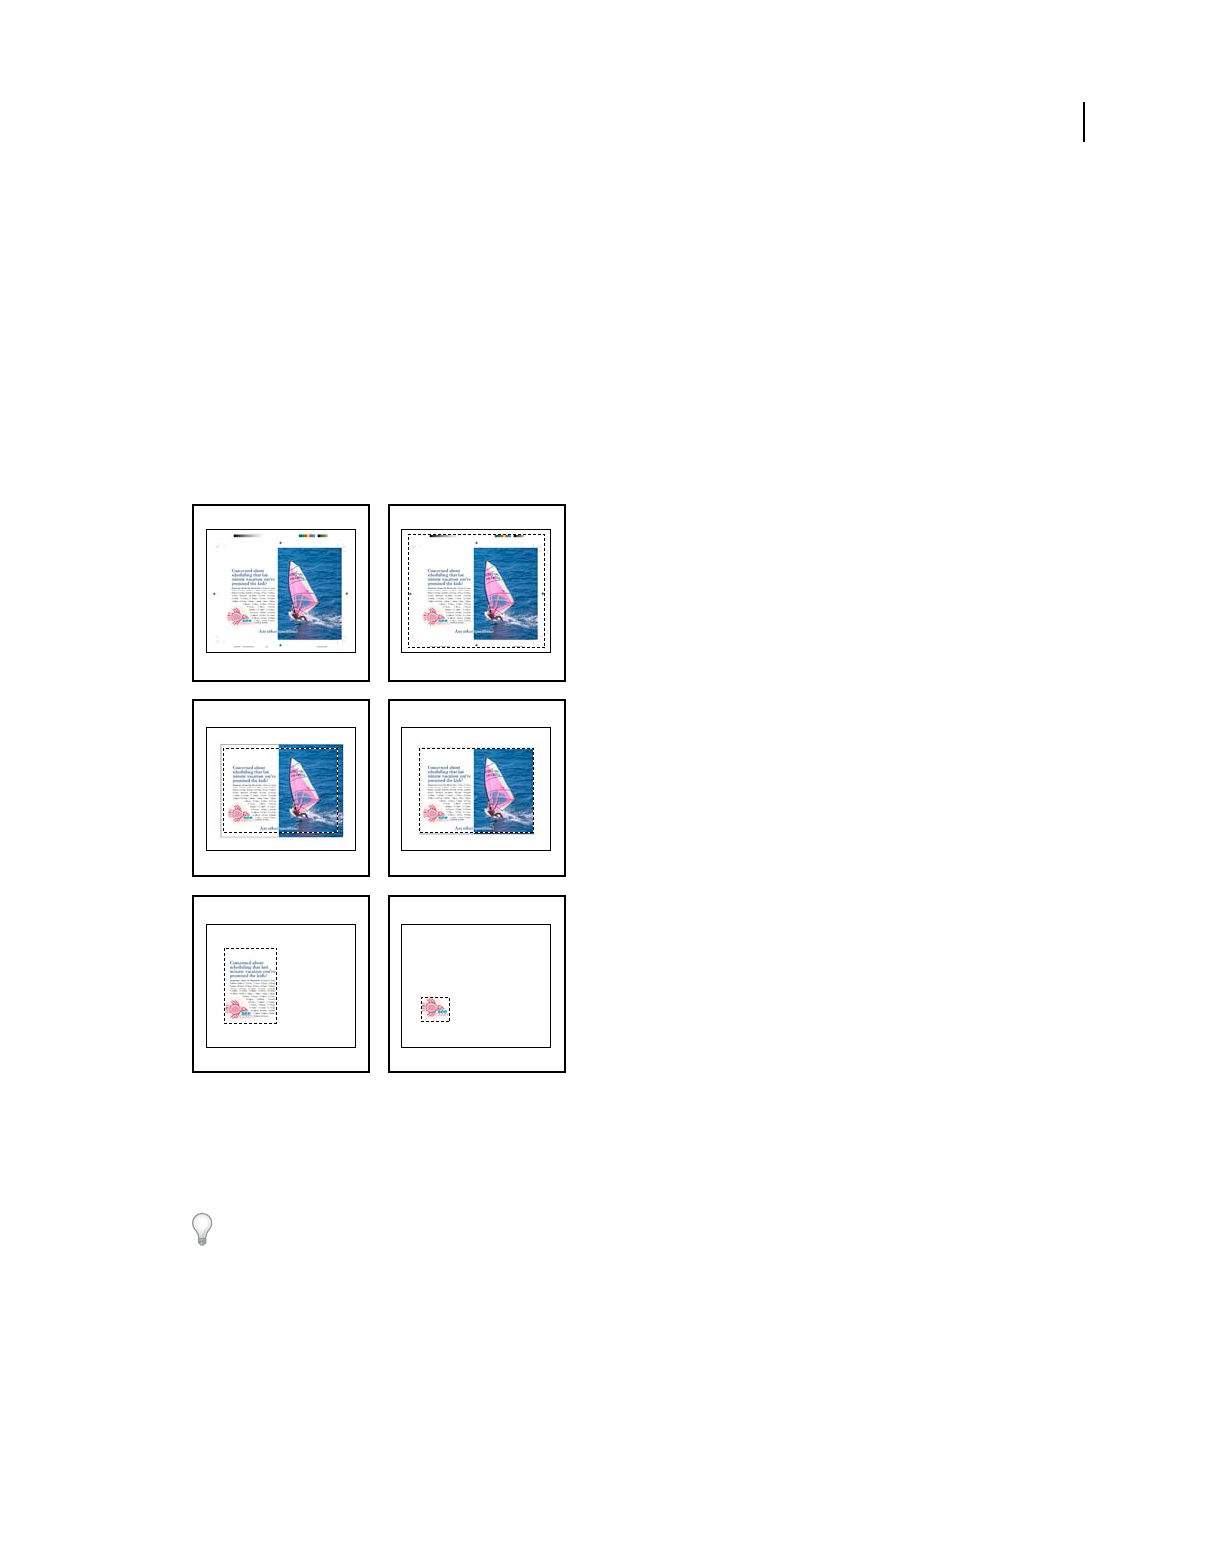
382
USING INDESIGN
Graphics
Last updated 11/16/2011
•Art Places the PDF only in the area defined by a rectangle that the author created as a placeable artwork (for
example, clip art).
•Crop Places the PDF only in the area that is displayed or printed by Adobe Acrobat.
•Trim Identifies the place where the final produced page will be physically cut in the production process, if trim
marks are present.
•Bleed Places only the area that represents where all page content should be clipped, if a bleed area is present. This
information is useful if the page is being output in a production environment. Note that the printed page may include
page marks that fall outside the bleed area.
•Media Places the area that represents the physical paper size of the original PDF document (for example, the
dimensions of an A4 sheet of paper), including page marks.
Options for cropping placed PDFs
A. Media B. Trim C. Bleed D. Content E. Crop F. Art
Transparent Background Select this option to reveal text or graphics that fall beneath the PDF page in the InDesign
layout. Deselect this option to place the PDF page with an opaque white background.
If you make the background transparent in a frame containing a PDF graphic, you can make it opaque later by adding
a fill to the frame.
InDesign (.indd) import options
InDesign preserves the layout, graphics, and typography in a placed INDD file. However, the file is treated as an object,
and you can’t edit it, although you can control the visibility of layers and choose which pages of a multi-page INDD
file to import.
AB
CD
EF

383
USING INDESIGN
Graphics
Last updated 11/16/2011
When you place an InDesign file and select Show Import Options in the Place dialog box, you’ll see a dialog box
containing the following options:
Show preview Preview a page before you place it. You can type a page number or click the arrows to preview a page
in a multi-page document.
Pages Specify the pages you want to place: the page displayed in the preview, all pages, or a range of pages.
Crop to Specify how much of the page or pages to place, the page itself or the bleed or slug areas on the pasteboard.
Place multiple graphics
The Place command lets you import more than one item at a time.
1Create frames for the graphics if you want to place some or all of them in frames.
2Choose File > Place, and select files.
You can select graphics files, text files, InDesign files, and other files you can add to InDesign documents.
3Optionally, select Show Import Options, click Open, and specify the import options for each file. (See “Import
options for graphics” on page 379.)
A thumbnail image of the first graphic you selected appears next to the loaded graphics icon. A number next to the
loaded graphics icon tells you how many graphics are ready for importing. The names of the graphics appear in the
Links panel, with the letters LP (for “loaded in place cursor”) next to the frontmost graphic.
Placing four files into placeholder frames
Press an arrow key to cycle through the graphics; press Esc to unload the frontmost graphic from the loaded graphics
icon without placing it in InDesign.
Note: You can keep thumbnail images from appearing in the loaded graphics icon if displaying the images slows down
your computer. In the Interface area of the Preferences dialog box, deselect Show Thumbnails On Place.
4Do one of the following:
•To import into a new frame, click the loaded graphics icon where you want the upper left corner of the graphic to
appear.
•To create a frame of a certain size and import the graphic into the frame, drag to define the frame. The frame
conforms to the proportions of the graphic being placed.
•To import into an existing frame, click the loaded graphics icon in the frame. Alt-click (Windows) or Option-click
(Mac
OS) to replace the contents of an existing frame.

384
USING INDESIGN
Graphics
Last updated 11/16/2011
•To import all the loaded graphics in a grid, start dragging, and press the arrow keys to determine the number of
rows and columns. Use the Up Arrow and Down Arrow keys to change the number of rows and the Left Arrow and
Right Arrow keys to change the number of columns. Release the mouse button to place the grid of images.
To change the spacing between frames, press Page Up or Page Down or hold down Ctrl (Windows) or Command (Mac
OS) while pressing the arrow keys.
Note: You can load more graphics by choosing File > Place while the graphics icon is displayed.
Control layer visibility in imported images
When you import Photoshop PSD files, layered PDFs, and INDD files, you can control the visibility of top-level layers.
Adjusting layer visibility in InDesign lets you vary an illustration depending on context. For example, in a
multilanguage publication, you can create a single illustration that includes one text layer for each language.
You can adjust layer visibility either when you place a file or by using the Object Layer Options dialog box. In addition,
if the Photoshop file contains layer comps, you can display the desired comp.
More Help topics
“Importing Adobe Illustrator graphics” on page 371
“Create a layered PDF in Adobe Illustrator” on page 371
“Importing Adobe Photoshop (.PSD) files” on page 373
Set layer visibility
1Do one of the following:
•To import a graphic without first creating a frame, make sure that nothing in the document is selected.
•To import a graphic into an existing frame, select the frame.
•To replace an existing image, select the graphics frame.
2Choose File > Place and select a graphics file.
3To replace a selected object, select Replace Selected Item.
4Select Show Import Options, and then click Open.
5In the Image Import Options or Place dialog box, click the Layers tab.
6To view a preview of the image, click Show Preview.
7(PDFs only) If you’re placing a page from a multipage PDF, click the arrows, or type a page number under the
preview image to preview a specific page.
8(Photoshop PSD files only) If the image contains layer comps, choose the layer comp you want to display from the
Layer Comp pop-up menu.
9Do one of the following:
•To open or close a layer set, click the triangle to the left of the folder icon.
•To hide a layer or layer set, click the eye icon next to the layer or layer set.
•To display the layer or layer set, click the empty eye column next to the layer or layer set.
•To display only the content of a particular layer or layer set, Alt-click (Windows) or Option-click (Mac OS) its eye
icon. Alt-click or Option-click the eye icon again to restore the original visibility settings of the other layers.
•To change the visibility of multiple items, drag through the eye column.

385
USING INDESIGN
Graphics
Last updated 11/16/2011
10 Set the When Updating Link option as desired:
Use Photoshop’s/PDF’s Layer Visibility Matches the layer visibility settings to those of the linked file when you update
the link.
Keep Layer Visibility Overrides Maintains the layer visibility settings as specified in the InDesign document.
11 Click OK, and do one of the following:
•To import into a new frame, click the loaded graphics icon in the layout at the place where you want the upper
left corner of the graphic to appear.
•To import into an existing, unselected frame, click the loaded graphics icon anywhere in that frame.
•To import into an existing selected frame, you don’t need to do anything. The image automatically appears in that
frame.
If you accidently replace an existing graphic with an image you’re placing, press Ctrl+Z (Windows) or Command+Z
(Mac OS) to return the original image to the frame and display the loaded graphics icon.
Set layer visibility for placed AI, PSD, PDF, and INDD files
After you place a Photoshop PSD or layered PDF, an Illustrator AI file, or an InDesign INDD file, you can control the
visibility of its layers by using the Object Layer Options dialog box. If the Photoshop PSD file contains layer comps,
you can choose which comp you want to display. In addition, you can choose whether to maintain the visibility settings
or match the settings of the original file each time you update the link.
1Select the file in the InDesign document.
2Choose Object > Object Layer Options.
3To view a preview of the image, select Preview.
4(Photoshop PSD files only) If the image contains layer comps, choose the layer comp you want to display from the
Layer Comp pop-up menu.
5Do one of the following:
•To open or close a layer set, click the triangle to the left of the folder icon.
•To hide a layer or layer set, click the eye icon next to the layer or layer set.
•To display the layer or layer set, click the empty eye column next to the layer or layer set.
•To display only the content of a particular layer or layer set, Alt-click (Windows) or Option-click (Mac OS) its eye
icon. Alt-click or Option-click the eye icon again to restore the original visibility settings of the other layers.
•To change the visibility of multiple items, drag through the eye column.
6Set the Updating Link Options as desired:
Use Layer Visibility Matches the layer visibility settings to those of the linked file when you update the link.
Keep Layer Visibility Overrides Maintains the layer visibility settings as specified in the InDesign document.
7Click OK.
Paste or drag graphics
When you copy and paste or drag a graphic into an InDesign document, some attributes of the original object may be
lost, depending on the limitations of the operating system and the range of data types the other application makes
available for transfer, and the InDesign Clipboard preferences. Pasting or dragging Illustrator graphics lets you select
and edit paths within the graphic.

386
USING INDESIGN
Graphics
Last updated 11/16/2011
Copying and pasting or dragging between two InDesign documents, or within a single document, however, preserves
all of the graphics attributes that were imported or applied. For example, if you copy a graphic from one InDesign
document and paste it into another, the new copy will be an exact duplicate of the original, even including the original’s
link information, so that you can update the graphic when the file on disk changes.
More Help topics
“About links and embedded graphics” on page 389
“Pasting Illustrator graphics into InDesign” on page 372
Copy and paste graphics
When copying and pasting a graphic from another document into an InDesign document, InDesign does not create a
link to the graphic in the Links panel. The graphic may be converted by the system clipboard during the transfer, so
both image quality and print quality may be lower in InDesign than in the graphic’s original application.
1In InDesign or another program, select the original graphic, and choose Edit > Copy.
2Switch to an InDesign document window, and choose Edit > Paste.
Drag and drop graphics
The drag-and-drop method works like the Place command, with images appearing in the Links panel after they’re
imported. You cannot set import options for the files you drag and drop; however, you can drag and drop multiple
files at once (the files are loaded in the graphics icon when you drag and drop more than one).
Select a graphic from Adobe Illustrator, Adobe Bridge, Explorer (Windows), the Finder (Mac OS), or your desktop,
and drag it into InDesign. The image must be in a format that InDesign can import.
After dragging and dropping a file from any location other than Illustrator, it appears in the Links panel in InDesign.
Using the Links panel, you can control versions and update as necessary.
1Select the original graphic.
2Drag the graphic into an open InDesign document window.
Note: In Windows, if you try to drag an item from an application that does not support drag and drop, the pointer
displays the Prohibited icon.
To cancel dragging a graphic, drop the graphic onto any panel title bar or the document title bar.
Fixing low-resolution images
Graphics you place in your document may appear pixelated or fuzzy or grainy. In most cases, it’s because InDesign
displays images in low-resolution by default to improve performance.
Check the display settings
To display graphics in high resolution, choose View > Display Performance > High Quality Display. For more details
on changing these display performance settings, see “Control graphics’ display performance” on page 387.
Use Place instead of Paste
The image may still be low resolution even though you changed the display performance settings. For these images,
make sure that you use the Place command to insert the image into InDesign. In some instances, pasting an image from
another application may result in the preview image being inserted instead of the original file.

387
USING INDESIGN
Graphics
Last updated 11/16/2011
Check your print settings
If your image appears in low resolution in print, check your print settings to make sure graphics are printing properly.
In the Graphics section of the Print dialog box, choose Send Data > All.
Avoid transformations in images of borderline quality
In addition, scaling or rotating an image could reduce its quality. You may want to choose Clear Transformations from
the Control panel menu.
Improve the image resolution
In some cases, such as with an image copied from a web page, you may need to replace a low-resolution image with a
high-resolution image.
Control graphics’ display performance
You can control the resolution of graphics placed in your document. You can change the display settings for the entire
document or for individual graphics. You can also change a setting that either allows or overrides the display settings
for individual documents.
Change a document’s display performance
A document always opens using the default Display Performance preferences. You can change the display
performance of a document while it is open, but the setting won’t be saved with the document.
If you’ve set the display performance of any images separately, you can override the settings so all objects use the same
settings.
1Choose View > Display Performance, and select an option from the submenu.
2To force objects that you have set individually to display using the document setting, deselect View > Display
Performance
> Allow Object-Level Display Settings. (A check mark indicates it is selected.)
Change an object’s display performance
1To preserve the display performance for individual objects when the document is closed and reopened, make sure
Preserve Object-Level Display Settings is selected in Display Performance preferences.
2Choose View > Display Performance, and make sure Allow Object-Level Display Settings is selected.
3With the Selection tool or Direct Selection tool , select an imported graphic.
4Do one of the following:
•Select Object > Display Performance, and choose a display setting.
•Right-click (Windows) or Control-click (Mac OS) the image, and choose a display setting from the Display
Performance submenu.
To remove an object’s local display setting, choose Use View Setting in the Display Performance submenu. To remove
local display settings for all graphics in the document, select Clear Object-Level Display Settings in the View > Display
Performance submenu.
Display performance options
These options control how graphics are displayed on the screen, but they do not affect the print quality or exported
output.

388
USING INDESIGN
Graphics
Last updated 11/16/2011
Use Display Performance preferences to set the default option used to open all documents, and customize the settings
that define those options. Each display option has separate settings for displaying raster images, vector graphics, and
transparencies.
Fast Draws a raster image or vector graphic as a gray box (default). Use this option when you want to quickly page
through spreads that have lots of images or transparency effects.
Typical Draws a low-resolution proxy image (default) appropriate for identifying and positioning an image or vector
graphic. Typical is the default option, and is the fastest way to display an identifiable image.
High Quality Draws a raster image or vector graphic at High Resolution (default). This option provides the highest
quality but the slowest performance. Use this option when you want to fine-tune an image.
Note: Image display options don’t affect output resolution when exporting or printing images within a document. When
printing to a PostScript device, exporting to XHTML, or exporting to EPS or PDF, the final image resolution depends on
the output options you choose when you print or export the file.
Set default display performance
The Display Performance preferences let you set the default display option, which InDesign uses for every document.
You can change a document’s display performance using the View menu, or change the setting for individual objects
using the Object menu. For example, if you work on projects that contain numerous high-resolution photos (such as
a catalog), you may prefer to have all your documents open quickly. You can set the default display option to Fast.
When you want to see the images in more detail, you can switch the document view to Typical or High Quality (leaving
the preference set to Fast).
You can also choose to view or override display settings applied to individual objects. If Preserve Object-Level Display
Settings is selected, any settings applied to objects are saved with the document.
1Select Edit > Preferences > Display Performance (Windows) or InDesign > Preferences > Display Performance
(Mac
OS).
2For Default View, select Typical, Fast, or High Quality. The display option you choose applies to all documents you
open or create.
3Do one of the following:
•To save display settings applied to individual objects, select Preserve Object-Level Display Settings.
•To display all graphics using the default display option, deselect Preserve Object-Level Display Settings.
4For Adjust View Settings, choose the display option you want to customize, and then move the slider for Raster
Images or Vector Graphics to the desired setting.
5Click OK.
Each display option has separate settings for raster (bitmap) images, vector graphics, and transparency effects.
Create contact sheets
A contact sheet is a grid of thumbnail images, often used for pre-press analysis. You can use a number of different
Adobe applications to create a contact sheet. In Photoshop, you can use either the Contact Sheet or Picture Package
command.
In previous versions of Adobe Bridge (CS2 and CS3), you can create a contact sheet for InDesign pages using the
Create InDesign Contact Sheet feature. This feature does not appear in later versions of Adobe Bridge. Instead, you
can use the Adobe Output Module in Adobe Bridge to create a PDF contact sheet.

389
USING INDESIGN
Graphics
Last updated 11/16/2011
You can also create a simple contact sheet in InDesign by placing multiple images in a grid.
1Choose File > Place, select multiple images, and choose Open.
If you want to include captions with your images, select Create Static Captions. See “Generate a caption from an
image” on page 238.
2Start dragging, and press the arrow keys to determine the number of rows and columns. Use the Up Arrow and
Down Arrow keys to change the number of rows and the Left and Right arrow keys to change the number of
columns.
To change the spacing between frames, press Page Up or Page Down or hold down Ctrl (Windows) or Command
(Mac OS) while pressing the arrow keys.
3Release the mouse button to place the grid of images.
Managing graphics links
About links and embedded graphics
When you place a graphic, you see a screen-resolution version of the file in the layout so that you can view and position
it. However, the actual graphic file may be either linked or embedded.
•Linked artwork is connected to, but remains independent of, the document, resulting in a smaller document. You
can modify linked artwork using transformation tools and effects; however, you cannot select and edit individual
components in the artwork. You can use the linked graphic many times without significantly increasing the size of
the document; you can also update all links at once. When you export or print, the original graphic is retrieved,
creating the final output from the full resolution of the originals.
•Embedded artwork is copied into the document at full resolution, resulting in a larger document. You can control
versions and update the file whenever you like; as long as the artwork is embedded, your document is self-sufficient.
To determine if artwork is linked or embedded, or change its status from one to the other, use the Links panel.
If the bitmap image you place is 48K or smaller, InDesign automatically embeds the full-resolution image instead of
the screen-resolution version in your layout. InDesign displays these images in the Links panel, so that you can control
versions and update the file whenever you like; however, the link is not necessary for optimal output.
Note: If you move a document to another folder or disk (for example, if you take it to a service provider), be sure that you
also move the linked graphics files; they are not stored inside the document. You can copy all related files automatically,
using the Preflight and Package features.
More Help topics
“Define preflight profiles” on page 617
“Package files” on page 621
Links panel overview
All files placed in a document are listed in the Links panel. These include both local (on disk) files and assets that are
managed on a server. However, files that are pasted from a website in Internet Explorer do not display in this panel.
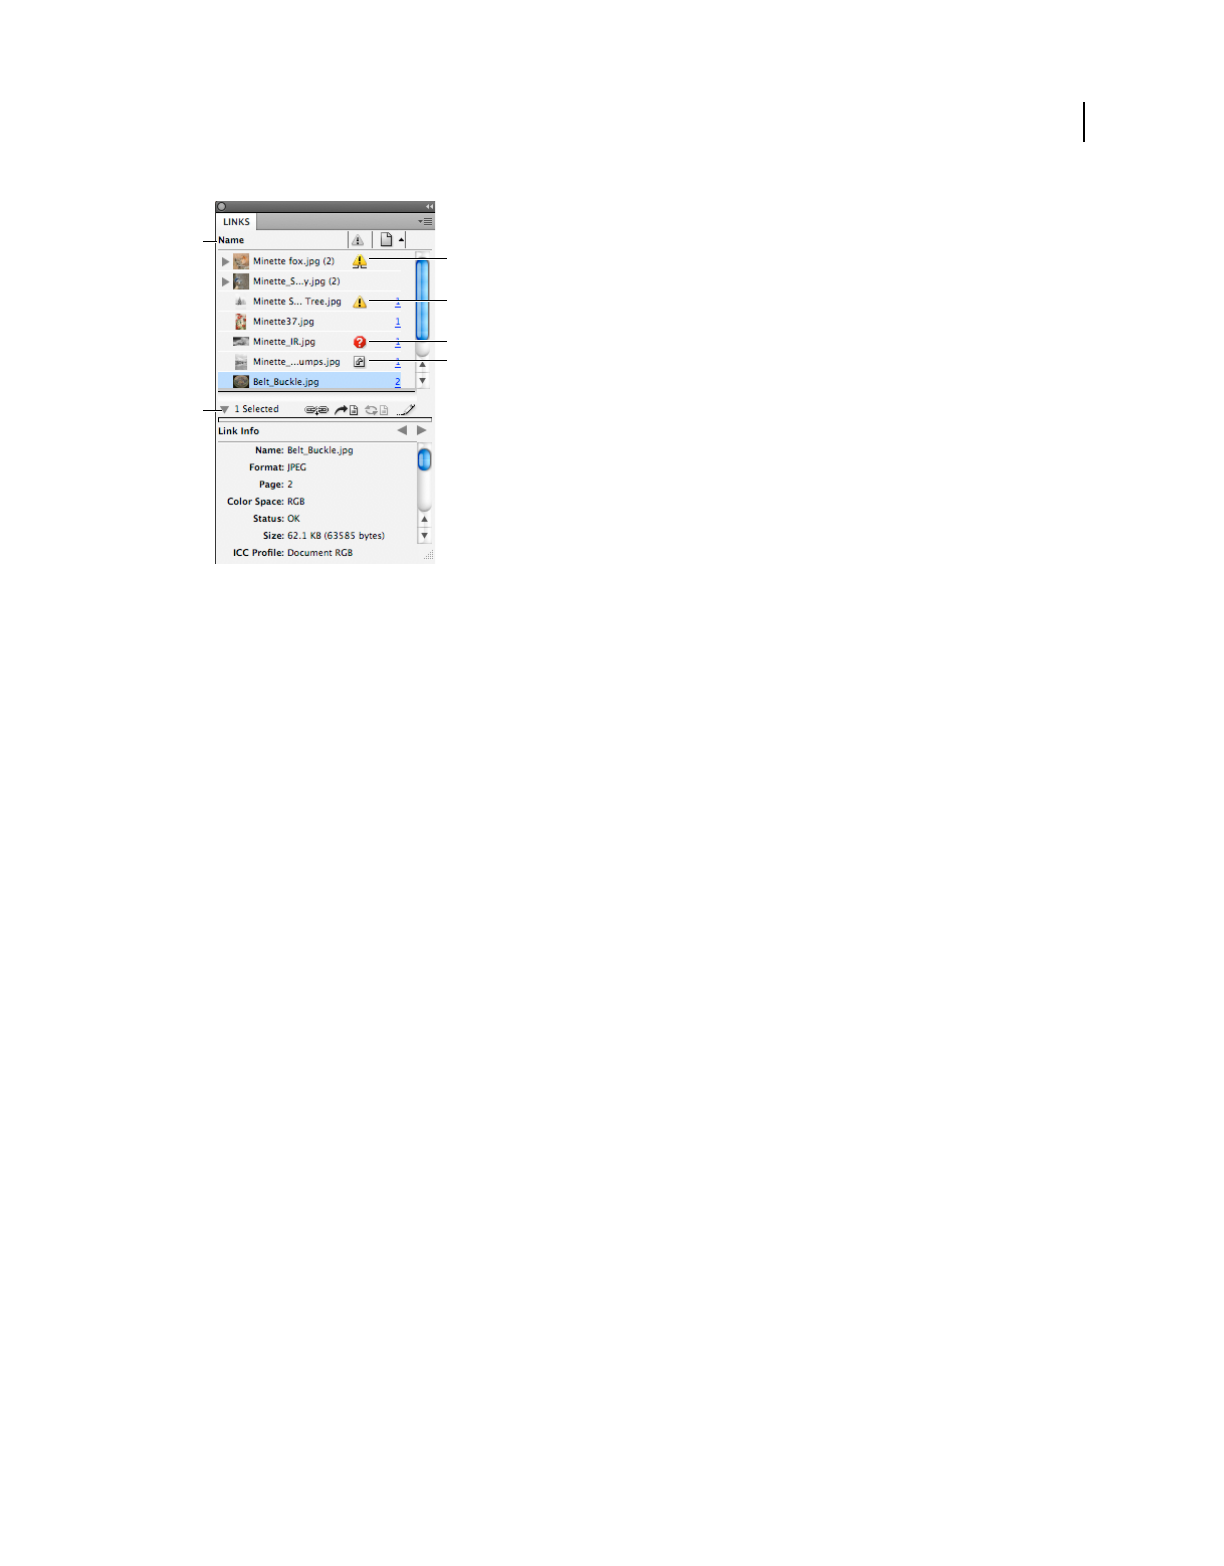
390
USING INDESIGN
Graphics
Last updated 11/16/2011
Links panel
A. Category columns B. Show/Hide Link Information C. One or more instances modified icon D. Modified icon E. Missing-link icon
F. Embedded-link icon
When the same graphic appears several times in the document, the links are combined under a disclosure triangle in
the Links panel. When a linked EPS graphic or InDesign document contains links, the links are also combined under
a disclosure triangle.
A linked file can appear in the Links panel in any of the following ways:
Up to Date An up-to-date file is blank in the Status column.
Modified This icon means that the version of the file on disk is more recent than the version in your document. For
example, this icon appears if you import a Photoshop graphic into InDesign, and then you or someone else edits and
saves the original graphic in Photoshop.
A slightly different version of the Modified icon appears when a graphic is modified and one or more instances are
updated while others are not.
Missing The graphic is no longer in the location from which it was imported, although it may still exist somewhere.
Missing links can happen if someone deletes the original file or moves it to a different folder or server after it’s been
imported. You can’t know whether a missing file is up to date until its original is located. If you print or export a
document when this icon is displayed, the file may not print or export at full resolution.
Embedded Embedding the contents of a linked file suspends management operations for that link. If the selected link
is currently in an “edit in place” operation, this option is not enabled. Unembedding the file restores management
operations to the link.
If a linked object does not appear on a specific document page, the following codes indicate where the object appears:
PB (pasteboard), MP (master page), OV (overset text), and HT (hidden text).
For a video tutorial on using the Links panel, see www.adobe.com/go/lrvid4027_id.
InDesign Secrets provides a videocast on Links panel tips and techniques at Saving time with the Links panel.
More Help topics
Links panel video
A
B
C
D
E
F

391
USING INDESIGN
Graphics
Last updated 11/16/2011
Use the Links panel
•To display the Links panel, choose Window > Links. Each linked file and automatically embedded file is identified
by name.
•To select and view a linked graphic, select a link in the Links panel and then click the Go To Link button ,
click the page number of the link in the Page column, or choose Go To Link in the Links panel menu. InDesign
centers the display around the selected graphic. To view a hidden object, you show the layer (or condition if it’s an
anchored object).
•To expand or collapse nested links, click the triangle icon to the left of the link. Nested links occur when the same
graphic appears several times in the document or when the linked EPS graphic or InDesign document contains
links.
•To sort links in the panel, click the category title at the top of the Links panel to sort by that category. Click the same
category again to reverse the order. For example, if you click the Page category, the links appear in their order from
the first page to the last page. If you click Page again, the links are sorted from last page to first. Use Panel Options
to add columns to the Links panel.
Work with Links panel columns
You can display additional categories, such as Creation Date and Layer, in the Links panel to display more information
about the graphics. For each category, you can determine whether the information appears as a column in the Links
panel and in the Link Info section at the bottom of the Links panel.
1Choose Panel Options from the Links panel menu.
2Select the check boxes under Show Column to add columns in the Links panel.
Folder 0 is the folder that contains the linked file; Folder 1 is the folder that contains Folder 0, and so on.
3Select the check boxes under Show In Link Info to display the information in the Link Info section at the bottom of
the Links panel.
4Click OK.
You can change the order of columns by selecting a column and dragging it to a different location. Drag the column
boundaries to change the column width. Click a category title to sort the links by that category in ascending order.
Click again to sort in descending order.
Change the Links panel rows and thumbnails
1Choose Panel Options from the Links panel menu.
2For Row Size, select Small Rows, Regular Rows, or Large Rows.
3For Thumbnails, determine whether thumbnail representations of the graphics appear in the Name column and in
the Link Info section at the bottom of the Links panel.
4Click OK.
Display link information
The Link Info section of the Links panel lists information about the selected linked file.
To change the information displayed in the Link Info section of the Links panel, choose Panel Options from the Links
panel menu, and select check boxes in the Show In Link Info column.
❖Double-click a link, or select a link and click the Show/Hide Link Information icon, which is a triangle on the left
side of the panel.

392
USING INDESIGN
Graphics
Last updated 11/16/2011
View metadata via the Links panel
If a linked or embedded file contains metadata, you can view the metadata using the Links panel. You cannot edit or
replace metadata associated with a linked file.
❖Select a file in the Links panel and choose Utilities > XMP File Info from the panel menu.
Embed an image within the document
Rather than link to a file that you’ve placed in a document, you can embed (or store) the file within the document.
When you embed a file, you break the link to the original. Without the link, the Links panel doesn’t alert you when the
original has changed, and you cannot update the file automatically.
Embedding a file increases the document file size.
Embed a linked file
1Select a file in the Links panel.
2Do any of the following:
•Choose Embed Link in the Links panel menu.
•If there are multiple instances of the file, choose Embed All Instances Of [Filename] in the Links panel menu. To
embed only one instance, select it and choose Embed Link.
The file remains in the Links panel marked with the embedded-link icon .
Note: For a text file that appears in the Links panel, select Unlink in the Links panel menu. When you embed a text file,
its name is removed from the Links panel.
Unembed a linked file
1Select one or more embedded files in the Links panel.
2Do one of the following:
•Select Unembed Link in the Links panel menu. If there are multiple instances of the file, choose Unembed All
Instances Of [Filename] in the Links panel menu.
•Click the Relink button or select Relink in the Links panel menu.
3Choose to link the file to the original file or to a folder InDesign creates from the embedded data stored in the
document.
Update, restore, and replace links
Use the Links panel to check the status of any link, or to replace files with updated or alternate files.
When you update or reestablish (relink) a link to a file, any transformations performed in InDesign are preserved (if
you choose Relink Preserved Dimensions in the File Handling preferences). For
example, if you import a square
graphic and rotate it 30°, and then you relink it to an unrotated graphic, InDesign rotates it 30° to match the layout of
the graphic it’s replacing.
Note: Placed EPS files may contain OPI links, which appear in the Links panel. Don’t relink OPI links to files other than
those originally intended by the creator of the EPS file; doing so can cause problems with font downloading and color
separations.

393
USING INDESIGN
Graphics
Last updated 11/16/2011
Choose how relinked graphics are scaled
When you relink to replace one graphic with a different source file, you can keep the image dimensions of the file that’s
being replaced, or you can display the incoming file in its actual dimensions.
1Choose Edit > Preferences > File Handling (Windows) or InDesign > Preferences > File Handling (Mac OS).
2Choose Preserve Image Dimensions When Relinking if you want images to appear at the same size as the images
they’re replacing. Deselect this option to have relinked images appear at their actual size.
Update modified links
InDesign first looks for a missing link in the folder in which another file has been relinked in the current session. Next,
it looks for a link in the same folder where the document is located. If it’s still not found, it looks in the parent folder
of the document.
Modified links are also called “out of date” links.
❖In the Links panel, do one of the following:
•To update specific links, select one or more links marked with the modified-link icon . Then click the Update
Link button , or choose Update Link from the Links panel menu.
•To update all modified links, choose Update All Links from the Links panel menu, or select a modified link and Alt-
click (Windows) or Option-click (Mac
OS) the Update Link button.
•To update only one link to a graphic that appears in several places in the document, select only the sublink and
choose Update Link. If you select the “parent” link, you can update all links to the modified graphic.
Replace a link with a different source file
1
Select any link in the Links panel, and click the Relink button or choose Relink from the Links panel menu. If a
“parent” link of multiple instances is selected, choose Relink All Instances Of [Filename] from the Links panel menu.
2In the dialog box that appears, select Search For Missing Links In This Folder if you want InDesign to search the
folder for files that have the same names as other missing linked files. If this option is not selected, only the selected
image is relinked.
3Choose Show Import Options to control how the new source file is imported.
4Locate and double-click the new source file.
5Choose import options if you clicked the Show Import options option. (See “Import options for graphics” on
page 379.)
Restore missing links
1To restore a missing link, select any link marked with the missing link icon in the Links panel, and click the
Relink button .
2In the dialog box that appears, select Search For Missing Links In This Folder to relink any missing file that appears
in the specified folder. Locate and double-click a file.
Find missing links
By default, InDesign checks for missing links and tries to resolve them when you open a document. Two preference
options let InDesign check for and find missing links automatically when you open a document.
Check Links Before Opening Document If you turn off this option, InDesign opens the document immediately, and
the link statuses remain pending until links are determined to be up-to-date, missing, or modified. If you turn on this
option, InDesign checks for modified or missing links.

394
USING INDESIGN
Graphics
Last updated 11/16/2011
Find Missing Links Before Opening Document If you turn off this option, InDesign does not attempt to resolve the
missing links. You may want to turn off this option if links slow performance to a server or if unexpected linkings
occur. This option is dimmed if Check Links Before Opening Document is turned off.
Search For Missing Links Use the Search For Missing Links command to search for and resolve missing links in your
document. This command is useful if you turned off the preferences option that checks for missing links when you
open a document, and now you have missing links. This command is also useful if you mount a server where images
are stored after opening a document.
•To change link settings, open the File Handling section of the Preferences dialog box, and determine whether the
Check Links Before Opening Document and Find Missing Links Before Opening Document options are selected.
•To let InDesign attempt to resolve missing links, choose Utilities > Search For Missing Links from the Links panel menu.
This command is dimmed if the document contains no missing links.
Specify a default Relink folder
1In the Preferences dialog box, select File Handling.
2From the Default Relink Folder menu, choose either of the following options, and then click OK:
Most Recent Relink Folder This option displays the most recently used folder you selected when relinking, matching
InDesign CS3 behavior.
Original Link Folder This option displays the original location of the linked file, matching the behavior of InDesign
CS2 and earlier.
Copy links to a different folder
Use the Copy Link(s) To command to copy graphics files to a different folder and redirect the links to the copied files.
This command is especially useful for moving files to a different drive, such as moving files from a DVD to a hard drive.
1Select the links to the files you want to copy, and choose Utilities > Copy Link(s) To from the Links panel menu.
2Specify the folder where the linked files will be copied and choose Select (Windows) or Choose (Mac OS).
Relink to a different folder
When you use the Relink To Folder command, you can point to a folder that contains files with the same names as
your out-of-date links. For example, if your current links point to low-resolution images, you can specify a different
folder that contains high-resolution images. You can specify a different extension for the files, allowing you to change
links from .jpg to .tiff, for example.
1Select one or more links in the Links panel.
2Choose Relink To Folder from the Links panel menu.
3Specify the location of the new folder.
4To use a different extension, select Match Same Filename But This Extension, and specify the new extension (such
as AI, TIFF, or PSD).
5Click Select (Windows) or Choose (Mac OS).

395
USING INDESIGN
Graphics
Last updated 11/16/2011
Relink files with different file extensions
The Relink File Extension command lets you replace images based on file extensions. For example, if you have several
JPEG images in your document, you can replace them with PSD files. The files with different extensions must be in the
same folder as the linked files being replaced.
1Make sure the files with different file extensions appear in the same folder as the original files.
2Select one or more links in the Links panel.
3Choose Relink File Extensions from the Links panel menu.
4Specify the file extension to replace the selected files, and click Relink.
Replace an imported file using the Place command
1Do one of the following:
•To replace the contents of a graphics frame, such as an imported graphic, use the Selection tool to select the
frame.
•To replace the contents of a text frame, use the Type tool to click an insertion point in a text frame, and choose
Edit
> Select All.
2Choose File > Place.
3Locate and select the new file.
4Make sure that Replace Selected Item is selected, and then click Open.
Copy the link pathname
You can copy either the full path of the linked image or the platform style path. Copying the full path of the image is
useful for notifying team members where art is located. For example, you can copy the full path and paste it into an
email message. Copying the platform path is useful for scripting or for specifying image fields in a data merge.
1Select a link in the Links panel.
2From the Links panel menu, choose Copy Info > Copy Full Path or Copy Platform Style Path.
3Paste the path.
Edit original artwork
The Edit Original command lets you open most graphics in the application in which you created them so that you can
modify them as necessary. Once you save the original file, the document in which you linked it is updated with the new
version.
Note: In InDesign, if you check out and select a managed graphics frame (one that has been exported to InCopy), rather
than the graphic itself, the graphic opens in InCopy.
Edit original artwork using the default application
By default, InDesign relies on the operating system to determine which application is used when opening the original.
1Select one or more images on the page or in the Links panel.
2Do any of the following:
•In the Links panel, click the Edit Original button .
•Choose Edit > Edit Original.
3After making changes in the original application, save the file.

396
USING INDESIGN
Graphics
Last updated 11/16/2011
Edit original artwork using a different application
1Select the image.
2Choose Edit > Edit With, and then specify the application you want to use to open the file. If the application does
not appear, choose Other, and browse to locate the application.
Reusing graphics and text
Ways to reuse graphics and text
InDesign offers several different ways to repurpose graphics and text.
Snippets A snippet is a file that contains objects and describes their location relative to one another on a page or
spread. (See “Use snippets” on page 396.)
Object libraries An object library provides a convenient place to store items such as logos, sidebars, pull-quotes, and
other repeating items. (See “Use object libraries” on page 397.)
Templates A template is a document that includes placeholder text and graphics. (See “Use document templates” on
page 104.)
More Help topics
“XML” on page 567
“Exporting” on page 114
Use snippets
A snippet is a file that holds objects and describes their location relative to one another on a page or page spread. Use
snippets to conveniently reuse and position page objects. Create a snippet by saving objects in a snippet file, which has
the .IDMS extension. (Previous InDesign versions use the .INDS extension.) When you place the snippet file in
InDesign, you can determine whether the objects land in their original positions or where you click. You can store
snippets in the Object library and in Adobe Bridge as well as on your hard disk.
Snippets contents retain their layer associations when you place them. When a snippet contains resource definitions
and these definitions are also present in the document to which it is copied, the snippet uses the resource definitions
in the document.
Snippets you create in InDesign CS5 can be opened in InDesign CS4 but not in any other previous version of InDesign.
More Help topics
“Working with XML” on page 567
“Use object libraries” on page 397
Create snippets
❖Do one of the following:
•Using a selection tool, select one or more objects, and then choose File > Export. From the Save As Type (Windows)
or Format (Mac
OS) menu, choose InDesign Snippet. Type a name for the file and click Save.
•Using a selection tool, select one or more objects, and then drag the selection to your desktop. A snippet file is
created. Rename the file.

397
USING INDESIGN
Graphics
Last updated 11/16/2011
•Select one or more objects, and then drag the selection to the Mini Bridge panel. A snippet file is created. Rename
the file.
•Drag an item from Structure View to your desktop.
Add snippets to a document
1Choose File > Place.
2Select one or more snippet (*.IDMS or *.INDS) files.
3Click the loaded snippet cursor where you want the upper-left corner of the snippet file to be.
If you placed the insertion point in a text frame, the snippet is placed in the text as an anchored object.
All objects remain selected after you place the snippet. By dragging, you can adjust the position of all objects.
4If you loaded more than one snippet, scroll and click the loaded snippet cursor to place the others.
You can drag a snippet file from your desktop into the InDesign document and click where you want the upper-left
corner of the snippet to be.
Choose how to place snippets
Rather than place snippet objects according to where you click on a page, you can place them in their original locations.
For example, a text frame that appeared in the middle of a page when it was made part of a snippet can appear in the
same location when you place it as a snippet.
❖In File Handling preferences, choose Original Location from the Position At menu to preserve objects’ original
locations in snippets. Choose Cursor Location from the Position At menu to place snippets according to where you
click a page.
You can press Alt (Windows) or Option (Mac) to override the Position setting you selected for handling snippets. For
example, if you selected Position At Cursor Location but you want to place snippet objects in their original locations,
hold down the Alt/Option key when you click the loaded snippet cursor on the page.
Use object libraries
Object libraries help you organize the graphics, text, and pages you use most often. You can also add ruler guides, grids,
drawn shapes, and grouped images to a library. You can create as many libraries as you need—for example, you can
create different object libraries for varied projects or clients.
During a work session, you can open as many libraries as system memory will allow. Object libraries can be shared
across servers, and across platforms, but only one person can have the library open at a time. If an object library
includes text files, make sure that the file’s fonts are available and active on all systems that will access the library.
When you add a page element, such as a graphic, to an object library, InDesign preserves all attributes that were
imported or applied. For example, if you add a graphic from an InDesign document to a library, the library copy will
duplicate the original, including the original’s link information, so that you can update the graphic when the file on
disk changes.
If you delete the object from the InDesign document, the object’s thumbnail will still appear in the Library panel, and
all of the link information will remain intact. If you move or delete the original object, a missing link icon will appear
next to the object’s name in the Links panel the next time you place it in your document from the Library panel.
Within each object library, you can identify and search for an item by title, by the date it was added to the library, or
by keywords. You can also simplify the view of an object library by sorting the library items and displaying their
subsets. For example, you can hide all items except EPS files.

398
USING INDESIGN
Graphics
Last updated 11/16/2011
Object library in Library panel
A. Object thumbnail and name B. Library Item Information button C. Show Library Subset button D. New Library Item button E. Delete
Library Item button
When adding an item to an object library, InDesign saves all page, text, and image attributes, and maintains
interrelationships among library objects and other page elements in
the following ways:
•Elements grouped in an InDesign document when dragged to the Library panel stay grouped when dragged out of
the Library
panel.
•Text retains its formatting.
•Paragraph styles, character styles, and object styles that have the same name as styles used in the destination
document are converted to the destination document’s styles; those that have different names are added to the
document.
•The original layers of an object are preserved when the Paste Remembers Layers option is selected in the Layers
panel menu.
Create an object library
An object library exists as a named file on disk. When you create an object library, you specify where to store it. When
you open a library, it appears as a panel that you can group with any other panel; the object library’s file name appears
in its panel tab. Closing an object library removes it from the current session, but doesn’t delete its file.
You can add or remove objects, selected page elements, or an entire page of elements to or from an object library. You
can also add or move library objects from one library to another.
1Choose File > New > Library.
2Specify a location and name for the library, and click Save. Remember that the name you specify becomes the name
of the library’s panel tab.
Open an existing library
❖Do one of the following:
•If you’ve already opened a library in the current session (and haven’t closed it), choose the library file in the
Window menu.
•If you have not opened a library, choose File > Open, and select one or more libraries. In Windows, library files use
the INDL extension. InDesign converts newly opened libraries from previous versions of the program to the new
library format; you are asked to save these libraries under a new name.
Close a library
1Click the tab for the library you want to close.
2Do one of the following:
•Choose Close Library in the Object Library panel menu.
•Choose the library file name on the Window menu.
BCDE
A

399
USING INDESIGN
Graphics
Last updated 11/16/2011
Delete a library
❖In Explorer (Windows) or Finder (Mac OS), drag a library file to the Recycle Bin (Windows) or Trash (Mac OS).
In Windows, library files have the INDL extension.
Add an object or page to a library
❖Do any of the following:
•Drag one or more objects from a document window to an active Object Library panel.
•Select one or more objects in a document window, and click the New Library Item button in the Object Library
panel.
•Select one or more objects in a document window, and choose Add Item in the Object Library panel menu.
•Choose Add Items On Page [number] As Separate Objects in the Object Library panel menu to add all the objects
as separate library objects.
•Choose Add Items On Page [number] in the Object Library panel menu to add all the objects as one library object.
•Drag an element from the Structure pane to an active Object Library panel.
If you hold down Alt (Windows) or Option (Mac OS) while you perform any of the above commands, the Item
Information dialog box appears as the item is added to the library.
Add an object from a library to a document
❖Do one of the following:
•Drag an object from the Object Library panel to a document window.
•In the Object Library panel, select an object, and choose Place Item(s) in the Object Library panel menu. This
method places the object at its original X,Y coordinates.
•Drag an XML element to a parent element in the Structure pane or to the page.
Manage library objects
Use the Object Library panel to manage objects.
Update a library object with a new item
1In the document window, select the item you want to add to the Library panel.
2In the Library panel, select the object you want to replace, and then choose Update Library Item from the Object
Library panel menu.
Copy or move an object from one library to another
1Drag one library’s panel tab out of the Object Library panel group to separate them, so you can see both libraries at
the same time.
2Do one of the following:
•To copy an object from one library to another, drag an item from one Library panel tab to the other.
•To move an object out of one library into another, hold down Alt (Windows) or Option (Mac OS), and drag an
item from one Library panel tab to the other.

400
USING INDESIGN
Graphics
Last updated 11/16/2011
Delete an object from an object library
❖In the Object Library panel, select an object, and do one of the following:
•Click the Delete Library Item button.
•Drag the item to the Delete Library Item button.
•Choose Delete Item(s) in the Object Library panel menu.
Change the object library display
The object library displays objects as thumbnails or as a text list. You can sort the thumbnails or list by object name,
age, or type. The list view and sorting options work best if you’ve cataloged the objects.
❖Do any of the following:
•To view objects as thumbnails, choose Thumbnail View or Large Thumbnail View from the Object Library
panel
menu.
•To view objects as a text list, choose List View from the Object Library panel menu.
•To sort the objects, choose Sort Items from the Object Library panel menu, and choose a sort method.
View all objects
❖Choose Show All in the Object Library panel menu.
View, add, or edit library information
With large or numerous object libraries, library information can be cataloged using the display objects’ names, by type
of object, or words in a description.
1In the Object Library panel, do one of the following:
•Double-click any object.
•Select an object, and click the Library Item Information button.
•Select an object, and choose Item Information in the Object Library panel menu.
2View or change the Item Name, Object Type, or Description options as necessary, and click OK.
Find objects in a library
When you search for objects, all objects except the results of your search are hidden from view. You can also use the
search feature to show and hide specific categories of objects. For example, you can display only object items with the
word “star” in their names.
1Choose Show Subset in the Object Library panel menu, or click the Show Library Subset button.
2Do one of the following:
•To search all objects in the library, select Search Entire Library.
•To search only within the objects currently listed in the library (refining a previous search), select Search Currently
Shown Items.
3Choose a category in the first menu in the Parameters section.
4In the second menu, specify whether the category you chose in the first menu must be contained in or excluded
from the search.
5To the right of the second menu, type a word or phrase you want to search for within the category you specified.

401
USING INDESIGN
Graphics
Last updated 11/16/2011
6To add search criteria, click More Choices up to five times; each click adds one search term. To remove search
criteria, click Fewer Choices as necessary; each click removes one search term.
7To display only those objects that match all search criteria, select Match All. To display objects that match any of
the criteria, select Match Any One.
8Click OK to begin the search.
To show all objects again, choose Show All in the Object Library panel menu.
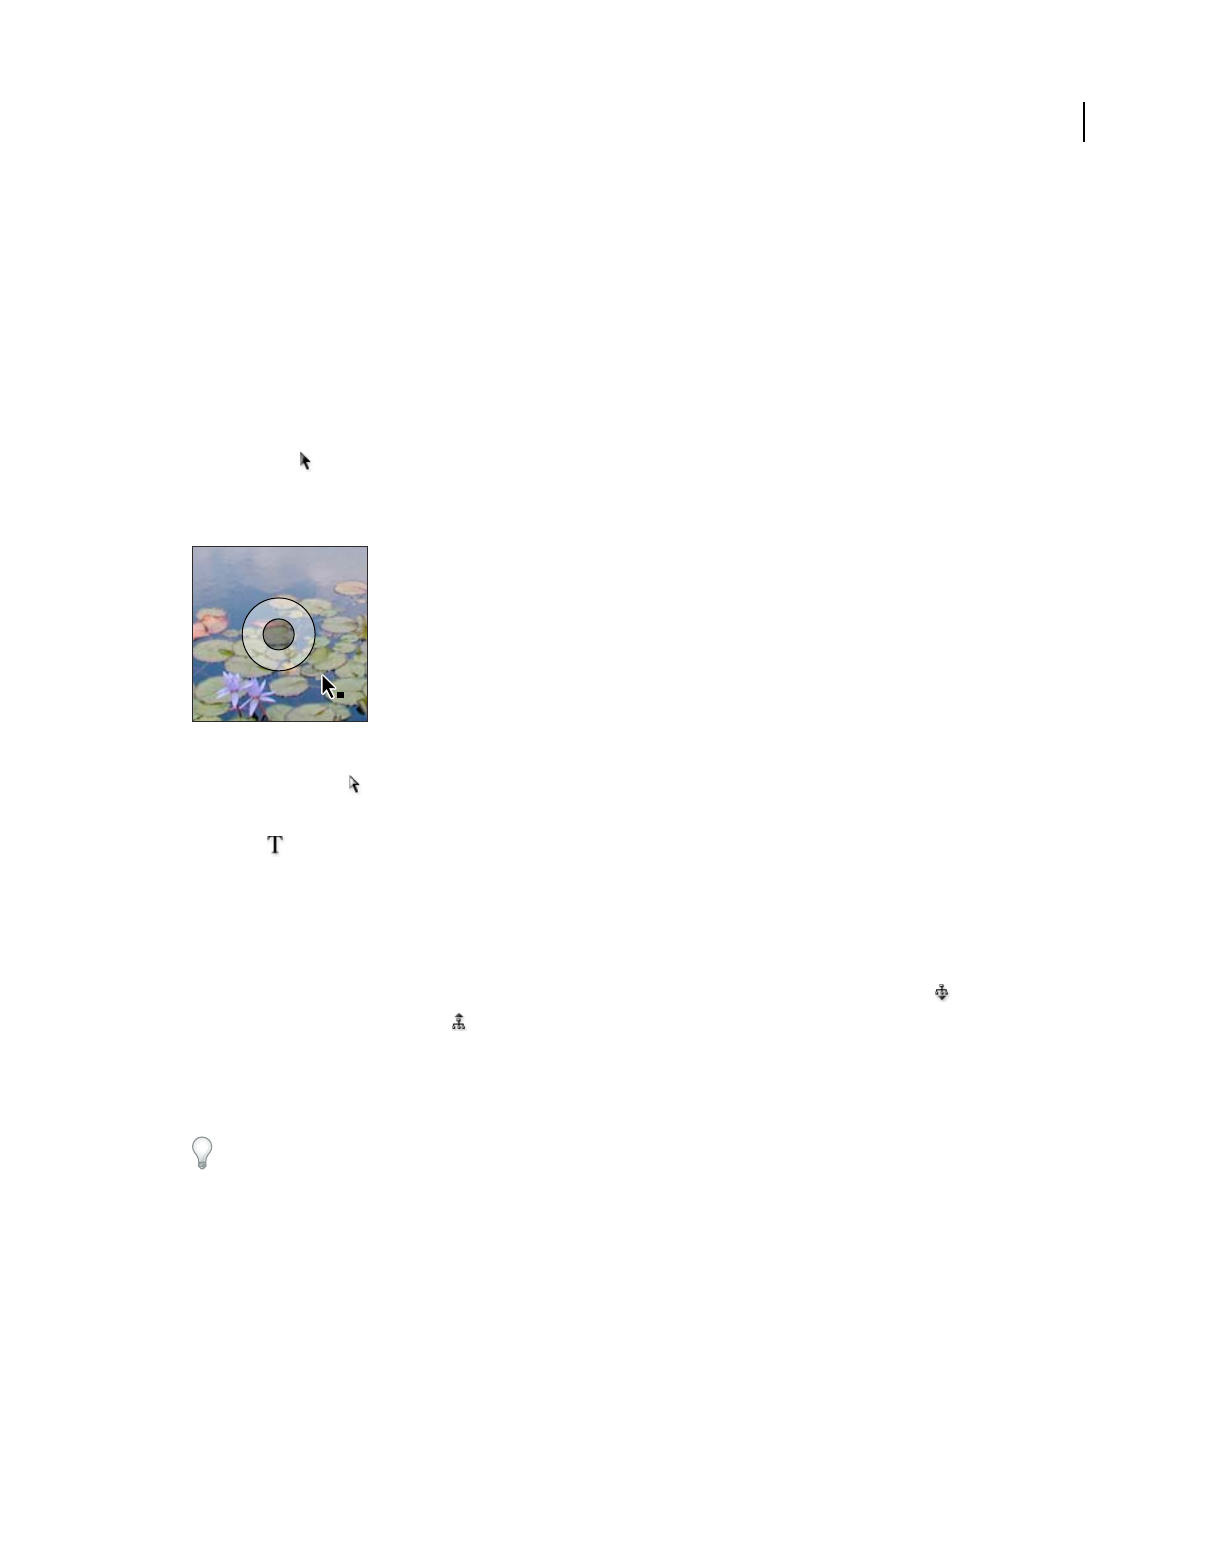
402
Last updated 11/16/2011
Chapter 13: Frames and objects
Selecting objects
Overview of selection methods
InDesign provides the following selection methods and tools:
Selection tool Allows you to select text and graphics frames, and work with an object using its bounding box. If you
click the content grabber (the donut) that appears when you hold the mouse pointer over an image, you can
manipulate the image within the frame without switching to the Direct Selection tool.
Content grabber
Direct Selection tool Allows you to select the contents of a frame, such as a placed graphic, or work directly with
editable objects, such as paths, rectangles, or type that has been converted to a text outline.
Type tool Allows you to select text in a text frame, on a path, or in a table.
Select submenu Allows you to select an object’s container (or frame) and its contents. The Select submenu also lets
you select objects based on their position relative to other objects. To view the Select submenu, choose Object
> Select.
You can also right-click (Windows) or Control-click (Mac
OS) an object to display its context menu, and then choose
Select.
Select buttons on the Control panel Lets you the select the content using the Select Content button or the container
using the Select Container button . You can also use the Select Next Object or Select Previous Object to select the
next or previous objects in a group or on a spread.
Select All and Deselect All commands Allow you to select or deselect all objects on the spread and pasteboard,
depending on which tool is active and what is already selected. Choose Edit
> Select All or Edit > Deselect All.
Double-click an object to switch between the selecting the frame and the object. Double-click a text frame to place the
insertion point and switch to the Type tool.
More Help topics
“Keys for selecting and moving objects” on page 693
Select objects
An object is any printable element on a page or on the pasteboard, such as a path or an imported graphic. A frame or
path is a shape you draw or a container for text or graphics. A bounding box is a rectangle with eight selection handles
that represents an object’s vertical and horizontal dimensions. Before you can modify an object, you must select it using
a selection tool.
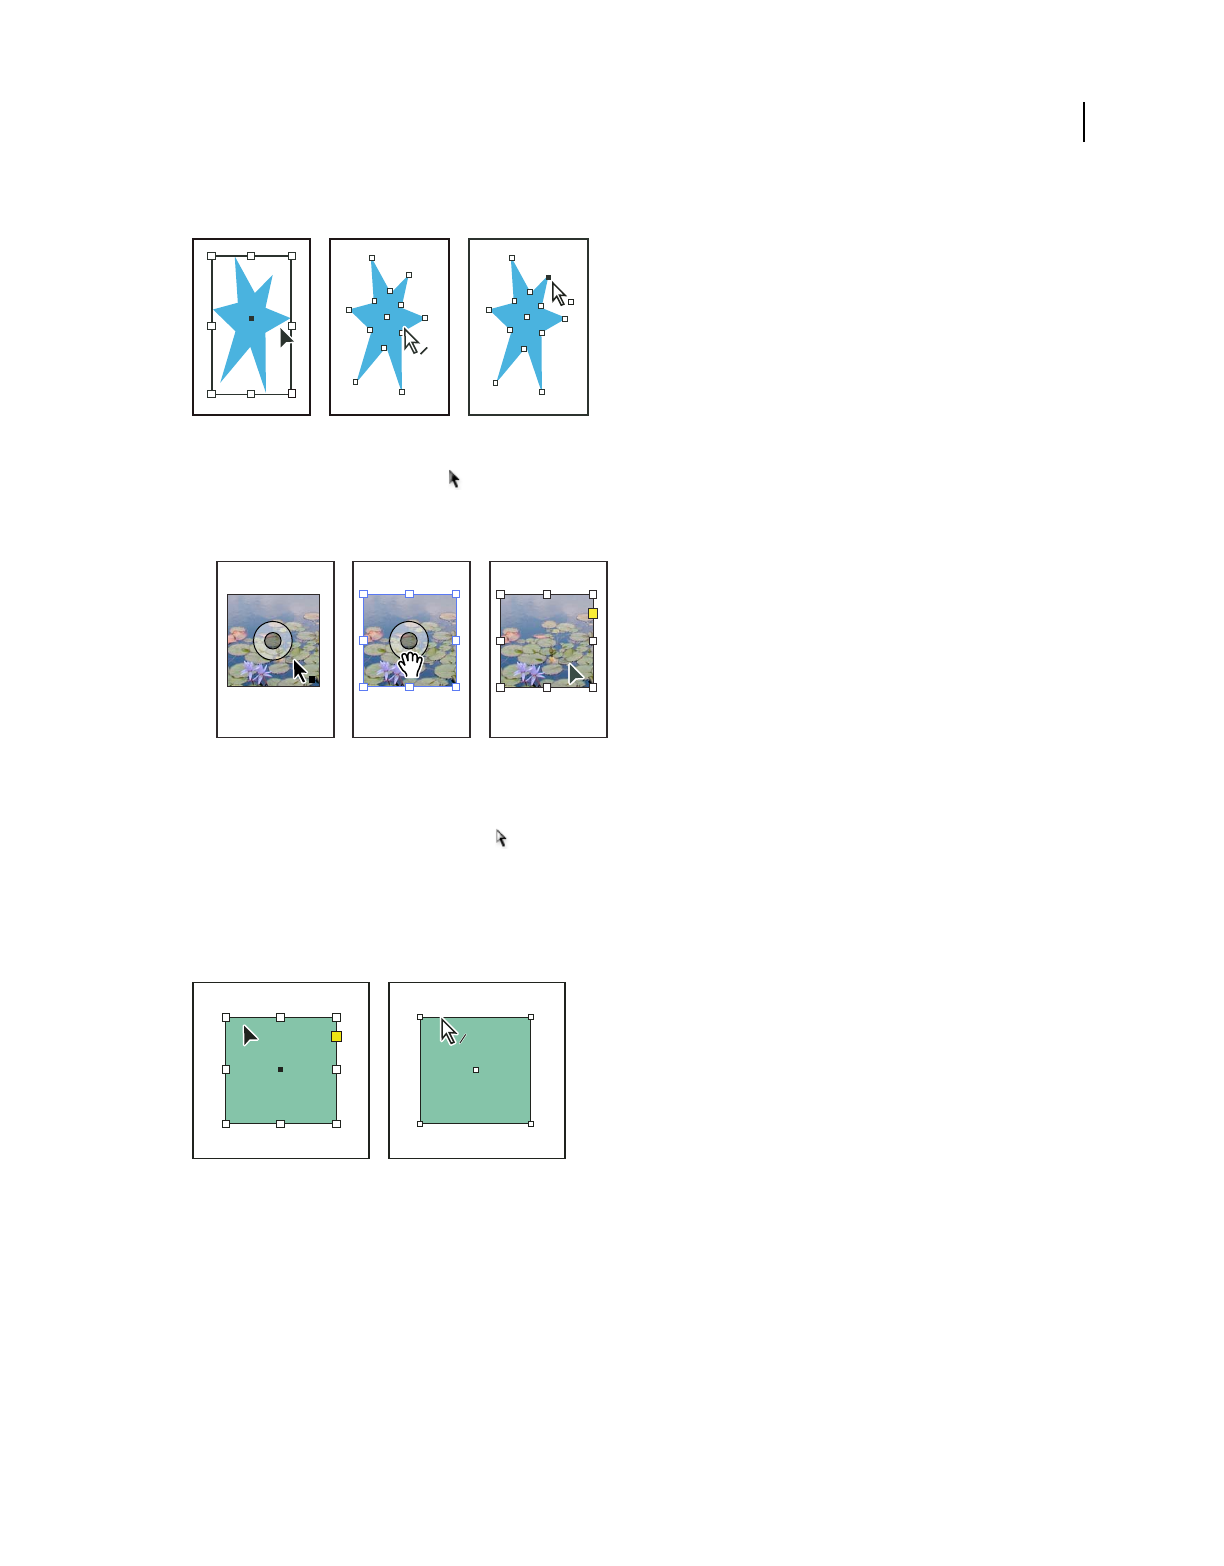
403
USING INDESIGN
Frames and objects
Last updated 11/16/2011
There are two ways to select an object in InDesign:
Path with bounding box selected (left), path selected (middle), and path with anchor point selected (right)
•You can use the Selection tool to select the object’s bounding box for performing general layout tasks, such as
positioning and sizing objects. When selecting an image, you can use the Selection tool to select either the frame or
the image within the frame.
Using the Selection tool to edit images
A. The content grabber appears when you mouse over an image. B. Click the content grabber to select the contents. C. Click outside the
content grabber to select the frame.
•You can use the Direct Selection tool to select the contents of a container (such as an imported graphic) or
individual points on a path for tasks involving resizing imported graphics, drawing and editing paths, and editing text.
Note: An imported graphic is always contained within a frame. It’s possible to select the graphic and its frame, the graphic
only, or its frame only. The frame and bounding box of an imported graphic can be different sizes. To see how InDesign
indicates what’s selected, see “Modifying objects using graphics frames” on page 431.
Bounding box selected (left) compared to rectangular path selected (right)
With rectangular objects, it can be difficult to tell the difference between the object’s bounding box and the path of the
object itself. A bounding box always displays eight large hollow anchor points. A rectangular path always displays four
small anchor points (which can be hollow or solid).
More Help topics
“About paths and frames” on page 84
“Understanding paths and shapes” on page 340
CAB
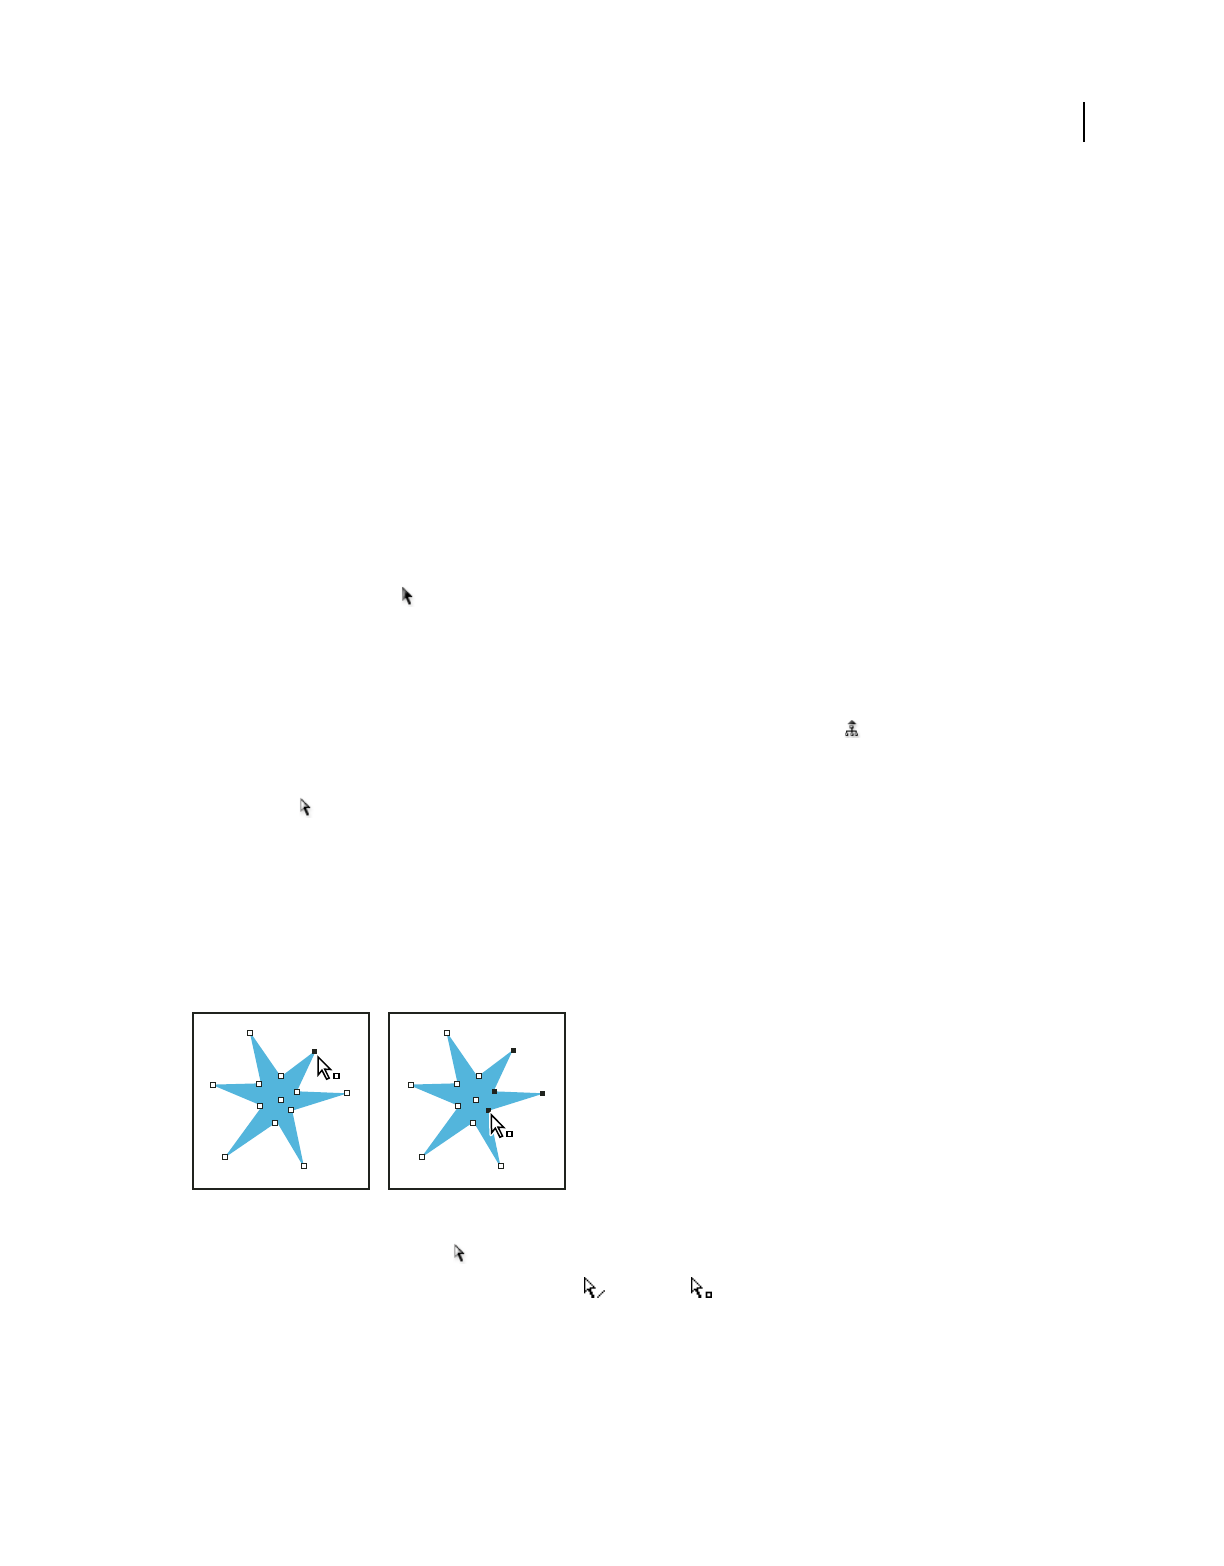
404
USING INDESIGN
Frames and objects
Last updated 11/16/2011
“Select nested or overlapping objects” on page 406
“Ruler guides” on page 56
“Keys for selecting and moving objects” on page 693
Selecting Objects video
Select a bounding box
For any object, you can select its bounding box—a rectangle that represents the object’s horizontal and vertical
dimensions. (For grouped objects, the bounding box is a dashed rectangle.) The bounding box is also called a
container. The bounding box makes it possible to quickly move, duplicate, and scale the object without having to use
any other tool. For paths, the bounding box makes it easy to work with an entire object without accidentally altering
the anchor points that determine its shape.
Note: For more precise moving and scaling, and for other modifications such as rotation, use the Control panel or the
Transform panel.
❖Using the Selection tool , do one of the following:
•Click the object. If the object is an unfilled path, click its edge. If the object is an image, click the content grabber to
select the bounding box of the image, or click outside the content grabber to select the frame.
•Drag a dotted selection rectangle or marquee around part or all of the object.
•With a graphic object or nested content selected, click the Select Container button on the Control panel.
When you select one or more objects with the Selection tool, you see a bounding box that indicates the size of each
object. If you don’t see a bounding box when an object is selected, you may have selected the object using the Direct
Selection tool
.
If you click a frame and it is not selected, the frame may be a locked item, it may be on a locked layer, or it may be a
master page item. See “Unable to select objects” on page 406.
Select a path or points on a path
Paths in InDesign are defined by anchor points, end points, and direction lines. You select anchor points and end
points using the Direct Selection tool.
A path with a single point selected (left) and multiple points selected (right)
1Using the Direct Selection tool , click the path to select it.
Notice how the tool changes when it’s above a path or a point .
2Do any of the following:
•To select an individual point, click it.
•To select multiple points on the path, press Shift as you click each point.

405
USING INDESIGN
Frames and objects
Last updated 11/16/2011
•To select all of a path’s points at once, click the point at the center of the object, or hold down Alt (Windows) or
Option (Mac
OS) and click the path. If you direct-select any part of the object, the Select All command also selects
all the points.
Select text inside a frame
•To select text by dragging, click on a text frame using the Type tool. An insertion point appears.
•To create an insertion point in text, double-click a text frame using any selection tool. InDesign switches to the Type
tool automatically.
Select an object inside a frame
❖Do any of the following:
•Click the object using the Direct Selection tool . The Direct Selection tool automatically changes to the Hand tool
when placed over a graphic object inside a frame (but not when placed over a non-graphic object, such as a path).
•If the object inside a frame is an image, click the content grabber to select the image.
Note: If you don’t want the content grabber to appear when you hover over an image, choose View > Extras > Hide
Content Grabber.
•With a frame selected, choose Select > Content from the Object menu or the frame’s context menu.
•With a frame selected, click the Select Content button on the Control panel.
Select multiple objects
•To select all the objects in a rectangular area, use the Selection tool to drag a marquee over the objects you want
to select.
•To select nonadjacent objects, use the Selection tool to select an object and then press Shift as you click additional
objects. Clicking selected objects deselects them.
•To add more objects to a selection, press Shift as you use the Selection tool to drag a marquee over additional
objects. Dragging over selected objects deselects them.
You can use these same techniques with the Direct Selection tool to select objects nested inside groups or frames.
Select or deselect all objects
To deselect all objects on the spread and its pasteboard, choose Edit > Deselect All. Or, with the Selection tool or Direct
Selection tool, click at least 3 pixels away from any object.
The Select All command has a different effect depending on the situation:
•If the Selection tool is active, all paths and frames on the spread and pasteboard are selected, with their bounding
boxes active.
•If the Direct Selection tool is active and an object is direct-selected, Select All selects all the anchor points of that
object but does not select any other object. If nothing is selected, Select All selects all the path objects on the spread
and pasteboard.
•If the Type tool is active and there is an insertion point in a text frame (indicated by a flashing vertical line), Select
All selects all text in that text frame and any text frames threaded to it, but selects no other objects.
•If an object in a group is selected, Select All selects the rest of the objects in the group but no other objects on the
spread.
1Select the tool you want to use. If desired, select an object or place the insertion point in a text frame.
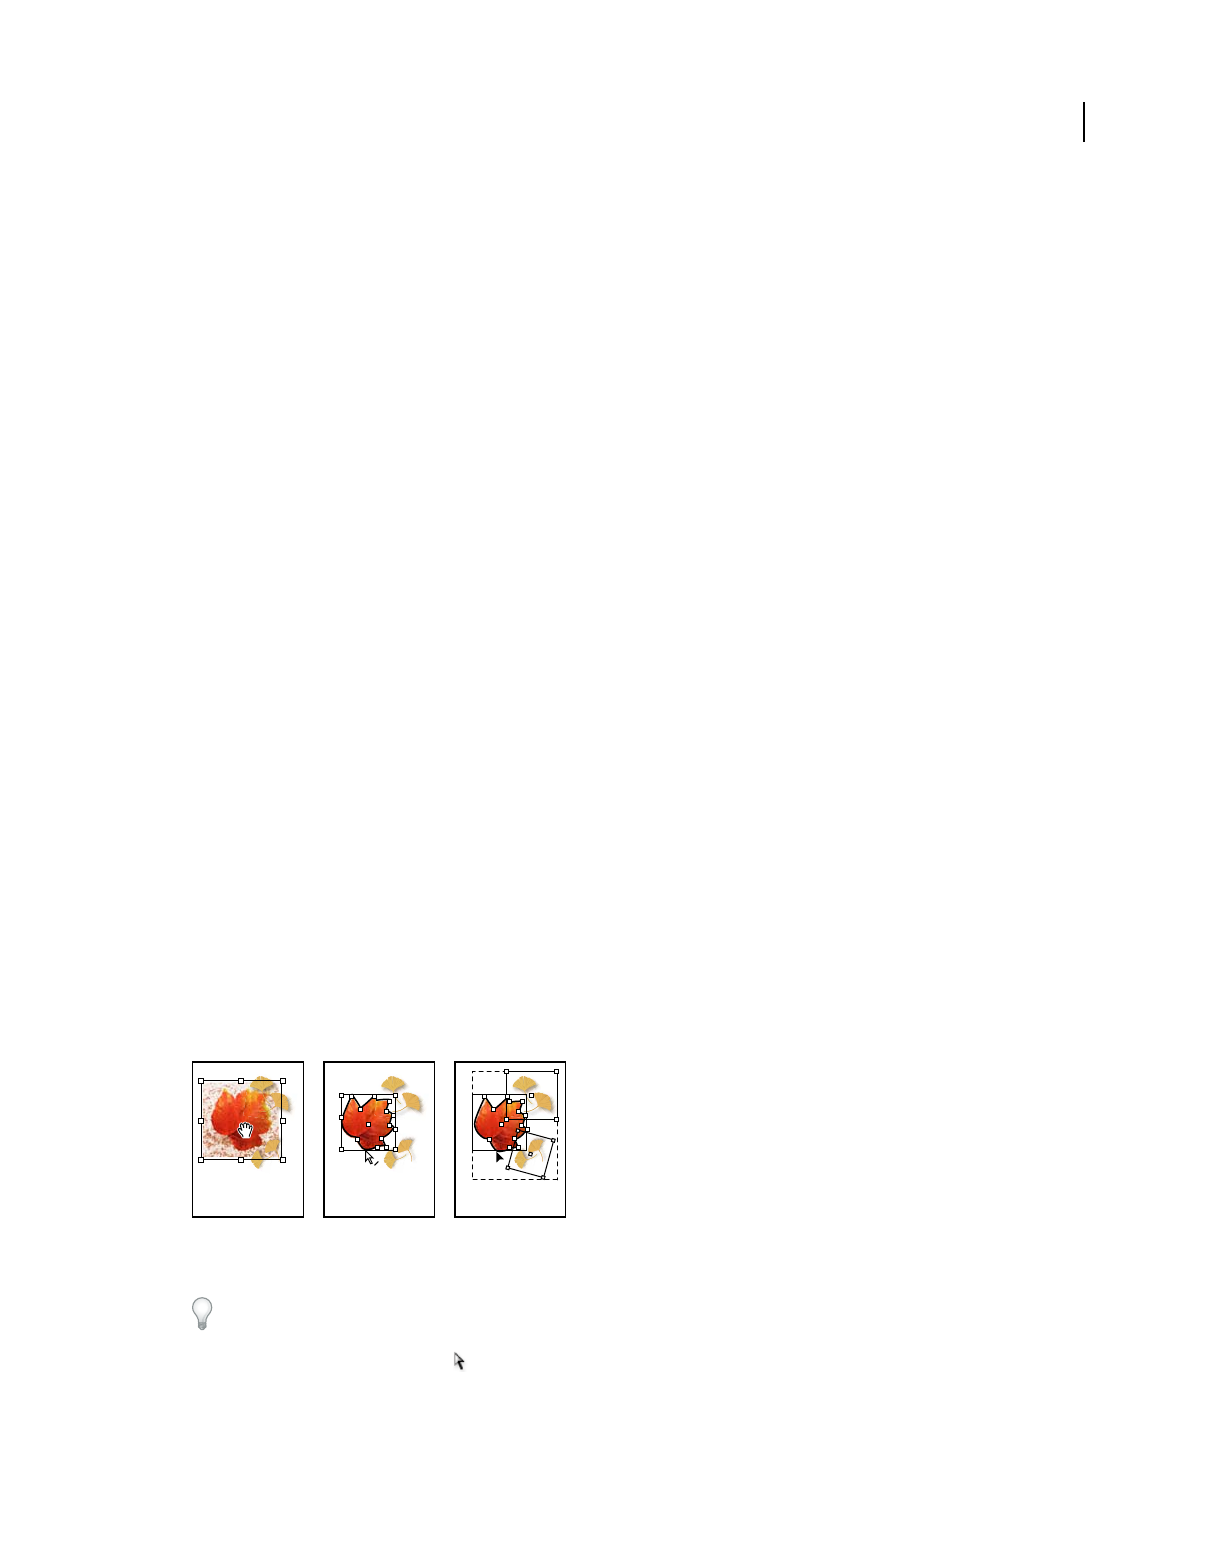
406
USING INDESIGN
Frames and objects
Last updated 11/16/2011
2Choose Edit > Select All.
Note: The Select All command doesn’t select nested objects, objects that are positioned on locked or hidden layers, master
page items that are not overridden on document pages, or objects on other spreads and pasteboards (except for threaded
text).
Unable to select objects
Not being able to select an object may be the result of the following issues:
•The object is covered by another object in a stack. Hold down Ctrl (Windows) or Command (Mac OS), and then
click the same place repeatedly until you’ve selected the frame or group you want. See “Select nested or overlapping
objects” on page 406.
•The object is a master page item, as indicated by a dotted border. To select a master page item, either turn to the
master page that is applied to the document page, or override the master page item. See “Override a master item”
on page 76.
•The object is locked using the Object > Lock command. Choose Object > Unlock All On Spread. See “Lock or
unlock objects” on page 429.
•The object is on a locked layer. Click the lock icon next to the layer in the Layers panel to unlock the layer. See “Lock
or unlock layers” on page 83.
Select nested or overlapping objects
When a frame contains an object, the contained object is said to be nested inside a container, or frame. Three common
kinds of nesting are: paths inside frames, frames inside frames, and groups inside groups. Always be aware of exactly
which objects or object attributes you need to select, which ones are currently selected, and which selection tools to use
to modify selections.
You control selections in nested groups using the Direct Selection and Selection tools, as well as the Select Content and
Select Container buttons. You can select text characters using the Type tool at any time, no matter how deeply a text
frame is nested.
Select nested, grouped, or overlapping objects
When you nest objects or place objects on top of each other on the same layer, it can be difficult to select a single object
or frame. The Object menu and context menu contain selection options to make it easier to select the object you want.
Selecting nested objects
A. Image selected B. Path of the frame containing the image is selected C. Group containing frame selected
Opening the Info panel makes it easier to see which object is selected.
1Using the Direct Selection tool , click the nested or grouped object.
2If you can’t select the object you want, use one of the following techniques:
•Choose Object > Select, and choose one of the selection options.
C A B

407
USING INDESIGN
Frames and objects
Last updated 11/16/2011
•Position the pointer over the object you want to select and right-click (Windows) or Control-click (Mac OS) to
display the context menu. Then choose Select and the desired selection option.
Note: Selecting objects using the context menu commands is not the same as using the Object > Select menu commands.
From the context menu, the selections are based on the exact point where you clicked to display the context menu. This
means that the next object above or below the mouse click would be selected, rather than the next object in the stacking
order.
•Hold down Ctrl (Windows) or Command (Mac OS), and then click the same place repeatedly until you’ve selected
the frame or group you want. (Do not click an anchor point.)
•To select all objects in a group individually, use the Selection tool to select the group, click the Select Content
button
on the Control panel, and then choose Edit > Select All.
3To progressively drill down or up through a stack of objects, do one of the following:
•Right-click (Windows) or Control-click (Mac OS), and then choose an option from the Select context menu.
•Choose Object > Select > Next Object Below or Next Object Above repeatedly until the object you want is selected.
When you reach the beginning or end of the stack, the selection doesn’t change.
•
Hold down Ctrl (Windows) or Command (Mac OS) and click the stack to drill down from the top of the stack. When
you reach the end of the stack, the selection starts over at the top of the stack. To drill up from the bottom of the
stack, hold down Alt+Ctrl (Windows) or Option+Command (Mac
OS) and click the stack using the Selection tool.
Note: The context menu options are sensitive to the location of the pointer.
Select multiple nested objects
1Using the Direct Selection tool , click the nested object.
2Hold down Shift as you click each additional nested object you want to select.
Selection options
Options on the Select submenu (choose Object > Select or choose Select on the context menu) help you select
overlapping, nested, or grouped objects. The availability of some options depends on the type of objects you’re working
with. When using the context menu, the object selected depends on the position of the pointer.
First Object Above Selects the object at the top of the stack.
Next Object Above Selects the object just above the current object.
Next Object Below Selects the object just below the current object.
Last Object Below Selects the object at the bottom of the stack.
Content Selects the content of the selected graphics frame, or, if a group is selected, selects an object within the group.
You can also click the Select Content button in the Control panel.
Container Selects the frame enclosing the selected object, or, if an object within a group is selected, selects the group
that contains it. You can also click the Select Container button in the Control panel.
Previous Object / Next Object Selects the next or previous object in the group if the selected object is part of a group,
or, if an ungrouped object is selected, selects the next or previous object on the spread. Shift-click to skip by five. Ctrl-
click (Windows) or Command-click (Mac
OS) to select the first or last object in a stack.
Arrange objects in a stack
Overlapping objects are stacked in the order in which they are created or imported. You can use the Arrange submenu
to change the stacking order of objects.
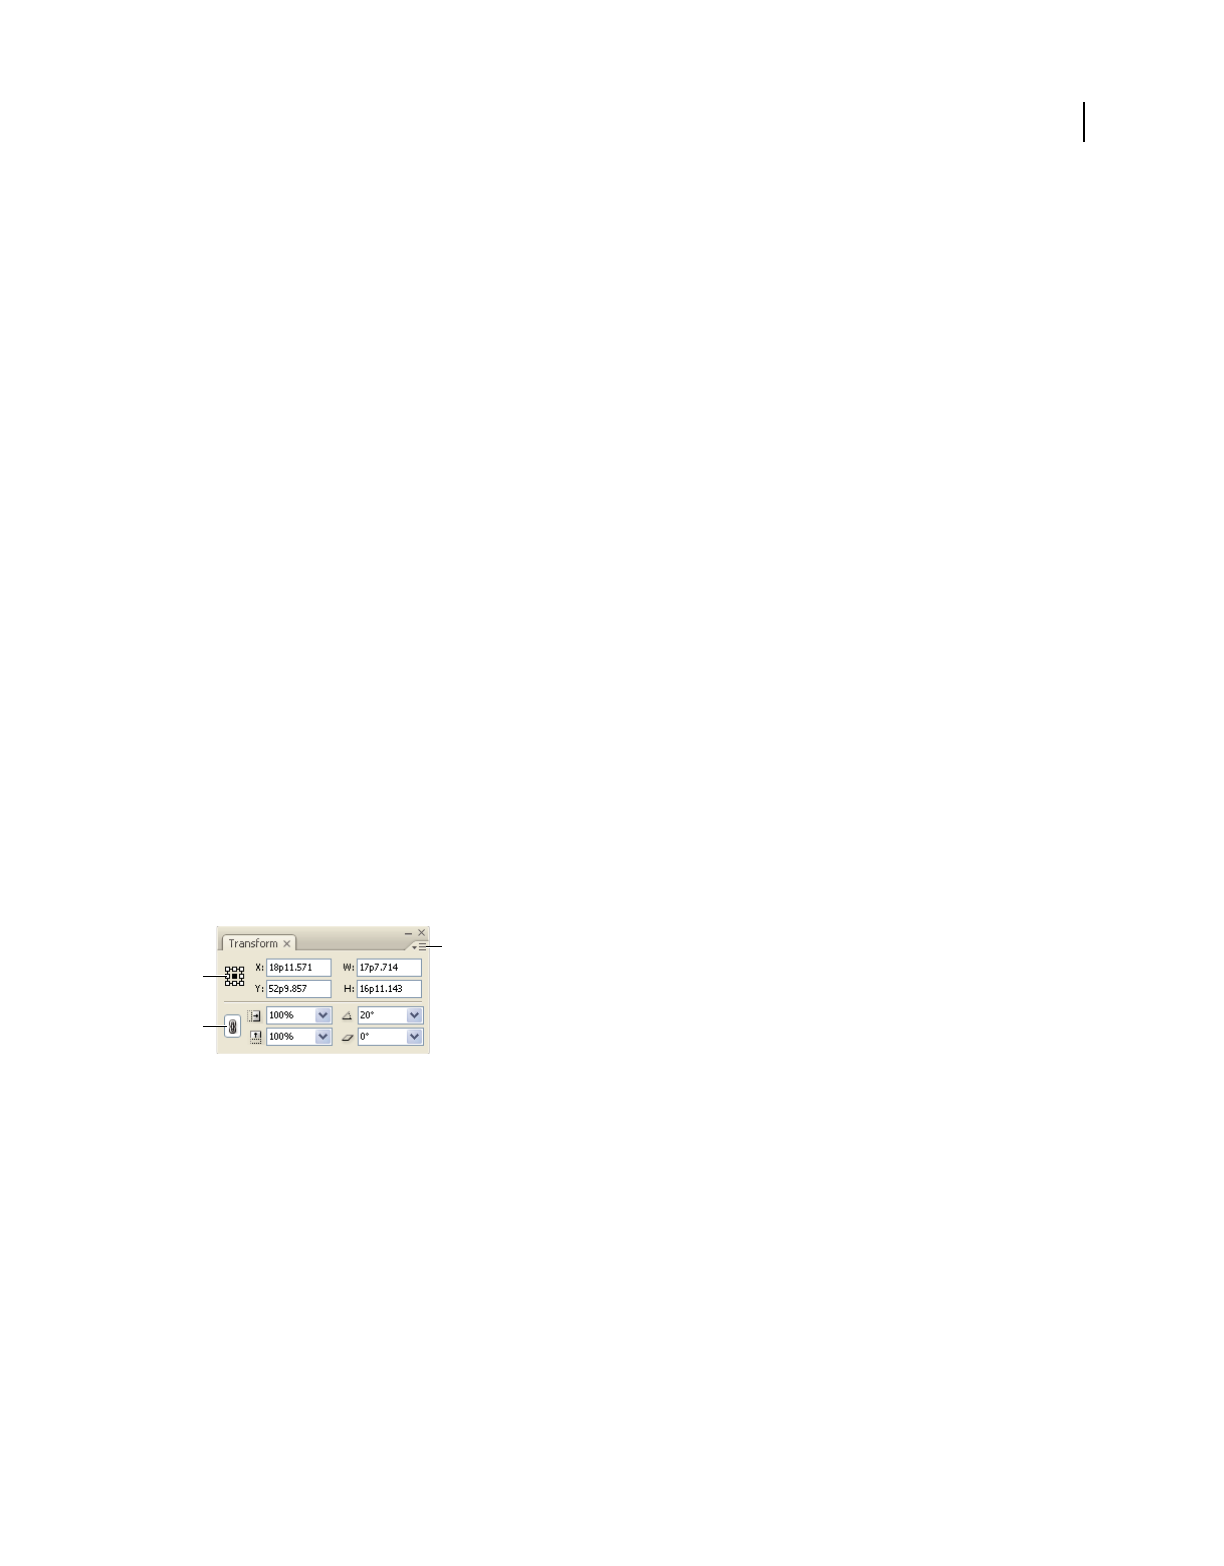
408
USING INDESIGN
Frames and objects
Last updated 11/16/2011
The Layers panel also helps determine the stacking order of objects. The order of each layer in the Layers panel
determines whether objects in a layer appear in front of or behind objects on other layers. The order of objects within
each layer determines the stacking order of those objects within that layer. You can drag the objects within a layer or
use the Object
> Arrange menu commands to control stacking within each layer. If you haven’t created any layers, your
document contains just one stack of objects on the single default layer. Objects on masters exist at the back of each
named layer.
Note: Grouping objects might change their stacking order (in relation to ungrouped objects).
1Select the object you want to move forwards or backwards in a stack.
2Do any of the following:
•To move a selected object to the front or back of a stack, choose either Object > Arrange > Bring to Front or
Object
> Arrange > Send to Back.
•To move a selected object forward or backward past the next object in a stack, choose either Object > Arrange >
Bring Forward or Object
> Arrange > Send Backward.
•In the Layers panel, click the disclosure triangle next to a layer, and then drag objects within the layer to change
their stacking order.
Transforming objects
Transform panel overview
Use the Transform panel to view or specify geometric information for any selected object, including values for
position, size, rotation, and shearing. Commands in the Transform panel menu provide additional options and quick
ways to rotate or reflect objects.
Note: The buttons and panel menu commands in the Transform panel are also available in the Control panel.
Transform panel
A. Reference point locator B. Constrain Proportions icon C. Panel menu
Display the Transform panel
❖Choose Window > Object & Layout > Transform.
View geometric information about objects
When you select an object, its geometric information appears in the Transform and Control panels. If you select
multiple objects, the information represents all selected objects as a unit.
❖Select one or more objects, and display the Transform panel (Window > Object & Layout > Transform).
Position information is relative to the ruler origin and the reference point of the object. Angle information is relative
to the pasteboard, where a horizontal line has an angle of 0°.
A
B
C
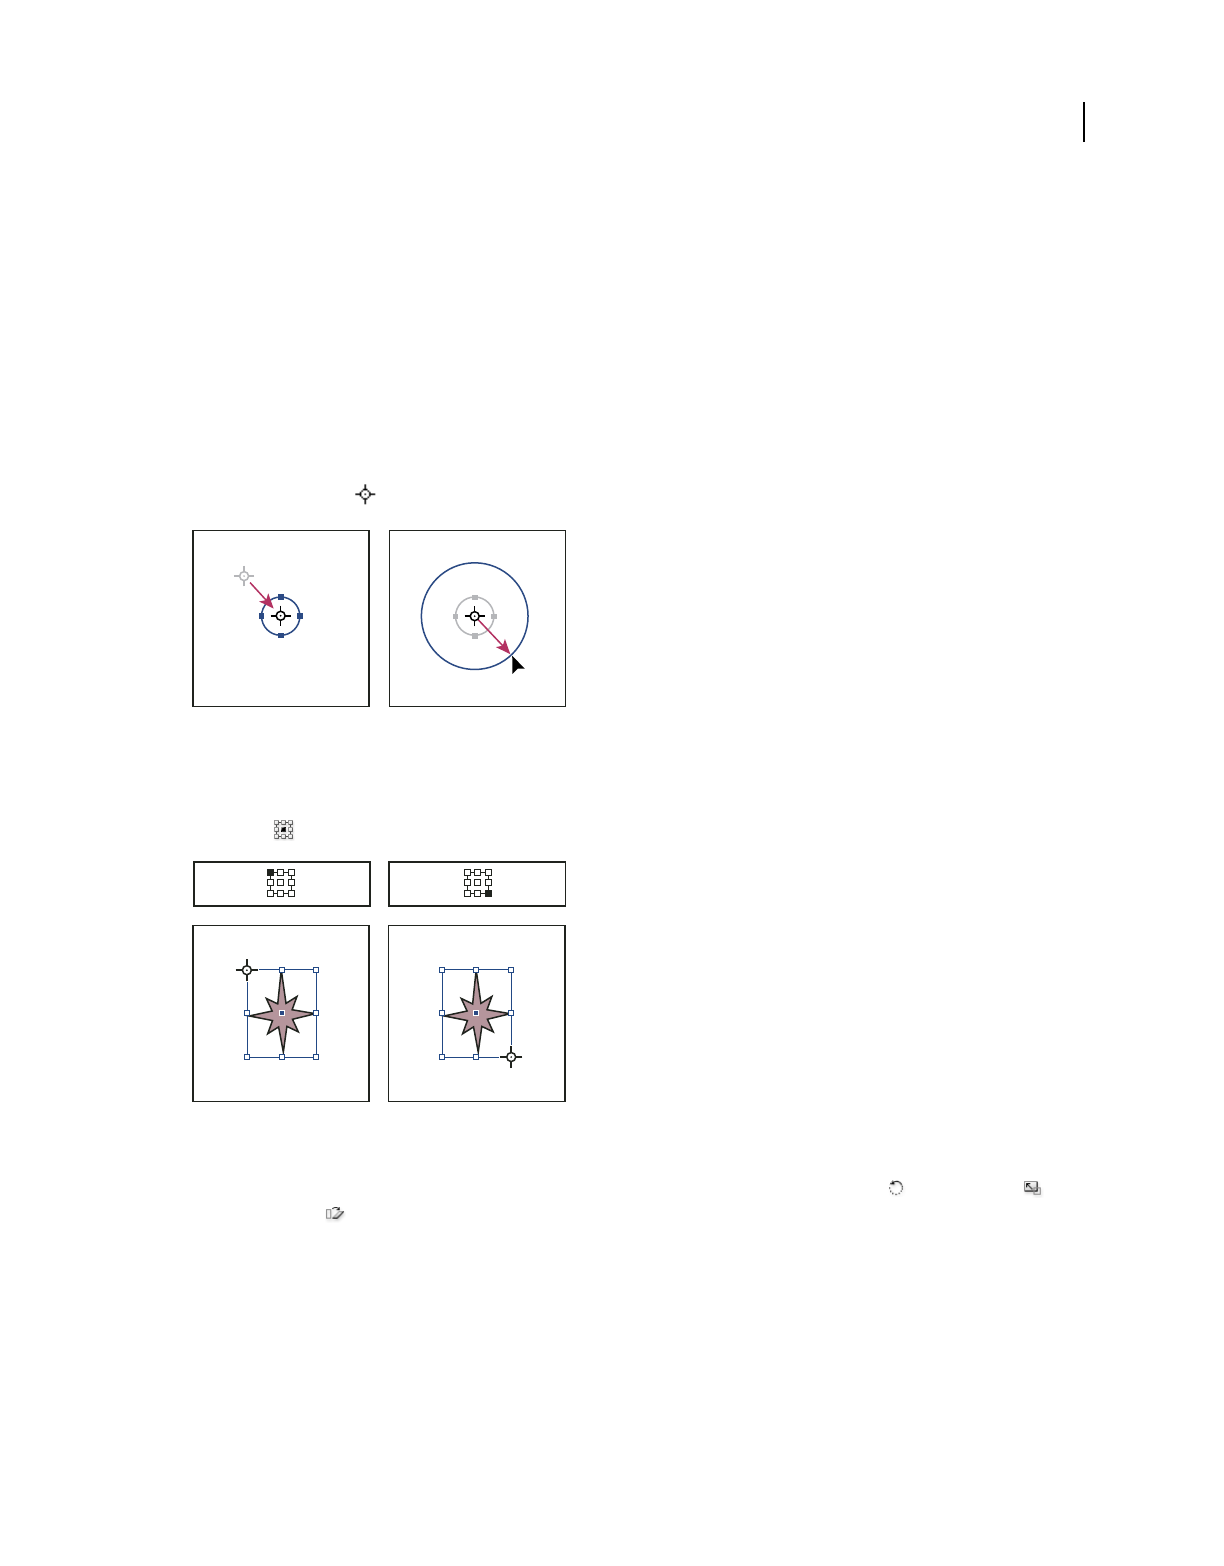
409
USING INDESIGN
Frames and objects
Last updated 11/16/2011
Change transformation settings
The Transform panel includes several options that determine how objects are transformed and how transformations
are displayed in the Transform and Control panels.
More Help topics
“Keys for transforming objects” on page 694
“Determine how scaling is tracked” on page 421
Change the reference point for selected objects
All transformations originate from a fixed point on or near the object, called the reference point. The reference point
is marked by an icon
when a transformation tool, such as the Scale tool, is active.
Reference point moved to center (left), and object scaled (right)
❖Do one of the following:
•To specify a different reference point for the selected object, click any of the nine points on the reference point
locator
in the Transform or Control panel.
As you click different reference points on the Transform or Control panel (top left and right), the reference point for the selected object changes
(bottom left and right).
•To move the selected object’s reference point to a specific location, select the Rotate tool , the Scale tool , or
the Shear tool , position the tool over the reference point icon, and then drag it to a new location. Or, with one
of these tools selected, click anywhere on the object or page. The reference point moves to that location.
Note: When a transform tool is selected, clicking away from the object does not deselect it— it moves the reference point.
Choose Edit
> Deselect All to deselect an object.
The last-selected reference point on the reference point locator becomes the new default reference point for all tools
and objects. If you drag an object’s reference point icon to a custom location (not on an anchor point), the panel
reference point returns to the default position once the current object is no longer selected. InDesign preserves the
default reference point position for new documents so you don’t have to reset
it.
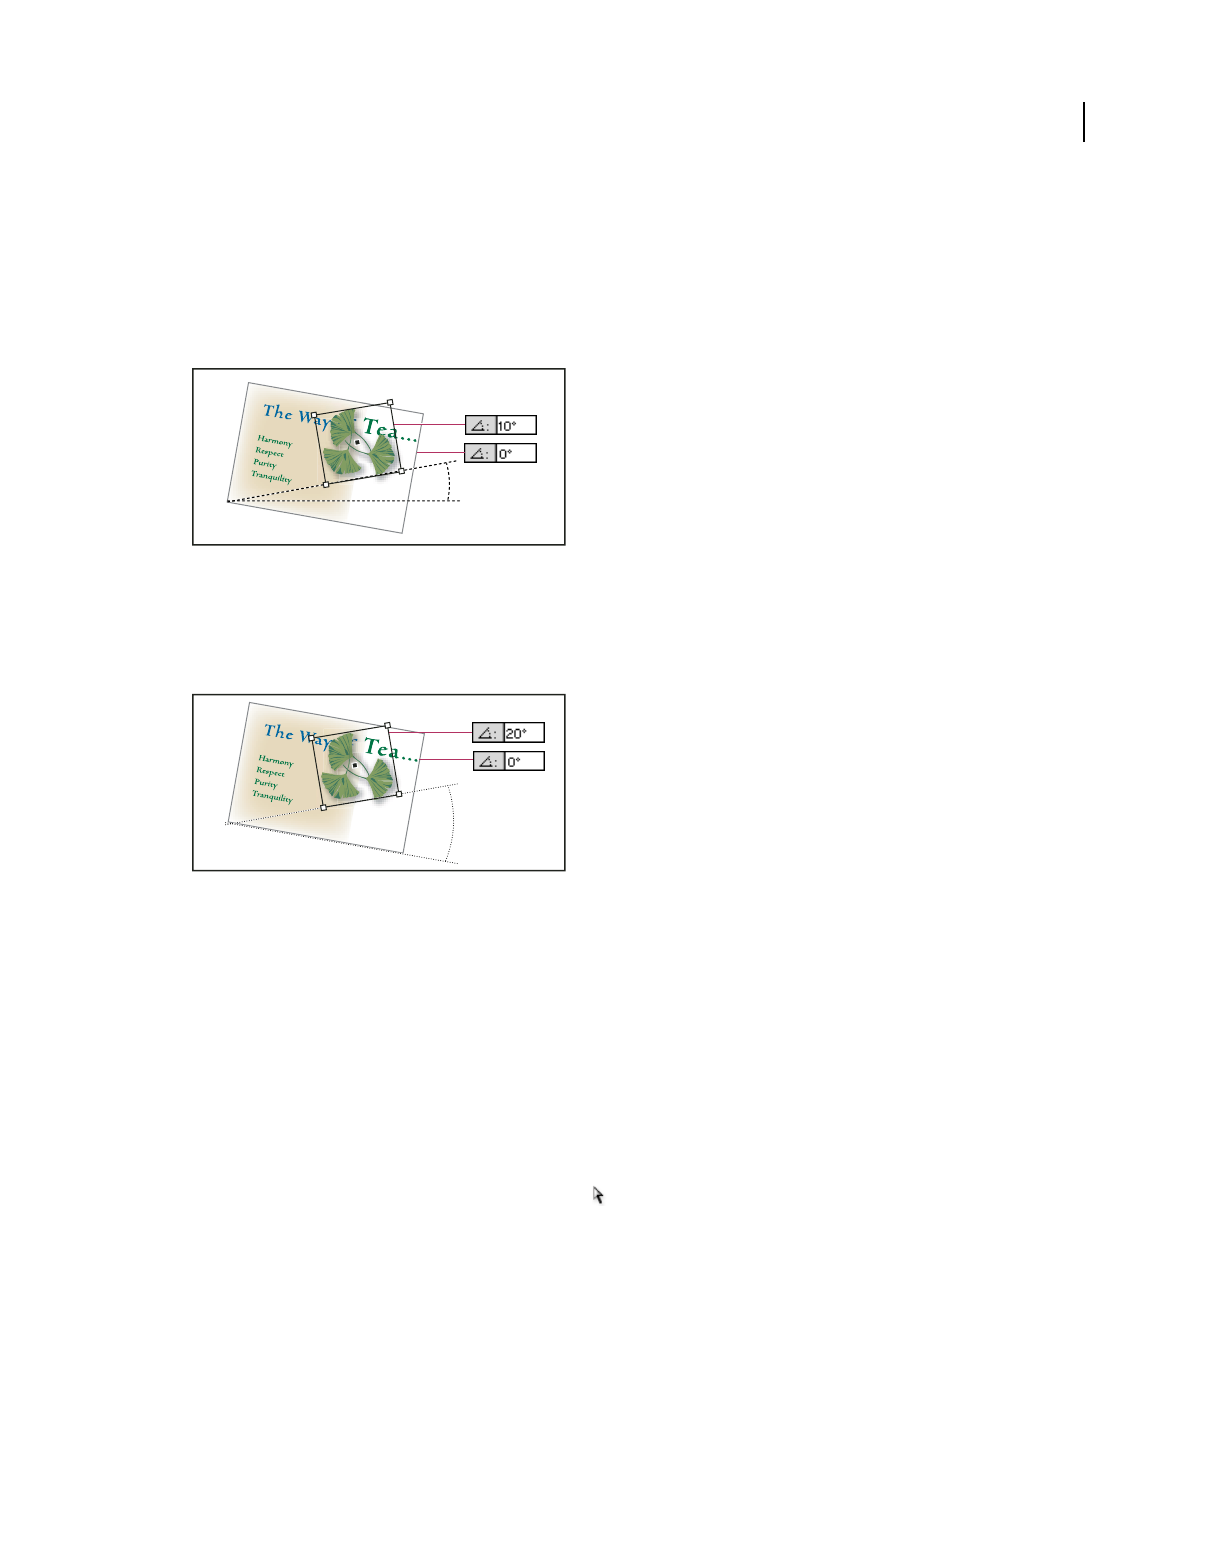
410
USING INDESIGN
Frames and objects
Last updated 11/16/2011
Change the information displayed for nested objects
The Transform panel orients an object to a spread’s pasteboard, where a horizontal line has a rotation angle of 0°. By
default, this is true even if the object is nested inside a transformed container object (that is, if the object is part of a
transformed group or pasted inside a transformed frame). For example, if you paste an unrotated graphic inside a
frame, rotate the frame 10° with the graphic inside, and then select the graphic using the Direct Selection tool, the
Transform panel displays the graphic’s rotation angle as 10°.
Object’s rotation angle displayed relative to pasteboard
If you prefer, you can deselect the Transformations Are Totals command to see the same information relative to the
nested object’s container. In the example above, if you deselect Transformations Are Totals, the Transform panel
displays the graphic’s rotation angle as zero (the angle it has relative to its rotated container).
Object’s rotation angle displayed relative to container object
1Open the Transform panel or Control panel.
2In the Transform or Control panel menu, do one of the following:
•Leave Transformations Are Totals selected (the default) to display transformation values for nested objects relative
to the pasteboard.
•Deselect Transformations Are Totals to display rotate, scale, and shear values for nested objects relative to the
container object.
Measure the position of selected objects
The Show Content Offset command determines the appearance of the X and Y values in the Transform panel for
nested objects selected with the Direct Selection tool
. The selected reference point in the reference point locator of
the Transform and Control panels determines which of the nine reference points on the selected object is being
compared to the zero point of the document or to the zero point of a container frame. The zero point of a container
frame is always its upper-left corner.
The position of selected objects is measured from three positions:
•The position of the container frame in relation to the zero point of the document. With Show Content Offset turned
on or off, select the container frame using the Selection tool.
•The position of the nested object in relation to the zero point of the document. Turn off Show Content Offset and
select the nested object using the Direct Selection tool.
10
20
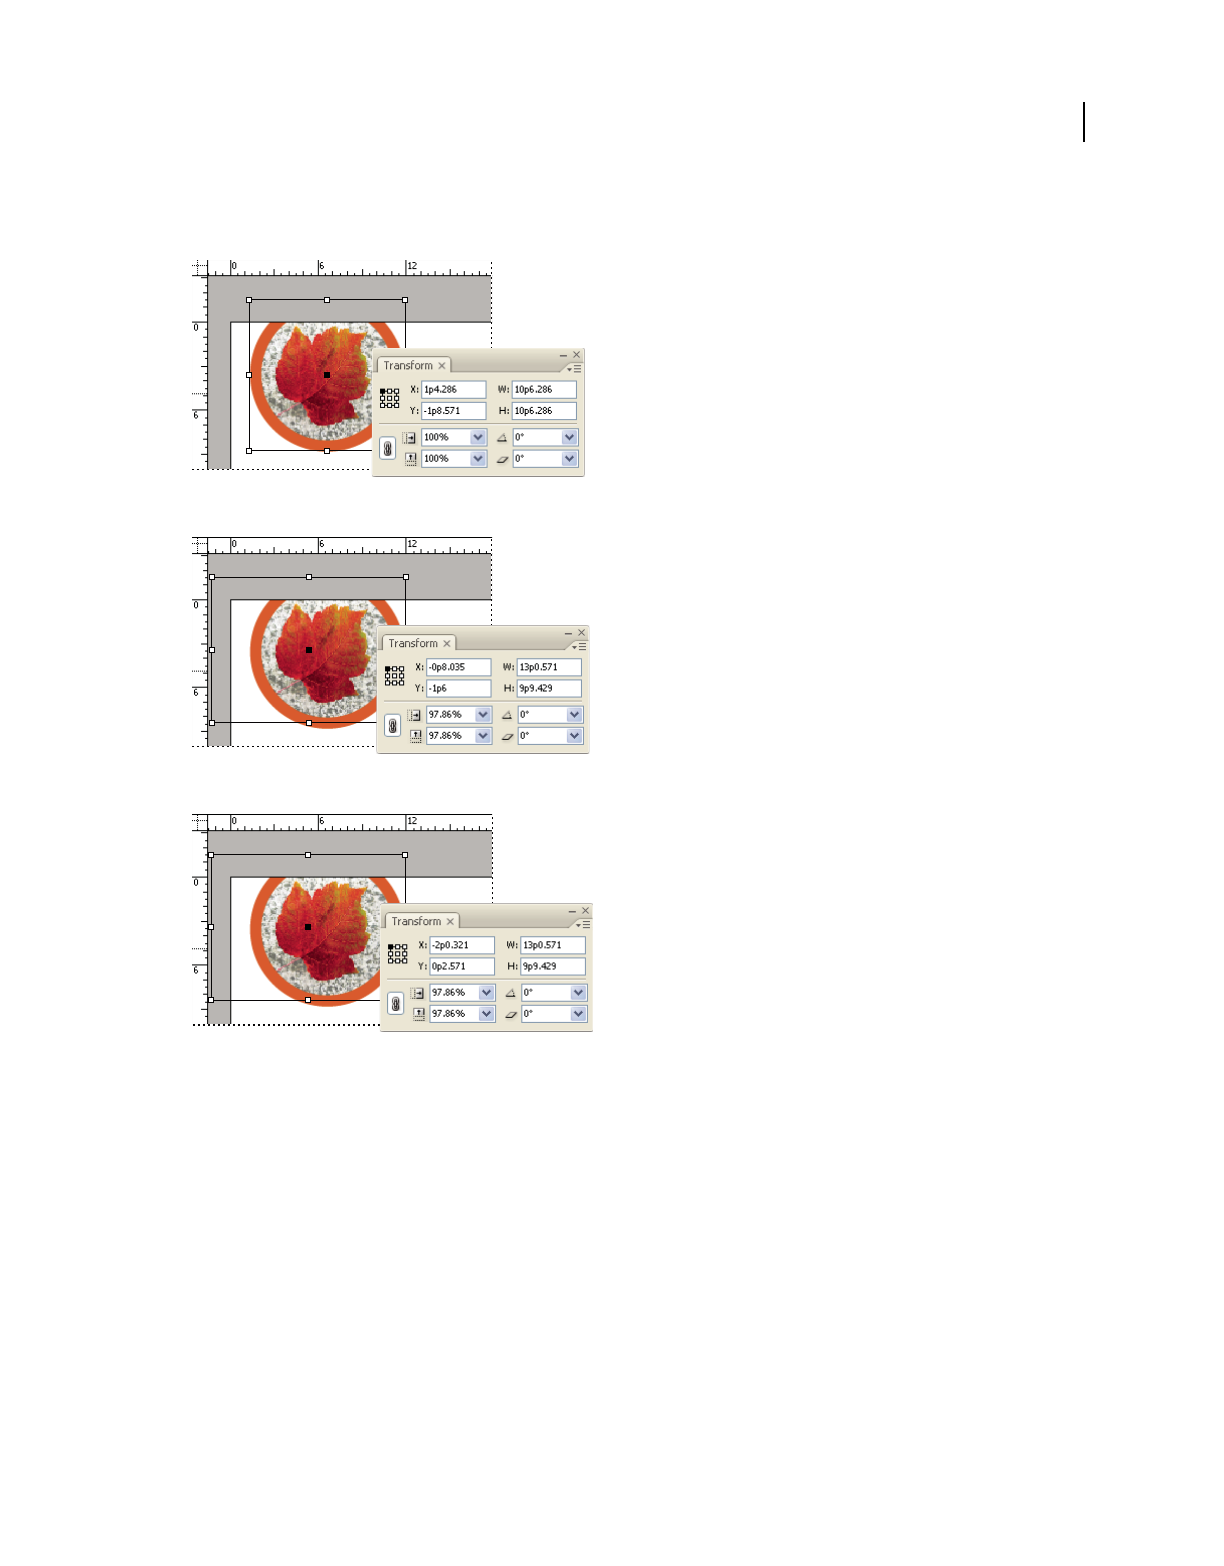
411
USING INDESIGN
Frames and objects
Last updated 11/16/2011
•The position of the nested object in relation to the zero point (upper-left corner) of its container frame. Turn on
Show Content Offset and select the nested object using the Direct Selection tool.
Parent frame’s position displayed relative to zero point of document
Nested object’s position displayed relative to zero point of document
Nested object’s position displayed relative to container frame
If Show Content Offset is selected, the X and Y values of the embedded object appear relative to the container object,
and the X/Y icons in the Transform panel change to X+/Y+. If this command is deselected, the nested object values
appear relative to the rulers.
❖In the Transform or Control panel menu, select or deselect Show Content Offset.
Include or exclude stroke weight in measurements
Stroke weight can affect an object’s size and position. You can change the stroke’s alignment and then choose whether
the Transform panel measures an object’s size and position from the center or from the edge of its stroke. For
information on changing stroke alignment, see “Stroke panel options” on page 359.
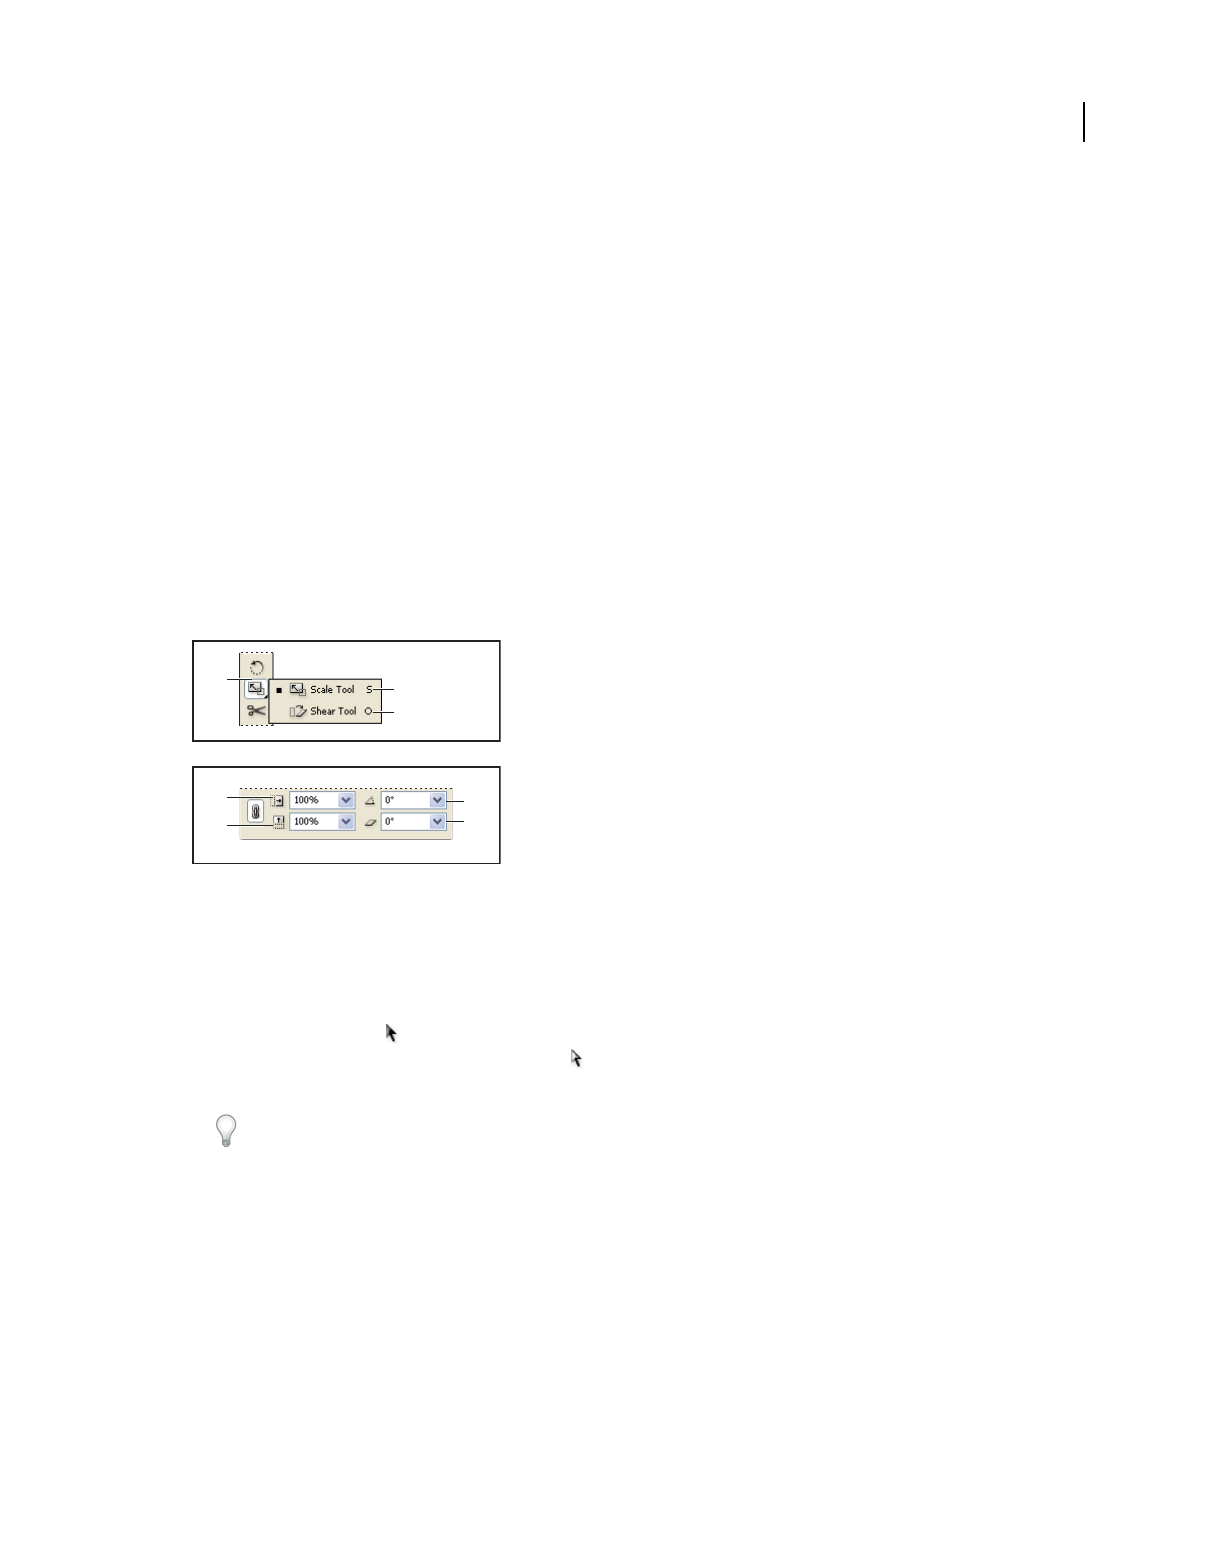
412
USING INDESIGN
Frames and objects
Last updated 11/16/2011
Note: This option does not change how stroke weights are affected when scaling a frame, only whether any changes affect
measurements.
❖In the Transform or Control panel menu, do one of the following:
•Select Dimensions Include Stroke Weight when you want panel measurements to represent the outer edge of an
object’s stroke. For example, if one frame is 2 points shorter than the other, but the shorter frame’s stroke is 2 points
thicker, this setting will cause both frames to display the same height values in the Transform and Control panels.
•Deselect Dimensions Include Stroke Weight when you want the panel measurements to represent an object’s path
or frame regardless of its stroke weight. For example, two frames of the same height will display the same height
values in the Transform and Control panels, regardless of differences in their stroke weights.
Transform objects
You can modify an object’s size or shape, and change its orientation on the pasteboard, by using tools and commands.
The toolbox includes four transformation tools—the Rotate, Scale, Shear, and Free Transform tools. In addition, you
can use the Selection tool to transform objects. All transformations, with the addition of reflection, are available in the
Transform and Control panels, where you can precisely specify transformations.
Transformation tools (top) compared to Transform panel (bottom)
A. Rotation options B. Shearing options C. Scaling options
When transforming objects, note the following:
•The results of a transformation can differ significantly, depending on what is selected. For example, when you
rotate an image, what gets rotated depends on whether you select the image, the frame, or the frame and the image.
Use the Selection tool
to transform (rotate, scale, or shear) an entire path and its content (click outside the
content grabber); use the Direct Selection tool to transform just the path without its content or the content
without its path. To transform the content without its path, make sure that all anchor points are selected.
To resize both the frame and content, use the Scale X Percentage and Scale Y Percentage fields, not the W and H
fields. The W and H fields change only the selected frame or content, not both. Keep in mind that you’re not limited
to specifying percentages in the Scale fields. You can type dimensions by including the unit of measurement, such as
“6p.”
•A transformation affects all selected objects as a single unit. For example, if you select multiple objects and rotate
them 30°, they all rotate around one reference point. If you want to rotate each selected object 30° around its own
reference point, you must select and rotate them individually.
•When transforming type, you can use either of two selection methods: Use the Selection or Direct Selection tool to
select an entire text frame or text converted to outlines, and then use the transformation tools; or use the Type tool
to select text or to click an insertion point in a text frame, and then specify transformations in the Transform panel,
Control panel, or dialog boxes available when you double-click a tool. In both cases, the transformation affects the
entire text frame.
C
A
C
C
B
A
B

413
USING INDESIGN
Frames and objects
Last updated 11/16/2011
•When you rotate, skew, or scale a group, the settings apply to the entire group, as well as to the individual objects
in the group. For example, if you rotate a group 30°, the rotation value in the Transform or Control panel is 30°
whether you select the group itself or direct-select an object in the group.
More Help topics
“Change transformation settings” on page 409
“Gallery of transformation tools” on page 34
“Keys for transforming objects” on page 694
“Repeat transformations” on page 424
“Clear transformations” on page 424
Transform objects with the Transform panel
Use the selection tools to determine whether the content and frame are transformed together or separately.
1Select an object to transform.
•To transform both the frame and its content, use the Selection tool to select the frame.
•To transform the content without transforming its frame, use the Direct Selection tool to direct-select the object,
or use the Selection tool to click the content grabber of an image.
•To transform a frame without transforming the content, direct-select the frame, and select all the anchor points.
2In the Transform panel or Control panel, specify the reference point for the transformation.
All values in the panel refer to the bounding boxes of the objects. X and Y values refer to the selected reference point
on the bounding box relative to the ruler origin.
3Do any of the following:
•Enter new values in the text boxes.
•Choose values from available pop-up menus.
•Choose commands from the panel menu.
Note: To maintain the object’s proportions when using the Scale X Percentage and Scale Y Percentage options, click the
Constrain Proportions icon
in the panel. When the option is not selected, dots appear on both sides of the icon (like a
broken chain link). You can also specify dimensions rather than percentages by specifying the unit of measurement, such
as 6p.
4Press Tab, Enter (Windows), or Return (Mac OS) to apply the change.
Transform objects with the Selection tool
Use the Selection tool to move, resize, and rotate objects.
1Using the Selection tool , select an object. To transform an image within a frame, click the content grabber that
appears when you hold the pointer over an image.
2Do any of the following:
•To move objects, click anywhere within the bounding box, and then drag.
•To scale objects, hold down Ctrl (Windows) or Command (Mac OS), and drag any bounding box handle until the
object is the desired size. Include the Shift key to preserve the selection’s proportions. Include the Alt (Windows)
or Option (Mac OS) key to scale objects from the center.

414
USING INDESIGN
Frames and objects
Last updated 11/16/2011
•To rotate objects, position the pointer anywhere outside a bounding box handle. When the pointer changes to ,
drag until the selection is at the desired angle of rotation.
•To reflect objects, drag a handle of the bounding box past the opposite edge or handle, until the object is at the
desired level of reflection.
Transform objects with the Free Transform tool
The Free Transform tool works the same way it does in Adobe Photoshop and Adobe Illustrator, by providing a way
to perform any transformation with just one tool. You can combine transformations, such as rotating and scaling,
while the Free Transform tool is active.
You can use keyboard shortcuts to instantly switch among the Free Transform tool (press E), the Selection tool (V),
and the Direct Selection tool (A).
1Using the appropriate selection tool, select the object or objects to transform.
2Select the Free Transform tool .
•To move objects, click anywhere within the bounding box, and then drag.
•To scale objects, drag any bounding box handle until the object is the desired size. Shift-drag the handle to preserve
the selection’s proportions.
•To scale objects from the center of the bounding box, Alt-drag (Windows) or Option-drag (Mac OS).
•To rotate objects, position the pointer anywhere outside the bounding box. When the pointer changes to , drag
until the selection is at the desired angle of rotation.
•To reflect objects, drag a handle of the bounding box past the opposite edge or handle, until the object is at the
desired level of reflection.
•To shear objects, begin dragging a handle, and then hold down Ctrl (Windows) or Command (Mac OS). Hold
down Alt+Ctrl (Windows) or Command+Option to shear from both sides of the object.
Rotate objects
You can rotate objects using any of several methods.
More Help topics
“Change transformation settings” on page 409
“Use smart guides” on page 61
Rotate an object using the Rotate tool
1Select an object to rotate. To rotate both the frame and its content, use the Selection tool to select the frame. To
rotate the content without rotating its frame, click the Content Grabber or use the Direct Selection tool to select the
object. To rotate a frame without rotating the content, direct-select the frame, and select all the anchor points.
2Select the Rotate tool .
3If you want to use a different reference point for the rotation, click where you want the reference point to appear.
4Position the tool away from the reference point, and drag around it. To constrain the tool to multiples of 45°, hold
down Shift as you drag. For finer control, drag farther from the object’s reference point.
You can also rotate by using the Free Transform tool.

415
USING INDESIGN
Frames and objects
Last updated 11/16/2011
If Smart Guides (and Smart Dimensions) are turned on, visual clues indicate when you’re rotating an object the same
degree as a nearby rotated object. For example, if you rotate one object on your page 24 degrees, a rotation icon appears
as you rotate another object close to 24 degrees.
Rotate an object using the Selection tool
❖Using the Selection tool, position the pointer anywhere outside a selection handle. When the pointer changes
to
, drag until the selection is at the desired angle of rotation.
Rotate an object using the Transform or Control panel
1Select an object to rotate. To rotate both the frame and its content, use the Selection tool to select the frame. To
rotate the content without rotating its frame, click the Content Grabber or use the Direct Selection tool to select the
object. To rotate a frame without rotating the content, direct-select the frame, and select all the anchor points.
2Do any of the following:
•To rotate clockwise or counterclockwise in 90° increments, click either of the Rotate buttons in the Control panel.
•To rotate by a preset angle, choose an angle from the Rotation Angle pop-up menu in the Transform or Control
panel.
•In the Rotation Angle box on the Transform or Control panel, type a positive angle to rotate selected objects
counterclockwise, or type a negative angle to rotate selected objects clockwise, and then press Enter (Windows) or
Return (Mac
OS).
•To create a copy of the object with the new rotation applied to the copy, type a value in the Rotation Angle box on
the Transform panel and then hold down Alt (Windows) or Option (Mac
OS) as you press Enter.
When you rotate a single object, the specified value remains displayed in the Transform or Control panel. When you
rotate multiple objects, the Rotation Angle is reset to 0 degrees, even though the objects are rotated.
Rotate an object using the Rotate command
You can use the Rotate command to rotate an object by a specific amount. This command also lets you rotate a copy
of the selected object, leaving the original in place.
1Select an object to rotate. To rotate both the frame and its content, use the Selection tool to select the frame. To
rotate the content without rotating its frame, direct-select the object. To rotate a frame without rotating the content,
direct-select the frame, and select all the anchor points.
2Do one of the following to open the Rotate dialog box:
•Choose Object > Transform > Rotate.
•Double-click the Rotate tool .
•Select the Rotate tool and Alt-click (Windows) or Option-click (Mac OS) on or near the object to select a new
reference point.
3Enter the rotation angle, in degrees, in the Angle box. Enter a negative angle to rotate the object clockwise; enter a
positive angle to rotate the object counterclockwise.
4Do one of the following:
•To preview the effect before you apply it, select Preview.
•To rotate the object, click OK.
•To rotate a copy of the object, click Copy.

416
USING INDESIGN
Frames and objects
Last updated 11/16/2011
Move objects
You can move objects by cutting them from one spot and pasting them into another, by entering new horizontal and
vertical coordinates, or by dragging them. Dragging also allows you to move a copy of an object or to copy objects
between software applications.
The Smart Guides feature makes it easy to move objects to precise locations in your layout. As you drag an object,
temporary guides appear, indicating that the object you’re moving is aligned with an edge or center of the page or with
another page item.
More Help topics
“Transform objects” on page 412
“Create masters” on page 71
“Change transformation settings” on page 409
“Use smart guides” on page 61
Move objects
For best results, use the Selection tool to move multiple objects. If you use the Direct Selection tool to select multiple
objects or paths, dragging moves only the selected graphic, path, or anchor points.
1Select an object to move. To move both the frame and its content, use the Selection tool to select the frame. To
move the content without moving its frame, direct-select the object, or click the content grabber when you mouse
over an image. To move a frame without moving the content, direct-select the frame, and select all the anchor
points.
2Do one of the following:
•To paste the object (or a copy of it) in a new location, choose Edit > Cut or Edit > Copy. Target the destination
spread, and choose Edit
> Paste. The objects appear in the center of the target spread.
•To paste a copy at the same position as the original, choose Edit > Copy. Then, choose Edit > Paste In Place. (To
offset the copy from the original, nudge it using the arrow keys.)
If you want an object to appear in the same position on many pages, consider creating a master page and paste the
object on it.
•To move an object to a specific numeric location, type a value for each of the X (horizontal) or Y (vertical) position
options in the Transform or Control panel. Then press Enter (Windows) or Return (Mac
OS).
•To nudge an object slightly in one direction, press or hold an arrow key; to nudge an object ten times as far, hold
down Shift as you press an arrow key.
•To move an object by dragging, drag the object to a new position. Shift-drag to constrain the movement of the
object horizontally, vertically, or diagonally (in multiples of 45°).
Drag the content grabber to move an image within its frame.

417
USING INDESIGN
Frames and objects
Last updated 11/16/2011
Move objects by a precise amount
You can use the Move command to move an object by a specific amount. This command also lets you move a copy of
the selected object, leaving the original in place.
1Select an object to move. To move both the frame and its content, use the Selection tool to select the frame. To move
the content without moving its frame, direct-select the object. To move a frame without moving the content, direct-
select the frame, and select all the anchor points.
2Choose Object > Transform > Move, or double-click the icon for the Selection or Direct Selection tool in the
toolbox.
3In the Move dialog box, do one of the following:
•Enter the horizontal and vertical distances that you want the object to move. Positive values move the object down
and to the right of the x axis; negative values move the object up and to the left.
•To move an object a precise distance and angle, enter the distance and angle for the move. The angle you enter is
calculated in degrees from the x axis. Positive angles specify a counterclockwise move; negative angles specify a
clockwise move. You can also enter values between 180° and 360°; these values are converted to their corresponding
negative values (for example, a value of 270° is converted to –90°).
4Do any of the following:
•To preview the effect before you apply it, select Preview.
•To move the object, click OK.
•To move a copy of the object, click Copy.
Move objects to a precise location
1Select an object to move.
2If you want to use a different reference point for the move, click where you want the reference point to appear.
For example, if you want to move the object to the upper-left corner of the page, select the upper-left reference point.
3In the X and Y fields on the Transform panel, enter the coordinates where you want the selection to be moved.
Specify the distance objects move when nudged
1Choose Edit > Preferences > Units & Increments (Windows) or InDesign > Preferences > Units & Increments
(Mac
OS).
2For Cursor Key, specify the distance you want each press of an arrow key to move selected objects, and then
click
OK.
If you hold down Shift while moving a selection, the selection moves ten times the distance you specify here.
Scaling vs. resizing objects
Resizing and scaling are different actions in InDesign. Resizing is simply changing the Width and Height values of an
object. Scaling involves using a percentage value related to the original scale (100%) of the frame.
The difference between resizing and scaling isn’t always apparent. A good way to see the difference is to resize and scale
a text frame that has a stroke applied to it. When you double the size of the text frame, the text size and stroke weight
remain the same. When you double the scale of the text frame, the text size and stroke weight also double.

418
USING INDESIGN
Frames and objects
Last updated 11/16/2011
Resizing a frame
By default, when the frame (and not the frame contents) is selected, changing the values of the Width and Height fields
changes only the frame, not its contents, regardless of which selection tool is active.
Scaling a frame and its contents
When the frame is selected with the Selection tool, changing the values of the Scale X Percentage and Scale Y
Percentage fields changes the frame and its contents. If Auto-Fit is selected, the frame and its contents are resized
together.
Resizing or scaling frame contents
If you want to change only the content (resize or scale) of a frame, click the Content Grabber or use the Direct Selection
tool to select the contents. Once selected, you can use the Width and Height fields or the Scale fields, depending on
your preference.
Overriding defaults
If you want to scale the frame or its contents by a percentage and have the results returned in the current measurement
system, you can enter in a number with the percent sign to override the default measurement system. For example, if
the current width is 12p, and you want the new width to be 75% of the current value, you can enter 75% in the Width
field. After you press Enter, the new value for the Width displays as 9p.
Similarly, you can use other measurement system values if you want to scale to a specific increment but have the results
display in percent of the original. For example, you can replace 100% with 9p, and InDesign figures out which
percentage is required to make it that width/height.
More Help topics
“Resize objects” on page 418
“Scale objects” on page 419
Resize objects
Dragging the handle of a frame that includes contents, such as an imported graphic, does not resize the contents by
default. It’s important to understand that the content and the container frame are separate items, each with its own
bounding box. Simply dragging the frame of an imported graphic will either crop the graphic or leave a blank space
outside the graphic, depending on which direction you drag. Being able to modify the frame apart from the contents
adds flexibility, but it may take some time to get used to.
The Smart Guides feature makes it easy to resize objects based on other items in your layout. As you resize an object,
temporary guides appear, indicating that the object is aligned with an edge or center of the page or is the same height
or width as another page item.
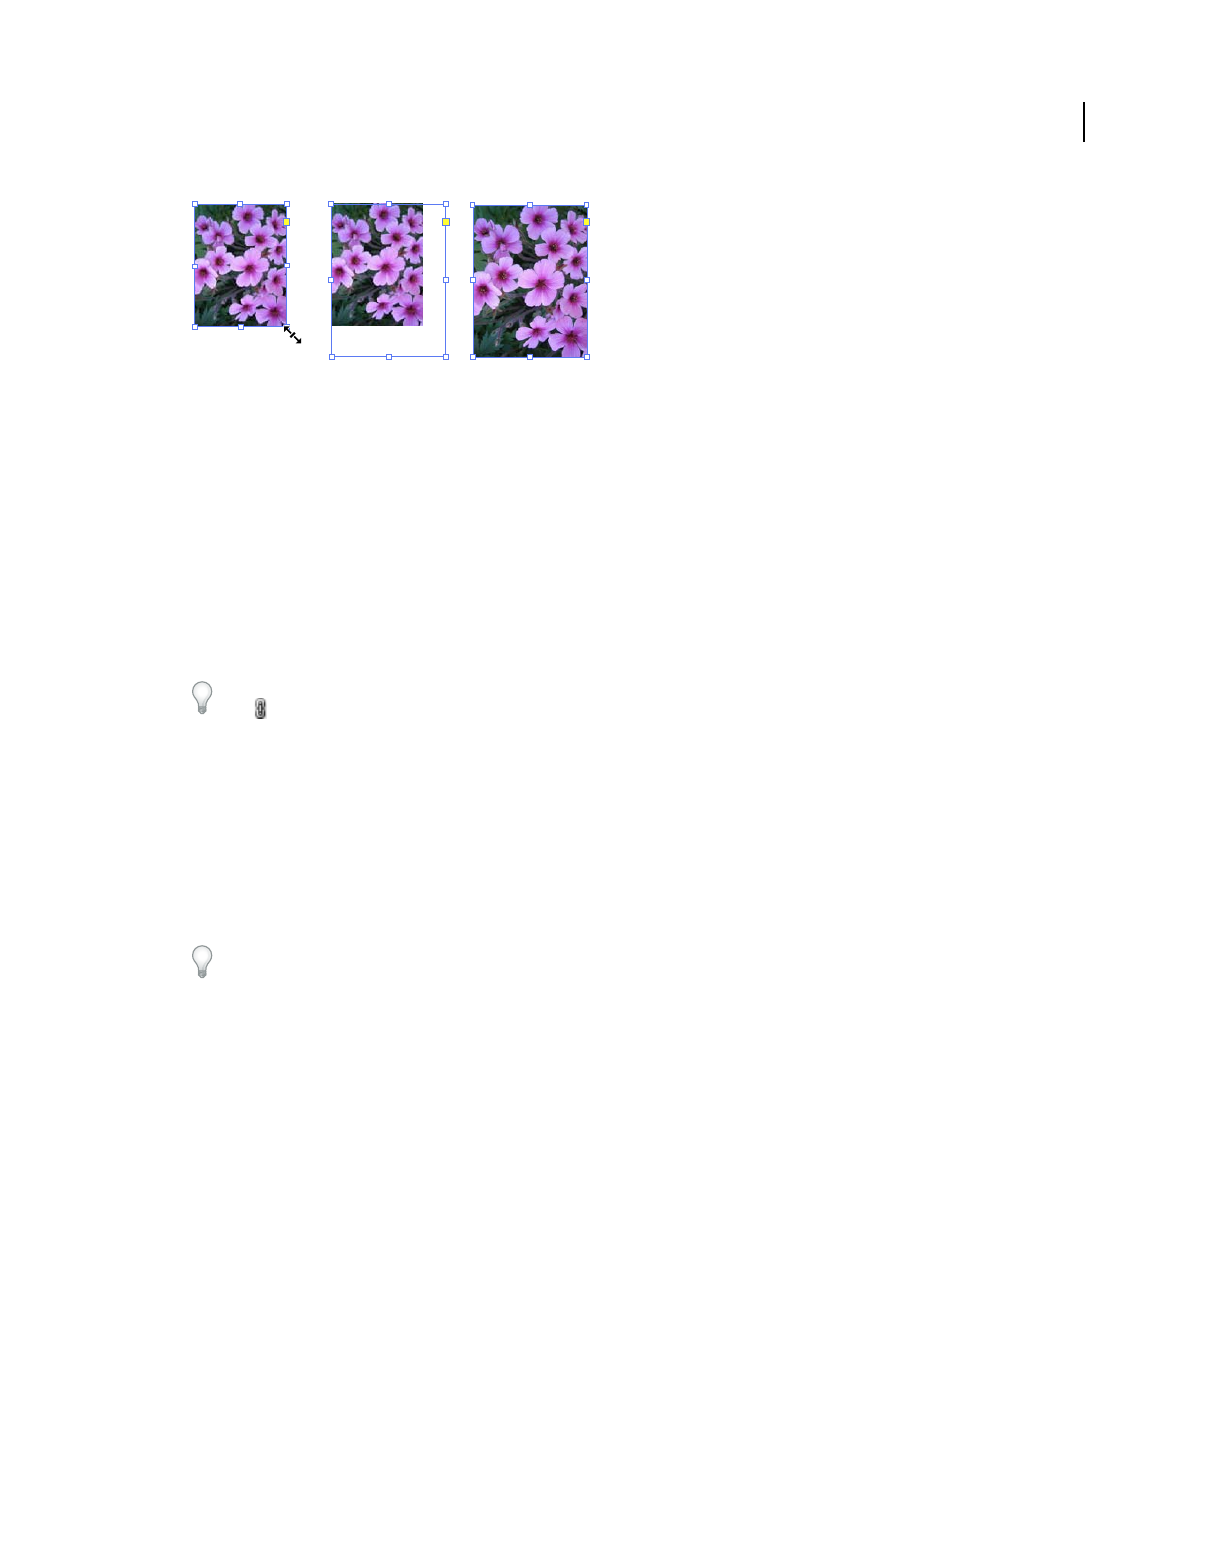
419
USING INDESIGN
Frames and objects
Last updated 11/16/2011
Resizing an imported graphic
A. Frame selected with Selection tool B. Frame resized C. Frame and content scaled
•To resize a frame, drag any handle using the Selection tool. If you hold down Ctrl (Windows) or Command
(Mac
OS) while dragging, the frame and the content are scaled. Adding the Shift key scales proportionally.
Note: If Auto-Fit is selected, resizing the frame resizes the image within the frame.
•To resize the content of a graphics frame, use the Selection tool to click the content grabber or direct-select the
graphic, and then drag any of the graphics frame handles.
•To resize a frame or its content to a precise size, select the object and enter the size in the width (W) or height (H)
fields on the Control panel.
To maintain the original proportions of the object when using the Control panel, make sure the Constrain Proportions
icon is selected.
•To resize both the frame and content, use the Scale X Percentage and Scale Y Percentage fields, not the W and H
fields. The W and H fields change only the selected frame or content, not both. Rather than specifying percentages,
you can type dimensions by including the unit of measurement, such as “6p.”
•To resize a frame or its content to a percentage of its current size, select the object and enter the percentage in the
width or height fields on the Transform panel.
•To create a copy of the selected object with the new size applied to the copy, type a value in the width or height fields
on the Transform panel and then hold down Alt (Windows) or Option (Mac
OS) as you press Enter.
After you resize a frame or object, you can use a fitting option (Object > Fitting) to fit the content to the frame or the
frame to the content.
More Help topics
“Scale objects” on page 419
“Scaling vs. resizing objects” on page 417
“Use smart guides” on page 61
Scale objects
Scaling an object enlarges or reduces it horizontally (along the x axis), vertically (along the y axis), or both horizontally
and vertically, relative to the reference point you specify.
By default, InDesign scales strokes. For example, if you scale a selected object with a 4-point stroke by 200%, the Stroke
panel indicates an 8-point stroke and the stroke visibly doubles in size. You can change the default stroke behavior by
deselecting Adjust Stroke Weight When Scaling in the Transform or Control panel menu.
AB C

420
USING INDESIGN
Frames and objects
Last updated 11/16/2011
More Help topics
“Scale type” on page 258
“Keys for transforming objects” on page 694
“Scaling vs. resizing objects” on page 417
“Change transformation settings” on page 409
Scale an object using the Selection tool
❖To scale the content and frame simultaneously, use the Selection tool to select the object and hold down Ctrl
(Windows) or Command (Mac
OS). Add the Shift key to resize the object proportionally.
Scale an object using the Scale tool
1Select an object to scale. To scale both the frame and its content, use the Selection tool to select the frame. To scale
the content without scaling its frame, click the Content Grabber to direct-select the object. To scale a frame without
scaling the content, direct-select the frame, and select all the anchor points.
2Select the Scale tool .
3Position the Scale tool away from the reference point and drag. To scale the x or y axis only, start dragging the Scale
tool along one axis only. To scale proportionally, hold down Shift as you drag the Scale tool. For finer control, start
dragging farther from the object’s reference point.
You can also scale by using the Free Transform tool.
Scale an object using the Transform panel
To maintain the original proportions of the object when using the Transform panel, make sure the Constrain
Proportions icon
is selected.
1Select an object to scale. To scale both the frame and its content, use the Selection tool to select the frame. To scale
the content without scaling its frame, direct-select the object. To scale a frame without scaling the content, direct-
select the frame, and select all the anchor points.
2In the Transform or Control panel, do one of the following:
•Choose a preset percentage value in the Scale X Percentage or Scale Y Percentage pop-up menu.
•Type a percentage value (such as 120%), or a specific distance (such as 10p) in the Scale X Percentage or Scale Y
Percentage box, and then press Enter or Return.
Scale an object using the Scale command
1Select an object to scale. To scale both the frame and its content, use the Selection tool to select the frame. To scale
the content without scaling its frame, direct-select the object. To scale a frame without scaling the content, direct-
select the frame, and select all the anchor points.
2Do one of the following to open the Scale dialog box:
•Choose Object > Transform > Scale.
•Double-click the Scale tool .
•Select the Scale tool and Alt-click (Windows) or Option-click (Mac OS) on or near the object to select a new
reference point.
3Type a percentage value in the Scale X or Scale Y box.

421
USING INDESIGN
Frames and objects
Last updated 11/16/2011
To maintain the original proportions of the object when using the Transform panel, make sure the Constrain
Proportions icon is selected.
4Do any of the following:
•To preview the effect before you apply it, select Preview.
•To scale the object, click OK.
•To scale a copy of the object, click Copy.
Determine how scaling is tracked
You can determine how scaling is tracked in the interface. If the Apply To Content preference option is selected in
General preferences, scaling values are reset to 100% in the Transform panel after the object is scaled. If Adjust Scaling
Percentage is selected, scaling values remain as specified (such as 125%).
With multiple objects selected, the scaling value will always display as 100%. However, you can select objects
individually to see the applied effect of the transform (such as 125%) if Adjust Scaling Percentage is selected.
1Choose Edit > Preferences > General (Windows) or InDesign > Preferences > General (Mac OS).
2Under When Scaling, select Apply To Content or Adjust Scaling Percentage, and then click OK.
If Adjust Scaling Percentage is selected and you scale an object, you can choose Redefine Scaling As 100% from the
Transform or Control panel menu to reset the scaling percentages to 100%.
Adjust stroke weight when objects are scaled
❖Select the Adjust Stroke Weight When Scaling option in the Transform or Control panel menu.
For example, if you scale a 4-point stroke by 200% when this option is turned on, the stroke weight becomes 8 points.
If you turn off this option, the object doubles in size but its stroke weight remains 4 points.
If this option is turned on and you scale an object disproportionally, InDesign applies the smallest stroke weight to all
sides. For example, suppose that you scale a selected object with a 4-point stroke only in the X direction by 200%.
Instead of applying an 8-point stroke in the X direction and a 4-point stroke in the Y direction, InDesign applies the
smaller value (4 points) to all sides.
Reset scaling value to 100%
In some cases, you may want to reset the Scale X and Scale Y values of an object to 100% without resizing the object.
For example, you may have opened a document from a previous version of InDesign that has non-100% scaling values,
or you may have scaled an object with the Adjust Scaling Percentage preference setting selected. When you choose this
command, the scaling values for all selected frames are reset to 100%. Choosing this command does not change the
size or appearance of objects.
1Select one or more objects that have non-100% scaling values.
This command is dimmed if you direct-select an imported image or if an object has 100% scaling values.
2Choose Redefine Scaling As 100% from the Transform or Control panel menu.
Note: Choosing this command may result in unexpected behavior with objects in transformed groups.
Reflect (flip) objects
Reflecting an object flips the object across an invisible axis at the reference point you specify. (See “Change
transformation settings” on page 409.)
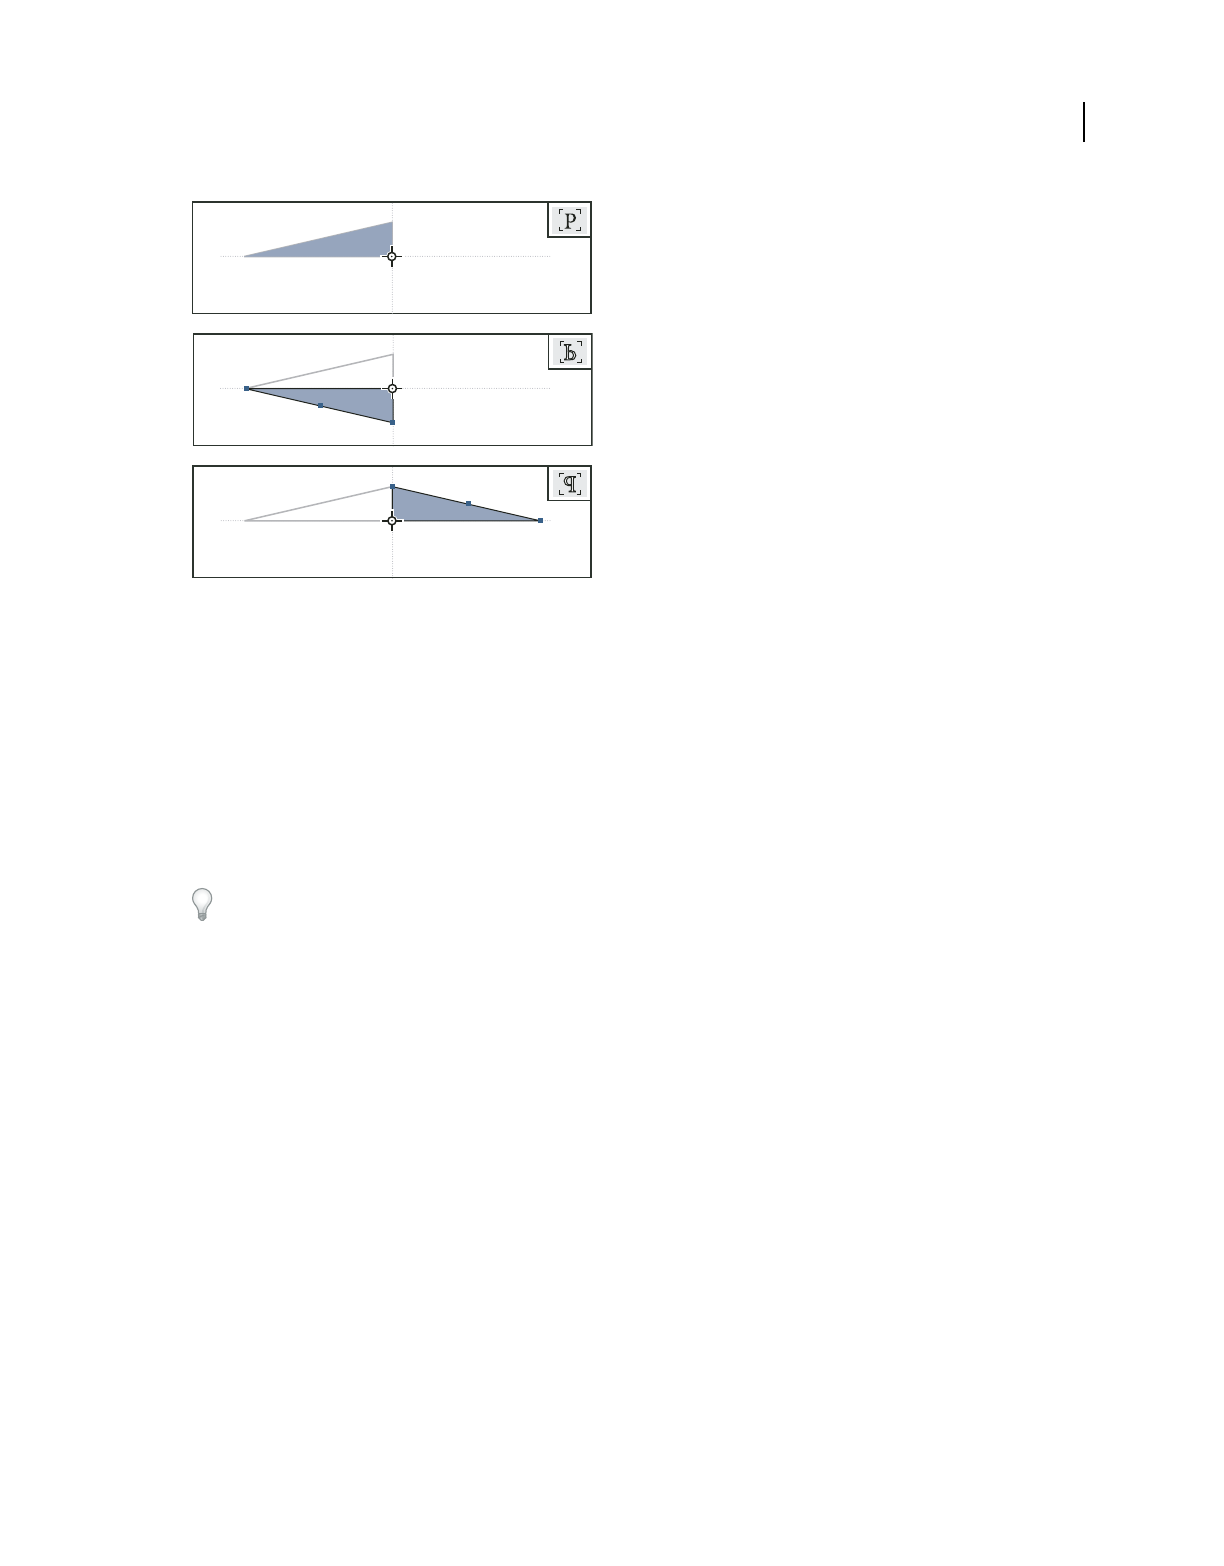
422
USING INDESIGN
Frames and objects
Last updated 11/16/2011
Original object (top) reflected using Flip Horizontal (middle) and Flip Vertical (bottom)
The flip/rotate indicator (P) in the middle of the Control panel appears white with a black outline if an object is flipped.
If the object is not flipped, the indicator is solid black.
1Select an object to flip. To flip both the frame and its content, use the Selection tool to select the frame. To flip the
content without its frame, direct-select the object. To flip a frame without its content, direct-select the frame, and
select all the anchor points.
2Do one of the following:
•To reflect using the reference point as a horizontal axis, click the Flip Horizontal button in the Control panel.
•To reflect using the reference point as a vertical axis, click the Flip Vertical button in the Control panel.
You can also reflect objects by using the Selection tool or Free Transform tool to pull one side of an object’s bounding
box past the opposite side, or by typing negative values into the Scale X Percentage or Scale Y Percentage options in
the Transform or Control panel.
Shear (skew) objects
Shearing an object slants or skews it along its horizontal or vertical axis, and can also rotate both of the object’s axes.
Shearing is useful for:
•Simulating some types of perspective, such as isometric projection.
•Slanting a text frame.
•Creating cast shadows when you shear a copy of an object.
More Help topics
“Change transformation settings” on page 409
Shear an object
1Select an object to shear. To shear both the frame and its content, use the Selection tool to select the frame. To shear
the content without its frame, click the Content Grabber to direct-select the object. To shear a frame without scaling
the content, direct-select the frame, and select all the anchor points.
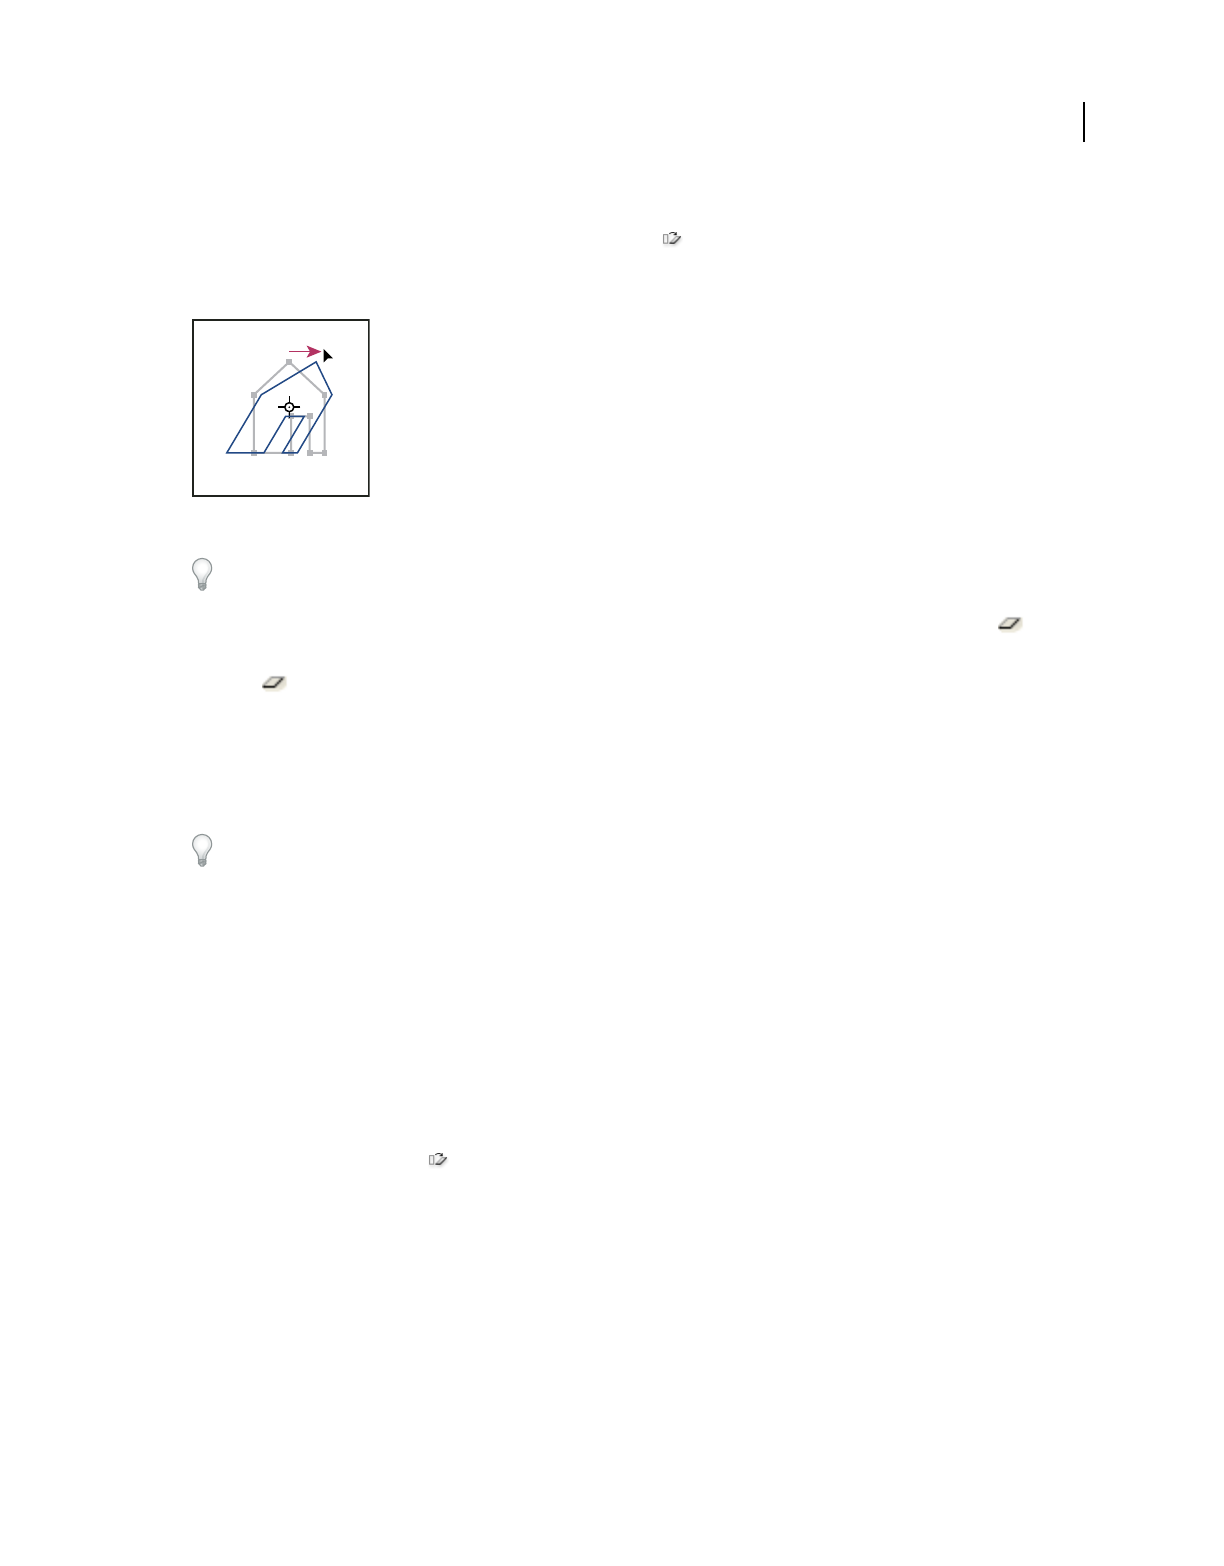
423
USING INDESIGN
Frames and objects
Last updated 11/16/2011
2Do one of the following:
•To shear selected objects by dragging, select the Shear tool . Then position the Shear tool away from the
reference point, and drag. Shift-drag to constrain shearing to a perpendicular vertical or horizontal axis. If you start
to drag at a non-perpendicular angle and then hold down the Shift key, shearing is constrained to that angle.
Object being sheared by dragging Shear tool with reference point placed in center
If you want to use a different reference point for the shearing, click where you want the reference point to appear.
•To shear using a preset value, in the Transform or Control panel, choose an angle from the Shear pop-up menu.
•To shear using a specific value, in the Transform or Control panel, type a positive or negative angle in the
Shear
box, and press Enter or Return.
•To create a copy of the object with the new shear applied to the copy, type a value in the Shear box in the Transform
panel, and then hold down Alt (Windows) or Option (Mac
OS) as press Enter.
When you shear a single object, the specified value remains displayed in the Transform or Control panel. When you
shear multiple objects, the Shear Angle value is reset to 0 degrees, even though the objects are sheared.
You can also shear by using the Free Transform tool.
Shear an object using the Shear command
You can shear an object by a specific amount by using the Shear command. This command also lets you shear a copy
of the selected object, leaving the original in place.
1Select an object to shear. To shear both the frame and its content, use the Selection tool to select the frame. To shear
the content without its frame, click the Content Grabber to direct-select the object. To shear a frame without scaling
the content, direct-select the frame, and select all the anchor points.
2Do one of the following to open the Shear dialog box:
•Select Object > Transform > Shear.
•Double-click the Shear tool .
•Select the Shear tool and Alt-click (Windows) or Option-click (Mac OS) to select a new reference point.
3Type a new shear angle.
The shear angle is the amount of slant to be applied to the object, relative to a line perpendicular to the shear axis.
(Shear angle is calculated clockwise from the current axis.)
4Specify the axis along which the object is to be sheared. You can shear an object along a horizontal or vertical axis.
5Do any of the following:
•To preview the effect before you apply it, select Preview.
•To shear the object, click OK.

424
USING INDESIGN
Frames and objects
Last updated 11/16/2011
•To shear a copy of the object, click Copy.
Repeat transformations
You can repeat transformations, such as moving, scaling, rotating, resizing, reflecting, shearing, and fitting. You can
repeat either a single transformation or a sequence of transformations, and you can apply those transformations to
more than one object at a time. InDesign remembers all transformations until you select a different object or perform
a different task.
Note: Not all transformations are recorded. For example, modifying a path or its points is not recorded as a
transformation.
1Select one or more objects, and perform all the transformations you want to repeat.
2Select the object or objects to which you want to apply the same transformations.
3Choose Object > Transform Again and then select one of the following options:
Transform Again Applies the last single transform operation to the selection.
Transform Again Individually Applies the last single transform operation to each selected object individually, rather
than as a group.
Transform Sequence Again Applies the last sequence of transform operations to the selection.
Transform Sequence Again Individually Applies the last sequence of transform operations to each selected object
individually.
More Help topics
“Duplicate objects” on page 429
Clear transformations
1Select the object or objects that have been transformed.
2Choose Clear Transformations from the Transform or Control panel menu.
Unless all values are the default values, clearing transformations results in a change of appearance for the objects.
Note: If the Scale values were reset at 100%, clearing the transformations will not change the scale.
Aligning and distributing objects
Align panel overview
You use the Align panel (Window > Object & Layout > Align) to align or distribute objects horizontally or vertically
along the selection, margins, page, or spread. Consider the following when working with the Align panel:
•The Align panel doesn’t affect objects to which you’ve applied the Lock Position command, and doesn’t change the
alignment of text paragraphs within their frames.
•Text alignment is not affected by the Align Objects options. (See “Align or justify text” on page 265.)
•You can use the Keyboard Shortcuts dialog box (Edit > Keyboard Shortcuts) to create custom align and distribute
shortcuts. (Under Product Area, select Object Editing.)
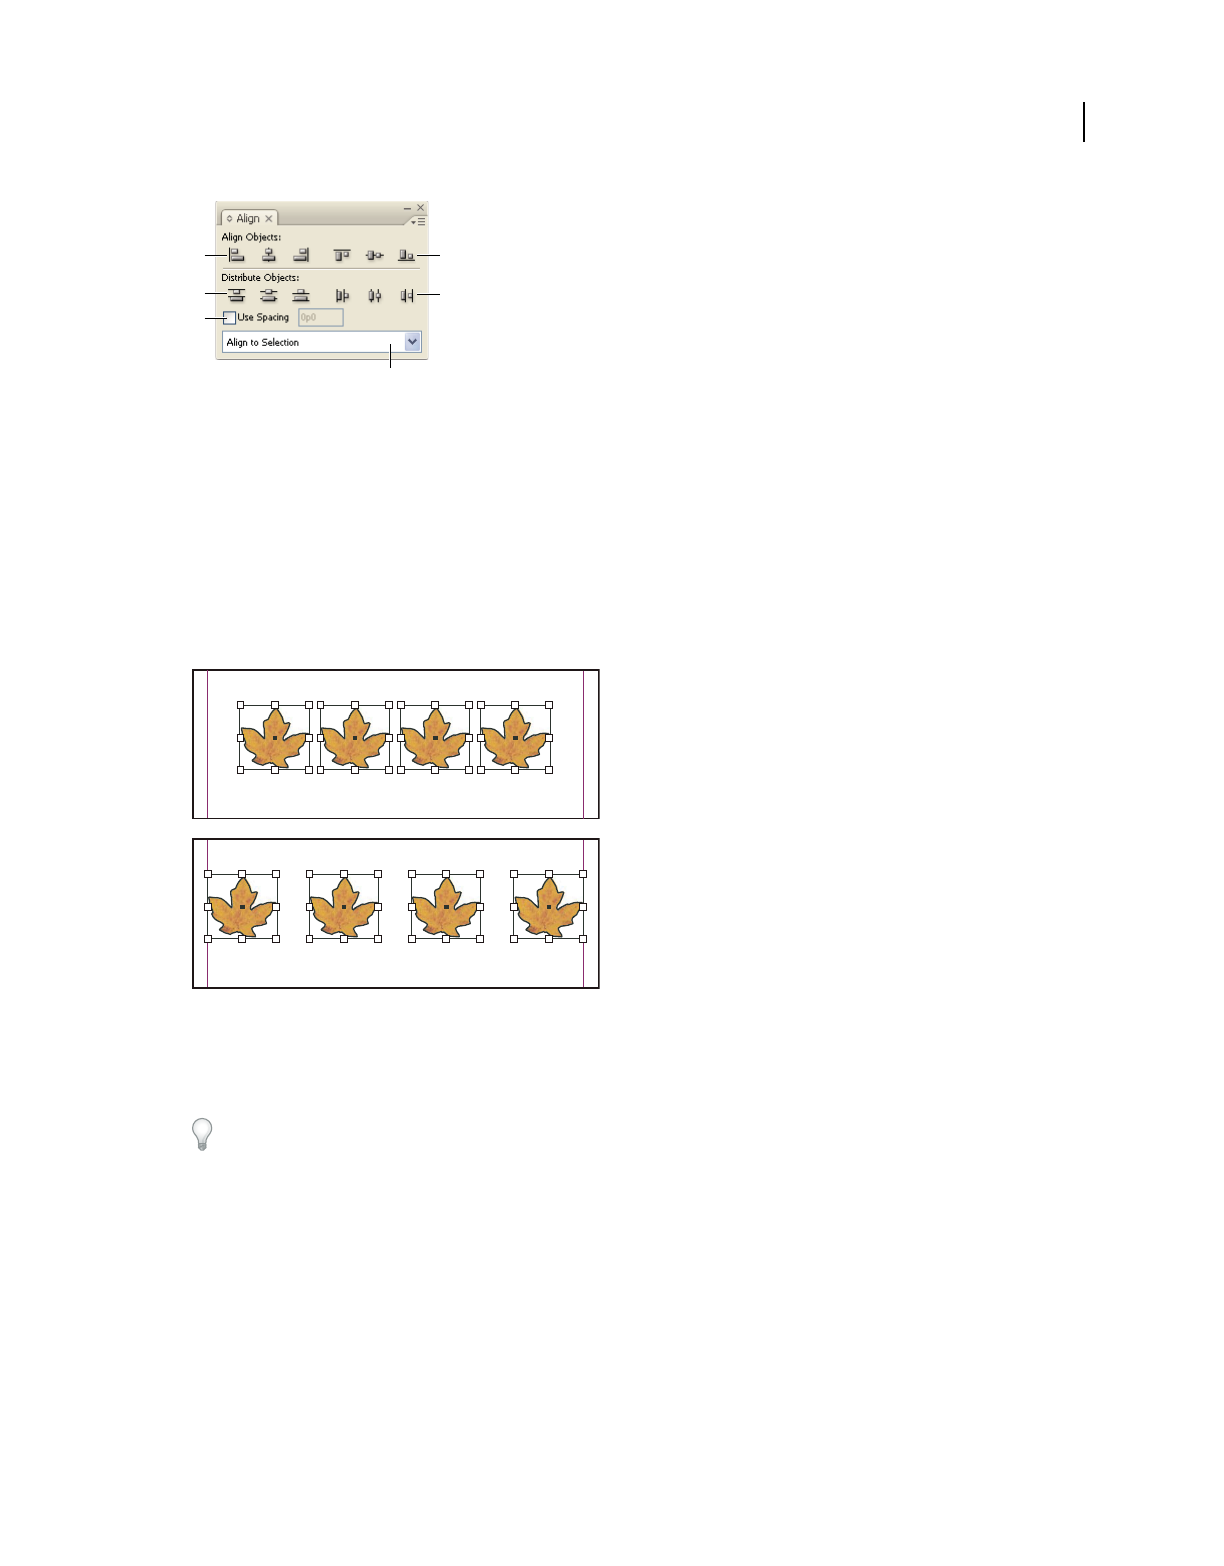
425
USING INDESIGN
Frames and objects
Last updated 11/16/2011
Align panel
A. Vertical alignment buttons B. Vertical distribution buttons C. Use Spacing distribution D. Horizontal alignment buttons E. Horizontal
distribution buttons F. Alignment location options
More Help topics
“Use keyboard shortcut sets” on page 28
Align or distribute objects
You can use the Align panel to align or space selected objects horizontally or vertically to the selection, margins, page,
or spread.
Objects distributed horizontally to selection (top) and to margins (bottom)
1Select the objects to align or distribute.
2Choose Window > Object & Layout > Align to display the Align panel.
To show or hide additional panel options, choose Show Options or Hide Options from the panel menu.
3From the menu at the bottom of the panel, specify whether you want to align or distribute objects based on the
selection, margins, page, or spread.
4Do one of the following:
•To align objects, click the button for the type of alignment you want.
•To distribute objects, click the button for the type of distribution you want. For example, if you click the Distribute
Left Edges button when Align To Selection is turned on, InDesign makes sure that there is an equal amount of space
from left edge to left edge of each selected object.
A
B
D
E
C
F
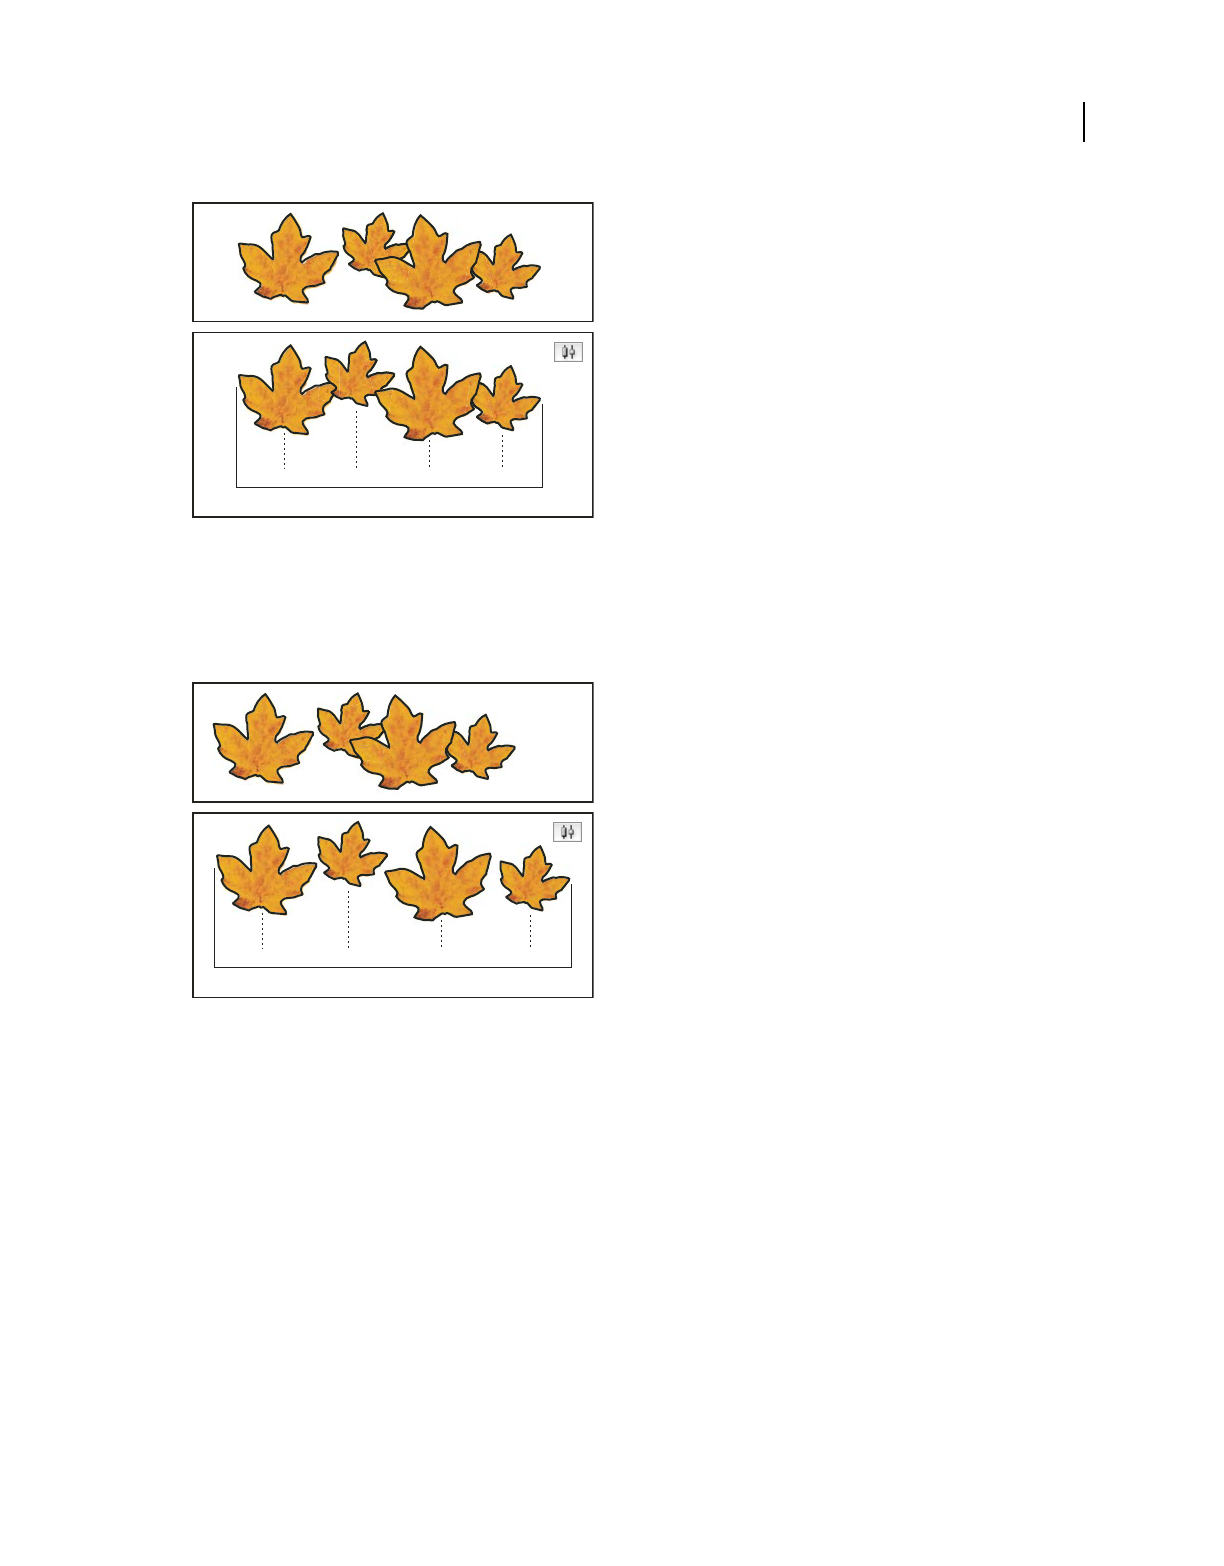
426
USING INDESIGN
Frames and objects
Last updated 11/16/2011
Using the Distribute Horizontal Centers option for even spacing
A. Creates even spacing between the centers of each object B. Keeps the overall width the same as before the transformation
•To set the space between objects, either center to center or edge to matching edge, select Use Spacing under
Distribute Objects, and then type the amount of space you want to apply. Click a button to distribute the selected
objects along their horizontal or vertical axes.
Using the Distribute Horizontal Centers option and adding a value for Use Spacing
A. Spaces the objects evenly from their centers by a specified value B. Changes the overall width of the objects as a whole
•To set the space between objects (facing edge to facing edge), under Distribute Spacing, select Use Spacing and type
the amount of space you want between the objects. (If Distribute Spacing is not visible, choose Show Options in the
Align Panel menu.) Then, click the Distribute Spacing button to distribute the objects along their horizontal or
vertical axes.
B
AAA
B
AAA
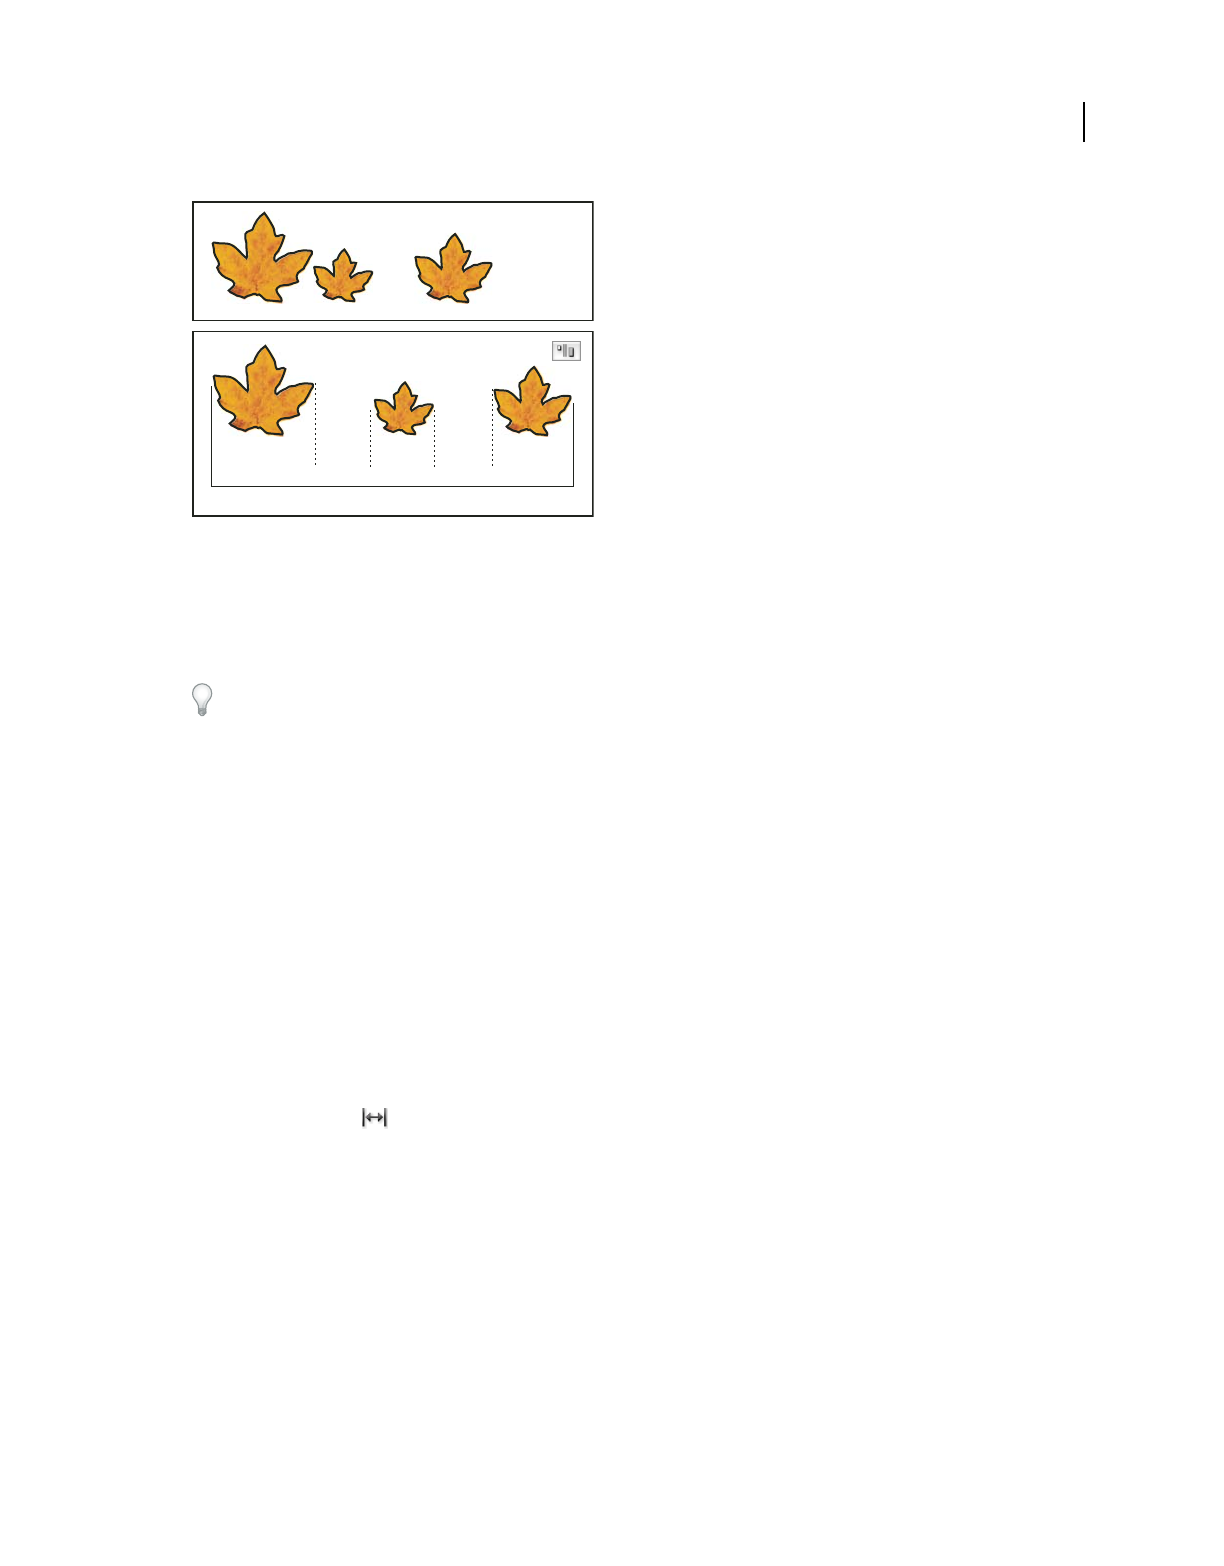
427
USING INDESIGN
Frames and objects
Last updated 11/16/2011
Using the Distribute Horizontal Space option and adding a value for Use Spacing
A. Creates spaces of a specified value between each object B. Changes the overall width of the objects as a whole
When you use spacing with vertical distribution, selected objects are spaced from top to bottom, starting with the top-
most object. When you use spacing with horizontal distribution, selected objects are spaced from left to right, starting
from the left-most object.
You can also use the Smart Spacing feature to align or distribute objects while moving them. For example, if two
vertical objects are 12 points apart, moving a third object 12 points below the second object causes temporary guides
to appear, allowing you to snap the object into alignment.
More Help topics
“Use smart guides” on page 61
“Align objects using the Gap tool” on page 427
Align objects using the Gap tool
The Gap tool provides a quick way to adjust the size of a gap between two or more objects. It also lets you resize several
objects that have commonly aligned edges simultaneously, while keeping the gaps between them fixed. It’s a one-step
way to adjust your layout by directly manipulating the space between objects.
The Gap tool ignores locked objects and master page items.
For a video tutorial on using the Gap Tool, see www.adobe.com/go/lrvid5155_id_en.
1Select the Gap tool .
2Move the pointer between two objects, and do any of the following actions:
•Drag to move the gap and resize all objects aligned along the gap.
•Shift-drag to move the gap between only the two nearest objects.
•Ctrl-drag (Windows) or Command-drag (Mac OS) to resize the gap instead of moving it. Adding the Shift key
resizes the gap between only the two nearest objects.
•Alt-drag (Windows) or Option-drag (Mac OS) to move the gap and objects in the same direction. Adding the
Shift key moves only the two nearest objects.
•Ctrl+Alt-drag (Windows) or Command+Option-drag (Mac OS) to resize the gap and move the objects. Adding
the Shift key to resize the gap and move only the two nearest objects.
B
AA

428
USING INDESIGN
Frames and objects
Last updated 11/16/2011
To view hints on using the Gap tool, select the Gap tool and open the Tool Hints panel (Window > Utilities > Tool
Hints).
Distribute objects using Live Distribute
When transforming multiple selected objects, you can resize the space between the selected objects proportionally
instead of resizing the actual objects. For example, if you want to change the spacing between five aligned rectangles,
you can do so without using any Distribute commands.
For a video on using Live Distribute, see http://tv.adobe.com/go/4949/.
1Select the objects.
2Start dragging a selection handle and hold down the Spacebar while dragging. Continue dragging to change the
spacing between the objects.
Grouping, locking, and duplicating objects
Group or ungroup objects
You can combine several objects into a group so that they are treated as a single unit. You can then move or transform
the objects without affecting their individual positions or attributes. For example, you might group the objects in a logo
design so that you can move and scale the logo as one unit.
Grouped object
Groups can also be nested—grouped into subgroups within larger groups. Use the Selection, Direct Selection, and
Group Selection tools to select different levels of a nested group’s hierarchy.
If you’re working with a stack of overlapping objects, and you group some objects that aren’t adjacent in the stacking
order, the selected objects will be pulled together in the stacking order, right behind the frontmost selected object. (For
example, when objects are stacked as A, B, C, D from front to back, and you group B and D together, the stacking order
becomes A, B, D, C.) If you group objects that exist on different named layers, all of the objects move to the frontmost
layer on which you selected an object. Also, the objects you select must either be all locked or all unlocked.
1Select multiple objects to be grouped or ungrouped. Selecting part of an object (for example, an anchor point) will
group the entire object.
2Choose either Object > Group or Object > Ungroup.
You can also use the Layers panel to add or remove objects from a group. See “Layers” on page 78.
If you’re not sure if an object is part of a group, select it using the Selection tool and look at the Object menu. If the
Object > Ungroup command is available, you’ve selected a group.

429
USING INDESIGN
Frames and objects
Last updated 11/16/2011
More Help topics
“Arrange objects in a stack” on page 407
“Select nested or overlapping objects” on page 406
Lock or unlock objects
You can use the Lock command to specify that you don’t want certain objects to move in your document. Locked
objects stay locked when a document is saved, closed, and then reopened.
As long as an object is locked, it cannot be moved. However, you can select locked objects if you turn off the Prevent
Selection Of Locked Objects option in General preferences. When you select a locked object, you can change attributes
such as color.
1Select the object or objects that you want to lock in place.
2Do any of the following:
•To lock the objects, choose Object > Lock.
•To unlock an object, click the lock icon.
•To unlock the objects on the current spread, choose Object > Unlock All On Spread.
You can also use the Layers panel to lock or unlock both objects and layers. When you lock a layer, the positions of all
objects on a layer are locked, and the objects cannot be selected. See “Layers” on page 78.
More Help topics
“Lock or unlock layers” on page 83
Hide objects
Hidden objects are not printed or exported, and they cannot be selected.
❖Do any of the following:
•To hide an object, select it and choose Object > Hide.
•To show hidden objects, choose Object > Show All On Spread.
Duplicate objects
You can duplicate objects using a number of different methods.
Duplicate an object using the Duplicate command
Use the Duplicate command to replicate a selected object instantly. The new copy appears on the layout slightly offset
down and to the right from the original.
❖Select an object or objects, and choose Edit > Duplicate.

430
USING INDESIGN
Frames and objects
Last updated 11/16/2011
Duplicate a selected object as you transform
You can duplicate an object each time you change its position, orientation, or proportions. For example, you can create
a flower by drawing one petal, setting its reference point at the base of the petal, and repeatedly rotating at incremental
angles, simultaneously duplicating to leave behind a new copy of the petal at each angle.
❖During a transformation, do one of the following:
•If you’re dragging the Selection tool , the Rotate tool , the Scale tool , or the Shear tool , start
dragging, and then hold down Alt (Windows) or Option (Mac OS) after you begin dragging. To constrain the
duplicate’s transformation, Alt+Shift-drag (Windows) or Option+Shift-drag (Mac
OS).
•If you’re specifying a value in the Transform or Control panel, press Alt+Enter (Windows) or Option+Return
(Mac
OS) after you’ve typed the value.
•If you’re pressing arrow keys to move objects, hold down Alt (Windows) or Option (Mac OS) as you press the keys.
Use Step and Repeat to duplicate objects
Use the Step and Repeat command to instantly create rows or columns of duplicates. For example, you can fill a page
with evenly spaced duplicates of a single business card design.
1Select the object or objects you want to duplicate.
2Choose Edit > Step and Repeat.
3For Repeat Count, specify how many duplicates you want to make, not counting the original.
4For Horizontal Offset and Vertical Offset, specify how far to shift the position of each new duplicate from the
previous duplicate along the
x and y axes, respectively, and click OK.
To create a page full of duplicates, first use Step and Repeat with Vertical Offset set to 0 (zero); this will create one row
of duplicates. Then select the entire row and use Step and Repeat with Horizontal Offset set to 0; this will repeat the
row down the page.
Duplicate objects into a grid
By dragging and using modifier keys, you can create a grid of object identical to the object being duplicated.
For a video on using grid mode, see http://tv.adobe.com/go/4949/.
1Select an object.
2Using the Selection tool, hold down Alt (Windows) or Option (Mac OS) and begin dragging.
3While still dragging, release the Alt or Option key. Press the Left Arrow and Right Arrow keys to change the number
of columns. Press the Up Arrow and Down Arrow keys to change the number of rows. Drag a rectangle to specify
the size of the grid.
4Release the mouse button.
Create nonprinting objects
You might want to create objects that appear onscreen, but will not be printed or appear in portable versions of the
document.
You can also use layers to selectively hide or show elements in a document, and you can assign layers a non-printing
status.
1Select the object or text frame that you don’t want to be printed.
2Open the Attributes panel (Window > Output > Attributes).
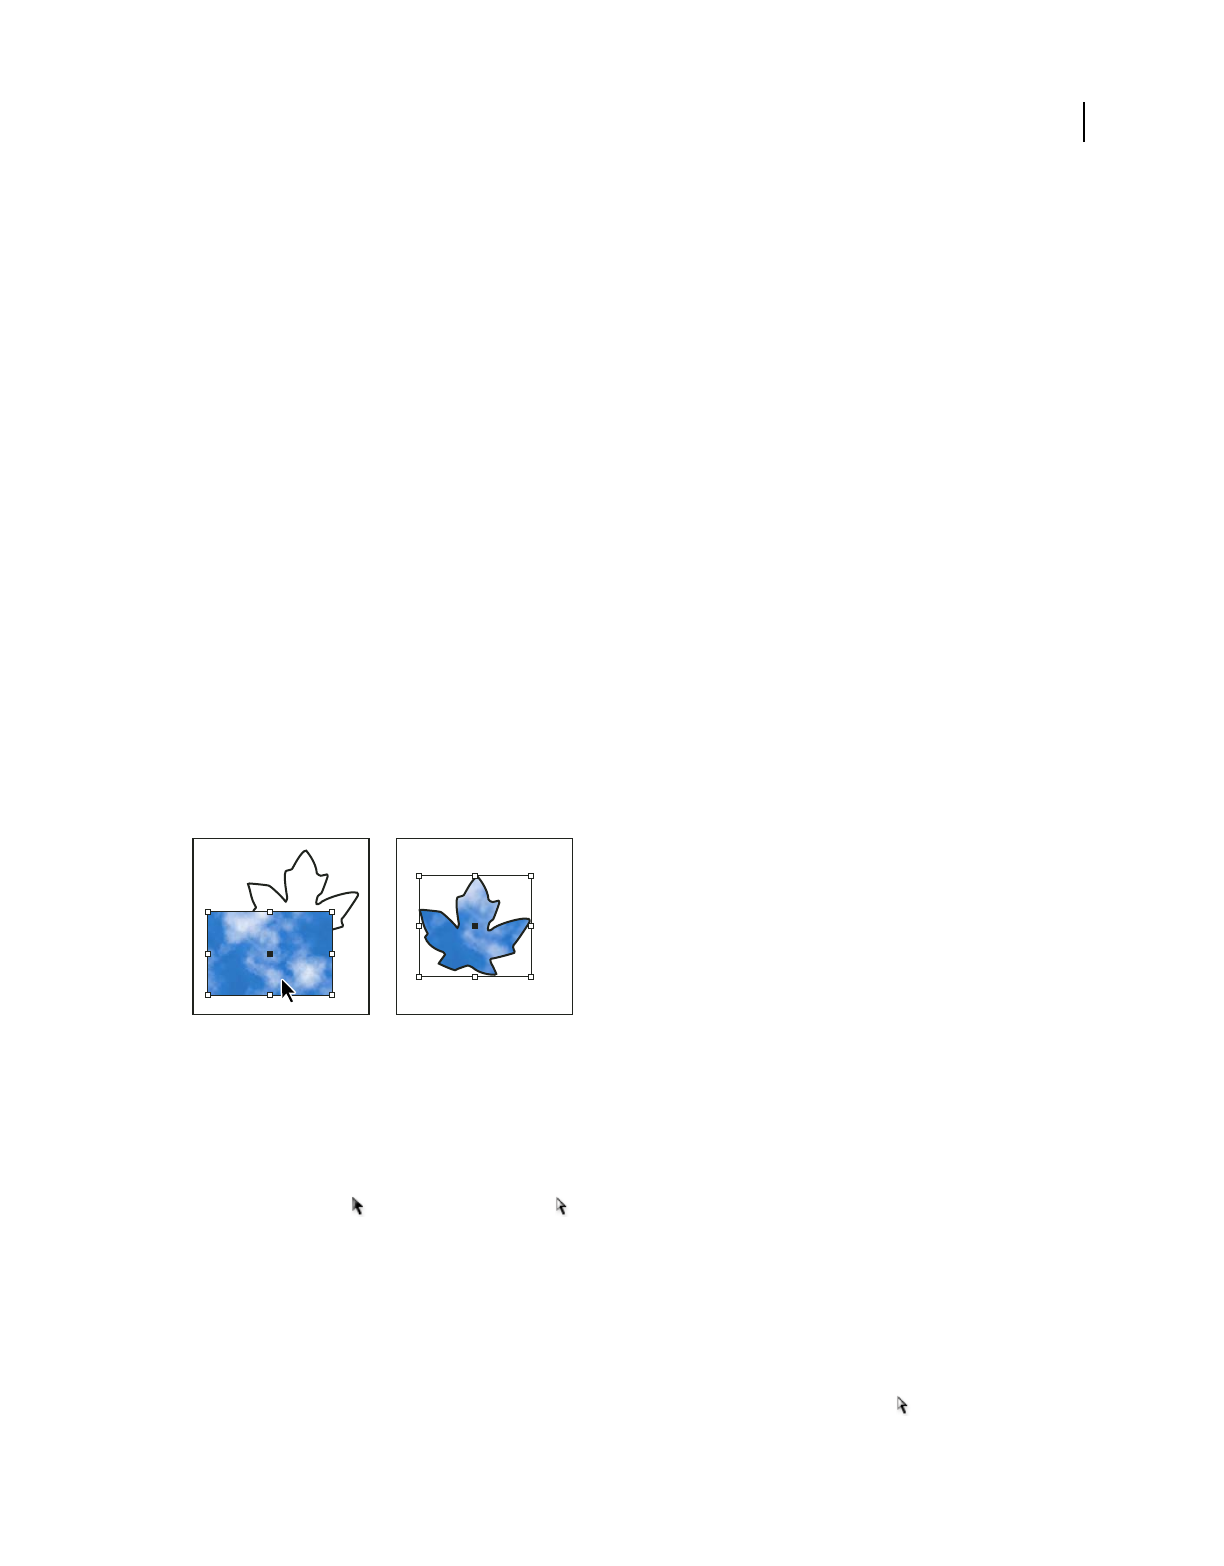
431
USING INDESIGN
Frames and objects
Last updated 11/16/2011
3In the Attributes panel, select Nonprinting.
More Help topics
“Set a layer as nonprinting” on page 83
Working with frames and objects
Modifying objects using graphics frames
Adobe InDesign objects include any item you can add or create in the document window, including open paths, closed
paths, compound shapes and paths, type, rasterized artwork, 3D objects, and any placed file, such as an image.
If a graphic exists inside a frame (as all imported graphics do), you can modify it by changing its relationship to its
frame, as in the following examples:
•Crop a graphic by making its frame smaller.
•Create various masking and layout effects by pasting an object into a frame.
•Add a keyline or outline to a graphic by changing the stroke weight and color of its frame.
•Center a graphic against a background rectangle by enlarging its frame and setting the frame’s fill color.
Paste an object into a frame
Use the Paste Into command to nest graphics within container frames. You can even nest graphics into nested frames.
Background image pasted into a frame
1Do one of the following:
•To paste one object inside a frame, select the object.
•To paste two or more objects inside a frame, group them first, because a frame can contain only one object.
•To paste a text frame inside another frame and preserve its current appearance, select the entire text frame using
the Selection tool
or Direct Selection tool , not the Type tool.
2Choose Edit > Copy (or Edit > Cut, if you don’t want to keep the original).
3Select a path or frame, and then choose Edit > Paste Into.
Remove a frame’s content
1Do one of the following:
•If you’re removing a graphic or a text frame, select the object with the Direct Selection tool . Or, use the Selection
tool to click the content grabber of the image.
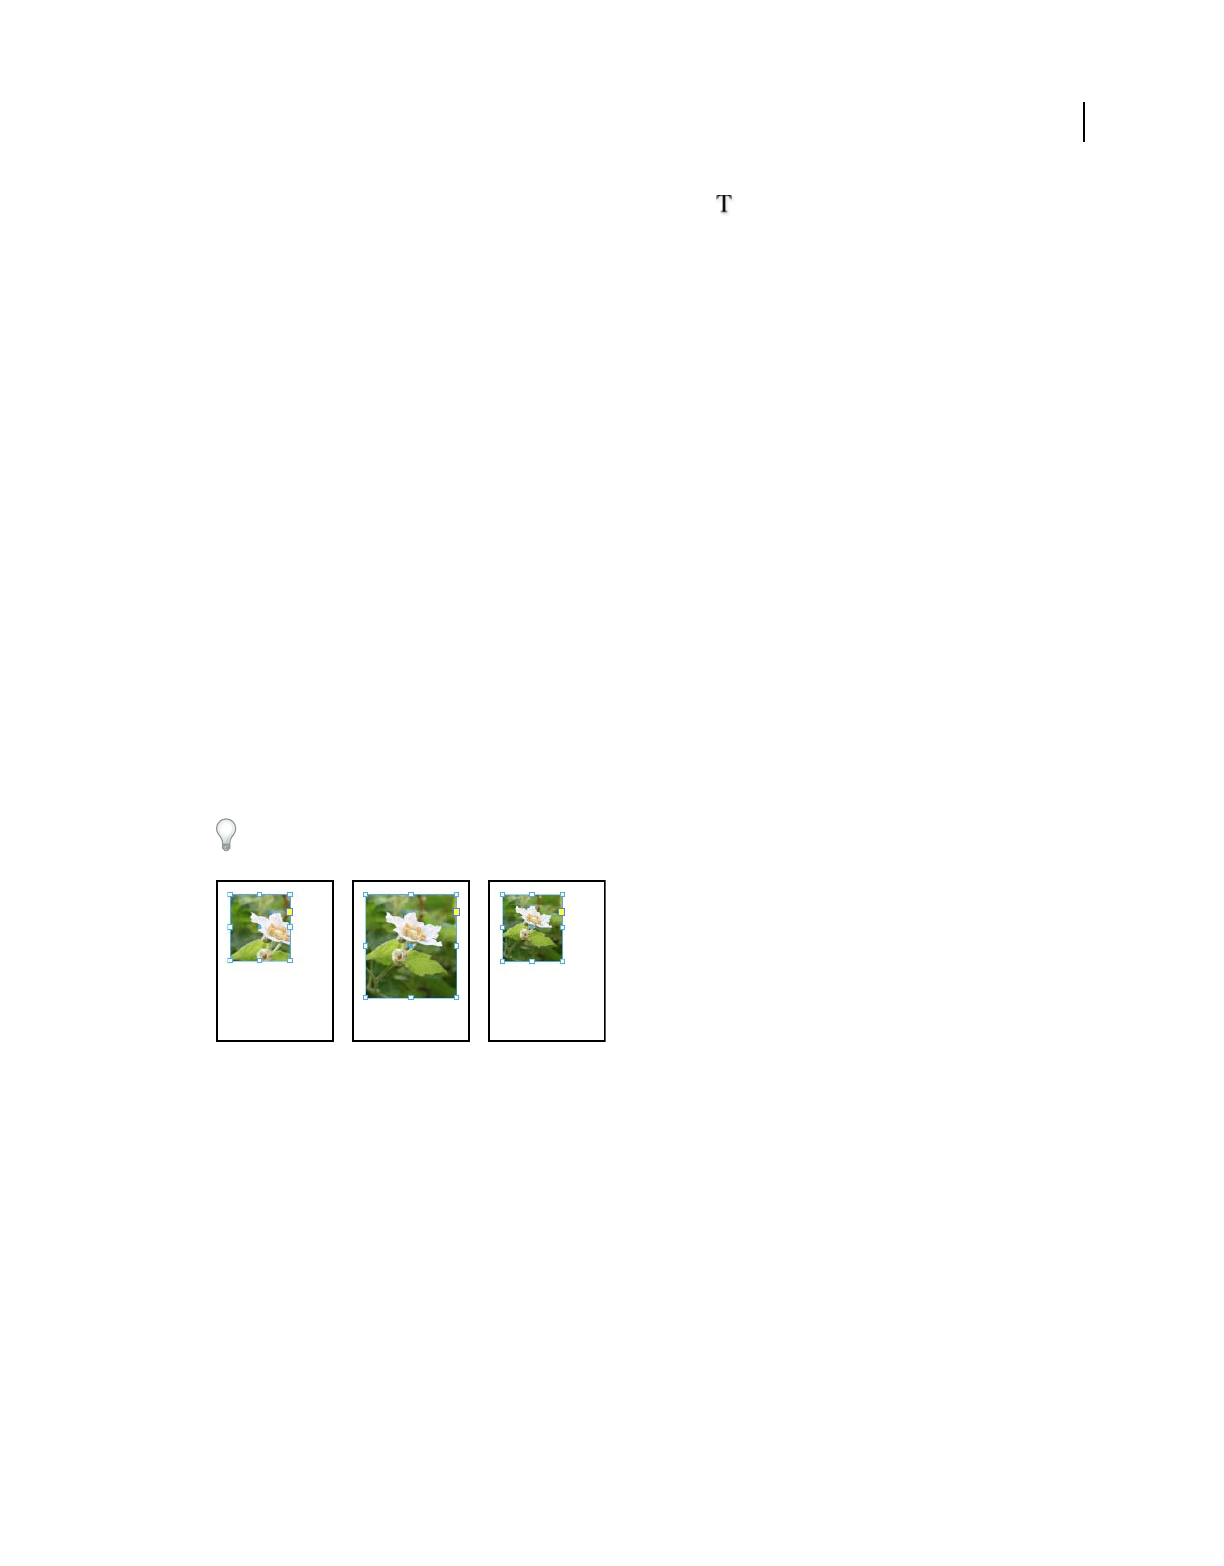
432
USING INDESIGN
Frames and objects
Last updated 11/16/2011
•If you’re removing text characters, select them with the Type tool .
2Do one of the following:
•To permanently remove the content, press Delete or Backspace.
•To place the content elsewhere on the layout, choose Edit > Cut, deselect the frame, and then choose Edit > Paste.
Note: An imported image cannot exist without a frame. If you cut an imported image from its frame and paste it
elsewhere within a document, a new frame will be created for it automatically.
Fitting objects to frames
If the frame and its content are different sizes, you can use the Fitting commands to achieve a perfect fit.
Frame alignment options apply to frames that contain either a graphic or another text frame (text frames nested within
another frame), but they do not affect paragraphs inside a text frame—you control alignment and positioning of text
itself using the Text Frame Options command and the Paragraph, Paragraph Styles, and Story panels.
Fit an object to its frame
1Select the frame of the object.
2Choose Object > Fitting and one of the following options:
Fit Content To Frame Resizes content to fit a frame and allows the content proportions to be changed. The frame
will not change, but the content may appear to be stretched if the content and the frame have different proportions.
Fit Frame To Content Resizes a frame to fit its content. The frame’s proportions are altered to match the content
proportions, if necessary. This is useful for resetting a graphics frame that you accidentally altered.
To fit a frame to its content quickly, double-click any corner handle on the frame. The frame resizes away from the
point you click. If you click a side handle, the frame resizes only in that dimension.
Aligning an object within a graphics frame
A. Original B. Frame resized to fit content C. Content resized to fit frame
Center Content Centers content within a frame. The proportions of the frame and its content are preserved. The
size of the content and frame are unaltered.
Fit Content Proportionally Resizes content to fit a frame while preserving the content proportions. The frame’s
dimensions are not changed. If the content and the frame have different proportions, some empty space will result.
Fill Frame Proportionally Resizes content to fill the entire frame while preserving the content’s proportions. The
frame’s dimensions are not changed. If the content and the frame have different proportions, some of the content
will be cropped by the bounding box of the frame.
Note: The Fitting commands fit the outer edges of the content to the center of the frame’s stroke. If the frame has a
thick stroke weight, outer edges of the content will be obscured. You can adjust the frame’s stroke alignment to the
center, inside, or outside of a frame edge. (See “Set strokes” on page 358.)
To remove undesired fitting settings applied using Auto-Fit, choose Object > Fitting > Clear Frame Fitting Options.
ABC

433
USING INDESIGN
Frames and objects
Last updated 11/16/2011
Using Auto Fit
If you resize an image frame when Auto-Fit is not selected, the frame resizes while the image size remains the same. If
you select Auto-Fit, the image resizes with the frame. If you decide you need to crop or transform the image, use the
Direct Selection tool to transform the image itself. Or, deselect Auto-Fit, transform the image, and select Auto-Fit
again.
You can select the Auto-Fit option in the Control bar and in the Frame Fitting Options dialog box.
Set frame fitting options
You can associate a fitting option to a placeholder frame so that whenever new content is placed in that frame, the
fitting command is applied.
1Select a frame.
2Choose Object > Fitting > Frame Fitting Options.
3Specify the following options, and then click OK:
Auto-Fit Select this option if you want the image to resize automically when you resize the frame.
Reference Point Specify a reference point for the cropping and fitting actions. For example, if you select the upper-
right corner for a reference point and choose Fit Content Proportionally, the image may be cropped on either the
left or bottom side (away from the reference point).
Crop Amount Specify the location of the image’s bounding box in relation to the frame. Use positive values to crop
the image. For example, you may want to exclude a border that surrounds the placed image. Use negative values to
add space between the image’s bounding box and the frame. For example, you may want white space to appear
between the image and the frame.
If you enter crop values that cause the image not to be visible, those values are ignored, but the fitting option is still
implemented.
Fitting On Empty Frame Specify whether you want to fit the content to the frame (which may cause the image to be
skewed), fit the content proportionally (some empty space may result), or fill the frame proportionally (one or more
sides may be cropped).
The fitting action is applied only when content is placed into a frame. If you resize the frame, the fitting option is
automatically reapplied only if Auto-Fit is selected.
More Help topics
“Using placeholders to design pages” on page 85
“Object styles” on page 213
Move a graphics frame or its content
When you use the Selection tool to select a graphics frame, you can select either the frame or the image within the
frame. If you click outside the content grabber and drag the selection, the frame’s content moves with the frame. If you
drag the content grabber, the image moves within the frame.
The following techniques include ways to move a frame or its content independent of each other. These techniques are
useful for adjusting how a graphic is cropped or masked by its frame.
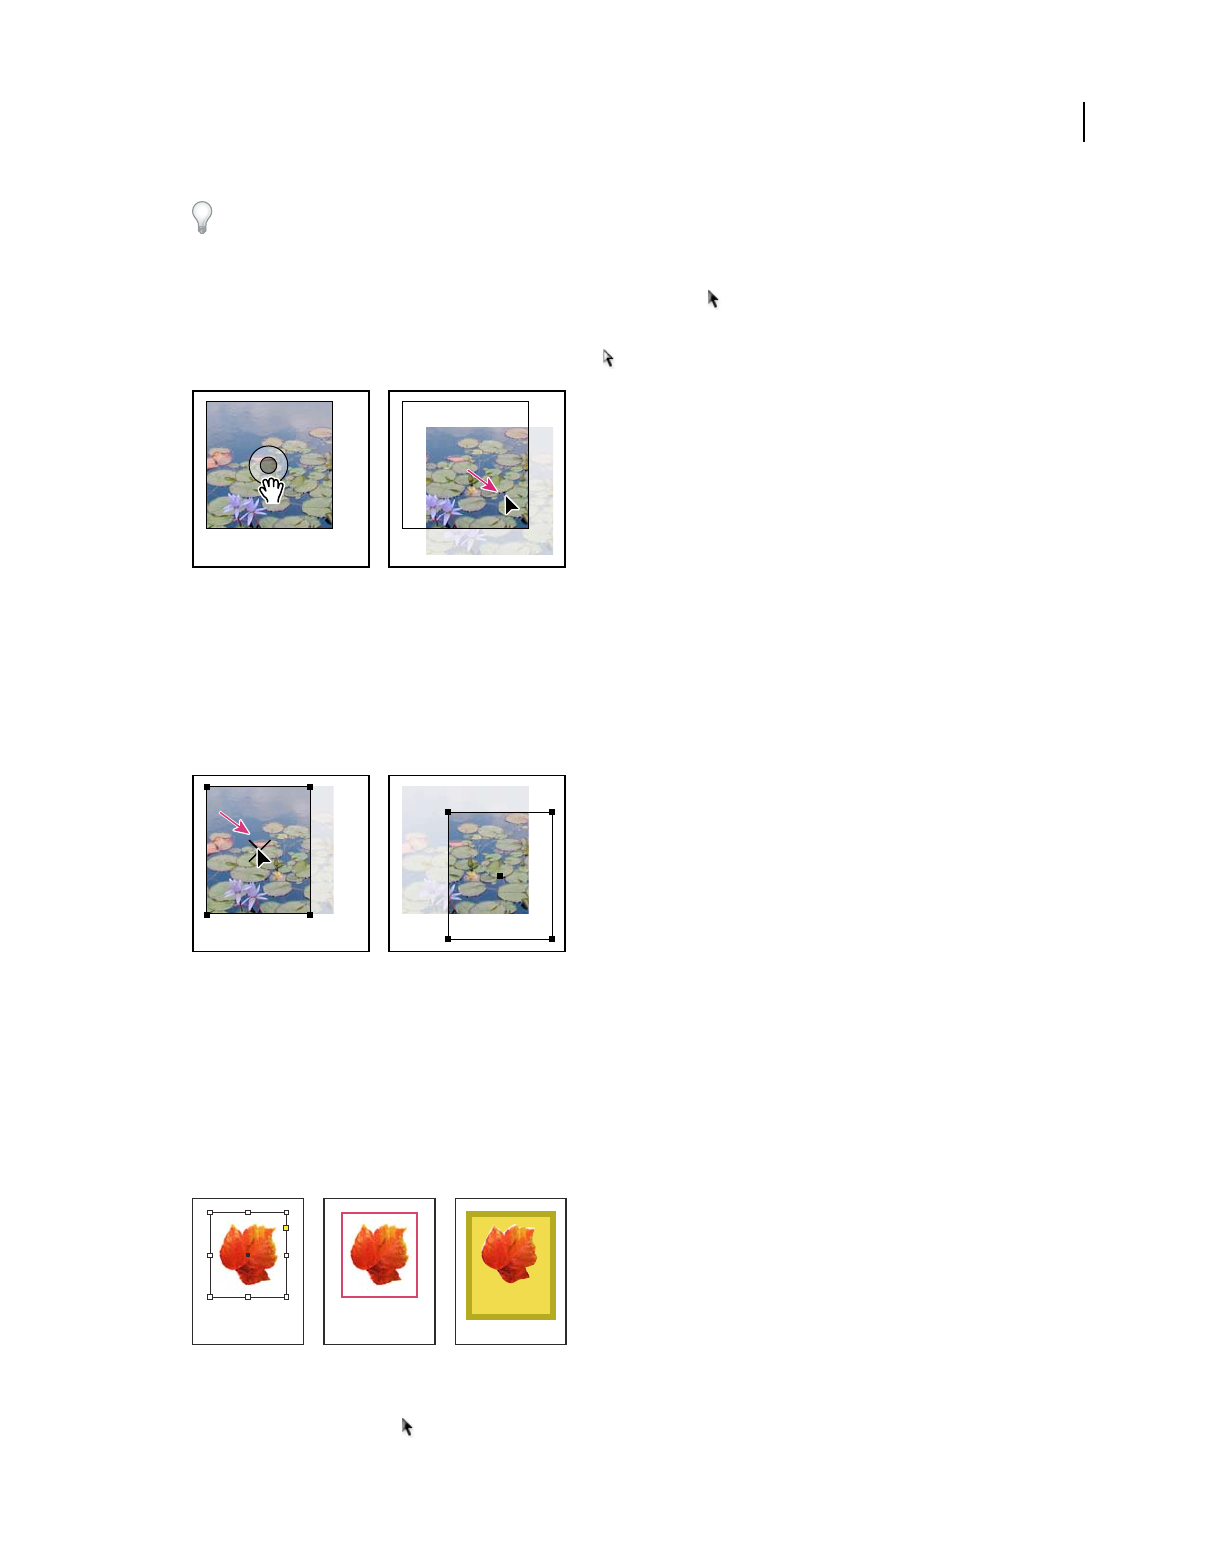
434
USING INDESIGN
Frames and objects
Last updated 11/16/2011
If a selection tool doesn’t work the way you expect it to, try deselecting everything first. Do this by pressing
Ctrl+Shift+A (Windows) or Command+Shift+A (Mac OS).
❖Do any of the following:
•To move a frame together with its content, use the Selection tool to click the image outside the content grabber.
•To move imported content without moving the frame (that is, to pan content behind its frame), drag the content
grabber. You can also use the Direct Selection tool
to select and drag the image.
Moving the content, but not its frame
Note: If you hold down the mouse button on a graphic before you move it, a dynamic graphics preview (a ghosted-back
image) of the outside of the frame appears, but the preview of the image that moves inside the frame is not ghosted. This
makes it easier to see how you are positioning the entire image within a frame.
•To move a frame without moving its content, click the frame using the Selection tool, switch to the Direct Selection
tool, and then drag the center point.
Moving the frame, but not its content
•To move multiple frames, use the Selection tool to select the objects, and then drag them. If you use the Direct
Selection tool to select multiple objects, only the item you drag is affected.
Create a border or background
A graphics frame is ideally suited for use as a border or background for its content, because you can change the frame’s
stroke and fill independent of the content.
Adding borders to graphics frames
A. Photo in graphics frame B. Frame with stroke applied C. Frame enlarged with both stroke and fill applied
1Using the Selection tool , click an imported graphic outside the content grabber to select its frame.
CAB
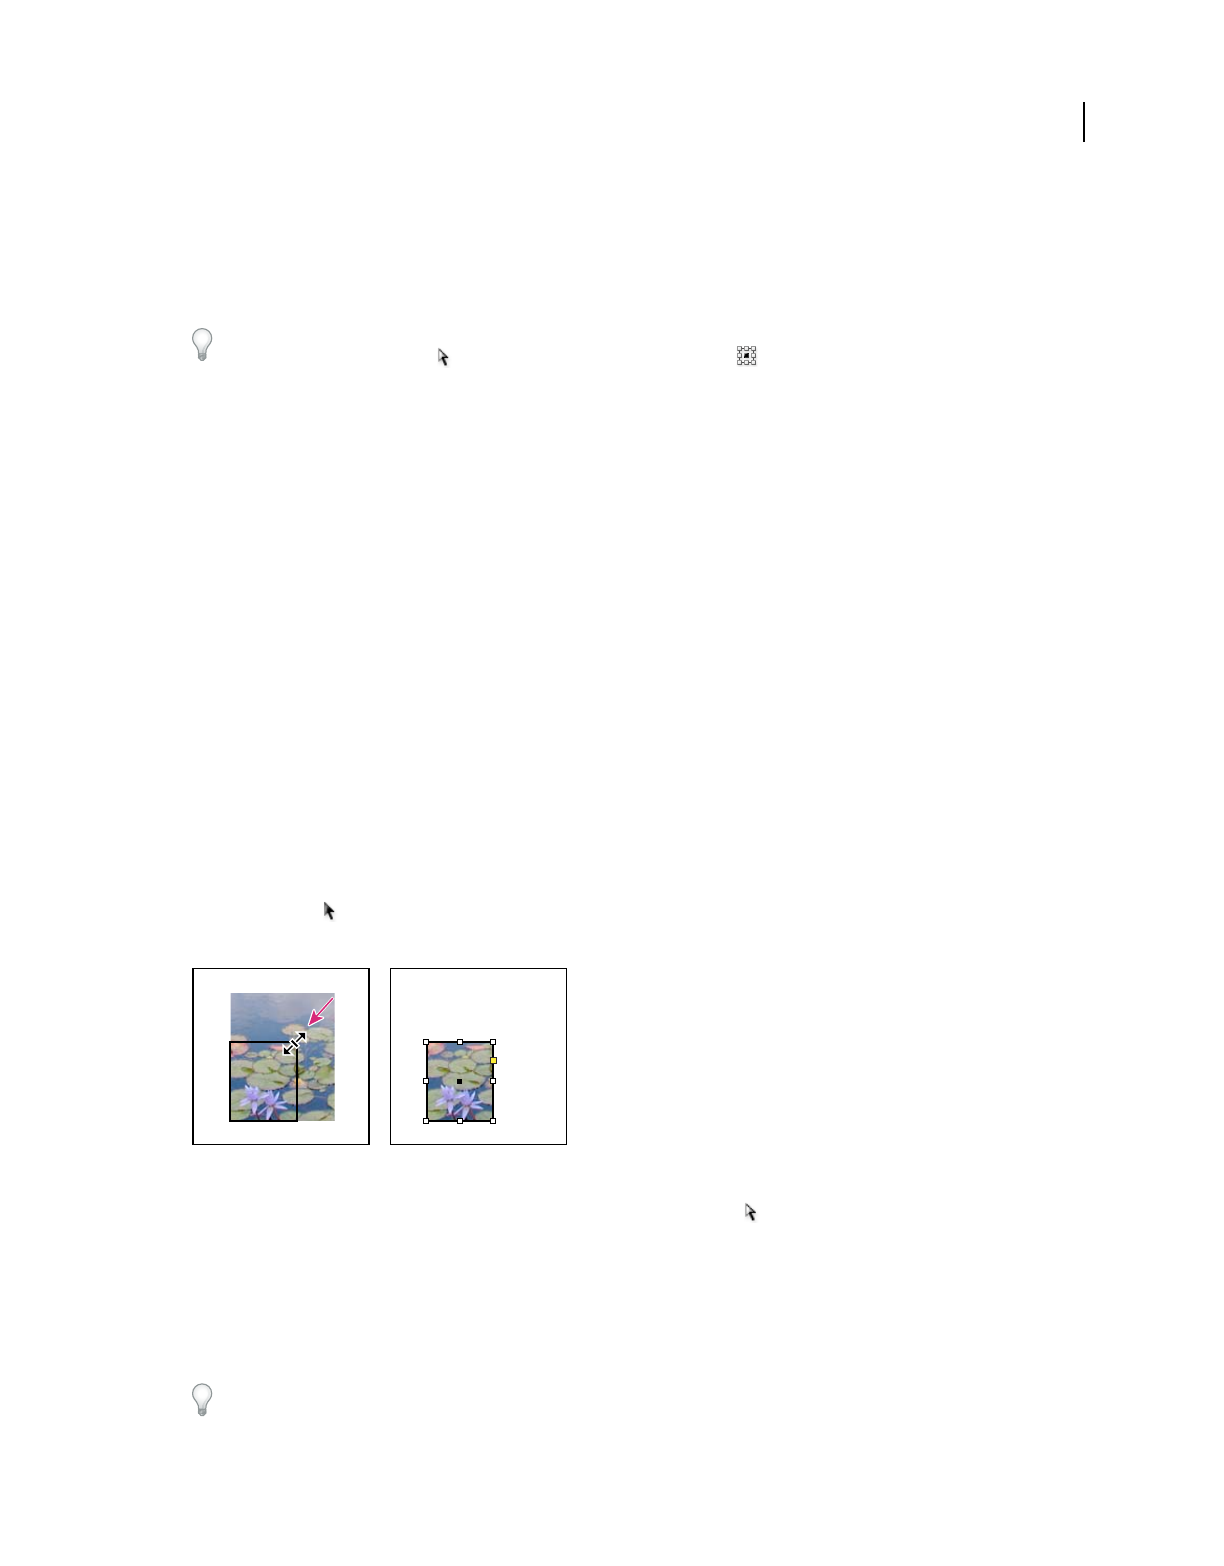
435
USING INDESIGN
Frames and objects
Last updated 11/16/2011
2To enlarge the frame without resizing the graphic, drag any bounding box handle outward. To maintain frame
proportions, hold down Shift as you drag.
3Use the Swatches panel and the toolbox to apply a stroke and fill color.
4Use the Stroke panel to adjust the frame’s stroke weight, style, or alignment.
You can quickly enlarge a frame equally around all sides by using the Transform or Control panel. Select the frame
with the Direct Selection tool , set the panel reference point locator to the center point, and enter new values
for the width and height.
More Help topics
“Applying line (stroke) settings” on page 358
“Apply color” on page 465
Crop or mask objects
Cropping and masking are both terms that describe hiding part of an object. In general, the difference is that cropping
uses a rectangle to trim the edges of an image, and masking uses an arbitrary shape to make an object’s background
transparent. A common example of a mask is a clipping path, which is a mask made for a specific image.
Use graphics frames to crop or mask objects. Because an imported graphic is automatically contained within a frame,
you can crop or mask it immediately without having to create a frame for it. If you haven’t created a frame for an
imported graphic manually, the frame is automatically created at the same size as the graphic, so it may not be obvious
that the frame is there.
Note: For efficient printing, only the data for the visible parts of cropped or masked images is sent when you output the
document. However, you will still save disk space and RAM if you crop or mask images to their desired shapes and sizes
before importing them into your document.
•To crop an imported image or any other graphic already inside a rectangular frame, click the object using the
Selection tool
and drag any handle on the bounding box that appears. Press Shift as you drag to preserve the
frame’s original proportions.
Cropping an image using a graphics frame
•To crop or mask any object, use the Selection or Direct Selection tool to select one object you want to mask.
Choose Edit > Copy, select an empty path or frame smaller than the object, and choose Edit > Paste Into.
•To crop frame content precisely, select the frame with the Direct Selection tool, and use the Transform or Control
panel to change the size of the frame.
•To specify crop settings for an empty placeholder frame, choose Object > Fitting > Frame Fitting Options, and then
specify the crop amount.
With an imported graphic, you can also create a mask by using the drawing tools to change the shape of the graphic’s
existing frame.

436
USING INDESIGN
Frames and objects
Last updated 11/16/2011
Object export options (CS5.5)
Object export options can be used to specify export parameters required when you export to different formats such as
EPUB, HTML, or accessible PDFs. Object export options can be applied to both text frames and graphic frames, as well
as groups. Use Object export options to:
•Define Alt text for placed images and graphics.
•Apply tags and actual text settings for tagged PDFs.
•Create different conversion settings on each object, so that they render well on different screen sizes and pixel
densities. Use these options to control the quality of rasterization applied to text effects such as drop shadow and
bevel when you export the layout to HTML or EPUB.
Apply Object export options
1Select the frame or group in the layout.
2Choose Object > Object Export Options.
3Apply the settings.
You can leave the Object Export Options dialog box while you select other objects on the layout to apply the settings.
Alt-text options
Alternative text (Alt text) is a brief text-based description of an image or graphic. This text is used in situations where
the image is not rendered or to help screen-readers.
Alt-text Source Select the source to assign the Alt text for the selected frames or groups.
•Custom Enter text manually.
•From Structure Use text as specified in the structure. See “Label graphics for use with screen-reader software” on
page 522.
•From XMP (Title |Description |Headline) Use data stored in common XMP fields. If XMP data is updated using
another application such as Adobe Bridge, when you update the link, text is updated automatically.
•From Other XMP If text string is stored in some other XMP field, enter the complete namespace and property name
in <ns>:<property> format. For example, the Adobe Bridge user interface supports IPTC Core, which contains a field
titled “IPTC Subject Code”. If this field was used to store the text string, then the Property value would be
“Iptc4xmpCore:SubjectCode[1].”
Note: When you import content from Microsoft Word, InDesign also imports alt-text applied to images.
Tagged PDF options
Apply Tag Select the source to assign the PDF Tag for the selected frames or groups.
•From Structure Use text as specified in the structure.
•Artifact Use for graphic elements that have no important meaning when they are read aloud by a screen reader.
•Based on Object Automatically determines the content of the frame and applies “Story” or “Figure” tag.
Actual Text Source PDF also supports actual text, in addition to Alt text. Actual text can be applied to graphic elements
that visually look like text. For example, a scanned TIFF image. Actual text is used to represent words that were
converted to artwork. Actual text is only applicable for tagged PDFs.
•Custom Enter text manually.

437
USING INDESIGN
Frames and objects
Last updated 11/16/2011
•From Structure Use text as specified in the structure. See “Label graphics for use with screen-reader software” on
page 522.
•From XMP (Title |Description |Headline) Use data stored in common XMP fields. If XMP data is updated using
another application such as Adobe Bridge, when you update the link, text is updated automatically.
•From Other XMP If text string is stored in some other XMP field, enter the complete namespace and property name
in <ns>:<property> format. For example, the Bridge user interface supports IPTC Core, which contains a field titled
“IPTC Subject Code”. If this field was where the text string is stored, then the Property value would be
“Iptc4xmpCore:SubjectCode[1].”
EPUB and HTML options
Use the EPUB and HTML options to specify image conversion settings for individual objects. If these settings are not
specified, the EPUB export image conversion settings are used. See “EPUB Images options” on page 125.
Custom Conversion Check to specify custom image conversion settings for selected frames.
•Size Specify if images must remain a fixed or resized relative to the page. Relative to Page Size sets a relative
percentage value based on the size of the image relative to the InDesign page width. This option causes the images to
rescale proportionally, relative to the width of the reading area.
•Resolution (ppi) Specify the resolution of the images in pixels per inch (ppi). While operating systems have
standardized on either 72 ppi or 96 ppi, mobile devices range from 132 ppi (iPad), to 172 ppi (Sony Reader), to over
300 ppi (iPhone 4). You can specify a ppi value for each object selected. Values include 72, 96, 150 (average for all
eBook devices today), and 300.
•Format Lets you choose whether the optimized images in your document are converted to GIF, JPEG, or PNG.
•Palette Lets you control how InDesign handles colors when optimizing GIF files. The GIF format uses a limited
color palette, which cannot exceed 256 colors.
Choose Adaptive to create a palette using a representative sample of colors in the graphic without any dithering
(mixing of small spots of colors to simulate additional colors). Choose Web to create a palette of web-safe colors that
are a subset of Windows and Mac
OS system colors. Choose System (Win) or System (Mac) to create a palette using
the built-in system color palette. This choice may cause unexpected results.
Select Interlace to display a slowly loaded image gradually by filling in missing lines. If this option is not select, an
image looks fuzzy and gradually becomes clear as the image reaches full resolution.
•Quality Determines the trade-off between compression (for smaller file sizes) and image quality for each JPEG
image created. Low produces the smallest file and lowest image quality.
•Method Determines how quickly JPEG graphics display when the file containing the image is opened on the web.
Choose Progressive to make the JPEG images display gradually and in increasing detail as they are downloaded. (Files
created with this option are slightly larger and require more RAM for viewing.) Choose Baseline to make each JPEG
file display only after it has been downloaded; a placeholder appears in its place until the file displays.
Custom Image Alignment and Spacing Specify the image alignment, left, center, right, and the top and bottom
padding.
Insert Page Break Select this option to insert page breaks with images. Page breaks can be inserted Before Image, After
Image, or Before and After Image.
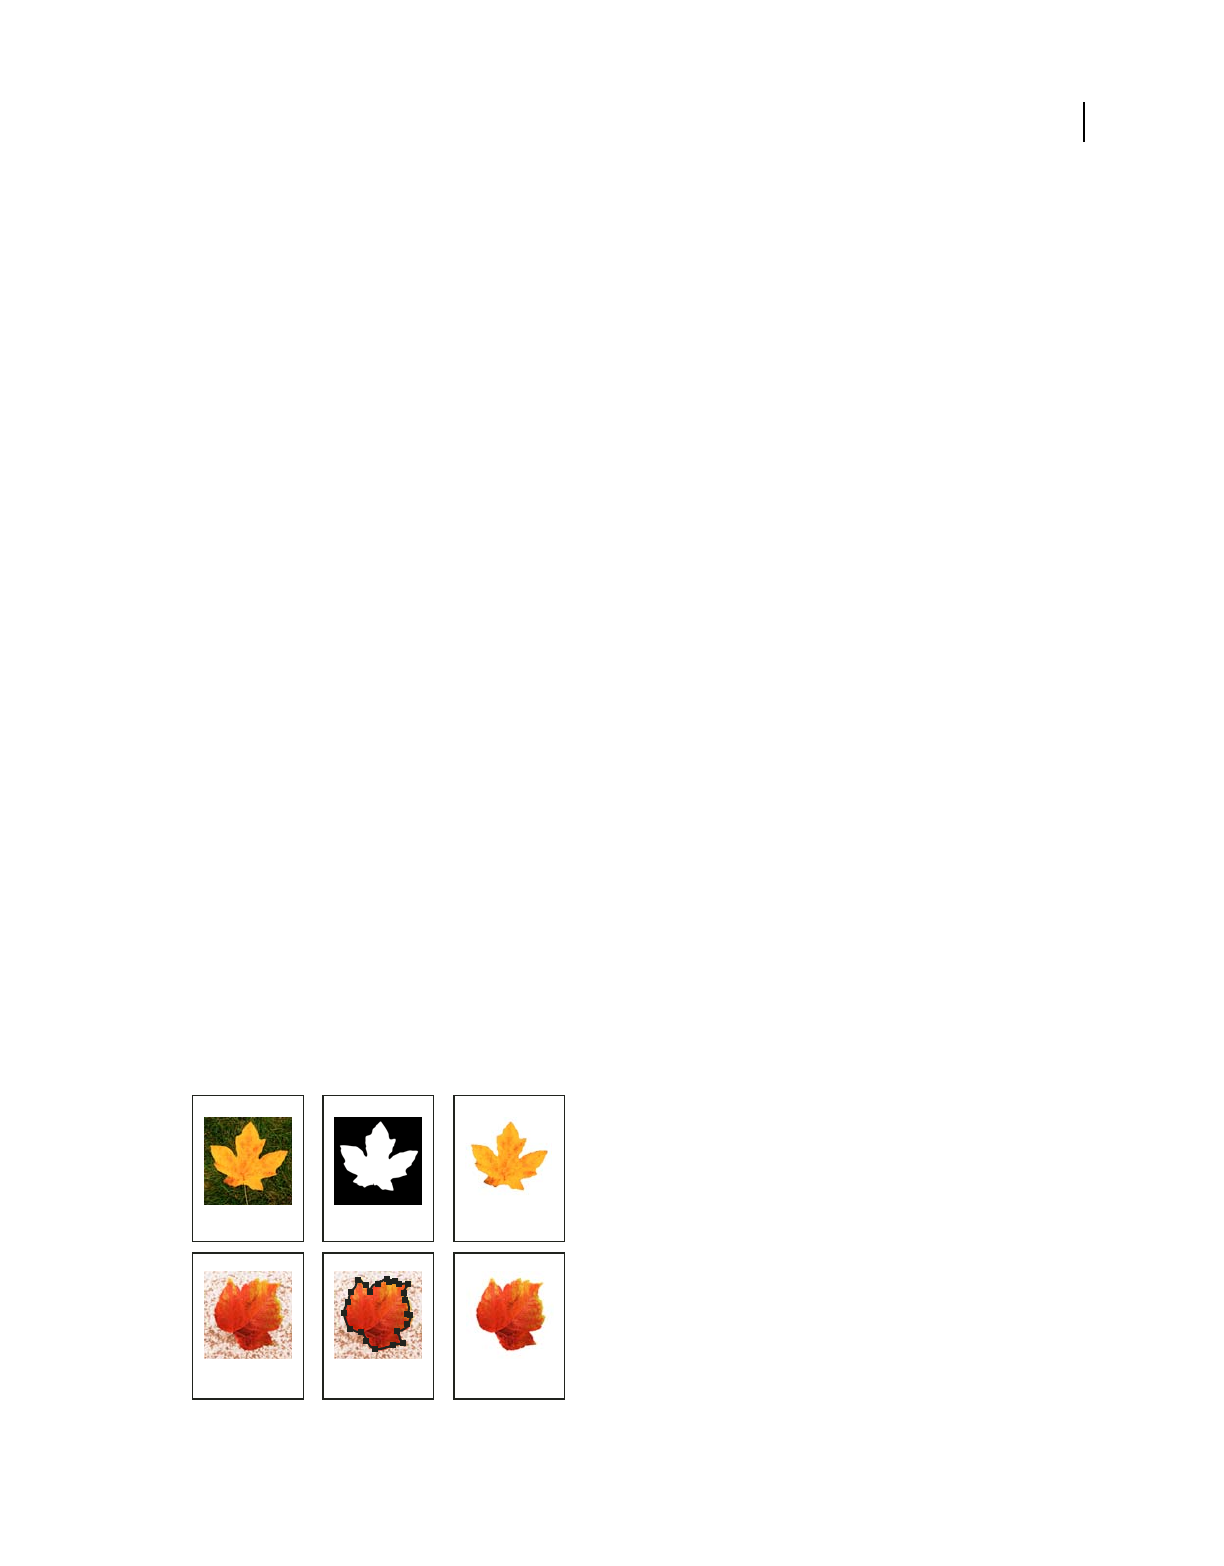
438
USING INDESIGN
Frames and objects
Last updated 11/16/2011
Clipping paths
Clipping paths
Clipping paths crop part of the artwork so that only a portion of the artwork appears through the shape or shapes you
create. You can create clipping paths to hide unwanted parts of an image, creating both a path for the image and a
frame for the graphic. By keeping the clipping path and graphics frame separate, you can freely modify the clipping
path without affecting the graphics frame by using the Direct Selection tool and other drawing tools in the toolbox.
You can create clipping paths in the following ways:
•Place already-saved graphics with paths or alpha (mask) channels, which InDesign can use automatically. You can
add paths and alpha channels to graphics using a program such as Adobe Photoshop.
•Use the Detect Edges option in the Clipping Path command to generate a clipping path for a graphic that was saved
without one.
•Use the Pen tool to draw a path in the shape you want, and then use the Paste Into command to paste the graphic
into the path.
When you use one of InDesign’s automatic methods to generate a clipping path, the clipping path is attached to the
image, resulting in an image that is clipped by the path and cropped by the frame.
Note: The graphics frame displays the color of the layer it appears on, and the clipping path is drawn in the inverse color
of the layer. For example, if the layer color is blue, the graphics frame will appear as blue, and the clipping path will appear
as orange.
Crop using a graphic’s path or alpha channel
InDesign can crop an imported EPS, TIFF, or Photoshop graphic using the clipping path or alpha channel saved with
the file. When an imported graphic includes more than one path or alpha channel, you can choose which path or alpha
channel to use for the clipping path.
An alpha channel is an invisible channel that defines transparent areas of a graphic. It’s stored inside a graphic with
the RGB or CMYK channels. Alpha channels are commonly used in video-effects applications. InDesign automatically
recognizes Photoshop’s default transparency (the checkerboard background) as an alpha channel. If the graphic has
an opaque background, you must use Photoshop to remove the background, or create and save one or more alpha
channels with the graphic. You can create alpha channels using background-removal features in Adobe Photoshop,
such as layer masks, the Channels panel, the Background Eraser, or the Magic Eraser.
Results of using alpha channels and embedded paths
A. Original graphic B. Alpha channel C. Placed graphic D. Original graphic E. Graphic with embedded path F. Placed graphic
CAB
FDE
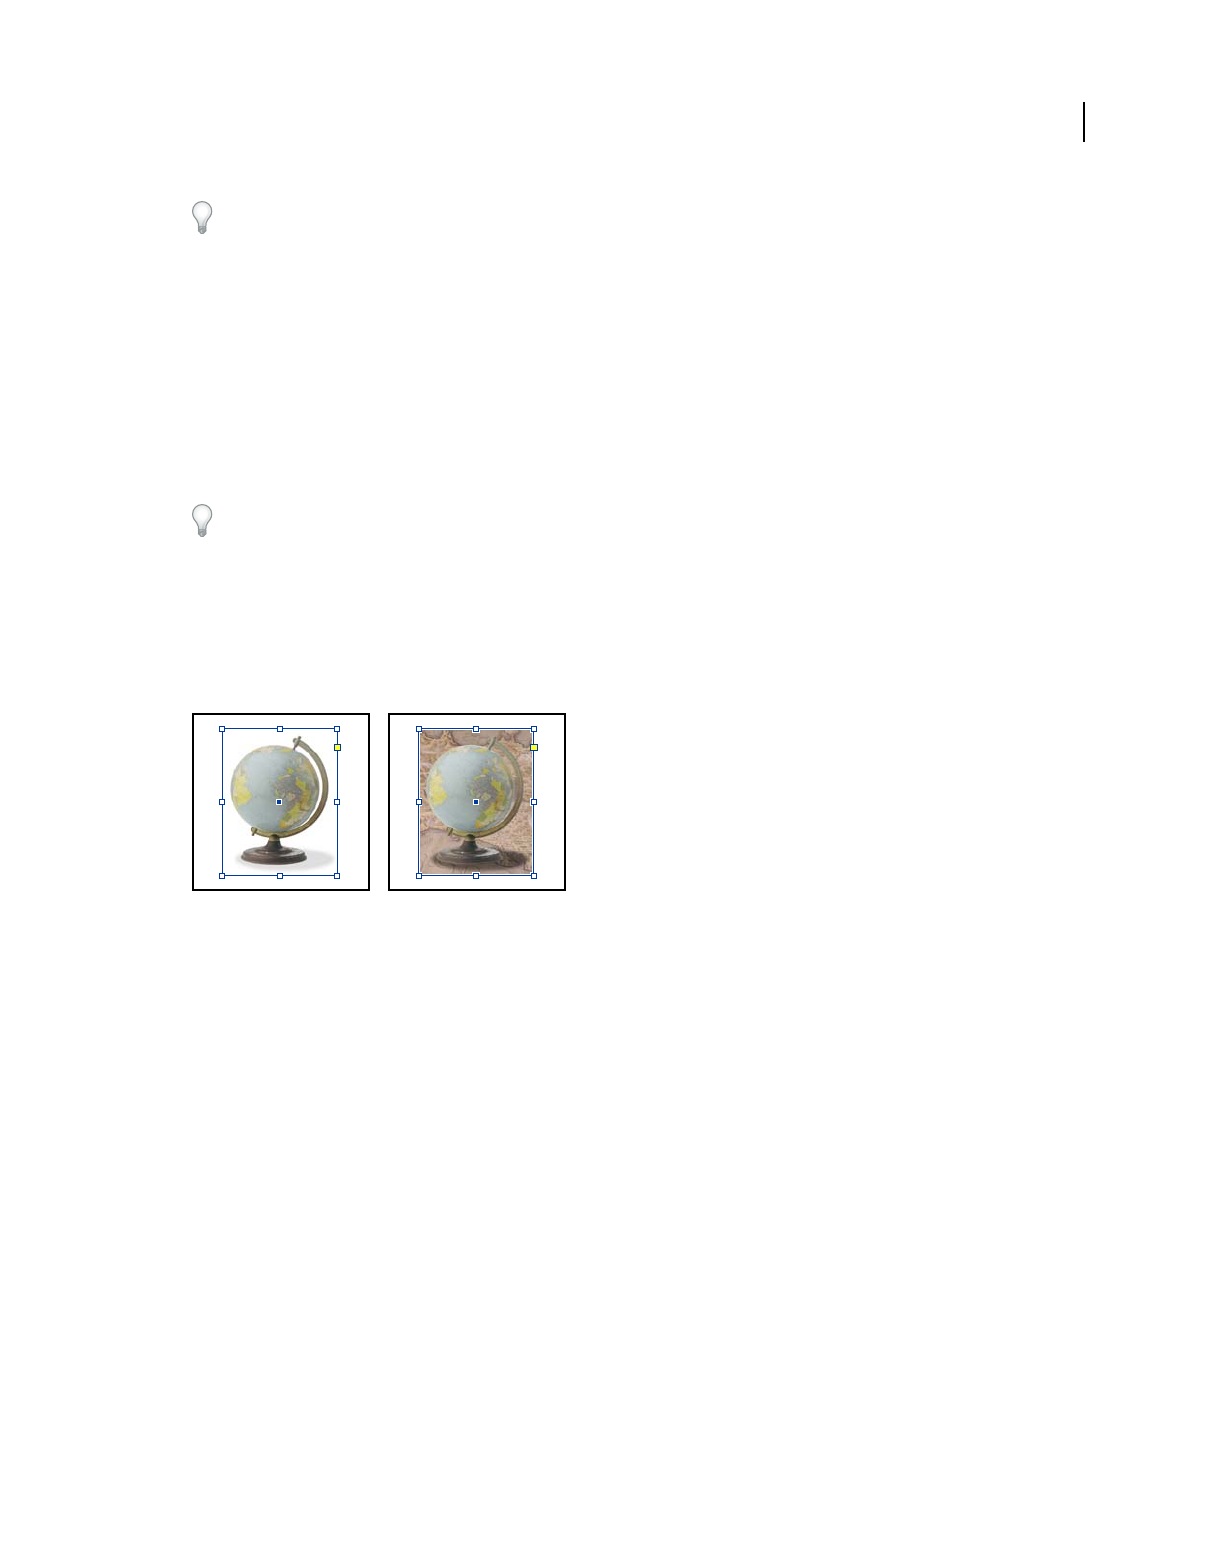
439
USING INDESIGN
Frames and objects
Last updated 11/16/2011
When you place a Photoshop file, the Image Import Options dialog box lets you choose to use the default clipping path
or select an alpha channel for clipping.
1Select an imported graphic, and choose Object > Clipping Path.
2In the Clipping Path dialog box, choose either Photoshop Path or Alpha Channel from the Type menu.
3Choose the desired path or alpha channel from either the Path or Alpha menu.
Note: If the Alpha Channel menu command is not available, no alpha channels were saved with the graphic.
4To inset the clipping path, specify a value for Inset Frame.
5To switch the visible and hidden areas, select Invert.
6If you chose an alpha channel, specify any other desired clipping path options, and click OK.
To turn off the clipping path, select the imported graphic, and choose Object > Clipping Path. Choose None in the Type
menu, and click OK.
Create a clipping path automatically
If you want to remove the background from a graphic that wasn’t saved with a clipping path, you can do it
automatically using the Detect Edges option in the Clipping Path dialog box. The Detect Edges option hides the lightest
or darkest areas of a graphic, so it works best when the subject is set against a solid white or black background.
Good (left) and bad (right) candidates for automatic clipping path
1Select an imported graphic, and choose Object > Clipping Path.
2In the Clipping Path dialog box, choose Detect Edges in the Type menu. By default, the lightest tones are excluded;
to exclude the darkest tones, also select the Invert option.
3Specify the clipping path options, and click OK.
Clipping path options
Threshold Specifies the darkest pixel value that will define the resulting clipping path. Increasing this value makes
more pixels transparent by extending the range of lightness values added to the hidden area, starting from 0 (white).
For example, if you want to remove a very light drop shadow when using Detect Edges, try increasing the Threshold
until the shadow disappears. If light pixels that should be visible are invisible, the Threshold is too high.
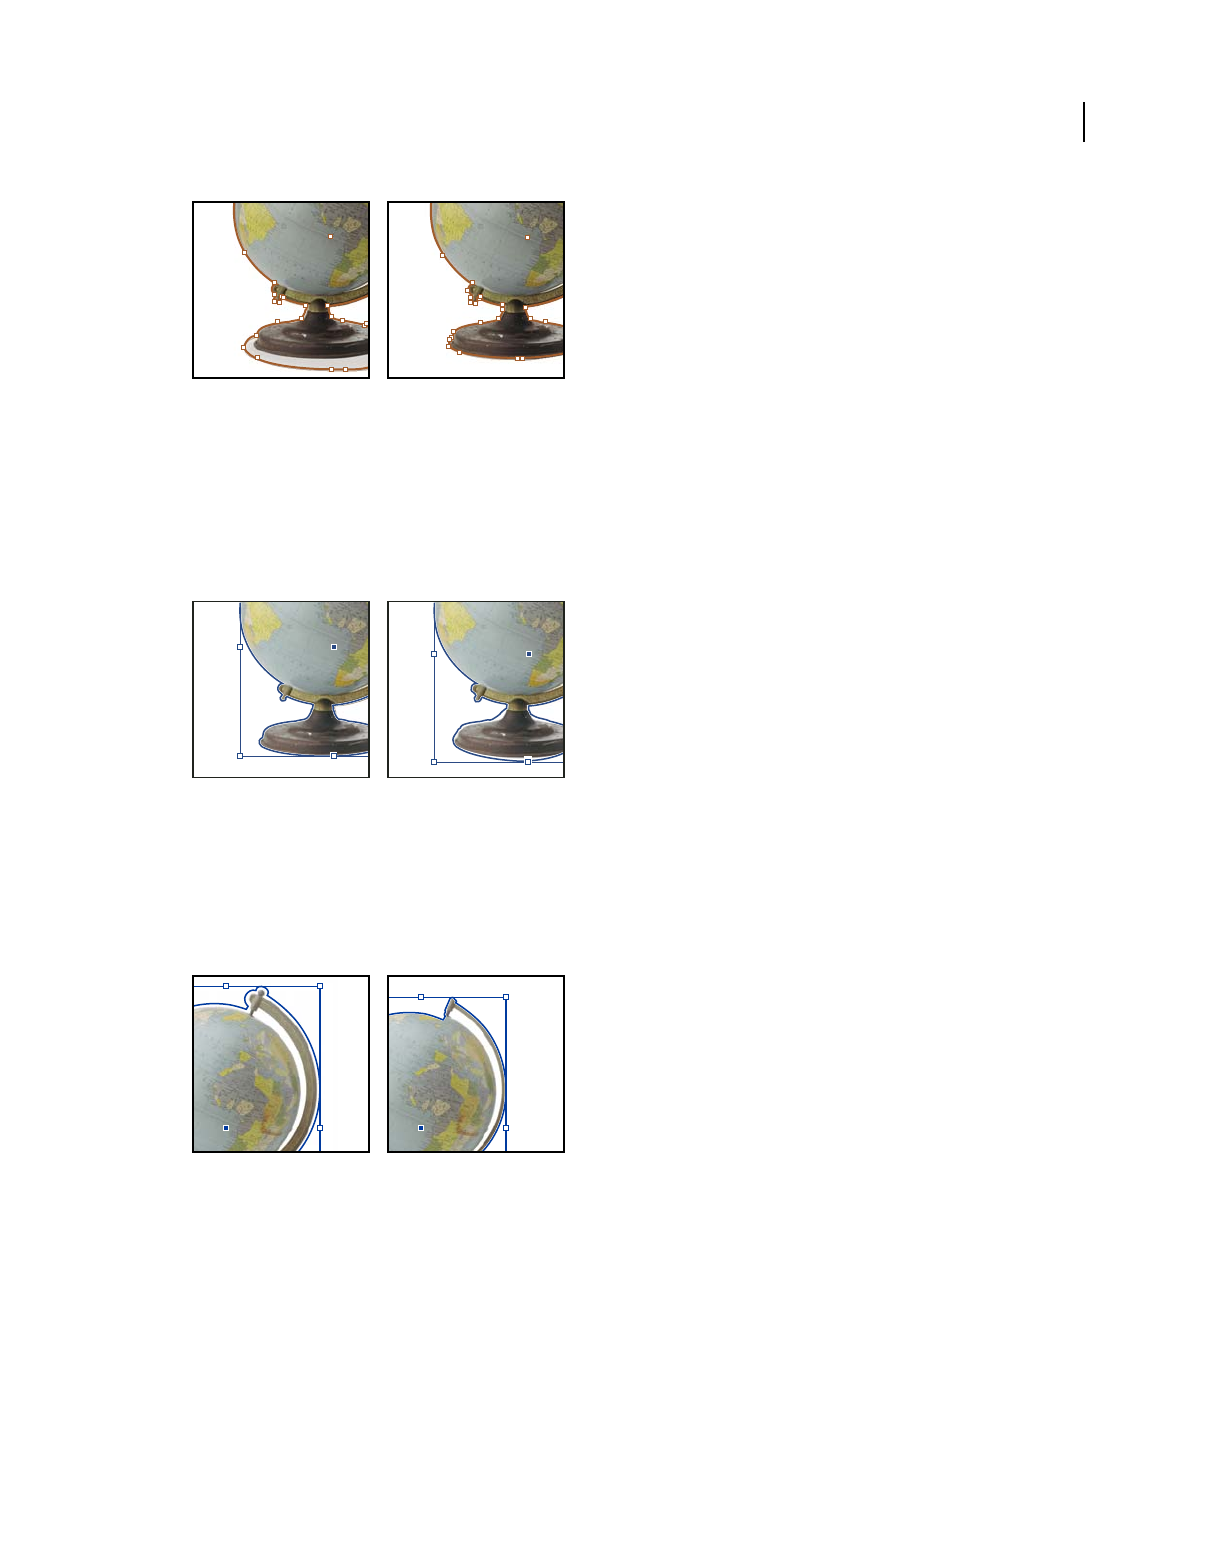
440
USING INDESIGN
Frames and objects
Last updated 11/16/2011
Threshold levels at 25 (left) and 55 (right)
Tolerance Specifies how similar a pixel’s lightness value can be to the Threshold value before the pixel is hidden by the
clipping path. Increasing the Tolerance value is useful for removing unwanted bumps caused by stray pixels that are
darker than, but close to the lightness value of, the Threshold value. Higher Tolerance values usually create a smoother,
looser clipping path, by increasing the range of values near the Tolerance value within which stray darker pixels are
included. Decreasing the Tolerance value is like tightening the clipping path around smaller variations in value. Lower
Tolerance values create a rougher clipping path by adding anchor points, which may make it harder to print the image.
Tolerance levels at 0 (left) and 5 (right)
Inset Frame Shrinks the resulting clipping path relative to the clipping path defined by the Threshold and Tolerance
values. Unlike Threshold and Tolerance, the Inset Frame value does not take lightness values into account; instead, it
uniformly shrinks the shape of the clipping path. Adjusting the Inset Frame value slightly may help hide stray pixels
that could not be eliminated by using the Threshold and Tolerance values. Enter a negative value to make the resulting
clipping path larger than the clipping path defined by the Threshold and Tolerance values.
Inset frame at -0p1 (left) and 0p3 (right)
Invert Switches the visible and hidden areas, by starting the clipping path with the darkest tones.
Include Inside Edges Makes areas transparent if they exist inside the original clipping path, and if their lightness
values are within the Threshold and Tolerance ranges. By default, the Clipping Path command makes only the outer
areas transparent, so use Include Inside Edges to correctly represent “holes” in a graphic. This option works best when
the brightness levels of areas you want to make transparent don’t match any areas that must be visible. For example, if
you choose Include Inside Edges for a graphic of silver eyeglasses, and the lenses become transparent, very light areas
of the eyeglass frame may also become transparent. If areas become transparent when that wasn’t your intent, try
adjusting the Threshold, Tolerance, and Inset Frame values.

441
USING INDESIGN
Frames and objects
Last updated 11/16/2011
Restrict to Frame Creates a clipping path that stops at the visible edge of the graphic. This can result in a simpler path
when you use the graphic’s frame to crop the graphic.
Use High Resolution Image Calculates transparent areas using the actual file, for maximum precision. Deselect this
option to calculate transparency based on the screen display resolution, which is faster but less precise. This option
isn’t available if you chose Alpha Channel, because InDesign always uses an alpha channel at its actual resolution. (See
“About transparency” on page 442.)
Convert a clipping path to a graphics frame
•Choose Object > Clipping Path > Convert Clipping Path To Frame.

442
Last updated 11/16/2011
Chapter 14: Transparency effects
Adding transparency effects
When you create an object in Adobe InDesign, by default it appears solid; that is, it has an opacity of 100%. You can
apply effects to objects using opacity and blends. Overlap objects, add transparency to objects, or knock out shapes
behind objects.
About transparency
When you create an object or stroke, when you apply a fill, or when you enter text, by default these items appear solid;
that is, they have an opacity of 100%. You can make the items transparent in a variety of ways. For example, you can
vary the opacity from 100% (completely opaque) to 0% (completely transparent). When you decrease opacity, the
underlying artwork becomes visible through the surface of the object, stroke, fill, or text.
You use the Effects panel to specify the opacity an object, its stroke, its fill, or its text, You can decide how the object
itself, its stroke, fill, or text blend with objects beneath. Where objects are concerned, you can choose to isolate
blending to specific objects so that only some objects in a group blend with objects below them, or you can have objects
knock out rather than blend with objects in a group.
For information on getting started with transparency (PDF), see www.adobe.com/go/learn_id_transparency_bp.
Areas of underlying objects appear through transparent object.
More Help topics
“About flattening” on page 454
Effects panel overview
Use the Effects panel (Window > Effects) to specify the opacity and blending mode of objects and groups, isolate
blending to a particular group, knock out objects inside a group, or apply a transparency effect.
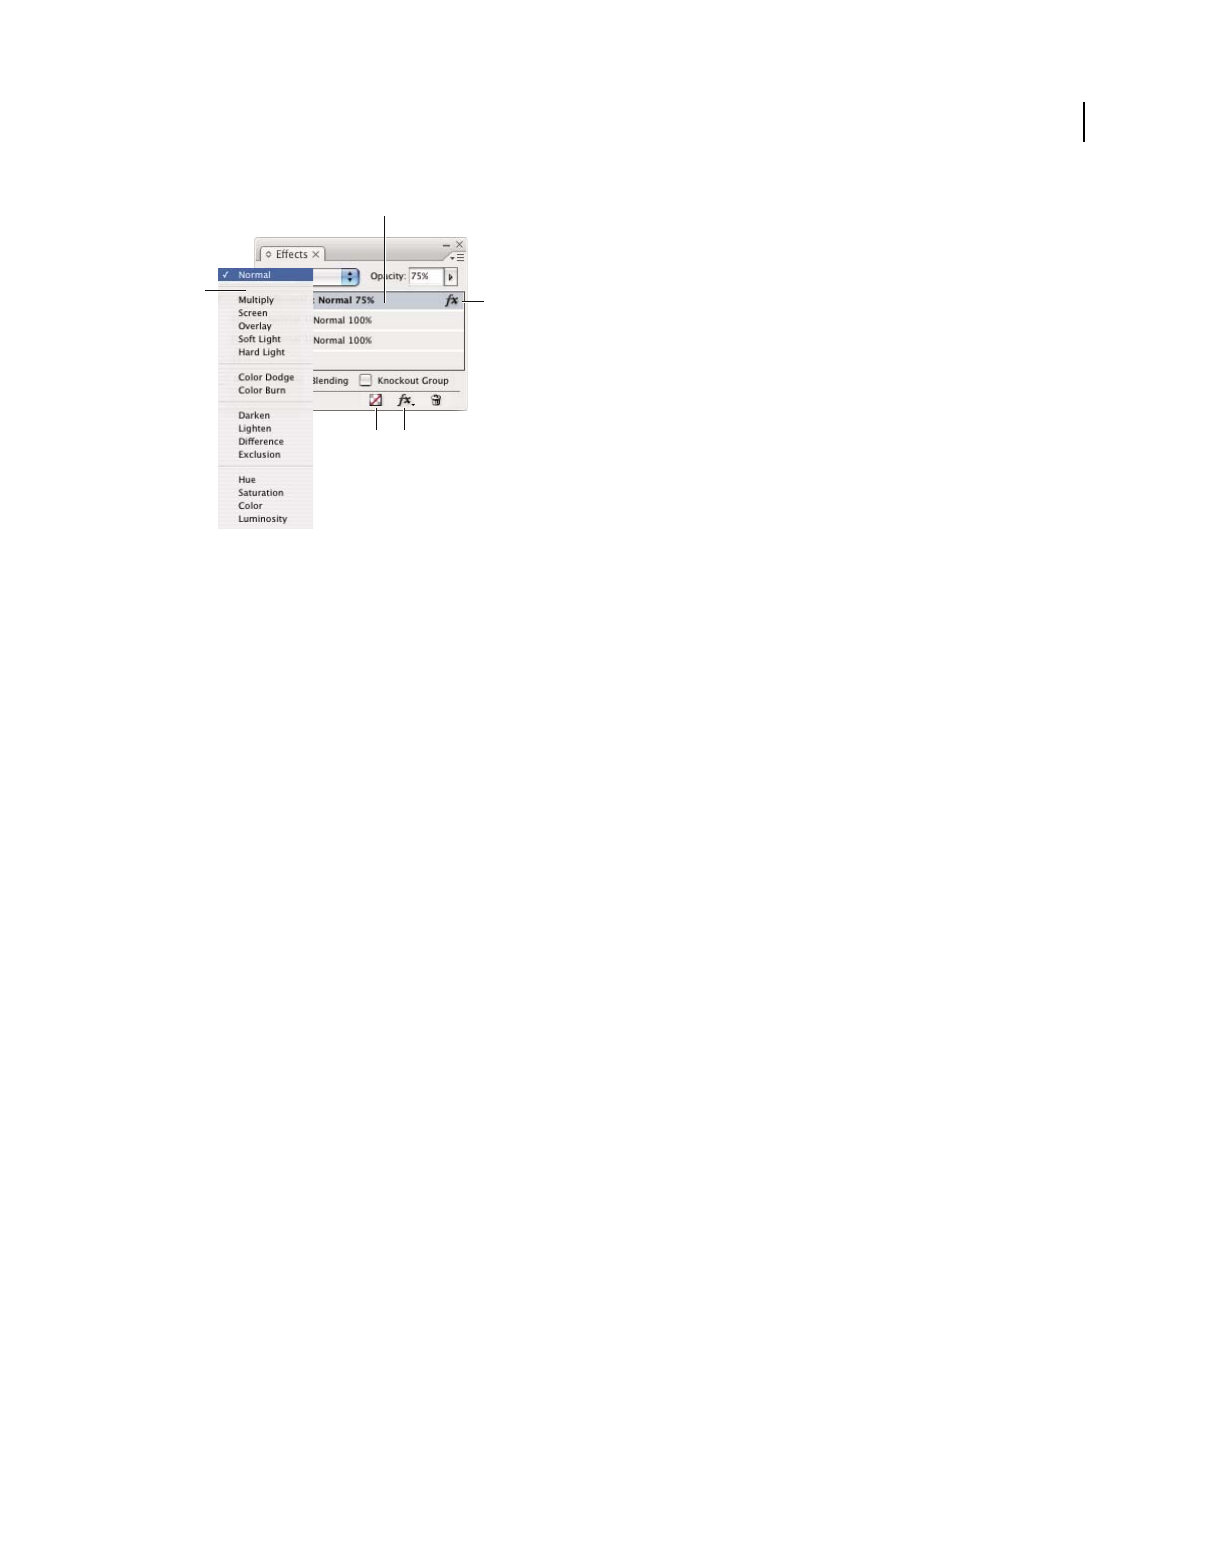
443
USING INDESIGN
Transparency effects
Last updated 11/16/2011
Add and edit transparency effects in the Effects panel
A. Blending mode B. Levels C. FX icon D. Clear effects E. FX button
Blending Mode Specifies how colors in transparent objects interact with the objects behind them. (See “Specify how
colors blend” on page 451.)
Opacity Determines the opacity of an object, stroke, fill, or text. (See “Set the opacity of an object” on page 449.)
Level Tells you the Object, Stroke, Fill, and Text opacity settings of the object, as well as whether transparency effects
have been applied. Click the triangle to the left of the word Object (or Group or Graphic) to hide or display these level
settings. The FX icon appears on a level after you apply transparency settings there, and you can double-click the FX
icon to edit the settings.
Isolate Blending Applies a blending mode to a selected group of objects. (See “Isolate blending modes” on page 453.)
Knockout Group Makes the opacity and blending attributes of every object in a group knock out, or block out,
underlying objects in the group. (See “Knock out objects within a group” on page 453.)
Clear All button Clears effects—stroke, fill, or text— from an object, sets the blend mode to Normal, and changes the
Opacity setting to 100% throughout the object.
FX button Displays a list of transparency effects. (See “Apply transparency effects” on page 443.)
Display Effects panel options
❖Choose Window > Effects and, if necessary, open the Effects panel menu and choose Show Options.
The Effects panel options are also available in the Effects dialog box (select an object and choose Object > Effects >
Transparency) and, in simplified form, on the Control panel.
Apply transparency effects
1Select an object. To apply effects to a graphic, select the graphic with the Direct Selection tool.
2Choose Window > Effects to display the Effects panel.
3Select a level to designate which parts or part of the object you want to change:
Object Affects the entire object—its stroke, fill, and text.
Graphic Affects only the graphic selected with the Direct Selection tool. Effects you apply to the graphic remain with
it when you paste the graphic in a different frame.
Group Affects all objects and text in the group. (Use the Direct Selection tool to apply effects to objects within a group.)
AA
B
C
DE

444
USING INDESIGN
Transparency effects
Last updated 11/16/2011
Stroke Affects only the object’s stroke (including its gap color).
Fill Affects only the object’s fill.
Text Affects only text inside the object, not the text frame. Effects you apply to text affect all the text in the object; you
can’t apply an effect to individual words or letters.
You can also choose a level setting in the Control panel: Click the Apply Effect To Object button and select Object,
Stroke, Fill, or Text.
4Do any of the following to open the Effects dialog box:
•In the Effects panel or Control panel, click the FX button and choose an effect from the menu.
•From the Effects panel menu, choose Effects and then an effect name.
•From the context menu, choose Effects and then an effect name.
•Choose Object > Effects, and then choose an effect name.
•On the Effects panel, click the triangle to display level settings if necessary, and then double-click a level setting—
Object, Stroke, Fill, or Text—on the Effects panel. By double-clicking, you both open the Effects dialog box and
choose a level setting.
5Choose options and settings for the effect. (See “Common transparency settings and options” on page 446.)
6Click OK.
More Help topics
“Set the opacity of an object” on page 449
Feathering video
Drop Shadows video
Edit a transparency effect
1Select the object or objects to which the effect has been applied.
2Do one of the following to open the Effects dialog box.
•On the Effects panel, double-click the FX icon to the right of Object (not at the bottom of the panel). You may need
to click the triangle next to the word Object to display the FX icon.
•Select the level with the effect you want to edit, click the FX button in the Effects panel, and choose the name
of an effect.
3Edit the effect.
Copy transparency effects
❖Do any of the following to copy transparency effects:
•To copy effects between objects, select the object with the effect you want to copy, select the object’s FX icon
in the Effects panel, and drag the FX icon to the other object. You can drag and drop effects between objects only
to and from the same level.
•To copy effects between objects selectively, use the Eyedropper tool . To control which transparency stroke, fill,
and object settings are copied with the Eyedropper tool, double-click the tool to open the Eyedropper Options
dialog box. Then select or deselect options in the Stroke Settings, Fill Settings, and Object Settings areas.
•To copy effects from one level to another in the same object, Alt-drag (Windows) or Option-drag (Mac OS) the FX
icon from one level to another (Stroke, Fill, or Text) on the Effects panel.
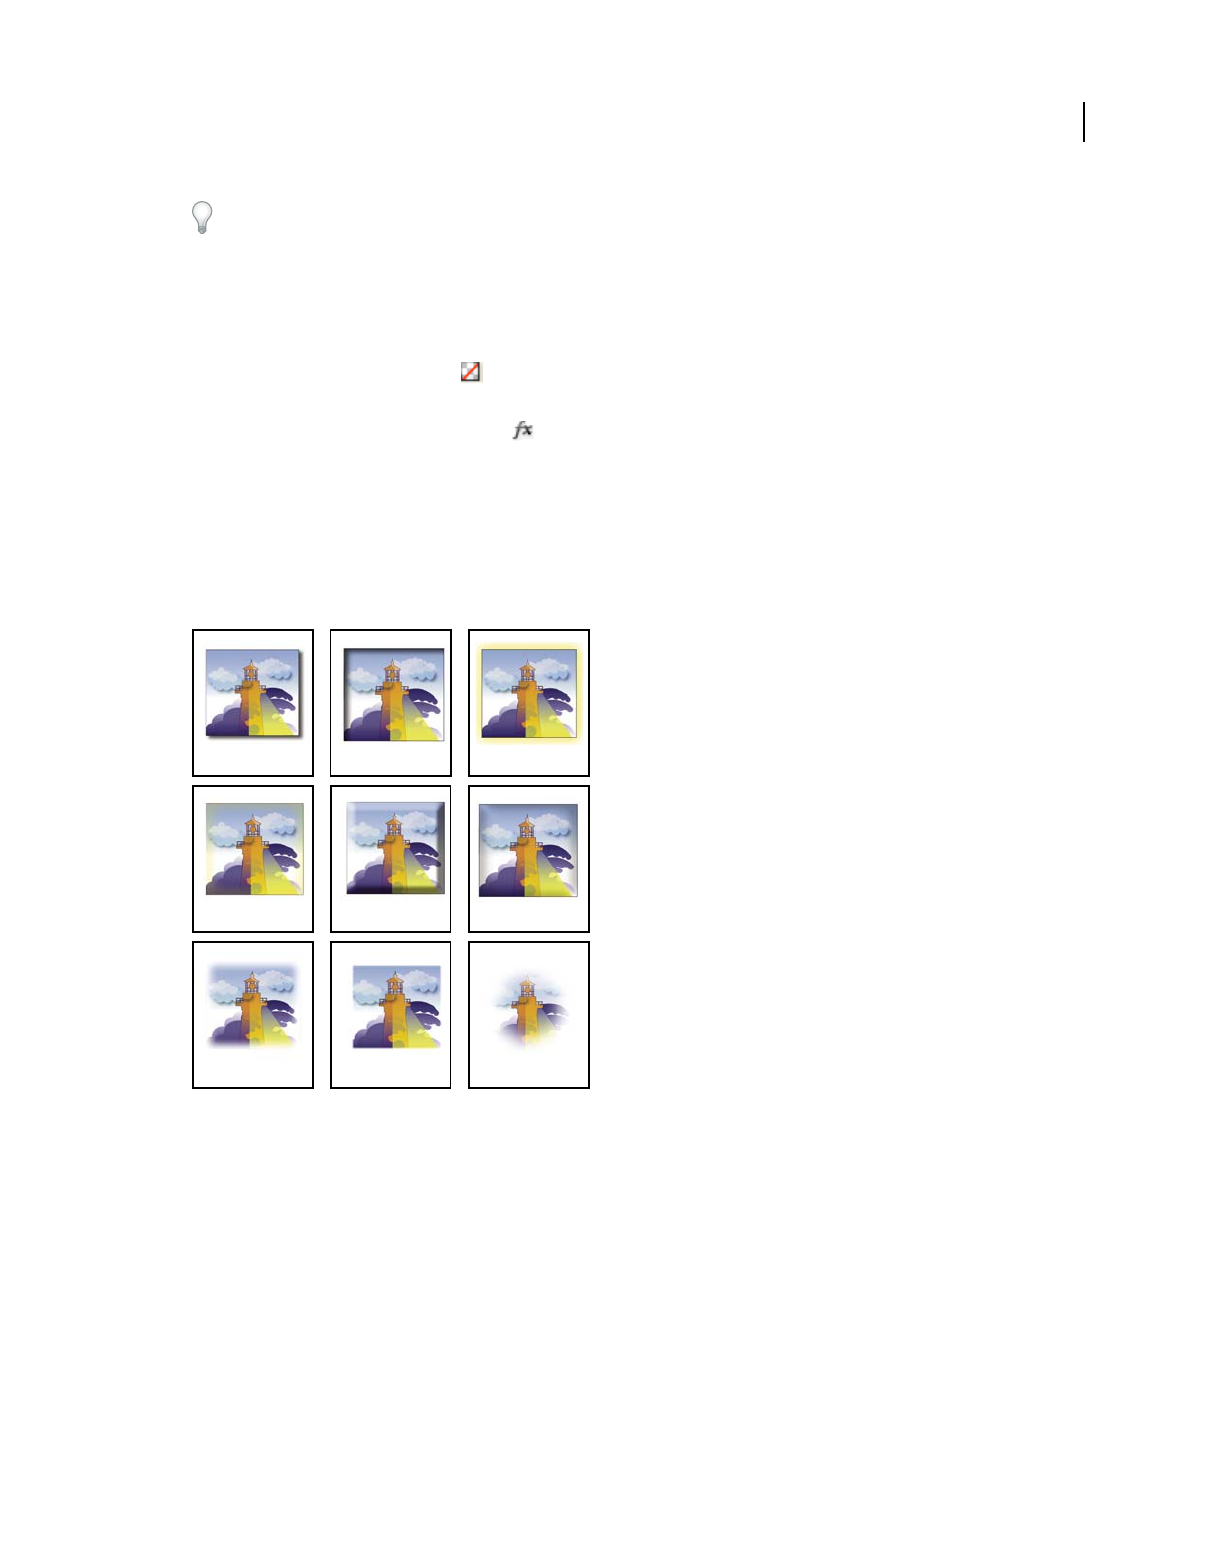
445
USING INDESIGN
Transparency effects
Last updated 11/16/2011
You can move effects from one level to another in the same object by dragging the FX icon.
Clear transparency effects from an object
❖Do any of the following:
•
To clear all effects from an object as well as change the blending mode to Normal and the Opacity setting to 100%,
click the Clear All Effects button
in the Effects panel or choose Clear All Transparency on the Effect panel menu.
•To clear all effects but maintain the blending and opacity settings, select a level and choose Clear Effects on the
Effects panel menu or drag the FX icon
from the Stroke, Fill, or Text level in the Effects panel to the Trash icon.
•To clear multiple levels (Stroke, Fill, or Text) of an effect, select the levels and click the Trash icon.
•To remove an individual effect from an object, open the Effects dialog box and deselect a Transparency effect.
Transparency effects
InDesign offers nine transparency effects. Many of the settings and options for creating these effects are similar.
Effects
A. Drop Shadow B. Inner Shadow C. Outer Glow D. Inner Glow E. Bevel and Emboss F. Satin G. Basic Feather H. Directional Feather
I. Gradient Feather
Drop Shadow Adds a shadow that falls behind the object, stroke, fill, or text.
Inner Shadow Adds a shadow that falls just inside the edges of the object, stroke, fill, or text, giving it a recessed
appearance.
Outer Glow and Inner Glow Add glows that emanate from the outside or inside edges of the object, stroke, fill, or text.
Bevel and Emboss Adds various combinations of highlights and shadows to give text and images a three-dimensional
appearance.
Satin Adds interior shading that makes a satiny finish.
Basic Feather, Directional Feather, and Gradient Feather Soften the edges of an object by fading them to transparent.
ABC
DE F
GHI

446
USING INDESIGN
Transparency effects
Last updated 11/16/2011
Note: In addition to the descriptions covered here, see “Common transparency settings and options” on page 446.
Common transparency settings and options
Many transparency effect settings and options are the same across different effects. Common transparency settings
and options include the following:
Angle and Altitude Determine the lighting angle at which a lighting effect is applied. A setting of 0 is equivalent to
ground level; 90 is directly above the object. Click the angle radius or enter a degree measurement. Select Use Global
Light if you want a uniform lighting angle for all objects. Used by the Drop Shadow, Inner Shadow, Bevel and Emboss,
Satin, and Feather effects.
Blending Mode Specifies how colors in transparent objects interact with the objects behind them. Used by the Drop
Shadow, Inner Shadow, Outer Glow, Inner Glow, and Satin effects. (See “Specify how colors blend” on page 451.)
Choke Along with the Size setting, determines how much of the shadow or glow is opaque and how much is
transparent; large settings increase opacity and small settings increase transparency. Used by the Inner Shadow, Inner
Glow, and Feather effects.
Distance Specifies the offset distance for the Drop Shadow, Inner Shadow, or Satin effect.
Noise Specifies the amount of random elements in the opacity of a glow or shadow as you enter a value or drag the
slider. Used by the Drop Shadow, Inner Shadow, Outer Glow, Inner Glow, and Feather effects.
Opacity Determines the opacity of an effect; drag the slider or enter a percentage measurement. (See “Set the opacity
of an object” on page 449.) Used by the Drop Shadow, Inner Shadow, Outer Glow, Inner Glow, Gradient Feather, Bevel
and Emboss, and Satin effects.
Size Specifies the amount of shadow or glow. Used by the Drop Shadow, Inner Shadow, Outer Glow, Inner Glow, and
Satin effects.
Spread Determines the transparency of the blur within the shadow or glow effect as established by the Size setting. A
higher percentage makes the blur more opaque. Used by the Drop Shadow and Outer Glow.
Technique These settings determine how the edge of a transparency effect interacts with background colors. Softer
and Precise are available for the Outer Glow and Inner Glow effects:
•Softer Applies a blur to the edge of the effect. At larger sizes, doesn’t preserve detailed features.
•Precise Preserves the edge of the effect, including its corners and other sharp details. Preserves features better than
the Softer technique.
Use Global Light Applies the global light setting to the shadow. Used by the Drop Shadow, Bevel and Emboss, and
Inner Shadow effects.
X Offset and Y Offset Offsets the shadow on the x- or y-axis by the amount you specify. Used by the Drop Shadow and
Inner Shadow effects.
Drop Shadow
The Drop Shadow effect creates a three-dimensional shadow. You can offset the drop shadow along the x or y axis, as
well as vary the blending mode, color, opacity, distance, angle, and size of the drop shadow. Use these options to
determine how the drop shadow interacts with objects and transparency effects:
Object Knocks Out Shadow The object appears in front of the drop shadow that it casts.
Shadow Honors Other Effects The drop shadow factors in other transparency effects. For example, if the object is
feathered on one side, you can make the drop-shadow disregard the feathering such that the shadow doesn’t fade out,
or make the shadow look feathered in the same way as the object is feathered.

447
USING INDESIGN
Transparency effects
Last updated 11/16/2011
Click the Drop Shadow button on the Control panel to quickly apply a drop shadow to or remove a drop shadow
from an object, a stroke, a fill, or text.
To select a color for a drop shadow, click the Set Shadow Color button (next to the Blending Mode menu) and choose
a color.
For a video tutorial on creating drop shadows, see www.adobe.com/go/vid0085.
More Help topics
“Adjust a gradient with the Gradient tools” on page 483
Inner Shadow
The Inner Shadow effect places the shadow inside the object, giving the impression that the object is recessed. You can
offset the inner shadow along different axes and vary the blending mode, opacity, distance, angle, size, noise, and choke
of the shadow.
Outer Glow
The Outer Glow effect makes the glow emanate from under the object. You can set the blending mode, opacity,
technique, noise, size, and spread.
Inner Glow
The Inner Glow effect causes an object to glow from the inside out. Choose the blending mode, opacity, technique,
size, noise and choke settings, as well as the Source setting:
Source Specifies the source for the glow. Choose Center to apply a glow that emanates from the center; choose Edge
to apply a glow that emanates from the object’s boundaries.
Bevel and Emboss
Use the Bevel and Emboss effect to give objects a realistic, three-dimensional look. The Structure settings determine
the object’s size and shape:
Style Specifies the bevel style: Outer Bevel creates the bevel on the outside edges of the object; Inner Bevel creates the
bevel on the inside edges; Emboss simulates the effect of embossing the object against underlying objects; Pillow
Emboss simulates the effect of stamping the edges of the object into underlying objects.
Size Determines the size of the bevel or emboss effect.
Technique Determines how the edge of the bevel or emboss effect interacts with background colors: Smooth blurs the
edges slightly (and doesn’t preserve detailed features at larger sizes); Chisel Soft blurs the edges, but not as much as the
Smooth technique (it preserves detailed features better than the Smooth technique but not as well as the Chisel Hard
technique); Chisel Hard provides a harder, more conspicuous edge (it preserves detailed features better than the
Smooth or Chisel Soft techniques).
Soften In addition to the Technique setting, blurs the effect to reduce unwanted artifacts and rough edges.
Direction Choose Up or Down to make the effect appear pushed up or down.
Depth Specifies the depth of the bevel or emboss effect.
The Shading settings determine how light interacts with the object:
Angle and Altitude Sets the height of the light source. A setting of 0 is equivalent to ground level; 90 is directly above
the object.

448
USING INDESIGN
Transparency effects
Last updated 11/16/2011
Use Global Light Applies the global light source as specified for all transparency effects. Choosing this option overrides
any Angle and Altitude settings.
Highlight and Shadow Specifies the blending mode for the bevel or emboss highlight and shadow.
Satin
Use the Satin effect to give objects a smooth, satin-like finish. Choose the blending mode, opacity, angle, distance, and
size settings, as well as whether to invert colors and transparencies:
Invert Select this option to reverse the colored and transparent areas of the object.
Basic Feather
The Feather effect softens (fades) the edges of an object over a distance that you specify:
Feather Width Sets the distance over which the object fades from opaque to transparent.
Choke Along with the Feather Width setting, determines how much of the softening glow is opaque and how much is
transparent; a large setting increases opacity and a small setting increases transparency.
Corners Choose Sharp, Rounded, or Diffused:
•Sharp Follows the outer edge of the shape, including sharp corners. This option is appropriate for star-like objects
and a special effect on a rectangular shape.
•Rounded Rounds the corner by the feather radius; essentially, the shape is first inset, then outset, to form the two
contours. This option works well with rectangles.
•Diffused Uses the Adobe Illustrator method, which makes the edges of the object fade from opaque to transparent.
For a video tutorial on feathering, see www.adobe.com/go/vid0086.
Noise Specifies the amount of random elements in the softening glow. Use this option to soften the glow.
Directional Feather
The Directional Feather effect softens the edges of an object by fading the edges to transparent from directions that
you specify. For example, you can apply feathering to the top and bottom of the object, not the left or right side.
Feather Widths Set the distance over which the top, bottom, left side, and right side of the object fade to transparent.
Select the Lock option to fade each side of the object by the same distance.
Noise Specifies the amount of random elements in the softening glow. Use this option to create a softer glow.
Choke Along with the Width settings, determines how much of the glow is opaque and how much is transparent; large
settings increase opacity and small settings increase transparency.
Shape Choose an option—First Edge Only, Leading Edges, or All Edges—to demarcate the object’s original shape.
Angle Rotates the frame of reference for the feathering effect such that, as long as you don’t enter a multiple of 90
degrees, the feathering edges are skewed rather than parallel to the object.
Gradient Feather
Use the Gradient Feather effect to soften the areas of an object by fading them to transparent.
Gradient Stops Create one gradient stop for each gradation in transparency that you want for your object.
•To create a gradient stop, click below the Gradient Slider (drag a gradient stop away from the slider to remove a
stop).
•To adjust the position of a stop, drag it left or right, or select it and then drag the Location slider.

449
USING INDESIGN
Transparency effects
Last updated 11/16/2011
•To adjust the mid-point between two opacity stops, drag a diamond above the Gradient Slider. Where the diamond
is located determines how abrupt or gradual the transition between stops is.
Reverse Gradient Click to reverse the direction of the gradations. This box is located to the right of the Gradient Slider.
Opacity Specifies the transparency between gradient points. Select a point and drag the Opacity slider.
Location Adjusts the position of a gradient stop. Select a gradient stop before dragging the slider or entering a
measurement.
Type Linear shades from the starting gradient point to the ending gradient point in a straight line; Radial shades from
the starting point to the ending point in a circular pattern.
Angle For linear gradients, establishes the angle of the gradation lines. At 90 degrees, for example, the lines run
horizontally; at 180 degrees, the lines run vertically.
Use Global Light
You can apply a uniform lighting angle to transparency effects in which shading is a factor: Drop Shadow, Inner
Shadow, and Bevel and Emboss. When you choose Use Global Light with these effects, lighting is determined by the
global setting in the Global Light dialog box.
1Do any of the following to open the Global Light dialog box:
•Choose Global Light from the Effects panel menu.
•Choose Object > Effects > Global Light.
2Enter a value or drag the angle radius to set the Angle and Altitude, and click OK.
Set the opacity of an object
You can apply transparency to a single object or selected objects (including graphics and text frames), but not to
individual text characters or layers. However, imported graphics with those types of transparency effects will appear
and print correctly.
For videos on adding opacity, see www.adobe.com/go/vid0087 and www.adobe.com/go/vid0088.
1Select the object or objects.
The word mixed appears in the Effects panel if you select multiple objects and their opacity settings conflict. For
example, if the Fill opacity setting is different in objects you selected, the Transparency palette reads, “Fill: Opacity
(mixed).”
2Choose Object, Stroke, Fill, or Text with any of these techniques:
•Click the Apply Effects button on the Control panel and choose an option.
•Click an option on the Effects panel (click the triangle next to the word Object, if necessary, to see the options).
3On the Control panel or Effects panel, type a value for Opacity or click the arrow next to the Opacity setting and
drag the slider. As the opacity value of objects is reduced, the transparency increases.
Note: If you direct-select and cut or copy an object from a transparent group in InDesign, and then paste the object
somewhere else in the document, the pasted object won’t be transparent unless it was previously selected individually and
had transparency applied.
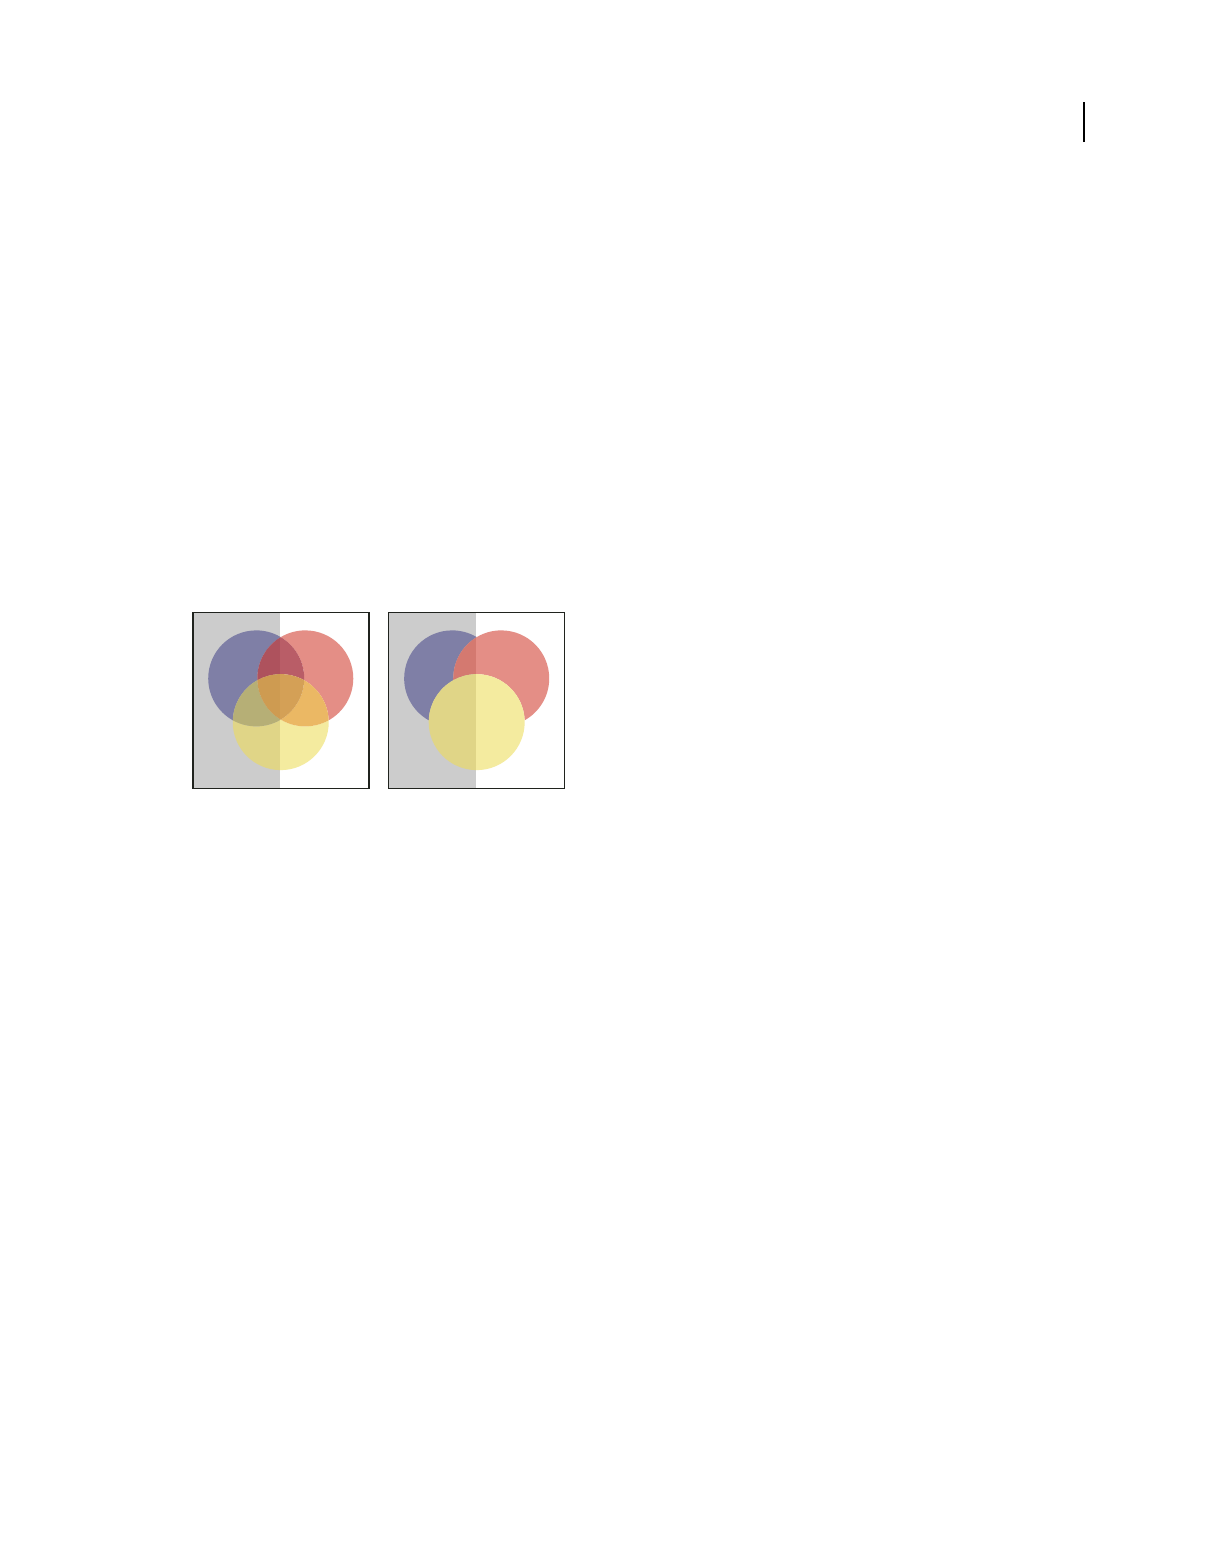
450
USING INDESIGN
Transparency effects
Last updated 11/16/2011
More Help topics
“Applying transparency to groups” on page 450
Applying Opacity Effects video
Setting Opacity video
Applying transparency to groups
Besides applying transparency effects to single objects, you can apply them to groups.
If you simply select objects and change their individual opacity settings, the selected objects’ opacity will change
relative to that of the others. Any overlapping areas will show an accumulated opacity.
In contrast, if you target a group that has been created with the Group command, and then change the opacity, the
group is treated as a single object by the Effects panel (the Effects panel shows only one level option—Group), and the
opacities within the group don’t change. In other words, objects within the group don’t interact with each other in
transparency.
Individual objects selected and set to 50% opacity (left) and group selected and set to 50% opacity (right)
Change the appearance of transparent artwork on screen
Use the Display Performance dialog box to set transparency preferences. These preferences determine the on-screen
quality of transparent objects in new documents and in documents saved with modified preferences. You can also set
the preferences to turn on or off the display of transparency in the document. Turning off transparency in the display
preferences doesn’t turn off transparency when printing or exporting the file.
Note: Before you print a file containing transparency effects, make sure that you check the transparency preferences first.
Printing automatically flattens the artwork, and may affect the appearance of the transparency effects.
1Choose Edit > Preferences > Display Performance (Windows) or Adobe InDesign > Preferences > Display
Performance (Mac
OS).
2Select an option (Fast, Typical, High Quality) in the Adjust View Settings section to determine the on-screen
resolution of any effect in the document. The settings you change apply only to the option you select here:
•Fast turns off transparency and sets the resolution to 24 dpi.
•Typical displays low-resolution effects and sets the resolution to 72 dpi.
•High Quality improves the display of effects, especially in PDF and EPS files, and sets the resolution to 144 dpi.
3Drag the Transparency slider. The default setting is Medium Quality, which displays drop shadows and feathering.
4Click OK.
5When inks overlap with blend modes, choose View > Overprint Preview. This option ensures that you can see on
screen how any inks interact with transparency.

451
USING INDESIGN
Transparency effects
Last updated 11/16/2011
Use the View menu to quickly change transparency display between Fast Display, Typical Display, and High Quality
Display.
More Help topics
“Control graphics’ display performance” on page 387
Stop displaying transparency
To improve display performance, you can turn off the display of transparency. Turning off transparency on screen
doesn’t turn off transparency for printing or exporting the file.
❖Choose View > Display Performance > Fast Display.
Removing white box effect in documents with transparency
In some instances, a white box or ghost border appears where a transparency effect is applied, usually in documents
that contain drop shadows or gradients. This problem may occur if the transparency effect interacts with a spot color.
To fix this problem, you can either avoid using spot colors with transparency or you can turn on overprinting.
To view and print a PDF document without the white box effect, in Acrobat enable Simulate Overprinting. In Acrobat
9, choose Advanced > Print Production > Output Preview. In Acrobat X, choose Tools > Print Production > Output
Preview.
If you’re sending the document to a printer that’s experiencing this white box effect, ask the service provider to turn
on PostScript Overprint at the RIP. If this doesn’t work, you can flatten the transparency and select the Simulate
Overprint option before you send the file. In InDesign, this option is found on the Output panel of the Print dialog
box when you select the Composite CMYK option.
Blending colors
Specify how colors blend
Blend the colors between two overlapping objects by using blending modes. Blending modes let you vary the ways in
which the colors of stacked objects blend.
1Select one or more objects or a group.
2Do one of the following:
•In the Effects panel, choose a blending mode, such as Normal or Overlay, from the menu.
•In the Transparency area of the Effects dialog box, choose a blending mode from the menu.
Blending mode options
The blending modes control how the base color, the underlying color in the artwork, interacts with the blend color, the
color of the selected object or group of objects. The resulting color is the color resulting from the blend.
Normal Colors the selection with the blend color, without interaction with the base color. This is the default mode.
Multiply Multiplies the base color by the blend color. The resulting color is always a darker color. Multiplying any
color with black produces black. Multiplying any color with white leaves the color unchanged. The effect is similar to
drawing on a page with multiple magic markers.

452
USING INDESIGN
Transparency effects
Last updated 11/16/2011
Screen Multiplies the inverse of the blend and base colors. The resulting color is always a lighter color. Screening with
black leaves the color unchanged. Screening with white produces white. The effect is similar to projecting multiple
slide images on top of each other.
Overlay Multiplies or screens the colors, depending on the base color. Patterns or colors overlay the existing artwork,
preserving the highlights and shadows of the base color while mixing in the blend color to reflect the lightness or
darkness of the original color.
Soft Light Darkens or lightens the colors, depending on the blend color. The effect is similar to shining a diffused
spotlight on the artwork.
If the blend color (light source) is lighter than 50% gray, the artwork is lightened, as if it were dodged. If the blend color
is darker than 50% gray, the artwork is darkened, as if it were burned in. Painting with pure black or white produces a
distinctly darker or lighter area, but does not result in pure black or white.
Hard Light Multiplies or screens the colors, depending on the blend color. The effect is similar to shining a harsh
spotlight on the artwork.
If the blend color (light source) is lighter than 50% gray, the artwork is lightened, as if it were screened. This is useful
for adding highlights to artwork. If the blend color is darker than 50% gray, the artwork is darkened, as if it were
multiplied. This is useful for adding shadows to artwork. Painting with pure black or white results in pure black or
white.
Color Dodge Brightens the base color to reflect the blend color. Blending with black produces no change.
Color Burn Darkens the base color to reflect the blend color. Blending with white produces no change.
Darken Selects the base or blend color—whichever is darker—as the resulting color. Areas lighter than the blend color
are replaced, and areas
darker than the blend color do not change.
Lighten Selects the base or blend color—whichever is lighter—as the resulting color. Areas darker than the blend color
are replaced, and areas lighter than the blend color do not change.
Difference Subtracts either the blend color from the base color or the base color from the blend color, depending on
which has the greater brightness value. Blending with white inverts the base color values; blending with black produces
no change.
Exclusion Creates an effect similar to, but lower in contrast than, the Difference mode. Blending with white inverts the
base color components. Blending with black produces no change.
Hue Creates a color with the luminance and saturation of the base color and the hue of the blend color.
Saturation Creates a color with the luminance and hue of the base color and the saturation of the blend color. Painting
with this mode in an area with no saturation (gray) produces no change.
Color Creates a color with the luminance of the base color and the hue and saturation of the blend color. This preserves
the gray levels in the artwork, and is useful for coloring monochrome artwork and for tinting color artwork.
Luminosity Creates a color with the hue and saturation of the base color and the luminance of the blend color. This
mode creates an inverse effect from that of the Color mode.
Note: Avoid applying the Difference, Exclusion, Hue, Saturation, Color, and Luminosity blending modes to objects with
spot colors; doing so can add unwanted colors to a document. For more information, see “Best practices when creating
transparency” on page 460.
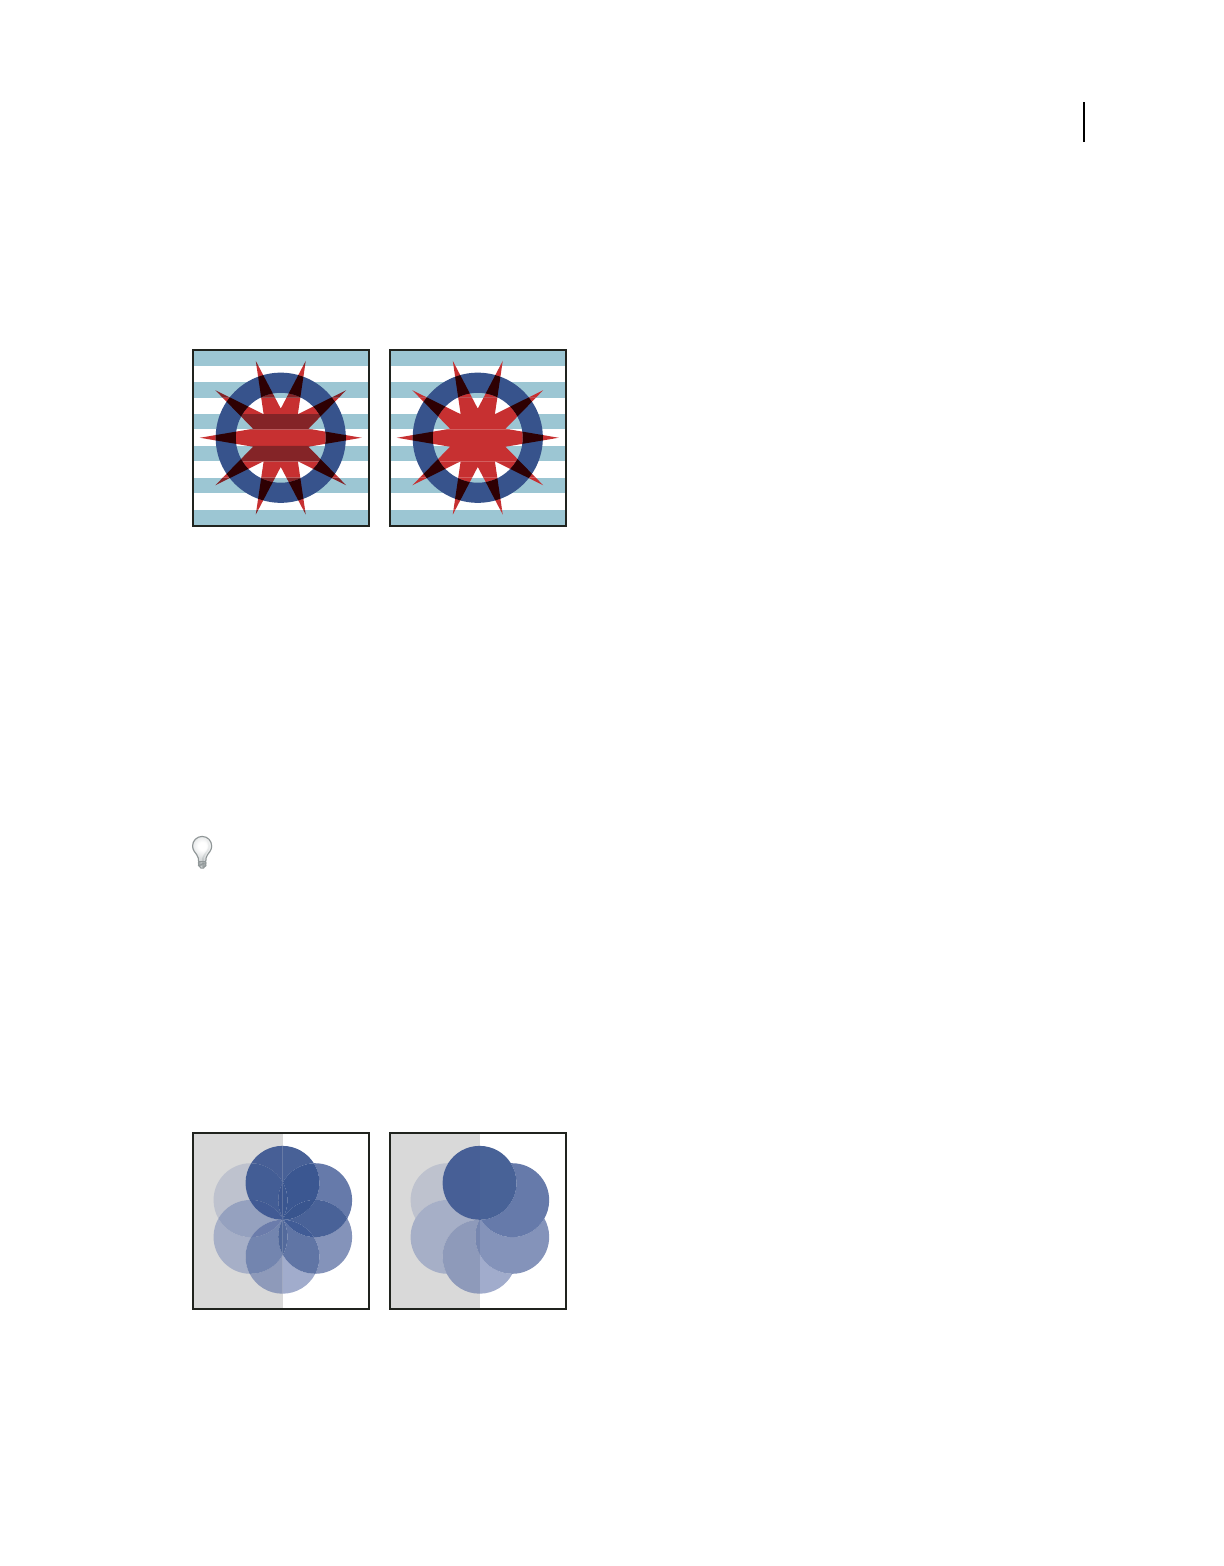
453
USING INDESIGN
Transparency effects
Last updated 11/16/2011
Isolate blending modes
When you apply a blending mode to an object, its colors blend with all objects beneath it. If you want to limit the
blending to specific objects, you can group those objects and then apply the Isolate Blending option to the group. The
Isolate Blending option confines the blending to within the group, preventing objects beneath the group from being
affected. (It is useful for objects that have a blending mode other than Normal applied to them.)
Group (star and circle) with Isolate Blending option deselected (left) compared to selected (right)
It is important to understand that you apply the blending modes to the individual objects, but apply the Isolate
Blending option to the group. The option isolates blending interactions within the group. It doesn’t affect blending
modes applied directly to the group itself.
1Apply the blending modes and opacity settings to the individual objects whose blending you want to isolate.
2Using the Selection tool, select the objects you want to isolate.
3Choose Object > Group.
4In the Effects panel, select Isolate Blending. (If the option is not visible, select Show Options in the Effects panel
menu.)
You can isolate the blending of objects in a PDF file that contains blending modes. First, place the PDF file with the
Transparent Background option selected in the Place PDF dialog box. Then apply the Isolate Blending option.
Knock out objects within a group
You use the Knockout Group option in the Effects panel to make the opacity and blending attributes of every object
in the selected group knock out—that is, visually block out—underlying objects in the group. Only objects within the
selected group are knocked out. Objects beneath the selected group are still affected by the blending or opacity that
you apply to objects within the group.
It is important to understand that you apply the blending modes and opacity to the individual objects, but apply the
Knockout Group option to the group.
Group with Knockout Group option deselected (left) compared to selected (right)
1Apply the blending modes and opacity settings to the individual objects that you want to knock out.
2Using the Selection tool, select the objects that you want to knock out.

454
USING INDESIGN
Transparency effects
Last updated 11/16/2011
3Choose Object > Group.
4In the Effects panel, select Knockout Group. (If the option is not visible, select Show Options in the Effects panel
menu.)
Specify a color space for blending transparent objects
To blend the colors of transparent objects on a spread, InDesign converts the colors of all objects to a common color
space using either the CMYK or RGB color profile for the document. This blending space enables objects of multiple
color spaces to blend when interacting transparently. To avoid color mismatches between different areas of the objects
on screen and in print, the blending space is applied for screen and in the flattener.
The blending space is applied only to those spreads that contain transparency.
❖Choose Edit > Transparency Blend Space, and then choose one of the document’s color spaces.
Note: For a typical print workflow, choose the Document CMYK color space.
More Help topics
“About flattening” on page 454
Flattening transparent artwork
About flattening
If your document or artwork contains transparency, to be output it usually needs to undergo a process called flattening.
Flattening divides transparent artwork into vector-based areas and rasterized areas. As artwork becomes more
complex (mixing images, vectors, type, spot colors, overprinting, and so on), so does the flattening and its results.
Flattening may be necessary when you print or when you save or export to other formats that don’t support
transparency. To retain transparency without flattening when you create PDF files, save your file as Adobe PDF
1.4
(Acrobat
5.0) or later.
You can specify flattening settings and then save and apply them as transparency flattener presets. Transparent objects
are flattened according to the settings in the selected flattener preset.
Note: Transparency flattening cannot be undone after the file is saved.
Overlapping art is divided when flattened.
For more information on transparency output issues, see the Print Service Provider Resources page of the Adobe
Solutions Network (ASN) (English only), available on the Adobe website.

455
USING INDESIGN
Transparency effects
Last updated 11/16/2011
About transparency flattener presets
If you regularly print or export documents that contain transparency, you can automate the flattening process by
saving flattening settings in a transparency flattener preset. You can then apply these settings for print output as well
as for saving and exporting files to PDF
1.3 (Acrobat 4.0) and EPS and PostScript formats. In addition, in Illustrator
you can apply them when saving files to earlier versions of Illustrator or when copying to the clipboard; in Acrobat,
you can also apply them when optimizing PDFs.
These settings also control how flattening occurs when you export to formats that don’t support transparency.
You can choose a flattener preset in the Advanced panel of the Print dialog box or of the format-specific dialog box
that appears after the initial Export or Save As dialog box. You can create your own flattener presets or choose from
the default options provided with the software. The settings of each of these defaults are designed to match the quality
and speed of the flattening with an appropriate resolution for rasterized transparent areas, depending on the
document’s intended use:
[High Resolution] is for final press output and for high-quality proofs, such as separations-based color proofs.
[Medium Resolution] is for desktop proofs and print-on-demand documents that will be printed on PostScript color
printers.
[Low Resolution] is for quick proofs that will be printed on black-and-white desktop printers and for documents that
will be published on the web or exported to SVG.
Apply a flattener preset for output
You can choose a flattener preset in the Print dialog box, or in the format-specific dialog box that appears after the
initial Export dialog box.
If you regularly export or print documents that contain transparency, you can automate the flattening process by
saving flattener settings in a
transparency flattener preset. You can then apply these settings when you print or export
to PDF
1.3 (Acrobat 4.0) or EPS formats.
❖In the Advanced panel of the Print, Export EPS, or Export Adobe PDF dialog box, choose a custom preset or one
of the following default presets:
[Low Resolution] Use for quick proofs that will be printed on black-and-white desktop printers, and for documents
that will be published on the web.
[Medium Resolution] Use for desktop proofs and print-on-demand documents that will be printed on Adobe
PostScript color printers.
[High Resolution] Use for final press output, and for high-quality proofs such as separations-based color proofs.
Note: The flattening settings are used only if the artwork contains transparency or if Simulate Overprint is selected in the
Output area of the Export Adobe PDF dialog box.
Create or edit a transparency flattener preset
You can save transparency flattener presets in a separate file, making it easy to back them up or to make them available
to your service providers, clients, or others in your workgroup. In InDesign, transparency flattener preset files have an
.flst extension.
1Choose Edit > Transparency Flattener Presets.
2Do one of the following:
•To create a new preset, click New.

456
USING INDESIGN
Transparency effects
Last updated 11/16/2011
•To base a preset on a predefined preset, select one in the list and click New.
•To edit an existing preset, select the preset and click Edit.
Note: You can’t edit the default flattener presets.
3Set flattening options.
4Click OK to return to the Transparency Flattener Presets dialog box, and click OK again.
Export and import a custom transparency flattener preset
You can export and import transparency flattener presets in order to share them with your service providers, your
clients, or others in your workgroup.
1Choose Edit > Transparency Flattener Presets.
2Select a preset in the list.
3Do one of the following:
•To export a preset to a separate file, click Save (InDesign) or Export (Illustrator), specify a name and location, and
then click Save.
Consider saving the preset outside of the application’s preferences folder. That way, it won’t be lost if you delete your
preferences.
•To import presets from a file, click Load (InDesign) or Import (Illustrator). Locate and select the file containing the
preset you want to load, and then click Open.
Rename or delete a custom transparency flattener preset
1Choose Edit > Transparency Flattener Presets.
2Select a preset in the list.
3Do one of the following:
•To rename an existing preset, click Edit, type a new name, and then click OK.
•To delete a preset, click Delete, and then click OK to confirm the deletion.
Note: You cannot delete the default presets.
Flatten an individual spread
You can apply flattener settings to individual spreads in a document, overriding the flattener preset you’ve set for the
entire document or book. This is useful for controlling the flattening quality in documents with a mix of high-
resolution images with lots of transparency and low-resolution images. In this case, you can flatten the complex spread
at a high quality, and use a faster and lower-quality flattener preset on the other spreads.
At print or export time, you can revert to the flattener settings for the document or book.
1Display the spread in the Document window.
2Choose Spread Flattening in the Pages panel menu.
3Choose any of the following, and then click OK:
Default Uses the document flattening preset for this spread.
None (Ignore Transparency) Ignores transparency for the spread. This option is useful for troubleshooting by the
service provider.

457
USING INDESIGN
Transparency effects
Last updated 11/16/2011
Custom Opens the Custom Spread Flattener Settings dialog box for specifying settings.
Ignore the flattener preset on an individual spread
❖Select Ignore Spread Overrides from any of the following locations in InDesign:
•The Flattener Preview panel (Window > Output > Flattener Preview).
•The Advanced area of the Print or Export Adobe PDF dialog box.
Transparency Flattener options
You can set Transparency Flattener options when creating, editing, or previewing flattener presets in Illustrator,
InDesign, or Acrobat.
Highlight (preview) options
None (Color Preview) Disables previewing.
Rasterized Complex Regions Highlights the areas that will be rasterized for performance reasons (as determined by
the Rasters/Vectors slider). Keep in mind that the boundary of the highlight area has a higher probability of producing
stitching problems (depending on the print-driver settings and the rasterization resolution). To minimize stitching
problems, select Clip Complex Regions.
Transparent Objects Highlights the objects that are sources of transparency, such as objects with partial opacity
(including images with alpha channels), objects with blending modes, and objects with opacity masks. In addition,
note that styles and effects may contain transparency, and overprinted objects may be treated as sources of
transparency if they are involved in transparency or if the overprint needs to be flattened.
All Affected Objects Highlights all objects that are involved in transparency, including transparent objects and objects
that are overlapped by transparent objects. The highlighted objects will be affected by the flattening process—their
strokes or patterns will be expanded, portions of them may get rasterized, and so on.
Affected Linked EPS Files (Illustrator only) Highlights all linked EPS files that are affected by transparency.
Affected Graphics (InDesign only) Highlights all placed content affected by transparency or transparency effects. This
option is useful for service providers who need to see graphics that require attention to print properly.
Expanded Patterns (Illustrator and Acrobat) Highlights all patterns that will be expanded if involved in transparency.
Outlined Strokes Highlights all strokes that will be outlined if involved in transparency or because Convert All Strokes
To Outlines is selected.
Outlined Text (Illustrator and InDesign) Highlights all text that will be outlined if involved in transparency or because
Convert All Text To Outlines is selected.
Note: In the final output, outlined strokes and text may appear slightly different from native ones, especially very thin
strokes and very small text. However, the Flattener Preview doesn’t highlight this altered appearance.
Raster-Fill Text And Strokes (InDesign only) Highlights text and strokes that have rasterized fills as a result of
flattening.
All Rasterized Regions (Illustrator and InDesign) Highlights objects and intersections of objects that will be rasterized
because there is no other way of representing them in PostScript or because they are more complex than the threshold
specified by the Rasters/Vectors slider. For example, the intersection of two transparent gradients will always be
rasterized, even if the Rasters/Vectors value is
100. The All Rasterized Regions option also shows raster graphics (such
as Photoshop files) involved in transparency, and raster effects such as drop shadows and feathers. Note that this
option takes longer to process than the others.

458
USING INDESIGN
Transparency effects
Last updated 11/16/2011
Transparency Flattener Preset options
Name/Preset Specifies the name of the preset. Depending on the dialog box, you can type a name in the Name text box
or accept the default. You can enter the name of an existing preset to edit that preset. However, you can’t edit the
default presets.
Raster/Vector balance Specifies the amount of vector information that will be preserved. Higher settings preserve
more vector objects, while lower settings rasterize more vector objects; intermediate settings preserve simple areas in
vector form and rasterize complex ones. Select the lowest setting to rasterize all the artwork.
Note: The amount of rasterization that occurs depends on the complexity of the page and the types of overlapping objects.
Line Art And Text Resolution Rasterizes all objects, including images, vector artwork, text, and gradients, to the
specified resolution. Acrobat and InDesign allow a maximum of 9600 pixels per inch (ppi) for line art, and 1200
ppi
for gradient mesh. Illustrator allows a maximum of 9600 ppi for both line art and gradient mesh. The resolution affects
the precision of intersections when flattened. Line Art and Text Resolution should generally be set to 600-1200 to
provide high-quality rasterization, especially on serif or small point sized type.
Gradient And Mesh Resolution Specifies the resolution for gradients and Illustrator mesh objects rasterized as a result
of flattening, from 72 to 2400
ppi. The resolution affects the precision of intersections when flattened. Gradient and
mesh resolution should generally be set between 150 and 300 ppi, because the quality of the gradients, drop shadows,
and feathers do not improve with higher resolutions, but printing time and file size increase.
Convert All Text To Outlines Converts all type objects (point type, area type, and path type) to outlines and discards all
type glyph information on pages containing transparency. This option ensures that the width of text stays consistent
during flattening. Note that enabling this option will
cause small fonts to appear slightly thicker when viewed in
Acrobat or printed on low-resolution desktop printers. It doesn’t affect the quality of the type printed on high-
resolution printers or imagesetters.
Convert All Strokes To Outlines Converts all strokes to simple filled paths on pages containing transparency. This
option ensures that the width of strokes stays consistent during flattening. Note that enabling this option causes thin
strokes to appear slightly thicker and may degrade flattening performance.
Clip Complex Regions Ensures that the boundaries between vector artwork and rasterized artwork fall along object
paths. This option reduces stitching artifacts that result when part of an object is rasterized while another part of the
object remains in vector form. However, selecting this option may result in paths that are too complex for the printer
to handle.
Stitching, where rasters and vectors meet.
Note: Some print drivers process raster and vector art differently, sometimes resulting in color stitching. You may be able
to minimize stitching problems by disabling some print-driver specific color-management settings. These settings vary
with each printer, so see the documentation that came with your printer for details.
(Illustrator only) Select Preserve Alpha Transparency (Flatten Transparency dialog box only) Preserves the overall
opacity of flattened objects. With this option, blending modes and overprints are lost, but their appearance is retained
within the processed artwork, along with the level of alpha transparency (as when you rasterize artwork using a

459
USING INDESIGN
Transparency effects
Last updated 11/16/2011
transparent background). Preserve Alpha Transparency can be useful if you are exporting to SWF or SVG, since both
of these formats support alpha transparency.
(Illustrator only) Select Preserve Spot Colors And Overprints (Flatten Transparency dialog box only) Generally
preserves spot colors. It also preserves overprinting for objects that aren’t involved in transparency. Select this option
when printing separations if the document contains spot colors and overprinted objects. Deselect this option when
saving files for use in page-layout applications. With this option selected, overprinted areas that interact with
transparency are flattened, while overprinting in other areas is preserved. The results are unpredictable when the file
is output from a page-layout application.
Preserve Overprint (Acrobat only) Blends the color of transparent artwork with the background color to create an
overprint effect.
Preview which areas of artwork will be flattened
Use the preview options in the Flattener Preview to highlight areas that are affected by flattening. You can use this
color-coded information to adjust flattening options.
Note: The Flattener Preview is not intended for precise previewing of spot colors, overprints, and blending modes. Instead,
use Overprint Preview mode for those purposes.
1Display the Flattener Preview panel (or dialog box):
•In Illustrator, choose Window > Flattener Preview.
•In Acrobat, choose Tools > Print Production > Flattener Preview.
•In InDesign, choose Window > Output > Flattener Preview.
2From the Highlight menu, choose the kind of areas you want to highlight. The availability of options depends on
the content of the artwork.
3Select the flattening settings you want to use: Either choose a preset or, if available, set specific options.
Note: (Illustrator) If the flattening settings aren’t visible, select Show Options from the panel menu to display them.
4If the artwork contains overprinted objects that interact with transparent objects, in Illustrator, select an option
from the Overprints menu. You can preserve, simulate, or discard overprints. In Acrobat, choose Preserve
Overprint to blend the color of transparent artwork with the background color to create an overprint effect.
5At any time, click Refresh to display a fresh preview version based on your settings. Depending on the complexity
of the artwork, you may need to wait a few seconds for the preview image to appear. In InDesign, you can also
choose Auto Refresh Highlight.
In Illustrator and Acrobat, to magnify the preview, click in the preview area. To zoom out, Alt-click/Option-click in
the preview area. To pan the preview, hold down the spacebar and drag in the preview area.
More Help topics
“About flattening” on page 454
Refresh the preview in the Flattener Preview panel
•To automatically update the display whenever it is out of date and idle, select Auto Refresh Highlight.
•To manually update the display, click Refresh.
In both cases, the display is updated in the document window according to the transparency flattening settings you
chose.

460
USING INDESIGN
Transparency effects
Last updated 11/16/2011
Best practices when creating transparency
In most cases, flattening produces excellent results when you use an appropriate predefined flattener preset, or create
a preset with settings appropriate for your final output. For a complete reference and troubleshooting guide on how
transparency affects output, see the document “Achieving Reliable Print Output with Transparency” (English only) on
the Adobe website.
However, if your document contains complex, overlapping areas and you require high-resolution output, you can
achieve more reliable print output by following a few basic guidelines:
Important: If you’re applying transparency to documents intended for high-resolution output, be sure to discuss your
plans with your service provider. Good communication between you and your service provider will help you achieve the
results you expect.
Overprinting objects
Although flattened objects may look transparent, they are actually opaque and don’t allow other objects beneath them
to show through. However, if you don’t apply overprint simulation, the transparency flattener may be able to preserve
basic overprinting of objects when exporting to PDF or printing. In this case, recipients of the resulting PDF file should
select Overprint Preview in Acrobat
5.0 or later to accurately view the results of overprinting.
Conversely, if you apply overprint simulation, the transparency flattener provides a simulation of what the overprints
look like, and this simulation results in all opaque objects. In PDF output, this simulation converts spot colors to
process color equivalents. Therefore, Simulate Overprint should not be selected for output that will be color separated
later.
Spot colors and blending modes
Using spot colors with certain blending modes sometimes produces unexpected results. This is because InDesign uses
process color equivalents on screen, but uses spot colors in print. In addition, isolated blending in an imported graphic
could create knockouts in the active document.
If you use blending, check your design periodically using Overprint Preview in the View menu. Overprint Preview
gives an approximation of how spot inks that overprint or interact with transparent objects will appear. If the visual
effect is not what you want, do any of the following:
•Use a different blending mode or no blending mode. Avoid these blending modes when working with spot colors:
Difference, Exclusion, Hue, Saturation, Color, and Luminosity.
•Use a process color where possible.
Blend space
If you apply transparency to objects on a spread, all colors on that spread convert to the transparency blend space
you’ve chosen (Edit
> Transparency Blend Space), either Document RGB or Document CMYK, even if they’re not
involved with transparency. Converting all the colors results in consistency across any two same-colored objects on a
spread, and avoids more dramatic color behavior at the edges of transparency. Colors are converted “on the fly” as you
draw objects. Colors in placed graphics that interact with transparency are also converted to the blend space. This
affects how the colors appear on-screen and in print, but not how the colors are defined in the document.
Depending on your workflow, do one of the following:
•If you create documents for print only, choose Document CMYK for the blend space.
•If you create documents for web only, choose Document RGB.
•If you create documents for both print and web, decide which is more important, and then choose the blend space
that matches the final output.

461
USING INDESIGN
Transparency effects
Last updated 11/16/2011
•If you create a high-resolution print piece that you’ll also publish as a high-profile PDF document on a website, you
may need to switch the blending space back and forth before final output. In this case, be sure to reproof the color
on every spread that has transparency, and avoid using the Difference and Exclusion blend modes—these modes
can change the appearance dramatically.
Type
When type is close to transparent objects, it may interact with transparent objects in unexpected ways. For example,
type that wraps around a transparent object may not actually overlap the object, but the glyphs may be close enough
to interact with the transparency. In this case, the flattener may convert the glyphs to outlines, resulting in thickened
stroke widths on the glyphs only.
If this happens, do either of the following:
•Move the text to the top of the stacking order. Use the Selection tool to select the text frame, and then choose
Object
> Arrange > Bring to Front.
•Expand all text to outlines for a consistent effect throughout the document. To expand all text to outlines, select
Convert All Text To
Outlines in the Transparency Flattener Preset Options dialog box. Selecting this option may
affect processing speed.
Image replacement
The flattener requires high-resolution data to accurately process a document with transparency. However, in an OPI
proxy workflow, placeholder or proxy images are used, for later replacement with high-resolution versions by an OPI
server. If the flattener doesn’t have access to the high-resolution data, then no OPI comments are produced and only
the low-resolution proxy images are output, resulting in low-resolution images at final output.
If you work in an OPI workflow, consider using InDesign to substitute images before saving the document as
PostScript. To do this, you must specify settings both when you place the EPS graphic and when you output it. When
you place the EPS graphic, select Read Embedded OPI Image Links in the EPS Import Options dialog box. When you
output, select OPI Image Replacement in the Advanced area of either the Print or Export EPS dialog box.
Color conversions
If a transparent object overlaps a spot color object, undesirable results may occur when you export to EPS format, and
then convert spot colors to process colors upon printing or create color separations in an application other than
InDesign.
To prevent problems in these cases, use the Ink Manager to convert spot colors to process color equivalents as
necessary prior to exporting from InDesign. Another way to prevent problems is to make sure that your spot inks are
consistent in both the original application (for example, Adobe Illustrator) and InDesign. This may mean that you’ll
need to open an Illustrator document, convert a spot color to process color, export it again to EPS, and then place the
EPS file in your InDesign layout.
Adobe PDF files
Exporting to Acrobat 4.0 (Adobe PDF 1.3) always flattens a document with transparency, which may affect the
appearance of its transparent objects. Nontransparent content is not flattened unless Simulate Overprint is selected in
the Output area of the Export Adobe PDF dialog box. Therefore, when you export an InDesign document with
transparency to Adobe PDF, do any of the following:
•Whenever possible, choose Acrobat 5.0 (Adobe PDF 1.4), Acrobat 6.0 (Adobe PDF 1.5), or Acrobat 7.0
(Adobe
PDF 1.6) compatibility in the Export Adobe PDF dialog box to preserve transparency in a live and fully
editable form. Make sure that your service provider can handle Acrobat
5.0, Acrobat 6.0, or Acrobat 7.0 files.

462
USING INDESIGN
Transparency effects
Last updated 11/16/2011
•If you must use Acrobat 4.0 compatibility, your document contains spot colors, and you want to create a PDF file
for on-screen viewing (such as a client review), you may want to select the Simulate Overprint option in the Output
area of the Export Adobe PDF dialog box. This option properly simulates the spot and transparent areas; recipients
of the PDF file won’t have to select Overprint Preview in Acrobat to see how the document will look when printed.
However, the Simulate Overprint option converts all spot colors to process color equivalents in the resulting PDF
file, so be sure to deselect this option when you create the PDF for final production.
•Consider using the predefined [Press Quality] Adobe PDF preset. This preset contains flattener settings
appropriate for complex documents intended for high-resolution output.
Trapping
Flattening may convert vectors to rasterized areas. Traps applied to artwork in Adobe Illustrator using strokes and
placed in InDesign will be preserved. Traps applied to vector artwork drawn in InDesign and then rasterized may not
be preserved.
To keep as many objects vector as possible, select the [High Resolution] transparency flattener preset in the Advanced
area of the Print or Export Adobe PDF dialog box.
More Help topics
“About transparency flattener presets” on page 455
“Options for omitting graphics” on page 612
“Ink Manager overview” on page 643

463
Last updated 11/16/2011
Chapter 15: Color
Understanding spot and process colors
About spot and process colors
You can designate colors as either spot or process color types, which correspond to the two main ink types used in
commercial printing. In the Swatches panel, you can identify the color type of a color using icons that appear next to
the name of the color.
When applying color to paths and frames, keep in mind the final medium in which the artwork will be published, so
that you apply color using the most appropriate color mode.
If your color workflow involves transferring documents among devices, you may want to use a color-management
system (CMS) to help maintain and regulate colors throughout the process.
About spot colors
A spot color is a special premixed ink that is used instead of, or in addition to, process inks, and that requires its own
printing plate on a printing press. Use spot color when few colors are specified and color accuracy is critical. Spot color
inks can accurately reproduce colors that are outside the gamut of process colors. However, the exact appearance of
the printed spot color is determined by the combination of the ink as mixed by the commercial printer and the paper
it’s printed on, not by color values you specify or by color management. When you specify spot color values, you’re
describing the simulated appearance of the color for your monitor and composite printer only (subject to the gamut
limitations of those devices).
Keep the following guidelines in mind when specifying a spot color:
•For best results in printed documents, specify a spot color from a color-matching system supported by your
commercial printer. Several color-matching system libraries are included with the software.
•Minimize the number of spot colors you use. Each spot color you create will generate an additional spot color
printing plate for a printing press, increasing your printing costs. If you think you might require more than four
colors, consider printing your document using process colors.
•If an object contains spot colors and overlaps another object containing transparency, undesirable results may
occur when exporting to EPS format, when converting spot colors
to process colors using the Print dialog box,
or
when creating color separations in an application other than Illustrator or InDesign. For best results, use the
Flattener Preview or the Separations Preview to soft proof the effects of flattening transparency before printing. In
addition, you can convert the spot colors to process colors by using the Ink Manager in InDesign before printing
or exporting.
•You can use a spot color printing plate to apply a varnish over areas of a process color job. In this case, your print
job would use a total of five inks—four process inks and one spot varnish.
About process colors
A process color is printed using a combination of the four standard process inks: cyan, magenta, yellow, and black
(CMYK). Use process colors when a job requires so many colors that using individual spot inks would be expensive or
impractical, as when printing color photographs.

464
USING INDESIGN
Color
Last updated 11/16/2011
Keep the following guidelines in mind when specifying a process color:
•For best results in a high-quality printed document, specify process colors using CMYK values printed in process
color reference charts, such as those available from a commercial printer.
•The final color values of a process color are its values in CMYK, so if you specify a process color using RGB (or LAB,
in InDesign), those color values will be converted to CMYK when you print color separations. These conversions
differ based on your color-management settings and document profile.
•Don’t specify a process color based on how it looks on your monitor, unless you are sure you have set up a color-
management system properly, and you understand its limitations for previewing color.
•Avoid using process colors in documents intended for online viewing only, because CMYK has a smaller color
gamut than that of a typical monitor.
•Illustrator and InDesign let you specify a process color as either global or non-global. In Illustrator, global process
colors remain linked to a swatch in the Swatches panel, so that if you modify the swatch of a global process color,
all objects using that color are updated. Non-global process colors do not automatically update throughout the
document when the color is edited. Process colors are non-global by default. In InDesign, when you apply a swatch
to objects, the swatch is automatically applied as a global process color. Non-global swatches are unnamed colors,
which you can edit in the Color panel.
Note: Global and non-global process colors only affect how a particular color is applied to objects, never how colors
separate or behave when you move them between applications.
Using spot and process colors together
Sometimes it’s practical to use process and spot inks in the same job. For example, you might use one spot ink to print
the exact color of a company logo on the same pages of an annual report where photographs are reproduced using
process color. You can also use a spot color printing plate to apply a varnish over areas of a process color job. In both
cases, your print job would use a total of five inks—four process inks and one spot ink or varnish.
In InDesign, you can mix process and spot colors together to create mixed ink colors.
More Help topics
“Mixing inks” on page 485
Comparing colors in InDesign and Illustrator
Adobe InDesign and Adobe Illustrator use slightly different methods for applying named colors. Illustrator lets you
specify a named color as either global or nonglobal, and InDesign treats all unnamed colors as nonglobal, process
colors.
The InDesign equivalents to global colors are swatches. Swatches make it easier to modify color schemes without
having to locate and adjust each individual object. This is especially useful in standardized, production-driven
documents like magazines. Because InDesign colors are linked to swatches in the Swatches panel, any change to a
swatch affects all objects to which a color is applied.
The InDesign equivalents to nonglobal swatches are unnamed colors. Unnamed colors do not appear in the Swatches
panel, and they do not automatically update throughout the document when the color is edited in the Color panel. You
can, however, add an unnamed color to the Swatches panel later.
Named and unnamed colors only affect how a particular color updates in your document, never how colors separate
or behave when you move them between applications.
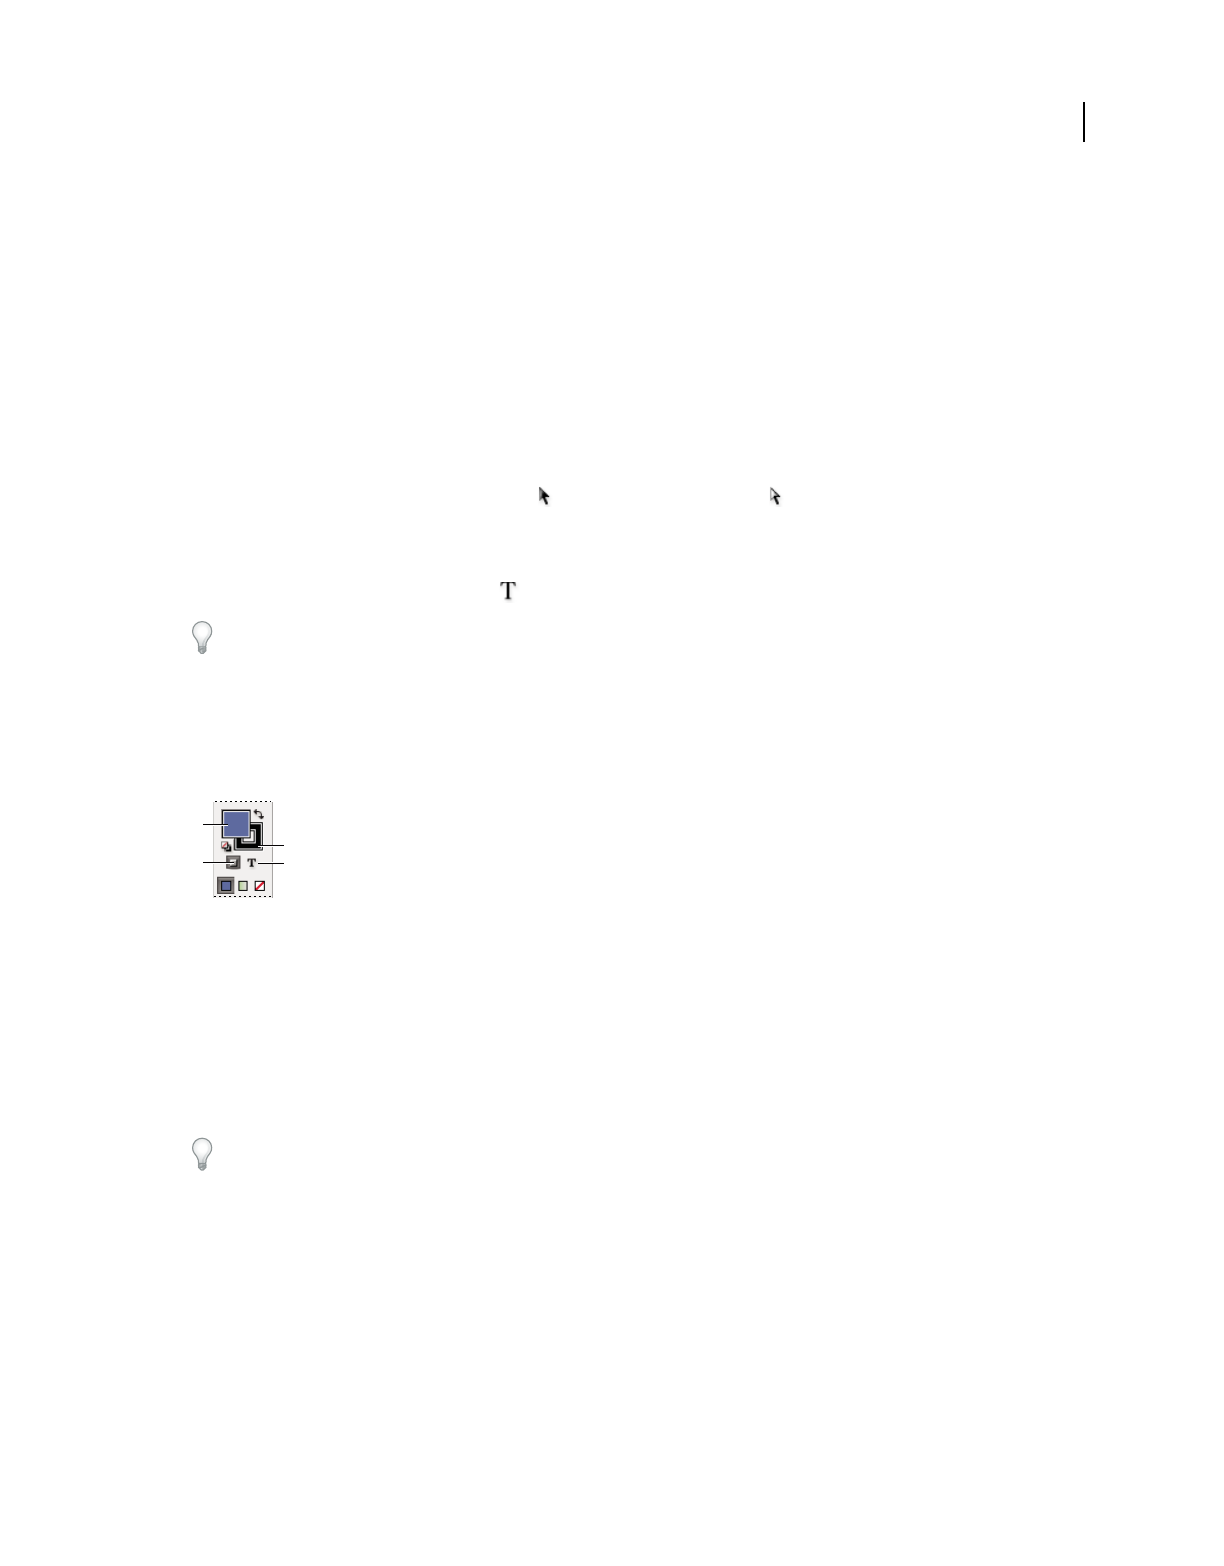
465
USING INDESIGN
Color
Last updated 11/16/2011
Applying color
Apply color
Adobe InDesign provides a number of tools for applying color, including the Toolbox, the Swatches panel, the Color
panel, the Color Picker, and the Control panel.
When you apply a color, you can specify whether the color applies to the stroke or fill of an object. The stroke is the
border, or frame, of an object, and the fill is the background of an object. When you apply a color to a text frame, you
can specify whether the color change affects the text frame or the text inside the frame.
1Select the object you want to color by doing one of the following:
•For a path or frame, use the Selection tool or the Direct Selection tool , as necessary.
•For a grayscale or monochrome (1-bit) image, click the Content Grabber or use the Direct Selection tool. You can
apply only two colors to a grayscale or monochrome image.
•For text characters, use the Type tool to change the text color of a single word or the entire text within a frame.
To change the color of gaps in a dashed, dotted, or striped stroke, use the Stroke panel.
2In the Toolbox or in the Color or Swatches panel, select the Formatting Affects Text or Formatting Affects
Container to determine whether color is applied to the text or the text frame.
3In the Toolbox or in the Color or Swatches panel, select the Fill box or the Stroke box to specify the fill or stroke of
the object. (If you selected an image, the Stroke box has no effect.)
Specify how color is applied in the Toolbox
A. Fill box B. Formatting Affects Container C. Stroke box D. Formatting Affects Text
4Do one of the following:
•Select a color, tint, or gradient using the Swatches or Gradient panel.
•Select a color, tint, or gradient from the Fill or Stroke menu in the Control panel.
•Double-click either the Fill or Stroke box in the Toolbox or the Color panel to open the Color Picker. Select the
desired color, and click
OK.
You can apply color to any grayscale image, provided it does not contain alpha or spot channels. If you imported an
image with a clipping path, select the clipping path using the Direct Selection tool to apply color to the clipped area only.
Select a color with the Color Picker
The Color Picker lets you choose colors from a color field or specify colors numerically. You can define colors using
the RGB, Lab, or CMYK color model.
1Double-click either the Fill or Stroke box in the Toolbox or the Color panel to open the Color Picker.
2To change the color spectrum displayed in the Color Picker, click a letter: R (Red), G (Green), or B (Blue); or L
(luminance), a (green-red axis), or b (blue-yellow axis).
C
D
A
B
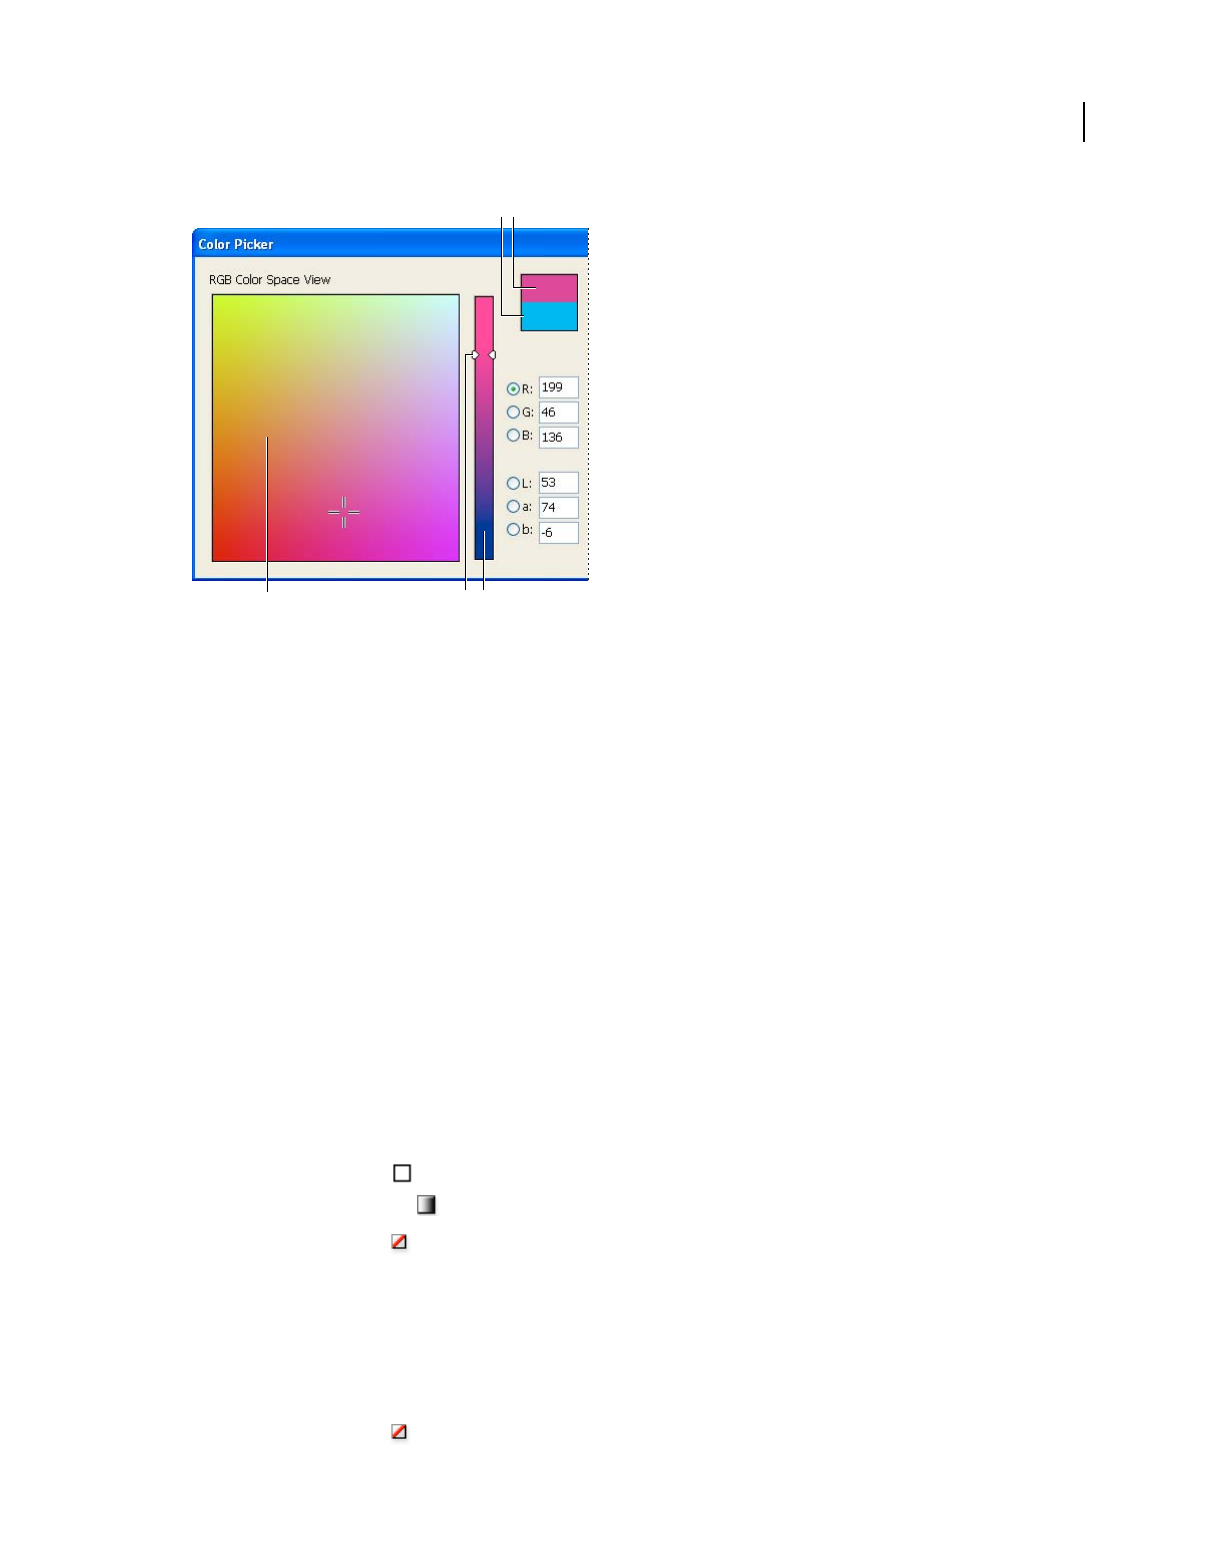
466
USING INDESIGN
Color
Last updated 11/16/2011
Color Picker
A. Original color B. New color C. Color field D. Color slider triangles E. Color spectrum
3To define a color, do any of the following:
•Click or drag inside the color field. Cross-hairs indicate the color’s position in the color field.
•Drag the color slider triangles along the color spectrum or click inside the color spectrum.
•Enter values in any of the text boxes.
4To save the color as a swatch, click Add CMYK Swatch, Add RGB Swatch, or Add Lab Swatch. InDesign adds the
color to the Swatches panel, using the color values as its name.
5Click OK.
Apply the last used color
The Toolbox displays the last color or gradient you applied. You can apply this color or gradient directly from the
Toolbox.
1Select the object or text you want to color.
2In the Toolbox, click the Fill button or Stroke button depending on which portion of the text or object you want to
color.
3In the Toolbox, do one of the following:
•Click the Color button to apply the last selected solid color in the Swatches or Color panel.
•Click the Gradient button to apply the last selected gradient in the Swatches or Gradient panel.
•Click the None button to remove the object’s fill or stroke.
Remove fill or stroke color
1Select the text or object whose color you want to remove.
2In the Toolbox, click the Fill button or Stroke button depending on which portion of the text or object you want to
change.
3Click the None button to remove the object’s fill or stroke.
CD E
A B

467
USING INDESIGN
Color
Last updated 11/16/2011
Applying colors by dragging and dropping
An easy way to apply colors or gradients is to drag them from a color source to an object or panel. Dragging and
dropping lets you apply colors or gradients to objects without first selecting the objects. You can drag the following:
•The Fill or Stroke box in the Toolbox or a panel.
•The Gradient box in the Gradient panel.
•Swatches from the Swatches panel.
•The last-used, in-gamut color swatch located next to the out-of-gamut icon in a panel.
You can drop colors or gradients on the following objects and panels:
•The fill or stroke of a path. To drop color on a fill or stroke, position the center of the drag icon precisely over the
path’s fill or stroke while you drag a color, and then release the mouse button.
•The Swatches panel.
If you drag one or more Swatches panel swatches, or the color swatch next to an out-of-gamut icon, you can drop them
into another InDesign document window, which adds the swatches to that document’s Swatches panel.
Apply a color or gradient swatch
1Using the Selection tool , select a text or object frame; or using the Text tool , select a range of text.
2If the Swatches panel is not open, choose Window > Color > Swatches.
3In the Swatches panel, select the Fill box or the Stroke box.
4Do one of the following:
•To apply color to selected text, click the Text button .
•To apply color to a selected object or text container (such as a frame or a table), click the Object button .
5Click a color or gradient swatch. The selected color or gradient is applied to any selected text or object, and it
appears in the Color panel and in the Fill box or Stroke box in the Toolbox.
You can set the default fill or stroke colors the same way you set other InDesign defaults. Choose Edit > Deselect All
to make sure that no objects are selected, and then choose a color.
Apply color using the Color panel
Although the Swatches panel is the recommended panel for working with colors, you can also mix colors by using the
Color panel; you may be familiar with it if you use other Adobe products, such as Adobe Illustrator.
You can add the current Color panel color to the Swatches panel at any time. The Color panel is most useful for mixing
unnamed colors.
Note: If you select an object that currently uses a named swatch, editing its color using the Color panel will change the
color of that object only. If you want to edit the color throughout the document, double-click its swatch in the Swatches
panel.
Edit the fill or stroke color
1Select the object or text you want to change.
2If the Color panel is not displayed, choose Window > Color.
3Select the Fill box or the Stroke box in the Color panel.
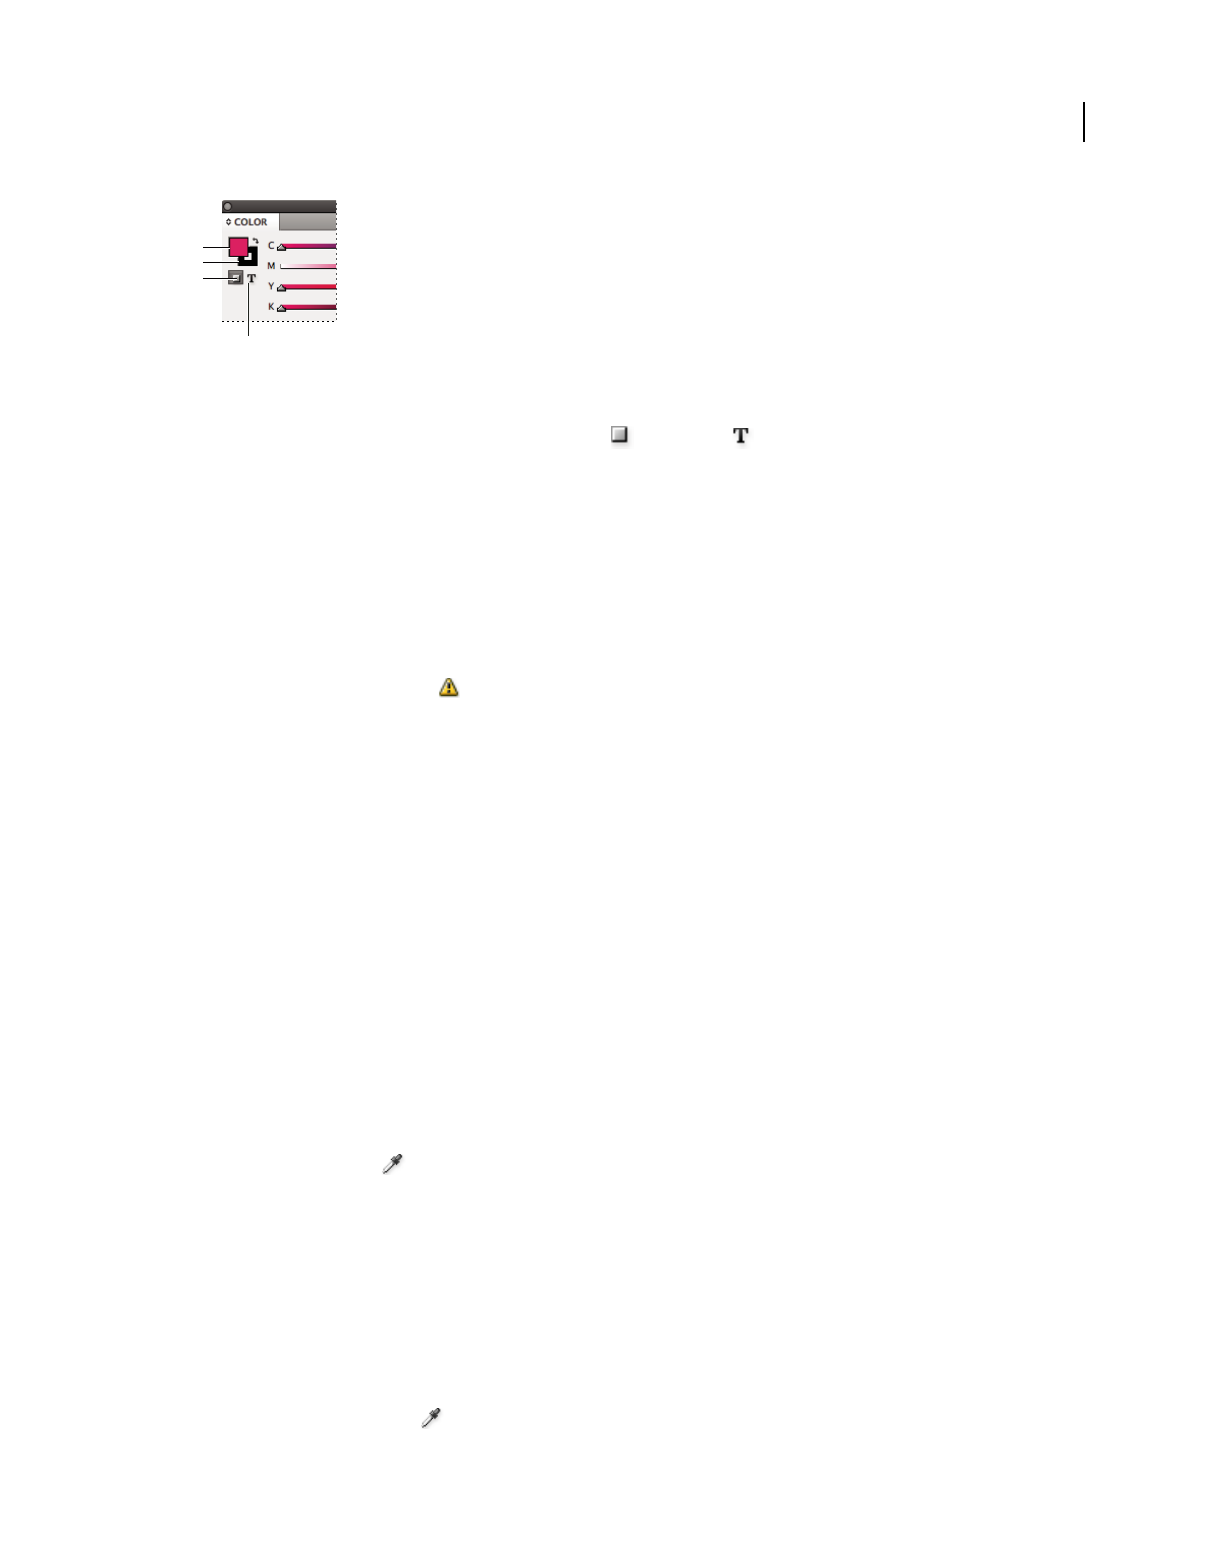
468
USING INDESIGN
Color
Last updated 11/16/2011
Color panel
A. Fill box B. Stroke box C. Formatting Affects Container D. Formatting Affects Text
4If you selected a text frame, select the Container box or Text box to change the color of either the fill or text
within the frame.
5Do one of the following:
•Adjust the Tint slider, which appears by default if the object uses a swatch from the Swatches panel.
•Choose a Lab, CMYK, or RGB color model in the Color panel menu, and use the sliders to change the color values.
You can also enter numeric values in the text boxes next to the color sliders.
•Position the pointer over the color bar, and click.
•Double-click the Fill or Stroke box, and select a color from the Color Picker. Then click OK.
6If an out-of-gamut alert icon appears, and you want to use the CMYK color values closest to the color you
originally specified, click the small color box next to the alert icon.
Create a swatch from a color in the Color panel
1In the Color panel, make sure that the active Fill or Stroke box displays the color you want to add.
2Choose Add To Swatches in the panel menu.
Cycle through color modes
❖Do one of the following:
•In the Color panel, Shift-click the color bar at the bottom of the panel.
•In the New Color Swatch or Swatch Options dialog box, Shift-click the color box.
•In the New Gradient or Gradient Options dialog box, select a gradient stop, make sure that RGB, LAB, or CMYK
is selected in the Stop Color menu, and then Shift-click the color box.
Apply colors using the Eyedropper tool
Use the Eyedropper tool to copy fill and stroke attributes, such as color, from any object in an InDesign file,
including an imported graphic. By default, the Eyedropper tool loads all available fill and stroke attributes of an object
and sets the default fill and stroke attributes of any new objects you draw. You can use the Eyedropper Options dialog
box to change the attributes the Eyedropper tool copies. You can also use the Eyedropper tool to copy type and
transparency attributes.
Note: If an attribute is not listed in the Eyedropper Options dialog box, it can’t be copied with the Eyedropper tool.
Apply colors using the Eyedropper tool
1Select one or more objects that have the fill and stroke attributes you want to change.
2Select the Eyedropper tool .
A
B
C
D

469
USING INDESIGN
Color
Last updated 11/16/2011
3Click any object that has the fill and stroke attributes you want to sample. A loaded eyedropper appears , and
the selected objects are automatically updated with the fill and stroke attributes of the object you clicked.
4To change other objects to the same attributes, click the objects with the loaded eyedropper. If an object is stroked
and not filled, be sure to click the object’s outline.
Pick up new attributes when the Eyedropper tool is loaded
1Press Alt (Windows) or Option (Mac OS) while the Eyedropper tool is loaded. The Eyedropper tool reverses
direction, and appears empty , to indicate that it’s ready to pick up new attributes.
2Without releasing the Alt or Option key, click an object containing the attributes that you want to copy, and then
release the Alt or Option key so that you can drop the new attributes on another object.
Change Eyedropper tool settings
1In the Toolbox, double-click the Eyedropper tool .
2Select the attributes in the Fill Settings and Stroke Settings sections that you want to copy with the Eyedropper tool,
and then click
OK.
To pick up only the fill or stroke color of an object and no other attributes, Shift-click the object with the Eyedropper
tool. When you apply the color to another object, only the fill or stroke color is applied, depending on whether the
stroke or fill is on top in the toolbar.
Apply colors to grayscale images
You can add color to a placed grayscale image in InDesign.
1Make sure the image is saved as a grayscale or bitmap image and that it’s saved in PSD, TIFF, BMP, or JPG format.
In Photoshop, you can choose Image > Mode > Bitmap or Image > Mode > Grayscale.
2Click the Content Grabber, or use the Direct Selection tool to select the image.
3Select a color from the Swatches panel or Color panel.
If the image is in PSD format, it may contain multiple layers, but the bottom layer must be opaque. You cannot apply
color to a PSD image with a transparent background in InDesign. In addition, the grayscale image cannot contain
alpha or spot channels.
Working with swatches
Swatches panel overview
The Swatches panel (Window > Color > Swatches) lets you create and name colors, gradients, or tints, and quickly
apply them to your document. Swatches are similar to paragraph and character styles; any change you make to a swatch
affects all objects to which the swatch is applied. Swatches make it easier to modify color schemes without having to
locate and adjust each individual object.
When the fill or stroke of selected text or an object contains a color or gradient applied from the Swatches panel, the
applied swatch is highlighted in the Swatches panel. Swatches you create are associated only with the current
document. Each document can have a different set of swatches stored in its Swatches panel.
When working with a prepress service provider, swatches let you clearly identify spot colors. You can also specify color
settings in a preflight profile to determine which color settings work with your printer.

470
USING INDESIGN
Color
Last updated 11/16/2011
Six CMYK-defined colors appear in the default Swatches panel: cyan, magenta, yellow, red, green, and blue.
Note: When you print a book whose chapters contain conflicting swatches, you can instruct InDesign to synchronize
settings with the master document. (See “Synchronize book documents” on page 315.)
More Help topics
“Understanding spot and process colors” on page 463
“Import swatches” on page 474
“Mixing inks” on page 485
“Tints” on page 479
Swatch types
The Swatches panel stores the following types of swatches:
Colors Icons on the Swatches panel identify the spot and process color types, and LAB , RGB ,
CMYK , and Mixed Ink color modes.
Tints A percentage value next to a swatch in the Swatches panel indicates a tint of a spot or process color.
Gradients An icon on the Swatches panel indicates whether a gradient is radial or linear .
None The None swatch removes the stroke or fill from an object. You can’t edit or remove this swatch.
Paper Paper is a built-in swatch that simulates the paper color on which you’re printing. Objects behind a paper-
colored object won’t print where the paper-colored object overlaps them. Instead, the color of the paper on which you
print shows through. You can edit the Paper color to match your paper stock by double-clicking it in the Swatches
panel. Use the Paper color for previewing only—it will not be printed on a composite printer or in color separations.
You can’t remove this swatch. Do not apply the Paper swatch to remove color from an object. Use the None swatch
instead.
Note: If the Paper color is not working as described, and you are printing to a non-PostScript printer, try switching your
printer driver to Raster Graphics mode.
Black Black is a built-in, 100% process color black defined using the CMYK color model. You can’t edit or remove this
swatch. By default, all occurrences of Black overprint (print on top of) underlying inks, including text characters at any
size. You can disable this behavior.
Registration Registration is a built-in swatch that causes objects to print on every separation from a PostScript
printer. For example, registration marks use the Registration color, so that printing plates can be aligned precisely on
a press. You cannot edit or remove this swatch.
You can also add colors from any color library to the Swatches panel so that they are saved with your document.
Customize swatch display
You can control the size of swatches and whether the name displays with the swatch.
1In the Swatches panel menu, choose one of the following:
•Name displays a small swatch next to the name of the swatch. The icons to the right of the name show the color
model (CMYK, RGB, and so on), and whether the color is a spot color, process color, registration color, or none.
•Small Name displays compacted swatch panel rows.
•Small Swatch or Large Swatch displays only the swatch. A triangle with a dot in the corner of the swatch indicates
that the color is a spot color. A
triangle without a dot indicates a process color.

471
USING INDESIGN
Color
Last updated 11/16/2011
2To set what type of swatches display, click one of the following buttons at the bottom of the Swatches panel:
•Show All Swatches displays all color, tint, and gradient swatches.
•Show Color Swatches displays only process color, spot color, mixed ink color, and tint swatches.
•Show Gradient Swatches displays only gradient swatches.
Note: The None swatch is always displayed regardless of which button you click.
Create color swatches
Swatches can include spot or process colors, mixed inks (process colors mixed with one or more spot colors), RGB or
Lab colors, gradients, or tints.
When you place an image that contains spot colors, the colors are automatically added as swatches to the Swatches
panel. You can apply these swatches to objects in your document, but you cannot redefine or delete the swatches.
Before you create swatches, learn which settings are appropriate for your printer service provider. You can specify
color settings in a preflight profile to highlight color settings that don’t work with your printer.
More Help topics
“Using colors from imported graphics” on page 487
“Preflighting files before handoff” on page 617
Create a new color swatch
1Choose New Color Swatch in the Swatches panel menu.
2For Color Type, choose the method you’ll use to print document colors on a printing press.
3For Swatch Name, do one of the following:
•If you chose Process as the color type and you want the name always to describe the color values, make sure that
Name With Color Value is selected.
•If you chose Process as the color type and you want to name the color yourself, make sure that Name With Color
Value is deselected, and type a Swatch Name.
•If you chose Spot, type a Swatch Name.
4For Color Mode, choose the mode you want to use in defining the color. Avoid changing the mode after you define
a color.
5Do one of the following:
•Drag the sliders to change the color values. You can also enter numeric values in the text boxes next to the color
sliders.
•For spot colors, choose from color libraries in the Color Mode menu.
6If an out-of-gamut alert icon appears, and you want to use the in-gamut color closest to the color you originally
specified, click the small color box next to the alert icon.
7Do one of the following:
•Click Add to add the swatch and define another one. Click Done when finished.
•Click OK to add the swatch and exit the dialog box.

472
USING INDESIGN
Color
Last updated 11/16/2011
To directly define a spot color using the New Swatch button in the Swatches panel, make sure that no swatches are
selected, and then hold down Alt+Ctrl (Windows) or Option+Command (Mac OS) as you click the New Swatch
button
.
Create a swatch based on the color of an object
1Select the object.
2In the Toolbox or Swatches panel, select the Fill box or the Stroke box.
3In the Swatches panel, do one of the following:
•Click the New Swatch button and double-click the resulting new swatch.
•Choose New Color Swatch in the Swatches panel menu.
The selected color or gradient appears in the Swatches panel and in the Fill box or Stroke box in the Toolbox, and is
applied to the fill or stroke of all selected objects.
Add unnamed colors to the Swatches panel
While you can create colors using the Color panel or Color Picker, unnamed colors are more difficult to edit later and
to use consistently. Use the Add Unnamed Colors option to search for unnamed colors applied to objects within the
document, and then add them to the Swatches panel. Colors are automatically named according to their CMYK, RGB,
or Lab components.
❖In the Swatches panel, choose Add Unnamed Colors.
Manage swatches
You can edit, duplicate, and delete swatches in the Swatches panel.
More Help topics
“Import swatches” on page 474
“Inks, separations, and screen frequency” on page 642
“Mixing inks” on page 485
Edit the default colors in the Swatches panel
You can change the swatches that appear by default in new documents.
1Close all open documents.
2Edit the swatches you want to change in the Swatches panel.
Duplicate a swatch
Duplicating swatches can be useful when you want to create a warmer or cooler variation of an existing color. Note
that duplicating a spot color will result in an additional spot color printing plate.
❖Do one of the following:
•Select a swatch, and choose Duplicate Swatch in the Swatches panel menu.
•Select a swatch, and click the New Swatch button at the bottom of the panel.
•Drag a swatch to the New Swatch button at the bottom of the panel.

473
USING INDESIGN
Color
Last updated 11/16/2011
Edit a swatch
You can change individual attributes of a swatch by using the Swatch Options dialog box. Additional options are
available when editing mixed ink swatches and mixed ink groups.
1In the Swatches panel, select a swatch, and do one of the following:
•Double-click the swatch.
•Choose Swatch Options in the Swatches panel menu.
2Adjust settings as desired, and click OK.
Control swatch names
By default, the name of a process color swatch is derived from the values of the color’s components. For example, if
you create a red process color using 10% cyan, 75% magenta, 100% yellow, and 0% black, its swatch will be named
C=10 M=75 Y=100 K=0 by default. This makes it easier to identify the composition of process colors.
By default, the name of a process color swatch automatically updates when you change its CMYK values; you can
switch this option off or on for individual swatches as needed. As with any swatch you define, you can change the name
of a process color swatch at any time.
1Double-click a process color in the Swatches panel.
2Do one of the following, and click OK:
•To let InDesign rename the swatch when you adjust its CMYK percentages, make sure that the Name With Color
Value option is selected.
•To rename a swatch when you adjust its CMYK values, make sure that the Name With Color Value option is
deselected.
Note: The new swatch is automatically renamed New Color Swatch (this has a number following it if more than one New
Color Swatch exists) when this option is deselected. You can change this name manually.
Delete individual swatches
When you delete a swatch that has been applied to an object in the document, InDesign prompts you for a replacement
swatch. You can designate an existing or unnamed swatch. If you delete a swatch used as the basis of a tint or mixed
ink, you will be prompted to choose a replacement.
1Select one or more swatches.
2Do one of the following:
•Choose Delete Swatch in the Swatches panel menu.
•Click the Delete icon at the bottom of the Swatches panel.
Note: You cannot delete spot colors that are used by placed graphics in the document. To delete these colors, you must
first delete the graphic. However, in rare cases the spot color cannot be removed even though the graphic has been
removed. In such instances, use File
> Export to create an InDesign Markup (IDML) file. Then re-open that file in
InDesign.
3InDesign asks you how to replace the swatch you’re deleting. Do one of the following, and click OK:
•To replace all instances of the swatch with another swatch, click Defined Swatch, and choose a swatch in the menu.
•To replace all instances of the swatch with an equivalent unnamed color, click Unnamed Swatch.

474
USING INDESIGN
Color
Last updated 11/16/2011
Delete all unused swatches
1Choose Select All Unused in the Swatches panel menu. Only swatches that are not currently used in the active file
will be selected.
2Click the Delete icon.
Merge swatches
When you import swatches or copy items from other documents, you may end up with duplicate swatches that may
be applied to different objects. Use the Merge Swatches command to combine duplicate swatches.
1In the Swatches panel, select two or more duplicate swatches.
The first swatch you select is the one the survives (gets merged into).
2Choose Merge Swatches in the Swatches panel menu.
Save swatches for use in other documents
To use your color swatches in other files or to share them with other designers, you can save swatches in an Adobe
Swatch Exchange (.ase) file. InDesign, as well as Illustrator and Adobe Photoshop, can import swatches from a
Colorbook file.
1In the Swatches panel, select the swatches you want to save.
2Choose Save Swatches in the Swatches panel menu.
3Specify a name and location for the file, and click Save.
Share swatches between applications
You can share the solid swatches you create in Photoshop, Illustrator, and InDesign by saving a swatch library for
exchange. The colors appear exactly the same across applications as long as your color settings are synchronized.
1In the Swatches panel, create the process and spot color swatches you want to share, and remove any swatches you
don’t want to share.
Note: You cannot share the following types of swatches between applications: patterns, gradients, mixed inks and tints,
and the Registration swatch from Illustrator or InDesign; and book color references, HSB, XYZ, duotone, monitorRGB,
opacity, total ink, and webRGB swatches from Photoshop. These types of swatches are automatically excluded when you
save swatches.
2Select Save Swatches from the Swatches panel menu, and save the swatch libraries in an easily accessible location.
3Load the swatch library into the Swatches panel for Photoshop, Illustrator, or InDesign.
Import swatches
You can import colors and gradients from other documents, adding either all or some of the swatches to the Swatches
panel. You can load swatches from InDesign files (.indd), InDesign templates (.indt), Illustrator files (.ai or .eps), and
Adobe Swatch Exchange files (.ase) created by InDesign, Illustrator, or Photoshop. Adobe Swatch Exchange files
contain swatches saved in the Adobe Swatch Exchange format.
InDesign also includes color libraries from other color systems, such as the PANTONE Process Color System®.
Note: Spot colors used by imported EPS, PDF, TIFF, and Adobe Photoshop (PSD) files are also added to the Swatches
panel.

475
USING INDESIGN
Color
Last updated 11/16/2011
More Help topics
“Kuler panel” on page 477
Import selected swatches from a file
1Choose New Color Swatch from the Swatches panel menu.
2Choose Other Library from the Color Mode list, and then select the file from which you want to import swatches.
3Click Open.
4Select the swatches you want import.
5Click OK.
Import all swatches from a file
1From the Swatches panel menu, choose Load Swatches.
2Double-click an InDesign document.
Copy swatches between InDesign documents
You can copy or drag a swatch (or objects with a swatch applied) from one document to another. When you do so, the
swatch is added to the destination document’s Swatches panel. If you want to copy the swatch’s tints and gradients as
well, you need to copy the original object, not just the swatch.
❖Do one of the following:
•Copy an object into the current document using drag-and-drop or copy-and-paste.
•Select the swatches you want to copy and drag them from the Swatches panel to the document window of another
InDesign document.
Note: If you drag a swatch that has an identical name as an existing swatch (including capitalization) but has different
color values, InDesign renames the swatch “[original swatch
name] 2.”
Load swatches from predefined custom color libraries
You can select from a range of color libraries—including the PANTONE Process Color System, Toyo™ Ink Electronic
Color Finder™ 1050, the Focoltone® color system, the Trumatch™ color swatch system, the DIC Process Color Note,
and libraries created especially for web use. Before using swatches from a color matching system, consult with your
prepress service providers to determine which ones they support.
1Choose New Color Swatch from the Swatches panel menu.
2Do one of the following:
•Choose the library file from the Color Mode list.
•Choose Other Library from the Color Mode list, locate the library file, and then click Open.
3Select one or more swatches from the library, and click Add. (To exit the dialog box without adding swatches,
click
OK.)
4When you are done adding swatches, click Done.

476
USING INDESIGN
Color
Last updated 11/16/2011
Color libraries installed with InDesign
InDesign installs color libraries for the color matching systems described below. You can install additional color
libraries and load swatches from them in InDesign.
ANPA Color Consists of 300 colors selected by ANPA (American Newspaper Publishers Association). Colors in this
library are primarily used as spot colors in newspapers.
DIC Color Provides 1280 CMYK spot colors from the DIC Process Color Note. Colors may be matched against the DIC
Color Guide, published by Dainippon Ink & Chemicals, Inc. For more information, contact Dainippon Ink &
Chemicals, Inc., in Tokyo, Japan.
Focoltone Consists of 763 CMYK colors. You can use Focoltone colors to help avoid prepress trapping and
registration problems by viewing the Focoltone charts that show the overprints that make up the colors.
A swatch book with specifications for process and spot colors, overprint charts, and a chip book for marking up layouts
are available from Focoltone. For more information, contact Focoltone International, Ltd., in Stafford, United
Kingdom.
HKS Use when your job specifies colors from the HKS color system, which is used in Europe.
PANTONE® PANTONE® Colors are the worldwide standards for spot color reproduction. In 2000, a major revision was
made to the PANTONE MATCHING SYSTEM® Color guides. 147 new solid colors and seven additional metallic
colors have been added to the System to now include a total of 1,114 colors. PANTONE Color guides and chip books
are now printed on coated, uncoated, and matte paper stocks to ensure accurate visualization of the printed result and
better on-press control.
You can print a solid PANTONE Color in CMYK. To compare a solid PANTONE Color to its closest process color
match, use the PANTONE solid to process guide. The CMYK screen tint percentages are printed under each color.
The guide is now printed on a brighter coated stock and includes comparisons of the 147 new solid colors to CMYK.
PANTONE process guides let you choose from over 3,000 process combinations now printed on coated and uncoated
stocks. Displayed in chromatic order in fan-guide format, it's easy to select colors and specify CMYK screen values.
For more information, contact Pantone, Inc., in Carlstadt, New Jersey, U.S.A.
System (Windows) Includes 256 colors of the Windows default 8-bit panel, which is based on a uniform sampling of
RGB colors.
System (Mac OS) Includes 256 colors of the Mac OS default 8-bit panel, which is based on a uniform sampling of RGB
colors.
Toyo Color Finder Includes 1050 colors based on the most common printing inks used in Japan. You can use the Toyo
94 Color Finder or the newer Toyo Color Finder. Consult the color guide that illustrates printed samples of Toyo Ink.
This color guide is available at print publishers and graphic arts supply stores. For more information, contact Toyo Ink
Manufacturing Co., Ltd., in Tokyo, Japan.
Trumatch Provides predictable CMYK color matching with over 2000 achievable, computer-generated colors.
Trumatch colors cover the visible spectrum of the CMYK gamut in even steps. The Trumatch Color Finder displays
up to 40 tints and shades of each hue, each originally created in four-color process and each reproducible in four colors
on electronic imagesetters. In addition, four-color grays using different hues are included. For more information,
contact Trumatch Inc., in New York, New York, U.S.A.
Web Includes the 216 RGB web-safe colors most often used by web browsers to display 8-bit images. This library helps
you create artwork for the web using colors that display consistently across Windows and Macintosh systems.

477
USING INDESIGN
Color
Last updated 11/16/2011
Kuler panel
About the Kuler panel
The Kuler™ panel is your portal to groups of colors, or themes, created by an online community of designers. You can
use it to browse thousands of themes on Kuler™, and then download some to edit or to include in your own projects.
You can also use the Kuler panel to create and save themes, and then share them with the Kuler community by
uploading them.
The Kuler panel is available in Adobe Photoshop®, Adobe Flash® Professional, Adobe InDesign®, Adobe Illustrator®,
and Adobe Fireworks®. The panel is not available in the French versions of these products.
For a video on the Kuler panel, see www.adobe.com/go/lrvid4088_xp.
For an article on Kuler and color inspiration, see Veerle Pieters' blog at
http://veerle.duoh.com/blog/comments/adobe_kuler_update_and_color_tips/.
Browse themes
An Internet connection is required to browse themes online.
Search themes
1Select Window > Extensions > Kuler, and then select the Browse panel.
2Do either of the following:
•In the Search box, enter the name of a theme, tag, or creator.
Note: Use only alphanumerical characters (Aa-Zz, 0-9) in searches.
•Filter the search results by selecting an option from the pop-up menus above the results.
View a theme online on Kuler
1In the Browse panel, select a theme in the search results.
2Click the triangle on the right side of the theme and select View Online in Kuler.
Saving frequent searches
1Select the Custom option in the first pop-up menu in the Browse panel.
2In the dialog box that opens, enter your search terms and save them.
When you want to run the search, select it from the first pop-up menu.
To delete a saved search, select the Custom option in the pop-up menu. Then clear the searches you want to delete,
and click Save.
Working with themes
You can use the Kuler panel to create or edit themes, and include them in your projects.
Note: In Illustrator, you create and edit themes with the Edit Color/Recolor Artwork dialog box, rather than the Create
panel. For details, see Illustrator Help.
Add a theme to the Swatches panel of your application
1In the Browse panel, select a theme you want to use.
2Click the triangle on the right side of the theme and select Add To Swatches Panel.

478
USING INDESIGN
Color
Last updated 11/16/2011
You can also add a theme from the Create panel by clicking the Add Selected Theme To Swatches button.
Edit a theme
1In the Browse panel, locate a theme you want to edit and then double-click the theme in the search results. The
theme opens in the Create panel.
2In the Create panel, edit the theme using the tools at your disposal. For more information, see the Create Panel
Tools topic that follows.
3Do one of the following:
•Save your theme by clicking the Save Theme button.
•Add the theme to your application’s Swatches panel by clicking the Add To Swatches Panel button at the bottom
of the panel.
•Upload the theme to the Kuler service by clicking the Upload button at the bottom of the panel.
Create panel tools
The Create panel provides a variety of tools to create or edit themes.
•Select a harmony rule from the Select Rule pop-up menu. The harmony rule uses the base color as the basis for
generating the colors in the color group. For example, if you choose a blue base color and the Complementary
harmony rule, a color group is created using the base color, blue, and its complement, red.
•Select the Custom rule to create a theme using free-form adjustments.
•Manipulate the colors in the color wheel. As you make your adjustments, the selected harmony rule continues to
govern the colors generated for the color group.
• Move the Brightness slider beside the wheel to adjust the color brightness.
•Set the base color by dragging the Base color marker (the largest, double-ringed color marker) around the wheel.
You can also set the base color by adjusting the color sliders at the bottom of the dialog box.
•Set one of the four other colors in the color group as the base color. Select the color’s swatch and click the bull’s-eye
button below the color group.
•Set the host application’s foreground/background color or stroke/fill color as the base color. Click one of the first
two buttons below the color group.
•Remove a color from the color group by selecting the color’s swatch and clicking the Remove Color button below
the color group. Add a new color by selecting an empty color swatch and clicking the Add Color button.
•Try different color effects by selecting a new harmony rule and by moving the markers in the color wheel.
•Double-click any of the swatches in the color group to set the active color (foreground/background or stroke/fill)
in your application. If the application doesn't have an active or selected color feature, the Kuler panel sets the
foreground color or the fill color as appropriate.
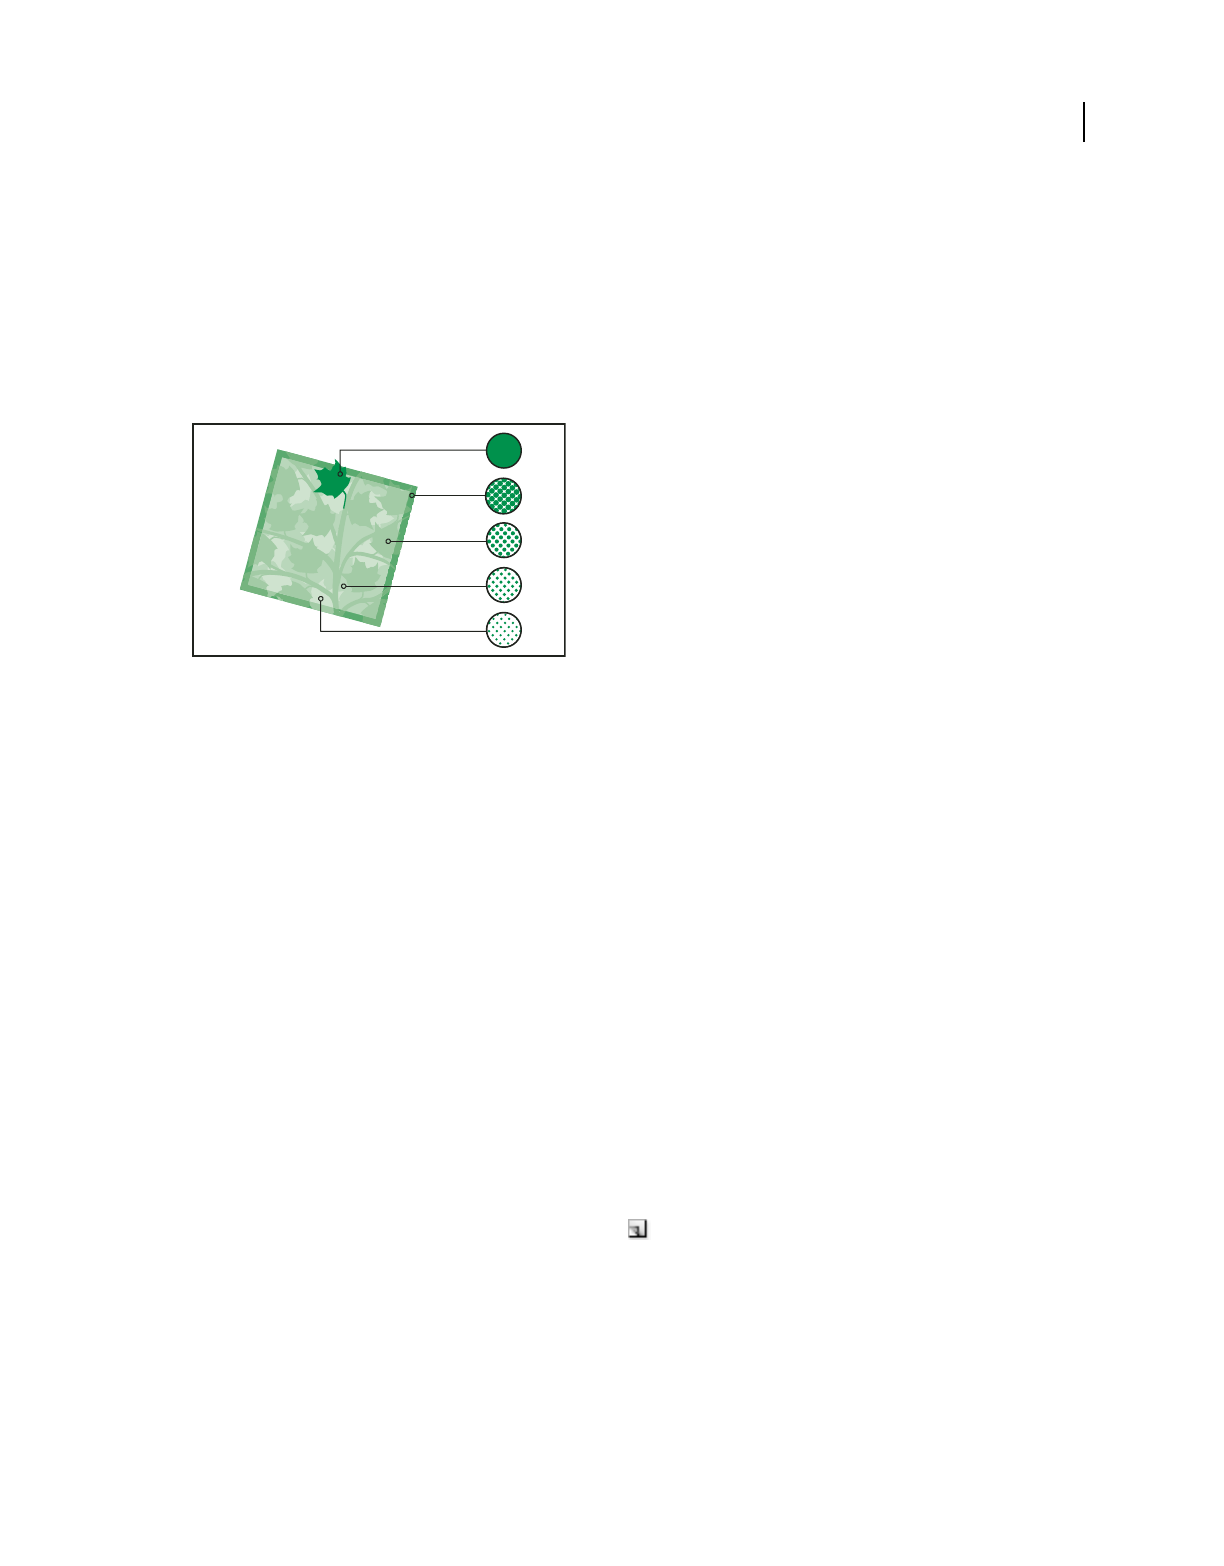
479
USING INDESIGN
Color
Last updated 11/16/2011
Tints
About tints
A tint is a screened (lighter) version of a color. Tinting is an economical way to make additional spot color variations
without having to pay for additional spot color inks. Tinting is also a quick way to create lighter versions of process
colors, although it doesn’t reduce the cost of printing process colors. As with non-tinted colors, it’s best to name and
store tints in the Swatches panel so that you can easily edit all instances of that tint in your document.
Spot color and tints
A tint of a spot color is printed on the same printing plate as the spot color. A tint of a process color multiplies each of
the CMYK process inks by the tint percentage; for example, an 80% tint of C10 M20 Y40 K10 results in C8 M16 Y32 K8.
Because colors and tints update together, if you edit a swatch, all objects that use a tint of that swatch update
accordingly. You can also edit the base swatch of a named tint using the Swatch Options command in the Swatches
panel menu; this updates any other tints based on the same swatch.
The tint range in Adobe Creative Suite 3 is 0% to 100%; the lower the number, the lighter the tint.
Create and edit tints
You can adjust the tint of an individual object, or create tints by using the Tint slider in the Swatches panel or Color
panel. The tint range is from 0% to 100%; the lower the number, the lighter the tint will be.
Because colors and tints update together, if you edit a swatch, all objects that use a tint of that swatch update
accordingly. You can also edit the base swatch of a named tint using the Swatch Options command in the Swatches
panel menu; this updates any other tints based on the same swatch.
Create a tint swatch using the Swatches panel
1In the Swatches panel, select a color swatch.
2Select the arrow next to the Tint box.
3Drag the Tint slider, and click the New Swatch button or select New Tint Swatch in the Swatches panel menu.
The tint appears in the Swatches panel with the name of its base color and the percentage of the tint.
Create a tint swatch using the Color panel
1In the Swatches panel, select a swatch.
2In the Color panel, drag the Tint slider, or enter a tint value in the Percentage box.
3In the Color panel menu, click Add To Swatches.
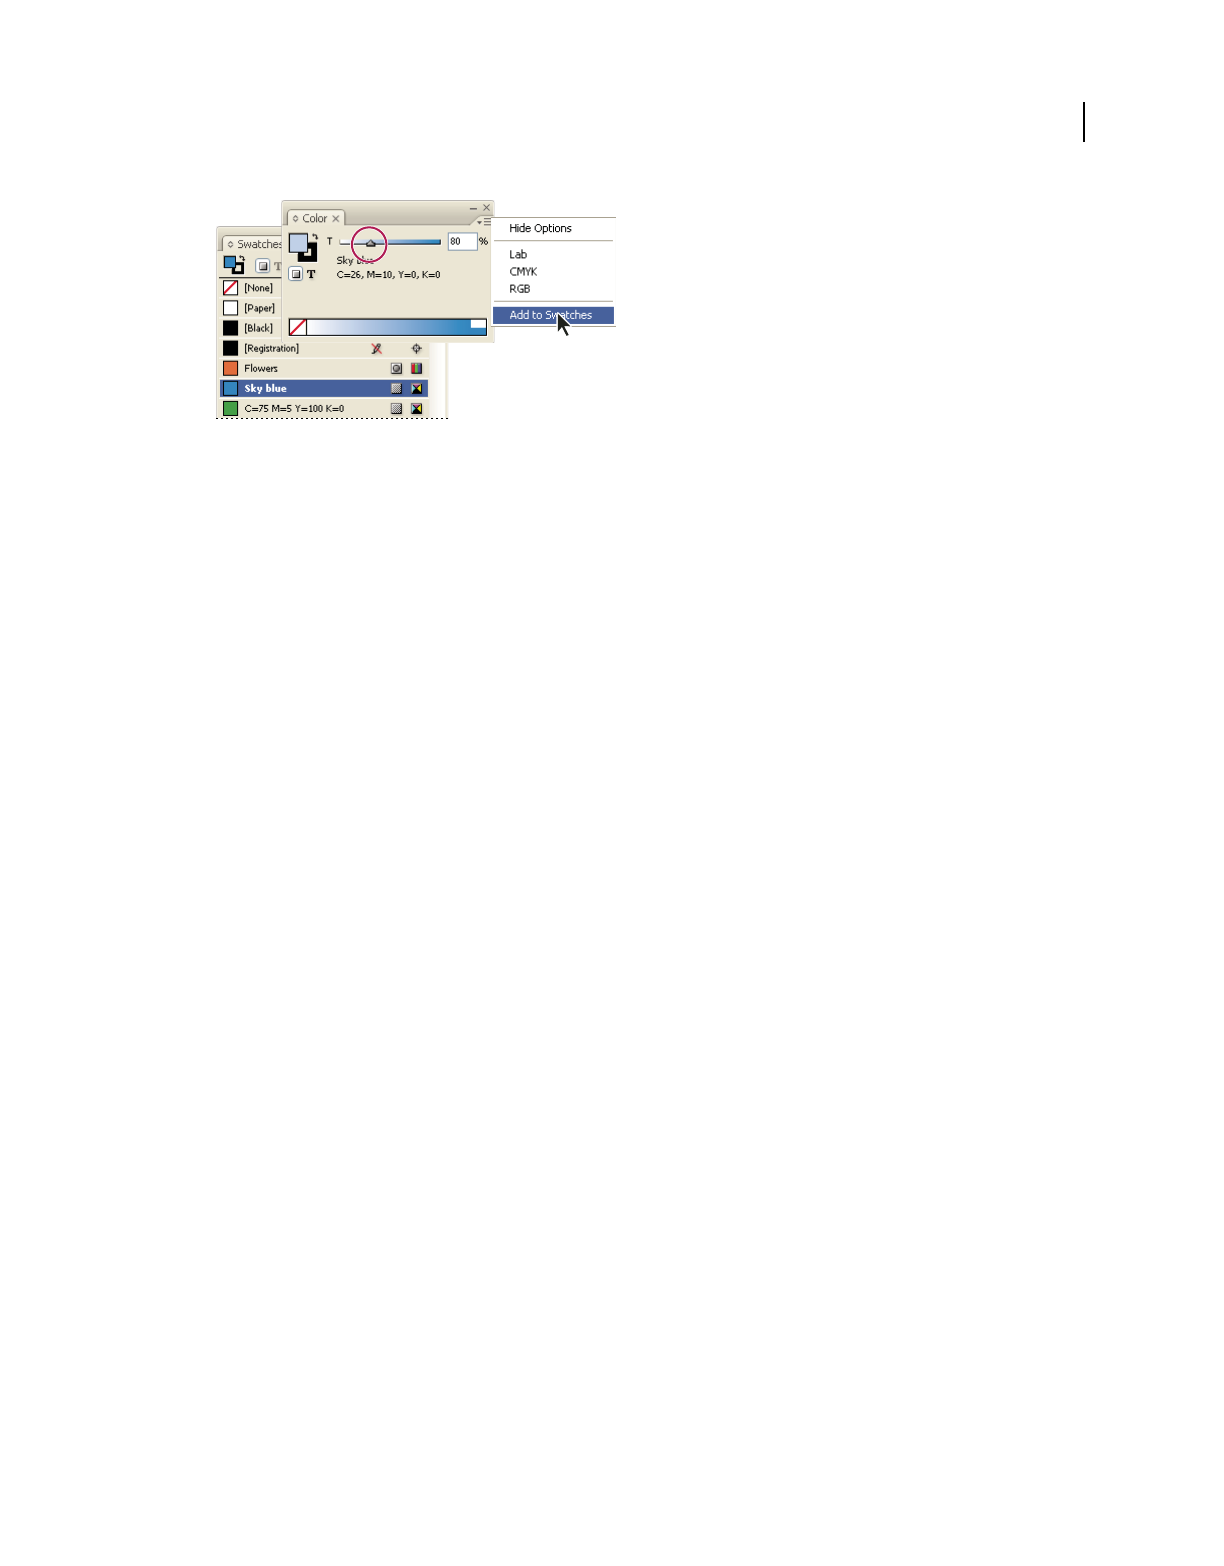
480
USING INDESIGN
Color
Last updated 11/16/2011
Drag the Tint slider and then click Add To Swatches.
Create an unnamed tint
1In the Swatches panel, select the Fill box or the Stroke box.
2Drag the Tint slider, or enter a tint value in the percentage box.
Edit a tint or base color swatch
1In the Swatches panel, double-click the tint swatch.
2Do one of the following, and click OK:
•To edit the tint, change the Tint value. This updates all objects using that tint swatch.
•To edit the tint’s base color swatch, change the Color Mode or the Color Mode values. This also updates all other
tints based on that same color swatch.
Gradients
About gradients
A gradient is a graduated blend between two or more colors or between two tints of the same color. The output device
you use affects how gradients color separate.
Gradients can include Paper, process colors, spot colors, or mixed ink colors using any color mode. Gradients are
defined by a series of color stops in the gradient bar. A stop is the point at which a gradient changes from one color to
the next, and is identified by a color square under the gradient bar. By default, a gradient starts with two colors and a
midpoint at 50%.
Note: When you create a gradient using colors of different modes and then print or color separate the gradient, all colors
are converted to CMYK process colors. Because of the color mode change, colors may shift. For best results, specify
gradients using CMYK colors.
More Help topics
“About printing” on page 597
Create a gradient swatch
You can create, name, and edit gradients using the same Swatches panel you use to work with solid colors and tints.
You can also create unnamed gradients using the Gradient panel.
1Choose New Gradient Swatch in the Swatches panel menu.
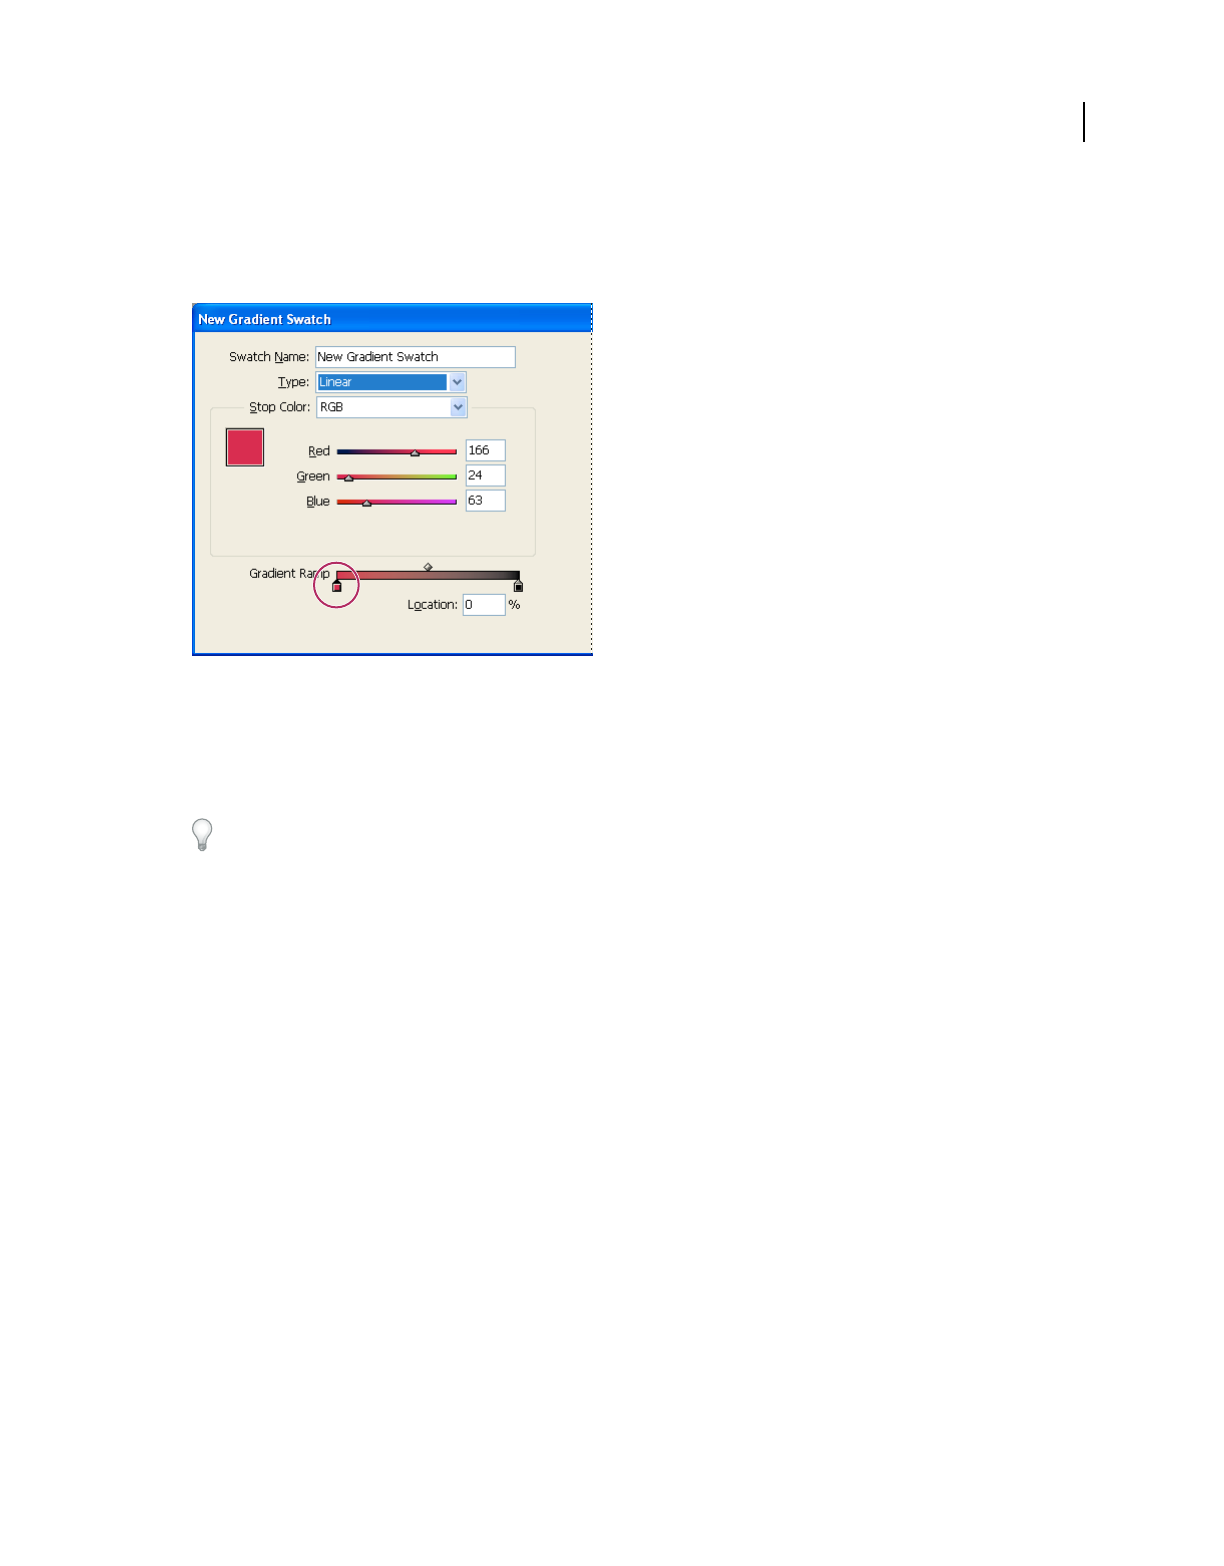
481
USING INDESIGN
Color
Last updated 11/16/2011
2For Swatch Name, type a name for the gradient.
3For Type, choose Linear or Radial.
4Select the first color stop in the gradient.
First color stop
5For Stop Color, do one of the following:
•To choose a color that’s already in the Swatches panel, choose Swatches, and select a color from the list.
•To mix a new unnamed color for the gradient, choose a color mode, and enter color values or drag the sliders.
By default, the first stop of the gradient is set to white. To make it transparent, apply the Paper swatch.
6To change the last color in the gradient, select the last color stop, and repeat step 5.
7To adjust the position of gradient colors, do one of the following:
•Drag the color stops located under the bar.
•Select a color stop under the bar, and enter a Location value to set the position of that color. This position represents
the percentage of distance between the previous color and the next color.
8To adjust the midpoint between two gradient colors (the point at which the colors are at 50%), do one of the
following:
•Drag the diamond icon located above the bar.
•Select the diamond icon above the bar, and enter a Location value to set the position of that color. This position
represents the percentage of distance between the previous color and the next color.
9Click OK or Add. The gradient is stored in the Swatches panel with its name.
Apply an unnamed gradient using the Gradient panel
Although the Swatches panel is the recommended panel for creating and storing gradients, you can also work with
gradients by using the Gradient panel (Window
> Color > Gradient), with which you may be familiar if you also use
Adobe Illustrator. You can add the current gradient to the Swatches panel at any time. The Gradient panel is useful for
creating an unnamed gradient that won’t be used often.
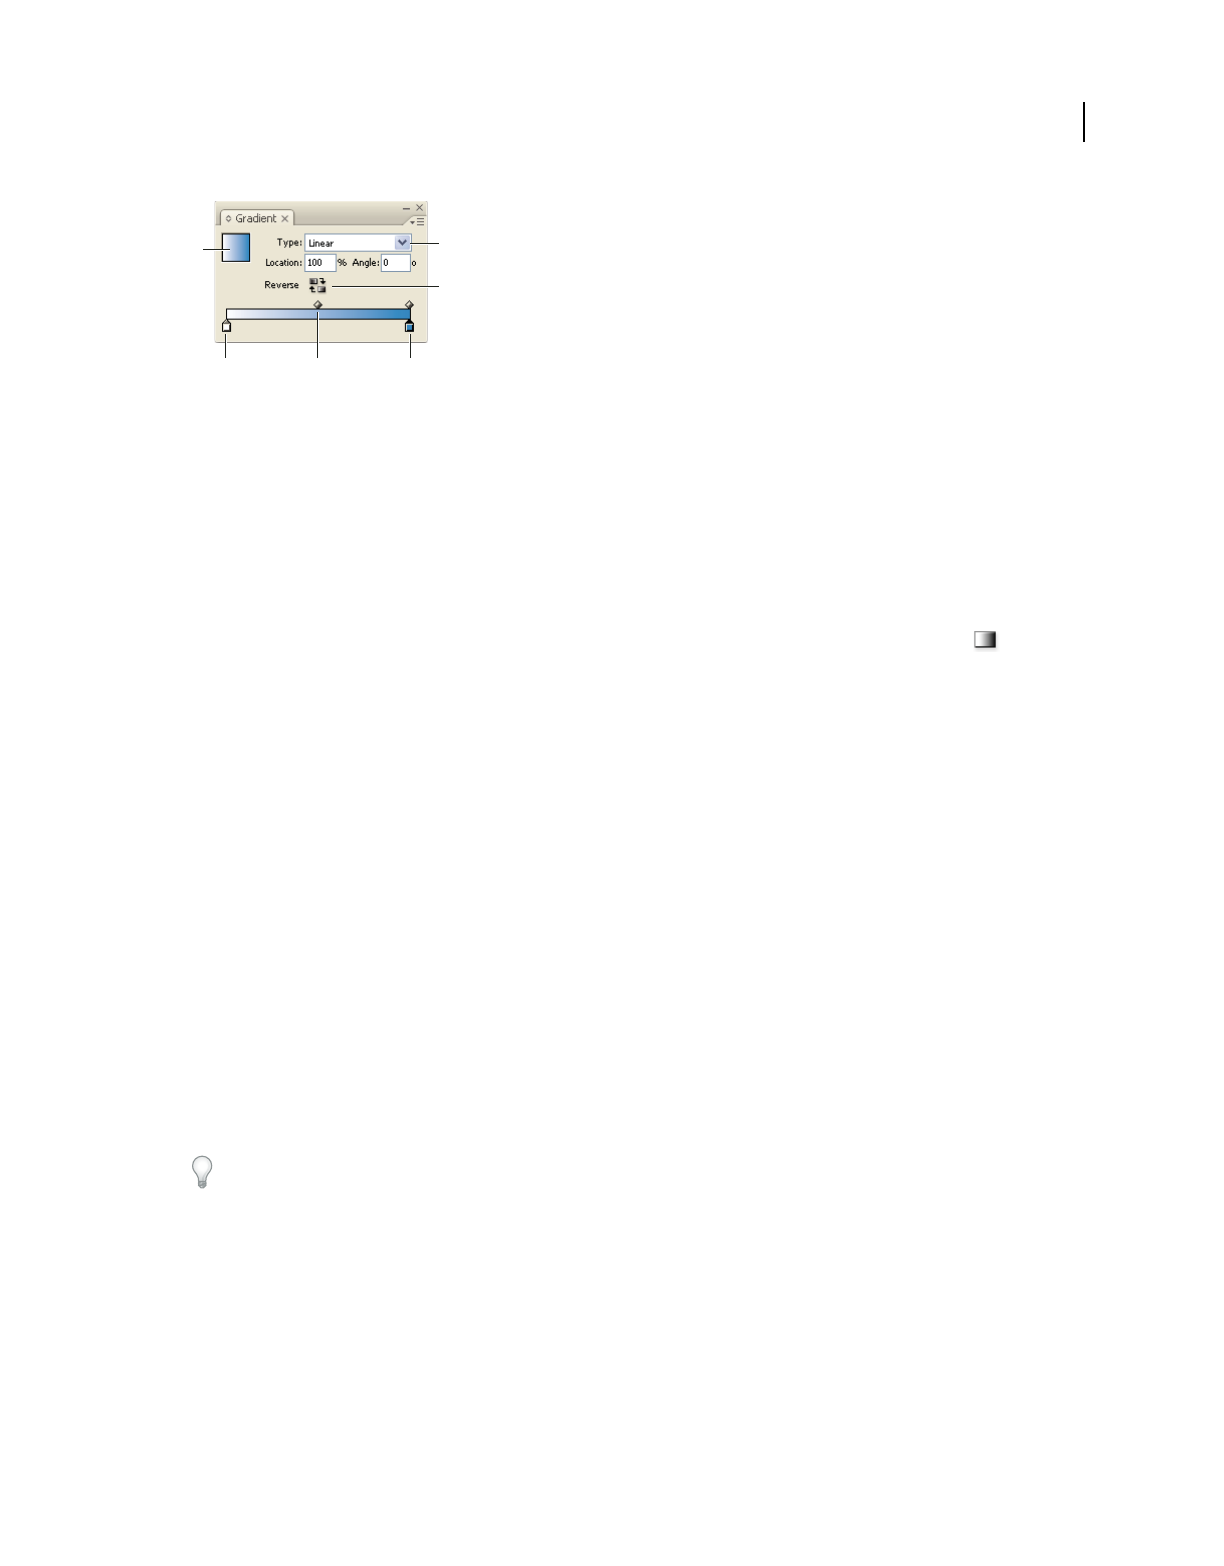
482
USING INDESIGN
Color
Last updated 11/16/2011
Gradient panel
A. Gradient fill B. Gradient type menu C. Reverse button D. Starting color stop E. Midpoint F. Ending color stop
Note: If you select an object that currently uses a named gradient, editing the gradient by using the Gradient panel will
change the color of that object only. To edit every instance of a named gradient, double-click its swatch in the Swatches
panel.
1Select the object or objects you want to change.
2Click the Fill or Stroke box in the Swatches panel or the Toolbox. (If the Gradient Fill box is not visible, choose Show
Options in the Gradient panel menu.)
3To open the Gradient panel, choose Window > Color > Gradient, or double-click the Gradient tool in the
Toolbox.
4To define the starting color of a gradient, click the leftmost color stop below the gradient bar, and then do one of
the following:
•Drag a swatch from the Swatches panel and drop it on the color stop.
•Alt-click (Windows) or Option-click (Mac OS) a color swatch in the Swatches panel.
•In the Color panel, create a color using the sliders or the color bar.
5To define the ending color of the gradient, click the rightmost color stop below the gradient bar. Then choose the
color you like, as described in the previous step.
6Select either Linear or Radial in the Type menu, and adjust color and midpoint positions as explained in “Create a
gradient swatch” on page 480.
7To adjust the gradient angle, type a value for Angle.
Modify gradients
You can modify gradients by adding colors to create multicolor gradients, and by adjusting color stops and midpoints.
It’s a good idea to fill an object with the gradient you plan to adjust, so that you can preview the effect on the object
while you adjust the gradient.
You can modify gradients pasted from Adobe Illustrator, provided that the gradient was pasted using AICB (Adobe
Illustrator Clipboard) format. (See “Pasting Illustrator graphics into InDesign” on page 372.) To select the gradient,
use the Direct Selection tool.
Note: If you edit a color swatch, any gradient stops that use that swatch will update accordingly, changing the gradient.
Add intermediate colors to a gradient
1Double-click a gradient swatch in the Swatches panel, or display the Gradient panel.
2Click anywhere below the gradient bar to define a new color stop. The new color stop is automatically defined by
the color values at that position along the existing gradient.
3Adjust the new color stop.
A
D
B
C
F
E
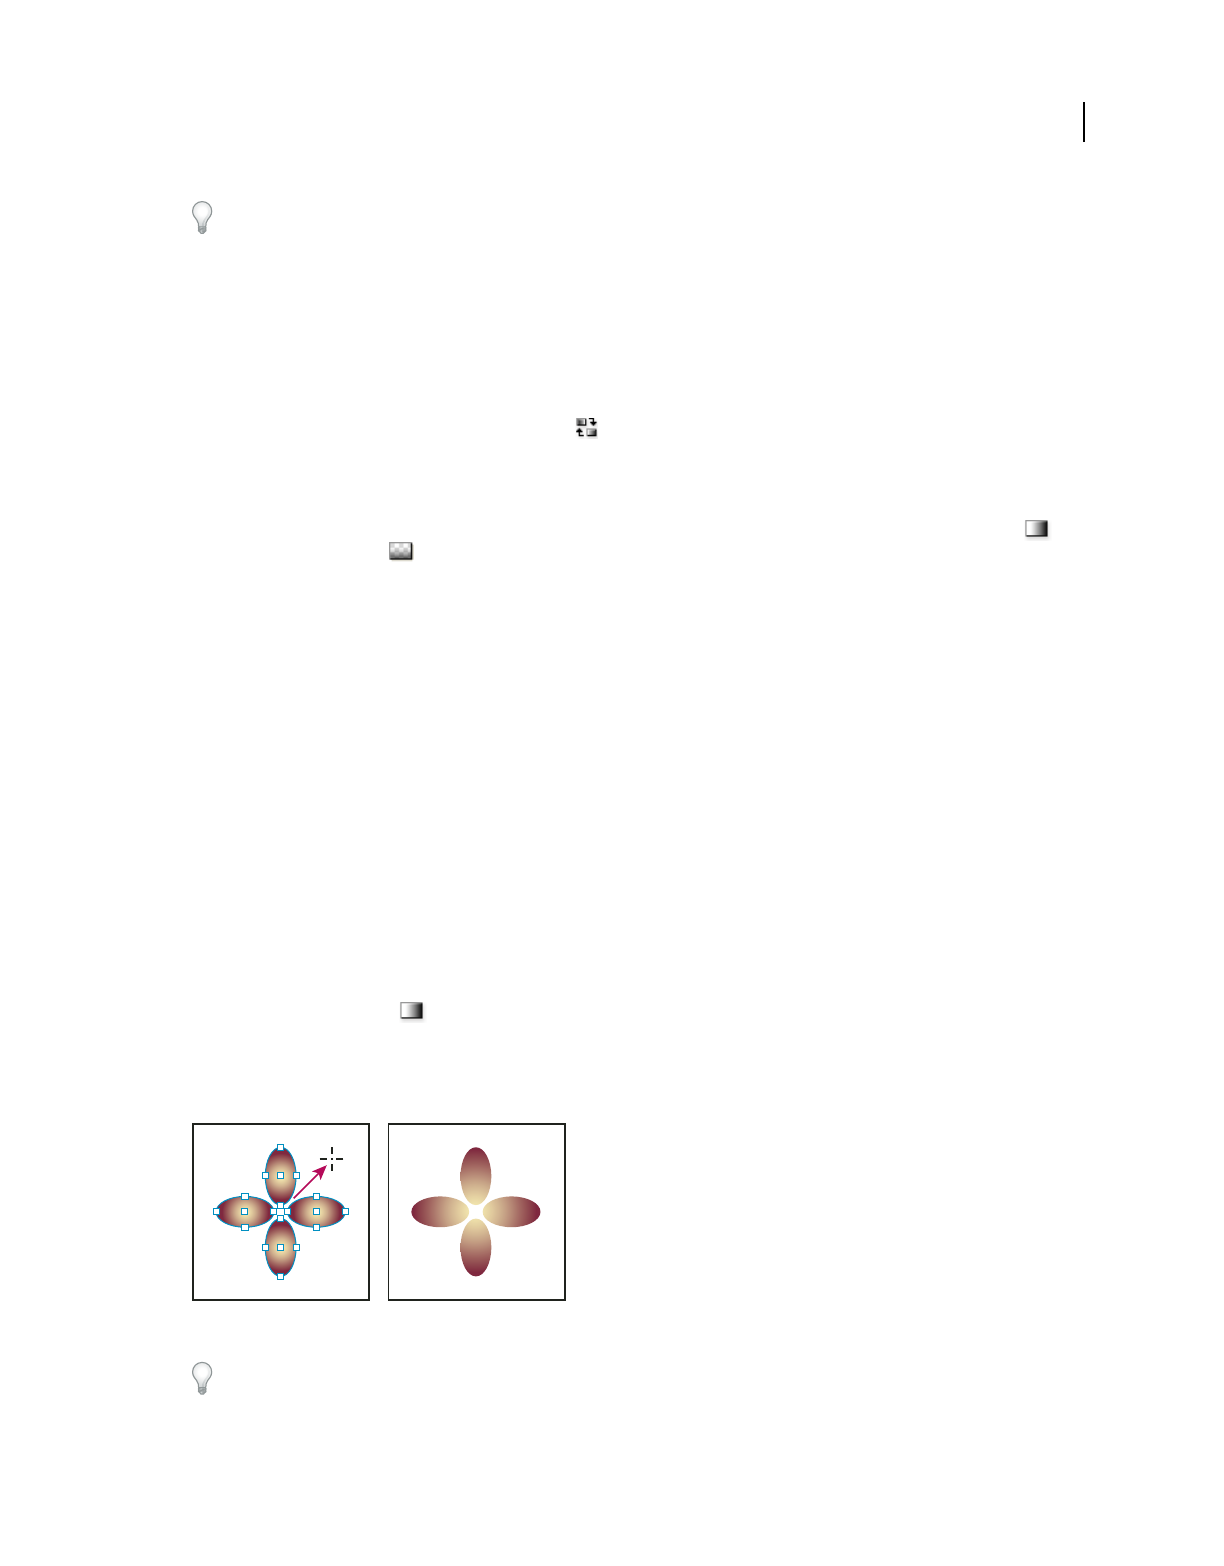
483
USING INDESIGN
Color
Last updated 11/16/2011
You can also drag a swatch from the Swatches panel onto the gradient bar in the Gradient panel to define a new color
stop.
Remove an intermediate color from a gradient
❖Select the intermediate color stop, and drag it to the edge of the panel.
Reverse a gradient’s color progression
1Activate a gradient.
2In the Gradient panel, click the Reverse button .
Adjust a gradient with the Gradient tools
Once you have filled an object with a gradient, you can modify the gradient by using the Gradient Swatch tool or
the Gradient Feather tool to “repaint” the fill by dragging along an imaginary line. The Gradient tools let you
change the direction of a gradient, change its beginning point and endpoint, and apply a gradient across multiple
objects. The Gradient Feather tool lets you soften the gradient in the direction in which you drag.
1In the Swatches panel or Toolbox, select the Fill box or the Stroke box, depending on where the original gradient
was applied.
2Select the Gradient Swatch or Gradient Feather tool, and position it at the place where you want to define the
beginning point of the gradient. Drag across the object in the direction you want the gradient to be applied. Hold
down Shift to constrain the tool to multiples of 45°.
Dragging the Gradient Feather tool across the gradient progressively softens the colors in the gradient within the area
you drag.
3Release the mouse button at the place where you want to define the endpoint of the gradient.
Apply a gradient across multiple objects
1Make sure that all selected objects already use a gradient.
2In the Toolbox, select the Fill box or the Stroke box.
3Select the Gradient tool , and position it where you want to define the beginning point of the gradient. Drag
across the object in the direction you want the gradient to be applied. Hold down Shift to constrain the tool to
multiples of 45°.
4Release the mouse button at the place where you want to define the endpoint of the gradient.
Default gradient fill (left) and gradient applied across objects (right)
If a compound path with a gradient is selected, you can edit the gradient across all of its subpaths by using the
Gradient panel alone, without having to use the Gradient tool.
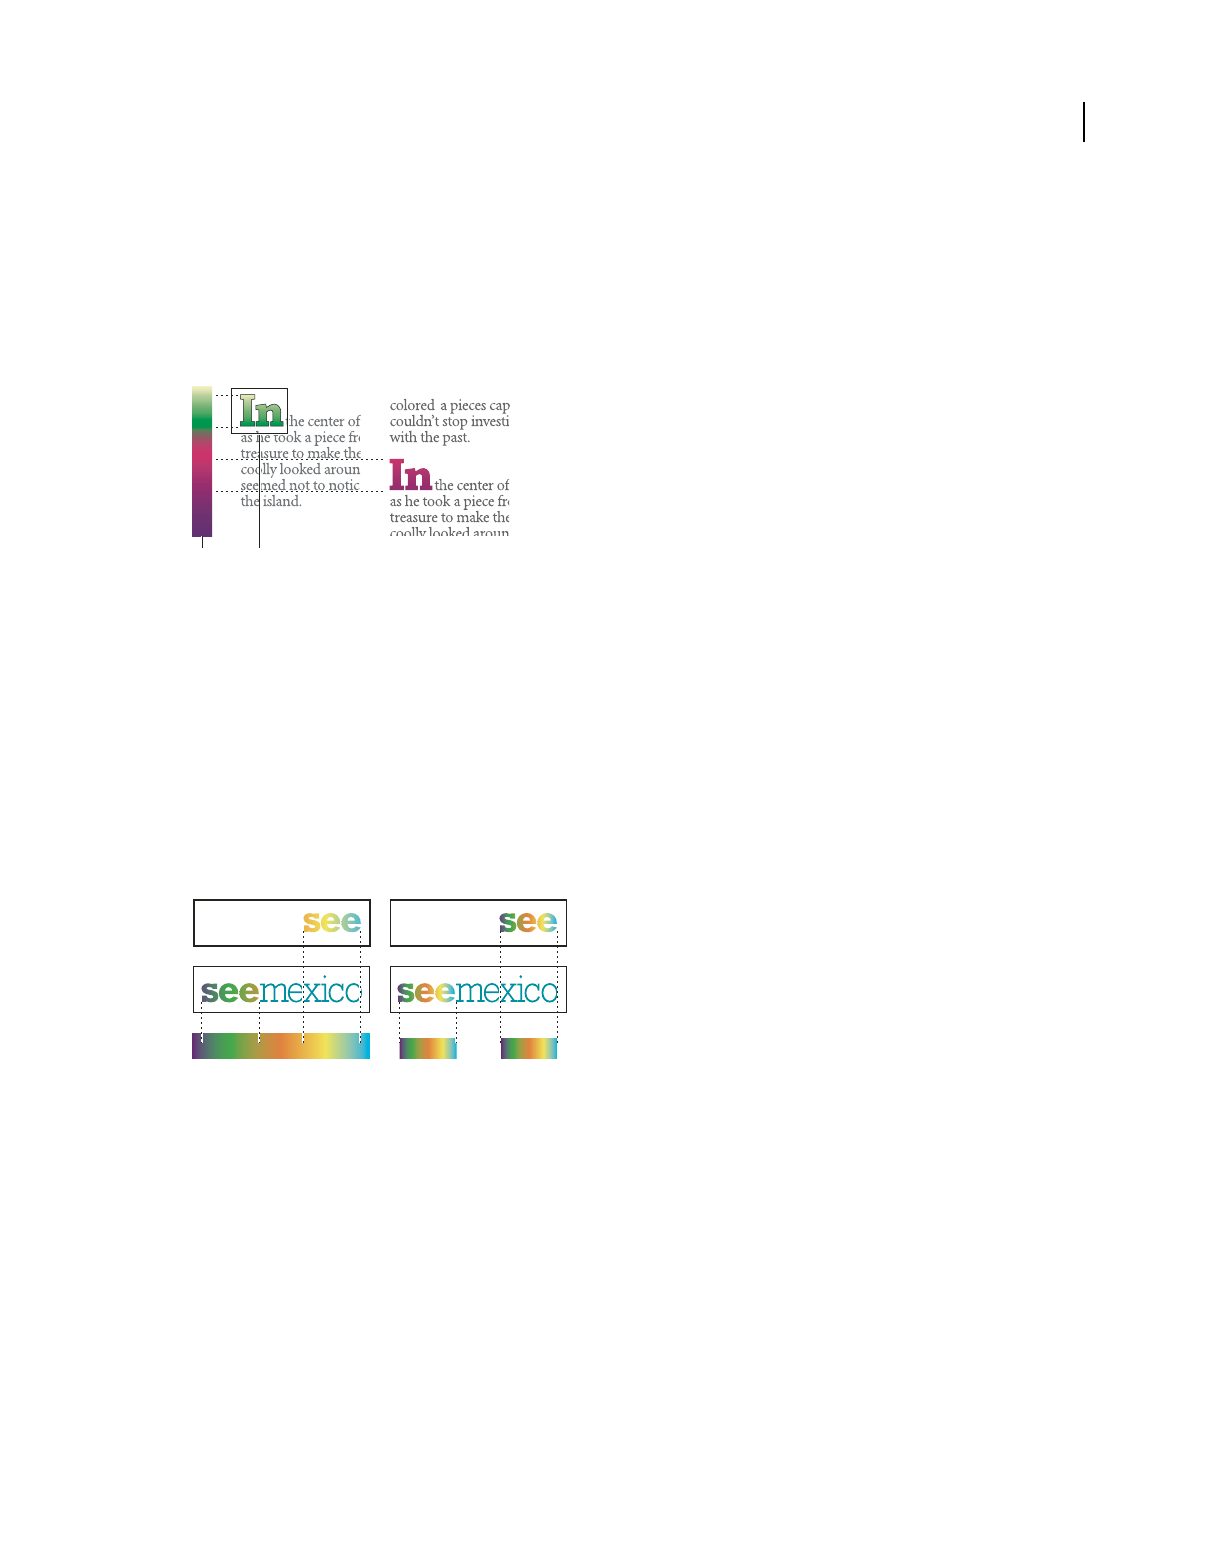
484
USING INDESIGN
Color
Last updated 11/16/2011
Applying gradients to text
Within a single text frame, you can create multiple ranges of gradient text alongside default black text and color text.
A gradient’s endpoints are always anchored in relation to the bounding box of the gradient’s path or text frame.
Individual text characters display the part of the gradient over which they are positioned. If you resize the text frame
or make other changes that cause text characters to reflow, the characters are redistributed across the gradient, and the
colors of individual characters change accordingly.
Working with gradient-filled text characters
A. Underlying gradient fill B. Text characters with gradient applied C. Text added, and text shifting position relative to gradient fill
If you want to adjust a gradient so that its complete color range spans a specific range of text characters, you have two
options:
•Use the Gradient tool to reset the gradient’s endpoints, so that they span only the characters you selected when you
applied the gradient.
•Select the text and convert it to outlines (editable paths), and then apply a gradient to the resulting outlines. This is
the best option for a short run of display type in its own text frame. The gradient will be permanently anchored to
the outlines, not the text frame, and the outlines will continue to flow with the rest of the text. However, the outlines
will function as a single inline graphic within the text frame, so you won’t be able to edit the text. Also, typographic
options will no longer apply; for example, text converted to outlines will not hyphenate.
By default, type that shifts position will change relative to its gradient (left); when type is converted to outlines, an applied gradient moves with
the type (right).
For information on converting text outlines to paths, see “Create paths from text outlines” on page 367.
More Help topics
“Change the color, gradient, or stroke of text” on page 255
Multiple gradients in a single text frame
Within a single text frame, you can select different ranges of text and apply a unique gradient to each range. Each
gradient is added to the text frame and tracked separately with the characters you selected when you applied each
gradient. However, the endpoints of the gradient are still anchored to the text frame’s bounding box, not to individual
ranges of text.
ABC
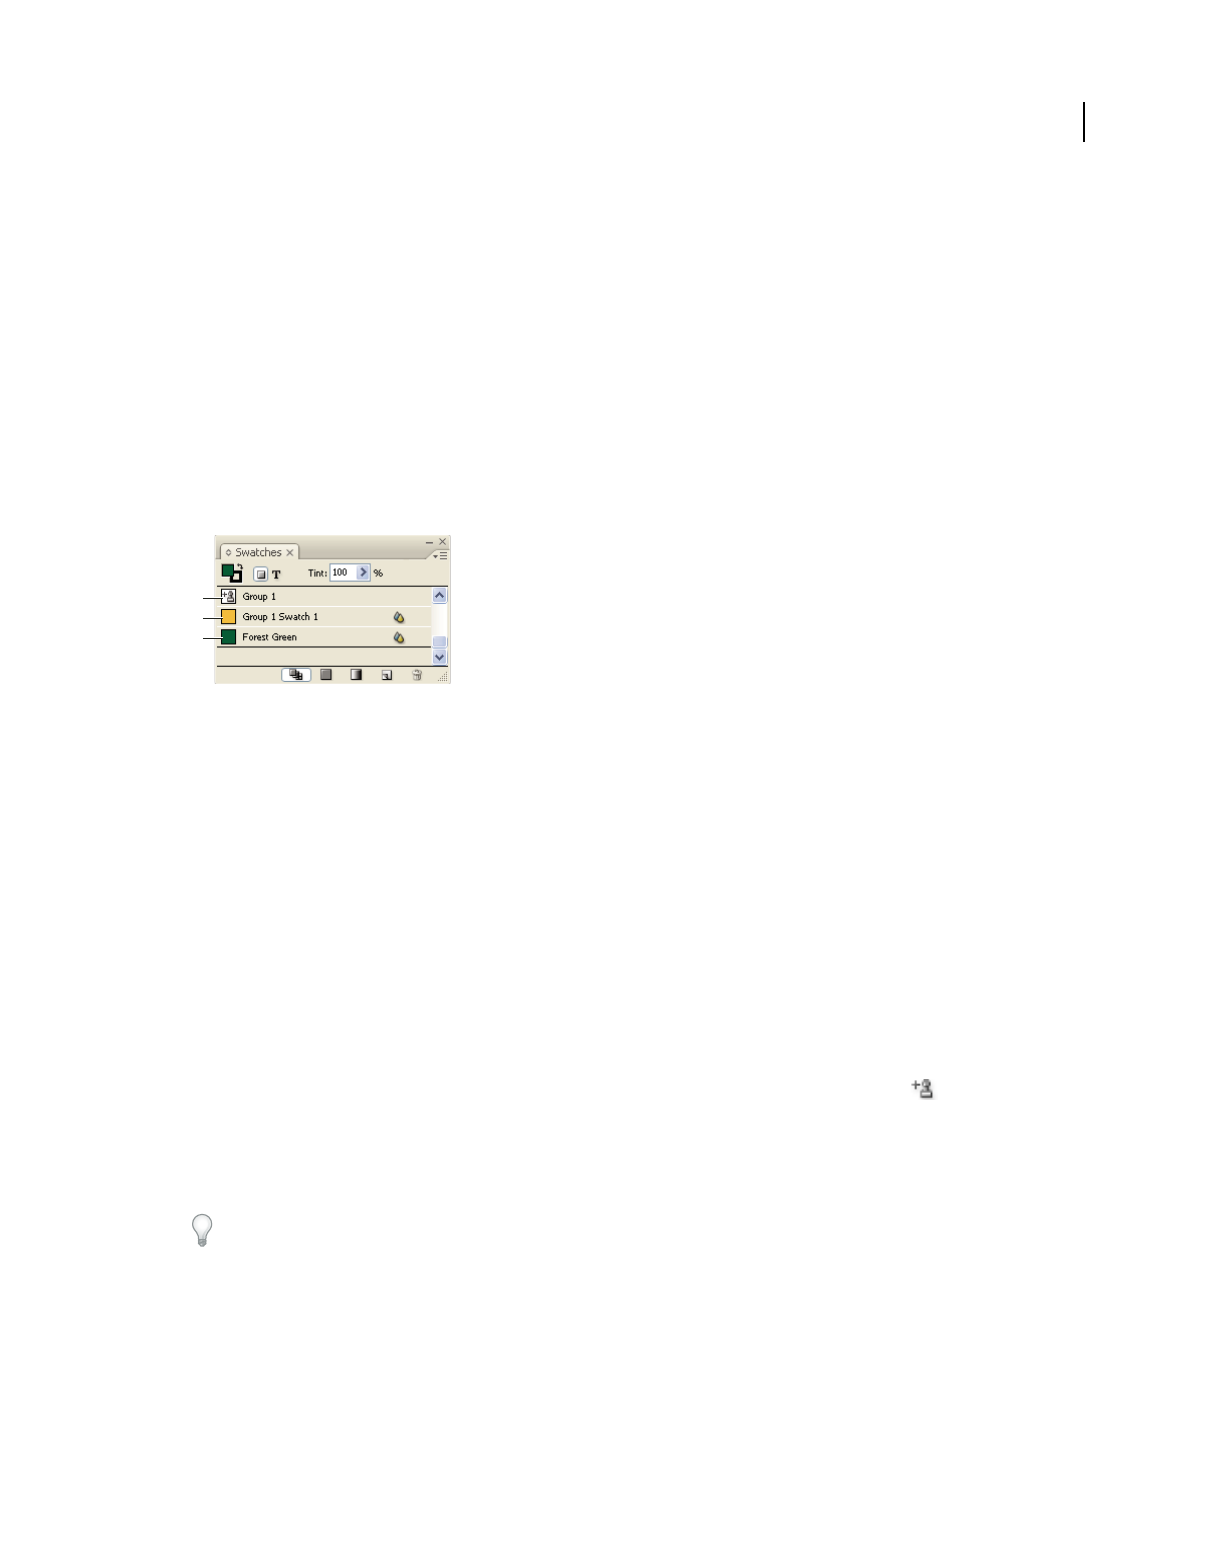
485
USING INDESIGN
Color
Last updated 11/16/2011
Mixing inks
Create and edit mixed ink swatches
When you need to achieve the maximum number of printed colors with the fewest number of inks, you can create new
ink swatches by mixing two spot inks or by mixing a spot ink with one or more process inks. Using mixed ink colors
lets you increase the number of colors available without increasing the number of separations used to print the
document.
You can create a single mixed ink swatch or use a mixed ink group to generate multiple swatches at once. A mixed ink
group contains a series of colors created from incremental percentages of different process and spot color inks. For
example, mixing four tints of process cyan (20%, 40%, 60%, and 80%) with five tints of a spot color (10%, 20%, 30%,
40%, and 50%) results in a mixed ink group that contains 20 different swatches.
Swatches panel with mixed ink swatches
A. Parent of mixed ink group B. Child in mixed ink group C. Mixed ink swatch (standalone)
Before you can create a mixed ink swatch or a mixed ink group, you must add at least one spot color to the Swatches
panel.
More Help topics
“Create color swatches” on page 471
“Manage swatches” on page 472
Create a mixed ink swatch
1From the Swatches panel menu, choose New Mixed Ink Swatch. (This option is dimmed until you add a spot color
to the Swatches panel.)
2Type a name for the swatch.
3To include an ink in the mixed ink swatch, click the empty box next to its name. An ink icon appears. A mixed
ink swatch must contain at least one spot color.
4
Adjust the percentage of each ink included in the swatch by using the slider bar or typing a value in the percentage box.
5To add the mixed ink to the Swatches panel, click Add or OK.
Colors on a monitor often look different when they print. For best results, ask your commercial printer to output a
sample of any mixed inks you want to print.
Create a mixed ink group
1From the Swatches panel menu, choose New Mixed Ink Group. (This option is dimmed until you add a spot color
to the Swatches panel.)
2Type a name for the Mixed Ink Group. Colors in the group will use this name followed by an incremented Swatch
suffix (Swatch 1, Swatch 2, and so on).
B
A
C

486
USING INDESIGN
Color
Last updated 11/16/2011
3To include an ink in the mixed ink group, click the empty box next to its name.
4For each ink you select, do the following:
•For Initial, enter the percentage of ink you want to start mixing to create the group.
•For Repeat, specify the number of times you want to increment the ink percentage.
•For Increment, specify the percentage of ink you want to add for each repetition.
5Click Preview Swatches to generate the swatches without closing the dialog box; you can then see whether your
current ink selections and values produce the results you want, and make adjustments if they don’t.
Note: An alert appears if the values you enter for Initial, Repeat, and Increment add up to more than 100% of any one
ink. If you decide to proceed anyway, InDesign caps the ink percentages at 100%.
6Click OK to add all inks in the mixed ink group to the Swatches panel.
Edit mixed ink swatches
You modify a mixed ink swatch using the same methods used to edit other swatches. As you edit a mixed ink swatch
or group, be aware of the following:
•If you use the Swatches panel to delete an ink that is used in a mixed ink swatch, InDesign prompts you for a
replacement. A mixed ink must contain at least one spot color, or it will be converted to a process color.
•Changes you make to the parent of a mixed ink group apply to all mixed inks in that group. (Changes you make
to a swatch in a mixed ink group apply to that swatch only.)
•Converting a mixed ink to a process or spot color removes its association with its mixed ink group.
•Deleting the parent of a mixed ink group deletes all swatches in the group.
1In the Swatches panel, double-click the parent of the mixed ink group you want to change.
2Do any of the following:
•Select a new ink to replace an existing component ink.
•Click the box next to an ink to exclude or include it as a component of the mixed ink group.
Note: You cannot change the initial percentages, repeats, or increments used to create the mixed ink group.
3Click OK.
Manage mixed ink groups
Use the Swatches panel to delete mixed ink groups, add swatches, and convert mixed ink swatches to process colors.
Delete mixed ink groups
❖In the Swatches panel, select the parent of the mixed ink group you want to delete, and click the Delete button.
Add a swatch to a mixed ink group
1In the Swatches panel, select the parent of the mixed ink group.
2Choose New Color Swatch from the panel menu.
3Specify a name for the swatch, if desired.
4For each ink listed, specify the percentage you want in the mixed ink swatch. (You cannot add or delete inks.)
5Click OK.

487
USING INDESIGN
Color
Last updated 11/16/2011
Convert a single mixed ink swatch to a process color
You can convert mixed inks to process colors to reduce printing costs. When you convert the parent of a mixed ink
group to process, the parent swatch disappears, and the other swatches in the mixed ink group are converted to process
colors.
1Double-click the mixed ink swatch you want to convert.
2For Color Type, select Process, and then click OK.
Convert all inks in a mixed ink group to process
❖Double-click the parent of the mixed ink group, and select Convert Mixed Ink Swatches To Process in the
dialog box that appears.
Using colors from imported graphics
Using colors from imported graphics
InDesign provides various ways for you to sample and redefine colors from the graphics you import into your
document. Spot colors from placed PDF or EPS files and spot-color channels in Adobe Photoshop (PSD) and TIFF
files appear as spot colors in the Swatches panel. You can apply these colors to objects in your document or convert
them to process colors; however, you cannot redefine the color values or delete the imported swatches. If you delete
the placed graphic, the colors remain but are converted to native InDesign colors, which can then be edited or deleted.
Using the Eyedropper tool to sample colors
You can use the Eyedropper tool to add colors from imported graphics to your document, or to apply them to
objects in your document. This is useful for coordinating layout colors with images.
For best results with color separations, you may want to make sure that color names, types (such as spot and process),
and models (such as RGB and CMYK) of the colors sampled in InDesign are consistent with the color definitions in
the imported graphics. If you’re not sure about the best settings to use, consult with your prepress service provider.
More Help topics
“Apply colors using the Eyedropper tool” on page 468
Working with spot-color channels in an Adobe Photoshop (PSD) file
When you place a native Photoshop file (PSD) or TIFF file in InDesign, any spot-color channels the file contains
appear in the Swatches panel as spot-color inks. You can select and apply these swatches to other objects in your
document; to delete these swatches, however, you must first delete the placed image.
If you import a file that has a spot-color channel with the same name as a spot color in your document, but with
different color values, you will be asked whether you want to use the color values in the placed file or the ones in the
document.
Working with colors from EPS or PDF files
When you place a PDF file, EPS graphic, or Adobe Illustrator (.AI) file, names of spot colors used in the graphic are
added to the Swatches panel in your document, so that you can be aware that they can cause additional printing costs
later, and also so that you can use the spot colors in your document.

488
USING INDESIGN
Color
Last updated 11/16/2011
If the graphic you are importing contains a spot color with the same name as a spot color in your document but
different color values, the color values in the document are used.
Change an imported spot color to a process color
When you import an EPS, PSD, TIFF or PDF graphic containing a spot color (or a spot-color channel), InDesign adds
the spot color name and definition to the Swatches panel. You can change an imported spot color swatch to a process
color swatch. This provides flexibility for adapting colors—even those in imported graphics—to your current output
requirements.
1In the Swatches panel, double-click the swatch you want to edit.
2In the Swatch Options dialog box, choose Process in the Color Type menu.
Note: This changes the color type in the InDesign document only. To permanently change the color type of colors within
a graphic, open the graphic in the program in which it was created, and then edit the color in that program.
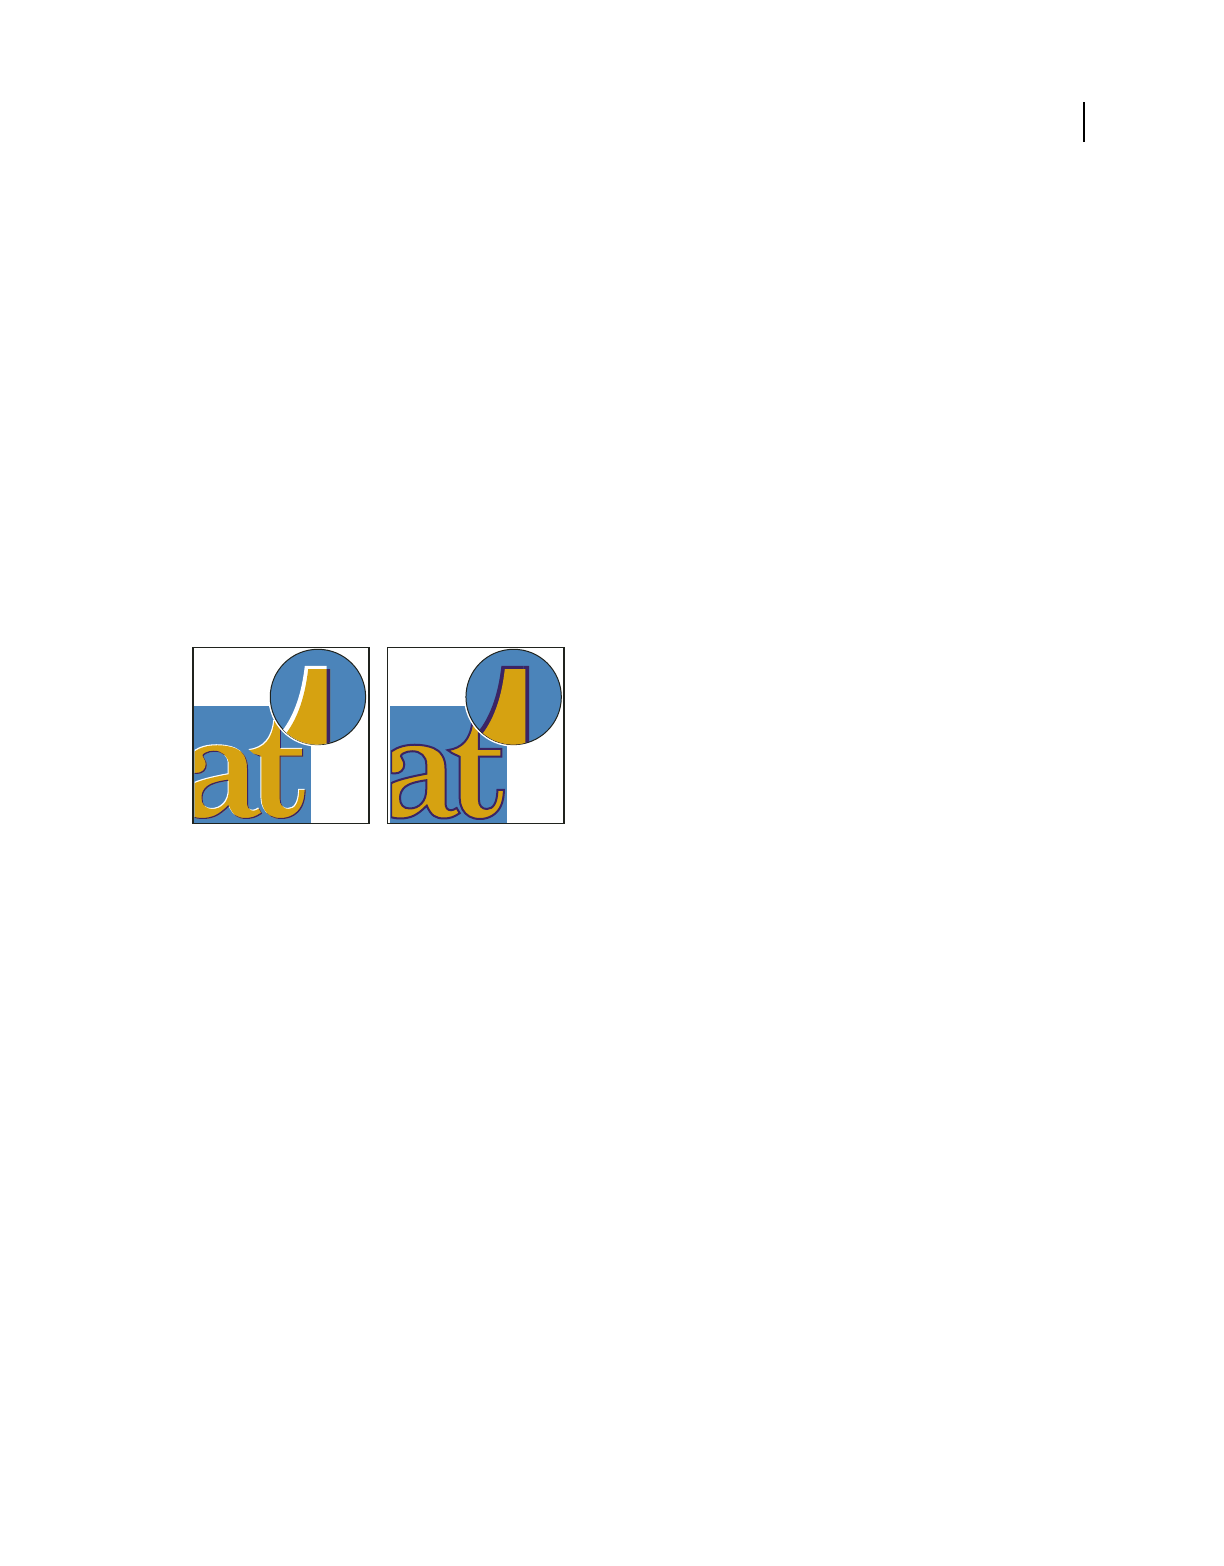
489
Last updated 11/16/2011
Chapter 16: Trapping color
Trapping documents and books
About ink trapping
When an offset printed document uses more than one ink on the same page, each ink must be printed in register
(perfectly aligned) with any other inks that it abuts, so that there is no gap where the different inks meet. However, it’s
impossible to ensure exact registration for every object on every sheet of paper running through a printing press, so
misregistration of inks can occur. Misregistration causes an unintended gap between inks.
You can compensate for misregistration by slightly expanding one object so that it overlaps an object of a different
color—a process known as trapping. By default, placing one ink over another knocks out, or removes, any inks
underneath to prevent unwanted color mixing; but trapping requires that inks overprint, or print on top of each other,
so that at least a partial overlap is achieved.
Misregistration with no trap (left) and with trap (right)
Most traps employ spreading—expanding a light object into a dark object. Because the darker of two adjacent colors
defines the visible edge of the object or text, expanding the lighter color slightly into the darker color maintains the
visual edge.
Trapping methods
Trap a document using any combination of methods, including the following:
•Use process colors that don’t need trapping.
•Overprint black.
•Manually overprint strokes or fills.
•Use Adobe InDesign CS4 built-in trapping or Adobe In-RIP Trapping.
•Trap imported graphics using the trapping features in the illustration programs in which they were created. Refer
to the documentation for these applications.
Choose a trapping solution that complements the color output workflow you’re using, such as Adobe PostScript or PDF.
Avoid the need for trapping by eliminating the possibility of misregistration in your use of color. Prevent
misregistration by making sure that abutting process colors have common inks. For example, if you specify a dark
purple stroke with a vivid red fill, they will both contain a significant percentage of magenta. The stroke’s and fill’s
common magenta will print as a single area, so that if misregistration occurs in the other process inks, the magenta
printing plate will make any resulting gap hard to see.

490
USING INDESIGN
Trapping color
Last updated 11/16/2011
More Help topics
“About overprinting” on page 639
About automatic trapping
InDesign can trap color documents with its built-in trapping engine, and can also take advantage of the Adobe In-RIP
Trapping engine available on Adobe PostScript output devices that support Adobe In-RIP Trapping.
Both trapping engines calculate adjustments to the edges of both type and graphics. They apply trapping techniques
to different parts of a single object, even if text or an InDesign object overlaps several different background colors.
Trapping adjustments are made automatically, and you can define trap presets to address the requirements of specific
page ranges. You only see the effects of trapping on color separations generated by a trapping engine; you cannot see
the results on-screen within InDesign.
The trapping engine detects contrasting color edges, and then creates traps based on the neutral densities (lightness or
darkness) of abutting colors, in most cases by spreading lighter colors into adjacent darker colors. The trapping
settings you specify in the Trap Presets panel modify the trapping engine’s results.
Automatic trapping requirements
To trap documents using the InDesign built-in engine, you need a PPD that supports separations.
To trap documents using the Adobe In-RIP Trapping engine, you need the following software and hardware:
•An Adobe PostScript Level 2 or later output device that uses a RIP that supports Adobe In-RIP Trapping. To find
out if a PostScript output device supports Adobe In-RIP Trapping, contact the manufacturer or your prepress
service provider.
•A PPD (PostScript Printer Description) file for a printer that supports Adobe In-RIP Trapping. You must select
this PPD when you install the printer.
More Help topics
“Select a PPD file” on page 606
Differences between built-in trapping and Adobe In-RIP Trapping
Composite color workflow With built-in trapping, you can separate a document by using InDesign or in-RIP
separations. To use Adobe In-RIP Trapping, you must use In-RIP separations.
Trap widths Built-in trapping limits trap widths to 4 points, regardless of the value you enter for the trap widths. For
larger trap widths, use Adobe In-RIP Trapping.
Vector EPS graphics Built-in trapping cannot trap placed vector EPS graphics; Adobe In-RIP Trapping traps all
imported graphics.
Trapping imported bitmap images
Built-in trapping can trap bitmap images, such as photographs, to text and graphics. Bitmap images must be saved
using a purely pixel-based file format that supports the color requirements of commercial printing. PSD (Photoshop)
and TIFF are the most appropriate formats for commercial printing jobs; before using other formats, consult with your
prepress service provider.
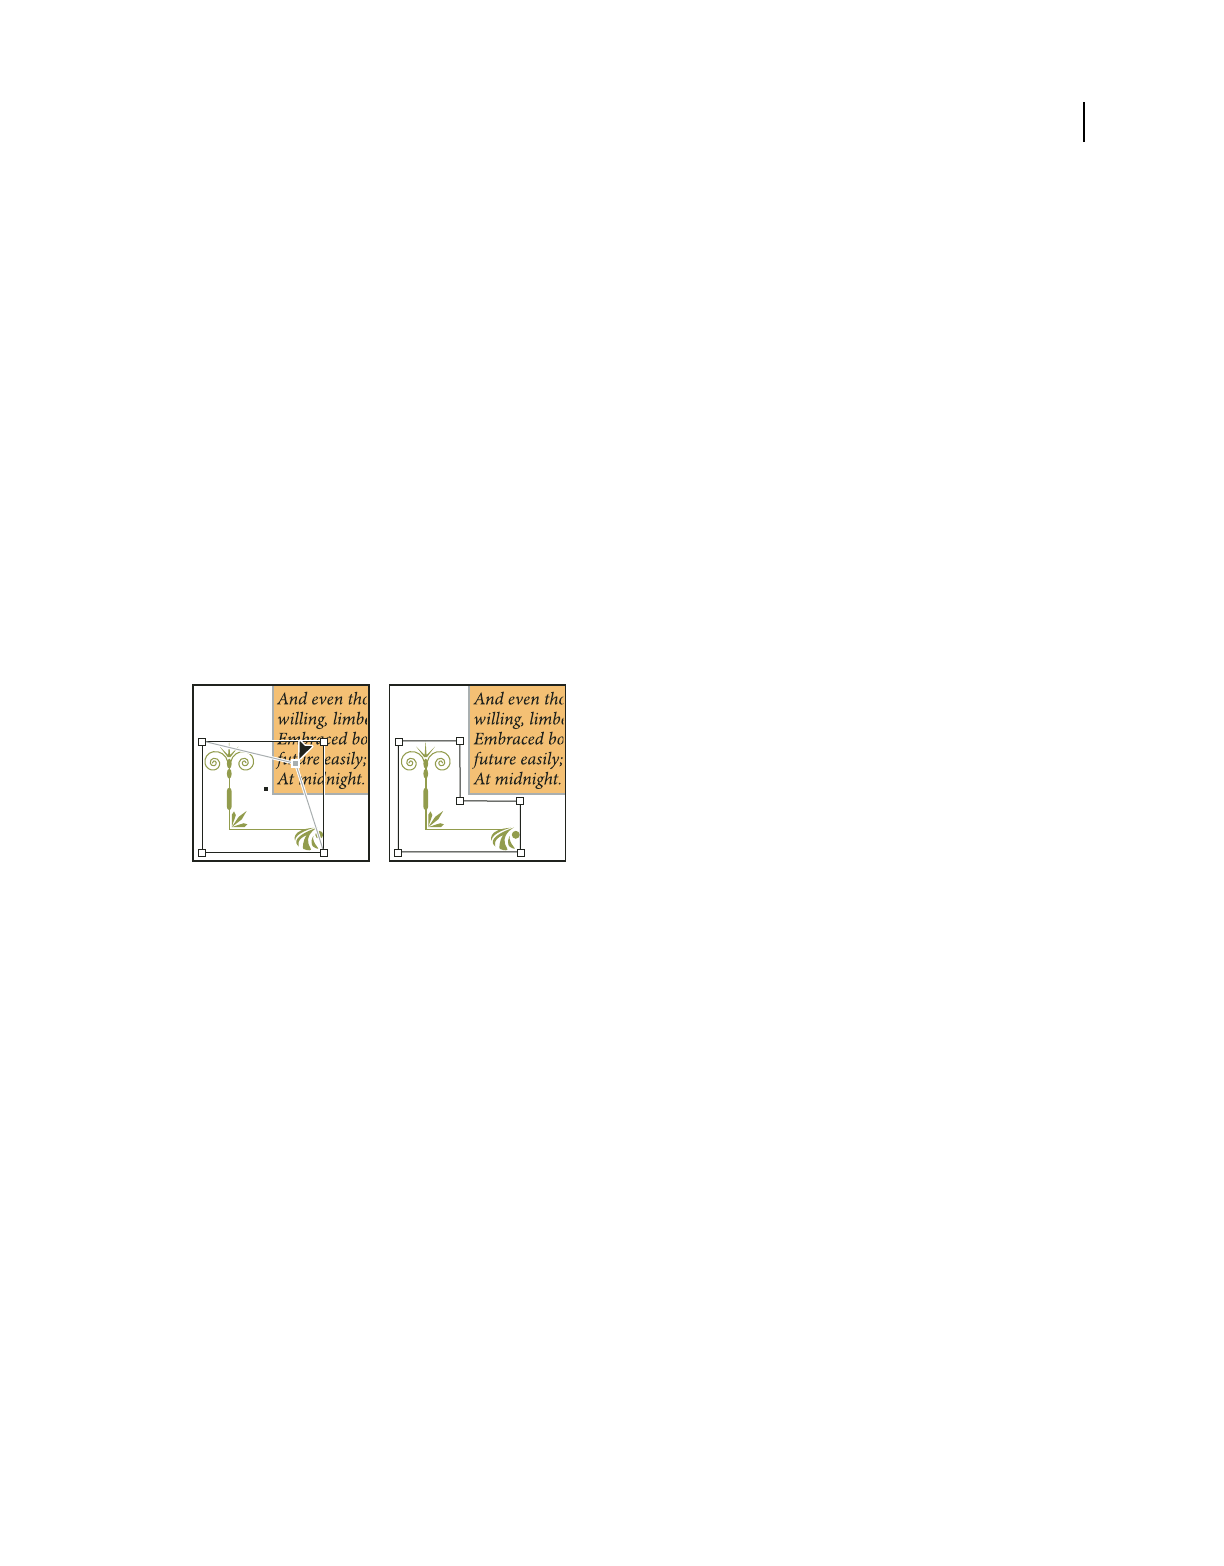
491
USING INDESIGN
Trapping color
Last updated 11/16/2011
If you’re using an Open Prepress Interface (OPI) server, verify that it creates for-position-only (FPO) images using
TIFF or PSD formats. If the images are TIFF or PSD, it may be possible to use built-in trapping, as long as you don’t
select any Omit For OPI options at output time. (Omit For OPI options are located in the Advanced section of the
Print dialog box when a PostScript printer is targeted.)
Note: The behavior and precision of trapping within an OPI workflow depends on many factors, such as the
downsampling method the OPI server uses to generate FPO images. For best results, consult with your OPI vendor for
information about integrating Adobe trapping solutions with the vendor’s OPI server.
Trapping imported vector graphics
Both Adobe In-RIP Trapping and built-in trapping can trap text and graphics created with InDesign tools and placed
vector PDF files. However, built-in trapping cannot trap placed vector EPS graphics.
The text, paths, and frames you create in InDesign won’t trap correctly if they overlap a frame containing a placed
graphic that built-in trapping won’t trap, such as vector EPS graphics. (However, those objects will trap correctly with
Adobe In-RIP Trapping.) You may be able to use built-in trapping with documents containing vector EPS graphics if
you adjust the graphic’s frame. If the placed EPS graphic isn’t rectangular, try reshaping the frame closer to the graphic
itself, and away from other objects. For example, you might choose Object
> Clipping Path to fit the graphics frame
more tightly around the graphic.
InDesign text and graphics that overlap placed EPS graphics (left) won’t trap correctly; to achieve good trapping, reshape the frame so that it
doesn’t touch other objects (right).
Trapping text
Both the Adobe In-RIP and built-in trapping engines can trap text characters to other text and graphics. (Built-in
trapping requires that the text and graphics are created with InDesign, and aren’t contained in imported graphics.) A
text character overlapping different background colors traps accurately to all of the colors.
Adobe In-RIP Trapping can trap all types of fonts. In contrast, built-in trapping works best with Type 1, OpenType,
and Multiple Master fonts only; using TrueType fonts may result in inconsistent traps. If your document must use
TrueType fonts and you want to use built-in trapping, consider converting all TrueType text to outlines by selecting
the text and choosing Type
> Create Outlines. The text will become InDesign objects that trap reliably. Text can’t be
edited after you convert it to outlines.
Maximizing trapping performance
Whether you use Adobe In-RIP trapping or built-in trapping, you can save time by not processing pages that don’t
need trapping, such as pages containing black text only. You can use trap presets to enable trapping only for the page
ranges that require it.
The speed with which built-in trapping is accomplished depends on the speed of your computer system. If you’re
trapping every page of a long document, use the fastest computer system you have. Built-in trapping also makes
extensive use of your computer’s hard disk, so a fast hard disk and data bus will benefit the built-in trapping engine.

492
USING INDESIGN
Trapping color
Last updated 11/16/2011
To maximize the time your computers are available for other tasks, consider using Adobe In-RIP Trapping, which
processes all traps at the RIP, instead of at your computer.
Setting aside disk space for built-in trapping
To trap the edges of every color that requires trapping, the trapping engine creates a large number of paths that are
used only by the output device (the paths are not stored in your document). While Adobe In-RIP Trapping processes
and stores these additional paths at the RIP, built-in trapping uses your computer’s hard disk as a temporary storage
area for these trap paths. Before you use built-in trapping, make available as much hard disk space as possible.
The amount of disk space you’ll need depends on a wide range of factors, so it isn’t possible to predict exactly what a
particular trapping job will require. However, disk space requirements are most likely to increase when one or more
of the following characteristics of your document increase:
•Number of pages included in trapping page ranges.
•Number of overlapping color objects.
•Number of images that need to be trapped.
•Amount of text that needs to be trapped.
•Resolution of final output.
If the processing of a job that uses built-in trapping is interrupted or exhausts your disk space, trapping data may
be left behind on your hard disk. When necessary, you can exit the application, and then find and delete temporary
data in the C:\Temp folder (Windows). In Mac
OS, restart your computer.
Trap a document or book
Do not change the default trapping settings unless you’ve consulted with your prepress service provider, and you
understand how trapping options work in the context of your specific document and printing conditions.
When trapping multiple documents in a book, make sure that you assign any custom trap presets to page ranges within
the individual documents of the book. You cannot assign trapping settings to an entire book at once. However, you
can resolve conflicting presets in a document.
1If necessary, create a trap preset with custom settings for your document and press conditions.
2Assign the trap preset to a page range.
3Choose File > Print to open the Print dialog box.
4Select Output from the list on the left.
5For Color, choose either Separations or In-RIP Separations, depending on whether you’re creating on-host or
in-RIP separations.
6For Trapping, choose one of the following options:
•Application Built-In, to use the trapping engine included with InDesign.
•Adobe In-RIP. This option works only when you target an output device that supports Adobe In-RIP Trapping.
7If your prepress service provider recommends changing ink settings, click Ink Manager. Select an ink, set the
options specified by your prepress service provider, and then click
OK:
8Continue specifying other print options, and then click Print to print your document.

493
USING INDESIGN
Trapping color
Last updated 11/16/2011
More Help topics
“Create or modify a trap preset” on page 493
“About printing” on page 597
“Assign a trap preset to pages” on page 494
Trap presets
Trap Presets panel overview
A trap preset is a collection of trapping settings you can apply to a page or range of pages in a document. The Trap
Presets panel provides an interface for entering trap settings and saving trap presets. You can apply trap presets to any
or all pages in the current document, or import the presets from another InDesign document. If you don’t apply a trap
preset to a trapping page range, that page range will use the [Default] trap preset.
More Help topics
“About InDesign styles and presets” on page 41
View trap preset settings
1If the Trap Presets panel is not open, choose Window > Output > Trap Presets.
2Do one of the following in the Trap Presets panel:
•Double-click the preset.
•Select the preset and choose Preset Options in the panel menu.
Compress the trap presets list
❖In the Trap Presets panel, choose Small Panel Rows in the panel menu.
Identify unused trap presets
❖In the Trap Presets panel, choose Select All Unused in the panel menu. The trapping engine highlights all presets
(except [Default] and [No Trap Preset]) that have not been assigned to the current document. You can easily delete
these presets.
Create or modify a trap preset
1If the Trap Presets panel is not open, choose Window > Output > Trap Presets.
2Choose New Preset in the panel menu to create a preset, or double-click a preset to edit it.
Note: Clicking the New Preset button at the bottom of the Trap Presets panel creates a preset based on the [Default] trap
preset settings.
3Specify the following options, and then click OK:
Name Type a name for the preset. You can’t change the name of the [Default] trap preset.
Trap Width Type values to specify the amount of overlap for inks.
Trap Appearance Specify options for controlling the shape of the traps.
Image Specify settings that determine how to trap imported bitmap images.
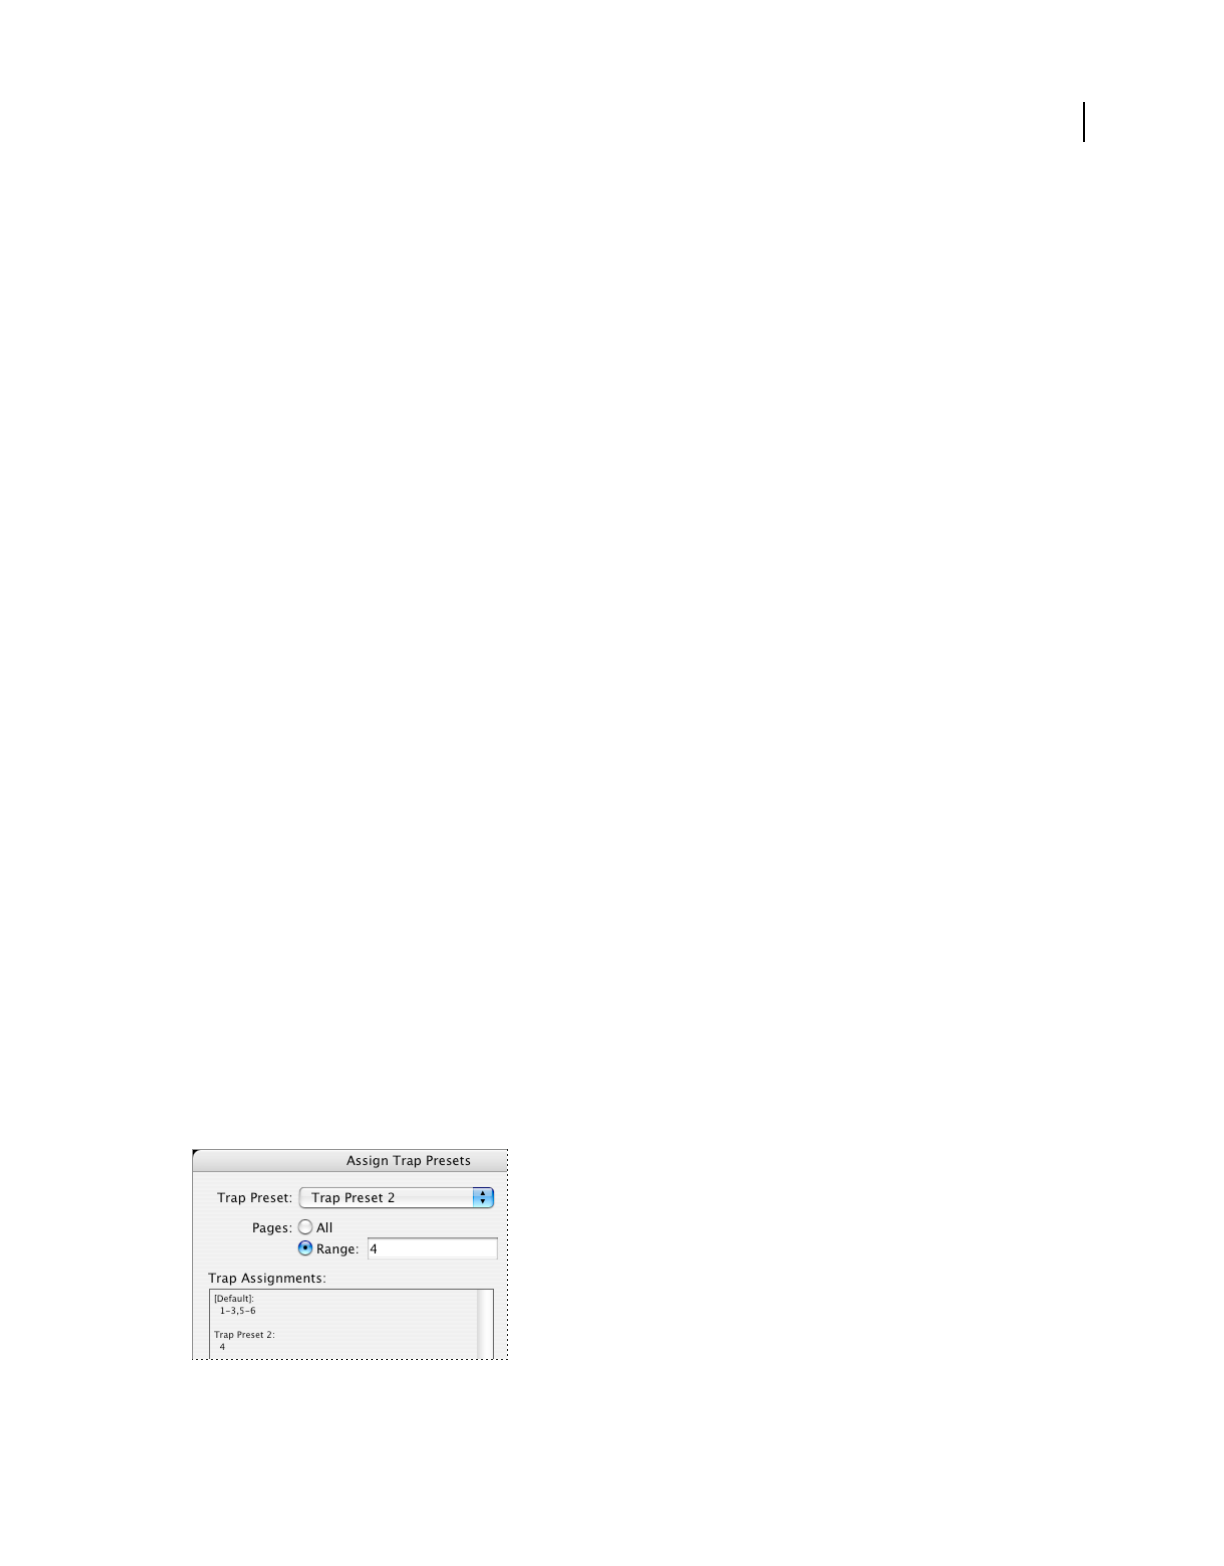
494
USING INDESIGN
Trapping color
Last updated 11/16/2011
Trap Thresholds Type values to specify the conditions under which trapping occurs. Many variables affect the values
you’ll need to enter here. For more information, consult with your prepress service provider.
More Help topics
“Trap preset options” on page 495
“Trapping imported bitmap images” on page 490
Manage trap presets
You can duplicate, delete, import, and customize trap presets.
Duplicate a trap preset
❖Do one of the following:
•In the Trap Presets panel, select a preset and choose Duplicate Preset in the panel menu.
•Drag a preset to the New Preset button at the bottom of the panel.
Delete a trap preset
1In the Trap Presets panel, select the preset(s), and then do one of the following:
•Click the Delete button.
•Choose Delete Presets in the panel menu.
2If prompted to replace a trap preset, choose one in the Delete Trap Preset dialog box that appears. This dialog box
appears if at least one of the selected presets has been assigned to a page.
3Click Yes to confirm the deletion.
Note: You cannot delete either of the two built-in presets: [Default] and [No Trap Preset].
Import presets from another InDesign document
1In the Trap Presets panel, choose Load Trap Presets in the panel menu.
2Select the InDesign file and click Open.
Assign a trap preset to pages
You can assign a trap preset to a document or to a range of pages in a document. Pages with no abutting colors will
print faster if you disable trapping on those pages. Trapping doesn’t actually occur until you print the document.
Trap assignments list the presets you have applied to various pages; the trap assignments are updated each time you click Assign.
1In the Trap Presets panel, choose Assign Trap Preset in the panel menu.

495
USING INDESIGN
Trapping color
Last updated 11/16/2011
2For Trap Preset, choose the preset you want to apply.
3Select the pages to which you want to apply the trap preset.
4Click Assign, and then click Done.
Note: If you click Done without clicking Assign, the dialog box closes without making any changes to the trap assignments.
Trap assignments previously made using the Assign button are preserved.
Set up trapping page ranges
1In the Trap Presets panel, choose Assign Trap Preset in the panel menu.
2For Trap Preset, choose the preset you want to apply to the page ranges.
3Select Range, and type one or more ranges in ascending sequence, using a hyphen for each range, and separating
pages and ranges with commas, or with commas and spaces. For example, 2-4, 6, 9-10, 12- is a valid range.
4Click Assign, and then click Done.
To disable a trapping page range, choose Assign Trap Preset in the panel menu, type a page range, and choose [No
Trap Preset] in the Trap Preset menu. Click Assign, and then click Done.
Trap preset options
You can change trap preset options whenever you create or edit a trap preset. The same trap preset options are available
in Acrobat and InDesign. In Acrobat, you can view trap presets by choosing Tools
> Print Production > Trap Presets.
In InDesign, choose Window
> Output > Trap Presets.
Trap widths
Trap width is the amount of overlap for each trap. Differences in paper characteristics, screen rulings, and printing
press conditions require different trap widths. To determine the appropriate trap widths for each job, consult your
commercial printer.
Default Specifies the trap width in points for trapping all colors except those involving solid black. The default value
is
0p0.25.
Black Indicates the distance that inks spread into solid black, or the holdback amount—the distance between black
edges and underlying inks for trapping rich blacks. The default value is 0p0.5. This value is often set to be 1.5 to 2 times
the value of the default trap width.
In InDesign, the value you set for Black Color determines the value for a solid black or a rich black, a process black (K)
ink mixed with color inks for increased opacity and richer color.
Note: (InDesign) If you choose Application Built-In trapping, and you specify a Default trap width or Black trap width
larger than 4
points, the resulting trap width is limited to 4 points. However, the value you specified will continue to be
displayed, because if you switch to Adobe In-RIP Trapping, traps larger than 4
points are applied as you specified.
Trap appearance
A join is where two trap edges meet at a common endpoint. You can control the shape of the outside join of two trap
segments and the intersection of three traps.
Join Style Controls the shape of the outside join of two trap segments. Choose from Miter, Round, and Bevel. The
default is Miter, which matches earlier trapping results to retain compatibility with previous versions of the Adobe
Trapping Engine.
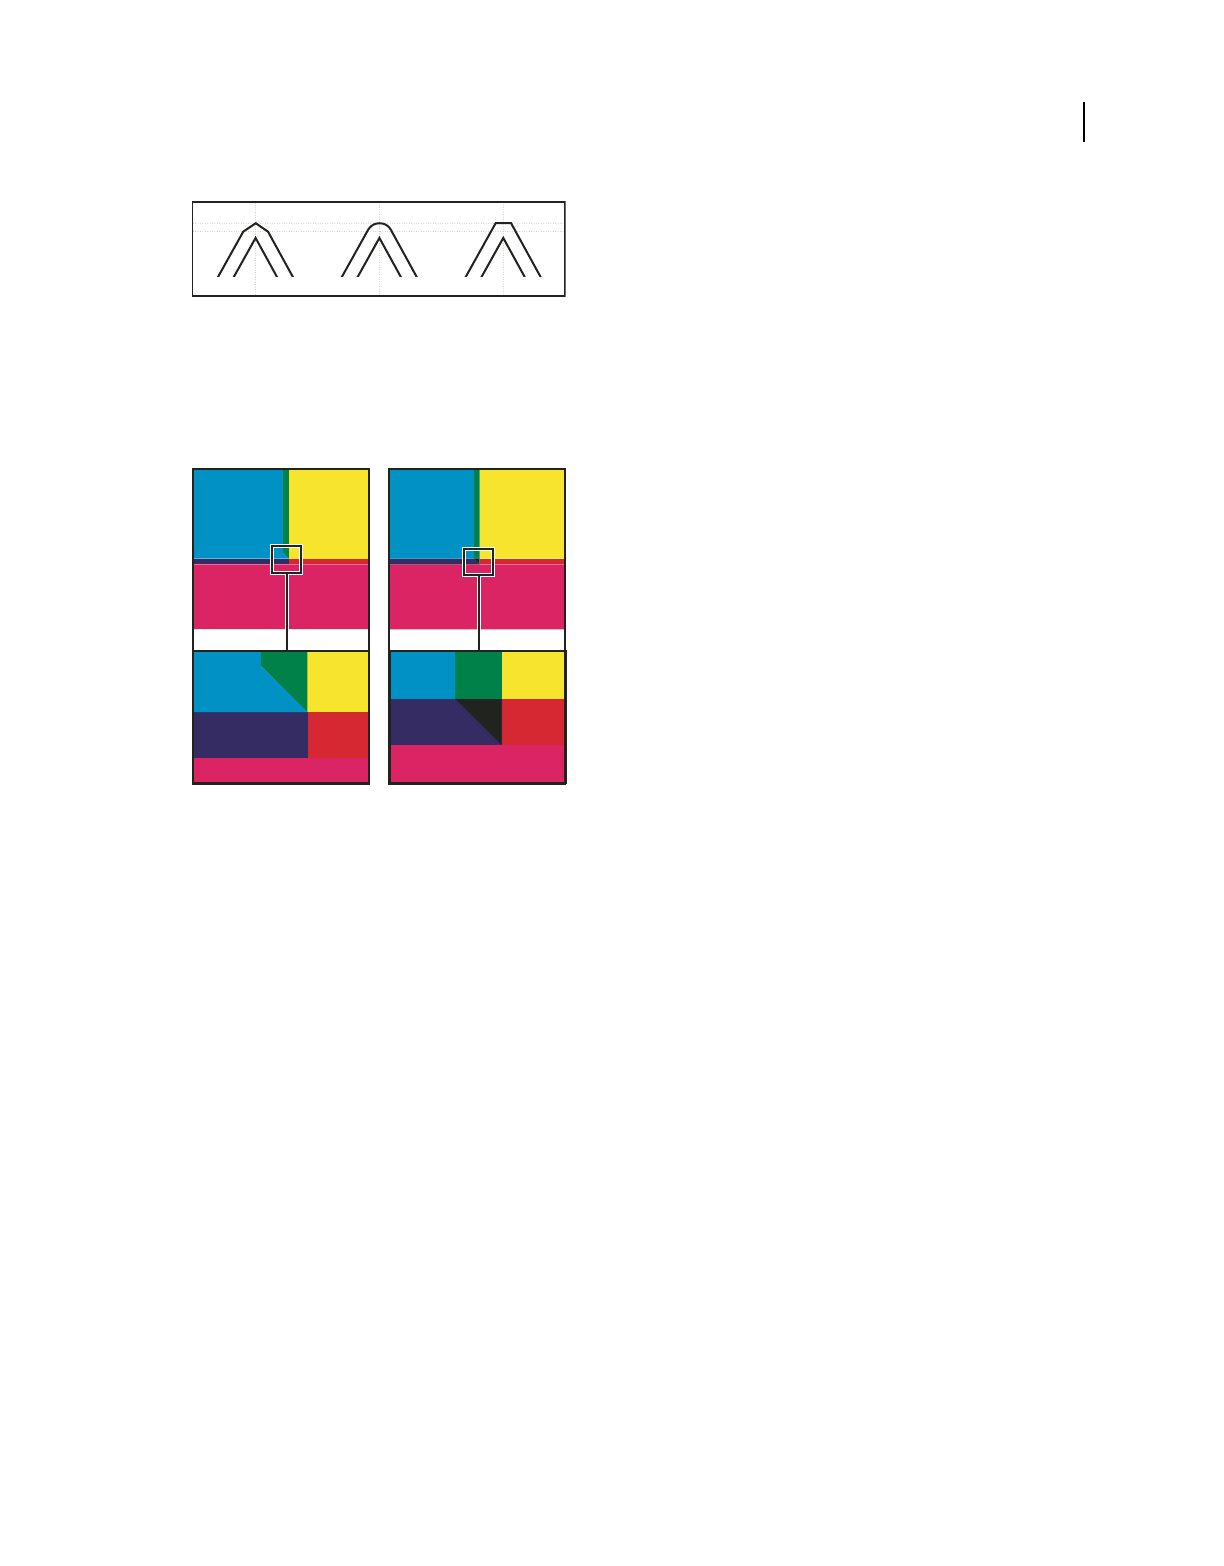
496
USING INDESIGN
Trapping color
Last updated 11/16/2011
Trap join examples, left to right: miter join, round join, bevel join
End Style Controls the intersection of three-way traps. Miter (the default) shapes the end of the trap to keep it away
from the intersecting object. Overlap affects the shape of the trap generated by the lightest neutral density object that
intersects with two or more darker objects. The end of the lightest trap is wrapped around the point where the three
objects intersect.
Close-up of trap end examples: miter (left) and overlap (right)
Trap thresholds
Step Specifies the color change threshold at which the trapping engine creates a trap. Some jobs need only the most
extreme color changes trapped, while others require traps for more subtle color changes. The Step value indicates the
degree to which components (such as CMYK values) of abutting colors must vary before trapping occurs.
To change how much the component inks in abutting colors can vary before causing those colors to trap, increase or
decrease the value for Step in the New Trap Preset or Modify Trap Preset Options dialog box. The default is 10%. For
best results, use a value from 8% to 20%. Lower percentages increase sensitivity to color differences and result in more
traps.
Black Color Indicates the minimum amount of black ink required before the Black trap width setting is applied. The
default value is 100%. For best results, use a value no lower than
70%.
Black Density Indicates the neutral density value at or above which InDesign considers an ink to be black. For
example, if you want a dark spot ink to use the Black trap width setting, enter the neutral density value here. This value
is typically set near the default of
1.6.
Sliding Trap Determines when the trapping engine starts to straddle the centerline of the color boundary. The value
refers to the proportion of the lighter color’s neutral density value to a darker, abutting color’s neutral density value.
For example, setting the Sliding Trap value to 70% moves the point at which the trap begins to straddle the centerline
to where the lighter color exceeds 70% of the darker color in neutral density (lighter color’s neutral density divided by
darker color’s neutral density
> 0.70). Colors of identical neutral density will always have their traps exactly straddle
the centerline, unless the Sliding Trap is set to
100%.
Trap Color Reduction Indicates the degree to which components from abutting colors are used to reduce the trap
color. This setting is useful for preventing certain abutting colors (such as pastels) from making an unsightly trap that

497
USING INDESIGN
Trapping color
Last updated 11/16/2011
is darker than either color. Specifying a Trap Color Reduction lower than 100% begins to lighten the color of the trap;
a Trap Color Reduction value of 0% makes a trap with a neutral density equal to the neutral density of the darker color.
Trapping imported graphics
You can create a trap preset to control traps within images, and to control traps between bitmap images (such as
photographs and those saved in raster PDF files) and vector objects (such as those from a drawing program and vector
PDF files). Each trapping engine handles imported graphics differently. It’s important to be aware of these differences
when setting trapping options.
Trap Placement Provides options for determining where the trap falls when you trap vector objects (including objects
drawn in InDesign) to bitmap images. All options except Neutral Density create a visually consistent edge. Center
creates a trap that straddles the edge between objects and images. Choke causes objects to overlap the abutting image.
Neutral Density applies the same trapping rules as used elsewhere in the document. Trapping an object to a
photograph with the Neutral Density setting can result in noticeably uneven edges as the trap moves from one side of
the edge to another. Spread causes the bitmap image to overlap the abutting object.
Trap Objects To Images Ensures that vector objects (such as frames used as keylines) trap to images, using the Trap
Placement settings. If vector objects don’t overlap images in a trapping page range, consider turning this option off to
speed trapping of that page range.
Trap Images To Images Turns on trapping along the boundary of overlapping or abutting bitmap images. This feature
is on by default.
Trap Images Internally Turns on trapping among colors within each individual bitmap image (not just where they
touch vector artwork and text). Use this option only for page ranges containing simple, high-contrast images, such as
screen shots or cartoons. Leave it unselected for continuous-tone and other complicated images, as it will create bad
traps. Trapping is faster when this option is unselected.
Trap 1-Bit Images Ensures that 1-bit images trap to abutting objects. This option doesn’t use the Image Trap
Placement settings, because 1-bit images use only one color. In most cases, leave this option selected. In some cases,
such as with 1-bit images where pixels are widely spaced, selecting this option may darken the image and slow the
trapping.
Set sliding traps
1Choose New Preset in the panel menu to create a preset, or double-click a preset to edit it.
2In the Trap Thresholds section, for Sliding Trap, enter a percentage from 0 to 100, or use the default of 70%. At 0%,
all traps default to centerline; at 100%, sliding traps are turned off, forcing one color to be spread fully into another
regardless of the neutral density relationship of the abutting colors.
About trapping black
When creating or editing presets, the value you type for Black Color determines what is considered solid black and rich
black. A rich black is any black color that uses a support screen—additional percentages of one or more process inks to
strengthen the black.
The Black Color setting is useful when you must compensate for extreme dot gain (as when using low-grade paper
stock). These situations cause black percentages lower than 100% to print as solid areas. By screening back blacks or
rich blacks (using tints of solid black) and decreasing the Black Color setting from its default of 100%, you can
compensate for dot gain and ensure that the trapping engine will apply the proper trap width and placement to black
objects.

498
USING INDESIGN
Trapping color
Last updated 11/16/2011
When a color reaches the Black Color value, the Black trap width value is applied to all abutting colors, and keepaway
traps are applied to rich black areas using the Black trap width value.
If support screens extend all the way to the edge of a black area, any misregistration causes the edges of support screens
to become visible, creating an unwanted halo or distorting the edges of objects. The trapping engine uses a keepaway,
or a holdback, for rich blacks to keep support screens a specified distance away from edges of reversed-out or light
elements in the foreground, so that the light elements retain their sharpness. You control the distance of support
screens from the edges of black areas by specifying the Black trap width value.
Note: If the element you’re trapping is a thin element, such as a black keyline around graphics, the trapping engine
overrides the Black trap width setting and limits the trap to half the width of the thin element.
Set the trap width for colors next to black
1Choose New Preset in the panel menu to create a preset, or double-click a preset to edit it.
2In the Trap Width section, for Black, enter a distance (in points) for how far you want other colors to spread into
black, or for how far you want support screens choked back under black. Typically, the Black trap width is set to be
1.5 to 2 times the value of the Default trap width.
3For Black Color and Black Density, set values.
Note: To use black trapping features, a color area must use an ink with a neutral density greater than or equal to the Black
Density, and the ink must occur in percentages greater than or equal to the Black Color.
More Help topics
“Trap Presets panel overview” on page 493
“Trap preset options” on page 495
Printing books with conflicting trap presets
You can apply one trap preset to one sheet of output, such as one page. Normally this is not a concern. However, if you
print multiple documents in a book, and each document or page has a different trap preset, InDesign can resolve some
trap preset conflicts by synchronizing presets among documents:
•If documents in a book use different trap presets with the same name, InDesign assigns the trap preset used in the
master document, provided you’ve selected the Trap Preset option in the Synchronize Options dialog box.
•The synchronizing feature makes all the master document’s presets available to the other documents in the book,
but does not assign them; you have to assign trap presets in each document, or use the [Default] trap preset. The
presets appear in the Trap Preset menu of the document’s Assign Trap Presets dialog box.
Note: If different trap presets are applied to pages in a spread, InDesign honors each trap preset.
More Help topics
“Synchronize book documents” on page 315

499
USING INDESIGN
Trapping color
Last updated 11/16/2011
Adjusting ink options for trapping
Adjusting ink neutral density values
By adjusting the ink neutral density (ND) values that the selected trapping engine uses, you can determine the precise
placement of traps. The default ND values for process inks are based on the neutral density readings of process ink
swatches that conform to industry standards in different parts of the world. The language version determines which
standard it conforms to. For example, the ND values for the U.S. English and Canadian versions conform to the
Specifications for Web Offset Publications (SWOP) solid ink density values published by the Graphic Arts Technical
Foundation of North America. You can adjust process ink neutral densities to match printing industry standards in
other parts of the world.
The trapping engine derives the ND values for a spot color from its CMYK equivalent. For most spot colors, the ND
values of their CMYK equivalents are accurate enough for proper trap creation. Spot inks that aren’t easily simulated
using process inks, such as metallic inks and varnishes, may need their ND values adjusted so that the trapping engine
can trap them correctly. By typing new values, you can ensure that an ink that is observably darker or lighter is
recognized that way by the trapping engine; the appropriate trap placement is then applied automatically.
You can get the appropriate neutral density value for a given ink by asking your commercial printer. The most accurate
method of determining an ink’s ND value is by measuring a swatch of the ink with a commercial densitometer. Read
the “V” or visual density of the ink (don’t use process filters). If the value differs from the default setting, type the new
value in the ND text box.
Note: Changing the neutral density for a spot color affects only how that color will trap. It doesn’t change the appearance
of that color in your document.
Follow these guidelines when adjusting ND values:
Metallic and opaque inks Metallic inks are usually darker than their CMYK equivalents, while opaque inks obscure
any ink beneath them. In general, you should set the ND values for both metallic and opaque spot colors much higher
than their default values to ensure that these spot colors won’t spread.
Note: Setting an ink to Opaque or Opaque Ignore in the Type menu of the Ink Manager prevents an opaque ink from
spreading into other colors, unless another opaque ink has a higher ND value.
Pastel inks These inks are normally lighter than their process equivalents. You may want to set the ND value for these
inks lower than their default values to ensure that they spread into adjacent darker colors.
Other spot inks Some spot colors, such as turquoise or neon orange, are significantly darker or lighter than their
CMYK equivalents. You can determine whether this is the case by comparing printed swatches of the actual spot inks
to printed swatches of their CMYK equivalents. You can adjust the spot ink’s ND value higher or lower as necessary.
Customize trapping for specialty inks
Using certain inks involves special trapping considerations. For example, if you are using a varnish on your document,
you don’t want the varnish to affect trapping. However, if you’re overprinting certain areas with a completely opaque
ink, you don’t need to create traps for items underneath. Ink options are available for these situations. It’s usually best
not to change the default settings, unless your prepress service provider recommends changing them.
Note: The speciality inks and varnishes used in the document may have been created by mixing two spot inks or by mixing
a spot ink with one or more process inks.
1Open the Ink Manager and select an ink that requires special treatment.

500
USING INDESIGN
Trapping color
Last updated 11/16/2011
2For Type, choose one of the following options, and then click OK:
Normal Use for traditional process inks and most spot inks.
Transparent Use for clear inks to ensure that underlying items trap. Use this option for varnishes and dieline inks.
Opaque Use for heavy, nontransparent inks to prevent trapping of underlying colors but allow for trapping along the
ink’s edges. Use this option for metallic inks.
Opaque Ignore Use for heavy, nontransparent inks to prevent trapping of underlying colors and to prevent trapping
along the ink’s edges. Use this option for those inks, such as metallics and varnishes, that have undesirable interactions
with other inks.
More Help topics
“Ink Manager overview” on page 643
“Mixing inks” on page 485
Adjust the trapping sequence
The trapping sequence (also called the trapping order) matches the order in which inks are printed at the press, but it
doesn’t match the order in which separations are produced at the output device.
The trapping sequence is particularly important when you’re printing with multiple opaque colors, such as metallic
inks. Opaque inks with lower sequence numbers are spread under opaque inks with higher sequence numbers. This
process prevents the last applied ink from being spread, and it still creates good traps.
Note: Don’t alter the default trapping sequence without first consulting with your prepress service provider.
1Open the Ink Manager. The current trapping sequence is displayed in the Sequence column of the inks list.
2Select an ink, type a new value for Trapping Sequence, and then press Tab. The sequence number of the selected
ink changes, and the other sequence numbers change accordingly.
3Repeat the previous step for as many inks as necessary, and then click OK.
More Help topics
“Ink Manager overview” on page 643
501
Last updated 11/16/2011
Chapter 17: PDF
Exporting to Adobe PDF
About Adobe PDF
Portable Document Format (PDF) is a universal file format that preserves the fonts, images, and layout of source
documents created on a wide range of applications and platforms. Adobe PDF is the standard for the secure, reliable
distribution and exchange of electronic documents and forms around the world. Adobe PDF files are compact and
complete, and can be shared, viewed, and printed by anyone with free Adobe Reader® software.
Adobe PDF is highly effective in print publishing workflows. By saving a composite of your artwork in Adobe PDF,
you create a compact, reliable file that you or your service provider can view, edit, organize, and proof. Then, at the
appropriate time in the workflow, your service provider can either output the Adobe PDF file directly, or process it
using tools from various sources for such post-processing tasks as preflight checks, trapping, imposition, and color
separation.
When you save in Adobe PDF, you can choose to create a PDF/X-compliant file. PDF/X (Portable Document Format
Exchange) is a subset of Adobe PDF that eliminates many of the color, font, and trapping variables that lead to printing
problems. PDF/X may be used wherever PDFs are exchanged as digital masters for print production—whether at the
creation or output stage of the workflow, as long as the applications and output devices support PDF/X.
Adobe PDFs can solve the following problems associated with electronic documents:
Export to PDF for printing
Exporting a document or book to Adobe PDF is as simple as using the default High Quality Print settings, or as
customized as you need it to be to suit your task. The PDF export settings you specify are saved with the application,
and will apply to every new InDesign document or book you export to PDF until you change them again. To quickly
apply custom settings to PDF files, you can use presets.
You can export a document, a book, or selected documents in a book as a single PDF file. You can also copy content
from your InDesign layout to the Clipboard, and automatically create an Adobe PDF file of that content. (This is useful
for pasting a PDF file into another application, such as Adobe Illustrator.)
When you export an InDesign file to PDF, you can preserve navigation elements such as table of contents and index
entries, and interactivity features such as hyperlinks, bookmarks, media clips, and buttons. You also have the option
of exporting hidden layers, nonprinting layers, and nonprinting objects to PDF. If you’re exporting a book, you can
merge identically named layers by using the Book panel.
Common problem Adobe PDF solution
Recipients can't open files because they don't have the applications
used to create the files.
Anyone, anywhere can open a PDF. All you need is the free Adobe
Reader software.
Combined paper and electronic archives are difficult to search, take up
space, and require the application in which a document was created.
PDFs are compact and fully searchable, and can be accessed at any
time using Reader. Links make PDFs easy to navigate.
Documents appear incorrectly on handheld devices. Tagged PDFs allow text to reflow for display on mobile platforms such
as Palm OS®, Symbian™, and Pocket PC® devices.
Documents with complex formatting are not accessible to visually
impaired readers.
Tagged PDFs contain information on content and structure, which
makes them accessible on-screen readers.

502
USING INDESIGN
PDF
Last updated 11/16/2011
For information on creating accessible PDF documents, see Adobe InDesign accessibility.
More Help topics
“Adobe PDF options” on page 506
“PDF compatibility levels” on page 507
“Create interactive documents for PDF” on page 530
Export an open document to PDF for printing
1Choose File > Export.
2Specify a name and location for the file.
3For Save As Type (Windows) or Format (Mac OS), choose Adobe PDF (Print), and then click Save.
When you select the Adobe PDF (Print) option, you cannot include interactive elements in the PDF. To export an
interactive document to PDF, see “Create interactive documents for PDF” on page 530.
4Do one of the following:
•To use a predefined set of job options, choose a preset from the Adobe PDF Preset menu.
•To create a PDF/X file, either choose a PDF/X preset from the Adobe PDF Preset menu, or choose a predefined
PDF/X format from the Standard menu.
•To customize options, select a category from the list on the left and then set the options.
5For Compatibility, choose the lowest PDF version necessary to open the files you create.
6Click Export (Windows) or Save (Mac OS).
To reset options to the default, in the Export Adobe PDF dialog box, hold down Alt (Windows) or Option (Mac OS)
and click Reset. (The Cancel button changes to Reset.)
Prepare layers before exporting a book to PDF
When you export a book to PDF, you can show and hide InDesign layers in the PDF document. To avoid duplication
of layer names in the PDF, you can merge the layers on export.
If the Merge Identically Named Layers On Export option is selected, layer names appear under the same book name
in Acrobat or Reader. If this option is not selected, layer names appear separately under each document name.
1If you don’t want certain layers to be merged, give them unique names in each book document.
Layer names are case-sensitive, so “Art” and “art” layers are not merged.
2In the Book panel menu, select Merge Identically Named Layers On Export.
Note: When you export the book to PDF, make sure that Create Acrobat Layers is selected. To select this option, you must
use Acrobat 6 (PDF 1.5) or later compatibility.
Export a book to PDF
1Do one of the following:
•To create a PDF of the entire book, click in a blank area of the Book panel to deselect any selected documents, and
choose Export Book To PDF in the Book panel menu.
•To create a PDF of documents within a book, select the document or documents in the Book panel, and choose
Export Selected Documents To PDF in the Book panel menu.

503
USING INDESIGN
PDF
Last updated 11/16/2011
2Specify a name and location for the PDF file, and then click Save.
3Either choose a preset from the Adobe PDF Preset menu, or select a category from the list on the left of the Export
Adobe PDF dialog box, and then customize the options.
4Click Export (Windows) or Save (Mac OS).
Reducing the size of PDFs
For PDF files that are intended to be distributed for viewing purposes only, you may want to reduce the size of PDF
files when you export from InDesign. Here are some of the size reduction techniques you can use in the Export Adobe
PDF dialog box:
•Choose [Smallest File Size] from the Adobe PDF Preset menu.
•In the Compression area, downsample images to 72 pixels per inch, select automatic compression, and select either
low- or medium-image quality for color and grayscale images. When you work with photographic images, use
Automatic (JPEG 2000) compression; when you work with images that are mostly solid color, such as charts and
graphs, use ZIP compression.
•In the Output area, use the Ink Manager to convert spot colors to process colors.
To reduce the size of PDFs, simply open the PDF in Acrobat 8.0 or later, choose Document > Reduce File Size, and
then specify the compatibility level. For greater control, choose Advanced > PDF Optimizer.
For more information on reducing the size of PDF files, see Acrobat Help and the Adobe website.
Adobe PDF presets
A PDF preset is a group of settings that affect the process of creating a PDF. These settings are designed to balance file
size with quality, depending on how the PDF will be used. Most predefined presets are shared across Adobe Creative
Suite components, including InDesign, Illustrator, Photoshop, and Acrobat. You can also create and share custom
presets for your unique output requirements.
A few of the presets listed below are not available until you move them—as needed—from the Extras folder (where
they are installed by default) to the Settings folder. Typically, the Extras and Settings folders are found in (Windows
Vista and Windows 7) ProgramData\Adobe\AdobePDF, (Windows XP) Documents and Settings\All
Users\Application Data\Adobe\Adobe PDF, or (Mac
OS) Library/Application Support/Adobe PDF. Some presets are
not available in some Creative Suite components.
The custom settings are found in (Windows XP) Documents and Settings/[username]/Application
Data/Adobe/Adobe PDF/Settings, (Windows Vista and Windows 7)
Users/[username]/AppData/Roaming/Adobe/Adobe PDF/Settings, or (Mac OS)
Users/[username]/Library/Application Support/Adobe/Adobe PDF/Settings.
Review your PDF settings periodically. The settings do not automatically revert to the default settings. Applications
and utilities that create PDFs use the last set of PDF settings defined or selected.
High Quality Print Creates PDFs for quality printing on desktop printers and proofing devices. This preset uses PDF
1.4, downsamples color and grayscale images to 300 ppi and monochrome images to 1200 ppi, embeds subsets of all
fonts, leaves color unchanged, and does not flatten transparency (for file types capable of transparency). These PDFs
can be opened in Acrobat
5.0 and Acrobat Reader 5.0 and later. In InDesign, this preset also creates tagged PDFs.
Illustrator Default (Illustrator only) Creates a PDF in which all Illustrator data is preserved. PDFs created with this
preset can be reopened in Illustrator without any loss of data.
Oversized Pages (Acrobat only) Creates PDFs suitable for viewing and printing of engineering drawings larger than
200 x 200 inches. These PDFs can be opened in Acrobat and Reader 7.0 and later.

504
USING INDESIGN
PDF
Last updated 11/16/2011
PDF/A-1b: 2005 (CMYK and RGB) (Acrobat only) Used for long-term preservation (archival) of electronic documents.
PDF/A-1b uses PDF
1.4 and converts all colors to either CMYK or RGB, depending on which standard you choose.
These PDFs can be opened in Acrobat and Reader versions 5.0 and later.
PDF/X-1a (2001 and 2003) PDF/X-1a requires all fonts to be embedded, the appropriate marks and bleeds to be
specified, and color to appear as CMYK, spot colors, or both. Compliant files must contain information describing the
printing condition for which they are prepared. PDF files created with PDF/X-1a compliance can be opened in Acrobat
4.0 and Acrobat Reader 4.0 and later.
PDF/X-1a uses PDF 1.3, downsamples color and grayscale images to 300 ppi and monochrome images to 1200 ppi,
embeds subsets of all fonts, creates untagged PDFs, and flattens transparency using the High Resolution setting.
Note: The PDF/X1-a:2003 and PDF/X-3 (2003) presets are placed on your computer during installation but are not
available until you move them from the Extras folder to the Settings folder.
PDF/X-3 This preset creates a PDF based on the ISO standard PDF/X-3:2002. The PDF created in this setting can be
opened in Acrobat 4.0 and Acrobat Reader 4.0 or later.
PDF/X-4 (2008) This preset creating ISO PDF/X-4:2008 files supports live transparency (transparency is not flattened)
and ICC color management. PDF files exported with this preset are in PDF 1.4 format. Images are downsampled and
compressed and fonts are embedded in the same manner as with the PDF/X-1a and PDF/X-3 settings. You can create
PDF/X-4:2008 compliant PDF files directly from Creative Suite 4 and 5 components including Illustrator, InDesign,
and Photoshop. Acrobat 9 Pro provides facilities to validate and preflight PDF files for PDF/X-4:2008 compliance as
well as convert non-PDF/X files to PDF/X-4:2008 if possible.
Adobe recommends PDF/X-4:2008 as the optimal PDF file format for reliable PDF print publishing workflows.
Press Quality Creates PDF files for high-quality print production (for example, for digital printing or for separations
to an imagesetter or platesetter), but does not create files that are PDF/X-compliant. In this case, the quality of the
content is the highest consideration. The objective is to maintain all the information in a PDF
file that a commercial
printer or print service provider needs in order to print the document correctly. This set of options uses PDF 1.4,
converts colors to CMYK, downsamples color and grayscale images to 300 ppi and monochrome images to 1200 ppi,
embeds subsets of all fonts, and preserves transparency (for file types capable of transparency).
These PDF files can be opened in Acrobat 5.0 and Acrobat Reader 5.0 and later.
Note: Before creating an Adobe PDF file to send to a commercial printer or print service provider, find out what the
output resolution and other settings should be, or ask for a .joboptions file with the recommended settings. You might
need to customize the Adobe PDF settings for a particular provider and then provide a .joboptions file of your own.
Rich Content PDF Creates accessible PDF files that include tags, hyperlinks, bookmarks, interactive elements, and
layers. This set of options uses PDF 1.5 and embeds subsets of all fonts. It also optimizes files for byte serving. These
PDF files can be opened in Acrobat
6.0 and Adobe Reader 6.0 and later. (The Rich Content PDF preset is in the Extras
folder.)
Note: This preset was called eBook in earlier versions of some applications.
Smallest File Size Creates PDF files for displaying on the web, an intranet, or for email distribution. This set of options
uses compression, downsampling, and a relatively low image resolution. It converts all colors to sRGB and embeds
fonts. It also optimizes files for byte serving. For best results, avoid using this preset if you intend to print the PDF file.
These PDF files can be opened in Acrobat 5.0 and Acrobat Reader 5.0 and later.
Standard (Acrobat only) Creates PDF files to be printed to desktop printers or digital copiers, published on a CD, or
sent to a client as a publishing proof. This set of options uses compression and downsampling to keep the file size
down, but also embeds subsets of all (allowed) fonts used in the file, converts all colors to sRGB, and prints to a medium

505
USING INDESIGN
PDF
Last updated 11/16/2011
resolution. Note that Windows font subsets are not embedded by default. PDF files created with this settings file can
be opened in Acrobat 5.0 and Acrobat Reader 5.0 and later.
For more information about shared PDF settings for Creative Suite components, see the PDF Integration Guide on
the Creative Suite DVD.
Customize Adobe PDF presets
Although the default PDF presets are based on best practices, you may discover that your workflow, or perhaps your
printer’s workflow, requires specialized PDF settings that aren’t available via any of the built-in presets. If this is the
case, you or your service provider can create custom presets. Adobe PDF presets are saved as .joboptions files.
1Choose File > Adobe PDF Presets > Define.
2Do one of the following:
•To create a new preset, click New. If you want to base the new preset on an existing preset, select the preset first. Set
PDF options, and click
OK. (See “Adobe PDF options” on page 506.)
•To edit an existing custom preset, select the preset and click Edit. (You cannot edit the default presets.) Set PDF
options, and click
OK.
•To delete a preset, select it and click Delete.
•To save a preset in a location other than the default Settings folder in the Adobe PDF folder, select it and click Save
As. Specify a location and click Save.
Alternatively, you can create a custom preset when you save a PDF file by clicking Save Preset at the bottom of the
Export Adobe PDF dialog box. Enter a name for the preset and click
OK.
Load Adobe PDF presets
New PDF presets (.joboptions files) that you create are stored in the Settings folder in the following locations:
Windows XP Documents and Settings\[username]\Application Data\Adobe\Adobe PDF
Windows Vista and Windows 7 Users\[username]\AppData\Roaming\Adobe\Adobe PDF
Mac OS User/[username]/Library/Application Support/Adobe/Adobe PDF
These presets automatically appear in the Adobe PDF Presets menu.
Supplementary InDesign PDF presets are installed in the system’s Adobe PDF\Extras folder. Use your system search
utility to locate additional .joboptions files. You may also receive custom PDF presets from service providers and
colleagues. For these presets to be listed in the Adobe PDF Presets menu, they must be moved to the Settings folder
either manually or by using the Load command.
Load PDF presets
The Load command is useful if you want to load PDF presets that someone sent you, or to load PDF presets from
InDesign CS2.
1Choose File > Adobe PDF Presets > Define.
2Click Load and select the .joboptions file you want to load.
The .joboptions file is copied to the Settings folder where new PDF presets are stored.
To make a .joboptions file available in the Adobe PDF Presets menu, you can also drag it to the Settings folder where
your PDF presets are stored.

506
USING INDESIGN
PDF
Last updated 11/16/2011
Convert PDF presets from InDesign CS
InDesign CS and earlier export PDF presets with .pdfs extensions, while InDesign CS2 and later export PDF presets
with .joboptions extensions. Importing a PDFS file converts it to a .joboptions file, and overrides settings as necessary.
For example, if Monitor RGB was selected as the destination profile in the Output area in InDesign CS, it is
automatically changed to Document RGB in InDesign CS4.
1Choose File > Adobe PDF Presets > Define.
2Click Load.
3Choose Previous-version PDF Settings Files (.pdfs) from the Files Of Type menu (Windows) or All Files from the
Enable menu (Macintosh).
4Double-click the file you want to convert.
The file becomes selected in the list of Adobe PDF presets.
Background Tasks panel
With the ability to export PDF files in the background, you can continue working on your document instead of waiting
until InDesign is done exporting. You can also queue up multiple PDF exports in the background. Use the Background
Tasks panel to view the progress of the export processes.
1Export one or more documents to Adobe PDF.
2To view the progress, choose Window > Utilities > Background Tasks.
Adobe PDF options
Adobe PDF option categories
You can set PDF options when you export to PDF or when you create or edit PDF presets. Adobe PDF options are
divided into categories. The categories are listed on the left side of the Export Adobe PDF dialog box, with the
exception of the Standard and Compatibility options, which are at the top of the dialog box. When you’re exporting to
PDF, changing any of the options causes “modified” to appear at the end of the preset name.
Standard Specifies a PDF/X format for the file.
Compatibility Specifies a PDF version for the file.
General Specifies basic file options.
Compression
Specifies if artwork should be compressed and downsampled, and if so, which method and settings to use.
Marks and Bleeds Specifies printer’s marks and the bleed and slug areas. Although the options are the same as in the
Print dialog box, the calculations are subtly different because a PDF is not output to a known page size.
Output Controls how colors and PDF/X output intent profiles are saved in the PDF file.
Advanced Controls how fonts, OPI specifications, transparency flattening, and JDF instructions are saved in the PDF
file.
Security Adds security to the PDF file. Security options are not available when you create or edit a PDF preset.
Summary Displays a summary of the current PDF settings. You can click the arrow next to a category (for example,
General) to view individual settings. To save the summary as an ASCII text file, click Save Summary. A warning
icon
appears with explanatory text if a setting in the selected preset cannot be honored and must be remapped. For
507
USING INDESIGN
PDF
Last updated 11/16/2011
example, if a preset specifies source profiles that don’t match the current color settings file, then the profiles specified
by the color settings file will be used.
About PDF/X standards
PDF/X standards are defined by the International Organization for Standardization (ISO). PDF/X standards apply to
graphic content exchange. During PDF conversion, the file that is being processed is checked against the specified
standard. If the PDF will not meet the selected ISO standard, a message appears, asking you to choose between
canceling the conversion or going ahead with the creation of a non-compliant file. A widely used standards for a print
publishing workflow is the PDF/X format such as PDF/X-1a.
The PDF/X-4 format is reliable for live transparency and color management. This format is optimal for RIP
processing, digital printers that use the Adobe PDF Print Engine, and any PDF file to be printed in Acrobat.
Note: For more information on PDF/X, see the ISO website and the Adobe website.
PDF compatibility levels
When you create PDFs, you need to decide which PDF version to use. You can change the PDF version by switching
to a different preset or choosing a compatibility option when you save as PDF or edit a PDF preset.
Generally speaking, unless there’s a specific need for backward compatibility, you should use the most recent version
(in this case version 1.7). The latest version will include all the newest features and functionality. However, if you’re
creating documents that will be distributed widely, consider choosing Acrobat 5.0 (PDF 1.4) or Acrobat 6.0 (PDF 1.5)
to ensure that all users can view and print the document.
The following table compares some of the functionality in PDFs created using the different compatibility settings.
Note: Acrobat 8.0 and 9.0 also use PDF 1.7.
Acrobat 3.0 (PDF 1.3) Acrobat 5.0 (PDF 1.4) Acrobat 6.0 (PDF 1.5) Acrobat 7.0 (PDF 1.6) and
Acrobat X (PDF 1.7)
PDFs can be opened with Acrobat
3.0 and Acrobat Reader 3.0 and
later.
PDFs can be opened with Acrobat
3.0 and Acrobat Reader 3.0 and
later. However, features specific
to later versions may be lost or not
viewable.
Most PDFs can be opened with
Acrobat 4.0 and Acrobat Reader
4.0 and later. However, features
specific to later versions may be
lost or not viewable.
Most PDFs can be opened with
Acrobat 4.0 and Acrobat Reader
4.0 and later. However, features
specific to later versions may be
lost or not viewable.
Cannot contain artwork that uses
live transparency effects. Any
transparency must be flattened
prior to converting to PDF 1.3.
Supports the use of live
transparency in artwork. (The
Acrobat Distiller feature flattens
transparency.)
Supports the use of live
transparency in artwork. (The
Acrobat Distiller feature flattens
transparency.)
Supports the use of live
transparency in artwork. (The
Acrobat Distiller feature flattens
transparency.)
Layers are not supported. Layers are not supported. Preserves layers when creating
PDFs from applications that
support the generation of layered
PDF documents, such as
Illustrator CS and later or InDesign
CS and later.
Preserves layers when creating
PDFs from applications that
support the generation of layered
PDF documents, such as
Illustrator CS and later or InDesign
CS and later.
508
USING INDESIGN
PDF
Last updated 11/16/2011
General options for PDFs
Click the General category in the Export Adobe PDF dialog box to set the following options:
Description Displays the description from the selected preset, and provides a place for you to edit the description. You
can paste a description from the Clipboard.
All Exports all pages in the current document or book.
Range Specifies the range of pages to export in the current document. You can type a range by using a hyphen, and
separate multiple pages or ranges by using commas. This option is unavailable when you’re exporting books or
creating presets.
Spreads Exports pages together as if they were printed on the same sheet.
Important: Do not select Spreads for commercial printing; if you do, the service provider cannot impose the pages.
Embed Page Thumbnails Creates a thumbnail preview for each page being exported, or one thumbnail for each spread
if the Spreads option is selected. The thumbnail is displayed in the InDesign Open or Place dialog boxes. Adding
thumbnails increases the PDF file size.
Optimize For Fast Web View Reduces PDF file size, and optimizes the PDF file for faster viewing in a web browser by
restructuring the file for page-at-a-time downloading (byte serving). This option compresses text and line art,
regardless of the settings you have selected in the Compression category of the Export Adobe PDF dialog box.
Create Tagged PDF During export, automatically tags elements in the story based on a subset of the Acrobat tags that
InDesign supports. This includes recognition of paragraphs, basic text formatting, lists, and tables. (You can also insert
and adjust tags in the document before exporting to PDF. See “Adding structure to PDFs” on page 517.)
Note: If Compatibility is set to Acrobat 6 (PDF 1.5) or later, tags are compressed for smaller file size. If the PDF is then
opened in Acrobat
4.0 or Acrobat 5.0, the tags will not be visible because those versions of Acrobat cannot decompress tags.
View PDF After Exporting Opens the newly-created PDF file in the default PDF viewing application.
Create Acrobat Layers Saves each InDesign layer as an Acrobat layer within the PDF. Also exports any printer’s marks
you’ve included to a separate marks and bleeds layer. The layers are fully navigable, which allows users of Acrobat
6.0
and later to generate multiple versions of the file from a single PDF. For example, if a document will be published in
multiple languages, you can place the text for each language in a different layer. A prepress service provider can then
show and hide the layers to generate different versions of the document.
If you select the Create Acrobat Layers option when you export a book to PDF, identically named layers are merged
by default.
Note: Create Acrobat Layers is available only when Compatibility is set to Acrobat 6 (PDF 1.5) or later.
DeviceN color space with 8
colorants is supported.
DeviceN color space with 8
colorants is supported.
DeviceN color space with up to 31
colorants is supported.
DeviceN color space with up to 31
colorants is supported.
Multibyte fonts can be
embedded. (Distiller converts the
fonts when embedding.)
Multibyte fonts can be
embedded.
Multibyte fonts can be
embedded.
Multibyte fonts can be
embedded.
40-bit RC4 security supported. 128-bit RC4 security supported. 128-bit RC4 security supported. 128-bit RC4 and 128-bit AES
(Advanced Encryption Standard)
security supported.
Acrobat 3.0 (PDF 1.3) Acrobat 5.0 (PDF 1.4) Acrobat 6.0 (PDF 1.5) Acrobat 7.0 (PDF 1.6) and
Acrobat X (PDF 1.7)

509
USING INDESIGN
PDF
Last updated 11/16/2011
Export Layers Determines whether visible layers and nonprinting layers are included in the PDF. You can use the
Layer Options settings to determine whether each layer is hidden or set as nonprinting. When exporting to PDF,
choose whether you want to export All Layers (including hidden and nonprinting layers), Visible Layers (including
nonprinting layers), or Visible & Printable Layers.
Bookmarks Creates bookmarks for table of contents entries, preserving the TOC levels. Bookmarks are created from
the information specified in the Bookmarks panel.
Hyperlinks Creates PDF hyperlink annotations for InDesign hyperlinks, table of contents entries, and index entries.
Visible Guides And Grids Exports margin guides, ruler guides, column guides, and baseline grids currently visible in
the document. Grids and guides export in the same color used in the document.
Non-Printing Objects Exports objects to which you have applied the Nonprinting option in the Attributes panel.
Interactive Elements Choose Include Appearance to include items such as buttons and movie posters in the PDF. To
create a PDF with interactive elements, choose the Adobe PDF (Interactive) option instead of the Adobe PDF (Print)
option. See “Export to interactive PDF options” on page 531.
More Help topics
“Export to PDF for printing” on page 501
“Hyperlinks” on page 535
“Bookmarks” on page 533
“Movies and sounds” on page 548
“Buttons” on page 558
Compression and downsampling options for PDFs
When exporting documents to Adobe PDF, you can compress text and line art, and compress and downsample bitmap
images. Depending on the settings you choose, compression and downsampling can significantly reduce the size of a
PDF file with little or no loss of detail and precision.
The Compression area of the Export Adobe PDF dialog box is divided into three sections. Each section provides the
following options for compressing and resampling color, grayscale, or monochrome images in your artwork.
Downsampling If you plan to use the PDF file on the web, use downsampling to allow for higher compression. If you
plan to print the PDF file at high resolution, check with your prepress service provider before setting compression and
downsampling options.
You should also consider whether users need to magnify a page. For example, if you are creating a PDF document of
a map, consider using a higher image resolution so that users can zoom in on the map.
Downsampling refers to decreasing the number of pixels in an image. To downsample color, grayscale, or
monochrome images, choose an interpolation method—average downsampling, bicubic downsampling, or
subsampling—and enter the desired resolution (in pixels per inch). Then enter a resolution in the For Images Above
text box. All images with resolution above this threshold will be downsampled.
The interpolation method you choose determines how pixels are deleted:
•Average Downsampling To Averages the pixels in a sample area and replaces the entire area with the average pixel
color at the specified resolution.

510
USING INDESIGN
PDF
Last updated 11/16/2011
•Subsampling To Chooses a pixel in the center of the sample area and replaces the entire area with that pixel color.
Subsampling significantly reduces the conversion time compared with downsampling but results in images that are
less smooth and continuous.
•Bicubic Downsampling To Uses a weighted average to determine pixel color, which usually yields better results
than the simple averaging method of downsampling. Bicubic is the slowest but most precise method, resulting in the
smoothest tonal gradations.
Compression Determines the type of compression that is used:
•Automatic (JPEG) Determines automatically the best quality for color and grayscale images. For most files, this
option produces satisfactory results.
•JPEG Is suitable for grayscale or color images. JPEG compression is lossy, which means that it removes image data
and may reduce image quality; however, it attempts to reduce file size with a minimal loss of information. Because
JPEG compression eliminates data, it can achieve much smaller files sizes than ZIP compression.
•ZIP Works well on images with large areas of single colors or repeating patterns, and for black-and-white images
that contain repeating patterns. ZIP compression can be lossless or lossy, depending on the Image Quality setting.
•JPEG 2000 Is the international standard for the compression and packaging of image data. Like JPEG compression,
JPEG 2000 compression is suitable for grayscale or color images. It also provides additional advantages, such as
progressive display. The JPEG 2000 option is only available when Compatibility is set to Acrobat
6 (PDF 1.5) or later.
•Automatic (JPEG 2000) Determines automatically the best quality for color and grayscale images. The Automatic
(JPEG 2000) option is only available when Compatibility is set to Acrobat
6 (PDF 1.5) or later.
•CCITT And Run Length Are only available for monochrome bitmap images. CCITT (Consultative Committee on
International Telegraphy and Telephony) compression is appropriate for black-and-white images and any images
scanned with an image depth of 1 bit. Group 4 is a general-purpose method that produces good compression for most
monochrome images. Group 3, used by most fax machines, compresses monochrome bitmaps one row at a time.
Run
Length compression produces the best results for images that contain large areas of solid black or white.
Note: Grayscale images that have been colorized in InDesign are subject to the compression settings for Color Images.
However, grayscale images colorized with a spot color (and [None] applied to their frames) use the compression settings
for grayscale.
Image Quality Determines the amount of compression that is applied. For JPEG or JPEG 2000 compression, you can
choose Minimum, Low, Medium, High, or Maximum quality. For ZIP compression, only 8-bit is available. Because
InDesign uses the lossless ZIP method, data is not removed to reduce file size, so image quality is not affected.
Tile Size Determines the size of the tiles for progressive display. This option is only available when Compatibility is set
to Acrobat
6 (1.5) and later, and Compression is set to JPEG 2000.
Compress Text And Line Art Applies Flate compression (which is similar to ZIP compression for images) to all text
and line art in the document, without loss of detail or quality.
Crop Image Data To Frames May reduce file size by exporting only image data that falls within the visible portion of
the frame. Do not select this option if postprocessors might require the additional information (for repositioning or
bleeding an image, for example).
Marks and Bleeds options for PDFs
Bleed is the amount of artwork that falls outside of the printing bounding box, or outside the crop marks and trim
marks. You can include bleed in your artwork as a margin of error, to ensure that the ink extends all the way to the
edge of the page after the page is trimmed or to ensure that a graphic can be stripped into a keyline in a document.
You can specify the extent of the bleed and add a variety of printer’s marks to the file.

511
USING INDESIGN
PDF
Last updated 11/16/2011
More Help topics
“Printer’s marks and bleeds” on page 607
Color management and PDF/X output options for PDFs
You can set the following options in the Output area of the Export Adobe PDF dialog box. Interactions between
Output options change depending on whether color management is on or off, whether the document is tagged with
color profiles, and which PDF standard is selected.
Note: For quick definitions of the options in the Output area, position the pointer over an option and read the Description
text box at the bottom of the dialog box.
Color Conversion Specifies how to represent color information in the Adobe PDF file. All spot color information is
preserved during color conversion; only the process color equivalents convert to the designated color space.
•No Color Conversion Preserves color data as is. This is the default when PDF/X-3 is selected.
•Convert to Destination Converts all colors to the profile selected for Destination. Whether the profile is included
or not is determined by the Profile Inclusion Policy.
•Convert to Destination (Preserve Numbers) Converts colors to the destination profile space only if they have
embedded profiles that differ from the destination profile (or if they are RGB colors, and the destination profile is
CMYK, or vice versa). Untagged color objects (those without embedded profiles) and native objects (such as line art
or type) are not converted. This option is not available if color management is off. Whether the profile is included or
not is determined by the Profile Inclusion Policy.
Destination Describes the gamut of the final RGB or CMYK output device, such as your monitor or a SWOP standard.
Using this profile, InDesign converts the document’s color information (defined by the source profile in the Working
Spaces section of the Color Settings dialog box) to the color space of the target output device.
Profile Inclusion Policy Determines whether a color profile is included in the file. The options vary, depending on the
setting in the Color Conversion menu, whether one of the PDF/X standards is selected, and whether color
management is on or off.
•Don’t Include Profiles Does not create a color-managed document with embedded color profiles.
•Include All Profiles Creates a color-managed document. If the application or output device that uses the Adobe
PDF file needs to translate colors into another color space, it uses the embedded color space in the profile. Before you
select this option, turn on color management and set up profile information.
•Include Tagged Source Profiles Leaves device-dependent colors unchanged and preserves device-independent
colors as the nearest possible equivalent in PDF. This is a useful option for print shops that have calibrated all their
devices, used that information to specify color in the file, and are only outputting to those devices.
•Include All RGB And Tagged Source CMYK Profiles Includes any profiles for tagged RGB objects and tagged CMYK
objects, such as placed objects with embedded profiles. This option also includes the Document RGB profile for
untagged RGB objects.
•Include Destination Profile Assigns the destination profile to all objects. If Convert To Destination (Preserve Color
Numbers) is selected, untagged objects in the same color space are assigned the destination profile so that color
numbers don’t change.
Simulate Overprint Simulates the appearance of printing separations by maintaining the appearance of overprinting
in composite output. When Simulate Overprint is unselected, Overprint Preview must be selected in Acrobat to see
the effects of overlapping colors. When Simulate Overprint is selected, spot colors are changed to their process
equivalents, and overlapping colors display and output correctly, without Overprint Preview selected in Acrobat. With

512
USING INDESIGN
PDF
Last updated 11/16/2011
Simulate Overprint on, and Compatibility (in the General area of the dialog box) set to Acrobat 4 (PDF 1.3), you can
soft-proof your document’s colors directly on the monitor before they are reproduced on a particular output device.
Ink Manager Controls whether spot colors are converted to process equivalents and specifies other ink settings. If you
make changes to your document using the Ink Manager (for example, if you change all spot colors to their process
equivalents), those changes will be reflected in the exported file and in the saved document, but the settings won’t be
saved with the Adobe PDF preset.
Output Intent Profile Name Specifies the characterized printing condition for the document. An output intent profile
is required for creating PDF/X-compliant files. This menu is only available if a PDF/X standard (or preset) is selected
in the General area of the Export Adobe PDF dialog box. The available options depend on whether color management
is on or off. For example, if color management is off, the menu lists only output profiles that match the destination
profile’s color space. If color management is on, the output intent profile is the same profile selected for Destination
(provided it is a CMYK output device).
Output Condition Name Describes the intended printing condition. This entry can be useful for the intended receiver
of the PDF document.
Output Condition Identifier Indicates a pointer to more information on the intended printing condition. The
identifier is automatically entered for printing conditions that are included in the ICC registry. This option is not
available when using either of the PDF/X-3 presets or standards, because the file would fail compliance when inspected
by the Preflight feature in Acrobat 7.0 Professional and later, or the Enfocus PitStop application (which is a plug-in for
Acrobat
6.0).
Registry Name Indicates the web address for more information on the registry. The URL is automatically entered for
ICC registry names. This option is not available when using either of the PDF/X-3 presets or standards, because the
file would fail compliance when inspected by the Preflight feature in Acrobat 7.0 Professional and later, or the Enfocus
PitStop application (which is a plug-in for Acrobat
6.0).
Font, OPI, and flattening options for PDFs
You can set the following options in the Advanced area of the Export Adobe PDF dialog box.
Subset Fonts When Percent Of Characters Used Is Less Than Sets the threshold for embedding complete fonts based
on how many of the font’s characters are used in the document. If the percentage of characters used in the document
for any given font is exceeded, then that specific font is completely embedded. Otherwise, the font is subsetted.
Embedding complete fonts increases file size, but if you want to make sure you completely embed all fonts, enter 0
(zero). You can also set a threshold in the General Preferences dialog box to trigger font subsetting based on the
number of glyphs a font contains.
OPI Lets you selectively omit different imported graphics types when sending image data to a printer or file, leaving
only the OPI links (comments) for later handling by an OPI server.
Preset If Compatibility (in the General area of the dialog box) is set to Acrobat 4 (PDF 1.3), you can specify a preset
(or set of options) for flattening transparency. These options are only used when exporting spreads with transparency
in artwork.
Note: Acrobat 5 (PDF 1.4) and later automatically preserve transparency in artwork. As a result, the Preset and Custom
options are not available for these levels of compatibility.
Ignore Spread Overrides Applies the flattener settings to all spreads in a document or book, overriding the flattener
preset on an individual spread.
Create JDF File Using Acrobat Creates a Job Definition Format (JDF) file and starts Acrobat Professional for
processing the JDF file. A job definition in Acrobat contains references to the files to be printed as well as instructions

513
USING INDESIGN
PDF
Last updated 11/16/2011
and information for prepress service providers at the production site. This option is only available if Acrobat 7.0
Professional or later is installed on your machine. For more information, see Acrobat Help.
More Help topics
“Options for omitting graphics” on page 612
Adding security to PDF files
When saving as PDF, you can add password protection and security restrictions, limiting not only who can open the
file, but also who can copy or extract contents, print the document, and more.
A PDF file can require passwords to open a document (document open password) and to change security settings
(permissions password). If you set any security restrictions in your file, you should set both passwords; otherwise,
anyone who opens the file could remove the restrictions. If a file is opened with a permissions password, the security
restrictions are temporarily disabled.
The RC4 method of security from RSA Corporation is used to password-protect PDF files. Depending on the
Compatibility setting (in the General category), the encryption level will be high or low.
Note: Adobe PDF presets don’t support passwords and security settings. If you select passwords and security settings in
the Export Adobe PDF dialog box, and then click Save Preset, the passwords and security settings won’t be preserved.
Security options for PDFs
You can set the following options when you create a PDF or when you apply password protection to a PDF. Options
vary depending on the Compatibility setting. Security options are not available for PDF/X standards or presets.
Compatibility Sets the type of encryption for opening a password-protected document. The Acrobat 4 (PDF 1.3)
option uses a low encryption level (40-bit RC4), while the other options use a high encryption level (128-bit RC4 or
AES).
Be aware that anyone using an earlier version of Acrobat cannot open a PDF document with a higher compatibility
setting. For example, if you select the Acrobat
7 (PDF 1.6) option, the document cannot be opened in Acrobat 6.0 or
earlier.
Require A Password To Open The Document Select this option to require users to type the password you specify to
open the document.
Document Open Password Specify the password that users must type to open the PDF file.
Note: If you forget a password, there is no way to recover it from the document. It’s a good idea to store passwords in a
separate secure location in case you forget them.
Use A Password To Restrict Printing, Editing And Other Tasks Restricts access to the PDF file’s security settings. If the
file is opened in Adobe Acrobat, the user can view the file but must enter the specified Permissions password in order
to change the file’s Security and Permissions settings. If the file is opened in Illustrator, Adobe Photoshop, or Adobe
InDesign, the user must enter the Permissions password, since it is not possible to open the file in a view-only mode.
Permissions Password Specify a password that is required to change the permissions settings. This option is available
only if the previous option is selected.
Printing Allowed Specifies the level of printing that users are allowed for the PDF document.
•None Prevents users from printing the document.

514
USING INDESIGN
PDF
Last updated 11/16/2011
•Low Resolution (150 dpi) Lets users print at no higher than 150-dpi resolution. Printing may be slower because
each page is printed as a bitmap image. This option is available only if the Compatibility option is set to Acrobat
5 (PDF
1.4) or later.
•High Resolution Lets users print at any resolution, directing high-quality vector output to Adobe PostScript and
other printers that support advanced high-quality printing features.
Changes Allowed Defines which editing actions are allowed in the PDF document.
•None Prevents users from making any changes to the document that are listed in the Changes Allowed menu, such
as filling in form fields and adding comments.
•Inserting, Deleting, And Rotating Pages Lets users insert, delete, and rotate pages, and create bookmarks and
thumbnails. This option is only available for high (128-bit RC4 or AES) encryption.
•Filling In Form Fields And Signing Lets users fill in forms and add digital signatures. This option doesn’t allow them
to add comments or create form fields. This option is only available for high (128-bit RC4 or AES) encryption.
•Commenting, Filling In Form Fields, And Signing Lets users add comments and digital signatures, and fill in forms.
This option doesn’t allow users to move page objects or create form fields.
•Page Layout, Filling in Form Fields, And Signing Lets users insert, rotate, or delete pages and create bookmarks or
thumbnail images, fill out forms, and add digital signatures. This option doesn’t allow them to create form fields. This
option is only available for low (40-bit RC4) encryption.
•Any Except Extracting Pages Lets users edit the document, create and fill in form fields, and add comments and
digital signatures.
Enable Copying Of Text, Images, And Other Content Lets users select and copy the contents of a PDF.
Enable Copying Of Content And Access For The Visually Impaired Lets visually impaired users use screen readers to
read and copy the document. This option is only available for low (40-bit RC4) encryption.
Enable Text Access For Screen Reader Devices For The Visually Impaired Lets visually impaired users read the
document with screen readers, but doesn’t allow users to copy or extract the document’s contents. This option is
available only for high (128-bit RC4 or AES) encryption.
Enable Plaintext Metadata Allows users to copy and extract content from the PDF. This option is only available when
Compatibility is set to Acrobat 6 (PDF 1.5) or later. Selecting this option allows storage/search systems and search
engines to access metadata stored in the document.
Font embedding and substitution
A font can be embedded only if it contains a setting by the font vendor that permits it to be embedded. Embedding
prevents font substitution when readers view or print the file, and ensures that readers see the text in its original font.
Embedding increases file size only slightly, unless the document uses CID fonts, a font format commonly used for
Asian languages. You can embed or substitute fonts in Acrobat or when you export an InDesign document to PDF.
You can embed the entire font, or just a subset of the characters used in the file.
When a font cannot be embedded due to the font vendor settings, and someone who opens or prints a PDF does not
have access to the original font, another font is temporarily substituted. To avoid problems, print only PDF files in
which fonts can be embedded.
The Multiple Master typeface can stretch or condense to fit, to ensure that line and page breaks in the original
document are maintained. The substitution cannot always match the shape of the original characters, however,
especially if the characters are unconventional ones, such as script typefaces.

515
USING INDESIGN
PDF
Last updated 11/16/2011
If characters are unconventional (left), the substitution font does not match (right).
Preparing a document for on-screen viewing
With its small file sizes, platform independence, and online navigation, Adobe PDF is an ideal format for distributing
documents electronically and viewing them on-screen. You can send Adobe PDF documents to other users as e-mail
attachments, or you can distribute the documents on the web or on an intranet.
For information on creating accessible PDF documents, see Adobe InDesign CS4 accessibility.
The following guidelines apply to electronically distributed Adobe PDF files:
•Before putting Adobe PDF documents on a website, check to see that the text, artwork, and layout in the documents
are complete and correct.
•Make sure that table of contents entries, hyperlinks, and bookmarks are generated correctly. Table of contents
entries are generated automatically from information in the Bookmarks panel.
•Set up passwords and other security options.
•Use a file name of no more than eight characters, followed by an extension of up to three characters. Many networks
and e-mail programs shorten long file names.
•Make sure that the file name has a PDF extension if users will view the file on a Windows computer or on the
Internet.
•To apply predefined Adobe PDF export settings for on-screen viewing, choose Smallest File Size.
Note: Adobe PDF files exported from InDesign documents that contain overprints or transparency effects are best
viewed in Acrobat
5.0 and later, or Adobe Reader 7.0 and later, with the Overprint Preview option selected.
More Help topics
“Customize Adobe PDF presets” on page 505
“General options for PDFs” on page 508
Preparing PDFs for service providers
About PDF print publishing tools
In some print publishing workflows, documents are distributed in the format of the authoring application (called the
native format). Once approved, the files are saved in PostScript or a proprietary format for prepress work and final
printing. Because applications generate PostScript in many different ways, PostScript files may be arbitrarily large and
complex. In addition, reliability problems such as missing fonts, corrupt files, missing graphic elements, and
unsupported features can result at output time. In response, Adobe and its partners continue to create reliable, PDF-
based publishing workflow solutions.

516
USING INDESIGN
PDF
Last updated 11/16/2011
From InDesign, you can export your document to a composite PDF file called a digital master. These digital masters
are compact, reliable files that you or your service provider can view, edit, organize, and proof. Then, at the appropriate
time in the workflow, your service provider can either output the PDF directly, or process it using tools from various
sources for post-processing tasks such as preflight checks, trapping, imposition, and color separation.
PDF files in the workflow
Many large publishers use PDFs to streamline their review and production cycles. For example, numerous magazines
and newspapers have adopted PDF as the standard format for delivering advertisements to local publishing offices via
satellite or ISDN lines. PDFs enable local publishers to instantly view an advertisement exactly as it was designed, make
late-stage text edits, and reliably print from any computer.
PDF workflow technologies and requirements
Adobe is continually addressing the workflow needs of service providers, and recommends that you visit the Adobe
website at www.adobe.com often for the latest developments. Currently, Adobe addresses publishing workflow needs
by providing an integrated system of several technologies:
•Adobe Acrobat 9, with its support for Adobe PDF version 1.7.
•Adobe PostScript 3 printing technology, for device-independent support, Adobe In-RIP Trapping, in-RIP color
separations, and smooth blends.
•Adobe InDesign CS4, with its high-resolution page layout capabilities and direct PDF processing.
•PDF/X, an ISO standard for graphic content exchange that eliminates many of the color, font, and trapping
variables that lead to printing problems.
A high-resolution composite PDF workflow typically includes a PostScript 3 output device whose RIP supports in-RIP
separations. Therefore, if your output device uses PostScript Level 2 or does not support in-RIP separations, use a
preseparated PostScript printing workflow.
More Help topics
“About PDF/X standards” on page 507
Checking your document before exporting
Before creating a PDF for a service provider, make sure that the InDesign document meets your service provider’s
specifications. The following list offers some recommendations:
•Use the InDesign Preflight feature to ensure that image resolution and color spaces are correct, that fonts are
available and can be embedded, that graphics are up-to-date, and so on.
•View your Adobe PDF export settings prior to exporting, and then adjust them as necessary. The Summary area
includes a warning section that indicates when preset settings can’t be honored.
•If your artwork contains transparency (including overprints and drop shadows) and you require high-resolution
output, it’s a good idea to preview the effects of flattening using the Flattener Preview panel before saving the file.
•If your artwork contains transparency, ask your prepress service provider if they want to receive flattened or
unflattened PDF files. Flattening should be done as late in the workflow as possible, preferably by the service
provider. However, if your service provider wants you to flatten transparency, submit a PDF/X-1a compliant file.
•If your document will be separated, you can preview the separations and ink coverage limits using the Separations
Preview panel.
•Use only high-resolution images in your document.

517
USING INDESIGN
PDF
Last updated 11/16/2011
•For best results, use only CMYK images in a four-color-process job. Alternatively, you can choose to convert RGB
images to CMYK in the Export Adobe PDF dialog box (Output category).
•You can exclude hidden or nonprinting layers from the exported PDF document. (See “Choose which layers are
printed or exported to PDF” on page 603.)
For detailed information about preparing InDesign documents for high-resolution PDF output, see the Adobe
InDesign CS4 Printing Guide for Prepress Service Providers on the Adobe InDesign CS4 DVD or on the Adobe website.
More Help topics
“Define preflight profiles” on page 617
“Flattening transparent artwork” on page 454
“Preview color separations” on page 637
Produce a print-ready Adobe PDF file
A service provider can use Acrobat 7.0 Professional and later to perform preflight checks and color separations.
Subsequent versions of Acrobat Professional contain more advanced preflight tools, including the ability to make
certain corrections automatically. Various prepress applications and in-RIP technologies can also perform preflight
checks, do trapping and imposition, and make the color separations of the pages in the digital master.
If you choose to leave out the images when creating the Adobe PDF file, make sure that the service provider has access
to the original high-resolution images that are required for proper output. In addition, make sure that the service
provider has Acrobat
7.0 or later for accurate viewing of text and color graphics. For best viewing, they should use
Acrobat
8 Professional or later.
If you’re using a color-managed workflow, you can use the precision of color profiles to perform an on-screen preview
(a soft proof). You can examine how your document’s colors will look when reproduced on a particular output device.
Note: Unless you are using a color management system (CMS) with accurately calibrated ICC profiles and are sure you
have properly calibrated your monitor, don’t rely on the on-screen appearance of colors.
1Prepare the document for exporting to Adobe PDF.
2Export using the .joboptions file provided by your service provider. If you don’t have a preferred .joboptions file,
use a PDF/X preset.
3Preflight the PDF in Acrobat 7.0 Professional or later.
4Proof and correct the PDF file.
5Hand off the press-ready PDF to the prepress service provider.
Structuring PDFs
Adding structure to PDFs
When you export to Adobe PDF with the Create Tagged PDF option selected in the General area of the Export Adobe
PDF dialog box, the exported pages are automatically tagged with a set of structure tags that describe the content,
identifying page items such as headlines, stories, and figures. To add additional tags or to fine-tune existing ones before
you export, you can use the Tags panel in InDesign. The Structure pane (View
> Structure > Show Structure) reflects
the changes.

518
USING INDESIGN
PDF
Last updated 11/16/2011
You can improve the accessibility and reuse of Adobe PDF documents by adding tags to the InDesign document before
you export. If your PDF documents don’t contain tags, Adobe Reader or Acrobat may attempt to automatically tag the
document when the user reads or reflows it, but the results may be disappointing. If you do not get the results you want
in the exported PDF file, you can use tools in Acrobat
6.0 Professional and later to edit the structure of tagged PDF
documents. For the most advanced tools, use Acrobat
9 Professional.
When you apply tags to a document for PDF export, the tags do not control which content is exported to PDF, as is
the case with XML export. Instead, the tags give Acrobat more information about the document’s structural contents.
Advantages of using tags
By applying tags to your document before exporting to PDF, you can do the following:
•Map InDesign paragraph style names to Acrobat tagged Adobe PDF paragraph styles to create a reflowable PDF
file for viewing on handheld devices and other media.
•Mark and hide printing artifacts, text, and images so that they won’t appear when reflowed in Acrobat. For example,
if you tag a page item as Artifact, the page item will not be displayed when you reflow the contents of a tagged Adobe
PDF document on a handheld device, a small display, or a monitor at a large magnification.
•Add alternative text to figures so that the text can be read aloud to the visually impaired with screen-reading
software.
•Replace graphic letters, such as ornate drop-caps, with readable letters.
•Provide a title for a set of articles, or group stories and figures into articles.
•Order stories and figures to establish a reading order.
•Recognize tables, formatted lists, and tables of contents. Recognize which content blocks belong to the different
stories.
•Include text formatting information such as Unicode values of characters, spacing between words, and the
recognition of soft and hard hyphens.
More Help topics
“Structure pane overview” on page 586
“Tag items” on page 582
How tags affect reuse and accessibility
The content of an Adobe PDF document can be reused for other purposes. For example, you might create an Adobe
PDF file of a report with text, tables, and images, and then use various formats to distribute it: for printing or reading
on a full-sized monitor, for viewing on a handheld device, for reading out loud by a screen reader, and for direct access
through a web browser as HTML pages. The ease and reliability with which you can reuse the content depends on the
underlying logical structure of the document.
To make sure that your Adobe PDF documents can be reused and accessed reliably, you must add tags to them.
Tagging adds an underlying organizational structure, or logical structure tree, to the document. The logical structure
tree refers to the organization of the document’s content, such as title page, chapters, sections, and subsection. It can
indicate the precise reading order and improve navigation—particularly for longer, more complex documents—
without changing the appearance of the PDF document.
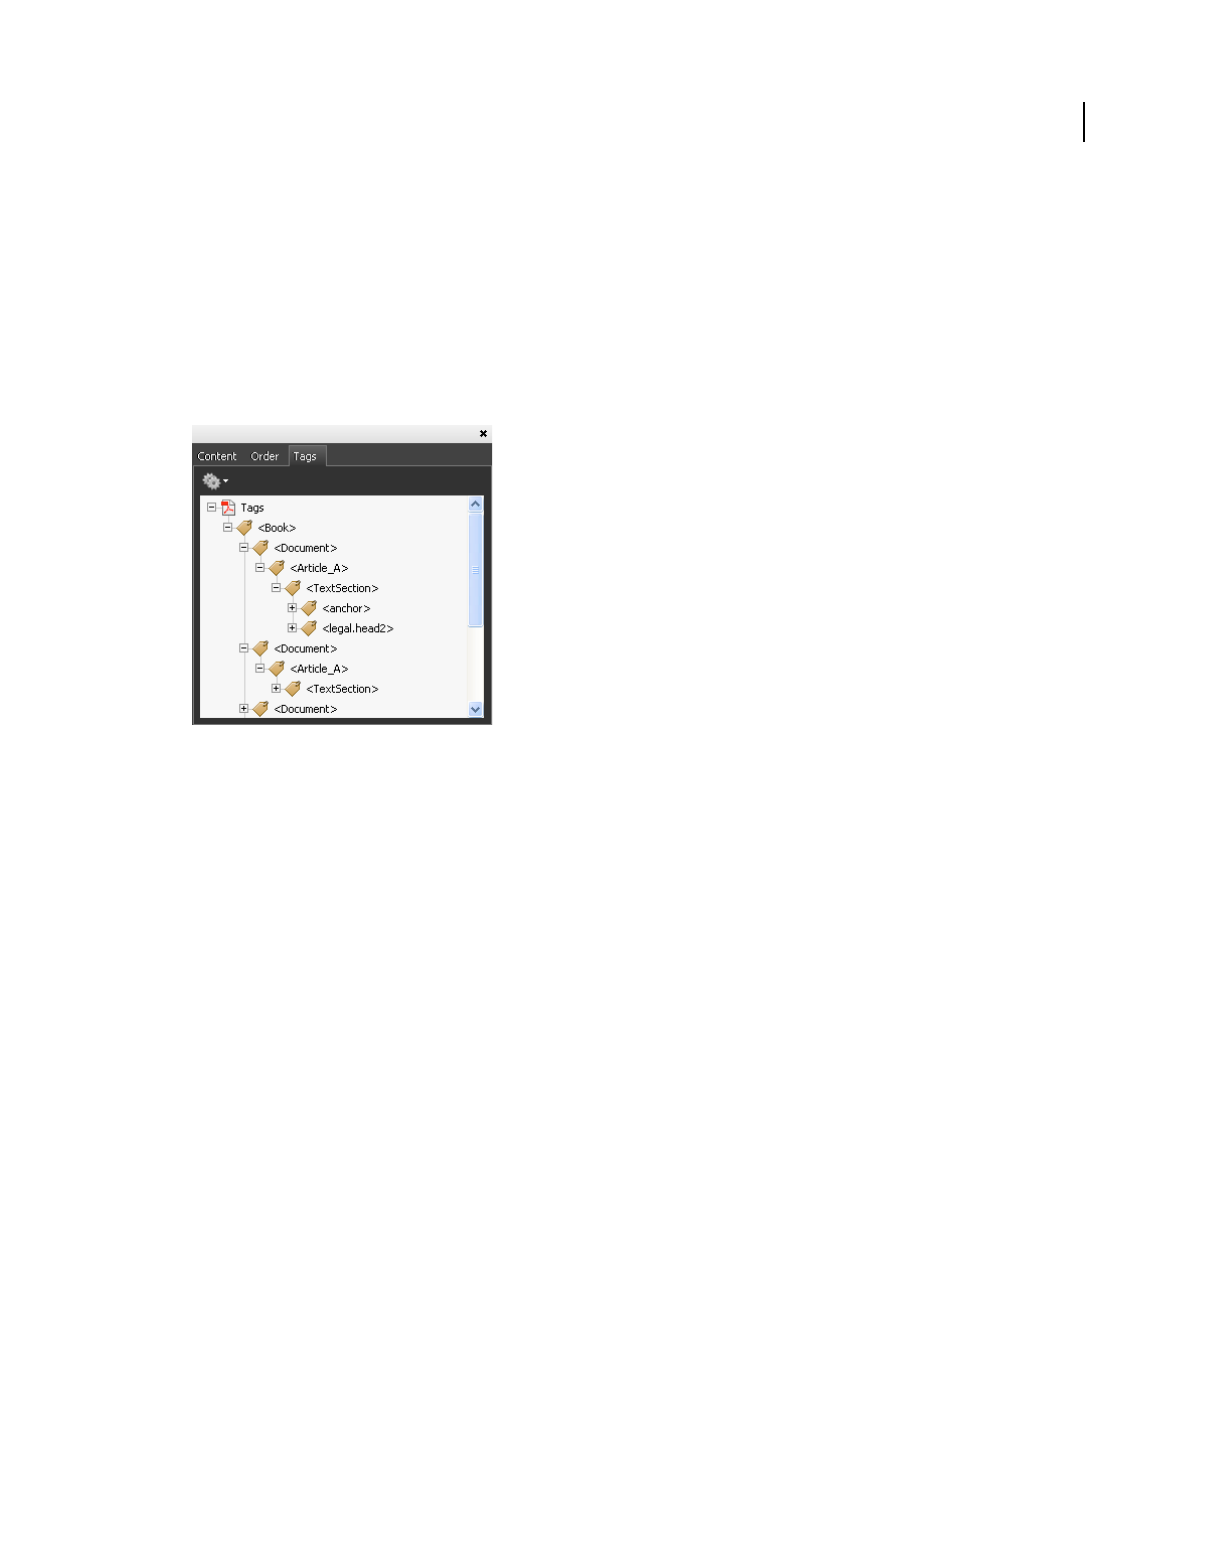
519
USING INDESIGN
PDF
Last updated 11/16/2011
For people who are not able to see or decode the visual appearance of documents, assistive technology can access the
content of the document reliably by using the logical structure tree. Most assistive technology depends on this
structure to convey the meaning of content and images in an alternative format, such as sound. In an untagged
document, no such structure exists, and Acrobat must infer a structure based on the reading order choices in the
preferences. This method is unreliable and often results in page items read in the wrong order or not read at all.
The tags appear on the Tags tab in Acrobat 6.0 and later, where they are nested according to the relationship
definitions for the tagged elements. You cannot edit tags in Acrobat Standard. If your work requires you to work
directly with tags, you should upgrade to Acrobat
9 Professional. For more information, see Acrobat Help.
Logical structure tree on the Tags tab in Acrobat 9
Note: Tags used in Adobe PDF files can be compared to tags in HTML and XML files. To learn more about basic tagging
concepts, see any of the many references and text books available in bookstores, in libraries, and on the Internet.
Understanding and optimizing reflow
You can reflow a PDF document to read it on handheld devices, smaller displays, or standard monitors at large
magnifications, without having to scroll horizontally to read each line.
When you reflow an Adobe PDF document, some content carries into the reflowed document and some doesn’t. In
most cases, only readable text reflows into the reflowed document. Readable text includes articles, paragraphs, tables,
images, and formatted lists. Text that doesn’t reflow includes forms, comments, digital signature fields, and page
artifacts, such as page numbers, headers, and footers. Pages that contain both readable text and form or digital
signature fields don’t reflow. Vertical text reflows horizontally.
As an author, you can optimize your PDF documents for reflow by tagging them. Tagging ensures that text blocks
reflow and that content follows the appropriate sequences, so readers can follow a story that spans different pages and
columns without other stories interrupting the flow. The reading order is defined by the structure tree, which you can
change in the Structure pane.
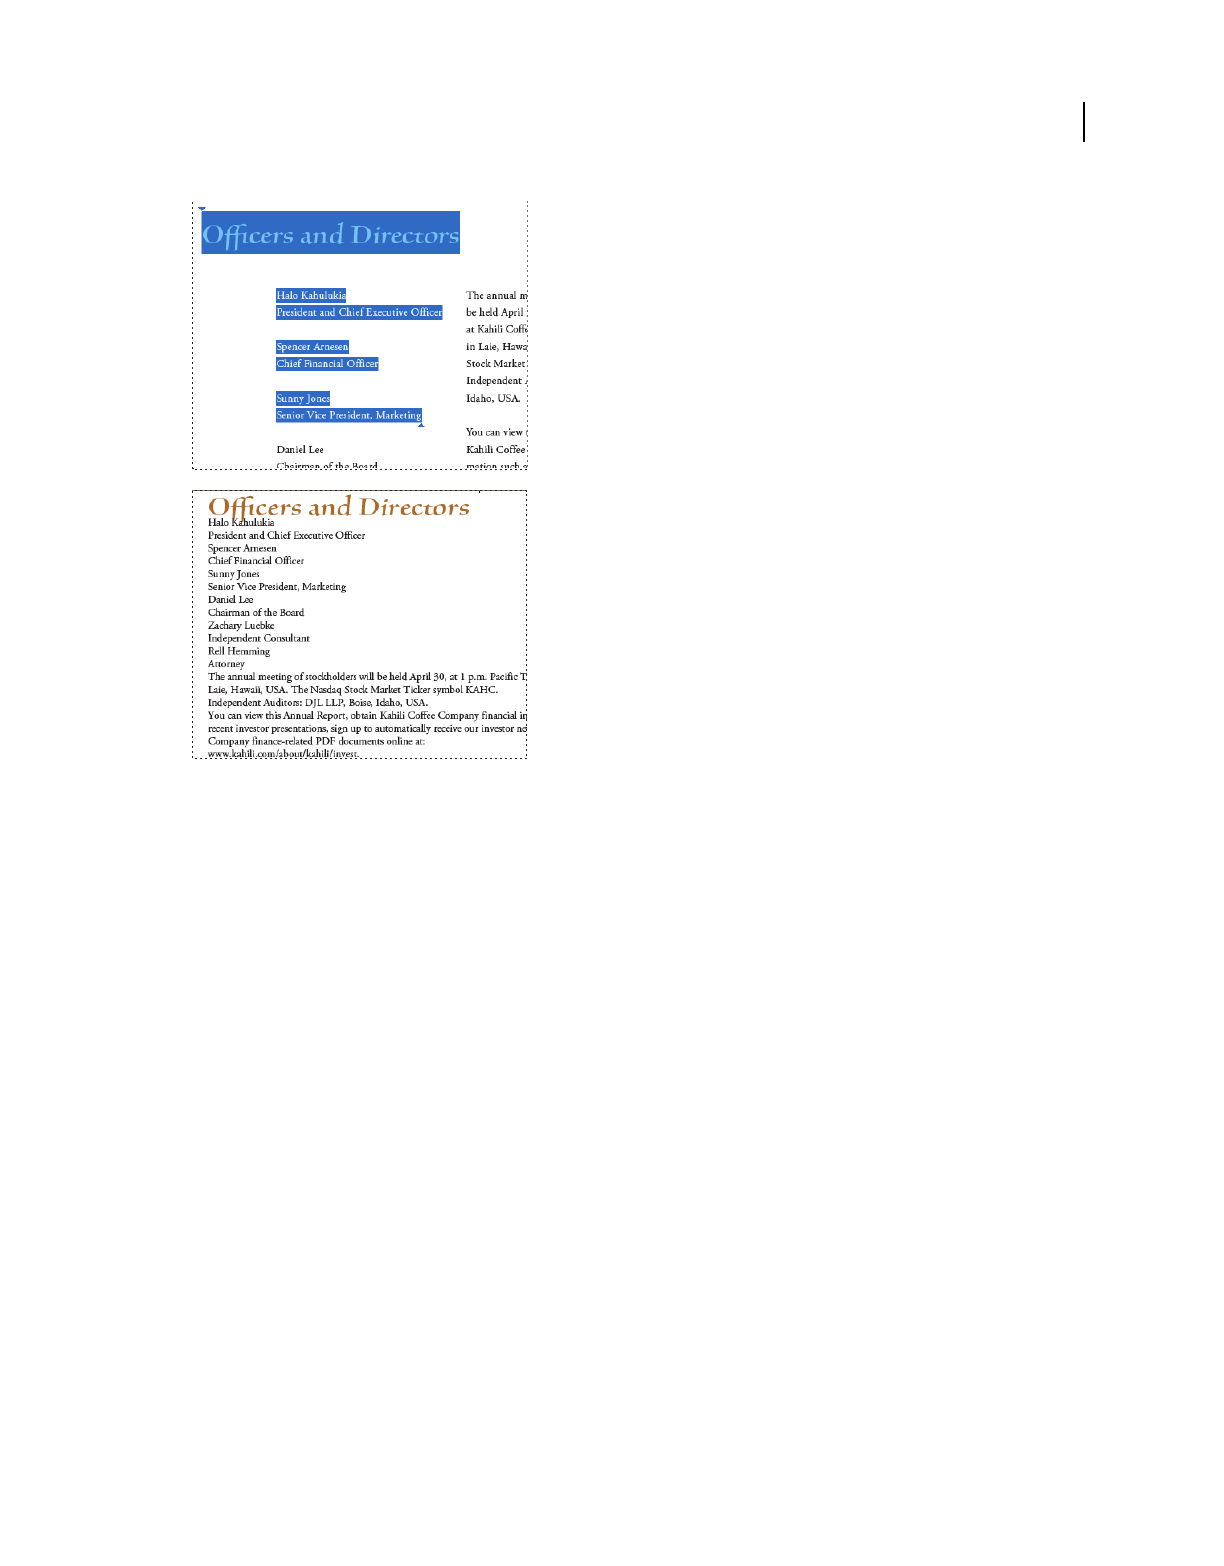
520
USING INDESIGN
PDF
Last updated 11/16/2011
Headings and columns (top) reflow in a logical reading order (bottom).
More Help topics
“Rearrange structured elements” on page 588
Tag page items
You can tag text frames and graphics automatically or manually. After you tag page items, you can use the Structure
pane to change the order of your page by dragging elements to a new location within the hierarchy. If you change the
order of the elements in the Structure pane, these changes are passed on to the Adobe PDF file. The order of the
elements becomes useful when the PDF file is saved from Acrobat as an HTML or XML file. The order is also useful
when you export an InDesign document for Dreamweaver (XHTML) or Digital Editions (EPUB) format.
More Help topics
“Structure pane overview” on page 586
“Tagging content for XML” on page 581
Tag page items automatically
When you choose the Add Untagged Items command, InDesign adds tags to the Tags panel, and applies the Story and
Figure tags to certain untagged page items. The Story tag is applied to any untagged text frames, and the Figure tag is
applied to any untagged graphics. You can then manually apply other tags to sections of text. However, automatically
tagging page items does not guarantee that the items will be structured accordingly in the exported PDF file.
1Choose Window > Utilities > Tags to display the Tags panel.
2Choose View > Structure > Show Structure to display the Structure pane, to the left of the Document window.
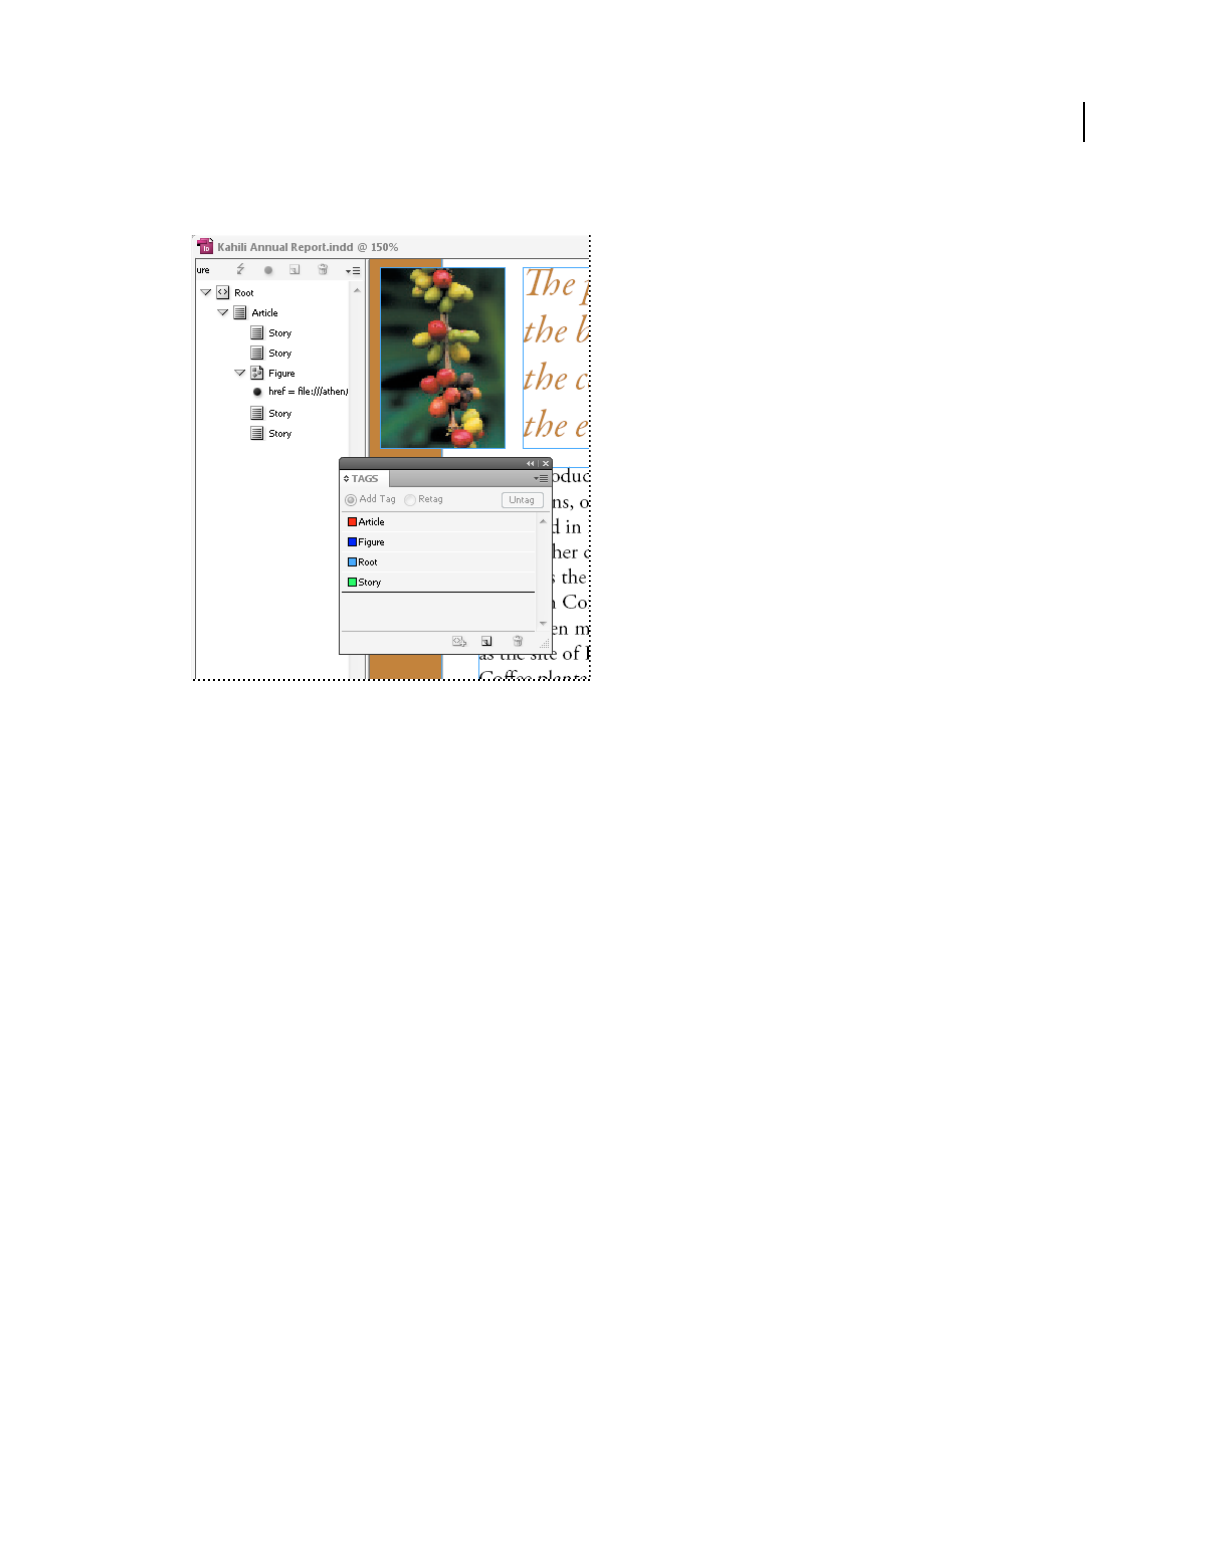
521
USING INDESIGN
PDF
Last updated 11/16/2011
3Choose Add Untagged Items from the Structure pane menu.
Tags in the Structure pane and Tags panel
Tag page items manually
1Choose Window > Utilities > Tags to display the Tags panel.
2Choose View > Structure > Show Structure to display the Structure pane, to the left of the Document window.
3Choose Add Untagged Items from the Structure pane menu.
4Select a page item in the document.
5Select a tag in the Tags panel. Note the following suggested uses for certain imported tags:
Artifact The Artifact tag lets you hide page items, such as page numbers or unimportant objects, when viewing the
exported PDF file in Reflow view, which displays only tagged items; see your Adobe Acrobat documentation. This is
especially useful for viewing PDF files on a handheld device or in other PDF readers.
Cell Use this tag for table cells.
Figure Use this tag for placed graphics. The Figure tag is applied to all untagged graphics placed in your document
when you choose Add Untagged Items.
Paragraph tags (P, H, H1–H6) These tags have no effect on the exported PDF text when viewed in Reflow view.
However, they can be useful in some situations when exporting a PDF file to HTML format.
Story Use this tag for stories. The Story tag is applied to all untagged text frames when you choose Add Untagged
Items. For example, suppose you have an InDesign document formatted with three paragraph styles: Head1, Head2,
and Body. First, map these paragraph styles to the H1, H2, and P tags, respectively. Next, export to PDF. Finally, when
you export the PDF document to HTML or XML in Acrobat, the paragraphs tagged as H1, H2, and P will display
appropriately (such as with large bold letters in H1) in a web browser. For information on exporting the PDF
document to
HTML or XML, see your Adobe Acrobat documentation.
More Help topics
“Tag text in tables” on page 584

522
USING INDESIGN
PDF
Last updated 11/16/2011
Label graphics for use with screen-reader software
If you want screen readers to describe graphical elements that illustrate important concepts in the document, you must
provide the description. Figures and multimedia aren’t recognized or read by a screen reader unless you add alternate
text to the tag properties.
The Alt text attribute lets you create alternate text that can be read in lieu of viewing an illustration. ActualText is
similar to Alt text in that it appears in lieu of an image. The ActualText attribute lets you substitute an image that is
part of a word, such as when a fancy image is used for a drop cap. In this example, the ActualText attribute allows the
drop cap letter to be read as part of the word.
When you export to Adobe PDF, the Alt text and Actual Text attribute values are stored in the PDF file and can be
viewed in Acrobat
6.0 and later. This alternate text information can then be used when the PDF file is saved from
Acrobat as an HTML or XML file. For more information, see your Adobe Acrobat documentation.
1If necessary, choose View > Structure > Show Structure to display the Structure pane, and choose Window >
Utilities > Tags to display the Tags panel.
2Choose Add Untagged Items from the Structure pane menu.
3To make sure the image is tagged as Figure, select the image, and then select Figure in the Tags panel.
4Select the Figure element in the Structure pane, and then choose New Attribute from the Structure pane menu.
5For Name, type either Alt or ActualText (this feature is case-sensitive).
6For Value, type the text that will appear instead of the image.
Group page items into an Article element
Use the Structure pane to logically group page items into an Article element. For example, if a set of stories spans
multiple pages, you can create an umbrella element that will contain these stories in a single group. These umbrella
elements are called structural elements. You can also name your grouped articles.
Note: You cannot tag grouped page items.
•To group page items, select New Element from the Structure pane menu, select the Article element in the Tags
panel, and then drag page elements underneath it in the Structure pane.
•To name grouped items, right-click the Article element in the Structure pane and choose New Attribute. For Name,
type Title. For Value, type the name of the article you want to use.
More Help topics
“Structure pane overview” on page 586
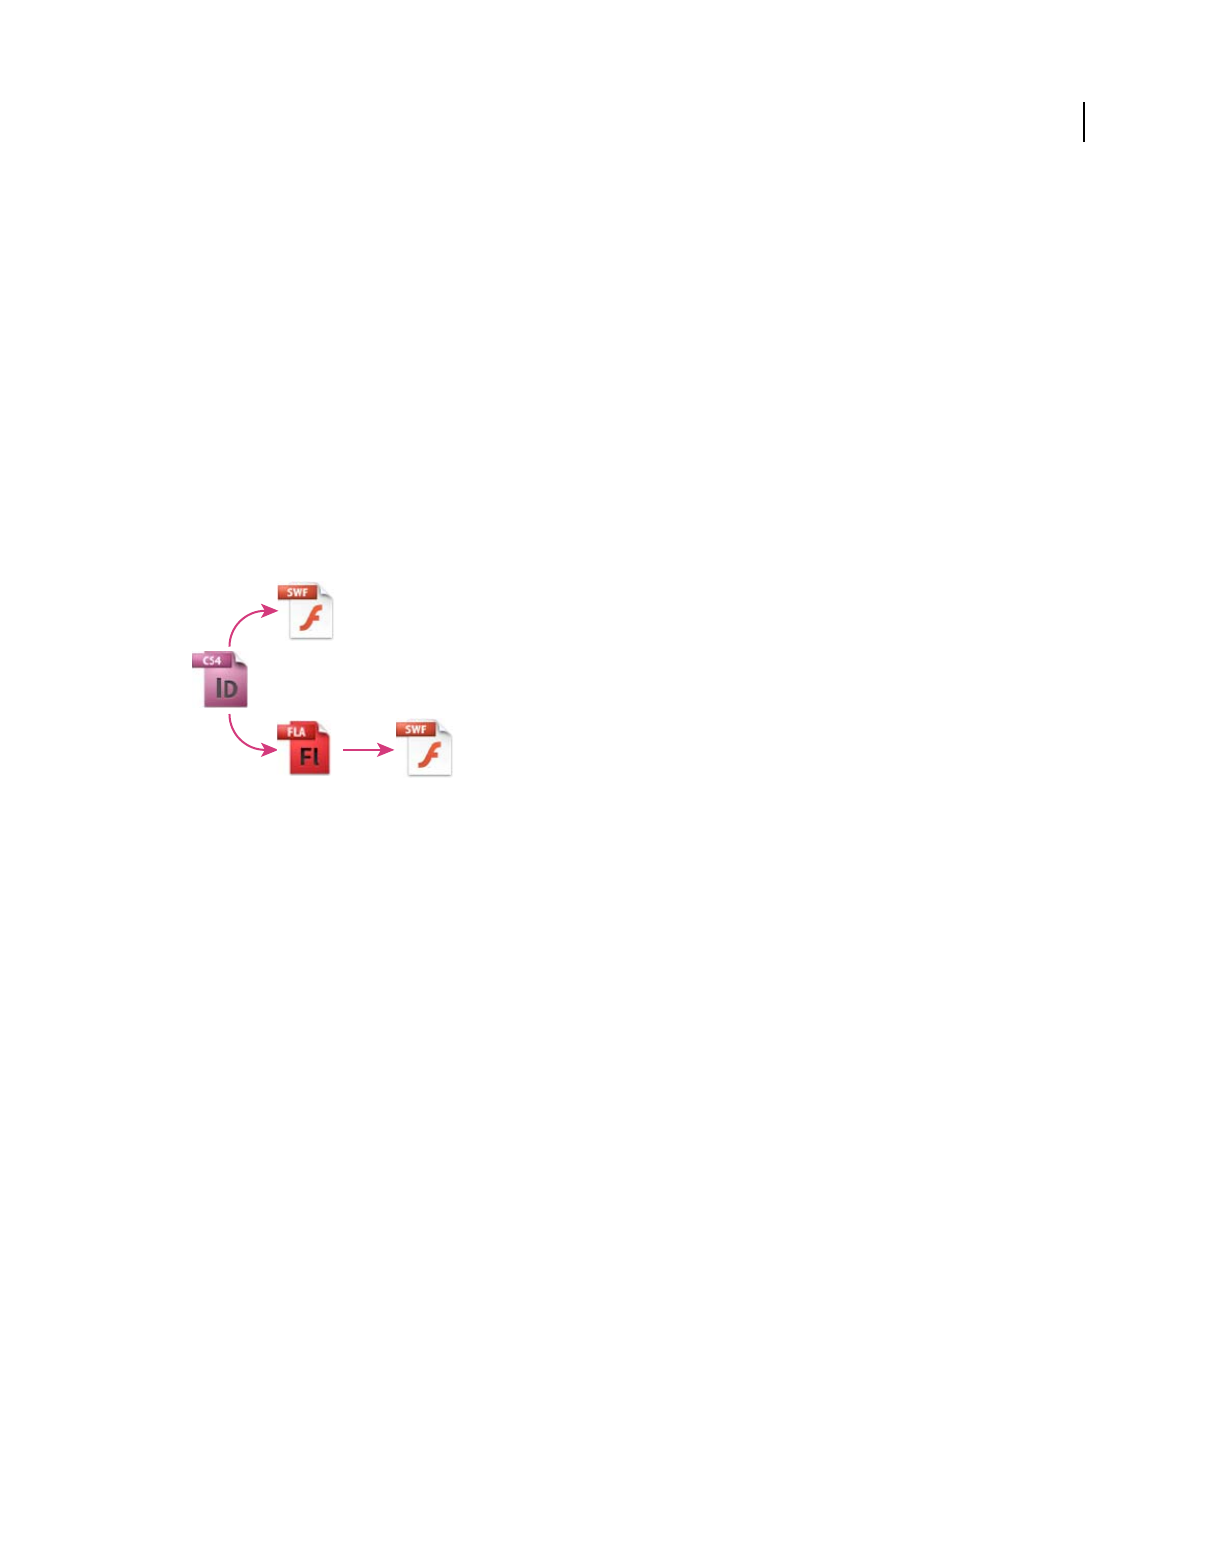
523
Last updated 11/16/2011
Chapter 18: Interactive documents
Interactive web documents for Flash
To create slideshow-type content that can be played in Flash Player, you can export to either SWF or FLA. The main
difference is that SWF files are ready to be viewed and cannot be edited, whereas FLA files must be edited in Adobe
Flash Professional to be viewed in Adobe Flash Player.
SWF An exported SWF file is ready for viewing in Adobe Flash Player and may include interactive elements such as
page transitions, hyperlinks, movies, sound clips, animation, and navigation buttons.
FLA An exported FLA file includes only some interactive elements. The FLA file can be opened in Flash Pro, where
you or a Flash developer can add advanced effects before exporting to SWF.
Export to Flash
A. Export directly to SWF B. Export to FLA for editing in Flash Professional
For a video tutorial about creating interactive documents, see www.adobe.com/go/lrvid5152_id_en.
Create interactive SWF (Flash) files for the web
When you export to SWF, you create an interactive file that’s ready for viewing in Adobe Flash Player or in a web
browser. The SWF file can include buttons, page transitions, movies and audio files, animation, and hyperlinks added
in InDesign. Exporting to SWF is a good way to create an interactive slideshow, or a flip book, based on an InDesign
document.
If you want to edit the document in Flash Pro before creating the SWF file, export to FLA instead of SWF. See “Create
FLA files for the web” on page 526.
A
B
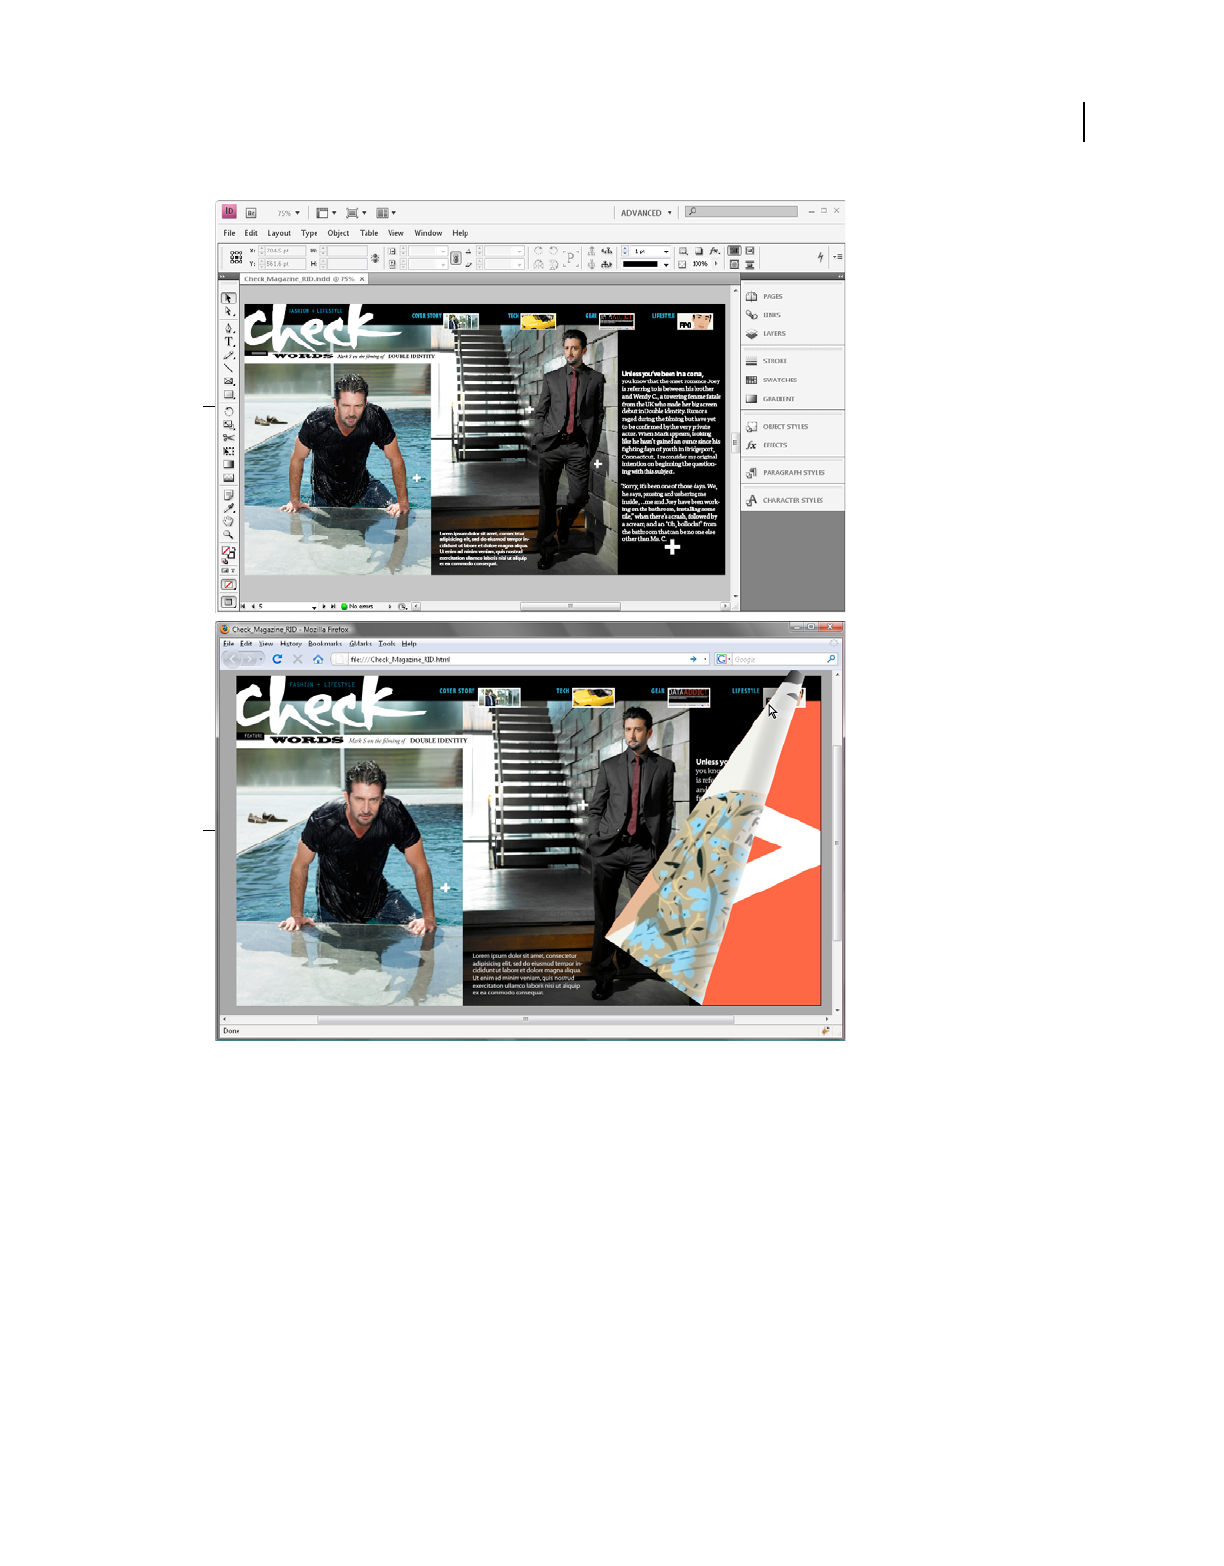
524
USING INDESIGN
Interactive documents
Last updated 11/16/2011
SWF export
A. Document in InDesign before SWF export B. Interactive SWF file in web browser
For a video tutorial introduction about creating interactive documents for SWF output, see
www.adobe.com/go/lrvid5152_id_en.
1Create or edit the InDesign document to prepare it for Flash export. For more detailed information on setting up
the document for export, see “Flash export issues” on page 528.
•Add navigation buttons that allow users to move from page to page in the exported SWF file. You can create a
buttons by drawing an object and converting it to a button using the Buttons panel (choose Window >
Interactive > Buttons). You can also use the Sample Buttons panel to drag predefined navigation buttons into
your document. See “Create buttons” on page 558.
•Use the Page Transitions panel (choose Window > Interactive > Page Transitions) to add page transitions such
as wipes or dissolves. When you export to SWF, you can also select the Include Interactive Page Curl option,
which lets viewers drag a page corner to turn the page.
A
B

525
USING INDESIGN
Interactive documents
Last updated 11/16/2011
•Use the Animation panel (choose Window > Interactive > Animation) to add motion presets. See “Animation”
on page 551.
2To export the document to SWF format, choose File > Export. Choose Flash Player (SWF) from the Save As Type
(Windows) or Format (Mac OS) menu, and click Save.
3In the Export SWF dialog box, specify the options, and then click OK. See “SWF export options” on page 525.
When you export a SWF file, separate HTML and SWF files are created. If the SWF file includes movies or sound clips,
a Resources folder is also created. To hand off or upload the files to the web, make sure you send all the assets.
SWF export options
The following options appear on the General and Advanced tabs of the Export SWF dialog box.
Export Indicate whether the current selection, all pages in the document, or a page range is included. Choosing
Selection is especially useful if you want to save the exported SWF file for use in an exported PDF file. If you select
Range, specify a page range, such as 1-7, 9 to print pages 1 through 7 and 9. See “Specifying pages to print” on page 600.
Generate HTML File Select this option to generate an HTML page that plays back the SWF file. This option is especially
useful for quickly previewing the SWF file in your web browser.
View SWF After Exporting Select this option to play back the SWF file in your default web browser. This option is
available only if you generate an HTML file.
Size (pixels) Specify whether the SWF file is scaled by a percentage, fit to a monitor size you specify, or sized according
to the width and height you specify.
Background Specify whether the background of your SWF is transparent or if it uses the current Paper color from the
Swatches panel. Selecting Transparent disables the Page Transitions and Interactive Page Curl options.
Interactivity And Media Select Include All to allow movies, sounds, buttons, and animations to be interactive in the
exported SWF file. Select Appearance Only to include the normal state of buttons and the video posters as static
elements. If Appearance Only is selected, animations export as they appear in the layout at the time of export.
Appearance Only is selected if you choose Flatten Transparency in the Advanced panel.
Page Transitions Specify one page transition to apply to all pages during export. If you use the Page Transitions panel
to specify transitions, choose the From Document option to use those settings.
Include Interactive Page Curl If this option is selected, users playing the SWF file can drag a corner of the page to turn
it, giving the appearance of turning the page in a real book.
Frame Rate Higher frame rates create smoother animations but may increase the file size. Changing the frame rate
does not affect playback duration.
Text Specify how InDesign text is output. Choose Flash Classic Text to output searchable text that results in the
smallest file size. Choose Convert To Outlines to output the text as a series of smooth straight lines, like converting
text to outlines. Choose Convert To Pixels to output the text in a bitmap image. Text converted to pixels may appear
jagged when zoomed in on.
Rasterize Pages This option converts all InDesign page items to bitmap. Selecting this option results in a larger SWF
file, and page items may appear jagged when zoomed in on.
Flatten Transparency This option removes live transparency from the SWF and preserves the transparency
appearance. However, all interactivity is removed from the exported SWF file if this option is selected.
Compression Choose Automatic to let InDesign determine the best quality for color and grayscale images. For most
files, this option produces satisfactory results. Choosing JPEG (Lossy) is suitable for grayscale or color images. JPEG
compression is lossy, which means that it removes image data and possibly reduces image quality. However, it attempts

526
USING INDESIGN
Interactive documents
Last updated 11/16/2011
to reduce file size with a minimal loss of information. Because JPEG compression eliminates data, it can achieve much
smaller files sizes. Choosing PNG (Lossless) exports the file without lossy compression.
If you notice a loss of image quality in transparent images when you export to SWF, choose PNG (Lossless) to improve
the quality.
JPEG Quality Specifies the amount of detail in the exported image. The higher the quality, the larger the file size. This
option is dimmed if you choose PNG (Lossless) for Compression.
Resolution Specify the resolution of bitmap images in the exported SWF. Choosing a high resolution is especially
important to allow viewers to zoom in on pixel-based content within your exported SWF. Choosing a high resolution
can significantly increase the file size.
More Help topics
“Flash export issues” on page 528
Export to Flash video
Create FLA files for the web
When you export your InDesign document to FLA file format, you can open the file in Adobe Flash® CS5 Professional
to edit the contents. Exporting to FLA in InDesign CS5 format replaces XFL export in InDesign CS4. Use the Flash
authoring environment to edit or add video, audio, animation, and complex interactivity.
If you want to export the InDesign document directly to a format that can be opened directly in a web browser, use the
SWF format instead of FLA. See “Create interactive SWF (Flash) files for the web” on page 523.
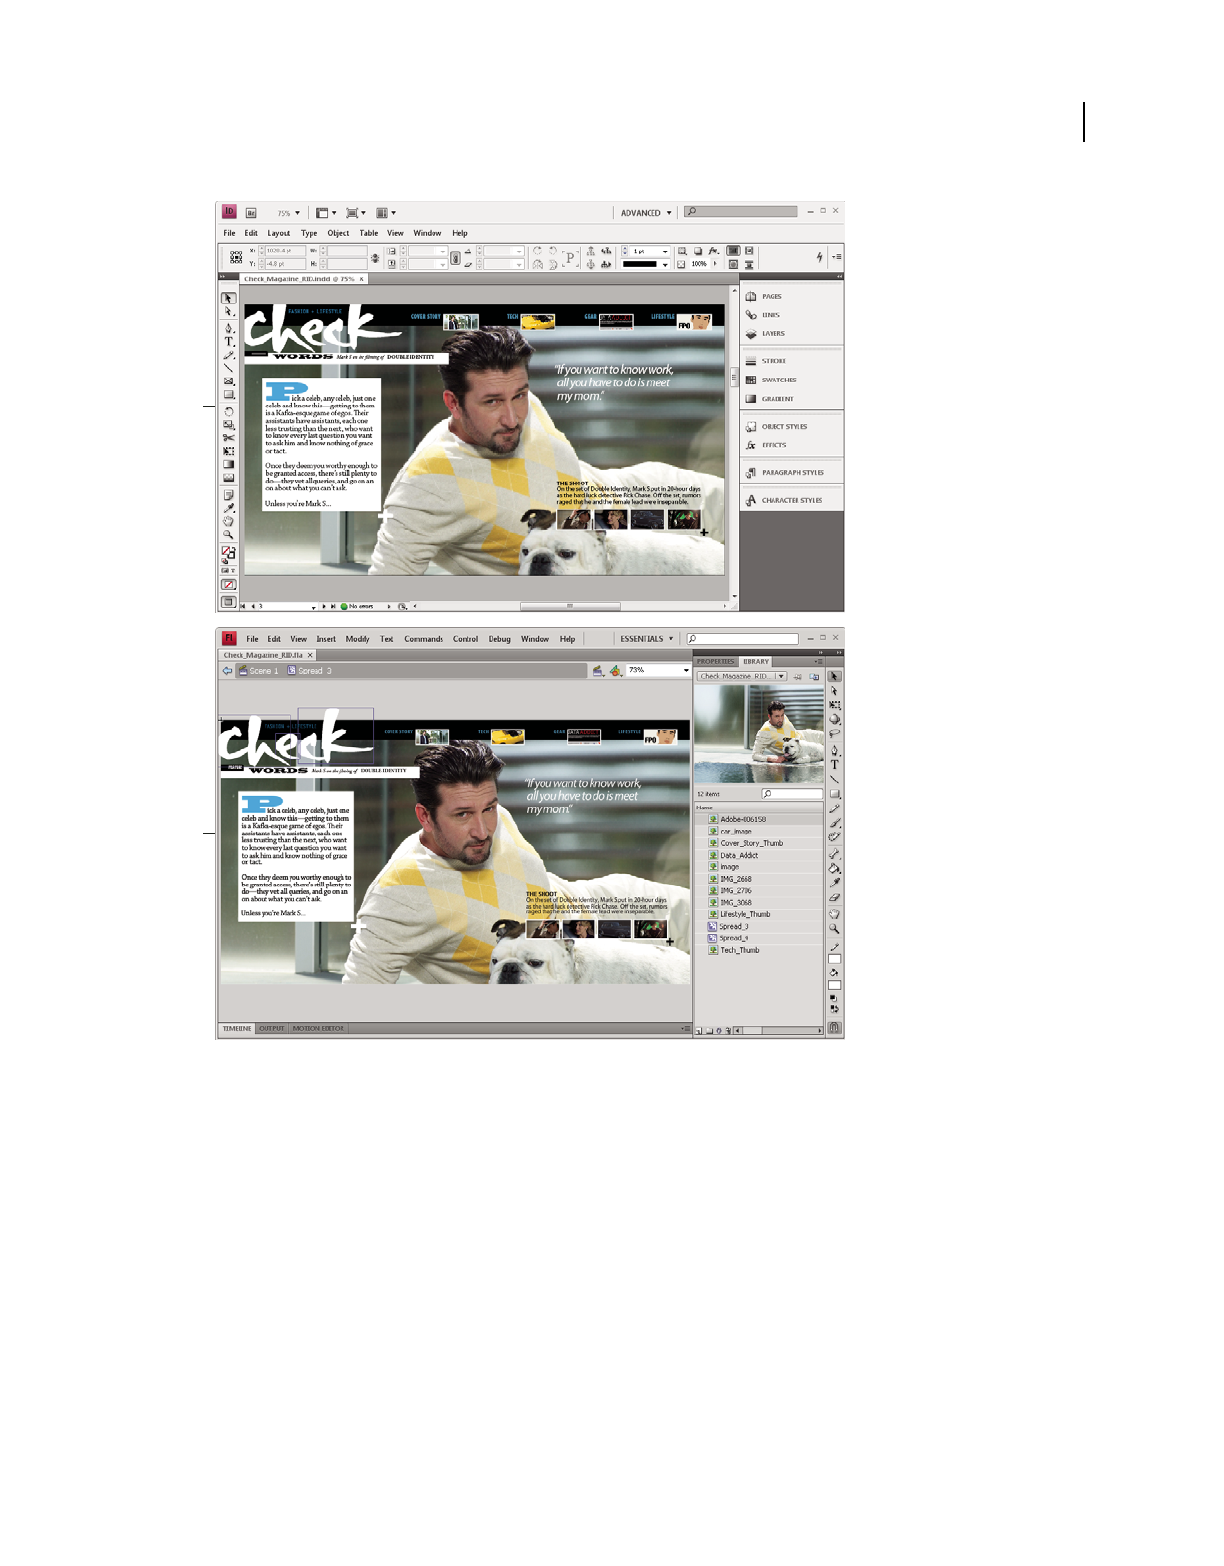
527
USING INDESIGN
Interactive documents
Last updated 11/16/2011
FLA export
A. Document in InDesign before FLA export B. FLA file opened in Flash Pro
1Create or edit the InDesign document to prepare it for Flash export. For more detailed information on setting up
the document for export, see “Flash export issues” on page 528.
2To export the document to FLA format, choose File > Export. Choose Flash CS5 Professional (FLA) from the Save
As Type (Windows) or Format (Mac OS) menu, and click Save.
3In the Export Flash CS5 Professional (FLA) dialog box, specify the options, and then click OK. For information on
export options, see “FLA export options” on page 528.
4Open the exported FLA file in Flash Professional.
For a video tutorial on FLA export options, see www.adobe.com/go/lrvid5154_id_en.
More Help topics
“FLA export options” on page 528
A
B

528
USING INDESIGN
Interactive documents
Last updated 11/16/2011
FLA export options
The following options appear in the Export Flash CS5 Professional (FLA) dialog box.
Export Indicate whether the current selection, all pages in the document, or a page range is included. If you select
Range, specify a page range, such as 1-7, 9 to print pages 1 through 7 and 9. See “Specifying pages to print” on page 600.
Rasterize Pages This option converts all InDesign page items to bitmap. Selecting this option results in a larger FLA
file, and page items become jagged when zoomed in on.
Flatten Transparency Selecting this option flattens all objects with transparency. Flattened objects may be difficult to
animate in Adobe Flash Pro.
Size (Pixels) Specify whether the FLA file is scaled by a percentage, fit to a monitor size you specify, or sized according
to a width and height you specify.
Interactivity And Media Select Include All to allow movies, sounds, buttons, and animations to be included in the
exported FLA file. If the document includes a multi-state object, it is converted into a movie clip symbol in which each
state appears on its own frame in the timeline.
Select Appearance Only to include the normal state of buttons and the video posters as static elements. If Appearance
Only is selected, animations export as they appear in the layout at the time of export. Appearance Only is selected if
you choose Flatten Transparency.
Text Specify how InDesign text is output. Choose Flash TLF Text to take advantage of the rich set of Text Layout
Framework attributes in Flash Professional. If this option is selected, select Insert Dictionary Hyphenation Points to
allow hyphenation. Choose Flash Classic Text to output searchable text that results in a small file size. Choose Convert
To Outlines to output the text as a series of smooth straight lines, like converting text to outlines. Choose Convert To
Pixels to output the text in a bitmap image. Text converted to pixels may appear jagged when zoomed in on.
Compression Choose Automatic to let InDesign determine the best quality for color and grayscale images. For most
files, this option produces satisfactory results. Choosing JPEG (Lossy) is suitable for grayscale or color images. JPEG
compression is lossy, which means that it removes image data and possibly reduces image quality. However, it attempts
to reduce file size with a minimal loss of information. Because JPEG compression eliminates data, it can achieve much
smaller files sizes. Choosing PNG (Lossless) exports the file without lossy compression.
JPEG Quality Specifies the amount of detail in the exported image. The higher the quality, the larger the file size. This
option is dimmed if you choose PNG (Lossless) for Compression.
Resolution Specify the resolution of bitmap images in the exported FLA file. Choosing a high resolution is especially
important to allow viewers to zoom in on pixel-based content. Choosing a high resolution can significantly increase
the file size.
More Help topics
“Flash export issues” on page 528
Flash export issues
Consider the following factors when designing your InDesign document for SWF or FLA output.
Document setup issues
How InDesign pages are converted When you export to SWF or FLA, InDesign spreads become separate clips in a
timeline, like slides in a slideshow. Each spread is mapped to a new keyframe. In Flash Player, you advance through
the spreads of the exported document by pressing arrow keys or clicking interactive buttons.

529
USING INDESIGN
Interactive documents
Last updated 11/16/2011
When creating a document intended for the web, choose Web from the Intent menu in the New Document dialog box.
Page size When you create a document, you can choose a specific resolution, such as 800 x 600, from the Page Size
menu in the New Document dialog box. During export, you can also adjust the scale or resolution of the exported SWF
or FLA file.
Interactivity features
Buttons, page transitions, hyperlinks, animation, and media files can be included in exported SWF and FLA files.
Buttons For buttons in an exported SWF or FLA file, the Next Page and Previous Page actions are especially useful
controls for playback in Flash Player. However, some actions that work in interactive PDF files have no effect in Flash
Player. When you choose an action in the Buttons panel, do not select an option from the PDF Only section.
You can add navigation buttons that are preformatted with Go To Next Page and Go To Previous Page actions.
Choose Sample Buttons from the Buttons panel menu. See “Add a button from the Sample Buttons panel” on
page 559.
Page Transitions All page transitions work well in Flash Player. In addition to page transitions that appear when you
turn the page, you can add include an interactive page curl during export that lets you drag corners of pages to turn
them.
Hyperlinks Create links to websites or to other pages in the document. Hyperlinks are broken in FLA files.
Movies and sound clips Movies and sound clips are included in an exported SWF file if they’re in a supported format,
such as SWF, FLV, F4V, and MP4 for movies and MP3 for sound clips.
When you export to FLA, only the poster image is included in the FLA file. Supported media files appear in a resources
folder saved in the same location as the exported FLA file.
Conversion issues
Color SWF and FLA files use RGB color. When a document is exported to SWF or FLA, InDesign converts all color
spaces (such as CMYK and LAB) to sRGB. InDesign converts spot colors to equivalent RGB process colors.
To avoid unwanted color changes in artwork with text with transparency, choose Edit > Transparency Blend Space >
Document RGB. To avoid unwanted color changes in images with transparency, avoid using a lossy compression
during export.
Text When exporting to SWF or FLA, you can determine whether text is output as Flash text or converted to outlines
or pixels. Text exported as Flash Classic Text remains fully editable when the FLA file is opened in Adobe Flash CS5
Professional and can be searched in web browsers when saved as SWF files.
Images When you export images to SWF or FLA, you can change image compression, JPEG quality, and resolution
settings during export.
When you export images to FLA, an image placed multiple times in your InDesign document is saved as a single image
asset with a shared location. Note that a large number of vector images in the InDesign document may cause
performance problems in the exported file.
To reduce file size, place repeating images on master pages, and avoid copying and pasting images. If the same image
is placed multiple times in the document and not transformed or cropped, only one copy of the file is exported in the
FLA file. Images that are copied and pasted are treated as separate objects.
By default, a placed Illustrator file is treated as a single image in the FLA file, whereas an Illustrator file that’s copied
and pasted generates many individual objects. For best results, place the Illustrator image as a PDF file instead of
copying and pasting from Illustrator. Copying and pasting results in multiple editable paths.

530
USING INDESIGN
Interactive documents
Last updated 11/16/2011
You can change preference options to make sure that Illustrator objects are pasted as one object instead of a collection
of small vectors. In Illustrator File Handling & Clipboard preferences, select PDF and deselect AICB (No
Transparency Support). In InDesign Clipboard Handling preferences, select both Prefer PDF When Pasting and Copy
PDF To Clipboard.
Transparency Before exporting to SWF, make sure that transparent objects do not overlap any interactive element,
such as a button or hyperlink. If an object with transparency overlaps an interactive element, the interactivity may be
lost during export. You may want to flatten transparency before exporting to FLA.
In some instances, choosing a lossy compression reduces the quality of images with transparency. When exporting,
choose PNG (Lossless) to improve the quality.
3D attributes 3D attributes are not supported in the exported SWF and FLA files.
Dynamic PDF documents
Creating a dynamic PDF document is a good way to create an interactive slideshow. You can create interactive
documents with buttons, movies and sound clips, hyperlinks, bookmarks, and page transitions. You can also set up
documents in InDesign that can be converted to forms in Acrobat.
Create interactive documents for PDF
You can export Adobe PDF documents that include the following interactive features.
Bookmarks Bookmarks you create in the InDesign document appear in the Bookmarks tab on the left side of the
Adobe Acrobat or Adobe Reader window. Each bookmark jumps to a page, text, or graphic in the exported PDF file.
See “Bookmarks” on page 533.
Movies and sound clips You can add movies and sound clips to a document, or you can link to streaming video files
on the Internet. These movies and sound clips can be played back in the exported PDF file. See “Movies and sounds”
on page 548.
Hyperlinks In an exported PDF document, clicking a hyperlink jumps to another location in the same document, to a
different document, or to a website. See “Hyperlinks” on page 535.
Cross-references A cross-reference refers readers from one part of your document to another in the exported PDF file.
Cross-references are especially useful in user guides and reference manuals. When a document with cross-references
is exported to PDF, the cross-references act as interactive hyperlinks. See “Cross-references” on page 541.
Page transitions Page transitions apply a decorative effect, such as a dissolve or wipe, when you turn the page in the
exported PDF while in Full Screen Mode. See “Page transitions” on page 556.
1Choose File > Export.
2Specify a name and location for the file.
3For Save As Type (Windows) or Format (Mac OS), choose Adobe PDF (Interactive), and then click Save.
4Specify options in the Export To Interactive PDF dialog box, and then click OK.
More Help topics
“Exporting to Adobe PDF” on page 501

531
USING INDESIGN
Interactive documents
Last updated 11/16/2011
Export to interactive PDF options
The following options appear in the Export To Interactive PDF dialog box.
Pages Indicate whether all pages in the document, or a page range is included. If you select Range, specify a page range,
such as 1-7, 9 to print pages 1 through 7 and 9. See “Specifying pages to print” on page 600.
View After Exporting Opens the newly-created PDF file in the default PDF viewing application.
Embed Page Thumbnails Creates a thumbnail preview for each page being exported, or one thumbnail for each spread
if the Spreads option is selected. The thumbnail is displayed in the InDesign Open or Place dialog boxes. Adding
thumbnails increases the PDF file size.
Create Acrobat Layers Saves each InDesign layer as an Acrobat layer within the PDF. The layers are fully navigable,
which allows users of Acrobat
6.0 and later to generate multiple versions of the file from a single PDF.
Create Tagged PDF During export, automatically tags elements in the story based on a subset of the Acrobat tags that
InDesign supports. This includes recognition of paragraphs, basic text formatting, lists, and tables. (You can also insert
and adjust tags in the document before exporting to PDF. See “Adding structure to PDFs” on page 517.)
View Initial view settings of the PDF when it’s opened.
Layout Initial layout of the PDF when it’s opened.
Presentation Select Opens In Full Screen Mode to display the PDF in Adobe Acrobat or Adobe Reader without menus
or panels displayed. To advance the pages automatically, select Flip Pages Every and specify the number of seconds
between page turns.
Page Transitions Specify one page transition to apply to all pages during export. If you use the Page Transitions panel
to specify transitions, choose the From Document option to use those settings.
Buttons And Media Select Include All to allow movies, sounds, and buttons to be interactive in the exported PDF file.
Select Appearance Only to include the normal state of buttons and the video posters as static elements.
Compression Choose JPEG (Lossy) to remove image data and possibly reduce image quality. However, file size is
reduced with a minimal loss of information. Choose JPEG 2000 (Lossless) to export the file without lossy compression.
Choose Automatic to let InDesign determine the best quality for color and grayscale images.
JPEG Quality Specifies the amount of detail in the exported image. The higher the quality, the larger the file size. This
option is dimmed if you choose JPEG 2000 (Lossless) for Compression.
Resolution Specify the resolution of bitmap images in the exported PDF. Choosing a high resolution is especially
important to allow viewers to zoom in on pixel-based content within your exported PDF. Choosing a high resolution
can significantly increase the file size.
Creating PDF forms
Although InDesign does not provide tools for adding form fields, Adobe Acrobat does. You can create a form in
InDesign that includes placeholders for fields such as radio buttons, check boxes, and text fields. Then you can export
to PDF, and use Acrobat to convert the placeholders into form fields.
1In InDesign, create the document you want to use for the form. Use tables and text boxes to create the placeholders
for the fields.
You can also add interactive buttons in InDesign.
2Export the document to Adobe PDF.

532
USING INDESIGN
Interactive documents
Last updated 11/16/2011
3Start the form wizard to convert the placeholders into form fields. Use the form tools to add and edit the form. For
more information, see the Adobe Acrobat documentation.
•In Acrobat X, choose Tools > Forms > Create to start the form wizard.
•In Adobe Acrobat 9, choose Forms > Start Form Wizard.
Additional Resources
Gabriel Powell provides a video tutorial about creating a PDF form design in InDesign and finishing it in Adobe
Acrobat at InDesign and Acrobat Forms Workflow.
The Acrobat team provides an article on Designing forms for auto field detection in Adobe Acrobat.
Michael Murphy provides a video tutorial about creating forms at Acrobat Friendly Form Design.
Bob Bringhurst provides an article about designing forms at Creating PDF Forms in InDesign.
Preview interactive documents
Use the Preview panel preview interactivity and animation of the current selection, the current spread, or the entire
document. You can resize, dock, or float the Preview panel, or move it to a second monitor.
1Choose Window > Interactive > Preview.
2To preview the interactivity and animation, do any of the following actions:
•Click the Set Preview Selection Mode button to preview the current selection.
•Click the Set Preview Spread Mode button to preview the current spread.
•Click the Set Preview Document Mode button to preview the current document.
3Click the Play Preview button to preview the selection, spread, or document. If necessary, click interactive items
such as buttons in the Preview panel to test them.
If you’re previewing the document, you can click the Go To Previous Page and Go To Next Page arrows at the
bottom of the panel to move to different pages.
If you edit your document, you can refresh the preview by clicking the Play Preview button in the Preview panel.
Preview the document in a web browser
1Choose Test In Browser from the Preview panel menu.
2Click the interactive items in you document to test them.
Edit Preview settings
1Choose Edit Preview Settings from the Preview panel menu.
The Preview Settings dialog box shows the current settings of the Export SWF dialog box.
2Edit the settings as needed. See “SWF export options” on page 525.
Use Presentation Mode
Presentation Mode displays the active InDesign document as a presentation. In Presentation Mode, the application
menu, panels, guides, and frame edges are hidden. The background area has a dark color by default in case your
document size is a different proportion from your current monitor dimensions.
533
USING INDESIGN
Interactive documents
Last updated 11/16/2011
Presentation Mode is a helpful companion feature to the Adobe Connect feature. You can start a web meeting by using
the File > Share My Screen command. Once the screen sharing has started, you can put your InDesign document into
Presentation Mode.
1Choose View > Screen Mode > Presentation.
2Use any of the following keystrokes.
You cannot edit the document in Presentation Mode. However with a dual screen monitor, you can have two windows
open on the same document and put one of them into Presentation Mode. This approach lets you edit the document
in the window set to Normal view and immediately see the results in the window set to Presentation Mode.
More Help topics
“Working with ConnectNow” on page 39
Bookmarks
Create bookmarks for PDF
A bookmark is a type of link with representative text that makes it easier to navigate documents exported as Adobe
PDF. Bookmarks you create in the InDesign document appear in the Bookmarks tab on the left side of the Acrobat or
Adobe Reader window. Each bookmark jumps to a text anchor or a page.
Entries in a generated table of contents are automatically added to the Bookmarks panel. In addition, you can further
customize your document with bookmarks to direct a reader’s attention or make navigation even easier. Bookmarks
can be nested under other bookmarks.
You may want bookmarks to appear in the Bookmarks tab of the PDF document, but you don’t want the table of
contents to appear in the PDF. In this case, generate a table of contents on the last page of the document. When you
export to PDF, don’t include the last page. Or, if you include the last page of the exported PDF, delete it in Acrobat.
1Choose Window > Interactive > Bookmarks to display the Bookmarks panel.
2Click the bookmark under which you want to place the new bookmark. If you don’t select a bookmark, the new
bookmark is automatically added to the end of the list.
3Do one of the following to indicate where you want the bookmark to jump:
•Click an insertion point in text.
Action What it does
Mouse click, Right arrow, or Page Down Next Spread
Shift-click, Right-click, Left Arrow, or Page Up Previous Spread
Esc Exit Presentation Mode
Home First Spread
End Last Spread
B Change background color to black
W Change background color to white
GChange background color to gray

534
USING INDESIGN
Interactive documents
Last updated 11/16/2011
•Select text. (By default, the text you select becomes the bookmark label.)
•Double-click a page in the Pages panel to view it in the document window.
4Do one of the following to create the bookmark:
•Click the Create New Bookmark icon on the Bookmarks panel.
•Choose New Bookmark from the panel menu.
Bookmarks appear in the Bookmarks tab when you open the exported PDF file in Adobe Reader or Acrobat.
Note: When you update the table of contents, the bookmarks are reordered, causing any bookmarks generated from a
TOC to appear at the end of the list.
More Help topics
“General options for PDFs” on page 508
“Export to PDF for printing” on page 501
Manage bookmarks
Use the Bookmarks panel to rename, delete, and arrange bookmarks.
Rename a bookmark
❖Click the bookmark in the Bookmarks panel, and choose Rename Bookmark from the panel menu.
Delete a bookmark
❖Click a bookmark in the Bookmarks panel, and choose Delete Bookmark from the panel menu.
Arrange, group, and sort bookmarks
You can nest a list of bookmarks to show a relationship between topics. Nesting creates a parent/child relationship.
You can expand and collapse this hierarchical list as desired. Changing the order or nesting order of bookmarks does
not affect the appearance of your actual document.
❖Do one of the following:
•To expand and collapse the bookmark hierarchy, click the triangle next to the bookmark icon to show or hide any
children it contains.
•To nest a bookmark under another bookmark, select the bookmark or range of bookmarks you want to nest, and
then drag the icon or icons onto the parent bookmark. Release the bookmark.
The bookmark or bookmarks you dragged are nested under the parent bookmark; however, the actual page remains
in its original location in the document.
Bookmarks panel showing bookmarks being nested under a parent bookmark
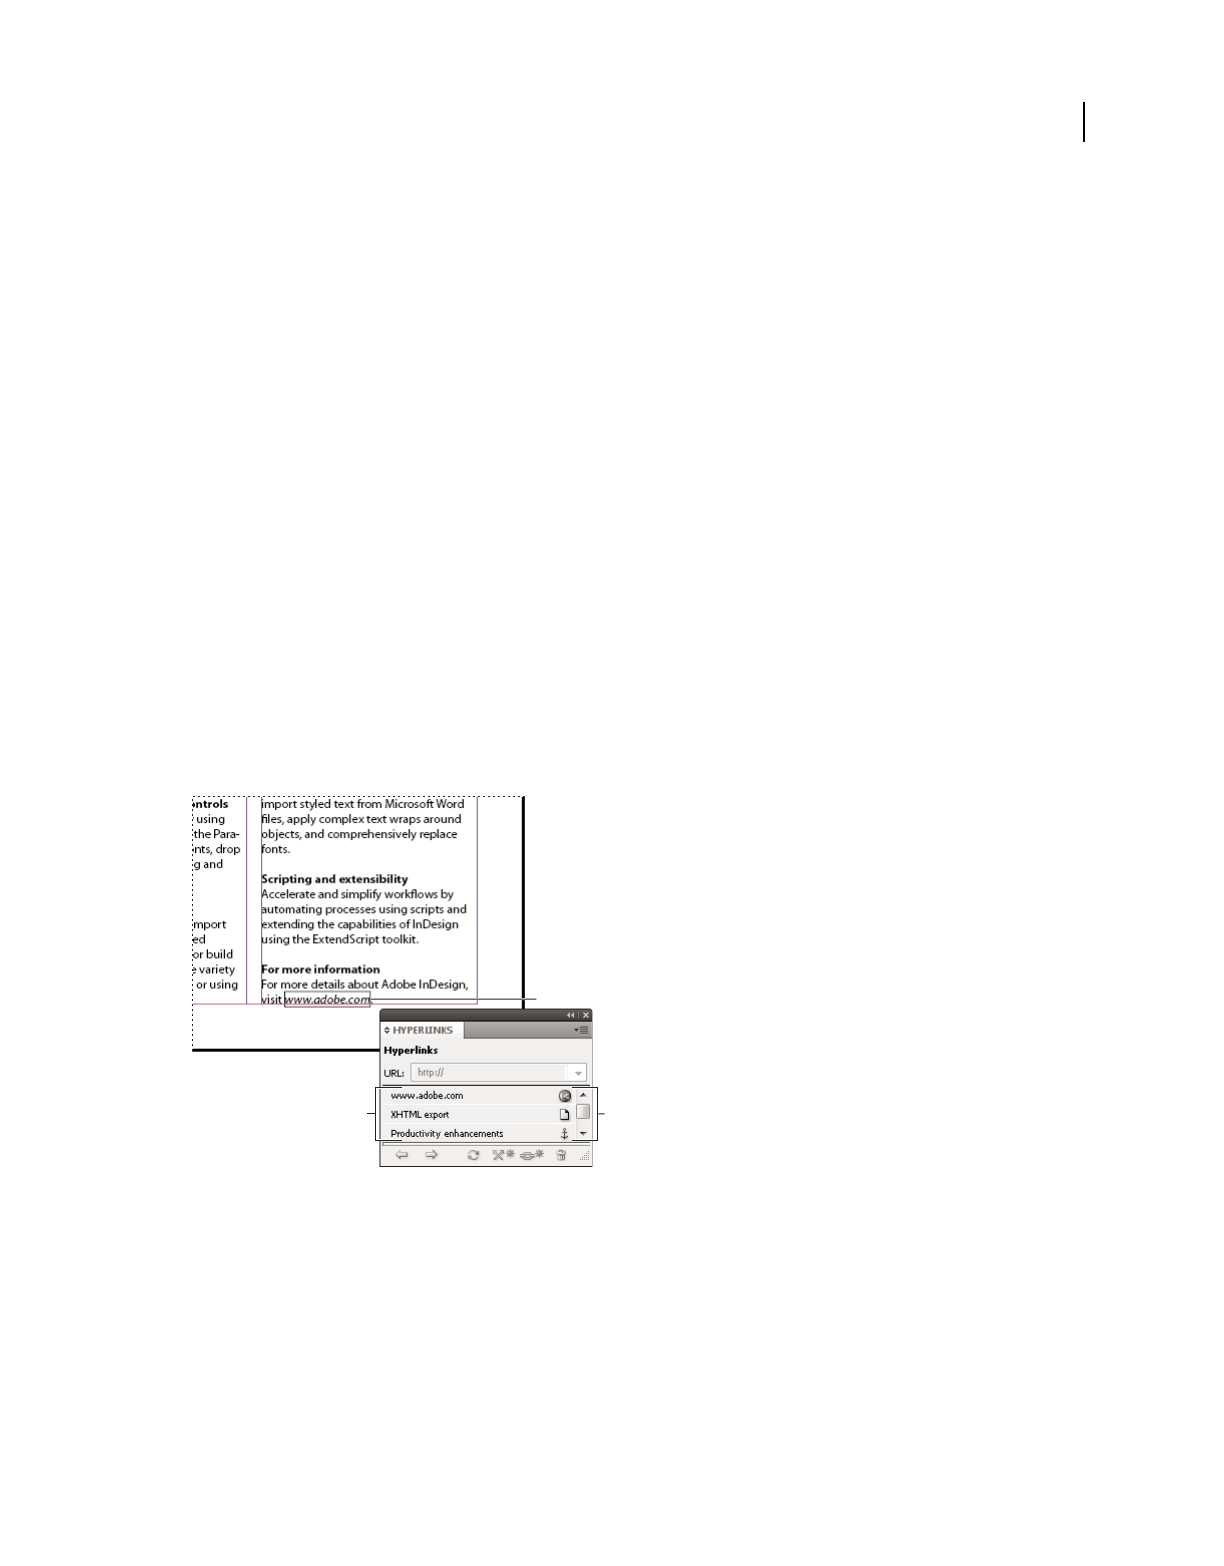
535
USING INDESIGN
Interactive documents
Last updated 11/16/2011
•To move a bookmark out of a nested position, select the bookmark or range of bookmarks you want to move. Drag
the icon or icons below and to the left of the parent bookmark. A black bar appears indicating where the bookmark
will be moved. Release the bookmark.
•To change the order of bookmarks, select a bookmark and move it to a new location. A black bar appears indicating
where the bookmark will be placed.
•To sort bookmarks, choose Sort Bookmarks from the Bookmarks panel menu. Bookmarks appear in the same order
as the pages they jump to.
Hyperlinks
Hyperlinks panel overview
You can create hyperlinks so that when you export to Adobe PDF or SWF in InDesign, a viewer can click a link to jump
to other locations in the same document, to other documents, or to websites. Hyperlinks you export to PDF or SWF
in InCopy are not active.
A source is hyperlinked text, a hyperlinked text frame, or a hyperlinked graphics frame. A destination is the URL, file,
email address, page text anchor, or shared destination to which a hyperlink jumps. A source can jump to only one
destination, but any number of sources can jump to the same destination.
Note: If you want the source text to be generated from the destination text, insert a cross-reference instead of adding a
hyperlink. See “Cross-references” on page 541.
Hyperlinks
A. Hyperlink source B. List of hyperlinks in the current document C. Hyperlink status icons
Open the Hyperlinks panel
•Choose Window > Interactive > Hyperlinks.
•Choose Window > Type & Tables > Cross-References.
Sort hyperlinks in the Hyperlinks panel
❖Choose Sort from the Hyperlinks panel menu, and then choose any of the following:
Manually Displays the hyperlinks in the order in which they were added to the document.
BC
A

536
USING INDESIGN
Interactive documents
Last updated 11/16/2011
By Name Displays the hyperlinks in alphabetical order.
By Type Displays the hyperlinks in groups of similar type.
Display hyperlinks in smaller rows
❖Choose Small Panel Rows from the Hyperlinks panel menu.
Create hyperlinks
You can create hyperlinks to pages, URLs, text anchors, email addresses, and files. If you create a hyperlink to a page
or text anchor in a different document, make sure that the exported files appear in the same folder.
To show or hide hyperlinks, choose View > Extras > Show Hyperlinks or Hide Hyperlinks.
Note: Hyperlinks are included in exported Adobe PDF files if Hyperlinks is selected in the Export Adobe PDF dialog box in
InDesign. Hyperlinks are included in the exported SWF file if Include Hyperlinks is selected in the Export SWF dialog box.
More Help topics
“Add automatic page numbers for story jumps” on page 94
“Export to PDF for printing” on page 501
“Cross-references” on page 541
Create a hyperlink to a web page (URL)
You can use several different methods to create hyperlinks to URLs. When you specify a URL, you can use any valid
Internet resource protocol: http://, file://, ftp://, or mailto://.
You can also use the Buttons feature to link to web pages. (See “Buttons” on page 558.)
You may want to create a character style for hyperlinks. Hyperlinks are often formatted in underlined blue text.
1Select the text, frame, or graphic you want to be the hyperlink’s source. For example, you can select the text, “See
the Adobe website.”
2In the Hyperlinks panel, use any of the following methods to create a hyperlink to a URL:
•In the URL text box, type or paste the URL name (such as http://www.adobe.com), and then choose New Hyperlink
from the Hyperlinks panel. Choose URL from the Link To menu, specify appearance options, and click OK.
•If a URL is selected in your document, choose New Hyperlink From URL in the Hyperlinks panel menu. Double-
click the hyperlink in the Hyperlinks panel, and then choose URL from the Link To menu, specify appearance
options, and click OK.
•Select a previously added URL from the URL menu. The hyperlink appearance is the same as that used in the
previous URL.
•Choose New Hyperlink in the Hyperlinks panel menu. Choose URL from the Link To menu, specify appearance
options, and click OK.
Note: If a URL hyperlink isn’t working in the exported PDF, there may be a problem with the hyperlink being a “Shared
Destination.” Double-click the hyperlink in the Hyperlinks panel, choose URL from the Link To menu, deselect Shared
Hyperlink Destination, and click OK.

537
USING INDESIGN
Interactive documents
Last updated 11/16/2011
Create a hyperlink to a file
When you create a hyperlink to a file, clicking the hyperlink in the exported PDF or SWF file opens the file in its native
application, such as Microsoft Word for .doc files.
Make sure the file you specify is available to anyone opening the PDF or SWF file you export. For example, if you’re
sending the exported PDF to a coworker, specify a file located on a shared server rather than your hard drive.
1Select the text, frame, or graphic you want to be the source of the hyperlink.
2Choose New Hyperlink in the Hyperlinks panel menu, or click the Create New Hyperlink button at the
bottom of the Hyperlinks panel.
3In the New Hyperlink dialog box, choose File from the Link To menu.
4For Path, type the pathname or click the folder button to locate and double-click the filename.
5Select Shared Hyperlink Destination if you want the file to be stored in the Hyperlinks panel for easy reuse.
6Specify the appearance of the hyperlink source, and then click OK.
Create a hyperlink to an email message
1Select the text, frame, or graphic you want to be the source of the hyperlink.
2Choose New Hyperlink in the Hyperlinks panel menu, or click the Create New Hyperlink button at the
bottom of the Hyperlinks panel.
3In the New Hyperlink dialog box, choose Email from the Link To menu.
4For Address, type the email address, such as username@company.com.
5For Subject Line, type the text that appears in the subject line of the email message.
6Select Shared Hyperlink Destination if you want the email message to be stored in the Hyperlinks panel for easy
reuse.
7Specify the appearance of the hyperlink source, and then click OK.
Create a hyperlink to a page
You can create a hyperlink to a page without first creating a destination. However, by creating a page destination, you
can specify a page number and view setting.
1Select the text, frame, or graphic you want to be the source of the hyperlink.
2Choose New Hyperlink in the Hyperlinks panel menu, or click the Create New Hyperlink button at the
bottom of the Hyperlinks panel.
3In the New Hyperlink dialog box, choose Page from the Link To menu.
4For Document, select the document containing the destination that you want to jump to. All open documents that
have been saved are listed in the pop-up menu. If the document you’re looking for isn’t open, select Browse in the
pop-up menu, locate the file, and then click Open.
5For Page, specify the page number you want to jump to.
6For Zoom Setting, do one of the following to select the view state of the page being jumped to:
•Select Fixed to display the magnification level and page position that were in effect when you created the link.
•Select Fit View to display the visible portion of the current page as the destination.
•Select Fit In Window to display the current page in the destination window.
•Select Fit Width or Fit Height to display the width or height of the current page in the destination window.

538
USING INDESIGN
Interactive documents
Last updated 11/16/2011
•Select Fit Visible to display the page so that its text and graphics fit the width of the window, which usually means
that the margins are not displayed.
•Select Inherit Zoom to display the destination window at the magnification level the reader uses when the hyperlink
is clicked.
7Specify appearance options, and then click OK.
Create a hyperlink destination
Creating a hyperlink destination is necessary only if you’re creating a hyperlink or cross-reference to a text anchor. A
text anchor can point to a selection of text or to the insertion point location. Then you create the hyperlink or cross-
reference that points to the hyperlink destination. You can also create hyperlink destinations for pages and URLs, but
a destination isn’t necessary for those links.
Hyperlink destinations you create do not appear in the Hyperlinks panel; they appear in the dialog box that appears
when you’re creating or editing hyperlinks.
1If you’re creating a text anchor, use the Type tool to place the insertion point, or select the range of text that you
want to be the anchor.
You cannot set up an anchor destination for text on a master page.
2Choose New Hyperlink Destination in the Hyperlinks panel menu.
3Do any of the following, and then click OK:
•Choose Text Anchor in the Type menu. Specify a name for the text anchor.
•Choose Page in the Type menu. Specify the page number you want to jump to and the Zoom Setting. Type a name
for the page, or select Name With Page Number to name the destination automatically based on the page number
and zoom setting you specify.
•Choose URL in the Type menu. Type or paste a URL, such as http://www.adobe.com. You can use any valid Internet
resource protocol: http://, file://, ftp://, or mailto://.
Create a hyperlink to a text anchor
1Select the text, frame, or graphic you want to be the source of the hyperlink.
2Choose New Hyperlink in the Hyperlinks panel menu, or click the Create New Hyperlink button at the bottom of
the Hyperlinks panel.
3Choose Text Anchor from the Link To menu.
4For Document, select the document containing the destination that you want to jump to. All open documents that
have been saved are listed in the pop-up menu. If the document you’re looking for isn’t open, select Browse in the
pop-up menu, locate the file, and then click Open.
5From the Text Anchor menu, choose the text anchor destination you created.
6Specify hyperlink appearance options, and then click OK.
Create a hyperlink to any shared destination
While creating a hyperlink, if you choose Shared Destination from the Link To menu, you can specify any named
destination. A destination is named when you add a URL using the URL text box or when you select Shared Hyperlink
Destination while creating a hyperlink to a URL, file, or email address.
1Select the text, frame, or graphic you want to be the source of the hyperlink.

539
USING INDESIGN
Interactive documents
Last updated 11/16/2011
2Choose New Hyperlink in the Hyperlinks panel menu, or click the Create New Hyperlink button at the bottom of
the Hyperlinks panel.
3In the New Hyperlink dialog box, choose Shared Destination from the Link To menu.
4For Document, select the document containing the destination that you want to jump to. All open documents that
have been saved are listed in the pop-up menu. If the document you’re looking for isn’t open, select Browse in the
pop-up menu, locate the file, and then click Open.
5Choose a destination from the Name menu.
6Specify hyperlink appearance options, and then click OK.
Hyperlink appearance options
The options determine the appearance of the hyperlink or cross-reference source in the exported PDF or SWF file.
These appearance options are also displayed in the InDesign document if you choose View > Extras > Show
Hyperlinks.
Character Style Choose a character style to apply to the hyperlink source. The Character Style option is available only
if the hyperlink source is selected text, not a selected frame or graphic.
If you’re inserting a cross-reference, you can apply a character style when you edit a cross-reference format. You can
also apply character styles to building blocks within a format. See “Using cross-reference formats” on page 543.
Type Select Visible Rectangle or Invisible Rectangle.
Highlight Select Invert, Outline, Inset, or None. These options determine the appearance of the hyperlink when it’s
being clicked in the PDF or SWF file.
Color Select a color for the visible hyperlink rectangle.
Width Select Thin, Medium, or Thick to determine the thickness of the hyperlink rectangle.
Style Select Solid or Dashed to determine the appearance of the hyperlink rectangle.
Convert URLs to hyperlinks
You can find and convert URLs (such as “www.adobe.com”) in your document and convert them to hyperlinks.
1Choose Convert URLs To Hyperlinks from the Hyperlinks panel menu.
2For Scope, indicate whether your want to convert URLs in the entire document, the current story, or the current
selection.
3To apply a character style to the hyperlink, select a character style from the Character Style menu.
4Do any of the following, and then click Done.
•Click Find to locate the next URL.
•Click Convert to convert the current URL to a hyperlink.
•Click Convert All to convert all URLs to hyperlinks.
Manage hyperlinks
Use the Hyperlinks panel to edit, delete, reset, or locate hyperlinks. In InCopy, you can manage hyperlinks only if the
story is checked out for editing.
Edit hyperlinks
1In the Hyperlinks panel, double-click the item you want to edit.

540
USING INDESIGN
Interactive documents
Last updated 11/16/2011
2In the Edit Hyperlinks dialog box, make changes to the hyperlink as necessary, and then click OK.
Note: To edit a hyperlink to a URL, select the hyperlink, edit the URL in the URL text box, and then press Tab or Enter.
Delete hyperlinks
When you remove a hyperlink, the source text or graphic remains.
❖Select the item or items you want to remove in the Hyperlinks panel, and then click the Delete button at the bottom
of the panel.
Rename a hyperlink source
Renaming the hyperlink source changes the way it appears in the Hyperlinks panel.
1In the Hyperlinks panel, select the hyperlink.
2Choose Rename Hyperlink from the Hyperlinks panel menu, and specify a new name.
Edit or delete hyperlink destinations
1Open the document in which the destination appears.
2Choose Hyperlink Destination Options in the Hyperlinks panel menu.
3For Destination, select the name of the destination you want to edit.
4Do one of the following:
•Click Edit, and then make changes to the destination as necessary.
•Click Delete to remove the destination.
5When you have finished editing or deleting destinations, click OK.
Reset or update hyperlinks
1Select the range of text, the text frame, or the graphic frame that will act as the new hyperlink source. For example,
you may want to select additional text to include in the source.
2Select the hyperlink in the Hyperlinks panel.
3Do either of the following:
•Choose Reset Hyperlink in the Hyperlinks panel menu.
•To update hyperlinks to external documents, choose Update Hyperlink in the Hyperlinks panel menu.
Go to a hyperlink source or anchor
•To locate the source of a hyperlink or cross-reference, select the item you want to locate in the Hyperlinks panel.
Choose Go To Source in the Hyperlinks panel menu. The text or frame will be selected.
•To locate the destination of a hyperlink or cross-reference, select the item you want to locate in the Hyperlinks
panel. Choose Go To Destination in the Hyperlinks panel menu.
If the item is a URL destination, InDesign starts or switches to your web browser to display the destination. If the item
is a text anchor or page destination, InDesign jumps to that location.

541
USING INDESIGN
Interactive documents
Last updated 11/16/2011
Editing hyperlinks imported from Word
When a Microsoft Word document with hyperlinks is imported into an InDesign document, you may notice a box or
border around the hyperlink URLs (such as www.adobe.com). The InDesign document inherits a blue swatch called
Word_R0_G0_B255. The document also inherits a character style called “Hyperlink” that underlines the text and
applies the blue color.
To remove the box, in the Hyperlinks panel, double-click the hyperlink. Under Appearance, choose Invisible
Rectangle from the Type menu, and click OK.
You may also want to delete the imported swatch. While doing so, you can replace it with a different swatch. See
“Delete individual swatches” on page 473.
Before you place the Word document in InDesign, you may want to remove the hyperlinks from the URLs in the Word
document to avoid inheriting this formatting. See your Word documentation. Another option is to create a character
style named “Hyperlink” in the InDesign document before you import. When you import the Word document, the
InDesign style that has the same name is used by default.
Cross-references
If you’re writing a manual or reference document, you may want to include a cross-reference to refer the reader from
one part of your document to another. Example: For more information, see “Field mice” on page 249. You can
specify whether a cross-reference derives from a paragraph style, such as a heading style, or from a text anchor you’ve
created. You can also determine the cross-reference format, such as Page Number Only or Full Paragraph & Page
Number.
Insert cross-references
Use the Hyperlinks panel to insert cross-references into your document. The text being referred to is the destination
text. The text that is generated from the destination text is the source cross-reference.
When you insert a cross-reference in your document, you can choose from several predesigned formats, or you can
create your own custom format. You can apply a character style to the entire cross-reference source, or to text within
the cross-reference. Cross-reference formats can be synchronized across a book.
Cross-reference source text is editable and can break across lines.
Note: Cross-references are included in exported Adobe PDF files if Hyperlinks is selected in the Export Adobe PDF dialog
box in InDesign. Cross-references are included in the exported SWF file if Include Hyperlinks is selected in the Export
SWF dialog box.
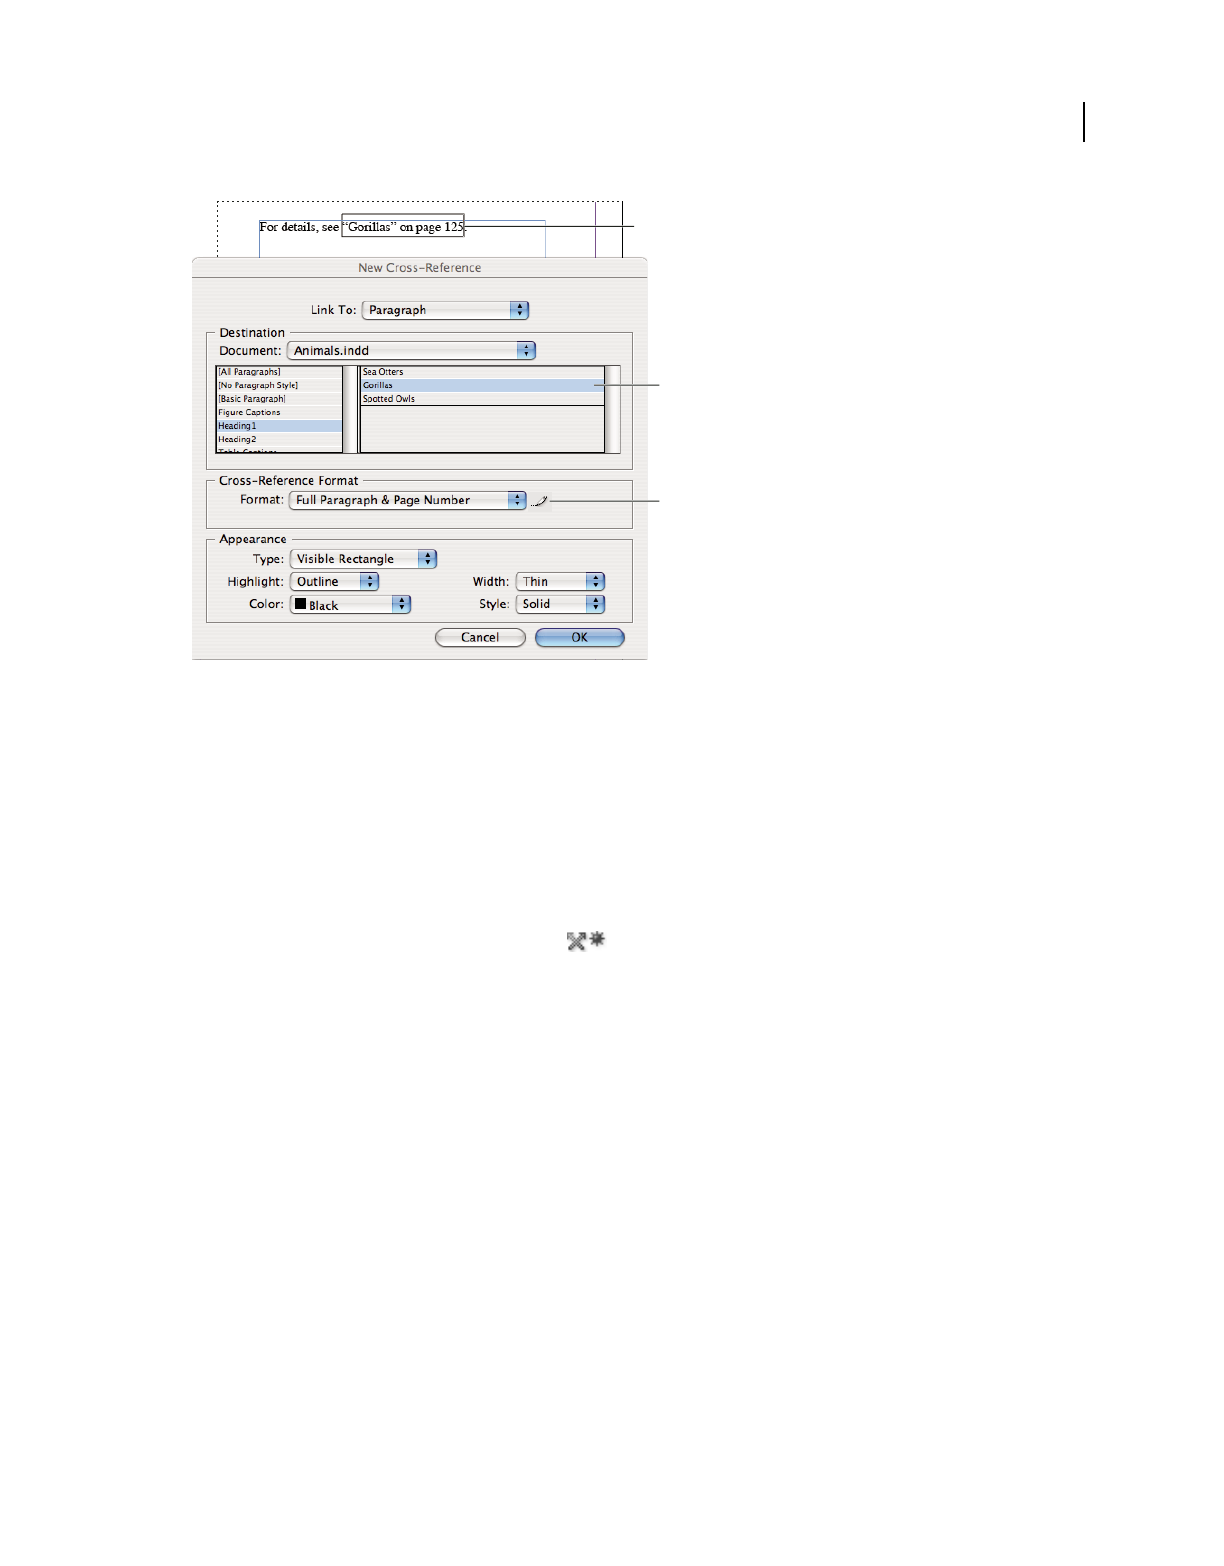
542
USING INDESIGN
Interactive documents
Last updated 11/16/2011
Inserting cross-references
A. Cross-reference source in document B. Selected destination paragraph C. Click here to create or edit cross-reference format.
For a video tutorial on inserting cross-references, see www.adobe.com/go/lrvid4024_id.
1Place the insertion point where you want the cross-reference to be inserted.
2Do any of the following:
•Choose Type > Hyperlinks & Cross-References > Insert Cross-Reference.
•Choose Window > Type & Tables > Cross-References, and then choose Insert Cross-Reference from the
Hyperlinks panel menu.
•Click the Create New Cross-Reference button in the Hyperlinks panel.
3In the New Cross-Reference dialog box, choose Paragraph or Text Anchor from the Link To menu.
If you choose Paragraph, you can create a cross-reference to any paragraph in the document you specify.
If you choose Text Anchor, you can create a cross-reference to any text in which you have created a hyperlink
destination. (See “Create a hyperlink destination” on page 538.) Creating a text anchor is especially useful if you want
to use different text than the actual destination paragraph.
4For Document, select the document containing the destination that you want to refer to. All open documents that
have been saved are listed in the pop-up menu. If the document you’re looking for isn’t open, choose Browse, locate
the file, and then click Open.
5Click a paragraph style (such as Head1) in the left box to narrow down the choices, and then select the paragraph
you want to refer to. (Or, if Text Anchor is selected, choose the text anchor.)
6Choose the cross-reference format you want to use from the Format menu.
You can edit these cross-reference formats or create your own. See “Using cross-reference formats” on page 543.
7Specify the appearance of the source hyperlink. See “Hyperlink appearance options” on page 539.
8Click OK.
A
B
C

543
USING INDESIGN
Interactive documents
Last updated 11/16/2011
When you insert a cross-reference, a text anchor marker appears at the beginning of the destination paragraph. You
can view this marker when you choose Type > Show Hidden Characters. If this marker is moved or deleted, the cross-
reference becomes unresolved.
Using cross-reference formats
Several cross-reference formats appear in the New Cross-Reference dialog box by default. You can edit these formats,
delete them, or create your own.
Note: If you’ve deleted or edited cross-reference formats in your document and want to return them to the default formats,
you can choose Load Cross-Reference Formats from the panel menu and choose a document with unedited formats. You
can also synchronize cross-reference formats in a book.
For a video tutorial on editing cross-reference formats, see www.adobe.com/go/lrvid4024_id.
Create or edit cross-reference formats
Unlike other presets, cross-reference formats can be edited or deleted. When you edit a cross-reference format, any
source cross-reference that uses that format is automatically updated.
1Do any of the following:
•Choose Define Cross-Reference Formats from the Hyperlinks panel menu.
•While creating or editing a cross-reference, click the Create Or Edit Cross-Reference Formats button .
2In the Cross-Reference Formats dialog box, do one of the following:
•To edit a format, select the format on the left.
•To create a format, select a format to base the new format on, and then click the Create Format button . This
creates a duplicate of the selected format.
3For Name, specify the name of the format.
4In the Definition text box, add or remove any text as needed. Click the Building Block icon to insert building
blocks from a menu. Click the Special Characters icon to select dashes, spaces, quotation marks, and other
special characters.
5To apply a character style to the entire cross-reference, select Character Style For Cross-Reference, and then choose
or create the character style from the menu.
You can also use the Character Style building block to apply a character style to text within the cross-reference.
6Click Save to save the changes. Click OK when finished.
544
USING INDESIGN
Interactive documents
Last updated 11/16/2011
Cross-reference building blocks
Creating cross-references to partial paragraphs
You can design cross-reference formats to include only the first part of a paragraph. For example, if you have headings
in your document that look like, “Chapter 7—Granada to Barcelona,” you can create a cross-reference that refers only
to “Chapter 7.”
Building block What it does Example
Page Number Inserts the page number. on page <pageNum/>
on page 23
Paragraph Number Inserts the paragraph number in a cross-
reference to a numbered list.
See <paraNum/>
See 1
In this example, only “1” is used from the paragraph, “1.
Animals.”
Paragraph Text Inserts the paragraph text without the
paragraph number in a cross-reference to a
numbered list.
See “<paraText/>”
See “Animals”
In this example, only “Animals” is used from the
paragraph, “1. Animals.”
Full Paragraph Inserts the entire paragraph, including
paragraph number and paragraph text.
See “<fullPara/>”
See “1. Animals”
Partial Paragraph Lets you create a cross-reference to the first
part of a paragraph, up to the specified
delimiter, such as a colon or em dash.
See <fullPara delim=”:” includeDelim=”false”/>
See Chapter 7
In this example, only “Chapter 7” is used from the title
“Chapter 7: Dogs and Cats.”
Specify the delimiter (such as : in this example), and
indicate whether the delimiter is excluded (“false” or “0”)
or included (“true” or “1”) in the source cross-reference.
See “Creating cross-references to partial paragraphs” on
page 544.
Text Anchor Name Inserts the text anchor name. You can create
text anchors by choosing New Hyperlink
Destination from the Hyperlinks panel menu.
See <txtAnchrName/>
See Figure 1
Chapter Number Inserts the chapter number. in chapter <chapNum/>
in chapter 3
File Name Inserts the filename of the destination
document.
in <fileName/>
in newsletter.indd
Character Style Applies a character style to text within a cross-
reference.
See <cs name=”bold”><fullPara/></cs> on page
<pageNum>
See Animals on page 23.
Specify the character style name, and include the text you
want to apply the character style to between the <cs
name=””> and </cs> tags.
See “Apply character styles within a cross-reference” on
page 545.
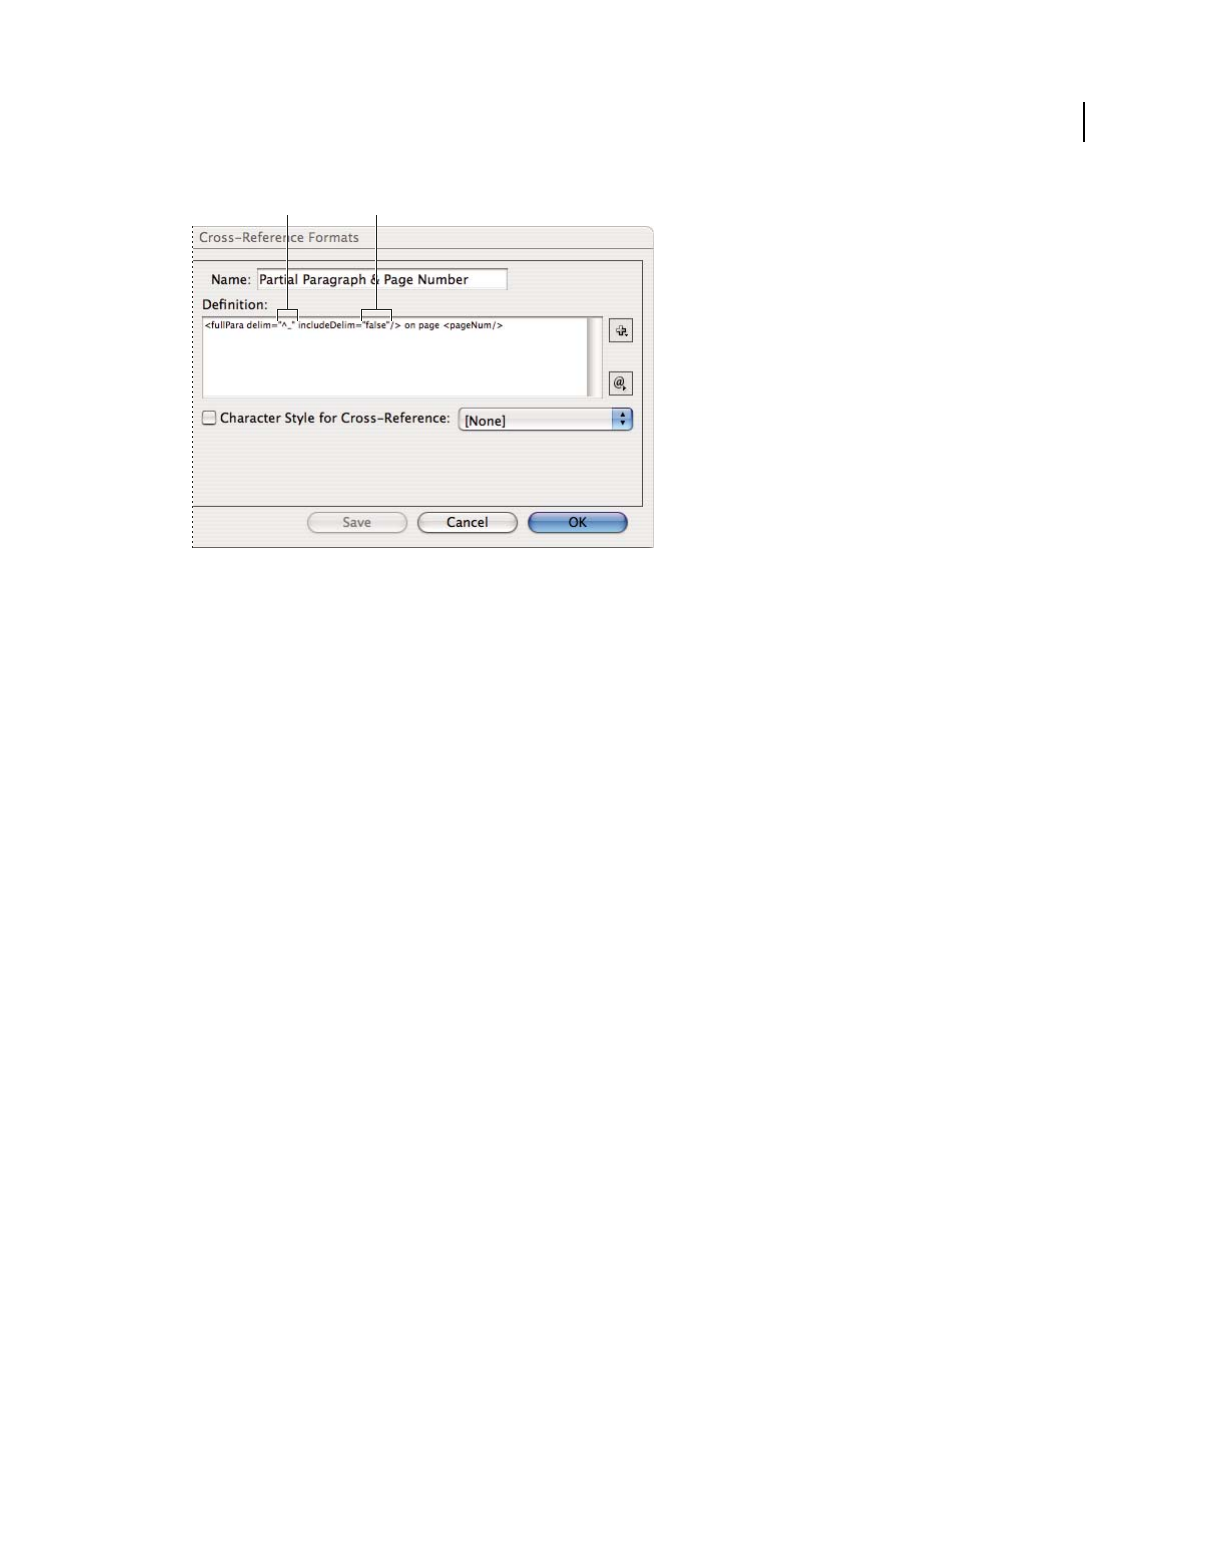
545
USING INDESIGN
Interactive documents
Last updated 11/16/2011
Cross-reference to partial paragraph
A. The cross-reference source ends at an em dash (^_) B. “false” excludes the em dash from the source
When you insert the Partial Paragraph building block, you must do two things. First, specify the delimiter between the
quotation marks. The delimiter is the character that ends the paragraph. Common delimiters include colons (Chapter
7: Granada), periods (Chapter 7. Granada), and dashes (Chapter 7—Granada). To insert special characters such as em
dashes (^_), em spaces (^m), and bullet characters (^8), choose an option from the menu that appears when you click
the Special Characters icon.
Second, indicate whether the delimiter character is excluded (Chapter 7) or included (Chapter 7—). Use
includeDelim=”false” to exclude the delimiter and includeDelim=”true” to include the delimiter. Instead of “false” or
“true,” you can use “0” or “1,” respectively.
Apply character styles within a cross-reference
If you want to emphasize a section of text within a cross-reference, you can use the Character Style building block. This
building block consists of two tags. The <cs name=”stylename”> tag indicates which style is applied, and the </cs> tag
ends the character style. Any text or building blocks between these tags is formatted in the specified style.
A B
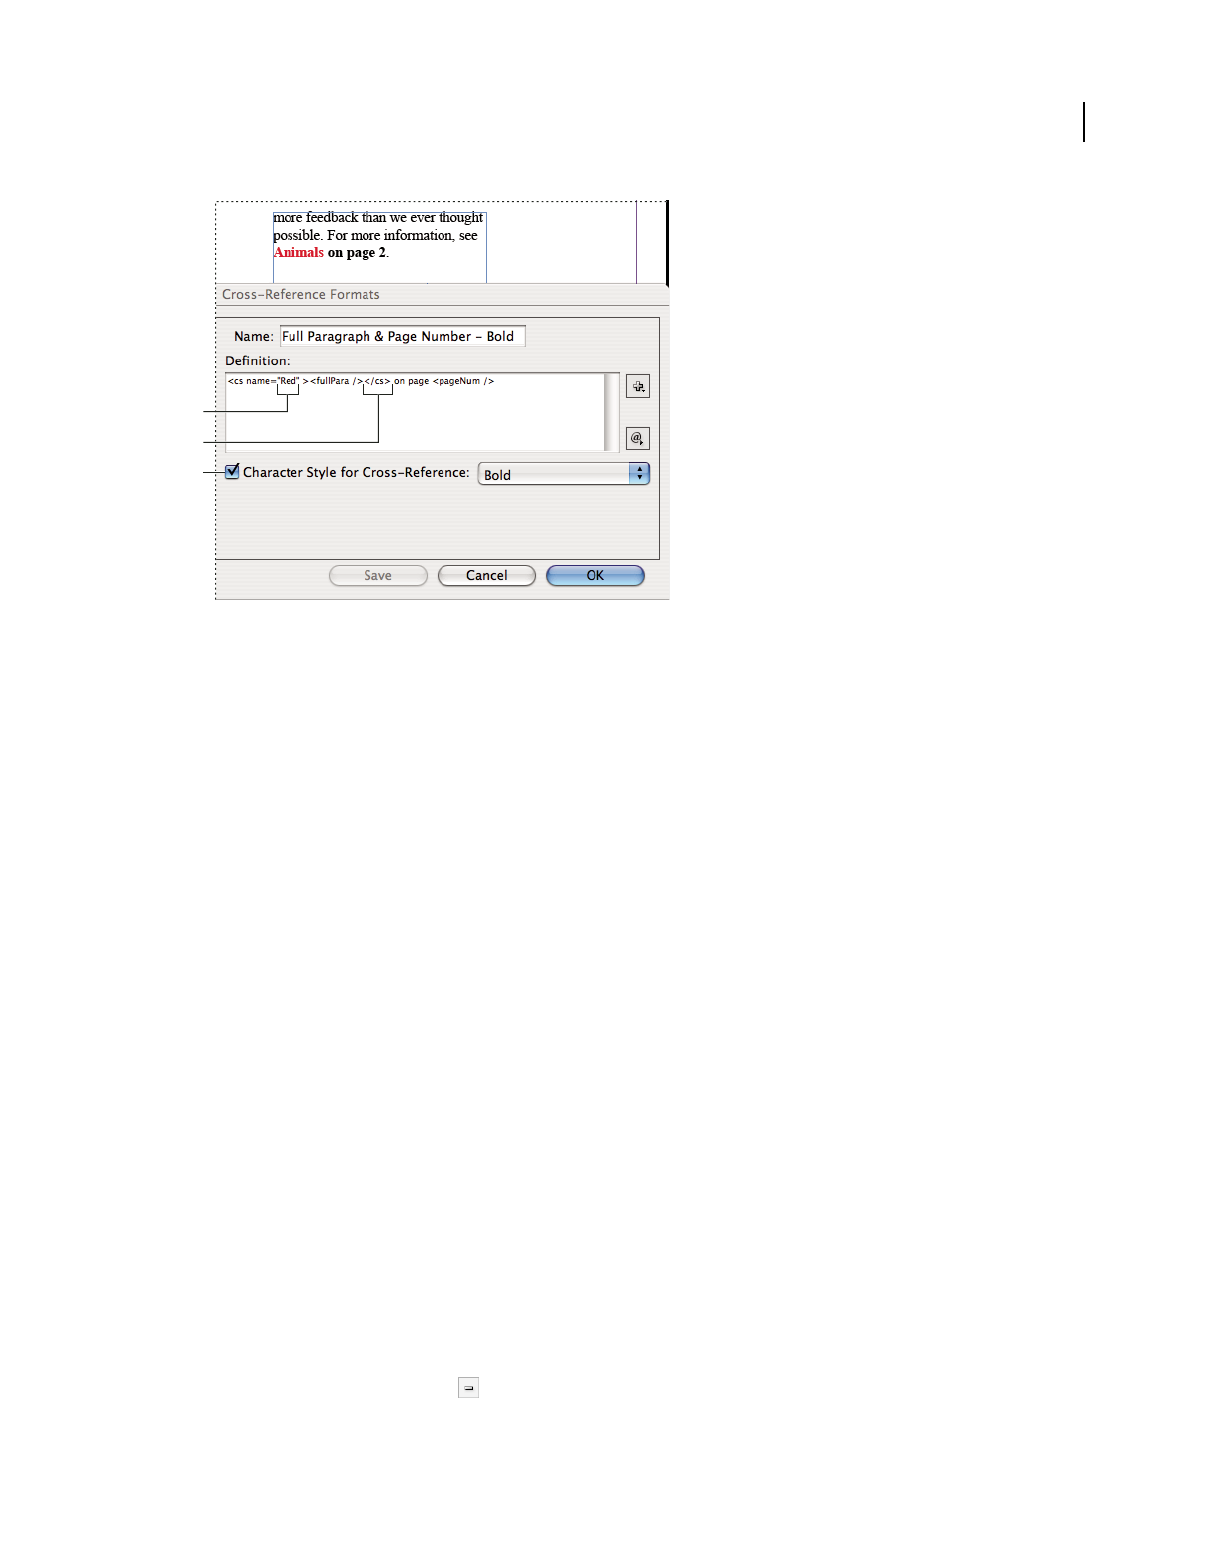
546
USING INDESIGN
Interactive documents
Last updated 11/16/2011
Applying a character style to a section of the cross-reference
A. This tag applies a character style named “Red.” B. This tag ends the character style formatting. C. A character style named “Bold” is applied
to the rest of the cross-reference source.
1Create the character style you want to use.
2In the Cross-Reference Formats dialog box, create or edit the format you want to apply.
3Under Definition, select the text and building blocks to which you want to apply the character style.
4Choose Character Style from the menu to the right of the definition list.
5Type the name of the character style between the quotation marks exactly as it appears in the Character Styles panel.
Style names are case sensitive. If the character style is in a group, type the name of the group followed by a colon before
the character style, such as Style Group 1: Red.
6Click Save to save the format, and then click OK.
Load (import) cross-reference formats
When you load cross-reference formats from another document, the incoming formats replace any existing formats
that share the same name.
In InCopy, you can import cross-reference formats only in standalone documents. You cannot import formats from
an InCopy document into an InDesign document. If the new or modified format in InCopy conflicts with a format in
the InDesign document when the story is checked in, the InDesign format takes precedence.
1Choose Load Cross-Reference Formats from the Hyperlinks panel menu.
2Double-click the document containing the cross-reference formats you want to import.
You can also share cross-reference formats across documents by synchronizing a book.
Delete cross-reference formats
You cannot delete a cross-reference format that has been applied to cross-references in the document.
1In the Cross-Reference Formats dialog box, select the format you want to delete.
2Click the Delete Format button .
A
B
C

547
USING INDESIGN
Interactive documents
Last updated 11/16/2011
Manage cross-references
When you insert a cross-reference, the Hyperlinks panel indicates the status of the cross-reference. For example, icons
indicate if the destination text appears on the pasteboard
, a master page , a hidden layer , in overset text ,
or in hidden text . Cross-references that link to such destination areas are unresolved. The panel also lets you know
if the destination paragraph has been edited (also called out-of-date) or is missing . Destination text is missing
if either the destination text or the file containing the destination text cannot be found. Hold the mouse pointer over
any icon to view a tool tip description.
In InCopy, you can manage cross-references only if the story is checked out for editing.
Update cross-references
An update icon indicates that the cross-reference destination text has changed or that the cross-reference source text
has been edited. You can easily update the cross-reference. If the destination moves to a different page, the cross-
reference is updated automatically.
When you update a cross-reference, any formatting changes you’ve made to the source text are removed.
When printing or outputting, you are notified if cross-references are out of date or unresolved.
You can also use the Preflight panel to notify you when cross-references are out of date or unresolved. When defining
a profile, select Cross-References in the Text section. See “Define preflight profiles” on page 617.
1Select one or more out-of-date cross-references. To update all cross-references, make sure that none are selected.
2Do any of the following:
•Click the Update Cross-References button in the Hyperlinks panel.
•Choose Update Cross-Reference from the Hyperlinks panel menu.
•Choose Type > Hyperlinks & Cross-References > Update Cross-Reference.
To update all cross-references in a book, choose Update All Cross-References from the book panel menu. You are
notified if any cross-references remain unresolved.
Relink cross-references
If the missing destination text has been moved to a different document, or if the document containing the destination
text is renamed, you can relink the cross-reference. When you relink, any changes made to the source cross-reference
are removed.
1In the Cross-References section of the Hyperlinks panel, select the cross-reference you want to relink.
2Choose Relink Cross-Reference from the Hyperlinks panel menu.
3Locate the document in which the destination text appears, and then click Open.
If any other destination text appears in that document, you can relink additional cross-references.
Edit cross-references
To change the appearance of the source cross-reference or specify a different format, you can edit the cross-reference.
If you edit a cross-reference that links to a different document, the document is opened automatically.
1Do any of the following:
•Choose Type > Hyperlinks & Cross References > Cross-Reference Options.
•In the Cross-References section of the Hyperlinks panel, double-click the cross-reference you want to edit.
•Select the cross-reference, and choose Cross-Reference Options from the Hyperlinks panel menu.

548
USING INDESIGN
Interactive documents
Last updated 11/16/2011
2Edit the cross-reference, and then click OK.
Delete cross-references
When you delete a cross-reference, the source cross-reference is converted to text.
1In the Cross-References section of the Hyperlinks panel, select the cross-reference or cross-references you want to
delete.
2Click the Delete icon, or choose Delete Hyperlink/Cross-Reference from the panel menu.
3Click Yes to confirm.
To completely remove a cross-reference, you can also select the cross-reference source and delete it.
Editing cross-reference source text
You can edit cross-reference source text. The advantage of editing cross-reference text is that you can change tracking
or word spacing as needed for copyfitting, or make other changes. The disadvantage is that if you update or relink the
cross-reference, any local formatting changes are removed.
Movies and sounds
Add movies and sound files to documents
Movies and sound clips you add to a document can be played when the document is exported to Adobe PDF or SWF,
or when you export the document to XML and repurpose the tags.
You can import video files in Flash Video format (.FLV and .F4V), H.264-encoded files (such as MP4), and SWF files.
You can import audio files in MP3 format. Media file types such as QuickTime (.MOV), AVI, and MPEG are
supported in exported interactive PDF files but not in exported SWF or FLA files. We recommend that you use file
formats such as FLV, F4V, SWF, MP4, and MP3 to take full advantage of the rich media support offered in Acrobat 9,
Adobe Reader 9, and Adobe Flash Player 10 or later.
Keep track of the media files you add to an InDesign document during the production cycle. If you move a linked
media clip after adding it to the document, use the Links panel to relink it. If you send the InDesign document to
another person, include any media files you add.
More Help topics
“Export to PDF for printing” on page 501
Add a movie or a sound file
1Choose File > Place, and then double-click the movie or sound file. Click where you want the movie to appear. (If
you drag to create the media frame, the movie boundary may appear cropped or skewed.)
When you place a movie or sound file, a media object appears in a frame. This media object links to the media file.
You can resize the media object to determine the size of the play area.
If the center point of the movie appears outside the page, the movie is not exported.
2Use the Media panel (choose Window > Interactive > Media) to preview a media file and to change settings.
3Export the document to Adobe PDF or SWF format.

549
USING INDESIGN
Interactive documents
Last updated 11/16/2011
If you export to Adobe PDF, choose the Adobe PDF (Interactive) option, not Adobe PDF (Print). See “Create
interactive documents for PDF” on page 530.
Change movie settings
Use the Media panel to change movie settings.
1Select the movie object in the document.
2In the Media panel, do any of the following:
Play On Page Load Play the movie when someone turns to the page on which the movie is located. If other page
items are set to play on page load, use the Timing panel to determine the order.
Loop Play the movie repeatedly. If the source file is a Flash Video format, looping works only in exported SWF files,
not PDF files.
Poster Specify the type of image that you want to appear in the play area. See “Poster options” on page 549.
Controller If the movie file is a Flash Video (FLV or F4V) file or an H.264-encoded file, you can specify
prefabricated controller skins that let users pause, start, and stop the movie using a variety of methods. If you select
Show Controller On Rollover, the controls appear when the mouse pointer hovers over the media object. Use the
Preview panel to preview the selected controller skin.
If the movie file is a legacy file (such as .AVI or .MPEG), you can choose None or Show Controller, which displays
a basic controller that lets users pause, start, and stop the movie.
SWF files you place may have their own controller skins. Use the Preview panel to test the controller options.
Navigation Points To create a navigation point, advance the video to a specific frame, and then click the plus sign
icon. Navigation points are useful when you want to play a video at a different starting point. When you create a
button that plays a video, you can use the Play From Navigation Point option to play the video starting at any
navigation point you add.
Change sound settings
Use the Media panel to change sound settings.
1Select the sound object in the document.
2In the Media panel, do any of the following:
Play On Page Load Play the sound file when someone turns to the page on which the sound object is located. If
other page items are set to play on page load, use the Timing panel to determine the order.
Stop On Page Turn Stop playing the MP3 sound file when someone turns to a different page. If the audio file is a
non-MP3 file, this option is dimmed.
Loop Play the MP3 sound repeatedly. If the source file is a non-MP3 file, this option is dimmed.
Poster Specify the type of image that you want to appear in the play area. See “Poster options” on page 549.
Poster options
A poster is the image that represents a media clip. Each movie or sound can appear with or without a poster. If the
poster in InDesign is larger than the movie, the poster is clipped to the size of the movie in the exported PDF or SWF
file. Specify any of the following types of poster images in the Media panel:
None Shows no poster for the movie or sound clip. This option is useful if you want the movie or sound clip to not be
visible on the page. For example, you may want the media to be played only when you turn the page, or you may want
a more complex design beneath the movie to show instead of the poster.

550
USING INDESIGN
Interactive documents
Last updated 11/16/2011
Standard Displays a generic movie or sound poster that isn’t based on the contents of the file.
To use a different standard poster, save an image as StandardMoviePoster.jpg or StandardSoundPoster.jpg, and
replace the existing file of the same name. This file is located in the Presets/Multimedia folder in the application folder.
From Current Frame Select this option to use the current frame displayed in the preview area of the Media panel. To
select a different frame, advanced the preview slider and click the icon to the right of the Poster menu. This option is
not available with legacy movie formats such as AVI and MPEG.
Choose Image Lets you select an image to use as the poster. Double-click the image you want to use. You can select
bitmap graphics, not vector graphics, for posters.
[From Video] This option is selected for converted CS4 documents that have media clips set to a specific frame.
Change media settings for interactive PDF files
1Choose PDF Options from the Media panel menu.
2Specify the following options, and click OK.
Description Type a description that appears if the media file cannot be played in Acrobat. This description also acts
as alternative text for visually impaired users.
Play Video In Floating Window Play the movie in a separate window. If you select this option, specify the size ratio
and position on the screen. Increasing the size of the floating window may reduce image quality. The floating
window scale is based on the size of the original movie, not the size of the scaled movie in the document layout.
This option is not available for SWF files or audio files.
Place a video file from a URL
Place a video file from a valid URL to play the streaming video in the exported PDF or SWF file. The video must be a
valid Flash Video file (FLV or F4V) or H.264-encoded file (such as MP4).
1Select an empty frame or a video object containing a video you want to replace.
2Choose Video From URL from the Media panel menu.
3Specify the URL and click OK.
Resize movie objects, posters, or frames
When you add a movie to the InDesign document, the movie object and poster appear in a frame. When you export
to PDF, the movie object’s boundary determines the size of the movie in the PDF document, not the frame size or
poster size.
For best results, keep the poster size and dimension the same as the movie. If you apply a clipping path or resize the
image, the exported PDF document may not include these changes.
Movies are displayed in the topmost layer of the PDF document. If you overlay a movie with another object in
InDesign, that object appears beneath the movie in the exported PDF.
If you want the PDF document to include a play area with feathering or other effects that may not export well when
applied to a poster, consider using a placed image for the play area, and then place a movie (without a poster) on top
of the placed image.
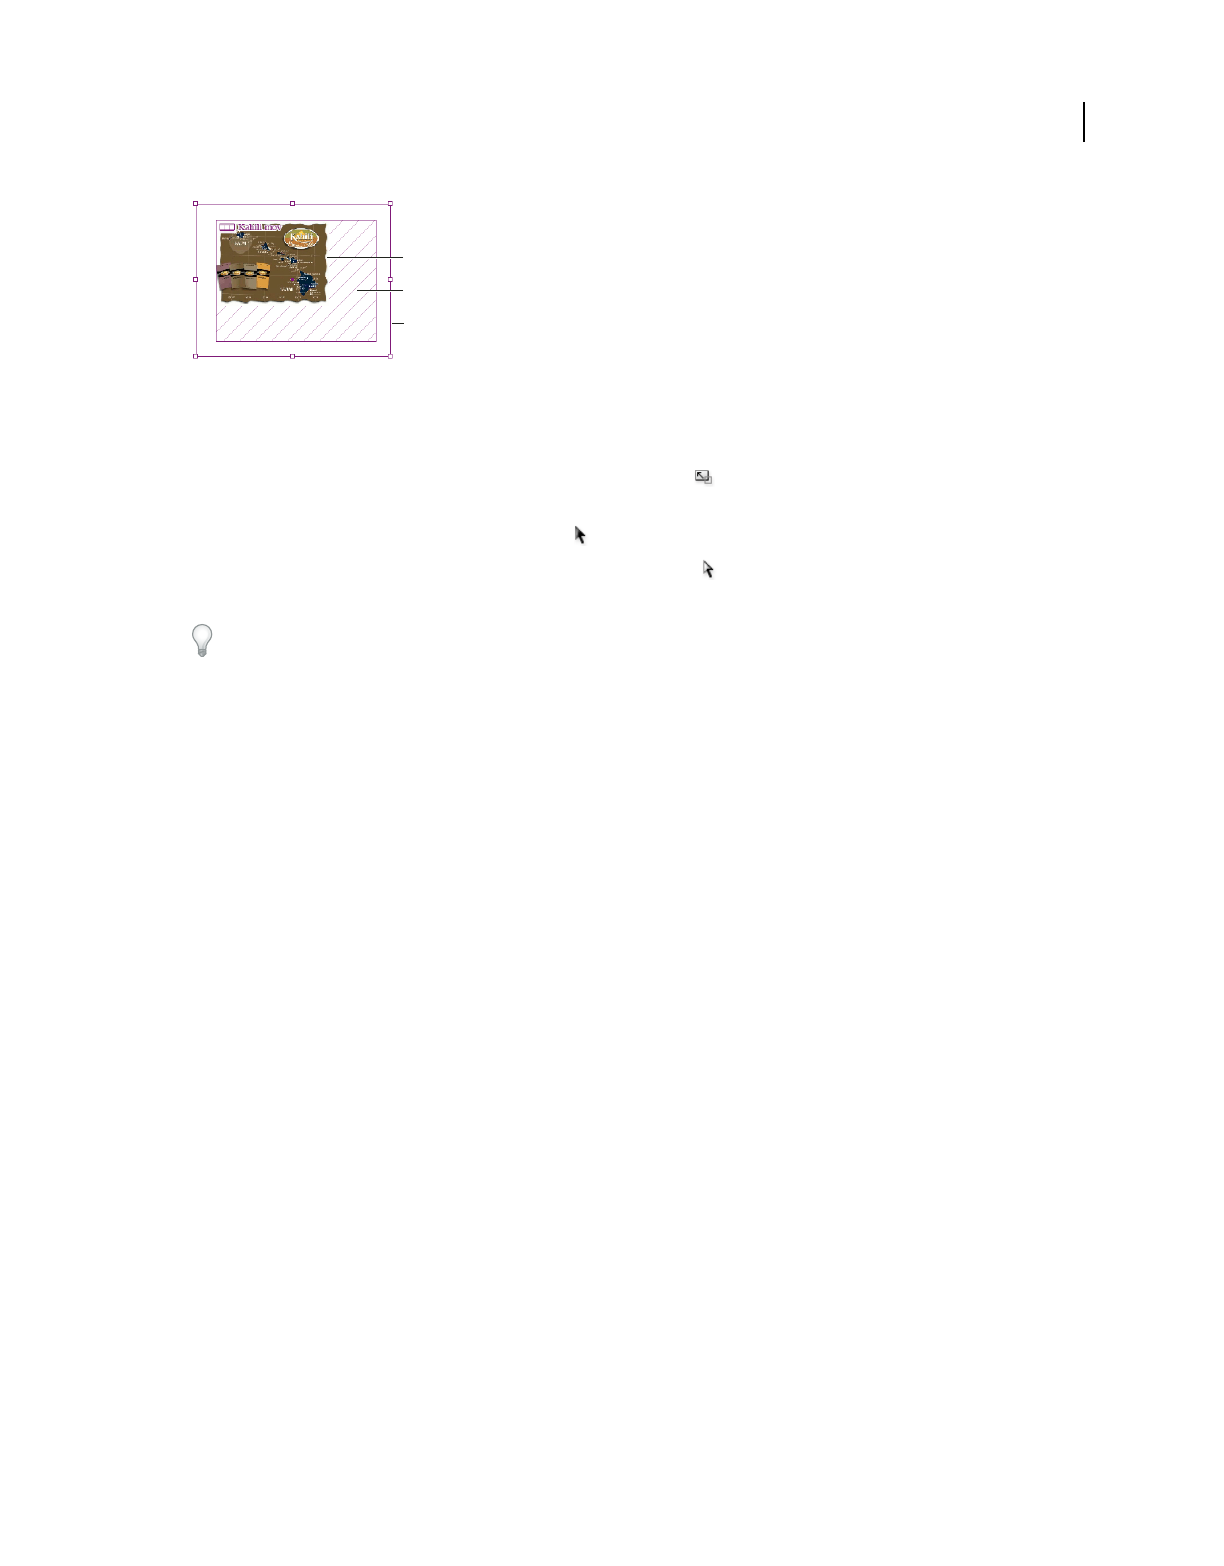
551
USING INDESIGN
Interactive documents
Last updated 11/16/2011
Resizing movie object
A. Poster B. Movie object C. Frame
❖Do any of the following:
•To resize the movie object, poster, and frame, use the Scale tool and drag one of the corner handles (hold down
Shift to maintain proportions).
•To resize only the frame, use the Selection tool to drag a corner handle.
•To resize the poster or media object, use the Direct Selection tool to select the poster. Switch to the Selection tool,
and then drag a corner handle.
You can also use the Fitting commands (Object > Fitting) to resize a poster within a frame.
Relink legacy media files
The FLV and F4V video formats and MP3 audio formats work best in InDesign for exporting interactive documents.
While video formats such as MOV, AVI, and MPG can be exported to PDF, they cannot be exported to Flash-based
formats such as SWF.
Use Adobe Media Encoder to convert video files to FLV, F4V, or MP4 format. Adobe Media Encoder does not convert
audio file formats to MP3, but you can use an application such as Apple iTunes to do so.
1Open Adobe Media Encoder, add the video files you want to convert, and convert them to FLV or F4V format.
For more information, see Adobe Media Encoder Help.
2Do any of the following actions:
•Place the media file in an InDesign document. See “Add movies and sound files to documents” on page 548.
•If the video files have already been placed in an InDesign document, use the Links panel to relink the files to
their new versions. See “Update, restore, and replace links” on page 392.
Animation
Animation effects let you make objects move in your exported SWF files. For example, you can apply a motion preset
to an image that makes it appear to fly in from the left side of the screen while shrinking and spinning. Use the
following tools and panels to animate documents.
A
B
C

552
USING INDESIGN
Interactive documents
Last updated 11/16/2011
Click Play Button to view animation
Animation panel Apply a motion preset and edit settings such as duration and speed.
Direct Selection tool and Pen tool Edit the path on which the animated object travels.
Timing panel Determine the order in which objects on a page are animated.
Preview panel View the animation in an InDesign panel.
Note: A related type of animation you can add in InDesign is a button rollover effect. For more information, see “Create
buttons” on page 558.
Animate a document with motion presets
Motion presets are pre-made animations that you can apply to objects quickly. Use the Animation panel to apply
motion presets and change animation settings such as duration and speed. The Animation panel also lets you specify
when an animated object plays.
These motion presets are the same as those found in Adobe Flash CS5 Professional. You can import any custom
motion preset created in Flash Professional. You can also save motion presets you create and use them in InDesign or
Flash Professional.
Animation features are supported only when exporting to the Adobe Flash Player (.SWF). They are not supported
when exporting to Interactive PDF. To add animation effects to a PDF file, export a selection as a SWF file from
InDesign and place that SWF file in the InDesign document.
For a video tutorial about creating and editing motion presets, see www.adobe.com/go/lrvid5159_id_en.
1Place the object you want to animate in your document.
2In the Animation panel (Window > Interactive > Animation), choose a motion preset from the Preset menu.
3Specify motion preset options.
4To edit the motion path, use the Pen tool and Direct Selection tool.
5Use the Timing panel to determine the order of the animation effects.
6Use the Preview panel to preview the animation in InDesign.
To remove animation from an object, select the object and click the Delete icon in the Animation panel.

553
USING INDESIGN
Interactive documents
Last updated 11/16/2011
Note: When certain animation effects such as Fade In are combined with a page transition or page curl, the animation
may not behave as expected in the Preview panel or in the exported SWF file. For example, objects that are set to "fade
in" are visible while turning the page when they should start as invisible. To avoid this conflict, do not use page transitions
on those pages with animation, and turn off the Include Interactive Page Curl option in the SWF Export dialog box.
Motion presets that may not work as expected with page transitions and page curl include Appear, Fade In, the various
Fly-in presets, Zoom in 2D, and Swoosh.
Convert selected objects to a motion path
You can create animation by selecting an object and a path and converting it to a motion path. If you selected two
closed paths, such as two rectangles, the path on top becomes the motion path.
1Select the object you want to animate and the path you want to use as the motion path.
You cannot convert more than two selected objects.
2In the Animation panel, click the Convert To Motion Path button .
3Change the settings in the Animation panel.
Motion preset options
Motion preset options appear in the Animation panel. Click the Properties option to display advanced settings.
Name Specify a name for the animation. Specifying a descriptive name is especially useful when setting up an action
that triggers the animation.
Preset Choose from a list of pre-defined motion settings.
Event(s) By default, On Page Load is selected, which means the animated object plays when the page is opened in the
SWF file. Choose On Page Click to trigger the animation when the page is clicked. Choose On Click (Self) or On Roll
Over (Self) to trigger the animation when the object itself is clicked or moused over, respectively. If you create a button
action that triggers the animation, On Button Event is selected. (See “Add actions to buttons” on page 560.) You can
specify multiple events to start the animation.
If you select the On Roll Over (Self) event, you can also select Reverse On Roll Off. This option reverses the action of
the animation when the mouse moves off the object.
Create Button Trigger Click this button to trigger the animation from an existing object or button. After you click
Create Button Trigger
, click the object that triggers the animation. The object is converted to a button, if necessary,
and the Buttons panel opens.
Duration Specify how much time it takes for the animation to occur.
Play Specify the number of times the animation is played, or select Loop to cause the animation to play repeatedly until
it’s stopped.
Speed Choose an option to determine whether the animation speed is a steady rate (None), starts slowly and speeds
up (Ease In), or slows down at the end (Ease Out).
Note: The following options are available when Properties is expanded.
Animate Choose From Current Appearance to use the object’s current properties (scale percentage, rotation angle,
and position) as the starting point of the animation.
Choose To Current Appearance to use the object’s properties as the ending point of the animation. Using this option
is especially useful in slide shows. For example, objects that fly in from off the page can appear on the page rather than
on the pasteboard, improving the appearance of the printed document.
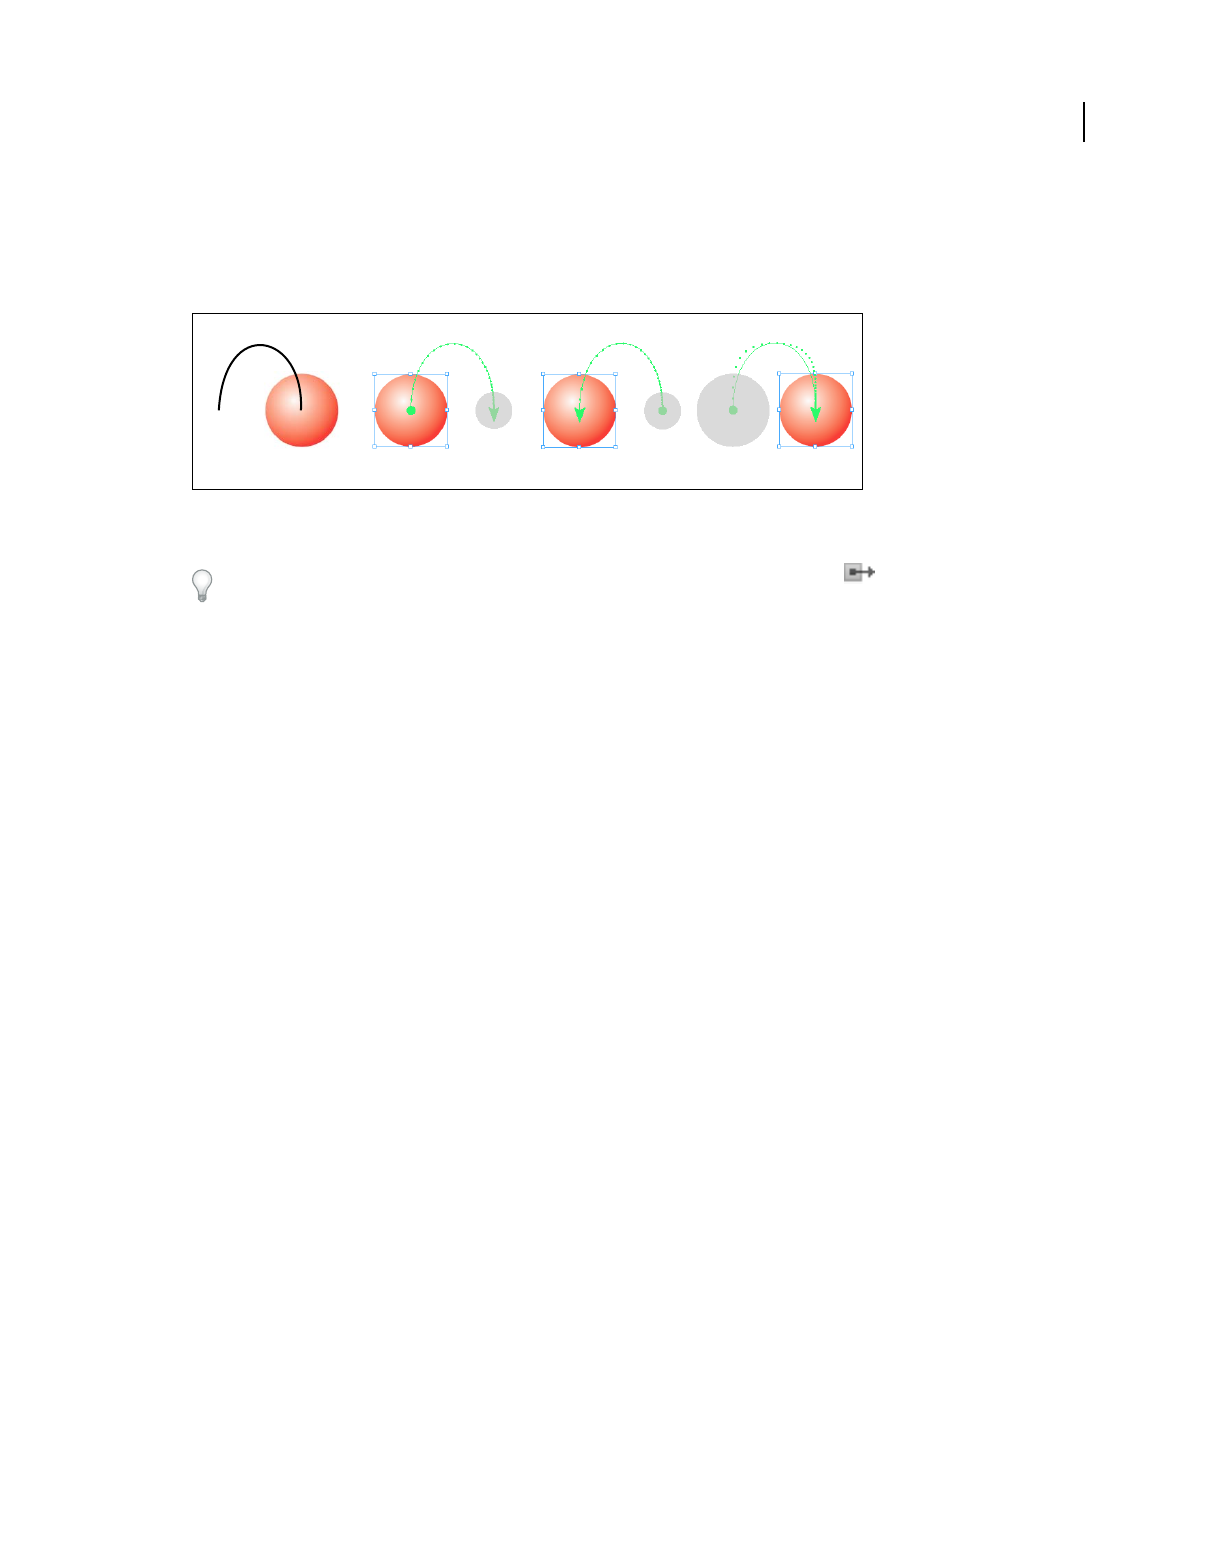
554
USING INDESIGN
Interactive documents
Last updated 11/16/2011
Choose To Current Location to use the current object’s properties as the starting point of the animation and the
object’s position as the ending point. This option is similar to From Current Appearance, only the object finishes in its
current location and the motion path is offset. This option is especially useful for certain presets, such as blurs and
fades, to prevent the object from appearing in an undesirable state at the end of the animation.
Animate settings
A. Object and path before animation B. From Current Appearance C. To Current Appearance D. To Current Location
To display the proxy at the end of the motion path, click the Show Animation Proxy at the bottom of the
Animation panel.
Rotate Specify a rotation angle that the object completes during the animation.
Origin Use the proxy to specify the origin point of the motion path on the animated object.
Scale Specify a percentage value to determine whether the object increases or decreases in size during playback.
Opacity Choose an option to determine whether the animation remains solid (None), gradually becomes visible (Fade
In), or gradually becomes invisible (Fade Out).
Visibility Select Hide Until Animated or Hide After Animating to make an object invisible before or after playback.
Manage motion presets
You can save animation settings as motion presets that you can easily reuse in InDesign. You can also import presets
from XML files that can be opened in Flash Professional or shared with other InDesign users.
Save motion presets for reuse
Custom presets appear at the top of the Presets menu in the Animation panel.
1In the Animation panel, change the settings as needed.
2Choose Save from the Animation panel menu.
3Type a name for the preset and click OK.
Delete custom motion presets
Use the Manage Presets dialog box to delete motion presets that you’ve saved, duplicated, or imported. You cannot
delete the motion presets in brackets that were installed with InDesign. When you delete a motion preset, it is deleted
both from the Presets menu and from the computer.
1Choose Manage Presets from the Animation panel menu.
2Select the preset you want to delete, and click Delete.
Duplicate motion presets
1Choose Manage Presets from the Animation panel menu.
2Select the preset you want to duplicate, and click Duplicate.
BCDA
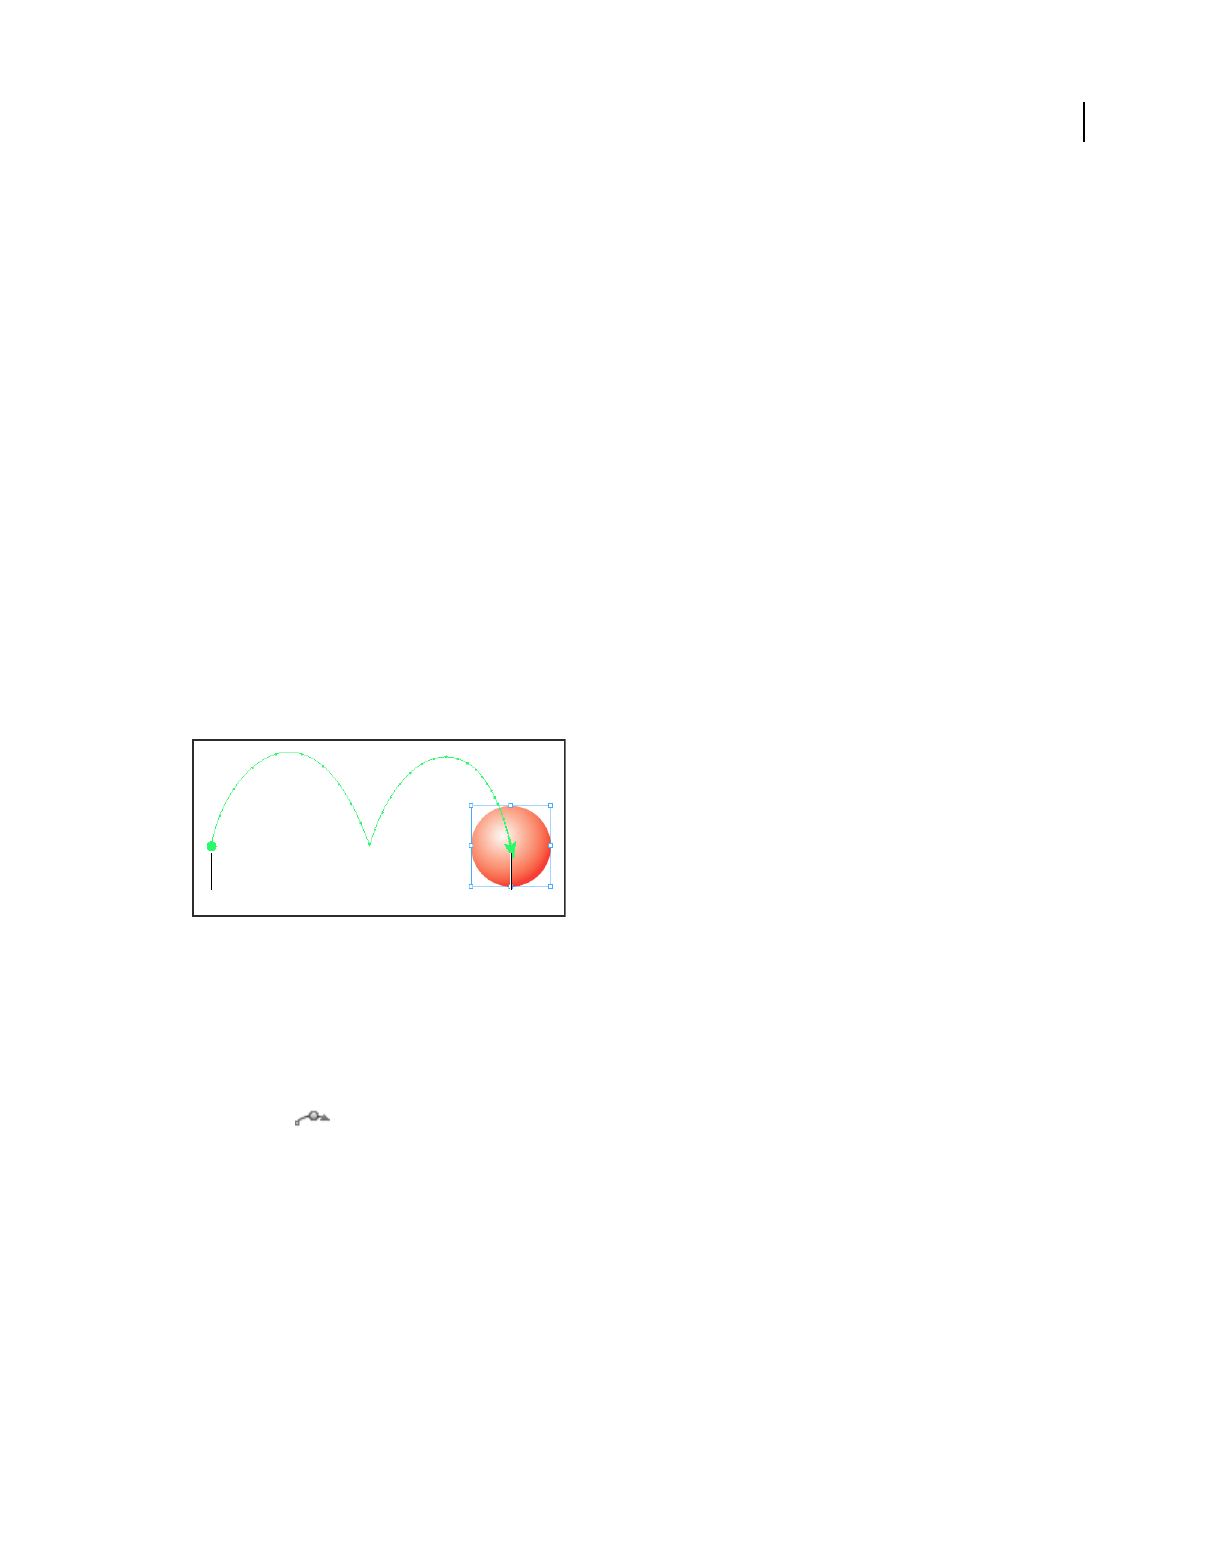
555
USING INDESIGN
Interactive documents
Last updated 11/16/2011
Save motion presets as XML files
Saving motion presets as XML files is useful if you want to share a motion preset with other InDesign users or open
the motion preset in Flash Professional.
When you save a motion preset as an XML file, the motion path is saved, along with the Duration, Speed, Scale, Rotate,
and Opacity settings.
1Choose Manage Presets from the Animation panel menu.
2Select a preset and click Save As.
3Specify the name and location of the motion preset, and click Save.
Import motion presets
You can import motion presets that have been exported from either InDesign or Flash Professional as XML files.
1Choose Manage Presets from the Animation panel menu.
2Click Load.
3Double-click the .xml file you want to import.
Edit a motion path
When you select an object that has animation, the motion path appears next to the object.
Motion path
A. Starting point B. Ending point
❖To edit a motion path, do any of the following:
•Use the Direct Selection tool and the Pen tool to edit a motion path using the same method you use to edit a
path. See “Editing paths” on page 351.
•To create a motion path from an existing path, select a path and an object, and click the Convert To Motion Path
button
in the Animation panel.
•To change the direction of the path, click Properties in the Animation panel, and then choose a setting from the
Animate menu. (See “Motion preset options” on page 553.) You can also select the motion path and choose
Object > Paths > Reverse Path. If you want to reverse the path without moving the object, remove the animation,
reverse the path, and then redo the animation.
Use the Timing panel to change the animation order
Use the Timing panel to change the order of when animated objects play. The Timing panel lists the animations on
the current spread based on the page event assigned to each animation. For example, you can change one set of
animations that occur when the page is loaded, and then change another set of animations that occur when the page
is clicked.
BA

556
USING INDESIGN
Interactive documents
Last updated 11/16/2011
Animated objects are listed in the order they were created. Animations listed for the Page Load event occur
sequentially by default. Animations listed for the Page Click event are played in sequence each time the page is clicked.
You can change the animation order, have objects play at the same time, and delay animation.
1Choose Window > Interactive > Timing to display the Timing panel.
2To determine whether to edit the timing of Page Load or Page Click events, choose an option from the Event menu.
Page Load and Page Click appear only if one or more items are assigned to that event.
3To edit the timing, do any of the following:
•To change the animation order, drag items up and down in the list. The top items are animated first.
•To delay animation, select the item, and specify the number of seconds of delay.
•To play multiple animated objects together, select the items in the list, and click the Play Together button
to link the items. Shift-click to select a range of items, and Ctrl-click (Windows) or Command-click (Mac OS)
to select non-adjacent items.
•If you decide you don’t want one or more linked items to play together, select them and click the Play Separately
button
.
•To play links items a specific number of times or to loop them, select all the items that are linked together, and
then specify the number of times the animations play back, or select Loop.
•To change which event triggers the animation, select the item and choose Reassign To On Page Load or Reassign
To On Page Click.
•To remove an item from the currently selected event (such as Page Load or Page Click), choose Remove Item.
If the item isn’t assigned to any event, it appears in the Unassigned category, which you can choose from the
Event menu.
Page transitions
Page transitions display a decorative effect such as a dissolve or wipe when you’re turning pages in a document that is
exported to SWF or PDF format. You can apply different transitions to different pages, or you can apply a single
transition to all the pages. Page transitions are especially useful when you create a slideshow in PDF or SWF format.
More Help topics
“Exporting to Adobe PDF” on page 501
“Create interactive SWF (Flash) files for the web” on page 523
Apply page transitions
You can apply page transitions to individual spreads or to all spreads in the document. Page transitions appear when
you export an InDesign document to PDF or SWF format. You cannot apply transitions to different pages within the
same spread or to master pages.
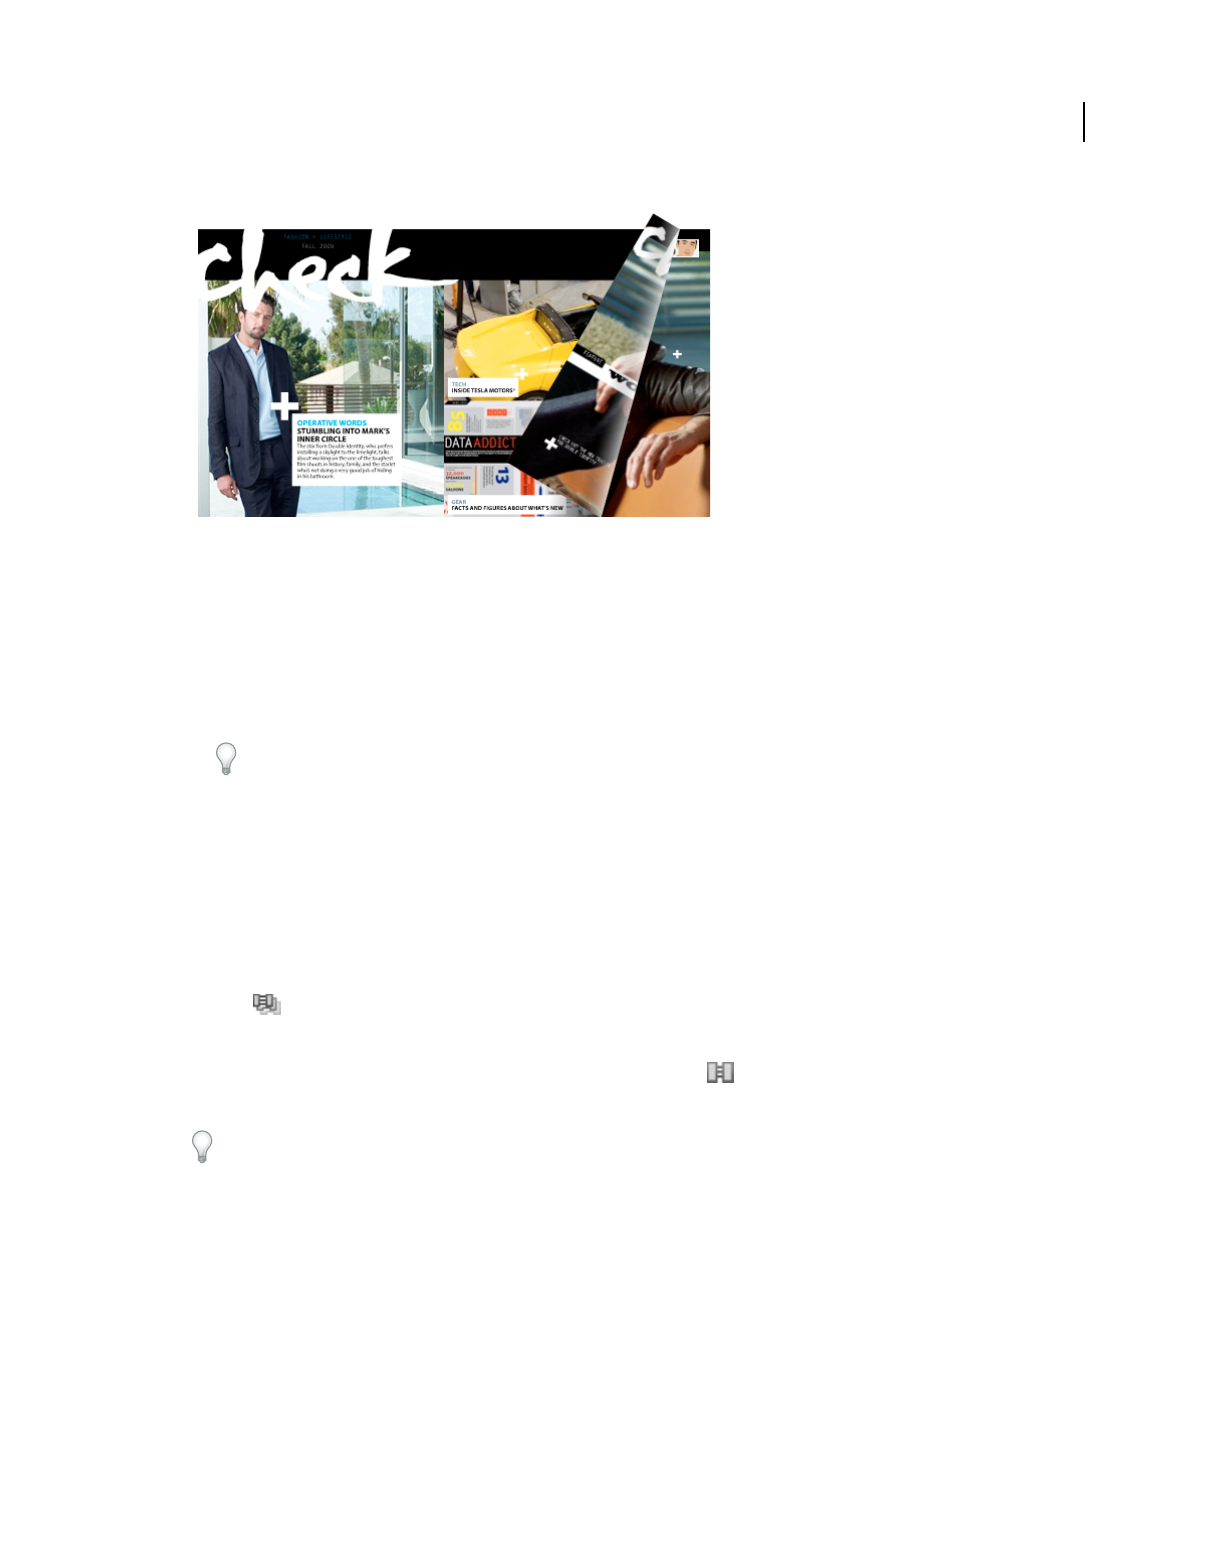
557
USING INDESIGN
Interactive documents
Last updated 11/16/2011
Page turn transition in SWF file. Click a corner of the image to view transition.
1In the Pages panel, select the spreads to which you want to apply the page transition.
Make sure the spread is selected, not simply targeted. The numbers below the pages in the Pages panel should be
highlighted.
2To display the Page Transitions panel, choose Window > Interactive > Page Transitions.
3Choose a Transition from the Transition menu.
Hold the mouse pointer over the thumbnail to view an animated preview of the selected transition.
You may wonder whether it’s necessary to select the Page Turn (SWF Only) transition to create a page curl effect
in SWF file. It isn’t necessary to apply this transition to turn pages manually in the SWF file. If you select the Include
Interactive Page Curl option in the Export SWF dialog box, you can either turn the pages manually by dragging a
corner in the exported SWF file, or you can use arrow keys or navigation buttons to activate whatever page
transition you select for that page.
4Customize the transition as desired by choosing options from the Direction and Speed menus.
5(Optional) To apply the selected transition to all spreads currently in the document, click the Apply To All Spreads
icon
, or choose Apply To All Spreads from the Page Transitions panel menu.
6(Optional) Select a different spread in the Pages panel, and apply a different page transition.
When you apply a page transition to a spread, a Page Transition icon appears next to the spread in the Pages panel.
You can hide these icons in the Pages panel by deselecting the Page Transitions option in the Panel Options dialog box.
To preview the page transitions, export the document either to PDF or SWF format.
Clear transitions
•In the Pages panel, select the spread from which you want to clear the transition, and then choose None from the
Transition menu in the Page Transition panel.
•To remove transitions from all spreads, choose Clear All from the Page Transitions panel menu.
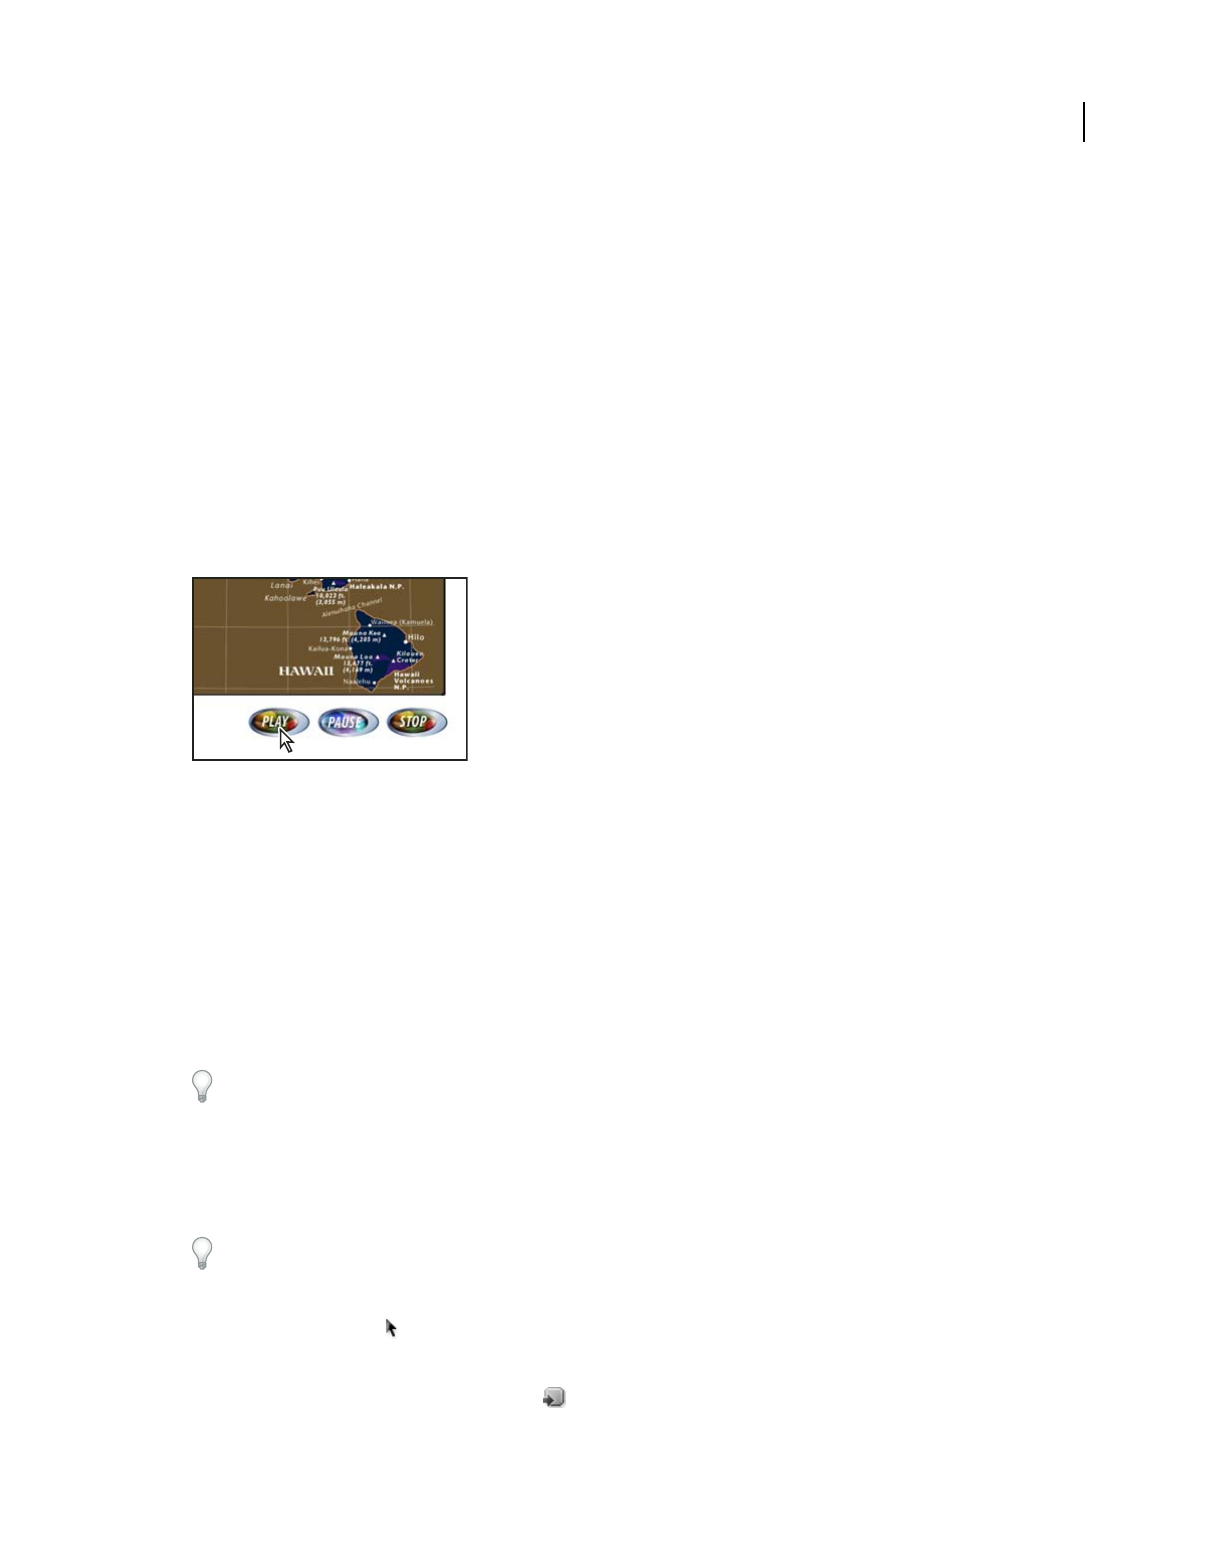
558
USING INDESIGN
Interactive documents
Last updated 11/16/2011
Viewing page transitions in a PDF
To include page transitions when you export the PDF document, select a page transition from Page Transitions menu
in the Export to Interactive PDF dialog box.
To see page transitions in the exported PDF, place the PDF in Full Screen Mode by pressing Ctrl+L (Windows) or
Command+L (Mac
OS) in Adobe Acrobat or Adobe Reader. Press Esc to exit from Full Screen Mode.
Buttons
Create buttons
You can create buttons that perform an action when the document is exported to SWF or PDF format. For example,
you can create a button that jumps to a different page or opens a website.
Button set up to play movie in exported PDF
When you create a button, you can do the following:
•Use the Buttons panel to make the buttons interactive. When a user clicks a button in the exported SWF or PDF
file, an action is performed. See “Make buttons interactive” on page 559.
•Use the Appearance section of the Buttons panel to define the appearance the button takes in response to certain
mouse actions. See “Change button appearance for rollover and clicking” on page 562.
•Use the Object States panel to create multi-state objects. See “Create multi-state objects” on page 564.
•Create a “hot spot” or “hot link” effect that displays an image when the button is moused over or clicked. See “Create
button hot spots” on page 565.
When working on buttons and designing dynamic documents, select the Interactivity workspace.
Create a button
1Use the Pen tool or a drawing tool, such as the Rectangle tool or Ellipse tool, to draw the button shape. If necessary,
use the Type tool to add text to the button, such as “Next” or “Purchase.”
If you’re creating navigation buttons (such as Next Page or Previous Page) that appear on multiple pages, add them
to a master page so that you don’t have to re-create buttons on every document page. These buttons appear on all
document pages to which the master is applied.
2Use the Selection tool to select the image, shape, or text frame that you want to convert.
You cannot convert a movie, sound, or poster to a button.
3Click the Convert Object To A Button icon in the Buttons panel (choose Window > Interactive > Buttons). Or,
choose Object > Interactive > Convert to Button.

559
USING INDESIGN
Interactive documents
Last updated 11/16/2011
4In the Buttons panel, do any of the following:
•In the Name text box, specify a name for the button to distinguish it from other buttons you create.
•Specify one or more actions for the button to determine what happens when the button is clicked in the exported
PDF or SWF file. See “Make buttons interactive” on page 559.
•Activate additional appearance states and change their appearance to determine what the button looks like when
you use the mouse to roll over the button or click it in the exported PDF or SWF file. See “Change button
appearance for rollover and clicking” on page 562.
5Use the Preview panel (Window > Interactive > Preview) to test the button before you export the document to
interactive PDF or SWF.
Add a button from the Sample Buttons panel
The Sample Buttons panel includes a number of pre-created buttons that you can drag into your document. These
sample buttons include effects such as gradient feathers and drop shadows, with a slightly different appearance for the
Rollover appearance. The sample buttons are also assigned actions. For example, the sample arrow buttons are preset
with Go To Next Page or Go To Previous Page actions. You can edit these buttons to suit your needs.
The Sample Buttons panel is an object library. As with any object library, you can add buttons to the panel and remove
ones you don’t want to use. (See “Use object libraries” on page 397.) The sample buttons are stored in the
ButtonLibrary.indl file, which is located in the Presets/Button Library folder in the InDesign application folder.
1Choose Sample Buttons from the Buttons panel menu to open the Sample Buttons panel.
2Drag a button from the Sample Buttons panel to the document. If you want navigation buttons to appear on every
page, add the buttons to a master page.
3Select the button using the Selection tool, and then edit the button as necessary using the Buttons panel.
While editing the sample buttons, keep the following in mind:
•If you add text to a button, remember to copy and paste the text from the Normal button state to the Rollover button
state. Otherwise, the text you add does not appear when the mouse rolls over the button in the PDF or SWF file.
•You can resize buttons. If you drag a pair of Next Page/Previous Page arrow buttons, resize the first button, and
then select the second button, and choose Object > Transform Again > Transform Again.
Use the Preview panel to test the button.
Convert a button to an object
When you convert a button to an object, the contents of the button remain on the page without the button properties.
Any content associated with the button’s other states are also removed.
1Use the Selection tool to select the button.
2Choose Object > Interactive > Convert To Object.
Make buttons interactive
You can create, edit, and manage interactive effects in InDesign. When the document is exported to Adobe PDF or
SWF, these interactive actions can be active.
For example, suppose you want to create a button that causes a sound to play in a PDF document. You can place the
sound file in an InDesign document, and then create a button that causes the sound to play when you click the button
in the PDF document.
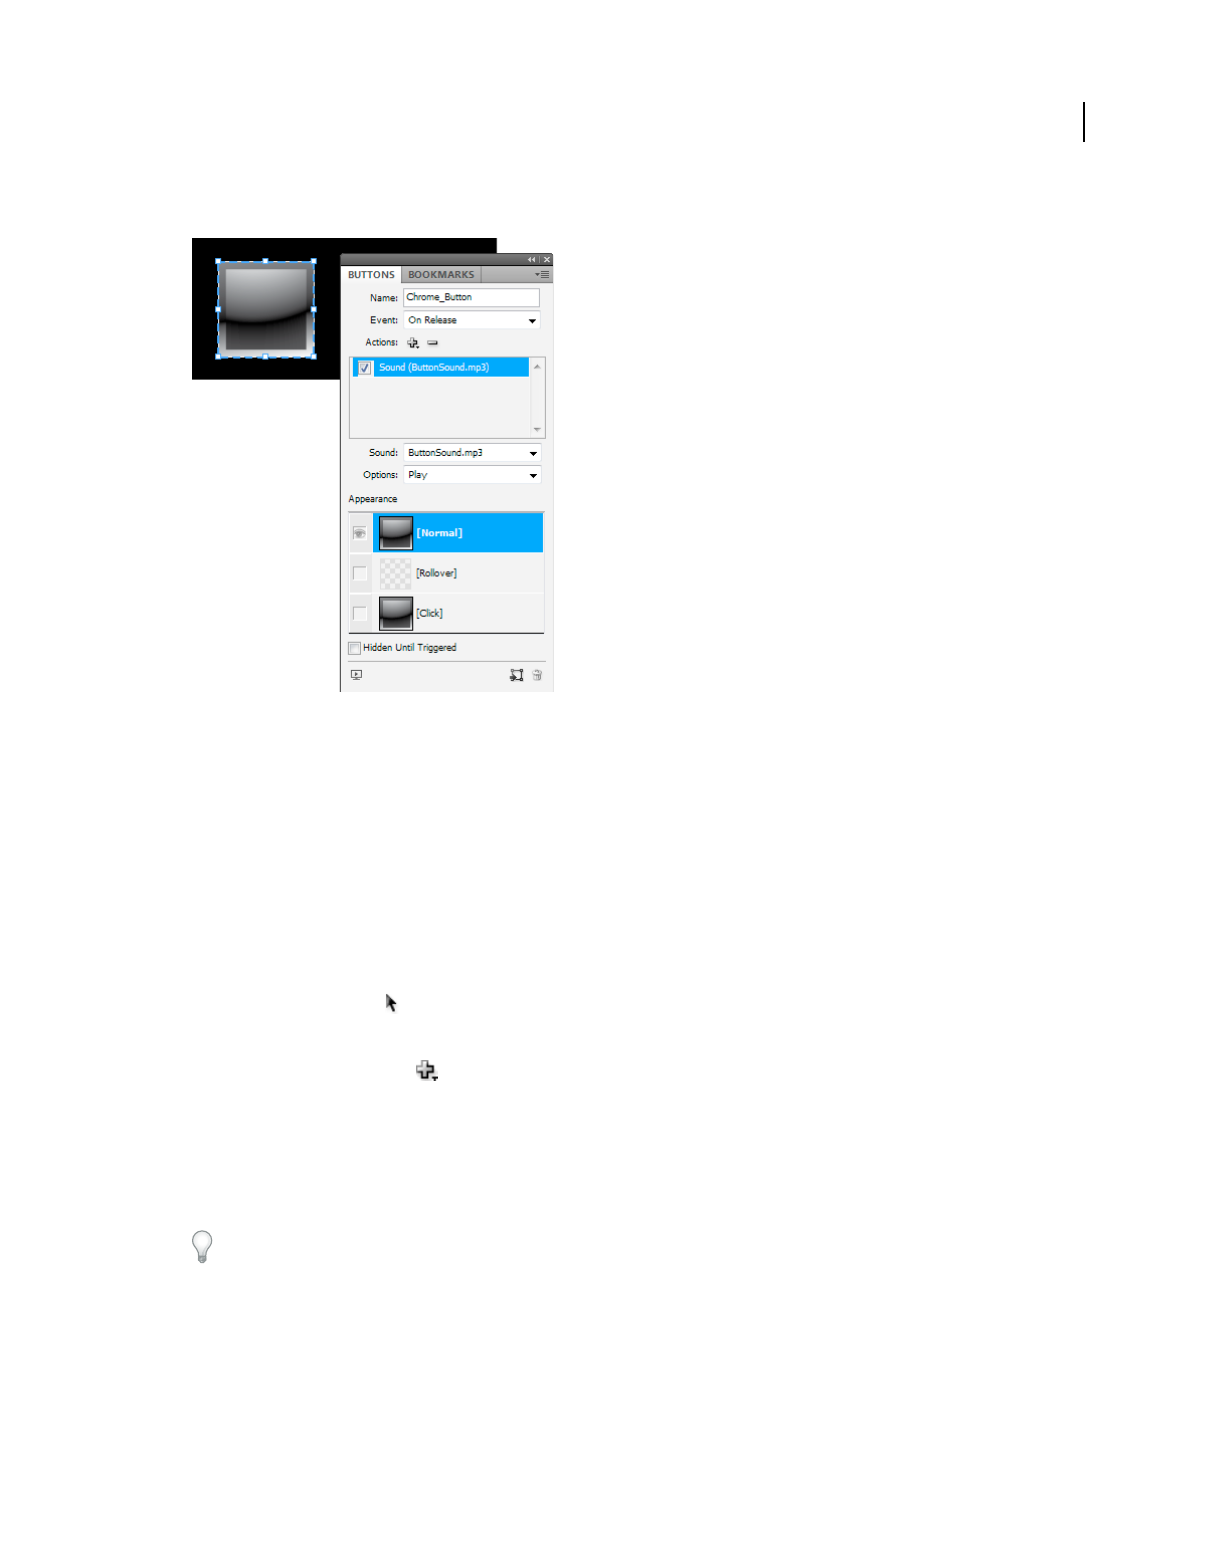
560
USING INDESIGN
Interactive documents
Last updated 11/16/2011
In this example, clicking the mouse button is the event, and playing the sound is the action.
This button is set to play a sound when the mouse button is released.
Note: Some actions are supported in both PDF and SWF files, and some actions are supported only in PDF or SWF. When
choosing an action, avoid choosing a PDF-only action if you’re exporting to SWF or a SWF-only action if you’re exporting
to PDF.
Add actions to buttons
You can assign actions to different events. For example, in an exported PDF file, you can specify a sound to play when
the mouse pointer enters the button area, and a movie to play when the mouse button is clicked and released. You can
also assign multiple actions to the same event. For example, you can create an action that plays a movie and sets the
view zoom to Actual Size.
1Use the Selection tool to select the button you created.
2In the Buttons panel, choose an event, such as On Release, that determines how actions are activated.
3Click the plus sign button next to Actions, and choose the action to assign to the event.
4Specify the settings of the action.
For example, if you choose Go To First Page, specify the zoom. If you choose Go To URL, specify the web page address.
Some actions, such as Go To Next View, do not have additional settings.
5If necessary, continue to add as many actions as needed to any event.
To test the button, export the document to PDF or SWF, and view the exported file. If you’re exporting to PDF, make
sure that the Interactive Elements option is selected. If you’re exporting to SWF, make sure that Include Buttons is
selected.

561
USING INDESIGN
Interactive documents
Last updated 11/16/2011
Event types
Events determine how actions are activated in buttons when the document is exported to Adobe PDF or SWF. (In
Acrobat, events are called triggers.)
On Release When the mouse button is released after a click. This is the most commonly used event, because it gives
the user one last chance to drag the cursor off the button and not activate the action.
On Click When the mouse button is clicked (without being released). Unless you have a specific reason for using On
Click, it’s preferable to use On Release so that users have a chance to cancel the action.
On Roll Over When the mouse pointer enters the button area defined by the button’s bounding box.
On Roll Off When the mouse pointer exits the button area.
On Focus When the button in a PDF file receives focus, either through a mouse action or pressing the Tab key.
On Blur When the focus moves to a different button or form field in the PDF file.
Action types
When you create an action, you indicate what happens when the specified event occurs—usually when someone clicks
the button. You can assign the following actions to occur when the event type is activated:
Go To Destination Jumps to the specified text anchor created using the Bookmarks or Hyperlinks panel. See “Create
jumps to text anchors” on page 562.
Go To First/Last/Next/Previous Page Jumps to the first, last, previous, or next page in the PDF or SWF file. Select an
option from the Zoom menu to determine how the page is displayed.
Go To URL Opens the web page of the specified URL.
Show/Hide Buttons Toggles between showing and hiding specified buttons in the exported PDF or SWF file. For
example, if you want one button to appear when another button is moused over, you can hide the target button until
it’s triggered and create an action that displays the hidden button on rollover. See “Display a different button on
rollover” on page 565.
Video Lets you play, pause, stop, or resume the selected movie. Only movies that have been added to the document
appear in the Video menu.
Sound Lets you play, pause, stop, or resume the selected sound clip. Only sound clips that have been added to the
document appear in the Sound menu.
Animation (SWF) Lets you play, pause, stop, or resume to selected animation. Only animations that have been added
to the document appear in the Animation menu.
Go To Page (SWF) Jumps to the page in the SWF file you specify.
Go To State (SWF) Jumps to a specific state in a multi-state object. For example, if a multi-state object includes several
different images as states, you can use this action to display a particular image.
Go To Next/Previous State (SWF) Jumps to the next or previous state in a multi-state object. These options are
especially useful for clicking through a slideshow. See “Create multi-state objects” on page 564.
Go To Next View (PDF) Jumps to a page after going to the previous view. In the same way that a Forward button is
available in a web browser only after someone clicks the Back button, this option is available only if the user has jumped
to a previous view.
Go To Previous View (PDF) Jumps to the most recently viewed page in the PDF document, or returns to the last used
zoom size.

562
USING INDESIGN
Interactive documents
Last updated 11/16/2011
Open File (PDF) Launches and opens the file that you specify. If you specify a file that is not PDF, the reader needs the
native application to open it successfully. Specify an absolute pathname (such as C:\docs\sample.pdf).
View Zoom (PDF) Displays the page according to the zoom option you specify. You can change the page zoom level
(such as Actual Size), the page layout (such as Continuous - Facing), or the rotation orientation.
Edit or delete button actions
1Use the Selection tool to select the button.
2In the Buttons panel, do any of the following:
•To deactivate actions, deselect the check box next to the item. Deactivating events and actions can be useful for
testing purposes.
•To change the order, drag and drop actions.
•To delete an action, select the action in the list box, and click the Delete Selected Action button .
•To edit an action, choose the event to which the action is assigned, select the action in the list box, and change the
settings. If you need to replace a action for an existing event, delete the action, and then add the new action to the
event.
Create jumps to text anchors
If you create a text anchor in an InDesign document, you can cause a button to jump to that anchor, even if it’s in
another InDesign document. Use the Bookmarks panel and Hyperlinks panel to add text anchors. You cannot create
jumps from buttons to bookmarks that aren’t text anchors.
Note: If you set a hyperlink destination to a button, the hyperlink will have no effect in the exported PDF or SWF
document.
1Use the Selection tool to select the button.
2In the Buttons panel, choose the event such as On Release that will trigger the jump.
3Click the plus sign button next to Actions, and choose Go To Destination.
4Select one of the open InDesign documents from the Documents menu, or click the folder icon to the right of the
menu and specify the file.
5Specify an anchor that was created using the Bookmarks panel or Hyperlinks panel.
6Select an option from the Zoom menu to determine how the page is displayed.
Note: If you specify an anchor in a different document, remember to export that target document to PDF, and use the
same filename as the InDesign document, replacing the INDD extension with PDF. Also, store the PDF documents in the
same folder to make sure that the links remain valid in Acrobat and Reader.
More Help topics
“Create bookmarks for PDF” on page 533
“Hyperlinks panel overview” on page 535
Change button appearance for rollover and clicking
A button consists of a group of individual objects that each represent a button appearance (sometimes called a “state”).
Each button can have as many as three appearances: Normal, Rollover, and Click. In the exported file, the Normal
appearance is used unless the mouse pointer moves into the area (Rollover) or the mouse button is clicked on the
button area (Click). You can make each appearance different to provide visual feedback.
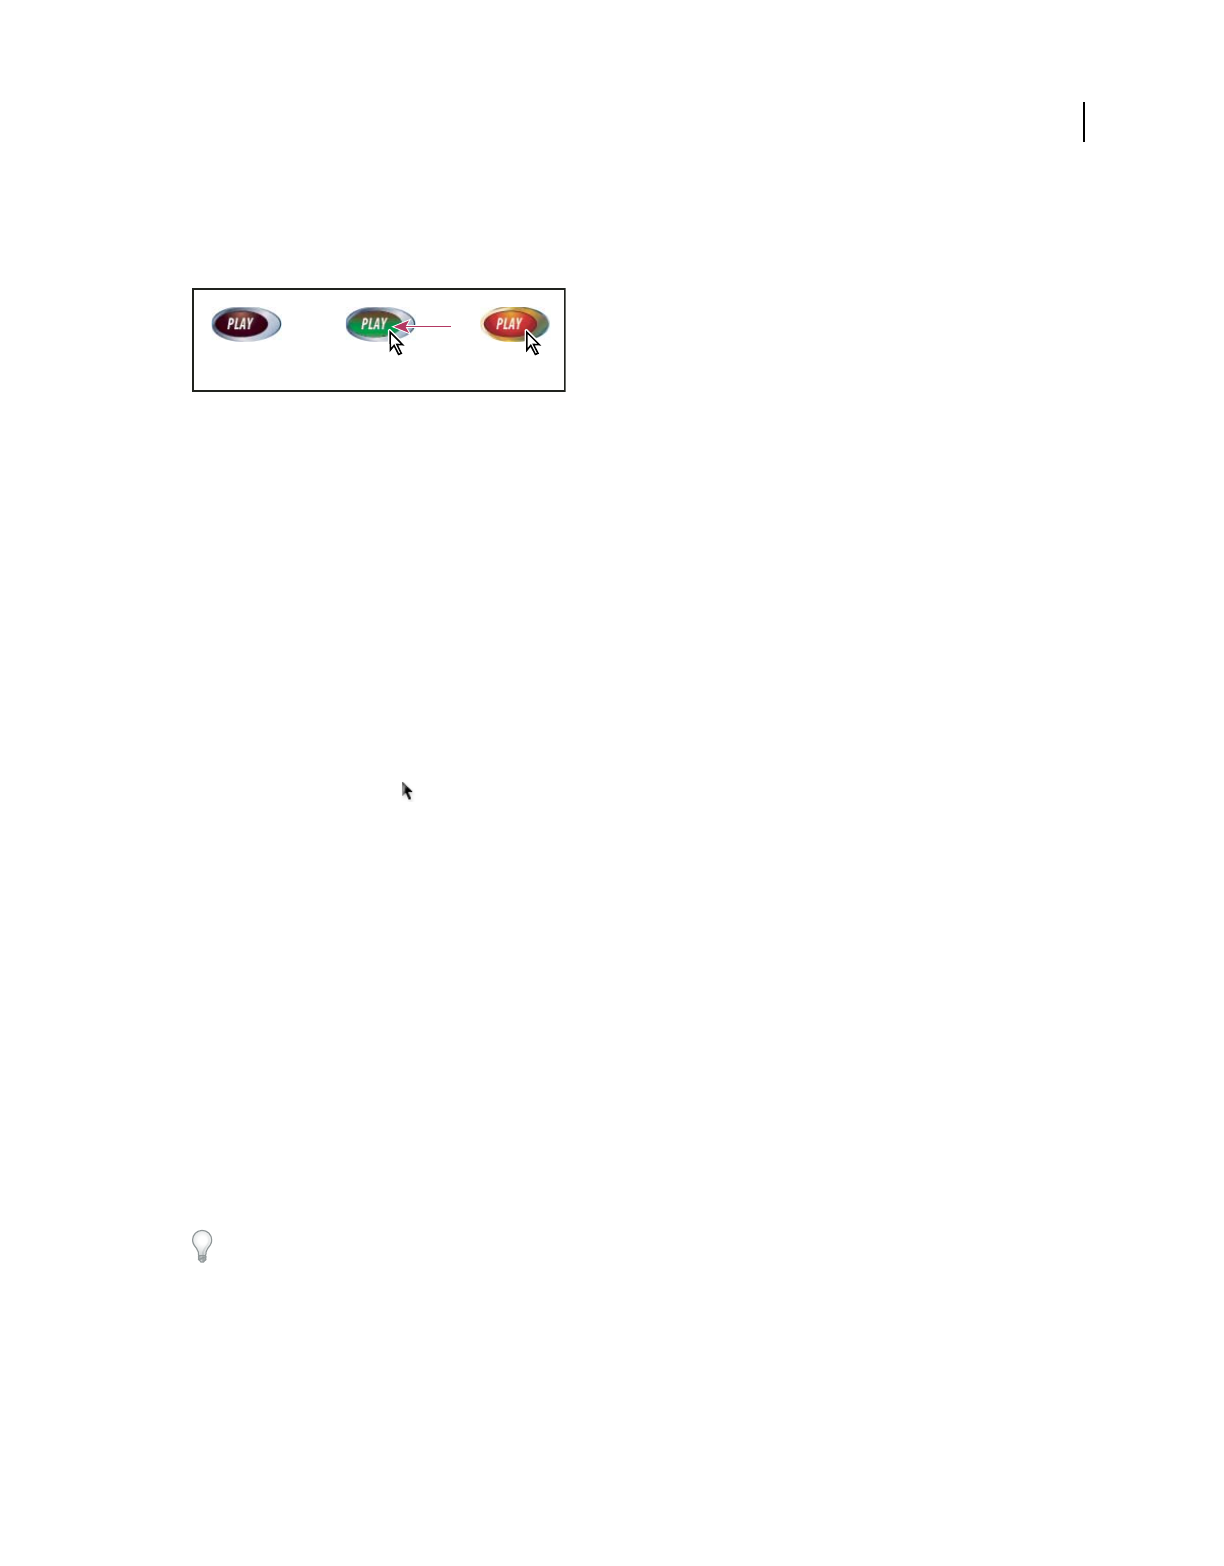
563
USING INDESIGN
Interactive documents
Last updated 11/16/2011
By default, any button you create is defined with the Normal appearance containing the button’s text or image. When
you activate a new appearance, the Normal appearance is copied. To distinguish an appearance from the others, you
can change the color or add text or an image.
Button states
A. Pointer not over button area (Normal) B. Pointer enters button area (Rollover) C. Pointer clicks (Click)
Note: The clickable area, or hot spot, of the button is the square bounding box of the largest state in the button. For
example, a round button has a square hot spot.
Change button appearances
If you’re creating a button with multiple appearances (Normal, Rollover, and Click), it’s a good idea to finish designing
the button before you activate other appearances. When you activate the Rollover or Click appearance, the Normal
appearance is copied.
Some changes affect only the selected appearances, while other changes affect all active appearances. If you select an
appearance and apply a different background color or edit the text, the change affects only the selected appearance. If
you use the Selection tool to move or resize the button, the change affects all appearances.
1Choose Window > Interactive > Buttons to display the Buttons panel.
2Using the Selection tool , select the button in the layout that you want to edit.
3Click [Rollover] to activate the Rollover appearance.
The Normal appearance is copied to Rollover.
4With Rollover still selected, change the appearance of the button.
•To change the color, choose a swatch from the Stroke or Fill menu in the Control panel.
•To place an image in the appearance, select the existing image by using the direct selection tool or double-clicking
the existing button image, and then choose File
> Place and double-click a file.
•To paste an image into a text frame, copy it to the Clipboard, select the appearance in the Buttons panel, and then
choose Edit
> Paste Into.
•To type text, select the Type tool, click the button, and type the text. You can also choose Edit > Paste Into to copy
a pasted text frame.
5To add the Click appearance, click [Click] to activate it, and then follow the same procedure to change its
appearance.
6Use the Preview panel to test the different button appearances.
To change the size of the State Appearance thumbnails in the Buttons panel, choose Panel Options from the Buttons
panel menu, select an option, and then click OK.
Delete and disable appearances
1Select the appearance in the Buttons panel.
AB C

564
USING INDESIGN
Interactive documents
Last updated 11/16/2011
2Do any of the following:
•To delete the Rollover or Click appearance, click the Delete icon at the bottom of the panel. Deleting an appearance
is especially useful if you edit the Normal appearance extensively and decide you want to base Rollover or Click on
the new Normal appearance.
•To disable an appearance without deleting it, click the Eye icon next to the appearance to deselect it. Disabled states
are not exported to the PDF or SWF file.
Note: You cannot delete or disable the Normal state.
Create multi-state objects
The Object States panel lets you create multiple versions of an object. A state is a version of a page item. An object that
includes multiple states is called a multi-state object.
With the Object States panel, there is no limit to the number of states you can create for an object. Each time you create
a state, you generate another version of your page item. Only one state is visible on the page at a time. For print and
PDF output, only the active state appears in the final output.
Create a multi-state object slide show
One of the most common uses for a multi-state object is a slide show that lets viewers of a SWF file click through a set
of images. For example, you can create a slide show of 20 images without having to place the images on 20 different
pages.
1Place the images that will appear in the slide show.
For best results, make sure that the image frames are the same size.
A state does not have to be a single item—it can be a collection of items.
2To stack the images, select them, and click Align Horizontal Centers and Align Vertical Centers in the
Control panel.
3With the images still selected, open the States panel (Window > Interactive > Object States), and click the Convert
Selection To Multi-State Object button
.
The images appear as states in the Object States panel, and a dashed frame borders the selected images.
4Create navigation buttons that trigger the Go To Next State and Go To Previous State actions when the mouse
button is release. See “Create buttons” on page 558.
5Use the Preview panel (Window > Interactive > Preview) to test the navigation buttons.
6Export the document to SWF format. See “Interactive documents” on page 523.
Edit a multi-state object
1Select a multi-state object.
2In the Object States panel, do any of the following:
•To edit a state, select the state in the Object States panel, and then edit the object. For example, you can add a
stroke or fill or resize the object.
•To add an object to an existing state, select both the object and the multi-state object, and then click the Add
Objects To Visible State button
.
•To add an object to an existing multi-state object, select both the object and the multi-state object, and then click
the Convert Selection To Multi-State Object button
.
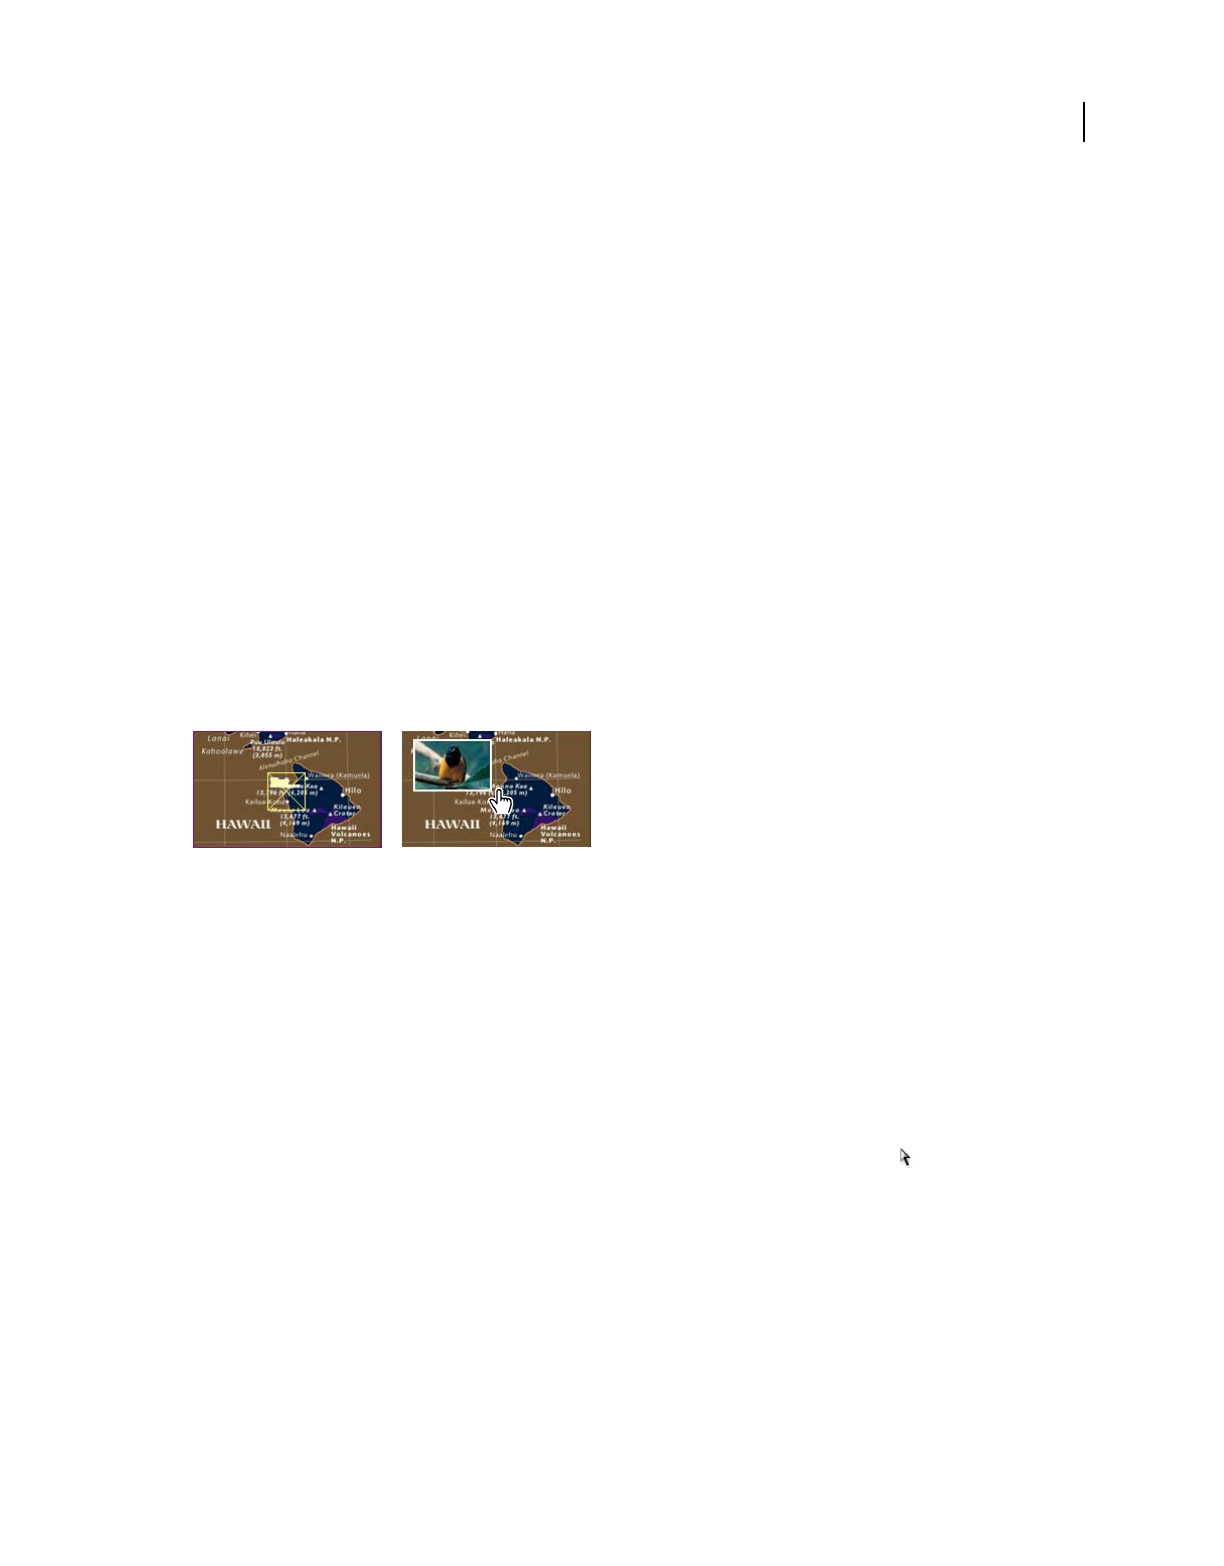
565
USING INDESIGN
Interactive documents
Last updated 11/16/2011
•To duplicate a state, select a state to base the new state on, and choose New State from the panel menu. Add,
remove, or edit the content of that state.
•To paste objects into an existing state, cut or copy one or more objects, select the multi-state object, select the
state in the Object States panel, and choose Paste Into State from the Object States panel menu.
•To convert a multi-state object back to a set of independent objects, select the state in the Object States panel
and choose Release State To Object from the panel menu. To convert all states in the multi-state object to
objects, choose Release All States To Objects.
•To delete a state and remove its contents, select the state and choose Delete State from the panel menu.
•To hide the multi-state object in the exported file until it’s triggered by a button, choose Hide Until Triggered
from the panel menu.
•To reset all multi-state objects in the document to the first state, choose Reset All Multi-State Objects To First
State from the panel menu. When you select a state, the object remains in that state, even if you close and reopen
the document. This option is a quick way to reset all the multi-state objects.
Create button hot spots
In some cases, you may want the button area (called a “hot spot” or “hot link”) to be invisible until the mouse pointer
hovers over it. For example, when you move a pointer over a button on a map, an image could be displayed that
represents a region, and the image could disappear when the pointer moves away from the region.
In the exported PDF file, holding the pointer over a hot spot causes an image to appear.
Display a hidden image on rollover
One way to achieve a “hot spot” effect is to apply an image to the Rollover state in the Buttons panel. To do this, create
a button in which the [Rollover] state displays an image while the [Normal] state doesn’t display the image.
1Select the image you want to use as a hot spot. Make sure the frame of the image does not have a border or
background.
2In the Buttons panel (choose Window > Interactive > Buttons), click the [Normal] appearance to convert the
selected image to a button.
3Click the [Rollover] appearance in the Buttons panel to activate it.
4Click the [Normal] appearance again. Then select the image using the Direct Selection tool and delete the image.
Make sure you delete the image (the contents of the frame), not the frame and contents. Deleting the frame deletes
the entire button.
5Use the Preview panel to preview the hot spot effect.
Display a different button on rollover
You can create a hot spot in which clicking or mousing over an object displays another object. To do this, create two
buttons, hide one of the buttons, and use the Show/Hide Button action to show and hide the target button.
1Create an object to be used as the source button. In the Buttons panel, click the Convert Object To A Button icon.
2Place the image you want to be used as the target button, and convert it to a button.

566
USING INDESIGN
Interactive documents
Last updated 11/16/2011
3Select the target image and select Hidden Until Triggered at the bottom of the Buttons panel.
The image needs to be hidden in the exported document so that it can be displayed when the source button is moused
over or clicked.
4Select the source button and create two different actions, one to show the target image and a second to hide the
target image.
If you want the image to appear when the mouse hovers over the source button, use the On Roll Over and On Roll Off
events. If you want the image to appear when you click the source button and disappear when you release it, use the
On Click and On Release events. In either case, use the Show/Hide Buttons action to display and hide the target button.
See “Make buttons interactive” on page 559.
5Use the Preview panel to test the buttons.
Changing PDF options for buttons
1Use the Selection tool to select the button.
2From the Buttons panel menu, choose PDF Options.
3Type a description that acts as alternative text for visually impaired users.
4Indicate whether the button should be printed in the PDF file, and then click OK.
Set the button tab order
The tab order determines the next (or previous) field to receive focus when a user presses Tab (or Shift+Tab) in the
PDF or SWF document. The tab order includes buttons on hidden layers, but not buttons on master pages.
1Go to the page containing the buttons.
2Choose Object > Interactive > Set Tab Order.
3Select each button you want to move and drag it to its new position, or click the Move Up and Move Down buttons.
When you’re done, click
OK.
If you use Acrobat to edit the PDF and add more buttons or form fields to the page, you may need to specify a new tab
order in Acrobat.
Digital Publishing Suite overview
The Adobe Digital Publishing Suite is a set of tools and hosted services that lets publishers create and distribute
publications on tablet devices such as the Apple iPad. These digital publications are called folios.
With InDesign, you can create folios and preview them on a tablet device and on a desktop previewer. However, a
subscription to the Digital Publishing Suite is necessary to build a custom viewer. Publishers can distribute their digital
publications by submitting them to the Apple Store or to the Android Market. You can make folios available to a
publisher who has a subscription to the Digital Publishing Suite.
The Folio Builder and Overlay Creator panels let you create digital publications for tablet devices.
To access the panels:
Overlay Creator Choose Window > Extensions > Overlay Creator.
Folio Builder Choose Window > Extensions > Folio Builder.
For more information on creating digital publications for tablet devices, see www.adobe.com/go/learn_dps_help_en.

567
Last updated 11/16/2011
Chapter 19: XML
For detailed information and instructions, click the links below.
Working with XML
Adobe InDesign CS5 is one of many applications that can produce and use XML. After you tag content in an InDesign
file, you save and export the file as XML so that it can be repurposed in another InDesign file or another application.
Similarly, you can import an XML file into InDesign and instruct InDesign to display and format the XML data any
way you want.
About XML
XML (Extensible Markup Language) is a way to repurpose data in a file or automate the process of replacing the data
in one file with data from another file. XML employs tags to describe parts of a file—a heading or a story, for example.
These tags mark data so it can be stored in an XML file and handled appropriately when it is exported to other files.
Think of XML as a translation mechanism for data. XML tags label text and other content in a file so that applications
can recognize and present the data.
Gabriel Powell provides a video tutorial about using XML in InDesign at Creating a Basic XML-ready Template.
Extensible language
XML is considered an extensible language because individuals create their own XML tags—they can create one tag for
each type of information that they want to repurpose. XML tags don’t carry information about how data is supposed
to be displayed or formatted. XML tags are strictly for identifying content.
In InDesign, for example, you can create a Heading1 tag and assign it to each first-level heading in a document. After
you save the document as an XML file, the Heading1 content can be imported and put to use—by any application that
can read XML—as a web page, printed catalog, directory, price list, or database table.
InDesign is one of many applications that can produce and use XML. After you tag content in an InDesign file, you
save and export the file as XML so that it can be repurposed in another InDesign file or another application. Similarly,
you can import an XML file into InDesign and instruct InDesign to display and format the XML data any way you
want.
In InDesign, you can create XML tags and tag parts of a document even if you’re not experienced with XML. InDesign
handles XML programming behind the scenes and creates the XML for you when you export a document in XML
format.
Important: Do not confuse XML tags with InDesign tagged text. For more information about tagged text, which is a
different method of exporting and importing InDesign content, view the Tagged Text PDF at
www.adobe.com/go/learn_id_taggedtext_cs5_en (PDF).
XML data structure
The element is the building block of XML data; an element is data that has been tagged. In XML files, elements are
nested within other elements to create a hierarchical structure for the data.
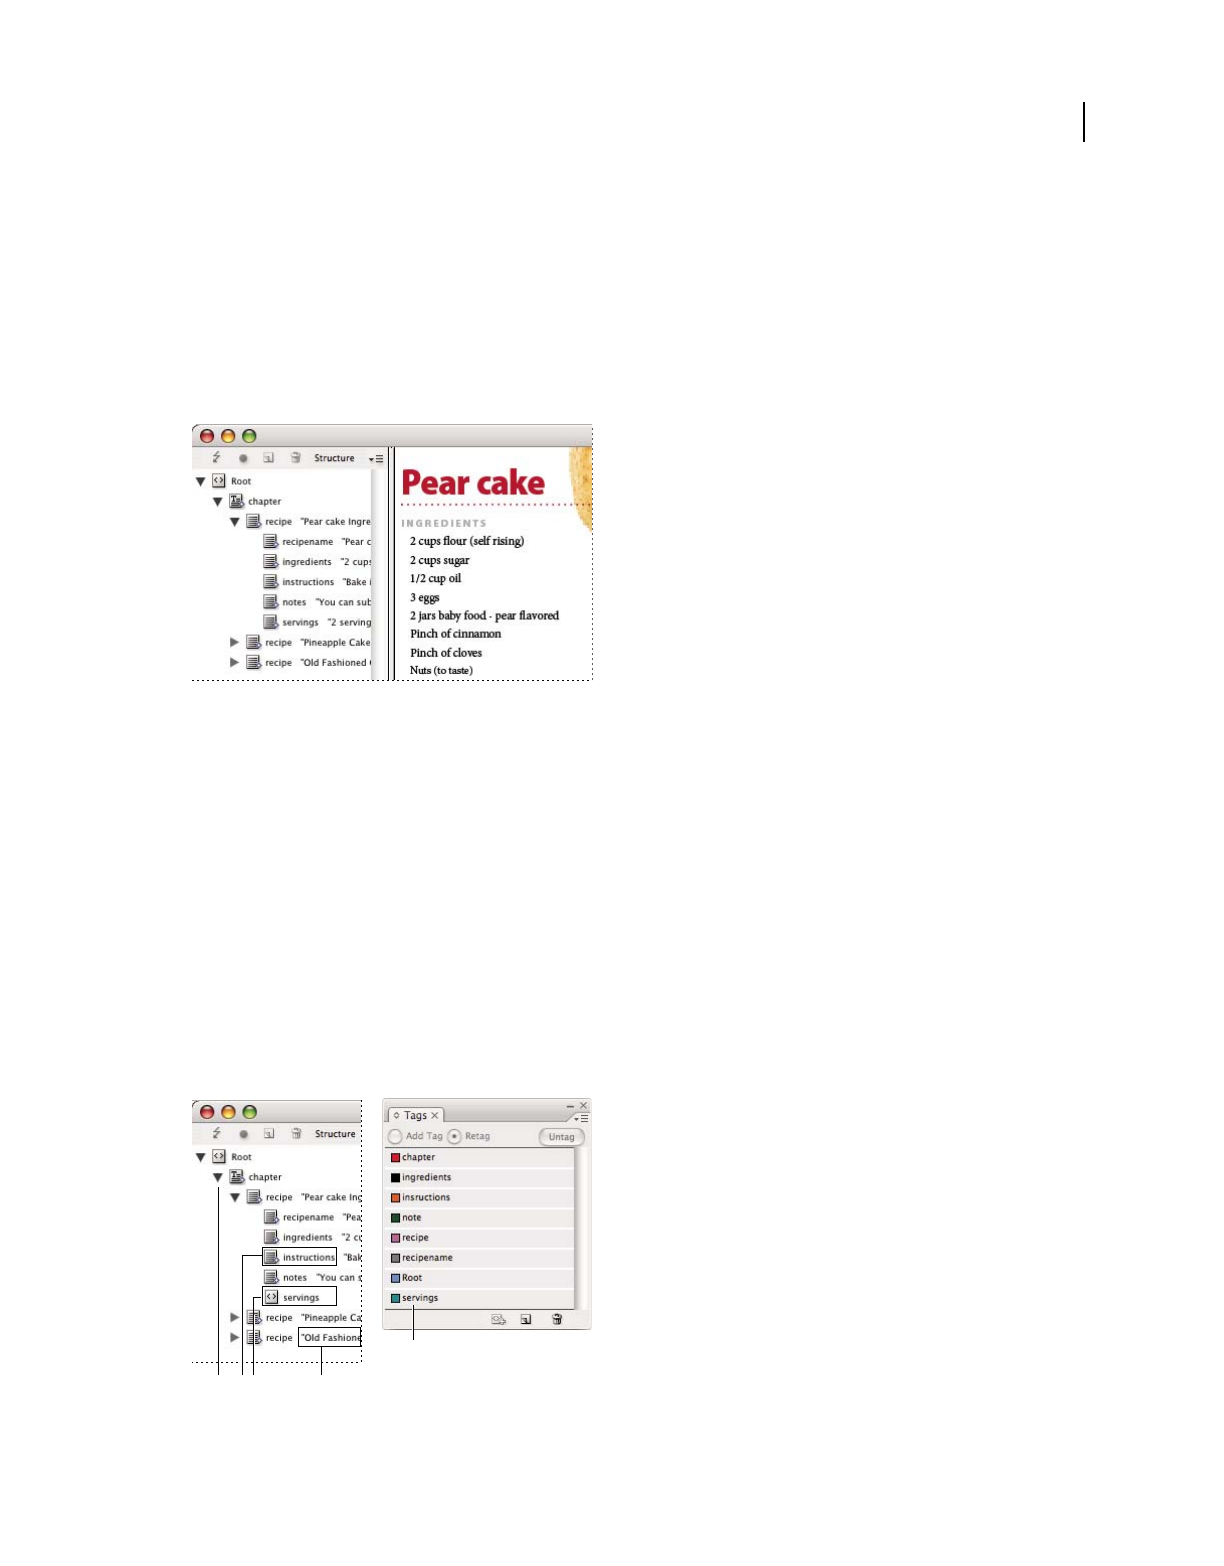
568
USING INDESIGN
XML
Last updated 11/16/2011
You can see the structure of XML data in the Structure pane, which displays the hierarchy and sequence of elements.
In the XML structure, child elements are contained by parent elements, which in turn may also be child elements. Or,
seen from the other direction, parent elements contain child elements, and these child elements may in turn be parent
elements to other child elements.
For example, in the following image, you can see a chapter element that contains (is the parent of) several recipe
elements. Each recipe element, in turn, is the parent of elements called recipename, ingredients, instructions,
notes, and servings. All elements are contained inside the Root element, which appears at the top of the Structure
pane.
XML in InDesign Structure pane (left) and placed in layout (right)
For more information on using XML in InDesign, visit www.adobe.com/go/learn_id_XMLscript.
More Help topics
“Structure pane overview” on page 586
“Place (import) text” on page 136
XML tools
InDesign provides the Structure pane and the Tags panel for working with XML content. The Structure pane displays
all the elements in the document and their hierarchical structure. To help you identify each element, InDesign displays
its element tag and an icon that indicates what type of content it holds. In addition, the Structure pane can display the
first few words of text in an element, called a text snippet, which is not to be confused with snippet files that store
objects for reuse.
Structure pane (left) and Tags panel (right)
A. Triangle to expand or collapse elements B. Element (placed in layout) C. Element (not in layout) D. Text snippet E. Element tag
A
E
B C D

569
USING INDESIGN
XML
Last updated 11/16/2011
The Structure pane lets you view, edit, and manage XML elements. You use the Structure pane in many ways when
working with XML. For example, to place imported XML content into the layout, you can drag elements from the
Structure pane directly to a page. You also use the Structure pane to adjust the hierarchy of the elements. You can add
elements, attributes, comments, and processing instructions by way of the Structure pane.
The Tags panel lists tags for elements. You can import, export, add, delete, and rename tags. You use the Tags panel
to apply element tags to content that you plan to export to XML, and to apply tags to frames before importing XML
content into them.
More Help topics
“Structure pane overview” on page 586
About DTD files
To share XML data with others, you need to agree on a standard set of tag names and element attributes so that
everyone in your group uses and applies tags the same way. One method for handling the sharing of XML data is to
use a document type definition (DTD) file.
A DTD file provides a set of elements and attributes for members of the group to use. It also defines the rules about
where elements can appear in the structural hierarchy. For example, the DTD file may require the Title element to be
a child of the Story element because the title is supposed to appear inside the story; if you tag a title without tagging the
story it appears in, the DTD file marks the Title element as invalid. You can search for and flag invalid structural errors
in an InDesign file with a DTD file. This process is called validating.
To use a DTD file (if your document doesn’t already contain one), you load it into your document. This imports the
element names from the DTD into the Tags panel. Others who have loaded the same DTD file have the same element
names, which ensures that everyone in the group uses the same elements. The imported elements are locked, which
means they can’t be deleted or renamed unless the DTD file is deleted from the document.
You may find that a DTD file created by a group or industry similar to yours includes tags and structures that meet
your needs. For a current list of registered DTDs, visit www.xml.com/pub/rg/DTD_Repositories (English only).
More Help topics
“Use DTD files to validate XML” on page 592
XML rule sets
XML rule sets are sets of instructions written in a scripting language (such as JavaScript or AppleScript) that evaluate
XML data and take certain actions if that data meets certain conditions. Each rule consists of at least one condition and
at least one action. A rule evaluates the XML data against the conditions, and if a condition is met, then it takes the
appropriate action. For example, an XML rule can specify that whenever the Paragraph element appears under the
Subhead element (a condition), a specific style (an action) is applied; or that whenever the Product element (a
condition) appears, a new frame is created and a product image is imported (actions). XML rules are a means of
dynamically creating and formatting layouts based on XML.
For information on XML rule sets and other XML scripting resources, see www.adobe.com/go/learn_id_XMLscript.
Preparing XML files for K4 or InCopy workflows
To prepare files with XML tagging for use within the K4 or InDesign/InCopy workflow environments, you may need
to adjust how you prepare the structure and import XML into InDesign files.

570
USING INDESIGN
XML
Last updated 11/16/2011
There are two methods for importing XML into InDesign: merge and append. Merge can replace the existing structure,
whereas append adds to any existing structure. In both cases, it is important that the root element is not associated
with a text frame. Either use the default element named "Root" or rename this element based on your current workflow
or requirement as needed, again being sure that it is not associated with a text frame.
For more information on using XML in K4 or InCopy workflows, contact your system administrator.
Importing XML
For detailed information and instructions, click the links below.
XML import and layout methods
After you import XML data, the imported content appears as elements (the basic building blocks of XML) in the
Structure pane. InDesign doesn’t create new frames or pages when you import XML.
Append or merge?
You can import XML using one of two modes: append or merge. The method you choose depends on your workflow
(manual or automated), how you want to handle existing content in your document, and whether you want advanced
options for handling the imported data.
Append mode When you append imported content, the existing structure and content of the document are left as is;
the new XML content is placed on the bottom of the Structure pane, in the form of elements.
Merge mode When you merge imported content, InDesign compares the incoming XML with the structure and
names of elements already in your document. If the elements match, imported data replaces existing document
content, and is merged into correctly tagged frames (or placeholders) in the layout. (Elements for which InDesign can’t
find a matching name and hierarchy rank are placed on the Structure pane so that you can place them manually.)
Merge mode not only makes automated layout possible, it provides more advanced import options, including the
ability to filter incoming text and clone elements for repeating data.
Content layout
After importing XML content, your next step is to place it in your document. You can place content manually,
automatically, or by using scripting. The method you choose depends on the content you’re importing, your
document’s layout, and your workflow process.
Place content manually With the manual method, you drag elements from the Structure pane onto the pages of your
document or into frames. This method requires little setup or planning. Use this method if the type of content you
import varies or if you acquire content from multiple sources.
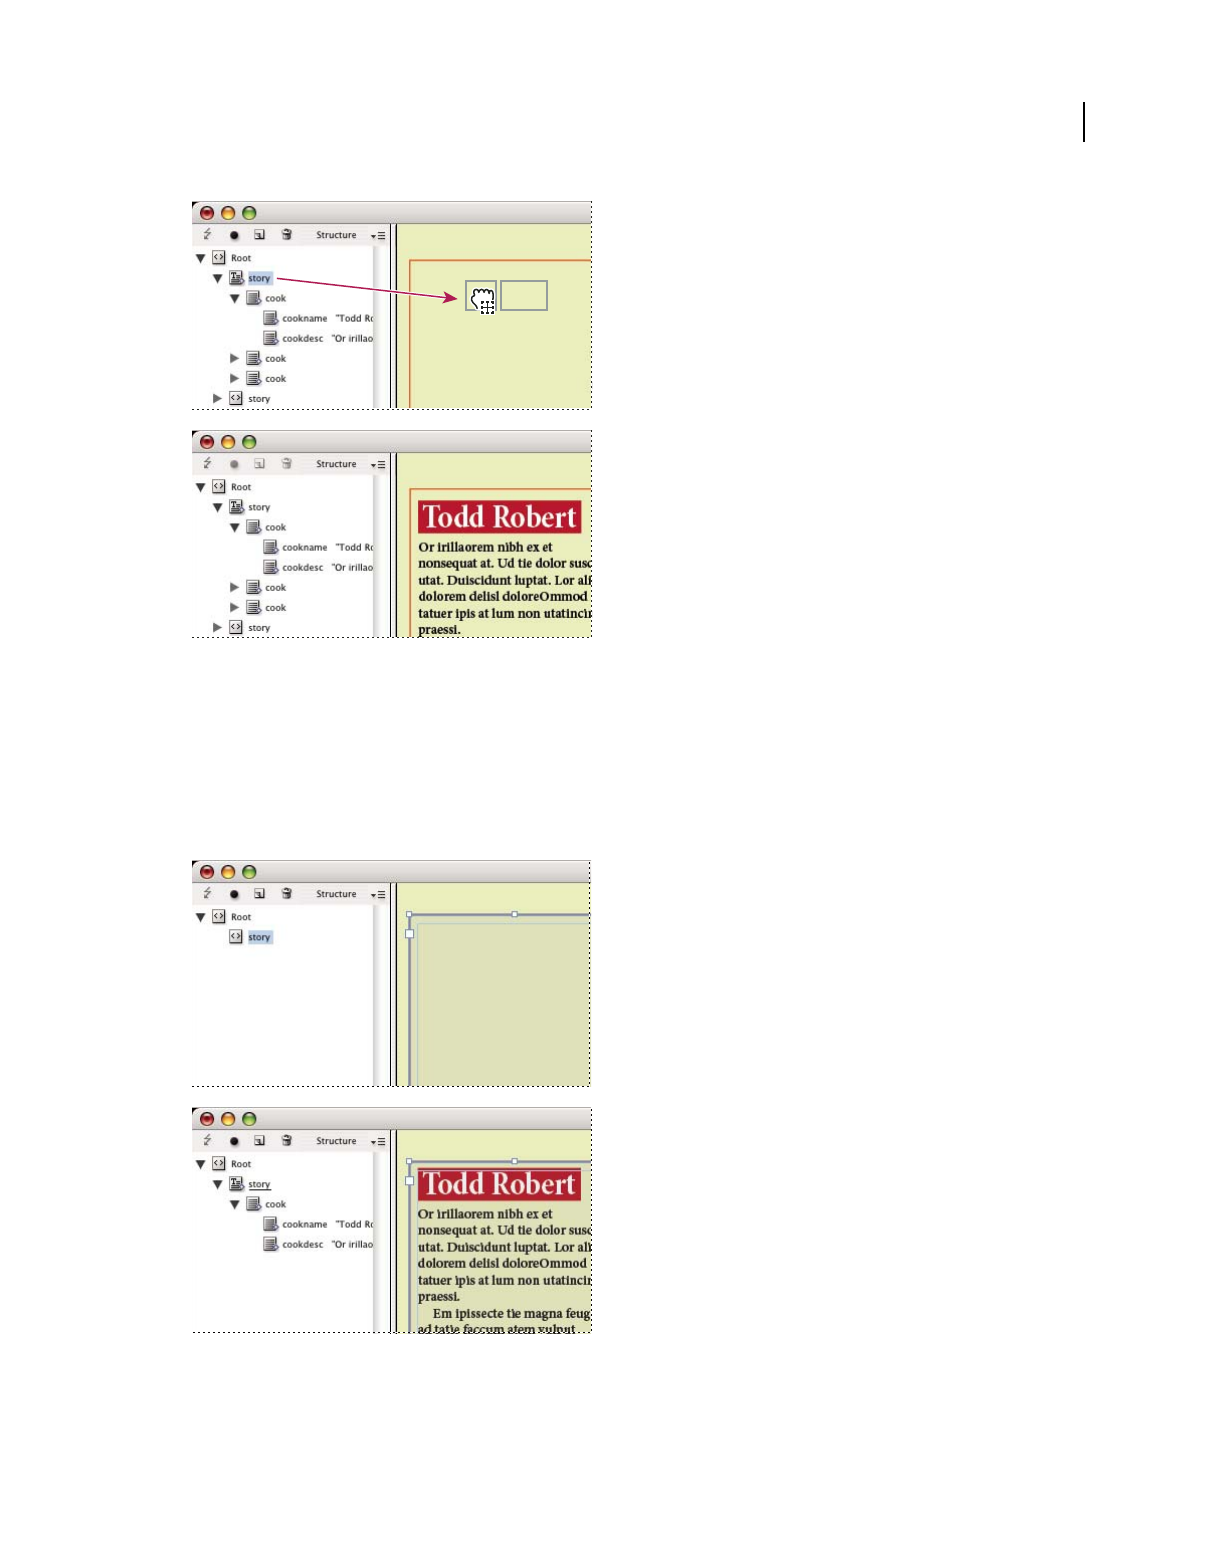
571
USING INDESIGN
XML
Last updated 11/16/2011
Manually placing imported XML content
Place content automatically By planning ahead, you can automate the process of placing XML data in your layout. To
place XML content automatically, you first prepare the document by creating tagged placeholder frames to hold
incoming XML. As long as the XML structure and tag names for incoming content matches the tag names and
structure of the placeholder frames, InDesign can place the imported XML automatically in your document. InDesign
can also clone elements to handle repeating data, such as address lists and catalogue material. Use the automatic layout
method as part of a structured workflow process to speed production time and efficiency.
The selected placeholder frame (above) is tagged with the Story element. When XML data is imported (bottom), the Story element placeholder
frame is automatically populated with the Story element content.

572
USING INDESIGN
XML
Last updated 11/16/2011
Note: InDesign recognizes special namespace attributes that can specify paragraph or character styles in XML. For more
information, see the XML technical reference guide and other resources at www.adobe.com/go/learn_id_XMLscript.
About merging
You can place XML data in a document using merge mode or append mode. Merging mode allows you to automate
the placement of content. You can also filter data in the XML file to place only certain parts of the content.
Merge incoming XML content when:
•The document contains placeholder frames and you want to fill them with imported XML content.
•The document contains XML content and you want to replace it with imported XML content.
•The document doesn’t contain any XML structure, and you want InDesign to replace the default root with the root
of the incoming XML file.
Merge mode compares incoming XML data to elements already in the document. It moves through the file, element
by element, comparing incoming elements to existing elements in the following manner:
1. InDesign begins comparing at the root element
•If the root elements of the imported XML file and InDesign document don’t match and the Structure pane contains
no existing structure, InDesign replaces the root of the InDesign document with the root of the incoming XML file
and imports the file.
•If the root elements don’t match and the Structure pane already contains elements, InDesign appends the file at the
end of the existing structure.
•If the root elements do match, the merge (and matching) process moves forward.
2. InDesign moves to the element under the root
Starting with the element just beneath the root in the incoming XML file, InDesign searches for a matching element
in the Structure pane. For a match to occur, the incoming XML element must have the same name as an existing
element in the Structure pane, and the two elements must exist at the same level in the hierarchy.
•If InDesign finds a matching element in the Structure pane, it replaces the element in the Structure pane with the
element from the incoming XML file.
•If InDesign doesn’t find a match, it inserts the incoming element in the Structure pane at the starting point of the
search. For example, if the search begins just below the root and a match isn’t found, the incoming element is placed
just below the root.
3. InDesign continues to compare elements
Element by element, InDesign continues to compare the incoming XML against the existing structure. The starting
point for the search in the Structure pane changes as the search progresses, with each search beginning just below the
last element inserted or replaced. InDesign always moves down from the current location; it never places elements
above the previous element it inserted or replaced.
Import and append XML data
When you import XML content, the new elements appear in the Structure pane. From there, you can drag elements to
place them in your document.
1Open an InDesign document or create a new document to receive the XML content.
2Open the Structure pane. (Choose View > Structure > Show Structure.)

573
USING INDESIGN
XML
Last updated 11/16/2011
3Choose File > Import XML (or choose Import XML on the Structure pane menu) and select the XML file you want
to import.
4Select Show XML Import Options.
5Select Append Content, and then click Open.
6To link the XML content to the original XML file, select Create Link.
InDesign will list the XML file in the Links panel and display a yellow alert triangle in the panel if the XML file changes.
7Click OK.
More Help topics
“Link or embed imported text files” on page 142
“Import and merge XML” on page 579
Lay out XML manually
You can manually place XML content in your document layout by dragging elements from the Structure pane to the
page or to existing frames. When you place an element, its child elements (and all child elements below those, if any)
are placed as well.
In the Structure pane, a structure-specific blue diamond appears on an element’s icon if the element has been placed
in the document; elements that haven’t been placed show an unplaced icon.
Note: If you imported XML using the Merge Content option, some elements may already be laid out. When you merge
imported content, InDesign automatically flows elements into existing frames if they are identically structured and
tagged.
1Open the Structure pane (View > Structure > Show Structure) and select the element that you want to lay out.
2Do either of the following for each element you want to place in your document:
•Drag the element onto the page. InDesign creates a frame for the element.
•Drag the element onto an existing frame. If the frame contains content, it is replaced by content from the XML data.
3To format the items you lay out, do any of the following:
•Map XML tags to paragraph, character, table, and cell styles.
•Apply styles to elements.
•Format the selected content manually by choosing text options in the Control panel.
Map XML tags to styles
XML tags are merely data descriptions; they carry no formatting instructions. As such, you need to format XML
content after you import it and lay it out. One way to do that is to map XML tags to paragraph, character, table, or cell
styles. For example, the Byline tag could be mapped to the Author character style, so that all imported and placed
XML content that is tagged Byline is automatically assigned the Author character style. Mapping tags to styles makes
formatting imported XML content easier and less time-consuming.
You don’t need to map every tag to a paragraph or character style. Some elements may not appear in the layout and
others may be easier to format one at a time. Moreover, child elements take on the paragraph or character style that is
assigned to their parent, which can cause confusion unless you are careful to map parent and child elements separately.
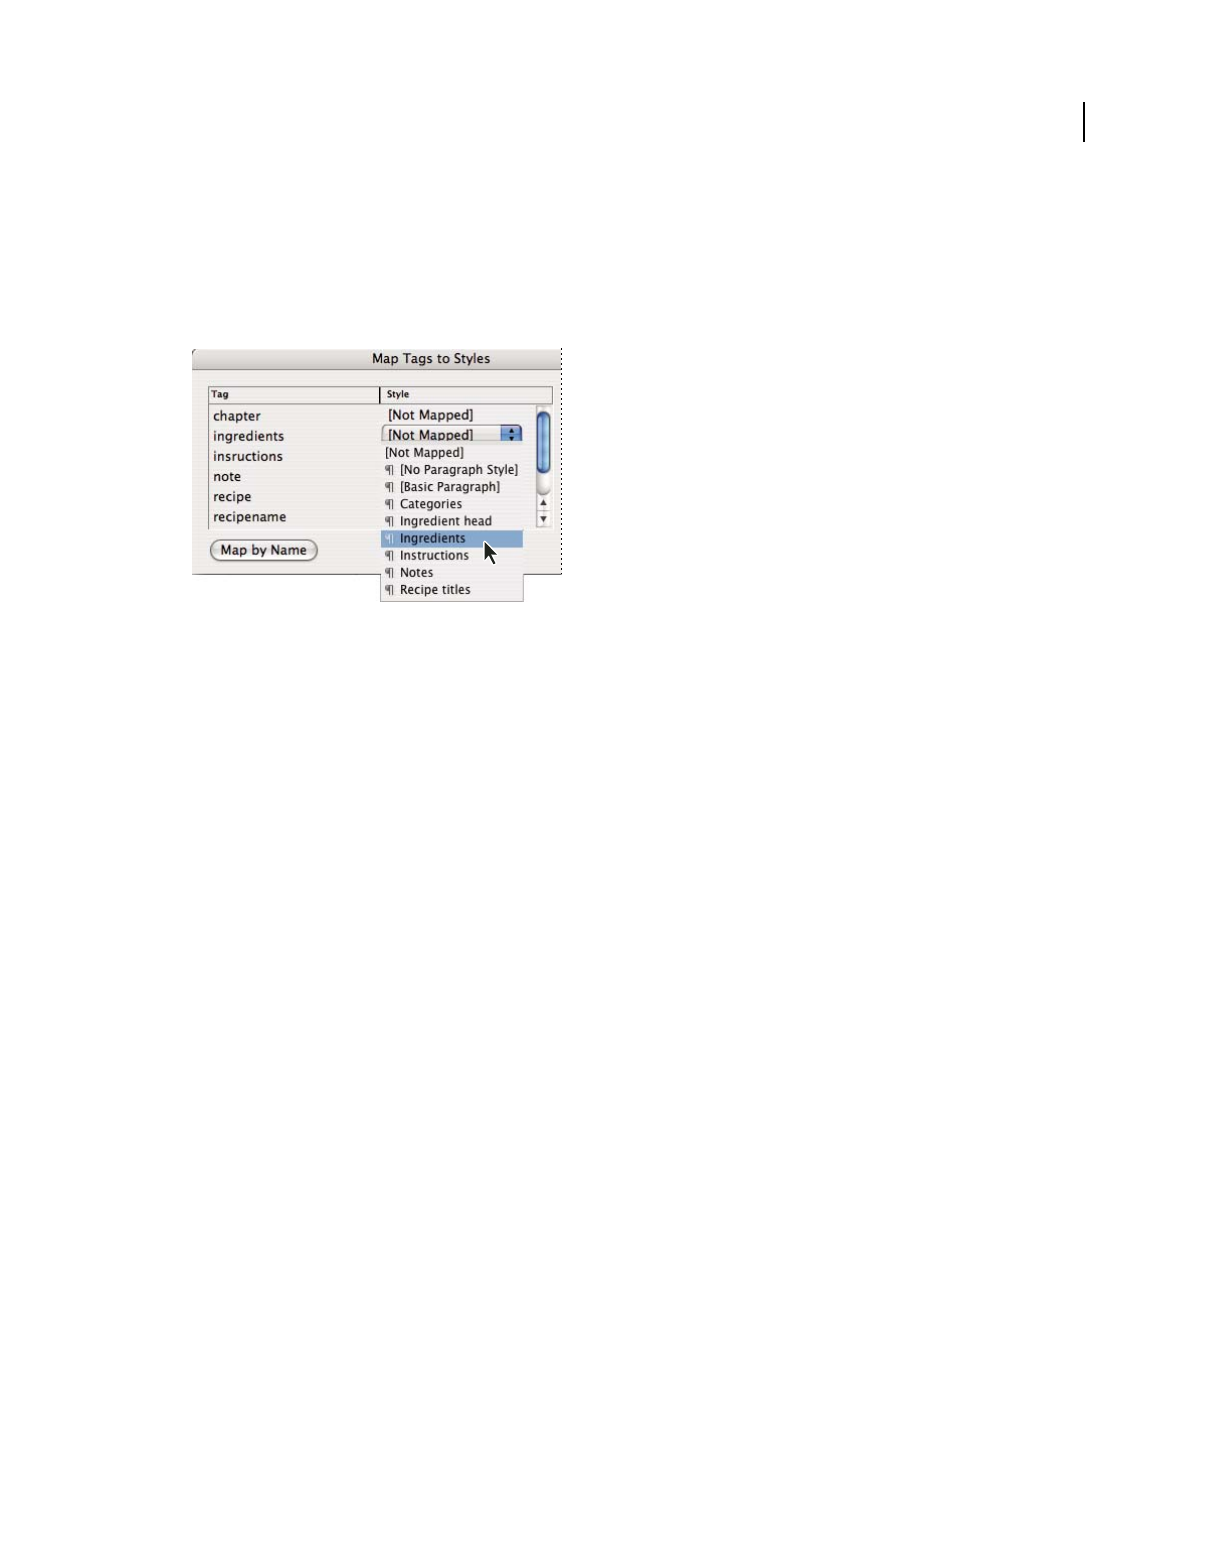
574
USING INDESIGN
XML
Last updated 11/16/2011
Important: The Map Tags To Styles command reapplies styles throughout a document, sometimes with unwanted
results. When you map a tag to a style, text that was previously assigned to one style may be reassigned to another,
depending on its XML tag. If you’ve already formatted some text, you might prefer to apply styles manually to prevent
your paragraph and character style choices from being overridden.
1Choose Map Tags To Styles from the Tags panel menu or the Structure pane menu.
A menu of styles appears for each tag in the Map Tags To Styles dialog box
2Do any of the following:
•
To import styles, tags, and mapping definitions from another document, click Load, choose a document, and click Open.
•To map tags to styles individually, click the Style column adjacent to a tag, and choose a paragraph or character style
from the menu that appears. (The paragraph symbol identifies paragraph styles in the menu; an “A” identifies
character styles.) Repeat for each tag you want to map.
•To automatically map tags to styles with the same names, click Map By Name. Styles with names that are identical
to tag names are selected in the Style column. To match, a tag and style must not only have the same name, but the
same case; H1 and h1, for example, are not considered a match. (If the same style name exists in two different style
groups, Map By Name doesn’t work and you are alerted to rename one of the styles.)
3Click OK.
More Help topics
“Add paragraph and character styles” on page 199
“Create and load XML tags” on page 581
About automatic layout
Using InDesign, you can automatically place imported XML content into a layout. To do this, you first create
placeholder frames or tables, and tag them with the same tag names as the XML elements you want to place into them.
Then, you import XML content into the placeholders in Merge mode. When tags match by name and by structural
hierarchy, InDesign merges the XML content, replacing any existing content in the document.
This technique is useful when you want to use the same layout for different sets of content. For example, a weekly
newsletter may have the same layout from week to week, but offer different content with each publication.
In order for imported XML to be merged directly into a layout, your document must meet these requirements:
•Frames (or tables) in the document must be tagged with names identical to elements in the XML file that you intend
to import.
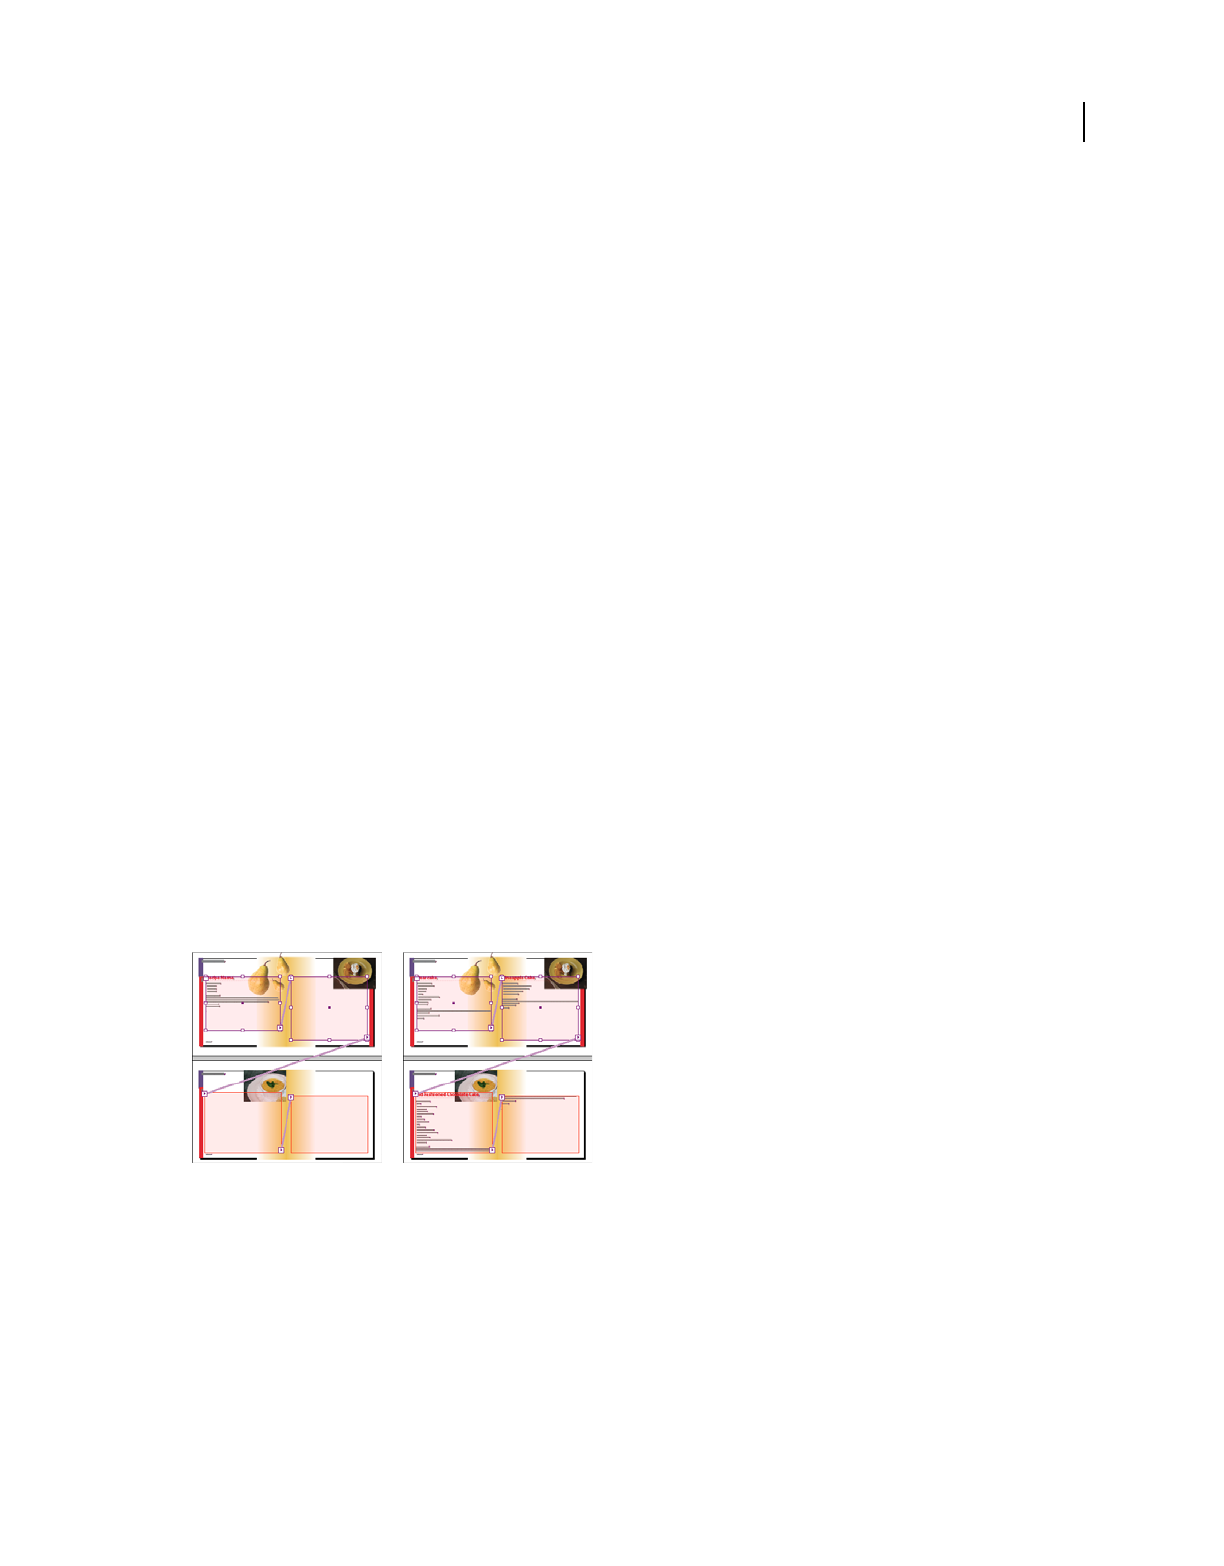
575
USING INDESIGN
XML
Last updated 11/16/2011
•The structure of the document (as shown in the Structure pane) must parallel the structure of the imported XML
file. In other words, the identically named elements must be found in the same locations in the structure hierarchy
of both files. To achieve this parallel structure, you may have to rearrange and reorder elements (and their child
elements) in the Structure pane or use the Apply XSLT option when you import the XML file.
Note: InDesign flows merged XML content into existing frames only. Any element content that doesn’t fit in its frame (or
series of threaded frames) becomes overset text.
More Help topics
“Threading text” on page 142
“Tag items” on page 582
“Rearrange structured elements” on page 588
Working with repeating data
XML is repeating if the same configuration of elements appears multiple times in a row, but contains unique data in
each instance. For example, database records are repeating. Addresses in a database table contain repeated
information—name, street address, city, state, postal code—for a variety of individuals.
When you import XML content, you can select Clone Repeating Text Elements in the XML Import Options dialog
box. Selecting this option tells InDesign to clone the repeated elements in the structure. Cloning allows you to merge
repeating XML data into a document without having to create placeholder elements in the Structure pane (or
placeholder text in a frame) for every single record. For example, to import an XML address list with 25 entries, create
a matching element structure for one entry in the Structure pane. When you import the complete list, InDesign clones
that structure to create elements for all 25 entries.
Repeating XML content is flowed as a single story when it is merged into the document. If placeholder frames have
been threaded together, the content is flowed from one frame to the next. If there isn’t enough room in the placeholder
frame(s) to accommodate the XML content, you can autoflow the remaining content by creating and threading more
frames; you don’t have to manually drag elements from the Structure pane into individual frames.
Threaded placeholder in layout (left) and layout after import (right)
Create placeholders for automatic layout
Create placeholder frames or tables in your document when you want InDesign to automatically merge imported XML
into your layout.
Note: InDesign flows merged XML content into existing frames only. Any content that doesn’t fit in the frames provided
becomes overset text.
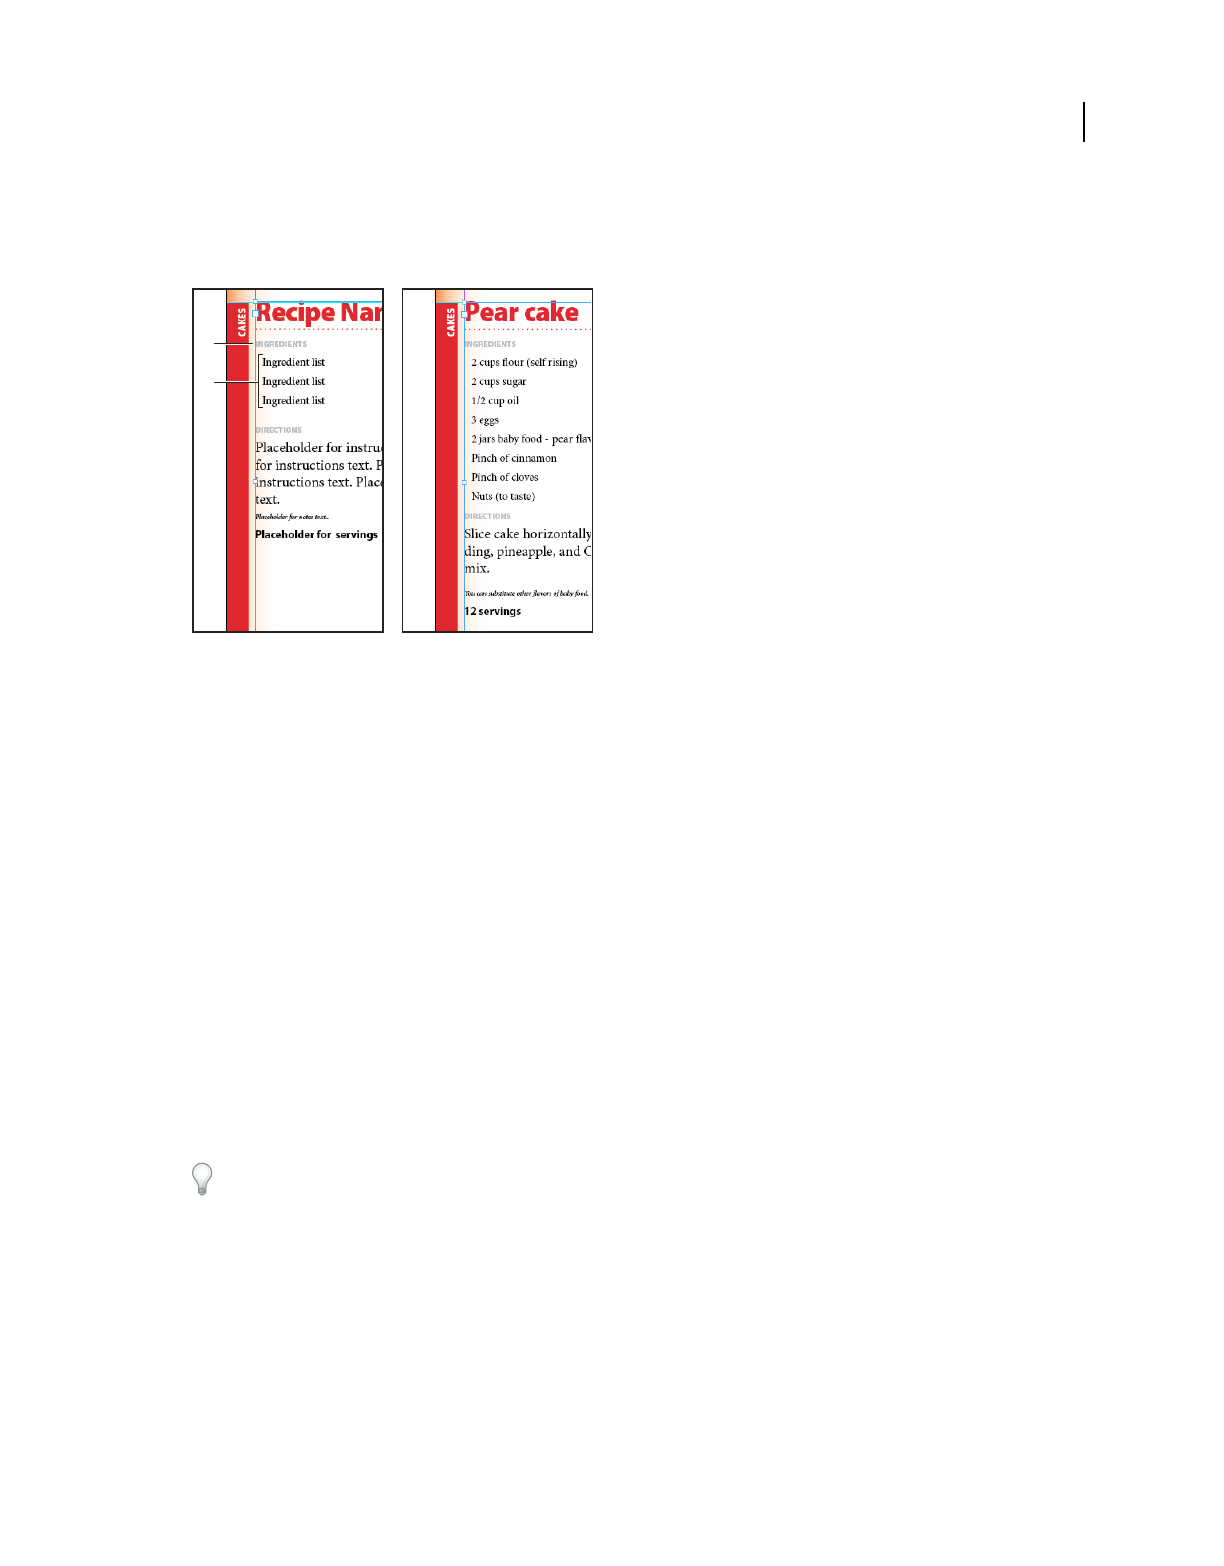
576
USING INDESIGN
XML
Last updated 11/16/2011
You can also create placeholder text to ensure XML data is placed and formatted correctly on the page. Placeholder
text can also be used to include tabs, spacing, or labels (called static text) between the XML elements that will appear
in a frame.
Tagged placeholder text (left) and layout after import (right)
A. Returns and static text added between elements B. Placeholder text
For example, if you are importing and placing product information, you can separate the name, description, and price
of the product with a tab, and include labels such as “Product:” or “Price:” before the placeholder text entries for those
elements. When XML data is merged into the frame, static labels, spacing, and tabs are preserved between the content
elements.
Note: If you merge repeating XML data into your document and instruct InDesign to clone repeating elements, the static
text and spacing are also cloned for each instance of the data.
More Help topics
“Thread text frames” on page 142
“Create and load XML tags” on page 581
“Rearrange structured elements” on page 588
“Tag items” on page 582
Create a placeholder frame
1Using the Type tool, create a text frame for the XML content.
If you want imported XML content to flow from one frame to another, create multiple frames and thread them
together.
2Open the Structure pane (View > Structure > Show Structure) and the Tags panel (Window > Utilities > Tags).
3If the Tags panel does not contain tags with names identical to the XML elements you plan to import, create the
tags or load the tags from the XML file.
4Tag the placeholder frame with the appropriate tag from the Tags panel. (When you tag a frame, any frames
threaded to it are assigned the same tag.)
5If necessary, arrange or add elements in the Structure pane to match the elements and structure of the XML you
will be importing.
A
B
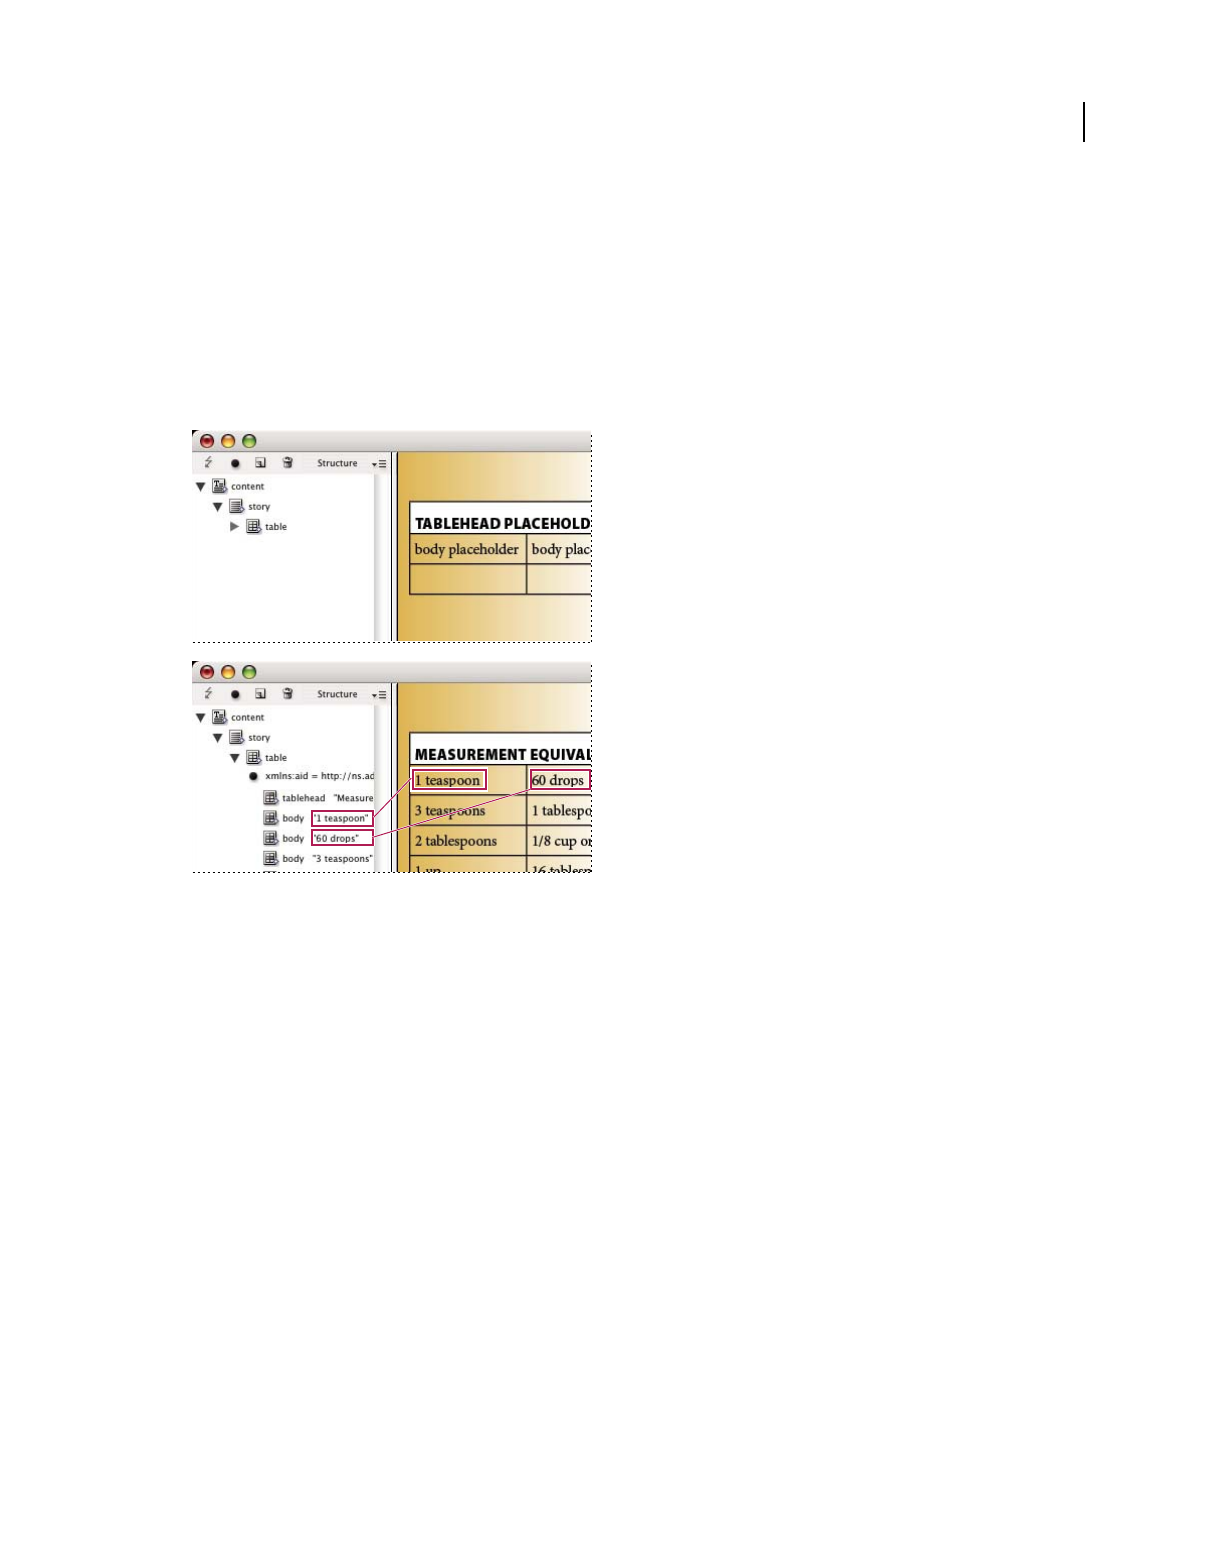
577
USING INDESIGN
XML
Last updated 11/16/2011
Create a placeholder table
You can import XML elements into a placeholder table as well as a placeholder frame. In a table, each cell is represented
by an element. InDesign places XML content into the table cell by cell, element by element, starting from the top left
corner of the table, matching the element to the tagged cell. When creating placeholder tables, you must tag the table
as well as each cell in the table. (Merged cells are considered a single cell.)
Because InDesign doesn’t distinguish between rows and columns when importing, the number of columns in the
placeholder must match the number of columns in the imported content. Also, all the table cell elements must be
contained within a single table element. In other words, the cells are all sibling elements under the same parent.
Placeholder table (above) and flow of XML content into placeholder table (below)
1Open the Tags panel (Window > Utilities > Tags) and the Structure pane (View > Structure > Show Structure).
2If the Tags panel doesn’t contain tag names identical to the names of the XML table elements you plan to import,
either load tags from an existing document or create the tags.
Note: At a minimum you must have tags for the parent element of the table cells, the table cells, and the element in which
the table will reside.
3Create a table containing the appropriate number of columns for the XML content. You don’t need to create the
exact number of rows, as InDesign will add rows to the table if needed.
4With an insertion point in the table, choose Table > Select > Table, and select the appropriate tag in the Tags panel.
5Tag each cell of the table with the desired tag. Depending on the structure of your XML content, you can either
select and tag the cells individually, or you can select an entire row or column—for example, if you want to tag the
first, or heading row—and tag all the selected cells using the same tag.
6As necessary, rearrange and add elements in the Structure pane so that your document has the same elements and
structure as the XML file you will import.
Create placeholder structure for repeating data
The same rules for merging XML also apply when merging repeating XML: The structure of the elements in the
Structure pane must parallel the structure of the imported XML data, and any placeholder frames must be tagged with
the same tag names as the parent elements in the XML file.
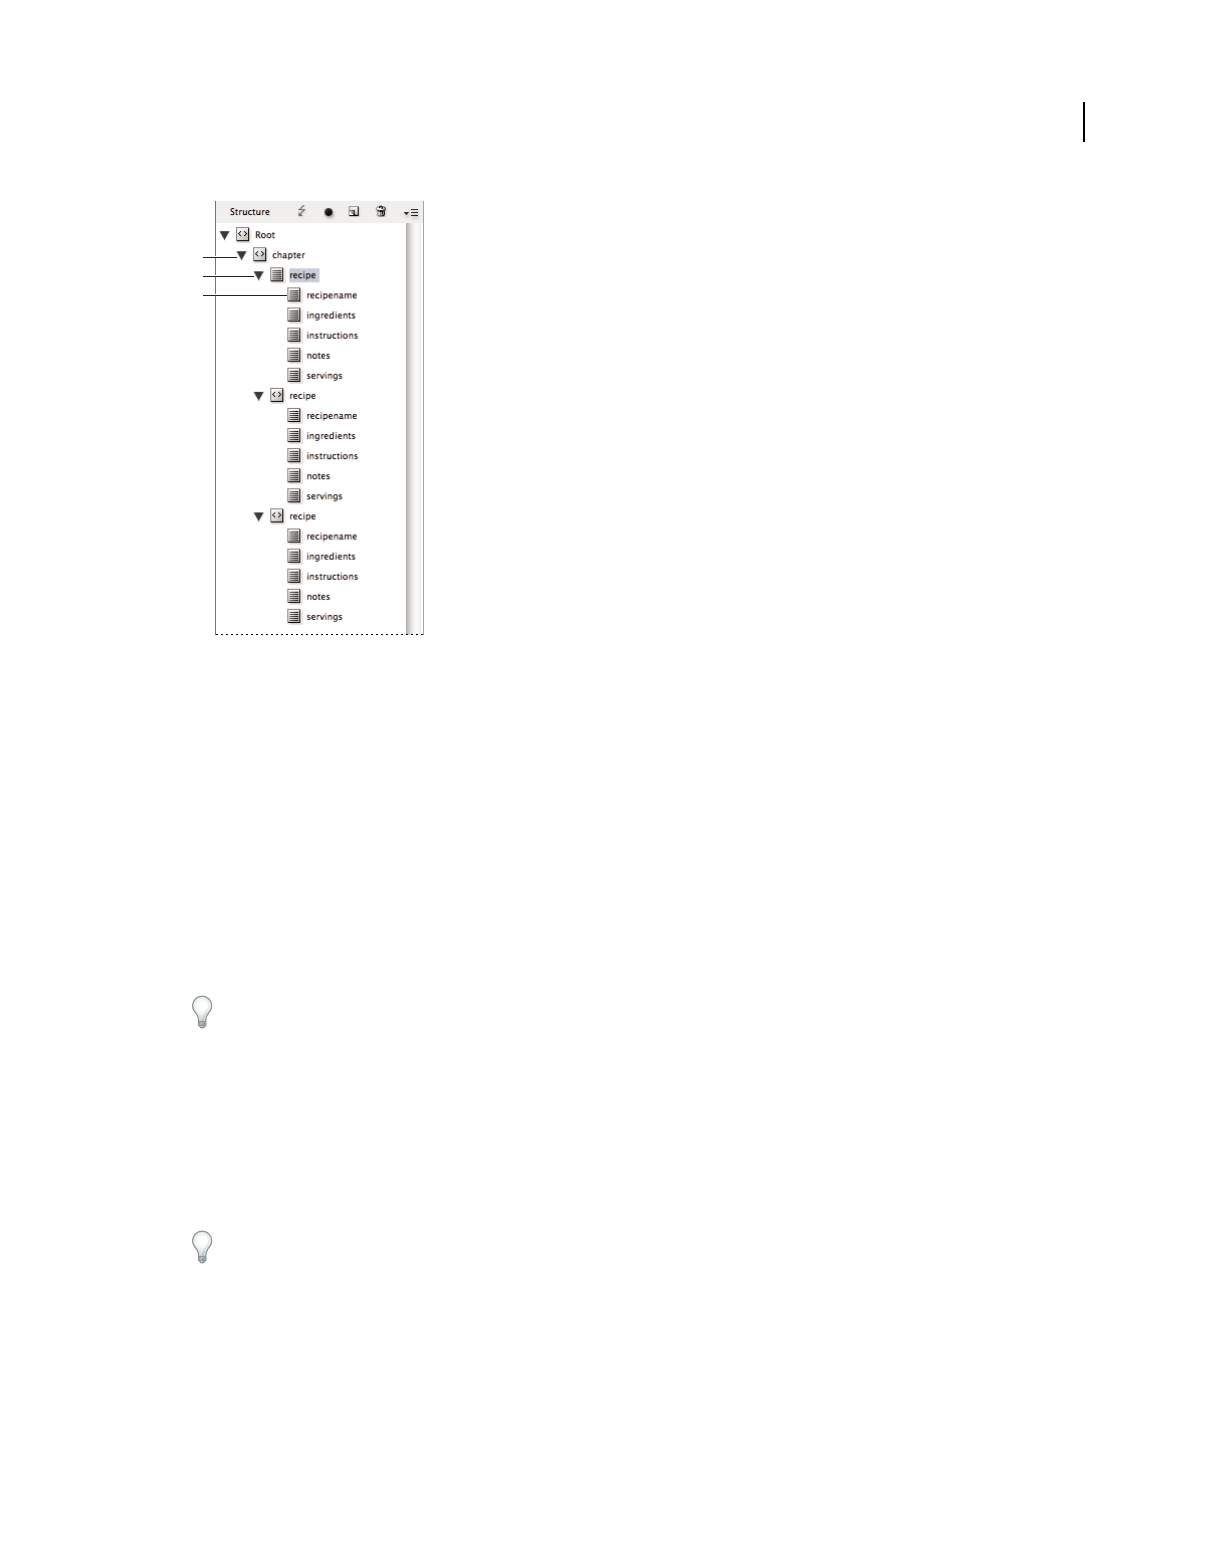
578
USING INDESIGN
XML
Last updated 11/16/2011
Structure pane showing structure of placeholder text
A. Element that will contain all repeated elements B. Element that will be cloned as repeating XML content is imported C. Child elements for
data contained in the repeating element
1First, you will need a parent or root element that describes the collection of information, or records, you will import.
For example, a Chapter element that will contain a series of recipes.
2Under that parent, create one element that describes the information (or record) that will repeat.
For example, under the Chapter element, you might create a Recipe element. This is the element that will be cloned
for each record in the imported XML.
3Under this element, create child elements to describe the units of information (or fields) that make up the record.
For example, under the Recipe element, you might create Recipename, Ingredients, Instructions, Notes, and
Serving elements.
To include labels, returns, or tabs between “field” elements in the repeating XML data, create placeholder elements in
the frame the imported content will be merged into. And add spacing or labels as needed between the placeholders.
Create placeholder text
1Open an existing document, or create a new document for the XML.
2Open the Tags panel (Window > Utilities > Tags) and the Structure pane (View > Structure > Show Structure).
3Make sure the Tags panel contains tag names that are identical to the names of elements you will import with the
XML file, and create new tags or load the necessary tags if necessary.
Importing a sample of the XML content is the easiest way to obtain all the necessary tags and to ensure that the
document structure matches the XML file.
4Create placeholder frames (and thread them together) as needed for your XML content.
5Using the Text tool, click in the first frame to create an insertion point, and type placeholder text for each element
you want to merge into that frame. Include any spacing you want between elements, as well as any static text.
Note: If you will be importing repeating data, you only need to create one instance of sample text for the elements that
will repeat.
A
B
C

579
USING INDESIGN
XML
Last updated 11/16/2011
6Format the text as you want it to appear in the final document.
7Tag the text frame with the tag for the parent element that will contain the elements (or repeating data) you want
to import into that frame.
8Position the insertion point in the placeholder text and choose Edit > Edit In Story Editor.
9Choose View > Structure > Show Tag Markers.
10 Choose Edit > Select All.
11 In the Tags panel, select Add Tag, and then click the tag you assigned to the frame.
InDesign wraps the placeholder text with the tag, and adds the element to the Structure pane.
12 Select the text representing the first child element and click its tag in the Tags panel. Repeat until you have tagged
all the child placeholder text.
Important: When tagging placeholder text, do not select any spacing or static text you want to keep between elements.
Tag only the text you want replaced with XML content.
13 In the Structure pane, review the hierarchy created by your tagging to ensure it matches the structure of the XML
content you will import.
Import and merge XML
After you have created and tagged placeholder frames, tables, and text—and made sure that your document and the
incoming XML file have the same tags and structure—you can import XML content into your layout.
You must use the Merge Content option to import XML into placeholders (or to replace existing content in your
document). When merging content, InDesign replaces identically tagged and structured elements in your document
with the imported XML elements. You can use additional import options to exclude imported (that is, filter) content
that doesn’t match the document structure, to delete document items that aren’t matched or replaced by the imported
XML, and to clone repeating XML elements.
If the imported XML file contains elements that are not found in the document, InDesign places these elements in the
Structure pane without laying them out in your document.
To successfully merge XML into placeholders, keep these rules in mind:
•Tag placeholders with the identical tag name as the XML element that will replace it (or be flowed into it).
•In placeholder text, make sure any spacing, returns, tabs, or static text is outside the placeholder element tags, but
within the parent element for the story.
•When you import the XML, select Do Not Import Contents Of Whitespace-Only Elements. (This preserves spacing
and static text if the XML elements you import consist of white spaces only.)
Merge XML into existing content or placeholders
1Open the InDesign document that contains placeholders for the XML content.
2Open the Structure pane (View > Structure > Show Structure).
3Choose File > Import XML (or choose Import XML on the Structure pane menu), and then select the XML file you
want to import.
4Select Show XML Import Options.
5Select Merge Content, and then click Open.
6To link the XML content to the original XML file, select Create Link.

580
USING INDESIGN
XML
Last updated 11/16/2011
InDesign will list the XML file in the Links panel and display a yellow alert triangle in the panel if the XML source file
changes.
7Select additional import options as needed:
Clone Repeating Text Elements If you are importing repeating XML, clones a single placeholder element to create a
container for each record in the file.
Only Import Elements That Match Existing Structure Filters the incoming XML, so that elements that do not exist in
the Structure pane are not imported.
Do Not Import Contents Of Whitespace-Only Elements Preserves any spacing or static text inserted between elements
in a placeholder frame.
Delete Elements, Frames, And Content That Do Not Match Imported XML After XML has been imported, deletes any
elements or placeholders in your document that were not matched (or replaced) by incoming data.
8Click OK.
InDesign merges content into the document starting with the first matching element in the XML file.
XML Import options
When importing and placing XML data using the Merge Content option, the XML Import Options dialog box offers
the following options:
Create Link Links to the XML file so that if the XML file is updated, you can update its XML data in your InDesign
document.
Apply XSLT Applies a stylesheet to define the transformation of the imported XML. Select Browse (Windows) or
Choose (Mac
OS) to select an XSLT file (.xsl or .xslt) from the file system. Use Stylesheet From XML, the default
option, causes InDesign to use an XSLT processing instruction, if one is present in the XML file, to transform the XML
data.
Clone Repeating Text Elements Replicates the formatting applied to tagged placeholder text for repeating content.
Create one formatting instance (for example, an address), and then reuse its layout to create other instances
automatically. (See “Working with repeating data” on page 575.)
Only Import Elements That Match Existing Structure Filters the imported XML content so that only elements from the
imported XML file with matching elements in the document are imported.
Import Text Elements Into Tables If Tags Match Imports elements into a table if the tags match the tags applied to the
placeholder table and its cells. For example, use this option to place database records into a table when generating price
lists or inventory sheets.
Do Not Import Contents Of Whitespace-only Elements Leaves any existing content in place if the matching XML
content contains only whitespace (such as a return or tab character). Use this option if you’ve included text between
elements in your placeholder frames and you want to preserve this text. For example, when laying out recipes
generated from a database, you might add labels such as “Ingredients” or “Instructions.” As long as the parent element
that wraps each recipe contains only whitespace, InDesign leaves the label in place.
Delete Elements, Frames, and Content That Do Not Match Imported XML Removes elements from the Structure pane
and the layout of the document if they don’t match any elements in the imported XML file. Use this option to filter
data from the document. For example, when importing names and addresses, you might have placeholder text for an
element containing the company name. If one of the names doesn’t include the company element, InDesign deletes
the element containing the placeholder text.
Import CALS Tables As InDesign Tables Imports any CALS tables in the XML file as InDesign tables.
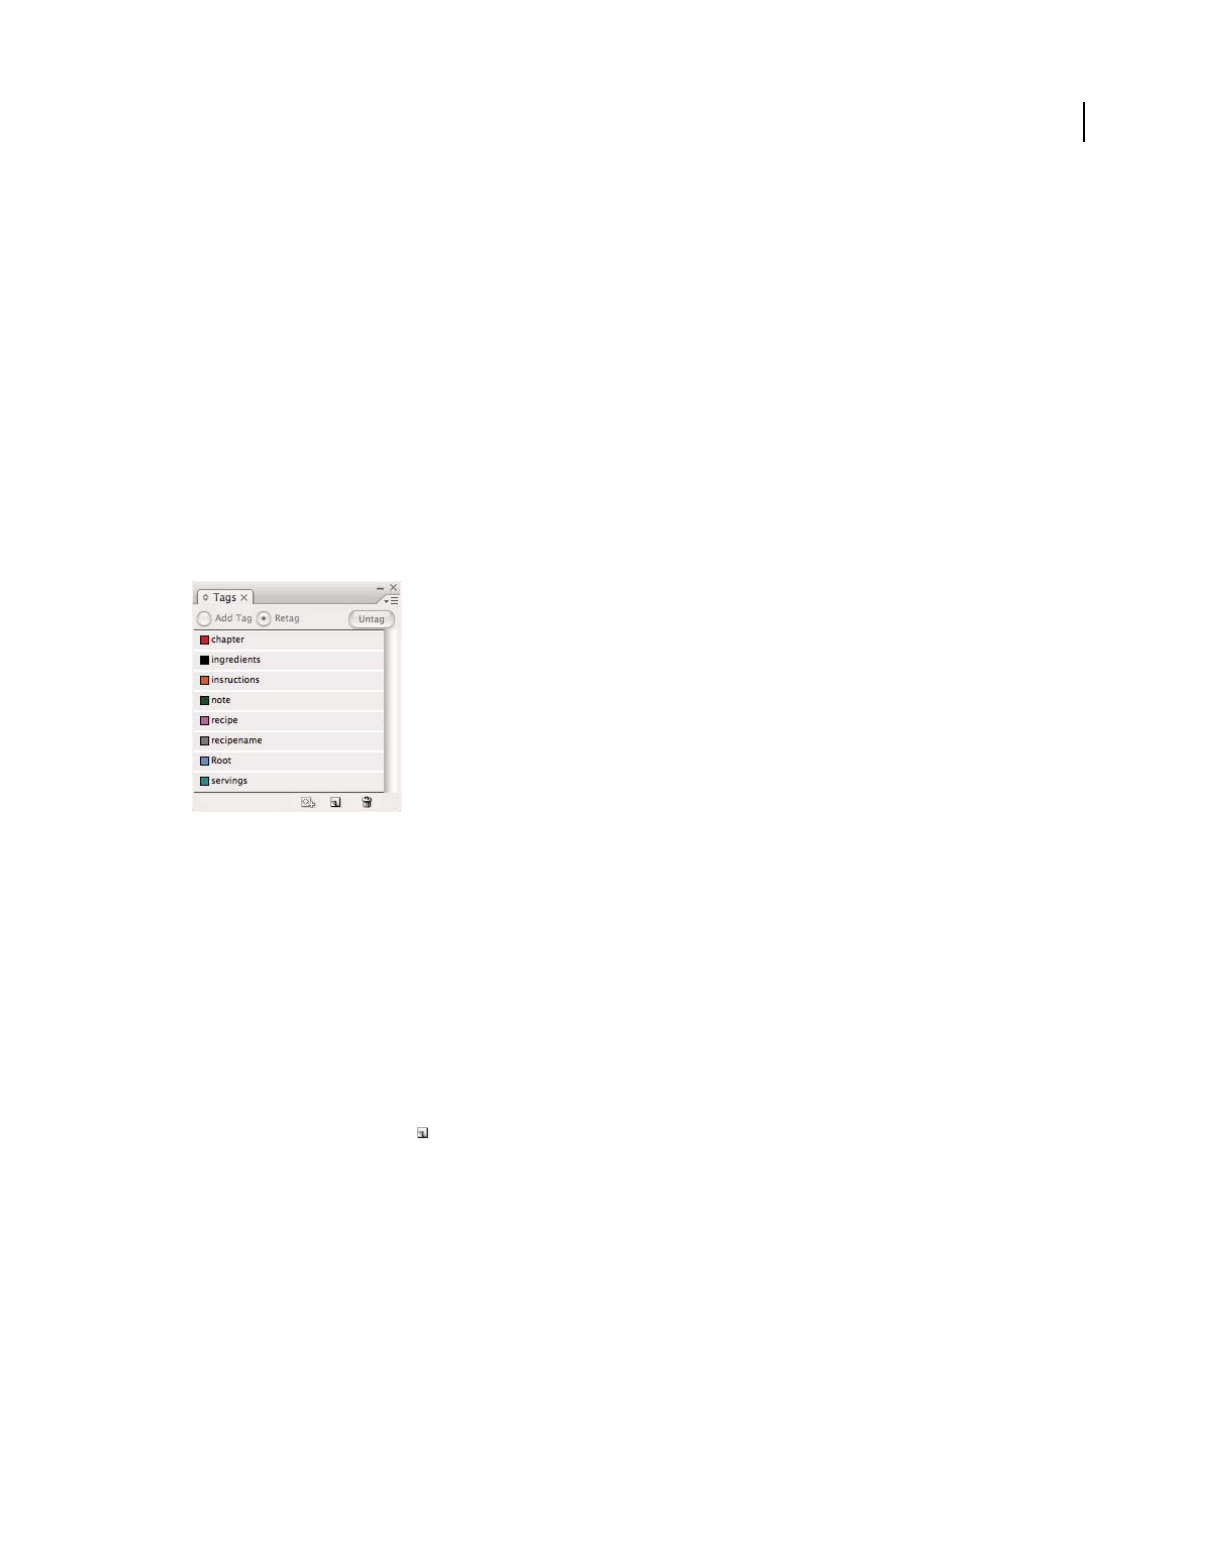
581
USING INDESIGN
XML
Last updated 11/16/2011
Tagging content for XML
For detailed information and instructions, click the links below.
Create and load XML tags
Before you tag page items, create (or load) tags to identify each content type or item in your document. You can create
tags from scratch or load them from another source, such as an InDesign document, InCopy document, or DTD file.
Use any of the following methods to create or load XML tags for your document:
•Create a tag with the New Tag command.
•Load tags from an XML file or another document.
•Import a DTD file.
•Import tags (and content) using the Import XML command.
The Tags panel with a list of available tags
More Help topics
“About XML” on page 567
“About DTD files” on page 569
Create an XML tag
1Choose Window > Utilities > Tags to open the Tags panel.
2Do one of the following:
•Choose New Tag from the Tags panel menu.
•Click the New Tag button on the Tags panel.
3Type a name for the tag. The name must conform to XML standards. If you include a space or an illegal character
in the tag name, an alert message appears.
4Select a color for the tag if you created your tag from the Tags panel menu. (If you created your tag with the New
Tag button, you can choose a color by changing the color of the tag.)
Note: You can assign the same color to different tags. The color you select appears when you apply the tag to a frame and
choose View
> Structure > Show Tagged Frames, or when you apply the tag to text within a frame and choose View >
Structure
> Show Tag Markers. (Tag colors do not appear in exported XML files.)
5Click OK.

582
USING INDESIGN
XML
Last updated 11/16/2011
Load XML tags from another source
You can load tags from an XML file, an InDesign document, or an InCopy document.
Note: InDesign automatically adds tags to the Tags panel when you load an XML file.
1Choose Load Tags from the Tags panel menu.
2Select the file containing the tags you want to load into the Tags panel, and then click Open.
Change tag name or color
1Double-click a tag name in the Tags panel or choose Tag Options in the Tags panel menu.
2Change the name or the color of the tag, and click OK.
Note: You cannot change the name of locked tags. InDesign automatically locks tags specified in a loaded DTD file. To
change the name of these tags, you must edit the DTD file and reload it into the document.
Tag items
Before you export content to an XML file, you must tag the text and other items (such as frames and tables) that you
want to export. You also need to tag items that you have created as placeholders for imported XML content. Items that
have been tagged appear as elements in the Structure pane.
Create (or load) tags to identify each content element that you want to export or import. Then tag text or page items
using one of these techniques:
Manual tagging Select a frame or text, and then click a tag in the Tags panel, or simply drag a tag from the Tags panel
to a text or graphics frame.
Automatic tagging Select a text frame, table, table cells, or image, and then click the Autotag icon in the Tags panel.
Items are tagged according to your tagging preset options.
Map tags to styles Associate tags with paragraph, character, table, or cell styles, and then apply tags automatically to
text, a table, table cells, and paragraphs that were assigned those styles.
When tagging page items, note the following:
•You can apply tags to stories as well as to text within stories. For example, you might want to apply an Article tag
to a story, and then apply more specific tags, such as Title and Body, to paragraphs within the story.
•You can apply only one tag to a story. When you tag a frame in a threaded story, all other frames in the story, along
with any overset text, are assigned the same tag.
•You can apply only one tag to a graphics frame. When you tag a graphics frame, InDesign records a reference to
the graphic’s location (on disk).
•You cannot tag a group of objects. To tag an item that’s part of a group, use the Direct Selection tool to select the item.
•When you tag text within a tagged element (such as a paragraph within a story), it appears as a child of the existing
element in the Structure pane.
•You can tag text or images on a master page, but only one instance of the corresponding element appears in the
Structure pane regardless of how many times the item appears on document pages. However, if you manually
override a master item and then tag it on a document page, the item will appear as a separate element in the
Structure pane.
•You can’t tag a footnote.
Note: Avoid tagging special characters, such as the Automatic Page Number character. When exporting, InDesign strips out
some special characters to comply with XML standards. InDesign warns you when characters cannot be encoded in XML.

583
USING INDESIGN
XML
Last updated 11/16/2011
More Help topics
“Work with attributes” on page 589
“Map XML tags to styles” on page 573
Tag frames manually
You can tag frames by using any of these methods.
•Drag a tag from the Tags panel onto a frame.
•Using a selection tool, select a frame, and then click a tag in the Tags panel.
If a frame is part of a group or nested within another frame, use the Direct Selection tool to select the frame.
•Open a frame’s context menu, choose Tag Frame, and then choose a tag.
•Using a selection tool, select an untagged text or graphics frame, drag the frame to the Structure pane, release the
mouse, and then select a tag name from the menu that appears.
Tag text within a text frame manually
When you tag text within a frame, the new element appears in the Structure pane as a child of the frame element in
which the text is located.
1Make sure that the story in which the text appears is tagged. (If a story isn’t tagged and you tag text within the story,
InDesign automatically tags the story using the tag specified in the Tagging Preset Options dialog box.)
2Using the Type tool, select text within the text frame.
3Click a tag in the Tags panel.
Note: You can’t tag footnotes.
Tag text frames, tables, table cells, and images automatically
By clicking the Autotag icon in the Tags panel, you can tag a text frame, table, table cells, or an image automatically.
To tag the item, InDesign applies a default tag that you specify in the Tagging Preset Options dialog box.
1Select the text frame, table, table cells, or image that you want to tag.
2In the Tags panel, click the Autotag icon .
InDesign adds the default tag’s name to the Tags panel after you click the Autotag icon.
Tag content according to paragraph or character style
Paragraph styles and character styles you assign to text can be used as a means of tagging paragraphs and text for XML.
For example, a paragraph style called Caption can be associated with a tag called FigureName. Then, using the Map
Styles To Tags command, you can apply the FigureName tag to all text in your document assigned the Caption
paragraph style. You can map more than one style to the same tag.
Important: The Map Styles To Tags command tags content automatically, including paragraphs and characters that are
tagged already. For example, if a paragraph assigned the Context style has been tagged with the Body tag, but you then
associate the Context style with the Expository tag, the paragraph is retagged; it is stripped of the Body tag and given
the Expository tag instead. If you want to retain existing tags, apply tags manually (or use the Map Styles To Tags
command very carefully).
1Choose Map Styles To Tags from the Tags panel menu.
2For each style in your document, specify the tag that you want it to be mapped to.
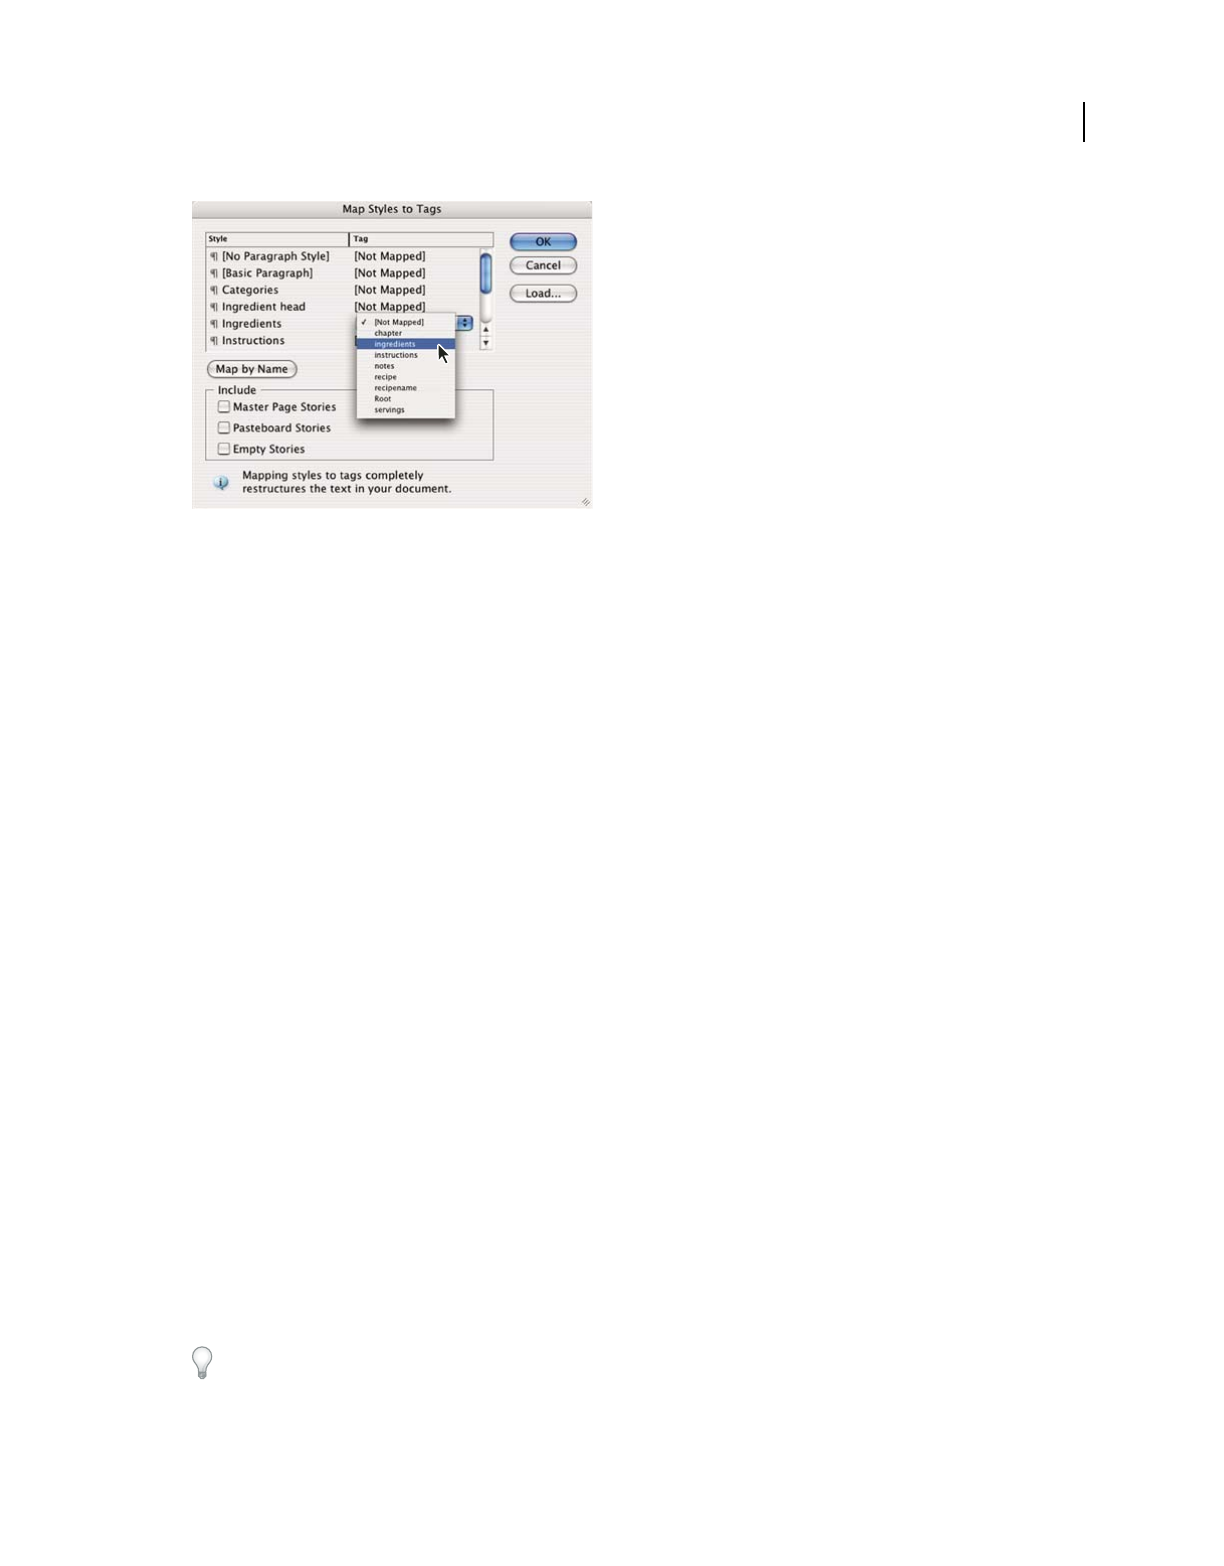
584
USING INDESIGN
XML
Last updated 11/16/2011
Map Styles To Tags dialog box
3To match style names to tag names, click Map By Name. Styles that are named identically to tag names are selected
in the dialog box. Map By Name is case-sensitive; Head1 and head1, for example, are treated as different tags.
4To use style mappings from a different InDesign file, click Load and select the file.
5Select or deselect Include options:
Master Page Stories Maps styles found on master page text frames to tags.
Pasteboard Stories Maps styles found on text frames on the pasteboard to tags. (Deselect this option to avoid tagging
content on the pasteboard.)
Empty Stories Maps styles located on empty text frames to tags. (Deselect this option to avoid tagging empty frames.)
6Click OK.
The new XML tags are applied throughout your document to paragraph and character styles that you specified in the
Map Styles To Tags dialog box.
Note: You cannot tag images with the Map Styles To Tags command. You need to manually tag images if you want to
include them in an XML file.
Tag text in tables
When you tag a table for XML, you create a table element as well as one cell element for each cell in the table. The cell
elements are child elements of the table element, and are created automatically.
1Click in the table and choose Table > Select > Table.
2Select a tag for the table in the Tags panel.
InDesign creates a cell element for each cell in the table (you can display them in the Structure pane). The tag applied
to table cell elements depends on your Autotag default settings.
3If needed, tag table cells with a different tag.
For example, you can tag the first-row cells with a different tag to identify them as heading cells. To apply tags to cells,
select the actual table cells in your document, and then select a tag. (Selecting cells in the table also selects the
corresponding cell elements in the Structure pane.)
You can also tag a table by selecting it and then clicking the Autotag icon in the Tags panel. The Table tag (or another
tag of your choice) is applied immediately to the table, according to your Autotag default settings.

585
USING INDESIGN
XML
Last updated 11/16/2011
Untag an item
Untag an item to remove its tag but retain the associated content.
1Select the element in the Structure pane, or select the page item or tagged text in the document layout.
2Click Untag in the Tags panel.
Retag items
Retag an item to replace the existing tag (you don’t need to untag it first). Use one of these techniques to retag an item:
•Using a selection tool, select a text frame, a graphics frame, or an element in the Structure pane, and then click a
different tag in the Tags panel.
•To retag a story, use the Type tool to place a insertion point anywhere in the story’s text. Select Retag in the Tags
panel, and then click a different tag.
•To retag a text block, use the Type tool to select the entire block of text. Select Retag in the Tags panel, and then
click a different tag. (If you select Add Tag and then click a different tag, a new child element appears in the
Structure pane.)
Specify Autotag defaults
When you select a text frame, table, table cells, or an image, and then click the Autotag icon in the Tags panel, InDesign
applies a default tag to the item you selected. You can specify these default tags in the Tagging Preset Options dialog box.
Note: InDesign applies a default tag when you create an element that requires a parent element, but doesn’t yet have one.
For example, if you tag text within a text frame but the frame itself isn’t tagged, InDesign assigns the frame a tag according
to the Tagging Preset Options. The capability to apply default tags helps InDesign maintain correct XML structure.
1Choose Tagging Preset Options from the Tags panel menu.
2Choose a default tag for text frames, tables, table cells, and images.
If the tag you need isn’t listed, you can choose New Tag from the menu and create a tag.
Show or hide tag markers and tagged frames
Tag markers are brackets that appear on the page around text that has been tagged. Show tag markers to see where
titles, headings, and other text has been tagged on a page. Tagged frames indicate where items such as text frames,
tables, and images have been tagged. The color assigned to a tag in the Tags panel determines the color of tag markers
and tagged frames. Tag markers and tagged frames only appear in Normal view.
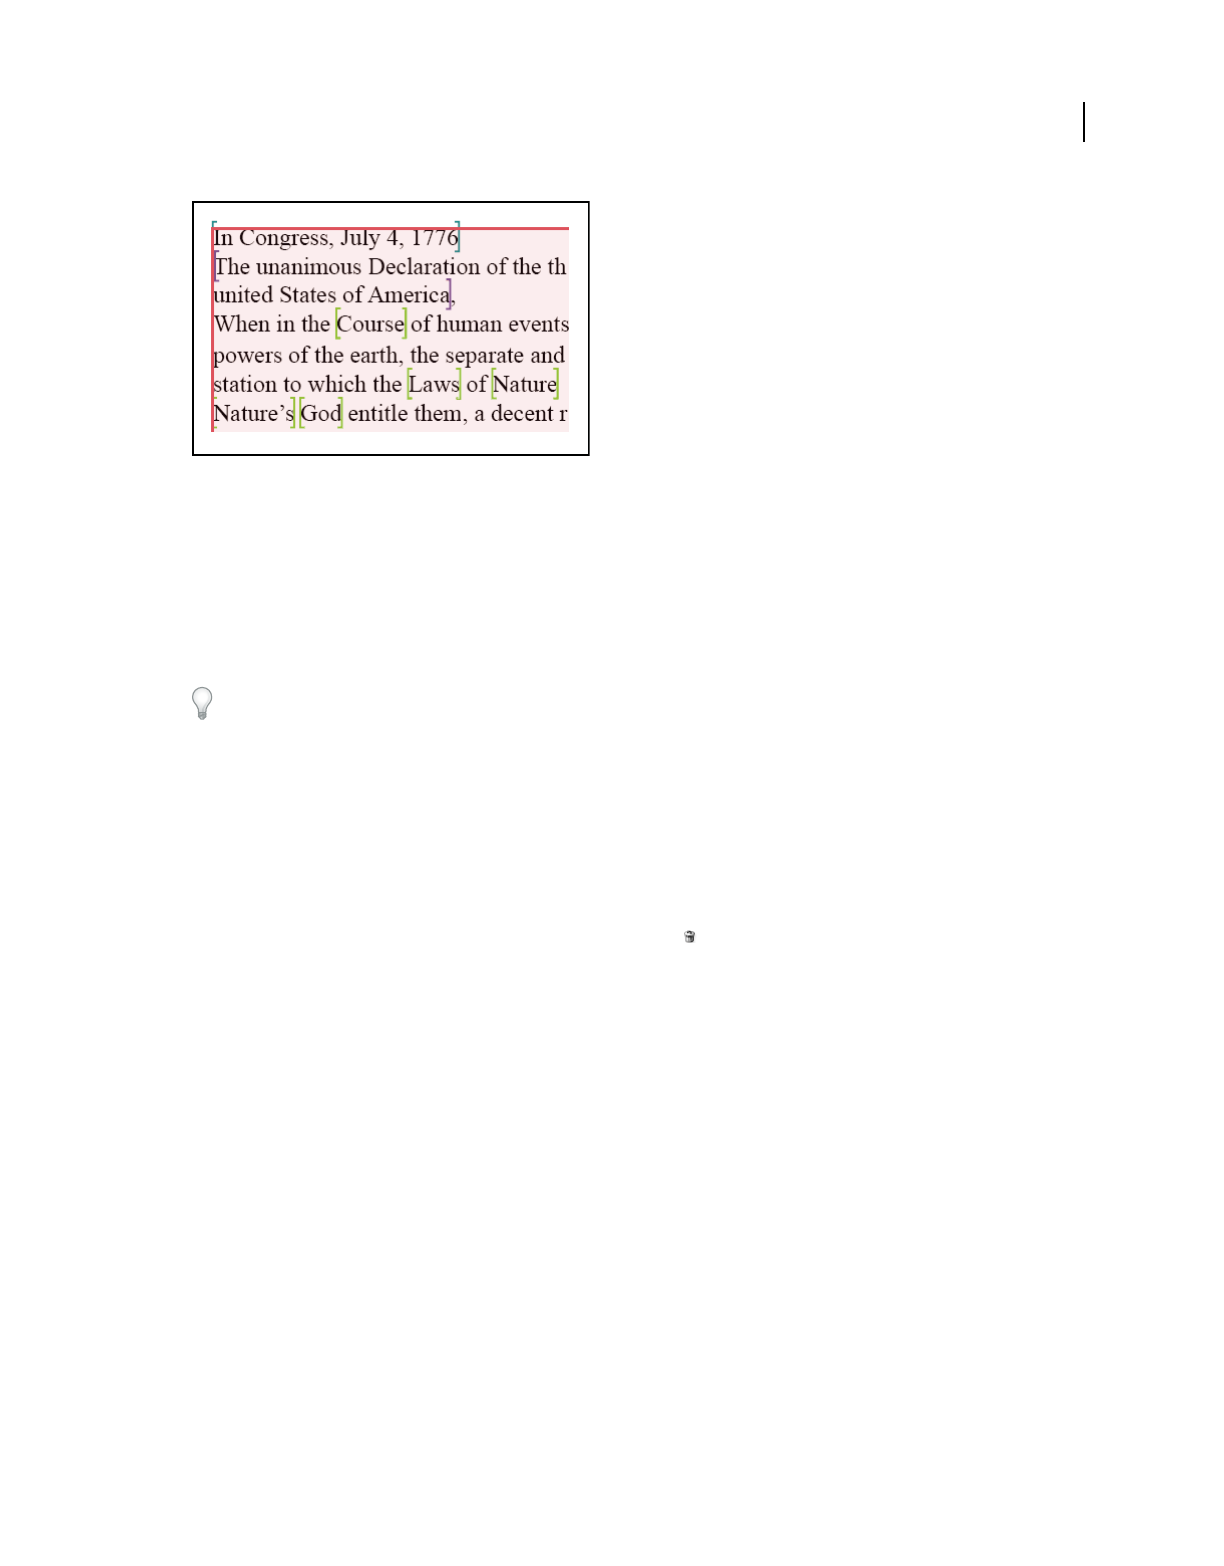
586
USING INDESIGN
XML
Last updated 11/16/2011
A tagged frame and, within it, tag markers.
❖Do any of the following:
•To display color-coded tagged frames, choose View > Structure > Show Tagged Frames.
•To hide the color-coding of tagged frames, choose View > Structure > Hide Tagged Frames.
•To display color brackets around tagged text, choose View > Structure > Show Tag Markers.
•To hide color brackets around tagged text, choose View > Structure > Hide Tag Markers.
To minimize the risk of accidentally deleting a tag marker, edit tagged text in Story Editor, where tag markers are
more visible.
More Help topics
“Use the Story Editor” on page 154
“Working with markers” on page 338
Delete tags
•To delete a tag from the Tags panel, drag it to the Delete icon at the bottom of the panel. If the tag has been
applied to content, an alert message appears. Select another tag to replace the deleted tag and click OK.
•To delete all unused tags, choose Select All Unused Tags from the Tags panel menu, and then click the Delete icon
at the bottom of the panel.
Note: Tags that were loaded with a DTD file cannot be deleted until the DTD file is deleted.
Structuring documents for XML
For detailed information and instructions, click the links below.
Structure pane overview
The Structure pane displays, in hierarchical form, items in a document that have been marked with XML tags. These
items are called elements. You can move elements in the Structure pane to define the order and hierarchy of items. An
element consists of an icon indicating the element type and a tag name.
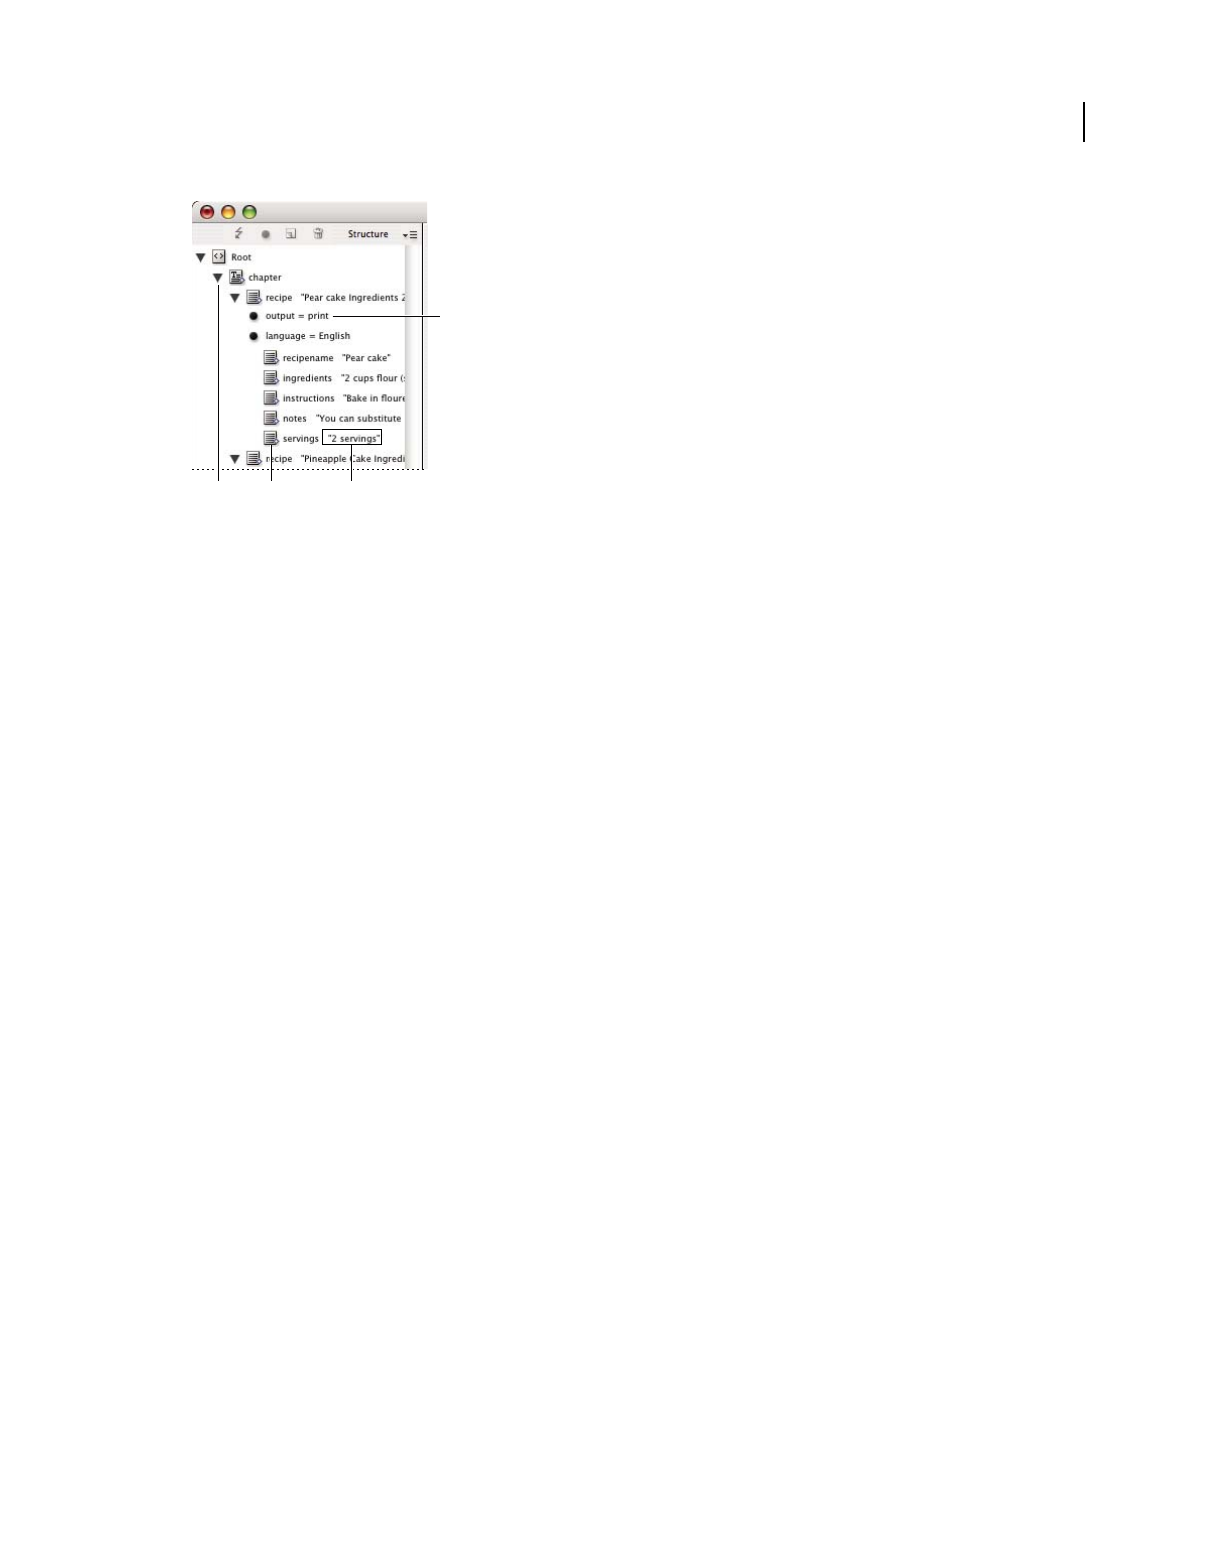
587
USING INDESIGN
XML
Last updated 11/16/2011
Structure pane
A. Triangle to expand or collapse elements B. Element C. Text snippet D. Attribute
Additionally, elements may provide this information:
Blue diamond A blue diamond on an element icon means that the element is attached to an item on the page; the
absence of a blue diamond means that the element has not been attached to a page item.
Underline The tag name is underlined if the item on the page to which the element corresponds is selected. For
example, if you select text to which you assigned the Title tag, the word Title in the text’s element is underlined in the
Structure pane. Underlining shows you whether selected items on the page and elements in the Structure pane
correspond.
Text snippet The first 32 characters of tagged text, called a text snippet, can appear to the right of the element. These
snippets help you identify the page item to which an element corresponds.
Dot and attribute Attributes provide metadata information about an element. If attributes are attached to an element,
a black dot along with attribute names and values appear below the element.
Use the Structure pane
•To open the Structure pane, choose View > Structure > Show Structure.
•To close the Structure pane, choose View > Structure > Hide Structure, or click the splitter button.
•To expand or collapse an element (and display or hide any of its child elements), click the triangle next to the
element.
•To adjust the size of the Structure pane, drag the splitter button.
•To expand or contract an element as well as all elements contained within it, hold down Ctrl (Windows) or
Command (Mac
OS) while clicking the triangle next to the element.
•To show or hide text snippets, choose Show Text Snippets or Hide Text Snippets from the Structure pane menu.
Structure pane icons
The following icons appear in the Structure pane:
A
D
B
C
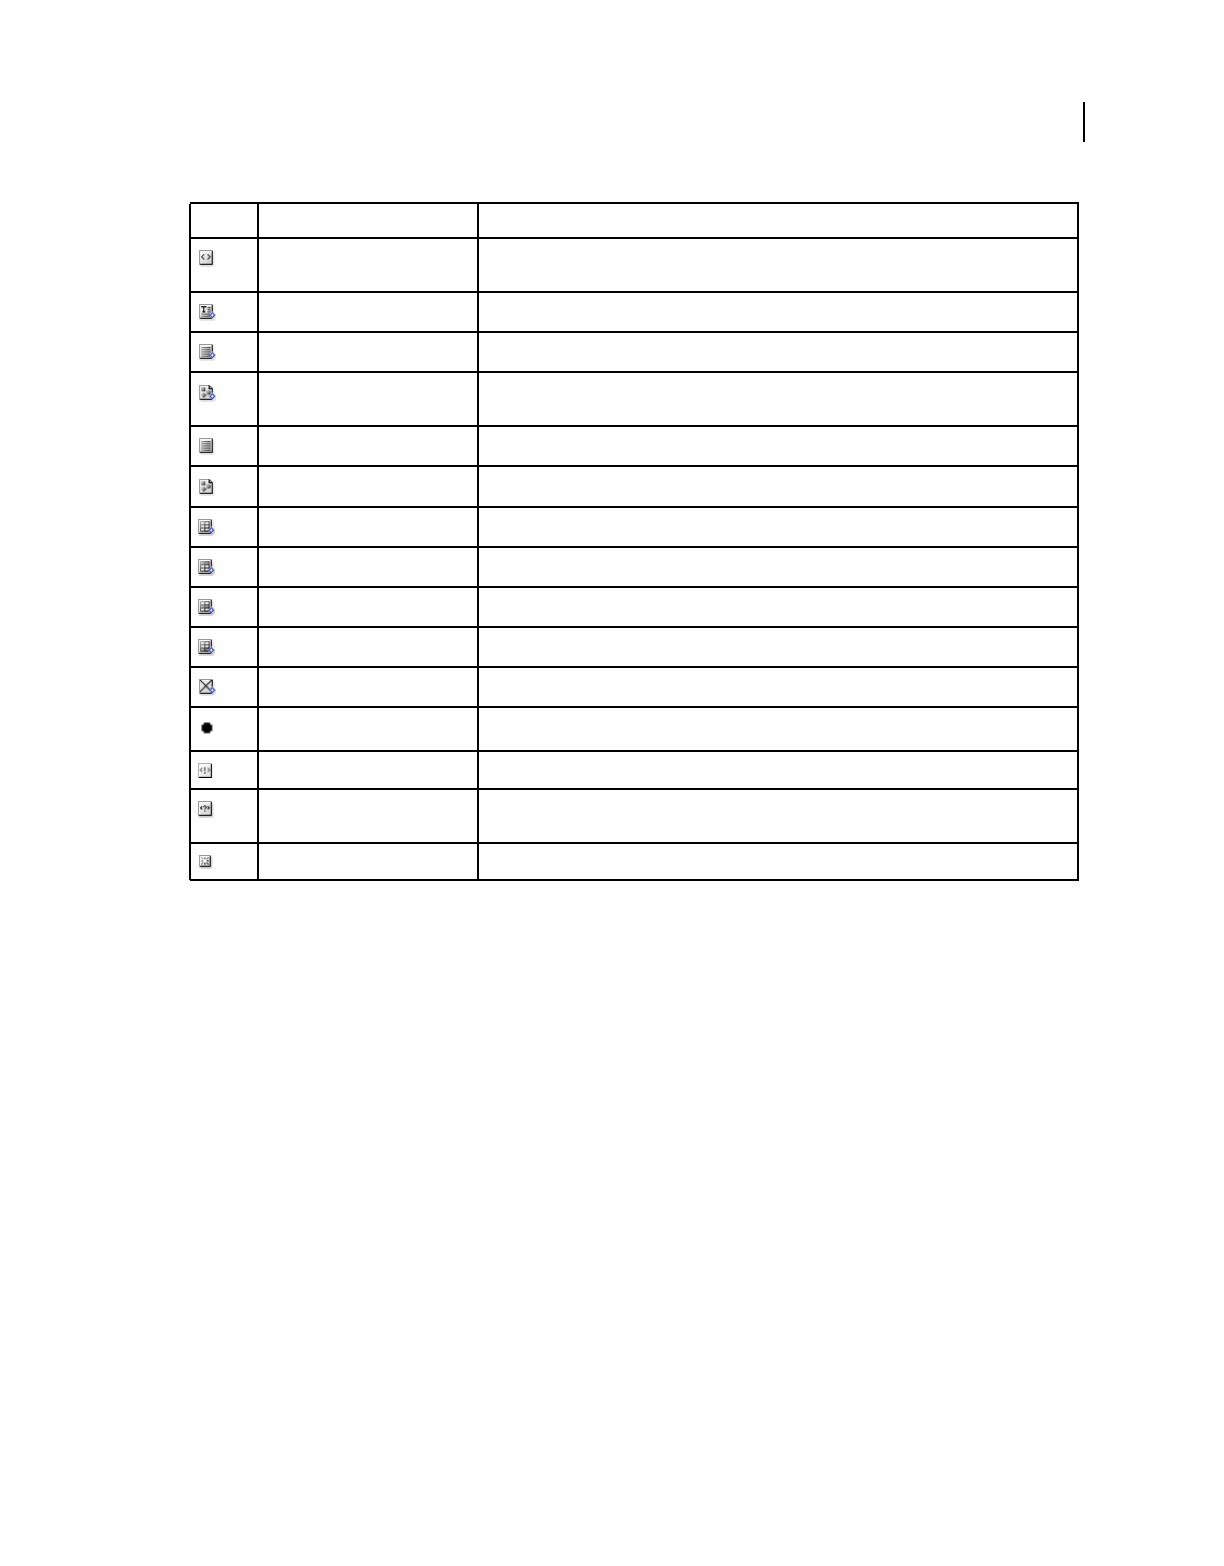
588
USING INDESIGN
XML
Last updated 11/16/2011
Rearrange structured elements
You can change the order and hierarchical rank of elements in the Structure pane. However, observe these rules:
•An XML document is required to have a single root element at the top of the structure. The root element contains
and is the parent to all other elements. Only the DTD (appearing as a DOCTYPE element), comments, and
processing instructions may appear above the root element in the Structure pane.
•Changes to the XML hierarchy structure may affect the appearance of tagged items on InDesign pages. For
example, making a text element the child of an element elsewhere in the structure also moves the text in the layout.
•You cannot drag a table cell element into a table element or move elements into a table element.
❖In the Structure pane, do one of the following:
•To move an element, drag it to a new location within the structure. A line appears when you drag to indicate where
you are inserting the element. The width of the line marks the level within the hierarchy.
•To make an element a child of another element, either position it over the parent element to highlight it or place it
amongst the parent’s other child elements, and then release the mouse button.
•To demote an element by one level in the hierarchy, drag it just above another parent element and move it to the
left slightly until the line indicating its placement spans the width of the parent element.
•To copy or cut an element, select the element or elements in the Structure pane, and then choose Edit > Copy or
Edit
> Cut. Select the element directly above where you want to insert the element, and choose Edit > Paste.
Icon Name Use
Root element Each document includes one root element at the top, which can be renamed but cannot be
moved or deleted.
Story element Represents tagged stories (one or more linked frames).
Text element Represents tagged text within a frame.
Graphic element Represents a tagged frame that includes a placed image. Each graphic element includes an href
attribute that defines the path or URL to the linked file.
Unplaced text element Unplaced text element not yet associated with a page item.
Unplaced graphic element Unplaced graphic element not yet associated with a page item.
Table element Represents a table.
Header cell element Represents a cell in the header row of a table.
Body cell element Represents a cell within the body of a table.
Footer cell element Represents a cell in the footer row of a table.
Empty element An empty frame is associated with this element.
Attribute Includes metadata, such as keywords or location of a linked image (HREF attribute).
Comment Includes comments that appear in the XML file, but not the InDesign document.
Processing instruction Includes an instruction that triggers an action in applications that can read processing
instructions.
DOCTYPE element Tells InDesign which DTD file to use when validating the XML file.
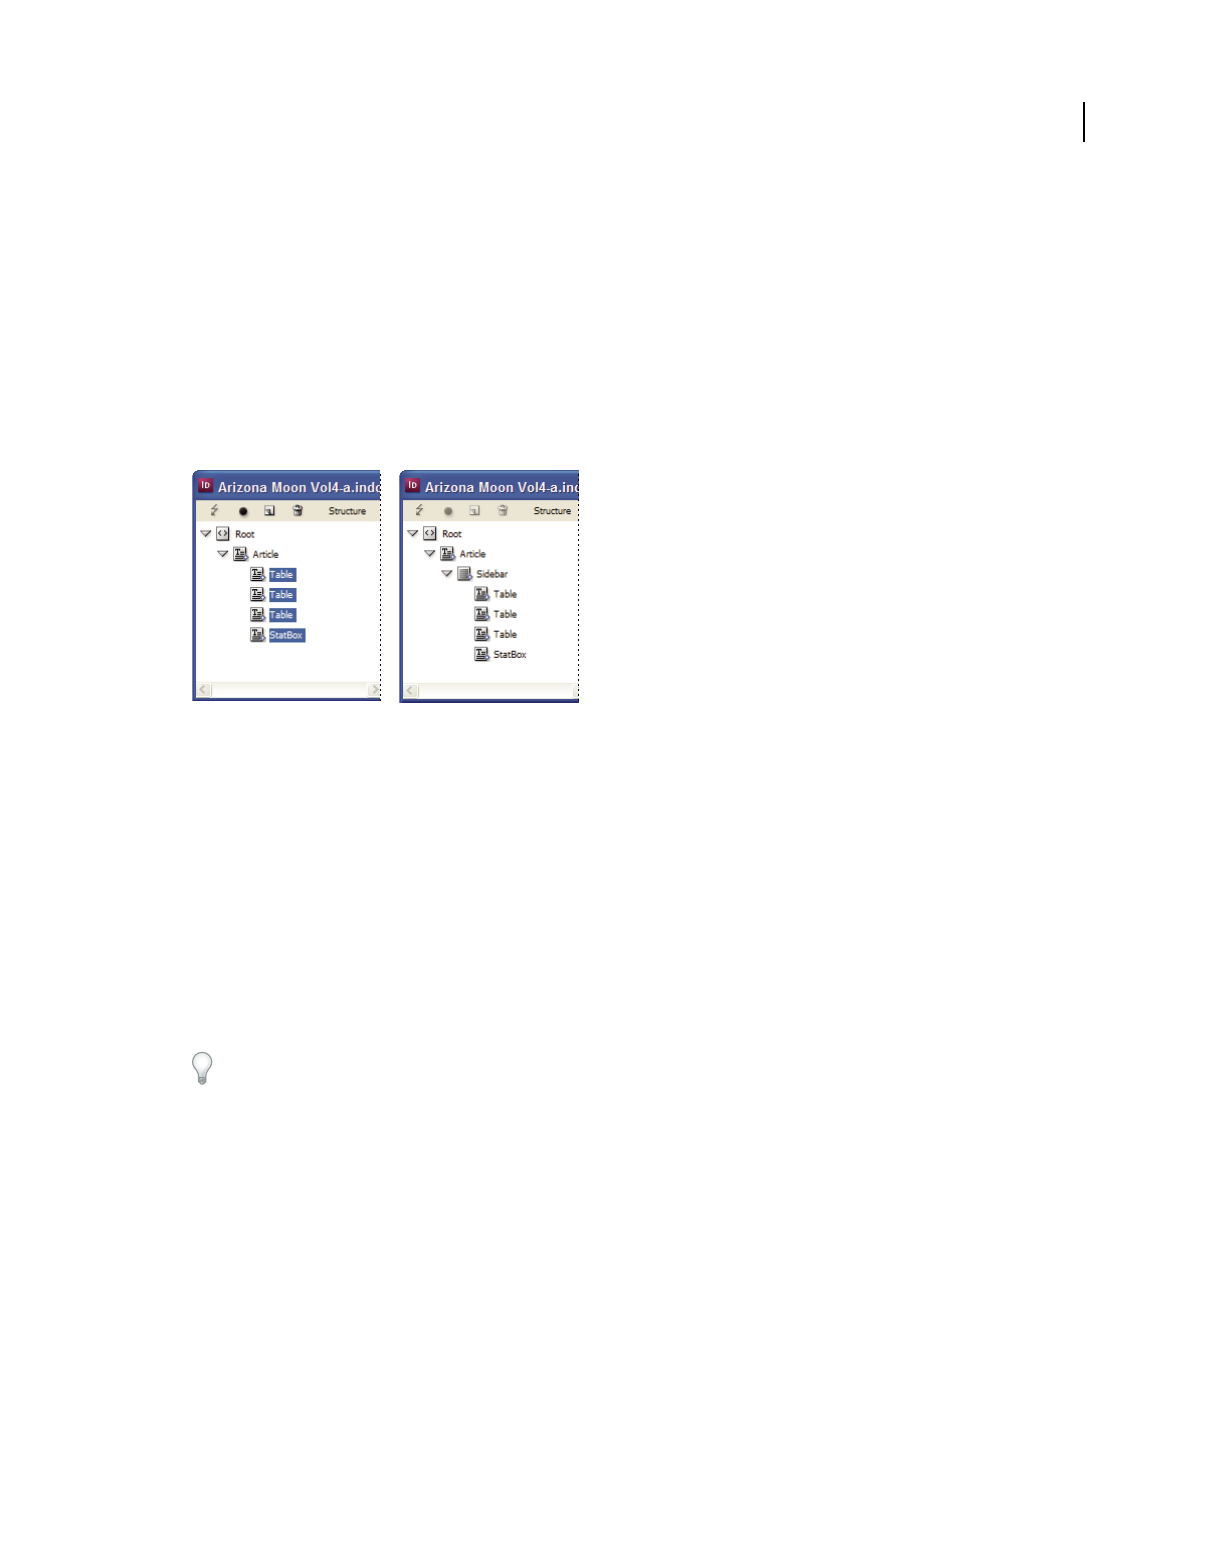
589
USING INDESIGN
XML
Last updated 11/16/2011
Note: When you cut an element, the element and contents are cut to the clipboard, but the frame remains intact.
More Help topics
“Keys for working with XML” on page 699
Insert a parent element
Insert a parent element in the Structure pane to maintain the proper XML structure or organize content better. Before
you can insert a new parent element, you must select the elements that will be the children of the new parent. When
the new parent element is inserted, the selected child elements are demoted by one rank in the structural hierarchy.
With child elements selected (left); a newly inserted parent element includes the child elements (right).
1In the Structure pane, select the elements that will be child elements to the new parent element you want to insert.
Note the following:
•You can’t select the Root or a root-level element.
•The elements must be on the same level of the structural hierarchy.
•The elements must be contiguous.
•The selection must not include table cells or attributes.
2On the Structure pane menu, choose New Parent Element, or right-click (Windows) or Control-click (Mac OS) and
choose New Parent Element.
3Select a tag for the new parent element and click OK.
Insert a new parent element quickly by selecting Add Tag in the Tags panel and then clicking a tag in the panel. You
can also right-click (Windows) or Control-click (Mac OS) an element you selected in the Structure pane, choose New
Parent Element, and then choose an element.
Work with attributes
An attribute provides additional information about an XML element. Each attribute consists of a name and a value.
Attributes appear in the Structure pane; they are not placed in the document or used as content in the document.
Include attributes with elements for the benefit of files and applications that will use the XML files you create in
InDesign.
When you tag an image, InDesign automatically creates an href attribute with a value that defines the on-disk location
of the image file. This href attribute allows other files and applications to locate the image on disk so it can be displayed.
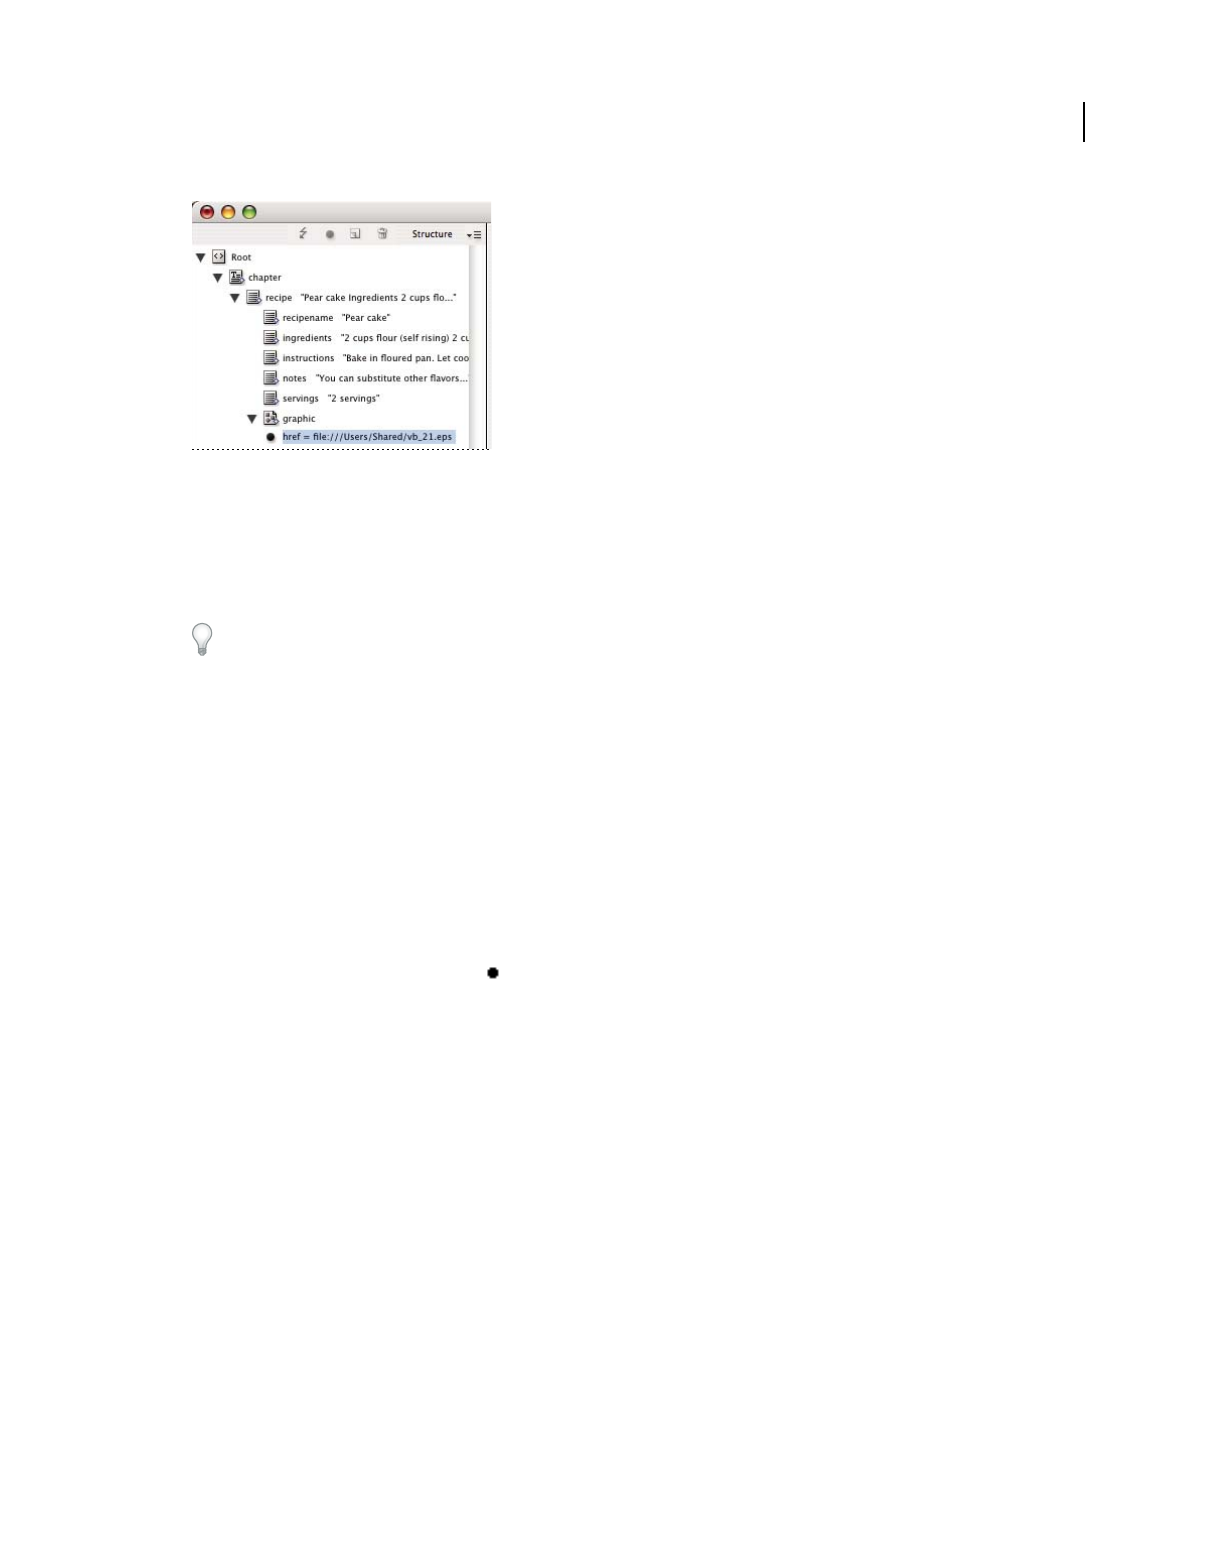
590
USING INDESIGN
XML
Last updated 11/16/2011
An attribute includes a name (href, in this case) and a value.
You can add attributes to any element except the DOCTYPE element (a DTD file), comments, and processing
instructions. For example, to include keywords for searching in a downstream application, you can create an attribute
called keywords. You could also create attributes to indicate substituted text, track article titles, and record other
content-related information.
If you are using a DTD file, view its contents to see which attributes it allows. Attribute names, like tag names, must
conform to the DTD.
Note: InDesign recognizes special namespace attributes that can specify paragraph or character styles, tables and table
cell styles, as well as control whitespace. For more information, see the XML technical reference and other resources at
www.adobe.com/go/learn_id_XMLscript.
More Help topics
“Exporting XML” on page 594
Add an attribute
1Select an element.
2Do one of the following:
•Click the Add An Attribute button .
•Choose New Attribute on the Structure pane menu.
•Right-click (Windows) or Control-click (Mac OS) the selected element and choose New Attribute.
3Specify a name and a value for the attribute, and then click OK.
Show or hide attributes in the Structure pane
❖Choose Show Attributes or Hide Attributes from the Structure pane menu.
You may need to click the triangle icon next to an element to display its attributes.
Edit or delete an attribute
1Select an attribute in the Structure pane.
2Do one of the following:
•To edit the attribute, double-click it or choose Edit from the Structure pane menu.
•To delete the attribute, click the Delete icon or choose Delete from the Structure pane menu.
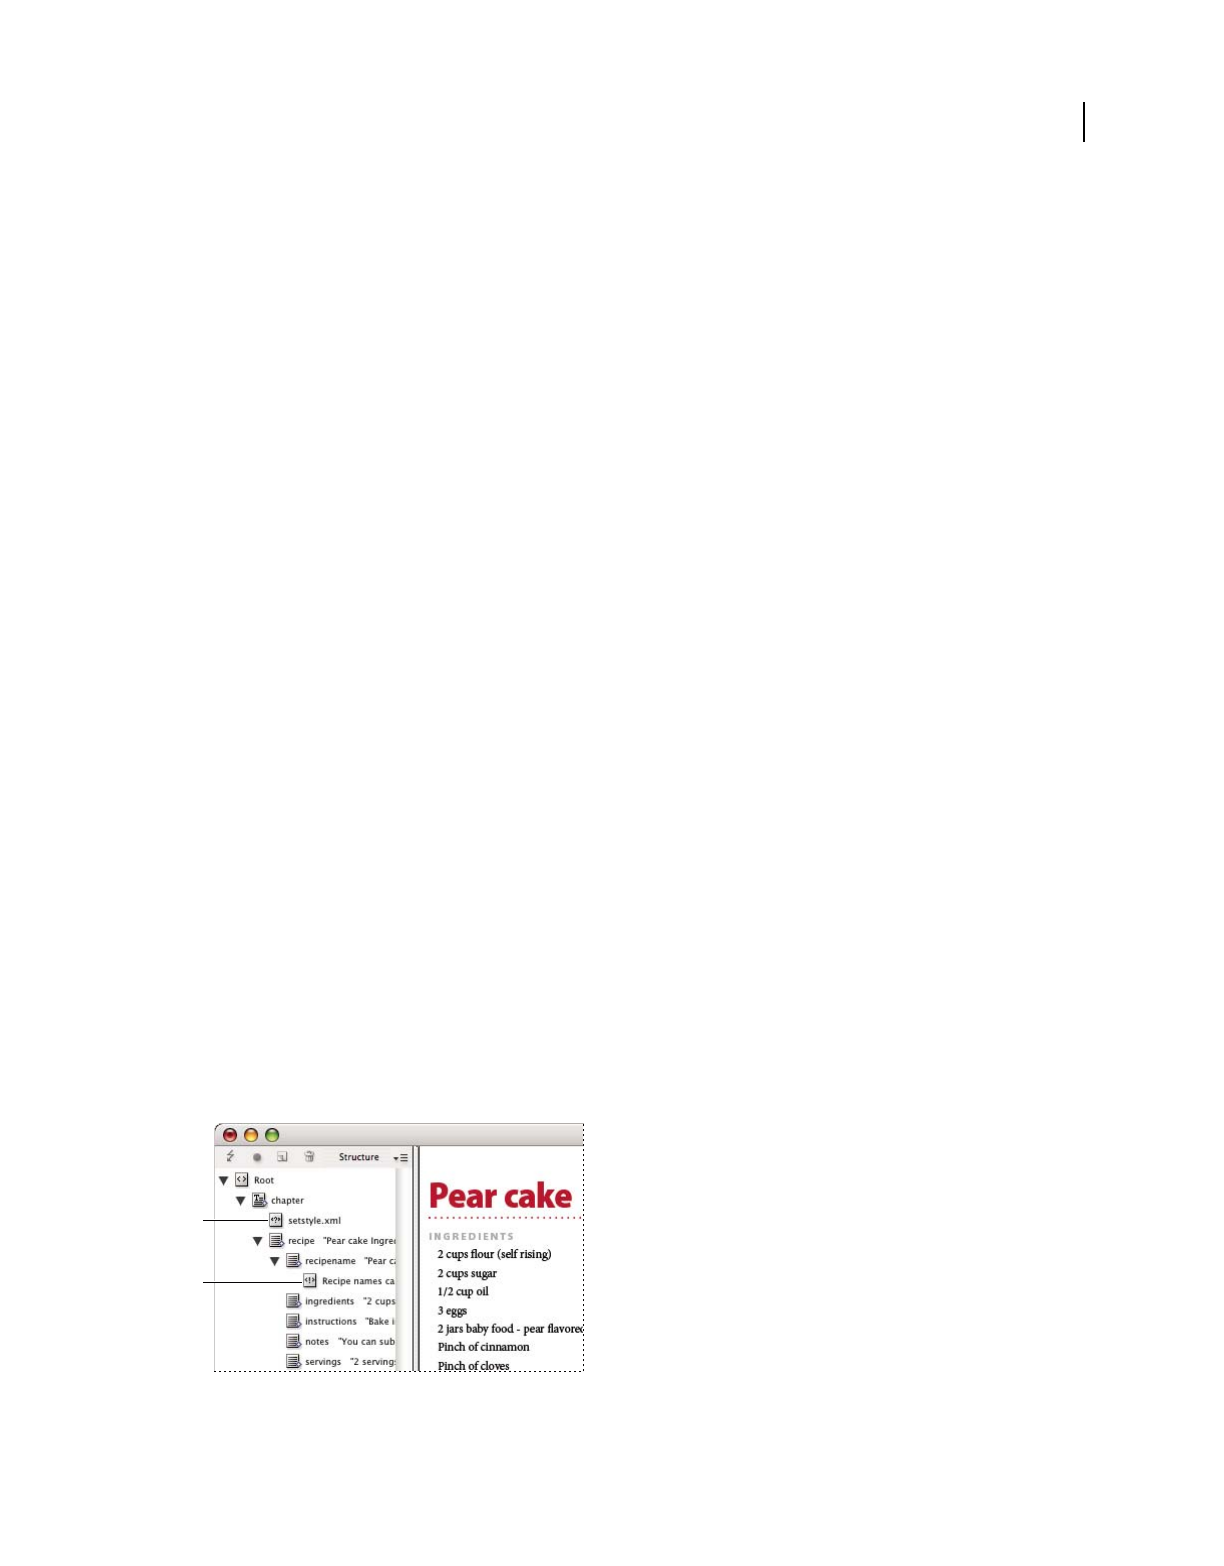
591
USING INDESIGN
XML
Last updated 11/16/2011
Edit href attributes
InDesign creates href attributes automatically to handle image files. The href attribute defines the on-disk location
of the image file so that the image file can be displayed. When you tag a placed image, InDesign creates an href
attribute value that lists the image’s path and filename.
The path can be an absolute link, a relative link to the same folder as the XML file, or a relative link to the Images
subfolder of the folder where the XML file is located. Relative paths are specific to the path where the document is
saved.
•An href attribute with an absolute link looks like the following (in Windows and the Mac OS):
href=file:///C:/Images/Meadow.psd
href=file:///Users/abhayc//Desktop/abc.jpg
•An href attribute to an image file in the same folder as the XML file looks like the following:
href=file:Meadow.psd
•An href attribute to an image file in the Images subfolder looks like the following:
href=file:///Images/Meadow.psd
You can edit the href attribute to specify a new link to an image. For example, you can edit an absolute link to make
it a relative link, thereby making the image file accessible when you export the file.
1In the Structure pane, double-click the href attribute. (You may need to click the triangle icon next to the image
element to display the attribute.)
2For Value, enter the new path to the image, and then click OK.
Add comments and processing instructions
Using InDesign, you can include comments and processing instructions in an XML file. Enter a comment to include
descriptive information about an element. Comments can be viewed in web browsers and text editors. They help
others understand XML structure and XML tags. A processing instruction is a special, application-specific command.
For example, you can enter a page-break processing instruction so that an application to which you export your XML
file understands where to enter a page break. InDesign user-created processing instructions are meant for use in other
programs; InDesign itself does not act on processing instructions.
Comments and processing instructions appear in the Structure pane. You can move, edit, and delete comments and
processing instructions as you can other elements in the Structure pane. They cannot, however, contain child elements
or attributes.
InDesign Structure pane with text snippets showing
A. Processing instruction B. Comment
A
B

592
USING INDESIGN
XML
Last updated 11/16/2011
More Help topics
“Rearrange structured elements” on page 588
Add a comment
1Select the element about which you will comment.
Note: To add a comment to a table, select a table cell element. You can add comments to table cells, not tables.
2Choose New Comment in the Structure pane menu.
3Type the comment in the New Comment dialog box.
Add a processing instruction
1Select an element for the processing instruction.
Note: To add a processing instruction to a table, select a table cell element. You can add processing instructions to table
cells, not tables.
2Choose New Processing Instruction in the Structure pane menu.
3For Target, enter a name that identifies the processing instruction to an application that reads exported XML files.
4For Data, enter a value that tells the application what to do with the processing instruction.
View comments and processing instructions
❖Choose Show Comments or Show Processing Instructions in the Structure pane menu.
Edit comments and processing instructions
1Select the comment or processing instruction.
2Do any of the following:
•Double-click the comment or processing instruction.
•Choose Edit on the Structure pane menu.
3Edit the comment or processing instruction and click OK.
Use DTD files to validate XML
Validating the XML in a document means to compare the structure, element tag names, and attributes against the
specifications of a DTD file. To validate against a DTD file, you must first load it into your document in InDesign.
Note: Loading a DTD file imports tag names into the Tags panel. These imported tag names are locked; they can’t be
deleted or renamed except by deleting the DTD file from the document.
The DOCTYPE element appears at the top of the Structure pane if a DTD file has been loaded into your document.
(DTDs are sometimes loaded automatically when you import an XML file.) To replace the DTD file in a document,
delete the existing DTD and then load a new one.
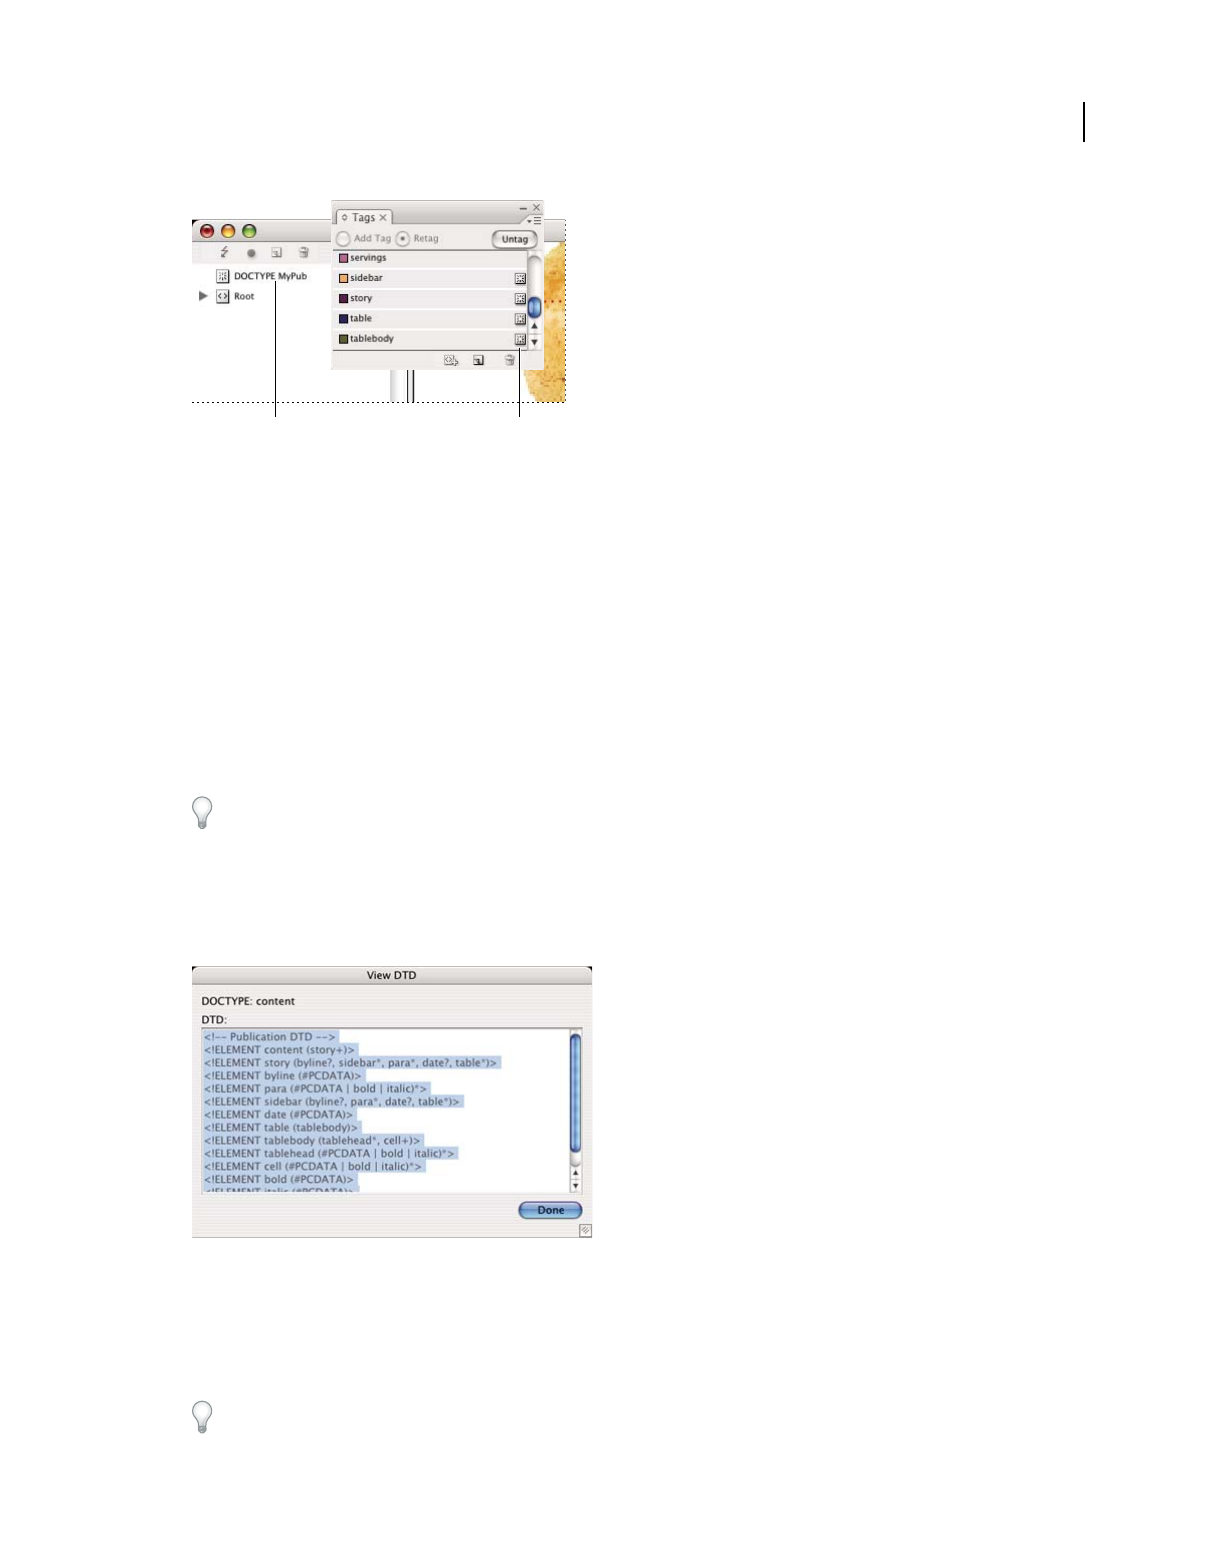
593
USING INDESIGN
XML
Last updated 11/16/2011
Working with DTD files in InDesign
A. DOCTYPE element from the DTD file (Structure pane) B. Locked tag from the DTD file (Tags panel)
More Help topics
“About DTD files” on page 569
Load a DTD file
When you load a DTD file, InDesign embeds the file in the document.
1Do one of the following:
•In the Structure pane, choose Load DTD from the Structure pane menu.
•In the Tags panel, choose Load DTD from the panel menu.
2Select a DTD file to import, and click Open.
To view tags defined in the DTD file, open the Tags panel by choosing Window > Utilities > Tags.
View a DTD file
DTDs are written in ASCII text. They may contain embedded instructions and explanations that describe how to apply
tags and order elements correctly. In InDesign, you can only view a DTD that is loaded in a document.
DTD file opened for viewing
❖Do one of the following:
•In the Structure pane menu, choose View DTD.
•Double-click the DOCTYPE element in the Structure pane.
To print a DTD file, copy code from the View DTD window and paste it in a text editor.
A B
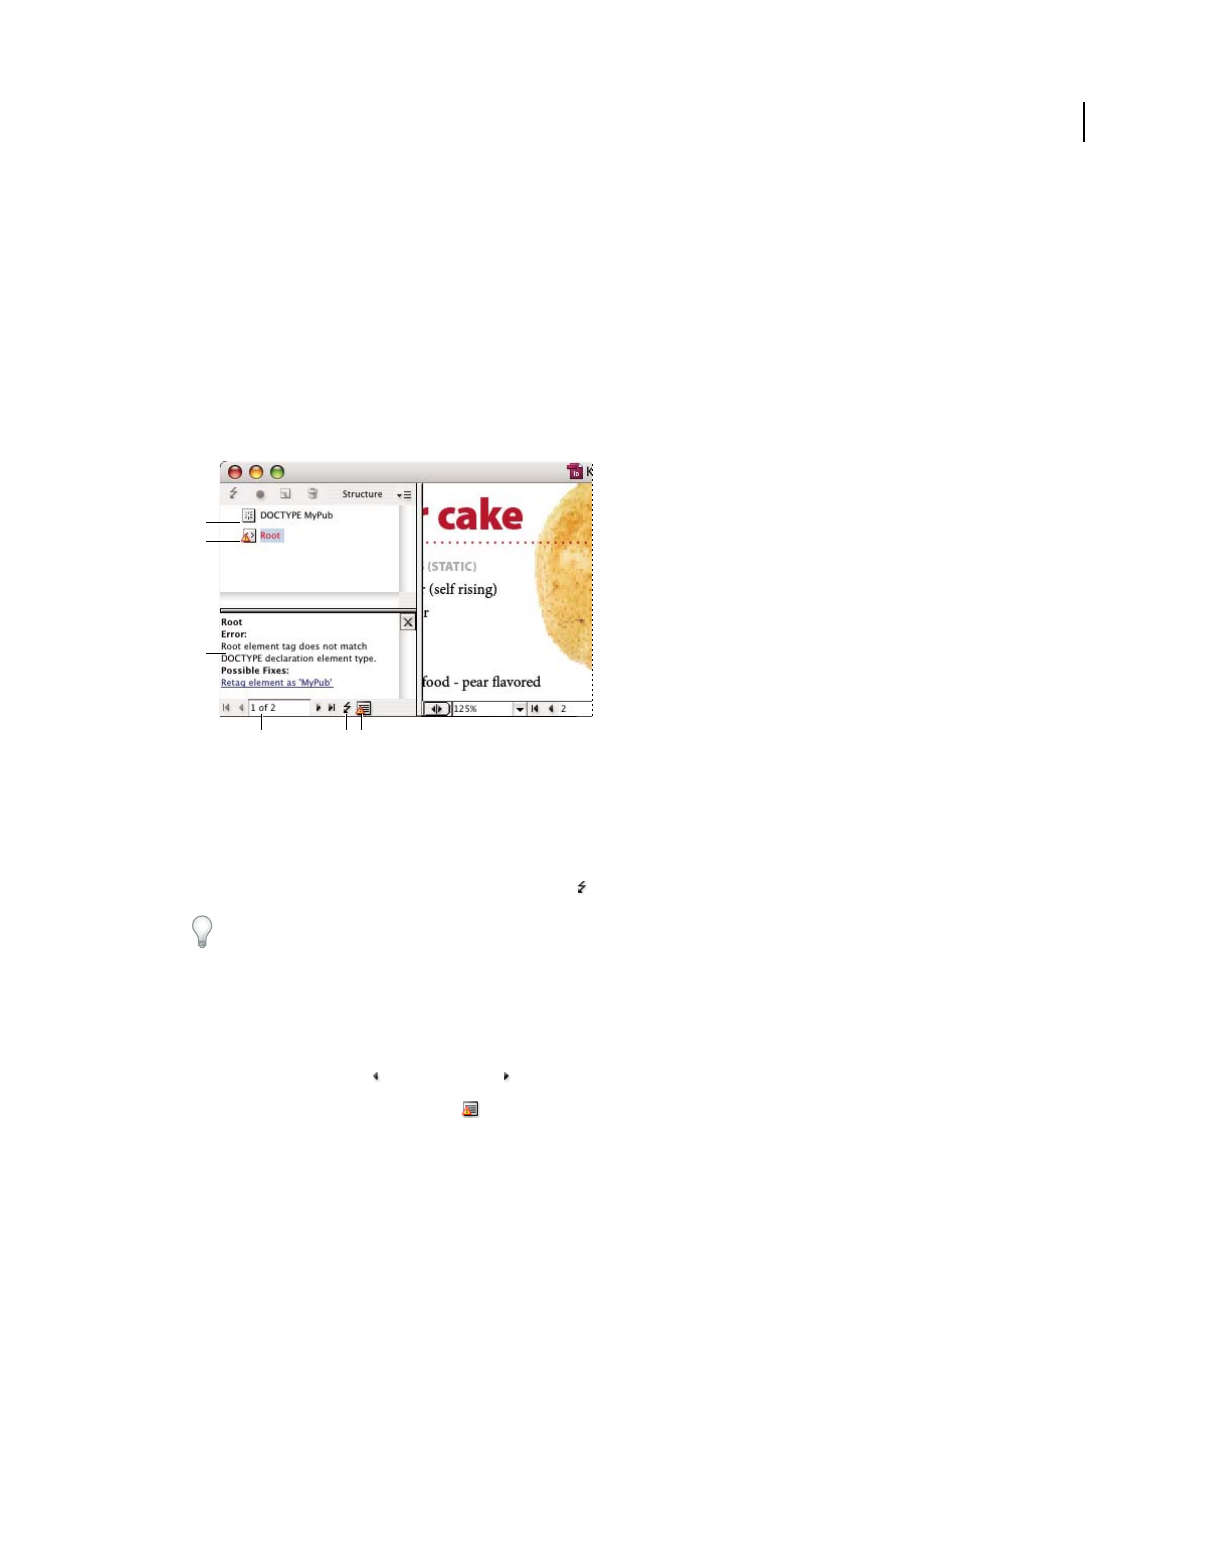
594
USING INDESIGN
XML
Last updated 11/16/2011
Delete a DTD file
❖Choose Delete DTD from the Structure pane menu.
InDesign deletes the copy of the DTD file stored in the InDesign document, not the original DTD file. Tags that were
imported with the DTD file remain in the Tags panel but are unlocked.
Validate XML structure
When you validate your document, InDesign alerts you if the XML deviates from rules established by the DTD file. It
suggests ways to make the XML meet DTD file requirements. You can fix errors one at a time or view all errors in a
separate window.
Structure pane with Suggestions pane
A. Loaded DTD B. Error or invalidating condition C. Description of error with suggested fix D. Error count E. Validate button F. View all
errors in a separate window
1Choose View > Structure > Show Structure.
2In the Structure pane, click the Validate button .
To change the root element from which InDesign validates, choose DTD Options in the Structure pane menu.
3To fix errors displayed in the Suggestion pane, either click a suggested fix to try it, or edit the XML structure and
tags directly using the Structure pane and the Tags panel.
4To view other errors, do one of the following:
•Click the Left arrow or Right arrow .
•Click the Error Window button to view all errors in a separate window.
•Choose View List Of Errors on the Structure pane menu.
Note: InDesign stops validating after detecting 250 errors. A plus sign in the Error Count box appears when this limit is
reached.
Exporting XML
Export document content to XML
Before you export content from an InDesign document to XML, you must have done the following:
•Created or loaded element tags.
A
B
C
DEF

595
USING INDESIGN
XML
Last updated 11/16/2011
•Applied tags to items on the pages of your document.
•Adjusted the hierarchy of tagged elements in the Structure pane, if needed.
You can export all or a portion of the XML content in your document. Only content that is tagged can be exported.
Important: If you are exporting a document that contains tables, you must tag the tables or InDesign will not export them
as part of the
XML.
1If you want to export only a portion of the document, select the element in the Structure pane where you want
exporting to begin.
2Choose File > Export.
3For Save As Type (Windows) or Format (Mac OS), choose XML.
4Specify a name and location for the XML file, and then click Save.
5In the General tab of the Export XML dialog box, choose any of the following:
Include DTD Declaration Exports the reference to the DTD along with the XML file. This option is only available if
there is a DOCTYPE element in the Structure pane.
View XML Using Opens the exported file in a browser, XML editing application, or text editor. Choose the browser or
application from the list.
Export From Selected Element Starts exporting from the element you selected in the Structure pane. This option is
only available if you selected an element before choosing File
> Export.
Export Untagged Tables As CALS XML Exports untagged tables in CALS XML format. To be exported, the table must
be in a tagged frame, and the table must not be tagged.
Remap Break, Whitespace, And Special Characters Exports break, whitespace, and special characters as decimal
character entities rather than straight characters.
Apply XSLT Applies a stylesheet to define the transformation of the exported XML to, for example, a modified XML
tree or HTML. Select Browse (Windows) or Choose (Mac
OS) to select an XSLT from the file system. The default
setting, Use Stylesheet From XML, uses an XSLT transformation instruction if one is referenced in the XML that is
applied on export.
6Choose an encoding type from the Encoding menu.
7To specify export options for images, click the Images tab, and then select one or more of the following:
Original Images Places a copy of the original image files in an Images subfolder.
Optimized Original Images Optimizes and compresses the original image files and places copies of the files in an
Images sub-folder.
Optimized Formatted Images Optimizes the original image files that contain applied transformation (such as rotation
or scaling) and places them in an Images sub-folder. For example, if the document contains two images, one cropped
and one not, only the cropped image is optimized and copied to the Images sub-folder.
8If you selected Optimized Original Images or Optimized Formatted Images in the previous step, choose options for
the optimizing the images.
9Click Export.
Note: Not all special characters are supported in XML (such as the Automatic Page Number character). InDesign warns
you if it cannot include a character in the exported XML file. This warning also appears if you didn’t tag a table.

596
USING INDESIGN
XML
Last updated 11/16/2011
More Help topics
“Create and load XML tags” on page 581
“Tagging content for XML” on page 581
“Rearrange structured elements” on page 588
Optimized image export options
The following options are available when you choose Optimized Original Images or Optimized Formatted Images in
the Images tab of the Export XML dialog box.
Image Conversion Specifies which file format to use for the converted image. If you choose Automatic, InDesign
chooses the best file type based on the image. Hence, you may want to specify both GIF Options and JPEG Options.
GIF Options Specify the formatting for images that are converted to GIF format when exported to XML. You can set
the following options:
•Palette Specifies the color palette you want the image to conform to when converted. Choose the palette for the
final display format of the XML content. Adaptive (no dither) works well for images with primarily solid colors and
can be used when the final output will be to multiple formats.
•Interlace Downloads every other line of the image with each pass, instead of downloading the entire image in one
pass. Interlacing enables a preview of the image to download quickly, as each successive pass adds resolution until the
final quality is met.
JPEG Options Specify the formatting for images that are converted to JPEG format when exported to XML. You can
set the following options:
•Image Quality Specifies the quality of the converted image. The higher the quality setting, the larger the file size and
the longer it takes to download.
•Format Method Specifies how the JPEG image is formatted for download. Baseline downloads the final quality
image in one pass, so that the file displays at its final quality as soon as it opens; this format may take longer to
download than a Progressive formatted image. Progressive downloads the image in a series of passes, with the first pass
a low-resolution version and each successive pass adding resolution to the image until the final quality is attained.
Save tags only as XML
Save tags only so you can load the tags into an InDesign document and make use of them there.
1Choose Save Tags from the Tags panel menu.
2Type a name, specify a location, and then click Save.
The tags in your document, along with their assigned colors, are saved in an XML file.
Edit an exported XML file
After you’ve used InDesign to create and export an XML file, you can make changes to the XML using either of these
methods:
•To make changes directly in the XML file, open it in a text or XML editor.
•To make changes that will be preserved in the source document, open the InDesign file that the XML was exported
from. After you make changes to the content in InDesign, you can export it to XML again, using the original XML
filename if you want to replace the file.

597
Last updated 11/16/2011
Chapter 20: Printing
For detailed information and instructions, click the links below.
Printing documents
For detailed information and instructions, click the links below.
About printing
Whether you are providing a multicolored document to an outside service provider, or just sending a quick draft of a
document to an inkjet or laser printer, knowing a few basics about printing will make the print job go more smoothly,
and help to ensure that the finished document appears as intended.
Types of printing
When you print a file, Adobe InDesign sends it to a printing device—either to be printed directly on paper or to a
digital printing press, or to be converted to a positive or negative image on film. In the latter case, the film can then be
used to create a master plate for printing by a commercial press.
Types of images
The simplest types of images, such as text, use only one color in one level of gray. A more complex image is one with
color tones that vary within the image. This type of image is known as a continuous-tone image. A photograph is an
example of a continuous-tone image.
Halftoning
To create the illusion of continuous tone, images are broken down into a series of dots. This process is called halftoning.
Varying the sizes and densities of the dots in a halftone screen creates the optical illusion of variations of gray or
continuous color in the printed image.
Color separation
Artwork that will be commercially reproduced and that contains more than a single color must be printed on separate
master plates, one for each color. This process is called color separation.
Getting detail
The detail in a printed image results from a combination of resolution and screen frequency. The higher an output
device’s resolution, the finer (higher) the screen frequency you can use.
Duplex printing
Printer-specific features such as duplex printing are available when you click the Printer button in the Print dialog box.
Duplex printing is available only if the printer supports it. For information on duplex printing, see your printer
documentation.

598
USING INDESIGN
Printing
Last updated 11/16/2011
Transparent objects
If the artwork contains objects with transparency features that you added using the Effects panel or the Drop Shadow
or Feather commands, the transparent artwork will be flattened according to settings in the flattener preset you choose.
You can affect the ratio of rasterized images to vector images in the printed artwork.
For more information on printing, see the Adobe Print Resource Center at www.adobe.com/go/print_resource. To
troubleshoot printing problems, see www.adobe.com/go/learn_id_printtrouble.
More Help topics
“Specify a halftone screen frequency and resolution” on page 645
Adobe Print Resource Center
Print a document or book
1Make sure that you’ve installed the correct driver and PPD for your printer.
2Open the Print dialog box:
•If you have individual documents open, choose File > Print. This opens the Print dialog box for the current
document.
•If you have either no documents or all documents selected in the Book panel, choose Print Book in the Book panel
menu. This will print all documents in a book.
•If you have some documents selected in the Book panel, choose Print Selected Documents in the Book panel menu.
3Specify the printer you’re using in the Printer menu. If a printer preset has the settings you want, choose it in the
Print Preset menu.
4In the General area, type the number of copies to print, choose whether to collate pages or print them in reverse
order, and indicate which pages you want printed.
The Page Range option is unavailable if you’re printing a book.
If you’re printing a document with multiple page sizes, use the controls above the Range to select a range with all pages
of the same size. See “Printing documents with multiple page sizes” on page 600.
5Indicate whether you want to print nonprinting objects, blank pages, or visible guides and baseline grids.
6Adjust settings as needed for each area of the Print dialog box.
7Click Print.
Settings you specify in the Print dialog box are saved with the document.
More Help topics
“Use print presets” on page 606
“Specify paper size and page orientation” on page 600
Adobe Print Resource Center
Page printing options
You can print all pages, even or odd pages only, a series of individual pages, or a contiguous range.
Range Specifies the range of pages to print in the current document. Indicate numbers in a range by using a hyphen,
and indicate multiple pages or ranges by using commas or spaces. (See “Specifying pages to print” on page 600.)
599
USING INDESIGN
Printing
Last updated 11/16/2011
If the document includes pages with different page sizes, you can use the options above the Range field to select all
pages of the same size. (See “Printing documents with multiple page sizes” on page 600.)
Sequence Choose All Pages to print all pages of a document. Choose Even Pages Only or Odd Pages Only to print only
those pages within the specified range. These options are unavailable when you are using the Spreads or Print Master
Pages options.
Spreads Prints pages together, as if they were bound, or printed on the same sheet. You can print only one spread per
sheet. If the new page is larger than the currently selected paper size, InDesign prints as much as it can, but won’t
automatically scale the page to fit the imageable area, unless you select Scale To Fit in the Setup area of the Print dialog
box. You may also want to specify landscape orientation.
Note: If different trapping styles are applied to pages in the spread, InDesign resolves the differences.
Print Master Pages Prints all master pages, rather than document pages. Selecting this option makes the Ranges option
unavailable.
Examples of page ranges
Options for printing objects
The General area of the Print dialog box contains options for printing elements usually visible only on-screen, such as
grids and guides. Choose from the following options:
Print Layers Determine which layers are printed. (See “Choose which layers are printed or exported to PDF” on
page 603.)
Print Non-printing Objects Prints all objects, regardless of your settings to selectively prevent individual objects from
printing.
Print Blank Pages Prints all pages in the specified page range, even if no text or objects appear on a page. This option
is unavailable when you are printing separations. If you are using Print Booklet for composite printing, use the Print
Blank Printer Spreads option to print blank spreads added to fill out composite signatures.
Page range Pages printed
11- Page 11 to the last page of the document.
-11 All pages up to and including page 11.
+11 Page 11 only.
-+11 All pages up to and including page 11.
+11- All pages from the eleventh page to the end of document.
1, 3-8, Page 1, plus pages 3 to 8.
+1, +3-+8, Page 1, plus pages 3 to 8.
Sec1 All pages in section labeled “Sec1”.
Sec2:7 Page numbered 7 (not necessarily the seventh page of that section) in section labeled “Sec2.”
PartB:7- Page numbered 7 in section labeled “PartB” to last page of section.
Chap2:7-Chap3 Page 7 in section labeled “Chap2” to end of section labeled “Chap3”.
Sec4:3-Sec4:6, Sec3:7 Pages 3–6 in “Sec4” and page 7 in “Sec3”.

600
USING INDESIGN
Printing
Last updated 11/16/2011
Print Visible Guides and Baseline Grids Prints visible guides and grids in the same color as shown in the document.
You can control which guides and grids are visible in the View menu. This option is unavailable when you are printing
separations.
Printing documents with multiple page sizes
You may want to print pages that have different sizes separately. An option in the Print dialog box makes it easy to
specify a range that selects all the pages of the same size in the document.
Before you submit a document with multiple page sizes for printing, ask the print provider about special requirements.
If you have difficulties printing a document with multiple page sizes, consider dividing it into separate documents.
1Choose File > Print.
2In the General panel, select or deselect Spreads to determine whether pages or spreads are printed.
If a spread includes pages of different sizes, the largest width and height on the spread determines the spread size.
3To print only pages of the same size, use the options above the Range field to select one of the pages or spreads, and
then click the pages icon
.
The Range field displays all the pages or spreads of that size.
4After printing a range of one page size, repeat the steps to print other page sizes.
Specifying pages to print
You can specify a page range using either absolute numbering (the page’s position in the current document) or
page/section numbering (the section and page numbers assigned to the page). By default, dialog boxes in InDesign
honor the format specified for Page Numbering in the Preferences dialog box.
•When Absolute Numbering is selected, numbers you specify for pages or page ranges correspond to the absolute
position of pages in your document. For example, to print the third page in the document, you would enter “3” for
Range in the Print dialog box.
•When Section Numbering is selected in the Preferences dialog box, you can enter pages and page ranges exactly as
they appear in your layout or using absolute numbering. For example, if the page labeled SecA:5 is the fifteenth page
in your document, you could print it by entering “SecA:5” in the Print dialog box or by entering “+15”. The “+” sign
indicates that you want to override the normal section and page numbering to use absolute page numbering.
If you are unsure which format to use when entering page numbers in the Print dialog box, imitate the format used
in the page box at the bottom of the document window.
Specify paper size and page orientation
It’s important to distinguish between page size (as defined in the Document Setup dialog box for your document) and
paper size (the sheet of paper, piece of film, or area of the printing plate you’ll print on). Your page size might be US
Letter (8.5-by-11 inches), but you might need to print on a larger piece of paper or film to accommodate any printer’s
marks or the bleed and slug areas.
The list of paper sizes available to InDesign comes from the PPD (PostScript printers) or from the printer driver (non-
PostScript printers). If the printer and PPD you’ve chosen for PostScript printing support custom paper sizes, you’ll
see a Custom option in the Paper Size menu.
Most imagesetters can accommodate regular paper sizes, such as letter and tabloid, as well as transverse orientation,
where the regular page size is rotated 90° when printed. The transverse orientation is often a more efficient use of
imagesetter media.
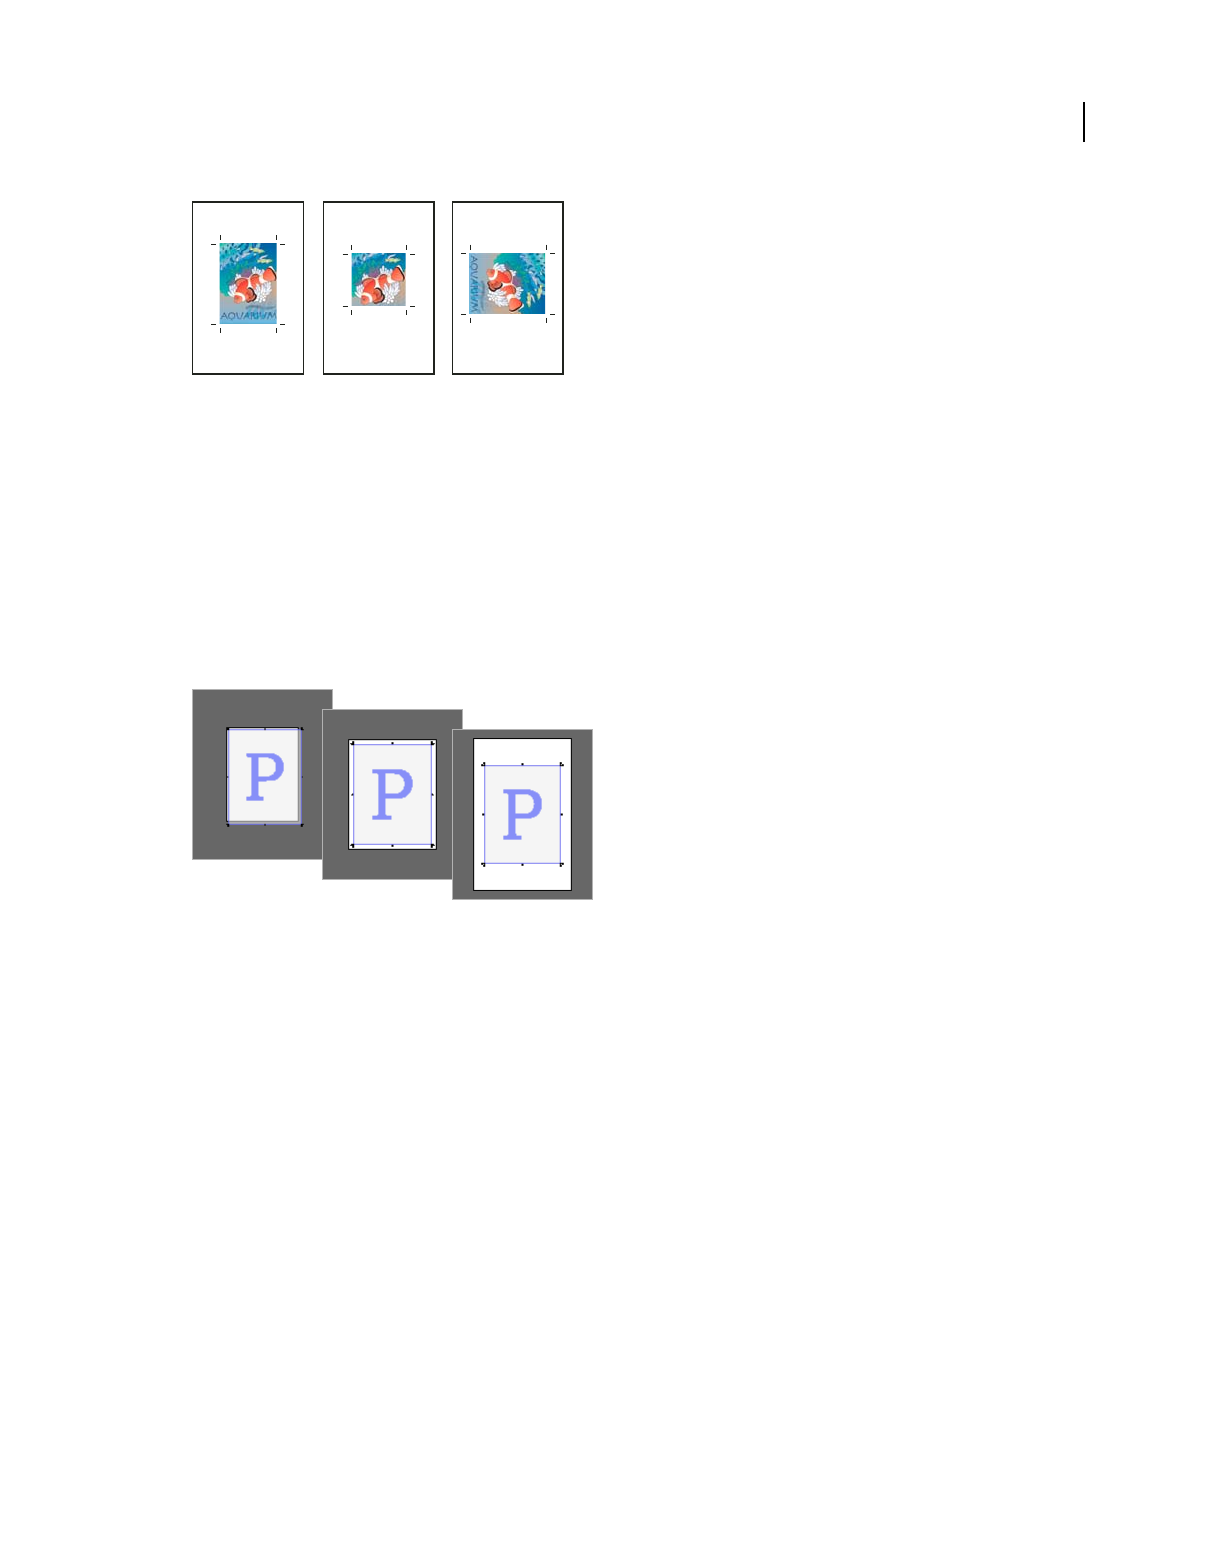
601
USING INDESIGN
Printing
Last updated 11/16/2011
Page size and orientations for imagesetters
A. Letter (tall orientation) B. Custom page size (tall orientation) C. Letter (transverse orientation)
Paper sizes are listed by familiar names (such as Letter). The dimensions define the limits of the imageable area—the
total paper size, less any unprintable border used by the printer or imagesetter. Most laser printers cannot print to the
exact edge of a page.
If you select a different paper size (for example, if you change from Letter to Legal), the document is rescaled in the
preview window. The preview window displays the entire imageable area of the selected page; when the preview size
is changed, the preview window automatically rescales to include the imageable area.
Note: The imageable area will vary by PPD file, even for the same paper size (for example, Letter), because different
printers and imagesetters define the sizes of their imageable areas differently.
Comparison of printing a letter-size page on Letter, Letter.extra, or Tabloid paper
Note: The preview in the lower-left area of the Print dialog box indicates whether you have enough space to include all
printer’s marks and the bleed and slug areas.
More Help topics
“Specify printer’s marks” on page 607
“Select a PPD file” on page 606
Specify paper size and orientation
1Choose File > Print.
2In the Setup area of the Print dialog box, choose an option in the Paper Size menu.
Make sure that your paper size is large enough to contain your document, the bleed and slug areas (if included), and
any printer’s marks. To conserve imagesetter film or paper, however, select the smallest paper size that will
accommodate your document and the necessary printing information.
3Click an Orientation button to rotate the document on the media.
ABC
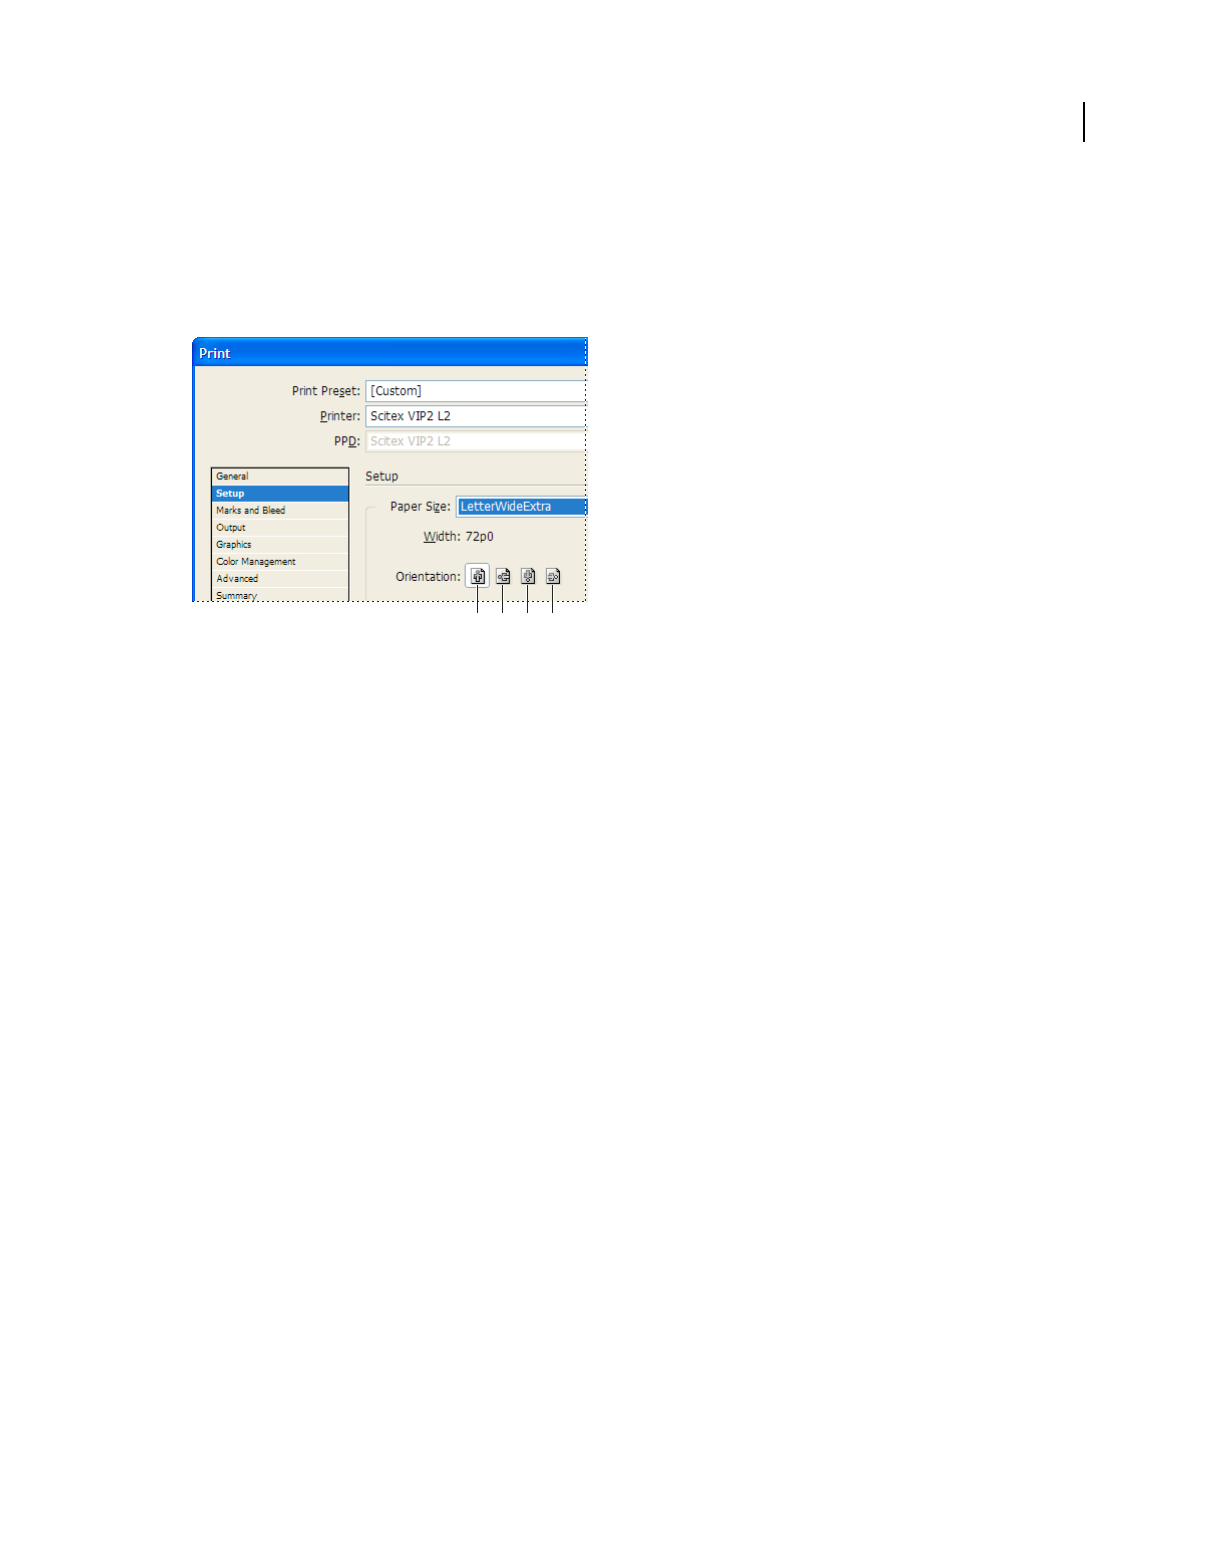
602
USING INDESIGN
Printing
Last updated 11/16/2011
In most cases, the page orientation specified in Document Setup (File > Document Setup) and the output orientation
specified in the Setup area of the Print dialog box should be the same (both portrait or both landscape), whether you
print normal or transverse. If you’re printing spreads, you may want to choose a different paper size and orientation
(such as landscape) to fit all pages of a spread on a single sheet. If you’ve rotated the spread view, you may want to
change the orientation to print the spread properly.
Orientation buttons
A. Portrait B. Landscape C. Reverse Portrait D. Reverse Landscape
Specify a custom paper size
If you’re using a printer that accommodates various paper sizes, such as a high-resolution imagesetter, you can specify
a custom paper size when you print. InDesign makes the custom option available only if the selected PPD supports
custom paper sizes.
The largest custom paper size you can specify depends on the maximum imageable area of your imagesetter. For more
information, consult the documentation for your specific printer.
Note: Custom paper size options for non-PostScript printers is not accessible from the InDesign Print dialog box. To set
those printer-specific features, click Setup (Windows), Printer (Mac
OS), or Page Setup (Mac OS) in the InDesign Print
dialog box. Check the documentation for your non-PostScript printer driver for details.
1Choose File > Print.
2If you are printing a PostScript file, choose PostScript for Printer in the General area of the Print dialog box. Then
select the PPD that supports custom paper sizes.
3In the Setup area of the Print dialog box, choose Custom in the Paper Size menu.
Note: If Custom is not available, the PPD you selected when you set up your printer does not support custom paper sizes.
4To specify width and height, do one of the following:
•To let InDesign determine the smallest paper size needed for your document’s contents, bleed and/or slug areas,
and any printer’s marks, select Auto for Width and Height. Auto, the default option, is also useful if you have
different sized pages in a book and you’re printing on continuous media, such as a roll of film or photosensitive
paper.
•To specify a paper size larger than the default, enter new dimensions in the Width and Height text boxes. Be sure
to increase the values; decreasing the default values may clip your document.
5To change the placement of the page on the film, enter a value for Offset.
The Offset value specifies the amount of space along the left side of the imageable area. For example, entering a value
of 30 points in the Offset option shifts your page 30 points to the right.
A B C D
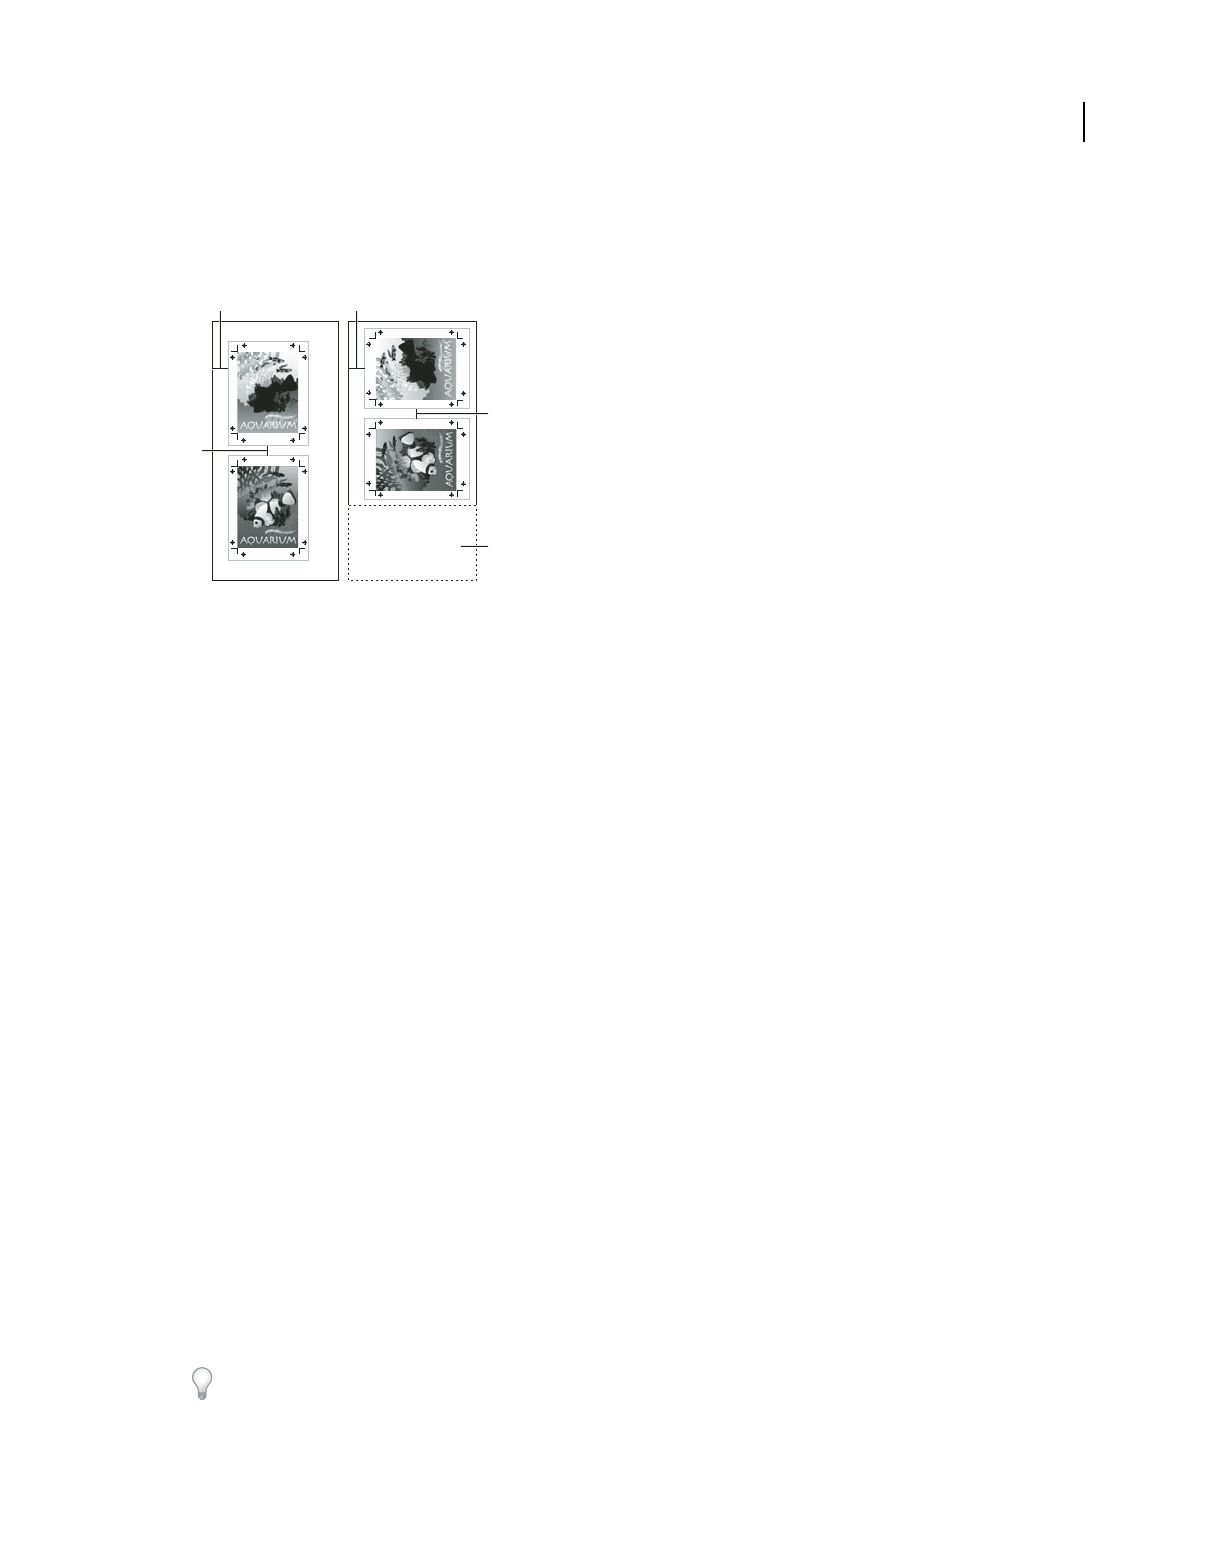
603
USING INDESIGN
Printing
Last updated 11/16/2011
6To rotate both media and page contents, select Transverse and click OK.
You can conserve a considerable amount of film or paper by using Transverse in conjunction with Offset. Compare
the following examples of an image printed by InDesign with Transverse selected and deselected.
Transverse deselected (left) compared to Transverse selected (right)
A. Offset value B. Gap C. Film saved
7To specify the distance between individual pages when printing on continuous media, enter a value for Gap.
Choose which layers are printed or exported to PDF
1To review or change the Show Layer and Print Layer settings for your document, select a layer in the Layers panel,
and then choose Layer Options from the panel menu. Specify layer options, and click OK.
2Do one of the following:
•Choose File > Print, and click General on the left side of the Print dialog box.
•Choose File > Export, specify Adobe PDF, and then click Save. On the left side of the Export Adobe PDF dialog box,
select General.
3From the Print Layers or Export Layers menu, choose which layers you want to print or include in the PDF:
All Layers Prints or outputs all layers in your document, even if they are hidden or set as nonprinting.
Visible Layers Prints or outputs all visible layers, even if they are set as nonprinting in Layer Options.
Visible & Printable Layers Prints or outputs only those layers that are set as both visible and printable.
More Help topics
“Export to PDF for printing” on page 501
Printing to non-PostScript language printers
You can print a document on a non-PostScript language printer. However, because PostScript is the standard page-
description language for professional publishing, many high-end color and graphics features, such as screen
frequencies or color separations, cannot be reproduced on non-PostScript printers. Most imported graphics file
formats print acceptably. In general, a document printed to a non-PostScript printer should look the way it appears
on-screen when you view the document using Preview Mode.
Some vendors sell software programs that add PostScript-language capability to a non-PostScript language printer.
Check with your software reseller for availability and compatibility.
B
A A
B
C
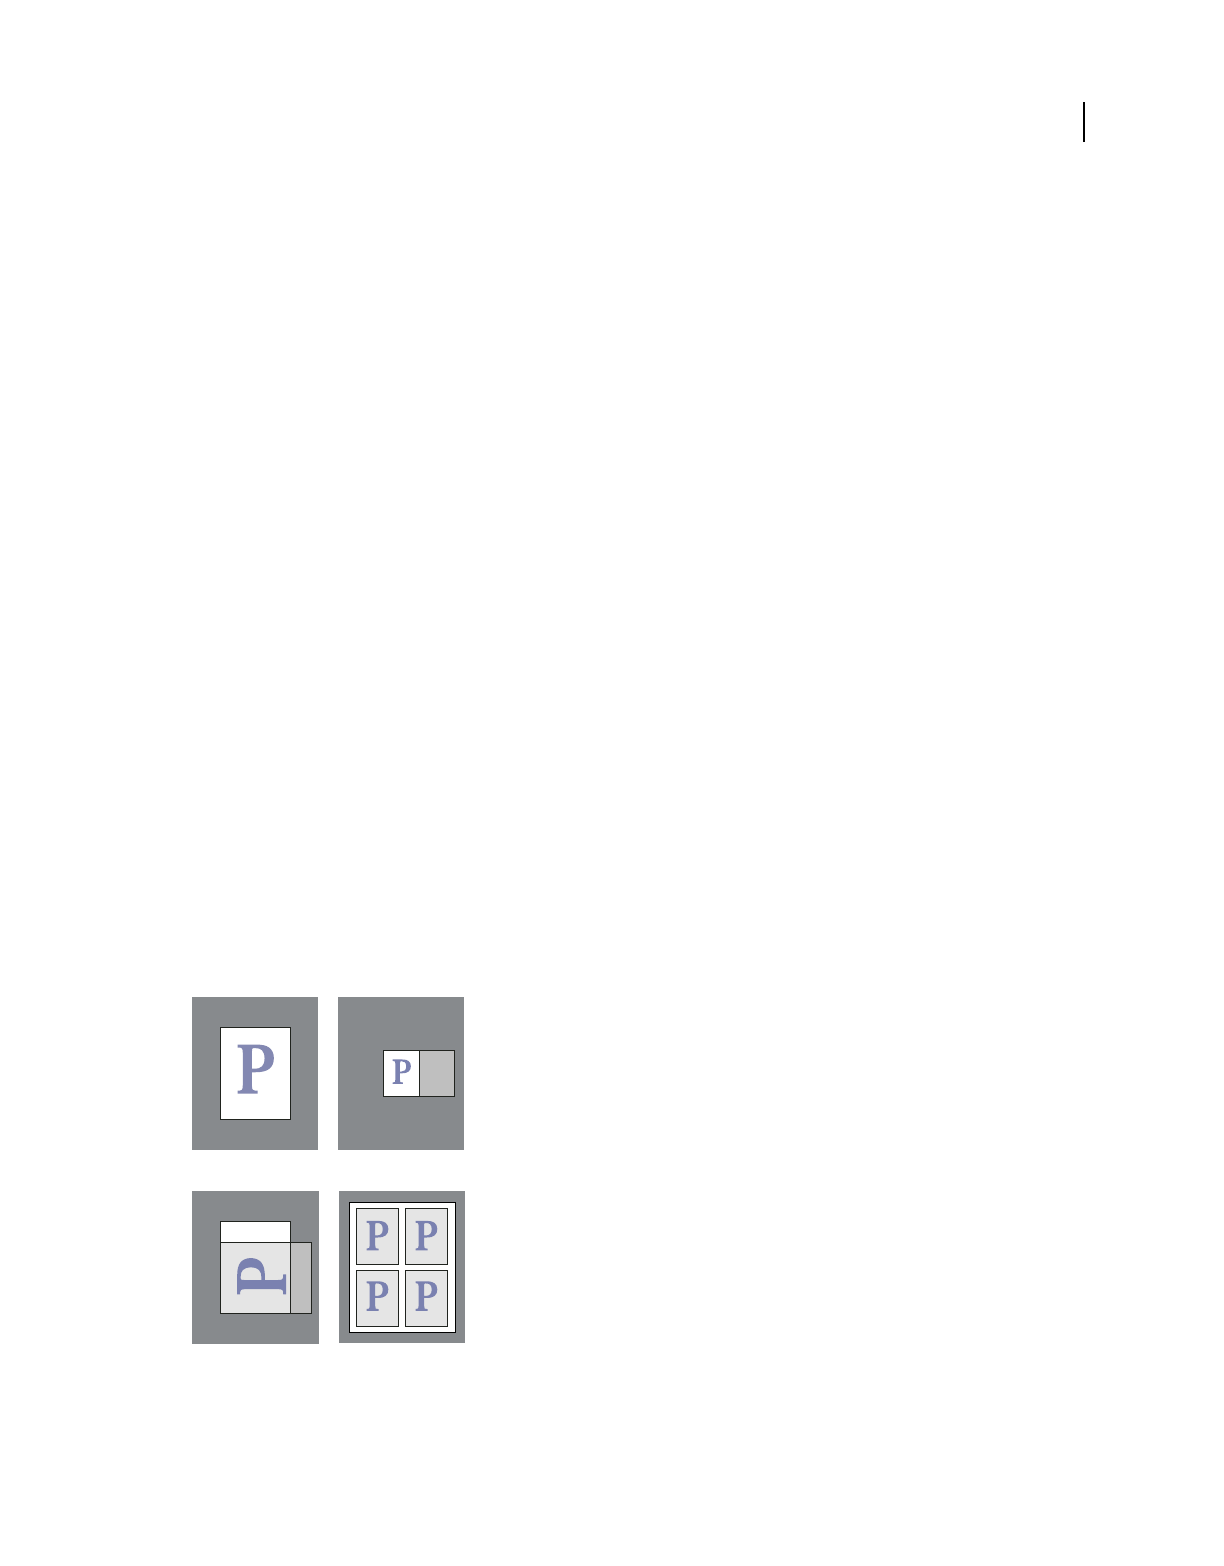
604
USING INDESIGN
Printing
Last updated 11/16/2011
Print as bitmap
When you print to a non-PostScript printer, you can choose to rasterize all artwork during printing. This option is
useful when printing documents that contain complex objects (such
as objects with smooth shading or gradients)
because it reduces the possibility of errors.
1Choose File > Print.
2Select Advanced on the left side of the Print dialog box.
3Select Print As Bitmap.
This option is available only if the printer driver identifies the printer as non-PostScript. If this option is selected for
non-PostScript printers in Mac
OS 10.3 or later, InDesign prints PostScript, which is then used by Mac OS and the
driver to render the page images. In Windows, the high-end color and graphics features may not be converted
appropriately if this option is not selected.
4Specify a resolution for bitmap printing.
The output resolution may be limited by the printer driver’s resolution. To get the best quality output, set the non-
PostScript printer driver resolution to be equal or greater than the output resolution specified in the InDesign Print
dialog box.
Preview documents
You can view how the document’s pages fit on the chosen paper size before you print to a PostScript printer. A preview
in the lower-left area of the Print dialog box shows whether your paper and orientation settings will work for your page
size. When you select different options in the Print dialog box, the preview updates dynamically with the combined
effects of your print settings.
1Choose File > Print.
2Click the preview image in the lower-left area of the Print dialog box.
The preview has three views:
Standard view Displays the relationship of a document page to the media. It shows the effects of various options such
as paper size to imageable area, bleed and slug areas, and page marks, as well as the effects of tiling and thumbnails.
Four different page-fit settings in Standard view
A. Default B. Spreads C. Orientation D. 2-by-2 Thumbnails
AB
CD
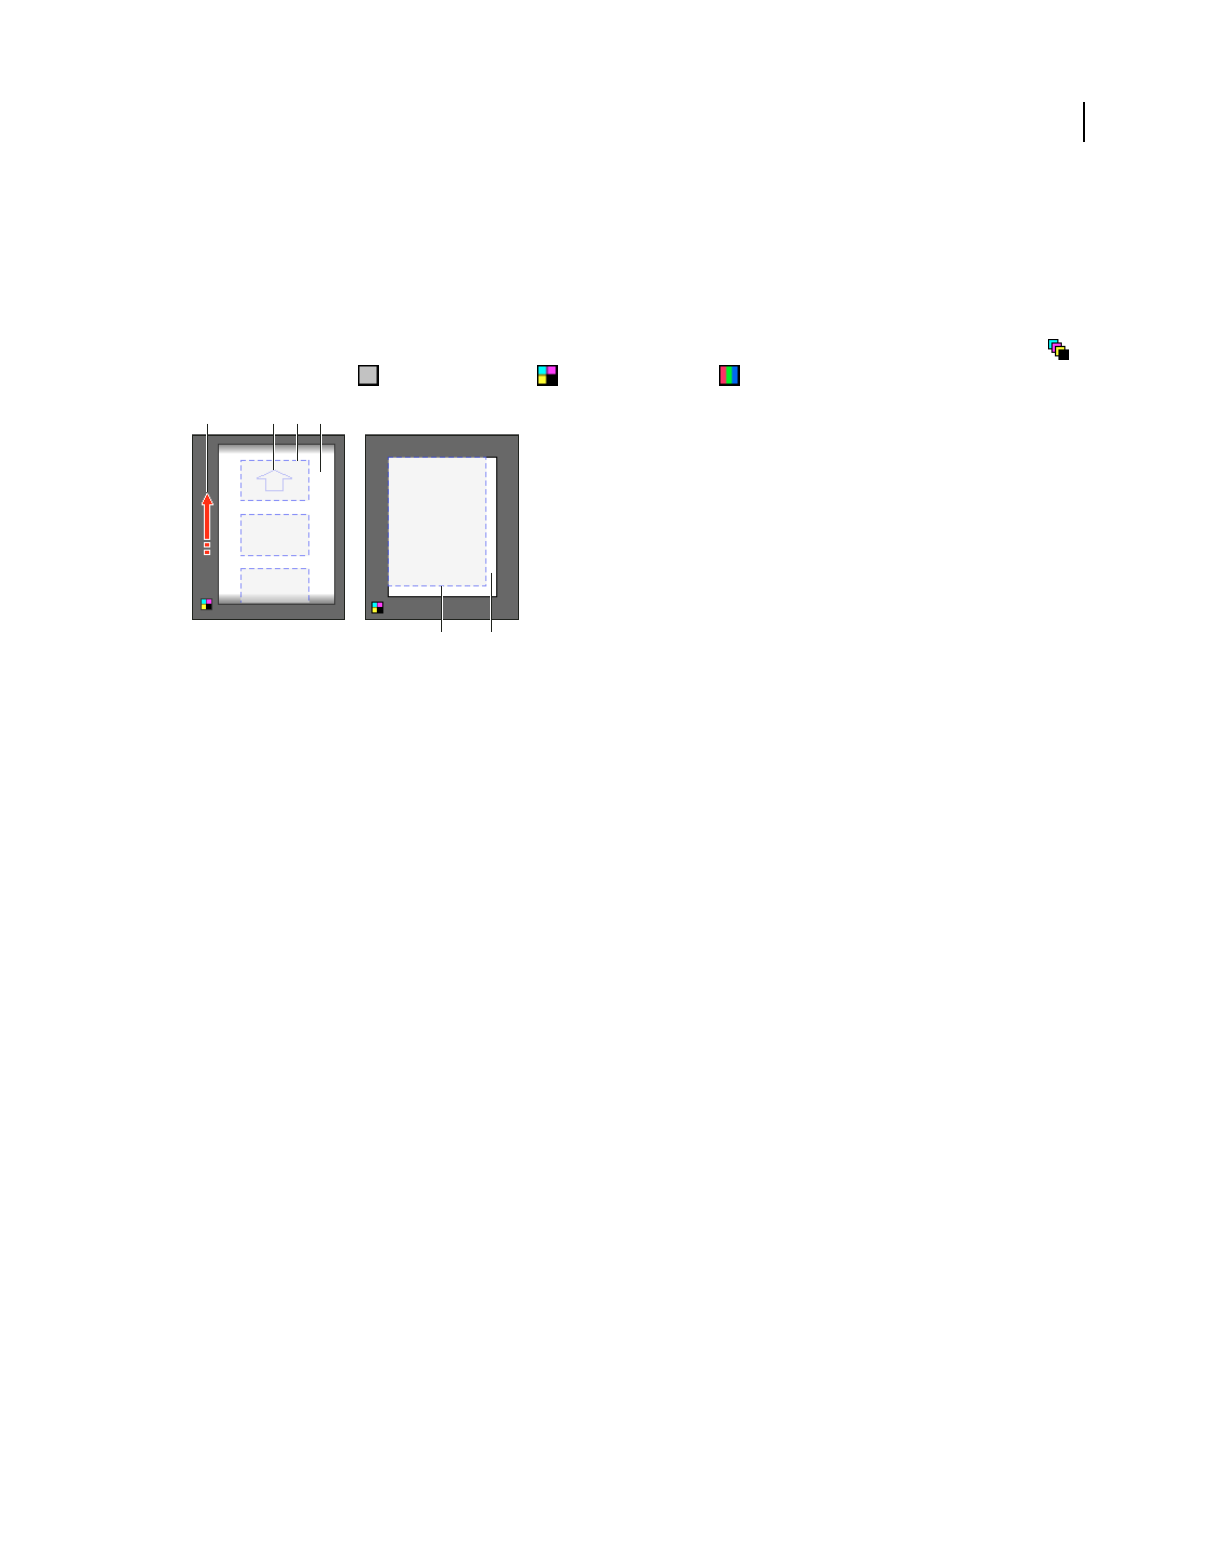
605
USING INDESIGN
Printing
Last updated 11/16/2011
Text view Lists the numerical values for certain print settings.
Custom page/Cut sheet views Displays the effects of different print settings, depending on your page size. For custom
page sizes, the preview shows how the media fits on the custom output device; the maximum supported media
dimensions of the output device; and the settings for offset, gap, and transverse. For cut sheets, such as Letter and
Tabloid, the preview shows the relationship of the imageable area to the media size.
In both the custom page and cut sheet views, the preview also indicates the output mode using an icon: Separations ,
Composite Grayscale , Composite CMYK , or Composite RGB .
Custom page view (left) and cut sheet view (right)
A. Direction of media travel B. Transverse deselected C. Paper size D. Media E. Imageable area F. Media
Setting up a printer
InDesign supports printing to both PostScript® (Level 2 and 3) and non-PostScript language printers, using most
current printer drivers. When you print to a PostScript printer, InDesign uses information from a PostScript Printer
Description (PPD) file to determine which settings to display in the Print dialog box.
Follow these basic steps when setting up a printer:
•Install the latest printer driver for your output device. See your operating system documentation for instructions.
•For PostScript printing, select a PPD file when you set up your printer.
More Help topics
“About printing” on page 597
About printer drivers
A printer driver lets you directly access printer features from applications on your computer. Having the correct driver
ensures that you have access to all of the features a particular printer supports.
Adobe recommends upgrading to the latest driver for your operating system.
Accessing printer driver features
Printer drivers may support features that are not included in InDesign, such as duplex printing. Support for these
features varies depending on the printer driver you have. Check with your printer manufacturer for details.
If you want to specify settings for a specific printer, InDesign provides access to the printer driver through the
following buttons in the InDesign Print dialog box. (When you choose to print to a PostScript file, these options are
not available.)
Setup (Windows) This button opens the Windows Print dialog box.
Page Setup (Mac OS) This button displays the standard Mac OS Page Setup dialog box.
A B C D
EF

606
USING INDESIGN
Printing
Last updated 11/16/2011
Printer (Mac OS) This button displays the standard Mac OS Print dialog box.
Note: Some InDesign printing features appear in both the printer driver dialog boxes and the InDesign Print dialog box.
For best results, specify the settings in the InDesign Print dialog box only. If settings overlap, InDesign tries to synchronize
the settings, or to ignore the driver’s settings. Some printer driver features (for example, N-up printing, which prints the
same artwork multiple times on the same page) produce adverse printing results when used with InDesign features such
as separations.
Select a PPD file
A PPD file (PostScript Printer Description file) customizes the behavior of the driver for your specific PostScript
printer. It contains information about the output device, including printer-resident fonts, available media sizes and
orientation, optimized screen frequencies, screen angles, resolution, and color output capabilities. It’s important to set
up the correct PPD before you print. Selecting the PPD that corresponds to your PostScript printer or imagesetter
populates the Print dialog box with the available settings for the output device. You can switch to a different one to suit
your needs. Applications use the information in the PPD file to determine which PostScript information to send to the
printer when printing a document.
For best printing results, Adobe recommends that you obtain the latest version of the PPD file for your output device
from the manufacturer. Many print service providers and commercial printers have PPDs for the imagesetters they
use. Be sure to store PPDs in the location specified by the operating system. For details, consult the documentation for
your operating system.
❖In Windows and in Mac OS, you select a PPD file in the same way you add a printer. The steps for selecting a PPD
file are different for each platform. See your operating system documentation for details.
Use print presets
If you regularly output to different printers or job types, you can automate print jobs by saving all output settings as
print presets. Using print presets is a fast, reliable way to print jobs that require consistently accurate settings for many
options in the Print dialog box.
You can save and load print presets, making it easy to back them up or to make them available to your service
providers, clients, or others in your workgroup.
You can create and review print presets in the Print Presets dialog box.
Create print presets
❖Do one of the following:
•Choose File > Print, adjust print settings, and click Save Preset. Type a name or use the default, and then click OK.
With this method, the preset is saved in the preferences file.
•Choose File > Print Presets > Define, and then click New. In the dialog box that appears, type a new name or use
the default, adjust print settings, and then click
OK to return to the Print Presets dialog box. Then click OK again.
Apply print presets
1Choose File > Print.
2Choose a print preset from the Print Preset menu. If you like, confirm the printer settings in the Print dialog box.
3Click Print.
Note: In InDesign, you can also print using a print preset by choosing one from the File > Print Presets menu.
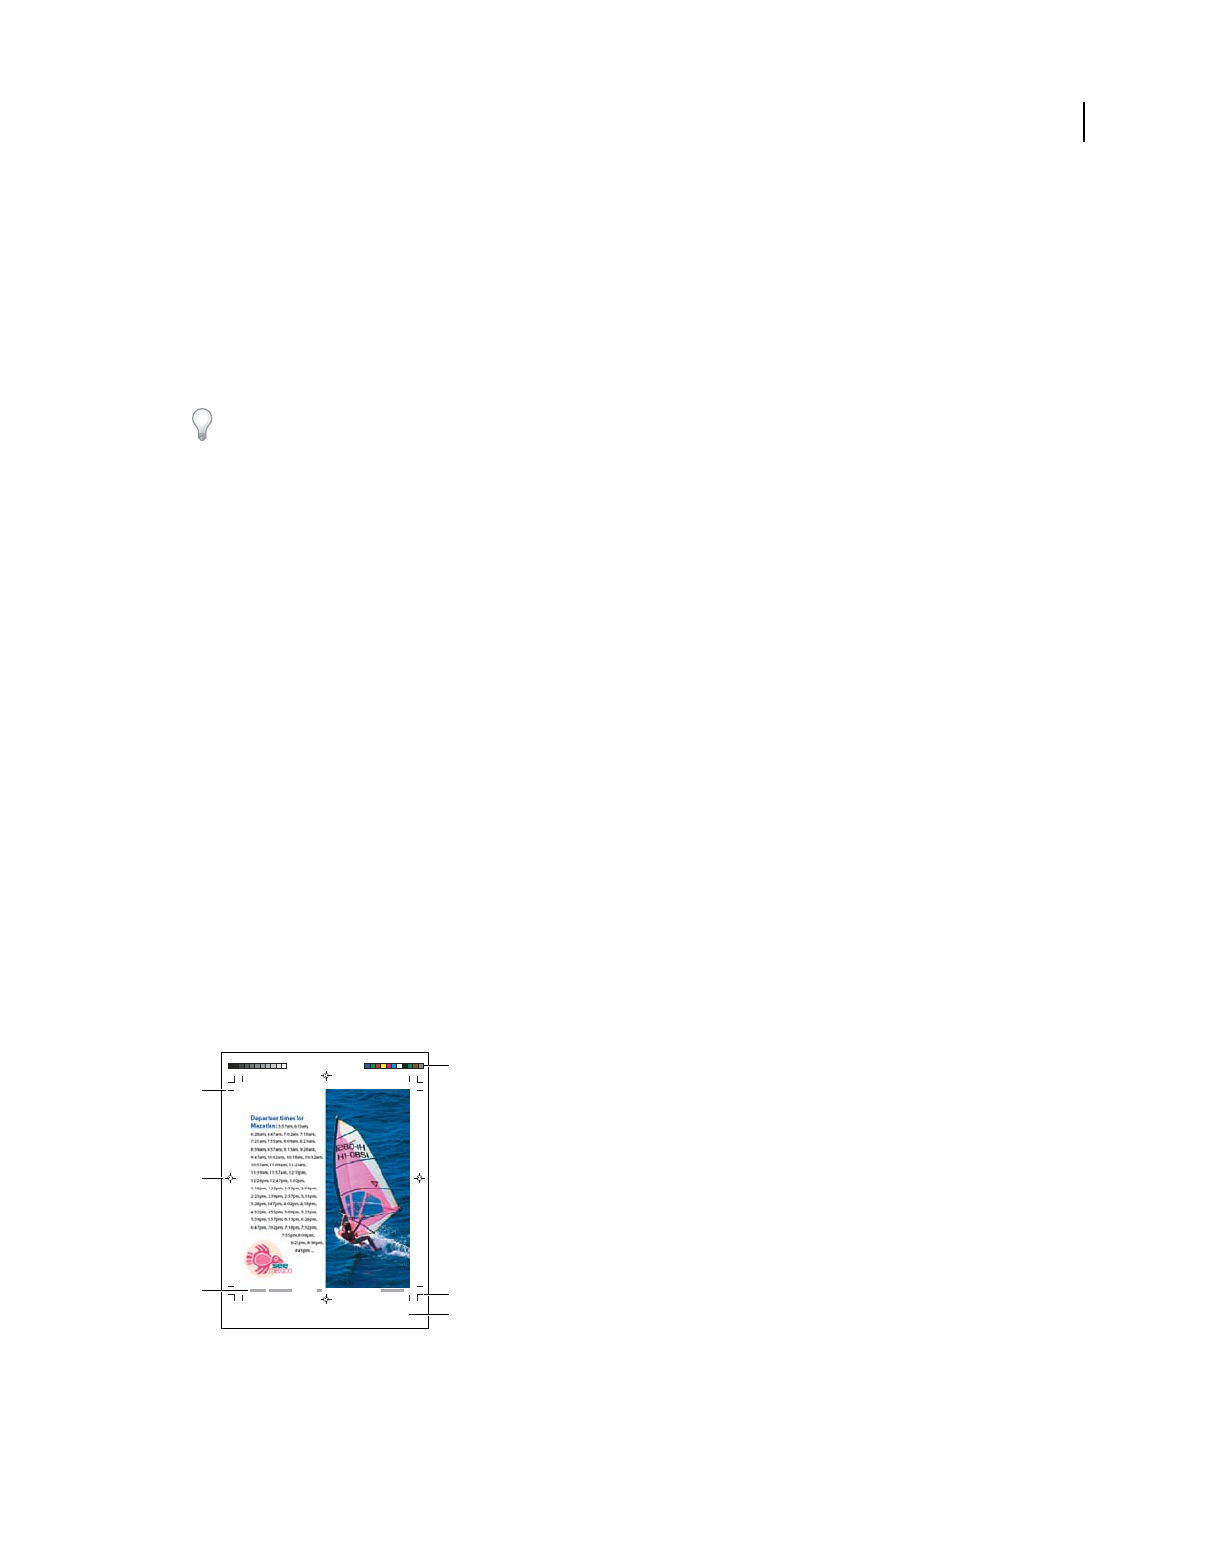
607
USING INDESIGN
Printing
Last updated 11/16/2011
Edit print presets
❖Do one of the following:
•Choose File > Print, adjust print settings, and click Save Preset. In the Save Preset dialog box that appears, either
type a name in the text box or use the current name. (If the current name is an existing preset, saving overwrites
that preset’s settings.) Click
OK.
•Choose File > Print Presets > Define, select a preset from the list, and then click Edit. Adjust print settings, and
click
OK to return to the Print Presets dialog box. Then click OK again.
You can edit the default preset as you would any other using the steps outlined above.
Delete print presets
1Choose File > Print Presets > Define.
2Select one or more presets from the list and click Delete. Shift-click to select adjacent presets. Ctrl-click (Windows)
or Command-click (Mac
OS) to select nonadjacent presets.
Printer’s marks and bleeds
Specify printer’s marks
When you prepare a document for printing, a number of marks are needed to help the printer determine where to trim
the paper, align separation films when producing proofs, measure film for correct calibration and dot density, and so
on. Selecting any page-mark option expands the page boundaries to accommodate printer’s marks, bleed (the parts of
text or objects that extend past the page boundary to account for slight inaccuracy when trimming), or slug area (an
area outside the page and bleed that contains printer instructions or job sign-off information).
If you are setting crop marks and want the artwork to contain a bleed or slug area, make sure that you extend the
artwork past the crop marks to accommodate the bleed or slug. Also make sure that your media size is large enough
to contain the page and any printer’s marks, bleeds, or the slug area. If a document doesn’t fit the media, you can
control where items are clipped by using the Page Position option in the Setup area of the Print dialog box.
If you select the Crop Marks option, fold marks are printed as solid lines when spreads are printed.
Printer’s marks
A. Crop marks B. Registration mark C. Page information D. Color bars E. Bleed marks F. Slug area
1Choose File > Print.
A
D
E
F
C
B

608
USING INDESIGN
Printing
Last updated 11/16/2011
2Click Marks and Bleed on the left side of the Print dialog box.
3Select either All Printer’s Marks or individual marks.
Print the bleed or slug areas
Specify the bleed and slug areas in the Document Setup dialog box. The bleed and slug areas are discarded when the
document is trimmed to its final page size. Objects outside the bleed or slug area (whichever extends farthest) are not
printed.
When printing, you can override the default location for bleed marks in the Bleed And Slug area of the Marks And
Bleed area.
Files saved in PostScript file format allow capable post-processing programs to implement their own variable bleed.
1Choose File > Print.
2Click Marks And Bleed on the left side of the Print dialog box.
3Select either All Printer’s Marks or individual marks.
4To override bleed settings in the Document Setup dialog box, uncheck Use Document Bleed Settings and enter
values from 0 to 6 inches (or equivalents) for Top, Bottom, Left, and Right (for single-sided documents), or Top,
Bottom, Inside, and Outside (for double-sided documents with facing pages). To extend the offset evenly on all
sides of the page, click the Make All Settings The Same icon
.
5Click Include Slug Area to print objects using the slug area defined in the Document Setup dialog box.
You can preview the bleed and slug areas before printing by clicking the Bleed Preview Mode or the Slug Preview
Mode icon at the bottom of the Toolbox. (These may be hidden by the Preview Mode icon .)
More Help topics
“Creating PostScript and EPS files” on page 623
Marks and Bleed options
The Marks And Bleed area includes the following options:
All Printer’s Marks Selects all printer’s marks including crop marks, bleed marks, registration marks, color bars, and
page information.
Crop Marks Adds fine (hairline) horizontal and vertical rules that define where the page should be trimmed. Crop
marks can also help register (align) one color separation to another. By using together with bleed marks, you can select
overlapped marks.
Bleed Marks Adds fine (hairline) rules that define the amount of extra area to image outside the defined page size.
Registration Marks Adds small “targets” outside the page area for aligning the different separations in a color
document.
Color Bars Adds small squares of color representing the CMYK inks and tints of gray (in 10% increments). Your
service provider uses these marks to adjust ink density on the printing press.
Page Information Prints the filename, page number, current date and time, and color separation name in 6-point
Helvetica in the lower-left corner of each sheet of paper or film. The Page Information option requires 0.5 inches
(13mm) along the horizontal edge.
Type Lets you choose default printer’s marks or custom marks (for Japanese pages, for example). You can create
custom printer’s marks or use custom marks created by another company.

609
USING INDESIGN
Printing
Last updated 11/16/2011
Weight Displays possible weights for crop and bleed mark lines.
Offset Specifies how far from the edge of the page (not the bleed) InDesign will draw printer’s marks. By default,
InDesign draws printer’s marks 6 points from the edge of the page. To avoid drawing printer’s marks on a bleed, be
sure to enter an Offset value greater than the Bleed value.
Change the page position on the media
When you print a document to a cut-sheet media size that is larger than the document size, you can control where the
slug and bleed areas, printer’s marks, and page fall on the media by using the Page Position options in the Setup area
of the Print dialog box. If a document doesn’t fit the media and needs to be clipped, you can specify which part of the
document is clipped. The preview image in the Print dialog box shows the results.
Note: To see the bleed and slug areas and printer’s marks, use the Scale To Fit option instead of Page Position; scaled
pages are always centered. The Page Position options are unavailable when Scale To Fit, Thumbnails, or Tile is selected.
❖In the Setup area of the Print dialog box, choose a position in the Page Position menu.
Printing thumbnails and oversized documents
For detailed information and instructions, click the links below.
Print thumbnails
To fit multiple pages on a single page, you can create thumbnails—small preview versions of your document.
Thumbnails are useful for verifying content and organization. Where appropriate, InDesign automatically changes the
paper orientation to provide the best fit of the page to the paper; however, you’ll need to reset the original orientation
if you deselect the Thumbnails option.
Note: When you print thumbnails, printer’s marks and any items in the bleed and/or slug areas are excluded.
1In the Setup area of the Print dialog box, select Thumbnails.
2In the menu, choose the number of thumbnails per page.
Printing oversized documents
Although you can create InDesign documents as large as 18-by-18 feet, most desktop printers cannot print such large
pages.
To print an oversized document on your desktop printer, you can print each page of your document in pieces, called
tiles, and then trim and assemble those pieces. If you prefer, you can scale the document to fit the available paper size.
More Help topics
“Tile a document” on page 610
“Scale documents” on page 611
“Scale type” on page 258
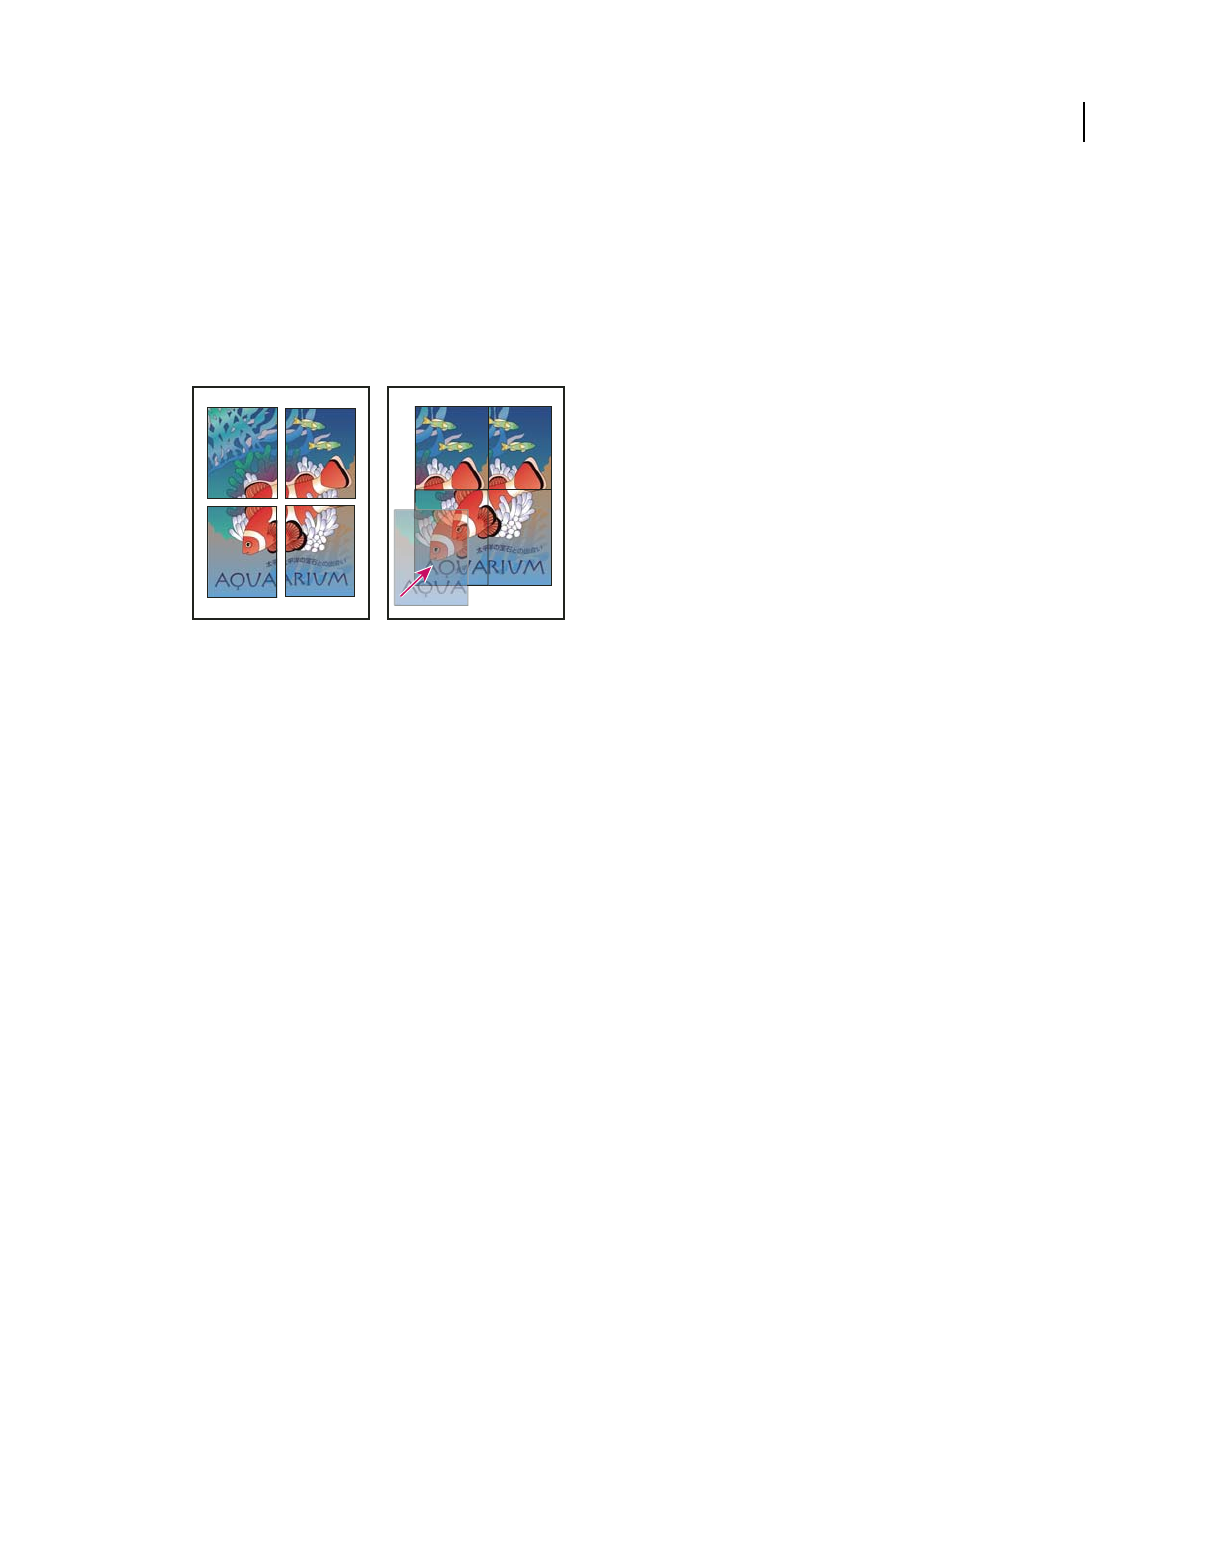
610
USING INDESIGN
Printing
Last updated 11/16/2011
Tile a document
A document’s dimensions do not necessarily match the paper sizes used by printers. As a result, when you print,
InDesign divides the oversized document into one or more rectangles, or tiles, that correspond to the page size
available on the printer. You can then assemble the overlapping sections.
You can have InDesign tile a document automatically, or you can specify the tiles yourself. Tiling manually lets you
control the origin point for the upper-left corner of the tile, so that you determine where the page falls on the paper.
Oversized pages divided into printable tiles (left) and the overlapping sections in final assembly (right)
Tile a document automatically
1Choose File > Print.
2In the Setup area of the Print dialog box, select Tile.
3Choose one of the following options in the Tile menu:
Auto Automatically calculates the number of tiles required, including the overlap.
Auto Justified Increases the amount of overlap (if necessary) so that the right sides of the rightmost tiles are aligned
at the right edge of the document’s page, and the bottom sides of the bottommost tiles are aligned at the bottom edge
of the document’s page.
4For Overlap, type the minimum amount of duplicated information you want printed on each tile for ease in
assembly. The Overlap option uses the unit of measure specified for the document. The value should be greater than
the minimum nonprinting margins for the printer. You can specify up to half the size of the shortest side of the
document page to overlap. For example, tiles for a page that measures 11-by-17 inches (279.4mm-by-431.8mm) can
overlap up to 5.5 inches (139.7mm).
Tile a document manually
While tiling a document automatically prints all the tiles at once, tiling a document manually requires you to print each
tile separately.
1If necessary, choose View > Show Rulers to display the rulers.
2Drag the intersection of the rulers to reset the zero point to the desired upper-left corner of the tile you want to
print. Remember to leave room for overlap and printer’s marks.
The size and shape of the area InDesign prints is determined by the current paper size and orientation.
3Choose File > Print, and then click Setup on the left.
4In the Setup area, select Tile, and then choose Manual in the Tile menu.

611
USING INDESIGN
Printing
Last updated 11/16/2011
Scale documents
To fit an oversized document on a smaller piece of paper, you can scale the document’s width and height, either
symmetrically or asymmetrically. Asymmetric scaling is useful when, for example, you’re printing film for use on a
flexographic press: If you know in which direction the plate will be mounted on the press drum, scaling can
compensate for the 2% to 3% stretching of the plate that usually occurs. Scaling does not affect the size of the pages in
the document.
Note: When you print spreads, each spread is scaled separately.
Scale a document manually
1Choose File > Print.
2In the Setup area of the Print dialog box, select Width to activate the Width and Height boxes.
3To maintain current document width to height proportions, select Constrain Proportions. Otherwise, make sure
that this option is unselected.
4Type percentages from 1 to 1000 in the Width and Height boxes. If you selected Constrain Proportions, you need
to enter only one value; the other is updated automatically.
Scale a document automatically
1In the Setup area of the Print dialog box, make sure that the Tile and Thumbnail options are unselected. (When
these options are selected, the Scale To Fit option is unavailable.)
2Select Scale To Fit. The scaling percentage, which is determined by the imageable area defined by the selected PPD,
appears next to the Scale To Fit option.
Printing graphics and fonts
Options for printing graphics
Choose from the following options in the Graphics area of the Print dialog box to specify how graphics are handled
during output.
Send Data Controls how much image data in placed bitmap images to send to the printer or file.
All Sends full-resolution data, which is appropriate for any high-resolution printing, or for printing grayscale or color
images with high contrast, as in black-and-white text with one spot color. This option requires the most disk space.
Optimized Subsampling Sends just enough image data to print the graphic at the best possible resolution for the
output device. (A high-resolution printer will use more data than a low-resolution desktop model.) Select this option
when you’re working with high-resolution images but printing proofs to a desktop printer.
Note: InDesign does not subsample EPS or PDF graphics, even when Optimized Subsampling is selected.
Proxy Sends screen-resolution versions (72 dpi) of placed bitmap images, thereby reducing printing time.
None Temporarily removes all graphics when you print and replaces them with graphics frames with crossbars,
thereby reducing printing time. The graphics frames are the same dimensions as the imported graphics and clipping
paths are maintained, so you can still check sizes and positioning. Suppressing the printing of imported graphics is
useful when you want to distribute text proofs to editors or proofreaders. Printing without graphics is also helpful
when you’re trying to isolate the cause of a printing problem.

612
USING INDESIGN
Printing
Last updated 11/16/2011
Options for downloading fonts to a printer
Printer-resident fonts are stored in a printer’s memory or on a hard drive connected to the printer. Type 1 and
TrueType fonts can be stored either on the printer or on your computer; bitmap fonts are stored only on your
computer. InDesign downloads fonts as needed, provided they are installed on your computer’s hard disk.
Choose from the following options in the Graphics area of the Print dialog box to control how fonts are downloaded
to the printer.
None Includes a reference to the font in the PostScript file, which tells the RIP or a post-processor where the font
should be included. This option is appropriate if the fonts reside in the printer. However, to ensure that fonts are
interpreted correctly, use one of the other font downloading options, such as Subset or Download PPD Fonts.
Complete Downloads all fonts required for the document at the beginning of the print job. All glyphs and characters
in the font are included even if they’re not used in the document. InDesign automatically subsets fonts that contain
more than the maximum number of glyphs (characters) specified in the Preferences dialog box.
Subset Downloads only the characters (glyphs) used in the document. Glyphs are downloaded once per page. This
option typically results in faster and smaller PostScript files when used with single-page documents or short
documents without much text.
Download PPD Fonts Downloads all fonts used in the document, even if those fonts reside in the printer. Use this
option to ensure that InDesign uses the font outlines on your computer for printing common fonts, such as Helvetica
and Times. Using this option can resolve problems with font versions, such as mismatched character sets between your
computer and printer or outline variances in trapping. Unless you commonly use extended character sets, you don’t
need to use this option for desktop draft printing.
More Help topics
“About preferences and defaults” on page 40
PostScript printing options
Choose from the following options in the Graphics area of the Print dialog box to specify how PostScript information
is sent to the printer.
PostScript Specifies a level of compatibility with the interpreters in PostScript output devices.
Data Format Specifies how InDesign sends the image data from your computer to a printer. ASCII is sent as ASCII
text, which is compatible with older networks and parallel printers and is usually the best choice for graphics used on
multiple platforms. Binary exports as binary code, which is more compact than ASCII but may not be compatible with
all systems.
Note: InDesign cannot always change the data format used by EPS or DCS graphics files. If you experience problems
sending data as Binary, try changing the data format of EPS or DCS graphics in the source application instead.
Options for omitting graphics
The OPI options in the Advanced area let you selectively omit different imported graphics types when sending image
data to a printer or file, leaving only the OPI links (comments) for later handling by an OPI server.
OPI Image Replacement Enables InDesign to replace low-resolution EPS proxies of graphics with high-resolution
graphics at output time. For OPI image replacement to work, the EPS file must contain OPI comments that link the
low-resolution proxy image to the high-resolution image. InDesign must have access to the graphics linked by the OPI
comments. If the high-resolution versions are not available, InDesign preserves the OPI links and includes the low-

613
USING INDESIGN
Printing
Last updated 11/16/2011
resolution proxy in the export file. Deselect this option to have an OPI server replace OPI-linked graphics later in the
workflow.
Omit For OPI Lets you selectively omit different imported graphics types (EPS, PDF, and bitmap images) when
sending image data to a printer or file, leaving only the OPI links (comments) for later handling by an OPI server. The
comments contain the information needed to locate a high-resolution image on an OPI server. InDesign only includes
the comments; the service provider must have access to the original high-resolution image on a server at replacement
time. The Omit For OPI option doesn’t apply to embedded graphics.
More Help topics
“Import options for graphics” on page 379
Managing color
For detailed information and instructions, click the links below.
Use color management when printing
When you print a color-managed document, you can specify additional color management options to keep color
consistent in the printer output. For example, suppose that your document currently contains a profile tailored for
prepress output, but you want to proof the document colors on a desktop printer. In the Print dialog box, you can
convert the document’s colors to the color space of the desktop printer; the printer profile will be used instead of the
current document profile. If you select the Proof color space and target an RGB printer, InDesign converts color data
to RGB values using the selected color profiles.
When printing to a PostScript printer, you also have the option of using PostScript color management. In this instance,
InDesign sends the document’s color data in a calibrated version of its original color space, along with the document
profile, directly to the PostScript printer and lets the printer convert the document to the printer color space. The
printer’s color space is stored at the device as a color rendering dictionary (CRD); this makes device-independent
output possible. CRDs are PostScript equivalents of color profiles. The exact results of the color conversion can vary
among printers. To use PostScript color management, you must have a printer that uses PostScript Level 2 or higher;
it is not necessary to install an ICC profile for the printer on your system.
Note: While working on a color-managed document, you can use the Preflight panel to make sure that your colors
conform to the guidelines you specify.
1Make sure that you’ve installed the correct driver and PPD for your printer.
2Choose File > Print.
3If a printer preset has the settings you want, choose it in the Printer Preset menu at the top of the Print dialog box.
4Adjust settings as desired for this document.
5Click Color Management on the left side of the Print dialog box.
6Under Print, select Document.
7For Color Handling, choose Let InDesign Determine Colors.
8For Printer Profile, select the profile for your output device.
The more accurately the profile describes the behavior of an output device and printing conditions (such as paper
type), the more accurately the color management system can translate the numeric values of the actual colors in a
document.

614
USING INDESIGN
Printing
Last updated 11/16/2011
9Select Preserve RGB Numbers or Preserve CMYK Numbers.
This option determines how InDesign handles colors that do not have a color profile associated with them (for
example, imported images without embedded profiles). When this option is selected, InDesign sends the color
numbers directly to the output device. When this option is deselected, InDesign first converts the color numbers to
the color space of the output device.
Preserving numbers is recommended when you are following a safe CMYK workflow. Preserving numbers is not
recommended for printing RGB documents.
10 Press either Setup (Windows) or Printer (Mac OS) to access the printer driver dialog box.
11 Turn off color management for the printer, and click Print to return to the InDesign Print dialog box.
Every printer driver has different color management options. If it’s not clear how to turn off color management,
consult your printer documentation.
12 Click Print.
Color output options for composites
In the Output area of the Print dialog box, you can determine how composite color in the document is sent to the
printer. When color management is enabled (the default), the Color setting defaults result in calibrated color output.
Spot color information is preserved during color conversion; only the process color equivalents convert to the
designated color space. If you’re not sure which color choice to use, consult your prepress service provider.
Composite modes only affect rasterized images and objects created using InDesign; placed graphics (such as EPS and
Adobe PDF files) are not affected unless they overlap transparent objects.
For more information on composite printing, see the Adobe Print Resource Center at
www.adobe.com/go/print_resource.
Note: The options available for non-PostScript printing depend on the color model the printer uses, which is usually RGB.
When you print as composite, automatic trapping is disabled; however, you can select the Simulate Overprint option
to proof overprinting for text, strokes, or fills.
The Output area in the Print dialog box includes the following Color options. Additional options may also be available,
depending on your printer.
Composite Leave Unchanged Sends a full-color version of specified pages to the printer, preserving all color values in
the original document. When this option is selected, Simulate Overprint is disabled.
Composite Gray Sends grayscale versions of specified pages to the printer when, for example, you are printing to a
monochrome printer without making separations.
Composite RGB Sends a full-color version of specified pages to the printer when, for example, you are printing to an
RGB color printer without making separations.
Composite CMYK Sends a full-color version of specified pages to the printer when, for example, you are printing to a
CMYK color printer without making separations. (This option is available only for PostScript printers.)
Separations Creates PostScript information for each of the separations required for the document, and sends that
information to the output device. (This option is available only for PostScript printers.)
In-RIP Separations Sends separation information to the output device’s RIP. (This option is available only for
PostScript printers.)
Text As Black Select this option to print all text created in InDesign in black, unless it has the color None or Paper or
a color value that equals white. This option is useful when you’re creating content for both print and PDF distribution.

615
USING INDESIGN
Printing
Last updated 11/16/2011
For example, if hyperlinks were blue in the PDF version, they would print black on a grayscale printer, rather than in
halftone patterns that would be difficult to read.
More Help topics
Adobe Print Resource Center
“Preparing to print separations” on page 634
Print a hard proof
A hard proof (sometimes called a proof print or match print) is a printed simulation of what your final output on a
printing press will look like. A hard proof is produced on an output device that’s less expensive than a printing press.
In recent years some inkjet printers have the resolution necessary to produce inexpensive prints that can be used as
hard proofs.
1Choose View > Proof Setup > Custom.
2In the Customize Proof Condition dialog box, select the device you want to simulate, and click OK.
3Select Preserve RGB Numbers or Preserve CMYK numbers, and click OK.
This option determines how InDesign handles colors that do not have a color profile associated with them (for
example, imported images without embedded profiles). When this option is selected, InDesign sends the color
numbers directly to the output device. When this option is deselected, InDesign first converts the color numbers to
the color space of the output device.
Preserving numbers is recommended when you are following a safe CMYK workflow. Preserving numbers is not
recommended for printing RGB documents.
4Choose File > Print.
5If a printer preset has the settings you want, choose it in the Printer Preset menu at the top of the Print dialog box.
6Adjust settings as desired for this document.
7Click Color Management on the left side of the Print dialog box.
8Under Print, select Proof. The profile should match the proof setup you specified.
9For Color Handling, choose Let InDesign Determine Colors.
10 Select Simulate Paper Color to simulate the specific shade of white exhibited by the print medium as defined by a
document’s profile (absolute colorimetric rendering intent). This option is not available for all profiles.
11 Press either Setup (Windows) or Printer (Mac OS) to access the printer driver dialog box.
12 Turn off color management for the printer, and click Print to return to the InDesign Print dialog box.
Every printer driver has different color management options. If it’s not clear how to turn off color management,
consult your printer documentation.
13 Click Print.
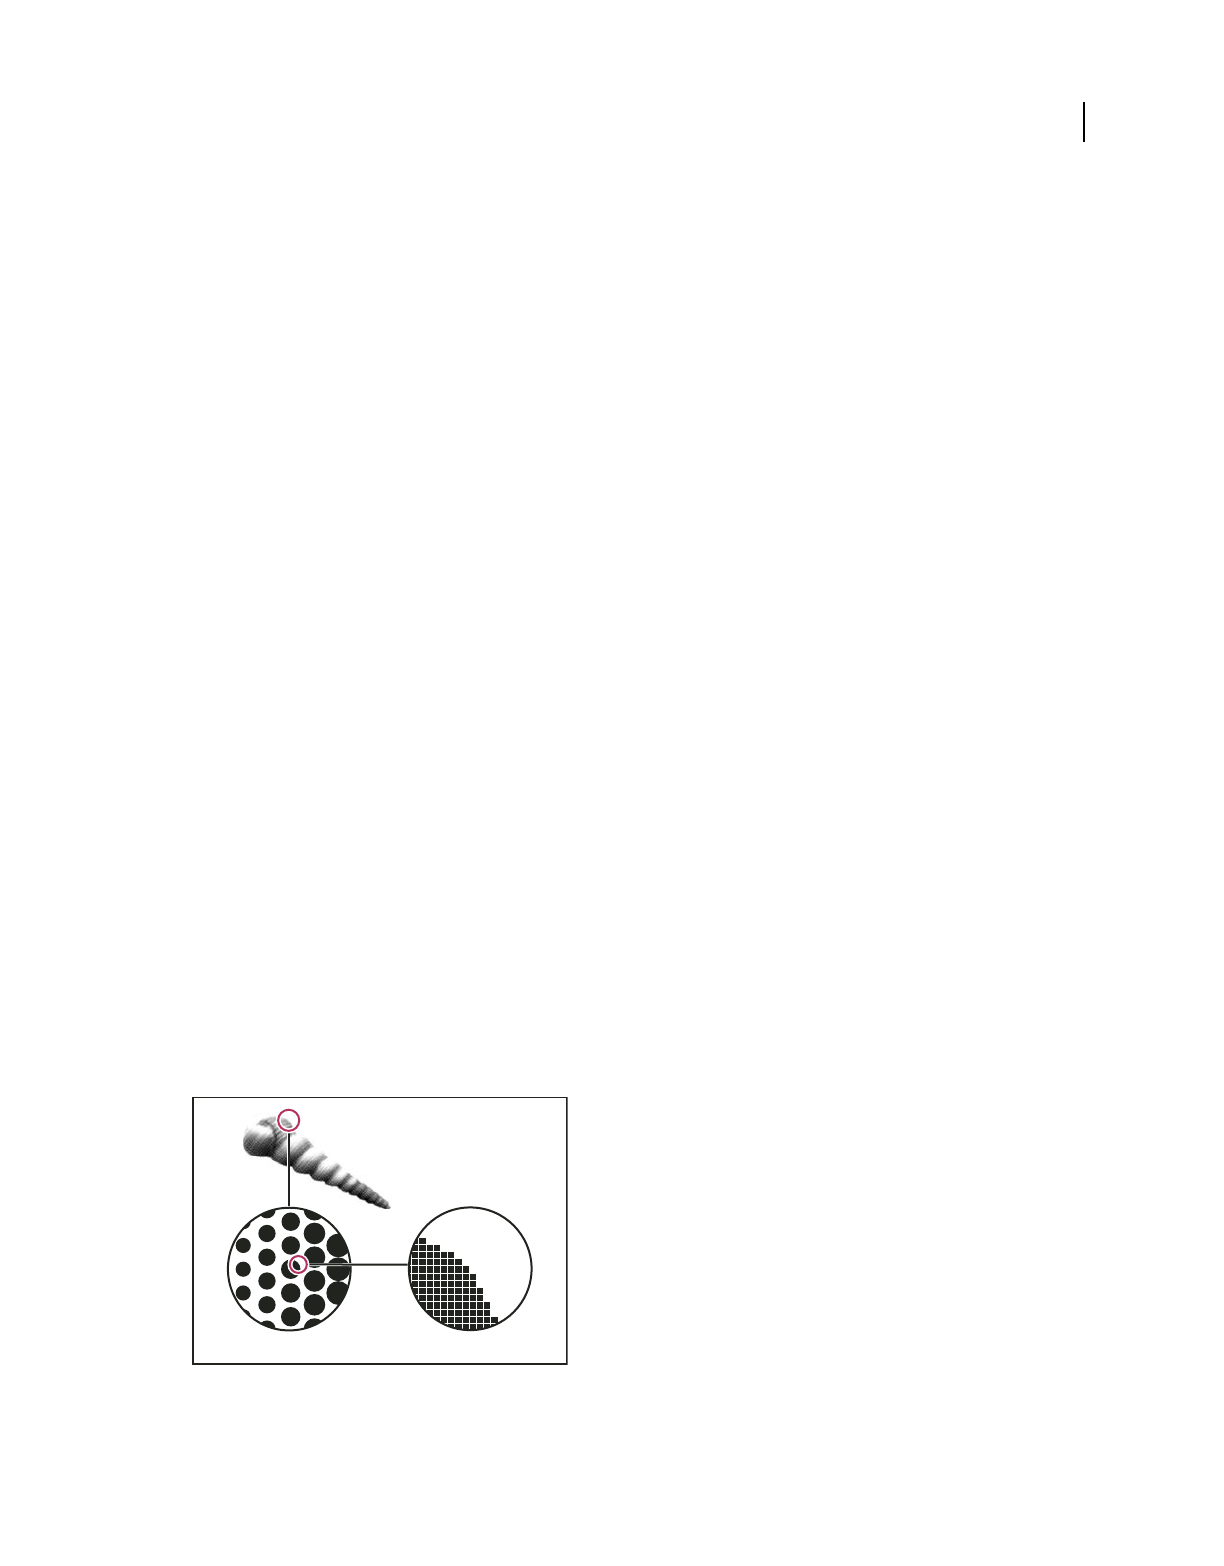
616
USING INDESIGN
Printing
Last updated 11/16/2011
Improving gradients and color blends in print
PostScript Level 2 and PostScript 3 output devices can print up to 256 shades of gray, and most PostScript desktop laser
printers are capable of printing approximately 32 to 64 shades, depending on the device resolution, specified screen
frequency, and halftoning method. Banding occurs when each available shade covers an area large enough for you to
see individual shades. Also, if you specify a gradient using two percentage values that differ by less than 50%, you’re
specifying a narrow range of shades that’s more likely to result in banding. If you have difficulty printing smooth
gradients without banding, try these techniques:
•Use a gradient that changes at least 50% between two or more process color components.
•Specify lighter colors, or shorten the length of dark gradients. Banding is most likely to occur between very dark
colors and white.
•Increase the percentage of change in the gradient.
•Decrease the screen frequency for the document (PostScript output devices only).
•If banding occurs in an imported graphic, such as an Adobe Illustrator® file, you might need to adjust the original
graphic.
•Print to a PostScript® 3 output device, which is capable of producing smoother gradients.
•Use shorter gradients. The optimum length depends on the colors in the gradient, but try to keep gradients shorter
than 7.5 inches.
More Help topics
“Gradients” on page 480
“Specify a halftone screen frequency and resolution” on page 645
About halftone dots and printer dots
Most printers simulate gray by using halftone dots printed on a grid; the grid cells are called halftone cells, and the grid
rows are called lines or line screens. Each halftone dot is made up of printer dots. As the halftone cell fills up with printer
dots, the halftone dot gets larger, resulting in a darker shade of gray.
Printer resolution determines the number of dots available to create the halftone dot. A printer with smaller dots can
produce a wider variety of halftone dot sizes, allowing more shades of gray. Screen frequency also plays a role: As
screen frequency increases, the halftone cell gets smaller, and so can hold fewer printer dots, resulting in fewer possible
shades of gray. As a result, there is a trade-off between the number of possible gray levels and image coarseness.
Simulating continuous tone with printer dots
A. Continuous tone simulated by line screen B. Line screen consisting of halftone dots in rows C. Halftone dots consisting of printer dots
A
BC
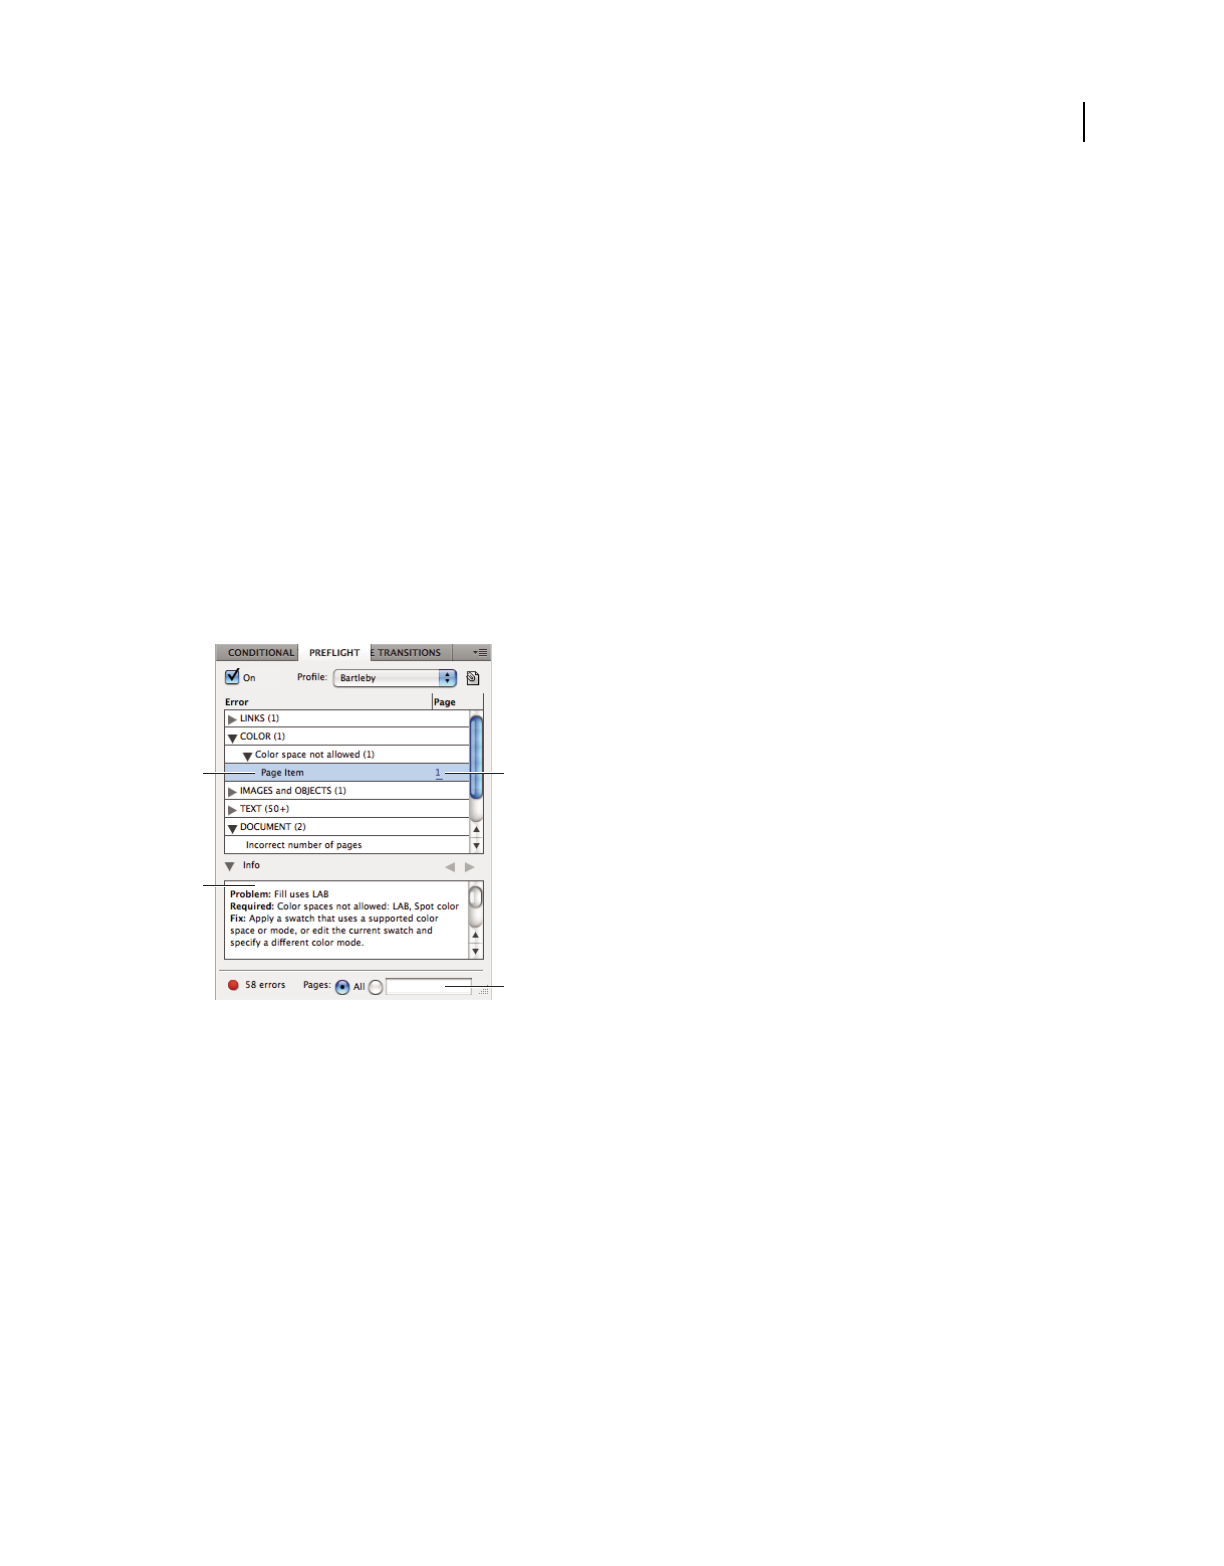
617
USING INDESIGN
Printing
Last updated 11/16/2011
Preflighting files before handoff
For detailed information and instructions, click the links below.
Preflight panel overview
Before printing or handing off the document to a service provider, you can perform a quality check on the document.
Preflight is the industry-standard term for this process. While you edit your document, the Preflight panel warns of
problems that can prevent a document or book from printing or outputting as desired. These problems include
missing files or fonts, low-resolution images, overset text, and a number of other conditions.
You can configure preflight settings to define which conditions are detected. These preflight settings are stored in
preflight profiles for easy reuse. You can create your own preflight profiles or import them from your printer or
another source.
To take advantage of live preflighting, create or specify a preflight profile in the early stages of creating a document. If
Preflight is turned on, a red circle icon appears in the status bar when InDesign detects any problems. You can open
the Preflight panel and view the Info section to get basic guidance for fixing the problems.
Preflight panel
A. Selected error B. Click page number to view page item C. Info area offers suggestions for fixing the selected error D. Specify a page range to
limit error checking
For a video tutorial on live preflight, see www.adobe.com/go/lrvid4025_id.
Open the Preflight panel
•Choose Window > Output > Preflight.
•Double-click the Preflight icon at the bottom of document window. The Preflight icon is green if no errors are
detected or red if errors are detected.
Define preflight profiles
By default, the [Basic] profile is applied to new and converted documents. This profile flags missing or modified links,
overset text, and missing fonts. Although you cannot edit or delete the [Basic] profile, you can create and use multiple
profiles. For example, you can switch between profiles when working on different documents, when using different
print service providers, or when running a single document through different production phases.
A
C
B
D

618
USING INDESIGN
Printing
Last updated 11/16/2011
Consult with your prepress provider to obtain a profile or to learn what the preflight profile settings are. To view a
printing guide for prepress providers (PDF), see www.adobe.com/go/learn_id_prepress_wp.
Define a preflight profile
1Choose Define Profiles from the Preflight panel menu or from the Preflight menu at the bottom of the document
window.
2Click the New Preflight Profile icon , and specify a name for the profile.
3In each category, specify the preflight settings. A check mark in a box indicates that all settings are included. An
empty box indicates that no settings are included.
Links Determine whether missing links and modified links are displayed as errors.
Color Determine which transparency blending space is required and whether items such as CMY plates, colorspaces,
and overprinting are allowed.
Images and Objects Specify requirements for items such as image resolution, transparency, and stroke thickness.
Text The Text category displays errors for items such as missing fonts and overset text.
Document Specify requirements for page size and orientation, number of pages, blank pages, and bleed and slug setup.
4Choose Save to preserve your changes on one profile before working on another profile. Or click OK to close the
dialog box and save all changes.
Embed and unembed profiles
When you embed a profile, you make the profile part of the document. Embedding profiles is especially useful when
you’re sending the file to someone else. Just because the profile is embedded does not mean it must be used. For
example, if you send a document with an embedded profile to a print service, the printer can select a different profile
to use with the document.
You can embed only one profile. The [Basic] profile cannot be embedded.
1To embed a profile, select it in the Profile list, and then click the Embed icon to the right of the Profile list.
You can also embed a profile in the Define Profiles dialog box.
2To unembed a profile, choose Define Profiles from the Preflight panel menu, select the profile, and then choose
Unembed Profile from the Preflight Profile Menu on the left side of the dialog box.
Export and load profiles
You can export a profile to make it available to others. Exported profiles are saved with a .idpp extension.
Exporting a profile is a good way to back up your profile settings. When you restore preferences, your profile
information is reset. If you need to restore preferences, you can simply load your exported profile.
You can also load a profile that someone else has made available to you. You can load a *.idpp file, or you can load the
embedded profile in the document you specify.
•To export a profile, choose Define Profiles from the Preflight menu. Choose Export Profile from the Preflight
Profile Menu, specify the name and location, and click Save.
•To load (import) a profile, choose Define Profiles from the Preflight menu. Choose Load Profile from the Preflight
Profile Menu, select the *.idpp file or document containing an embedded profile you want to use, and click Open.
Delete a profile
1Choose Define Profiles from the Preflight menu.

619
USING INDESIGN
Printing
Last updated 11/16/2011
2Select the profile you want to delete, and then click the Delete Preflight Profile icon .
3Click OK to delete the profile.
View and resolve preflight errors
In the error list, only the categories with errors are listed. You can click the arrow next to each item to expand or
collapse it.
When viewing the list of errors, note the following issues:
•In some cases, a design element such as a swatch or a paragraph style is causing the problem. The design element
itself is not reported as an error. Instead, any page item to which the design element is applied appears in the error
list. In such cases, make sure that you resolve the issue in the design element.
•Errors that occur in overset text, hidden conditions, or notes are not listed. Deleted text that is still available in
tracked changes is also ignored.
•A master page item with a problem is not listed if the master is unapplied, or if no page it is applied to is in the
current scope. If an master page item has an error, the Preflight panel lists it only once, even though the error is
repeated on every page to which the master is applied.
•Errors that occur in non-printing page items, in page items on the pasteboard, or in hidden or non-printing layers
appear in the error list only if the appropriate options are specified in the Preflight Options dialog box.
•If you need to output only certain pages, you can limit preflight checking to a page range. Specify a page range at
the bottom of the Preflight panel.
Turn on or off live preflighting
By default, preflighting is turned on for all documents.
1To turn on or off preflighting for the active document, select the On option in the upper-left corner of the Preflight
panel, or choose Preflight Document from the Preflight menu at the bottom of the document window.
2
To turn on or off preflighting for all documents, select Enable Preflight For All Documents from the Preflight panel menu.
Resolve errors
1In the error list, double-click a row or click the page number in the Page column to view the page item.
2Click the arrow to the left of Info to view information on the selected row.
The Info panel includes a description of the problem and offers suggestions for fixing it.
3Fix the error.
Select a different profile
Using different profiles is useful in many workflows. For example, you can select different profiles for documents
you’re editing at the same time, or you can select a new profile to begin a new production phase. When you select a
different profile, the document is reexamined.
1Open the document.
2In the Preflight panel, select a profile from the Profile menu.
If you want to use this profile whenever you work on this document, embed the profile. Otherwise, the document
opens using the default working profile.

620
USING INDESIGN
Printing
Last updated 11/16/2011
Specify a page range for preflighting
❖At the bottom of the Preflight panel, specify the page range (such as 1-8).
The rules for specifying page ranges are the same as in the Print dialog box. Errors that appear on pages outside this
page range are omitted from the error list.
Set Preflight options
1Choose Preflight Options from the Preflight panel menu.
2Specify the following options, and then click OK.
Working Profile Select the profile to use as the default for new documents. If you want the working profile to be
embedded in new documents, select Embed Working Profile Into New Documents. See “Define preflight profiles”
on page 617.
Use Embedded Profile / Use Working Profile When you open a document, determine whether its embedded profile
or the specified working profile is used for preflighting.
Layers Specify whether items on all layers, visible layers, or visible and printable layers are included in preflighting.
For example, if an item is on a hidden layer, you can prevent errors from being reported on that item.
Non-Printing Objects Select this option to report errors on objects marked as non-printing in the Attributes panel
or on master page objects on pages to which Hide Master Items has been applied.
Objects On Pasteboard Select this option to report errors on objects placed on the pasteboard.
Limit the number of rows per error
You can keep your error lists more manageable by limiting the number of rows per error. For example, in a document
that should not use TrueType fonts, a single TrueType font used throughout the document can generate hundreds of
errors. If you limited the number of rows per error to 25, only the first 25 errors appear in the list, and (25+) appears
next to the error.
❖Choose Limit Number Of Rows Per Error from the Preflight panel menu, and then choose the number.
Save error report
You can generate a text-only or PDF file that lists the errors displayed in the Preflight panel. The report also includes
other statistics such as time, document name, and profile name.
For a full inventory of the document that includes all fonts, inks, links, and other items used, create a report using the
Package feature.
1Choose Save Report from the Preflight panel menu.
2Specify whether you want to save the file as a PDF or text file from the Save As Type (Windows) or Format
(Mac
OS) menu.
3Specify the name and location of the report, and then click Save.
Preflight books
Choosing Preflight Book from the Book panel menu causes all documents (or all selected documents) to be examined
for errors. You can use the profile embedded in each document, or you can specify a profile to use. A green, red, or
question mark icon indicates the preflight status of each document. Green indicates the document has no reported
errors. Red indicates errors. A question mark indicates an unknown status. For example, the document may be closed,
preflighting may be turned off, or the preflight profile was changed.

621
USING INDESIGN
Printing
Last updated 11/16/2011
Set preflight options in a book
1Choose Preflight Book from the book panel menu.
2In the Preflight Book Options dialog box, specify whether you want the preflight options to apply to the entire book
or only to selected documents.
3Under Preflight Profile, indicate whether you want to use the profile specified in the Use Profile menu or the
embedded profile of each document.
The profile you specify is temporarily used for each document. When you close and open any of the individual
documents, either the working profile or the embedded profile is used, depending on which option is specified in
the Preflight Options dialog box.
4Under Include, determine which items are included in the error list.
Layers Specify whether items on all layers, visible layers, or visible and printable layers are included in preflighting.
For example, if an item is on a hidden layer, you can choose not to view errors reported on that item.
Objects On Pasteboard Select this option to report errors on objects placed on the pasteboard.
Non-Printing Objects Select this option to report errors on objects marked as non-printing in the Attributes panel.
5Select Generate Report to generate a text or PDF file containing a list of errors. The generated report lists all errors
in the book.
6Click Preflight.
Resolve preflight errors in a book
When a red dot appears to the right of a document name in the book panel, the document contains preflight errors.
1In the Book panel, double-click the document containing errors.
2Use the Preflight panel to view the errors in each document, and make the necessary changes to fix the problems.
Design elements such as styles or swatches may cause errors. In such cases, make sure that you resolve the errors in the
styles or swatches of the style source document, and then synchronize the book.
If you specified a profile to be used in book preflight that is not the embedded document profile, keep in mind that a
different profile may be selected when you open the document again. The different profile may result in different
preflight errors.
Package files
You can gather the files you’ve used, including fonts and linked graphics, for easy handoff to a service provider. When
you package a file, you create a folder that contains the InDesign document (or documents in a book file), any
necessary fonts, linked graphics, text files, and a customized report. This report, which is saved as a text file, includes
the information in the Printing Instructions dialog box; a list of all used fonts, links, and inks required to print the
document; and print settings.
InDesign performs an up-to-date preflight check. The Package Inventory dialog box indicates any detected problem
areas. You can also give your service provider a composite PDF file made from your document or a PostScript file.
1Do one of the following to open the Package dialog box:
•Choose File > Package. (If Package does not appear in the File menu, try choosing a different workspace, such as
Window > Workspace > Advanced.)
•In the Book panel menu, choose Package Book or Package Selected Documents, depending on whether all, some,
or none of the documents are selected in the Book panel.

622
USING INDESIGN
Printing
Last updated 11/16/2011
An alert icon indicates problem areas.
2In the Package Inventory dialog box, do one of the following:
•If you’re notified of problems, click Cancel, and use the Preflight panel to resolve problem areas.
•Click the problem area (such as Fonts) and then correct the problem. When you’re satisfied with the document,
begin the packaging process again.
•Click Package to begin packaging.
3Fill in the printing instructions. The filename you type is the name of the report that accompanies all other
packaging files.
4Click Continue, and then specify a location in which to save all packaging files.
5Select the following, as needed:
Copy Fonts Copies all necessary font files, not the entire typeface.
Copy Linked Graphics Copies linked graphics files to package folder location.
Update Graphic Links In Package Changes graphic links to the package folder location.
Use Document Hyphenation Exceptions Only If this option is selected, InDesign flags this document so that it doesn’t
reflow when someone else opens or edits it on a computer that has different hyphenation and dictionary settings. You
can turn on this option when sending the file to a service provider.
Include Fonts And Links From Hidden And Non-Printing Content Packages the objects located on hidden layers,
hidden conditions, and layers for which the Print Layer option is turned off. When this option is not selected, the
package includes only what is visible and printable in the document when you create the package.
View Report Opens the printing instructions report in a text editor immediately after packaging. To edit the printing
instructions before completing the packaging process, click the Instructions button.
6Click Package to continue packaging.
More Help topics
“Link or embed imported text files” on page 142
“Creating PostScript and EPS files” on page 623
Correct font errors
The Fonts area of the Package Inventory dialog box lists all fonts used in the document—including fonts applied to
overset text or text on the pasteboard, and fonts embedded in EPS files, native Adobe Illustrator files, and placed PDF
pages—and determines whether the font is installed on your computer and available. Selecting Show Problems Only
shows fonts that fit into the following categories:
Missing fonts Lists fonts that are used in the document but are not installed on the current computer or available as
document installed fonts.
Incomplete fonts Lists fonts that have a screen font on the current computer but not a corresponding printer font.
Protected fonts Lists fonts that cannot be embedded in PDF or EPS files or used as document installed fonts due to
license restrictions.
❖Do either of the following:
•Close the Preflight dialog box and install the fonts on your computer.

623
USING INDESIGN
Printing
Last updated 11/16/2011
•Click Find Font in the Fonts area of the Preflight dialog box, and search for, list, and replace fonts used in your
document.
Make sure that the fonts used in the document are licensed, installed, and activated either on your computer or on the
output device.
More Help topics
“Document installed fonts” on page 249
Repair links and images
The Links And Images area of the Package Inventory dialog box lists all links, embedded images, and placed InDesign
files used in the document, including DCS and OPI links from linked EPS graphics. Images embedded in EPS graphics
and placed InDesign files are not included as links in the preflight report. The preflight utility indicates missing or out-
of-date links, and any RGB images (which may not separate properly unless color management is on and set up
correctly).
Note: The Package Inventory dialog box cannot detect RGB images embedded in placed EPS, Adobe Illustrator, Adobe
PDF, FreeHand files, and placed .INDD files. For best results, verify color data for placed graphics using the Preflight
panel or in their original applications.
1To view only problem images, select Show Problems Only in the Links And Images area of the Package Inventory
dialog box.
2To repair a link, do one of the following:
•Select the problem image and click either Update or Relink.
•Click Repair All.
3Locate the correct image files and click Open.
Creating PostScript and EPS files
For detailed information and instructions, click the links below.
Creating PostScript or EPS files
As an alternative to printing a document to a printer, you can save a PostScript-language description of the document
as a .PS file for printing on remote printers—for example, by a prepress service provider. A service provider can send
a .PS file directly to the imagesetter. The size of a PostScript file is usually larger than the original InDesign document,
because the graphics and fonts are embedded.
You can also export a document page or spread to an EPS (Encapsulated PostScript) file and place it in other
applications.
Choosing the right method for creating a PostScript file
You can save your InDesign document or book in any of three types of PostScript files: device-independent, device-
dependent, or device- and driver-dependent.
624
USING INDESIGN
Printing
Last updated 11/16/2011
The following tables list recommended printer drivers and output methods for achieving the best results with post-
processing applications and InDesign. If your document will be processed by an OPI server, or by an imposition,
trapping, or other prepress application before it is printed by a RIP, choose PostScript® File in the Printer menu in the
InDesign Print dialog box. That way, InDesign has complete control over the DSC output. For desktop printing, use
any supported PostScript printer driver.
The tables use asterisks to indicate the relative suitability of each method for prepress work:
*** The PostScript file is fully DSC-compliant, and very suitable for use with a wide variety of post-processing
applications, RIPs, and workflows. This method is the best all-round choice for applications that rely on DSC.
** The PostScript file is largely DSC-compliant, and generally suitable for use with a wide variety of post-processing
applications, RIPs, and workflows. Some compatibility issues may exist for certain types of applications that rely
heavily on DSC.
A printer driver isn’t used when the printer selection is “PostScript® File.”
The PPD used by the selected printer appears in the PPD text box at the top of the Print dialog box.
About device- and driver-dependent PostScript files
Select a printer and a supported driver in the Printer menu. A device- and driver-dependent PostScript file has the
following characteristics:
•It is driver-dependent. The PostScript file will contain code generated by InDesign and by the driver. The InDesign
code is primarily responsible for the page content, including font downloading, and for setting basic device
information, such as media size, resolution, and screening. The driver is primarily responsible for setting special
driver features, such as watermarks, and for enabling or controlling special device features. Since InDesign doesn’t
have complete control over creating the PostScript file, the level of DSC compliance isn’t quite as high as it is with
driver-independent PostScript files. The level of DSC compliance, and therefore the PostScript file’s suitability for
prepress tasks, depends on the printer driver used.
•It is device-dependent. It contains code for enabling and controlling specific device features, making it less
compatible with devices other than the target device.
•It can be composite or separated (all of the color output methods that InDesign supports are available).
•It can be trapped by InDesign (either by using Application Built-In or Adobe In-RIP Trapping).
•It can be printed directly to the device, or to file.
Printer selection: PostScript® File
Operating system PPD Prepress suitability
All platforms Device-independent ***
Device-dependent ***
Printer selection: <installed printer>
Operating system Printer driver Prepress suitability
Mac OS 10.2 Built-in PS Driver for Mac OS X **
Windows 2000/XP Pscript 5 **

625
USING INDESIGN
Printing
Last updated 11/16/2011
A device- and driver-dependent PostScript file is ideally suited for proofing (by the designer) to desktop PostScript
printers. It can also be used by service providers who don't plan to do any prepress tasks to the job outside of InDesign
or the RIP system. In other words, if trapping is done, it happens in InDesign or at the RIP.
More Help topics
“Choosing the right method for creating a PostScript file” on page 623
“Setting up a printer” on page 605
Create a device-independent PostScript file
Select PostScript File in the Printer menu, and select Device Independent in the PPD menu. A device-independent
PostScript file has the following characteristics:
•It is 100% DSC-compliant, making it ideal for such post-processing tasks as trapping and imposition.
•All device and driver dependencies are removed, so that the file will print to almost any output device. However,
special printer features found in PPD files, such as image exposure, available media sizes, and optimized screen
frequencies, aren’t available in device-independent output.
•The color output is always composite CMYK, but it also includes spot colors. As a result, it has to be separated in
post-processing software, or at the RIP using in-RIP separations.
•It cannot be trapped by InDesign; trapping must occur at the RIP, or in post-processing software.
•It can only be printed to file (not directly to a device or application) from InDesign.
A device-independent PostScript file is ideal for composite prepress workflows, where the file will be trapped and
separated later in the production process, such as during imposition, trapping, or at the RIP (if the output device
supports in-RIP separations).
1Choose File > Print.
2In the Print dialog box, for Printer, choose PostScript File.
3For PPD, choose Device Independent.
4View or change existing print settings. InDesign uses the current page range when creating the PostScript file.
5Click Save.
6Specify a name and location, and click Save.
Create a device-dependent PostScript file using InDesign
Select PostScript File in the Printer menu, and select a PPD. A device-dependent PostScript file has the following
characteristics:
•It is 100% DSC-compliant, making it ideal for such post-processing tasks as trapping and imposition.
•It contains a description of everything in your document, including information about linked files, optimized
screen frequencies, resolution, and available media sizes tailored to the currently selected output device.
•All driver dependencies are removed.
•It can be composite or separated. All of the color output methods that InDesign supports are available. (In-RIP
separations are available if the PPD and output device support them.)
•It can be trapped by InDesign (either by using Application Built-In or Adobe In-RIP Trapping).
•It can only be printed to file (not directly to a device or application) from InDesign.

626
USING INDESIGN
Printing
Last updated 11/16/2011
A device-dependent PostScript file is ideally suited to pre-separation or trapping workflows, where the file will be
trapped using automatic or Adobe In-RIP Trapping features within InDesign.
1Choose File > Print.
2In the Print dialog box, for Printer, choose PostScript File.
3Choose the PPD for the final output device.
4View or change existing print settings. InDesign uses the current page range when creating the PostScript file.
5Click Save.
6Specify a name and location, and click Save.
Create a PostScript file using a PostScript printer driver (Windows)
1Choose File > Print.
2In the InDesign Print dialog box, click the Setup button at the bottom of the dialog box.
3In the printer driver’s dialog box, select Print to File.
4Click the Layout tab, and then click the Advanced button.
5Click Document Options, click PostScript Options, and then choose Optimize For Portability in the PostScript
Output Option menu. Click
OK.
6Click OK or Print to return to the InDesign Print dialog box.
7In the InDesign Print dialog box, click Print.
8Specify a name and location, and click Save.
Create a PostScript file using a PostScript printer driver (Mac OS)
1Choose File > Print.
2In the Print dialog box, choose PostScript File in the Printer menu, and click Save.
3In the Save PostScript File dialog box, specify a name and location for the PostScript file (.ps), and then click Save.
Export pages in EPS format
Use the Export command to export InDesign pages in EPS format, which you can import into another program. If you
export multiple pages, each page is exported as a separate file with a number appended to the end of the filename. For
example, if you export pages 3, 6, and 12, and specify the filename News.eps, InDesign will create three files named
News_3.eps, News_6.eps, and News_12.eps.
If you want to open InDesign pages in Illustrator or Adobe Photoshop, export pages as PDF or EPS files.
1Choose File > Export.
2Specify a location and a filename. Be sure to include the EPS extension.
3For Save As Type (Windows) or Format (Mac OS), choose EPS, and click Save.
4Under Pages in the Export EPS dialog box, do one of the following:
•Select All Pages to export all pages in the document.
•Select Ranges and type a page range. You can type a range using a hyphen, and separate pages or ranges using
commas.

627
USING INDESIGN
Printing
Last updated 11/16/2011
•Select Spreads to export facing pages as a single EPS file (one spread per EPS).
5Set additional options.
6Under Bleed, type a value between 0p0 and 36p0 to specify extra space for graphics that are positioned beyond the
edge of the page or trim area.
7Click Export.
More Help topics
“Options for omitting graphics” on page 612
“About preferences and defaults” on page 40
“Apply a flattener preset for output” on page 455
“Ink Manager overview” on page 643
EPS export options
When you export to EPS, you can specify the following options:
PostScript® Specifies a level of compatibility with the interpreters in PostScript output devices. Level 2 will often
improve the printing speed and output quality of graphics printed only on a PostScript Level
2 or greater output
device. Level 3 provides the best speed and output quality, but requires a PostScript 3 device.
Color Specifies how color is represented in the exported file. The options below are similar to the Color settings in the
Print dialog box.
•Leave Unchanged Leaves each image in its original color space. For example, if the document contains three RGB
images and four CMYK images, the resulting EPS file will contain the same RGB and CMYK images.
•CMYK Creates a separable file by representing all color values using the gamut of cyan, magenta, yellow, and black
process color inks.
•Gray Converts all color values to high-quality black-and-white images. The gray levels (shades) of the converted
objects represent the luminosity of the original objects.
•RGB Represents all color values using the red, green, and blue color space. An EPS file with RGB color definitions
is better suited for on-screen viewing.
•PostScript® Color Management Uses the document’s color data in a calibrated version of its original color space.
Preview Determines the characteristics of the preview image that is saved in the file. The preview image is displayed
in applications that cannot display EPS artwork directly. If you don’t want to create a preview image, choose None in
the format menu.
Embed Fonts Specifies how to include fonts used in the pages you export.
•None Includes a reference to the font in the PostScript file that tells the RIP or a post-processor where the font
should be included.
•Complete Downloads all fonts required for the document at the beginning of the print job. All glyphs and
characters in a font are downloaded even if they don’t appear in the document. InDesign automatically subsets fonts
that contain more than the maximum number of glyphs (characters) specified in the Preferences dialog box.
•Subset Downloads only the characters (glyphs) used in the document.
Data Format Specifies how InDesign sends the image data from your computer to a printer: as ASCII or Binary data.
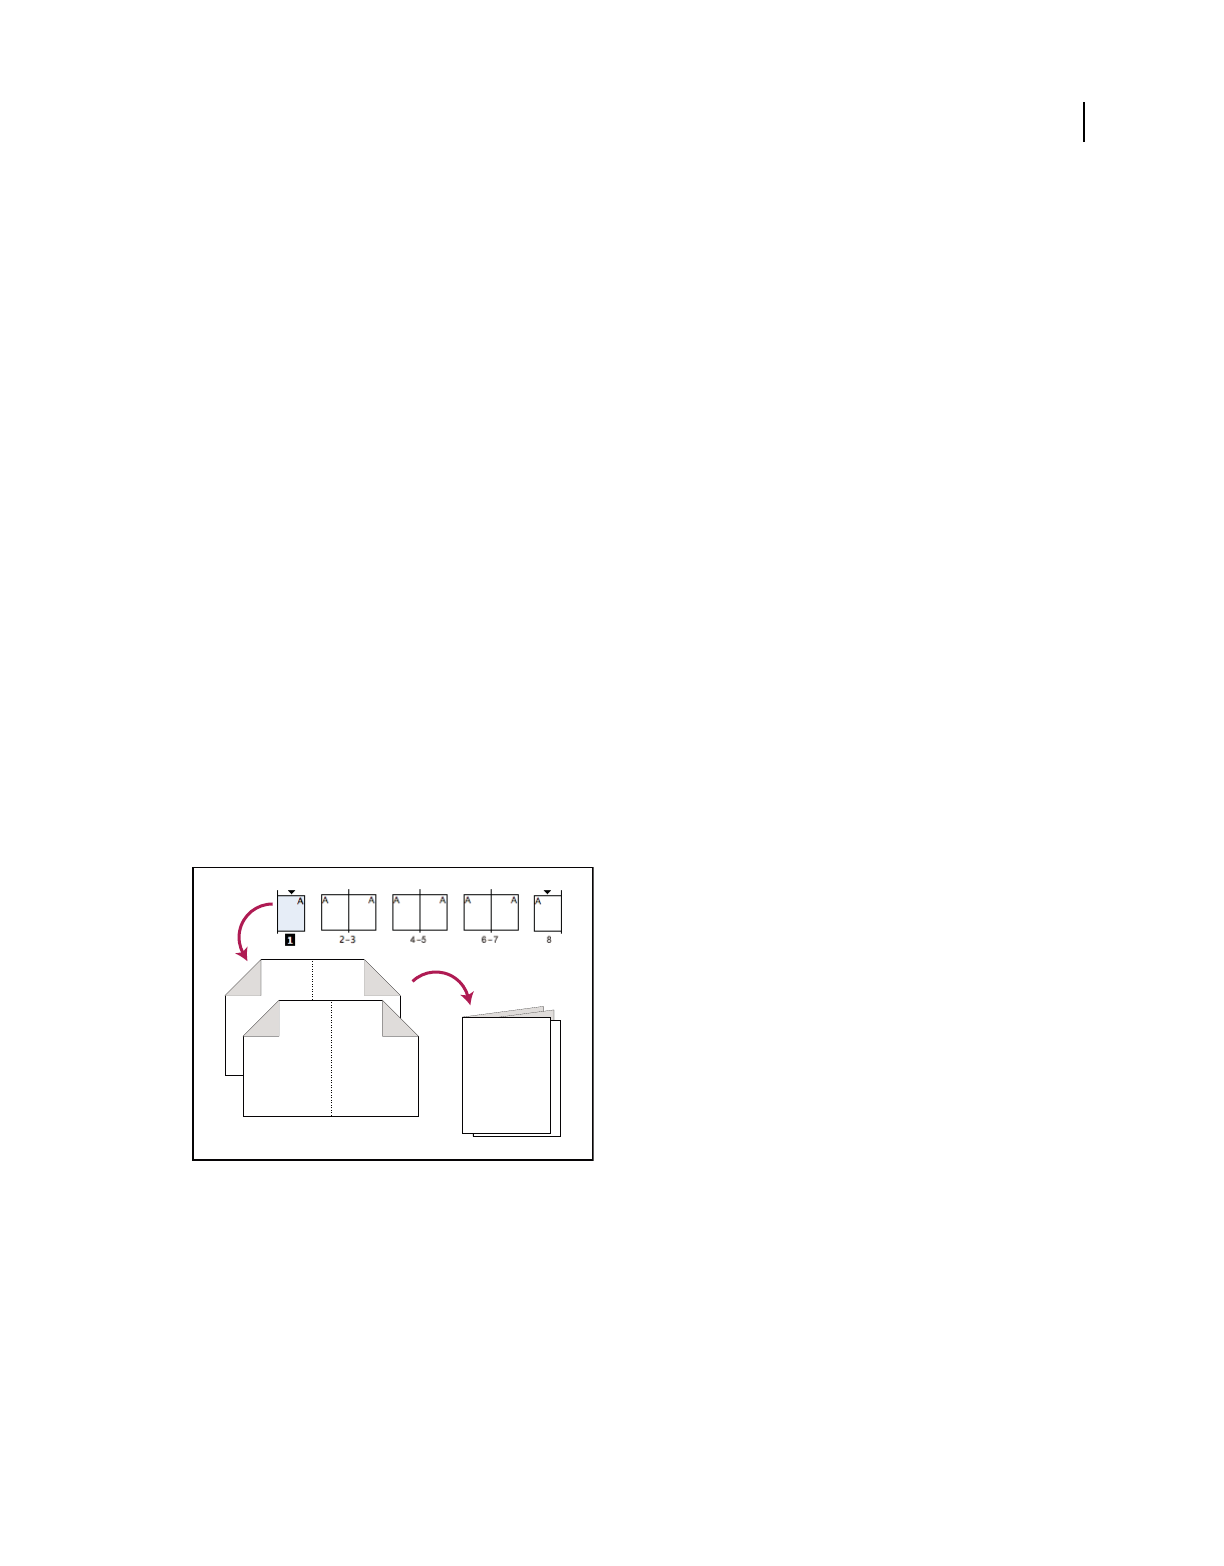
628
USING INDESIGN
Printing
Last updated 11/16/2011
Images Specifies how much image data in placed bitmap images to include in the exported file.
•All Includes all available high-resolution image data in the exported file and requires the most disk space. Choose
this option if the file will be printed on a high-resolution output device.
•Proxy Includes only screen-resolution versions (72 dpi) of placed bitmap images in the exported file. Choose this
option in conjunction with the OPI Image Replacement option, or if the resulting PDF file will be viewed on-screen.
OPI Image Replacement Enables InDesign to replace low-resolution EPS proxies of graphics with high-resolution
graphics at output time.
Omit For OPI Selectively omits imported graphics when sending image data to a printer or file, leaving only the OPI
links (comments) for later handling by an OPI server.
Transparency Flattener Select a flattener preset in the Preset menu to specify how transparent objects appear in the
exported file. This option is the same as the Transparency Flattener option that appears in the Advanced area of the
Print dialog box.
Ink Manager Corrects any ink options without changing the design of the document.
Printing booklets
Impose a document for booklet printing
The Print Booklet feature lets you create printer spreads for professional printing. For example, if you’re editing an 8-
page booklet, the pages appear in sequential order in the layout window. However, in printer spreads, page 2 is
positioned next to page 7, so that when the two pages are printed on the same sheet, folded, and collated, the pages end
up in the appropriate order.
Pages appear in sequence in the layout window, but are printed in a different order so that they appear correct when folded and bound.
The process of creating printer spreads from layout spreads is called imposition. While imposing pages, you can change
settings to adjust spacing between pages, margins, bleed, and creep. The layout of your InDesign document is not
affected, because the imposition is all handled in the print stream. No pages are shuffled or rotated in the document.
Note: You cannot create a new document based on the imposed pages. In addition, if your document includes multiple
page sizes, you cannot use Print Booklet to impose a document.
1Choose File > Print Booklet.
2If a printer preset has the settings you want, choose it in the Print Preset menu.
1
6
5 4
8 1
7 2
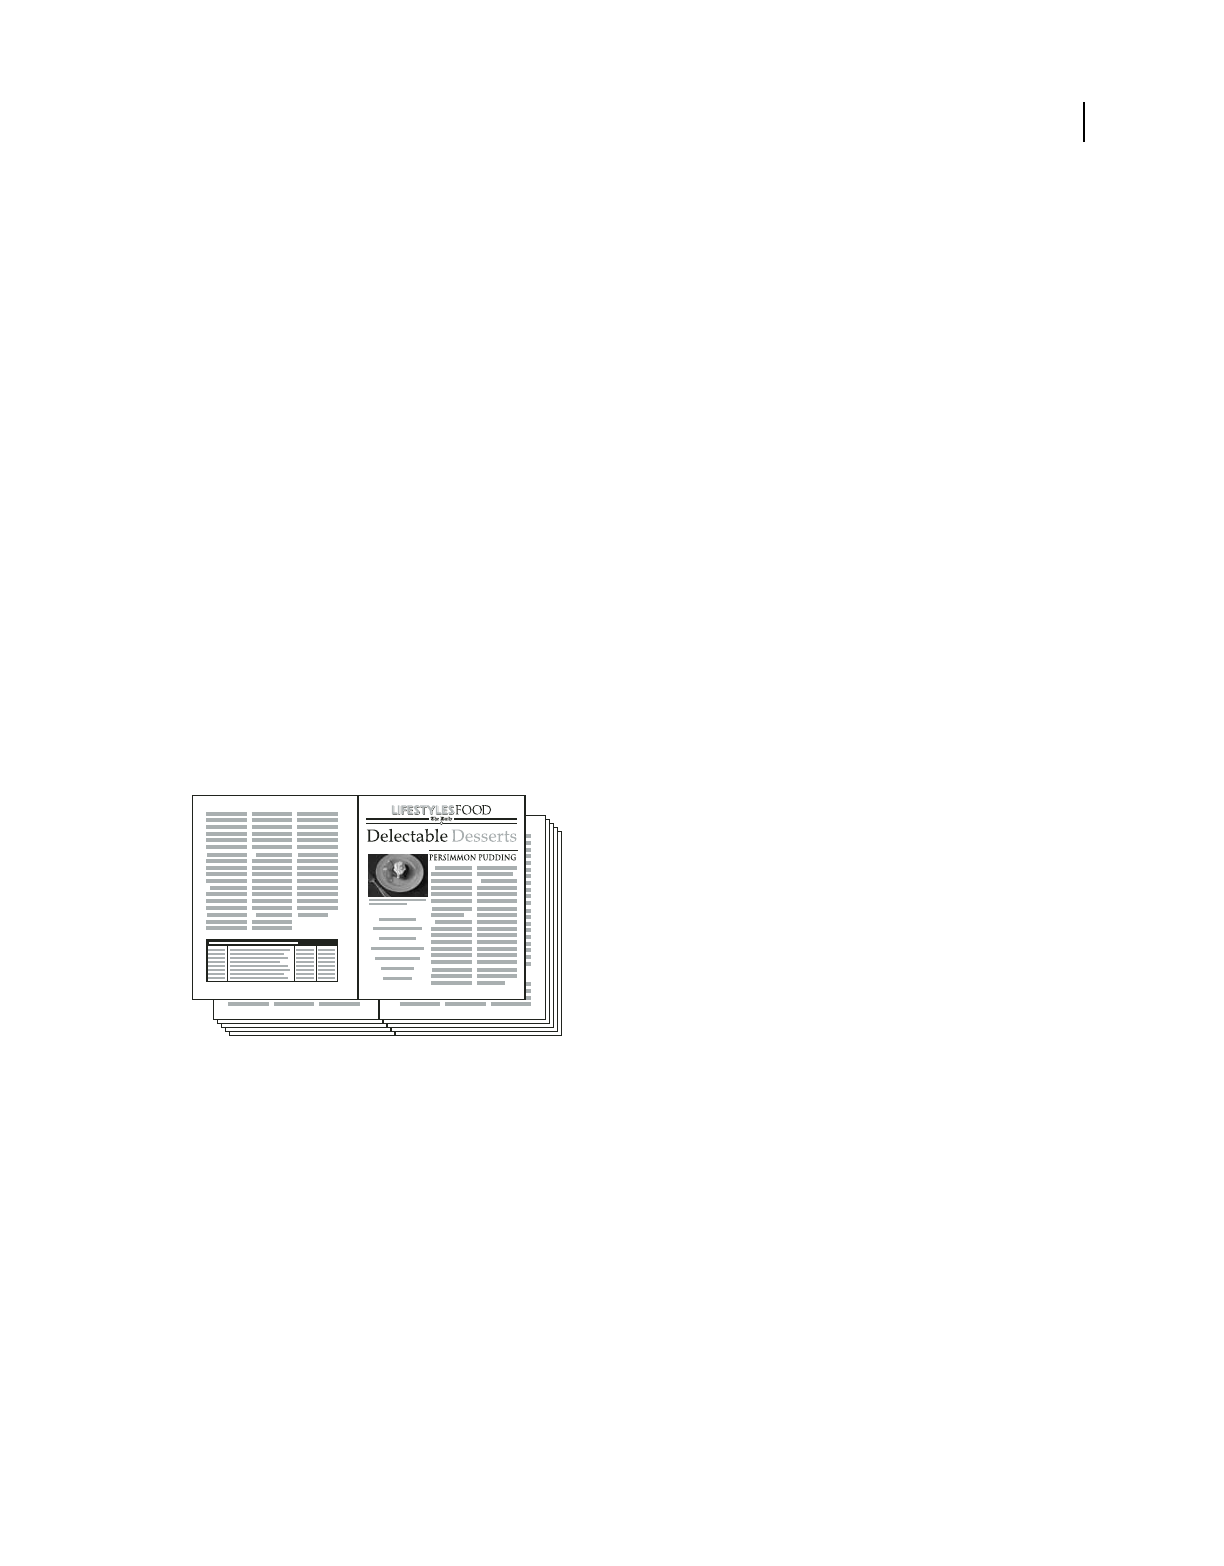
629
USING INDESIGN
Printing
Last updated 11/16/2011
To use the print settings (as they appear in the Print dialog box) of the current document, choose Current Document
Settings from the Print Preset menu.
3If you don’t want the entire document to be imposed, select Range in the Setup area and specify which pages to
include in the imposition.
Use hyphens to separate consecutive page numbers, and commas for nonadjacent page numbers. For example, typing
3-7, 16 imposes pages 3 through 7 and
16.
Note: If you have divided the document into sections of page numbers, you should enter section page numbers (such as
Sec2:11) in the Range field.
4To change settings such as printer’s marks and color output, click Print Settings. Using the options on the left,
change settings as needed, and then click OK.
5In the Print Booklet dialog box, specify other booklet setup options as appropriate, and then click Print.
Note: The number of pages in a booklet is always a multiple of four. If you are printing to a PDF printer, blank pages are
inserted in the PDF to create the booklet.
Booklet types
You can choose three types of imposition: 2-up Saddle Stitch, 2-up Perfect Bound, and Consecutive.
2-up Saddle Stitch Creates two-page, side-by-side printer spreads. These printer spreads are appropriate for printing
on both sides, collating, folding, and stapling. InDesign adds blank pages as needed to the end of the finished
document. The Space Between Pages, Bleed Between Pages, and Signature Size options are dimmed when 2-up Saddle
Stitch is selected.
Creating printer spreads for a 24-page black-and-white newsletter using the 2-up Saddle Stitch style yields 12 spreads.
2-up Perfect Bound Creates two-page, side-by-side printer spreads that fit within the specified signature size. These
printer spreads are appropriate for printing on both sides, cutting, and binding to a cover with adhesive. If the number
of pages to be imposed is not evenly divisible by the signature size, InDesign adds blank pages as needed to the back of
the finished document.
16 1
215
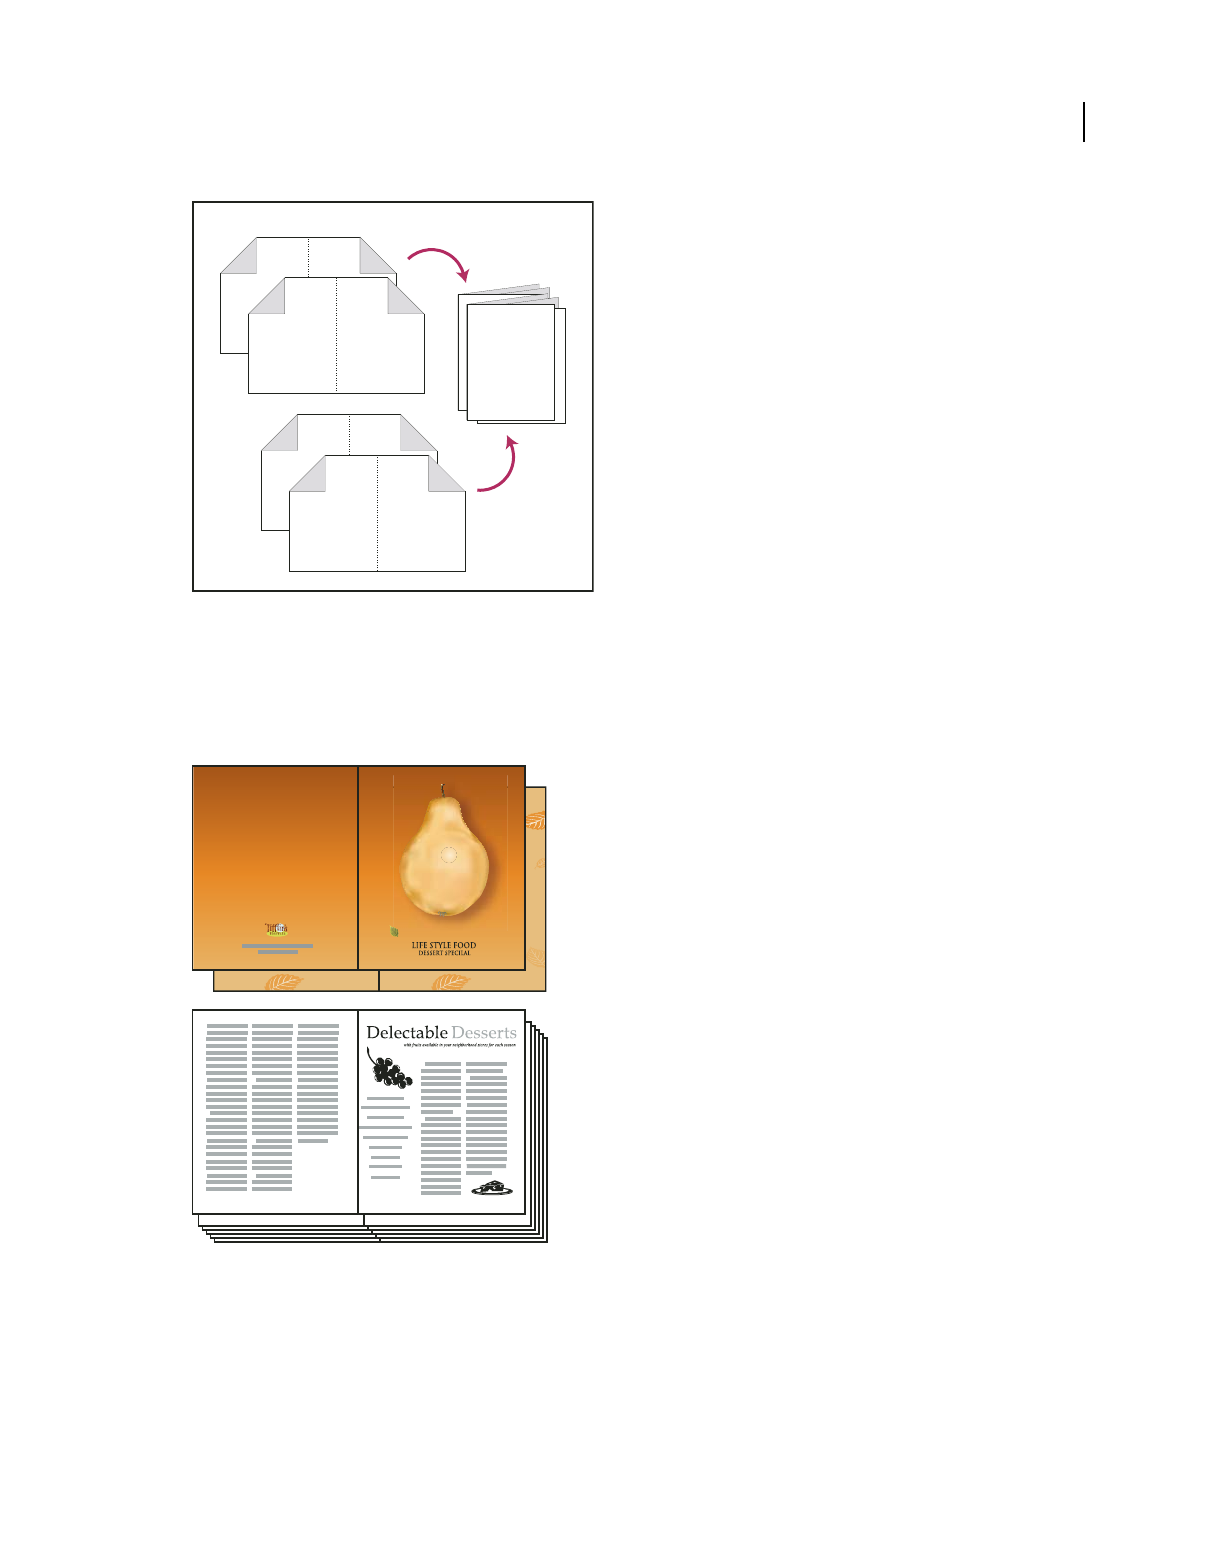
630
USING INDESIGN
Printing
Last updated 11/16/2011
2-up Perfect Bound divided in four signatures
If a booklet has a color cover and black-and-white insides, you can create two separate impositions from the same
document: one for the front cover, inside front cover, inside back cover, and back cover; and one for the 24 pages inside
the booklet. To produce the color signature, click Range in the Pages area of the Setup area, and type 1-2, 27-28 (or
whatever the section page numbers are). To produce the black-and-white insides, type 3-26 in the Range text box.
28-page booklet with a color cover
A. Color signature for cover B. Black-and-white inside page
Consecutive Creates a two-, three-, or four-page panel appropriate for a foldout booklet or brochure. The Bleed
Between Pages, Creep, and Signature Size are dimmed when a Consecutive option is selected.
1
1
68
54
81
72
14
13 12
16 9
15 10
16 1
215
A
B
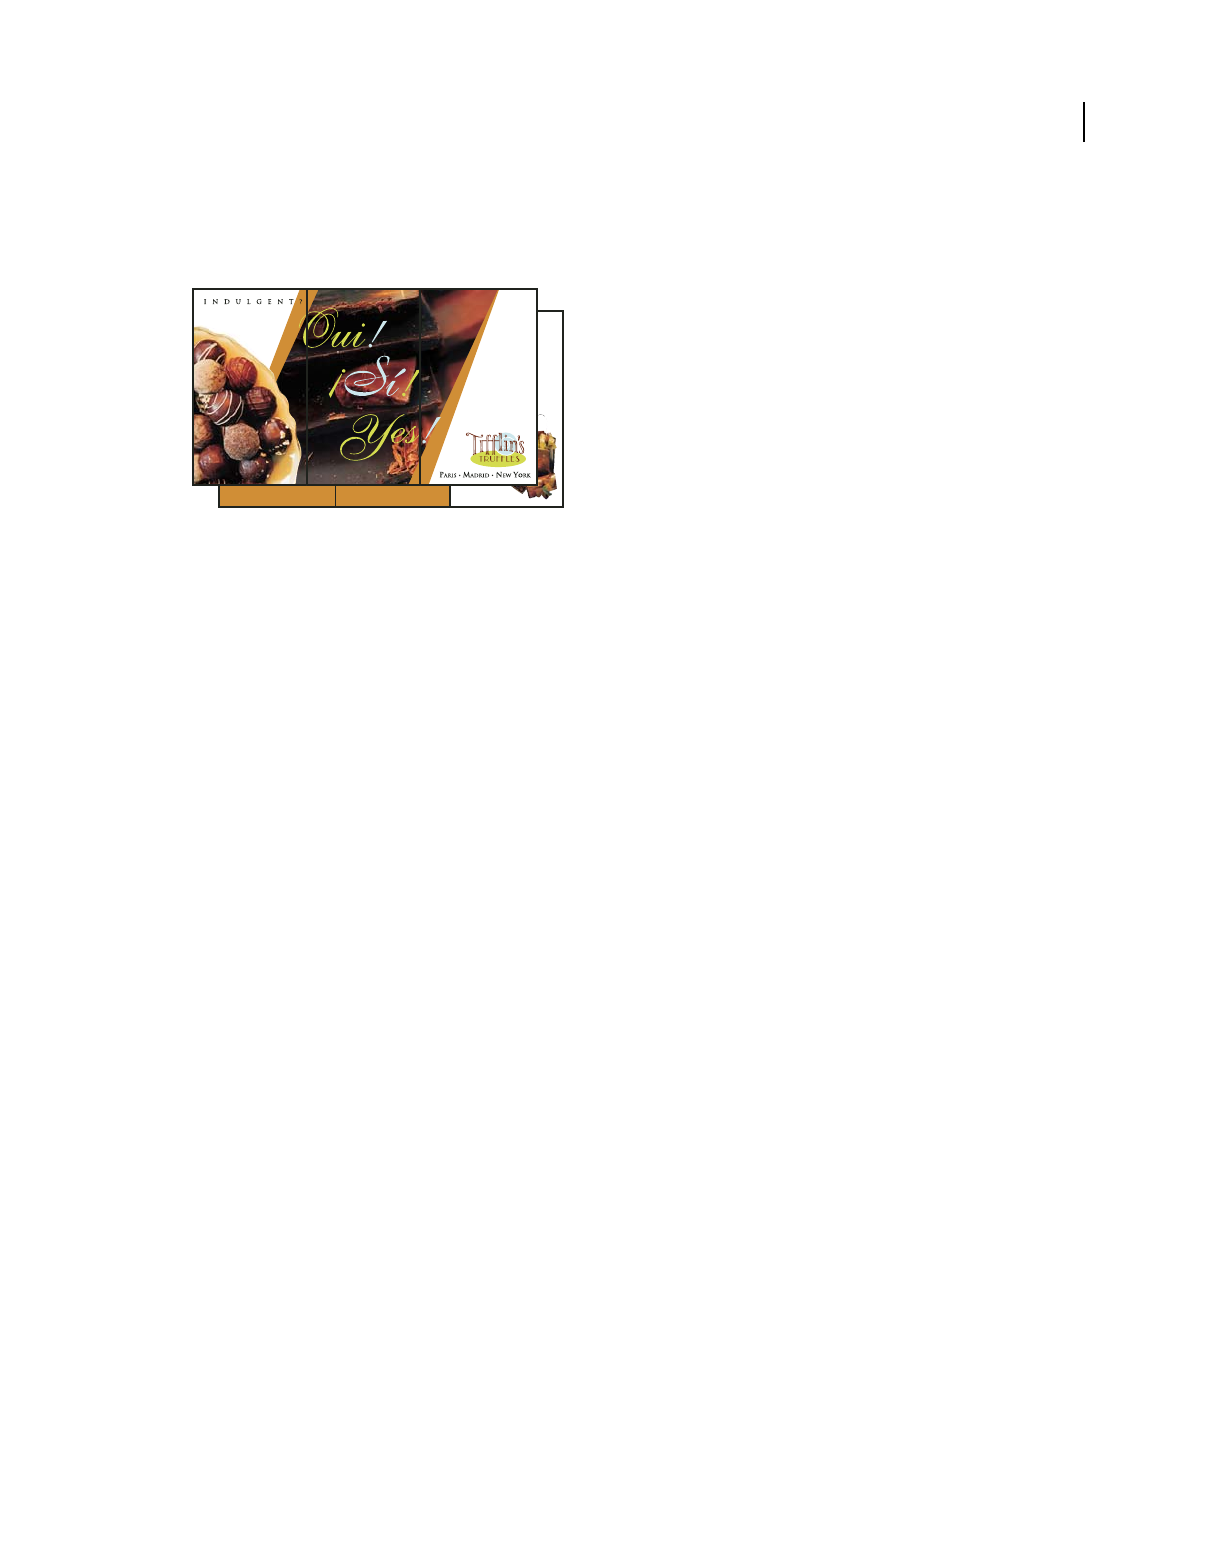
631
USING INDESIGN
Printing
Last updated 11/16/2011
For example, if you want to create printer spreads for a traditional six-panel, trifold brochure, choose 3-up
Consecutive. You may be accustomed to setting up trifolds as one page with three different columns. With InDesign
imposition, you can simply create pages that are the size of each panel.
3-Up Consecutive
Spacing, bleed, and margin options for booklet printing
You can change the following options in the Setup area of the Print Booklet dialog box.
Space Between Pages Specifies the gap between pages (the right side of the left page and the left side of the right page).
You can specify a Space Between Pages value for all the booklet types except Saddle Stitch.
For Perfect Bound documents, if you are creeping in (with a negative value), the minimum Space Between Pages value
is the width of the Creep value. If you’re manually creating signatures (for example, if there are different stocks in the
same document), you can enter a Space Between Pages value to specify a starting creep for spreads that belong to
different signatures.
Bleed Between Pages Specifies the amount of space used to allow page elements to encroach the gap in Perfect Bound
printer spread styles. This option is sometimes referred to as crossover.) The field accepts values between 0 and half the
Space Between Pages value. You can specify this option only when 2-up Perfect Bound is selected.
Creep Specifies the amount of space necessary to accommodate paper thickness and folding on each signature. In
most cases, you’ll want to specify a negative value to create a push-in effect. You can specify Creep for 2-up Saddle
Stitch and 2-up Perfect Bound booklet types. (See “Understanding creep” on page 632.)
Signature Size Specifies the number of pages in each signature for 2-up Perfect Bound documents. If the number of
pages to be imposed is not evenly divisible by the Signature Size value, blank pages are added to the end of the
document as necessary.
Automatically Adjust To Fit Marks And Bleeds Lets InDesign calculate the margins to accommodate the bleeds and the
other printer mark options currently set. The fields under Margins are dimmed when this option is selected, but they
reflect the actual values that will be used to fit marks and bleeds. If you deselect this option, you can adjust the margin
values manually.
Margins Specifies the amount of space that surrounds the actual printer spread after trimming. To specify individual
values for Top, Bottom, Left, and Right, deselect Automatically Adjust To Fit Marks And Bleeds, and increase the
values to insert extra space beyond the default marks and bleeds. (Decreasing the values may result in clipping the
marks and bleeds.) You can specify margin values for all booklet printing types.
Print Blank Printer Spreads If the number of pages to be imposed is not evenly divisible by the Signature Size value,
blank pages or spreads are added to the end of the document. Use this option to determine whether those blank spreads
at the end of the document are printed. Note that printing other blank pages in the document is controlled by the Print
Blank Pages option in the Print dialog box.

632
USING INDESIGN
Printing
Last updated 11/16/2011
Understanding creep
Creep specifies the distance pages move from the spine to accommodate paper thickness and folding in Saddle Stitch
and Perfect Bound documents. InDesign considers the “cover” of the final piece to be the outermost printer spread,
while the “centerfold” is considered to be the innermost printer spread. The term sheet represents two printer spreads:
the front of the sheet and the back of the sheet. The creep increment is calculated by dividing the specified creep value
by the total number of sheets minus one.
When you provide a positive creep value, the centerfold is not adjusted, but the pages on the outer sheets move away
from the spine. When you provide a negative creep, the cover is not adjusted, but the pages on the inner sheets move
towards the spine.
For example, a 16-page InDesign document could yield eight printer spreads, or four sheets. The front of the first sheet
will consist of the first printer spread (pages 16 and
1) while the back of the first sheet will consist of the second printer
spread (pages 2 and 15).
If the creep value in this example is 24 points (an exaggerated amount for the sake of clarity), the creep increment is 8
points per sheet (24 divided by 3). The amount of creep applied to the innermost sheet is 24 points, the amount of creep
applied to the third sheet is 16 points, and the amount of creep applied to the second sheet is 8 points. No creep will
be applied to the first outermost sheet.
The amount of creep for each successive sheet is decreased by the creep increment. In summary, each page on the
innermost sheet is moved 12 points (half of the 24-point creep value for this sheet) away from the spine, each page on
the third sheet is moved 8 points (half of the 16-point creep value for this sheet) away from the spine, and each page
on the second sheet is moved 4 points (half of the 8-point creep value for this sheet) away from the spine.
Preview or view a summary of booklet printing
The Preview area of the Print Booklet dialog box lets you review color thumbnails of the printer spreads created by
your selected imposition style. You can also see the printer’s marks you’ve specified in the Print dialog box.
1Choose File > Print Booklet.
2Do any of the following:
•Click Preview on the left side of the dialog box. To flip through the printer spreads, click the scroll arrows. Click the
left scroll arrow to go backwards from spread to spread. You can also drag the scroll box to change printer spreads.
•Click Summary on the left side of the Print Booklet dialog box to view a summary of current booklet settings. Check
the bottom of the Summary area for any conflicting settings.
If you click Print Settings and change the settings in the Print dialog box, you can observe the effect of the modified
settings in the Preview area.
Troubleshooting booklet printing
Note these issues to address when printing booklets.
Can’t create new document Unfortunately, you can’t create a new InDesign document with the imposed pages. You
can print the imposed document or create a PDF.
Blank pages not included You may add blank pages in the middle of a document to make sure there are enough pages
for each printer spread. However, if these pages contain no text or objects, they may not be recognized, and additional

633
USING INDESIGN
Printing
Last updated 11/16/2011
blank pages are added at the end of the document. To make sure that the blank pages you added are included in the
imposed document, click Print Settings in the Print Booklet dialog box, and then select Print Blank Pages and click OK.
Printing double-sided pages without a duplex printer Use the Odd Pages Only and Even Pages Only options in either
Adobe Acrobat or InDesign. After one set is printed, flip over the pages, load it in the printer, and print the rest of the
pages. For best results, print a test document to see which direction and order the pages should be added to the printer.
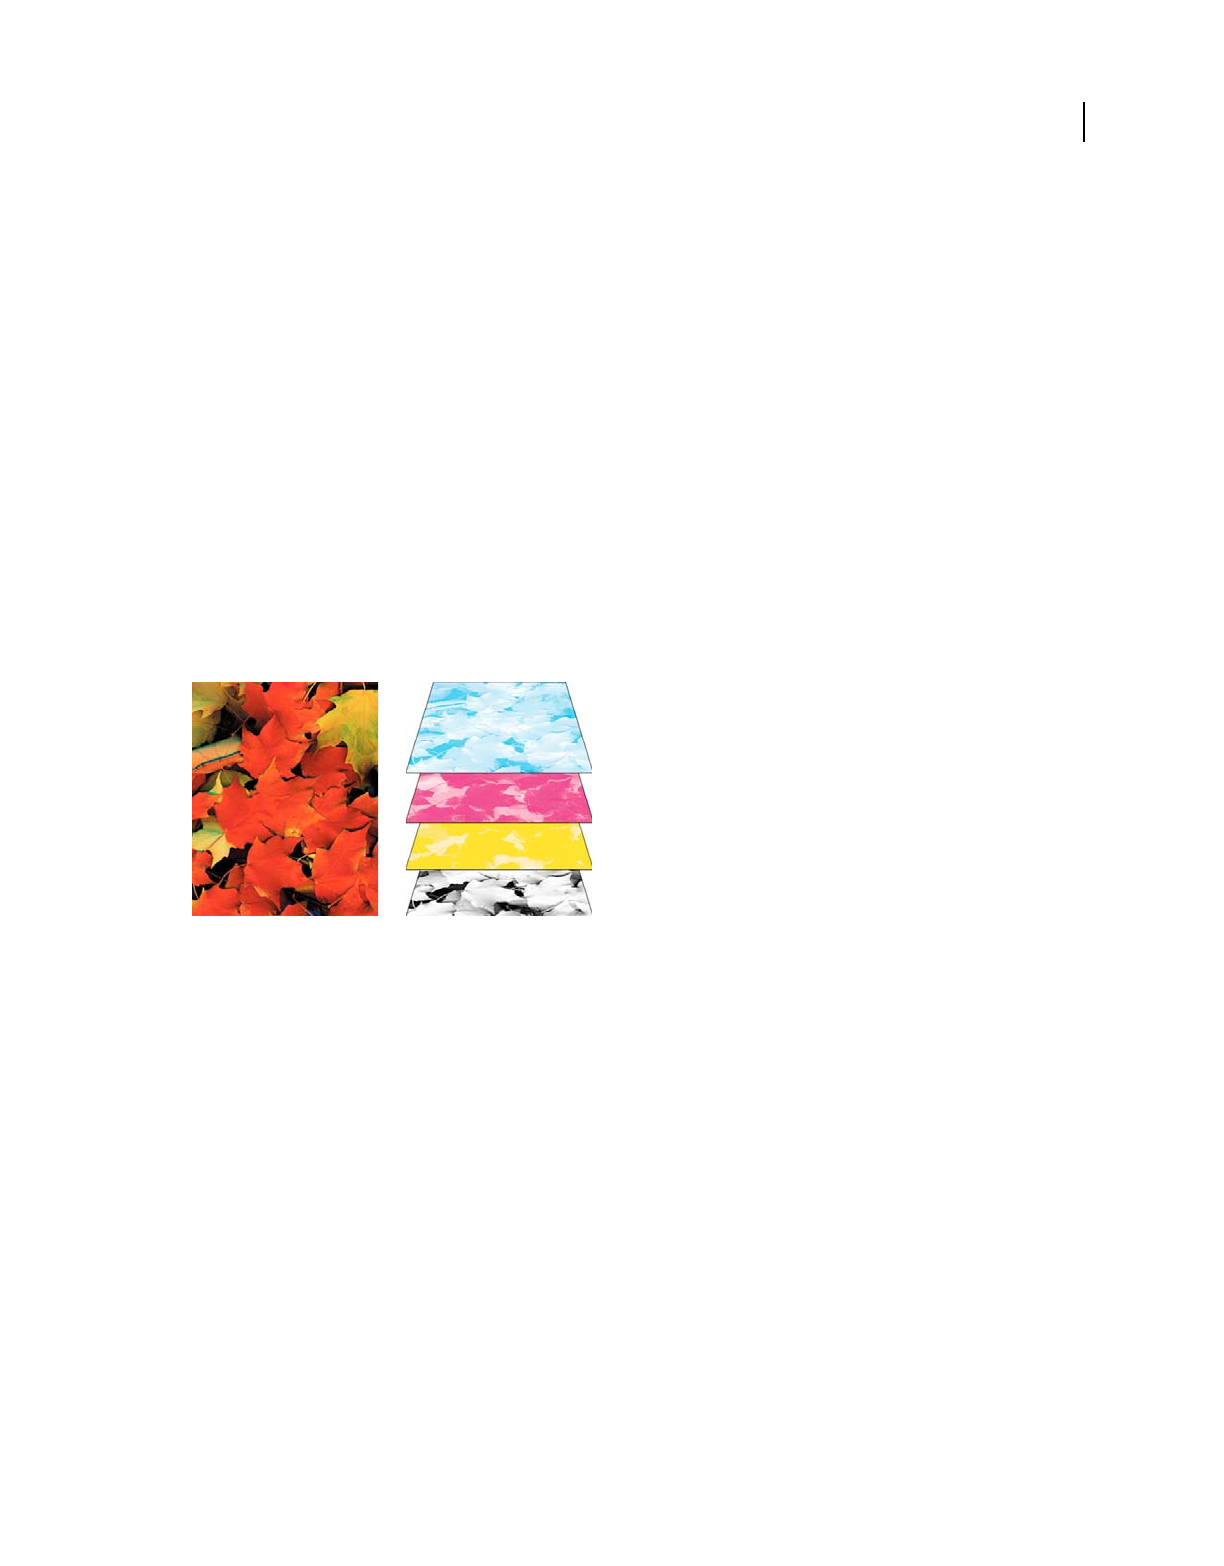
634
Last updated 11/16/2011
Chapter 21: Color separations
For detailed information and instructions, click the links below.
Preparing to print separations
For detailed information and instructions, click the links below.
Creating separations
To reproduce color and continuous-tone images, printers usually separate artwork into four plates—one plate for each
of the cyan (C), yellow (Y), magenta (M), and black (K) portions of the image. When inked with the appropriate color
and printed in register with one another, these colors combine to reproduce the original artwork. The process of
dividing the image into two or more colors is called color separating, and the films from which the plates are created
are called the separations.
Composite (left) and separations (right)
Separation workflows
Adobe InDesign CS4 supports two common PostScript workflows; the main difference is where separations are
created—at the host computer (the system using InDesign and the printer driver), or at the output device’s RIP (raster
image processor). Another alternative is a PDF workflow.
Host-based separations In the traditional host-based, preseparated workflow, InDesign creates PostScript
information for each of the separations required for the document, and sends that information to the output device.
In-RIP separations In the newer RIP-based workflow, a new generation of PostScript RIPs performs color separations,
trapping, and even color management at the RIP, leaving the host computer free to perform other tasks. This approach
takes less time for InDesign to generate the file, and minimizes the amount of data transmitted for any given print job.
For example, instead of sending PostScript information for four or more pages to print host-based color separations,
InDesign sends the PostScript information for a single composite PostScript file for processing in the RIP.
For a video tutorial on preparing files for output, see www.adobe.com/go/vid0089. To view a printing guide for
prepress providers (PDF), see www.adobe.com/go/learn_id_prepress_wp.

635
USING INDESIGN
Color separations
Last updated 11/16/2011
More Help topics
“Print or save separations” on page 647
“Export to PDF for printing” on page 501
Preparing Files for Output video
Prepare your document for color separations
1Correct any color problems in your artwork.
2Set overprint options.
3Create trapping instructions to compensate for misregistration on press.
4Preview color separations on your screen.
Note: Steps 1–4 are recommended but not required in producing color separations.
5Choose File > Print to display the Print dialog box.
6If you’ve created a printer preset with the appropriate separation settings, select it in the Print Preset menu at the
top of the Print dialog box.
7Choose a printer or PostScript file in the Printer menu.
8If you’re printing to a PostScript file, choose the PPD for the device that will output the separations.
9To view or change existing print options, click a section name on the left side of the Print dialog box.
10 Before you deliver your document to a service provider, proof the separations.
11 Print or save separations.
More Help topics
“About overprinting” on page 639
“Preview color separations” on page 637
“Proofing color separations” on page 647
“Print or save separations” on page 647
Outputting spot colors
You can use custom inks, called spot colors, in addition to, or in place of, process colors. For example, instead of using
the four process colors to reproduce artwork consisting of black text and bluish-green line drawings, you could use
two spot colors—one of black, and one representing the exact shade of green. You can also use spot color inks to
produce colors not reproducible by CMYK inks, such as varnishes or fluorescent and metallic colors. In addition, you
can mix two or more spot colors together or mix spot colors with process colors to create mixed inks.
You can color artwork with process colors, spot colors, or a combination of both. When printing separations, you can
convert spot colors to their process color equivalents so that they will be printed on the CMYK plates.
More Help topics
“Separate spot colors as process” on page 644
“Mixing inks” on page 485

636
USING INDESIGN
Color separations
Last updated 11/16/2011
View the process color equivalents of a spot color
1Select the spot color in the Swatches panel.
2Choose CMYK in the Color panel menu.
The CMYK equivalent values for the spot color are displayed in the Color panel.
You can also hold the pointer over the spot color in the Swatches panel. The formula for the color will appear in the
tool tip.
Print an object on all color plates
If you want an object to print on all plates in the printing process, including spot color plates, you can apply registration
color to the object. Registration color is used for crop marks and trim marks. For composite output, objects with
registration color applied will print as C 100, M 100, Y 100, and K 100. For separations, these objects will print as 100%
on each plate.
1Select the objects to which you want to apply registration color.
2Choose Window > Swatches.
3In the Swatches panel, click the Registration color swatch .
More Help topics
“Printer’s marks and bleeds” on page 607
Printing gradients as separations
Consider the following when producing separations for documents with gradients:
•A gradient created in InDesign that contains a combination of spot and process colors will be separated onto both
the process and spot plates.
•A gradient that contains process colors will be separated onto the process plates.
•A gradient that contains two tints of the same spot color will be separated onto a single spot color plate.
•To create a gradient that separates on one piece of film between a spot color and white, create a gradient fill between
the spot color and the Paper swatch in the Swatches panel.
•If you create a gradient between two spot colors, you should assign different screen angles to those spot colors. If
two spot colors have the same screen angle, they will overprint each other. If you’re not sure what the angles should
be, consult with your prepress service provider.
More Help topics
“About halftone screen frequency” on page 645
Printing a composite
You can print a color or grayscale composite proof to check colors in your document. A composite image can help you
design and proof your layout before you print final (and costly) separations.
When InDesign prints a composite, it prints all of the colors used in the file on one plate, regardless of whether any
individual colors are selected.

637
USING INDESIGN
Color separations
Last updated 11/16/2011
Consider the following issues when printing composites:
•While no proof will give you an exact representation of your final output, you can greatly improve its accuracy by
calibrating all the devices you use to create a document (such as scanners, monitors, and printers). If the devices
are calibrated, the color management system can help you get predictable and consistent color.
•Any overprinting options that you’ve selected in the document will print correctly on a printer that supports
overprinting. Since most desktop printers don’t support overprinting, you can simulate the effects of overprinting
by selecting Simulate Overprint in the Output section of the Print dialog box.
Important: Selecting Simulate Overprint will convert spot colors to process colors for printing. If you intend to use a
file for separations on a RIP, or for final output, do not select this option.
•When you print to a black-and-white printer, InDesign produces a grayscale composite version of the pages. If the
document contains color, InDesign prints visually correct grays to simulate that color. For example, the gray that
simulates a 20% tint of yellow is lighter than a 20% tint of black, since yellow is visually lighter than black.
•When you print a book with chapters containing conflicting spot inks or trap styles, you can instruct InDesign to
synchronize settings with the master document.
•If you’re using color management with the Book feature, make sure that each document in the book uses the same
color management settings in the Color Settings dialog box.
Note: Remember that, like monitors, color printers vary greatly in color reproduction quality; thus, proofs from your
service provider are the best way to verify how the finished piece will look.
More Help topics
“Improving gradients and color blends in print” on page 616
“Synchronize book documents” on page 315
“Use color management when printing” on page 613
Preview color separations
You can preview color separations, ink coverage limits, and overprinting using the Separations Preview panel.
Previewing separations on your monitor lets you check the following:
Varnishes and other coatings Since varnishes are transparent, they can be difficult to preview on-screen. When you
preview a varnish separation by itself, the varnished areas appear in black.
Rich black Previewing separations lets you identify areas that will print as rich black, or process black (K) ink mixed
with color inks for increased opacity and richer color.
Ink coverage Too much ink on the paper can cause drying problems. Ask your commercial printer for the maximum
ink coverage of the press you will be printing on. You can then preview the document to identify areas where ink
coverage exceeds the press’s limit.
Overprinting You can preview how blending, transparency, and overprinting will appear in color-separated output.
Note: You can also see overprinting effects when you output to a composite printing device. This is useful for proofing
color separations.
While previewing separations on your monitor can help you detect problems without the expense of printing
separations, it does not let you preview trapping, emulsion options, printer’s marks, and halftone screens and
resolution. Work with your commercial printer to verify these settings using integral or overlay proofs.
Note: Objects on hidden layers are not included in an on-screen preview.
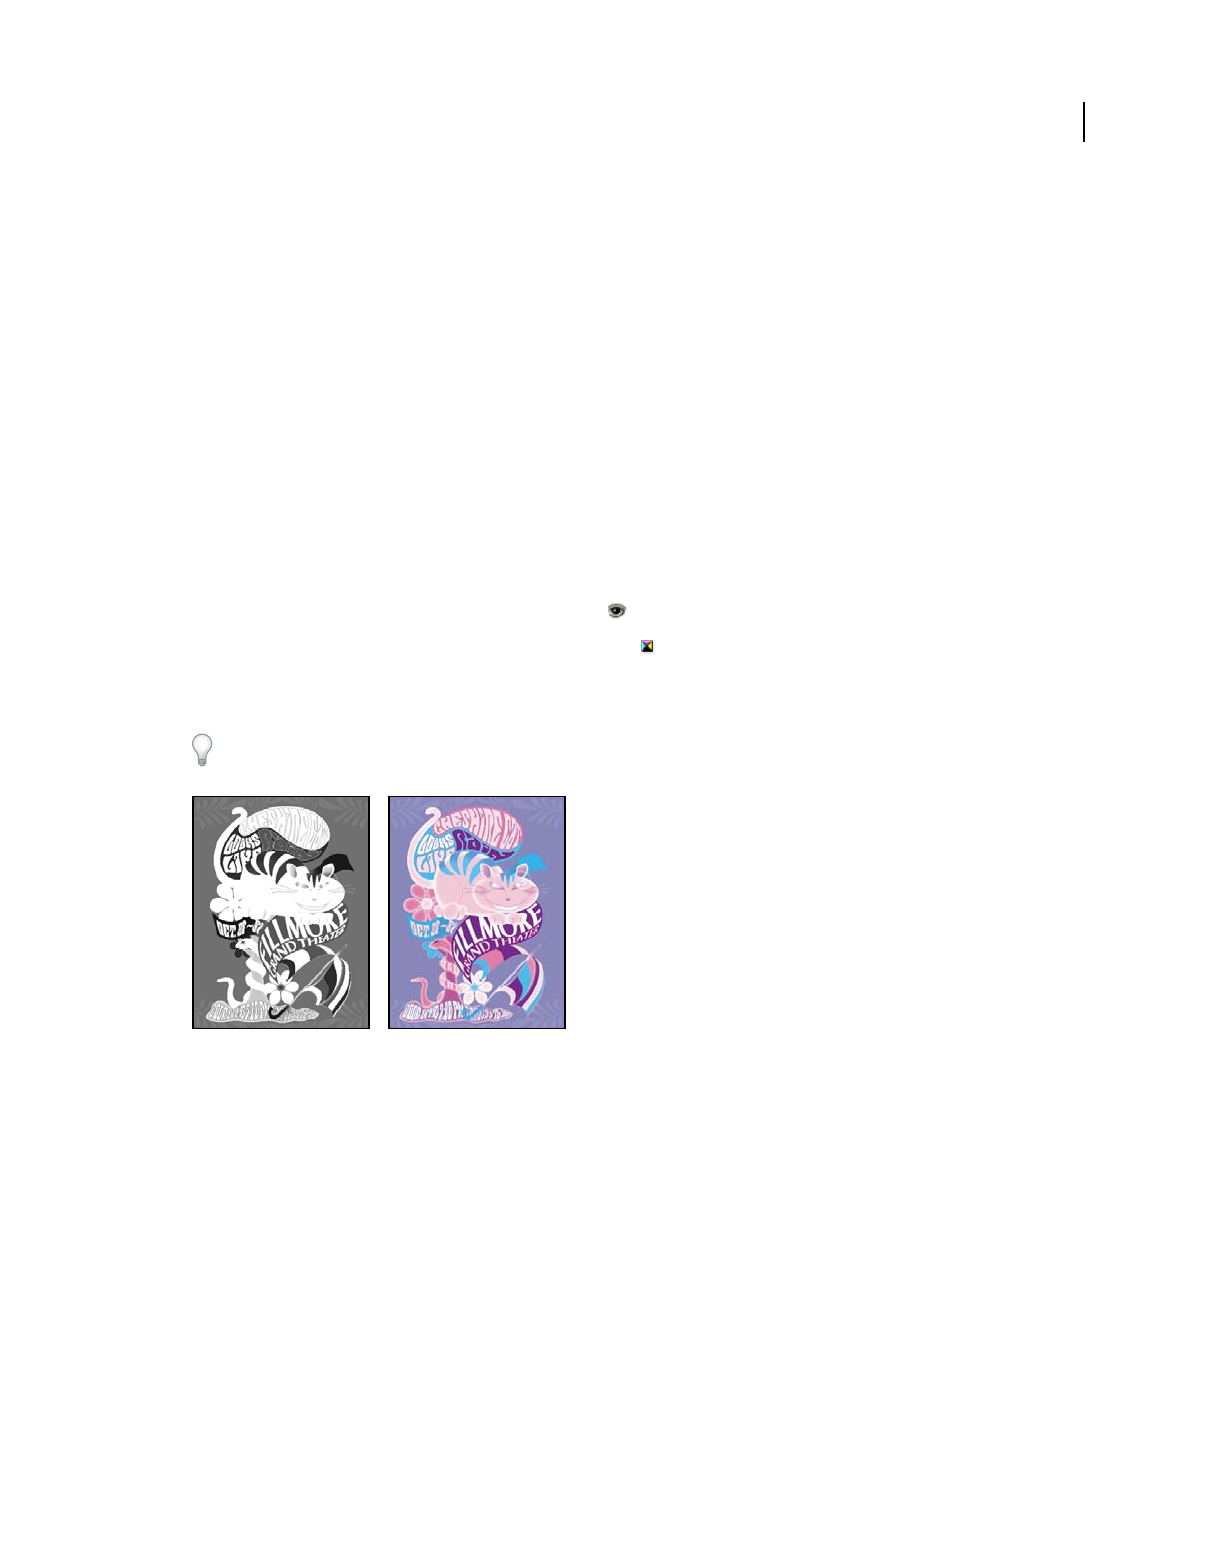
638
USING INDESIGN
Color separations
Last updated 11/16/2011
More Help topics
“Overprinting page items” on page 640
“Keys for using the Separations Preview panel” on page 703
“Separate spot colors as process” on page 644
Preview separation plates
1Choose Window > Output > Separations Preview.
2For View, choose Separations.
3Do any of the following:
•To view a single separation and hide all others, click the name of the separation you want to view. By default, areas
of coverage appear in black. To change this, deselect Show Single Plates In Black on the panel menu.
•To view one or more separations, click the empty box to the left of each separation name. Each separation appears
in its assigned color.
•To hide one or more separations, click the eye icon to the left of each separation name.
•To view all process plates at once, click the CMYK icon .
•To view all separations at once, click and drag the pointer across all of the eye icons (or empty boxes) next to the
separation names.
The Separations Preview panel can also be controlled using keyboard shortcuts.
Previewing a single separation (left) and multiple separations (right)
Preview ink coverage
1Choose Window > Output > Separations Preview.
2For View, choose Ink Limit. Enter a value for maximum ink coverage in the box that appears next to the View
menu. (Ask your commercial printer for the correct value to enter.)
3Verify ink coverage in the document preview. Areas that exceed the ink coverage limit are shown in shades of red
(dark red areas exceed the ink coverage limit by more than light red areas). All other areas appear in grayscale.
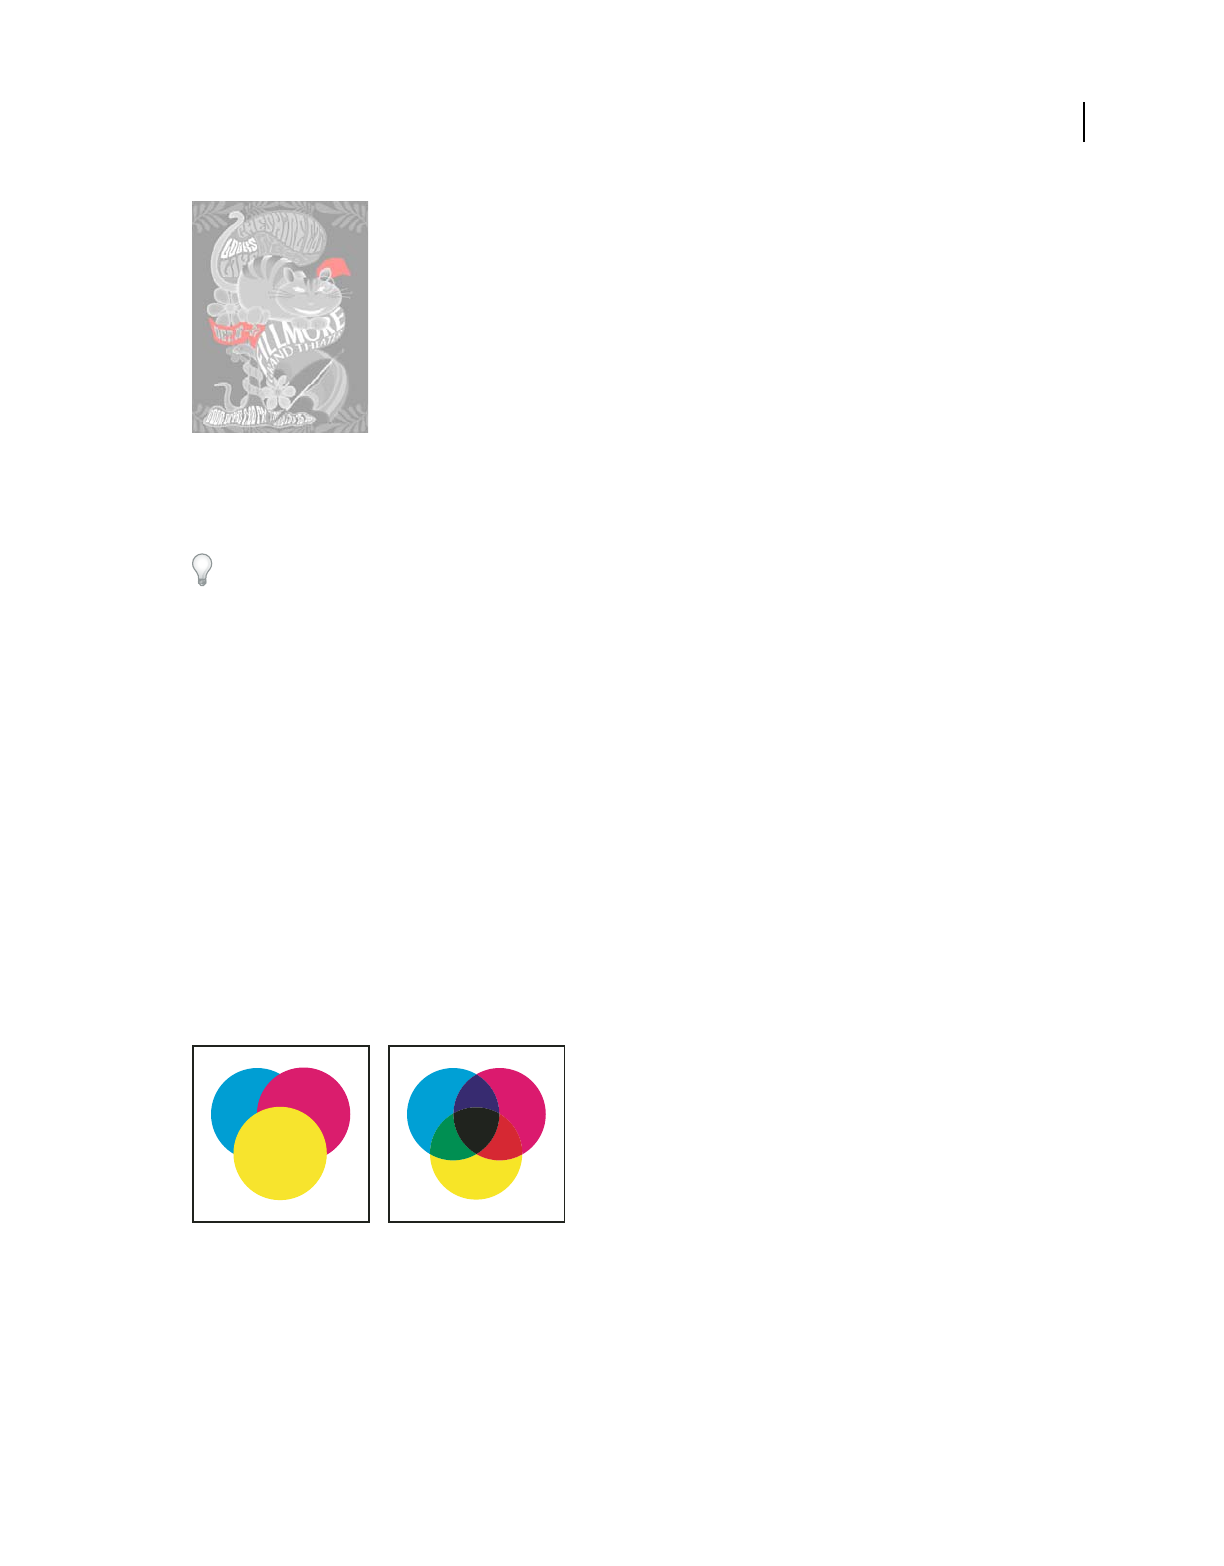
639
USING INDESIGN
Color separations
Last updated 11/16/2011
Areas that exceed the specified ink coverage limit are shown in red.
4To check ink coverage for a specific area, use the pointer to hover over that area in the document window. Ink
coverage percentages appear in the panel next to each ink name.
You can adjust ink coverage by converting some spot colors to process colors. To adjust ink coverage in placed graphics,
edit the graphics in their source applications.
Return to normal view
1Choose Window > Output > Separations Preview.
2For View, choose Off.
Overprinting
For detailed information and instructions, click the links below.
About overprinting
If you have not changed the transparency of your artwork with the Transparency panel, the fills and strokes in the
artwork will appear opaque, because the top color knocks out, or cuts out, the area underneath. You can prevent
knockout by using the Overprint options in the Attributes panel. After you’ve set your overprint options, you can
preview the overprinting effects on-screen.
Three overlapping circles without overprinting (left) compared to three overlapping circles with overprinting (right)
InDesign also has overprint simulation, which is useful for simulating the effects of overprinting spot and process inks
on a composite printing device.
Black ink applied to text or native InDesign objects is overprinted by default to prevent misregistration of small black-
type characters positioned over color areas, or of color areas outlined with black lines. You can change black ink
settings using Appearance Of Black preferences.

640
USING INDESIGN
Color separations
Last updated 11/16/2011
Your design workflow may require a certain color to be set to overprint. For example, you want to print all the text in
your publication in a specific color. Consider the following options:
•Create an object style that uses the spot ink as the fill or stroke with a matching overprint fill or stroke.
•Create a separate layer for objects that contain your spot color and assign them to black.
•Create a composite PDF and change overprint settings within the PDF.
•Assign overprint settings in your RIP.
•Apply overprint settings to an image or object and add it to your library, or edit a placed file in its original
application.
More Help topics
“Preview color separations” on page 637
“Overprinting page items” on page 640
Determining when to overprint manually
Automatic trapping in InDesign—either as built-in trapping or Adobe In-RIP Trapping—nearly eliminates the need
for manual overprinting. However, manual overprinting can be an effective solution in the rare cases when you can’t
use automatic trapping.
Use the following guidelines to determine whether or not to use overprinting:
•Consult with your service provider to see if their output devices support manual overprinting.
•Overprint when the artwork doesn’t share common ink colors and you want to create a trap or overlaid ink effects.
When overprinting process color mixes or custom colors that don’t share common ink colors, the overprint color
is added to the background color. For example, if you print a fill of 100% magenta over a fill of 100% cyan, the
overlapping fills appear violet, not magenta.
•Don’t overprint when using a stroke to trap two process colors. Instead, you specify a CMYK stroke color that uses
the higher value from the corresponding inks in each original color.
•Make sure that you and your prepress service provider agree on when and how to overprint manually, because
doing so will significantly affect trapping options specified in the Print dialog box. Overprinting is supported by
most, but not all, PostScript Level 2 and PostScript 3 devices.
Overprinting page items
You can overprint strokes or fills, paragraph rules, and rules above footnotes. You can also simulate overprinting of
spot colors.
More Help topics
“Preview color separations” on page 637
“Define custom stroke styles” on page 360
“Footnotes” on page 189
“Adjusting ink neutral density values” on page 499
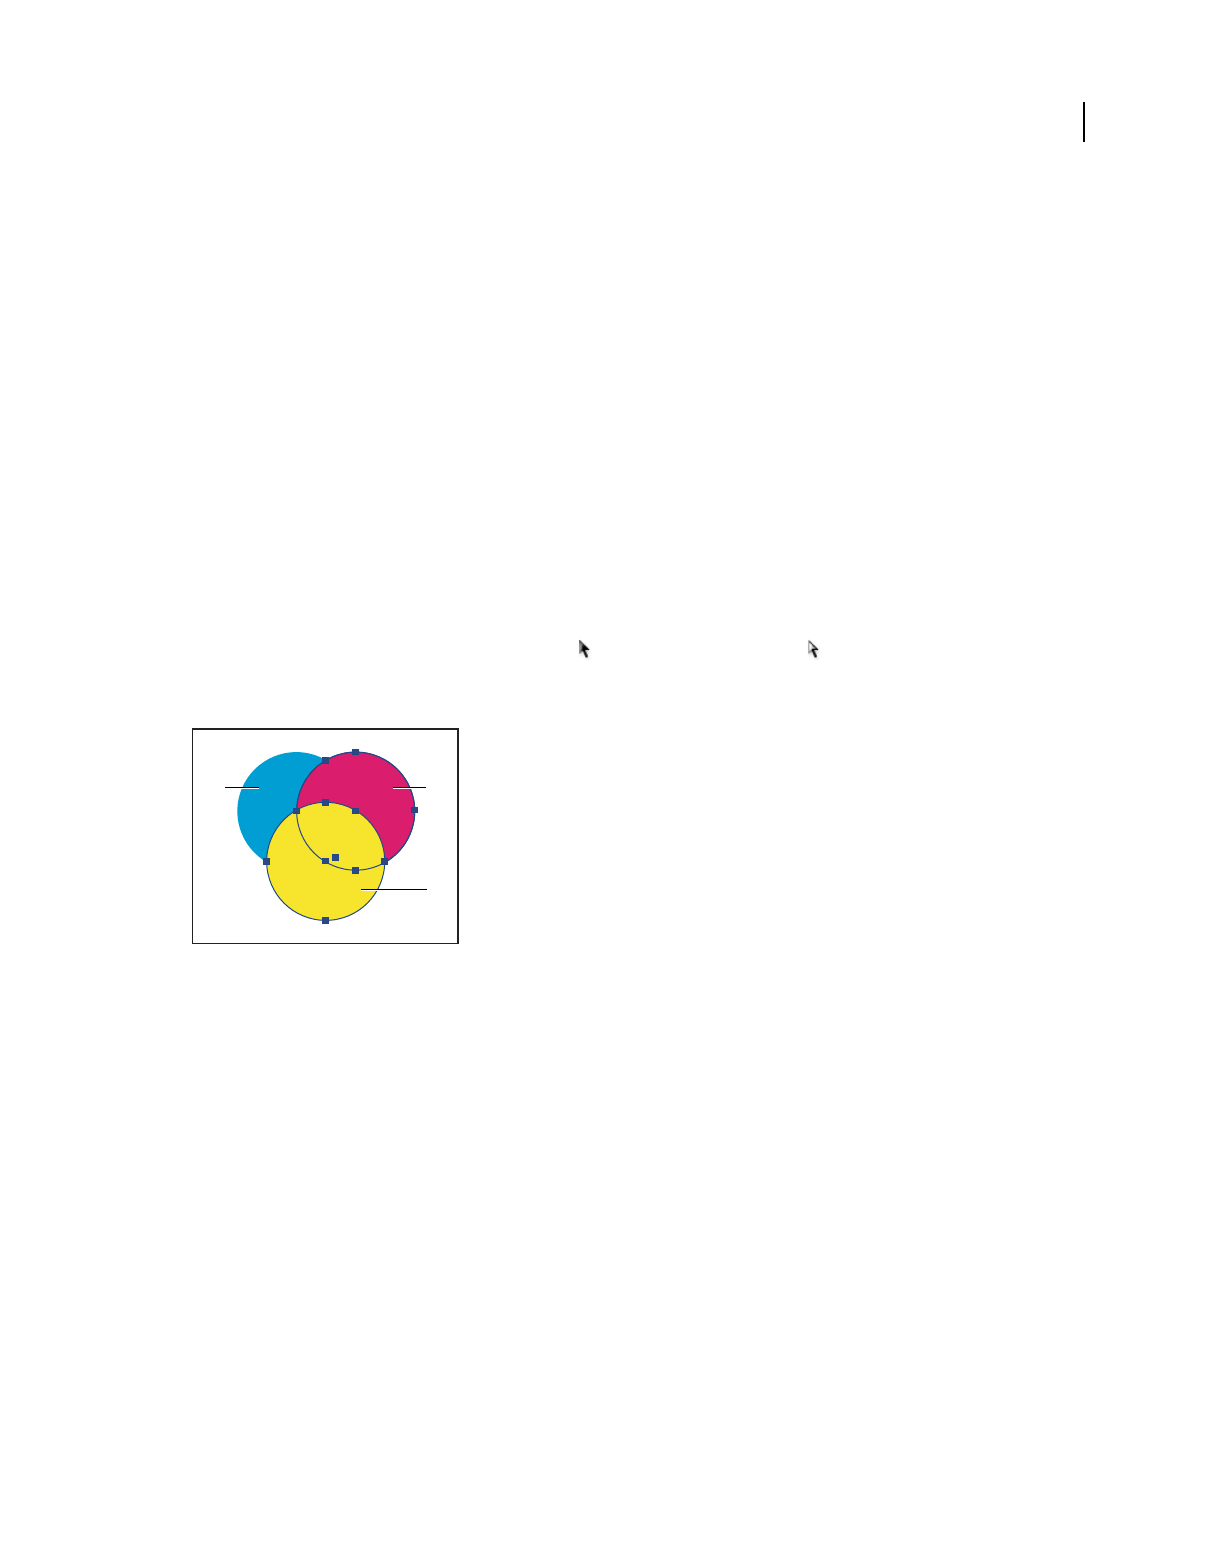
641
USING INDESIGN
Color separations
Last updated 11/16/2011
Overprint a stroke or fill
You can overprint strokes or fills of any selected paths using the Attributes panel. An overprinted stroke or fill doesn’t
need to be trapped, because overprinting covers any potential gaps between adjacent colors. You can also overprint a
stroke to simulate a trap (by overprinting a color you’ve manually calculated as the proper combination of two adjacent
colors).
Keep the following guidelines in mind as you apply manual overprinting:
•If you use the Overprint Fill option on a 100% black stroke or fill, the black ink may not be opaque enough to
prevent the underlying ink colors from showing through. To eliminate the show-through problem, use a four-color
(rich) black instead of a 100% black. Consult with your service provider about the exact percentages of color to add
to the black.
•When using a stroke to trap objects (but not text characters), adjust the stroke alignment so the stroke falls outside
the path or object, rather than inside or centered on the path.
•When using a stroke to trap two spot colors or a spot and a process color, you usually apply the lighter color to the
stroke, and overprint the stroke.
Use the Separations Preview panel to preview how colors will overprint.
1Select one or more paths with the Selection tool or the Direct Selection tool , or select text characters with the
Type tool. To overprint the stroke of a path that is pasted inside a frame, you must first select the nested (inner)
path using the Direct Selection tool.
Overprinting fills and strokes
A. Cyan (bottom layer) B. Magenta (middle layer) C. Yellow (top layer)
2Choose Window > Output > Attributes.
3In the Attributes panel, do any of the following:
•To overprint the fill of selected objects, or to overprint unstroked type, select Overprint Fill.
•To overprint the stroke of selected objects, select Overprint Stroke.
•To overprint a color applied to the spaces in a dashed, dotted, or patterned line, select Overprint Gap.
Overprint a paragraph rule
1Make sure a swatch exists for your overprint color.
2Using the Type tool, click an insertion point in a paragraph.
3In the Paragraph panel, choose Paragraph Rules in the Paragraph panel menu.
4In the pop-up menu at the top of the dialog box, choose the paragraph rule you want to overprint.
5Select one of the following, then click OK.
•To overprint the stroke of the rule, select Overprint Stroke.
C
B
A

642
USING INDESIGN
Color separations
Last updated 11/16/2011
•To overprint a color applied to the spaces in a dashed, dotted, or patterned line, select Overprint Gap.
Note: The Overprint Stroke and Overprint Gap options in the Paragraph Rules dialog box can be saved as part of a
paragraph style.
Overprint rules above footnotes
InDesign can automatically insert a rule to separate footnotes from the body of the document. You can choose to
overprint the rule.
1Make sure a swatch exists for your overprint color.
2Choose Type > Document Footnote Options.
3In the Footnote Options dialog box, click the Layout tab.
4Select Overprint Stroke, and click OK.
Simulate overprinting of spot inks
Overprint simulation is useful for simulating the effects of overprinting spot inks with different neutral density values
(for example, red and blue). When you print to a composite output device using overprint simulation, you can see if
the resulting color is one that you want to overprint or knock out.
1In the Output area of the Print dialog box, choose a composite option in the Color menu.
Note: You cannot simulate overprinting when Composite Leave Unchanged is selected.
2Select Simulate Overprint.
Change the black overprint setting
To knock out black objects in InDesign, you must prevent the black swatch from overprinting. Unlike most color
swatches, which knock out by default, the black swatch overprints by default, including all black strokes, fills, and text
characters. The 100% process black appears as [Black] in the Swatches panel. Knock out black objects by either
deselecting the overprint default in Preferences or by duplicating the default black swatch and applying the duplicated
swatch to color objects that knock out. If you disable the overprint setting in the Preferences dialog box, all instances
of Black knock out (remove underlying inks).
It can be cheaper and easier to have the print shop overprint process black on the press.
1Choose Edit > Preferences > Appearance Of Black (Windows) or InDesign > Preferences > Appearance Of Black
(Mac
OS).
2Select or deselect Overprint [Black] Swatch at 100%.
Note: Overprint [Black] Swatch at 100% does not affect tints of [Black], unnamed black colors, or objects that appear
black because of their transparency settings or styles. It affects only objects or text colored with the [Black] swatch.
Inks, separations, and screen frequency
For detailed information and instructions, click the links below.
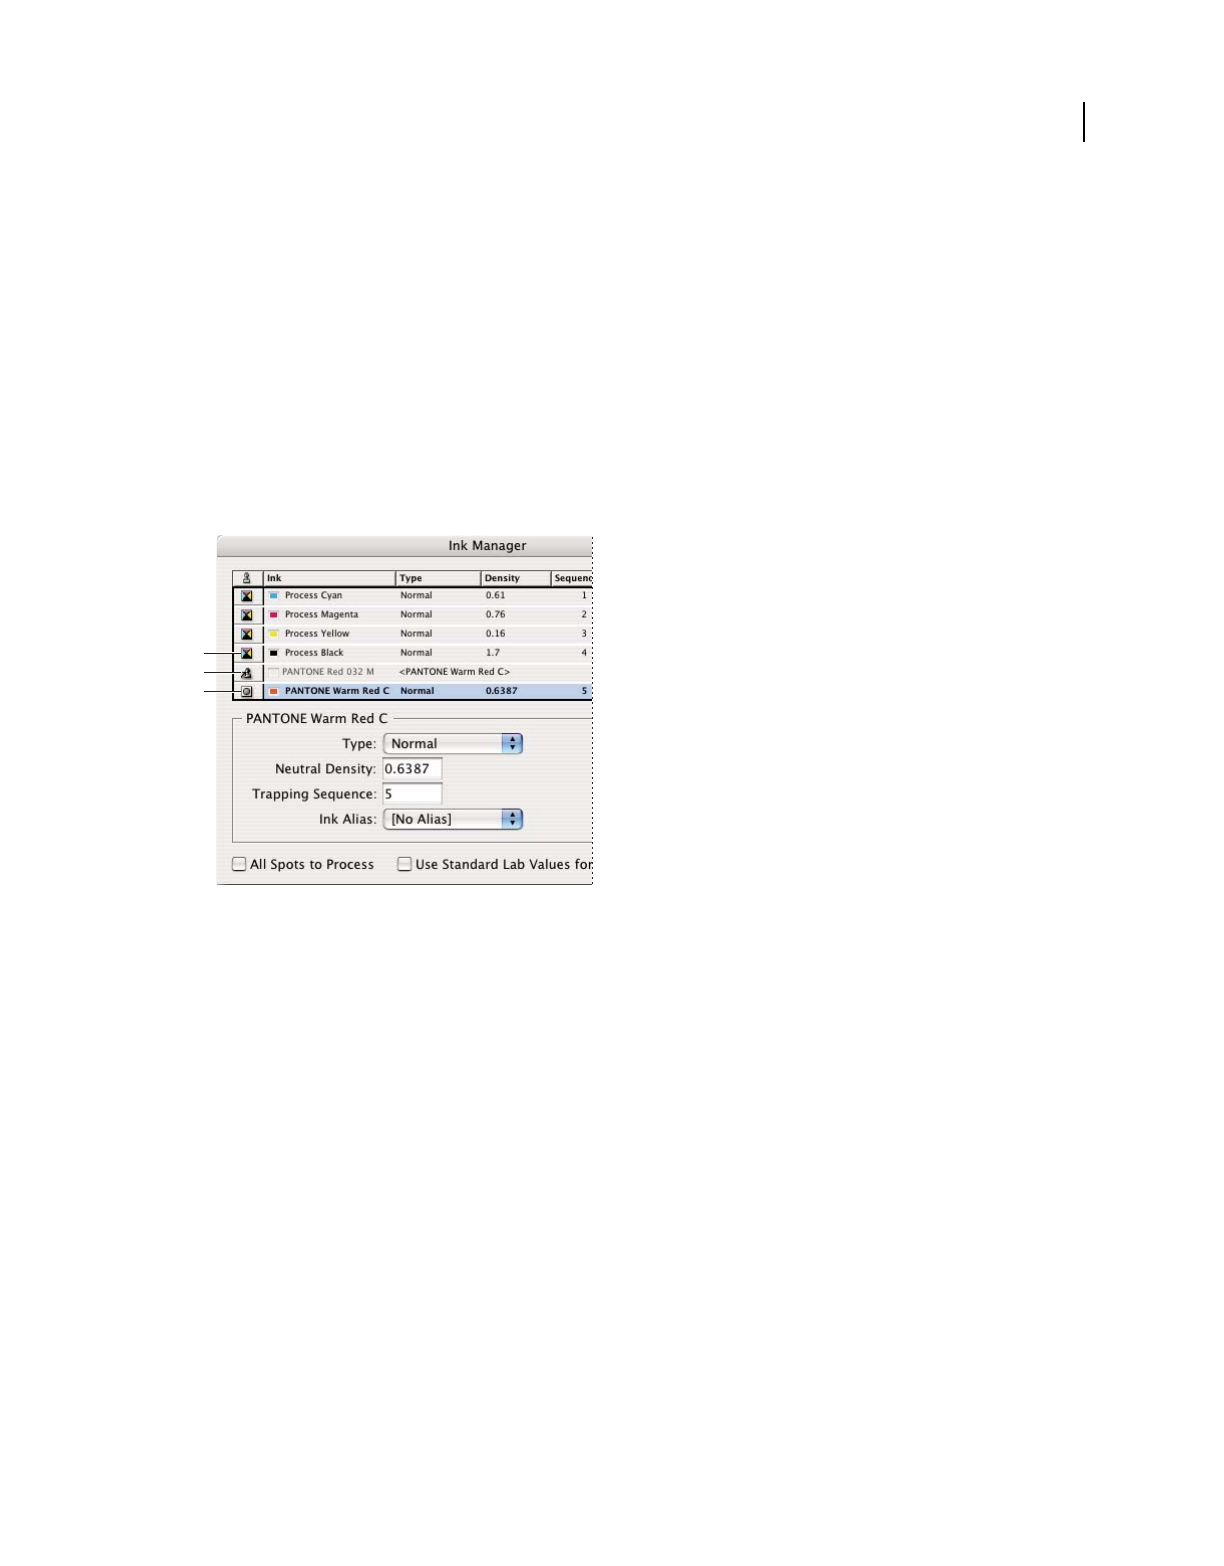
643
USING INDESIGN
Color separations
Last updated 11/16/2011
Ink Manager overview
The Ink Manager provides control over inks at output time. Changes you make using the Ink Manager affect the
output, not how the colors are defined in the document.
Ink Manager options are especially useful for print service providers. For example, if a process job includes a spot color,
a service provider can open the document and change the spot color to the equivalent CMYK process color. If a
document contains two similar spot colors when only one is required, or if the same spot color has two different names,
a service provider can map the two to a single alias.
In a trapping workflow, the Ink Manager lets you set the ink density for controlling when trapping takes place, and it
lets you set the correct number and sequence of inks.
Note: InDesign and Acrobat share the same Ink Manager technology. However, only InDesign has the Use Standard Lab
Values For Spots option.
Ink Manager
A. Process ink B. Aliased Spot ink C. Spot ink
Open the Ink Manager
Do one of the following:
•From the Separations Preview panel menu (Window > Output > Separations Preview), choose Ink Manager.
•Choose File > Print, and click Output. In the Output section, click Ink Manager.
Specify which colors to separate
Each separation is labeled with the color name that InDesign assigned it. If an icon of a printer appears next to the color
name, InDesign creates a separation for the color. Any spot inks—including those defined and used in imported PDF
files or EPS graphics—also appear in the ink list.
1In the Output area of the Print dialog box, select Separations or, if you use a PPD file that supports in-RIP
separations, select In-RIP Separations.
2Do one of the following:
•To create a separation, make sure that the printer icon is displayed next to the color name in the ink list.
•To choose not to create a separation, click the printer icon next to the color’s name. The printer icon disappears.
A
B
C

644
USING INDESIGN
Color separations
Last updated 11/16/2011
Separate spot colors as process
Using the Ink Manager, you can convert spot colors to process colors. When spot colors are converted to process color
equivalents, they are printed as separations rather than on a single plate. Converting a spot color is useful if you’ve
accidentally added a spot color to a process color document, or if the document contains more spot colors than are
practical to print.
1In the Ink Manager, do one of the following:
•To separate individual spot colors, click the ink-type icon to the left of the spot color or aliased spot color. A process
color icon appears. To change the color back to spot, click the icon again.
•To separate all spot colors, select All Spots To Process. The icons to the left of the spot colors change to process
color icons. To restore the spot colors, deselect All Spots To Process.
Note: Selecting All Spots To Process removes any ink aliases you’ve set up in the Ink Manager and can also affect
overprinting and trapping settings in the document.
2(InDesign only) To use the Lab values of a spot color rather than CMYK definitions, choose Use Standard Lab
Values For Spots.
Create an ink alias for a spot color
You can map a spot color to a different spot or process color by creating an alias. An alias is useful if a document
contains two similar spot colors when only one is required, or if it contains too many spot colors. You can see the
effects of ink aliasing in the printed output, and you see the effects on-screen if Overprint Preview mode is on.
1In the Ink Manager, select the spot color ink you want to create an alias for.
2Choose an option in the Ink Alias menu. The ink type icon and ink description change accordingly.
Display or output spot colors using Lab values
Some predefined spot colors, such as colors from the TOYO, PANTONE, DIC, and HKS libraries, are defined using
Lab values. For backward compatibility with previous versions of InDesign, colors from these libraries also include
CMYK definitions. Lab values, when used in conjunction with the correct device profiles, give you the most accurate
output across all devices. If color management is critical to your project, you might prefer to display, export, and print
spot colors using their Lab values. The Ink Manager option Use Standard Lab Values For Spots lets you control which
color mode InDesign uses for these predefined spot colors: Lab or CMYK. If you need the output to match earlier
versions of InDesign, you should use the CMYK equivalent values.
Note: To improve on-screen accuracy, InDesign uses the Lab values automatically if Overprint Preview is on. It also uses
Lab values when printing or exporting if you’ve selected Simulate Overprint in the Output area of either the Print or
Export Adobe PDF dialog box.
1Choose Ink Manager in the Separations Preview panel menu.
2Do one of the following:
•For Lab values, select Use Standard Lab Values For Spots.
•For CMYK values, deselect Use Standard Lab Values For Spots.
More Help topics
“Ink Manager overview” on page 643

645
USING INDESIGN
Color separations
Last updated 11/16/2011
About halftone screen frequency
In commercial printing, continuous tone is simulated by dots (called halftone dots) printed in rows (called lines or line
screens). Lines are printed at different angles to make the rows less noticeable. The Screening menu in the Output
section of the Print dialog box displays the recommended sets of line screens in lines per inch (lpi), and resolution in
dots per inch (dpi), based on the currently selected PPD. As you select inks in the ink list, the values in the Frequency
and Angle boxes change, showing you the halftone screen frequency and angle for that ink.
A high line-screen ruling (for example, 150 lpi) spaces the dots closely together to create a finely rendered image on
the press; a low line-screen ruling (60 lpi to 85 lpi) spaces the dots farther apart to create a coarser image. The size of
the dots is also determined by the line screen. A high line-screen ruling uses small dots; a low line-screen ruling uses
large dots. The most important factor in choosing a line-screen ruling is the type of printing press your job will use.
Ask your service provider how fine a line screen its press can hold, and make your choices accordingly.
Line screens
A. 65 lpi: Coarse screen for printing newsletters and grocery coupons B. 85 lpi: Average screen for printing newspapers C. 133 lpi: High-quality
screen for printing four-color magazines D. 177 lpi: Very fine screen for printing annual reports and images in art books
The PPD files for high-resolution imagesetters offer a wide range of possible screen frequencies, paired with various
imagesetter resolutions. The PPD files for low-resolution printers typically have only a few choices for line screens,
usually coarser screens of between 53 lpi and 85 lpi. The coarser screens, however, give optimum results on
low-resolution printers. Using a finer screen of 100 lpi, for example, actually decreases the quality of your image when
you use a low-resolution printer for final output.
Specify a halftone screen frequency and resolution
❖In the Output section of the Print dialog box, choose one of the following options:
•To select one of the preset screen frequencies and printer resolution combinations, choose an option in the
Screening menu.
•To specify a custom halftone screen frequency, select the plate to be customized, and then enter the lpi value in the
Frequency text box and a screen angle value in the Angle text box.
Note: Before creating your own halftone screens, check with your service provider for the preferred frequencies and angles.
Also, be aware that some output devices override the default frequencies and angles.
More Help topics
“About halftone screen frequency” on page 645
B
D
A
C
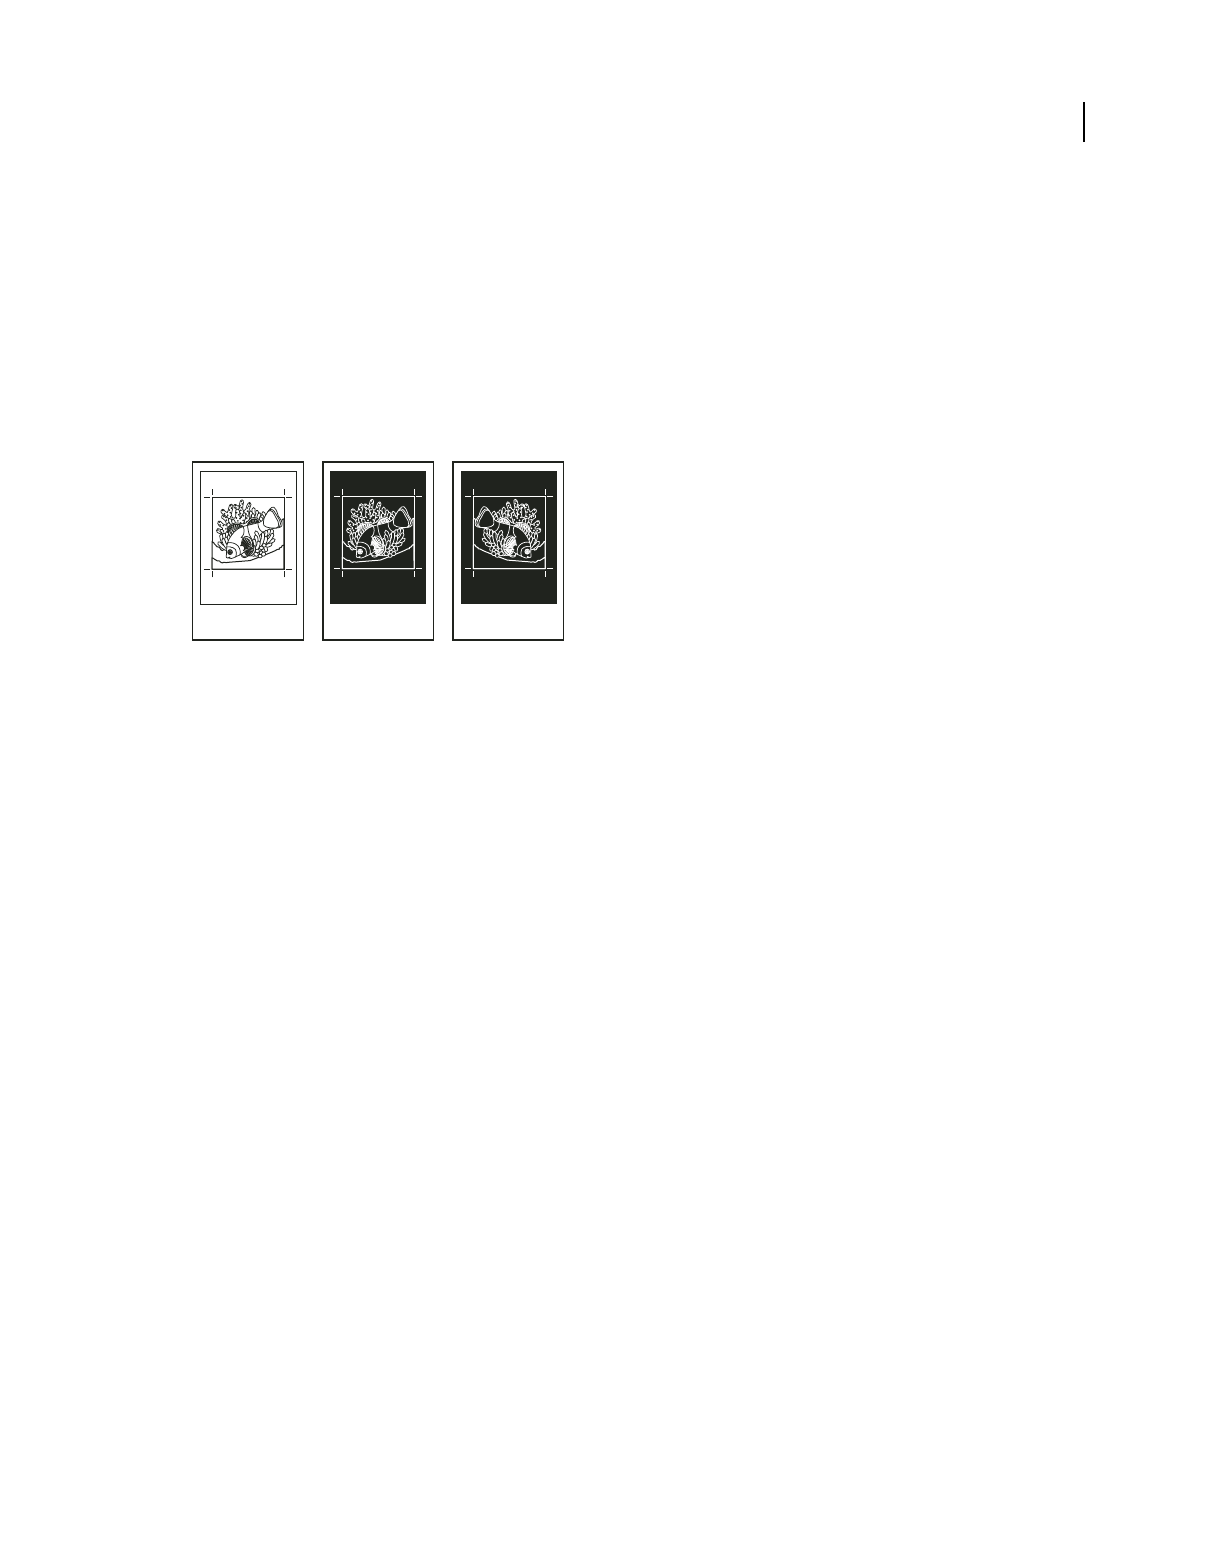
646
USING INDESIGN
Color separations
Last updated 11/16/2011
About emulsion and image exposure
Depending on the type of printing press used and how information is transferred from the film to the printing plates,
you may need to give your service provider film negatives or positives, with emulsion side up or down. Emulsion refers
to the photosensitive layer on a piece of film or paper. Typically, print service providers require negative film in the
United States and positive film in Europe and Japan. Check with your service provider to determine which emulsion
direction they prefer.
To tell whether you are looking at the emulsion side or the nonemulsion side (also referred to as the base), examine
the final film under a good light. One side appears shinier than the other. The dull side is the emulsion side; the shiny
side is the base.
Emulsion options
A. Positive image B. Negative C. Negative with emulsion side down
Important: The emulsion and image exposure settings in the Print dialog box override any conflicting settings in the
printer driver. Always specify print settings using the Print dialog box.
Specify emulsion
1In the Output section of the Print dialog box, for Color, choose Composite Gray or a separation option.
2For Flip, select one of the following options:
None (the default) Makes no changes to the orientation of the imageable area. Type in the image is readable (that is,
right reading) when the photosensitive layer is facing you.
Horizontal Mirrors the imageable area across a vertical axis so that it is wrong reading.
Vertical Mirrors the imageable area across a horizontal axis so that it is upside down.
Horizontal & Vertical Mirrors the imageable area across the horizontal and vertical axes so that it is wrong reading.
Type is readable when the photosensitive layer is facing away from you. Images printed on film are often printed
Horizontal & Vertical.
Specify the image exposure
1In the Output section of the Print dialog box, for Color, choose Composite Gray or a separation option.
2Select or deselect the Negative option.
Checking separation and document settings
The Summary area of the Print dialog box displays a summary of color management information, printer’s marks
dimensions, and bleeds for the document. The section also indicates whether trapping has been enabled.
You can also perform a quality check before printing or handing off the document to a service provider.
ABC

647
USING INDESIGN
Color separations
Last updated 11/16/2011
More Help topics
“Define preflight profiles” on page 617
Proofing color separations
Create a hard proof to verify that colors will print on the correct separations, or a soft proof to preview how your
document’s colors will look when reproduced on a particular output device.
Note: While no proof will give you an exact representation of your final output, you can greatly improve its accuracy by
calibrating all the devices you use to create a document (such as scanners, monitors, and printers). If the devices are
calibrated, the color management system can help you get predictable and consistent color.
The hard proof represents your expectation of the way the final separations will appear, and helps the service provider
to verify that the output is correct. Be sure to print proofs on a PostScript printer; you cannot reliably proof color
separations printed from a non-PostScript printer.
For assurance that the file will print correctly, consider saving the separations as a PostScript file, converting the
PostScript file to Acrobat 8 PDF using Acrobat Distiller, and then viewing the PDF document in Acrobat. By viewing
the PDF document in Acrobat, you can inspect high-quality PostScript output on-screen at a high level of detail.
More Help topics
“Preview color separations” on page 637
“Print a hard proof” on page 615
Producing in-RIP separations
To produce in-RIP separations, you need the following software and hardware:
•A PPD file that supports in-RIP separations.
•Any PostScript 3 output device, or a PostScript Level 2 device whose RIP supports in-RIP separations. If the
document contains duotones from Photoshop
5.0 or later, a PostScript 3 device is required to generate in-RIP
separations.
Note: Depending on the prepress software available, a service provider may be able to perform such prepress activities as
trapping, imposition, separating, and OPI replacement at the output device’s RIP. Therefore, your service provider may
prefer to receive a composite PostScript file of the document optimized for in-RIP separations, rather than a preseparated
PostScript file.
More Help topics
“Creating PostScript and EPS files” on page 623
Print or save separations
1At the top of the Print dialog box, choose a preset in the Print Preset menu, if one with the appropriate separation
settings exists.
2Do one of the following:
•To print to an output device, choose the device in the Printer menu.
•To print to a file, choose PostScript® File in the Printer menu. Then choose a PPD that supports the output device.
3Click General, and specify the pages to separate.

648
USING INDESIGN
Color separations
Last updated 11/16/2011
4Click Output, and do one of the following:
•To print to an output device, choose Separations to create the separations in InDesign.
•To print to a file, choose either Separations, or In-RIP Separations to save separation settings in a composite
PostScript file for processing in the RIP.
Note: To use Adobe In-RIP Trapping, you must be working with in-RIP rather than host-based separations. Otherwise,
the trapping feature won’t have access to all of the colors at once, and trapping won’t occur.
5Click Graphics, and do the following:
•For Send Data, choose All.
•For Download, choose Complete or Subset, unless fonts will be inserted later (for example, at the RIP or by a post-
processing application).
•For PostScript®, select the PostScript level of the output device: Level 2 or Level 3.
6Click Advanced, and do any of the following:
•To replace low-resolution graphics embedded in placed EPS files with their high-resolution versions at output time,
make sure that Read Embedded OPI Image Links was selected when the EPS file was placed in the InDesign
document, and then select OPI Image Replacement in the Advanced area of the Print dialog box.
•To omit different imported graphics types for later replacement by an OPI server, select from the Omit For OPI
options.
•For Transparency Flattener Preset, choose [High Resolution] or an available custom style with high-resolution
settings.
7Choose any other print options.
8Do one of the following:
•To print to an output device, click Print.
•To print to a file, click Save and accept the default filename, or type another name for the file. Then click Save again.
Note: Once you’ve created separations of the InDesign document, the settings you’ve chosen in the Print dialog box are
saved with the separated file. The file saves the separation settings, the PPD information, and any color conversions you
have specified in the Print dialog box.
More Help topics
“Creating PostScript and EPS files” on page 623
“Encapsulated PostScript (.eps) files” on page 376
“Options for omitting graphics” on page 612

649
Last updated 11/16/2011
Chapter 22: Automation
For detailed information and instructions, click the links below.
Scripting
Scripting in InDesign
Scripting is a great tool for performing a variety of tasks. A script can be as simple as an automated common task or as
complex as an entire new feature. You can create your own scripts, and you can run scripts that other people have
created. For more information on scripting, see the Scripting Guide in the Adobe InDesign Technical Info folder on
the InDesign DVD. You can also find the Scripting Guide, scripting requirements, and other developer resources at
www.adobe.com/go/scripting_id.
The Scripting Guide contains an introduction to scripting and tutorials. The Technical Info folder also includes a
number of useful scripts that you can run, such as a script that draws guides around the selected object. Some of these
scripts appear by default in the Scripts panel.
More Help topics
Scripting with InDesign
Scripts panel and Script Label panel overview
InDesign includes two panels for scripting: the Scripts panel and the Script Label panel.
The Scripts panel is where you run scripts without leaving InDesign. The Scripts panel displays the scripts that are
located in the Scripts folders in the InDesign application folder and in your Preferences folders. If you create or receive
a script, you can place it in the Scripts Panel folder so that it shows up in the Scripts panel.
Mac OS Users/[username]/Library/Preferences/Adobe InDesign/[version]/[language]/Scripts/Scripts Panel
Windows XP Documents and Settings\[username]\Application
Data\Adobe\InDesign\[version]\[language]\Scripts\Scripts Panel
Windows Vista and Windows 7
Users\[username]\AppData\Roaming\Adobe\InDesign\[version]\[language]\Scripts\Scripts Panel
A quick way to locate the Scripts Panel folder is to right-click (Windows) or Control-click (Mac OS) a script in the
Scripts panel, and choose Reveal In Explorer (Windows) or Reveal In Finder (Mac OS).
You can then double-click a script in the Scripts panel to run it, or you can run scripts using Quick Apply.
The Script Label panel lets you specify a label for a page item, such as a text frame or shape. Specifying labels for page
items is especially useful for writing scripts in which you need to identify an object.
For detailed information on adding, running, and editing scripts, see the Scripting Guide in the Adobe InDesign
Technical Info folder on the InDesign DVD or on the Adobe website at www.adobe.com/go/scripting_id.
More Help topics
“Use Quick Apply” on page 243

650
USING INDESIGN
Automation
Last updated 11/16/2011
Open the Scripts panel
❖Choose Window > Utilities > Scripts.
Open the Script Label panel
❖Choose Window > Utilities > Script Label.
Running sample scripts
You can run these scripts in InDesign:
AddGuides Adds guides around the selected object or objects.
AddPoints Adds points to the paths of the selected object or objects.
AdjustLayout Moves objects by specified distances on right/left pages.
AlignToPage Aligns objects to specified positions on a page.
AnimationEncyclopedia Automatically creates buttons with different animation properties.
BreakFrame Removes a selected text frame and its contents from a story.
CornerEffects Re-draws the path of the selected item or items using a variety of corner effects. Corner effects can be
applied to selected points on the path.
CreateCharacterStyles Defines a complete character style based on the selected text.
CropMarks Adds crop and/or registration marks around the selected object or objects.
ExportAllStories Exports all stories in a document to a series of text files.
FindChangeByList Performs a series of common text find/change operations by reading a tab-delimited text file.
ImageCatalog Places all graphics in a specified folder in a “contact sheet” layout.
MakeGrid Creates a grid by subdividing or duplicating the selected object or objects.
Neon Applies a “blend” effect to the selected object or objects.
PathEffects Changes the position of path points on the selected object or objects to add a creative effect.
PlaceMultipagePDF Places all pages of a PDF.
SelectObjects Selects objects on the active spread by their object type.
SortParagraphs Sorts the paragraphs in the selection alphabetically.
SplitStory Splits the text frames in the selected story into separate, unlinked text frames.
TabUtilities Applies tab stops and indents to the selected text.
For more information on installing and using these sample scripts, see
www.adobe.com/go/learn_id_scripting_readme_cs5_en (PDF).

651
USING INDESIGN
Automation
Last updated 11/16/2011
Plug-ins
Install plug-ins
The InDesign plug-in modules are software programs developed by Adobe Systems, and by other software developers
working in conjunction with Adobe, to add features to Adobe software. A number of importing, exporting,
automation, and special-effects plug-ins come with your program and are automatically installed in the Plug-Ins
folder. In fact, most of the features you see in InDesign are provided by plug-ins.
Once installed, plug-in modules appear as options on menus, in dialog boxes, or in panels.
For information on third-party plug-ins, see www.adobe.com/go/learn_id_plugins_en.
1If an installer is provided, use it to install the plug-in module. Otherwise, drag a copy of the module into the
Plug-Ins folder inside the InDesign
application folder.
2Follow any installation instructions that come with the plug-in.
Note: You can use any commercial plug-in designed for use with InDesign. Adobe Technical Support can help you isolate
problems related to plug-ins. However, if it has been determined that the problem is directly related to a plug-in created
by another company, you will need to contact that company for further support.
Use Extension Manager to configure plug-ins
Use the Extension Manager application to inspect and customize the set of installed plug-ins. For example, you can get
detailed information about installed plug-ins, create custom plug-in sets for different tasks or workgroups, and isolate
plug-ins when troubleshooting problems. You can also disable plug-ins.
❖Choose Help > Manage Extensions (Windows) or InDesign > Manage Extensions (Mac OS).
For more information on using Extension Manager, click Help in the Extension Manager application.
Data merge
About data merge
To create form letters, envelopes, or mailing labels, you merge a data source file with a target document. Data merge
is also referred to as mail merge.
The data source file contains the information that varies in each iteration of the target document, such as the names
and addresses of the recipients of a form letter. A data source file is made up of fields and records.Fields are groups of
specific information, such as company names or postal codes, whereas records are rows of complete sets of
information, such as a company’s name, street address, city, state, and postal code. A data source file can be a comma-
delimited file (.csv) or a tab-delimited (.txt) file in which each piece of data is separated by a comma or a tab,
respectively.
The target document is an InDesign document that contains the data-field placeholders, plus all the boilerplate
material, text, and other items that remain the same in each iteration of the merged document.
The merged document is the resulting InDesign document that contains the boilerplate information from the target
document, repeated as many times as it takes to accommodate each record from the data source.
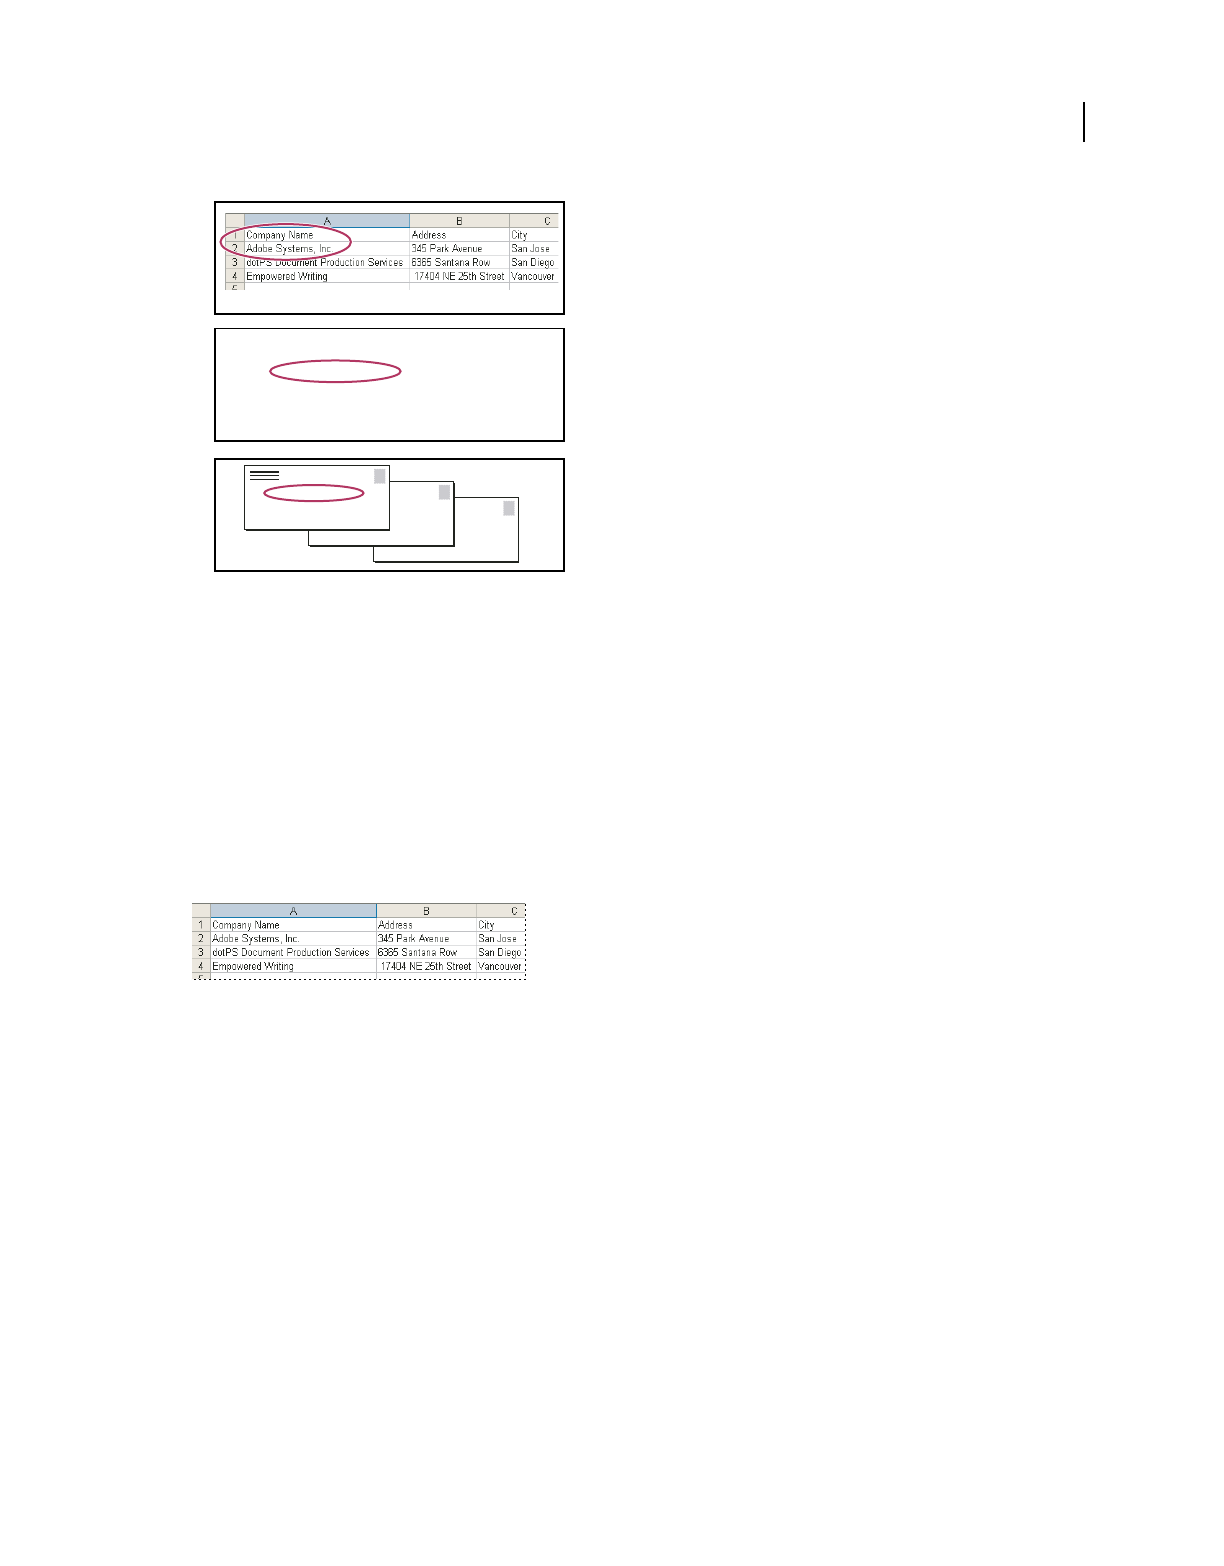
652
USING INDESIGN
Automation
Last updated 11/16/2011
Data merge
A. Data source file B. Target document C. Merged document
Basic steps for merging data
1. Make plans to determine which data fields you’ll be using in your source and target documents.
Determine how you want the final document to look, so that you know which fields are necessary to accomplish the
merge. For example, if you are creating a postcard that will be mailed to customers, you might want to use the following
data fields:
<<Company Name>><<Address>><<City>>, <<State>><<Postal Code>>
Your spreadsheet or database might look like this:
Sample data file
2. Save the data source file—usually a spreadsheet or database file—as a comma-delimited (.csv) or tab-
delimited (.txt) text file.
Make sure that your data source file is structured in such a way that you can include the appropriate fields in your
target document. For example, the top row of a spreadsheet should contain the field names that you’ll use in the target
document, such as “Company” and “Address.”
For more information, see “About data source files” on page 653.
3. Create a target document that includes text and other items that remain the same in each version of the target
document.
For more information, see “About target documents” on page 654.
4. Select the data source using the Data Merge panel.
For more information, see “Select a data source” on page 654.
A
B
C
Empowered Writing
17404 NE 25th Street
Vancouver, WA 98684
dotPS Document Production Services
6365 Santana Row
San Diego, CA 92110
Adobe Systems, Inc.
345 Park Avenue
San Jose, CA 95110
<<Company Name>>
<<Address>>
<<City>>, <<State>> <<Postal Code>>

653
USING INDESIGN
Automation
Last updated 11/16/2011
5. Insert fields from the Data Merge panel into the target document.
You can add data fields to either a document page or a master page. If you add data fields to a master page, you have
additional options.
For more information, see “Insert data fields” on page 655 and “Adding data field placeholders to master pages” on
page 656.
6. Preview the records to make sure that the target document will look the way you intend.
For more information, see “Preview records in the target document” on page 656.
7. Merge the target document with the data source file, or export to PDF.
For more information, see “Merge records” on page 658.
About data source files
The data source typically originates from a spreadsheet or database application, but you can create your own data
source file using InDesign or any text editor. Data source files should be saved in a comma-delimited (.csv) or tab-
delimited (.txt) text format. Check your source application’s user guide for more information on exporting to these
formats.
In a comma- or tab-delimited text file, records are separated by paragraph breaks; fields are separated by commas or
tabs. The data source file can also include text or paths that refer to images on disk.
Example of comma-delimited data source file
Name,Company Name,State
Bill Tucker,CoreVent Labs,Nevada
Dat Nguyen,"Brady, Hunt, and Baxter, Inc",Delaware
Maria Ruiz,"Brinquist Enterprises, Inc.",California
If you want to include a comma or quotation mark in a comma-delimited file, enclose the text within quotation
marks, such as “Brady, Hunt, and Baxter, Inc.”. If you do not include the quotation marks, each name is treated as a
separate field.
You cannot insert a line break within a field in the data source file. If it’s necessary to split a field across different lines,
create two different fields, such as <<Address1>> and <<Address2>>.
You can choose Remove Blank Lines For Empty Fields when merging the document to prevent empty lines. However,
if any characters, including spaces, appear on the line, the line is not deleted.
Add image fields in the data source file
By adding image fields to the data source file, you can allow a different image to appear on each merged record. For
example, when you merge documents that include information from various companies, you may want to include an
image of each company’s logo as part of the merge.
1Open the data source file.
2At the beginning of the data field name, type an “at” symbol (@) to insert text or paths that refer to image files.
The @ symbol is required only in the first line; subsequent lines should include the image paths. Paths, which are case-
sensitive, must follow the naming conventions of the operating system in which they’re stored.
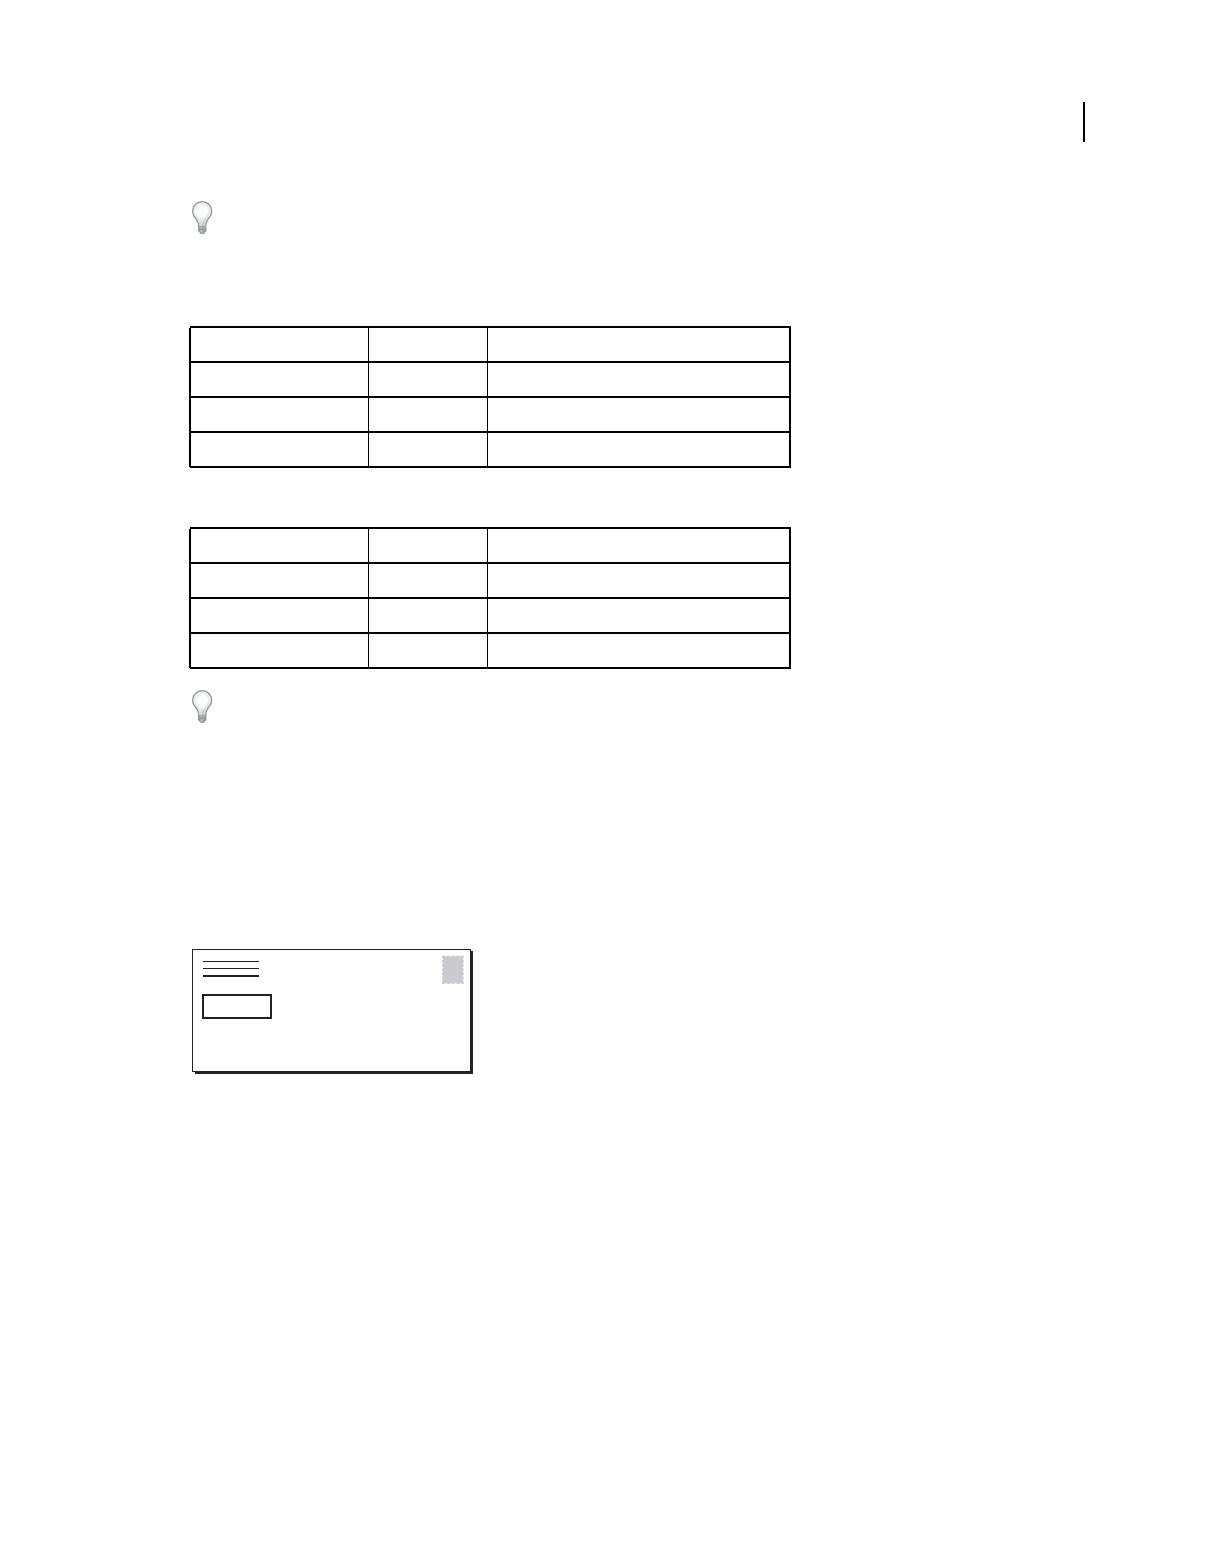
654
USING INDESIGN
Automation
Last updated 11/16/2011
If you get an error message when you type the @ symbol at the beginning of the field, type an apostrophe (') before
the @ symbol (such as '@Photos) to validate the function. Some applications, such as Microsoft Excel, reserve the @
symbol for functions.
(Windows) Example of image references in data source file
(Mac OS) Example of image references in data source file
You can use InDesign to view the path of an image on your operating system. Insert an image in an InDesign
document, and then use the Links panel to view the image’s location. With the image selected, choose Copy Info >
Copy Full Path from the Links panel menu. You may need to edit the path after you paste it in your data source. This
technique is especially useful for images on a server.
About target documents
Once your data source file is created, you need to set up the target document and insert the fields from the data source
file. The target document contains data-field placeholder text and graphics, such as the design that you want to appear
on every postcard. These fields become available to add after you select a data source.
The target document includes fields from the data source with field placeholder text shown.
When you merge data, InDesign creates a new document that replaces the fields with the data you designated in the
data source file. You can place data fields on either a master page or a document page.
Select a data source
Before you insert fields into your target document, select a data source in the Data Merge panel. You can have only one
data source file selected per target document.
1Create or open the document you’ll be using as the target document.
2Choose Window > Utilities > Data Merge.
3Choose Select Data Source from the Data Merge panel menu.
4To change delimited text options, select Show Import Options.
Name Age @Photos
Bill Tucker 36 C:\Photos\BillTucker.jpg
Dat Nguyen 53 C:\MyDocuments\dat.gif
Maria Ruiz 26 C:\Photos\Ruiz.psd
Name Age @Photos
Bill Tucker 36 Mac HD:Photos:BillTucker.jpg
Dat Nguyen 53 Desktop:Family:dat.gif
Maria Ruiz 26 Mac HD:Photos:Ruiz.psd
<<Company Name>>
<<Address>>
<<City>>, <<State>> <<Postal Code>>
<<Photos>>

655
USING INDESIGN
Automation
Last updated 11/16/2011
InDesign automatically detects the type of delimiter and encoding used in the data source file, so showing the import
options usually isn’t necessary. However, you can specify different encoding and delimiter options if you think they
haven’t been correctly identified.
5Locate the data source file, and click Open.
6If you selected Show Import Options, change the delimiter and encoding options as necessary, and then click OK.
The data fields appear in the Data Merge panel.
Note: If an alert message indicates that it cannot open the file, or if incorrect fields appear in the list box, you may need
to edit the spreadsheet or database file and save it as a comma-delimited or tab-delimited file.
Once the data source is selected and fields are loaded in the Data Merge panel, any changes made to the data source
are not reflected in the target document until you update the data source.
Insert data fields
When you select the data source, a list of data field names appears in the Data Merge panel. These names are identical
to the column heads from the data source file. Icons indicate whether the field is text or an image. When data fields are
added to your document, they become field placeholders, such as <<Company>>. You can select and format these
placeholders as you would any other text or graphic.
You can assign an image field to an existing frame to create a floating image. Or, if the insertion point is in a text frame
or if text is selected when you insert an image field, a small placeholder is inserted as an inline frame. You can resize
the image placeholder to determine the size of the merged images.
Once you insert a data field, InDesign remembers its data source. Any errors in the list of fields, such as typos, empty
fields, and unintended field types, must be corrected in the source application and then updated using the Data Merge
panel.
Insert a text data field in the target document
1Create a text frame on a document page or master page.
If you’re adding data fields to a master page, see “Adding data field placeholders to master pages” on page 656.
2Place the insertion point in the text frame where you want the field placeholder to appear, or select the text you want
to replace.
3To insert a field placeholder, do one of the following:
•Click a field in the Data Merge panel list.
•Drag a field name from the Data Merge panel list, and drop it onto the text frame to add the placeholder. If you drag
a text field onto an empty frame, the empty frame becomes a text frame.
Text field placeholders appear in the target application within double angle brackets (such as <<Name>>) using the
current formatting attributes (such as font and size).
Note: You cannot create a valid field by simply typing the field name or editing an existing field. You must insert it from
the Data Merge panel.
Insert an image data field in the target document
•To insert a new inline graphic placeholder, drag an image field onto a text frame, or place the insertion point in a
text frame and click the image field.
•To insert a new floating graphic, drag an image field onto an empty frame or existing graphics frame. If you drag
an image field onto an empty frame, the empty frame becomes a graphics frame.

656
USING INDESIGN
Automation
Last updated 11/16/2011
•To insert a field into grouped items, table cells, or nested items, drag the image field onto the target.
Image field placeholders appear as frames containing the field name.
Adding data field placeholders to master pages
If you insert data field placeholders on master pages, you have advantages that are not available when you insert
placeholders on document pages:
•The resulting merged document contains the original placeholders on its master pages and includes the merged
results on document pages as overridden master page items.
•The merged document maintains a connection to the data source, so if records in the data source are modified, you
can update the merged document contents by choosing Update Content In Data Fields. This option is especially
helpful if you change the layout in the merged document and then need to add new data from the data source.
•The settings in the Create Merged Document dialog box are the same as those used in the target document, so you
can quickly re-create the current document with the same appearance. You can also use these shared settings to
create an identical document with a different data source, or create a new document with a slightly modified layout.
Note: If you’re adding data fields to a master page, make sure that the text frame containing the data fields allows master
item overrides. Select the text frame on the master page and choose Allow Master Item Overrides On Selection from the
Pages panel menu. If this option is not selected, the data will not be merged. (See “Create masters” on page 71.)
You cannot place data fields on both master pages and document pages. In order to merge properly, you must apply a
master containing data fields to the first page of the document.
Important: If an error message indicates that InDesign cannot merge the document because no placeholders are present,
you may have added the placeholders to the left master page in a one-page document. Page 1 is based on the right master
page, so add the placeholders to the right master page.
Update, remove, or replace data source files
•To update data source files, edit and save the data source file in comma- or tab-delimited format, and then choose
Update Data Source from the Data Merge panel.
The changes will be reflected in the Data Merge panel. If the changes are not reflected in the document after updating,
deselect Preview to turn it off, and then select Preview again to turn it back on.
•To remove the connection to the data source file, choose Remove Data Source from the Data Merge panel menu.
•To switch to a new data source file, choose Select Data Source from the Data Merge panel menu, and then specify
the new data source file. InDesign may not recognize some of the fields. In this situation, it’s best to delete and
reinsert placeholder fields.
If you generate a merged document from a target document in which data fields appeared on master pages, you can
update the data fields in the merged document.
Preview records in the target document
Before you merge the target document and data source file, it’s a good idea to preview the records to make sure that
field data will appear properly when the information is merged. When you preview records, the Data Merge panel
displays actual data from the data source file instead of the field placeholders. For example, instead of seeing
<<Company>>, you might see Adobe Systems, Inc. You can use the navigation buttons on the Data Merge panel to
cycle through the records.

657
USING INDESIGN
Automation
Last updated 11/16/2011
If you find problems with any of the records, such as typographical errors or extra spaces, it is recommended that you
edit the source file in its original application. (See “About data source files” on page 653.)
1Click Preview at the bottom of the Data Merge panel, or choose Preview from the Data Merge panel menu.
2Click the navigation buttons to cycle through data from different records.
To go to a specified record, click the navigation buttons at the bottom of the panel. You can also type the number of
the record you want to preview in the navigation text box at the bottom of the panel, and then press Enter or Return.
Switching preview on or off
Some issues may arise or correct themselves when you switch between previewing modes. Keep the following in mind:
•Placeholders replace the preview content when the Preview Record option is not selected. If you delete an image as
well as the frame containing the image, or delete a whole text string, when you deselect the Preview Record option,
the placeholders will not appear as they have also been removed.
•Changes in the Content Placement Options dialog box are not reflected until you click OK. Also, if the Preview
Record option is selected, the data will not reflect the updated placement settings until you deselect and select the
option again.
•If you try to save the document in preview mode, you will receive a message prompting you to turn off preview
mode before saving your document.
Edit data field placeholders
When you add a text data field to a document, the placeholder text for the field is entered using the formatting
attributes (such as font and size) active at the insertion point. You can then edit the placeholder text’s attributes to
control the look of the actual data.
❖Do one of the following:
•To change placeholder attributes, select the placeholder text, and then change the formatting attributes as you
would with other text.
•To change a placeholder, select the placeholder or the actual data, and select a different field name in the Data
Merge panel.
•To delete a placeholder, select the placeholder and press Backspace or Delete.
Note: In Story Editor view, text placeholders are displayed in the same way as hyperlinks. Some Data Merge panel options
are not available in Story Editor view.
Set content placement options
Use the Content Placement Options dialog box to specify the default settings for the current document or for all future
data merge projects. You can specify how the image is placed, whether images are linked or embedded, whether blank
lines are removed for empty fields, and the maximum number of records for each merged document.
1Do one of the following:
•To affect only the current document, open the target document.
•To affect all future documents you create, close all documents.
2Choose Window > Utilities > Data Merge.
3Choose Content Placement Options from the Data Merge panel menu.

658
USING INDESIGN
Automation
Last updated 11/16/2011
4Change the content placement options. (See “Content placement options” on page 659.)
5Click OK.
Merge records
After you format the target document and insert fields from the data source file, you’re ready to officially merge the
information from the data source with the target document. You can merge the records to another InDesign document
or directly to PDF. When you merge, InDesign creates a new document or PDF based on the target document, and
replaces the fields in the target document with the appropriate information from the data source file.
When you merge a document that includes data field placeholders on master pages, those master page items will be
copied into the master pages in the newly generated document.
Merge single or multiple records
1With the target document open, do one of the following:
•Choose Create Merged Document from the Data Merge panel menu, or click the Create Merged Document
button
.
•Choose Export To PDF from the Data Merge panel menu.
2On the Records tab, for Records To Merge, select All Records to merge all the records in the data source file, select
Single Record to merge a specific record, or specify a Range of records to merge.
3For Records Per Document Page, do one of the following:
•Choose Single Record so that each record starts at the top of the next page.
•Choose Multiple Records to create more than one record per page. (For example, to print mailing labels.)
You cannot merge multiple records if the data fields appear on a document page in a document with multiple pages,
or if data fields appear on multiple master pages.
4Select Generate Overset Text Report With Document Creation to automatically open a report that tracks overset
conditions created during the merge of the data into the InDesign document. (See “Overset text reports” on
page 659.)
5Select Alert When Images Are Missing to display a missing link alert when one or more images are not available.
6If you selected Multiple Records on the Records tab, click the Multiple Record Layout tab, and specify the following:
•For Margins, type values to specify the distance between margin guides and each edge of the page.
•For Layout Of Records, select either Rows First or Columns First, and then specify the spacing between the columns
and rows.
7If you selected Multiple Records, select Preview Multiple Record Layout to review changes made in the Create
Merge Records dialog box. You can click the Page buttons to navigate the records.
8Click the Options tab and specify the placement options. (See “Content placement options” on page 659.)
9When you’re finished, click OK.
10 If you’re exporting directly to PDF, specify PDF options, and click Export. Then specify the filename and location,
and click Save. (See “Adobe PDF options” on page 506.)
If the data source file points to any unsupported file formats or images that are not available, you may need to correct
the data source file to point to a supported file, correct the path to any missing file, or simply move the file to the correct
folder so that InDesign can find it and place it.

659
USING INDESIGN
Automation
Last updated 11/16/2011
Limitations for merging multiple records
You can choose Multiple Records to create more than one record per page. For example, if you are printing mailing
labels, you'll want to print more than one label per page. The way the records will appear in the merged publication
depends mainly on the layout options. Here is a list of limitations you might encounter when using the Multiple
Records option:
•You cannot merge multiple records if the data fields appear on a document page in a document with multiple pages,
or if data fields appear on multiple master pages.
•The Data Merge allows for only one size of place holder.
•Deleting a record in the merged publication will not reflow the remaining records into the empty placeholder.
Merging to a PDF file
When you merge to a PDF file, all the options are the same as when you create a merged InDesign document. The
resulting PDF takes advantage of PDF XObjects for the static parts of the page, resulting in a reduced-size, efficient PDF.
Update data fields
After merging a document with data placeholders on master pages, you can change the layout of the merged document
and still update the values of data fields in the data source. Use the Update Data Fields to update the data fields while
maintaining the layout of the document. This option is available only in a merged document in which data
placeholders appear on master pages.
1Make any changes to the data source file, and then save and close the data source file.
2In the merged document, choose Update Data Fields.
The changes that have been made by updating the data fields appear in a log file.
This option works best when you simply edit or add records in the data source file. If you add placeholder fields, add
new fields to the data source, or change the settings in the Create Merged Document dialog box, use the Create Merged
Document option to generate a new merged document.
Overset text reports
The Overset Text Report appears if the Generate Overset Text Report option is selected in the Create Merged
Document dialog box, and if one or more fields include overset text after the data is merged.
The report displays each overset instance in a numbered list showing the page number the text appears on, followed
by overset character/word count and a snippet of the overset text.
If the report appears when you create a merged document, use the report to fix the overset condition. For example,
you may want to increase the text frame size, decrease the font size, or edit the text.
Content placement options
The following options appear in the Content Placement Options dialog box:
Fit Images Proportionally Maintains the image’s aspect ratio but scales the image to fit within the frame (default).
Fit Images To Frames Scales the image so that its aspect ratio is identical to the frame’s aspect ratio.
Fit Frames To Images Preserves the image size but adjusts the frame size to match it.
Preserve Frame And Image Sizes Places the image at its intrinsic size into the frame, aligned to the upper-left corner
of the frame. The image is cropped if too big for the frame.

660
USING INDESIGN
Automation
Last updated 11/16/2011
Fill Frames Proportionally Places the image so that its height or width fills the frame, leaving the rest of the image
cropped.
Center In Frame Aligns the center of the image to the center of the frame.
Link Images Creates a link, or file path, to the original image file. If this option is not selected, all image data is
embedded in the InDesign document.
Remove Blank Lines For Empty Fields Remove paragraph returns inserted for empty fields. This is especially useful for
mailings in which you have an optional address field. This option ignores soft returns. If any characters, including
spaces, appear on the line, the line is not deleted.
Record Limit Per Document Specifies the maximum number of records for each merged document. When the
threshold is reached, a new document is created with the number of pages necessary to hold the remaining records
being merged (up to the per-record limit). This option is available only when Single Record is selected.
Page Limit Per Document Specifies the maximum number of pages for each document. When the threshold is
reached, a new document is created with the number of pages necessary to hold the remaining records being merged
(up to the per-page limit). This option is available only when Multiple Records is selected from the Records Per
Document Page menu when merging.

661
Last updated 11/16/2011
Chapter 23: Sharing content between
InCopy and InDesign
For detailed information and instructions, click the links below.
Understanding a basic managed-file workflow
For detailed information and instructions, click the links below.
Sharing content
The Adobe InCopy LiveEdit Workflow plug-ins let writers and editors develop copy in InCopy at the same time as
designers prepare layouts in Adobe InDesign. This workflow includes container files, called assignments, for grouping
related pieces of content, and file-locking and notification tools for sharing and updating files in InCopy or InDesign
over a shared network or in compressed packages that can be distributed via e-mail.
In the shared network workflow, InDesign users export text and graphics to a shared location on a file system, where
the files become available to InCopy users who will write and edit the content. Selected text frames and graphics frames
are either exported to the assignment or exported as separate InCopy files, where they become part of the managed
process and are linked to the InDesign document. These shared files are referred to as managed files. When users work
in the assignment file or in the InDesign file on a local server, changes to the associated layout or content are
communicated to all users involved in the workflow for that document.
Multiple InCopy or InDesign users can open the same content file simultaneously, and multiple InCopy users can
open the same assignment file simultaneously. However, only one user at a time can check out the InCopy file for
editing. Others can view the file on a read-only basis. The user who checks out a managed InCopy file can share his or
her work with other users by saving the file to the shared server or by returning the file to the InDesign user; however,
other users can’t make changes to the file until it’s checked back in. This system allows multiple users to access the
same file but prevents users from overwriting each other’s work.
For more information, see the InCopy LiveEdit Workflow guide (PDF) at www.adobe.com/go/learn_liveedit.
More Help topics
“Managed files” on page 664
Ways to work with content in InCopy
Content is either a body of text that flows through one or more frames, or an imported graphic. There are five basic
ways to work on content in InCopy: open an assignment file, open an assignment package, open a linked InCopy file,
open an InDesign file that has linked InCopy files, or compose content entirely in InCopy.
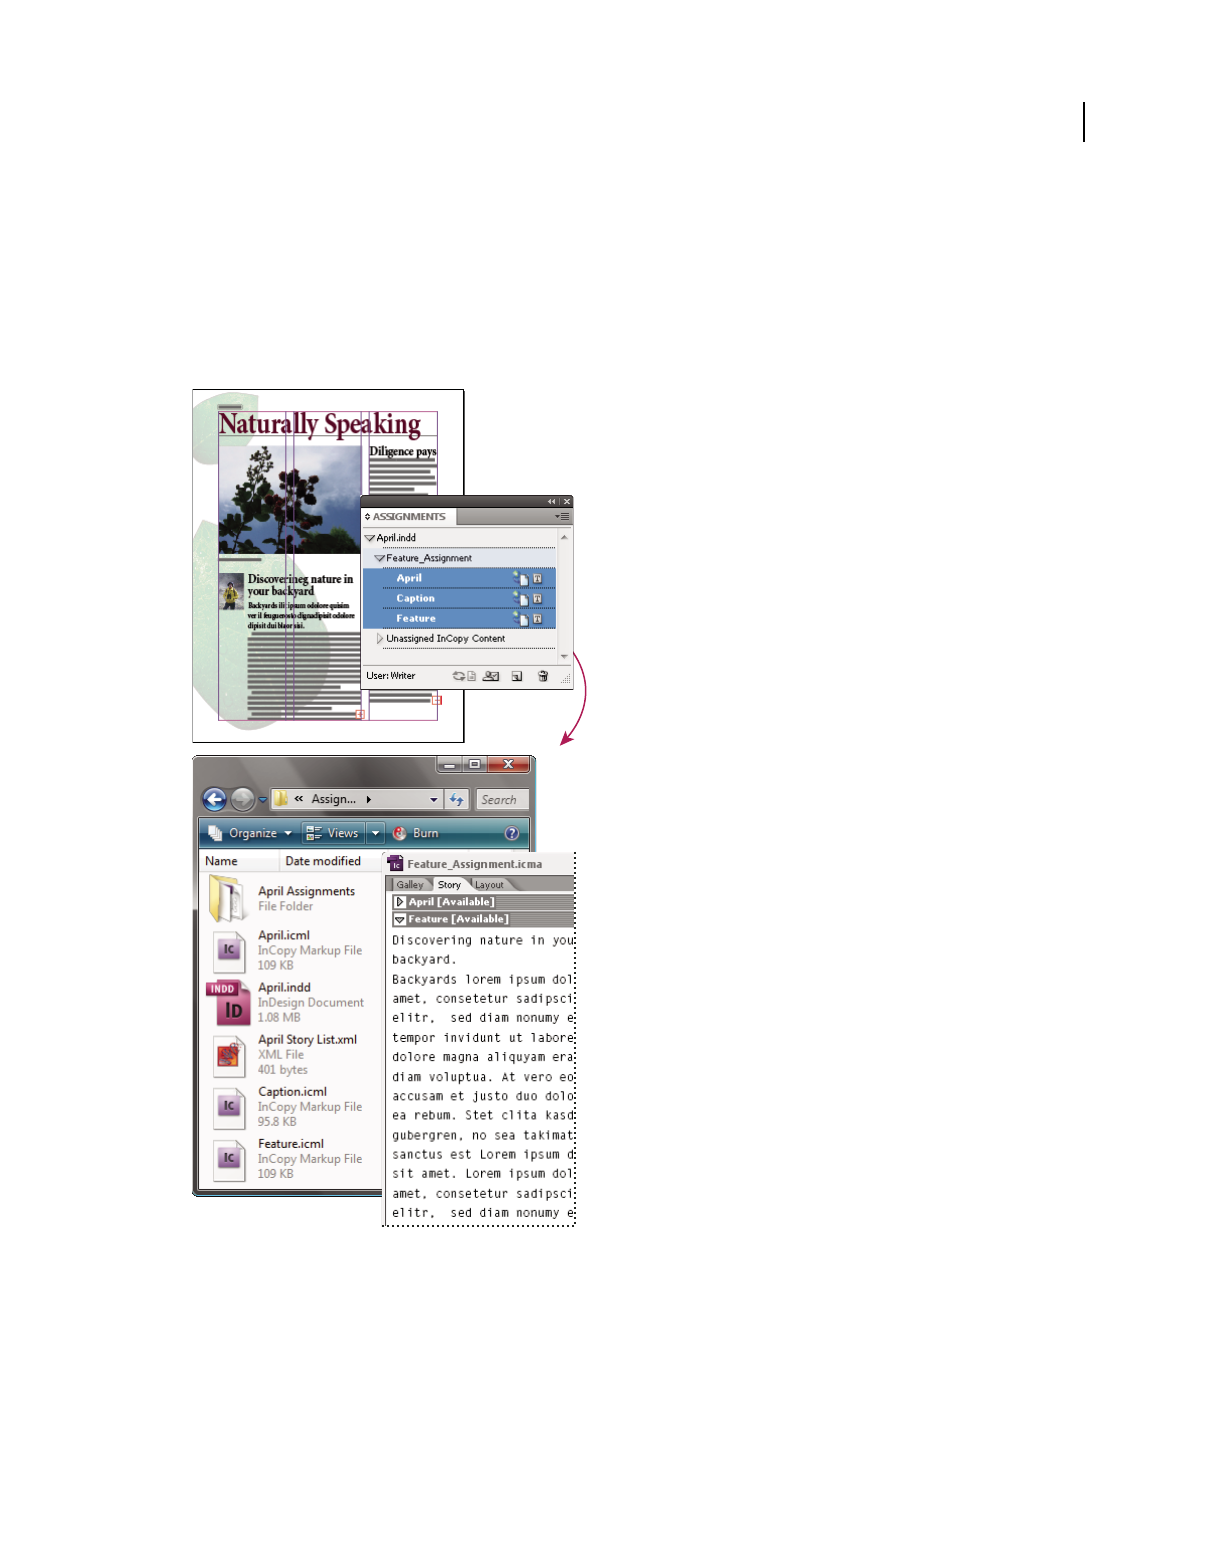
662
USING INDESIGN
Sharing content between InCopy and InDesign
Last updated 11/16/2011
Open assignment files created in InDesign
InDesign users can create an assignment file and designate content for sharing. This method lets the InDesign user
associate related components (heading, body, graphics, captions, and so on), and then assign them to different InCopy
users for writing and editing. InCopy users open the assignment file and work on only the components assigned to
them. The live layout view shows how their edited copy relates to the InDesign layout, without opening the entire
InDesign document. However, if the layout changes, the InDesign user must update assignments to notify InCopy
users about the changes. You can share assignment files on a server or through assignment packages.
InDesign document (.indd) with assignment file (.icml) composed of three linked content files (.incx). Assignment and its components are listed
in Assignments panel and are opened in InCopy.
Open assignment packages
The assignment packages workflow is especially useful when designers and writers are working on the same project
but don’t have access to a local server. In such cases, the InDesign user can create one or more packages and send the
compressed files to the assigned InCopy users via e-mail. InCopy users can open the assignment packages, edit the
contents, and return the packages to the InDesign user, who can then update the document.
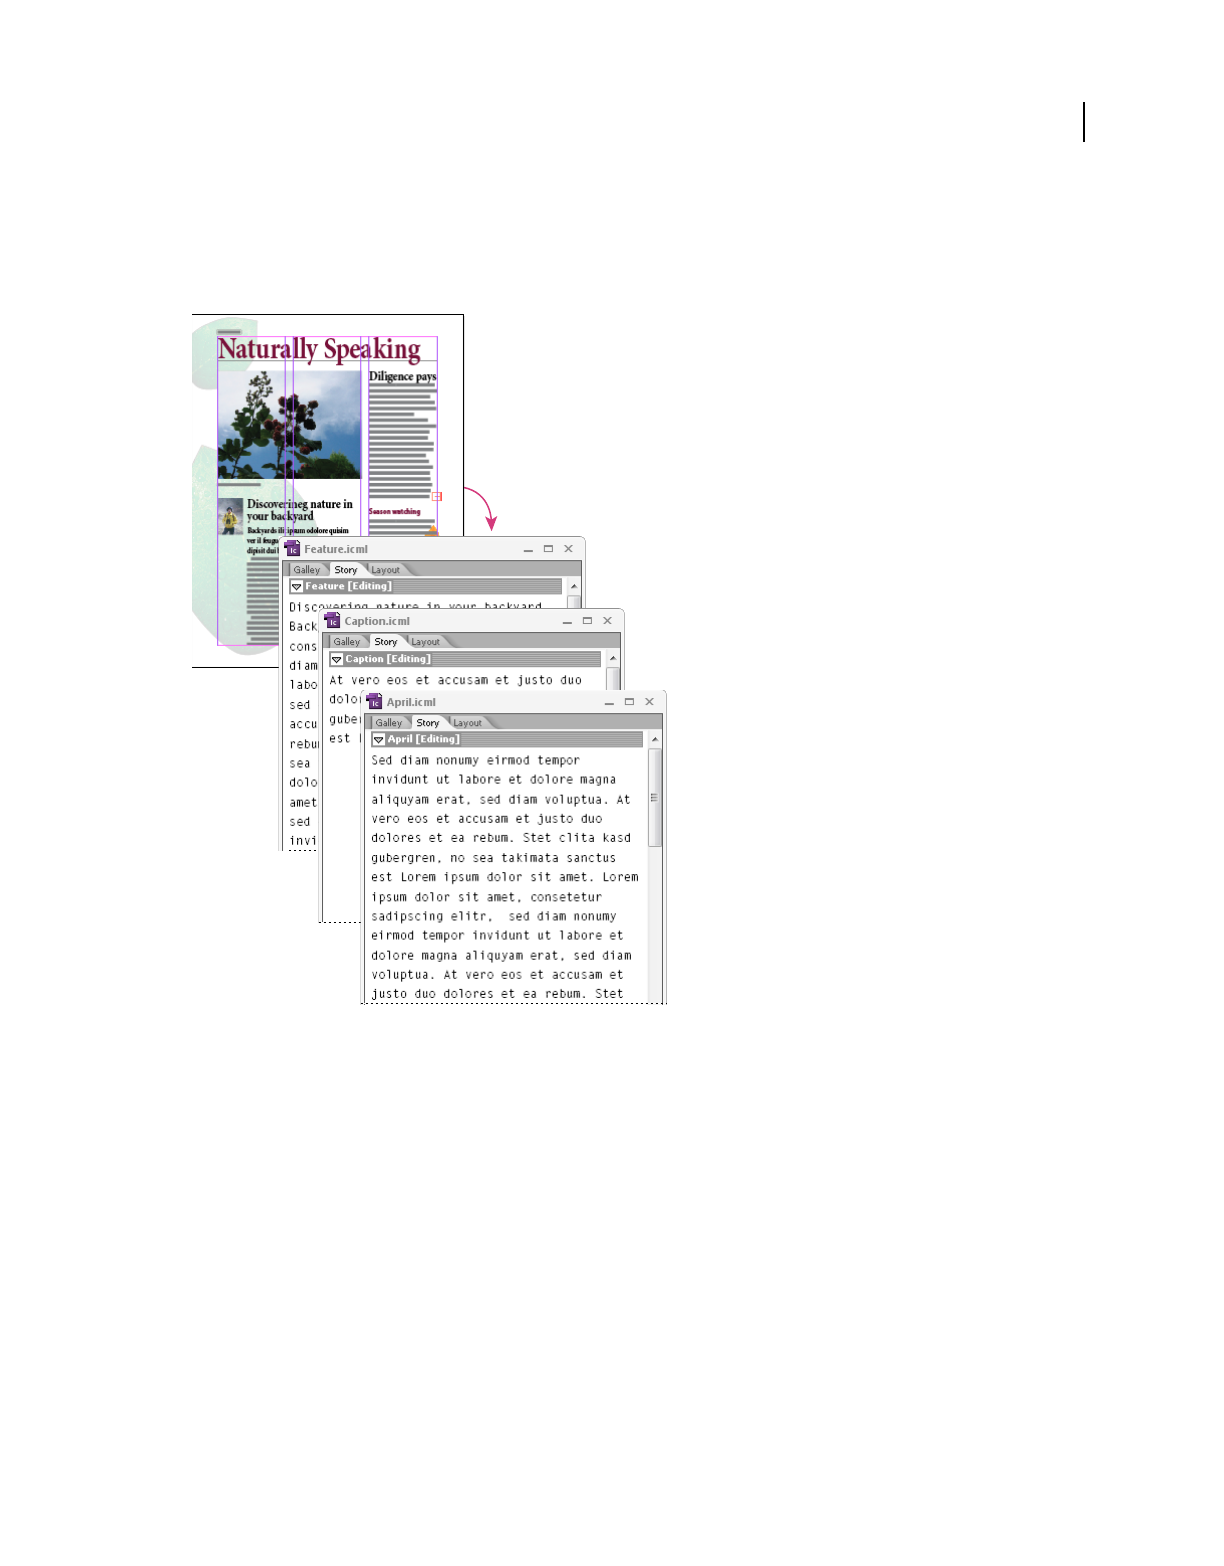
663
USING INDESIGN
Sharing content between InCopy and InDesign
Last updated 11/16/2011
Open linked InCopy files exported from InDesign
In certain workflows, InDesign users might export text and graphics as separate files, rather than wrapping them inside
an assignment file. Exporting separate files is useful if you work on unrelated graphics or bodies of text. However,
InCopy users aren’t able to see how the content fits within the InDesign layout.
InDesign document (.indd) with three linked but unassigned content files (.icml) opened in InCopy
Open InDesign documents that have linked InCopy files
To see all page items in the context of an entire layout, InCopy users can open and edit an InDesign document in
InCopy. This approach can be useful for editing and copyfitting if seeing the overall layout is important, or for editing
most of the stories in a document rather than a few. After the InCopy user edits the stories, the InDesign user can then
update the links to the modified files. If the InDesign user changes the layout, the InCopy user is notified when the
InDesign document is saved.
Compose content entirely in InCopy
You can create content in InCopy that isn’t associated with an InDesign file. In these stand-alone documents, you can
type text, assign fonts and styles, and import graphics from other applications (such as Adobe Illustrator and Adobe
Photoshop) to enhance the text. You can also assign tags for future XML use. This approach is a good option in an
editorial workflow where the content precedes the design. You can also set up and modify the text area, page size, and
orientation for stand-alone InCopy documents. But if the story is later linked to an InDesign document, the InDesign
settings override the settings used in InCopy.

664
USING INDESIGN
Sharing content between InCopy and InDesign
Last updated 11/16/2011
More Help topics
“Export content as separate InCopy files (InDesign)” on page 672
Managed files
For a file to be managed, it must be added to an assignment file, exported from InDesign as InCopy content, or placed
as InCopy content into InDesign. Managed files communicate both content status and ownership. With managed files,
you can:
•Lock and unlock stories to help preserve file integrity.
•Notify InCopy users when the associated InDesign layout is outdated.
•Identify the user working on a file.
•Notify users when an InCopy content file is outdated, being used by someone, or available for editing. Notification
methods include alert messages, frame icons, status icons in the Links panel, and status icons in the Assignments
panel.
Read-only files
Once a content file becomes managed, it’s read-only to all users in the workflow at all times, except to the person who
has checked it out. The software creates a lock file (*.idlk) when a user checks out a content file, giving that user
exclusive editing control. Read-only files have the following characteristics:
•An InCopy user cannot manually format the text in it. However, if text has been assigned character or paragraph
styles, an InDesign user can change the definition of those styles, thereby changing the formatting of the text even
when the file is checked out to someone else. These style definition changes are reflected in the text once the
InDesign user updates the file.
•In general, neither an InCopy nor InDesign user can change objects, such as text and applied styles, in locked
InCopy content. Some objects, such as character and paragraph styles, are only used by the content. For example,
you can’t change how a character style is applied to objects in locked content, but you can change the character style
itself, thereby changing the appearance of the text.
•An InDesign user can change the margins and columns of the text content as well as the shape, location, and
number of text frames the story occupies.
•An InDesign user can change the geometry and formatting of a graphics frame without checking out the graphic.
An InCopy user cannot change a graphics frame or any formatting on the frame. However, both InDesign and
InCopy users have to check out the graphics frame in order to modify the graphic itself (for example, to rotate or
scale it).
Best practices for working with managed files
Use the following practices to make sure that you work with the most up-to-date content and don’t overwrite someone
else’s work:
•Store assignment files on a server where all team members have access. If team members don’t have access to a
server, you can create and distribute assignment packages.
•When you create an assignment, a special folder is created to hold the assignment file and the content. Use these
assignment folders to maintain assignment and content files. They simplify managing the shared files across a
workgroup and help ensure that users open the correct files.

665
USING INDESIGN
Sharing content between InCopy and InDesign
Last updated 11/16/2011
•In InCopy, open the assignment file instead of an individual InCopy story. That way, you can see the copyfit and
layout information in Galley and Layout views. If you export content without using assignment files, you can see
copyfit and layout information only by opening the InDesign file.
•As soon as you open an assignment file, open an InDesign document, or check out content in either InDesign or
InCopy; make sure that frame edges are showing (View
> Extras > Show Frame Edges) so that you can see the frame
icons when they appear.
•In InDesign, if you must remove files from the workflow (because of a production deadline, for example), you can
unlink them or cancel an assignment package.
More Help topics
“Unlink content files (InDesign)” on page 683
Managed-file workflow examples
When you establish workflow management between InCopy and InDesign, writers and editors can compose, rewrite,
expand, and edit documents at the same time that designers prepare the layout. Common workflows include managing
files on a local server, sharing files via e-mail packages, or using some combination of the two methods.
These workflows assume that you have a basic InDesign template with layout geometries, styles, and placeholder text.
Layout geometries include page dimensions as well as text and graphics frames. InCopy uses these items to show
proper copyfit information.
Local server workflow
1. In InDesign, create assignments and add content to them.
This step incorporates exported text and graphics frames into the managed process, where they become available to
InCopy users for writing and editing.
2. Make the assignment files available to InCopy users.
Save the files to a server that all workflow users have access to.
3. In InCopy, open the assignment file, and check out and edit a story or graphic.
In InCopy, the files containing content assigned to you appear in the Assignments panel. Whenever you save the file
on a local server, the changes are saved on the file system and anyone working on that document (the InDesign layout
or another managed content file in the document) receives notification of the changes. Those users can update the
content to view the latest changes. The content remains checked out to you until you check it in.
4. In InDesign, work on the layout.
Regardless of whether the content files are being edited in InCopy, InDesign users can work on the document layout;
they don’t have to check out the document. Whenever the InCopy user saves the checked-out content, the InDesign
user can update that content within the layout to see the latest revisions.
5. In InCopy, continue working.
When finished with your edits, check in the content. Other users are then able to check out the content and work on it.
If a user is modifying the layout in InDesign simultaneously, you can update and view the layout geometry as you work.

666
USING INDESIGN
Sharing content between InCopy and InDesign
Last updated 11/16/2011
6. In InDesign, make sure that all the content is checked in.
The managed workflow makes it possible to know who has checked out files. After content files are checked in,
InDesign users can check out the files to finalize the layout as necessary.
E-mail package workflow
1. In InDesign, create and send assignment packages.
Create assignment packages and assign contents to the appropriate InCopy users, and then send the packages to the
InCopy users. The packaged files are automatically checked out to help avoid editing conflicts.
2. In InCopy, open the assignment package, and check out and edit a story or graphic.
If you receive an assignment package in e-mail, double-click the package to open it in InCopy. Changes you make to
the file are saved only locally. Other users are not notified when you make changes.
3. In InDesign, work on the layout.
Regardless of whether the content files are packaged, InDesign users can work on the document layout; they don’t have
to check out the document. If you need to update the layout or assignments, you can send an updated package to the
InCopy users.
4. In InCopy, return the edited package.
When finished with your edits, check in the content and return the modified package. Other users are then able to
check out the content, view the latest revisions, and work on the file.
5. In InDesign, make sure that all the content is checked in.
The managed workflow makes it possible to know who has checked out files. After assignment packages are returned,
stories in assignment packages are checked in. InDesign users can check out the files to finalize the layout as necessary.
Enter user identification
All users in the workflow must have a user name. This identification reveals who has checked out a particular file and
makes this information available to other users. It’s also required in order to check out a file for editing.
If you’ve already specified a user name and want to change it, you must check in any content you have checked out.
Otherwise, changing user identification during an editing session would forfeit your ability to edit content that you
have checked out—it would be checked out to you under a different name.
User identification is application-specific; no single user can have multiple user identifications per application.
Note: The InCopy Notes and Track Changes features also use the specified name to identify the author of a note or a
tracked change.
1Do either of the following:
•Choose File > User.
•Choose User from the Assignments panel menu.
2Type a unique name and click OK.
If you forget to specify a user name using this method, you’re prompted to enter one when you attempt your first
workflow action.
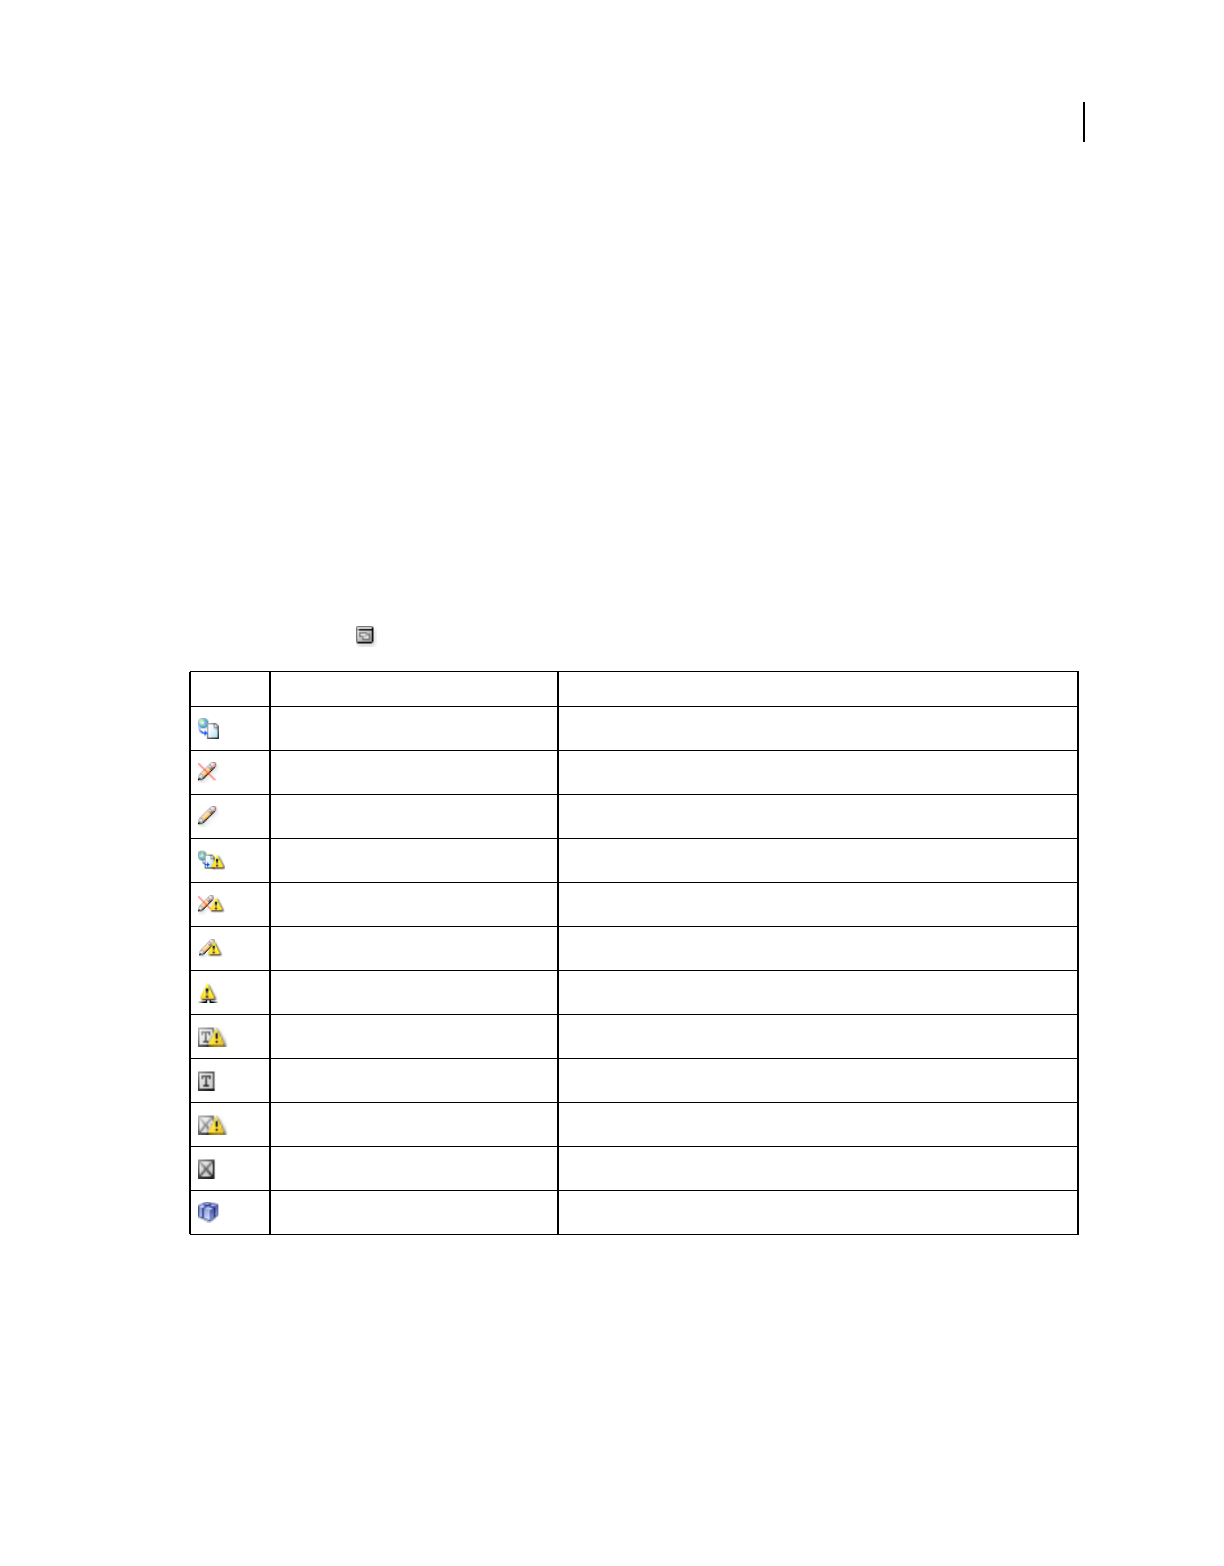
667
USING INDESIGN
Sharing content between InCopy and InDesign
Last updated 11/16/2011
Note: The Color pop-up menu in this dialog box is for identifying editorial notes and tracked changes. You can choose
the color now if you want, but it doesn’t affect anything you do in a managed workflow.
More Help topics
“Tracking and reviewing changes” on page 193
“Adding editorial notes in InDesign” on page 196
Workflow icons
Icons can appear on text and graphics frames, the Assignments panel, and in the story bar (InCopy only). Edit status
icons appear next to the managed file in the Links panel and Assignments panel, and communicate content status.
Icons appear on frames that contain a linked InCopy story (in the Layout view in both InDesign and InCopy). These
icons also communicate content status and can be used to differentiate between managed and unmanaged content.
The associated tool tip indicates editing status and ownership. To view the frame icons, make sure that frame edges
are showing in InDesign and InCopy (View
> Extras > Show Frame Edges).
Note: (InDesign) The InDesign document window must be in Normal Mode for the frame edges to show. (Click the
Normal Mode button
at the lower left of the toolbox.)
Note: The Out Of Date icon on the Available, In Use, Editing, Text Content, and Graphics Content icons indicates that
the content is out of date; that is, the version on the file system is newer than the version displayed on your computer.
Icon Name Location
Available Assignments panel (InDesign and InCopy), text frames, and graphics frames
In Use By [name] Assignments panel, text frames, and graphics frames
Editing Assignments panel, text frames, and graphics frames
Available And Out Of Date Text and graphics frames
In Use By [name] And Out Of Date Text and graphics frames
Editing And Out Of Date Text and graphics frames
Out Of Date Assignments panel
Text Content Out Of Date Assignments panel and text frames
Text Content Up To Date Assignments panel and text frames
Graphics Content Out Of Date Assignments panel and graphics frames
Graphics Content Up To Date Assignments panel and graphics frames
Packaged Content Assignments panel

668
USING INDESIGN
Sharing content between InCopy and InDesign
Last updated 11/16/2011
Sharing content
Exporting content from InDesign
Exporting content from InDesign to InCopy establishes a link between the two applications. You export InDesign text
frames, graphics frames, and their contents to InCopy using either of two methods:
•Create a container file (*.icma)—called an assignment—and add related groupings of document items (such as the
text and graphics of a story) to the assignment so they can be worked on together. Content within assignments is
exported as *.icml files.
•Export text and graphics frames separately (including placeholder frames) using the Edit > InCopy > Export menu
commands. Exported content is saved as *.icml files.
After content is exported, small icons appear at the top left of exported frames in InDesign and InCopy, and in the
Assignments panel. A link to the exported file appears in the Links panel. These icons indicate the status of managed
frames and they differentiate managed frames from those that aren’t part of the workflow. All exported content
appears in the Assignments panel. Content exported using the Export menu commands appears in the Unassigned
InCopy Content section of the Assignments panel list. While both methods establish a controlled connection between
InCopy content and an InDesign document, the primary method is to use assignment files.
Exporting content makes the content available for users to check out while maintaining a link to the original InDesign
document. (This link is made from within InDesign; you cannot create the link from InCopy.)
Once the content is exported, InCopy users can see (but not change) the page layouts, styles, and so forth as they appear
in the InDesign document.
Note: You can also create text or anchored graphics using InCopy and then place them in InDesign.
More Help topics
“Assignment files” on page 669
“Assignments panel overview” on page 668
“Workflow icons” on page 667
“Placing InCopy files in InDesign documents” on page 683
Assignments panel overview
The primary tool for working with assignments is the Assignments panel (Window > Assignments in InCopy,
Window > Editorial > Assignments in InDesign). The Assignments panel displays the files exported from the currently
active InDesign document, and an icon indicates their status. The Assignments panel menu also contains commands
that control import version and file-management functions between InCopy and InDesign. When you open an
assignment in InCopy, the assignment name and its contents appear in the Assignments panel. You can double-click
text and graphics frames in the Assignments panel to select them in the document window.
Note: All content exported to InCopy or added to an assignment is also listed in the Links panel. Although you can do
some workflow management tasks, such as checking out and checking in content, the recommended panel for these tasks
is the Assignments panel.
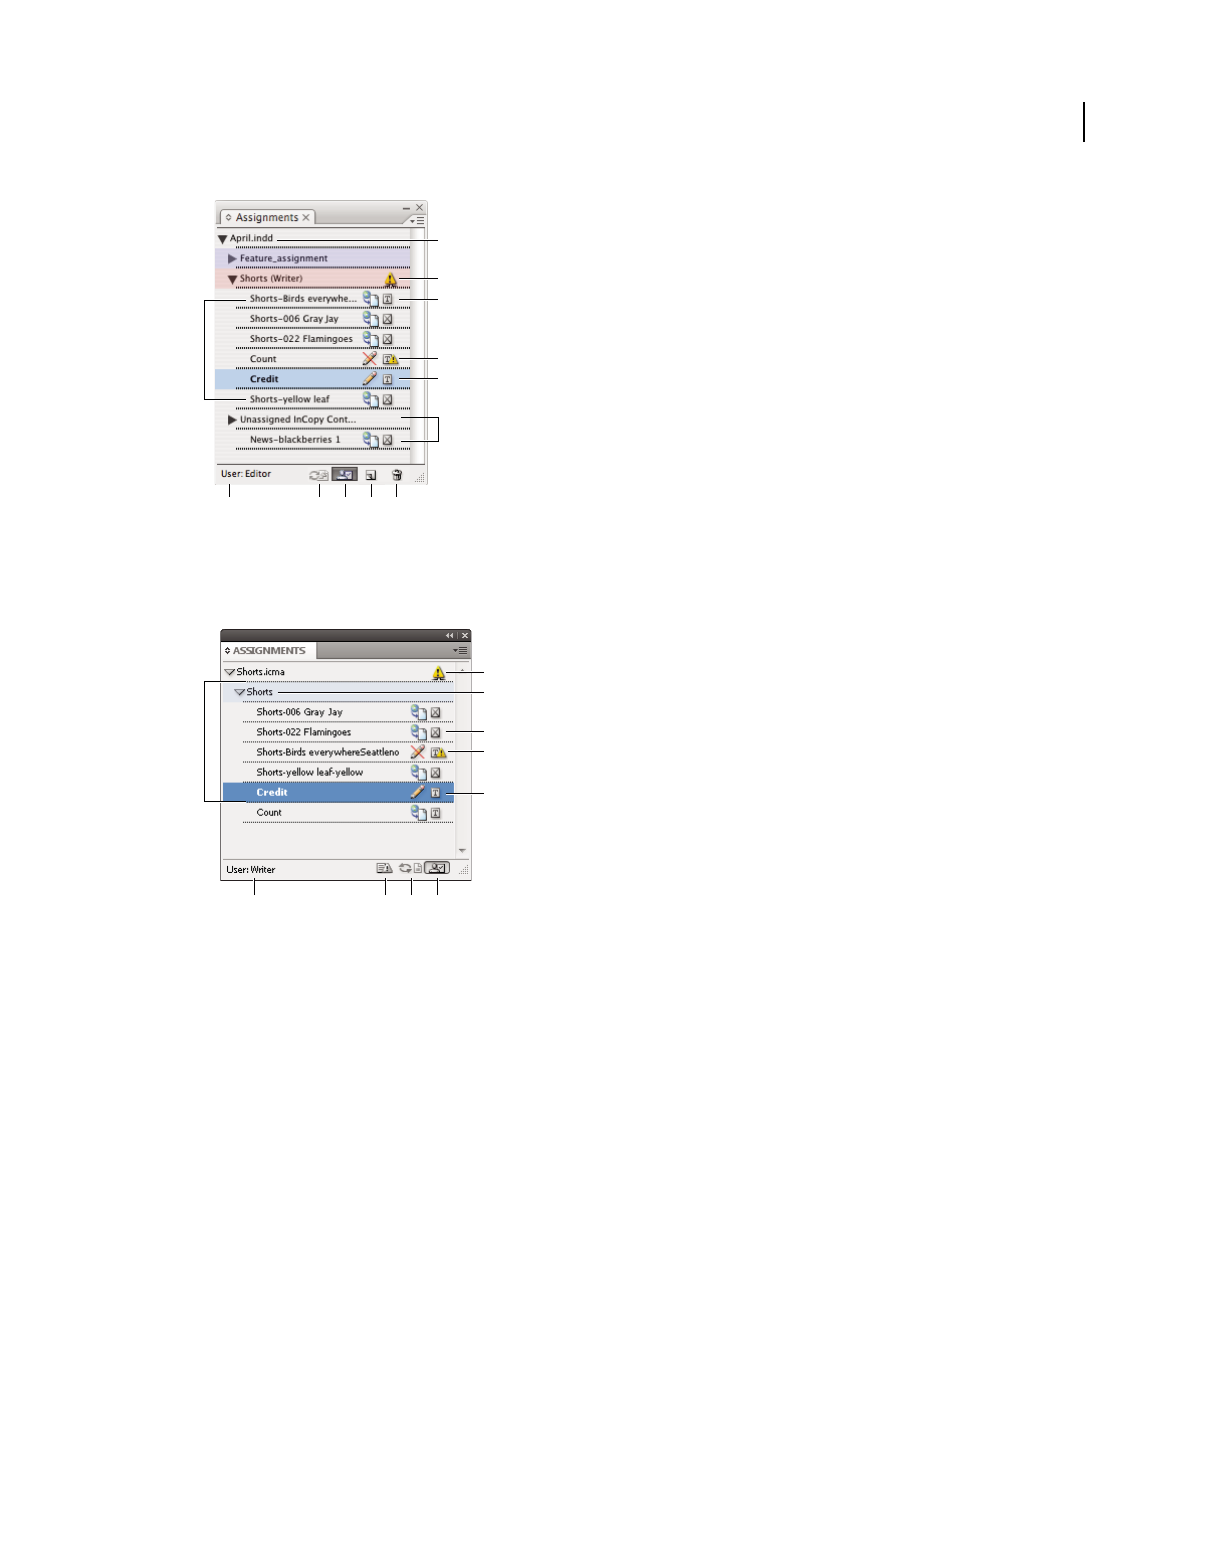
669
USING INDESIGN
Sharing content between InCopy and InDesign
Last updated 11/16/2011
InDesign Assignments panel
A. InCopy content names B. InDesign document name C. Assignment Out Of Date status D. Available And Text Up To Date status E. In Use
And Text Out Of Date status F. Editing And Text Up To Date status G. Unassigned content H. User name I. Update Content button J. Check
Out/Check In Selection button K. New Assignment button L. Delete Selected Assignments/Remove button
InCopy Assignments panel
A. InCopy content names B. Assignment Out Of Date status C. Assignment name D. Available And Text Up To Date status E. In Use And
Text Out Of Date status F. Editing And Text Up To Date status G. User name H. Update Design button I. Update Content button J. Check
Out/Check In Selection button
More Help topics
“Exporting content from InDesign” on page 668
“Assignment files” on page 669
Assignment files
In InDesign, assignment files are containers for organizing collections of page items. For example, you might want to
select all the items in a story (headline, byline, copy, graphics, and captions), and then assign them to one InCopy user.
Adding those items to an assignment provides a convenient way for InCopy users to access only the content for which
they are responsible. Assignment files (*.icma) appear in the file system, in the InCopy story bar, and in status
messages. Only InDesign users can create assignment files; only InCopy users can open them.
When you create an assignment, a folder is created in the same location as the InDesign document by default. This
assignment folder includes the *.icma assignment files and a content subfolder that contains any exported InCopy
story files (in .icml format) that are part of images or other resources. Once the assignment is created, store the project
folder in a location where all users have access to it, or create and distribute an assignment package. If content is
exported before it’s added to an assignment, the files on disk are not moved to the content folder of the assignment file.
B
C
A
D
E
F
G
H I J K L
G
B
A
C
D
E
F
GHIJ

670
USING INDESIGN
Sharing content between InCopy and InDesign
Last updated 11/16/2011
Assignment files include the following:
•Links or pointers to the associated page items, including placeholder frames. These elements let the InCopy user
open a single file in InCopy and have editorial access to multiple page items.
•Any transformations on the graphics included in the assignment, such as moving, scaling, rotating, or shearing.
•Page geometry, so InCopy users can see the layout of the frame and its content that they’re editing without opening
the entire InDesign file.
•Color-coding of assigned frames in the document.
Illustration of page in InCopy showing page geometry and color coding
Create assignments and add content (InDesign)
Only InDesign users can create assignments and add content to them. There are several ways to create assignments.
The method you choose usually depends on whether you have content to add at the time you create the assignment.
•Create empty assignment files. From your InDesign document, you can create a series of empty assignments to act
as templates for content to come later.
•Create assignments and add content at the same time.
•Add content to an existing assignment file. You can add linked content—text and graphics that have already been
exported as InCopy content—or you can add selected page items to become linked InCopy content. If one or more
of the selected frames already contain InCopy content files, and none is part of an assignment, you can add them
to a new or existing assignment file.
By default, the assignment folder you create is saved in the same folder as the InDesign document. You can then place
this folder on a server or create and send a package.
Note: If you don’t want InCopy users to place and fit graphics, don’t add graphics frames to an assignment.
More Help topics
“Relink missing assignment files (InDesign)” on page 682
“Best practices for working with managed files” on page 664
Create empty assignment files (InDesign)
1In InDesign, save the document.
2In the Assignments panel, choose New Assignment from the panel menu.
3In the New Assignment dialog box, specify assignment file options and click OK.

671
USING INDESIGN
Sharing content between InCopy and InDesign
Last updated 11/16/2011
Simultaneously create assignments and add content (InDesign)
1In InDesign, create a document that has one or more text frames, graphics frames, or placeholder items, and then
save the document.
2Select the text and graphics frames you want to add.
3Do one of the following:
•From the Assignments panel menu, choose Add To Assignment, and then select New.
•Choose Edit > InCopy > Add [option] To Assignment > New.
4In the New Assignment dialog box, specify assignment file options and click OK.
The newly created assignment file includes any frames selected in the document window.
Add content to existing assignments (InDesign)
1Save the InDesign document.
2Select the text and graphics frames you want to add.
3Do one of the following:
•From the Assignments panel menu, choose Add To Assignment, and then select the assignment.
•Drag content from the Unassigned InCopy Content section of the Assignments panel into an existing assignment.
•Select page items with the Selection tool and drag them to an existing Assignment in the Assignments panel.
•Choose Edit > InCopy > Add [option] To Assignment, and then select the assignment.
4Choose Update All Assignments from the Assignments panel menu to make the content files available to InCopy
users.
Note: You can add content only to assignments in the same document. However, you can import the same content into
multiple documents and add it to an assignment in each of those documents.
Assignment file options (InDesign)
When you create or modify an assignment file, you can set the following options:
Assignment Name The unique identification of the assignment in the Assignments panel, for example “Ocean article.”
This name must conform to the file naming conventions of the operating system.
Assigned To The unique identification of the user assigned to the files. The user’s name appears in parentheses
following the assignment name in the Assignments panel. Entering a name here is for informational purposes only; it
doesn’t grant special rights or permissions to the user.
Color Displays a list of colors for adding a distinctive highlight to the frames of the current assignment in the
document window, and to the assignment names in the Assignments panel. This color coding differentiates frames
that belong to one assignment from frames that belong to another, and it differentiates from unassigned frames. To
toggle the display of this color coding, choose View
> Extras > Show/Hide Assigned Frames. In InCopy, the color
coding is visible only in Layout view.
Note: If toggling the display of assigned frames produces unexpected results, those frames might be tagged for XML and
View
> Structure > Show Tagged Frames might be enabled. You cannot show assigned frames and tagged frames at the
same time.
Change Click the Change button to specify the location of the assignments folder. By default, the assignments folder
is created in the same location as the InDesign file.

672
USING INDESIGN
Sharing content between InCopy and InDesign
Last updated 11/16/2011
Placeholder Frames Lets InCopy users see the text and graphics frames in the assignment as well as boxes (or other
shapes) representing all other frames on those InDesign pages. All frames and placeholders accurately reflect the size,
shape, and location of the InDesign originals. Placeholder frames are empty shapes that don’t show any of the content
in the InDesign document. The Placeholder Frames option provides the least amount of fidelity, and therefore
provides the fastest performance. In InCopy, the placeholder frames are visible only in Layout view. InCopy users
cannot check out and edit placeholder frames.
Assigned Spreads Lets InCopy users see all assigned frames, as well as the entire contents of other frames that aren’t
part of the assignment, on the same spread. In InCopy, content in frames outside an assignment isn’t editable and is
visible only in Layout view.
All Spreads Exports all content in the InDesign document to the assignment file. This option provides the maximum
amount of fidelity; it also provides the slowest performance because the assignment file displays the design and layout
of every page, including pages not relevant to the section a user is editing.
Linked Image Files When Packaging Includes a copy of linked images in the assignment package. Selecting this option
gives InCopy users access to images but increases the package’s file size. InCopy users can include images while
returning a package.
Export content as separate InCopy files (InDesign)
If your workgroup prefers working with separate files rather than using assignments, you can export InCopy content
without using an assignments file. Compared with creating a single assignment file with references to multiple content
files and layout information, this method creates a separate file (.icml) for each text or graphics frame you specify in
the document. To see the context of the content you are editing, you must also open the associated InDesign document
(.indd).
Cater the InDesign document to suit your workflow needs. For example, if you want all of the editor’s comments to be
exported in a single file, create a layer for the editor to make comments. You can then export all the content on the
selected layer.
Note: A quick way to export content as separate InCopy files is to use the Selection tool to drag selected frames into the
Unassigned InCopy Content in the Assignments panel.
1In InDesign, create a document with one or more text frames, graphics frames, or placeholder items.
2Do either of the following:
•Select the text or graphics frame of a single story, or Shift-click to select multiple frames.
•Click an insertion point in a story, or select some text in a text frame.
3Choose Edit > InCopy > Export, and then choose one of the following options:
Selection Exports all selected text and graphics frames.
Layer Exports all content on the selected layer.
All Stories Exports every story that has not been exported already.
All Graphics Exports every graphic that has not been exported already.
All Graphics And Stories Exports every story and graphic that has not been exported already.
If you export all content in the document, and then add more text or graphics frames to the same document, you can
save time exporting the new ones by using the Export > All Stories (or All Graphics or All Graphics And Stories)
command again. InDesign exports only the new content.
4Enter a name and location for the files, and then click Save.

673
USING INDESIGN
Sharing content between InCopy and InDesign
Last updated 11/16/2011
The file name you specify is used as a prefix for identifying each exported content file in the file system. If you export
multiple text frames, the first several characters of the text are automatically appended to the file name; for example,
“mystory-Upcoming cycling events.icml.” For multiple graphics frames, the file names are formed as “mystory-
graphic,” “mystory-graphic-1,” and so on. The file name appears in the file system, in the InCopy story bar, and in
status messages.
5When prompted, save your InDesign file.
The InCopy content is now managed, and is available to be checked out and edited by other users in the workflow.
Shared content appears in the Links panel just like imported graphics. If you move a shared file manually, you can use
the Links panel to update its link.
When you export content, you see the Available icon on the text frame (InDesign and InCopy), and in the
Assignments panel (InCopy). The word [Editing] appears in the story bar (InCopy).
Assignment packages
Create and send packages (InDesign)
Under ideal circumstances, all InDesign and InCopy users on the team have access to a server where assignment files
are stored. However, if one or more users don’t have access to a common server, you can create and distribute
compressed assignment packages. After working on the assignment, the InCopy user repackages the assignment and
returns it to be integrated into the InDesign document. Package files created in InDesign include the .icap extension.
The return package files created in InCopy include the .idap extension.
There are two commands for packaging files: Package For InCopy and Package And Email. Use Package For InCopy
to create a compressed package that you can distribute manually; use Package And Email to create a compressed
package that is attached automatically to an e-mail message.
Note: Do not confuse an assignment package with the File > Package command in InDesign that lets you bundle and send
a document and its assets to a printer.
More Help topics
“Package files” on page 621
Create a package for manual distribution
1Create an assignment and add the content you want to include in the package.
Only content that is checked in can be included in the packaged assignment. If any content is checked out, you’re
prompted to check in content.
2In the Assignments panel, select the assignment and choose Package For InCopy from the panel menu.
3Specify a name and location for the package file, and click Save.
You can attach the package file to an e-mail message, upload it to an FTP server, or copy it to a disk or other external
media.
Note: Choosing Edit > Undo after you create a package cancels the package and unlocks the items in the assignment, but
it doesn’t delete the package file from your computer or unsend the e-mail.

674
USING INDESIGN
Sharing content between InCopy and InDesign
Last updated 11/16/2011
Create a package for e-mail (InDesign)
1Create an assignment and add the content you want to include in the package.
Only content that is checked in is included in the packaged assignment. If any content is checked out, you’re prompted
to check in content.
2In the Assignments panel, select the assignment and choose Package For InCopy And Email from the panel menu.
A compressed assignment package is created and attached to an e-mail message of your default e-mail application.
Note: If you want to use a different e-mail application, change the default e-mail application. See your system
documentation for details.
3Edit the e-mail message by adding a recipient and providing any instructions. Send the message.
All items in the assignment are checked out to the assigned user. However, the contents of the package itself aren’t
locked, so anyone can open the package and edit them.
Cancel a package
In some cases, the package you send isn’t returned. For example, the message may have gotten lost, or the recipient
may no longer work on the project. In such a situation, you can cancel a package.
1In the Assignments panel, select the packaged assignment, and choose Cancel Package from the panel menu.
2Click OK to cancel the package.
Canceling a package doesn’t remove the package file from your computer.
When a package is cancelled, the package’s contents are available for editing. Be aware that if someone returns a
package that has been cancelled, conflicts may occur.
Update a package
After you create a package, you may want to add, remove, or resize items.
1Add, remove, or resize one or more stories to the packaged assignment.
2Select the assignment in the Assignments panel, and do one of the following:
•Choose Update Package from the Assignments panel menu. Specify the name and location of the file. Make the
updated package available to users by placing it on a shared server or by e-mail. Remember to notify InCopy users
that the package has been updated.
•Choose Update Package And Email from the Assignments panel menu, and then send the message.
When InCopy users open the updated package, only new content is added automatically to the assignment; InCopy
users can decide whether to overwrite existing content, allowing them to preserve previous edits.
Receive packages (InCopy)
You may receive a package from an InDesign user who created the package or from an InCopy user who forwarded
the package to you. When you open an assignment package, the package is decompressed, and the contents are copied
to a new subfolder in an InCopy Assignments folder.
More Help topics
“Check in content” on page 680
“Save changes (InCopy)” on page 681

675
USING INDESIGN
Sharing content between InCopy and InDesign
Last updated 11/16/2011
Open a package (InCopy)
❖To open an InCopy package (*.icap or *.incp), do any of the following:
•Launch the package using the e-mail application. For example, double-click the attachment file.
•Use Explorer or Finder to open the file. For example, double-click the file or drag it to the InCopy application icon.
•In InCopy, choose File > Open, and double-click the packaged assignment file.
•In InCopy, choose Open Package from the Assignments panel menu, and then double-click the package file.
You can now edit the stories in the package. When you begin editing a story, you’re prompted to check out the contents
of the frame. When you’ve finished editing, save all content and return or forward the package.
Return or forward a package (InCopy)
After you open and edit a package, you can send it to another InCopy user or you can return it to the InDesign user
who created the package. Package files created for other InCopy users include the .icap extension; return package files
created for InDesign users include the .idap extension.
1Edit and check in the content you want to include in the package.
2From the Assignments panel menu, choose one of the following:
Forward For InCopy Create a package for another InCopy user. Specify the name and location of the package file, and
then make it available to the InCopy user.
Forward For InCopy And Email Create and send a package for another InCopy user via e-mail. The package appears as
an attachment in a new message in your default e-mail application. Specify the recipient, provide instructions, and
send the e-mail message.
Return For InDesign Create a package to return to the InDesign user.
Return For InDesign And Email Create and return a package to the InDesign user by e-mail. The package appears as an
attachment in a new message in your default e-mail application. Specify the recipient, provide instructions, and send
the e-mail message.
Receive return packages (InDesign)
❖To open an InDesign package (*.idap or *.indp), do any of the following:
•Launch the package using the e-mail application. For example, double-click the attachment file.
•
Use Explorer or Finder to open the file. For example, double-click the file or drag it to the InDesign application icon.
•In InDesign, choose File > Open, and double-click the package file.
•In InDesign, choose Open Package from the Assignments panel menu, and then double-click the package file.
You’re prompted to update all links when opening the package. If a story has been modified since the assignment was
packaged, you can determine whether to update or unlink the content in the InDesign file. When the stories in the files
are returned and checked in, you can check out and edit the content.
More Help topics
“Update assignment files (InDesign)” on page 677
“Unlink content files (InDesign)” on page 683

676
USING INDESIGN
Sharing content between InCopy and InDesign
Last updated 11/16/2011
Working with managed files
Open shared content
Only InCopy users can open assignment files (.inca). If an InCopy user opens an InDesign file that contains
assignments, the user will have access to all the managed content, regardless of assignments.
❖Do one of the following.
•In InCopy, choose File > Open, select an assignment file (.icma or .inca), and click Open.
•In InDesign or InCopy, choose File > Open, select an InDesign file (.indd) that contains assigned content, and click
Open.
•Open an assignment package. See “Receive packages (InCopy)” on page 674.
The assignment names and their contents appear in the Assignments panel.
More Help topics
“Assignment files” on page 669
“Managed files” on page 664
Check out content
When you check out an item, a hidden lock file (.idlk) is placed on the file system. Once the content is checked out,
you have exclusive control over its content, and others are locked out from making changes. You can check out InCopy
content only; you cannot check out InDesign documents with layout information.
If you attempt to close an InDesign document containing one or more InCopy content files that are checked out to
you, an alert message appears, prompting you to check in all content. If you close the document without checking in
the content files, they will still be checked out to you the next time you open the InDesign document. Saving the
InDesign document automatically saves every editable InCopy content file.
More Help topics
“Managed files” on page 664
Check out content (InDesign)
❖Do one of the following:
•In the layout, select the text or graphics frames to edit and choose Edit > InCopy > Check Out.
•In the Assignments panel, select the files and choose Check Out from the panel menu.
When you check out available content in InDesign, you see the Editing icon on the InDesign frame. In InCopy, the
In Use icon appears on the InCopy frame and in the Assignments panel if the assignment files are stored on a local
server.
Check out content (InCopy)
1Do one of the following:
•If the content you want is part of an assignment, choose File > Open and select the assignment file (.icma or .inca).
•If the content you want was exported as individual files, choose File > Open and select the InCopy file (.icml or
.incx). To see the layout so you can do copyfitting, select the InDesign document.

677
USING INDESIGN
Sharing content between InCopy and InDesign
Last updated 11/16/2011
2Do one of the following:
•To check out a single InCopy content file, choose File > Check Out.
•To check out all content in an assignment at once, select the assignment in the Assignments panel, and choose
Check Out from the panel menu.
•To check out individual items in an assignment, open the assignments list in the Assignments panel, select an item
or multiple items, and choose Check Out from the panel menu.
The Editing icon appears next to the item or items in the Assignments panel, indicating that the content is checked
out to you for your exclusive use.
3If prompted to update the content with changes, click OK.
When you check out available content in InCopy, you see the Editing icon on the InCopy frame, and in the
Assignments panel. In InDesign, the In Use icon appears on the InDesign frame.
Opening managed files (InCopy)
Opening a managed content file (.icml or .incx) directly in InCopy and working with it in Story view may be more
appropriate for quick writing and editing. You do not have to check out an individual managed file to edit it; InCopy
automatically checks it out. When you save and close the file, InCopy automatically checks in the content. The Save
commands are different when you open individual files.
More Help topics
“Managed files” on page 664
“Save changes (InDesign)” on page 680
Update assignment files (InDesign)
You can save changes to assignments manually or when you close the current document. Updating an assignment file
is the only way to make layout changes available to InCopy users.
❖Do one of the following:
•To update selected assignments, select them in the Assignments panel and choose Update Selected Assignments
from the Assignments panel menu.
•To update all out-of-date assignments in the current document, choose Update Out-Of-Date Assignments from
the Assignments panel menu. Only assignments that are out of date are updated.
•To update all assignments in the current document, choose Update All Assignments from the Assignments panel
menu.
Note: If an InCopy user has an assignment open when you update the assignment, the Out Of Date icon appears next
to the assignment in the InCopy Assignments panel.
More Help topics
“Update content” on page 678
“Create and send packages (InDesign)” on page 673
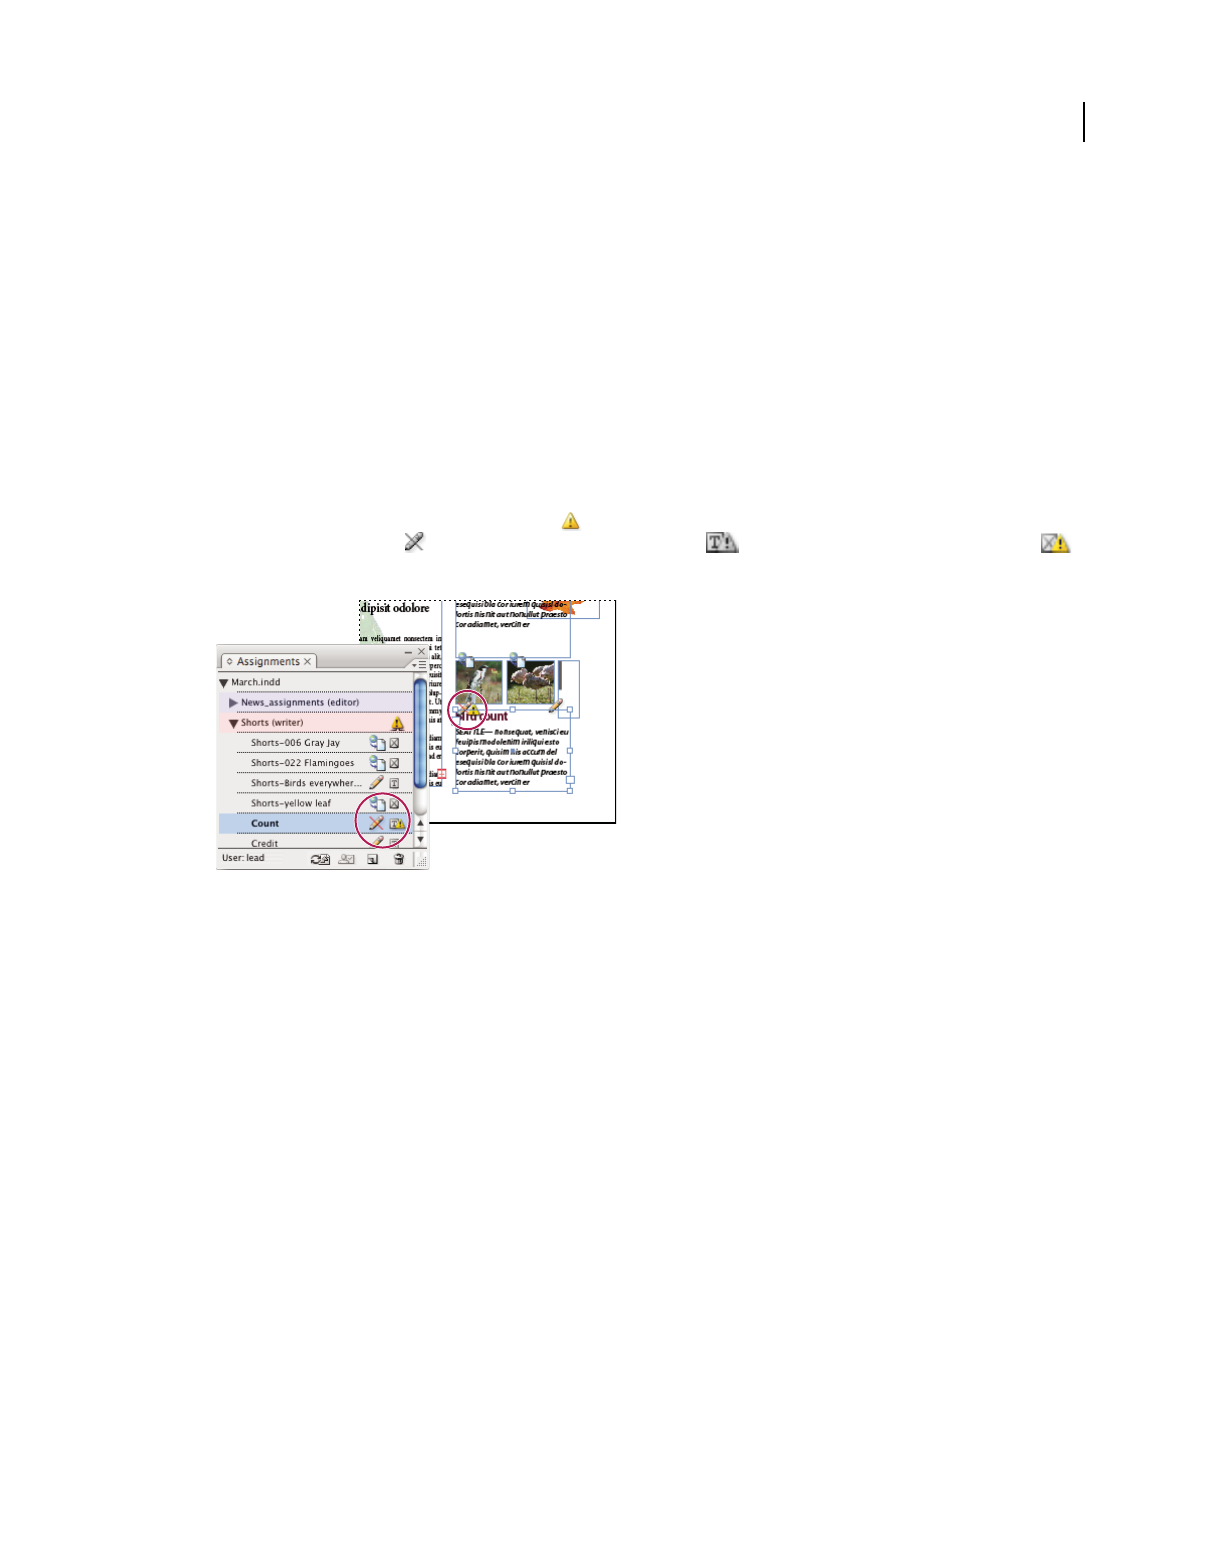
678
USING INDESIGN
Sharing content between InCopy and InDesign
Last updated 11/16/2011
Update content
To make sure that you’re always working on the most up-to-date content, be sure to watch for Out Of Date icons in
the Assignments panel, and then update content accordingly. Updating an InCopy assignment file and its contents or
updating individual content files copies data from the latest file system copy so that the version displayed on your
computer matches the one on the file system. Updating does not require checking in or out and does not give you
editing rights. However, updating can cause problems if another user has deleted your lock.
Note: Updating content does not update content in assignment packages that have not been returned.
A typical updating workflow is as follows:
1The InCopy user opens an assignment file or checks out an individual content file and edits the content.
2The InCopy user saves the content file, which updates the copy on the file system, and continues working.
3The InDesign user sees the Out Of Date icon in both the Assignments panel and the Links panel next to the
selection, and the In Use and Text Content Out Of Date icon or Graphics Content Out Of Date icon
on the associated frame.
Assignments panel with In Use and Out Of Date icons (left) and Layout with out-of-date content (right)
4The InDesign user updates the content.
More Help topics
“Accidentally updating your work” on page 679
“Links panel overview” on page 389
Update content while opening a managed document (InDesign)
1Choose File > Open, locate the file you want to open, and click Open.
2Click Yes when prompted to update the document with the modified content on the file system.
3Do one of the following:
•To let InDesign update the links, click Fix Links Automatically.
•To fix links manually, click Don’t Fix, and then, in the Links panel, select the file to update and choose Update Link
from the panel menu.
Update content while working (InDesign)
❖Do one of the following:
•Select the text or graphics frames in the layout and choose Edit > InCopy > Update Content.
679
USING INDESIGN
Sharing content between InCopy and InDesign
Last updated 11/16/2011
•Select the text or graphics frames in the Links panel, and click the Update Link button or choose Update
Link from the Assignments panel menu.
Update content while working (InCopy)
❖Do one of the following:
•Click an insertion point in the text frame to select it, and then choose File > Update Content.
•Select the content in the Assignments panel, and then click the Update Content button or choose Update
Content from the Assignments panel menu.
You can also update content using the Links panel.
Accidentally updating your work
In most cases, the update commands are disabled for content you have checked out, because that content would always
be up to date. However, an undesirable situation can occur if a different user deletes the lock on checked-out content
(by dragging the lock file [.idlk] to the Recycle Bin [Windows] or Trash [Mac
OS]), and modifies the content. In this
case, the update commands can become enabled even while the content is checked out to you, essentially allowing two
people to edit the content at the same time. Updating the content results in lost work. For best results, do not delete
the lock files.
Update the InDesign layout
InDesign users can modify the layout (for example, change the size or location of the text frames of a story) and save
the changes while InCopy users are modifying the text of these text frames. In a shared server workflow, the way
InCopy users are notified about layout changes depends on whether they have opened an assignment file or have
checked out individual content files and also opened the linked InDesign file.
Consider the following:
•If an InDesign user changes the layout of frames in an assignment, the user must update the assignment to make
the design changes available to InCopy users. InDesign does not automatically update assignment files when the
document is saved.
•Once the InDesign user updates the assignment stored on a shared server, the Out Of Date icon appears next
to the assignment in the InCopy Assignments panel. The InCopy user must update the design to see the current
layout.
•If an InDesign user changes the layout of exported content that is not part of an assignment, the Out Of Date icon
appears next to the InDesign document name in the Assignments panel, and the document title bar indicates the
layout is out-of-date. InCopy users can update the currently active InDesign document with the latest layout and
style changes.
Updating the layout in InCopy is useful for copyfitting tasks, because the latest appearance and line breaks are visible
in Layout and Galley views.
❖Do one of the following:
•If you have an assignment file open and the Assignments panel shows the Out Of Date icon next to the
assignment name, click the Update Design button , or choose File > Update Design. You cannot undo this
command.
•If you are not working with assignment files and you have more than one InDesign document open, select the one
you want to make active, and choose File
> Update Design.

680
USING INDESIGN
Sharing content between InCopy and InDesign
Last updated 11/16/2011
Check in content
When you check in a managed content file, you save it to a shared location on a file system where it can be checked
out by others for editing or other changes. Exporting a text or graphics frame from InDesign also checks it in
automatically.
Although a checked-in file is available for editing, it is not actually editable until it is checked out (unless you edit the
content in stand-alone mode in InCopy). Checking in content relinquishes editing control, but does not close the file.
The content remains open on your screen, but in a read-only state.
The LiveEdit Workflow plug-ins do not create multiple file versions. Instead, files are overwritten when updated in
either InCopy or InDesign.
If you are working on an assignment package, return or forward the assignment package after checking it in.
More Help topics
“Exporting content from InDesign” on page 668
“Managed files” on page 664
Check in managed content (InDesign)
❖Do one of the following:
•Select the content in the layout and choose Edit > InCopy > Check In.
•In the Assignments panel, select the content and choose Check In from the panel menu.
Check in managed content (InCopy)
❖Do one of the following:
•Select the content in Layout view and choose File > Check In.
•In the Assignments panel, select the content and choose Check In from the panel menu.
Note: You can undo the most recent changes before you check in content.
When you check in a file, the Available icon appears on the text or graphics frame in the InDesign layout, in the
InCopy Layout view, in the Assignments panel, and in the story bar (InCopy).
Save changes (InDesign)
As you work on content you have checked out, you can save your changes and update the file-system copy.
❖Do one of the following:
•To save the selected content without saving changes to the InDesign document or any of its linked files, select the
content in the layout and choose Edit
> InCopy > Save Content.
•To save every content file checked out to you, choose File > Save. This type of save does not automatically update
assignment files or checked-out content files in InCopy. However, the checked-out files in InCopy will show the
Out Of Date icon
in the Assignments panel.
•To save the InDesign document under a new name with links to any existing InCopy files, choose File > Save As.
This action causes the assignments in the InDesign file to appear as missing until they are updated.
•To save a copy of the currently active document, choose File > Save A Copy. You can choose to give the copy a new
name and location with links to any existing InCopy files.

681
USING INDESIGN
Sharing content between InCopy and InDesign
Last updated 11/16/2011
More Help topics
“Update content” on page 678
Save changes (InCopy)
❖Do one of the following:
•To save the InCopy file under the same name and location on the file system, choose File > Save Content. The file
is still checked out to you.
•To save the InCopy content file under a new name, choose File > Save Content As. The newly created content file
is not managed in the workflow. The Save Content As command is available only if you have opened the InCopy
content file (.icml or .incx) directly.
•To save a copy of the currently active InCopy content file, choose File > Save Content Copy. You can choose to give
the copy a new name and location. The saved copy is not managed in the workflow. The Save Content Copy
command is available only if you have opened the InCopy content file (.icml or .incx) directly.
•To save all currently open and checked-out InCopy content files, choose File > Save All Content. This saves all files
to their current locations. The Save All Content command is available only if you have opened an assignment or
InDesign file.
Adjusting your workflow
Move content between assignments (InDesign)
InDesign users can move content between existing assignments as well as from the Unassigned InCopy Content
section of the Assignments panel. You can also create a new assignment and move content to it.
1Save the InDesign document.
2In the Assignments panel, click the arrow to the left of the assignment name to display the contents of the
assignment.
3Select an item in an assignment.
4Do one of the following:
•Drag the content from one assignment to another.
•To move content to an existing assignment, choose Add To Assignment from the Assignments panel menu, and
then select the desired assignment.
•To create a new assignment as you move content, from the Assignments panel menu, choose Add To Assignment >
New, and then specify options in the New Assignment dialog box.
5Choose Update All Assignments from the Assignments panel menu.
If the assignment lists are short, you might prefer dragging content items to and from assignments and the Unassigned
InCopy Content section.
More Help topics
“Unlink content files (InDesign)” on page 683

682
USING INDESIGN
Sharing content between InCopy and InDesign
Last updated 11/16/2011
Delete assignments (InDesign)
❖In the Assignments panel, select one or more assignments and choose Delete Assignment in the panel menu.
Deleting assignments accomplishes the following:
•Removes the assignment data from the document.
•Deletes the assignment file from the file system.
•Removes the assignment name from the list.
•Moves any InCopy content to the Unassigned InCopy Content section in the Assignments panel.
Note: If an InCopy user has an assignment open when it is deleted in InDesign, an alert message notifies the InCopy user
that the assignment has been deleted. However, the content files are not deleted and can be updated without loss of
changes.
More Help topics
“Unlink content files (InDesign)” on page 683
Relink missing assignment files (InDesign)
If you move or delete an assignment file from disk, and then open the InDesign document from which it was created,
InDesign won’t know where the assignment file is located. You need to re-create the assignment file so InDesign can
find it.
More Help topics
“Update, restore, and replace links” on page 392
Re-create the assignment file in the original location
❖In the Assignments panel, do one of the following:
•Select the missing assignment (it will still be listed in the panel) and choose Update Selected Assignments from the
panel menu.
•Choose Update All Assignments from the panel menu.
Change the assignment location
❖To re-create the assignment file in a new location, do one of the following in the Assignments panel:
•Select the assignment and choose Change Assignment Location from the panel menu. Specify a location and name
for the new file.
•Double-click the assignment name. In the Assignment Options dialog box, click Change and specify a location and
name for the new file.
Correct mistakes
If you make a mistake, you can discard changes made since the last Save command and restore the content from the
file system.

683
USING INDESIGN
Sharing content between InCopy and InDesign
Last updated 11/16/2011
Because InDesign automatically saves every editable InCopy content file when you save the InDesign document, the
Cancel Checkout command restores only versions since the last time the document was changed.
❖Do one of the following:
•To undo the most recent change, choose Edit > Undo [action].
•To undo all changes made since the last time you saved the document, choose File > Revert Content.
•To undo changes since the last saved version and remove the lock file, select the content in the Assignments panel
and choose Cancel Check Out from the panel menu. This action makes the content read-only and available for
others to check out.
Overriding locked files (InDesign)
Users might not immediately realize how their actions affect others in the workflow, and might accidentally create
situations where conflicts exist between content status and ownership. If necessary, the InDesign user can resolve
conflicts by unlinking a locked file checked out to a different user and taking control over the file. Unlinking a file
stores the content in the InDesign document, but the content is no longer shared with InCopy.
More Help topics
“Unlink content files (InDesign)” on page 683
“Accidentally updating your work” on page 679
Unlink content files (InDesign)
If necessary (because of a production deadline, for example), InDesign users can remove a content file from the
managed workflow and from the Links panel by unlinking it. If you want to make the content available again for
editing, you must reexport it as InCopy content using a different file name. This ensures that the old lock file won’t
prevent users from editing the file.
Note: Unlinking your own checked-out file removes it from the workflow and deletes the lock file from disk. You can re-
export the content and overwrite the file name without conflict.
❖To unlink an InCopy content file, select the file (.icml or .incx extension) in the Links panel and choose Unlink from
the panel menu. Unlinking embeds the content into the document and removes the link to the InCopy file on disk.
To relink the file, choose Edit > Undo Unlink.
You can also unlink by deleting a frame, or using the InDesign Links panel to relink a content file to another file. You
can also select the story in the Assignments panel and drag it to the Trash icon.
Placing InCopy files in InDesign documents
Although a typical workflow begins in InDesign, where the basic layout and text and graphics placeholders are defined
and exported to InCopy, a different workflow can start with a stand-alone InCopy content file (.icml or .incx) that you
place in InDesign using the File
> Place command.
Consider the following dependencies when you place InCopy content files in an InDesign document:
Styles If the InCopy text file has styles applied, they are added to the InDesign list of styles for the document. In the
event of a style-name conflict, InDesign overwrites the imported style with its existing style.

684
USING INDESIGN
Sharing content between InCopy and InDesign
Last updated 11/16/2011
Layout You can create the basic layout geometry for the content in InDesign, and then create or import the text and
styles from a word-processing application. (Text files placed within InCopy are embedded in the InCopy document
and are not linked to any external file.)
Placing/Duplicating If you place an InCopy content file more than once, each instance of the content appears in the
InDesign Links panel, but they are all managed as one content file. The same is true for any exact copies of a content
file (by any means of duplication).
Note: If you copy and paste some, but not all, of the text in a managed InCopy content file, the result is a new content file
that is not connected to the original and has no link to any external file (InCopy or otherwise). The original and the pasted
portions can be edited independently of each other.
Updates/Management Once multiple instances of a managed content file are present in an InDesign document, they
behave as if they were open in two applications. For example, checking out one instance of the content file locks all
other instances so that you can edit only the checked-out instance. In this case, you would use the appropriate Update
command to refresh the other (open) instances of the content.
685
Last updated 11/16/2011
Chapter 24: Comparison of PageMaker
and InDesign menus
PageMaker menu commands
Browse through these tables to learn where Adobe PageMaker commands are found in AdobeInDesign CS5.
PageMaker File menu commands
PageMaker command InDesign equivalent Additional information
File > New File > New > Document
File > Open File > Open
File > Recent Publications File > Open Recent (Windows®)
File > Close File > Close
File > Save File > Save There is no preference in InDesign to Save Smaller or
Save Faster. Use Save to perform a fast save and Save
As to compact a document to the smallest possible
size.
File > Save As File > Save As See note above.
File > Revert File > Revert InDesign does not revert to “mini-saved” versions of
a document as PageMaker does; instead, InDesign
offers unlimited levels of Undo.
File > Place File > Place
File > Acquire No equivalent Scan images using the software that came with your
scanner, and then place the images in InDesign.
File > Export File > Export
File > Links Manager Window > Links
File > Document Setup File > Document Setup
File > Printer Styles File > Print Presets
File > Print File > Print
File > Preferences > General Edit > Preferences (Windows) or
InDesign
> Preferences (Mac OS)
Equivalent settings can be found in Composition,
Units & Increments, Guides & Pasteboard, and
Display Performance preferences.
File > Preferences > Online No equivalent You can drag objects from a web browser to
InDesign without configuring a proxy.
686
USING INDESIGN
Comparison of PageMaker and InDesign menus
Last updated 11/16/2011
PageMaker Edit menu commands
PageMaker Layout menu commands
File > Preferences > Layout Adjustment Layout > Layout Adjustment You specify layout adjustment options and enable
layout adjustment at the same time. Settings in
InDesign match those in PageMaker almost exactly.
Ruler guides follow their associated column or
margin guides by default. To change this, deselect
Allow Ruler Guides To Move.
File > Preferences > Trapping Window > Output > Trap Presets To specify trapping preferences, create a new Trap
preset.
File > Exit (Windows) or File > Quit
(Mac
OS)
File > Exit (Windows) or InDesign > Quit
InDesign (Mac
OS)
PageMaker command InDesign equivalent Additional information
Edit > Undo Edit > Undo InDesign allows unlimited levels of Undo.
Edit > Cut Edit > Cut
Edit > Copy Edit > Copy
Edit > Paste Edit > Paste InDesign does not support OLE; however, you can
set similar options in the Links panel.
Edit > Clear Edit > Clear
Edit > Select All Edit > Select All
Edit > Deselect All Edit > Deselect All
Edit > Editions (Mac OS) No equivalent InDesign does not support Publish/Subscribe;
however, you can set similar options in the Links
panel.
Edit > Paste Multiple Edit > Step And Repeat
Edit > Paste Special Edit > Paste Without Formatting
Edit > Insert Object (Windows) File > Place
Edit > Edit Story Edit > Edit In Story Editor
Edit > Edit Original Edit > Edit Original You can also choose Edit Original in the Links panel
menu.
Edit > Show Clipboard (Mac OS) No equivalent
PageMaker command InDesign equivalent Additional information
Layout > Go To Page Layout > Go To Page You can also double-click a page icon in the Pages
panel to jump to that page.
Layout > Insert Pages Layout > Pages > Insert Pages
Layout > Remove Pages Layout > Pages > Delete Pages
Layout > Sort Pages Window > Pages Click and drag pages in the Pages panel to sort them.
PageMaker command InDesign equivalent Additional information
687
USING INDESIGN
Comparison of PageMaker and InDesign menus
Last updated 11/16/2011
PageMaker Type menu commands
Layout > Go Back Layout > Go Back
Layout > Go Forward Layout > Go Forward
Layout > Column Guides Layout > Margins And Columns
Layout > Copy Master Guides No equivalent InDesign master guides from any given master are
always copied to pages that use that master.
Layout > Autoflow Press Shift when a loaded text icon is
displayed.
You can flow text manually, automatically (with
autoflow), or semi-automatically.
PageMaker command InDesign equivalent Additional information
Type > Font Type > Font
Type > Size Type > Size
Type > Leading Type > Character or Control panel in
Character mode (Window
> Control)
InDesign uses baseline leading by default, as
opposed to proportional leading, which is
PageMaker’s default.
Type > Type Style Type > Character or Control panel in
Character mode (Window
> Control)
InDesign displays the type styles available for the
selected font. You can also use Quick Apply.
Type > Expert Kerning Type > Character or Control panel in
Character mode (Window
> Control)
Expert kerning in PageMaker is similar to optical
kerning in InDesign.
Type > Horizontal Scale Control panel in Character mode
(Window
> Control)
Type > Character Type > Character
Type > Paragraph Type > Paragraph
Type > Indents/Tabs Type > Tabs
Type > Hyphenation Type > Paragraph Choose Hyphenation from the Paragraph panel
menu.
Type > Alignment Type > Paragraph or Control panel in
Paragraph mode (Window
> Control)
Type > Style Type > Paragraph Styles or Type >
Character Styles
InDesign supports both paragraph and character
styles.
Type > Define Styles Type > Paragraph Styles or Type >
Character Styles
Choose New Paragraph Style in the Paragraph Styles
panel to create a paragraph style. Choose New
Character Style in the Character Styles panel to
create a character style.
PageMaker command InDesign equivalent Additional information
688
USING INDESIGN
Comparison of PageMaker and InDesign menus
Last updated 11/16/2011
PageMaker Element menu commands
PageMaker command InDesign equivalent Additional information
Element > Fill Window > Color > Swatches or Window >
Color > Color
InDesign does not support patterned fills. The
Swatches panel in InDesign is equivalent to the
Colors palette in PageMaker.
Element > Stroke Window > Stroke Choose a stroke style in the Stroke panel or define a
custom stroke style.
Element > Fill And Stroke Window > Color > Swatches, Window >
Stroke, and Window
> Output >
Attributes
Create tints using the Swatches panel. Specify
overprinting in the Attributes panel.
Element > Frame > Attach Content No equivalent InDesign automatically creates a frame for text files
or graphics you import. To paste content into an
existing frame, select the frame, and then place or
paste the content into it.
Element > Frame > Frame Options Object > Text Frame Options (text frames
only) or Object
> Fitting
For text frames, specify columns, vertical alignment,
and inset spacing in the Text Frame Options dialog
box. Set horizontal alignment in the Paragraph
panel (Type
> Paragraph). For graphics and text
frames, use subcommands on the Object
> Fitting
menu to fit content to a frame (or vice versa).
Element > Frame > Change To Frame Object > Content > [content
type]
Element > Frame > Next Frame View > Extras > Show Text Threads
Element > Frame > Previous Frame View > Extras > Show Text Threads
Element > Frame > Remove From Threads Double-click the in port or out port to
break a thread.
Element > Frame > Delete Content Select content in the frame, and then
press Delete.
Select text with the Type tool. Select graphics with
the Direct Selection tool.
Element > Arrange Object > Arrange
Element > Align Objects (Windows) or
Element
> Align (Mac OS)
Window > Object & Layout > Align
Element > Text Wrap Window > Text Wrap
Element > Group Object > Group
Element > Ungroup Object > Ungroup
Element > Lock Position Object > Lock Position
Element > Unlock Object > Unlock Position
Element > Mask Object > Clipping Path You can also mask a graphic by creating the masking
shape, copying the image you want to mask, and
then pasting it into the shape (Edit
> Paste Into), or
by adjusting its graphics frame.
Element > Unmask Object > Clipping Path See note above.
Element > Image > Image Control No equivalent Use the Edit Original command to change image
control settings in the original application.
Element > Image > CMS Source Object > Image Color Settings
Element > Image > Photoshop Effects Object > Effects
689
USING INDESIGN
Comparison of PageMaker and InDesign menus
Last updated 11/16/2011
PageMaker Utilities menu commands
PageMaker View menu commands
Element > Polygon Settings Double-click the Polygon tool in the
Toolbox
Element > Rounded Corners Object > Corner Options
Element > Link Info Window > Links Choose Link Information on the Links panel menu.
Element > Link Options Type Preferences or Window > Links In File Handling Preferences, select or deselect
Create Links When Placing Text And Spreadsheet
Files. Or, on the Links panel menu, choose Unlink.
Element > Non-Printing Window > Output > Attributes
Element > Remove Transformation No equivalent
PageMaker command InDesign equivalent Additional information
Utilities > Plug-ins Help > Configure Plug-ins (Windows) or
InDesign
> Configure Plug-ins (Mac OS)
Utilities > Find Edit > Find/Change You can perform Find/Change operations in Layout
view or Story Editor.
Utilities > Find Next Edit > Find Next See note above.
Utilities > Change Edit > Find/Change See note above.
Utilities > Spelling Edit > Spelling > Check Spelling You can check spelling in Layout view or Story
Editor.
Utilities > Book File > New > Book You add, delete, and sort documents in a book using
the Book panel.
Utilities > Index Entry Window > Type & Tables > Index To add an index entry, click the New button in the
Index panel.
Utilities > Show Index Index panel in Reference mode
(Window
> Type & Tables > Index)
Utilities > Create Index Window > Type & Tables > Index Choose Generate Index on the Index panel menu.
Utilities > Create TOC Layout > Table Of Contents
Utilities > Define Colors Window > Color > Swatches Choose New Color Swatch in the Swatches panel
menu.
PageMaker command InDesign equivalent Additional information
View > Display Master Items Choose Hide/Show Master Items from the
Pages panel menu
View > Display Non-Printing Items Select Normal View Mode in the
Toolbox to view nonprinting items. To
hide nonprinting items, select Preview
Mode .
You can also create a layer for objects you do not
want to print, and then show or hide that layer when
you print or export.
View > Zoom In View > Zoom In
PageMaker command InDesign equivalent Additional information
690
USING INDESIGN
Comparison of PageMaker and InDesign menus
Last updated 11/16/2011
PageMaker Window menu commands
View > Zoom Out View > Zoom Out
View > Actual Size View > Actual Size
View > Fit In Window View > Fit Page In Window or View > Fit
Spread In Window
View > Entire Pasteboard View > Entire Pasteboard
View > Zoom To Choose a magnification level from the
Zoom menu at the bottom of the
document window.
View > Hide/Show Rulers View > Hide/Show Rulers
View > Snap To Rulers No equivalent
View > Zero Lock Right-click (Windows) or Control-click
(Mac
OS) the zero point, and then choose
Lock Zero Point from the context menu
that appears.
View > Hide/Show Guides View > Grids & Guides > Hide/Show
Guides
View > Snap To Guides View > Grids & Guides > Snap To Guides
View > Lock Guides View > Grids & Guides > Lock Guides And
View
> Grids & Guides > Lock Column
Guides
View > Clear Ruler Guides Using InDesign keyboard shortcuts, Press
Ctrl+Alt+G (Windows) or
Command+Option+G (Mac
OS) to select
all guides on the current spread, and then
press Delete.
View > Send Guides To Back Edit > Preferences > Guides & Pasteboard
(Windows) or InDesign
> Preferences >
Guides & Pasteboard (Mac
OS)
Select the Guides In Back option.
View > Hide/Show Scroll Bars No equivalent
PageMaker command InDesign equivalent Additional information
Window > Arrange Icons (Windows) No equivalent
Window > Tile Window > Arrange > Tile
Window > Cascade Window > Arrange > Cascade
Window > Hide/Show Tools Window > Tools
Window > Hide/Show Control Palette Window > Control
Window > Hide/Show Colors Window > Color > Swatches or Window >
Color > Color
Window > Hide/Show Styles Window > Styles > Paragraph Styles or
Character Styles
Window > Hide/Show Layers Window > Layers
PageMaker command InDesign equivalent Additional information
691
USING INDESIGN
Comparison of PageMaker and InDesign menus
Last updated 11/16/2011
Window > Hide/Show Master Pages Window > Pages
Window > Hide/Show Hyperlinks Window > Interactive > Hyperlinks
Window > Plug-in Palettes No equivalent Plug-ins appear as added options in InDesign menus
or panels, or in InDesign dialog boxes.
Window > [name of open
document]
Window > [name of open
document]
PageMaker command InDesign equivalent Additional information
692
Last updated 11/16/2011
Chapter 25: Keyboard shortcuts
Default keyboard shortcuts
Adobe InDesign CS5 provides shortcuts to help you quickly work in documents without using the mouse. Many
keyboard shortcuts appear next to the command names in menus. You can use the default InDesign shortcut set, the
QuarkXPress
4.0 or Adobe PageMaker 7.0 shortcut set, or a shortcut set that you create. You can share shortcut
shortcut sets with others using InDesign on the same platform.
More Help topics
“Use keyboard shortcut sets” on page 28
Keys for tools
You can generate a list of the current keyboard set by choosing Show Set in the Keyboard Shortcuts dialog box. This
option is especially useful for printing a copy of your custom shortcuts.
This table isn’t a complete list of keyboard shortcuts. It lists only those shortcuts that aren’t displayed in menu
commands or tool tips.
Choose Window > Utilities > Tool Hints, and then select a tool to view its shortcuts and modifier keys.
Tool Windows Mac OS
Selection tool V, Esc V, Esc
Direct Selection tool A A
Toggle Selection and Direct Selection tool Ctrl+Tab Command+Control+Tab
Page tool Shift+P Shift+P
Gap tool U U
Pen tool P P
Add Anchor Point tool = =
Delete Anchor Point tool - -
Convert Direction Point tool Shift+C Shift+C
Type tool T T
Type On A Path tool Shift+T Shift+T
Pencil tool (Note tool) N N
Line tool \ \
Rectangle Frame tool F F
Rectangle tool M M
Ellipse tool L L
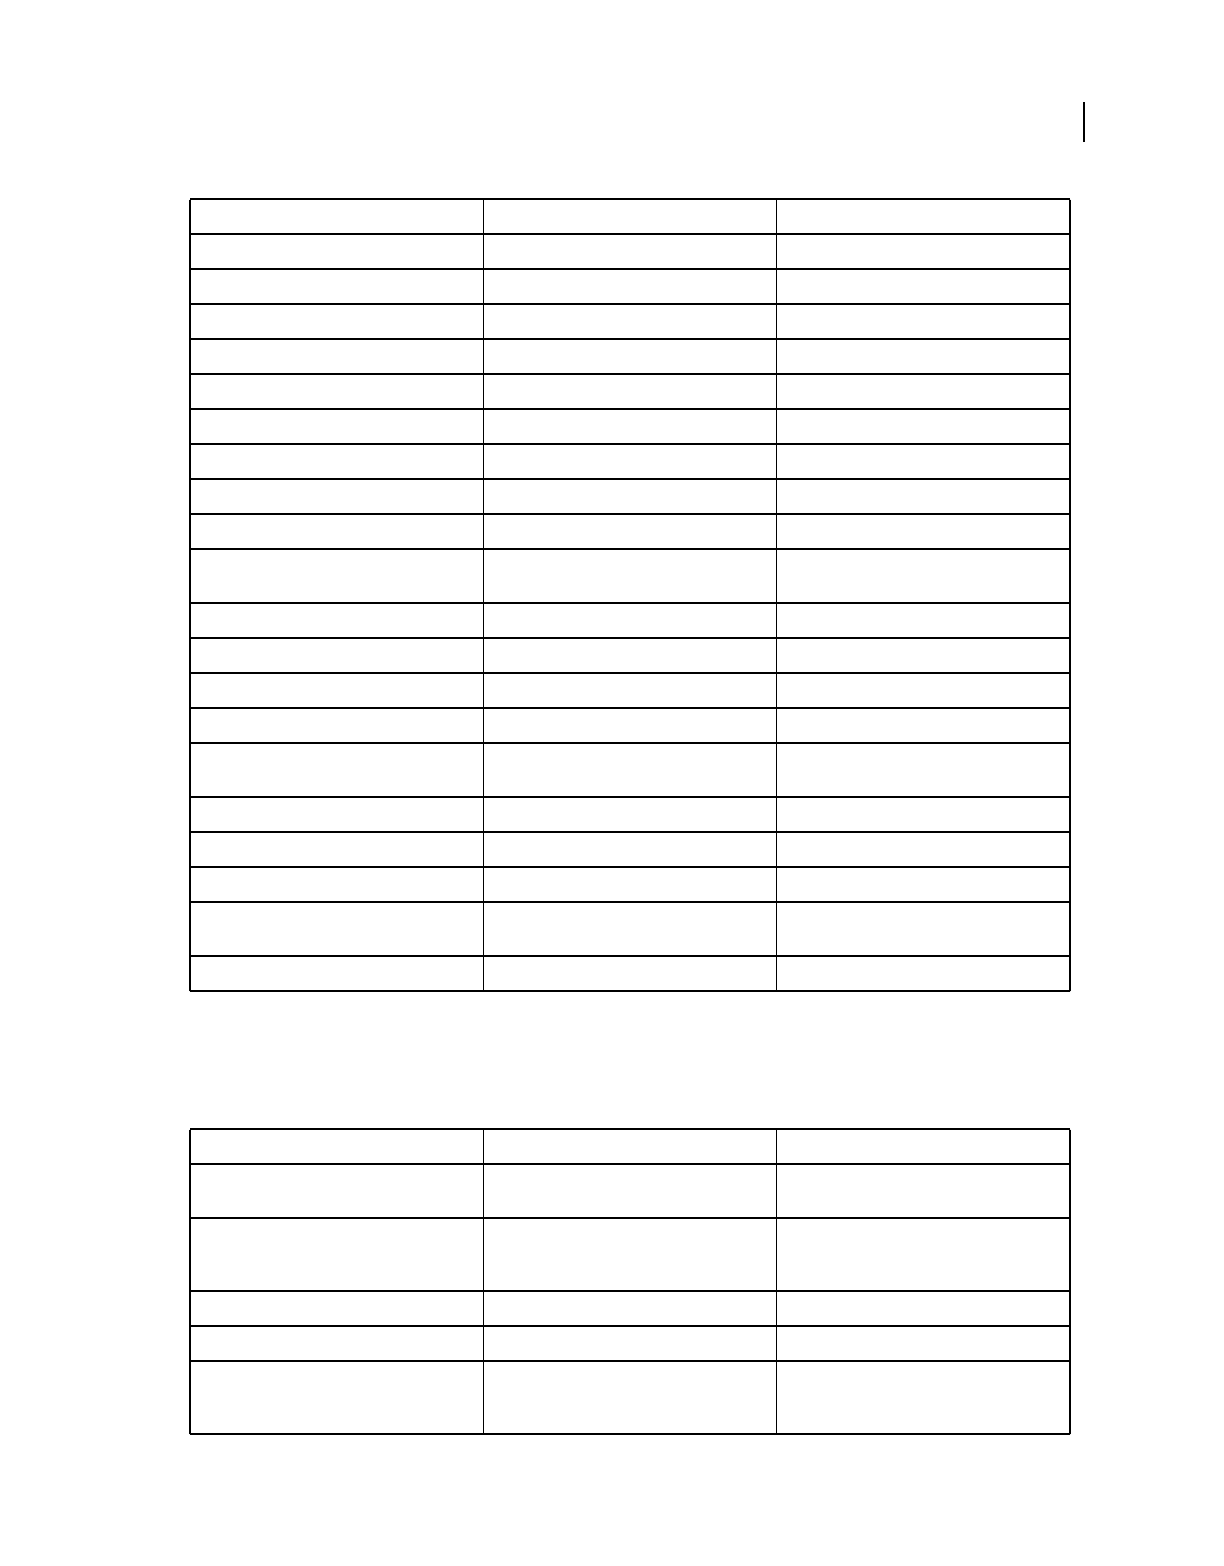
693
USING INDESIGN
Keyboard shortcuts
Last updated 11/16/2011
Keys for selecting and moving objects
This table isn’t a complete list of keyboard shortcuts. It lists only those shortcuts that aren’t displayed in menu
commands or tool tips.
Rotate tool R R
Scale tool S S
Shear tool O O
Free Transform tool E E
Eyedropper tool I I
Measure tool K K
Gradient tool G G
Scissors tool C C
Hand tool H H
Temporarily selects Hand tool Spacebar (Layout mode), Alt (Text mode), or
Alt+Spacebar (both)
Spacebar (Layout mode), Option (Text mode),
or Option+Spacebar (both)
Zoom tool Z Z
Temporarily selects Zoom In tool Ctrl+Spacebar Command+Spacebar
Toggle Fill and Stroke X X
Swap Fill and Stroke Shift+X Shift+X
Toggle between Formatting Affects
Container and Formatting Affects Text
J J
Apply Color , [comma] , [comma]
Apply Gradient . [period] . [period]
Apply No Color / /
Switch between Normal View and Preview
Mode
W W
Gradient Feather tool Shift+G Shift+G
Result Windows Mac OS
Temporarily select Selection or Direct
Selection tool (last used)
Any tool (except selection tools)+Ctrl Any tool (except selection tools)+ Command
Temporarily select Group Selection tool Direct Selection tool+Alt; or Pen, Add Anchor
Point, or Delete Anchor Point tool+Alt+Ctrl
Direct Selection tool+Option; or Pen, Add
Anchor Point, or Delete Anchor Point
tool+Option+Command
Select container of selected content Esc or double-click Esc or double-click
Select content of selected container Shift+Esc or double-click Shift+Esc or double-click
Add to or subtract from a selection
of
multiple objects
Selection, Direct Selection, or Group
Selection tool+Shift–click (to deselect, click
center point)
Selection, Direct Selection, or Group
Selection tool+Shift–click (to deselect, click
center point)
Tool Windows Mac OS
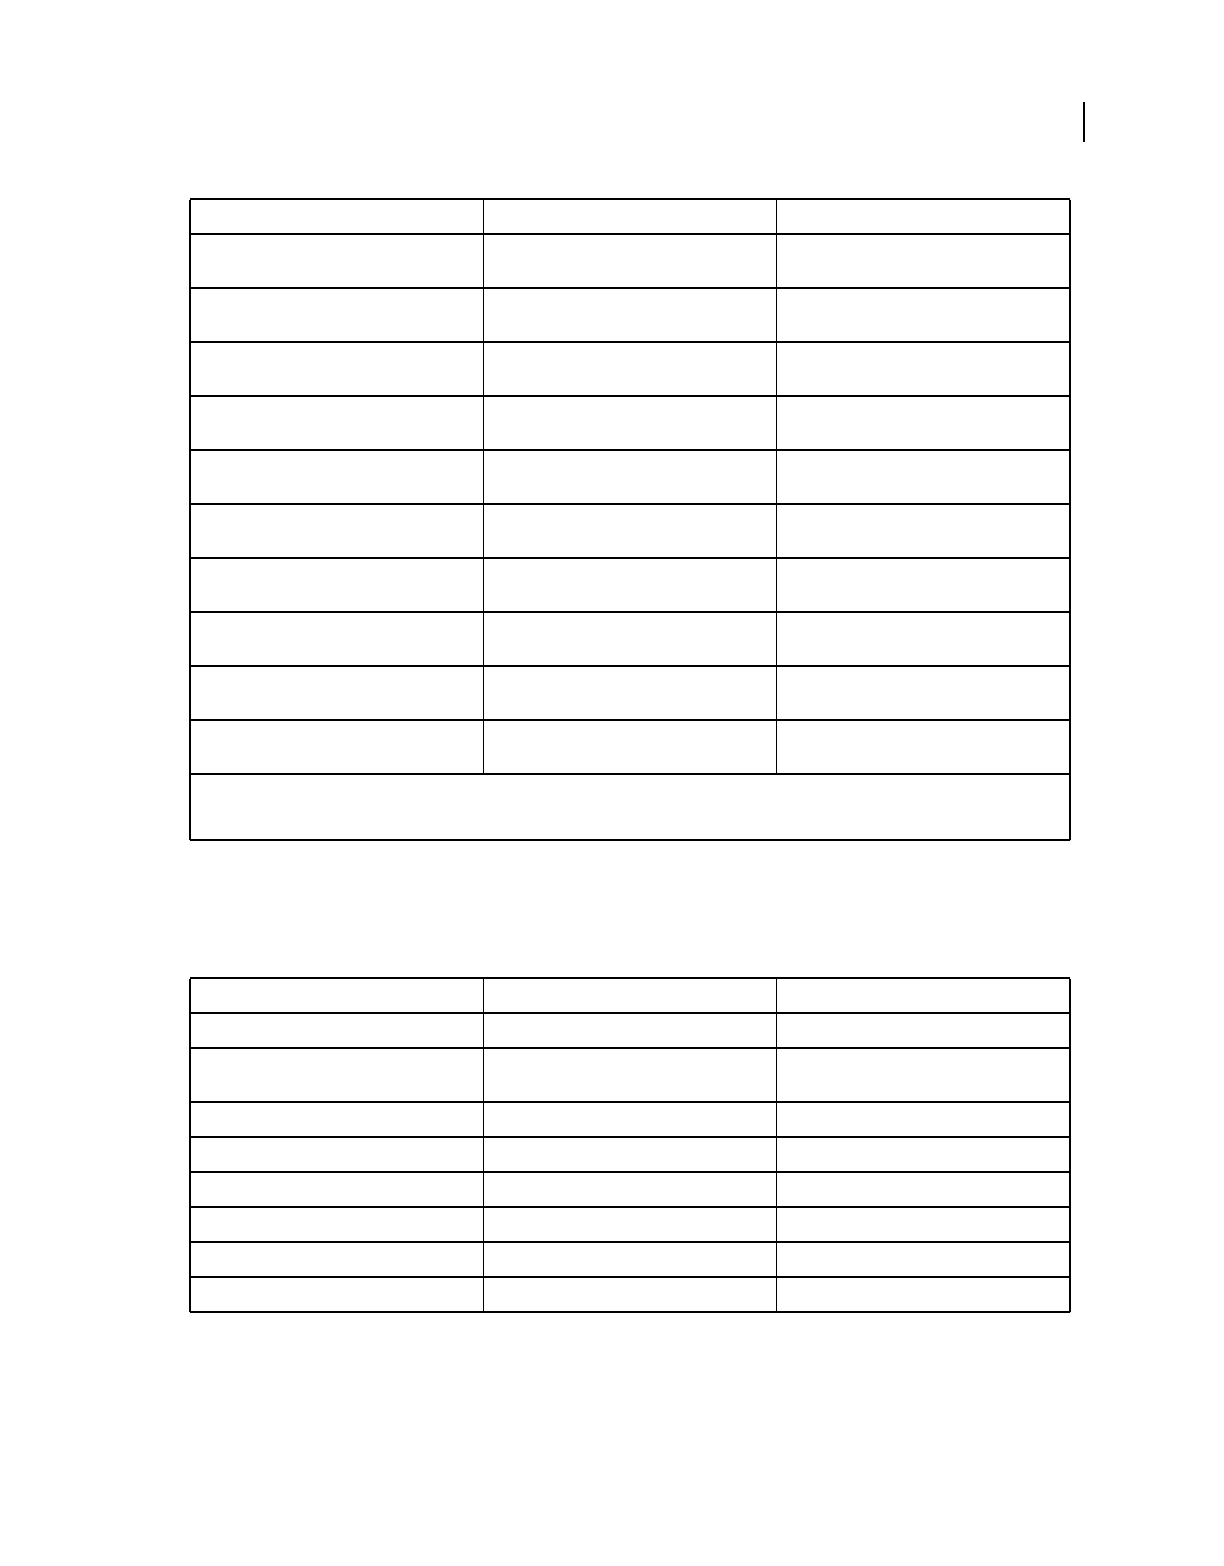
694
USING INDESIGN
Keyboard shortcuts
Last updated 11/16/2011
Keys for transforming objects
This table isn’t a complete list of keyboard shortcuts. It lists only those shortcuts that aren’t displayed in menu
commands or tool tips.
Duplicate selection Selection, Direct Selection, or Group
Selection tool+Alt–drag*
Selection, Direct Selection, or Group
Selection tool+ Option–drag*
Duplicate and offset selection Alt+Left Arrow, Right Arrow, Up Arrow, or
Down Arrow key
Option+Left Arrow, Right Arrow, Up Arrow, or
Down Arrow key
Duplicate and offset selection by 10 times** Alt+Shift+Left Arrow, Right Arrow, Up Arrow,
Down Arrow key
Option+Shift+Left Arrow, Right Arrow, Up
Arrow, Down Arrow key
Move selection** Left Arrow, Right Arrow, Up Arrow, Down
Arrow key
Left Arrow, Right Arrow, Up Arrow, Down
Arrow key
Move selection by 10th** Ctrl+Shift+Left Arrow, Right Arrow, Up Arrow,
Down arrow key
Command+Shift+Left Arrow, Right Arrow, Up
Arrow, Down arrow key
Move selection by 10 times** Shift+Left Arrow, Right Arrow, Up Arrow,
Down Arrow key
Shift+Left Arrow, Right Arrow, Up Arrow,
Down Arrow key
Select master page item from
document
page
Selection or Direct Selection tool+Ctrl+Shift–
click
Selection or Direct Selection tool+
Command+Shift–click
Select next object behind or in front Selection tool+Ctrl–click, or Selection
tool+Alt+Ctrl–click
Selection tool+Command–click or Selection
tool+Option+ Command–click
Select next or previous frame in story Alt+Ctrl+Page Down/ Alt+Ctrl+Page Up Option+Command+Page Down/
Option+Command+Page Up
Select first or last frame in story Shift+Alt+Ctrl+Page Down/
Shift+Alt+Ctrl+Page Up
Shift+Option+Command+Page Down/
Shift+Option+Command+Page Up
*Press Shift to constrain movement to 45° angles.
**Amount is set in Edit > Preferences > Units & Increments (Windows) or InDesign > Preferences > Units & Increments (Mac OS).
Result Windows Mac OS
Duplicate and transform selection Transformation tool+Alt–drag* Transformation tool+Option–drag*
Display Transform tool dialog box Select object+double-click Scale tool, Rotate
tool, or Shear tool in Toolbox
Select object+double-click Scale tool, Rotate
tool, or Shear tool in Toolbox
Decrease scale by 1% Ctrl+, Command+,
Decrease scale by 5% Ctrl+Alt+, Command+Option+,
Increase scale by 1% Ctrl+. Command+.
Increase scale by 5% Ctrl+Alt+. Command+Option+.
Resize frame and content Selection tool+Ctrl–drag Selection tool+Command–drag
Resize frame and content proportionately Selection tool+Shift+Ctrl–drag Selection tool+Shift+Command–drag
Result Windows Mac OS
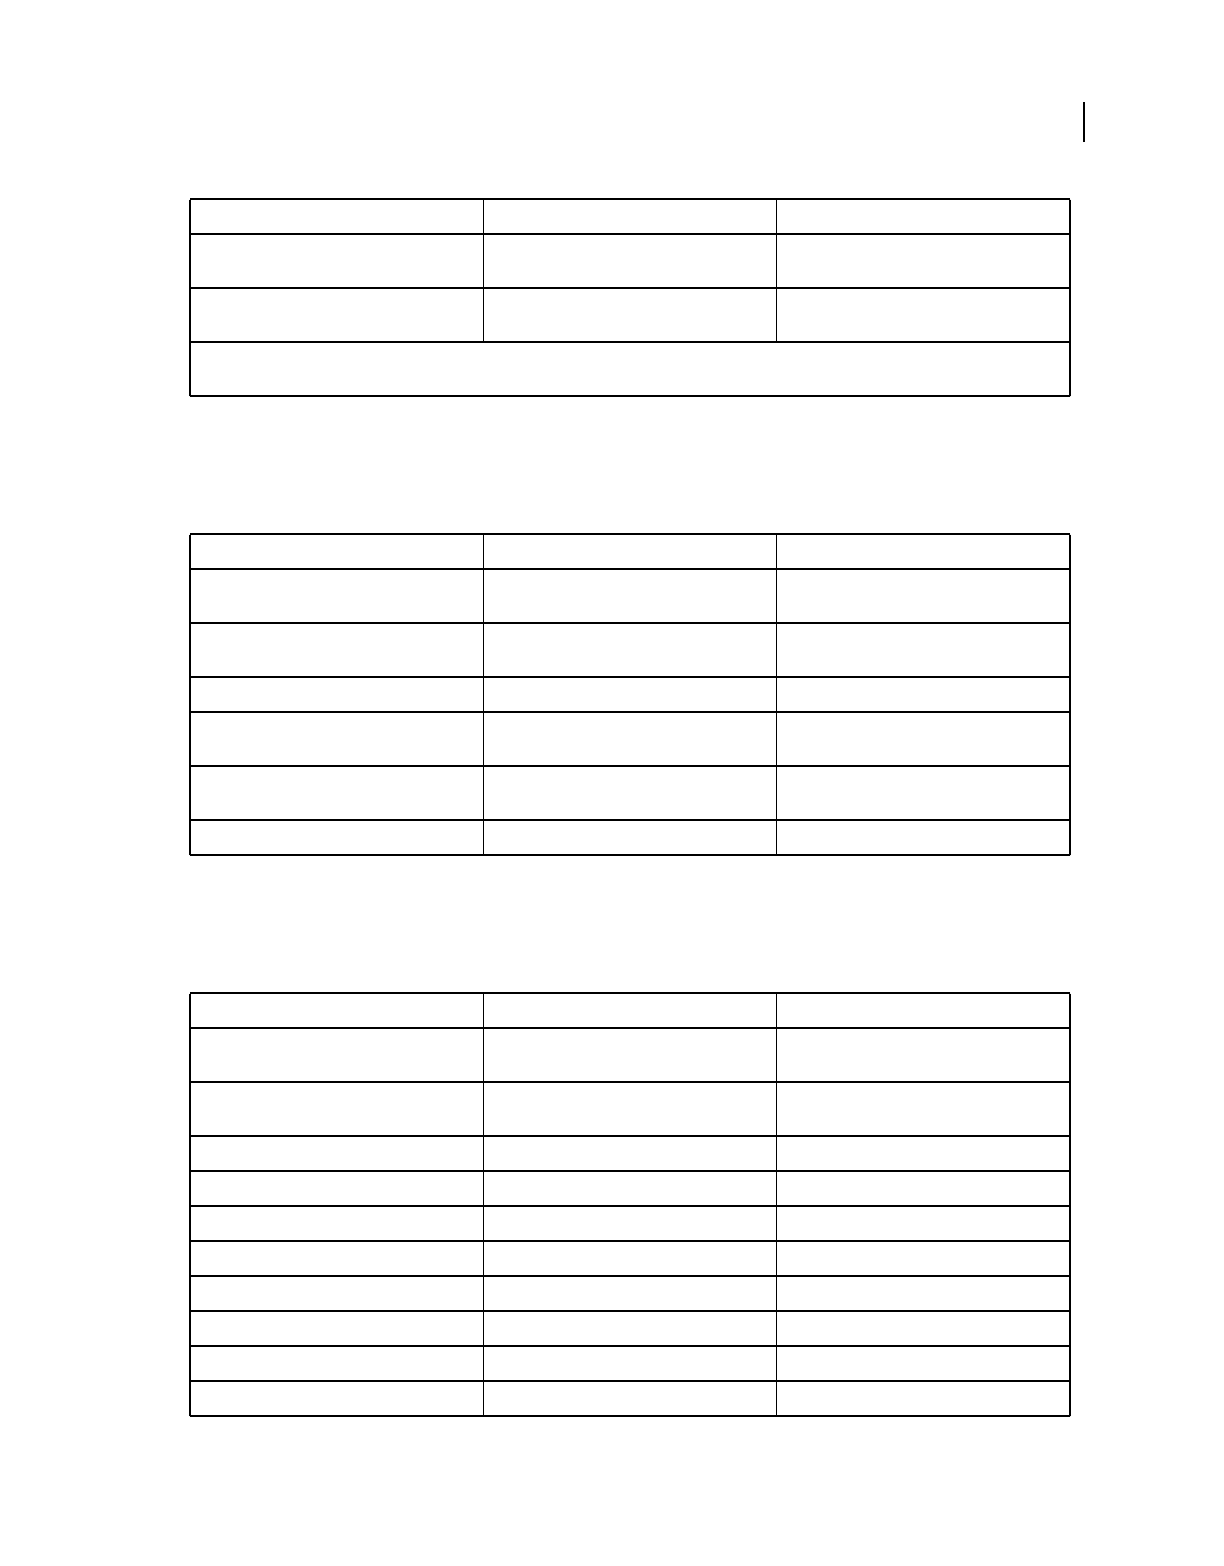
695
USING INDESIGN
Keyboard shortcuts
Last updated 11/16/2011
Keys for editing paths and frames
This table isn’t a complete list of keyboard shortcuts. It lists only those shortcuts that aren’t displayed in menu
commands or tool tips.
Keys for tables
This table isn’t a complete list of keyboard shortcuts. It lists only those shortcuts that aren’t displayed in menu
commands or tool tips.
Constrain proportion Ellipse tool, Polygon tool, or Rectangle
tool+Shift–drag
Ellipse tool, Polygon tool, or Rectangle
tool+Shift–drag
Switch image from High Quality Display to
Fast Display
Ctrl+Alt+Shift+Z Command+Option+Shift+Z
*After you select a transformation tool, hold down the mouse button, and then hold down Alt (Windows) or Option (Mac OS) and drag. Press
Shift to constrain movement to 45° angles.
Result Windows Mac OS
Temporarily select Convert Direction Point
tool
Direct Selection tool+Alt+Ctrl, or Pen
tool+Alt
Direct Selection tool+Option+ Command, or
Pen tool+Option
Temporarily switch between Add Anchor
Point and Delete Anchor Point tool
Alt Option
Temporarily select Add Anchor Point tool Scissors tool+Alt Scissors tool+Option
Keep Pen tool selected when pointer is over
path or anchor point
Pen tool+Shift Pen tool+Shift
Move anchor point and handles while
drawing
Pen tool+spacebar Pen tool+spacebar
Display the Stroke panel F10 Command+F10
Result Windows Mac OS
Insert or delete rows or columns while
dragging
Begin dragging row or column border, and
then hold down Alt as you drag
Begin dragging row or column border, and
then hold down Option as you drag
Resize rows or columns without changing the
size of the table
Shift–drag interior row or column border Shift–drag interior row or column border
Resize rows or columns proportionally Shift–drag right or bottom table border Shift–drag right or bottom table border
Move to next/previous cell Tab/Shift+Tab Tab/Shift+Tab
Move to first/last cell in column Alt+Page Up/ Alt+Page Down Option+Page Up/ Option+Page Down
Move to first/last cell in row Alt+Home/ Alt+End Option+Home/ Option+End
Move to first/last row in frame Page Up/Page Down Page Up/Page Down
Move up/down one cell Up Arrow/Down Arrow Up Arrow/Down Arrow
Move left/right one cell Left Arrow/Right Arrow Left Arrow/Right Arrow
Select cell above/below the current cell Shift+Up Arrow/ Shift+Down Arrow Shift+Up Arrow/ Shift+Down Arrow
Result Windows Mac OS
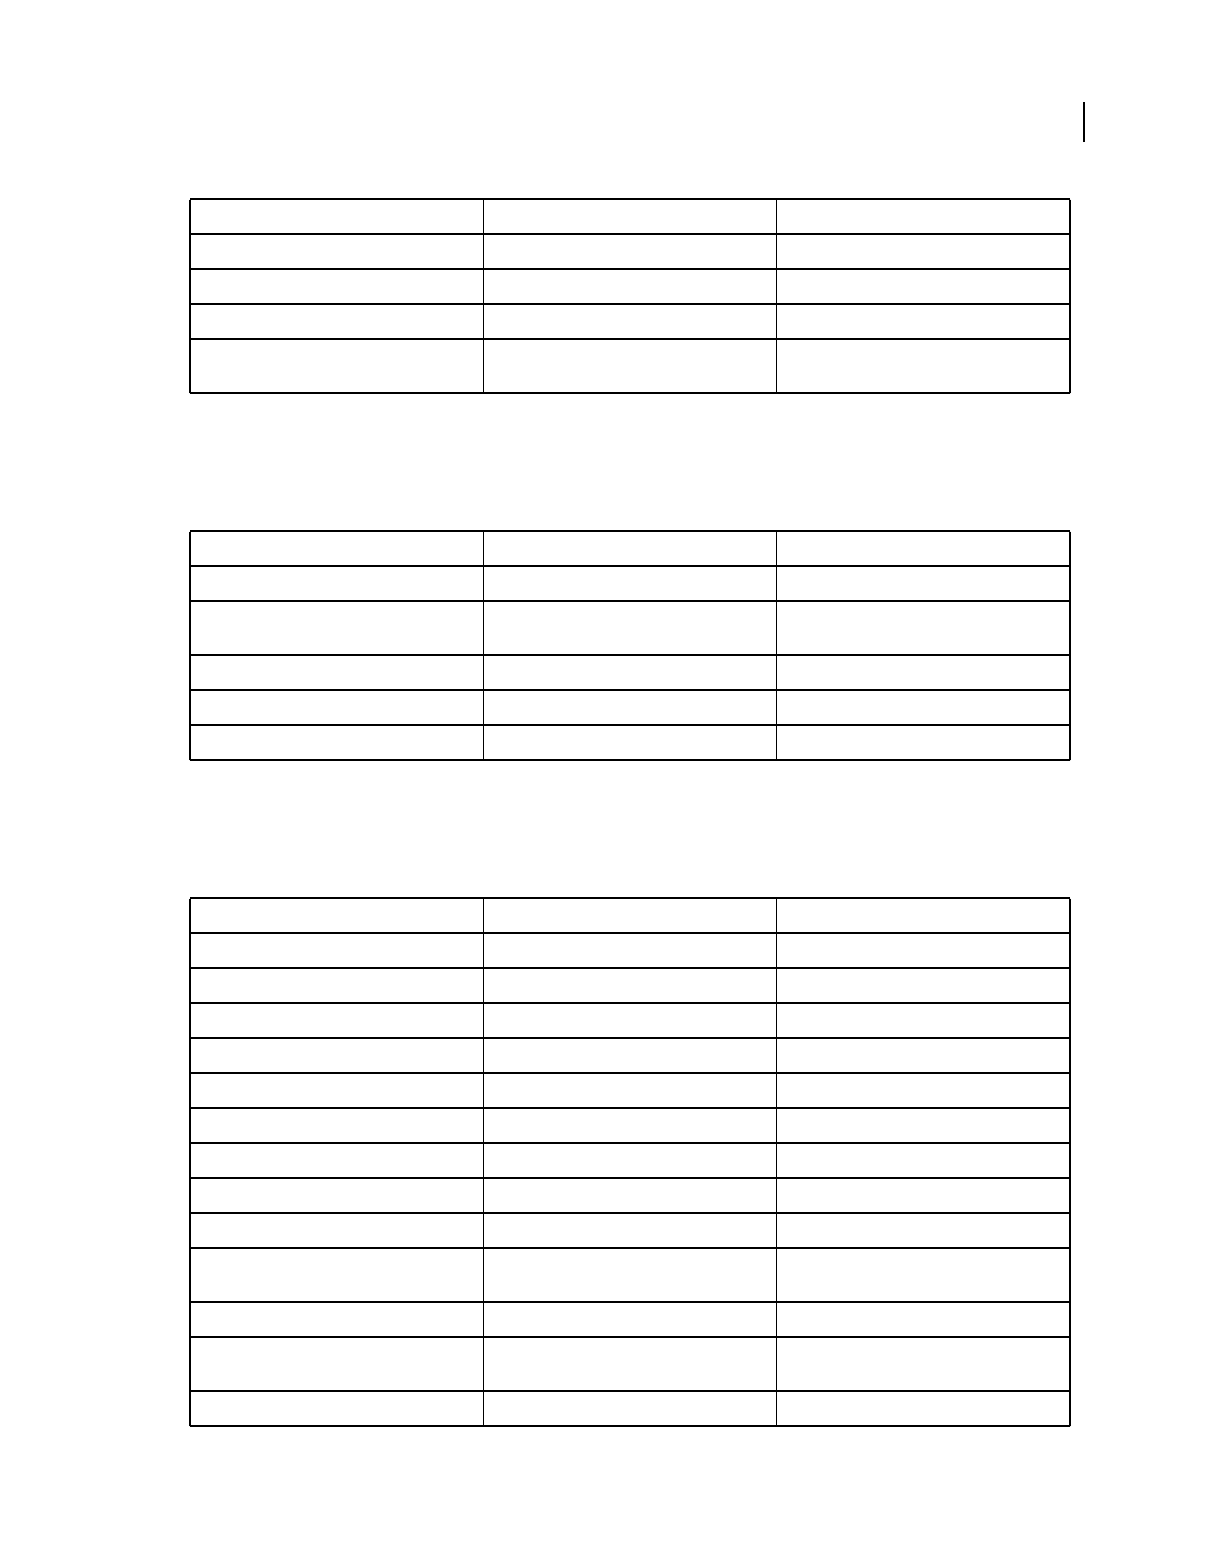
696
USING INDESIGN
Keyboard shortcuts
Last updated 11/16/2011
Keys for finding and changing text
This table isn’t a complete list of keyboard shortcuts. It lists only those shortcuts that aren’t displayed in menu
commands or tool tips.
Keys for working with type
This table isn’t a complete list of keyboard shortcuts. It lists only those shortcuts that aren’t displayed in menu
commands or tool tips.
Select cell to the right/left of the current cell Shift+Right Arrow/ Shift+Left Arrow Shift+Right Arrow/ Shift+Left Arrow
Start row on next column Enter (numeric keypad) Enter (numeric keypad)
Start row on next frame Shift+Enter (numeric keypad) Shift+Enter (numeric keypad)
Toggle between text selection and cell
selection
Esc Esc
Result Windows Mac OS
Insert selected text into Find What box Ctrl+F1 Command+F1
Insert selected text into Find What box
and
finds next
Shift+F1 Shift+F1
Find next occurrence of Find What text Shift+F2 or Alt+Ctrl+F Shift+F2 or Option+Command+F
Insert selected text into Change To box Ctrl+F2 Command+F2
Replace selection with Change To text Ctrl+F3 Command+F3
Result Windows Mac OS
Bold (only for fonts with bold face) Shift+Ctrl+B Shift+Command+B
Italic (only for fonts with italic face) Shift+Ctrl+I Shift+Command+I
Normal Shift+Ctrl+Y Shift+Command+Y
Underline Shift+Ctrl+U Shift+Command+U
Strikethrough Shift+Ctrl+/ Control+Shift+Command+/
All caps (on/off) Shift+Ctrl+K Shift+Command+K
Small caps (on/off) Shift+Ctrl+H Shift+Command+H
Superscript Shift+Ctrl+(+) [plus sign] Shift+Command+(+) [plus sign]
Subscript Shift+Alt+Ctrl+(+) [plus sign] Shift+Option+Command+(+) [plus sign]
Reset horizontal or vertical scale to 100% Shift+Ctrl+X or Shift+Alt+Ctrl+X Shift+Command+X or
Shift+Option+Command+X
Align left, right, or center Shift+Ctrl+L, R, or C Shift+Command+L, R, or C
Justify all lines Shift+Ctrl+F (all lines) or J (all but last line) Shift+Command+F (all lines) or J (all but last
line)
Increase or decrease point size* Shift+Ctrl+> or < Shift+Command+> or <
Result Windows Mac OS
697
USING INDESIGN
Keyboard shortcuts
Last updated 11/16/2011
Keys for navigating through and selecting text
This table isn’t a complete list of keyboard shortcuts. It lists only those shortcuts that aren’t displayed in menu
commands or tool tips.
Increase or decrease point size by five times* Shift+Ctrl+Alt+> or < Shift+Command+ Option+> or <
Increase or decrease leading (horizontal
text)*
Alt+Up Arrow/ Alt+Down Arrow Option+Up Arrow/ Option+Down Arrow
Increase or decrease leading by five times
(horizontal text)*
Alt+Ctrl+Up Arrow/ Alt+Ctrl+Down Arrow Option+Command+Up Arrow/
Option+Command+Down Arrow
Auto leading Shift+Alt+Ctrl+A Shift+Option+Command+A
Align to grid (on/off) Shift+Alt+Ctrl+G Shift+Option+Command+G
Auto-hyphenate (on/off) Shift+Alt+Ctrl+H Shift+Option+Command+H
Increase or decrease kerning and tracking
(horizontal text)
Alt+Left Arrow/Alt+Right Arrow Option+Left Arrow/ Option+Right Arrow
Increase or decrease kerning and tracking by
five times (horizontal text)
Alt+Ctrl+Left Arrow/ Alt+Ctrl+Right Arrow Option+Command+Left Arrow/
Option+Command+Right Arrow
Increase kerning between words* Alt+Ctrl+\ Option+Command+\
Decrease kerning between words* Alt+Ctrl+Backspace Option+Command+Delete
Clear all manual kerning and reset tracking to
0
Alt+Ctrl+Q Option+Command+Q
Increase or decrease baseline shift**
(horizontal text)
Shift+Alt+Up Arrow/ Shift+Alt+Down Arrow Shift+Option+Up Arrow/ hift+Option+Down
Arrow
Increase or decrease baseline shift by five
times (horizontal text)
Shift+Alt+Ctrl+Up Arrow/
Shift+Alt+Ctrl+Down Arrow
Shift+Option+Command+Up Arrow/
Shift+Option+Command+Down Arrow
Automatically flow story Shift–click loaded text icon Shift–click loaded text icon
Semi-automatically flow story Alt–click loaded text icon Option–click loaded text icon
Recompose all stories Alt+Ctrl+/ Option+Command+/
Insert current page number Alt+Ctrl+N Option+Command+N
*Press Shift to increase or decrease kerning between words by five times.
**Amount is set in Edit > Preferences > Units & Increments (Windows) or InDesign > Preferences > Units & Increments (Mac OS).
Result Windows Action Mac OS Action
Move to right or left one character Right Arrow/ Left Arrow Right Arrow/ Left Arrow
Move up or down one line Up Arrow/ Down Arrow Up Arrow/ Down Arrow
Move to right or left one word Ctrl+Right Arrow/ Ctrl+Left Arrow Command+Right Arrow/ Command+Left
Arrow
Move to start or end of line Home/End Home/End
Move to previous or next paragraph Ctrl+Up Arrow/ Ctrl+Down Arrow Command+Up Arrow/ Command+Down
Arrow
Result Windows Mac OS
698
USING INDESIGN
Keyboard shortcuts
Last updated 11/16/2011
Keys for viewing documents and document workspaces
This table isn’t a complete list of keyboard shortcuts. It lists only those shortcuts that aren’t displayed in menu
commands or tool tips.
Move to start or end of story Ctrl+Home/ Ctrl+End Command+Home/ Command+End
Select one word Double-click word Double-click word
Select one character right or left Shift+Right Arrow/ Shift+Left Arrow Shift+Right Arrow/ Shift+Left Arrow
Select one line above or below Shift+Up Arrow/ Shift+Down Arrow Shift+Up Arrow/ Shift+Down Arrow
Select start or end of line Shift+Home/ Shift+End Shift+Home/ Shift+End
Select one paragraph Triple-click or quadruple-click paragraph,
depending on Text Preferences setting
Triple-click or quadruple-click paragraph,
depending on Text Preferences setting
Select one paragraph before or after Shift+Ctrl+Up Arrow/ Shift+Ctrl+Down
Arrow
Shift+Command+Up Arrow/
Shift+Command+Down Arrow
Select current line Shift+Ctrl+\ Shift+Command+\
Select characters from insertion point Shift–click Shift–click
Select start or end of story Shift+Ctrl+Home/ Shift+Ctrl+End Shift+Command+Home/
Shift+Command+End
Select all in story Ctrl+A Command+A
Select first/last frame Shift+Alt+Ctrl+Page Up/ Shift+Alt+Ctrl+Page
Down
Shift+Option+ Command+Page Up/
Shift+Option+ Command+Page Down
Select previous/next frame Alt+Ctrl+Page Up/ Alt+Ctrl+Page Down Option+Command+Page Up/
Option+Command+Page Down
Delete word in front of insertion point (Story
Editor)
Ctrl+Backspace or Delete Command+Delete or Del (numeric keypad)
Update missing font list Ctrl+Alt+Shift+/ Command+Option+Shift+/
Result Windows Mac OS
Temporarily select Hand tool Spacebar (with no text insertion point), Alt-
drag (with text insertion point), or
Alt+spacebar (in both text and non-text
modes)
Spacebar (with no text insertion point),
Option–drag (with text insertion point), or
Option+spacebar (in both text and nontext
modes)
Temporarily select Zoom In tool Ctrl+spacebar Command+spacebar
Temporarily select Zoom Out tool Alt+Ctrl+spacebar or Alt+Zoom In tool Option+Command+spacebar or
Option+Zoom In tool
Zoom to 50%, 200%, or 400% Ctrl+5, 2, or 4 Command+5, 2, or 4
Redraw screen Shift+F5 Shift+F5
Open new default document Ctrl+Alt+N Command+Option+N
Switch between current and previous zoom
levels
Alt+Ctrl+2 Option+Command+2
Switch to next/previous document window Ctrl+~ [tilde]/ Shift+Ctrl+F6 or Ctrl+Shift+~
[tilde]
Command+F6 or Command+~ [tilde]/
Command+Shift+~ [tilde]
Result Windows Action Mac OS Action
699
USING INDESIGN
Keyboard shortcuts
Last updated 11/16/2011
Keys for working with XML
This table isn’t a complete list of keyboard shortcuts. It lists only those shortcuts that aren’t displayed in menu
commands or tool tips.
Scroll up/down one screen Page Up/Page Down Page Up/Page Down
Go back/forward to last-viewed page Ctrl+Page Up/ Ctrl+Page Down Command+Page Up/ Command+Page Down
Go to previous/next spread Alt+Page Up/ Alt+Page Down Option+Page Up/ Option+Page Down
Fit spread in window Double-click Hand tool Double-click Hand tool
Activate the Go To command Ctrl+J Command+J
Fit selection in window Ctrl+Alt+(+) [plus sign] Command+Option+(+) [plus sign]
Go to master page while \ panel is closed Ctrl+J, type prefix of master, press Enter Command+J, type prefix of master, press
Return
Cycle through units of measurement Shift+Alt+Ctrl+U Shift+Option+Command+U
Snap guide to ruler increments Shift–drag guide Shift–drag guide
Switch between page and spread guides
(creation only)
Ctrl–drag guide Command–drag guide
Temporarily turn on/off snap to Control-drag object
Create vertical and horizontal ruler guides for
the spread
Ctrl–drag from zero point Command–drag from zero point
Select all guides Alt+Ctrl+G Option+Command+G
Lock or unlock zero point Right-click zero point and choose an option Control–click zero point and choose an
option
Use current magnification for view threshold
of new guide
Alt–drag guide Option–drag guide
Select buttons in alert dialog boxes Press first letter of button name, if underlined Press first letter of button name
Show information on installed plug-ins and
InDesign components
Ctrl+Help > About Design Command+InDesign menu > About InDesign
Result Windows Mac OS
Expand/Collapse element Right Arrow/Left Arrow Right Arrow/Left Arrow
Expand/Collapse element and child elements Alt+Right Arrow/ Alt+Left Arrow Option+Right Arrow/ Option+Left Arrow
Extend XML selection up/down Shift+Up Arrow/ Shift+Down Arrow Shift+Up Arrow/ Shift+Down Arrow
Move XML selection up/down Up Arrow/ Down Arrow Up Arrow/ Down Arrow
Scroll structure pane up/down one screen Page Up/ Page Down Page Up/ Page Down
Select first/last XML node Home/ End Home/ End
Result Windows Mac OS
700
USING INDESIGN
Keyboard shortcuts
Last updated 11/16/2011
Keys for indexing
This table isn’t a complete list of keyboard shortcuts. It lists only those shortcuts that aren’t displayed in menu
commands or tool tips.
Keys for panels
This table isn’t a complete list of keyboard shortcuts. It lists only those shortcuts that aren’t displayed in menu
commands or tool tips.
Extend selection to first/last XML node Shift+Home/ Shift+End Shift+Home/ Shift+End
Go to previous/next validation error Ctrl+Left Arrow/ Ctrl+Right Arrow Command+Left Arrow/ Command+Right
Arrow
Automatically tag text frames and tables Ctrl+Alt+Shift+F7 Command+Option+Shift+F7
Result Windows Mac OS
Create index entry without dialog box Shift+Ctrl+Alt+[ Shift+Command+Option+[
Open index entry dialog box Ctrl+7 Command+7
Create proper name index entry (last name,
first name)
Shift+Ctrl+Alt+] Shift+Command+Option+]
Result Windows Mac OS
Delete without confirmation Alt-click Delete icon Option-click Delete icon
Create item and set options Alt-click New button Option-click New button
Apply value and keep focus on option Shift+Enter Shift+Enter
Activate last-used option in last-used panel Ctrl+Alt+~ [tilde] Command+Option+~ [tilde]
Select range of styles, layers, links, swatches,
or library objects in a panel
Shift-click Shift-click
Select nonadjacent styles, layers, links,
swatches, or library objects in a panel
Ctrl-click Command-click
Apply value and select next value Tab Tab
Move focus to selected object, text, or
window
Esc Esc
Show/Hide all panels, Toolbox, and Control
panel (with no insertion point)
Tab Tab
Show/Hide all panels except the Toolbox and
Control panel (docked or not)
Shift+Tab Shift+Tab
Open or close all stashed panels Ctrl+Alt+Tab Command+Option+Tab
Result Windows Mac OS
701
USING INDESIGN
Keyboard shortcuts
Last updated 11/16/2011
Keys for the Control panel
This table isn’t a complete list of keyboard shortcuts. It lists only those shortcuts that aren’t displayed in menu
commands or tool tips.
Keys for type panels and dialog boxes
This table isn’t a complete list of keyboard shortcuts. It lists only those shortcuts that aren’t displayed in menu
commands or tool tips.
Stash a panel group Alt+drag any panel tab (in the group) to edge
of screen
Option+drag any panel tab (in the group) to
edge of window
Select item by name Alt+Ctrl-click in list, and then use keyboard to
select item by name
Option+Command-click in list and then use
keyboard to select item by name
Open the Drop Shadow panel Alt+Ctrl+M Command+Option+M
Result Windows Mac OS
Toggle focus to/from Control panel Ctrl+6 Command+6
Toggle Character/Paragraph text attributes
mode
Ctrl+Alt+7 Command+Option+7
Change reference point when proxy has
focus
Any key on the numeric keypad or keyboard
numbers
Any key on the numeric keypad or keyboard
numbers
Display the pop-up menu that has focus Alt+Down Arrow
Open Units & Increments Preferences Alt-click Kerning icon Option-click Kerning icon
Open the Text Frame Options dialog box Alt-click Number Of Columns icon Option-click Number of Columns icon
Open the Move dialog box Alt-click X or Y icon Option-click X or Y icon
Open the Rotate dialog box Alt-click Angle icon Option-click Angle icon
Open the Scale dialog box Alt-click X or Y Scale icon Option-click X or Y Scale icon
Open the Shear dialog box Alt-click Shear icon Option-click Shear icon
Open Text Preferences Alt-click Superscript, Subscript, or Small Caps
button
Option-click Superscript, Subscript, or Small
Caps button
Open the Underline Options dialog box Alt-click Underline button Option-click Underline button
Open the Strikethrough Options dialog box Alt-click Strikethrough button Option-click Strikethrough button
Open the Grids Preferences Alt-click Align To Baseline Grid, or Do Not
Align To Baseline Grid button
Option-click Align To Baseline Grid, or Do Not
Align To Baseline Grid button
Open the Drop Caps & Nested Styles dialog
box
Alt-click Drop Cap Number Of Lines, or Drop
Cap One Or More Characters icon
Option-click Drop Cap Number Of Lines, or
Drop Cap One Or More Characters icon
Open the Justification dialog box Alt-click Leading icon Option-click Leading icon
Result Windows Mac OS
702
USING INDESIGN
Keyboard shortcuts
Last updated 11/16/2011
Keys for the character and paragraph styles
This table isn’t a complete list of keyboard shortcuts. It lists only those shortcuts that aren’t displayed in menu
commands or tool tips.
Keys for the Tabs panel
This table isn’t a complete list of keyboard shortcuts. It lists only those shortcuts that aren’t displayed in menu
commands or tool tips.
Keys for the Layers panel
This table isn’t a complete list of keyboard shortcuts. It lists only those shortcuts that aren’t displayed in menu
commands or tool tips.
Result Windows Mac OS
Open Justification dialog box Alt+Ctrl+Shift+J Option+Command+Shift+J
Open Paragraph Rules dialog box Alt+Ctrl+J Option+Command+J
Open Keep Options dialog box Alt+Ctrl+K Option+Command+K
Activate Character panel Ctrl+T Command+T
Activate Paragraph panel Ctrl+Alt+T Command+Option+T
Result Windows Mac OS
Make character style definition match text Select text and press Shift+Alt+Ctrl+C Select text and press
Shift+Option+Command+C
Make paragraph style definition match text Select text and press Shift+Alt+Ctrl+R Select text and press
Shift+Option+Command+R
Change options without applying style Shift+Alt+Ctrl-double-click style Shift+Option+Command-double-click style
Remove style and local formatting Alt-click paragraph style name Option-click paragraph style name
Clear overrides from paragraph style Alt+Shift-click paragraph style name Option+Shift-click paragraph style name
Show/hide Paragraph and Character Styles
panels, respectively
F11, Shift+F11 Command+F11, Command+Shift+F11
Result Windows Mac OS
Activate Tabs panel Shift+Ctrl+T Shift+Command+T
Switch between alignment options Alt-click tab Option-click tab
Result Windows Mac OS
Select all objects on layer Alt-click layer Option-click layer
Copy selection to new layer Alt-drag small square to new layer Option-drag small square to new layer
Add new layer below selected layer Ctrl-click Create New Layer Command-click Create New Layer
703
USING INDESIGN
Keyboard shortcuts
Last updated 11/16/2011
Keys for the Pages panel
This table isn’t a complete list of keyboard shortcuts. It lists only those shortcuts that aren’t displayed in menu
commands or tool tips.
Keys for the Color panel
This table isn’t a complete list of keyboard shortcuts. It lists only those shortcuts that aren’t displayed in menu
commands or tool tips.
Keys for using the Separations Preview panel
This table isn’t a complete list of keyboard shortcuts. It lists only those shortcuts that aren’t displayed in menu
commands or tool tips.
Add new layer to the top of the layer list Shift+Ctrl-click Create New Layer Shift+Command-click Create New Layer
Add new layer to the top of the layer list and
open New Layer dialog box
Shift+Alt+Ctrl-click Create New Layer Cmd+Option+Shift-click Create New Layer
Add new layer and open New Layer dialog
box
Alt-click Create New Layer Option-click Create New Layer
Result Windows Mac OS
Apply master to selected page Alt-click master Option-click master
Base another master page on selected master Alt-click the master you want to base the
selected master on
Option-click the master you want to base the
selected master on
Create master page Ctrl-click Create New Page button Command-click Create New Page button
Display Insert Pages dialog box Alt-click New Page button Option-click New Page button
Add new page after last page Shift+Ctrl+P Shift+Command+P
Result Windows Mac OS
Move color sliders in tandem Shift-drag slider Shift-drag slider
Select a color for the nonactive fill or stroke Alt-click color bar Option-click color bar
Switch between color modes (CMYK, RGB, LAB) Shift-click color bar Shift-click color bar
Result Windows Action Mac OS Action
Turn on Overprint preview Ctrl+Alt+Shift+Y Command+Option+Shift+Y
Show all plates Ctrl+Alt+Shift+~ [tilde] Command+Option+Shift+~ [tilde]
Show Cyan plate Ctrl+Alt+Shift+1 Command+Option+Shift+1
Show Magenta plate Ctrl+Alt+Shift+2 Command+Option+Shift+2
Show Yellow plate Ctrl+Alt+Shift+3 Command+Option+Shift+3
Show Black plate Ctrl+Alt+Shift+4 Command+Option+Shift+4
Result Windows Mac OS
704
USING INDESIGN
Keyboard shortcuts
Last updated 11/16/2011
Keys for the Swatches panel
This table isn’t a complete list of keyboard shortcuts. It lists only those shortcuts that aren’t displayed in menu
commands or tool tips.
Keys for the Transform panel
This table isn’t a complete list of keyboard shortcuts. It lists only those shortcuts that aren’t displayed in menu
commands or tool tips.
Keys for resolving conflicts between Mac OS 10.3x and 10.4
This table isn’t a complete list of keyboard shortcuts. It lists only those shortcuts that aren’t displayed in menu
commands or tool tips.
Show 1st Spot plate Ctrl+Alt+Shift+5 Command+Option+Shift+5
Show 2nd Spot plate Ctrl+Alt+Shift+6 Command+Option+Shift+6
Show 3rd Spot plate Ctrl+Alt+Shift+7 Command+Option+Shift+7
Result Windows Mac OS
Create new swatch based on the current
swatch
Alt-click New Swatch button Option-click New Swatch button
Create spot color swatch based on the
current swatch
Alt+Ctrl-click New Swatch button Option+Command-click New Swatch button
Change options without applying swatch Shift+Alt+Ctrl-double-click swatch Shift+Option+Command-double-click
swatch
Result Windows Mac OS
Apply value and copy object Alt+Enter Option+Enter
Apply width, height, or scale value proportionally Ctrl+Enter Command+Enter
Result Mac OS
Open Preferences dialog box Command+K
Open Paragraph Styles panel Command+F11
Open Character Styles panel Command+Shift+F11
Open Swatches panel F5
Open Pages panel Command+F12
Minimize active application window Command+M
Hide application Command+H
Result Windows Action Mac OS Action
