Apple Aperture 1.0 User Manual
User Manual: apple Aperture - 1.0 - User Manual Free User Guide for Apple Aperture Software, Manual
Open the PDF directly: View PDF ![]() .
.
Page Count: 1
- Aperture User Manual
- Contents
- Introducing Aperture
- Part I: Interface and Acquisition
- An Overview of Aperture
- The Aperture Interface
- Working with Aperture Projects
- Importing Images
- An Overview of Importing Images
- File Formats You Can Import into the Library
- Planning Your Import Strategy
- Importing from Your Digital Camera or Card Reader
- Importing Image Files Stored on Your Computer
- Automatically Naming Your Imported Images
- Adding Metadata to Images During Import
- Creating Stacks Automatically During Import
- Adjusting the Image File’s Time When Importing
- Dragging Files from the Finder to the Projects Panel
- Importing Folders of Images from the Finder
- Importing Your iPhoto Library
- Transferring Projects from Another System
- Making an Immediate Backup
- Where Aperture Stores Your Managed Files in the Library
- Part II: Photo Editing
- Working with Images in the Browser
- An Overview of the Browser
- Navigating Through and Selecting Images
- Working with a Selection of Images
- Working with Images in Grid View
- Working with Images in List View
- Searching for Images in the Browser
- Rearranging Images in the Browser
- Sorting Images in Grid View
- Rotating Images
- Creating Versions of an Image
- Deleting Images from the Browser
- Dragging Images into Different Projects and Albums
- Working with Referenced Images
- Identifying Referenced Images
- Displaying a List of Referenced Images
- Locating a Referenced Image on a Hard Disk
- Reconnecting Missing or Offline Referenced Images
- Relocating Referenced Images’ Master Files
- Moving Referenced Images’ Master Files to the Aperture Library
- Copying, Moving, and Deleting Referenced Images
- Using the Query HUD to Search for Referenced Images’ Master Files
- Working with Two Projects Open
- Displaying Specific Metadata with Your Images
- Displaying Images in the Viewer
- An Overview of the Viewer
- Showing or Hiding the Viewer
- Changing the Viewer Background
- Changing the Number of Images in the Viewer
- Comparing Images
- Viewing Stacks
- Viewing Images with the Loupe
- Using the Color Meter
- Showing Hot Areas in Your Images
- Viewing Images at Full Resolution
- Viewing Master Images
- Setting Up the Viewer for Onscreen Proofing
- Viewing Images on Multiple Displays
- Displaying Metadata Associated with Images
- Selecting Image Preview Options
- Quickly Accessing Commands
- Viewing Images in Full Screen Mode
- An Overview of Full Screen Mode
- Entering and Exiting Full Screen Mode
- Working with the Filmstrip in Full Screen Mode
- Working with the Toolbar in Full Screen Mode
- Using HUDs in Full Screen Mode
- Changing the Display of Metadata in Full Screen Mode
- Using Keyboard Shortcuts in Full Screen Mode
- Quickly Accessing Commands
- Stacking Images and Making Picks
- Rating Images
- Applying Keywords to Images
- An Overview of Keywords
- Viewing Keywords Applied to Images
- Applying Keywords Using the Keywords HUD
- Applying Keywords Using Keyword Controls and Keyword Presets
- Applying Keywords Using the Lift & Stamp HUD
- Applying Keywords Using the Metadata Inspector
- Applying Keywords to Images in the Light Table
- Removing Keywords from an Image
- Importing and Exporting Keyword Lists
- Working with Metadata
- An Overview of Metadata, Metadata Views, and Metadata Presets
- Displaying Metadata with Your Images
- Turning the Display of Metadata On or Off
- Viewing and Changing Metadata in the Metadata Inspector
- Working with Metadata Views
- Working with Metadata Presets
- Batch Changing Metadata
- More Information About IPTC Metadata
- Understanding Badge Overlays
- Searching for and Displaying Images
- An Overview of Searching
- Controls in the Query HUD
- Searching Across the Entire Library
- Searching by Image Name, Caption, or Other Text
- Searching by Keyword
- Searching by Date
- Searching by Rating
- Searching by IPTC Information
- Searching by EXIF Information
- Searching by Import Session
- Searching by File Status
- Searching by Other Metadata
- Searching by a Combination of Criteria
- Saving Your Search Results
- Grouping Images with Smart Albums
- Working with Images in the Browser
- Part III: Distribution and Backup
- Printing Your Images
- An Overview of Printing
- Controls in the Print Dialog
- Printing a Single Image
- Printing a Series of Images
- Printing a Contact Sheet or Series of Contact Sheets
- Printing a Book
- Printing a Light Table Arrangement
- Creating and Modifying Print Presets
- Proofing Your Images Onscreen
- Turning Off Color Management in Your Printer
- Exporting Your Images
- An Overview of Exporting Images
- Exporting Copies of Digital Master Files
- Exporting Image Versions
- Setting Image Resolution When Exporting
- Renaming Images at Export
- Adjusting Images at Export
- Adding a Watermark at Export
- Tips for Creating High-Quality Watermarks
- Applying IPTC Metadata and Keywords to Your Images
- Exporting Metadata Listed in a Separate File
- Exporting Using Plug-Ins
- Exporting Images to Use in Email
- Working with Export Presets
- Creating Slideshow Presentations
- An Overview of Slideshows
- Creating a Slideshow
- Controlling a Slideshow
- Arranging the Order of a Slideshow’s Images
- Controls in the Slideshow Presets Dialog
- Creating Slideshow Presets
- Modifying Slideshow Presets
- Creating a Growing Grid of Images
- Playing Your Slideshow on Your Main Display Only
- Displaying Your Images to Music
- Using the Light Table
- An Overview of the Light Table
- Creating a Light Table Album
- Placing and Viewing Images in the Light Table
- Moving and Resizing Images in the Light Table
- Aligning and Arranging Images in the Light Table
- Adjusting the Light Table View
- Setting View Options for the Light Table
- Transferring Images from the Light Table
- Printing a Light Table Arrangement
- Deleting a Light Table Album
- Creating Webpages
- Creating Books
- Backing Up Your Images
- An Overview of the Backup Workflow
- Planning Your Backup System
- Working with the Vaults Panel
- Creating Vaults
- Updating Vaults
- Disconnecting a Vault’s Hard Drive from Your System Temporarily
- Reconnecting a Vault’s Hard Drive to your System
- Deleting a Vault Permanently
- Backing Up Images from a Portable in the Field
- Restoring Your Aperture System
- Printing Your Images
- Part IV: Appendixes and Glossary
- Glossary
- Index
Aperture
User Manual
K
Apple Computer, Inc.
© 2006 Apple Computer, Inc. All rights reserved.
The owner or authorized user of a valid copy of Aperture
software may reproduce this publication for the purpose
of learning to use such software. No part of this
publication may be reproduced or transmitted for
commercial purposes, such as selling copies of this
publication or for providing paid for support services.
Every effort has been made to ensure that the
information in this manual is accurate. Apple is not
responsible for printing or clerical errors. Because Apple
frequently releases new versions and updates to its
system software, applications, and Internet sites, images
shown in this book may be slightly different from what
you see on your screen.
The Apple logo is a trademark of Apple Computer, Inc.,
registered in the U.S. and other countries. Use of the
“keyboard” Apple logo (Option-Shift-K) for commercial
purposes without the prior written consent of Apple
may constitute trademark infringement and unfair
competition in violation of federal and state laws.
Apple, the Apple logo, Apple Cinema Display, ColorSync,
FireWire, iPhoto, iTunes, Mac, Macintosh, Mac OS, and
QuickTime are trademarks of Apple Computer, Inc.,
registered in the U.S. and other countries.
Aperture, Finder, and MacBook are trademarks of Apple
Computer, Inc.
.Mac is a service mark of Apple Computer, Inc.
Adobe, Adobe RGB, Photoshop, and PostScript are
trademarks or registered trademarks of Adobe Systems
Incorporated in the U.S. and/or other countries.
Other company and product names mentioned herein
are trademarks of their respective companies. Mention
of third-party products is for informational purposes
only and constitutes neither an endorsement nor a
recommendation. Apple assumes no responsibility with
regard to the performance or use of these products.

3
1
Contents
Preface 11 Introducing Aperture
12
What’s Next?
Part I Interface and Acquisition
Chapter 1 15 An Overview of Aperture
16
A First Look at Aperture
17
Creating Projects and Importing Your Photos
20
Photo Editing with Aperture
31
Image Processing
32
Distribution
37
Backing Up Your Work
Chapter 2 39 The Aperture Interface
40
The Aperture Main Window
41
Projects Panel
42
Viewer and Browser
43
Control Bar
45
Toolbar
49
Adjustments Inspector
50
Metadata Inspector
52
Import Panel
53
Vaults Panel
54
Book Layout Editor
57
Webpage Editor
60
Light Table
61
Heads-Up Displays
64
Workspace Layouts
65
Customizing the Toolbar
67
Setting Aperture Preferences

4
Contents
Chapter 3 71 Working with Aperture Projects
72
Basic Components of Aperture
78
Working with Projects
79
Creating and Naming Projects
80
Opening and Closing Projects
82
Creating and Showing Favorite Projects
82
Deleting Images from Projects and Albums
83
Deleting Items from the Projects Panel
83
Working with Library Files
85
Quickly Accessing Commands
Chapter 4 87 Importing Images
88
An Overview of Importing Images
89
File Formats You Can Import into the Library
90
Planning Your Import Strategy
91
Importing from Your Digital Camera or Card Reader
97
Importing Image Files Stored on Your Computer
105
Automatically Naming Your Imported Images
108
Adding Metadata to Images During Import
109
Creating Stacks Automatically During Import
110
Adjusting the Image File’s Time When Importing
110
Dragging Files from the Finder to the Projects Panel
111
Importing Folders of Images from the Finder
112
Importing Your iPhoto Library
114
Transferring Projects from Another System
114
Making an Immediate Backup
115
Where Aperture Stores Your Managed Files in the Library
Part II Photo Editing
Chapter 5 119 Working with Images in the Browser
120
An Overview of the Browser
122
Navigating Through and Selecting Images
124
Working with a Selection of Images
125
Working with Images in Grid View
126
Working with Images in List View
127
Searching for Images in the Browser
128
Rearranging Images in the Browser
129
Sorting Images in Grid View
130
Rotating Images
130
Creating Versions of an Image
132
Deleting Images from the Browser

Contents
5
134
Dragging Images into Different Projects and Albums
135
Working with Referenced Images
141
Working with Two Projects Open
142
Displaying Specific Metadata with Your Images
Chapter 6 145 Displaying Images in the Viewer
146
An Overview of the Viewer
148
Showing or Hiding the Viewer
148
Changing the Viewer Background
149
Changing the Number of Images in the Viewer
150
Comparing Images
151
Viewing Stacks
151
Viewing Images with the Loupe
152
Using the Color Meter
154
Showing Hot Areas in Your Images
155
Viewing Images at Full Resolution
156
Viewing Master Images
156
Setting Up the Viewer for Onscreen Proofing
157
Viewing Images on Multiple Displays
158
Displaying Metadata Associated with Images
160
Selecting Image Preview Options
162
Quickly Accessing Commands
Chapter 7 163 Viewing Images in Full Screen Mode
164
An Overview of Full Screen Mode
165
Entering and Exiting Full Screen Mode
165
Working with the Filmstrip in Full Screen Mode
169
Working with the Toolbar in Full Screen Mode
171
Using HUDs in Full Screen Mode
173
Changing the Display of Metadata in Full Screen Mode
174
Using Keyboard Shortcuts in Full Screen Mode
174
Quickly Accessing Commands
Chapter 8 175 Stacking Images and Making Picks
175
An Overview of Stacking Images
177
Creating Stacks
180
Working with Stacks
186
Keyboard Shortcuts for Working with Stacks

6
Contents
Chapter 9 187 Rating Images
188
An Overview of the Aperture Rating System
190
Rating Images
192
Sorting Images by Rating
194
Including Image Rating in Your Workflow
195
Comparing and Rating Images
197
Keyboard Shortcuts for Displaying Images with Specific Ratings
Chapter 10 199 Applying Keywords to Images
200
An Overview of Keywords
202
Viewing Keywords Applied to Images
206
Applying Keywords Using the Keywords HUD
213
Applying Keywords Using Keyword Controls and Keyword Presets
218
Applying Keywords Using the Lift & Stamp HUD
222
Applying Keywords Using the Metadata Inspector
223
Applying Keywords to Images in the Light Table
223
Removing Keywords from an Image
224
Importing and Exporting Keyword Lists
Chapter 11 225 Working with Metadata
226
An Overview of Metadata, Metadata Views,
and Metadata Presets
228 Displaying Metadata with Your Images
231 Turning the Display of Metadata On or Off
232 Viewing and Changing Metadata in the Metadata Inspector
235 Working with Metadata Views
238 Working with Metadata Presets
241 Batch Changing Metadata
242 More Information About IPTC Metadata
243 Understanding Badge Overlays
Chapter 12 247 Searching for and Displaying Images
248 An Overview of Searching
252 Controls in the Query HUD
253 Searching Across the Entire Library
253 Searching by Image Name, Caption, or Other Text
255 Searching by Keyword
256 Searching by Date
258 Searching by Rating
259 Searching by IPTC Information
260 Searching by EXIF Information
261 Searching by Import Session
262 Searching by File Status

Contents 7
263 Searching by Other Metadata
264 Searching by a Combination of Criteria
265 Saving Your Search Results
Chapter 13 267 Grouping Images with Smart Albums
268 An Overview of Smart Albums
270 Collecting Images in a New Smart Album
271 Searching Within a Smart Album
272 Revising the Contents of a Smart Album
272 Transferring Smart Album Images to Another Project or Album
273 Deleting a Smart Album
Part III Distribution and Backup
Chapter 14 277 Printing Your Images
277 An Overview of Printing
279 Controls in the Print Dialog
281 Printing a Single Image
282 Printing a Series of Images
282 Printing a Contact Sheet or Series of Contact Sheets
283 Printing a Book
284 Printing a Light Table Arrangement
284 Creating and Modifying Print Presets
286 Proofing Your Images Onscreen
287 Turning Off Color Management in Your Printer
Chapter 15 291 Exporting Your Images
292 An Overview of Exporting Images
293 Exporting Copies of Digital Master Files
296 Exporting Image Versions
306 Working with Export Presets
Chapter 16 311 Creating Slideshow Presentations
312 An Overview of Slideshows
314 Creating a Slideshow
315 Controlling a Slideshow
315 Arranging the Order of a Slideshow’s Images
315 Controls in the Slideshow Presets Dialog
317 Creating Slideshow Presets
318 Modifying Slideshow Presets
319 Creating a Growing Grid of Images
320 Playing Your Slideshow on Your Main Display Only
321 Displaying Your Images to Music

8Contents
Chapter 17 323 Using the Light Table
324 An Overview of the Light Table
325 Creating a Light Table Album
326 Placing and Viewing Images in the Light Table
327 Moving and Resizing Images in the Light Table
328 Aligning and Arranging Images in the Light Table
330 Adjusting the Light Table View
331 Setting View Options for the Light Table
331 Transferring Images from the Light Table
332 Printing a Light Table Arrangement
332 Deleting a Light Table Album
Chapter 18 333 Creating Webpages
334 An Overview of Creating Webpages
336 Creating Web Galleries
339 Creating Web Journals
341 Viewing and Navigating Through Webpages
342 Choosing and Modifying Themes
345 Working with Web Gallery Pages
346 Working with Web Journal Pages
348 Exporting Webpages
351 Working with Web Export Presets
Chapter 19 357 Creating Books
358 An Overview of Creating Books
363 Planning Your Book
365 Creating a Book Album
366 Controls in the Book Layout Editor
369 Choosing a Theme
370 Viewing Pages
372 Placing Images in a Book
374 Adding and Removing Pages
379 Working with Pages
383 Working with Images
388 Working with Text
393 Working with Master Pages
396 Copying a Book Album
397 Printing Books

Contents 9
Chapter 20 399 Backing Up Your Images
400 An Overview of the Backup Workflow
401 Planning Your Backup System
402 Working with the Vaults Panel
404 Creating Vaults
405 Updating Vaults
406 Disconnecting a Vault’s Hard Drive from Your System Temporarily
406 Reconnecting a Vault’s Hard Drive to your System
407 Deleting a Vault Permanently
407 Backing Up Images from a Portable in the Field
409 Restoring Your Aperture System
Part IV Appendixes and Glossary
Appendix A 413 Setting Up an Aperture System
414 Setting Up a Basic System
415 Optional Equipment to Consider
417 Setting Up Your System with Two Displays
419 Configuring Mac OS X for Multiple Displays
Appendix B 423 Calibrating Your Aperture System
423 An Overview of Color Management
427 Calibrating Your Camera
428 Calibrating and Profiling Your Display
430 Calibrating and Profiling Your Printer
Appendix C 431 Credits
Glossary 433
Index 453

11
Preface
Introducing Aperture
Aperture is a powerful and easy-to-use digital image
management system that can track thousands of digital
images and provides the professional photographer with
high-quality image management and adjustment tools.
Designed for the needs of professional photographers, Aperture is an all-in-one
post-production tool that provides:
ÂAn advanced RAW workflow: From capture to output, you can work with your images
captured as RAW files, without having to first convert them to another format before
viewing, adjusting, organizing, or printing them. Aperture supports RAW formats
from leading digital camera manufacturers (including Canon and Nikon).
ÂFlexible image management: A new, open Library structure lets you store photos
anywhere you want. You can have Aperture either store image files in the Library or
simply link to image files in their current locations. You can also have Aperture link to
your iPhoto Library without copying the images into the Aperture Library. Aperture
can work with photos stored on any number of hard disk drives and other storage
media. You can catalog and search for images that are stored on multiple hard disks,
including offline volumes, CDs, and DVDs.
ÂProfessional project management: Aperture allows you to manage thousands of
projects and provides flexible organizational tools, comprehensive metadata support,
and powerful search tools that let you find files instantly.
ÂNondestructive image processing: Designed to protect your images from the moment
they’re imported, Aperture identifies your original images as digital “master files,” and
it has built-in safeguards to help ensure that you don’t accidentally overwrite or
modify them.
ÂVersatile printing and publishing: Working directly with your RAW images, you can
create color-accurate prints, custom contact sheets, stunning websites, and unique
bound books with tools that are intuitive and powerful.

12 Preface Introducing Aperture
With Aperture you can efficiently import digital images, perform a photo edit, adjust
and retouch images, publish images for the web or print, and back up your entire
image library for safekeeping. Aperture lets you work with high-quality JPEG, TIFF, and
RAW image files directly from your camera or card reader and maintain that high
quality throughout your workflow.
What’s Next?
This manual is only one of several types of documentation you can use as you work
with Aperture.
ÂFor instructions for installing Aperture software, see Installing Your Software.
ÂFor an introduction to the basic concepts, procedures, and digital photography
workflow for using Aperture, see Aperture Getting Started.
ÂFor an overview of Aperture, an introduction to the Aperture interface, and
detailed instructions for using the many features and tools in Aperture, continue
reading this manual.
ÂFor information about making image corrections and adjustments in Aperture, see
Performing Image Adjustments in the Aperture Help menu.
ÂFor a list of the keyboard shortcuts you can use to perform tasks in Aperture, see
Aperture Quick Reference.
ÂFor an introduction to the fundamentals of digital photography, see
Digital Photography Fundamentals in the Aperture Help menu.
ÂFor information about ordering printed books of your images, see
Ordering Books and Prints in the Aperture Help menu.
ÂFor the most recent technical and release information about Aperture, see
Late-Breaking News in the Aperture Help menu.
ÂFor information about new features in Aperture, see New Features in the Aperture
Help menu.
ÂFor the latest articles about technical issues and solutions, go to the Aperture
Support website, available from the Aperture Help menu.

I
Part I: Interface and Acquisition
This section provides introductory information about the
application and its interface. It also explains how to set up
your image management system and import images into it.
Chapter 1 An Overview of Aperture
Chapter 2 The Aperture Interface
Chapter 3 Working with Aperture Projects
Chapter 4 Importing Images


1
15
1An Overview of Aperture
Aperture is designed to be the center of your digital
photography workflow, from capturing new images to the
final delivery of professional-quality photographs.
This chapter provides an overview of how Aperture works and what you can do with it. If
you’re new to Aperture, this chapter is for you. If you’re familiar with the Aperture features
and interface, feel free to skip this chapter. The chapter doesn’t provide all the detailed
information and instructions needed to perform work on your images. Once you’re
familiar with Aperture, you’ll find in-depth explanations and instructions in later chapters.
This chapter covers:
ÂA First Look at Aperture (p. 16)
ÂCreating Projects and Importing Your Photos (p. 17)
ÂPhoto Editing with Aperture (p. 20)
ÂImage Processing (p. 31)
ÂDistribution (p. 32)
16 Part I Interface and Acquisition
A First Look at Aperture
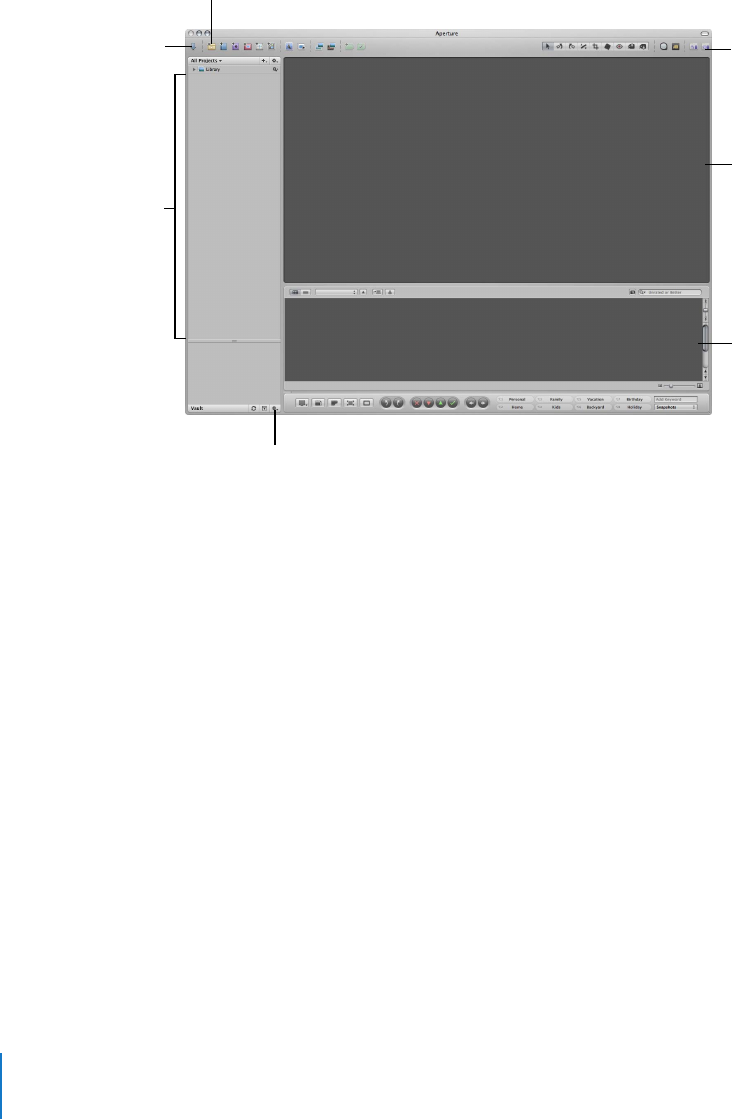
When you first open Aperture, you see the following areas:
Note: Because you can customize the toolbar, adding and deleting the buttons you
want, your toolbar may appear different from the one pictured in this manual. For more
information about changing the toolbar, see “Customizing the Toolbar” on page 65.
Click here to open the
Import panel.
Your projects appear
here.
To create a project to hold your
imported images, click here.
Browser
Viewer
Click here to open the Vaults panel.
You select a hard disk to use for
backing up images here.
Toolbar
Chapter 1 An Overview of Aperture 17
I
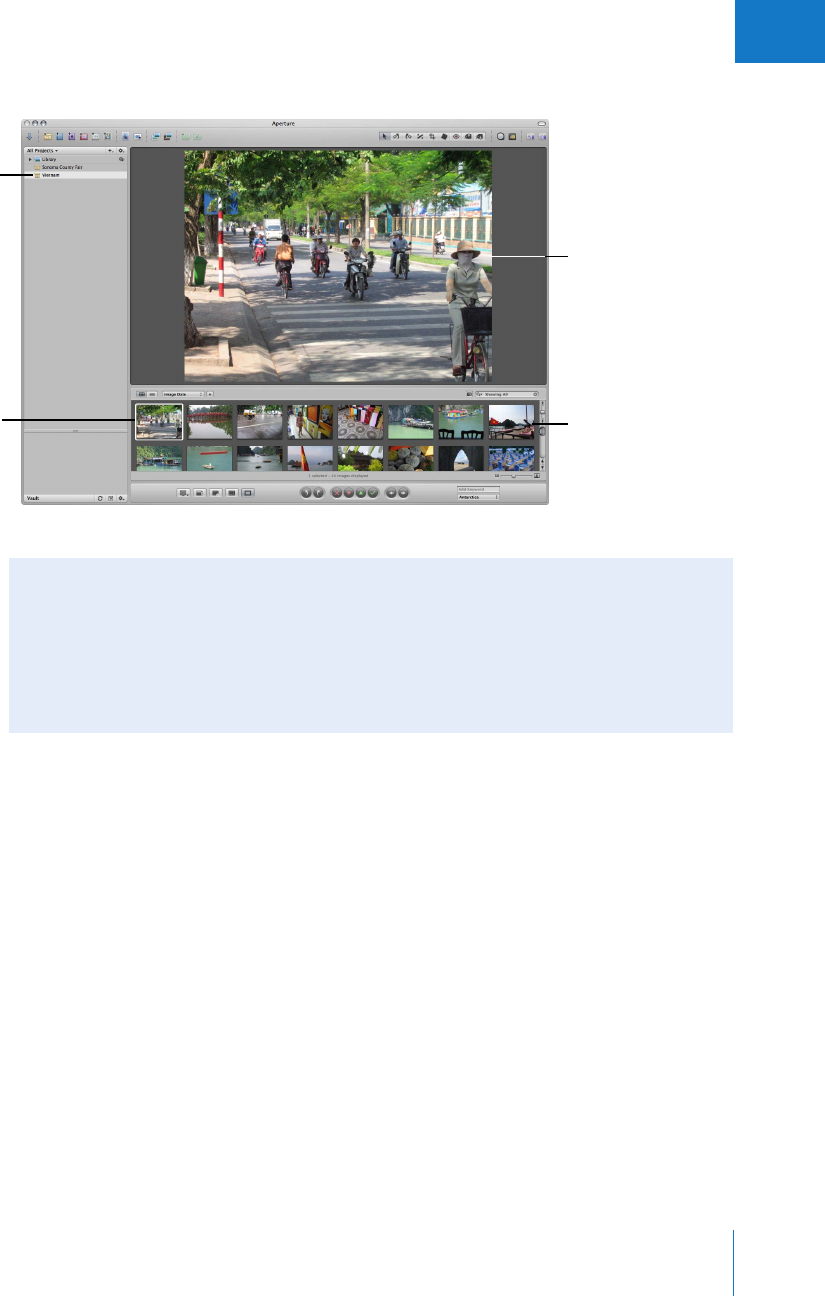
After you import images into a new project, your screen will look similar to this:
Creating Projects and Importing Your Photos
To use Aperture, you first import your photos. You can import digital photos directly
from your camera or a card reader and from hard disks or other storage devices where
you’ve archived digital files. After a shoot, you can connect your card reader or digital
camera to your computer and Aperture automatically detects it. You can then easily
import your new images into Aperture.
Creating Projects
As you work with Aperture, you create projects to hold your images. A project is similar
to a folder that can hold dozens, hundreds, or even thousands of images. For example,
after completing a travel shoot to Antarctica, you might create a new project named
Antarctica and import the photos into it.
Aperture imports the
images into a project.
Click the project to
see its images in
the Browser.
Select a thumbnail
in the Browser. Your project’s image
thumbnails
The Viewer shows the
selected image.
About Aperture Sample Projects
The Aperture installation disc includes several sample projects containing high-resolution
images. When you first open Aperture, a dialog appears asking if you’d like to install a
sample project. Other sample projects are available in the Sample Projects folder on the
Aperture installation disc. You can import these projects into Aperture from the Aperture
installation disc at any time after installing the application.
18 Part I Interface and Acquisition
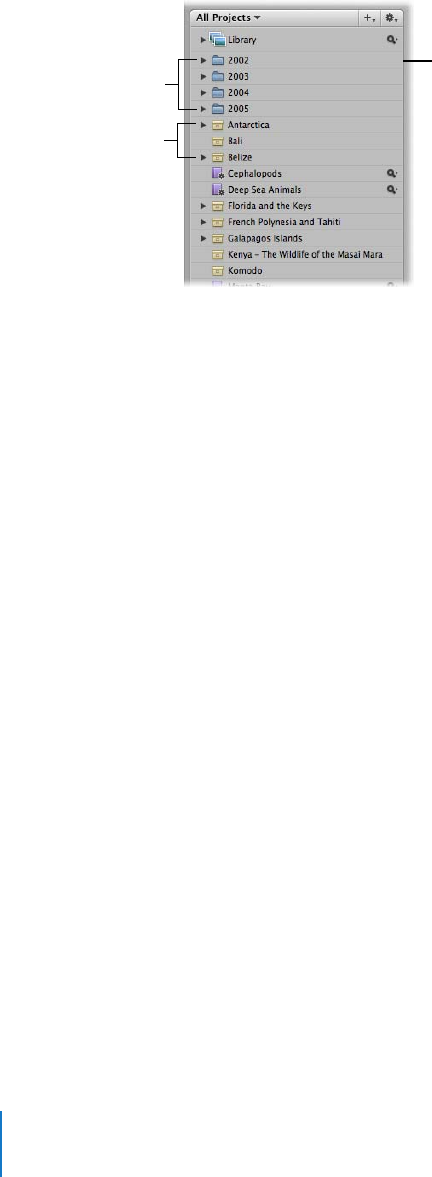
Your new project appears in a list in the Projects panel.
As your portfolio increases and you create more and more projects, you can organize
your work into hierarchies of folders, projects, and albums.
You can create as many projects as you need and name them according to any naming
scheme you prefer. It’s important to name projects so that they will be easy to identify
and access. When you need to further subdivide and organize images in a project, you
can create albums.
Over the long term you may be using Aperture to track years of projects, so you’ll want
to develop a naming system that is easy to use and understand. For more information
about organizing your images in projects and albums, see Chapter 3, “Working with
Aperture Projects,” on page 71.
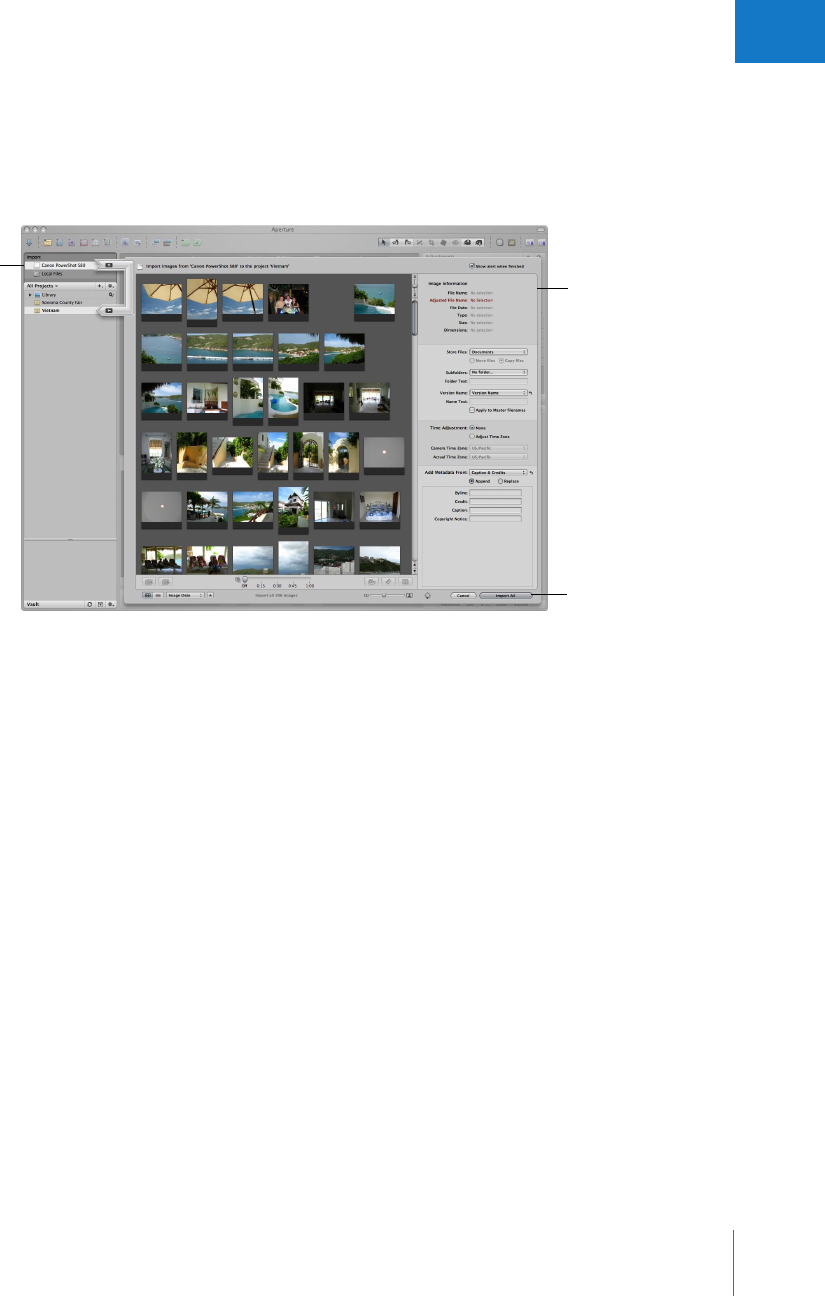
Examples of items in
the Projects panel
Projects
Folders
Chapter 1 An Overview of Aperture 19
I
Importing Images
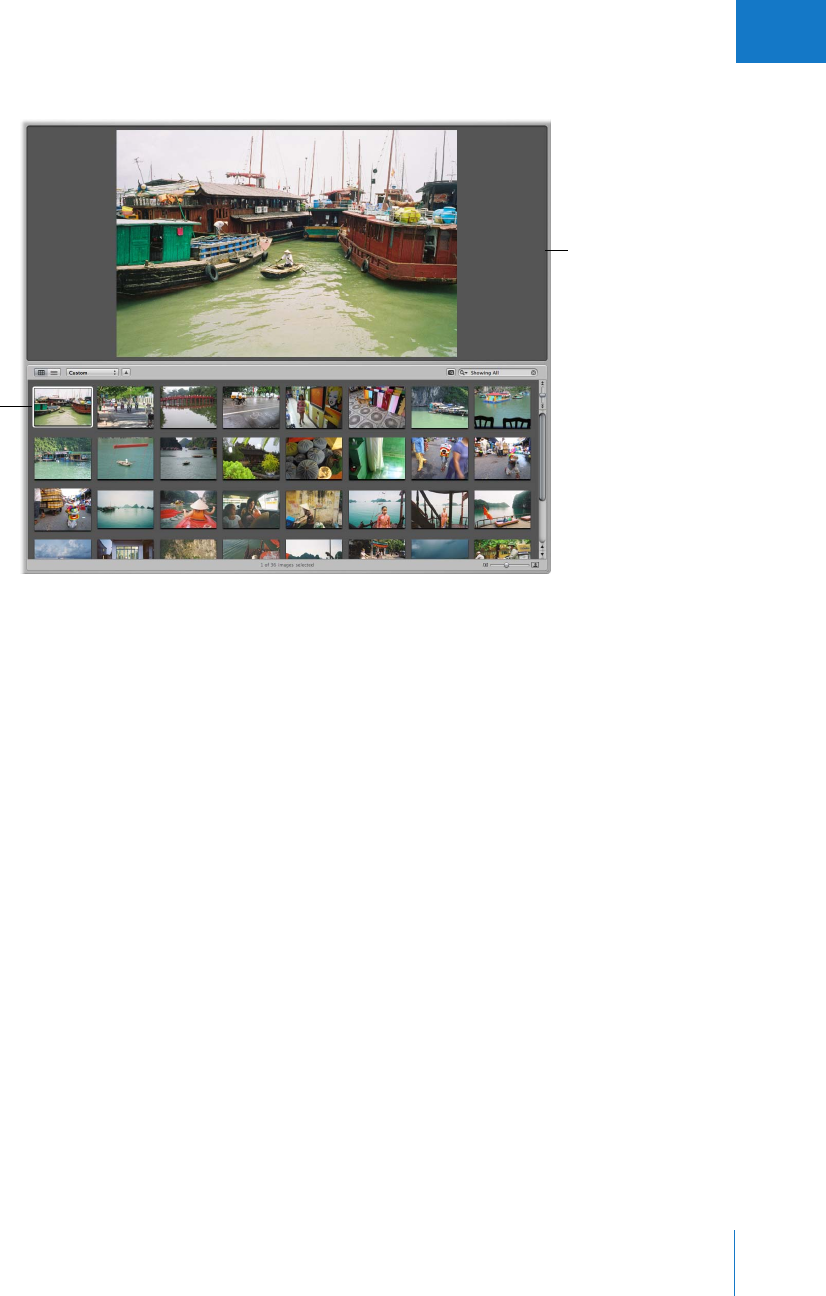
When you connect a camera or card reader to your computer, the Import dialog appears.
You can select your camera or card reader and see the images you’re about to import.
You can select all the images on a memory card or select and import only those you
want. You can also select image files on your hard disk for importing.
You can then specify options for importing your images. For example, you can specify
that your images be imported into the Aperture Library in your Pictures folder, or
specify another location to store them. If you have images already stored on a hard
disk, you can simply allow Aperture to access them without changing their current
locations. You can choose how images are named and include other information that is
recorded with each image to help identify it. For example, you can specify the event
name, date, time, photographer, and location, as well as copyright information.
You can also specify other import options, such as whether you want Aperture to
group related images together in stacks. For example, if you have bracketed images or
images shot in quick succession, you can have Aperture import and stack these images
together to make reviewing and working with them easier.
Specify import
options here.
When you click
Import All, your images
are imported into the
selected project or a new
project.
Select your camera, card
reader, or hard disk here.

20 Part I Interface and Acquisition
Importing Files from Your Body of Work
You can easily import your collection of archived digital images into Aperture from any
hard disk or storage device connected to your computer. When importing legacy
images from your portfolio, you can move them into the main Aperture Library, or
simply identify where the images are located, and Aperture adds them to its
management system without changing the image locations. This means that with
Aperture, you can still work with your images in their current organization and on
multiple hard disks without relocating or reorganizing your current files. You can also
move or copy images to new locations when needed.
Aperture can also import your iPhoto Library and files stored in a variety of common
file types and formats, including:
ÂGIF
ÂJPEG
ÂJPEG2000
ÂPNG
ÂPSD
ÂRAW files from a variety of supported digital cameras
ÂTIFF
Note: For a list of supported digital cameras, go to http://www.apple.com/aperture.
For more information about importing images, see Chapter 4, “Importing Images,” on
page 87.
Photo Editing with Aperture
Aperture allows you to easily view and work with your images onscreen. It provides
easy-to-use tools and controls, as well as efficient methods for rating images, searching
for images, and comparing and adjusting them.
Viewing and Working with Images in the Browser and Viewer
To work with your images, you select a project in the Projects panel and Aperture
displays that project’s images in the Browser. You use the Browser to review, organize,
and select images.
Chapter 1 An Overview of Aperture 21
I
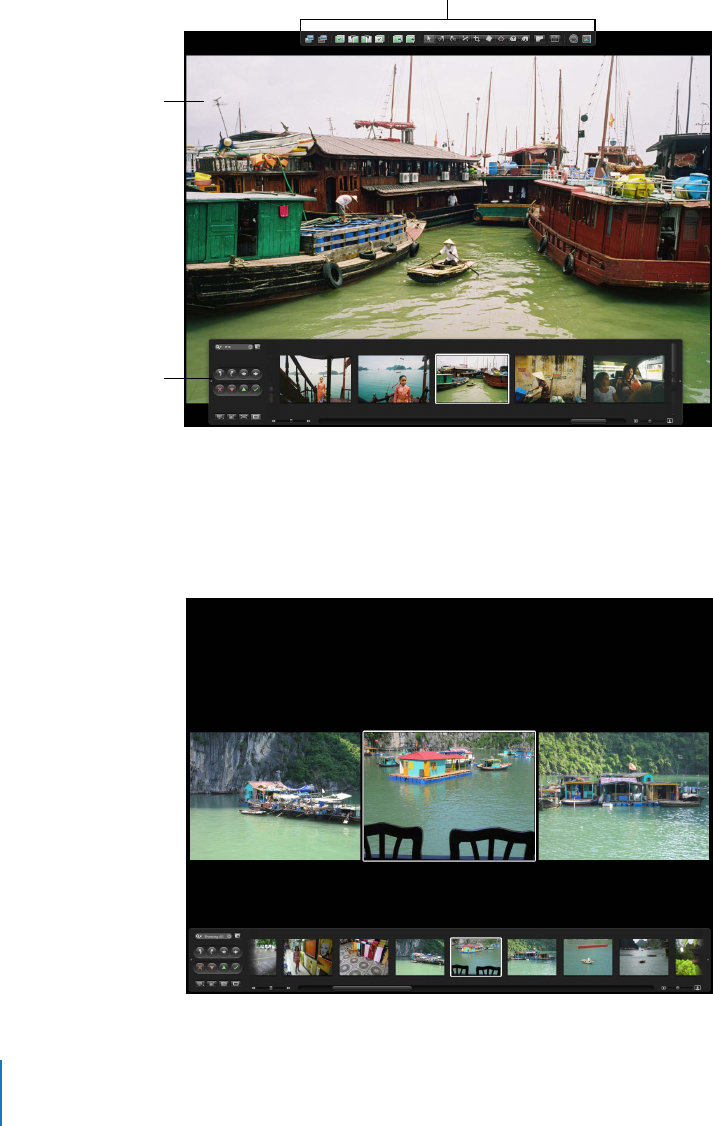
When you select a thumbnail image in the Browser, the image appears in the Viewer.
The Browser can show your images as thumbnails arranged in a grid. You can click an
individual image to select it, and a white border appears around the image. To quickly
move to and select other images, press the arrow keys. You can drag images to
rearrange them in the Browser, or drag them into different projects or albums. You can
also display your images as a list of files.
The Viewer displays the
selected image.
Select images here.
A selected image appears
with a white outline.
22 Part I Interface and Acquisition
You can also view your images in Full Screen mode, where you can work with them
in detail.
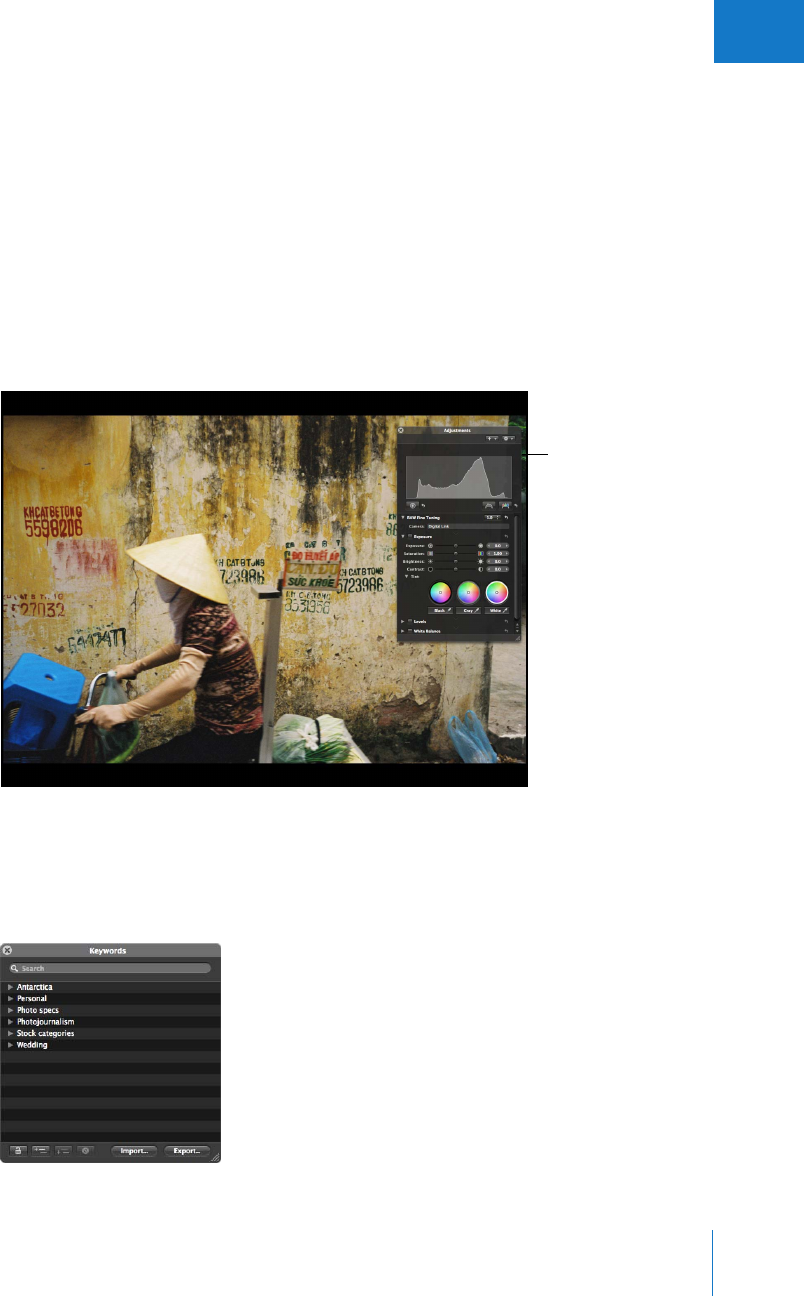
To see images in Full Screen mode, you press F. Press F again to switch back to the Viewer.
In Full Screen mode, you can change the display of images to show single images,
three images, or up to ten images at once. For more information about using Full
Screen mode, see Chapter 7, “Viewing Images in Full Screen Mode,” on page 163.
Filmstrip available
in Full Screen mode
Toolbar available in
Full Screen mode
The displayed image fills
the screen.
Chapter 1 An Overview of Aperture 23
I
Displaying your images clearly and accurately is a pivotal function of Aperture. With
Aperture you can take advantage of the latest display technology and view and work
with your images in Full Screen mode and on dual displays.
Using Aperture with two displays is ideal for creating a large workspace. You can easily
compare and adjust images, play slideshows, and present the best of your photos at
optimal size during client reviews.
Working with Heads-Up Displays
To work efficiently in Aperture, you can use floating panels of controls called heads-up
displays (HUDs) to change images. For example, when you view images in Aperture in
Full Screen mode, you can open an Adjustments HUD to adjust your images.
As you work on your images, you can position HUDs anywhere on the screen and use
them to make changes. For example, Aperture provides a Keywords HUD that you can
use to quickly assign keywords to your images. To assign a keyword, you simply drag it
from the Keywords HUD to the image.
HUDs are available for
use in Full Screen mode
and can make adjusting
images easier.
24 Part I Interface and Acquisition
Working with Inspectors
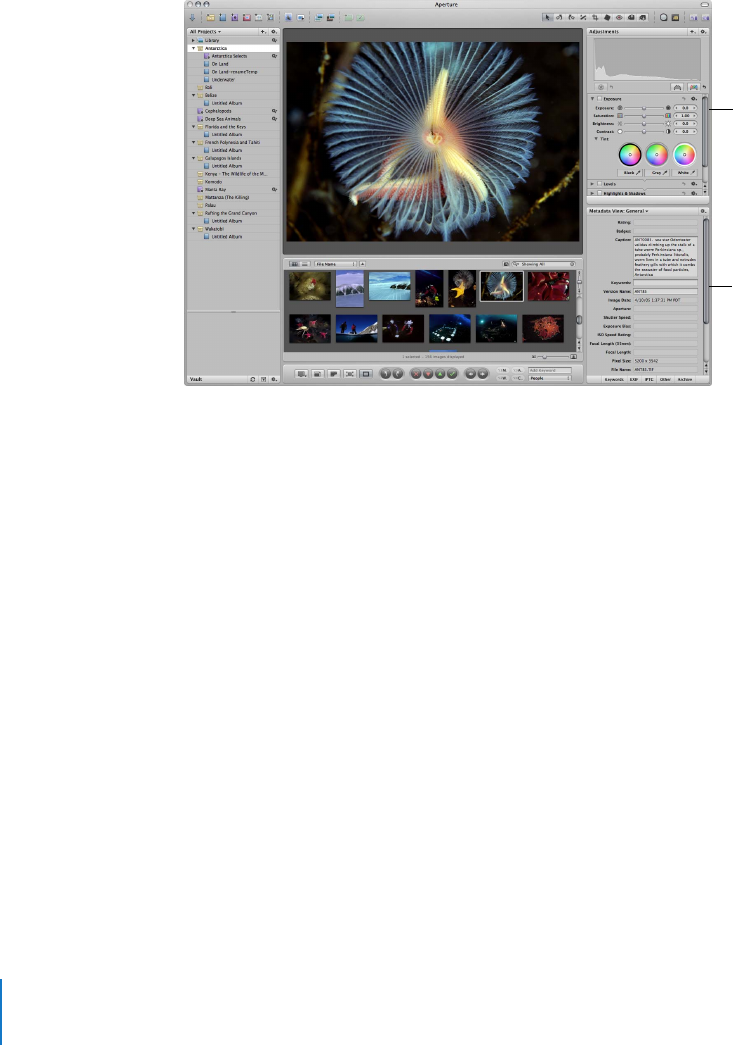
Aperture also provides an Adjustments Inspector for applying adjustments and a
Metadata Inspector that allows you to review and assign metadata to your images. You
can show or hide the Adjustments and Metadata Inspectors together or individually
whenever you want. Showing the Inspectors panel is as easy as double-clicking an
image in the Browser or pressing the I key.
For more information about making adjustments and retouching your images, see
Performing Image Adjustments in the Aperture Help menu.
Adjustments Inspector
Metadata Inspector
Chapter 1 An Overview of Aperture 25
I
Rating Images with Aperture
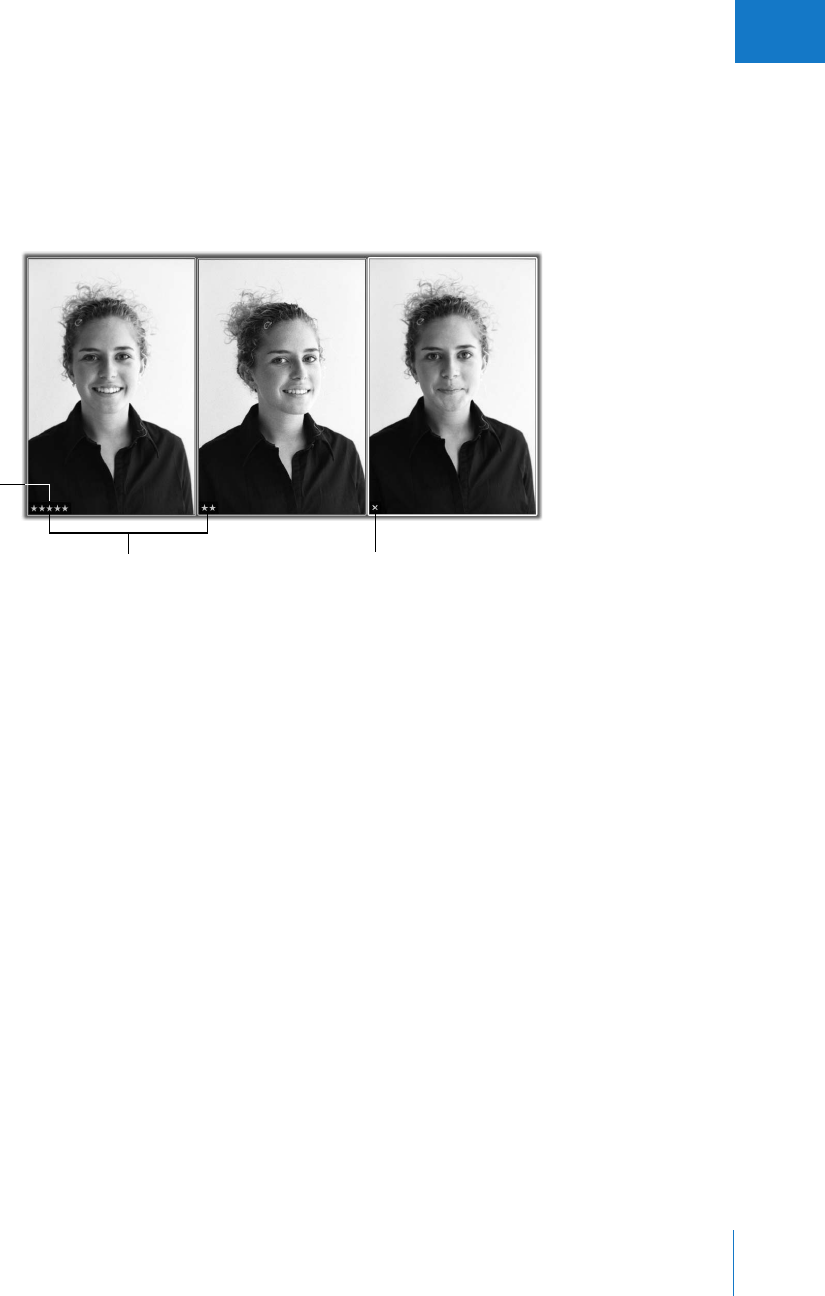
You can rate images as you review them in the Viewer or the Browser, or in Full Screen
mode. Rating controls appear below the Browser and in the filmstrip in Full Screen
mode. By selecting an image and clicking a rating button, you can quickly rate images
as rejected, or assign them from one to five stars (with five stars being the highest, or
Select, rating). Image ratings appear as easy-to-read overlays on the image.
Once images are rated, you can have Aperture display only images of a certain rating,
so you can focus on a particular group of images. For more information about rating
your images, see Chapter 9, “Rating Images,” on page 187.
Stars indicate a
positive rating.
Five stars indicate the
highest rating (Select).
An X indicates a negative
rating (Reject).
26 Part I Interface and Acquisition
Finding and Displaying Images with the Query HUD
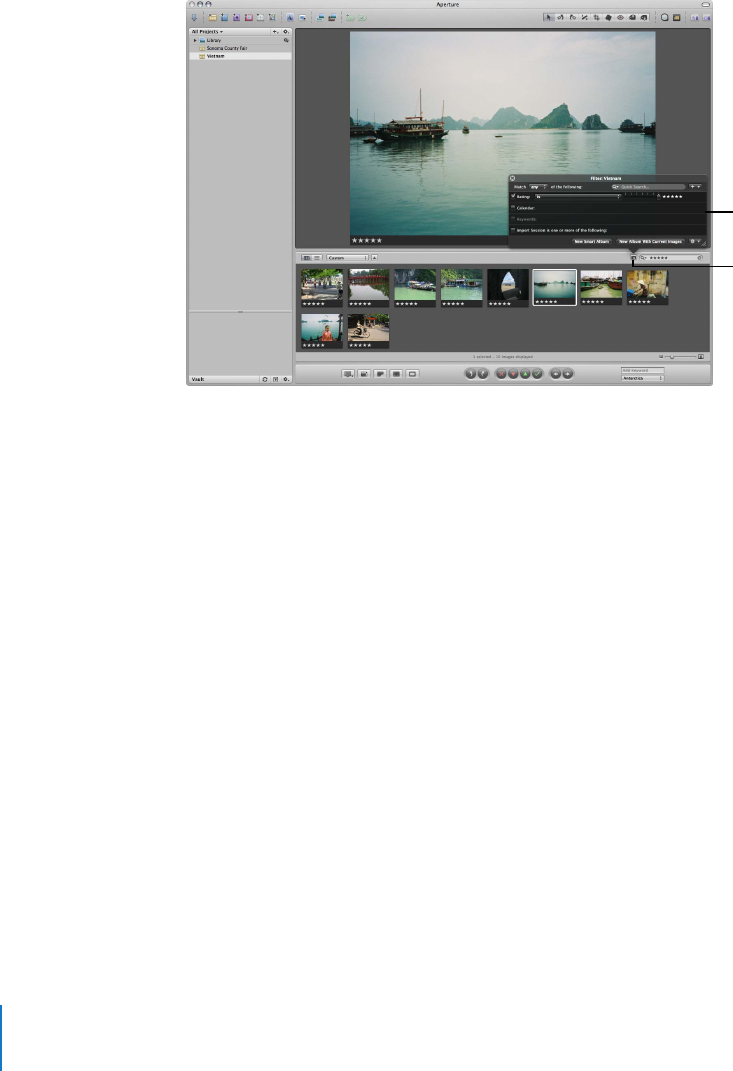
You can use the Query HUD to search for and display only certain photos in a project
or album. Click the Query HUD button beside the search field in the Browser and the
Query HUD appears. In the Query HUD, you can specify criteria for the photos you
want to work with.
You can enter any search criteria you want to display specific images. You can also
display images based on rating, date when shot, keywords, or import group. After you
specify the search criteria, Aperture displays only those images that match the criteria
and hides the rest. For more information about searching for images, see “Searching for
and Displaying Images” on page 247.
The Query HUD is set
to show images rated
five stars.
Click the Query HUD
button to open the
Query HUD.
Chapter 1 An Overview of Aperture 27
I
Comparing Photos
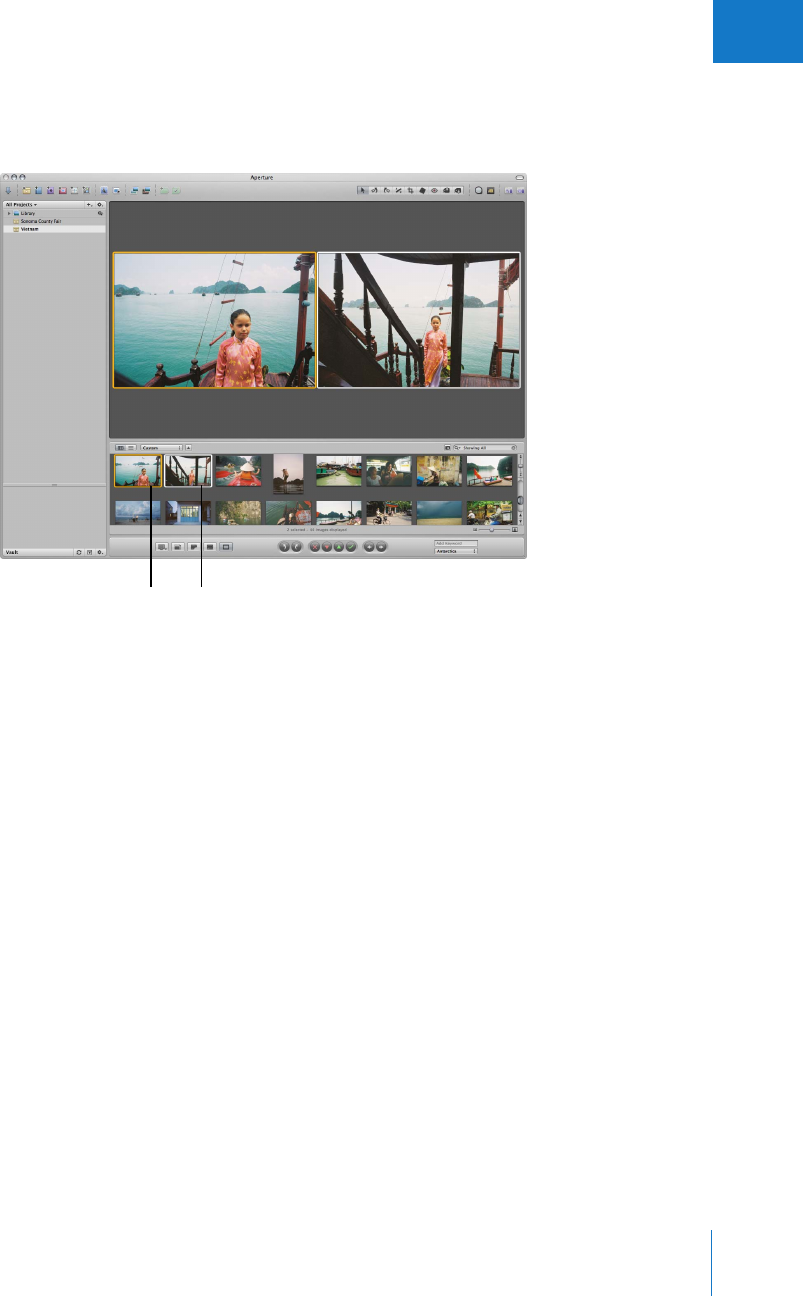
Aperture allows you to carefully compare images. You select an image and press Return
to have Aperture display it for comparison against other images in a selection.
While comparing images, you can rate the selected images or make adjustments to
them. For example, you might use the comparison method to make final selections
of the best images in a series. Or, you might compare two versions of an image and
make adjustments.
Select an image and
press Return to select it
as the “compare” image.
Select an image for
comparison by pressing
the arrow keys.
28 Part I Interface and Acquisition
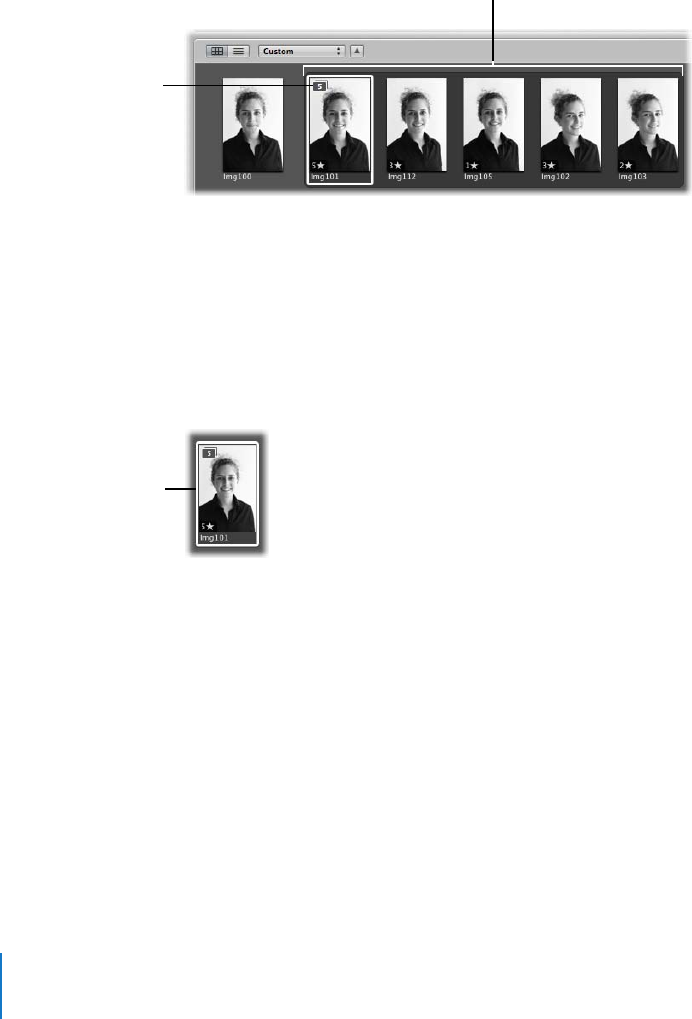
Stacking Images
Photographers frequently work with large selections of images. To help you work
efficiently with a series of shots, such as bracketed shots or shots taken in quick
succession, Aperture can automatically stack related shots. You can also select and
manually stack related shots yourself and review them for a “pick”, the image that you
intend to use.
Once photos are in a stack, you can work with them as if they were a single image
instead of many individual photos. A stack appears as a series of linked photos in the
Browser. The pick of the stack appears on the left with a Stack button. You can drag an
image in the stack into the pick position. By clicking the Stack button, you can close
the stack so that only the pick image appears. You can then work with the single pick
image without the encumbrance of the other stacked photos. You can expand a stack
to see all its images whenever you want.
Working with stacks can greatly increase the efficiency of reviewing large collections of
photos. For more information about working with stacks of images, see Chapter 8,
“Stacking Images and Making Picks,” on page 175.
The Stack button
indicates the number of
images in the stack.
A stack with five images is
shown expanded, or open.
Only the pick image
is shown when the
stack is closed.
Chapter 1 An Overview of Aperture 29
I
Assigning Keywords to Images
Carefully assigning keywords to images is critical for the photographer who needs a
means to easily locate specific images among thousands. Applying keywords is also
required if you plan to sell images to image libraries, such as Corbis or Getty Images.
You can use Aperture to assign keywords to images using standard IPTC fields (the
standard metadata fields defined by the International Press Telecommunications
Council). You can also select images and assign keywords that you define.
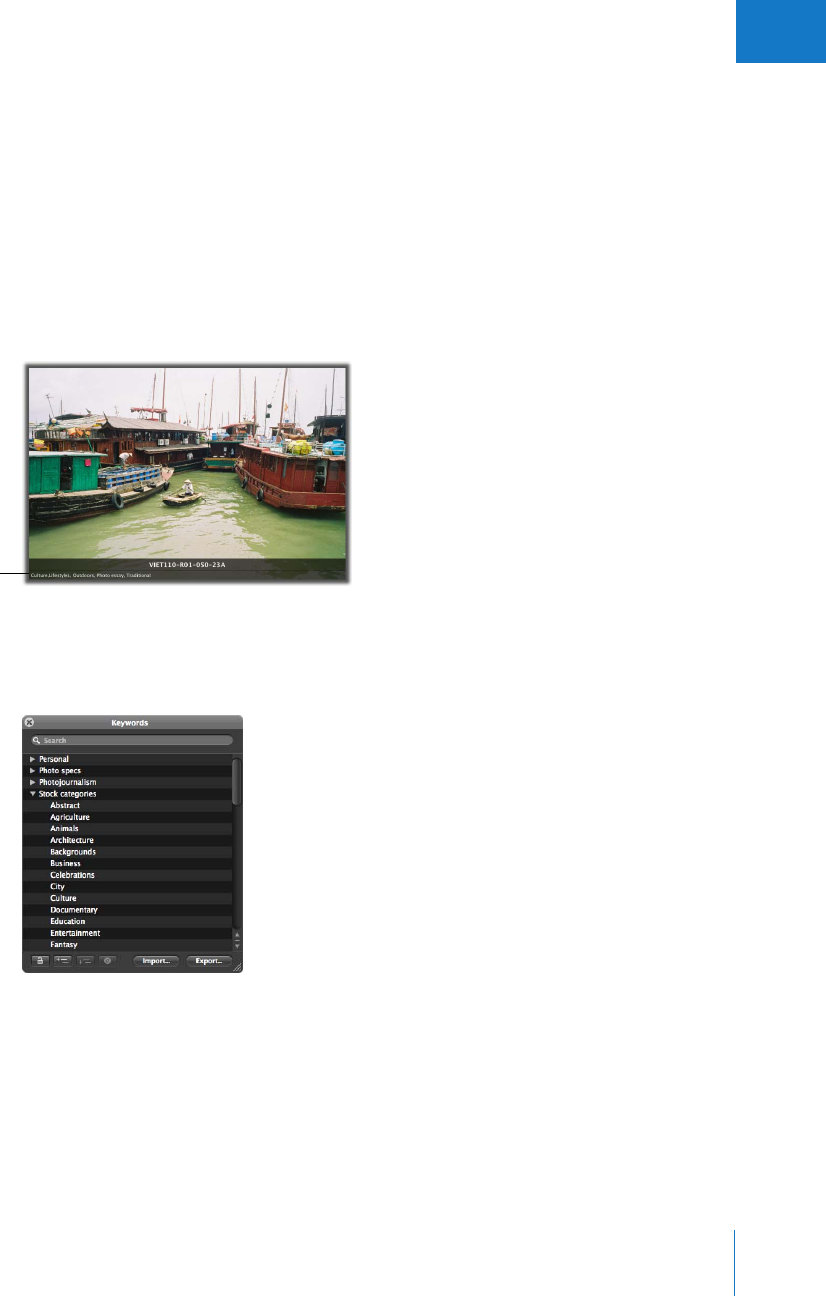
You can display images in the Viewer with their version names and any assigned
keywords appearing on or below the image.
The Keywords HUD lists all the keyword categories and keywords that you define. For
example, if you shoot weddings, you might create a wedding category with specific
keywords that include Candid, Ceremony, Guests, and so on.
You can apply a keyword directly to a selected image or group of images by dragging
it from the Keywords HUD to the selection in the Viewer or Browser.
Keywords and
other metadata
30 Part I Interface and Acquisition
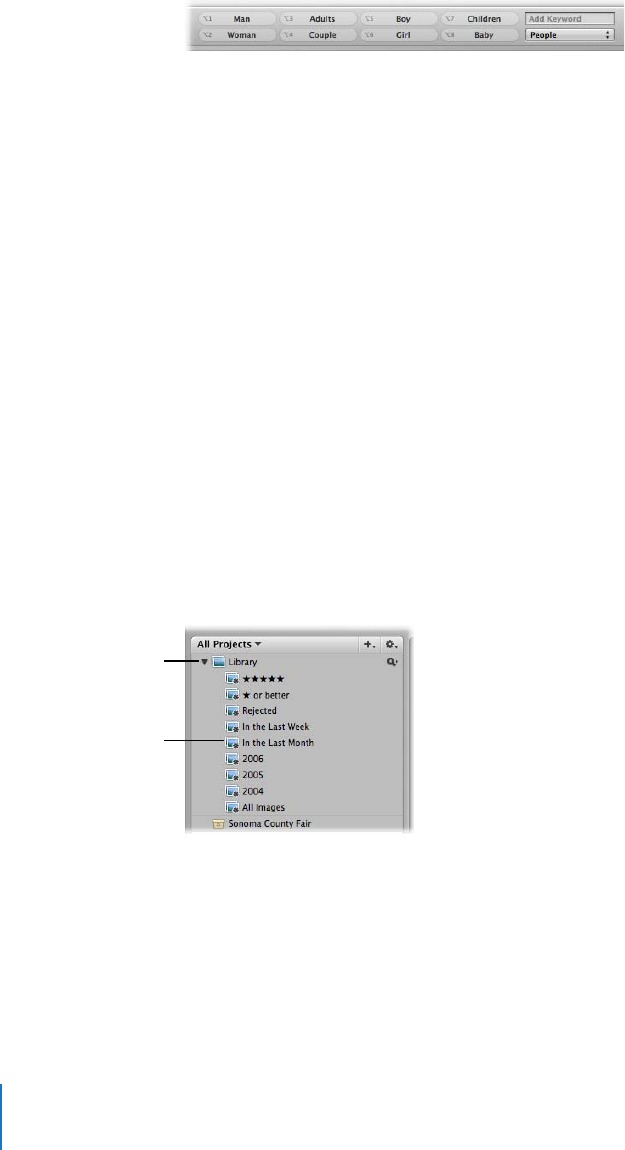
You can also show keyword controls in the control bar at the bottom of the Aperture
main window by choosing Window > Show Keyword Controls.
Using these simple controls, you can display different categories of keywords and easily
apply those keywords with a quick click or keystroke.
Your Aperture keyword scheme can ensure comprehensive accessibility to your images,
and even help with the management of your copyrights, sales, and usage rights. For
more information about assigning keywords, see Chapter 10, “Applying Keywords to
Images,” on page 199.
Grouping Images with Smart Albums
Photographers often need an easy way of regrouping and presenting images based on
the needs of a client or project. For example, a corporate client might call to request
images of a general location or subject, such as airports or Asian temples, to be
included with future collateral. Aperture allows you to easily make selections from
across the entire library of images and group them in Smart Albums, which are albums
that can be dynamically generated based on search criteria you specify.
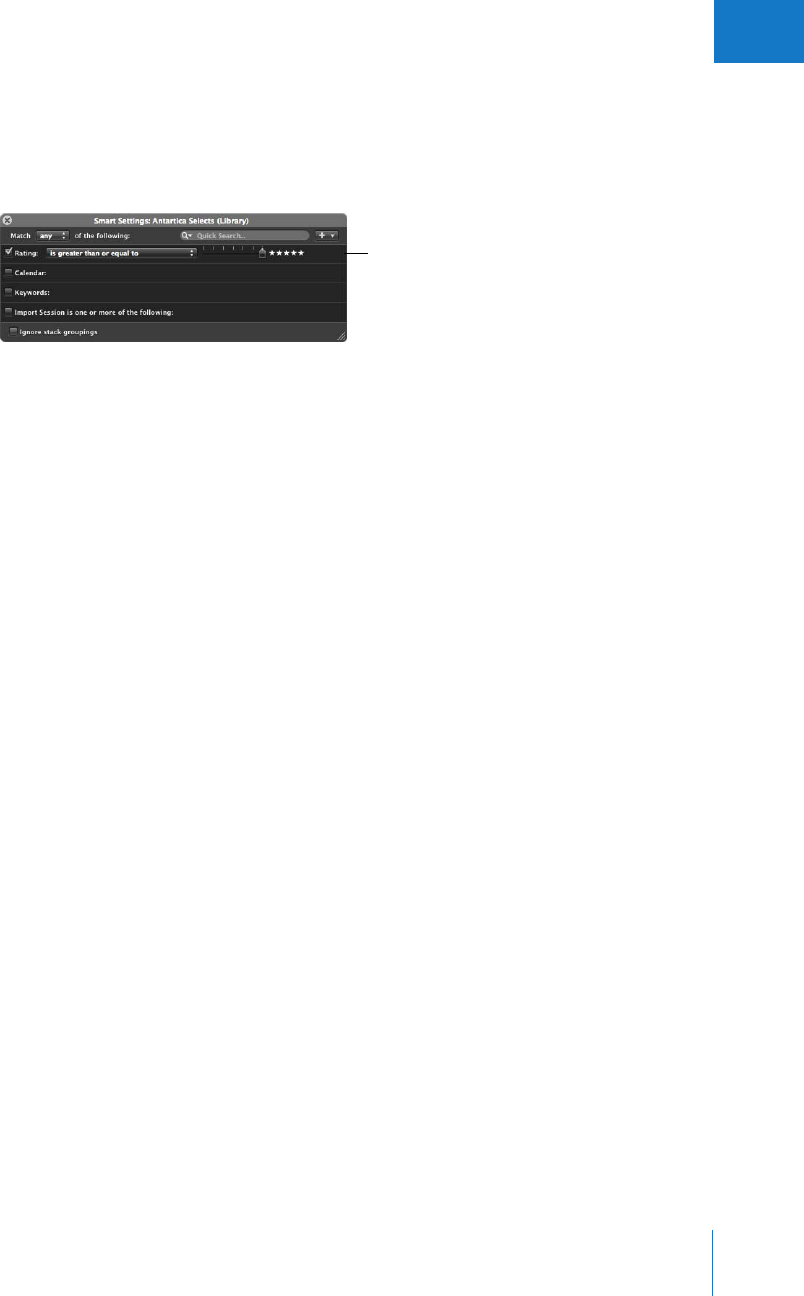
Aperture comes with a selection of predefined Smart Albums set up in the Library for
you. For example, there are Smart Albums that gather all your select images, all images
taken in the last week, and all images taken in the last month. When you click the
Library disclosure triangle, you see the list of Smart Albums created for you. Select a
Smart Album to see its contents in the Browser
Although a Smart Album appears similar to the other projects or albums in the Projects
panel, the contents of the album are specified by search criteria. You don’t import
master files or versions into a Smart Album. You use the Query HUD to specify the
image keywords or other criteria that identify the images you want, and image versions
automatically appear in the album. By adjusting the search criteria, you change the
contents of the Smart Album.
Disclosure triangle
A Library Smart Album
has this icon.
Chapter 1 An Overview of Aperture 31
I
For example, after creating an empty Smart Album in the Projects panel, you might
specify that you want any image that is rated five stars.
Aperture searches across the Library and displays all the images rated five stars in the
Smart Album. New images rated five stars are added to the Smart Album automatically.
You can work with the photos in the Smart Album just as you can with images in any
other album.
You can make Smart Albums that gather images from across the entire Library or from
within a specific project only. When you no longer need a Smart Album, you can delete
it, and the contents of the Library remain the same (the Smart Album’s images are not
deleted from the Library). For more information about using Smart Albums, see
Chapter 13, “Grouping Images with Smart Albums,” on page 267.
Image Processing
You can use Aperture to crop, rotate, horizontally align, and remove red-eye from
images, as well as adjust color and exposure, reduce noise, and so on.
Aperture provides controls for performing many types of image adjustments, including:
ÂRAW image fine-tuning
ÂExposure adjustments
ÂColor adjustments
ÂWhite-balance adjustments
ÂRed-eye correction
ÂSpot and patch corrections
ÂStraightening
ÂCropping
ÂHighlights and shadows adjustments
ÂMonochrome color mixing
ÂChoosing monochrome colors
ÂApplying sepia tones
ÂNoise-reduction adjustments
ÂImage sharpening
ÂEdge-sharpening adjustments
In the Query HUD,
specify the search criteria
for images you want in
the Smart Album.
32 Part I Interface and Acquisition
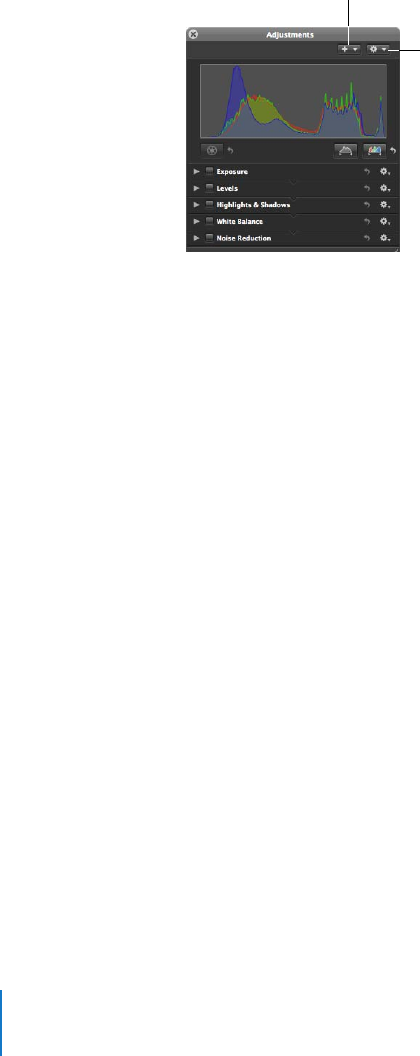
For especially efficient image adjusting, you can save adjustment settings as presets
(collections of saved adjustments) and apply the same adjustments to many images
at once.
You can adjust your images using the controls in the Adjustments HUD.
The controls in the Adjustments HUD are also available in the Adjustments Inspector.
You can also easily export your images to a third-party application such as Adobe
Photoshop, make adjustments, and then bring the adjusted image back into Aperture.
For detailed information about making adjustments to your images, see
Performing Image Adjustments in the Aperture Help menu.
Distribution
When it’s time to show your work to others, Aperture provides the following methods
of distribution:
ÂCreating slideshow presentations
ÂPerforming Light Table reviews
ÂCreating web galleries and web journals
ÂOrdering printed books
ÂPrinting and exporting images
Adjustment Action
pop-up menu
Add Adjustments
pop-up menu
Chapter 1 An Overview of Aperture 33
I
Presenting Your Images in Slideshows
You can use Aperture to make slideshow presentations to clients or viewers. Using one
or two large-screen displays, you can set Aperture to present slideshow images in a
variety of ways. For example, you can present images as a sequence of single images or
as multiple images in columns and rows on your screen. You can also customize your
slideshow by setting the display interval, choosing accompanying music, using
transitional fades, changing the background, and more. You can control the slideshow
using the arrow keys on your keyboard or have images appear automatically.
To create a slideshow, you select the images you want to show and choose
File > Slideshow. For more information about creating slideshows, see Chapter 16,
“Creating Slideshow Presentations,” on page 311.
34 Part I Interface and Acquisition
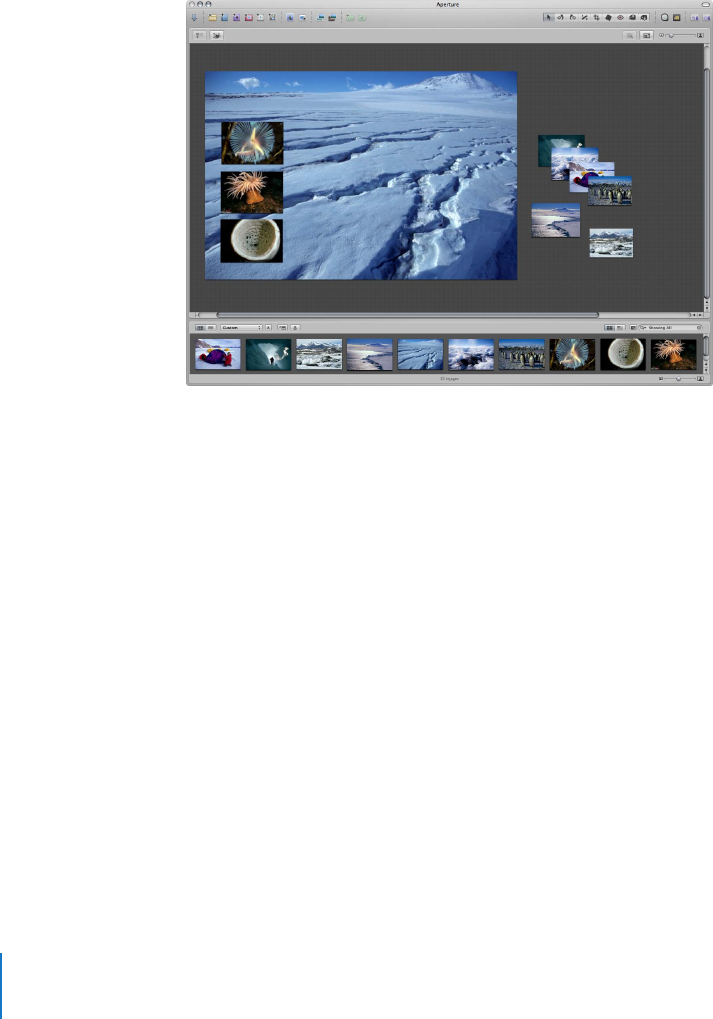
Reviewing Images in the Aperture Light Table
You can use the Aperture Light Table to freely arrange and organize a group of images
visually to see how various combinations of images work together. Or, you can arrange
a combination of images and print them in specific geometric arrangements. When
viewing a selection of images in the Light Table, you can freely drag the images into
any position or arrangement you want, and resize them to determine how they might
look grouped on a page.
For more information about using the Light Table, see Chapter 17, “Using the Light
Table,” on page 323.
Publishing Your Images in Web Galleries and Web Journals
To provide clients or the public the convenience of an online review, you can use
Aperture to create webpages and websites. With Aperture, you can easily post your
webpages to your .Mac account, or you can post them to your own website server and
then provide the Internet address to clients or other reviewers.
Chapter 1 An Overview of Aperture 35
I
Aperture provides ready-made themes and webpage layouts that you can quickly
choose for the design of your pages.
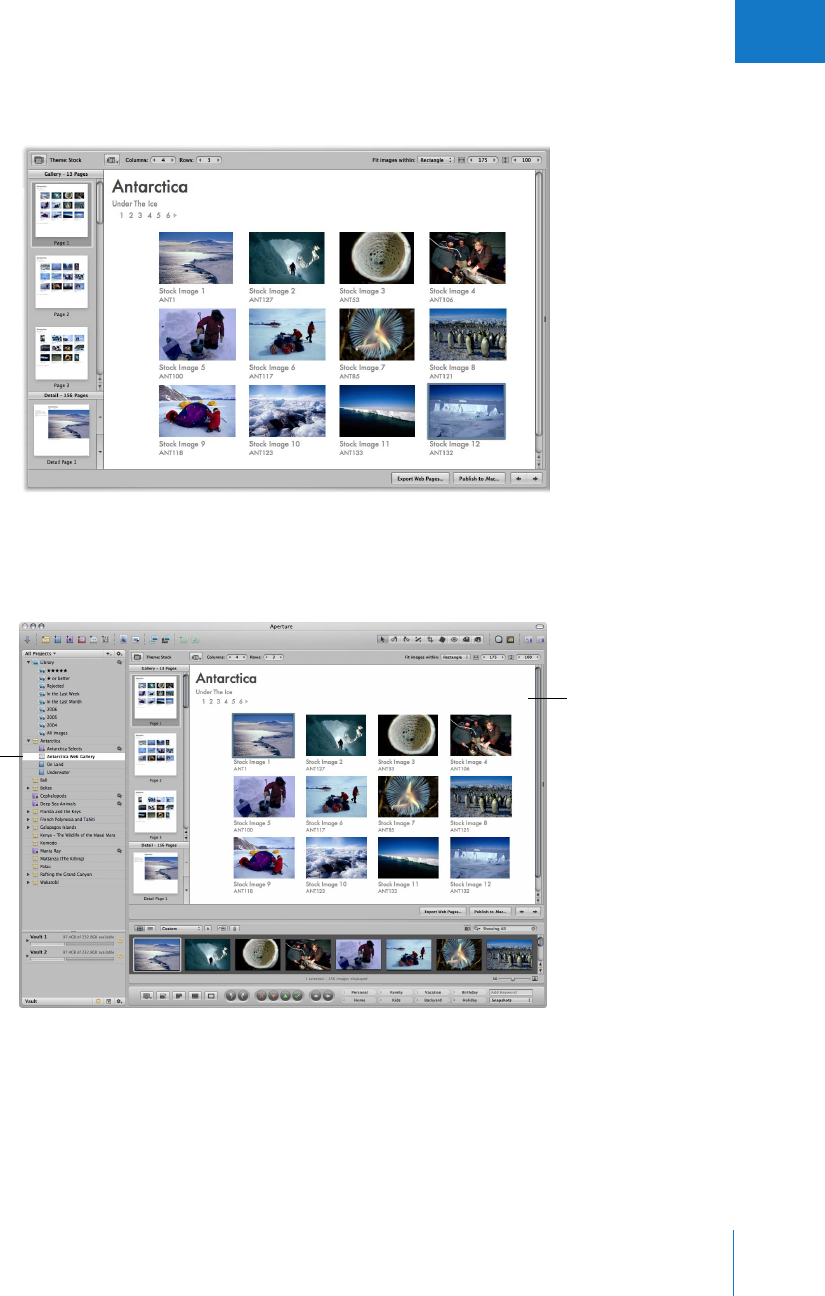
To create webpages that present a gallery of your images, you create a web gallery
album and use the Webpage Editor to design your pages. When you place images in
the album, Aperture automatically populates your web gallery with your images.
You can also create a web journal, which allows you to mix text and images on the
webpage. For example, you might create a web journal that chronicles your latest trip and
include your photos. You create web journal pages by creating a web journal album and
using the Webpage Editor to design your pages. For more information about creating web
galleries and web journals, see Chapter 18, “Creating Webpages,” on page 333.
The Webpage Editor
shows with the selected
images.
The new album you
created appears in the
Projects panel.
36 Part I Interface and Acquisition
Printing Your Images in Books
You can lay out images and combine them with text to create books. Aperture provides
a Book Layout Editor that allows you to easily combine your images with text on the
page. Aperture also provides master templates that you can use to compose pages. You
can easily create professional-looking pages for art books, wedding albums, picture
books, and more.
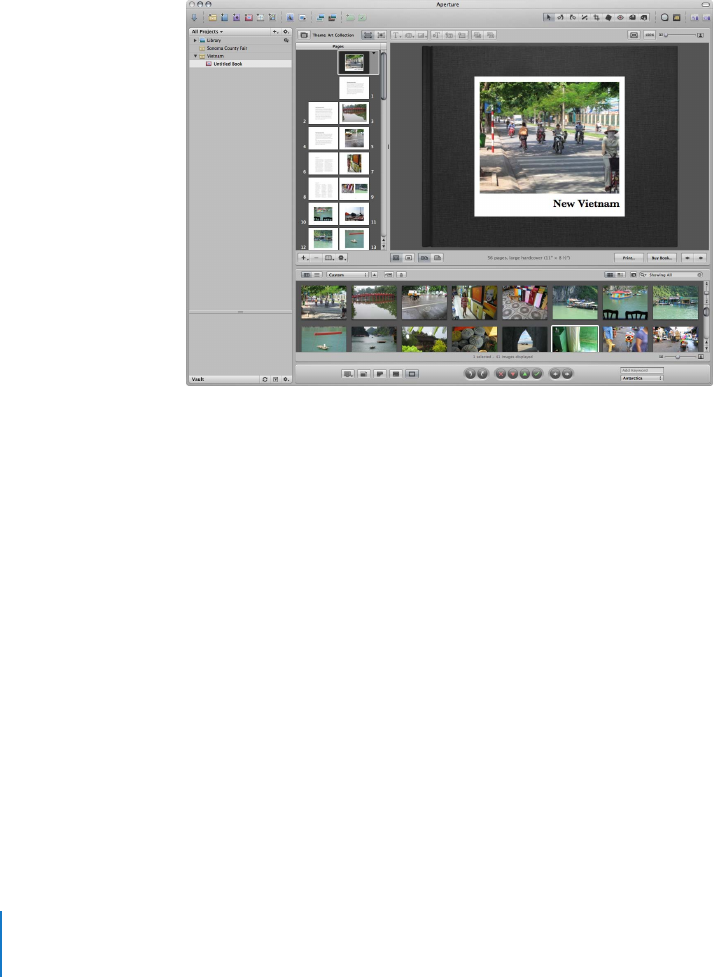
You create a book by creating a book album and using the Book Layout Editor to
design the book’s pages.
In the Book Layout Editor, you select a page’s thumbnail image to see an enlarged view
of the page’s layout and contents. You can also change the page design, and the
current page is automatically updated to the format you chose. To add an image, you
drag it from the Browser into a photo box on the page. For more information about
creating books, see Chapter 19, “Creating Books,” on page 357.

Chapter 1 An Overview of Aperture 37
I
Printing and Exporting Images
You can also easily print individual images in standard and custom print sizes and print
collections of images on contact sheets. Aperture has many preset printing options to
help facilitate printing. You can also customize print settings to get the optimum use of
your printer and meet custom print requirements. For more information about print
options, see Chapter 14, “Printing Your Images,” on page 277.
When you need to deliver digital files to clients, prepare files for posting on websites, or
transfer files to other computers or users, you can export images in a variety of formats.
You can export your original digital master files as well as versions that you’ve created.
Aperture provides many preset options for exporting files in a variety of file sizes and
formats, and you can add custom touches such as watermarks or copyright
information. When you export images, you can assign custom filenames and export all
or a selection of the metadata associated with an image. For example, you can send an
editor a digital file complete with the IPTC information you’ve added. Aperture also
enables you to quickly email images. For more information about exporting images,
see Chapter 15, “Exporting Your Images,” on page 291.
Backing Up Your Work
After importing images from your camera and erasing memory cards in preparation for
the next shoot, the only record of your images is stored on your hard disks. It’s vital that
you back up your files on storage media separate from your computer and its hard disks.
Backing up your photos and storing the backups in a safe place can save your work from
catastrophes such as fire, theft, storm-related disruptions, or equipment failure.
Aperture backs up your managed images (images that are stored in the Aperture
Library) and all information, such as versions, metadata, and previews, associated with
them on vaults located on hard disk drives. Aperture doesn’t back up the digital master
files of referenced images located outside the Aperture Library. You must maintain your
own backup system of referenced image master files. Aperture does back up the
versions, previews, and metadata information associated with referenced images, but
does not back up the master images themselves.
38 Part I Interface and Acquisition
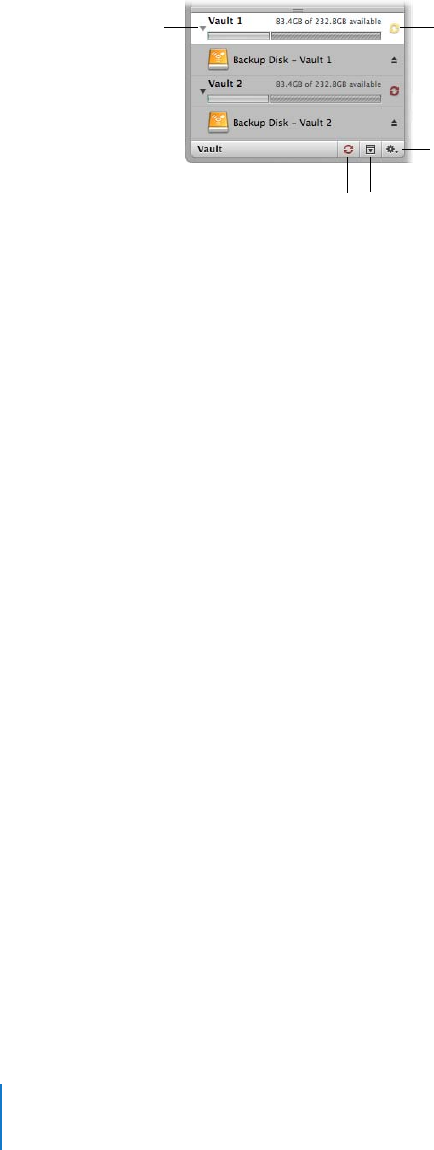
You can view your vaults in the Vaults panel. There are several controls that you’ll use
when you update vaults to back up your images.
You can create multiple vaults to provide duplicate backups. Each vault holds a backup
copy of the entire Aperture Library.
After you import new images into Aperture, you should immediately make a backup of
the newly imported files. Once the images are backed up, you can depend on the
reliable Aperture backup functions to track all the versions of your photos and the work
you have done with them.
For an explanation of the Aperture backup and archiving features, see Chapter 20,
“Backing Up Your Images,” on page 399.
Disclosure triangle Vault Status button
Vault Action
pop-up menu
Update All Vaults
button
Vaults Panel
button

2
39
2The Aperture Interface
The Aperture interface is modeled around acquiring, editing,
processing, and distributing photos.
This chapter describes the names and functions of the Aperture interface elements.
Use this chapter to orient yourself while learning Aperture. To find detailed information
about the concepts described in this chapter, read the chapter about the topic. You
can also search for terms associated with Aperture in the index and glossary.
This chapter covers:
ÂThe Aperture Main Window (p. 40)
ÂProjects Panel (p. 41)
ÂViewer and Browser (p. 42)
ÂControl Bar (p. 43)
ÂToolbar (p. 45)
ÂAdjustments Inspector (p. 49)
ÂMetadata Inspector (p. 50)
ÂImport Panel (p. 52)
ÂVaults Panel (p. 53)
ÂBook Layout Editor (p. 54)
ÂWebpage Editor (p. 57)
ÂLight Table (p. 60)
ÂHeads-Up Displays (p. 61)
ÂWorkspace Layouts (p. 64)
ÂCustomizing the Toolbar (p. 65)
ÂSetting Aperture Preferences (p. 67)
40 Part I Interface and Acquisition
The Aperture Main Window
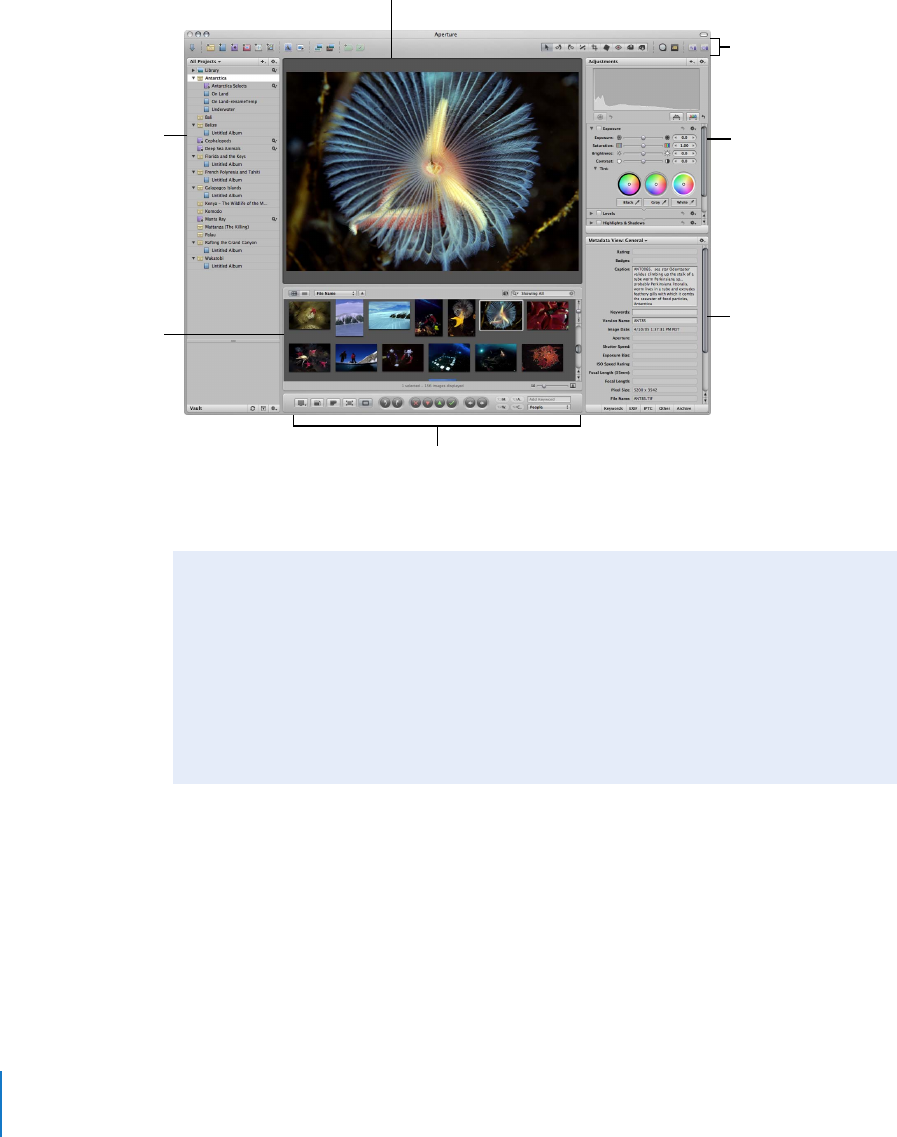
The Aperture main window contains the following areas.
Note: The inspectors are not shown by default. You can show or hide the Inspectors
panel by pressing I.
Projects panel
Browser
Toolbar
Adjustments Inspector
Metadata Inspector
Viewer
Control bar
Arranging the Interface
Aperture provides three preconfigured workspace layouts: Basic, Maximize Browser,
and Maximize Viewer. The areas in the Aperture interface are resizable, and you can
customize any of these workspaces to suit your workflow.
To view the workspace layout shown above, choose Window > Layouts > Basic, then
press I to show the Inspectors panel.
For more information about workspace layouts, see “Workspace Layouts” on page 64.
Chapter 2 The Aperture Interface 41
I
Projects Panel
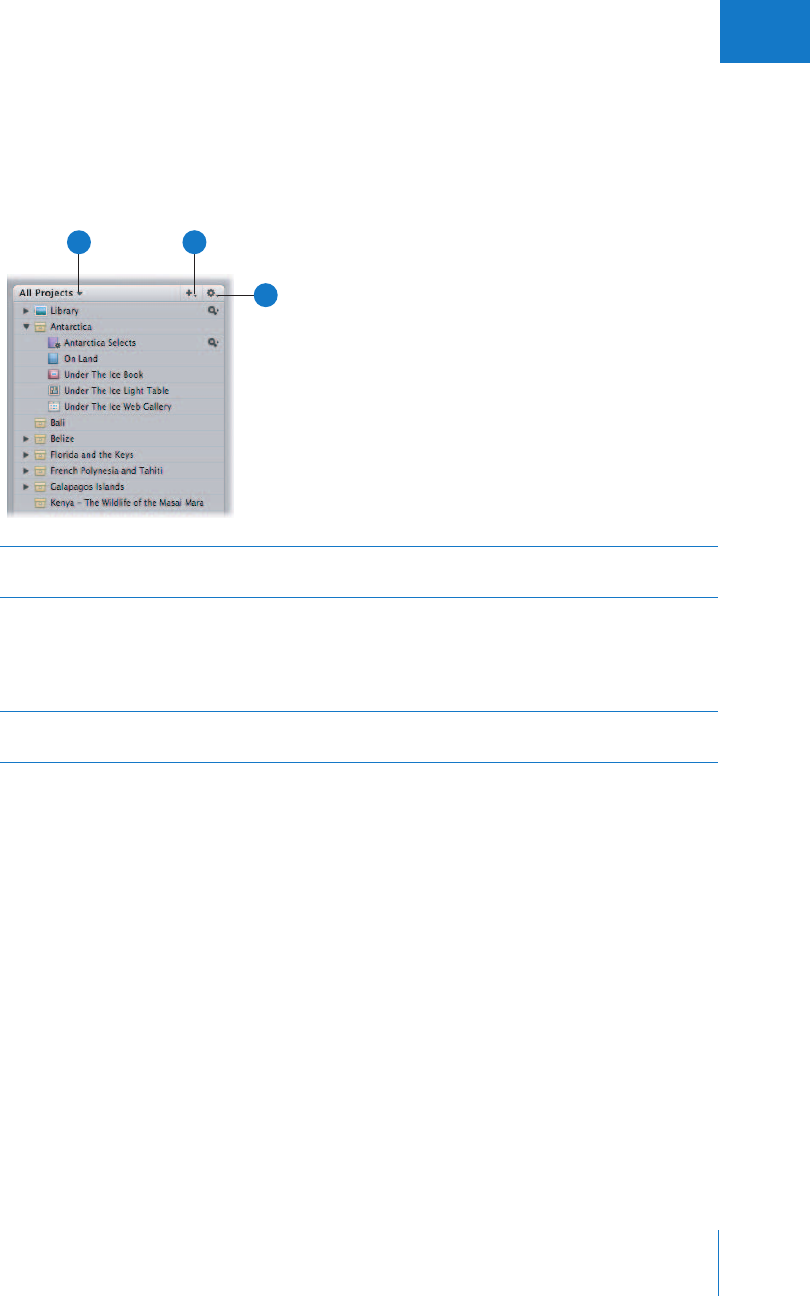
The Projects panel holds containers—projects, folders, and albums—with which you
can organize your images. You can create Smart Albums that automatically find and
store images based on search criteria you specify. You can also create webpages (photo
galleries and online journals), Light Table arrangements, and books.
To learn more about using the Projects panel, see Chapter 3, “Working with Aperture
Projects,” on page 71.
AProjects
pop-up menu
Choose to show all, your favorite, or recently selected projects by
choosing an option from the pop-up menu.
BAdd to Library
pop-up menu
Create new projects and albums, including web gallery, web journal,
Light Table, and book albums, from this pop-up menu. You can
automatically fill your albums with selected images or create empty
albums. You can also create Smart Albums, which you fill by
specifying search criteria such as filenames or dates.
CProject Action
pop-up menu
Add and remove favorite items or export projects from this
pop-up menu
A B
C
42 Part I Interface and Acquisition
Viewer and Browser
The Viewer and Browser work together to display a project’s or album’s images. When
you select a project or album in the Projects panel, images appear in the Browser.
When you select one or several image thumbnails in the Browser, those images are
displayed in the Viewer. You can use the Viewer to examine an image at its full size or
compare multiple images side by side.
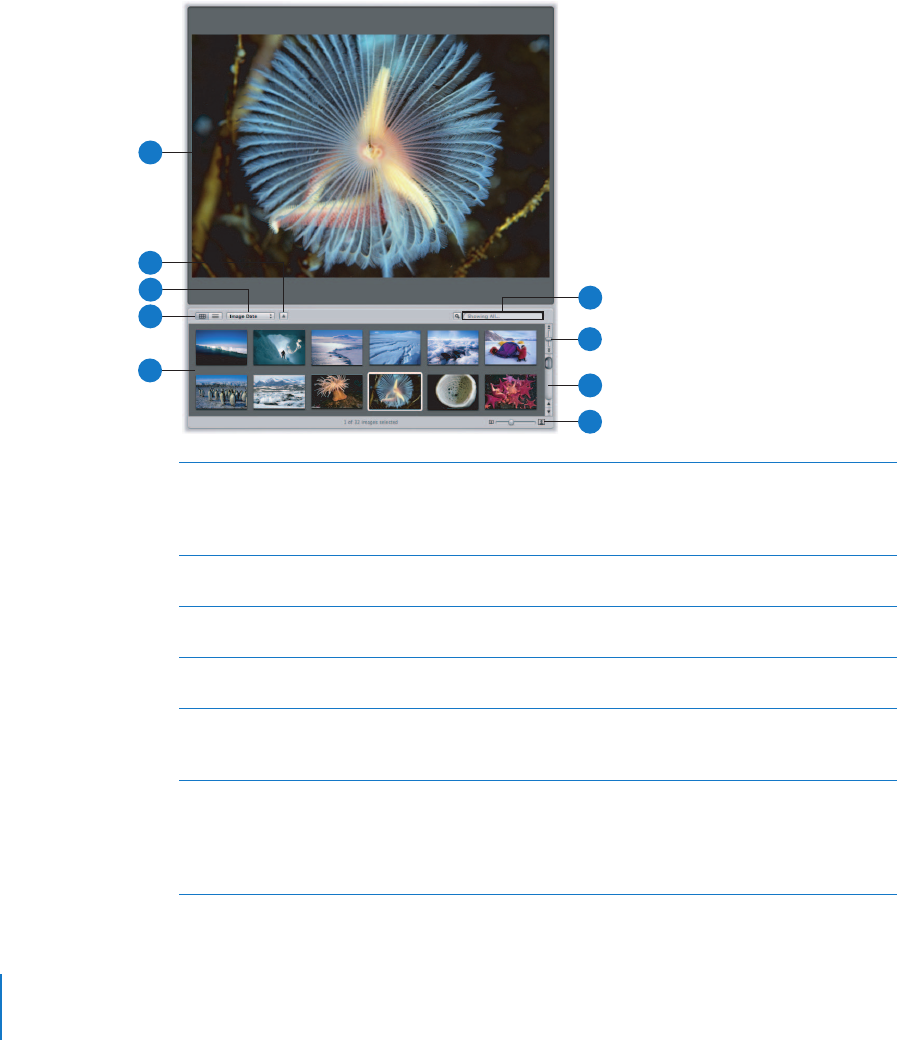
ABrowser The Browser displays the contents of any project or album selected
in the Projects panel. By default, the Browser displays images in a
project or album as a set of gridded image thumbnails. You can
also view your images in list view.
BGrid View/List View
buttons
Display the Browser contents in grid view (a grid of image
thumbnails) or in list view (a list of sortable file data).
CSorting pop-up menu Sort your images by a variety of sort properties in this pop-up
menu, or define your own custom sort criteria.
DSort Direction button Use this button in conjunction with the Sorting pop-up menu to
arrange the order of your images.
EViewer The Viewer displays the images you’ve selected in the Browser.
You can apply adjustments, keywords, and metadata to an image
in the Viewer.
FQuery HUD button
and search field
Search for images by entering a term in the search field or
choosing an option from the search field pop-up menu (with a
magnifying glass icon). To perform a more complex search for
images using the Query HUD, click the Query HUD button (to the
left of the search field).
D
E
C
B
A
F
G
H
I
Chapter 2 The Aperture Interface 43
I
To learn more about using the Browser and Viewer, see Chapter 5, “Working with
Images in the Browser,” on page 119 and Chapter 6, “Displaying Images in the Viewer,”
on page 145.
Control Bar
The control bar contains buttons and controls you can use to rotate, rate, and navigate
through images, as well as apply keywords to them. It runs across the bottom of the
Aperture main window. If you don’t need the control bar, you can hide it by choosing
Window > Hide Control Bar (or press D).
Display Controls
GShuttle control Use the Shuttle control to quickly move through your
image thumbnails.
HScroll bar Use the scroll bar to scroll through your image thumbnails.
IThumbnail Resize slider Use the Thumbnail Resize slider to quickly change the size of your
image thumbnails.
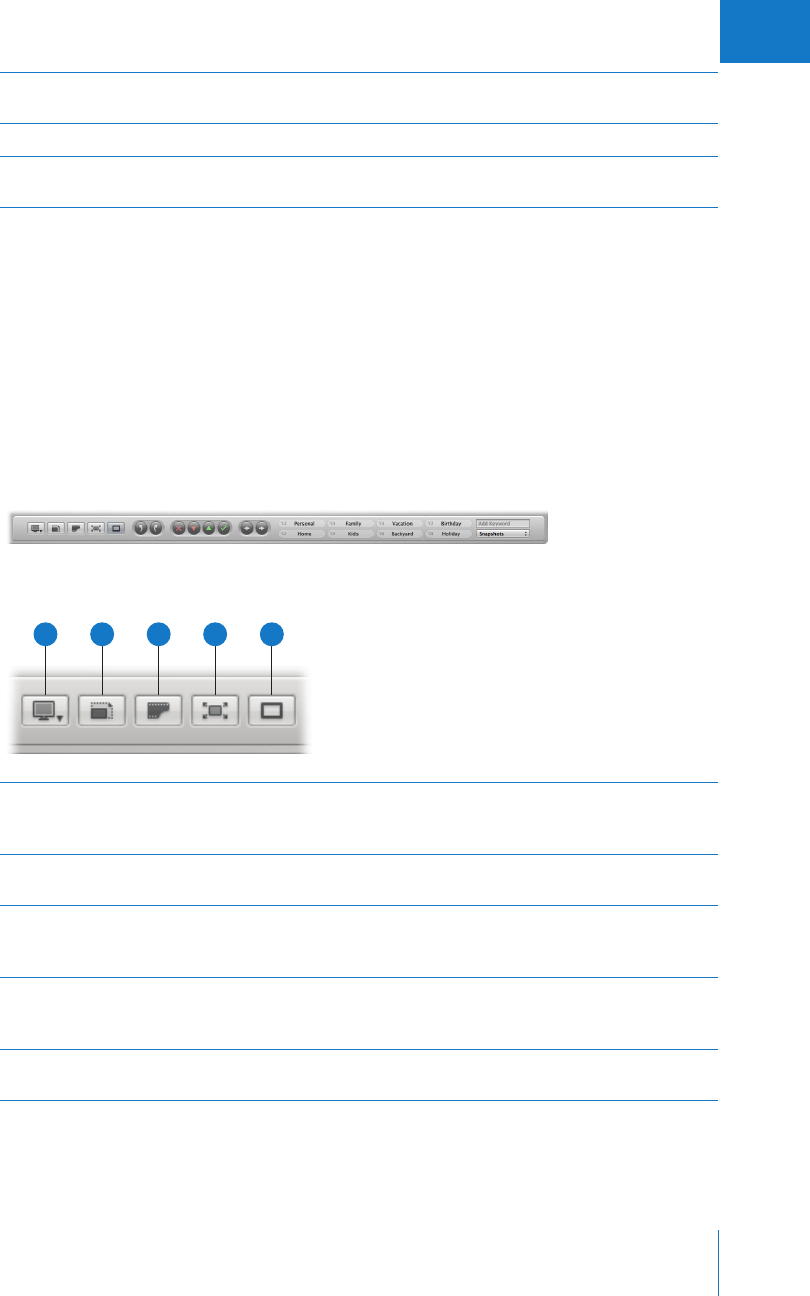
AViewer Mode
pop-up menu
Choose how to view your images and arrange your displays from
this pop-up menu. For more information, see Chapter 6, “Displaying
Images in the Viewer,” on page 145.
BZoom Viewer button Click this button to move between viewing an image at actual size
and fitting the image to the Viewer’s screen size.
CShow Master Image
button
Click this button to view the original digital master file without any
applied adjustments. Click again to switch the view back to the
current version.
DFull Screen button Click this button to switch to Full Screen mode. For more
information, see Chapter 7, “Viewing Images in Full Screen Mode,”
on page 163.
EPrimary Only button Click this button to temporarily change between making metadata
changes to all selected images or the primary selection only.
A BCDE
44 Part I Interface and Acquisition
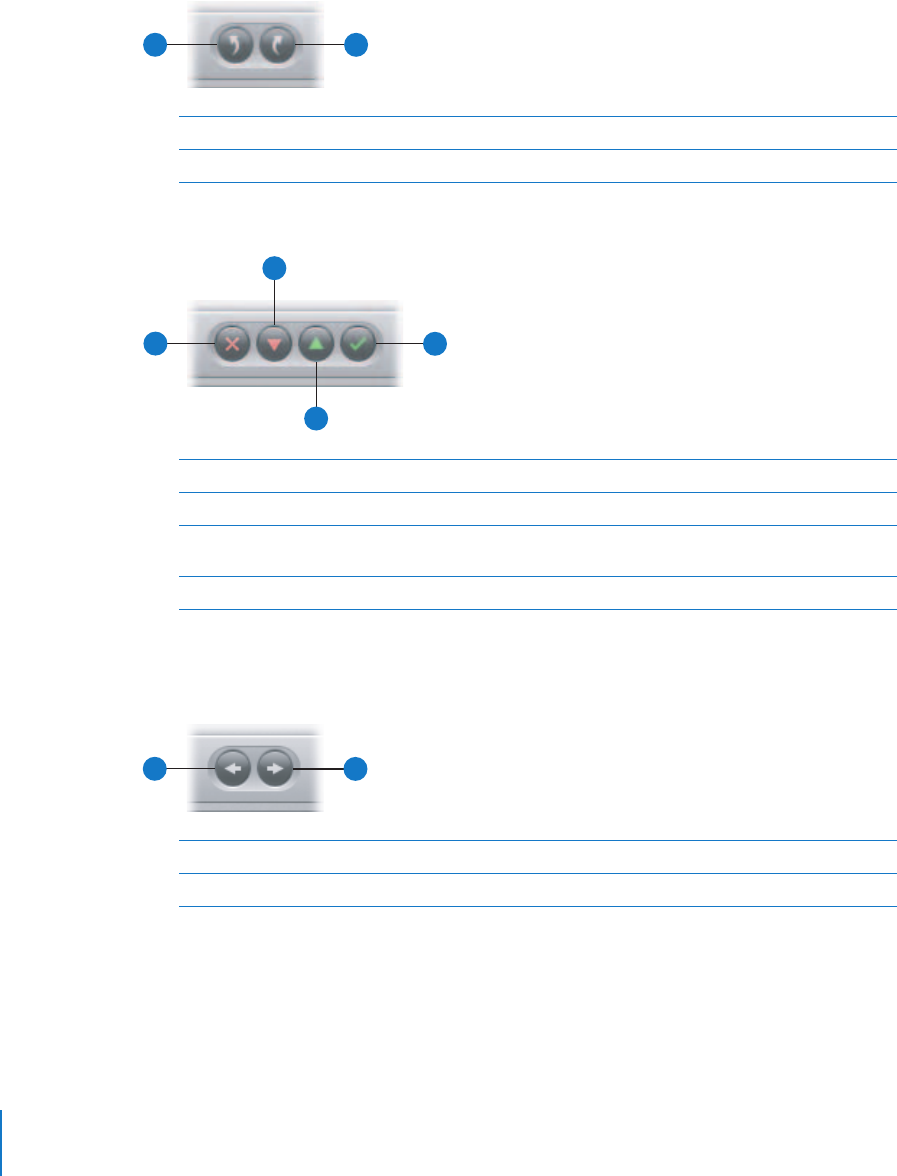
Rotate Buttons
Rating Buttons
To learn more about rating your images, see Chapter 9, “Rating Images,” on page 187.
Navigation Buttons
ARotate Left Click this button to rotate the selected image to the left.
BRotate Right Click this button to rotate the selected image to the right.
A B
AReject Click this button to give the selected image a Reject rating.
BDecrease Rating Click this button to decrease the rating of the selected image.
CSelect Click this button to give the selected image a Select rating
(five stars).
DIncrease Rating Click this button to increase the rating of the selected image.
A
B
C
D
APrevious Image Click this button to go to the previous image.
BNext Image Click this button to go to the next image.
A B
Chapter 2 The Aperture Interface 45
I
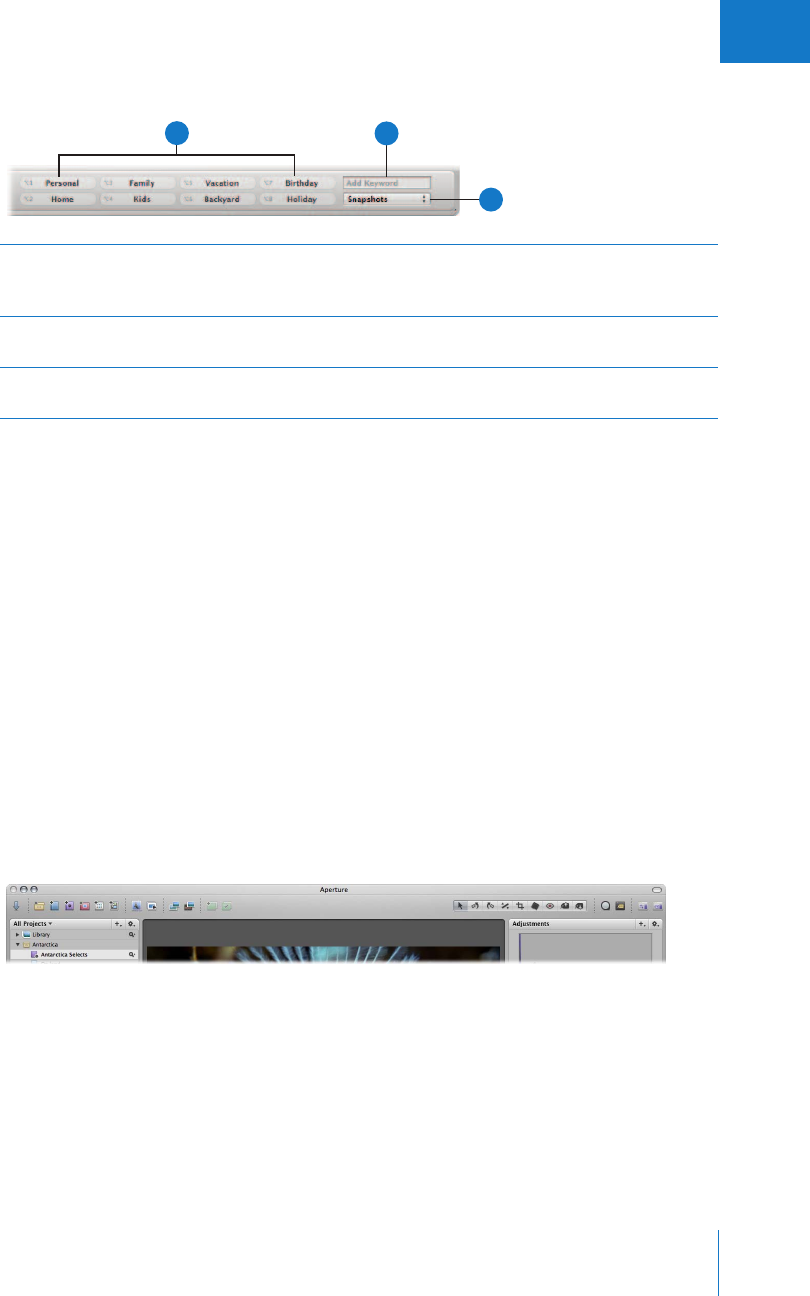
Keyword Controls
Note: If the Adjustments and Metadata Inspectors are shown, there may not be
enough room to show the entire control bar. In that case, the keyword controls are not
shown. You can hide the Inspectors panel by pressing I.
To learn more about applying keywords, see Chapter 10, “Applying Keywords to
Images,” on page 199.
Toolbar
The toolbar is a collection of buttons and tools located at the top of the Aperture main
window. Its buttons and tools are grouped by function: there are buttons for creating
projects, organizing images, and configuring the Aperture workspace, as well as tools
for applying adjustments. The toolbar is shown by default, but you can hide it by
choosing View > Hide Toolbar.
You can customize the toolbar. For more information, see “Customizing the Toolbar”
on page 65.
Note: Because you can customize the toolbar, adding and deleting the buttons you
want, your toolbar may appear different from the one pictured in this manual.
AIndividual keyword
buttons
Click any of these buttons to apply a preset keyword to a selected
image or group of images Hold down Shift and click the button to
remove the keyword.
BAdd Keyword field Enter a new keyword, then press Return. Aperture creates a new
keyword and applies it to the selected image.
CKeyword Preset Group
pop-up menu
Choose a keyword preset group to display on the keyword buttons,
or edit the buttons in an existing keyword preset group.
B
C
A
46 Part I
Interface and Acquisition
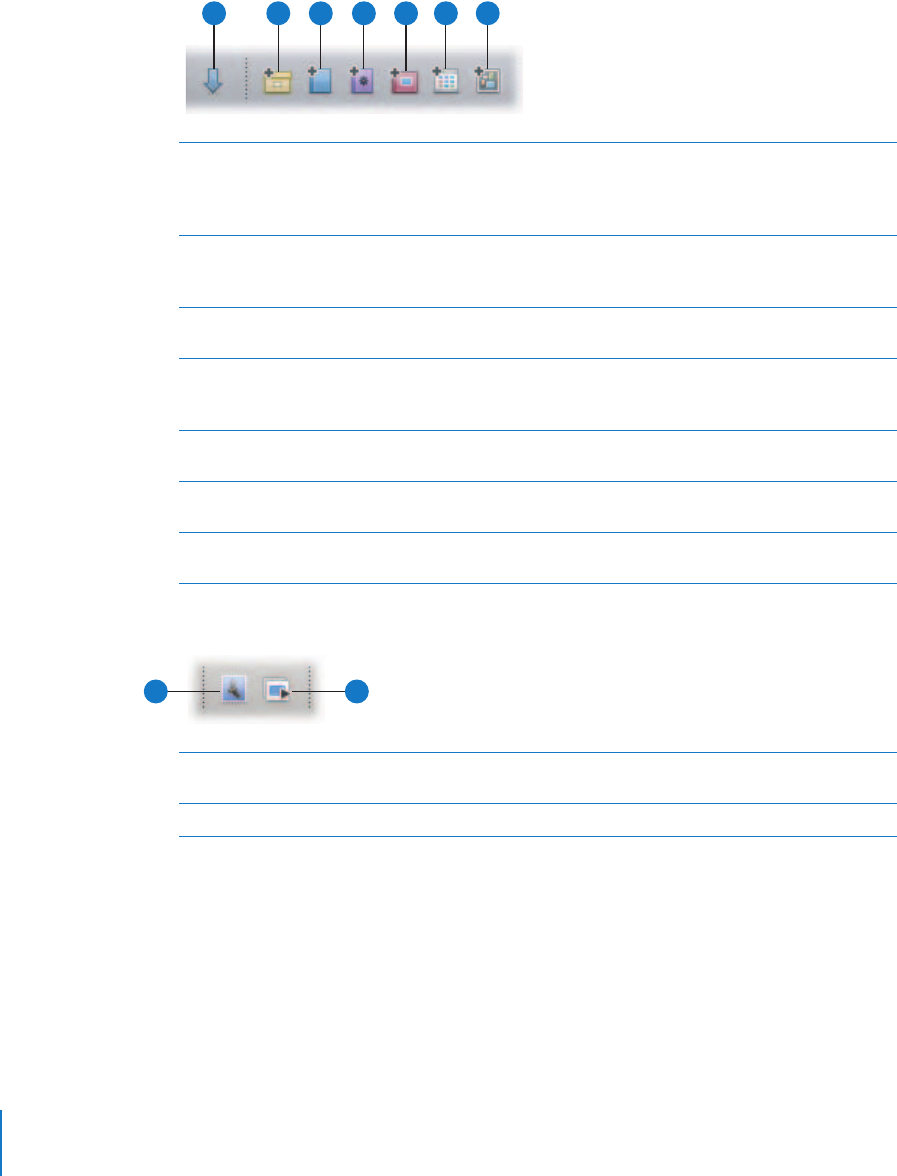
Import and Project Buttons
Email and Slideshow Buttons
A
Import Panel
Click this button to show or hide the Import panel. When you
select either the camera, a memory card, or a mounted drive, the
Import dialog appears. For more information, see “Import Panel” on
page 52.
B
New Project
Click this button to create a new project. You will have the option
to create an empty project, a project with any images you’ve
selected, or a project with all the images in the Browser.
C
New Album
Click this button to create a new album containing your current
image selection.
D
New Smart Album
Click this button to create a new Smart Album. For more
information, see Chapter 13, “Grouping Images with Smart Albums,”
on page 267.
E
New Book Album
Click this button to create a new book album. For more
information, see Chapter 19, “Creating Books,” on page 357.
F
New Web Gallery Album
Click this button to create a new web gallery album. For more
information, see Chapter 18, “Creating Webpages,” on page 333.
G
New Light Table Album
Click this button to create a new Light Table album. For more
information, see Chapter 17, “Using the Light Table,” on page 323.
B C D
A E F G
A
Email
Click this button to open your email program and attach
selected images.
B
Slideshow
Click this button to initiate a slideshow of the selected images.
A B
Chapter 2
The Aperture Interface
47
I
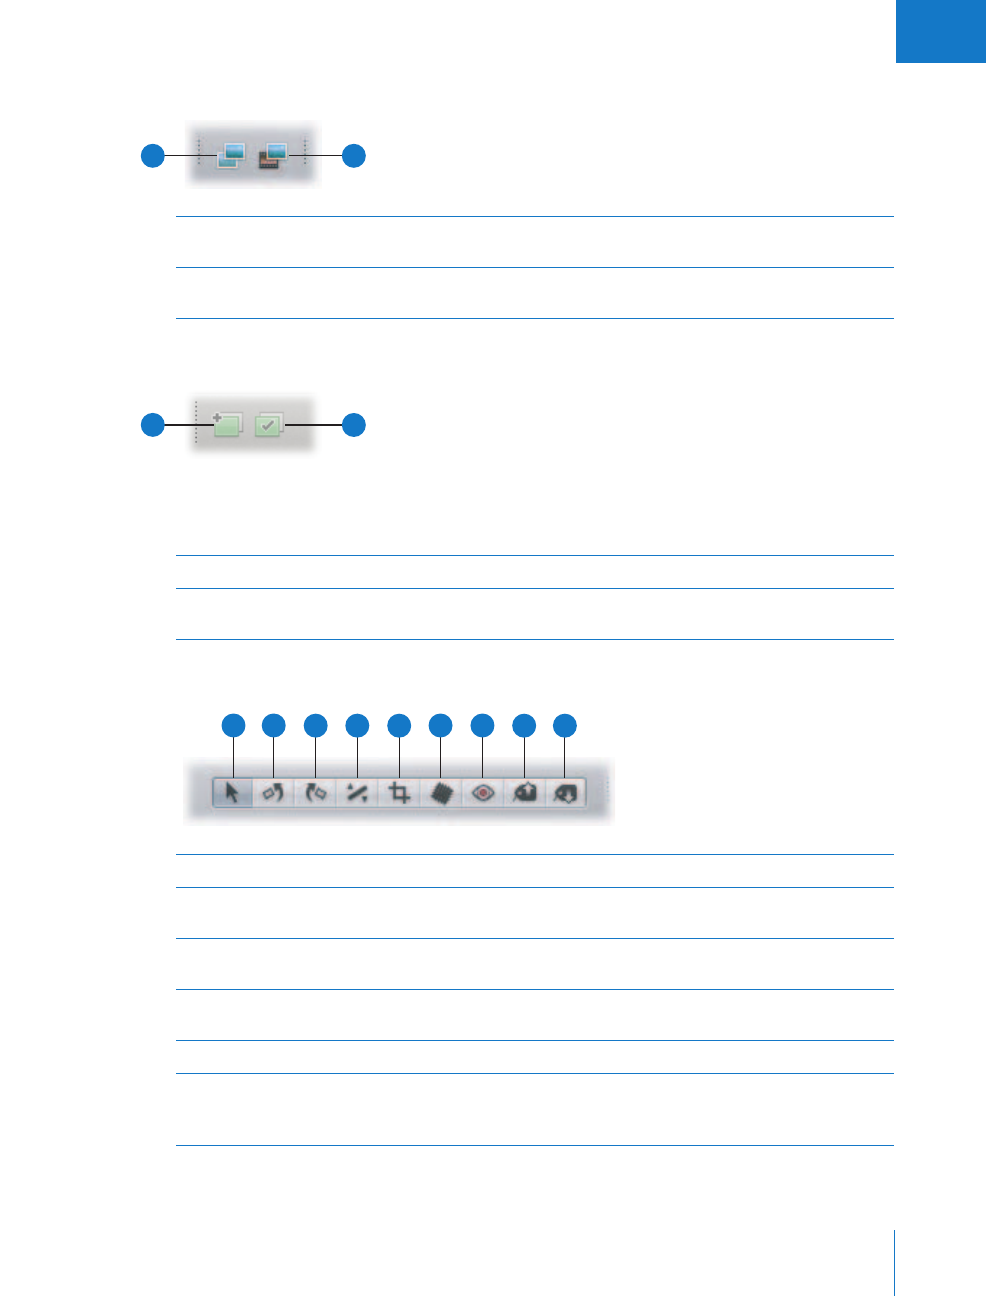
Version Buttons
Stacking Buttons
For details about working with stacks, see Chapter 8, “Stacking Images
and Making Picks,” on page 175.
Adjustment Tools
A
Duplicate Version
Click this button to duplicate the selected image version, with all
applied metadata and adjustments.
B
New Version
From Master
Click this button to create a new version from a selected image’s
digital master file.
A B
AB
A
Stack
Click this button to group the selected images in a stack.
B
Stack Pick
Click this button to mark the selected image as the stack’s pick, or
best image.
A
Selection
Select projects, albums, and images with this tool.
B
Rotate Left
Rotate an image to the left with this tool. You can use this tool to
rotate an image displayed in the Viewer or Browser.
C
Rotate Right
Rotate an image to the right with this tool. You can use this tool to
rotate an image displayed in the Viewer or Browser.
D
Straighten
Use the guides to help manually straighten (or level) the
selected image.
E
Crop
Trim the selected image with this tool.
F
Spot & Patch
Remove imperfections in the image, such as sensor dust, with this
tool. The tool either copies the pixels around the blemish (“spotting”)
or copies pixels from another area of the image (“patching”).
A B C D E F G H I
48 Part I Interface and Acquisition
For more information about working with the adjustment tools, see
Performing Image Adjustments in the Aperture Help menu.
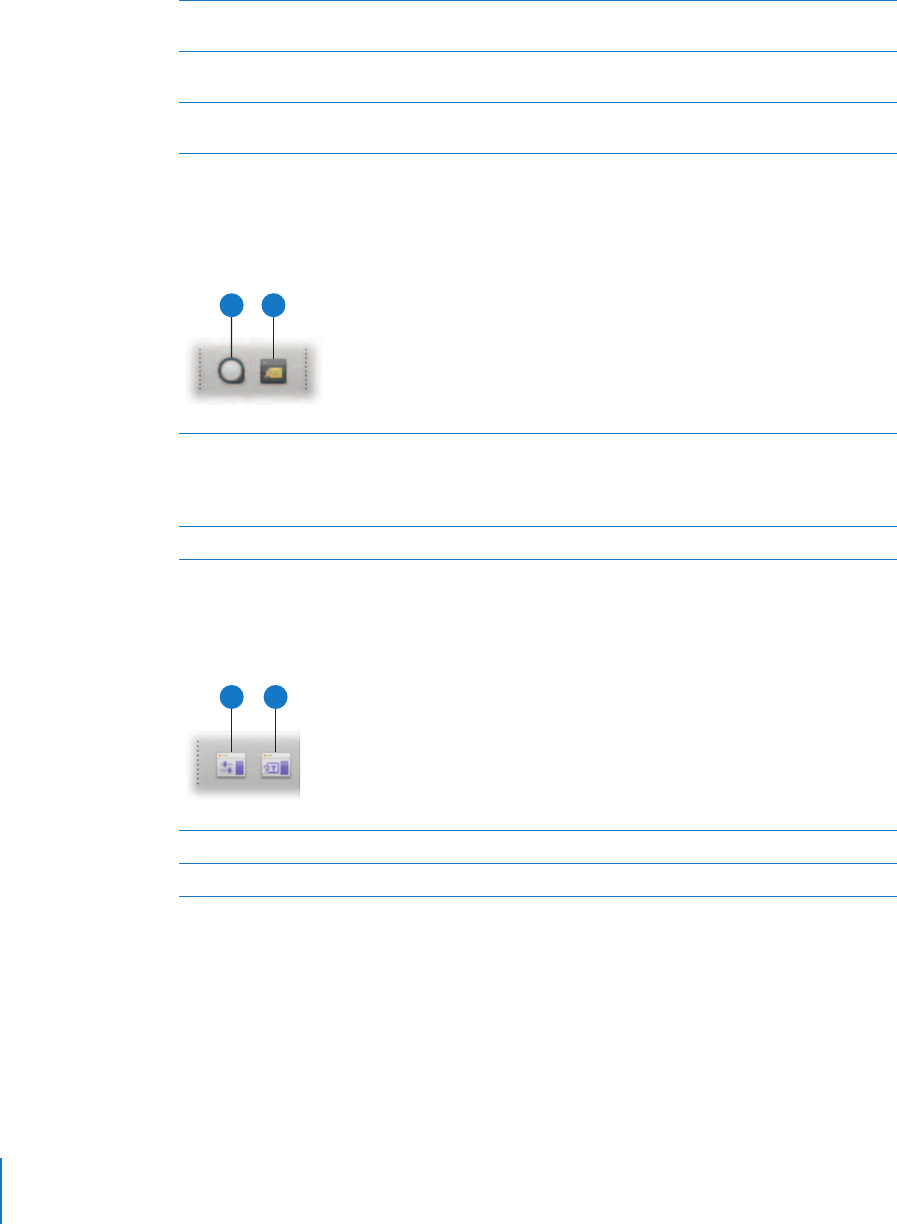
Loupe and Keywords HUD Buttons
Adjustments and Metadata Inspector Buttons
Aperture provides three layout buttons that you can use to quickly change the
workspace layout.
For more information about workspace layouts, see “Workspace Layouts” on page 64.
GRed Eye Reduce red-eye, occurring when the subject’s retinas reflect light
from your camera’s flash, with this tool.
HLift Copy a set of metadata and adjustments, including cropping and
straightening of images, from a selected image with this tool.
IStamp Stamp, or apply, a copied set of adjustments or metadata to one or
several images with this tool.
ALoupe Click this button to open the Loupe tool, which zooms in on your
image by magnifying the area of the image it is placed over. You
can adjust the diameter of the Loupe by choosing View > Increase
Diameter or View > Decrease Diameter.
BKeywords HUD Click this button to show or hide the Keywords HUD.
AB
AAdjustments Inspector Click this button to show or hide the Adjustments Inspector.
BMetadata Inspector Click this button to show or hide Metadata Inspector.
AB
Chapter 2 The Aperture Interface 49
I
Adjustments Inspector
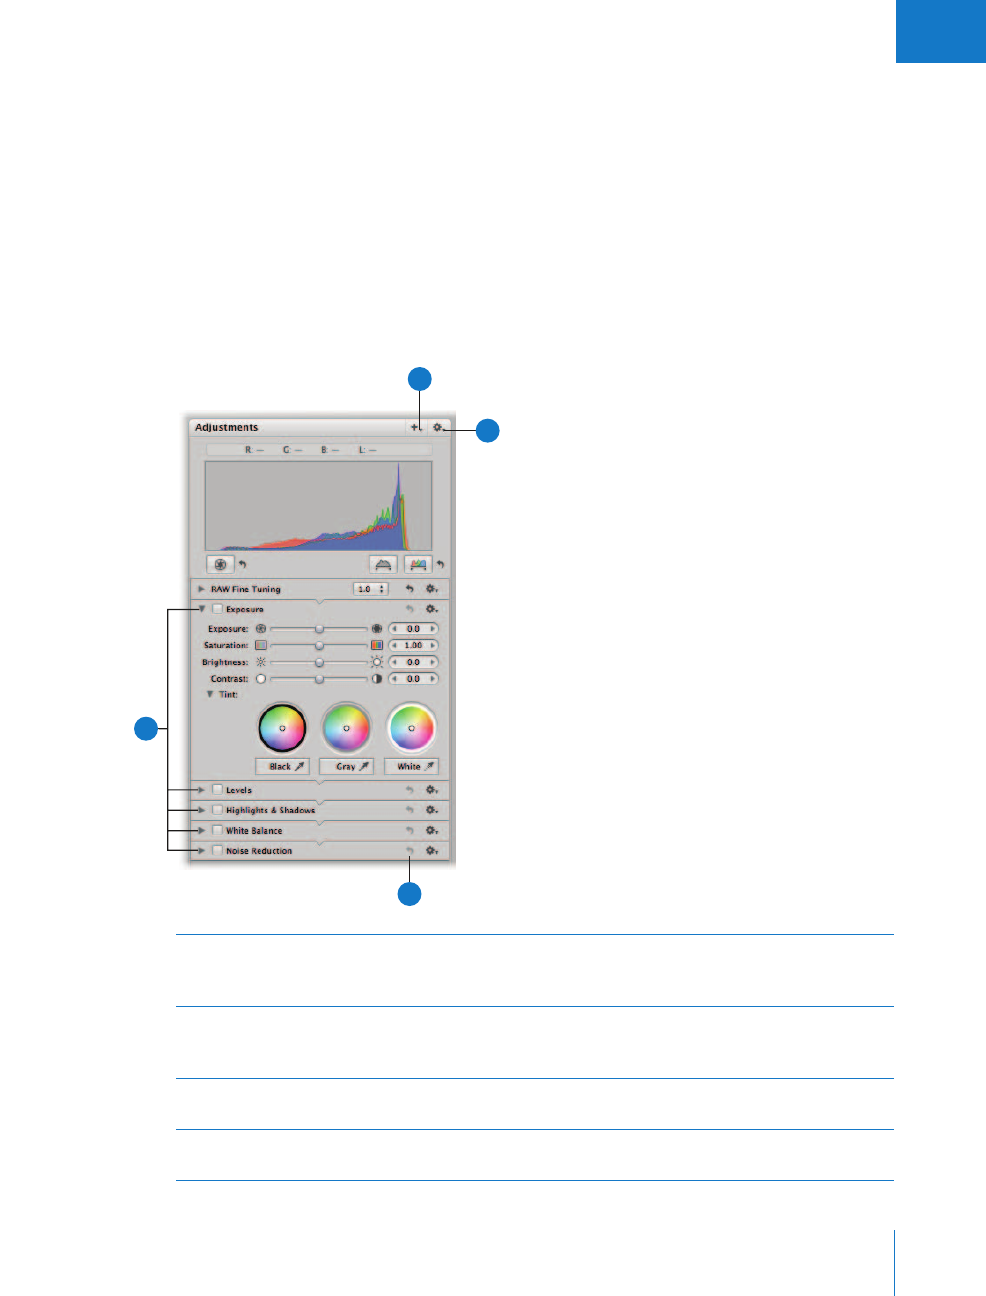
You can use controls in the Adjustments Inspector to apply, edit, and remove image
adjustments. Controls in the Adjustments Inspector are grouped according to the type
of image adjustment they perform. You can see the controls for an adjustment by
clicking its disclosure triangle.
To show the Adjustments Inspector, do one of the following:
mChoose Window > Show Inspectors (or press I) to open the Inspectors panel.
mDouble-click an image in the Browser to open the Inspectors panel.
mChoose Window > Show Adjustments (or press Control-A).
AAdjustments Click the disclosure triangle for an adjustment to view its controls.
Select the checkbox for an adjustment to apply changes using the
adjustment controls.
BAdd Adjustments
pop-up menu
Choose the types of adjustments you want to apply to an image
from this pop-up menu. When you choose an adjustment, its
controls appear in the Adjustments Inspector.
CAdjustment Action
pop-up menu
Choose a histogram view and remove selected or all
adjustments made.
DReset button Click the Reset button for an adjustment to reset the controls to
their default settings.
B
C
A
D

50 Part I Interface and Acquisition
To remove an adjustment from an image, deselect the checkbox for the adjustment. For
more information about using adjustment controls, see Performing Image Adjustments in
the Aperture Help menu.
Although you can apply initial adjustments with the Adjustments Inspector, it’s often
more convenient to use the Adjustments HUD in Full Screen mode. For more
information, see Chapter 7, “Viewing Images in Full Screen Mode,” on page 163.
Metadata Inspector
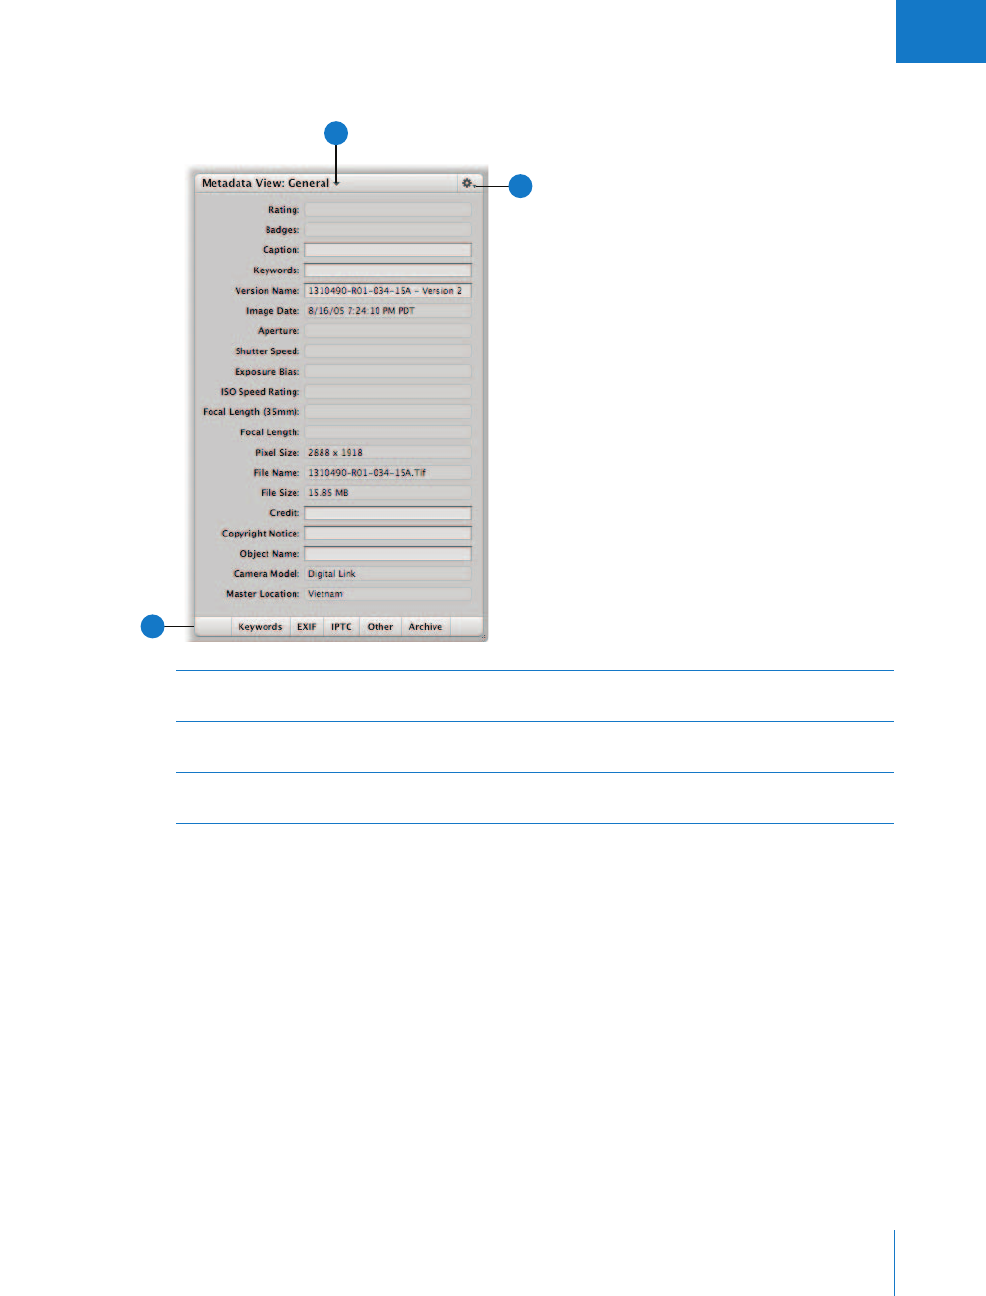
The Metadata Inspector displays an image’s caption text, keywords, version number,
filename, and file size. You can also view EXIF (Exchangeable Image File) and IPTC
(International Press Telecommunications Council) data associated with your image. EXIF
metadata is embedded with an image file by the digital camera and includes camera
settings such as shutter speed, date and time, focal length, exposure, metering pattern,
and flash information. IPTC information can be embedded in a digital image with most
software programs used to edit photos, and can include a caption, the place and date a
photo was taken, and copyright information.
To show the Metadata Inspector, do one of the following:
mChoose Window > Show Inspectors (or press I) to open the Inspectors panel.
mDouble-click an image in the Browser to open the Inspectors panel.
Chapter 2 The Aperture Interface 51
I
mChoose Window > Show Metadata (or press Control-D).
AMetadata display
buttons
Click a button to select the type of metadata to display.
BMetadata View
pop-up menu
Choose the metadata view being displayed from this pop-up menu.
CMetadata Action
pop-up menu
Choose options for editing and arranging your metadata views and
for creating metadata presets from this pop-up menu.
A
C
B
52 Part I Interface and Acquisition
Import Panel
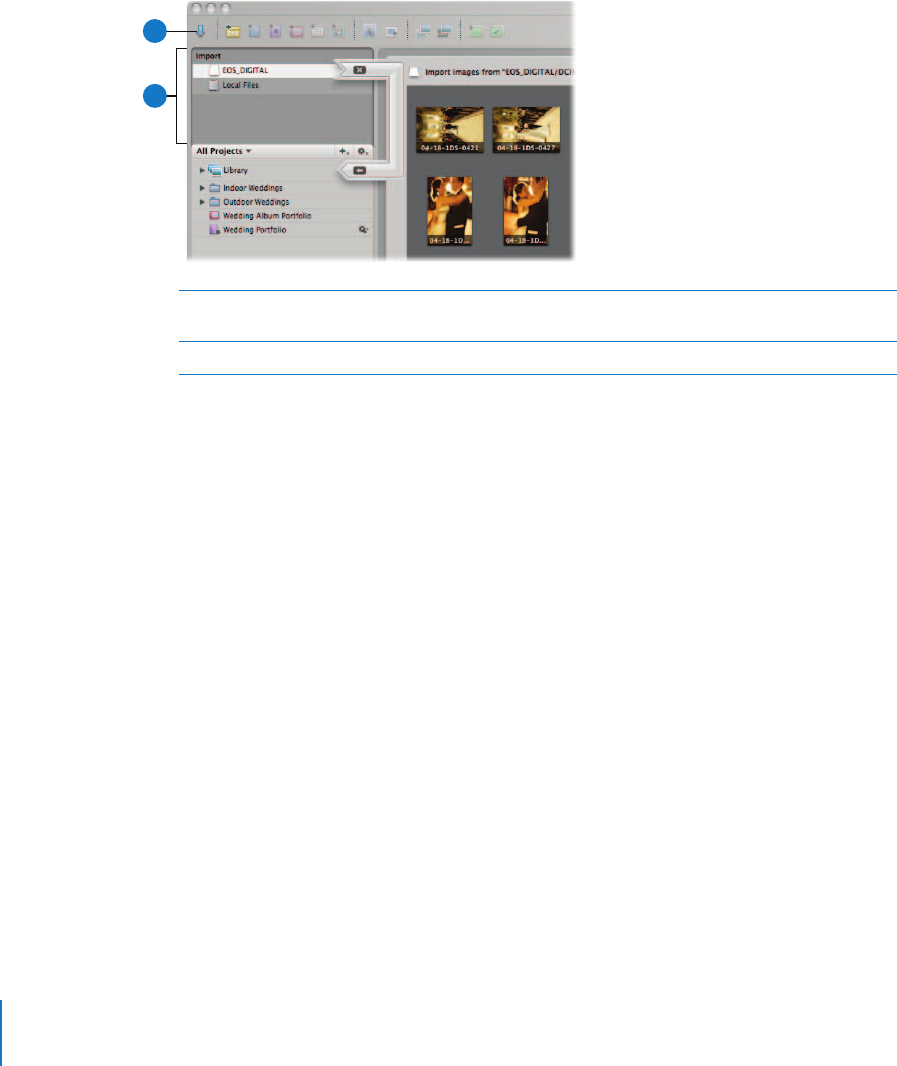
The Import panel displays a list of connected cameras, card readers, and external hard
disk drives, as well as local hard disks and mounted servers. To import images into
Aperture, you select a device in the panel or connect a camera or card reader, and the
Import dialog appears.
For more information, see Chapter 4, “Importing Images,” on page 87.
AImport panel This list displays all locations from which you can currently import
images, including internal disks and connected drives.
BImport Panel button Click this button to show or hide the Import panel.
B
A
Chapter 2 The Aperture Interface 53
I
Vaults Panel
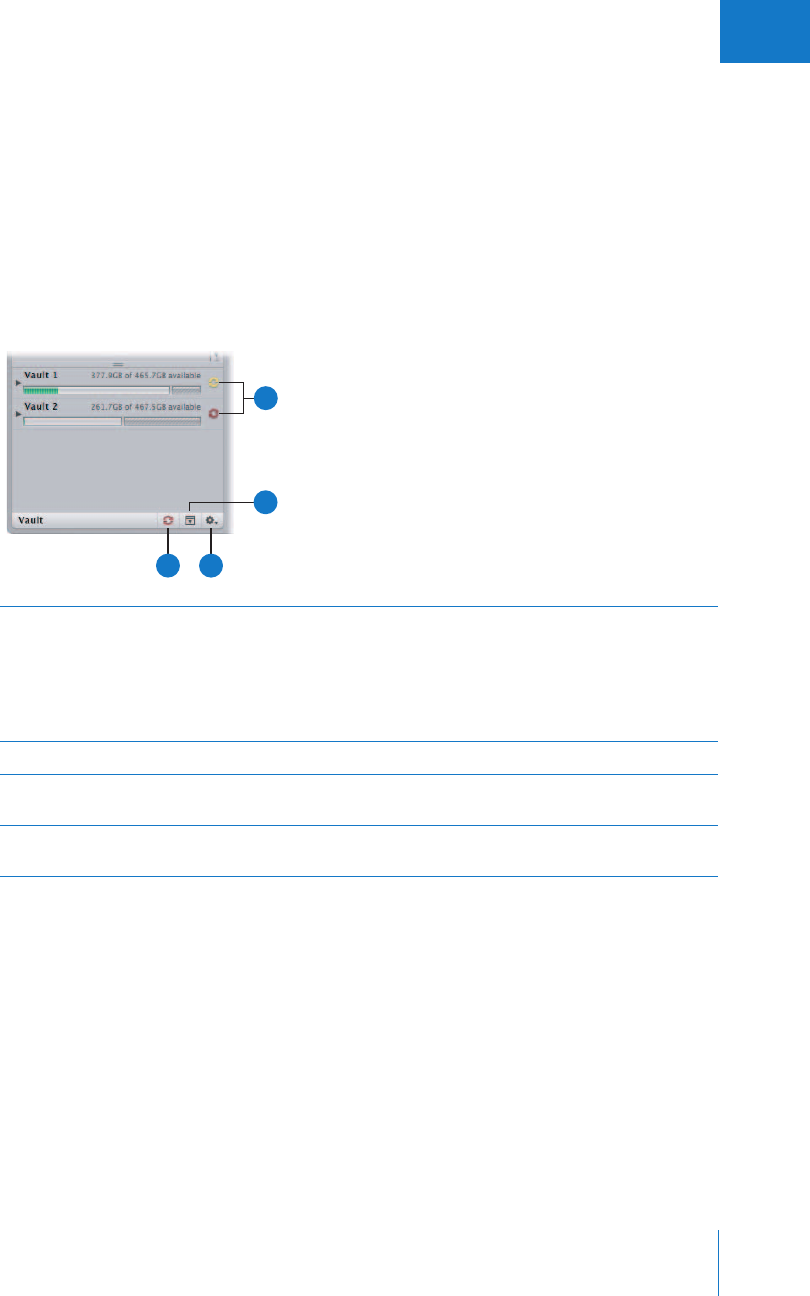
The Vaults panel lists your backup vaults and their locations. Vaults are usually located
on external FireWire drives.
As you add images to the Library, Aperture automatically tracks which managed image
files have been backed up to your vault. When your vault is up to date, the Vault Status
button appears black. When a change to at least one version occurs, such as an
adjustment, the Vault Status button appears yellow. When Aperture determines that
even a single master file has not been backed up, the Vault Status button appears red.
You can have Aperture update your vaults whenever you want.
For more information, see Chapter 20, “Backing Up Your Images,” on page 399.
AVault Status buttons Click the Vault Status button next to a vault to update the vault.
The Vault Status button changes color to indicate the current
update status of the vault. Black means the vault is up to date.
Yellow means that changes have been made to images that have
not been backed up. Red means that images have been added to
the Library that have not been backed up.
BVaults Panel button Click this button to show or hide the Vaults panel.
CVault Action
pop-up menu
Add, remove, and update vaults from this
pop-up menu.
DUpdate All Vaults
button
Click this button to update all your existing vaults.
C
A
B
D
54 Part I Interface and Acquisition
Book Layout Editor
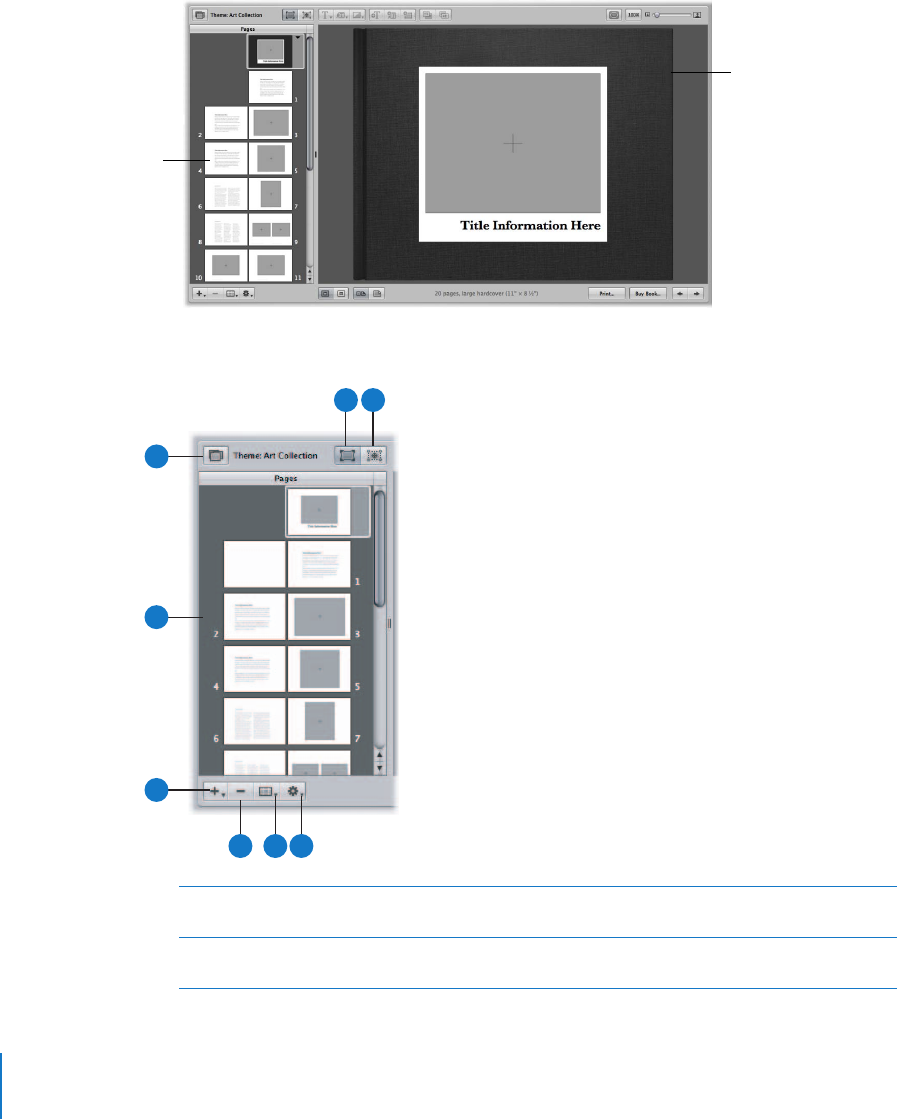
When you create a new book album, the Book Layout Editor appears. In it, you can
create a variety of printed books to showcase your images.
Pages Panel Area
Design each page in
the Book Layout Editor.
Select a page to edit in
the Pages panel.
AAdd Pages
pop-up menu
Choose to add one or several pages to your book from this
pop-up menu.
BPages panel Select an individual book page in the Pages panel to view, or
rearrange your book pages.
C
B
A
G
H
D E
F
Chapter 2 The Aperture Interface 55
I
Book Layout Controls
Text, Metadata, and Photo Box Buttons
CTheme button Click this button to choose a theme and layout for your book’s pages.
DEdit Content button Click this button to change images or edit text on your pages.
EEdit Layout button Click this button to change the page layout, moving and resizing
text, metadata, and photo boxes on pages.
FBook Action
pop-up menu
Choose options to reflow the images in a book, add an index and
page numbers, or add and change the look of text, metadata, and
photo boxes from this pop-up menu.
GSet Master Page
pop-up menu
Choose the master page you want to apply to a selected page from
this pop-up menu.
HDelete Pages button Click this button to delete one or several selected pages from
your book.
AText Style
pop-up menu
Choose the style of text you want for a selected text box using this
pop-up menu.
BMetadata Format
pop-up menu
Choose the type of metadata you want to display with your images
from this pop-up menu.
CPhoto Filter
pop-up menu
Choose a filter to change the look of images. For example, you might
apply filters that change an image to black and white or sepia.
A B C
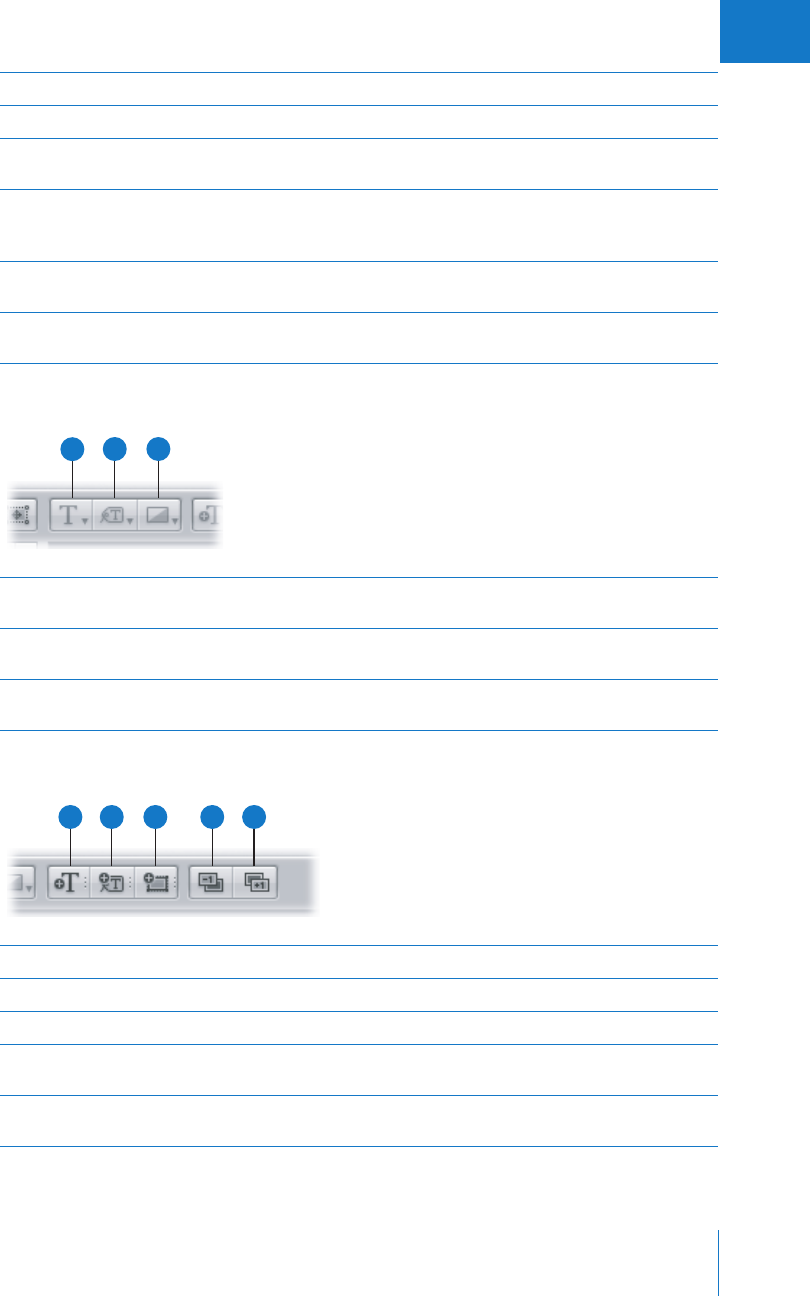
AAdd Text Box Click this button to add a text box to the page.
BAdd Metadata Box Click this button to add a metadata box to the page.
CAdd Photo Box Click this button to add a photo box to the page.
DSend Backward Click this button to move a selected box backward in the stacking
order of overlapping text or image boxes.
EBring Forward Click this button to move a selected box forward in the stacking
order of overlapping text or image boxes.
A B C D E
56 Part I Interface and Acquisition
Page Display Controls
Cover and Page Display Buttons
Printing and Page Navigation Buttons
To learn more about creating books, see Chapter 19, “Creating Books,” on page 357.
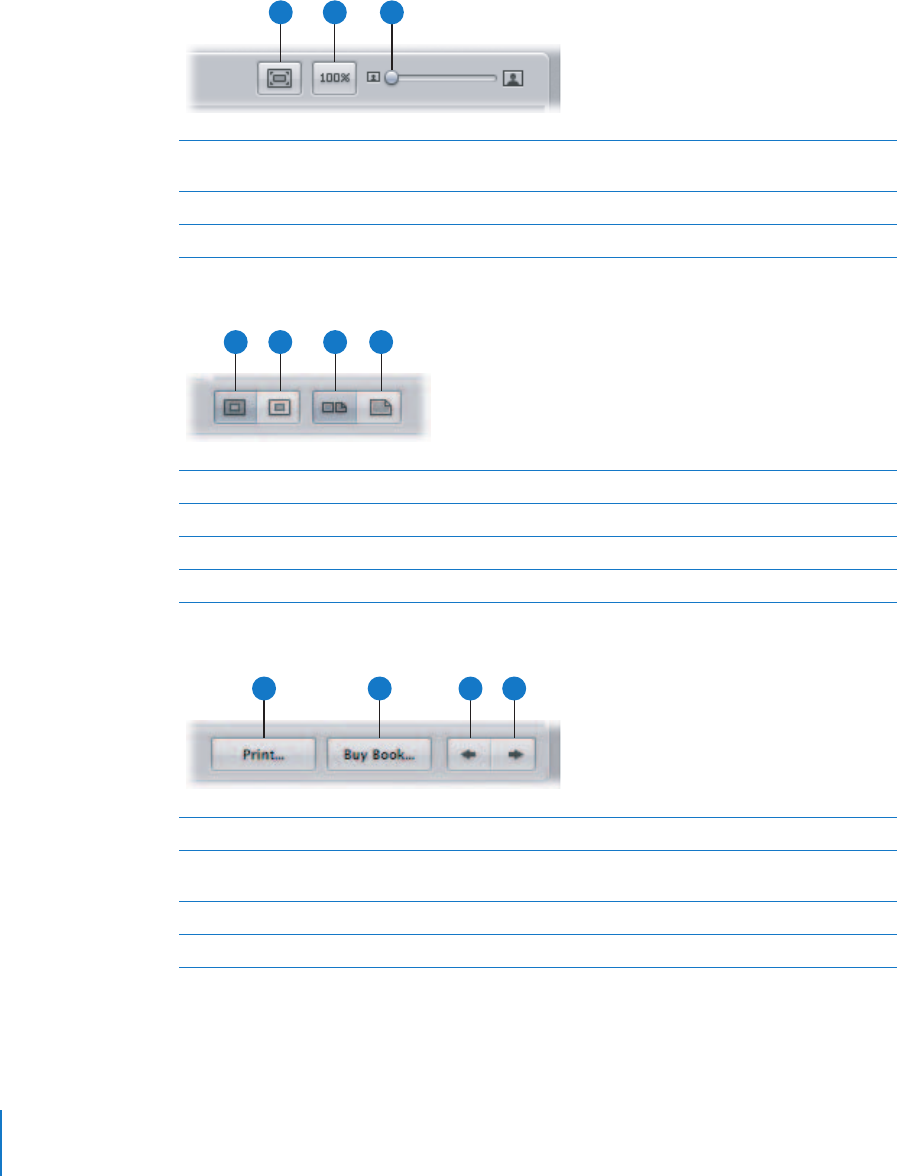
AScale To Fit button Click this button to scale the display of your pages to fit the Book
Layout Editor screen size.
BActual Size button Click this button to view the selected page at its actual size.
CDisplay Size slider Drag this slider to increase or decrease the size of the page.
A B C
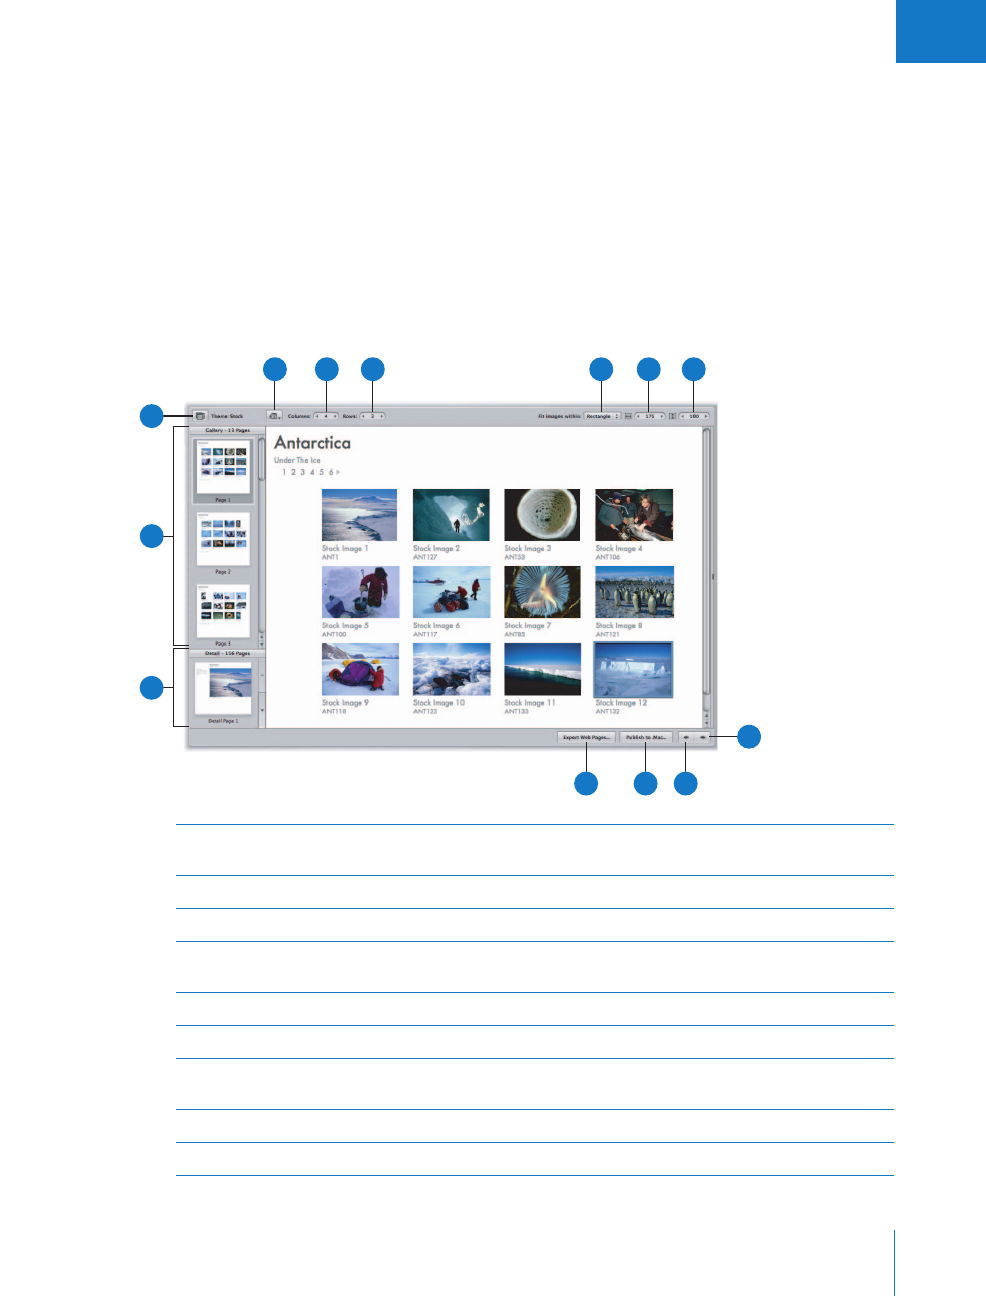
ALarge Hardcover Click this button to choose a large hardcover book format.
BLarge Softcover Click this button to choose a large softcover book format.
CShow Full Spreads Click this button to display two facing pages.
DShow Single Pages Click this button to display single pages.
A B C D
APrint Click this button to print your book’s pages.
BBuy Book Click this button to purchase a printed copy of your book from
Apple’s print vendor.
CPrevious Page Click this button to go to the previous page of your book.
DNext Page Click this button to go to the next page of your book.
A B C D
Chapter 2 The Aperture Interface 57
I
Webpage Editor
You can use the Webpage Editor to create professional-quality, gallery-style pages and
web journal pages for displaying your images. After designing your pages, you can post
them to your .Mac account or web server. The controls in the Webpage Editor differ slightly
depending on whether you have selected a web gallery album or a web journal album.
Web Gallery Controls
To work with a web gallery in the Webpage Editor, select a web gallery album in the
Projects panel and select a page to view from the thumbnail pages on the left side.
When the selected page appears, you can add and arrange images and text.
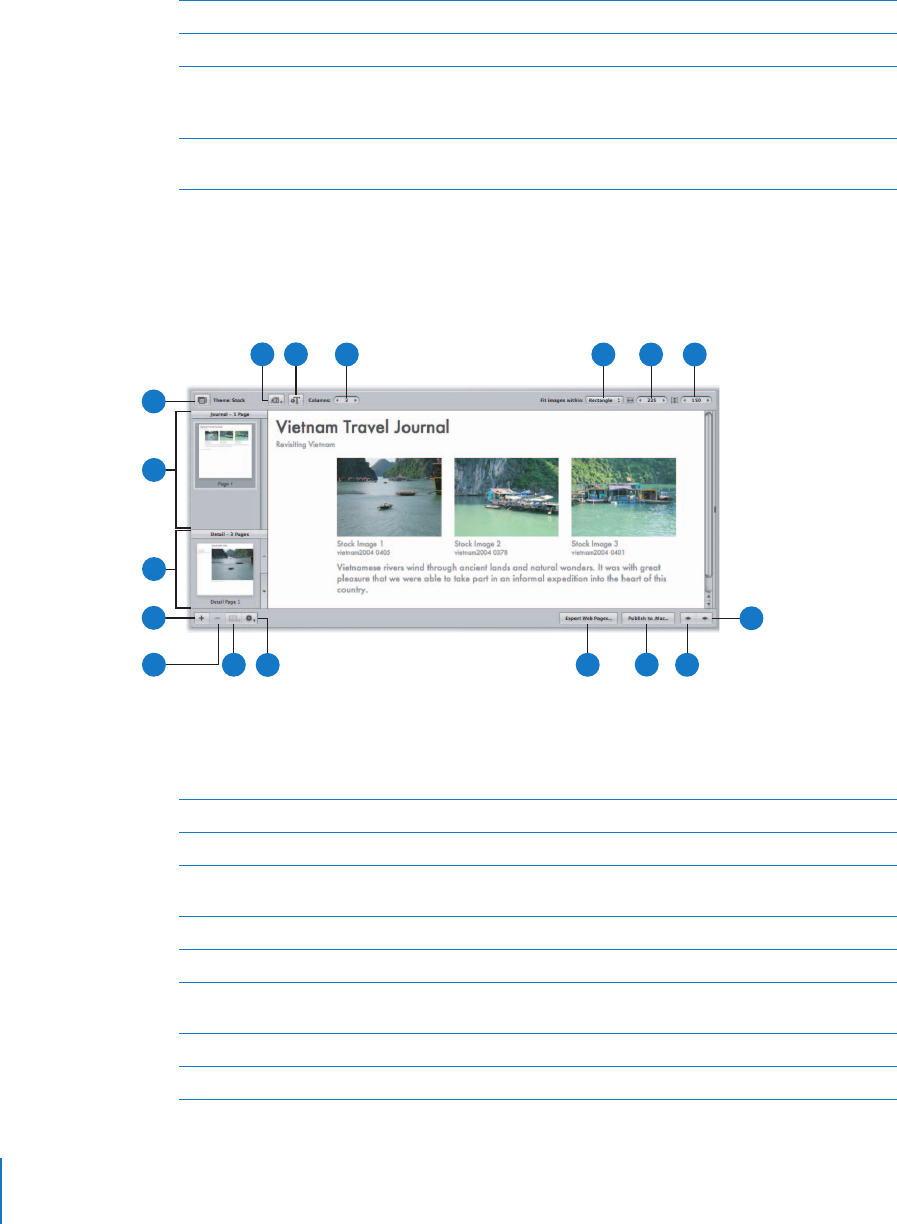
ADetail Images panel Click the thumbnail image in this panel to see the enlarged version
of the selected image.
BGallery Pages panel Click a page’s thumbnail to see the enlarged version.
CSite Theme button Click this button to choose a theme, or layout, for your webpages.
DMetadata View
pop-up menu
Choose a metadata view to use with the webpage images from
this pop-up menu.
EColumns value slider Specify the number of columns you want on a page.
FRows value slider Specify the number of rows you want on a page.
G“Fit images within”
pop-up menu
Choose how to display images on the webpage.
HWidth value slider Specify the width of the images displayed on the page.
IHeight value slider Specify the height of the images displayed on the page.
D E F G H I
L M K
J
A
B
C
58 Part I Interface and Acquisition
Web Journal Controls
You can also create journal-style webpages, mixing paragraphs of text and images, to
display on the web. When working with a web journal, you can manually arrange
images and text on the page.
To work with a web journal in the Webpage Editor, select a web journal album in the
Projects panel, and select a page to view from the thumbnail pages on the left side.
When the selected page appears, you can add and arrange images and text.
JNext Page button Click this button to go to the next web gallery page.
KPrevious Page button Click this button to go to the previous web gallery page.
LPublish to .Mac button Click this button to publish your finalized webpages to your .Mac
account. For more information, see “Exporting to .Mac” on
page 348.
MExport Web Pages
button
Click this button to export your webpages. For more information,
see “Exporting Webpages as HTML Files” on page 350.
B
C
A
D
F G H I J
O
P M
N
Q
E
K
L
ARemove Page button Click this button to remove a selected page from your web journal.
BAdd Page button Click this button to add a page to your web journal.
CDetail Images panel Click the thumbnail image in this panel to see the enlarged version
of a selected image.
DJournal Pages panel Select a page’s thumbnail in this panel to see the enlarged version.
ESite Theme button Click this button to choose a theme, or layout, for your webpage.
FMetadata View
pop-up menu
Choose a metadata view to use with the webpage images from
this pop-up menu.
GAdd Text Box button Click this button to add a text box to the current webpage.
HColumns value slider Specify the number of columns you want on a page.

Chapter 2 The Aperture Interface 59
I
To learn more about creating webpages, see Chapter 18, “Creating Webpages,” on
page 333.
I“Fit images within”
pop-up menu
Choose how images appear on the webpage from this pop-up menu.
JWidth value slider Specify the width of the images displayed on the page.
KHeight value slider Specify the height of the images displayed on the page.
LNext Page button Click this button to go to the next webpage.
MPrevious Page button Click this button to go to the previous webpage.
NPublish to .Mac button Click this button to publish your finalized webpages to your .Mac
account. For more information, see “Exporting to .Mac” on
page 348.
OExport Web Pages
button
Click this button to export your webpages. For more information,
see “Exporting Webpages as HTML Files” on page 350.
PPage Action
pop-up menu
Rearrange the order of images and choose the conditions for
automatically adding pages to your web journal from this
pop-up menu.
QPage Template
pop-up menu
Choose a page template, or layout, from this pop-up menu.
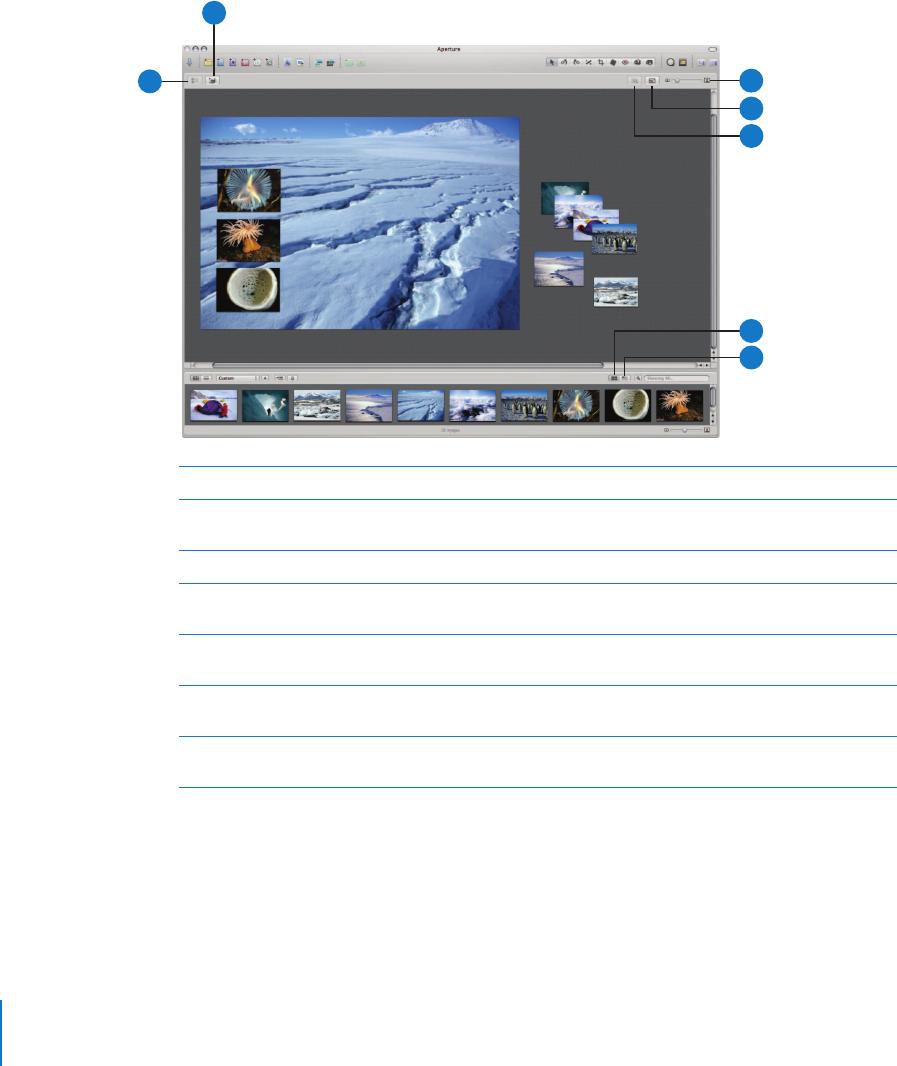
60 Part I Interface and Acquisition
Light Table
The Light Table provides an open workspace where you can freely arrange images. You
can use the Light Table to review and compare images, create mockups of webpages,
compare color values in a selection of images before applying color corrections, or do
anything else that involves viewing and comparing your images.
To learn more about the Light Table, see Chapter 17, “Using the Light Table,” on page 323.
APut Back button Click this button to remove a selected image from the Light Table.
BUncover button Click this button to reveal images that are covered by other images
in the Light Table.
CLight Table Zoom slider Drag the Light Table Zoom slider to change the Light Table’s size.
DScale to Fit All
Items button
Click this button to fit the entire Light Table on your screen.
ENavigator button When the Light Table is larger than your screen, click this button to
reposition your view on another area of the Light Table.
FShow All Images button Click this button to see the entire contents of the Light Table album
in the Browser.
GShow Unplaced
Images button
Click this button to see only images in the Browser that are not yet
placed in the Light Table.
A
B
C
D
E
F
G
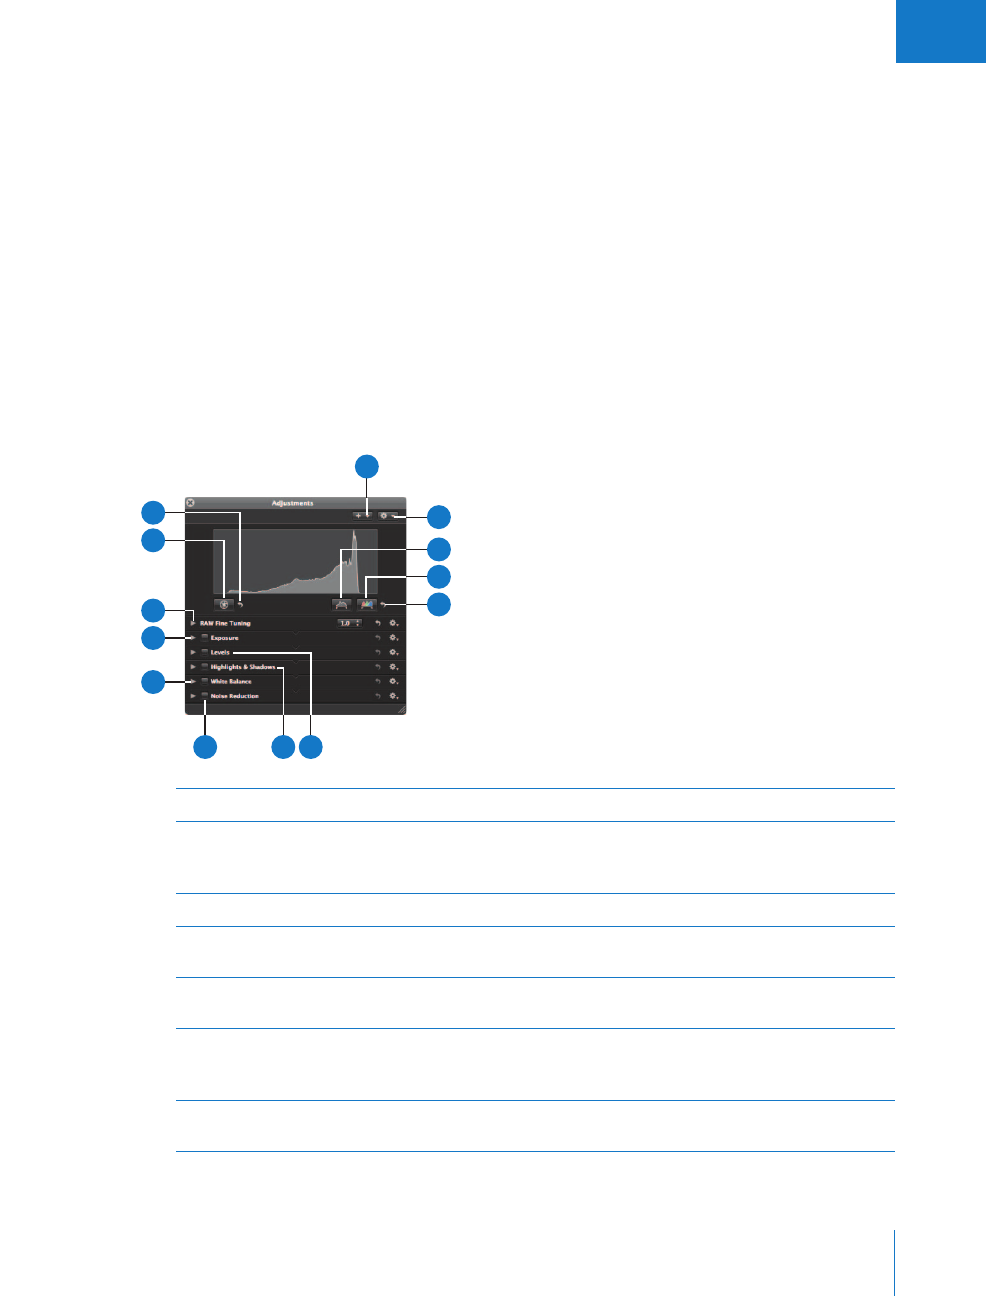
Chapter 2 The Aperture Interface 61
I
Heads-Up Displays
Heads-up displays, or HUDs, are collections of related tools and controls contained in a
floating panel. You can move a HUD as far as your display screen extends. You can use
HUDs in regular and Full Screen mode.
Adjustments HUD
The Adjustments HUD contains controls for Aperture image adjustments, such as
Exposure, Levels, and White Balance. The controls in the Adjustments HUD are the
same as those in the Adjustments Inspector. You can use the HUD in the Viewer or in
Full Screen mode. To show controls for an adjustment, click its disclosure triangle; to
remove the adjustment applied to the image, deselect the adjustment’s checkbox.
To show the Adjustments HUD:
mChoose Window > Show Adjustments HUD (or press H).
AWhite Balance controls Adjust color temperature and tint using these controls.
BExposure controls Use these controls to adjust exposure, contrast, saturation, and
brightness, or adjust the tint of the black, gray, and white color
values in the selected image.
CRAW Fine Tuning controls Use these controls to select the setting for treatment of RAW images.
DAuto Exposure button Click this button to have Aperture automatically adjust the
image’s exposure.
EAuto Exposure
Reset button
If you don’t like the Auto Exposure adjustments, click this Reset
button to remove them.
FAdd Adjustments
pop-up menu
Choose the type of adjustment you want to apply to an image
from this pop-up menu. When you choose an adjustment, its
controls appear in the Adjustments HUD.
GAdjustment Action
pop-up menu
Choose a histogram view and remove selected or all
adjustments made.
B
D
E
F
J
G
ML K
H
I
C
A

62 Part I Interface and Acquisition
For more information about using the Adjustments HUD and its controls, see
Performing Image Adjustments in the Aperture Help menu.
Individual Adjustment Tool HUDs
Many of the Aperture adjustment tools, including Crop, Spot & Patch, Red Eye, Lift, and
Stamp, work in conjunction with HUDs.
To view any of these HUDs:
mSelect the adjustment tool in the toolbar.
To learn more about the adjustment tools, see Performing Image Adjustments in the
Aperture Help menu.
HAuto Levels
Combined button
Click this button to have Aperture automatically adjust the levels in
the selected image based on the combined luminance values of all
three color channels.
IAuto Levels
Separate button
Click this button to have Aperture automatically adjust the levels in
the selected image by individual color channels.
JAuto Levels
Reset button
If you don’t like the Auto Levels adjustments, click this Reset button
to remove them.
KLevels controls Use these controls to adjust the shadows, midtones, and highlights
in the image based on a histogram that can be set to show
luminance; combined red, green, and blue channels (RGB); or
individual red, green, and blue channels.
LHighlights & Shadows
controls
Use these controls to adjust the shadows and highlights in the image.
M Noise Reduction
controls
Use these controls to adjust the noise in the image.
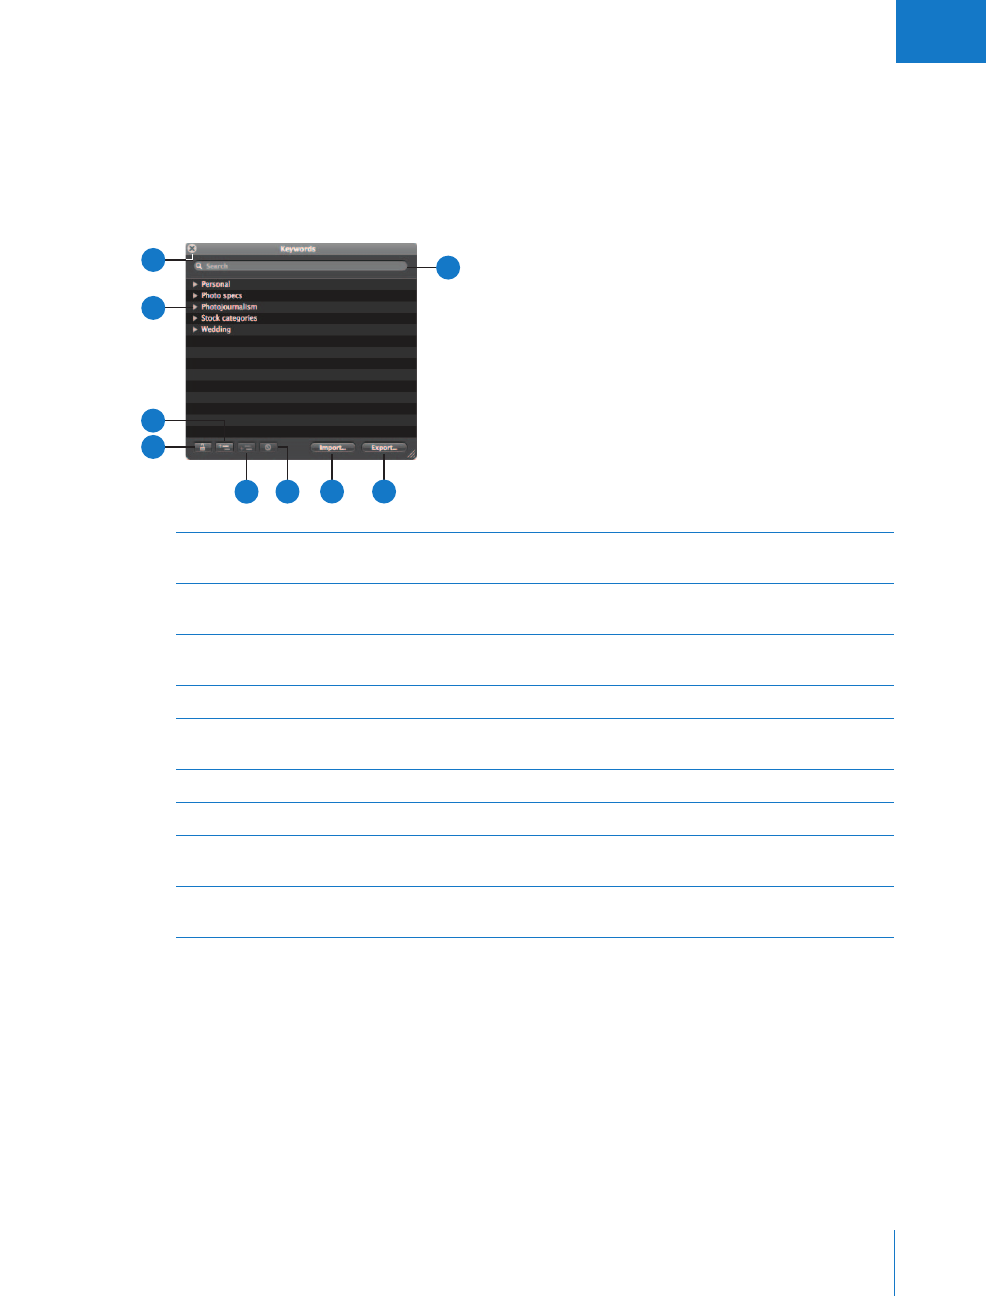
Chapter 2 The Aperture Interface 63
I
Keywords HUD
The Keywords HUD contains a library of keywords, allowing you to efficiently organize
and apply keywords to your images.
To show the Keywords HUD:
mChoose Window > Show Keywords HUD (or press Shift-H).
ALock button Click this button to lock the Keywords HUD and prevent changes.
Click it again to unlock the HUD.
BAdd Keyword button Click this button to add a keyword to the keyword library of the
Keywords HUD.
CDisclosure triangle Click the disclosure triangle for a keyword group to view all
keywords in the group.
DClose button Click this button to close the Keywords HUD.
ESearch field Enter text to search for keywords that match the text. Click the
Reset button (with an X) to clear the field.
FExport button Click this button to export your Aperture keyword list.
GImport button Click this button to import keywords into the Keywords HUD.
HRemove Keyword
button
Click this button to remove one or more selected keywords.
IAdd Subordinate
Keyword button
Click this button to add a subordinate keyword, such as a keyword
within a keyword group.
C
D
B
A
E
G F
H
I

64 Part I Interface and Acquisition
Workspace Layouts
In addition to allowing you to show and hide areas of the interface, Aperture offers
three preconfigured workspace layouts, created to accommodate different workflows.
ÂBasic: Use the Basic workspace layout to review images, perform initial rating passes,
and create and work with stacks of images.
ÂMaximize Browser: Use the Maximize Browser workspace layout to work with
multiple projects.
ÂMaximize Viewer: Use the Maximize Viewer workspace layout to see an enlarged view
of images with the Browser and Viewer controls still available. This workspace layout
is useful when working with the Light Table.
You can easily switch between workspace layouts by choosing commands or pressing
keyboard shortcuts.
To choose a workspace layout, do one of the following:
mChoose Window > Layouts, then choose the layout you want from the submenu.
mPress Command-Option and the letter corresponding to the layout you want: S for
Basic, B for Maximize Browser, or V for Maximize Viewer.
Chapter 2 The Aperture Interface 65
I
You can use keyboard shortcuts to quickly show or hide different areas of your workspace.
Customizing the Toolbar
The toolbar can be customized to display exactly the tools you need. You can
customize the toolbar by selecting the tools to include, rearranging them, and
choosing whether both the tool’s icon and text appear.
Hiding and Showing the Toolbar
You can choose to hide the toolbar completely.
To hide the toolbar:
mChoose View > Hide Toolbar (or press Shift-T).
To show a toolbar that has been hidden:
mChoose View > Show Toolbar (or press Shift-T).
∏Tip: You can also quickly hide or show the toolbar by clicking the Toolbar button (a
gray oblong button) in the top-right corner of the Aperture main window.
Keyboard shortcut Function
Show/Hide Import panel
Show/Hide Vaults panel
Show/Hide Projects panel
Show/Hide Viewer
Show/Hide keyword controls
Show/Hide Inspectors panel
Swap workspace
Rotate workspace
Show/Hide toolbar
Turn on/off Full Screen mode
shift I
shift R
W
V
shift D
I
option W
shift W
shift T
F
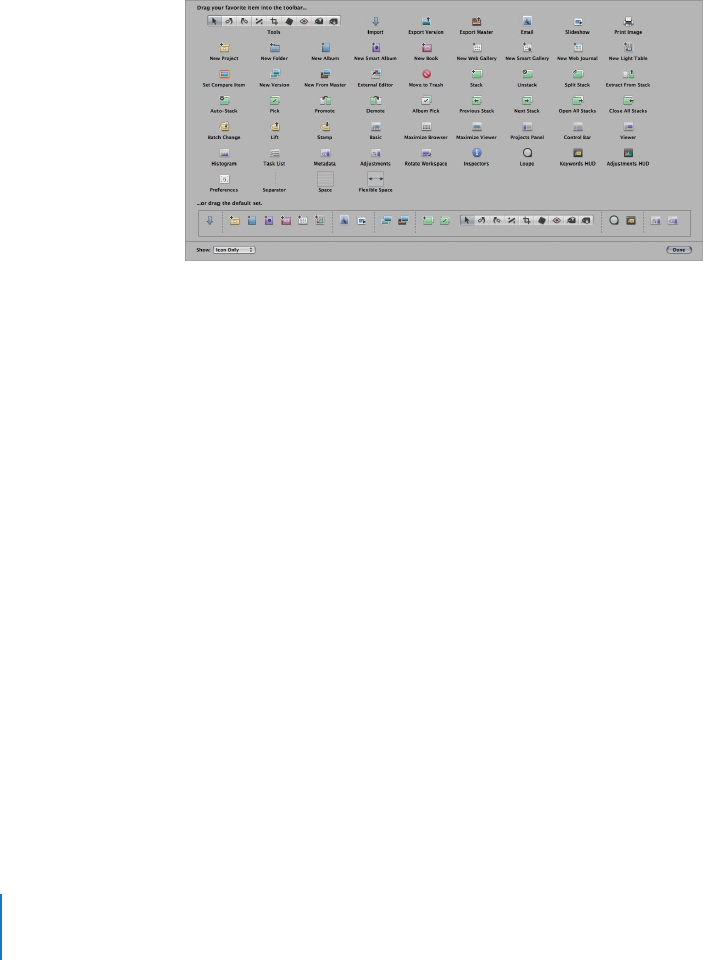
66 Part I Interface and Acquisition
Customizing the Toolbar Buttons
Aperture provides a simple drag-and-drop interface for adding, deleting, and
rearranging the toolbar buttons.
To customize the toolbar:
1Do one of the following:
ÂChoose View > Customize Toolbar.
ÂControl-click the toolbar, then choose Customize Toolbar from the shortcut menu.
A dialog appears, showing icons for toolbar buttons and tools.
2Configure the toolbar by doing any of the following:
ÂTo add tools to the toolbar: Drag their icons from the dialog to the location where you
want them to appear in the toolbar.
ÂTo remove items from the toolbar: Drag them out of the toolbar, or Control-click the
item you want to remove and choose Remove Item from the shortcut menu.
ÂTo change the order of the items in the toolbar: Drag each item to its new position.
ÂTo control whether each tool’s icon and text appear in the toolbar: Choose Text Only,
Icon Only, or Icon & Text from the Show pop-up menu in the lower-left corner of the
dialog, or Control-click the toolbar and choose Text Only, Icon Only, or Icon & Text
from the shortcut menu.
3Click Done when you have finished configuring the toolbar.
To reset the toolbar:
mTo return the toolbar to its default state, drag the default toolbar up from the bottom
of the dialog and into the toolbar area.
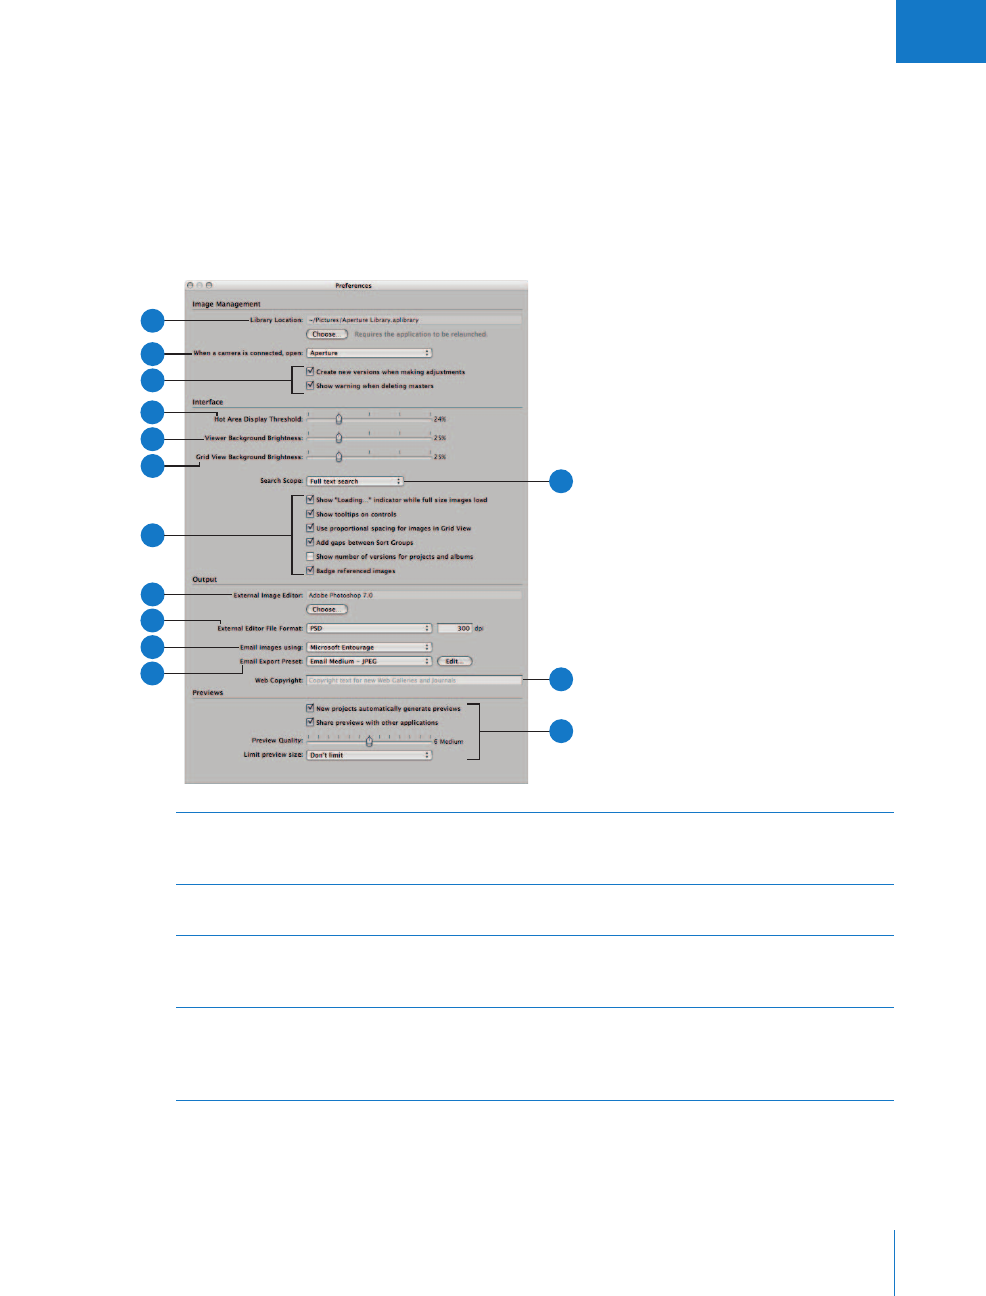
Chapter 2 The Aperture Interface 67
I
Setting Aperture Preferences
You can use the Preferences window to specify settings in Aperture. By taking time to
specify your preference settings, you can speed up your workflow.
To open the Preferences window:
mChoose Aperture > Preferences, or press Command-comma (,).
The Preferences window appears.
AEmail Export Preset
pop-up menu
Choose an export preset to use when exporting images to your
email client. If you want to create a custom export preset, click Edit
and create a new preset in the Export Presets dialog.
B“Email images using”
pop-up menu
If you want to export images to an email client, choose the email
application from this pop-up menu.
CExternal Editor File
Format pop-up menu
Choose a file format in which to export an image to an external
editor from this pop-up menu. You can also specify the dot-
per-inch (dpi) resolution of the image in the dpi field.
DExternal Image
Editor field
You can use an external editor to make adjustments to your
images. To identify an external image editor, click Choose and
select an application. To open an image in the external editor,
select the image, then choose Images > Open With External Editor.
F
C
B
A
G
H
J
K
M
D
E
I
L
N

68 Part I Interface and Acquisition
EImage display
checkboxes
Select the “Show Loading indicator while full size images load”
checkbox to have Aperture display an initial proxy image if there is
any delay when loading a full-size image.
Select the “Show tooltips on controls” checkbox to have Aperture
display the names of interface items when you place your pointer
over them.
Select the “Use proportional spacing for images in Grid View”
checkbox to change the spacing of images in the Browser.
Select the “Add gaps between Sort Groups” checkbox to add space
between groups when sorting by a particular category. For example,
when sorting images by rating, you can have Aperture add a gap
between the last five-star image and the first four-star image.
Select the “Show number of versions for projects and albums”
checkbox to have Aperture display the number of versions in a
project or album in the Projects panel.
Select the “Badge referenced images” checkbox to display badges
that identify referenced images.
FGrid View Background
Brightness slider
Adjust the Browser background brightness using this slider.
GViewer Background
Brightness slider
Adjust the Viewer background brightness using this slider.
HHot Area Display
Threshold slider
You can view an image’s hot areas (where exposure goes beyond
the current screen or print gamut) by choosing View > Highlight
Hot Areas. To adjust the threshold used to determine an image’s
hot areas, drag the slider.
IAperture options
checkboxes
Select the “Create new versions when making adjustments”
checkbox to have Aperture automatically create a new version
when you adjust a selected image.
Select the “Show warning when deleting masters” checkbox to
have Aperture display an alert message when you delete master
image files.
J“When a camera is
connected”
pop-up menu
Choose an application to open when a camera is connected to
your computer.
KLibrary Location field Displays the default location of the Library. To specify a custom
location for the Aperture Library, click Choose and navigate to a
location to store the Library. Reopen Aperture to complete the
location change.
LSearch Scope
pop-up menu
Use this pop-up menu to set your preferences for how Aperture
searches. You can have Aperture search for your entered text
throughout all the metadata associated with your images, or
perform a limited text search that doesn’t search through your
images’ EXIF information.

Chapter 2 The Aperture Interface 69
I
MWeb Copyright field Enter copyright text for web galleries and web journals here.
NPreviews options To set Aperture to create previews for the images in all new
projects and new Libraries, select the “New projects automatically
generate previews” checkbox. Deselect this option if you don’t
want previews created for images in new projects.
To enable sharing of JPEG preview images with other applications,
select the “Share previews with other applications” checkbox.
To change the image quality of the previews, drag the Preview
Quality slider. The higher the quality you select, the more disk
space the preview requires.
To set a maximum pixel size for your previews, choose a size from
the “Limit preview size” pop-up menu.

3
71
3Working with Aperture Projects
The basic components of Aperture, including projects,
albums, and versions, provide the building blocks for working
in a nondestructive environment.
This chapter explains basic elements in Aperture and describes how to set up and use
projects to hold your images.
This chapter covers:
ÂBasic Components of Aperture (p. 72)
ÂWorking with Projects (p. 78)
ÂCreating and Naming Projects (p. 79)
ÂOpening and Closing Projects (p. 80)
ÂCreating and Showing Favorite Projects (p. 82)
ÂDeleting Images from Projects and Albums (p. 82)
ÂDeleting Items from the Projects Panel (p. 83)
ÂWorking with Library Files (p. 83)
ÂQuickly Accessing Commands (p. 85)

72 Part I Interface and Acquisition
Basic Components of Aperture
Aperture uses the following basic components in your image management system:
ÂDigital master files: The original image files imported from your camera, memory
card, computer, or external storage media.
ÂVersions: Files derived from the digital master files and used to display your images
with any changes you’ve made, including image adjustments or changes to metadata.
ÂProjects: Containers that hold digital master files, versions, and albums. Projects
can hold up to 10,000 digital master files, although it’s recommended that for
practical usage, you limit the number of files (both digital master files and versions)
below 10,000.
ÂAlbums: Containers that hold versions. You can create albums to organize images
within projects or outside of them.
ÂFolders: Containers used to organize projects and albums.
ÂLibrary: The Aperture database that records and tracks your digital master files and
all corresponding versions. You can also create multiple Aperture Library files in
different locations. The Library tracks all the information about projects and albums
you create to organize your images.
ÂManaged and referenced images: Master files stored in the Aperture Library are called
managed images because Aperture manages the location of the images in its database.
Managed images are physically located in the Aperture Library file in the Pictures
folder. You can also import images into Aperture without storing the digital master files
in the Library. Images that are not stored in the Library file are called referenced images.
Aperture links to referenced images in their current locations on your hard disk,
without placing them in the Aperture Library file.
ÂVaults: Containers that each hold a backup of the Library and all its images
and information.
The next sections explain details about each of these elements and how you work with
them in Aperture.
What Are Digital Master Files?
A digital master file is the original RAW, JPEG, TIFF, or PNG file that was imported into
Aperture from your camera, a memory card, a computer, or external storage media
such as an external hard disk drive or CD. Aperture never changes the master file, so
you always have originals to work from.
Important: Digital master files—especially RAW files—tend to be quite large. Projects
consisting of several thousand digital master files require high-capacity hard disks.
For information about importing your digital master files, see Chapter 4, “Importing
Images,” on page 87.
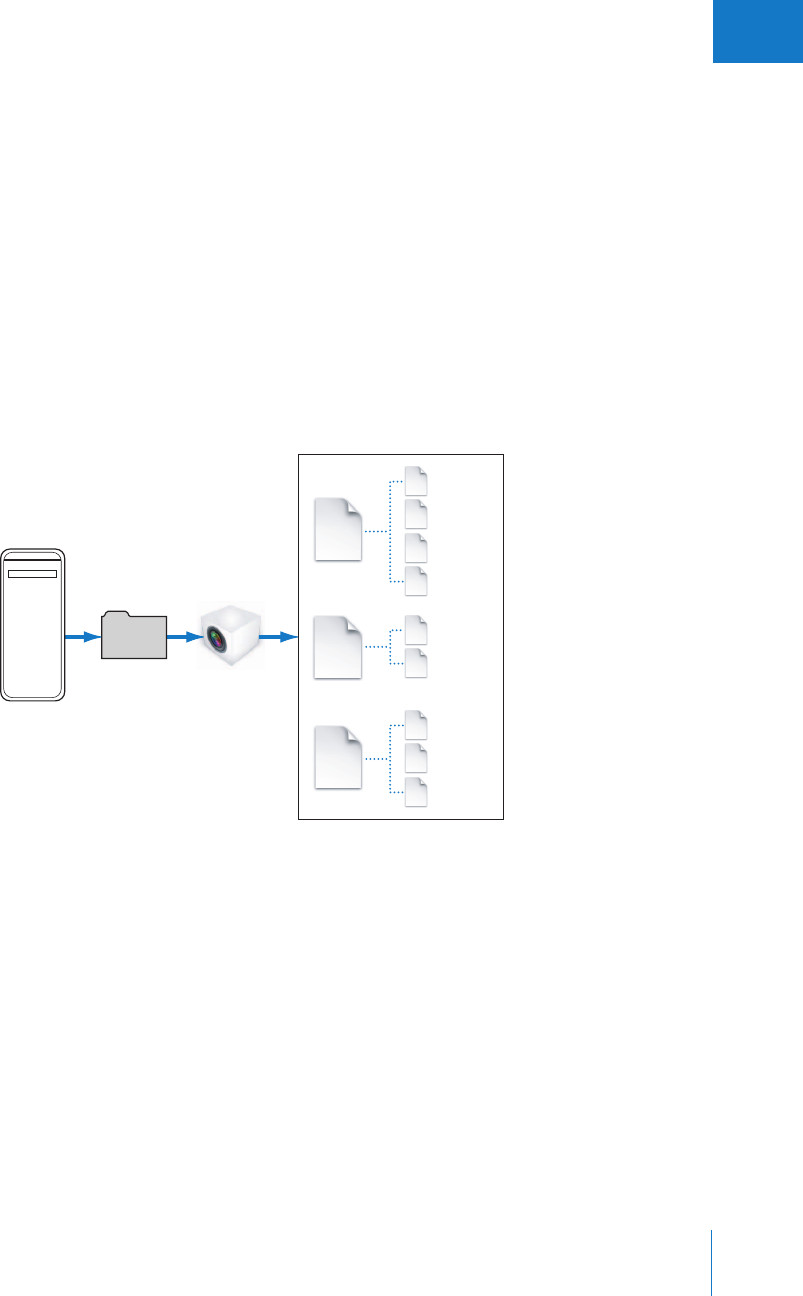
Chapter 3 Working with Aperture Projects 73
I
What Are Versions?
Once you have digital master files on your hard disk, you can review and make
adjustments to your images. For example, you can change the exposure, contrast, or
saturation, or add information to an image, such as the photographer’s name, event,
and location. To work with images, Aperture creates a “version” of each master file that
includes your adjustments and embedded information, and leaves the master file
unchanged. A version refers to the master file on your hard disk, but it is not the master
file itself. Versions store only the thumbnail image, adjustments, and embedded
information. A full image file is not created until you are ready to print or export, saving
valuable storage space on your hard disk.
In many cases, your workflow may call for different renderings of the same image. For
example, a client may request a color as well as a black-and-white version of the same
head shot. You can create multiple versions of the same image in Aperture at any time.
When you create a version, several things occur:
ÂAperture reads the original master file on disk and displays it on the screen.
ÂAs you make adjustments or add information to the image, Aperture displays the
image with your changes to the version, but the original master file is never changed.
Pictures
folder
Computer
Aperture
Library file
3A
3B
3C
2A
2B
Versions
from
Master 1
Master
Versions
from
Master 2
Master
Versions
from
Master 3
Master
1A
1
1B
1C
1D
2
3
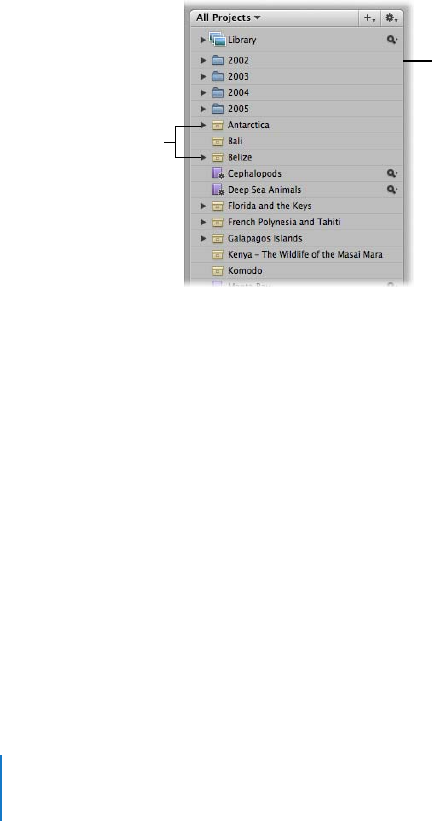
74 Part I Interface and Acquisition
What Are Projects?
You organize your digital master files and versions using projects. A project is a
container consisting of image versions and their corresponding master files. A project
can hold up to 10,000 master files, and you can create as many projects as you wish up
to the limitations of your disk space. For example, you can create a new project for
each of your shoots. Or if you do several shoots of the same subject, you may want to
create a project that encompasses all of the shoots. Projects are the most basic
component of Aperture because they contain your digital master files and track all
changes to versions.
You can easily transfer projects from one Aperture system to another. All links between
versions and their master files are maintained when projects are transferred. This is
particularly useful if you use a portable computer when on location or away from your
studio, and a workstation at your studio. For more information, see “Transferring
Projects from Another System” on page 114.
You can have multiple projects open at the same time, each represented by its own
icon in the Projects panel and tab in the Browser.
What Are Albums?
An album is a container in the Aperture Library that holds only image versions (not the
digital master files to which they refer). You use albums to organize images in the
Library, making your selections of versions easier to manage. You can create albums at
the Library level or within a project.
You use albums created at the Library level to organize versions from multiple projects.
For example, you can create an album to consolidate your favorite images, or “selects,”
from multiple projects. You can then publish this collection of selects on your website
or export the album’s contents for review by a prospective client.
Examples of items in
the Projects panel
Projects
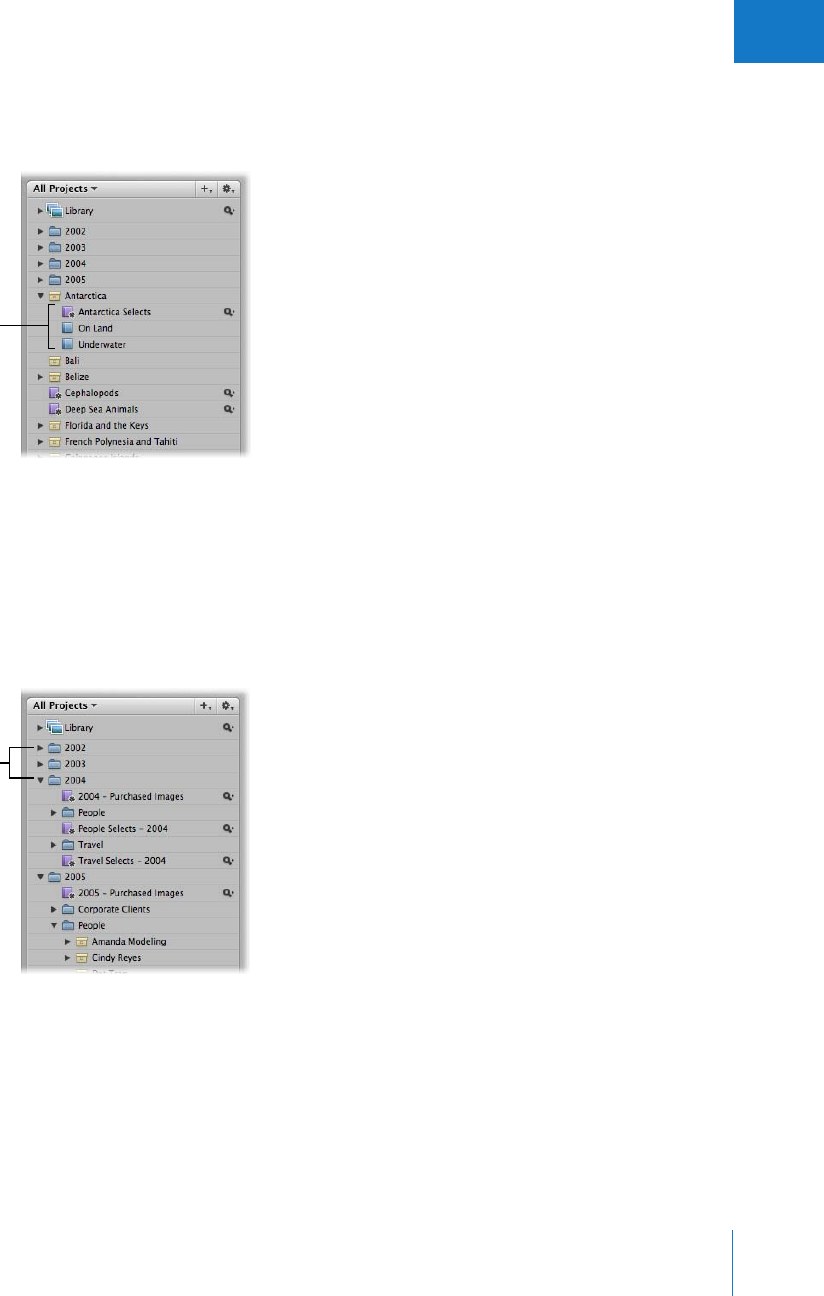
Chapter 3 Working with Aperture Projects 75
I
You can also create albums within projects to help you organize your images into
relevant groups. For example, images in your Antarctica project can be divided into
three albums: Antarctica Selects, On Land, and Underwater.
You can also place versions from other projects into an album that resides within a project.
What Are Folders?
In Aperture, you use folders to organize projects and albums. For example, you can
import images into projects and then place the projects in folders based on the year,
such as 2002, 2003, 2004, and 2005. If you shoot multiple projects for the same client,
you can create a folder that holds the client’s individual projects.
Folders contain only albums, projects, and other folders. They don’t contain master
files or versions.
Three albums created
within one project
These folders organize
images based on what
year they were shot.

76 Part I Interface and Acquisition
What Is the Library?
The Aperture Library tracks every project, album, master file, and version no matter
whether the images are stored in the Aperture Library file or in other hard disk
locations. Aperture automatically creates a Library file in your Pictures folder the first
time you open Aperture. You can choose to import images into your Library or have
Aperture access them from other locations on different hard disks. The Library tracks all
your images and the information recorded about them, as well as information about
where backup files are stored. You can access images in the Library by clicking Library
at the top of the Projects panel.
You can change the location of the Library file to a different folder or a different disk.
You can specify where the Library should be located using the Preferences window. For
more information about working with multiple Library files in Aperture, see “Working
with Library Files” on page 83.
Projects that you transfer from other Aperture systems to your Aperture system are also
added to the Library. And when you back up your digital master files to your vaults on
external FireWire drives, those actions are tracked by the Aperture Library as well.
What Are Managed Images and Referenced Images?
Aperture lets you choose how you organize your photos on disk. You can store your
photos in the Aperture Library, or you can import images by simply linking to the
image files in their current locations, without placing them in the Library.
Images whose digital master files are stored in the Aperture Library are called managed
images. These master files are stored in the Library exactly as they were in previous
versions of Aperture. Aperture manages master image files in the Library, keeping them
always accessible, and provides benefits such as one-click backup of digital master files
to vaults.
Imported images whose digital master files haven’t been placed in the Library are
called referenced images. Using referenced images in your Aperture system can provide
a number of substantial benefits to your photography workflow. You can incorporate
your existing portfolio of images into Aperture without changing the current location
of the files. Importing images by reference does not result in a duplication of your
image files in the Aperture Library, thus saving hard disk space. You can also connect
and disconnect hard disks holding your referenced images’ master files as you need
them. This allows you to keep master files for less-used images offline or to make
specific types of images available for editing or adjustments as needed. Using
referenced images in your Aperture system provides a means of building a flexible
image management system customized to your work style.

Chapter 3 Working with Aperture Projects 77
I
You specify that an image will be a managed image or a referenced image when you
import it. When importing images, you can:
ÂSpecify that master files be stored in the Aperture Library.
ÂImport images as referenced images, so that their master files remain in their
current locations.
ÂMove or copy image files to a new location. For example, you might decide that a
certain group of referenced image files, such as wedding photos, will always be
placed in one hard disk location, while other groups, such as sports photos, will
reside in a different hard disk location.
You can work with referenced images—creating versions, making adjustments,
cropping, and adding metadata—just as you can with images whose master files are
stored in the Library. Versions that you create from a referenced image are stored in the
Library. In order for you to make adjustments to a version from a referenced image, the
referenced image’s master file must be available on your hard disk or other storage
device. For example, if you delete a referenced image’s master file in the Finder,
Aperture no longer has access to the master file and so no longer allows you to change
your versions or create new ones.
To help you identify referenced images, Aperture marks them with a badge overlay that
you can display or hide. When a referenced image’s master file is missing or offline, its
badge changes to show that the image is not accessible. For example, if you disconnect
a hard disk that holds master files for many referenced images, Aperture automatically
marks the referenced images in the Browser and Viewer as offline. If you reconnect the
hard disk or other storage device later, Aperture accesses the master files automatically
and you can work with and change their versions again.
You can also relocate master files, moving them out of the Library or moving referenced
master files to different hard disk locations. If needed, you can also move referenced
master files into the Aperture Library by choosing the Consolidate command.
You can search for images based on whether they are managed images, referenced
images, or online or offline images. Aperture also provides robust file-management
tools that let you quickly determine which images are offline and easily reconnect
images that have been moved to different volumes.

78 Part I Interface and Acquisition
What Is a Vault?
To ensure you have backup copies of your images, you create a vault to hold the
backup. A vault is a container that holds an exact copy of the Library. This includes your
projects, digital master files, and any versions you’ve created. You can easily create and
update a vault to back up the Library. It’s a good idea to create multiple vaults on
multiple external hard drives to safeguard copies of the Library.
You can have as many vaults as you deem necessary. Creating more than one vault is
useful if you work at different locations; you can always keep one vault on a FireWire
drive onsite and another one offsite. All vaults and backup files are tracked by the
Library so that even if you disconnect the external hard drive that contains your vault,
Aperture can access it the next time you reconnect the drive and update your vault.
All the managed master file images, versions, and all metadata, previews, and adjustment
information associated with your images are backed up. The versions, previews, and
metadata associated with referenced images’ master files are also backed up in the vault.
Referenced images’ master files are not backed up in the vault with the Library.
Important: Because the digital master files for referenced images are stored outside of
the Library, you must manage the backup and archiving of them yourself.
Working with Projects
How you use and organize your projects depends on the scope of your workflow as
well as your particular organizational style. These factors also affect your decision to
use one or more albums in your project.
Organizing Your Projects
Typically, you create a new project for each photographic project or job that you work
on, regardless of its duration. For example, if you’re working on a documentary in
Thailand, you would create a project for it. If you’re also shooting the temples in the
interior of the country, that could be a second, separate project. Both projects could
conceivably refer to some of the same images, but they are completely independent
structures, each with its own versions, master files, and albums.
Very large photography projects, such as documentaries and sporting events, often
consist of large numbers of captured images. You can always break one project into
several should the need arise.
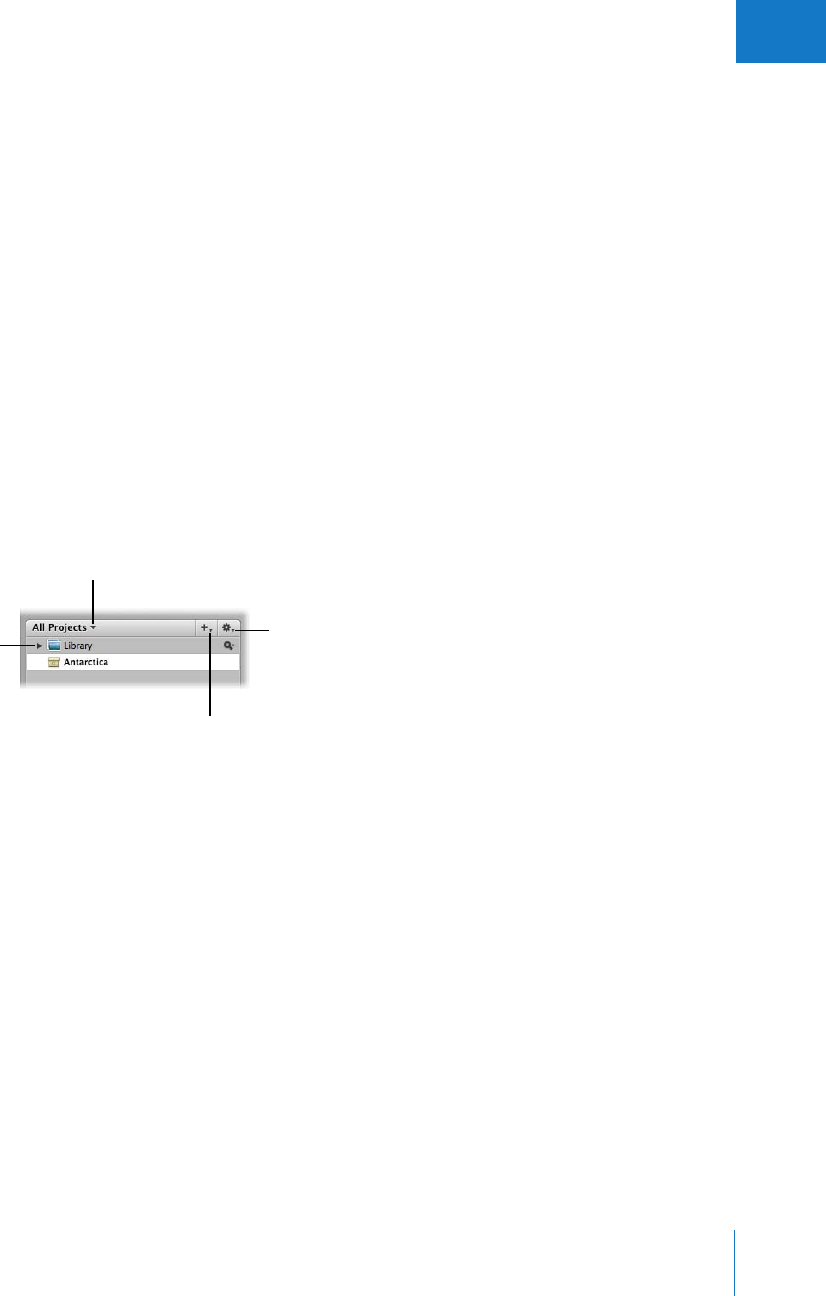
Chapter 3 Working with Aperture Projects 79
I
Using More Than One Album in a Project
For some projects, it makes sense to use several albums within the project. You can use
albums in several ways, including:
ÂAlbums as events: Break a project into a series of albums according to specific events.
For example, a wedding project can be divided into albums for each of the following
events: Preparation, Ceremony, and Reception.
ÂAlbums as days: Break a project that spans multiple days into albums for individual
days. For example, a project consisting of a two-week trip to Japan can be divided
into 14 individual albums corresponding to each day.
ÂAlbums for specific subjects: Break a project consisting of multiple photographed
subjects into individual albums dedicated to each subject. For example, a studio
photographer may shoot three models for a single project. The photographer can
create an album for each model. Or you might create albums to hold specific image
types, such as candid shots, landscapes, or close-ups.
Creating and Naming Projects
There are several controls in the Projects panel that you’ll use when working with projects.
ÂDisclosure triangle: Click this to see all items within the Library, project, or folder.
ÂProjects pop-up menu: Choose to display all projects, favorites, or recent projects.
ÂAdd to Library pop-up menu: Choose to add a new item, such as a project or Smart
Album, to the Library or selected project.
ÂProject Action pop-up menu: Add the selected item to a list of favorites, or remove it
from the favorites list.
You can create projects at any time, although typically you create them when you
import images. When you import images into the Aperture Library and no project is
selected, a new project is created to contain those images. However, you can create a
new empty project at any time. For more information about importing files and
creating projects automatically, see Chapter 4, “Importing Images,” on page 87.
Projects pop-up menu
Project Action
pop-up menu
Disclosure triangle
Add to Library
pop-up menu
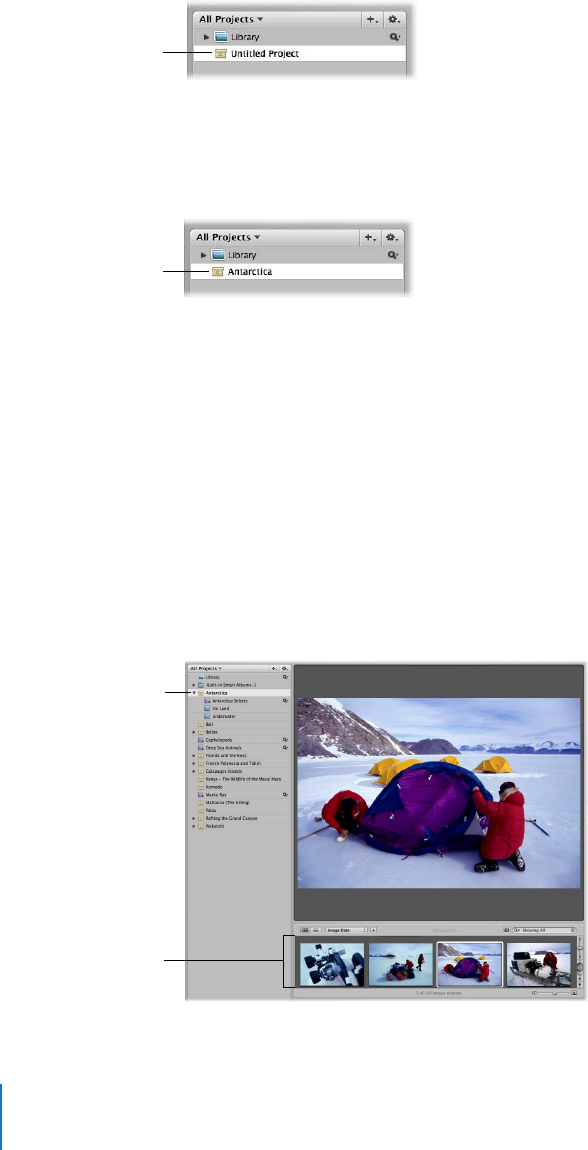
80 Part I Interface and Acquisition
To create a new project:
1Choose File > New Project (or press Command-N).
2Enter the name you want for the project, then press Return.
For information about naming files, see “Automatically Naming Your Imported Images”
on page 105.
Opening and Closing Projects
To work with your images in Aperture, you first select a project in the Projects panel to
open it in the Browser and Viewer. You can open and work on more than one project at a
time. When multiple projects are open, each project appears in the Browser with its own
tab. You can click a project’s tab to bring it to the front. You can also open a project in its
own pane to view two projects in the Browser side by side. When you finish working and
quit Aperture, Aperture remembers which projects were open. The next time you open
Aperture, all projects that were open at the end of your last session open automatically.
To open a project:
mSelect the project in the Projects panel.
A new, untitled
project appears in the
Projects panel.
The project now has the
name you entered.
Select a project to view
its images in the Browser.
All images in the project
appear in the Browser.
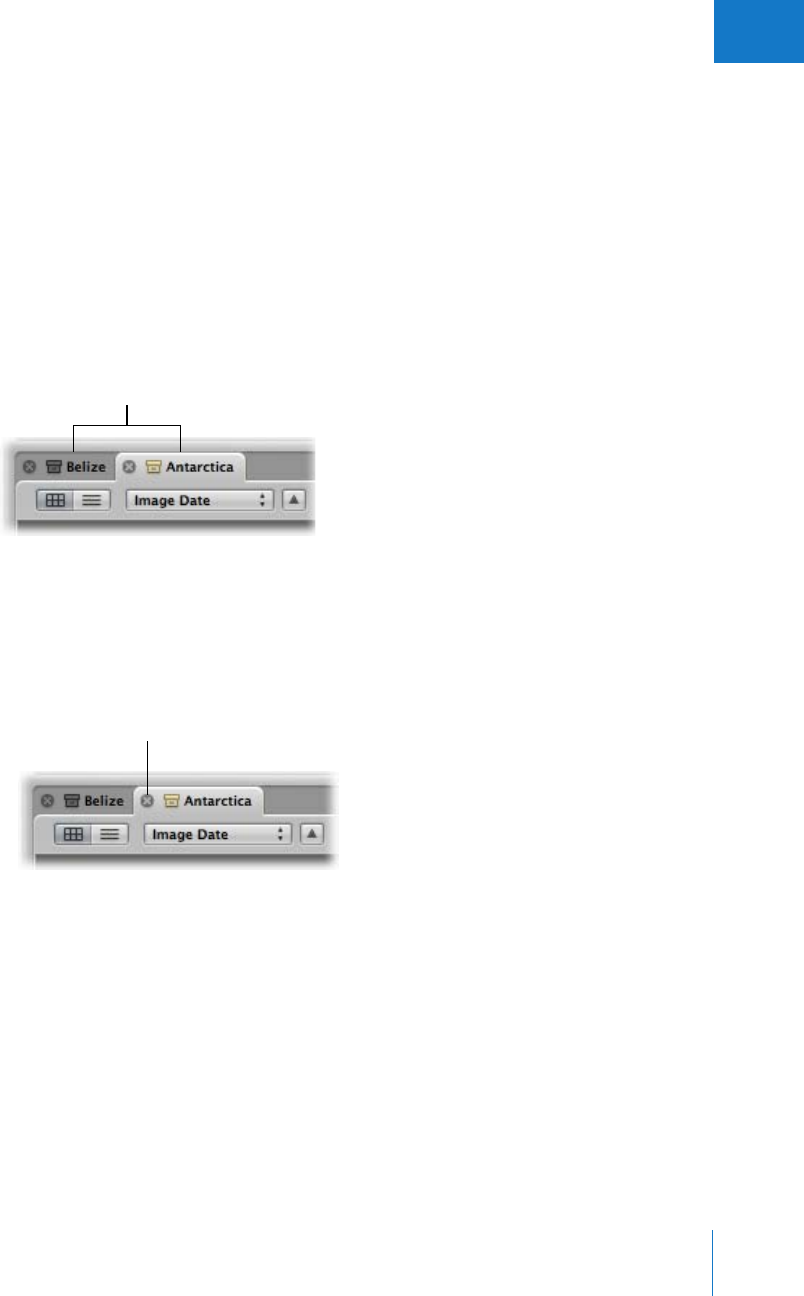
Chapter 3 Working with Aperture Projects 81
I
To open additional projects in the Browser:
mCommand-click a project in the Projects panel.
The newly opened project appears in the Browser with its own tab, in front of any
other open projects.
To open another project in its own pane:
mOption-click a project in the Projects panel.
The newly opened project appears in the Browser in its own pane.
To switch between several open projects:
mIn the Browser, click a project’s tab.
To close a project:
1Click the project’s tab to bring it to the front.
2Do one of the following:
ÂChoose File > Close Tab (or press Command-W).
ÂClick the tab’s close button.
Projects are identified
by their tabs.
Close button in a tab
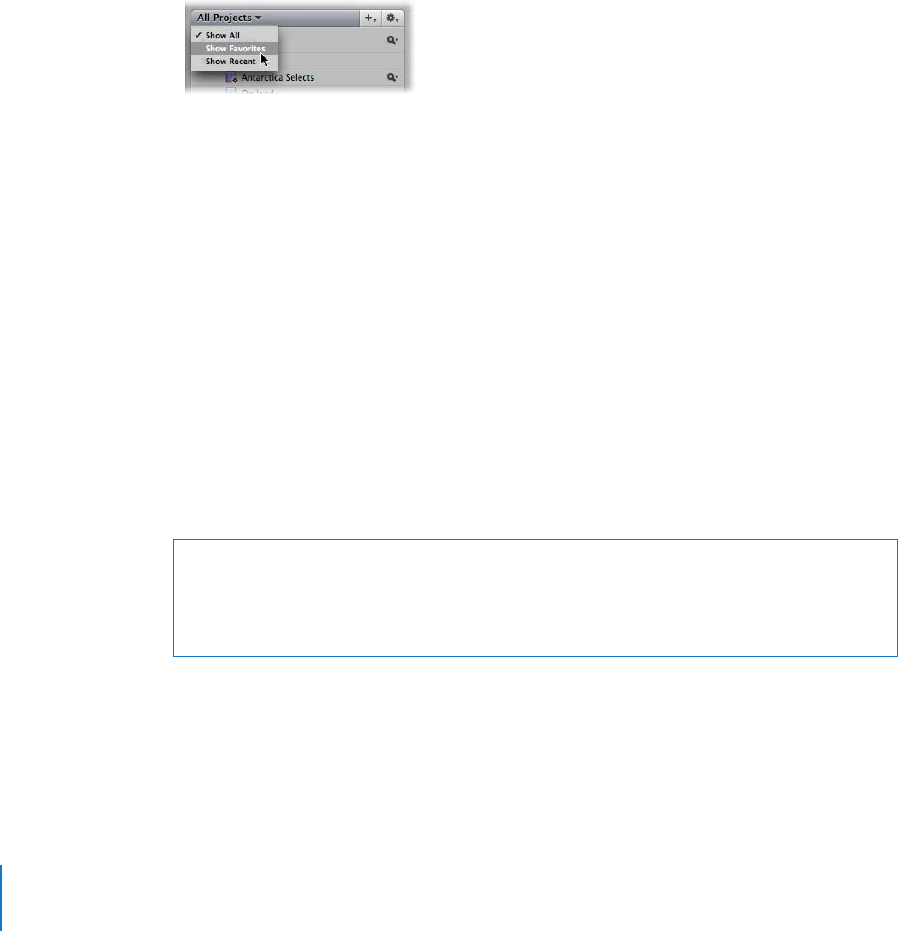
82 Part I Interface and Acquisition
Creating and Showing Favorite Projects
If you have certain projects that you work on most often or projects that you work on
together, you can make them favorites to quickly view them all at the same time.
To make a project or folder a favorite:
mIn the Projects panel, select a project, then choose Add to Favorites from the Project
Action pop-up menu.
To view favorite projects or folders:
mIn the Projects panel, choose Show Favorites from the Projects pop-up menu at the
top-left corner.
To remove a project or folder as a favorite:
mIn the Projects panel, select a project, then choose Remove From Favorites from the
Project Action pop-up menu.
Deleting Images from Projects and Albums
Aperture allows you to delete versions separately from their digital master files. You can
also delete a master file and all its versions in a project. If you delete a version in an
album, its master file and related versions are not deleted.
To delete a master file and all its versions from a project:
1Select the image, then choose File > Delete Master Image and All Versions.
A dialog appears asking if you want to continue.
2Click the Move to Trash button.
The digital master file and all versions are deleted.
To delete only a version from an album:
mSelect the image, then choose Images > Remove From Album (or press Delete).
The version is deleted. The digital master file and its other versions are not deleted.
Warning: This action cannot be undone. Once you click the Move to Trash button, the
master file is moved to the Trash. All versions and their adjustments and metadata are
permanently deleted. To permanently remove the master file from your hard disk,
empty the Trash.

Chapter 3 Working with Aperture Projects 83
I
Deleting Items from the Projects Panel
You can also delete items from the Projects panel. When you delete an item from the
Projects panel, the contents of the item are deleted with it.
Note: If you delete a project or a project within a folder, the digital master files
contained in the project are also deleted.
To delete projects and folders:
1Select the item, then do one of the following:
ÂTo delete a project: Choose File > Delete Project (or press Command-Delete).
ÂTo delete a folder: Choose File > Delete Folder (or press Command-Delete).
A dialog appears asking if you want to continue.
2Click the Delete button.
The selected item is deleted along with its contents.
To delete an album, a Light Table album, a web gallery album, a web journal album,
or a book album:
mSelect the album, then choose File > Delete [Item].
The selected item is deleted along with its contents.
Working with Library Files
When the Library file becomes large and requires more disk space than is available in
its current location, you can move it to a hard disk with more storage capacity.
Aperture is preset to create the Library in the Pictures folder on your internal hard disk.
You can specify that the Library be located in a different folder or on a different disk.
Each time you open Aperture, the application opens the Library in the location you
specified. To change the location of the Library, you move it to a new location and then
use the Aperture Preferences window to specify the new location.
∏Tip: To maximize performance, place the Library file on an internal hard disk.
Warning: This action cannot be undone. Once you click the Delete button, the master
files are moved to the Trash. All versions and their adjustments and metadata are
permanently deleted. To permanently remove the master files from your hard disk,
empty the Trash.

84 Part I Interface and Acquisition
To change the location of a Library file:
1Quit Aperture.
2Locate the Aperture Library file in the Pictures folder on your hard disk and move it to
the new location in a different folder or on a different hard disk.
3Open Aperture and choose Aperture > Preferences, or press Command-comma (,).
4Click Choose under the Library Location option.
5Navigate to the new location of the Library, select it, and click Select.
6Quit Aperture and then reopen it.
When you reopen Aperture, it accesses the Library in the new location.
If the Aperture Library becomes large, you can create additional separate Library files to
hold more images. For example, you might create different Library files in different
locations on your internal hard disk, or on different hard disks. You then specify in the
Aperture Preferences window which Library the application should access when it
opens. Creating a new empty Library file is as easy as specifying a different folder for
the Library in the Preferences window and then quitting and reopening Aperture. You
can also rename Library files as needed. Thus, you might have multiple Library files
with different names in the same location and set Aperture to access the Library file
you want.
To create a new, empty Library file in a new location:
1Choose Aperture > Preferences, or press Command-comma (,).
2Click Choose under the Library Location option.
3Navigate to and select the folder where you want to place the new Library, then click Select.
4Quit Aperture and then reopen it.
By default, Aperture creates a new Library file named Aperture Library. It’s
recommended that you rename Library files to avoid any mix-ups or the possibility of
overwriting one Library file with another accidentally. After renaming a Library file,
make sure to open Aperture and select the renamed Library file.
When you have multiple Library files and you want to switch between them, you use
the Preferences window to select the Library you want. You then quit and reopen the
application to complete the switch.
To access a different Aperture Library:
1Choose Aperture > Preferences, or press Command-comma (,).
2Click Choose under the Library Location option.
3Navigate to and select the Library you want, then click Select.
4Quit Aperture and then reopen it.

Chapter 3 Working with Aperture Projects 85
I
Adding Times and Dates to Aperture Album Names
It is common to differentiate albums in a project by adding the dates to the album names.
If you add dates to an album name, avoid using special characters like the slash (/), since
that may be interpreted by Mac OS X as a file separator.
Quickly Accessing Commands
You can access commands via a shortcut menu, as an alternative to using the menu bar
at the top of the screen or pop-up menus within a window.
To view the shortcut menu:
mPosition the pointer over the Projects panel, then Control-click.
Note: Although accessing commands from shortcut menus can help you work more
quickly, keep in mind that not all commands are available in shortcut menus.

4
87
4Importing Images
Aperture provides tools and workflow options that make it
easy to import your images.
This chapter describes a variety of methods for importing images into Aperture. You can
import images directly from your camera or card reader, import images stored on your
computer hard disk or other storage devices, import your iPhoto Library, and more.
This chapter covers:
ÂAn Overview of Importing Images (p. 88)
ÂFile Formats You Can Import into the Library (p. 89)
ÂPlanning Your Import Strategy (p. 90)
ÂImporting from Your Digital Camera or Card Reader (p. 91)
ÂImporting Image Files Stored on Your Computer (p. 97)
ÂAutomatically Naming Your Imported Images (p. 105)
ÂAdding Metadata to Images During Import (p. 108)
ÂCreating Stacks Automatically During Import (p. 109)
ÂAdjusting the Image File’s Time When Importing (p. 110)
ÂDragging Files from the Finder to the Projects Panel (p. 110)
ÂImporting Folders of Images from the Finder (p. 111)
ÂImporting Your iPhoto Library (p. 112)
ÂTransferring Projects from Another System (p. 114)
ÂMaking an Immediate Backup (p. 114)
ÂWhere Aperture Stores Your Managed Files in the Library (p. 115)
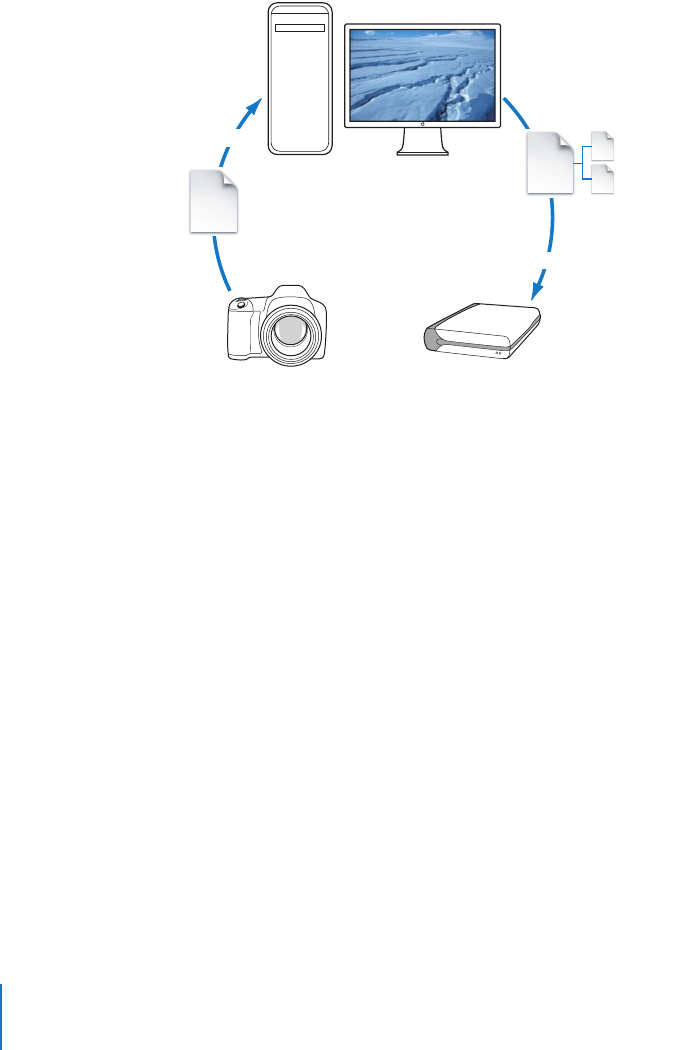
88 Part I Interface and Acquisition
An Overview of Importing Images
When you import from a camera or card reader, Aperture places the images in a
project. If you don’t select an existing project, a new one is created automatically.
As Aperture imports images, it generates a version file and an image thumbnail
corresponding to each digital master file.
You can import digital master images directly from a camera or card reader and from
your hard disk drives.
When you import images, you can choose whether to have the digital master files stored
in the Aperture Library or store them on your hard disk outside of the Library where they
can be accessed as referenced images. For more information about referenced images,
see “What Are Managed Images and Referenced Images?” on page 76.
Camera
Vault
(FireWire drive)
Import
Back up
Aperture Library
(system disk)
Importing
to Aperture
Digital
master files
Versions
Project
RAW
& JPEG

Chapter 4 Importing Images 89
I
As you import images, you can have Aperture automatically name and record
information about them. Aperture can assign filenames using custom naming
conventions, as well as record metadata such as captions, keywords, dates, copyright
and credit information, and IPTC information. You can even set Aperture to stack
related images together, keeping bracketed shots or a series of shots taken in quick
succession in groups that you can easily select and work with. For more information
about stacks, see Chapter 8, “Stacking Images and Making Picks,” on page 175.
File Formats You Can Import into the Library
Aperture is a QuickTime-compatible application, so it supports standard
QuickTime-compatible still-image file formats, as well as some other file formats
and file types. The following file types and formats can be imported:
ÂGIF
ÂJPEG
ÂJPEG2000
ÂPNG
ÂPSD (8 and 16 bit)
ÂRAW files from a variety of supported digital cameras
ÂTIFF (8 and 16 bit)
Note: For a list of supported digital cameras, go to http://www.apple.com/aperture.
Does Aperture Support Tethered Shooting?
You can use an Automator workflow to set up tethered shooting between your
camera and your computer to automatically import images into Aperture. Aperture
works with Automator to automate common tasks. For information about using an
Automator workflow for tethered shooting, go to http://automator.us/aperture.

90 Part I Interface and Acquisition
Planning Your Import Strategy
Before you import images into Aperture, it’s a good idea to plan the organization of
your images. Eventually your image library may contain many thousands of images that
you’ll want organized in a flexible and easy-to-manage system. It’s important to take a
long-term view of what makes for an effective and efficient organization of your
projects based on your specific type of photography.
You may already have a large digital portfolio that you eventually want to import into
the Aperture Library. As an import strategy, it’s best to try out importing images in a
series of steps:
ÂOpen and use the sample project as you explore Aperture features.
ÂIf you have an iPhoto Library, you can import it so that you can use your images in
Aperture. For more information about importing your iPhoto Library, see “Importing
Your iPhoto Library” on page 112.
ÂMake trial imports of a small group of images directly from your digital camera or
card reader. Learn about the filenaming and automatic metadata features of
Aperture. For information about importing from your digital camera or card reader,
see “Importing from Your Digital Camera or Card Reader,” next.
ÂPlan how you want to import your legacy digital images. Because you may have many
thousands of images previously stored on disk, you need to decide whether you’ll store
newly imported images in the Aperture Library, or store them as referenced images,
leaving them in their current hard disk locations. You can also copy or move images to
a different hard disk location when importing them. Also, plan the project organization
you’ll need to hold the images. For more information about importing files, see
“Importing Image Files Stored on Your Computer” on page 97.
ÂTry out the different methods for importing individual files into your system. You can
import individual files, import files stored in folders, and drag files or folders from the
Finder into Aperture. For more information, see “Dragging Files from the Finder to
the Projects Panel” on page 110 and “Importing Folders of Images from the Finder”
on page 111.
Once you’re familiar with Aperture, you can begin to create and organize your
professional image management system.

Chapter 4 Importing Images 91
I
Importing from Your Digital Camera or Card Reader
You can import images from a camera or card reader into Aperture using the Import
dialog in two ways:
ÂImport all images on the camera or card reader at once.
ÂImport a selection of images from the camera or card reader.
You can also:
ÂChoose to store imported images in the Aperture Library or select a different location
on your hard disk and import them as referenced images.
ÂHave Aperture automatically reformat your memory card after the images are imported.
ÂHave Aperture automatically create stacks of bracketed images or images shot in
quick succession.
ÂApply a naming convention to standardize the names of the image files in the Library.
ÂApply metadata to the image files, such as keywords, captions, copyright
information, and the photographer’s name. You can also apply or replace existing
metadata associated with an image when you import the image.
ÂAdjust the shoot time of images that were shot in a different time zone.
When connecting your camera directly to the computer, make sure that you turn the
camera on and set it to the mode for transferring images (PC, PTP, Normal, or another
mode, depending on the type of camera). Some cameras automatically select the
correct transfer mode when connected to a computer. See your camera’s manual for
specific instructions.
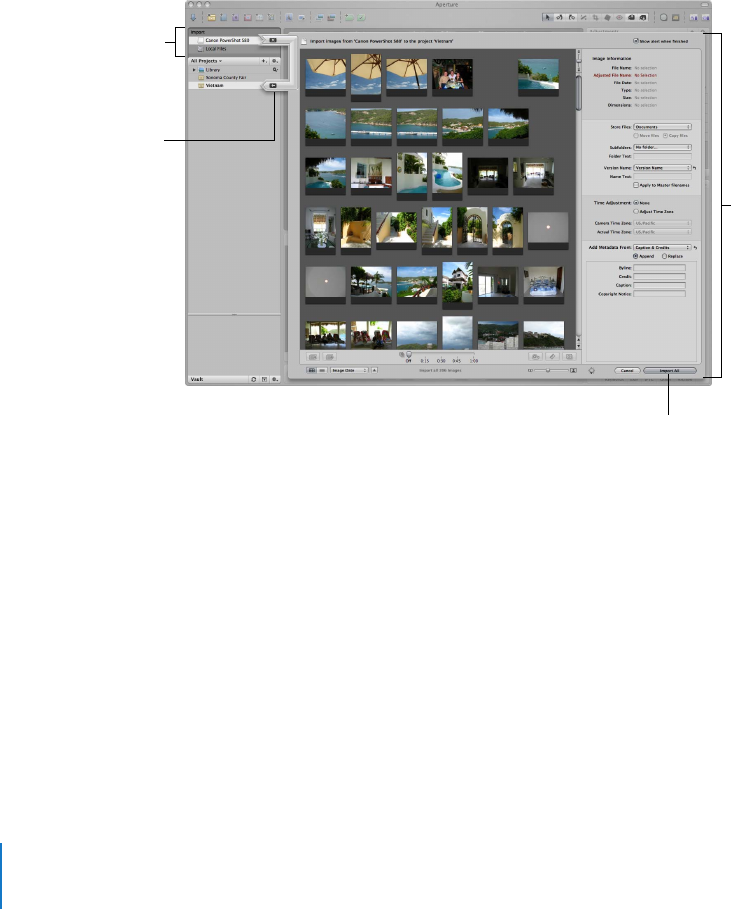
92 Part I Interface and Acquisition
Importing All Images from a Camera or Card Reader
You can import all the image files located on your camera or card reader into
Aperture at once.
To import all the images from a camera or card reader into Aperture:
1Connect your camera or card reader to your computer.
The Import panel and Import dialog appear, showing the images on the camera or card.
Note: If iPhoto opens when you connect your camera or card reader, quit iPhoto and
then, in Aperture, choose Aperture > Preferences. Choose Aperture from the “When a
camera is connected” pop-up menu. Disconnect and reconnect your camera to have
Aperture open the Import dialog.
Import dialog
Import arrow
Import panel
Import button
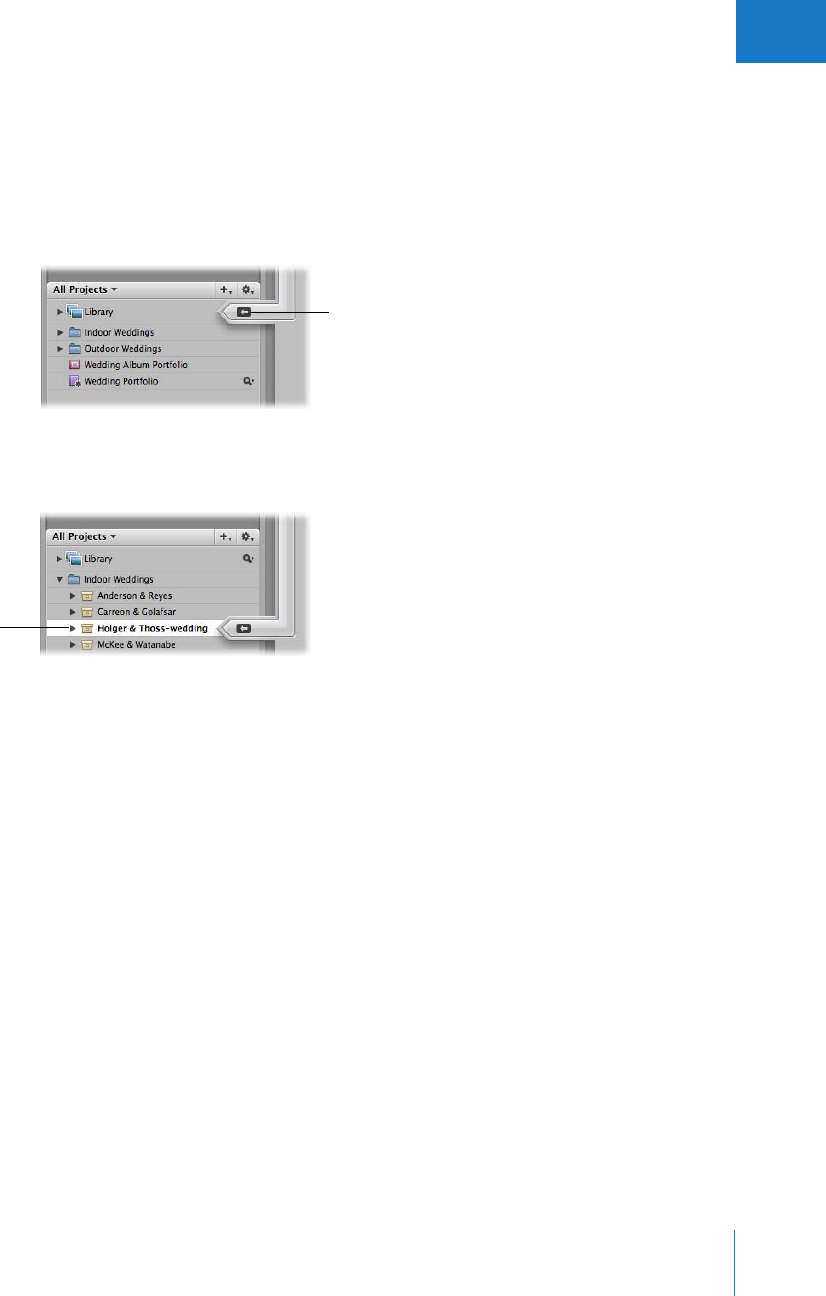
Chapter 4 Importing Images 93
I
2Do one of the following:
ÂIf you want to import into a new, empty project: Choose File > New Project (or press
Command-N) to create a new project.
Note: You can also click the Library icon in the Projects panel, if necessary, to select
it. When you select the Library (not a project), a new, untitled project is automatically
created when images are imported.
ÂIf you want to import the images into an existing project: Select the project. The Import
arrow points at the currently selected project, indicating the destination for the import.
The top-left portion of the Import dialog updates, displaying where the images are
being placed.
3Choose a location for the imported images by doing one of the following:
ÂTo store imported master image files in the Aperture Library: Choose In the Aperture
Library from the Store Files pop-up menu.
ÂTo store imported master image files as referenced images in the Pictures folder on your
hard disk: Choose Pictures from the Store Files pop-up menu.
ÂTo store imported master image files as referenced images in a location other than the
Pictures folder: Choose “Choose” from the Store Files pop-up menu and select the
folder you want. Choose “No folder” from the Subfolders pop-up menu to specify
that the files be stored as separate individual files in the selected folder. You can also
specify that Aperture create and store your files in a hierarchy of subfolders with
specific folder names. For more information about specifying folders to hold your
imported images, see “Importing Master Files for Referenced Images into Folders” on
page 103. Choose whether you want the image files moved or copied to a new
location by clicking the “Move files” or “Copy files” button. For more information
about moving and copying files, see “Changing the Location of Images When You
Import Them” on page 100.
Make sure the Import arrow
is pointing to the Library to
import the images into a
new project.
Select the project
into which you want to
import images.
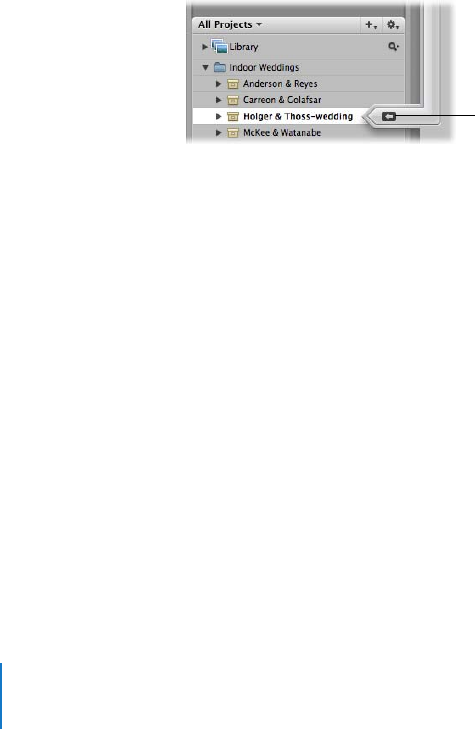
94 Part I Interface and Acquisition
4Choose a naming convention from the Version Name pop-up menu to specify how you
want the images named.
For example, choose Master Filename from the Version Name pop-up menu to have
your files stored using the current master filenames from your camera or card. Choose
a name format from the Version Name pop-up menu to have your images stored
using a specified name. If you choose a custom name format, enter the name you
want in the Name Text field. You can also apply the name format to the master file as
well. Choose Edit from the Version Name pop-up menu to define a new naming
scheme. For more information about naming files, see “Automatically Naming Your
Imported Images” on page 105.
5To add metadata to your images as they’re imported, choose a metadata preset from
the Add Metadata From pop-up menu. For more information about setting up and
using metadata presets, see “Working with Metadata Views” on page 235.
6With no images selected in the dialog, click the Import arrow or the Import button in
the lower-right corner of the dialog.
If you select images, only the selected images are imported. To reset the image
selection so that no images are selected, click in the background beside a thumbnail.
The import process begins and an indicator appears next to the project’s name,
showing the progress of the import. When images are imported, a dialog appears.
7Click Eject Card, Erase and Eject Card, or Done.
As the images appear in the Browser, you can begin working with them. Images may
temporarily appear as gray boxes until the loading is complete.
When you’re ready to import,
click the Import arrow.
Chapter 4 Importing Images 95
I
Importing a Selection of Images
You can also import a selection of images from your camera or card reader.
To import a selection of images:
1Connect your camera or card reader to your computer.
The Import panel and Import dialog appear, showing the images on the camera or card.
2In the Projects panel, do one of the following:
ÂChoose File > New Project (or press Command-N) to create a new project.
ÂSelect an existing project to hold your images. (The Import arrow points at the
selected project.)
The top-left portion of the Import dialog updates, displaying where the images are
being placed.
3Select the images you want to import by Shift-clicking to select a range of adjacent
images, Command-clicking to select nonadjacent images, or dragging a selection
rectangle around the images you want.
The current number of images selected for import is displayed on the Import button in
the lower-right corner of the dialog.
To reset the image selection so that no images are selected, click in the background
beside a thumbnail.
If necessary, adjust the size of the thumbnails by dragging the Thumbnail Resize slider
at the bottom of the dialog.
Import button showing
the number of images
selected for import

96 Part I Interface and Acquisition
4Choose a location for the imported images by doing one of the following:
ÂTo store imported master image files in the Aperture Library: Choose In the Aperture
Library from the Store Files pop-up menu.
ÂTo store imported master image files as referenced images in the Pictures folder on your
hard disk: Choose Pictures from the Store Files pop-up menu.
ÂTo store imported master image files as referenced images in a location other than the
Pictures folder: Choose “Choose” from the Store Files pop-up menu and select the
folder you want. Choose “No folder” from the Subfolders pop-up menu to specify
that the files be stored as separate individual files in the selected folder. You can also
specify that Aperture create and store your files in a hierarchy of subfolders with
specific folder names. For more information about specifying folders to hold your
imported images, see “Importing Master Files for Referenced Images into Folders” on
page 103. Choose whether you want the image files moved or copied to a new
location by clicking the “Move files” or “Copy files” button. For more information
about moving and copying files, see “Changing the Location of Images When You
Import Them” on page 100.
5Choose a naming convention from the Version Name pop-up menu to specify how you
want the images named.
For example, choose Master Filename from the Version Name pop-up menu to have
your files stored using the current master filenames from your camera or card. Choose a
name format from the Version Name pop-up menu to have your images stored using a
specified name. If you choose a custom name format, enter the name you want in the
Name Text field. You can also apply the name format to the master image as well.
Choose Edit from the Version Name pop-up menu to define a new naming scheme. For
more information about naming files, see “Automatically Naming Your Imported
Images” on page 105.
6To add metadata to your images as they’re imported, choose a metadata preset from
the Add Metadata From pop-up menu. For more information about setting up and
using metadata presets, see “Working with Metadata Views” on page 235.
7When you are satisfied with your image selection, click the Import arrow or the Import
button in the lower-right corner of the dialog.
The import process begins and an indicator appears next to the project’s name,
showing the progress of the import. When images are imported, a dialog appears.
8Click Eject Card, Erase and Eject Card, or Done.
As the images appear in the Browser, you can begin working with them. Images may
temporarily appear as gray boxes until the loading is complete.
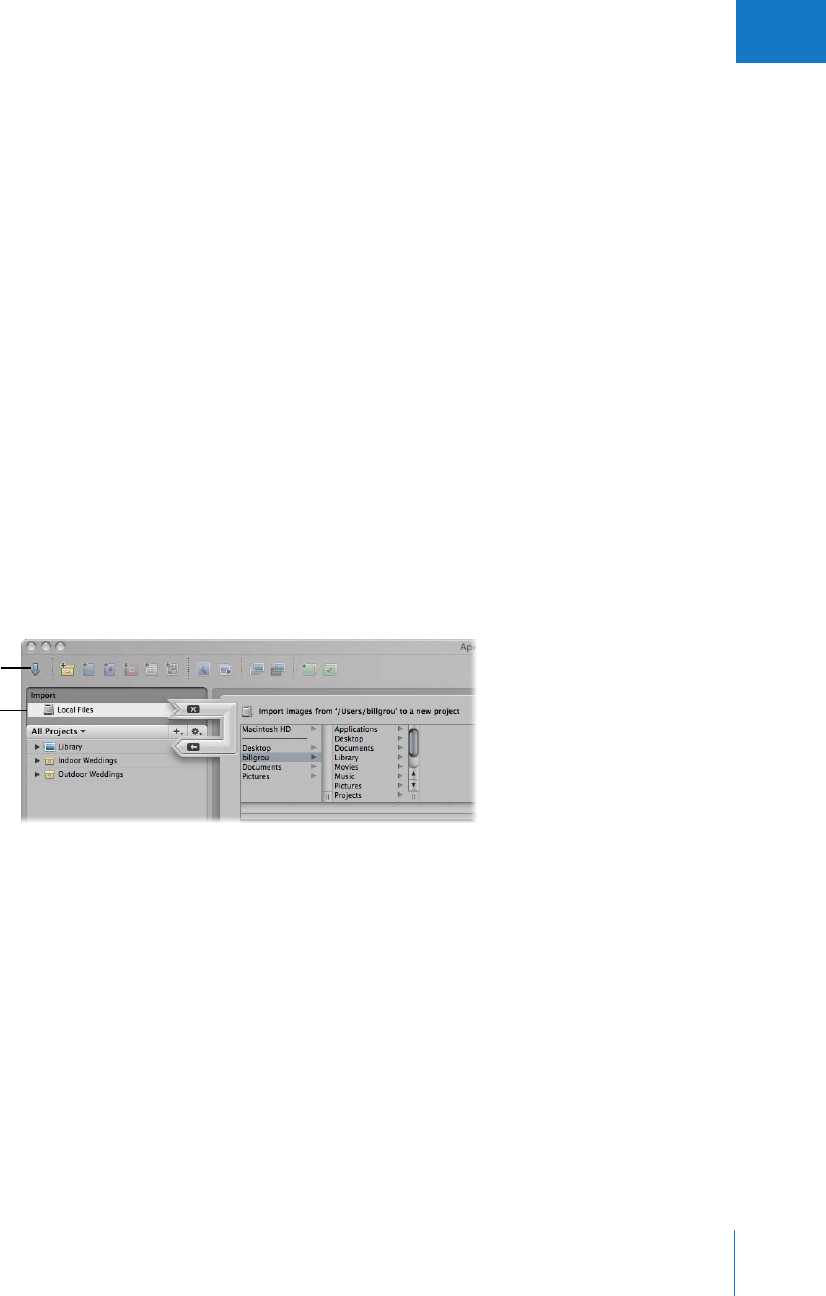
Chapter 4 Importing Images 97
I
Importing Image Files Stored on Your Computer
You can import image files stored on your computer and other storage devices. You
have a choice of storing imported images in the Aperture Library, importing images as
referenced images and leaving them in their current locations, or importing images as
referenced images and moving or copying them to a different location.
Note: If you have folders of images to import, you can import them using the Import
Folders as Projects command. For more information, see “Importing Folders of Images
from the Finder” on page 111.
You can import image files in many common image formats, including images scanned
from nondigital sources such as film and photographic prints. Adding these image files
to your Aperture database is as simple as navigating to the folder where they reside on
your hard disk using the Import dialog.
When you import images from a folder on your computer system, you have the choice
of importing the images into a new project or an existing one.
To import image files stored on your computer’s hard disk or other storage device:
1If the Import panel is hidden, click the Import Panel button in the toolbar to show it (or
press Shift-I).
2Select the disk that holds the image files you want to import.
The Import dialog appears with the file browser at the top.
Select the disk where the
images you want to
import are located.
Import Panel button
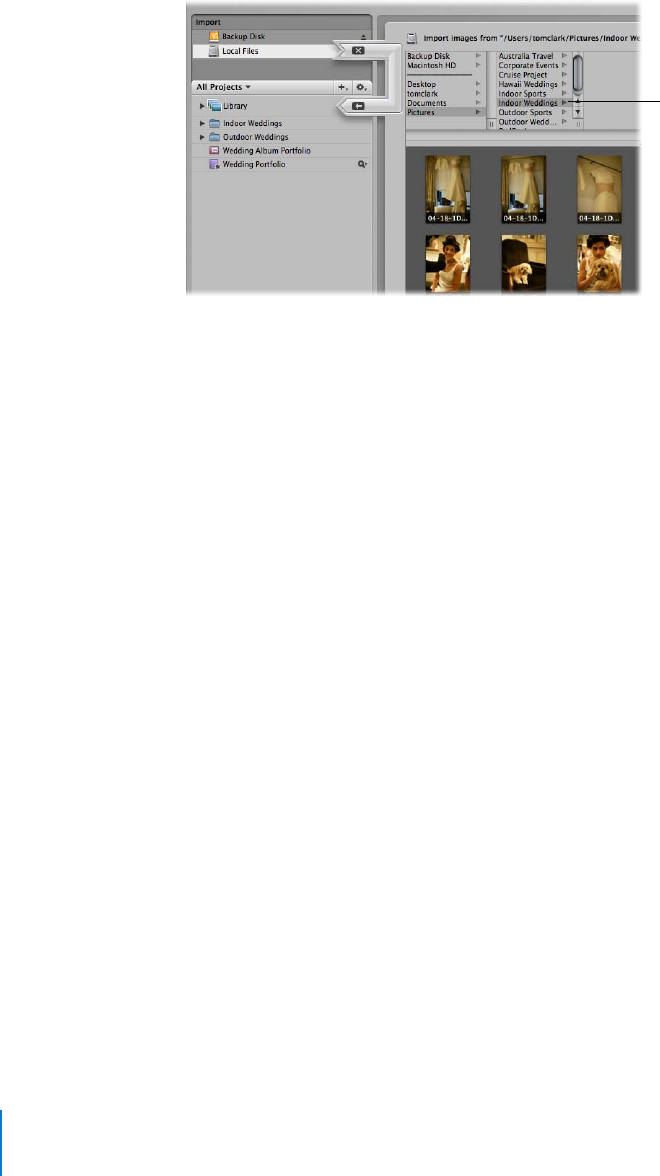
98 Part I Interface and Acquisition
3In the file browser, navigate to the folder containing the image files you want to import.
When you have selected the folder containing the image files you want to import,
image thumbnails appear in the Import dialog.
4In the Projects panel, do one of the following:
ÂSelect Library to create a new, untitled project or choose File > New Project (or press
Command-N). (The Import arrow points at the Library.)
ÂSelect an existing project to hold your images. (The Import arrow points at the
selected project.)
The top-left portion of the Import dialog updates, displaying where the images are
being placed.
5Select the images you want to import by Shift-clicking to select a range of adjacent
images, Command-clicking to select nonadjacent images, or dragging a selection
rectangle around the images you want.
Select the folder
of images you
want to import.

Chapter 4 Importing Images 99
I
6Choose a location for the imported images by doing one of the following:
ÂTo store imported master image files in the Aperture Library: Choose In the Aperture
Library from the Store Files pop-up menu.
ÂTo import the files as referenced images stored in their current locations on your hard
disk: Choose “In their current location” from the Store Files pop-up menu.
ÂTo store imported master image files as referenced images in the Pictures folder on your
hard disk: Choose Pictures from the Store Files pop-up menu.
ÂTo store imported master image files as referenced images in a location other than the
Pictures folder: Choose “Choose” from the Store Files pop-up menu and select the
folder you want. Choose “No folder” from the Subfolders pop-up menu to specify
that the files be stored as separate individual files in the selected folder. You can also
specify that Aperture create and store your files in a hierarchy of subfolders with
specific folder names. For more information about specifying folders to hold your
imported images, see “Importing Master Files for Referenced Images into Folders” on
page 103. Choose whether you want the image files moved or copied to a new
location by clicking the “Move files” or “Copy files” button. For more information
about moving and copying files, see “Changing the Location of Images When You
Import Them” on page 100.
7Choose a naming convention from the Version Name pop-up menu to specify how you
want the images named.
For example, choose Master Filename from the Version Name pop-up menu to have
your files stored using the current master filenames from your camera or card. Choose
a name format from the Version Name pop-up menu to have your images stored using
a specified name. If you choose a custom name format, enter the name you want in
the Name Text field. You can also apply the name format to the master image as well.
Choose Edit from the Version Name pop-up menu to define a new naming scheme.
For more information about naming files, see “Automatically Naming Your Imported
Images” on page 105.
8To add metadata to your images as they’re imported, choose a metadata preset from
the Add Metadata From pop-up menu. For more information about setting up and
using metadata presets, see “Working with Metadata Views” on page 235.
9When you are satisfied with your image selection, click the Import arrow or the Import
button in the lower-right corner of the dialog.
As the images appear in the Browser, you can begin working with them.
Note: If the folder contains subfolders of images and you want those imported too,
choose File > Import > Folders as Projects as described in “Importing Folders of Images
from the Finder” on page 111.
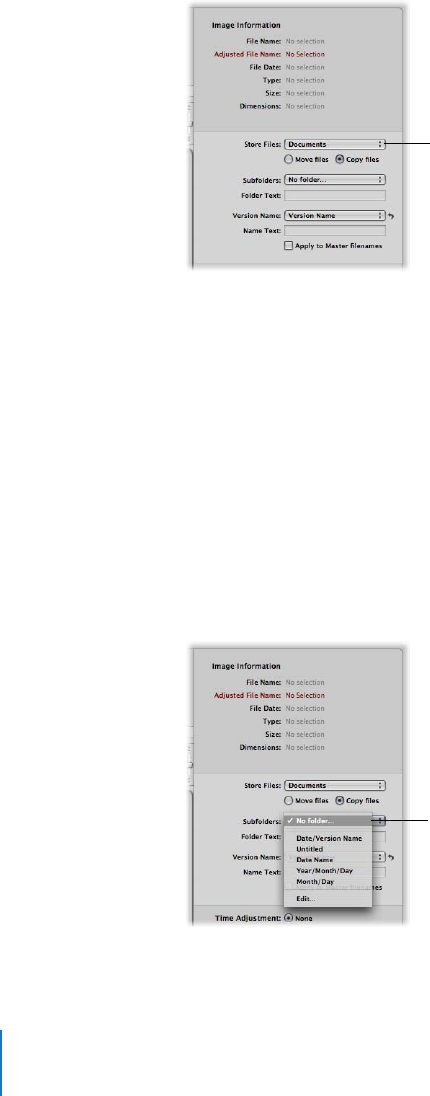
100 Part I Interface and Acquisition
Changing the Location of Images When You Import Them
When you import images stored on a hard disk, you can copy or move those images to
a new location. You specify a new location for the moved or copied files by choosing a
destination folder from the Store Files pop-up menu in the Import dialog.
You specify filenames used within Aperture by choosing a name format from the
Version Name pop-up menu. You can also have Aperture change the Finder filename of
images to the selected name format by selecting the “Apply to Master filenames”
checkbox. Then an image will have the same filename in the Finder and in Aperture.
When you move or copy image files to a different location, you can have Aperture
place them as individual files in the destination folder, or place them in subfolders
within the destination folder. For example, a group of images might be copied into a
destination folder with each image placed in a subfolder identified by a date. Or, each
image might be placed in a hierarchy of subfolders organized by year, month, and day.
You choose the subfolder organization you want from the Subfolders pop-up menu. You
can also specify your own custom folder organizations by choosing the Edit command.
Choose a folder
destination for the files
you are moving or
copying using this
pop-up menu.
Subfolders pop-up menu
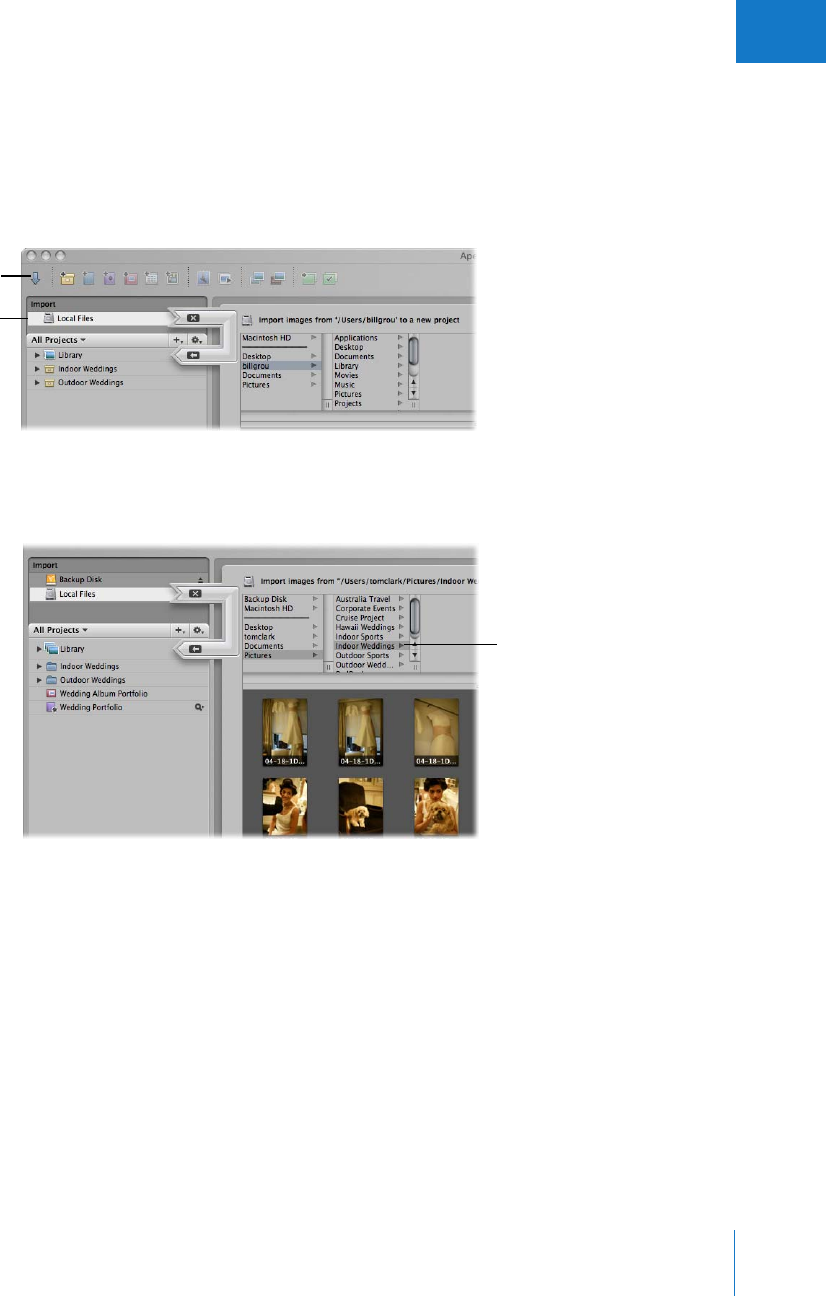
Chapter 4 Importing Images 101
I
For more information about creating custom subfolder hierarchies, see “Importing
Master Files for Referenced Images into Folders” on page 103.
To copy or move images to a new location when importing them from a hard disk:
1Click the Import Panel button in the toolbar (or press Shift-I) to show the Import panel.
2Select the disk that holds the image files you want to import.
The Import dialog appears with the file browser at the top.
3In the file browser, navigate to the folder containing the image files you want to import.
When you have selected the folder containing the image files you want to import,
image thumbnails appear in the Import dialog.
4In the Projects panel, do one of the following:
ÂSelect Library to create a new, untitled project or choose File > New Project (or press
Command-N). (The Import arrow points at the Library.)
ÂSelect an existing project to hold your images. (The Import arrow points at the
selected project.)
The top-left portion of the Import dialog updates, displaying where the images are
being placed.
5Select the images you want to import.
Select the disk where the
images you want to
import are located.
Import Panel button
Select the folder of
images you want to
import.

102 Part I Interface and Acquisition
6Choose a location for the imported images by doing one of the following:
ÂTo store imported master image files as referenced images in the Pictures folder on your
hard disk: Choose Pictures from the Store Files pop-up menu.
ÂTo store imported master image files as referenced images in a location other than the
Pictures folder: Choose “Choose” from the Store Files pop-up menu and select the
folder you want. Choose “No folder” from the Subfolders pop-up menu to specify
that the files be stored as separate individual files in the selected folder. You can also
specify that Aperture create and store your files in a hierarchy of subfolders with
specific folder names. For more information about specifying folders to hold your
imported images, see “Importing Master Files for Referenced Images into Folders” on
page 103. Choose whether you want the image files moved or copied to a new
location by clicking the “Move files” or “Copy files” button. For more information
about moving and copying files, see “Changing the Location of Images When You
Import Them” on page 100.
7Choose a naming convention from the Version Name pop-up menu to specify how you
want the images named.
For example, choose Master Filename from the Version Name pop-up menu to have
your files stored using the current master filenames from your camera or card. Choose a
name format from the Version Name pop-up menu to have your images stored using a
specified name. If you choose a custom name format, enter the name you want in the
Name Text field. You can also apply the name format to the master image as well.
Choose Edit from the Version Name pop-up menu to define a new naming scheme. For
more information about naming files, see “Automatically Naming Your Imported
Images” on page 105.
8To add metadata to your images as they’re imported, choose a metadata preset from
the Add Metadata From pop-up menu. For more information about setting up and
using metadata presets, see “Working with Metadata Views” on page 235.
9When you are satisfied with your image selection, click the Import arrow or the Import
button in the lower-right corner of the dialog.
As the images appear in the Browser, you can begin working with them.

Chapter 4 Importing Images 103
I
Importing Master Files for Referenced Images into Folders
When you import images as referenced images, you can have Aperture place their
master files individually into a selected folder, or create subfolders to hold the files. For
example, you might have the imported image files placed in subfolders identified by
date. You can create folder name format presets that you can quickly choose to select
the folder name format you want.
To create a folder name format, you select the name elements you want in the Folder
Naming Presets dialog. You can specify a combination of name elements to create the
custom folder names you want. You can compose folder name formats that combine
the following name elements:
ÂVersion Name
ÂMaster Filename
ÂSequence Number (1 of 3, 2 of 3, 3 of 3)
ÂImage Year
ÂImage Month
ÂImage Day
ÂImage Date
ÂImage Time
ÂIndex Number (1, 2, 3)
ÂCustom Name
ÂCounter (001, 002, 003)
ÂCurrent Date
ÂCurrent Time
ÂCurrent Year
ÂCurrent Month
ÂCurrent Day
ÂFolder Name
ÂProject Name
You can also create a hierarchy of folders within folders. For example, you can specify
that Aperture place your images in a subfolder named Date, and within that folder you
can create subfolders identified by the time the image was taken. To create the folder
name format, you drag the elements you want into the Format field and drag the
forward slash element between the elements where a subfolder should be created.
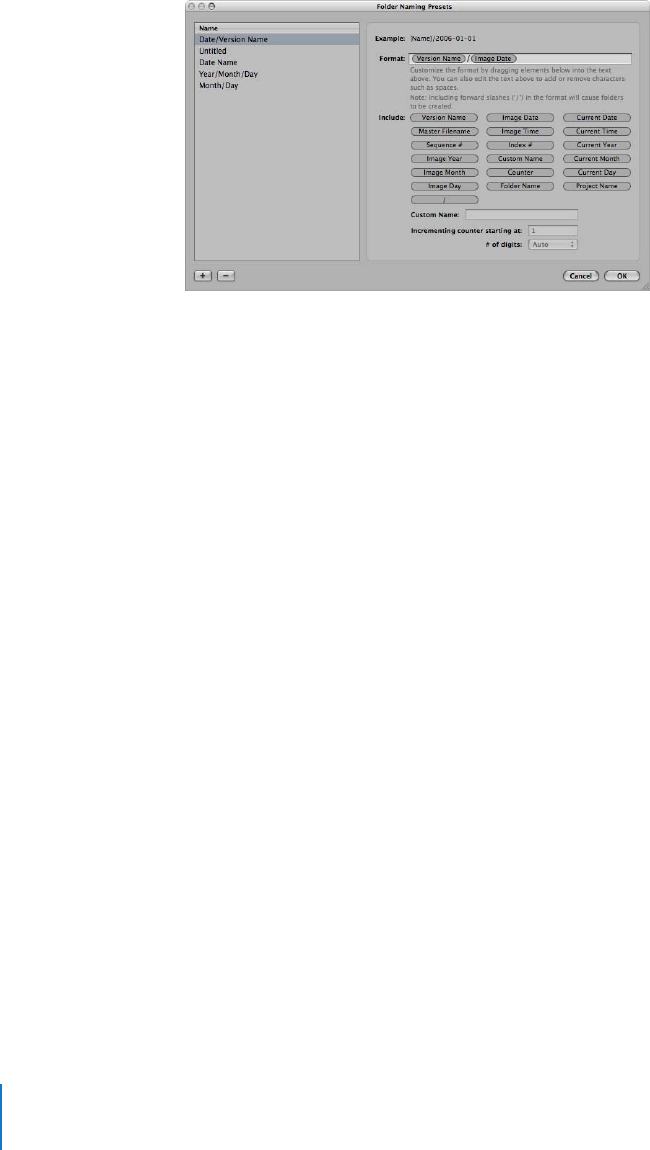
104 Part I Interface and Acquisition
To create a custom folder name preset:
1In the Import dialog, choose Edit from the Subfolders pop-up menu.
The Folder Naming Presets dialog appears.
2Click the Add (+) button to create a new name format, or select the preset name
format you want to change.
3Drag the name elements you want into the Format field in the order you want them.
4Drag a backslash between the elements where you want subfolders created.
5Enter a custom name in the Custom Name field, if you want.
6Click OK.
Your new folder name format now appears in the Subfolders pop-up menu.
When using a counter in your folder name format, you can specify the starting number
and the number of digits, from one to six digits, that appear in the counter. When you
use a folder name format with a counter, make sure to reset the initial starting number,
if necessary. Otherwise, on the next import Aperture will continue numbering the
image folders starting from the last number of the previous import.
To reset the starting number of a counter in a folder name format:
mIn the Folder Naming Presets dialog, type 0 (zero) in the “Incrementing counter
starting at” field.

Chapter 4 Importing Images 105
I
Automatically Naming Your Imported Images
The filenames given to images by the camera are often difficult to distinguish. When
you import images, you can have Aperture use the original name assigned by the
camera, or use a filenaming convention that you choose or create. For example, you
can use a name format that includes a name that you specify, plus the date, time, and
index number. Aperture provides a number of preset name formats, and you can also
create your own naming conventions to suit the different types of shoots you do. You
can choose a preset name format when you import new photos.
Aperture provides the following preset name formats:
You can apply names to your image files when you import them and when you export
them. You can specify names that will be applied to the versions and to the digital
master files. For example, when you import images from your camera, you can specify
that a name format be applied to each image version that Aperture creates. You can
also specify that Aperture apply names to the digital master files as they are stored in
the Library or on a hard disk. When importing image files, you select the “Apply to
Master filenames” checkbox to apply the name format you want to the digital master
files. Then both versions and digital master files will share the same name format. When
you export master files, you can also rename the digital master files, if you choose.
When you import digital master files as referenced images, you can’t rename the digital
master files when you leave the digital master files in their original locations. However,
when you import digital master files as referenced images and move them to a new
hard disk location, you can rename them at that time.
To choose a preset name format:
1In the Import dialog, choose a name format from the Version Name pop-up menu.
2To apply the filename to the digital master file as well as to the version names, select
the “Apply to Master filenames” checkbox.
Preset name format Example
Master Filename IMG001
Image Date/Time 2005-10-14 09.03.25 PM
Version Name IMG001
Version Name and Date/Time IMG001 - 2005-10-14 09.03.25 PM
Version Name with Sequence IMG001 (1 of 2), IMG002 (2 of 2)
Version Name with Index IMG001 1, IMG002 2
Custom Name with Index Thailand 1, Thailand 2
Custom Name with Counter Thailand 001, Thailand 002

106 Part I Interface and Acquisition
Applying Valid Filenames
Proper filenaming is one of the most critical aspects of media and project management.
When you capture your digital master files, consider how and where your files may be
used in the future. Naming your files simply and consistently makes it easier to share
media among multiple photographers, transfer projects to other Aperture systems, move
files across a network, and properly restore archived projects. The following sections
present several issues to consider when naming project files and image files.
Avoiding Special Characters
The most conservative filenaming conventions provide the most cross-platform
compatibility. This means that your filenames will work in different operating systems, such
as Mac OS X and other UNIX-based operating systems, Mac OS 9, and Windows. You also
need to consider filenaming when you transfer files via the Internet, where you can never
be certain what computer platform your files may be stored on, even if temporarily.
Avoid Example characters Reasons
File separators : (colon)
/ (slash)
\ (backslash)
You cannot use colons in the
names of files and folders
because Mac OS 9 (Classic) uses
this character to separate
directories in pathnames. In
addition, some applications may
not allow you to use slashes in
the names of items.
These characters are directory
separators for Mac OS 9,
Mac OS X, and DOS (Windows)
respectively.
Special characters not included
in your native alphabet
¢ ™ These characters may not be
supported or may be difficult to
work with when exported to
other applications.
Punctuation marks, parentheses,
quotation marks, brackets, and
operators
. , [ ] { } ( ) ! ; “ ‘ * ? < > | These characters are often used
in scripting and programming
languages.
White space characters such
as spaces, tabs, new lines, and
carriage returns (the last two
are uncommon)
White space is handled
differently in different
programming languages and
operating systems, so certain
processing scripts and
applications may treat your files
differently than expected. The
most conservative filenames
avoid all use of white space
characters, and use the
underscore (_) character instead.
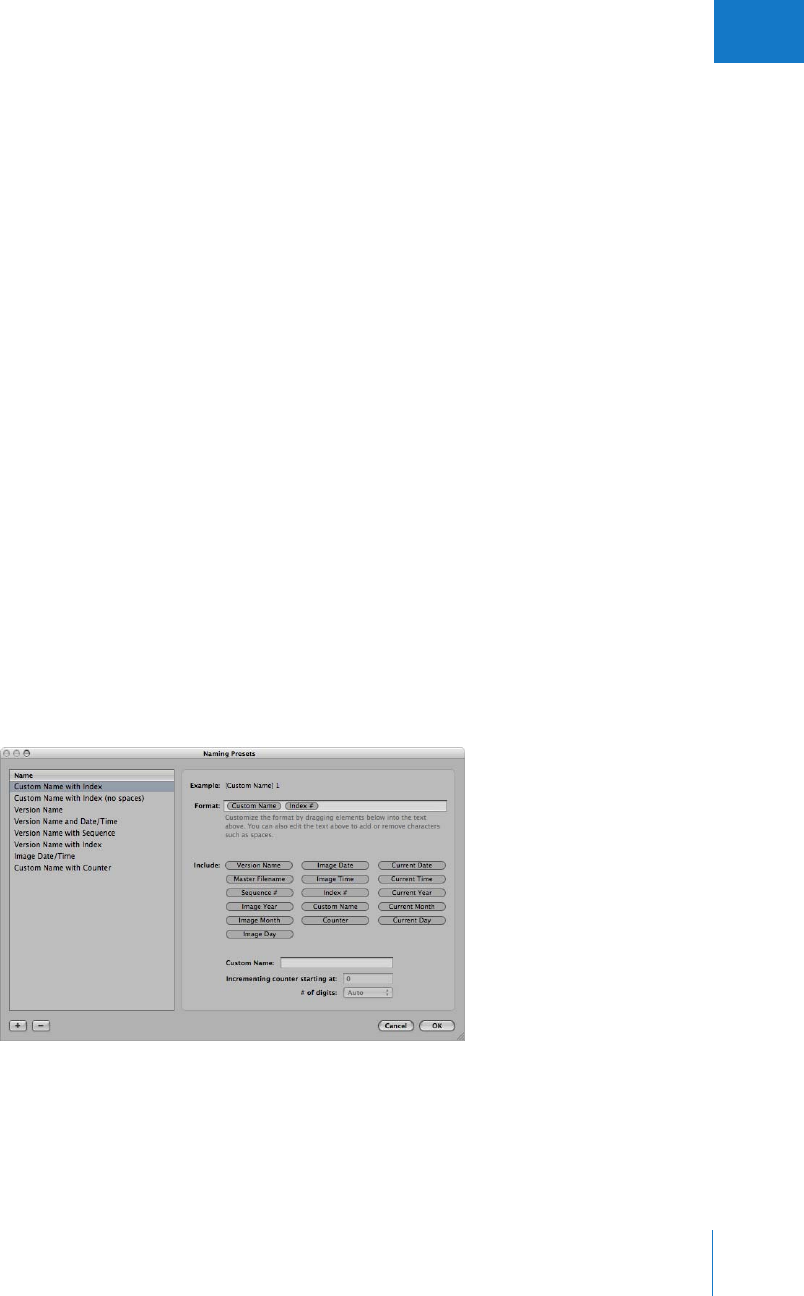
Chapter 4 Importing Images 107
I
Creating Custom Name Formats
In addition to the preset name formats, you can create custom name formats. To create
a name format, you select the name elements you want in the Naming Presets dialog.
You can compose a name format that combines the following name elements:
ÂVersion Name
ÂMaster Filename
ÂSequence Number (1 of 3, 2 of 3, 3 of 3)
ÂImage Year
ÂImage Month
ÂImage Day
ÂImage Date
ÂImage Time
ÂIndex Number (1, 2, 3)
ÂCustom Name
ÂCounter (001, 002, 003)
ÂCurrent Date
ÂCurrent Time
ÂCurrent Year
ÂCurrent Month
ÂCurrent Day
To create a custom name format:
1In the Import dialog, choose Edit from the Version Name pop-up menu.
The Naming Presets dialog appears.
2Click the Add (+) button to create a new name format, or select the preset name
format you want to change.
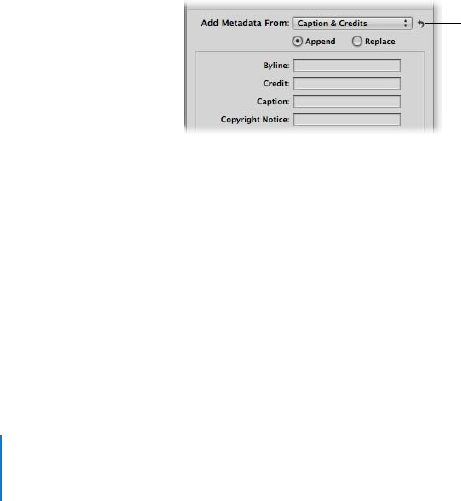
108 Part I Interface and Acquisition
3Drag the name elements you want into the Format field in the order you want them.
You can also add valid characters or spaces between the name elements. For more
information about valid filenaming characters, see “Automatically Naming Your
Imported Images” on page 105.
4Enter a custom name in the Custom Name field, if you want.
5Click OK.
Your new name format now appears in the Version Name pop-up menu.
When using a counter in your name format, you can specify the starting number and
the number of digits, from one to six digits, that appear in the counter. When you use a
preset name format with a counter, make sure to reset the initial starting number, if
necessary. Otherwise, on the next import Aperture will continue numbering the
imported images starting from the last number of the previous import.
To reset the starting number of a counter in a name format:
mIn the Naming Presets dialog, type 0 (zero) in the “Incrementing counter starting at” field.
Adding Metadata to Images During Import
You can add metadata to your images as they are imported into Aperture. Adding
metadata during import helps you keep track of your images and quickly locate them
using the Query HUD. For example, you can add IPTC keywords and other metadata to
the image files.
To add metadata to your images as they’re imported:
mChoose a metadata view or preset from the Add Metadata From pop-up menu in the
Import dialog.
When you choose a view, Aperture displays the metadata fields for that view for you to
complete. You can enter the metadata you want in the fields.
When you choose a metadata preset, Aperture displays the list of metadata fields and
metadata for that preset. You can edit the metadata preset to store any metadata that
you want to apply frequently to your images using the Metadata Inspector. For more
information about editing metadata presets, see Chapter 11, “Working with Metadata,”
on page 225.
Click the Reset button
to clear entries in the
metadata fields.
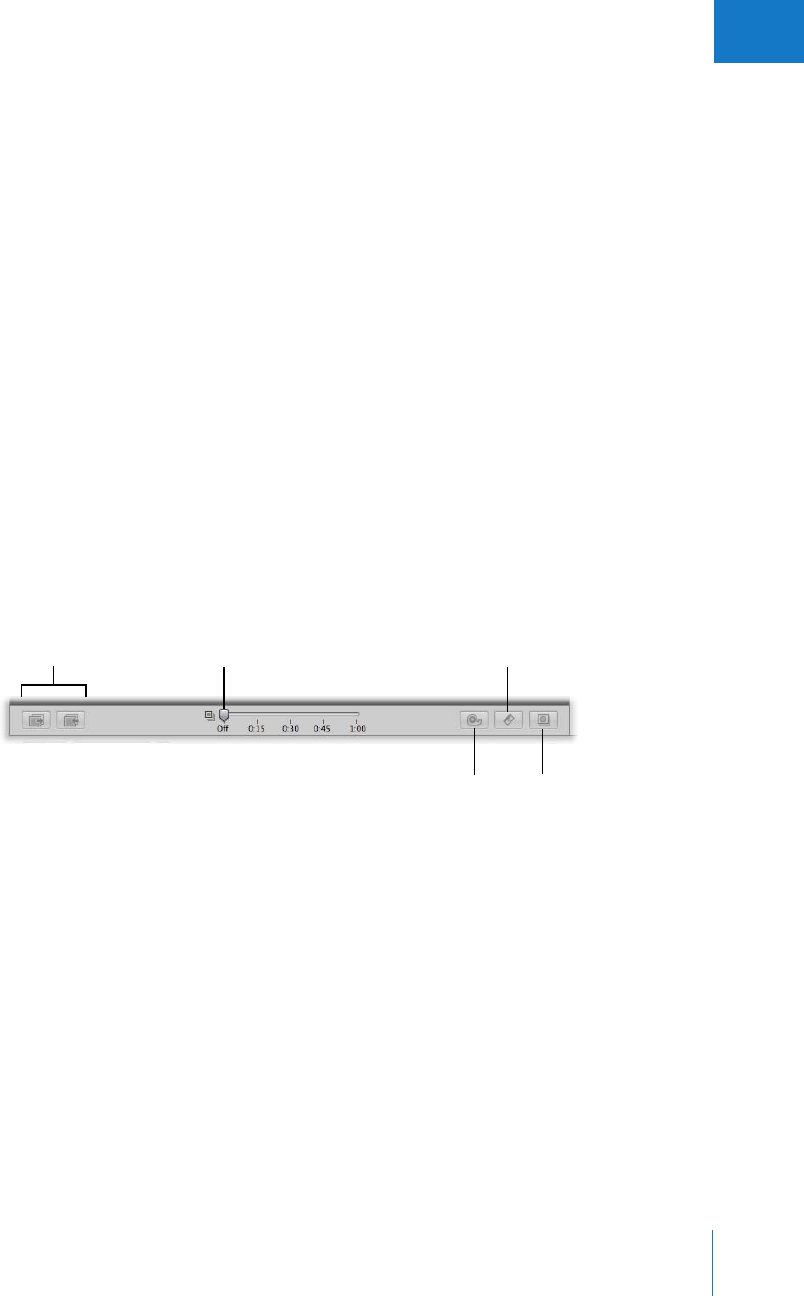
Chapter 4 Importing Images 109
I
To clear the entries in the metadata fields:
mClick the Reset button (with a curved arrow) beside the Add Metadata From pop-up menu.
Creating Stacks Automatically During Import
You can automatically create stacks when you import images. You can preview the
stacks before you import using the Auto-Stack slider in the Import dialog. For detailed
information about working with stacks, see Chapter 8, “Stacking Images
and Making Picks,” on page 175.
Stacks are automatically created based on auto-bracketed images and images shot
continuously or within short intervals of time. You can manually adjust the stacking of
images shot within a short period of time by specifying the time interval of images that
should be stacked.
To create stacks automatically:
1If necessary, show the Import panel by clicking the Import Panel button in the toolbar.
2Select your camera or card reader, or navigate to a folder on your hard disk that holds
images you want to import.
3Select the images you want to import.
4Adjust the Auto-Stack slider.
You can adjust the period of time between shots from 1 second to 1 minute.
When the images appear stacked, you can open or close the stacks by clicking the
Open All Stacks and Close All Stacks buttons. If you want to divide a stack, you can
select an image within a stack and click the Split Stack button, and a new stack appears
holding your selected image and stacked images after it. You can also unstack your
images by clicking the Unstack All Stacks button.
If you are not satisfied with how the images are stacked, drag the slider to the
Off position.
You can also manually select and stack images in the Import dialog in the same way
you can in the Browser. For more information about stacking images, see Chapter 8,
“Stacking Images and Making Picks,” on page 175.
Drag the Auto-Stack
slider to stack images.
Click these buttons to
open or close stacks.
Click the Split Stack
button to split a stack.
Click the Stack button to
stack selected images.
Click the Unstack All Stacks
button to unstack all stacks.
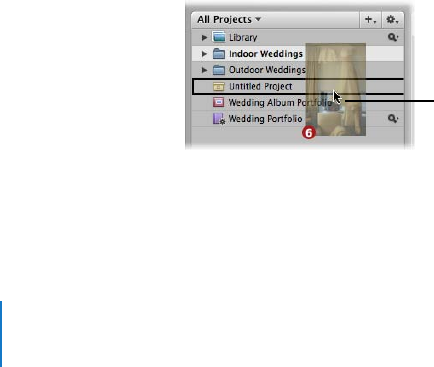
110 Part I Interface and Acquisition
Adjusting the Image File’s Time When Importing
On a trip, it’s easy to forget to update your camera’s clock to match the local time zone.
If you didn’t synchronize your camera time to the new location, Aperture makes it easy
to correct the time assigned to the image file by whole hours when importing.
To adjust image file capture time when importing:
1If necessary, show the Import panel by clicking the Import Panel button in the toolbar.
2Select your camera or card reader, or navigate to a folder on your hard disk that holds
images you want to import.
3Select the images you want to import.
4In the Import dialog, select Adjust Time Zone.
5Choose the time zone that matches the camera’s time setting from the Camera Time
Zone pop-up menu.
6Choose the time zone of the shoot location from the Actual Time Zone pop-up menu.
7Verify that the additional settings are correct, then click the Import button.
Aperture automatically updates the capture time of your image files according to the
Time Adjustment settings.
Dragging Files from the Finder to the Projects Panel
You can drag image files from the Finder or desktop directly into a project. This is useful
if you’ve received image files from a source other than your camera, and you want to
use them in Aperture. You can also do this if you have image files scattered on your
desktop or throughout folders on your system and you want to consolidate them in
one place in the Library.
To quickly import image files from the Finder into a project:
1In the Projects panel, create a new project or select an existing project.
2Locate the image file or files in the Finder.
3Select the image files and drag them to the project in the Projects panel.
The import process begins and an indicator appears next to the project’s name,
showing the progress of the import.
Drag the selected image
files to a project.

Chapter 4 Importing Images 111
I
Importing Folders of Images from the Finder
If you’ve spent time organizing your images into a meaningful hierarchy on your
computer and you want to keep that organization, you can import a folder of images
as a project or drag it directly into the Projects panel. When you import a folder of
images or drag it into the Projects panel, the folder becomes a project and any
subfolders become albums within the project.
To import a folder of images from the Finder using the Import command:
1In the Projects panel, select Library.
2Choose File > Import > Folders into a Project.
3Select the folder of images that you want to import.
4Choose a location for the imported images by doing one of the following:
ÂTo store imported master image files in the Aperture Library: Choose In the Aperture
Library from the Store Files pop-up menu.
ÂTo import the files as referenced images stored in their current locations on your hard
disk: Choose “In their current location” from the Store Files pop-up menu.
ÂTo store imported master image files as referenced images in the Pictures folder on your
hard disk: Choose Pictures from the Store Files pop-up menu.
ÂTo store imported master image files as referenced images in a location other than the
Pictures folder: Choose “Choose” from the Store Files pop-up menu and select the
folder you want. Choose “No folder” from the Subfolders pop-up menu to specify
that the files be stored as separate individual files in the selected folder. You can also
specify that Aperture create and store your files in a hierarchy of subfolders with
specific folder names. For more information about specifying folders to hold your
imported images, see “Importing Master Files for Referenced Images into Folders” on
page 103. Choose whether you want the image files moved or copied to a new
location by clicking the “Move files” or “Copy files” button.
Warning: When importing folders of images into Aperture, carefully plan how you
want your images organized before you begin. The top-level folder containing images
becomes a project containing all the images in the subfolders as well. This means that
if you import a folder with thousands of images contained within its subfolders,
Aperture will create a project with thousands of images. You can import a maximum
of 10,000 master images into a project. If you have over 10,000 images to import into
Aperture, consider importing the subfolders individually instead. Each subfolder will
then become its own project.

112 Part I Interface and Acquisition
5Choose a naming convention from the Version Name pop-up menu to specify how you
want the images named.
For example, choose Master Filename from the Version Name pop-up menu to have
your files stored using the current master filenames from your camera or card. Choose a
name format from the Version Name pop-up menu to have your images stored using a
specified name. If you choose a custom name format, enter the name you want in the
Name Text field. You can also apply the name format to the master image as well.
Choose Edit from the Version Name pop-up menu to define a new naming scheme. For
more information about naming files, see “Automatically Naming Your Imported
Images” on page 105.
6Click Open.
The top-level folder is converted to a project. If the folder you imported contains a
hierarchy of subfolders and images, the subfolders appear as albums.
You can select multiple folders to import by Shift-clicking them.
When you drag folders into the Projects panel, Aperture uses the last import settings
you specified to determine how the folders are imported and where they are stored.
To drag folders into Aperture:
1In the Finder, locate the folder containing the images you want to import.
2Drag the folder to the Projects panel.
The top-level folder is converted to a project. If the folder you imported contains a
hierarchy of subfolders and images, the subfolders appear as albums.
Importing Your iPhoto Library
When you first open Aperture, a dialog appears that enables you to import your iPhoto
Library. You can import your iPhoto Library, copying it into the Aperture Library, or you
can simply allow Aperture to access the iPhoto Library as referenced images without
storing it in the Aperture Library.
The organization of your iPhoto images and albums is maintained as projects in the
Projects panel. Each image’s name, EXIF information, keywords, rating, and any applied
adjustments are maintained as well. You cannot import slideshows, books, and Smart
Albums from your iPhoto Library.
Note: You must upgrade to iPhoto version 5.0.4 or later before you can import photos
from your iPhoto Library into Aperture.
If you choose not to import your iPhoto Library right away, you can do it later.

Chapter 4 Importing Images 113
I
To import your iPhoto Library:
1Choose File > Import > iPhoto Library.
2Select the iPhoto Library folder using the file browser in the Import dialog.
3Choose a location for the imported images by doing one of the following:
ÂTo store imported master image files in the Aperture Library: Choose In the Aperture
Library from the Store Files pop-up menu.
ÂTo import the files as referenced images stored in their current locations on your hard
disk: Choose “In their current location” from the Store Files pop-up menu.
ÂTo store imported master image files as referenced images in the Pictures folder on your
hard disk: Choose Pictures from the Store Files pop-up menu.
ÂTo store imported master image files as referenced images in a location other than the
Pictures folder: Choose “Choose” from the Store Files pop-up menu and select the
folder you want. Choose “No folder” from the Subfolders pop-up menu to specify
that the files be stored as separate individual files in the selected folder. You can also
specify that Aperture create and store your files in a hierarchy of subfolders with
specific folder names. For more information about specifying folders to hold your
imported images, see “Importing Master Files for Referenced Images into Folders” on
page 103. Choose whether you want the image files moved or copied to a new
location by clicking the “Move files” or “Copy files” button.
4Choose a naming convention from the Version Name pop-up menu to specify how you
want the images named.
For example, choose Master Filename from the Version Name pop-up menu to have your
files stored using the current master filenames from your camera or card. Choose a name
format from the Version Name pop-up menu to have your images stored using a specified
name. If you choose a custom name format, enter the name you want in the Name Text
field. You can also apply the name format to the master image as well. Choose Edit from the
Version Name pop-up menu to define a new naming scheme. For more information about
naming files, see “Automatically Naming Your Imported Images” on page 105.
5Click Choose.
Your iPhoto Library is imported into Aperture.
If you choose to store the photos imported from your iPhoto Library in the Aperture
Library, Aperture makes a copy of each image file and places it in the Aperture Library.
This doubles the amount of disk space the image files occupy on your computer. To
save space, import the photos in your iPhoto Library as referenced images. You can also
delete images from your iPhoto Library after importing them, but you will no longer
have access to those images within iPhoto. If you choose not to delete the images in
your iPhoto Library, any changes you make to those images in iPhoto will not be
reflected in the duplicate images in Aperture.
Note: You can also import individual images or albums from your iPhoto Library.

114 Part I Interface and Acquisition
Transferring Projects from Another System
If you work with several computers, or work on a project with other people, you may
find it necessary to transfer projects from one Aperture system to another. Transferring
projects is a simple import process.
To transfer a project from one computer to another:
1Select the project you want to transfer, then choose File > Export Project (or press
Command-Shift-E).
2Enter a name and choose a location for the exported project.
3If your project contains referenced images, select the “Consolidate images into
exported project” checkbox to transfer the original referenced images’ master files as
well as the previews and metadata as a self-contained project that another Aperture
system can use.
If you want to transfer projects with referenced images to another computer, and
don’t want to transfer the referenced images’ master files, but would rather transfer
just the referenced image previews, don’t select the “Consolidate images into
exported project” checkbox.
4Click Save.
The project file is exported to the location you chose.
5Connect or network the two computers together.
For more information, see the documentation that came with the computers.
6Open Aperture on the computer to which you want to transfer the project.
7In the Projects panel, select Library.
8Choose File > Import > Projects.
9In the Import dialog, navigate to the location on the other computer where the project
you want to transfer is stored, select the project, then click Open.
The selected project appears in the Projects panel.
Making an Immediate Backup
After you import images into Aperture, you can make an immediate backup to ensure
that your digital master files exist in more than one place. You do this by having
Aperture update your vault. For more information, see Chapter 20, “Backing Up Your
Images,” on page 399.

Chapter 4 Importing Images 115
I
Where Aperture Stores Your Managed Files in the Library
You always view and work with your images within Aperture. However, you may
wonder where your managed image files physically reside in the Aperture Library on
your computer’s hard disk. By default, your images are stored in the Aperture Library
file within your Pictures folder.
You can open and see the contents of the Aperture Library file in the Finder by
Control-clicking the file and choosing Show Package Contents. However, it’s not
recommended that you access or work with your master files in this way because it
presents a risk of interfering with the Aperture Library.
Warning: You should always back up and work with your managed images and
projects from within the Aperture application. If you move or accidentally change the
files stored in the Aperture Library file, Aperture may not be able to locate your
project and images later. Making a change to a managed file in the Finder, such as
renaming it, creates changes that the application cannot track.

II
Part II: Photo Editing
This section explains the Aperture features used for photo
editing and working with your images.
Chapter 5 Working with Images in the Browser
Chapter 6 Displaying Images in the Viewer
Chapter 7 Viewing Images in Full Screen Mode
Chapter 8 Stacking Images and Making Picks
Chapter 9 Rating Images
Chapter 10 Applying Keywords to Images
Chapter 11 Working with Metadata
Chapter 12 Searching for and Displaying Images
Chapter 13 Grouping Images with Smart Albums


5
119
5Working with Images
in the Browser
After a shoot, you may need to sort through hundreds or
even thousands of images in a project. Aperture provides
efficient methods for increasing your productivity when
working with large numbers of images.
This chapter provides information about using the Browser to select and organize
images in a project. The Browser works together with the Viewer to provide the
principal views of your images. You can quickly search for an image in a project,
reorder and sort images, rotate images to portrait or landscape orientation, create
new versions, and delete images.
This chapter covers:
ÂAn Overview of the Browser (p. 120)
ÂNavigating Through and Selecting Images (p. 122)
ÂWorking with a Selection of Images (p. 124)
ÂWorking with Images in Grid View (p. 125)
ÂWorking with Images in List View (p. 126)
ÂSearching for Images in the Browser (p. 127)
ÂRearranging Images in the Browser (p. 128)
ÂSorting Images in Grid View (p. 129)
ÂRotating Images (p. 130)
ÂCreating Versions of an Image (p. 130)
ÂDeleting Images from the Browser (p. 132)
ÂDragging Images into Different Projects and Albums (p. 134)
ÂWorking with Referenced Images (p. 135)
ÂWorking with Two Projects Open (p. 141)
ÂDisplaying Specific Metadata with Your Images (p. 142)
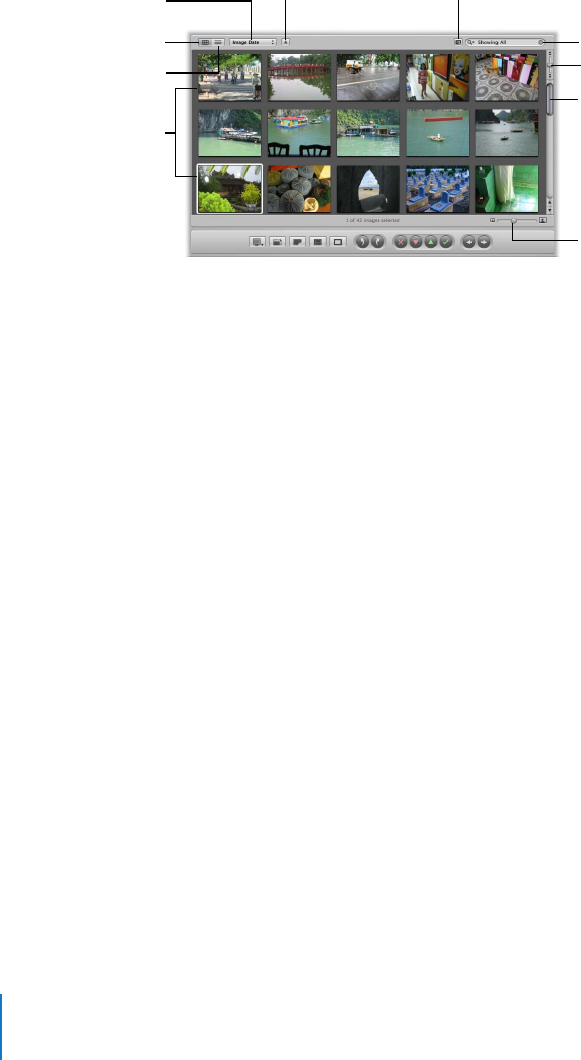
120 Part II Photo Editing
An Overview of the Browser
When you select a project or album in the Projects panel, thumbnails of its images
appear in the Browser. You select images in the Browser to work with them. You can
move and rearrange images, rotate images, make new versions, and delete images
from the project.
ÂGrid View button: Click this button to display images as thumbnails.
ÂList View button: Click this button to display images as a text list.
ÂSorting pop-up menu: You can choose to sort images by image date, rating, or
keywords from this pop-up menu.
ÂSort Direction button: Click this button to sort images in ascending or descending order.
ÂQuery HUD button: Click this button to show the Query HUD for searching. For more
information, see Chapter 12, “Searching for and Displaying Images,” on page 247.
ÂSearch field: Enter text to search for images associated with that text, such as a
version name or keyword.
ÂShuttle control: Drag this to shuttle continuously through images in the Browser. You
can also use the J, K, and L keys.
ÂScroll bar: Use this to scroll through all images in a project.
ÂThumbnail Resize slider: Drag this slider to increase or decrease the size of thumbnails
displayed in grid view.
Aperture provides fast and efficient ways of selecting images. You can use the arrow
keys to quickly select an image or multiple images to work on. You can also select
images by clicking, dragging a selection rectangle, and using keyboard shortcuts.
Grid View button
Shuttle control
Thumbnail Resize slider
Scroll bar
Sort Direction button
Search field
Images displayed in grid
view in the Browser
List View button
Sorting pop-up menu Query HUD button
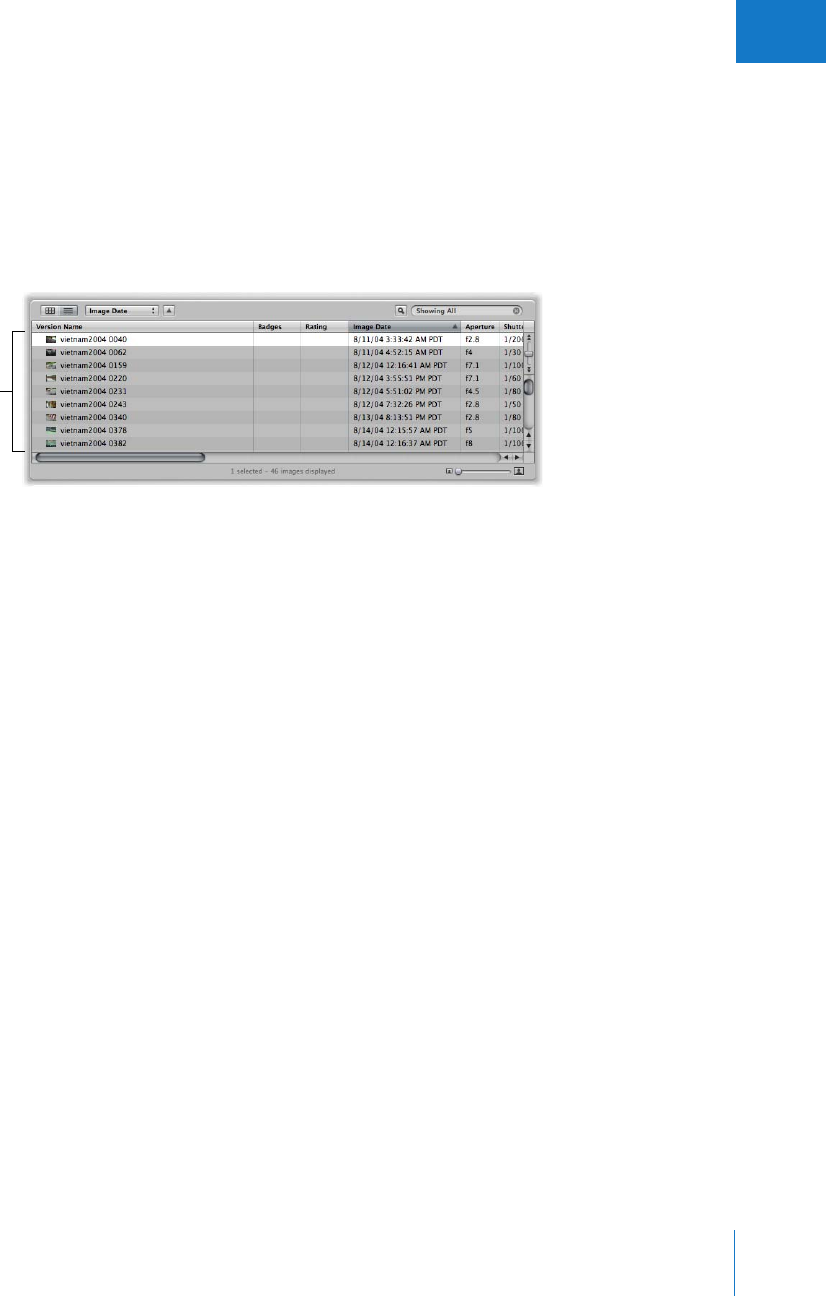
Chapter 5 Working with Images in the Browser 121
II
You can display images in the Browser in either grid view or list view. Grid view
organizes thumbnails of your images in a grid pattern. Use grid view when it’s easiest
to identify your images by sight and work with thumbnails as you organize, stack, or
assign keywords to images.
List view displays a list of your images with associated file information. Use list view
when you need to see or sort your images by corresponding file data such as image
date, file size, or rating.
List view is a great way to quickly see information about your files. You can also use list
view to sort your images by any of the column categories. Click the category column
heading to sort your images by that category.
You can also customize the information that appears with your images. For example,
you can set your images to appear with filename, IPTC data, and EXIF data. You can
change what information appears in the Browser in grid and list views by customizing
view options. For more information, see “Displaying Specific Metadata with Your
Images” on page 142.
If you make a mistake while editing, in most cases you can choose the Undo command
to immediately cancel your last action. In fact, you can choose the Undo command
multiple times to undo your last series of actions. Aperture places deleted digital
master files in the Trash. If you discover a deletion you did not intend to make, and the
Undo command cannot recover the deletion, you can still recover the master file from
the Trash until the Trash is emptied.
Images displayed in list
view in the Browser
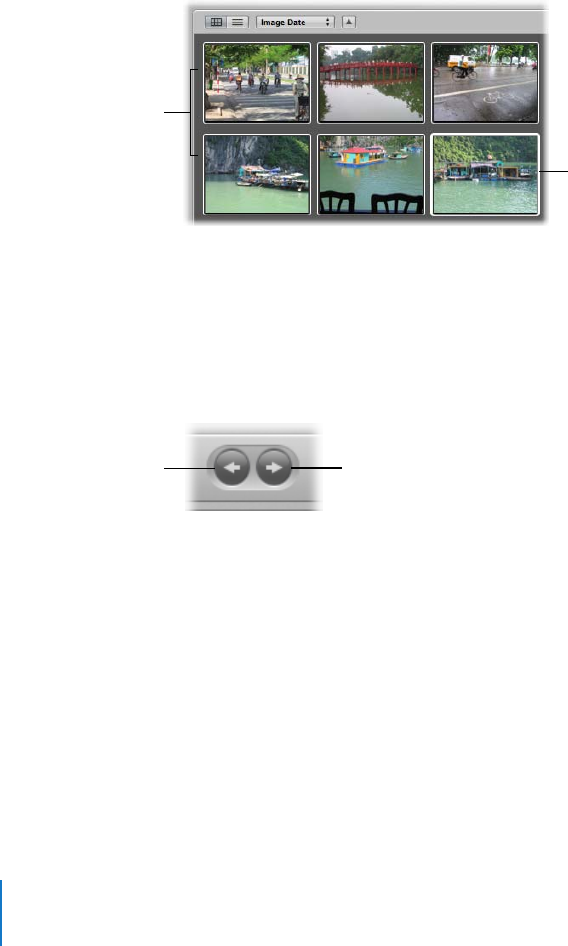
122 Part II Photo Editing
Navigating Through and Selecting Images
Selecting images is a fundamental task in Aperture. Knowing the many ways you can
select images can help increase your productivity and satisfaction while working with
your images.
You can select one or several of the images in the Browser to view them in the Viewer.
Aperture identifies the images you’ve selected by displaying them with a white border.
When you select a group of images, the actively selected image, called the primary
selection, appears with a thick white border and the rest of the selected images appear
with thin white borders.
To navigate to images, do one of the following:
mPress an arrow key to move left, right, up, or down.
mUse the scroll bar to scroll through the images in the Browser, then click the image
you want.
mIn the control bar, click the Previous Image or Next Image button.
Aperture provides fast and efficient ways of selecting images, depending on your work
style and preferences.
All selected images
display a white border. A thick white border
surrounds the primary
selection.
Previous Image button Next Image button

Chapter 5 Working with Images in the Browser 123
II
You can select images in the following ways:
Task Action
Select a single image ÂClick the image.
ÂPress the arrow keys to navigate to the image.
Select a range of images ÂClick the first image in a range, then Shift-click the last image.
ÂPress the arrow keys to select the first image, then press Shift and
the arrow keys to select the last image in the range.
ÂSelect the first image, then choose Edit > Grow Selection (or
press Command-E) to extend the selection.
ÂSelect the first image, then choose Edit > Select to End (or press
Shift-End) to extend the selection to the last image in the Browser.
ÂSelect the last image in a range, then choose Edit > Select to
Beginning (or press Shift-Home) to extend the selection to the
first image in the Browser.
ÂDrag a selection rectangle to select all the images that fall within
the rectangle.
Select an image among
selected images
ÂPress semicolon (;) or press Command–Option–Left Arrow to
select the previous image in the selection. Press apostrophe (‘) or
press Command–Option–Right Arrow to select the next image in
the selection.
Select an image in a stack ÂPress the Right or Left Arrow key.
Select the “pick” of the stack ÂChoose Edit > Select Parent (or press Shift-Option-E).
Select nonadjacent images ÂCommand-click the images you want to select. Command-click
the images again to deselect them.
Slide a selection ÂPress Command–Left Arrow or Command–Right Arrow to slide the
current selection over by one image. For example, you can move a
three-image selection left or right by one image at a time.
Select the next stack ÂWith a stack selected, press Option–Page Up or Option–Page Down.
Select or set a compare item ÂSelect the image, then press Return.
Deselect the compare item ÂPress Command-Return.
Select a different compare item ÂSelect the image you want as a compare item, then press Return.
Select all images in the Browser ÂChoose Edit > Select All (or press Command-A).
Select only the primary image,
deselecting all others
ÂChoose Edit > Reduce Selection (or press Shift-E).
Deselect all images in
the Browser
ÂClick the gray background of the Browser, or Choose Edit >
Deselect All (or press Command-Shift-A).
Deselect the current selection
and select all unselected images
ÂChoose Edit > Invert Selection (or press Command-R).
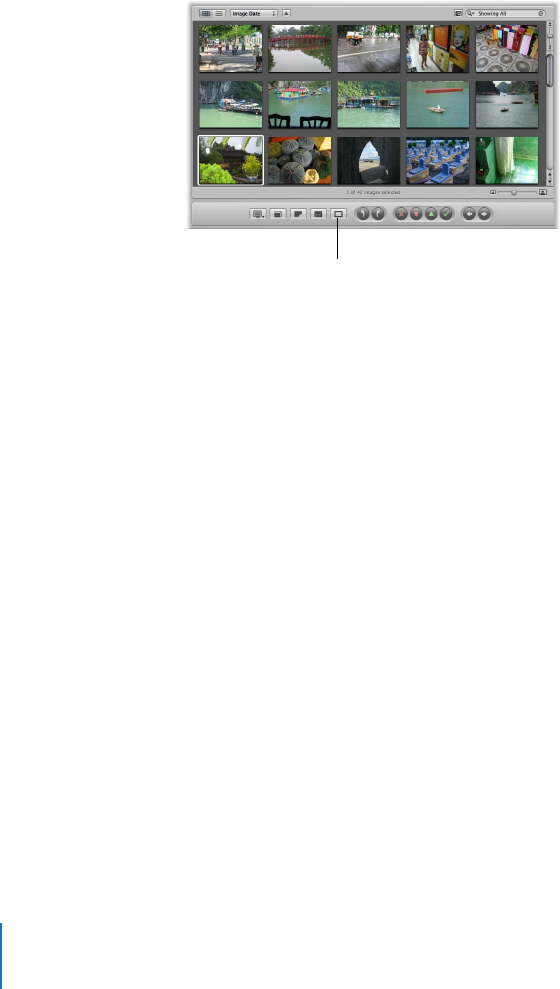
124 Part II Photo Editing
Working with a Selection of Images
At times, when you select a group of images, you may want to apply a change to only
the last image selected, and not change all the other selected images. Aperture
provides a Primary Only button in the control bar that gives you the option of applying
changes to the primary image in a group of selected images, leaving the rest of the
selected images unchanged. The primary image in a selected group of images appears
with a thick white border. You can change the primary image in a selection, without
changing the number of images selected, by pressing the Left or Right Arrow key.
Aperture is preset to have the Primary Only feature turned off, which applies your
changes to all the images in a selection.
To apply a change to only the primary image of a selection of images:
mClick the Primary Only button.
If you discover that a change was applied to only one image when you expected it to
change multiple selected images, check to see if the Primary Only button is selected.
Primary Only button
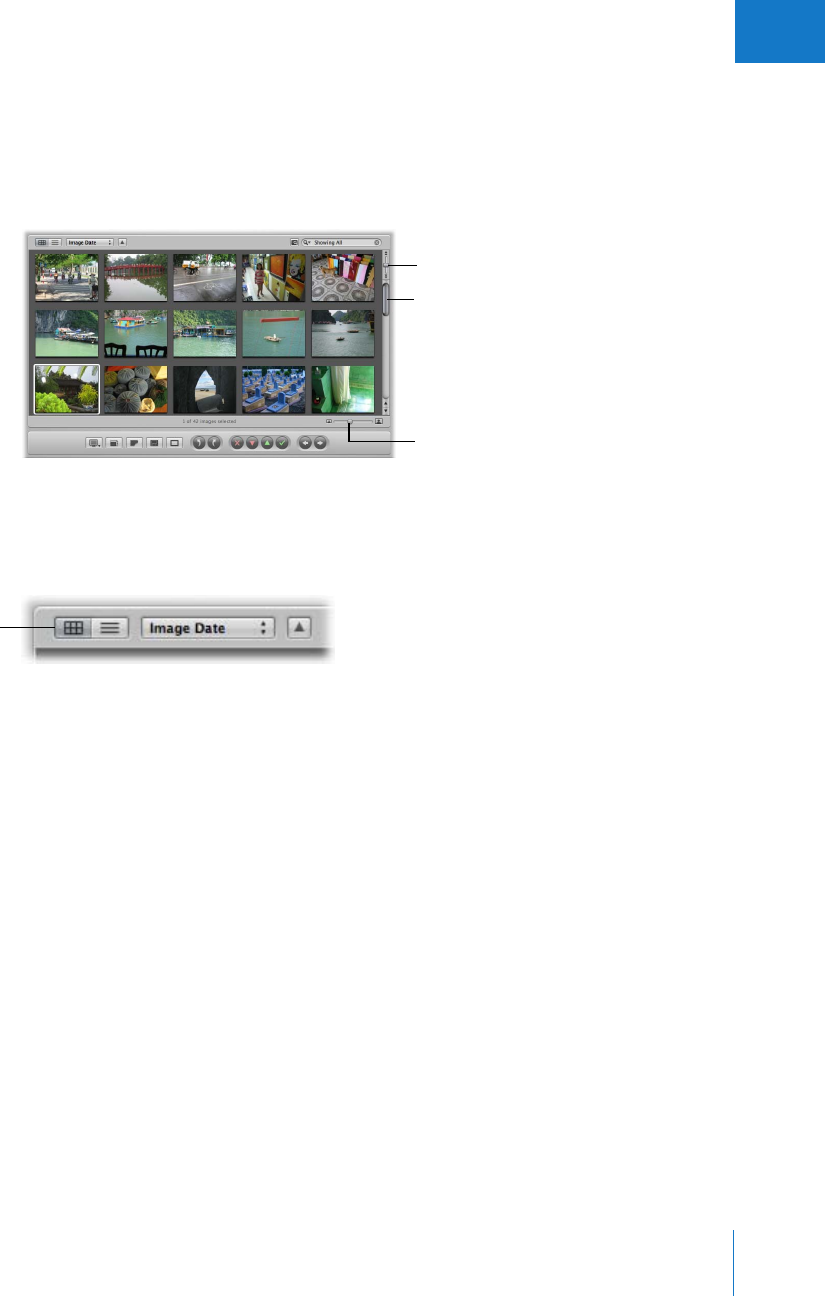
Chapter 5 Working with Images in the Browser 125
II
Working with Images in Grid View
Grid view displays a grid of thumbnails as a top-level view of your project. Grid view is
the Browser’s default view. If your project has many images, you may want to adjust the
size of the thumbnails to a size convenient for selecting and working with them. You
can also use the Shuttle control or scroll bar to scroll through the images.
To switch to grid view, do one of the following:
mChoose View > Grid (or press Control-G).
mClick the Grid View button in the Browser.
To adjust thumbnail size:
mDrag the Thumbnail Resize slider to increase or decrease the size of the thumbnails.
To shuttle continuously through the images in a project, do one of the following:
mDrag the Shuttle control.
mPress J to shuttle left, press K to stop shuttling, or press L to shuttle right.
Note: Pressing J or L multiple times increases the shuttle speed.
Depending on your work preferences, you may want to lighten or darken the
background that your thumbnails appear against in the Browser. The darker the
background, the less it interferes with the colors in your image. It’s a good idea to set
the background to a dark color when performing color adjustments to your images.
You can darken the background from shades of gray all the way to black, or lighten it
from gray to white.
To lighten or darken the background of the Browser:
1Choose Aperture > Preferences, or press Command-comma (,).
2In the Preferences window, drag the Grid View Background Brightness slider to lighten
or darken the background, then close the window.
Shuttle control
Thumbnail Resize slider
Scroll bar
Grid View button
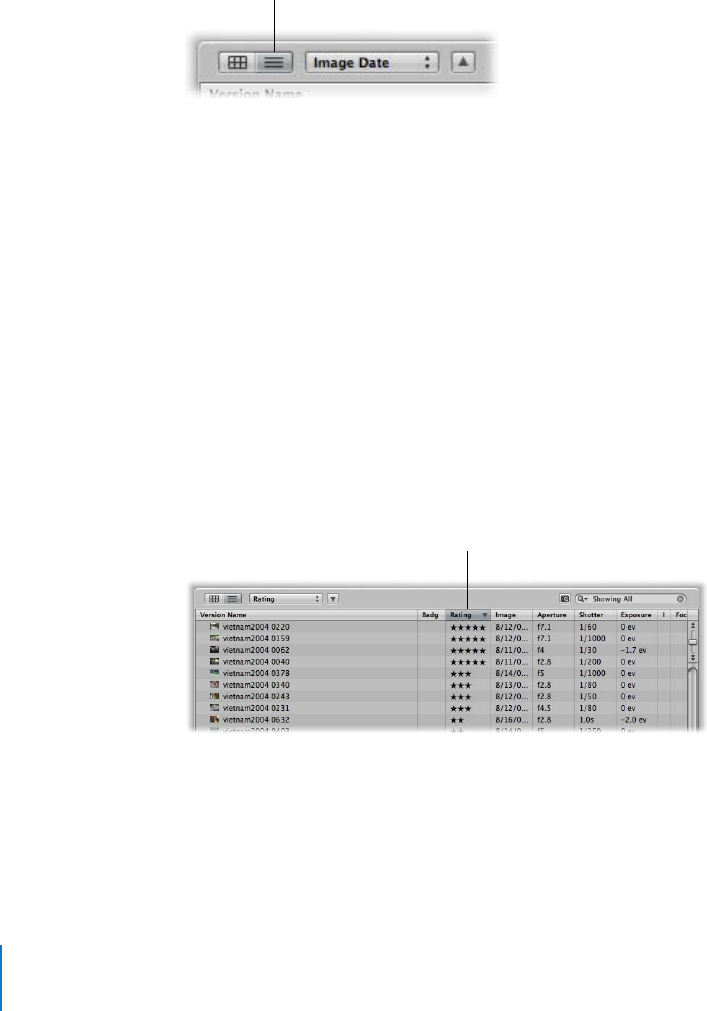
126 Part II Photo Editing
Working with Images in List View
Instead of thumbnails, list view displays images by name and icon with accompanying
information such as rating, image dimensions, file size, and date.
To switch to list view, do one of the following:
mChoose View > List (or press Control-L).
mClick the List View button in the Browser.
To choose what type of information is displayed in list view:
1Choose View > View Options (or press Command-J).
The View Options window appears.
2In the List View Columns section, choose a display option from the Set 1 pop-up menu.
Columns in the Browser immediately change to display the information you selected.
3Click Done.
One of the main advantages of list view is that you can quickly sort images based on a
category of information. When you click a column heading in list view, Aperture
reorders the images, sorting them by that category. For example, you might sort your
images by date.
To sort images in list view by a category:
mClick the category column heading in the Browser.
When you work in list view, it may sometimes be difficult to determine the content of
an image based on the file information. You can enlarge the thumbnail icons that
appear in list view to give you a better look at the images.
List View button
Images in list view
sorted by rating
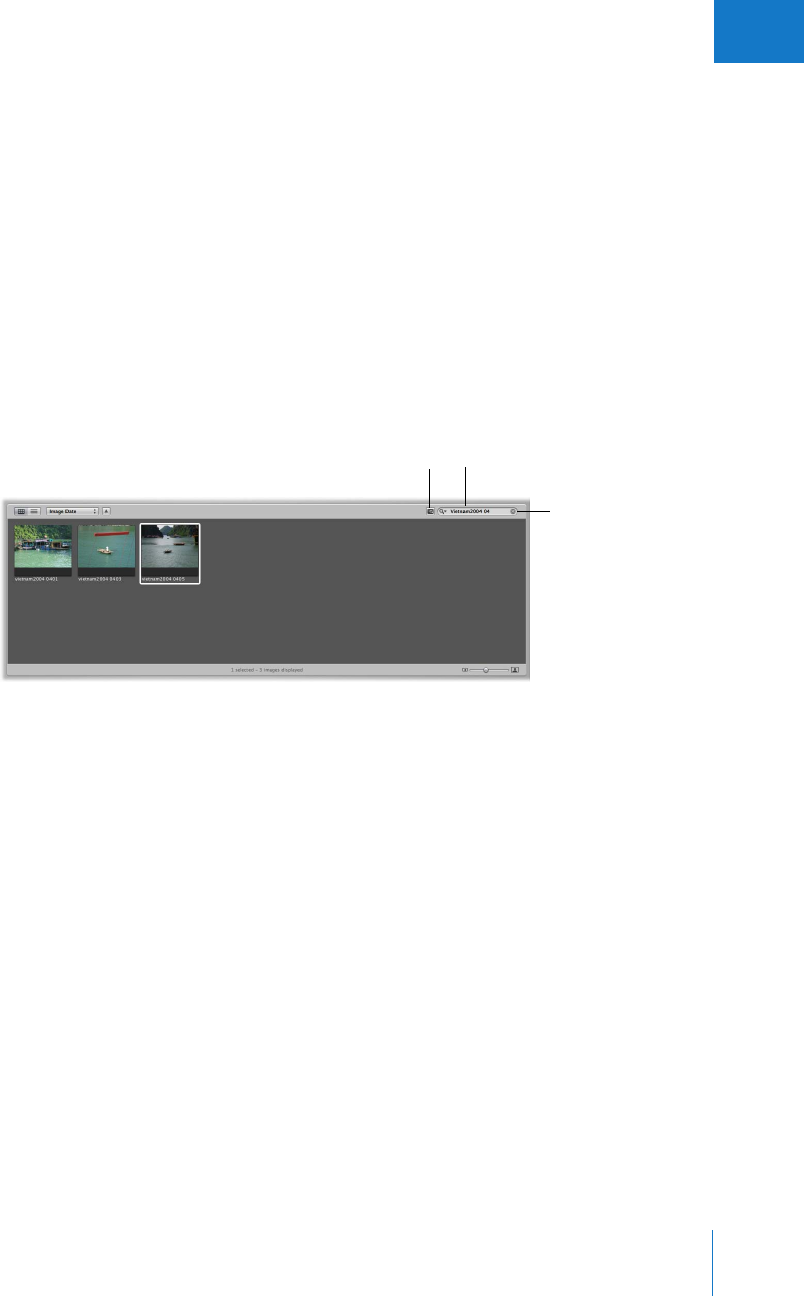
Chapter 5 Working with Images in the Browser 127
II
To enlarge the thumbnail icons in list view:
mDrag the Thumbnail Resize slider to increase or decrease the size of the icons.
You can also easily rename files after importing. When you rename a file, you are
renaming the image version, not the digital master file. The filename of the original
master file does not change.
To rename an image version in list view:
mSelect an image, double-click the image name, then enter a new name.
Searching for Images in the Browser
When you have many images in a project, more than the Browser can display at once,
you can use the search field to locate images. Enter the search criteria in the search
field and Aperture finds the image or images for you.
You can search for images in a project and show just the search results in the Browser.
For example, if you have several hundred images of a wedding, but want to view only
those that have the keyword Bride, you can use the Query HUD to display only the
images of the bride, hiding the remainder from view.
For more information about using the Query HUD to find images, see Chapter 12,
“Searching for and Displaying Images,” on page 247.
To search for an image in the Browser:
mEnter text associated with that image in the Browser’s search field.
To see all your images again:
mClick the search field’s Reset button or delete the text in the search field.
Important: You can use keyboard shortcuts to quickly implement a search that displays
images with specific ratings or images that have a specific keyword. It’s possible while
working with images to accidentally press such a keyboard shortcut and see the
number of images on your screen unexpectedly change or even disappear. If this
happens, you can quickly display your images by clicking the Reset button (with an X)
in the search field to reset the search criteria in the Query HUD.
Reset button
Search fieldQuery HUD button

128 Part II Photo Editing
When viewing the contents of albums (including Smart Albums) in the Browser, you
may not be able to see images with a rating of Reject. This is because the Browser
Query HUD is set to show unrated images or better. To view rejected images, you must
set the Browser Query HUD to show all images.
To set the Browser Query HUD to show all images:
1In the Projects panel, select an album.
2In the Browser, click the Query HUD button (with a magnifying glass icon).
3In the Query HUD, deselect the Rating checkbox.
All images, including rejects, appear in the Browser, and Showing All appears in the
Browser’s search field.
To set the Browser Query HUD to show rejected images only:
1In the Query HUD, make sure the Rating checkbox is selected.
2Choose “is” from the Rating pop-up menu, and set the Rating slider to X (Reject).
Only images with the Reject rating appear in the Browser, and X appears in the
Browser’s search field.
Rearranging Images in the Browser
As you work with images in the Browser, you can move and rearrange images into any
order or grouping you want. For example, you might want to keep all related images of
a wedding event, such as the cake cutting, in close proximity to allow you to easily
adjust them.
You can drag images to new locations in the Browser. You can drag single images or
selections of multiple images. When you drag images to new locations, you create a
custom arrangement of your images; the Sorting pop-up menu changes to show the
Custom option. Aperture records the order of your images, and any time you choose
Custom from the Sorting pop-up menu, your images reappear in that order.
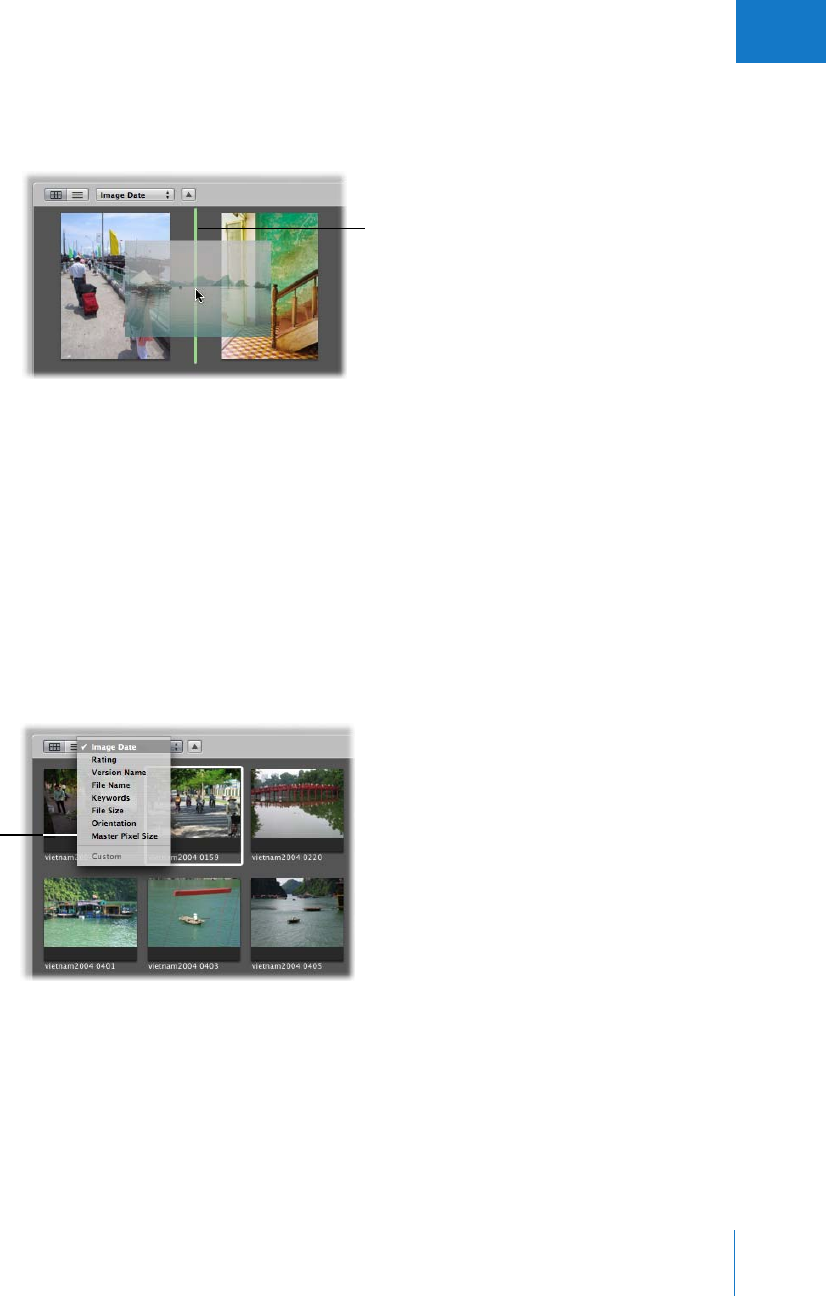
Chapter 5 Working with Images in the Browser 129
II
To rearrange images in the Browser:
mDrag the images you want to a new location; when the green bar appears, release the
mouse button.
To restore a custom arrangement of your images in the Browser:
mChoose Custom from the Sorting pop-up menu.
Aperture remembers the last time you moved images and restores that arrangement.
Sorting Images in Grid View
You can change the order of images in the Browser based on image properties such
as filename, file size, date, rating, and more. For example, when displaying images by
filename, Aperture places the images in alphabetical order according to filename.
You might also order the images by date or time. You choose the grid view sort
property from the Sorting pop-up menu.
To change the displayed order of images in the Browser:
mChoose a sort property from the Sorting pop-up menu.
As you drag an image to
a new location, a green
bar marks where the
image will be placed.
Choose the sort property
you want here.
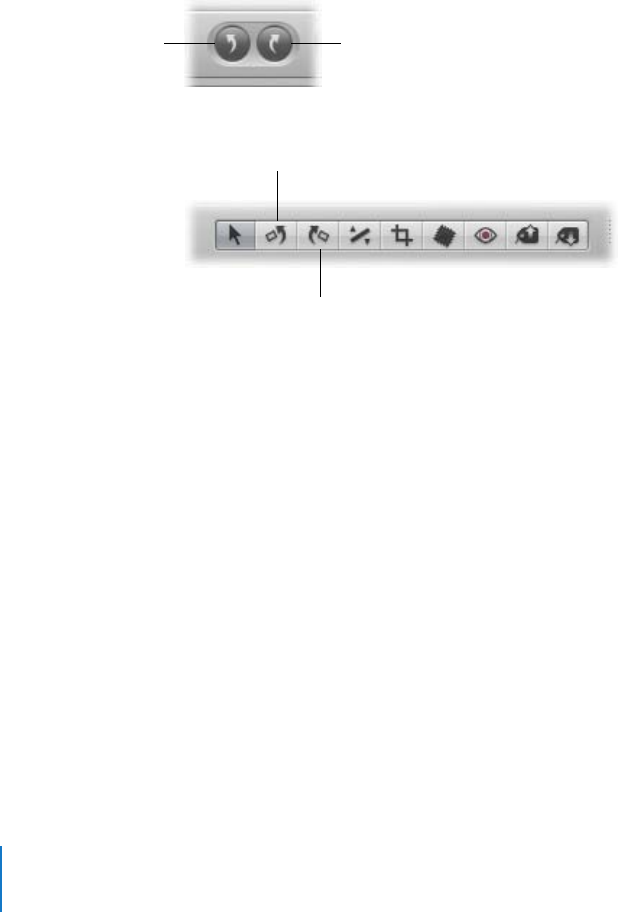
130 Part II Photo Editing
Rotating Images
When images are imported into a project, some may appear in an incorrect orientation,
requiring you to rotate them right side up. The control bar provides rotate buttons for
rotating selected images, and the toolbar contains rotate tools. You can rotate images
individually or select a group and rotate them all at once. You can also conveniently
select images and quickly rotate them using keyboard shortcuts.
To rotate images counterclockwise, do one of the following:
mSelect an image or group of images, then choose Images > Rotate Counterclockwise, or
press the left bracket ([) key.
mSelect an image or group of images, then click the Rotate Left button in the control bar.
mSelect the Rotate Left tool in the toolbar, then click an image.
To rotate images clockwise, do one of the following:
mSelect an image or group of images, then choose Images > Rotate Clockwise, or press
the right bracket (]) key.
mSelect an image or group of images, then click the Rotate Right button in the control bar.
mSelect the Rotate Right tool in the toolbar, then click an image.
Creating Versions of an Image
Occasionally, you may want to make copies of an image. For example, you might copy
an image and apply different exposure settings or other adjustments, or change it for a
specific use, such as for placement in a webpage or book. When you copy an image,
Aperture makes a new version of the image.
When you create a new image version, you have a choice of copying the original digital
master file or the currently selected version with any changes you’ve made. For example,
if you’ve made a series of adjustments to an image and now you want to start from the
original digital master file and make different adjustments, you can copy the digital
master file and start with a fresh, unchanged image.
Rotate Left button Rotate Right button
Rotate Left tool
Rotate Right tool

Chapter 5 Working with Images in the Browser 131
II
To create a new version from a digital master file:
1Select the image you want to copy.
2Do one of the following:
ÂChoose Images > New Version From Master (or press Option-G).
ÂClick the New Version From Master button in the toolbar.
ÂTo copy the master JPEG image, choose Images > New Version From Master JPEG
(or press Option-J).
Note: This command is dimmed unless a JPEG image is selected.
ÂTo duplicate the master file and automatically select the duplicate, choose Images >
Create and Add to Selection > New Version From Master (or press Shift-Option-G).
If you’re creating a number of image versions showing incremental changes to an
image, you can copy the last version you made and make more changes. For example,
if you plan to use the same cropping and exposure adjustments in multiple versions, it
makes sense to perform those adjustments first and then make copies of the image
version before proceeding.
To copy the selected image version:
1Select the image you want to copy.
2Do one of the following:
ÂChoose Images > Duplicate Version (or press Option-V).
ÂClick the Duplicate Version button in the toolbar.
ÂTo duplicate the version and automatically select the duplicate, choose Images >
Create and Add to Selection > Duplicate Version (or press Shift-Option-V).
If you create multiple versions of an image, Aperture groups the versions in a stack. The
stack represents all the versions of a particular image that you have created. You can
open the stack and see the different versions you’ve created for an image. For example,
you might open a stack of versions and select a specific image version to copy. The
entire stack appears in all the different projects or albums in which the image appears.
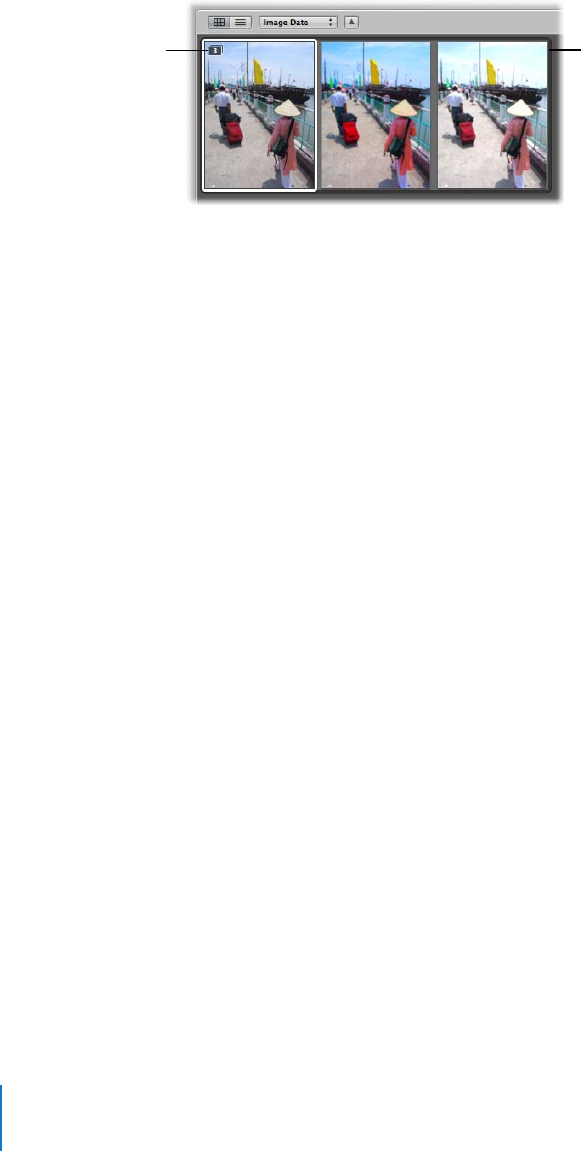
132 Part II Photo Editing
To open a stack to see all the versions:
mClick the Stack button on the stack.
When a stack is open, you can select any of its image versions to display that version in
the Viewer. For more information about working with stacks, see Chapter 8, “Stacking
Images and Making Picks,” on page 175.
Deleting Images from the Browser
When necessary, you can delete versions and even digital master files.
When deleting images, you can:
ÂRemove a version from an album, leaving any other versions of the image in their
original locations
ÂDelete versions from within a stack
ÂDelete digital master files
To remove a version from an album:
mSelect the version and choose Image > Remove From Album (or press Delete).
You may also want to delete a version from a stack.
To delete a version from a stack:
1Open the stack and select the version you want to delete.
2Choose File > Delete Version (or press Command-Delete).
If you delete the last version in a stack, Aperture asks whether you want to delete the
digital master file. If you confirm that you want to delete the master file, the master file
is moved to the Trash.
When an image is represented in the Browser by a single version, you can select the
version and delete it, and the corresponding digital master file is deleted as well.
A light gray border
surrounds the images
in a stack.
Click the Stack button
on an image to show
all versions in the stack.

Chapter 5 Working with Images in the Browser 133
II
To delete a master file:
1Select a version in an album or project.
2Choose File > Delete Version (or press Command-Delete).
3When a dialog appears asking you to confirm that you want to delete the digital
master file and versions, click Move to Trash.
You can select a stack containing versions of an image and delete all the images in the
stack as well as the digital master file.
To delete a stack and its digital master file:
1Select the stack you want to delete.
2Choose File > Delete Master Image and All Versions.
3When a dialog appears asking you to confirm that you want to delete the digital
master file and versions, click Move to Trash.
Warning: When you delete a master file, the master file and all version information is
permanently removed from the Aperture Library. This includes all applied
adjustments and metadata. You cannot use the Undo command to restore the master
file or associated versions. Deleting a master file also clears the Undo queue, so you
cannot undo the series of actions before the master file deletion. Deleted files are
placed in the Trash in an Aperture folder. The deleted files are recoverable from the
Trash until you empty it.
Recovering Deleted Files
If you accidentally delete an image you meant to keep, and you can’t recover it by
choosing Undo, you may be able to recover it from the Trash. If you originally backed
up your deleted digital master files, the vault may also still hold them. If necessary,
you can restore the Library from the vault. If you updated your vault after the
deletion, the deleted digital master files are placed in a folder given your vault’s name
and the words “Deleted Images.” You can find the Deleted Images folder in the folder
that holds your vault. The Deleted Images folder holds the deleted digital master files
only; it does not hold any information about versions or changes to your files. You can
open this folder and import the original digital master files. To remove the deleted
images from your hard disk, move the files to the Trash. To make the space these
files occupied on both your internal and external hard disks available, you have to
empty the Trash (choose Finder > Empty Trash).

134 Part II Photo Editing
Dragging Images into Different Projects and Albums
You can drag images into different projects and albums. Depending on where you drag
an image, Aperture either moves or copies the image to the new location.
As a general rule, when you drag an image into a different project, Aperture moves the
version and the corresponding digital master file into the new project.
When you drag an image into a different album, Aperture copies the version into the
album, leaving the master file in the original location. An image can be copied into any
album in the same project or into albums in different projects. The destination album can
be an album, book album, Light Table album, web gallery album, or web journal album.
You can also change the result of dragging by holding down the Option key as you drag.
To copy an image into a different album:
mDrag the image into another album in the Projects panel.
To move an image into a different album:
mOption-drag the image into another album in the Projects panel.
To move an image into a different project:
mDrag the image into another project in the Projects panel.
To copy an image into a different project:
mOption-drag the image into another project in the Projects panel.
You can also drag images out of Smart Albums. If you drag an image from a Smart
Album into another album, the version is copied to the new location. If you drag an
image into a project different from the project that contains the digital master file,
Aperture moves the master file to the destination project. All links to versions in other
albums are maintained. For more information about using Smart Albums, see
Chapter 13, “Grouping Images with Smart Albums,” on page 267.
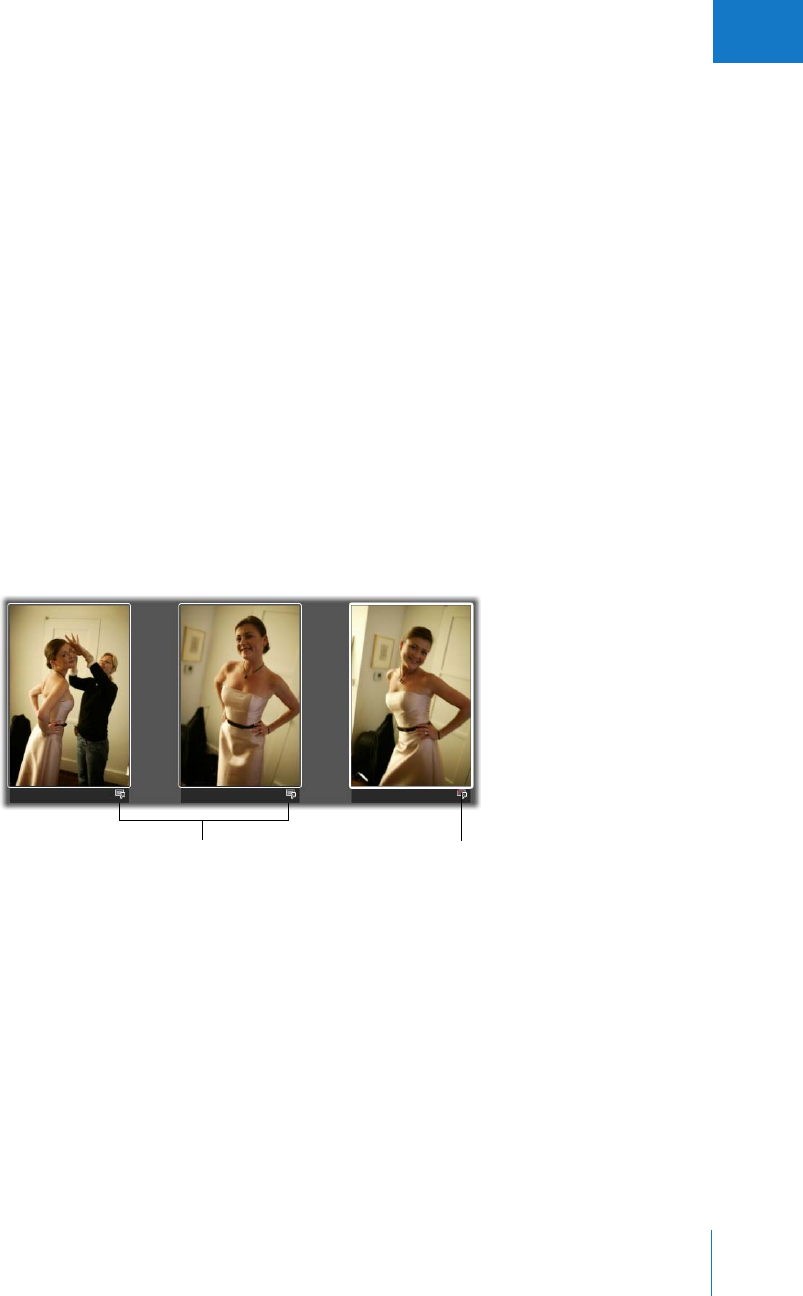
Chapter 5 Working with Images in the Browser 135
II
Working with Referenced Images
Master files for images that you import as referenced images may reside in many different
locations on your hard disk storage devices instead of in the single location of your main
Aperture Library file. At times you may need to determine which images are referenced
images in order to readily locate them in the Finder. With Aperture, you can easily:
ÂDisplay badge overlays that identify referenced images
ÂDisplay a list of referenced images
ÂLocate a referenced image’s master file on your hard disk
ÂReconnect missing or offline referenced images
ÂRelocate referenced images’ master files
ÂCopy, move, and delete master files for referenced images
ÂMove referenced images’ master files to the Aperture Library
ÂUse the Query HUD to search for referenced images
Identifying Referenced Images
After you import referenced images, you can identify them in the Browser by turning
on referenced image badge overlays. Referenced images appear with badges that
show whether their master files are currently available (online) or not found (offline).
These badge overlays
indicate the images are
referenced images.
This badge overlay
indicates the image is an
offline referenced image.
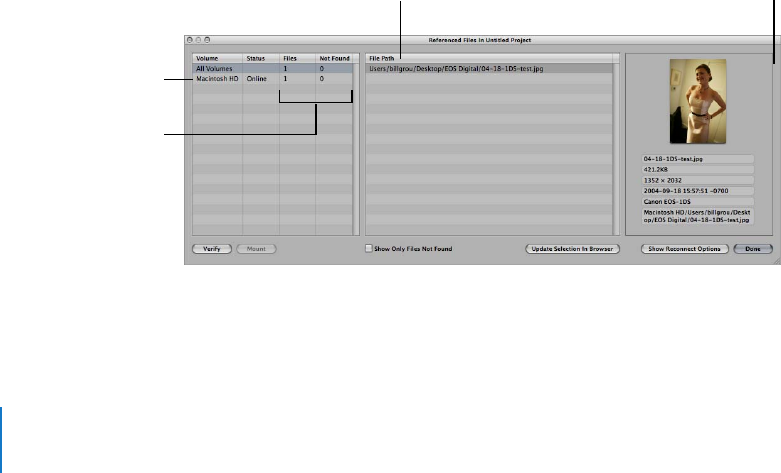
136 Part II Photo Editing
To turn on referenced image badge overlays:
1Choose Aperture > Preferences.
2Select the “Badge referenced images” checkbox.
You can select and work with online referenced images using the same procedures you
use with images whose master files reside in the Aperture Library.
Aperture keeps track of referenced images’ master files when you simply move or
rename the files in the Finder, keeping them on the same hard disk or volume.
A referenced image appears as an offline image if the hard disk holding the referenced
image’s master file has been disconnected from your computer system. A referenced
image is listed as “not found” when its master file has been deleted, moved to the
Trash, or moved from its original hard disk location to another hard disk drive and
Aperture can’t find it.
Displaying a List of Referenced Images
When working with numerous images in the Browser, you may need to determine
which images have master files that reside in the Aperture Library and which are
referenced images whose master files are located elsewhere on your hard disks.
You can select a group of images in the Browser and then have Aperture show a list of
the referenced images within the selection and where the master files are located.
To see a list of referenced images in a selection:
1In the Browser, select the group of images you want.
2Choose File > Manage Referenced Files.
The Referenced Files dialog appears.
Shows the names of hard
disks where referenced
master files are located.
Identifies how many
master files for referenced
images are on the hard
disk, and how many are
not found.
Displays the specific image
and metadata to help you
identify the image.
Identifies the hard disk
location of the referenced
master files.

Chapter 5 Working with Images in the Browser 137
II
Locating a Referenced Image on a Hard Disk
At times you may need to quickly find a referenced image’s master file on your hard
disk to copy or move it, attach it to an email, or otherwise work with it outside of
Aperture. You can select an image in the Browser and have Aperture display the
image’s master file location in the Finder.
To locate a referenced image’s master file in the Finder:
1Select the referenced image you want in the Browser.
2Choose File > Show in Finder.
A Finder window appears, displaying the selected referenced image’s master file.
Note: If you open a referenced image’s master file from the Finder in another
application, you will not see the changes or adjustments you’ve made to the image in
Aperture. Your changes appear in versions stored in the Aperture Library, and the
referenced image’s master file is always left unchanged. To see the adjusted photo, you
need to export a version of it.
Reconnecting Missing or Offline Referenced Images
When a referenced image’s master file is offline, you can’t make adjustments to the
image until you reconnect the master file to your Aperture system. If you have
disconnected a hard disk drive that holds a referenced image’s master file, you can
reconnect the drive to your computer system and Aperture will automatically locate
the hard disk and reconnect the master file.
If an image is offline or modified in some way that makes it unrecognizable as the
original referenced image, you can still select it and have Aperture reconnect the
master file for the specific image.
To reconnect an offline referenced image:
1Reconnect the hard disk holding the referenced image’s master file, or otherwise locate
or make the file available to Aperture for reconnecting.
2Select a project that contains the offline image you want to reconnect, or select the
offline image in the Browser.
3Choose File > Manage Referenced Files.
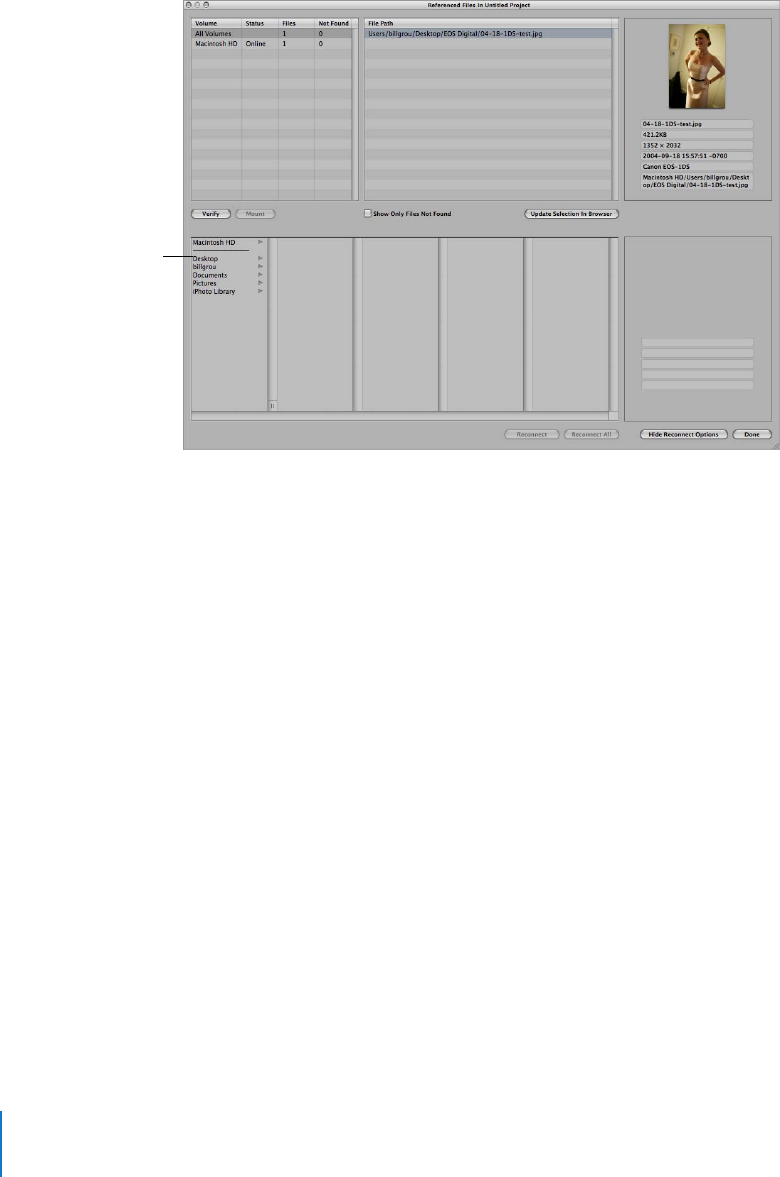
138 Part II Photo Editing
4Click the Show Reconnect Options button.
5At the top of the window, select the file path for the master file that you want to reconnect.
A thumbnail of the image and some identifying metadata appear.
6In the bottom half of the window, navigate to the referenced image’s master file
location on the hard disk and select the master file.
You can follow the file path listed for a selected image in the top of the window.
When you select the file, a thumbnail of the image and metadata appear, allowing you
to compare it to the thumbnail and metadata in the upper window to make sure
you’ve selected the correct file.
7Click Reconnect to reconnect a specific image or click Reconnect All to reconnect all
the selected images.
Select the volume you
want here, and navigate
to the location of the file
on the hard disk.

Chapter 5 Working with Images in the Browser 139
II
Relocating Referenced Images’ Master Files
You can easily move master files for referenced images to new locations on the same
hard disk or a different hard disk. For example, if you use several hard disks, you might
want to move their master files to a convenient location on a different hard disk.
To move master files for referenced images to a new location:
1In the Browser, select the referenced images whose master files you want to move.
2Choose File > Relocate Masters.
3Choose the folder location you want in the Relocate Masters dialog.
4Choose “No folder” from the Subfolders pop-up menu to specify that the files be stored
as separate individual files in the selected folder. You can also specify that Aperture
create a hierarchy of subfolders with specific folder names to store your files. For more
information about specifying folders to hold your imported image files, see “Importing
Master Files for Referenced Images into Folders” on page 103. Choose whether you
want the image files moved or copied to the new location by clicking the “Move files”
or “Copy files” button.
5Choose a naming convention from the Name Format pop-up menu to specify how you
want the master files named.
For example, choose Master Filename from the Version Name pop-up menu to have
your files stored using the current master filenames from your camera or card. Choose a
name format from the Version Name pop-up menu to have your master files stored
using a specified name. If you choose a custom name format, enter the name you want
in the Name Text field. For more information about naming files, see “Automatically
Naming Your Imported Images” on page 105.
6Click Relocate Masters.
Moving Referenced Images’ Master Files to the Aperture Library
You can move referenced images’ master files to the Aperture Library. For example, if
you have a variety of master files stored in different hard disk locations and it would be
convenient to work with them all stored in the Aperture Library, you can select the
referenced images in the Browser and have Aperture move their master files to the
Library. With the referenced images’ master files stored in the Library, Aperture
manages all aspects of them, always keeps them available, and allows you to back
them up in your vaults.
To move referenced images’ master files to the Aperture Library:
1In the Browser, select the referenced images whose master files you want to move to
the Library.
2Choose File > Consolidate Masters.
3Click Continue to confirm that you want the referenced images consolidated.
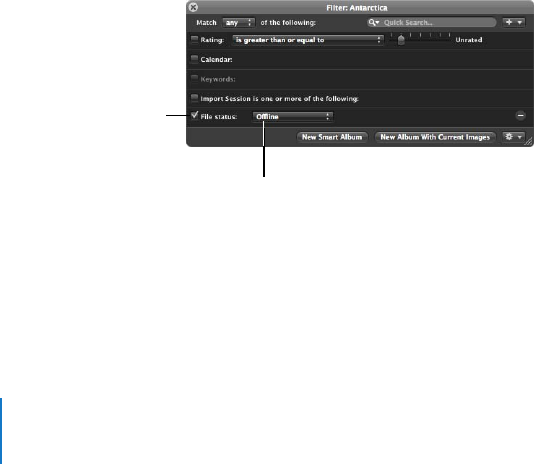
140 Part II Photo Editing
Copying, Moving, and Deleting Referenced Images
You can copy, move, and delete referenced images in your Aperture projects using the
same procedures you use for other Aperture versions and digital master files.
When you copy a version of a referenced image in Aperture, a new version is created
and tracked in the Aperture Library. No new files are recorded on the hard disk in the
location of the referenced image’s master file.
When you move a referenced image between the projects on your Aperture system,
the referenced image’s master file remains in its original location on your hard disk.
When you delete a referenced image’s master file from Aperture, you can specify
whether the image’s master file is placed in the Trash.
Using the Query HUD to Search for Referenced Images’ Master Files
You can also search for images using their file status. For example, you can search for
images that are referenced images, managed images, and online or offline images.
To search for images by file status, you use the File Status search options.
To search for images by file status:
1In the Projects panel, select a project or an album you want to search.
2Show the Query HUD by doing one of the following:
ÂChoose Edit > Find (or press Command-F).
ÂClick the Query HUD button beside the search field in the Browser.
3In the Query HUD, choose File Status from the Add Filter pop-up menu, and select the
File Status checkbox.
4Deselect any checkboxes that aren’t part of your query, and choose the search criteria
from the File Status pop-up menu.
5Choose “any” from the Match pop-up menu, if it’s not already chosen.
The images that match the search criteria are displayed in the Browser.
Select the “File status”
checkbox.
Choose the file status you
want to search for.
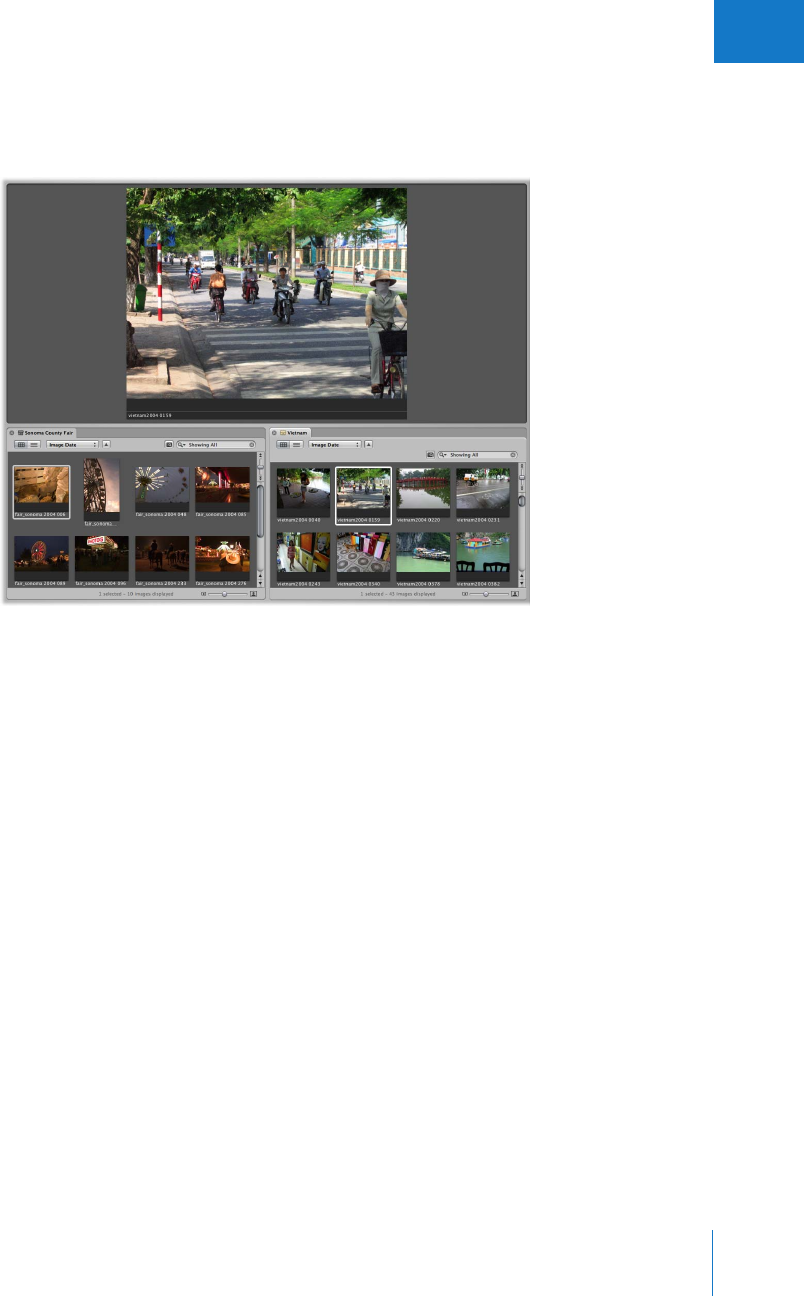
Chapter 5 Working with Images in the Browser 141
II
Working with Two Projects Open
You can work with two projects open at once, splitting the Browser into a separate
pane for each project.
When you Option-click a second project in the Projects panel, Aperture splits the
Browser into two panes and shows thumbnails for both projects. You can select images
in either pane and see the selections in the Viewer. You may find that working with
multiple projects open allows you to easily copy or transfer the contents of one project
to another.
To open an additional project in a split Browser:
mOption-click the project you want to open.
To close a project opened in a split Browser, do one of the following:
mChoose File > Close Tab (or press Command-W).
mClick the close button in the project’s tab.
You can also open more than two projects without splitting the Browser. When you
Command-click projects in the Projects panel, you see tabs for each project appear
across the top of the Browser. You can click a tab to see the image thumbnails for that
particular project.
To open an additional project as a tab in the Browser:
mCommand-click the project you want to open.
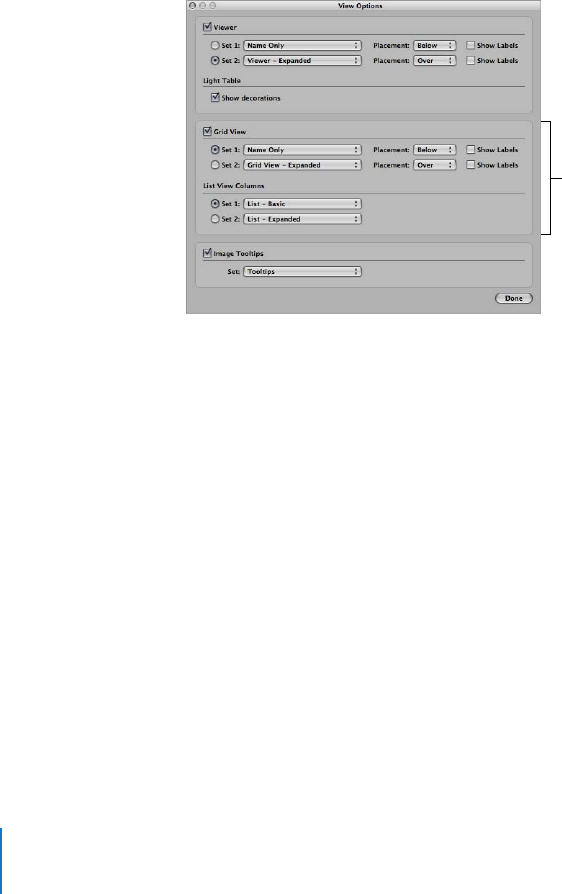
142 Part II Photo Editing
Displaying Specific Metadata with Your Images
To help identify your images as you work, you can set Aperture to display the metadata
associated with images by changing grid or list view options. For example, you can set
Aperture to display keywords, IPTC information, or EXIF information with images in grid
view. You can also configure two views of information to be displayed with images and
quickly switch between views. For example, the first view might show ratings for use
while photo editing. You might also create another view to display IPTC and EXIF
information as you manage files for export. You can then switch between views to
change the information that appears with your images depending on the task at hand.
You use the View Options window to customize the display of information shown with
images in the Browser.
In the Grid View section, you select the Set buttons and choose the information you
want displayed. You can also choose where the information should appear from the
Placement pop-up menus.
The Browser’s metadata
display settings appear
here.

Chapter 5 Working with Images in the Browser 143
II
To set the display of metadata shown with images in the Browser:
1Choose View > View Options (or press Command-J).
2Select the Grid View checkbox.
3Choose the metadata views you want to use from the Set 1 and Set 2 pop-up menus.
4Choose the location where you want the metadata displayed from the Placement
pop-up menus.
5Click the Set 1 or Set 2 button to select the metadata view you want displayed.
6Click Done.
To turn the display of metadata on or off in the Browser:
mPress U.
To switch between sets of Browser metadata information:
mPress Shift-U.
For more information about displaying metadata with your images, see Chapter 11,
“Working with Metadata,” on page 225.

6
145
6Displaying Images in the Viewer
The Viewer displays a detailed view of the image or images
selected in the Browser. You can view an image in incredible
detail or view several images at a time.
This chapter provides instructions for displaying images in the Viewer so you can make
adjustments, closely compare similar images, and inspect images at full resolution. If
you use a dual-display system, you can set the Viewer to show your images on both
screens to provide stunning, full-detail views.
This chapter covers:
ÂAn Overview of the Viewer (p. 146)
ÂShowing or Hiding the Viewer (p. 148)
ÂChanging the Viewer Background (p. 148)
ÂChanging the Number of Images in the Viewer (p. 149)
ÂComparing Images (p. 150)
ÂViewing Stacks (p. 151)
ÂViewing Images with the Loupe (p. 151)
ÂUsing the Color Meter (p. 152)
ÂShowing Hot Areas in Your Images (p. 154)
ÂViewing Images at Full Resolution (p. 155)
ÂViewing Master Images (p. 156)
ÂSetting Up the Viewer for Onscreen Proofing (p. 156)
ÂViewing Images on Multiple Displays (p. 157)
ÂDisplaying Metadata Associated with Images (p. 158)
ÂSelecting Image Preview Options (p. 160)
ÂQuickly Accessing Commands (p. 162)
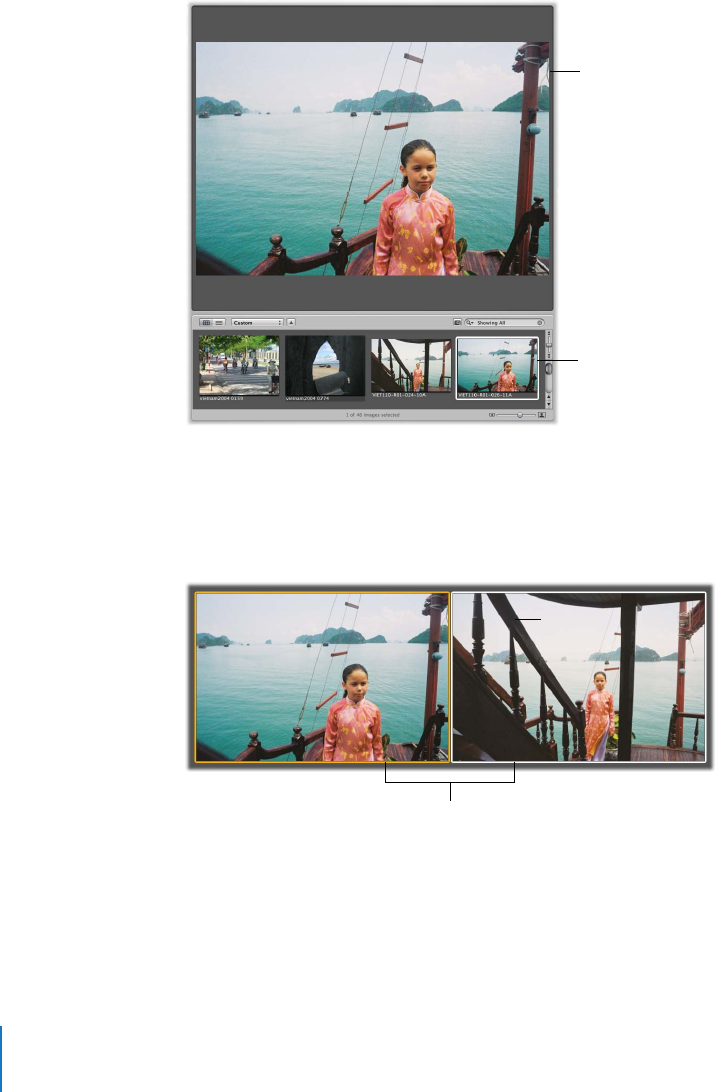
146 Part II Photo Editing
An Overview of the Viewer
When you select images in the Browser, the Viewer immediately displays a detailed
view of your selection. You can display one image at a time, three images at a time, or
multiple images.
When rating or adjusting images, you can set the Viewer to compare two images at once.
You can select an image to compare against and then display other similar or related
images next to it for inspection. You might use the Aperture comparison feature to select
images from a series or compare versions of adjusted images to see which is the best.
A detailed view of the
selected image appears
in the Viewer.
The selected image in
the Browser
You can use the Viewer
to compare two images.
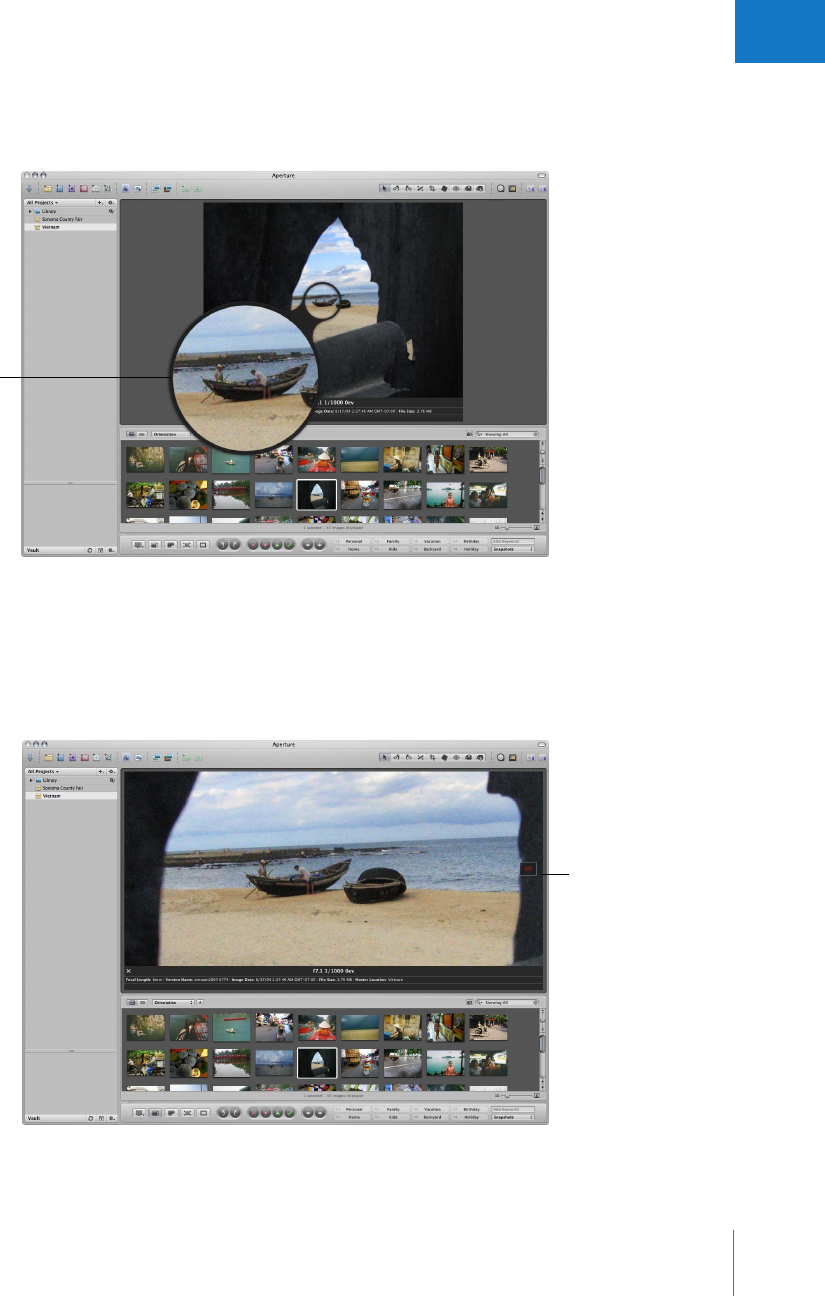
Chapter 6 Displaying Images in the Viewer 147
II
You can use a software loupe to magnify part of an image, perhaps to see the effect of
removing blemishes or sharpening an image. You can position the Loupe over different
portions of an image and see the magnified view.
Depending on the size of your display and Viewer, images may be displayed at a
reduced size to fit your Viewer. You can have Aperture display your images at full
resolution, pixel for pixel, which can create images larger than can fit on your display’s
screen. Displaying an image at full resolution allows you to examine the image exactly
as it was recorded and see the precise effects of your adjustments and changes.
The Loupe shows a
magnified view of
whatever is beneath it.
Full-resolution view of an
image that is larger than
the Viewer’s screen size

148 Part II Photo Editing
Using two displays with your Aperture system is an excellent means of viewing your
images. Aperture can show your images on both displays, allowing you to dedicate one
display to enlarged views. When your system uses two or more displays, Aperture
provides two Viewers, called the primary Viewer and secondary Viewer. Just as you can
with a single Viewer, you can set the Viewer on your second display to show images
singly, three at a time, or up to ten at a time.
You can also set view options that determine the amount of information that appears
with each image. For example, you can display images in the Viewer with their
keywords and other information, such as IPTC or EXIF metadata.
Showing or Hiding the Viewer
You can quickly hide the Viewer to provide more room for the Browser, and show it
when needed.
To show or hide the Viewer:
mChoose Window > Show/Hide Viewer (or press V).
Changing the Viewer Background
Depending on your work preferences, you may want to lighten or darken the
background that your images appear against in the Viewer. You can darken the
background from shades of gray all the way to black, or lighten it from gray to white.
To change the background of the Viewer:
1Choose Aperture > Preferences, or press Command-comma (,).
2Drag the Viewer Background Brightness slider to lighten or darken the background.
3Close the Preferences window.
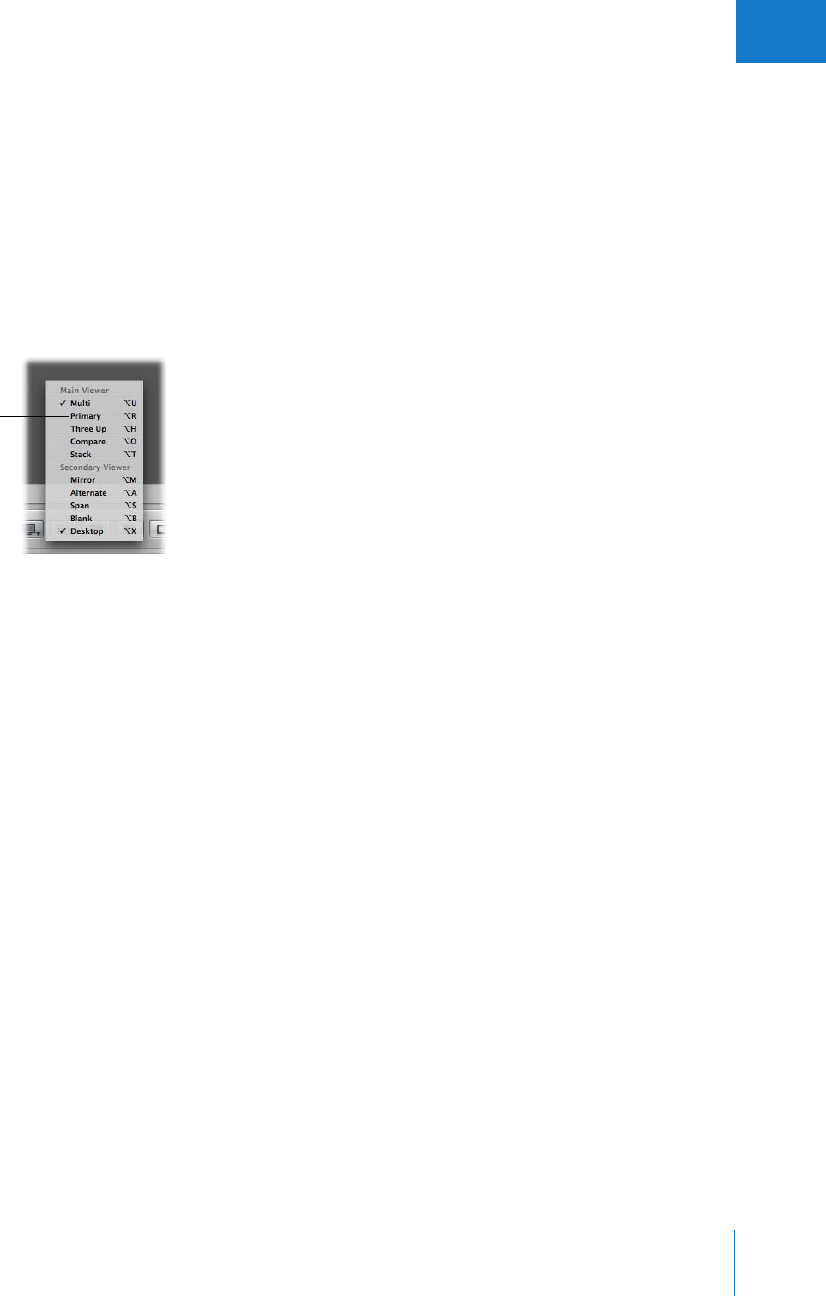
Chapter 6 Displaying Images in the Viewer 149
II
Changing the Number of Images in the Viewer
You can specify whether the Viewer displays one image, three images, or multiple
images at a time. If your system uses multiple displays, you can configure your primary
and secondary displays to show single images, three images, or multiple images
simultaneously. The display settings you choose also set the display of images in
Full Screen mode.
To display a single image, do one of the following:
mChoose View > Main Viewer > Primary (or press Option-R).
mChoose Primary from the Viewer Mode pop-up menu in the control bar.
When the Viewer is set to show three images at a time, Aperture displays the selected
image in the center of the three images that appear in the Viewer.
To display three images, do one of the following:
mChoose View > Main Viewer > Three Up (or press Option-H).
mChoose Three Up from the Viewer Mode pop-up menu in the control bar.
When the Viewer is set to show multiple images, Aperture displays all selected images.
To display multiple images, do one of the following:
mChoose View > Main Viewer > Multi (or press Option-U).
mChoose Multi from the Viewer Mode pop-up menu in the control bar.
Choose Primary from
the Viewer Mode pop-up
menu to view a single
image on the screen.
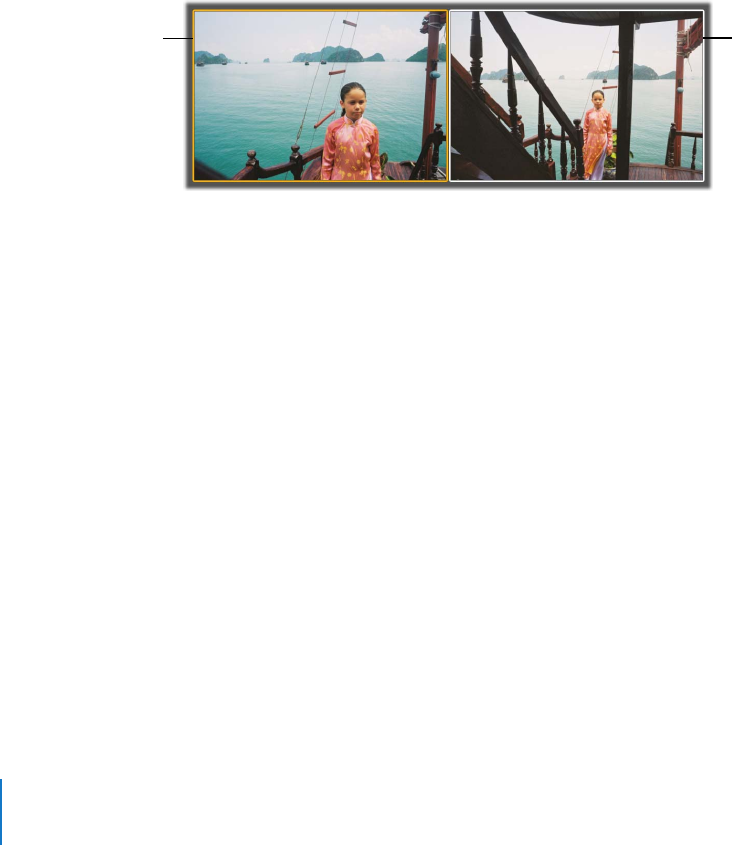
150 Part II Photo Editing
Comparing Images
You can select an image against which to compare other images in your project or the
Library. The selected image remains on the screen as you select and display other images
to compare against it. The comparison feature is useful for making final selections of the
best images in a series, or comparing two versions of an image for correct exposure or
highlights. When comparing images, you can apply ratings and keywords, and make
adjustments to selected images.
Comparing images involves setting a “compare” image and then viewing other images
against the compare image.
To set the compare image:
1Select an image.
2Choose Edit > Set Compare Item (or press Return).
To view an image against a compare image, do one of the following:
mSelect a second image.
mNavigate through the images in the Browser with the Up, Down, Left, and Right Arrow keys.
If you wish, you can view multiple images against the compare image.
To view multiple images against a compare image, do one of the following:
mCommand-click multiple images in the Browser.
mHold down the Shift key while pressing the Up, Down, Left, or Right Arrow key.
When you’ve finished comparing images, you can turn this feature off.
To turn off the comparison feature and select the compare item:
mChoose Edit > Select Compare Item (or press Option-Return).
To turn off the feature and select the image you’re viewing against the compare item:
mChoose Edit > Clear Compare Item (or press Command-Return).
You can also use these procedures to compare images in Full Screen mode. For more
information about Full Screen mode, see Chapter 7, “Viewing Images in Full Screen Mode,”
on page 163.
The compare image is
displayed with a yellow
border, visible in the
Viewer and Browser.
The image you want to
examine against the
compare image is shown
to the right.
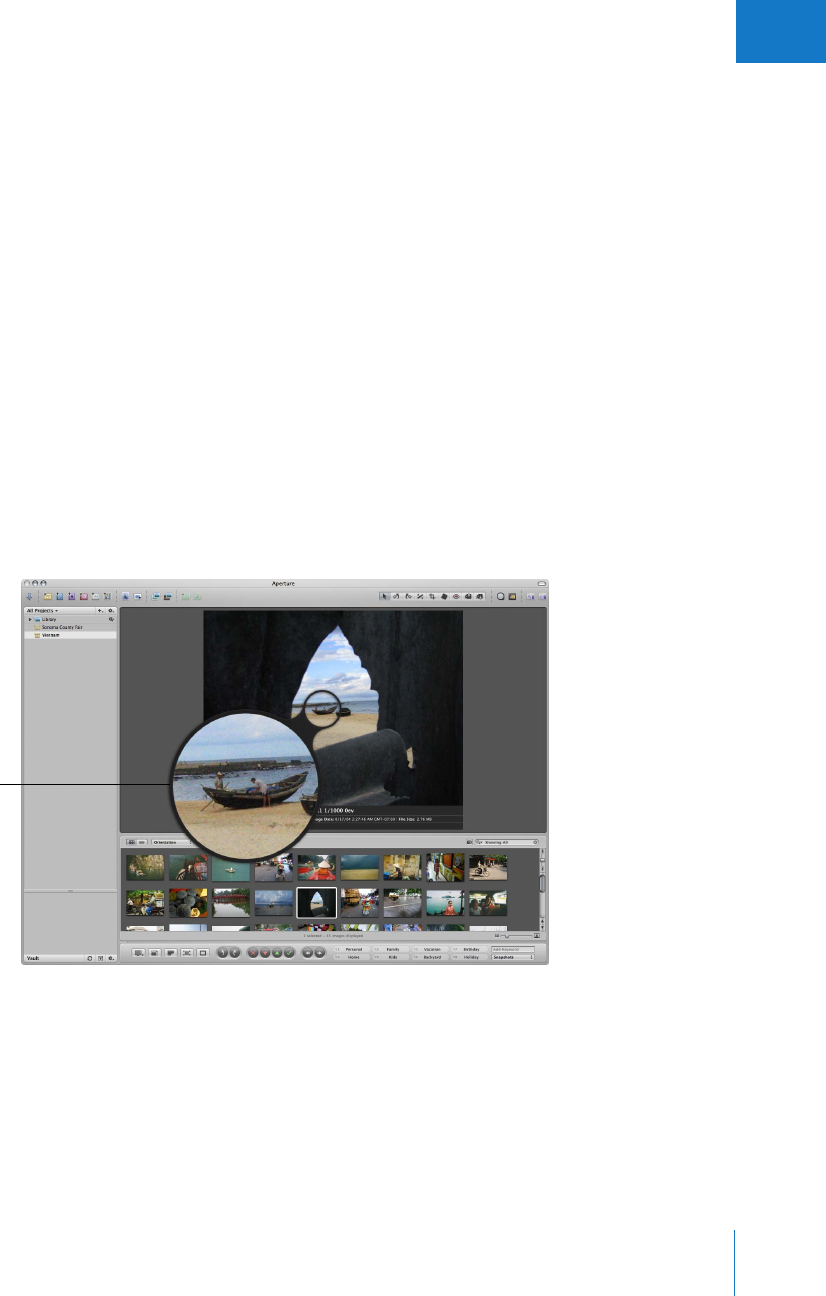
Chapter 6 Displaying Images in the Viewer 151
II
Viewing Stacks
To efficiently work with images in stacks, you can set the Viewer to automatically open
a selected stack and set up the stacked images for comparison. The pick of the stack is
set as the compare item. This stack viewing feature also works in Full Screen mode.
To set the Viewer to automatically open and compare the images in stacks,
do one of the following:
mChoose View > Main Viewer > Stack (or press Option-T).
mChoose Stack from the Viewer Mode pop-up menu in the control bar.
For more information about using stacks, see Chapter 8, “Stacking Images
and Making Picks,” on page 175.
Viewing Images with the Loupe
You can use the Loupe to examine parts of an image. You position the small ring of the
Loupe over the portion of the image you want to see, and the large ring shows a
magnified view. It’s useful for making quick checks for dust specks, flaws, fingerprints, or
other issues. You can use the Loupe on any image or thumbnail in the Aperture Library.
For information about the latest enhancements to the Loupe, see New Features in the
Aperture Help menu.
The Loupe shows a
magnified view of
whatever is beneath it.
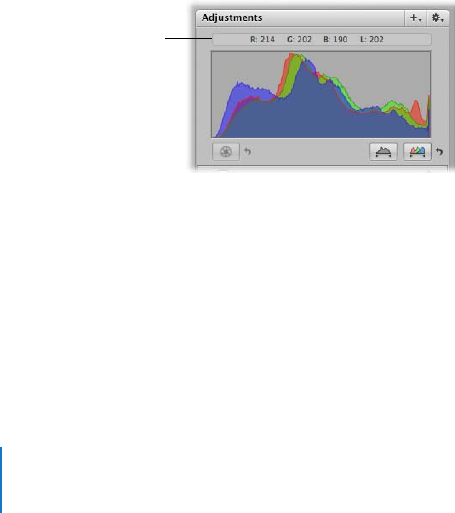
152 Part II Photo Editing
To show the Loupe, do one of the following:
mChoose View > Loupe, or press the grave accent (`) key.
mClick the Loupe button in the toolbar.
To hide the Loupe, do any of the above again.
You can also change the size of the Loupe and increase or decrease its magnification level.
To reduce the size of the Loupe:
mChoose View > Decrease Diameter, or press Option-Shift–hyphen (-), to decrease the
Loupe size.
To enlarge the size of the Loupe:
mChoose View > Increase Diameter, or press Option-Shift–equal sign (=), to increase the
Loupe’s size.
To increase the Loupe magnification:
mPress Command–Shift–equal sign (=).
Press these keys repeatedly to increase magnification more.
To decrease the Loupe magnification:
mPress Command-Shift-hyphen (-).
Press these keys repeatedly to decrease magnification more.
Using the Color Meter
Aperture provides a built-in Color meter you can use to sample the color values in an
image and display them as RGB, Lab, or CMYK values.
When you place the pointer over an image or thumbnail, the color values are displayed
in the Adjustments Inspector or Adjustments HUD. You can also use the Loupe for a
more accurate pixel selection and see the color values displayed within the magnified
area of the Loupe.
Color meter
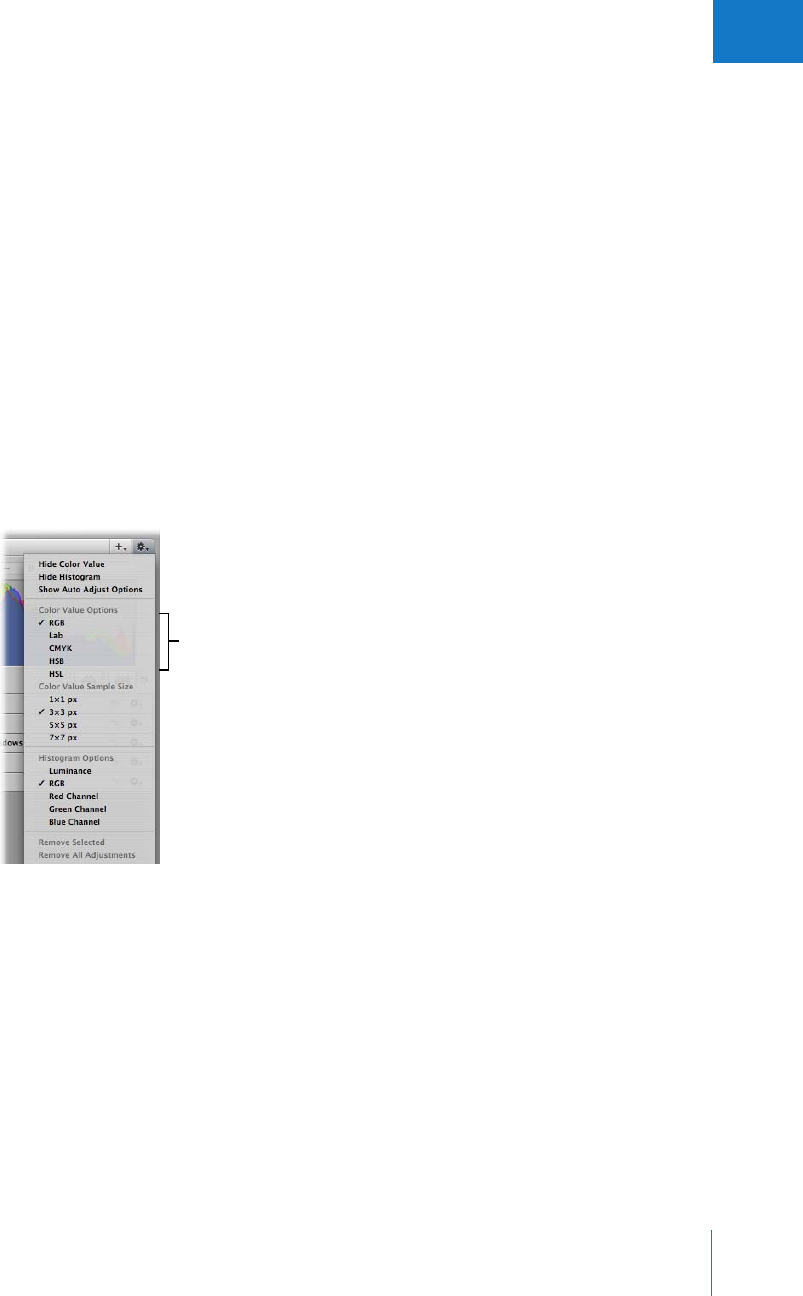
Chapter 6 Displaying Images in the Viewer 153
II
Sampling Color Values
The Color meter displays the color values of the pixels in the image beneath the
pointer or the target area of the Loupe.
To use the pointer to sample the color values in an image:
mPlace the pointer over the area of the image where you want to sample the color values,
and view the values at the top of the Adjustments Inspector or Adjustments HUD.
Note: When you select a large image with multiple adjustments applied, ellipsis
points (...) may appear in the Color meter rather than numerical values. As soon as
Aperture renders the image, the appropriate numerical values appear.
Choosing a Color Value Option
You can set the Color meter to display RGB, Lab, CMYK, HSB, or HSL color values.
To choose a color value option for the Color meter:
mIn the Adjustments Inspector or Adjustments HUD, choose a color value option from
the Adjustment Action pop-up menu.
Choose a color value option here.
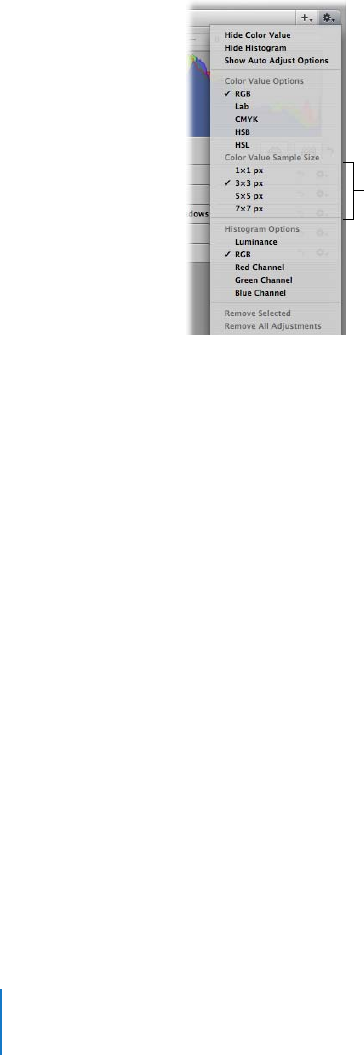
154 Part II Photo Editing
Choosing a Color Value Sample Size
You can also set the sample size (pixel area) Aperture uses to determine color values.
To choose a color value sample size for the Color meter:
mIn the Adjustments Inspector or Adjustments HUD, choose an appropriate color value
sample size from the Adjustment Action pop-up menu.
Showing Hot Areas in Your Images
Images may occasionally have areas that can’t be reproduced by a printer. For example,
white areas in an image brightly lit with direct sunlight, or bright flashes off a water
surface, may be so bright that their color is outside the color gamut of a printer. You may
be able to adjust these areas by changing the exposure or the gamma setting of the
image. Aperture can display these “hot areas” of an image with red tints on the image.
To show the hot areas in your images:
mChoose View > Highlight Hot Areas (or press Shift-Option-H).
Choose a color value sample size here.
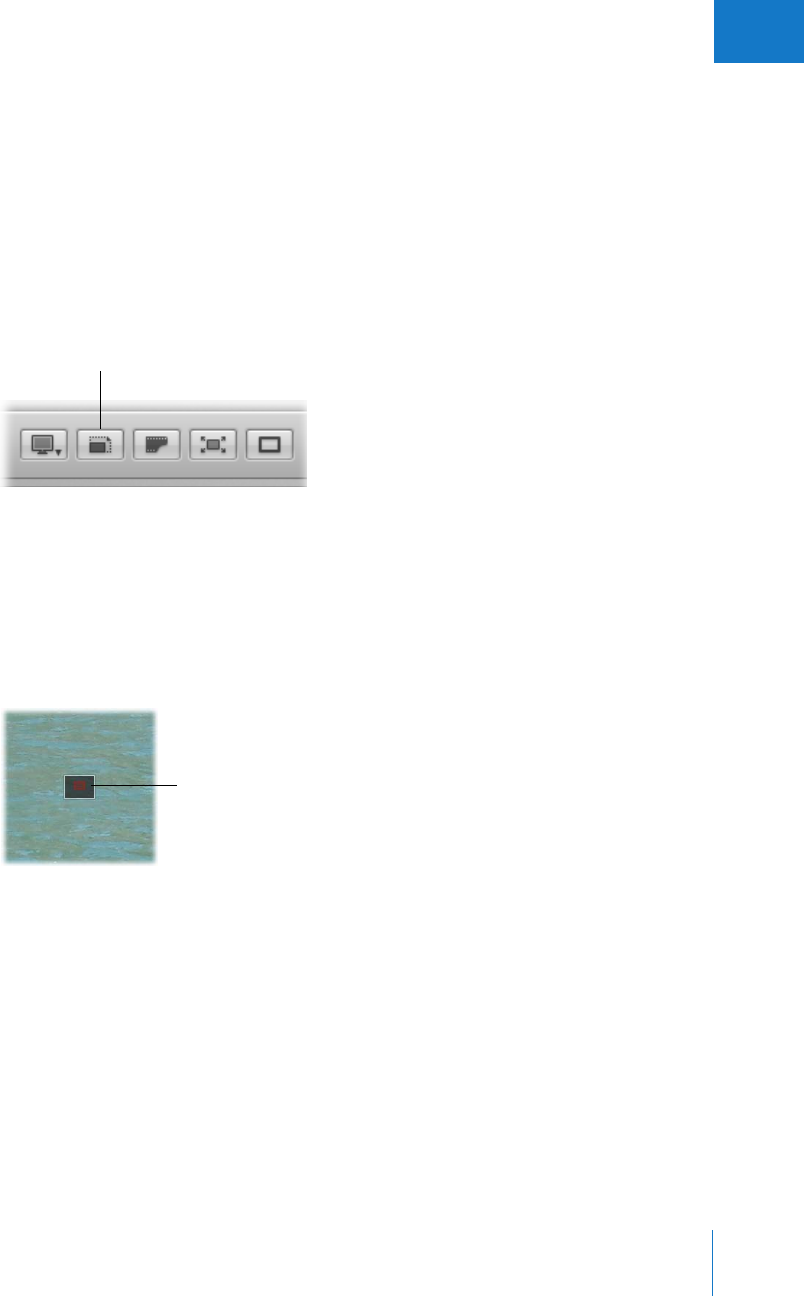
Chapter 6 Displaying Images in the Viewer 155
II
Viewing Images at Full Resolution
A full-resolution view of an image shows every pixel in the image. You can set Aperture
to display an image at full resolution, even though the image may not fit within the
Viewer. Viewing images at full resolution allows you to inspect your images using the
finest level of detail possible.
To display a selected image at full resolution, do one of the following:
mChoose View > Zoom to Actual Size (or press Z).
mClick the Zoom Viewer button in the control bar.
Click the button again to turn off the full-resolution display.
When an image doesn’t fit within the area of the Viewer, a small, gray box appears on
the image with a red rectangle inside, showing the portion of the image that is
currently visible in the Viewer. You can drag the red rectangle within the gray box to
see other parts of the image, also known as panning.
To pan the full-resolution image in the Viewer, do one of the following:
mDrag the red rectangle that appears on the image.
mHold down the Space bar and drag the image.
Zoom Viewer button
Drag the red rectangle
to change your view of
the image.

156 Part II Photo Editing
Viewing Master Images
When working with adjusted images, or versions, you may at times want to check what
the original master image looks like. You can have Aperture quickly display the digital
master file on which a selected version is based.
To display the master file for a selected version, do one of the following:
mChoose View > Show Master Image (or press M).
mClick the Show Master Image button in the control bar.
Setting Up the Viewer for Onscreen Proofing
Images displayed on your computer screen may look different when displayed on
computer screens that use different color technologies. Your images may also reproduce
differently in print depending on the type of printer, the paper used, and the color
profile of the printing device.
To see what an image will look like when you print it or view it on a different screen,
you can have Aperture adjust your screen so that your images resemble the final
results. To adjust your computer screen, you choose a proofing profile that matches as
closely as possible the characteristics of the final output device. For example, if your
image will be printed on sheetfed coated paper, you can choose a proofing profile for
sheetfed coated paper to see what the printed image might look like. Aperture
provides several dozen profiles that match the characteristics of many printers, screen
devices, and color spaces.
After choosing a proofing profile that matches the final output of the image, you turn
on the onscreen proofing feature, and the image changes to show the expected results.
Onscreen proofing changes the look of images in the Viewer and in Full Screen mode.
To choose a proofing profile:
mChoose View > Proofing Profile, then choose the profile you want from the submenu.
To turn onscreen proofing on or off:
mChoose View > Onscreen Proofing (or press Shift-Option-P).
Note: After setting up onscreen proofing, make sure to set your image export preset
to match the eventual output of the image. Choose Aperture > Presets > Image
Export. In the dialog that appears, choose the profile you want from the ColorSync
Profile pop-up menu. For more information about exporting images, see Chapter 15,
“Exporting Your Images.”
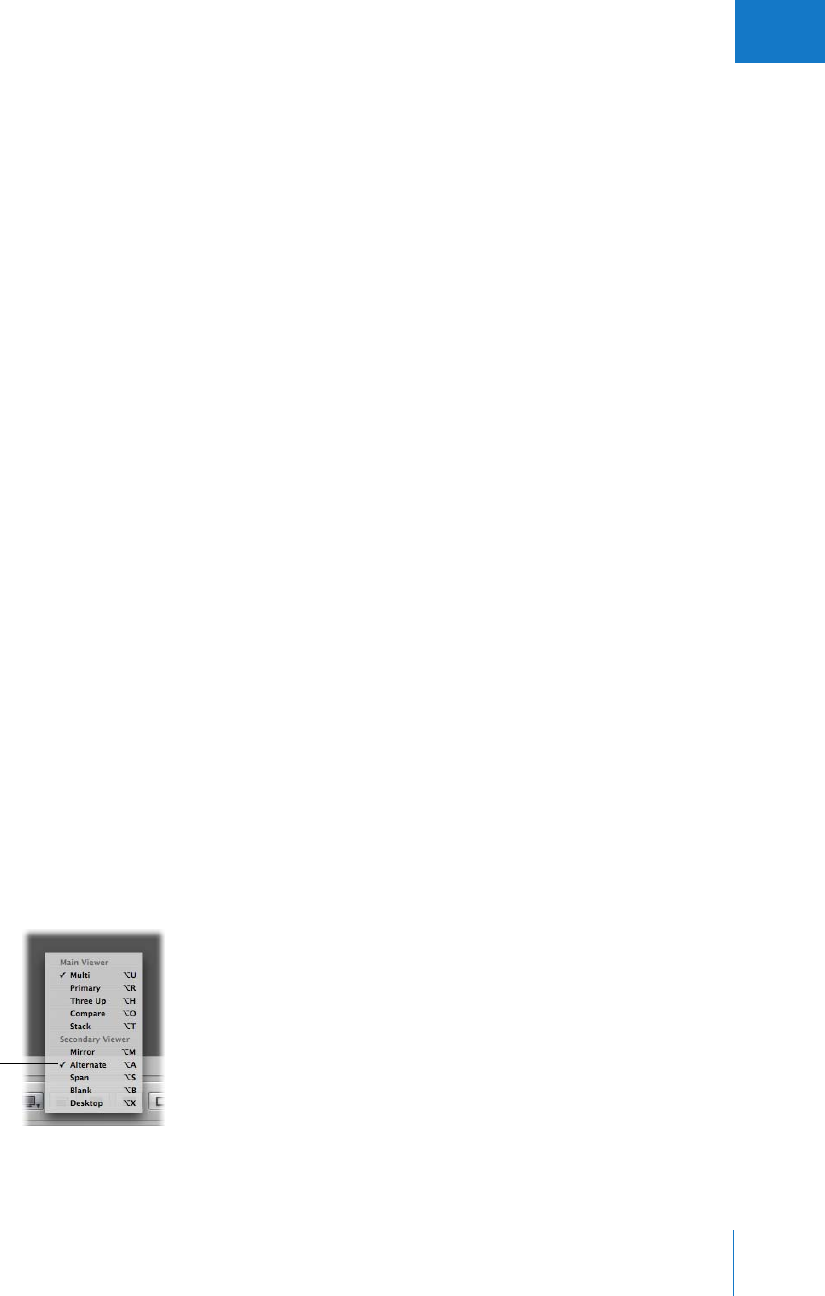
Chapter 6 Displaying Images in the Viewer 157
II
Viewing Images on Multiple Displays
Using the additional screen space of a second display affords an excellent platform
for viewing and adjusting images, playing slideshows, and presenting your full-color,
full-size images to clients. For more information about setting up two displays, see
“Setting Up Your System with Two Displays” on page 417.
When your system uses two displays, Aperture provides two Viewers in which you can
view multiple images. These Viewers are called the primary Viewer and secondary
Viewer. The primary Viewer is used for displaying the Aperture application and the
secondary Viewer for viewing images.
You can set the secondary Viewer to display images in different ways by choosing an
option from the Viewer Mode pop-up menu in the control bar.
ÂDesktop: Turns off the dual-display function.
ÂBlank: Sets the secondary Viewer to be a blank screen.
ÂMirror: Displays the same images in the primary and secondary Viewers. For example,
if you have the primary Viewer set to display three images, the secondary Viewer
displays three images as well.
ÂAlternate: Displays the currently selected image in the secondary Viewer. The
secondary Viewer shows only one image even when you have the primary Viewer set
to display multiple images.
ÂSpan: Splits the display of the currently selected images between the primary and
secondary Viewers. For example, if you select seven images to view, the primary
Viewer shows as many as fit its screen size, and the remaining images appear in the
secondary Viewer. Thus, one Viewer might show four images and the other Viewer
might show the remaining three of the seven. Span is also used if you want to
compare images and show one image per display.
To display the currently selected image in the secondary Viewer,
do one of the following:
mChoose View > Secondary Viewer > Alternate (or press Option-A).
mChoose Alternate from the Viewer Mode pop-up menu in the control bar.
Choose Alternate from
the Viewer Mode pop-up
menu to display the
selected image in the
secondary Viewer.
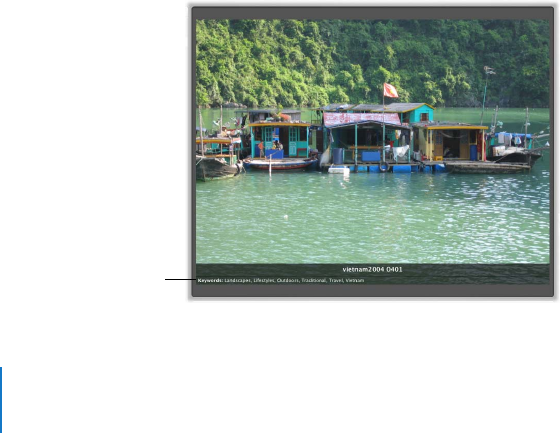
158 Part II
Photo Editing
To display the same images in both the primary and secondary Viewers,
do one of the following:
m
Choose View > Secondary Viewer > Mirror (or press Option-M).
m
Choose Mirror from the Viewer Mode pop-up menu in the control bar.
To display a selection of images across both the primary and secondary Viewers,
do one of the following:
m
Choose View > Secondary Viewer > Span (or press Option-S).
m
Choose Span from the Viewer Mode pop-up menu in the control bar.
To turn off the display of images in the secondary Viewer,
do one of the following:
m
Choose View > Secondary Viewer > Blank (or press Option-B).
m
Choose Blank from the Viewer Mode pop-up menu in the control bar.
To turn off the secondary Viewer function, do one of the following:
m
Choose View > Secondary Viewer > Desktop (or press Option-X).
m
Choose Desktop from the Viewer Mode pop-up menu in the control bar.
Displaying Metadata Associated with Images
To help identify your images as you work with them, you can set Aperture to display
the metadata associated with images in the Viewer. You can display keywords, ratings,
EXIF information, IPTC information, and more. You can specify whether the information
appears below the image or across the bottom of the image.
You can also specify up to two sets of predefined information displays. For example,
one set of Viewer options can be configured to show ratings only, and another set to
show all the IPTC information associated with an image. You can then switch between
sets to change the information that appears with your images.
The caption
and keywords are
displayed here.
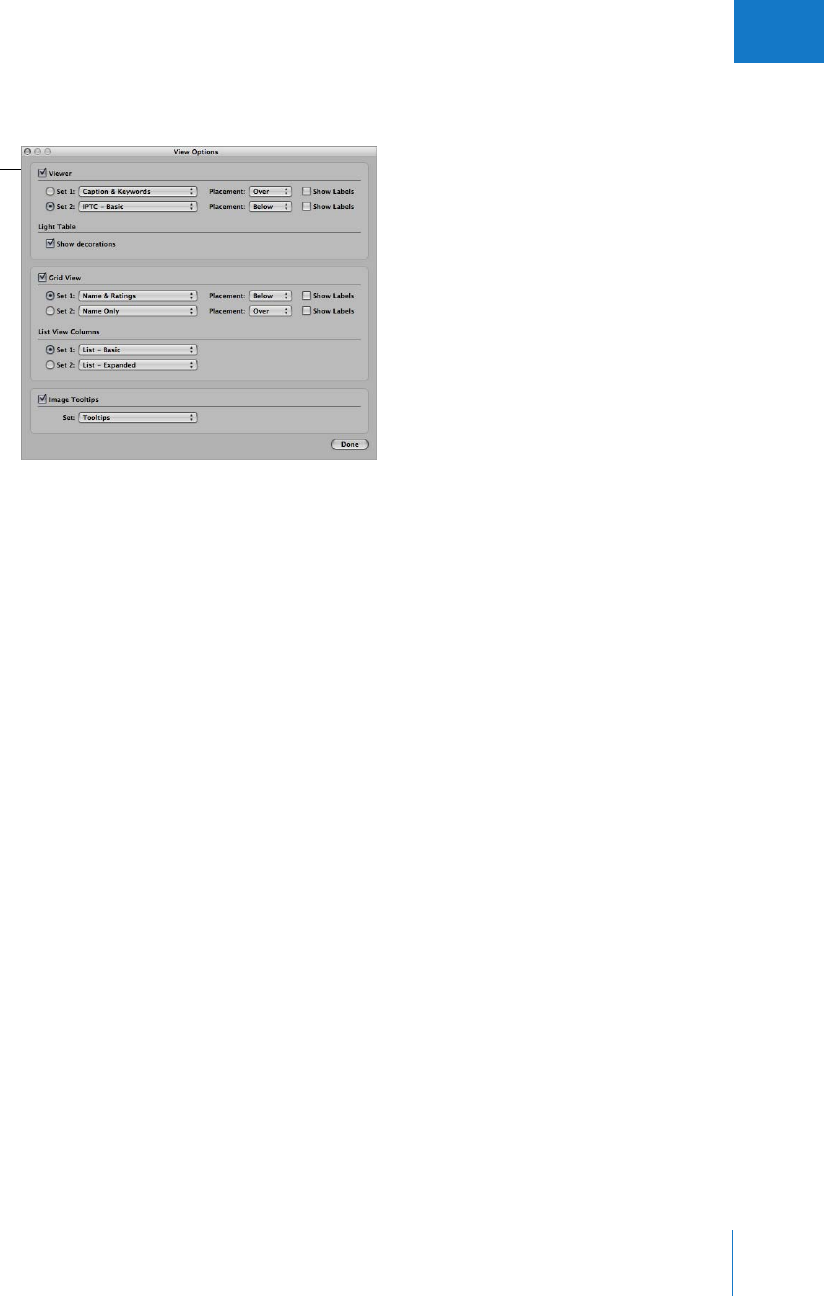
Chapter 6 Displaying Images in the Viewer 159
II
To set the display of metadata shown with images in the Viewer:
1Choose View > View Options (or press Command-J).
2Select the Viewer checkbox.
3Choose the metadata views you want to use from the Set 1 and Set 2 pop-up menus.
4Choose the location where you want the metadata displayed from the Placement
pop-up menus.
You can choose whether you want the metadata to appear over the bottom edge of
the image or below the image.
5Click the Set 1 or Set 2 button to select the metadata view you want displayed.
6Click Done.
To turn the display of metadata on or off in the Viewer:
mPress Y.
To switch metadata views in the Viewer:
mPress Shift-Y.
For more information about using metadata, see Chapter 11, “Working with Metadata,”
on page 225.
The View Options
window lets you choose
how you want to
view images.

160 Part II Photo Editing
Selecting Image Preview Options
Aperture can create high-resolution JPEG images that are shown when you select an
image in the Browser. These preview images allow you to quickly see and work with
your images when you select them, even if images are offline referenced images. The
previews allow you to display high-resolution, detailed views of images in quick
succession in the Viewer and when displaying slideshows using the best quality of
display. You can also share the preview images with other applications. You can select
preview options in the Preferences window that allow you to control the creation and
quality of the previews.
You can have Aperture create high-resolution previews of your images automatically, or
you can control the creation of previews manually. You can have Aperture create
previews for each new project that you create. You can also have Aperture create
previews for all your projects or for only specific projects. For example, you can select a
project and specify that the images in it should have previews created for them. You
can also specify that other projects don’t create previews for their images. You can
control the creation of previews on a project-by-project basis. Aperture creates
previews for projects as a background task that you can monitor with the Task list.
You can also control the creation of previews manually. You can select versions and have
Aperture create previews for them when needed. Thus, when projects are not set to
create automatic previews, you can still create previews for specific versions as you want.
You can also change the quality of the preview images to match your working
preferences. For example, if you don’t require high-resolution previews, and prefer to
work with images that are smaller files, you can lower the preview image quality. This is
particularly useful when working on a MacBook or MacBook Pro.

Chapter 6 Displaying Images in the Viewer 161
II
To change preview options:
1Choose Aperture > Preferences, or press Command-comma (,).
2In the Previews area of the Preferences window, do any of the following:
ÂTo set Aperture to create previews for the images in all new projects and new
Libraries: Select the “New projects automatically generate previews” checkbox.
Deselect this option if you don’t want previews created for images in new projects.
ÂTo enable sharing of JPEG preview images with other applications: Select the “Share
previews with other applications” checkbox.
ÂTo change the image quality of the previews: Drag the Preview Quality slider. The
higher the quality you select, the more disk space the preview requires.
3Close the Preferences window.
You can turn the creation of preview images on for specific projects in the Projects
panel or for the entire Library, and Aperture automatically creates previews as new
versions are created or modified. When a preview exists for an image, you can drag it
into other applications.
To turn the creation of previews on or off for specific projects:
1Select the project or Library in the Projects panel.
2Choose Maintain Previews for Project from the Project Actions pop-up menu to turn
high-resolution preview creation on or off.
A checkmark beside the command indicates that high-resolution preview creation is
turned on.
To turn the creation of previews on or off for the entire Library:
1Select the Library in the Projects panel.
2Choose Maintain Previews for All Projects from the Project Actions pop-up menu to
turn high-resolution preview creation on or off.
A checkmark beside the command indicates that high-resolution preview creation is
turned on.
You can also have Aperture create or update previews for selected images. When you
turn the creation of previews off, Aperture does not delete previews that were created
previously. It stops creating new previews from then on.

162 Part II Photo Editing
To create or update previews for selected images:
1In the Browser, select the images you want to update with new previews.
2Choose Images > Update Previews.
Note: You can also force Aperture to update previews for images by selecting the
images you want to update and then holding down Option and choosing Images >
Generate Previews from the shortcut menu.
You can also delete the previews for selected images.
To delete the previews for selected images:
1In the Browser, select the images whose previews you want to delete.
2Choose Images > Delete Previews.
Quickly Accessing Commands
You can access commands via a shortcut menu, as an alternative to using the menu bar
at the top of the screen or pop-up menus within a window.
To view the shortcut menu:
mPosition the pointer over the Viewer, then Control-click (press the Control key and click).
Note: Although accessing commands from shortcut menus can help you work more
quickly, keep in mind that not all commands are available in shortcut menus.

7
163
7Viewing Images
in Full Screen Mode
Full Screen mode’s large viewing space and black background
provide an excellent work area for viewing and adjusting
your images.
Full Screen mode provides access to many of the tools and HUDs in Aperture. This
chapter explains how you can use Full Screen mode’s filmstrip and toolbar to move
through, compare, and rate your images, and use the Aperture HUDs to crop, adjust,
and add metadata to your images.
This chapter covers:
ÂAn Overview of Full Screen Mode (p. 164)
ÂEntering and Exiting Full Screen Mode (p. 165)
ÂWorking with the Filmstrip in Full Screen Mode (p. 165)
ÂWorking with the Toolbar in Full Screen Mode (p. 169)
ÂUsing HUDs in Full Screen Mode (p. 171)
ÂChanging the Display of Metadata in Full Screen Mode (p. 173)
ÂUsing Keyboard Shortcuts in Full Screen Mode (p. 174)
ÂQuickly Accessing Commands (p. 174)
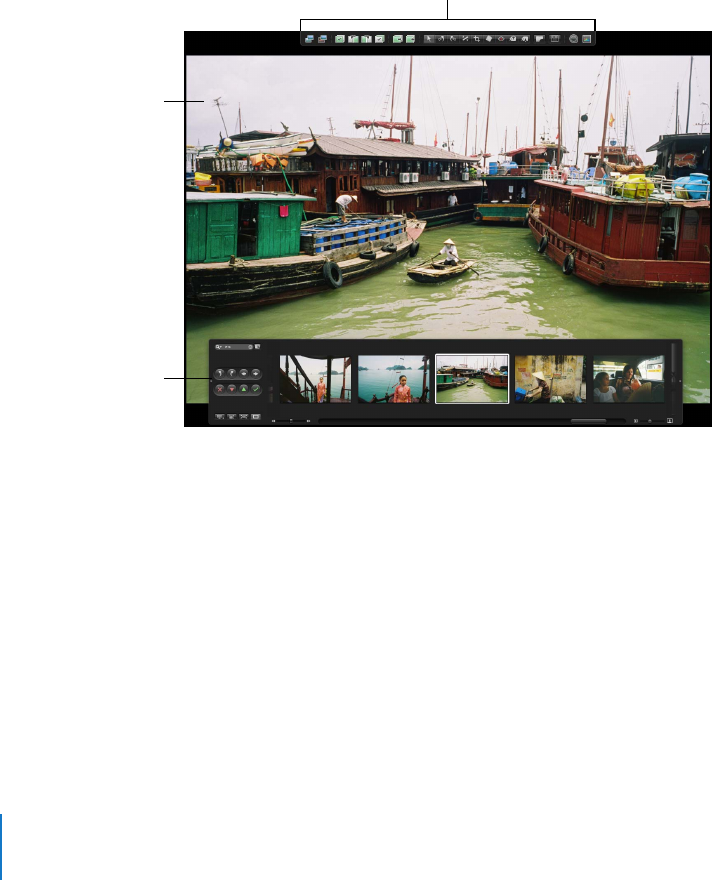
164 Part II Photo Editing
An Overview of Full Screen Mode
Full Screen mode projects your images onto a black background for detailed viewing.
Using a dual-display system in Full Screen mode gives you an enlarged space to
compare and adjust images. For more information about setting up a dual-display
system, see “Setting Up Your System with Two Displays” on page 417.
You can view, compare, and stack your images in Full Screen mode. You can also apply
adjustments and keywords. When you’ve finished working with your images, you can
use this mode to preview and proof your images.
Full Screen mode includes a toolbar and filmstrip to help you view, organize, and adjust
your images.
Use the toolbar buttons and tools to change your images. The toolbar includes
buttons for creating versions and working with stacks, as well as a full set of image
adjustment tools.
Use the filmstrip to move through, organize, and rate your images. You can dock the
filmstrip on the left, right, or bottom of the screen—wherever it best suits your work
habits. You can also hide or show the filmstrip whenever you want.
You can use any of the Aperture HUDs in Full Screen mode. You can open the
Adjustments HUD or Keywords HUD by pressing its keyboard shortcut. In fact, you’ll
find it convenient to use keyboard shortcuts for most features you use in Full Screen
mode. For more information about keyboard shortcuts you can use, see “Using
Keyboard Shortcuts in Full Screen Mode” on page 174.
Filmstrip available
in Full Screen mode
Toolbar available in
Full Screen mode
The displayed image fills
the screen.
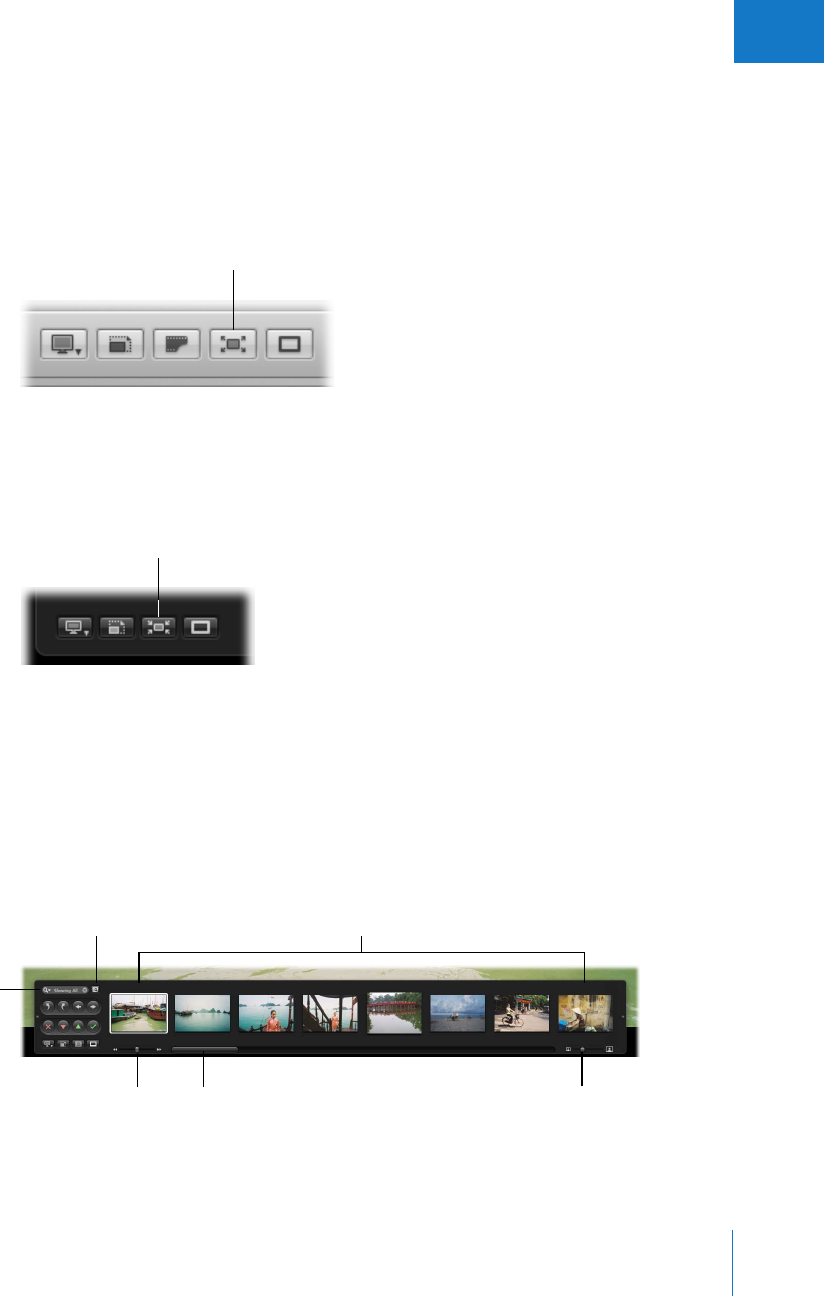
Chapter 7 Viewing Images in Full Screen Mode 165
II
Entering and Exiting Full Screen Mode
You can quickly switch between Full Screen mode and your workspace layout in the
Aperture main window.
To enter Full Screen mode:
mClick the Full Screen button in the control bar (or press F).
The Aperture main window disappears and your images appear in Full Screen mode.
To exit Full Screen mode, do one of the following:
mClick the Exit Full Screen button in the filmstrip (or press F).
mPress Escape.
The workspace layout you were working in before entering Full Screen mode reappears.
Working with the Filmstrip in Full Screen Mode
The filmstrip in Full Screen mode is similar to the control bar in the Aperture main
window. You can use the filmstrip’s controls to move through, rotate, view, and rate
your images.
Full Screen button
in the control bar
Exit Full Screen button
in the filmstrip
Images shown in the filmstrip
Query HUD button
Scroll bar Thumbnail Resize slider
Shuttle control
Search field
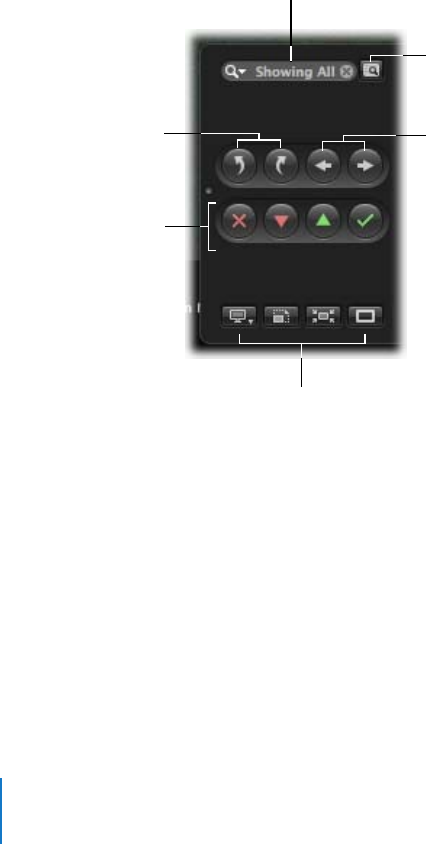
166 Part II Photo Editing
Controls in the Filmstrip
The following controls in the filmstrip are used to view images in Full Screen mode.
Navigation Controls
ÂShuttle control: Click either side of this slider to rapidly shuttle through your filmstrip
images. The closer to the double arrows you click, the more rapidly the filmstrip
moves through its images. You can also use the J, K, and L keys to shuttle through
your images.
ÂScroll bar: Use this to scroll through your images.
ÂThumbnail Resize slider: Drag the slider to change the size of the image thumbnails
shown in the filmstrip.
The following controls are displayed on the left side of the filmstrip and control the
images shown in the filmstrip.
Search Controls
ÂSearch field: Enter text; images that match appear in the full-screen view.
ÂQuery HUD button: Click this button to show the Query HUD. From the Query HUD, you
can perform a quick search or create a new album to hold the contents of your search.
Rating buttons
Display controls
Rotate buttons Navigation buttons
Search field
Query HUD button
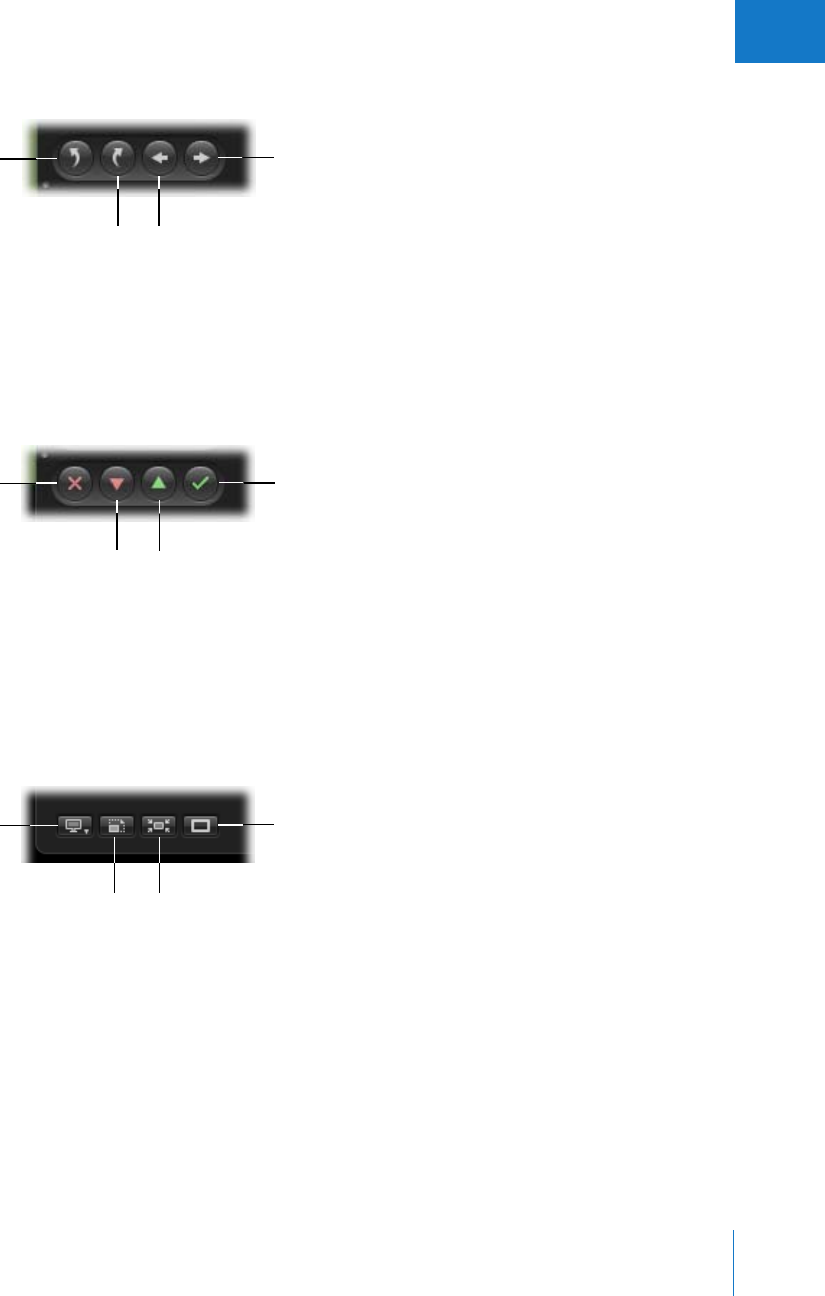
Chapter 7 Viewing Images in Full Screen Mode 167
II
Rotate and Navigation Buttons
ÂRotate Left: Click this button to rotate the selected image counterclockwise.
ÂRotate Right: Click this button to rotate the selected image clockwise.
ÂPrevious Image: Click this button to display the previous image.
ÂNext Image: Click this button to display the next image.
Rating Buttons
ÂReject: Click this button to give the selected image a Reject rating.
ÂDecrease Rating: Click this button to decrease the selected image’s rating.
ÂIncrease Rating: Click this button to increase the selected image’s rating.
ÂSelect: Click this button to give the selected image a Select rating.
Display Controls
ÂViewer Mode pop-up menu: Use this to choose how to view images on your display or
displays and how to position images on each display. You can also control the filmstrip
with this pop-up menu (see “Moving and Resizing the Filmstrip” on page 168).
ÂZoom Viewer: Click this button to enlarge the image to a 100 percent pixel-for-pixel view.
ÂExit Full Screen: Click this button to exit Full Screen mode.
ÂPrimary Only: Click this button to temporarily change between making metadata
changes to all selected images or the primary selection only.
Rotate Left Next Image
Previous Image
Rotate Right
Reject Select
Decrease
Rating
Increase
Rating
Viewer Mode
pop-up menu
Primary Only button
Exit Full Screen
button
Zoom Viewer
button

168 Part II Photo Editing
Viewing Images with the Filmstrip
You can easily view images in Full Screen mode by selecting them in the filmstrip.
To view an image that’s in the filmstrip:
mSelect an image displayed in the filmstrip by pressing the arrow keys or clicking the
image you want to see.
To view more than one image at the same time, do one of the following:
mCommand-click individual images that are not adjacent to select them.
mShift-click images to select a range of images.
mChange your view settings in the Viewer Mode pop-up menu.
Moving and Resizing the Filmstrip
You can move the filmstrip to any location on your primary display. But there are times,
especially when viewing an image at full resolution, that you cannot keep the filmstrip
from overlapping your image. The filmstrip includes controls that let you define when
the filmstrip appears. You can also specify how the filmstrip fits on the screen in
relation to the image or images you are viewing.
There are several ways you can configure the filmstrip. You can choose to always show
the filmstrip, show it based on image dimensions, or have Aperture automatically fit
the images and filmstrip on your screens without overlapping.
To always show the filmstrip:
mChoose On from the Viewer Mode pop-up menu, or press Control-slash (/).
To only show the filmstrip when you move the pointer over its docked position:
mChoose Auto from the Viewer Mode pop-up menu, or press Control-period (.).
To have Aperture automatically fit the image and the filmstrip on the screen:
mChoose Avoid from the Viewer Mode pop-up menu (or press Control-V).
Aperture fits your images and the filmstrip on your screen, keeping the filmstrip and
your images from overlapping.
You can drag the filmstrip to any location on your primary display’s screen. When you
move the filmstrip to the edge of the screen, the filmstrip reconfigures to match the
new orientation.
To move the filmstrip to a different location:
mDrag the filmstrip to a new location.
You can also lengthen or shorten the filmstrip to make it better fit the screen.
To resize the filmstrip:
mDrag the end of the filmstrip (near the small dots that appear on either end).
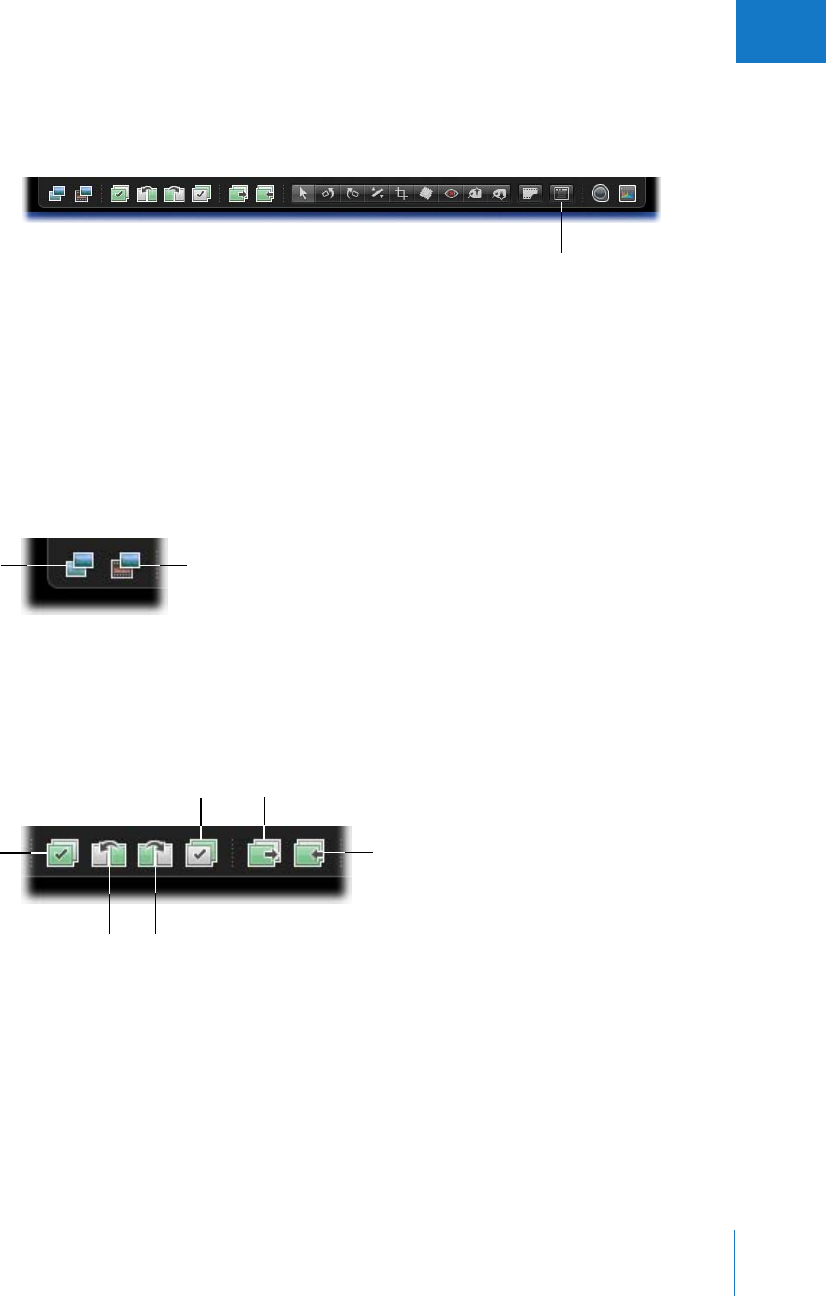
Chapter 7 Viewing Images in Full Screen Mode 169
II
Working with the Toolbar in Full Screen Mode
The toolbar displayed in Full Screen mode is similar to the toolbar in the Aperture
main window.
To view the Full Screen mode toolbar:
mIn Full Screen mode, move the pointer to the top of your primary screen.
You can also have the toolbar always appear on the screen by clicking the Always Show
Toolbar button.
You can use the toolbar’s buttons and tools to create image versions, work with stacks,
and make a variety of adjustments to your images.
Version Buttons
ÂDuplicate Version: Click this button to create a new version of the selected image.
ÂNew Version From Master: Click this button to create a version from the original
master file. A duplicate of the master file is created.
Stacking Buttons
ÂStack Pick: Select a stack item, then click this button to mark the image as its stack’s pick.
ÂPromote: Select a stack item, then click this button to move the selected stack item
closer to the stack’s pick.
ÂDemote: Select a stack item, then click this button to move the selected stack item
farther from the stack’s pick.
Always Show Toolbar
Duplicate Version New Version From Master
Close All Stacks
Stack Pick
Demote
Album Pick Open All Stacks
Promote
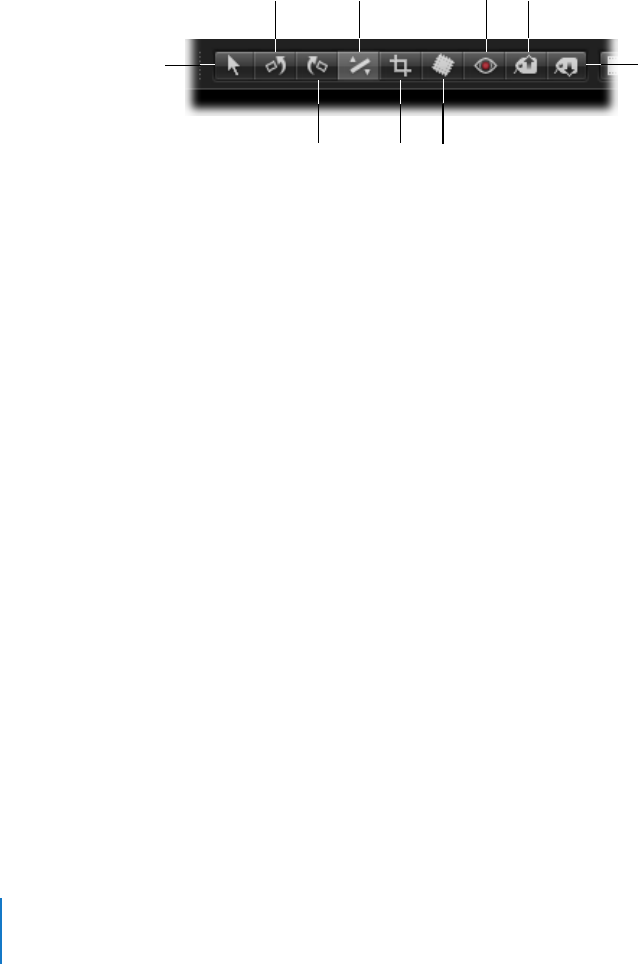
170 Part II Photo Editing
ÂAlbum Pick: Select an image version to represent a stack, then click this button to
select the image as the pick within that particular album (the stack can have a
different pick image in another album).
ÂOpen All Stacks: Click this button to open all the image stacks in the album or project
you’re viewing.
ÂClose All Stacks: Click this button to close all the image stacks in the album or project
you’re viewing.
Adjustment Tools
ÂSelection: Use this tool to select images.
ÂRotate Left: Use this tool to rotate an image counterclockwise.
ÂRotate Right: Use this tool to rotate an image clockwise.
ÂStraighten: Use this tool to manually rotate an image so that it’s straight in relation to
a virtual horizon.
ÂCrop: Use this tool to crop an image to a constrained aspect ratio or custom dimension.
ÂSpot & Patch: Removes imperfections in the image, such as sensor dust, by either
copying the pixels around the blemish (“spotting”) or copying pixels from another
area of the image (“patching”).
ÂRed Eye: Use this tool to correct red-eye, occurring when the subject’s retinas reflect
light from your camera’s flash.
ÂLift: Use this tool to copy a set of metadata and adjustments from a selected image.
ÂStamp: Use this tool to stamp, or apply, a copied set of adjustments to one or
several images.
Selection Stamp
Rotate Left
Crop
Lift
Rotate Right Spot & Patch
Straighten Red Eye
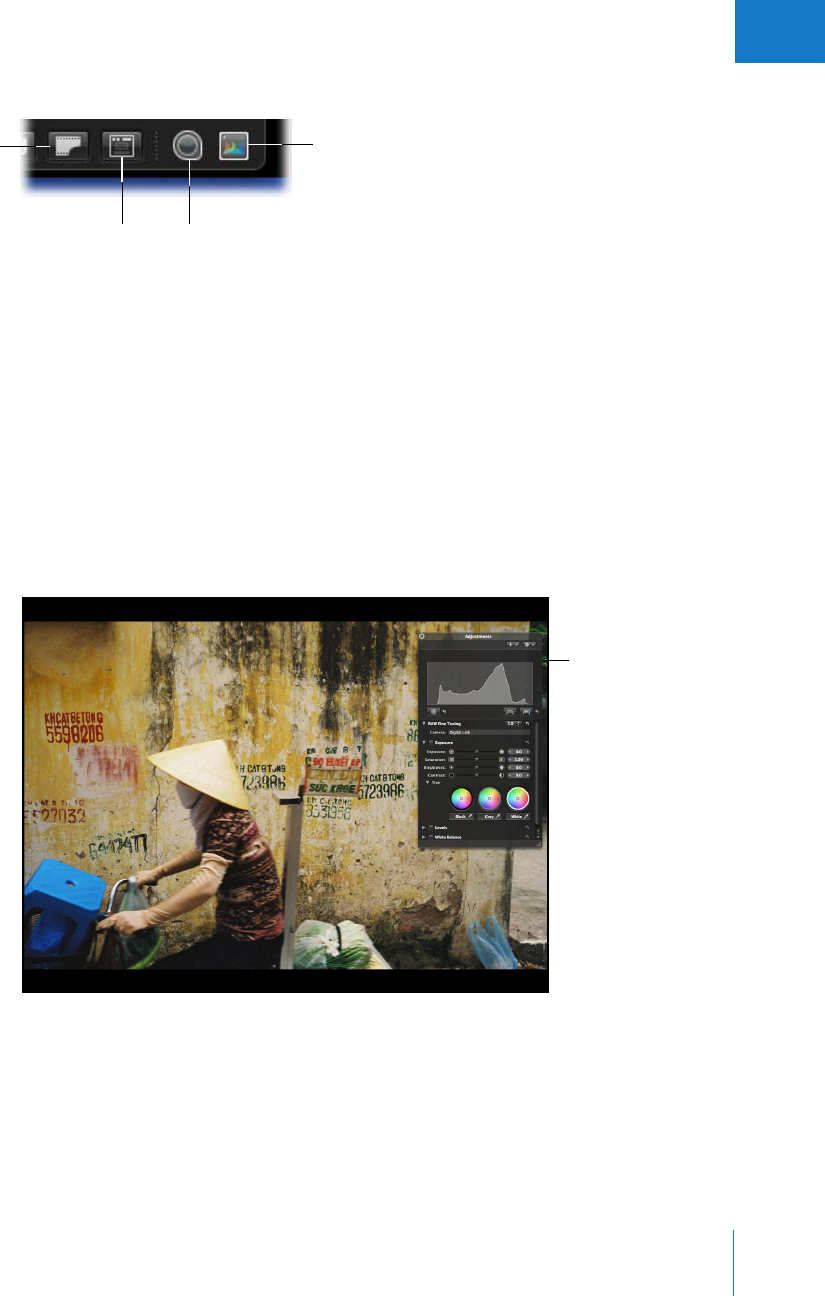
Chapter 7 Viewing Images in Full Screen Mode 171
II
Other Buttons
ÂShow Master Image: Click this button to view the original master file without any
applied adjustments. Click again to switch the view back to the current version.
ÂAlways Show Toolbar: Click this button to keep the toolbar in view.
ÂLoupe: Click this button to open the Loupe, which you can use to minutely examine
parts of an image.
ÂAdjustments HUD: Click this button to show or hide the Adjustments HUD.
Using HUDs in Full Screen Mode
You can use any of the Aperture HUDs in Full Screen mode. For example, you can open
a HUD when you want to add keywords or make adjustments to images.
Loupe
Show Master Image Adjustments HUD
Always Show
Toolbar
HUDs are available for
use in Full Screen mode
and can make adjusting
images easier.
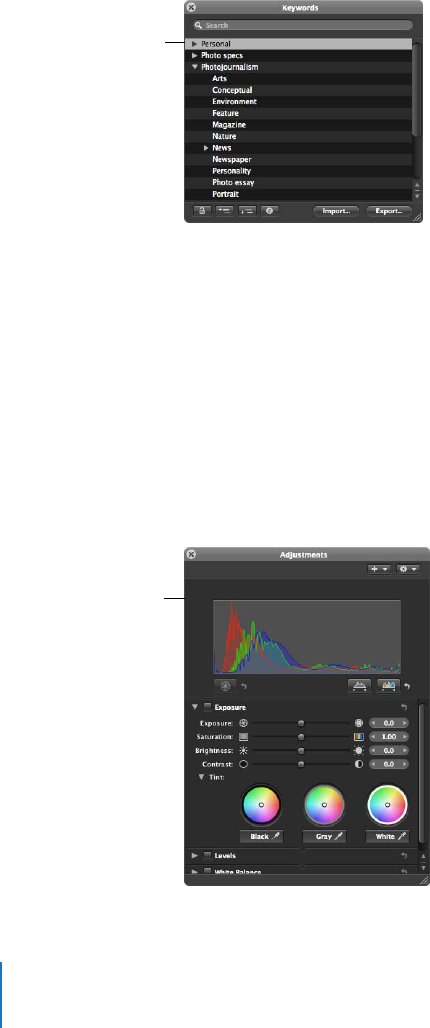
172 Part II Photo Editing
Keywords HUD
Use the Keywords HUD to create and organize keywords and to add keywords to your
images. For more information about applying keywords to images, see Chapter 10,
“Applying Keywords to Images,” on page 199.
To show the Keywords HUD:
mpress Shift-H.
For more information about using the Keywords HUD, see Chapter 10, “Applying
Keywords to Images,” on page 199.
Adjustments HUD
Use the Adjustments HUD to remove image flaws like red-eye, noise, and dust; adjust
exposure, levels, and white balance; and straighten and crop your images. For more
information about adjusting images, see Performing Image Adjustments in the
Aperture Help menu.
To show the Adjustments HUD:
mPress H.
Use the Keywords HUD
in Full Screen mode to
quickly add keywords to
your images.
Use the Adjustments
HUD in Full Screen mode
to remove flaws and
make adjustments to
your images.
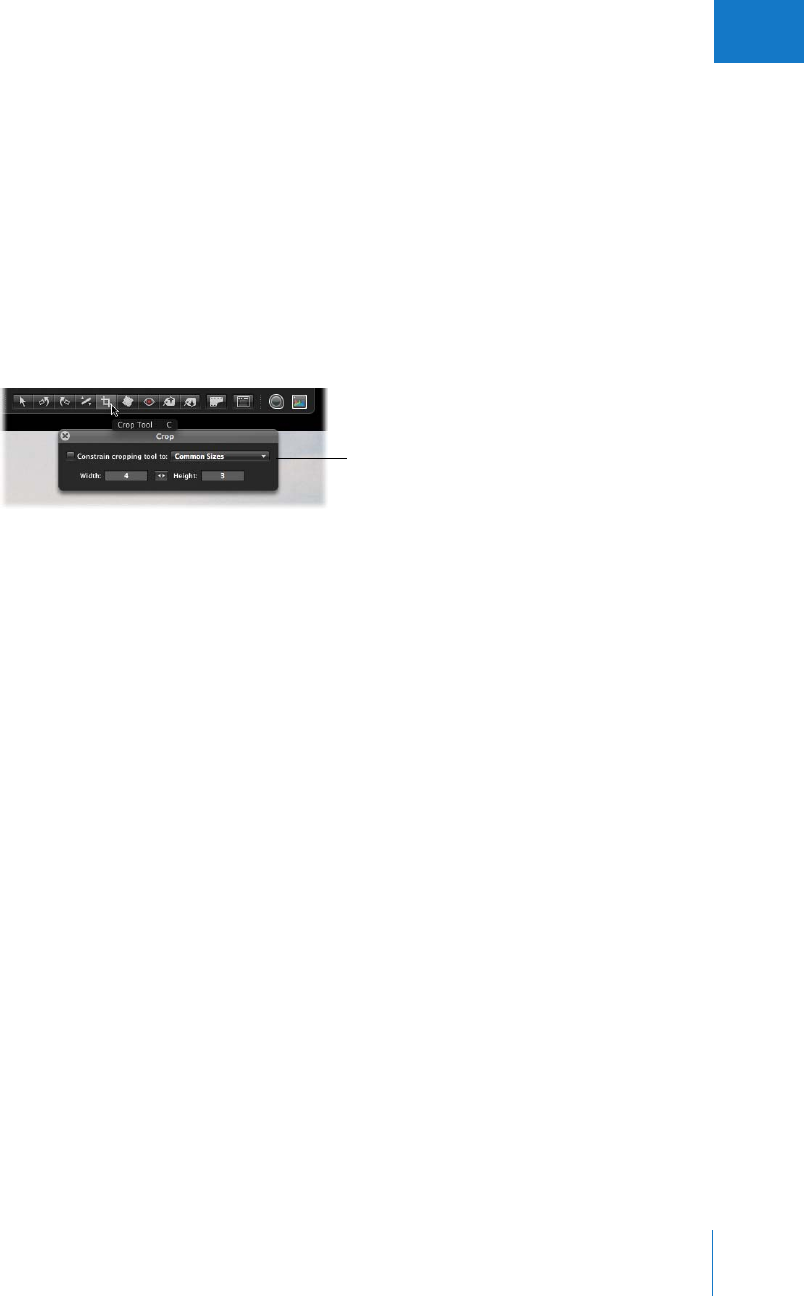
Chapter 7 Viewing Images in Full Screen Mode 173
II
Tools HUDs
Many of the adjustment tools work in conjunction with HUDs, and you can use all of
them in Full Screen mode.
To open any of the adjustment tool HUDs:
1Show the Full Screen mode toolbar by moving your pointer to the top of the screen on
your main display.
2Select an adjustment tool in the toolbar.
If the tool you selected has a HUD, that HUD appears. For more information about
using any of the adjustment tools and their HUDs, see Performing Image Adjustments in
the Aperture Help menu.
Changing the Display of Metadata in Full Screen Mode
The metadata display settings you have chosen for the Viewer and Browser also
apply to images displayed in Full Screen mode and in its filmstrip. The settings for the
Viewer control the display of metadata for full-screen images, and the settings for the
Browser control the display of metadata for thumbnails in the filmstrip. For more
information about setting the display of metadata, see Chapter 11, “Working with
Metadata,” on page 225.
Although the menus are not available in Full Screen mode, you can change the display
of metadata using the same keyboard shortcuts used to change the display of
metadata in the Browser and Viewer.
To turn the display of metadata on or off in Full Screen mode:
mPress Y.
To switch between sets of metadata for images in Full Screen mode:
mPress Shift-Y.
To hide or show metadata in the filmstrip:
mPress U.
To switch between sets of metadata in the filmstrip:
mPress Shift-U.
The Crop HUD appears
when you select the
Crop tool in the toolbar.
174 Part II Photo Editing
Using Keyboard Shortcuts in Full Screen Mode
Here are several useful keyboard shortcuts you can use in Full Screen mode:
To find more keyboard shortcuts, look in the Aperture menus, consult the
Aperture Quick Reference document, or go to the chapter that covers the task for which
you want to find a keyboard shortcut.
Quickly Accessing Commands
In Full Screen mode, you can also access commands via a shortcut menu.
To view the shortcut menu:
mPosition the pointer anywhere in the Full Screen mode screen except the filmstrip or
toolbar, then Control-click (press the Control key and click).
Note: Although accessing commands from shortcut menus can help you work more
quickly, keep in mind that not all commands are available in shortcut menus.
Keyboard shortcut Function
Go to next image
Go to previous image
Shuttle filmstrip left
Stop shuttling left or right
Shuttle filmstrip right
Show Adjustments HUD
Show Keywords HUD
Show Red Eye HUD
Show Lift & Stamp HUD
Show Crop HUD
Show Spot & Patch
J
K
L
H
shift H
E
O
C
X

8
175
8Stacking Images
and Making Picks
Photographers frequently shoot a series of related photos
with the aim of selecting one image for use. Aperture makes
it easy to choose the best image out of a series.
This chapter explains how you can easily group related images into sets, called stacks,
that are easy to review, work with, and select final picks from.
This chapter covers:
ÂAn Overview of Stacking Images (p. 175)
ÂCreating Stacks (p. 177)
ÂWorking with Stacks (p. 180)
ÂKeyboard Shortcuts for Working with Stacks (p. 186)
An Overview of Stacking Images
To capture a specific moment in time, such as a bride and groom kissing or two
dignitaries shaking hands, a photographer may shoot multiple pictures, using both
bracketing and continuous shooting, to increase the odds of capturing a usable image.
After shooting the series, the photographer reviews the images and picks the best
image of the group.
Reviewing and making picks from many related pictures can be time-consuming and
difficult. To help with this task, you can organize related shots into stacks. A stack is a
set of similar or related images from which one image will be selected for use. Aperture
can automatically group such photos into stacks when you import them from a camera
or memory card. You can also select images and create stacks manually.
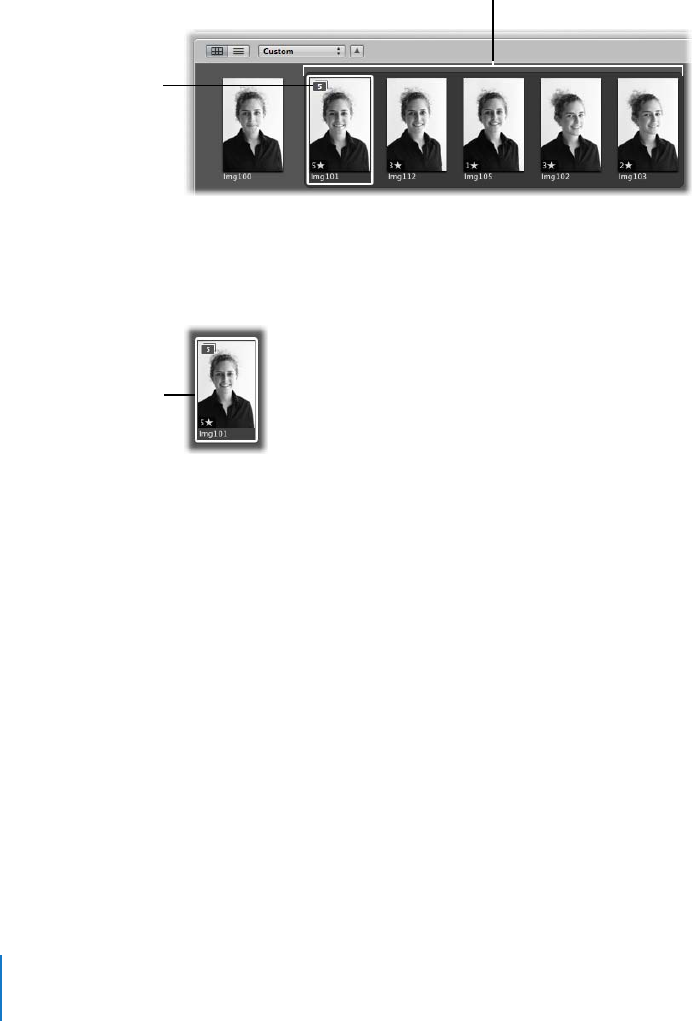
176 Part II Photo Editing
A stack appears in the Browser as a group of images. The image that represents the
stack, called the pick, is selected and displayed on the left. You can select any image in
the stack as the pick, and it moves to the leftmost position in the stack. You can
rearrange the order of images in a stack. For example, you might choose an alternate
image and position it next to the pick. A Stack button appears in the upper-left corner
of the pick image in the stack, indicating the number of images in the stack.
After creating a stack and selecting the pick, you can close the stack by clicking the
Stack button on the pick image. When a stack is closed, only the stack’s pick image
appears in the Browser. Clicking the Stack button again expands the stack.
By closing stacks, you quickly reduce the number of images you have to sort through
when selecting images in the final photo edit.
Important: The purpose of stacking is to select a single pick from among a group of
related photos. When you close a stack, only the pick image remains visible and
available to searches. For this reason, you should not use stacks for the simple grouping
of images. Stacking images that you intend to use makes accessing and searching for
them difficult when stacks are closed.
After creating stacks, you can organize and change them as you need. You can add
images to a stack and remove those that don’t belong. You can also split a stack into
multiple stacks when necessary.
The Stack button
indicates the number of
images in the stack.
A stack with five images is
shown expanded, or open.
Only the pick image
is shown when the
stack is closed.
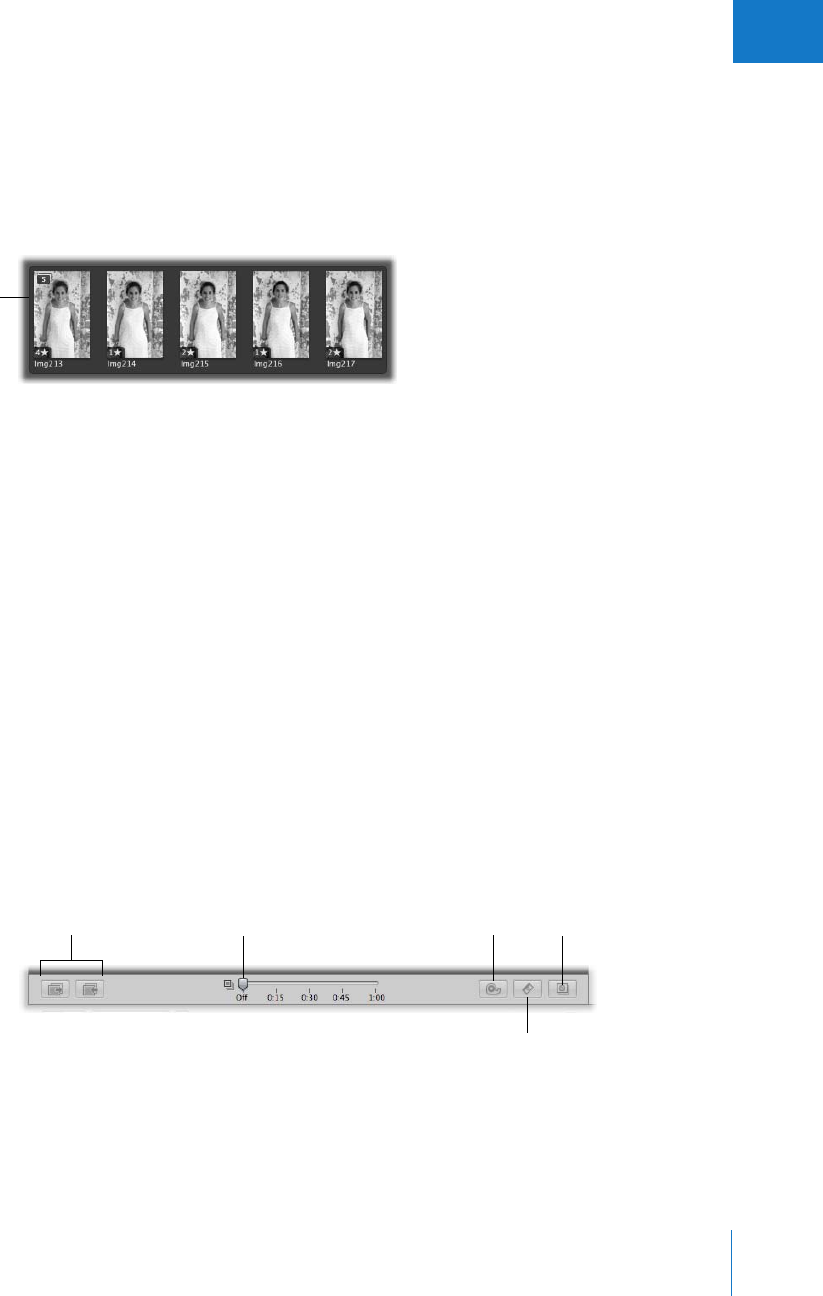
Chapter 8 Stacking Images and Making Picks 177
II
Creating Stacks
When you import your images, you can specify that Aperture create stacks automatically.
For example, if you shoot a series of images in quick succession (such as at a sports event)
or if you bracket images to allow for differences in lighting or exposure, you most likely
will want to view those images together. Aperture can stack those images based on
metadata recorded by the camera as the series of pictures is taken.
ÂImage series: With a series of images shot in quick succession, Aperture can determine
the images in a sequence and group them in a single stack. For example, sports
photographers shoot rapid bursts of images to capture actions. Based on timeline
metadata—when a series of shots was taken and the interval between shots—
Aperture can determine which images fall into a sequence and group them in stacks.
ÂBracketed shots: These typically represent a series of three pictures with slightly
different exposure settings. Advanced digital cameras often have options for shooting
bracketed shots automatically. When Aperture detects a series of bracketed images, it
includes the neutral image and the over- and underexposed images in the stack.
Creating Stacks Automatically
When importing images, you can have Aperture automatically group them into stacks.
To set Aperture to stack images automatically during import:
1Connect your camera or card reader to your computer.
2When the Import panel and the Import dialog appear, select your camera or card reader.
3Drag the Auto-Stack slider to set the interval between successive shots that should
be stacked.
The images in the dialog are stacked according to the slider setting. Inspect the stacks
to determine if the time interval should be shortened or lengthened.
Note: You can also manually select images in the Import dialog and stack and unstack
them using the same commands and procedures you use to stack images in the Browser.
This shows an example of
a series of images taken
in quick succession.
Drag the slider
to stack images.
Click these buttons to
open or close stacks.
Click here to
unstack all stacks.
Click here to stack
selected images.
Click here to split a stack.
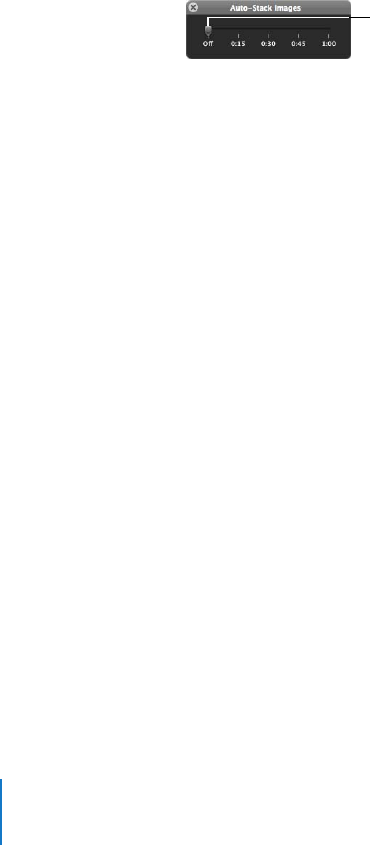
178 Part II Photo Editing
4Specify the other import options you want, then click Import All.
5For more information about importing your photos, see Chapter 4, “Importing Images,”
on page 87.
After Aperture imports and stacks your images, you can review each stack to determine
if the automatic stacking meets your approval.
If you prefer, you can also automatically stack images after importing them.
To stack images after they are imported:
1In the Projects panel, select a project or album that contains images you want to stack.
2Choose Stacks > Auto-Stack (or press Command-Option-A).
3In the Auto-Stack Images HUD, drag the slider to specify the maximum interval
between successive shots.
As you drag the slider, the images in the Browser are stacked according to the interval
of time specified. For example, if you typically shoot a series of related images in
1-second intervals, set the slider to 1 second.
4Inspect the stacks to determine if the time interval should be shortened or lengthened.
Comparing Images in Stacks
To help with the photo editing process, you can set the Viewer and Browser to
automatically open a selected stack and set up the stacked images for comparison.
The pick of the stack is set as the “compare” item. This stack viewing feature also
works in Full Screen mode.
To set the Viewer to automatically open and compare the images in stacks, do one
of the following:
mChoose View > Main Viewer > Stack (or press Option-T).
mChoose Stack from the Viewer Mode pop-up menu.
∏Tip: When the Viewer is in Stack mode, you can press the Up and Down Arrow keys to
move from stack to stack.
Move the slider to indicate the
maximum interval between shots.
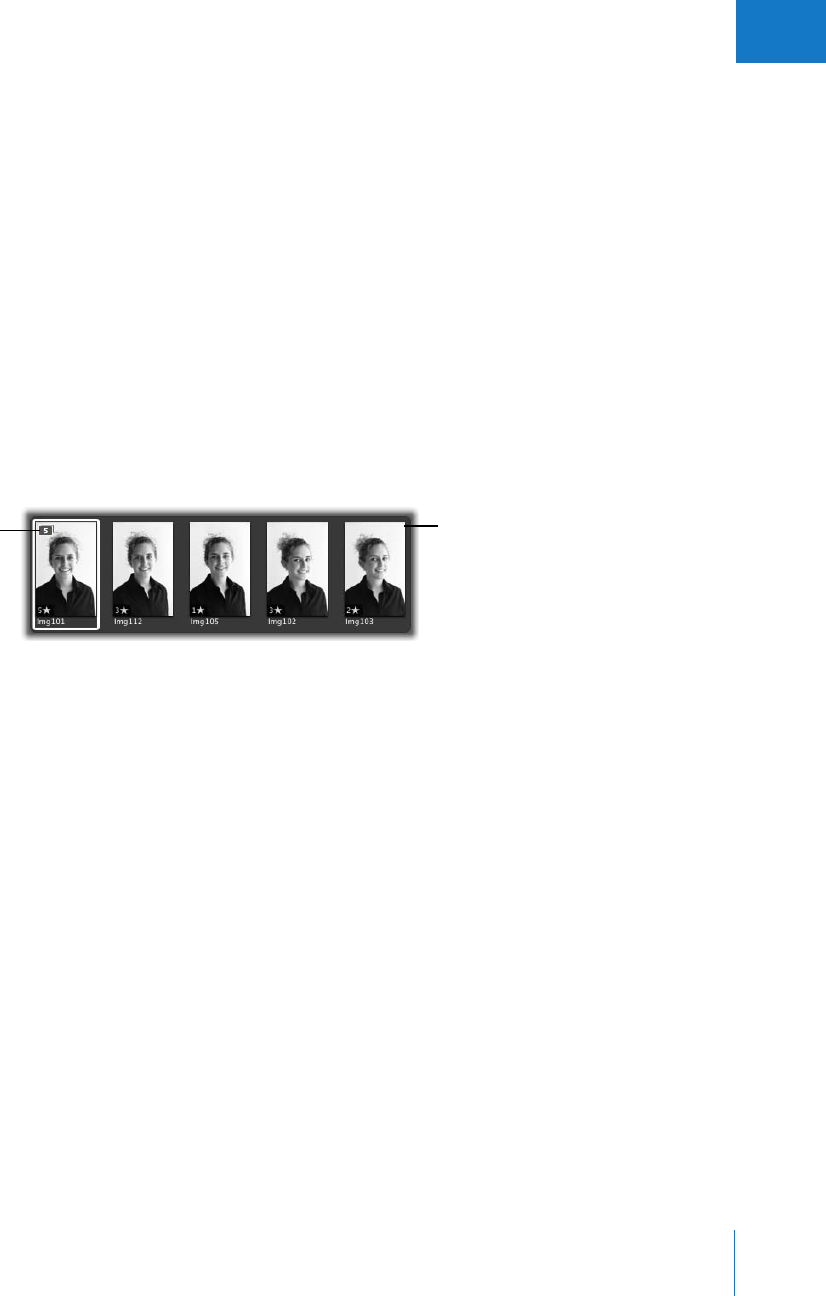
Chapter 8 Stacking Images and Making Picks 179
II
Creating Stacks Manually
After importing photos, you may want to quickly review them and delete those that
you immediately see have technical or content flaws. You may then want to group the
remaining images into stacks before rating them. Stacking images manually can help
provide an initial organization and an overview of your shots, which you can then put
through a more refined or discriminating rating pass later.
To create a stack manually:
1In the Browser, select the images you want to stack.
You can Shift-click adjacent images and Command-click nonadjacent images to
select them.
∏Tip: As a fast way to select a series of images, select an image at one end of the
series, hold down the Shift key, and press the Right or Left Arrow key to select
additional images.
2Choose Stacks > Stack (or press Command-K).
The selected images are now stacked and appear linked in gray. The Stack button
appears on the current pick image. You can change the pick image and rearrange the
order of the images in the stack as you wish.
You can unstack a selection of images, if you need to.
To unstack a selection of images:
mAfter creating a stack, choose Edit > Undo, or select the stack and choose Stacks >
Unstack (or press Command-Shift-K).
The Stack button
appears on the
current pick image.
The selected images are now
stacked and have a dark gray
line around them.

180 Part II Photo Editing
Tips for Creating Stacks Quickly and Efficiently
One secret to an efficient photo edit is to quickly group related images into stacks
before rating. Here is a suggested method for quickly creating multiple stacks in a fast
initial pass through your images.
To create multiple stacks quickly:
1Drag related images into easily selectable rows or groups.
Adjacent images are the easiest to select when creating stacks.
2Select an image at one end of the series.
3Holding down the Shift key, press the Right or Left Arrow key to quickly select
additional images. To select individual images that are not adjacent, Command-click
the images.
4Press Command-K to create the new stack.
5Press Shift-K to close the stack.
∏Tip: To quickly move from stack to stack in the Browser, press Option–Page Up or
Option–Page Down.
Working with Stacks
When working with stacks you can:
ÂOpen and close stacks
ÂDesignate a pick image for a stack
ÂDesignate an album pick for a stack
ÂArrange images in a stack
ÂAdd images to and remove images from stacks
ÂSplit stacks
ÂDrag stacks to new locations
ÂWork with stacks in list view
ÂWork with stacks in Full Screen mode

Chapter 8 Stacking Images and Making Picks 181
II
Opening and Closing Stacks
You can close a stack and open it again whenever you wish. You may want to do this to
free up space in the Browser. You can also close stacks to quickly reduce the number of
images you must sort through when selecting images for a final photo edit. When a
stack is closed, only the stack’s pick image appears in the Browser.
To close a stack, do one of the following:
mSelect an open stack, then choose Stacks > Close Stack (or press Shift-K).
mClick the Stack button on the pick image.
To close all stacks:
mChoose Stacks > Close All Stacks, or press Option-semicolon (;).
To open a stack, do one of the following:
mSelect a closed stack, then choose Stacks > Open Stack (or press Shift-K).
mClick the Stack button.
To open all stacks:
mChoose Stacks > Open All Stacks, or press Option-apostrophe (‘).
Designating a Pick Image for a Stack
The pick image represents the stack. You can set the image you like best as the pick, or
Aperture can set the pick automatically. When you select and stack images manually in
the Browser, the leftmost image becomes the pick. You can change the pick whenever
you wish.
To set an image as the pick, do one of the following:
mSelect an image in the stack, then choose Stacks > Pick, or press Command-backslash (\).
mDrag the image you want into the pick (or leftmost) position in the stack. When you see
a green bar appear, release the mouse button.
Note: When you place a stack in a book album or web gallery or web journal album,
Aperture displays the stack pick. If you drag a stacked image that is not the stack pick
into the book or web gallery or web journal album, Aperture reminds you to select the
stack pick. If you don’t want to place the pick in the album, but want to use a different
version from within the stack, select the version you want and then make it the album
pick by choosing Stacks > Set Album Pick.
Only the pick image
is shown when the
stack is closed.

182 Part II Photo Editing
Designating an Album Pick for a Stack
The same stack may appear in several albums. Depending on the purpose of the
album, you may want a different pick image for each album. For example, a stack in a
web gallery album may have one pick image, and the same stack in a book album may
have a different pick image adjusted for printing. You can designate a specific image in
a stack to be an “album pick”—the pick for the stack within a specific album. Each
album can have a different album pick for the stack.
An album pick appears with the Album Pick badge.
To select an album pick for a stack that appears in multiple albums:
mSelect an image in the stack, then choose Stacks > Set Album Pick, or press
Command-Shift-Backslash (\).
Arranging Images in a Stack
It can sometimes be difficult to decide which image in the stack should be the pick. In
many cases, images are so similar that more than one of them merit the pick position.
For this reason, you may want to have alternate images available when presenting
images to clients.
You can change the order of images within a stack to help you choose the pick and
alternates. Moving an image to the left promotes it, and moving it to the right demotes it.
To promote an image in a stack, do one of the following:
mSelect an image, then choose Stacks > Promote, or press Command–left bracket ([).
mDrag the image over the image location you want until you see a green bar appear,
then release the mouse button.
To demote an image in a stack, do one of the following:
mSelect an image, then choose Stacks > Demote, or press Command–right bracket (]).
mDrag the image over the image location you want until you see a green bar appear,
then release the mouse button.
Album Pick badge
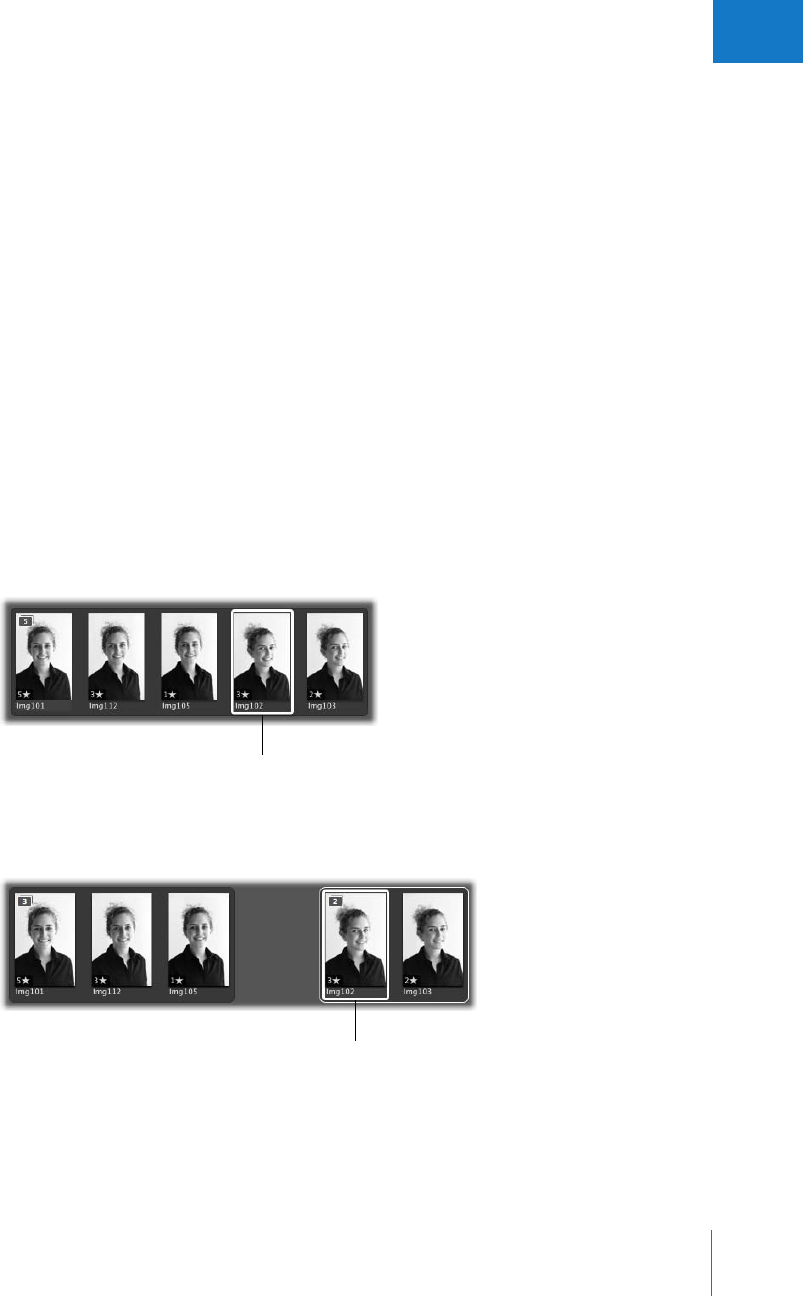
Chapter 8 Stacking Images and Making Picks 183
II
Adding Images to and Removing Images from Stacks
You can add images to and remove images from stacks at any time. You can drag
images into or out of a stack, as well as drag images from one stack to another.
To add an image to a stack, do one of the following:
mSelect the stack and the image you want to add to it, then choose Stacks > Stack (or
press Command-K).
mDrag the image into an expanded stack.
To remove an image from a stack, do one of the following:
mSelect the image, then choose Stacks > Extract Item (or press Shift-Option-K).
mDrag the image out of an expanded stack.
Splitting Stacks
You can split a stack into multiple stacks to refine the organization of your images. All
images remain stacked, but they are now part of new stacks. The image selected as the
splitting point becomes the pick for the new stack.
To split a stack:
1In an expanded stack, select the image that you want as the first image in a new stack.
2Choose Stacks > Split Stack (or press Option-K).
The new stack is marked with a white outline. The selected image becomes the pick of
the new stack.
Select the image you
want as the first image
in the new stack.
The selected image becomes
the pick in the new stack, which
is marked with a white outline.
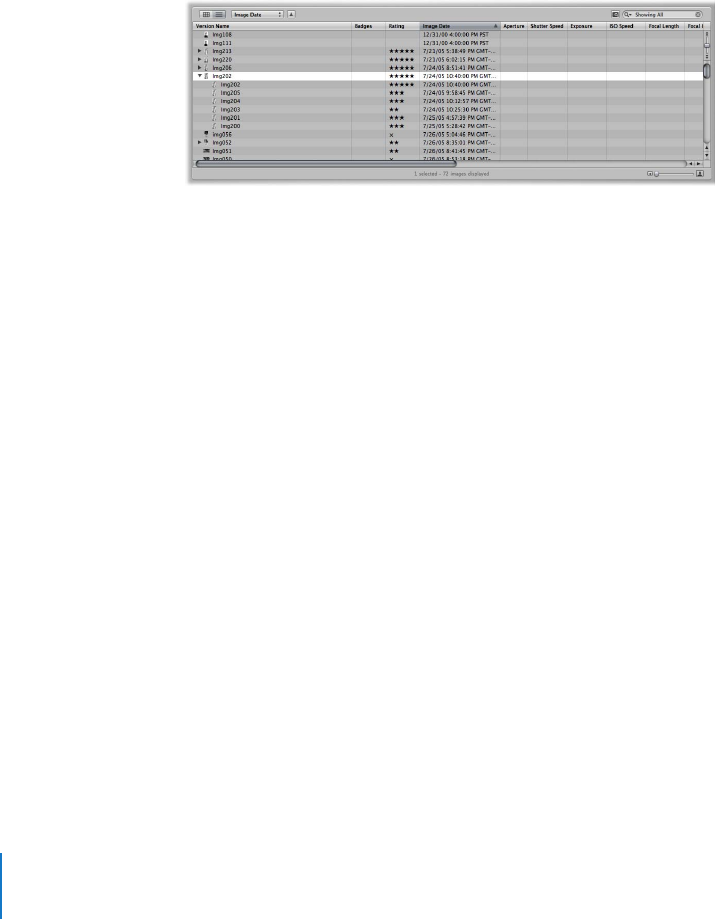
184 Part II Photo Editing
Dragging Stacks
You can drag an entire stack to a new location, and you can drag specific images within
a stack to a new location. When a stack is closed, dragging the stack moves the entire
stack. When a stack is open, you can drag individual versions to new locations in the
Browser. You can also drag images into a stack. If you drag a stacked image into a
different project, however, the entire stack moves to the new location.
Working with Stacks in List View
If you prefer, you can also create and work with stacks in list view. You can select
images to stack, select a pick, add and remove images, and split stacks, just as you can
in grid view.
In list view, a stack is identified by a disclosure triangle beside the image name.
To open and close stacks in list view:
mClick the disclosure triangle beside the stack name.
You can work with the images in a stack in list view by dragging, pressing keyboard
shortcuts, or choosing commands from the Stacks menu.
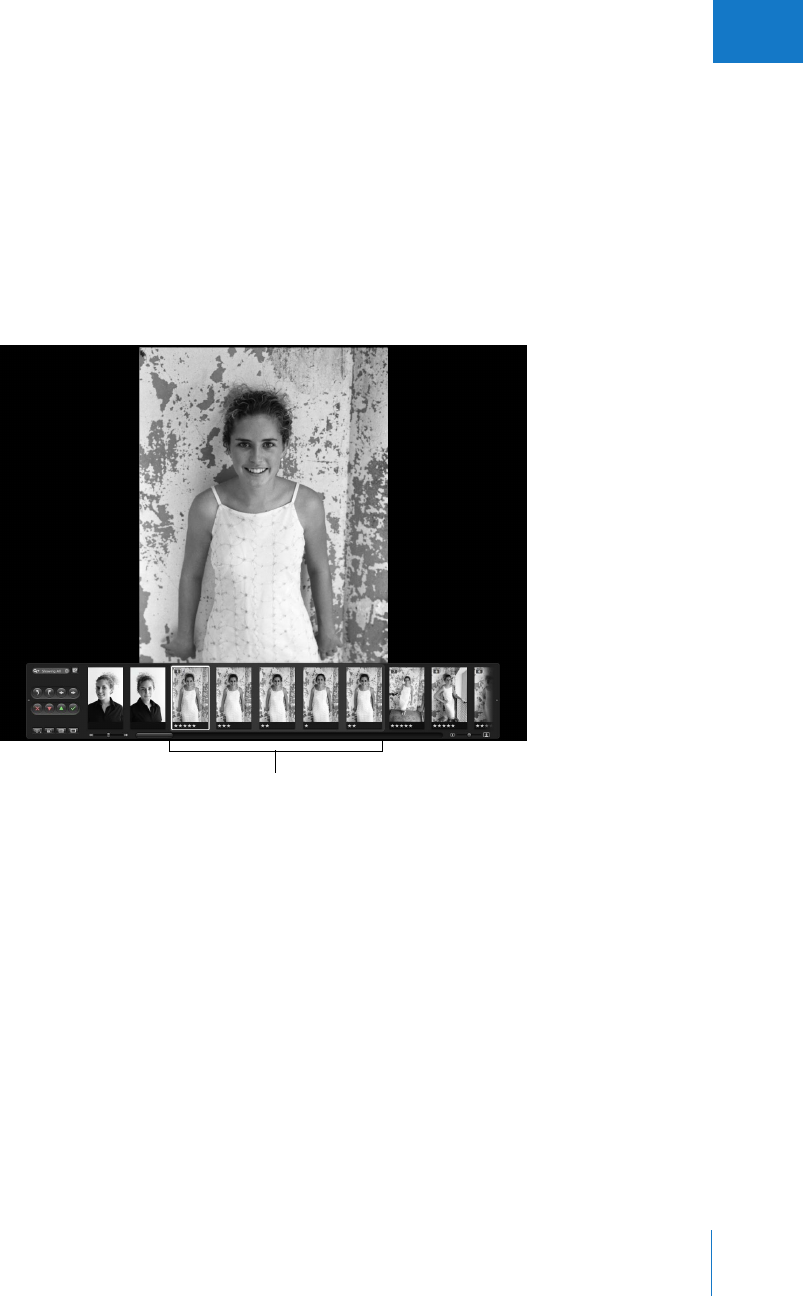
Chapter 8 Stacking Images and Making Picks 185
II
Working with Stacks in Full Screen Mode
You can also review stacks using the filmstrip in Full Screen mode. A stack appears
marked with a Stack button. You can open or close stacks to review the contents of a
stack or compare images within stacks. You can reorder images in a stack or change a
stack’s pick image using the keyboard shortcuts for promoting and demoting stacked
images. You can also use the stacking buttons in the toolbar and keyboard shortcuts to
work with stacks.
When a stack appears in the filmstrip, you can rate the pick image and open the stack
and rate the images within it.
After stacking images, you may want to rate your picks or the images within stacks. For
more information about rating images, see Chapter 9, “Rating Images,” on page 187.
Open stack
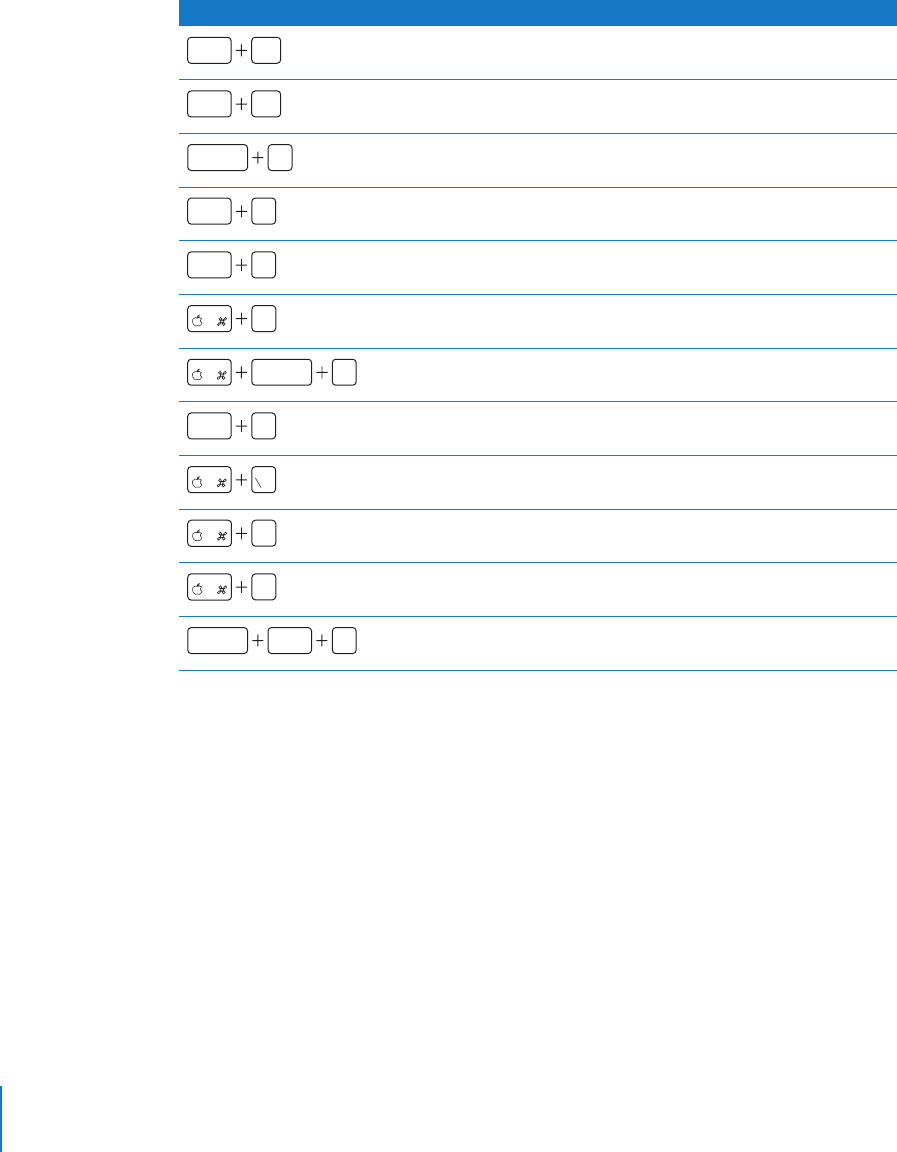
186 Part II Photo Editing
Keyboard Shortcuts for Working with Stacks
Aperture provides the following keyboard shortcuts for efficiently working with stacks:
Keyboard shortcut Function
Go to previous stack
Go to next stack
Open/Close stack
Open all stacks
Close all stacks
Create stack
Unstack
Split stack
Set stack pick
Promote stack item
Demote stack item
Extract item
page
up
option
page
down
option
shift K
option '
option ;
K
shift K
option K
[
]
shift option K

9
187
9Rating Images
Rating images is a quick and easy way to narrow down the
number of images you intend to work with. It can also help
you locate your best images later.
This chapter explains how to quickly assign image ratings and use them to sort and
review images.
This chapter covers:
ÂAn Overview of the Aperture Rating System (p. 188)
ÂRating Images (p. 190)
ÂSorting Images by Rating (p. 192)
ÂIncluding Image Rating in Your Workflow (p. 194)
ÂComparing and Rating Images (p. 195)
ÂKeyboard Shortcuts for Displaying Images with Specific Ratings (p. 197)
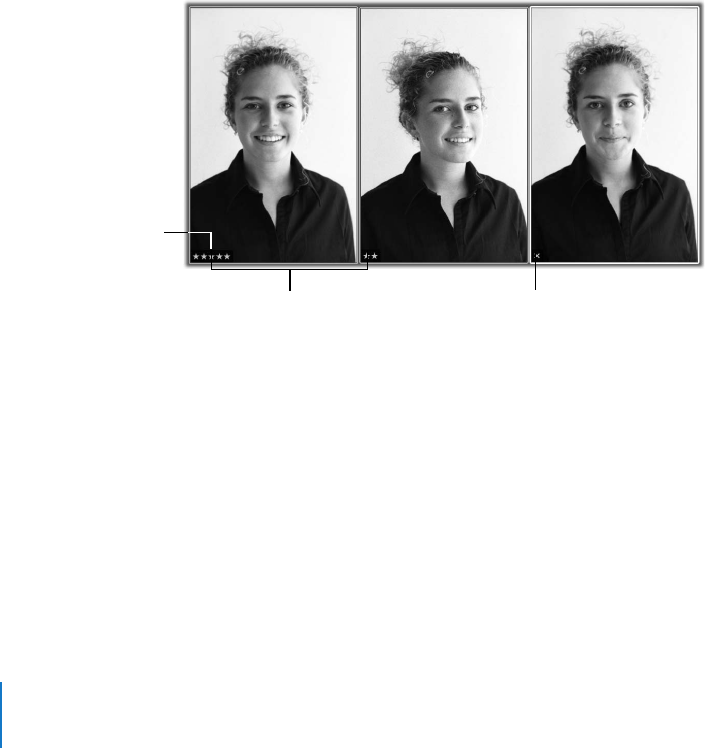
188 Part II
Photo Editing
An Overview of the Aperture Rating System
After finishing a shoot, photographers typically review their images and determine
which ones are worth working with. While a “yes or no” judgment of an image can
work for a small selection of photos, with a larger collection of similar images that show
small variations, photographers need an organized method of noting which images are
superior shots, which deserve further review, and which are poor quality or rejects. A
simple and effective rating system can help photographers quickly narrow the focus of
the selection process.
Rating is a simple process with powerful results. If you can easily identify 100 out of 500
images that aren’t going to work, removing these images reduces your workload by 20
percent. Rating and thereby reducing your workload can save you a considerable
amount of time.
Aperture provides a system for rating images from Select to Reject
.
The easily
decipherable image ratings appear on the images themselves as overlays. Positive
ratings appear as stars; you can rate images from one to five stars, with five being the
highest, or Select, rating. A negative, or Reject, rating appears as an X.
Stars indicate a
positive rating.
Five stars indicate the
highest rating (Select).
An X indicates a negative
rating (Reject).
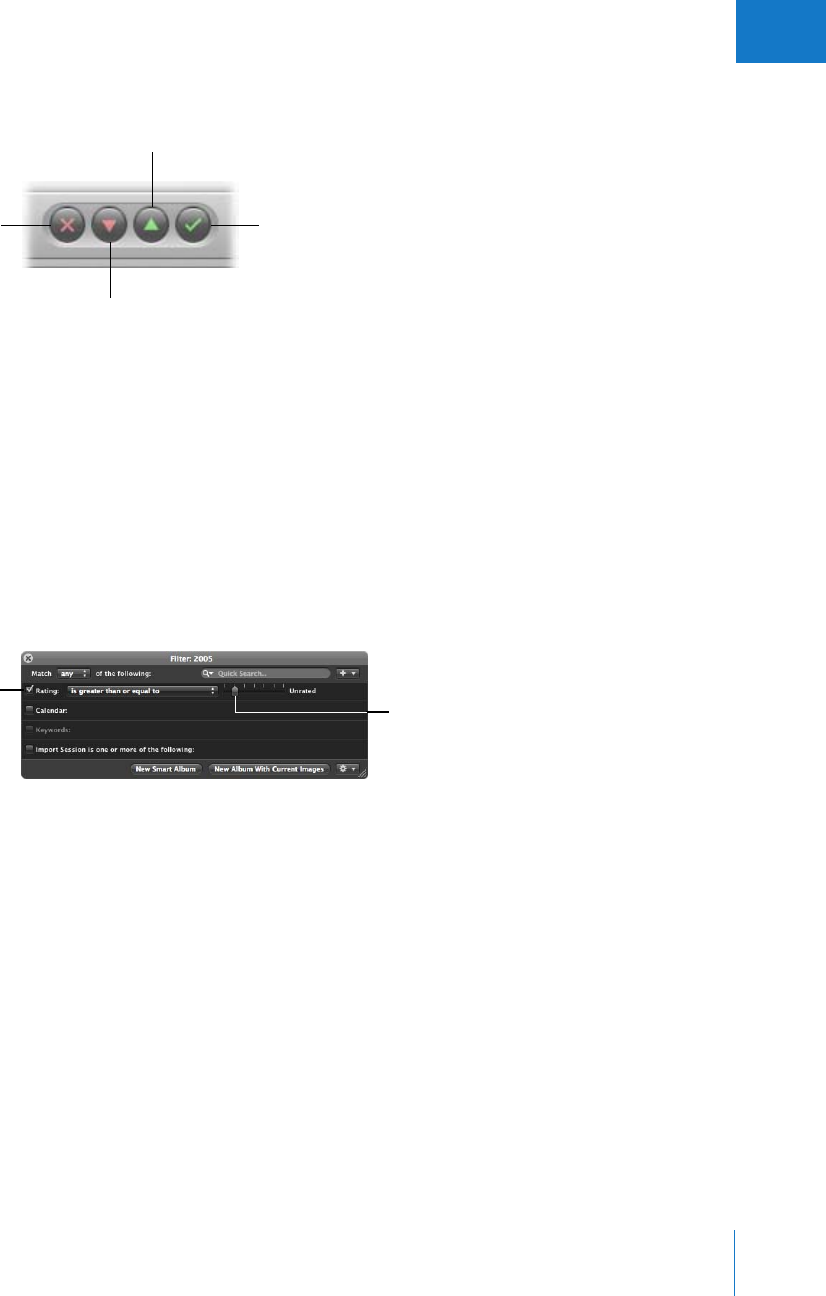
Chapter 9 Rating Images 189
II
The process of rating an image can be as easy as selecting an image and clicking a
rating button to assign a rating to the image.
You can also use keyboard shortcuts to quickly assign or change ratings.
You can quickly review and rate images one after another with speed and efficiency.
You can also select and rate multiple images at once. You can review and rate images in
the Viewer, Browser, and Light Table, as well as in Full Screen mode. When you’ve
finished rating images, Aperture allows you to sort images according to their ratings.
You use the Query HUD to hide or show images of a certain rating. For example, after
an initial rating pass, you can set the Query HUD to show only those images that are
rated one star. You can then closely inspect and further refine your selection or begin
an adjustments pass. Aperture is preset to hide images that are rated Reject, so you
may need to change the Query HUD settings to see rejected images.
Reject
Decrease Rating
Select
Increase Rating
Make sure this checkbox
is selected, then choose
an option from the
pop-up menu.
Set the slider to a rating.
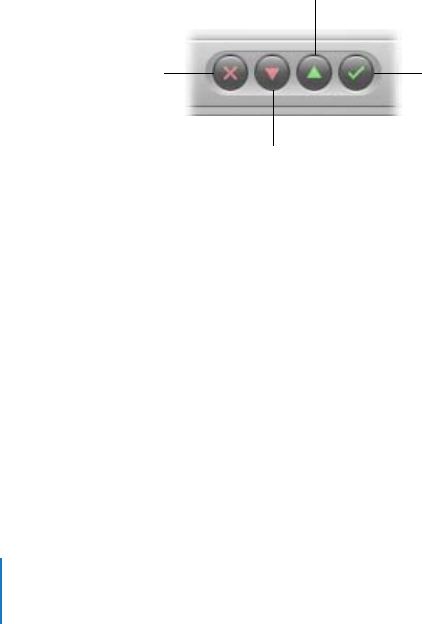
190 Part II Photo Editing
Rating Images
Aperture provides a set of seven possible image ratings:
ÂFive stars, or Select
ÂFour stars
ÂThree stars
ÂTwo stars
ÂOne star
ÂUnrated, or neutral
ÂReject
Rejected images appear with a white X overlay. Positive ratings appear with white star
overlays. If no overlays are displayed on the image, the image is considered neutral or is
not rated. You can rate a single image or apply a rating to several images at once.
Rating Individual Images
You can quickly rate a selected image with the rating buttons.
To rate an individual image:
1Select an image in the Browser.
The image you selected appears in the Viewer.
2Click the rating buttons in the control bar to assign a rating.
ÂTo assign the highest rating to the image: Click the Select button.
ÂTo assign a rating of Reject: Click the Reject button.
ÂTo increase or decrease the image rating: Click the Increase Rating or Decrease
Rating button.
Note: As long as the image is selected, you can change its rating.
3To select the next image, press the Right or Left Arrow key or click the Previous Image
or Next Image button in the control bar.
Reject
Decrease Rating
Select
Increase Rating
Chapter 9 Rating Images 191
II
Keyboard Shortcuts for Rating Images
For quick and efficient rating, use the arrow keys to select images, and use the
following keyboard shortcuts to apply ratings:
The last three keyboard shortcuts in the table allow you to easily cancel the rating of
the previously rated image. For example, if you rate an image Select, and then find the
next image you’re rating is better, you can remove the rating given to the previous
image and increase the currently selected image’s rating.
Keyboard shortcut Function
Increase rating
Decrease rating
Apply Reject
Apply one star
Apply two stars
Apply three stars
Apply four stars
Apply five stars
Increase the rating of the selected image and cancel the rating
assigned to the previously rated image
Decrease the rating of the selected image and cancel the rating
assigned to the previously rated image
Reject the selected image and cancel the rating assigned to the
previously rated image
=
or
=
or
9
or
9
1
1
or
2
2
or
3
3
or
4
4
or
5
or
5
or
shift =
shift -
shift 0
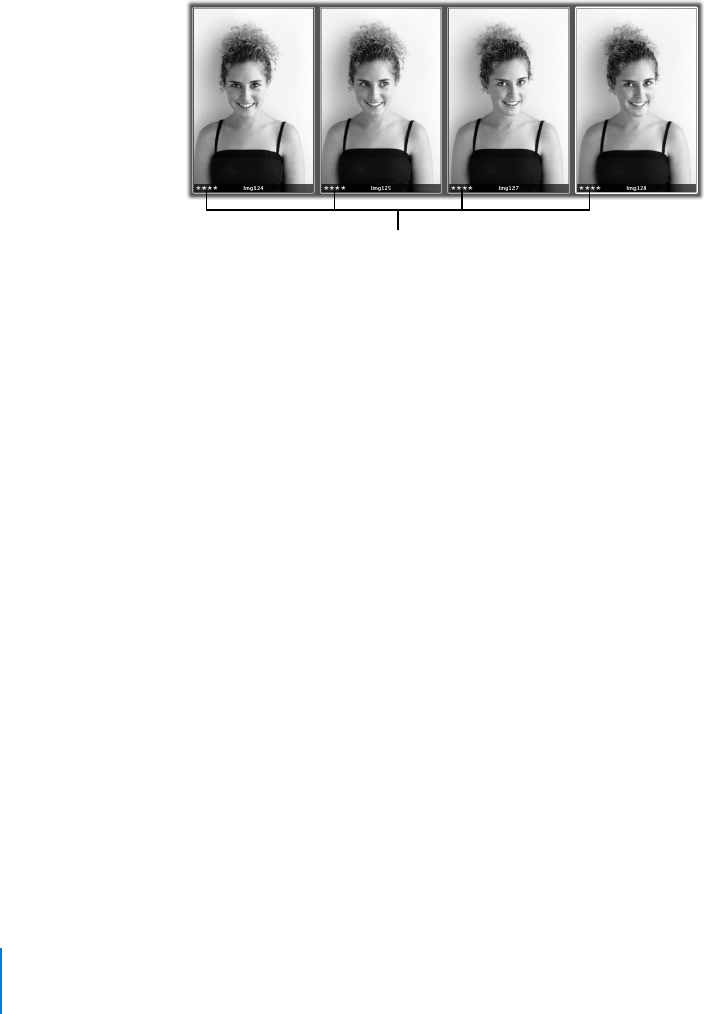
192 Part II Photo Editing
You can also apply a rating to several images at once.
To apply the same rating to multiple images at once:
1Select the images you want to rate.
For more information, see “Navigating Through and Selecting Images” on page 122.
2Click a rating button, or press the keyboard shortcut for a rating (see “Keyboard
Shortcuts for Rating Images” on page 191).
Note: If you’ve selected multiple images to rate and find that only one image receives a
rating, check to see if the Primary Only button in the control bar is deselected. You can
quickly select or deselect the Primary Only option by pressing S.
Sorting Images by Rating
After you’ve rated your images, you can sort images according to a specific rating. For
example, after an initial rating pass, you can choose to show only those images rated
Select, with five stars. You can then closely inspect and further refine your selection or
begin making adjustments to images.
Image files are not deleted when sorted by rating. They are only temporarily removed
from view.
The rating you assign is displayed
on all the selected images.
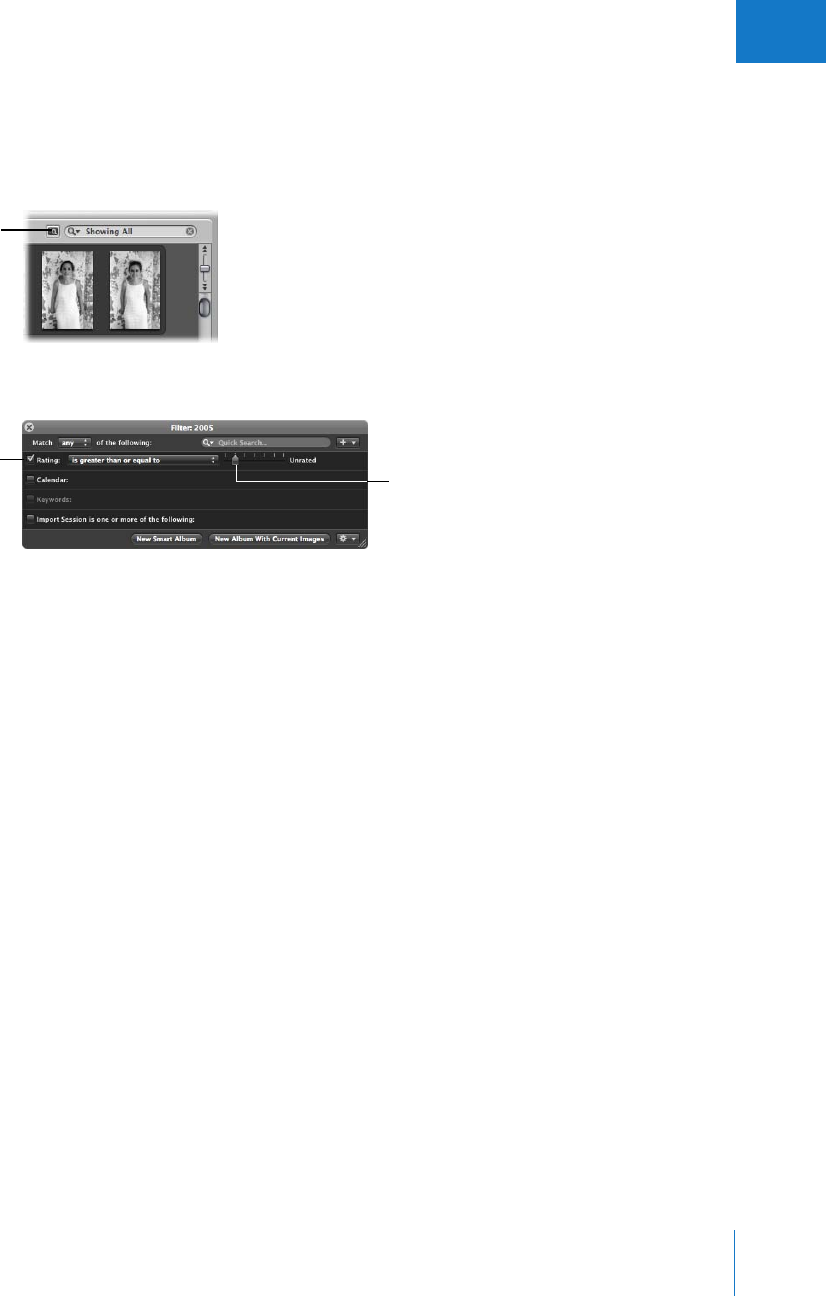
Chapter 9 Rating Images 193
II
To sort images by rating:
1Show the Query HUD by doing one of the following:
ÂChoose Edit > Find (or press Command-F).
ÂIn the Browser, click the Query HUD button next to the search field.
2Select the Rating checkbox.
3Choose an option from the Rating pop-up menu.
4Drag the Rating slider to specify a rating.
The Browser instantly displays only images that meet the specified rating criteria.
To view all images again:
mDeselect the Rating checkbox in the Query HUD (or press Control-6).
To view all images that are unrated or better:
mPress Control–grave accent (`).
To view rejected images only:
mPress Control-8.
Query HUD button
in the Browser
Make sure this checkbox
is selected, then choose
an option from the
pop-up menu.
Set the slider to a rating.
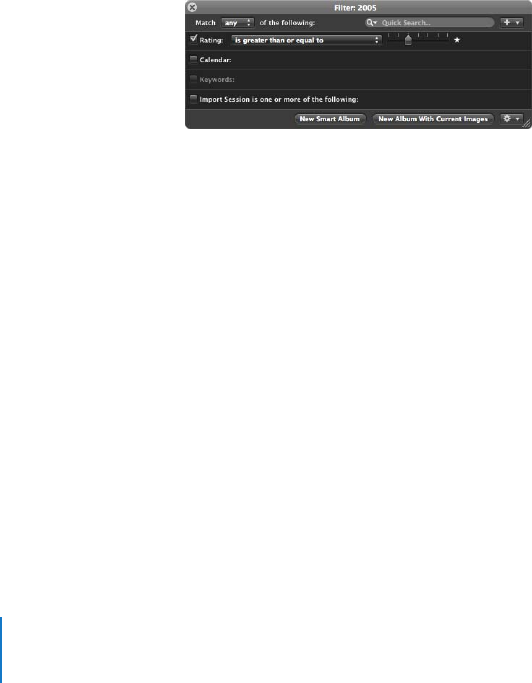
194 Part II Photo Editing
Including Image Rating in Your Workflow
You can use image rating as part of your workflow to help reduce a large group of
images to a smaller group of preferred images. Sometimes you can accomplish the
selection process in one pass, especially if the group of images is small. If the group is
large, additional rating and culling passes may be necessary.
Rating images with multiple passes can allow you to take a measured approach to the
photo editing process. You can systematically rate images and then remove levels of
rated images from view to work with your best images.
Here is a suggested workflow for rating images in multiple passes.
To rate images in multiple passes:
1Begin by assigning a Reject rating to all images that are clearly unacceptable.
If the Query HUD is set to show unrated images or better (the default setting), the
rejected images immediately disappear.
2In the next rating pass, assign positive ratings to any images that deserve a rating of
one star or higher. Leave images you’re uncertain about unrated.
3To hide all unrated images, show the Query HUD and specify a rating that is greater
than or equal to one star as search criteria.
Only images with a rating of one star or better remain visible in the Browser.
4In the next rating pass, assign a rating of two stars or better to any images that are
better than one star.
5Change the search criteria in the Query HUD to show only those images that are rated
two stars or better.
6In the next rating pass, assign a rating of three stars or better to your images.
7Change the search criteria in the Query HUD to show only those images that are rated
three stars or better.
8In the next rating pass, assign a rating of four stars or better to your images.
9Change the search criteria in the Query HUD to show only those images that are rated
four stars or better.
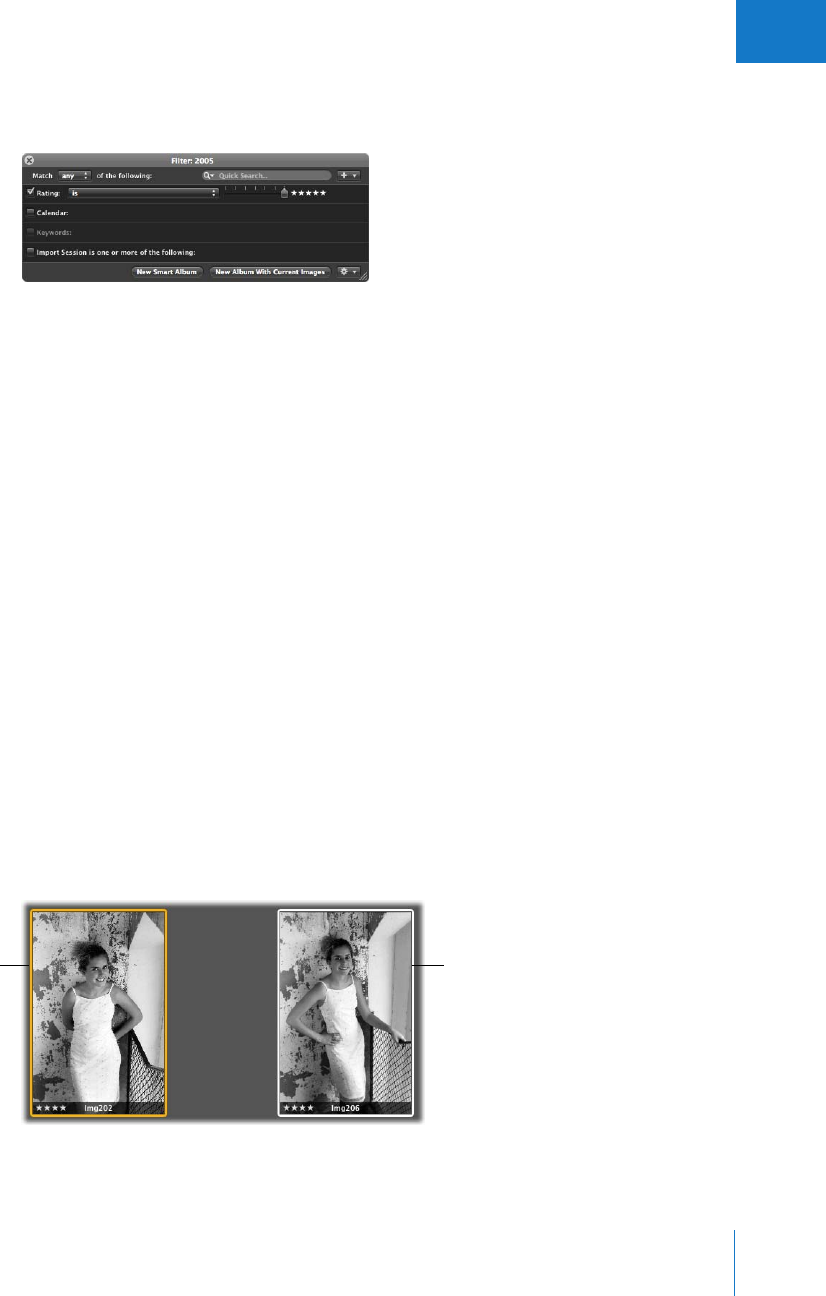
Chapter 9 Rating Images 195
II
10 In the next pass, assign a rating of five stars, or Select, to your best images.
11 Specify a rating that is equal to five stars in the Query HUD.
Only the images rated Select remain visible in the Browser.
Comparing and Rating Images
For those really tough decisions, Aperture allows you to compare and rate a select
image against close alternates. This is particularly useful when you are trying to choose
an image from a small group of similarly composed images.
For example, choosing the best image from a series of head shots can be difficult. Even
in head shots captured within a short time span, the facial expressions of the subject
can change ever so slightly. By comparing images side by side and rating them, you
can more easily select among like images.
To compare and rate images:
1Select the image that appears to be the best.
2To set this image as the “compare” image, choose Edit > Set Compare Item
(or press Return).
The compare image appears in the Viewer and the Browser with a yellow border. The
next selected image appears with a white border immediately to the right of the
compare image. If you want to view another image against the compare image, simply
select it. The alternate image you selected appears to the right of the compare image
in the Viewer.
The compare image has
a yellow border.
The alternate image has
a white border.
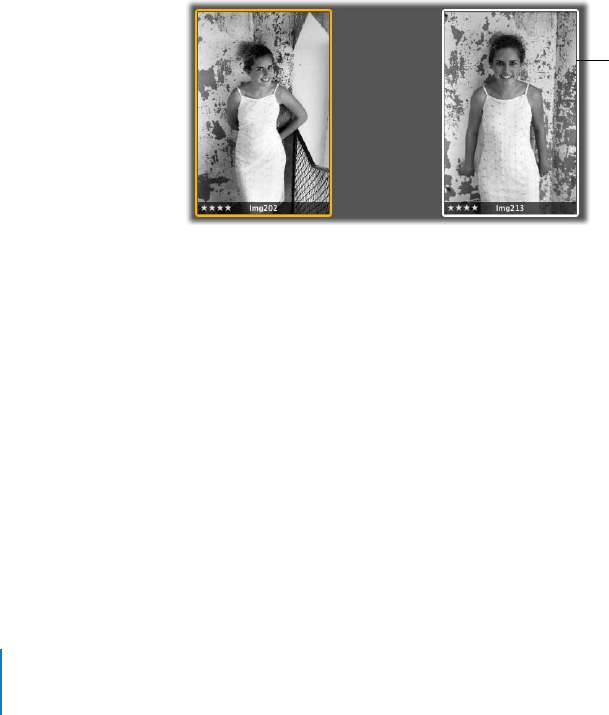
196 Part II Photo Editing
If you have a second display and want to view each image on a different display,
choose View > Secondary Viewer > Span (or press Option-S).
3Rate your compare image by doing one of the following:
ÂTo assign the Select rating: Press Option-backslash (\).
ÂTo increase the compare image’s rating: Press Option–equal sign (=).
ÂTo decrease the compare image’s rating: Press Option-hyphen (-).
ÂTo assign the Reject rating: Press Option-9.
The rating appears as an overlay on the compare image.
4Rate the alternate image by doing one of the following:
ÂTo assign the Select rating: Press Command-5 or backslash (\).
ÂTo increase the image’s rating: Press Command–equal sign (=).
ÂTo decrease the image’s rating: Press Command-hyphen (-).
ÂTo assign the Reject rating: Press Command-9.
The rating appears as an overlay on the alternate image.
5Navigate to the next alternate by pressing the Left or Right Arrow key, or click the
Previous Image or Next Image button in the control bar.
If you discover that the new selection is a better choice or has the best rating, you can
make it the compare image by pressing Return or choosing Edit > Set Compare Item.
You can then review and compare your alternates against this image to confirm it as
the best image.
∏Tip: To quickly make a selected item the compare image, press Return. To turn off the
comparison feature, press Command-Return.
The new alternate
appears in the Browser
with a white border.
Chapter 9 Rating Images 197
II
Keyboard Shortcuts for Displaying Images
with Specific Ratings
To quickly display images with a certain rating level or better, use the following
keyboard shortcuts:
Keyboard shortcut Function
Show unrated images or better
Show images rated one star or better
Show images rated two stars or better
Show images rated three stars or better
Show images rated four stars or better
Show images rated five stars (Select)
Show all
Show unrated images only
Show rejects only
control
control 1control
2control
3control
4control
5control
6control
7control
8control

10
199
10 Applying Keywords to Images
Adding keywords to your images helps you organize your
images and quickly locate specific images.
This chapter provides information about adding keywords to images and using these
keywords to help define and organize your images.
This chapter covers:
ÂAn Overview of Keywords (p. 200)
ÂViewing Keywords Applied to Images (p. 202)
ÂApplying Keywords Using the Keywords HUD (p. 206)
ÂApplying Keywords Using Keyword Controls and Keyword Presets (p. 213)
ÂApplying Keywords Using the Lift & Stamp HUD (p. 218)
ÂApplying Keywords Using the Metadata Inspector (p. 222)
ÂApplying Keywords to Images in the Light Table (p. 223)
ÂRemoving Keywords from an Image (p. 223)
ÂImporting and Exporting Keyword Lists (p. 224)
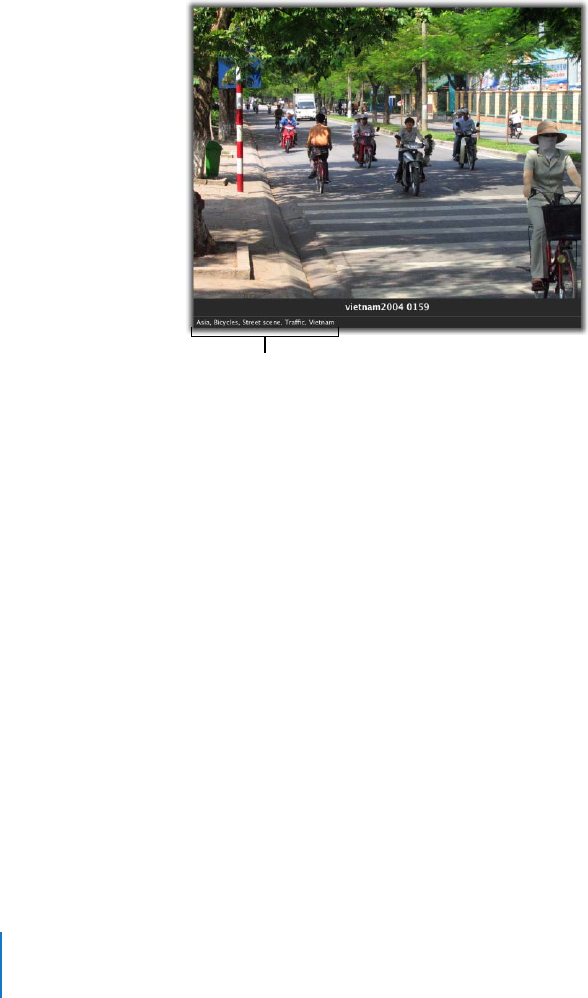
200 Part II Photo Editing
An Overview of Keywords
Keywords are descriptive words assigned to image versions and saved as metadata. For
example, a family portrait may include such keywords as Portrait, Family, Father, Mother,
Daughter, Husband, Wife, Park, Client Select, Purchased, and more.
Once you have applied keywords to your images, you can have Aperture display an
image’s keywords in the Viewer and Browser. You can also view keywords for selected
images in the Metadata Inspector.
You can use the Query HUD to quickly locate images by their keywords and use Smart
Albums to automatically group images that have specific keywords. For example, you
can create a Smart Album at the Library level named Purchased, which automatically
groups all images with the keyword Purchased. If you want to quickly review the
images your clients bought over time, all you have to do is open the Smart Album
named Purchased.
You can also apply keywords to images based on your future intentions. For example,
you could create a Smart Web Gallery Album that gathers images that have a For web
keyword applied. As you’re reviewing your images, apply the keyword For web to any
image you think is worthy of being published on your website. All images with the
keyword For web are now collected in the Smart Web Gallery Album. If you later change
your mind about publishing an image on your website, you can always remove the
keyword. As soon as you remove the keyword, the image is removed from the Smart
Web Gallery Album.
Keywords assigned
to an image
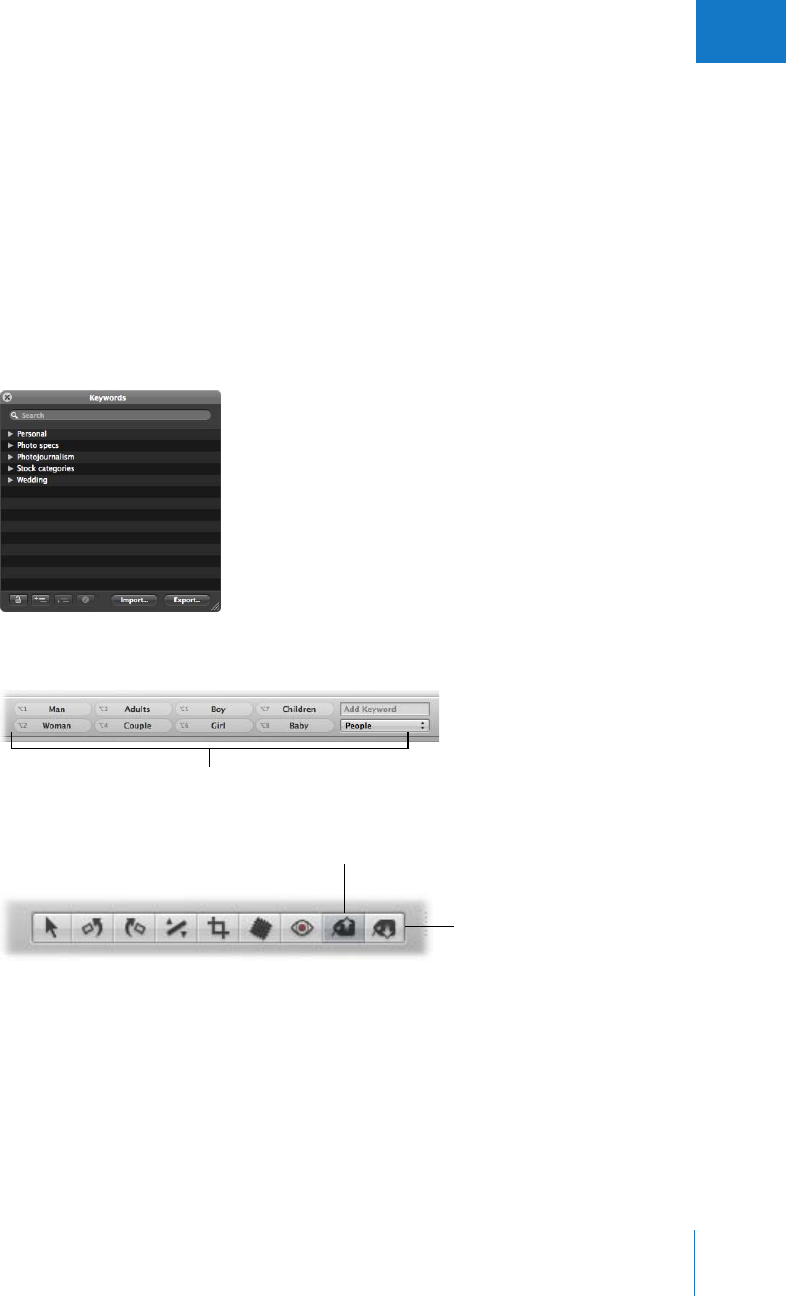
Chapter 10 Applying Keywords to Images 201
II
If you sell your images to image libraries, you can export the keywords assigned to your
images as IPTC data. During export, Aperture embeds your keywords individually in the
image file as IPTC-compliant keyword fields. The more keywords you apply to your
images, the more likely it is that your images will be located by potential customers. For
more information, see Chapter 15, “Exporting Your Images,” on page 291.
Important: If you are planning to export your keywords as IPTC data, make sure your
keyword phrases are no more than 64 characters in length. Longer keyword phrases
may not be displayed properly in other IPTC editors or operating systems.
There are several ways to apply keywords:
ÂUsing the Keywords HUD
ÂUsing keyword controls and presets in the control bar
ÂUsing the Lift and Stamp tools via the Lift & Stamp HUD
Keyword controls
Lift tool in the toolbar
Stamp tool in the toolbar
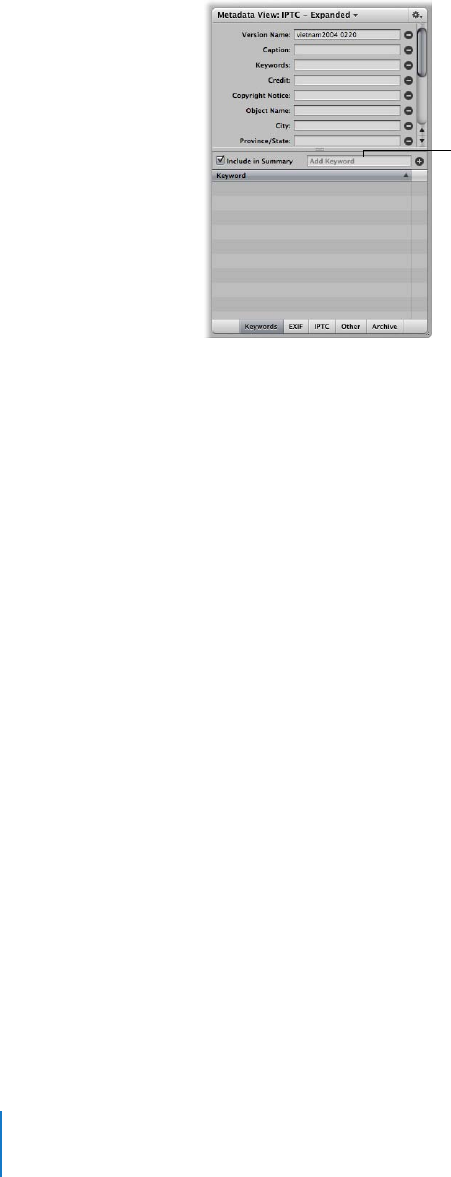
202 Part II Photo Editing
ÂUsing the Metadata Inspector
Viewing Keywords Applied to Images
You can view the keywords applied to an image version in several areas:
ÂIn overlays that appear on or below images in the Browser or Viewer
ÂIn the Metadata Inspector
ÂIn the Keywords column of the Browser, when the Browser is in list view
Displaying Keywords in the Viewer and Browser
You can turn on the display of image keywords in the Browser and Viewer. Your
keywords are displayed in overlays that appear across the bottom of the image or
below the image.
Add keywords here.
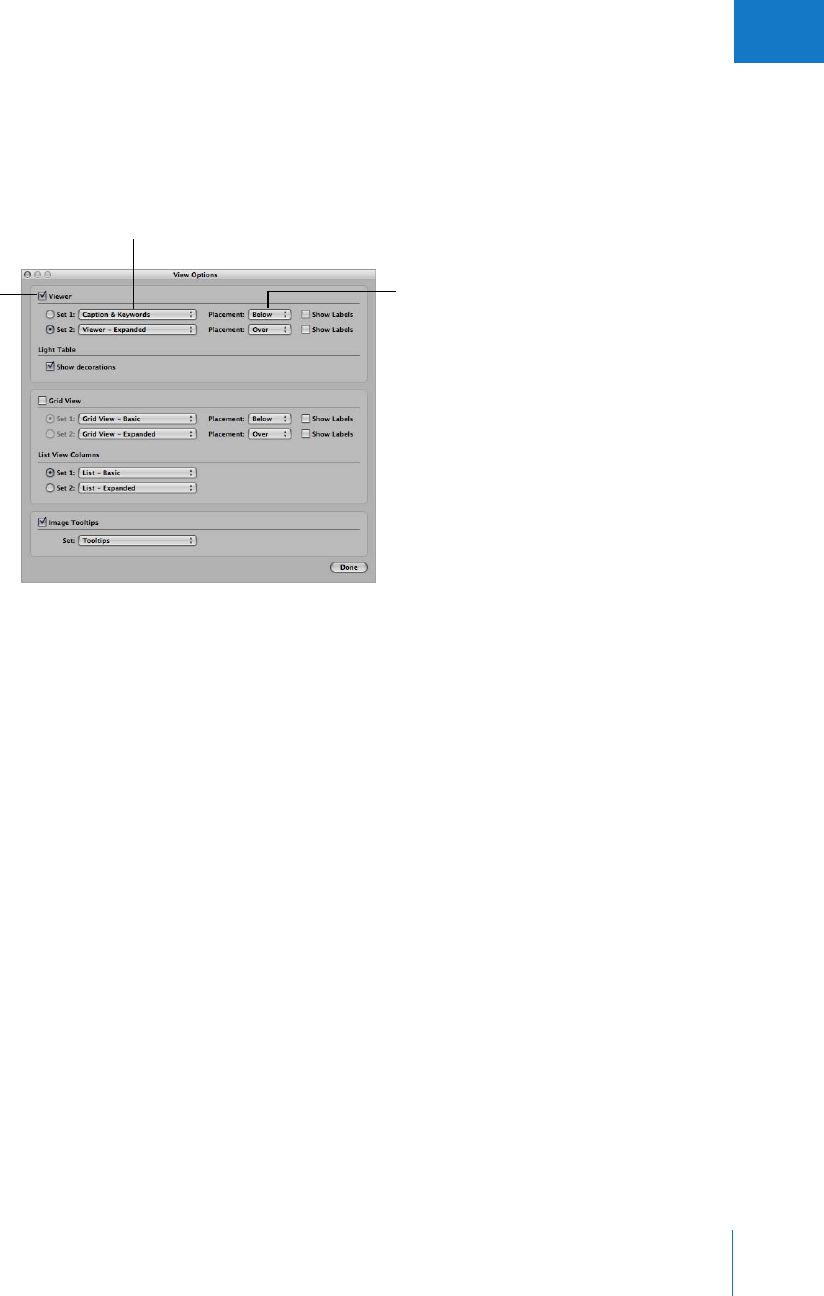
Chapter 10 Applying Keywords to Images 203
II
To display keywords using overlays:
1Choose View > View Options (or press Command-J).
2In the View Options window, select the Viewer checkbox.
3Choose Caption & Keywords from the Set 1 pop-up menu.
4Choose an option from the Placement pop-up menu to specify where you want the
information displayed in relation to the image.
5To display keywords in the Browser, select the Grid View checkbox.
6Choose Caption & Keywords from the Set 1 pop-up menu.
7Choose an option from the Placement pop-up menu to specify where you want the
information displayed in relation to the image.
8Click Done.
Aperture is now set to display keywords assigned to images. You can quickly hide or
show the overlays when you need to.
Make sure the Viewer
checkbox is selected.
Choose where you want the
information displayed from
this pop-up menu.
Choose Caption & Keywords
from this pop-up menu.
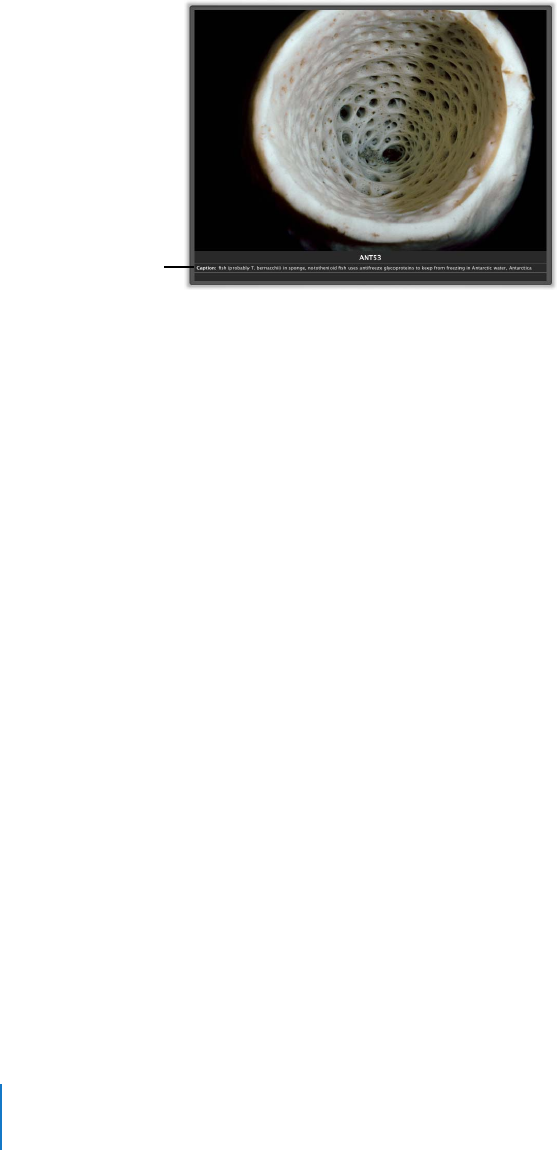
204 Part II Photo Editing
To hide or show overlays in the Viewer or Browser, do one of the following:
mPress the Y key to hide or show overlays in the Viewer.
mPress the U key to hide or show overlays in the Browser.
Viewing Keywords Using the Metadata Inspector
The Metadata Inspector provides views of the metadata associated with a selected
image. When you show the Metadata Inspector and select an image, the Metadata
Inspector displays the keywords assigned to your image, including IPTC keywords.
To view keywords using the Metadata Inspector:
1If necessary, show the Metadata Inspector by doing one of the following:
ÂChoose Window > Show Inspectors (or press I).
ÂDouble-click an image in the Browser.
ÂChoose Window > Show Metadata (or press Control-D).
The captions and
keywords appear in the
area you specified.
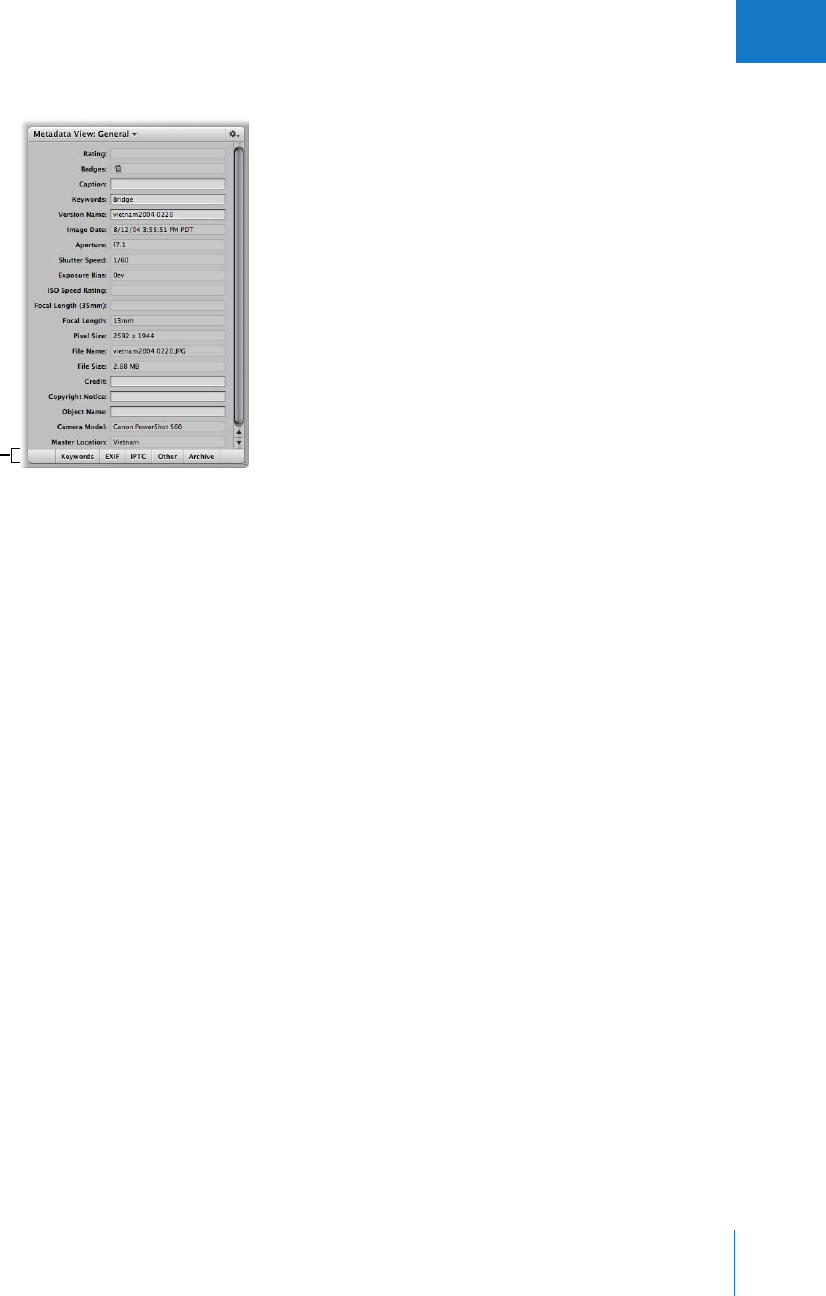
Chapter 10 Applying Keywords to Images 205
II
2Click the Keywords button at the bottom of the Metadata Inspector.
3In the Browser, select an image to see its keywords.
Any keywords applied to the selected image appear in the Keyword summary area of
the Metadata Inspector.
Viewing Keywords in the Browser in List View
When the Browser is set to list view, Aperture can display a column that shows the
keywords assigned to images.
To view keywords in the Keywords column of the Browser:
1Choose View > View Options (or press Command-J).
The View Options window appears.
2In the List View Columns section, select the Set 1 button, if necessary, and choose
Caption & Keywords from the Set 1 pop-up menu, then click Done.
3To set the Browser to list view, click the List View button (or press Control-L).
The Browser switches from grid view to list view. The keywords for each image appear
in the Keywords column.
Click the Keywords
button to display the
keywords applied to a
selected image.
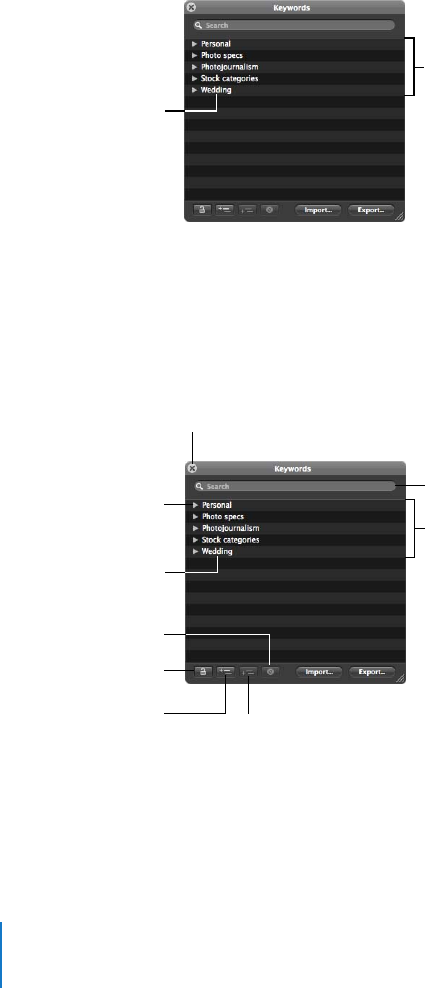
206 Part II Photo Editing
Applying Keywords Using the Keywords HUD
The Keywords HUD provides a versatile way to apply keywords to images. The Keywords
HUD contains a library of predefined keywords that you can browse and search. You can
also add your own keywords or remove keywords. The Keywords HUD is automatically
updated with any keywords you add. For example, when you enter a new keyword in the
Metadata Inspector, that keyword also appears in the Keywords HUD. When you change a
keyword, for example, by changing its spelling or capitalization, the keyword is updated
on all images that have that keyword assigned.
You can use the Keywords HUD in the Browser in grid and list views, in the Light Table,
and in Full Screen mode. You can also use the Keywords HUD when working with book
albums in the Book Layout Editor and when working with web gallery and web journal
albums in the Webpage Editor.
Controls in the Keywords HUD
ÂClose button: Click this button to close the Keywords HUD.
ÂSearch field: Enter text to search for keywords that match the text. Click the Reset
button (with an X) to clear the field.
Keyword group
Keyword list
Disclosure triangle
Close button
Search field
Keyword group
Lock button
Add Subordinate
Keyword button
Keyword list
Remove Keyword button
Add Keyword button
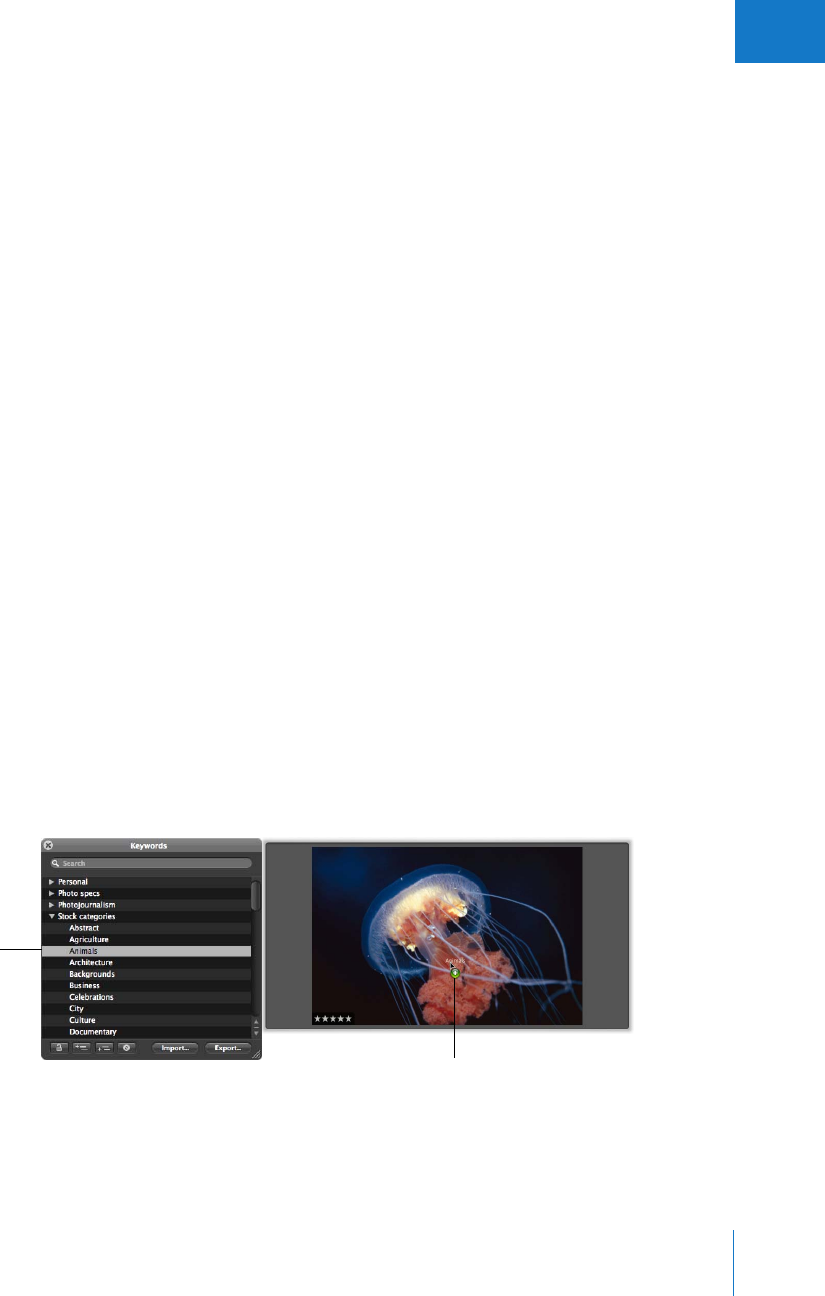
Chapter 10 Applying Keywords to Images 207
II
ÂKeyword group: A set of related keywords. Some are predefined in Aperture, but you
can create new groups and add keywords to them. You can have keyword groups
within other groups.
ÂDisclosure triangle: Click the disclosure triangle next to a keyword group to view all
keywords in the group.
ÂLock button: Click the Lock button to prevent changes to the Keyword HUD.
ÂAdd Keyword button: Click this button to add a keyword to the keyword library of the
Keywords HUD.
ÂAdd Subordinate Keyword button: Click this button to add a subordinate keyword,
such as a keyword within a keyword group.
ÂRemove Keyword button: Click this button to remove one or more selected keywords.
ÂKeyword list: Displays all keywords in the keyword library of the Keywords HUD.
Using the Keywords HUD to Apply Keywords
You can use the Keywords HUD to quickly apply keywords to one or more images. You
can simply drag keywords to any image or selection of images in the Viewer or
Browser. When you select a group of images, you can assign keywords to all the
selected images at once.
To assign a keyword using the Keywords HUD:
1To show the Keywords HUD, do one of the following:
ÂChoose Window > Show Keywords HUD (or press Shift-H).
ÂClick the Keywords HUD button in the toolbar.
The Keywords HUD appears.
2Do one of the following:
ÂIf the Browser is in grid view: Drag a keyword or keyword group from the Keywords
HUD to an image or selected images in the Viewer or Browser.
Drag a keyword from the
Keywords HUD...
...to an image.

208 Part II Photo Editing
ÂIf the Browser is in list view: Drag the keyword from the Keywords HUD to an image in
the Browser list. The keyword appears in the Keywords column for that image.
Note: Depending on the view options you have set, the Keywords column may not
appear. For more information, see “Viewing Keywords in the Browser in List View”
on page 205.
The keyword is applied to the image or selection of images to which you dragged
it. To view keywords applied to images, see “Viewing Keywords Applied to Images”
on page 202.
To apply multiple keywords using the Keywords HUD:
1To show the Keywords HUD, do one of the following:
ÂChoose Window > Show Keywords HUD (or press Shift-H).
ÂClick the Keywords HUD button in the toolbar.
The Keywords HUD appears.
2To select the keywords you want to apply, do one of the following:
ÂHold down the Shift key while pressing the Up or Down Arrow key to select
several keywords.
ÂShift-click a group of adjacent keywords.
ÂCommand-click keywords that aren’t adjacent.
The selected keywords are highlighted in the keyword list.
3Drag the keywords from the Keywords HUD to an image or selection of images in the
Browser or Viewer.
The keywords are assigned to the image or selection of images to which you
dragged them.
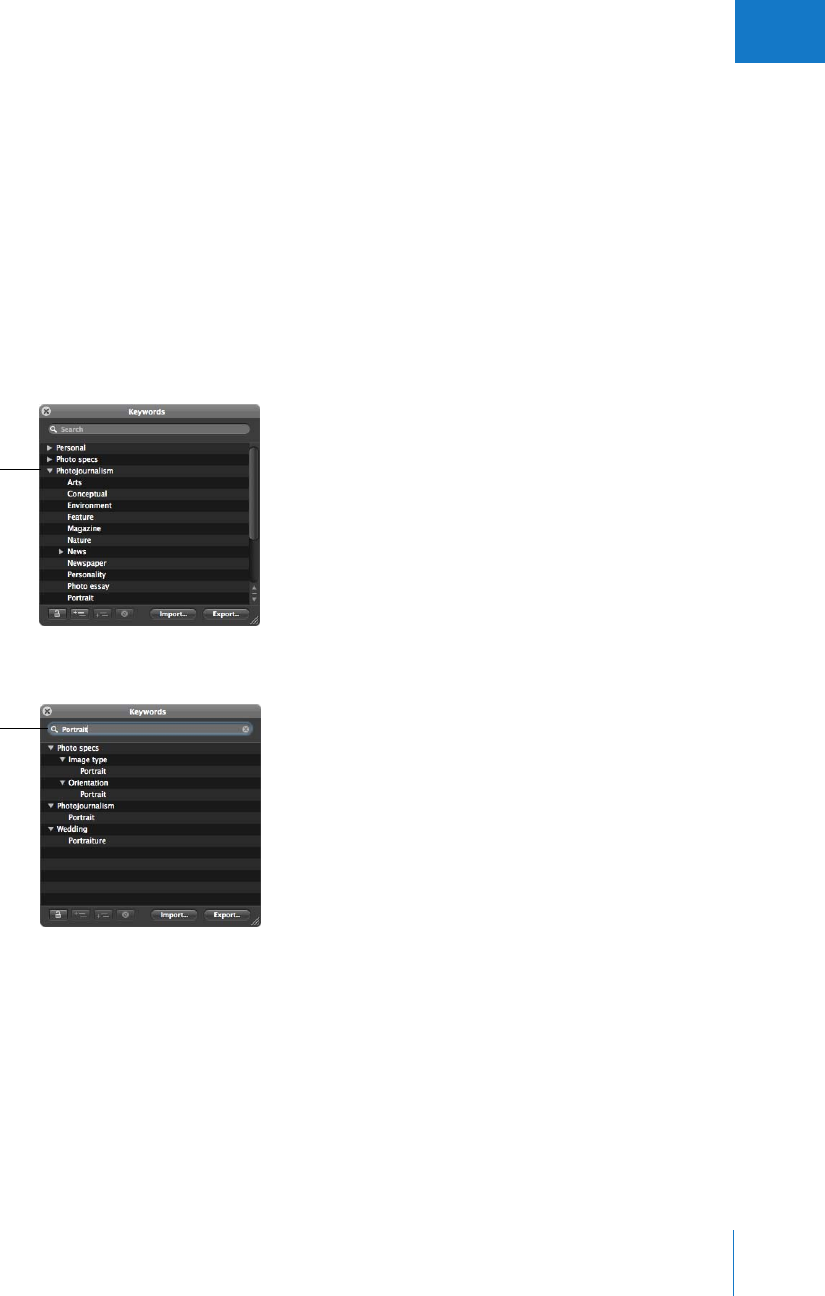
Chapter 10 Applying Keywords to Images 209
II
Browsing and Searching for Keywords
You can browse and search for specific keywords in the Keywords HUD.
To locate a keyword using the Keywords HUD:
1To show the Keywords HUD, do one of the following:
ÂChoose Window > Show Keywords HUD (or press Shift-H).
ÂClick the Keywords HUD button in the toolbar.
The Keywords HUD appears.
2Do one of the following:
ÂScroll up and down to review the keywords, and click the disclosure triangles to
reveal the keywords in each keyword group.
ÂType the keyword you’re looking for in the Keywords HUD search field.
The keyword list updates to reveal all instances of the keyword you entered.
Click the disclosure
triangle next to a
keyword group to
display all the
keywords in it.
Enter a keyword in
the search field.
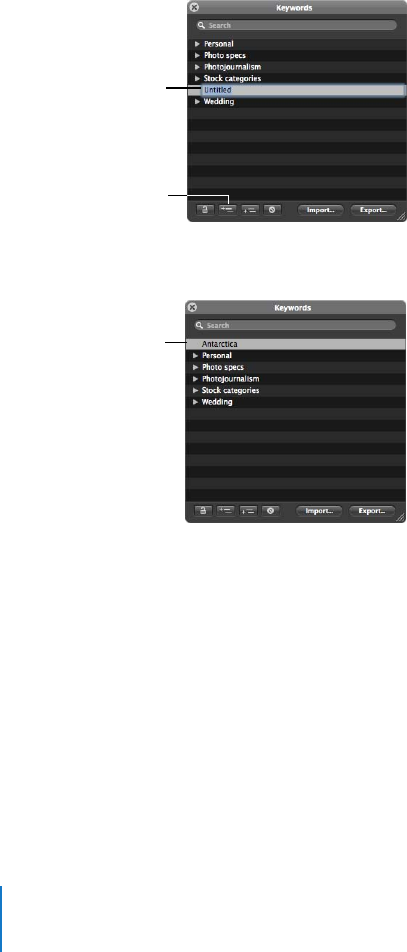
210 Part II Photo Editing
Adding Keywords to the Keywords HUD
You can add new keywords to the keyword library of the Keywords HUD.
To add new keywords to the keyword library:
1To show the Keywords HUD, do one of the following:
ÂChoose Window > Show Keywords HUD (or press Shift-H).
ÂClick the Keywords HUD button in the toolbar.
The Keywords HUD appears.
2Click the Add Keyword button.
3Type the new keyword, then press Return.
A new, untitled
keyword appears in
the keyword list.
Click this button to
add a new keyword.
The new keyword is
added to the keyword
library and is sorted
alphabetically.
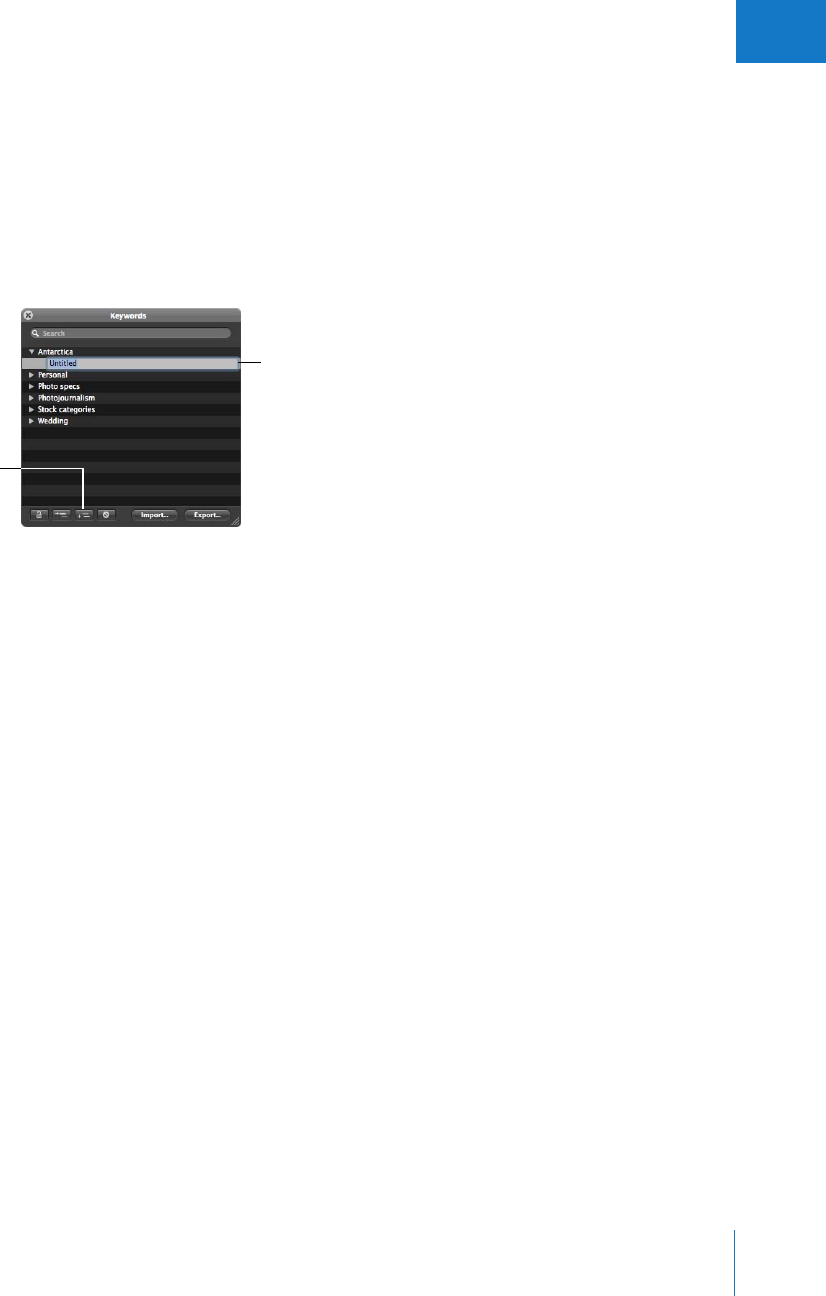
Chapter 10 Applying Keywords to Images 211
II
To add keywords to a keyword group:
1To show the Keywords HUD, do one of the following:
ÂChoose Window > Show Keywords HUD (or press Shift-H).
ÂClick the Keywords HUD button in the toolbar.
The Keywords HUD appears.
2Select the keyword group to which you want to add a keyword.
3Click the Add Subordinate Keyword button.
4Type the new keyword, then press Return.
The new keyword appears in the keyword group you selected, sorted alphabetically
within the group.
You can also create new keyword groups. For example, if you added the keyword Fish
to your list, you might want to add Angelfish, Dolphin, Tuna, and Shark under the Fish
keyword so you can further define your images.
To create a new keyword group with keywords in it:
1To show the Keywords HUD, do one of the following:
ÂChoose Window > Show Keywords HUD (or press Shift-H).
ÂClick the Keywords HUD button in the toolbar.
The Keywords HUD appears.
2Click the Add Keyword button, then type a name for the new keyword group.
3With the new keyword group name selected, click the Add Subordinate Keyword
button, type a keyword, then press Return.
The keyword you just added becomes the first keyword in the new group.
4To add another keyword to the new group, click the Add Keyword button, type a
keyword, then press Return.
Click this button to add a
keyword within a
keyword group.
A new, untitled keyword
appears in this list within
the keyword group.
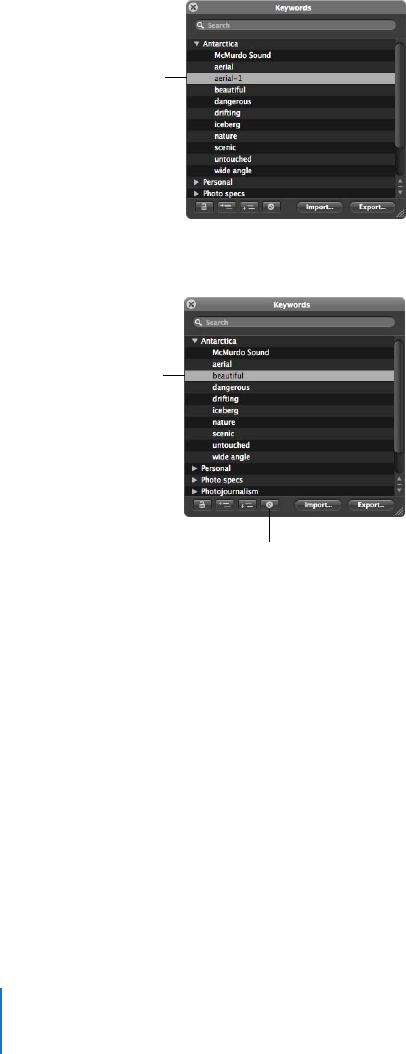
212 Part II Photo Editing
Removing Keywords from the Keywords HUD
After adding keywords to the keyword library of the Keywords HUD, you may decide
not to use certain keywords. If so, you can easily remove them.
To remove a keyword or keyword group from the keyword library:
1In the Keywords HUD, select the keyword or keyword group you want to remove.
2Click the Remove Keyword button.
Important: Removing a keyword from the keyword library removes it from any images
to which it’s already assigned.
The selected keyword
is highlighted.
Click this button to
remove a keyword.
The selected keyword is
removed. The next
keyword in the list is
automatically selected.
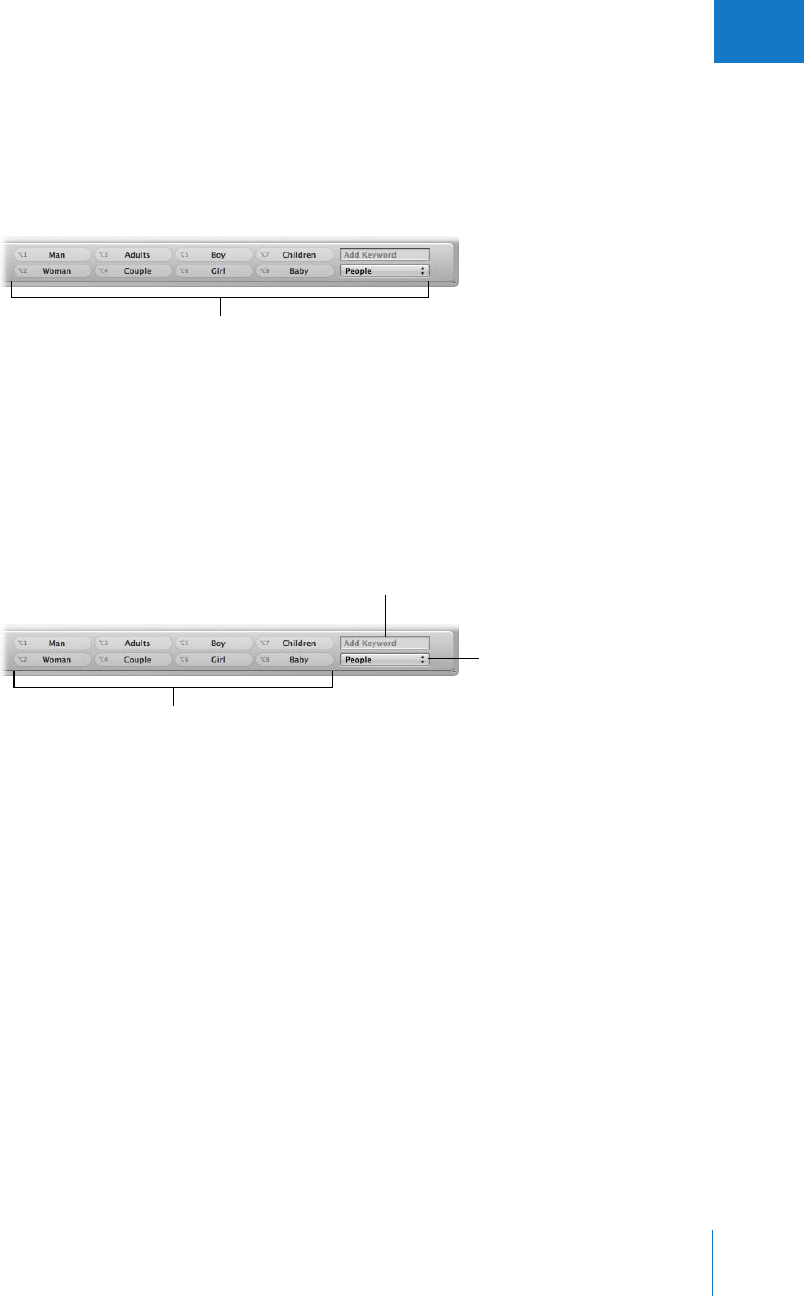
Chapter 10 Applying Keywords to Images 213
II
Applying Keywords Using Keyword Controls
and Keyword Presets
One way to apply keywords is to use the keyword controls located in the control bar.
You can add new keywords to images or apply preset keywords that are part of a
keyword group.
About the Keyword Controls in the Control Bar
The keyword controls are located at the right side of the control bar and are typically
shown by default. However, if there is not enough room on your screen (for example, if
the Adjustments Inspector and Metadata Inspector are shown), they are hidden.
To show the keyword controls in the control bar:
1If necessary, choose Window > Hide Inspectors (or press I) to hide the Inspectors panel.
2Choose Window > Show Keyword Controls (or press Shift-D).
ÂKeyword buttons: These buttons display the preset keywords in the selected keyword
preset group. The first eight keywords are assigned to the keyboard shortcut key
combination of Option and a number key (1 through 8) on the keyboard. Press
Option and a number key on the keyboard (not the numeric keypad) to add the
preset keyword to a selected image, or click a button. The control bar can hold up to
20 keyword buttons. To remove a keyword applied by clicking a button, press
Shift-Option and the button’s corresponding number key. To remove all keywords,
press Shift-Option-9.
Keyword controls
Keyword Preset Group
pop-up menu
Keyword buttons showing
individual keywords assigned
to the number keys 1–8
Add Keyword field
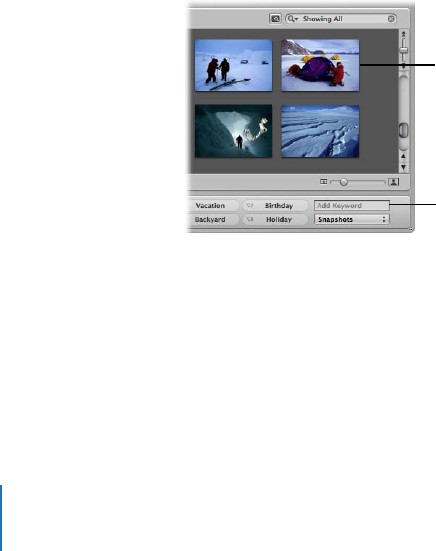
214 Part II Photo Editing
ÂAdd Keyword field: Type a new keyword in this field and press Return to add it to a
selected image. To remove a keyword you’ve just applied, type the keyword again
and press Shift-Return. If the Keywords HUD is locked, you are asked whether you
want to unlock the Keywords HUD and add the keyword to the keyword library, or
not add the keyword to the image.
ÂKeyword Preset Group pop-up menu: Use this to choose the keyword preset group
you want displayed. The first eight keywords in the group are assigned to the
keyboard shortcut combination Option and a number key from 1 through 8.
Adding Keywords to Images Using Keyword Controls
You can easily add a preset keyword to an image.
To add a preset keyword to an image:
1Select the image to which you want to assign a keyword.
2Do one of the following:
ÂChoose Metadata > Add Keyword, then choose the keyword you want from
the submenu.
ÂPress Option and a number key from 1 to 8 to assign one of the first eight keywords.
ÂClick a keyword button in the control bar.
You can also easily apply a new keyword that’s not part of your keyword library.
To apply a new keyword using the keyword controls:
1In the Browser, select an image or group of images.
2In the control bar, type the new keyword in the Add Keyword field, then press Return.
The keyword you entered is now applied to the image or group of images.
To view keywords applied to images, see “Viewing Keywords Applied to Images” on
page 202.
Select the image to
which you want to apply
a new keyword.
Enter your keyword in
this field, then press
Return.
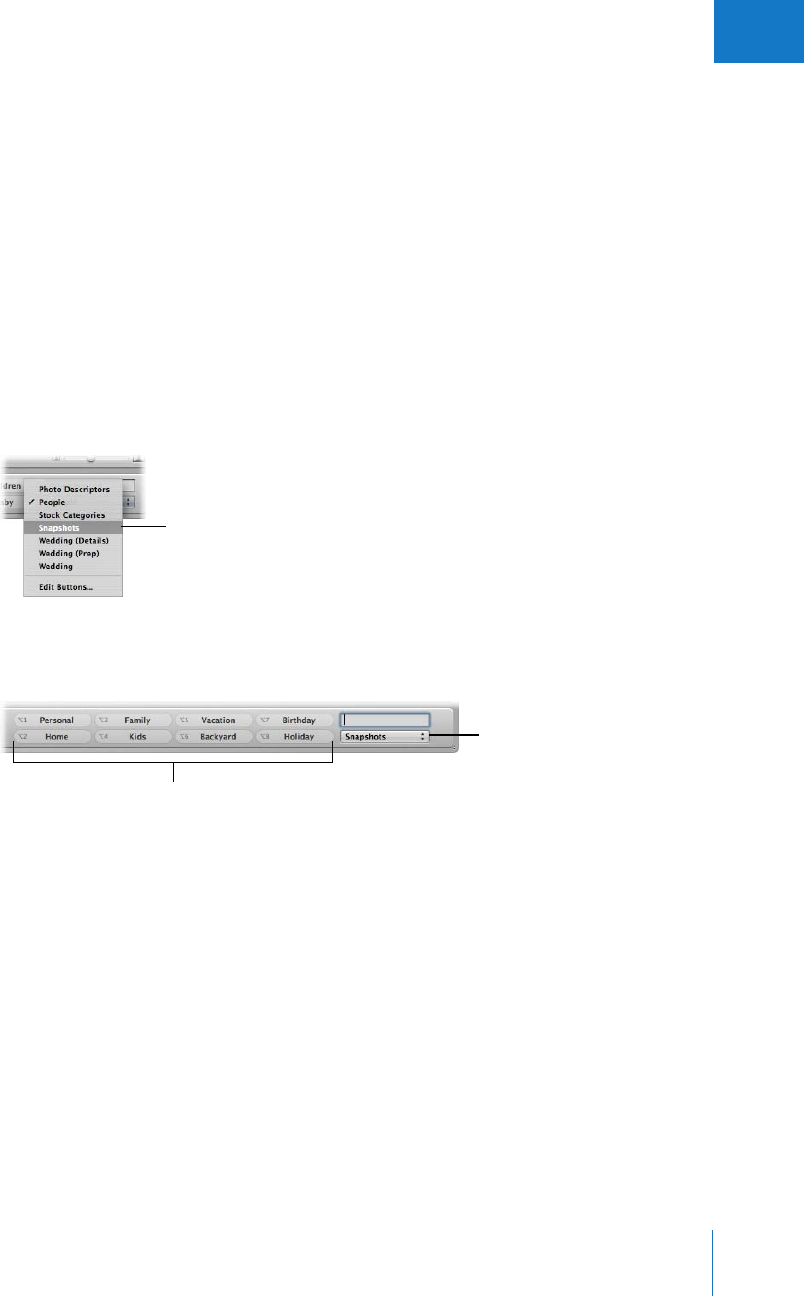
Chapter 10 Applying Keywords to Images 215
II
Choosing a Keyword Preset Group
Aperture provides groups of related keywords in sets that you can easily select and use.
A group of related keywords is called a keyword preset group. You can select a keyword
preset group whenever you need it, and create your own keyword preset groups that
include keywords you frequently use.
When you choose a keyword preset group, Aperture assigns the specific keywords to
keyword buttons in the control bar. This allows you to quickly set the control bar to
show the most useful keywords.
To choose a keyword preset group and apply keywords to images:
1Select an image or group of images in the Browser.
2Choose Window > Show Keyword Controls (or press Shift-D).
3Choose a keyword preset group from the Keyword Preset Group pop-up menu.
The keyword buttons in the control bar update according to the keyword preset group
you chose.
4Click the keyword buttons or press Option and a number key (1 through 8) on your
keyboard to apply keywords to the selected images.
∏Tip: You can quickly move through the keyword preset groups in the Keyword Preset
Group pop-up menu by pressing comma (,) or period (.).
For information about viewing keywords applied to images, see “Viewing Keywords
Applied to Images” on page 202.
Choose the keyword
group you want to use.
The Keyword Preset Group
pop-up menu displays
your choice.
The keyword buttons now
appear with keywords from
the group you chose.
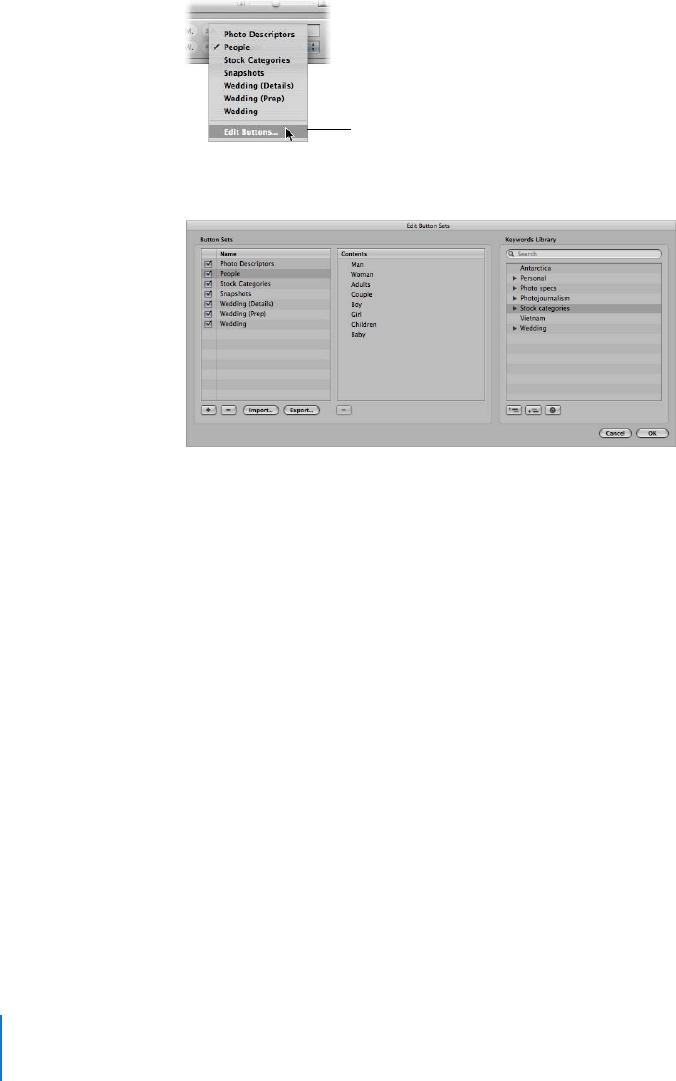
216 Part II Photo Editing
Creating a Keyword Preset Group
You can create new keyword preset groups when you need them.
To create a keyword preset group and assign keywords to it:
1In the control bar, choose Edit Buttons from the Keyword Preset Group pop-up menu.
The Edit Button Sets window appears.
The Name column on the left lists the keyword preset groups that already exist. When
you select a keyword preset group in this column, the keywords included in the group
appear in the center Contents column. You add or remove keywords by adding them to
or removing them from the Contents column. The Keywords Library column provides a
list of the existing keywords in your keyword library. You can drag keywords from this
list into the Contents column. You can also add keywords and keyword groups to your
keyword library using the controls below the Keywords Library column.
Choose Edit Buttons to add a
new keyword preset group.
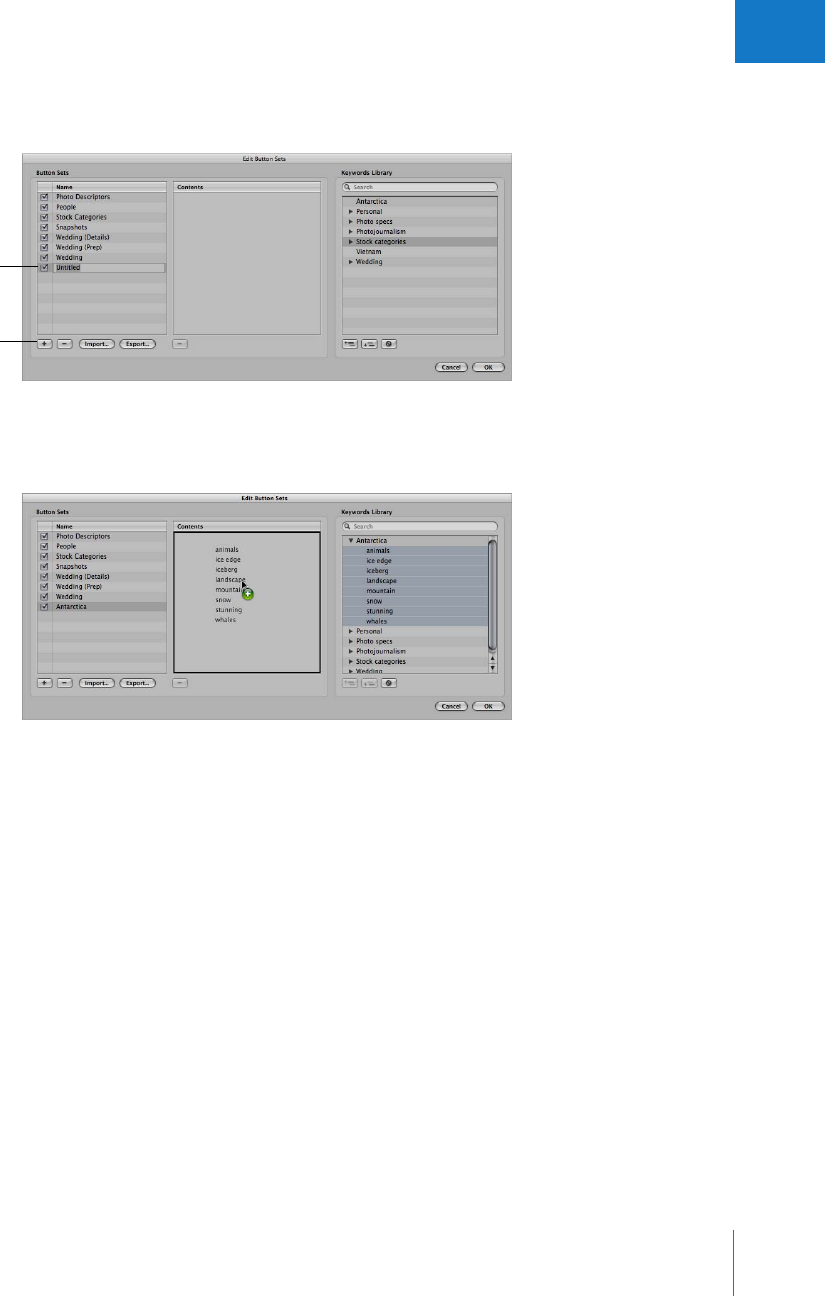
Chapter 10 Applying Keywords to Images 217
II
2To create a new keyword preset group, click the Add (+) button.
An untitled preset group appears in the Name column.
3Type a name for the new keyword preset group, then press Return.
4Drag keywords from the Keywords Library column to the Contents column.
If you wish, you can select multiple keywords and drag them to the Contents column at
once. Hold down the Shift key while pressing the Up or Down Arrow key to select
several keywords, Shift-click to select adjacent keywords, or Command-click to select
nonadjacent keywords.
5Drag the keywords in the Contents column into the order you want.
The first eight keywords will be assigned to the keyboard shortcut key combination of
Option and a number key (1 through 8) on the keyboard. To remove a keyword from
the column, select it and press Delete, or click the Delete (–) button below the column.
6After arranging the keywords in order, click OK.
The new keyword preset group appears in the Keyword Preset Group pop-up menu.
If the keyword preset group has fewer than eight keywords, the unassigned keys
are inactive.
A new, untitled preset
group appears in this list.
Click the Add button
to add a keyword
preset group.
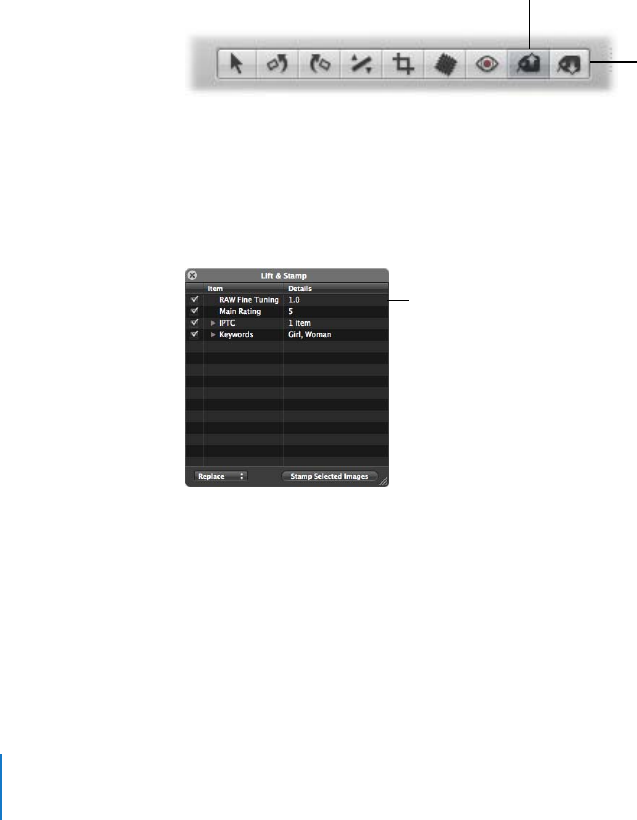
218 Part II Photo Editing
Applying Keywords Using the Lift & Stamp HUD
If you have images that should share the same keywords, you can use the Lift and
Stamp tools to quickly apply all or some of the keywords from one image to other
images. Using the Lift and Stamp tools is an efficient way to apply keywords to large
numbers of images. The Lift and Stamp tools can also apply adjustments made to
images, such as cropping, straightening, exposure changes, and other adjustments. For
more information about using the Lift and Stamp tools to apply adjustments, see
Performing Image Adjustments in the Aperture Help menu.
The Lift and Stamp tools have a corresponding HUD you can use in the Browser, Viewer,
and Light Table, as well as in Full Screen mode.
To lift all the keywords from an image and stamp them on another image
or group of images:
1Select the Lift tool (or press 0).
The Lift & Stamp HUD appears.
2Click an image with the tool.
All the image’s metadata, such as applied adjustments, rating, and keywords appear in
the Lift & Stamp HUD.
Lift tool in the toolbar
Stamp tool in the toolbar
All information for
the selected image
appears here.
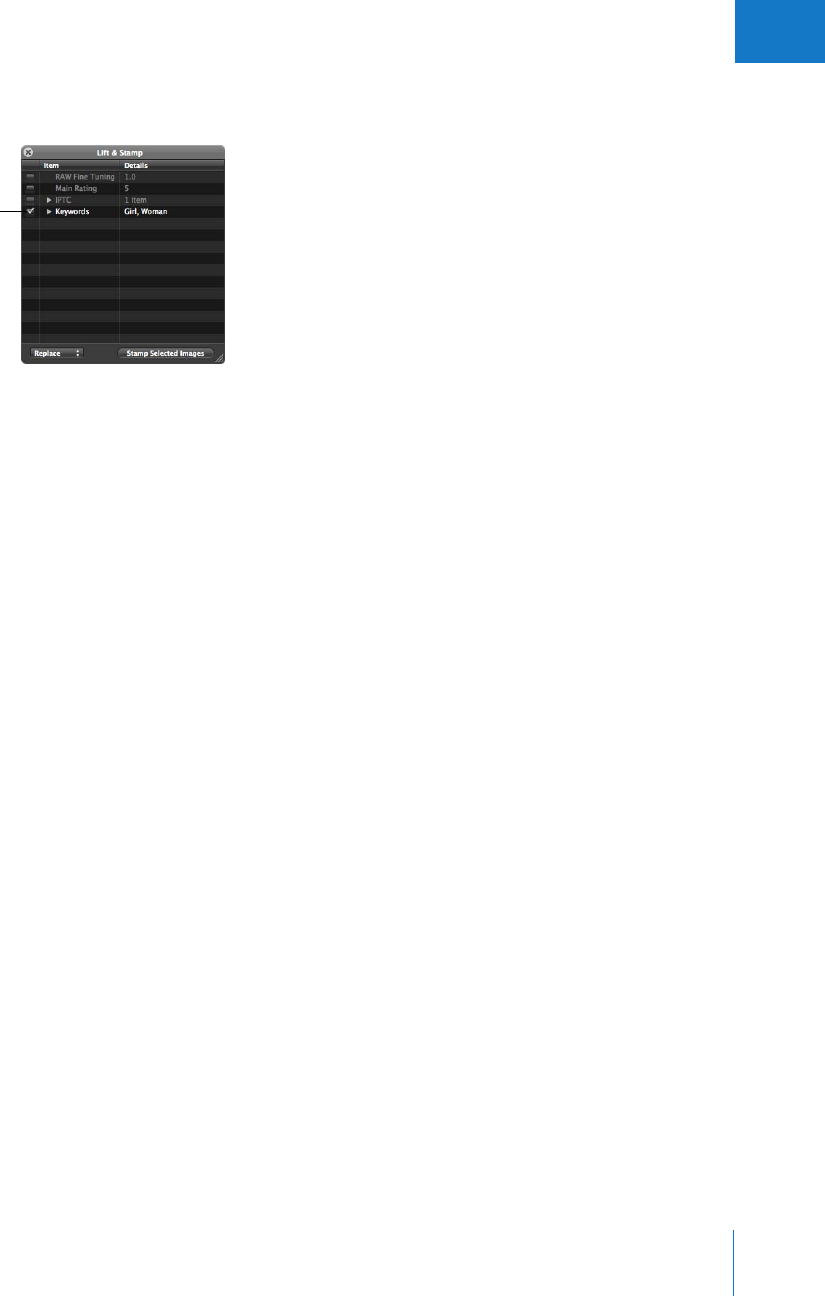
Chapter 10 Applying Keywords to Images 219
II
3Deselect the metadata checkboxes except for Keywords, or select items in the HUD and
press Delete to delete them.
4To apply the keywords from the HUD, select the Stamp tool and click the images to
which you want to assign the keywords. You can Shift-click to stamp a range of images.
The keywords from the first image are applied to the second image or group of images.
You can also lift keywords and apply them to a selection of images at once.
To stamp keywords on a selection of images at once:
1Using the toolbar’s standard Selection tool, select the images you want.
2Select the Lift tool (or press 0).
The Lift & Stamp HUD appears.
3With the Lift tool selected, click an image that has the keywords you want to stamp on
the selected images.
All the image’s metadata, such as applied adjustments, rating, and keywords appear in
the Lift & Stamp HUD.
4Deselect the metadata checkboxes except for Keywords.
5Click the Stamp Selected Images button.
In many cases, you do not want to copy all keywords from one image and paste them
onto another. For this reason, you can select specific keywords that apply to the image
you want to stamp them on.
Make sure the Keywords
checkbox is the only
one selected.
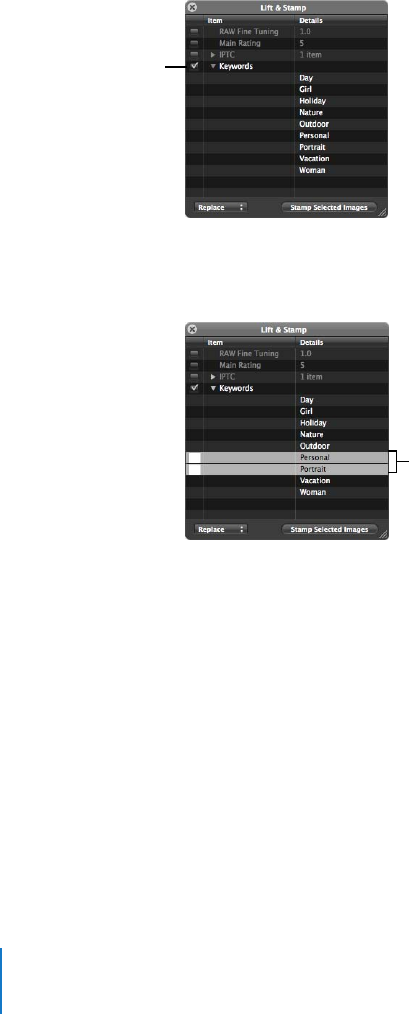
220 Part II Photo Editing
To stamp a reduced selection of keywords on an image or group of images:
1Select the Lift tool (or press O).
The Lift & Stamp HUD appears.
2Select an image.
3In the Lift & Stamp HUD, deselect all image information checkboxes except for Keywords.
4Click the Keywords disclosure triangle to reveal the keywords from the selected image.
5Remove any keywords you don’t want to stamp on an image or group of images by
selecting each unwanted keyword in the list and pressing the Delete key.
6Use the Stamp tool to select an image or group of images to which to apply the keywords.
The reduced selection of keywords is applied to the selected image or group of images.
You can quickly lift and stamp the keywords and all other metadata and adjustments
from one image to another using keyboard shortcuts.
Click the disclosure
triangle to reveal all
keywords applied to the
selected image.
Select the keywords you
don’t want to stamp,
then press Delete.
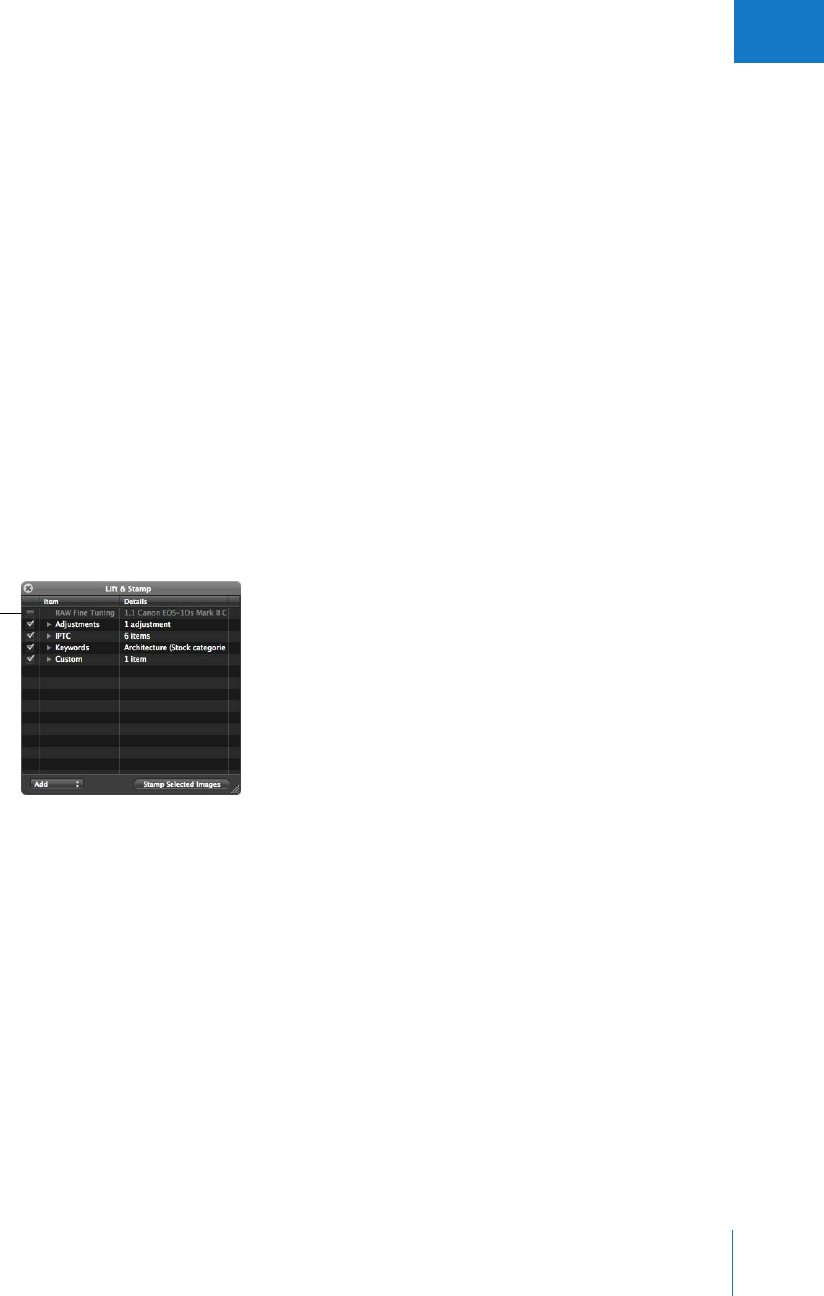
Chapter 10 Applying Keywords to Images 221
II
To quickly lift and stamp image metadata:
1Select an image, then press Command-Shift-C to lift the metadata from the image.
2Select an image or group of images, then press Command-Shift-V to stamp the
metadata on the selected images.
You can also lift RAW Fine Tuning parameter values from one RAW image and stamp
them on another. RAW Fine Tuning adjustments are included in lift and stamp
operations by default. If you don’t want to lift and stamp RAW Fine Tuning adjustments,
you must deselect them in the Lift & Stamp HUD.
To exclude RAW Fine Tuning adjustments from lift and stamp operations:
1In the toolbar, select the Lift tool (or press O).
The pointer changes from the Selection tool to the Lift tool.
2Click the RAW image that has the adjustments, metadata, or keywords you want to copy.
The Lift & Stamp HUD appears, showing the RAW Fine Tuning parameter values,
adjustments, IPTC metadata, and keywords applied to the image.
3Deselect the RAW Fine Tuning checkbox to prevent Aperture from copying the RAW
Fine Tuning parameter values from one image to another.
4In the toolbar, select the Selection tool, then do one of the following:
ÂDrag a selection rectangle around the images you want to stamp the adjustments on
to select them.
ÂSelect the images you want to stamp the adjustments on by Shift-clicking to select a
range of adjacent images and Command-clicking to select nonadjacent images.
5In the toolbar, select the Stamp tool, then click the Stamp Selected Images button in
the Lift & Stamp HUD.
The adjustments and metadata copied from the first image are applied to the
selected images; however, the RAW Fine Tuning parameter values are not applied to
the image selection.
Deselect the RAW Fine
Tuning checkbox.
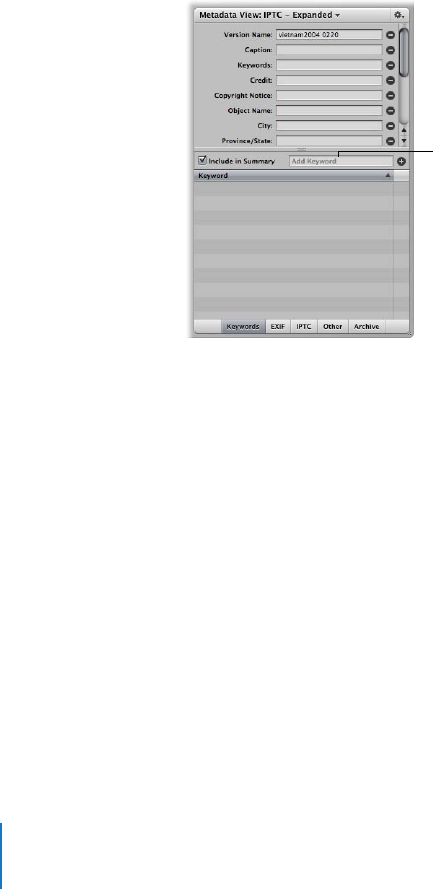
222 Part II Photo Editing
Applying Keywords Using the Metadata Inspector
When you select an image, you can use the Metadata Inspector to see the image’s
keywords and add new keywords, if needed.
To apply keywords using the Metadata Inspector:
1Do one of the following:
ÂSelect an image, then choose Window > Show Inspectors (or press I).
ÂSelect an image, then choose Window > Show Metadata (or press Control-D).
ÂDouble-click an image in the Browser to show the Metadata Inspector.
2Click the Keywords button at the bottom of the Metadata Inspector.
A list of the image’s keywords appears.
3To add a keyword, type a keyword in the Add Keyword field and click the Add (+) button.
Type a keyword here and
click the Add button.

Chapter 10 Applying Keywords to Images 223
II
Applying Keywords to Images in the Light Table
You can use the Light Table to arrange your image selection in a freeform manner. After
arranging your images into groups, you can apply keywords to groups at once. For
example, if you make a Light Table album consisting of the selects from your wedding
shoot, you can group the images according to the part of the wedding event they
show. After you’ve arranged them, you can apply keywords, such as Getting Ready,
Wedding Ceremony, Formal Shots, and Reception, as appropriate.
To apply keywords to groups of images in the Light Table:
1Select a Light Table album in the Projects panel.
2Choose Window > Show Keywords HUD (or press Shift-H).
3In the Light Table or Browser, select a group of images to which you want to
assign keywords.
4Drag the appropriate keywords from the Keywords HUD to the selected images.
The keywords are applied to the selected images at once.
For more information about using the Light Table, see Chapter 17, “Using the Light
Table,” on page 323.
Removing Keywords from an Image
At times, you may want to remove all the keywords that you have applied to an image.
To remove all keywords from an image:
1Select the image.
2Choose Metadata > Remove Keyword > Remove All Keywords (or press Shift-Option-9).
You can also remove keywords from an image by removing specific keywords in the
Metadata Inspector.
To remove specific keywords using the Metadata Inspector:
1Double-click the image that has the keywords you want to remove.
The Inspectors panel appears.
If the Metadata Inspector isn’t shown, choose Window > Show Metadata (or press
Control-D).
2Click the Keywords button to show the image’s assigned keywords.
3Click the Delete (–) button beside the keywords you want to remove.
You can easily remove an individual keyword from a selection of images without
removing the remaining keywords applied to the images.

224 Part II Photo Editing
To selectively remove an individual keyword from a group of images:
1Select the group of images.
2In the control bar, type the keyword you want to remove in the Add Keyword field,
then press Shift-Return.
The keyword is removed from the selected images.
Importing and Exporting Keyword Lists
You can import and export keyword lists to share with other Aperture users and transfer
to other Aperture systems. You can also create keyword lists for specific projects and then
import them as needed. When you export a keyword list, all your keywords are placed in
a simple tab-delimited text file (.txt). The tab-delimited list is set up in a hierarchical
structure that matches the hierarchical structure of the Keywords HUD.
To export a keyword list:
1In the Keywords HUD, click the Export button.
2In the dialog that appears, give the keyword list a name, choose a location, and click Save.
The keyword list is saved as a text file (.txt) to the location you chose.
Once you have an exported keyword list, you can transfer the file to another Aperture
system and import it. You can also manually create or edit keyword lists using other
applications, such as TextEdit, and import the lists into Aperture, as long as they follow
a tab-delimited text file structure.
To import a keyword list:
1In the Keywords HUD, click the Import button.
2In the dialog that appears, navigate to the keyword list file and click Open.
The Keywords HUD is updated to include all the new keywords from the imported
keyword list.

11
225
11 Working with Metadata
You can display different combinations of metadata, such
as version names, captions, ratings, keywords, and IPTC
information, with your images.
This chapter explains how to set the display of metadata with your images using the
View Options window. It also explains how to use the Metadata Inspector to display
and change the metadata for a selected image, as well as create custom sets of
metadata for display. This chapter also provides information about the icons (called
badges) that appear on images when you’ve made changes to them.
This chapter covers:
ÂAn Overview of Metadata, Metadata Views, and Metadata Presets (p. 226)
ÂDisplaying Metadata with Your Images (p. 228)
ÂTurning the Display of Metadata On or Off (p. 231)
ÂViewing and Changing Metadata in the Metadata Inspector (p. 232)
ÂWorking with Metadata Views (p. 235)
ÂBatch Changing Metadata (p. 241)
ÂMore Information About IPTC Metadata (p. 242)
ÂUnderstanding Badge Overlays (p. 243)
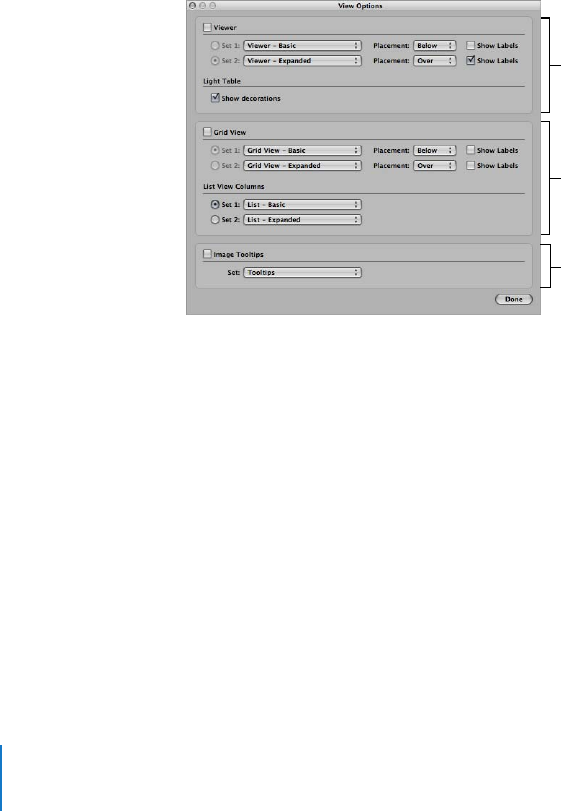
226 Part II Photo Editing
An Overview of Metadata, Metadata Views,
and Metadata Presets
You can display different combinations of metadata with your images in the Viewer
and Browser, as well as in Full Screen mode. Aperture provides many metadata views
that represent specific combinations of information that you can display. For example,
you can choose a basic metadata view that shows an image’s version name and
caption. Or, you can choose an expanded metadata view that displays an image’s
rating, badges, aperture setting, shutter speed, exposure bias, focal length, caption,
keywords, version name, ISO speed rating, file size, and master image file location. You
can also create your own metadata views.
You choose the metadata view you want in the View Options window. You can choose
different metadata views for the Viewer, the Browser in grid view, and the Browser in
list view. You can also display metadata with labels that help identify the types of
metadata being displayed.
When you position the pointer over an image, Aperture can display information about
it in a pop-up text box called an image tooltip. You can turn the display of image
tooltips on or off in the View Options window. Tooltips can also display whether an
image is a managed image file or a referenced image file. You can choose a metadata
view to specify the combination of metadata that appears in image tooltips.
Browser metadata
display settings
Viewer metadata
display settings
Image tooltip settings
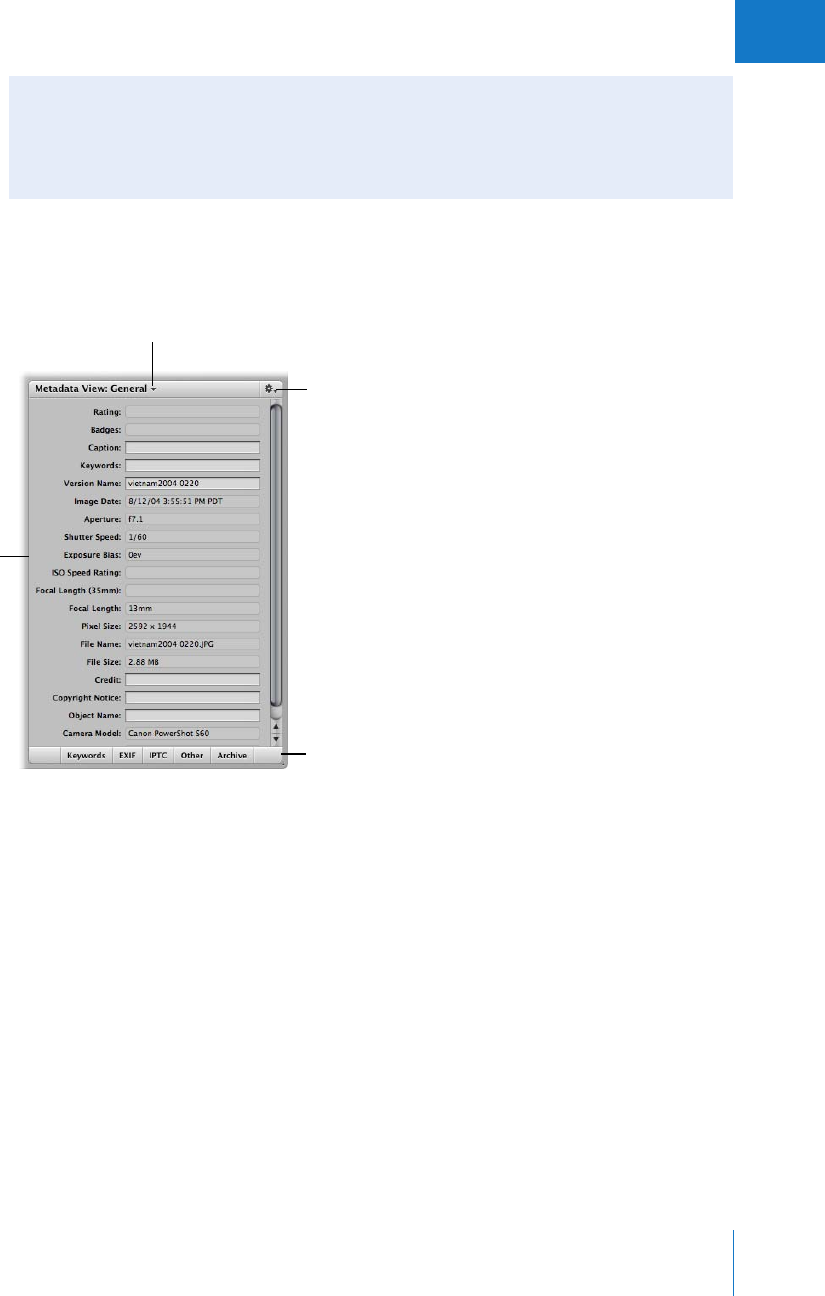
Chapter 11 Working with Metadata 227
II
You can view the metadata for a selected image in the Metadata Inspector. To show the
Metadata Inspector, choose Window > Show Metadata (or press Control-D).
You can change the combination of metadata that appears in the Metadata Inspector
by choosing a metadata view from the Metadata View pop-up menu. You can also
change those metadata items that are editable. Click the buttons at the bottom of the
inspector to display each button’s type of metadata.
You can also add the actual metadata you want applied to your images to the fields of
a metadata view and save it as a metadata preset. You can then use that metadata
preset to apply combinations of metadata to images as you import them or change
them using the Batch Change dialog. For example, if you have a specific combination
of metadata that one of your services always requires, you can create a metadata
preset specific for that service. Then whenever you import images destined for that
service, or prepare images to send to that service, you can apply the metadata you
need using the preset you created.
You can create and manage your own metadata views and metadata presets using the
Metadata Action pop-up menu in the Metadata Inspector.
About Displaying Metadata in Full Screen Mode
Choosing a metadata view for the Viewer also defines the metadata that appears with
images in Full Screen mode. Choosing a metadata view for the Browser in grid view defines
the metadata that appears with image thumbnails in the Full Screen mode filmstrip.
Choose a metadata view
from the Metadata View
pop-up menu.
Edit and arrange your
metadata views using this
pop-up menu.
To view a subset of the
image’s metadata, click
the appropriate button.
Metadata Inspector
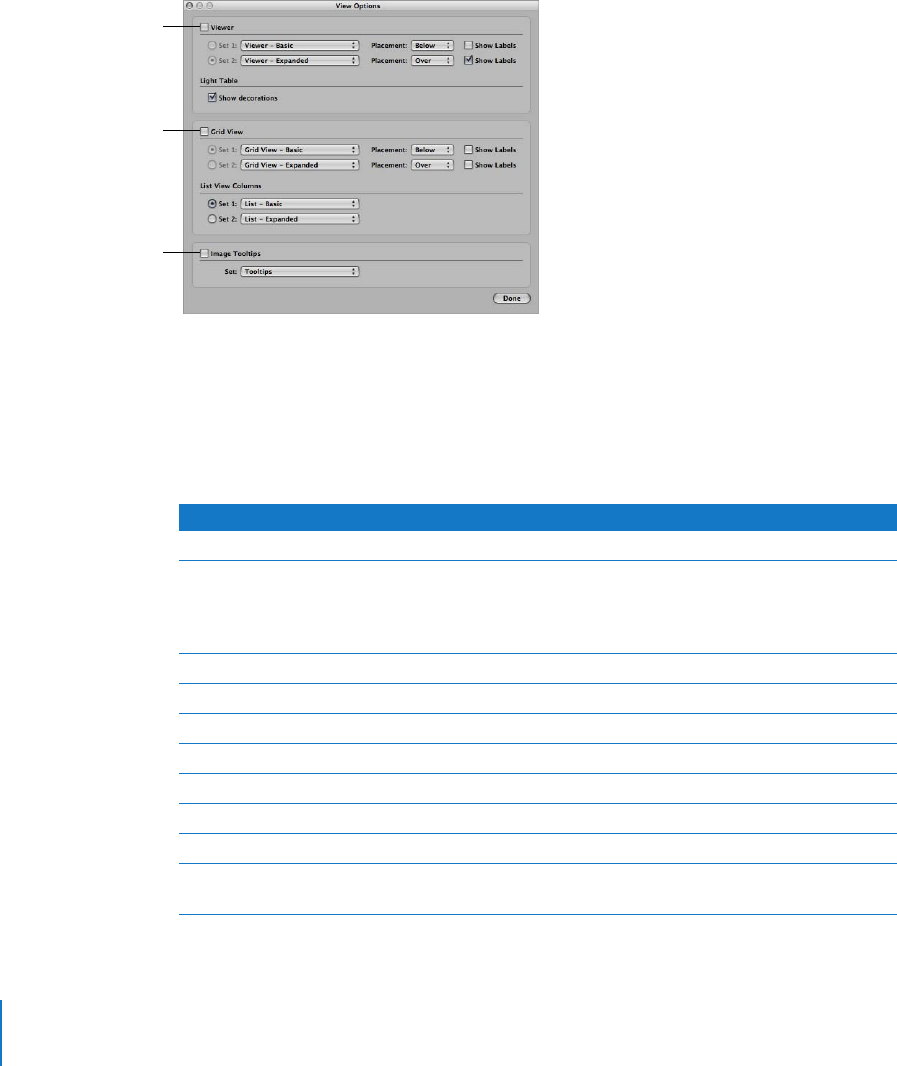
228 Part II Photo Editing
Displaying Metadata with Your Images
You use the View Options window to specify the metadata shown with images in the
Viewer and Browser, as well as the metadata that appears in image tooltips. For the
Viewer and Browser, you can choose a metadata view to display and choose an
alternate that you can quickly switch to by pressing a keyboard shortcut.
You can also choose whether the information should appear on or below the image
using the Placement pop-up menus.
Some metadata views are specifically designed for displaying information in the Viewer,
the Browser in grid view or list view, or in image tooltips. The following table lists the
metadata views that you can choose and the information that each view displays.
Select this checkbox to
turn on the display of
metadata in the Viewer.
Select this checkbox to
turn on the display of
metadata in the Browser.
Select this checkbox to
turn on the display of
image tooltips.
Metadata view name Information displayed
All IPTC Lists all IPTC fields
General Rating, badges, caption, version name, image date, aperture,
shutter speed, exposure bias, ISO speed rating, focal length
(35mm), focal length, pixel size, filename, file size, credit, copyright
notice, object name, camera model, master location, and keywords
Name Only Version name
Caption Only Caption
Name & Rating Version name, rating, and badges
Name & Caption Version name and caption
Ratings Rating and badges
Caption & Keywords Version name, caption, and keywords
Caption & Credits Version name, byline, credit, caption, and copyright notice
File Info Version name, filename, file size, pixel size, color model, image date,
and badges

Chapter 11 Working with Metadata 229
II
Photo Info–EXIF Version name, image date, camera model, pixel size, aperture,
shutter speed, exposure bias, focal length (35mm), focal length,
and ISO speed rating
EXIF-Expanded Version name, image date, camera make, camera model, pixel size,
aperture, shutter speed, exposure bias, focal length (35mm), focal
length, ISO speed rating, aspect ratio, orientation, depth, color
space, exposure mode, flash, serial number, lens minimum (mm),
maximum lens aperture, lens maximum (mm), color model, profile
name, and badges
IPTC-Basic Version name, caption, keywords, credit, copyright notice, and
object name
IPTC-Expanded Version name, caption, credit, copyright notice, object name, city,
province/state, country name, special instructions, byline, category,
date created, headline, source, and keywords
Grid View–Basic Badges and rating
Grid View–Expanded Badges, rating, and version name
Viewer-Basic Badges and rating
Viewer-Expanded Rating, badges, aperture, shutter speed, exposure bias, focal length
(35mm), focal length, caption, keywords, version name, image date,
ISO speed rating, file size, and master location
List-Basic Version name, badges, rating, image date, aperture, shutter speed,
exposure bias, focal length (35mm), focal length, pixel size,
orientation, aspect ratio, filename, file size, camera model, import
group, and master location
List-Expanded Version name, badges, rating, image date, caption, keywords, credit,
copyright notice, object name, filename, camera model, import
group, master location, aperture, shutter speed, exposure bias, ISO
speed rating, focal length (35mm), focal length, and pixel size
Tooltips Version name, file name, image date, caption, keywords, aperture,
shutter speed, exposure bias, ISO speed rating, focal length
(35mm), focal length, pixel size, camera model, and rating
Metadata view name Information displayed
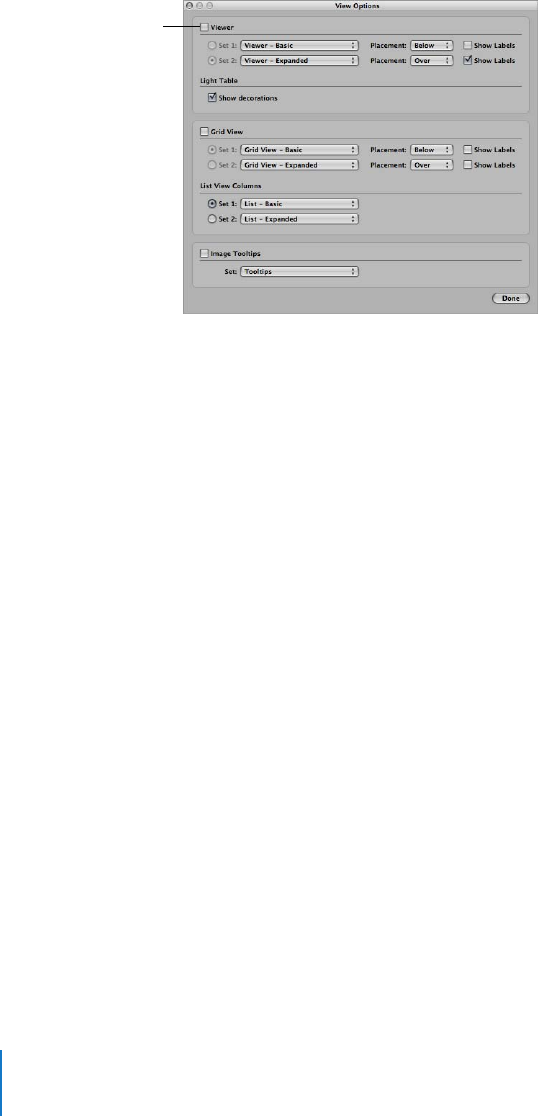
230 Part II Photo Editing
To set the display of metadata in the Viewer:
1Choose View > View Options (or press Command-J).
2Select the Viewer checkbox.
3Choose the metadata view you want from the Set 1 pop-up menu. Choose an alternate
metadata view from the Set 2 pop-up menu.
4Choose where you want the metadata displayed in relation to the image from the
Placement pop-up menus.
5To include labels with metadata items, select the Show Labels checkbox.
6Click the Set 1 or Set 2 button to specify the set you want to use.
7Click Done.
To set the display of metadata in the Browser in grid view:
1Choose View > View Options (or press Command-J).
2Select the Grid View checkbox.
3In the Grid View area, choose the metadata view you want from the Set 1 pop-up
menu. Choose an alternate metadata view from the Set 2 pop-up menu.
4Choose where you want the metadata displayed in relation to the image from the
Placement pop-up menus.
5To include labels with metadata items, select the Show Labels checkbox.
6Click the Set 1 or Set 2 button to specify the set you want to use.
7Click Done.
When you choose a metadata view for the Browser in list view, the metadata view
determines the number of columns that appear. Each metadata item in the metadata
view becomes a list view column.
Select this checkbox to
turn on the display of
metadata in the Viewer.

Chapter 11 Working with Metadata 231
II
To set the display of metadata in the Browser in list view:
1Choose View > View Options (or press Command-J).
2Select the Grid View checkbox.
3In the List View Columns area, choose the metadata view you want from the Set 1
pop-up menu. Choose an alternate metadata view from the Set 2 pop-up menu.
4Click the Set 1 or Set 2 button to specify the set you want to use.
5Click Done.
To set the display of metadata in image tooltips:
1Choose View > View Options (or press Command-J).
2Select the Image Tooltips checkbox.
3Choose the metadata view you want from the Set pop-up menu.
4Click Done.
Turning the Display of Metadata On or Off
After choosing a metadata view, you can turn the display of metadata on and off and
switch between metadata views.
To hide or show metadata in the Viewer, do one of the following:
mChoose View > Metadata Overlays > Viewer (or press Y).
mChoose View > View Options (or press Command-J), select or deselect the Viewer
checkbox, then click Done.
To switch metadata views in the Viewer, do one of the following:
mChoose View > Metadata Overlays > Change Viewer Set (or press Shift-Y).
mChoose View > View Options (or press Command-J), select the Set 1 or Set 2 button in
the Viewer section, then click Done.
To hide or show metadata in the Browser in grid view, do one of the following:
mChoose View > Metadata Overlays > Grid View (or press U).
mChoose View > View Options (or press Command-J), select or deselect the Grid View
checkbox, then click Done.
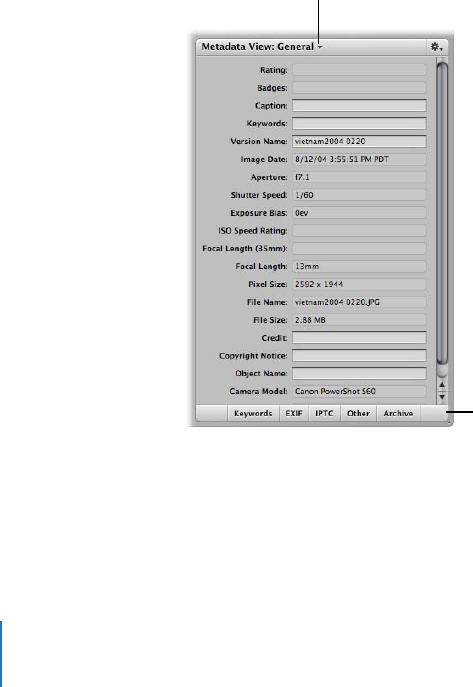
232 Part II Photo Editing
To switch metadata views in the Browser, do one of the following:
mChoose View > Metadata Overlays > Change Browser Set (or press Shift-U).
mChoose View > View Options (or press Command-J), select the Set 1 or Set 2 button in
the Grid View or List View Columns section, then click Done.
To turn image tooltips on or off, do one of the following:
mChoose View > Image Tooltips (or press T).
mChoose View > View Options (or press Command-J), select or deselect the Image
Tooltips checkbox, then click Done.
Viewing and Changing Metadata in the Metadata Inspector
You can view or change the metadata for a selected image in the Metadata Inspector.
The selected image’s metadata appears in text fields. You can change the metadata
categories shown in the Metadata Inspector by choosing a different metadata view
from the Metadata View pop-up menu. You can also view keywords, EXIF information,
IPTC information, other miscellaneous metadata that you specify, and backup location
information by clicking the buttons at the bottom of the inspector.
Choose a metadata view
from the Metadata View
pop-up menu.
To view a subset of the
image’s metadata, click
the appropriate button.
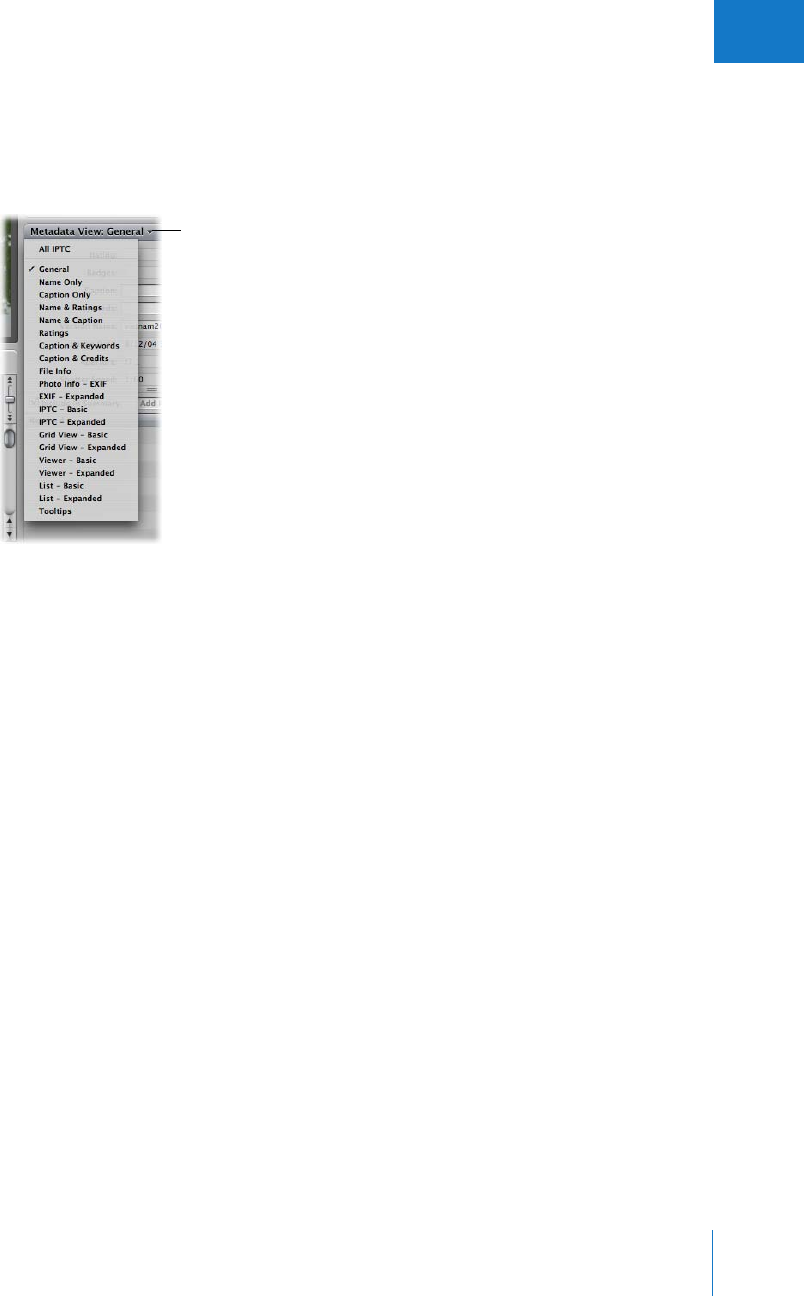
Chapter 11 Working with Metadata 233
II
To view and change metadata in the Metadata Inspector:
1Select an image.
2To show the Metadata Inspector, choose Window > Show Metadata (or press Control-D).
3Choose a metadata view from the Metadata View pop-up menu.
4To change the metadata in an editable text field, click in the text field to make it active,
then enter the text you want.
Working with the AutoFill List Editor
As you enter metadata in the Metadata Inspector’s fields, Aperture checks for previous
entries, and if it locates a match, it completes the entry for you. For example, if you
used the keyword Landscape previously, and you type the first few letters of Landscape
again, Aperture automatically enters Landscape in the field. You can set up and change
the list of metadata that Aperture automatically enters using the AutoFill List Editor.
You can enter up to 20 entries for a field type. If you’ve made a spelling mistake when
typing an entry, you can also use the AutoFill List Editor to correct the mistake so that
Aperture always suggests the correct spelling.
Choose a metadata view
from this pop-up menu.
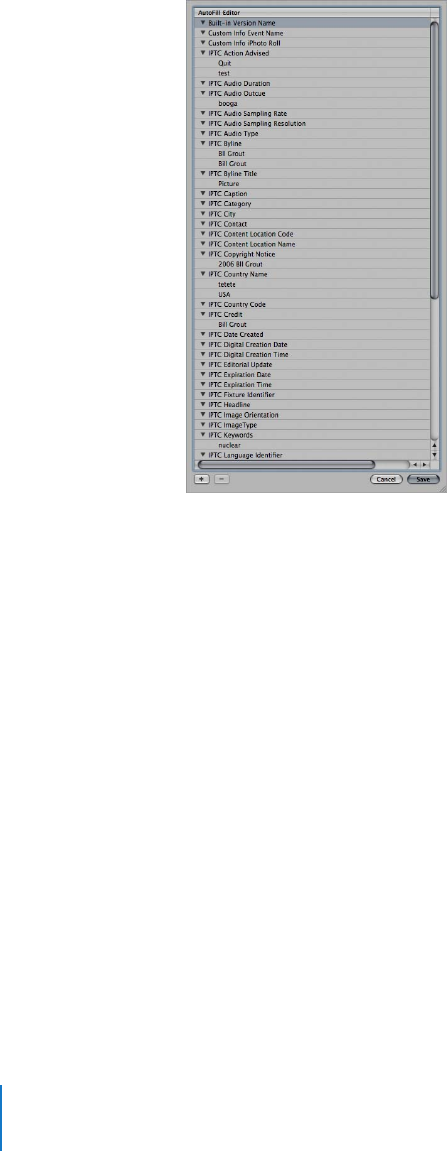
234 Part II Photo Editing
To set up autofill entries in the AutoFill List Editor:
1Choose Metadata > Edit AutoFill List.
2To edit the list, do one of the following:
ÂTo add an entry: Select the metadata type you want to change, click the Add (+)
button, and enter the text you want.
ÂTo change an entry: Click the disclosure triangle for the metadata type you want to
work with to display its entries, then double-click the entry you want to change. Type
the new text.
ÂTo delete an entry: Click the disclosure triangle for the metadata type you want to
work with to display its entries. Select the entry you want to delete, then click the
Delete (–) button.
3Click Save.
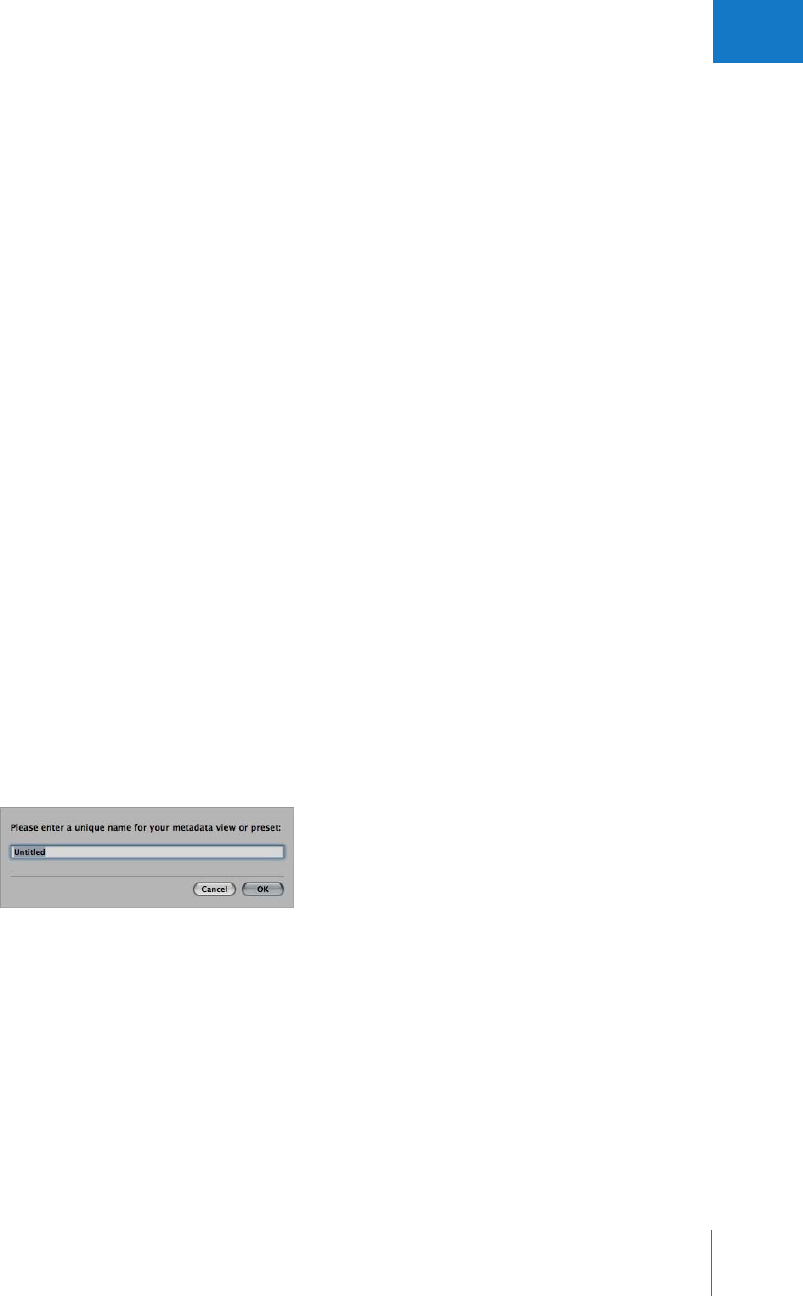
Chapter 11 Working with Metadata 235
II
Working with Metadata Views
You can create your own combinations of metadata to display with your images, called
metadata views. (In previous versions of Aperture, metadata views were called
metadata sets.) You can modify the metadata views that come with Aperture.
Using the Metadata Inspector, you can:
ÂCreate new metadata views
ÂModify existing metadata views
ÂArrange the order of metadata views in pop-up menus
ÂRename metadata views
ÂDuplicate metadata views
ÂDelete metadata views
You can also apply combinations of metadata to your images by recording metadata in
a view and saving it as a metadata preset. For more information about creating and
using metadata presets, see “Working with Metadata Presets” on page 238.
Creating New Metadata Views
You can create new metadata views that display different combinations of metadata.
You can also add new kinds of metadata to your metadata views in addition to the
metadata categories that Aperture provides.
To create a new metadata view:
1To show the Metadata Inspector, choose Window > Show Metadata (or press
Control-D).
2Choose New View from the Metadata Action pop-up menu.
3In the dialog that appears, enter a name for the new metadata view, then click OK.
The Metadata Inspector changes to display an empty area to which you can now add
categories of metadata.

236 Part II Photo Editing
4To add metadata categories to your metadata view, do any of the following:
ÂTo add a keywords field to the metadata view: Click the Keywords button and select
the Include in Summary checkbox.
ÂTo add EXIF fields to the metadata view: Click the EXIF button and select the
checkboxes for the EXIF fields you want.
ÂTo add IPTC fields to the metadata view: Click the IPTC button and select the
checkboxes for the IPTC fields you want.
ÂTo add other fields to the metadata view: Click the Other button and select the
checkboxes for the fields you want. You can also create new metadata fields by
entering text in the New Custom Metadata and Metadata Value fields, and then
clicking the Add (+) button. The new metadata field appears in the list, and you can
select its checkbox to add it to the metadata view.
Note: Once a new metadata field is created, it isn’t associated with a specific
metadata view. If you delete the metadata view in which a new metadata field was
created, the field is not deleted from Aperture.
ÂTo add information to the metadata view about where and when an image was backed
up in a vault: Click the Archive button and select the Include in Summary checkbox.
You can remove a metadata category by clicking the Delete (–) button beside it.
Modifying Existing Metadata Views
You can change the combination of metadata displayed by a metadata view. You can
add or remove metadata categories, or create new ones.
To modify a metadata view:
1To show the Metadata Inspector, choose Window > Show Metadata (or press Control-D).
2Choose the metadata view you want to change from the Metadata View pop-up menu.
3Choose the Edit command for the view you want to change from the Metadata Action
pop-up menu.
You can now change the metadata fields that appear in the metadata view.
4To add or remove categories of metadata that appear in the metadata view, do any of
the following:
ÂTo add or remove a keywords field: Click the Keywords button and select or deselect
the Include in Summary checkbox.
ÂTo add or remove EXIF fields: Click the EXIF button and select or deselect the
checkboxes for the EXIF fields you want to add or remove.
ÂTo add or remove IPTC fields: Click the IPTC button and select or deselect the
checkboxes for the IPTC fields you want to add or remove.
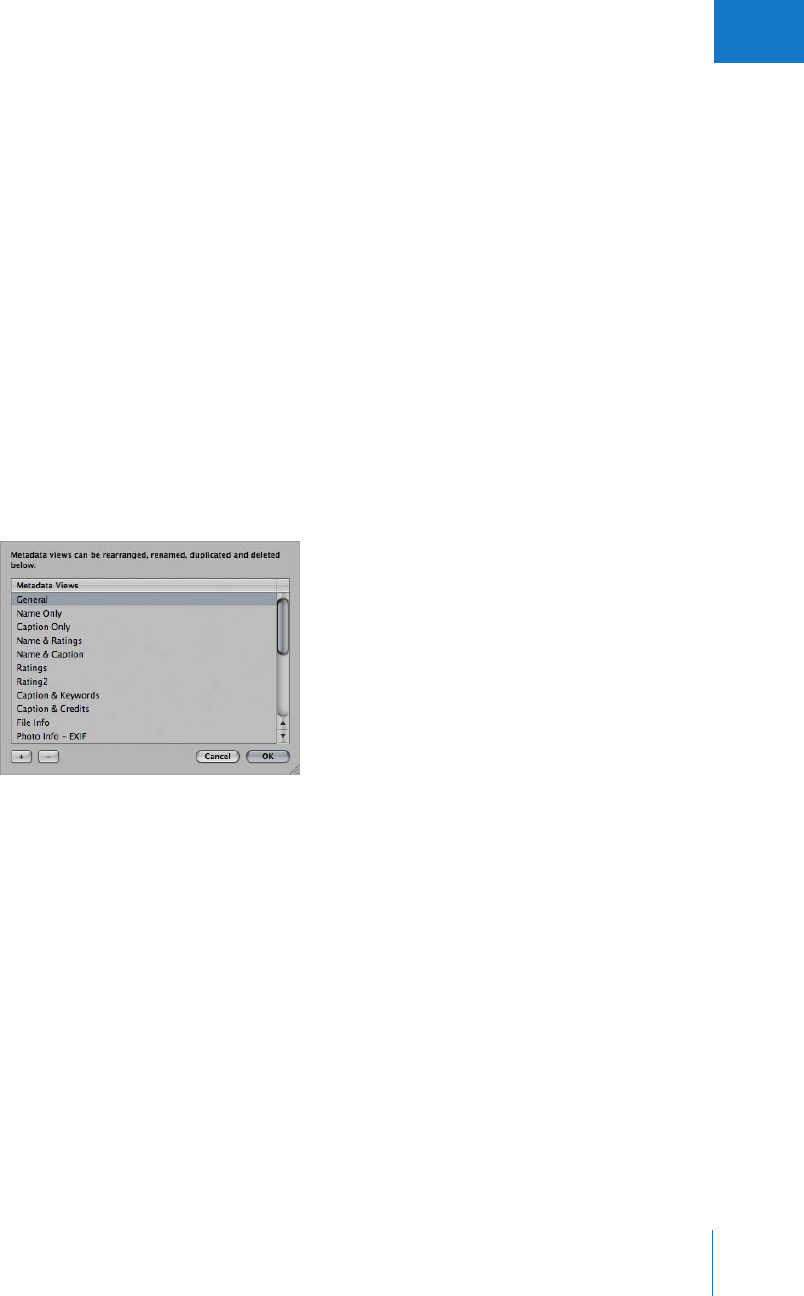
Chapter 11 Working with Metadata 237
II
ÂTo add or remove other fields: Click the Other button and select or deselect the
checkboxes for the fields you want to add or remove. You can also create new
metadata fields by entering text in the New Custom Metadata and Metadata Value
fields, and then clicking the Add (+) button. The new metadata field appears in the
Name list, and you can select its checkbox to add it to the metadata view.
ÂTo add or remove information about where and when an image was backed up in a
vault: Click the Archive button and select or deselect the Include in Summary checkbox.
Managing Metadata Views
You can make changes to the list of metadata views that appears in the pop-up menus
in the View Options window and Metadata Inspector.
To arrange the metadata view list:
1To show the Metadata Inspector, choose Window > Show Metadata (or press Control-D).
2Choose Manage Views from the Metadata Action pop-up menu.
3To rearrange the order of metadata views, drag them to new locations in the Metadata
Views list.
You can also rename, add, or delete metadata views in this dialog.
To rename a metadata view:
mDouble-click the metadata view name, then type a new name in the field that appears.
To add a duplicate metadata view:
mSelect a metadata view, then click the Add (+) button.
To delete a metadata view:
mSelect a metadata view, then click the Delete (–) button.

238 Part II Photo Editing
Working with Metadata Presets
You can create your own preset combinations of metadata that you want applied to
images. You create a preset by first choosing a metadata view that displays the types of
metadata you want to apply. You can also create a custom view if you want. You then
add the metadata you want to apply to the view’s metadata fields, and save the
information as a metadata preset. Your metadata preset is then available to be chosen
when you import images, batch change images, or modify an image’s metadata in the
Metadata Inspector. Aperture also provides easy methods of managing your presets.
Creating Metadata Presets
You can create new metadata presets that apply different combinations of metadata.
To create a new metadata preset:
1To show the Metadata Inspector, choose Window > Show Metadata (or press Control-D).
2Choose the metadata view that you want to use for the preset from the Metadata View
pop-up menu.
3Enter the metadata you want applied to your images in the metadata fields.
4Choose Save as Preset from the Metadata Action pop-up menu.
5In the dialog that appears, enter a name for the new metadata preset, then click OK.
The new metadata preset now appears under the Append with Preset and Replace
with Preset commands in the Metadata Action pop-up menu.
To modify an existing metadata preset:
1To show the Metadata Inspector, choose Window > Show Metadata (or press Control-D).
2Choose the metadata view that you want to use for the preset from the Metadata View
pop-up menu.
3Choose Replace with Preset from the Metadata Action pop-up menu, then choose the
preset you want to modify.
4Enter the changes you want in the metadata fields in the Metadata Inspector.
5Choose Save as Preset from the Metadata Action pop-up menu.
6Give the metadata preset a new name, then click OK.
If you want, you can delete the previous metadata preset or rename presets by
choosing Manage Presets from the Metadata Action pop-up menu.

Chapter 11 Working with Metadata 239
II
Applying Combinations of Metadata Using Metadata Presets
You can apply metadata using metadata presets when importing images using the
Import dialog and when using the Batch Change command. You can also apply
metadata presets to selected images using the Metadata Inspector.
To apply a metadata preset when importing images:
1Show the Import panel by choosing File > Import > Images or by clicking the Import
Panel button.
2Select the images you want to import, if necessary.
3Choose the metadata preset you want to use from the Add Metadata From pop-up menu.
4Select Append to add the preset’s metadata to the images, maintaining any currently
associated metadata, or select Replace to add the preset’s metadata to the images and
remove any other associated metadata.
5Select the other import options you want, then click the Import button.
To apply a metadata preset when changing images with the Batch Change dialog:
1Select the images you want to change.
2Do one of the following:
ÂChoose Metadata > Batch Change.
ÂShow the Metadata Inspector by choosing Window > Show Metadata (or pressing
Control-D), then choose Batch Change from the Metadata Action pop-up menu.
3Choose the metadata preset you want from the Add Metadata From pop-up menu.
4Select Append to add the preset’s metadata to the images, maintaining any currently
associated metadata, or select Replace to add the preset’s metadata to the images and
remove any other associated metadata.
5Select the other options you want, then click OK.
To apply a metadata preset when changing images with the Metadata Inspector:
1Select the images you want to change.
2Show the Metadata Inspector by choosing Window > Show Metadata (or press Control-D).
3Choose the metadata preset you want from the Add Metadata From pop-up menu.
4Do one of the following:
ÂFrom the Metadata Action pop-up menu, choose Append with Preset, then choose
the preset you want to use to add metadata to the image, maintaining any currently
associated metadata.
ÂFrom the Metadata Action pop-up menu, choose Replace with Preset and then
choose the preset you want to use to add metadata to the image, removing any
previously applied metadata.
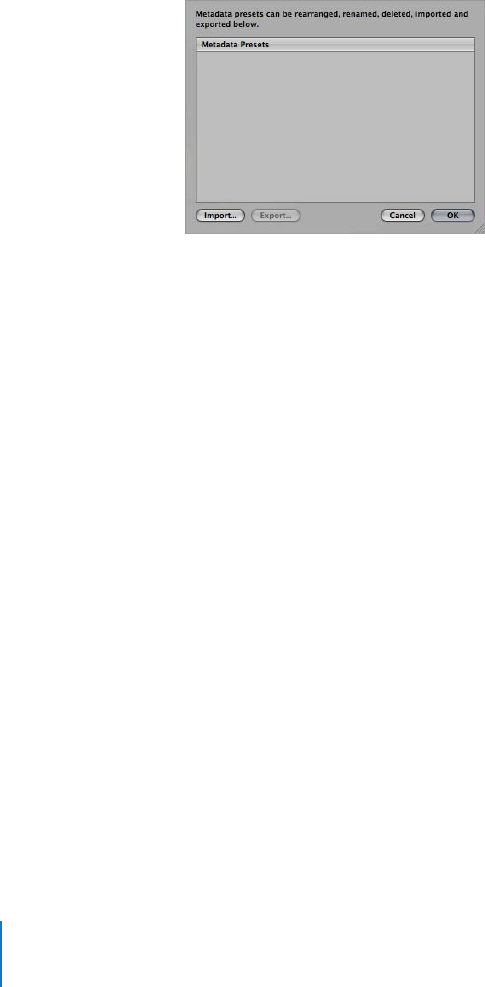
240 Part II Photo Editing
Managing Metadata Presets
You can make changes to the list of metadata presets that appears in pop-up menus.
To arrange the metadata preset list:
1To show the Metadata Inspector, choose Window > Show Metadata (or press Control-D).
2Choose Manage Presets from the Metadata Action pop-up menu.
3To rearrange the order of metadata presets, drag them to new locations in the
Metadata Presets list.
You can also rename and delete metadata presets in this dialog.
To rename a metadata preset:
mDouble-click the metadata preset name, then type a new name in the field that appears.
To delete a metadata preset:
mSelect a metadata preset, then press the Delete key.
When you work with other Aperture users, you can share your metadata presets to
ensure a consistent application of metadata to all the images. You can export metadata
presets for others to use and import presets when you need them.
To export a metadata preset:
1To show the Metadata Inspector, choose Window > Show Metadata (or press Control-D).
2Choose Manage Presets from the Metadata Action pop-up menu.
3Select the metadata preset that you want to export, then click Export.
4Choose a location where you want the metadata preset information stored, then click Save.
To import a metadata preset:
1To show the Metadata Inspector, choose Window > Show Metadata (or press Control-D).
2Choose Manage Presets from the Metadata Action pop-up menu.
3Click Import.
4Select the metadata preset file that you want to import, then click Open.
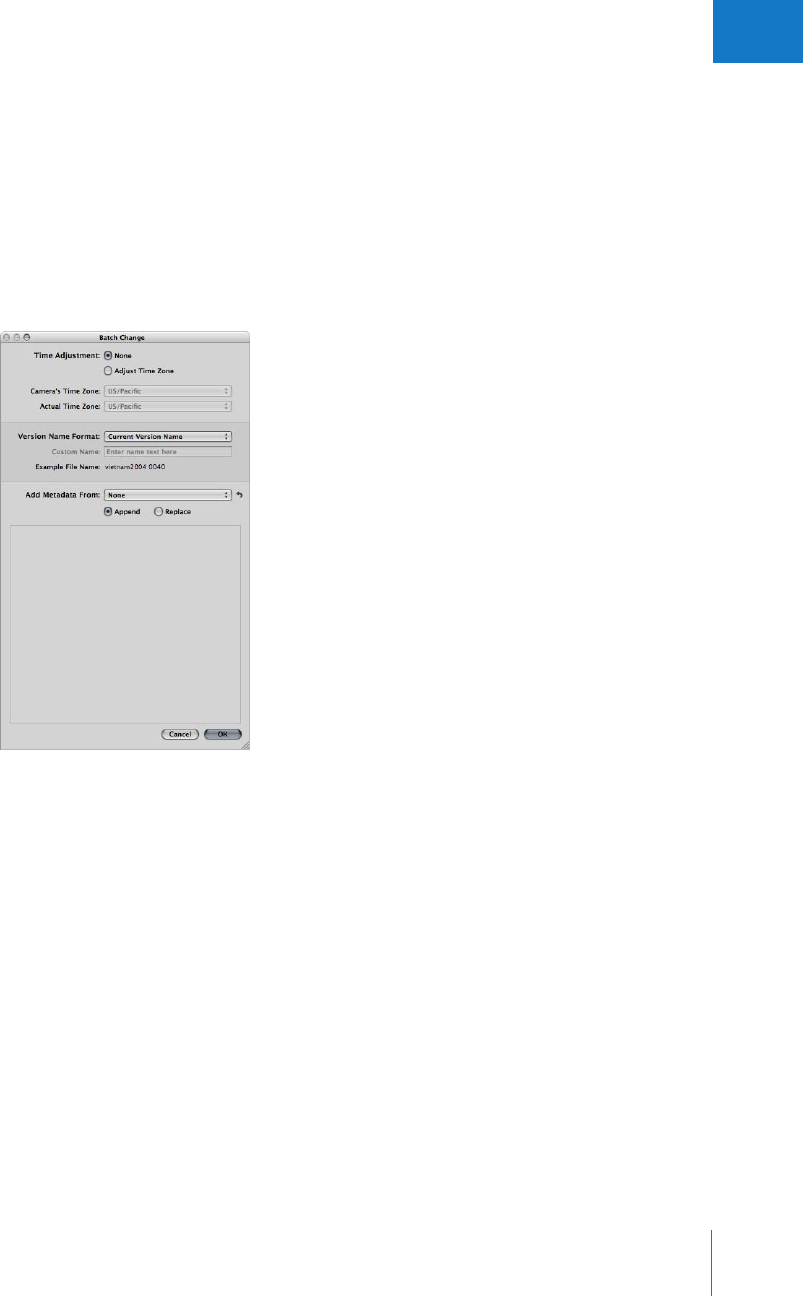
Chapter 11 Working with Metadata 241
II
Batch Changing Metadata
You can select a group of images and make metadata changes to all the images at
once. For example, if you need to add the same set of keywords to a selection of
images, or change the version name format, you can select the images and use the
Batch Change dialog to change them.
To change the metadata associated with a selection of images:
1Select the images you want to change.
2Choose Metadata > Batch Change (or press Command-Shift-B).
3In the Batch Change dialog, choose a metadata preset from the Add Metadata From
pop-up menu to select a preset template of metadata to be applied.
You can click the Append button to add the metadata to that already applied to the
selected images, or click the Replace button to add the metadata, replacing any
previously assigned metadata.
4Enter any metadata you want applied in the metadata fields.
5Specify any other metadata options you want to change, then click OK.

242 Part II Photo Editing
More Information About IPTC Metadata
If you intend to export your keywords as IPTC metadata, make sure each keyword entry
is no more than 64 characters long. Keyword entries longer than 64 characters may not
be displayed properly in other IPTC editors or operating systems.
Here are some examples of common character limits for IPTC fields:
IPTC field and character limit Description and example
Caption
2000 characters
A long-form description of the subject and related information in a
natural language caption.
Example: Mayor Alvarado addresses a crowd at the first soccer
match of the season.
Keywords
64 characters
A list of words describing the subject in discrete words or phrases.
Example: Politician, Mayor, Futbol, Soccer, News, Game, Team, San Jose
Credit
32 characters
Photographer’s name and/or agency name.
Example: Matthew Birdsell/Mercury News
Copyright
128 characters
Copyright date, photographer’s name, agency name, and rights.
Example: © 2003 Matthew Birdsell/Mercury News. All rights reserved.
Object name
64 characters
A unique identifier, used by an agency or organization to
catalog images.
Example: mt52642j
Created date
16 characters
Date the image was created.
Example: 05/16/2005
City
32 characters
City where the image was captured.
Example: San Jose
Province/State
32 characters
Province or state where the image was captured.
Example: California
Country
64 characters
Country where the image was captured.
Example: USA
Special instructions
256 characters
Applicable restrictions, rights, or embargo information.
Example: MAGS OUT, INTERNET OUT, NO THIRD-PARTY SALES
Byline
64 characters
The image byline text.
Example: © Matthew Birdsell/Mercury News
Category
3 characters
Applicable ANPA category codes.
Example: I (International)
Headline
256 characters
The headline published with the image.
Example: Mayor Alvarado Opens New Soccer Season in San Jose
Source
32 characters
The source that provided the image.
Example: Mercury News
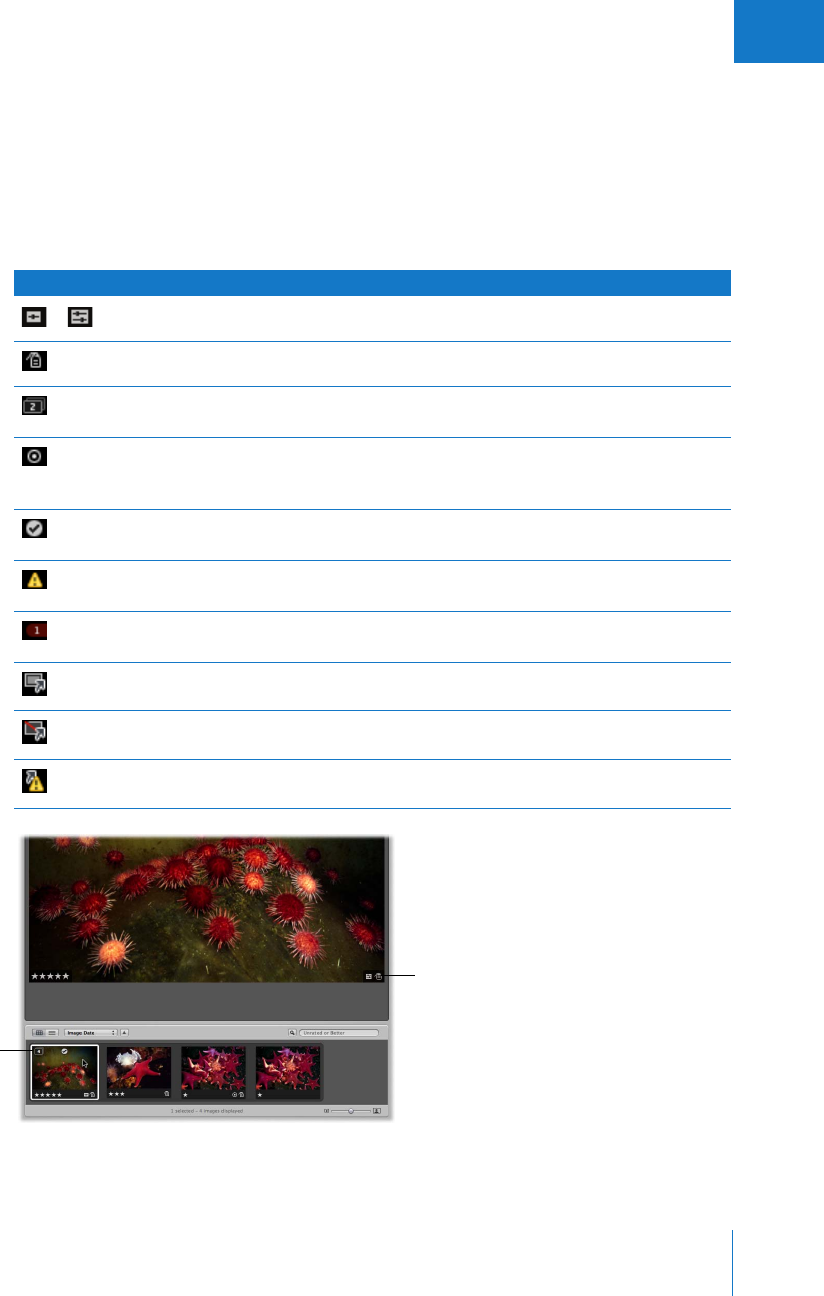
Chapter 11 Working with Metadata 243
II
Understanding Badge Overlays
When you apply adjustments, keywords, or other changes to an image, Aperture marks
the image with a badge overlay. Badges can appear on images in the Viewer, Browser,
and Light Table, in book pages and webpages, and in Full Screen mode.
How Badge Overlays Appear in Aperture
The following table shows badges that appear on images in Aperture.
Badge Definition
One or more adjustments have been applied to the image.
One or more keywords have been applied to the image.
Images are contained in a stack. The number indicates the number of images
in the stack.
The image has been edited with the external editor, and is therefore
represented by the master file created when the file was exported to the
external editor.
The image is an album’s pick image, the identifying image for that album, web
gallery album, web journal album, Light Table album, or book album.
Because of low image resolution, the image’s print quality may be affected.
This badge appears on images placed in book pages and webpages.
The number indicates the number of times the image has been used in a
given book, web journal, or Light Table arrangement.
The image has a referenced image master file.
The referenced image’s master file is offline.
The referenced image’s master file has not been found.
or
These four images are
stacked together; the
checkmark identifies this
image as the album pick.
Keywords and
adjustments have been
applied to this image.
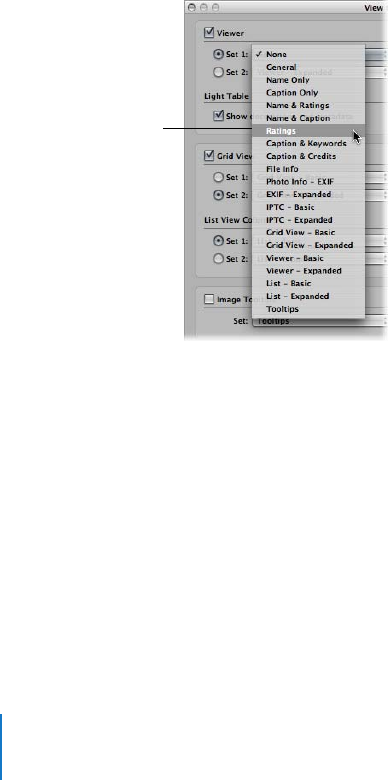
244 Part II Photo Editing
Displaying Images with Badge Overlays
Badge visibility is determined by the metadata view that is displayed. You can control
whether badges are visible by choosing a metadata view that includes badge
overlays; you can also control whether badge overlays are visible by turning metadata
views on or off.
Important: Badge overlays appear only in the Aperture application; they do not appear
on images exported or printed from Aperture.
To display badge overlays on images in the Viewer:
1Choose View > View Options (or press Command-J).
The View Options window appears.
2Select the Viewer checkbox.
3From the Viewer Set 1 pop-up menu, choose a metadata view that includes badge
overlays. Some examples are General and Ratings, as well as Viewer-Basic and
Viewer-Expanded.
4Click Done.
Badges are now visible in the Viewer.
You can turn off the display of badge overlays in the Viewer by turning off the display
of metadata. For more information, see “Turning the Display of Metadata On or Off”
on page 231.
Choose a metadata view
that includes badge
overlays from the Set 1
pop-up menu.

Chapter 11 Working with Metadata 245
II
To display badge overlays on images in the Browser in grid view:
1Choose View > View Options (or press Command-J).
The View Options window appears.
2Select the Grid View checkbox.
3From the Grid View Set 1 pop-up menu, choose a metadata view that includes badge
overlays. Some examples are General and Ratings, as well as Grid View–Basic and Grid
View–Expanded.
4Click Done.
Badge overlays are now visible in the Browser in grid view.
You can turn off the display of badge overlays in the Browser by turning off the display
of metadata. For more information, see “Turning the Display of Metadata On or Off” on
page 231.
To display badge overlays on images in the Light Table, do one of the following:
mChoose View > View Options (or press Command-J), select the “Show decorations”
checkbox in the Light Table section, then click Done.
mChoose View > Metadata Overlays > Light Table (or press Shift-G).
Badges and metadata are now visible in the Light Table.
To turn off badge overlays in the Light Table, do one of the following:
mChoose View > Metadata Overlays > Light Table (to remove the checkmark).
mChoose View > View Options (or press Command-J), deselect the “Show decorations”
checkbox in the Light Table section, then click Done.
mPress Shift-G.
Badge overlays are now turned off in the Light Table.

12
247
12 Searching for
and Displaying Images
Aperture allows you to easily search for and gather images in
a variety of locations. You can perform complex searches and
save your search results.
This chapter provides information about using the Query HUD to search for images
using a wide variety of criteria, including image name, subject, keyword, photographer,
caption or text, date, location, EXIF and IPTC information, and more.
This chapter covers:
ÂAn Overview of Searching (p. 248)
ÂControls in the Query HUD (p. 252)
ÂSearching Across the Entire Library (p. 253)
ÂSearching by Image Name, Caption, or Other Text (p. 253)
ÂSearching by Keyword (p. 255)
ÂSearching by Date (p. 256)
ÂSearching by Rating (p. 258)
ÂSearching by IPTC Information (p. 259)
ÂSearching by EXIF Information (p. 260)
ÂSearching by Import Session (p. 261)
ÂSearching by File Status (p. 262)
ÂSearching by Other Metadata (p. 263)
ÂSearching by a Combination of Criteria (p. 264)
ÂSaving Your Search Results (p. 265)
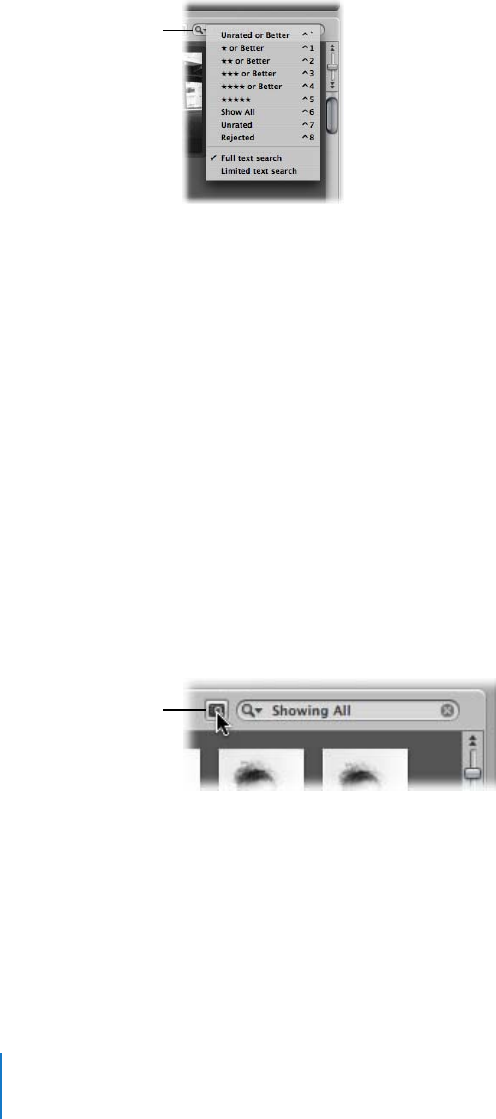
248 Part II Photo Editing
An Overview of Searching
Aperture provides a pop-up menu in the search field of the Browser that allows you to
quickly display images by rating and change how Aperture performs searches.
To have Aperture search for images by rating, you can choose a rating level from the
pop-up menu. You can also have Aperture perform full text searches or limited text
searches. When you choose “Full text search” from the pop-up menu, Aperture searches
for any text entered in the search field throughout all the metadata associated with
your images. If you choose “Limited text search”, Aperture searches for any entered text,
but doesn’t search through the EXIF, IPTC, badge, or custom metadata associated with
images. However, a limited text search does include keywords, aspect ratio, filename,
rating, version name, orientation, pixel size, processed pixel size, master location, and
import group. Choosing a limited text search provides faster results. You can set your
preference for a full or limited text search using the Search Scope pop-up menu in the
Preferences window.
To set the search scope in the search field:
mChoose the type of search you want to perform from the search field pop-up menu.
To view specific images in the Library or a selected project, you can also use the
Query HUD.
Search field
pop-up menu
Click here to show the
Query HUD.
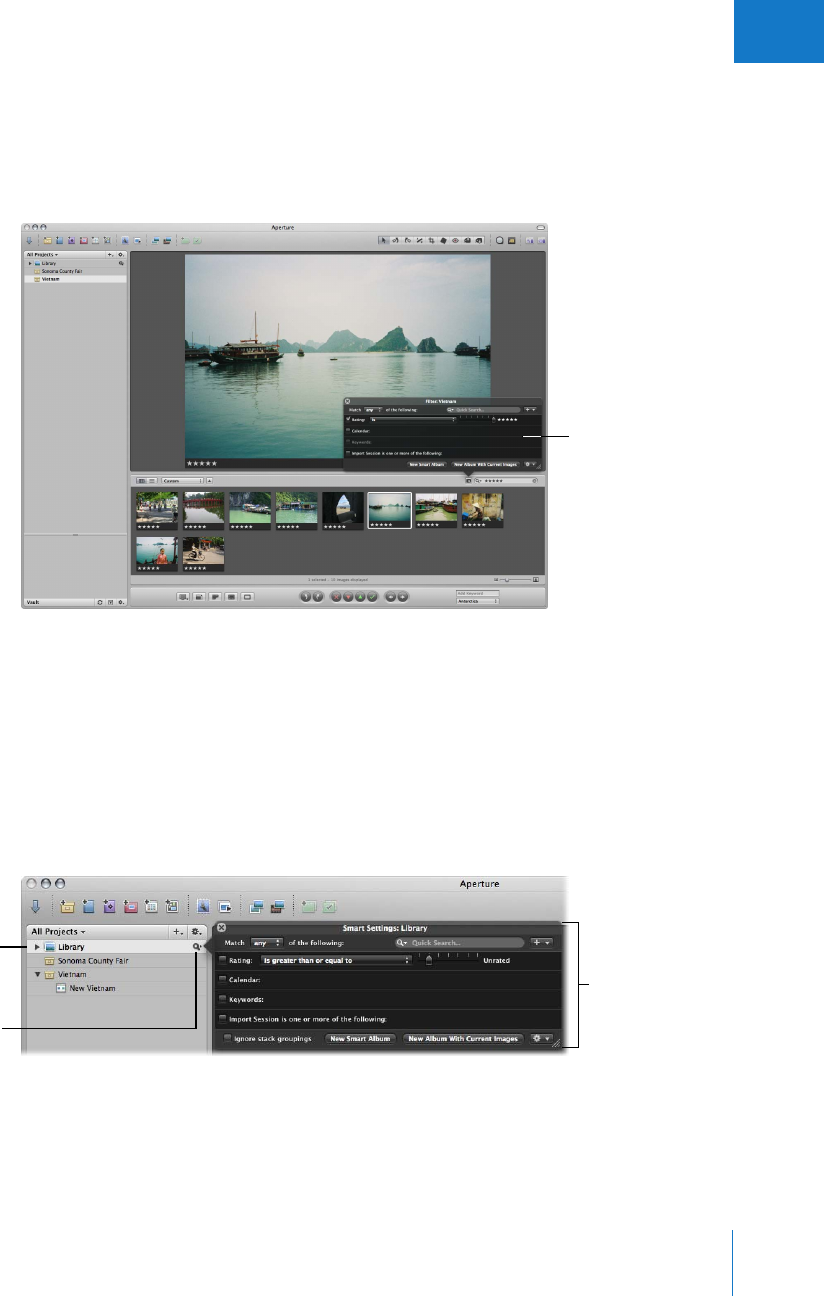
Chapter 12 Searching for and Displaying Images 249
II
The Query HUD is an easy-to-use panel with options for specifying search criteria. For
example, you might enter the image name Dawn in the Query HUD, and Aperture
locates files that include that text in their metadata. To show the Query HUD for a
selected project, you click the Query HUD button (with a magnifying glass icon) next to
the search field in the Browser.
You can use the Query HUD to locate images across all projects, to display particular
images within a project, and to create Smart Albums, which automatically gather
images based on search criteria.
You specify where you want to search by selecting the Library or the project or album
that contains the images you want. To search for images across your entire Aperture
portfolio, select Library and click the Query HUD button to the right of the Library
name. When you enter search criteria in the Query HUD, Aperture displays results from
across all your projects.
Query HUD set to show
images rated five stars.
Specify your search
criteria here.
Click here to show a
Query HUD for searching
across the Library.
Select Library to search
across the entire Library.
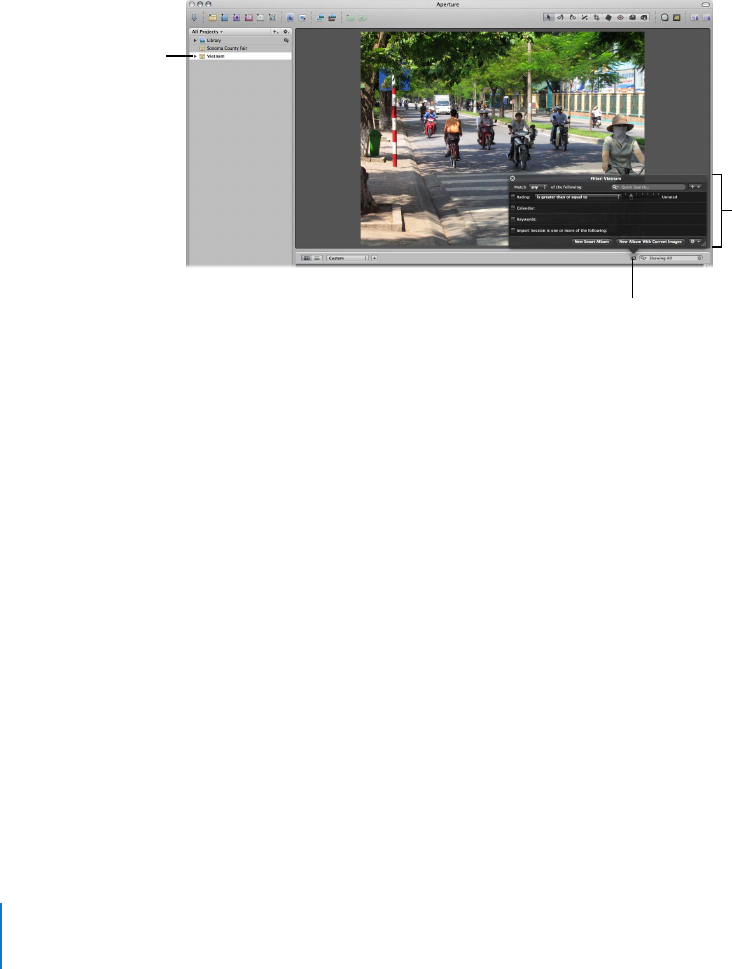
250 Part II Photo Editing
The most common reason to perform a search is to display a selection of images within
a project. By selecting a project and using the Query HUD, you can quickly display
specific images, hiding the rest from view. For example, you might isolate and display
only those images of a certain subject, pose, rating, or location. Your search doesn’t
change the contents of the project; it only temporarily changes the images you view in
the Browser. If you cancel the search criteria in the Query HUD, all of your images
appear in the Browser again. The Query HUD is preset to show images that are unrated
or better, hiding rejected images. You can change the Query HUD criteria to show
rejected images if you wish.
You can also create special albums, called Smart Albums, whose contents are derived
solely by search criteria. For example, you might create a Smart Album that searches for
and displays all portrait images from the entire Library. When you create a Smart
Album, you use the Query HUD to define criteria for the images that should appear in
it. For more information about creating and using Smart Albums, see Chapter 13,
“Grouping Images with Smart Albums,” on page 267.
Aperture can locate images based on many types of information associated with the
images. When you import images into Aperture, certain information is automatically
assigned to each image, including EXIF metadata such as image date, photographer,
camera technical data, filename, and much more. You can also assign your own
metadata to images, including keywords, summaries, captions, and information used
by IPTC fields, and then locate your images by searching for the metadata.
Select the project you
want to search.
Specify the search criteria
you want.
Click here to show the
Query HUD.
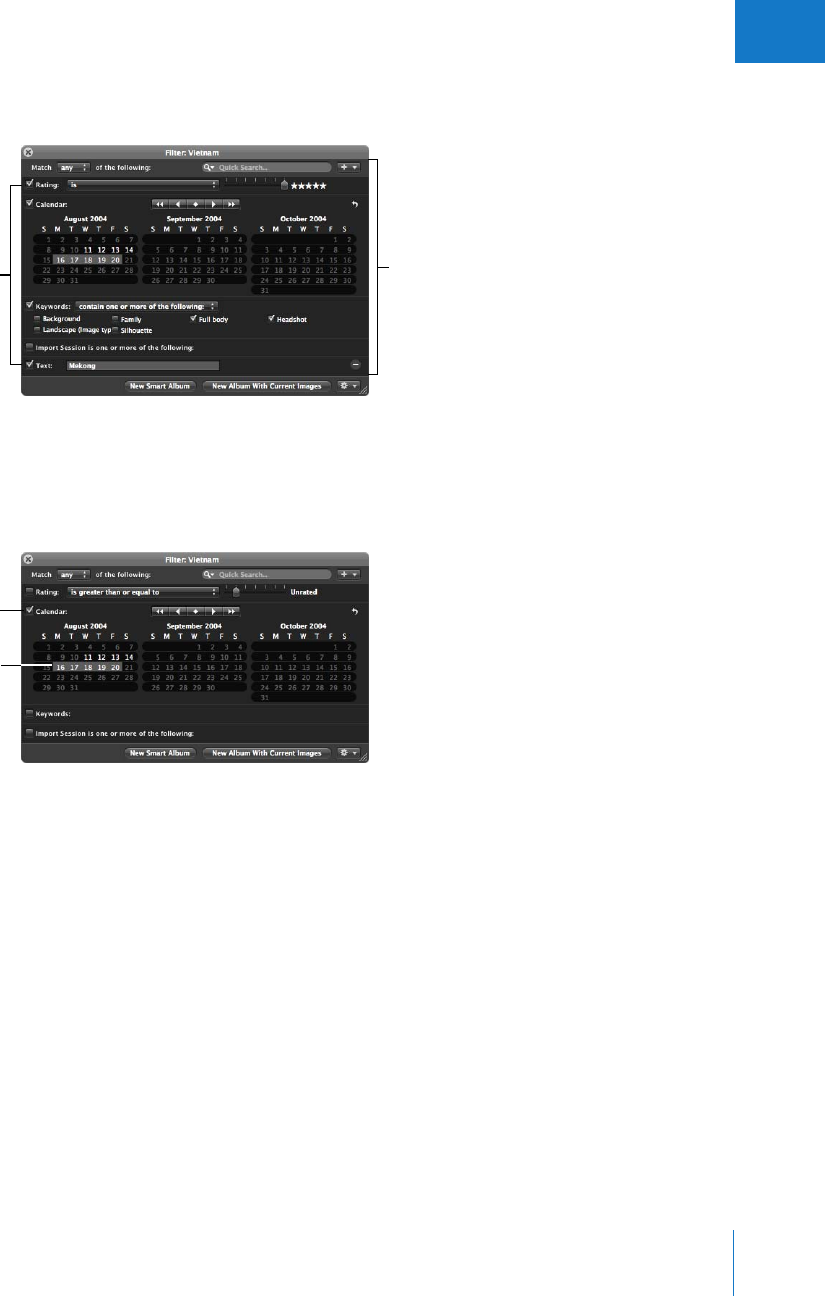
Chapter 12 Searching for and Displaying Images 251
II
The search criteria that you use can be simple or complex. For example, the following
illustration shows some of the search criteria you can specify using the Query HUD.
To search using a particular type of search criteria, you select the checkbox to turn on
the search option and then specify the criteria that Aperture should look for. For
example, to find images taken on a specific date, you select the Calendar checkbox and
select a date or range of dates.
The images taken on the dates you specified are displayed in the Browser, where you
can review and work with them.
You can also create complex searches by adding search criteria options to the
Query HUD.
Specify your search
criteria.
Select the checkboxes
for the items you want
to search by.
Select the Calendar
checkbox.
Select the dates you
want to search by.
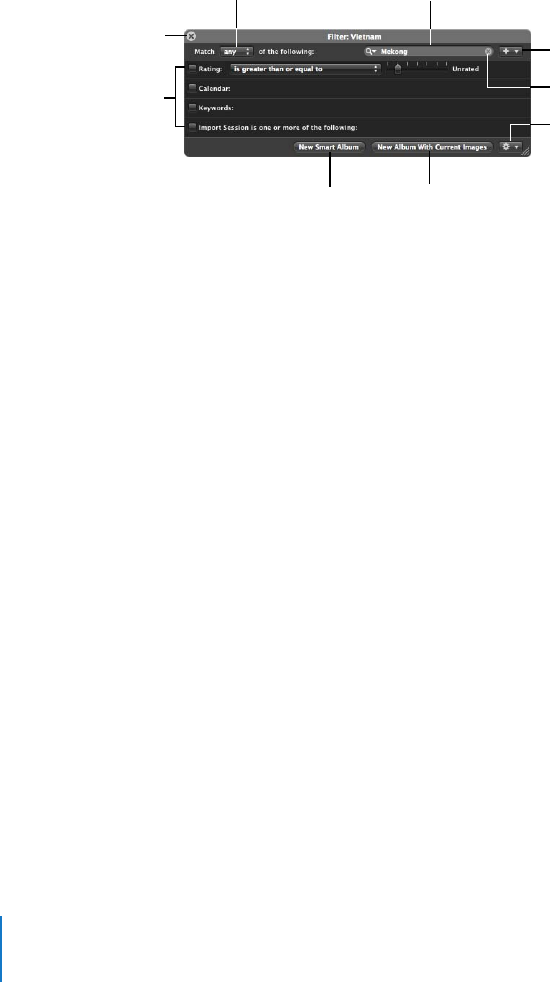
252 Part II Photo Editing
To show the Query HUD, do one of the following:
mChoose Edit > Find (or press Command-F).
mClick the Query HUD button (with a magnifying glass icon) beside the search field in
the Browser.
Controls in the Query HUD
The Query HUD has the following controls:
ÂClose button: Click this button to close the Query HUD.
ÂMatch pop-up menu: Choose whether the image should match any of the search
criteria or all the criteria that are marked by selected checkboxes.
ÂSearch field: Enter the text you want to search for. Click the search field’s Reset
button (with an X) to clear the search field.
ÂAdd Filter pop-up menu: Choose additional search criteria, such as date, EXIF and IPTC
information, text, rating, and other metadata.
ÂSearch criteria: Select checkboxes for categories and specify what you want to search
for, such as ratings, keywords, and dates.
ÂNew Smart Album: Click this button to create a new Smart Album based on the
search criteria. For more information, see Chapter 13, “Grouping Images
with Smart Albums,” on page 267.
ÂNew Album With Current Images: Click this button to create a new album containing
images that match the current search criteria.
ÂQuery HUD Action pop-up menu: Create a new Light Table, book, web gallery,
Smart Web Gallery, or web journal album containing images that match the
current search criteria.
Close button
Match pop-up menu
Add Filter pop-up menu
Search field
Search criteria
New Smart Album
button
New Album With
Current Images button
Query HUD Action
pop-up menu
Reset button
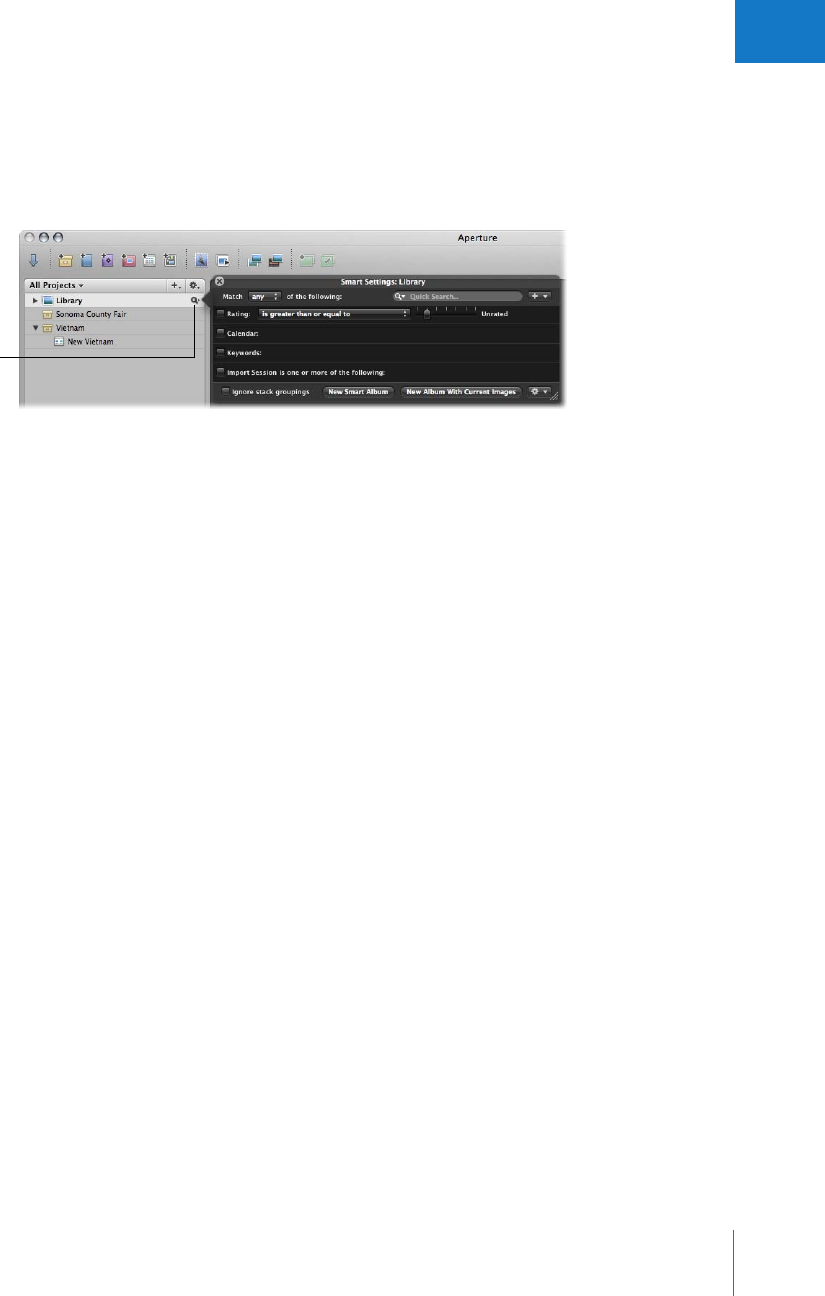
Chapter 12 Searching for and Displaying Images 253
II
Searching Across the Entire Library
At times, you may want to search for images that reside in many different projects. For
example, you might want to locate all your select photos for an entire year or for a
particular month. To search across the Library, you click the Query HUD button beside
the Library name.
To search for images across the entire Library:
1Select Library in the Projects panel.
2Click the Query HUD button beside the Library name.
3When the Query HUD appears, enter or select the search criteria you want.
The results of your search appear in the Browser.
∏Tip: You can further refine the results of the Library search by clicking the Query HUD
button beside the search field in the Browser. The Browser’s Query HUD appears, and
any search criteria you specify change the results you see in the Browser.
For information about entering search criteria in the Query HUD to perform different
kinds of searches, see the sections about specifying search criteria that follow.
Searching by Image Name, Caption, or Other Text
You can search for images using any text that you’ve associated with an image. For
example, you might search for images based on text in an image’s caption or keywords,
or in any other text entry. You can also search by multiple text entries.
To search for images by text:
1In the Projects panel, select a project or an album you want to search.
2Show the Query HUD by doing one of the following:
ÂChoose Edit > Find (or press Command-F).
ÂClick the Query HUD button beside the search field in the Browser.
Click the Query HUD
button next to the
Library name to search
across the entire Library.
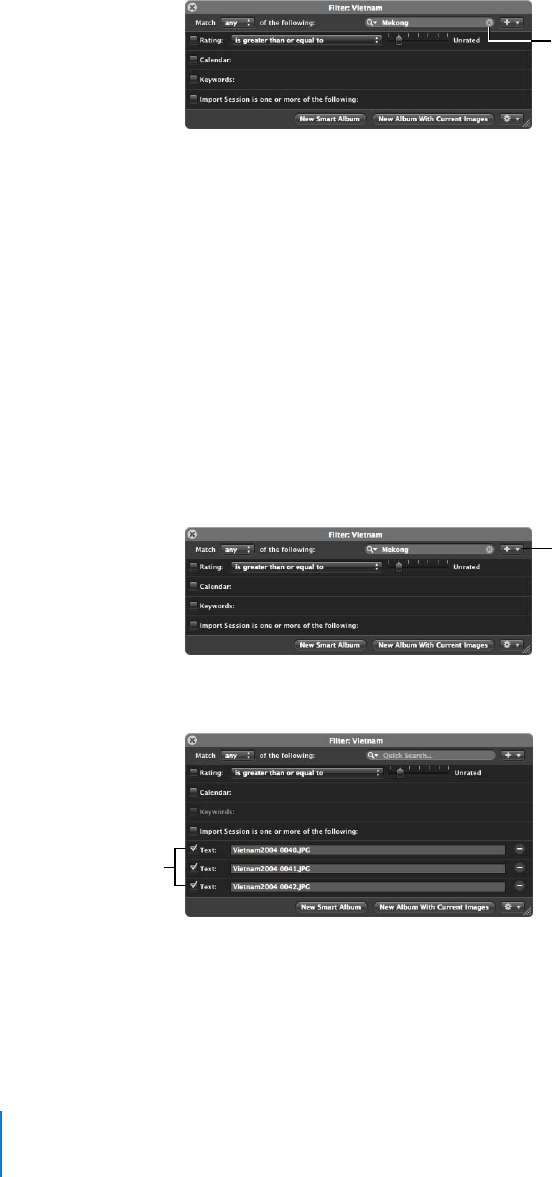
254 Part II Photo Editing
3In the Query HUD, enter the text you want to search for in the search field.
You can enter multiple text items, separating them by commas. Aperture locates any
images that have a match for all the text items.
The images that match the search criteria are displayed in the Browser. To save your
search results, see “Saving Your Search Results” on page 265.
To search for images by multiple text entries:
1In the Projects panel, select a project or an album you want to search.
2Show the Query HUD by doing one of the following:
ÂChoose Edit > Find (or press Command-F).
ÂClick the Query HUD button beside the search field in the Browser.
3In the Query HUD, add as many text fields as you need by choosing Text from the Add
Filter pop-up menu multiple times.
4Select the Text checkboxes and enter text in each field to locate the images you want.
5Choose “any” from the Match pop-up menu to locate images that have matches for any of
the text entries, or choose “all” to locate images that have matches for all of the text entries.
The images that match the search criteria are immediately displayed in the Browser. To
save your search results, see “Saving Your Search Results” on page 265.
Enter the text you want
to search for in this field.
Choose Text from the
Add Filter pop-up menu.
Select the Text
checkboxes and enter
text in each text field
you added.
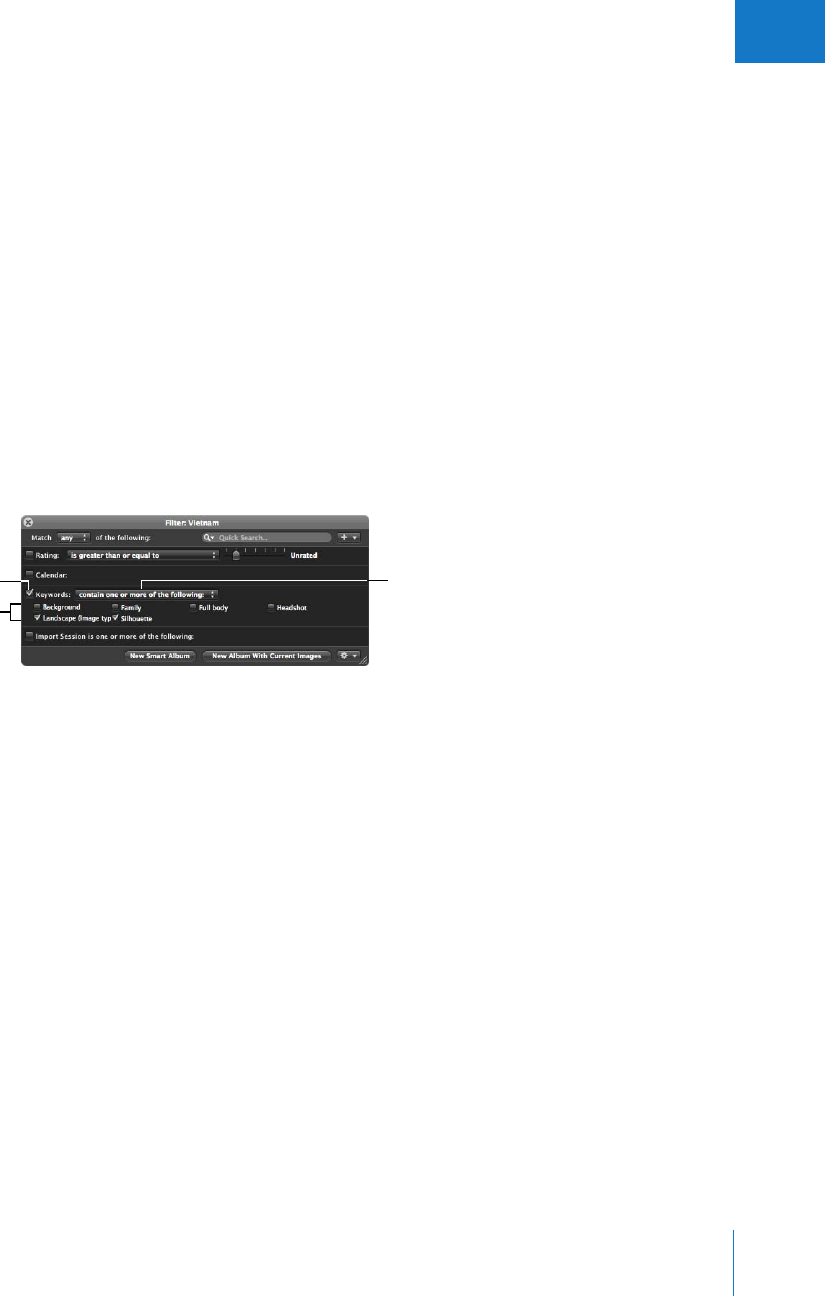
Chapter 12 Searching for and Displaying Images 255
II
Searching by Keyword
You can search for and locate images by any of the keywords that you’ve assigned to
them. You can select one or more keywords to search for. You can also specify which
keywords an image must have to qualify as a match. For example, you can choose to
search for images that have both Silhouette and Landscape as keywords, or images that
have either Silhouette or Landscape as keywords.
To search for images by keyword:
1In the Projects panel, select a project or an album you want to search.
2Show the Query HUD by doing one of the following:
ÂChoose Edit > Find (or press Command-F).
ÂClick the Query HUD button beside the search field in the Browser.
3In the Query HUD, select the Keywords checkbox.
Note: The Keywords checkbox is dimmed if no keywords have been applied to the
images in the selected project or album.
4Choose an option from the Keywords pop-up menu:
ÂTo display images that have any of the selected keywords: Choose “contain one or more
of the following.”
ÂTo display only those images that have all the keywords you selected: Choose “contain
all of the following.”
5Select the checkboxes next to the keywords you want to search for.
6Choose “any” from the Match pop-up menu, if it’s not already chosen.
You can also search for IPTC keywords using the IPTC search options. These options
allow you to specify searches for specific IPTC fields in a variety of ways. For example,
you can search for any images that don’t have keywords assigned. For more
information, see “Searching by IPTC Information” on page 259.
The images that match the search criteria are immediately displayed in the Browser. To
save your search results, see “Saving Your Search Results” on page 265.
Select the Keywords
checkbox. Choose an option from
the Keywords pop-up
menu.
Select the checkbox next
to each keyword you
want to search for.
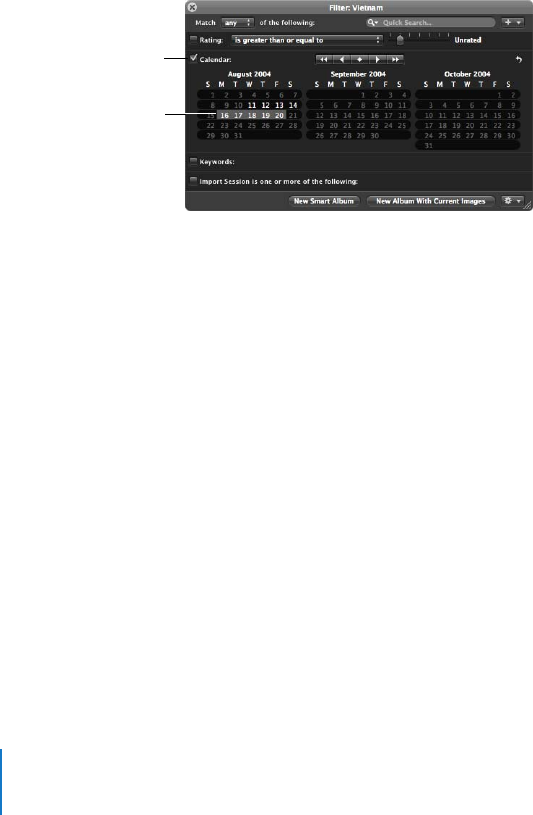
256 Part II Photo Editing
Searching by Date
You can search for and locate images by the date they were taken. For example, you
might locate any images taken during a trip between May 16, 2005, and May 20, 2005. To
search for images by date, you use the Calendar search options. When the calendar
appears, any dates that appear in bold represent dates on which new photos were taken
as registered in the EXIF data. You can select a date or several dates in the calendar to
search for images taken on those dates. You can also specify a range of dates.
To search for images by date:
1In the Projects panel, select a project or an album you want to search.
2Show the Query HUD by doing one of the following:
ÂChoose Edit > Find (or press Command-F).
ÂClick the Query HUD button beside the search field in the Browser.
3In the Query HUD, select the Calendar checkbox.
4Select the date or dates you want to search by.
Shift-click to select a range of continuous dates; Command-click to select multiple
noncontinuous dates.
5Choose “any” from the Match pop-up menu, if it’s not already chosen.
The images that match the search criteria are immediately displayed in the Browser. To
save your search results, see “Saving Your Search Results” on page 265.
Select the Calendar
checkbox.
Select the dates you
want to search by.
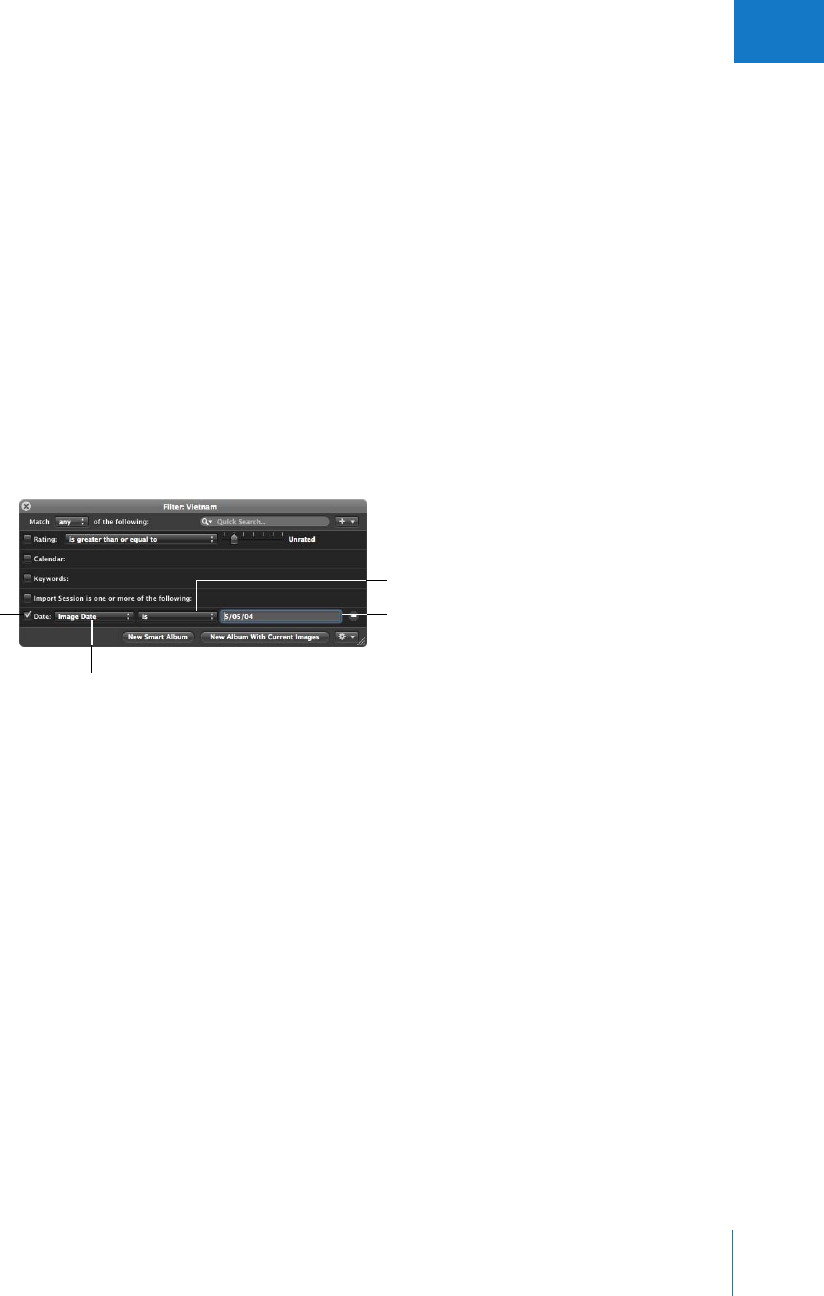
Chapter 12 Searching for and Displaying Images 257
II
Images that you import from sources other than cameras and card readers, such as
JPEG or TIFF files, may not have EXIF information associated with them. However, they
typically have a creation date assigned to the file. You can use this creation date to
locate images using the Date search options.
To search for images by creation date:
1In the Projects panel, select a project or an album you want to search.
2Show the Query HUD by doing one of the following:
ÂChoose Edit > Find (or press Command-F).
ÂClick the Query HUD button beside the search field in the Browser.
3In the Query HUD, choose Date from the Add Filter pop-up menu.
4Select the Date checkbox, then choose a date option from the Date pop-up menu.
5Choose an option from the middle pop-up menu to qualify your search.
6Enter the date you want the search based upon.
If needed, you can add multiple Date options to specify the capture year, capture
month, capture day, and so on.
7Choose “any” from the Match pop-up menu, if it’s not already chosen.
The images that match the search criteria are immediately displayed in the Browser. To
save your search results, see “Saving Your Search Results” on page 265.
Select the Date
checkbox.
Choose a date option from
the Date pop-up menu.
Enter a date here.
Choose how you want to
qualify your search from
this pop-up menu.
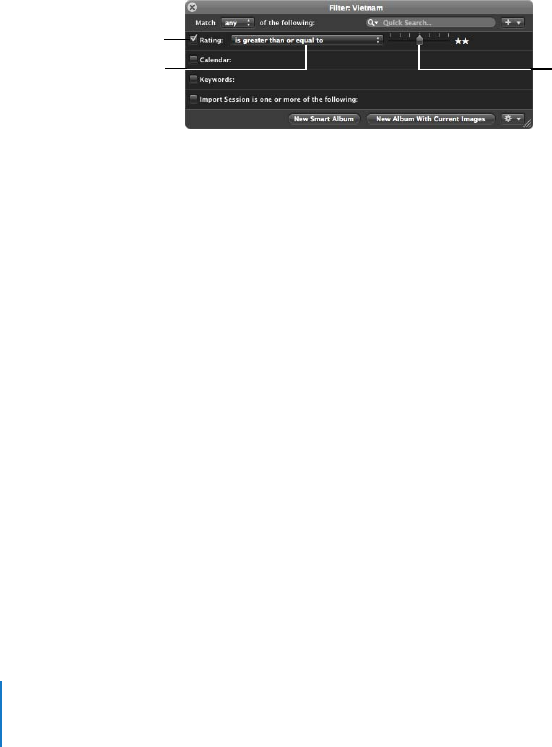
258 Part II Photo Editing
Searching by Rating
You can use the Query HUD to see all images with a certain rating. For example, you
can search for all the images in a project that have a rating of five stars. You can show
images with a specific rating, images rated at or below a specific rating, or images rated
at or above a rating. Aperture is preset to hide images rated as rejected, showing only
those that are unrated or better.
You can also search using multiple rating criteria by adding several rating search
criteria options from the Add Filter pop-up menu. For example, you might create a
search that locates images that have a rating of three stars or four stars only.
To search for images by rating:
1In the Projects panel, select a project or an album you want to search.
2Show the Query HUD by doing one of the following:
ÂChoose Edit > Find (or press Command-F).
ÂClick the Query HUD button beside the search field in the Browser.
3In the Query HUD, select the Rating checkbox.
4From the Rating pop-up menu, choose whether you want to search for images with a
rating that is equal to, greater than or equal to, or less than or equal to the specified rating.
5Specify the rating level by dragging the slider.
The images that match the search criteria are displayed in the Browser. To save your
search results, see “Saving Your Search Results” on page 265.
You can quickly display images with specific ratings using keyboard shortcuts. For more
information, see “Keyboard Shortcuts for Displaying Images with Specific Ratings” on
page 197.
Select the Rating
checkbox.
Specify the rating level
you want using this slider.
Choose an option from
the Rating pop-up menu.
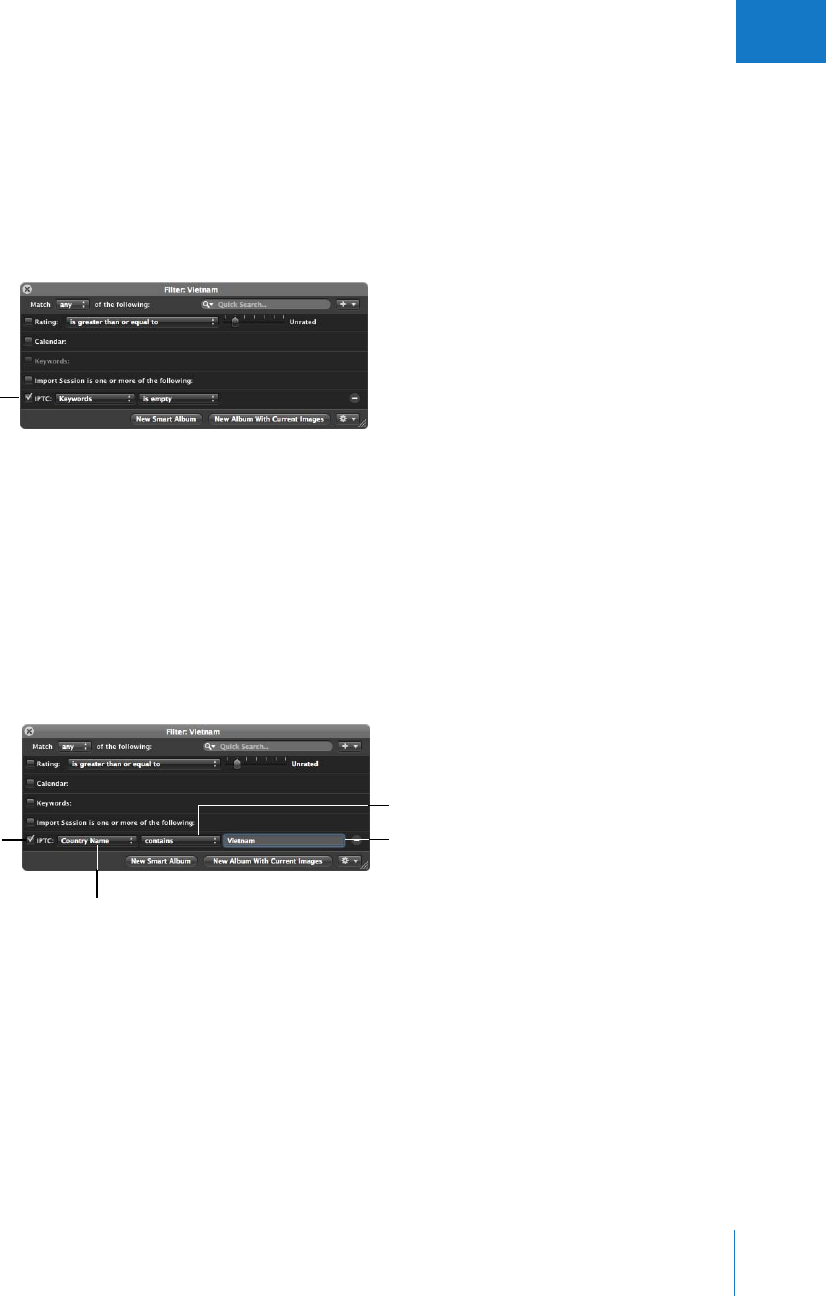
Chapter 12 Searching for and Displaying Images 259
II
Searching by IPTC Information
You can now search for and locate images using any IPTC information that you’ve
assigned using enhanced search qualifiers. For example, you might locate any images
that have IPTC keywords assigned to them. To search for images by IPTC information,
you use the IPTC search options. For example, you can search for any image that
doesn’t have keywords applied by specifying a search that uses the keywords criteria
and an “is empty” search qualifier.
To search for images by IPTC information:
1In the Projects panel, select a project or an album you want to search.
2Show the Query HUD by doing one of the following:
ÂChoose Edit > Find (or press Command-F).
ÂClick the Query HUD button beside the search field in the Browser.
3In the Query HUD, choose IPTC from the Add Filter pop-up menu.
4Select the IPTC checkbox, then choose the IPTC field you want to search by from the
IPTC pop-up menu.
Specify the search
criteria here.
Choose an IPTC field
to search by.
Select the IPTC checkbox.
Choose how you want to
qualify your search from
this pop-up menu.
Enter an IPTC value here.

260 Part II Photo Editing
5Choose an option from the middle pop-up menu to qualify your search.
ÂChoose “contains” to specify characters that the IPTC field should contain somewhere
within the field.
ÂChoose “does not contain” to specify characters that the IPTC field should not contain.
ÂChoose “is” to specify the exact characters that the IPTC field should contain.
ÂChoose “is not” to specify the exact characters that the IPTC field should not contain.
ÂChoose “starts with” to specify the characters that the IPTC field should begin with.
ÂChoose “ends with” to specify the characters that the IPTC field should end with.
ÂChoose “is empty” to specify that the IPTC field should hold no entry.
ÂChoose “is not empty” to specify that the IPTC field can be any entry as long as the
field is not empty.
6Enter an IPTC value you want to search by in the IPTC text field.
7Choose “any” from the Match pop-up menu, if it’s not already chosen.
The images that match the search criteria are immediately displayed in the Browser. To
save your search results, see “Saving Your Search Results” on page 265.
Searching by EXIF Information
You can search for and locate images using any EXIF information recorded by your
camera for your images. For example, you might locate any images that were created
with a certain camera or at a specific exposure. To search for images by EXIF
information, you use the EXIF search options.
To search for images by EXIF information:
1In the Projects panel, select a project or an album you want to search.
2Show the Query HUD by doing one of the following:
ÂChoose Edit > Find (or press Command-F).
ÂClick the Query HUD button beside the search field in the Browser.
3In the Query HUD, choose EXIF from the Add Filter pop-up menu.
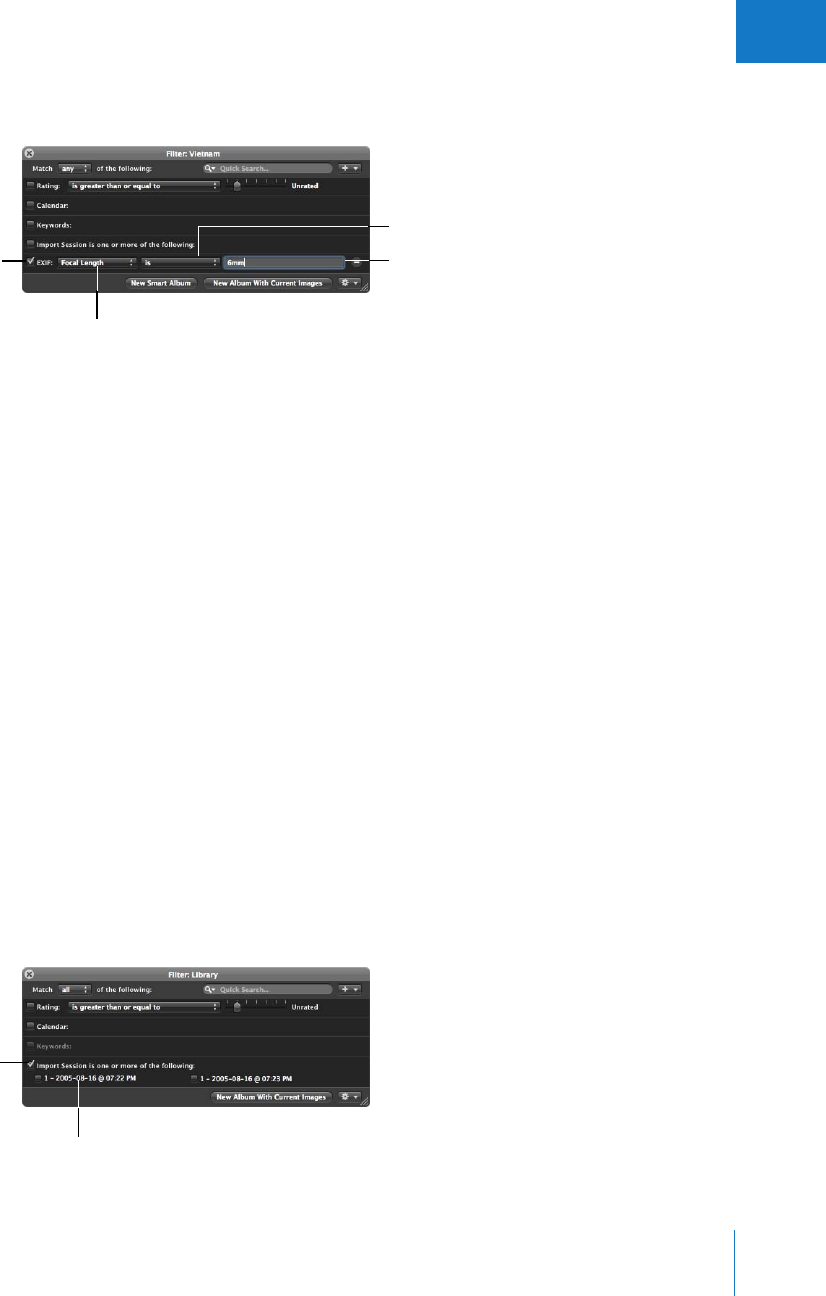
Chapter 12 Searching for and Displaying Images 261
II
4Select the EXIF checkbox, then choose an EXIF field you want to search by from the
EXIF pop-up menu.
5Choose an option from the middle pop-up menu to qualify your search.
6Enter the EXIF value you want to search by in the EXIF text field.
7Choose “any” from the Match pop-up menu, if it’s not already chosen.
The images that match the search criteria are immediately displayed in the Browser.
To save your search results, see “Saving Your Search Results” on page 265.
Searching by Import Session
At times, you may want to locate images that were imported at a specific time or date.
Aperture keeps track of your import sessions and can identify images that were
imported at the same time. To search for images based on their import session, you use
the Import Session search options.
To search for images by import session:
1In the Projects panel, select a project or an album you want to search.
2Show the Query HUD by doing one of the following:
ÂChoose Edit > Find (or press Command-F).
ÂClick the Query HUD button beside the search field in the Browser.
3In the Query HUD, select the Import Session checkbox and select the checkbox for the
import group you want to search by.
Choose an EXIF field
to search by.
Select the EXIF checkbox.
Choose how you want to
qualify your search from
this pop-up menu.
Enter an EXIF value here.
Select the
Import Session
checkbox.
Select an import group.
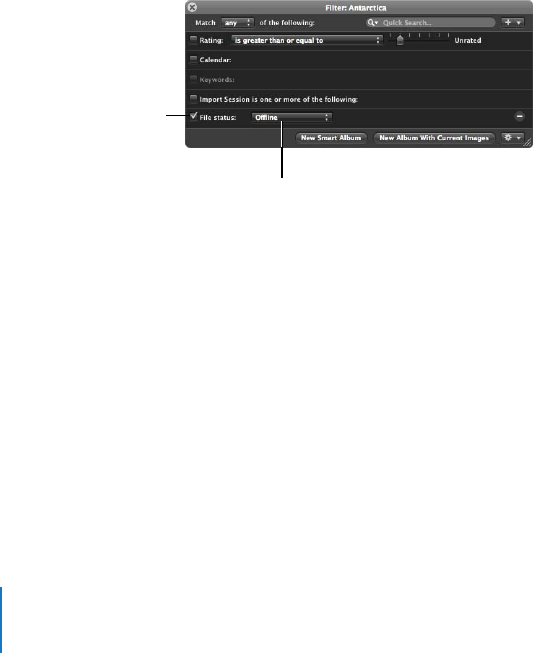
262 Part II Photo Editing
4Choose “any” from the Match pop-up menu, if it’s not already chosen.
The images that match the search criteria are displayed in the Browser. To save your
search results, see “Saving Your Search Results” on page 265.
Searching by File Status
You can also search for images using their file status. For example, you can search for
images that are referenced images, managed images, and online or offline images.
To search for images by file status, you use the File Status search options.
To search for images by file status:
1In the Projects panel, select a project or an album you want to search.
2Show the Query HUD by doing one of the following:
ÂChoose Edit > Find (or press Command-F).
ÂClick the Query HUD button beside the search field in the Browser.
3In the Query HUD, choose File Status from the Add Filter pop-up menu, and select the
“File status” checkbox.
4Deselect any checkboxes that aren’t part of your query, and choose the search criteria
from the File Status pop-up menu.
5Choose “any” from the Match pop-up menu, if it’s not already chosen.
The images that match the search criteria are displayed in the Browser. To save your
search results, see “Saving Your Search Results” on page 265.
Select the “File status”
checkbox.
Choose the file status you
want to search for.
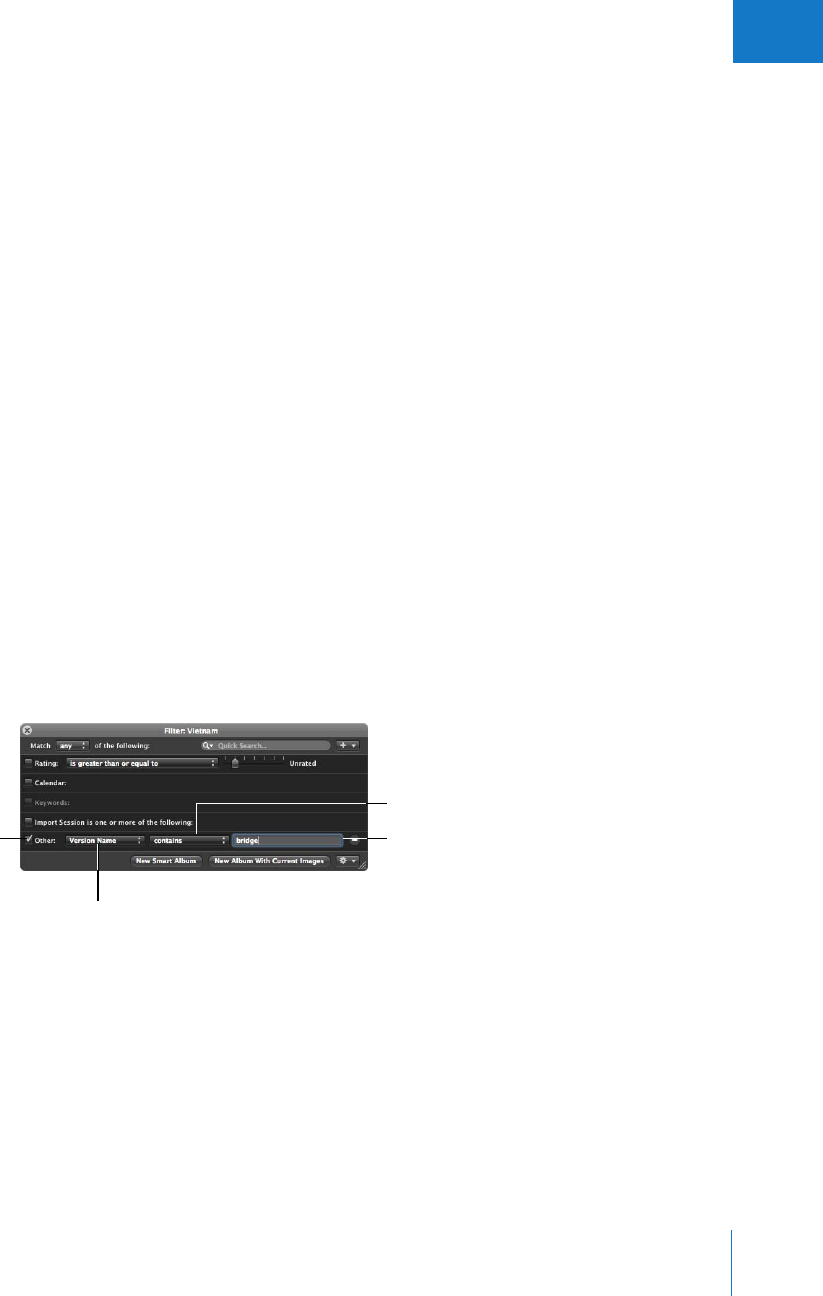
Chapter 12 Searching for and Displaying Images 263
II
Searching by Other Metadata
You can also search for images using the following kinds of metadata:
ÂVersion name
ÂAspect ratio
ÂFilename
ÂFile size
ÂMaster pixel size
ÂOrientation
ÂCamera time zone
ÂPicture time zone
ÂStock ID number
To search for images by metadata other than IPTC or EXIF information, you use the
Other Metadata search options.
To search for images by metadata:
1In the Projects panel, select a project or an album you want to search.
2Show the Query HUD by doing one of the following:
ÂChoose Edit > Find (or press Command-F).
ÂClick the Query HUD button beside the search field in the Browser.
3In the Query HUD, choose Other Metadata from the Add Filter pop-up menu.
4Select the Other checkbox and specify the search criteria.
5Choose “any” from the Match pop-up menu, if it’s not already chosen.
The images that match the search criteria are displayed in the Browser. To save your
search results, see “Saving Your Search Results” on page 265.
Select the Other
checkbox.
Choose the type of metadata
you want to search for.
Choose how you want to
qualify your search from
this pop-up menu.
Enter a metadata
value here.
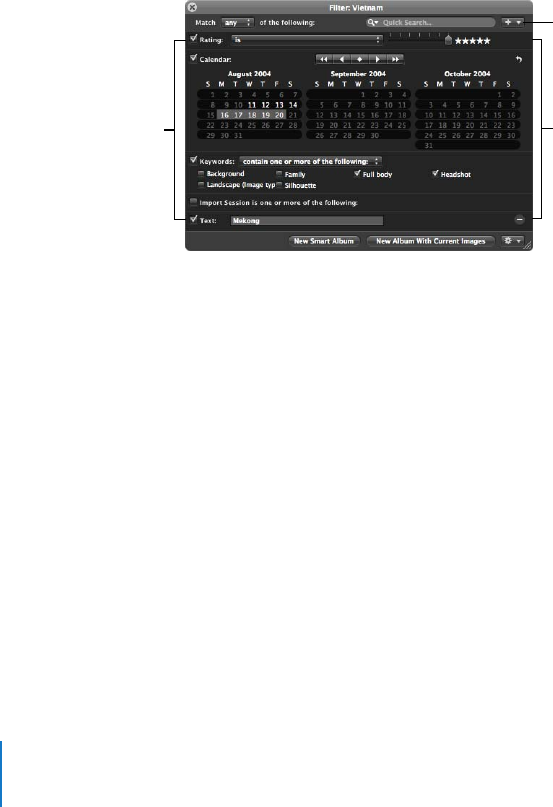
264 Part II Photo Editing
Searching by a Combination of Criteria
You can create complex combinations of search criteria in the Query HUD. For example,
you could search for images that have certain keywords, and that were taken on a
specific date. To create complex searches, you can add multiple search options using
the Add Filter pop-up menu.
To search for images by a combination of search criteria:
1In the Projects panel, select a project or an album you want to search.
2Show the Query HUD by doing one of the following:
ÂChoose Edit > Find (or press Command-F).
ÂClick the Query HUD button beside the search field in the Browser.
3In the Query HUD, choose the search options you want to add from the Add Filter
pop-up menu.
4Select the checkboxes beside the criteria you want to use and specify the search criteria.
5Do one of the following:
ÂTo specify that an image must match at least one of the criteria or keywords: Choose
“any” from the Match pop-up menu.
ÂTo specify that an image must match all the criteria and keywords: Choose “all” from the
Match pop-up menu.
The images that match the search criteria are immediately displayed in the Browser.
To save your search results, see the next section, “Saving Your Search Results.”
Specify your search
criteria.
Select the checkboxes
for the items you want
to search by.
To add additional search
options, choose them
from this pop-up menu.
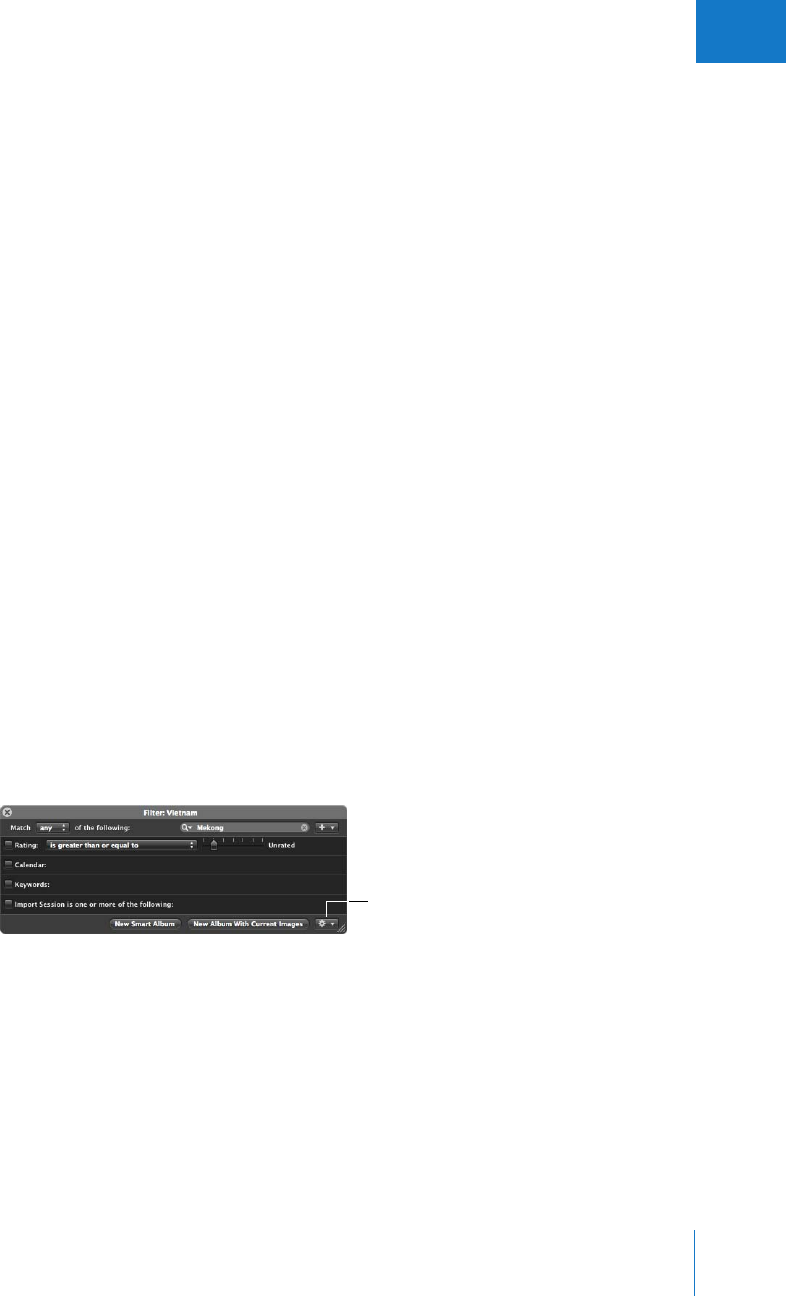
Chapter 12 Searching for and Displaying Images 265
II
Saving Your Search Results
When you perform a search using the Query HUD, you can choose to save your results
in several ways. You can create a new Smart Album that locates images that match the
search criteria. You can also save the search results themselves into a new album, Light
Table album, book album, web gallery album, Smart Web Gallery Album, or web
journal album.
To create a Smart Album based on the search criteria:
1Use the Query HUD to search for images based on specified criteria.
2In the Query HUD, click New Smart Album.
A new, untitled Smart Album appears in the Projects panel.
3Enter the name you want for the Smart Album, then press Return.
When you add images to a project or the Library that match the search criteria, they
are automatically added to the Smart Album.
For more information, see Chapter 13, “Grouping Images with Smart Albums,” on
page 267.
To save your search results in an album:
1Use the Query HUD to search for images based on specified criteria.
2In the Query HUD, do one of the following:
ÂTo create a new album: Click New Album With Current Images, enter the name you
want for the album, then press Return.
ÂTo create a new Light Table, book, web gallery, Smart Web Gallery, or web journal
album: Choose the appropriate option from the Query HUD Action pop-up menu,
enter the name you want for the album, then press Return.
All images that match the search criteria are placed in the new album you created.
Query HUD Action
pop-up menu

13
267
13 Grouping Images
with Smart Albums
When you need to group certain types of images, either
temporarily or permanently, you can use a Smart Album to
gather the images.
This chapter provides instructions for using the Aperture Smart Album feature. You can
create a Smart Album and specify search criteria that identify the images you want, and
Aperture will automatically search for and display them in the new album. Whenever
an image meets the search criteria later, it’s automatically added to the Smart Album.
This chapter covers:
ÂAn Overview of Smart Albums (p. 268)
ÂCollecting Images in a New Smart Album (p. 270)
ÂSearching Within a Smart Album (p. 271)
ÂRevising the Contents of a Smart Album (p. 272)
ÂTransferring Smart Album Images to Another Project or Album (p. 272)
ÂDeleting a Smart Album (p. 273)
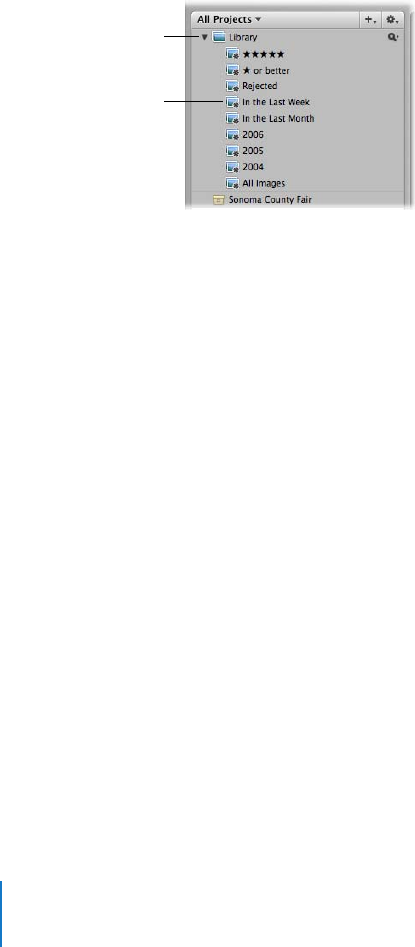
268 Part II Photo Editing
An Overview of Smart Albums
Unlike a standard project into which you import images, a Smart Album’s contents are
controlled by the criteria you specify in the Smart Album’s Query HUD. When you
change a Smart Album’s search criteria, the contents of the Smart Album change.
Aperture comes with a selection of Smart Albums set up in the Library for you. For
example, there are Smart Albums that gather all your select images, all images taken in
the last week, and all images taken in the last month. When you click the Library
disclosure triangle, you see the list of Smart Albums created for you. Select a Smart
Album to see its contents in the Browser.
You can also create your own Smart Albums. For example, suppose you want to create
a Smart Album that includes the best images you took of a particular sports event. You
select the project containing shots of the sports event, create a Smart Album, show the
Query HUD, and search for images rated Select (five stars). All images with that rating
immediately appear in the Smart Album.
You can also choose where to search for images—across the entire Library or within a
specific project or folder. The scope of a Smart Album’s search is determined when you
create the album, and can’t be changed afterward. For example, when you select the
Library and create a Smart Album, the Smart Album searches across the entire Library.
When you select a project, the Smart Album searches within that project. When you
select a folder, the Smart Album searches the projects within the folder.
Disclosure triangle
A Library Smart Album
has this icon.

Chapter 13 Grouping Images with Smart Albums 269
II
By instituting specific keyword schemes, you can create Smart Albums that are
automatically updated with specific kinds of images.
For example, you might create Smart Albums that:
ÂCollect images of certain poses or subjects, such as head shots, images of particular
models, or sports scenes
ÂCollect images based on business information, such as purchase date, payment, or
amount due
ÂCollect images suitable for a specific purpose, such as for distribution on the web or
submission to stock photography houses
ÂGather the best images of your collection into a portfolio of poster images that you
use to present or introduce your work
ÂAutomatically gather a project’s select images
As you complete projects throughout the year, Smart Albums are automatically
updated with images that match their search criteria.
You might also use Smart Albums to explore different aspects of your photography.
For example, you can create temporary collections of images based on technical data
such as camera model, exposure, or lens type as you investigate technical influences
on your images.
You can quickly create a Smart Album to review images and then delete it. Or, you can
create Smart Albums that hold permanent and expanding collections of images. Using
Smart Albums can become a handy way to relieve yourself from slow reviews of
images that you are required to track periodically.
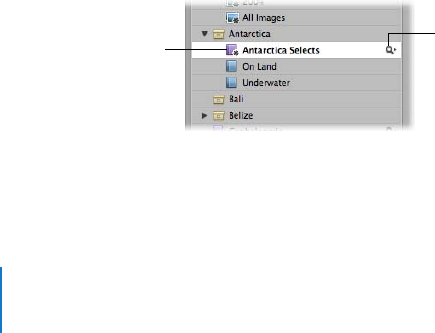
270 Part II Photo Editing
Collecting Images in a New Smart Album
You can collect images based on any of the information you can search for using the
Query HUD. For example, you can create a Smart Album that gathers images based on
a specific keyword or a combination of keywords, ratings, dates, or other metadata. You
can narrow or broaden the Smart Album search criteria in the Query HUD at any time.
To create a Smart Album that searches across the entire Library:
1Select Library in the Projects panel.
2Do one of the following:
ÂChoose File > New Smart > Album (or press Command-Shift-L).
ÂChoose New Smart Album from the Add to Library pop-up menu in the Projects panel.
ÂClick the New Smart Album button in the toolbar.
A new, untitled Smart Album appears in the Projects panel.
3Rename the Smart Album by entering the name you want.
4In the Query HUD, specify the search criteria you want.
For more information about using the Query HUD and specifying search criteria, see
Chapter 12, “Searching for and Displaying Images,” on page 247.
5Click the Query HUD’s close button.
Aperture finds the images matching the specified search criteria and displays them in
the Browser. You can now work with these versions of your images in the same way
you work with images in any project or album.
To create a Smart Album that searches only within one project:
1Select the project in the Projects panel.
2Do one of the following:
ÂChoose File > New Smart > Album (or press Command-Shift-L).
ÂChoose New Smart Album from the Add to Library pop-up menu in the Projects panel.
ÂClick the New Smart Album button in the toolbar.
A new, untitled Smart Album appears within the project.
3Rename the Smart Album by entering the name you want.
Query HUD button
Enter a new name for the
Smart Album.
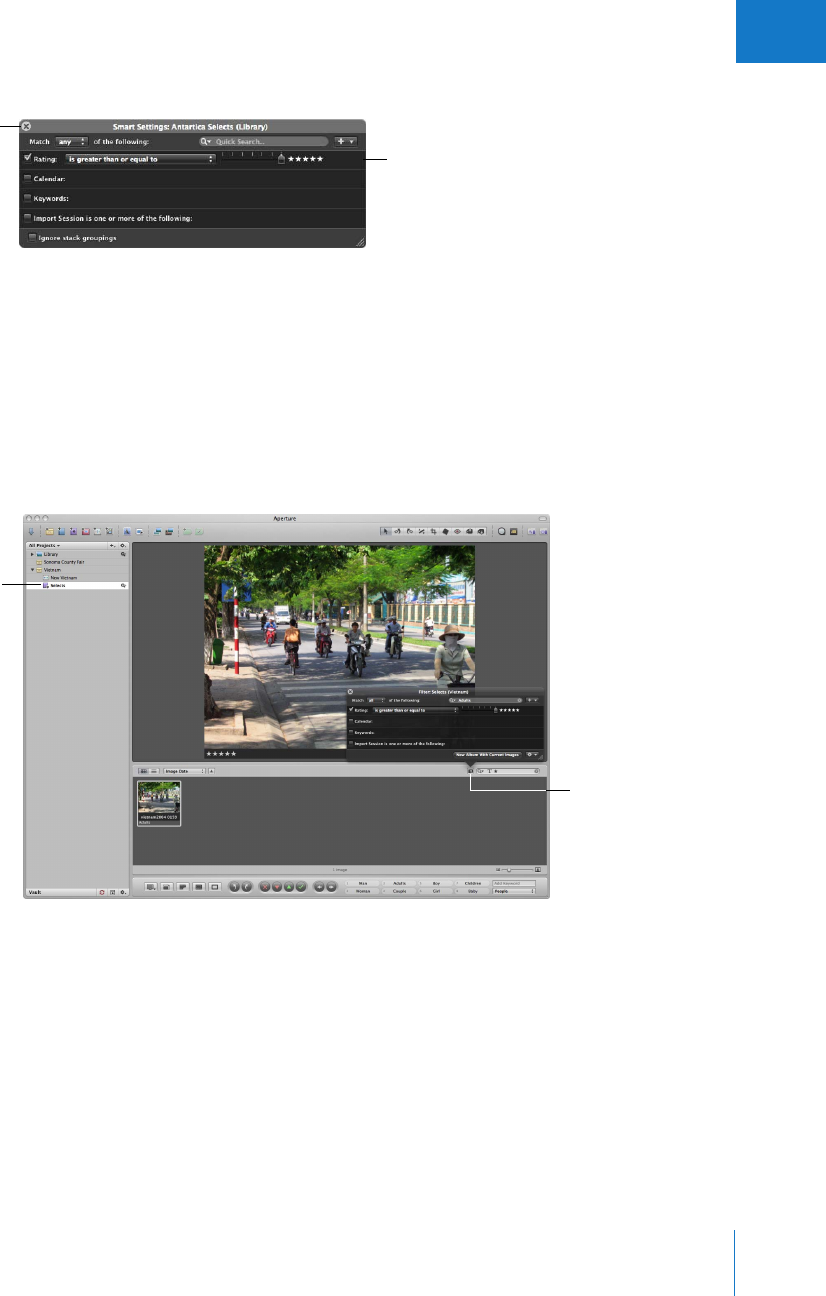
Chapter 13 Grouping Images with Smart Albums 271
II
4In the Query HUD, specify the search criteria you want.
For more information about using the Query HUD and specifying search criteria, see
Chapter 12, “Searching for and Displaying Images,” on page 247.
5Click the Query HUD’s close button.
Searching Within a Smart Album
After creating a Smart Album, you can search for specific images within the contents of
the Smart Album.
To search within the contents of a Smart Album:
1Show the Query HUD by clicking the Query HUD button in the Browser.
2When the Query HUD appears, specify secondary search criteria to show specific
images within the Smart Album.
To see the entire contents of the Smart Album again, delete the criteria in the Query HUD.
Specify the search criteria
for images you want in
the Smart Album.
Close button
Show the Browser’s
Query HUD and specify
search criteria.
Select the Smart Album
you want to search within.

272 Part II Photo Editing
Revising the Contents of a Smart Album
To change the contents of a Smart Album, you change the search criteria for the Smart
Album. You can manually select individual images and delete them, but the deletion
removes both the version and the digital master file wherever it exists in the original
project. Similarly, you cannot simply drag images into a Smart Album to add them.
If you decide that certain images should not be in a Smart Album, you can narrow the
search criteria to exclude images. Aperture performs a new search and revises the
Smart Album’s contents. To remove an image from a Smart Album, you might also
change the image so that it no longer matches the Smart Album’s search criteria. For
example, if a Smart Album gathers images rated five stars, changing an image’s rating
to four stars removes it from the Smart Album.
To change the contents of a Smart Album by changing the search criteria:
1In the Projects panel, click the Query HUD button to the right of the Smart Album to
show the Query HUD.
2Revise the search criteria in the Query HUD to eliminate or add the images you want, or
change the keyword or rating for the image itself.
3Click the Query HUD’s close button.
Transferring Smart Album Images to Another
Project or Album
You can transfer images from a Smart Album to another project or album, including
web gallery albums, web journal albums, and book albums. You transfer images by
selecting the images in the Smart Album and dragging or copying them into another
project or album.
To transfer images from a Smart Album to another project or album:
1Select a project or album to hold the images, or create a new project or album.
2Select the Smart Album, then select the images you want.
3Drag the images into the project or album you want.
You can also select the images in the Smart Album and have Aperture automatically
create a new album to hold them.
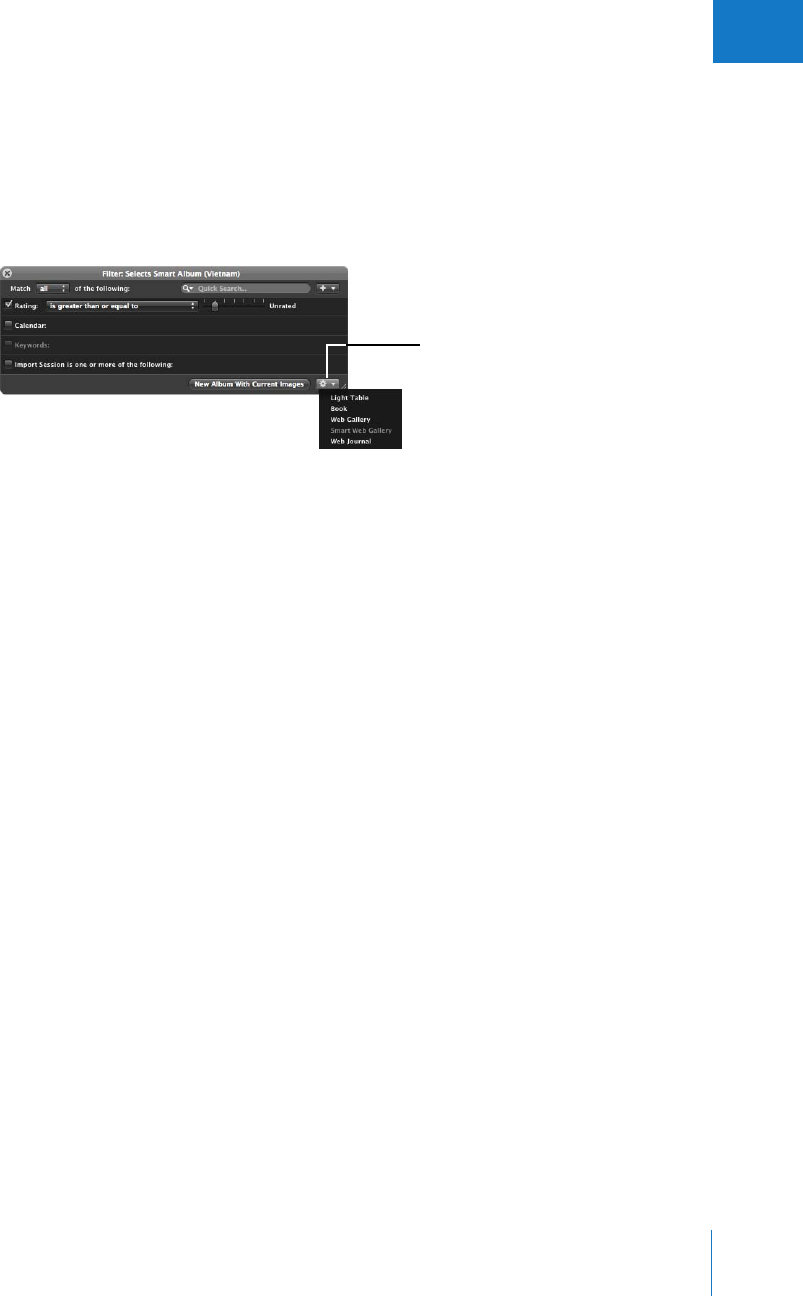
Chapter 13 Grouping Images with Smart Albums 273
II
To transfer images from a Smart Album to a new album:
1Select the images you want in the Smart Album.
2Click the Query HUD button in the Browser.
3Click the New Album With Current Images button to create an album, or choose the
type of album you want from the Query HUD Action pop-up menu in the bottom-right
corner of the Query HUD.
A new album is created, containing the images you selected.
Deleting a Smart Album
You can delete a Smart Album at any time, and none of the images gathered from the
Library are deleted. If you’ve transferred images from a Smart Album to another album,
the images in the other album are also not deleted when you delete the Smart Album.
To delete a Smart Album:
1Select the Smart Album in the Projects panel.
2Choose File > Delete Smart Album (or press Command-Delete).
Click the New Album with
Current Images button, or choose
a type of album from the Query
HUD Action pop-up menu.

III
Part III: Distribution and Backup
This section describes methods of printing, exporting,
and publishing your images for viewing. It also provides
information about setting up and maintaining your
backup systems.
Chapter 14 Printing Your Images
Chapter 15 Exporting Your Images
Chapter 16 Creating Slideshow Presentations
Chapter 17 Using the Light Table
Chapter 18 Creating Webpages
Chapter 19 Creating Books
Chapter 20 Backing Up Your Images


14
277
14 Printing Your Images
Aperture makes it easy to print high-resolution images.
You can print single images, contact sheets, webpages, and
books. You can also print images selected in the Light Table.
This chapter provides information about several methods for printing your images,
including creating PDF files that you can easily transfer to clients for review.
This chapter covers:
ÂAn Overview of Printing (p. 277)
ÂControls in the Print Dialog (p. 279)
ÂPrinting a Single Image (p. 281)
ÂPrinting a Series of Images (p. 282)
ÂPrinting a Contact Sheet or Series of Contact Sheets (p. 282)
ÂPrinting a Book (p. 283)
ÂPrinting a Light Table Arrangement (p. 284)
ÂCreating and Modifying Print Presets (p. 284)
ÂProofing Your Images Onscreen (p. 286)
ÂTurning Off Color Management in Your Printer (p. 287)
An Overview of Printing
Aperture allows you to print your photos as high-resolution single images and
multi-image contact sheets. You can also print books and Light Table arrangements
created in Aperture. Aperture offers a variety of printing options, including using a
standard or custom paper size and assigning a specific ColorSync profile.
The easiest way to print images is to use one of the Aperture print presets. Print
presets, or groups of print settings, allow you to easily print your images without
having to repeatedly change your settings. If the preconfigured presets don’t meet
your needs, you can create your own.

278 Part III Distribution and Backup
For example, if you regularly print both 8-by-10-inch and 11-by-14-inch photographs,
you can create a print preset for each of these paper sizes. For photographers with
multiple printers, such as a standard and wide-format inkjet printer, you can create
print presets for each printer. Give the presets a name you’ll remember, and next time
you need to print, simply select the print preset that corresponds to your paper size or
your printer type.
You can modify existing print presets, create new print presets, and delete print presets
you no longer use. When changing your print presets, remember that modifying an
existing preset deletes its original settings; creating a new preset, on the other hand,
does not delete any existing settings.
Before you print your images, you can proof them onscreen using the onscreen
proofing feature.
Printing Tips
Here are a few suggestions to help you with the printing process.
ÂUse the highest-resolution image possible: It’s preferable to work with images
imported directly from your camera. However, even images imported directly from
your camera or card reader can be low-resolution, low-quality images. This is why
it’s important to shoot with the highest-resolution settings available on your
camera. Compression settings applied during image capture may be apparent
when you print. Consider shooting RAW files if the setting is available, and shoot at
the highest bit depth possible.
If you’ve imported an image that was reduced or compressed in another
application, Aperture cannot increase the resolution of the file. In other words,
Aperture cannot replace image information that was previously removed during
the compression process. If possible, locate the original full-resolution image file,
use the Lift and Stamp tools to apply the adjustments you’ve made to the low-
resolution file, and print the higher-resolution image file.
ÂColor calibrate your Aperture system: It’s important to calibrate your display and
printer so that your printed images look as much as possible like the images you
see on the computer screen. For more information about color calibrating your
Aperture system, see Appendix B, “Calibrating Your Aperture System,” on page 423.
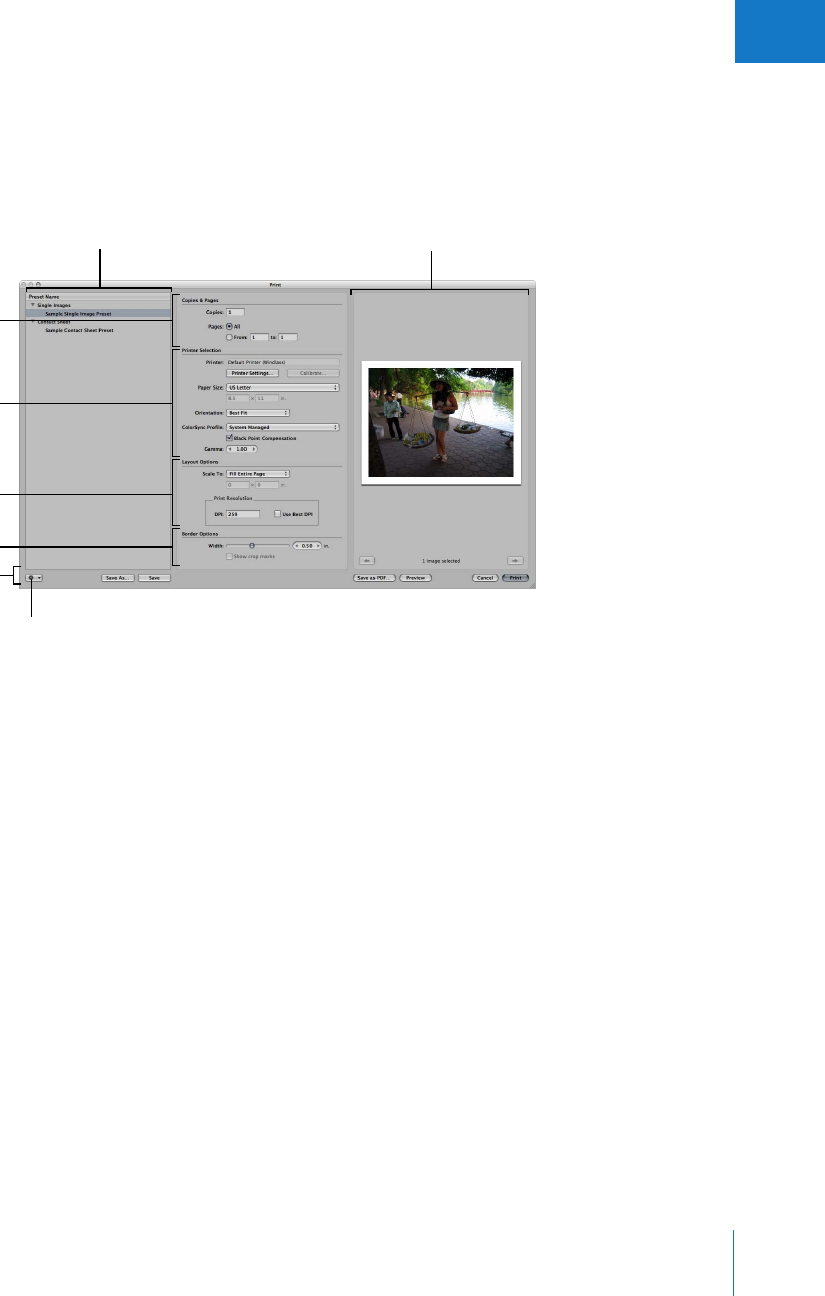
Chapter 14 Printing Your Images 279
III
Controls in the Print Dialog
Whether you’re printing a single high-resolution print, a series of contact sheets, or
your latest travelogue book, you use the Print dialog to print your work.
To open the Print dialog:
mSelect an image in the Browser, then choose File > Print Image (or press Command-P).
The Print dialog is divided into six areas.
Preset Name List
This column contains all presets, those that come with Aperture as well as new ones
that you create.
ÂSingle Images: Displays settings for printing a single image per page.
ÂContact Sheet: Displays settings for printing a series of images on one or more pages.
Preset Options
ÂPrint Preset Action pop-up menu: Use this pop-up menu to add new print presets and
lock and unlock presets.
ÂSave As button: Click this button to save a copy of the preset.
ÂSave button: Click this button to save a preset with its current name.
Copies & Pages
ÂCopies field: Enter the number of copies of the image to print.
ÂPages buttons and fields: Print the entire selection of images or a reduced set.
Copies & Pages area
Printer Selection area
Layout Options area
Border Options area
Preset Name list Preview area
Preset options
Print Preset Action pop-up menu

280 Part III Distribution and Backup
Printer Selection
ÂPrinter field: Displays the printer that will print the images.
ÂPrinter Settings button: Click this button to choose a printer and adjust its settings. If
you are using an ICC profile for your printer and paper choice, click this button and
choose Color Management from the third pop-up menu from the top of the dialog,
then select No Color Adjustment to turn off system-level color management.
Aperture can then control color management using an ICC profile selected for your
printer and paper.
ÂPaper Size pop-up menu: Choose a paper size from the list of available sizes.
ÂOrientation pop-up menu: Choose landscape or portrait orientation, or Best Fit. Best
Fit automatically orients your image to the page and is usually a good choice for
printing single images, but may not provide good results for contact sheets.
ÂColorSync Profile pop-up menu: Choose a printer profile to use when printing.
ÂBlack Point Compensation checkbox: Select this checkbox to scale the black and white
luminance values to the selected ColorSync profile. This option compensates for the
difference between the way black images are saturated on a computer screen
compared to the way black ink is saturated on a print. Turning on black point
compensation can prevent shadows from appearing as solid black.
ÂGamma value slider: Specify a gamma setting to adjust the brightness of the printed
image so that it matches the display’s output as closely as possible. Because displays
illuminate images, images shown on a display screen tend to appear more luminous
than when printed. Increasing the gamma value can compensate for this difference.
A typical setting ranges between 1.1 and 1.2.
Layout Options
ÂScale To pop-up menu: When you select a single-image preset, you can use this
pop-up menu to choose whether to fit your image to the selected paper size, print a
specific image size, or print a custom image size. Fit Entire Image scales the image to
be as large as possible for the paper size without cropping the image. Fill Page
makes the image fit the entire page, cropping the image if necessary. Custom allows
you to specify the image dimensions you’d like.
“Number of pages” and “Number of columns and rows” buttons: When you select a
contact sheet preset, select one of these options to specify the number of pages that
you want the printed images to occupy, or the number of rows and columns of
images on the page.
ÂMetadata pop-up menu: When you select a contact sheet preset, choose a metadata
view to specify the metadata you want printed with your images.
ÂFont Size pop-up menu: When you select a contact sheet preset, choose the font size
of the metadata that will be printed.
ÂPrint Resolution: Type the dot-per-inch (dpi) resolution at which you want to print
your image in the DPI field. You can also select the Use Best DPI checkbox to allow
Aperture to calculate the best print resolution for the images for the selected printer.

Chapter 14 Printing Your Images 281
III
Border Options
ÂWidth controls: Drag the slider, or enter a value in the value slider, to reduce the size
of the image in order to create a white border around the image.
ÂShow crop marks checkbox: Select this checkbox to print a cut line.
Preview Area
This area shows how the image or images will print on the selected paper size. If there
is more than one page, you can use the Previous Image and Next Image buttons to
navigate through the pages.
ÂSave as PDF button: Click this button to create a PDF.
ÂPreview button: Click this button to view a PDF version of your print request in Preview.
ÂCancel button: Click this button to close the Print dialog.
ÂPrint button: Click this button to send your print job to the printer.
Printing a Single Image
When you want to print a single image on a single sheet of paper, you use a
single-image preset.
To print a single image:
1In the Browser, select an image.
2Choose File > Print Image (or press Command-P).
3In the Print dialog, select a single-image preset in the Preset Name list.
4After you’ve verified that all the settings in the Print dialog are correct, click Print.
If Aperture Does Not Recognize Your Printer
If your printer does not appear in the Printer pop-up menu when you click the Printer
Settings button, visit your printer manufacturer’s website and download the latest drivers.

282 Part III Distribution and Backup
Printing a Series of Images
You can print multiple images at once, each on its own sheet of paper.
To print a series of images:
1In the Browser, select the images you want to print.
For more information, see “Navigating Through and Selecting Images” on page 122.
2Choose File > Print Images (or press Command-P).
3In the Print dialog, select a single-image preset in the Preset Name list.
4After you’ve verified that all the settings in the Print dialog are correct, click Print.
Your images are printed, one image per page.
Printing a Contact Sheet or Series of Contact Sheets
You can print contact sheets of your images, and Aperture does all the layout work for
you. All you have to do is select the number of pages or columns; Aperture adjusts the
size of the images based on your Layout Options settings.
To print contact sheets:
1In the Browser, select the images you want to print.
2Choose File > Print Images (or press Command-P).
3In the Print dialog, specify the following settings:
ÂSelect a contact sheet preset in the Preset Name list.
ÂMake sure the settings in the Printer Selection area are correct, such as paper size
and ColorSync profile.
ÂIn the Layout Options area, specify the number of pages or the number of columns
and rows as a basis for laying out the contact sheets.
Aperture automatically adjusts the size of images based on your Layout Options
settings. The size of the images on the contact sheet is based on whether or not you
choose to constrain the images within a specific number of pages. The fewer pages
selected, the smaller the images. Similarly, if you specify the number of columns and
rows on the page, the more columns and rows, the smaller the images.
ÂVerify the layout of your contact sheet in the preview area.
ÂFor printers incapable of printing full bleeds, select the “Show crop marks” checkbox
in the Border Options area.
4After you’ve verified that all the settings in the Print dialog are correct, click Print.
Your contact sheet is printed.

Chapter 14 Printing Your Images 283
III
Printing a Book
You can print a book to check the final format and look of it before having it printed by
a professional printer, ordering a printed copy online, or distributing copies to others.
To print a book:
1Select a book album in the Projects panel.
The book appears in the Book Layout Editor.
2Choose File > Print Book (or press Command-Option-P).
3In the Print dialog, specify the following settings:
ÂSelect a book preset in the Preset Name list.
Note: The Mini-Size Book preset should be selected only for books created using the
Mini book size. This preset selects a paper size appropriate for a mini-size book. Full-
size book layouts may print with images cut off or missing when the Mini-Size Book
preset is selected.
ÂMake sure the settings in the Printer Selection area are correct, such as paper size
and ColorSync profile.
ÂVerify the layout of your book in the preview area.
4Click Print.
Your book is printed.
You can also create a PDF file of a book to store an electronic copy for use at another
time or to send to others.
To create a PDF file of a book:
1In the Projects panel, select a book album.
2Choose File > Print Book (or press Command-Option-P).
3In the Print dialog, click the Save as PDF button.
4Enter a name for the PDF file and choose a location to save the file, then click Save.

284 Part III Distribution and Backup
Printing a Light Table Arrangement
You can print an arrangement of images in the Light Table.
To print a Light Table arrangement:
1Select a Light Table album in the Projects panel.
The Light Table appears above the Browser.
2Do one of the following:
ÂTo print selected images: Select the images you want to print in the Light Table.
ÂTo print the entire Light Table arrangement: Deselect all images in the Light Table by
clicking the background.
3Choose File > Print Light Table (or press Command-Option-P).
4In the Print dialog, specify the following settings:
ÂSelect a Light Table preset in the Preset Name list.
ÂMake sure the settings in the Printer Selection area are correct, such as paper size
and ColorSync profile.
5After you’ve verified that all the settings in the Print dialog are correct, click Print.
Your Light Table arrangement is printed.
Creating and Modifying Print Presets
After examining a selected preset’s print settings, you may want to change certain
settings. You can do this by modifying an existing print preset, creating a new, undefined
print preset, or duplicating an existing print preset and making changes to it.
Creating a New Print Preset
In almost all situations, it’s better to create a new print preset than to modify an existing
one. You can easily create a new print preset based on any existing print preset. Creating
a new print preset does not modify or delete any existing print preset settings.
To create a new print preset:
1Choose File > Print Images (or press Command-P).
The Print dialog appears.
2Choose a print preset category from the Print Preset Action pop-up menu at the
bottom-left side of the dialog.
A new preset appears in the Preset Name list.
3Enter a new name for the preset.
4Change the print settings as required, then click OK.
You can now select this preset whenever you need to use these print settings.

Chapter 14 Printing Your Images 285
III
Modifying an Existing Print Preset
Any existing print preset can be changed, either temporarily or permanently. If you
change a preset’s settings without saving it, the preset will revert to its original settings
after the print job is processed. If you save the modified settings, the preset will retain
the setting changes.
To modify an existing print preset:
1Choose File > Print Images (or press Command-P).
The Print dialog appears.
2Select a print preset, then modify it as appropriate.
Changing an existing preset’s settings activates the Save button.
3When you’re ready to save the preset, click Save.
The print preset is saved with its new settings.
Duplicating a Print Preset
If you frequently use the majority of a specific print preset’s settings, changing one or
two items such as the type of printer or the paper size, it’s more convenient to
duplicate the preset with the print settings you need than to create a new one. For
example, if you plan to frequently print 8-by-10-inch and 11-by-14-inch prints on the
same printer, you can create a preset for 8-by-10-inch prints with the appropriate
settings, duplicate the preset with its settings, and then change the paper size. Then
name one preset 8 x 10 and the other 11 x 14. After that, you simply select the preset for
the image size you plan to print, and click Print.
To copy a new print preset:
1Choose File > Print Images (or press Command-P).
The Print dialog appears.
2Select a print preset to duplicate, then choose Duplicate from the Print Preset Action
pop-up menu at the bottom-left side of the dialog.
A new duplicate preset, based on the currently selected print preset, appears in the
Preset Name list.
3Enter a new name for the preset.
4Change the print settings as required, then click OK.
You can now select this preset whenever you need to use these print settings.

286 Part III Distribution and Backup
Locking Print Presets
If you worry that you may inadvertently modify your print presets, you can lock them.
To lock or unlock a print preset:
mIn the Print dialog, select the preset, then choose Lock or Unlock from the Print Preset
Action pop-up menu at the bottom-left side of the dialog.
When a preset is locked, a lock icon appears to the right of the preset name.
Deleting a Print Preset
You can delete a print preset that you no longer use.
To delete a print preset:
mIn the Print dialog, select the preset, then choose Delete from the Print Preset Action
pop-up menu at the bottom-left side of the dialog.
The preset is deleted from the Preset Name list.
Proofing Your Images Onscreen
Your printer, paper type, and color profile all affect the way your images are printed.
Onscreen proofing allows you to proof the color in your images onscreen, before you
print them.
To use onscreen proofing, choose the proofing profile that most closely matches the
characteristics of the final output device, and then turn on onscreen proofing.
To choose a proofing profile:
mChoose View > Proofing Profile, then choose the profile you want from the submenu.
To turn onscreen proofing on or off:
mChoose View > Onscreen Proofing (or press Shift-Option-P).
When onscreen proofing is on, a checkmark appears beside the option in the View menu.
For more information about using the Aperture onscreen proofing feature, see “Setting
Up the Viewer for Onscreen Proofing” on page 156.
For more information about ColorSync profiles and color calibrating your computer, see
Appendix B, “Calibrating Your Aperture System,” on page 423.
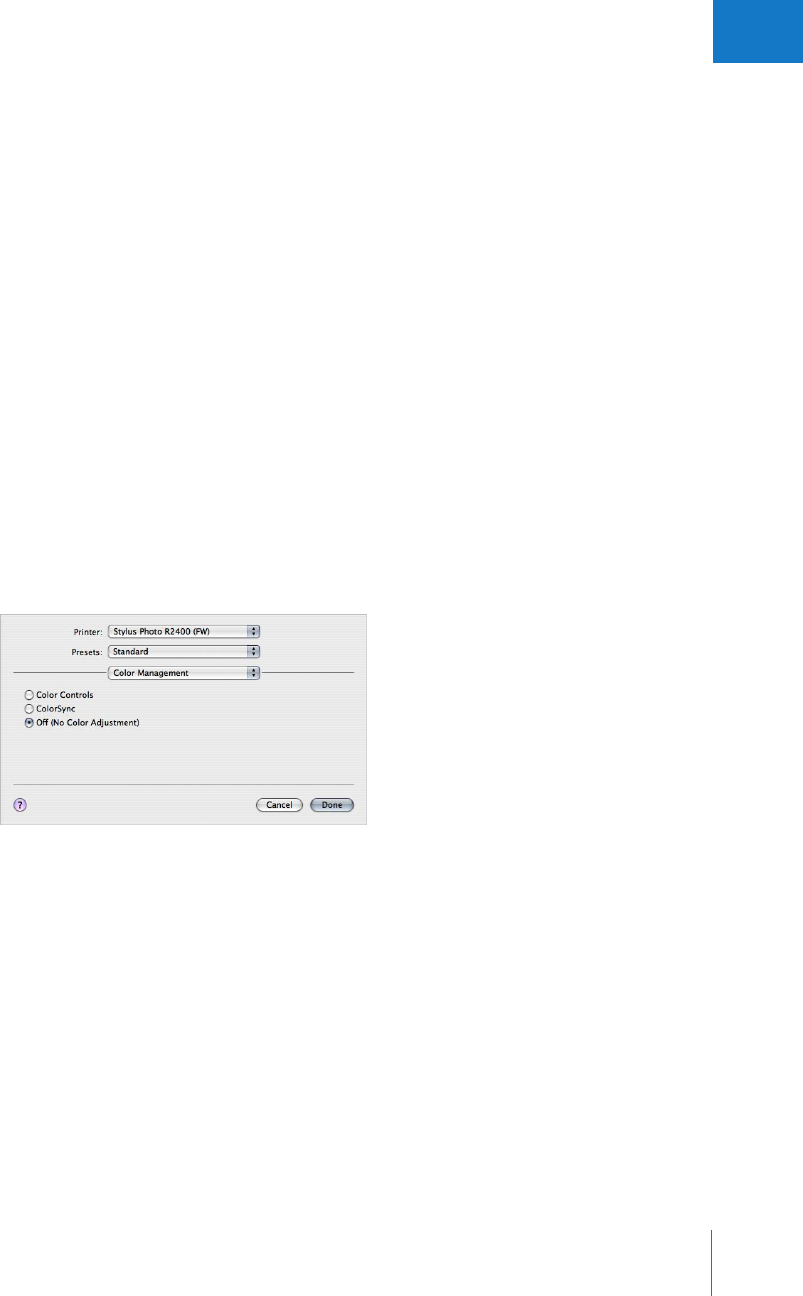
Chapter 14 Printing Your Images 287
III
Turning Off Color Management in Your Printer
For best results, you should turn off color management in your printer when printing
an image using Aperture. By default, most printers are set to convert the image to the
printer’s color space. However, Aperture is designed to perform this conversion
internally. Each printer manufacturer creates its own print dialog. This means the
setting for turning off color management in your printer varies depending upon the
manufacturer of your printer and the printer model.
Note: If you have multiple printers connected to your computer, you must create a
print preset and turn off color management for each printer.
The following is a set of example tasks for turning off color management in Epson R2400,
Canon i9100, and HP Photosmart 8700 series printers.
To turn off color management in an Epson R2400 printer:
1In Aperture, choose File > Print (or press Command-P).
The Print dialog appears.
2Click the Printer Settings button.
3In the dialog that appears, choose Color Management from the third pop-up menu
from the top of the dialog, and select Off (No Color Adjustment).
4Make sure the other printer settings are correct, then click Done.
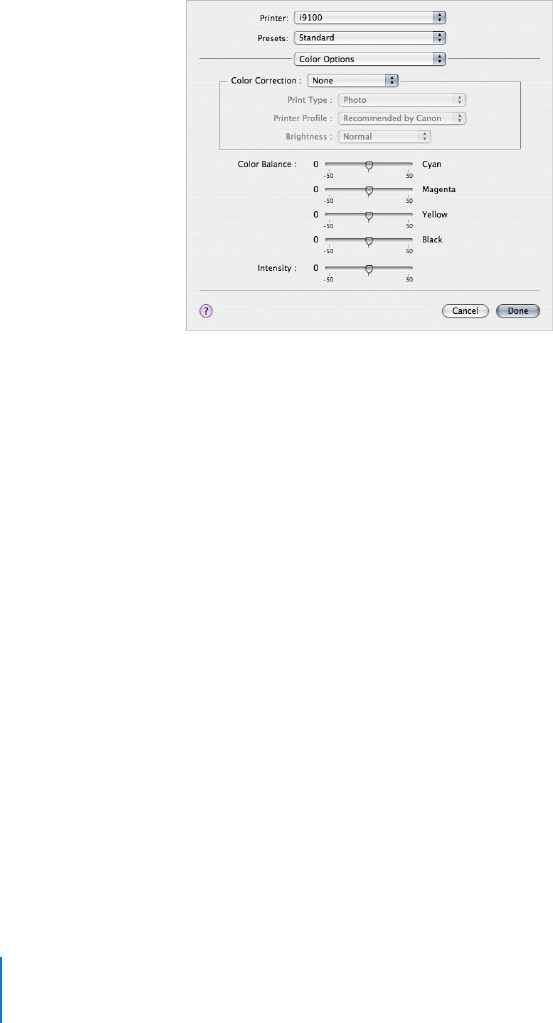
288 Part III Distribution and Backup
To turn off color management in a Canon i9100 printer:
1In Aperture, choose File > Print (or press Command-P).
The Print dialog appears.
2Click the Printer Settings button.
3In the dialog that appears, choose Color Options from the third pop-up menu from the
top of the dialog, and choose None from the Color Correction pop-up menu.
4Make sure the other printer settings are correct, then click Done.
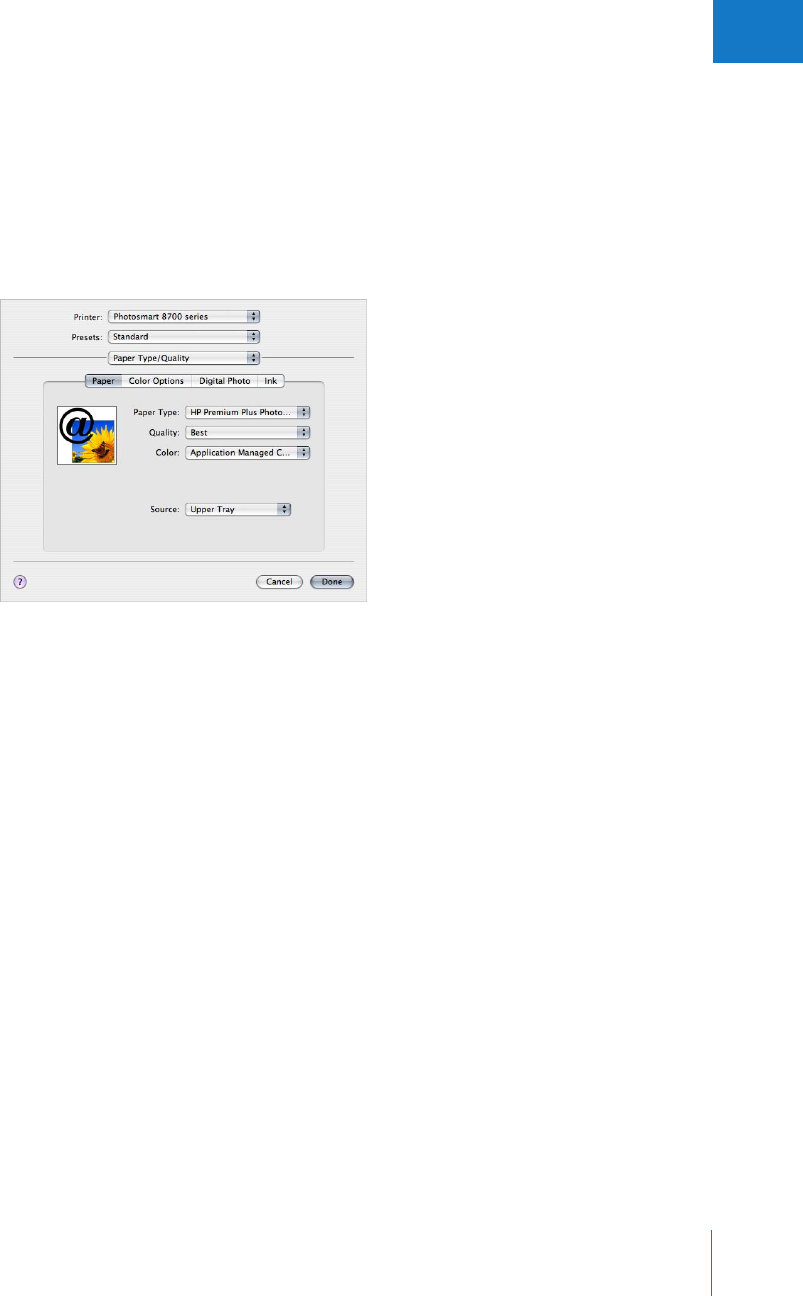
Chapter 14 Printing Your Images 289
III
To turn off color management in an HP Photosmart 8700 series printer:
1In Aperture, choose File > Print (or press Command-P).
The Print dialog appears.
2Click the Printer Settings button.
3In the dialog that appears, choose Paper Type/Quality from the third pop-up menu
from the top of the dialog, click the Paper button, then choose Application Managed
Color from the Color pop-up menu.
4Make sure the other printer settings are correct, then click Done.

15
291
15 Exporting Your Images
After you’ve finished working on your images, you can use
Aperture to export them as files. You can export these files to
another application, send them to a printing service or to
your clients, or publish them on the web.
This chapter provides information about exporting your images in several formats,
including JPEG, TIFF, PNG, and PSD file formats. During export you can rename, resize,
and adjust images and include EXIF information, IPTC information, or other metadata.
You can also apply ColorSync profiles and watermarks to files you export.
This chapter covers:
ÂAn Overview of Exporting Images (p. 292)
ÂExporting Copies of Digital Master Files (p. 293)
ÂExporting Image Versions (p. 296)
ÂWorking with Export Presets (p. 306)

292 Part III Distribution and Backup
An Overview of Exporting Images
Using Aperture, you can export copies of digital master files, as well as versions that
you’ve created. When you export versions, you can export them in JPEG, TIFF, PNG, and
PSD file formats.
At export, you can rename files, resize and adjust images, and include metadata such as
EXIF information, IPTC information, and keywords. You can also apply ColorSync profiles
and watermarks to the versions you’re exporting. You can export separate lists of metadata
for selected images as a file. You can also export digital master files with IPTC data stored
in XMP sidecar files that can be used in other applications, such as Adobe Photoshop.
Before exporting your images to another application, a printing service, a client, or
a website, you need to know what file types the receiver can use. You should also
check with the receiver about other important information, including file size
limitations, required image dimensions, and naming conventions. The key to
successful file transfer is anticipating—and avoiding—anything that can prevent
the receiver from opening your files.
The easiest way to export images is to use one of the Aperture export presets. Presets,
or groups of export settings, allow you to easily export your images. If the presets
included with Aperture don’t meet your needs, you can create your own.
For example, if you regularly send groups of photos to a stock photography house and
a printer, you can create an export preset for each destination. For the stock
photography house, you can include the keywords and metadata you’ve embedded in
your images, including usage marks. For the printing service, you can specify the image
size and limit the file size. Give the presets a name you’ll remember, and next time you
need to send images to either destination, simply select the correct export preset.
You can also modify existing export presets and delete export presets you no longer use.
Exporting Images to an External Editor
Aperture provides an easy way to transfer images to another application for changes
and then bring the revised images back into Aperture. You can specify an application
as an external editor in the Preferences window. For example, if your image editing
sometimes requires one or more of the specialized tools available in Adobe
Photoshop, you can select Photoshop as your external editor. You can then select an
image and choose Images > Open With External Editor. Aperture makes a new
version of your image and opens it in Adobe Photoshop. After you make your
changes and save the image, the revised version automatically reappears in Aperture.
The external editor doesn’t change the original digital master file. For more
information, see Performing Image Adjustments in the Aperture Help menu.
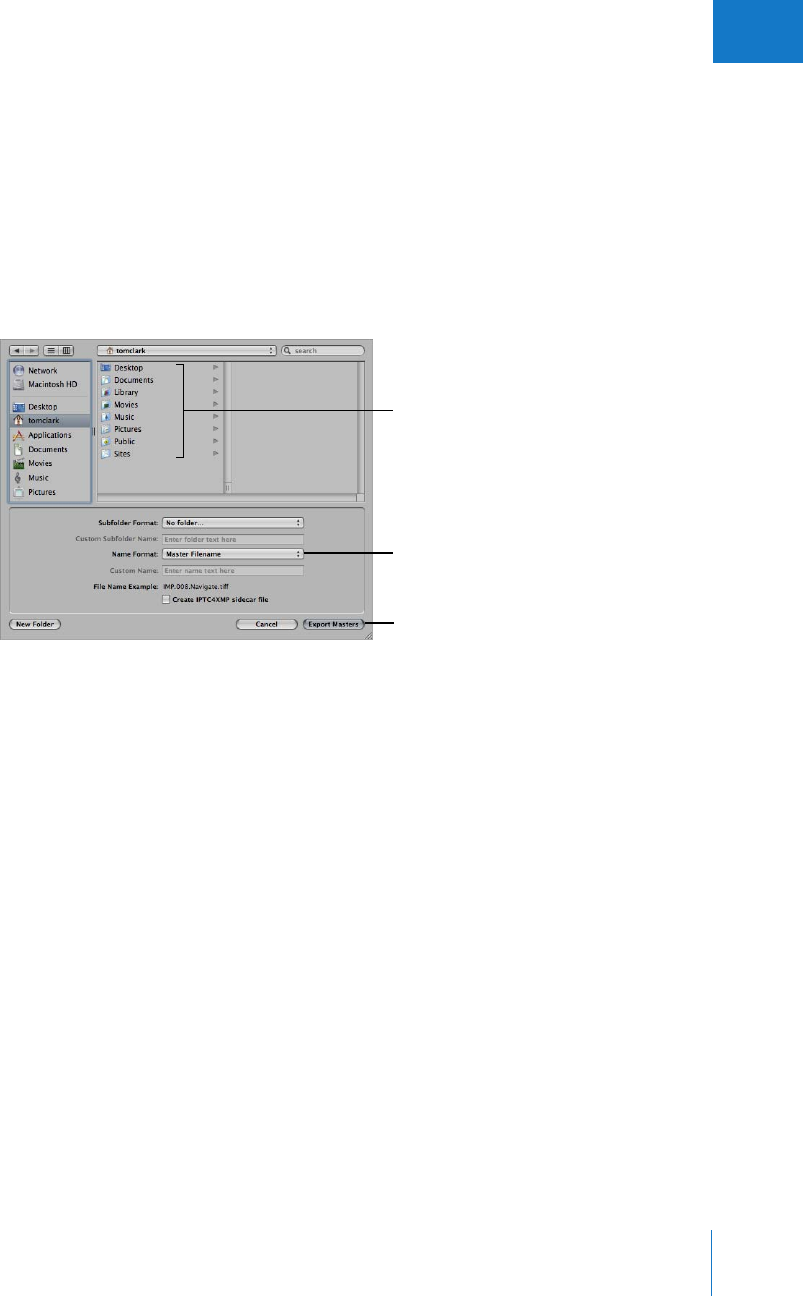
Chapter 15 Exporting Your Images 293
III
Exporting Copies of Digital Master Files
When you export master files, duplicates of the files that were imported from your
camera or other source are created; no adjustments, file modifications, or any other
changes are exported with the file.
To export copies of digital master files:
1Select an image or images in the Browser.
2Choose File > Export > Export Masters (or press Command-Shift-S).
3Navigate to the location where you want the exported files placed.
4Do one of the following:
ÂChoose “No folder” from the Subfolder Format pop-up menu to specify that the files
be stored as separate individual files in the selected folder.
ÂTo specify that Aperture create and store your files in a hierarchy of subfolders with
specific folder names, choose a folder preset from the Subfolder Format pop-up
menu. For more information about specifying folders to hold your exported images,
see “Exporting Master Files into Folders in the Finder” on page 294.
ÂEnter a custom folder name in the Custom Subfolder Name field.
5Choose a name format for your master files from the Name Format pop-up menu.
For more information about selecting and setting up filenaming formats, see “Creating
Custom Name Formats” on page 107. Aperture shows an example of the selected name
format in the dialog.
6To export the digital master file with an XMP sidecar file that contains the image’s IPTC
metadata, select the “Create IPTC4XMP sidecar file” checkbox.
7When you’re ready to export your files, click Export Masters.
Copies of the digital master files for the selected images are exported to the location
you specified.
Choose a location for the
exported files.
Choose a name format for your
master files here.
Click this button to export files.

294 Part III Distribution and Backup
Exporting Master Files into Folders in the Finder
When you export master files, you can have Aperture place the files individually into a
selected folder, or create subfolders to hold the files. For example, you might have the
exported files placed in subfolders identified by date. You can create folder formats that
you can quickly choose to select the folder structure you want.
To create a folder name format, you select the name elements you want in the Folder
Naming Presets dialog. You can compose subfolder formats that combine the following
name elements:
ÂVersion Name
ÂMaster Filename
ÂSequence Number (1 of 3, 2 of 3, 3 of 3)
ÂImage Year
ÂImage Month
ÂImage Day
ÂImage Date
ÂImage Time
ÂIndex Number (1, 2, 3)
ÂCustom Name
ÂCounter (001, 002, 003)
ÂCurrent Date
ÂCurrent Time
ÂCurrent Year
ÂCurrent Month
ÂCurrent Day
ÂFolder Name
ÂProject Name
You can specify a combination of name elements to create the custom folder names
you want.
You can also create a hierarchy of folders within folders. For example, you can specify
that Aperture place your images in a subfolder named Date, and within that folder you
can create subfolders identified by the time the image was taken. To create the folder
name format, you drag the elements you want into the Format field and drag the
forward slash element between the elements where a subfolder should be created.
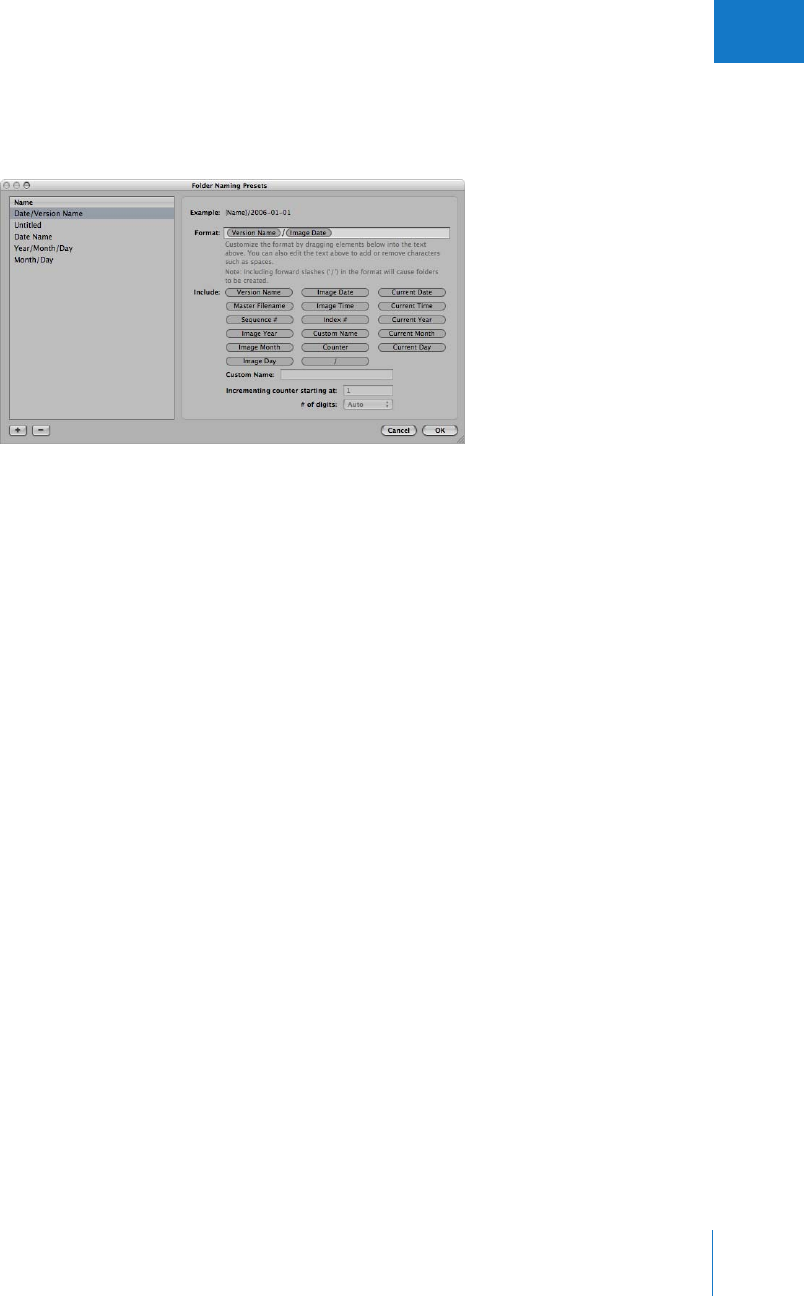
Chapter 15 Exporting Your Images 295
III
To create a folder name format:
1In the Export dialog, choose Edit from the Subfolder Format pop-up menu.
The Folder Naming Presets dialog appears.
2Click the Add (+) button to create a new folder name format, or select the preset folder
name format you want to change.
3Drag the name elements you want into the Format field in the order you want them.
4Drag a forward slash between the elements where you want subfolders created.
5Enter a custom name in the Custom Name field, if you want.
6Click OK.
Your new folder name format now appears in the Subfolder Format pop-up menu.
When using a counter in your folder name format, you can specify the starting number
and the number of digits, from one to six digits, that appear in the counter. When you
use a folder name format with a counter, make sure to reset the initial starting number, if
necessary. Otherwise, on the next export Aperture will continue numbering the folders
containing the exported images starting from the last number of the previous export.
To reset the starting number of a counter in a folder name format:
mIn the Folder Naming Presets dialog, type 0 (zero) in the “Incrementing counter starting
at” field.
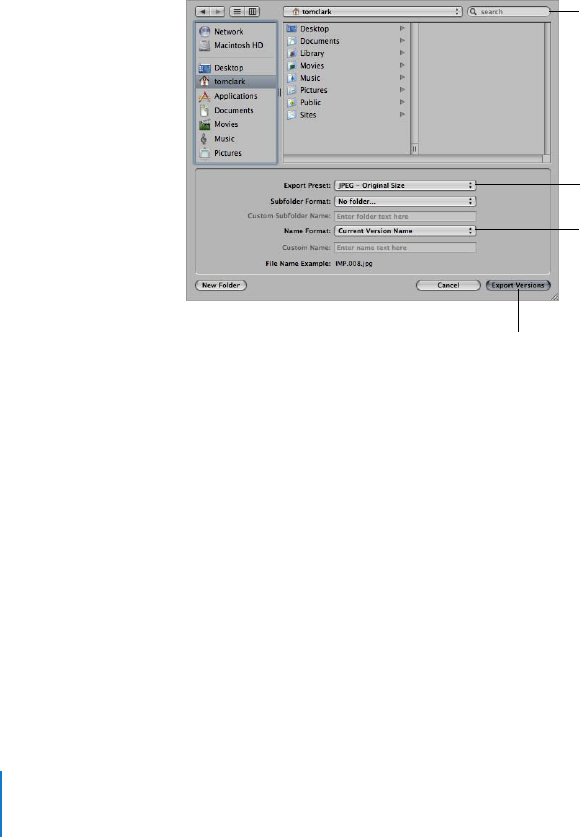
296 Part III Distribution and Backup
Exporting Image Versions
You can export image versions that you’ve created in Aperture. For example, you might
make adjustments to images for a specific purpose and then export them for use in
another application. You can also rename images when exporting them, make minor
adjustments on export, add watermarks, and export images with metadata. You can
also quickly export images to your email application to send them to others.
When you export image versions, you can specify settings for the exported files, such
as format, size, and filename.
To export versions of images:
1Select an image or images in the Browser.
2Choose File > Export > Export Versions (or press Command-Shift-E).
3Navigate to the location where you want the exported images placed.
4Choose an export preset from the Export Preset pop-up menu.
5Do one of the following:
ÂChoose “No folder” from the Subfolder Format pop-up menu to specify that the files
be stored as separate individual files in the selected folder.
ÂTo specify that Aperture create and store your files in a hierarchy of subfolders with
specific folder names, choose a folder preset from the Export Subfolder pop-up
menu. For more information about specifying folders to hold your exported images,
see “Exporting Master Files into Folders in the Finder” on page 294.
Choose a location for the
exported files.
Choose an export preset
for the exported files.
Choose a name format
for the exported files.
Click this button to
export the files.
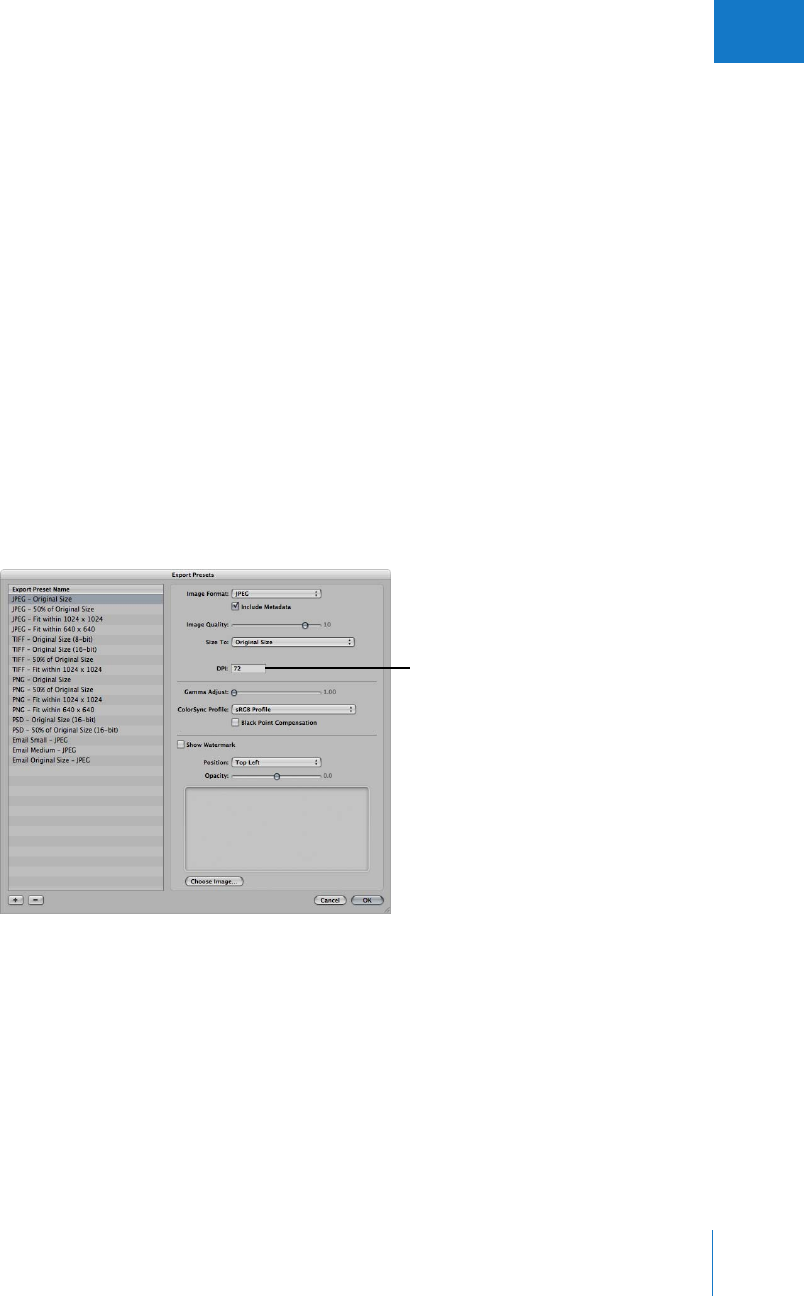
Chapter 15 Exporting Your Images 297
III
6Choose a name format for your files from the Name Format pop-up menu.
7When you’re ready to export files, click Export Versions.
The dialog shows the progress of the export. The images you selected are exported to
the location you specified.
Setting Image Resolution When Exporting
You can set the image resolution you want for exported images in the Export Presets
dialog in two ways: by specifying a dpi setting or by specifying image dimensions (in
inches). First you select an export preset in the Export Presets dialog, and then you
specify the resolution you want used with that preset. When exporting images, you
choose the export preset that has the resolution setting you want.
To specify the dpi setting for exported images in an export preset:
1Select the image or images you want to export.
2Choose File > Export > Export Version (or press Command-Shift-E).
3Navigate to the location where you want the exported images placed.
4Choose Edit from the Export Preset pop-up menu.
The Export Presets dialog appears.
5Select an export preset, then enter the dpi setting you want.
6Specify additional settings as necessary, then click OK.
7Choose a name format from the Export Name Format pop-up menu, then click Export.
Enter a dpi setting for
exported images here.
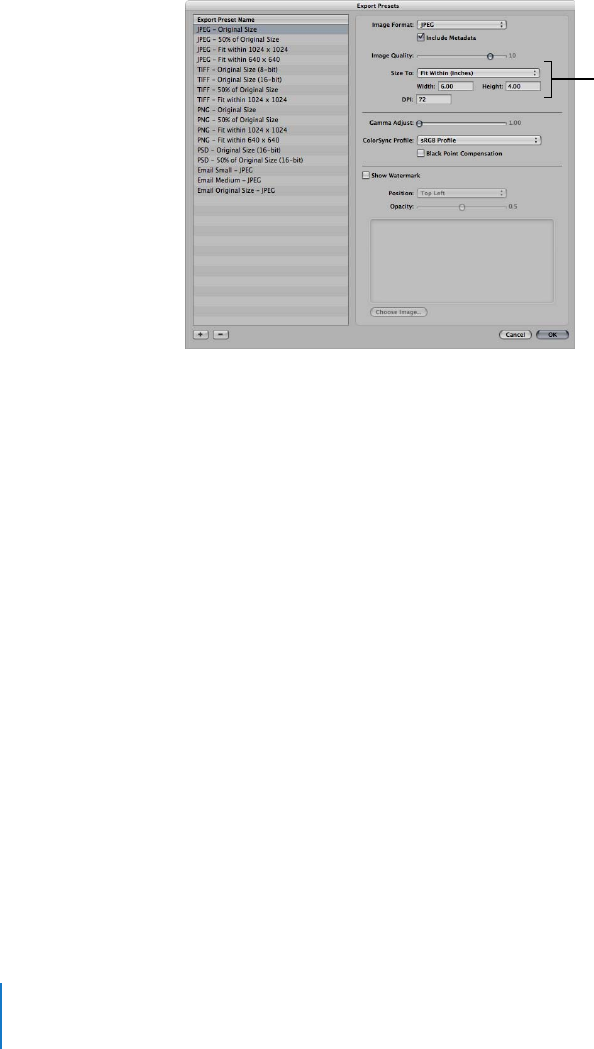
298 Part III Distribution and Backup
To export images constrained to a size in inches:
1Select the image or images you want to export.
2Choose File > Export > Export Version (or press Command-Shift-E).
3Navigate to the location where you want the exported images placed.
4Choose Edit from the Export Preset pop-up menu.
The Export Presets dialog appears.
5Select an export preset.
6Choose Fit Within (Inches) from the Size To pop-up menu, and specify the size of the
image by entering values in the Width and Height fields.
7Specify additional settings as necessary, then click OK.
8Choose a name format from the Export Name Format pop-up menu, then click Export.
Renaming Images at Export
When you export selects from a large group of images, the exported files often have
nonsequential names. You can rename your images at export, giving them more
meaningful names.
For example, suppose you want to export images LA 031, LA 441, LA 686, and LA 894
from image group LA 001 to LA 1061. You can use the Custom Name with Index name
format to rename your images LA 1, LA 2, and so on.
To rename images at export:
1Select the image or images you want to export.
2Choose File > Export > Export Version (or press Command-Shift-E).
3Navigate to the location where you want the exported images placed.
Choose Fit Within (Inches)
and enter the width and
height values here.
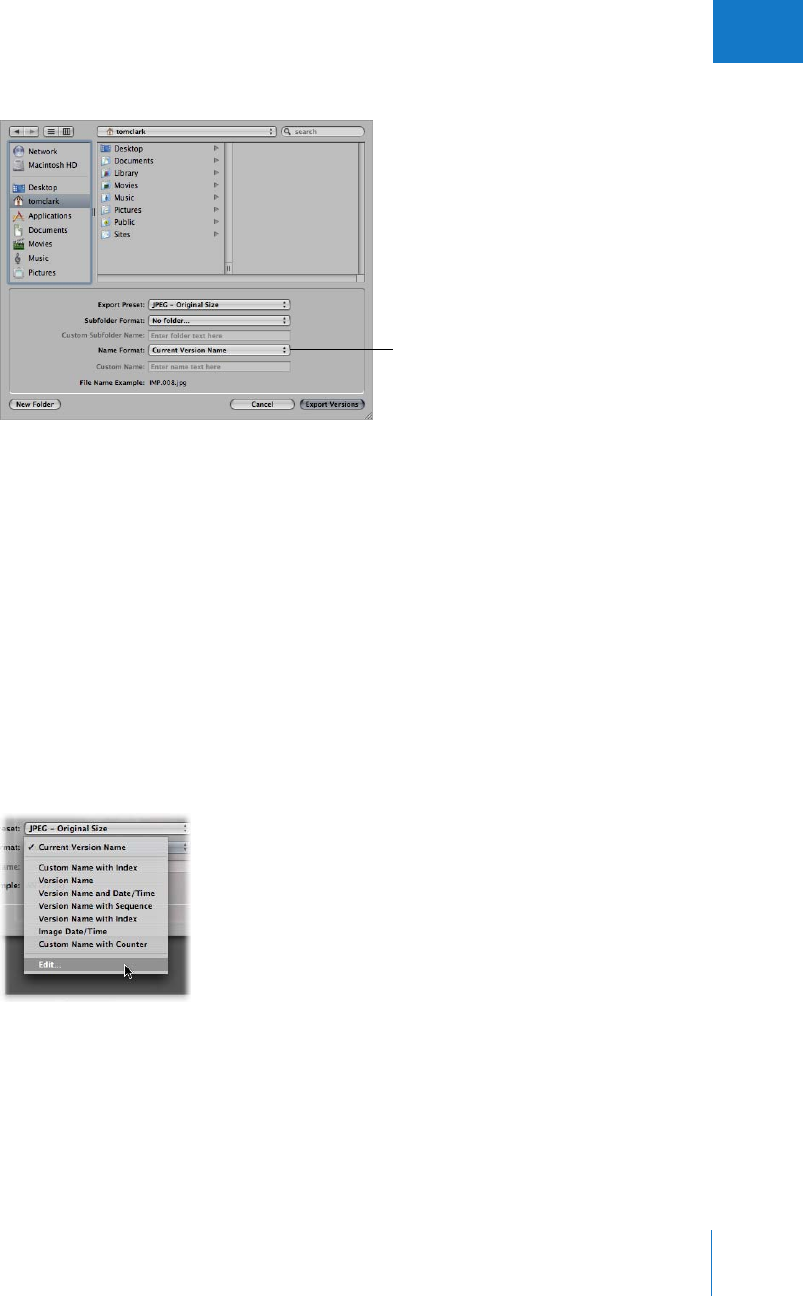
Chapter 15 Exporting Your Images 299
III
4Choose a name format from the Export Name Format pop-up menu.
If you choose a Custom Name format, enter your custom name in the Custom Name field.
5When you’re ready to export files, click Export.
The files are exported with the name format you specified.
If none of the preset name formats meet your needs, you can create a new name format.
For example, you could create a name format that uses a custom name, the index
number, and the date.
To create a new name format:
1Select an image in the Browser.
2Choose File > Export > Export Version (or press Command-Shift-E).
3Choose Edit from the Export Name Format pop-up menu.
The Naming Presets dialog appears.
Choose a name format
here; if you choose a
Custom Name format,
enter the name in the
field below.
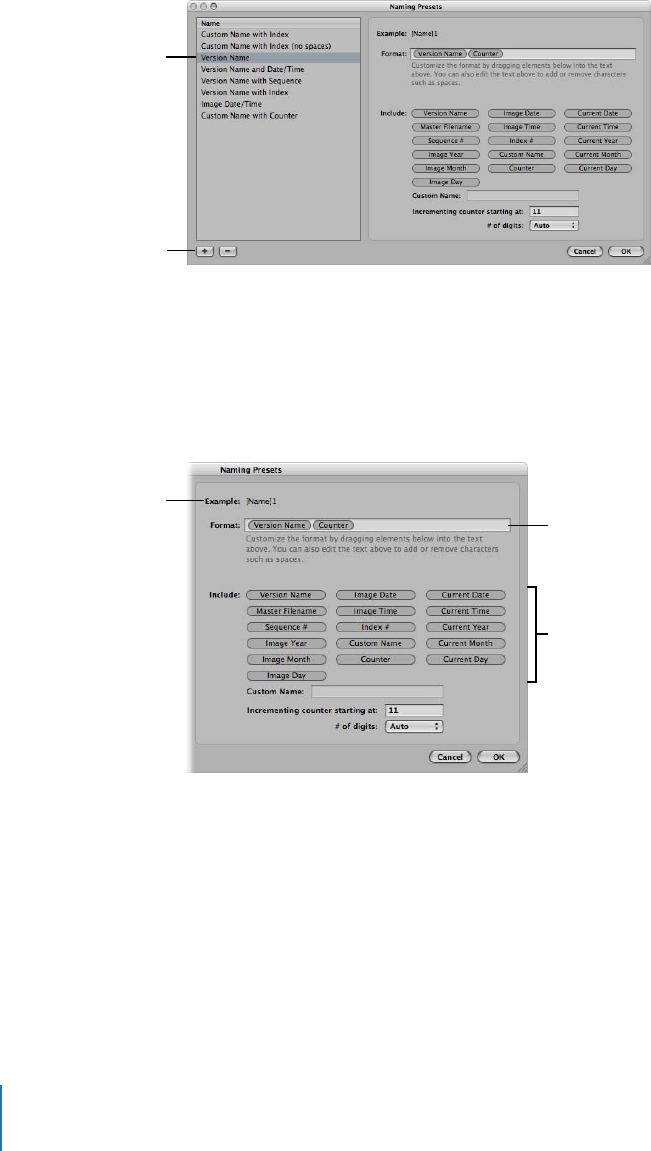
300 Part III Distribution and Backup
4In the Name list, select an existing name format on which to base the new name
format, then click the Add (+) button.
A copy of the selected name format is created.
5Rename the new name format.
6Add or remove name elements by dragging the elements where you want them and,
when appropriate, entering relevant naming information in the fields provided. You can
also enter characters directly in the Format field.
As you select or deselect name elements, the Example field automatically updates.
7When you’re satisfied with the new name format, click OK.
The new name format appears in the Export Name Format pop-up menu.
When exporting images for specific uses, such as for use on websites, you may need
to use filenames without spaces so that they are compatible with the intended
application or website. Aperture adds spaces to filenames depending on the name
format you use. You can easily modify name formats to remove spaces from filenames.
Select an existing name
format in this list.
Click the Add button.
Add or remove name
elements by selecting or
deselecting the checkboxes.
Name elements appear here
when their checkboxes are
selected.
The name format
example automatically
updates as you change
the name elements.
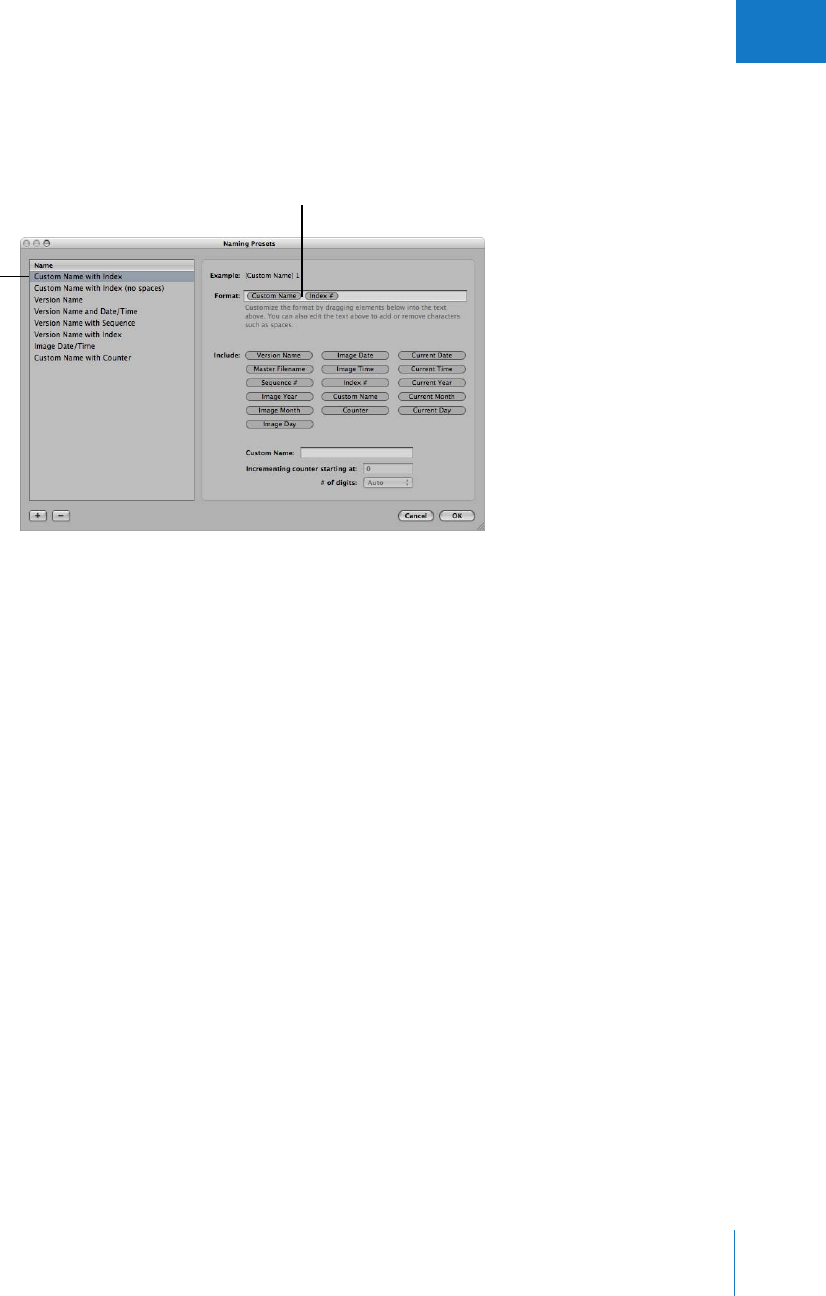
Chapter 15 Exporting Your Images 301
III
To modify a name format to remove spaces:
1Choose Aperture > Presets > File Naming.
2In the Naming Presets dialog, select the preset name format you want to modify.
3In the Format field, select and delete the spaces or characters between the name elements.
If you wish, you can also add spaces or characters between name elements.
4Click OK.
Adjusting Images at Export
You can also apply final adjustments to images at export by choosing ColorSync profiles,
setting gamma adjustment, and applying black point compensation. Because these
adjustments are applied at export, your Aperture image versions and master files are not
changed. Only exported files receive image adjustments applied with an export preset.
Select the space between
name elements and delete it.
Select the name format
you want to modify.
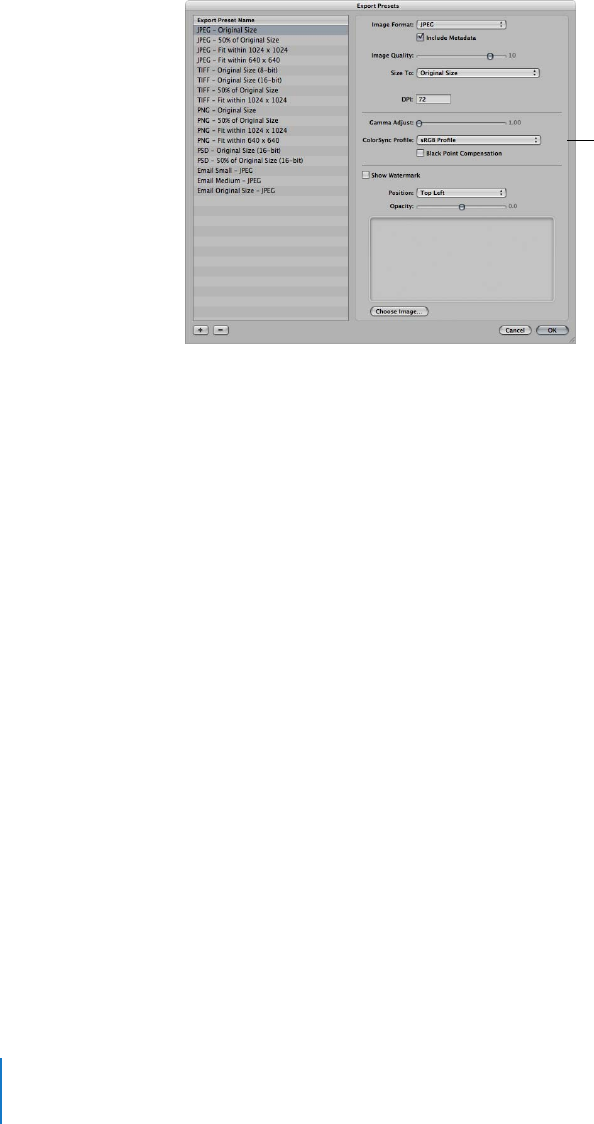
302 Part III Distribution and Backup
To adjust images at export, you create a new export preset in the Export Presets dialog,
and then adjust the Image Quality, Gamma Adjust, ColorSync Profile, and Black Point
Compensation settings as appropriate.
Gamma adjustments applied at export are applied on top of gamma adjustments
previously applied to image versions. Before exporting, verify that you are not doubling
any gamma adjustments previously applied to your images.
When you export, select the preset that includes the adjustments you want to make. For
information about creating export presets, see “Working with Export Presets” on page 306.
To adjust images at export:
1Select the image or images you want to export.
2Choose File > Export > Export Version (or press Command-Shift-E).
3Navigate to the location where you want the exported images placed.
4Choose Edit from the Export Preset pop-up menu.
The Export Presets dialog appears.
5Select an export preset and specify any adjustment options you want.
6Click OK.
7Choose a name format from the Export Name Format pop-up menu.
8Click Export.
Your files are exported with the adjustments you specified.
Use these options to
adjust images when they
are exported.

Chapter 15 Exporting Your Images 303
III
Adding a Watermark at Export
A watermark is a visible graphic overlay that is applied to an image. Photographers
often use watermarks to indicate that images are protected by a copyright and
discourage others from inappropriately using their images.
You can import a graphics file and add it to your images as a watermark.
To add a watermark image to your exported images:
1Select the images you want to export.
2Choose File > Export > Export Versions (or press Command-Shift-E).
3In the dialog that appears, choose Edit from the Export Preset pop-up menu.
4In the Export Presets dialog, select the export preset you want to use to export your images.
5Select the Show Watermark checkbox.
6Click the Choose Image button.
7Select the image you want to use as a watermark, then click Choose.
8Choose where you want the watermark to appear on the image from the Position
pop-up menu.
9To adjust the opacity of the watermark, drag the Opacity slider to a new position.
10 When you’re satisfied with how your watermark appears in the watermark preview
area, click OK.
11 Navigate to the location where you want the exported images placed.
12 Choose a name format for your exported files from the Export Name Format pop-up menu.
13 Click Export.
Your files are exported with the watermark you created.
Tips for Creating High-Quality Watermarks
Use the following guidelines to create high-quality watermarks for your images:
ÂSave your watermark as a .psd (Photoshop) file with a transparent background.
ÂCreate multiple sizes of your watermark so that you can select the one that is the
best match for the output size of the exported image.
Note: If a watermark file is larger than the image you want to export, Aperture
automatically scales the watermark down to fit the image. (Aperture does not scale
watermarks up.)
ÂAfter you create a watermark, save it as part of an export preset so you can reuse it
as often as you need.

304 Part III Distribution and Backup
Applying IPTC Metadata and Keywords to Your Images
Many publications use a standard set of image keywords; the American Newspaper
Publishers Association (ANPA) wire codes, developed by the Newspaper Association of
America, are one example. You can apply these keywords to your images when
exporting to JPEG, TIFF, and PSD file formats.
Remember that applying metadata at export applies all the metadata attached to your
image. If your image version has metadata that you don’t want exported, create an
image version that includes only the metadata intended for export.
Note: The PNG file format does not support the inclusion of metadata.
To include metadata with images at export:
1Select the image or images you want to export.
2Choose File >Export > Export Version (or press Command-Shift-E).
3Navigate to the location where you want the exported images placed.
4Choose Edit from the Export Preset pop-up menu.
5In the Export Presets dialog, select the export preset you want to use to export
your images.
6Select the Include Metadata checkbox.
7Click OK.
8Choose a name format for your exported files from the Export Name Format
pop-up menu.
9Click Export.
The metadata is included in your exported images.
Exporting Metadata Listed in a Separate File
You can select images and export the metadata assigned to them in a tab-delimited
text file. The text file lists the version name, ratings, keywords, and other metadata
assigned to the image.
To export image metadata in a text file:
1Select the images whose metadata you want to export.
2Choose File > Export > Export Metadata.
3Select the location where you want the file stored, then click Export Metadata.
Aperture exports the metadata information as a standard Unicode text file that you can
open and use with any application that uses text files.

Chapter 15 Exporting Your Images 305
III
Exporting Using Plug-Ins
Some applications or photography services supply plug-ins that set up Aperture to
export files automatically with the format and settings the application or service
requires. For example, a stock photography service or print lab may require that images
be transferred to them at a specific size, a specific file format, or with particular types of
metadata. Such a service can create its own plug-in that automatically sets up Aperture
to export files with precisely the characteristics the service needs.
To use an export plug-in, you must first obtain the plug-in software from the service or
application vendor and install it. Third-party plug-ins for Aperture are stored in the
following location: Library/Application Support/Aperture/Plug-ins/Export.
To export images using a third-party plug-in:
1Select the images you want to transfer.
2Choose File > Export, then select the plug-in that you wish to use.
Exporting Images to Use in Email
While it’s not the best method for delivering uncompressed or large image files, email
provides a quick and easy way to deliver images. Aperture contains three export
presets (Email Small, Email Medium, and Email Original Size) that create compressed
JPEG files that are easy to send via email. If these export presets don’t meet your needs,
you can create your own custom email export preset.
You can also have Aperture transfer an image directly to your email application. To
specify that Aperture use a specific email application to send your images, choose the
email application you want to use in the Preferences window. You can also specify the
email export preset used to prepare the images.
To specify an email application and email export preset for Aperture to use:
1Choose Aperture > Preferences, or press Command-comma (,).
2In the Preferences window, choose the email application you want from the “Email
images using” pop-up menu.
3To specify an export preset for Aperture to use when preparing images for email
transfer, choose the preset you want from the Email Export Preset pop-up menu. If
none of the presets meet your needs, click Edit and create a new export preset.
For more information about creating export presets, see “Creating an Export Preset” on
page 308.

306 Part III Distribution and Backup
To send an image directly to your email application:
1Select the image you want to send.
2Choose File > Email (or press Option-E).
The image is exported directly to your email application.
Note: Before you attempt to email an image, find out the maximum file size your email
client supports. If your exported images exceed this maximum file size, consider using
FTP software or another file-sharing technique to deliver your images.
To export an image to attach to an email message later:
1Select the image or images you want to export.
2Choose File > Export Version (or press Command-Shift-E).
3Navigate to the location where you want the exported images placed.
4Choose an email export preset from the Export Preset pop-up menu.
5Choose a name format for your files from the Export Name Format pop-up menu.
6When you’re ready to export files, click Export.
You can now open your email application and attach the exported files.
Working with Export Presets
Export presets are groups of saved export settings that help you quickly and easily
export your images. Aperture comes with numerous export presets, and you can also
create your own.
Controls in the Export Presets Dialog
Before using an export preset, whether it’s one that comes with Aperture or one that
you created, you can view its settings to make sure they are exactly what you want.
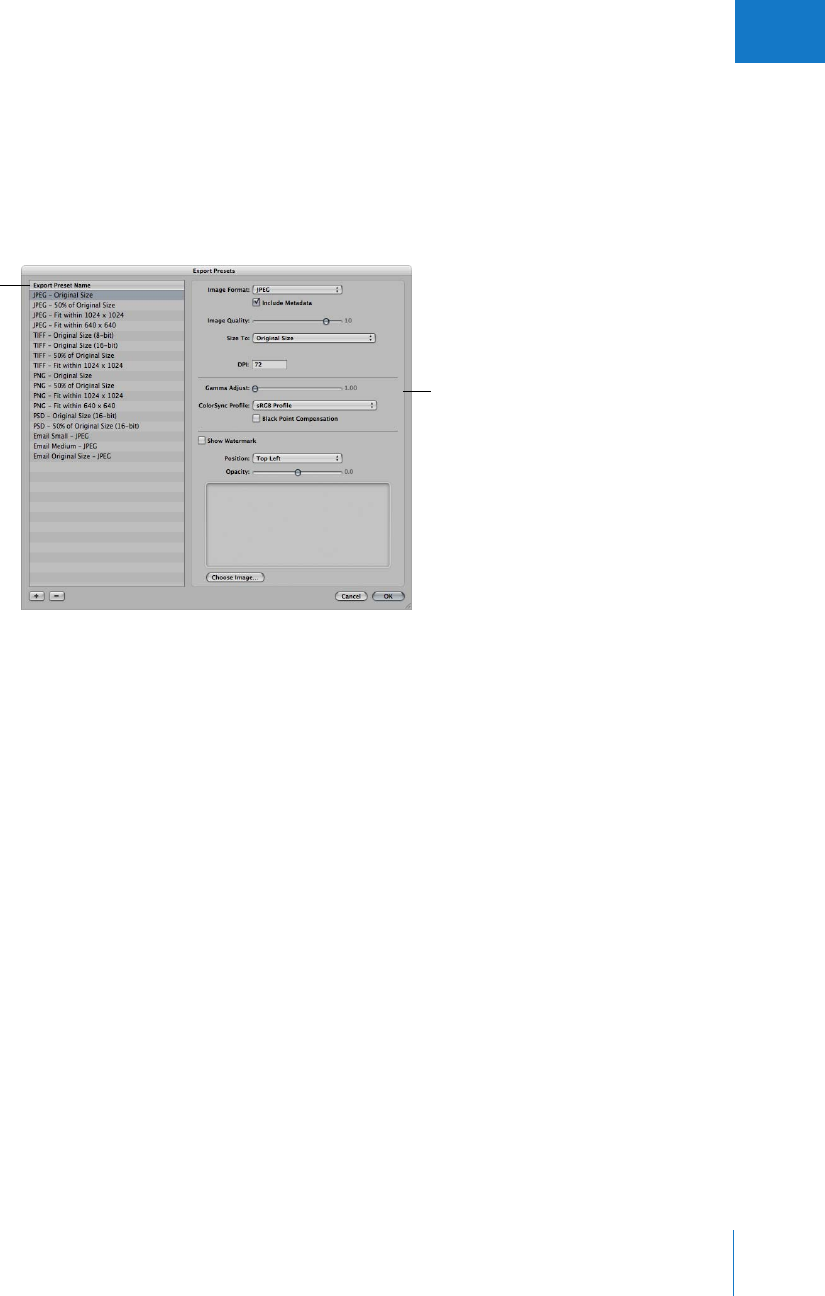
Chapter 15 Exporting Your Images 307
III
To view the settings for an export preset, do one of the following:
mChoose Aperture > Presets > Image Export.
mWith an image selected, choose File > Export Version (or press Command-Shift-E) and
in the dialog that appears, choose Edit from the Export Preset pop-up menu.
The Export Presets dialog appears, listing the presets available and the configurable
export settings.
The Export Presets dialog includes these controls:
ÂImage Format pop-up menu: Choose an image format for the exported files, such as
JPEG or TIFF.
ÂInclude Metadata checkbox: Select this checkbox to include EXIF and IPTC metadata
in the exported files.
ÂImage Quality slider: Choose how much to compress your files by dragging the slider.
Setting the slider to 12 applies the least compression and results in a higher-quality
image; setting the slider to 0 (zero) applies the most compression and results in a
lower-quality image.
ÂSize To pop-up menu: Export your images at their original size, or specify image
dimensions or a percentage of the image’s original size.
ÂDPI: Specify dots per inch (dpi), the resolution at which the images will be reproduced.
ÂGamma Adjust slider: Gamma describes how your image distributes brightness. Drag
the slider to apply a uniform gamma adjustment to your exported images.
ÂColorSync Profile pop-up menu: Choosing a ColorSync profile ensures consistent color
reproduction on other systems and in the printed image. Aperture provides a large
selection of profiles, and any custom profiles you’ve saved during calibration are also
included in the pop-up menu. To apply a ColorSync profile to the images you’ve
selected for export, choose a profile from the pop-up menu.
Available presets are
shown here.
The right side of the
dialog shows the settings
for the selected preset.
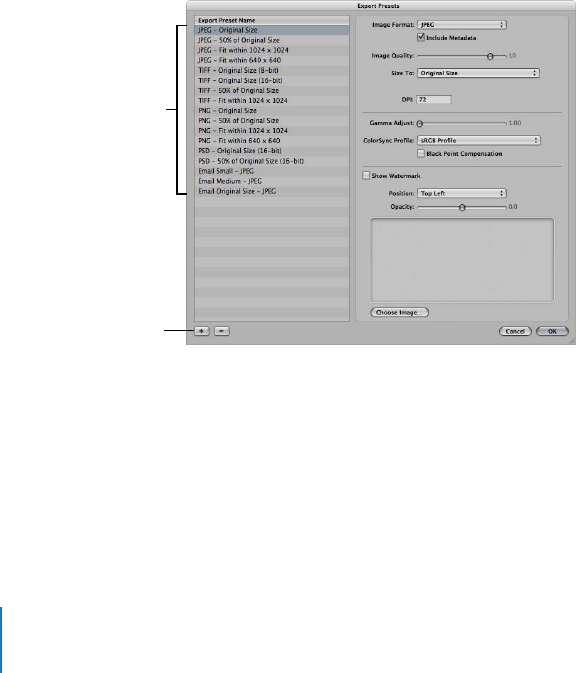
308 Part III Distribution and Backup
ÂBlack Point Compensation checkbox: Select this checkbox to scale the black and white
luminance values to the selected ColorSync profile. Activating black point
compensation can prevent shadows from appearing as solid black.
ÂShow Watermark checkbox: To add a watermark to your images, select this checkbox.
After selecting the checkbox, you can choose a file to apply as a watermark image,
and place your watermark with a specified opacity on your image.
For more information about adding watermarks, see “Adding a Watermark at Export”
on page 303.
Creating an Export Preset
If none of the predefined export presets suit your needs, you can create your own
export preset. An easy way to create a new export preset is to copy an existing preset
and then modify the copy.
To create a new export preset:
1Do one of the following:
ÂChoose Aperture > Presets > Image Export.
ÂWith an image selected, choose File > Export Version (or press Command-Shift-E) and
in the dialog that appears, choose Edit from the Export Preset pop-up menu.
The Export Presets dialog appears.
2Select an export preset on which to base your new preset, then click the Add (+) button.
A new preset appears highlighted in the Export Preset Name list.
3Enter a new name for the preset.
4Change the export settings as required, then click OK.
Select a preset on which
to base your new preset.
Click the Add button to
add a new preset.
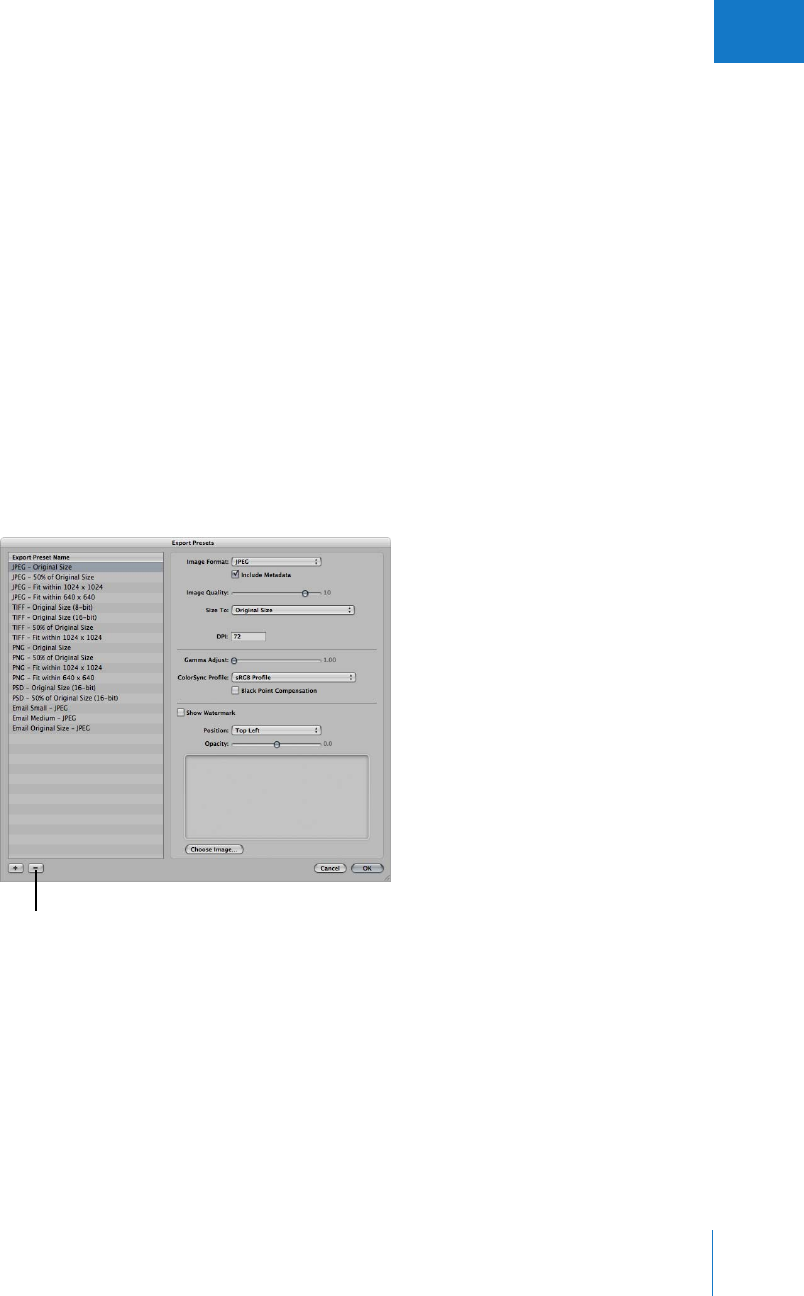
Chapter 15 Exporting Your Images 309
III
Modifying an Export Preset
You can modify existing presets when you need to. The next time you export using that
preset, Aperture remembers your modified settings and exports your images accordingly.
To modify an existing preset:
1Do one of the following:
ÂChoose Aperture > Presets > Image Export.
ÂWith an image selected, choose File > Export Version (or press Command-Shift-E) and
in the dialog that appears, choose Edit from the Export Preset pop-up menu.
The Export Presets dialog appears.
2Select the preset you want and change its settings as required, then click OK.
Deleting an Export Preset
You can delete an export preset when you no longer need it.
To delete an export preset in the Export Presets dialog:
1Select the preset, then click the Delete (–) button.
The preset disappears from the preset list.
2Click OK.
The preset is permanently deleted.
Note: If you click the Delete button and then click Cancel, the preset will reappear the
next time you open the Export Presets dialog.
Click the Delete button to
delete the selected preset.

16
311
16 Creating Slideshow Presentations
With Aperture, you can easily create and present slideshows
of your images. You can use slideshows to review images with
clients, present a series of final select images, or present your
images to audiences complete with background music.
This chapter explains how to create and play slideshows. You also learn how to specify
the slideshow settings that determine how your images appear onscreen.
This chapter covers:
ÂAn Overview of Slideshows (p. 312)
ÂCreating a Slideshow (p. 314)
ÂControlling a Slideshow (p. 315)
ÂArranging the Order of a Slideshow’s Images (p. 315)
ÂControls in the Slideshow Presets Dialog (p. 315)
ÂCreating Slideshow Presets (p. 317)
ÂModifying Slideshow Presets (p. 318)
ÂCreating a Growing Grid of Images (p. 319)
ÂPlaying Your Slideshow on Your Main Display Only (p. 320)
ÂDisplaying Your Images to Music (p. 321)
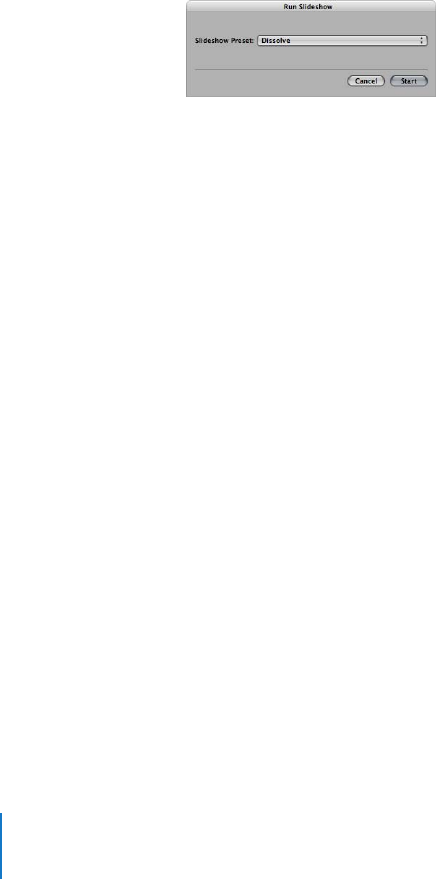
312 Part III Distribution and Backup
An Overview of Slideshows
Aperture makes it easy to create slideshows to present your images. You can select a
project in the Projects panel or any number of images in the Browser and immediately
display the images in a slideshow on your computer screen. You can determine the
number of images that appear onscreen at one time, set the timing of the display, add
music, and more. Your slideshows can play automatically or you can control them using
keyboard shortcuts, displaying images one by one as you review them with a client.
To create a slideshow, you select a project or the individual images you want to display
and then choose File > Slideshow.
When the Run Slideshow dialog appears, you can specify how you want images
displayed by choosing a slideshow preset.
Slideshow presets are groups of predetermined settings for playing a slideshow. For
example, you can choose a slideshow preset to quickly set up a slideshow as a series of
images that appear four at a time, with a specific display duration and type of transition
between images. Aperture provides several slideshow presets that you can choose.
The slideshow presets include:
ÂDissolve: Displays each image for 3 seconds, with a 2-second cross fade.
ÂFade through Black: Displays each image on a black background for 3 seconds, with a
2-second cross fade.
ÂManual: You control this slideshow’s progression with the Right and Left Arrow keys.
ÂSlow Dissolve: Displays each image for 5.1 seconds, with a 5-second cross fade.
Â4-Up Slow: Successively displays four images one at a time, showing each image for
3 seconds and then transitioning with a 2-second cross fade. The first image is
replaced with the fifth, and so on.
Â4-Up Fast: Successively displays four images one at a time, showing each image for
1 second. The first image is replaced with the fifth, and so on.
Important: To display slideshows at the best quality, you should set Aperture to create
high-resolution previews. You can also display slideshows with good-quality images
without creating high-resolution previews. For more information about creating
high-resolution previews, see the Aperture User Manual in the Aperture Help menu.
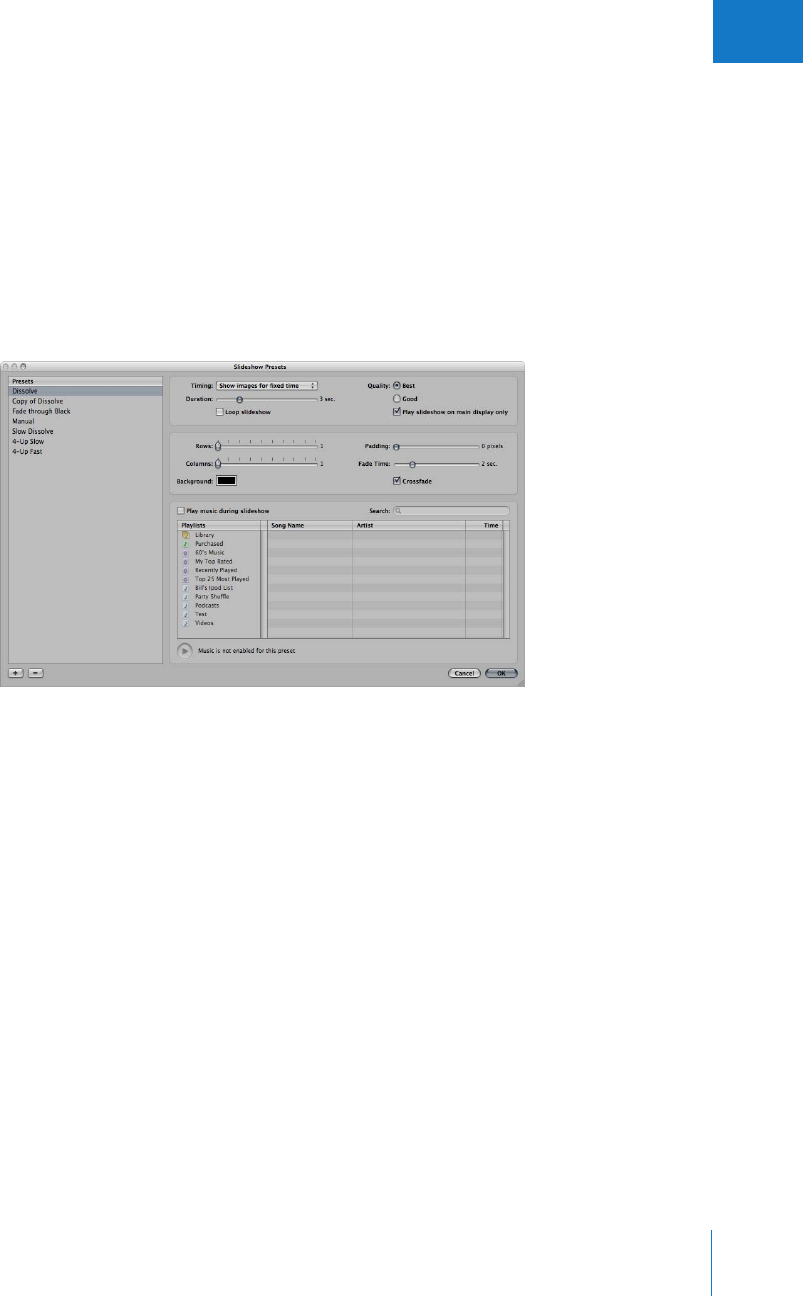
Chapter 16 Creating Slideshow Presentations 313
III
You can also create your own custom presets. For example, to prepare for a presentation,
you could create two new slideshow presets: one for your presentation and the other for
your question and answer period. The presentation slideshow can show one image at a
time and be manually controlled, so you can move through the images at your own pace.
Your second slideshow preset, to be used during the question and answer period of your
presentation, can display the same images you just showed in a grid across two displays.
The images can advance automatically and be set to music.
To create or modify a slideshow preset, you choose Aperture > Presets > Slideshow (or
choose Edit from the Slideshow Preset pop-up menu in the Run Slideshow dialog), and
the Slideshow Presets dialog appears.
You can then select a slideshow preset, or create a new one, and specify the settings
you want.
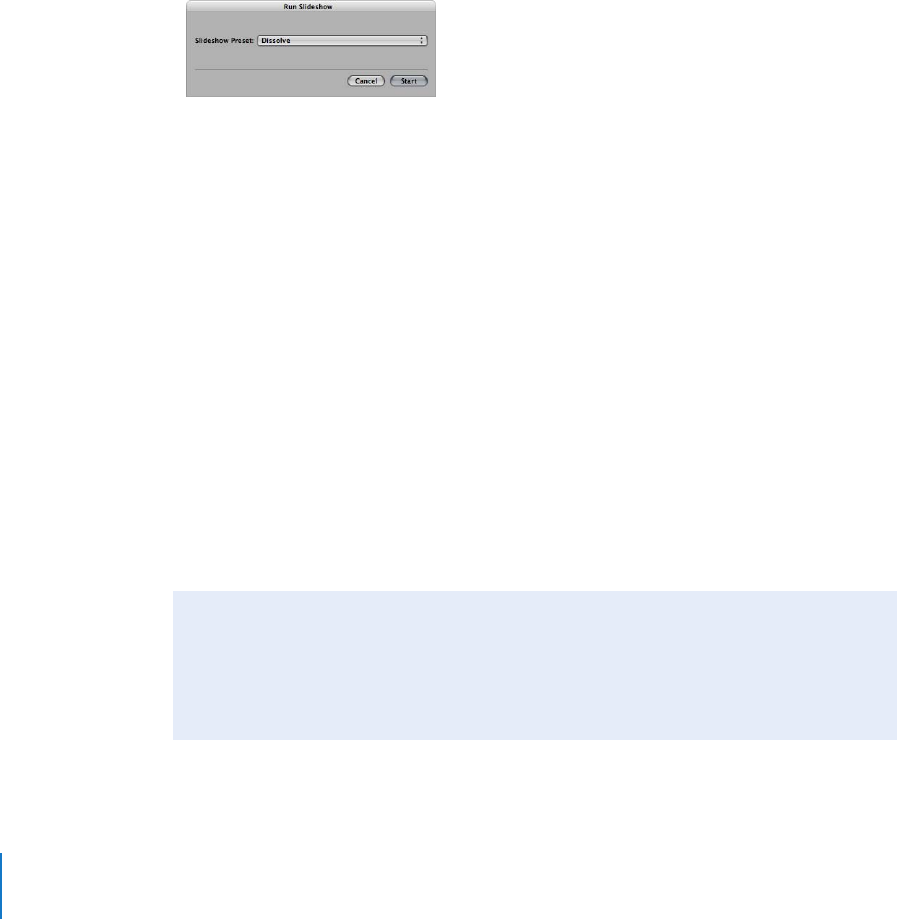
314 Part III Distribution and Backup
Creating a Slideshow
You can easily set up your slideshow by selecting the images you want and then
choosing a slideshow preset.
To create and play a slideshow:
1Select a set of images by doing one of the following:
ÂSelect a project or album in the Projects panel.
ÂSelect individual images or image stacks in the Browser.
2Choose File > Slideshow (or press Shift-S).
The Run Slideshow dialog appears.
3Choose a preset from the Slideshow Preset pop-up menu.
The slideshow presets include:
ÂDissolve: Displays each image for 3 seconds, with a 2-second cross fade.
ÂFade through Black: Displays each image on a black background for 3 seconds, with a
2-second cross fade.
ÂManual: You control this slideshow’s progression with the Right and Left Arrow keys.
ÂSlow Dissolve: Displays each image for 5.1 seconds, with a 5-second cross fade.
Â4-Up Slow: Successively displays four images one at a time, showing each image for
3 seconds and then transitioning with a 2-second cross fade. The first image is
replaced with the fifth, and so on.
Â4-Up Fast: Successively displays four images one at a time, showing each image for
1 second. The first image is replaced with the fifth, and so on.
4Click Start.
If either no image or a single image is selected, the slideshow displays all images in the
current album or project.
Saving Slideshows
You can save a slideshow’s images by creating an album and then placing the image
versions for your slideshow in it. You can also apply a keyword such as Slideshow (or
any other unique identifying keyword) to images and then create a Smart Album that
automatically groups the images.

Chapter 16 Creating Slideshow Presentations 315
III
Controlling a Slideshow
Once you start playing a slideshow, you can use keyboard shortcuts to control
the slideshow.
To pause the slideshow:
mPress the Space bar.
To continue playing the slideshow:
mPress the Space bar again.
To move forward through the slideshow:
mPress the Right Arrow key.
To move backward through the slideshow:
mPress the Left Arrow key.
To stop the slideshow:
mPress Esc (Escape). The slideshow stops playing, and your Aperture workspace reappears.
Arranging the Order of a Slideshow’s Images
You can arrange the order of images in your slideshow.
To arrange the order of your slideshow’s images:
mBefore creating the slideshow, arrange the image thumbnails in the Browser in the
order that you want them to appear in the slideshow.
You can then play your slideshow by following the instructions in the previous section,
“Controlling a Slideshow.”
Controls in the Slideshow Presets Dialog
The Slideshow Presets dialog contains options for creating and modifying existing
slideshow presets. In it, you can choose how many images to display at a time, how
those images are arranged, and how long each image is displayed in your slideshow.
You can also choose to play slideshows on one or two displays, with custom
background colors and music.
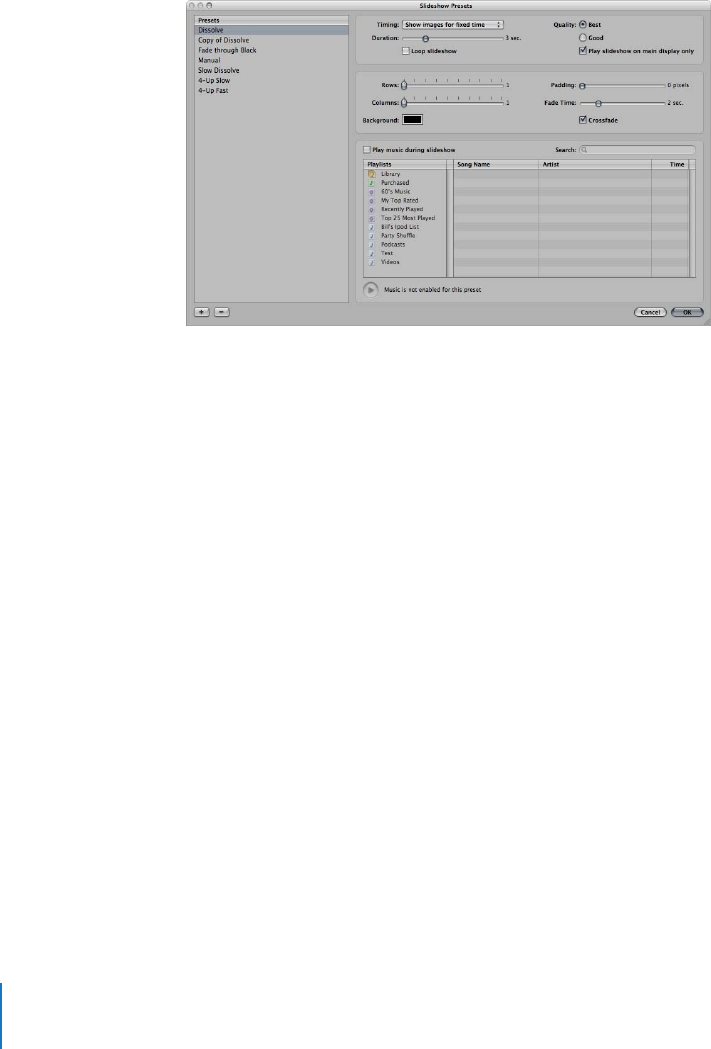
316 Part III Distribution and Backup
To open the Slideshow Preset dialog, do one of the following:
mChoose Aperture > Presets > Slideshow.
mChoose File > Slideshow (or press Shift-S), then choose Edit from the Slideshow Preset
pop-up menu in the Run Slideshow dialog.
The Slideshow Presets dialog appears.
The Slideshow Presets dialog has the following options:
ÂPresets list: Displays the list of current slideshow presets.
ÂTiming pop-up menu: Choose how the slideshow duration is determined: by fitting
the slideshow to the duration of the music, by showing each image for a fixed time,
or by advancing images manually.
ÂDuration slider: Determines the amount of time each image will be shown. Drag the
slider to the right to increase each image’s display time, and to the left to decrease
display time.
“Loop slideshow” checkbox: Select this checkbox to loop, or continuously play, your
slideshow. If you select this option, you must stop your slideshow manually by
pressing Esc.
ÂQuality buttons: Select a radio button to specify image quality: either Best or Good
images. Selecting Best displays slides as full-size images. Select Good to display slides
for faster display.
“Play slideshow on main display only” checkbox: If you use a dual-display system and
want your slideshow to play only on your main display, select this checkbox.
ÂRows slider: Drag this slider to increase the number of rows of images.
ÂColumns slider: Drag this slider to increase the number of columns of images.
ÂBackground color field: Change the background color of your slideshow by clicking
the Background color field and then choosing a new background color from the
Colors palette.
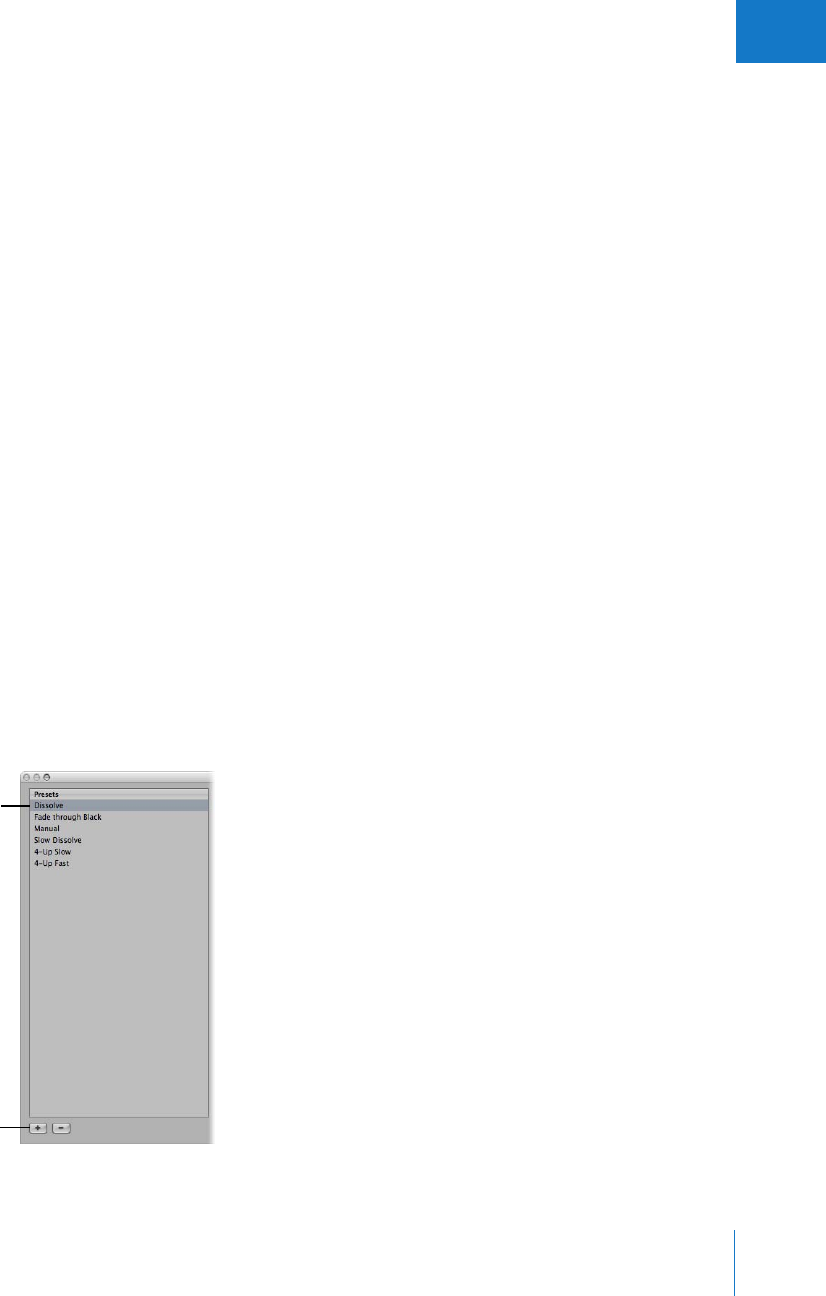
Chapter 16 Creating Slideshow Presentations 317
III
ÂPadding slider: Adjust padding, or the space between the top and bottom rows of
images, by dragging the slider to the right to add space, and to the left to
decrease space.
ÂFade Time slider: Adjust the fade time between images by dragging this slider to the
right to increase fade time, and to the left to decrease fade time.
ÂCrossfade checkbox: Select this checkbox to move between images by fading out the
first and fading in the second.
“Play music during slideshow” checkbox: Select this checkbox to play your slideshow
with an accompanying song or iTunes playlist.
ÂiTunes library area: Displays your iTunes music library. Navigate through the library to
select a song to accompany your slideshow, or search for a song name, artist, or song
time by entering it in the search field.
Creating Slideshow Presets
It’s easiest to create a new slideshow preset by duplicating an existing preset and
modifying it. First, identify which existing preset you want to model your new preset
on. After duplicating the preset and renaming the duplicate, you can easily customize
your new slideshow preset’s settings.
To create a new slideshow preset:
1Choose Aperture > Presets > Slideshow.
The Slideshow Presets dialog appears.
2Select a preset in the Presets list on which to model your new preset.
3In the bottom-left corner of the dialog, click the Add (+) button.
Click this button to add
a new preset.
Select a preset in the list.
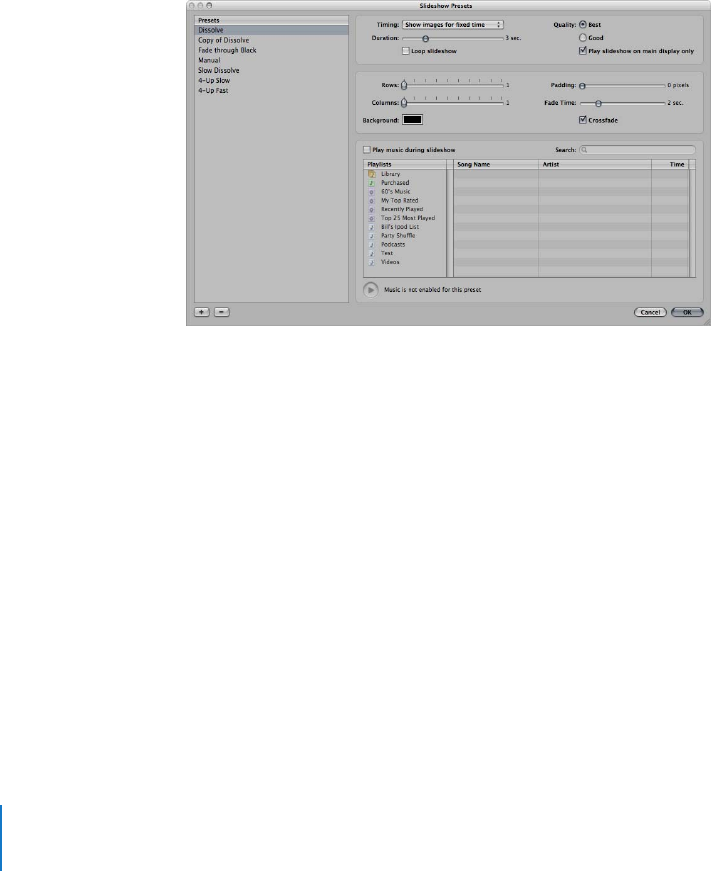
318 Part III Distribution and Backup
A copy of the slideshow preset appears highlighted in the Presets list.
4Enter a name for the new slideshow preset, then press Return.
5When you’ve finished specifying the slideshow options you want, click OK.
Modifying Slideshow Presets
You can modify slideshow presets to create custom slideshows for any presentation.
To modify an existing preset:
1Choose Aperture > Presets > Slideshow.
The Slideshow Presets dialog appears.
2Select the preset you want to modify in the Presets list.
3Modify the slideshow preset’s settings as appropriate.
4When you’ve finished modifying the slideshow preset, click OK.
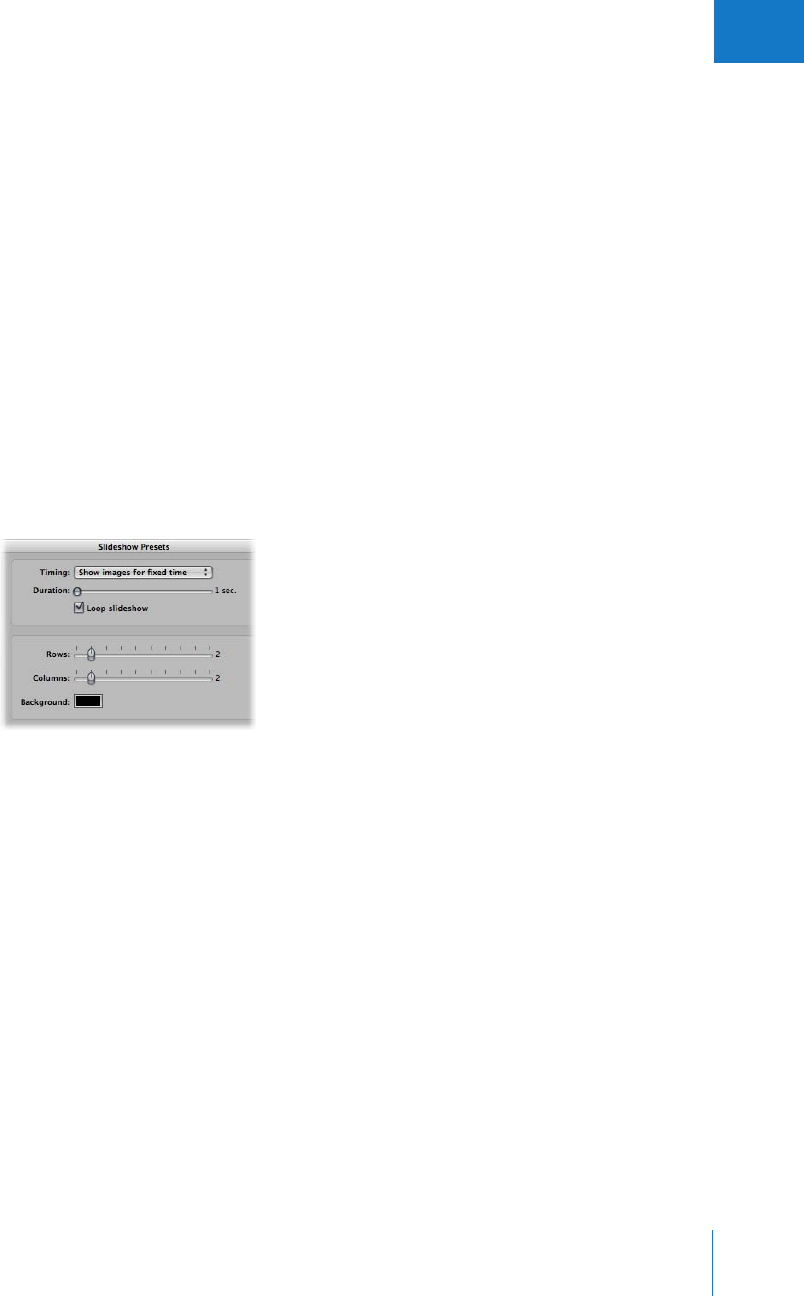
Chapter 16 Creating Slideshow Presentations 319
III
Creating a Growing Grid of Images
Most slideshow presets are set to replace one image with another. You can create a
slideshow that successively adds images to your screen in a grid pattern.
To display images in a grid:
1Select a set of images to be displayed in your slideshow.
2Choose File > Slideshow (or press Shift-S).
The Run Slideshow dialog appears.
3Choose Edit from the Slideshow Preset pop-up menu.
The Slideshow Presets dialog appears.
4Do one of the following:
ÂSelect a slideshow preset to modify.
ÂCreate a new slideshow preset.
5In the Slideshow Presets dialog, adjust the Rows and Columns sliders to specify the
number of rows and columns in your image grid.
6Click OK.
The Run Slideshow dialog appears.
7Click Start to begin playing the slideshow presentation.
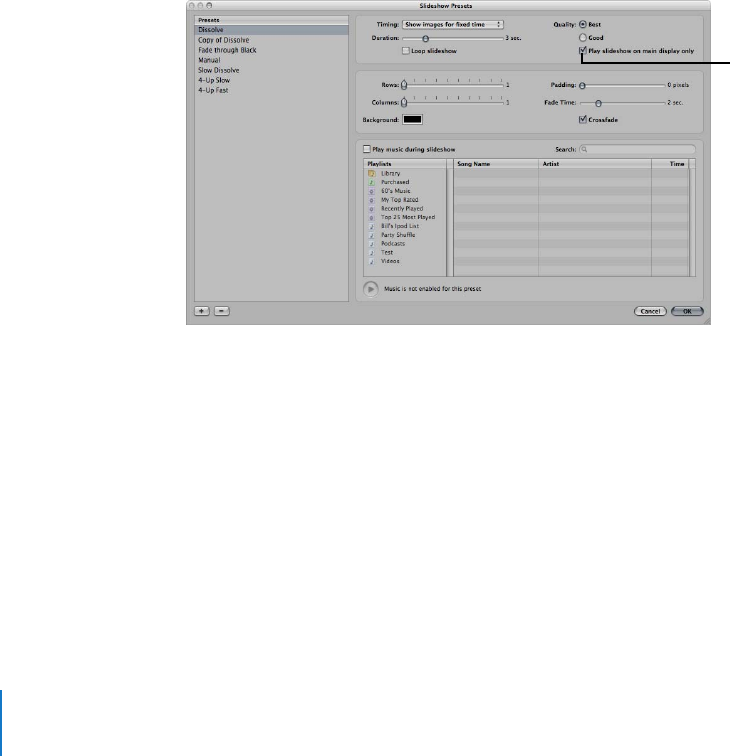
320 Part III Distribution and Backup
Playing Your Slideshow on Your Main Display Only
Your slideshow automatically plays according to your default display setup. If you use a
dual-display system but want to view a slideshow only on your main display, you can
easily make that change in the Slideshow Presets dialog.
To play your slideshow only on your main display:
1Select a set of images to be displayed in your slideshow.
2Choose File > Slideshow (or press Shift-S).
The Run Slideshow dialog appears.
3Choose Edit from the Slideshow Preset pop-up menu.
The Slideshow Presets dialog appears.
4Do one of the following:
ÂSelect a slideshow preset to modify.
ÂCreate a new slideshow preset.
5In the Slideshow Presets dialog, select the “Play slideshow on main display only” checkbox.
6Click OK.
The Run Slideshow dialog appears.
7Click Start to begin playing the slideshow presentation.
Select this checkbox.
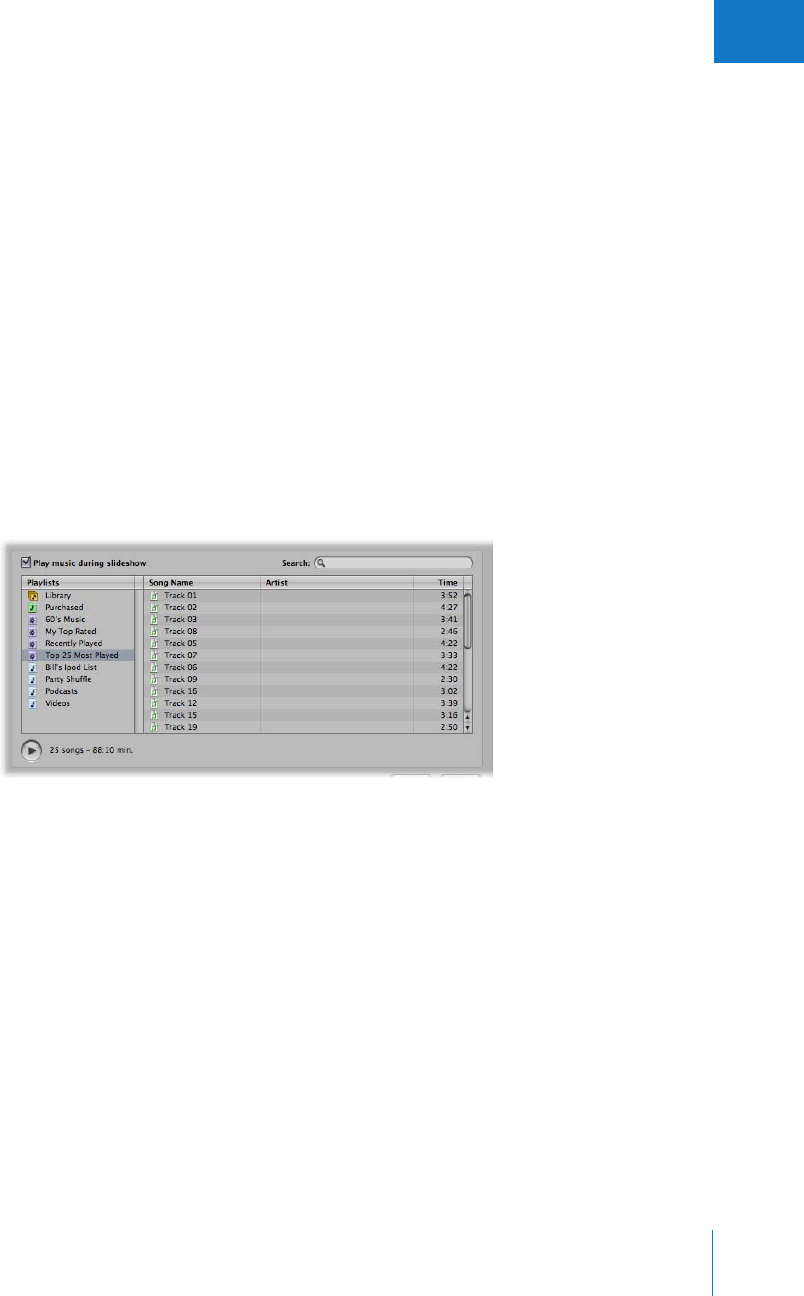
Chapter 16 Creating Slideshow Presentations 321
III
Displaying Your Images to Music
Adding music to your slideshow can increase your audience’s enthusiasm and
participation. You can easily add music from your iTunes music library to accompany
your slideshow.
To add music to your slideshow presentation:
1Select a set of images to be displayed in your slideshow.
2Choose File > Slideshow (or press Shift-S).
The Run Slideshow dialog appears.
3Choose Edit from the Slideshow Preset pop-up menu.
The Slideshow Presets dialog appears.
4Do one of the following:
ÂSelect a slideshow preset to modify.
ÂCreate a new slideshow preset.
5In the Slideshow Presets dialog, select the “Play music during slideshow” checkbox.
6Select a song or playlist from your iTunes music library.
You can search for a specific song, artist, or song time by entering it in the search field.

322 Part III Distribution and Backup
7If you want to preview your song choice, click the Play button.
8If you want the image display time to be adjusted so that your slideshow is the same
duration as the song, choose “Fit to music” from the Timing pop-up menu.
Aperture adjusts the amount of time each image is displayed to fit the duration of the
selected song.
9If you are satisfied with your music selection, click OK.
The Run Slideshow dialog appears.
10 Click Start to begin playing the slideshow presentation.

17
323
17 Using the Light Table
The Light Table provides a large, open space where you can
freely resize, group, and rearrange images.
This chapter provides instructions for using the Light Table. You can place a selection of
images in the Light Table for review and drag them to new positions, group them in
different combinations, and resize them as needed. You can also easily arrange related
images together to compare them, as you might during color correction.
This chapter covers:
ÂAn Overview of the Light Table (p. 324)
ÂCreating a Light Table Album (p. 325)
ÂPlacing and Viewing Images in the Light Table (p. 326)
ÂMoving and Resizing Images in the Light Table (p. 327)
ÂAligning and Arranging Images in the Light Table (p. 328)
ÂAdjusting the Light Table View (p. 330)
ÂSetting View Options for the Light Table (p. 331)
ÂTransferring Images from the Light Table (p. 331)
ÂPrinting a Light Table Arrangement (p. 332)
ÂDeleting a Light Table Album (p. 332)
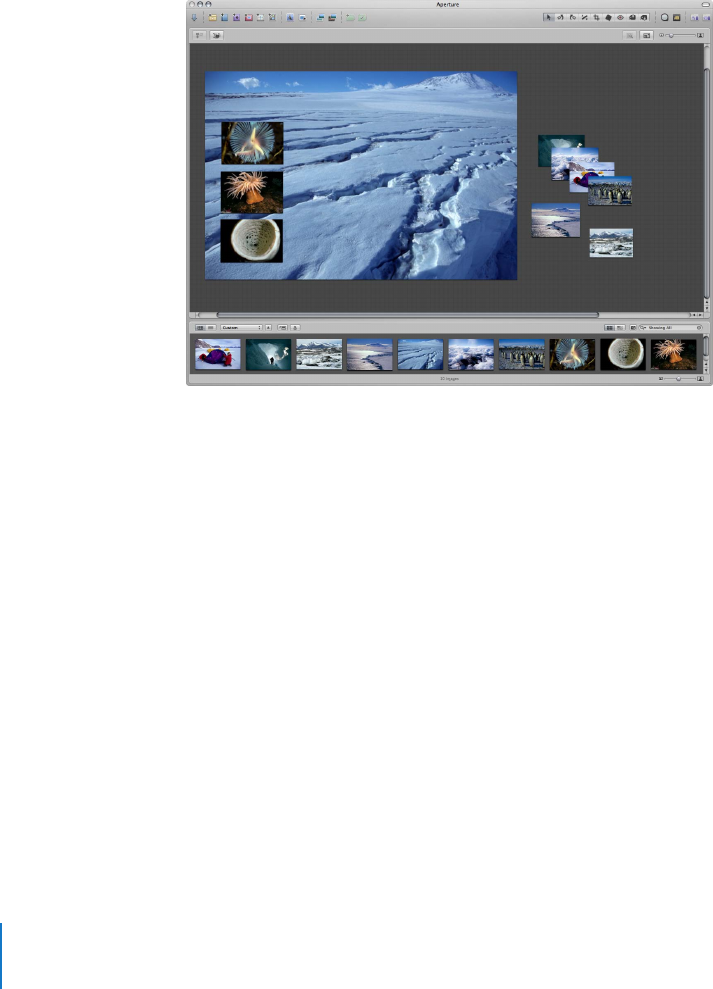
324 Part III Distribution and Backup
An Overview of the Light Table
The Light Table is used to arrange and view images. You can work with images in the
Light Table just as you would work with slides on a physical light table. You can place a
selection of images in the Light Table for review and drag them to new positions,
arranging, grouping, and resizing them in different combinations to see how they
might look on webpages or book pages. You never run out of space in the Light
Table—it grows as you add images to it, and it’s easy to adjust the view by zooming in
or changing the area of the Light Table that’s shown.
You can use the Light Table when color correcting many related photos. You can arrange
related images together and carefully compare the color values between images.
You can also use the Light Table to sort images into related piles. After sorting, you can
select groups of images and assign keywords to all the images in a group at once.
You can use the Light Table to create editorial layouts as well, arranging images
onscreen to tell a story. You can put the selects from a given project in the Light Table
and arrange them so that they progress visually, eliminating repetitive images. As you
group and pair images of the same subject, you’ll find the Light Table ideal for
examining the relationships between images.

Chapter 17 Using the Light Table 325
III
Creating a Light Table Album
To view images in the Light Table, you first create a Light Table album. You can create a
new empty album and drag or import images into it, or select images in a project and
create a Light Table album to hold them.
To create a new, empty Light Table album:
1In the Projects panel, select Library or the project where you want the new Light Table
album to appear.
2Do one of the following:
ÂChoose File > New > Light Table.
ÂControl-click in the Projects panel, then choose New > Light Table from the
shortcut menu.
ÂChoose New Empty Light Table from the Add to Library pop-up menu in the
Projects panel.
A new, untitled Light Table album appears.
3Enter a new name for the Light Table album.
Now you can drag or import images into the new Light Table album.
To create a Light Table album that holds a selection of images:
1In the Browser, select the images you want in the Light Table album.
2Do one of the following:
ÂChoose File > New From Selection > Light Table.
ÂControl-click in the Projects panel, then choose New From Selection > Light Table
from the shortcut menu.
ÂClick the New Light Table Album button.
ÂIn the Projects panel, choose New Light Table From Selection from the Add to Library
pop-up menu.
A new, untitled Light Table album appears with the selected images in it.
3Enter a new name for the Light Table album.
You can now begin placing images in the Light Table.
Click this button to create a
new Light Table album.
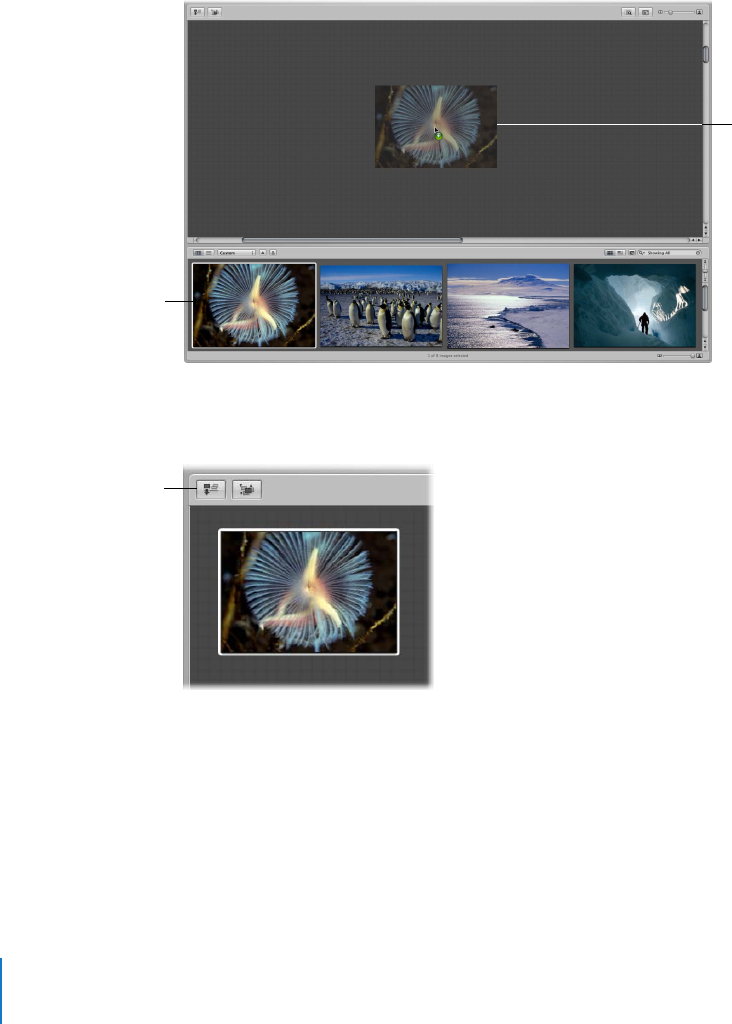
326 Part III Distribution and Backup
Placing and Viewing Images in the Light Table
After adding images to the Light Table album, you can select the ones you want to
work with and place them in the Light Table for viewing.
To add images to the Light Table:
mSelect a Light Table album in the Projects panel, then drag images from the Browser to
the Light Table.
To remove an image from the Light Table:
mSelect the image, then click the Put Back button.
The image disappears from the Light Table but remains available in the Browser.
If you have many images in a Light Table album, it may be difficult to remember which
images you haven’t yet placed in the Light Table. You can set the Browser to show only
those images that haven’t been placed in the Light Table.
...to the Light Table.
Simply drag images from
the Browser...
Click the Put Back
button to remove a
selected image.
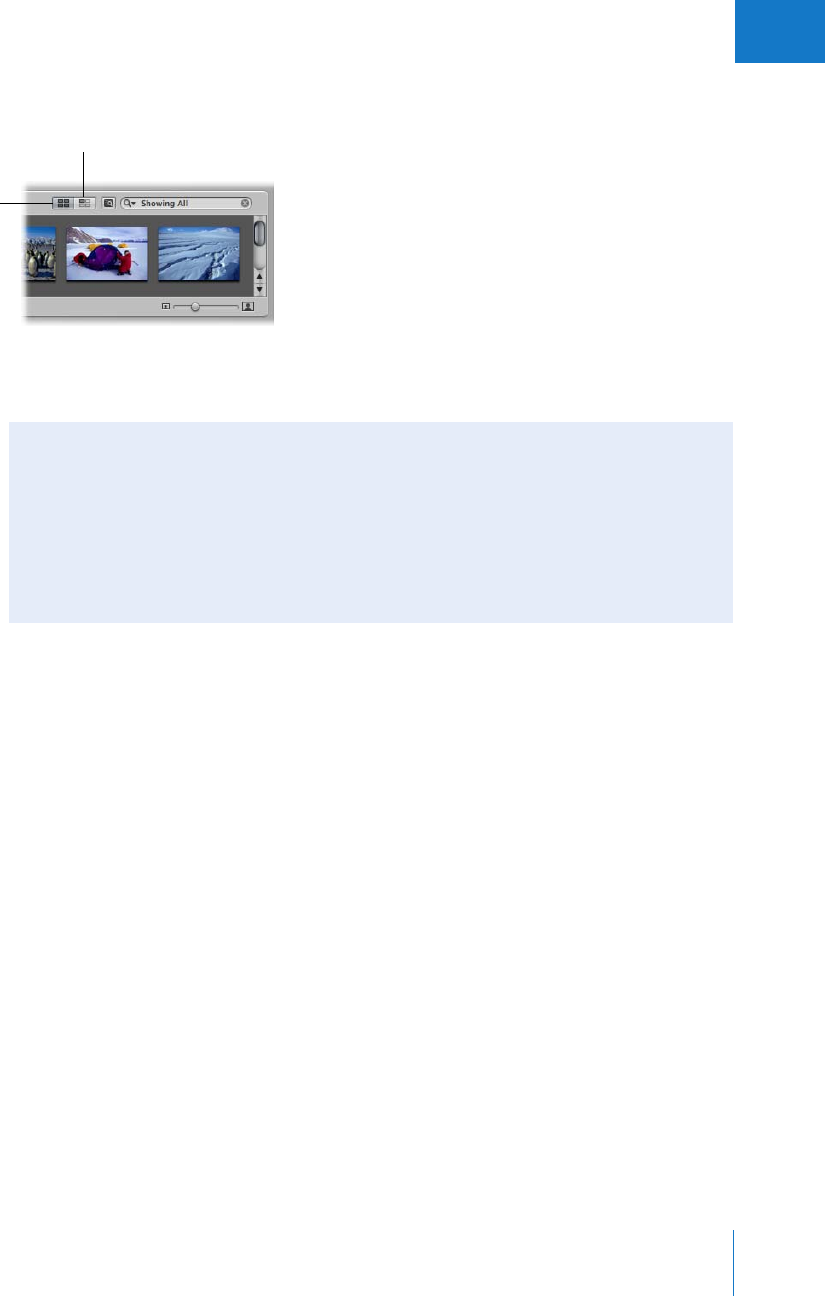
Chapter 17 Using the Light Table 327
III
To see only images in the Browser that remain unplaced:
mClick the Show Unplaced Images button.
To see the entire contents of the Light Table album in the Browser:
mClick the Show All Images button.
Moving and Resizing Images in the Light Table
You can drag images to different locations in the Light Table, trying out different
combinations and orientations. For example, you might take a group of related images and
arrange them to see how they’d appear on a print page. You can also enlarge or reduce
images. After resizing an image, you can quickly reset the image back to its original size.
To move images in the Light Table:
mIn the Light Table, select the images you want to move and drag them to a new location.
To drag an image to a location offscreen:
mDrag the image to the border of the Light Table until the screen begins to scroll.
Show All Images button
Show Unplaced Images button
Making Adjustments to Images in the Light Table
You can’t select and use the Crop, Straighten, Spot & Patch, and Red Eye tools in the
toolbar when using the Light Table. To use these tools to make a change to an image
in the Light Table, select the image in the Browser, then click the Show Viewer button
at the top of the Browser (to the right of the Sort Direction button). The selected
image appears in the Viewer and you can make your changes. Click the Show Viewer
button again to return to the Light Table.
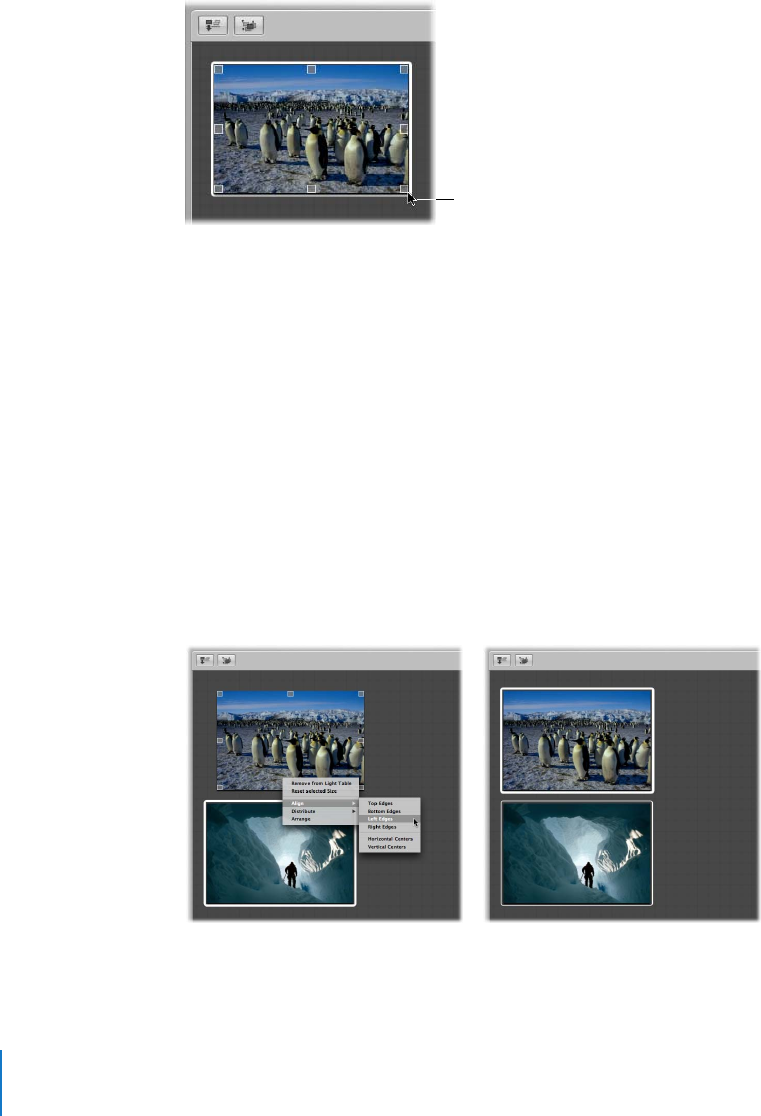
328 Part III Distribution and Backup
To change an image’s size:
1Select the image in the Light Table.
2Position the pointer over the image, then drag a resize handle to change the image’s size.
To reset an image to its previous size, do one of the following:
mChoose Edit > Undo Resize (or press Command-Z).
mControl-click the image, then choose Reset Selected Size from the shortcut menu.
Aligning and Arranging Images in the Light Table
You can select a group of images in the Light Table and automatically align them
according to their top, bottom, or side edges, or by their centers. You can also have
Aperture arrange a selected group with equal space between each image.
To align selected images:
1In the Light Table, select the images you want to align.
2Control-click one of the images, choose Align from the shortcut menu, then choose the
type of alignment you want from the submenu.
Move the pointer over
the image to show resize
handles, then drag to
change the image’s size.
The selected images are aligned according
to the option you chose.
Choose Align from the shortcut menu,
then choose an option from the submenu.
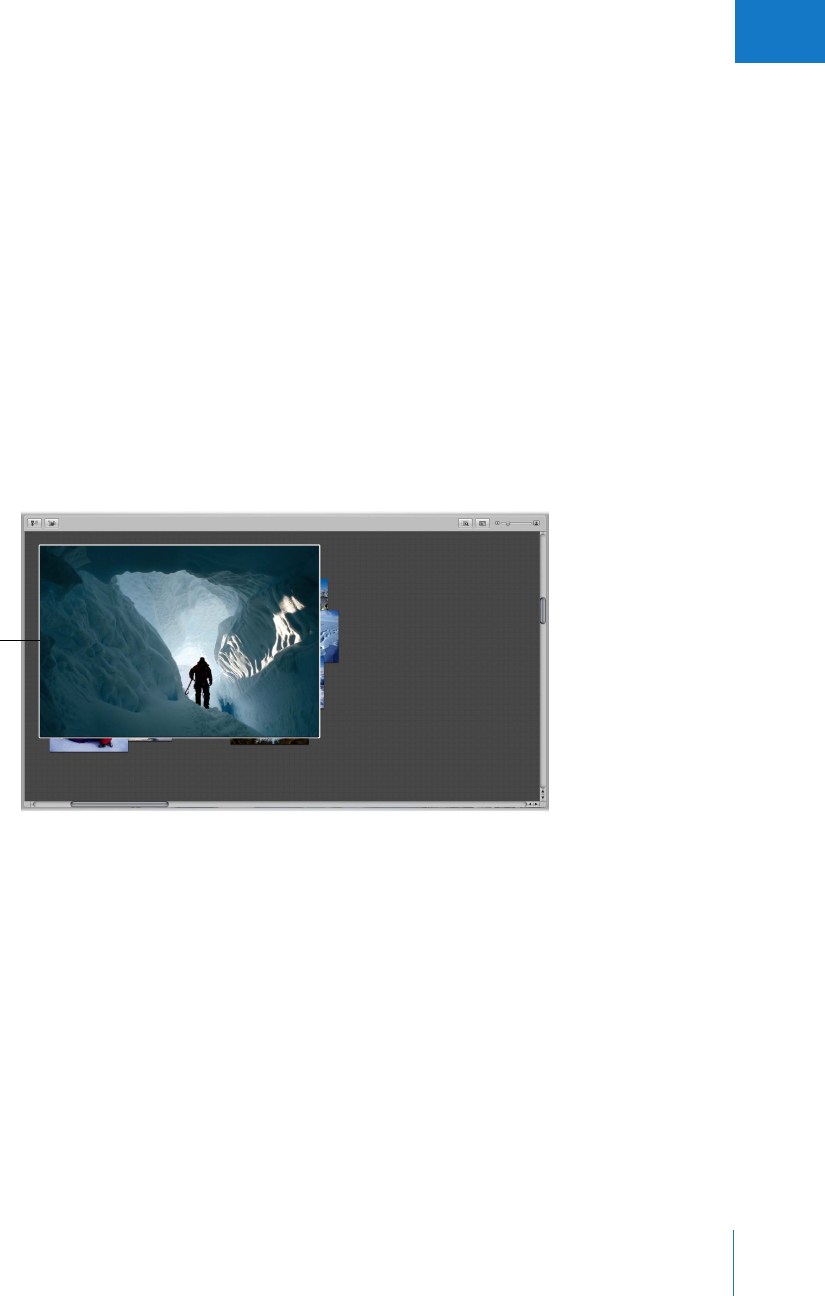
Chapter 17 Using the Light Table 329
III
To distribute selected images with an equal amount of space between them:
1In the Light Table, select the images you want to distribute.
2Control-click one of the images, choose Distribute from the shortcut menu, then
choose Horizontal or Vertical Distribution from the submenu.
The images are distributed horizontally or vertically in the Light Table.
You can also automatically group a selection of images. Aperture gathers the images
and places them together for easy arrangement. If some images in a group are hidden
behind other images, you can also reveal, or uncover, all images in the group.
To group images in the Light Table:
1In the Light Table, select the images you want to group.
2Control-click the selection, then choose Arrange from the shortcut menu.
To reveal images in the Light Table that are covered by other images:
1Select the top image in the group.
The top image is
selected.
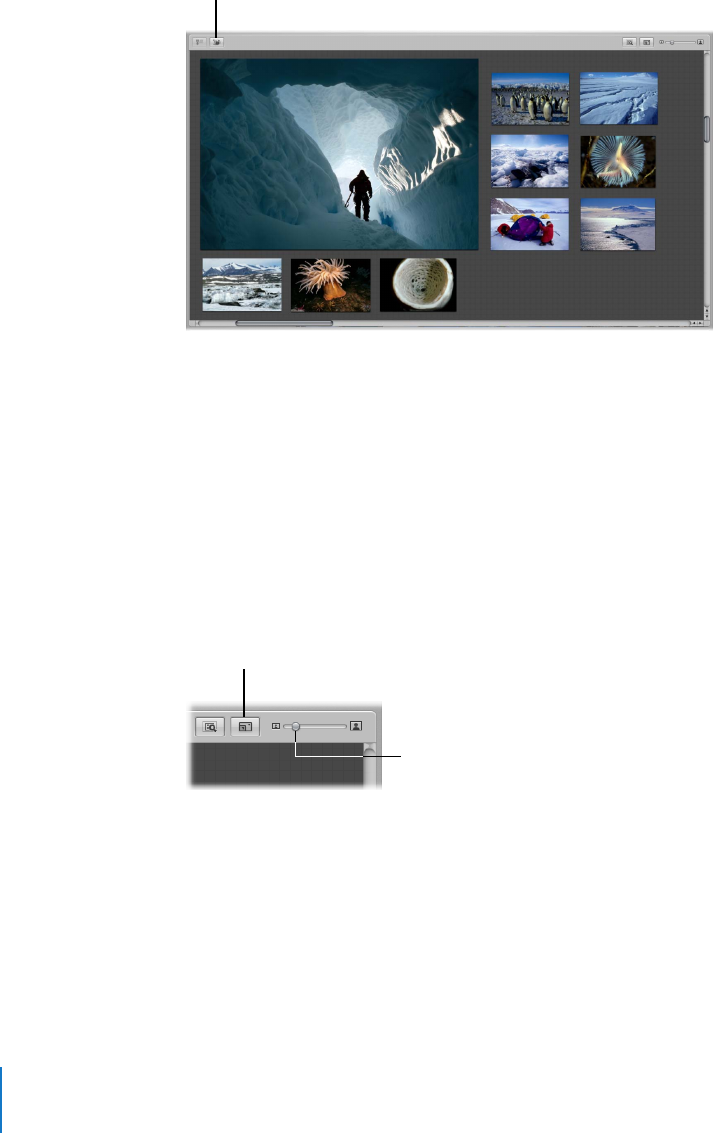
330 Part III Distribution and Backup
2Click the Uncover button (or press Shift-X).
3Select an uncovered image.
The images are regrouped, with the selected image on top.
Adjusting the Light Table View
You can adjust the Light Table view to better view and work with images. This is
particularly useful when the Light Table is larger than your screen size. You can also
increase the area of the Light Table.
To zoom in or out of the Light Table, do one of the following:
mDrag the Light Table Zoom slider to change the view.
To fit the Light Table to your screen size, do one of the following:
mClick the Scale to Fit All Items button.
To change the Light Table view to 100 percent:
mControl-click in a blank portion of the Light Table, then choose Zoom to 100% from the
shortcut menu.
Click the Uncover button
to reveal all images under
the selected image.
Drag the Light Table
Zoom slider to zoom
in or out.
Scale to Fit All Items button
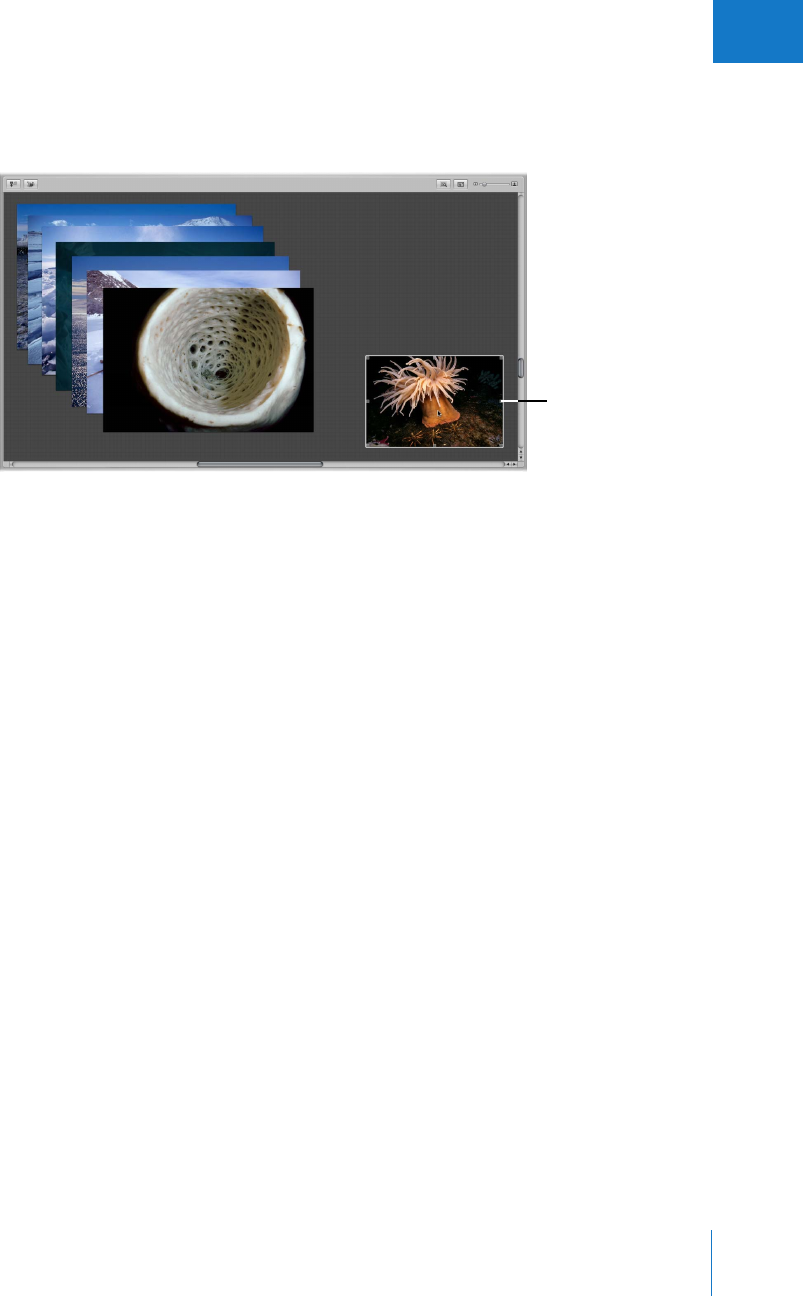
Chapter 17 Using the Light Table 331
III
To increase the area of the Light Table:
mDrag an image to the border of the grid background so that the area of the Light Table
automatically expands.
Setting View Options for the Light Table
You can set the view options for the Light Table to display badge and metadata
overlays, such as ratings, on your images.
To change the display of image information in the Light Table:
1Choose View > View Options.
2In the View Options window, select the “Show decorations” checkbox to display badge
and metadata overlays on images in the Light Table.
3Click Done.
Transferring Images from the Light Table
You can easily select and transfer your images from the Light Table to a new album.
To transfer images from the Light Table to a new album:
1Select the images you want to transfer.
2In the Projects panel, choose New Album From Selection, New Web Gallery From
Selection, New Web Journal From Selection, or New Book From Selection from the Add
to Library pop-up menu.
The images you selected are copied to the new album.
Drag an image to a
border of the Light
Table to expand the
Light Table area.
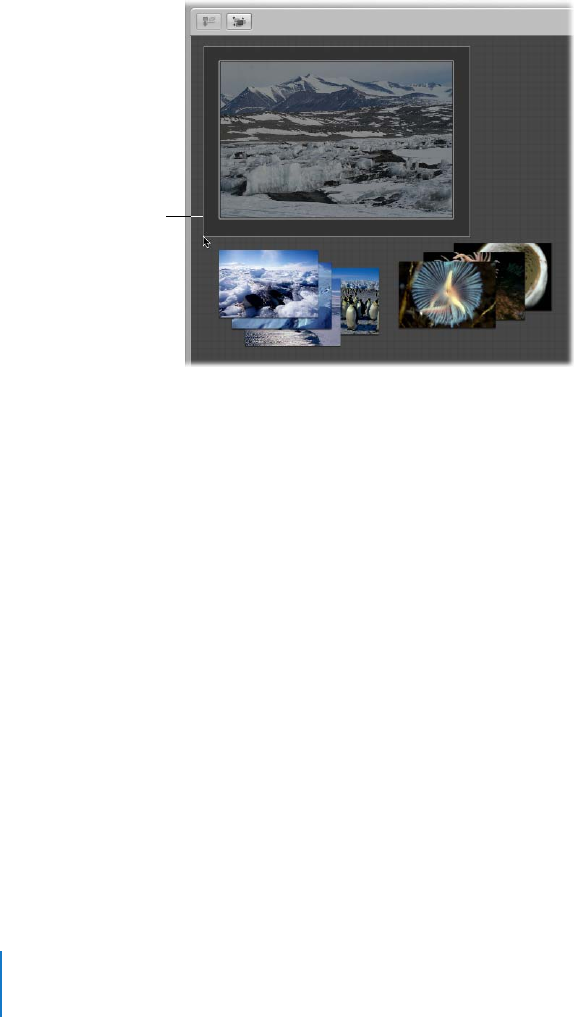
332 Part III Distribution and Backup
Printing a Light Table Arrangement
After arranging your images, you can print the image arrangement for further review.
To print a Light Table arrangement:
1Select the images in the Light Table that you want to print by dragging a selection
rectangle around them.
If no images are selected, the entire Light Table is printed.
2Choose File > Print Light Table (or press Command-Option-P).
3In the Print dialog, specify your print options, then click Print.
For more information, see Chapter 14, “Printing Your Images,” on page 277.
Deleting a Light Table Album
You can quickly delete an entire Light Table album. If you’ve transferred images from
the Light Table album to other projects or albums, the images in the other projects and
albums remain unchanged, even though the Light Table versions are gone.
To delete a Light Table album:
1Select the Light Table album in the Projects panel.
2Choose File > Delete Light Table (or press Command-Delete).
Drag a selection
rectangle around the
images you want
to print.

18
333
18 Creating Webpages
In Aperture, you can easily create webpages of your images
that you can post to your .Mac account homepage or to your
own website. Then clients can conveniently review your work
via the Internet.
This chapter provides instructions for creating and posting webpages of your images.
Using the built-in Aperture webpage themes, or designs, you can create webpages that
show your images in eye-catching settings. You can also create web journal pages of
images and explanatory text, narrative, or captions that support your images. For
example, you might create web journal pages that show and tell the story of an
overseas shoot or a journalistic project.
This chapter covers:
ÂAn Overview of Creating Webpages (p. 334)
ÂCreating Web Galleries (p. 336)
ÂCreating Web Journals (p. 339)
ÂViewing and Navigating Through Webpages (p. 341)
ÂChoosing and Modifying Themes (p. 342)
ÂWorking with Web Gallery Pages (p. 345)
ÂWorking with Web Journal Pages (p. 346)
ÂExporting Webpages (p. 348)
ÂWorking with Web Export Presets (p. 351)
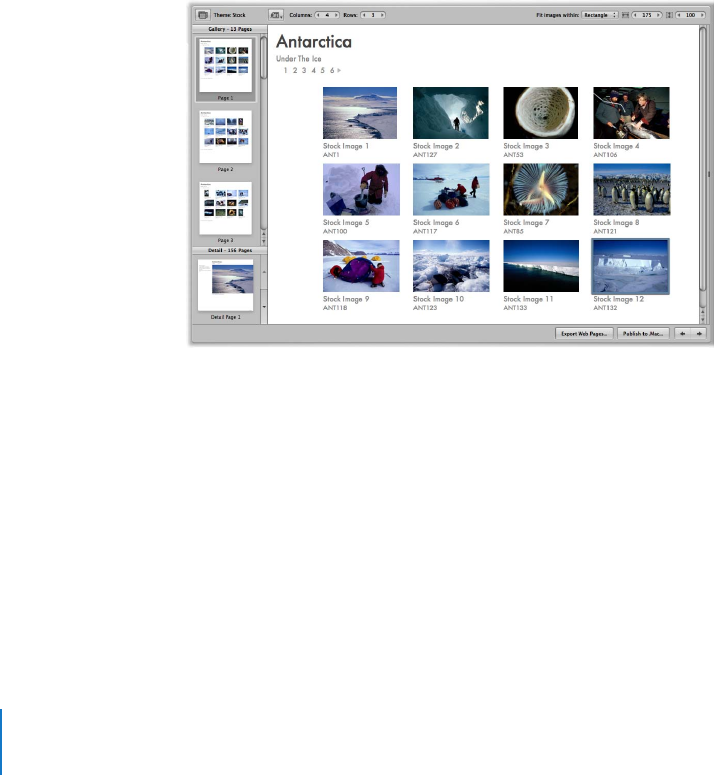
334 Part III Distribution and Backup
An Overview of Creating Webpages
Web delivery is convenient when time won’t allow office visits or delivery of prints to
clients. Photographers around the world currently benefit from web distribution of
their works, providing clients with online access to galleries of their best images.
Building a web portfolio for prospective clients can extend the reach of your
photography business and reputation globally.
Using Aperture, you can create two types of webpages—web galleries and web
journals. Both are based on themes, or page designs, are easily editable, and can be
posted to the web.
Web Gallery
Web gallery pages are designed to display images without your having to lay out pages
by hand. Aperture automatically creates the appropriate number of webpages and
populates them with the selected images. You can then adjust the pages to make the
images appear as you want them. You can also choose the metadata information that
appears next to each image, such as captions, names, and ratings.
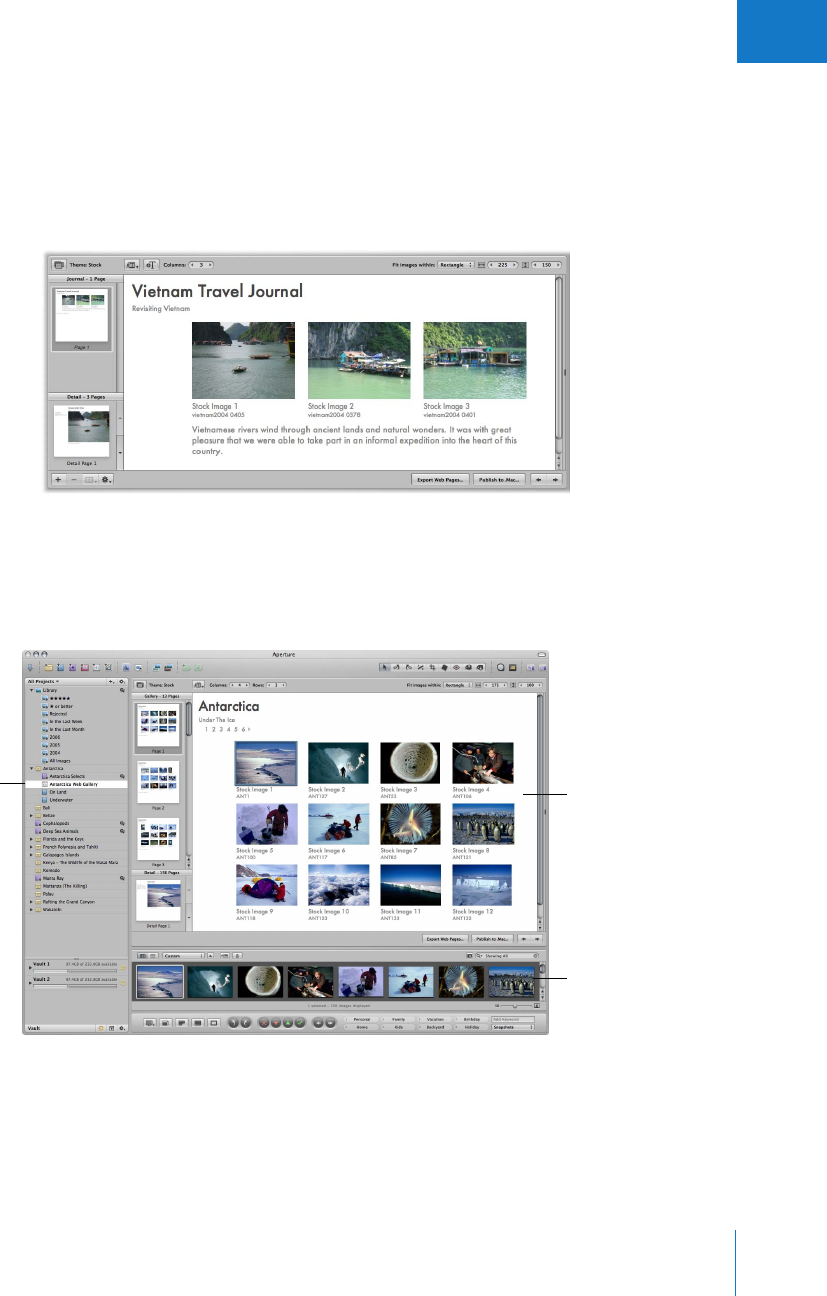
Chapter 18 Creating Webpages 335
III
Web Journal
Web journal pages allow you to mix images and text manually on the page. Web
journals are ideal for projects in which you show photos with narrative to support
them. Unlike with a web gallery, you manually add pages, images, and text to your web
journal. You can choose a theme to apply to all your pages, and you can change the
layout of images and text on your web journal pages.
To create a web gallery or web journal, you create a web gallery or web journal album.
When you select the album in the Projects panel, the Webpage Editor appears above
the Browser. The Webpage Editor is where you design your webpages, including
changing the theme, positioning images, and adding text.
After you’ve laid out your web gallery or web journal pages in the Webpage Editor, you
can export them to your .Mac account, or save them as HTML pages that you can post
to your webpage server. Once the images are posted online, you can give clients the
Internet address of the pages, and clients can view them remotely.
Web gallery album in the
Projects panel Webpage Editor
The Browser displays the
images in the web
gallery album.
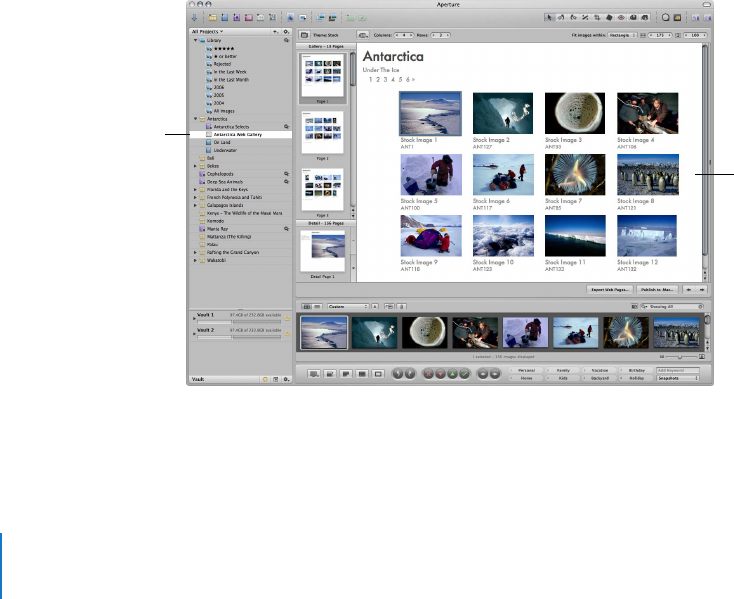
336 Part III Distribution and Backup
Creating Web Galleries
Web galleries offer a way to showcase your images on the web. You have a number of
options for designing these pages. You can choose the type of information to
accompany each image, such as name and rating. You can also specify the number of
columns and rows you want on each page.
Creating Web Gallery Albums
To create a web gallery, you must first create an album that holds your web gallery images.
The easiest way to do this is to select images you want to appear in the web gallery, create
an album, and have Aperture automatically place the images on the webpages. Aperture
creates as many webpages as necessary to hold all of the selected images.
To create a web gallery album from selected images:
1In the Browser, select the images you want to place on your webpages.
2Do one of the following:
ÂChoose File > New From Selection > Web Gallery.
ÂChoose New Web Gallery From Selection from the Add to Library pop-up menu in
the Projects panel.
A new, untitled web gallery album appears in the Projects panel, and the Webpage
Editor appears above the Browser.
3Rename the album.
The new album contains the selected images.
You can also create an empty web gallery album and then drag images into the album.
The Webpage Editor
appears with the
selected images.
The new album you
created appears in the
Projects Panel.

Chapter 18 Creating Webpages 337
III
To create a new, empty web gallery album:
1Do one of the following:
ÂChoose File > New > Web Gallery.
ÂChoose New Empty Web Gallery from the Add to Library pop-up menu in the
Projects panel.
A new, untitled web gallery album appears in the Projects panel.
2Rename the album.
3Drag the images you want into the new web gallery album.
To make changes to the webpages, you use the controls in the Webpage Editor. For
more information, see “Web Gallery Controls in the Webpage Editor” on page 338.
Creating Smart Web Gallery Albums
You can use the Aperture Smart Album feature to gather images from the Library or
from projects and place them automatically in web gallery pages. Smart Albums gather
images based on search criteria that you specify. For example, you can create a Smart
Web Gallery Album that gathers your select images from across the entire Aperture
Library. Then each time you rate an image as Select, Aperture automatically adds it to
your Smart Web Gallery Album and to a web gallery page. You can then update your
.Mac account with pages of your most up-to-date select images or post them to your
website. For more information about creating and using Smart Albums, see Chapter 13,
“Grouping Images with Smart Albums,” on page 267.
Note: Smart Web Gallery Albums are only available for web galleries, not for web journals.
To create a Smart Web Gallery Album of your images:
1Do one of the following:
ÂChoose File > New Smart > Web Gallery.
ÂChoose New Smart Web Gallery from the Add to Library pop-up menu in the
Projects panel.
2Enter a name for the new Smart Web Gallery Album.
3Click the Query HUD button (with a magnifying glass icon) to the right of the Smart
Web Gallery Album name to show the Query HUD.
4In the Query HUD, specify the criteria for the Smart Web Gallery Album.
The Smart Web Gallery Album is created and filled with the images that meet the
search criteria.
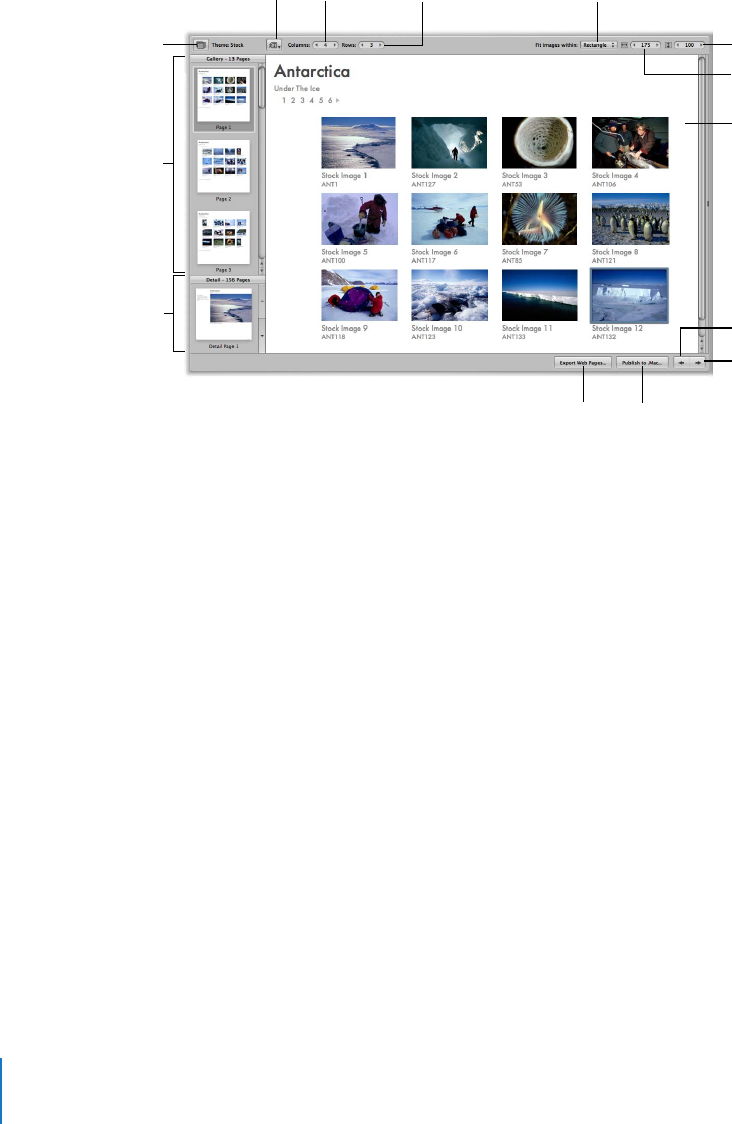
338 Part III Distribution and Backup
Web Gallery Controls in the Webpage Editor
The following controls are available for revising web gallery pages and images.
ÂSite Theme button: Click this button to choose a theme, or layout, for your webpage.
ÂGallery Pages panel: Click here to see a specific page of the web gallery.
ÂDetail Images panel: Click here to see the enlarged version of a selected image in a
web gallery.
ÂMetadata View pop-up menu: Choose the type of metadata that is included with
each image in the webpage.
ÂColumns value slider: Use this to specify the number of columns you want on a page.
Click the arrows to increase or decrease the number of columns, or double-click in
the number field and enter a new value.
ÂRows value slider: Use this to specify the number of rows you want on a page. Click
the arrows to increase or decrease the number of columns, or double-click in the
number field and enter a new value.
“Fit images within” pop-up menu: Choose an option for how you want images to
appear on the webpage.
ÂWidth value slider: Use this to specify the column width. Click the arrows to increase
or decrease the width, or double-click in the number field and enter a new value.
ÂHeight value slider: Use this to specify the row height. Click the arrows to increase or
decrease the height, or double-click in the number field and enter a new value.
ÂExport Web Pages button: Click this button to export your webpages.
“Fit images within”
pop-up menu
Columns
value slider
Rows
value slider
Width value slider
Height value slider
Detail Images panel
Next Page button
Previous Page button
Gallery Pages panel
This shows how your
images will appear on
the web gallery page.
Export Web Pages button Publish to .Mac button
Metadata
View pop-up
Site Theme button

Chapter 18 Creating Webpages 339
III
ÂPublish to .Mac button: Click this button to publish your finalized webpages to your
.Mac account. For more information, see “Exporting to .Mac” on page 348.
ÂPrevious Page button: Click this button to go to the previous webpage.
ÂNext Page button: Click this button to go to the next webpage.
Creating Web Journals
Web journals provide a great way to mix images and text to chronicle trips and
explain images on the web. You can manually add and arrange images and text in
your web journal.
Creating Web Journal Albums
To create a web journal, you must first create an album that holds your webpage’s
images. The easiest way to do this is to select images you want to appear in the web
journal and create an album. Aperture creates a web journal album that contains the
images you selected, and the Webpage Editor appears above the Browser. The Browser
contains the selected images, which you can then manually place on the webpages.
To create a web journal album from selected images:
1In the Browser, select the images you want to place on your webpages.
2Do one of the following:
ÂChoose File > New From Selection > Web Journal.
ÂChoose New Web Journal From Selection from the Add to Library pop-up menu in
the Projects panel.
A new, untitled web journal album appears in the Projects panel.
3Rename the album.
The selected images appear in the Browser, below the Webpage Editor. You can then
manually add images to your web journal pages.
Making Adjustments to Images in a Web Gallery or Web Journal
You can’t select and use the Crop, Straighten, Spot & Patch, and Red Eye tools in the
toolbar when using the Webpage Editor. To use these tools to make a change to an
image in a web gallery or web journal, select the image in the Browser, then click the
Show Viewer button at the top of the Browser (to the right of the Sort Direction
button). The selected image appears in the Viewer and you can make your changes.
Click the Show Viewer button again to return to the Webpage Editor.
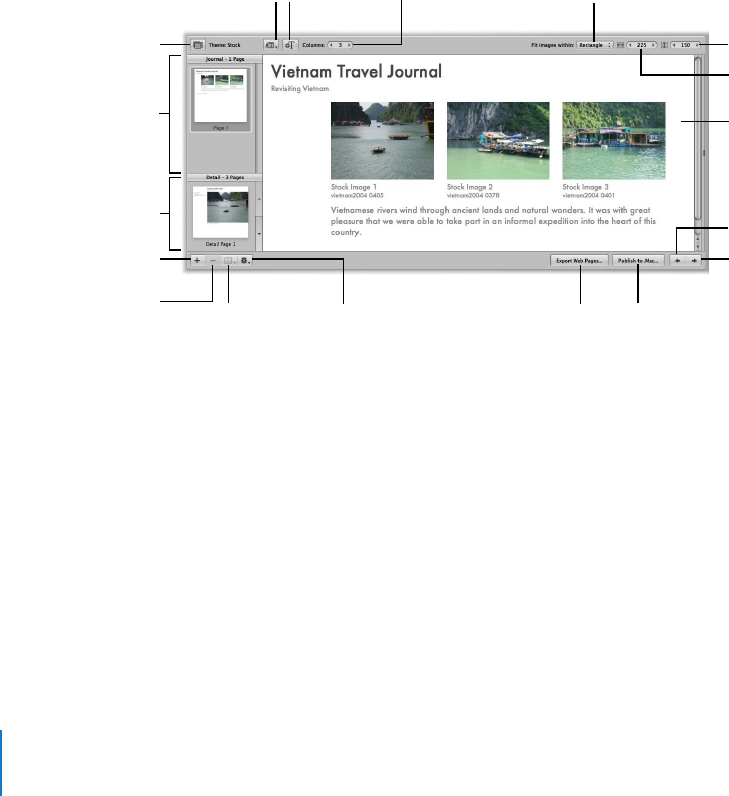
340 Part III Distribution and Backup
To create a new, empty web journal album:
1Do one of the following:
ÂChoose File > New > Web Journal.
ÂChoose New Empty Web Journal from the Add to Library pop-up menu in the
Projects panel.
A new, untitled web journal album appears in the Projects panel.
2Rename the album.
3Drag the images you want into the new web journal album.
To make changes to the webpages, you use the controls in the Webpage Editor. For
more information, see “Web Journal Controls in the Webpage Editor,” next.
Web Journal Controls in the Webpage Editor
The following controls are available for web journal pages and images.
ÂSite Theme button: Click this button to choose a theme, or layout, for your webpage.
ÂJournal Pages panel: Click here to see a specific page of the web journal.
ÂDetail Images panel: Click here to see the enlarged version of a selected image in a
web journal.
ÂAdd Page button: Click this button to add a page to your web journal.
ÂRemove Page button: Click this button to remove a selected page from your web journal.
ÂPage Template pop-up menu: Use this to choose a page template, or layout.
ÂPage Action pop-up menu: Choose how to add pages to your web journal.
ÂMetadata View pop-up menu: Choose the type of metadata that is included with
each image in the webpage.
Export Web Pages
button
Site Theme button
Detail Images panel
Journal Pages panel
Add Page button
Page Action
pop-up menu
Page Template
pop-up menu
Width value slider
Height value slider
Next Page button
Previous Page button
This shows how your
images will appear on
the web gallery page.
“Fit images within”
pop-up menu
Columns
value slider
Add Text Box
button
Publish to .Mac
button
Remove Page
button
Metadata
View pop-up
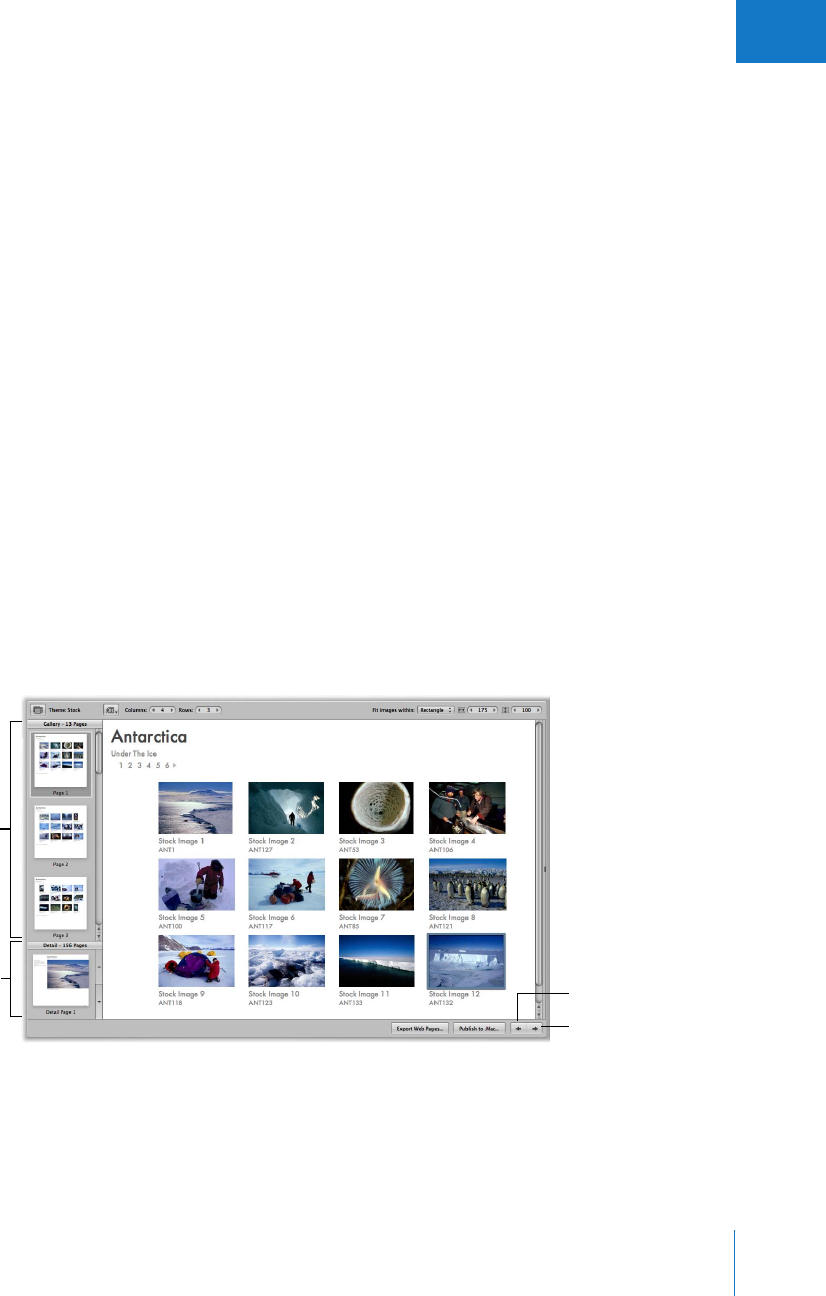
Chapter 18 Creating Webpages 341
III
ÂAdd Text Box button: Click this button to add a text box to the bottom of the
current webpage.
ÂColumns value slider: Specify the number of columns you want on a page. Click the
arrows to increase or decrease the number of columns, or double-click in the number
field and enter a new value.
“Fit images within” pop-up menu: Choose an option for how you want images to
appear on the webpage.
ÂWidth value slider: Use this to specify the width of photo boxes on the page. Click the
arrows to change the width, or double-click in the number field and enter a new value.
ÂHeight value slider: Use this to specify the height of photo boxes on the page. Click
the arrows to change the height, or double-click in the number field and enter a
new value.
ÂExport Web Pages button: Click this button to export your webpages.
ÂPublish to .Mac button: Click this button to publish your finalized webpages to your
.Mac account. See “Exporting to .Mac” on page 348.
ÂPrevious Page button: Click this button to go to the previous webpage.
ÂNext Page button: Click this button to go to the next webpage.
Viewing and Navigating Through Webpages
As you modify your webpages, there are some easy ways to view and navigate
through your pages.
Click here to see the
enlarged version of the
selected image.
Next Page button
Previous Page button
Select the page you want
to work on here.

342 Part III Distribution and Backup
To view a particular webpage, do one of the following:
mUse the scroll bar in the Gallery Pages panel (for a web gallery) or the Journal Pages
panel (for a web journal) to locate the page, then click the page.
mClick the Previous Page or Next Page button to display a different page.
When someone clicks an image on a web gallery or web journal page in your website,
a page showing an enlarged view of the image appears. You can view these enlarged
images in the Webpage Editor.
To see an enlarged image from a webpage, do one of the following:
mPosition the pointer over the image, then click the Detail button (with a curved arrow).
mClick the up or down arrow buttons on the side of the Detail Images panel to navigate
through detail pages for the images in a web gallery or web journal.
To return to the page view after viewing an enlarged image:
mClick a page in the Gallery Pages panel (for a web gallery) or the Journal Pages panel
(for a web journal).
Choosing and Modifying Themes
Aperture provides a variety of themes that you can choose for your web gallery or web
journal pages. When you choose or change a theme, Aperture updates all your pages
to use the new theme. After a theme is applied to your pages, you can modify it by
changing the number and size of images on the page. You can also display images with
metadata and have copyright information appear on your webpages.
Choosing a Theme
The theme you choose for your pages determines the basic template design of the
page. Make sure to explore the themes to see which best suits your work.
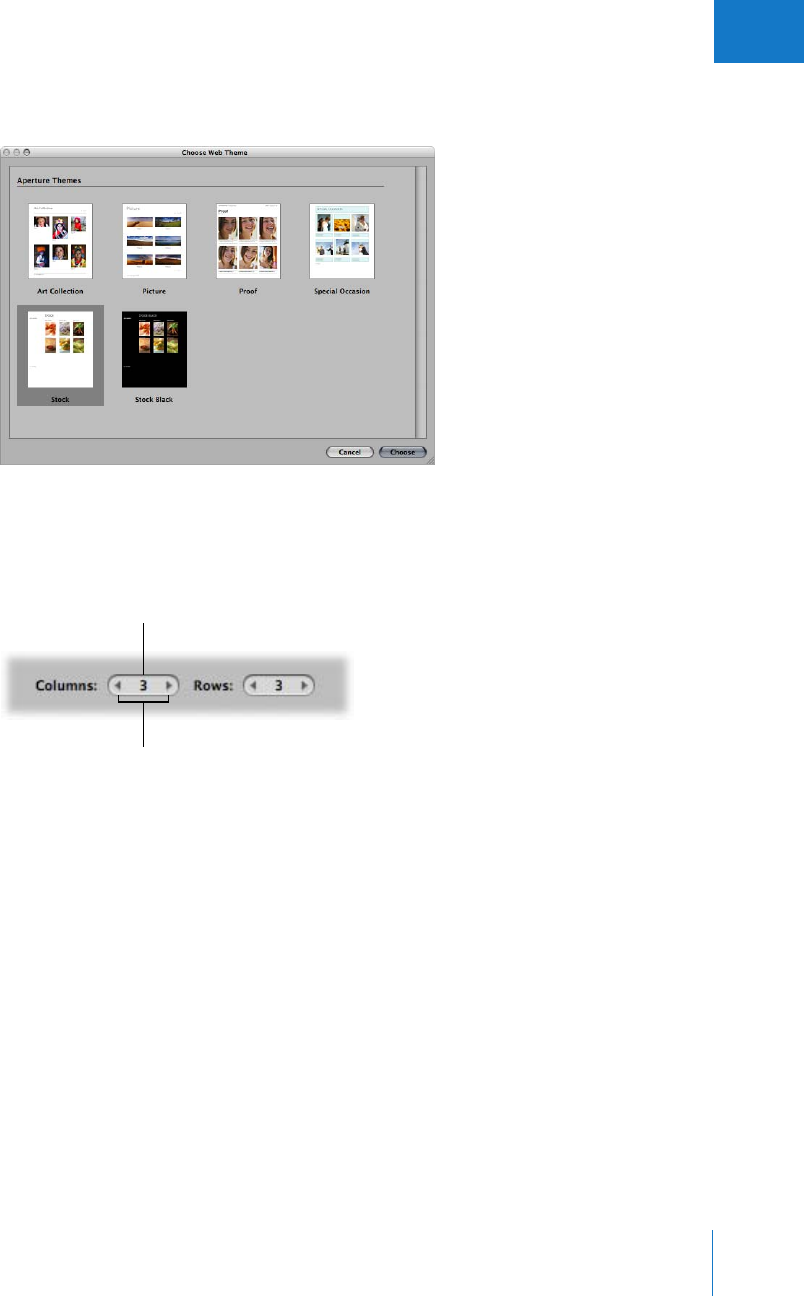
Chapter 18 Creating Webpages 343
III
To choose a theme for your web gallery or web journal pages:
1Click the Site Theme button at the top-left corner of the Webpage Editor.
2Select the theme you want to use, then click Choose.
Changing the Number of Images on Webpages
After you’ve chosen a theme, you can modify how many images appear on each page.
Note: When a web journal is open in the Webpage Editor, only the Columns value
slider is available. You can manually add as many rows of images to a page as you need.
To change the number of columns and rows of images on the page:
mDouble-click in the number field of the Columns or Rows value slider and enter a new
number, or click the left or right arrow.
When you change the number of columns and rows, Aperture automatically updates
all your webpages to reflect the new settings.
Left and right arrows
Columns value slider
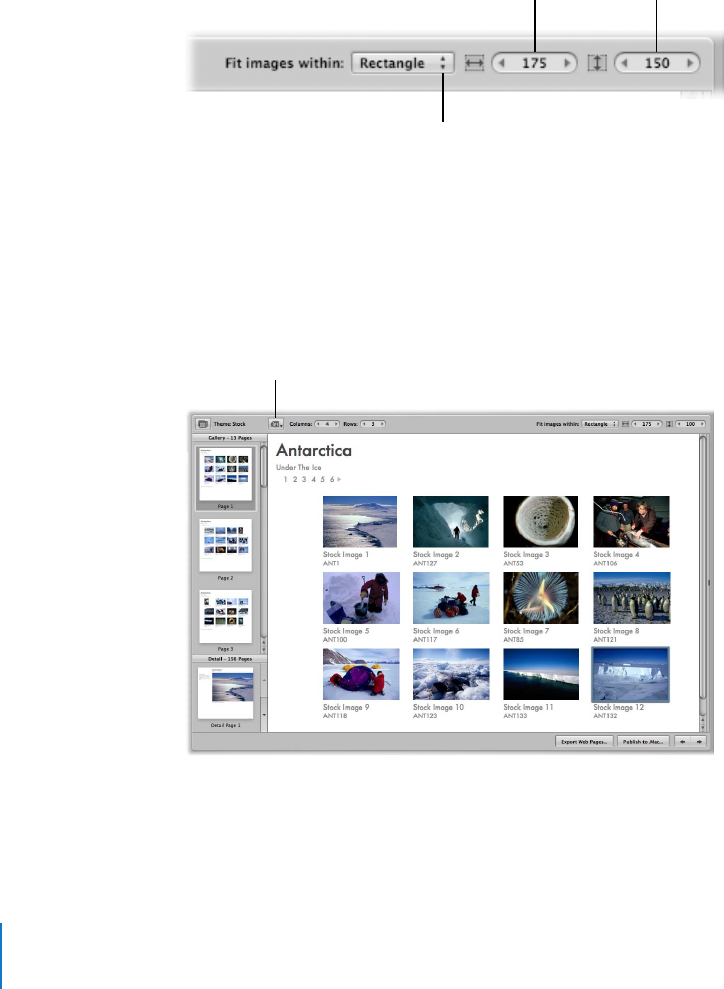
344 Part III Distribution and Backup
Resizing the Images on Webpages
You can increase or decrease the size of images on your pages.
To change the size of images on the page:
1From the “Fit images within” pop-up menu, choose whether you want the images to be
spaced according to their longest edge or both edges.
2To increase or decrease the image size, double-click in the number field of the Height
and Width value sliders and enter new numbers, or click the left or right arrows.
Displaying Images with Metadata
You can specify that your images appear with metadata on your web gallery or journal
pages. You can choose different combinations of metadata to appear on your pages.
For example, you might display your web gallery pages with a simple set of metadata
that includes the filename, caption, and image date.
To specify the types of metadata that appear with your images:
mIn the Webpage Editor, choose an option from the Metadata View pop-up menu.
Width value slider
Choose how you want your
images to fit on the pages
from this pop-up menu.
Height value slider
Metadata View
pop-up menu

Chapter 18 Creating Webpages 345
III
Changing Copyright Information
Web gallery and journal pages also appear with copyright information on the page.
You can select the copyright text on the webpage and change it. You can also specify
the copyright information you want for all your webpages in the Preferences window.
To change the copyright information that appears on web gallery or journal pages:
1Choose Aperture > Preferences, or press Command-comma (,).
2Type the text you want in the Web Copyright field.
Working with Web Gallery Pages
When you create a web gallery, the images in it are placed automatically. You can then
make changes to the pages in the Webpage Editor.
Ordering, Adding, and Deleting Images in a Web Gallery
You can adjust the placement of images on web gallery pages and add and delete
images in the Webpage Editor.
To change the viewing order of your images in a web gallery:
mDrag the images to different locations, either in the Webpage Editor or Browser.
You can add images to a web gallery after you’ve created it.
To add an image to a web gallery:
mDrag an image from a project, album, or the Library into your web gallery album.
To delete an image from a web gallery:
mSelect the image in the Browser, then choose Images > Remove From Album (or press
the Delete key).
Changing Text on Web Gallery Pages
Depending on the theme you choose for your web gallery, pages may appear with
titles, subtitles, or headings. You can change the sample text to text appropriate for
your web gallery.
To change titles and subtitles on web gallery pages:
mClick the title, subtitle, or heading you want to change, then type the text you want.
Hiding or Showing Image Plate Numbers in Web Galleries
You can turn on or off the display of plate numbers in your web galleries. Aperture is
preset to not display plate numbers for images.
To turn on the display of plate numbers in a web gallery:
mIn the Webpage Editor, choose Enable Plate Metadata from the Metadata View
pop-up menu.

346 Part III Distribution and Backup
Working with Web Journal Pages
As you work with a web journal, you can add images and text to pages, add pages,
choose header types, delete pages, and change the page order.
Adding, Arranging, and Deleting Images and Text
on Web Journal Pages
When you create a web journal, you must manually place your images and add text.
To add images to a web journal page:
mDrag images from the Browser to the page in the Webpage Editor.
You can also drag several images into place at once by selecting and dragging
groups of images. For example, if your webpage is set to display four images per row,
you can arrange four images in the order you want them, and then drag all four to
the page at once.
To move images on a web journal page:
1Click an image to select it.
2Drag the grid mark at the top of the photo box to move the image to the new location.
Release the mouse button when a green bar appears where you want to place the image.
Aperture places your images in the photo boxes designed for the page.
To remove an image from a web journal page:
1Click the image to select it.
2Click the Remove button (with a minus sign) to remove the selected photo box.
You can add text boxes to web journal pages as you need them. Text boxes are added
to the page one after another. New text boxes are always added to the bottom of the
page, but you can drag text boxes to new locations when you need to rearrange them.
To add text to a web journal page:
1In the Journal Pages panel, select the page to which you want to add text.
2Click the Add Text Box button.
3Enter the text you want.
You can drag the text box to a new location if you wish.
To move a text box:
1Click the text box to select it.
2Position the pointer on the grid mark at the top of the text box and drag the text box
until you see a green bar appear where you want to place the text box.

Chapter 18 Creating Webpages 347
III
To remove a text box from a web journal page:
1Click the text box to select it.
2Click the Remove button (with a minus sign) to remove the selected text box.
Adding Pages to a Web Journal
You can add pages to your web journal as you need them.
To add a page to a web journal:
1Select a page in the Journal Pages panel where you want the new page to appear.
The new page will appear after the selected page.
2Click the Add Page (+) button to add a new page.
Adding Pages by Metadata Category
You can have Aperture create pages in your journal to hold images that have a type of
metadata, such a specific rating, keyword, or image date. For example, you can have
Aperture create a page for each keyword assigned to the album’s images and place
images that have certain keywords on the correct pages automatically. Or, if your
album holds images with four- and five-star ratings, you can create a page that
automatically holds the five-star images and another that holds the four-star images.
You can have Aperture add pages for images based on:
ÂDay
ÂKeyword
ÂRating
ÂByline
ÂCity
ÂCategory
To add a new page based on a metadata category:
1Select a page in the Journal Pages panel where you want the new page to appear.
The new page will appear after the selected page.
2Choose an option for the type of page you want from the Page Action pop-up menu.
Choosing a Header Style for a Web Journal Page
Depending on the theme you choose, you can change the look of web journal pages
by choosing a style that displays either a heading followed by text, or a heading
followed by an image.
To choose the header style for a web journal page:
1Select a page in the Journal Pages panel.
2Choose either Header with Text or Header with Image from the Page Template
pop-up menu.

348 Part III Distribution and Backup
Deleting Pages from a Web Journal
When you no longer need a page, you can delete it from the web journal.
To delete a page from a web journal:
1Select the page you want to delete in the Journal Pages panel.
2Click the Remove Page (–) button to delete the page.
Reordering Pages in a Web Journal
You can change the order of web journal pages when necessary.
To move a page up or down in the page order of a web journal:
1Select the page you want to move in the Journal Pages panel.
2Choose either Move Current Page Up or Move Current Page Down from the Page
Action pop-up menu.
Exporting Webpages
After you’ve created your webpages, you can post them to your .Mac account or your
website so that others can access them via the Internet. Your Aperture webpages are
composed of numerous files, including image files and thumbnail images, HTML
webpage files, and additional web formatting files. All of these files are linked together
to compose your webpages, and they must be transferred intact to the website in a
manner that preserves the links and relationships between files.
You can post your webpages to the Internet in these ways:
ÂSet up Aperture to automatically post pages to your .Mac account.
ÂExport your pages as HTML files and images and then integrate them into your website.
Exporting to .Mac
The easiest way to transfer files to the Internet is to have Aperture automatically copy
the files to your .Mac account. With a few clicks, you can have Aperture open your .Mac
account, transfer the files with links intact, and create the Internet addresses that others
need to use to access the pages.
To learn more about creating and setting up a .Mac account, go to http://www.mac.com.
With your .Mac account set up, you can easily transfer your web gallery or web journal
to your .Mac account. The web address of your new .Mac album appears in the Publish
Album dialog and in the web browser after the pages are published. You can copy and
send this address to clients so they can view the images.

Chapter 18 Creating Webpages 349
III
To export your web gallery or web journal to your .Mac account:
1In the Webpage Editor, click Publish to .Mac.
2In the dialog that appears, specify the following:
ÂPublish Album As: Enter a name for the web gallery or web journal.
The Internet address for the webpage appears below the Publish Album As field.
Make sure to write down this address for later use.
ÂThumbnail Image Preset pop-up menu: Choose the quality you want for displayed
thumbnail images.
ÂDetail Image Preset pop-up menu: Choose the quality of detail images that will appear
when someone clicks a thumbnail.
3When you’re ready, click Publish.
The Publish Complete dialog appears, listing the address of your webpage.
You can select the address and press Command-C to copy the address to the Clipboard.
You need this address to link the web gallery or journal to your .Mac homepage.
4Click View in Browser to see the new webpage.
The published web gallery or journal appears in your web browser.
To link your web gallery or web journal to your .Mac homepage:
1Go to http://www.mac.com, then click the HomePage link at the top of the screen.
2If you haven’t already done so, log in.
3If you don’t have a menu page, create one.
4In the Pages list, select the menu page, then click Edit.
The page category is listed to the right of the selection.
5In the “Edit your page” section, click the Add (+) button next to an existing link to add a
new one.
A new empty link is created to the right of the previous link.
6Enter a page title and brief description, then click the Edit Link button.
7In the “Edit your links” section, click the Other Pages tab, paste the link to your web
gallery or web journal in the Address field by pressing Command-V, then click Apply.
8When you are ready to publish your new homepage, click the Publish button at the
top-right corner of the screen.
A new screen appears with a link to your updated homepage address.

350 Part III Distribution and Backup
If you later forget the address of your site, you can check your iDisk to see a listing of
sites. From the Finder, choose Go > iDisk > My iDisk, then open the Sites folder. The
names listed in your Sites folder represent your published sites. From that, you can
determine the path to a site by entering your personal information into the sample path:
http://homepage.mac.com/membername/sitename
Exporting Webpages as HTML Files
Integrating your Aperture webpages into your business’s website requires you to
thoroughly understand your website structure and web server. With some planning, you
can modify your home or access pages to provide links to your Aperture webpages.
You can also open your webpages in a standard HTML editor and make the changes
required for them to work in your site. You can add and revise the HTML code that
creates the page structure. You can plan how the pages link to the structure of your
website and provide additional items such as navigation buttons or links that normally
appear on your webpages. If you use a web design service to create and maintain your
site, you can supply your Aperture files to your service as a folder and allow them to
integrate your Aperture webpages. If you are your own webmaster, you can transfer
your Aperture web files to your web server or Internet service provider using a copying
method such as FTP, or using the transfer features of your webpage service.
You can export webpages that you’ve created in Aperture. When you export your
Aperture webpages, you can export them to a folder on your computer to keep them
organized in one place. You can name the folder and choose the image quality and file
types that are created. Aperture has web export presets you can choose that
automatically set up the export of webpages. You can choose an existing export preset
or create your own.
About Updating Web Galleries and Web Journals
When you update the images in a web gallery or web journal already posted to .Mac,
Aperture first checks to determine which images in a web gallery or web journal are
new or changed, and then exports only those images to temporary storage for
transfer to .Mac, saving time when updating large web galleries or web journals.
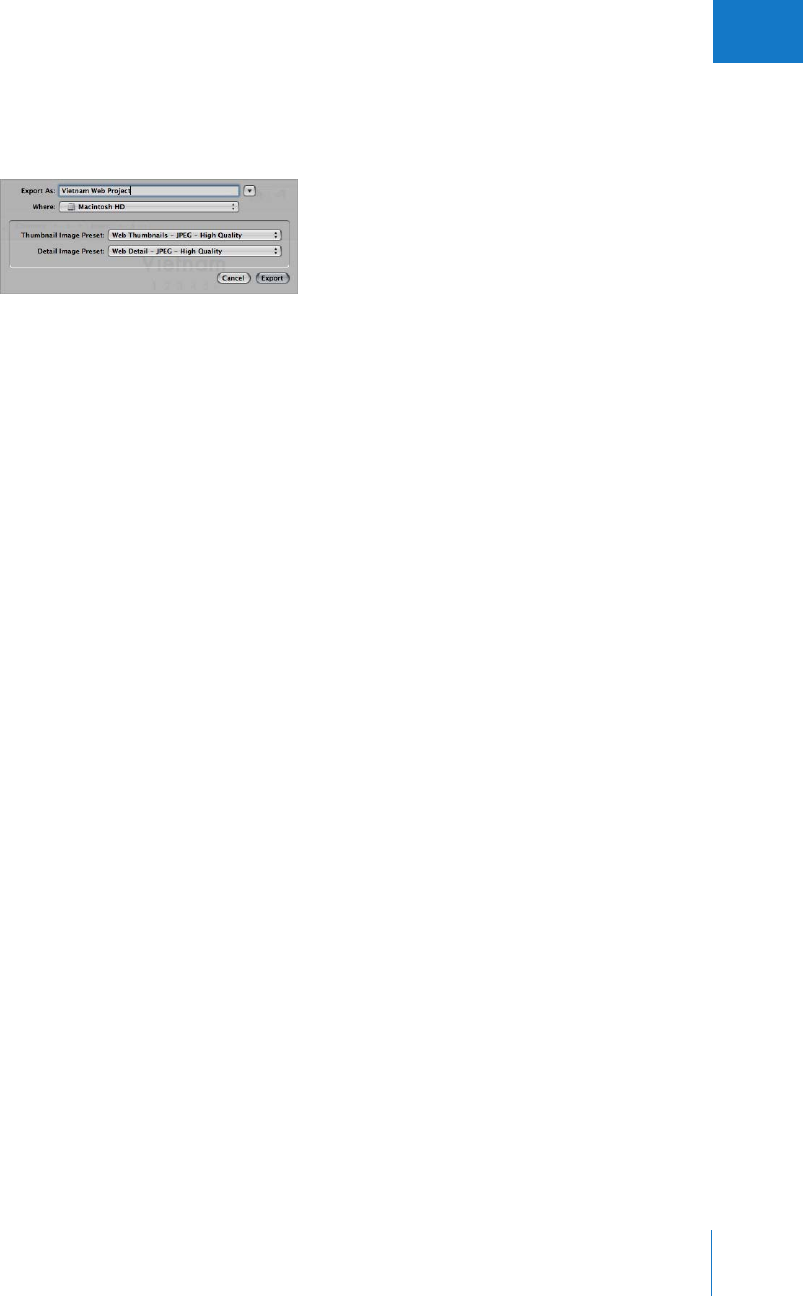
Chapter 18 Creating Webpages 351
III
To export webpages:
1Click the Export Web Pages button.
2Type a name for the folder that will hold the webpage files in the Export As field.
3Choose a location for the webpage folder from the Where pop-up menu.
4Choose a web export preset for your thumbnail images from the Thumbnail Image
Preset pop-up menu.
5Choose a web export preset for your detail image pages from the Detail Image Preset
pop-up menu.
6When you’re ready to export your webpages, click Export.
The dialog shows the progress of the export. The images you selected are exported to
the location you specified.
Working with Web Export Presets
Web export presets are groups of saved export settings that are configured to produce
different types of web images. You use them to help you quickly and easily export your
images for use on the web. Aperture comes with a number of web export presets, and
you can also create your own.
Viewing the Settings for a Web Export Preset
Before using a web export preset, whether it’s one that comes with Aperture or one that
you created, you can view its settings to make sure they are exactly what you want.
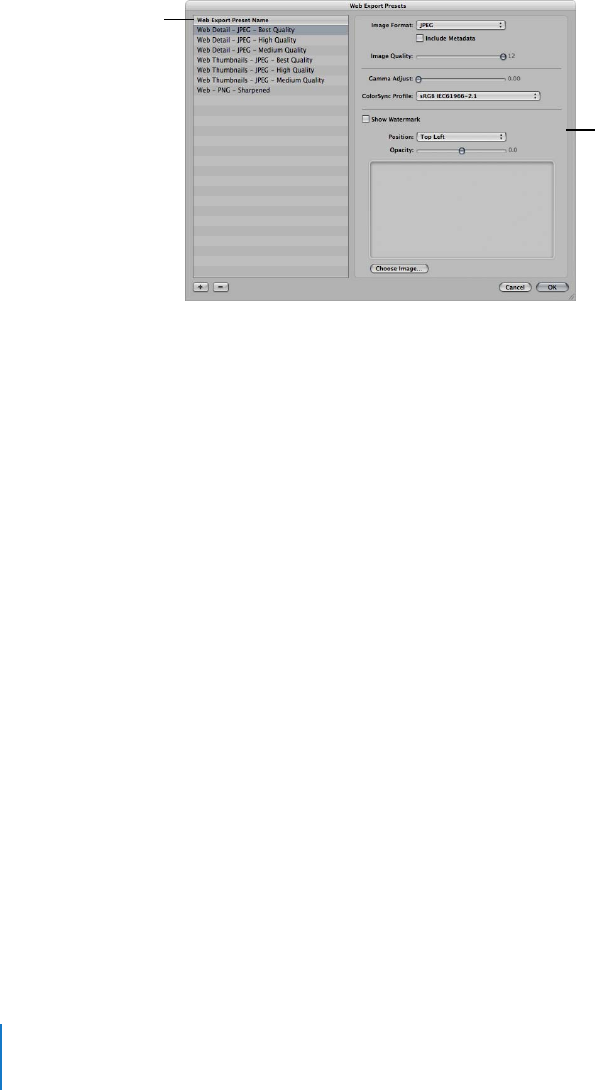
352 Part III Distribution and Backup
To view the settings for an export preset:
mChoose Aperture > Presets > Web Export.
The Web Export Presets dialog appears, listing the presets available and their
export settings.
The Web Export Presets dialog includes these controls:
ÂImage Format pop-up menu: Choose an image format to convert your images to,
such as JPEG or PNG, from this pop-up menu.
ÂInclude Metadata checkbox: Select this checkbox to include EXIF and IPTC metadata
information in the image files.
ÂImage Quality slider: Choose how much to compress your JPEG files by selecting a
number with the slider. Setting the slider to 12 applies the least compression and
results in a higher-quality image; setting the slider to 0 (zero) applies the most
compression and results in a lower-quality image.
ÂGamma Adjust slider: Gamma describes how your image distributes brightness. Drag
the slider to apply a uniform gamma adjustment to your exported images.
ÂColorSync Profile pop-up menu: Choosing a ColorSync profile ensures consistent color
reproduction on other systems and in the printed image. Aperture provides a large
selection of profiles, as well as any custom profiles you’ve saved during calibration. To
apply a ColorSync profile to the images you’ve selected for export, choose a profile
from the pop-up menu.
ÂShow Watermark checkbox: A watermark is a visible graphic or text overlay that is
applied to an image. Photographers often use watermarks to indicate that images
are protected by a copyright and discourage others from inappropriately using their
images. To add a watermark to your images, select the Show Watermark checkbox.
After selecting the checkbox, you can select a file to apply as a watermark image,
and place your watermark in various positions on your image.
For more information about adding watermarks, see “Adding Watermarks to
Webpage Images” on page 355.
Available presets are
shown here.
The right side of the
dialog shows the settings
for the selected preset.
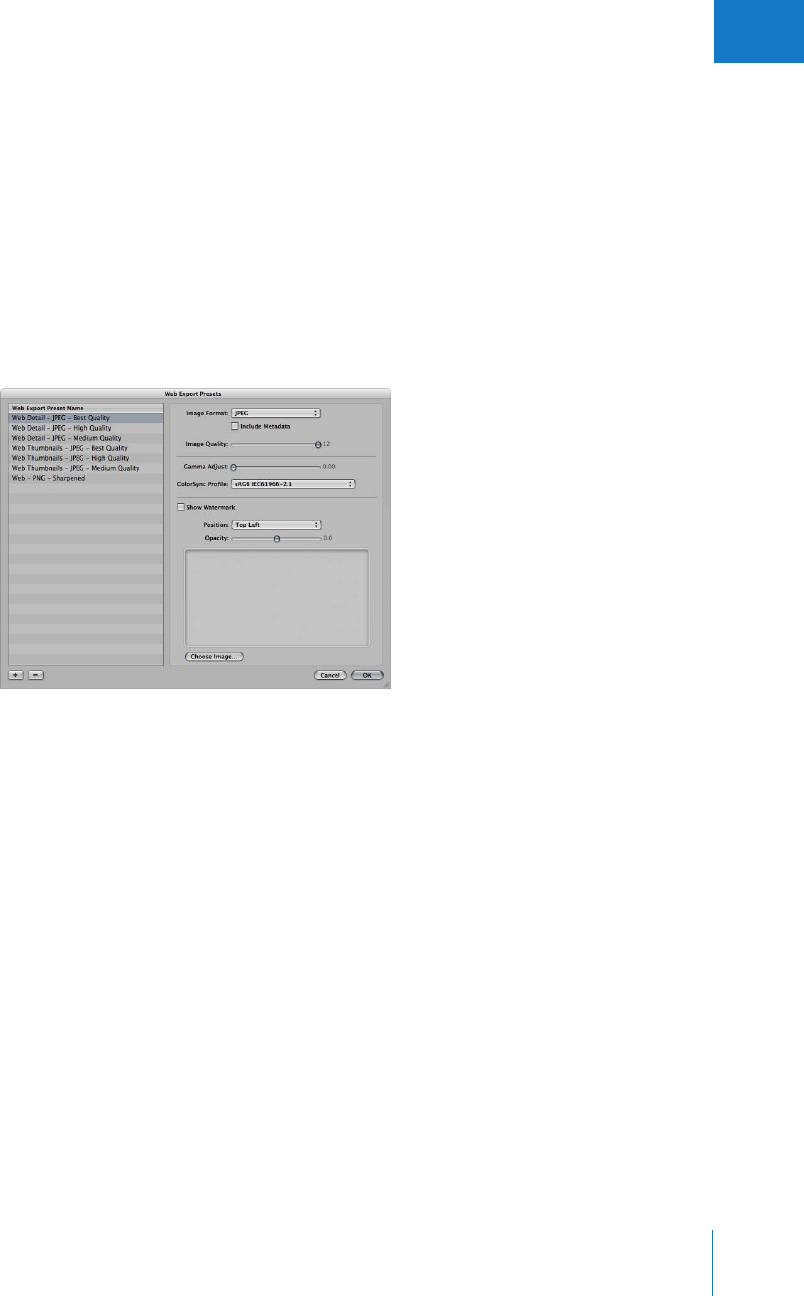
Chapter 18 Creating Webpages 353
III
Creating Web Export Presets
If none of the existing web export presets suit your needs, you can create your own.
An easy way to create a new export preset is to copy an existing preset and then
modify the copy.
To create a new web export preset:
1Do one of the following:
ÂChoose Aperture > Presets > Web Export.
ÂIn the Webpage Editor, click the Export Web Pages button, then choose Edit from the
Thumbnail Image Preset or Detail Image Preset pop-up menu.
The Web Export Presets dialog appears.
2Select a web export preset on which to base your new preset, then click the Add (+) button.
A new preset, based on the export preset you selected, appears highlighted in the
Web Export Preset Name list.
3Enter a new name for the preset.
4Change the export criteria as required, then click OK.
Modifying Web Export Presets
After examining a selected preset’s settings, you may want to change something about
the preset. To modify a selected preset, you can simply change the necessary settings
and click OK. The next time you export using that preset, Aperture remembers your
modified settings and exports your web images accordingly.
When you modify an existing preset, you lose its original settings.
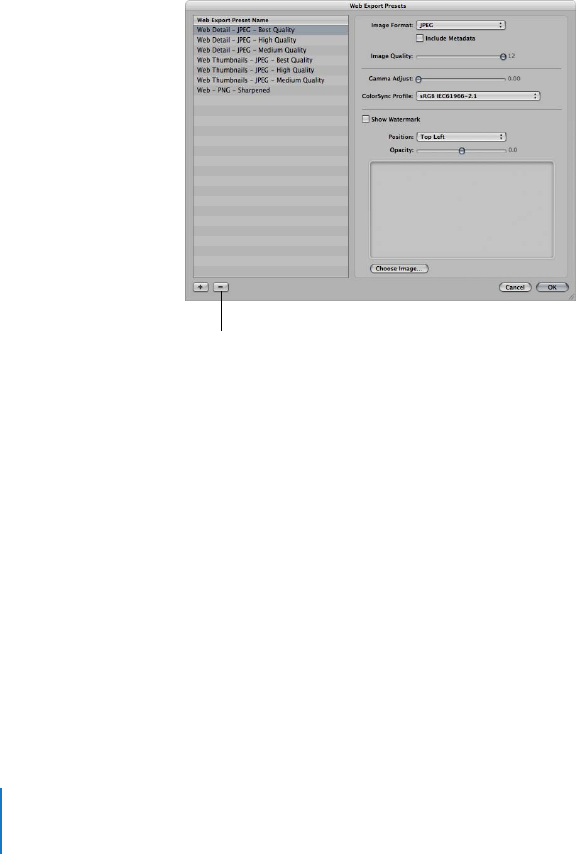
354 Part III Distribution and Backup
To change a web export preset:
1Do one of the following:
ÂChoose Aperture > Presets > Web Export.
ÂIn the Webpage Editor, click the Export Web Pages button, then choose Edit from the
Thumbnail Image Preset or Detail Image Preset pop-up menu.
The Web Export Presets dialog appears.
2Select the export preset you want to change, modify its settings, then click OK.
Deleting Web Export Presets
You can delete web export presets when you no longer need them.
To delete a web export preset:
mIn the Web Export Presets dialog, select the preset, then click the Delete (–) button.
The preset is permanently deleted.
Click the Delete button to
delete the selected preset.
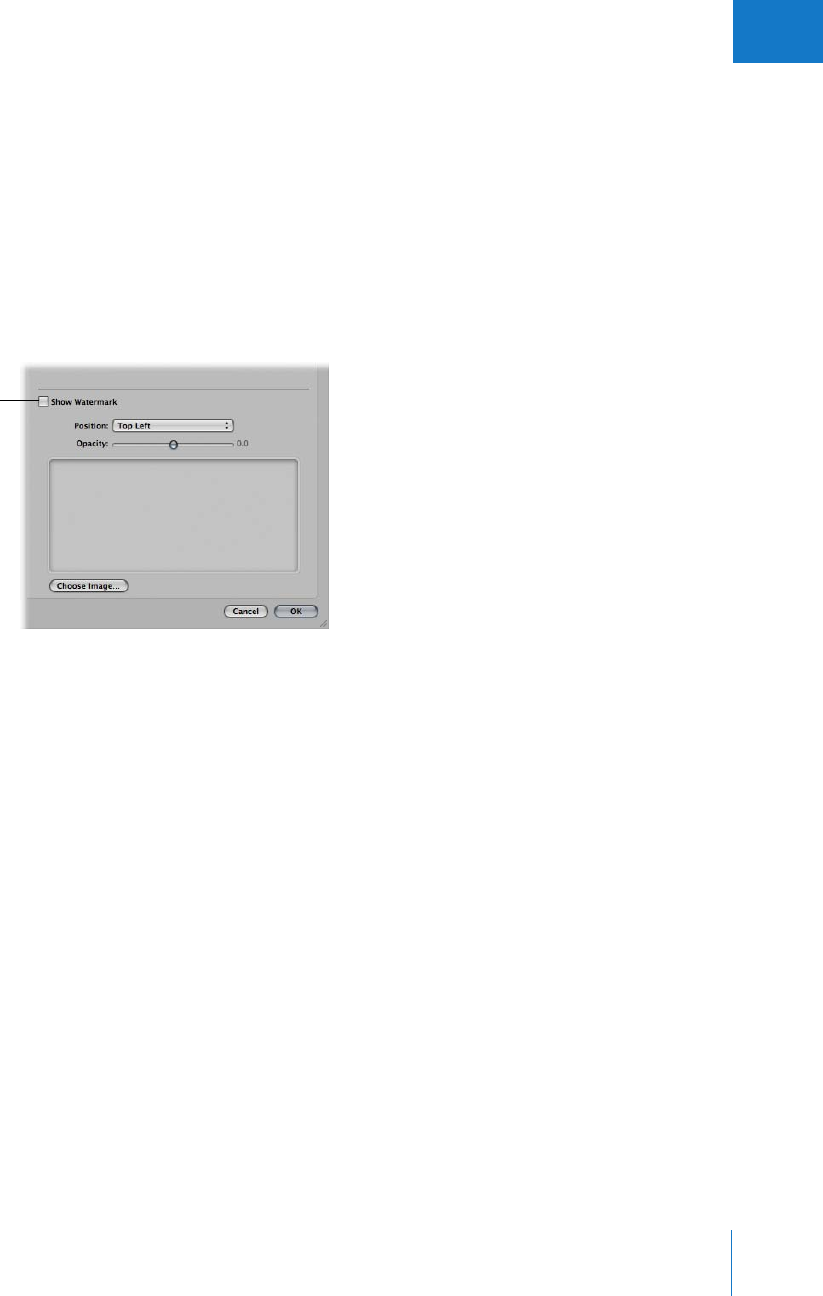
Chapter 18 Creating Webpages 355
III
Adding Watermarks to Webpage Images
You can add a graphics file to your images as a watermark to discourage others from
using your images without your permission. Watermarks are especially useful when
applied to images posted on the web.
To create a preset that adds a watermark to your exported web images:
1Choose Aperture > Presets > Web Export.
2In the Web Export Presets dialog, select the web export preset you want to modify, or
click the Add (+) button to create a new preset.
3Select the Show Watermark checkbox.
4Click the Choose Image button.
5Select the image you want as a watermark, then click Choose.
6Choose where you want the watermark to appear on the image from the Position
pop-up menu.
7To adjust the opacity of the watermark, drag the Opacity slider to a new position.
Select this checkbox to
apply a watermark to
your images.

356 Part III Distribution and Backup
8When you’re satisfied with how your watermark appears in the watermark preview
area, click OK.
Tips for Creating High-Quality Watermarks
Use the following guidelines to create high-quality watermarks for your images:
ÂSave your watermark as a .psd (Photoshop) file with a transparent background.
ÂCreate multiple sizes of your watermark so that you can select the one that is the
best match for the output size of the exported image.
Note: If a watermark file is larger than the image you wish to export, Aperture
automatically scales the watermark down to fit the image. (Aperture does not scale
watermarks up.)
ÂAfter you create a watermark, save it as part of a web export preset, so you can
reuse it as often as you need.
Note: Export presets and web export presets are independent of one another.
Make sure to save your watermark as part of the appropriate preset.

19
357
19 Creating Books
With Aperture, you can easily create books of your images
that you can print using Apple’s print vendor, your own print
vendor, or your own printer.
This chapter provides instructions for using the selection of book designs and page
layouts included in Aperture to create impressive books of your images.
You can order printed books using Apple’s print vendor service which provides
excellent printed results and direct delivery to you or your clients. You can also print
your books on your own color printer, or create files that you can hand off to a print
vendor. With Aperture, you can print outstanding portfolios of your works that
effectively show your images in their best light.
This chapter covers:
ÂAn Overview of Creating Books (p. 358)
ÂPlanning Your Book (p. 363)
ÂCreating a Book Album (p. 365)
ÂControls in the Book Layout Editor (p. 366)
ÂChoosing a Theme (p. 369)
ÂViewing Pages (p. 370)
ÂPlacing Images in a Book (p. 372)
ÂAdding and Removing Pages (p. 374)
ÂWorking with Pages (p. 379)
ÂWorking with Images (p. 383)
ÂWorking with Text (p. 388)
ÂWorking with Master Pages (p. 393)
ÂCopying a Book Album (p. 396)
ÂPrinting Books (p. 397)
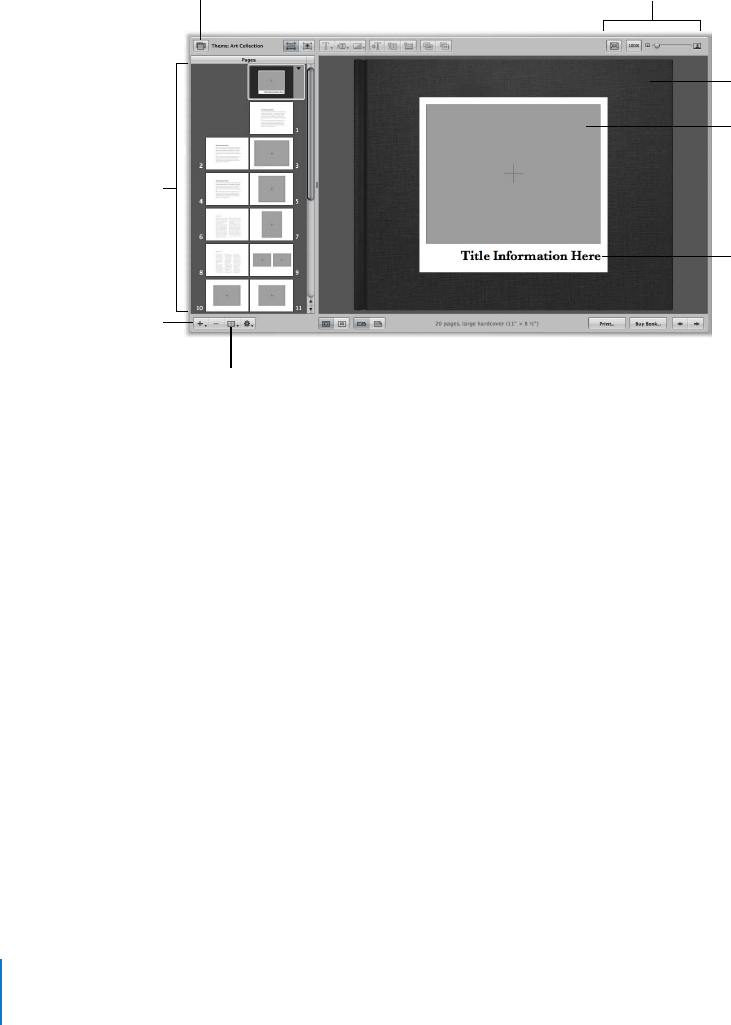
358 Part III Distribution and Backup
An Overview of Creating Books
Aperture provides options for creating a print book to suit a variety of needs. When you
select or create a book album in the Projects panel, the Book Layout Editor appears
above the Browser. You use the Book Layout Editor to set up the page structure of your
book and place images and text on the pages.
Book Layout Editor
To add an image to a
page, drag an image
from the Browser into a
photo box on the page.
To add text to a page,
click a text box and type
or paste the text.
To display and work with
a page in your book, click
a page thumbnail here.
Use this pop-up menu to
add pages to your book.
Use this pop-up menu to
choose the master page
design you want.
Use this button to choose
a theme for your book.
Use these controls to
change your view of the
pages, zooming in or out.
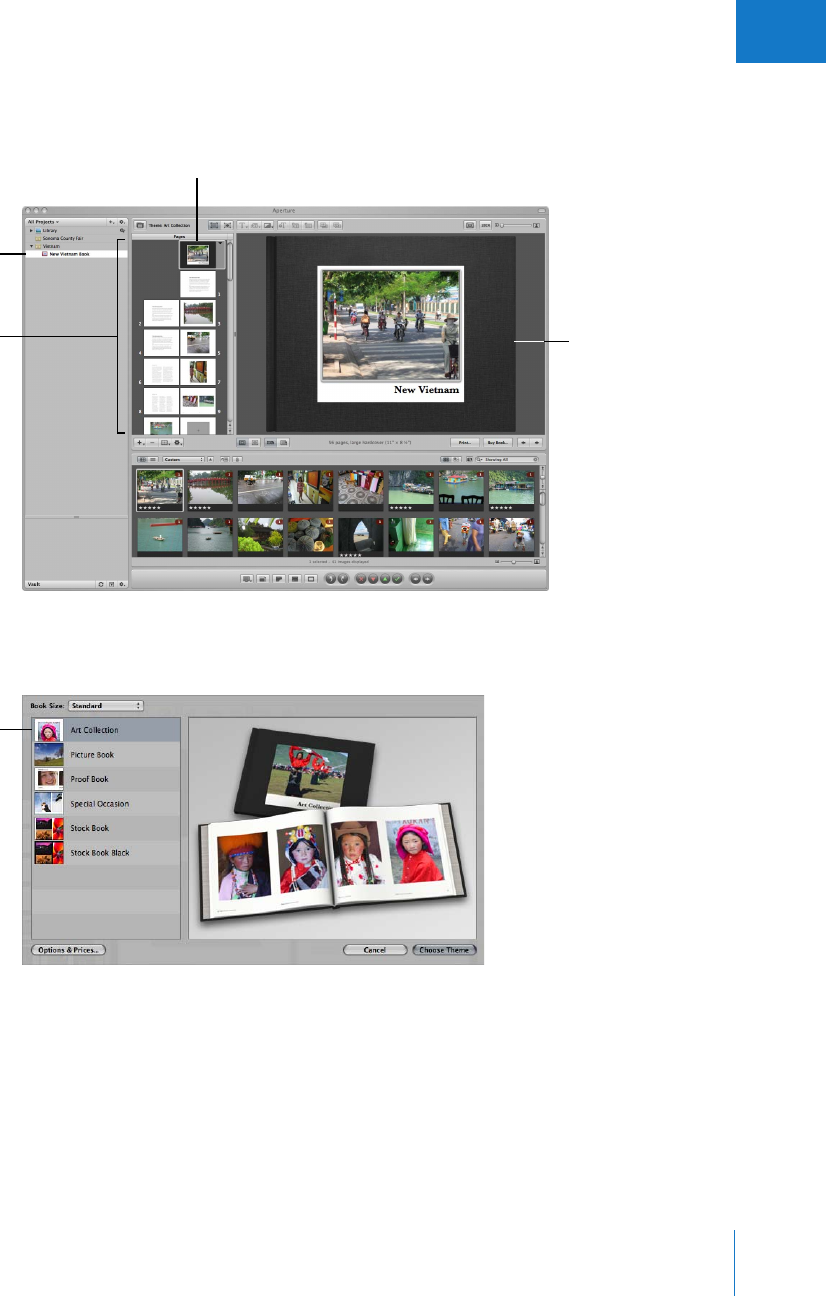
Chapter 19 Creating Books 359
III
The Pages panel on the left shows thumbnails of your book pages. You can scroll
through the thumbnails and click one to select a page of your book to work on. A
larger view of the selected page appears on the right.
Books are based on a theme, or design, and master page layouts that present your
images in a standardized way. Click the Theme button to see the themes you can choose.
Selected book album
Select the page you want
to work on here.
Selected page
A larger view of the
selected page appears
here.
Select the theme
you want here.
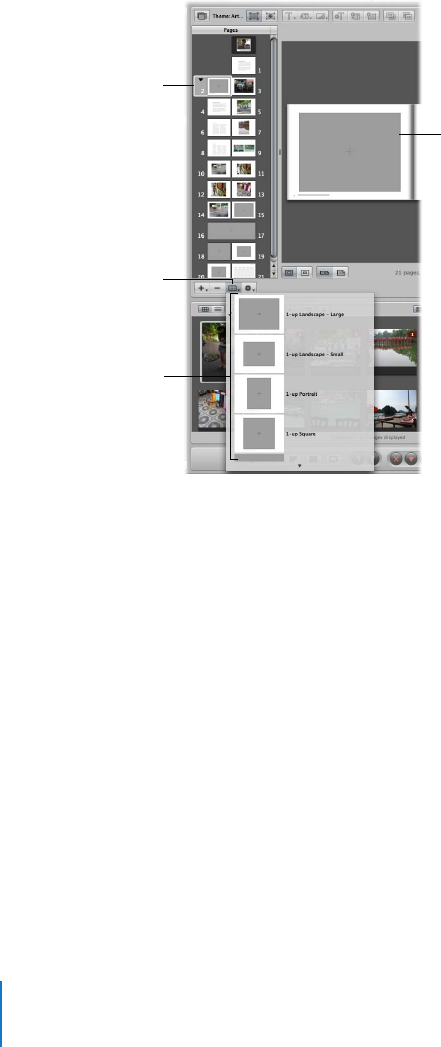
360 Part III Distribution and Backup
When you choose a theme, the Book Layout Editor provides a professionally designed
set of master pages that determine how you mix text and images on the page. For
example, you can choose among master pages that create a cover page, pages of text
in columns of various sizes, pages of images in different arrangements, and pages with
different combinations of images and text. You’ll find master pages provide a fast and
convenient method for quickly laying out a book.
When you first create a book album in the Projects panel, Aperture automatically
creates a default set of pages for you. You then use the Book Layout Editor to format
your pages and create any additional pages you need.
Selected page
Choose a master
page design from the
Set Master Page
pop-up menu.
Choose the master page
design you want here.
The new page format
appears here. You can drag
images into the gray photo
boxes that appear on pages.
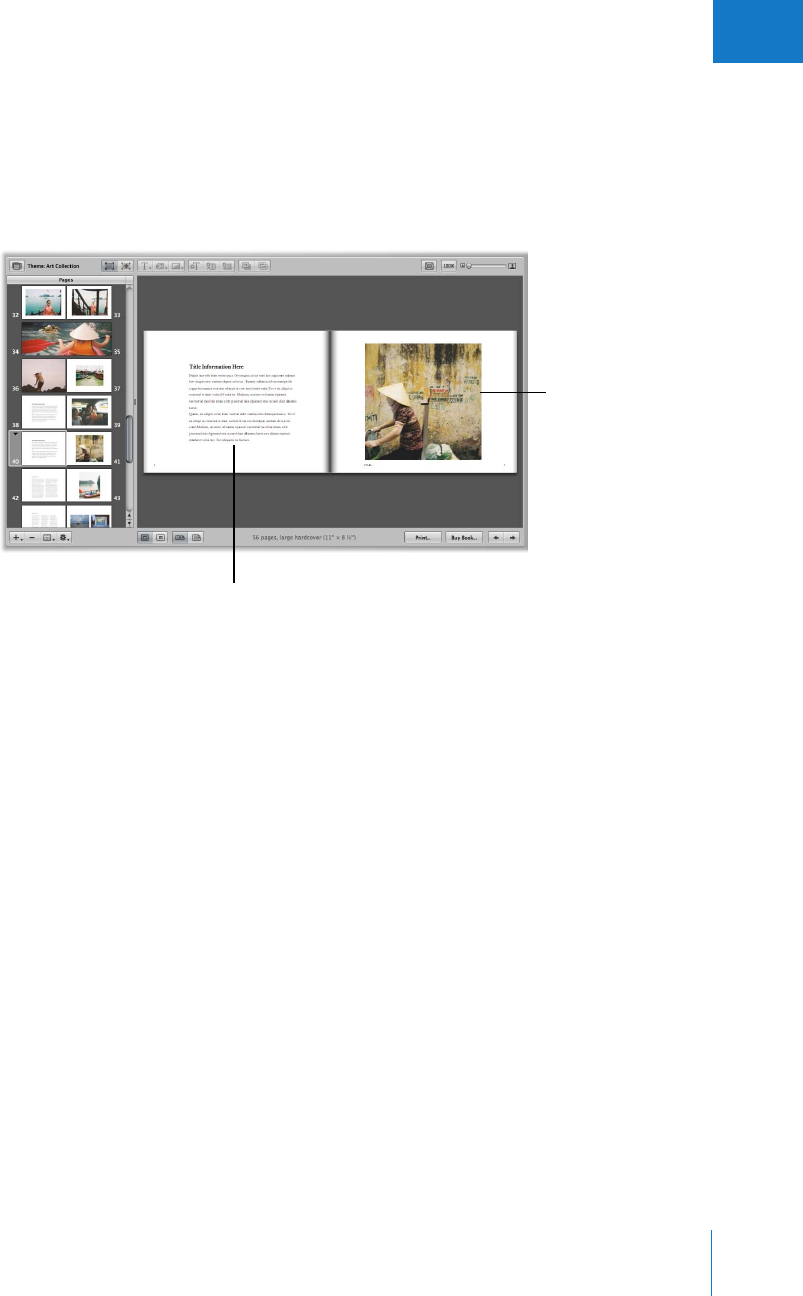
Chapter 19 Creating Books 361
III
You can apply a master page design to any selected page to define where your text
and images appear. Pages appear with gray photo boxes to hold images and text boxes
to hold text. To add images, you drag them into the photo boxes from the Browser. To
add text, you select a text box and type or paste text into it. If you wish, you can also
place metadata boxes next to images to display an image’s version name, caption,
keywords, and other metadata.
If you prefer, you can build a book page by page. You can add a new page to your
book, choose a master page design, fill in images and text, and then create the next
page, repeating the procedure for each page you add.
You can also select a group of images in the Browser and have Aperture automatically
place them into pages in your book. Aperture creates as many pages as you need and
fills them with your images. You can change the page design of individual pages later
by applying different master page designs.
As you work on a book, you may need to adjust the layout of individual pages. For
example, you may discover that one image in a group should appear slightly larger. You
can move and resize the boxes that hold images on individual pages, making minor
layout adjustments when a master page design doesn’t quite suffice.
Text box
holding text
Photo box
holding an image
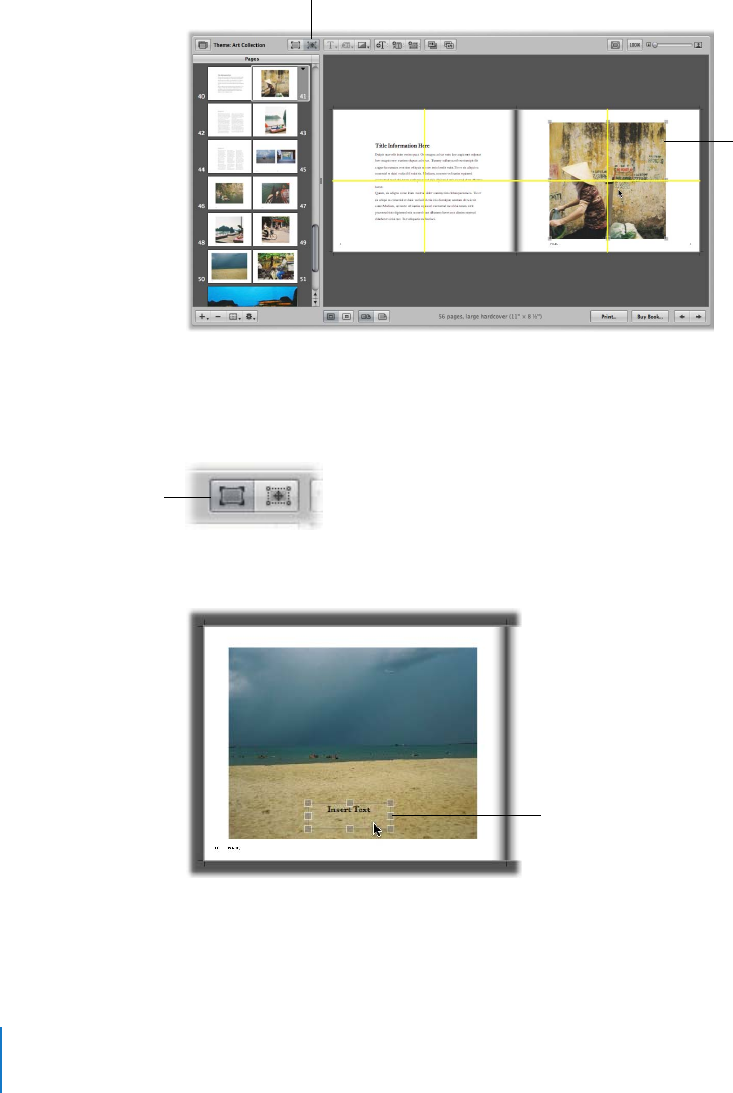
362 Part III Distribution and Backup
To change the design of a page, click the Edit Layout button. You can then work with
the photo boxes and text boxes that appear on the page, resizing and rearranging
them. The Book Layout Editor automatically displays grid lines that show you how the
item you’re working with aligns with other items already on the page.
To add text and images to your pages without changing the page layout, click the Edit
Content button. You can then add images and text to the page, but you can’t move or
resize the boxes on the page, which helps prevent unintended formatting changes.
You can also add photo, text, or metadata boxes to a page when you need them.
Edit Layout button
Drag photo boxes to
different positions.
Edit Content button
Text box added to page
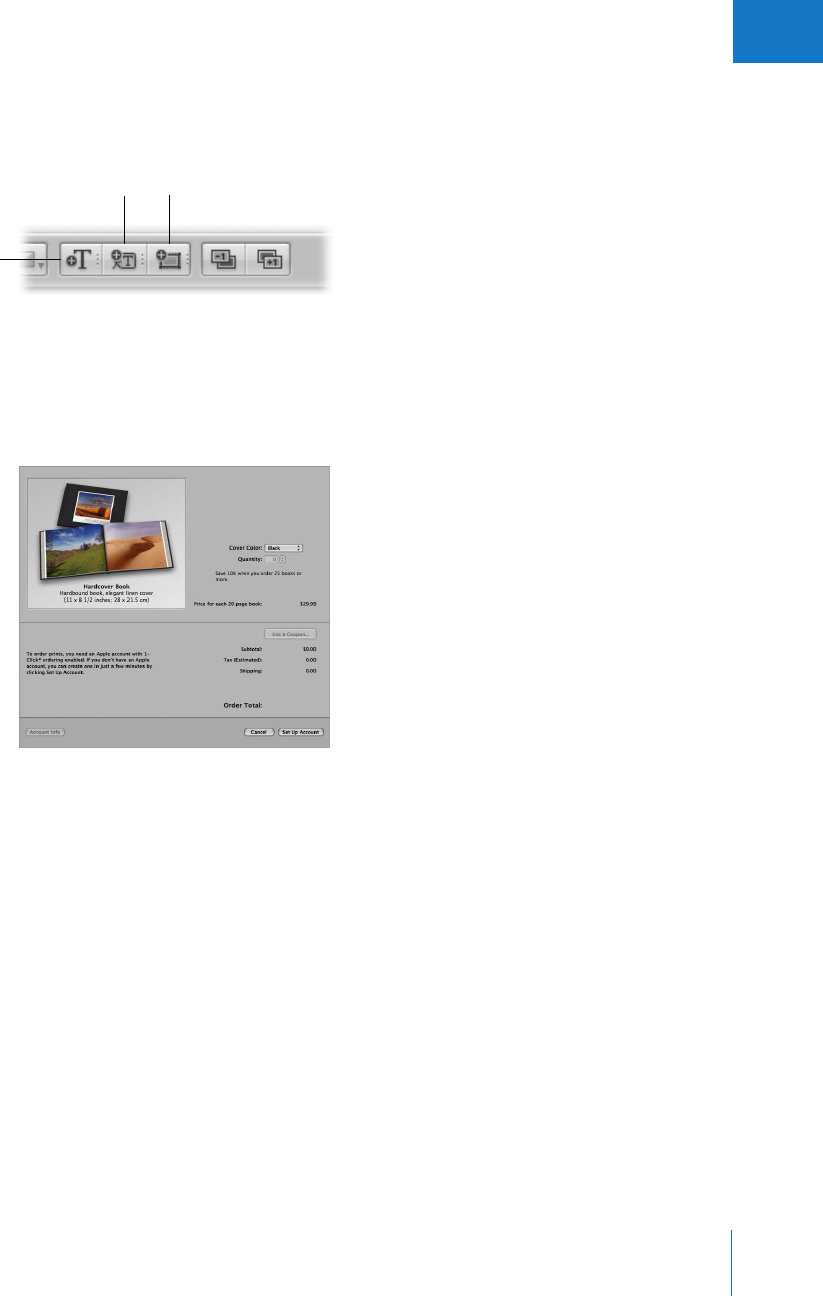
Chapter 19 Creating Books 363
III
Click the Edit Layout button and then click the Add Text Box, Add Metadata Box, or Add
Photo Box button to add a new box to the page. When a box appears, you can resize
and reposition it.
The Book Layout Editor also allows you to create covers, indexes, and blank pages, use
automatic page numbers, and create or modify master page designs.
When your book is complete, you can purchase printed copies from the Apple print
vendor for a fee.
Note: Although you can create books larger than 99 pages, there is a 99-page limit for
books ordered through the Apple print vendor. When you try to order the book, a dialog
warns you that there are too many pages. If you plan to print a book using the Apple
print vendor, make sure to keep the number of pages at or below the 99-page limit.
If you prefer to print your books yourself, you can print your book using your own office
printer or export your book as a PDF file that you can send to a print shop for printing.
Planning Your Book
The amount of planning and work involved in creating a book varies with the type of
project. If you’re creating wedding photo albums, you may be primarily concerned with
creating a reusable book design into which you can quickly place images that tell the
wedding story. The end result may be one or several printed copies per project.
Add Text Box button
Add Photo Box
button
Add Metadata
Box button

364 Part III Distribution and Backup
On the other hand, producing a large book, such as a coffee table book, may require a
good deal of planning, writing, design, page composition, proofing, and production
work. In addition, you’ll want to look ahead and decide how the manuscript should be
printed and bound, the number of copies for the print run, and what copyright and
permissions information your book should include.
For relatively simple books, here are some of the typical steps in the publishing process:
1Gather your initial selection of images in the Light Table and arrange them to tell the
story you want.
2Roughly plan the arrangement of images on each page.
3If you’ll be adding text to your images, you may want to write, edit, and spell-check
your text using a word processor. You can then easily cut and paste the text into your
book later.
4Choose a cover image and decide what text should appear on the cover.
5Create any copyright or permissions notices you need.
6Create a book album and choose a theme for your book.
7Place the book’s images in the book album and order them as they should appear in
the book. Don’t place the images on your pages yet.
8Specify any overall settings for the book, such as size, hardcover or softcover binding,
page numbering, and so on.
9Create the number of pages you need and apply master page designs to them.
10 Have Aperture automatically place your images, or drag the images onto your pages.
11 Reposition and resize images, adjusting individual page layouts if necessary.
12 Add text to your pages and cover.
13 Print a proof and carefully review the text and layout of the book.
14 Send the book to be printed using Apple’s print vendor or create a PDF file that you
can print or send to a print vendor. If you create a PDF file, make sure to include all the
fonts you used in your book in the PDF file.
If you’re creating a larger, more complex book, you’ll want to contact a print vendor early
to make sure you consider printing issues such as the choice of paper stock, the use of
inks and varnishes, review of bluelines, binding, packaging, shipping, and pricing.
If you routinely produce printed albums, you can create a book album that you can
copy and reuse with each new project. After setting up master pages and individual
page layouts, you can copy the book album to another project and then substitute the
new images, increasing your publishing productivity greatly. You can then customize
certain pages, such as your cover, to provide any unique touches you like.

Chapter 19 Creating Books 365
III
Creating a Book Album
You can create a book album two ways:
ÂSelect the images you want in the book and then create a new album holding
the selection.
ÂCreate a new book album and then drag the images you want into it.
To create a book album from a selection of images:
1Select the images you want to use in the book, then do one of the following:
ÂChoose File > New From Selection > Book.
ÂIn the Projects panel, choose New Book From Selection from the Add to Library
pop-up menu.
ÂClick the New Book Album button in the toolbar.
2In the dialog that appears, specify the following:
ÂTheme list: Select a theme in the list to see a preview of its design on the right.
ÂBook Size pop-up menu: Choose the physical size of the book.
3When you’re ready, click Choose Theme.
A new, untitled book album appears in the Projects panel that includes the
selected images.
4Rename the book album.
To create a new, empty book album:
1Do one of the following:
ÂChoose File > New > Book.
ÂIn the Projects panel, choose New Empty Book from the Add to Library pop-up menu.
2In the dialog that appears, specify the following:
ÂTheme list: Select a theme in the list to see a preview of its design on the right.
ÂBook Size pop-up menu: Choose the physical size of the book.
3When you’re ready, click Choose Theme.
A new, untitled book album appears in the Projects panel.
4Rename the book album.
To add images to the empty book album:
1Select the project that holds the images in the Projects panel.
The project’s images appear in the Browser.
2Drag the images from the Browser to the book album in the Projects panel.
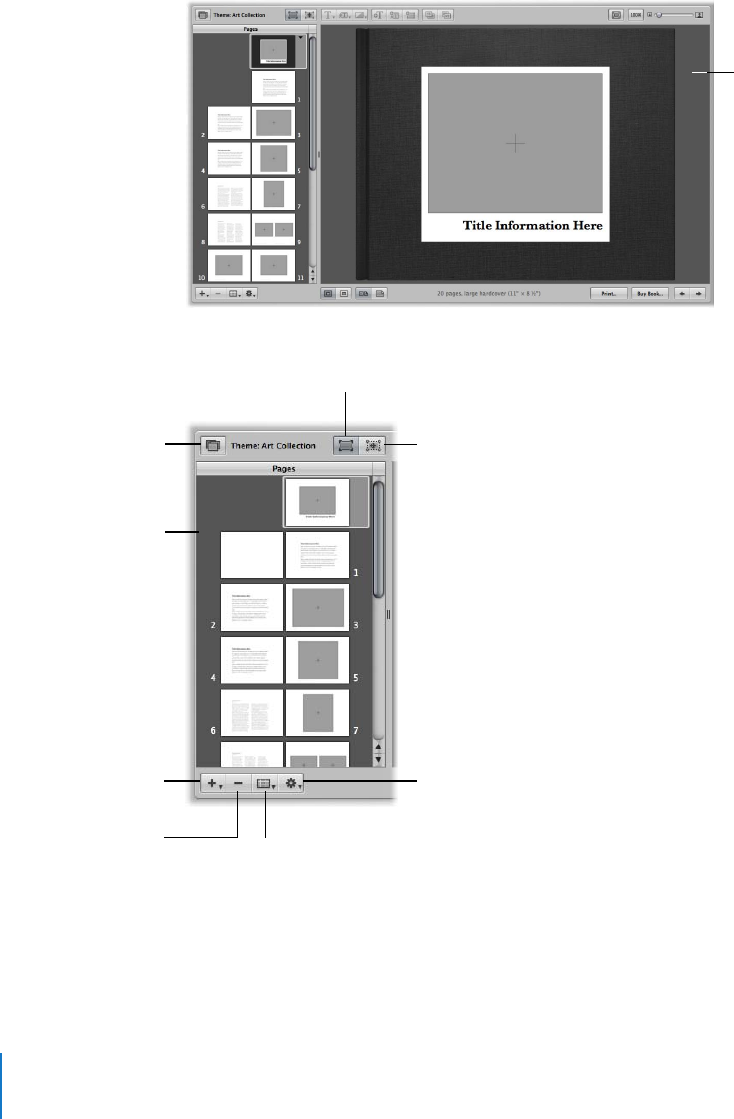
366 Part III Distribution and Backup
Controls in the Book Layout Editor
The Book Layout Editor is where you design the layout of pages in your book and add
images and text to pages.
The following controls are available for working with books in the Book Layout Editor.
ÂTheme button: Click this button to choose a theme for your book’s pages.
ÂEdit Content button: Click this button to edit the text on your pages.
ÂEdit Layout button: Click this button to change the page layout. You can then select
text, metadata, and photo boxes on the page and move and resize them as you like.
The Book Layout Editor
is where you design
your book.
Theme button Edit Layout button
Edit Content button
Pages panel
Add Pages pop-up menu
Set Master Page
pop-up menu
Book Action
pop-up menu
Delete Pages button

Chapter 19 Creating Books 367
III
ÂPages panel: Click here to see an individual page in the book.
ÂAdd Pages pop-up menu: Choose an option from this pop-up menu to add a page or
pages to the book.
ÂDelete Pages button: Click this button to delete the selected page or pages from
your book.
ÂSet Master Page pop-up menu: Choose the master page you want to apply to a
selected page.
ÂBook Action pop-up menu: Choose options to reflow the images in a book, add an index
and page numbers, or add and change the look of text, metadata, and photo boxes.
ÂText Style pop-up menu: Choose the style of text you want for a selected text box.
ÂMetadata Format pop-up menu: Choose the type of metadata you want to display
with your images.
ÂPhoto Filter pop-up menu: Choose to apply various filters to an image to change its look.
ÂAdd Text Box button: Click this button to add a text box to the page.
ÂAdd Metadata Box button: Click this button to add a metadata box to the page.
ÂAdd Photo Box button: Click this button to add a photo box to the page to hold
an image.
ÂSend Backward button: Click this button to move a selected box backward in the
stacking order of overlapping text or image boxes.
ÂBring Forward button: Click this button to move a selected box forward in the
stacking order of overlapping text or image boxes.
Photo Filter
pop-up menu
Metadata Format
pop-up menu
Text Style
pop-up menu
Add Text Box button
Send Backward button
Bring Forward button
Add Photo Box
button
Add Metadata
Box button
368 Part III Distribution and Backup
ÂScale To Fit button: Click this button to scale the display of your pages to fit the
Viewer size.
ÂActual Size button: Click this button to view the selected page at its actual size.
ÂDisplay Size slider: Drag this slider to increase or decrease the size of the page in
the Viewer.
ÂLarge Hardcover button: Click this button to specify your book format as a large
hardcover book.
ÂLarge Softcover button: Click this button to specify your book format as a large
softcover book.
ÂShow Full Spreads button: Click this button to display two facing pages in the Viewer.
ÂShow Single Pages button: Click this button to view single pages only.
ÂPrint button: Click this button to print book pages.
ÂBuy Book button: Click this button to purchase your book from Apple’s print vendor.
ÂPrevious Page button: Click this button to see the previous page of your book.
ÂNext Page button: Click this button to see the next page of your book.
Display Size slider
Scale To Fit button
Actual Size button
Large Hardcover button
Show Full Spreads
button
Show Single Pages
button
Large Softcover
button
Print button
Previous Page button
Next Page button
Buy Book button
Chapter 19 Creating Books 369
III
Choosing a Theme
You choose a theme for your book when you create your book album. A theme
provides a professionally designed set of master pages that determine how you place
text and images on the page.
It’s a good idea to explore the page styles and looks of Aperture themes. Some theme
designs lend themselves better to presenting many pictures without much text, others
to more traditional mixes of text and images, such as you might find in coffee table
books. Once you know the characteristics of the different themes, you can choose the
theme best suited to a project.
It’s important to choose the theme you want at the beginning of a project. Each theme
presents different combinations of master pages. Although you can change themes
after you start a project and Aperture will attempt to convert your book structure to
the new theme’s master pages, you may need to redo some of your work to make up
for differences between themes. Because themes are different, the conversion may not
be exact. It’s not recommended that you complete a book and then change themes to
see it with different layouts.
To choose a new theme for your book:
1In the Book Layout Editor, click the Theme button.
A dialog appears alerting you that you may lose text when you change themes.
2Click OK.
3Choose a book size from the Book Size pop-up menu.
4In the Themes list, select the theme you want.
5Click Choose Theme.
After you change the theme, Aperture updates all your pages to use the new theme.
Warning: It’s possible to lose text when you change themes. If you change book
themes, make sure to first copy the text you’ve entered into another document so
that you have a backup copy.
Theme button
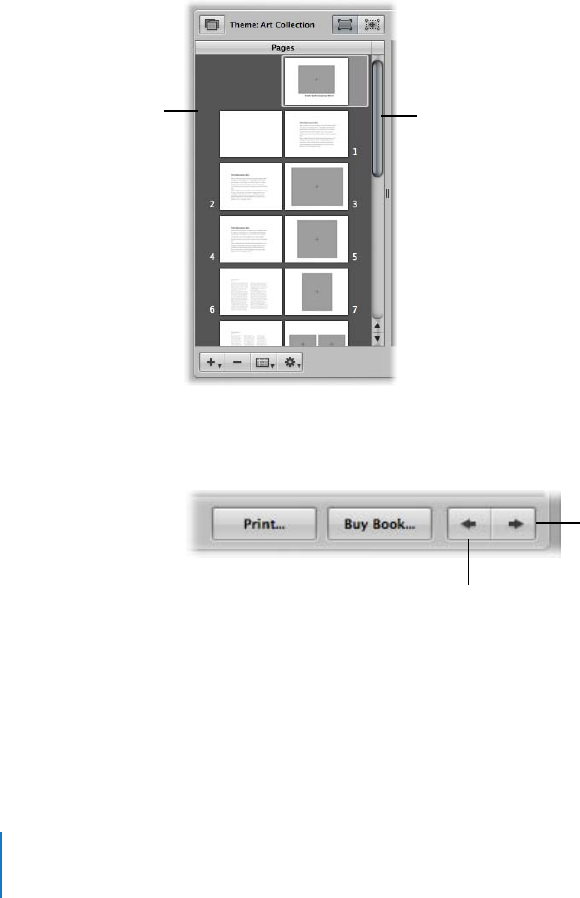
370 Part III Distribution and Backup
Viewing Pages
As you work on a book, you can select and view particular pages, and you can change
your view of the pages. You can display your pages laid out singly or side by side, and
you can enlarge or reduce your view of book pages.
Navigating to Book Pages
You can navigate to pages in your book by scrolling, pressing the arrow keys, or
clicking the Previous Page and Next Page buttons.
To view a particular page in a book:
mUse the scroll bar in the Pages panel to scroll to the page you want, then click the page
to select it.
You can also quickly scroll through your pages by pressing the arrow keys or clicking
the Previous Page and Next Page buttons.
Click to select the
page you want in
the Pages panel.
Use the scroll bar to
scroll through the pages
in your book.
Previous Page button
Next Page button
Chapter 19 Creating Books 371
III
Displaying Single Pages or Spreads
You can set the Book Layout Editor to display your pages singly or side by side.
For example, you can display the pages side by side to see how images work in
two-page spreads.
To display pages singly or side by side:
mClick the Show Single Pages or Show Full Spreads button.
Note: Printing single- or double-sided pages is a function of your printer and the
options available in the printer’s Print dialog. If you’re purchasing printed books from
Apple’s print vendor, your book is automatically printed double-sided.
Resizing the Page View
You can reduce or enlarge your view of your book pages. For example, you might
enlarge the display of your pages to closely inspect details, or reduce your view to get
an overview of the general page composition.
To reduce or enlarge the display of your pages:
mDrag the Display Size slider left or right to change your view.
To return your page view to a size that fits the current screen size:
mClick the Scale to Fit button.
To change the page view to show the actual size of the page:
mClick the Actual Size button.
Show Full Spreads
button
Show Single Pages
button
Display Size slider
Scale To Fit button
Actual Size button
372 Part III Distribution and Backup
Placing Images in a Book
You can place images manually on your pages, or have Aperture automatically fill your
pages with the images in a book album.
Placing Images Manually
You can place images in a book manually by dragging them in one at a time.
To add images to the book manually:
mDrag an image from the Browser to a photo box on the page.
Viewing Images to be Placed in a Book
Once an image is placed in the book, its Browser thumbnail is marked with a number
to show how many times it appears on the pages of the book.
In a long book with many images, it can at times be difficult to know which images
have been placed in a book. To help you work efficiently, you can click the Show
Unplaced Images button to see only the images that remain unplaced.
To display only unplaced images in the Browser:
mClick the Show Unplaced Images button.
The number indicates
the number of times an
image has been placed
in a book.
Click here to see all the
images in the book album.
Click here to see only
unplaced images.
Chapter 19 Creating Books 373
III
To display all an album’s images in the Browser:
mClick the Show All Images button.
To inspect selected images in detail, you can also quickly display them in a standard
Viewer. When the Book Layout Editor is open, the Browser provides a button for quickly
switching to a standard Viewer.
To display a selection of images in a book album in a standard Viewer:
1Select the images in the Browser.
2Click the Show Viewer button.
To return to the Book Layout Editor, click the Show Viewer button again.
Placing Images Automatically
You can have Aperture automatically place your images in a book. It’s a good idea to
set up the page structure of your document first by creating the number of pages
needed and assigning the master page layouts that you want. Then arrange your
images in the Browser in the order in which they should appear in the book, and you
can have Aperture flow the images into the structure you created.
You can place all the unplaced images into your book at once, or you can select specific
images and have Aperture flow them into any empty pages. For example, you might
select several images and have Aperture flow them into the first several pages of your
book, and then select several more images and have Aperture flow them into the
following pages.
If you prefer, you can have Aperture create as many pages as necessary to hold all your
images and place them on the pages. Aperture creates new pages using master page
designs from the selected theme and fills them with your images. You can then change
the master page assignments if you wish.
Show Viewer button
Making Adjustments to Images in a Book
You can’t select and use the Crop, Straighten, Spot & Patch, and Red Eye tools in the
toolbar when using the Book Layout Editor. To use these tools to make a change to
an image in your book, select the image in the Browser, then click the Show Viewer
button. The selected image appears in the Viewer and you can make your changes.
Click the Show Viewer button again to return to the Book Layout Editor.

374 Part III Distribution and Backup
Flowing Unplaced Images
When you create a structure of pages to hold your images, you can have Aperture flow
in unplaced images. If more pages are required to hold your images than your book
currently has, Aperture creates more pages. If you’ve already placed some images on
pages in the book, Aperture flows in images beginning with the first empty photo box.
To have Aperture place unplaced images:
mChoose Autoflow Unplaced Images from the Book Action pop-up menu.
Flowing Selected Images
You can select images in the Browser and have Aperture flow them into the current
page structure, starting with the first empty photo box. For example, you can select two
images in the Browser and have Aperture flow them into the first two empty photo
boxes of your book. You can thus flow images into a document’s page structure little by
little as you create a series of pages. If you select more images than your current page
structure can hold, Aperture creates new pages as necessary to hold your images.
To have Aperture place selected images:
1Select the images you want to place in the book.
2Choose Autoflow Selected Images from the Book Action pop-up menu.
Adding and Removing Pages
When you create a book album, Aperture automatically sets up default pages laid out
for you. You can select and change these pages to suit your book’s requirements, and
you can add and remove pages as needed. You can insert new blank pages wherever
you want in your book. After adding pages, you can drag them in the Pages panel to
new locations in the book.
You can:
ÂAdd individual pages one at a time to a book
ÂHave Aperture automatically add new pages to your book
ÂSelect images and have Aperture create new pages to hold them
ÂAdd images to new pages that use a specific master page design
ÂAdd index pages that show thumbnails of all the images in the book

Chapter 19 Creating Books 375
III
Adding Individual Pages to a Book
As you create a book, you can create new pages one by one and add them to your book.
To add a single page to your book:
1Select a page in the Pages panel where the new page should appear.
The new page will appear just after the selected page.
2Choose Add New Page from the Add Pages pop-up menu.
The new page appears in the Pages panel.
3With the page selected in the Pages panel, choose a master page from the Set Master
Page pop-up menu.
The new page now has the page layout you chose.
You can also duplicate pages within a book.
To duplicate a single page in your book:
1Select a page in the Pages panel where the new page should appear.
The new page will appear just after the selected page.
2Choose Duplicate Page from the Add Pages pop-up menu.
A new page appears in the Pages panel.
3With the page selected, choose a master page from the Set Master Page pop-up menu,
if you wish.
The new page now has the page layout you chose.
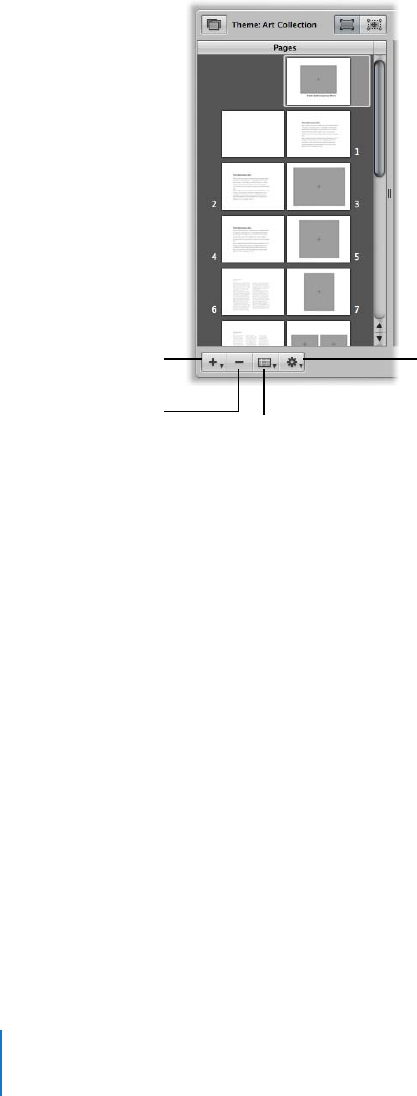
376 Part III Distribution and Backup
Automatically Creating New Pages
You can have Aperture automatically add pages to your book containing unplaced
images in the book album. Aperture creates the number of pages needed to hold the
remaining unplaced images.
To automatically place the unplaced images in pages added to your book:
1Arrange the images in the Browser in the order in which you want them to appear in
the book.
2Select a page in the Pages panel where the new pages should appear.
The new pages will appear just after the selected page.
3Choose Add New Pages > With Unplaced Images from the Add Pages pop-up menu.
All the unplaced images in the album are added to new pages in your book.
Adding New Pages to Hold a Selection of Images
You can also select a group of images and have Aperture automatically place them on
new pages in your book. Aperture creates the number of pages needed to hold the
selected images.
Add Pages pop-up menu Book Action
pop-up menu
Delete Pages button Set Master Page
pop-up menu

Chapter 19 Creating Books 377
III
To add a selection of images to new pages in your book:
1Select the images you want in the Browser.
2Select a page in the Pages panel where the new pages should appear.
The new pages will appear just after the selected page.
3Choose Add New Pages > With Selected Images from the Add Pages pop-up menu.
The selected images are added to your book.
Adding New Pages Based on a Master Page
You can add pages that are based on a specific master page to your book.
To add a new page based on a master page to your book:
1To show master pages, choose Show Master Pages from the Book Action pop-up menu.
2Select a master page in the Master Pages panel.
3Select a page in the Pages panel where the new page should appear.
The new page will appear just after the selected page.
4Choose Add New Page From Master from the Add Pages pop-up menu.
You can also select a master page and have Aperture place any unplaced images in
new pages that are based on the master page.
To add pages based on a master page and have Aperture fill them
with unplaced images:
1To show master pages, choose Show Master Pages from the Book Action pop-up menu.
2Select a master page in the Master Pages panel.
3Select a page in the Pages panel where the new page should appear.
The new page will appear just after the selected page.
4Choose Add New Pages From Master > With Unplaced Images from the Add Pages
pop-up menu.
Aperture adds the unplaced images to new pages in your book. All the pages are
based on the selected master page.
You can also select images and have Aperture place them in new pages that are based
on a master page.

378 Part III Distribution and Backup
To add pages based on a master page and have Aperture fill them with
a selection of images:
1To show master pages, choose Show Master Pages from the Book Action pop-up menu.
2Select a master page in the Master Pages panel.
3Select the images you want in the Browser.
4Select a page in the Pages panel where the new pages should appear.
The new pages will appear just after the selected page.
5Choose Add New Pages From Master > With Selected Images from the Add Pages
pop-up menu.
Aperture adds the selected images to new pages to your book. All the pages are based
on the selected master page.
Adding an Image Index to a Book
You can add index pages to a book that show thumbnails of all the book’s images.
Depending on the theme you choose, Aperture provides different looks and layouts for
image indexes. Typically, the image index appears at the end of a book or at its beginning.
To add an index page to the end of your book:
1To show master pages, choose Show Master Pages from the Book Action pop-up menu.
2Select an index master page in the Master Pages panel.
3Choose Add New Page From Master from the Add Pages pop-up menu.
Add as many index pages as your book needs to hold all the images.
4To fill the index pages at the end of your book, select all the images in your album and
choose Autoflow Selected Images from the Book Action pop-up menu.
All the selected images are flowed into the photo boxes on the index pages. You can
also drag images into the index pages manually. If you want the index pages to appear
in a different position in your book, you can drag them in the Pages panel.
You can also add an index of metadata for the images to your book.
Chapter 19 Creating Books 379
III
To add a metadata index to your book.
mChoose Create Index from the Book Action pop-up menu.
Aperture adds index pages to the end of your book and updates the index with the
metadata information from your images. You can change the metadata that appears in
the index by selecting metadata boxes and changing the metadata format using the
Metadata Format pop-up menu.
Working with Pages
As you work with your book pages, you can make a variety of design and text changes.
You can:
ÂCreate a cover for a softcover or hardcover book
ÂChoose a master page design for your pages
ÂCopy pages
ÂReorder pages in a book
ÂRemove pages from a book
ÂChoose a background image for a page
ÂAdd page numbers to your pages
ÂRebuild a book
Metadata Format
pop-up menu
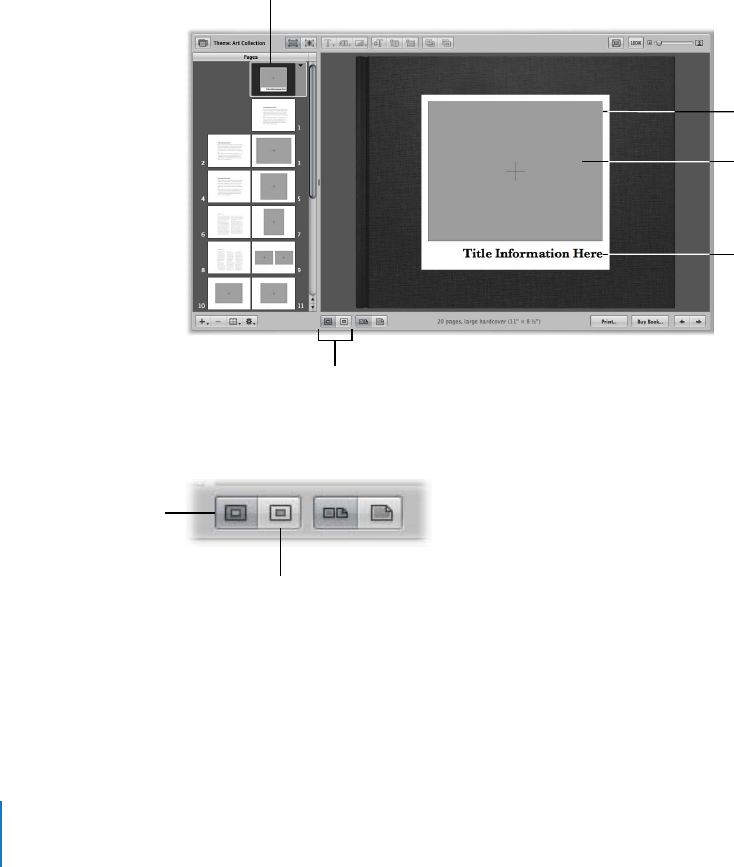
380 Part III Distribution and Backup
Creating a Cover for Your Book
When you create a new book album, Aperture automatically creates a front cover page
for your book. You can select the page and add a title, cover image or design, and other
text or images that you like.
You can also choose between a softcover or hardcover design. Softcover designs have a
white background, but when you select a hardcover design and purchase printed
copies of the book from Apple’s print vendor, you can choose from a selection of
hardcover colors. Note that you can only add images and text to the front cover of your
book; you can’t specify images or text on the spine or back cover when purchasing
books from Apple’s print vendor. For more information about purchasing printed books
from Apple’s print vendor, see the electronic document Ordering Books and Prints,
available from the Aperture Help menu.
To choose whether your book has a softcover or hardcover design, you click one of the
book cover buttons.
Cover page showing a
hardcover design
To add an image to your
cover, drag an image
from the Browser into
the photo box.
Cover title
Book cover page
Book cover buttons
Large Hardcover button
Large Softcover button

Chapter 19 Creating Books 381
III
To select a hardcover or softcover design for your book:
mClick the Large Hardcover or Large Softcover button.
If you don’t plan to purchase printed books from the Apple print vendor, you may want
to employ a graphic designer to create the front and back cover for you, or design the
cover yourself using a graphics application.
Choosing a Master Page Layout
You select a design for your page by applying a master page layout. Aperture provides
different master page layouts depending on the theme you chose. You can choose a
page design from the Set Master Page pop-up menu. For example, you might create a
single-image page, and later decide to change that page to hold two images.
You can apply different master page designs to a page to find the design that works
best for your images and book.
To apply a master page design to a page:
1Select the page in the Pages panel.
2Choose the master page you want from the Set Master Page pop-up menu.
If you changed a page’s design by repositioning or resizing boxes, and you want to
start over with the original design, you can reapply the original master page design.
To reapply a master page design to a page:
1Select the page you want to change in the Pages panel.
2Choose Reapply Master from the Book Action pop-up menu.
Copying Pages
If you’ve made changes to a page and you’d like to use that page again in your book,
you can duplicate it. Or, you might duplicate a page and then make small modifications
to it, keeping both the new page design and the original for later use.
To copy pages:
1Select the page or pages you want to duplicate.
You can Shift-click pages in the Pages panel to select multiple pages.
2Choose Duplicate Page from the Add Pages pop-up menu.
Reordering Pages in a Book
You can move pages within a book. If you need to move a particular page forward or
backward in the page order, you can drag it to a new location in the book structure.
To move a page in your book:
1Select the page in the Pages panel.
2Drag the page to a new location.

382 Part III Distribution and Backup
Removing Pages from a Book
You can remove pages from a book. Removing pages removes the contents of the
page, and remaining pages simply reflow to fill the deletion. You cannot remove the
cover page of a book.
To remove pages from your book:
1Select the page or pages you want to remove in the Pages panel.
You can Shift-click pages to select multiple pages.
2Click the Delete Page button (or press the Delete key), then confirm that you want to
delete the page or pages.
Choosing a Background Image
You can choose a background image to appear behind the other images on a page. For
example, you might create a page that shows a bride and groom in the foreground and
a church setting in the background. Or, you might choose a background image that
complements the colors of a foreground image.
To choose a background image for a page:
1Select the page in the Pages panel.
2Drag the image you want over the page until you see the background change color,
then release the mouse button.
To remove a background image:
1Select the page in the Pages panel.
2Click the page background to select the image.
A white border appears around the page outline.
3Press the Delete key to remove the image.
Using Page Numbers in Your Book
Aperture can automatically provide page numbering in your books. Each theme
provides page numbers in preset positions on the page. You can turn off page
numbering if you wish. You cannot reposition page numbers on the page, or change
the format of the page numbers.
To turn on page numbering:
mChoose Page Numbers > Always from the Book Action pop-up menu.
You can also choose the Automatic option to turn on page numbering. When chosen, the
Automatic option displays page numbers on pages when no images appear behind them.
To turn off page numbering:
mChoose Page Numbers > Off from the Book Action pop-up menu.

Chapter 19 Creating Books 383
III
Rebuilding a Book
If you’ve made modifications to the design of a book and you want to start over with
an unmodified design, you can have Aperture rebuild your book. Aperture rebuilds the
book structure using the default series of master page designs and adds your images
to the revised pages. You lose any changes that you previously made to your pages.
You can have Aperture place all the images in the Browser in the book, or place
selected images in the book.
To rebuild a book with all the images in the Browser:
mChoose Rebuild Book With All Images from the Book Action pop-up menu.
To rebuild a book with a selection of images:
1Select the images you want to place in the book.
2Choose Rebuild Book With Selected Images from the Book Action pop-up menu.
Working with Images
As you add images to your pages, you can make adjustments to the page design. You
can adjust the position of images within photo boxes and change box sizes and
locations on the page. Aperture also allows you to change the look of your images by
applying filters. For example, you can select a photo box and apply a sepia tone to the
image it holds.
Adding Photo Boxes to a Page
After creating a page and applying a master page design, you may need to add more
photo boxes to hold images on the page. You can select a different master page design
that has more photo boxes, or you can add photo boxes where you need them.
To add a photo box to a page:
1Click the Edit Layout button, if it’s not already selected.
2Select the page you want in the Pages panel.
3Click the Add Photo Box button.
When the photo box appears, you can drag it to a new position and resize it.

384 Part III Distribution and Backup
Changing How an Image Fills a Photo Box
Aperture is preset to scale images to fill a photo box. You can change the position of an
image within a photo box, making it appear centered or aligned on the right or left edge.
To change how an image fills a box:
1Click the Edit Layout button, if it’s not already selected.
2Select the photo box you want to change.
3Choose Photo Box Alignment from the Book Action pop-up menu, then choose an
alignment option from the submenu.
ÂTo have an image scale to fit the size of the box on the page: Choose Scale to Fill.
ÂTo have an image appear centered in the box: Choose Scale to Fit Centered.
ÂTo have an image appear aligned on the left edge of the box: Choose Scale to Fit
Left-Aligned.
ÂTo have an image appear aligned on the right edge of the box: Choose Scale to Fit
Right-Aligned.
You can also adjust the scaling of an image within a box. Aperture provides an Image
Scale slider to rescale images.
To change the scale of an image in a photo box:
1Double-click the image.
A slider appears that allows you to adjust the scale of the image.
2Drag the slider to adjust the image scale.
Click outside the photo box to hide the slider again.
If an image is scaled so that only part of the image is visible within the photo box, you
can change the part of the image that’s visible.
To change the part of the image that appears in a photo box:
1Double-click the image.
A slider appears that allows you to adjust the scale of the image.
2Drag the image to change the part that’s visible within the box.

Chapter 19 Creating Books 385
III
Changing the Aspect Ratio for a Photo Box
Pages hold photo boxes with specific sizes and aspect ratios. You can select a box and
change the aspect ratio to fit the image. For example, you can change a box with a
landscape orientation to one with a portrait orientation.
Aperture provides commands for creating photo boxes in the following aspect ratios:
Â4:3 landscape
Â3:2 landscape
Â2:3 portrait
Â3:4 portrait
ÂSquare
ÂThe aspect ratio of the current image
To change the aspect ratio for a photo box:
1Click the Edit Layout button, if it’s not already selected.
2Select the photo box you want to change.
3Choose Photo Box Aspect Ratio from the Book Action pop-up menu, then choose an
aspect ratio from the submenu.
ÂTo change a box to a 4:3 landscape aspect ratio: Choose Landscape 4:3.
ÂTo change a box to a 3:2 landscape aspect ratio: Choose Landscape 3:2.
ÂTo change a box to a 2:3 portrait aspect ratio: Choose Portrait 2:3.
ÂTo change a box to a 3:4 portrait aspect ratio: Choose Portrait 3:4.
ÂTo change a box to a square aspect ratio: Choose Square.
ÂTo create a box that fits the cropping of the current image in the box: Choose Photo
Aspect Ratio.
Arranging Images on the Page
You can resize and reposition photo boxes on the page. You must first select the Edit
Layout button to enable changing the page format. You can then click boxes to select
them. Once selected, image and text boxes show handles that you can drag to resize
the box. You can also drag the content of the box to move the box to a new position.
As you drag a box, you’ll see yellow guidelines appear that mark the important margins
and image borders on your page. Using the guidelines, you can make sure that your
boxes correctly align with other boxes on your pages.
To arrange photo boxes on the page:
1Click the Edit Layout button, if it’s not already selected.
2Select the photo box you want to move or resize.
3Drag the box to a new location, or drag a handle on the selected box to change the
image’s size.

386 Part III Distribution and Backup
Copying, Pasting, Cutting, and Removing Images from Photo Boxes
After you place images in photo boxes on your pages, you can select a box or group of
boxes and copy and paste the contents, or cut or remove the images from boxes.
To copy and paste the contents of selected boxes:
1Click the Edit Content button, if it’s not already selected.
2Select the photo box or boxes whose contents you want to copy.
3Choose Edit > Copy Content.
4Select the photo box or boxes where you want the copied contents to appear.
5Choose Edit > Paste Content.
To copy selected boxes:
1Click the Edit Layout button, if it’s not already selected.
2Select the box or boxes you want to copy.
3Choose Edit > Copy.
4Select the page where you want the copied photo box or boxes to appear.
5Choose Edit > Paste.
To cut the contents of selected boxes, placing the contents in the Clipboard:
1Click the Edit Content button, if it’s not already selected.
2Select the photo box or boxes whose contents you want to cut.
3Choose Edit > Cut Content.
To remove the contents of selected boxes without saving them in the Clipboard:
1Click the Edit Content button, if it’s not already selected.
2Select the box or boxes whose contents you want to remove.
3Press the Delete key.
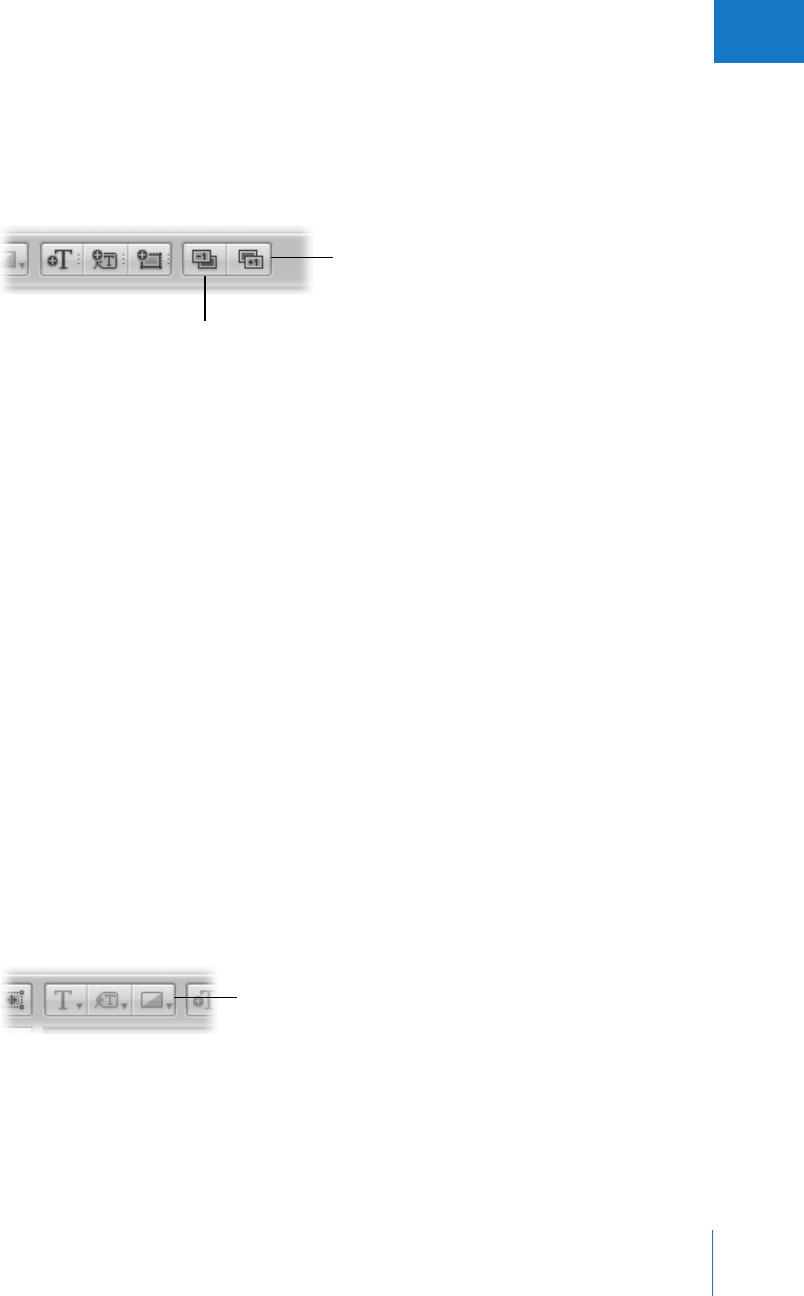
Chapter 19 Creating Books 387
III
Stacking Photo Boxes in a Specific Order
As you arrange boxes on the page, perhaps overlapping them to create a certain look,
you may want to change their stacking order. For example, you might want to place
three images on top of one another in a specific order. To change the stacking order of
boxes, you select a box and then click the Bring Forward or Send Backward button.
To change the order of a stack of boxes:
1Click the Edit Layout button, if it’s not already selected.
2Select the box whose stacking order you want to change.
3Do one of the following:
ÂClick the Bring Forward or Send Backward button.
ÂChoose Arrange from the Book Action pop-up menu, then choose an option from
the submenu.
Removing Photo Boxes
After creating a page and applying a master page design, you may want to remove one
or more photo boxes from the page. You can choose a different master page design
that has fewer photo boxes, or you can remove photo boxes from the page.
To remove photo boxes from a page:
mClick the Edit Layout button, select a photo box or boxes, then choose Edit > Cut (or
press Delete).
Changing the Look of Images with Filters
Aperture allows you to change the look of images by applying filters. For example, you
might apply a filter that fades an image so that you can position text over it to create
an interesting cover. You can also apply filters that change an image to black and
white or sepia.
Send Backward button
Bring Forward button
Photo Filter
pop-up menu

388 Part III Distribution and Backup
To apply a filter to a photo box:
1Select the photo box that contains the image you want to change.
2Choose the filter style you want from the Photo Filter pop-up menu.
Note: When you apply a filter to an image in a book and then examine the image with
the Loupe, the image appears without the filter effect. The filter is applied only to the
image in the book, not to the image source. The Loupe displays the image source.
Working with Text
As you work with your book layout, you can add text and position it on the page.
You can:
ÂPlace text on the page by entering it in text boxes
ÂAdd new text boxes to the page
ÂAdd metadata boxes that display an image’s metadata
ÂChoose the style of your text, changing the font, font style, and font size
ÂArrange text on the page by changing the size and position of text boxes
ÂChange the number of text columns on the page
ÂRemove text boxes from the page
You can make text changes to individual pages in your book, or change master pages
to create template pages with custom text styles and layouts.
Placing Text on the Page
Master page designs provide text boxes that you can select and enter text into. You can
also copy text and paste it into text boxes.
To add text to a text box:
1Click the Edit Content button, if it’s not already selected.
2Select the page you want to work on in the Pages panel.
3Select the text box you want to change.
4Select any existing text and type or paste in the text you want.
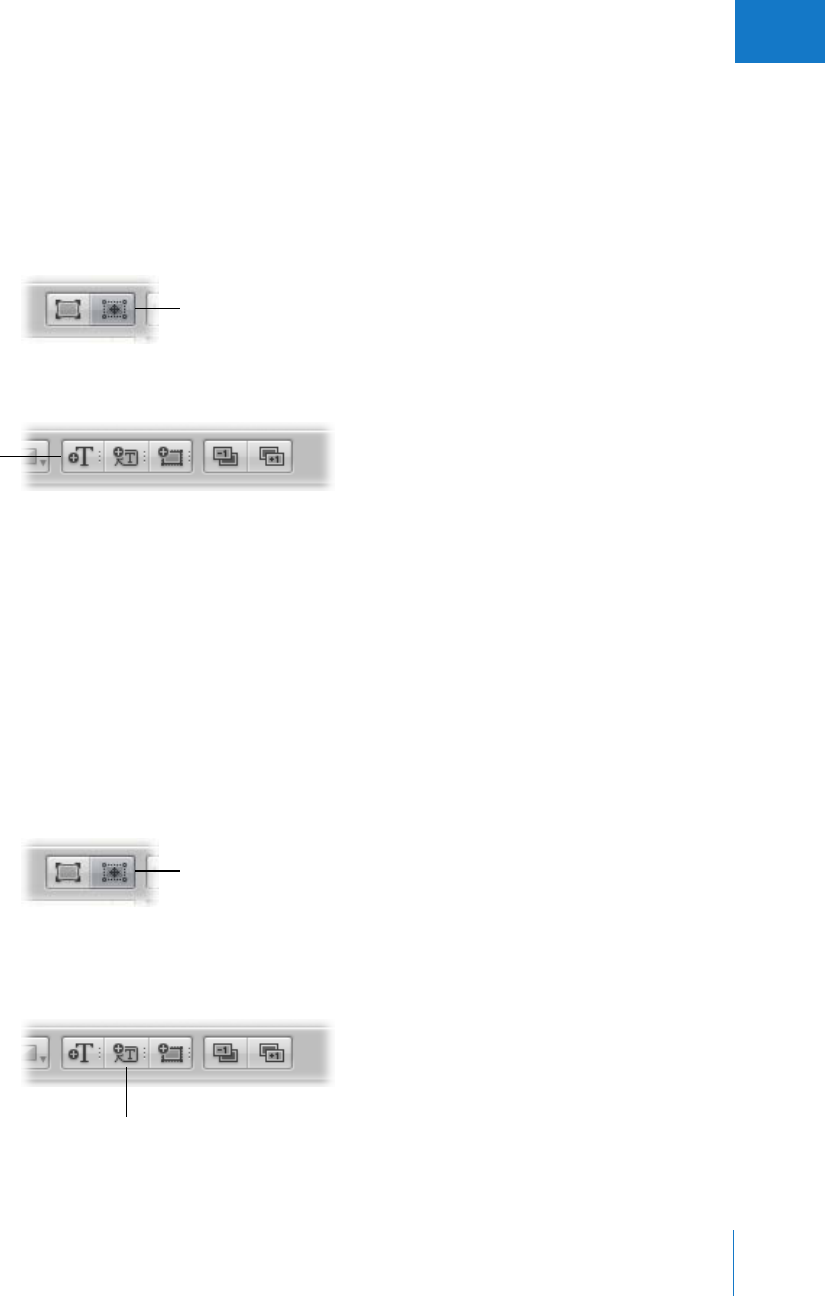
Chapter 19 Creating Books 389
III
Adding Text Boxes to a Page
When you want to add text to a page and need another text box, you can add one and
position it where you want.
To add a text box to a page:
1In the Pages panel, select the page to which you want to add text.
2Click the Edit Layout button.
3Click the Add Text Box button.
A new text box appears on the page.
4Drag the new text box to the location you want.
You can resize a text box by dragging its resize handles.
Adding Metadata Boxes to a Page
You can display your images on the page with the metadata associated with them. To
display an image’s metadata, you add a metadata box to the page and link it to the image.
To add a metadata box to a page:
1In the Pages panel, select the page to which you want to add the metadata box.
2Click the Edit Layout button.
3Select the photo box to which you want to add a metadata box.
4Click the Add Metadata Box button.
A new metadata box appears on the page.
Click the Edit Layout
button to add or move a
text box on the page.
Add Text Box button
Click the Edit Layout button
to add or move a metadata
box on the page.
Add Metadata box button
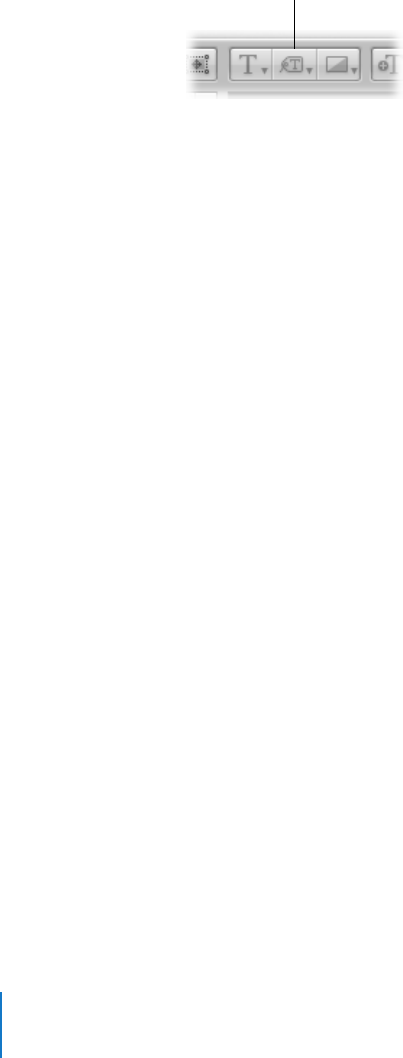
390 Part III Distribution and Backup
5Drag the new metadata box to the location you want.
You can resize a metadata box by dragging its resize handles.
6Choose the type of metadata you want displayed in the box from the Metadata Format
pop-up menu.
You can unlink a metadata box from its selected image and relink it when necessary.
To unlink a metadata box:
1In the Pages panel, select the page that has a metadata box you want to unlink.
2Select the metadata box you want to unlink.
3Choose Unlink Metadata Box from the Book Action pop-up menu.
To relink a metadata box:
1In the Pages panel, select the page that has the metadata box you want to link.
2Command-click the metadata box and the photo box you want to link to select them.
3Choose Link Metadata Box from the Book Action pop-up menu.
Hiding or Showing Image Plate Numbers in Books
You can turn on or off the display of plate numbers in your books and web galleries.
Aperture is preset to not display plate numbers for images.
To turn on the display of plate numbers in a book:
mIn the Book Layout Editor, choose Enable Plate Metadata from the Book Action
pop-up menu.
Metadata Format
pop-up menu
Chapter 19 Creating Books 391
III
Choosing a Text Style
You can assign text styles to text and metadata boxes to change the look of your text.
Aperture master pages come with preset text styles that include designs for important
text elements such as cover text, subtitles, headings, and paragraph text. You can easily
apply these styles to text and metadata boxes as you work.
To change the text style of a text or metadata box:
1Select the text or metadata box you want to change.
2Choose a text style for your text from the Text Style pop-up menu.
Making Font Changes in Books
Aperture provides a Font window that you can use to change fonts in your books. You can
select text in a text box on a page and change the font, font size, font color, and more.
Important: Aperture follows the text-smoothing preferences you have set up in the
Appearance pane of System Preferences. The default setting for Mac OS X doesn’t
smooth fonts that are 8 points in size or smaller. This setting only affects the
appearance of fonts onscreen; the fonts will appear smoothed when printed.
To show the Font window:
mChoose Edit > Show Fonts (or press Command-T).
Text Style
pop-up menu

392 Part III Distribution and Backup
Arranging Text on the Page
You can resize and reposition text and metadata boxes on the page. You must first
select the Edit Layout button to enable changing the page format. When you click
boxes to select them, the boxes show handles that you can drag to resize the boxes.
You can also drag the contents of a box to move the box to a new position.
To arrange text on the page:
1Click the Edit Layout button, if it’s not already selected.
2Select the page you want to work on in the Pages panel.
3Select the text box you want to move or resize.
4Drag the box to a new location, or drag a handle on the selected box to change the
image’s size.
Changing the Number of Columns of Text
You can change a text box so that it’s formatted to hold from one to four columns of text.
To change the number of text columns in a text box:
1Click the Edit Layout button, if it’s not already selected.
2Select the text box.
3Choose Text Box Columns from the Book Action pop-up menu, then choose the
number of columns you want from the submenu.
4If necessary, resize the text box to better accommodate the changed column layout of
the box.
Removing Text Boxes from a Page
After creating a page and applying a master page design, you may want to remove one
or more text boxes from the page. You can choose a different master page design that
has fewer text boxes, or you can manually select and remove text boxes.
To remove text or metadata boxes from a page:
1Click the Edit Layout button.
2Select the text or metadata box you want to remove, then choose Edit > Cut
(or press Delete).
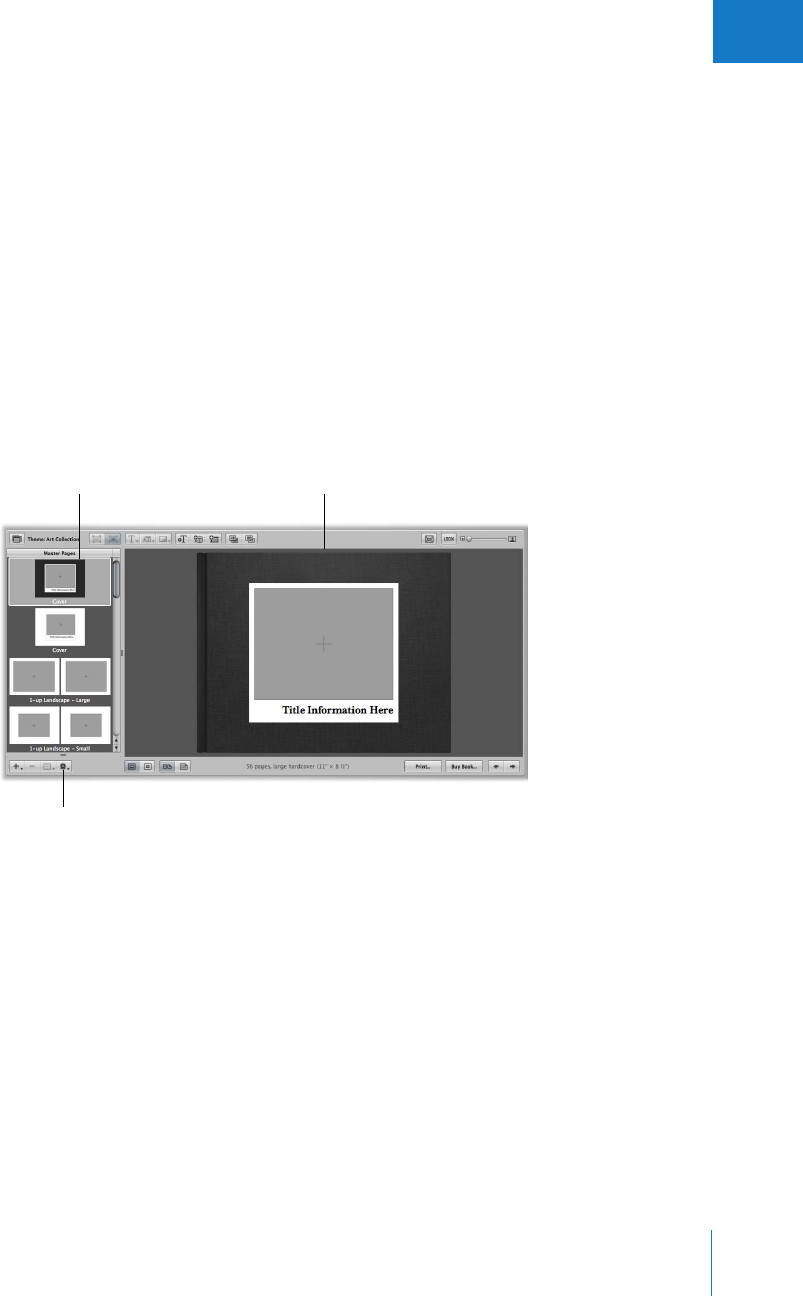
Chapter 19 Creating Books 393
III
Working with Master Pages
Master pages supply the initial design of your pages. As you create pages, you apply
master page designs repeatedly throughout a book.
If you plan to make reusable book albums, you can customize the page designs of a
selected theme before creating your books. You can select a master page and modify it,
changing the photo, text, and metadata boxes that appear on the page. You can also
create new master pages to suit specific layout needs. To modify your pages, you can
use the procedures for working with photo, text, and metadata boxes presented earlier
in this chapter.
To modify a master page, you show master pages in the Master Pages panel, and then
add a new page or select the page you want to work on. When you select a master
page in the Master Pages panel, the Book Layout Editor displays an enlarged view of
the page.
You can:
ÂView master pages
ÂCreate new master page designs or modify existing master page designs
ÂCreate left and right (facing page) versions of a master page, or combine left and
right versions into one page
ÂUpdate your book with changes made to the master pages on which the book
pages are based
Choose the master page
you want to work on here.
Make layout changes to
your master page here.
Choose Show Master Pages from
this pop-up menu to show the
Master Pages panel.

394 Part III Distribution and Backup
Viewing Master Pages
To view and work on the master pages for a theme, you must show the master pages
in the Master Pages panel.
To show master pages:
mChoose Show Master Pages from the Book Action pop-up menu.
The Master Pages panel appears above the Pages panel, showing thumbnails of the
master pages for the selected theme. You can select master pages in the Master Pages
panel to display and work on them. You can drag the border between the Master Pages
panel and the Pages panel to resize the panel display.
To hide master pages:
mChoose Hide Master Pages from the Book Action pop-up menu.
Creating and Modifying Master Pages
You can create new master pages, or you can duplicate existing master pages and
modify them. For example, if you decide to customize a two-photo layout from an
original master page design, you can save the customized version and have multiple
two-photo layouts that you can choose. Once you create a new master page, the
master page name appears in the Set Master Page pop-up menu, where you can
choose it to apply the design to pages in your book.
To create a new master page design:
1Choose Show Master Pages from the Book Action pop-up menu.
2Click a master page in the Master Pages panel.
3Choose Add New Page from the Add Pages pop-up menu.
4Rename the page if you wish.
5Select the new master page and make your changes.
To duplicate and modify a master page design:
1Choose Show Master Pages from the Book Action pop-up menu.
2Select the master page you want to duplicate in the Master Pages panel.
3Choose Duplicate Page from the Add Pages pop-up menu.
4Rename the page if you wish.
5Select the new master page and make your changes.
You can also change the design of a page in your book and save the changes to create
a new master page.

Chapter 19 Creating Books 395
III
To create a new master page design from a page in your book:
1In the Pages panel, select a page in your book whose modifications you want to save as
a master page.
2Choose Save Page > As New Document Master from the Book Action pop-up menu.
3Choose Show Master Pages from the Book Action pop-up menu, if necessary, to show
the Master Pages panel.
4Select the new master page in the Master Pages panel and rename it.
After updating the design of a page in your book, you can update the original master
page with those changes.
To save changes in a book page to the original master page design:
1In the Pages panel, select the page whose design you modified.
2Choose Save Page > To Document Master from the Book Action pop-up menu.
Aperture updates the original master page with your design changes.
Unifying and Splitting Master Pages
Some master pages have left and right versions to match the book margins on the left
and right facing pages. You can select a left or right master page and consolidate the
two versions into one page.
To unify left and right versions of a master page:
1Select a left or right master page in the Master Pages panel.
2Choose Unify Master Page from the Book Action pop-up menu.
You can also select a master page that has only one version and split it into left and
right versions.
To split a master page that doesn’t have left or right versions into
left and right versions:
1Select a master page in the Master Pages panel.
2Choose Split Master Page from the Book Action pop-up menu.
You can now adjust the position of items on the new pages to match the margins on
the left and right pages.

396 Part III Distribution and Backup
Updating Book Pages with Master Page Changes
After you change a master page, the modified design can be applied to pages in your
book. Aperture does not automatically update the design of pages whose master
pages are modified later. However, you can choose to update the pages in a book with
revised master page designs.
To update a page with a changed master page design:
1In the Pages panel, select the page whose master page design you want to update.
2Choose Reapply Master from the Book Action pop-up menu.
Aperture applies the current master page design to the selected page.
Copying a Book Album
After you’ve set up a book structure that you like, you can reuse it for other projects. For
example, you might create a wedding album book structure that you reuse frequently.
You can select and duplicate a book album. You can then remove the images from the
album and replace them with others to fill the new book. Aperture can automatically
flow the new images into the duplicated book structure.
To copy a book album and place new images in it:
1Select the book album in the Projects panel.
2Choose File > Duplicate Book.
3Drag the duplicate book album to a new project, if you wish.
4With the duplicate book album selected in the Projects Panel, select an image in the
Browser and choose Edit > Select All (or press Command-A).
5To remove the images from the album, choose Images > Remove From Album
(or press Delete).
All the images are removed from the Browser and the book pages.
6Select the project that has the images you want to place in the book.
7Select the images and drag them to the duplicate book album in the Projects panel.
8Select the duplicate book album in the Projects panel.
9Arrange the images in the Browser in the order you want them to appear in your book.
10 Choose Autoflow Unplaced Images from the Book Action pop-up menu.
The images are automatically placed in the book pages.
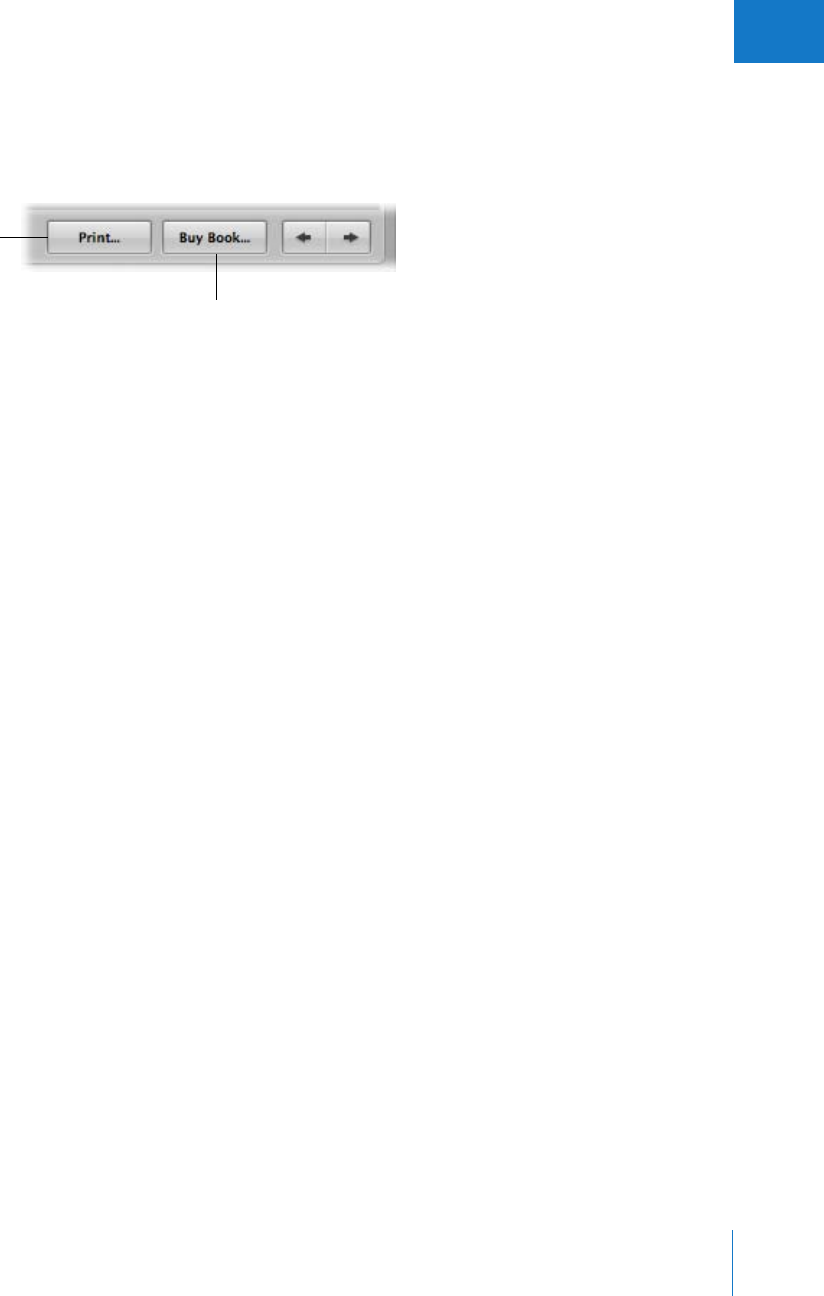
Chapter 19 Creating Books 397
III
Printing Books
After you’ve created your book, you can purchase printed and bound copies from
Apple’s print vendor. You can also print your book using your own printer or create PDF
files that you can send to clients or your own print vendor.
If you plan to hand off your files to a print vendor, you can save your book either as a
PDF file or a PostScript document. You can then deliver this file to the printer or lab. For
more information about printing books on your printer, see Chapter 14, “Printing Your
Images,” on page 277. For information about purchasing printed books, see the
electronic document Ordering Books and Prints, available from the Aperture Help menu.
Click here to print your
book on your printer or
create a PDF file.
Click here to purchase a
printed book using your
.Mac account.

20
399
20 Backing Up Your Images
To safeguard your photography portfolio, it’s important to
establish a reliable backup system and back up regularly.
This chapter provides instructions for using the Aperture backup system to back up the
entire Aperture Library on a regular basis. Aperture clearly indicates how up to date
your most recent backup is, and you can update your backups immediately whenever
you wish. In the event of a rare equipment failure or unforeseen catastrophe such as a
fire or weather-related damage, you can easily restore the entire Aperture Library onto
your computer or a new computer.
This chapter covers:
ÂAn Overview of the Backup Workflow (p. 400)
ÂPlanning Your Backup System (p. 401)
ÂWorking with the Vaults Panel (p. 402)
ÂCreating Vaults (p. 404)
ÂUpdating Vaults (p. 405)
ÂDisconnecting a Vault’s Hard Drive from Your System Temporarily (p. 406)
ÂReconnecting a Vault’s Hard Drive to your System (p. 406)
ÂDeleting a Vault Permanently (p. 407)
ÂBacking Up Images from a Portable in the Field (p. 407)
ÂRestoring Your Aperture System (p. 409)

400 Part III Distribution and Backup
An Overview of the Backup Workflow
Making backup copies of the Library affords you the reassurance that should an
unforeseen incident cause the loss of your files, you can easily restore them from your
backup vaults later. If you back up the Library regularly and store backups offsite, you
run little risk of losing your work.
When you back up your images, Aperture makes a complete copy of the Library in its
current state. If you remove items from the Library, those items are removed from the
backup when it is next updated.
You can make and store as many complete backups of the Library as you wish. If you
want to keep a historical archive of the Library, you’ll need to devise a system of storing
separate backups in some regular chronological order.
You set Aperture to back up a copy of the Library to a designated storage area called a
vault. For safety and redundancy, use external hard disks to hold your vaults. Aperture
lets you create as many vaults as you deem necessary. For example, you may want to
create one vault on an external hard disk for daily backups and a second vault on
another external hard disk that you keep offsite.
All the managed master file images, versions, and all metadata, previews, and adjustment
information associated with your images are backed up. The versions, previews, and
metadata associated with referenced images’ master files are also backed up in the vault.
Referenced images’ master files are not backed up in the vault with the Library.
Important: Referenced images are not backed up in the vault with the Library. Because
the digital master files for referenced images are stored outside of the Library, you must
manage the backup and archiving of them yourself.
Although rare, mechanical failures and unexpected damage to your computer system
can occur. And from time to time you may upgrade your equipment and need to move
your portfolio to a new system. Aperture allows you to easily restore the entire
Aperture Library from your backup disks onto your computer or a new system. For
more information about restoring images and projects, see “Restoring Your Aperture
System” on page 409.
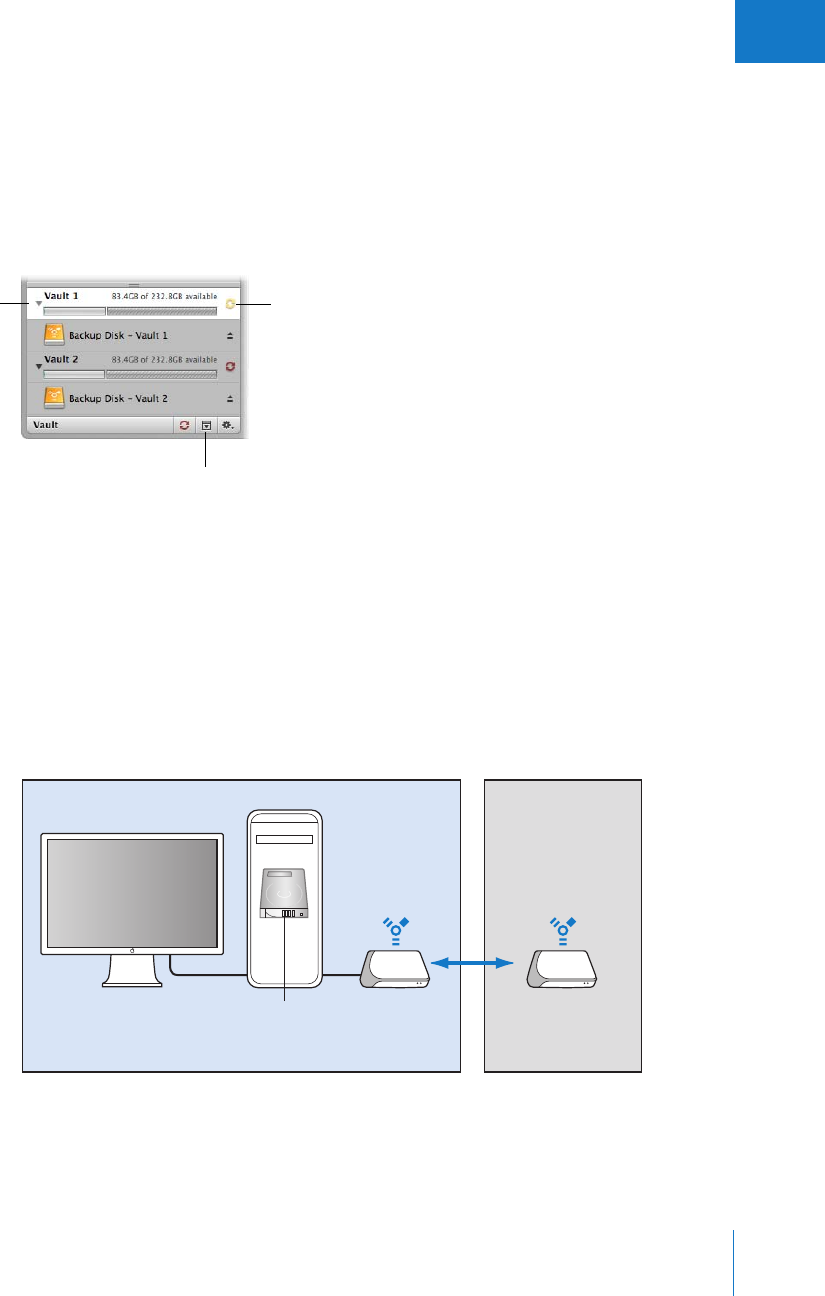
Chapter 20 Backing Up Your Images 401
III
As you add to your photo library, Aperture automatically tracks which files have been
backed up to each vault. When there are image files in the Library that are not backed
up in a vault, the Vault Status button appears red. When your vault is up to date, the
Vault Status button for the vault appears black. When you have made image
modifications (such as image adjustment, metadata, or keyword changes) that have
not been backed up in a vault yet, the button appears yellow. You can update your
vaults at any time.
Planning Your Backup System
As you begin working with Aperture, it’s important to perform regular backups of your
images. When you import new images from your camera, you should immediately
create a backup so that you have copies safely stored. As you routinely work with
Aperture, creating new image versions and making adjustments, you’ll want to make
sure your work is copied to disk and your backup vaults are up to date.
A typical backup system used with Aperture might look like the following:
Vault Vault Status button
Click the Vaults Panel button
to show the Vaults panel.
Office Remote location
Aperture Library
(internal disk)
Vault
(external disk)
Vault
(kept offsite and
updated regularly)

402 Part III Distribution and Backup
This system backs up the Aperture Library to two vaults stored on external hard disks.
You routinely back up the Library on one external hard disk. You use the second hard
disk as a backup that you keep offsite. You can then alternately back up the Library on
your onsite external hard disk and swap it with the offsite hard disk to keep all your
vaults updated.
To set up your Aperture backup system, you’ll need to do the following:
1Determine the number of vaults you need. For example, do you need one for routine
backups, one for weekly backups, and one for offsite storage?
2Determine the number of hard disks you need for routine backups.
3Determine the number of hard disks you’ll use for storing backups offsite.
4Connect your hard disk drives to your computer.
5Open Aperture and create the vaults you need, assigning a hard disk to each vault.
6Update the new empty vaults with copies of the Aperture Library.
7Disconnect one of the vault hard disks and take it to an offsite location for safekeeping.
When planning the amount of storage space you’ll need, estimate the amount of disk
space needed to hold your existing digital images (photos you plan to import into
Aperture) and the amount of space you might need for new projects. For example,
RAW images typically require 8 to 18 MB of disk space per file. Estimating the number
of images in a typical project and the number of projects you usually do in a year, you
can make a rough estimate of what might represent a year’s storage space.
For step-by-step instructions for initially setting up your hard disks and backup system,
see Appendix A, “Setting Up an Aperture System,” on page 413.
Working with the Vaults Panel
You use the Vaults panel at the bottom of the Projects panel to set the location of your
vaults and check their status.
To show the Vaults panel, do one of the following:
mChoose Window > Show Vaults (or press Shift-R).
mClick the Vaults Panel button.
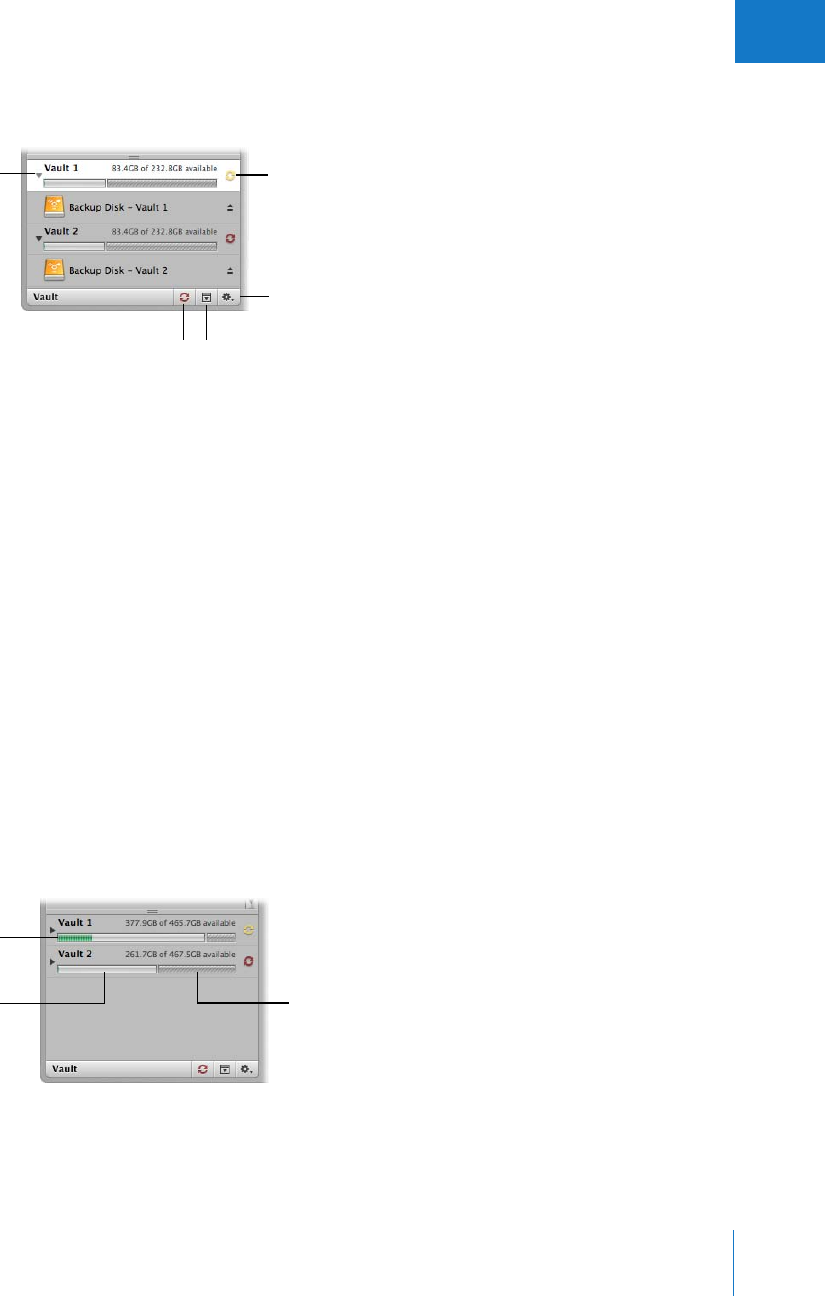
Chapter 20 Backing Up Your Images 403
III
Controls in the Vaults Panel
There are several controls that you’ll use when you update vaults.
ÂDisclosure triangle: Click this to see the hard disk that is assigned to a vault.
ÂVault Status button: Click this button to update a vault. The color of the Vault Status
button indicates the state of the vault:
ÂBlack: The vault is up to date.
ÂYellow: All master files in the Library have been backed up, but a change has
occurred to at least one version (such as an adjustment) that has not been backed
up. The vault should be updated to safeguard your work.
ÂRed: At least one master file in the Library has not been backed up. The vault
should be updated to protect against the loss of master files.
ÂUpdate All Vaults button: Click this button to update all of your connected vaults at
the same time.
ÂVaults Panel button: Click this button to show or hide the Vaults panel.
ÂVault Action pop-up menu: You can use this pop-up menu to add and remove vaults,
as well as update a vault.
ÂDisk space available: Aperture keeps track of how much storage space is available on
the hard disk used by a vault. Color-coded bars indicate the space used by the vault,
unused space, and space used for other, non-Aperture files.
Disclosure triangle Vault Status button
Vault Action
pop-up menu
Update All Vaults
button
Vaults Panel
button
Space used by
non-Aperture files
Unused space available
on the vault
The colored bar
represents the space
used by the vault.
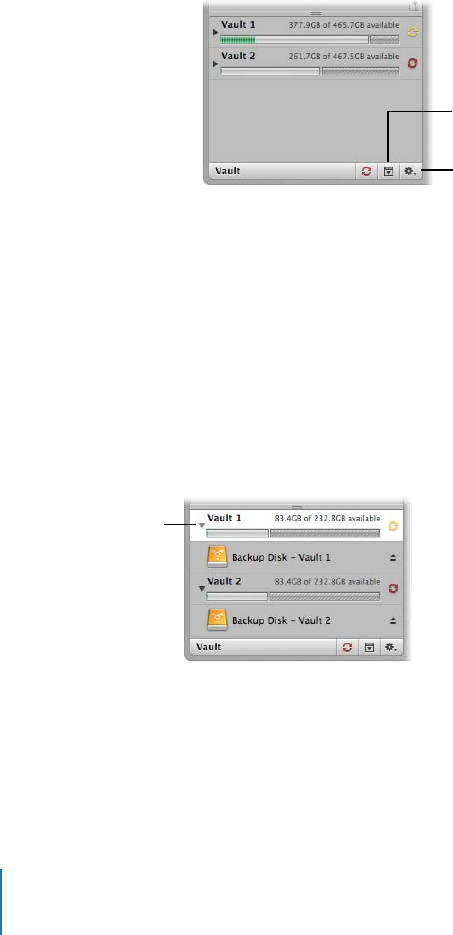
404 Part III Distribution and Backup
Creating Vaults
Before you can back up your files, you must create a vault and assign a hard disk to it.
After you assign a disk to the vault, Aperture uses the vault to back up the entire
Library. You can create additional vaults and assign hard disks to them, and each
additional vault also records a complete backup of the Library.
To create a new vault:
1Do one of the following:
ÂChoose File > Vault > Add Vault.
ÂChoose Add Vault from the Vault Action pop-up menu.
2In the Add Vault dialog, specify the following options:
ÂType the name you want for the vault in the Vault Name field.
ÂChoose where you want the vault stored from the Where pop-up menu.
3Click Add.
Important: To ensure preservation of your image assets, make sure to assign a separate
external hard disk drive to each vault.
To see the hard disk assigned to a vault:
mIn the Vaults panel, click the disclosure triangle beside the vault name.
You can easily see the amount of free space your vault has available next to the vault
name. Make sure to assign enough disk space to the vault to ensure a complete backup
of the Library and to allow the Library to grow as you import new images over time.
Vault Action
pop-up menu
Vaults Panel button
Click the disclosure
triangle to see which
hard disk is assigned
to the vault.

Chapter 20 Backing Up Your Images 405
III
Updating Vaults
You can have Aperture update your vaults at any time. You can tell which vaults need
to be updated by the color of the Vault Status button next to each vault. You can have
Aperture update a particular vault or all of your vaults at once.
After you import new images into Aperture, you should make an immediate backup to
ensure the digital files exist in more than one place. You can make an immediate
backup of your imported images by updating an existing vault.
To update all connected vaults:
1Do one of the following:
ÂChoose File > Vault > Update All Vaults.
ÂIn the Vaults panel, click the Update All Vaults button.
2In the dialog that appears, click Update All Vaults.
To update an existing vault:
1Do one of the following:
ÂChoose Window > Show Vaults (or press Shift-R).
ÂClick the Vaults Panel button.
2Select the vault you want to update.
3Do one of the following:
ÂIn the Vaults panel, choose Update Vault from the Vault Action pop-up menu.
ÂClick the Vault Status button beside the vault name.
4In the dialog that appears, click the Update Vault button.

406 Part III Distribution and Backup
Disconnecting a Vault’s Hard Drive
from Your System Temporarily
You may routinely disconnect a backup hard disk drive from your Aperture system and
take it to a safe offsite location. When you disconnect a backup hard drive from your
computer, Aperture takes the associated vault offline. When you reconnect the hard
drive again, Aperture automatically detects the hard disk and connects it to the
corresponding vault.
To disconnect a vault’s hard disk drive from your Aperture system:
1Do one of the following:
ÂClick the disclosure triangle next to the vault name to display the name of the hard
disk assigned to the vault, then click the Eject button next to the hard disk name.
ÂIn the Finder, drag the hard disk icon for the drive to the Trash, or select the disk in
the sidebar and click the Eject button.
2Disconnect the hard disk drive from your computer.
Reconnecting a Vault’s Hard Drive to your System
If you keep a backup of the Aperture Library on an offsite hard disk drive, you’ll
occasionally need to bring it in for updating. Aperture keeps track of the hard disks that
have been disconnected from their vaults. When you reconnect a hard disk drive,
Aperture automatically detects the hard disk, determines which vault it’s assigned to,
and reconnects the vault.
At times, you may rename a backup hard disk drive or add a new one and copy a vault
to the new drive. In this case, you need to specify the location, or path, of the new or
changed backup hard disk drive.
To specify a vault’s new location or path:
1Connect the hard disk drive to your computer.
2To show the Vaults panel, do one of the following:
ÂChoose Window > Show Vaults (or press Shift-R).
ÂClick the Vaults Panel button.
3Select the vault to be updated to a new path.
4Choose Update Vault Path from the Vault Action pop-up menu.
5Navigate to the location of the vault on the hard disk drive, select it, and click Update Path.

Chapter 20 Backing Up Your Images 407
III
Deleting a Vault Permanently
You can delete an entire vault and all the images on it when you need to reconfigure
your backup system. This is useful when you have moved your backup vault to a
larger-capacity hard disk and you want to delete the vault information from the current
hard disk drive to use it for other purposes.
To permanently remove a vault and delete its information:
1In the Vaults panel, select the vault you want to remove.
2Do one of the following:
ÂChoose File > Vault > Remove Vault.
ÂChoose Remove Vault from the Vault Action pop-up menu.
A dialog appears asking if you want to remove the vault.
3Click one of the following buttons:
ÂRemove Vault: When you click this button, Aperture no longer tracks the vault, but
the vault’s files remain on the hard disk.
ÂRemove and Delete Vault: When you click this button, Aperture no longer tracks the
vault, and the vault’s files are deleted from the hard disk.
Backing Up Images from a Portable in the Field
Some photographers who work in the field capture images and store them temporarily
in an Aperture Library on a portable computer. It’s important to use a safe and reliable
way of updating your main Aperture system with new images from the field.
To update your main system’s Library without risking overwriting images, it’s
recommended that you export images from your field computer as a project. You can
then transfer the project to your main computer and import it into the Library. With
this method, no images are overwritten and there is no risk of losing work.
Important: Copying the entire Aperture Library from one computer to another is not
recommended. Transferring images by copying the Library risks overwriting and losing
images when two Library files are not identical.

408 Part III Distribution and Backup
To export a project from Aperture:
1Select the project you want to export in the Projects panel.
2Do one of the following:
ÂChoose File > Export Project (or press Command-Shift-E).
ÂChoose Export Project from the Project Action pop-up menu in the Projects panel.
3Type a name for the exported project in the Save As field.
4Choose a location to save the project from the Where pop-up menu.
5Click Save.
After exporting your project, you can transfer it to your main Aperture system in a
variety of ways. One way is to transfer the project to an external hard disk. You can then
connect the hard disk to your main computer and import the project into the Aperture
Library. You might also transfer images over your office network.
You can also use a FireWire cable to connect two computers and transfer your project.
You connect both computers via their FireWire ports, and then restart one of the
computers in FireWire Target Disk Mode. When a computer is restarted in FireWire
Target Disk Mode, the computer’s hard disk icon appears on the desktop of the other
computer. You can then copy the project from one computer to another.
For more information about using FireWire Target Disk Mode, see Mac Help in the
Mac OS X Help menu.
To import a project into the Aperture Library:
1Connect the computer or hard disk drive from which you want to import the project.
If you’re connecting a computer directly to your Aperture system computer via a FireWire
cable, restart the computer that holds the project while holding down the T key. The
computer starts up in FireWire Target Disk Mode and a FireWire icon appears onscreen.
The computer’s hard disk icon then appears on the other computer’s desktop.
2Choose File > Import > Projects.
3Select the project you want to import, then click Open.
The new project appears in the Projects panel.
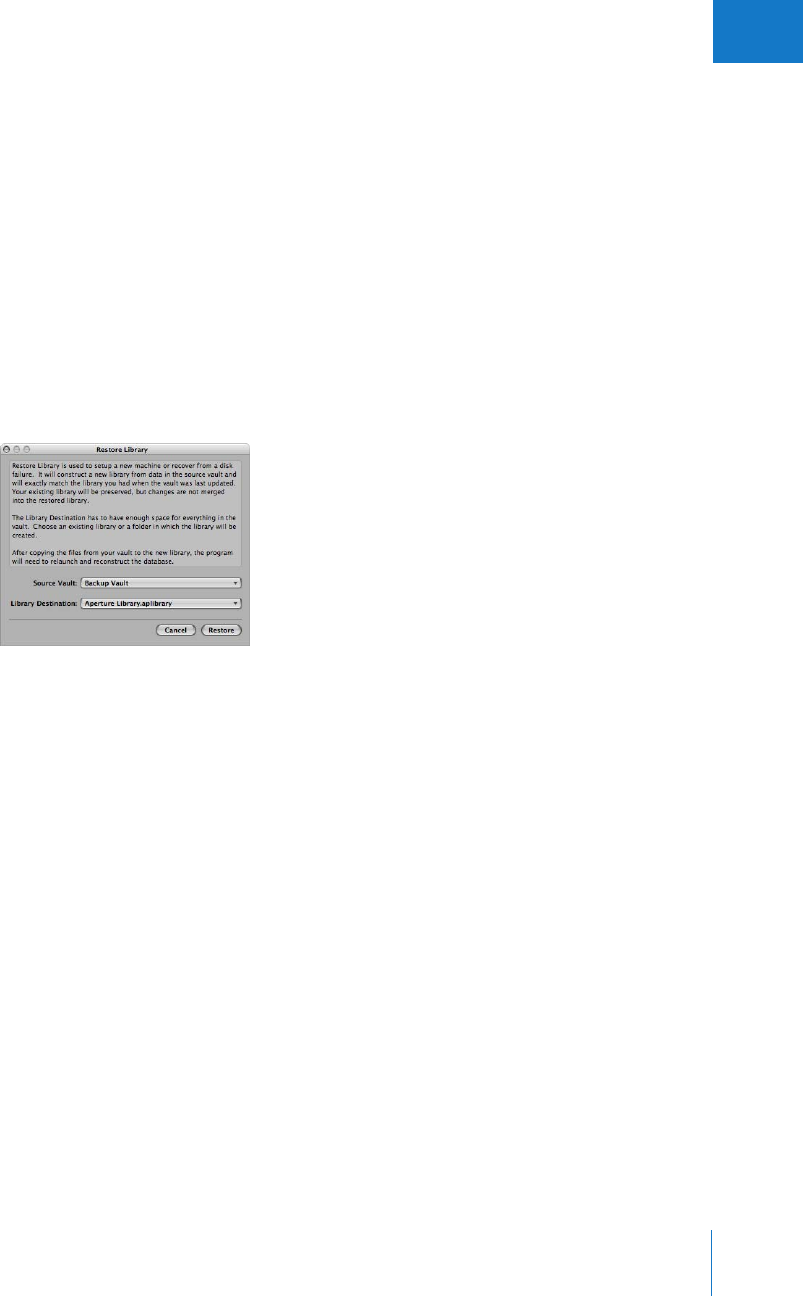
Chapter 20 Backing Up Your Images 409
III
Restoring Your Aperture System
If you buy a new computer or use another system at a different location and want
access to the Aperture Library, you can install Aperture and then transfer the Library
from your vault (on your backup disk) to the other computer. If you experience
equipment failure or other unexpected events, such as fire or weather-related damage
to your equipment, you can easily restore the entire Library to your new computer
from a backup disk.
To restore the entire Library from an external backup disk:
1Connect the hard disk drive that contains the most up-to-date vault to your computer
and open Aperture.
2Choose File > Vault > Restore Library.
The Restore Library dialog appears.
3Choose Select Source Vault from the Source Vault pop-up menu.
4Navigate to the vault from which you want to restore, then click Select.
5Choose Select Destination from the Library Destination pop-up menu.
6Navigate to the location to place the Library, then click Select.
7Click Restore, then click Restore again.

IV
Part IV: Appendixes and Glossary
This section describes the procedures for setting up and color
calibrating your Aperture system, and provides a glossary of
photography and color management terms.
Appendix A Setting Up an Aperture System
Appendix B Calibrating Your Aperture System
Appendix C Credits
Glossary
Index


413
A
Appendix
ASetting Up an Aperture System
Setting up the hardware for your system can be as simple
as connecting your camera or card reader to your computer.
You can also set up a system that uses external hard disks
and color-calibrated displays.
This appendix provides instructions for setting up your computer system to use
Aperture. It provides instructions for setting up a basic system, explains optional
equipment that you might consider to enhance your system, and explains how to
set up additional displays. For information about software and hardware
requirements for using Aperture, see the Before You Install Aperture document on
the Aperture installation disc. For information about installing software, see the
Installing Your Software booklet.
This chapter covers:
ÂSetting Up a Basic System (p. 414)
ÂOptional Equipment to Consider (p. 415)
ÂSetting Up Your System with Two Displays (p. 417)
ÂConfiguring Mac OS X for Multiple Displays (p. 419)
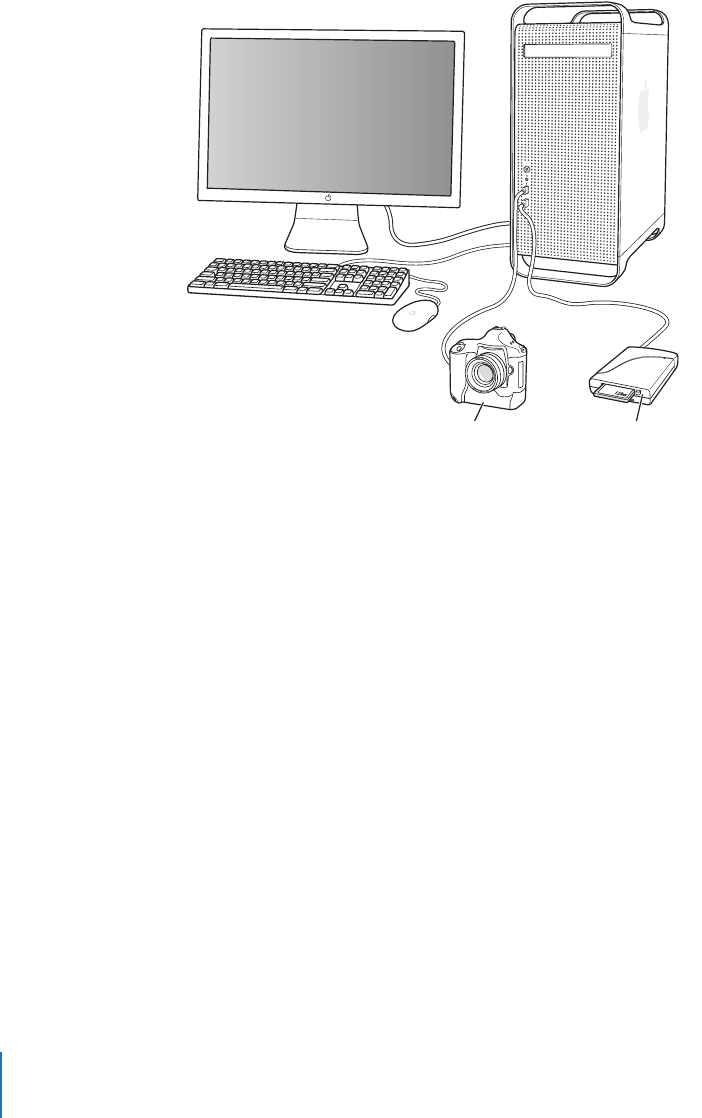
414 Part IV Appendixes and Glossary
Setting Up a Basic System
The following are basic instructions for connecting a digital camera or card reader to
your computer.
A basic Aperture system consists of the following equipment:
ÂA computer and display
ÂA digital camera or card reader (because of their speed, FireWire card readers are
strongly recommended)
ÂA cable to connect your camera or card reader to your computer (typically a USB 2.0
cable or a 4-pin-to-6-pin FireWire cable that came with your camera or card reader)
For information about setting up a computer and display, see the documentation that
came with the computer and display.
Card reader
Camera
Computer
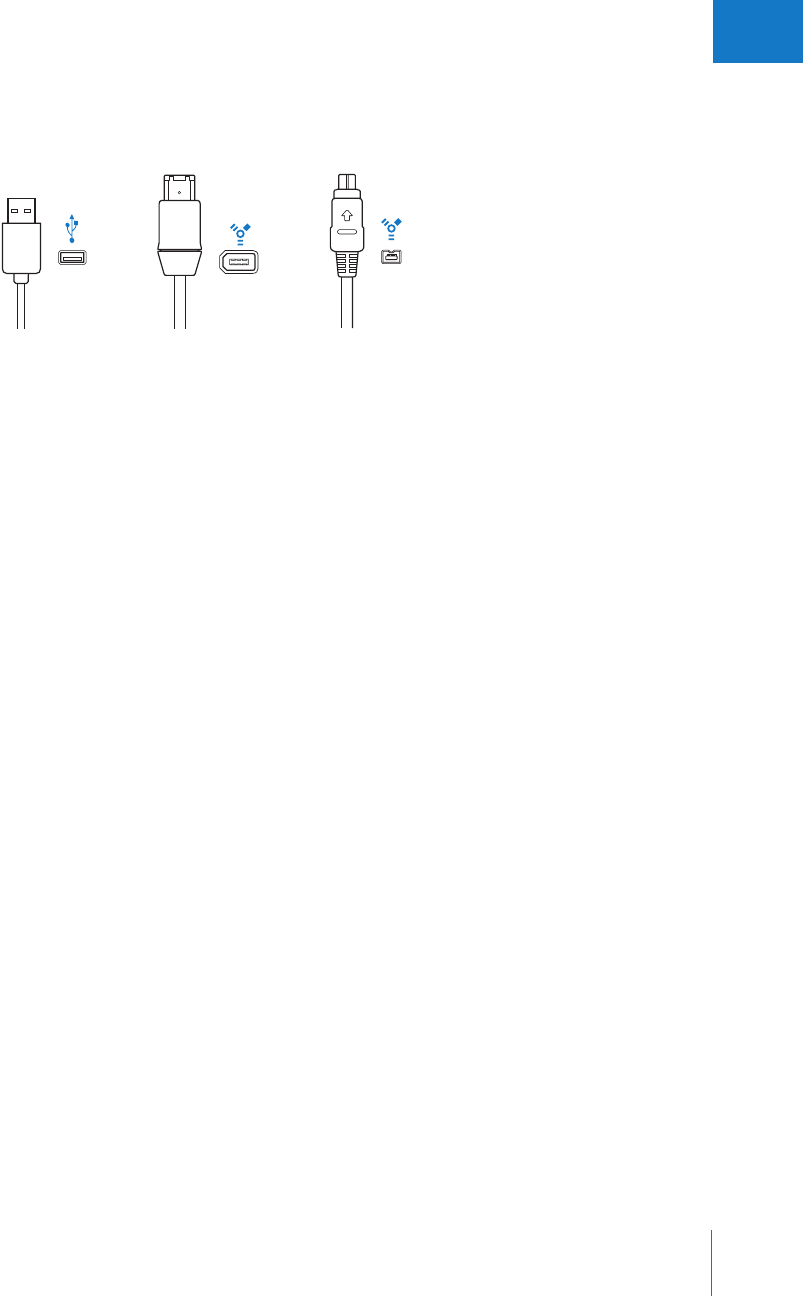
Appendix A Setting Up an Aperture System 415
IV
To connect a camera or card reader to your computer:
mConnect your camera or card reader to your computer using the USB or FireWire cable
that came with your camera or card reader.
To ensure proper setup, see the documentation that came with your camera or card reader.
Optional Equipment to Consider
You may consider using additional hardware and equipment, depending on the
number of images you have and your workflow:
ÂAdditional random-access memory (RAM)
ÂAdditional hard disk storage options
ÂAdditional displays
Additional RAM
The more RAM your computer has, the faster it can process your actions. While
Aperture functions with the minimum required amount of RAM, more RAM will make
Aperture faster. If you plan to work on large projects or have multiple applications
open at one time, it’s a good idea to have extra RAM installed in your computer.
Additional Hard Disk Storage Options
The more disk space you have, the more images Aperture can store in the Aperture
Library. If you’ll be shooting and storing many images (a photography project can
contain thousands of images), consider purchasing the highest-capacity hard disk you
can afford for your startup disk, the hard disk that contains the operating system. Even
high-resolution JPEG files require a lot of space.
Aperture uses external FireWire drives to back up image files and the Aperture Library.
The Aperture database tracks the contents of all vaults located on external FireWire
drives, whether they are connected to your computer or not. Storing multiple copies of
your backup files in separate locations lessens your chances of losing your images to a
catastrophic event.
USB 2.0 FireWire 400 (6-pin) FireWire 400 (4-pin)

416 Part IV
Appendixes and Glossary
FireWire drives provide many advantages:
Â
All FireWire drives can be daisy-chained, meaning that you can connect multiple
drives using a single FireWire port.
Â
FireWire drives are a good way to attach additional hard disk storage space to a
portable computer.
Â
FireWire drives are “hot-swappable,” meaning that you can connect and disconnect
them from a computer without having to shut down first.
Important:
You should never physically disconnect a FireWire drive before unmounting
it from the desktop.
When evaluating a FireWire drive for use with Aperture, take the following into
consideration:
Â
Some FireWire drives may require driver software:
You may need to install special driver
software in order to use a particular FireWire drive. Check the documentation that
came with your FireWire drive for more information.
Â
FireWire drives may be bus-powered:
This means that they derive power from the
FireWire interface itself via pins on the full-sized 6-pin FireWire connector. As a result,
these drives are more convenient for portable use, and can be used in conjunction
with a portable computer without the need for AC power. Larger FireWire drives may
not be bus-powered, however, requiring you to plug them into a wall socket.
Additional Displays
You can connect two displays to your computer. With a second display, you can use the
extra screen space to take advantage of the ability of Aperture to compare images and
play slideshows across multiple displays.
To connect three or more displays to your computer, you must install a PCI graphics
card in one of your computer’s PCI expansion slots. For more information, see your
computer’s manual or the instructions that came with the PCI expansion card.
For information about supported graphics cards, visit the Apple Aperture website at
http://www.apple.com/aperture/specs.html.
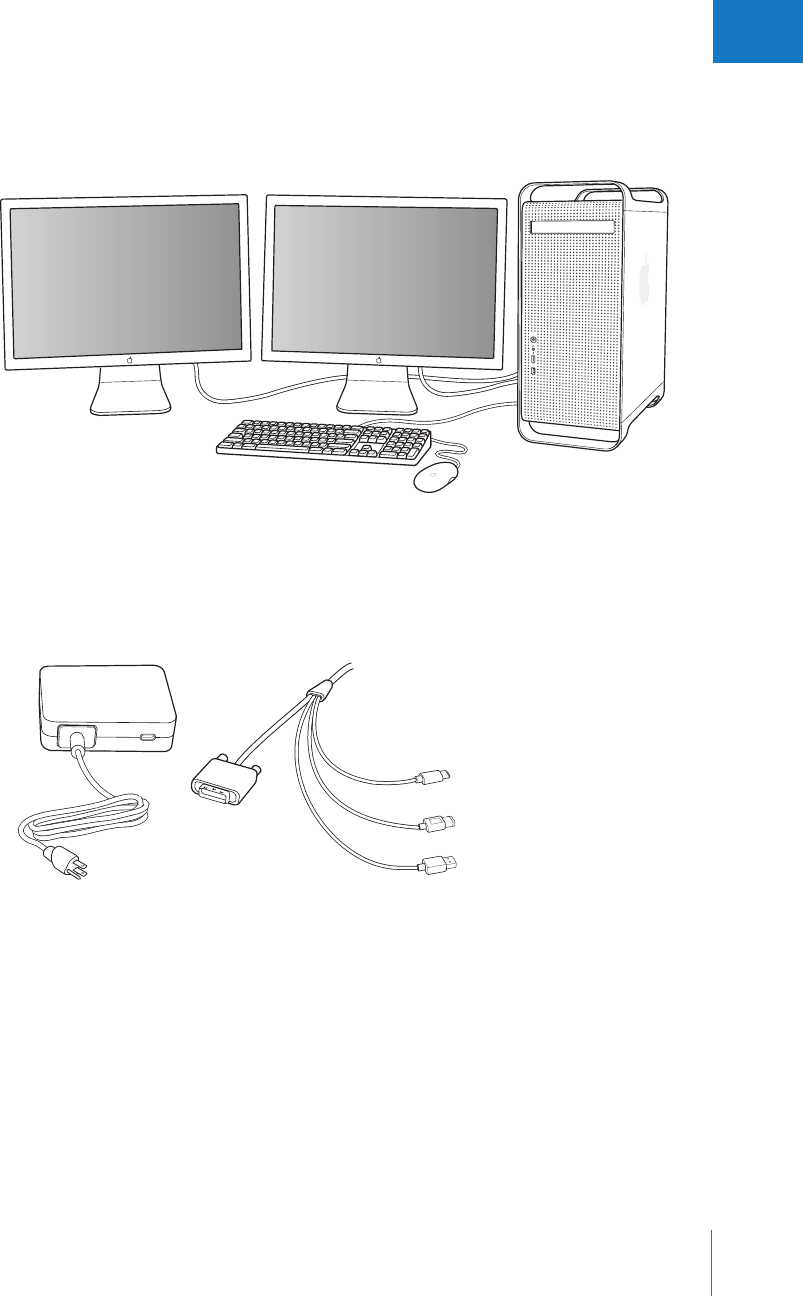
Appendix A Setting Up an Aperture System 417
IV
Setting Up Your System with Two Displays
Using more than one display gives you additional screen space to view and adjust
images, play slideshows, and present your full-size, full-color images.
For connecting a second display, you’ll need the following:
ÂPower adapter for the display
ÂDisplay cable to connect the display to the graphics card on your computer
Power adapter Apple Cinema Display cable connectors
DVI
USB
FireWire
DC power
£
d
H
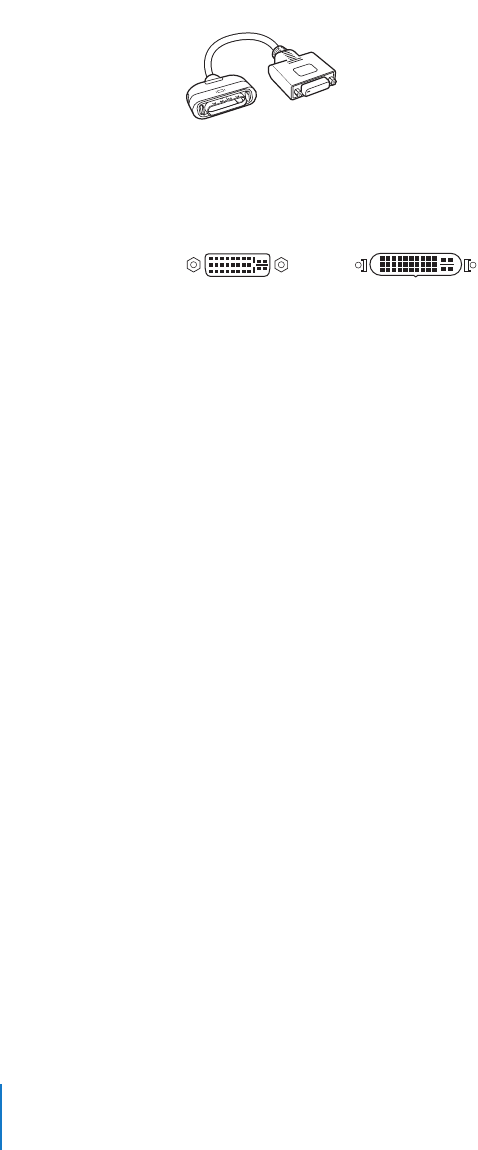
418 Part IV Appendixes and Glossary
Note: You may also need to purchase an adapter to connect the display cable to the
graphics card on your computer.
Macintosh computers come with two possible display ports: Apple Display Connector
(ADC) ports to connect ADC displays, and Digital Visual Interface (DVI) ports to connect
digital displays that have DVI connectors (such as a flat-panel Apple Cinema Display).
ÂIf your second display is an ADC display: Connect it to an available ADC display port on
your computer, or use a DVI to ADC adapter to connect the display to a DVI display port.
ÂIf your second display is a DVI display: Connect the display to an available DVI display
port on your computer, or use an ADC to DVI adapter to connect the display to an
ADC display port.
See the documentation that came with your computer or graphics card for more
information about the type of display cable or adapter you need.
To connect a second display to your computer:
1Turn off the computer.
2Connect a display cable (and adapter, if necessary) from an available display port on
your computer or graphics card to the display.
Depending on your displays, you may have one or more cables to connect. Refer to the
documentation that came with the display and your computer for detailed information.
Important: Make sure the cables are connected firmly, or you may not be able to see
an image on the display.
ADC to DVI adapter
ADC display port DVI display port
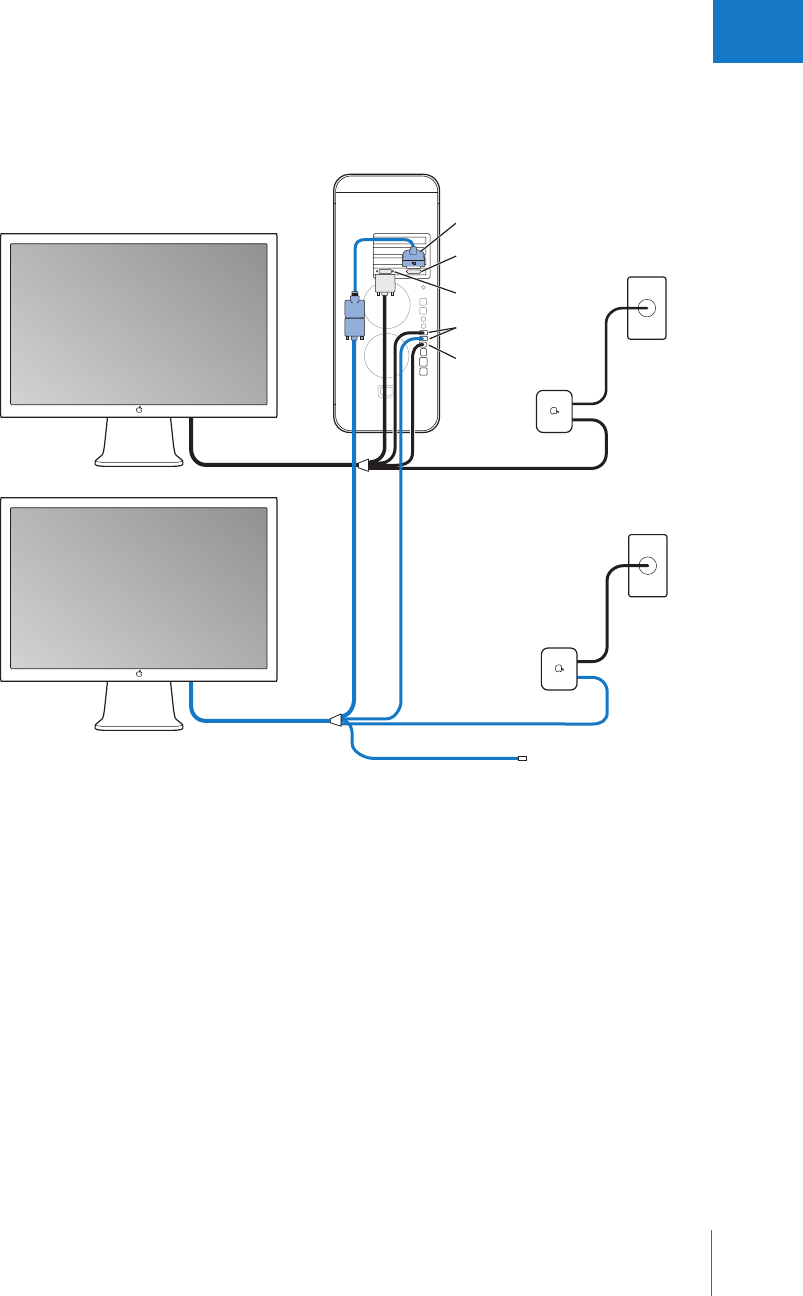
Appendix A Setting Up an Aperture System 419
IV
The following illustration shows one possible scenario for connecting two displays
to a computer.
3Turn on the displays (if necessary) and start up your computer.
You’ll now want to adjust your displays for proper viewing.
Configuring Mac OS X for Multiple Displays
If your computer is connected to two displays, you can set them up to show a
continuous desktop that extends across both screens. This is known as extended
desktop mode.
Because Aperture controls the second display, you must keep your computer in this
mode for the application to operate properly. If you work in mirroring mode, where the
same contents appear on both displays, Aperture may not work properly.
Apple Cinema Display
Second Apple Cinema Display
Power Mac G5
DVI display port
ADC to DVI adapter
ADC display port
USB ports
DC plug
AC plug
FireWire 400 port
Power
adapter
Power
outlet
DC plug
AC plug
Power
adapter
Power
outlet
FireWire connector
(not used)
£
£
d
H
H
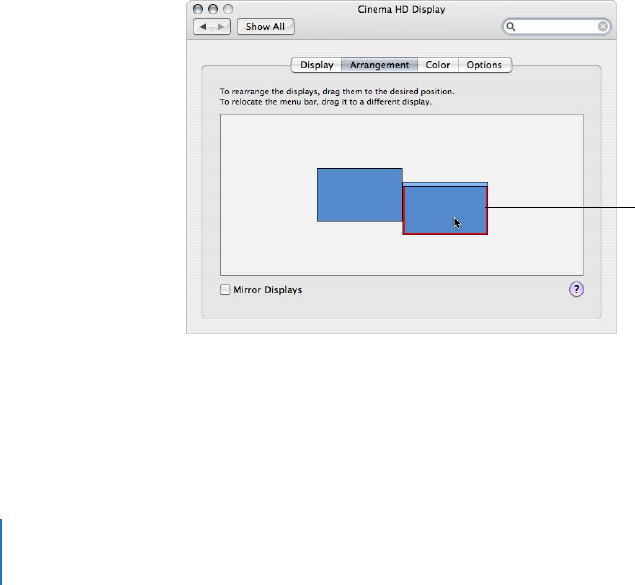
420 Part IV Appendixes and Glossary
To exit mirroring mode:
1Choose Apple (K) menu > System Preferences.
2Click Displays, then click Arrangement.
Note: If the Arrangement button does not appear, click the Detect Displays button. If
the Arrangement button still does not appear, make sure the second display is properly
connected to your computer. For more information, see “Setting Up Your System with
Two Displays” on page 417.
3Deselect the Mirror Displays checkbox.
After you connect a second display, your displays may show the arrangement of the
desktop out of order. For example, the display that shows the hard disk icon and menu
bar is typically on the left, so that your desktop extends out to the right on the
rightmost display.
To rearrange the position of the displays:
1Choose Apple menu > System Preferences.
2Click Displays, then click Arrangement.
Note: If the Arrangement button does not appear, click the Detect Displays button. If
the Arrangement button still does not appear, make sure the second display is properly
connected to your computer. For more information, see “Setting Up Your System with
Two Displays” on page 417.
3Drag one of the blue rectangles, representing one of the displays, to match the
position of the display on your desk.
The display screens temporarily refresh to accommodate the new arrangement.
The red outline indicates
the screen of the display
you are moving.
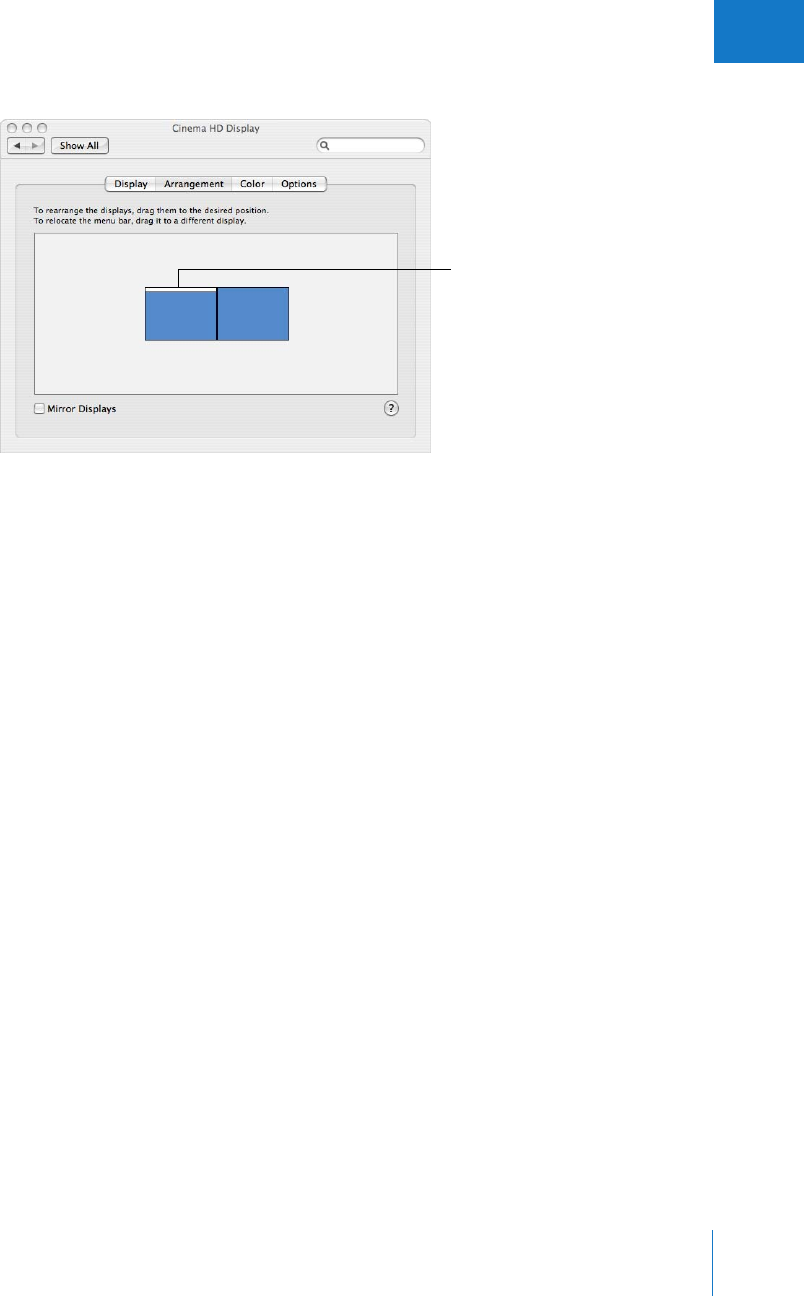
Appendix A Setting Up an Aperture System 421
IV
4Drag the white rectangle to move the menu bar to the display on the left.
The display screens temporarily refresh to accommodate the new arrangement. The
contents of the screen may be rearranged to accommodate the new position of the
menu bar.
To ensure proper color management from the time you download your images until
the time you print them or send them to a professional lab, it is essential that you color
calibrate your displays. Color calibrating your display or displays ensures that the colors
you see on your screen are faithfully reproduced when images are printed.
For more information about color calibrating your displays, see Appendix B, “Calibrating
Your Aperture System,” on page 423.
Drag the menu bar to the
display on the left.

423
B
Appendix
BCalibrating Your Aperture System
The accuracy of your display and printer’s ColorSync profile is
critical to ensuring accurate color reproduction.
Aperture is a powerful digital image adjustment application, but its power is limited to
the accuracy of the devices that display and print your images. This appendix provides
information about color calibrating cameras, displays, and printers. Whether you use a
desktop inkjet printer or a professional lab prints your images, calibrating your display
and print devices and using custom profiles ensure predictable colors in your prints
every time.
This chapter covers:
ÂAn Overview of Color Management (p. 423)
ÂCalibrating Your Camera (p. 427)
ÂCalibrating and Profiling Your Display (p. 428)
ÂCalibrating and Profiling Your Printer (p. 430)
An Overview of Color Management
Maintaining calibrated displays and printers is essential to good color management.
Every display and printer is unique. As these devices age, environmental conditions,
system configurations, and changes in materials such as inks and paper affect the
devices’ ability to reproduce color. Changes in the way a device reproduces color over
time are known as drift. Maintaining good color management ensures that when you
make adjustments to the colors in your digital images in Aperture, these colors are
faithfully reproduced on your display screen and on the printed page.
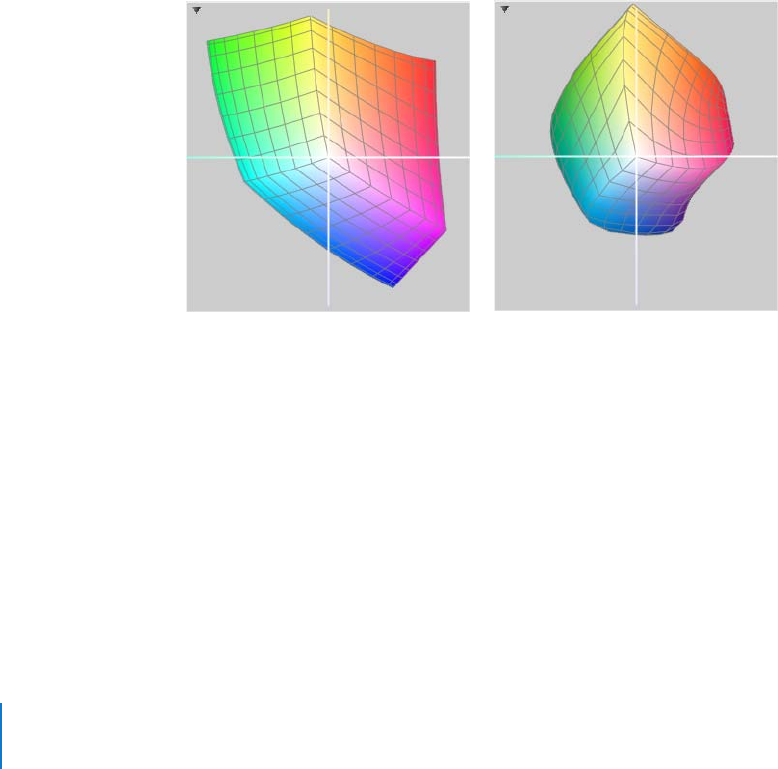
424 Part IV Appendixes and Glossary
What Is a Device’s Gamut?
The range of colors an individual color device is capable of reproducing is known as its
gamut. Because of the differences in gamuts between devices, such as a displays and
printers, these devices are incapable of exactly reproducing the same range of colors. In
fact, two displays of the same model made by the same manufacturer have distinct
gamuts. Types of ink and paper stock can also affect a printer’s gamut. Likewise, the
age of a display and how frequently it’s used can affect its gamut.
Displays and printers cannot reproduce the same colors consistently when their
gamuts don’t overlap. For example, displays are capable of showing brighter and more
saturated colors than the colors produced by a printer. The illustrations below show
representations of the range of color and brightness values each device is capable of
displaying. If you superimpose the printer’s gamut on the display’s gamut, some of the
display’s colors fall outside the range of the printer’s gamut. The printer is incapable of
reproducing the full range of colors in the image displayed onscreen because of the
printer’s smaller gamut. Color values that are contingent upon the ability of a device to
reproduce color are known as device dependent.
Display’s gamut Printer’s gamut

Appendix B Calibrating Your Aperture System 425
IV
What Is a Color Space?
When compared to the full spectrum of light, the gamut of a display or printer is
relatively narrow. Because of the small gamuts of the devices, mathematical models are
used to simulate the full spectrum of light within the gamuts of the devices. These
models are known as color spaces.
Color spaces in which the interpretation of a color is not dependent on a specific device
are known as device independent. The Commission Internationale de l’Eclairage (CIE) was
established in 1931 to create standards for a series of color spaces representing the visible
spectrum. The CIE color spaces, CIE XYZ and CIE Lab, are found in ColorSync Utility. As
technology evolved, new color spaces were created for RGB and CMYK color.
For more information about RGB and CMYK color, see Digital Photography Fundamentals,
available in the Aperture Help menu.
Device-independent color spaces are used by ColorSync Utility, Aperture, and other
color management systems to transfer and transform color data from one device to
another. Color from one device-dependent color space, such as a display, is translated
to a device-independent color space, such as sRGB, and then translated to another
device-dependent color space, such as a printer. The independent color space acts as
an objective interpreter, ensuring that the color data is accurately passed on to the
next device.
Understanding ColorSync Utility
ColorSync Utility is the color management system used by Mac OS X. ColorSync is
completely integrated with Mac OS X and available to all native Mac OS X applications,
including Aperture. ColorSync is used to manage accurate color, from image acquisition
to image manipulation and display to publishing. ColorSync is used consistently by all
devices and applications in your workflow.
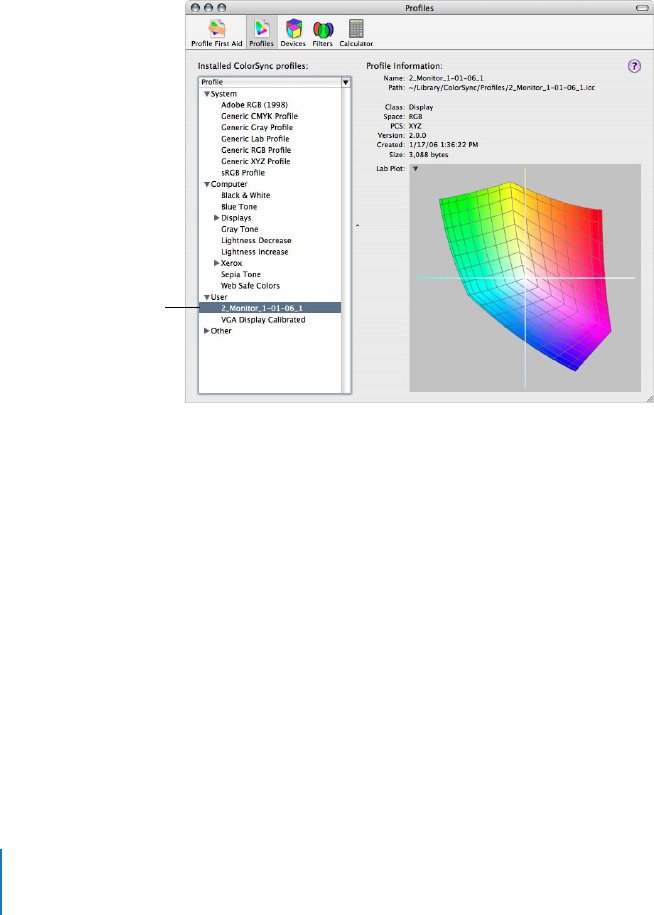
426 Part IV Appendixes and Glossary
What Is a Device Profile?
ColorSync and other color management systems use device profiles to identify and
transfer color data from one device-dependent color space, such as a camera, to
another device-dependent color space, such as a printer. Device profiles contain data
about the unique color characteristics of a device. A device’s profile includes
information about its gamut, color space, colorants, and modes of operation.
Many types of hardware and software have generic ICC profiles available in ColorSync
Utility. You can also use ColorSync Utility and a color measurement device, such as a
spectrophotometer, to accurately create your own custom device profile. When you
profile a color device, an ICC profile is created and placed in Users/username/Library/
ColorSync/Profiles/.
Once your display and printer have up-to-date custom profiles, you can begin to make
accurate color adjustments to your digital images in Aperture. Aperture uses the
ColorSync CMM, or color matching method, to translate and transfer the color data
from your camera to your display and then to your printer. Although the gamuts of the
devices are very different, ColorSync knows the exact parameters of their gamuts
because of their custom profiles. The ColorSync CMM allows you to preview how the
color in an image changes when you make color adjustments in Aperture. As long as
you have current profiles of your display and printer, the printed image will closely
match the image on the screen.
A custom device profile
for a display

Appendix B Calibrating Your Aperture System 427
IV
Calibrating Your Camera
Creating an accurate profile for your digital camera is not easy. Unless you’re using your
camera in a strictly controlled lighting situation, such as a studio, the variable lighting
conditions from one scene to another make profiling a digital camera difficult. This
leaves you with three options: shoot RAW files, painstakingly profile the camera with
the best profiling package you can afford, or use a generic profile, such as sRGB.
Shooting RAW Files Requires No Camera Profile
Whether you need to profile your camera depends on your workflow. If you shoot JPEG
files, the camera has to apply a color space to the image file. However, if you shoot RAW
files, no profiling is necessary. A RAW image file consists of bit-for-bit data captured by
the digital image sensor. When you select the RAW setting on your camera, the camera
ignores the color space settings. When you import the RAW image into Aperture,
Aperture ignores the color space settings as well.
Profiling Your Camera
Most digital cameras are set at the factory to shoot in a default color space when you
first use them, but each camera, regardless of manufacturer and model, has a unique
gamut. In order to color calibrate your camera, you need to create a new custom
profile. Color calibrating your camera requires the purchase of a profiling package
designed for profiling digital cameras, a carefully constructed lighting environment
dictated by the profiling package, and the use of a color calibration target. Because
each camera is unique, you must repeat the color calibration for each camera.
Using a Generic Profile
Provided that your displays and printers are calibrated, setting your camera to shoot
using a generic profile, such as sRGB, is easier than profiling your camera. Most digital
cameras have more than one color space option available. As the image is shot, the
camera converts the image from its native color space to the generic color space you
selected prior to shooting the image. When the image file is imported into Aperture,
ColorSync manages the color in the image according to the generic color space and
accurately displays it on the screen.
Note: Digital cameras that don’t have the ability to change generic profiles shoot in the
sRGB color space. You cannot create a custom profile for these cameras.
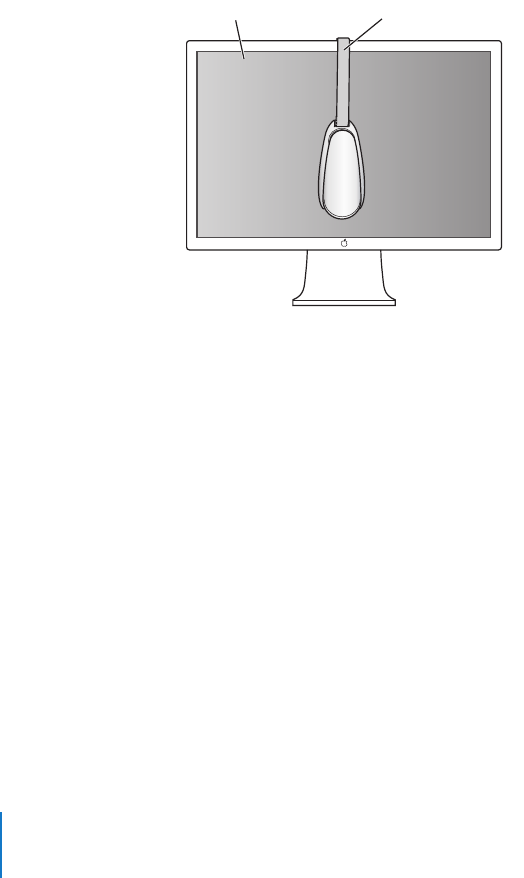
428 Part IV Appendixes and Glossary
Calibrating and Profiling Your Display
To color calibrate your display, you must use a third-party color management system.
Calibrating and profiling your display with a color management system is fairly easy.
Today, color management systems do most of the work for you. Color calibration
systems often come with an optical device that you place over the screen to read the
display’s output.
To calibrate and profile your display:
1Install the software that came with your color management system.
2Open the color calibration software application.
3Attach the optical device to your display, and follow the instructions that came with
your color management system.
When the application has finished calibrating your display, it asks you to save the
custom ICC profile created during the calibration process. This profile is saved at Users/
username/Library/ColorSync/Profiles/. Now your display is calibrated.
If you have a second display, you can calibrate it as well.
Apple Cinema Display Color calibration device
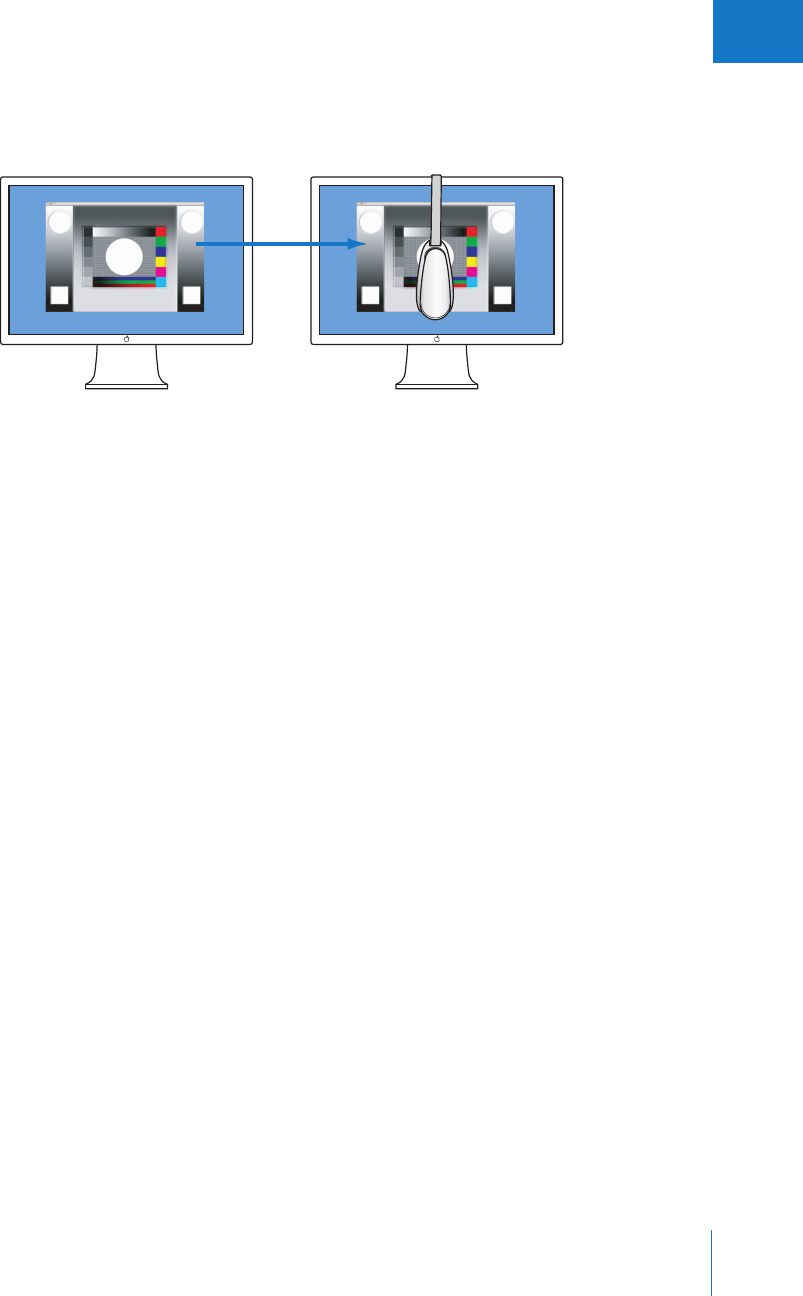
Appendix B Calibrating Your Aperture System 429
IV
To calibrate and profile your second display:
1Drag the application to the second display, then attach the optical device.
2Follow the previous calibration steps.
Now your second display is calibrated.
Important: Your display’s profile is a snapshot of the device’s behavior. If the behavior
of the display changes, the profile is no longer valid. Therefore, it’s important to profile
your display as frequently as possible. Some color adjustment professionals profile their
displays daily.
Drag the color calibration window
to the second display.
Apple Cinema DisplayApple Cinema Display

430 Part IV Appendixes and Glossary
Calibrating and Profiling Your Printer
Calibrating and profiling your printer is similar to calibrating and profiling your display.
The color management system comes with color charts specifically designed to help
the calibration system create a profile for your printer.
To calibrate and profile your printer:
1If you haven’t already done so, install the software that came with your color
management system.
2Open the color calibration software application.
3Follow the onscreen instructions to print the color chart using the printer you want
to profile.
4Follow the instructions that came with your color management system to scan the
color chart.
When the application has finished scanning the color chart, it asks you to save the
custom ICC profile created during the calibration process. This profile is saved at Users/
username/Library/ColorSync/Profiles/. Now your printer is profiled.
Important: Your printer’s profile is a snapshot of the device’s behavior. This means that
the profile is specific to the type of paper and ink used when the printer was profiled. If
you print on multiple types of paper, such as glossy and semi-glossy, it is important
that you create separate profiles for each paper type.

431
C
Appendix
CCredits
Vietnam
Photography by William McLeod
Copyright 2005 william mercer mcLeod
http://www.williammercermcleod.com
Sonoma Fairgrounds
Photography by William McLeod
Copyright 2005 william mercer mcLeod
http://www.williammercermcleod.com
Antarctica
Photography by Norbert Wu
Copyright 2005 Norbert Wu
http://www.norbertwu.com
Amanda Modeling
Photography by Matthew Birdsell
Copyright 2005 Matthew Birdsell
http://www.matthewbirdsell.com

433
Glossary
Glossary
additive color Images with color elements derived from the light source itself. RGB is a
common form of additive color. See also RGB.
adjustment Any change to the appearance of an image.
Adobe RGB (1998) A commonly used color profile often used for printing. Many
professional labs request that image files be delivered in this color space. See also
color space.
album A type of container in the Aperture Library that holds only versions. You can
create albums at either the project level or within a project. See also folder, Library,
project, version.
alternate The image immediately next to the pick in a stack. Alternate images are useful
when more than one image in a stack merit the pick position. See also pick, stack.
ambient light The lighting characteristics that already exist in the scene (indoor or
outdoor) without any additional light supplied by the photographer.
analog-to-digital conversion The process of transforming light energy voltage values
captured by the camera’s digital image sensor into binary (digital numbers) for
processing and storage. See also digitization, quantization.
angle of view The area of the scene displayed within the frame. Determined by the
focal length of the lens.
aperture An adjustable iris or diaphragm in the lens through which light passes.
Measured in f-stops. See also f-stop.
aperture priority A setting on certain cameras that automatically sets the shutter
speed for a correct exposure based on the aperture setting provided by the
photographer. See also exposure, shutter priority.
archive The process of storing image data on a permanent medium, such as optical
media (CD or DVD).

434 Glossary
aspect ratio The ratio of height to width of the photograph. Common North American
aspect ratios are 3.5 x 5, 4 x 6, 5 x 7, 11 x 14, and 16 x 20 inches.
auto focus The system within the camera that automatically focuses the lens on a
specific portion of the subject or scene.
automatic bracketing A setting on many professional cameras that automatically
brackets the exposure of the image. See also bracketing.
background The area in the rear of the image that appears behind the subject. See
also depth of field, foreground.
backlighting A light source that faces toward the lens of the camera, emanating from
behind the subject. Backlighting makes the outline of the subject stand out from the
background, often resulting in a silhouette. See also frontlighting, sidelighting, silhouette.
Bayer pattern color filter array A specific arrangement of red, green, and blue lenses
attached to the surface of a digital image sensor. There are roughly twice as many
green lenses as blue and red to accommodate how the human eye perceives color. See
also complementary metal oxide semiconductor (CMOS), charge-coupled device (CCD),
digital image sensor.
bit depth The number of tonal values or shades of a color each channel in a pixel is
capable of displaying. Increasing the bit depth of color channels in an image’s pixels
exponentially increases the number of colors each pixel can express. See also color
channels, color depth.
black point compensation Black point compensation ensures that black and white
luminance values are appropriately scaled to fit within the range or gamut of the
destination device (printer, paper, and ink). Using black point compensation helps
prevent clipping in shadows because the blacks are scaled to fit within the gamut of
the printer, paper, and ink.
bounce lighting Natural and unnatural light sources (flash and tungsten) redirected
toward the subject using a reflective surface to give the effect of natural light as well as
fill-in shadows. See also color temperature, fill-in lighting, white balance.
bracketing The process of taking three shots of the same image based on the aperture
and shutter values recommended by the light meter: one shot one stop under the
recommended exposure, one shot at the recommended exposure, and one shot one
stop over the recommended exposure. You can also narrow the bracketing range to
fractions of a stop. Bracketing is used in difficult lighting situations to ensure the scene
is captured with the correct exposure. See also automatic bracketing.
Browser The part of the Aperture interface that displays the contents of the Library,
projects, or albums. The Browser displays images either as thumbnails (grid view) or by
file information (list view). See also Viewer.

Glossary 435
Bulb (B) A manual shutter speed setting on many cameras used for timed exposures.
When the shutter is set to B, the shutter stays open until the photographer depresses
the shutter release button. See also shutter, shutter speed.
burning The process of exposing a portion of the image longer than the rest of the
image—the opposite of dodging. Burning a portion of the image makes that area
darker than the surrounding areas of the image.
calibration The process of creating an accurate color profile for a device. Calibrating a
device ensures accurate color translation from device to device. See also device
characterization.
camera A photographic device usually consisting of a lightproof box with a lens at one
end and either light-sensitive film or a digital image sensor at the other. See also digital
point-and-shoot camera, digital single-lens reflex (DSLR) camera.
camera shake Blurring of the image caused by the combination of a slow shutter speed,
small aperture, and long focal length. See also aperture, shutter speed, tripod, unipod.
capture The process of taking the image received by the digital image sensor and
camera processor and storing that information on the memory card in the camera. See
also camera, digital image sensor, memory card.
center-weighted metering A type of metering that measures the light in the entire
viewfinder but gives extra emphasis to the center of the frame. Center-weighted
metering is the most common type of metering in consumer cameras. See also
evaluative metering, light meter, spot metering.
charge-coupled device (CCD) A type of digital image sensor that records the pixel
information row by row. See also complementary metal oxide semiconductor (CMOS),
digital image sensor.
close-up An image where the subject usually appears within 3 feet of the camera. For
example, head shots are often referred to as close-ups. A shot of an ant on a flower’s
petal, where the ant fills a majority of the frame, is also a close-up.
CMYK A working space used for print pieces combining cyan, magenta, and yellow
inks in different combinations to create a color that reflects the proper color of light.
Black ink (K) is added to the image last to generate pure black on the page. See also
subtractive color, working space.
color cast An unnatural tint in an image due to a lack of color balance. Color casts
are often caused by artificial light sources such as interior lighting. Color casts in
images are commonly removed by adjusting levels, tint, or white balance. See also
white balance.

436 Glossary
color channels The individual channels into which color information for digital images
is divided. Each individual color channel represents one of the three individual primary
colors that combine to represent the final image. Each channel has a bit depth; most
digital image files have 8 bits per channel, meaning that there are 256 levels of color
for each channel. See also bit depth, color depth.
color depth The possible range of colors that can be used in an image. There are
generally three choices with digital images: grayscale, 8-bit, and 16-bit. Higher color
depths provide a wider range of colors but require more storage space. See also bit
depth, color channels.
color interpolation The process of calculating additional color values from light
captured via the red, green, and blue elements on the digital image sensor.
color management system (CMS) An application that controls and interprets the
reproduction of color between devices and imaging software for accuracy.
See also ColorSync.
color matching method (CMM) A software algorithm designed to translate color
information from one device profile to another, such as from your display to your printer.
ColorSync is a thoroughly integrated CMM used by Mac OS X. See also ColorSync.
color space A mathematical model used to describe part of the visible spectrum. Color
from one device is mapped from the device-dependent value to a device-independent
value in a color space. Once in an independent space, the color can be mapped to
another device-dependent space. See also device dependent, device independent.
color temperature Describes the color quality of light. Color temperature is measured
in units called kelvins (K). See also kelvin (K), white balance.
colorimeter An instrument capable of measuring the color value of a sample, using
color filters. A colorimeter is used to determine if two colors are the same. However, it
does not take into account the light under which a sample is measured. Colorimeters
are often used to calibrate displays and printers. See also calibration.
colorimetry The science of measuring color both objectively and perceptively.
ColorSync A color management system that is part of the Mac operating system. In
Mac OS X, ColorSync is thoroughly integrated with the entire operating system and is
available to all native Mac OS X applications. See also color management system (CMS),
color matching method (CMM), ColorSync Utility.
ColorSync Utility A centralized application for setting preferences, viewing installed
profiles, assigning profiles to devices, and repairing profiles that do not conform to the
current ICC specification. See also ColorSync, International Color Consortium (ICC), profile.

Glossary 437
Commission Internationale de l’Eclairage (CIE) An organization established in 1931 to
create standards for a series of color spaces representing the visible spectrum of light.
See also color space, device dependent, device independent, lab plot.
complementary metal oxide semiconductor (CMOS) A type of digital image sensor
that is capable of recording the entire image provided by the light-sensitive elements
in parallel (essentially all at once), resulting in a higher rate of data transfer to the
storage device. Tiny colored microlenses are fitted on each light-sensitive element in a
CMOS sensor to increase its ability to interpret light. See also charge-coupled device
(CCD), digital image sensor.
compositing A process in which two or more digital images are combined into one.
See also effects.
compression The process by which digital image files are reduced in size. Lossy
compression is the process of reducing digital image file sizes through the removal of
redundant or less important image data. Lossless compression reduces file sizes by
mathematically consolidating redundant image data without discarding it. See also
decompression, LZW compression.
composition The arrangement of visual elements in a scene.
contact sheet Based on a print preset in Aperture, a printed selection of thumbnail-sized
images with or without associated metadata. Contact sheets in Aperture are similar in
appearance to contact prints made by exposing negatives or transparencies against
photographic paper.
cones A type of receptor in the eye capable of perceiving color. There are three types
of cone cells, each sensitive to a particular frequency range in the visible spectrum.
Cone cells are capable of seeing either red, green, or blue colors. See also rods.
contrast The difference between the brightness and color values in an image that
allows the viewer to distinguish between objects in an image. High-contrast images
have a large range of values, from the darkest shadow to the lightest highlight.
Low-contrast images have a more narrow range of values, resulting in a “flatter” look.
See also density, flat.
crop The process of printing or distributing only part of the original image. The
general purpose of cropping an image is to create a more effective composition.
Another reason for cropping an image is to make it fit a particular aspect ratio, such as
4 x 6. See also adjustment, aspect ratio, effects.
decompression The process of creating a viewable image from a compressed digital
image file. See also compression.
definition The clarity of details in an image. See also resolution.

438 Glossary
densitometer An instrument designed to measure the optical density of photographs.
See also device characterization.
density The ability of an image to reproduce distinct dark colors. An image with high
definition in the darker colors is referred to as dense. See also contrast, flat.
depth of field The area of the image that appears in focus from the foreground to the
background. Depth of field is determined by a combination of the opening of the
aperture and the focal length of the lens. See also aperture, background, focal length,
foreground.
desaturate To remove color from an image. Complete desaturation results in a
grayscale image. See also saturation.
destination profile The working-space profile that defines the results of a color
conversion from a source profile. See also profile.
device characterization The process of creating a unique, custom profile for a device,
such as a display or printer. Characterizing a device involves specialized dedicated
hardware and software to determine the exact gamut of the device. See also
calibration, gamut.
device dependent Color values that are contingent upon the ability of a device to
reproduce those colors. For example, some colors produced by displays cannot be
reproduced on paper by a printer. The colors produced by the display are outside the
gamut of the printer. Therefore, those colors are considered to be device dependent.
See also gamut.
device independent Standard color spaces, such as CIE Lab and XYZ, where the
interpretation of a color is not dependent on a specific device. See also color space,
Commission Internationale de l’Eclairage (CIE).
diffused lighting A type of light that is scattered across the subject or scene. Diffused
lighting results in an image with low contrast and detail, as seen in images captured
outdoors on an overcast day. See also contrast, flat.
digital A description of data that is stored or transmitted as a sequence of ones and
zeros. Most commonly, refers to binary data represented using electronic or
electromagnetic signals. JPEG, PNG, RAW, and TIFF files are all digital. See also
digitization.
digital image sensor The computer chip located at the image plane inside the camera
that consists of millions of individual light-sensitive elements capable of capturing
light. See also camera, charge-coupled device (CCD), complementary metal oxide
semiconductor (CMOS), megapixel.

Glossary 439
digital noise Misinterpreted pixels occurring as the result of high ISO settings; also
known as chrominance signal-to-noise ratio. Random bright pixels, especially in solid
colors, are the result of digital noise. See also ISO speed.
digital point-and-shoot camera A lightweight digital camera with a built-in autofocus
feature, aptly named for the two steps required of the photographer to capture an
image. The lens, aperture, and shutter are one assembly that is usually irremovable
from the camera. See also camera, digital single-lens reflex (DSLR) camera.
digital single-lens reflex (DSLR) camera An interchangeable-lens camera where the
image created by the lens is transmitted via a reflexing mirror through a prism to the
viewfinder, and the viewfinder image corresponds to the actual image area. The mirror
reflexes, or moves up, so as not to block the digital image sensor when the shutter is
open. See also camera, digital point-and-shoot camera.
digitization The process of converting an analog voltage value to a digital value.
digitize A term often used by photographers for converting images captured on film
into a digital format, such as TIFF, using a film scanner.
disclosure triangle A small triangle you click to show or hide details in the
Aperture interface.
display The computer’s monitor.
distort Performing an adjustment that changes the shape or composition of an image.
See also effects.
dodging The process of limiting the exposure of a specific portion of an image (the
opposite of burning-in). Dodged areas in an image appear brighter than if they were
exposed for as long as the rest of the image. See also burning, effects, exposure.
dot gain A printing press term used to describe the enlargement of half-tone dots as
ink is absorbed into paper. Dot gain can affect the quality of an image’s appearance by
reducing the amount of white reflected off the paper.
dots per inch (dpi) A printer resolution measurement that refers to the maximum
number of dots within a square inch. See also print, resolution.
drift Changes in the way a device reproduces color over time. For example, the age of
inks and type of paper can cause a printer’s color output to drift. See also device
characterization, gamut.
drop shadow An effect that creates an artificial shadow behind an image. Typically
used on websites and in photo albums to create the illusion of three dimensions.
dust and scratch removal The process of digitally removing the blemishes caused by
dust and scratches on film scans.

440 Glossary
dye sublimation A type of printer that creates images by heating colored ribbon to
a gaseous state, bonding the ink to the paper. See also inkjet printer, print, photo
printer, RA-4.
editing The process of arranging and eliminating images. See also photo edit.
effects A general term used to describe the introduction of unnatural visual elements
to enhance an image. See also compositing, filters.
electromagnetic radiation A type of energy ranging from gamma rays to radio waves
that also includes visible light. See also light.
embedded profile The source profile saved in the digital image file. JPEG, TIFF, PNG, and
PDF file formats support embedded profiles. See also device characterization, profile.
emulsion The tiny layers of gelatin, consisting of light-sensitive elements, found in film.
When the emulsion is exposed to light, a chemical reaction occurs. After the film is
developed, an image appears. See also dust and scratch removal, film.
evaluative metering A type of metering that operates by dividing the frame into
several small segments, taking a reading from each individual segment, and processing
the average of the total segments to recommend the best exposure value for the
overall image. See also center-weighted metering, light meter, spot metering.
EXIF Short for Exchangeable Image File. The standard format for storing information—
such as shutter speed, aperture, white balance, exposure compensation, metering setting,
ISO setting, date, and time—about how an image was shot. See also metadata, IPTC.
export The process of formatting data in such a way that it can be understood by
other applications. In Aperture, images can be exported in their native RAW format, as
well as in JPEG, TIFF, PNG, and PSD formats. The EXIF and IPTC metadata associated
with an image can be exported as well.
exposure The amount of light in an image. Exposure is controlled by limiting the
intensity of light (controlled by the aperture) and the length of time light comes into
contact with the digital image sensor (controlled by the shutter). Exposure affects the
overall brightness of the image as well as its perceived contrast. See also aperture,
contrast, digital image sensor, shutter.
exposure meter See light meter.
extended desktop mode A setting in System Preferences that allows the Mac OS X
desktop to span multiple displays. See also display, mirroring.

Glossary 441
external editor An application used in tandem with Aperture to perform advanced
adjustments, such as compositing. Aperture creates a new master file when an image is
sent to an external editor and automatically retrieves the master file when the image is
saved. See also compositing, master file.
external flash A type of flash connected to the camera via the hot-shoe bracket or PC
terminal. Using an external flash is the best technique for avoiding the red-eye effect in
your subject’s eyes. See also flash, red-eye.
f-stop The ratio of the focal length of the lens to the diameter of the opening of the
aperture. See also aperture.
fill-in lighting The use of an artificial light source, such as daylight lamps or flash, to soften
a subject or fill in shadows. See also bounce lighting, color temperature, white balance.
film A flexible transparent base coated with a light-sensitive emulsion capable of
recording images. See also dust and scratch removal, emulsion.
filmstrip An interface element in Full Screen mode that allows you to scroll through,
rate, rotate, and search for images. See also Full Screen mode.
filters a. Modifiable search criteria used in the Query HUD to return a specific selection
of images. b. Effects applied in Photoshop that affect the visual quality of the image to
which they’re applied. c. A colored piece of glass or plastic designed to be placed in
front of a camera lens to change, emphasize, or eliminate density, reflections, or areas
within the scene. See also compositing, density, effects.
finishing The process of applying the final adjustments to a digital image just before
distribution. Finishing may involve applying an additional gamma adjustment upon
export, or using an external editor to either burn or dodge a portion of the image
before sending it to the printer. See also export, external editor.
Finder a. The part of Mac operating system software that keeps track of files,
applications, and folders and displays the desktop. b. See viewfinder.
FireWire The Apple trademark name for the IEEE 1394 standard. A fast and versatile
interface used to connect external devices to computers. FireWire is well suited to
transferring large amounts of data, and FireWire devices such as hard drives are often
used to provide additional storage space. Aperture vaults are commonly stored on
external FireWire hard drives. See also vault.
fixed lens See prime lens.
flash A device either on or attached to the camera that emits a brief, intense burst of
light when the shutter release button is pressed. Flashes, synchronized with the shutter,
are used to obtain a correctly exposed image in low-light situations. See also exposure,
external flash, fill-in lighting, hot shoe.

442 Glossary
flat The lack of density in an image when the contrast is too low. See also contrast, density.
focal length The distance from the rear nodal point of the lens to the point where the
light rays passing through the lens are focused onto the image plane—the digital
image sensor. Focal lengths are measured in millimeters (mm).
folder A type of container in the Aperture Library used to organize projects and
albums within projects. See also album, Library, project.
foreground The area of the image between the subject and the camera. See also
background, depth of field.
format a. File format: A specific method of encoding information. Most well-known file
formats, such as TIFF and PNG, have published specifications. b. Disk formatting: The
preparation of a hard disk or other storage medium for use with a file system. For
example, disk drives used with Mac OS X use the Mac OS Extended format. See also
JPEG, PNG, PSD, TIFF, vault.
frame The border of an image. Frame can also be used as a verb to describe the
process of constructing a composition within a specific image area. See also crop.
frontlighting A light source, emanating from the direction of the camera, that faces
toward the subject. See also backlighting, sidelighting.
Full Screen mode A mode in Aperture with minimal user interface, used to view
full-screen images with the least amount of light and color interference. See also
filmstrip, HUD.
gamma A curve that describes how the middle tones of an image appear. Gamma is a
nonlinear function often confused with brightness or contrast. Changing the value of
the gamma affects middle tones while leaving the whites and blacks of the image
unaltered. Gamma adjustment is often used to compensate for differences between
Macintosh and Windows video cards and displays. The Mac Standard gamma is 1.8; the
PC Standard is 2.2.
gamut The range of colors an individual color device is capable of reproducing. Each
device capable of reproducing color has a unique gamut determined by age, frequency
of use, and other elements such as inks and paper. See also device characterization,
device dependent, gamut mapping, ICC profile.
gamut mapping The process of identifying colors outside a device’s gamut and then
calculating the nearest color within its gamut. Gamut mapping is used when receiving
color information from another color space. See also color space, gamut.
highlights The brightest areas of the subject or scene. See also contrast, density, shadows.

Glossary 443
hot shoe An apparatus at the top of a camera designed to hold a portable flash. When
the shutter release button is pressed, an electric signal is transmitted through a
connection in the hot shoe to activate the portable flash. See also external flash, flash.
HUD Short for heads-up display. In Aperture, HUDs are floating tool panels that allow you
to work on your image in regular and Full Screen mode. You can open and then move a
HUD wherever you wish, based on your display setup. See also Full Screen mode.
hue An attribute of color perception; also known as color phase. Red and blue are
different hues.
International Color Consortium (ICC) An organization established to create the color
management standard known as the ICC profile. ICC profiles are universally accepted by
hardware and software vendors because they’re based on an open standard. See also
ICC profile.
ICC profile Created as a result of device characterization, the ICC profile contains the
data about the device’s exact gamut. See also device characterization, gamut,
International Color Consortium (ICC).
importing The process of bringing digital image files of various types into a project in
Aperture. Imported files can be created in another application, downloaded from a
camera or card reader, or brought in from another Aperture project. See also project.
inkjet printer A type of printer that creates images by spraying little ink droplets onto
the paper. See also dye sublimation, print, photo printer, RA-4.
IPTC Short for International Press Telecommunications Council. IPTC metadata is used by
photographers and media organizations to embed keywords (words describing the
characteristics of the image, including the photographer’s name) in the image files
themselves. Large publishers typically use image management systems to quickly identify
images based on the IPTC information embedded in the image. See also EXIF, metadata.
iris See pupil.
ISO speed The relative sensitivity of film provided as a benchmark by the International
Standards Organization (ISO). In digital cameras, the minimum ISO rating is defined by
the sensitivity of the digital image sensor. When the ISO setting on the camera is
increased, allowing the photographer to shoot in low-light situations, the camera
amplifies the voltage received from the light-sensitive elements on the digital image
sensor prior to converting the voltage signals to digital values. See also digital image
sensor, digital noise.
JPEG Short for Joint Photographic Experts Group, JPEG is a popular image file format
that lets you create highly compressed graphics files. The amount of compression used
can be varied. Less compression results in a higher-quality image. See also format.

444 Glossary
kelvin (K) A unit of measurement used to describe color values of light sources, based on a
temperature scale that begins at absolute zero. See also color temperature, white balance.
keywords Descriptive words about the subject in the image that are added to image
versions and saved as metadata. See also metadata.
lab plot A visual three-dimensional representation of the CIE Lab color space. See also
color space, ColorSync.
lens A series of sophisticated elements—usually glass—constructed to refract and
focus the reflective light from a scene at a specific point: the digital image sensor in a
camera. See also camera, digital image sensor, macro lens, prime lens, telephoto lens,
wide-angle lens, zoom lens.
Library In Aperture, a container file that holds projects, folders, albums, master files,
and versions. You organize the elements in the Library, rename items, sort them,
and so on, in the Projects panel. By default, the Aperture Library file is located at
Users/username/Pictures/. See also album, folder, master file, project, version.
light Visible energy in the electromagnetic spectrum with wavelengths ranging
between 400 and 720 nanometers. See also electromagnetic radiation.
light meter A device capable of measuring the intensity of reflective light. Light
meters are used as an aid for selecting the correct exposure settings on the camera.
Most cameras have internal light meters. See also center-weighted metering, evaluative
metering, meter, spot metering.
luminance A value describing the brightness of all color channels combined in a pixel.
LZW compression A lossless data-compression algorithm developed by Abraham
Lempel, Jakob Ziv, and Terry Welch in 1984. LZW compression algorithms are typically
used with JPEG and TIFF graphics files to reduce the file size for archiving and
transmission at a ratio of 2.8:1. See also compression, JPEG, TIFF.
macro lens A type of lens used for extreme close-up photography. See also camera,
lens, prime lens, telephoto lens, wide-angle lens, zoom lens.
master file The source image file that was copied from either your computer’s file
system or your camera’s memory card. In Aperture, the master file is never modified.
Anytime a change is made to the image, that change is applied to the version. See also
memory card, project, version.
megapixel 1 million pixels. For example 1,500,000 pixels is 1.5 megapixels. See also
digital image sensor, pixel.
memory card The device in the camera where digital images are stored. See also
camera, capture.

Glossary 445
metadata Data about data; metadata describes how data was collected and formatted.
Databases use metadata to track specific forms of data. Aperture supports both EXIF
and IPTC metadata. See also EXIF, IPTC.
meter The process of using a light meter to calculate the appropriate exposure. See
also light meter.
midtones The color values in an image between the highlights and shadows. See also
contrast, highlights, shadows.
mirroring The process of showing the same image on two or more displays. See also
extended desktop mode.
monitor See display.
negative Developed film with a reverse tone image of the subject or scene. See also
dust and scratch removal, emulsion, film, positive.
noise See digital noise.
offset press A type of professional printer used for high-volume printing for items such
as magazines and brochures. Offset printing presses deposit ink in lines of halftone
dots to produce images on the page. See also photo printer.
opacity The level of an image’s transparency.
optical zoom lens See zoom lens.
overexposure The result of exposing a scene too long. Overexposed scenes appear
too bright and lack adequate details in the shadows. See also exposure, underexposed.
panning Moving the camera along with a moving subject in order to keep the subject
in the frame. Panning a fast-moving subject with a slow shutter speed usually causes
the subject to remain relatively in focus, while the remaining areas of the scene are
blurred or stretched in the direction of the camera movement. See also camera.
panorama Usually refers to a scenic landscape image with a wide aspect ratio.
Photographers often digitally combine or “stitch” multiple images of the same scene to
create a continuous panoramic image. See also aspect ratio.
phase An attribute of color perception; also known as hue. See also hue.
photo edit The process of choosing selects, as well as sorting out images from a group
that you don’t plan to use or publish, also known as rejects. The more aggressively you
cull undesirable images from your working group of images, the more time you save
when you process the images for display. See also rating, Reject, Select.

446 Glossary
photo printer A type of printer capable of producing photo-quality images. See also
gamut, dye sublimation, inkjet printer, offset press, print, RA-4.
pick The image that represents the stack. The pick is usually the best image in the
stack. See also alternate, stack.
pixel The smallest discernible visual element of a digital image. See also megapixel.
polarizing filter A filter placed on the front of the camera lens that selectively
transmits light traveling on one plane while absorbing light traveling on other planes.
Polarizing filters are capable of reducing unwanted reflections on windows and shiny
surfaces. Polarizing filters are also used to darken the sky. See also filters.
positive Developed film where the tonal relationship of the subject or scene is the
same on film as viewed by the eye; also known as a slide. See also dust and scratch
removal, emulsion, negative.
PNG Short for Portable Network Graphics. PNG is a bitmapped graphics file that has
been approved by the World Wide Web Consortium to replace patented GIF files. PNG
files are patent and royalty free. See also format.
presets A saved group of settings, such as export, naming, print, and web export
settings. Presets determine properties such as file format, file compression, filename
construction, paper size, and ColorSync profile. Presets are usually defined for particular
workflows and can be tailored to client specifications. See also ColorSync.
prime lens A lens with a fixed focal length that cannot be changed.
print An image printed on paper; also known as a photograph. See also dye
sublimation, inkjet printer, RA-4.
profile A compilation of data on a specific device’s color information, including its
gamut, color space, and modes of operation. A profile represents a device’s color-
reproduction capabilities and is essential to effective color management. See also
device characterization, gamut.
program exposure An exposure mode on many automatic cameras where the camera
automatically sets the aperture and shutter values for a correct exposure. See also exposure.
project In Aperture, the top-level container that holds all the master files, versions, and
metadata associated with your shoot. See also album, folder, Library, master file, version.
PSD The file extension for Photoshop Document. PSD files are proprietary graphics
files for Adobe Systems Incorporated. See also format.
pupil The part of the eye that contracts and expands depending on the amount of
light; also known as the iris.

Glossary 447
quantization The process of converting a value derived from an analog source into a
discrete digital value. See also digitization.
QuickTime A cross-platform multimedia technology developed by Apple. Widely used
for editing, compositing, web video, and more.
RA-4 A type of professional printer capable of printing digital files on traditional
photographic paper. RA-4 printers use a series of colored lights to expose the paper;
the colors blend together to produce continuous-tone prints. See also dye sublimation,
inkjet printer, print, photo printer.
RAID Short for Redundant Array of Independent Disks. A method of providing
photographers who have large image libraries many gigabytes of high-performance
data storage by formatting a group of hard disks to act as a single drive volume. The
performance of a group of hard disks striped together as a RAID can be much higher
than that of the individual drives.
RAM Short for random-access memory. A computer’s memory capacity, measured in
megabytes (MB) or gigabytes (GB), which determines the amount of data the computer
can process and temporarily store at any moment.
rangefinder An apparatus found on many cameras used to help focus the image. See
also camera, viewfinder.
raster image processor (RIP) A specialized printer driver that replaces the driver that
comes with your printer. It takes input from applications and converts, or rasterizes, the
information into data that the printer understands so that it can put dots on a page.
Software RIPs typically offer features not found in standard printer drivers.
rating In Aperture, the process of adding a value to an image to indicate its quality in
relation to other images in a selection. See also photo edit, Reject, Select.
RAW The original bit-for-bit digital image file captured by the camera.
reciprocity The relationship between the aperture and the shutter that allows for
correct exposures as a result of multiple shutter speed and aperture setting
combinations. An increase in aperture and decrease in shutter speed creates the same
exposure as the previous aperture and shutter combination, and vice versa. See also
aperture, shutter.
red-eye The phenomenon that gives people glowing red eyes in photographs. Red-
eye is caused by the close proximity of the flash to the lens (especially built-in flash). In
Aperture, Red Eye is an adjustment that replaces red pixels with black, eliminating the
red-eye effect. See also external flash.
Reject In Aperture, a negative rating applied to an image as part of the photo editing
process. See also photo edit, rating, Select.

448 Glossary
relative colorimetric A rendering intent suitable for photographic images. It compares
the highlight values of the source color space to that of the destination color space and
shifts out-of-gamut colors to the closest reproducible color in the destination color
space. See also rendering intent.
rendering intent The method by which colors that are out of gamut for a selected
output device are mapped to that device’s reproducible gamut.
resolution The amount of information a digital image is capable of conveying.
Resolution is determined by the combination of file size (number of pixels), bit depth
(pixel depth), and dpi (dots per inch). See also bit depth, dots per inch (dpi), pixel.
retouching The process of altering an image to add or remove details. See also
burning, compositing, dodging, effects, filters.
RGB Short for Red, Green, Blue. A color space commonly used on computers in which
each color is described by the strength of its red, green, and blue components. This
color space directly translates to the red, green, and blue elements used in computer
displays. The RGB color space has a very large gamut, meaning it can reproduce a wide
range of colors. This range is typically larger than printers can reproduce. See also
additive color.
rods A type of receptor in the eye capable of perceiving luminance. Rods do not
perceive color, but only levels of brightness. See also cones.
saturation The intensity of color in an image. Saturated colors are perceived to have a
“purer” look, resulting from the absence of the color gray. See also adjustment, desaturate.
Select In Aperture, the highest rating that can be applied to an image as part of the
photo editing process. A Select rating is applied when you intend to display or
distribute the image. See also photo edit, rating, Reject.
selective focus The process of isolating a subject by using an f-stop that produces a
shallow depth of field. See also depth of field.
shadows The darkest areas of a subject or scene. See also contrast, density, highlights.
shortcut menu A menu you access by holding down the Control key and clicking an
area of the interface, or by pressing the right mouse button.
shutter A complicated mechanism, usually consisting of a blade or a curtain, that
precisely controls the duration of time light passing through the lens remains in
contact with the digital image sensor. See also shutter speed.
shutter priority A setting on certain cameras that automatically sets the aperture for a
correct exposure based on the shutter speed set by the photographer. See also
aperture priority, exposure.

Glossary 449
shutter speed The length of time the shutter is open or the digital image sensor is
activated or charged. Shutter speeds appear as fractions of a second, such as 1/8 or
1/250. See also shutter.
Shuttle control A control in the Full Screen mode filmstrip that allows you to quickly
advance through the images in the filmstrip. See also filmstrip, Full Screen mode.
sidelighting Light that hits the subject from the side perpendicular to the angle of the
camera. See also backlighting, frontlighting.
silhouette An image in which the subject is a solid dark shape against a bright
background. Extreme backlighting, such as a sunset, can cause the silhouette effect
when your subject is placed in the foreground. See also backlighting, foreground.
single-image print Based on a print preset in Aperture, a single image printed on a
single sheet of paper.
slider In Aperture, an interface element that can be dragged forward or backward to
make an adjustment. Sliders can be found in the Adjustments Inspector as well as in
the Adjustments HUD. See also adjustment, HUD.
soft proof The onscreen simulation by a display of the expected output from a
printer or press.
slide See positive.
slideshow An animated presentation of a series of images. In Aperture, slideshows can
be combined with music to present a series of images across up to two displays.
Smart Album Dynamic albums in Aperture used to organize images by gathering
versions based on search criteria. See also album.
soft lighting See diffused lighting.
source image file See master file.
source profile The profile of an image file before it undergoes color conversion.
spectrophotometer An instrument that measures the wavelength of color across an
entire spectrum of colors. As it can be used to profile both displays and printers, the
spectrophotometer is preferred for device profiling.
spot metering A type of metering that operates by metering within a small target that
is usually in the center of the frame. See also center-weighted metering, evaluative
metering, light meter.

450 Glossary
sRGB A common working space designed to represent the average PC monitor.
Because of its small gamut, it is suitable for web graphics but not for print production.
See also working space.
stack In Aperture, a set of similar images, where only one image is intended for use.
See also alternate, pick.
stopping down The process of changing the aperture, or f-stop, to a smaller opening.
See also aperture, f-stop.
subtractive color Images with color elements derived from the light reflected off the
surface of an object. CMYK is a common form of subtractive color. See also CMYK.
SWOP Short for Specifications for Web Offset Publications, a standard printing-press
profile. Web here refers to a web press, not to the Internet.
tabs In Aperture, elements that delineate projects, folders, or albums in the Browser
when more than one is selected in the Projects panel. You click a tab to view the
contents of a currently open project, folder, or album. See also album, folder, project.
target A reference file used to profile a device such as a scanner or digital camera. It
often contains patches whose color values have been measured. The output from a
device is then compared with the target. See also device characterization.
telephoto lens A lens with a long focal length that magnifies the subject. See also lens.
TIFF Short for Tagged Image File Format. TIFF is a widely used bitmapped graphics file
format, developed by Aldus and Microsoft, that handles monochrome, grayscale
images. See also format.
transition A visual effect applied between the display of images in a slideshow. In
Aperture, you can choose the duration of the cross fade between images.
tripod A stand with three legs used to keep a camera steady. The use of a tripod is
especially necessary when shooting long exposures. See also camera shake, exposure.
tungsten light A type of light with low color temperature. Tungsten light sources
usually include household lamps but should not be confused with fluorescent. See also
color temperature, white balance.
underexposed The result of not exposing a scene long enough. Underexposed scenes
appear dark. See also exposure, overexposure.
unipod Similar to a tripod; a stand with one leg used as an aid in keeping a camera
steady. See also camera shake, exposure.
untagged A document or an image that lacks an embedded profile.

Glossary 451
vault A designated storage space that contains an exact copy of the Aperture Library
(from the last time you backed up), usually saved on an external FireWire drive. See also
FireWire, Library.
version The file containing all the metadata and adjustment information applied to an
image. In Aperture, only versions are changed. The master image files are never
touched. See also master file.
Viewer An area in Aperture that displays the images currently selected in the Browser.
You can use the Viewer to perform adjustments on images as well as compare them
with each other. See also Browser.
viewfinder The part of the camera designed to preview the area of the scene that will
be captured by the digital image sensor. See also camera, digital image sensor.
vignetting Darkening, also known as fall-off, at the corners of the image as a result of
too many filters attached to the lens, a large lens hood, or poor lens design. See also
filters, lens.
watermark A visible graphic or text overlay applied to an image to indicate that the
image is protected by a copyright. Watermarks are used to discourage the use of your
images without your explicit permission.
white balance An adjustment that changes the color temperature and tint of a digital
image. The goal of adjusting an image’s white balance is to neutralize color casts in an
image. For example, if the white in an image is too yellow because of incandescent
lighting, white balancing adds enough blue to make the white appear neutral. See also
color cast, color temperature, kelvin (K).
white point The color temperature of a display, measured in kelvins. The higher the
white point, the bluer the white is; the lower the white point, the redder the white. The
native white point for a Macintosh computer is D50 (5000 kelvins); for a Windows PC, it
is D65 (6500 kelvins). See also color temperature, kelvin (K).
wide-angle lens A lens with a short focal length that takes in a wide view. The focal
length of a wide-angle lens is smaller than the film plane or digital image sensor. See
also digital image sensor, lens.
workspace The arrangement of the Browser, Viewer, Projects panel, and inspectors. In
Aperture, there are multiple workspaces. See also Browser, Viewer.
working space The color space in which you edit a file. Working spaces are based
either on color space profiles such as Apple RGB or on device profiles.
zoom lens A lens that has the mechanical capacity to change its focal length; also
known as an optical zoom lens. See also lens.

453
Index
Index
2-page spreads 371
2:3 portrait aspect ratio 385
3:2 landscape aspect ratio 385
3:4 portrait aspect ratio 385
4-Up Fast or Slow slideshow preset 312, 314
4:3 landscape aspect ratio 385
100% view 330
A
Actual Size button 56, 368, 371
actual size display 56, 368, 371
Actual Time Zone pop-up menu 110
adapters (graphics cards) 418
ADC ports 418
Add Adjustments pop-up menu 49, 61
Add Filter pop-up menu 252, 254, 257, 258, 264
Add gaps between Sort Groups checkbox 68
additive color 433
Add Keyword button 63, 207, 210
Add Keyword field 45, 214
Add Metadata Box button 55, 363, 367, 389
Add New Page command 375
Add Page button 58, 340, 347
Add Pages pop-up menu 54, 367
Add Photo Box button 55, 363, 367, 383
Add Subordinate Keyword button 63, 207, 211
Add Text Box button 55, 58, 341, 346, 363, 367, 389
Add to Favorites command 82
Add to Library pop-up menu 41, 79
Add Vault dialog 404
adjusting Light Table view 330
Adjustment Actions pop-up menu 49, 61
adjustments. See image adjustments
Adjustments HUD
controls 32
functions and controls 61
opening 172
Adjustments HUD button 171
Adjustments Inspector 24, 49, 51
adjustment tool HUDs 173
adjustment tools 47, 170
Adobe RGB color profile 433
Album Pick button 170
albums
album picks 182
copying albums 396
copying images from 272
creating 252
defined 72, 433
deleting albums 83
deleting images from 82, 132
dragging images into 134
importing folders of images as 112
importing from iPhoto Libraries 113
Light Table albums. See Light Table
marking picks 170
moving images into 134
organizing projects with 79
planning books 364
saving for slideshows 314
saving search results as 265
searching for images 249
Smart Albums. See Smart Albums
stacks in 182
transferring Light Table images into 331
types and functions 74
web gallery albums. See web galleries
web journal albums. See web journals
aligning
images in Light Table 328
images in photo boxes 384
items on book pages 362
alternate images 433
Alternate option (multiple displays) 157
Always Show Toolbar button 169, 171
ambient light 433
American Newspaper Publishers Association (ANPA)
codes 242, 304
analog-to-digital conversion 433
angles of view 433
ANPA codes 242, 304
Aperture
changing files outside of application 115
overview 16
Aperture Library file 115
Aperture options checkboxes 68

454 Index
aperture priority 433
aperture settings
aperture, defined 433
in metadata 228
Apple Display Connector (ADC) ports 418
applying
keywords 213, 223
master page designs 361
Archive button 236, 237
archiving images. See backing up images
Arrangement button 420
Arrange Sets command 237, 240
arranging items. See rearranging images
aspect ratios 140, 262, 263, 385, 434
assigning keywords 207, 213, 217, 222, 223
attaching images to email 306
auto-bracketed images 109, 434
Auto Exposure button 61
Auto Exposure Reset button 61
Autoflow Selected Images command 374
Autoflow Unplaced Images command 374
auto focus 434
Auto Levels Combined button 62
Auto Levels Reset button 62
Auto Levels Separate button 62
automatic bracketing 109, 434
automatic image placement 373
automatic page creation 376
automatic stack creation 177
Auto-Stack command 178
Auto-Stack Selected Images HUD 178
Auto-Stack slider 109, 177
Avoid command 168
B
B (Bulb) setting 435
backgrounds
in book pages 382
in Browser 125
in images 434
in slideshows 316
in Viewer 148
backing up images
after import 114
archives, defined 433
creating vaults 404
functions and controls 403
overview 37, 400
planning systems for 401
reconnecting hard disks 406
restoring files 400
restoring Library 409
storage space 402, 403
updating vaults 405
in vaults 37, 53, 78, 404
working with multiple computers 407
backing up in slideshows 315
backlighting 434
back-to-back printing 371
Badge referenced images checkbox 136
badges
displaying 228, 244
Light Table display 331
types of 243
Basic workspace layout 64
Batch Change dialog 241
batch changes to metadata 241
Bayer pattern color filter array 434
bit depth 278, 434
black-and-white images 387
black point compensation 280, 434
Black Point Compensation setting 280, 302, 308
black Vault Status buttons 403
blank screens, setting 157
bleeds 282
Book Action pop-up menu 55, 367, 374
book albums
copying 396
creating 365
saving search results as 265
Book Layout Editor
displaying 358
functions and controls 54, 366–368
master page views 393
overview 36
printing books 283
selecting themes 369
switching to Viewer 373
books
adding images 362, 365, 372, 373
adding or removing pages 367, 374, 376, 382
badge overlays 243
book albums 265, 365
copying albums 396
covers 368, 380
creating 36, 365
creating automatically 361
displaying pages 370
editing text and layout 366
flowing unplaced images into 374
indexes 367, 378
layout controls 55
metadata boxes 389
metadata in 361, 367
navigating through pages 370
numbering pages 382
number of pages in 363
ordering 363, 368, 397
overview 358
photo boxes 367, 383

Index 455
planning process 363
printing 283, 363, 397
rearranging pages 381
rebuilding after changes 383
saving search results in albums 265
shortcut keys for turning pages 370
single-page or full-spread view 368, 371
text boxes 388
text on pages 362, 367
themes 359, 365, 366, 369
unplaced images 372, 377
updating pages with changes 396
zooming view of pages 368, 371
Book Size pop-up menu 365
borders
on images 195, 122
on printed images 281
bounce lighting 434
bracketed images 109, 177
Bring Forward button 55, 367, 387
Browser
badge overlays 243, 245
creating versions in 130–132
darkening or lightening background 125
deleting images 82, 132
dragging images into projects or albums 134
finding images in 127
functions and controls 42
grid view 125, 142
illustrated 16
image information in 121
keyword display 202, 205
list view 126, 142
metadata display 226, 228, 230
navigating in 122
opening multiple projects 141
overview 120
project tabs 141
rearranging images in 128
rotating images in 130
selecting images in 122
sorting images in 129
splitting panes 141
stacks in 176
working with 21
browsing through keywords 209
Bulb setting (B) 435
burning 435
bus-powered hard disks 416
Buy Book button 56, 368
buying books. See ordering books
byline-based web journal pages 347
bylines in metadata 229, 242
C
cables 414
Calendar search options 256
calibration
camera profiles 427
color management and 423
color spaces and 425
ColorSync Utility and 425
custom device profiles 307, 352
defined 435
device profiles 426
display calibration 278, 421, 428
printer profiles 430
proofing profiles 156
cameras
camera profiles 427
connecting to computers 414
connection modes 91
defined 435
importing images from 19, 92–96
importing selected images 95
metadata 228
resolution settings 278
shutter speeds and settings 50
supported digital cameras 20
camera shake 435
Camera Time Zone pop-up menu 110
captions
in metadata 228, 242
in Metadata Inspector 50
searching for images by 253
capturing images 435
card readers
connecting to computer 414
ejecting cards 94
erasing cards 94
importing files from 19, 91–96
importing selected images 95
carriage return characters 106
categories
adding to metadata sets 236
deleting 236
in IPTC and EXIF metadata 229
metadata character limits 242
category-based web journal pages 347
CCDs (Charged Coupled Devices) 435
centering images 384
center-weighted metering 435
changing the location of images 100
characters
in filenames 106
limits in IPTC data 201
limits in metadata 242
Charged Coupled Devices (CCDs) 435

456 Index
CIE (Commission Internationale de l’Eclairage)
425, 437
CIE color spaces 425
cities
city-based web journal pages 347
metadata character limits 242
names in metadata 229
Clear Compare Item command 150
Close All Stacks button 109, 170
close button 63, 206, 252
close-ups 435
closing
projects 80, 141
stacks 109, 170, 176, 181
CMM (color matching method) 436
CMOS (complementary metal oxide
semiconductor) 437
CMS (color management systems) 436
CMYK color space 425, 435
color channels 436
color corrections 324
color depth 436
color display proofing profiles 156
color gamut. See gamut
colorimeters 436
colorimetry 436
color interpolation 436
color management
calibration 278, 421, 428
camera profiles 427
color spaces 156, 425
ColorSync utility 425
device profiles 426
gamut 154, 424
overview 423
printer calibration 430
color management systems (CMS) 436
color matching methods 426, 436
color of book covers 380
color spaces 156, 425, 427
ColorSync 426, 436
ColorSync Profile pop-up menu 280, 307, 352
ColorSync profiles 280, 292, 302
ColorSync Utility
camera profiles 427
color spaces in 425
defined 436
overview 425
columns
of images in slideshows 316, 319
in metadata display 230
in text boxes 392
in web galleries 338
in web journals 341
in webpages 343
Columns slider 316, 319
Columns value slider 57, 58, 338, 341, 343
Commission Internationale de l’Eclairage (CIE) 425,
437
compare items 123, 150, 195
comparing images
Light Table review 34
to originals 156
overview 27
rating process and 195
selecting compare items 123, 150
in stacks 178
in Viewer 146
complementary metal oxide semiconductor
(CMOS) 437
compositing 437
composition 437
compression
defined 437
exporting compressed images 305
image quality 307
printing and 278
web exports 352
cones 437
connecting multiple displays 418
contact sheets 279, 282, 437
continuing slideshows after pauses 315
continuous-play slideshows (looping) 316
contrast 437
control bar 43
copies to print 279
Copy Content command 386
copying
book albums 396
digital master files 293
duplicating images 134
duplicating versions 169
image adjustments 170
images from projects or albums 134
images from Smart Albums 272
keywords 218–220
Library 407
page designs 381, 394
photo box contents 386
pixels 170
print presets 285
copyright
data on webpages 345
metadata 50, 89, 228
metadata character limits 242
watermarks 303
counters in filenames 104, 105, 108, 295
countries
metadata character limits 242
names in metadata 229
cover buttons 56
covers for books 368, 380

Index 457
created date metadata 242
Create Index command 379
Create new versions when making adjustments
checkbox 68
creation dates 257
credits in metadata 228, 242
crop marks 281
cropping images 170, 384, 437
Crop tool 47, 170
Crop tool HUD 62
Crossfade checkbox 317
cross-platform filenames 106
Customize Toolbar dialog box 66
Custom name formats 299
Custom Name with Counter format 105
Custom Name with Index format 105
Cut Content command 386
cut lines 282
D
Date pop-up menu 257
dates
creation dates 257
date-based organization 79
date-based web journal pages 347
in filenames 85, 89, 105
finding images by 256
in metadata 50, 228, 242
sorting by 129
decompression 437
decorations 245, 331
Decrease Diameter command 152
Decrease Rating button 44, 167, 190
decreasing ratings 44, 167, 190, 196
definition in images 437
Delete command 83
Delete Folder command 83
Delete Master Image and All Versions command
82, 133
Delete Page button 382
Delete Pages button 55, 367
Delete Project command 83
Delete Smart Album command 273
Delete Version command 132
deleting. See removing
deleting previews 162
Demote button 169
demoting images 169, 182
densitometers 438
density 438
depth of field 438
desaturating images 438
deselecting images 123
designs for pages. See themes
desktop, extended 419
destination profiles 438
destinations for restoration 409
Detail Image Preset pop-up menu 349
Detail Images panel 57, 58, 338, 340, 342
Detect Displays button 420
device characterization 438
device-dependent color capabilities 424, 438
device-independent color capabilities 425, 438
device profiles 426
diffused lighting 438
digital cameras. See cameras
digital data 438
digital image sensors 438
digital master files
copying versions of 131
creating projects 74
creation dates 257
defined 72, 444
deleting 82, 132, 133
displaying 156, 171
exporting 293
importing into projects 88
location of 115, 228
versions of 73
digital noise 439
digital photos. See images
digital point-and-shoot cameras 439
digital single-lens reflex cameras (DSLRs) 439
Digital Visual Interface (DVI) ports 418
digitization 439
digitizing images 439
disclosure triangles 63, 79, 207, 403, 439
disconnecting hard disks 406
display adapters 416
display controls 43
displaying
Adjustments Inspector 49, 51
adjustment tool HUDs 62
all images 193
badges 244
Book Layout Editor 358
digital master files 156, 171
existing vaults 405
export presets 306, 351
favorite projects 82
filmstrip 168
full-resolution images 147, 155
Full Screen mode 164
hot areas 154
keyword controls 213, 215
keywords 202–205
Keywords HUD 63, 207, 208, 209, 210, 211
Light Table adjustments 329
master pages 394
metadata 142, 158, 228, 232
metadata sets 233

458 Index
multiple displays. See dual displays
overlapping images in Light Table 329
overlays 204
pages in books 370
page spreads in books 368
panels with keyboard shortcuts 65
projects 79
Smart Album contents 268
stacks 151
storage space available 403
toolbar 169
unrated images 193
Viewer 148
watermarks 303, 308
webpages 341, 342
zooming in or out to view book pages 371
displays
calibration 278, 307, 421
color management 423
defined 439
device profiles 426
extended desktop or mirroring mode 419
Full Screen mode 164
gamut 424
HUDs. See HUDs
Light Table adjustments 329
multiple displays. See dual displays
proofing images on 286
rearranging 420
slideshows 312, 316
Display Size slider 56, 368, 371
Dissolve slideshow preset 312, 314
distorting adjustments 439
distributing images
Light Table review 34, 329
methods 32
printing books 36
slideshows 33
web galleries 34
web journals 35
webpages 334
dividing stacks 109, 183
dodging 439
dot gain 439
dot-per-inch (dpi) print resolution 280
dots per inch (dpi) 307, 439
double-sided printing 371
dpi (dots per inch) 307, 439
DPI field 280
dragging
filmstrip 168
folders into projects 112
images from Smart Albums 134
images in Browser 128
images in Light Table 326, 327
images in stacks 184
images into books 361, 372
images into projects 110
images into stacks 183
images into web galleries 337
images into web journals 340
keywords for images 207
keywords in preset groups 217
panning view of images 155
stacks 184
drift 423, 439
drivers for hardware 416
drop shadows 439
DSLRs (digital single-lens reflex cameras) 439
dual displays 157, 417–421
calibrating 429
configuring 419–421
Full Screen mode and 23, 164
PCI graphics cards and 416
primary and secondary Viewer 148
slideshow choices 316
slideshows and 316, 320
duplex printing 371
Duplicate Book command 396
Duplicate Page command 375, 376, 377, 378, 381,
394
Duplicate Version button 47, 131, 169
duplicating. See copying
Duration slider 316
dust and scratch removal 439
DVI ports 418
dye sublimation 440
E
Edit Button Sets window 216
Edit Content button 55, 362, 366, 388
Edit Current Set command 236
editing
badge overlays on images 243
book page layouts 362
changing files outside of Aperture 115
contents of Smart Albums 272
export presets 309
images 20–26, 440
master pages 394
metadata 232, 241
metadata sets 236
photo layout in books 385
print presets 285
slideshow presets 318
web export presets 353
webpage themes 342
Edit Layout button 55, 362, 366, 385, 389
Edit Link button 349
effects 440
Eject button 406

Index 459
ejecting
cards from readers 94
hard disks 406
electromagnetic radiation 440
Email button 46
Email Export Preset pop-up menu 67, 305
Email images using pop-up menu 67
emailing images 305
embedded profiles 440
empty projects 93, 95
emulsion 440
erasing cards in readers 94
evaluative metering 440
evenly distributing images in Light Table 329
event-based organization 79
Exchangeable Image File data. See EXIF
(Exchangeable Image File) metadata
EXIF (Exchangeable Image File) metadata
adding fields to metadata sets 236
date information 256
defined 440
displaying 50, 142, 158
exporting 292
fields in 228
finding images with 260
EXIF button 236
Exit Full Screen button 167
Export button 63
Export dialog 293
Exported Master Name Format pop-up menu 293
Export File Format pop-up menu 67
exporting
adjusting images for export 301
black point adjustments and 302
ColorSync Profiles and 302
digital master files 293
export presets. See export presets
gamma adjustments 302
HTML files 348
image quality and 302
images, defined 440
images for email 305
keywords 201, 224
lists of metadata 292
metadata 304
metadata with images 304
overview 292
PDF files 283
projects 114, 408
renaming files during export 298
using plug-ins 305
versions 296, 350
watermarks 303, 355
web export presets 351
web journal pages 341
webpages 338, 348
XMP sidecar files 292
Export Name Format pop-up menu 297, 299
export plug-ins 305
Export Preset pop-up menu 296
export presets
creating 308
defined 292, 306
deleting 309
displaying settings 307
for email 305
filenames and 299
image adjustments and 301
metadata included in 304
modifying 309
versions of images 296
watermarks 303
web export presets 351
Export Presets dialog 306, 307, 308
Export Web Pages button 58, 59, 338, 341, 351
exposure
defined 440
hot areas 154
metadata 50
exposure bias 228
Exposure controls 61
exposure meters 440
extended desktop mode 419, 440
external editors 115, 441
external flashes 441
external hard disks
adding additional space 415
backing up to 400
disconnecting 406
identifying 404
offsite storage 406
planning backup systems 402
reconnecting 406
restoring from 409
space on 402, 403
vaults on 78, 404
External Image Editor field 67
Extract Item command 183
F
facing pages 368
Fade through Black slideshow preset 312, 314
Fade Time slider 317
favorite projects 82
field computers 407
file formats 67, 89, 307, 352
filenames
assigning automatically 89, 105
customized filenames 103, 107, 294
in metadata 228

460 Index
in Metadata Inspector 50
renaming images 127, 298
searching for images by 140, 253, 262, 263
selecting for exported images 293
sorting by 129
times and dates in 85
files
changing outside Aperture 115
naming 106
size in Metadata Inspector 50
file size
backup storage space and 402
for emailed images 306
in metadata 228
searching for images by 140, 262, 263
sorting by 129
file status 140, 262
fill-in lighting 441
film 441
filmstrip 164, 165–168, 185, 441
filtering search criteria 252, 254, 258, 264
filters
applying to book images 367
applying to images 387
defined 441
Finder 115, 441
finding images
in Browser 120, 127
with combinations of criteria 140, 262, 263, 264
by date 256
by EXIF data 260
in filmstrip 166
by import session 261
in Library 253
by IPTC data 259
by keywords 255
by names or text 253
in Query HUD 248–252
by ratings 258
refining search results 253
saving search results 265
search criteria. See search criteria
Smart Albums and 271, 272
stacks and 176
finding keywords 206, 209
finishing process 441
FireWire 408, 415, 441
“Fit images within” pop-up menu 57, 59, 338,
341, 344
fitting images
in web galleries 338
in web journal pages 341
on webpages 344
fitting pages onscreen 371
fitting slideshows to music 322
fixed lenses 441
flashes 50, 441
flat images 442
flowing unplaced images 377
focal lengths 50, 228, 442
folder name format 103
folder name format presets 103
Folder Naming Presets dialog 104
folders
defined 72, 75, 442
deleting 83
for webpages 351
importing 111
importing images from 98, 101
Font Size pop-up menu 280
foregrounds in images 442
foreign-language characters 106
formats, defined 442
See also file formats
formatting text 367, 391
frames 442
framing images 442
frontlighting 442
f-stops 441
full-page spreads 371
full-resolution display 155
Full Screen button 43, 165
Full Screen mode
badge overlays 243
defined 442
entering and exiting 22, 165
filmstrip 165
keyboard shortcuts 174
metadata display in 173, 227
overview 164
shortcut menu 174
stacks in 185
toolbar 169
turning on or off 65
using HUDs in 171
full-size slideshows 316
G
galleries. See web galleries
Gallery Pages panel 57, 338, 342
gamma 442
Gamma Adjust slider 302, 307, 352
Gamma value slider 280
gamut 154, 424, 442
gamut mapping 442
generic camera profiles 427
GIF files 20, 89
glossary 433–451
graphics cards 416, 418
grid lines on book pages 362
grid patterns of images 319

Index 461
grid view
badge overlays 245
entering 121, 125
metadata display 226, 230
options 142
sorting images in 129
Grid View Background Brightness slider 68
Grid View Background Levels slider 125
Grid View button 42, 120, 125
grouping images
in Light Table 329
in Smart Albums 30
in stacks 28
Grow Selection command 123
H
hardcover books 368, 380
hard disks
adding additional disks 415
backing up to 400
bus-powered 416
disconnecting 406
identifying 404
importing images from 97
locations of images 115
offsite storage 406
planning backup systems 402
reconnecting 406
restoring from 409
storage space 402, 403
transferring images 408
vaults on 78, 404
hardware
color management 424
considerations 416
device profiles 426
disk drive considerations 415
multiple-display systems 416
See also specific types of hardware
header styles 347
headings on pages 345
headlines in metadata 229, 242
heads-up displays. See HUDs, names of specific HUDs
height of rows 338, 341
Height value slider 57, 59, 338, 341
hidden images in Light Table 329
hiding
badge overlays 245
filmstrip 168
image tooltips 232
Loupe tool 152
master pages 394
metadata 143, 159, 231
overlays 204
page numbers 382
panels with keyboard shortcuts 65
rejected images 250
unrated images 250
Viewer 148
Highlight Hot Areas command 154
high-resolution images 278
high-resolution previews 160
homepages, linking to 349
Hot Area Display Threshold slider 68
hot areas 68, 154
HTML files
exporting 348, 350
saving web galleries or journals 335
HUDs (heads-up displays)
using in Full Screen mode 171
Full Screen mode and 171
functions and controls 61
working with 23
I
ICC profiles 426, 428, 430
icons
badge icons 243
tools 66
identifying referenced images 135
ID numbers 140, 262, 263
IEEE 1394. See FireWire
If 131
image adjustments
adjusting during export 301
Adjustments HUD 32, 172
Adjustments Inspector 49
badge overlays 243
defined 433
editing prior adjustments 50
gamma adjustments 352
HUDs for tools 62, 173
lifting 170
types of 31
versions and 73
Image Date/Time format 105
Image Display checkboxes 68
Image Export command 307
Image Format pop-up menu 307, 352
image indexes 367, 378
Image Quality slider 302, 307, 352
images
adjustments. See image adjustments
on book covers 380
comparing 27, 146, 150
digital master files. See digital master files
exporting. See exporting
file formats. See file formats
file information 126
finding. See finding images

462 Index
image tooltips 226, 231, 232
importing. See importing images
indexes 367, 378
keywording. See keywords
legacy images 90
locations of 115
metadata in. See metadata
pick images 181
rating. See rating images
selecting 120, 122, 170
series of 177
sharing 32
slideshows. See slideshows
sorting. See sorting images
stacks. See stacks
storage space for 402
versions. See versions
Image Scale slider 384
image tooltips 226, 231, 232
Import 46
Import button 52, 63
Import dialog 19, 92
importing albums 46
importing images
automatically naming 105
backing up and 114
from cameras or card readers 91–96
defined 443
dragging files into projects 110
file formats 89
finding images imported during same
session 261
folders of images 111
import buttons 46
import groups 236, 237
Import Panel button 52
from iPhoto Libraries 112
large numbers of images 111
locations of imported images 115
metadata and 108
options 19
organizing imports 90
overview 88
selected images 95
into stacks 109, 177
stored on computers 97
time stamps 110
transferring projects 114
trial imports 90
importing keyword lists 224
importing projects
from other computers 114, 408
Import panel
displaying 65
functions 52
hiding 65
opening 16, 92
Import Panel button 46
Include Metadata checkbox 307, 352
Increase Diameter command 152
Increase Rating button 44, 167, 190
increasing ratings 44, 167, 190, 196
incremental versions 131
indexes in books 367, 378
ink types 430
inkjet printers 443
inserting pages 375, 376, 377, 378
Inspectors
displaying 65
displaying adjustments 49
displaying metadata 51
hiding 65
overview 24
Inspectors button 49, 51
instructions in metadata 229, 242
interface elements 39, 40
International Press Telecommunications Council
data. See IPTC metadata
iPhoto
disabling for cameras or cards 92
importing images from 20, 90
importing Library 112
IPTC button 236
IPTC metadata
adding during import 108
adding fields to metadata sets 236
assigning keywords 29
character length 201
character limits 242
defined 443
displaying 50, 142, 158
exporting 292, 304
exporting keywords as 201
fields in 228, 242
finding images by 259
irises 443
ISO speeds 228, 443
iTunes playlists 317, 321
J
Journal Pages panel 58, 340
journals. See web journals
JPEG files
color spaces and 427
compressing 352
defined 443
digital master files 72
exporting 292
importing 20, 89
keywords for 304
JPEG2000 files 20, 89

Index 463
K
K (kelvin) 444
keyboard shortcuts
arranging workspace elements and panels 65
assigning keywords with 215, 217
Full Screen mode 174
lifting and stamping keywords 220
Loupe tool 152
metadata display 159, 173
navigating through books 370
rating images 191, 196, 197
rotating images 130
selecting images 123, 179
shuttling through images 125
slideshows 315
stack commands 186
versions 131
keyword buttons 213
keyword controls 30, 45, 65, 213, 213–214
keyword groups 207
keyword list 207
Keyword Preset Group pop-up menu 45, 214, 215
keyword preset groups
applying keywords 215–217
assigning to buttons 45
creating 216
keywords
adding fields to metadata 236
adding or deleting from preset groups 216
adding to Keywords HUD 210
applying during import 108
applying preset groups 215–217
applying to images 201
applying to multiple images 219, 241
applying with Keywords HUD 206–212
applying with Lift & Stamp HUD 218–220
applying with Metadata Inspector 222
assigning to buttons 45, 213
badge overlays 243
browsing through 209
character limits 242
defined 444
deleting 212, 223
displaying 142, 158, 202
exporting 201, 224, 292, 304
importing 224
IPTC data 201
keyboard shortcuts 215, 220
keyword-based web journal pages 347
keyword controls 30, 213, 213–214
Light Table and 223
listing 207, 222
in metadata 228
in Metadata Inspector 50
overview 29, 200
preset keywords 45, 206, 213, 214, 215
searching for images by 253, 255
searching through 206, 209
Smart Albums and 269
subordinate keywords 211
viewing for images 202–205
Keywords button 236
Keywords HUD
adding new keywords to 210
applying keywords with 206–212
functions and controls 63, 206
illustrated 23
listing keywords 29
opening 172
Keywords HUD button 48
Keywords pop-up menu 255
L
labels
metadata 230
tools 66
lab plots 444
landscape photo boxes 385
laptops, working with vaults on 407
Large Hardcover button 56, 368, 381
Large Softcover button 56, 368, 381
layering images and text on book pages 367
layout buttons 48
layouts
book designs. See master pages
options for printing 280
workspaces. See workspaces
left-aligning images 384
left-hand pages 395
legacy images 90
lenses 444
Levels controls 62
Library
adding items to 79
backing up to vaults 400
copying 407
defined 72, 76, 444
finding images in 253
overview 400
planning backup systems 401
restoring 400, 409
searching 249
updating vaults 405
vaults and 78
working with multiple computers 407
Library Location field 68
Lift & Stamp HUD 218–220
lifting
copying adjustments 170
keyboard shortcuts 220

464 Index
keywords 218, 219
Lift tool 48
Lift tool 48, 170, 218, 219
Lift tool HUD 62
light 444
light meters 444
Light Table
adding images to 326
aligning images 328
arranging images 329
badge overlays 243, 245, 331
color correcting and 324
creating albums 325
deleting albums 332
deleting images 326
functions and controls 60
grouping images 329
keywording images 223
metadata display 331
moving and resizing images 327
overlapping images in 329
overview 34, 324
printing arrangements of images 284, 332
resetting images 328
resizing display 330
sorting images 324
transferring images from 331
unplaced images 327
Light Table albums
creating 325
saving search results as 265
Light Table Zoom slider 60, 330
lining up images. See aligning
linking metadata boxes to images 390
linking to homepages 349
Link Metadata Box command 390
listing
assigned keywords 222
items in Library 79
items in projects or folders 79
keywords 207
slideshow presets 316
list view
displaying 121
displaying stacks in 184
keyword display in 205
metadata display 226
metadata display in 230
options 142
working with images in 126
List View button 42, 120, 126, 205
locations
of images 115
in metadata 50
for restoration 409
of vaults 404
Lock button 63, 207
locked vaults 407
locking print presets 286
looping slideshows 316
Loupe button 48, 171
Loupe tool 48, 147, 151, 171
low-resolution images 278
luminance 444
LZW compression 444
M
.Mac accounts
exporting webpages to 335, 348
linking webpages to homepages 349
publishing to 339, 341
Mac OS display configuration 419–421
macro lenses 444
magnifying
full-resolution view 155
images on webpages 342
images with Loupe 147, 151
images with Zoom Viewer 167
view in Light Table 330
view of pages 368, 371
Mail pop-up menu 305
maintaining previews for all projects 161
main window 40
managed image files
location 115
managed images 72, 76
Manual slideshow preset 312, 314
master digital files. See digital master files
Master File Name format 105
master page layouts 359, 367, 369
master pages
adding pages based on 377
copying 394
creating 394
displaying 394
editing 394
left-hand and right-hand 395
overview 393
saving 395
selecting 381
themes 369
unifying and splitting 395
updating 395
updating book pages with changes 396
master pixel size 140, 262, 263
matching colors 426
matching search criteria 252, 256
Match pop-up menu 252, 256
mathematical operators 106
Maximize Browser workspace layout 64
Maximize Viewer workspace layout 64

Index 465
megapixels 444
memory cards 444
memory for processing 415
metadata
adding during import 108
applying to multiple images 241
badges 243
in book indexes 379
on book pages 367, 389
boxes. See metadata boxes
Browser display 230
categorizing web journal pages with 347
character limits 242
customized fields 236
dates in 257
defined 445
deleting categories 236
descriptions of fields 242
displaying 50, 142, 158, 228, 232, 361, 367
editing 232
EXIF metadata 229
exporting 292, 304, 352
export presets 307
in filenames 89
finding images with 259, 260
formatting text in books 391
Full Screen mode display 173
hiding 143, 231
image tooltips 231
Inspector. See Metadata Inspector
IPTC metadata 29, 201
keyboard shortcuts for copying 220
keywords in 200
labels for 230
Light Table display 331
overview 226
positioning display 228
preset displays 158
Query HUD and 250
searchable data fields 140, 262, 263
sets of. See metadata sets
switching sets 231
Viewer display 230
in web galleries 338
in web journals 340
webpage display 344
Metadata Action pop-up menu 51, 227, 235, 238
metadata boxes
deleting 392
linking to images 390
moving 392
on book pages 389
metadata buttons 55
Metadata display buttons 51
Metadata Format pop-up menu 55, 367, 379
Metadata Inspector
applying keywords with 222
displaying metadata in 232
editing metadata in 232
functions and controls 50
illustrated 24
keyword display 204
metadata sets in 227
opening 204, 227
Metadata pop-up menu 51, 233, 280
metadata preset 108
metadata sets
adding categories 236
applying to multiple images 241
badge display and 244
creating 235, 238
customized fields 236
deleting categories 236
displaying 233
editing 236
fields and character limits 242
in Metadata Inspector 227
overview 226
rearranging in pop-up menus 237, 240
switching 228, 231, 232
types of 228
metadata view 108
Metadata View pop-up menu 57, 58, 338, 340
metering 445
metering pattern metadata 50
midtones 445
migrating to new equipment 400, 409
mirroring displays 157, 419, 445
modifying. See editing
monitors. See displays
Move Current Page Up or Down commands 348
Move to Trash button 82
moving
book pages 381
filmstrip 168
images from project or albums 134
images in Browser 128
images in Light Table 327
items to Trash 82
panning images 155
photo boxes 385
selected images 123
text boxes in web journals 346
text on pages 392
web journal images 346
Multi command 149
multiple computers, working with 407
multiple-criteria searches 140, 262, 263
multiple displays. See dual displays
multiple images
printing 282

466 Index
rating 192
selection modes 167
in slideshows 319
in Viewer 149
multiple projects 141
multiple search criteria 258
multiple stacks of images 183
multiple text fields 254
music settings for slideshows 317, 321
N
Name Format pop-up menu 104, 107, 295
naming
custom filenames 103, 107, 294
files 89, 106
imported images automatically 105
Light Table albums 325
projects 79
renaming files 127, 298
Smart Albums 270
vaults 404
Naming Presets dialog 103, 107, 294, 299
navigating
through book pages 56, 368, 370
in Browser 122
in filmstrip 166, 167
through images 44, 120, 125
through slideshows 315
in web galleries 339
in web journals 341
through webpages 341, 342
navigation buttons 44, 56
Navigator button 60
negatives 445
networks, importing projects over 408
New Album button 46
New Album With Current Images button 252, 273
New Book Album button 46, 365
New Book From Selection command 365
New Empty Book command 365
New Empty Light Table command 325
New Empty Web Gallery command 337, 340
New Light Table Album button 46
New Light Table From Selection command 325
New Project button 46
New Smart Album button 46, 252, 270
New Smart Web Gallery command 337
Newspaper Association of America 304
New Version From Master button 47, 131, 169
New Web Gallery Album button 46
New Web Gallery From Selection command 336
New Web Journal From Selection command 339
Next Image button 44, 122, 167
Next Page button 56, 58, 59, 339, 341, 368
noise 445
nonadjacent images, selecting 123
non-Roman characters 106
Normal mode 91
numbering pages 367, 382
numbers of images on pages 343
O
object names in metadata 228, 242
offline hard disks 406
offset presses 445
offsite storage 406
onscreen proofing 156, 286
onscreen slideshows 312–318
opacity 445
opacity of watermarks 308, 355
Opacity slider 355
Open 132
Open All Stacks button 109, 170
opening
Adjustments HUD 172
adjustment tool HUDs 173
Book Layout Editor 358
Keywords HUD 172
Metadata Inspector 204, 227
multiple projects 141
projects 80
Query HUD 249
stacks 109, 170, 176, 181
Viewer 148
Webpage Editor 335
operating system naming conventions 106
operator characters 106
optical zoom lenses 445
orange borders 195
ordering books 363, 368, 397
organizing projects
before importing files 90
importing folders 111
tips 78
orientation
photo boxes 385
printer settings 280
searching for images by 140, 262, 263
Orientation pop-up menu 280
Other button 236
output device proofing profiles 156
overexposure 445
overlapping images
on book pages 367
filmstrip and 168
in Light Table 329
overlapping photo boxes 387
overlapping text on book pages 367
overlays
badges 243

Index 467
displaying or hiding 204
keywords 202
Light Table display 331
ratings 190
P
Padding slider 317
Page Action pop-up menu 59, 340, 347
page controls 56
page designs. See themes
page display controls 56
page navigation buttons 56
page numbers in books 367, 382
pages
adding metadata boxes to 389
adding or removing from books 367, 374, 382
adding text to 389
background images 382
copying designs 381
creating automatically 374, 376
deleting photo boxes 387
formatting text in 391
inserting 375, 376, 377, 378
layouts 366
left-hand and right-hand 395
master pages 360, 377, 381, 393
navigating through 368
numbering 367, 382
number of, in books 363
number to print 279
overlapping images on 387
photo boxes 383, 387
rearranging in books 381
saving as master pages 395
updating with changes 396
in web galleries 338
in web journals 340, 347
webpages. See webpages
Pages panel 54, 359, 367
page spreads 368
Page Template pop-up menu 59, 340, 347
panning images 155, 384, 445
panoramas 445
Paper Size pop-up menu 280
paper size settings 280
paper types 430
Paste Content command 386
pasting
photo box contents 386
stamping. See stamping
patch adjustments 170
Patch tool 170
paths to hard disks 406
pausing slideshows 315
PC mode 91
PCI graphics cards 416
PDF files 281, 283
phase 445
Photo Box Aspect Ratio command 385
photo box buttons 55
photo boxes
adding and filling 367, 372, 383
aspect ratios 385
buttons 55
copying and pasting contents 386
deleting boxes 387
deleting images 386
image size choices 384
moving 385
overlapping 387
photo edits, defined 445
Photo Filter pop-up menu 55, 367, 388
photo printers 446
photos. See images
Photoshop files. See PSD files
Pick command 181
picks
album picks 182
defined 176, 446
marking images as 169
selecting 123, 181
pixels
copying 170
defined 446
display resolution 147
size in metadata 228
Placement pop-up menu 228
placing images 327, 374, 376, 377
placing metadata 228
planning
backup systems 401
book layout 363
platform naming conventions 106
playing slideshows 312, 320
PNG files 20, 72, 89, 292, 304, 446
polarizing filters 446
pop-up menus 85, 237, 240
portable computers, working with vaults on 407
portfolios, importing 90
portrait photo boxes 385
positives 446
posting webpages on Internet 348
preferences
preview options 160
Preferences window 67
preset export options 296, 306, 350, 351
preset filename formats 105
preset information display 158
preset keywords 45, 206, 213, 214, 215
preset metadata displays 158
preset print settings 279, 281

468 Index
presets 446
preset slideshows 312, 314
Presets list 316
Preview button 281
preview creation 161
preview images
preferences 160
previewing printing options 281
preview options 160
previews 160
deleting 162
Previous Image button 44, 122, 167
Previous Page button 56, 58, 59, 339, 341, 368
Primary Only button 43, 124, 167
primary selections 122, 124, 167
primary Viewer 148, 157
prime lenses 446
Print button 56, 281, 368
Print dialog 279, 332
printers
calibrating 430
color management 423
double-sided functionality 371
gamut 424
settings 280
troubleshooting 281
printing
Book Layout Editor and 36
book pages 368
books 283, 358, 363, 397
contact sheets 282
controls for 279
crop marks and borders 281
double-sided pages 371
dpi 280
hot areas and 154
layout options 280
Light Table arrangements 284, 332
metadata sets 280
multiple images 282
overview 277
previewing 281
printer settings 280
print presets. See print presets
print vendors 364, 397
proofing onscreen 286
single images 281
tips and suggestions 278
to PDF files 283
Use Best DPI checkbox 280
Print Preset Action pop-up menu 279, 284
print presets
books 283
creating and modifying 279, 284
deleting 286
duplicating 285
Light Table presets 284
locking presets 286
printing with 277
saving 279
print resolution 280
prints, defined 446
print vendors 364, 397
processing power 415
profiles, defined 446
program exposure 446
Project Action pop-up menu 41, 79
project buttons 46
projects
albums in 75, 79
closing 141
creating 17, 79
defined 72, 74, 446
deleting images 82
deleting projects 83
displaying 79
dragging images into 110, 134
empty 93, 95
exporting 114, 408
favorites 82
filenaming schemes 106
folders in 75
importing images into 88, 93, 111
importing or exporting keyword lists 224
moving images into 134
naming 79
opening and closing 80
opening multiple projects 141
organization tips 75, 78, 79, 90
Projects panel functions 41
searching for images 249
Smart Albums and 270, 272
switching between 81
tabs in Browser 141
transferring images from Light Table 331
transferring projects 74, 114
working with multiple computers 407
Projects panel 18, 41, 65, 83, 85
Projects pop-up menu 41, 79
Promote button 169
promoting images 169, 182
proofing images onscreen 156, 286
proofing profiles 286
Proportional spacing for images in Grid View
checkbox 68
province/state names in metadata 229, 242
proxy-image slideshows 316
PSD files
defined 446
exporting 292
importing 89
metadata 304

Index 469
supported formats 20
watermarks 303
PTP mode 91
Publish Album As option 349
Publish Complete dialog 349
Publish to .Mac button 58, 59, 339, 341
Publish to .Mac command 349
punctuation in filenames 106
pupils 446
purchasing books 368, 397
Put Back button 60, 326
Q
Quality button 316
quantization 447
Query HUD
date searches 256
EXIF data searches 260
functions and controls 252
IPTC data searches 259
keyword searches 200, 255
multiple-criteria searches 140, 262, 263, 264
opening 249
overview 248–252
ratings-based searches 258
saving search results 265
Smart Albums and 30, 250, 268, 270
Smart Web Gallery Albums 337
text searches 253
working with 26
Query HUD Action pop-up menu 252
Query HUD button 42, 120, 166, 252
QuickTime 447
QuickTime-compatible file formats 89
R
RA-4 printers 447
RAID devices 447
RAM 415, 447
rangefinders 447
raster image processors (RIPs) 447
rating buttons 44, 190
rating images
assigning ratings 190
comparing images 195
defined 447
displaying ratings 158
displaying unrated images 193
finding images by ratings 258
keyboard shortcuts 191, 196, 197
multiple images at once 192
multiple rating passes 194
overview 25, 188
rating-based web journal pages 347
rating buttons 44, 167, 190
ratings in metadata 228
sorting by ratings 129, 192
star ratings 188
workflow processes 194
Rating pop-up menu 258
RAW files
color spaces and 427
defined 447
digital master files 72
file size 402
importing 89
resolution and 278
supported formats 20
RAW Fine Tuning controls 61
reapplying master page layouts 381, 396
Reapply Master command 381, 396
rearranging display positions 420
rearranging images
on book pages 367
in Browser 128
in Light Table 328, 324, 327
moving photo boxes 385
in page layouts 361
in slideshows 315
in stacks 169, 182
in web galleries 345
in web journal s 346
rearranging metadata sets in pop-up menus 237,
240
rearranging pages
in books 381
in web journals 348
rearranging text
in page layouts 361, 392
in web journals 346
rearranging tools in toolbar 66
Rebuild Book With All Images command 383
Rebuild Book With Selected Images command 383
reciprocity 447
reconnecting hard disks 406
recovering from file losses 400
red-eye 48, 170, 447
Red Eye tool 48, 170
Red Eye tool HUD 62
red rectangle symbol 155
red Vault Status buttons 403
referenced images 72, 76, 93, 96
backing up 78, 400
changing the location 100
consolidating into the Library 139
displaying a list 136
identifying 135
importing 88, 99, 102
importing iPhoto Library 112
locating master files 137
reconnecting 137

470 Index
relocating 139
searching for 140
working with 135
refining search results 253
reflowing images in books 367
Reject button 44, 167, 190
rejecting images
buttons for 167, 190
compare images 196
displaying rejected images 193
hiding rejected images 250
Reject ratings 188, 447
relative colorimetric 448
relinking metadata boxes to images 390
Remove Album command 132
Remove and Delete Vault button 407
Remove From Album command 345
Remove From Favorites command 82
Remove Keyword button 63, 207, 212
Remove Page button 58, 340, 348
Remove Vault command 407
removing
albums 83
background images 382
book pages 374
digital master files 132, 133
export presets 309
folders 83
hard disks 406
images from Browser 132
images from Light Table 326
images from photo boxes 386
images from slideshows 315
images from Smart Albums 272
images from stacks 183
images from web galleries 345
images from web journals 346
image versions 82
items from projects 82, 83
keywords 212, 216, 223
Light Table albums 332
metadata boxes 392
metadata categories 236
pages from books 367, 374, 382
photo boxes 387
print presets 286
projects 82, 83
Smart Albums 273
text boxes 347, 392
tools from toolbar 66
vault images 407
vaults 407
versions 132
web export presets 354
web journal pages 340, 348
renaming
files 127
image versions 127
rendering intent 448
Reset button 49
resetting
images in Light Table 328
toolbar 66
resizing
filmstrip 168
fonts 280
images during export 307
images for email 305
images for printing 280
images in Light Table 328
images in photo boxes 384
Light Table view 330
Loupe tool 152
watermarks 303, 356
webpage images 344
resolution
camera settings 278
defined 448
DPI setting 307
full-resolution display 147, 155
printing and 278
Restore Library dialog 409
restoring
images in Light Table 328
last sorting arrangement 129
master page layouts 381
toolbar 66
retouching images 170, 448
return characters 106
revealing images in Light Table 329
reverse order in slideshows 315
RGB color space 425, 448
right-aligning images 384
right-hand pages 395
RIPs (raster image processors) 447
rods 448
rolls from iPhoto Libraries 113
Rotate buttons 167
Rotate Clockwise command 130
Rotate Counterclockwise command 130
Rotate Left and Rotate Right buttons 44, 130, 167
Rotate Left and Rotate Right tools 47, 130, 170
rotating images
in Browser 130
in filmstrip 167
tools 170
rotating workspaces 65
rows
of images in slideshows 316, 319
in web galleries 57, 338
in webpages 343

Index 471
Rows slider 316, 319
Rows value slider 57, 338, 343
Run Slideshow dialog 312, 314
S
saturation 448
Save As button 279
Save as PDF button 281, 283
Save button 279
saving
books as PDFs 283
page designs as master pages 395
print presets 279
search results 265
slideshows 314
Scale to Fit All Items button 60, 330
Scale to Fit button 56, 368, 371
Scale To pop-up menu 280
screen displays. See displays, dual displays
scroll bar 43, 120, 166
search criteria
combining 140, 262, 263, 264
filtering by 252
matching 252
multiple criteria 258
options 252
Smart Albums and 272
search field 63, 120, 127, 166, 206, 252
searching 140, 262
searching for images. See finding images
secondary Viewer 148, 157
Select 82
Select button 44, 167, 190
Select Compare Item command 150
Select Destination command 409
selecting images
adding pages to books 376
for book albums 365
in Browser 120
changing one image in selections 124
compare images 150
deselecting 123
for books 373
for Light Table albums 325
to import 95
multiple images 123
overview 122
primary selections 122
Selection tool 170
shortcuts 123
for stacks 179
selecting keywords 208, 220
Selection tool 47, 170
selective focus 448
Select ratings 196, 448
selects, defined 74
Send Backward button 55, 367, 387
sending images in email 305
sepia-tone filters 387
sequences of images 105, 177
Set 1 pop-up menu 203
Set Album Pick command 182
Set Compare Item command 150, 195
Set Master Page pop-up menu 55, 367, 375, 381
setting up systems 414–421
shadows 308, 448
sharing images. See distributing images
shortcut keys. See keyboard shortcuts
shortcut menus
defined 448
displaying 85
Full Screen mode 174
Projects panel 85
Viewer 162
Show All Images button 60, 327, 373
“Show crop marks” option 281
“Show decorations” checkbox 245
Show Full Spreads button 56, 368, 371
Show Inspectors command 227
Show Keyword Controls command 213, 215
Show loading indicator while full size images load
checkbox 68
Show Master Image button 43, 156, 171
Show Master Pages command 377, 394
Show number of versions for projects and albums
checkbox 68
Show proxy indicator while full size images load
checkbox 68
Show Single Pages button 56, 368, 371
Show tooltips on controls checkbox 68
Show Unplaced Images button 60, 327, 372
Show warning when deleting masters checkbox 68
Show Watermark checkbox 308, 352, 355
shutter priority 448
shutters 448
shutter speeds 50, 228, 449
Shuttle control 43, 120, 125, 166, 449
sidelighting 449
single-image prints 279, 449
Single Images preset 281
single-page view 368, 371
Site Theme button 57, 58, 338, 340, 343
Size To pop-up menu 307
sliders 449
slides 449
Slideshow
Best quality 316
Good quality 316
slideshow button 46
Slideshow Preset pop-up menu 313

472 Index
slideshow presets
creating 317
dual displays and 320
editing 318
functions and controls for 315
grid patterns 319
music settings 321
types of 312
Slideshow Presets dialog 313, 315
slideshows
backgrounds 316
changing images in 315
creating 314
defined 449
fade time 317
functions and controls for 315
grid patterns in 319
keyboard shortcuts 315
looping 316
music settings 317, 321
overview 33, 312–315
playing 320
presets. See slideshow presets
quality 316
saving 314
timing 316
transitions 312
Slow Dissolve slideshow preset 312, 314
Smart Albums
automatic updates to 269
changing contents of 272
collecting images into 270–273
creating 250, 252, 268
defined 250, 449
deleting 273
displaying contents of 268
dragging images from 134
listing contents 30
overview 30, 268–271
saving search results as 265
searching for images in 271
transferring images to projects or albums 272
Smart Web Gallery Albums 265, 337
softcover books 368, 380
soft lighting 449
soft proofs 449
software drivers 416
Sort Direction button 42, 120
sorting images
in Browser 120
in grid view 129
Light Table and 324
in list view 126
by ratings 192
restoring last sort 129
Sorting pop-up menu 42, 120, 129
source image files. See digital master files
source profiles 449
sources in metadata 229, 242
source vaults 409
space characters 106
spacing between images in slideshows 317
spacing images evenly in Light Table 329
Span option (multiple displays) 157
special characters in filenames 106
special instructions in metadata 229, 242
spectrophotometers 449
Split Stack command 183
Split Stacks button 109
splitting
master pages 395
stacks 109, 183
Spot & Patch tool 47, 170
Spot & Patch tool HUD 62
spot adjustments 170
spot metering 449
square photo boxes 385
sRGB color space 425, 427, 450
Stack 47
Stack button 132, 176, 181
stacking buttons 47
stacking photo boxes on pages 387
Stack Pick button 47, 169
stacks
adding and removing images 183
arranging images in 182
closing 170, 176
comparing images in 178
creating 109, 177, 179
defined 450
displaying 151
dividing 109
dragging images in 184
dragging stacks 184
Full Screen mode 185
importing images automatically 109, 177
keyboard shortcuts for 186
list view 184
in multiple albums 182
opening or closing 109, 170, 181
overview 28, 175
picks 123, 169, 176, 181
promoting and demoting images 182
selecting images in 123
splitting 183
tips for quickly creating 180
toolbar buttons 169
unstacking 179
stamping 48, 170, 219, 220
Stamp tool 48, 170, 219
Stamp tool HUD 62
star ratings 188

Index 473
state names in metadata 229, 242
stock ID numbers 140, 262, 263
stopping down 450
stopping slideshows 315
storage space 402, 403, 415
straightening images 47, 170
Straighten tool 47, 170
subfolder organization 100
subfolders 112
subject-based organization 79
subordinate keywords 211
subtitles on pages 345
subtractive color 450
switching
between projects 81
to Full Screen mode 165
metadata sets 228, 231, 232
themes 369
workspaces 64, 65
SWOP 450
symbols in filenames 106
synchronizing vaults and backup files 78
system setup 414–419
T
tab-delimited keyword lists 224
tabs 450
target files 450
telephoto lenses 450
templates
books 359
header styles 347
web journal templates 340
terms, glossary of 433–451
text
adding to books 362
adding to web journals 341
on book covers 380
in books 361, 366
boxes. See text boxes
buttons 55
columns in 392
on contact sheets 280
deleting 347
formatting 367, 391
keyword lists 224
lost after switching themes 369
moving on pages 392
searching for images by 253
on web gallery pages 345
on web journal pages 346
See also metadata
Text Box Columns command 392
text boxes
adding boxes to pages 367, 389
adding text to 388
columns in 392
deleting 392
moving 392
text buttons 55
text files 224
Text Style pop-up menu 55, 367, 391
Theme button 55, 359, 366, 369
themes
for books 359, 365, 366, 369
header styles 347
list of 365
master pages 381, 393
selecting and editing 342
switching to other themes 369
for web journals 340
for webpages 338
Themes list 369
Three Up command 149
Thumbnail Image Preset pop-up menu 349
Thumbnail Resize slider 43, 120, 125, 127, 166
thumbnails
of book pages 359
creating while importing 88
in grid view 125
illustrated 17
in image indexes 378
size of 120, 125, 127, 166
viewing images as 120
on webpages 349
TIFF files 20, 72, 89, 292, 304, 450
time
adjusting for imported images 110
bracketing images 109
in filenames 85, 105
slideshow timing 316
stacking shots in same time interval 177
time zones 110, 140, 262, 263
timing slideshows to music 322
Timing pop-up menu 316, 322
titles on pages 345
Toolbar
illustrated 16
toolbars
adding tools to 66
customizing 65
displaying 65
Full Screen mode 164, 169
hiding 65
overview 45
restoring 66
tools
adding to toolbar 66
labels and icons 66
toolbar buttons 45
tools HUDs 173

474 Index
tooltips for images 226, 231, 232
transferring
files 292
images from cameras or cards 91
images from Smart Albums 272
images to or from Light Table 331
images to other computers 408
Libraries 409
projects 74, 114
transition effects 450
transparency of watermarks 308, 355
tripods 450
troubleshooting printers 281
tungsten lights 450
U
Uncover button 60, 330
underexposure 450
unifying master pages 395
unipods 450
unlinking metadata boxes from images 390
Unlink Metadata Box command 390
unlocking print presets 286
unlocking vaults 407
unplaced images
creating pages automatically 376
displaying 372
flowing into books 374, 377
Light Table placement 327
unrated images 193, 250
unstacking images 179
untagged images 450
Update All Vaults button 53, 403, 405
Update Vault command 405
Update Vault Path command 406
updating
images on multiple computers 407
master pages 395
Smart Albums 269
vault images 401
vaults 53, 78, 402, 403, 405
USB cables 415
Use Best DPI checkbox 280
Use proportional spacing for images in Grid View
checkbox 68
user interface elements 39, 40
V
vault
backing up referenced images 400
Vault Action pop-up menu 53, 403, 404
vaults
adding or deleting 403
backing up Library to 400
creating 404
defined 72, 78, 451
deleting images in 407
identifying hard disks 404
locking and unlocking 407
overview 37
planning backup systems 402
reconnecting hard disks 406
restoring images from 400
restoring Library from 409
source vaults 409
status of 53, 402
updating 78, 401, 403, 405
working with multiple computers 407
Vaults panel
displaying 65
functions 53
hiding 65
illustrated 37
opening 16
overview 402
Vaults Panel button 53, 403
Vault Status button 53, 401, 403
version buttons 47, 169
Version Name and Date/Time format 105
Version Name format 105
version names
formats for 105
in metadata 228
searching for 140, 262, 263
Version Name with Index format 105
Version Name with Sequence format 105
version numbers 50
versions
in albums 74
creating 130, 169
creating while importing 88
defined 72, 73, 451
deleting 82, 132
duplicating 169
exporting 296, 350
incremental versions 131
moving into other projects or albums 134
numbers 50
in projects 74
renaming 127
toolbar buttons 169
video cards 416
Viewer
adjusting image view 155
background 68, 148
badge overlays 243
comparing images in 150
defined 451
displaying or hiding 65, 148
full-resolution image display 155
functions and controls 42

Index 475
hot areas in images 154
illustrated 16
image display size 147
keyword display in 202
keywords in 203
Loupe 151
metadata in 158, 226, 228, 230
multiple screen displays 148, 157
number of images in 149
onscreen proofing 156
overview 146
shortcut menu 162
stacks in 151
switching to Book Layout Editor 373
Viewer Background Brightness slider 68
Viewer Mode pop-up menu 43, 157, 167
viewfinders 451
View Options command 203
View Options window 126, 142, 159, 203, 226
vignetting 451
W
watermarks
defined 451
displaying 308
exporting images with 292, 352
opacity 308, 355
resizing 356
tips for 303
webpage images 355
Web Copyright field 69, 345
Web Export command 352, 353, 354
web export presets
creating 353
deleting 354
editing 353
selecting 351
watermarks 355
Web Export Presets dialog 352, 353, 354
web galleries
adding images 337, 345
albums 336
controls 57
copyright information 345
creating 336
deleting images 345
exporting 338, 348, 350
functions and controls 338
metadata display 344
navigating and viewing 342
numbers of images on pages 343
overview 34, 334
posting on Internet 348
rearranging images in 345
resizing images on 344
saving search results as 265
Smart Web Gallery Albums 337
text on pages 345
themes 342
watermarks on images 355
web journals
adding images 340, 346
adding pages 340, 347
adding text to pages 341
albums 339
copyright information 345
creating 339
deleting images 346
deleting pages 340, 348
exporting 348, 350
functions and controls 58
header styles 347
metadata-based pages 347
metadata display 344
navigating and viewing 342
numbers of images on pages 343
overview 35, 334
posting on Internet 348
rearranging layout and images 346
rearranging pages 348
resizing images on 344
saving search results as 265
text boxes 346
themes 342
watermarks on images 355
Webpage Editor
functions and controls 57, 338, 340
opening 335, 336
overview 35
publishing functions 349
web journals 339
webpages
badge overlays 243
copyright information 345
creating 334
displaying 341
exporting 338, 341, 348, 350
linking to .Mac homepages 349
metadata display 344
navigating through 341, 342
numbers of images on 343
posting on Internet 348
resizing images on 344
themes 342
types of 334
watermarks on images 355
web galleries See web galleries
web journals. See web journals
“When a camera is connected” pop-up menu 68
white balance 61, 451

476 Index
White Balance controls 61
white borders 122, 195
white point 451
white space characters 106
wide-angle lenses 451
width
of borders 281
of columns 338, 341
of images 57, 59
Width controls 281
Width value slider 57, 59, 338, 341
wire codes 304
workflow processes 194
working space 451
workspaces
arranging interface elements 40
defined 451
layout buttons 48
rotating 65
switching between 64, 65
types of 64
X
XMP sidecar files 292
X ratings 188
Y
yellow Vault Status buttons 403
Z
zooming
full-resolution view 155
viewing book pages 368, 371
viewing images at 100% 167
viewing images in Light Table 330
zoom lenses 451
Zoom to 100% command 330
Zoom Viewer button 43, 155, 167