Autodesk Navis Works 2014 Installation Guide Navisworks Install
User Manual: autodesk NavisWorks - 2014 - Installation Guide Free User Guide for Autodesk NavisWorks Software, Manual
Open the PDF directly: View PDF ![]() .
.
Page Count: 120 [warning: Documents this large are best viewed by clicking the View PDF Link!]
- Contents
- Autodesk Installation Overview and FAQ
- What's New in the 2014 Installation Guide
- Installation Overview
- Frequently Asked Questions
- What if I have lost my serial number or product key?
- Why do I need to activate a product after installation?
- Can I install Autodesk products from a website?
- How does a trial license work in a product suite or bundle?
- How do I change my license type?
- Where can I find product license information after installation?
- After installation, how can I change product configuration, repair, or uninstall the product?
- Autodesk Network Administrator's Guide
- Network Administration and Deployment
- What's New in the 2014 Network Administrator's Guide
- About Deployments
- Language Pack Deployment
- Check Deployment Readiness
- Ensure .NET 3.5 Support for Windows 8
- Determine the Installation Type
- Determine the License Server Model
- Configure Individual Products
- Include Additional Software
- Include Service Packs
- Create a Network Share
- Create a Deployment
- Create a Combined 32- and 64-bit Deployment
- Modify a Deployment
- Direct Users to the Administrative Image
- Uninstall Deployed Products
- Alternative Distribution Methods
- Installation Questions
- Licensing Questions
- Deployment and Networking Questions
- Where should deployments be located?
- When should I select all products for the administrative image, and can I add products later?
- What are profiles of user preferences?
- What happens if I choose to append or merge service packs?
- Where can I check if service packs are available for my software?
- How do I extract an MSP file?
- How should I configure a network license server for a firewall?
- Uninstall and Maintenance Questions
- How can I see what is included in a default installation?
- Is it possible to change the installation folder when adding or removing features?
- How do I install tools and utilities after installing my product?
- When should I reinstall the product instead of repairing it?
- Do I need the original media to reinstall my product?
- When I uninstall my software, what files are left on my system?
- Glossary
- Network Administration and Deployment
- Autodesk Licensing Guide
- Introduction
- Stand-Alone Licensing
- Network Licensing
- Planning Your Network Licensing
- Understanding Your Network License
- Running the Network License Manager
- Using Other Features of Network Licensing
- Frequently Asked Questions about Network Licensing
- Autodesk Navisworks 2014 Installation Supplement
- Index
Contents
Chapter 1 Autodesk Installation Overview and FAQ . . . . . . . . . . . . . 1
What's New in the 2014 Installation Guide . . . . . . . . . . . . . . . . 1
Installation Overview . . . . . . . . . . . . . . . . . . . . . . . . . . . . 1
Prepare for Installation . . . . . . . . . . . . . . . . . . . . . . . . 2
Select Install Type . . . . . . . . . . . . . . . . . . . . . . . . . . . 3
Change Product Language . . . . . . . . . . . . . . . . . . . . . . 4
Specify License . . . . . . . . . . . . . . . . . . . . . . . . . . . . 5
Configure and Install . . . . . . . . . . . . . . . . . . . . . . . . . 6
Activate Products . . . . . . . . . . . . . . . . . . . . . . . . . . . 6
Create Deployment . . . . . . . . . . . . . . . . . . . . . . . . . . 7
Frequently Asked Questions . . . . . . . . . . . . . . . . . . . . . . . . 8
What if I have lost my serial number or product key? . . . . . . . . 8
Why do I need to activate a product after installation? . . . . . . . 8
Can I install Autodesk products from a website? . . . . . . . . . . 8
How does a trial license work in a product suite or bundle?
. . . . . . . . . . . . . . . . . . . . . . . . . . . . . . . . . . . 9
How do I change my license type? . . . . . . . . . . . . . . . . . . 9
Where can I find product license information after
installation? . . . . . . . . . . . . . . . . . . . . . . . . . . . . . 9
After installation, how can I change product configuration,
repair, or uninstall the product? . . . . . . . . . . . . . . . . . . 9
Chapter 2 Autodesk Network Administrator's Guide . . . . . . . . . . . . 11
i
Network Administration and Deployment . . . . . . . . . . . . . . . . 11
What's New in the 2014 Network Administrator's Guide . . . . . 11
About Deployments . . . . . . . . . . . . . . . . . . . . . . . . . 12
Language Pack Deployment . . . . . . . . . . . . . . . . . . . . . 13
Check Deployment Readiness . . . . . . . . . . . . . . . . . . . 13
Ensure .NET 3.5 Support for Windows 8 . . . . . . . . . . . . . . 14
Determine the Installation Type . . . . . . . . . . . . . . . . . . 15
Determine the License Server Model . . . . . . . . . . . . . . . . 16
Configure Individual Products . . . . . . . . . . . . . . . . . . . 16
Include Additional Software . . . . . . . . . . . . . . . . . . . . 17
Include Service Packs . . . . . . . . . . . . . . . . . . . . . . . . 18
Create a Network Share . . . . . . . . . . . . . . . . . . . . . . . 19
Create a Deployment . . . . . . . . . . . . . . . . . . . . . . . . 20
Create a Combined 32- and 64-bit Deployment . . . . . . . . . . 22
Modify a Deployment . . . . . . . . . . . . . . . . . . . . . . . . 23
Direct Users to the Administrative Image . . . . . . . . . . . . . . 24
Uninstall Deployed Products . . . . . . . . . . . . . . . . . . . . 24
Alternative Distribution Methods . . . . . . . . . . . . . . . . . . . . . 25
Overview of Distribution Methods . . . . . . . . . . . . . . . . . 25
Batch Files for Deployments . . . . . . . . . . . . . . . . . . . . 25
Group Policies for Deployments . . . . . . . . . . . . . . . . . . 28
Microsoft SCCM for Deployments . . . . . . . . . . . . . . . . . 34
Imaging Software for Deployments . . . . . . . . . . . . . . . . . 39
Installation Questions . . . . . . . . . . . . . . . . . . . . . . . . . . . 42
Licensing Questions . . . . . . . . . . . . . . . . . . . . . . . . . 43
Deployment and Networking Questions . . . . . . . . . . . . . . 44
Uninstall and Maintenance Questions . . . . . . . . . . . . . . . 46
Glossary . . . . . . . . . . . . . . . . . . . . . . . . . . . . . . . . . . 48
Chapter 3 Autodesk Licensing Guide . . . . . . . . . . . . . . . . . . . . . 49
Introduction . . . . . . . . . . . . . . . . . . . . . . . . . . . . . . . . 49
What's New in the 2014 Licensing Guide . . . . . . . . . . . . . 49
License Types . . . . . . . . . . . . . . . . . . . . . . . . . . . . 49
Activation . . . . . . . . . . . . . . . . . . . . . . . . . . . . . . 51
Registration . . . . . . . . . . . . . . . . . . . . . . . . . . . . . 51
Simplified Licensing . . . . . . . . . . . . . . . . . . . . . . . . . 52
Stand-Alone Licensing . . . . . . . . . . . . . . . . . . . . . . . . . . . 52
Introduction to Stand-Alone Licenses . . . . . . . . . . . . . . . 52
Multi-Seat Stand-Alone License . . . . . . . . . . . . . . . . . . . 52
Manage Your Stand-Alone License . . . . . . . . . . . . . . . . . 53
Transfer Your Stand-Alone License . . . . . . . . . . . . . . . . . 55
Troubleshoot a Stand-Alone License Error . . . . . . . . . . . . . 59
Network Licensing . . . . . . . . . . . . . . . . . . . . . . . . . . . . . 61
Planning Your Network Licensing . . . . . . . . . . . . . . . . . 61
Understanding Your Network License . . . . . . . . . . . . . . . 67
Running the Network License Manager . . . . . . . . . . . . . . 77
ii | Contents
Using Other Features of Network Licensing . . . . . . . . . . . . 86
Frequently Asked Questions about Network Licensing . . . . . . 102
Chapter 4 Autodesk Navisworks 2014 Installation Supplement . . . . . . 105
System Requirements . . . . . . . . . . . . . . . . . . . . . . . . . . 105
About Language Packs . . . . . . . . . . . . . . . . . . . . . . . . . . 107
Uninstalling Language Packs . . . . . . . . . . . . . . . . . . . 108
File Exporters . . . . . . . . . . . . . . . . . . . . . . . . . . . . . . . 108
Autodesk Navisworks Uninstall Information . . . . . . . . . . . . . . 108
Index . . . . . . . . . . . . . . . . . . . . . . . . . . . . . . . 111
Contents | iii
iv
Autodesk Installation
Overview and FAQ
What's New in the 2014 Installation Guide
The Installation Overview and FAQ is now part of a consolidated Installation Help
online document that includes the Network Administrator's Guide, Licensing Guide,
and product-specific supplements. This new structure is expected to be easier
to use and to maintain.
The product installers now also install an Autodesk Uninstall Tool that makes
it much easier to uninstall a suite or several products in a single operation. You
can read more about the Uninstall Tool in this FAQ topic (page 9).
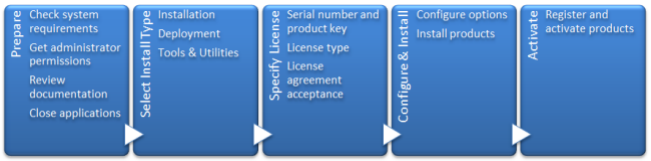
Installation Overview
The following diagram shows the major parts of the installation process:
Further details are provided in the following sections.
1
1

Prepare for Installation
Before starting to install, check the following details:
■Confirm that your computer meets the minimum system requirements.
If in doubt, click System Requirements at the bottom of the installer screen.
■Find the certified and recommended computer hardware for the products
or suites you are planning to install. For more information, go to
www.autodesk.com/hardware.
■Review product documentation to clarify details such as the type of
installation to do (stand-alone or network) and which products to install.
Documentation is accessible from links on the lower left corner of the
installer:
■Ensure that your user name has Administrator permissions to install
applications on the computer or network.
■Obtain serial numbers and product keys for all products you want to install.
These are on the product package or provided at the time you download
the software.
■When you are ready to run the installer, close all running applications.
Windows 8 and the .NET 3.5 Requirement
Some Autodesk products require Microsoft DirectX, which, in turn, requires
the Microsoft .NET Framework. But Windows 8 has enforced restrictions on
installing .NET 3.5 and earlier versions from local media. Therefore, Autodesk
products require Internet access so that Windows updates can install or enable
the .NET Framework.
If the Autodesk installer is unable to install .NET 3.5 or an earlier version on
Windows 8, the following message appears:
An Internet connection is required to install a Windows component.
Please connect and re-launch the installer.
The .NET installation is prevented by any of the following conditions:
■An Internet connection is not available during installation.
■The computer is configured to use Windows Server Update Services (WSUS)
instead of Windows Update.
2 | Chapter 1 Autodesk Installation Overview and FAQ

■The Windows 8 update for Microsoft Security Advisory ( 2749655) is not
installed.
If any of these conditions cannot be resolved, then the System Administrator
or user must manually enable .NET 3.5 on each Windows 8 computer before
running the Autodesk installer. For more information and procedures, see the
following MSDN article.
Select Install Type
Here is some basic information to help you choose the right path.
■Install is recommended for individual users or small groups. The key
point is that you will repeat the installation process on each computer.
This is the only valid installation type for a stand-alone license, but it can
also be used with a multi-seat stand-alone or network license.
■Create Deployment is recommended for network administrators, using
either a multi-seat stand-alone or network license. In the deployment
process, the installation is configured once, stored on the network, and
then distributed efficiently to users' computers.
For more information on deployments, see Create Deployment (page 7)
or the Network Administrator's Guide.
■Install Tools & Utilities is used to install tools and utilities related to
your suite or product. If you have a network license for your Autodesk
product, you will need to use this option to install the Network License
Manager before any users can run the product. Consult the documentation
for your suite or product to identify the available tools and utilities of
interest.
Select Installer Language
On the first screen of the installer, you can select the language for the installer
screens, using this control on the upper right:
For some Autodesk products, later in the install process you can select the
language for installed products. For more information, see Change Product
Language (page 4).
Installation Overview | 3
Change Product Language
IMPORTANT This topic does not apply to Autodesk products that provide each
language version on separate media. For these products, you must specify the
product language when purchasing, and cannot change it.
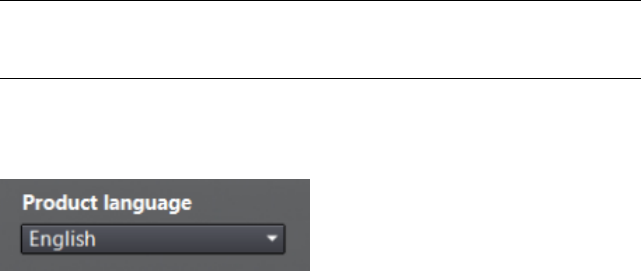
For some Autodesk products, such as AutoCAD, you can select the product
language at the time of installation, using this drop-down menu on the
installer:
Language Selection Menu
If the language you want is not on this menu, your available options vary by
Autodesk product. Some products, such as Inventor, use language packs to
support additional languages.
These conditions apply to language selection:
■Each suite installation uses a single language. If you need to install one or
more products in a different language, that requires a separate installation.
■All deployments must be in a single language. One administrative image
can support deployments for different languages, but each deployment is
for one language.
■If you are installing multiple products and select a language that is not
supported by some products, these products use a default language.
■After you leave the Product Information page of the installer, the menu
for selecting a language or adding a language pack is disabled. If you later
decide to change the language or add a language pack, you cannot go back
to the Product Information page and use the menu. Instead, you must
cancel the installation, start the installer again, and then make the correct
language selection on the Product Information page.
About Language Packs
A language pack is a software module that can be added to an Autodesk product
to change the language used throughout the user interface and the
documentation. A single instance of the product software can support multiple
languages by adding language packs. Each language pack is matched to a
4 | Chapter 1 Autodesk Installation Overview and FAQ
specific Autodesk product, and includes an installer. You must install the
Autodesk product before installing a language pack. Each installed language
pack creates a separate icon on the Windows Start menu, such as "Inventor -
French (Francais)" that you can use to start the product in that language.
Depending on your product, language packs may be available on the
installation media or from a website.
A language pack installer provides an option to create a language pack
deployment for a particular product. The language pack deployment can be
installed on multiple computers, after the related product is installed, to add
another language version.
Specify License
The following notes provide a general overview. For more detailed information,
see the Licensing Guide for your product.
License Types
You can install most Autodesk products for a trial period of 30 days to evaluate
the product. If you purchase a license, it is configured as either stand-alone
or network, and for a specific number of users. These license types are briefly
described as follows:
■A stand-alone license is intended for use by one person. The licensed
products can be installed on two computers, as long as both instances are
not running concurrently.
■A multi-seat stand-alone license is intended to support a specified
maximum number of users, but it can be installed on a larger number of
computers for convenient access.
■A network license supports a specified number of users who are
connected to a network. The Network License Manager is installed on one
or more servers on the network to manage the distribution of licenses to
users.
Network License Server Models
If you are using a network license, choose the server configuration for the
Network License Manager that was specified at the time of license purchase:
■Single License Server
One server manages all licenses on the network.
■Distributed License Server
Installation Overview | 5

Licenses are distributed across a pool of multiple servers in the network.
You enter the name of each server in the pool.
■Redundant License Server
Three servers are available to authenticate each license. You enter the
names of the three servers.
Configure and Install
Installation Path
This path specifies where the product folder will be installed. If you change
the location, use only valid ASCII characters in the install path.
Configuration
Most products have a number of configuration settings. On the Install >
Configure Installation page, for any product you have selected to install, you
see a triangular control for access to a configuration panel:
Click anywhere in the product box to open the configuration panel. For many
products, you can select an installation type, either Typical to accept the
default configuration settings, or Custom to review the settings and decide
whether to modify them. More information on the configuration settings for
your product may exist in a product supplement to Installation Help. After you
have configured the settings as required, click the triangle to close the
configuration panel.
Activate Products
When you run an Autodesk product for the first time, the activation process
verifies that your license is valid, and associates the license with your computer.
If it is connected to the Internet, your computer can communicate directly
with Autodesk to complete the activation process.
6 | Chapter 1 Autodesk Installation Overview and FAQ
If your computer is disconnected from the Internet, you will see a website
address where you can activate a product later when you are connected. Record
the website address, product name, serial number, product key, and request
code. You will need to enter this data on a web page to activate the product.
For more information on activation, go to Autodesk Licensing and select the
FAQ link.
Create Deployment
If you want to install Autodesk products on multiple computers using an
efficient process, create a deployment.
Administrative Image
The deployment process creates an administrative image, which is a set of
installation files that are used to install a consistent configuration of programs
on each computer. Other settings:
■Administrative image path. Specify a shared network location where
you have Full Control permissions. Users will go to this path to install the
programs.
■Target platform. Select either 32-bit or 64-bit to match the operating
system of the computers that will use the deployment.
■Include only products required by this deployment
configuration. If selected, the deployment cannot be modified in the
future to include additional products. If unselected, the administrative
image will include all possible products, and the deployment can be
modified in the future in any way.
Installation Settings
■Silent mode runs the installation in background, without user input.
IMPORTANT In silent mode, the user's computer can restart automatically and
without warning when the installation is complete.
■A log file records installation data for each computer.
■A network log file keeps a central record of installation data for all
computers that run the deployment. It has the same name as your
deployment, and must reside in a shared folder where users have Change
permissions, so that their computers can write to the log file.
Installation Overview | 7
Frequently Asked Questions
For advice and assistance with topics not covered here, go to Autodesk Support,
click your product name, and search in the Knowledgebase for your product.
What if I have lost my serial number or product
key?
Check your product packaging or purchase records, if available, or contact
Autodesk Customer Service for assistance.
Why do I need to activate a product after install-
ation?
Activation verifies for Autodesk and for you as a license holder that your
Autodesk product is installed on an eligible computer. The activation process
improves license security and management. For example, it ensures that a
multi-seat license is not in use by more than the authorized number of users.
Can I install Autodesk products from a website?
Several Autodesk websites are being set up to support product downloads,
including Subscription, Education, eStore, My Account, and the Trial site. On
each site where downloads have been implemented, you have a choice of
several download methods to suit different requirements. If you want to install
products directly on your computer, use the Install Now option. If you want
to download the files to install products later, or to create a deployment,
Download Manager is recommended, or you can use Browser Download. More
details are provided on the download websites.
8 | Chapter 1 Autodesk Installation Overview and FAQ
How does a trial license work in a product suite
or bundle?
A single trial period, usually 30 days, applies to all Autodesk products in the
suite or bundle. When the first product is started, the trial period begins for
all products. If the user does not activate one of the products before the trial
period ends, access to all of the products is denied. After the trial period ends,
the user can restore access to the products by entering an activation code.
How do I change my license type?
If you are running a product installer and simply entered the wrong license
type (network or stand-alone) by mistake, use the Back button to return to
the Product Information dialog, and change the license type.
If you want to change the license type for an installed product, contact your
Autodesk reseller or license supplier to review any business requirements and
to obtain the new license and serial number. Then uninstall your product and
run a new install to change the license type and enter the new serial number.
For Media & Entertainment products 3ds Max, Maya, MotionBuilder, Mudbox,
and Softimage, a procedure is available for switching a stand-alone license to
a network license. Instructions are provided in the supplements for these
products in Autodesk Installation Help.
Where can I find product license information
after installation?
Select Help menu ➤ About, or About [Product Name]. If your product uses
InfoCenter, that is where you can find the Help menu.
After installation, how can I change product
configuration, repair, or uninstall the product?
To uninstall several products or an entire suite, it is recommended that you
use the Autodesk Uninstall Tool, which you can launch from the list of
products on your computer.
Frequently Asked Questions | 9
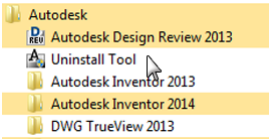
Access to the list varies by version of Windows:
■Windows 7 or XP: Click Start menu ➤ All Programs.
■Windows 8: Right-click Start screen ➤ All Apps.
In the tool window, select the products to be uninstalled. If uninstalling one
of your selected products would prevent another product from operating
correctly, you will see a warning message about also uninstalling the related
products. The Uninstall Tool does not uninstall service packs or locally installed
Help files.
Some uninstall operations are best done for individual products rather than
from the Uninstall Tool. An example is uninstalling a product without
removing the related language packs. Product-specific operations are explained
in the following procedure.
1Go to the Windows control panel:
■Windows XP: Click Start menu ➤ Settings ➤ Control Panel ➤ Add
or Remove Programs.
■Windows 7: click Start menu ➤ Control Panel ➤ Programs/Uninstall
a Program.
■Windows 8: right-click Start screen ➤ All Apps ➤ Control Panel.
2In Windows control panel, click the product name, and then click
Uninstall/Change (Windows 7 or 8) or Change/Remove (Windows XP).
The Installer opens in maintenance mode, and directs you through the
process.
10 | Chapter 1 Autodesk Installation Overview and FAQ
Autodesk Network Ad-
ministrator's Guide
Network Administration and Deployment
What's New in the 2014 Network Administrator's
Guide
The Network Administrator's Guide is now part of a consolidated Installation Help
online document that includes the Installation Overview and FAQ, Licensing Guide,
and product-specific supplements. This new structure is expected to be easier
to use and to maintain.
Other improvements are as follows:
■Deployment path length validation. Deployments created on Windows
can exceed the maximum path length for the operating system, especially
if they are nested deeply within a directory structure. To reduce the chances
of exceeding this limit, Autodesk shortened many of the deployment
directory names, and implemented a path length check that alerts the user
if a path is too long, and by how many characters.
■Combined 32- and 64-bit deployments. For networks that include both
32- and 64-bit computers, network administrators can create a combined
deployment that will determine the computer type and automatically install
the matching product versions. For more information, see Create a Combined
32- and 64-bit Deployment (page 22).
■Including additional software in deployments. When you select the
Autodesk products to include in a deployment, you can also include
third-party products, add-ins from the App Store, language packs, and other
2
11

.MSI or .EXE packages. For more information, see Include Additional
Software (page 17).
■Scripted uninstall file. Each deployment now includes a batch file that
you can use to automatically uninstall all or part of a deployment. For
more information, see Uninstall Deployed Products (page 24).
About Deployments
A deployment provides an efficient way to install one or more Autodesk
products with a standard configuration on multiple computers. The files
required for the installation process are stored on the network, in an
administrative image, in a folder to which all users have shared access. To
install the products, users navigate to the deployment folder and double-click
an installer shortcut (.LNK file).
NOTE The installer referenced in this guide applies only to Windows operating
systems. However, some of the concepts and procedures may apply to Autodesk
products on Linux or Mac OS X networks.
Some essential facts about deployments:
■Deployments can be created for network licenses or multi-seat stand-alone
licenses.
■Multiple deployments with different configurations can exist in the same
folder, sharing the same administrative image.
■Each deployment installs products in a single language. If you need to
install products in different languages, each language requires a separate
deployment. For products that support language packs, you can include
additional language packs with a deployment.
■An existing deployment can form the basis for creating another deployment
with a different configuration.
■Deployments can be configured to generate a log file for each installation.
Network administrators can use these log files for troubleshooting.
■Each deployment creates a subfolder, <deployment name>\SMS_SCCM scripts,
which contains two documents to help you with the distribution of
deployments using Microsoft Systems Management Server (SMS) and System
Center Configuration Manager (SCCM): SMS_SCCM_ReadMe.txt and
<deployment name>_SCCM.txt. The SMS_SCCM scripts folder also contains
two files to help you create a batch file to automate the uninstallation of
12 | Chapter 2 Autodesk Network Administrator's Guide
some or all of the products in a deployment. The two files are <deployment
name>_Uninstall.txt and Product_Uninstall_ReadMe.txt.
Language Pack Deployment
Some Autodesk products, such as Inventor and Revit, can use separate language
packs to add one or more additional language versions to an installed product.
Each language pack provides user-interface strings, message text, and
documentation in a specific language, without duplicating the product
software. To distribute a specific language version to multiple instances of an
Autodesk product, you can use the installer included with each language pack
to create a language pack deployment. If you need to deploy language packs
for multiple languages or multiple products, you can create a batch file to
install a series of language packs on each computer.
Check Deployment Readiness
This checklist identifies preliminary tasks to complete, information to gather,
and decisions to make before creating a network deployment.
TIP To review deployment settings, including details of product configuration,
you can create a test deployment. After the learning process, you can delete the
test deployment.
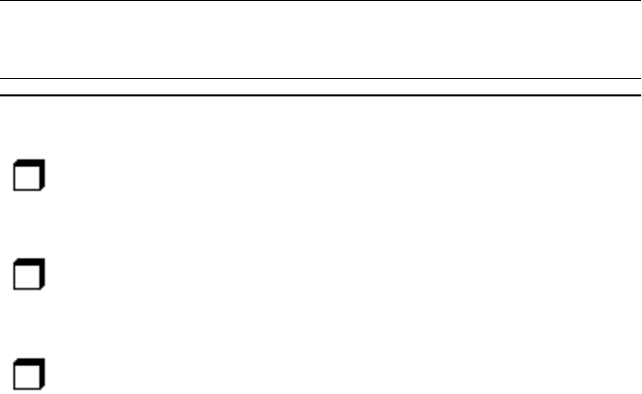
Deployment Checklist
Review the system requirements by clicking the System Requirements link in the
installer. Confirm that your network, servers, and client computers meet these
system requirements.
Understand the general process for installing the type of license you have pur-
chased. For a network license deployment, know the license server name(s), and
the type of license server model that was specified at the time of license purchase.
Install and activate any network administrator tools and utilities. For example, if
you are using a network license, install the Network License Manager from the
installer.
Network Administration and Deployment | 13

Deployment Checklist
For any Windows 8 computers, ensure that the Microsoft .NET 3.5 Framework
can be installed, or manually enable it before deployment.
Locate your product serial number and product key. These are found on the
outside of the product packaging, or in an email message if you downloaded
your product or upgrade from Autodesk.
Identify a network location for deployments, and create a shared folder to contain
deployments.
If your product has language options, decide which language to use for each
deployment.
NOTE Languages can be included when you initially create a deployment, or
when you create a new deployment configuration, but not when you modify a
deployment.
Determine whether to create log files on individual computers, in the deployment
folder, or both.
Determine whether to run installations in silent mode.
NOTE When products are installed in silent mode, the user's system can automat-
ically reboot without warning when the installation is complete.
Identify other configuration options to set, such as defined search paths, locations
of support files, and whether to automatically install service packs.
Ensure .NET 3.5 Support for Windows 8
Some Autodesk products require Microsoft DirectX, which, in turn, requires
the Microsoft .NET Framework. But Windows 8 has enforced restrictions on
installing .NET 3.5 and earlier versions from local media. Therefore, Autodesk
products require Internet access so that Windows updates can install or enable
the .NET Framework.
14 | Chapter 2 Autodesk Network Administrator's Guide
If the Autodesk installer is unable to install .NET 3.5 or an earlier version on
Windows 8, the following message appears:
An Internet connection is required to install a Windows component.
Please connect and re-launch the installer.
The .NET installation is prevented by any of the following conditions:
■An Internet connection is not available during installation.
■The computer is configured to use Windows Server Update Services (WSUS)
instead of Windows Update.
■The Windows 8 update for Microsoft Security Advisory ( 2749655) is not
installed.
If any of these conditions cannot be resolved, then the System Administrator
or user must manually enable .NET 3.5 on each Windows 8 computer before
running the Autodesk installer. For more information and procedures, see the
following MSDN article.
Determine the Installation Type
When setting up your deployment, you specify the installation type by target
platform and license type.
Target Platform
Specify either a 32-bit or 64-bit platform, depending on the operating system
of the computers that will use the deployment. For some Autodesk products,
you can install a 32-bit version on a 64-bit operating system. For more
information, consult product-specific documentation.
License Type
Specify one of the following license types in the installer, based on the type
of license you purchased:
Network License With this license type, you install the product to computers
on a network, along with the files and registry entries that allow the product
to communicate with the Network License Manager (NLM) on one or more
servers. You also define the NLM configuration. When an Autodesk product
starts up on a client computer, it requests a license from NLM, then returns
it when the product is stopped. Computers running the product based on a
network installation do not require individual activation.
Network Administration and Deployment | 15
A major advantage of a network license is that you can install the product on
more systems than the number of licenses you have purchased (for example,
purchase 25 licenses, but install on 40 computers). At any one time, the product
runs on the maximum number of computers for which you have licenses, so
you get true floating licenses.
Stand-Alone License This license type is for multi-seat stand-alone installations
where a single serial number and product key are used to install products on
multiple computers. With this license type you do not use NLM to manage
product licensing. Instead, installation, registration, and activation occur on
each computer. After the first computer activates the multi-seat stand-alone
serial number and product key, activation occurs automatically for all other
computers using this deployment, as long as they are connected to the Internet.
Determine the License Server Model
If you choose the Network License option, you need to know which license
server model will be used to distribute the product licenses. The model was
specified as one of the following when the license was purchased:
■Single license server model. The Network License Manager (NLM) is
installed on a single server, so license management and activity is restricted
to this server. A single license file records the total number of licenses
available on the server.
■Distributed license server model. Licenses are distributed across more
than one server. A unique license file is required for each server. To create
a distributed license server, you must run NLM on each server that is part
of the distributed server pool.
■Redundant license server model. Three servers are available to
authenticate each license. With this configuration, licenses continue to
be monitored and issued as long as at least two servers are functional. The
license file on all three servers is the same, and you must run NLM on each
server.
For more information, see Understanding License Server Models (page 61) in
the Licensing Guide.
Configure Individual Products
When you create a deployment, you can accept the default settings for any
product you choose to install, or you can configure these settings to create a
16 | Chapter 2 Autodesk Network Administrator's Guide
custom deployment. Configuration details for different products are covered
in product supplements to Installation Help. It is recommended that you review
these supplements, and determine the right settings for each product in your
deployment.
To configure product settings, on the Create Deployment page of the installer,
ensure that the product is selected for installation, and then click the product
in the scrolling list. The configuration panel opens.
IMPORTANT The configuration settings you choose apply to every instance of
the product installed from the deployment. After the deployment is created, these
settings can be changed only by modifying the deployment.
Most products allow you to choose an installation type, either Typical to select
the most common options, or Custom to review options in more detail.
Some other common product settings are as follows:
■User preferences for product behavior
■Installation of support files, such as material libraries
■Access to online resources
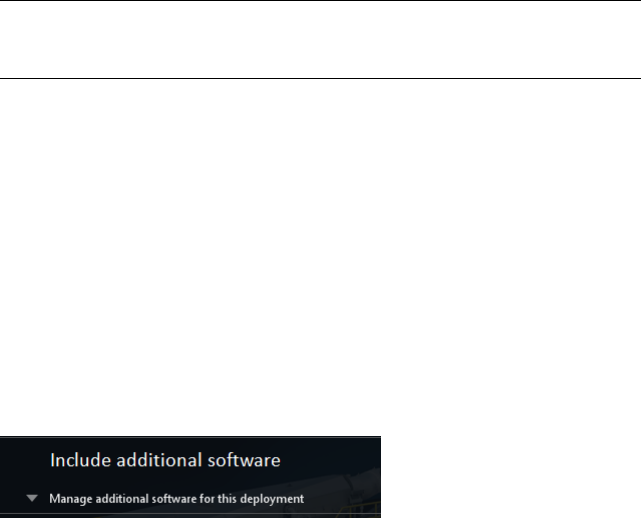
Include Additional Software
When you create a deployment, at the end of the product list in the installer
you see an option to include additional software in your image.
This is used for installing language packs, components from apps.ex-
change.autodesk.com, or other third-party software. The additional software
must be packaged in a self-extracting executable (.EXE) or .MSI format. This
option should not be used to install Vault or other Autodesk products. When
you choose this option, you use a table to manage the additional software.
Network Administration and Deployment | 17
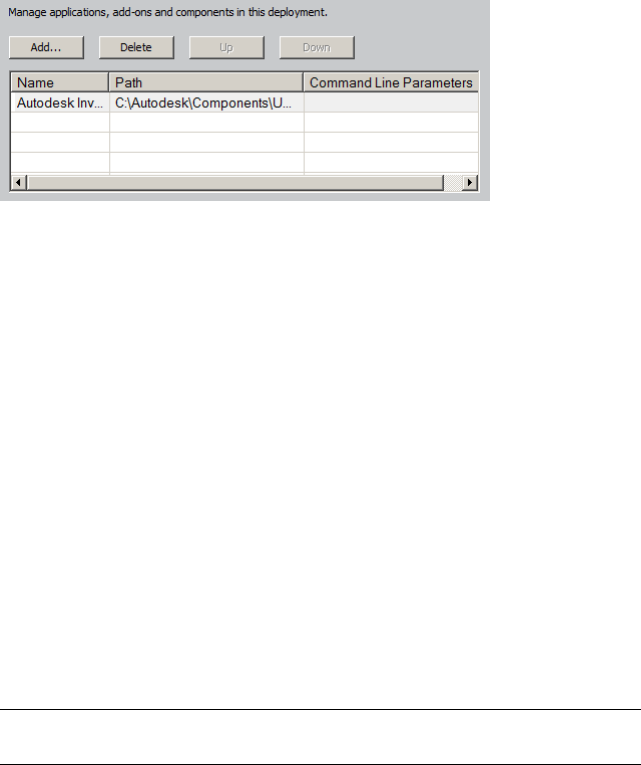
Before creating a deployment, store any additional software in a single location
that is easy to find. To add software to a deployment, click Add, browse to the
file location, and then click the file. The file name and path are added to the
management table. Buttons for deleting files and moving them up or down
in the list become active when the table contains at least two files. Horizontal
and vertical scroll bars are added when the table extends beyond the window.
Include Service Packs
Most products provide the option to include service packs in a deployment.
You can download a service pack from autodesk.com, or use a service pack
stored on a local hard drive or network location. In either case, the service
pack will be applied after installation of the main product.
If you select the Install Service Pack from autodesk.com button, the service pack
will be automatically downloaded and you will not need to extract the MSP
file.
You can add multiple service packs to a deployment only if the service packs
are locally stored, not if you are downloading them from autodesk.com.
NOTE If the deployment process for the main product is canceled or fails, the
service pack installation will automatically be canceled.
Two options are available for including service packs in deployments:
■Append the Service Pack onto the Deployment. When you append
a service pack, the service pack is applied to the current deployment only.
Multiple service packs can be appended to a deployment. The service pack
file is included in the deployment and the service pack is applied after the
product is deployed.
■Merge the Service Pack into the Administrative Image MSI File.
With this option, the service pack is merged into the administrative image.
18 | Chapter 2 Autodesk Network Administrator's Guide
Once merged, a service pack cannot be removed from the administrative
image.
To extract a Microsoft Installer Patch (MSP) file from a service pack
1Download the service pack from the Support site for your product.
2Review the service pack Readme file for information about patch usage.
3Open a Windows command prompt and enter the patch file name
followed by the /e switch and a target file name. Here is the general
command format:
<local_drive:>\<patch_name>.exe /e
<local_drive:>\<patch_name>.msp
Here is an example:
C:\ProductSP1.exe /e ./ProductSP1.msp
where ProductSP1.exe is the name of the downloaded patch and
ProductSP1.msp is the name of the extracted file. Using ‘./’ in front of the
extraction file name places the extracted file in the same folder as the
original executable. The “e” command line switch extracts the MSP file
from the executable.
To include a service pack with the deployment
To include a service pack with a deployment, the MSP file must be extracted
from the downloaded service pack executable.
1On the Include Service Packs page, click the Browse button.
2In the Open dialog box, locate the service pack you want to include with
the deployment.
3Select the MSP file and click Open.
4Specify whether you want to append the service pack to the deployment
or merge the service pack into the administrative image.
5Click Next.
Create a Network Share
After you have fully prepared for creating a deployment, you are ready to set
up and distribute Autodesk products from a shared network location. A network
share is an installation folder to which all users' computers have access. You
create deployments in the network share, and point users to this location to
Network Administration and Deployment | 19

install the program. Any subfolders inside a network shared folder are
automatically shared.
IMPORTANT If your deployment folder is nested inside a series of subfolders, you
risk exceeding the path length limit set by the Windows operating system. Avoid
this possibility by placing your deployments in a location at or near the top
directory of the drive, such as \\serverXX\Deployments.
If you select the option to create a network log file, then during installation,
the user's computer writes an entry to the log file in the network share.
Therefore, this option requires that users have read-write access to the network
share.
You can create a deployment folder on a network share as part of the process
of creating the deployment. If you plan to create several deployments of the
same product or suite, configured for different user groups, then these
deployments can share the same administrative image, and the shortcuts can
reside in the same folder. However, if you plan to create deployments of
different products or suites, it is recommended that you create separate product
folders on the network share before starting to create deployments.
For more information on how to create a network share, see the documentation
for your operating system.
Create a Deployment
Use this procedure to create a new deployment from the installer. In the
process, you can create a default deployment by accepting the default
configuration of each installed product, or you can create a custom
deployment by customizing the configuration settings of one or more
products in the deployment.
To create a deployment
1Close all running applications on your computer.
2Start the installer.
3On the first page, if language choices are available, select a language for
the deployment instructions, and then click Create Deployment.
20 | Chapter 2 Autodesk Network Administrator's Guide
4On the Configure <name> page, Administrative Image section, specify
the following data:
aEnter a descriptive name for the deployment that identifies the
user group, platform, or other attribute to differentiate this
deployment from others.
bEnter the path or browse to the shared network folder where you
want to create and store your administrative image.
IMPORTANT If your deployment folder is nested inside a series of
subfolders, you risk exceeding the path length limit set by the Windows
operating system. Avoid this possibility by placing your deployments
in a location at or near the top directory of the drive, such as
\\serverXX\Deployments.
Users install the program from this location.
cSelect either 32-bit or 64-bit for the target operating system.
dChoose whether to include only the products required by this
configuration.
■If selected, the deployment cannot be modified in future to
include additional products.
■If unselected, the administrative image will include all possible
products, so the current deployment can be modified in any
way.
5In the Installation Settings section, select one or more of these
options:
■Silent mode runs the installation in background, without prompting
the user for any input.
NOTE Silent mode can automatically restart the user's computer without
warning after installation.
■Log file on each workstation can enable users to review and
troubleshoot their own installations.
■Network log file in a central location supports the network
administrator in reviewing data for all installations.
NOTE The network log file must be in a shared folder where users of the
deployment have read-write access. Otherwise, log data for user
installations cannot be written to the log file.
6Review and accept the Autodesk software license agreement.
Network Administration and Deployment | 21

7On the Product Information page, select your license type, and enter
your serial number and product key. If this data is valid, green check
marks appear.
8If you are sure that the product information is correct, click Next.
9On the Create Deployment Configuration page, select the products to
include in the deployment.
10 If you need to configure settings for a product, click the product name
to open the configuration panel where you can review and change
settings.
IMPORTANT The configuration settings you choose apply to every instance
of the product installed from the deployment. After the deployment is
created, these settings can be changed only by modifying the deployment.
Configuration settings vary widely by product. For more information,
see the Installation Help supplement for the product.
11 Click Create to create the deployment.
After the deployment is created, the Deployment Configuration Complete
page opens, showing the path to the new deployment and a link for
registering products online.
12 After you have finished using this screen, click Finish.
Create a Combined 32- and 64-bit Deployment
If you are deploying products on a network that includes both 32- and 64-bit
computers, consider creating a combined deployment that detects the
computer type and delivers the matching deployment. You must first create
separate 32- and 64-bit deployments before you create the combined
deployment.
IMPORTANT Before starting this procedure, ensure that all products in the
deployment support 32-bit operating systems.
To create a combined deployment
1Create separate 32- and 64-bit deployments from the product installers
and store them in the same deployment folder. Include either '32' or '64'
in the deployment name to clearly designate the type.
2In the deployment Tools folder, double-click the CombineDeploy.exe
tool.
22 | Chapter 2 Autodesk Network Administrator's Guide
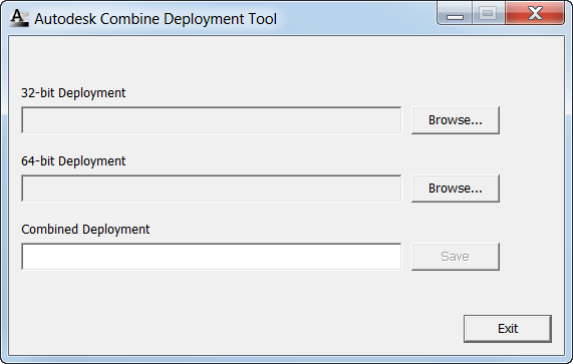
3In the tool panel, browse to the 32- and 64-bit deployments, and then
enter a descriptive name for the combined deployment.
The combined deployment is saved in the same folder as the 32- and
64-bit deployments.
Modify a Deployment
Inside each deployment folder is a Tools folder that contains a shortcut (.LNK
file) named Create & Modify a Deployment. You can use this shortcut to
■Create a new deployment configuration
■Create a new deployment configuration that uses an existing deployment
as a template
■Modify the configuration of an existing deployment
The installer pages guide you through the process, similar to when creating
an original deployment. If your original administrative image was set to include
only products required by the deployment configuration, then your options
for creating or modifying the deployment are limited. In particular, you cannot
add products to the deployment that are not in the original administrative
image. Conversely, if your original administrative image was not set to include
only the required products, then it includes all product files. As a result, you
can add products when you modify this deployment or when you create new
deployment configurations.
Network Administration and Deployment | 23
To modify a deployment
1Open the shared network folder that contains the deployment.
2In the Tools folder, double-click the Create & Modify a Deployment
shortcut.
The installer opens at the Modify Deployment page.
3Click through the deployment configuration pages, and select the
required options.
4Click Create Deployment.
Direct Users to the Administrative Image
After you have created the deployment, users can install the program using
the shortcut (.LNK file) located in the deployment folder with the
administrative image. The shortcut name matches the deployment name that
you specified when creating the deployment. Notify users of the shortcut
name and location. Instruct them to double-click the shortcut to start the
installation. If the deployment uses silent mode, advise users to keep other
applications closed during the installation, because their computers might
restart automatically after products are installed.
Uninstall Deployed Products
Each deployment includes a batch file that you can use to automate the
uninstallation of some or all of the products in the deployment. Along with
the file there is a text document that explains how to customize the batch file
for your use. The files are located in the <deployment name>\SMS_SCCM scripts
folder, and the file names are as follows:
■<deployment name>_Uninstall.txt
■Product_Uninstall_ReadMe.txt
In summary, the process involves converting the .TXT file to a .BAT file with
ANSI encoding, and then uncommenting a number of lines in the file,
removing the :: characters at the beginning of the ::call :funcUninstall command
line for each product that you want to uninstall.
24 | Chapter 2 Autodesk Network Administrator's Guide
Alternative Distribution Methods
Overview of Distribution Methods
In addition to standard deployments, you can use the following alternative
methods of distributing Autodesk programs on Windows platforms:
■Batch files
■Group Policy Objects (GPOs)
■Microsoft System Center Configuration Manager (SCCM)
■Imaging software
Each method is described in a separate set of topics in this guide:
■Batch Files for Deployments (page 25)
■Group Policies for Deployments (page 28)
■Microsoft SCCM for Deployments (page 34)
■Imaging Software for Deployments (page 39)
Batch Files for Deployments
A batch file executes a set of commands. Installation batch files are useful for
installation of stand-alone or network licensed programs on computers that
are connected to a network. These files are also useful for installing service
packs, extensions, and object enablers on a network.
The batch file consists of one or more commands, as well as command switches
that specify options, and flags that modify the options. An installation script
also contains path names.
An installation script points to the location of the product's setup.exe file. You
must point to the setup.exe file on your installation media or network location.
In order for your Autodesk product to run properly, you must have
Administrator permissions on the computer where the program is being
installed.
Alternative Distribution Methods | 25
Sample Installation Batch Files
The sample batch files in this section install AutoCAD in typical configurations
for stand-alone or network licensed versions. To make it easy to copy this
sample batch file and substitute your own information, the same names are
used throughout for variables.
Notes
<mediaDriveLetter> is the drive letter where the media is mounted or the
setup.exe file is stored
Install options used here include /t (setup is executed by script) and /qb (display
a basic user interface). Others such as /w (log nonfatal warnings) are defined
for Microsoft Msiexec command line, and documented on the MS TechNet
website.
<SerialPrefix> is the first 3 digits of the serial number
<SerialPostfix> is the last 8 digits of the serial number
<ProdKey> is the Product Key
<lang> is the IETF language tag, for example en-US for English-United States
<eula_lang> is the ISO 3166-1 alpha-2 standard for the country for example
US = United States
Stand-Alone License
<mediaDriveLetter>\setup.exe /t /qb /language <lang> /c
ACAD: INSTALLDIR="%programFiles%\Autodesk\AutoCAD 2014"
ACADSERIALPREFIX=<SerialPrefix>ACADSERIALNUMBER=<SerialPostfix>
ADLM_PRODKEY=<ProdKey> ADLM_EULA_COUNTRY=<eula_lang>
InstallLevel=5
Example:
C:\setup.exe /t /qb /language en-us /c
ACAD: INSTALLDIR="%programFiles%\Autodesk\AutoCAD 2014"
ACADSERIALPREFIX=123 ACADSERIALNUMBER=12345678
ADLM_PRODKEY=001E1 ADLM_EULA_COUNTRY=US InstallLevel=5
Single Network License
<mediaDriveLetter>\setup.exe /t /qb /language <lang> /c
ACAD: INSTALLDIR="%programFiles%\Autodesk\AutoCAD 2014"
26 | Chapter 2 Autodesk Network Administrator's Guide
ACADSERIALPREFIX=<SerialPrefix>ACADSERIALNUMBER=<SerialPostfix>
ADLM_PRODKEY=<ProdKey> ADLM_EULA_COUNTRY=<eula_lang>
InstallLevel=5
ACADSTANDALONENETWORKTYPE="3" ACADLICENSESERVERTYPE="Single
Server License"
ACADLICENSETYPE="Network License"
ACADSERVERPATH="<FlexLicenseServer> 000000000000"
Notes
For network licenses, ACADSTANDALONENETWORKTYPE identifies the type
of license being installed. It has three possible values: 0 for both network and
stand-alone, 1 for stand-alone, and 3 for network.
<FlexLicenseServer> is the network license server.
Distributed Network License
<mediaDriveLetter>\setup.exe /t /qb /language <lang> /c
ACAD: INSTALLDIR="%programFiles%\Autodesk\AutoCAD 2014"
ACADSERIALPREFIX=<SerialPrefix>ACADSERIALNUMBER=<SerialPostfix>
ADLM_PRODKEY=<ProdKey> ADLM_EULA_COUNTRY=<eula_lang>
InstallLevel=5
ACADSTANDALONENETWORKTYPE="3"
ACAD_LICENSESERVER_DISTRIBUTED="1"
ACADLICENSESERVERTYPE="Distributed Server License"
ACADLICENSETYPE="Network License"
ACADSERVERPATH="@<server1>;@<server2>;@<server3>;"
Notes
<server1> thru <serverN> are valid network license servers.
Redundant Network License
<mediaDriveLetter>\setup.exe /t /qb /language <lang> /c
ACAD: INSTALLDIR="%programFiles%\Autodesk\AutoCAD 2014"
ACADSERIALPREFIX=<SerialPrefix>ACADSERIALNUMBER=<SerialPostfix>
ADLM_PRODKEY=<ProdKey> ADLM_EULA_COUNTRY=<eula_lang>
InstallLevel=5
ACADSTANDALONENETWORKTYPE="3"
ACADLICENSESERVERTYPE="Redundant Server License"
ACADLICENSETYPE="Network License"
Alternative Distribution Methods | 27

ACADSERVERPATH="<server1> 000000000000 27005;<server2>
000000000000 27005;<server3> 000000000000 27005;"
Notes
<server1> thru <server3> are valid network license servers with redundant
licenses.
Run Batch Files
After creating a batch file, you move it to a server or use a mapped drive letter
or a UNC (universal naming convention) path. If you place it on a server for
users to run, create a shared folder on the server, and then add users to the
share with the rights they need. Users who just run the batch file can have
read-only access to the shared folder.
Next, in another server location, create a directory for each product you want
to install. Copy the installation files to this directory from the product media.
You may also want to create directories for service packs, extensions, and your
own customization tools.
Use one of the following methods to run an installation batch file:
■Run the batch file manually at each individual computer. To run the
installation, paste the batch file into the Run dialog box or run it from the
Windows command prompt.
■Send an email to each user who should run the batch file, with the UNC
path and any required instructions.
■Email the batch file to each user with instructions for use.
■Set up the batch file so that it runs on login.
Group Policies for Deployments
With group policies, you can advertise and install a program by assigning a
deployment to specific computers. Generally, you would assign the deployment
to a computer that is shared by several users. A deployment assigned to a
computer can be used by any user of that computer.
NOTE Autodesk products are designed to be installed on a computer so that any
user who logs on to the computer can run the software. If you assign a deployment
to a specific user rather than a computer, you may encounter problems when a
second specified user tries to install or uninstall a copy of the program.
28 | Chapter 2 Autodesk Network Administrator's Guide
The following section outlines the advantages and disadvantages of using
group policies.
Advantages
■Works well with deployment functionality.
■Allows you to add custom files to a deployment.
■Allows deployment to computers rather than to users.
Disadvantages
■Prohibits the passing of command-line parameters to an MSI executable.
You must use scripts instead.
■Prohibits customization of application settings, other than what is set
while creating a deployment.
Autodesk products typically have software prerequisites that must be installed
on a computer to support the Autodesk product. In particular, Microsoft .NET
Framework 4.0, Fusion, and the Fusion plug-in must be installed prior to using
group policies. Before deploying products, consult the System Requirements for
each product, and ensure that these are installed on the computer where the
program will being installed.
Distributing a program through group policies involves three main steps:
1Create an application distribution share point. The application
distribution share point is created when you create a deployment.
2Assign the deployment to a computer. See Use Group Policies to
Assign a Deployment to Computers (page 29).
3Verify the installation. Confirm that the program has been correctly
installed. See Verify a Group Policy Deployment (page 32).
Use Group Policies to Assign a Deployment to Com-
puters
Perform the following procedures from a Windows 7 or 8 computer or a
Windows 2003, 2008 or 2012 server that has Group Policy Management
Console installed, and has access to the Active Directory server.
Alternative Distribution Methods | 29

NOTE For more information, go to Microsoft TechNet and search for "Group Policy
Management Console".
To assign a deployment to a computer
1Start the Group Policy Management Console (gpmc.msc).
2Right-click the organizational unit where you want to create the group
policy object (GPO). Then select Create and Link a GPO Here and name
the Group Policy.
3Edit the policy.
4In the Group Policy Object Editor dialog box, under Software Settings,
right-click Software Installation, and click New ➤ Package.
5In the Open dialog box, navigate to the administrative image created by
the deployment process. Navigate to Img\<processor type>\<product name
folder>. The processor type is either x86 or x64, depending on the
processor type for which you created your deployment.
Examples
For x86 deployments:
\\server123\Deployment\Img\x86\<product name>
For x64 deployments:
\\server123\Deployment\Img\x64\<product name>
6Select the Windows Installer Packages file called <product
name>-<deployment name>.msi. Click Open.
If the product was AutoCAD and the deployment was called “Design
2014 64 bit,” then the deployment’s MSI file would be acad-Design 2014
64 bit.msi.
7In the Deploy Software dialog box, select Advanced and click OK.
8In the Properties dialog box, Modifications tab, click Add.
9In the Open dialog box, select the Transform Package file called <product
name>-<deployment name>.mst). Click Open.
10 In the Properties dialog box, Modifications tab, click Add.
11 In the Open dialog box, navigate to <deployment location>\Tools and
select the Transform Package file called gpo.mst.
12 Click OK to complete the package.
30 | Chapter 2 Autodesk Network Administrator's Guide

Adding a Language Pack
If your product uses language packs, you may need to add a language pack to
your package.
To add a language pack
1In the Group Policy Object Editor dialog box, under Software Settings,
right-click Software Installation for the same object, and then click New
➤ Package.
2In the Open dialog box, navigate to the location of the administrative
image that you specified when creating the deployment. Navigate to
Img\<processor type>\<locale>\<product name>\<product name>lp.msi.
Click Open.
The <locale> used in the examples is en-us for US English.
Examples
For x86 deployments: \\server123\Deployment\Img\x86\en-us\<product name>
For x64 deployments: \\server123\Deployment\Img\x64\en-us\<product name>
3In the Deploy Software dialog box select Advanced and click OK.
4In the <product name> Properties dialog box, Modifications tab, click
Add.
5In the Open dialog box, select the Transform Package file called <product
name>-<deployment name>.mst located at Img\<processor type>\acad. Click
Open.
6In the <product name> Properties dialog box, Modifications tab, click
Add.
7In the Open dialog box, navigate to <deployment location>\Tools and
select the Transform Package file called gpo.mst.
8Click OK to complete the package.
To add the product-specific package
1In the Group Policy Object Editor dialog box, under Software Settings,
right-click Software Installation for the same object, and then click New
➤ Package.
Alternative Distribution Methods | 31

2In the Open dialog box, navigate to the location of the administrative
image that you specified when creating the deployment. Navigate to
Img\<processor type>\<locale>\<product name>ps.msi. Click Open.
The <locale> used in the examples is en-us for US English.
Examples
For x86 deployments: \\server123\Deployment\Img\x86\en-us\<product name>
For x64 deployments: \\server123\Deployment\Img\x64\en-us\<product name>
3In the Deploy Software dialog box select Advanced and click OK.
4In the <product name> Properties dialog box, Modifications tab, click
Add.
5In the Open dialog box, select the Transform Package file called
acad-<deployment name>.mst located at Img\<processor type>\<product
name>. Click Open.
6In the <product name> Properties dialog box, Modifications tab, click
Add.
7In the Open dialog box, navigate to <deployment location>\Tools and
select the Transform Package file called gpo.mst.
8Click OK to complete the package.
The GPO is now assigned to all computers that are members of the
organizational unit for which the GPO was created. The next time a computer
in the organizational unit is restarted, the program will be installed and will
be available for all users of the computer. See Verify a Group Policy Deployment
(page 32) to confirm that the group policy has been created correctly.
Verify a Group Policy Deployment
To verify that this deployment has been correctly assigned to a computer,
restart a computer that is in the organizational unit for which the group policy
was created. The program installation begins before the login prompt is
displayed. The operating system displays group policy messages, including a
message indicating the installation of any managed software.
After logging in, double-click the program icon on the desktop to complete
the installation and start the program.
32 | Chapter 2 Autodesk Network Administrator's Guide

NOTE If problems arise, an entry is logged in the system's Event Viewer, under
Applications.
GPO Requirements for Deploying Revit Interoperabil-
ity
These instructions apply to group policy object (GPO) deployments of Revit
Interoperability components with 3ds Max, 3ds Max Design, Inventor, or
Showcase. The product-specific MSI files are as follows:
■RXM2014.msi for 3ds Max or 3ds Max Design
■RXI2014.msi for Inventor
■RXS2014.msi for Showcase
In addition to the main GPO transform file (gpo.mst), deployments that include
a Revit Interoperability component must include one of the following
product-specific transform files:
■RXM2014.mst for 3ds Max or 3ds Max Design
■RXI2014.mst for Inventor
■RXS2014.mst for Showcase
These MST files are located in the \Img\<processor type>\RX2014 directory.
If the deployment does not install products on the default path (C:\Program
Files\Autodesk) then you must use a tool such as Orca (available with Windows
SDK) to transform the INSTALLDIR property in the Property table.
To change the INSTALLDIR property:
1Run Orca, and open the Revit Interoperability MSI file for your product
(example: RXI2014.msi for Inventor).
2Select the Transform menu ➤ New Transform. Orca will track any
changes that you make to the cells in the install tables.
3With the Property table selected in the left pane, click Tables ➤ Add
Row.
4Add the INSTALLDIR row to the Property table, and enter the install
path, with a backslash (\) at the end (example: C:\Inventor\).
5Select Transform ➤ Generate Transform and save the MST file.
Alternative Distribution Methods | 33

6Include this MST file along with gpo.mst and the transform file for the
Revit Interoperability MSI.
Microsoft SCCM for Deployments
Microsoft System Center Configuration Manager (SCCM) allows you to manage
software distribution to selected target systems through a remote process. For
more information about this topic, go to Microsoft TechNet and search for
"System Center Configuration Manager".
Each deployment includes a folder <deployment name>\SMS_SCCM scripts,
which contains four documents to help you with SCCM deployments and
uninstalling products:
■SMS_SCCM_ReadMe.docx
■<deployment name>_SCCM.txt
■Product_Uninstall_Readme.txt
■<deployment name>_Uninstall.txt
For more information, see Use SCCM to Uninstall Deployed Products (page
37).
NOTE Microsoft .NET Framework 4.0 must be installed on each target computer
before using SCCM to distribute Autodesk products. Some products require .NET
4.5, which can be installed by the SCCM deployment.
To deploy Autodesk products with SCCM
1Identify or create a collection of target computers to receive the software
package.
2Create a source directory using the Create Deployment procedure in the
installer. See Set Up a Source Directory for SCCM (page 35).
3Create an SCCM package to deploy to your target systems, and notify
users that the software package is available. See Create the SCCM Software
Installation Package (page 35).
34 | Chapter 2 Autodesk Network Administrator's Guide

Set Up a Source Directory for SCCM
When you use SCCM to deploy Autodesk products, you set up the source
directory using the Create Deployment process in the installer.
The Create Deployment process creates an administrative image that is used
by SCCM to distribute the Autodesk products to the target systems. The
location of the administrative image is the package source directory.
To learn more about deployments and setting up the source directory for
Autodesk software, see About Deployments (page 12).
NOTE Before trying to configure SCCM to deploy the product, it is recommended
that you test your deployment to ensure that it can install the product successfully.
To test your deployment
1Log on to a Windows computer as a user who has administrative
privileges.
2Navigate to the source directory where your administrative image was
created.
3Double-click the deployment shortcut created by the deployment process.
The program is either installed, or error information is written to the
log file at %temp%.
Create the SCCM Software Installation Package
After creating the source directory using the deployment process, create the
SCCM software installation package. An SCCM package contains the files and
instructions that SCCM uses to distribute the software and advertise the
package to users. The deployment process creates the files and instructions,
but SCCM must be configured to use these files.
To create a software installation package using SCCM
1Click Start menu ➤ All Programs ➤ Microsoft System Center ➤
Configuration Manager 2007 ➤ ConfigMgr Console.
2In the Configuration Manager Console window, expand Software
Distribution.
3Right-click Packages ➤ Distribute ➤ Software.
Alternative Distribution Methods | 35
4In the Distribute Software wizard, click Next.
5In the Package dialog box, select Create a New Package and Program
without a Definition File. Click Next.
6In the Package Identification dialog box, enter the information for Name,
Version, Publisher, Language and any comments. Click Next.
7In the Source Files dialog box, make selections for where SCCM retrieves
the files and how it manages them. Select “Always Obtain Files from a
Source Directory”. Click Next.
8In the Source Directory dialog box, specify the location of the source
directory. Click Next.
9In the Distribution Points dialog box, select the distribution point(s),
which is the location from which the software package will be deployed
to the target computers. Click Next.
10 In the Program Identification dialog box, enter the name of your
program. This name displays in Add or Remove Programs in the Control
Panel. In the Command Line field, enter .\Img\setup.exe /W /Q /I
.\Img\<deployment name>.ini /language en-us. For example, if
your deployment is named "Adsk-2014", you would enter
.\Img\setup.exe /W /Q /I .\Img\Adsk-2014.ini /language en-us.
Click Next.
NOTE This example assumes the language pack you wish to install is US
English. About the flags, /W indicates SMS and SCCM, /Q indicates a silent
install, and /I indicates a deployment installation.
11 In the Program Properties dialog box, Program Can Run drop-down list,
select how you want your program to install. Your choices are
■Only When a User is Logged On
■Whether or Not a User is Logged On
■Only When No User is Logged On
12 In the After Running drop-down list, select an action to take after the
program has been installed. Your choices are
■No Action Required
■Program Restarts Computer
■ConfigMgr Restarts Computer
■ConfigMgr Logs User Off
NOTE Some products require a system restart after installation.
36 | Chapter 2 Autodesk Network Administrator's Guide
Click Next.
13 In the Advertise Program dialog box, select Yes to advertise the program
to users. Click Next.
14 In the Select a Program to Advertise dialog box, select the package you
want to advertise. Click Next.
15 In the Select Program ➤ Advertisement Target dialog box, select the
collection of people to whom you want to advertise, or create a new
collection.
16 In the Select Program ➤ Advertisement Name dialog box, enter or
change the name of your advertisement. Add any comments to further
describe the advertisement. Click Next.
17 In the Select Program ➤ Advertisement Subcollection dialog box, select
one of the following options:
■Advertise this Program to an Existing Collection
■Create a New Collection and Advertise this Program to It
18 Click Next.
19 In the Select Program ➤ Advertisement Schedule dialog box, if desired,
set options to advertise your program at a specific date and time, or set
an expiration date. Click Next.
20 In the Select Program ➤ Assign Program dialog box, select one of the
following options:
■If the installation process is mandatory, select Yes, Assign the Program.
■If the installation process is optional, select No, Do Not Assign the
Program.
Click Next.
21 In the Summary dialog box, verify your advertisement information. Use
the back buttons to make any changes. To finish, click Next.
Use SCCM to Uninstall Deployed Products
Before using this procedure, go to the <deployment name>\SMS_SCCM scripts
folder and create an uninstallation batch file with ANSI encoding, following
the instructions in the Product_Uninstall_Readme.txt file. You will use the
resulting batch file <deployment name>_Uninstall.bat in this procedure.
Alternative Distribution Methods | 37
To create a software uninstallation package using SCCM
1Click Start menu ➤ All Programs ➤ Microsoft System Center ➤
Configuration Manager 2007 ➤ ConfigMgr Console.
2In the Configuration Manager Console window, expand Software
Distribution.
3Right-click Packages ➤ Distribute ➤ Software.
4In the Distribute Software wizard, click Next.
5In the Package dialog box, select Create a New Package and Program
without a Definition File. Click Next.
6In the Package Identification dialog box, enter the information for Name,
Version, Publisher, Language and any comments. Click Next.
7In the Source Files dialog box, make selections for where SCCM retrieves
the batch file (<deployment name>_Uninstall.bat) and how it manages it.
Select “Always Obtain Files from a Source Directory”. Click Next.
8In the Source Directory dialog box, specify the location of the source
directory. Click Next.
9In the Distribution Points dialog box, select the distribution point(s).
This is the location from which the software package will be deployed
to the target computers. Click Next.
10 In the Program Identification dialog box, enter the name of your
program. This is the name that displays in Add or Remove Programs in
the Control Panel. In the Command Line field, enter .\<deployment
name>_Uninstall.bat. Click Next.
11 In the Program Properties dialog box, Program Can Run drop-down list,
select how you want your program to run. Your choices are
■Only When a User is Logged On
■Whether or Not a User is Logged On
■Only When No User is Logged On
12 In the After Running drop-down list, select an action to take after the
program has run. Your choices are
■No Action Required
■Program Restarts Computer
■ConfigMgr Restarts Computer
■ConfigMgr Logs User Off
NOTE Some products require a system restart after running.
38 | Chapter 2 Autodesk Network Administrator's Guide
Click Next.
13 In the Advertise Program dialog box, select Yes to advertise the program
to users. Click Next.
14 In the Select a Program to Advertise dialog box, select the package you
want to advertise. Click Next.
15 In the Select Program ➤ Advertisement Target dialog box, select the
collection of people to whom you want to advertise, or create a new
collection.
16 In the Select Program ➤ Advertisement Name dialog box, enter or
change the name of your advertisement. Add any comments to further
describe the advertisement. Click Next.
17 In the Select Program ➤ Advertisement Subcollection dialog box, select
one of the following options:
■Advertise this Program to an Existing Collection
■Create a New Collection and Advertise this Program to It
18 Click Next.
19 In the Select Program ➤ Advertisement Schedule dialog box, if desired,
set options to advertise your program at a specific date and time, or set
an expiration date. Click Next.
20 In the Select Program ➤ Assign Program dialog box, select one of the
following options:
■If the installation process is mandatory, select Yes, Assign the Program.
■If the installation process is optional, select No, Do Not Assign the
Program.
Click Next.
21 In the Summary dialog box, verify your advertisement information. Use
the back buttons to make any changes. To finish, click Next.
Imaging Software for Deployments
You can use imaging software, such as Norton™ Ghost™, to create a master
image to distribute Autodesk products. Once created, the master image can
be replicated to other computers throughout your facility.
Alternative Distribution Methods | 39

IMPORTANT Autodesk does not recommend or support the distribution of products
using imaging software. However, if you plan to use this method of distribution,
please review the following instructions carefully.
The use of imaging software can result in conflicts with product licensing,
incomplete installations, and problems with activation.
NOTE If you experience licensing instability in a SATA RAID environment, using
imaging software to distribute Autodesk products can cause product activation
problems, such as an “Activation code limit exceeded” situation.
Distribute Multi-Seat Stand-Alone Products
You can use a master image to distribute a multi-seat stand-alone product to
multiple computers.
NOTE When using Norton Ghost, you must use the -ib switch to include the boot
sector in your master image. Consult your imaging software for more details on
including the boot sector as part of the master image.
Master images should not be created if you have previously run Autodesk
products on the master computer. Cleaning the system may be necessary. For
more information, see Clean a Master System and Restore the Operating System
(page 42).
To distribute a multi-seat stand-alone product to multiple computers using
a master image
1Create a network deployment for a multi-seat stand-alone product. For
more information, see Create a Deployment (page 20).
2Install the Autodesk product from the deployment onto the master
computer.
3On the master computer, create a master image, including the boot
sector. Test the product on a computer other than the master computer
before distributing the product. Launch the product on the other
computer, and then register and activate it. Users have a trial period to
register and activate the product on their computers.
4Apply the master image to the target computers.
40 | Chapter 2 Autodesk Network Administrator's Guide
Distribute Network Licensed Products
You can use a master image to distribute network licensed products.
To distribute a network licensed product to multiple computers using a master
image
1Create a network deployment for a network licensed product. For more
information, see Create a Deployment (page 20).
2Install the product from the deployment onto the master computer.
NOTE A license server must be running, and each computer must be
connected to the network in order for the product to obtain a license.
3After the product has been installed, use imaging software to create a
master image of the system's hard drive.
4Apply the master image to the target computers.
Restore the Master Image
The following procedure assumes that you have saved a copy of each
computer’s AdLM folder (and Product Licenses folder, if present) to another
computer or an external drive before you reformat the computer.
To restore a product using a master image
1Exit any running application. Do not run the application again until
after you have completed this procedure.
2In Windows Explorer, copy the AdLM folder from the appropriate path
shown below to a location other than the disc that will be restored.
%programdata%\FLEXnet
3Reformat the computer and restore the master image.
NOTE Do not perform a low-level format of the hard drive.
4Copy the AdLM folder that you created in step 2 to its original location
on the reformatted computer.
Alternative Distribution Methods | 41

NOTE When you restore the disc image, any files that were altered are put back
in their original state and ready to use again. The license files are preserved, and
no reactivation of products is necessary.
Clean a Master System and Restore the Operating
System
If you have already run your Autodesk product on the master computer, the
master computer should be properly cleaned before creating a master image.
To clean a master computer and restore the operating system
1Clean the hard drive, including the boot sector.
For example, if you use GDISK utility from Norton, use the following
command:
gdisk 1 /diskwipe
Where 1 is the hard disk that is being wiped.
NOTE If you use a utility other than Norton Ghost, make sure that it cleans
the boot sector; otherwise, you will not be able to activate Autodesk products.
2Create a new partition and use the restore disc or product media to install
the operating system.
Installation Questions
This section provides answers to some frequently asked questions about
installation and deployment. For additional advice and assistance, go to
Autodesk Support, click your product name, and search in the Knowledgebase
for your product.
42 | Chapter 2 Autodesk Network Administrator's Guide
Licensing Questions
What is the difference between a stand-alone license
and a network license?
A stand-alone license supports one or more Autodesk products for an individual
user. Similarly, a multi-seat stand-alone license supports a specific number of
users. While the software can be installed on additional computers in your
facility, the license specifies a maximum number of concurrent users.
A network license supports a specific maximum number of concurrent users
on computers connected to a network. A software utility known as the Network
License Manager (NLM) issues licenses to computers, up to the number of
licenses purchased. At this point, no more computers can run the Autodesk
product until a license is returned to the NLM.
What is the benefit of using a network licensed version
of the software?
Network licensing provides ease of license management for large
drafting/design facilities, classrooms, and other environments that need to
support many users. The Network License Manager provides centralized control
of licenses, including their registration, activation, and distribution to users.
One main advantage of a network license is that you can install products on
more computers than the number of licenses you have purchased. For example,
you can purchase 25 licenses but install them on 40 computers for ease of
access. At any one time, products can run on the maximum number of
computers for which you have licenses. This means you get a true floating
license. A network licensing system can also be configured to allow users to
borrow a license for a limited time to use on a computer disconnected from
the network.
What is SAMreport-Lite?
SAMreport-Lite is a report generator that helps you monitor the usage of
network licenses for products that use FLEXnet™. SAMreport-Lite is not
distributed with Autodesk products, but it is available from Autodesk.
Installation Questions | 43
SAMreport-Lite can help you better manage your software licenses. For more
information, click SAMreport-Lite.
Deployment and Networking Questions
Where should deployments be located?
Create a network share folder in the top directory of the drive where you want
to store deployments, such as \\serverXX\Deployments. This location minimizes
the possibility of your deployment path exceeding the path length limit set
by the Windows operating system. You can then add subfolders named to
reflect the products deployed. If you plan to create several deployments of
the same product or suite, configured for different user groups, then these
deployments can share the same administrative images, and the shortcuts can
reside in the same folder. Any subfolders inside a shared folder are
automatically shared.
For more information on network shares, see Create a Network Share (page
19).
When should I select all products for the administrative
image, and can I add products later?
If you include all products in your deployment, the administrative image will
be larger, but you will be able to modify the deployment or create new ones
without restrictions. If you select the checkbox "Include only products required
by this deployment configuration", the resulting deployment includes a subset
of the available products. Any modifications to this deployment, or additional
deployments based on the first one, will be limited to the same set of products
or fewer.
It is recommended that you include all available products if you plan to create
multiple deployments from this administrative image with different product
mixes, and prefer not to use the installation media again. However, if you are
certain that you will never want to deploy some of the products, or if you do
not expect to create additional deployments, you should select a subset of
products.
44 | Chapter 2 Autodesk Network Administrator's Guide
You can create another deployment later, and include additional products,
but to do this you need to create a new administrative image from the
installation media.
What are profiles of user preferences?
A profile is a collection of user settings for AutoCAD or another Autodesk
product. Profiles are not used by all products. When you specify a profile on
the Specify User Preferences page during the deployment process, it ensures
a standard configuration for all computers that use that deployment to install
the product.
Profiles can contain configuration settings for almost anything that is not a
drawing-based system variable. For example, a profile can contain support
paths, grip settings, and print settings. Profiles are created on the Profiles tab
of the product's Options dialog box.
What happens if I choose to append or merge service
packs?
When you append a service pack, it is applied to the current deployment only.
The service pack file is included in the deployment, and the service pack is
applied after the product is deployed.
When you merge a service pack, the service pack is merged into the
administrative image. Once merged, a service pack cannot be removed from
the administrative image.
You can choose to append or merge service packs from the product
configuration panel when creating a deployment.
Where can I check if service packs are available for my
software?
To find out if a patch or Service Pack is available, visit the Support page for
your product at http://autodesk.com/servicesandsupport.
Installation Questions | 45
How do I extract an MSP file?
This topic applies only to Windows platforms. A Microsoft Patch (MSP) file is
usually contained in a Service Pack executable that you download from the
Support website for your product. To extract the MSP file from the executable,
run the patch program from the Windows command prompt using the /e
switch. The syntax is as follows:
<local_drive:>\<patch_name>.exe /e <local_drive:>\<patch_name>.msp
Pay particular attention to the location where the files are extracted. For details
about using the patch file, review the Readme file for the patch.
How should I configure a network license server for a
firewall?
If you have a firewall between the license server(s) and the client computers,
you need to open some TCP/IP ports on the server for license-related
communication. Open port 2080 for adskflex, and open ports 27000 through
27009 for lmgrd.
Uninstall and Maintenance Questions
How can I see what is included in a default installation?
Follow the installation process to the Configure Installation page. The products
selected here are installed in a default installation. If you click a selected
product to open the configuration panel, you can see the default settings for
subcomponents and features.
Is it possible to change the installation folder when
adding or removing features?
After your product is installed, you cannot change the installation path.
Changing the path while adding features results in program corruption, so it
is not an option.
46 | Chapter 2 Autodesk Network Administrator's Guide
How do I install tools and utilities after installing my
product?
Run the installer again from the downloaded package or the original media,
and click Install Tools & Utilities on the first screen. The installer guides you
through the process of selection, configuration, and installation of tools and
utilities.
When should I reinstall the product instead of repairing
it?
Reinstall your product if you accidentally delete or alter files that are required
by the program. Missing or altered files adversely affect the performance of
your product and cause error messages when you try to execute a command
or find a file.
If an attempt to repair an installation fails, reinstalling is the next best option.
Do I need the original media to reinstall my product?
Yes, unless you installed the product from an Autodesk website, using the
Install Now or Download Now options. When reinstalling a product, you are
prompted to load the original media. If the product was installed from a
network deployment, you need access to the original deployment, unaltered
by later changes such as the addition of a service pack.
When I uninstall my software, what files are left on
my system?
If you uninstall the product, some files remain on your computer such as files
you created or edited (for example, drawings or custom menus).
Your license file also stays on your computer when you uninstall your product.
If you reinstall on the same computer, the license information remains valid;
you do not have to reactivate the product.
Installation Questions | 47
Glossary
activate Part of the Autodesk software registration process, it allows you to
run a product in compliance with the product's end-user license agreement.
administrative image A collection of shared file resources created by the
deployment process and used to install the program to network computers.
deployment The process of installing Autodesk products to one or more
computers on a network.
hot fix Autodesk terminology for a minor application patch that contains a
few code fixes.
installation image A deployment that consists of one or more MSI files and
their associated data files, any associated transforms, additional user-specified
custom files, profile, and registry settings.
language family A set of languages (core product, plus language packs) that
are distributed together, typically based on a geographic grouping. Languages
are not distributed in this way for all Autodesk products.
language pack A set of installed files, used by some Autodesk products, that
enable the user to work in the application in the language specified by the
language pack.
License Transfer Utility A tool used to transfer a stand-alone license for an
Autodesk product from one computer to another, using Autodesk servers.
Both the source and target computers require Internet access.
multi-seat stand-alone installation A type of installation in which multiple
stand-alone seats of the product are installed using a single serial number.
network license installation A type of installation in which the product is
installed on multiple computers, but the distribution of licenses is handled
by the Network License Manager.
patch A software update to an application.
service pack Autodesk terminology for a major application patch that typically
includes many code fixes.
silent mode An installation that proceeds without any explicit user input.
No dialog boxes are presented that require interaction from the user.
48 | Chapter 2 Autodesk Network Administrator's Guide
Autodesk Licensing
Guide
Introduction
What's New in the 2014 Licensing Guide
The Licensing Guide is now part of a consolidated Installation Help online
document that includes the Installation Overview and FAQ, Network Administrator's
Guide, and product-specific supplements. This new structure is expected to be
easier to use and to maintain.
Other improvements are as follows:
■Updated Network License Manager tools with FLEXnet 11.11.
■New topics explain License Sharing and Cascading (page 67) for network
licenses and Simplified Licensing (page 52) with term licenses.
■Network license file examples have been updated.
■New topics have been added to support term license users: Manage a Term
License (page 55) and Restoring Access to a Term License (page 61).
License Types
Autodesk provides two main types of licenses:
■A stand-alone license supports one or more Autodesk products for an
individual user. This license type also has a multi-seat version that supports
a specific number of users. The software can be installed on additional
computers in your facility, but the number of concurrent users is limited.
3
49

■A network license supports a specific maximum number of users on
computers connected to a network. A software utility known as the Network
License Manager (NLM) issues a license to each user who starts an Autodesk
product, up to the number of licenses purchased. When a user closes all
Autodesk products, typically the license is returned to the NLM, and is
available to other users. However, NLM can be configured to allow a user
to borrow a license and disconnect from the network until a specified
return date. A borrowed license is only returned to NLM on the return
date, or sooner if the user chooses to return it early.
Autodesk supports dynamic product usage and license behaviors. You can
purchase a specific type of behavior with a specific license and change that
license at a later date without having to uninstall and reinstall the Autodesk
product.
License usage types
NOTE All license types are available as stand-alone and network except for the
Student Portfolio license, which is available as stand-alone only.
Commercial A license for a product that was purchased commercially.
Not for Resale A license for a product that is not sold commercially.
Educational (EDU)/Institution A license designed specifically for educational
institutions.
Student Portfolio A license for students who are using an Autodesk product
as part of their curriculum.
License behaviors
Trial A license that allows individuals to run a product or suite in trial mode
for a specified time period, usually 30 days. The trial period starts the first
time you launch the product, or one of the products in the suite. You can
activate and register the license at any time, before or after the trial period
expires.
Permanent Allows permanent use of an Autodesk product.
Term Extendable Allows access to an Autodesk product for a limited time.
The term can be extended at any time.
Term Non-Extendable Allows access to an Autodesk product for a limited
time. The term cannot be extended.
License models
Standard Applies to an activated stand-alone license.
50 | Chapter 3 Autodesk Licensing Guide

Capacity Applies to a usage-based license. In this model, the user pays a fee
that varies according to the amount of time that the product is actually used.
Term Applies to a term-based license. In this model, the user pays a fee for a
specified term, which can be renewed. Term-based licenses require named
users.
Activation
Activation is the process of verifying the serial number and product key of an
Autodesk product, and licensing it to run on a specific computer. This process
occurs the first time the product is started.
Activation cannot occur if the serial number and product key combination is
invalid, or if the computer is disconnected from the Internet. In such cases,
contact Autodesk to resolve the situation. While disconnected from the
Internet, you can run the product in Trial mode for an extended period, usually
30 days, and follow instructions for offline activation. This process usually
involves four steps:
1Record the product name, serial number, product key, and request code.
2Connect online to a specified Autodesk website and enter the product
data.
3Receive an activation code from Autodesk.
4Enter the activation code on a product screen.
If you upgrade your product from an earlier version, you may need to provide
your old serial number. For more information on activation, go to Autodesk
Licensing and select the FAQ link.
NOTE If you are installing and using an Autodesk product on both operating
systems of a dual-boot operating system, obtain a separate activation code for
each operating system.
Registration
Depending on your product, registration is optional or required. If required,
you are prompted to create an Autodesk User ID associated with an individual
or company account. If registration is optional, you can choose to postpone
it, and you will be reminded periodically to register. The Autodesk website
where you register products is https://registeronce.autodesk.com.
Introduction | 51
Simplified Licensing
The licensing process has been simplified for some customers with stand-alone
term licenses, including students at educational institutions. The licenses are
pre-registered so that the customers are not required to enter serial numbers
and product keys or follow the activation process. These customers are
encouraged to download products from an Autodesk website using the Install
Now option, which automatically installs the product on the user's computer.
Students at educational institutions are entitled to download free copies of
Autodesk products from the Autodesk Education Community website, stu-
dents.autodesk.com. The products are fully functional with stand-alone
three-year term licenses.
Stand-Alone Licensing
Introduction to Stand-Alone Licenses
A stand-alone license authorizes a single user to use the specified Autodesk
product. The product can be installed on more than one computer, but
multiple instances of the same product cannot be running concurrently on
different computers.
Stand-alone licensing allows you to use your Autodesk product in trial mode
for a specified period, usually 30 days, from the first time you start the product.
For a product suite, the trial period countdown begins when the first product
is started, and it applies to all Autodesk products in the suite. You can activate
your license at any time before or after the trial period expires.
The licensing process creates a license file and a minor change to the
computer's file system. These changes remain on your computer when you
uninstall your product. If you reinstall your Autodesk product on the same
computer, the license remains valid. You do not have to reactivate the product.
Multi-Seat Stand-Alone License
A multi-seat stand-alone license allows you to use a single serial number and
product key to run one or more Autodesk products on a specified number of
computers. As with a single stand-alone license, products activate automatically
52 | Chapter 3 Autodesk Licensing Guide
when started for the first time if an Internet connection is available, and if
the serial number and product key combination is registered correctly with
Autodesk.
A multi-seat stand-alone license can be deployed efficiently to multiple
computers on a network from an image created by the Create Deployment
option in the installer.
For more information about multi-seat stand-alone installation and
deployments, see the Network Administrator's Guide for your product, or go to
www.autodesk.com/licensing.
Manage Your Stand-Alone License
View Product License Information
You can view detailed information about your Autodesk product license, such
as the serial number, license usage type and behavior.
To view product license information
1Start your Autodesk product.
2Click Help ➤ About, or About [Product Name].
3In the About window, click Product Information or Product License
Information.
Save License Information as a Text File
You can view detailed information about your Autodesk product and your
product license (such as the serial number, license usage type and behavior),
and then save this information as a text file for future reference.
To save license information as a text file
1Start your Autodesk product.
2Click Help ➤ About or About [Product Name].
3In the About window, click Product Information or Product License
Information.
Stand-Alone Licensing | 53
4In the Product License Information dialog box, click Save As.
5In the Save As dialog box, name the file, choose a location where you
want to save the file, and then click Save.
6In the Product License Information dialog box, click Close.
Update Your Serial Number
You typically update your serial number for a stand-alone license when you
purchase a new license in order to change the license type or behavior. For
example, you would do this if you want to convert an educational license to
a commercial license, or if you want to extend the term of a term extendable
license. When you update a license, you do not need to uninstall and reinstall
the product. The new license includes a new serial number that you enter in
the Product License Information dialog box.
Your serial number is located on the outside of the product packaging or in
the Autodesk Upgrade and Licensing Information email you received when you
downloaded your product.
When you register and activate your product, your serial number is submitted
to Autodesk over the Internet, if a connection is available.
If you have a suite of products that use a single serial number, only the first
product you register and activate displays the updated serial number. For other
products to display the serial number, you must update them from the Help
menu.
To update your serial number
1Start your Autodesk product.
2Click Help ➤ About, or About [Product Name].
3In the About window, click Product Information or Product License
Information.
4In the Product License Information dialog box, click Update.
5In the Update the Serial Number dialog box, enter your product serial
number.
NOTE If you have lost your serial number, go to www.autodesk.com/contactus
for assistance.
6Click Activate. The updated serial number is displayed.
54 | Chapter 3 Autodesk Licensing Guide

NOTE In some cases, you must restart the product to display the updated
serial number.
7In the Product License Information dialog box, click Close.
Manage a Term License
Each Autodesk term license contract identifies a term expiry date and a number
of allowed users. Users log in to the Autodesk My Accounts portal to download
products associated with a specific contract. If you are the administrator for
a term license, you access the portal to provide a list of named users and send
invitations to the users to download and install products. To prevent license
errors, this list must be updated with any changes to the group of eligible
users.
If the term license expires, you can purchase a new contract for the same
product. When one of the named users for the new contract launches the
product, they will follow a procedure to change the serial number for the
product, which re-activates the license and associates it with the new contract.
This process of changing the serial number is required separately for each
product covered by the contract.
Transfer Your Stand-Alone License
About the License Transfer Utility
The License Transfer Utility is used only with stand-alone licenses. It transfers
a product license online from one computer to another, and ensures that the
product works only on the computer that contains the license. A suite license
can also be transferred, in which case all installed suite products are disabled
on the exporting computer, and enabled on the importing computer.
For some Windows-based products, you can install the License Transfer Utility
from the Tools & Utilities tab of the installer. For others, you select the License
Transfer Utility on the product configuration panel of the installer.
IMPORTANT To transfer a license, the Autodesk product or suite must be installed
on both computers. In addition, you need an Internet connection, and an Autodesk
user ID and password, available from the Autodesk Register Once website (https://re-
gisteronce.autodesk.com).
Stand-Alone Licensing | 55
The License Transfer Utility is a custom stand-alone installation option. During
installation, a shortcut is created. A shortcut is installed once per product, per
computer.
You can transfer a license to another computer temporarily or permanently.
For example, a temporary transfer enables you to use the Autodesk product
on a mobile computer while your main computer is being repaired or replaced.
License transfers rely on the product serial number or product key. Before an
Autodesk license can be exported, it must be activated with the serial number
and product key. During license import, a previously activated and exported
license is imported to a product or suite installed with the same serial number.
The activation is transferred to the importing computer, completing the license
transfer.
The maximum number of concurrent license exports is equal to the number
of seats you own. For example, if your license covers five seats you can have
up to five license exports in progress at any time.
When you upgrade your Autodesk product, you can no longer perform online
license transfers of the previous license.
Although the License Transfer Utility allows you to transfer a product license
between computers, your license agreement may not allow the installation of
an Autodesk product on more than one computer. Consult your license
agreement to find out whether your product license permits the use of the
License Transfer Utility.
Export a License
A license is exported when the License Transfer Utility moves a product license
from a computer to the online Autodesk server.
The license can be exported as public or private:
■Public means that anyone using the same serial number and their own
user ID and password can import that license.
■Private means that you are reserving that license for yourself and the
license can only be imported with the same serial number, user ID, and
password that were used when it was exported.
If it has not been imported, a private license becomes public after 14 days.
56 | Chapter 3 Autodesk Licensing Guide
To export a license
1On the computer where you want to export the license, start the License
Transfer Utility.
■Windows 7 or XP: Click Start menu ➤ Autodesk ➤ [Product
Name] ➤ License Transfer Utility.
■Windows 8: Right-click Start screen ➤ All Apps ➤ License Transfer
Utility – [Product Name]
■Mac OS X: Open Applications/Autodesk/[Product
Name]/Licensing/License Transfer Utility.
■Linux: Open a shell and run the following command, where
<productKey> is the product key for a specific product, not a suite:
/opt/Autodesk/Adlm/R7/bin/LTU <productKey> 2014.0.0.F
-d "SA"
NOTE If your product is installed on Mac OS X or Linux as part of an
Autodesk Suite, you may find a shell script such as LTU.sh in the same folder
as the application. This script will start LTU and provide the correct product
key. To use the script, run it in Terminal, select the language of the user
interface, and then follow the remaining steps of this procedure.
The Export the License dialog box displays the Autodesk product name
and serial number.
2Click Sign In.
3On the Log In page, enter your Autodesk user ID and password and click
Log In.
4On the License Export page, confirm the export information.
5If you want to make the license available as a public import, click Make
the license available as a public import.
6Click Export.
7On the License Export Confirmation page, click Finish.
Import a License
A license is imported when the License Transfer Utility moves a previously
exported product license from the online Autodesk server to a computer. The
import action completes the license transfer process, and transfers the product
Stand-Alone Licensing | 57
activation to the importing computer. The presence of an active license allows
your Autodesk product to run on that computer.
To import a license
1On the computer where you want to import the license, start the License
Transfer Utility.
■Windows 7 or XP: Click Start menu ➤ Autodesk ➤ [Product
Name] ➤ License Transfer Utility.
■Windows 8: Right-click Start screen ➤ All Apps ➤ License Transfer
Utility – [Product Name]
■Mac OS X: Open Applications/Autodesk/[Product
Name]/Licensing/License Transfer Utility.
■Linux: Open a shell and run the following command, where
<productKey> is the product key for a specific product, not a suite:
/opt/Autodesk/Adlm/R7/bin/LTU <productKey> 2014.0.0.F
-d "SA"
NOTE If your product is installed on Mac OS X or Linux as part of an
Autodesk Suite, you may find a shell script such as LTU.sh in the same folder
as the application. This script will start LTU and provide the correct product
key. To use the script, run it in Terminal, select the language of the user
interface, and then follow the remaining steps of this procedure.
The Import the License dialog box displays the Autodesk product name
and serial number.
NOTE If you are importing a license to replace a trial license, you will see
the Update the Serial Number and Product Key dialog box. In this case, enter
the required data, and then click Update.
2In the Import the License dialog box, click Sign In.
3On the Log In page, enter your Autodesk user ID and password and click
Log In.
4On the License Import Confirmation page, click Finish.
The license is now imported to the computer and you can run your
Autodesk product on this computer. If you want to transfer the license
to another computer, repeat the export and import procedures.
58 | Chapter 3 Autodesk Licensing Guide

Troubleshoot a Stand-Alone License Error
Preserving a License When Hardware Changes
If you replace or reconfigure hardware on the computer where your Autodesk
product license resides, the stand-alone license might fail, with the result that
you will not be able to use your product.
To prevent damage to your product license, use the License Transfer Utility
to export your license file before changing the hardware. After the hardware
change, you can import the license file back onto the computer. For
information about using the License Transfer Utility, see About the License
Transfer Utility (page 55).
NOTE If you get a license error when you change your hardware, you may have
to reactivate your license. See Activation (page 51).
Reinstalling an Operating System
If you reinstall the operating system on the computer where your Autodesk
license resides, the license can fail. As a result, you would be unable to use
your product, and you would have to reactivate your license. The following
procedure prevents a license failure when reinstalling the operating system.
See Activation (page 51).
NOTE The following procedure is for the Windows operating system. If you are
running Autodesk products on Mac OS X or Linux platforms, see your product
supplement to Installation Help for more information.
To prevent a license error when reinstalling an operating system
NOTE If using Norton™ Ghost™ or another image utility, do not include the Master
Boot Record.
1Locate one of the following folders and make a backup copy:
■(Windows XP) C:\Documents And Settings\All Users\Application
Data\FLEXnet
■(Windows 7, 8, Server 2008 R2, or 2012 R2) C:\ProgramData\FLEXnet
Stand-Alone Licensing | 59

2Reinstall the operating system and reinstall the Autodesk product.
3Paste the license folder to the same location from which you originally
copied the folder in step 1.
You can now run your Autodesk product.
Changing the System Date and Time
Your product license allows for time changes to the system clock within two
days of the current time. If you set your system clock back or forward more
than two days, the next time you start your product, you will see a reminder
to correct the system clock. If you do not correct the system clock, you receive
a license error.
To prevent a license error, ensure that the system date and time on your
computer are accurate when you install and activate your Autodesk product.
Distributing a Software Image to Multiple Computers
You can use the installer's Create Deployment option to create a product
installation image on your server, and make it available on your computer
network. During creation of this image, you are prompted for registration
information, which is stored with the image and deployed to all product
installations. For more information, see the Network Administration Guide.
Additionally, you can manually distribute the software using the installation
media that comes with your Autodesk product. However, if your computers
do not have an Internet connection, make sure that the registration data for
each computer matches exactly. Inconsistent registration data can cause
activation failures.
NOTE The distribution of applications using “ghosting” is not recommended. It
can result in incomplete installations and activation problems.
Preserving a License on a Re-imaged Computer
On a network license server, licenses are maintained on the server. No
additional steps are needed to preserve network licenses.
60 | Chapter 3 Autodesk Licensing Guide
For a stand-alone license, you need to export the license before re-imaging
the computer. You can use the License Transfer Utility to export the license
to the Autodesk server. After the re-imaging, import the license to the correct
computer.
Restoring Access to a Term License
The most common reasons for being denied access to a term-licensed Autodesk
product are as follows:
■The user ID you entered does not represent an authorized user. To change
or check permissions, see your license administrator. Other options in this
situation are to enter the user ID for an authorized user, or to enter a
different serial number that associates the user ID with a valid contract.
■The term contract has expired. To extend your contract, see your license
administrator. Another option in this situation is to enter a different serial
number that associates your user ID with a valid contract.
Network Licensing
Planning Your Network Licensing
Understanding License Server Models
This section explains the three possible server models that support the Network
License Manager. A server network can include Windows, Mac OS X, and
Linux servers in any combination. Advantages and disadvantages of each
model are presented to help you decide which one best suits your needs. When
you purchase a network license, you specify which server model you will use.
Single License Server Model
In the single license server model, the Network License Manager is installed
on a single server, so license management and activity is restricted to this
server. A single license file represents the total number of licenses available
on the server.
Network Licensing | 61
Advantages of the Single License Server Model
■Because all license management takes place on a single server, you have
just one point of administration and one point of failure.
■Of the three license server models, this configuration requires the least
amount of maintenance.
Disadvantage of the Single License Server Model
■If the single license server fails, the Autodesk product cannot run until the
server is back online.
Distributed License Server Model
In the distributed license server model, licenses are distributed across more
than one server. A unique license file is required for each server. To create a
distributed license server, you must run the Network License Manager on each
server that is part of the distributed server pool.
Advantages of the Distributed License Server Model
■Servers can be distributed across a wide area network (WAN); they do not
need to exist on the same subnet.
■If one server in the distributed server pool fails, the licenses on the
remaining servers are still available.
■If you need to replace a server in the distributed server pool, you do not
need to rebuild the entire pool.
■Server replacement is easier than in a redundant server pool, where you
must reactivate the entire pool.
Disadvantages of the Distributed License Server Model
■If a server in the distributed server pool fails, the licenses on that server
are unavailable.
■This model can require more time for setup and maintenance than other
models.
Redundant License Server Model
In the redundant license server model, three servers are configured to
authenticate license files. Licenses can be monitored and issued as long as at
62 | Chapter 3 Autodesk Licensing Guide

least two license servers are still functional. The Network License Manager is
installed on each server, and the license file on each server is the same.
In the redundant license server model, all servers must reside on the same
subnet and have consistent network communications. (Slow, erratic, or dial-up
connections are not supported.)
Advantage of the Redundant License Server Model
■If one of the three servers fails, all licenses that are managed in the server
pool are still available.
Disadvantages of the Redundant License Server Model
■If more than one server fails, no licenses are available.
■All three servers must reside on the same subnet and have reliable network
communications. The redundant server pool does not provide network
fault tolerance.
■If one of the three servers is replaced, the complete redundant server pool
must be rebuilt.
■If your Autodesk product supports license borrowing, and licenses are
borrowed from a redundant license server pool, you must restart the license
server after you stop the Network License Manager.
Windows System Requirements for the Network Li-
cense Manager
NOTE The Network License Manager supports Ethernet network configurations
only.
Hardware and software requirements for the network license server
RequirementHardware/Software
Windows® 8 32- or 64-bit
Operating System
■Windows 8
■Windows 8 Pro
■Windows 8 Enterprise
Windows 7 32- or 64-bit
Network Licensing | 63

Hardware and software requirements for the network license server
RequirementHardware/Software
■Windows 7 Home Premium
■Windows 7 Professional
■Windows 7 Ultimate
■Windows 7 Enterprise
■Windows 7 Starter (32-bit)
Windows XP 32- or 64-bit. SP2 or later for 64-bit systems; SP3 or later for
32-bit.
■Windows XP Home (32-bit)
■Windows XP Professional
Windows Server 32- or 64-bit SP1 or later
■Windows 2012 Server
■Windows 2008 Server R2
■Windows 2008 Server (SP2 or later)
■Windows 2003 Server R2
■Windows 2003 Server
Intel® Pentium® III or higher
Computer/processor
450 MHz (minimum)
Compatible with existing Ethernet network infrastructureNetwork interface card
NOTE The Network License Manager supports multiple network interface
cards, but at least one must be an Ethernet card.
TCP/IPCommunication protocol
NOTE The Network License Manager uses TCP packet types.
Internet Explorer 7, 8, 9, or 10Internet browser
64 | Chapter 3 Autodesk Licensing Guide

Hardware and software requirements for the network license server
RequirementHardware/Software
11.11.0.0FLEXnet
Virtual Machine Support
Virtual OSVirtualizerHardware
Windows 8, Windows 7, Windows
Server, or Windows XP; 32- or 64-bit
on all platforms.
Windows 2012, 2008 or 2003 R2
servers running on VMware® ESX
4.0 or 5.0 (License Manager Only)
Intel PC 64
Linux System Requirements for the Network License
Manager
NOTE The Network License Manager supports Ethernet network configurations
only.
Linux hardware and software requirements for the network license server
RequirementHardware/Software
Linux® 32- or 64-bit
Operating system
Red Hat® Enterprise Linux 5.0 WS (U4)
Intel Pentium 3 or higherComputer/processor
450 MHz (minimum)
Compatible with existing Ethernet network infrastructureNetwork interface card
NOTE The Network License Manager supports multiple network interface
cards, but at least one must be an Ethernet card.
TCP/IPCommunication protocol
Network Licensing | 65

Linux hardware and software requirements for the network license server
RequirementHardware/Software
NOTE The Network License Manager uses TCP packet types
Qt 4.7.2Internet browser
11.11.0.0FLEXnet
Mac OS X System Requirements for the Network Li-
cense Manager
NOTE The Network License Manager supports Ethernet network configurations
only.
Mac OS X hardware and software requirements for the network license server
RequirementHardware/Software
Mac OS® X version 10.5.3 and higher
Operating system
Intel MacComputer/processor
Compatible with existing Ethernet network infrastructureNetwork interface card
NOTE The Network License Manager supports multiple network interface
cards, but at least one must be an Ethernet card.
TCP/IPCommunication protocol
NOTE The Network License Manager uses TCP packet types
Safari 4.0.x or 5.0.xInternet browser
11.11.0.0FLEXnet
66 | Chapter 3 Autodesk Licensing Guide
Understanding Your Network License
How Your License Works
When you start an Autodesk product, it requests a license from the license
server through the TCP/IP network. If a license is available, the Network License
Manager assigns a license to the computer, and the number of available licenses
on the license server is reduced by one.
When you exit a product, the license returns to the Network License Manager.
If you run multiple sessions of an Autodesk product on an individual computer,
only one license is used. When the last session is closed, the license is released.
The following three items manage the distribution and availability of licenses:
■License manager daemon (lmgrd or lmgrd.exe) handles the original
contact with the application, and then passes the connection to the vendor
daemon. By using this approach, a single lmgrd daemon can be used by
multiple software vendors to provide license authentication. The lmgrd
daemon starts and restarts the vendor daemons as needed.
■Autodesk vendor daemon (adskflex or adskflex.exe) tracks the Autodesk
licenses that are checked out and the computers that are using them. Each
software vendor has a unique vendor daemon to manage vendor-specific
licensing.
NOTE If the adskflex vendor daemon terminates for any reason, all users lose
their licenses until lmgrd restarts the vendor daemon or until the problem
causing the termination is resolved.
■License file is a text file that has vendor-specific license information.
License Sharing and Cascading
The Network License Manager (NLM) enables several Autodesk products on
the same computer to share a single license when appropriate. For example,
if you launch AutoCAD, the NLM can assign a single AutoCAD license to your
computer. Later, if you launch Revit, and there are available licenses for the
Building Design Suite (BDS), the NLM can take back the AutoCAD license and
upgrade your license to a BDS license that can support AutoCAD, Revit, and
other BDS products running concurrently. If you then shut down Revit and
other BDS products, so that you are running only AutoCAD, the NLM cannot
Network Licensing | 67
downgrade your suite license to a single AutoCAD license if the suite license
is required by another user. In this situation, AutoCAD is holding onto a suite
license that it may not need. The only way to return that license to NLM is
to shut down AutoCAD.
License cascading is a process by which network licenses are automatically
switched or substituted by the NLM according to a hierarchy of value. It occurs
in order to distribute licenses most efficiently among a group of users, subject
to the limitation that licenses can be upgraded but not downgraded. The basic
principles are that lower-cost licenses are used when possible, and higher-cost
licenses are used only when required, such as when a user is running two or
more suite products, or when all the lower-cost licenses are in use.
The NLM surveys license usage every two minutes; if possible, it redistributes
licenses among users, and takes back licenses that have been unused for longer
than the allowed idle time, or timeout period. For more information on license
timeout, see Set Up License Timeout (page 100).
License cascading is most effective in a large user group when the NLM has a
pool of different license types available for distribution. For example, if the
pool includes product-specific licenses for several products, some licenses for
a standard suite, and some licenses for an ultimate suite, the NLM has many
options for efficient license management. It can assign single-product licenses
as individual products start up, replace these with a suite license if a user runs
multiple products, and upgrade a standard suite license to an ultimate one if
a user invokes an advanced operation that requires a product from the ultimate
suite.
For more information, see the Services & Support topic Understanding Cascade
Licensing for Autodesk Products.
Interpreting Your License File
The network license file you receive from Autodesk contains licensing
information required for a network installation. You obtain license file data
when you register your Autodesk product.
The license file contains information about network server nodes and vendor
daemons. It also contains an encrypted digital signature that is created when
Autodesk generates the file.
The license file configures network license servers to manage licenses. When
creating a deployment, the network license server name(s) are specified so
that each product instance knows which server(s) to contact to obtain a license.
68 | Chapter 3 Autodesk Licensing Guide

The network license server(s) must be accessible to every user who runs one
or more products that require a network license.
The following table defines each license file parameter. For more information,
see the License Administration Guide, installed with the Network License
Manager.
Definitions of license file parameters
ExampleDefinitionParameterLine
LABSERVERName of the server where the Net-
work License Manager resides
Host NameSERVER
03D054C0149BEthernet address of the server where
the Network License Manager resides
Host ID
[None]USE_SERVER
adskflex.exeName of the server-side Autodesk
vendor daemon
Vendor DaemonVENDOR
port=2080Network port number reserved and
assigned for use only by Autodesk
Port Number
products running the Autodesk
vendor daemon
SERIES_1Name of feature code groupNamePACKAGE
1.000Internal version number referenceVersion
COMPONENTS=
"526000REVIT_9_OF\
List of feature codes supported in the
package
COMPONENTS
51200ACD_2013_OF\
513001INVBUN_11_OF"
OPTIONS=SUITEOPTIONS
SUPERSEDEReplacement for any existing Incre-
ment line of the same feature code
SUPERSEDE
Network Licensing | 69

Definitions of license file parameters
ExampleDefinitionParameterLine
from any license files on the same li-
cense server that have a date earlier
than the defined Issue Date
SIGN=0 SIGN2=0Encrypted signature used to authen-
ticate the attributes of the license file
SIGN
51200ACD_2013_0FProduct supported by the license fileFeature CodeINCREMENT
permanentAmount of time the licenses are
available
Expiration Date
25Number of licenses supported by the
license file
Number of Licenses
COMMERCIALLicense usage type and license beha-
vior of the product that is supported
by the license file
VENDOR_STRING
BORROW=4320Definition of the license borrowing
period for the licenses defined under
the same increment line.
BORROW
In this example, the maximum period
that licenses can be borrowed is 4320
hours (180 days), unless otherwise
noted.
License borrowing is disabled when
this parameter is absent in the license
file.
DUP_GROUP=UHDefinition of multiple license requests
when the same user and same host
share the same license
DUP_GROUP
15-jul-2012Date that the license file was gener-
ated by Autodesk
ISSUED
70 | Chapter 3 Autodesk Licensing Guide

Definitions of license file parameters
ExampleDefinitionParameterLine
123-12345678Serial number of the Autodesk
product
Serial Number
SIGN=6E88EFA8D44CEncrypted signature used to authen-
ticate the attributes of the license file
SIGN
License File Examples
The Autodesk network license file contents reflect the license server
configuration and the licensed products, as shown in the examples provided.
Example of a License File Not Specific to a Product
Here is an example of the contents of a license file and the parameters
associated with each line:
SERVER
ServerName HostID
USE_SERVER
VENDOR adskflex port=portnumber
INCREMENT feature_code Adskflex Version ExpDate
NumberofLicenses \
VENDOR_STRING=UsageType:Behavior BORROW=4320 SUPERSEDE \
DUP_GROUP=DupGrp ISSUED=IssueDate SN=SerialNumber SIGN= \
Example of a License File for a Single or Distributed
Server
Here is an example of a completed license file for a single or distributed license
server model:
Network Licensing | 71
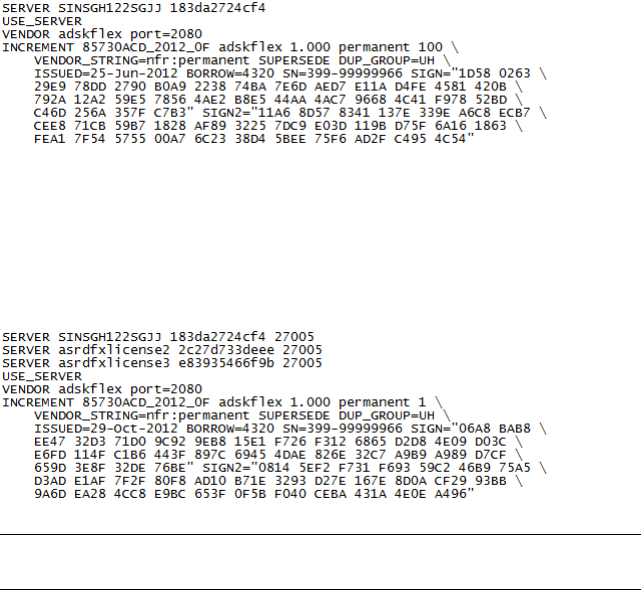
Example of a License File for a Redundant Server
Here is an example of a completed license file for a redundant license server
model:
NOTE The redundant server model requires the addition of a port number (the
default is 27005) for each server.
Example of a License File for Combined Autodesk
Product Versions
You can combine a license file for different releases of the same Autodesk
product or for different Autodesk products, and run all products from one
license server.
Here is an example of the contents of a combined license file for AutoCAD 2012
and AutoCAD 2013:
72 | Chapter 3 Autodesk Licensing Guide
Package License File Types and Examples
Autodesk offers a package license file option, which allows the use of a suite
of products that are packaged and sold together. The package license file
contains a set number of licenses for four different versions of your software.
Running an instance of any one of the versions uses one license in the package.
Packaged license files support prior versioning for subscription users. Package
license files operate under the following guidelines:
■Package license files come with the current version of the software and
three previous versions of the same product.
■License files can be combined with license files for different products. For
more information about combining license files, see Example of a Package
License File for Combined Autodesk Product Versions (page 75).
■Package license files cannot be combined with non-package license files
for product versions contained in the package. For example, you cannot
combine an Autodesk 2014 package license file with a regular license file
for an Autodesk product 2014, 2013, 2012, or 2011.
■Both the PACKAGE and INCREMENT sections of the license file are required
for licensing to work properly. When you combine license files, be sure to
include both of these sections.
■License borrowing, option files, and licensing cascading work the same
for package licenses as they do for regular license files.
■A new license file supersedes an older one.
Network Licensing | 73

Example of a Package License File for a Single or Dis-
tributed Server
Here is an example of a completed package license file for a single or distributed
license server model:
Example of a Package License File for a Redundant
Server
Here is an example of a completed package license file for a redundant license
server model:
74 | Chapter 3 Autodesk Licensing Guide
Example of a Package License File for Combined
Autodesk Product Versions
Here is an example of a completed package license file for combined Autodesk
product versions:
Network Licensing | 75
Losing Your Connection to the License Server
When an Autodesk product is running, it communicates with the license
server at regular intervals using a method known as the “heartbeat” signal. If
the heartbeat signal is lost, the server tries to reconnect. If the server cannot
reconnect, the user receives a license error.
If the product stops working because it has lost a connection to the server,
you must shut down the product, and then restart it. Most Autodesk products
give you the opportunity to save open documents before shutting down. If
the problem causing the original loss of the heartbeat signal is resolved and
licenses are available on the server, you can restart your Autodesk product. If
you are running several Autodesk products when a license server connection
is lost, the error messages for different products typically appear after different
time delays, based on product settings.
76 | Chapter 3 Autodesk Licensing Guide

Running the Network License Manager
The Network License Manager is used to configure and manage the license
servers. When you create a deployment, the installer prompts you for
information about the license manager, such as license server model and server
name.
Install the Network License Manager
IMPORTANT Do not install the Network License Manager on a remote drive.
When you install the Network License Manager files, you must provide a path to
a local drive. You must specify the drive letter; the universal naming convention
(UNC) is not permitted.
You can install the Network License Manager before or after you install the
products that will use it. Network License Manager must configure the license
servers before any products can obtain licenses and start running.
If an earlier version of the Network License Manager is already installed on
the computer, you should upgrade by installing the new Autodesk Network
License Manager into the folder where the old version was located.
Windows procedure
■Install the Network License Manager from the Install Tools & Utilities
panel of the Autodesk installer.
Mac OS X procedure
1Navigate to the NetworkLicenseManager folder on your product install
media, or in the package you downloaded.
2Do one of the following:
■(DVD or USB) Double-click the Network License Manager package
icon.
■(Download) Double-click the Network License Manager .dmg, then
double-click the Network License Manager package icon.
The Install Autodesk NLM wizard appears.
3Click Continue to begin the installation, then follow the instructions
in the installer to install the Network License Manager tools.
Network Licensing | 77
4Click Close when you see the Install Succeeded message.
By default, the Network License Manager tools are installed in the
following directory: /usr/local/flexnetserver. In addition, scripts to
help set up your license server are installed in the following directory:
/Library/StartUpItems/adsknlm.
Linux procedure
1Open a shell as a super user (using su -).
2Navigate to the NetworkLicenseManager directory on your product install
media, or extract the Network License Manager package from the
compressed file that you downloaded.
3To install the Network License Manager, enter the following command:
rpm -ivh adlmflexnetserver-#.rpm
where # is the package number.
Obtain the Server Host Name and Host ID
Autodesk uses the server host name, host ID, and product serial number to
generate a license file.
To obtain the information, use one of the following procedures.
To obtain the host name and ID at the Windows command prompt
1At the Windows command prompt, enter ipconfig /all
2Record the Host Name and Physical Address line. Eliminate dashes from
the physical address. This is your twelve-character host ID.
NOTE If your server has more than one network adapter, select the one that
corresponds to a physical network adapter. View the Description field above
each physical address. If there is more than one physical network adapter,
it does not matter which one you use. Devices such as VPN adapters, PPP
adapters, and modems are not valid.
3Close the Windows command prompt.
78 | Chapter 3 Autodesk Licensing Guide

To obtain the host name and ID using the LMTOOLS utility
IMPORTANT Do not run LMTOOLS on a remote computer.
You should be logged in with Administrator rights when working with the
LMTOOLS utility.
1Click Start ➤ All Programs ➤ Autodesk ➤ Network License Manager
➤ LMTOOLS Utility.
2In the LMTOOLS utility, click the Systems Settings tab.
3Locate the Computer/Hostname box. Copy the host name and paste the
information into a text editor.
4Locate the Ethernet Address box. The 12-character Ethernet address is
the host ID.
NOTE If your server has more than one Ethernet adapter, select one that
corresponds to a physical network adapter. If you are using a Mac OS X
computer with more than one network card, you must use the address of
the primary network card.
5Close LMTOOLS.
To obtain the host name and ID using the Mac OS X or Linux terminal window
1Launch a Terminal window.
2Go to the directory where lmutil is installed.
3Retrieve the host name by entering the following in Terminal:
<prompt>./lmutil lmhostid -hostname
The host name is displayed.
4Retrieve the host ID by entering the following in Terminal:
<prompt>./lmutil lmhostid
The twelve-character host ID is displayed.
5Close the Terminal Window.
Configure a License Server
Configure a license server to manage your Autodesk product licenses.
Network Licensing | 79

IMPORTANT If you have a firewall between the license server(s) and the client
computers, you must open some TCP/IP ports on the server for license-related
communication. Open port 2080 for adskflex, and open ports 27000 through
27009 for lmgrd.
Configure the license server using one of the following procedures.
You should be logged in with Administrator rights when working with the
LMTOOLS utility.
NOTE If your license server is running, you must stop it before performing any
system maintenance. For more information, see Stop and Restart the License
Server (page 91).
To configure a license server with LMTOOLS
1Do one of the following:
■Windows 7 or XP: Click Start ➤ All Programs ➤ Autodesk ➤
Network License Manager ➤ LMTOOLS Utility.
■Windows 8: Right-click Start screen ➤ All Apps ➤ LMTOOLS
Utility.
2In the LMTOOLS utility, on the Service/License File tab, make sure the
Configure Using Services option is active.
3Click the Config Services tab.
4In the Service Name list, select the service name you want to use to
manage licenses.
By default, the service name is Flexlm Service 1. If FLEXnet® is managing
other software on your computer in addition to Autodesk, you can change
the service name to avoid confusion. For example, you can rename Flexlm
Service 1 to Autodesk Server1.
NOTE If you have more than one software vendor using FLEXnet for license
management, the Service Name list contains more than one option. Make
sure that only one Autodesk service is listed.
5In the Path to Lmgrd.exe File field, enter the path to the Network License
Manager daemon (lmgrd.exe), or click Browse to locate the file.
By default, this daemon is installed in the C:\Program
Files\Autodesk\Autodesk Network License Manager folder.
6In the Path to the License File box, locate or enter the path.
80 | Chapter 3 Autodesk Licensing Guide

This is the path to the license file obtained through autodesk.com or the
location where you placed the license file if you obtained it offline.
7In the Path to the Debug Log File box, enter a path to create a debug
log, or click Browse to locate an existing log file.
It is recommended that you save to the C:\Program
Files\Autodesk\Autodesk Network License Manager folder. The log file must
have a .log file extension. For new log files, you must enter the .log
extension manually.
8To run lmgrd.exe as a service, select Use Services.
9To start lmgrd.exe automatically when the system starts, select Start Server
at Power Up.
10 Click Save Service to save the new configuration under the service name
you selected in step 4. Click Yes when prompted if you would like to
save the settings to the service.
11 Click the Start/Stop/Reread tab and do one of the following:
■If a service has not yet been defined for Autodesk, click Start Server
to start the license server.
■If a service for Autodesk is already defined and running, click ReRead
License File to refresh the Network License Manager with any changes
made to the license file or options file.
The license server starts running and is ready to respond to client
requests.
12 Close LMTOOLS.
Some Autodesk products provide a script to automate part of this procedure.
See the "Product Supplements" section of Installation Help for more information.
Before configuring your license server for Mac OS®X, ensure that the following
steps have been completed:
■You have installed the Autodesk Network License Manager which contains
the following files: lmgrd, adskflex, and lmutil.
■You have received the network license file from Autodesk that contains
the product licenses; for example, productlicense.lic.
NOTE Before performing any system maintenance on your license server, see Stop
and Restart the License Server (page 91).
Network Licensing | 81
To configure automatic start-up of a Mac OS X license server
1Create a directory titled flexnetserver under the home directory; for
example, /usr/local/flexnetserver.
2Move the following files: lmgrd, adskflex, lmutil, and your product license
file (.lic) into the flexnetserver directory created in Step 1.
3If it does not already exist, create the directory StartupItems under /Library
using the sudo command. For example, sudo mkdir StartupItems.
4Create a startup item directory; for example, /Users/<user id>/adsknlm.
5Create an executable script file; for example, adsknlm, by entering the
following in Terminal:
NOTE The executable file name must be the same as the directory name.
#!/bin/sh
./etc/rc.common
StartService() {
ConsoleMessage “Starting Autodesk Network License
Manager”
/usr/local/flexnetserver/lmgrd -c\
/usr/local/flexnetserver/productlicense.lic -l\
/usr/local/flexnetserver/debug.log
}
StopService() {
ConsoleMessage “Stopping Autodesk Network License
Manager”
/usr/local/flexnetserver/lmutil lmdown -q -all -force
}
RestartService() {
ConsoleMessage “Restarting Autodesk Network License
Manager”
/usr/local/flexnetserver/lmutil lmreread -c
/usr/local/flexnetserver/productlicense.lic
}
RunService “$1”
6Grant the executable permission to the script by entering the following
in Terminal:
chmod +x adsknlm
82 | Chapter 3 Autodesk Licensing Guide

7Create a property list file named StartupParameters.plist and add it to the
directory by entering the following in Terminal:
{
Description=”Autodesk Network License Manager”;
Provides=(“adsknlm”)OrderPreference =”None”;
Messages={start=
“Starting Autodesk Network Manager Service”;
stop=
“Stopping Autodesk Network Manager Service”;
};}{
8Move the startup item directory to /Library/StartupItems/ and modify your
directory permission by entering the following in Terminal:
NOTE For security reasons your startup item directory should be owned by
root, the group should be set to wheel, and the permission for the directory
should be 755.
sudo mv /Users/<user id>/adsknlm/
/Library/StartupItems/
sudo chown root /Library/StartupItems/adsknlm/
sudo chgrp wheel /Library/StartupItems/adsknlm/
sudo chmod 755 /Library/StartupItems/adsknlm/
sudo chown root /Library/StartupItems/adsknlm/*
sudo chgrp wheel /Library/StartupItems/adsknlm/*
9Your resulting directory should look like this:
drwxr-xr-x
4 root wheel 136 Jul 31 01 01:50drwxr-xr-x
3 root wheel 102 Jul 30 01 21:59-rw-r--r--
1 root wheel 204 Jul 30 20:16
StartupParameters.plist-rwxr-xr-x
1 root wheel 417 Jul 31 00:45 adsknlm
10 Reboot your Mac and verify in the debug.log file (/Users/<user id>/NLG/)
that the lmgrd and adskflex start up successfully.
NOTE Before performing any system maintenance on your license server, see Stop
and Restart the License Server (page 91).
Before configuring your license server for Linux, ensure that the following
steps have been completed:
■You have installed the Autodesk Network License Manager, which contains
the following files: lmgrd, adskflex, and lmutil.
Network Licensing | 83
■You have received the network license file from Autodesk that contains
the product licenses; for example, productlicense.lic.
To configure automatic start-up of a Linux license server
1Extract the FLEXnet IPv4 server files into the following directory:
/opt/flexnetserver.
2Copy the .lic file into the flexnetserver directory created in Step 1.
3Open a terminal window in root mode.
4Go to the directory /etc/.
5Locate the rc.local file.
6Edit the rc.local file and start lmgrd by entering the following commands
in the terminal window:
NOTE Replace acad.lic with your license file name.
/bin/su <user id> -c ‘echo starting lmgrd>\
/opt/flexnetserver/boot.log’
/usr/bin/nohup/bin/su <user id> -c ‘umask 022;\
/opt/flexnetserver/lmgrd -c\
/opt/flexnetserver/acad.lic >> \
/opt/flexnetserver/boot.log ‘
/bin/su <user id> -c ‘echo sleep 5 >> \
/opt/flexnetserver/boot.log ‘
/bin/sleep 5
/bin/su <user id> -c ‘echo lmdiag >>\
/opt/flexnetserver/boot.log ‘
/bin/su <user id> -c ‘/opt/flexlm11.11/lmutil lmdiag
-n -c\
/opt/flexnetserver/acad.lic >> \
/opt/flexnetserver/boot.log ‘
/bin/su <user id> -c ‘echo exiting >>\
/opt/flexnetserver/boot.log ‘
7Save the edited rc.local file.
8Reboot your machine and verify that the lmgrd and adskflex have started
by doing one of the following:
■During the reboot, look for the message that the license server has
started.
84 | Chapter 3 Autodesk Licensing Guide
■Check the boot.log file created in /opt/flexnetserver/ to see if lmgrd and
adskflex have started.
Uninstall the Network License Manager
Before uninstalling the Network License Manager, you must stop the license
server. For more information, see Stop and Restart the License Server (page
91).
Either before or after the uninstall, you must manually delete files that you
created for use with the Network License Manager, such as log files, license
files, and the options file. These files are not automatically deleted when you
uninstall the Network License Manager.
Windows procedure
1Do one of the following:
■Windows 7 or XP: Click Start ➤ All Programs ➤ Autodesk ➤
Network License Manager ➤ LMTOOLS Utility.
■Windows 8: Right-click Start screen ➤ All Apps ➤ LMTOOLS
Utility.
2In the LMTOOLS utility, click the Start/Stop/Reread tab, and then click
Stop Server.
3Close LMTOOLS.
4In the Windows Control Panel, locate Autodesk Network License Manager
in the list of programs, and uninstall it by clicking Remove or Uninstall.
5If prompted, restart your computer.
Mac OS X procedure
1Delete the following directories:
■/usr/local/flexnetserver/
■/Library/StartUpItems/adsknlm
This removes the main license server tools as well as the configuration
scripts that help you set up your license server.
2Reboot your machine.
Network Licensing | 85

Linux procedure
1Open a shell as a super user.
2Execute the following command to verify the package number of the
Network License Manager that you installed:
rpm -qa |grep adlm
3Execute the following command to uninstall the Network License
Manager package:
rpm -e adlmflexnetserver-#.rpm
where # is the package number.
4If you edited your rc.local file to configure your license server (for
example to start lmgrd), remove those commands from the rc.local file.
Using Other Features of Network Licensing
License Borrowing
If you are using a network-licensed version of your Autodesk product and your
network administrator supports the license borrowing feature, you can borrow
a product license from your network license server to use the Autodesk product
for a specified time when your computer is not connected to the network.
Your license is automatically returned to the license server at the end of the
day on the return date you set when you borrow the license. You can also
return a license early. The maximum borrowing period is six months.
NOTE License borrowing does not apply to stand-alone licenses.
NOTE A limited number of licenses are available for borrowing. If you try to
borrow a license and are notified that no licenses are available, see your network
administrator for help.
Borrow a License
With a borrowed license, you can run an Autodesk product for a specified
time period while disconnected from the network. If you do not remember
when a borrowed license expires, you can check the date in two ways: click
86 | Chapter 3 Autodesk Licensing Guide
Help ➤ About and consult the Product License Information dialog box, or
in some products, place your cursor over the Borrowing icon in the status tray
(lower right corner of the screen).
When the borrowing period expires, the borrowed license is automatically
returned to the license server. When your computer is reconnected to the
network, you can run your Autodesk product from the network or borrow a
license again.
Interaction with Other License-Borrowing Tools
Using the license-borrowing feature in your Autodesk product is the
recommended way to borrow a license. Some third-party borrowing tools are
available, but these tools are not supported or compatible with the
license-borrowing feature in your Autodesk product. Other supported
license-borrowing tools are the Autodesk License-Borrowing utility (shipped
with Autodesk products) and the borrowing feature in LMTOOLS utility, a
component of the Autodesk Network License Manager on Windows servers.
If another license-borrowing tool is active when you attempt to use the
license-borrowing feature, proceed as follows to borrow a license for your
Autodesk product:
■If you run the Autodesk License-Borrowing utility that shipped with your
Autodesk product and then turn on the borrowing flag for the Adskflex
option or the All option, a license can be borrowed when you start your
Autodesk product. However, you cannot return a license until you exit
and then restart your Autodesk product.
■On a Windows server, if borrowing is set in the LMTOOLS utility for all
products, either use the other tool to borrow licenses for your Autodesk
product, or stop the borrowing process in LMTOOLS utility, and then use
the license-borrowing feature in your Autodesk product.
■If borrowing is set in LMTOOLS utility for non-Autodesk products only,
stop the borrowing process in the LMTOOLS utility. You can then use the
license-borrowing feature to borrow licenses for your Autodesk product.
If you do not stop the borrowing process in LMTOOLS utility, the
license-borrowing feature will not function.
To borrow a license using the Tools menu
This option is not available in all Autodesk products.
1Click Tools menu ➤ License Borrowing ➤ Borrow License.
Network Licensing | 87
2In the Borrow a License window, on the calendar, click the date when
you want to return the license.
This date must be within the valid date range set by your network
administrator. The valid date range is displayed in this window.
3Click Borrow License.
4In the License Borrowed message, click Close. The license is borrowed,
and you can now use your Autodesk product with your computer
disconnected from the network.
NOTE In some products, you can verify that your license is borrowed by
placing your cursor over the Borrowing icon in the status tray, which is in
the lower-right corner of your Autodesk product.
To borrow a license using the Help menu
1Click Help ➤ About ➤ Product Information or Product License
Information.
2In the Product License Information window, click Borrow License.
3In the Borrow a License window, on the calendar, click the date when
you want to return the license.
This date must be within the valid date range set by your network
administrator. The valid date range is displayed in this window.
4Click Borrow License.
5In the License Borrowed message, click Close. The license is borrowed,
and you can now use the Autodesk product with your computer
disconnected from the network.
BORROWLICENSE Command
Use this command to borrow a product license from the network license server.
With a borrowed license, you can run an Autodesk product disconnected from
the network. Access to the command varies by product, and includes one or
more of the following options.
Tools menu: License Borrowing ➤ Borrow License
Help menu: About ➤ Product Information or Product License
Information ➤ Borrow License
Command line: borrowlicense
88 | Chapter 3 Autodesk Licensing Guide

The Borrow a License window is displayed, presenting the following options:
Calendar Sets the date when you plan to return a borrowed license. The return
date must be within the range specified by your network administrator.
Borrow a License Borrows the license from the network license server based
on the specified return date.
Cancel Cancels the borrowing action; no license is borrowed.
Return a License
Your borrowed network license is automatically returned to the network license
server on the day that the license expires. You can return a license earlier than
the expiry date, but to do this, your computer must be connected to the
network license server.
Once a borrowed license is returned, you can borrow a license again as long
as your computer is connected to the network license server and a license is
available on the server.
To return a borrowed license early
Access to the command varies by product, and includes one or more of the
following options:
■Click Tools menu ➤ License Borrowing ➤ Return License Early.
■Click Help menu ➤ About ➤ Product Information or Product License
Information. In the Product License Information dialog box, click Return
License, and then click Yes.
■In the status tray, right-click the License Borrowing icon. Click Return
License Early.
NOTE If your product supports access to license borrowing commands in the
status tray, you can use this method to return a borrowed license early, but the
display settings for the status tray must be turned on. To turn on the display
settings, right-click an empty area on the status bar. Click Tray Settings.
Your license is returned to the network license server.
Network Licensing | 89
To check the license expiration date
Access to this command varies by product, and includes one or both of the
following options:
■In the status tray, right-click the License Borrowing icon.
■Click Help menu ➤ About ➤ Product Information or Product License
Information. In the Product License Information dialog box, see the License
Expiration Date.
RETURNLICENSE Command
Use this command to return a borrowed Autodesk product license earlier than
the return date specified when you borrowed the license. Access to the
command varies by product, and includes one or more of the following
options.
Tools menu: License Borrowing ➤ Return License
Help menu: About ➤ Product Information or Product License Information
➤ Return License
Status tray: Right-click the License Borrowing icon. Click Return License
Early.
Command line: returnlicense
FLEXnet Configuration Tools
The Network License Manager uses FLEXnet® license management technology
from Flexera Software™. FLEXnet provides administrative tools that help to
simplify management of network licenses. You can use FLEXnet tools to
monitor network license status, reset licenses lost during a system failure,
troubleshoot license servers, and update existing license files.
For specific information about using FLEXnet configuration tools, you can
find the License Administration Guide in the following directory:
■Windows: C:\Program Files\Autodesk Network License
Manager\Docs\FlexUser\LicenseAdministration.pdf
■Mac OS X:/usr/local/flexnetserver/LicenseAdministration.pdf
■Linux:/opt/flexnetserver/LicenseAdministration.pdf
90 | Chapter 3 Autodesk Licensing Guide
Windows Utilities for License Server Management
FLEXnet provides two utilities for managing the license server. The default
location for these tools is in this folder: C:\Program Files\Autodesk\Autodesk
Network License Manager.
LMTOOLS Utility (lmtools.exe) Provides a Microsoft® Windows graphical
user interface for managing the license server.
lmutil.exe Provides a set of command-line options for managing the license
server.
You can use LMTOOLS or lmutil.exe to perform the following server
management tasks:
■Start, stop, and restart the server.
■Configure, update, and reread the license file.
■Diagnose system or license problems.
■View server status, including active license status.
Stop and Restart the License Server
Before you can perform any system maintenance on your license server
(including uninstalling the Autodesk License Manager) you must stop the
license server. When you have completed maintenance, you can restart the
license server.
You should be logged in with Administrator rights when working with the
LMTOOLS utility.
To stop a Windows license server
1Do one of the following:
■Windows 7 or XP: Click Start ➤ All Programs ➤ Autodesk ➤
Network License Manager ➤ LMTOOLS Utility.
■Windows 8: Right-click Start screen ➤ All Apps ➤ LMTOOLS
Utility.
2In the LMTOOLS utility, click the Service/License File tab.
3Select the Configure Using Services option.
4Select the service name for the license server you want to stop manually.
Network Licensing | 91
5Click the Start/Stop/Reread tab.
6Click Stop Server.
7Close LMTOOLS.
To restart a Windows license server
1Do one of the following:
■Windows 7 or XP: Click Start ➤ All Programs ➤ Autodesk ➤
Network License Manager ➤ LMTOOLS Utility.
■Windows 8: Right-click Start screen ➤ All Apps ➤ LMTOOLS
Utility.
2In the LMTOOLS utility, click the Service/License File tab.
3Select the Configure Using Services option.
4Select the service name for the license server you want to start manually.
5Click the Start/Stop/Reread tab.
6Click Start Server to restart the license server.
Different procedures are required for regular and automatic license servers.
Both versions are provided here.
To stop a Mac OS X license server
Enter the following in Terminal:
./lmutil lmdown -q -force
To restart a Mac OS X license server
Enter the following in Terminal:
./lmgrd -c acad.lic -l debug.log
To stop an automatic Mac OS X license server
Enter the following in Terminal:
sudo
/sbin/SystemStarter stop adsknlm
To restart an automatic Mac OS X license server
Enter the following in Terminal:
92 | Chapter 3 Autodesk Licensing Guide

sudo
/sbin/SystemStarter restart adsknlm
To stop a Linux license server
Enter the following in Terminal:
./lmutil lmdown -q -force
To restart a Linux license server
Enter the following in Terminal:
./lmgrd -c acad.lic -l debug.log
NOTE Replace acad.lic with your license file name and debug.log with your log file
name.
Update FLEXnet from a Previous Version
Autodesk 2014 products require FLEXnet version 11.11.0.0 or later. If you are
currently using an earlier version of FLEXnet, you need to update.
NOTE If the server where you plan to install the Autodesk Network License Manager
has FLEXnet installed for another product, make sure that the version of lmgrd.exe
(Windows) or lmgrd (Mac or Linux) is the most current version.
To determine the installed version of FLEXnet, you need to verify the version
of the following files:
■lmgrd.exe
■lmtools.exe
■lmutil.exe
■adskflex.exe
You should be logged in with Administrator rights when working with the
LMTOOLS utility.
Network Licensing | 93
To verify the file version of Windows tools
1Do one of the following:
■Windows 7 or XP: Click Start ➤ All Programs ➤ Autodesk ➤
Network License Manager ➤ LMTOOLS Utility.
■Windows 8: Right-click Start screen ➤ All Apps ➤ LMTOOLS
Utility.
2In LMTOOLS utility, click the Utilities tab.
3Enter the location of the file, or click the Browse button to locate the
file and click Open. The default file location is as follows:
C:\Program Files\Autodesk\Autodesk Network License Manager\lmutil.exe
4Click Find Version.
The version number of the file you selected is displayed. If necessary,
use the following procedure to update your version of FLEXnet.
To update FLEXnet in Windows
1Back up your license files.
2Do one of the following:
■Windows 7 or XP: Click Start ➤ All Programs ➤ Autodesk ➤
Network License Manager ➤ LMTOOLS Utility.
■Windows 8: Right-click Start screen ➤ All Apps ➤ LMTOOLS
Utility.
3In the LMTOOLS utility, click the Start/Stop/Reread tab.
4Click Stop Server.
5Close LMTOOLS.
6Note the location where the Network License Manager is installed and
then uninstall the Network License Manager. For details about
uninstalling the Network License Manager, see Uninstall the Network
License Manager (page 85).
7Install the Network License Manager. For details about installing the
Network License Manager to the same location as the previous version,
see Install the Network License Manager (page 77).
8Do one of the following:
■Double-click the LMTOOLS icon on the desktop.
■Windows 7 or XP: Click Start ➤ All Programs ➤ Autodesk ➤
Network License Manager ➤ LMTOOLS Utility.
94 | Chapter 3 Autodesk Licensing Guide

■Windows 8: Right-click Start screen ➤ All Apps ➤ LMTOOLS
Utility.
9In the LMTOOLS utility, click the Start/Stop/Reread tab.
10 Click Start Server.
11 Close LMTOOLS.
To determine the installed version of FLEXnet, you need to verify the version
of the following files:
■lmgrd
■lmutil
■adskflex
NOTE Version 11.11.0.0 of the FLEXnet license manager that ships with Autodesk
products is backwards compatible, and will administer licenses for products from
versions 2002 through 2014. Please note that Autodesk products older than version
2005 are no longer supported.
To verify the version of Mac OS X or Linux tools
You should be logged in with the same user ID you used when installing the
FLEXnet files, for example, /Users/<userid>/adsknlm (Mac OS X) or
/home/<userid>/adsknlm (Linux).
Enter the following commands in the terminal window/prompt:
<prompt>./lmutil -v
<prompt>./lmgrd -v
<prompt>./adskflex -v
The output of each command will look similar to this example:
Copyright
©1989-2010 Macrovision Europe Ltd. And/or Macrovision
Corporation.
All Rights reserved.
lmutil v11.5.0.0 build 56285 i86_mac10
To update FLEXnet in Mac OS X
Administrator permission is required for this procedure. FLEXnet is installed
in /usr/local/flexnetserver when running the flexnetserver merge module.
1Back up your license files.
Network Licensing | 95
2Stop the Autodesk Network License Manager service by entering the
following in Terminal:
sudo ./lmutil lmdown -q -force
3Note the location where the Network License Manager is installed and
then uninstall the Network License Manager by entering the standard
Mac OS X commands, for example, rm.
4Install the Network License Manager.
5Start the Autodesk Network License Manager service by entering the
following string in Terminal.
NOTE In the string, replace product.lic and debug.log with your license file
name and log file name.
sudo ./lmgrd -c product.lic -l debug.log
To update FLEXnet in Linux
Administrator permission is required for this procedure. FLEXnet is installed
in /opt/flexnetserver when running the flexnetserver merge module.
1Back up your license files.
2Stop the Autodesk Network License Manager service by entering the
following in Terminal:
./lmutil lmdown -q -force
3Note the location where the Network License Manager is installed and
then uninstall the Network License Manager by entering the standard
Linux commands, for example, rm.
4Install the Network License Manager. Copy the new version of the
FLEXnet network license manager files (lmgrd, adskflex, and lmutil) to
the location recommended when you configured your license server, for
example, /home/<user id>/adsknlm.
5Start the Autodesk Network License Manager service by entering the
following string in Terminal.
NOTE In the string, replace product.lic and debug.log with your license file
name and log file name.
./lmgrd -c product.lic -l debug.log
96 | Chapter 3 Autodesk Licensing Guide

Set Up and Use an Options File
With an options file, you set configuration options that determine how a
license server manages licenses. An options file sets parameters that the license
file reads and the lmgrd program executes.
The options file on each server specifies the license-handling behavior for that
server. By managing the contents of the options files, you can specify the
same behavior on all license servers, or implement particular differences among
the servers.
NOTE For options file changes to take effect on a license server, you must save
the options file, and then reread the license file.
Use the options file to set parameters for the following server-related features:
■Report log file
■License borrowing
■License timeout
You can also set up advanced parameters for reserving licenses, restricting
license usage, or defining groups of users. These options are particularly useful
if you find that a pool of licenses is not being correctly shared or cascaded
among users. For more information, go to the Autodesk Services & Support
web page How to control network license access using an options file.
To learn more about setting advanced options file parameters, see the FLEXnet
document, License Administration Guide. This document is installed on the
license server, in the Network License Manager directory.
Create an Options File
NOTE For options file changes to take effect on a license server, you must save
the options file, and then reread the license file.
Network Licensing | 97
To create an options file on a Windows platform
You should be logged in with Administrator permissions when working with
the LMTOOLS utility.
1Open a text editor, enter the parameters you want, and then save the
document as a file named adskflex.opt to the same location where you
saved the license file.
NOTE Be sure to save the file with the extension .opt. The default extension
.txt is not recognized by the Network License Manager.
2Do one of the following:
■Windows 7 or XP: Click Start ➤ All Programs ➤ Autodesk ➤
Network License Manager ➤ LMTOOLS Utility.
■Windows 8: Right-click Start screen ➤ All Apps ➤ LMTOOLS
Utility.
3In the LMTOOLS utility, on the Start/Stop/Reread tab, click Reread License
File.
4Close LMTOOLS.
To create an options file on a Mac OS X or Linux platform
1Open a text editor, enter the parameters you want, and then save the
document as a file named adskflex.opt to the same location where you
saved the license file.
NOTE Make sure you save the file with the extension .opt. The default
extension .txt is not recognized by the Network License Manager.
2Launch a Terminal window, navigate to the Autodesk Network License
Manager folder, and enter the following string:
./lmutil lmreread -c @hostname-all
3Close the Terminal window.
Create a Report Log
In the options file, you can create a report log file, which is a compressed,
encrypted file that provides usage reports on license activity.
98 | Chapter 3 Autodesk Licensing Guide

To create a report log
1In a text editor, open the options file, adskflex.opt.
2In the options file, enter the following syntax on its own line
(REPORTLOG must be uppercase):
REPORTLOG [+]report_log_path
■Windows example: REPORTLOG +"c:\My Documents\report.rl"
means that a report log named report.rl is located in the folder c:\My
Documents.
■Mac OS X or Linux example: REPORTLOG +"/Users/<user
id>/NLM/report.rl" means that a report log named report.rl is located
in the folder /Users/<user id>/NLM.
NOTE Path names that contain spaces must be enclosed in quotation marks.
In the REPORTLOG syntax, “[+]” means that entries to the log file you
create are appended rather than replaced each time the Network License
Manager is restarted. It is recommended that you use this option to retain
a history of log entries.
Configure License Borrowing with the Options File
If your Autodesk product supports the license borrowing feature, you can use
the options file to configure license borrowing options. For example, define
the maximum number of licenses that can be borrowed from your network
at any one time. In addition, define who can borrow an Autodesk product
license. Licenses are assigned to people, not computers.
For more information on license borrowing, see License Borrowing (page 86).
NOTE If your Autodesk product licenses are borrowed from a redundant license
server pool, you must restart the license server after you stop the Network License
Manager.
At the end of a borrow period, the borrowed license is automatically disabled
on the borrower's computer and becomes available again on the license server.
A license can also be returned before the borrow period has ended.
Network Licensing | 99

To set license borrowing parameters
1In the options file, enter the following syntax on its own line
(BORROW_LOWWATER must be uppercase):
BORROW_LOWWATER feature_code n
In the BORROW syntax, “feature_code” is the name of the product in
the license file, and “n” is the minimum number of licenses that must
remain on the server. When this number is reached, no more licenses
can be borrowed.
For example, the syntax BORROW_LOWWATER Autodesk_f1 3 means
that for the product Autodesk_f1, when only three licenses remain on
the license server, no licenses can be borrowed.
2Enter the following syntax on the next line (MAX_BORROW_HOURS
must be uppercase):
MAX_BORROW_HOURS feature_code n
In this syntax, “n” is the number of hours that a license can be borrowed.
For example, the syntax MAX_BORROW_HOURS Autodesk_f1 360 means
that for product Autodesk_f1, licenses can be borrowed for 360 hours,
or 15 days.
NOTE Licenses are borrowed in multiples of 24 hours only. Any number that
is not a multiple of 24 is rounded down to the nearest multiple. For example,
the number 125 is rounded down to 120 hours, or 5 days.
For more information about setting up the license borrowing feature, see the
FLEXnet documentation. On a Windows server, the default install location
for the documentation is C:\Program Files\Autodesk\Autodesk Network License
Manager folder. On a Mac OS X or Linux server, the documentation is installed
in the Network License Manager directory.
NOTE To borrow a license in an Autodesk product, click Help ➤ About ➤ Product
Information ➤ Borrow License. Alternatively, enter borrowlicense on the product
command line. Help for this feature is available in the Borrow a License for [Product
Name] window and in C:\Program Files\[Product Name]\Help\adsk_brw.chm.
Set Up License Timeout
License timeout is set in the options file to determine how long a product
session can be idle before the license is reclaimed by the license server. When
you set this flag in the options file, a user's license is reclaimed by the license
100 | Chapter 3 Autodesk Licensing Guide

server if the product is idle on a computer for more than the timeout period
you define.
IMPORTANT License timeout is not supported by all Autodesk products.
If a user's license is lost because of the idle timeout, the product attempts to
claim a new license once the user uses the product again. If no license is
available, the user can save work before the product shuts down.
You can use the TIMEOUT parameter to set individual license timeouts for
each Autodesk product on your computer, or use the TIMEOUTALL parameter
to set one license timeout for all Autodesk products on your computer.
To set license timeout parameters
■For individual Autodesk products: In the options file, enter the following
syntax on its own line (TIMEOUT must be uppercase):
TIMEOUT feature_code n
In the TIMEOUT syntax, “feature_code” is the name of the product (referred
to in the INCREMENT line in the license file), and “n” is the number of
seconds before an inactive license is reclaimed by the license server.
For example, the syntax TIMEOUT Autodesk_f1 7200 means that for the
product Autodesk_f1, the license timeout period is 7200 seconds, or two
hours.
■For all Autodesk products: In the options file, enter the following syntax
on its own line (TIMEOUTALL must be uppercase):
TIMEOUTALL n
In the TIMEOUTALL syntax, “n” is the number of seconds before an
inactive license is reclaimed by the license server.
For example, the syntax TIMEOUTALL 7200 means that for all Autodesk
products, the license timeout period is 7200 seconds, or two hours.
For more information about using the license timeout feature, see the FLEXnet
document, License Administration Guide. On a Windows server, the default
install location for the document is C:\Program Files\Autodesk\Autodesk Network
License Manager folder. On a Mac OS X or Linux server, the document is
installed in the Network License Manager directory.
Network Licensing | 101
Frequently Asked Questions about Network
Licensing
This section outlines some common questions and their solutions with regards
to software licenses and licensing your product(s). For additional advice and
assistance, go to Autodesk Support, click your product name, and search in the
Knowledgebase for your product.
What is the difference between a stand-alone license
and a network license?
A stand-alone license supports one or more Autodesk products for an individual
user. Similarly, a multi-seat stand-alone license supports a specific number of
users. While the software can be installed on additional computers in your
facility, the licensed number of users cannot be exceeded.
A network license supports a specific maximum number of users who are
connected to a network. A software utility known as the Network License
Manager (NLM) issues licenses to users, up to the number of licenses purchased.
At this point, no more computers can run the Autodesk product until a license
is returned to the NLM.
What is the benefit of using a network licensed version
of the software?
Network licensing provides ease of license management for large
drafting/design facilities, classrooms, and other environments that need to
support many users. The Network License Manager provides centralized control
of licenses, including their registration, activation, and distribution to users.
One main advantage of a network license is that you can install products on
more computers than the number of licenses you have purchased. For example,
you can purchase 25 licenses but install them on 40 computers for ease of
access. At any one time, products can run on the maximum number of
computers for which you have licenses. This means you get a true floating
license. A network licensing system can also be configured to allow users to
borrow a license for a limited time to use on a computer disconnected from
the network.
102 | Chapter 3 Autodesk Licensing Guide
How does the licensing process use the Internet?
Internet communication is required to complete the process of license
activation. If you are not connected to the Internet when you install an
Autodesk product, you can operate in trial mode for a specified period, typically
30 days. When you choose to activate the software and enter your registration
data, your computer communicates with Autodesk over the Internet. An
activation code is provided for you to enter in the fields of a product dialog
box. The Internet is also used to communicate with Autodesk for other
purposes such as authorizing access to websites, downloading service packs,
and sending product support messages.
Can I use the Network License Manager with IPv6?
The standard version of Network License Manager distributed with Autodesk
products is designed for networks that use Internet Protocol version 4 (IPv4).
Other versions for use on IPv6 networks are available for download from
Autodesk websites:
■www.autodesk.com/licensetools
■www.autodesk.com/nlm-ipv6-windows
■www.autodesk.com/nlm-ipv6-mac
■www.autodesk.com/nlm-ipv6-linux
Network Licensing | 103
104
Autodesk Navisworks
2014 Installation Supple-
ment
This section contains information that is specific to the installation, configuration, and
licensing of the following Autodesk Navisworks software:
■Autodesk Navisworks Manage
■Autodesk Navisworks Simulate
■Autodesk Navisworks Freedom
■Autodesk Navisworks File Exporters
System Requirements
See the following sections for hardware and software requirements.
Single Installation Requirements
■Microsoft® Windows® 8 (64-bit) or Microsoft Windows 7 (32 or 64-bit)
(Service Pack 1) Home Basic, Home Premium, Professional, Enterprise, or
Ultimate (recommended)
■Intel® Pentium® 4 or AMD Athlon™ 3.0 GHz (or higher) with SSE2 technology
■512 MB RAM (minimum); 2 GB or greater RAM (recommended)
■30 GB free disk space for installation
■Direct3D 9® and OpenGL® capable graphics card with Shader Model 2
(minimum)
■1,280 x 800 VGA display with true color (1,920 x 1,080 monitor and 32-bit
video display adapter recommended)
4
105
■Microsoft Mouse-compliant pointing device
■Microsoft® Internet Explorer® 7.0 or later
Deployment Requirements
Hardware and software requirements for the location of the administrative
image
■10 GB hard disk
Hardware and software requirements for client machine
■Microsoft® Windows® 8 (64-bit) or Microsoft Windows 7 (32 or 64-bit)
(Service Pack 1) Home Basic, Home Premium, Professional, Enterprise, or
Ultimate (recommended)
■Intel® Pentium® 4 or AMD Athlon™ 3.0 GHz (or higher) with SSE2
technology
■512 MB RAM (minimum); 2 GB or greater RAM (recommended)
■30 GB free disk space for installation
■Direct3D 9® and OpenGL® capable graphics card with Shader Model 2
(minimum)
■1,280 x 800 VGA display with true color (1,920 x 1,080 monitor and 32-bit
video display adapter recommended)
■Microsoft Mouse-compliant pointing device
■Microsoft® Internet Explorer® 7.0 or later
Hardware and software requirements for the network license server (Windows)
■Microsoft® Windows® 8 or Microsoft Windows 7 (Service Pack 1)
■Intel® Pentium® 3 or higher, 450 Mhz (minimum)
■Network interface card compatible with existing Ethernet network
infrastructure
NOTE The Network License Manager supports Ethernet network configurations
only.
■TCP/IP communication protocol
NOTE The Network License Manager uses TCP packet types.
■FLEXnet 11.10.0.0
106 | Chapter 4 Autodesk Navisworks 2014 Installation Supplement

About Language Packs
Each Autodesk product is installed with a default language. A language pack
is a mechanism used by some Autodesk products to provide another language
for the user interface and the documentation. Each language pack contains
only the text strings and documents required to support a user working in the
specified language; it does not duplicate the core product software.
To run Autodesk Navisworks in another of the installed languages, you need
to add one of the language selector arguments to the desktop shortcut. To be
able to do this, you need to have installed at least one language pack during
the Autodesk Navisworks installation process.
Language packs are about 200 MB in size, so they can be installed and
uninstalled quickly. A single installed product can support several languages,
enabling users to switch from one to another when required.
NOTE Microsoft Windows 7 is the most stable platform for use with language
packs. You may experience display problems with Windows XP. For best results,
the Windows language setting should match the Autodesk language setting.
To run Autodesk Navisworks in another language
1Right-click the Autodesk Navisworks desktop shortcut, and click
Properties on the shortcut menu to open the Autodesk
NavisworksProperties dialog box.
2On the Shortcut tab, enter a space in the Target field after
..\roamer.exe, and then enter one of the following arguments:
■-lang en-US for English localization
■-lang de-DE for German localization
■-lang es-ES for Spanish localization
■-lang fr-FR for French localization
■-lang it-IT for Italian localization
■-lang ja-JP for Japanese localization
■-lang ko-KR for Korean localization
■-lang pt-BR for Brazilian Portuguese localization
■-lang ru-RU for Russian localization
■-lang zh-CN for Chinese (PRC) localization
About Language Packs | 107

The syntax for the shortcut is "drive:pathname\roamer.exe" - lang [language
pack]. So for example, the following entry starts the program from a
folder named Autodesk Navisworks in Italian language: "C:\Autodesk
Navisworks\roamer.exe" -lang it-IT
NOTE To run the product in a different language you must have already
installed the corresponding language pack.
3Click OK to save the changes.
Uninstalling Language Packs
You can uninstall language packs without uninstalling the main product. The
default language that was installed with the product cannot be separately
uninstalled.
You can uninstall language packs in the same way that you uninstall products.
Go to the Windows Control Panel where products are listed, and click the
language pack that you want to uninstall.
File Exporters
Autodesk Navisworks provides file exporters to create native Autodesk
Navisworks files directly in CAD applications.
You can choose to install/deploy file exporters with or without installing
Autodesk Navisworks.
NOTE File exporters are not available if you are installing/deploying Autodesk
Navisworks Freedom.
Autodesk Navisworks Uninstall Information
If you uninstall Autodesk Navisworks, some files remain on your computer
such as files you created or edited (for example, drawings or custom menus).
Your license file also stays on your computer when you uninstall your product.
If you reinstall on the same computer, the license information remains valid;
you do not have to reactivate the product. For more information on installation
and licensing please refer to the Autodesk Navisworkssupport site.
108 | Chapter 4 Autodesk Navisworks 2014 Installation Supplement

IMPORTANT Do not use registry cleaning programs or attempt to modify the
registry entries yourself to uninstall Autodesk Navisworks. Failure to follow the
official uninstall procedure will result in the inability to re-install the software.
Autodesk Navisworks Uninstall Information | 109
110
Index
.NET 3.5 Framework 14
A
activating programs 51, 57
activation 6, 8, 9
AdLM (Network License Manager) 77
administrative image 7, 44
shortcut 24
adskflex (Autodesk vendor daemon) 67
Adskflex option 86
advertising deployments 28
assigning deployments 28, 29
Autodesk
License Borrowing utility 86
License Transfer Utility 55
Network License Manager 77
products
activating 51
using off network 86
B
batch file 13, 24
batch files
deploying program with 25
running 28
samples 26
borrowing licenses 86
configuring 99
returning licenses 89
BORROWLICENSE command 88
C
cleaning hard drives 42
client computers
assigning deployments 29
restoring master systems 42
verifying deployments 32
combined product versions
license file example 72
package license file example 75
Commercial licenses 49
configuration 16
defaults 46
configuration settings 6
configuring
license borrowing 99
license servers 79
Linux 83
Mac OS X 81
options file 97
Windows 80
copying
licenses 55, 59
custom settings 6
customized deployments 16, 20
D
daemons
license manager daemons 67
vendor daemons 67
date and time, system 60
default installation 46
deployment 60
deployments
3ds Max and Max Design 33
add-ons 17
assigning 28, 29
batch files 25
checklist 13
combined 22
create 20
customized 16
directory locations 44
distributing 28, 39
group policies 28
imaging software 39
Inventor 33
111 | Index
issues 42
methods 25
modifying 23, 44
new features 11
overview 12
Showcase 33
verifying installation 32
DirectX 9.0C 34
display product license information 53
distributed license server 5, 62
license file example 71
distributed license server model 16
distributing software images 60
documentation links 2
Download Manager 8, 51
dual-platform deployment 22
E
Educational (EDU)/Institution
licenses 49
Ethernet address 78
expiration dates for licenses 86
exporting licenses 55
transfer files 56
F
firewall 79
firewall and license server 46
FLEXnet tools 90
documentation 99
options file 97, 99
updating 93
G
glossary 48
group policies 28
verifying deployments 32
group policy object (GPO) 29
H
hard disks, cleaning 42
hardware certification 2
hardware changes, and license errors 59
hardware requirements, Network License
Manager
Linux 65
Mac OS X 66
Windows 63
heartbeat signals 76
host names and IDs 78
LMTOOLS procedure 79
Mac or Linux procedure 79
Windows procedure 78
I
imaging software deployments 39
importing licenses 55
transfer files 57
InfoCenter 9
Install Now 8, 51
installation
advertising deployments 28
batch files 25
customizing 16
default settings 46
group policies 28
imaging software 39
network deployment 13
repairing damaged installations 41
restore operating system 42
service packs 18
software deployments 13
tools and utilities 47
types of 15
verifying deployments 32
installation log 7
installation path, changing 46
installation process diagram 1
installation updates 1
installing Network License Manager 77
IPv6 103
K
Knowledgebase 8, 42
112 | Index
L
language pack 13
language pack, adding 29
languages 3, 4
license
cascading 67
sharing 67
substitution 67
License Administration Guide 90, 100
license borrowing 86
configuring 99
expiration dates 86
returning licenses 89
third-party licensing tools 86
license data 53
license file example
combined product versions 72
combined product versions, package
license 75
distributed license server 71
generic 71
redundant server 72
redundant server, package
license 74
single license server 71
single or distributed server, package
license 74
license files
examples 71
package license examples 73
package license overview 73
understanding 68
license information, display 53
license manager daemon 67
license server
Windows 91
license server models 5, 16, 61
distributed 62
redundant 62
single 61
license servers
borrowing licenses 86
configuring 79
Linux 83
Mac OS X 81
options file 97
Windows 80
host names and IDs 78
limited number of licenses 86
losing connection 76
Network License Manager 77
returning licenses 89
stopping and restarting 91
third-party licensing tools 86
Windows management utilities 91
license term 55
License Transfer Utility 55
license types 5, 43
change 9
license usage report 98
licenses
assigning 67
behaviors (term limits) 97
borrowing 49, 86, 97
exporting 56
FLEXnet tools 90
functional overview 67
importing 57
issues 102
license files 68
license servers 79
multi-seat stand-alone 49, 52
network 49
Network License Manager 77
on re-imaged computers 60
registration 51
returning 90
single-user 52
stand-alone 49, 52
timeout 97, 100
transferring 55, 57, 59
types 49
licensing updates 49
limits on number of licenses 86
Linux
configuring license servers 83
Network License Manager system
requirements 65
obtaining server host names and
IDs 79
lmgrd (license manager daemon) 67
Index | 113
LMTOOLS utility 80, 86, 91
obtaining server host names and
IDs 79
lmtools.exe utility 91
lmutil.exe utility 91
log files 7, 97, 98
M
Mac OS X
configuring license servers 81
Network License Manager system
requirements 66
obtaining server host names and
IDs 79
master images 39, 41
master systems 42
Microsoft Installer Patch files 18, 46
Microsoft System Center Configuration
Manager 34, 35
Microsoft Windows
configuring license servers 80
Network License Manager system
requirements 63
MSP files 18, 46
multi-seat stand-alone installations 40
multi-seat stand-alone licenses 49, 52
N
named users 49, 55
network administration new features 11
network installations
batch files 25
deployment 13
group policies 28
imaging software deployments 41
types of 15
network license 3, 43
usage reports 43
network license installations
imaging software deployments 41
license behaviors 97
license borrowing 99
selecting 15
with firewall 46
Network License Manager
about 77
assigning licenses 67
installing 77
uninstalling on Windows 85
upgrading 77
network license servers
borrowing licenses 86
limited number of licenses 86
returning licenses 89
third-party licensing tools 86
network licenses 49
controlling access 97
timeout 100
usage report 98
network shares
creating 19
locations 44
new features 1
new licensing features 49
Norton Ghost 39
Not for Resale licenses 49
O
operating system selection 7
operating systems, restoring 42
operating systems,reinstalling 59
options file
creating 97
license borrowing setup 99
license timeout setup 100
report log setup 98
options file (FLEXnet tools) 97
P
package license files 73
Permanent licenses 49
physical address 78
private licenses 56
product settings 6
profiles, user 45
public licenses 56
114 | Index
R
re-imaged computers 60
reactivating licences 59
redundant license server 5, 62
license file example 72
package license file example 74
redundant license server model 16
reinstall product 47
reinstalling operating systems 59
remove deployment 24
repair product 9
report log files, creating 98
restart Windows license server 91
restore
damaged installation 41
operating system 42
return dates for licenses 86
returning borrowed licenses 86, 89
RETURNLICENSE command 90
Revit Interoperability 33
running batch files 28
S
SAMreport-Lite 43
SATA RAID environments 39
SCCM (System Center Configuration
Manager) 34
SCCM packages 35
SCCM uninstall 37
serial number 2, 8
serial numbers, updating 54
servers
host names and IDs 78
license servers 77, 79
Linux configuration 83
Mac OS X configuration 81
Windows configuration 80
stopping and restarting 91
service packs 18, 45
shortcut to administrative images 24
silent mode 7
single license server 5, 61
license file example 71
package license file example 74
single license server model 16
single-user licenses 49, 52
software requirements, Network License
Manager
Linux 65
Mac OS X 66
Windows 63
source directory for SCCM 35
stand-alone installations
batch files 25
imaging software and 40
selecting 15
stand-alone license 3, 43
stand-alone licenses 49, 52
student licensing 52
Student Portfolio licenses 49
suite 9
switch license type 9
system date and time 60
system requirements 2
system requirements, Network License
Manager
Linux 65
Mac OS X 66
Windows 63
T
TCP/IP names 78
Term Extendable licenses 49
term licence errors 61
Term Non-Extendable licenses 49
third-party licensing tools 86
time and date, system 60
timeout of network licenses 100
tools and utilities 3
tools and utilities, installing 47
transfer files
exporting 56
importing 57
transfer of license 55
transferring licenses 55
Trial licenses 49
typical settings 6
Index | 115
U
undeployment 24
uninstall product 9, 47
uninstalling Network License Manager on
Windows 85
updating FLEXnet tools 93
upgrading Network License Manager 77
usage-based license 49
user profile settings 45
V
vendor daemons 67
verifying group policy deployments 32
W
web-based installation 8
Windows
configuring license servers 80
Network License Manager system
requirements 63
obtaining server host names and
IDs 78
Windows 8 2, 14
116 | Index
